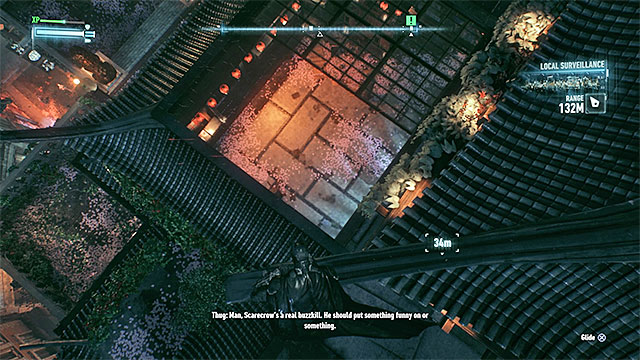
This unofficial manual for Batman: Arkham Knight is a thorough guide into this complex game. The basic assumption is to help the player solve the most frequently encountered problems, as well as to discuss the entire contents of the game. This guide has been divided into two main parts. The first one comprises of walkthrough for the game's main storyline and for side missions, which are connected with locating dangerous criminals and capturing them. Descriptions of the individual missions, among others, provide information exploration, combat, sneaking, using the batmobile and fighting game bosses also, a separate chapter has been devoted to them). The second part of the guide comprises, predominantly, of a comprehensive description of all the activities connected with the Riddler. The rest of the chapters provide among others, walkthroughs for all then of the Riddler trials and information of the whereabouts of all the 243 available puzzles screenshots + detailed maps . Apart from that, the second part of this guide provides descriptions of Augmented Reality Training events, where you need to prove your expertise at fighting, melee combat or driving the batmobile. This has been complemented with the development of the Batman (the best abilities) and winning trophies. Batman: Arkham Knight is the fourth installment of the game developed by Warner Bros Interactive Entertainment, where you take control of the Batman and where you get to explore the virtual Gotham City. Like in the previous installments, you are going to take on many challenges, where you have to struggle against the criminals made famous by the comic books. In itself, also the city houses many interesting secrets, which wait for you to discover them. It is worth adding that, for the first time in the history of the franchise, you can explore the are not only by yourself, but also using the batmobile.
This guide has been color coded in the following manner:
Jacek "Stranger" Halas (www.gry-online.pl)
This unofficial Batman: Arkham Knight game guide contains a detailed walkthrough for all the missions in the game (story missions and side quests, like for example rescuing hostiles or eliminating villains). In the descriptions, you can find useful tips and information about the place where you can unlock a given mission, area exploration (also using detective mode), fighting, using the Batmobile and sneaking without alarming the enemies. Moreover, a lot of space in the game guide is devoted to all the boss fights (strategies, attacks, etc.). Descriptions of boss fights can be found in the walkthrough, as well as in a separate chapter. In the game guide, you will also find some basic tips (prepared both for beginners and players that know the previous episodes of the game well). Batman: Arkham Knight is the fourth part of the Batman series. Once again, we find ourselves in Gotham, which is troubled by many well-known villains. Our task is to find them and have them pay for their sins. One of the major novelties in the game is the Batmobile, which allows Batman to move much faster and eliminate armored targets.
Jacek "Stranger" Halas (www.gry-online.pl)
The following colors are used in the game guide text:

Move

Look around

Run (hold) / Glide (hold) / Dodge (press twice)

Crouch (hold)

Switch stance (stand/crouch)

Zoom in

Aim gadget (hold) / Counterattack (press)

Use gadget / Hit

Stun enemy with the cape

Hook

Enter Batmobile / Summon Batmobile

Activate detective mode (press) / Scan objects around you (hold)

Choose gadget

Augmented Reality (AR) Challenges

Mission choice

WayneTech tab

Combo Takedown 1

Combo Takedown 2

Combo Takedown 3

Previous / Next gadget

Select Batarang

Select Batclaw

Select Explosive Gel

Select Remote Electrical Charge

Select Freeze Blast

Select Smoke Pellet

Select Disruptor

Select Remote Batarang

Select Line Launcher

Select Remote Hacking Device

Select Voice Synthesizer

Remote Batmobile control

Move

Look around

Booster (hold)

Catapult and glide (press twice)

Slide

Switch camera

Activate Battle Mode

Exit Batmobile

Rear view

Move

Look around
Use dodge engines (use together with A or D keys)

Zoom in

Vulcan Gun / Winch

60mm Cannon

Missile Barrage

Drone Hacker

Electroshock Defense / Activate The Riddler blockage

Sonar

Crime scan

Move

Look around / Zoom in

Run (hold) / Glide (hold) / Dodge (press twice)

Run (hold) / Glide (hold) / Dodge (press twice)

Hit

Counterattack

Activate detective mode (press) / Scan objects around you (hold)

Augmented Reality (AR) Challenges

Choose mission

Choose gadget

Enter Batmobile / Summon Batmobile

Aim gadget (hold) / Quick batarang (press

Hook

Crouch (hold)

WayneTech tab

Pause

Move

Look around / Rear view

Use dodge engines (use together with analog stick) / Slide

Follow / Stun target

Break / Reverse

Booster (hold)

Augmented Reality (AR) Challenges

Choose mission

Exit Batmobile

Activate Battle Mode (hold)

Switch camera

Accelerate

WayneTech tab

Pause

Move
Look around / Zoom in

Use dodge engines (use together with analog stick) / Slide

Electroshock Defense

Missile Barrage

Drone Hacker

Sonar

Augmenter Reality (AR) Challenges

Choose mission

Exit Batmobile

Return to Pursuit Mode (release key)

Vulcan Gun

60mm Cannon

WayneTech tab

Pause

Move

Look around / Zoom in

Run (hold) / Glide (hold) / Dodge (press twice)

Stun enemy with the cape

Hit

Counterattack

Activate detective mode (press) / Scan objects around you (hold)

Augmented Reality (AR) Challenges

Choose mission

Choose gadget

Enter Batmobile / Summon Batmobile

Aim gadget (hold) / Quick batarang (press)

Hook

Crouch (hold)

WayneTech tab

Pause
Batmobile - Pursuit Mode

Controlling the Batmobile

Look around / Rear view (press)

Use dodge engines (use together with analog stick) / Slide

Follow / Stun target

Break / Reverse

Booster (hold)

Augmented Reality (AR) Challenges

Choose mission

Exit Batmobile

Activate Battle Mode (hold)

Switch camera

Accelerate

WayneTech tab

Pause
Batmobile - Battle Mode

Move

Look around / Zoom in

Use dodge engines (use together with analog stick)

Electroshock Defense

Missile Barrage

Drone Hacker

Sonar

Augmented Reality (AR) Challenges

Choose mission

Exit Batmobile

Return to Pursuit Mode (release key)

Vulcan Gun

60mm Cannon

WayneTech tab

Pause
Below there is a set of hints that you may want to read before starting the adventure in Batman: Arkham Knight. They were prepared for both those who just begin their experience with the series, as well as the veterans.
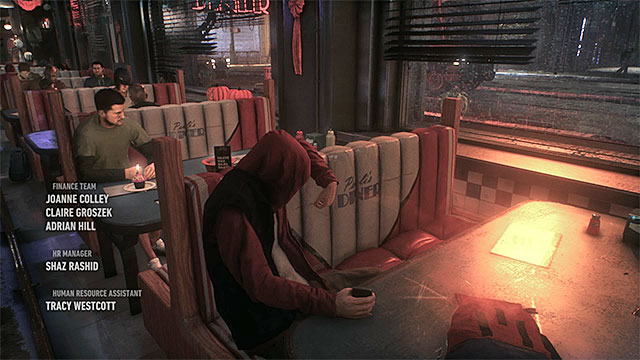 The person accused by one of the civilians is sitting in the corner of the bar.
Move the analog stick or use the keyboard to activate the furnace and burn Joker's body.
In the prologue, you will take control of Gary Owens for a while. After one of the civilians stops you, go to the left corner of the bar and try to talk to the person sitting there. A cut-scene will start.
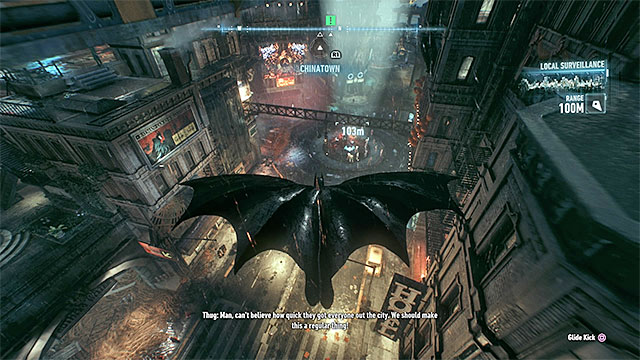 It is better to attack thugs from above.
After you gain control over Batman, glide towards the roof where Gordon is. To reach it, you can try flying down and up and repeat. Also, use the hook.
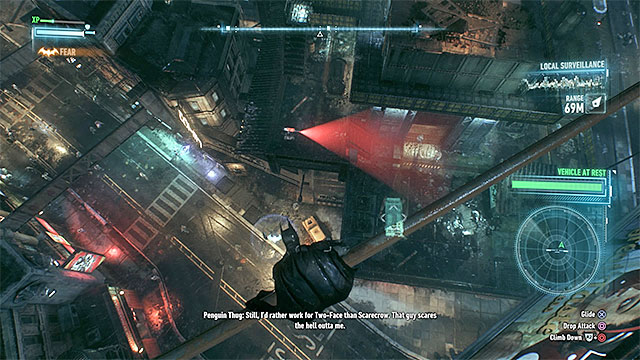
Listen to a conversation with Oracle and head to Chinatown, where you are supposed to find the policeman. There are quite a lot of thugs there and it is good to attack them from the air. Use standard attacks, switch between targets and use counterattack when an enemy wants to hit you. After clearing the area, approach Kevern, who is wounded.
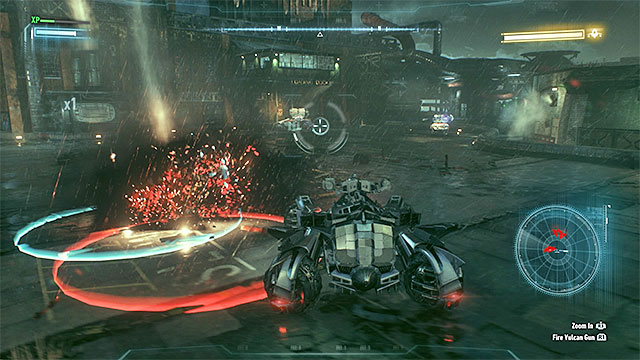
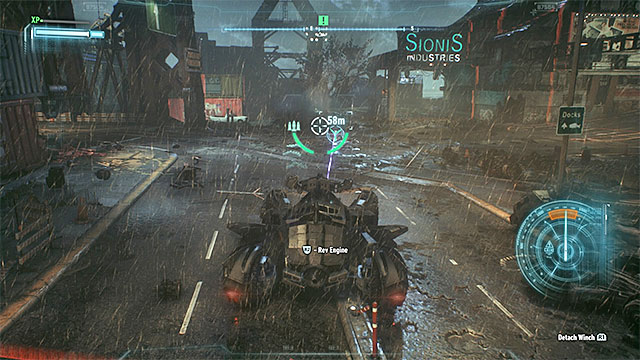
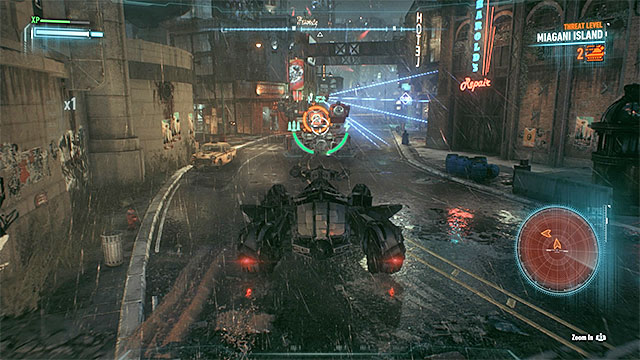
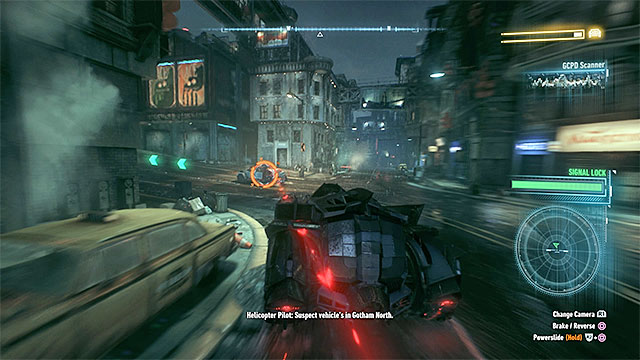 During the pursuit, watch out not to find yourself on the way of enemy attacks (red beam).
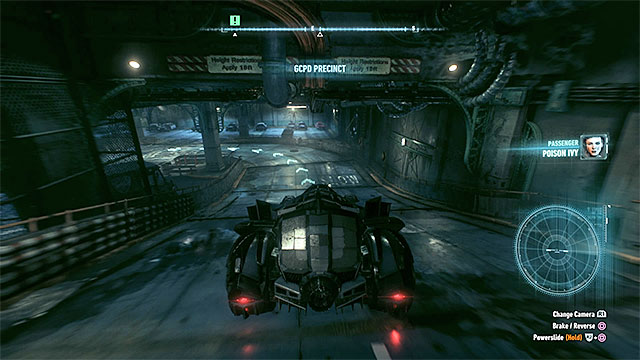
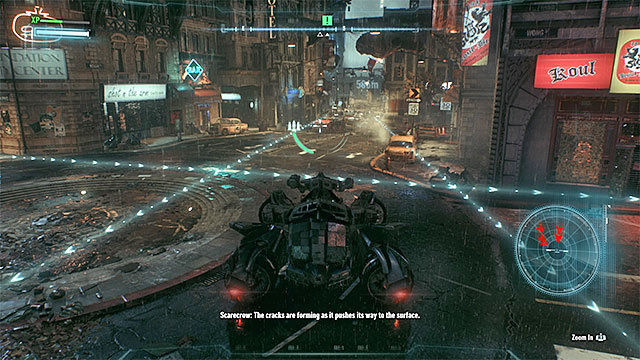
Press the key responsible for summoning the Batmobile and start chasing the enemy vehicle. During this part of the mission, you need to watch out for enemy attacks. The game will signal an incoming bullet with a grey beam. Try to avoid it (when you get in the way of an incoming attack, the beam will turn red), because you may not be able to get out of the way on time and the Batmobile armor will be damaged. Also, try to stay rather close to the enemy machine, as it will gradually make it weaker.
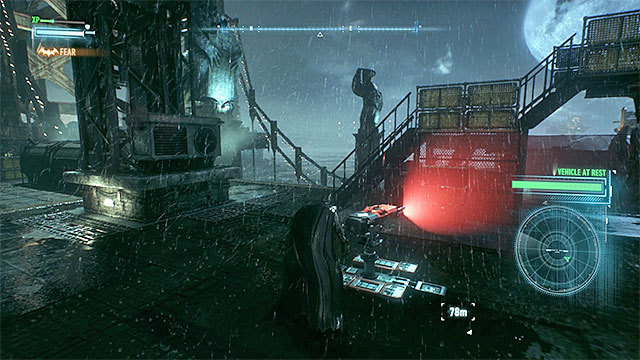
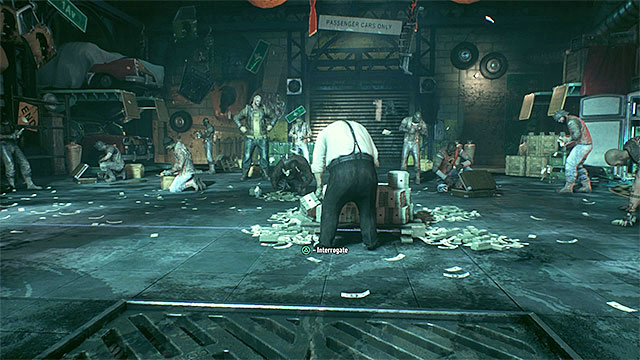
Continue the pursuit until the enemy vehicle is destroyed. Park near the wreck, exit the Batmobile and interrogate the driver. Listen to a conversation with Oracle.
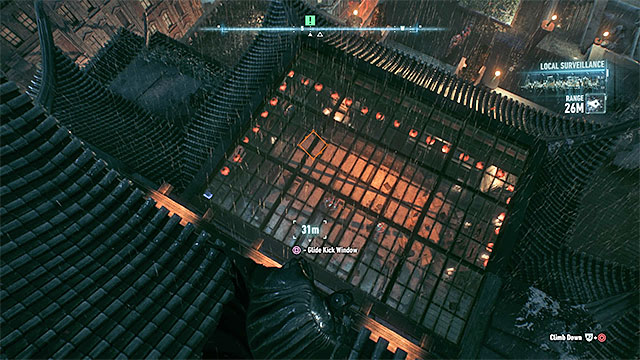 Enter the safe house through the glass roof.
Head to the safe house marked by the game. It is best to get inside by breaking the glass roof. It will allow you to ambush the thugs. When you're inside, follow the game's suggestion and use a Smoke Pellet. Eliminate all the enemies (watch out for the thug who uses charge - you can interrupt it with a Batarang) and watch a cut-scene with Poison Ivy.
 Destroy enemy tanks and watch out for their attacks.
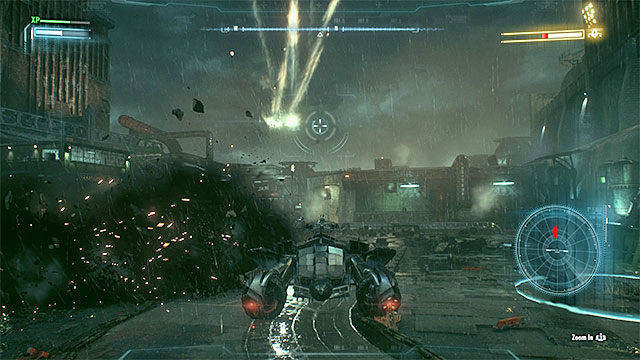
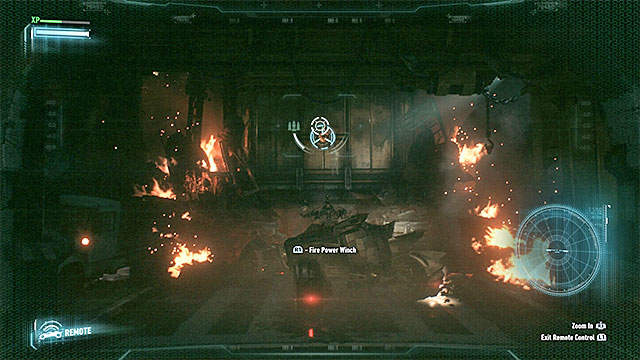
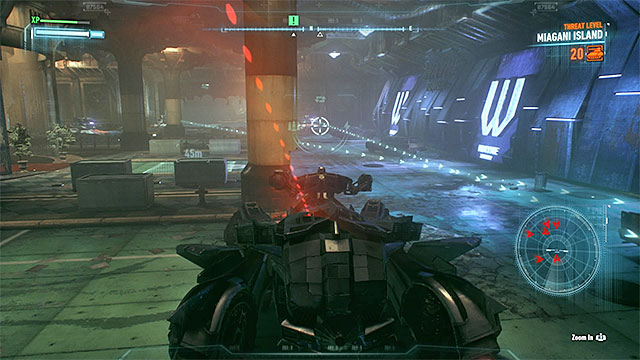
After leaving the building and eliminating some more enemies, open the gadget menu and choose Batmobile Remote Control. When you take control over the Batmobile, start from holding the key/button responsible for Battle Mode. Wait until enemy tanks appear in the area and attack them using 60mm cannon. Try to avoid the red beams by sliding and don't stay in one place for too long. You have to destroy all the tanks and park the Batmobile in the place marked by the game.
 The game always shows an information when Missile Barrage is ready to use.
After listening to another conversation with Oracle, head to the place where you will be completing the first Augmented Reality (AR) challenge. It consists of three stages:
Note! From now on, you can complete Augmented Reality challenges. There are 69 of them and their are not only connected to using the Batmobile.
 There are more tanks in front of the film studio.
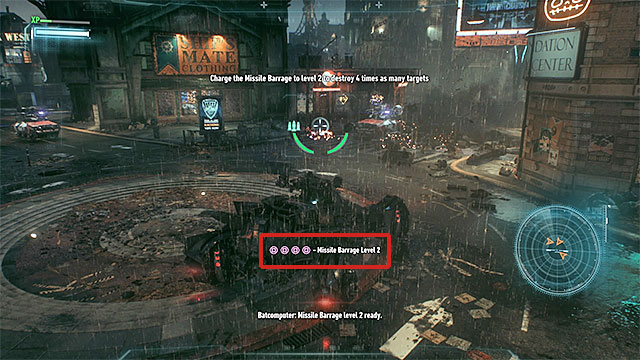
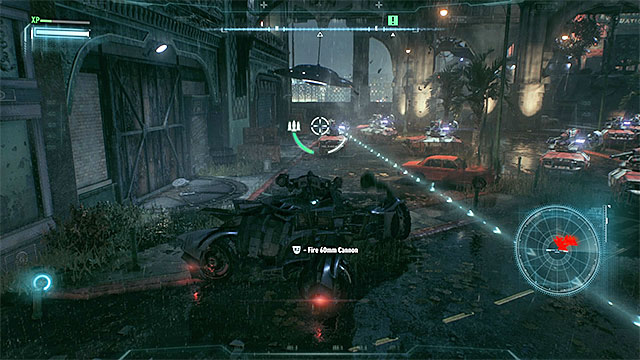
Head towards Panessa Studios. When you reach your destination, you will once again have to fight enemy tanks. Just like during the training that you've finished before, remember not to stay in one place for too long and avoid the beams that mark the trajectory of the missiles. To destroy the tanks, use 60mm cannon and wait for Missile Barrage to charge to the full. Using it this way will allow you to eliminate a maximum of four tanks at once.
 Park the Batmobile in the police station underground parking lot.
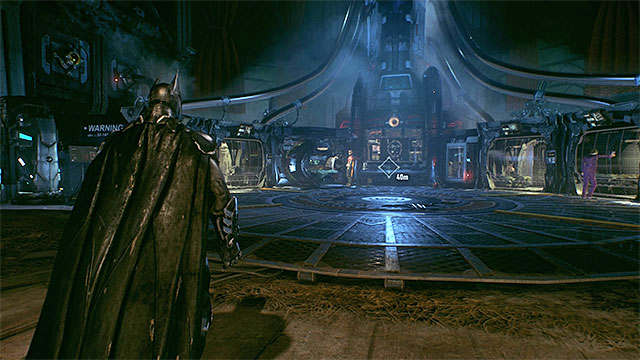
Now you need to go to GCPD (Gotham City Police Department), but there should be no more obstacles on your way. When you reach the police station, locate the entrance to the parking lot and park the Batmobile near the cells. Leave the vehicle and talk to Gordon, who will tell you about the tasks that you can fulfill (you can select quests in a newly unlocked quest menu).
Note - The police station is a sort of a base. You can return here to activate new side quests and, to talk to friendly NPCs, interrogate villains and view your trophies.
 Use detective mode to find the scanner.
To continue the main story, you need to leave GCPD. The only exit in the building is located in the eastern part and it leads to the parking lot, where you've parked your vehicle.
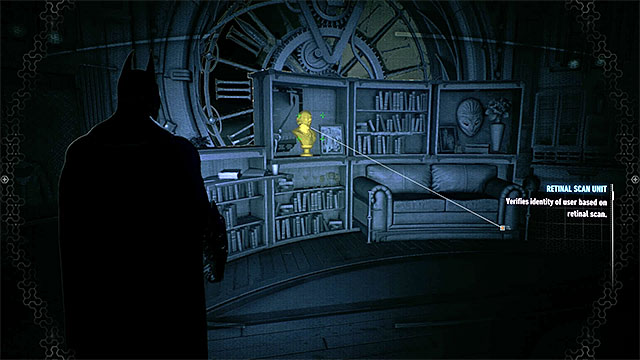
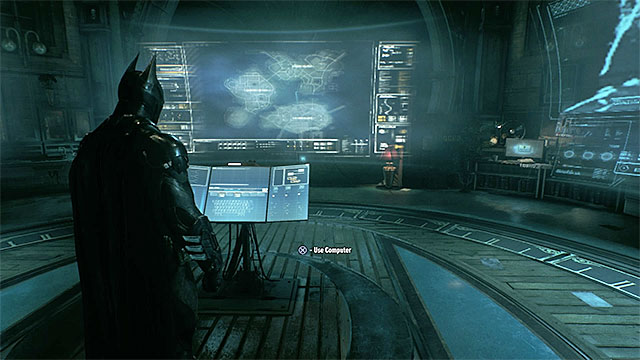
Enter the Batmobile and head to the Clock Tower. As you go, Lucius Fox will contact you and you will learn that the booster is now available for use. When you reach the Clock Tower, leave the Batmobile and use the hook to get to the top. Press the key/button responsible for interaction to get inside the Tower. Now, switch on detective mode and locate a bust, which is also a scanner. Approach the Batcomputer and use it. Watch a cut-scene about meeting Oracle.
 The first interactive object is the big neon.
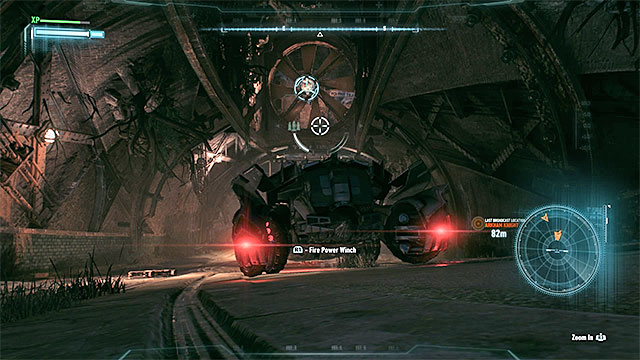
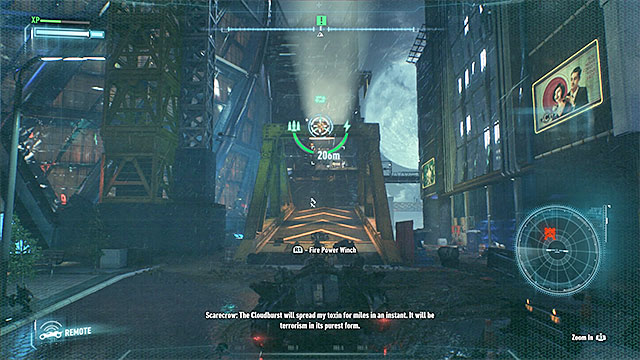
Leave the Clock Tower through the hatch in the roof. Listen to a conversation with Gordon and head to Panessa Studios. When you reach it, investigate one of the top shelves and try to use the Remote Hacking Device. You will fail because of the generator problem. Wait until Lucius Fox contacts you and head to the airdrop area. When you're there, summon the Batmobile and park in the area marked by the game. Soon, a Winch will be attached to your vehicle.
Point the Batmobile towards the train station neon and switch to Battle Mode. Now use the Winch - you have to catch the neon and move the analog stick down or hold the down directional key. This will remove the obstacle (it will take you a few seconds to detach the neon from the building). Head straight and use the booster to reach the roof of the nearby building.
 After using the Winch on the third object, you will be pulling yourself towards it.
There is another interactive object on the right. Use the Winch on it (after entering the Battle Mode). Raise the platform, head towards it and use the booster to make a long jump with the Batmobile. Now you muse carefully drive across the fragments of the roof. You can stay in the Pursuit Mode or use Battle Mode and "slide".
Soon, you will reach the last part of the roof. Locate the third interactive object and use the Winch. This time, you will not be pulling the object to you, but you will pull yourself towards the object. Allow the Batmobile to turn 90 degrees up (so it's in a vertical position) and when you're on another roof, detach the Winch.
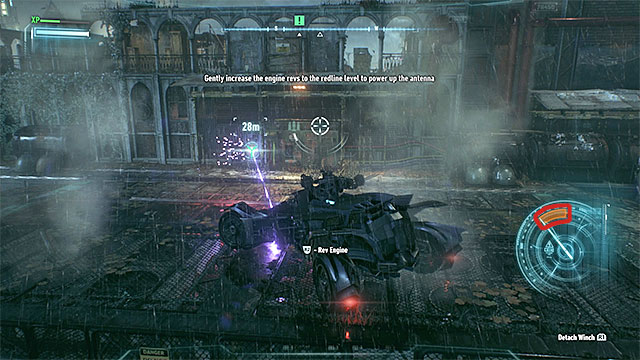 Mind the revolution gauge - it needs to match the orange area.
With the Batmobile, reach the generator near the antenna and use the Winch one again. You have to charge the generator using the acceleration pedal. Observe the revolution gauge in the bottom-right corner. The arrow has to constantly stay in the orange area. Fortunately, you can retry if you fail. After activating the first antenna, listen to a conversation with Oracle and Robin.
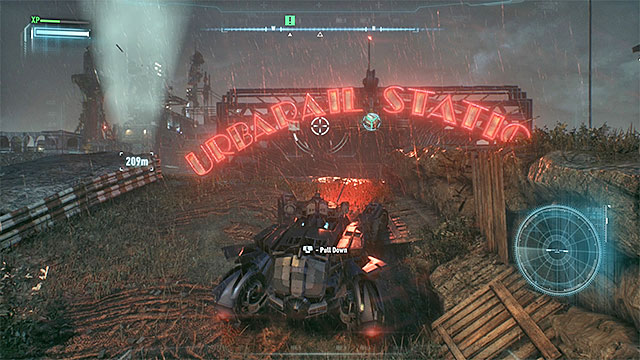
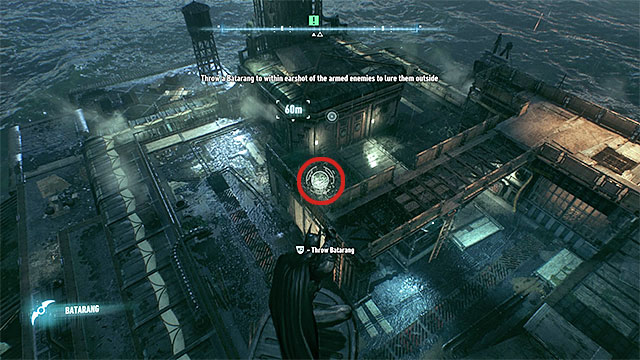 One of the places when you can use a Batarang.
Your new destination is Falcone Shipping Yard. You have to get there without the Batmobile, as it is currently providing power to the generator near the first antenna. Land on the roof of the small building and turn on detective mode. You will see five thugs and a hostage inside. Move to one of the vantage points nearby and face the exit from the room with the thugs. Open the inventory and choose normal Batarang. Throw it so that it hits the ground near the exit door. When you do it correctly, two thugs should go outside.
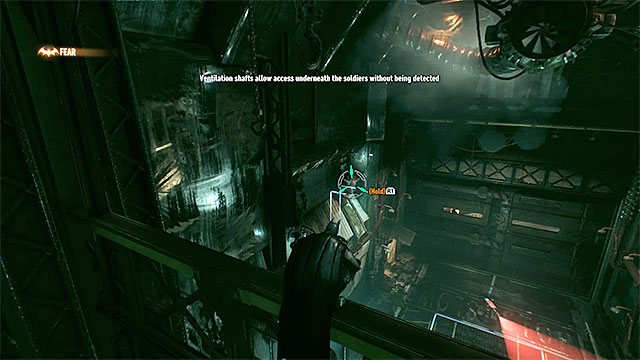
Now you have to eliminate both the enemies without raising alarm. You can do it on many ways. The easiest one is to glide towards the thugs, land behind their backs and execute them silently. You can also use other methods, like for example wait for the enemies to stand under the vantage points or use ventilation shafts in the floor to easily get near the opponents.
 Use the ventilation shaft to get to a seemingly inaccessible room.
Batman will soon contact Lucius Fox. Stand in the place marked by the game and wait until Wayne's friend brings you a new version of the Batsuit (8.03). After learning its new functions, head to the room where there are still three enemies left. Use detective mode to locate a ventilation shaft that will take you inside the building.
Note - After wearing the new suit, the game will suggest participating in training sessions (you will see the icons around you). You can do that if you want to, but it is not required to complete the mission.
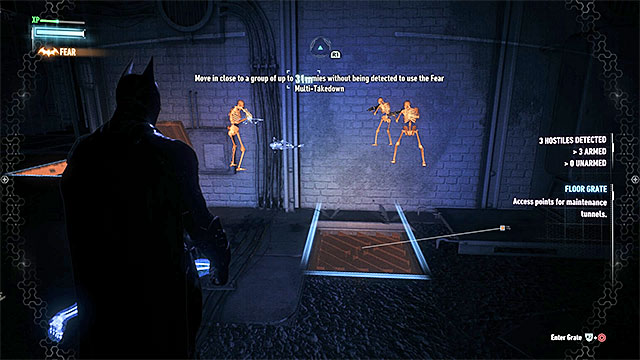
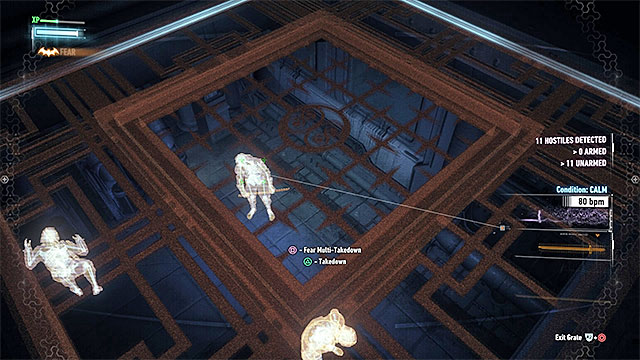
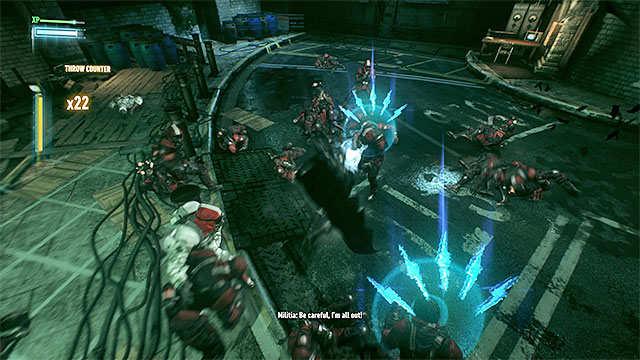
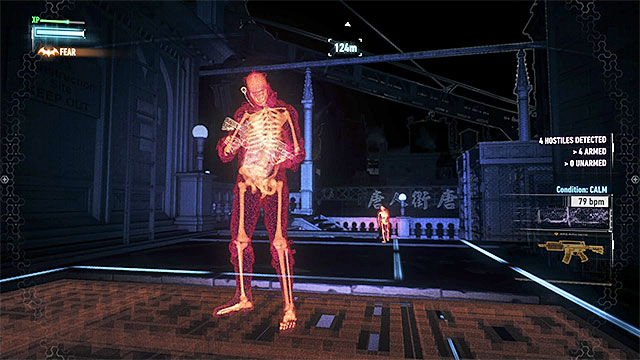
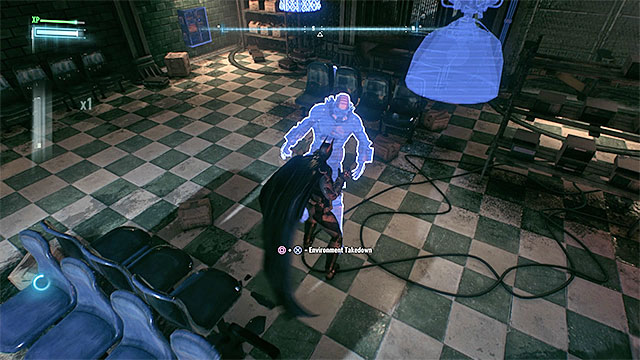
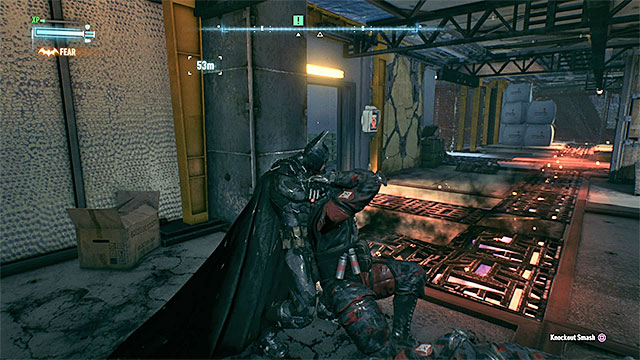
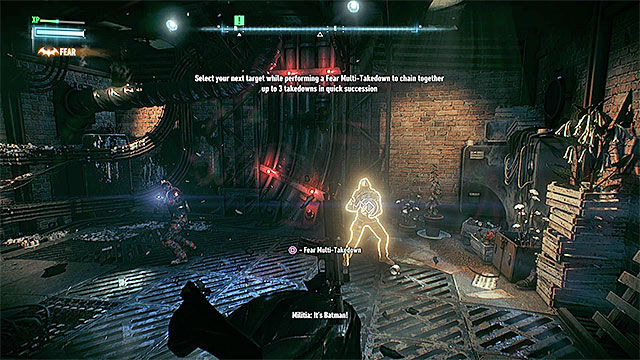 After activating Fear Multi-Takedown, jump from one enemy to another so that Batman can automatically stun them.
When you are in the room with three armed thugs, press the attack key/button to activate Fear Multi-Takedown. Batman will automatically attack the first enemy and you just have to jump to the next enemy in slow motion. You should eliminate all the opponents without any trouble.
You can now free Detective Cottell. Next, use the Remote Hacking Device on the terminal nearby.
Now you need to complete a simple puzzle. The goal is to turn both the receivers in the right way (they have to face the Ace Chemicals building located on the right). The solution is shown on the screen above.
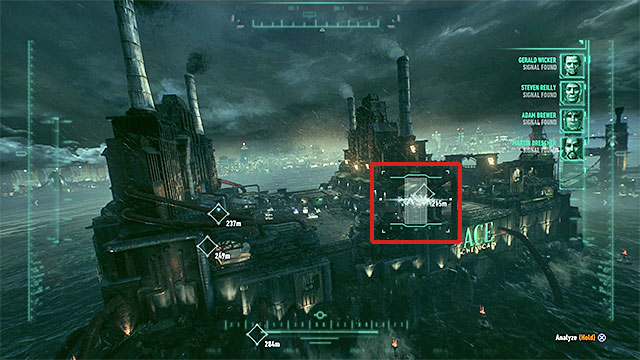
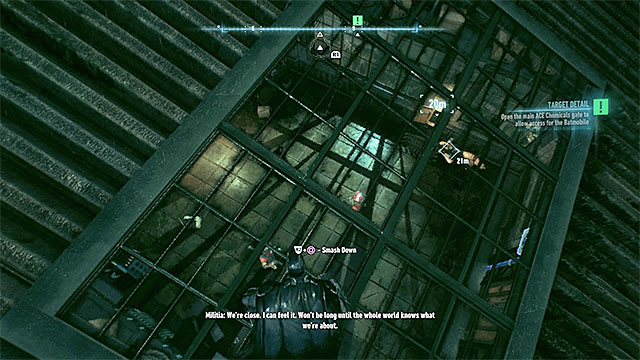
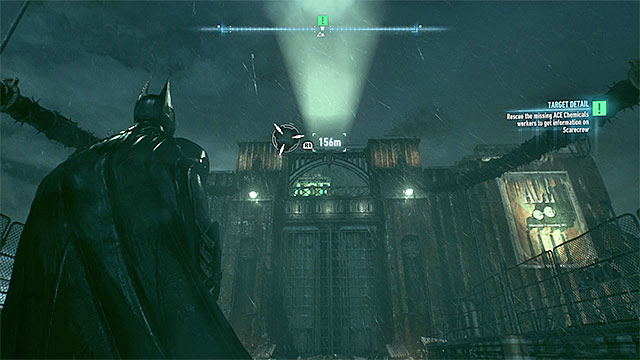 Pull yourself up, above the Ace Chemicals main gate.
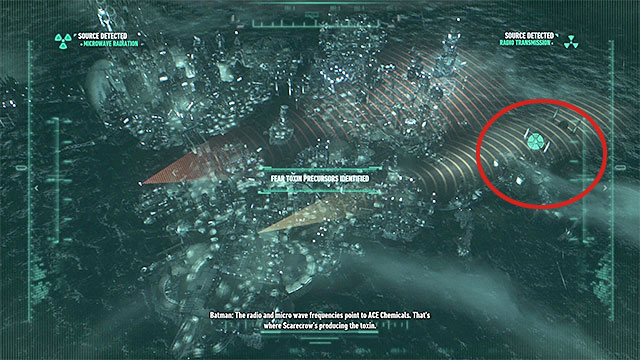
Listen to a conversation with Gordon over the radio and head to ACE Chemicals factory located south-west from your current position. Your destination is quite far away, so it is advisable to use the Batmobile. After you get there, you will watch a cut-scene in which Arkham Knight will appear for the first time. When it's over, use the grapnel to get to the platform above the main gate. You will see another cut-scene and a conversation with Oracle will begin.
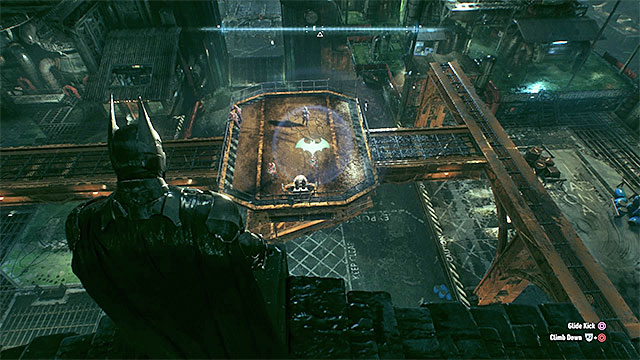
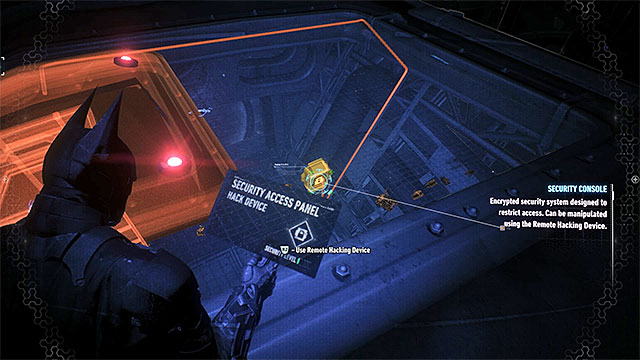
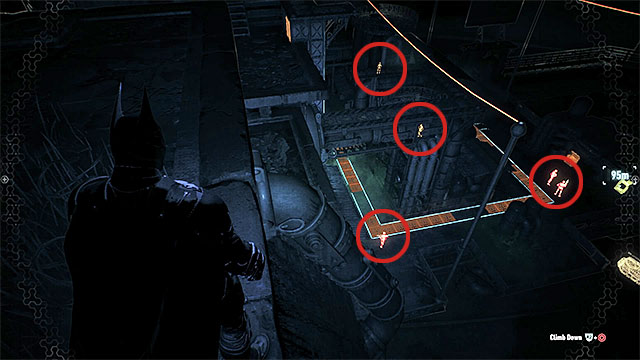 There are five enemies near the terminal with two of them patrolling the area.
Follow the game's suggestion and activate detective mode. This will allow you to notice five enemies near the terminal on the left. For now, ignore the rest of the enemies for now and don't jump down, because the tanks parked there would kill you very quickly.
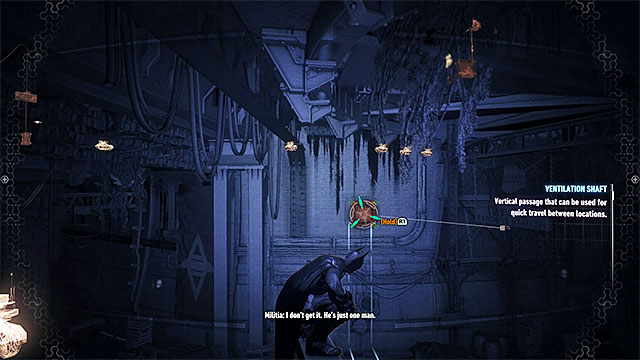
The easiest way to reach the thugs near the terminal is to use the ventilation shaft. Go down to the tunnel and use it to silently execute two enemies that patrol the area. Next, deal with the single guard who stands the farthest from the terminal. He will not move, so you can easily perform a takedown.
 Scanning the area the right way.
Lastly, use the ventilation shaft again to approach the two thugs standing right next to the terminal. It is best to use Fear Multi-Takedown, which will allow you to eliminate them with zero risk.
After securing the area, use the terminal. Use your grapnel to get on top of the highest building in the factory. After the hero throws a Batarang, start searching a good place for scanning the area. You will know it by the grey bar that appears after pressing the appropriate key/button. Identify five lost workers. Their locations will be marked on your map.
 The mechanism that controls the gate is located close to it, in a room with several enemies inside.
Head towards Martin Drescher, who is being held near the main gat to the factory. The room is occupied by several opponents. The best strategy is to land on the roof and then destroy the glass part so that you can ambush the thugs. Deal with all the enemies, which shouldn't cause you much trouble. After the fight, you will learn that Drescher was murdered earlier. Listen to a conversation with the Oracle and pull the lever to lower the gate.
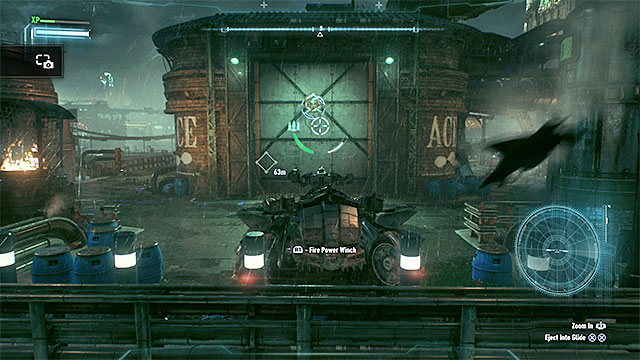
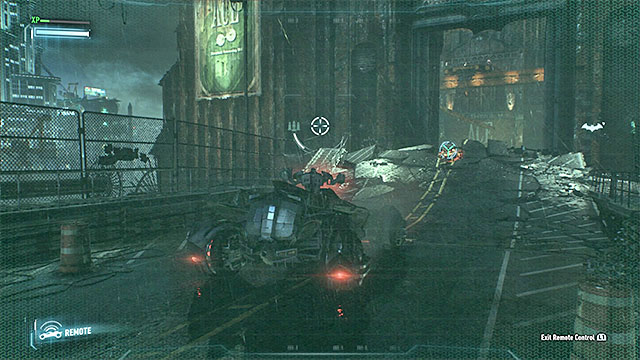 Prepare a ramp using the Winch.
Open the gadget menu and select Batmobile Remote Control. Locate an interactive object and use the Winch. Use reverse to raise the ramp. Head straight onto the ramp and use the Afterburner to make it to the factory main square. Deal with the tanks and remember to slide all the time, which will allow you to avoid enemy attacks (red beams).
After eliminating the enemy vehicles, locate another interactive object on the smaller gate to the right. Just like before, you need to use the Winch, which will allow you to remove the obstacle. Head north-east, to the place where Mark Cheung is.
 You will find Mark Cheung after destroying this gate.
After reaching the new part of the factory, eliminate the guards around (use Vulcan Gun or run them over). Locate a wall with an interactive object on it and attach the Winch to make a hole. You can now go back to controlling Batman. Get rid of the group of thugs and enter the room where Cheung is. It will result in meeting Arkham Knight and his bodyguards.
Don't try to search for a way out. Instead, after Arkham Knight ends his monologue, use Batmobile Remote Control. Use Riot Suppressor to secure Batman. After the large glass is destroyed, start attacking the enemies. Return to the Batmobile and wait until Mark Cheung gets inside. Head to the bridge on which the police are waiting (use the Afterburner at the end to jump across the broken part).
 Attack the enemies standing on the platform from above.
Use the Afterburner again to reach the factory main square. Leave the Batmobile and notice the large platform located right above the square. There are a few enemies on it and it is good to attack them from one of the high vantage points. Target one of the two opponents with firearms. When the fight starts, watch out especially for the guards with guns. Try to eliminate them first or at least disarm them.
After you deal with the first group, elite enemies will appear on the platform. During the fight, focus on performing perfect counterattacks. Also, be aware that they may dodge some of your melee attacks. It is therefore good to use some of your offensive gadgets.
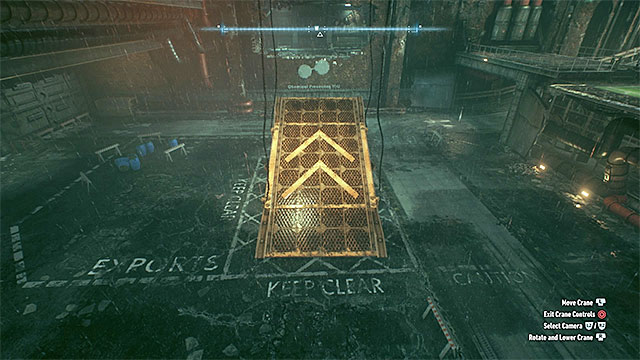
After the battle is over, approach the mechanism that controls the crane and start moving the ramp attached to it. You have to raise it to a position shown on the screen above. Return to the Batmobile and head to the ramp. Use the Afterburner to get to the next part of the factory.
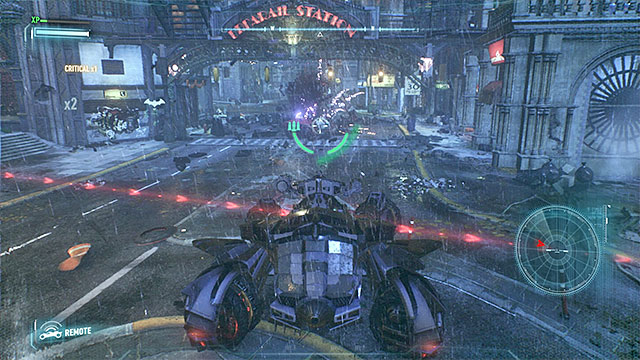
Get onto another large square and deal with all the tanks in the area first. There are a lot of enemy vehicles here, so use your dodging engines and retreat to the previous area if need be. Don't forget about using Missile Barrage - during the end of the battle, you should be able to launch level 2 of this attack (destroying four targets).
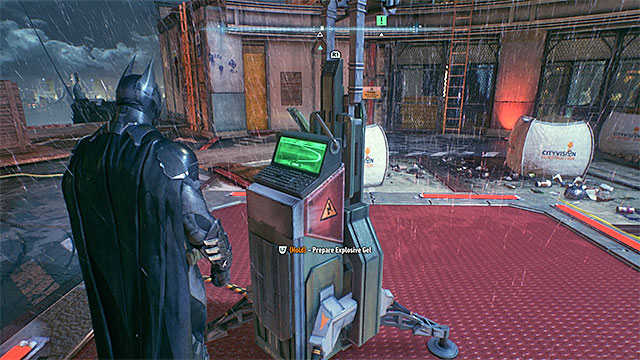
 The place where you use Explosive Gel for the first time.
After the battle, don't leave the Batmobile but use the Winch on the nearby object to damage the large pipe. Now, head to the room located above the loading zone, with several enemies inside. You can get to the room through one of the windows or through the roof. When the fight starts, deal with the medic (dressed in white) as fast as you can, as he is able to heal his allies.
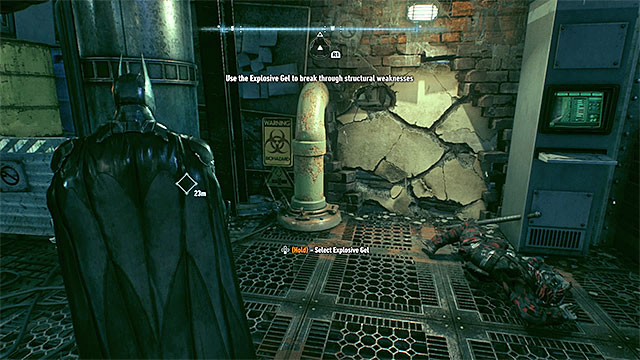
When the fight is over, look for a week wall near the big pipe (you can use detective mode). Choose Explosive Gel form the inventory, approach the wall, use the Gel and detonate it. Use the newly opened passage to reach Gerald Wicker's body.
 You can use the Winch on the pipe only after you use Explosive Gel and hack the terminal on the wall.
Listen to a conversation with Oracle and Robin and then use Explosive Gel on the weak spot in the floor. Jump down to a lower level. Don't come close to the pipes with poisonous gas spreading from them. Use Explosive Gel again to find another pipe. You cannot damage it now, but you can use the Batmobile.
Approach the fuse box on the wall, open it and allow Batman to open the nearby shutter. Activate Batmobile Remote Control. Head towards the shutter and use the Winch. When it catches the pipe, reverse to damage it. Completing all this tasks will allow you to proceed. In the next corridor, you will find Steven Reilly's body.
 Enter the elevator after you raise it with the Batmobile.
Stop when you reach the elevator. Break into the fuse box to open the gate. Now, use Batmobile Remote Control and shoot a rocket at the weak wall located near the elevator shaft. You will see an interactive object on which you should use the Winch. Reverse to raise the elevator.
Switch to Batman and get inside the elevator (you need to approach it from the side when the Batmobile is and crouch). When you're inside, switch to controlling the Batmobile. Head straight slowly, which will lower the elevator (you cannot detach the Winch as it would make Batman fall).
 Jump out of the ventilation shaft when you are above the enemies.
When the elevator reaches the bottom, take control over Batman and enter a new area in the factory. Use the grapnel to pull yourself to the hatch in the roof and start going through the ventilation shaft. Stop when you reach a room with several enemies. It is best to start the fight from Fear Multi-Takedown. Focus on the medic in the white suit. You can use objects from the environment to eliminate the enemies, but it is not necessary.
When the battle is over, approach Adam Brewer. Take him to the elevator and use Batmobile Remote Control once again. Reverse to raise the elevator with Batman and the rescued hostage. As you leave the elevator, a cut-scene will appear. You will participate in the first boss fight.
 Move away from the red circles before they Arkham Knight attacks.
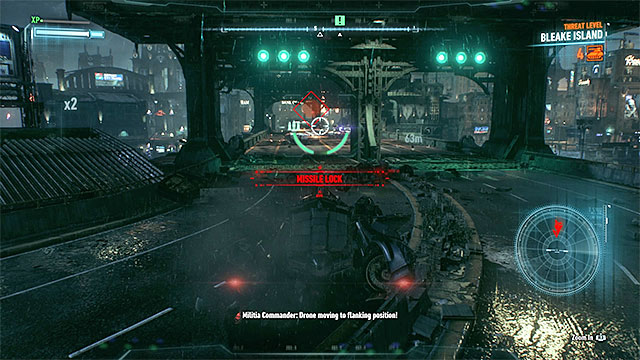
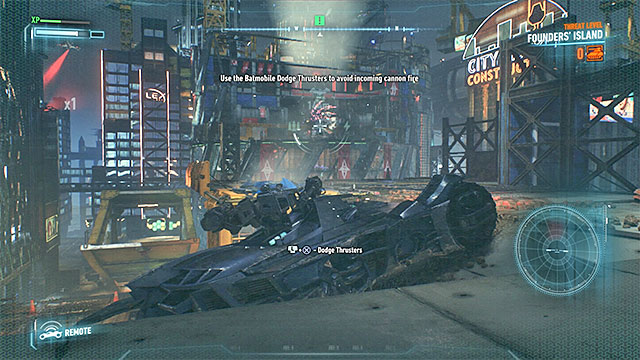
At the beginning of the battle, don't bother attacking the flying machine controlled by Arkham Knight. Instead, focus on destroying all the tanks on the square. Besides avoiding their attacks, you also need to watch out for the flying machine. The game displays circles on the ground, which mark the area when missiles will explode. Just like in the case of tanks - red color means that you're in trouble. Move away from the spot and use dodging engines to do it quickly.
 Use Vulcan Gun to destroy enemy missiles approaching you.
After you deal with the tanks, Arkham Knight will shoot several missiles directly at the Batmobile. To avoid being hit, destroy them on the way. Use Vulcan Gun to do that.
 Attack the flying machine and avoid being hit.
After you avoid the first attack, start damaging the machine. Its energy bar can be seen in the top-right corner of the screen. You can lower the bar by shooting from your 60mm cannon. It is very important to constantly move from one place to another and to use dodging engines, because Arkham Knight will perform his attacks regularly. Shooting the machine down will end the fight.
Switch to Pursuit Mode and reach a small ramp. Get out of the Batmobile and approach the switch responsible for controlling the ramp. Raise the ramp and get back to the Batmobile. Together with Adam Brewer, reach the bridge on which you will find Gordon.
Enter the Batmobile and use the Afterburner to get to the factory. Stop on the first main square and shoot the wall marked by the game, which will make a large hole.
Leave the vehicle and reach the upper platform. You will find a terminal that controls the crane. You need to move the ramp again. Raise it to the position shown on the screen above. Go back to the Batmobile and use the ramp (with Afterburner) to make it inside the building. Head straight and destroy two enemy tanks on the way.
 Going through the ventilation shaft will allow you to get close to the enemies.
Stop the Batmobile after reaching a large closed gate and exit the vehicle. Look up and use the grapnel to reach the platform above. Be careful, because there are two guards near the turret that is constantly turning around (the range of view is marked with red color). The best way to safely approach the enemies is to use the grapnel on the bars at the beginning of the top-left shaft. Allow Batman to go all the way to the bottom and move so that you are directly below your opponents. Wait until the guys on the turret can't see you and use Fear Multi-Takedown to quickly deal with both the enemies.
After neutralizing the enemies, hide in the shaft below as quickly as you can so that the guards wouldn't see you. When it's safe again, get out of the shaft and approach the turret. Press the appropriate key/button to destroy it. Listen to a conversation with Gordon and open the fuse box to lower the gates.
 Neutralizing a large group of enemies is not so difficult.
Return to the Batmobile and continue driving. Stop near the next obstacle and use the grapnel to reach the platform on the top. There are as many as twenty thugs in the area, but fortunately - no elite units. It is best to start the fight from attacking one of the medics. Deal with the second one as quickly as you can and watch out for the enemies that can charge at you (you can interrupt the, using Batarangs).
When the battle is over, interact with the fuse box. Get into the Batmobile and head straight. You should reach the last obstacle. Here, following the game's suggestion, you should eject Batman (press the appropriate key/button twice), which will make him reach a large hall.
 The best strategy is to sneak up to the enemies from behind and eliminate them silently.
There are eight armed enemies in the room and three turrets (fortunately, they cannot turn around and two of them are facing the main gate). Try to eliminate the guards silently, without being noticed. Use detective mode to locate the opponents. You can move around using the cornices and interactive shelves near the ceiling. Look for single targets and attack them in a way that you prefer. You can simply sneak up to them from behind and use takedown or for example use the ventilation shaft, perform executions when hanging from the wall, or spread Explosive Gel on the weak parts of the wall and detonate it in the right moment. If you're noticed, use Smoke Pellets and use the grapnel to quickly go back to the top of the room.
 Go to the room above only after you secure the hall.
When securing the hall, be especially careful when you're near one of the turrets. Try to eliminate the enemies around it when they are out of its range of attack (you can also draw their attention with a Batarang). After eliminating all the thugs, sabotage all three turrets (simply approach them from behind and press the appropriate key/button).
When the hall is clear, go up the stairs to the main room. Open the door and watch a cut-scene about meeting Scarecrow.
 You need to move the cylinders.
Start from approaching the main computer. Use it to prepare the neutralizer. Now, approach one of the four interactive cylinders and start pulling it out slowly. You mustn't hurry. The diodes on the cylinder will inform you whether you're doing everything right. Try not to make any orange or red diode appear. After pulling the cylinder out, you have to slowly carry it to one of the new slots (They are connected in pairs). Interact with the slot and carefully put the cylinder in.
Now you should repeat the steps described above with all the remaining cylinders (pull out, carry it to another slot, put in). After pulling out the last cylinder, you will watch a cut-scene.
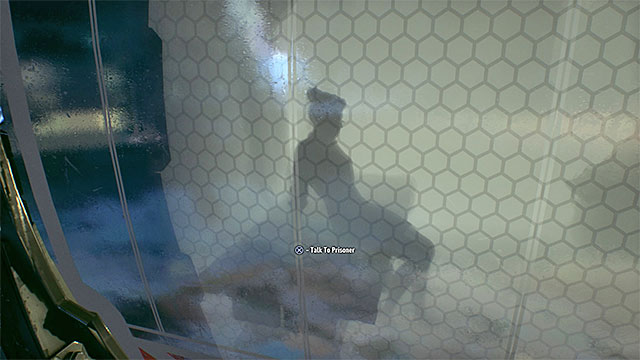 Examine all the cells - you need to talk to four prisoners.
Now you need to complete a short scene while controlling Gordon. Start walking towards the elevator. When you reach it, interact with it and wait until you pass the verification process. Enter the elevator and press the red button to get to a new location.
Enter the large hall and start examining the cells located on your both sides. Talk to the prisoners. Batman will soon appear in this location and you will watch a cut-scene. When it's over, you will go back to what you were doing previously.
 Destroy one of the walls using the Winch
After taking control over Batman again, activate Batmobile Remote Control. Switch to Battle Mode and use the Winch on the interactive object on one of the walls. Reverse and wait until the wall is destroyed. Get inside the Batmobile. Now you need to leave the factory - follow the road and don't forget to use the Afterburner when you're outside. This will allow you to jump across the broken part of the bridge.
Note - From now on, you can see the location of Augmented Reality challenges on your map. Completing is not required to finish the main story.
 You can avoid the tanks or destroy them (which is a better idea).
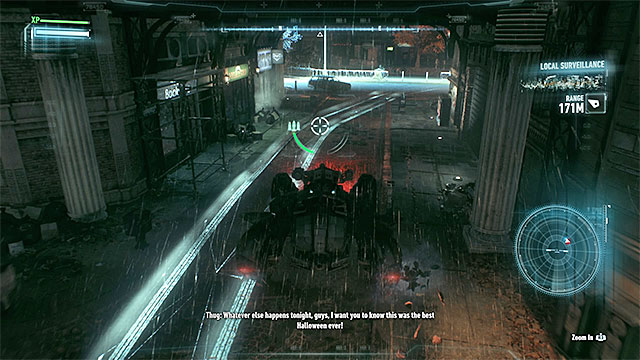
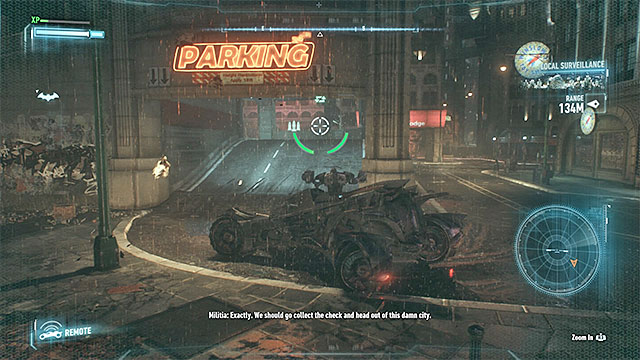
Listen to a conversation with Alfred and Gordon. Your next destination is GCPD. Use the Batmobile to get there. Be careful, because you will regularly encounter enemy tanks on your way. Theoretically, you can go past them, but it is a much better idea to destroy them (use 60mm cannon and Missile Barrage). After reaching your destination, go to the parking lot and meet with Gordon.
 Activate the Drone Hacker after the you lock the target.
Start following the car driven by Gordon. Soon, there will be two enemy armored vehicles following him as well. Don't switch to Battle Mode, but stay in Pursuit Mode instead. You need to mind two things: Firstly, observe the beams that show enemy attacks and use dodging engines to quickly move to the sides. Secondly, try to stay in some distance from enemy vehicles, which will allow you to lock the target. After the targeting process is complete, press the key/button responsible for activating the Drone Hacker.
Every enemy armored vehicle needs to be hit with the Drone Hacker three times. At the end, park the Batmobile in the place shown by the game and wait until Gordon gets inside.
Destroy all the tanks near the Clock Tower.After listening to a conversation with Alfred, head to the Clock Tower. Soon, you will start encountering enemy tanks. There should be about a dozen of them in total and you need to be careful not to get circled by the vehicles (it will be difficult for you to dodge the missiles). After dealing with the enemies, listen to a conversation with Gordon and get to the Batmobile.
 You don't have to eliminate the thugs silently, but it's a good idea to do so.
Don't rush to the top of the tower, because you still need to deal with some thugs in the area. Use detective mode to locate them quickly. There are six armed enemies and one of them is a medic. It is good to eliminate them silently, one by one, without alarming the others. You can do it by for example sneaking up from behind or jumping down from the ventilation shaft. Be aware that Arkham Knight will warn his subordinates about your actions after you kill several of them. It will make the others be more careful for some time.
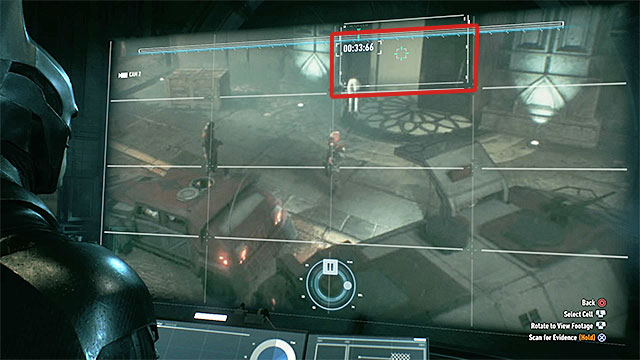
After securing the area, head to the top of the Tower and unlock the way from inside. When you reach your destination, you will watch a reconstruction of the events. Look around the room and notice the knocked-over wheelchair. After talking to Gordon, use the computer located in the tower to watch the camera recordings.
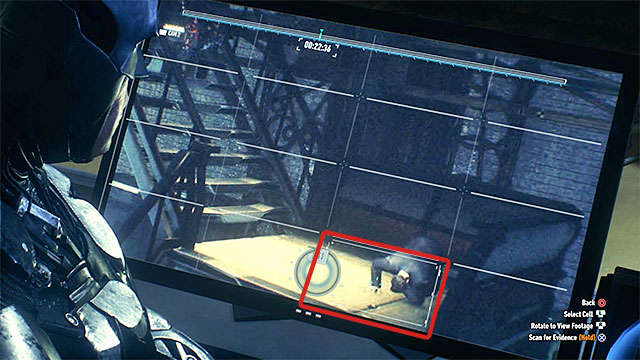
Fast-forward to 33 seconds and zoom in on the top-right camera view. Scan the person that carries Oracle out of the building (shown on the picture above). You will learn that Arkham Knight is the one responsible for the abduction.
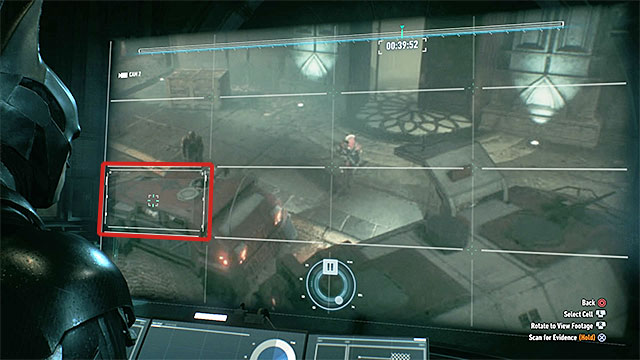
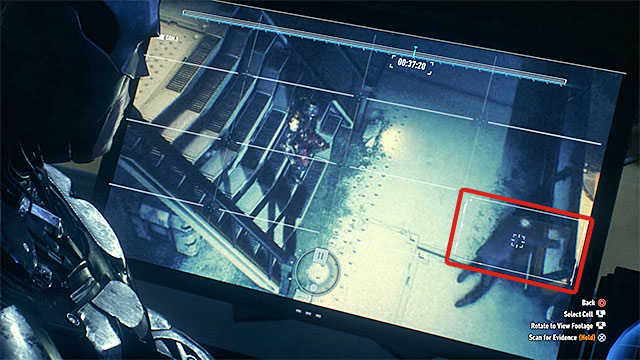
Stay on the top-right camera view and fast-forward to 39 seconds. Target the vehicle that you can see on the screen above. Scan the machine to confirm that Barbara is really inside.
 After you use the scanner, you will see the vehicle tracks on the road.
Turn on the computer in the Clock Tower. Go outside (use the hatch in the ceiling) and return to the Batmobile. Activate Battle Mode and press the key/button responsible for using Forensics Scanner. After it starts working, you will notice that the Batmobile is scanning the area for tracks of enemy vehicle, in which Oracle is. Follow the tracks (you don't have to hurry, so focus on not loosing the trail).
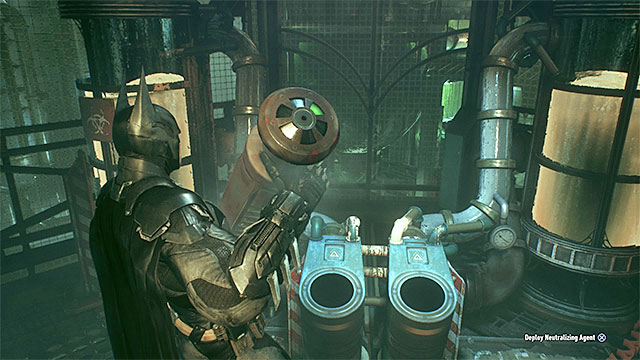
 Neutralize the bomb only after you finish the battle.
When following the tracks, you will be interrupted by an unidentified object dropped down by the flying machine. Park near the object, exit the Batmobile and examine it. It's a bomb. Return to the vehicle and prepare yourself for battle. When fighting, you cannot get too far away from the bomb, because it will make it explode. Therefore, you need to be more effective when eliminating enemy tanks and carefully perform your dodges so that you don't fail the mission.
After securing the area and applying the virus, return to the bomb. Use the Winch on it and start to slowly increase the revolution. Just like in one of the missions from the first part of the game, you need to watch the revolution gauge so that it stays in the orange area.
Note - from now, you can search for other bombs. Destroying them is a side quest, which is not required to complete the main story.
 Stop when you reach the raised drawbridge.
After detonating the bomb, return to the Batmobile. Activate Battle Mode once again and use the Forensics Scanner. Locate the tracks of the vehicle and start following them. They will lead you to a raised drawbridge, which connects Miagani Island with the rest of Gotham. Listen to a conversation with Alfred. He will tell you something about the way in which you can lower the bridge. Leave the Batmobile.
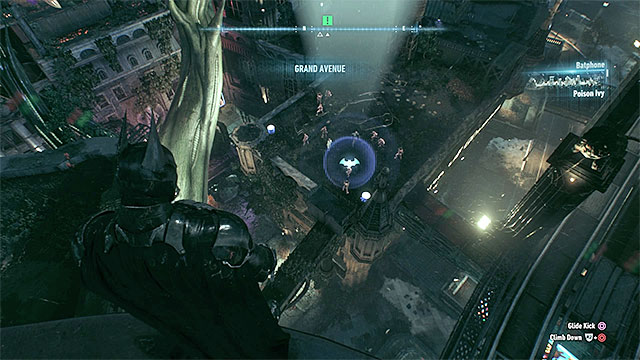
 The drone operator should one of the first enemies that you eliminate.
Head to Grand Avenue Station located in the south-eastern part of Miagani Island. You cannot use the Batmobile, so you should rely on gliding to keep away from the streets (there are a lot of enemy units there). After reaching your destination, get to one of the vantage points and scan the area using the detective mode. You will learn that the computer which controls the bridge is guarded by eight armed thugs.
As usual, try to eliminate the enemies silently. One of the first opponents that you should deal with is the drone operator standing on one of the balconies. When you do that, you will also disable the flying machine. Attack the rest of the enemies in any order and use the objects from the environment (vantage points, ventilation shafts, weak walls, etc.)
When the fights are over, search for the terminal and hack it. Listen to a conversation with Alfred and watch a recording prepared by Riddler.
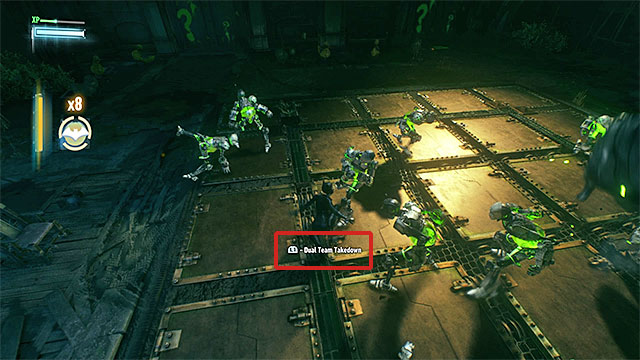 The game will inform you when Dual Team Takedown is available.
Pinkney Orphanage is located to the west fro where you are now. You need to check out this area before you go back to tracking Arkham Knight's vehicle. After reaching your destination, you can deal with the thugs standing near the entrance or sneak past them. Enter the building and go to the room where Catwoman is to rescue her.
Now you need to deal with Riddler's thugs. A novelty here is that you can switch between controlling Batman and Catwoman as you please. Moreover, after performing an appropriate number of attacks, you will be able to use Dual Team Takedown (wait for an information to appear on the screen). After winning the battle, listen to what Riddler has to say about the collar that Catwoman has on her neck.
Note - From now, you can complete the missions connected with Riddler's trials or return to the main story. If you choose the former, access the window where missions are listed (it comprises a separate menu) and find Riddler's Revenge there.
 Quickly eliminate the missiles shot at the Batmobile.
Head back to the bridge where you've left the Batmobile. Get inside the vehicle and park it in the lace shown by the game. Activate Battle Mode and use Forensics Scanner to continue following the tracks of Arkham Knight's machine.
During this part of the mission, you will sometimes near to stop and fight with tanks that will appear in the area. It is a good idea to follow the suggestions of the game and use Vulcan Gun to destroy the sensors attached to enemy vehicles. It will allow you to deal with them faster. Use Vulcan Gun also to destroy the missiles as they fly towards the Batmobile. Continue following the tracks. They will lead you to a place where the car crashed.
 You will find the door in some distance from the car.
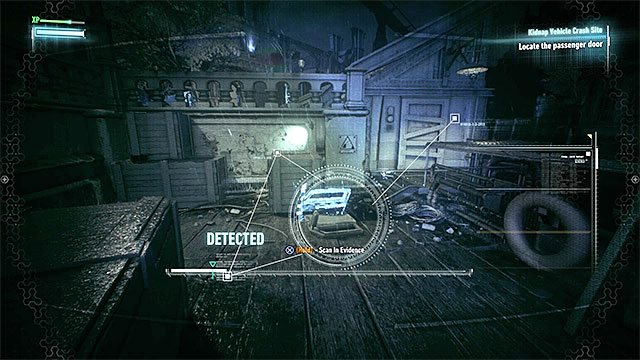
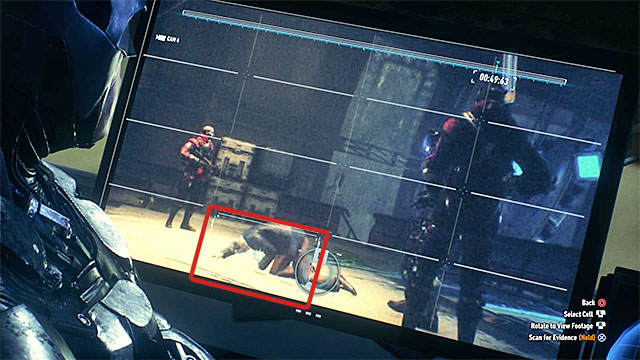
Approach the car and activate the Scan In Evidence mode. Start from scanning the whole vehicle (always hold the appropriate key/button). From the first reconstruction, you will learn that the driver flew out through the windshield. Start moving the timeline to locate the place where his body landed. Approach the body and scan it.
Return to the vehicle and scan the passenger seat. You will notice that the door on the right side was detached from the vehicle during the crash. Use the timeline again to learn the location of the door. Go to the door and scan it.
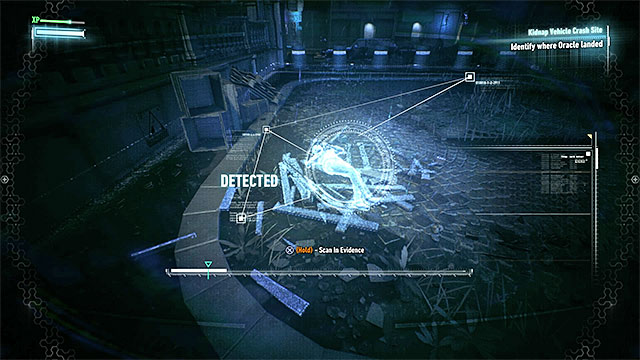 The place where Barbara was after jumping out of the car.
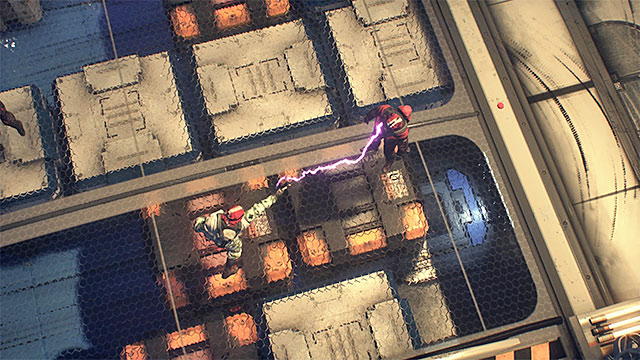
Return to the car and start manipulating the timeline. Now, your priority will be to find the place where Barbara landed after she jumped out of the car. Scan this area. Your next discovery will be the fact that someone shot her after she got out of the car.
Again, scan the place where Barbara landed to perform a ballistic test. This operation will tell you that it was Arkham Knight who stopped Barbara from escaping.
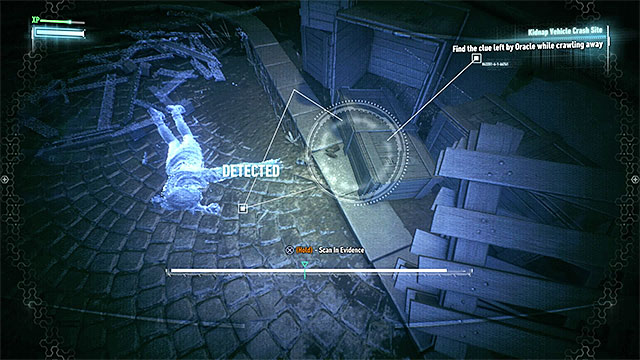
At the end, you need to find the trail that Oracle left behind her, after getting out of the car and being caught by Arkham Knight again. The place where the trail begins is shown in the picture above. After moving the timeline to the proper position, you need to examine that wooden box. You will find the scrambler. Talk to Lucius Fox. Also, Alfred will tell you about some side quests available.
Note - you don't have to complete the side quests that Alfred told you about. If you want to stick with the main story, go meet with Lucius.
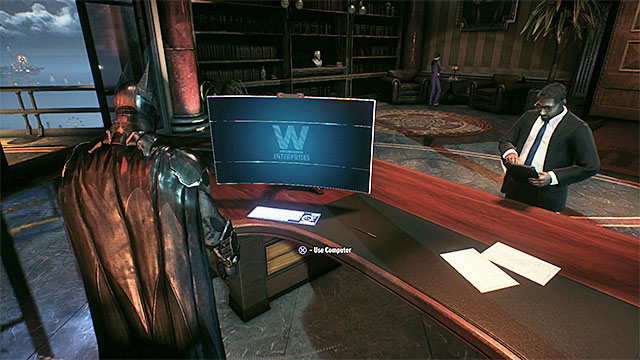 Use the computer in Bruce Wayne's office.
Wayne Tower is located in the south-eastern part of the island. Just like before, use your ability to glide to avoid the tanks parked in the streets. When you reach your destination, use the grapnel to reach the top floor of the building. Talk to Lucius Fox and use the main computer to analyze the encryption protocols.
Lastly, you need to decide what upgrade to install in the Batmobile.
Note - the upgrade that you choose will not be installed right away. This will happen a bit later and you can't miss this moment.
 In the first part of the tunnel, there is a ventilator that you can pull out.
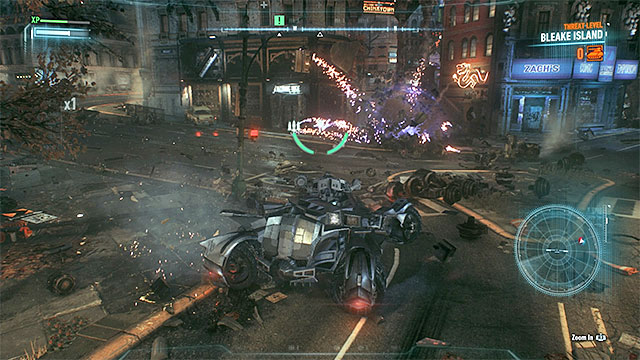
Your next destination is the entrance to the tunnels. It is located in the central part of Miagani Island. Glide towards the entrance and summon the Batmobile when you're near. Now, a rather difficult battle awaits you. You will be facing several dozen enemy tanks. When fighting, avoid staying in one place for too long. To reduce the number of targets that you need to face at one time, you can go to the narrow alleys nearby. This will make it more difficult for the vehicles to reach you.
When the battle is over, go back to the place marked by the game, park the Batmobile and go inside the tunnel, when the passage is open. Stop near the first barricade, look up and use the Winch on the large ventilator. Pull it out and use the grapnel to reach the hole.
 Aim at the wall on the other side of the large ventilator.
Listen to a conversation with Robin and spread Explosive Gel on the planks nearby unlock the passage. Do the same near the next wall and go inside the ventilation shaft. After reaching a large working ventilator, select Line Launcher in the inventory. Aim at the wall on the other side. Slide on the rope to the shelf that you can see far away
Now it's the first time that you have to use another one of Batman's gadget, the Remote Control Batarang. Use detective mode to locate an interactive switch (behind the fence). The Batarang has to fly through the hole in the wall, located to the right of the switch (control the Batarang as it flies and hold the key/button responsible for decreasing speed if needed).
When you hit the switch with the Batarang, a passage will open. You need to get to it right away using the Line Launcher. Climb onto the shelf and approach the edge. Choose Remote Control Batarang again. This time, you need to send it to a hole in the left wall (it is well visible). Behind the hole, direct the Batarang towards another switch.
Select Line Launcher and aim at the shelf nearby. When the rope reaches the target, immediately press the key/button responsible for slowing down when sliding. Turn the camera to the left and use the Line Launcher again on the wall shown in the picture above. It will change your course 90 degrees.
 Use the grapnel to reach the entrance to the ventilation shaft.
You will reach a large tunnel with a very big group of enemies inside. Don't try to attack them, because they are enemy tanks parked nearby and they would kill you immediately. Instead, start jumping from one vantage point to another and look for a ventilation shaft located very high. Reach it using the grapnel. Start going through the shaft and ignore the enemies. You need to get to the room marked by the game. When trying to leave the shaft, you will be attacked by Arkham Knight (you cannot escape it). Watch the cut-scene.
 You need to stun the brute with the cape before you start hitting him.
Soon, another fight will start. At the beginning, you will be facing a new type of thug - the brute. To eliminate this type of enemy, you first have to stun him with the cape. Then, use the Beatdown attack (keep pressing the attack key/button rhytmically). This time, no one will interrupt you as you perform the Beatdown, but in the next fights, you will have to mind other enemies also. This means that you will sometimes have to dodge or perform counterattacks.
More enemies will soon start getting into the room. Watch out especially for the ones with swords (it is more difficult to hit them and to dodge their attacks). There is also another brute. Look for the medic (dressed in white) and try to eliminate him as soon as you see him. During this battle, don't try to get close to the exit, because Batman would be killed by the tanks right away.
 Use the fuse box to take control over the Batmobile.
The battle will end when one of the tanks will try to ram the wall that separates the room from the tunnel. Move to the left of the machine to get out of its range of attack. Interact with the fuse box to open the shutters.
Use Batmobile Remote Control and shoot the wooden barricade to get to the main tunnel. Attack the tanks located there (among them, the one which rammed the wall earlier). You shouldn't have much trouble eliminating them. After the battle, drive the Batmobile to the end of the tunnel and interact with another fuse box.
Attack the APC only when you get rid of the other vehicles.Return to the Batmobile and follow the enemy APC. When completing this mission, be in Pursuit Mode all the time. Soon, other enemy vehicles will appear. Dodge their attacks using your side engines and try to aim the Drone Hacker at them. Attack the APC after you get rid of the other vehicles. The APC cannot attack, but you have to hit it several times with the missiles (you can see the energy bar in the top-right corner of the screen).
After immobilizing the APC, park next to it and interrogate the driver (unfortunately, it is not Arkham Knight). You will need to intimidate him several times, so press the key/button responsible for acceleration lightly. You will obtain info about the location of Barbara Gordon.
 Park in the place marked by the game so that Batwing could install the upgrade.
Listen to a conversation with Alfred and Lucius Fox. Lucius will tell you that the Batmobile upgrade that you selected earlier is now ready to be installed. Reach the place marked by the game and wait until Batwing installs it.
You will have the opportunity to test the new feature right away, because enemy tanks will appear nearby. Of course, you don't need to use it all the time, but try to get to know the new function. After the battle, listen to a conversation with Alfred (a new side quest will be unlocked).
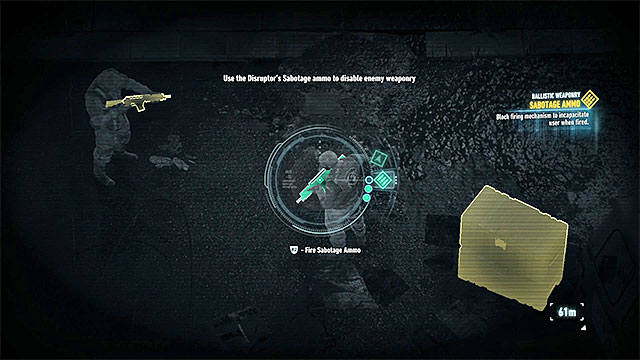 You can use the disruptor for example to sabotage firearms.
Head to the place marked by the game and when you reach your destination, use the grapnel to get to the roof. Nightwing is already waiting there for you. During the conversation, you will learn about Penguin's actions. You will also receive a new gadget - the Disruptor.
Select the Disruptor from the inventory and notice the enemies below you. You have three charges. Use it on the two armed opponents to neutralize their weapons. Send two charges towards one of the weapons and it will explode when the enemy tries to use it. You can now jump down and deal with the thugs (at first, stay away from the one with the weapon that you've sabotaged). During the fight, watch out for the brute and use Beatdown on him. After the battle, select the Disruptor and aim at the van to send a following missile. Lastly, knock on the back door of the van so that it moves.
 The van is heading to a well-guarded warehouse.
Now you need to follow the van, but you cannot be seen by the enemies that are inside. Rely on using the grapnel and on gliding. Keep away from the ground and stay about 200 meters behind the car. The van should stop near a warehouse located in the northern part of the island. Scan the area (detective mode) from a safe distance and you will learn that there are six armed thugs around and two turrets.
 Destroy both the turrets.
Before you can enter Penguine's hideout, you first need to secure the area. Just like in other situation of this sort, try to stay hidden and eliminate the enemies one by one. You can sneak up from behind, use the ventilation shafts or make use of your gadgets. When securing the area, try to neutralize the turret locate at the back of the building. Approach it quickly when it will be facing the other way (there are ventilation shafts nearby). Lastly, deal with the turret near the entrance.
 Use the ventilation shafts to get directly below Penguin
Enter the building and reach the place where you need to interact with the hatch in the floor. In the next room, locate the entrance to the ventilation shaft. Go through it so that you are directly below Penguin. Press the appropriate key/button and take Penguin hostage. When interrogating him, you can press the key/button responsible for counterattack in the right moment, but a fight will start anyway.
Good news is that during the battles in this location, you can use Nightwing's help. Just like in the case of Catwoman, you can switch freely between the two characters. Moreover, you should look out for the moment when the game allows you to perform Dual Team Takedown. Together with Nightwing, defeat all the Penguin's thugs.
 Close the door to the vault before you detonate the weapons cache.
Enter the vault, approach the weapons cache and select Explosive Gel from the inventory. Spread the gel there, but don't detonate it yet, as the explosion would kill Batman. Instead, walk out of the vault and close the large door. After doing this, press the detonation key/button. You will unlock a new side quest connected with other weapons caches. Use the grapnel on the balconies on the top and listen to a conversation with Alfred.
Start from using the ladder. After activating the detective mode, you will notice that Penguin's people prepared an ambush. Don't try to get close to them. Instead, use the grapnel to move closer to the ceiling. Activate Batmobile Remote Control and locate a multistory car park (you can see it in the picture above). Drive the Batmobile to the top level of the car park and you will get directly behind the thugs. Ambush them and destroy the turrets also. Now you can switch to the hero and leave the building. Talk to Alfred about Stagg airships.
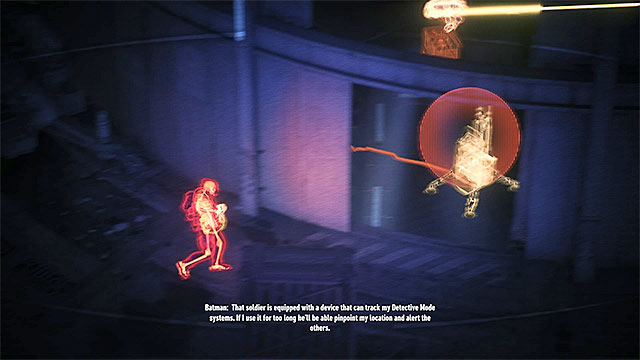 Get rid of the enemy with the Detective Mode Scanner as soon as you can.
Head towards Stagg Airships located right near Founder's Island. Your next destination is the watchtower. As you go there, watch out for the flying machines with guns (red cones). Avoid getting close to them to prevent being noticed.
When you reach the watchtower, you will notice that it is occupied by thugs supported by a drone. It is not your only problem, because there is also an enemy with a device that can reveal Batman's detective mode. You can avoid this problem in many ways. You can for example activate the detective mode only for a short period of time, several times (the enemy won't be able to detect your position). Also, you can resign from using this mode and rely on your own observations. If you choose to do so, it is good to move around when hanging from the edge of a building and hide behind covers when checking the area. It is obvious that the enemy with the Detective Mode Scanner should be the first person to deal with.
 The terminal that you have to destroy.
Besides the thug with the scanner, you should also watch out for the drone operator. He is located in the middle part of the tower. Good news is that he cannot move from his position. Lastly, deal with other thugs, but remember that they can suddenly change their positions when they notice that their allies are gone.
After securing the area, locate the terminal that controls the turrets guarding the airships. Spread Explosive Gel in this place and detonate the terminal.
Note - from now on, you can complete new side quests that consist in sabotaging other watchtowers. Of course, it is not required to complete the main story.
 Activate the detective mode and hack the terminal.
Before you try to get on board of one of the airships, listen to a conversation with Alfred and with Lucius Fox. Head to Wayne International Plaza. Reach one of the top balconies, locate a scanner in the wall and take the Remote Hacking Device.
You can now approach the edge and glide towards the airship. Reach the entrance and you will notice that it is closed. Activate detective mode and locate the control panel. Choose Remote Hacking Device from the inventory and use it on the terminal. To hack the system, you need to guess the password by moving the analog sticks or the keyboard and mouse. The password is BIOCHEMISTRY. Now, you can open the entrance.
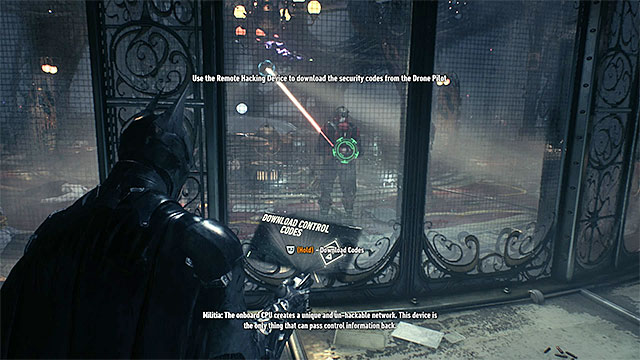 Steal the code from the drone operator.
Go through the ventilation shaft, jump down and stand near the close door that separate Batman from the three thugs. You will have an opportunity to test the Remote Hacking Device. Aim at the drone operator and hold the appropriate key/button to download the code. Take control of the drone and order it to attack the enemies. This time, you will be able to neutralize all the enemies at once, but later in the game, a drone will be only be able to deal with opponents near it.
Try to open the door. You will fail, so use the Remote Hacking Device on the control panel to the let (password: PROTEINS). Enter the large hall and listen to a conversation with Alfred.
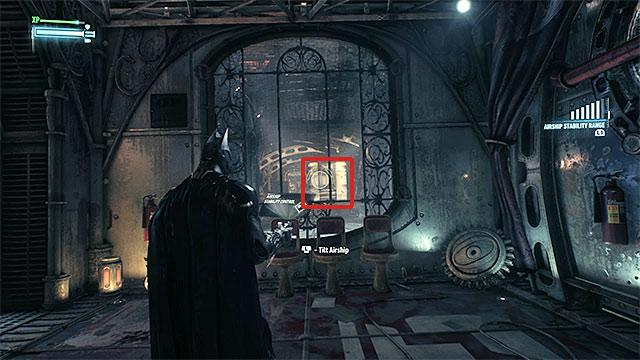 Tilt the airship to move the crate.
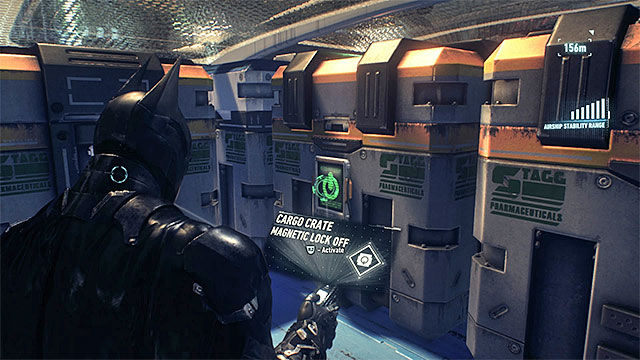
Go to the room where you can see a terminal. Hack the terminal to take control of the airship's stabilizers and to be able to tilt the airship. Use this function now - you need to get rid of the large crate to unlock the passage in the floor. Head to the hatch and use it.
Head straight and stop in the room with three new crates. First, move the crates to the right maximally. Select the Remote Hacking Device and aim at the crate in the middle (shown in the picture above) and move its magnetic lock. This will block it in current position. Now, tilt the airship the other way and the crate on the left will move, which will unlock the passage.
Go to the end of the corridor, look up and use the grapnel on the interactive hatch. Here, you will have to fight an elite enemy, who is wielding a blade. When he starts to attack you, move the analog stick down (or press the down directional key) and hold the key/button responsible for counterattack. Start attacking only after he finishes his combo.
 Hack the panel to open the airship side door.
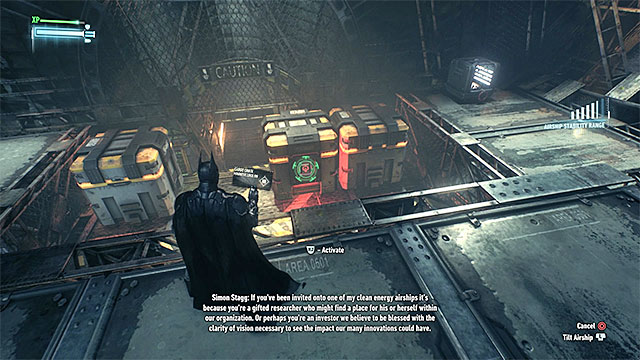
Hack the nearby panel using the Remote Hacking Device (password: ELEMENTS) and enter the main area in the airship, where there are twenty thugs. Attack them from above and start the battle. Surprisingly, winning this fight should not be a problem. Beside one brute (use Beatdown on him), all the enemies are in their weakest forms.
After the battle, talk to Simon Stagg. You will soon experience some reality disturbances - attack the enemies that rise up from the ground. Be prepared to quickly press the attack key/button to get out of Joker's clasp. After regaining consciousness, use the Remote Hacking Device to hack the panel (password: NUCLEICACIDS). Make an attempt on jumping onto the next airship, which will fail.
After listening to a conversation with Alfred, use the Remote Hacking Device to hack the terminal that controls the stabilizers once again. Look for a hatch in the floor and use it. You will reach a room with a lot of crates. Now, you will have to solve a series of puzzles that consist in moving and blocking the crates. Perform the steps described below.
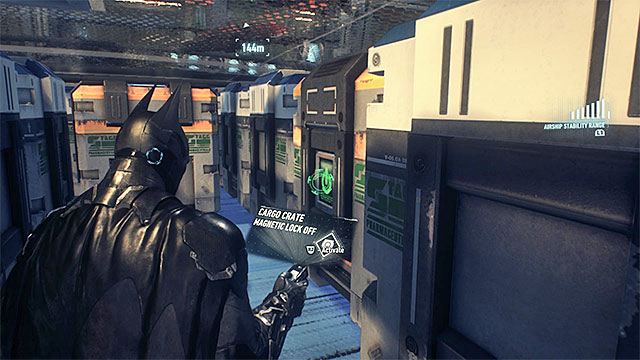
First, go a few steps forward and block the crate shown in the picture above (on the right). Tilt the airship to the left (you must do that from a safe distance, for example standing at the beginning of the corridor or in a place where there are no crates that would move). Use the passage.
 Use Explosive Gel on this wall.
Open the magnetic lock on the crate that is blocking your passage and tilt the airship to the left. Notice the wall on the right - you have to spread some Explosive Gel and detonate it.
To the left of the wall that you've just blown, locate a the crate that you can see in the picture above and block its position. Now step back a bit and tilt the airship to the right. Two crates should move to the newly opened section. Also, the crate to the right of the blocked one will reveal a passage.
Go a few steps forward and block the crate on the right (in the picture). Tilt the airship to the left. One of the crates will move. This will reveal the exit from this area. Go to the end of the corridor and use the grapnel on the hatch.
Reach the newly discovered control panel and hack into it using the Remote Hacking Device (the password is CARBOHYDRATE). Use the Grappling Hook on the newly discovered vent on the ceiling and follow the path leading to the laboratory. You cannot use the main door, so use the Grappling Hook on top ledges. This will take you to a vent shaft.
 You can take control over the drone - first you have to download the codes from the operator
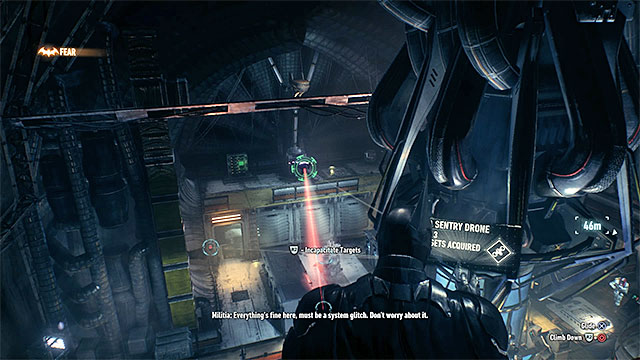
When you get to the laboratory scan the area to find out that there are 8 armed opponents here. First, use the narrow ledges by the ceiling so to get close to the drone operator standing on the right balcony. Pull out the Remote Hacking Device from the inventory and download the security codes the way you did before. Then take control over the drone and have it take down the nearby enemies (do it promptly, because if you wait too long, the drone will be destroyed).
In the next phase of clearing off the location do your best to quickly neutralize the opponent with a Detective Mode detector and the medic wearing white, so he did not revive his allies. As usually, avoid detection helping yourself with gadgets, vent shafts and other interactive objects.
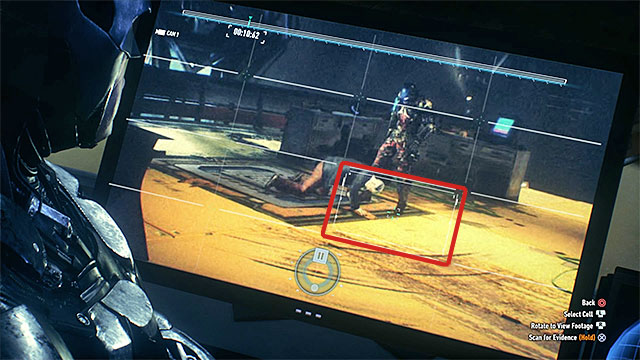
After the fight approach the central computer to find out you need Stagg's fingerprints. To get them, you have to analyze the new material from video cameras mounted in the airship. First, switch to the view from the top left camera and fast-forward the recording to about 10 s. Select the rectangle marked in the above picture (the one where you can see Stagg touching the floor with his hand) and do a scanning.
Now switch to the view from the top right camera and fast-forward the recording to about 22 s. Select the rectangle marked in the above picture, i.e. the moment when Stagg again touches the floor with his hand. Scan it.
Now switch to the view from bottom left camera. Fast-forward the recording to about 37 s. Select the rectangle marked in the above picture. This is the moment when Stagg touches a barrier with his hand. Do a scanning again.
The last two fingerprints can be gained in the view from bottom right camera. Fast forward the recording to about 49 s. and select the rectangle shown in the above picture, where you can see Stagg touching the floor with his hand.
Make sure the Evidence Scanner is selected and reach all the four locations identified while analyzing the video material. After reaching each of them you should be able to see Stagg's hologram, which you have to scan in order to get a print of one or several of his fingers. Once you "collect" the entire hand use the central computer once more.
 You should attack the electrified enemies with the Batclaw
You can now go to the main laboratory exit, because the fingerprints you acquired let you unlock the door without any problem. Hear a conversation with Alfred and use the Remote Hacking Device to hack into the nearby terminal (the password is LIPIDS).
In the adjacent room there is a group of opponents. What is new in this fight, is the fact that some enemies get into an electrified state and attacking them the usual way can hurt you. To prevent that you should attack them with the Batclaw or wait until they get back to their normal state. Regardless of how you do that, try to eliminate the two medics as soon as possible, because they can charge up their allies.
 Glide toward the glass wall of the second airship
After the fight a conversation with Lucius Fox starts, in which you will be able to select another Batmobile upgrade. The available options depend on the previous decisions in this area. A new available upgrade is the EMP charge that lets you temporarily immobilize enemy machines and destroy incoming missiles.
Hack into the side terminal again (the one with the password NUCLEICACIDS). Turn toward the glass wall on the nearby airship. Since you do not have to worry about the defense turrets any more, you can freely glide there.
 The box will destroy one of the glass walls once you make the airship swing hard enough
Right after you manage to get through the glass, another fight starts. This one is not especially difficult, although you should know that apart from ordinary guards there are 3 Combat Experts to eliminate. After the fight look for a weak wall and blow it up using Explosive Gel. Now reach another device and hack into it using the Remote Hacking Device, so to be able to manipulate the balance of the airship.
Start swaying the airship, so that a box near you starts moving. You want the box break through one of the walls, thus unlocking a passage for you. Now you have to follow a rather linear series of corridors. Look into all cells you pass by on your way in order to hear the recordings about the inmates kept inside. Now talk to Alfred and use the door leading to the bioengineering laboratory.
 Be on your guard when the enemies use mines or thermobaric grenades
Watch the cut-scene showing imprisoned Stagg, climb to the top ledges and look around the location. There are 10 enemies here, including an elite soldier with a minigun, who should be left for the last.
While securing this location try to stay hidden, although you should know all enemies will do their best to make it hard for Batman. Once in a while they may throw thermobaric grenades into vent shafts. As soon as you hear they are going to use a grenade, leave the vent shaft as quickly as you can (jump out of it or use a vertical shaft to get back to a top ledge). Besides, the opponents may set mines on ledges that could be used against them. If a ledge is mined, you should stay away from it.
 While fighting the elite enemy press the counter button in the correct moments
As I noted, deal with the opponent with a minigun only when all his friends are lying unconscious. Sadly, you cannot perform a standard takedown on him. Sneak up to him from behind and launch a series of standard attacks and be ready to counter his strikes a few times whenever the enemy tries to hit you back. For extra protection from his attacks you may want to use the Disruptor to block his minigun (you cannot sabotage this weapon).
After the combat approach the chamber where Simon Stagg is being held captive and start a conversation with him to watch an important cut-scene. When it is over, go to the adjacent room, where the Scarecrow is. Try to knock out any of his clones.
 Enter the hideout through the hole in the roof
After you have experienced more visions, eliminate the enemies in this room and talk to Alfred. Head toward Scarecrow's hideout marked on the map, located in Chinatown. Once you get there, find a large hole in the roof, through which you can enter the hideout. Approach the large glass cell where Oracle is held captive and watch another cut-scene.
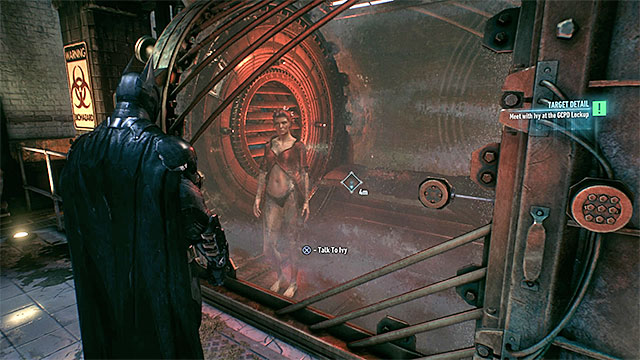 Poisonous Ivy's cell - talk to her and leave the police station together
Call for the Batmobile and head toward the GCPD police station, where you have already been before. Enter the underground parking garage, stop the vehicle at the designated space and enter the station. You have to reach Poisonous Ivy's cell, so that Batman could convince her for cooperation. By the way, have a chat with officer Cash. Go back to the Batmobile with Ivy. While you are leaving the underground parking garage, Cash informs you of a huge Cobra tank that appeared in the area. You will have to figure out how to destroy it.
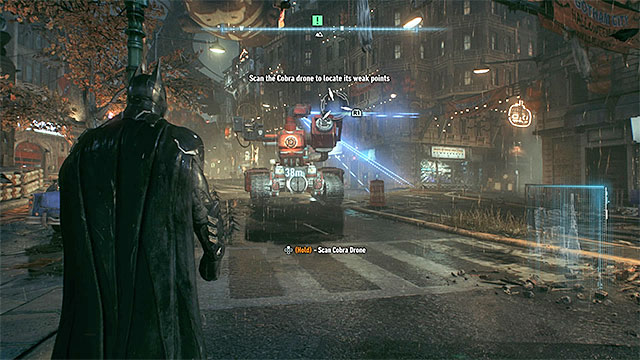 Scan separate parts of the tank while staying out of its range of fire
Exit the underground parking garage and carefully approach the Cobra tank, which is patrolling the area. At all cost avoid getting caught in its sight (the blue rays), otherwise Batman will not even have a chance of escaping and will be killed immediately.
You have to scan three parts of the tank - its rear and the two sides. Despite what you may think, it is not necessary to glide or climb on rooftops, as you may well enough approach the machine on foot. In order to scan one of its part hold the key/button as prompted on screen (Batman will inform you whether the scanning was successful or not). After taking three successful scans you will identify the tanks rear as its weak spot.
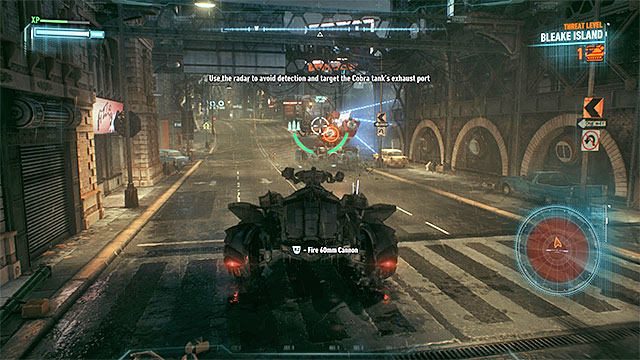
Return to the Batmobile and carefully approach the Cobra tank. Just as before, you must not cross the tank's path, so keep a careful eye on the mini-map and, if necessary, drive into back alleys. Your goal is to get exactly behind the Cobra tank. Approach it so to start the aiming process targeted at its rear (as shown in the above picture) and when it is ready use the 60mm cannon. A single hit should destroy the enemy machine.
 Carefully aim at the Cobra tanks one by one, so not to get spotted
Soon Batman will be contacted by Lucius Fox about installing the Batmobile's upgrade that you chose before. To do this head to the Clock Tower and enter the marked garage to start the installation. Only when it is done, drive to the Botanical Gardens. Soon after entering the Miagani Island you will be warned about three incoming Cobra tanks. The tactics against them is the same as previously, i.e. take a position behind one and activate the 60mm cannon once you lock on it. Do not hurry too much and watch the mini-map closely, so to avoid getting attacked while locking on one of the tanks.
 Keep moving all the time and do not let the Batmobile get surrounded
After destroying the enemy machines reach the Botanical Gardens. Drop Ivy off in the designated spot and listen to a conversation with her. Soon after that Batman will be contacted by Alfred (he will inform you of a new optional mission) and Lucius Fox. Lucius will tell you about a new Batmobile upgrade that can be installed (this one is fixed in advance). Head to the underground parking garage in Wayne Tower.
Once you reach your destination you will find out that enemy forces have set an ambush for Batman. A battle against 20 tanks awaits you. You have to destroy all incoming missiles and be careful not to get cornered, otherwise you will be unable to use dodge engines. Keep in mind that more tanks will come from the ramp that you used to get down to the garage. When you win the battle, park the Batmobile in the designated space and wait until the sonar is installed.

Drive out of the underground parking lot, activate the Batmobile's Battle Mode and start pressing the Sonar key/button. Each time you use the Sonar look closely at the mini-map, as it will display roots leading to the Ivy's Plant. Follow the roots to the center - marked in the above pictures.
Stop the Batmobile and hold the Sonar button in order to send a special missile under the ground. This will launch another cut-scene.
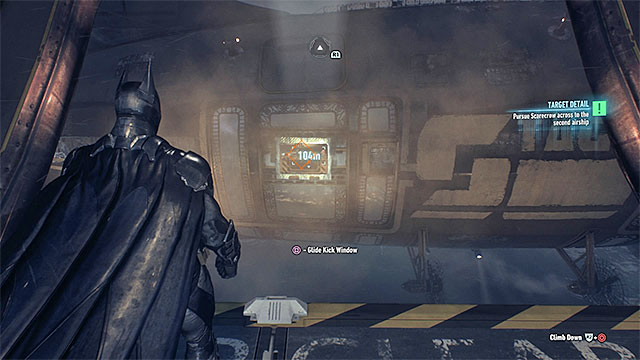
 Eliminate all enemies on the rooftop
Another compulsory battle awaits you, this time you have to eliminate all the opponents on the rooftop of a building near to Batman's current position. If possible, it is best to take them out by surprise, the more that you do not have to hurry with this. First of all, try eliminating the enemy medic to prevent him from electrifying the armors of his friends. Beware of the heavy soldier, whom you can defeat using Beatdown skill. When you win the battle conversations with Poison Ivy and Alfred will start.
 Reach the main hall - here you will meet Robin and use the Batcomputer
Select Panessa Studios as your next destination and drive there by the Batmobile. Once you get there, use the Grappling Hook to get to the roof of the large building, where the entrance is. Get through the verification process, enter the elevator and wait until it takes Batman down to the underground compound. Meet up with Robin and Henry Adams, then interact with the big Batcomputer.
 Land on the drone
Exit the studio and head toward the Founder's Island (you cannot rely on the Batmobile now, so use gliding and the Grappling Hook). On your way to that destination watch out for stationary turrets and flying machines patrolling the area.
When you get close to the designated area, land on a rooftop and check the current location of the relay drone. Glide toward it and try landing on it. This is not so difficult, as it is flying slowly. Batman will automatically hack into the drone's board system and get the relay chip. This way your Remote Hacking Device will get a new function - Drone Hacker.
 Target the flying drone and hack it
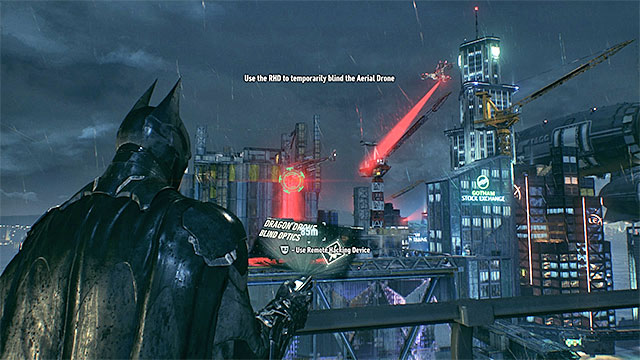
Make sure you have selected the Remote Hacking Device equipped with the newly acquired Drone Hacker. Target the flying machine circling over the first radar and use the device on it. This will shut down its combat effectiveness for 60 seconds.
Quickly get to the roof with the first radar. Approach the terminal, select the Explosive Gel in your inventory, spread it out and detonate it, so to shut down the radar. When you do this leave the area before the flying drone regains its full functionality.
 Peek out of the corner in order to safely hack one of the turrets
The second radar is in the north-west from here, in Ryker Heights district. No flying machines here, however, you will have a group of opponents on a roof to eliminate. A good way to start this fight, is to use Fear Takedown when one of the enemies stands by the weak wall. Besides, you may also throw a Batarang at the opponent with the cylinder. When the fight proper starts be extra careful of the Combat Experts and block their sword attacks.
After the fight approach the fuse box and unlock the lower passage. Carefully jump down to the lower level and be careful not to get into the fire range of one of the two defense turrets. Stand by the wall, so you could peek out of the corner without getting detected. Use the Remote Hacking Device to turn off one of the turrets for 15 seconds. Run next to it and sabotage the two defense turrets. Finally, spread out the Explosive Gel on the control panel of the second radar to disable it.
 Take down the enemies by the missile launcher one by one
The missile launcher is in the east from the location where you disabled the second radar. Its guarded by 8 armed bandits. When you get there check their positions, note, however, that one of them has a device that allows him to detect the Detective Mode. He should be one of the first you eliminate. While securing this location you can use vent shafts, however, listen closely to Arkham Knight's comments, as he may order his men to throw thermobaric grenades into the shaft.
Once you secure the area, approach the missile launcher and hear Batman's comment on its shields.
 Head to the ramp only after taking down Cobra tanks
Head to the control room in the middle level of the building. There is a computer here, which you have to interact with. After doing that you will automatically take control of the Batmobile. Do not rush to your next destination, as the area is being patrolled by five elite Cobra tanks, which you should deal with first. Just to remind, avoid getting in the tanks' fire range (when in danger switch back to Pursuit Mode and use the Afterburner) and look for a chance to launch missiles at their rear.
Only after destroying the tanks (by the way, you will unlock a new side mission) start following the marked trail. Stop by the ramp. Here you have to use the Winch to raise the ramp a little bit.
 Attack the missile launcher and be ready to dodge with the Batmobile when it is fired at
The game will not let you make the jump with the Batmobile just yet, as the Arkham Knight appears with his men. Move undetected so you could start the fight with a Fear Takedown (it is best if it gets one of the medics). Soon after the fight starts Batman will engage directly with Arkham Knight, but the latter escapes and you are left to take down his men. It is not difficult, but be careful not to get cornered, as the fighting area is small, and do not let the medics electrify their allies' armors. After the fight go back to the computer.
Soon you get control of the Batmobile again. Once more use the Winch to raise up the ramp and jump to the other side using the Afterburner. Approach the missile launcher and shoot at it with the 60mm cannon. Whenever you notice that the missile launcher commences its standard attack, use the dodge engines to return to the spot where landed after the jump. Besides, use Vulcan Cannon to destroy single missiles launched at the Batmobile. Keep on fighting until the missile launcher is destroyed.
 Use the computer in the Oracle's clock tower
Jump into the Batmobile and head to the previously visited Clock Tower. Once you get there, leave the vehicle and climb up to the peak of the tower in order to use the secret entrance. Interact with the bust in order to reveal the computer, and use it. Hear out the conversation with Alfred, then with Henry Adams. The latter reveals that in the meantime Harley Quinn attacked Panessa Studio and plans on releasing the Joker Infected.
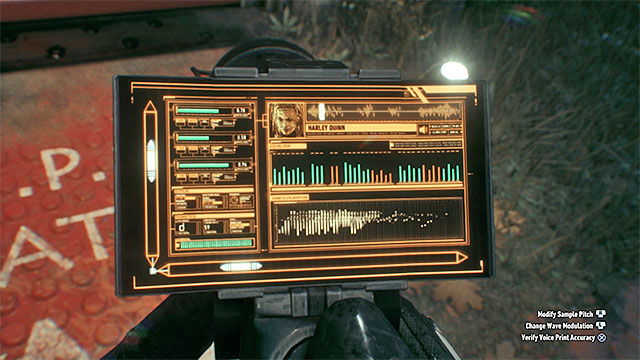
Leave the Clock Tower and head over to Panessa Studios. Again you have to get to the rooftop and approach the elevator exit. This is where 9 bandits await. Two of them are equipped with firearms, so they should be your primary target. Later in combat prevent other enemies from picking up the weapons.
After the fight try interacting with the voice scanner to find out that Harley Quinn has reprogrammed it. Wait until Batman equips Voice Synthesizer and loads a sound recording. You have to move the vertical and horizontal slides to get the perfect imitation of Harley's voice. The correct position of both slides is shown in the above picture.
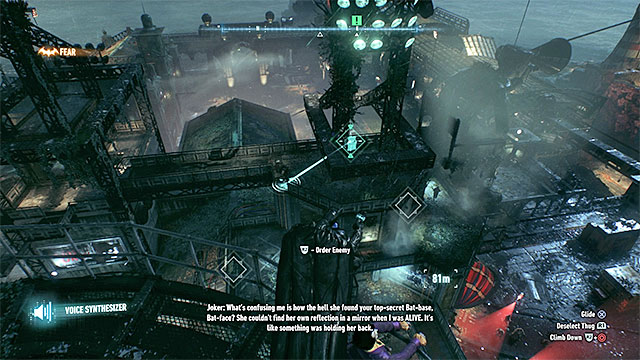 Voice Synthesizer is useful for luring enemies into secluded places
After preparing the voice sample aim the Voice Synthesizer at the scanner and use it. The game will not let you enter the building right away, as more enemies will come from the inside and set up two defense turrets by the entrance. Initially, the game lets you test the Voice Synthesizer while sneaking. Selecting this gadget lets you pick an opponent and give him an order using the voice of Harley Quinn. It is an excellent method for luring out single enemies from groups, so to deal with them secretly.
Neutralize enemies one by one, while keeping low profile. The last human target should be the bandit with a minigun. When you attack him (e.g. from above) remember to initially start a series of strikes and block his counter attacks. At the end eliminate the two turrets standing by the building entrance. Hack one of them using the Remote Hacking Device, and then quickly destroy the one still active. Then hide in the vent shaft, wait until the reactivated turret turns the other way and sabotage it too.
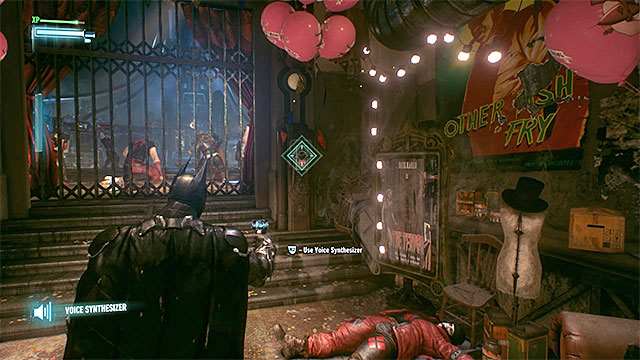 Use voice synthesizer to unlock the main hall entrance
Again approach the voice scanner. Enter the elevator and take a long ride to the quarantine zone in the underground complex of the film studio. Right after leaving the elevator you will encounter for the first time a bandit with a shield. When fighting this type of enemy you have to perform an Aerial Attack. Start by stunning the enemy with your cape, then bend the stick toward him (or hold the correct directional button) and double click the jump key/button.
After the fight select the Voice Synthesizer from the inventory and use it on the nearby panel. You will have to take on more thugs, including the newly met shielded opponents. A good news is that in this battle you are aided by Robin, so switch between the two heroes and remember to use Team Attacks. When you win the fight, interrogate one of the bandits and use the computer.
Note! After you use the computer, you will be given three-part objective to apprehend Joker Infected. You have to reach these characters in a set order, so first go to the sound stage B.
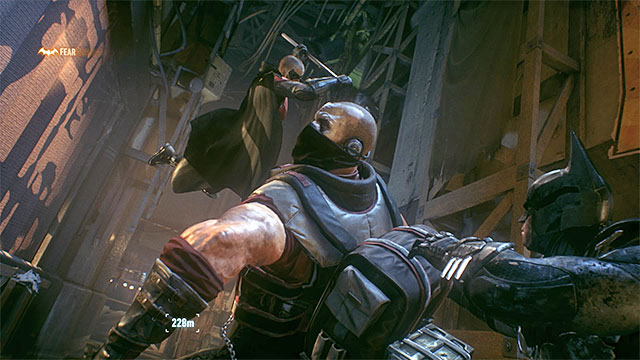 Batman and Robin can perform a Team Attack on the enemy with a minigun
First, head to the center location of the studio. Now take the green corridor (north-west) leading to the stage B. Open the door together with Robin and deal with 7 new opponents. In the next corridor there is an opponent with a minigun and you have to use a trick to get rid of him. Stand behind a curtain by the corridor where the enemy is and get to the vantage point with the Grappling Hook. Jump down, sneak behind the opponent and press the Team Takedown key/button. The nearby door will lead you to the main part of the stage B, where you will find out that before getting Christina Bell, first you have to deal with her (numerous) bodyguards.
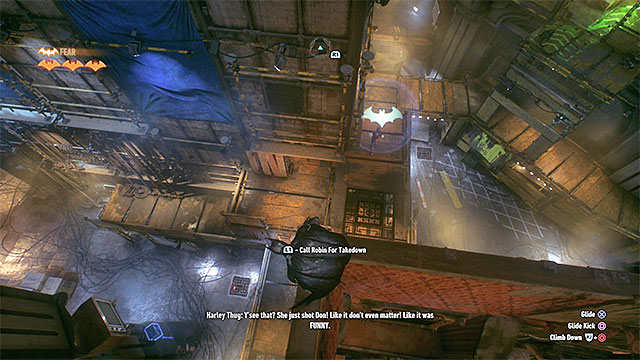 It is good to send out your ally to perform a silent takedown
Initially, there are 10 enemies in the area. What is new here, is the fact that you can use your ally for silent takedowns (while playing as Batman, you can send Robin, and the other way round). However, you can use that only three times. Besides, you have to carefully pick your targets, because after knocking out the enemy you automatically switch to the character who did the action and you have to personally get him back to a safe vantage point.
Apart from using the tactics described above, while securing this location also use previously learned methods - you can sneak up to enemies from behind, get past them through vent shafts, perform Inverted Takedowns from vantage points or use gadgets (e.g. the Disruptor to sabotage enemy weapons or the Voice Synthesizer to lure them to a secluded area). The last man standing should be the guard with the minigun. You do not have to attack him directly (although it is possible), instead sneak up to him from behind and launch the Team Takedown.
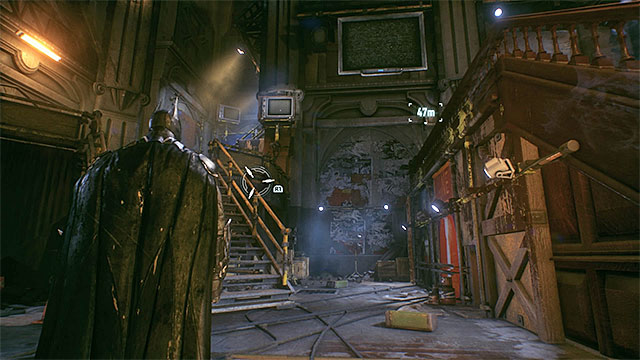 The stairs leading to the room with Christina
Ultimately, you want to see only the bandits from the room with Christina left standing. At this point they will step into the main hall, and you will have to eliminate them. The hardest part is that there are two opponents with miniguns. Do what you can to separate them (you can use the Voice Synthesizer) and only then perform a Team Takedown on one of them. Once you secure the area, try to get into the room with Christina and press the counter key/button to knock her out.
Wait until Robin brings you unconscious Christina and head back to the main hall of the studio together. The heroes get separated here for a while, and you get to chase after another villain all by yourself (initially, at least).
 Use the Voice Synthesizer while staying hidden in the vent shaft
Now you should go to the north-west corridor leading to the sound stage A. It is shut, but you can unlock it by tricking the bandits inside (they appeared there only after you apprehended Christina). Use the Detective Mode in order to locate the vent shaft leading to the closed area. Get inside the shaft and approach the opponents. Select the Voice Synthesizer from the inventory, aim at an enemy and use Harley Quinn's voice to command him to open the gate. You can now exit the shaft starting the fight with a Double Fear Takedown.
After eliminating all the thugs press the other button. Approach the character sitting in a wheelchair and try to rescue him. After the cut-scene take the nearby corridor to the stage A (in the meantime, Batman will be joined by Robin).
 Keep attacking ordinary thugs to stack up the score multiplier
A duel with a mini-boss, Albert King, awaits you. He is not difficult to beat, although you have to follow a few step procedure to gradually lower his health bar displayed in the right top corner of the screen.
After you start the combat, do not try to attack King and if possible stay away from him, so to avoid getting Batman or Robin hurt. Instead, focus on his thugs, jumping from one to another to increase the multiplier.
Let Batman and Robin perform quick strikes after launching a Team AttackKeep hitting the ordinary bandits until you can launch a Team Attack. Use this as soon as possible - the attack will be automatically aimed at Albert King. Repeat these steps, i.e. knock down the ordinary thugs and perform Team Attacks against the boss.
In the next part of the duel, after launching a Team Attack you will be able to deliver a series of quick strikes resembling a classic Beatdown. Keep pressing the attack key/button. Be ready to counter the boss's attacks by pressing the counter button, when he tries to break free and strike you back. The duel is over when King's health bar drops to zero. Let Robin pick him up and get back to the central room, where, as previously, you will get briefly separated. By the way, Albert will inform you that the last Batmobile upgrade (the one you did not pick last time) is ready to be installed.
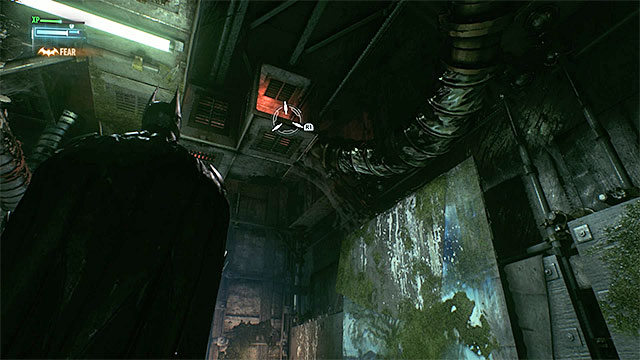 Entrance to the vent shaft is well hidden
There is only sound stage C left to investigate. Take the northern corridor in the central hall, which turns east a little bit farther. The nearby corridor is guarded by a bandit with a minigun, whom you should trick too. Look around in the adjacent corridor, behind the vent on the ceiling. Get up there using the Grappling Hook and walk through the shaft until you get to a small room on the side, next to a weak wall.
Apply Explosive Gel on the wall. Then select the Voice Synthesizer from the inventory. Aim at the enemy with a minigun and command him with Harley Quinn's voice to check out the weak wall. As soon as he stands by the wall detonate the charge.
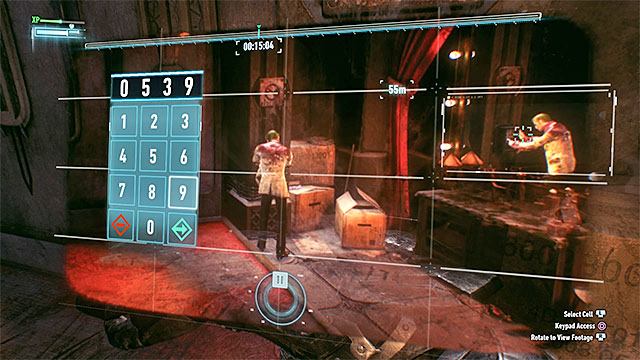
You can now resume your journey to the scene C. Press the button you see on the way and examine the sheet in the central part of the room. Once you regain full consciousness and talk to Robin, go to the next room. Try using the panel by the locked door to find out that you need a 4-digit code to open it.
Batman soon starts analyzing a video. You do not have to select any rectangles, but simply fast-forward the film and observe Johnny Charisma. After he enters the first digit he covers the keypad with his body, but the rest of the code can be seen in the mirror on the right. The correct combination is 0539 - type it in when a numpad appears on the screen (the above picture).
 The first of the bombs that you have to disarm
Enter the stage where Johnny Charisma is. At this he starts singing and becomes the Joker. The stage itself starts rotating slowly. You cannot attack Johnny as Batman, because he has armed five bombs and is wearing the sixth one. Instead, take control of Robin, who appears in the background. As Robin reach the first bomb, hide behind it and hold the correct key/button to disarm it.
 Disarm the bombs when Johnny Charisma is looking away
Now you have to move Robin to the right. It is VERY IMPORTANT that you leave cover only when Johnny Charisma is facing you away, so he did not spot Batman's ally. Each time you get to another bomb hide behind it so not to get spotted while disarming it. There will be no way of hiding in the case of the third bomb, so you need a good timing to disarm it and hide again before the stage makes a full turn.
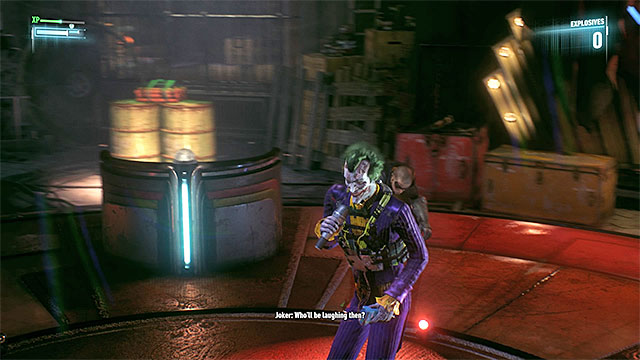 You have to neutralize Johnny using Takedown
After disarming all five bombs take Robin toward the stage where Batman and Johnny Charisma are. Sneak up to the villain from behind and press the Silent Takedown key/button. Robin will disarm the bomb that Johnny Charisma is wearing and then stun him. Wait until Robin picks up unconscious Johnny and head back to the central room of the studio.
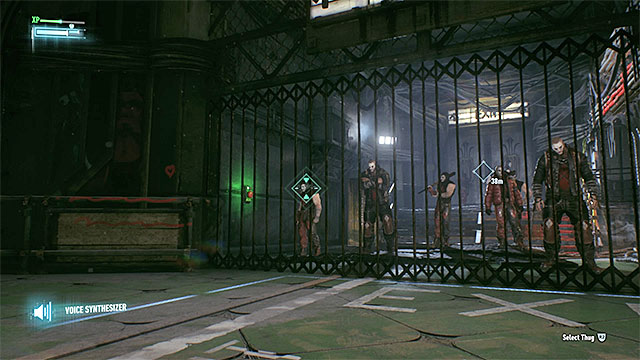 Use the voice synthesizer on one of the enemies
Head back to the quarantine zone. Soon you will discover that the corridor has been locked and more bandits are waiting on the other side of the gate. You have to use the same tactics as when you tried to get to Albert, i.e. use vent shafts under the floor. Retreat a little bit so the guards could not see you, find an entrance to the vent shafts and approach the thugs undetected. Select the Voice Synthesizer from the inventory, aim at any of the opponents and tell him to press the button on the wall.
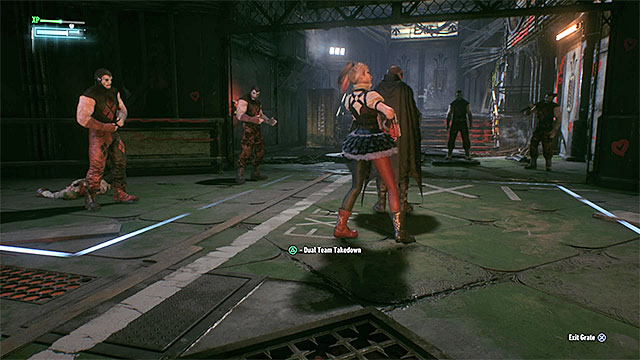 Wait for Harley to approach the vent shaft exit and launch a Team Attack
The deceived bandit will not manage to press the button, because the real Harley Quinn comes. Wait until she finishes the conversation with Robin and tells her men to lower the gate. Do not come out from the vent shaft until Harley approaches Batman hidden inside. Only then, use a Team Takedown.
When you manage to stun Harley start attacking her thugs. In this combat use Team Attacks together with Robin. It is good to use them especially against tougher bandits. After the fight approach unconscious Harley as Batman, pick her up and get back to the quarantine zone. This is where you will see another cut-scene.
 You have to approach Robin and throw him into Batman's cell
After seeing the entire cut-scene, as Batman enter the cell next to Robin. Wait until the scene "resets" and approach the ally again. Press the interact key/button to throw Robin into the cell prepared for Batman. Listen to a conversation with Alfred.
Leave the film studio, jump into the Batmobile and head toward the Merchant Bridge. Park the vehicle in the designated spot and wait until the last upgrade is installed (the one you did not pick last time). By the way, Alfred will inform you about a new side mission.
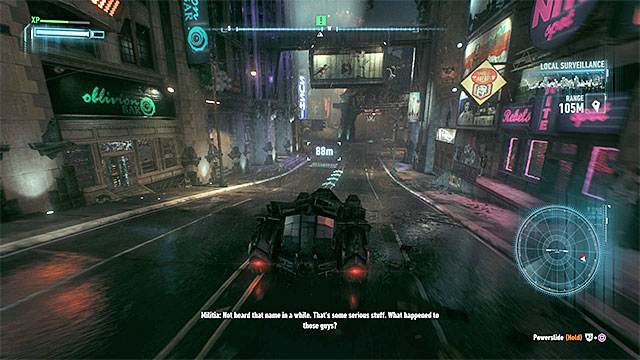 Reach the seismic activity investigation point
Call in the Batmobile and drive toward the central part of Miagani Island. When you get close make sure there are no tanks or enemy flying machines in the area (if there are some, you have to deal with them first). Park the Batmobile in the designated spot and watch a short video warning you against enemy military forces closing to the Botanical Gardens. Your next objective is to protect the Poison Ivy and her plants.
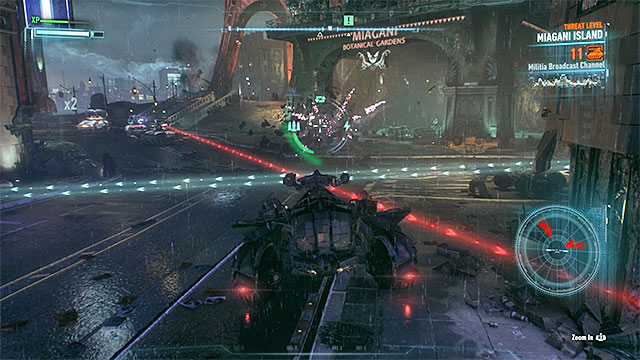 Use dodges to prevent the Batmobile from destruction
Now you have to take part in a long and rather demanding fight, in which you have to eliminate waves of enemy military forces appearing near the Botanical Gardens, where the Poison Ivy resides. Initially, these are usual tanks - nearly 20 of them. While fighting against these machines keep using the dodge engines. Besides, you can use the Drone Hacker (hack single machines to fight for your side) and EMP charge (temporarily stuns tanks).
The second part of the battle is equally demanding, as it puts you up against several Cobra tanks. You have to plan your attacks, targeted their rear, very carefully (fortunately, you do not have to hurry), as their routs often cross and in effect the Batmobile may suddenly be caught up in their fire range. When you win the two fights, go (on foot) to the large plant marked on the map and talk to Poison Ivy. At this point, an important cut-scene will launch.
 Glide to the front of the wrecked airship
Now you have to get back to one of the airships in the north-west part of the map. You cannot use the Batmobile nor lower your altitude too much, because of the contamination of that area, so use interchangeably glide and the Grappling Hook to speed up Batman. Moreover you have to avoid the enemy Flying Machines patrolling the area (when you get too close blind them with the Remote Hacking Device).
When you get near the airship glide toward its wrecked front, where a relatively small group of bandits is. First, deal with the medic and be careful of the new shielded enemy, who, as you already know, should be "stomped on".
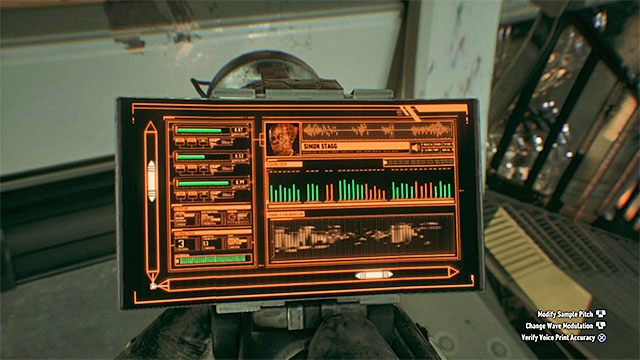
After the fight head toward the only available exit door. At first you cannot open it, so you have to prepare another voice sample (Simon Stagg's this time). Use both analog sticks (or directional keys) to set the slides in correct positions, as shown in the picture, and verify. If the test is successful use the Voice Synthesizer on the reader. You can now take the corridor leading to the bioengineering lab, where, in the meantime, new enemies appeared.
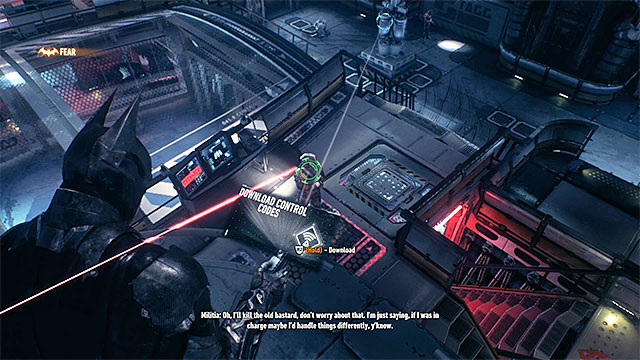 You may hack the drones or simply stun their operators
There are 8 opponents in total in the lab and eliminating them is more difficult than you may think. The only good news is that there is no one with the ability to detect the Detective Mode, so you can use it all you want. First, locate the two medics in this location and try to stun them, while watching out for drones scanning the area (you can lure the medics to secluded spaces using the Voice Synthesizer). Only when they are neutralized focus on the two drone operators. Depending on your preferences you can either simply knock them out or approach and use the Remote Hacking Device to take control over the drones. All the time listen to the comments on the radio, as the bandits may try to secure themselves with mines or thermobaric grenades.
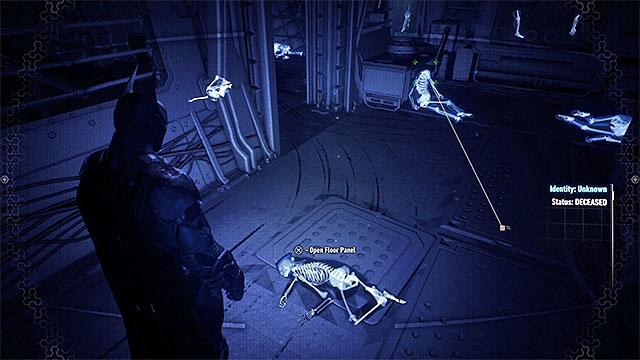
After neutralizing all enemies approach the capsule where Stagg was being held captive and turn on the Detective Mode. Start collecting his fingerprints left in the room. Follow the trails to the interactive floor panel, as shown in the picture, where Simon Stagg hides (he is near the chimpanzee cage). Open the panel and interrogate the man. By the way, you will acquire the Nimbus Power Cell.
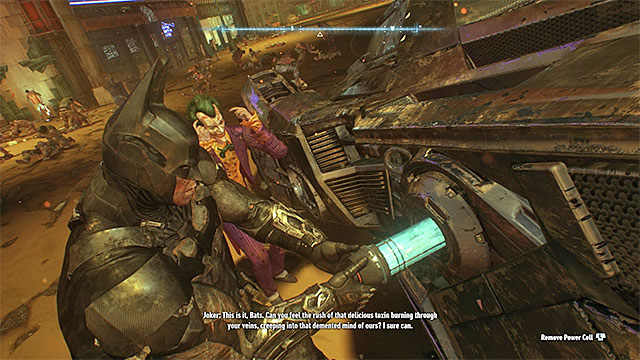 You have to carefully remove the old battery and insert the new one
Head back to the front of the airship where you previously dealt with a group of opponents. When you get there, you will find out that the place is being patrolled by an enemy drone. Use the Remote Hacking Device to temporarily blind the flying machine and leave the airship. Head back to Miagani Island, where you left the Batmobile. Get to the roof marked on the map and let Batman jump into the poisonous cloud.
Start SLOWLY removing the damaged battery from the Batmobile and be ready to counter an opponent who will try to interrupt Batman. When you successfully remove the battery, insert the new one, also very carefully. Wait until Batman gets inside the Batmobile.
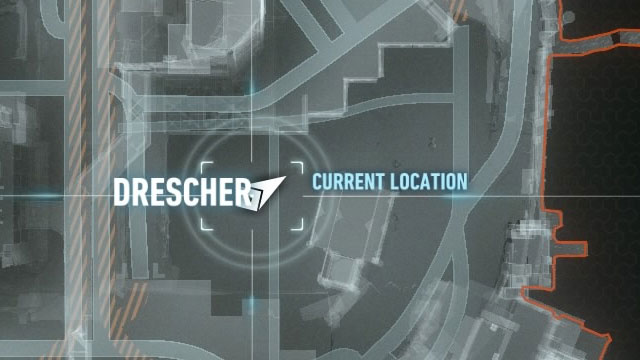
First follow the marks on the ground. After driving a few hundred meters activate the Battle Mode and keep using the Sonar. Just as in one of the previous missions of the kind you have to focus entirely on the mini-map displaying the radar readings. Follow the roots to the location of the new plant (the red point on the mini-map). This is close to the church in Drescher district, as shown in the above picture.
After getting there hold the Sonar button. Launching the missile under the ground will end with a failure and in effect you will have to investigate the subway network.
Note! Before you start this mission it is good to unlock new combat skills and (most importantly) Batmobile's defense, as they will prove very useful here (and also some time later).
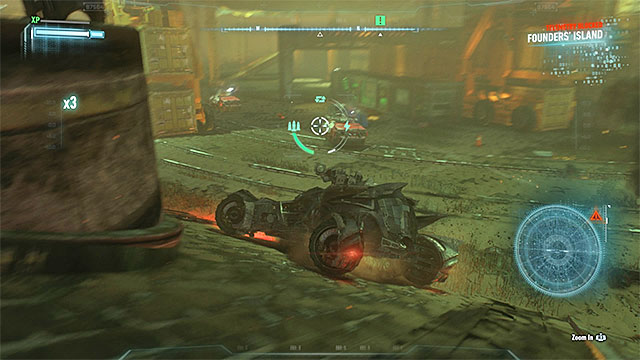 Keep moving and be extra careful of enemy missiles
Start the patrol from Port Adams. After getting there wait until the gate is open and get ready for the most demanding fight so far, in which you will have to take on enemy tanks and flying machines. Most importantly get away from the main gate as quickly as possible and find a spot where enemy forces will have it hard to flank the Batmobile. Just as you did previously, apart from firing at enemies, use the Drone Hacker (take control of larger and more resistant enemy machines), EMP charge and the dodge engines.
If possible you should also destroy flying drones as quickly as possible, because they are much more mobile than tanks. Moreover, from time to time they bomb the area with rockets, which are harder to dodge (stay away from red circles appearing on the ground).
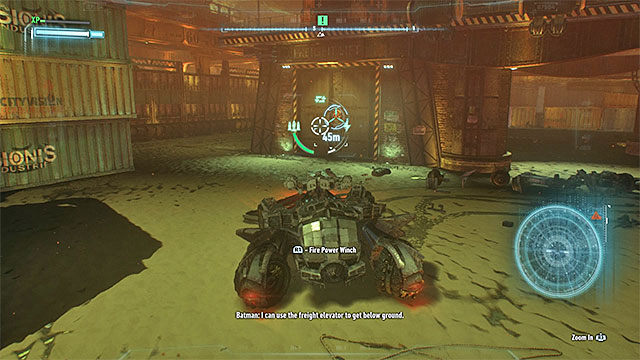 Tear out the door and grab the elevator mechanism
When you secure the first part of the port, look for a ramp that will get you to the location with containers. This is where you will encounter more enemy machines, fortunately, in the meantime the Batmobile energy bar should have regenerated, so you will not be left defenseless. After destroying about a dozen tanks look for the closed elevator door. Use the Winch on the door and when you manage to tear them out, grab the elevator mechanism. Drive close to the mechanism and properly operate the gas pedal (the rev has to be within the orange area on the tachometer) to move the elevator and get to the subway network.
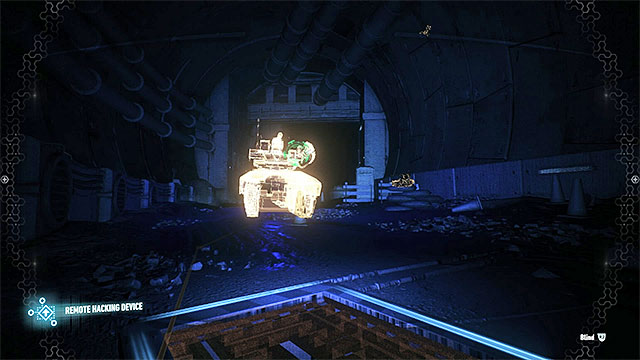
Start driving through the city's tunnels. Soon you will face the first large obstacle. In order to bypass it, you must move on the ceiling - the maneuver has been shown on the picture above. To do it, start driving while being far away from the obstacle and gradually turn left or right. You can additionally help yourself by activating the afterburner in the final phase of the operation.
Use the remote hacking device to blind the tanksSoon you will reach a barricade that cannot be bypassed in the car. You must leave the Batmobile and find the entrance to the ventilation shafts. Walk through them and stop near the first tank. Select remote hacking device from the inventory, aim it at enemy machine and use the gadget to temporary "blind" the tank. Now you can leave the shaft and bypass the enemy machine.
Not far further you will face two new tanks. Wait until one of them starts moving away and quickly get to the one parked on the right side. Position yourself at the wall, lean out from it and once again use the remote hacking device (important - only one tank can be hacked at a time). Quickly go forward. Stop at one of other walls and again blind the tank that patrols the neighborhood with the remote hacking device.
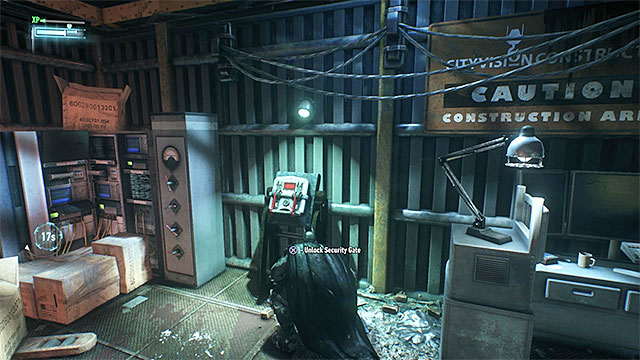 Find the switch that unlocks the road for the Batmobile
After blinding the third tank, bypass it or attract yourself to the ceiling with the grappling hook. You must reach the room near which two other tanks are parked (luckily, they are turned to the other side). In this room you must find the switch that will open the gate near the Batmobile.
Go back to controlling the Batmobile and destroy all the tanks that you have blinded before. Then, destroy the two machines parked at another closed gate. Start controlling Batman, find the switch on the right side and open the gate. Now you can jump into the Batmobile and move further.
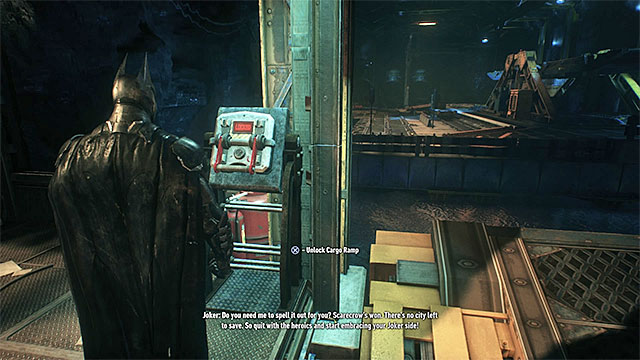 Another switch will allow you to manipulate the float
Jump to the Batmobile in another part of the tunnel and reach the control room on the first floor. There use the switch in order to raise the float, and then go back to the Batmobile and use the platform. In the next tunnel you must once again drive on the ceiling (as you remember, using the afterburner can be helpful). Do the same in the part of the tunnel where the ground is damaged and a small water tank can be found. Moving on the ceiling will allow you to bypass the obstacle.
Stop in the next larger location. Leave the Batmobile and go on your foot to the room on the right. Inside, find the switch that will unlock the possibility to manipulate the nearby float.

Drive on the mentioned float in the Batmobile. Move to the other side so that the platform will change its position under the weight - the picture above shows how it is supposed to be positioned. DON'T RIDE OFF the float. Leave the Batmobile on it, jump out of the car and go back to the control room. Use the switch again, you will block the ramp.
Now you can jump back to the Batmobile, drive away from the ramp and go back on it after accelerating and using the afterburner. Due to the fact that you have blocked the float, it won't change its position under the Batmobile's weight and will allow you to jump above the water tank.
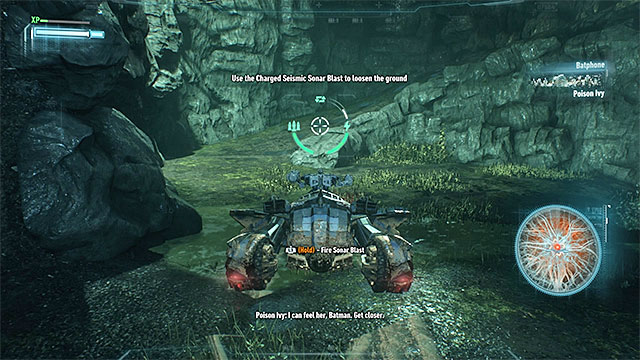
Activate Batmobile's battle mode in the last part of the tunnel and start using the sonar to scan your surroundings. Just as before, observe the mini-map that will lead you to the plant you seek. Stop in the place shown on the picture above and hold the sonar key/button in order to shoot a bullet underground. The Batmobile will get caught by Poison Ivy's plant and you will return to the surface.
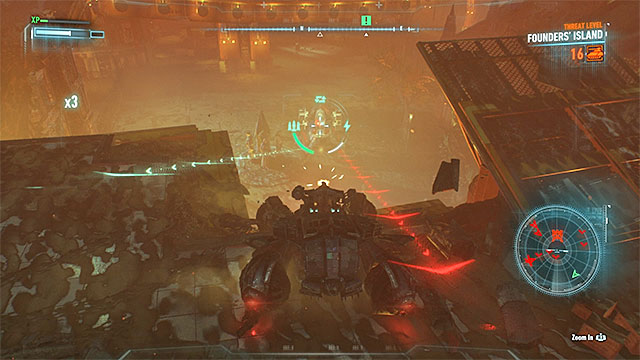 Try to first eliminate those enemies that are a greater threat
A new battle awaits you, this one even harder than the previous one in the port. While fighting, you must stay close to the church and eliminate great amounts of tanks and flying machines.
Once the battle starts, you should use the ramps in order to get to higher levels. From there, it will be easier to control enemy forces' actions. Use the engines responsible for dodges as often as possible - you will have to survive the whole battle on Batmobile's energy without the possibility to regenerate it. Try to focus on destroying the flying drones and those tanks that in addition to the regular fire can shoot rockets at Batman. As always, you should remember about activating additional vehicle car equipment, such as drone hacker which you can use to convince stronger tanks to join your side. There are around forty machines to destroy in total. Once the battle is won, listen to the conversation with Arkham Knight and Poison Ivy.
Important! This is a long and hard battle in which you control the Batmobile. If possible, before starting it, unlock as many vehicle upgrades as possible, it will increase your victory chances.
 Plan your attacks on Cobra tanks carefully so that you won't get caught by other enemies
Start driving in the Batmobile towards the Bleake Island. After driving through one of the bridges that lead there let Batman contact Alfred. On this island a new large battle will take place. During it you won't be able to leave the location.
Seven enemy vehicles can be found there - six Cobra tanks and one Cloudburst tank. First you should focus only on Cobra tanks and on avoiding the machine controlled by Arkham Knight. Bleake Island is quite large, so you can carefully plan your next moves (observe the mini-map). Wait for one of the tanks to get away from the others, drive to its back and shoot a rocket into its exhaust. Repeat this tactic until only the Cloudburst tank remains on the map.
 Drive to Arkham Knight's vehicle and scan it
Your next task is to scan the Cloudburst tank in order to find its potential weaknesses. The machine is by default moving slowly, but the fact that it is constantly scanning the territory around it is quite an obstacle. You can use the pursuit mode to quickly drive to Arkham Knight's vehicle or, while getting close, hide behind buildings and other obstacles to avoid being detected. Hold the scan button/key. You will learn that four cooling systems are the tank's weak points.
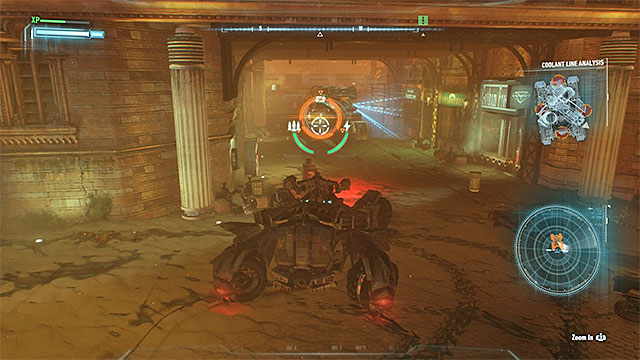 Target the cooling systems and destroy them
A very hard part of the battle is ahead of you. You must perform four successful attacks on Cloudburst tank without the possibility to regenerate Batmobile armor in the meantime. Each time, start with driving close enough to the tank to start the targeting process. Once it is done, use the 60mm cannon.
 During the escape, don't stop and avoid the fire from the "overloaded" tank
JUST AFTER you shoot the missile, go back to pursuit mode and start escaping in the Batmobile. The Cloudburst tank will activate the Overload mode and will chase you. Don't stop until the system overload bar of enemy tank visible on the screen depletes. Help yourself with the afterburner and avoid dead ends where you won't be able to continue the escape. During the chase you must also watch out for rockets shot by enemy tank. Try to avoid the red circles appearing on the ground.
You must repeat all activities described above three times, each time aiming at different part of the cooling system. It will allow you to get to the final phase of the battle.
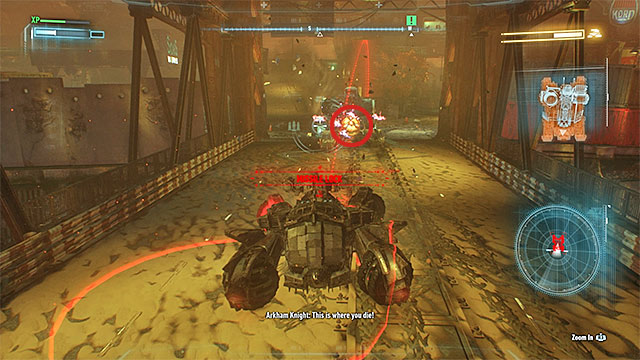
Final part of the duel with Arkham Knight is also very challenging. This time you won't need to hide because you will no longer aim at any Cloudburst tank weakpoints. Instead, you will attack its central mechanism which has been marked on the picture above. Before you start attacking enemy vehicle, wait until it appears on one of the island's main streets - it is very important to have a large area of operation. Position yourself quite far from the tank and start attacking its "core" with 60mm cannon. Of course, enemy won't be helpless. Most of all, avoid its missiles by dodging the red circles appearing on the ground. Additionally, use Vulcan cannon to destroy the rockets shot at Batmobile.
The Cloudburst tank will be destroyed after more or less a dozen of precise hits. Good news is that if you fail, you will return to the checkpoint after destroying the cooling system (so you won't have to restart the whole battle from the start). Wait until Batman starts fighting with Arkham Knight and press the close combat attack button/key in order to defeat the adversary.
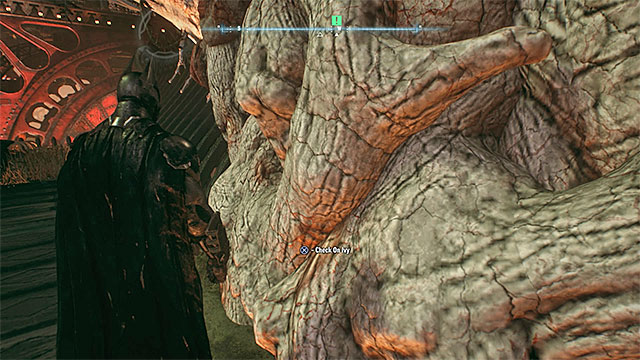 Walk to the plant to meet with Poison Ivy
Listen to another conversation with Alfred, then bounce from the roof (temporary you can't use the Batmobile) and glide towards the main plant of Poison Ivy. Once you reach your destination, interact with the plant and you will meet with Poison Ivy. After watching the cutscene in which the poisonous cloud will be neutralized, wait until Alfred makes contact with Batman. He will give you an opportunity to participate in some optional quests, but if you want, you can ignore them and continue the progression in the main storyline.
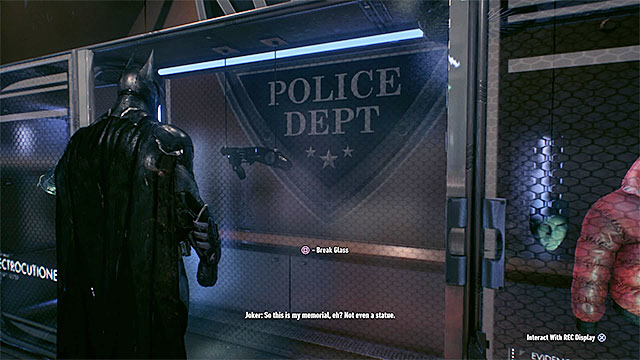 The place where you obtain the remote electrical charge
Jump to the Batmobile and drive to the Gotham City Police Department. Just as in case of previous visits to this location, you can use the underground parking lot. Once you reach the department, walk through the rooms until you reach the one pointed by the game. There you must talk to sergeant McAllister and listen to the recording left by commissioner Gordon.
After the conversation ends, remain in the department and go to the evidence room that can be found in the southeastern part of the location. Walk to the glass pointed by the game, break it and take a new gadget - the Remote Electrical Charge.
 You must use the remote electrical charge to deactivate the generator
Leave the police department and go to the abandoned shopping mall that can be found near the Ryker Heights district. Be careful as you will probably have to destroy some enemy tanks groups on your way (luckily, there won't be any Cobras among them).
Stop near the shopping mall. Access inside will be blocked by shutters. Use the detective mode to find an interactive hatch leading to the sewers. In the sewers, stop at the place where electrical lightning can be seen. Select the electrical charge from the inventory and shoot it at the generator. It will turn it off (there are two charge types so pick the correct one). Walk through the water and, once you get to the other side, use the electrical charge again to reactivate the generator and reopen the gate.
 Shutters can be spread by using the voice synthesizer
Hang on the ventilation shaft with the grappling hook and reach the main room where you will find large amounts of armed bandits. Luckily, you won't have to fight them. Pick the voice synthesizer and order one of the enemies to push the button responsible for spreading the shutters. Now use the Batmobile remote control and eliminate all enemies with your vehicle. Leave the ventilation shaft once you secure the territory.
Find the fuse box and, after interacting with it, walk to the elevator shaft. Now you will have to perform a series of complicated activities which will end in reaching the bottom of the shaft.
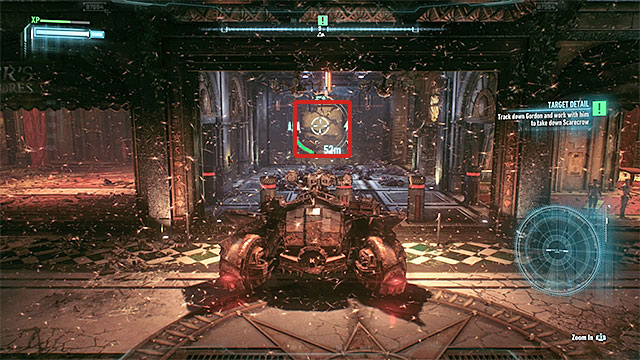 Aim the Batmobile at the weakened wall
Your first task in the large shaft is deactivating the first of two huge ventilators. Activate the remote Batmobile control and stop the vehicle in such position that you will see the unlocked elevator shaft. Use the 60mm cannon in order to destroy the large wall in the glass. Go back to controlling Batman and use the grappling hook to reach the newly unlocked ledge. There you will find a fuse box. Breaking in it will lower the blockades that made it impossible for the Batmobile to drive into the shopping center.
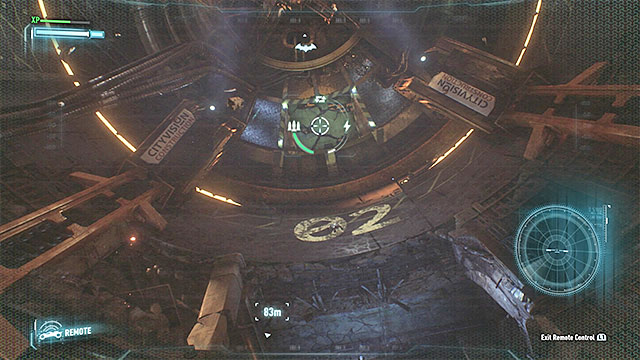
Again use the Batmobile remote control. Drive the vehicle to the building and look around for the interactive hook on the ceiling. Use the windlass on it. You shouldn't pull out the hook. Instead, you should use it to safely lower the Batmobile in the shaft. Once you get the vehicle to the shaft, target another weakened wall that has been shown on the picture above. It's on the highest level of the elevator shaft.
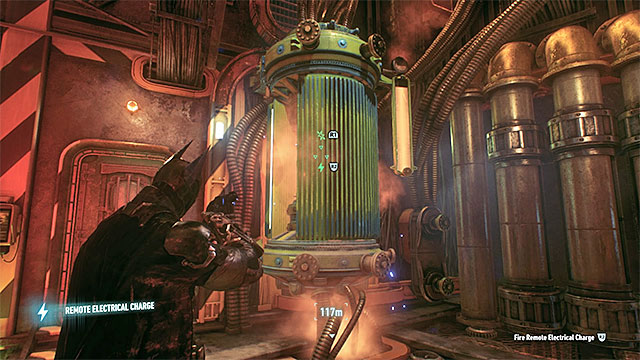 Load the generator with electric charges in order to overload it
Now you can again take control of the main character and use the grappling hook to get to the platform unlocked by destroying the weakened wall. Once you get there, pick the electric charge and aim at the generator that can be found there. You must send impulses that will load the generator with additional energy (don't try to turn the generator off!). It will lead to overloading it. The generator will explode and due to that action first of two large fans will deactivate.
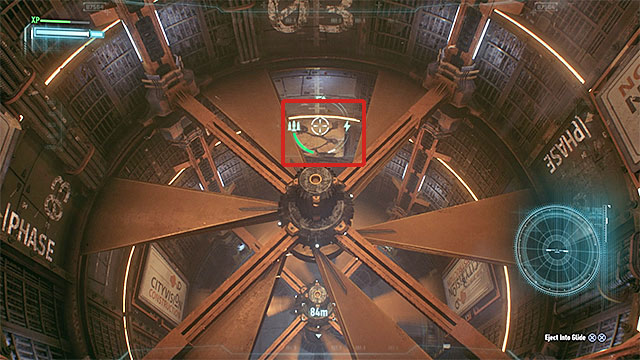 Another wall that must be destroyed can be found under the deactivated fan
Go back to controlling the Batmobile that should still be hanging in the shaft. Lower it slightly down and aim at the new weakened wall that can be found below the first deactivated fan (on third shaft level). Use the 60mm cannon to destroy it, wait until some enemies appear there and attack them as well. Then, use the grappling hook and gliding to reach the new hole as Batman. There you must find the upper ledge to which you can get by using the grappling hook. There you will find a small elevator that is out of order.
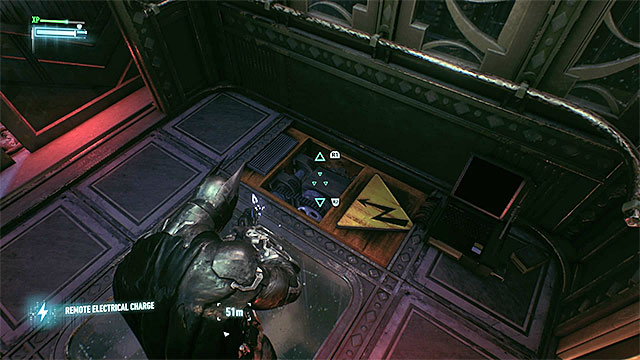 Move the elevator with electric charge
Pick the electric charge from the inventory and target the elevator generator in order to activate it. Your objective is to get the elevator reach the place from which you can spray the explosive gel on the weakened wall.
Use the new entrance to reach the room where you will face enemies with tasers for the first time. As the game hints you, the only way to stun them in "harmless" way is by using the electric charge. Each stunned enemy can be then easily finished. Once the battles end, use the nearby switch that unlocks access to the main shaft.
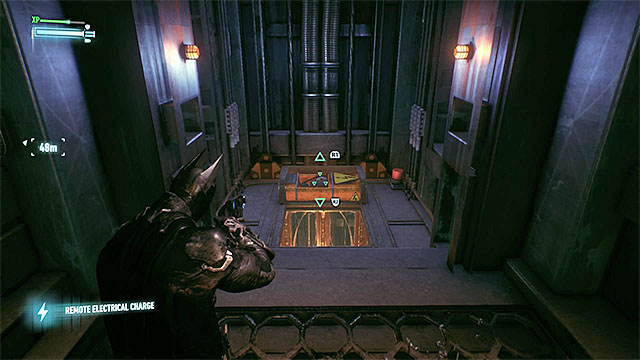 Once you get to the side shelf, send the elevator up
Temporary ignore the main shaft and go to the eastern corridor. Use the grappling hook and get to the place where four bandits can be found. You don't have to eliminate enemies in the conventional way, you can send an electric charge to the nearby generator and electrocute them instead. Reach the new switch and then walk into another inactive elevator. As before, start with getting it as far below as possible with the electric charge.
Notice that you can climb on the side ledge. After lowering the elevator, aim at the elevator from distance and use the electric charge to send it back up. Now you can jump back to the shaft and find the ventilation hatch in its lower part.
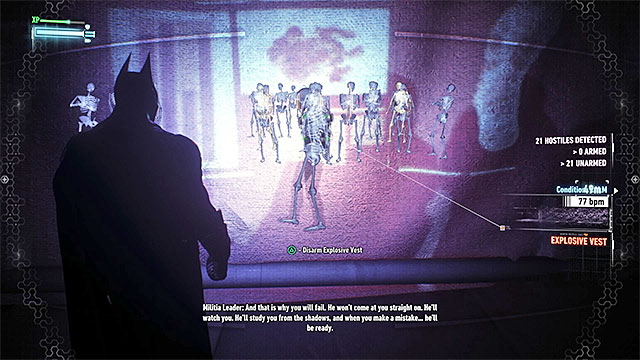 Activate the takedown after you reach the other side of the projector screen
Many bandits can be found in the new room. You can't attack them until you take care of their leader that has a bomb on him. Move through the upper ledges until you get to the back of the stage. Only after that you should jump down. Walk towards the screen and, once you position yourself precisely behind bandits' leader, press the takedown button/key. It will allow you to disarm the bomb and, obviously, will start another battle. During the battle you must especially watch out for another group of enemies with tasers. Use electric charge on them in order to avoid unnecessary damage. Additionally, similarly to other battles, try to stun two medics as quickly as possible. Once the battle is over, find the fuse box and enter the new corridor.
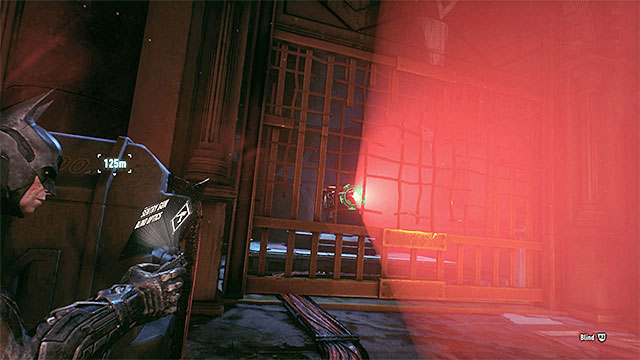 Turn off the defense turret for more than a dozen of seconds to gain access to the small shaft
Once you win the battle, find the fuse box and enter the new corridor. Soon you will reach the lowest level of the main shaft. While still controlling Batman, check the western corridor. There's an active defense turret there, so you must hide behind the cover and temporary deactivate it with the remote hacking device. Quickly go to the smaller shaft, look up and use the grappling hook to reach the room on the higher floor. A generator can be found there that is powering the second fan. Just as before, you must overload the generator and make it explode. To do it, you need the electric charge.
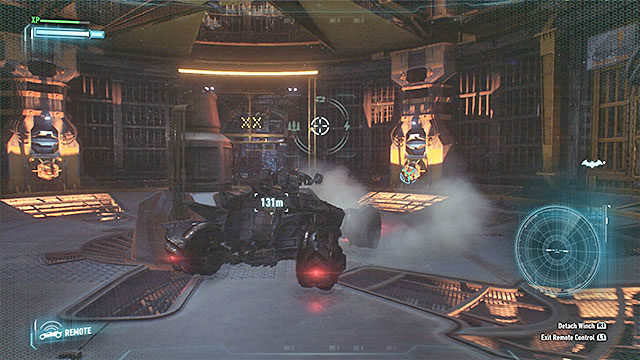 Use the winch to lower the large platform on which the Batmobile is parked
Don't try to go back to the small elevator shaft, you wouldn't have enough time to hack the turret again. Remain in the room with the destroyed generator and activate the Batmobile remote control. Use the fact that the second fan is inactive and resume the process of lowering the car hanged on the winch to the upper hook. You must get the vehicle to the bottom. Once you reach the large platform, unhook the winch.
Now target one of the side hooks and turn the reverse gear. You must gradually lower the large platform. Keep doing it until it reaches the bottom. Now you can ride into the corridor with the defense turret and use the Batmobile to destroy it. Switch to Batman and go back to the large shaft.
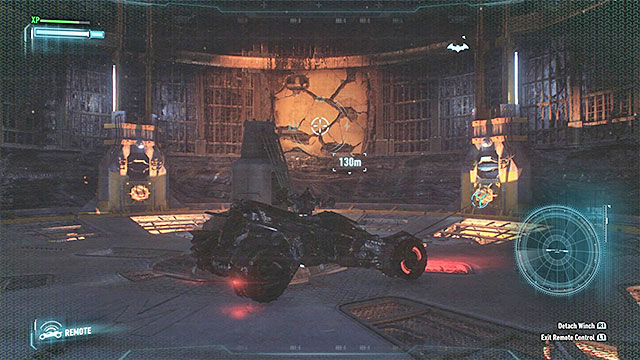 Destroy the weakened wall and raise the large platform to reach the destination in the Batmobile
Use your vehicle to destroy the weakened wall that can be found slightly above. Once again you must use the winch on one of the hooks. However, this time you must position yourself in a way so that the large platform will start slowly rise. Your objective is to allow the Batmobile to ride through the hole created after destroying the weakened wall. It will let you reach the drilled tunnels. Listen to the conversation with Alfred, use the fuse box and enter the tunnels. Soon you will have to once more face Arkham Knight who took control of a large drilling machine.
 Help yourself with boost and avoid all the unbreakable obstacles
Don't try to fight the drilling machine, you can't stop it in any conventional way. What's more, if you touch it, the Batmobile will explode. Start with immediately turning around (handbrake will be helpful) and riding in the opposite direction. You will start the first of many escape sequences. During it use the boost regularly and avoid hitting the unbreakable elements of the surrounding - you can't allow yourself to waste any time.
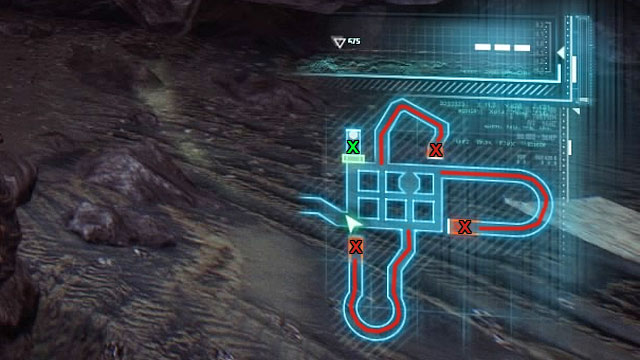
In order to stop the drilling machine, you must outsmart your enemy. Notice the corridor with the red lines shown on the picture above. The lines lead to places where you can find explosive charges (red X marks). They will help you weaken the Arkham Knight's vehicle.
 "Convince" Arkham Knight to pursuit Batman
Each time you must force the drilling machine to chase the Batmobile. If it won't happen automatically, you can wait for the machine to appear behind you or even shoot at it from a distance.
Once the escape starts, you can't allow yourself to make any mistakes and you can't stop even for a moment - despite its large size, the drilling machine is fast and quite agile. Use the brake to help yourself in turning. Aim the batmobile at one of the "red" corridors from the picture and, after entering it, watch yourself to avoid falling on obstacles (such as barriers and fans). In order to avoid any hits, help yourself with boost and small turns to the sides.
 You must guide the drilling machine to the tunnels with explosives three times
Each time during the escape through the red tunnel, you must reach its end (the red X marks on one of the previous images). The Batmobile will easily avoid the explosives placed in the tunnel, but the drilling machine will hit them and, due to the explosion, its health bar will deplete (upper right corner of the screen).
The actions described above must be repeated with all three tunnels leading to the places with explosives. It will allow you to fully deplete the enemy's health bar. Once that happens, it will be destroyed.
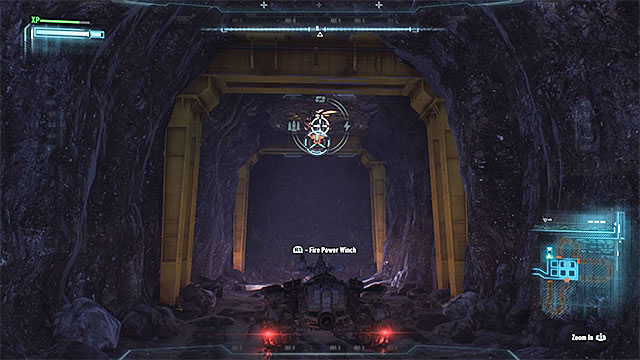 Pull out part of the ceiling and escape before the Batmobile will get crushed
Now go to the previously unavailable gate in the northwestern part of the tunnels (green X sign on one of the previous images). There you must use the winch to create a hole in the ceiling. Soon the Arkham Knight will appear there. Once you regain control of your character, press the jump button/key twice in order to catapult from the Batmobile and to avoid being crushed by the drilling machine. The duel will end after that.
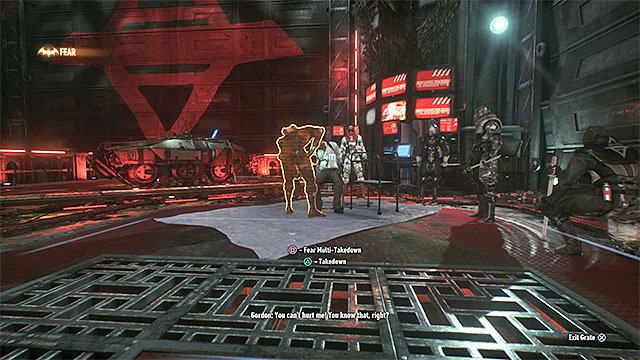 Attack Arkham Knight's men stationed near the imprisoned commissioner Gordon
Don't try to jump down to the destroyed Batmobile. Instead, look up and pull yourself to the higher ledge with the grappling hook. Start walking through the narrow corridors. They will lead you to the ventilation shafts. Use them to reach the large room in which the commissioner Gordon is imprisoned.
There are many enemies around Gordon and it is a good idea to take them by surprise. To do it, start the battle with a fear takedown. During the combat, try to quickly stun the medics and don't let your opponents pick up gunfire. Once the fight is over, try to free commissioner Gordon. Arkham Knight will appear on the scene. You will learn his true identity and finally will have an opportunity to fight him without the backup of any vehicles.
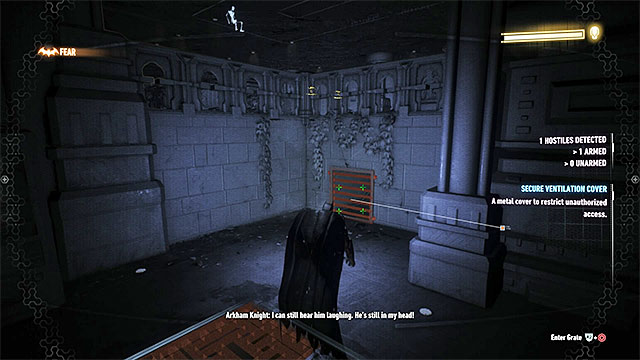 Use the ventilation shaft to safely get close to the boss
The duel with Arkham Knight consists of four phases. Your main objective in each of them is reaching the observation point occupied by your opponent without being spotted (he has a sniper rifle with which he observes his surroundings.
Start with activating the detective mode and examining the territory. You can't jump to any observation points that are nearby the Arkham Knight and you can't walk to him traditionally as he observes his surroundings and you could be easily targeted by him. Instead, get to the lowest level of the main room and look for the entrance to the ventilation shaft that leads to the boss.
 You must get under the ledge occupied by Arkham Knight
Walk through the ventilation shaft and use the exit under the Arkham Knight - it will allow you to get through the territory observed by him. Look at the ledge on which the opponent is hiding and pull yourself there with the grappling hook. Batman will deal some damage to the Arkham Knight and the second phase of the duel will start.
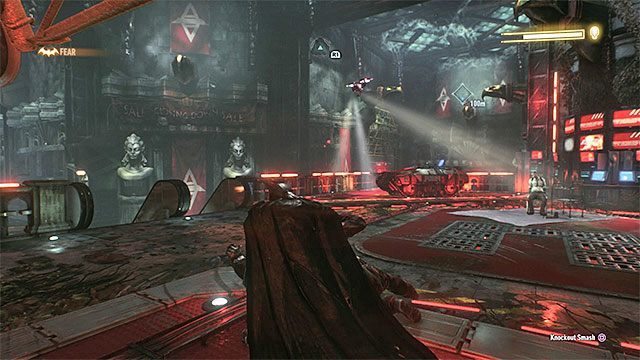 You can temporary blind the flying drone, but most of the time it is better to avoid the machine
In this phase of the duel Arkham Knight will summon five bandits to his aid and will take control of a flying drone. Since the drone is related to the boss, you can't eliminate it completely. If left with no other choice, help yourself with the remote hacking device to temporary blind the drone, in all other situations simply avoid the territory in which the machine can be found (luckily, it moves very slowly).
As for the enemies, don't rush with attacking them, use the gadgets and the surroundings for your advantage. For example, you can attack them from the ventilation shafts, sneak up on them from behind, lure them away with voice synthesizer or stun them by spraying the explosive gel on weakened walls. Important - use the detective mode cautiously as one of your enemies has a device that can detect it.
 Reach the vertical shaft and use the tunnels to get close to the boss
Focus on Arkham Knight after you take care of his allies. Just as before, it is best to get close to the boss through the ventilation shafts. Look nearby him for a vent leading to a vertical shaft and get inside by using the grappling hook. Then, use the ventilation tunnels to get under Arkham Knight. Just as during the first phase, use the grappling hook on the ledge occupied by the boss.
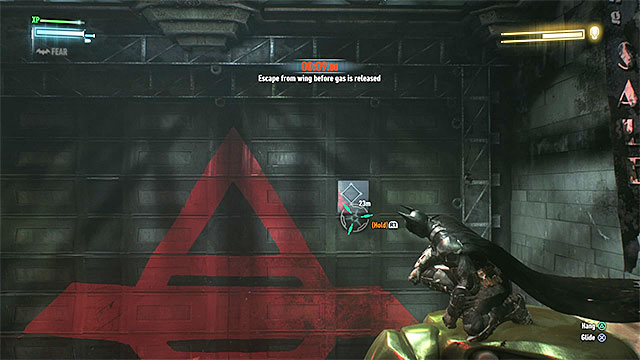
Third phase of the duel starts with a time limited challenge. You must escape a room with poison gas in less than 30 seconds. Use detective mode to find the vent on the wall shown on the picture above and pull yourself to it with the grappling hook.
 Get near the moving stairway and wait until the Arkham Knight stops observing it
In this part of the duel Arkham Knight is accompanied by six new bandits. Additionally, you must once more watch out for his flying drone. This time enemies aren't detected nor marked in different color in the detective mode. Despite that, you shouldn't have trouble with finding and eliminating them.
As previously, focus on Arkham Knight only after you take care of his backup. Use the ventilation shafts to get close to the moving stairway. Use the grappling hook to get to the higher level when the boss will look the other side. Quickly target the ledge with the Arkham Knight before he will spot you.
 Use the grappling hook to get out of the trap
Similarly to phase three, first you must escape the room with poison gas. This time you have only 15 seconds. The bars on the wall can be spotted ahead from the place where you start.
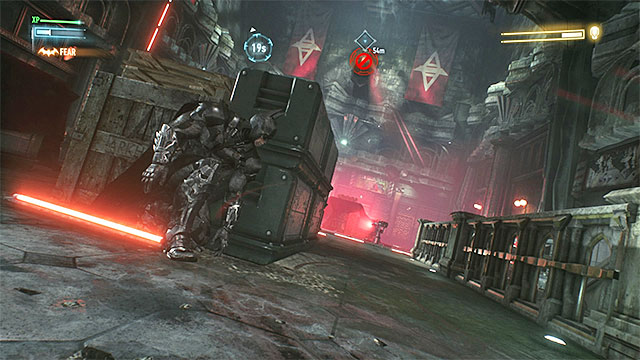 Hide behind the chests near the stairs
In this phase Arkham Knight will no longer have bandits to help him. Instead, two defense turrets will be placed near his position. Additionally, this time you can't use the ventilation shafts to get close to the boss.
Start on the lowest level and slowly go towards the inactive moving stairway leading to the boss. Before you use the stairs, you must perform two actions. First, blind the flying drone for 30 seconds with the remote hacking device. Second, make sure that Arkham Knight isn't currently looking at the stairs. Once you get to the higher level, hide behind the nearest chest.

Pick the path shown on the picture above, it will allow you to get close to both defense turrets without being spotted. As before, leave the hideout once Arkham Knight will start observing the territory to the left or right from that place.
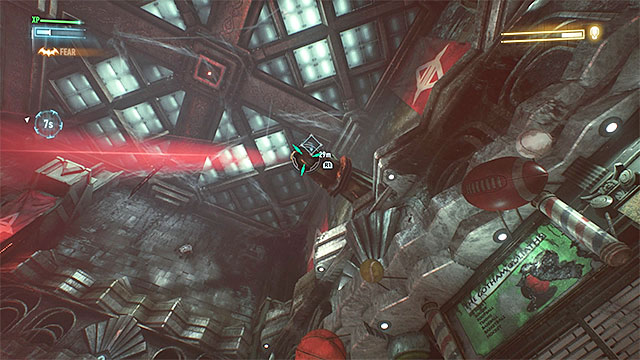 When it is safe, pull yourself to the ledge
Position yourself near the new chest, quickly select the remote hacking device and use it to temporary deactivate the right defense turret. Now you have fifteen seconds to get to the ledge with Arkham Knight. Do it once he turns left or right. Additionally, you must check the current position of the left turret and wait until it turns the other side. If you want, you can even run towards the ledge to reduce the time when you're vulnerable. Pull yourself to the ledge and let Batman take care of Arkham Knight.
 Attack the elite enemy after you use electric charge on him
After watching a new cutscene, walk again towards the imprisoned commissioner Gordon and free him. New enemies will appear in the room, but this time their employer won't be helping them. Despite that, be careful, because among the enemies there's an elite opponent in heavy armor. Additionally, he is electrified, so first you must use electric charge on him and only after that you can run towards him to stun him with the cape and use the takedown. You can also help yourself with the explosive gel to gradually weaken him.
Follow commissioner Gordon to the elevator and, after walking inside, wait until it transports both characters to the roof of the abandoned shopping mall. There you will meet with Scarecrow, but you won't have any control of what will happen.
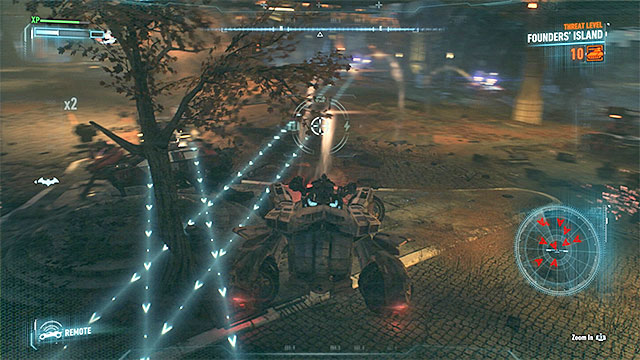 Care for Batmobile's energy bar and don't get too far away from Batman and Oracle
Press the key/button responsible for summoning the "replacement" Batmobile and start attacking the enemy tanks that are positioned around the abandoned shopping mall. During the battle you can't get too far away from Batman and the Oracle, so you will have to use the dodge control engines of the vehicle more frequently that usually.
You should start the battle with activating the fully developed suppressive fire which allows you to fire ten missiles. Look for opportunities to use this part of the equipment later in the battle as well. As for the enemy vehicles, focus mostly on destroying the tanks that are able to fire rockets at Batmobile. Use Vulcan cannon to destroy those rockets. You must destroy around two dozens of enemy machines. Once you do it, move Barbara to the Batmobile and drive her to the Gotham City Police Department.
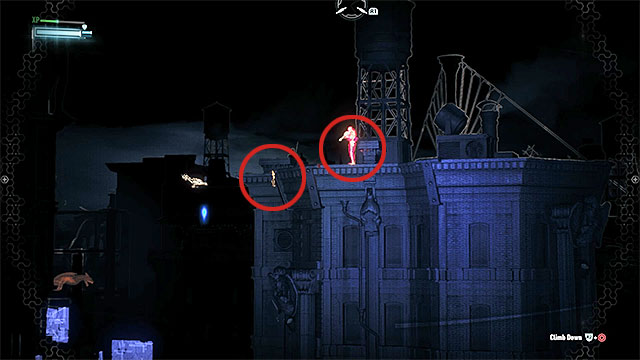 Use detective mode to find the snipers from safe distance
Return to the Batmobile and start driving towards the Clock Tower. Leave the vehicle once you are around 150-200 meters from your destination - the tower is observed by two snipers positioned on the roofs of nearby buildings. Use detective mode to find both snipers, and then try to sneak up on both of them and perform silent takedowns. If you get caught in the meantime, help yourself with the smoke bombs and quickly get off the roof and hide in the alleys between the buildings or in areas with roofs where the snipers won't be able to get you.
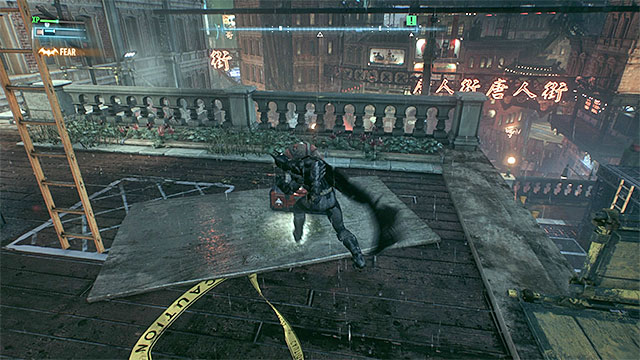 Enemies might try to place defense turrets - it is a good idea to interrupt them
There are nine bandits to neutralize in addition to the snipers. They are patrolling the multi-level territory around the clock tower. You don't need to hurry with eliminating them, so use the detective mode to find them and easily surprise them. While securing the area, watch out for the enemy with a minigun whom you should leave to take care off as last. Additionally, it is wise to neutralize the medic and drone operator early (the flying machine can be first sabotaged by removing the security codes). If possible, avoid being detected, even if you manage to escape the enemies will start placing defense turrets around them once they know you're there. You can interrupt them, avoid the turrets or try to destroy them. After securing the area, reach the computer terminal marked by the game and interact with it.
Listen to the conversation with the Oracle. She will inform you about a new available side quest (of course, it's not mandatory). Now go back to the Gotham City Police Department and talk with the Oracle face to face. In the meantime, the department will be attacked by Scarecrow's military forces.
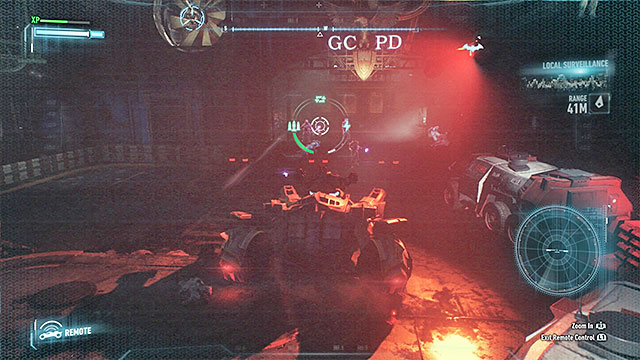 It is a good idea to use the Batmobile to takedown all enemies
Go to the underground parking lot where you have earlier left the Batmobile. Once you get there, two transporters with large amounts of bandits will arrive. Direct combat with Scarecrow's men is unadvised because you would have to deal with limited visibility and be cautious when attacking enemies with tasers and shields. A much better idea is to use the grappling hook to reach one of the upper balconies in the underground parking lot. Position yourself in a place where enemies won't be able to shoot you. Then, activate the Batmobile remote control and use the car to eliminate your opponents. Use the Batmobile to eliminate the second wave of enemies as well (it is possible that you will have to walk down for a moment to "encourage" your opponents to get into vehicle's range).
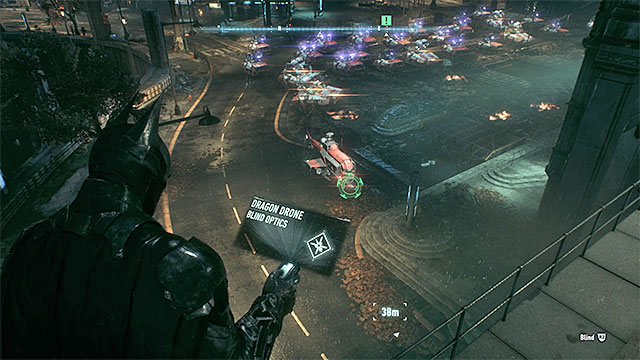 Hack the flying machine and jump to the upper part of the underground parking
Once the battles ends, listen to new conversations with Oracle and officer Cash. Jump for a moment to the Batmobile and use the winch to pull out the fan at the ceiling. Then use grappling hook to get to the newly unlocked passage. Use the ventilation tunnels and grappling hook to get to the top of the elevator shaft. Soon you will get outside the building.
Ignore the tanks positioned around the Police Department and don't worry that the main generator has been destroyed - it cannot be prevented. Go to the gate leading to the underground parking. Currently it is observed by a flying machine, so you must use the remote hacking device to temporary blind it. Then walk through the narrow hole near the destroyed enemy tank.
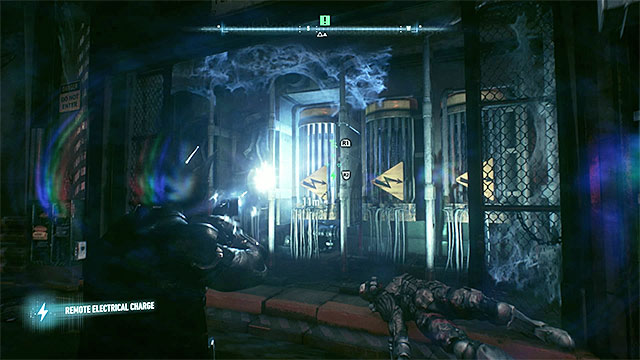 Load the generators with the remote electric charge
Get close to the new group of enemies whom you must defeat without the help of your vehicle. Watch out especially for enemies with tasers and for elite enemies with shields. Use electric charge, cape stun and stomp against them. Once the battle is won, get close to three backup generators. Use electric charge to power them up. Now you can summon the Batmobile and go to the exit from the underground parking.
Important - before you drive to the surface, invest available development points into upgrading the Batmobile. The hardest battle in the vehicle awaits you.
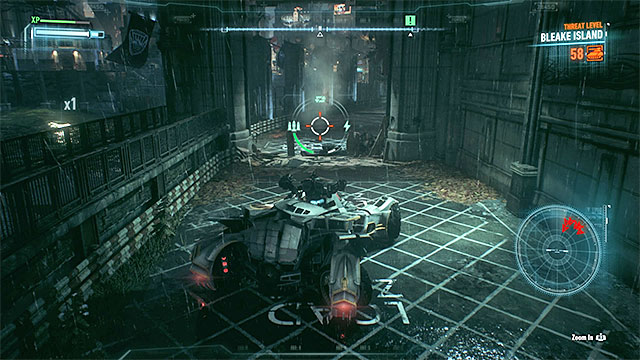
The battles will start once you leave the underground parking. Winning will be hard because you will have to destroy more than 60 (!) enemy machines. What's more, you won't be able to regenerate Batmobile's energy, so you must keep it on a reasonable level since the very beginning of the combat.
After leaving the underground parking, destroy two closest flying drones. Then, consider getting through the barricade located on the left side and shown on the picture above. It would allow you to get to the back of the Police Department. If you do it, enemies will have to use narrow passages to get to you (the passage where you have destroyed the barricade and the one on the other side of the building). Thanks to that, you won't find yourself under a massive attack of enemy forces.
 Look around for violet and yellow icons, hitting the machines marked with them will make it much easier for you to win
Depending on how the battle goes, you can remain on the back of the Police Department, go back near the parking (main enemy forces can be found there) or travel through the whole island without stopping in any specific territory. No matter how you act, focus mostly on destroying the flying drones and shooting down the rockets flying at the Batmobile.
Oracle will help you in effective destroying tanks and flying machines. Keep attention to enemy machines marked by her and try to focus your fire on them. Violet color means that once you hit that enemy an EMP charge will be shot around it - it will temporary immobilize nearby units. Yellow color means that hitting enemy vehicle will make him explode. Additionally, use all the special equipment of the Batmobile, such as drone hacker and suppressive fire. Leave the armored tanks for the last part of the battle. Attack them from long distance and avoid their heavy fire by hiding behind building's walls.
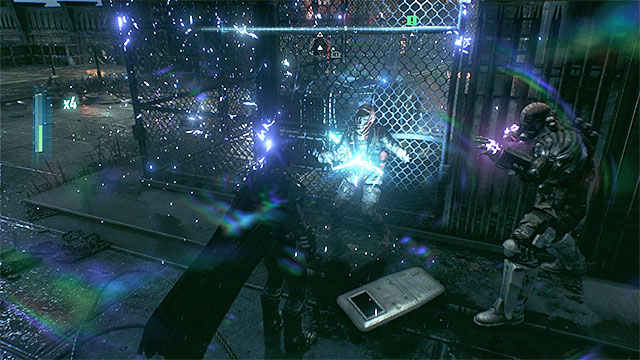 Depend on team attacks performed together with the Oracle
Destroying all enemy vehicles won't finish the siege on the Police Department - new enemies will appear on the roof and you will have to stop them from sabotaging the building's security systems. Before you go to them, check if you can buy some upgrades that will improve Batman's resistance and melee combat abilities.
Once the battle starts, focus mostly on taking care of enemies with tasers and shields. Also, be prepared for another group of bandits that will soon reach the roof on a flying machine. Among the new group you will find some martial arts experts, so you will have to perform counterattacks with even greater precision. You will get a small facilitation from Oracle with whom you will be able to sometimes activate team attacks (throwing the enemy on the electric fence or on pipes with hot steam). As these attacks are strictly limited, try to use them only on the strongest opponents.
 Eliminating elite soldiers will give you most trouble - you must first "stomp" them and then activate the beat down
There will be another group of bandits, this time commanded by two elite opponents in heavy armors. You must attack them in a specific way. First you must stomp on them (cape stun and then pressing the jump key/button twice) and then, once the opponent is stunned, activate the beat down. Try to plan the attacks so that other bandits won't interrupt you in finishing their leaders - stop their attacks with counters and then continue the combo that is part of the beat down. Keep fighting until you secure the roof (if you die, you won't start the battle from the beginning but from the moment when the last group of enemies appeared).
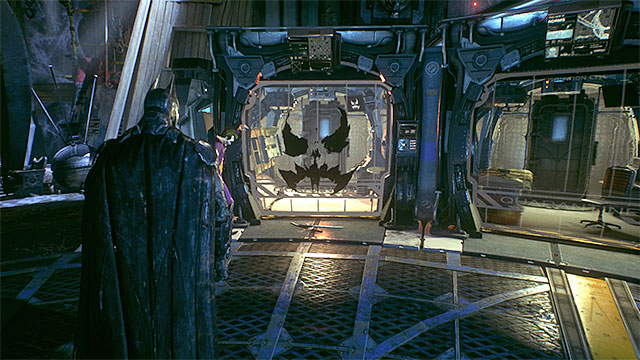 Check the Robin's cell
Once the battle is won, wait for officer Cash and Oracle to contact Batman. The information they will give you will point you back to the Panessa Studios. Similarly to previous visits to this location, use the door on the roof and the elevator.
Enter the quarantine zone and walk towards the cell in which Batman has earlier placed Robin. Listen to Scarecrow's talk and leave the place (if you want, you can talk with Harley Quinn, but it's not mandatory).
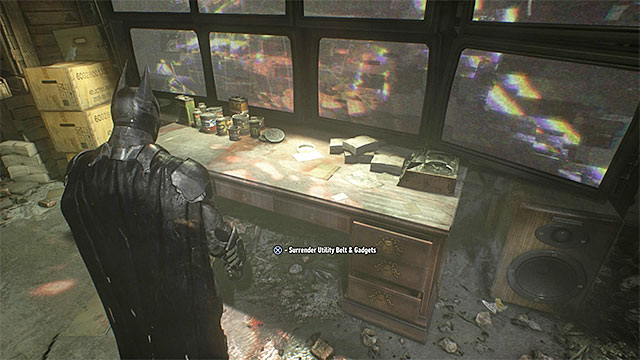 Take off the gadget belt and leave it on the table
After you leave the movie studio, wait until Oracle contacts Batman and go to the marked building in Kingston district. Once you reach it, enter the building and reach the room with large amount of screens. Now listen to Scarecrow's instructions and interact with the table in order to leave the utility belt on it. Now you can go to the truck parked nearby and sit inside.
Use unique takedowns on JokersSoon you will face the first of a series of consciousness disorders. When you find yourself in an empty alley, walk along the path. Climb in order to bypass a gate. Once you reach the closed territory, first check the side doors and then walk to the corpses of Bruce Wayne parents. Soon Joker "clones" will start appearing nearby. Attack them and use counters. As the multiplier increases, you will be able to activate the Joker takedown. Use it as frequently as possible, after few tries you will be able to catch the "real" Joker with it. Start pressing the attack key/button to try to strangle the Joker. It will trigger a long cutscene.
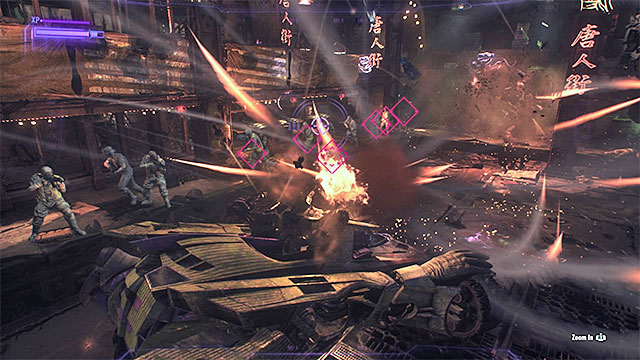 Wait until the game will let you activate Joker's vehicle's special attack
Start by using the Joker's vehicle to eliminate the opponents positioned nearby. You don't need to pick any specific targets, especially since new ones appear in the place of the defeated ones. Keep shooting until you will be able to activate the special attack (The Killing Joke) which is Joker's version of suppressive fire.
When you take direct control of the Joker, use the small exit from the room. Kill all enemies met on your way - The Penguin, the Riddler with the hostage sergeant Hanrahan and Two-Face. Once you leave the building, a new cutscene will start.
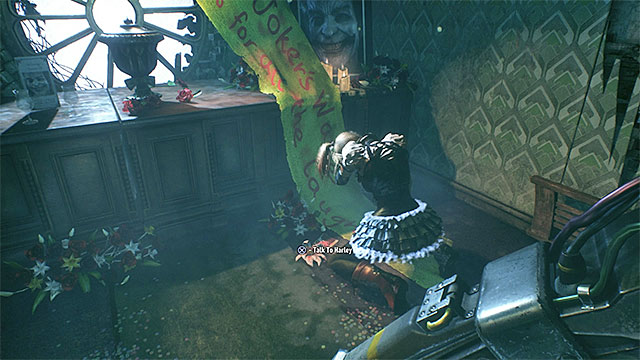 An altar can be found in one of the visited locations
Once you regain control of the Joker, start by activating the flashlight. Explore the catacomb-like location. Stop in each room where there's a cutscene to watch or Joker's commentary to hear. On the way, use the weapon to destroy Batman's statue. Walk to the altar and try to talk with Harley Quinn. Destroy the chairs to unlock access to the side corridor. Now stop near the desk with radio turned on.
Soon you will reach a larger room with new Batman statue. Destroy it and new ones will appear. Keep destroying the monuments until the Batman himself arrives. Use the weapon to destroy part of the weakened wall and move on. Reach the interactive button and try to push it on. When Batman shows again, shoot at him few times. It will lead to a direct confrontation between the two characters.
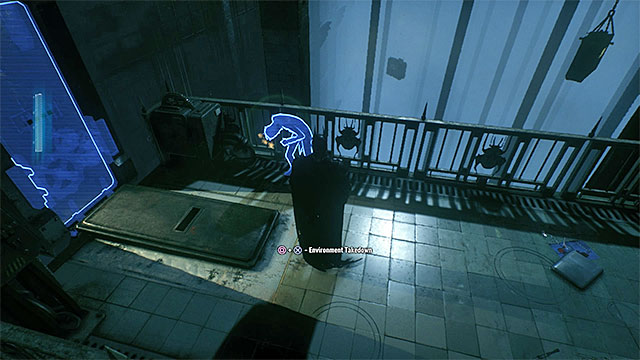
Once you take control of Batman, focus on attacking Joker who will be basically helpless. You must get him close to the cell from which Batman walked out previously and activate the special environmental takedown (the picture above). It will imprison the Joker in the cell. Now all that's left is to watch a new cutscene.
Important! It's the end of the basic part of the main storyline, but there are two additional endings to be unlocked. In order to gain access to those endings you must complete a specific amount of side quests (Most Wanted) related to capturing other villains in Gotham. More detailed information about it can be found in the next chapter of this guide.
Important! New Story+ mode becomes available from now. It allows you to start the game again on higher difficulty level. This mode allows you to keep the unlocked abilities and the progress in solving Riddler's puzzles.
In the Batman: Arkham Knight game there are two additional endings. The access to them is available only after you have completed the main plot, that is after completing all of the activities described on the Epilogue - Joker page.
 In both cases you need to get to the searchlight on the top of the police station
In order to get the possibility to see the first additional ending you need to complete seven, randomly chosen, secondary missions, which are connected with The Most Wanted. The description of the requirements is a little misleading in this case. You do not need to put seven known villains (ex. Penguin or Two-Face) behind the bars, because not all of the optional missions end with duels with characters like that. What matters is that all of the seven, randomly chosen, secondary missions are completed in 100% (you can check the progress in the mission window).
After you've completed all of the requirements needed to unlock the ending you need to get to the roof of the Gotham police station, which is located on the Miagani Island. You need to get to the floodlight and press the interaction button. It will lead to screening of the short movie. After seeing it you will be able to continue the game with unlocking the second additional ending among the other actions.
The second additional ending has higher requirements than the first one described above. Therefore, you will unlock it a little bit later. In order to get the possibility to see the second additional ending you will have to complete ALL of the secondary missions connected with The Most Wanted. With the Riddler's Revenge optional mission among others. This mission can be completed in 100% only after you solved all 243 riddles and beating up Riddler in a direct fight.
Just like in the case of the first additional ending, after meeting all of the requirements you need to get to the floodlight on the roof of the Gotham police station. Interacting with it leads to screening the ending.
You gain access to this mission as the last one and it takes placer towards the end of the main storyline. After you have completed the Stop Scarecrow's Men from destroying Oracle's Servers main mission, Batman will be contacted by the Oracle. From her, you learn about the trouble Jack Ryder has gotten himself into.
 Glide towards the isle with the Statue of Lady of Gotham
To start this mission, you need to reach an islet with the statue of the Lady of Gotham, which neighbors Bleake Island and Miagani Island. You need to glide there, because the islet with the statue is surrounded by water on all sides and there is no access route there.
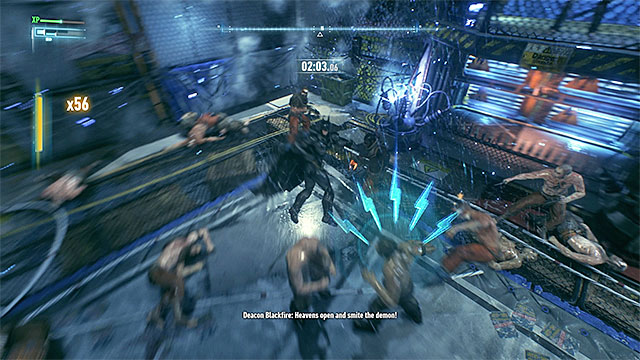 During the fight, steer clear of the electrified fences and do not let the enemies use any firearms.
Approach the blip on the radar and enter the detective mode. Thanks to this, you will learn that Jack Ryder is being held hostage by Deacon Blackfire. Land on the arena, where there is a big group of cultists and start the fight.
In total, you have 3 minutes to perform all of the activities so, you need to hurry. Eliminate the goons, one after another, and first take on the ones trying to use their firearms. Stay away from the electrified fences surrounding the arena and seize each opportunity to push the opponents towards them.
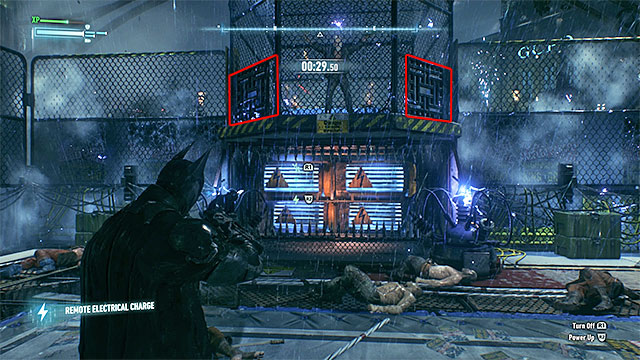
After you have handled all 25 goons, select the electromagnetic pulse from the inventory. Use it to disable the four generators that power the fence. After you do that, use the grapple to catch n to one of the grates marked on the screenshot. Thanks to this, you will reach the area where deacon Blackfire is staying. Finally, see the cutscene of imprisoning the deacon.
You gain access to this mission relatively early into the game. After you have completed the Investigate the Crash Site main mission (where you search the site of the crash of the vehicle Oracle travelled on) Batman should ask Alfred for the current progress in searching the criminals. As a result, you learn, among others, about the blazing fire station. It is a good idea to take a closer look at that.
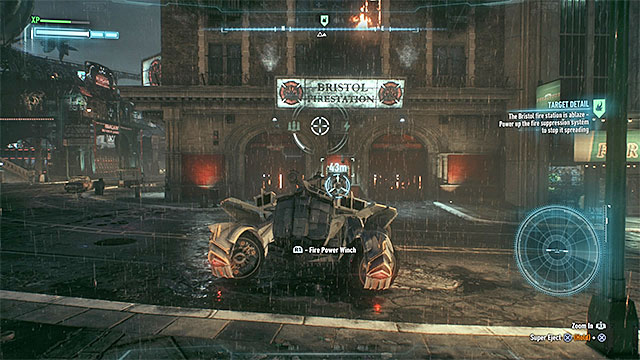 Use the hoist and put out the fire
The blazing fire station is located in Bristol and the best way to get there is o the batmobile, because you then need to use its hoist, after you get to the destination. Aim the hoist at the interactive catch and start revving up the engine of the batmobile. While doing that, make sure that the revolution meter of the vehicle stays within the orange area. Soon after you have started the fire safety mechanism, you learn that Firefly is the one responsible here.
 Follow Firefly and avoid fire
You need to follow the escaping Firefly on the batmobile. This is not too difficult, in spite of the fact that the opponent is dropping explosive and flaming traps onto the road. Keep within medium distance of the Firefly and remember to use brakes to enter tight, 90 turns .
Eject Batman as soon as he gets sufficiently close to the Firefly (only after he runs out of fuel!)Do not attempt laying any sort of fire on the Firefly, remain in the batmobile's pursuit mode. You need tor the opponent to run out of fuel in his jetpack (the meter in the upper-right corner of the screen). As soon as this happens, cut down the distance and wait for the message about the option to eject Batman and perform a special takedown in mid-air (double-tap the jump key/button).
If everything went according to the plan, Batman reaches Firefly automatically. The only thing you need to do now is use Beatdown, so you need to start tapping the melee key/button. After you land the sequence of blows, the Firefly breaks free and escapes.
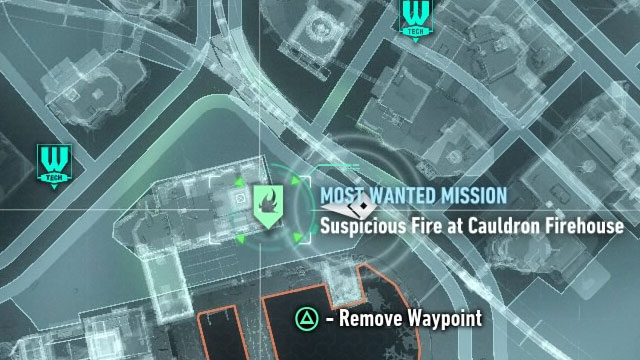
You now need to locate another fire station that has been set on fire by the Firefly. You can do this on your own, by reaching the top of any skyscraper and taking a look around for any black smoke, thanks to which you locate the building. If you do not want to lose your time, take a look at the above screenshot - another fire station is in Cauldron on Bleake Island. Just like before, use the hoist and put out the fire by managing the revolutions of the engine.
After a while, another chase after Firefly starts. The premises of this one are identical with the previous one. So, you need to avoid flames and wait for the opponent to run out of fuel. Then, eject Batman towards the criminal and beat him up.
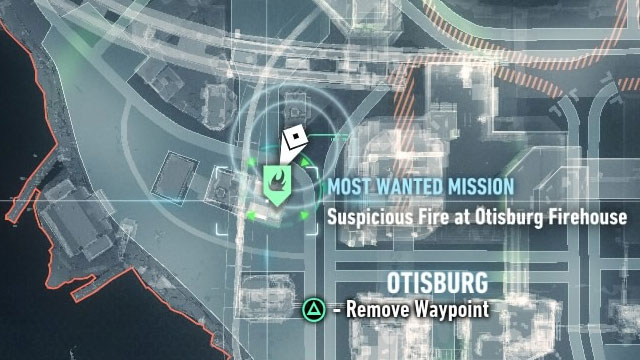
After the Firefly escapes again, locate the last, third, fire station. The location has been shown in the above screenshot - it is in Otisburg district on the Founders' Island. Put out the fire using the hoist of the batmobile.
You can now start the last pursuit after the Firefly. Capture him, after he runs out of fuel. This time around, the Firefly will not be able to escape. Instead, he is arrested and the mission ends.
The objective of this mission is to destroy the Penguin's five weapon caches and it is impossible to miss this one. This is so because you destroy the first cache during the main storyline. To learn more, see the walkthrough for the game and start with Meet with Nightwing to locate Penguin in the walkthrough for the main storyline. From the moment at which you destroy the first weapon cache, you can find the rest of Penguin's hideouts. Each time, Batmen will be contacted by Nightwing (you need to have this mission selected as active).
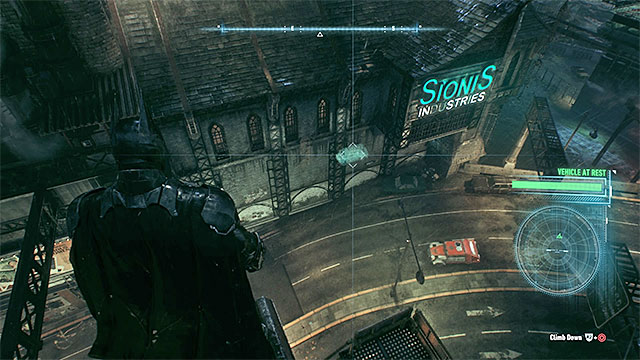 Your destination is the Sionis Industries building
After you listen to the conversation with Nightwing, head towards the Panessa Studios and find the van there. From the inventory, select the disruptor and use it to plant the tracking device on the van. After that, knock on the van's tail gate, which makes the bandits start escaping.
Just like in the main mission, you need to use grapple and gliding, to follow the van (at the distance of around 150-200 of it) and to make sure that you remain unspotted by the bandits. You need to continue, up until the moment where the vehicle reaches Penguin's hideout. It is located in the Sionis Industries building in the South-eastern part of Bleake Island.
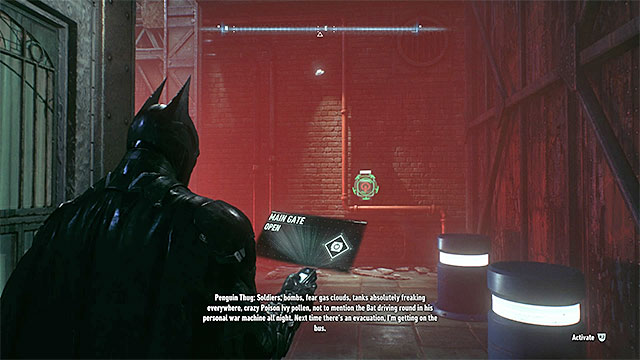 The panel that you need to break into, to open the gate.
Keep appropriate precautions, because the entrance is being protected with two turrets. Do not try to hack into them. Instead, use the remote hacking device to access the panel on the wall , which controls the main gate. After you lower the gate, use the batmobile remote control and destroy both of the turrets. You can now enter the building. Locate a big elevator shaft here and reach the very top, using the grapple. Here, find the switch that draws away the curtains under the glass roofing.
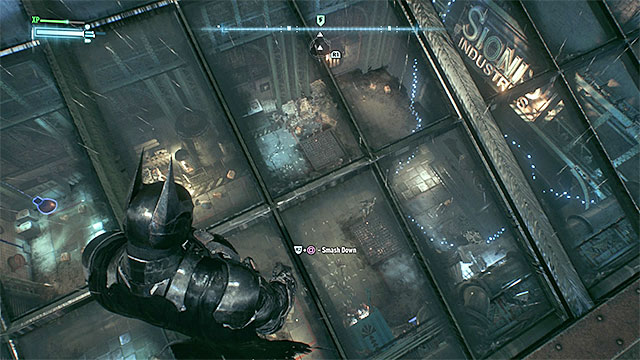 Attack the opponents by dropping onto them through the glass roofing
You can now leave the building. Use the grapple to make it over to its rooftop and walk onto its glass part. You need to drop through the glass into the building and start fighting the opponents in the main room. During the fights, deal first with the opponents with firearms and also make use of team attacks as often as possible, with Nightwing (it is a good idea to eliminate the bulky bandit this way).
After you win, enter the vault and use the explosive gel over the weapon cache. Leave, move the huge vault door and detonate the gel from a safe distance.
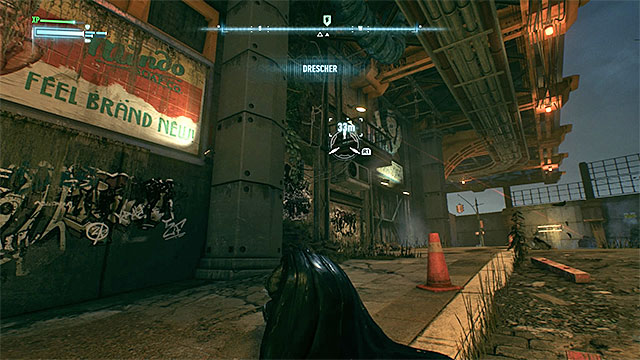 Sneak up on the sniper from the side
Contact Nightwing to learn that another van is in Kingston. In the same way as previously, use the disruptor to plant the tracking device and follow the vehicle, within a safe distance, into Penguin's new hideout. This one is in Drescher, in the North-Western part of the Founders' Island.
The entrance to Penguin's hideout is being guarded by a single sniper. Try to get him from the side, grab on to the balcony and perform a stealth takedown. After you have eliminated the sniper, enter the building.
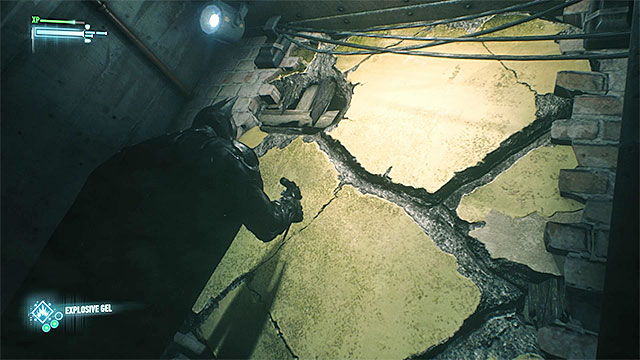 Apply the explosive gel to the wall with five armed men next to
Go into the vertical venting shaft to the right. Sneak under the armed opponents (do not attack them yet!) and exit after you get to the other side of the weakened wall. Apply explosive gel to that wall, return to the shaft and detonate the charge. The explosion should knock out five opponents that have been standing at the wall. As for the remaining two, it is best to get them by surprise, with fear takedowns.
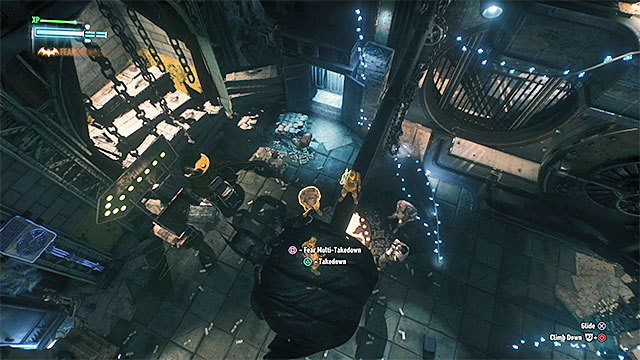 Attack the new opponents by surprise
Find another venting shaft under the ceiling. You first need to rip off the grate so, use the claw. Only after you have gained access to the shaft, use the grapple to get inside. In the next room, there are seventeen bandits where three of them pack firearms. Still before you start fighting, it is a good idea to use the disruptor to render their guns useless. Only then, start fighting. You will be helped out by Nightwing.
After the fighting ends, enter the vault, apply the explosive gel to the weapons cache there, close the vault door and detonate.
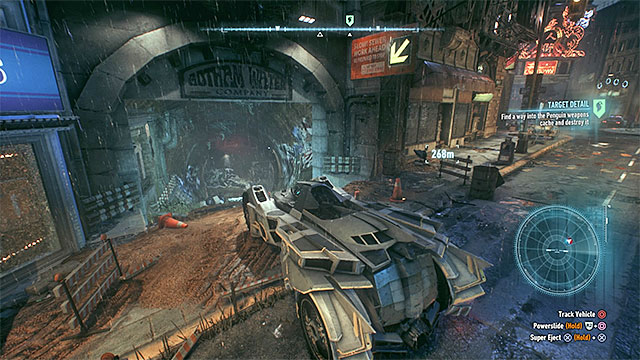 The entrance into the underground tunnels
Contact Nightwing, who gives you directions towards the van parked near the Salvation Bridge. Use the disruptor to plant the tracking device and, after it starts escaping, follow it. Penguin's men go to sewage treatment plant in Chinatown on Bleake Island. Approach the locked gate of the plant and contact Alfred, who suggests an alternative access route through the sewers. Call the batmobile and follow the markings on the ground. This way, you will get to the entrance to the sewers, not too far away Southwards from Penguin's hideout.
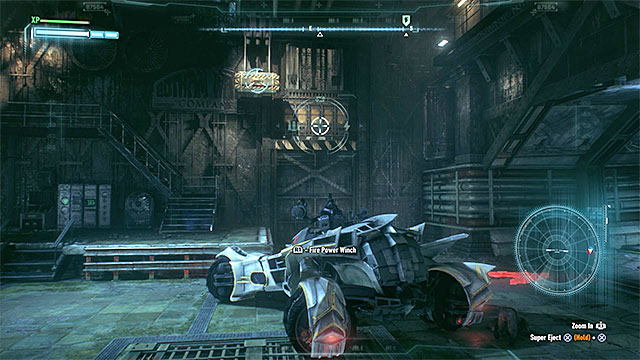 Use the hoist to gain access to Penguin's hideout
Stop by the blockades in the sewers and use the batmobile to eliminate the opponents here. After you have cleared the area, make it over, as Batman, to the upper left room. There, you find a switch that lowers the blockades. Drive the batmobile into the main hall and locate the catch on the right. Use the hoist on it and back up the car to lift the grate. Leave the batmobile here and reach, as Batman the newly-opened passageway.
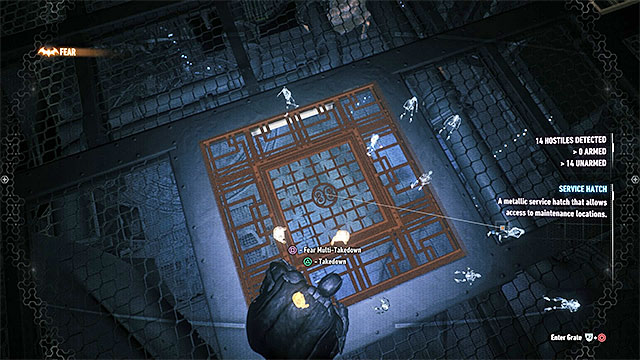 Use fear takedowns and start fighting
After you get above the bandits, stand next to one of the grates. It is best to start the fights with fear takedowns. You need to watch out here, because Nightwing is not going to help you out and some of the opponents (e.g. the ones with stun guns) require specific attacks.
After you have secured the area, enter the vault and apply explosive gel to the weaponry. Close the vault door and blow up the weapons. Soon, Batman will be contacted by Penguin, from whom you learn that he has captured Nightwing. Listen to the conversation with Alfred and returns to the sewers.
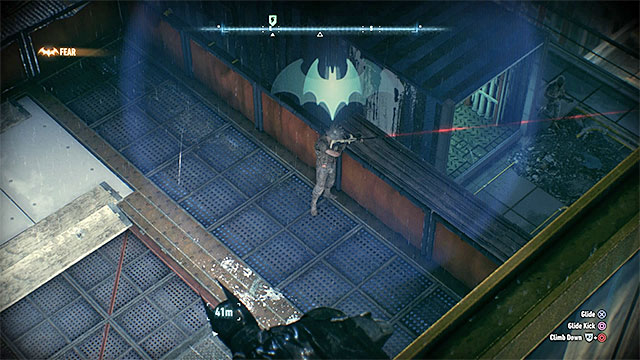 The sniper is one of the opponents guarding Penguin's hideout
Head to Otisburg on Founders' Island, because this is where Nightwing is being kept. It is not going to be easy to gain access into the Penguin's hideout, because the area is being monitored by a sniper and additionally, one of the six remaining bandits has a device that disrupts the functioning of the detective mode. Start by eliminating the sniper (it is best to glide to the rooftop of the building and locate him from the highest vantage point). With the rest of the bandits, deal only after you have taken down this one (if you get cornered, use smoke pellets).
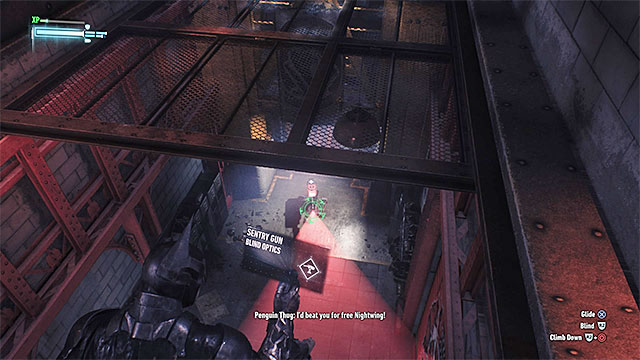 Hack into the turret from a distance
After you have cleared the rooftop of the building, take a look around for an elevator shaft and break into the fuse box on the right. You can now jump into the shaft and head into the next room with opponents. Locate the narrow passage into the neighboring room, thanks to which you will get above an operating turret. Disable the turret with the remote hacking device, run up to it and destroy it. You can now return and use the entrance of the venting shaft, which the turret was turned towards.
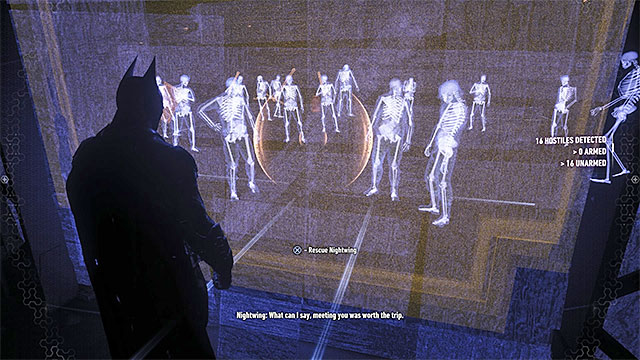 Stand by the wall, right behind the captured Nightwing
Follow the shafts and ignore the bandits around Nightwing, for now. What you need to do is reach the exit of the venting shaft, behind a weakened wall. Jump out of the shaft, stand near the wall and press the interaction key/button to free Nightwing. This will start a fight and it is quite demanding, because you will have to deal with opponents with shields (stun them with the cape and then crash onto them) and opponents with stun guns (use the electromagnetic pulse). The good news is that Nightwing is going to help you in the fights.
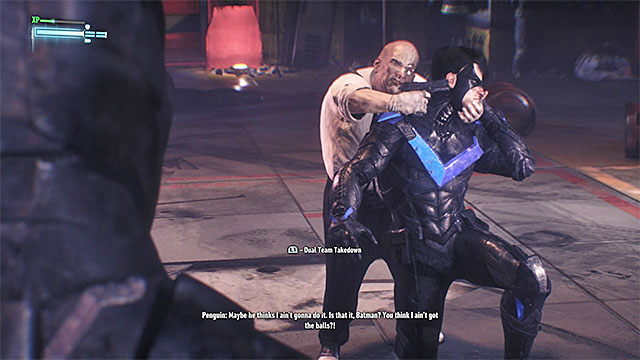 You can defeat Penguin with team takedown
After the fight, enter the vault here. Apply explosive gel to the weapons. After you exit the vault, you notice Penguin holding Nightwing. There is no special action that you need to perform here. Just wait until you can use team attack. After a short struggle, you can detonate the gel.
Finally, wait for Penguin to be thrown into the batmobile and take him back to the GCPD Police Station. Handing the Penguin over to the police ends the mission.
This mission unlocks automatically at the specific point into the storyline, and therefore you cannot miss it. The mission in question is the Find a way to infiltrate the Stagg Enterprises airships, main mission, where you sabotage the first watchtower. From now on, you can reach the rest of the towers off your own accord.
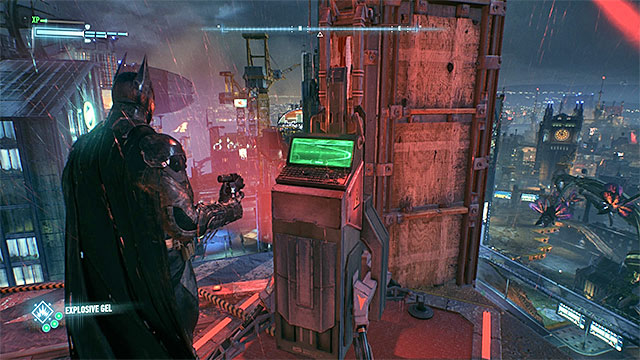 An example terminal that you need to apply the explosive gel to
To complete this mission, you need to find a total of 21 watchtowers - 8 of them are on the Miagani Island, 4 on the Bleake Island and 9 on the Founders' Island. You can deal with the towers in any order and you need to locate them on your own. From afar, you can tell them apart by the red cones that represent the range of the turrets on them. Of course, you can also use the maps provided below.
After you come close to a watchtower, you need to deal with all the bandits there. It is a good idea to scan the area with the detective mode to find out about the numbers of the enemy and learn the deployment of turrets, which need to be avoided at all costs. Whether you rely on open confrontation or eliminate all the enemies stealthily, is up to you. After you secure the area, Batman needs to locate the interactive terminal, which makes the tower work. Your objective is to destroy it and for this, you use the explosive gel.
Note - Starting with the moment, at which you destroy the second tower, Batman will contact Deathstroke on the radio, after each successful sabotage. You won't be fighting him during this mission, but completing it in 100% is required for unlocking the duel with that villain in another optional task - Campaign for Disarmament.
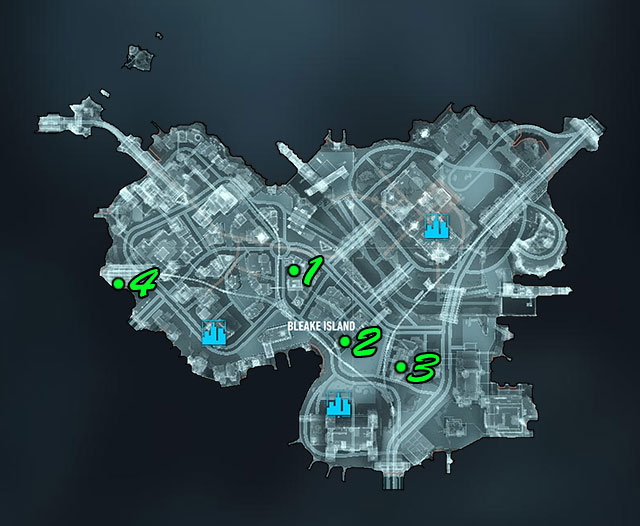
Watchtower 1 - Near the terminal, there are two drone operators and it is them that you should deal with in the first place, because hacking into the drone will allow you to eliminate several bandits without raising any suspicion. Pay attention to the single medic here. You cannot let him treat the rest of the enemies.
Watchtower 2 - The rooftop with the opponents on and the terminal, are being monitored by the turret. Use the remote hacking device to disable it for one minute and then attack the enemies. During the fights, be especially wary of the opponents with firearms and the shielded opponent, because he is wearing heavy armor. If you run out of time, while eliminating the opponents, escape to a vantage point and hack into the turret again.
Watchtower 3 - After you reach the terminal, first locate the drone operator, hack into the drone and eliminate, at least, one bandit this way. In this location, there also is an opponent with a minigun and he is the last one that you should be taken down (also, you can attack him using the drone).
Watchtower 4 - The terminal is on one of the middle levels on the building and it is a good idea to use the detective mode to find it. Near the terminal, there are two regular bandits and you should have no problems eliminating them.
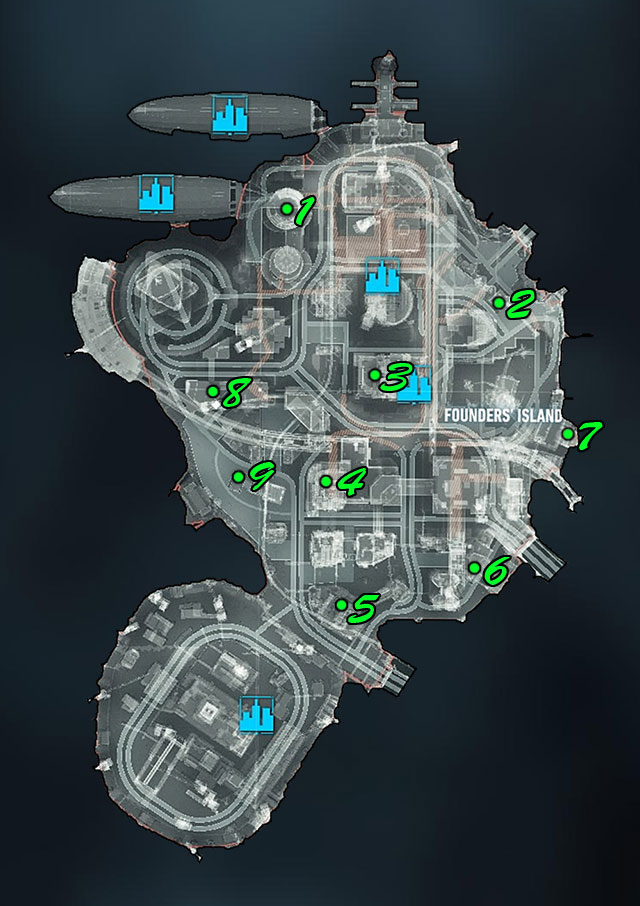
Watchtower 1 - You neutralize this tower during the storyline mission - it is Find a way to Infiltrate Stagg Enterprises Airships. To learn more, see the walkthrough for this mission.
Watchtower 2 - You can find this terminal on a small rooftop with a group of bandits on. Try to attack the opponent with the firearm, in the first place, and then prevent the rest of the bandits from seizing that weapon.
Watchtower 3 - There is a quite big building to secure, here. Apart from that, there are only elite bandits here. Try to start by eliminating the two medics, which will prevent them from healing the rest of the opponents, later into the fight. Finally, deal with the four (!) opponents with miniguns. Use the voice synthesizer to lure them into a seclusion and attack afterwards. Additionally, it is a good idea to disable some of their weapons, with the disruptor, thanks to which you will not get under saturation enemy fire.
Watchtower 4 - This terminal is being watched by seven armed bandits. You can eliminate them one-by-one, while staying in hiding. Still, you need to know that among the opponents, there is a medic and an opponent with the detective mode detector (use it with moderation, or eliminate that one soon after you reach this tower).
Watchtower 5 - Near the terminal, there are three armed opponents. One of them is the drone operator and you can use this to your advantage. Thanks to the seizing the drone, you will be able to deal with all of the bandits in one take. If this does not work for you, try to lure them away with the voice synthesizer.
Watchtower 6 - You need to make it over to a relatively small rooftop, where there is a group of bandits. Among others, you will have to deal with two martial artists here, so you need to ensure proper delivery of dodges.
Watchtower 7 - You can try to eliminate the opponents around the terminal either silently (it is a good idea to lure them away, in such a situation) or deal with them in open fight. Regardless of what you do, try to eliminate two medics pretty soon. You also need to watch out for the elite opponent with shield, whom it is best to leave for the end.
Watchtower 8 - Around the terminal, there are eight opponents. After the fighting starts, you need to render them unable to use their firearms and stun guns. Apart from that, deal with the heavy opponent.
Watchtower 9 - The terminal is on a small rooftop that is being monitored by a nearby turret. Hack into the turret before you take on the opponents around the terminal. You will have to deal with, as many as, three medics, which makes eliminating them a priority. Apart from that, watch out for the two martial artists.
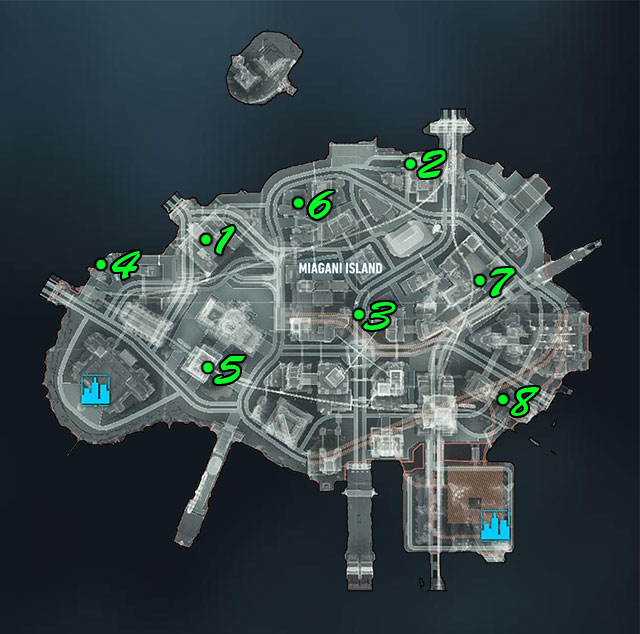
Watchtower 1 - The terminal is within the range of two turrets, but you can get to the control panel on the rooftop above and disable them. Only then, deal with the bandits around the terminal - watch out for the heavy opponents and ones with stun guns.
Watchtower 2 - First of all, try to locate the opponent with the detective mode disruptor. Neutralizing him will make dealing with the rest much easier. Finally, deal with the elite opponent with minigun, thanks to which you will take him down without being bothered.
Watchtower 3 - The terminal is on the footbridge between buildings and there are two rotary turrets right next to it. Hack into one of the turrets, glide towards the other one, at the right moment, and sabotage it. Then, disable the one that you have hacked into, before it returns to the initial mode.
Watchtower 4 - The terminal is on a small rooftop and it is being watched by a group of bandits. It is not too easy to defeat them, because one of them has a stun gun and another one is a heavy one, who you need to use beatdown on.
Watchtower 5 - In here, there is a large metal structure and the good news is that, by default, the bandits are standing within considerable distance of each other. Among the opponents, there is a drone operator and if it is possible, it would be a good idea to hack into it and use it to your advantage.
Watchtower 6 - The terminal is within range of the turret on the nearby wall so, you should use remote hacking device early enough, to disable it for 60 seconds. As for the bandits, they are armed so, it would be a good idea to eliminate them stealthily, or rely on fear takedowns and smoke pellets fort escape, in case of being detected.
Watchtower 7 - Near the terminal, there are quite a few bandits that it is going to be difficult to eliminate. Try to attack them by surprise and after the fighting starts, pay the most attention to the heavy opponent - you first need to stun him with the cape, jump onto him and launch beatdown. Apart from that, prevent the rest of the opponents from using firearms and try to take out the medic as soon as possible.
Watchtower 8 - The terminal is on the footbridge located within the range of two turrets. Fortunately, this problem can be solved by reaching the control panel, on one of the rooftops above. After you have dealt with the turrets, deal with the bandits and try to prevent them from using firearms (knock the weapons out of their hands and do not let them approach crates with guns).
This mission unlocks automatically at a certain point of the main storyline so you can't miss it. More specifically, it happens after the Track the Arkham Knight's vehicle using the Forensics Scanner main task in which you disarm the first mine. From that moment you can find new explosives on your own.
 You must use the winch before and after the battle
In the first part of this mission you must disarm fourteen mines - five of them can be found on Miagani Island, four on Bleake Island and five on Founders' Island. You can reach them in any order you want, and you must find them on your own. The fact that they pulse in red will be helpful - position yourself on building's roofs and look around. Of course, you can also simply use the maps shown below.
Once you get close to a mine with the Batmobile, you must use the winch on the object and confirm that you want to start installing the virus. It will trigger a battle in which, depending on difficulty level (different dots right from the side mission marker), you will have to destroy from a dozen to even few dozens of tanks and flying machines. After eliminating enemy forces you must return to the mine and use the winch once again. Finally, you must manipulate the gas pedal properly so that the engine revolution bar remains in the orange field. This will lead to mine's explosion.
Important - Many mines are guarded by large groups of enemy vehicles, there might be even 40-60 tanks and flying drones among them. Before you start this side mission, you should buy as many vehicle upgrades as possible, especially the ones that upgrade the armor and firepower of main weapons.
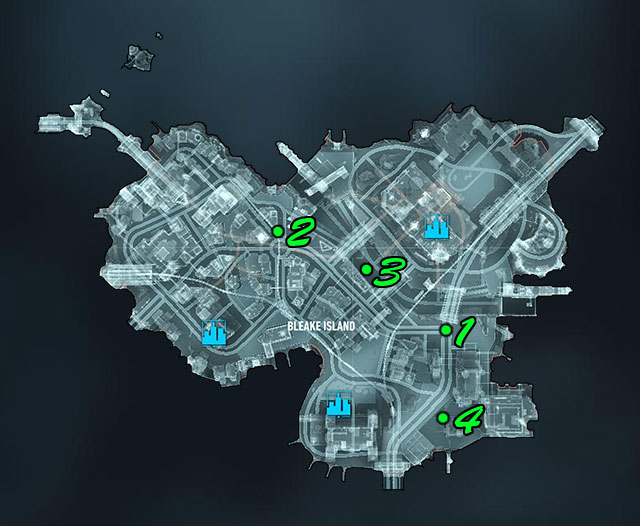
Mine 1 - You disarm this mine during the main mission Track the Arkham Knight's vehicle using the Forensics Scanner. It will be the first mine you destroy in this task.
Mine 2 - The mine can be found at the large crossroad. You must destroy more than 30 tanks during the battle, including many elite enemy units.
Mine 3 - The mine can be found in a large sewer and disarming it won't be easy, as in order to do it, you must destroy almost 50 enemy machines. Watch out especially for tanks appearing on upper streets. You can destroy them with precise shots (it is a good idea to zoom the view) or try to hack them.
Mine 4 - The mine can be found at the railroads. It's weakly protected, you must eliminate "only" 20 enemy vehicles.
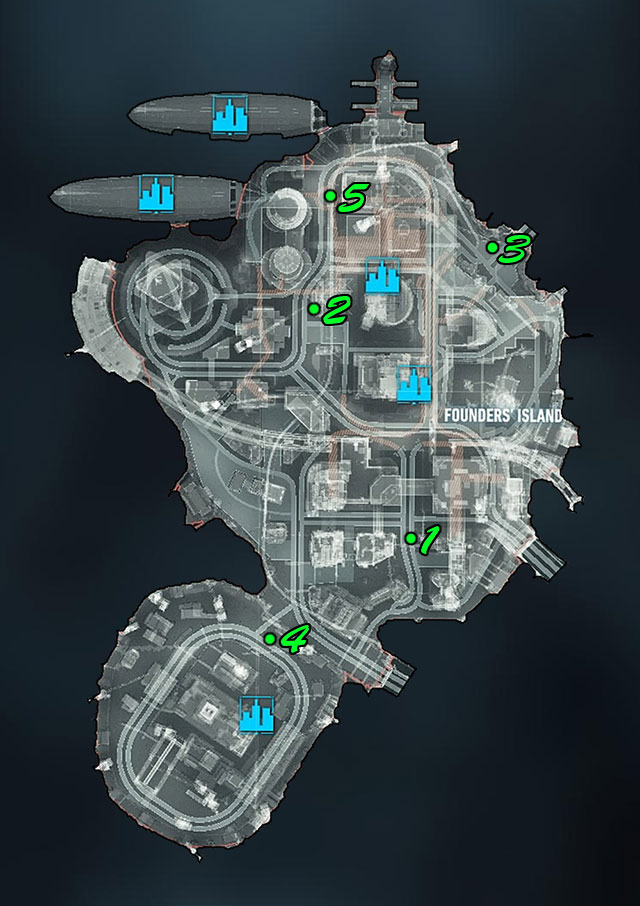
Mine 1 - The mine can be found near a crossroad and a large ramp. Once the battle starts, you will have to eliminate, among other enemies, flying drones and tanks able to shoot rockets at you.
Mine 2 - The mine is located in a well visible place near the station. Two dozens of enemy machines are guarding it.
Mine 3 - The mine can be found near one of the bridges leading to the neighboring island. There are more than 30 enemy vehicles to defeat there, including flying drones.
Mine 4 - The mine can be found at the entrance to the Adams port. In order to disarm it you must face 40 enemy units.
Mine 5 - You will find the mine at a small roundabout with a tree in its center. This time you will have to destroy almost fifty machines.
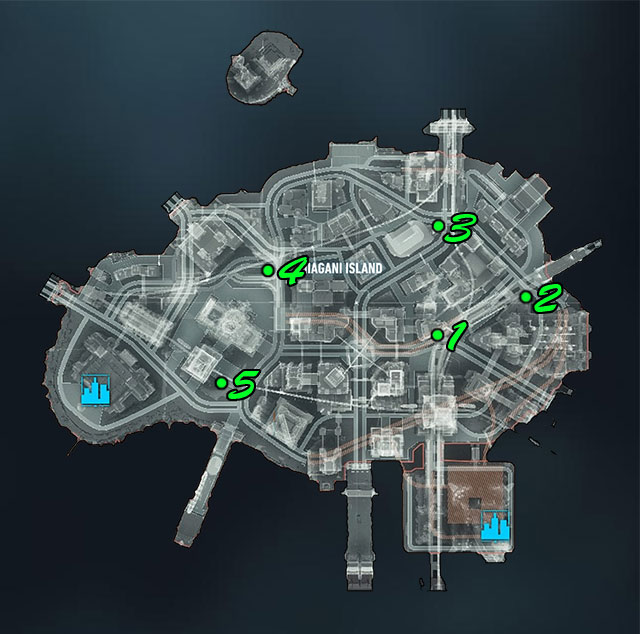
Mine 1 - The mine can be found on the sidewalk near the Gotham Bank. In order to disarm it, you must destroy two dozens of enemy machines.
Mine 2 - The mine can be found at a small roundabout. There you must participate in a quite challenging battle during which you must destroy three dozens of enemy units.
Mine 3 - The mine can be found near the crossroad, it is guarded by 22 enemy machines. It shouldn't be hard to eliminate them.
Mine 4 - The mine can be found near the lower road. It's one of the lesser guarded ones, you will have to destroy only 20 enemy vehicles.
Mine 5 - The mine can be found at the base of a large metal construction. You will have to eliminate two dozens of enemy units.
Second part of this quest is about capturing and arresting Deathstroke. However, the game won't allow you to do it immediately. To be able to fight this villain you must first:
Only after fulfilling those requirements Deathstroke will contact Batman and a new point will be added to the world map. The point will guide you to the Grand Avenue district on Miagani Island, where the fight will start.
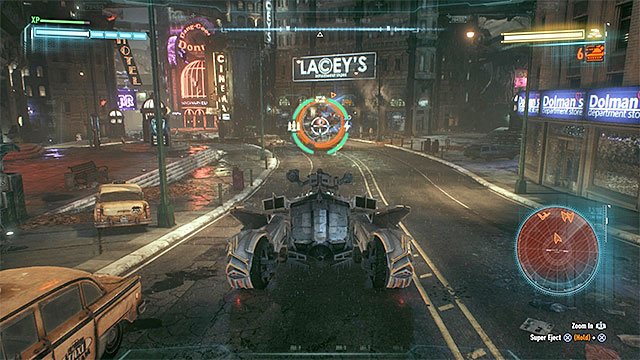 Destroy Cobra tanks and avoid Deathstroke's vehicle
After parking the Batmobile in the marked location, the battles will start. At first you should completely ignore the machine controlled by Deathstroke. Instead, focus on destroying the five Cobra tanks accompanying it. As you probably remember from the main storyline, you must carefully drive to those tanks from the back (important - they scan the territory around them from time to time!) and wait until they are targeted. A single hit should be enough to destroy a tank. Remember to get away from the place of attack immediately after shooting. If you get targeted by a Cobra, you must hide in a back alley as quickly as possible (afterburner can be helpful).
 Watch out for Deathstroke's tank's attacks - use dodge and Vulcan cannon to avoid taking damage
Focus on Deathstroke's tank once all Cobra tanks are destroyed. In this case you don't need to aim at any armor's weakpoints. Once you get close to enemy machine, start the regular attack with 60mm cannon. During the assault try to avoid taking any damage from retaliating enemy. Use dodge steering engines to get away from red beams and circles appearing on the ground. Additionally, use Vulcan cannon to shoot down rockets flying at the Batmobile. Deathstroke's machine isn't extremely resistant and destroying it should take about half a minute.
Wait until Deathstroke is placed in the Batmobile and drive him to GCPD arrest. It will end the mission.
In order to unlock this mission you must get close to one of the militia checkpoints related to this task and wait until the job is added to the mission window during progression in the main storyline.
 After the battles you must find the unconscious leader (detective mode will be helpful)
In order to complete this quest, you must destroy 20 militia checkpoints - 8 of them can be found on Miagani Island, 4 on Bleake Island and 8 on Founders' Island. You can reach the checkpoints in any order you want and you must find them on your own. You can either look around for fenced territories or use the maps shown below.
Once you get close to a checkpoint you must secure it. It is done by eliminating all the enemies found on its territory. Depending on checkpoint type, you can do it by playing only as Batman or (if, for example, you must additionally destroy enemy machines) you will need to use Batmobile's backup as well. No matter how you taken care of the enemies, once the battles end, you must find the body of the leader (detective mode will help you with that) and search him in order to obtain and destroy the device he possess. By doing so, you will lower the barriers and secure the checkpoint.
Important - While neutralizing checkpoints, Deathstroke will regularly contact Batman. You won't be able to fight him during this mission. However, completing it in 100% is required to unlock the duel with the mentioned villain in other side mission - Campaign for Disarmament.
The map above shows location of militia checkpoints. More precise descriptions of the checkpoints can be found below.
 You can use the Batmobile to jump to the fenced territory or take care of the enemies without the vehicle
Point 1 - The fenced territory can be found near the garage gate that leads to the place where one of Riddler's trials took place. You can attack the bandits that can be found there with no backup, but in that case you must watch out, among other things, for enemies with shields, tasers and gunfire. Optionally, you can use the nearby jump to get to the place in Batmobile and secure the location with your vehicle.
Point 2 - The checkpoint is guarded by six armed enemies. One of them is a drone operator, you can use his machine to eliminate some of the enemies. The rest should be caught by surprise; you can, for example, use fear takedowns on them.
Point 3 - The checkpoint is guarded by enemies equipped with gunfire, but you can easily get close to them in the Batmobile and eliminate them without leaving the vehicle.
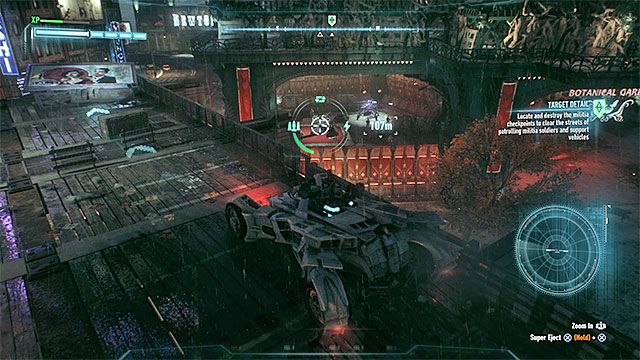
Point 4 - You will find drones in addition to the standard enemies in the fenced territory. Enter the Batmobile and find the path leading to the highly placed platforms near the checkpoint - they have been shown on the picture above. From that high place you will be able to easily clean the checkpoint.
Point 5 - The checkpoint is guarded by a small group of bandits that don't have guns nor other advanced gadgets. The only thing you must be worrying about is quickly eliminating two medics that are part of the group.
Point 6 - A small group of soldiers can be found in the fenced territory. While fighting them, you must only watch out for the enemy in heavy armor whom you must defeat with the beat down.
Point 7 - The checkpoint is guarded by eight opponents. There are no enemies with guns among them. The only impediments are soldier in heavy armor and bandit with a shield (use cape stun and stomp).
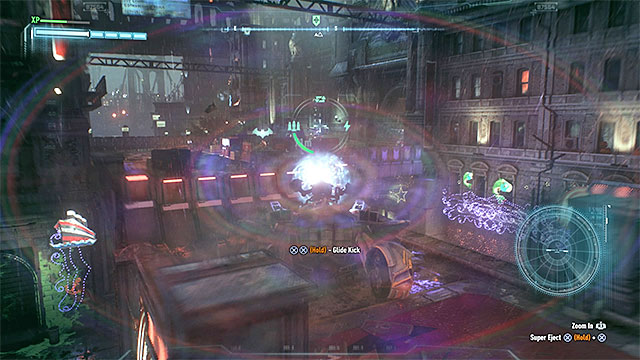 Shoot enemy drones from long distance
Point 8 - On the fenced territory, in addition to a group of enemies, you will find two drones. You should use Batmobile to destroy them. Search for a place on the same level on which the enemy checkpoint can be found. From there you will be able to easily shoot and neutralize the drones.
The map above shows location of militia checkpoints. More precise descriptions of the checkpoints can be found below.
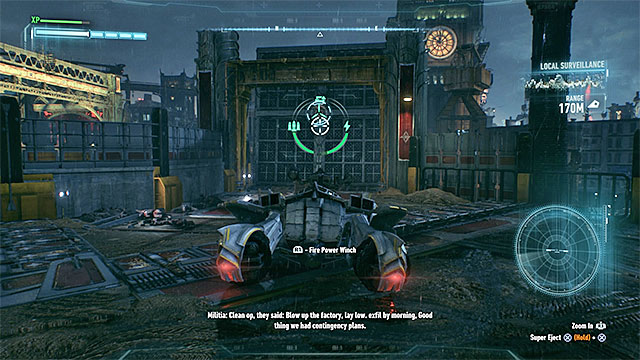

Point 1 - At first the checkpoint seems to be extremely hard to secure due to bandits and drones and the lack of possibility to reach it in the Batmobile. The latter can be solved. To do it, first you must secure the checkpoint number 1 from Founders' Island. Then, find the raised gate shown on the picture number 1 and use the winch to lower it down. Now you can accelerate and jump with the help of afterburner (it has been explained on picture number 2). You should land precisely inside the fenced territory, so all that's left is to utilize Batmobile's weaponry.
Point 2 - The checkpoint is guarded by a small group of bandits. Good news is that you can surprise them by breaking in the control panel with the use of the remote hacking device and unlocking the alternative passage. Bad news is, among the enemies you will find one enemy in heavy armor.
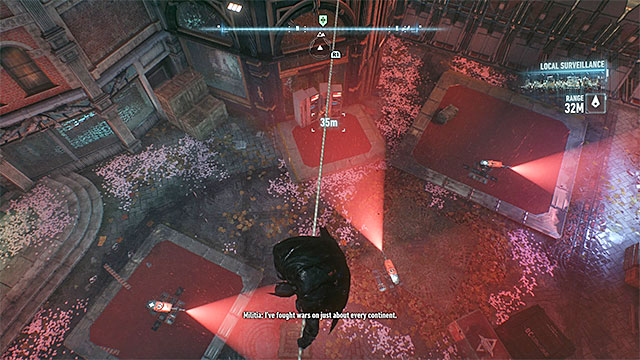 Stop above the stationary turret and wait until it will be safe to land next to it
Point 3 - Three defense turrets and a single enemy can be found in the fenced territory. The guard is by default turned with his back to the sentries. Move above the turret that isn't moving and use remote hacking device on one of the other ones. Sabotage the second rotating turret, get back up and use the mentioned gadget again. Now destroy two remaining turrets and after that stun the bandit.
Point 4 - The checkpoint is guarded by a large group of enemies. Additionally, you will find two defense turrets there, but you can land behind them. Before starting the battle, use the jammer on the weapons which some bandits have. When the fight starts, eliminate the medics in first order. Additionally, watch out for martial arts experts, enemies with tasers, enemies in heavy armors and enemies with shields.
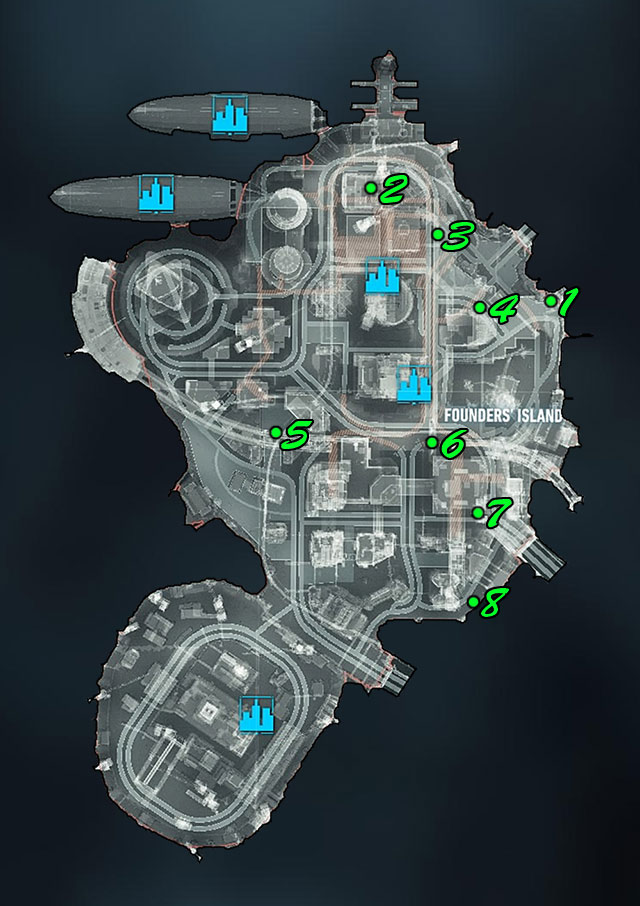
The map above shows location of militia checkpoints. More precise descriptions of the checkpoints can be found below.
Point 1 - Checkpoint is guarded by a medium-sized group of bandits. Some of them have gunfire, so it is advised to use the jammer to make it impossible for them to shoot at you. Additionally, you should take your enemies from surprise (fear takedowns are good idea). Important - Raised gate can be found here. You can use winch on it and unlock a jump that will allow you to reach checkpoint 1 from Bleake Island.
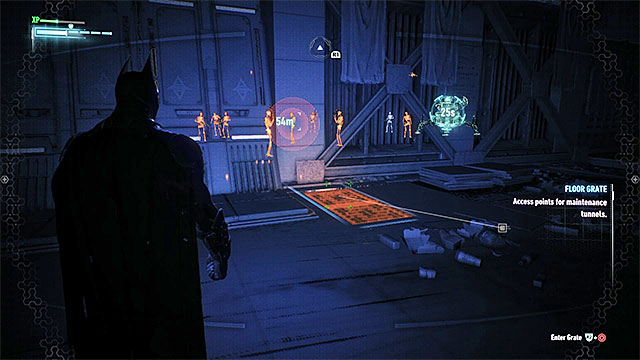 Entrance to the ventilation shaft
Point 2 - Destroying this checkpoint requires great precision and conviction - enemies with guns and a single drone can be found in the fenced zone. Start by getting to the barricade and using jammer on weapons of few selected enemies. Then find the ventilation shaft in the ground and use it to reach checkpoint's territory. Before you jump out of the shaft, hack the drone with the remote hacking tool. Then, position yourself under one of enemy groups and use the fear takedowns. When the battles start, try to quickly jump towards enemies with weapons and, if needed, help yourself with smoke bombs. Try to win the battle before the drone reactivates (otherwise, escape with the grappling hook).
Point 3 - Eight bandits can be found in the fenced territory. You must watch out during the battle, as four of them are martial arts experts (try to perform perfect counters) and some of them have tasers.
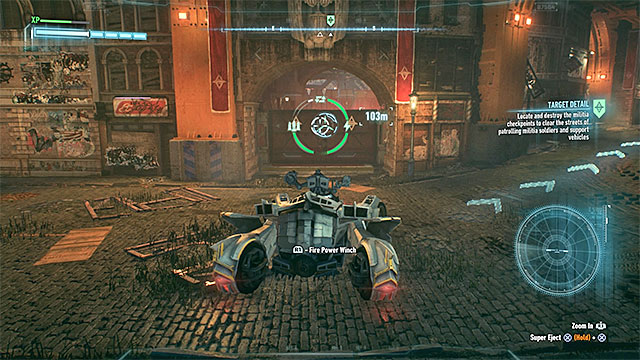
Point 4 - In addition to the enemies fully equipped with weapons, defense turrets can be found on the checkpoint territory. Luckily, you don't need to take them out personally, as you can enter the territory in Batmobile. To do it, find the gate shown on the picture above and pull it out with the winch.
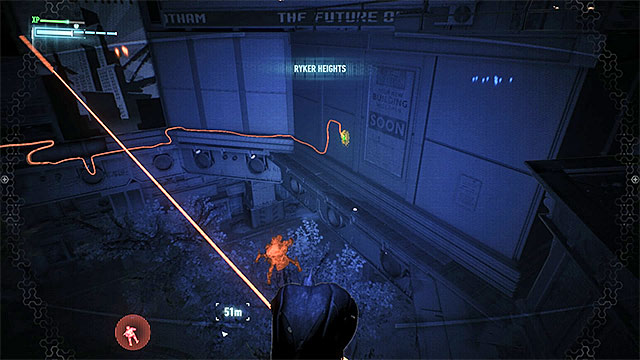
Point 5 - In addition to bandits, you can find drones in the fenced territory. By default, you can't get there in Batmobile. The solution to that problem is finding the button shown on the picture above. Using the remote hacking device in that place will lower one of the nearby barricades. Use the new passage and shoot the enemy targets from the higher level or jump down with the vehicle and then eliminate the opposition.
Point 6 - The checkpoint will be guarded by five enemies with guns. First three opponents can be neutralized with fear takedown. Jump towards two remaining with no special help or with the use of smoke bomb.
Point 7 - You will find a group of bandits in the fenced territory. They won't be using guns, but one of them will be equipped with heavy armor. It is wise to leave him for the end and help yourself with beat down.
Point 8 - There is a small group of bandits on the fenced territory. Try to use jammer on weapons used by some enemies. Additionally, when the battles starts, watch out for enemies with tasers.
The mission unlocks early in the game. During your first visit in GCPD lockup Batman meets with officer Cash and learns from him about hanging corpses that were recently found. The officer tells you that they should be examined more thoroughly and that you should capture the killer.

Go towards the Merchant Bridge that can be found in the north-eastern part of Bleake Island. Once you reach the destination, walk towards the mutilated corpse and start examining it. The scanner that is a part of Batman's equipment has three working modes - it can be used for checking the skin, muscles and bones. In each case you must find one interactive section, they have been shown on the pictures above:
You must find other murdered people on your own, they won't appear on the world map. You can try to find them on your own by listening to the classic music and trying to find its source, but it will be much easier to use the clues shown below.
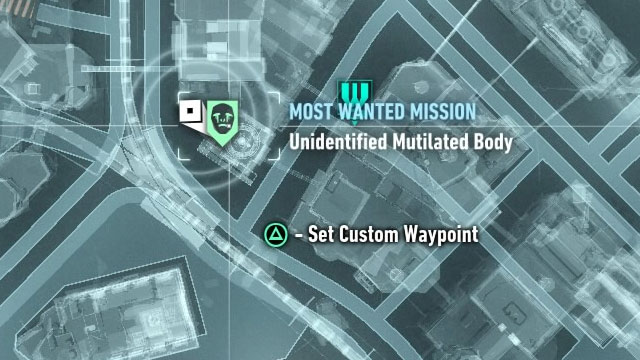
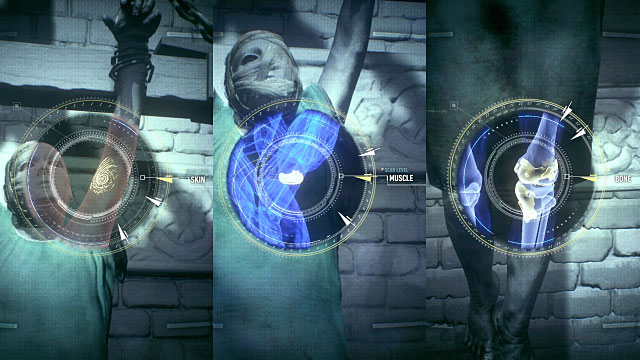
Second corpse can be found on the roof in the central part of Bleake Island, northeast from clock tower (picture 1).
Use the scanner and localize the zones shown on the picture 2:
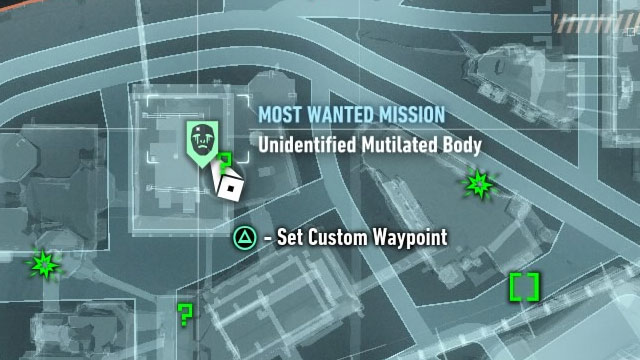
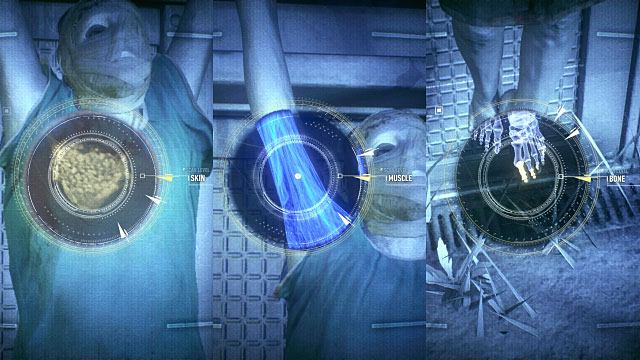
Third body can be found in the northern part of Miagani Island (picture 1).
Use the scanner and find the zones shown on the picture 2:
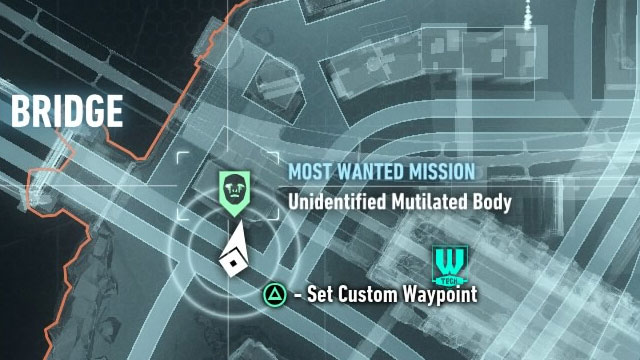
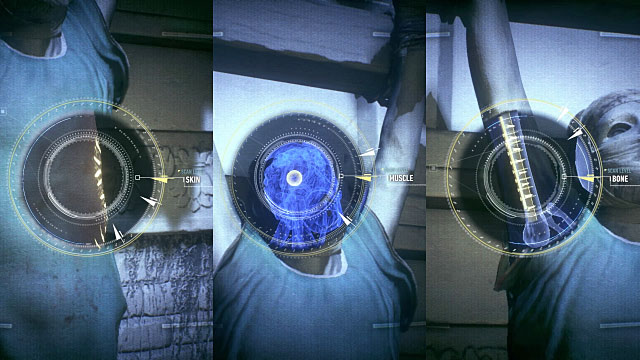
Fourth body can be found in the western part of Miagani Island, near the Salvation Bridge (picture 1).
Use the scanner and find the zones shown on the picture 2:
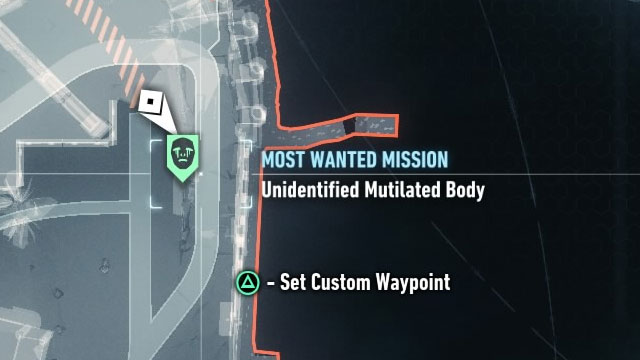

Fifth body can be found in the eastern part of Founders' Island (picture 1).
Use the scanner and find the zones shown on the picture 2:
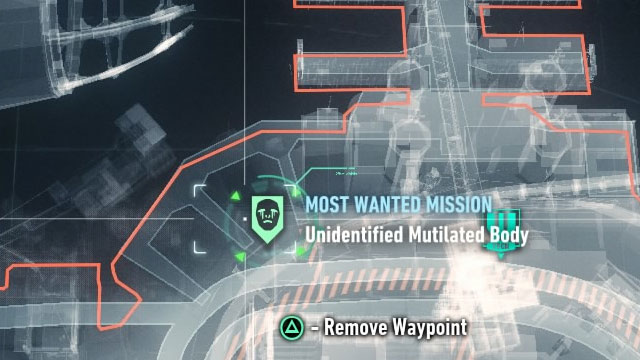
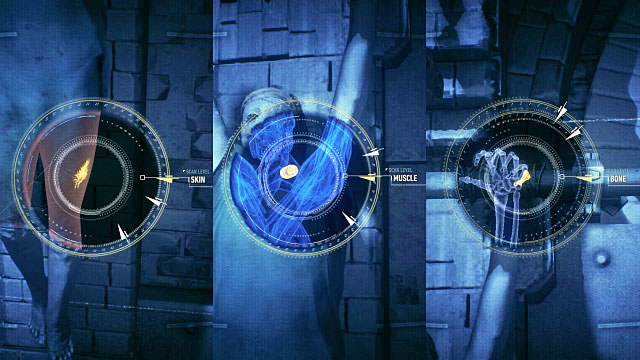
The final, sixth corpse can be found in the northern part of Founders' Island, near Stagg's airships (picture 1).
Use the scanner and find the zones shown on the picture 2:
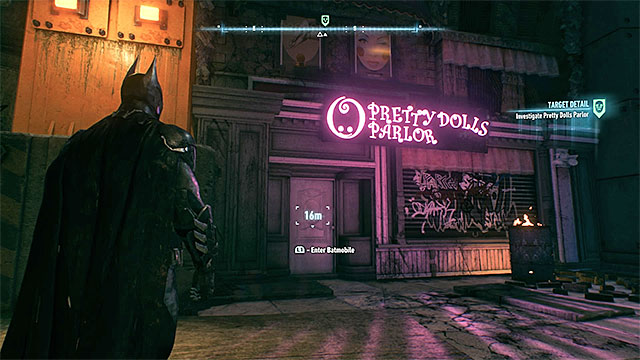 Entrance to the parlor
After investigating the sixth victim listen to another conversation with Alfred. You will be pointed to the Pretty Dolls Parlor south from the place where you found the last corpse. Once you reach the destination, leave the Batmobile and go towards the small entrance to the building. Go to the back and use explosive gel to destroy the weakened wall. Your objective is to reach a large, round operation room. There you will meet professor Pyg.
 You must perform ground takedowns on Pyg's patients
First you must fight patients of the mad doctor. It might be tricky as regular attacks cannot eliminate them for good. The only way to permanently get rid of an opponent is to perform ground takedown on him after he falls to the ground. You must remember that performing the finisher takes some time and can be cancelled by other enemies. Because of that, you should activate the takedown only when you're standing near an isolated knocked down enemy.
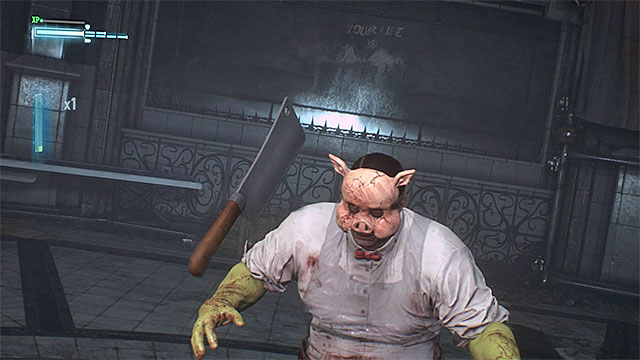 Throw back the cleavers thrown at you by Pyg
After you eliminate the first group of patients, professor Pyg and a new group of his minions will join the fight. During this battle, you should ignore the Pyg for most of the time and react only if he throws cleavers at you. Once that happens, press the counter key/button in order to block his attacks and throw back one of the cleavers. Focus only on performing takedowns on new patients during the rest of the battles. As earlier, try to pick only single enemies that are away from the main group, it will reduce the probability of failing the finisher.

Take interest in professor Pym only after you get rid of all the patients. Wait until he throws another cleaver at Batman and perform the counter to throw one of the weapons back to its owner. Once Pyg is temporarily stunned, run towards the operating table highlighted in blue (picture above) and perform the takedown on the enemy - it will automatically end the battle.
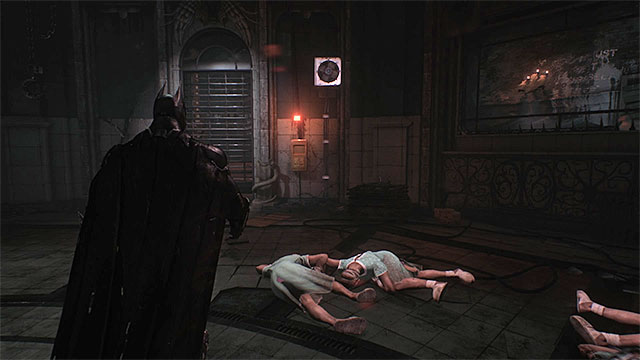 Break into the fuse box
Before you leave this location, find a fuse box on one of the walls. By breaking in you will free the hostages that were held in the upper cages. After that, pick up the unconscious professor Pyg. All that you have left to do is driving him to the GCPD lockup. The mission will end there.
This mission unlocks automatically later in the game. You will be able to complete it after receiving the Investigate the unusual seismic activity on Miagani Island main mission. While talking with Alfred through the radio, Batman will learn that connection with Lucius Fox has been lost and that he should check why it happened.
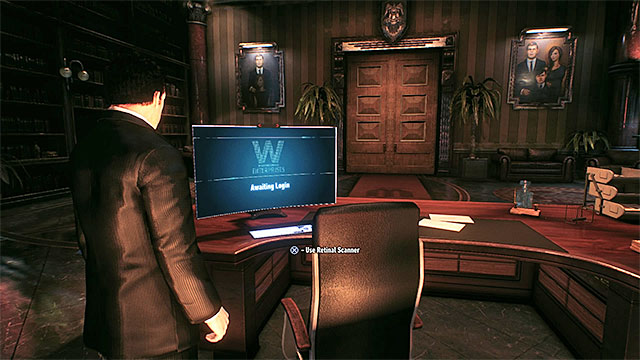 You must try to use Wayne's computer twice
Drive in the Batmobile to the Wayne tower. Use the underground parking entrance. Stop near the elevator and use it to reach the office in the highest floor of the skyscraper.
During the next few dozens of seconds you will play as Bruce Wayne. Listen to the conversation with Clara, walk to the main office and interact with the computer. Trying to access the computer system will fail. Wait until Lucius Fox enters the room. Try to use the computer again. You will deduce that an identity thief, Thomas Elliot, has been posing as Bruce Wayne.
As Batman, go to the office in which Elliot is keeping Lucius Fox as hostage. You must disarm Elliot when neither the life of Batman nor Lucius are in danger. More specifically, wait until Elliot decides to aim at Batman (picture above) and QUICKLY press the counter key/button. This very short mission will end after listening to the conversation with Lucius.
This mission unlocks rather early in the game. After completing the main task Investigate the crash site (checking the crash site of the vehicle in which captured Oracle was moving) Batman should ask Alfred for current progress in the topic of wanted criminals. You will learn, among other things, about a suspicious character standing near a burning bat sign on the roof of one of the buildings in Grand Avenue district on Miagani Island.
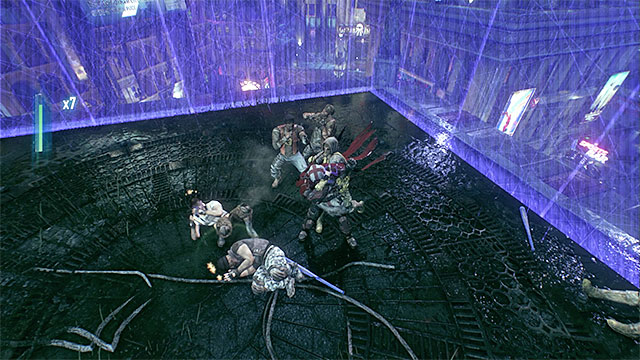 You can't allow Azrael to receive any damage
After reaching the marked location in Grand Avenue district, you will learn that Batman was summoned by Azrael who wants to become his successor. Batman will first want to check Azrael's combat skills - there are four trials to complete.
After finishing the conversation the first trial will start. You will control Azrael. He has almost the same abilities and gadgets as Batman. The main impediment during the battles with bandits is the fact that YOU CAN'T receive any damage. Because of that, avoid unnecessary risks and perform perfect counters. Once you win the battle, listen to the conversation with Batman about new trials.
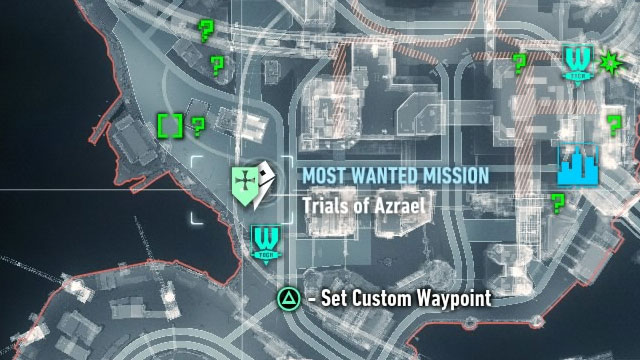
You must find the places where you participate in further trials on your own, by finding burning bat marks on rooftops. New bat mark can be found in the place shown on the picture above - in the central part of Founders' Island, not far north from Adams port.
During the next Azrael battle you will face not only common bandits, but elite opponents as well. Watch out especially for the large enemy whom you must first stun and then perform a beat down on him. Additionally, watch out whenever enemies will try to throw a large object at Azrael - when that happens, jump to the sides or throw the items back (counter button).
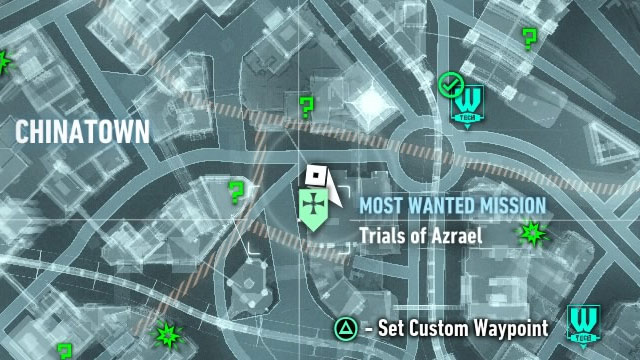
Another burning bat sign can be found on the roof in the Chinatown district on Bleake Island. Talk with Azrael and participate in another battle.
During the new battles try to eliminate enemy medic as fast as possible because he is able to electrify other bandits. If you won't manage to stop him fast enough, then neutralize enemies that are electrified with the use of the claw (don't try to attack them in regular ways, you will receive damage from electricity and fail the trial).
Last trial takes place on a platform on a huge statue of Lady of Gotham that can be found on a separate island southwest from Bleake Island. The place has been shown on the picture above.
In this mission the only enemy type that you will face are martial arts experts. They are very challenging. Most of all, try to remain in defensive and wait for enemy to start his attack. Once that happens, perform a counter and only after that hit him with your own punches. Additionally, you must hold the counter button/key always when one of the elite enemies will start a series of melee weapon attacks (above his head you will see yellow icons instead of blue ones).
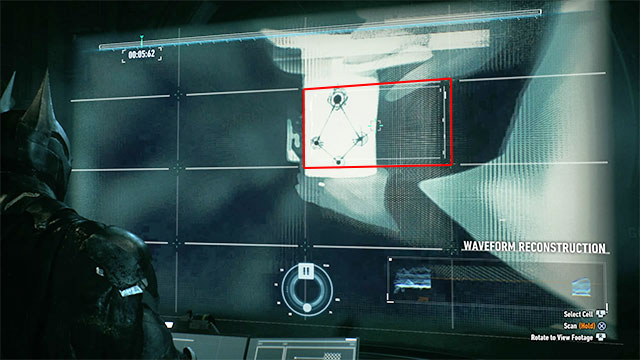
Listen to the conversations with Azrael and with Alfred, then, as Batman, go to the clock tower. There, interact with the batcomputer to start the analysis of Azrael's brain neurologic activity.
Your new task is to rewind the video material and to find specific markers that appear during some moments. First marked can be spotted around fifth second, you must select the rectangle shown on the picture above.
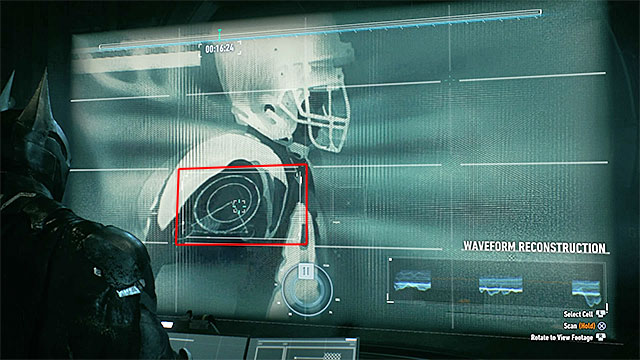
Another marker will appear around 16 second and it has been shown on the picture.
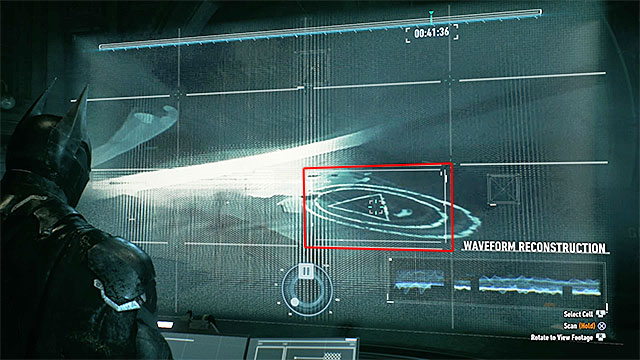
Third marker will appear around 28 second. The rectangle that you must pick has been shown on the picture above.
The last marker can be found after rewinding to around 41 second. Select the rectangle shown on the picture.
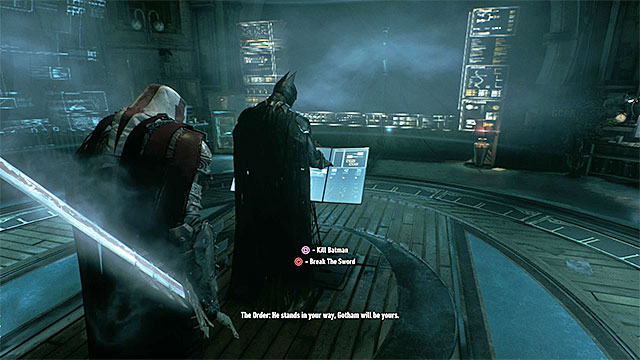 Two of three ways of acting become available after standing near Batman
After listening to a new conversation you will again control Azrael. You must decide how you will act. Three main options are:
No matter how you acted, the mission will end.
This task unlocks early in the game. After completing the Interrogate the driver of the military vehicle main mission and installing a new upgrade in the Batmobile, Alfred should contact Batman. He will inform you that Arkham Knight has mobilized his followers and that you should destroy the armored vehicles that they are using. From now on you can find and eliminate APC vehicles.
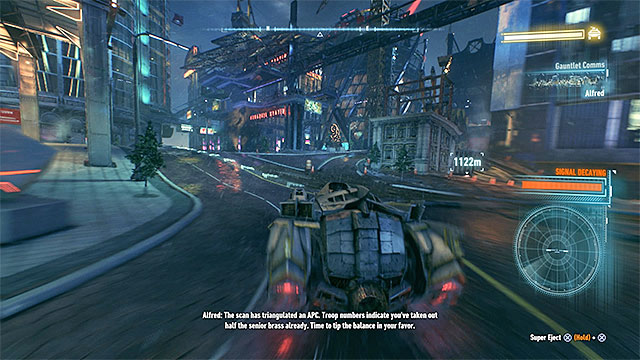 Try to get to an APC vehicle as quickly as possible to start the pursuit
There are nine APC vehicles to destroy - three in each main island of the city. The machines aren't located in one specific part of the map, they are constantly moving around it. Luckily, you don't have to find them on your own, each time when you activate this side mission (select it from the mission list) Alfred will inform Batman about the location of a new armored vehicle. You must try to get close to it before the signal will be lost, otherwise you will have to start the locating process all over again. Because of that, you shouldn't participate in any unnecessary battles during the chase. You can also use the afterburner to reach the destination faster.
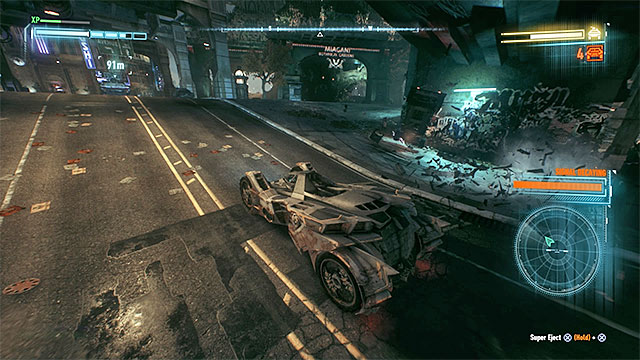 It is a good idea to push the smaller vehicles off the road
Once you get close to the marked APC vehicle, it will start running away. Additionally, the driver will call smaller vehicles to help him. At first the backup will be small, but as you progress in this mission the numbers of enemy forces will gradually increase. In the final phase of the mission it will be even 7-8 additional machines. Destroying the reinforcements isn't mandatory, but you shouldn't ignore that step as they make it much harder to get the target.
To destroy the backup vehicles you can use the standard drone hacker, but two other methods are very effective. Side swipes are especially useful if you activate it when the enemy machine is driving parallel to Batmobile. A single proper attack can lead even to destroying enemy forces vehicle. Additionally, consider using the electromagnetic explosion which can stop a whole group of vehicles at once.
 Use the drone hacker on the chased armored vehicle
Attack the armored vehicle once you get rid of his allies. The best weapon against it is the drone hacker - each hit will deplete the energy bar shown in the upper right corner of the screen. In the meantime, dodge with the use of Batmobile's engines to avoid enemy machine's attacks.
The methods described above must be used on all nine vehicles. What's important, after destroying a vehicle you must ride far away from its wreck and wait for few moments. Only after that the mission becomes active again and you will be able to pick it from the task list so Alfred will tell you where you can find the next APC vehicle.
The mission unlocks very early in the game. During your first visit in GCPD lockup Batman will meet with officer Cash and will learn about missing firemen from the fire station number 17 from him. They must be found and, if they are in danger, helped.
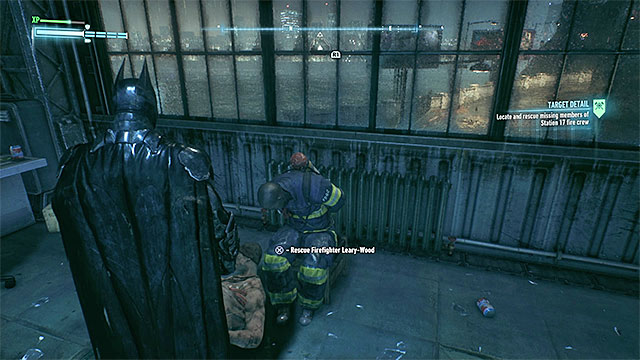 An example fireman - you can free him only after taking care of nearby bandits
The mission consists of two parts. First you will have to save fifteen firemen - six of them can be found on Bleake Island, five on Founders' Island and four on Miagani Island. Then you will have to find and free the fire chief. The game will help you in finding 1-2 firemen but you must find the rest on your own. You can use the detective mode while traveling through the city and look around for larger bandit groups or (a better idea) use the maps shown below.
Each time, you must take care of all the bandits bullying the imprisoned firemen. Once you secure the territory, you can free the hostage. Depending on the situation, you should take enemies out from hiding or participate in direct combat. No matter the circumstances, you won't be able to use the Batmobile. More detailed information about finding and saving specific firemen can be found further in the description of this mission.
Point 1: Fireman Cannon - You must take care of a group of bandits standing at the back of the building at the water. Before you start the battle, try to use the jammer to sabotage the guns and (if it's possible) the taser used by three of your enemies. Once the battle starts, watch out especially for enemies with tasers and for enemies with shields who must be stunned with the cape and stomped.
Point 2: Fireman Leary-Wood - Five bandits with firearms can be found near the imprisoned fireman. First, eliminate the two enemies patrolling the zone. Then, land on the roof of the building with the hostage and get inside through the glass ceiling. Activating fear takedowns will let you easily eliminate the three remaining thugs.
Point 3: Fireman Ashley - Similarly to previous battles, before you decide to attack them, use the jammer on the bandits with guns. Additionally, watch out for the enemies with knives, hold the counter button/key when they start to attack.
Point 4: Fireman Adamson - The fireman is guarded by six bandits. Defeating them shouldn't be hard as there are no elite enemies among them.
Point 5: Fireman Wyatt - You must secure the pier. You will face six enemies with guns there. Stealth approach is recommended, it will make it much easier to complete this phase. Start with the bandits patrolling the pier and, once you deal with them, focus on enemies standing near the hostage. You can take care of them by, for example, jumping through the shaft and activating the fear takedowns or by spraying and detonating the explosive gel on the nearby weakened wall.
Point 6: Fireman Norman - You must neutralize the group of bandits standing near the water. As always, use the jammer on the enemy with firearms. Once the regular battle starts, watch out for the strong opponent, you must use beat down on him. Also, watch out for thugs with shields, you must stomp them.
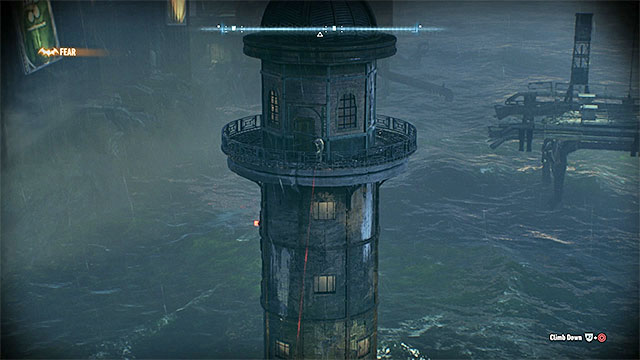
Point 1: Fireman Scott - The location is well guarded by bandits, so you must be very careful. Start with eliminating the sniper shown on the picture above, he can be found at the lighthouse (fly towards it from other side and attack him from the back). Additionally, try to find the enemy that blocks detective mode quickly, otherwise you will have to watch yourself much more when finding and surprising the enemies. There are seven enemies to eliminate there.
Point 2: Fireman Bliss - Ten enemies can be found there. Once the battle starts, try to stop the thugs from reaching the ammunition boxes, otherwise they might prove to be troublesome. Also, remember about using the beat down on stronger opponents.
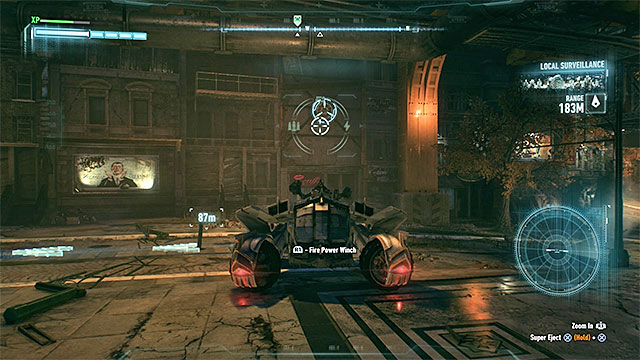
Point 3: Fireman Lozar - Reaching the imprisoned fireman isn't easy as the bandits are located inside the building. Explore the territory East from the marker on the map - you must find the interactive hatch shown on the picture above and use the Batmobile's winch on it. Pull out a fragment of the wall and then go to the newly unlocked door.
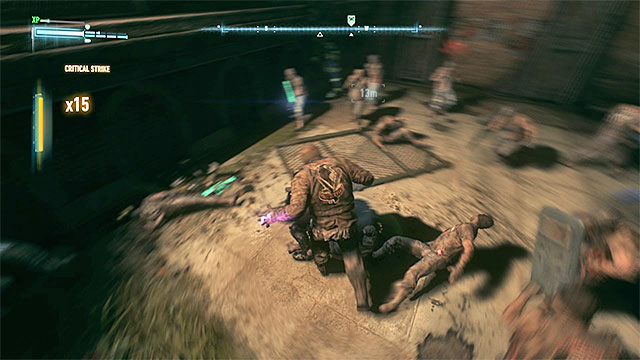
It's not the end of the trouble as defeating the enemies will be very hard. Before the battle starts, try to sabotage the weapons of some thugs and the separate ammunition box. Once the fight begins, be especially cautious of the electrified larger thugs - one of them has been shown on the picture above. To defeat those opponents, first you must use the EMP on them. Then, after removing the electricity (temporarily!) stun them with the cape and use the beat down (try to eliminate each such opponent in one long sequence of attacks). In the meantime, watch out for other opponents, especially for bandits with shields and for enemies throwing objects from their surrounding.
Point 4: Fireman Wilson - This location is occupied by a strong group of bandits. Similarly to previous skirmishes, first use the jammer on weapons and ammunition box. During the battle, watch out for three larger thugs.
Point 5: Fireman Taylor - There are eight armored bandits in the port. It is recommended to act from hiding. First eliminate the opponents patrolling the port. Then reach the roof of the building with the hostage. Jump to the room and activate the fear takedowns.
Point 1: Fireman Green - A group of armored bandits can be found around the fireman. Sabotage the weapons of some of them with the jammer and then attack them from above. Quickly jump towards the enemies and don't let them use the firearms.
Point 2: Fireman Hill - Nine bandits can be found near the imprisoned fireman, but you must watch out only for the one that has a gun. If you want to, you can start the battle with the fear takedown - it will make it easier for you to win.
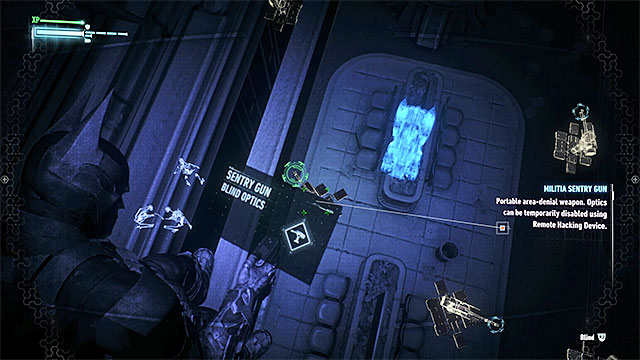
Point 3: Fireman Richardson - You must be careful as many defense turrets can be found nearby. Since the attack ranges of most of them overlap, you must plan your attack thoroughly. Get above the turret shown on the picture above. This turret is observing three bandits and the hostage. Hack it with the remote hacking tool and after that jump down to participate in the battles. During the new battle, try to remain close to the hacked turret to avoid finding yourself in the range of other devices. Before you free the fireman, don't forget to destroy the turret (you can leave the other ones).
Point 4: Fireman Daniell - The captive fireman is surrounded by a large group of bandits. Sadly, most of them have firearms. Try to use the jammer to block the weapons of at least some of your opponents and then perform a surprise attack. Try to effectively jump between targets so that you won't need to use the smoke bombs or run away from the battlefield.
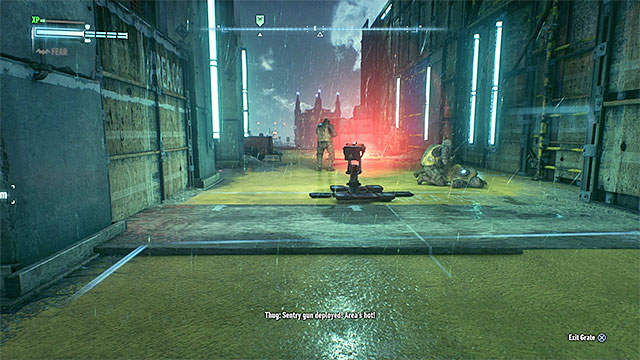 Enemies can place turrets or mines and use grenades
You will learn about the whereabouts of the imprisoned fire chief from the last fireman. You must go to the CityVision building located in the northern part of Founders' Island. Once you reach the destination, use detective mode from safe distance. You will learn that there are sixteen armed bandits there.
Stealth approach is recommended here - use the detective mode to find single enemies, sneak up on them from the back and perform silent takedowns. If possible, avoid any "invasive" methods (such as fear takedowns or explosive gel) - alarmed enemies will place mines and defense turrets. Additionally, enemies will start throwing grenades to the ventilation shafts.
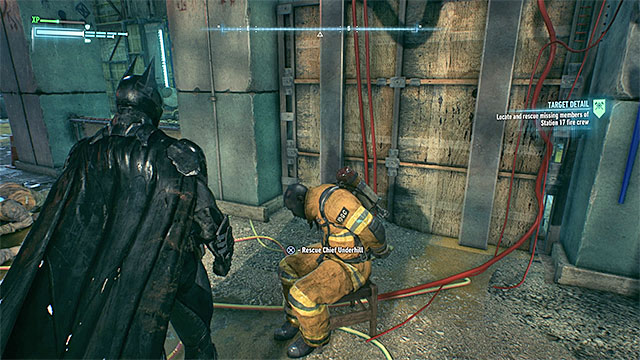 Get to the chief after you secure the territory
Keep eliminating enemies until only larger groups remain. Only then you should switch to more aggressive methods of operation. Once the area is secure, find the imprisoned chief Underhill. During the conversation with him Batman will determine that he is responsible for the arsons. Because of that, final action of the mission is driving Underhill to GCPD lockup.
This mission is unlocked during completing the main plot of the game. After completing the main task, Taking Ivy to the Botanical Gardens, Alfred should contact Batman and inform him about an ongoing bank robbery that Harvey Dent's (Two-Face) people are responsible for. You will be able to stop them from taking all of the valuables.
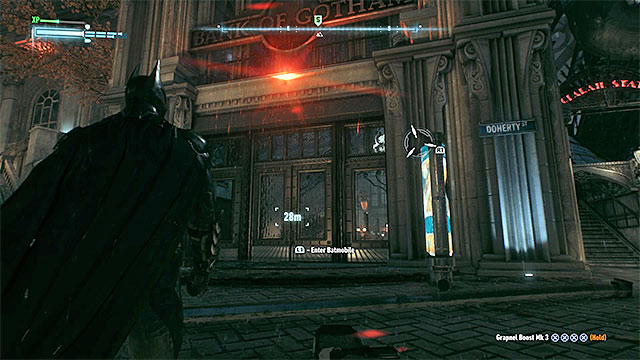 Get inside the bank to start the elimination of the Two-Face's subordinates
The bank that Two-Face's people are robbing is in Chinatown. After getting there get out of the Batmobile and get inside the building. The game will show you a short movie about the current state of affairs. You need to hurry and take down any eight bandits (there will be a bigger number of your enemies in the bank) before they steal 100 million of dollars. The condition of the treasury is shown on the top bar and you can't let it get to zero.
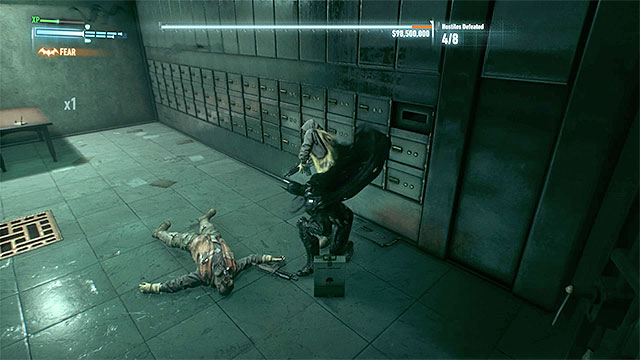 Aggressively stun one enemy after another, if you are noticed quickly run away and help yourself with the smoke grenades
As you are racing against time, you cannot allow yourself to act slowly. You need to play aggressively, but of course you cannot forget that the enemies have firearms and they can quickly deprive Batman from all of his health points. As far as choosing the next person to attack is concerned, remember that you don't need to attack those who are taking the money to the garbage truck. Just choose the easiest aims.
According to a given hint, the howling alert can deafen the majority of Batman's attacks. Often choose the elimination of the single enemies in grapple, especially when you have the opportunity to finish them off when they are temporarily stunned and on the floor. Rely on the Batman's gadgets more than ever, for example on the batarangs. Apart from that seek the occasion to use inverted takedowns at the observation points, to get through the glass roofs and to use the fear takedown. When using the last ability, firstly get close to the group of two or three enemies, and then use it.
 Get rid of the rest of the enemies (without a rush) by using detective mode
The neutralization of those eight bandits will not end the scene in the bank, as you will still have to fight some more bandits that are in the building, and there should be five of them. The bad news is that, in the meantime, the alarm has been switched off, therefore you need to plan your moves in some hiding places (use observation points and ventilation shafts). The good news is that you don't have to race against time anymore. You can slowly plan new ambush (using the detective mode is advised).
After securing the bank, stand next to the blocked exit and wait until Batman speaks with officer Cash. Then you can leave the bank.
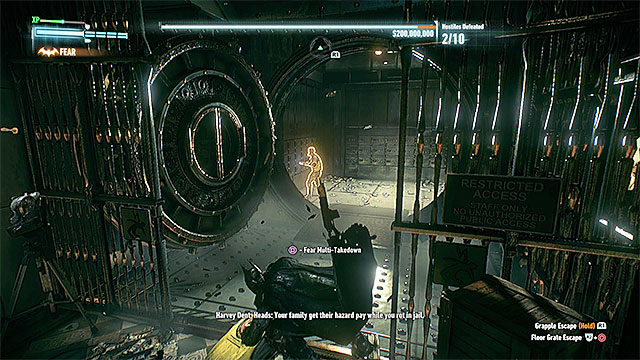 Knockout 10 randomly chosen bandits before they finish the robbery
Activate this task again and go to the attacked bank in the Drescher district. The pattern of the actions is identical as in the building before, thus you need to finish two scenes inside the building. In the first part, your task is to neutralize ten bandits before they steal 200 million dollars. Just like before you can't linger. Locate single enemies and perform quick takedowns or get closer to bigger groups and eliminate them, for example by using fear takedown.
After stopping the robbery eliminate remaining enemies. In total there should be eight of them, and as you don't need to race against time, plan your attacks very carefully. As you know already, you can, for example, use observation points or ventilation shafts. After stunning all the enemies, wait until Batman speaks with officer Cash, after that he will be able to leave the building.
 Quickly eliminate next enemies, as in a limited amount of time you need to eliminate 15 of them
The third and the last bank is in Kingston, you will get directed there after you have activated that task again. This is the biggest challenge so far. Firstly, you need to neutralize 15 bandits before they steal 300 million dollars. You need to hurry even more and risk with undertaking aggressive actions, especially because the robbery will be going very smoothly and bandits will be delivering the money to two different garbage trucks. Just like before, use Batman's gadgets or fear takedown.
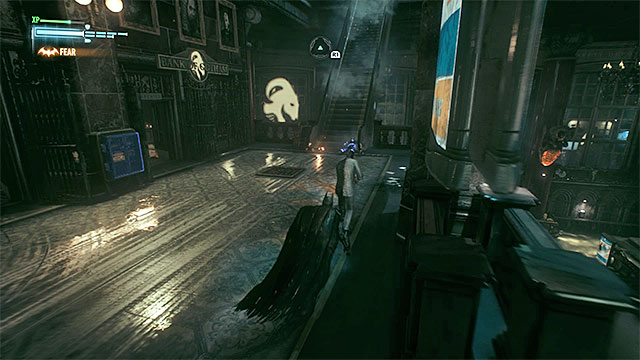 Firstly eliminate Two-Face's guards then attack him
Two-Face, together with a new group of bandits, will show up after you've stopped the bank robbery. Ignore the main enemy at first and focus on his subordinates. Don't try to use the detective mode here, as your enemies have devices that can block it and that can detect the attempt to use it. Firstly get rid of the medics and then neutralize the enemies as you wish. Try to attack from the hiding place by using silent takedowns and use the observation points and ventilation shafts.
Take care of Two-Face when he is the last one in the bank. You don't need to try too hard, it is enough to sneak upon him from behind and use the usual attack by surprise. If you get seen, run away as fast as you can, because Harvey uses a very good gun. At the end of the mission you need to take Two-Face to GCPD Lockup.
You need to unlock this task on your own request, fortunately it is not a complicated process. At any moment of the game go to the Miagani Island and start pulling yourself up to the roofs of the nearby buildings by using the hook. After one of those actions Batman will have an unexpected encounter with a winged monster, which looks like a huge bat, and that will lead to adding a new mission.
 The detective mode is the best way to locate the winged monster
At the beginning of this task you need to locate the flying beast. In order to do that, you need to get to the center of the Miagani Island, bounce off the roof of one of the buildings and glide above the area. The loud squawk of the monster will help you locate it, as it will get louder when you get closer to it. What is more, use the detective mode as it will make the monster more visible to you.
 Use the gliding option in order to get closer to the monster while flying
After you've located the winged monster you have to get close enough to it so that Batman can catch it while still flying. In order to get closer to it, you need to use the hook to catapult Batman and to increase his flying speed. Glide towards the beast. After you've got close to the beast, the short video about catching a monster and getting its blood sample will turn on automatically (you don't need to interfere in any way).
 A computer in Langstrom's laboratory
Listen to the conversation with Alfred, then go to doctor Langstrom's laboratory, which is located in Chinatown district on the Bleake Island. After getting there, get inside the building and use the elevator. You can watch the movie, which is displayed on the wall (this is optional). The most important thing is to examine the corpse of Francine Langstrom and to interact with a computer that belongs to a scientist, who turned into a huge bat.
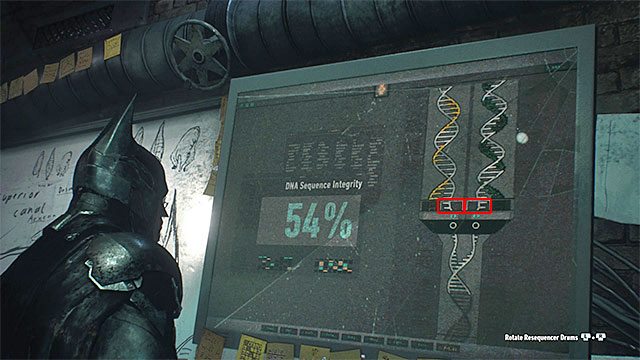
There is a simple riddle to solve here. Depending on the needs you will have to either use one or two analog sticks (or suitable keys) to turn the DNA chains. You have to make sure that "clean", white chains are going through the rectangles that are on the picture above. After you've done it properly, the percentage of integrity will increase - it has to reach 100% for you to get the medicine.
 At every time locate the flying monster and get close to it while still flying
The last part of that mission is very simple. Get out of the laboratory and start gliding above the central part of Bleake Island. Use the detective mode again in order to find the winged monster and get close to it while still flying. Batman will catch the creature and inject the medicine to it, but the final result won't be sufficient.
Next, get to the northern art of the Founders' Island and locate the winged monster for the last time. Use the gliding again in order to catch the monster and inject it with the medicine. All that is left for you to do is to take the monster to the GCPD Lockup and put it in the doctor Langstrom's (who, in meantime, will gain his human form back) solitary.
The first time you fight Arkham Knight will be at the beginning of the main story, when you rescue the lost workers at ACE Chemicals. When going back with one of the workers, you will be stopped by the villain, who is controlling a flying machine.
 Move away from the red circles before they Arkham Knight attacks.
At the beginning of the battle, don't bother attacking the flying machine controlled by Arkham Knight. Instead, focus on destroying all the tanks on the square. Besides avoiding their attacks, you also need to watch out for the flying machine. The game displays circles on the ground, which mark the area when missiles will explode. Just like in the case of tanks - red color means that you're in trouble. Move away from the spot and use dodging engines to do it quickly.
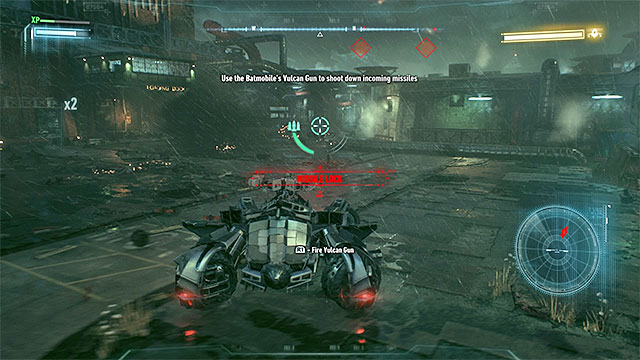 Use Vulcan Gun to destroy enemy missiles approaching you.
After you deal with the tanks, Arkham Knight will shoot several missiles directly at the Batmobile. To avoid being hit, destroy them on the way. Use Vulcan Gun to do that.
 Attack the flying machine and avoid being hit.
After you avoid the first attack, start damaging the machine. Its energy bar can be seen in the top-right corner of the screen. You can lower the bar by shooting from your 60mm cannon. It is very important to constantly move from one place to another and to use dodging engines, because Arkham Knight will perform his attacks regularly. Shooting the machine down will end the fight.
The duel with Albert King occurs in the course of the main story. He is one of the Joker Infected whom you have to apprehend once more during one of later visits in Panessa Studios. He is located in the sound stage A.
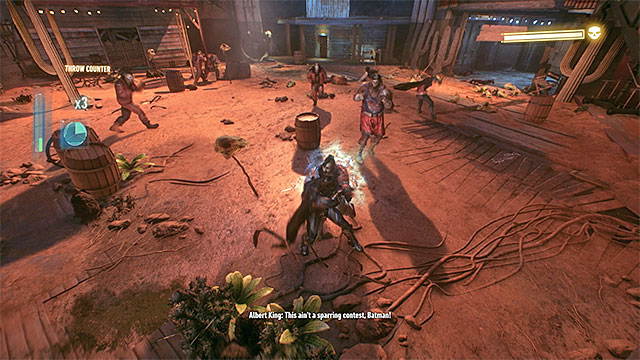 Keep attacking ordinary thugs to stack up the score multiplier
A duel with a mini-boss, Albert King, awaits you. He is not difficult to beat, although you have to follow a few step procedure to gradually lower his health bar displayed in the right top corner of the screen. After you start the combat, do not try to attack King and if possible stay away from him, so to avoid getting Batman or Robin hurt. Instead, focus on his thugs, jumping from one to another to increase the multiplier.
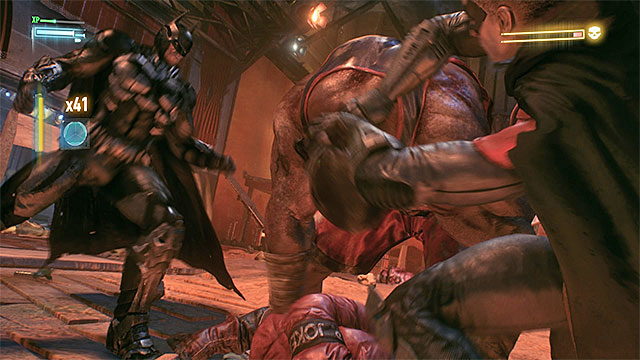 Let Batman and Robin perform quick strikes after launching a Team Attack
Keep hitting the ordinary bandits until you can launch a Team Attack. Use this as soon as possible - the attack will be automatically aimed at Albert King. Repeat these steps, i.e. knock down the ordinary thugs and perform Team Attacks against the boss.
In the next part of the duel, after launching a Team Attack you will be able to deliver a series of quick strikes resembling a classic Beatdown. Keep pressing the attack key/button. Be ready to counter the boss's attacks by pressing the counter button, when he tries to break free and strike you back. The duel is over when King's health bar drops to zero.
Johnny Charisma must be stopped in the course of the main story. He is one of the Joker Infected whom you have to apprehend once more during one of later visits in Panessa Studios. He is hiding in the sound stage C. This enemy has no health bar and beating him does not take a standard fight. Instead, you have to use a trick to catch him again.
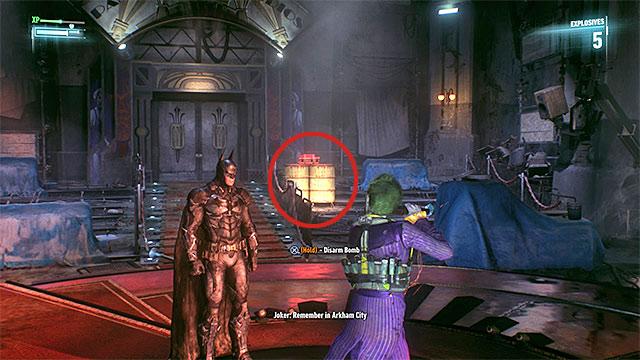 The first of the bombs that you have to disarm
Enter the stage where Johnny Charisma is. At this he starts singing as the Joker. The stage itself starts rotating slowly. You cannot attack Johnny as Batman, because he has armed five bombs and is wearing the sixth one. Instead, take control of Robin, who appears in the background. As Robin reach the first bomb, hide behind it and hold the correct key/button to disarm it.
 Disarm the bombs when Johnny Charisma is looking away
Now you have to move Robin to the right. It is VERY IMPORTANT that you leave cover only when Johnny Charisma is facing you away, so he did not spot Batman's ally. Each time you get to another bomb hide behind it so not to get spotted while disarming it. There will be no way of hiding in the case of the third bomb, so you need a good timing to disarm it and hide again before the stage makes a full turn.
 You have to neutralize Johnny using Takedown
After disarming all five bombs take Robin toward the stage where Batman and Johnny Charisma are. Sneak up to the villain from behind and press the Silent Takedown key/button. Robin will disarm the bomb that Johnny Charisma is wearing and then easily stun him.
The second encounter with Arkham Knight starts later in the main storyline. More specifically, it happens once you receive the main quest related to destroying the Cloudburst tank he controls on the Bleake Island.
 Plan your attacks on Cobra tanks carefully so that you won't get caught by other enemies
Once you reach the island, you can't immediately attack the main target because, in addition to the Cloudburst tank, there are six Cobra tanks in the neighborhood as well. Eliminating the Cobras temporary takes the priority and while you're doing it you must avoid the vehicle controlled by Arkham Knight. Bleake Island is quite large, so you can carefully plan your next moves (observe the mini-map). Wait for one of the tanks to get away from the others, drive to its back and shoot a rocket into its exhaust. Repeat this tactic until only the Cloudburst tank remains on the map.
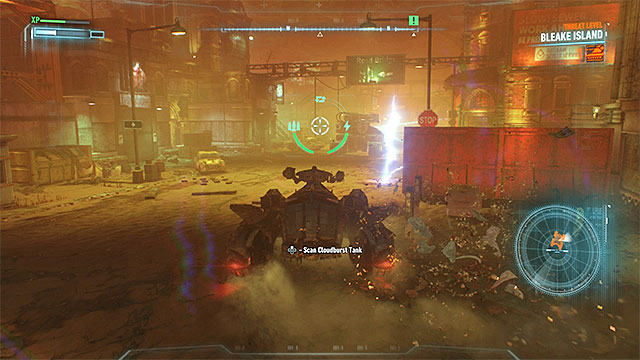 Drive to Arkham Knight's vehicle and scan it
Your next task is to scan the Cloudburst tank in order to find its potential weaknesses. The machine is by default moving slowly, but the fact that it is constantly scanning the territory around it is quite an obstacle. You can use the pursuit mode to quickly drive to Arkham Knight's vehicle or, while getting close, hide behind buildings and other obstacles to avoid being detected. Hold the scan button/key. You will learn that four cooling systems are the tank's weak points.
 Target cooling systems and destroy them
A very hard part of the battle is ahead of you. You must perform four successful attacks on Cloudburst tank without the possibility to regenerate Batmobile armor in the meantime. Each time, start with driving close enough to the tank to start the targeting process. Once it is done, use the 60mm cannon.
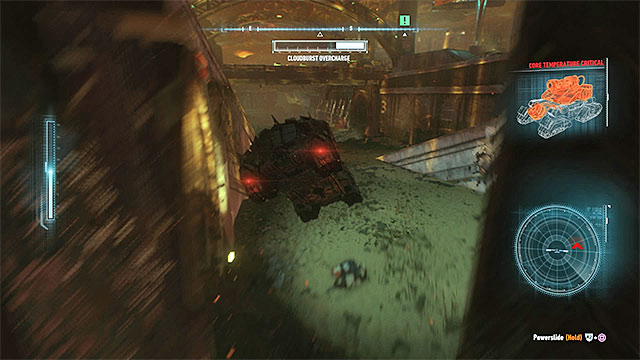 During the escape, don't stop and avoid the fire from the "overloaded" tank
JUST AFTER you shoot the missile, go back to pursuit mode and start escaping in the Batmobile. The Cloudburst tank will activate the Overload mode and will chase you. Don't stop until the system overload bar of enemy tank visible on the screen depletes. Help yourself with the afterburner and avoid dead ends where you won't be able to continue moving. During the escape you must also watch out for rockets shot by enemy tank. Try to avoid the red circles appearing on the ground.
You must repeat all activities described above three times, each time aiming at different part of the cooling system. It will allow you to get to the final phase of the battle.

Final part of the duel with Arkham Knight is also very challenging. This time you won't need to hide because you will no longer aim at any Cloudburst tank weakpoints. Instead, you will attack its central mechanism which has been marked on the picture above. Before you start attacking enemy vehicle, wait until it appears on one of the island's main streets - it is very important to have a large area of operation. Position yourself quite far from the tank and start attacking its "core" with 60mm cannon. Of course, enemy won't be helpless. Most of all, avoid its missiles by dodging the red circles appearing on the ground. Additionally, use Vulcan cannon to destroy the rockets shot at Batmobile.
The Cloudburst tank will be destroyed after more or less a dozen of precise hits. Good news is that if you fail, you will return to the checkpoint after destroying the cooling system (so you won't have to restart the whole battle from the start). Wait until Batman starts fighting with Arkham Knight and press the close combat attack button/key in order to defeat the adversary.
The third encounter with Arkham Knight takes place while exploring the abandoned shopping mall in order to find Commissioner Gordon during the main storyline. Soon after entering the drilled tunnels under the mall a giant drilling machine controlled by Arkham Knight will appear.
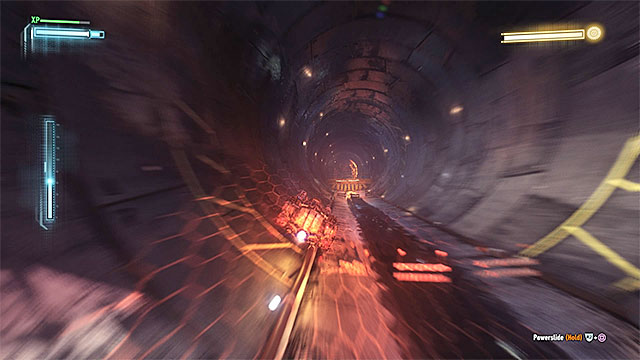 Help yourself with boost and avoid all the unbreakable obstacles
Don't try to fight the drilling machine, you can't stop it in any conventional way. What's more, if you touch it, the Batmobile will explode. Start with immediately turning around (handbrake will be helpful) and riding in the opposite direction. You will start the first of many escape sequences. During it use the boost regularly and avoid hitting the unbreakable elements of the surrounding - you can't allow yourself to waste any time.

In order to stop the drilling machine, you must outsmart your enemy. Notice the corridor with the red lines shown on the picture above. The lines lead to places where you can find explosive charges (red X marks). They will help you weaken the Arkham Knight's vehicle.
 "Convince" Arkham Knight to pursuit Batman
Each time you must force the drilling machine to chase the Batmobile. If it won't happen automatically, you can wait for the machine to appear behind you or even shoot at it from a distance.
Once the escape starts, you can't allow yourself to make any mistakes and you can't stop even for a moment - despite its large size, the drilling machine is fast and quite agile. Use the brake to help yourself in turning. Aim the batmobile at one of the "red" corridors from the picture and, after entering it, watch yourself to avoid falling on obstacles (such as barriers and fans). In order to avoid any hits, help yourself with boost and small turns to the sides.
 You must guide the drilling machine to the tunnels with explosives three times
Each time during the escape through the red tunnel, you must reach its end (the red X marks on one of the previous images). The Batmobile will easily avoid the explosives placed in the tunnel, but the drilling machine will hit them and, due to the explosion, its health bar will deplete (upper right corner of the screen).
The actions described above must be repeated with all three tunnels leading to the places with explosives. It will allow you to fully deplete the enemy's health bar. Once that happens, it will be destroyed.
 Pull out part of the ceiling and escape before the Batmobile will get crushed
Now go to the previously unavailable gate in the northwestern part of the tunnels (green X sign on one of the previous images). There you must use the winch to create a hole in the ceiling. Soon the Arkham Knight will appear there. Once you regain control of your character, press the jump button/key twice in order to catapult from the Batmobile and to avoid being crushed by the drilling machine. The duel will end after that.
Fourth encounter with Arkham Knight takes place soon after the third one, which was avoiding the drilling machine controlling by him. After returning to the abandoned shopping mall and trying to save commissioner Gordon (it's part of the main storyline), he will appear again and this time you will fight him directly, without using any additional machines.
 Use the ventilation shaft to safely get close to the boss
The duel with Arkham Knight consists of four phases. Your main objective in each of them is reaching the observation point occupied by your opponent without being spotted (he has a sniper rifle with which he observes his surroundings.
Start with activating the detective mode and examining the territory. You can't jump to any observation points that are nearby the Arkham Knight and you can't walk to him traditionally as he observes his surroundings and you could be easily targeted by him. Instead, get to the lowest level of the main room and look for the entrance to the ventilation shaft that leads to the boss.
 You must get under the ledge occupied by Arkham Knight
Walk through the ventilation shaft and use the exit under the Arkham Knight - it will allow you to get through the territory observed by him. Look at the ledge on which the opponent is hiding and pull yourself there with the grappling hook. Batman will deal some damage to the Arkham Knight and the second phase of the duel will start.
 You can temporary blind the flying drone, but most of the time it is better to avoid the machine
In this phase of the duel Arkham Knight will summon five bandits to his aid and will take control of a flying drone. Since the drone is related to the boss, you can't eliminate it completely. If left with no other choice, help yourself with the remote hacking device to temporary blind the drone, in all other situations simply avoid the territory in which the machine can be found (luckily, it moves very slowly).
As for the enemies, don't rush with attacking them, use the gadgets and the surroundings for your advantage. For example, you can attack them from the ventilation shafts, sneak up on them from behind, lure them away with voice synthesizer or stun them by spraying the explosive gel on weakened walls. Important - use the detective mode cautiously as one of your enemies has a device that can detect it.
 Reach the vertical shaft and use the tunnels to get close to the boss
Focus on Arkham Knight after you take care of his allies. Just as before, it is best to get close to the boss through the ventilation shafts. Look nearby him for a vent leading to a vertical shaft and get inside by using the grappling hook. Then, use the ventilation tunnels to get under Arkham Knight. Just as during the first phase, use the grappling hook on the ledge occupied by the boss.

Third phase of the duel starts with a time limited challenge. You must escape a room with poison gas in less than 30 seconds. Use detective mode to find the vent on the wall shown on the picture above and pull yourself to it with the grappling hook.
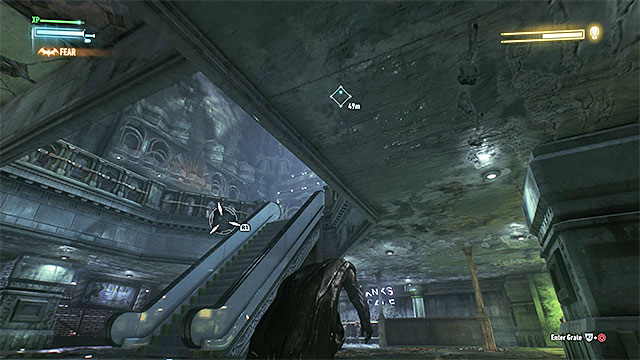 Get near the moving stairway and wait until the Arkham Knight stops observing it
In this part of the duel Arkham Knight is accompanied by six new bandits. Additionally, you must once more watch out for his flying drone. This time enemies aren't detected nor marked in different color in the detective mode. Despite that, you shouldn't have trouble with finding and eliminating them.
As previously, focus on Arkham Knight only after you take care of his backup. Use the ventilation shafts to get close to the moving stairway. Use the grappling hook to get to the higher level when the boss will look the other side. Quickly target the ledge with the Arkham Knight before he will spot you.
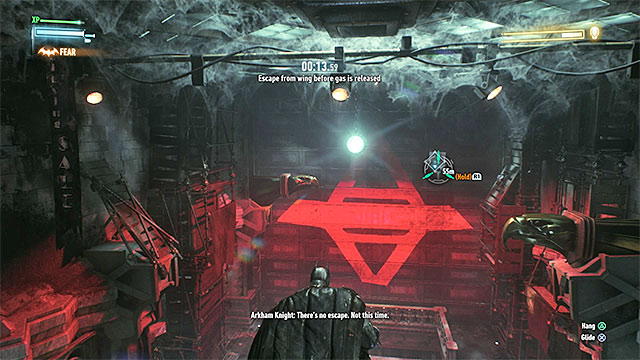 Use the grappling hook to get out of the trap
Similarly to phase three, first you must escape the room with poison gas. This time you have only 15 seconds. The bars on the wall can be spotted ahead from the place where you start.
 Hide behind the chests near the stairs
In this phase Arkham Knight will no longer have bandits to help him. Instead, two defense turrets will be placed near his position. Additionally, this time you can't use the ventilation shafts to get close to the boss.
Start on the lowest level and slowly go towards the inactive moving stairway leading to the boss. Before you use the stairs, you must perform two actions. First, blind the flying drone for 30 seconds with the remote hacking device. Second, make sure that Arkham Knight isn't currently looking at the stairs. Once you get to the higher level, hide behind the nearest chest.
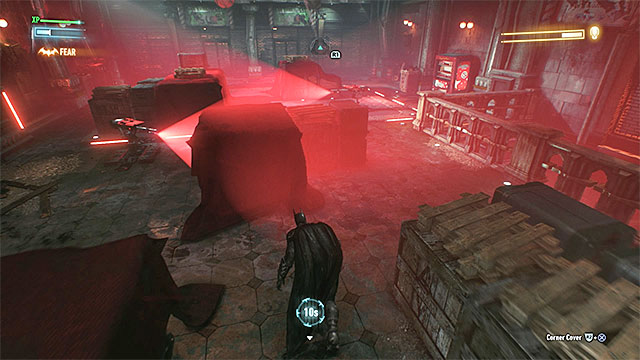
Pick the path shown on the picture above, it will allow you to get close to both defense turrets without being spotted. As before, leave the hideout once Arkham Knight will start observing the territory to the left or right from that place.
 When it is safe, pull yourself to the ledge
Position yourself near the new chest, quickly select the remote hacking device and use it to temporary deactivate the right defense turret. Now you have fifteen seconds to get to the ledge with Arkham Knight. Do it once he turns left or right. Additionally, you must check the current position of the left turret and wait until it turns the other side. If you want, you can even run towards the ledge to reduce the time when you're vulnerable. Pull yourself to the ledge and let Batman take care of Arkham Knight.
The fights against the Firefly take place during the Gotham on Fire side mission, i.e. the one concerned with fire stations that are being set on fire. In total, you need to defeat the Firefly three times, where each one of the fights is identical with the previous one. This has been described below.
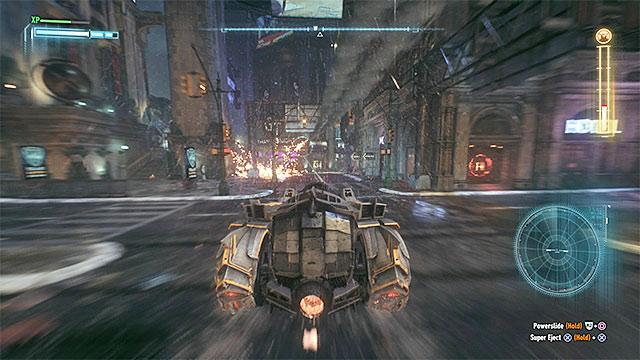 Follow the Firefly and avoid fire
All of the three encounters with the Firefly take place each time you manage to extinguish the fire of the fire station that he has set on fire. After you regain control of Batman, follow him in the car. It is not too difficult, although the opponent is deploying explosive and flaming traps on the road. Keep within the medium distance of the Firefly and remember to use your brakes for effective 90 turns.
 Eject Batman as soon as he gets sufficiently close to the Firefly (only after he runs out of fuel!)
Do not attempt laying any sort of fire on the Firefly, remain in the batmobile's pursuit mode. You need tor the opponent to run out of fuel in his jetpack (the meter in the upper-right corner of the screen). As soon as this happens, cut down the distance and wait for the message about the option to eject Batman and perform a special takedown in mid-air (double-tap the jump key/button).
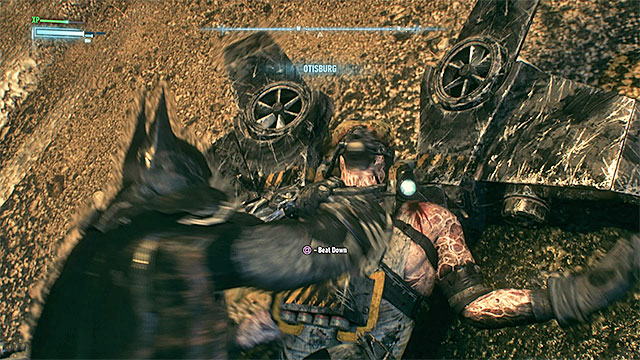 Beat up the Firefly after you catch him in mid-air
If everything went according to the plan, Batman reaches Firefly automatically. The only thing you need to do now is use Beatdown, so you need to start tapping the melee key/button.
Do the same in the case of the remaining two fights with the Firefly.
You must defeat Deathstroke after reaching the final phase of the Campaign for Disarmament side mission. What's interesting, it's not a duel during which you will use melee weapons since both Batman and Deathstroke will be using vehicles during the whole battle.
 Destroy Cobra tanks and avoid Deathstroke's vehicle
After parking the Batmobile in the marked location the battles will start. At first you should completely ignore the machine controlled by Deathstroke. Instead, focus on destroying the five Cobra tanks accompanying it. As you probably remember from the main storyline, you must carefully drive to those tanks from the back (important - they scan the territory around them from time to time!) and wait until they are targeted. A single hit should be enough to destroy a tank. Remember to get away from the place of attack immediately after shooting. If you get targeted by a Cobra, you must hide in a back alley as quickly as possible (afterburner can be helpful).
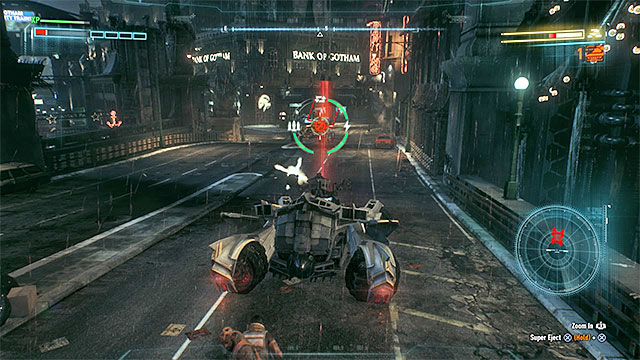 Watch out for Deathstroke's tank's attacks - use dodge and Vulcan cannon to avoid taking damage
Focus on Deathstroke's tank once all Cobra tanks are destroyed. In this case you don't need to aim at any armor's weakpoints. Once you get close to enemy machine, start the regular attack with 60mm cannon. During the assault try to avoid taking any damage from retaliating enemy. Use dodge steering engines to get away from red beams and circles appearing on the ground. Additionally, use Vulcan cannon to shoot down rockets flying at Batmobile. Deathstroke's machine isn't extremely resistant and destroying it should take around half a minute. Deathstroke will be automatically captured by Batman - you don't need to help him in any way.
The battle with Professor Pyg takes place during the final phase of The Perfect Crime side quest during which you investigate the mutilated corpses in various parts of Gotham City. You will be fighting the mentioned enemy once you reach the operating room in Pretty Dolls Parlor.
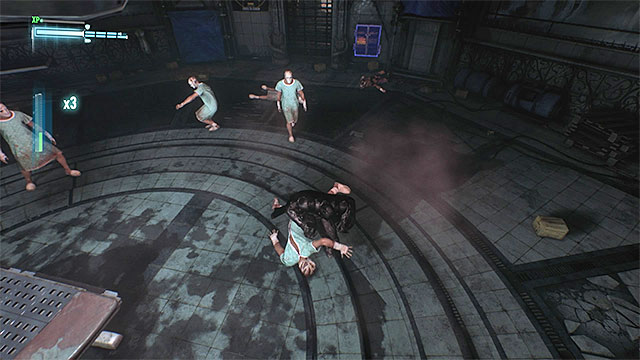 You must perform ground takedowns on Pyg's patients
First you must fight patients of the mad doctor. It might be tricky as regular attacks cannot eliminate them for good. The only way to permanently get rid of an opponent is to perform ground takedown on him after he falls to the ground. You must remember that performing the finisher takes some time and can be cancelled by other enemies. Because of that, you should activate the takedown only when you're standing near a lonely knocked down enemy.
 Throw back the cleavers thrown at you by Pyg
After you eliminate the first group of patients, professor Pyg and a new group of his minions will join the fight. During this battle, you should ignore the Pyg for most of the time and react only if he throws cleavers at you. Once that happens, press the counter key/button in order to block his attacks and throw back one of the cleavers. Focus only on performing takedowns on new patients during the rest of the battles. As earlier, try to pick only single enemies that are away from the main group, it will reduce the probability of failing the finisher.
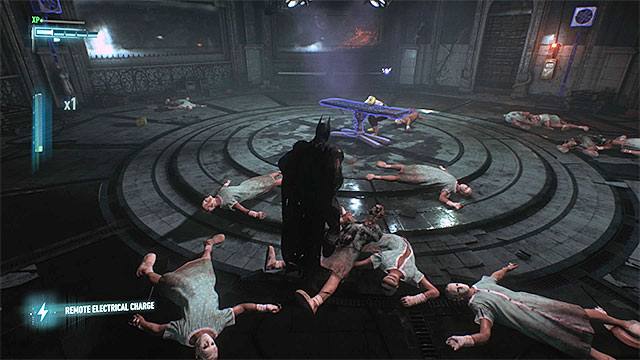
Take interest in professor Pyg only after you get rid of all the patients. Wait until he throws another cleaver at Batman and perform the counter to throw one of the weapons back to its owner. Once Pyg is temporarily stunned, run towards the operating table highlighted in blue (picture above) and perform the takedown on the enemy - it will automatically end the battle.
This unofficial guide for the Batman: Arkham Knight predominantly includes information on the whereabouts of the Riddler's collectibles, trophies, riddles, breakable objects, bomb rioters as well as solutions for all of the 243 puzzles. Description of each puzzle includes information on how to get there, which gadgets to use and what to do. Descriptions of the more difficult puzzles have been provided with screenshots, which depict the successive steps to take, in order to solve those puzzles. Additionally, this guide includes maps of all the isles within Gotham as well as the maps of interiors of all the main locations, where the collectibles are located. Apart from information on collectibles, this guide also provides you with comprehensive walkthroughs for all ten Riddler trials and descriptions of the boss fights with him (i.e. the one that takes place after you solve the tenth trial and the one after you solve the last puzzle). Also, this guide includes a separate chapter devoted to Augmented Reality (AR) challenges. In total, there are 69 of them in the game and they test, among others, your proficiency at hand-to hand combat, stealth or at driving the batmobile. This is supplemented with a chapter on trophies available in the game and information on the fastest ways of obtaining them. Batman: Arkham Knight is the next installment of the well known game series, where you get to control the Batman. Once again, you will have to face many dangerous missions, while exploring the city of Gotham.
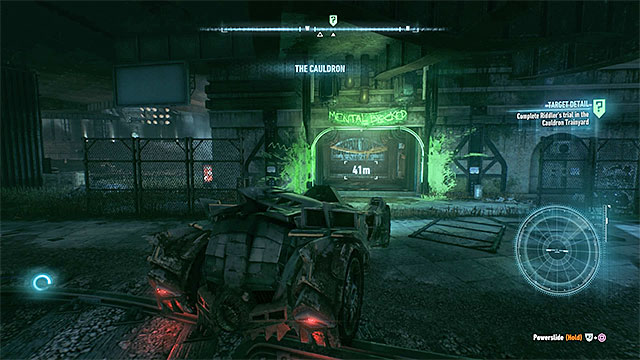
This guide has been color coded in the following manner:
Jacek "Stranger" Halas (www.gry-online.pl)
After you reach Cauldron, drive the batmobile into the green garageRiddler's revenge is one of the side missions. This is the most complex side mission of all available in the game, because here, you need to complete then trials of the Riddler. Additionally, to end this mission, you also need to find and solve all the 243 puzzles thought up by the criminal.
It is impossible to miss this mission. What is even more, during the main storyline of the game, the premises of this mission, and the troublesome situation that the Catwoman has gotten herself into, will be communicated to you. To learn more, see Find Catwoman at the Riddler's Orphanage, in the walkthrough for the game's main storyline. After you have unlocked this side mission, you can head towards the track line in Cauldron, where you need to solve the first Riddler trail. Make sure that you are driving the batmobile, drive into the garage and wait for the elevator to start.
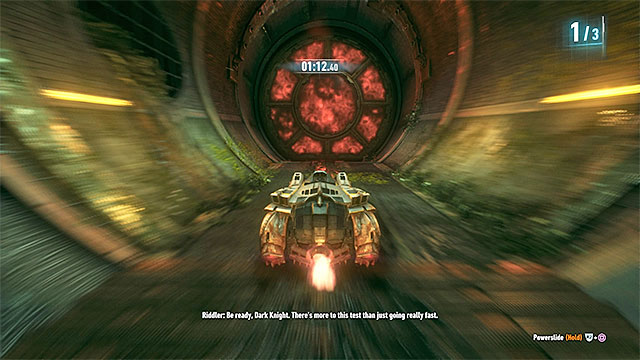 Use the Riddler blockade to deal with the obstacles in your way
To complete the first Riddler trial, you will be predominantly using the batmobile. First of all, you need to complete three time trials, where you drive through Riddler's obstacle courses. Each trial starts immediately after you have finished the previous one so, you will not have a moment to catch your breath.
After you have listened to Riddler's first speech, test the Riddler Blockade, thanks to which you can manipulate the mechanisms left by him - the interactive platforms or the mechanisms. Stop by the blockades and wait for them to be lowered, which starts the first time trial. After you start, keep using the blockade to neutralize all of the obstacles in your way. Soon, you reach a fork, where you need to go left.
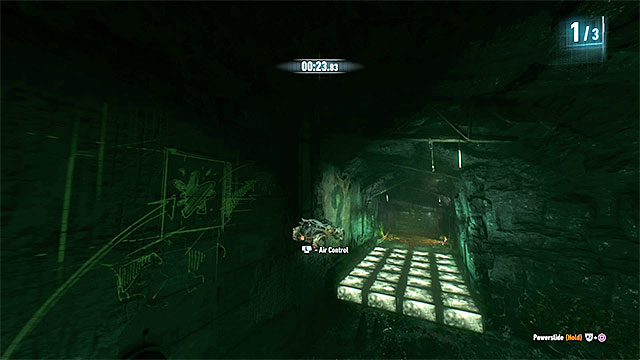 After each lap, you need to take a perfectly-timed long jump
Soon, you will have to deal with the more demanding obstacles. Use the blockade to extend the lower platform in the tunnel. In the next room, you will have to drive perfectly over the right wall and here, it is a good idea to use turbo charger, thanks to which you will not fall off the wall into the water. Towards the end of the route, use the blockade to form a big ramp. In here, activate the charge to ensure a proper jump.
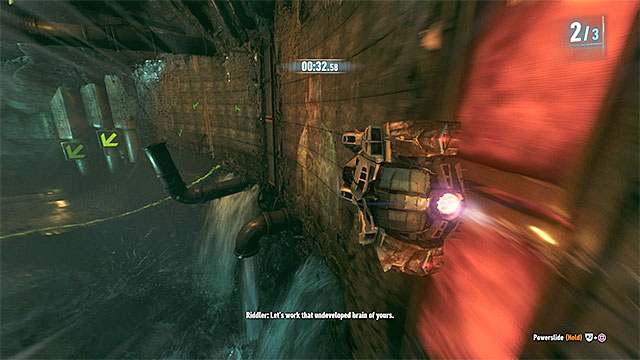 Lower the obstacle before you take another wall-drive
During the second "lap", you need to keep in mind that lowering some of the obstacles extend others. This may be a serious handicap so, try to activate the Riddler's blockade at the last moment possible. After you get to the fork, go right. Apart from the extending platforms, you also need to be careful while following narrower paths. Remove the obstacle before you drive over the right wall. Towards the end, extend the last platform to land on it, after a long jump.
 You need to reach the finishing line before time elapses
In the last, third, time trial there are even more obstacles, which are frequently placed next to each other. As I have suggested before, use the Riddler blockade at the last possible moment, thanks to which you avoid colliding with an obstacle, after you have interacted with the previous one.
At the fork, go left again and steer clear of water. Be careful while driving over the right wall, because there are two barricades there, now. Apart from that, make sure that you have extended the landing platform, towards the end. If you do not make too many mistakes, you reach the finishing line with 5-10 spare seconds.
This is not the end, though, because in order to obtain the first key for Catwoman's collar, you still have to solve an additional puzzle. Get out of the batmobile, walk onto the pressure plate and take a look at the board with lit lamps on it. The most important one is the green one. You will be able to solve this puzzle after you have switched to Catwoman. On a sort of a game board, you need to find a capsule that corresponds to the one which you have earlier seen as Batman, on the board (organization of the objects on the game board corresponds to the organization of lamps on the wall). The location of the key has been presented in the above screenshot.
After Catwoman uses the key on her collar, cut back to Batman and leave. You can now take on the second trial.
 Position the ramp in the way that allows you to reach the stable ledge above.
To start the second Riddler trial, you need to head to Chinatown. After you get there, drive into the garage and wait for the elevator to get you below. Also here, you use the batmobile, but not only that and you will not have to race against time. The plan is to reach the generator, which you can use the hoist on, and for this, you will have to use the mechanisms around you.
Climb onto the nearby elevation and use the combat mode in narrower spots. Your destination is the movable ramp. Stop on the ramp and use the Riddler blockade to deactivate the obstacle that has been blocking it. Thanks to this, you can manipulate the ramp freely. Stop in the lower part of the ramp, gain speed and use the charger to get to the ledge above.
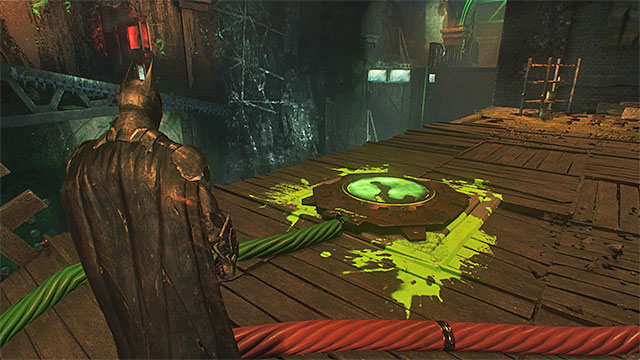
Turn right, use the blockade to extend the platform closer to you and park the batmobile there. Get out of the car and find the pressure plate shown in the above screenshot which you need to stand on. This will extend the platform in the middle. Activate the batmobile remote control (you cannot walk off the pressure plate) and drive the batmobile onto that ledge. Then, use the Riddler blockade to extend the third platform (the first one will slide back in, but this one is already behind you). Walk over that platform to reach a new stable ledge.
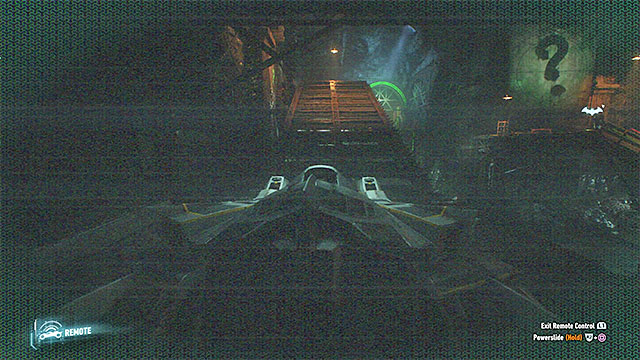 Drive onto the ramp and take a long jump
Drive onto the new movable ramp and start using the blockade to hide the blocks that are sliding out. After the ramp turns up, as far as possible, make sure that the bigger platform behind it is out (if not, use the blockade). After that, back up as far as possible, drive onto the ramp and take the charger- aided jump .
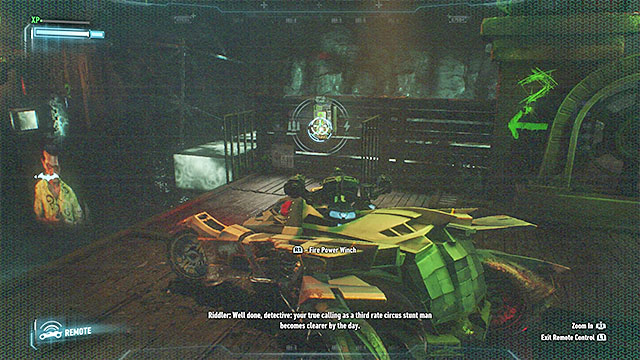 Use the hoist on the generator
You now only need to reach the interactive catch on the generator. Use the hoist on it and start revving up the engine - you need to keep the meter within the orange field.
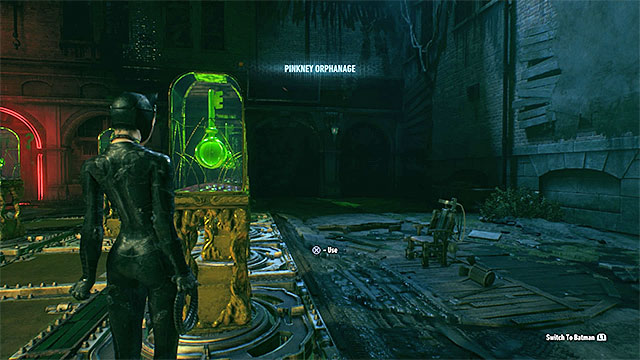
You can now return to Batman and go to the pressure plate near the panel with buttons. Just like in the case of the first trial, remember where the green bulb is, switch to Catwoman and find the corresponding capsule with the key (the above screenshot). Approach the green door now and listen to Riddler's commentary. You can now cut back to Batman and leave.
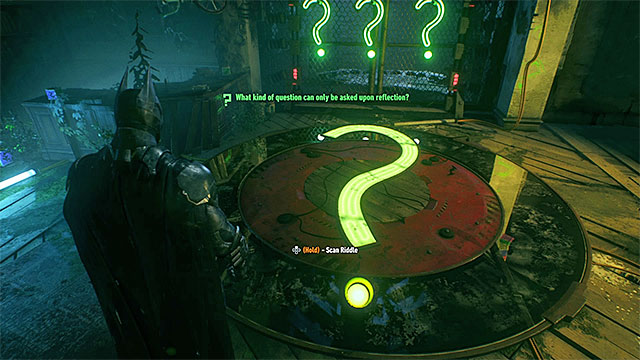
The third trail takes place in Pinkney Orphanage, i.e. where you have first met the Riddler and the Catwoman. After you get there, get out of the batmobile (you are not going to need it in this trial) and enter the building. You need to reach the room with the first puzzle to solve.
The puzzle here is about throwing the batarang at the green buttons, which will turn the circles in the flooring (each button corresponds to a different fragment of the floor). What you need to do is form a question mark this way (it should then go green), facing towards the green buttons. Stand in the spot shown in the above screenshot. To solve the word puzzle, you need to use the evidence scanner with the green question mark in front of you AND the reflection of the green lamp (the question mark's dot). Only after you have met these two requirements, scanning will be successful.
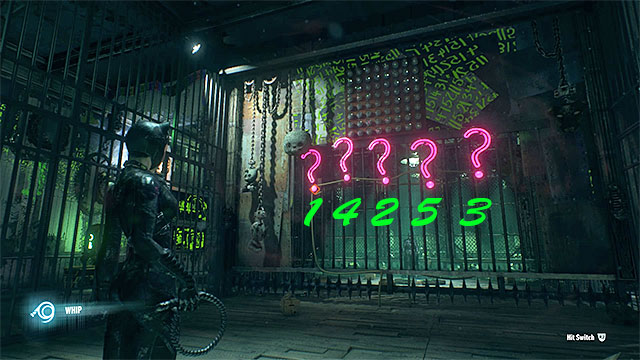
Talk to Catwoman and head towards the green door. In the next room, there is a puzzle to solve which requires cooperation from both of the characters. Start by walking onto the blue pressure plate, as Batman, and onto the pink one, as Catwoman.
As Batman, keep an eye on the figures that appear above the five question marks. They tell you the order in which you hit the buttons, BUT as Catwoman (not as Batman). Switch to her and start using the whip against the buttons, in the correct order. This has been shown in the above screenshot - start with button 1 and follow through to button 5.
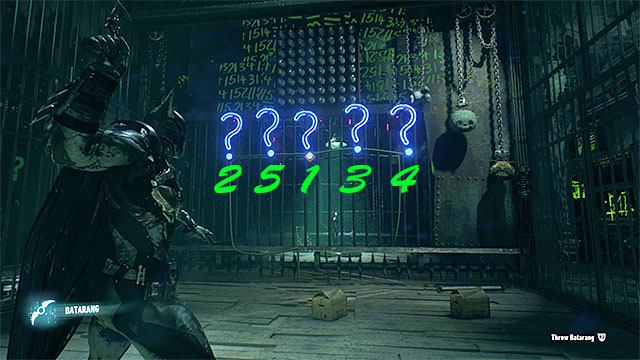
Repeat the above steps in the reverse order, now. As Catwoman, remember the digits that appear above the question marks, switch to Batman and throw the batarangs at them. The correct order has been presented in the above screenshot (start with 1 and follow through to 5).
At the end of the trial, there is a fight against 10 Riddler's henchmen. These are not too demanding and additionally, you can make things easier with team actions. Approach the shelf by the wall and collect the collar key. After you see a short cutscene, leave.
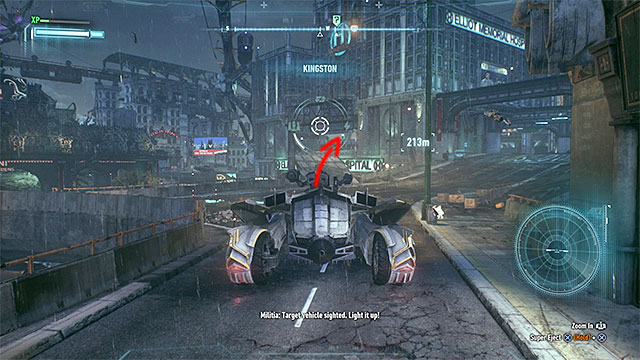
This trail takes place in the tunnels under the Elliot Memorial Hospital, where you can have some problems locating the gate to the building's underground. Do not climb to the rooftop of the hospital and explore its lower levels. Here, you should find a small square, surrounded by huge indestructible barricades. The solution to this problem is looking around the area for the ramp shown in the above screenshot. Use the ramp (with the charger) to get near the garage.
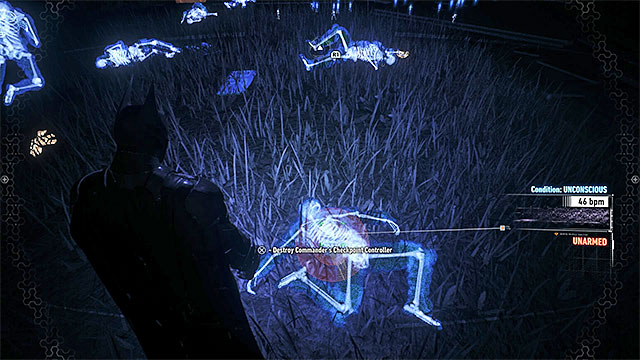 Locate the unconscious leader and search him
If you still have not completed the Own the Roads side mission, it will be possible to drive into the garage only after you have neutralized the militia outpost here. Use the batmobile to knock out all of the opponents, find the leader (it is a good idea to use the detective mode here) and smash the controlling device that you find on him. Only after that, can you drive into the elevator, through the garage gate, and wait until you get to the location of the trial proper.
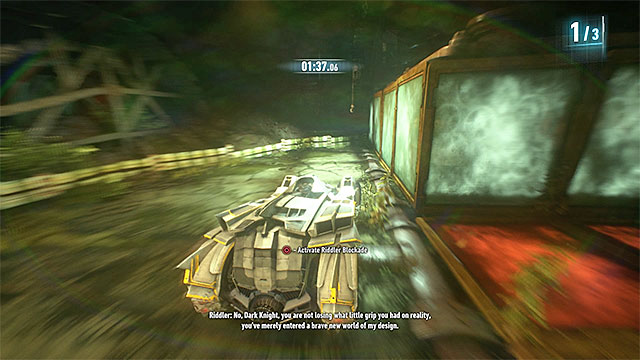 Use the blockade only when you are not over red plates
This trial is very similar to the first one, because you need to win three time trials. In this case, all three take place over the same circuit. With each successive lap, avoiding some of the obstacles will be a bit more difficult and you will also have less time to reach the finishing line.
The obstacles that you run into can be divided into two groups. The first one is movable elements of the ceiling which you need to manipulate with the Riddler blockade. It is very important here that you cannot activate the blockade while driving over red plates - at the beginning of each lap, drive into the side sections and later on, reach the safe spots. The other group is green blocks that slam into the ground on a regular basis. They are impossible to control in any way so, make sure that you drive flawlessly and steer clear of the green fragments of the track.
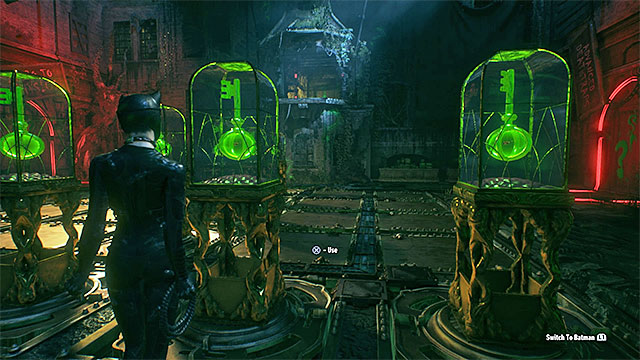
After you have won the three time trials, get out of the batmobile and go to the pressure plate. See the panel with the flashing bulbs, switch to Catwoman and find the correct capsule, basing on the panel readings - it has been shown in the above screenshot. After you have used the correct key, switch to Batman and go back to the surface.
 Eject Batman, towards the first button
The next Riddler trial takes place in Gotham Casino. Find the garage gate, drive inside and take the elevator into the underground. During this trial, you will have to use the option to eject Batman from the batmobile, which you activate by double tapping the jump key/button. Follow through and eject Batman after you reach the blockades near water. Do not release the jump button and have Batman reach the first button, opposite the starting point.
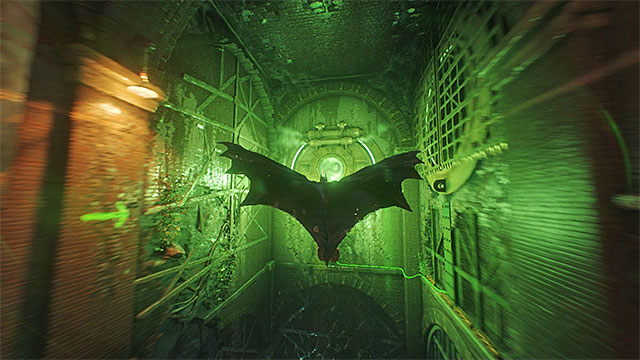 Turn right- in mid-air and glide towards the second button.
You now need to return to the batmobile, gain speed again and eject Batman. This time around, you need to turn right, while gliding (maintain the appropriate altitude). This will let you glide towards the second green button.
 Glide through the tunnel and do not touch the edges
Return to the batmobile for the last time and eject Batman. Start by gliding in the direction of the previous button. Here, you need to glide into the right tunnel and make it through the center of it, while staying away from its sharp edges. After you do that, take another turn, while gliding, and reach safely the last green button.
Just like you did previously, you need to walk onto the pressure plate, as Batman, and see the panel with the flashing bulbs. Switch to Catwoman and reach the capsule shown in the above screenshot, where the right key is. After you remove another part of the collar, switch back to Batman and return to the surface.
This trial is similar to the third one, because here you need to cooperate closely with Catwoman. Return to Pinkney Orphanage, enter the building, head to the main hall and go with Catwoman to the green door, which has been unlocked after you have completed the previous trial.
Stand by walking onto the pressure plates shown in the above screenshot, as both of the characters - Batman needs to be standing on the one to the left and Catwoman on the one in the middle. Select Batman and throw a batarang at the question mark on the left. Thanks to this, an orb of energy starts to travel and the premise of this puzzle is to move carefully between pressure plates, to manipulate the movable tunnels. This is to allow the orb to reach its destination.
As Batman, walk over onto the right pressure plate and after some time, join him as CatwomanTake the successive steps by following this description. You need to be very precise here, and patient, because the orb of energy is quite slow. Wait for the orb to pass through the first tunnel that has been elevated after Batman walked onto the left pressure plate. As batman, go right, pass by the plate with Catwoman on and reach the rightmost one (i.e. the one farthest away from the question mark).
Switch to Catwoman and wait for the orb of energy gets past "her" tunnel. Walk off the central plate and join Batman on his plate. Thanks to this, the interactive tunnel moves close to the ceiling.
 Batman needs to walk over to the central pressure plate
After the orb makes it through the upper tunnel, walk off the central plate as Batman (Catwoman needs to stay there). As Batman, go left and stand on the central pressure plate.
 Move as Catwoman and (after the orb makes it through the tunnel) move Batman onto the left plate
Wait for the orb of energy to get through "Catwoman's" tunnel. As Catwoman, go left, as far as you can, and walk onto the left pressure plate. Switch to Batman, wait for the orb to get through his tunnel and join Catwoman on the left pressure plate. You now only need to wait for the orb to reach its destination.
 As Batman, attack the blue opponents, and as Catwoman, the red ones
After the fight, as Batman, jump onto the small platform with the green button, above the discharges. Switch to Catwoman and jump down to a lower level. Your attempt to collect the key results in a new fight with Riddler's henchmen, but the rules are different here. As Batman, engage the blue ones only and as Catwoman, the red ones. In the meantime, use gadgets or dodge, to avoid taking damage from those of the opponents that the other character is supposed to deal with.
You can now collect the key. After you have opened another part of the collar, switch back to Batman and leave.
 Grapple the catch next to digit 1
To start the seventh trial, you need to reach the garage gate near the Divinity Church. After you take the elevator, drive into the round underground hall. Here, you will have to solve a quite complex puzzle that assumes using the batmobile, to a large extent.
First of all, use the hoist of the batmobile on the catch closest to the starting point, i.e. the one next to which you can see digit 1 on the wall. You do not need to rip off anything here. Instead, use the hoist to lower yourself to the central chamber that is partially flooded.
Keep lowering the batmobile, up to the point at which it is located right above the operating drills. The next step is quite difficult to get. You need to remain in your position and lean the analog stick to the side (or press a side directional button). Thanks to this, the metal plates under the wheels of the batmobile start moving to the side. Keep doing this, up until you reveal the passage shown in the above screenshot. Eject from the batmobile and glide there.
You will reach the location of the first pressure plate. Walk onto it to lower the water level in the central hall. After that, return to the batmobile and drive back up. Only then, release the hoist.
 Destroy the weakened wall next to the second side-chamber.
Now you need to reach the interactive catch next to the white figure 2. Just like previously, use the hoist and start lowering the vehicle. After you get to the very bottom, lean the analog stick to the side, which moves the metal plates under the wheels and reveals new side chamber. By default, it is behind a weakened wall so, use the 60mm cannon. Glide into the side room and make sure that you do not land too soon, because you first need to get past electrified fragments of the flooring.
Walk onto the pressure plate. After the attempt to return to the batmobile, there appears a group of Riddler's henchmen. It is a good idea to start off with a team action with the batmobile. During the fights proper, stay away from the electrified fragments of the floor.
 You can climb down the wall, to the very bottom, only if you have earlier moved the metal panels
After you defeat the mechanical opponents, return to the batmobile and STAY IN for a bit longer in this position. You need to restore the original arrangement of the moving panels. Therefore, move them in the direction opposite to the one that you moved them earlier. Only then, can you climb back up and release the hoist.
You can now head towards another interactive catch, by the white figure 3 on the wall. Use the hoist against the catch and lower the batmobile as far down as possible. Move the metal plates aside to reveal the passage below. Glide there and walk onto the pressure plate.
The attempt to return to the batmobile activates two turrets in the neighboring tunnel. Activate the batmobile remote control and destroy them. Only after that, reach the last pressure plate, which has been revealed thanks to lowering the water level in the main hall.
See the panel with bulbs under the ceiling and switch to Catwoman. The correct capsule with the key has been shown in the above screenshot. After you complete this puzzle, switch back to batman and leave the underground complex.
 Crawl under the ceiling to the second pressure plate
This trial is another one that takes place in Pinkney Orphanage. Get there, get out of the batmobile and head into the central hall. After you meet up with Catwoman, go through the newly-unlocked green door.
As Batman, walk onto the pressure plate to the right of the starting point. Switch to Catwoman and grab on to the grates under the ceiling. Crawl under the ceiling into the area to the left of the entrance to this room and drop onto the second pressure plate.
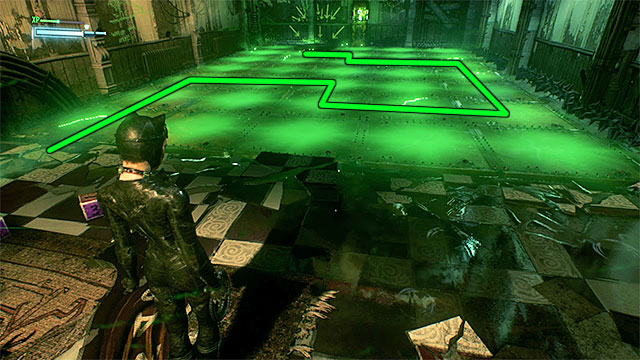
To solve the main puzzle, you need to keep switching between Batman and Catwoman on a regular basis. Take a look at the panels in the distance - initially, there is only one flashing bulb on each, but this will change, with time. What makes things difficult is that the panel in front of Batman marks the safe route for Catwoman and vice versa. You need to work your way through, gradually, over the correct fields. With time, things will get more difficult, and the panels will start to turn slowly. Fortunately, you can take your time. What is even more, in case of any mistake, the character does not die and takes slight damage instead.
The correct routes for Batman and Catwoman to follow have been shown in the above screenshots. Each character needs to stop on the new pressure plate.
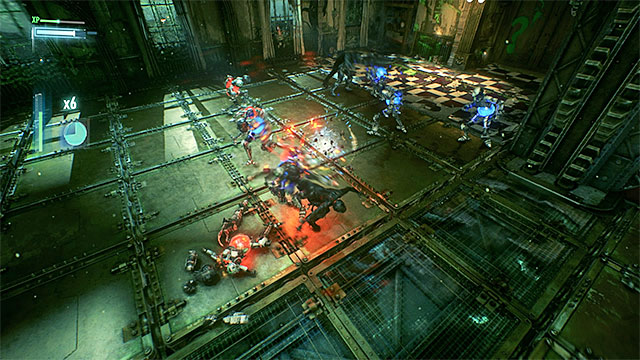 Remember to attack only the opponents paired with the specific character
After you solve the puzzle, you will still have to fight with Riddler's henchmen. In the course of the fights, remember to attack only those of the opponents that are associated with the character (the blue ones should be attacked by the Batman and the red ones by Catwoman). The facilitation here is that you can use team attacks, thanks to which the fight will be shorter. After the fight, collect the key, use it on Catwoman's collar and leave the orphanage as Batman.
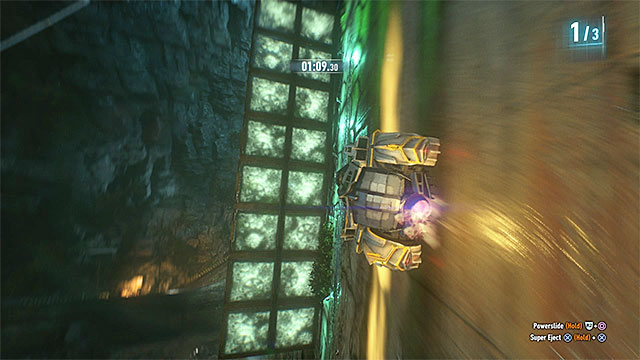 Do not slow down too much, while riding over the right wall
The ninth Riddler trial takes place in the tunnels under the Ranelagh Ferry Terminal. Reach the garage gate and take the elevator down. Here, you will have to race three time trials that are much more difficult than the previous ones.
The first and the second race are quite similar to each other and in both cases you will have to use the Riddler blockade to manipulate the elements of the surroundings. You need to know that not all of the obstacles can be dealt with in this way. The first section of the route is definitely more difficult and it assumes that you take a long wall-drive along the right wall. You need to make sure that you remove the obstacles and not lose too much speed, or you will fall off the wall. Apart from that, the last section is quite demanding, where you ride over the left wall, for a change. In this case, make sure that you remove the obstacles at the last possible moment, and only when the batmobile is in a safe position (i.e. when it is safe from being destroyed by an extending obstacle).
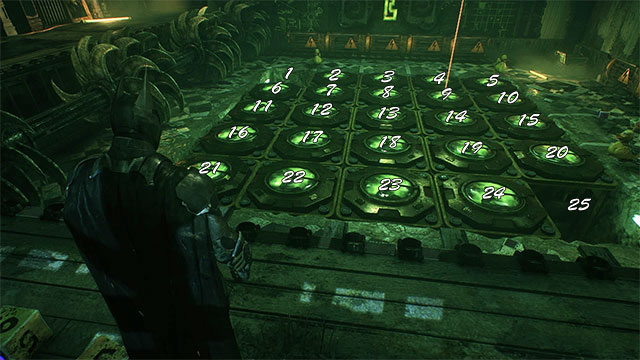 Towards the final part of the lap, take a slalom course and maintain appropriate altitude.
Unfortunately, the third time trial is much more difficult, because the Riddler himself takes control of the obstacles, which makes it impossible to use the blockade. At the beginning of the course, take a slalom ride, drive through the gates when it is safe (if necessary, use the charger). After you get to the vertical right wall, you need to perform a slalom ride also. Additionally, make sure that you pass by the right obstacle without losing speed, because you will have to take a jump over operating mechanisms, after you get off the wall.
Towards the end, ride over the left wall again. Also in this time, slaloming is required. Try to be highly precise and activate the charger is short blasts, as soon as you notice the batmobile losing speed too fast.
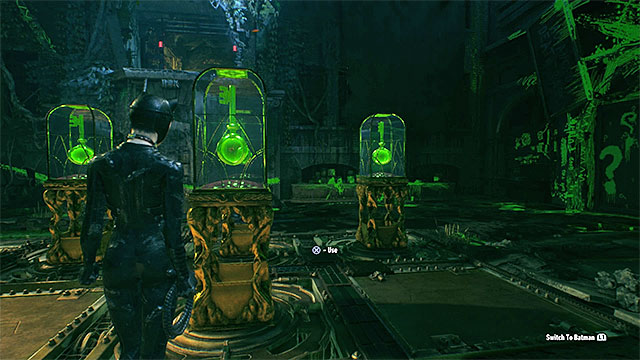
After you complete all three time trials, stop the batmobile by the interactive pressure plate and walk onto it, as Batman. Analyze the readings of the panel and, after you switch to Catwoman, approach the correct capsule with the key inside (the above screenshot). However, this is not it, yet. There is still one more trial for you to do. Listen to Riddler and return to the surface as Batman.
 As Catwoman, crawl under the ceiling to reach the game board
Head back to Pinkney Orphanage and meet up with Catwoman in the building's main hall. Go through the green door that has been unlocked after the previous trial. After you reach a new location, switch to Catwoman and catch on to the grates under the ceiling. Make it over to the huge gaming board, this way, which is inaccessible for Batman (at any attempt to get there as Batman, blockades slide out).
Here, you need to solve three puzzles and each one is highly demanding. The plan is that you move over a board with interactive pressure plates. For this, you need to use generators at the top of the screen and to the right (each generator can move a row of pressure plates associated with it) and you need to activate them as Batman, by sending the electromagnetic pulse. Additionally, in certain situations, it will be necessary to block certain pressure plates to prevent them from moving. You will be able to do this as Catwoman, by standing on the plate that should remain in its position, after the generator is activated.
Note - the board is made up of 25 fields that have been numbered in the way shown in the above screenshot - it is necessary that you refer back to this!
Note - Always remember to pick the appropriate type of the electromagnetic pulse. Depending on which one has been used, the plates move in different directions (up, down/ left, right).
The main premise of this puzzle is that you leave the spot, where there is plate 9, thanks to which the color of the beam turns from red to green. At the beginning, the free fields are in slots 1 and 25.
Switch quickly to Catwoman and pull her up to the interactive ceiling, because Riddler soon activates spinning blades. Wait for the cycle of the blades to end, after which they stop.
The second one is much more complicated, because you need to free two spots for red beams. The slots in question are 5 and 12.
Just like before, do not wait for the Riddler to start the blades and have the Catwoman grab on to the ceiling.
In this one, just like in the previous one, you need to "free" two beams. The slots in question are 21 and 23.
Now, you only need to grab on to the ceiling, as Catwoman (faster than before). Do not wait for the blades to end their cycle and join Batman. Return to the previous room, now. In here, there is a capsule with the last key. Thanks to obtaining it, you remove the collar from the neck of the Catwoman.
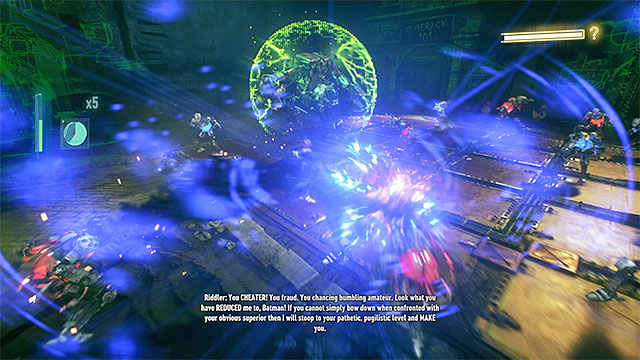 Steer clear of the Riddler's machine and attack his henchmen
Return to the main hall and try to leave the orphanage. This will result in Riddler appearing, in the flesh. He will be using the machine of his own design and you start your fight with him. After the fight starts, ignore the boss and attack Riddler's henchmen. Remember that Batman needs to fight the blue opponents and Catwoman the red ones. You need to expect that the Riddler may occasionally switch the colors. Apart from that, avoid the green projectiles fired by his machine. You can eliminate opponents effectively thanks to team attacks. After you have eliminated Riddler's goons, do not attack him, nor approach him, because the flooring around him will soon be electrified. You will be unable to finish this fight so, wait simply for Nigma to leave the location.
Note - you now need to find and solve all of the 243 puzzles connected with Riddler. Only then, will you be able to fight the fight proper with him. Detailed information on whereabouts of individual puzzles, and the ways to solve them, have been provided in separate chapters of this guide.
 Interact with the control panel at the Pinkney Orphanage
It has already been stated, earlier in This walkthrough that you can start the actual fight with the Riddler only after you have completed all 243 puzzles. All of them have been provided with walkthroughs that you can find on the following pages of This chapter. After you solve them all, return to the Pinkney orphanage. Walk into the main hall and interact with the control panel with a question mark, which will confirm that you actually have solved all of the 243 puzzles. After a while, the Riddler appears in his machine and This time around, you will be able to complete the fight.
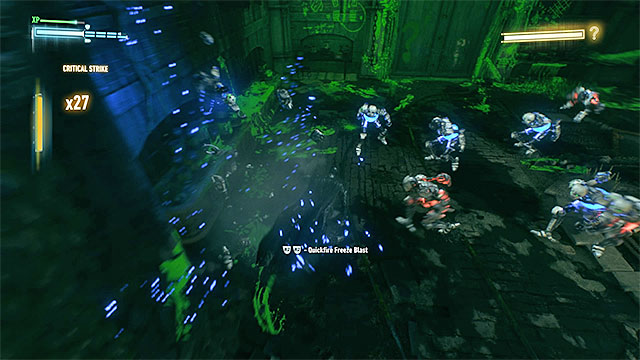 Attack the blue robots
After you start fighting, attack the Riddler's blue robots only. Fortunately, they are not too heavily armed and therefore, it is a quick thing to destroy them. For the whole time, you need to keep ignoring the Riddler. You only need to watch out for the green projectiles that he fires and dodge at the right moments.
 On the red robots, use the gadgets that either stop or damage them.
The red robots of the Riddler cannot be attacked, as of now, because the Catwoman is not there to fight with you. You can follow the suggestion and use the Freeze blast against them (which will freeze them), but other things work also. Cape stun and electric charge work just as well.
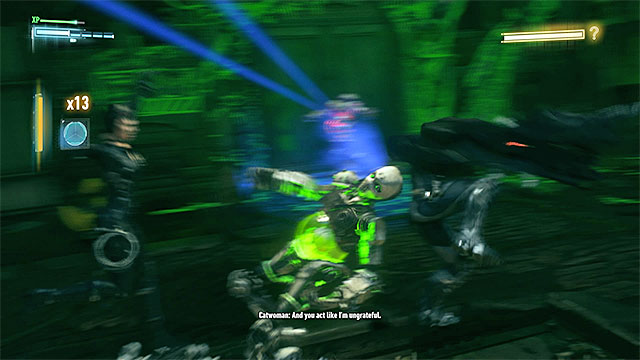 Aid your fighting with team attacks
Keep fighting up until the Catwoman appears. From now on, things are going to be easier. As Batman, attack the blue robots and the red ones as the Catwoman. You need to be careful, because the Riddler will occasionally change which robots should be attacked by whom so, do not attack blindly. To eliminate the robots quickly, use team attacks, especially that you get the option to do This quite often.
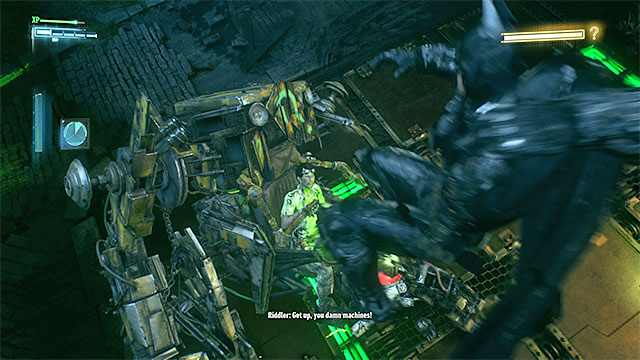 Attack after the Batman jumps onto the Riddler's machine
Your objective is to bring about the situation, in which all of the bodyguards are neutralized. Wait for the Riddler's machine to hit the ground and run up to him from the frontal side. Press the standard attack key/button for your character to jump onto the machine. Keep pressing the attack key for Batman to deal damage to the Riddler, which deprives him of a third of his health.
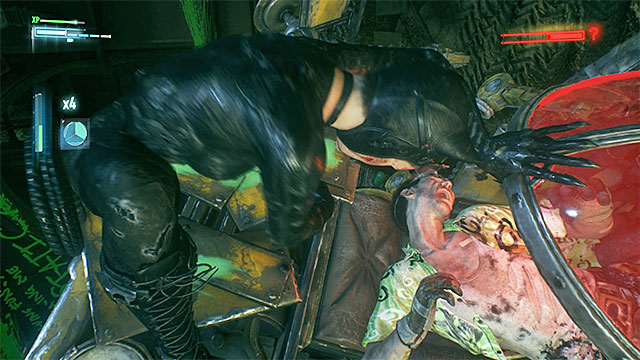 Now, the Riddler needs to be attacked by the Catwoman
Keep engaging the Riddler's robots, and remember to match their colors with the character that you are currently controlling. Just like earlier, you need to destroy all of the robots. Wait for the Riddler's machine to hit the ground again BUT do not attack it and jump onto the machine as the Catwoman and start bashing the Riddler.
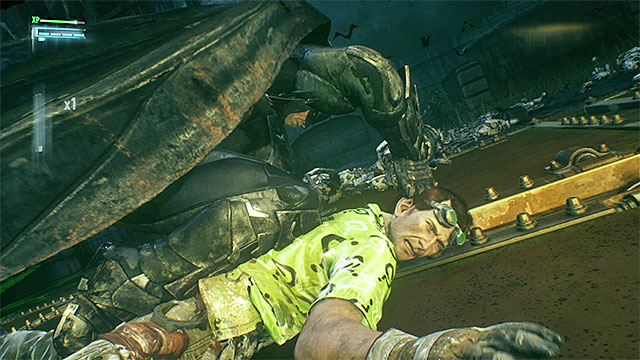 Again, as Batman, attack to defeat the Riddler once and for all
There are no surprises in the final part of This fight. You need to eliminate all of the Riddler's robots, after which you engage the main boss. Attack the Riddler as Batman again. Attacking the Riddler with a combo deprives him of the entire health bar and you win.
To end this side mission, you still need to escort the Riddler back to the GCPD precinct, but This is just a formality.
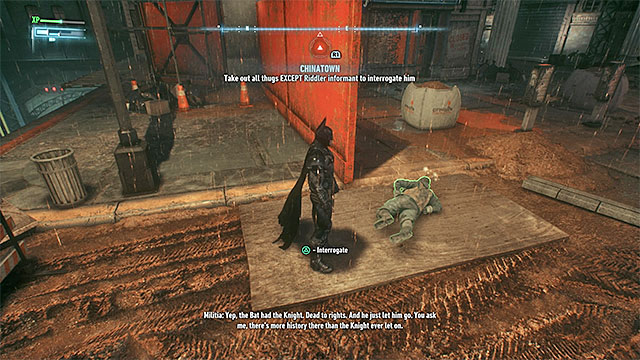 You need to deal with the informant's guards and interrogate him
Of course, you can find the individual collectibles entirely basing on this guide, but you can make things easier by making their general whereabouts appear on the map, as you explore the game world.
Icons of collectibles are added to the map in the way similar to the previous games in the series. During the game, you need to keep an eye out for Riddler informants, who are marked in green. After you have located one, deal with his guards, so that he is the only man standing. You can then approach the informant, or eject yourself from the batmobile, in his direction. You can interrogate the bandit by pressing the counterattack key/button.
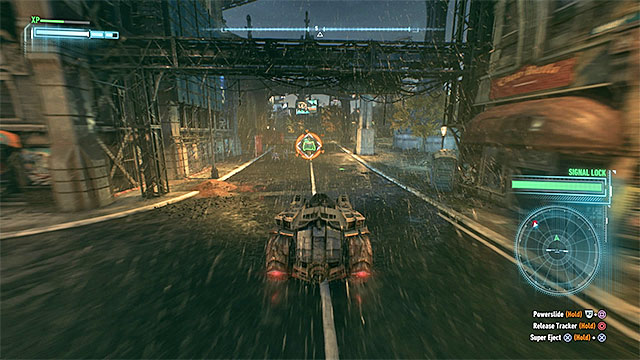 Destroy the vehicle of the informant
Some of the informants drive cars around the city and in such a case, the vehicle is marked in green. You can use batmobile to halt the enemy vehicles. At this point, it is worth noting that some of the informants drive cars armed with firearms and, in such a situation during the pursuit, you need to avoid enemy fire. To stop the enemy vehicle, you need to use the drone hacker. You can stop civilian cars after the first use. In the case of the better armored cars, you will have to use the gadget 2-3 times.
Note- Do not expect that interrogating one informant will reveal all of the collectibles. Only collectibles located in the closest are will appear on the map. Therefore, throughout the entire game, you need to interrogate several dozens of informants. It is a good idea to check out on the information in the corner of the map - it tells you how many riddles have not yet been solved in the individual location.
Note - If you want to learn the whereabouts of the collectibles hidden inside buildings, interrogate informants in that very district. For example, if you want to find collectibles in the Arkham Knight's HQ, interrogate informants on the Founders' Island. The only exception is the GCPD buildings - in this case, the locations of the four collectibles will be added to your map only after you have interrogated the dirty cop marked in green.
Note - After they are captured, some of the informants do not want to share their information with you and attack instead. In such a situation, you can try countering - if you succeed, you obtain the information anyway.
Note - If you accidentally stun an informant prematurely, you do not lose the opportunity to find the collectibles in that area. Simply, return to the district after some time and sooner or later, you will find someone marked in green. Do the same if new informants stopped appearing, even though you successfully conducted your interrogations apart from that, you can also try returning to the main menu and reloading the game.
There are four puzzle types in Batman: Arkham Knight:
Note - You can start solving some of the puzzles, virtually, from the very beginning of the game. Some of them remain inaccessible, at first. This may be a result of lack of access to a given location, or of the fact that Batman does not have a gadget yet. It is best to start your search only after you have completed the main storyline of the game.
The above screenshot presents the map of Bleake Island, i.e. one of the three main areas within Gotham city. You can visit the isle since the beginning of the game. What you can find there, among others, are Panessa Studios and GCPD police arrest, and there are separate maps for both of the locations, which you can find in separate chapters of this guide.
 Find the trophy under the bridge
Required gadgets: -
Trophy walkthrough: The trophy can be found under the bridge leading to Ace Chemicals. You can take it without using any gadgets.
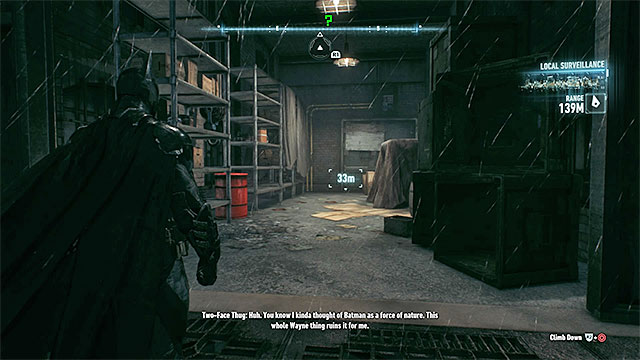 Entrance to the building with the trophy
Required gadgets: -
Trophy walkthrough: The trophy can be found inside one of the buildings. Find the entrance inside and walk in. The secret can be obtained without the need of using any gadgets.
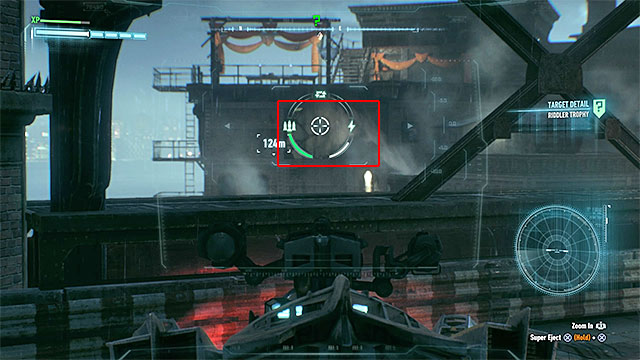
Required gadgets: Batmobile
Trophy walkthrough: The trophy is located inside one of the buildings near the water. Access to it is blocked by a weakened wall. The only way to destroy the wall is by using the Batmobile. Drive the vehicle to the road leading towards the Ace Chemicals and stop west from the secret. Park the Batmobile in a place from which you will be able to see the weakened wall - it has been shown on the picture above. Destroy the wall and fly as Batman to the trophy.
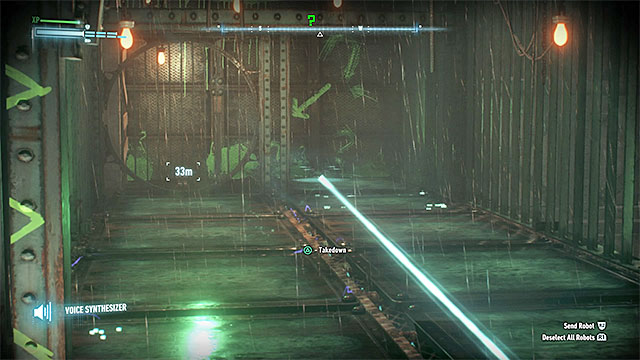 Send the robot towards the trophy in the cage
Required gadgets: voice synthesizer
Trophy walkthrough: The trophy can be found in a large cage with electric floor. You can't reach it on your own, instead you must guide the nearby Riddler's robot inside. If it's the first time you meet the robot, then you must sneak up on him and take him down from the back. You will receive the chip that allows you to control the machine. If you have obtained the chip earlier, you can skip this step.
Start by sneaking up on the robot (if you have performed the takedown, then wait for it to respawn). Don't let him see Batman as after that he will focus only on attacking you. After positioning yourself behind the robot, use voice synthesizer on him. Mark the territory inside the cage and order the machine to walk there. Jump on the cage and use the synthesizer again. This time order the machine to pick up the trophy. Change the location again, while ensuring that the robot won't see you. Use the synthesizer on the robot for the last time, this time ordering him to walk outside the cage (with the secret). Now you can defeat the robot and take the trophy that he has taken.
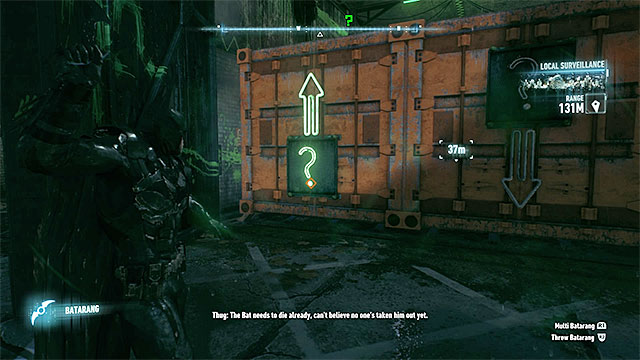 Use the batarang to raise up the containers
Required gadgets: batarang, batclaw, remote controlled batarang
Trophy walkthrough: Reach the place with two containers. Use batarang on the question mark on the left container, you will raise the containers. Now you can enter the building. Position yourself on the pressure plate and catch the trophy with the batclaw.
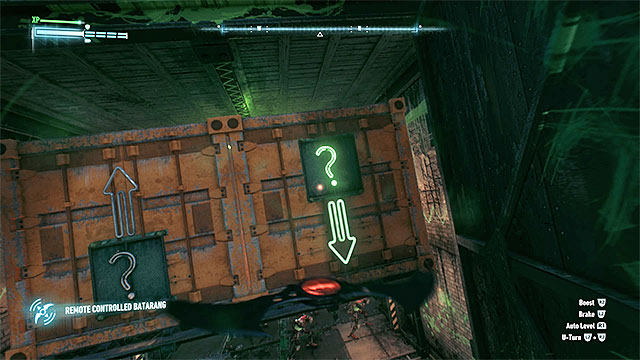 Use the remote controlled batarang to hit the new button and crush the robots
Don't try to leave the building yet - Riddler's robots with firearms will appear nearby. Pick the remote controlled batarang from the inventory and throw it. Once the batarang leaves the building, turn it around and aim it at the question mark at the right container. The gadget must hit the button with proper speed, so accelerate it in the final phase of the flight. Properly performed action will make the containers fall and crush the robots. It will allow you to safely leave the place.
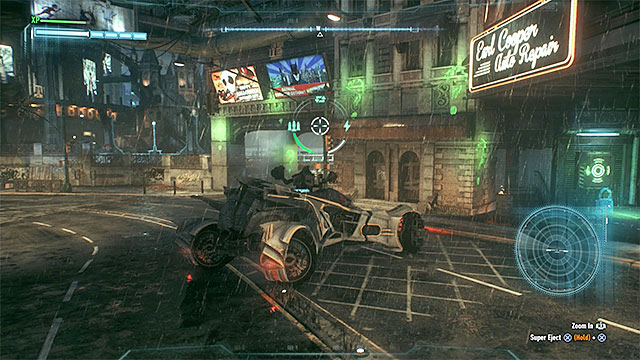 Question marks will appear once you use the forensic scanner
Required gadgets: Batmobile, forensic scanner, grappling hook
Trophy walkthrough: Find a flashing green button on the wall of one of the buildings, drive towards it in the Batmobile and activate the forensic scanner. Remain in Batmobile's battle mode and follow the green question marks that will start appearing due to the scanner's work. They will lead you under the bridge.
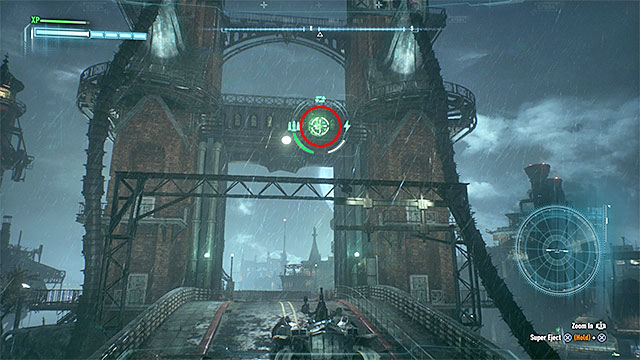
Remain in battle mode. Ride around the buildings until you reach the road leading to the bridge. Once you get on the bridge, find new question marks and keep following them. You must drive near the ACE Chemicals. There, take interest in two towers connected with a bridge. You must target the green sign shown on the picture above and use the Batmobile to destroy a fragment of the wall. Use the grappling hook to reach the newly created hole and look inside the small room for the trophy.
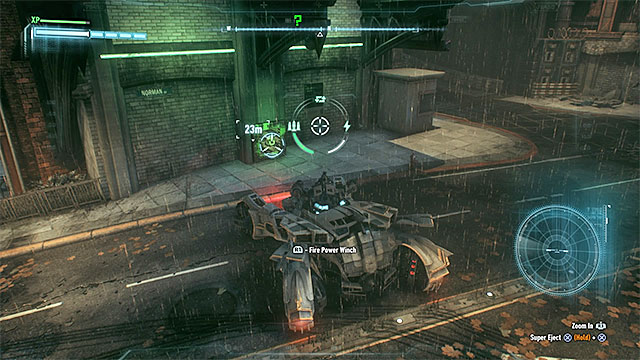 Use the winch on the hook in the wall
Required gadgets: Batmobile, winch
Trophy walkthrough: The trophy can be found in the container inserted in the wall. Drive near it in the Batmobile, find the interactive hook and use the winch. Pull out the container, leave the vehicle and reach the secret.
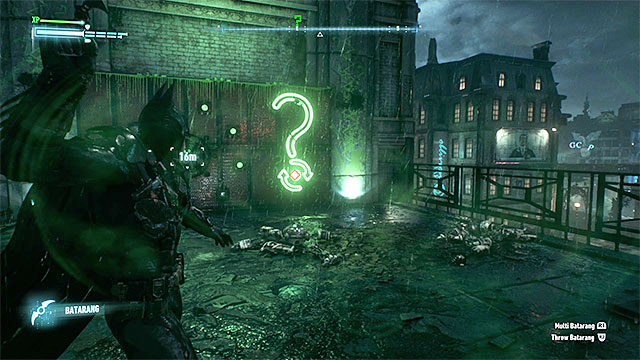 Hit the question mark to repair the robots
Required gadgets: batarang
Trophy walkthrough: The trophy can be found in a small cage on the wall. Attack the three robots. Once they are down, hit the green question mark with the batarang. The robots will be repaired. Now, start a new battle and use the batarang again. Defeat the robots again. You will be rewarded with opening of the cage.
Required gadgets: Batmobile, winch, grappling hook
Trophy walkthrough: The trophy can be found in a cage on the roof of a building. Obtaining it is quite hard. Activate the detective mode and read the coordinates written on the roof [1665, 3171]. Open the world map and use the coordinates (they are displayed in the lower right corner of the screen) to find the place that you must investigate. It has been marked on the picture above, it's the eastern part of Bleake Island.
Once you reach the destination, use the detective mode again and find the fuse box. You will learn that in order to load it Batmobile will be needed. Sadly, you can't call it yet, first you must guide the car to the nearby roofs. Go south from the fuse box. You must reach the path near the lighthouse that has been marked on the picture above.
 Perform two jumps in Batmobile
Now you must perform two jumps in Batmobile on your way to the fuse box. First jump is performed in the place where the path near the lighthouse ends. This jump will get you to the metal roofs. Second jump takes place on the right ramp. In both cases you must use the afterburner to ensure success. Once you get to the box, use Batmobile's winch on it. You must manipulate the gas pedal properly - try to keep the turnovers bar in the orange zone. This will let you load the box.
 Catapult from the Batmobile and use the grappling hook to reach the trophy before the time runs out
The final phase of the riddle is hardest. From the moment you load the box, you will have only 45 seconds to return to the cage with the trophy. Drive the Batmobile to the end of the roof and catapult Batman (having upgraded version of the catapult is recommended). Once you start the flight, look for opportunities to pull yourself with the grappling hook to higher objects (like antennas or building roofs) and to catapult Batman with great speed. You can't allow yourself to get off the track or slow down. If you give your best, you should reach opened cage with the trophy while still having around 5-10 seconds of the time.
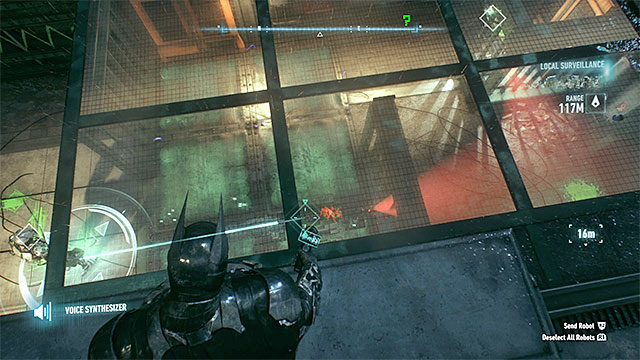 Start by ordering the robot to destroy the first defense turret and then hack the second one
Required gadgets: voice synthesizer, remote hacking device
Trophy walkthrough: The trophy can be found in a large cage with electric floor. You can't reach it on your own, instead you must guide the nearby Riddler's robot inside. If it's the first time you meet the robot, then you must sneak up on him and take him down from the back. You will receive the chip that allows you to control the machine. If you have obtained the chip earlier, you can skip this step.
Stand on the wall behind the robot or on the roof next to it (if you performed a knockout, then use the batarang on the question mark so that the machine respawns) and don't let it see you as he would focus only on attacking you. Pick the voice synthesizer from the inventory and mark the robot. Then order the machine to destroy the closer defense turret. There's another turret in the cage but this one is unavailable for the robot. Because of that, you must use the remote hacking device to temporary deactivate it. Now you can order the robot to pick up the trophy and take it out of the cage. Now you can defeat the robot and take the trophy.
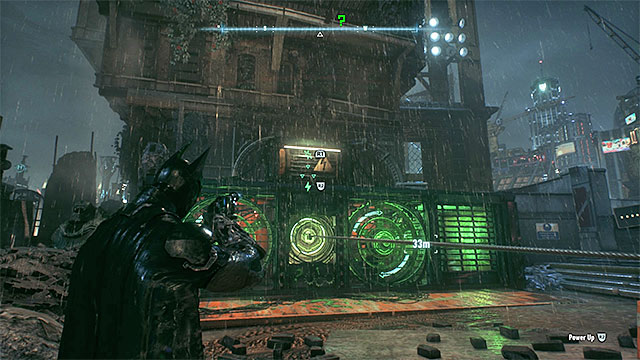 Use the Electromagnetic pulse after using the winch
Required gadgets: Batmobile, winch, EMP
Trophy walkthrough: The trophy is locked in a cage. Enter the Batmobile and use the winch on the hook to uncover the interactive object. Leave the car and use the EMP to activate the upper generator. Now you can enter the newly opened cage with the secret.
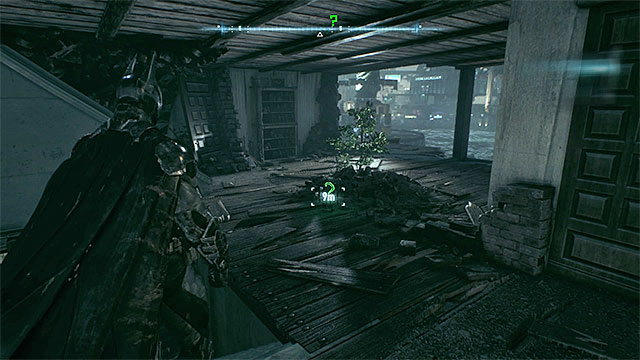 Room with the trophy
Required gadgets: grappling hook
Trophy walkthrough: The trophy can be found on one of the higher floors of the ruined building. You can get there easily by using the grappling hook.
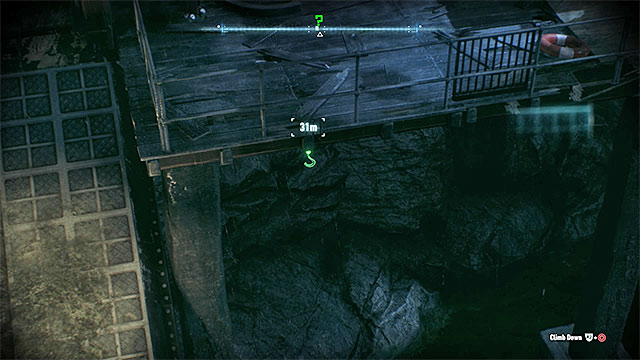
Required gadgets: batclaw
Trophy walkthrough: The trophy is attached to the bottom of one of the wooden platforms at the water. It has been shown on the picture above. Position yourself on one of the nearby ledges and, when the collectible gets in your line of sight, pull it to yourself with the batclaw.
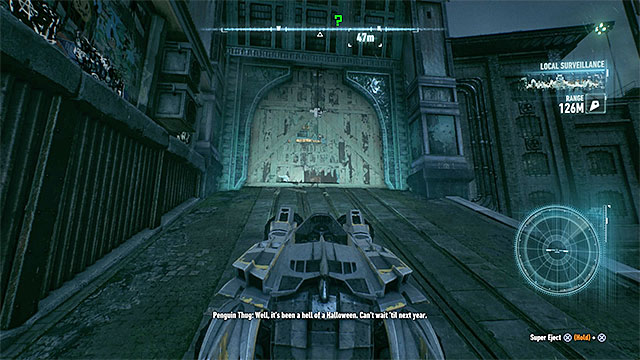 Drive the Batmobile through one of the wooden gates
Required gadgets: Batmobile, grappling hook
Trophy walkthrough: The trophy can be found inside a building. To unlock the access inside, jump to the Batmobile and get through one of the wooden gates. Park the car inside the building and use the grappling hook to reach the upper balconies.
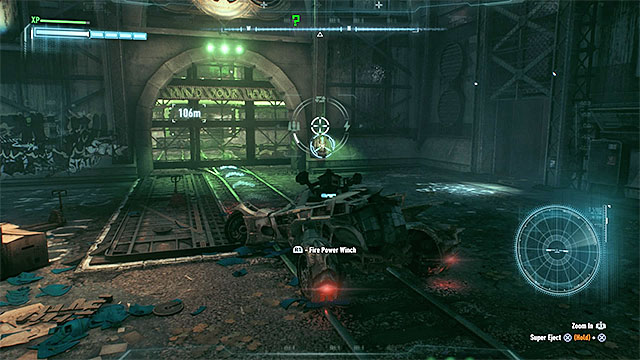 The gate that leads to the solution of the riddle
Required gadgets: Batmobile, winch, EMP, line launcher, batarang, batclaw
Trophy walkthrough: The riddle solving takes place in the underground of the Panessa Studios. Drive the Batmobile there and use the winch on the fuse box found right from the entrance gate. Maintain the proper engine RPM (the pointer should remain in the orange zone) to load the box.
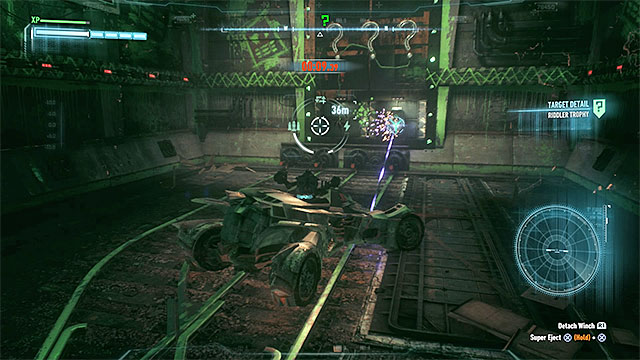 Activate the EMP to temporary turn off the force field
Walk to another room and use the winch again, this time on the nearby generator. Your objective is to load the Batmobile so that you will be able to use its EMP. Activating the electromagnetic pulse will turn off the upper force field for 10 seconds.
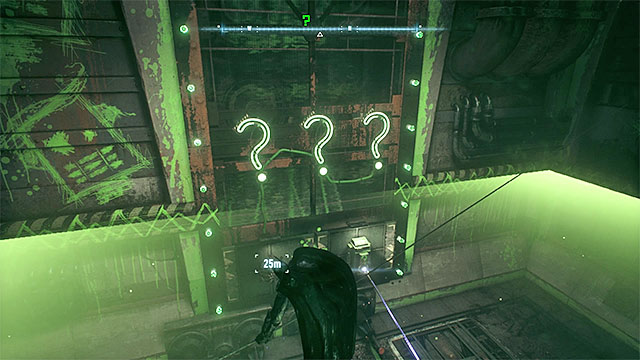 Using the line launcher will let you hang above the force field
The hardest part is ahead of you - you must catapult Batman from the Batmobile and hold the button/key responsible for activating the line launcher while in the air. Your character should throw the rope. Remain on it. Don't worry that the force field is active again, now you're above it. Throw the batarang at all three green question marks. Now you can jump down and use the batclaw to catch the trophy from the newly opened cage.
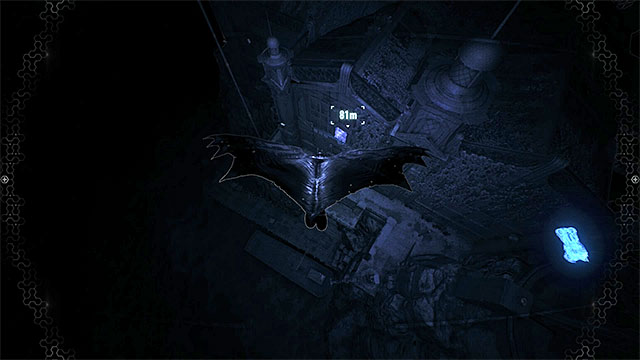 Glide towards the weakened wall in order to get through it
Required gadgets: -
Trophy walkthrough: The trophy is in a small room inside the building. Access to it is blocked by a weakened wall (use detective mode to find it). Glide towards that wall from one of the roofs. Batman should easily get through it.

Required gadgets: Batmobile
Trophy walkthrough: The trophy is located on the roof of the Panessa studios, behind a weakened wall. You must get there in the Batmobile and it is harder that it might seem as you can't call the vehicle while you're on the roofs. Go southeast from the secret. Get to the path near the lighthouse which has been marked on the picture above.
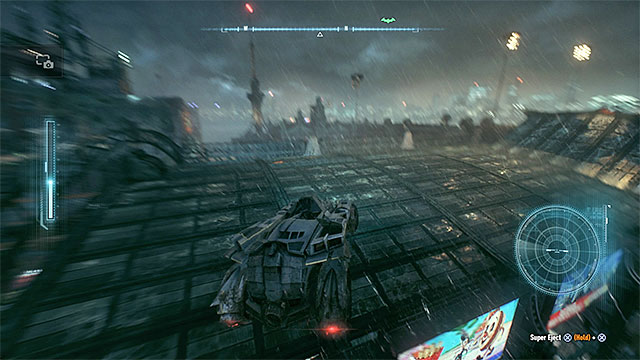 Perform two jumps in the Batmobile
Now you must perform two jumps in the Batmobile on your way to the trophy. First jump is done in the final part of the road near the lighthouse, second once you're on the roof, with the use of the right ramp. Additionally, you will be forced to drive through some narrow roofs, in those cases you can help yourself (however, it is not mandatory) with the battle mode that will give you increased precision. Once you reach the weakened wall, use Batmobile's cannon to destroy it.
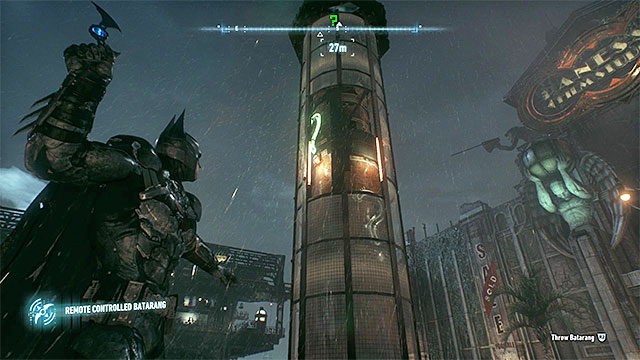 Uncover the question marks and throw batarangs at them
Required gadgets: Batmobile, winch, remote controlled batarang
Trophy walkthrough: The trophy can be found in a cage on the top of a small glass tower. Enter the Batmobile and use the winch on the interactive hook at the base of the tower. Now drive the Batmobile left or right in order to move the glass plates of the tower. By doing so you must uncover the green interactive question marks. Throw remote controlled batarangs at them (you can try to use the standard versions as well). Once you activate all three question marks, the tower will ride down and the cage with the secret will open.
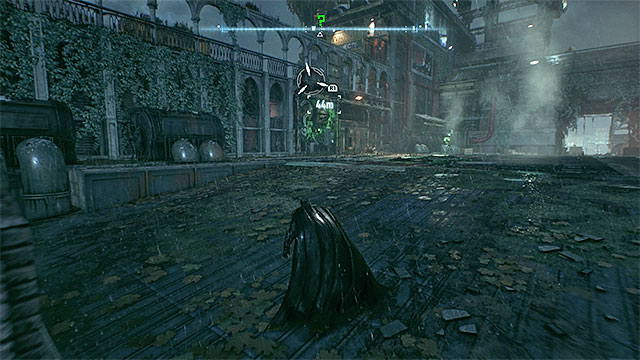 Position the robot on the right pressure plate and sneak up on him from the left
Required gadgets: voice synthesizer, batclaw
Trophy walkthrough: The trophy can be found in a small cage attached to a building's wall. In order to gain access to it you must "cooperate" with Riddler's robot found nearby. If you meet the robot for the first time, you must sneak up on him and perform a takedown. By doing so you will obtain a chip that will allow you to give commands to the robot. If you already have the chip, you can skip this step.
Position yourself out of robot's view (if you performed a takedown, then use the batarang on the question mark to respawn the machine) and don't let him see you as after that he will focus only on attacking you. Pick the voice synthesizer from the inventory and mark the robot. Then order the machine to position itself on the right pressure plate. Carefully get close to the left plate and stop Batman there. Now you can turn towards the secret and capture it remotely with the batclaw.
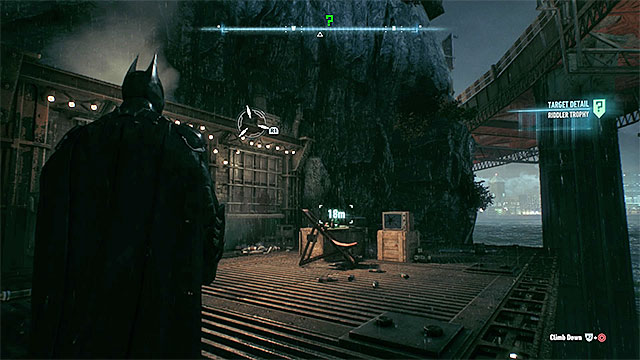 Trophy is well visible and not guarded by anyone
Required gadgets: -
Trophy walkthrough: The trophy can be found in an easily accessible place under the bridge. It's in a chest near the sunbed and a TV.
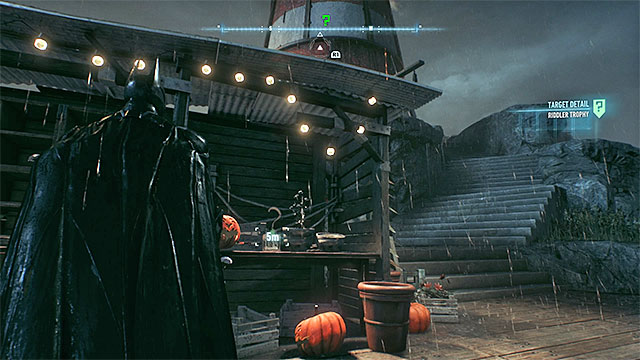 Look around near the lighthouse
Required gadgets: -
Trophy walkthrough: The trophy can be found at the bottom of the lighthouse. Once you get there, you must only find the small booth (you don't need to use any gadgets).
 Perform the slide only after you spray and detonate the gel
Required gadgets: Batmobile, winch, explosive gel
Trophy walkthrough: The trophy is in a large cage. Once you reach the destination, use Batmobile's winch on the interactive hook and drag the metal object from the cage. Leave the Batmobile, spray the explosive gel on the right side of the pulled object. Now, put the object back inside. Detonate the gel and the hot steam on the right side of the cage will disappear. Perform a slide while running (single press of the proper button/key) and you will get inside the cage from where you can take the secret.
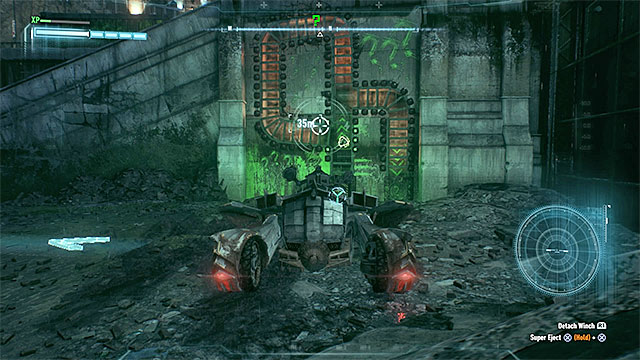 Prepare the winch and release the hook to move the ball with the trophy
Required gadgets: Batmobile, winch
Trophy walkthrough: The trophy is placed inside a ball located in an inaccessible labyrinth. You will have to use the Batmobile, more specifically its winch. Hold to the hook which is a launcher of some sort. Move back a bit in the Batmobile (not to the end) to prepare the launcher to work. Then, release the hook and the ball with the trophy will be thrown. It will reach the right exit from the labyrinth only if you used proper strength of the launcher. If you failed, then repeat the whole process and reduce or increase launcher's strength.
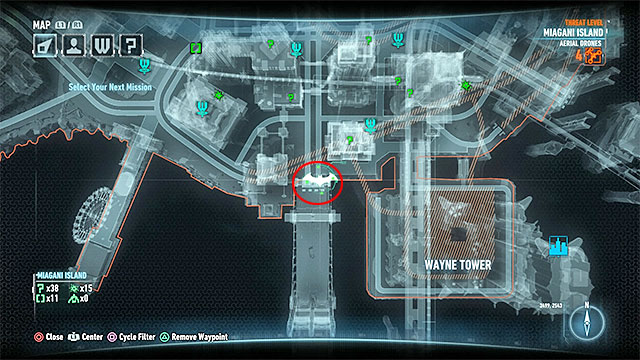 Alternately control Batman and Batmobile - you must clear the path to the trophy
Required gadgets: batarang, Batmobile, winch, Batmobile remote control
Trophy walkthrough: The trophy can be found behind the bars. Once you get close to it, start with using the batarang on the left green question mark. Enter the newly unlocked territory as Batman. Use Batmobile remote control to capture the left hook with the winch. Pull out the large plate. Switch back to Batman and enter the middle territory. Again, use Batmobile remote control. This time use the winch on the right hook. As before, pull the plate and switch to Batman. Now you can take the secret. In order to leave the room you must repeat all the steps backwards.
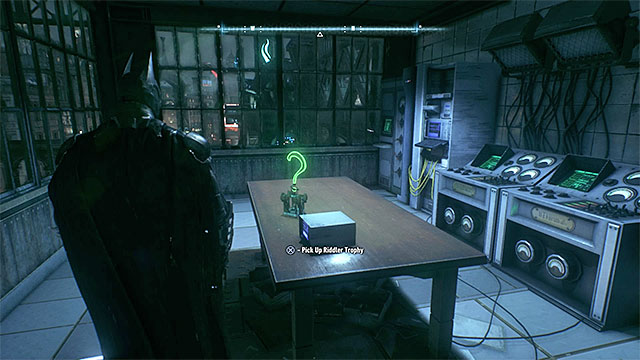 The trophy is lying on the table
Required gadgets: -
Trophy walkthrough: The trophy can be found in a room inside the tower. You will find it on the table and you can take it without using any gadgets.
Required gadgets: Batmobile, winch, afterburner
Trophy walkthrough: The cage with the trophy can be found on the top of the tower. There you will find written coordinates [3496, 2540]. Open the world map and use the coordinates (they will appear in the lower right corner of the screen) to find the place that you must investigate. It has been shown on the picture above and it is located in the southern part of Miagani Island. Get there in the Batmobile and find the interactive fuse box. You must connect the winch to it and load it. To do it, increase the engine RPM so that the pointer will remain in the orange zone.
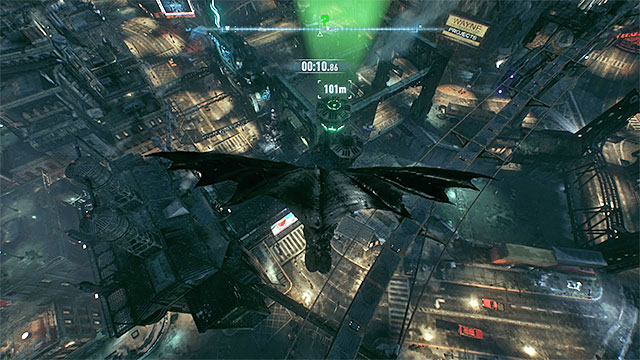 Use the afterburner and in the final phase catapult from the Batmobile
Now you must complete a pretty hard time trial - you have 45 seconds to get back to the cage with the secret. Start driving the Batmobile, avoid any crashes and use afterburner (having the upgraded version is recommended). When you're more or less 200 meters from the destination, catapult Batman and glide towards the roof with the open cage. If you haven't made any mistakes, you will land on the roof with 5-10 seconds remaining.
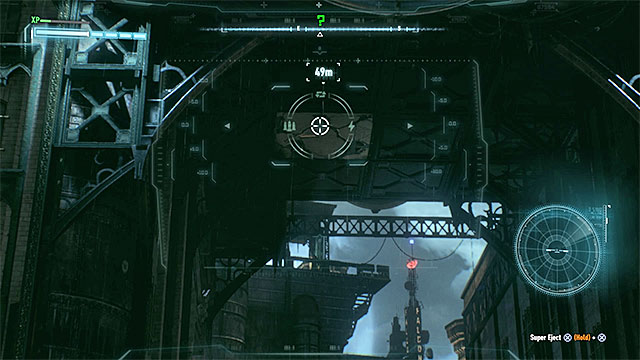 Part of the wall that you must destroy
Required gadgets: Batmobile, batclaw
Trophy walkthrough: Once you get to the destination, look around for a weakened part of the ceiling and use Batmobile's cannon to destroy it. Now you can leave the vehicle and pull the trophy to yourself with the batclaw.
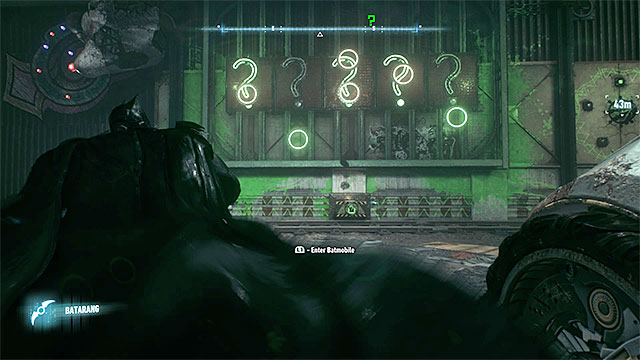 Throw the batarangs at the question marks when the dots are inside the highlighted green circles
Required gadgets: Batmobile, winch, batarang, batclaw
Trophy walkthrough: The trophy is in a cage on the wall. Start with using Batmobile's winch on the interactive generator. Quickly jump out of the vehicle and turn towards the board with the question marks. Throw batarangs when the dots of the question marks will appear near the circles lighted in green (you don't need to aim precisely, only press the key/button responsible for batarang quick throw). Correctly hitting five question marks in a single series will open the cage - once that happens, use the batclaw to get the secret.
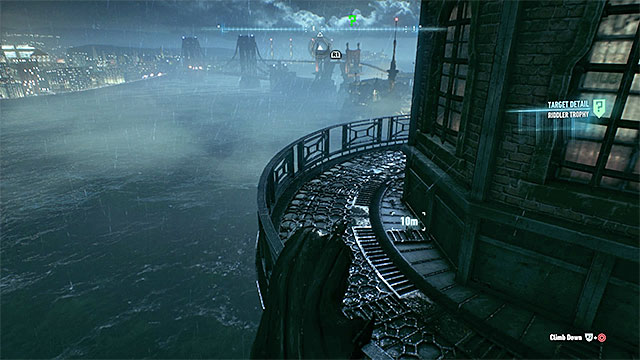 Check the upper balconies of the lighthouse
Required gadgets: -
Trophy walkthrough: The trophy can be found in an easy accessible place at the top of the lighthouse. You can collect it without using any gadgets.
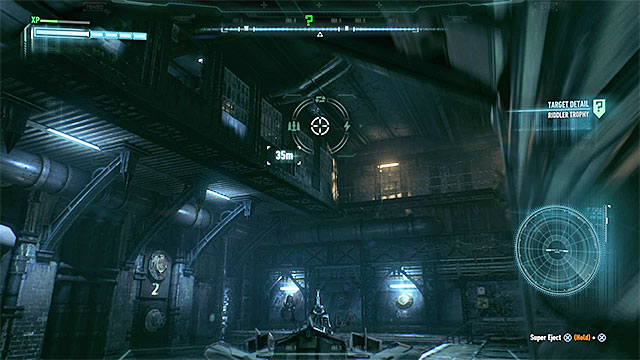 You must search the tunnels under Bleake Island
Required gadgets: -
Trophy walkthrough: The trophy can be found in the tunnels under the island. Reach the larger chamber and examine the rooms on the ground floor.
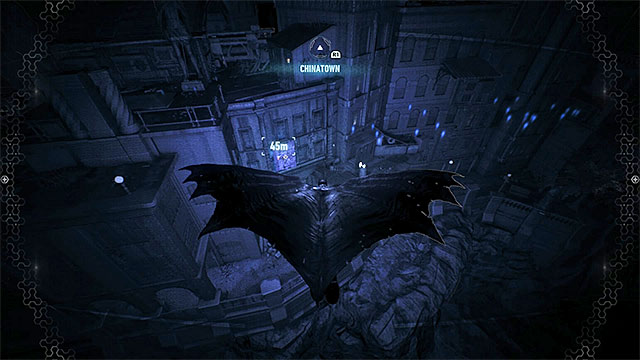 You can use the detective mode to find the weakened wall
Required gadgets: -
Trophy walkthrough: The trophy can be found inside the building and is protected by a weakened wall. Jump from a higher viewpoint and glide towards the wall. Break through it.
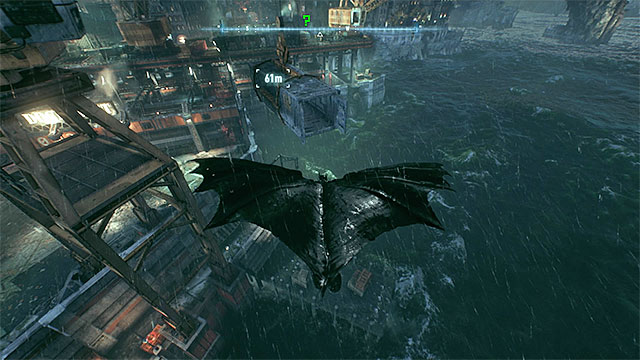 Fly into the container
Required gadgets: -
Trophy walkthrough: The trophy can be found inside the container hanged high above the ground, on a crane. Fly to the container from the side of the open door.
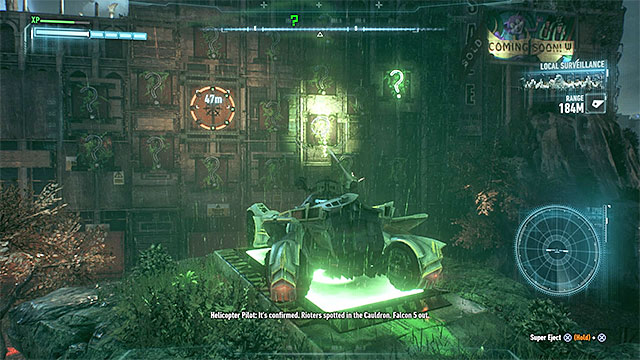 Quickly hit the lighted question marks
Required gadgets: Batmobile, batclaw
Trophy walkthrough: Park the Batmobile on the large pressure plate. During this riddle you must quickly hit the lighted up green question marks (with any cannon) before they are turned off again. Completing the whole sequence will open the cage with the trophy. Use the claw to get it.
Required gadgets: Batmobile, afterburner, winch, forensic scanner, batclaw
Trophy walkthrough: The riddle starts at a glowing button. Reaching it with the Batmobile is quite hard. You must get there through the neighboring roofs. Start in the place shown on the picture above - southeast from your current location, near the lighthouse. You must jump in the place where the path near the lighthouse ends (help yourself with the afterburner). You will land on the roof. Turn the Batmobile to the right and use the ramp to perform the second jump.
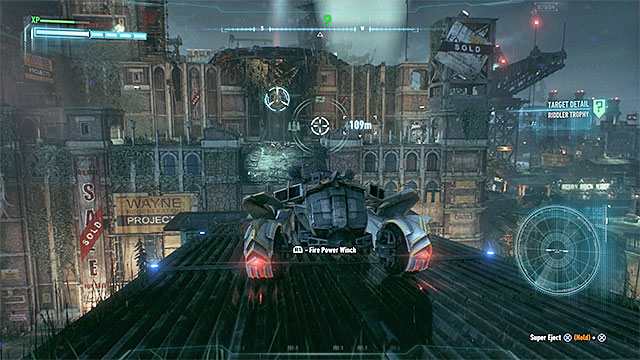
Carefully ride through the roofs (you can help yourself by switching to Batmobile's combat mode). Stop once you reach the place shown on the picture above. Use Batmobile's winch on the hook on the left from the glowing button. Go towards the hook and, when Batmobile will be in horizontal position, pull yourself to it. Now you can drive to the glowing button and activate the forensic scanner. Green question marks will start appearing nearby.
 The round sign can be found under the bridge
Almost immediately after starting following the question marks you must jump down from the upper ledge. Slowly move forward through some small tunnels. The question marks will lead you to the round green sign under the bridge. Shoot it to destroy part of the bridge. Now leave the Batmobile and catch the trophy with the batclaw.
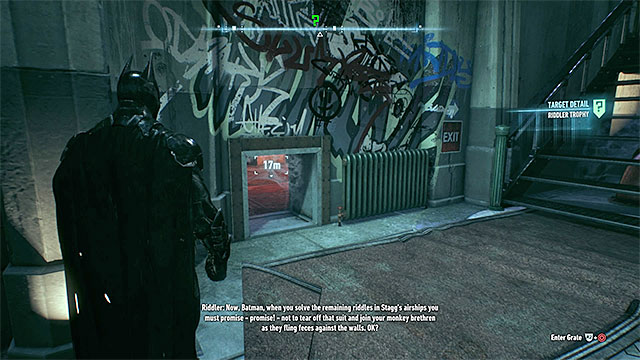 Find the small entrance to the room with the secret
Required gadgets: -
Trophy walkthrough: The trophy can be found inside the building. To reach it, you must find the small hole in the wall through which Batman can get inside.
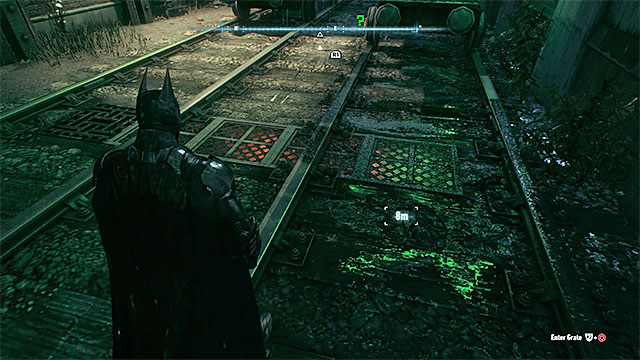 The ventilation shaft will be accessible after moving the locomotive
Required gadgets: Batmobile, winch
Trophy walkthrough: Search for the locomotive standing on the rails at the back of Falcone Shipping. Drive there in the Batmobile, use the winch on the hook of the locomotive and move the large machine. This will uncover the entrance to the ventilation shaft in the ground. Inside it you will find the trophy.
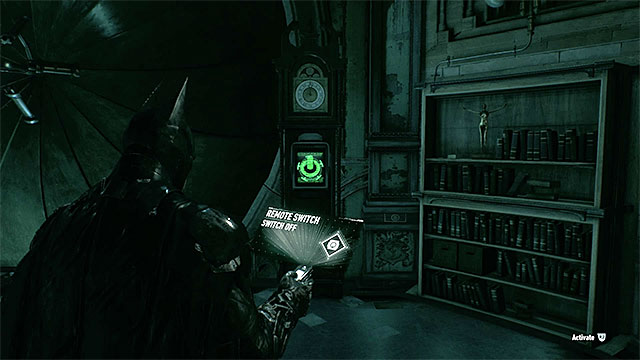 Using the remote hacking device will uncover the secret locker with Batgirl's costume
Required gadgets: remote hacking device
Riddle walkthrough: Get inside the clock tower. Find the interactive control panel and use the remote hacking device. Wait until the locker with Batgirl's costume opens. Scan the costume to finish the riddle.
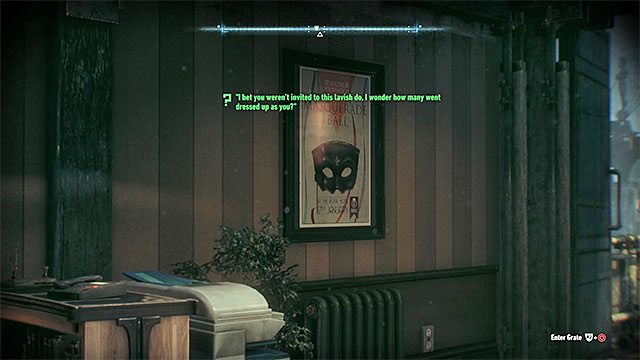 The poster that you must scan
Required gadgets: -
Riddle walkthrough: Use one of the lower entrances to the clock tower. Not entrance to Oracle hideout on the roof of the tower but to the lower floors where her servers were located. Reach the highest floor and look around for a poster promoting the masquerade ball - it's hanging on one of the walls near the balcony exit. You must scan the poster.
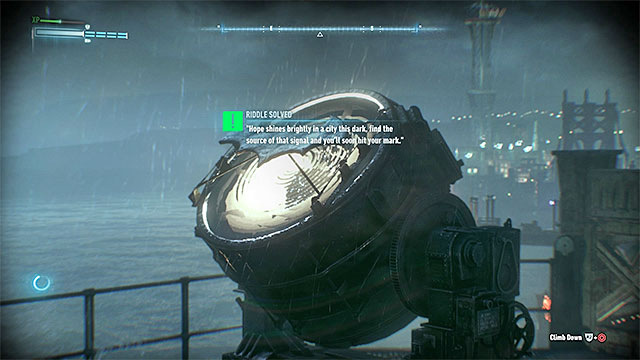
Scan the reflector on the top of GCPD
Required gadgets: -
Riddle walkthrough: It's a very simple riddle. You must scan the reflector that can be found on the top of the GCPD lockup (zoom the screen on it) - the same one that activates the Knightfall Protocol at the end of the game.
Important! Despite the fact that the island with the statue related to this riddle is marked on the world map as part of Miagani Island, the solution is counted as part of Bleake Islands riddles.
 Position yourself in large distance so that you will see the whole statue
Required gadgets: -
Riddle walkthrough: Don't go to the marked island, you must complete the riddle from long distance. You can land on GCPD lockup. Turn towards the large statue of Lady of Gotham and scan it to complete the riddle.
 Zoom the screen on the prison
Required gadgets: -
Riddle walkthrough: Stand at the roof of Falcone Shipping and turn southeast. You must scan the Arkham Asylum seen far away (zoom the screen on it).
 Photograph the human remains in the lighthouse
Required gadgets: -
Riddle walkthrough: Reach the lighthouse and enter it. You must scan the human skeletons (stand slightly away from them and don't zoom the camera).
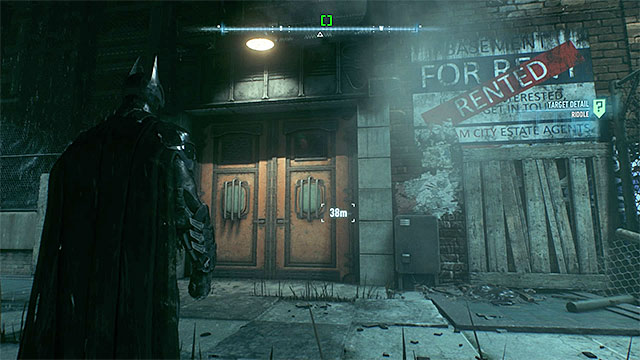
Required gadgets: -
Riddle walkthrough: You can solve this riddle after you complete the Creature of the Night side mission. You will have to visit doctor Langstrom laboratory. Entrance to the building has been shown on the picture above.
 Scan the board in the laboratory
Use the elevator that will ride you to a new floor. Then, walk to the laboratory. There you must scan the board with a bat drawing.
 The building that you must scan
Required gadgets: -
Riddle walkthrough: Find The Deacon's Mission building, stand at proper distance from it and make the scan.
 An example breakable object - use Batmobile's main cannon
There are fifteen breakable objects to destroy on Bleake Island. Eliminating them all will complete three new Riddler's puzzles (solved puzzles counter will increase every five destroyed objects).
Use Batmobile's 60mm cannon to the objects. They are painted in red and can be found mostly on building's walls. You shouldn't have much trouble with finding them, help yourself with zooming the screen.
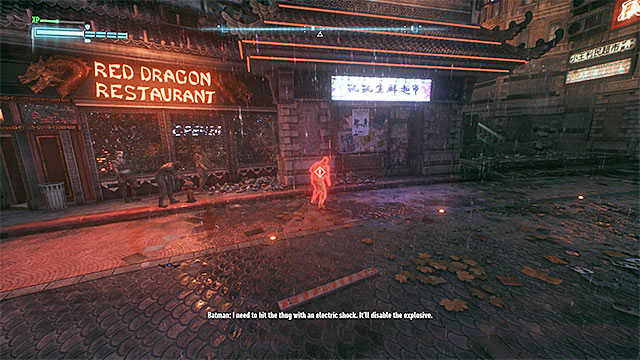 Remote controlled batarang will let you find the enemy with a bomb
Three bomb rioters can be found on Bleake Island. In each case, method of operation is the same. You must start with getting to the pressure plate and, after positioning yourself on it, listen to the speech of the Riddler. Next step is throwing the remote controlled batarang towards the enemies causing trouble on the streets. Don't knock down the enemies, instead only make the batarang fly next to them. One of the enemies will be identified as bomb rioter and the game will mark him in red.
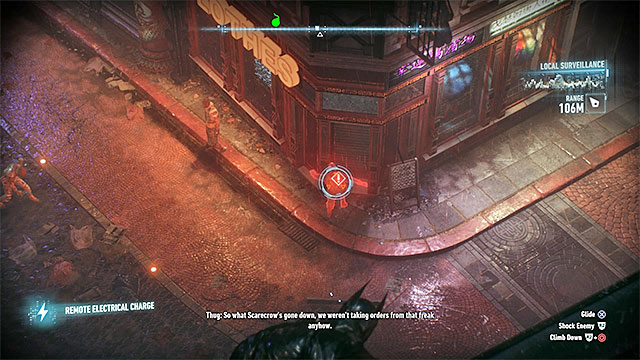 Use the EMP on the bomb rioter
The final phase is neutralizing the bomb that the marked in red rioter is carrying. In order to do it you must use the EMP. You can either shoot the charge from long distance or during the battle. In the latter case, make sure that you will takedown the enemy early and help yourself with the combination of buttons/keys responsible for quick using of the mentioned gadget.
The above screenshot presents the map of Founders' Island, i.e. one of the three main areas within Gotham city. You can visit the isle since the beginning of the game. What you can find there, among others, are Arkham Knight Headquarters and metro tunnels. Apart from that, you can examine two Stagg Blimps. All of the additional areas have their own maps that you can find in separate chapters of this guide.
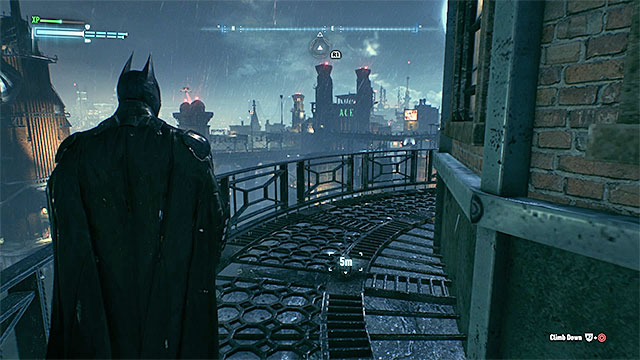 Reach the top of the lighthouse
Required gadgets: -
Trophy walkthrough: The trophy can be found in an easily accessible place on the top of the lighthouse. You can collect it without using any gadgets.
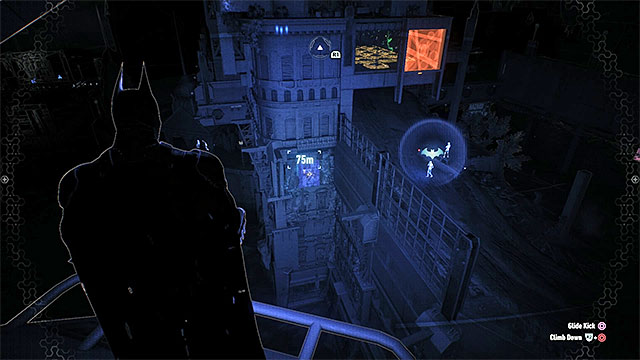 You must hit the weakened wall
Required gadgets: -
Trophy walkthrough: The trophy is located inside the building at the water and it is protected by a weakened wall. Go to some high viewpoint and glide from there towards the wall to get through it. Inside you can collect the secret.
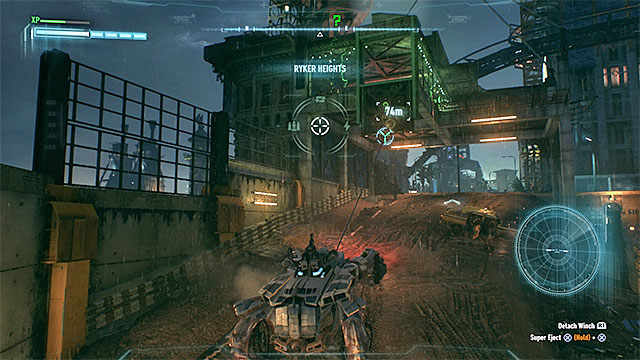 Use the winch to unlock access to the room with the riddle
Required gadgets: Batmobile, winch, grappling hook, Batmobile remote control, line launcher
Trophy walkthrough: The trophy is in a small room to which access you can unlock only by using the Batmobile. Find the place with an interactive hook and attach your vehicle to it with the winch. Lower the metal curtain and drag yourself there with the grappling hook.
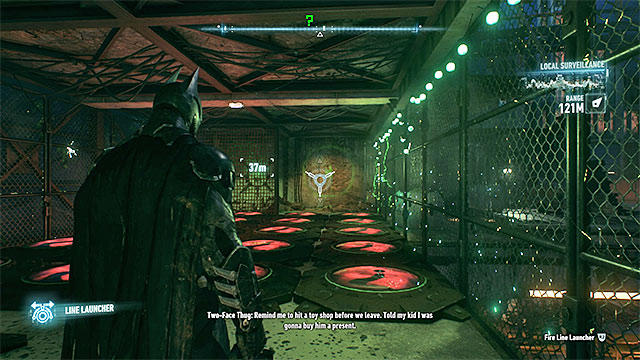
Start by positioning yourself on the green pressure plate. Then, activate Batmobile remote control and unplug the winch. Now, stand in the place shown on the picture above and use the line launcher. It will let Batman bypass all the red pressure plates and safely reach the opened cage with the secret.
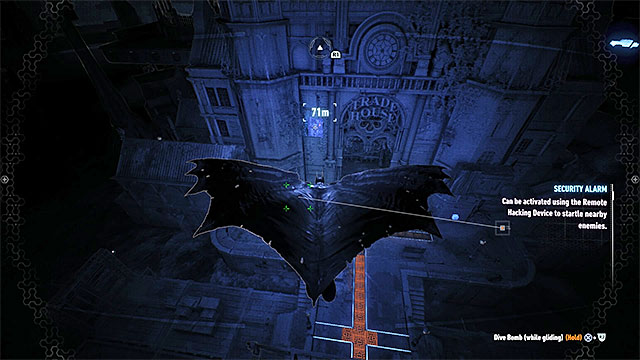 Glide towards the weakened wall
Required gadgets: -
Trophy walkthrough: The trophy can be found inside the Trade House. Find the weakened wall on the left from the main entrance to the building. Glide towards it from some high roof and break through it.
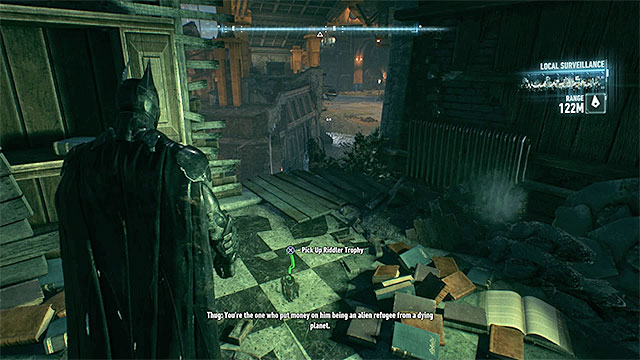 Check the building near the water
Required gadgets: -
Trophy walkthrough: The trophy is located inside one of the ruined buildings at the water. You can take it without using any gadgets.
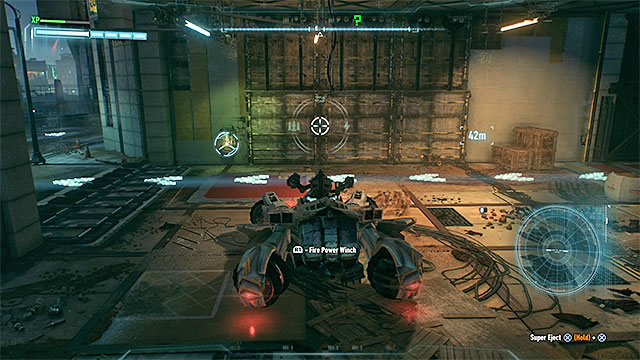 Use the winch on the generator
Required gadgets: Batmobile, winch, voice synthesizer, batclaw
Trophy walkthrough: You will be able to reach the trophy only after you destroy one of militia checkpoints. Find the generator in the territory with a roof and load it with Batmobile's winch (keep the engine RPM in the orange zone). It will uncover the corridor with one of Riddler's robots.
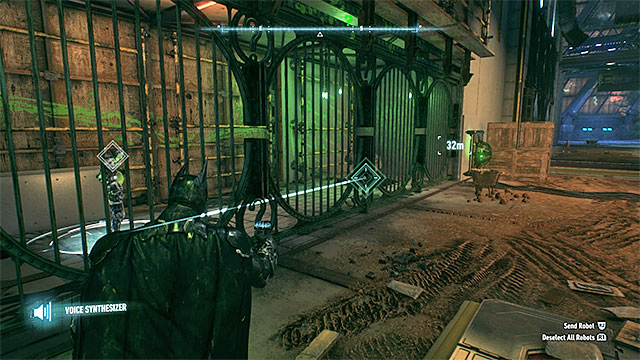 Send the robot towards the pressure plate
If you don't have the chip needed for controlling the robots, focus on other secrets for now. Sooner or later you will obtain it. If you have it, use voice synthesizer on the robot. Order the machine to go to the right pressure plate. Now you can use the batclaw to take the trophy from the right cage.
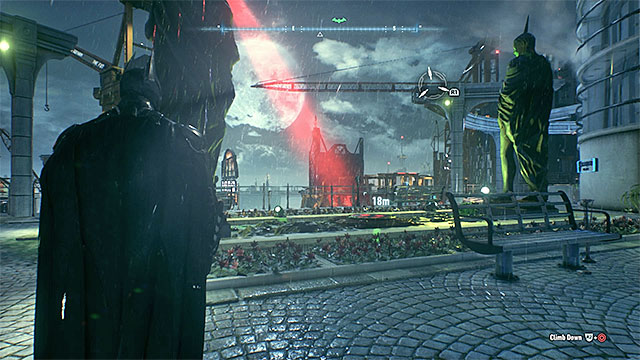 Find the pressure plate on the bridge between the skyscrapers
Required gadgets: grappling hook
Trophy walkthrough: Investigate the underground territories, more specifically the places with damaged Killinger sign. Use grappling hook to reach the upper ledge, there you will find the locked cage with the trophy and coordinates [2147,1492]. Open the world map and use the coordinates (they are displayed in the bottom right corner of the screen) to find the place which you must examine - it's a bridge between two skyscrapers, west from your current position. Once you reach the destination, stand on the pressure plate and wait for Riddler's speech.
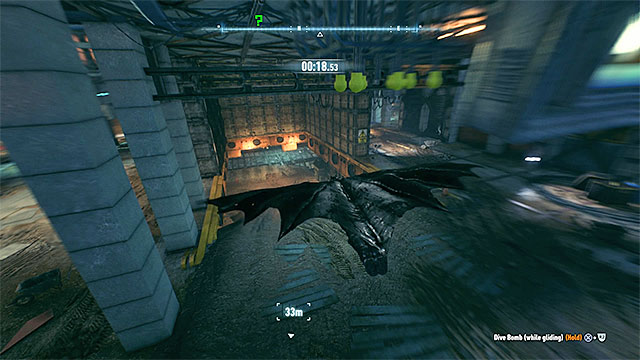 Dive into the underground tunnels
Now you will have to complete a rather hard time trial - you must get back to the cage with the trophy in less than 30 seconds. When the time trial starts, jump from the edge of the building and dive. You must flatten out at the right moment to avoid hitting any obstacle or the ground. Fly straight for a bit and then turn left to get into the underground territories. Here you must turn right twice and use the grappling hook at the end to drag yourself to the ledge with the secret. If you won't make any mistakes, you will have around 5 remaining seconds when you get the trophy.
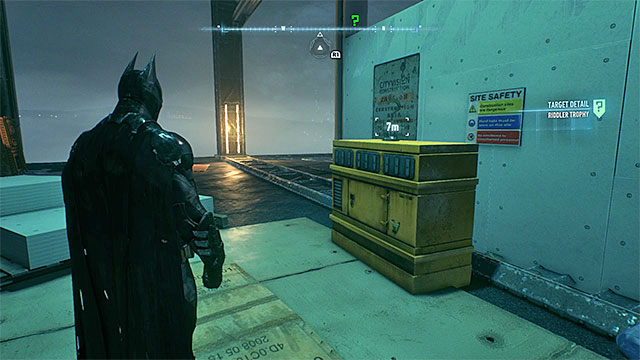 The trophy is obtained easily
Required gadgets: -
Trophy walkthrough: Reach the large building skeleton with Gotham City Trains neon. The trophy can be found on one of the floors of the building, in an easily accessible place.
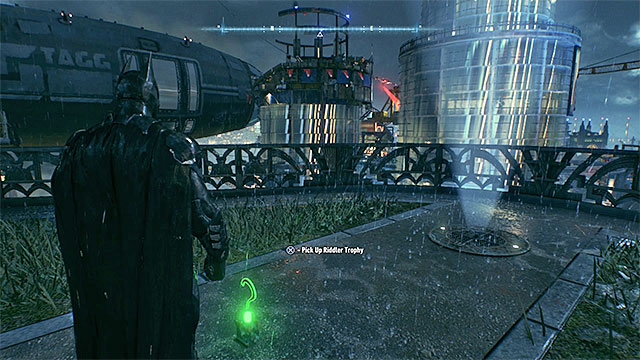 Reach the top of the skyscraper
Required gadgets: -
Trophy walkthrough: The trophy can be found at the top of the skyscraper and you can get it without using any gadgets.
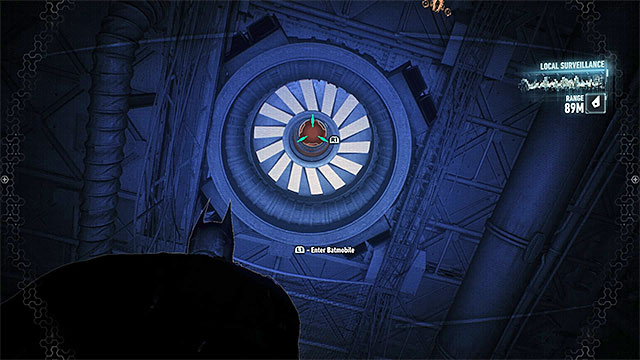
Required gadgets: Batmobile, forensic scanner, grappling hook
Trophy walkthrough: Find the glowing green button on the wall of one of the buildings, drive towards it in the Batmobile and activate the forensic scanner. Remain in combat mode and start following the green question marks appearing due to scanner's work. The question marks will lead you to the hatch at the ceiling. Leave the Batmobile, stand in the place shown on the picture above and use the grappling hook.
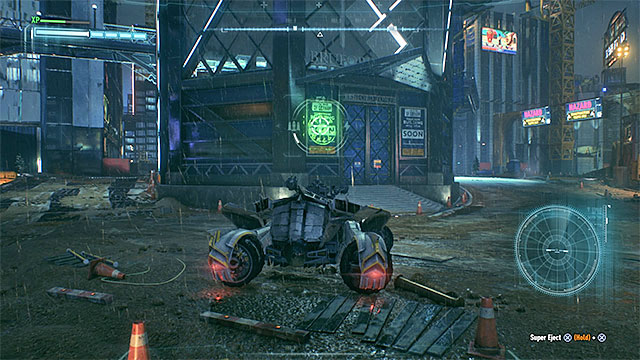 Use 60mm cannon on the green sign
Once you reach the upper level, summon the Batmobile, activate the forensic scanner again and resume following the green question marks. They will lead you to a building with a round green mark on its wall. Use the cannon to shoot that spot. You will destroy the weakened wall. Now you can reach the trophy.
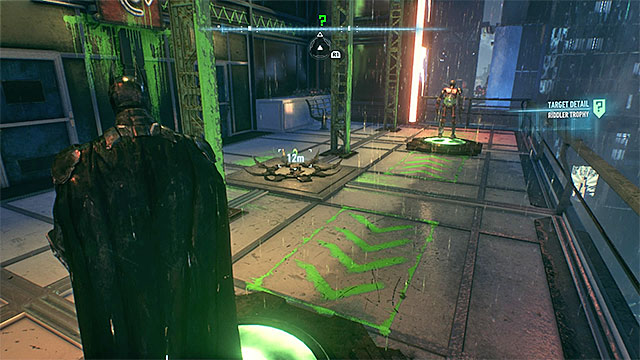 Batman and the robot must stand on different pressure plates
Required gadgets: voice synthesizer
Trophy walkthrough: The trophy is located in a small closed cage. In order to gain access to it you must "cooperate" with nearby Riddler's robot. If you meet the robot for the first time, you must sneak up on him and perform a takedown on him. By doing so you will obtain a chip that will allow you to give commands to the robots. If you already have the chip, then you can skip this step.
Position yourself outside of robot's sight (if you took him down, then use the batarang on the question mark to respawn it) and don't let him see you. Pick voice synthesizer from the inventory and mark the robot. Order the machine to position itself on the right pressure plate. Carefully get close to the left plate and stop Batman on it. Now you can turn towards the secret and catch it from distance with the batclaw.
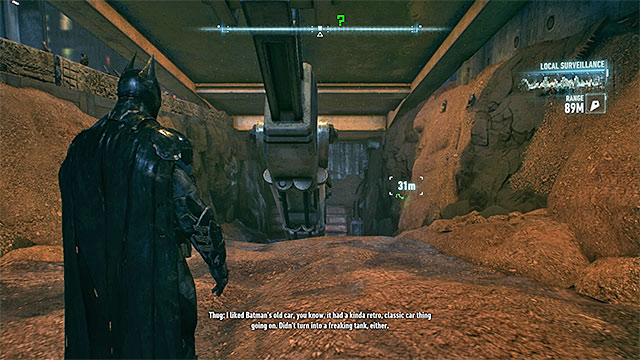 Check the territory under the ramp
Required gadgets: -
Trophy walkthrough: The trophy can be found under the giant metal ramp. You can obtain this secret without using any gadgets.
 Once you pull the question marks from the wall, hit them with batarangs
Required gadgets: Batmobile, winch, batarang, batclaw
Trophy walkthrough: The trophy can be found in the locked cage on the wall. Drive the Batmobile there and use the winch on the interactive hook. Pull out the plate with three question marks from the wall. Leave the Batmobile and use the batarangs to hit the question marks (press the batarang quick use button/key). After that you can get the trophy with batclaw.
 The gate on which you must use the remote electrical charge
Required gadgets: remote electrical charge, batarang, remote controlled batarang
Trophy walkthrough: Find the closed passage at the water which can be unlocked by using the remote electrical charge on the generator above the gate. Walk inside but don't rush to the trophy as there's a defense turret on the right. Use the batarang on the green question mark to roll out the blind.
 Get rid of the robots with the remote controlled batarang
After collecting the secret a group of Riddler's robots will appear in the neighboring room. You can't defeat them in direct battle as they have firearms. Instead, select the remote controlled batarang and aim it at the green question mark. Wait for the robots to be destroyed by a defense turret and use the remote controlled batarang again to roll out the blind. Finally, use the pulse to unlock the exit.
 Secret can be easily found
Required gadgets: -
Trophy walkthrough: The trophy is easily accessible. You will find it near the burning barrel and the mattress.
Use the winch twice (the second time to avoid being crushed)Required gadgets: Batmobile, winch, batclaw, Batmobile remote control
Trophy walkthrough: Find the interactive hook in the Batmobile, catch it with the winch and pull out the fragment of the wall. Enter the long corridor with the cage containing the trophy. Stand on the pressure plate and catch the trophy with the batclaw. This will activate a trap and you must act quickly to avoid being crushed. Activate Batmobile remote control and pull out the wall again with the winch.
 The place where you will find the trophy (it's hard to miss)
Required gadgets: -
Trophy walkthrough: The trophy can be found on one of the floors of the building and you can get it without using any gadgets.
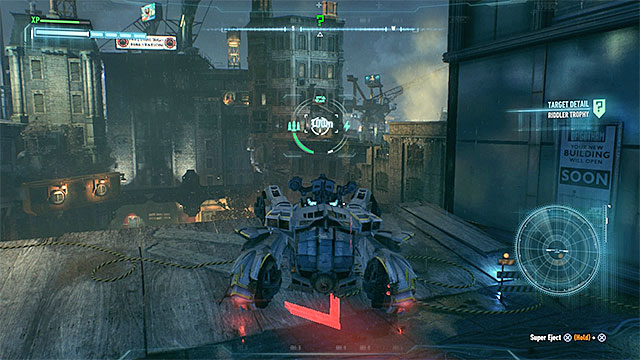 Destroy the weakened wall from distance with the use of Batmobile
Required gadgets: Batmobile
Trophy walkthrough: You can reach the trophy only after you destroy one of the militia checkpoints. The secret is located inside the building, behind a weakened wall. You must park the Batmobile around one hundred meters from the wall, in a place from which it is well visible. Destroy the wall and go to the newly created hole to take the trophy.
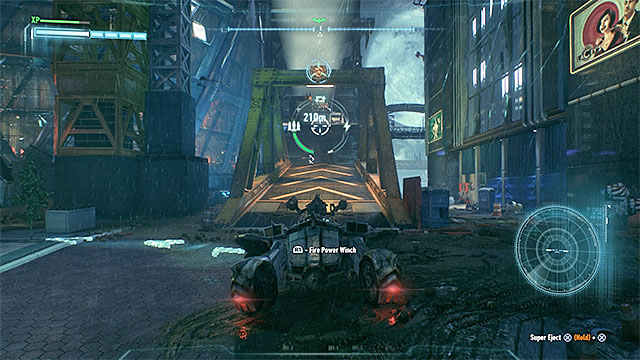
Required gadgets: Batmobile, winch, afterburner
Trophy walkthrough: Find the pulsing green button on the wall of one of the buildings, drive towards it in the Batmobile and activate the forensic scanner. Remain in Batmobile's battle mode and start following the green question marks appearing due to scanners work. The question marks will lead you to a large object under construction. Drive slightly back and find the ramp shown on the picture above. Use the winch on the ramp to raise it and then perform a jump with the help of the afterburner.
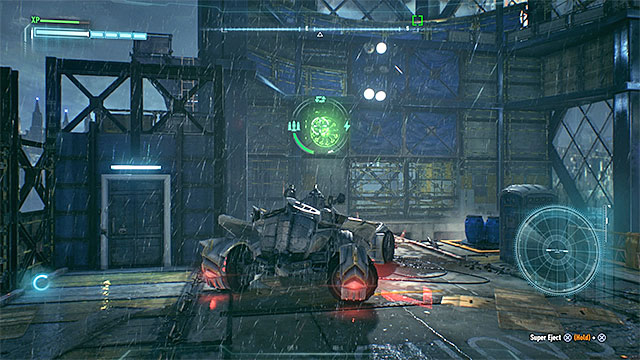 Ride to the top of the building and find the round sign after you perform the jump
If you performed the jump correctly, you will land on one of the floors of the new building. Reactivate the scanner and reach the top. There you must find the round green sign on one of the walls and shoot it with your vehicle. All that's left is to reach the new hole and pick the trophy.
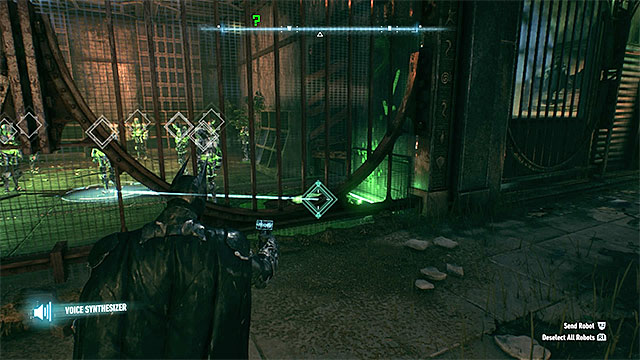 Use the voice synthesizer to position one of the machines on the pressure plate
Required gadgets: voice synthesizer, Batmobile, winch, batclaw
Trophy walkthrough: Examine the underground territories in order to find a room with large amounts of Riddler's robots. You must take control of one of them. If you don't have the chip that allows you to control the robots, focus on other secrets and sooner or later you will obtain it. Pick any robot and use voice synthesizer on him. Order the machine to move on the right pressure plate.
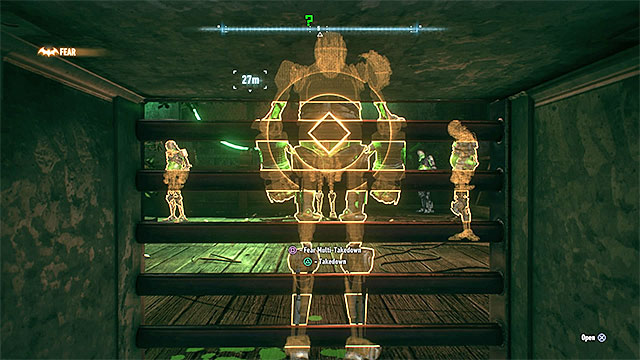 Use the ventilation shaft
Notice that the right door opened. Drive there in the Batmobile and destroy the weakened wall. Enter the building and use the ventilation shaft to reach the room with the robots. You must defeat all machines. You should start by activating the fear takedowns. Once the area is secured, use the batclaw to catch the trophy from distance.
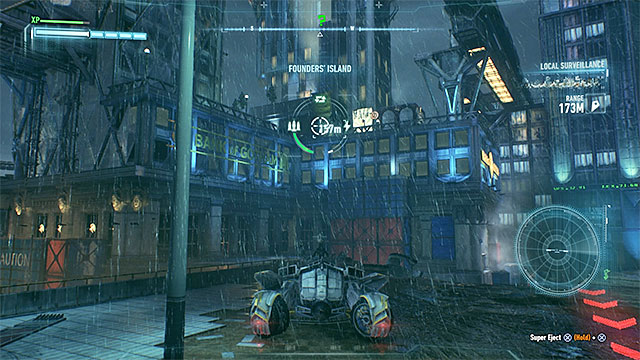
Required gadgets: Batmobile
Trophy walkthrough: The trophy can be found inside the skyscraper and is protected by a weakened wall. You can't use the Batmobile to reach the platform with the hideout, but you can shoot at it from one of the lower levels. The proper place to start the shooting has been shown on the picture above.
Required gadgets: Batmobile, winch, grappling hook
Trophy walkthrough: The trophy can be found in a closed cage on a small, highly hanged cage. Once you reach the destination, read the coordinates [2456, 2663]. Open the world map and use the coordinates (they appear in the bottom right corner of the screen) to find the place that you must investigate - it has been marked on the picture above and it is located in the southern part of GCPD lockup on Bleake Island.
 Use the hook launcher on, among other objects, the Lady of Gotham statue
Once you reach the destination, look around for a generator attached to the wall of the police department. You must load it with Batmobile's winch. A hard time trial is ahead of you - you will have only 40 seconds to get back to the cage with the secret. You MUST use the grappling hook launcher, more specifically it's most upgraded version. You can catapult Batman with greatest strength by pressing the jump key/button three times (don't release the button after the third pressing). Catapult Batman from the Batmobile and use the launcher during the flight. On the way, among other objects, pull yourself to the upper part of the Lady of Gotham statue and to one of the cranes. Make sure to land precisely, don't waste too much time on that.
 Send the robot for the trophy after hacking the defense turret
Required gadgets: voice synthesizer, remote hacking device
Trophy walkthrough: Land on the roof of the building and look around for a large cage with electrified floor near which Riddler's robot is standing. If it's your first encounter with the robot, then you must jump on him and perform the knockdown. You will obtain a chip that allows you to give commands to the robots. If you already have the chip, you can skip this step.
Remain on the roof from which the whole cage can be seen. During this riddle you can't be spotted by the robot (instead of following your orders he would focus on attacking you). First, use the remote hacking device and deactivate the defense turret for half a minute. After that, use the voice synthesizer and start guiding the robot through a not too complicated labyrinth. He must reach the trophy and pick it up. Hack the turret again and then order the robot to walk out of the electrified cage. Now you can attack it and take the trophy.
Required gadgets: Batmobile, winch, remote electrical charge
Trophy walkthrough: It's a hard riddle during which you must guide the ball with the trophy to the end of the labyrinth - the route of the ball has been marked with red color on the picture above.
Point the remote electrical charge at the generator 1 from the picture and make the ball attached to it. Quickly jump to the Batmobile and use its winch to move the hook A as far to the right as possible. If you did everything properly, the ball will land in a new place.
Next step is the hardest. Make sure that the hook A is moved maximally to the right and leave the Batmobile without unhooking the winch. Now use the remote electrical charge on generators 1 and 2 to attach the ball from two different sides. Your objective is to get the ball fly to the right side of the labyrinth - it has been shown on the picture above and you will probably manage to do it after few tries.
Use the winch on the hook B, move it as far down as possible and load the generator 2 with the remote electrical charge to move the ball to the left. Now move generator 1 precisely above the ball, catch it (remote electrical charge) and use the winch to move hook A to the left. Now you must wait for the ball to reach the exit and then take the reward.
 Look around for the trophy near the water
Required gadgets: -
Trophy walkthrough: The trophy has been left near the water and you can take it without using any additional gadgets.
You can use detective mode to quickly find the weakened wallRequired gadgets: -
Trophy walkthrough: The trophy can be found inside a large bridge and it is protected by a weakened wall. Find the wall and glide towards it to get through.
 The place where you will find the trophy
Required gadgets: -
Trophy walkthrough: The trophy can be found on one of the floors of the ruined building in a well visible place. You can obtain it without using any gadgets.
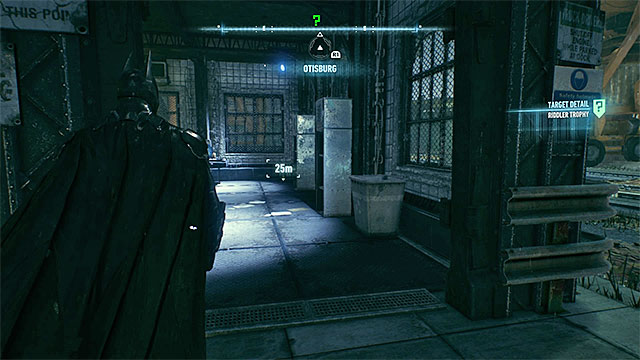 Explore the inside of the small building in the port
Required gadgets: -
Trophy walkthrough: The trophy can be found inside a small building at the entrance to Adams port.
 Send the robots under the container and then crush them by hitting the question mark with the batarang
Required gadgets: voice synthesizer, batarang
Trophy walkthrough: Reach a cage in the port in which a group of Riddler's robots can be found. If you don't have the chip required for controlling the robots, focus on other secrets and sooner or later you will obtain it. If you have it, use the voice synthesizer on the robots. Send them one after another to the nearby container while ensuring that none of them will spot Batman. After sending two-three robots, use the batarang to hit the green question mark. The robots will be crushed. Repeat the process until you eliminate all robots. Once that happens, enter the cage and take the trophy.
Required gadgets: grappling hook, batclaw
Trophy walkthrough: Find the locked cage with the trophy in the port and read the coordinates [3258, 2136]. Open the world map and use the coordinates (they are displayed in the bottom right corner of the screen) to find the place that you must explore - it has been marked on the picture above, it's a large metal construction on Miagani Island. Reach the highest floor of the construction and stand on the pressure plate.
 Use the grappling hook launcher on the way to catapult Batman
A hard time trial is ahead of you - you will have only 40 seconds to get back to the trophy in the port. You MUST use the grappling hook launcher, more specifically it's most upgraded version. You can catapult Batman with maximum strength by pressing the jump key/button three times (don't release the button after the third pressing). Use that method to catapult the hero on the nearby viewpoint. Use the same method two-three more times during the flight. Each time you should pick the highest roofs and antennas and avoid letting Batman to glide for two long. Prepare the batclaw for use in the final phase of the flight. Land once you notice the trophy cage and immediately use the mentioned gadget. The time limit is very inflated, so you can't waste too much time on trying to land perfectly at the collectible.
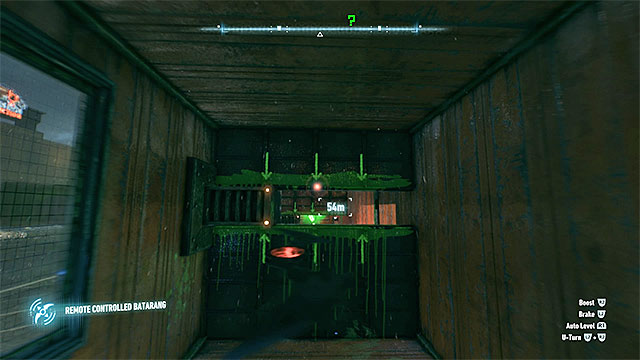 Batarang must fly through all three holes and hit the green question mark
Required gadgets: Batmobile, winch, remote controlled batarang
Trophy walkthrough: Find the oblong cage in which the trophy is placed. You must use Batmobile's winch here. Attach yourself to each of three hooks and pull out the metal objects. You must hurry as they will be slowly returning to their original position. Once you finish using the winch, jump out of the car and use the remote controlled batarang. Aim the gadget at the small right hole and fly through the holes to finally hit the green question mark. Now you can use the newly unlocked entrance to the container and take the secret.
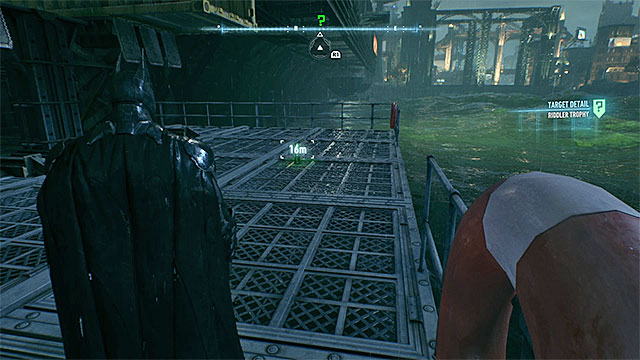 Examine the platform at the water
Required gadgets: -
Trophy walkthrough: The trophy can be found on the large metal platform at the water. You can take it without using any additional gadgets.
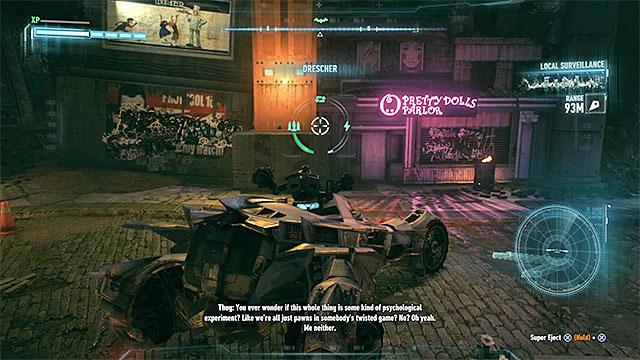
Required gadgets: explosive gel
Trophy walkthrough: The trophy is in Pretty Dolls Parlor in the central part of the Founders' Island. The entrance to the parlor has been shown in the above screenshot and it becomes available only after you have completed The Perfect Crime side mission .
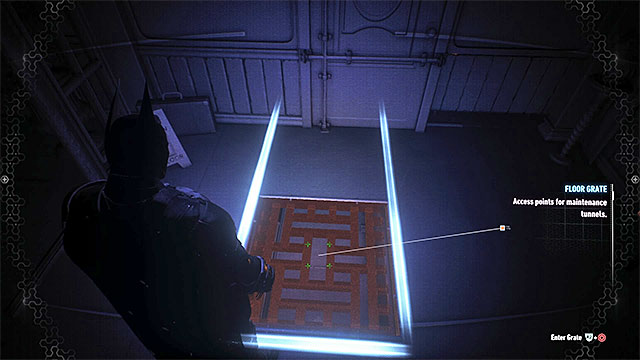 Get through the shaft and destroy the weakened wall
In one of the corridors at the beginning, find the venting shaft embedded into the flooring. Take it and get into a side room. Here, spray the explosive gel over the weakened wall and enter the room with the trophy in it.
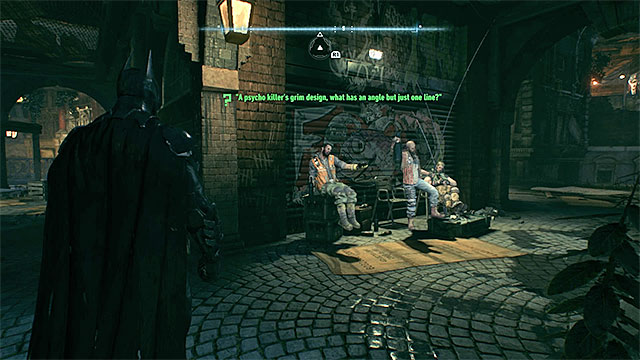 Photograph the murdered people
Required gadgets: -
Riddle walkthrough: Look around under the airships, near the water. You must find three murdered bandits that were left by a serial killer.
 Scan the mansion seen far away
Required gadgets: -
Riddle walkthrough: Get to the top of the building and turn west, to the water. Far away you should see the mansion - zoom the screen on it and perform the scan.
Required gadgets: grappling hook
Riddle walkthrough: Reaching the place where you will make the scan will require you to explore the area thoroughly. Once you reach the marked territory, search for the manhole shown on the picture above. Use it to get to the underground territories.
In the underground territories, focus on examining the ceiling. You should find the place shown on the picture above. Batman can use the grappling hook there and pull himself to the upper ledge.
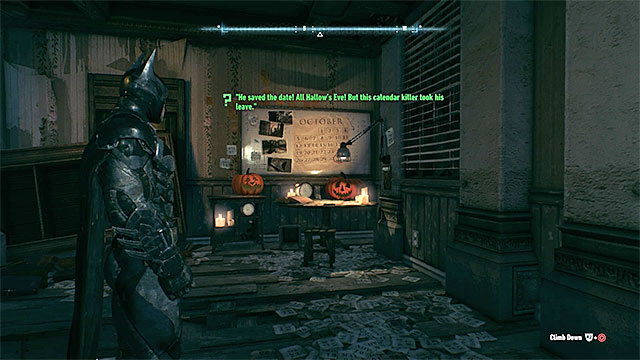 The place where you make the scan
Now all that's left is to enter the small room with the calendar. This is where you must make the scan.
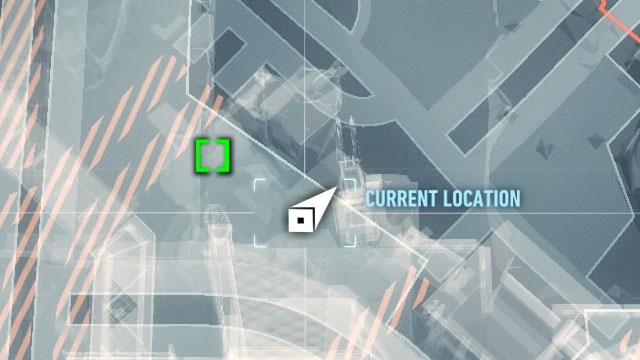
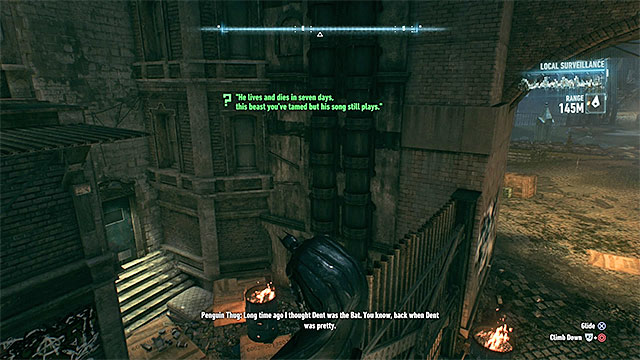
Required gadgets: -
Riddle walkthrough: Explore the underground territories. While at it, listen to sounds of the surrounding, they will guide you to the gate shown on the picture above. Climb on it and go to the entrance to the nearby building.
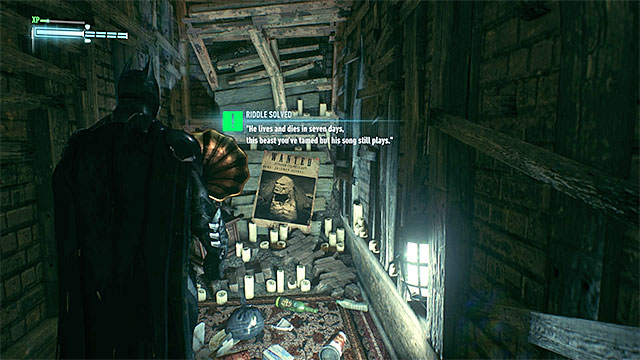 The place where you should perform the scan
After using the door, get to the place where you will find the poster and a large amount of candles. This is where you must activate the scanner.
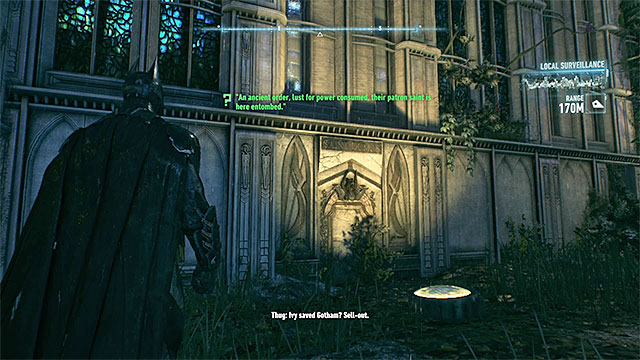 Examine all walls of the church
Required gadgets: -
Riddle walkthrough: Check the underground territories, thus reaching the church and nearby cemetery. Examine all walls of the church to find Saint Dumas tomb that you must scan.
 The logo can be found on one of the walls of the skyscraper
Required gadgets: -
Riddle walkthrough: Examine all walls of the marked skyscraper. You must find and scan the large logo of the Goth Corp.
 Scan the sign at the entrance to the destroyed Penguin's mansion
Required gadgets: -
Riddle walkthrough: It's a simple riddle. Reach the ruined mansion of Penguin and scan the Cobblepot Manor sign that can be found above the main entrance inside.
Required gadgets: batclaw
Riddle walkthrough: Reach the part of the port with large amount of containers. Take an interest in the opened container shown on the picture above.
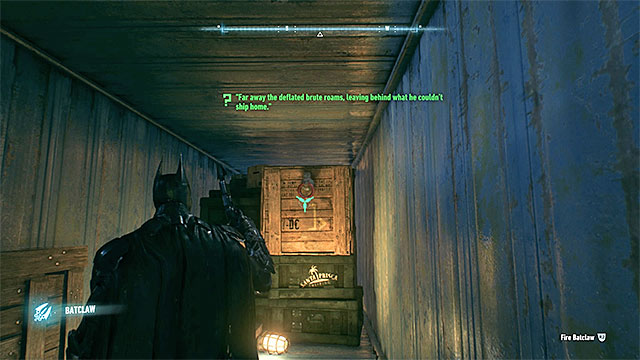 Use the batclaw on the chest and, after that, make a scan
Enter the container and use the batclaw on the chest found ahead of you. After pulling out one of the walls of the chest, scan its insides.
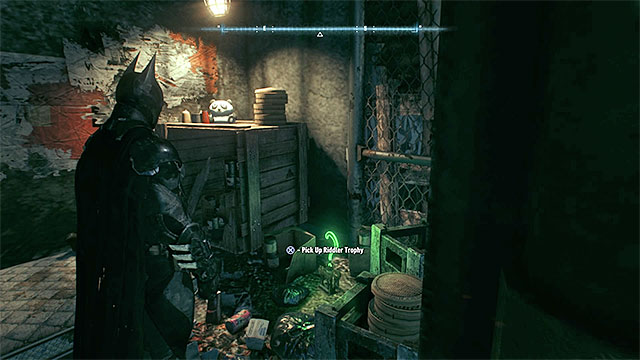
Required gadgets: -
Riddle solution: You solve the riddle in the Pretty Dolls Parlor in the central part of the Founders' Island. The entrance to the parlor has been shown in the above screenshot and it becomes available only after you have completed The Perfect Crime side mission.
 You need to scan the poster on the wall
Walk into the hall, where you have fought Professor Pyg. Find a poster advertising the circus, to the right of the entrance.
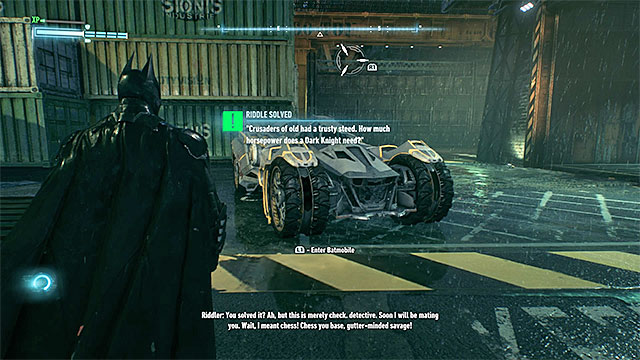 Scan the Batmobile (in any place of the game world)
Required gadgets: -
Riddle walkthrough: It's an unusual riddle. Despite the fact that it is considered as part of Founders' Island secrets, you don't need to get anywhere to solve it. To complete this riddle you must simply scan the Batmobile at any time you want.
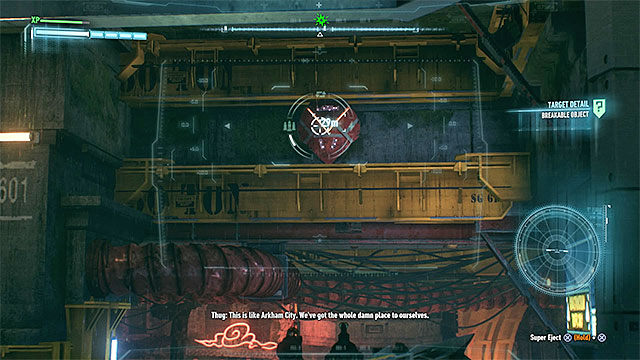 An example breakable object - use the main Batmobile's cannon
There are eleven breakable objects to destroy on Founders' Island. Eliminating them all doesn't mean you complete eleven riddles as the game increase the counter of solved riddles every five broken objects. You can increase the counter by three on the Founders' Island because four "missing" objects can be found in the underground construction of Gotham Metro City (separate chapter of this guide).
Use Batmobile's 60mm cannon on the objects. They are painted in red and can be found mostly on building's walls. You shouldn't have much trouble with finding them, help yourself with zooming the screen.
The above screenshot presents the map of Miagani Island, i.e. one of the three main areas within Gotham city. You can visit the isle since the beginning of the game. What you can find there, among others, are Pinkney Orphanage (Riddler's hideout) and Wayne Tower, but they do not have their separate maps.
Examine the territory under the bridgeRequired gadgets: -
Trophy walkthrough: The trophy can be found in a small room with a bed located under the bridge. You can get it without the need to use any gadgets.
 Use Batmobile to destroy the weakened fragment of the wall
Required gadgets: Batmobile
Trophy walkthrough: The trophy is located in a closed building near the water. Find a weakened fragment of one of the building's walls. Park the Batmobile at the nearby bridge so that you will see the weakened wall, then shoot at it. Now you can reach the room with the secret.
 The wall on which you must use Batmobile's cannon
Required gadgets: Batmobile, EMP, voice synthesizer, batarang
Trophy walkthrough: The trophy is located inside the building and obtaining it is quite complicated. Start by finding a weakened wall leading to the room with the secret. Use the Batmobile to break it and go inside.
In the room you will find Riddler's robot. If it's your first encounter with the robot, then you must sneak up on him and use takedown on him. You will obtain a chip that allows you to give commands to the robots (additionally, you will have to use batarang on the question mark for the robot to be repaired). If you already have the chip, you can skip this step.
Position yourself on the upper ledge from which the whole room is visible. During the riddle you can't be seen by the robot (instead of completing your orders he would have focused on attacking you). Use the voice synthesizer on the robot and order him to stand near the barricade shown on the picture above.
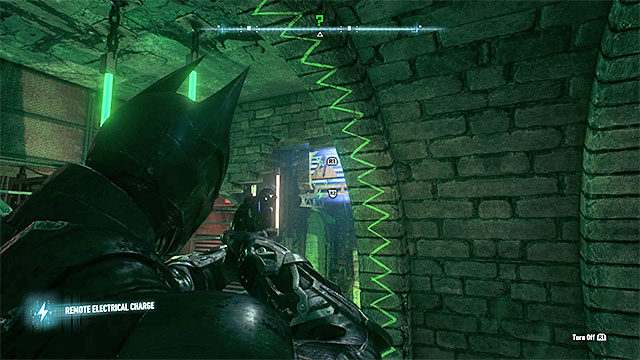 Generator is located on the right side - use EMP on it in order to load it up
Now pick the EMP from the inventory, turn right and send the charge towards the generator attached to the wall. It will activate it. Due to that, the large barricade will move left and ram the robot. Don't worry about it and use the batarang on the left question mark. The robot will be rebuilt. Again, use the voice synthesizer and order the robot to position itself on the right pressure plate in the fenced zone. Now you can take the trophy - it's under the generator.
Required gadgets: Batmobile, winch, batclaw
Trophy walkthrough: The trophy is located in a small cage on the roof. Obtaining access to it is hard. The cage is powered by a fuse box to which you must connect the Batmobile. It means that you must get the vehicle to the roofs. Go south from the secret and find the multi-level parking shown on the picture above. Enter the Batmobile and drive to the highest level of the parking.
There's a jump on the highest level of the parking. You must use it to reach the neighboring roof (help yourself with the afterburner). After that, position your vehicle in a way shown on the picture above. Use the winch from the distance and load the box (the Batmobile's engine RPM pointer must remain in the orange zone). Now all that's left is to capture the trophy with the claw.
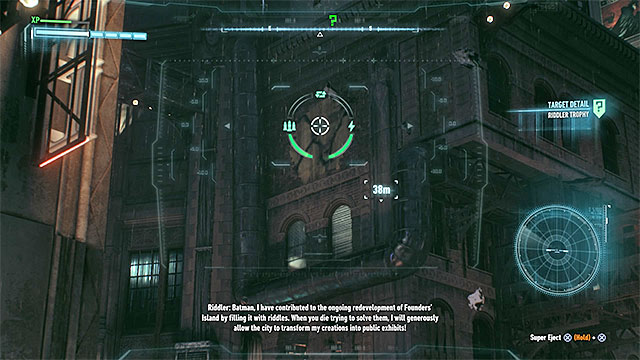 The wall that you must destroy
Required gadgets: Batmobile
Trophy walkthrough: The trophy is inside the building. Examine the building in order to find a weakened part of the wall. Use Batmobile to destroy that wall and then glide into the room with the secret.

Required gadgets: Batmobile, winch
Trophy walkthrough: The trophy is located inside the ball which you must guide through a sort of a labyrinth and make it reach a hole located at the base of a metal construction. In order to complete this plan you must use Batmobile's winch. Start by attaching yourself to the left hook. Move the metal object left and the ball with the secret will drop to the hole shown on the picture above.
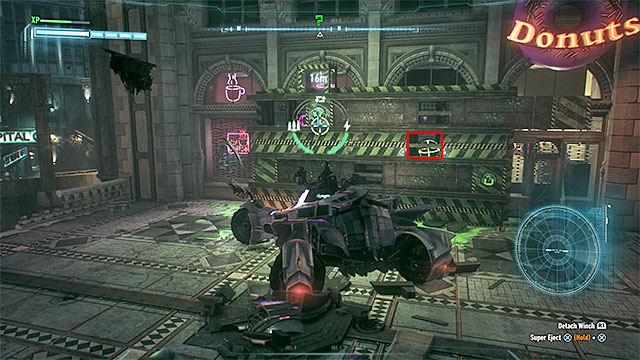
Next, move the metal object right. You must make the ball with the secret move to the right hole shown on the picture above.
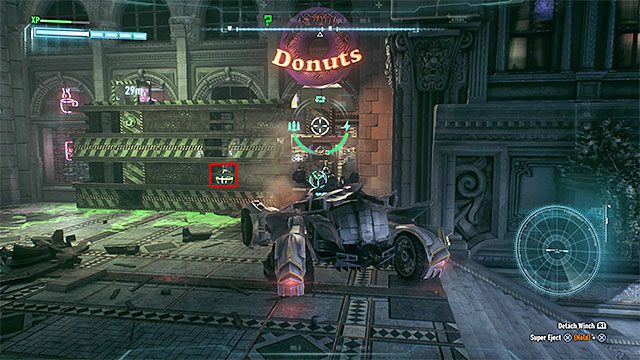
Now, use the winch to attach yourself to the right interactive hook. Change the position of the new metal object so that the ball will drop to another hole shown on the picture. Finally, move the same object left and the ball will reach the last hole. You will be able to walk towards it and take the trophy.
 You must get through the wall
Required gadgets: -
Trophy walkthrough: The trophy is located inside the building. Use detective mode to find a small weakened wall fragment. Fly towards that fragment from one of the higher viewpoints. Get through the wall and take the secret.
Required gadgets: -
Trophy walkthrough: Find the building with a Dang-Good Donuts neon. You must use the gliding option to fly through the giant donut shown on the picture above. It will give you access to the ledge with the trophy.
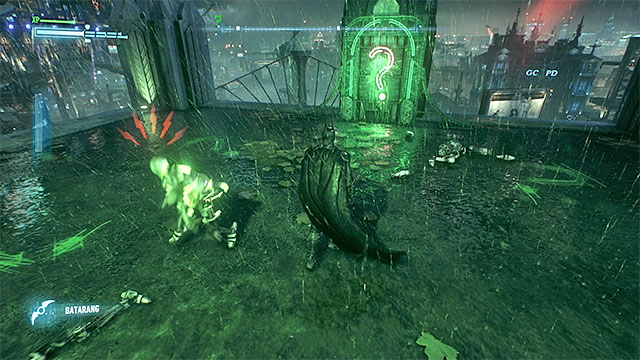 Hitting the question mark will allow you to attack the red robots
Required gadgets: batarang, batclaw
Trophy walkthrough: Reach the roof with a group of Riddler's robots. Start with attacking the green ones and ignoring the red robots. Once you eliminate the green robots, use batarang at the question mark. It will allow you to eliminate the remaining opponents. Finally, use the batclaw to take the trophy from the newly opened cage.
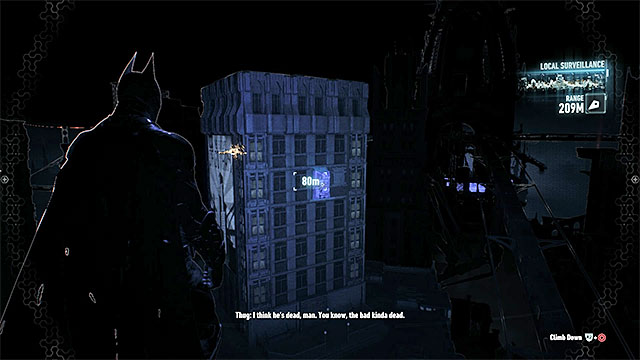 Wall that you must destroy
Required gadgets: -
Trophy walkthrough: The trophy is located inside the building. Find a weakened fragment of the wall in detective mode. Now glide towards that fragment from one of the higher viewpoints. Get through the wall and collect the secret.
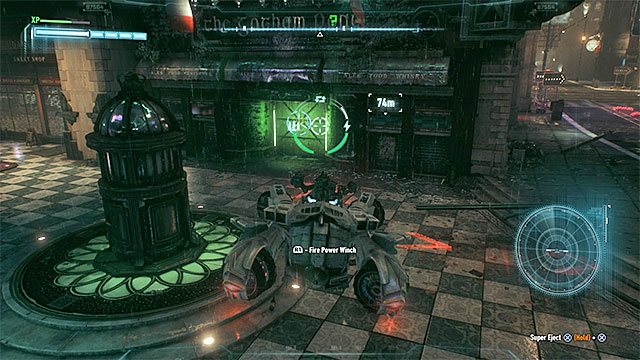 Pull out part of the wall with Batmobile's winch
Required gadgets: Batmobile, winch, Batmobile remote control or remote hacking device
Trophy walkthrough: The trophy is located inside the building. Find the interactive hook on one of the walls and put it out with Batmobile's winch. Now you can walk inside and take the secret. Walking out will be harder due to a defense turret that appeared nearby. You can destroy it with the vehicle (Batmobile remote control) or hack it (remote hacking device).
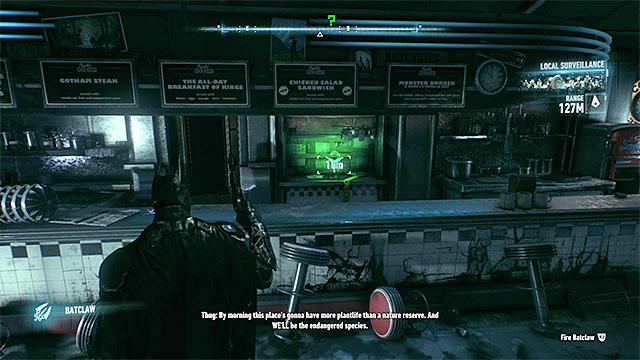 You will notice the trophy behind the counter
Required gadgets: batclaw
Trophy walkthrough: The trophy can be found inside the restaurant in which the game prologue took place. Get inside and use the batclaw to catch the secret found on the other side of the counter.
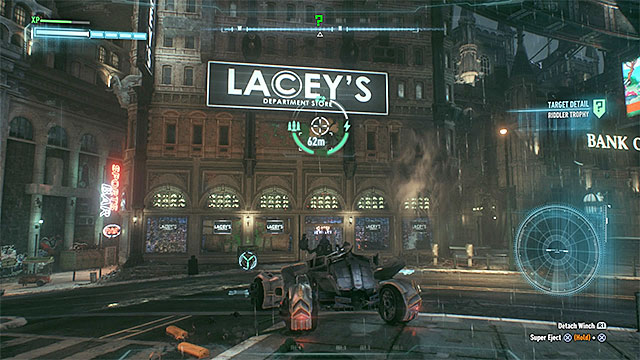 The weakened wall will be uncovered only after you use the winch
Required gadgets: Batmobile, winch
Trophy walkthrough: The trophy is inside the building. In order to gain access to it, you must use the Batmobile. Find the interactive hook and pull the large object with the winch. This will raise the large shop banner. Look up and use Batmobile's weaponry to destroy the newly uncovered weakened wall. Now you can reach the hole and walk to the room with the secret.
Required gadgets: grappling hook
Trophy walkthrough: You must examine the tunnels under the island. Use the grappling hook to get to the metal beams at the ceiling. Now find the balcony shown on the picture above and pull yourself there. The trophy can be found in the corner part of the balcony.
 Reach building's top
Required gadgets: -
Trophy walkthrough: The trophy is located on the small roof of the skyscraper. You can take it without using any gadgets.
 The side door of the wagon is open
Required gadgets: -
Trophy walkthrough: The trophy can be found inside an inactive wagon to which you can get through one of the open side doors (by gliding or using the grappling hook).
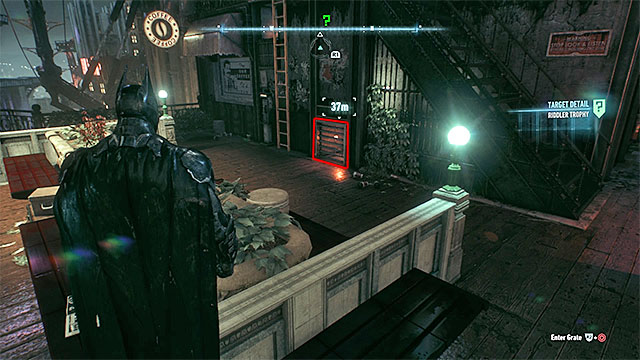
Required gadgets: -
Trophy walkthrough: The trophy is in a small room inside the building. Look around for the ventilation shaft shown on the picture above and use it to reach the secret.
 Find the wagon with the secret
Required gadgets: -
Trophy walkthrough: The trophy is located on the roof of one of the wagons on Grand Avenue station. You can take it without the necessity of activating any gadgets.
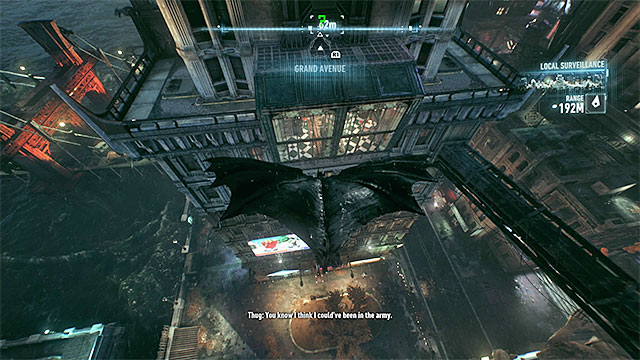 Glide towards the glass wall of the building and get through it
Required gadgets: -
Trophy walkthrough: The trophy is located at one of the higher floors of the large building. You will get in by gliding through the large glass fragment of the wall (fly there from a high viewpoint).
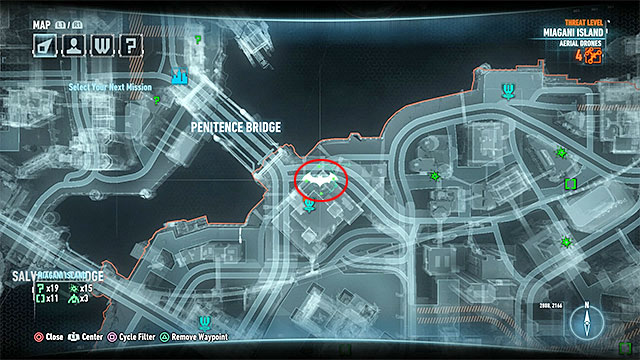
Required gadgets: grappling hook
Trophy walkthrough: The trophy is hidden in a small closed cage on the roof of the building. Once you reach the destination, read the coordinates [2887, 2171]. Open the world map and use the coordinates (they appear in the lower right corner of the screen) to find the place that you must explore - it has been marked on the picture above, it's in Elliot Memorial hospital that is located in the northwestern part of Miagani Island.
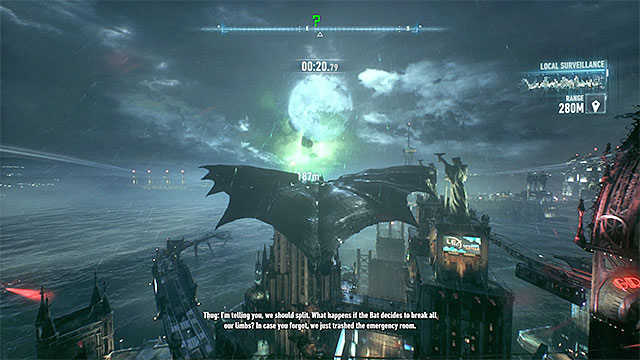 Use the grappling hook launcher to catapult Batman as high as possible - he must effectively avoid the smaller buildings and maintain high flight speed
Once you reach the destination, position Batman on the green pressure plate and wait for the time trial to start. It's quite requiring - you will have only 40 seconds to get back to the cage with the trophy. You MUST use the grappling hook launcher here, more specifically it's most upgraded version. You can catapult Batman with the highest strength by pressing the jump key/button three times (release the button after pressing it for the third time). Shoot the hero in such way from the hospital's roof. During the rest of the flight use the launcher in similar way around two more times. Each time you should pick the highest roofs and antennas to avoid getting close to the lower buildings. If you complete everything according to the plan, you will reach the open cage while still having more than ten seconds of time.
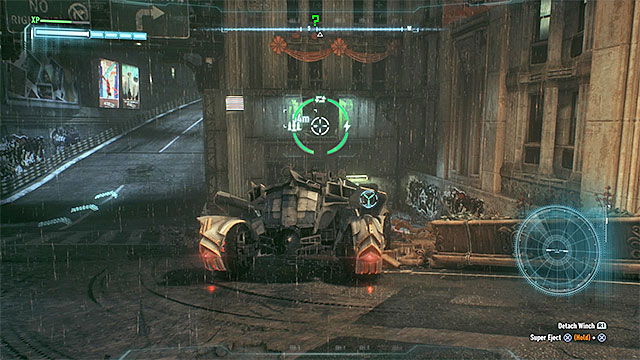 Use the winch to destroy the weakened wall
Required gadgets: Batmobile, winch, grappling hook, Batmobile remote control
Trophy walkthrough: The trophy is inside the building and you must use Batmobile to obtain access to it. First, use the winch and pull out a large block from the wall. Then, destroy the weakened upper wall and get there as Batman. Use the grappling hook to pull yourself to the upper room. Once you take the secret, Riddler's robots will appear at the exit. You won't be able to eliminate them in regular way as the machines will have firearms. Instead, use the Batmobile remote control and release the hook. The containers will fall on the robots. Finally, use the winch again to unlock the exit.
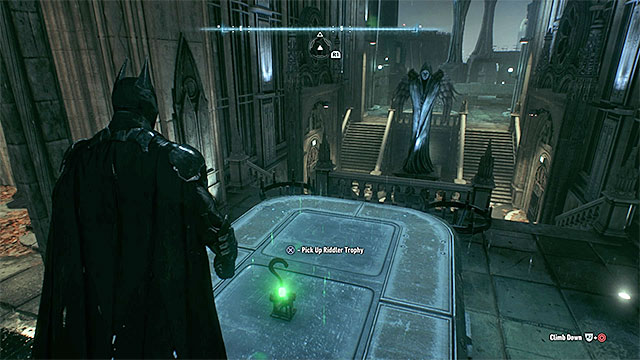 Secret is located in a well visible place
Required gadgets: -
Trophy walkthrough: The trophy is lying on a sarcophagus and you can take it without the need of using any gadgets.
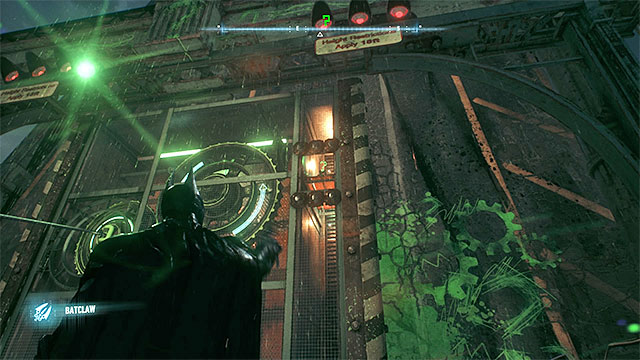 Once the trophy is in an uncovered place, use the batclaw
Required gadgets: Batmobile, winch, batclaw
Trophy walkthrough: Reach the destination in Batmobile and use the winch on the construction. Make the whole mechanism move and quickly jump out of the vehicle. Focus on the platform with the trophy that will slowly rise. You must use the batclaw when the trophy will be temporary in the uncovered place.
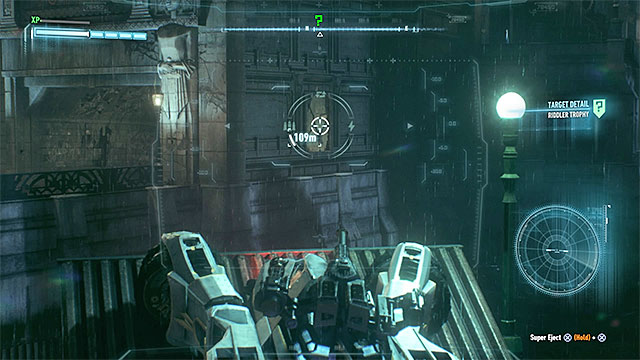 Position yourself near the water, in the place from which the weakened wall is visible
Required gadgets: Batmobile
Trophy walkthrough: The trophy is located inside the building near the water. Access to it is guarded by a weakened wall. Position yourself in the Batmobile in such a place (for example, near the ramp) so that you would see the wall. Now all that remains is to destroy it and glide towards the hideout with the secret.
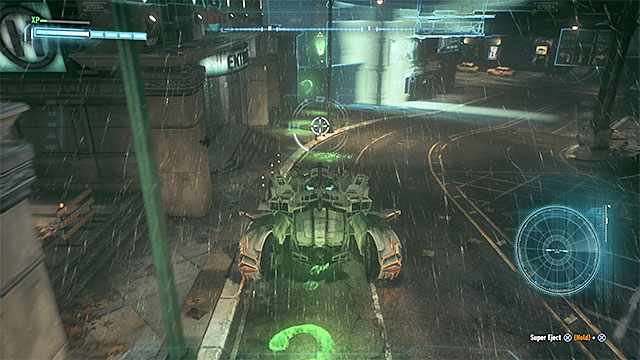 The question marks will appear due to using the forensic scanner
Required gadgets: Batmobile, forensic scanner
Trophy walkthrough: Find the glowing green button on the wall of one of the buildings, ride towards it in the Batmobile and activate the forensic scanner. Remain in combat mode of the vehicle and start following the green question marks appearing due to the scanner's work. Don't leave the combat mode even when you will have to use the right ramp to reach the upper bridge and continue the search.
 The round green sign shows you the fragment of the wall that can be destroyed
The question marks will lead you to the building on the right from Jenna's Furniture shop on which a unique round sign will appear. Use the Batmobile's weaponry there, destroying the weakened wall fragment. Now you can get there and take the trophy.
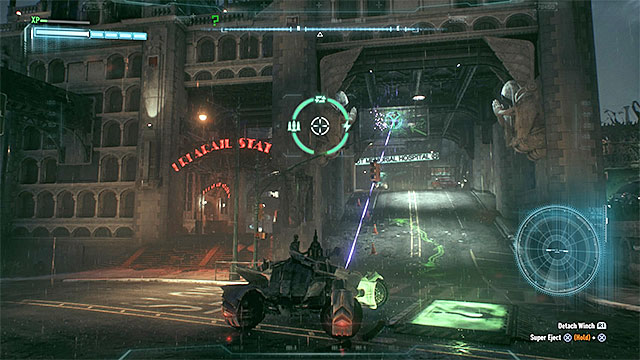
Required gadgets: Batmobile, winch, suppressive fire, batclaw
Trophy walkthrough: There's a rather complicated puzzle to solve here. First you must use Batmobile's winch on the upper hook shown on the picture above - it can be found on the other side of the street from the building with the green question marks. Hooking to the generator will load Batmobile's weapons.
 Shoot the question marks
Don't unplug yourself from the generator. Instead, move the Batmobile to the large pressure plate. Now, start using Batmobile's weaponry (any cannon you want) to hit the lighted up question marks. After completing the first sequence, groups of four question marks will light up twice. Each time you must hit them fast enough , otherwise you will have to repeat the riddle from the start.
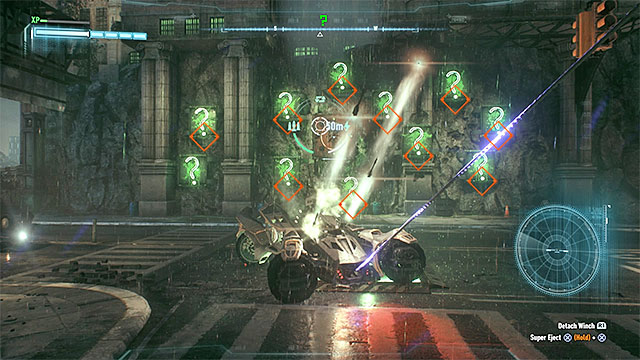 Shoot the rockets and quickly hit the button (or few buttons) that remained active
Finally, all the green question marks will light up. Now use the suppressive fire to hit most of the buttons with a series of rockets. At least one of the buttons will remain active - find it quickly and shoot with the standard weapon. If you managed to hit all the question marks, the cage with the trophy will open and you will be able to take it with the batclaw.
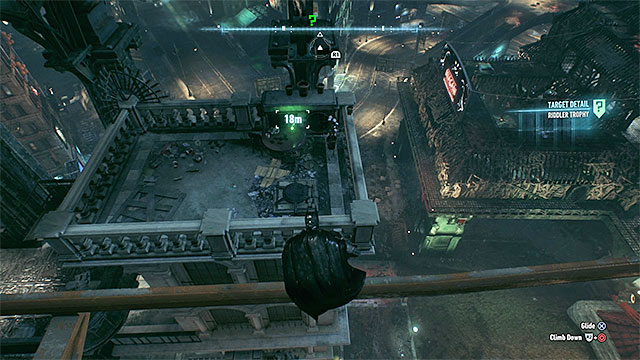 Reach the small tower
Required gadgets: -
Trophy walkthrough: The trophy can be found on the top of one of the towers near the rail station. You can take it without the need of using any gadgets.
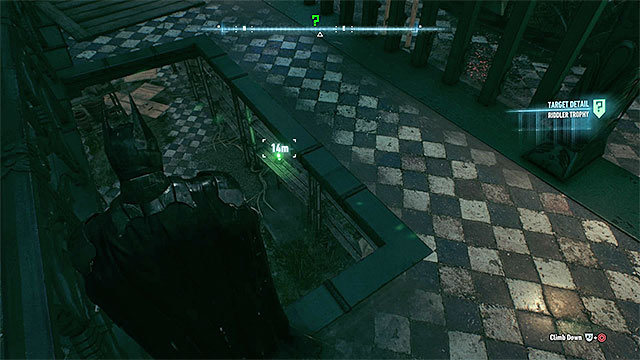 Finding the trophy won't be hard
Required gadgets: -
Trophy walkthrough: The trophy is on one of the lower floors in the botanical gardens. You can get to the gardens by gliding and thus avoiding Poison Ivy's plants.
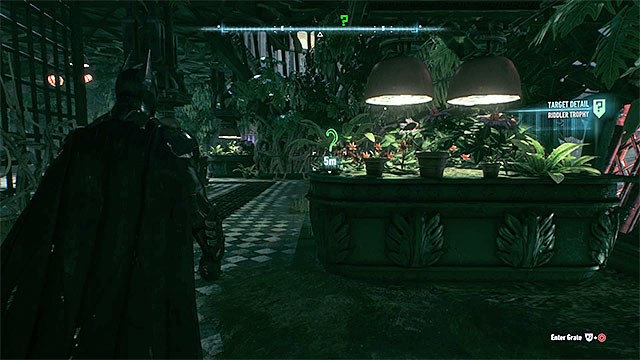 Check the greenhouse
Required gadgets: -
Trophy walkthrough: The trophy is in the greenhouse in the southern part of the botanical gardens. You must only find the door that leads to the room with the secret.
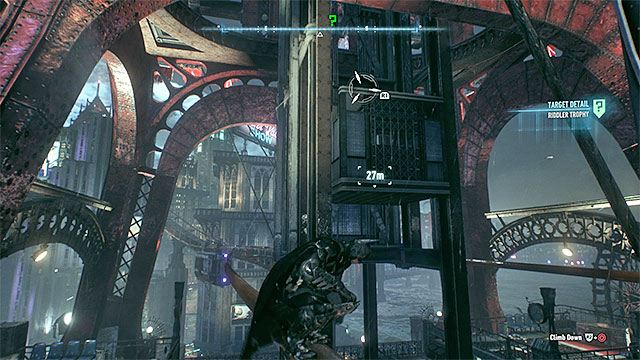
Required gadgets: grappling hook
Trophy walkthrough: The trophy is located inside a small elevator shown on the picture above. Get to the roof of the elevator with the grappling hook, jump inside through the small hole and take the secret.
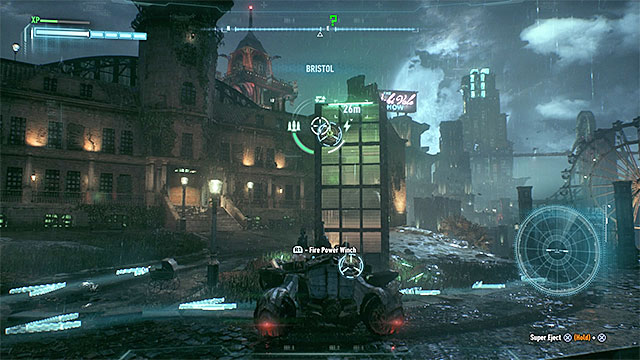 Find the weakened wall at the base of Lady of Gotham statue
Required gadgets: -
Trophy walkthrough: The trophy can be found on the small island with the Lady of Gotham statue. Use detective mode to find the weakened wall at the base of the large statue. Glide towards it and break through the wall to reach the trophy.
 Send the robot towards the lower pressure plate
Required gadgets: voice synthesizer, explosive gel, batarang
Trophy walkthrough: The trophy can be found in a locked cage near which you will find Riddler's robot. If it's the first time you face the robot, you must sneak up on him and perform the takedown. By doing so you will obtain a chip that allows you to give commands to the robots (additionally, after that you will have to use the batarang on the middle question mark to respawn the robot). If you already have the chip, you can skip this step.
Position yourself on the upper ledge and make sure that the robot won't see you. Pick voice synthesizer from the inventory and send the robot towards the lower pressure plate.
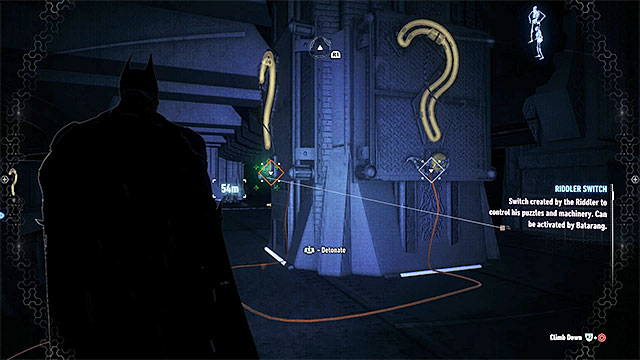
Now, focus on examining the upper ledge - you must find the two question marks shown on the picture above and spray the explosive gel on them. Once that is done, stand on the upper pressure plate. Detonate the gel and quickly send two batarangs at the green question marks in front of Batman. If you turn off all four question marks quickly enough (two with the explosive gel and two with the batarangs), the cage with the secret will open.
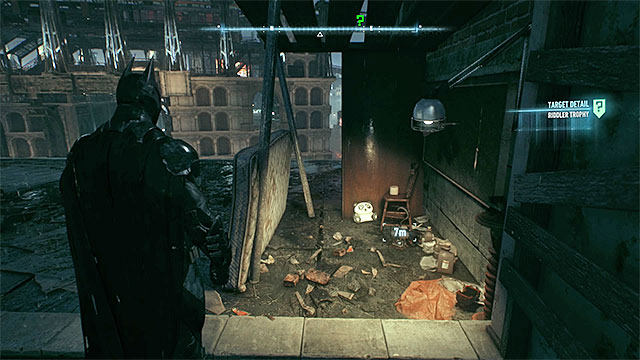 Check the roof of the orphanage
Required gadgets: -
Trophy walkthrough: The trophy can be found on the roof of the Pinkney's orphanage. It is hidden behind a mattress and you can collect it without using any gadgets.
Start with catching the upper hookRequired gadgets: Batmobile, winch, remote electrical charge
Trophy walkthrough: The trophy can be found inside a ball located in a small tower. Your job is to guide the ball to the bottom of the construction. In order to complete this riddle you must use Batmobile's winch and remote electrical charge alternately. Start with using the winch on the highest hook and pulling out the metal object.
 You can push the ball to the lower parts of the tower with the generators
Leave the Batmobile for a while, find the highest generator and use remote electrical charge on it. This should push the ball to the middle part of the tower. Now you must repeat all the steps - use the winch on the middle hook and after pulling it out use the remote electrical charge on the middle generator. The ball should fall to the lower part of the tower and land in the container. Now you must pull out the lower metal object with the winch. Inside you will find the ball - pull the trophy from it.
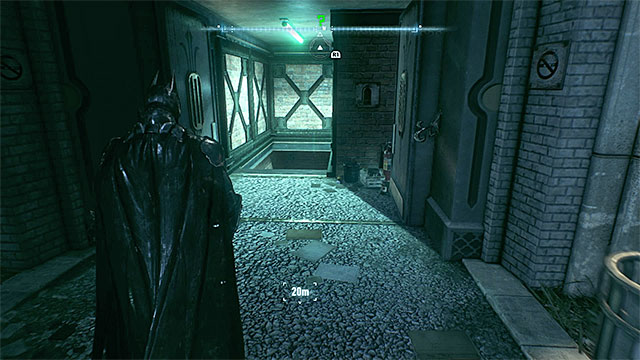
Required gadgets: -
Trophy walkthrough: The trophy can be found in one of the middle floors of Wayne Tower. Examine the skyscraper to find the entrance to the building shown on the picture above.
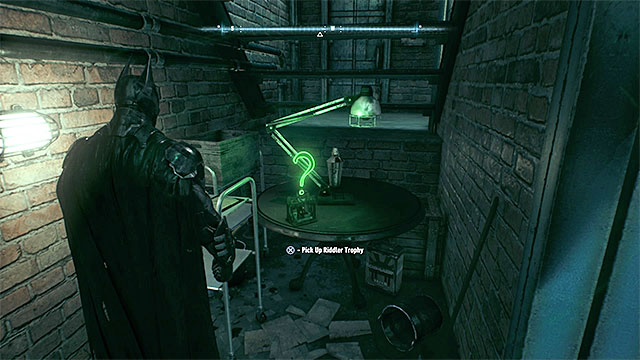 The trophy can be found under the stairs
Once you get inside the tower, follow the corridors and turn right the first moment you have the chance to. There you will find the trophy hidden under the stairs.
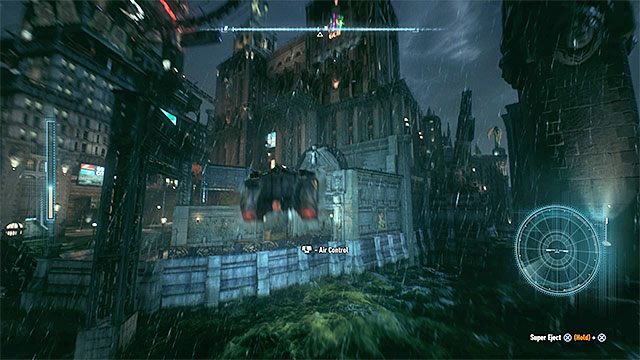 Use the jump
Required gadgets: Batmobile, afterburner, remote hacking device
Trophy walkthrough: Find the glowing green button on Wayne Tower wall, drive towards it and activate the forensic scanner. Remain in battle mode and start following the green question marks appearing due to the work of the scanner. They will lead you to a jump. Accelerate and use the afterburner to jump above the water.
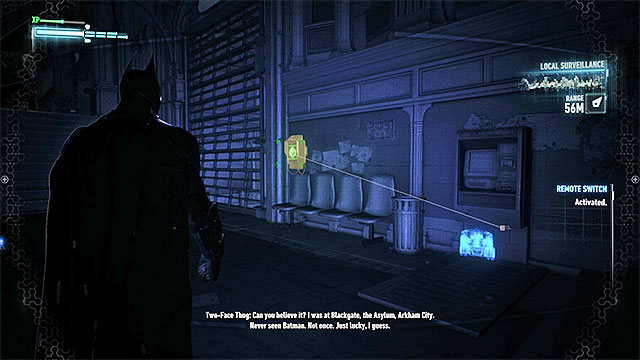 The panel that you must hack
After landing, activate the scanner again and resume following the question marks. This time they will lead you to a small blocked passage on Grand Central station. Leave the Batmobile and walk around the building from the left side. Once you reach the station, find the control panel and hack into it with the remote hacking device. You will unlock the road for the Batmobile.
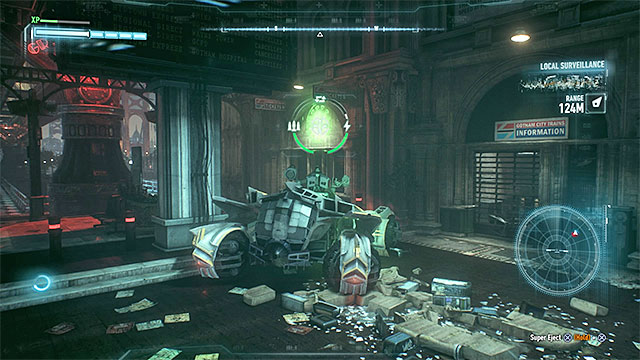 Find the round green sign and use 60mm cannon on it
It's almost the end of the ride. Find new question marks until a green round sign will appear on one of the walls. You must shoot at it with Batmobile's weaponry and thus destroy a fragment of the wall. Use the newly unlocked passage to reach a small room with the trophy.
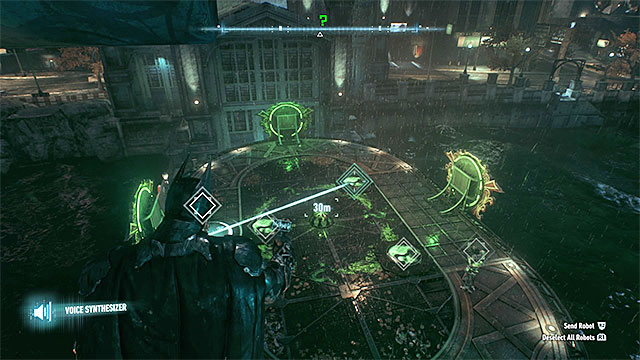 Send the robots on two different pressure plates and go yourself on the third one
Required gadgets: voice synthesizer, batclaw
Trophy walkthrough: Investigate the pier in order to find two Riddler's robots and don't let them see you as they would attack you (additionally, one of the machines has firearms). If it's your first encounter with the robots, then you must sneak up on one of them and perform a takedown. By doing so you will obtain a chip that will allow you to give orders to the robots. If you already have the chip, you can skip this step.
Position yourself on any higher ledge and start using the voice synthesizer on the robots. Each of them must be positioned on separate pressure plate. As Batman, stand on the third pressure plate. Now you can catch the trophy with the batclaw.
Important! While solving this riddle, you can face a game bug due to which the robots will start to "clone". In such case you can send all three machines to pressure plates and get the trophy from longer distance.
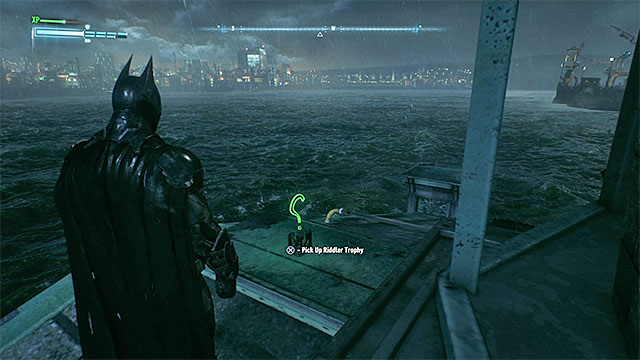 Reach the end of the pier
Required gadgets: -
Trophy walkthrough: The trophy can be found at the end of the pier and can be obtained without using any gadgets.
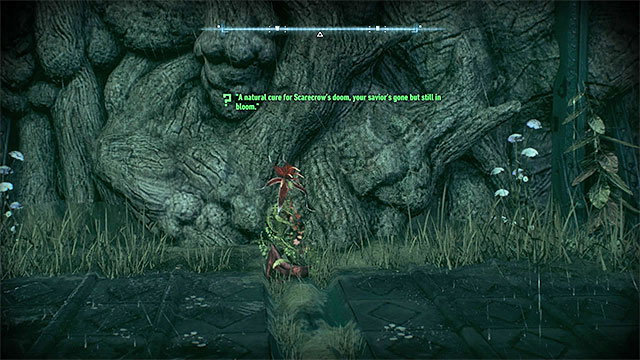
Required gadgets: -
Riddle walkthrough: You can solve this riddle only after progressing enough in the storyline, more specifically after you get rid of the cloud above the Gotham with Poison Ivy's help. Go to the place where you always met with Poison Ivy. Find the red flower shown on the picture above and scan it.
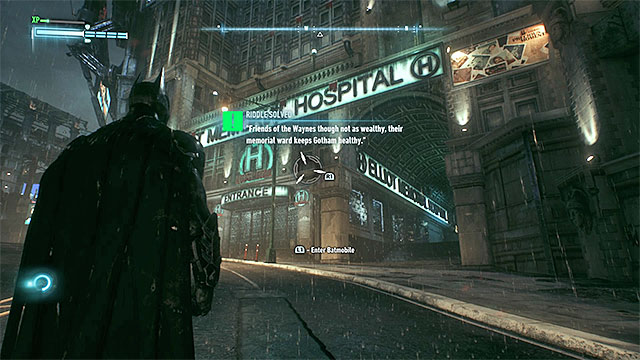 Scan the hospital logo from a distance
Required gadgets: -
Riddle walkthrough: Go to the Elliot Memorial hospital. You must scan the board with hospital name. It can be done from a distance long enough to make the whole board fit in the frame.
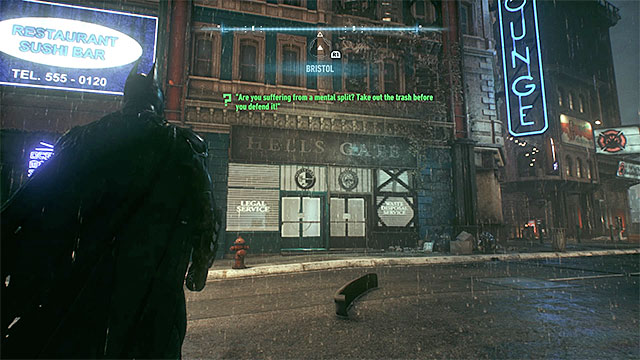 The building that meets the requirements
Required gadgets: -
Riddle walkthrough: A simple riddle. After reaching the destination, find the building with Hell's Gate sign (it's on the left from the large blue neon) and scan it.
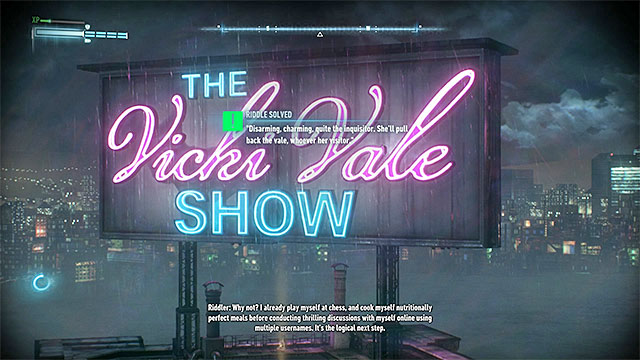 The object to scan is a large and hard to miss neon
Required gadgets: -
Riddle walkthrough: The object to scan is large Vicki Vale Show neon. Scan it from large distance, preferably from the roof of one of the nearby skyscrapers.
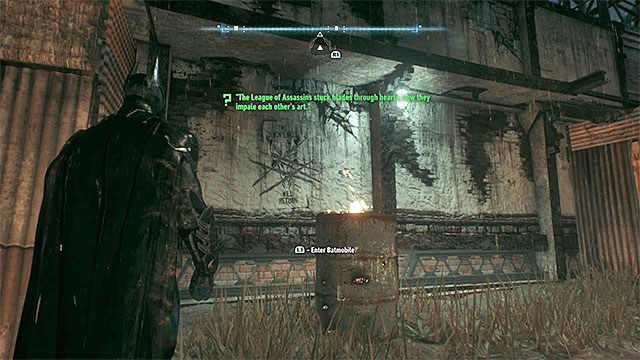 Zoom the screen for the scan to success
Required gadgets: -
Riddle walkthrough: Investigate the alley between the buildings. Take interest in the defaced drawing on the wall and scan it.
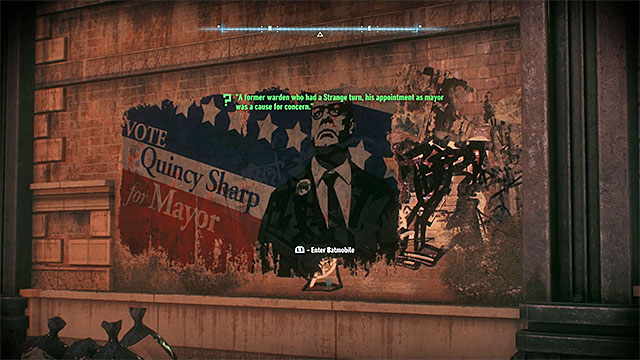 Find the partially destroyed election poster
Required gadgets: -
Riddle walkthrough: Examine the territory at the base of two buildings. On the wall of one of them you will find a partially damaged election poster of Quincy Sharp. You must scan it.
 Climb on the roof and zoom the screen so that the Wonder Tower from Arkham City will fit the frame
Required gadgets: -
Riddle walkthrough: Reach the top of the pointer building. You must scan the Wonder Tower seen in the distance in Arkham City visited in previous installments of the series (zoom the screen on it).
Required gadgets: remote hacking device
Riddle walkthrough: The riddle can be solved inside Pinkney's orphanage. Additionally, you can solve it only after unlocking tenth Riddler's trial. Reach the side room in which Batman cooperated with Catwoman in moving the blocks on the large game board. Examine the side territory on the left - there you will find the control panel shown on the picture above. Hack into it with the remote hacking device - MASTERPLAN is the password.
 Scan the helmet lying on the table
Enter the new room and walk towards the table found in front of the entrance. You must zoom on the helmet and scan it.
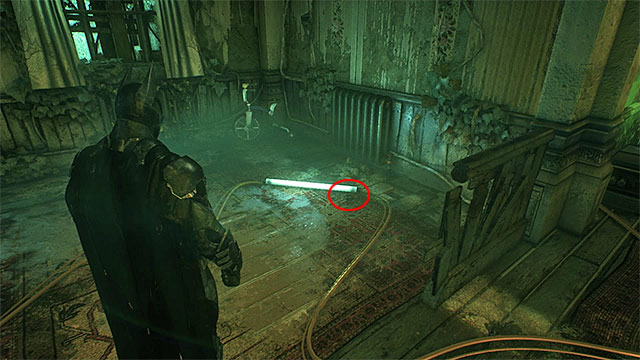
Required gadgets: -
Riddle walkthrough: The riddle can be solved inside Pinkney's orphanage. You must scan the collar used to imprison Catwoman in the orphanage. If Catwoman haven't been rescued yet, then look for her in the main room and zoom on her neck. If you have completed all the trials and saved her, then the collar can be found in the side room leading to the place where the tenth trial took place. It will be lying on the ground near a light turned on. The place has been shown on the picture above.
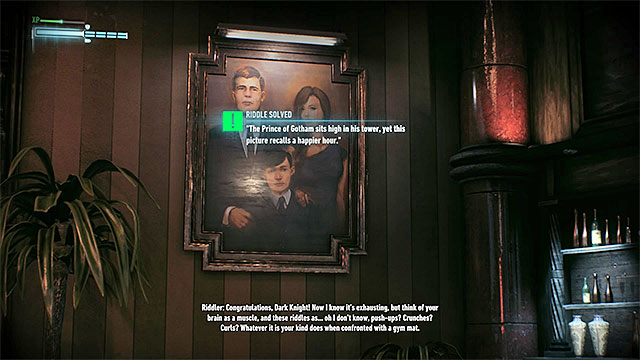 Find the painting of Wayne's family
Required gadgets: -
Riddle walkthrough: Go to Wayne Tower. You must reach Bruce Wayne's office found on the highest floor of the building (using the grappling hook will be helpful). After entering the room, find the painting of Wayne's family on the left from the bar and scan it from the proper distance (don't stand too close).
 An example breakable object - use the main Batmobile's cannon
There are fifteen breakable objects to destroy on Miagani Island. Eliminating them all will complete three new Riddler's puzzles (solved puzzles counter will increase every five destroyed objects).
Use Batmobile's 60mm cannon on the objects. They are painted in red and can be found mostly on building's walls. You shouldn't have much trouble with finding them, help yourself with zooming the screen.
 Remote controlled batarang will allow you to find the enemy carrying the bomb
Three bomb rioters can be found in Miagani Island. In each case method of operation is the same. You must start with getting to the pressure plate and, after positioning yourself on it, listen to the speech of the Riddler. Next step is throwing the remote controlled batarang towards the enemies causing trouble on the streets. Don't knock down the enemies, instead only make the batarang fly next to them. One of the enemies will be identified as bomb rioter and the game will mark him in red.
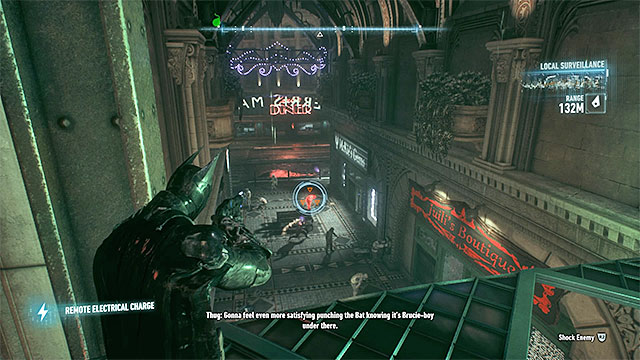 Use the EMP on the bomb rioter
The final phase is neutralizing the bomb that the marked in red rioter is carrying. In order to do it you must use the EMP. You can either shoot the charge from large distance or during the battle. In the latter case, make sure that you will takedown the enemy early and help yourself with the combination of buttons/keys responsible for quick using of the mentioned gadget.
The above screenshot presents the map of the interior of Panessa Studios, i.e. one of the main locations on Bleake Island. This is a location that you will visit many times while completing the main story, but the full access to it can only be obtained after resolving a crisis situation - the appearance of Harley Quinn. You should focus on finding secrets only after completing the main task Stop Harley Quinn from kidnapping infected Jokers.
Note - The game does not save the progress in gaining secrets automatically, so be careful not to turn off the computer too soon, because you might lose some of them. To enforce autosave you need to get outside the building or get back to the central part of the movie studio, which is the Backstage.
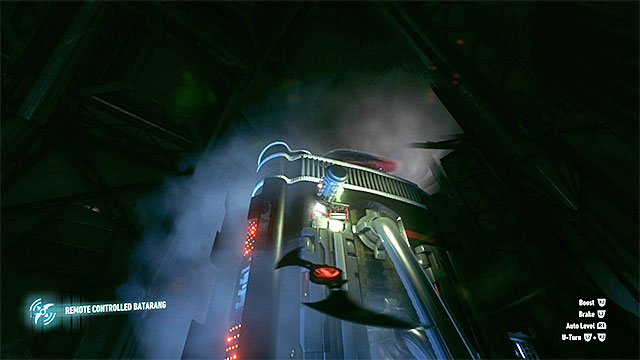
The Freeze Blast is a unique gadget, the possession of it is required for completing some of the secrets in the movie studio. You don't gain it during the completing the main story, but getting it, fortunately, is very simple. Go to the Quarantine Area, the big room which is close to the way out from the movie studio. In that room there are several cells in which Batman keeps/used to keep the infected Jokers. The gadget you are looking for is on the small table, next to the cell on the left, as shown on the picture.
Required gadgets: remote batarang
The description of finding the trophy: The Trophy is in the area between the Quarantine Area and the Backstage. You can't get to it as the access to it is limited by a closed gate. To solve that problem you need to use the remote batarang. Place yourself in the Quarantine Area and send the batarang towards the discharges at the ceiling, as shown at the picture above. You need to get the batarang electrified.
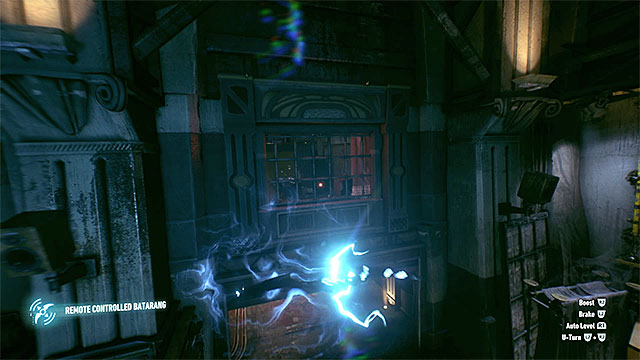 The electrified batarang needs to fly through the shutter
Turn the batarang back and steer it towards the big shutter placed above the way out from the Quarantine Area. Get through that shutter and turn right. Send it to the lower level and make it hit the fuse box, which is located next to the closed gate. You can enter the new area and take the trophy that is on the floor next to the stairs.
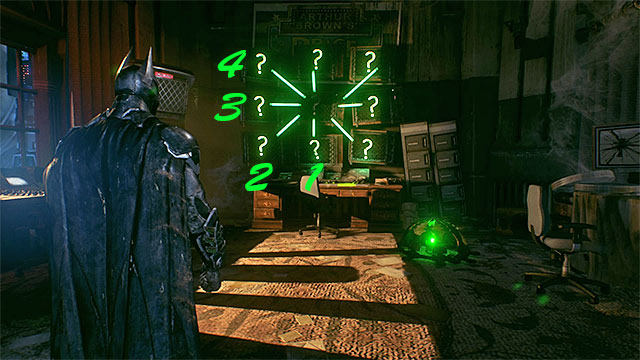
Required gadgets: remote batarang
The description of finding the trophy: The Trophy is in the area in between the Quarantine Area and the Backstage. Do all of the tasks needed in order to open the side room, which has been mentioned in the description of finding the trophy 1. Enter the new area, use the stairs and get to the room on the next floor. There is a simple riddle to solve, you need to turn all of the question marks off. Hitting a particular question mark will lead to the turning on or off of all of the question marks that are connected with that particular one by a line (vertical, horizontal or diagonal). There are many solutions of that riddle, an exemplary solution is shown on the picture above, that is: middle down question mark, left down question mark, left middle question mark, left upper question mark.
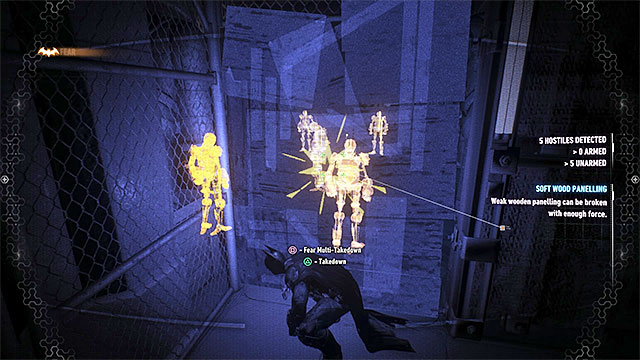 You can activate the fear takedowns by placing yourself next to the weakened wall
Required gadgets: fear takedowns (maximally improved)
The description of finding the trophy: The Trophy is in the area in between the Quarantine Area and the Backstage. There is a separate door that leads to it. After entering the new room turn left towards the ventilation shaft and go through it. Get out of the shaft and stand behind the weakened wall, next to one of the five Riddler's robots. You need to activate the fear takedowns. You can finish that task only when you have the maximally improved version of that attack, which allows you to get rid of all five targets at one run. Otherwise you won't be able to neutralize all five machines in four seconds. If you haven't improved that ability yet, you need to wait until you gain enough of the experience points and do some shopping. After eliminating the robots go to the previous room and get the secret from the newly opened cage.
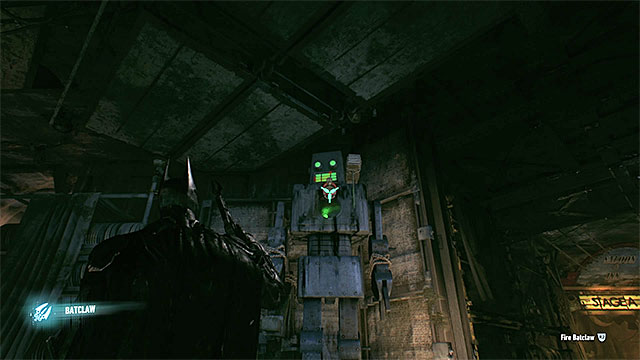 The place of using the claw
Required gadgets: the claw
The description of finding the trophy: in the main area of the Backstage you need to find an interactive grapple, get hold of it with the claw and start pulling. Use that gadget again in order to catch the trophy.
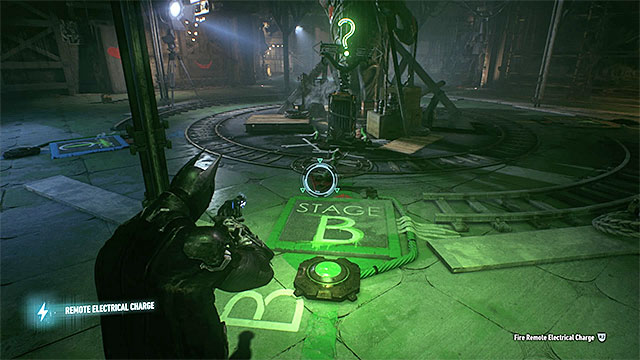
Required gadgets: electric charge, batarang
The description of finding the trophy: You solve this riddle in the main area of the Backstage and this one is a little bit complicated. Namely, it involves the turning of the Poseidon's statue. During solving of that riddle you will need to use two gadgets - batarangs, you can hit the main button and change the direction of the turning of the statue (right or left), and with the electric charge you can make the whole construction move and stop it in the right places.
Use the electric charge on the generator on the statue and get to the plate with a green letter B on it. Wait until the statue turns that way and then use the opposite charge of the electric charge to stop it. The red arrow should be turned towards the plate (as shown on the picture above) and the first green light should turn on.
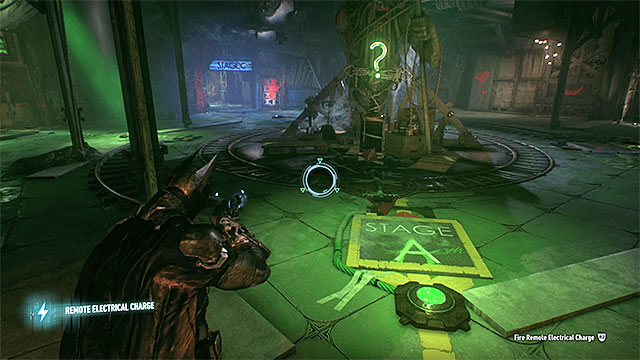 Stop the arrow at the plate with a letter A on it
Now, the statue should start turning right, so when you need it use the batarang on the upper button (the right arrow needs to turn on). Make the whole mechanism move by using the electric charge, quickly get to the plate with a green letter A on it and wait until you can use the electric charge again to stop the construction. The second green light will turn on.
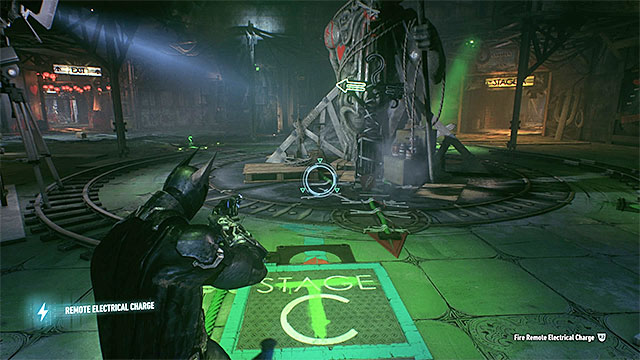 At the very end the arrow needs to stop next to the plate with a green letter T on it
You need to make the statue turn left by using the batarang, because it can't, at any point, get close to the "starting" plate which resets the riddle. Activate the generator by using the electric charge and go to the plate with letter C, on which a green letter T has been painted. Wait until the red arrow shows up and use the electric charge to stop the construction. The last green light will turn on, and finally you will be able to take the trophy from the cage.
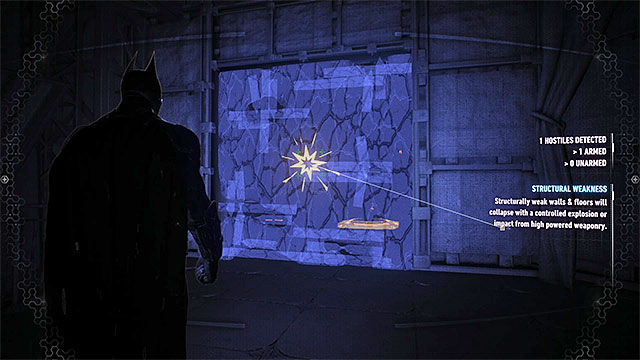 Locate the weakened wall and use the explosive gel on it
Required gadgets: explosive gel, remote batarang
The description of finding the trophy: Explore the northeast part of the main area of the Backstage. There is a weakened wall there (you can use the detective mode to locate it faster) and you need to destroy it by using the explosive gel. After doing that get into the new room and place yourself on the pressure plate.
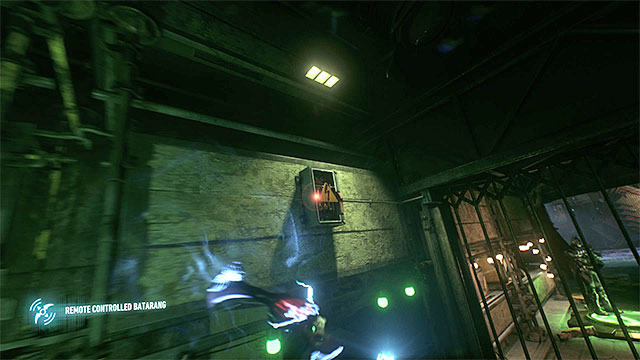 You need to hit the fuse box at the very end
Turn towards a small opening in the wall and start throwing remote batarangs into the small shaft. First two batarangs need to hit the green question marks in different parts of the shaft. The last, third, batarang needs to get through the whole shaft and hit the fuse box, which is in the room next to the one in which Batman is. It will lead to unlocking the trophy.
Required gadgets: electric charge
The description of finding the trophy: Explore the northeast part of the main area of the Backstage and use the electric charge to unlock the access to the room in which there is a cage with trophy. In order to open the cage you need to solve a riddle by activating the nearby generators by using the electric charge. You need to do it in a particular order. It is shown at the picture above and is as follows (counting from left): the first generator, the fifth generator, the seventh generator, the third generator, the second generator, the fourth generator, the eighth generator, the sixth generator.
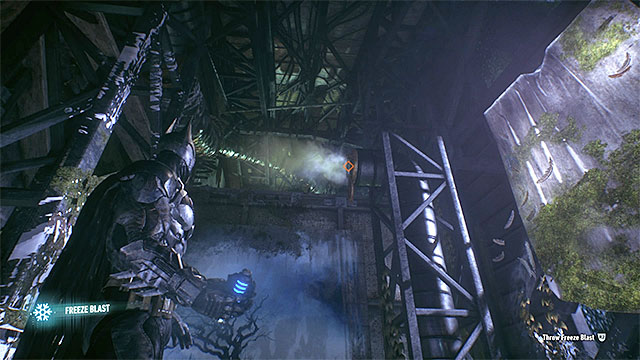
Required gadgets: freeze blast, hook, disruptor, voice synthesizer
The description of finding the trophy: Explore the corridor in the northwest part of the main area of the Backstage. You need to locate a pipe from which a hot steam is getting out, as shown on the picture above. Use a Freeze Blast on it (you can take that gadget from the Quarantine Area), thanks to it you will unlock the possibility of pulling yourself up to the ceiling by using the hook.
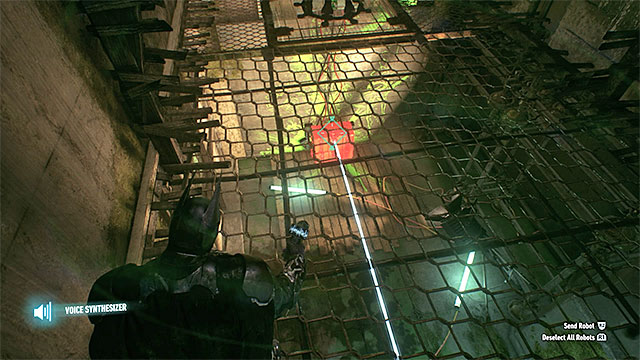 Sabotage the gun box and lead the Riddler's robot to it
Get above the room in which the Riddler's robot is. Start with using the disruptor on the gun box, which can be seen on the lower level, thanks to which it will get sabotaged. Now, you need to give the robot an order. If you don't have a chip that allows you to control the robots focus on other secrets, and, sooner or later, you will get one. Otherwise, use the voice synthesizer on the robot. Make him go and check the gun box. If you sabotaged it, the robot would get destroyed and the cage with the trophy would open on the upper level.
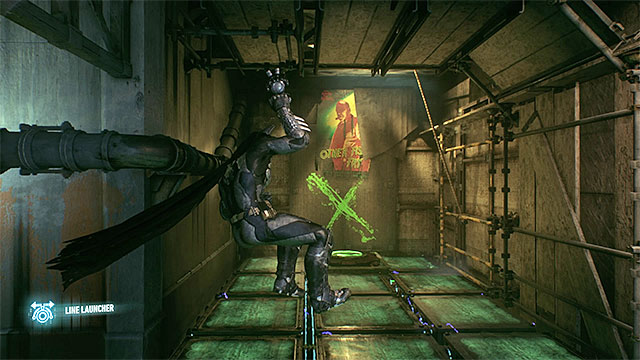 While using the line launcher try to find the opportunities to change the way you move
Required gadgets: electric charge, line launcher, claw
The description of finding the trophy: Explore the western part of the main area of the Backstage. There is a gate there, that you can lift with using the electric charge. Place yourself on the pressure plate and choose the line launcher from the inventory. Launch it dead ahead, slow down the line and turn the camera so that you can see the left corridor. As soon as you get next to it use the launcher to change the direction you move by 90 degrees. Land on the second pressure plate, turn around and use the line launcher again. Just as before, you need to turn 90 degrees to get to the third pressure plate. Land on it. You can hide the claw so that you can catch the trophy from the cage on the wall.
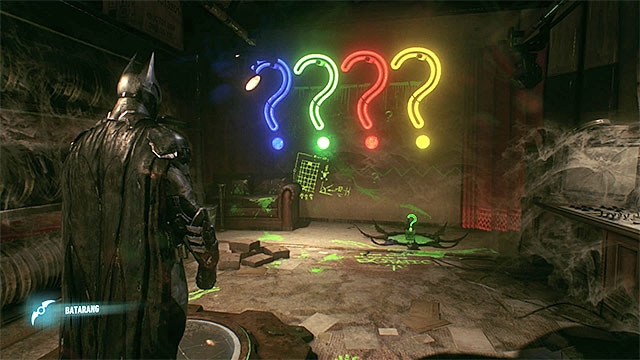 The right combination of the colors of the question marks
Required gadgets: batarang
The description on finding the trophy: Get to the stage A of the movie studio and explore the small room, which is on the left from the entrance. In order to solve this riddle you need to stand on the pressure plate and use the batarangs to set the right colors for the four question marks. The clue to that riddle is in the room on the right from the entrance there are four lights in there. Nevertheless, you don't need to go there, because you can use the above solution. Looking from left to right order of colors is: blue, green, red and yellow. You can take the trophy now.
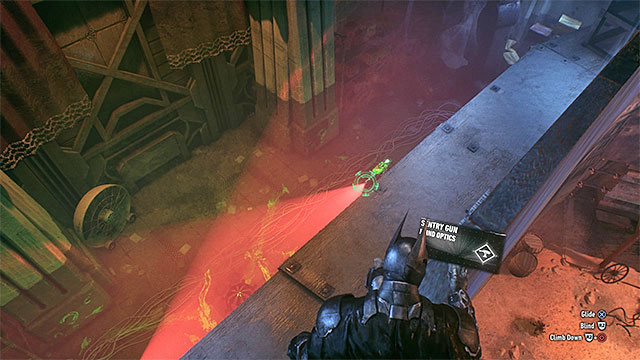 Hack one of the towers before you start destroying them
Required gadgets: hook, remote hacking device
The description of finding the trophy: Go to the back of the stage A and use the hook to pull yourself up to the upper shelf. Under Batman there are two defense towers. Use the remote hacking device for getting into one of them. Quickly get to the active tower and sabotage it. At the end destroy the hacked tower. Now you can take the trophy.
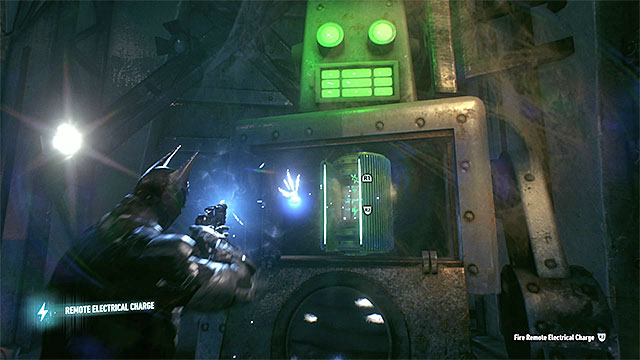 Send charges to the generator to reload it
Required gadgets: hook, claw, electric charge
The description of finding the trophy: Go to the back of the stage A and use the hook in order to pull yourself up to the upper shelf. Find the interactive hitch in the big robot and catch it with the claw. Start pulling, which will lead to uncovering of the generator. Now, you have to start using the electric charge. Send few charges to the generator in order to reload it. After it explodes you can take the trophy from the nearby cage.
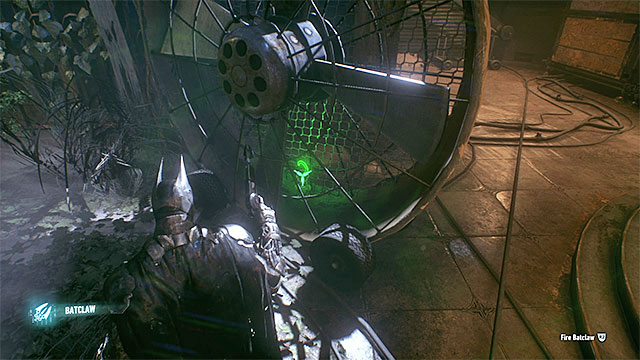 Catch the trophy only after the fan stops
Required gadgets: remote hacking device, claw
The description of finding the trophy: The trophy is located on the stage B of the movie studio. Find the control Panel under the ceiling and break into it by using the remote hacking device. Enter the IMPELLER password. Now you can turn towards the fan, which is turned off, and catch the collectible by using the claw.
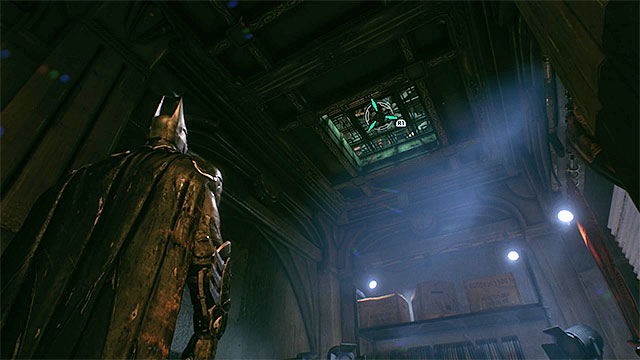
Required gadgets: hook, line launcher, Freeze Blast
The description of finding the trophy: Go to the room on the stage B in which, during the completing of the main story, Christina Bell was. Find the grid on the ceiling and pull yourself up to it by using the hook.
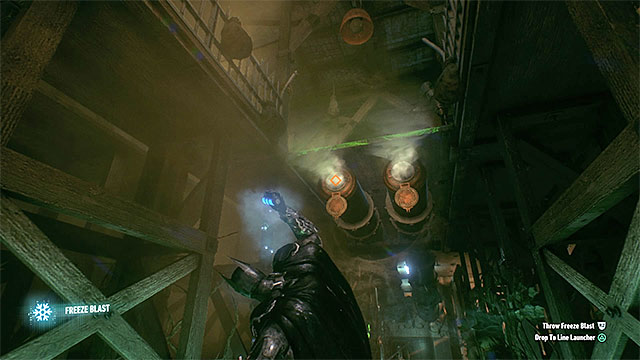 Use the Freeze Blast on two pipes
After getting to the new place use the line launcher and start a ride. At the final part of the ride stop and jump on the line. Turn around, look up and use Freeze Blasts in order to stop the hot steam from coming out of the two pipes. Now you can get to the upper balconies and get to the room with trophy from them.
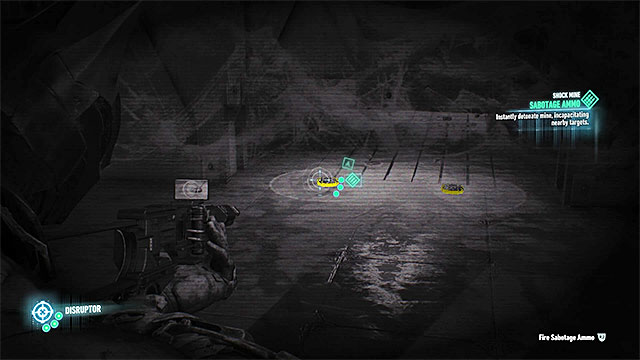
Required gadgets: disruptor (improvement is needed)
The description of finding the trophy: In the northwest part of the stage B you need to find the grid on the floor and use it. After getting to the lower level take an interest in the two mines, that are shown on the picture above. In order to disarm them you need to use the disruptor, which is appropriately improved. If you don't have that improvement you need to wait until you have enough of the experience points and then buy it. You can do the tackle now (press the right key/button during the run) and go to a small room with the trophy.
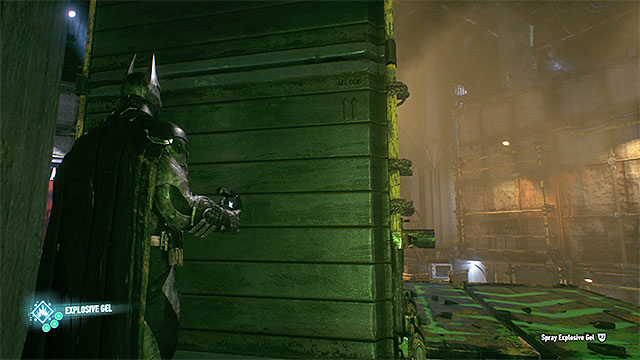 Spray the explosive gel on one of the moved plates
Required gadgets: electric charge, explosive gel
The description of finding the trophy: The trophy is hidden behind the weakened wall in the western part of the stage B. Start with locating of the generator, on which you can use the electric charge. Note that sending the charge will lead to the moving of the two plates vertically. Get to the rear part of the right plate and spray the explosive gel on it.
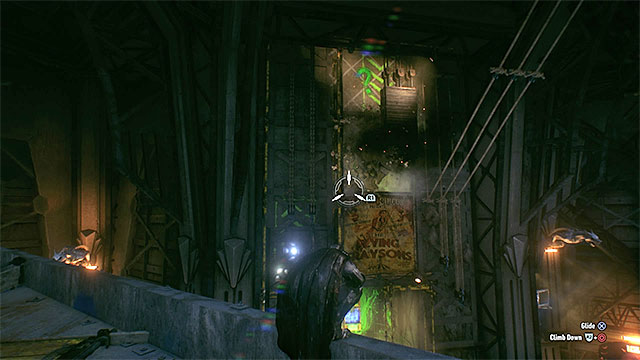 You need to detonate the explosive gel in a right time (don't wait until the plate gets back to the top!)
Place yourself on an observation point and send the opposite charge by using the electric charge so that the plates will go back to where they originally were. Wait until the plate with the explosive gel on it gets next to the weakened wall and then detonate the gel, this will unlock the access to the secret.
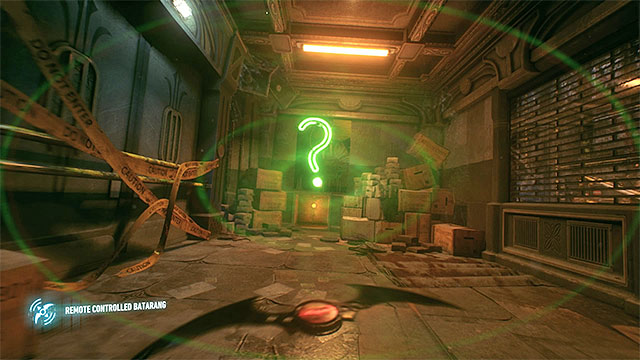 Direct the remote batarang on the question mark
Required gadgets: remote batarang
The description of finding the trophy: The trophy is in one of the side rooms of the stage B and you can get there by going through a small opening in the wall. After getting there place yourself on the pressure plate and focus on the green question mark which shines in the western room. Choose the remote batarang from the inventory and make it go through the western ventilating shaft and hit the button. It will lead to opening of the cage with a secret.
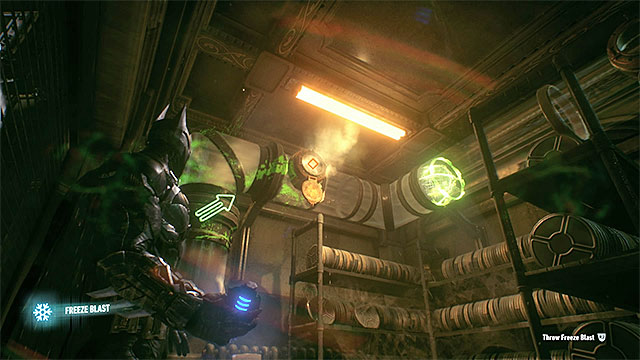 Throw the grenade at pipes from which the steam is coming out
Required gadgets: Freeze Blast
The description of finding the trophy: Get to one of the side rooms of the stage B. The trophy that you are looking for is inside a ball that is located in a tube and your task is to move that ball maximally to the right. The task is very easy, all you need to do is to hit the pipes, from which the hot steam is coming out, with a Freeze Blast. After the ball falls down go to it and take the secret.
 The question mark that you need to hit with the batarang
Required gadgets: remote batarang
The description of finding the trophy: The trophy is in the cage, in the corridor that leads to the stage C. In the northwest part of that corridor you will find the entrance to the shaft, go to the small room through it. You also need to throw the remote batarang into the same shaft and when it gets closer to the secret direct it towards the question mark under the ceiling, and make it hit that question mark. Now you can go and get the trophy.
 Remember ONLY the colors of the writings that you see on the screen
Required gadgets: batarang
The description of finding the trophy: Get to the console in the central part of the stage C, activate it and listen to the Riddler's instruction. Every time you need to remember the order in which the colors are shown on the screen (not what the particular writing means!) and you need to repeat it by hitting the right question marks. These are the solutions of all parts of that riddle:
Now you can take the trophy from the cage.
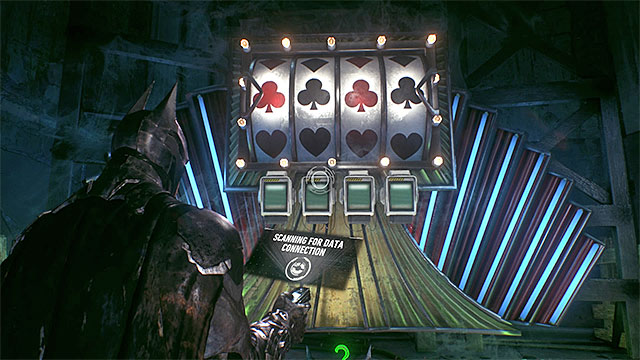
Required gadgets: remote hacking device
The description of finding the trophy: Get to the machine which is located in the northeast part of the stage C. You need to use the remote hacking device on all four control Panels to stop the lots at the right positions. The solution is shown on the picture above - the icons in each row have to match (they need to be of the same type). Now you can take the trophy.
 The cell in which Robin has been held
Required gadgets: -
The description of solving the puzzle: You solve this puzzle in the Quarantine Area, that is a big room with cells. You can solve it only if you scored enough in the main story, that is after Batman locked Robin in one of this cells. Go there (the first on the left) and scan it.
 Scan the altar in memory of Joker
Required gadgets: voice synthesizer
The description of solving the puzzle: Examine the southwest part of the main area of the Backstage. You will find a closed gate there and you will need to use the voice synthesizer on it (Harley's voice). Get into the next small room and scan the altar in memory of Joker, made by Harley.
Take a photo of the glazed cabinetRequired gadgets: -
The description of solving the puzzle: Get to the stage A of the movie studio and examine the small room on the right from the entrance. Scan the poster that is in the glazed cabinet.
 A sample surprise box that can be destroyed - always use a batarang
In the Panessa Studios there are, in total, fifteen surprise boxes left by Harley Quinn. Destroying all of them will lead to solving of three new Riddler's riddles (the register of the solved riddles rises after each fifth destroyed box).
To destroy a box that you just found (they can be on the floor or on desks) use a batarang. The box will explode at the moment when the batarang touches it.
 The box is behind the weakened wall
Box number 4 from the map that is added to this chapter is located behind the weakened wall in the main area of the Backstage. Get to that item from the northern side and destroy the wall by using the explosive gel.
 Use the openings and ventilation shafts to get to the side rooms
Boxes number 11, 12 and 13 are in the side rooms of the stage B. In order to get there you need to use the openings in the walls or the short ventilation shafts.
 The entrance to the shaft
Box number 15 is in the small room next to the stage C of the movie studio. Start south from the room with the secret and find a ventilation shaft, because you will have to go through it.
The above screenshot presents the map of the interior of the Gotham Police Station, i.e. one of the main locations on Bleake Island. You visit this location multiple times, while completing the game's main storyline, and it takes place for the first time at the beginning of the campaign mode. In here, there are no opponents, because all of the criminals are locked up.
 Break the glass and take the trophy
Required gadgets: -
Trophy walkthrough: The trophy can be found in the room with the evidence. Walk to the glass and break it with any attack.
 Jack Ryder
Required gadgets: -
Riddle walkthrough: Reach the interrogation room in the northern part of the police department where Jack Ryder works. Scan it to solve the riddle.
Officer Cash's deskRequired gadgets: -
Riddle walkthrough: Walk to the main room of the police department and scan the desk at which officer Cash is working.
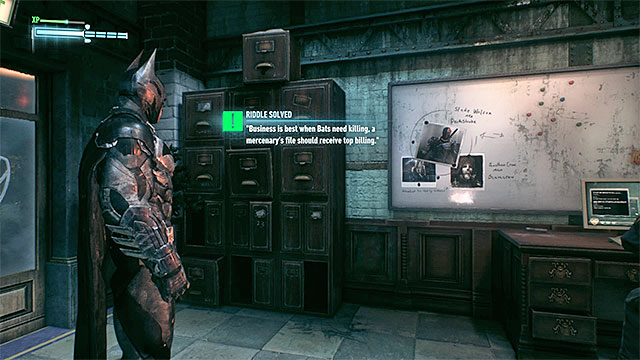 Take interest in the board in communications room
Required gadgets: -
Riddle walkthrough: Go to the department's communications room. Scan the board with three pictures (Arkham Knight, Scarecrow, Deathstroke). Important - full set of the pictures will appear there only a while after you start the side quests related to Deathstroke character.
The above screenshot presents the map of the interiors of two Stagg Blimps, in the North-Western part of the Founders' Island. At first, it is impossible to access the airships, because you o not have the gadgets necessary for that. Therefore, you need to wait until you have made enough progress into the main storyline and received new gadgets.
Returning to the Stagg airships, once you have unlocked them in the main storyline, is not difficult. You can make it over to the Alpha airship after you glide towards it, off the rooftop of one of the tallest buildings on the Founders' Island. You need to land on the airship and find the manhole shown in the above screenshot, thanks to which you get to the foyer.
It is even easier to get on board the Beta airship. After you have made it onto one of the tallest cranes around, you only need to glide towards the destroyed front part of the airship shown in the above screenshot.
At times, exploration of both of the airships tends to be annoying. This is so, because they are multistory structures and additionally, you often need to deal with narrow pathways, hard-to-find manholes, or containers to move, to get to the collectibles. Below, you can find hints on exploration of the select areas within the Alpha airship. It is a good idea to get to know them, before you start searching for the collectibles.
Many of the collectibles are in the foyer of the Alpha airship (its Eastern part), which is located on the bottom levels of the airship and you may have some problems getting near there. A good idea is to take the main path into the foyer of the cargo compartment. Here, you find the manhole shown in the above screenshot and taking the manhole is the easiest way to get to the lower levels.
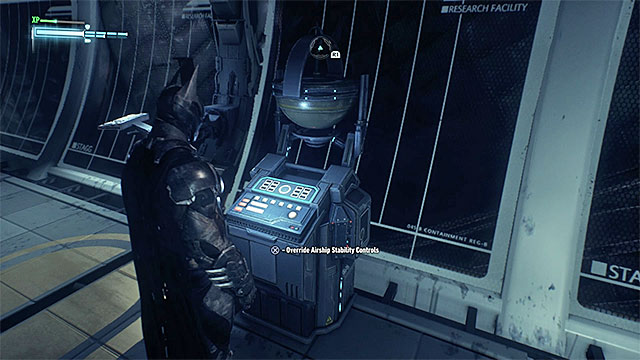
In the case of the cargo compartment of the Alpha airship, the most difficult part is the fact that Batman may initially not be able to control the stabilizers of the airship, in order to roll it. For this, you need to find the terminal, shown in the above screenshot, in a small corridor Westwards of the cargo compartment. By default, the terminal is within the range of the turret so, before you hack into it, you need to sabotage the turret. From now on, you can control the stabilizers, while in the cargo compartment.

The exploration of the Beta airship is less complicated than in the case of the Alpha. To all intents and purposes, you only need to watch out while in the Western part of the airship. In one of the corridors, there are two turrets with several collectibles past them. Do not try hacking into the turrets, or running past them. Instead, use the voice synthesizer on the reader shown in the above screenshot. After the gate opens, use the device for remote hacking, to tilt the airship. A big container will slide out of the room, which destroys both of the turrets and allows you to continue your exploration.
Note - Attached to the container, there is trophy marked as 20, in our walkthrough. After you move the container, it falls out of the airship and crashes near the shore of the Founders' Island. To get the collectible, you need to make it over there!
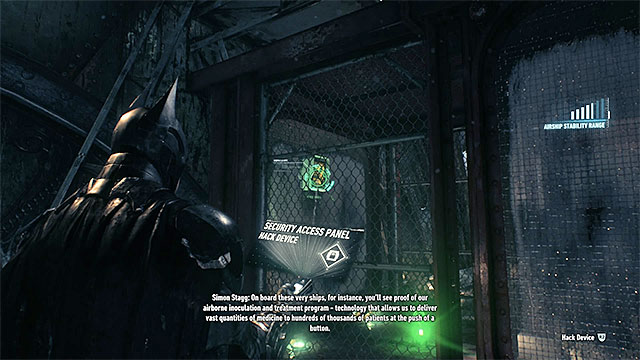 Use the remote hacking device to gain access to the trophy
Required gadgets: remote hacking device
Trophy walkthrough: The trophy is on one of the middle levels of the airship's foyer. To the South of it, there is a locked gate. Use the remote hacking device on the panel that you can see across the gate (the password is FRICTION) to access the collectible.
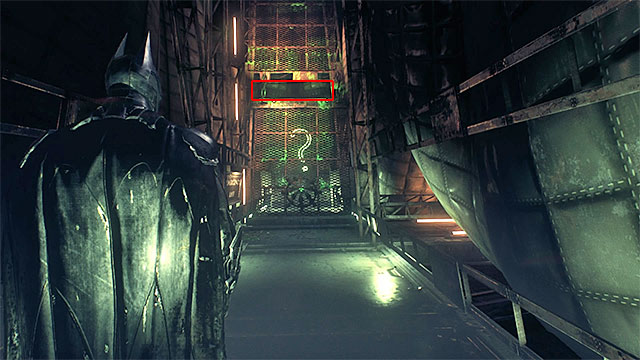 Aim the remote controlled batarang on the small opening with the question mark past it
Required gadgets: remote controlled batarang
Trophy walkthrough: The trophy is under the corridor between the foyer and the cargo compartment (take the manhole on the floor to get there). Here, find a pressure plate, walk onto it and select the remote controlled batarang. You need to control it across the small opening opposite the pressure plate and hit the green question mark. You can now collect the item from the cage.
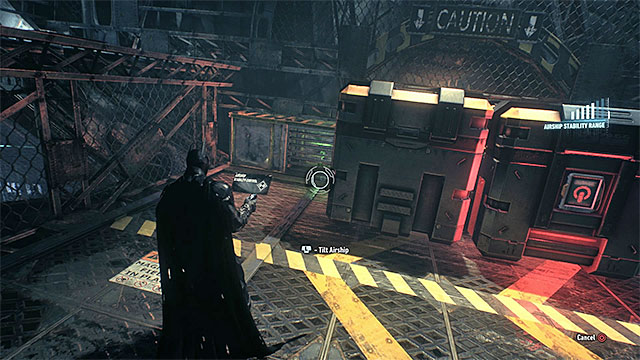 Tilt the airship to reveal the grate that you can rip off
Required gadgets: remote hacking device
Trophy walkthrough: The trophy is in a small cage. Stand next to it and use the remote hacking device to hack into the airship's stabilizers and tilt it. As a result, the big containers should move and reveal the grate that you need to rip of to get to the collectible.
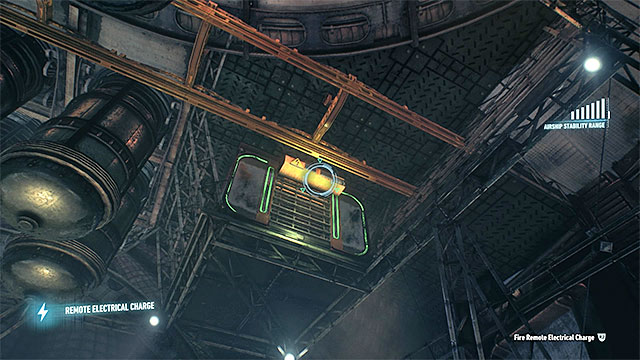
Required gadgets: remote hacking device, electrical charge, grapple
Trophy walkthrough: Explore the lower levels of the foyer. Here, you should notice a cage with green lining, under the ceiling. Use the remote hacking device to hack into the airship's stabilizers and tilt it. As a result, the cage shown in the above screenshot will be revealed. Fire an electrical charge at it, to lift the gate and pull the cage using the grapple. You can now collect the trophy from the cage.
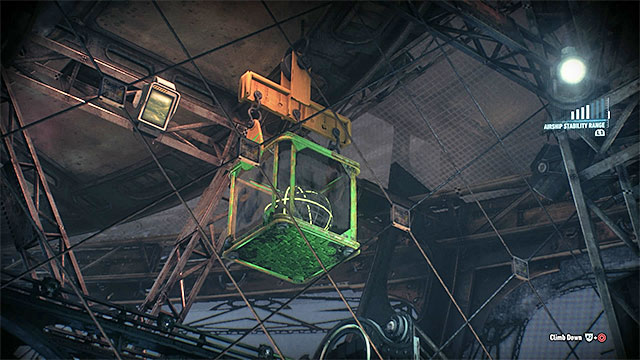
Required gadgets: remote hacking device
Trophy walkthrough: Explore lower levels of the foyer. You need to find the orb shown in the above screenshot inside of which there is the trophy. Hack into the control panel right next to the orb, with the remote hacking device - (the password is GRADIENT), thanks to which the orb comes out of the glass cube.
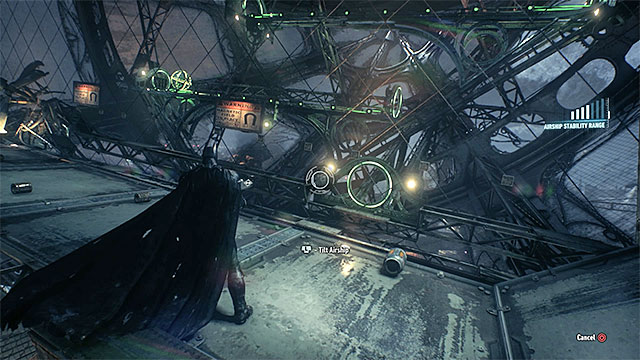 Tilt the airship to the sides, thanks to which the orb, with the trophy inside, will roll
You need to keep using the remote hacking device. Hack into the stabilizers and tilt it to the sides, which will keep the orb rolling along the paths. It needs to reach the opening below, thanks to which you will be able to collect the trophy.
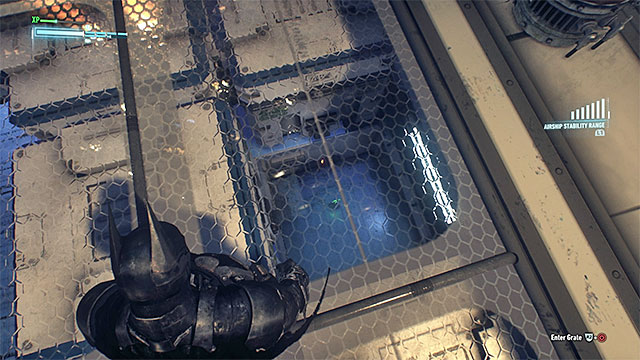
Required gadgets: remote hacking device
Trophy walkthrough: The trophy is in the lower area of the cargo compartment and you can reach it, while exploring the main level - it has been shown in the above screenshot.
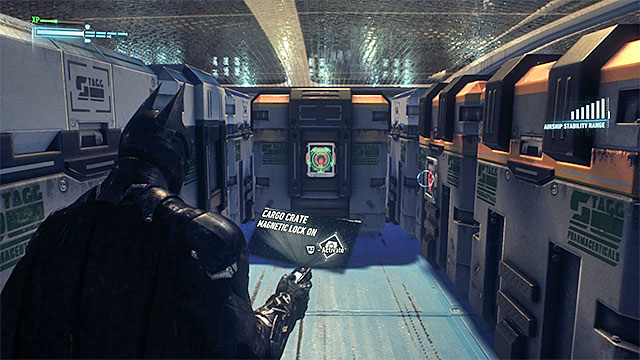
Take the manhole to descend to a lower level and walk between the big containers. Stop near the two containers shown in the screenshot, in the middle of the cargo compartment. You need to use the remote hacking device to release the blockade on one of the crates. After you back up, tilt the airship, thanks to which both of the containers will move right.
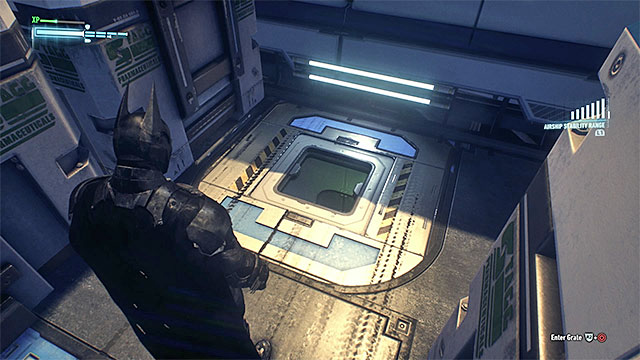 Take the manhole to get to the trophy
Note that this revealed the manhole in the floor, into the venting shaft, which is located to the West of the trophy. Jump in and follow the shaft to get to the collectible.
 The trophy is well exposed
Required gadgets: -
Trophy walkthrough: The trophy is at the end of the corridor, near the terminal and the turret.
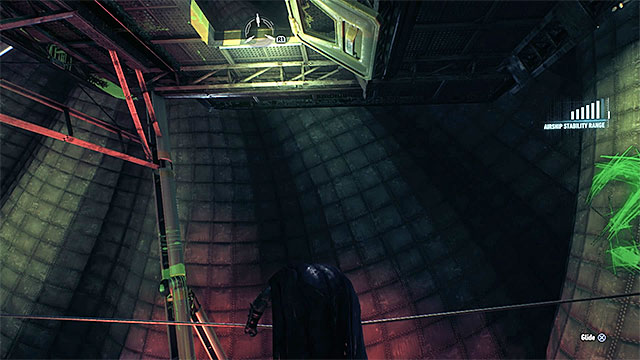 Climb onto the zipline and turn your attention to the ledges
Required gadgets: grapple, line launcher
Trophy walkthrough: Explore the corridor where the turret used to be. Right now, there is a manhole under the ceiling, here. You can get into it, using the grapple. After you get into the room with red pressure plates, select the rope launcher and fire it. Zip down the line and, towards the end of the ride, jump onto the rope and turn back. Again, use the grapple to reach the ledges above. On the top ledge, you find the trophy.
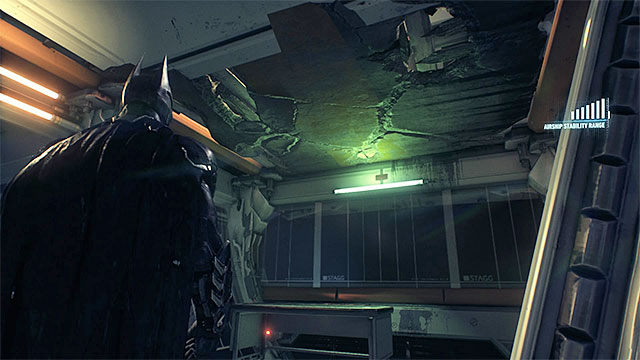
Required gadgets: explosive gel, remote hacking device, batclaw
Trophy walkthrough: The trophy is attached to the ceiling in the glazed room, which is inaccessible only apparently. Find the weakened fragment of the ceiling, near the trophy, which has been shown in the above screenshot. Climb onto the table and spray the explosive gel over the ceiling. Back up and detonate it.
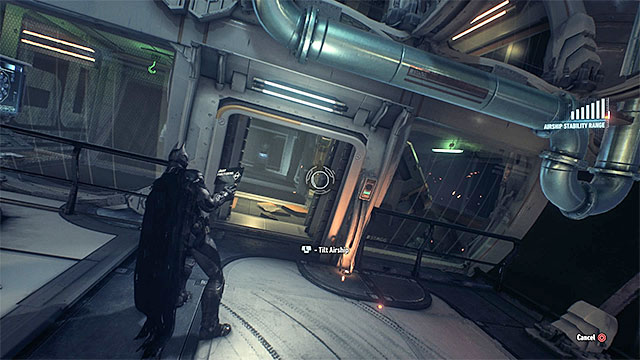 Keep tilting the airship to make the container ram into the wall fragment
Use the remote hacking device now to hack into the airship's stabilizers. First of all, tilt the airship to make the container drop down from the platform above. Then, tilt the airship several times, towards one of the glazed walls of the room with the collectible. After several attempts, the container smashes the wall and you will be able to use the batclaw to catch the collectible.
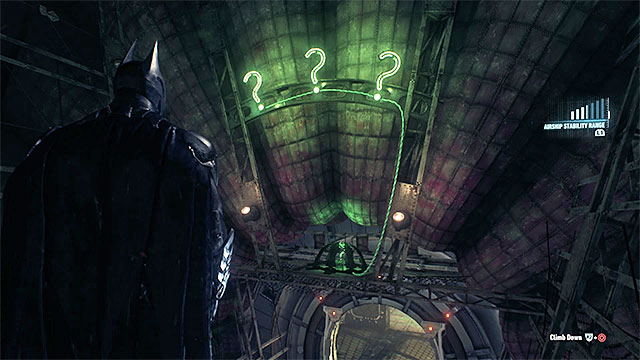 Throw batarangs at the question marks
Required gadgets: grapple, batarang, batclaw
Trophy walkthrough: Use the grapple to make it over to the ledge above the door of the main corridor into the lab. Find three green question marks, above Batman and quickly throw three batarangs to hit them all. This will open the cage with the trophy - reach it with the batclaw.
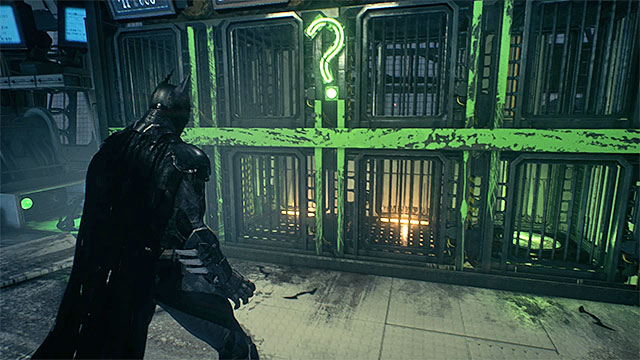 Use the fact that the monkey follows Batman (if only it does not run into any obstacles)
Required gadgets: remote hacking device, batarang
Trophy walkthrough: Explore the Northern room in the lab and hack into the panel, using the remote hacking device (the password is BAMBOO). In here, you need to cooperate with the captive monkey - as you walk to the left and to the right, it will follow Batman. Additionally, you need to use batarangs to hit the question marks and manipulate the barriers. First off, help the animal reach the left pressure plate and, under the time pressure, onto the right one. You can now collect the trophy from the nearby cage.
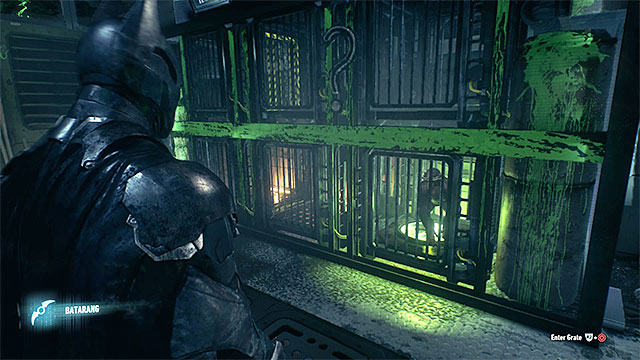 Lead he monkey up to the pressure plate
Required gadgets: remote hacking device, batarang, batclaw
Trophy walkthrough: Explore the right side of the lab and hack into the panel, using the remote hacking device (the password is SIMIAN). Here, you need to "cooperate" with the captive monkey - as you go left and right, you make it follow Batman. The animal needs to reach the pressure plate and to clear the way for it, use the batarangs on the green question mark. After you solve the riddle, grab the trophy under the ceiling, using the batclaw .

Required gadgets: remote hacking device, batarang, batclaw
Trophy walkthrough: Explore the lower level of the Eastern part of the biomedical engineering lab. Here, you find a panel that you need to hack into, using the remote hacking device (the password is CHIMPANZEE). You need to "cooperate" here with two lab monkeys - by walking left and right, you make them follow Batman. Additionally, you need to use batarangs to hit the question mark and manipulate barriers. The chimps need to stand in the positions shown in the above screenshot - block the barriers on the left to prevent them from following Batman to the left. You can now use the batclaw on the trophy under the ceiling.
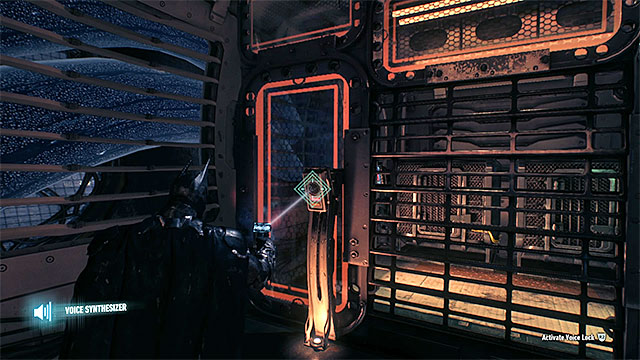 To reach the trophy, you only need to use the voice synthesizer
Required gadgets: voice synthesizer
Trophy walkthrough: The trophy is in the North-Eastern part of the biomedical engineering lab. Use the voice synthesizer on the reader to gain access.
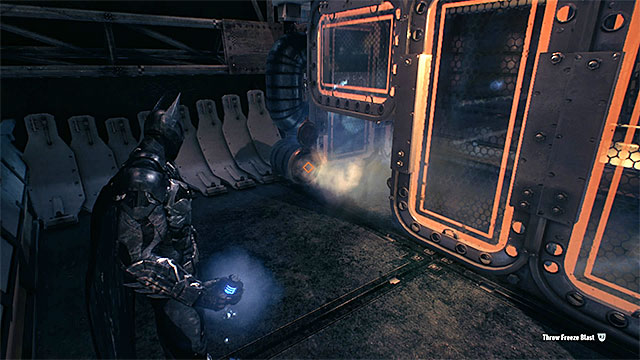
Required gadgets: freeze blast
Trophy walkthrough: The trophy is under the stairs in the Northern part of the biomedical engineering lab. To gain access, you need to use the freeze blast on the hot steam escape shown in the above screenshot.
Note - If you have not obtained the freeze blast yet, go to the Panessa Studios. To learn more, see the page entitled How to obtain Freeze Blast ?.
 Use the pulse on the generators
Required gadgets: electrical charge
Trophy walkthrough: In the Southern part of the lab, find a venting shaft and enter it to get to the room with the collectible/ Here, you need to solve a simple puzzle - use the electrical charge to activate three generators here. This will open the cage with the trophy.
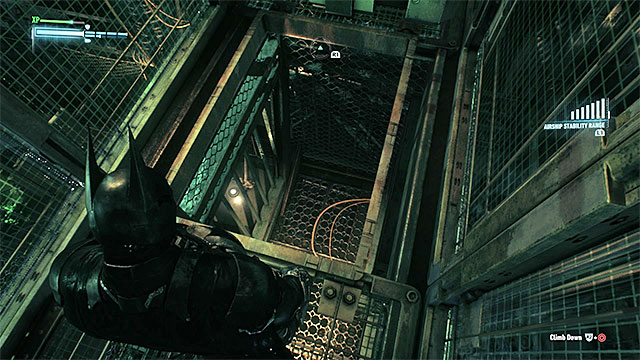
Required gadgets: remote hacking device
Trophy walkthrough: Find the control panel in the South-Western part of the biomedical engineering lab and use the remote hacking device (the password is PRIMATES). Here, you need to "cooperate" with two lab monkeys - by waling left and right you make them follow Batman. Additionally, you need to use batarangs to hit the question mark and to manipulate the elevation of the barriers. The chimps need to stand in the positions shown in the above screenshot - lock the left-hand barriers to prevent them from following Batman to the left. You can now use the batclaw on the trophy on the wall.
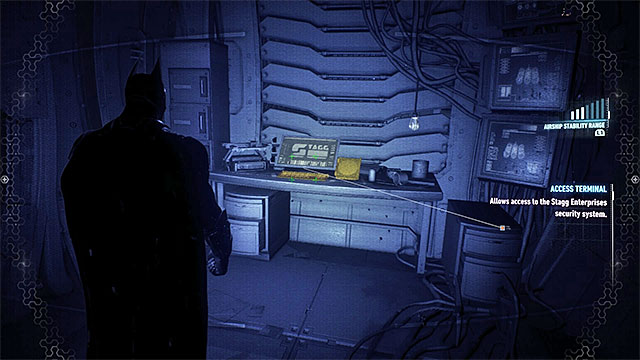 Open the cells using the computer at the end of the corridor
Required gadgets: -
Trophy walkthrough: The trophy is inside one of the cells in the quarantine zone. Find the computer in the Eastern part of the corridor and interact with it to open the cell with the collectible in it.
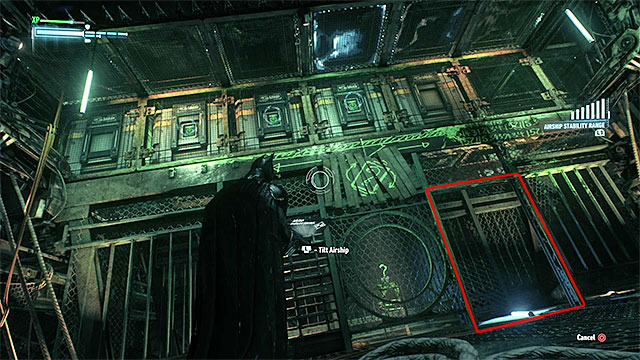
Required gadgets: explosive gel, remote hacking device, grapple
Trophy walkthrough: Start Eastwards of the collectible. Spray explosive gel over the weakened wall and follow the narrow corridor into the Western room. To get to the trophy you will have to keep moving the containers under the ceiling, with the remote hacking device. Start by releasing the blockades on the containers. Then, tilt the airship to make them all move to the left. This will reveal the side passage shown in the screenshot - you need to use the grapple twice to make it over to the rooftop of the structure.
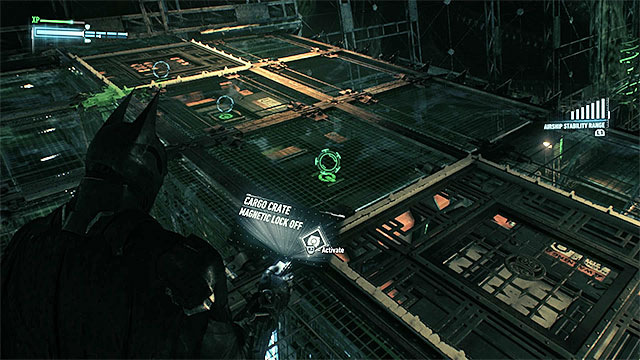
Now you only need to gain access to the second one of the manholes. Tilt the airship to make the containers move over to the spot where you have just been using the grapple. Block the container shown in the above screenshot in place and tilt the airship in the opposite direction. Only one container should move (the one that has not been blocked).
Drop down to get the trophyIf everything went as planned, you will be able to use the other manhole and after you drop to a lower floor, and drop into the hole in the flooring. Thanks to this, you will get right next to the collectible.
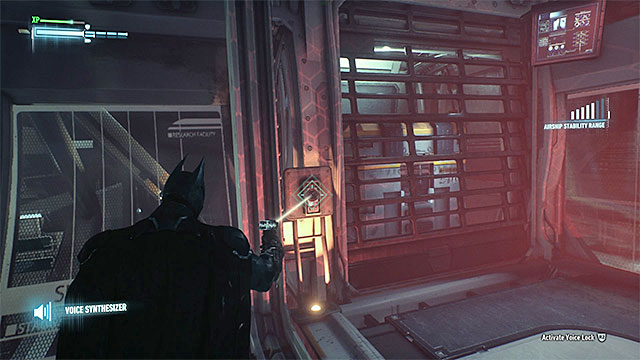
Required gadgets: voice synthesizer, remote hacking device
Trophy walkthrough: Reach the location with two turrets in the way. Select the voice synthesizer and use it on the reader on the left, shown inn the above screenshot. After the gate opens, use the remote hacking device to tilt the airship. The container from the side storage starts to move and ram into all of the turrets in its way.
 Find the smashed container at the shore and collect the trophy
You probably noticed that the container falls out of the airship. Leave the airship and glide towards the Northern shore of the Founders' Island. Here, find the smashed container and collect the trophy.
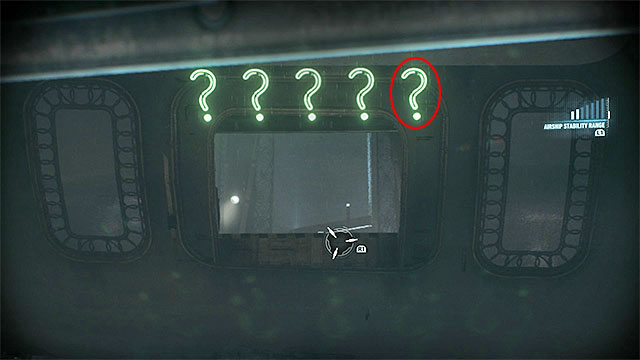
Required gadgets: remote controlled batarang
Trophy walkthrough: Find the lever that opens the sluice and after you use it, stand on the pressure plate. Note the green question marks shown in the above screenshot, on board the Alpha airship. The aim of this riddle is to hit the right-most question mark, at the moment at which all of the question marks are active (when they turn green). For this, use the remote controlled batarang and thanks to the option to slow it down in mid-air, circle around the fifth question mark up until the right moment to hit it.
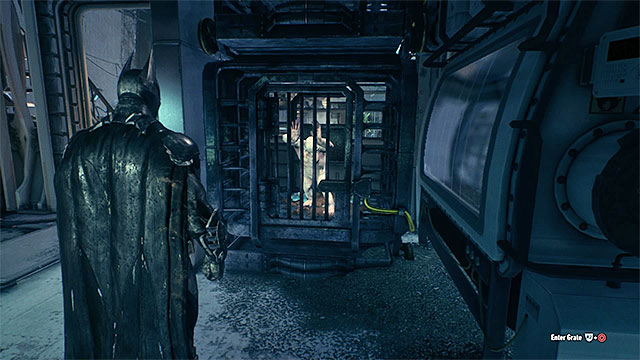 Photograph the albino in one of the cages
Required gadgets: explosive gel
Riddle solution: Explore the lower levels of the lab (use the explosive gel to make a way for yourself). Find the cage with an albino monkey in it and scan the animal.
 Approach the table and take a photo of the magazine
Required gadgets: -
Riddle solution: Explore the upper level of the Northern part of the biomedical lab. You need to scan the magazine on one of the tables.
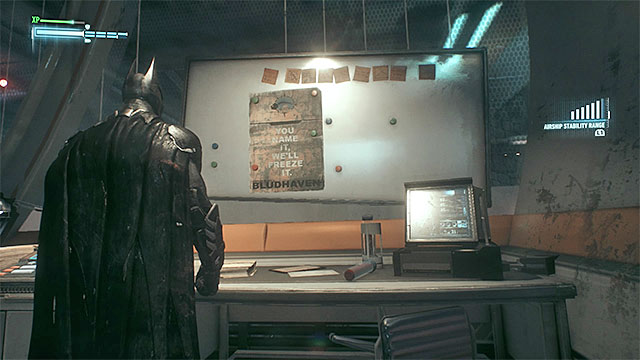 Scan the poster
Required gadgets: -
Riddle solution: Explore the Western part of the airship and find the Bludhaven advertisement poster on the board. Scan it.
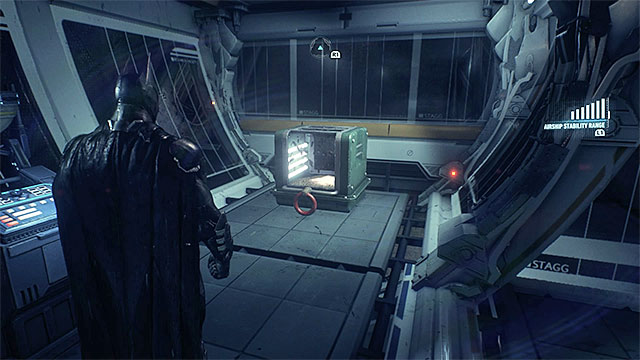 An example crate with insects - you only need to approach some of them, but for some you need to use the batclaw
ON board both of the Stagg airships there are fifteen Insect Crates that you need to smash. Smashing all of them completes three new Riddler puzzles (the counter goes up every five objects that you smash).
There are two different ways, in which to destroy the insect crates. For some of them, you simply need to walk up to them and press the attack key/button. Some of the crates, however, are not as easy to access and in such a situation, you need to use the batclaw non the crate's a lach to rip it apart.
The above screenshot presents the map of metro tunnels under construction. They stretch under the Founders' Island. You explore the tunnels during the main storyline, i.e. while searching for one of the plants of the Poison Ivy. Of course, you can return to the tunnels later into the game and do some more exploring.
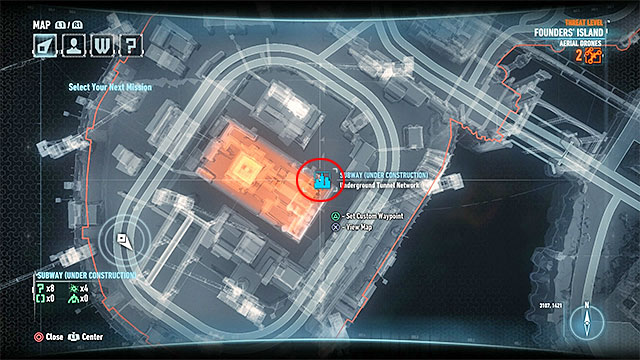
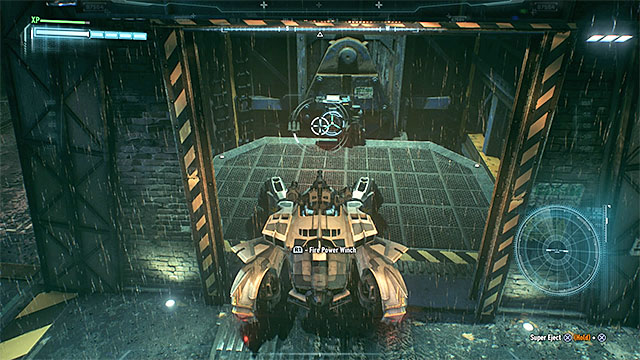
Getting inside metro tunnels isn't as easy as entering the police department or movie studio. After advancing in the storyline you will be able to use the elevator shown on the pictures above. It can be found in Adams port in the southwestern part of Founders' Island. Once you reach the elevator, you must attach to it with the winch and by loading the generator make the elevator move.
Important - due to the bugs in the game the elevator sometimes doesn't move after loading it with the winch. In that case you must ride inside again and position the Batmobile in different place.
Important - if you want to leave the metro tunnels, go back to the elevator and use the winch again.
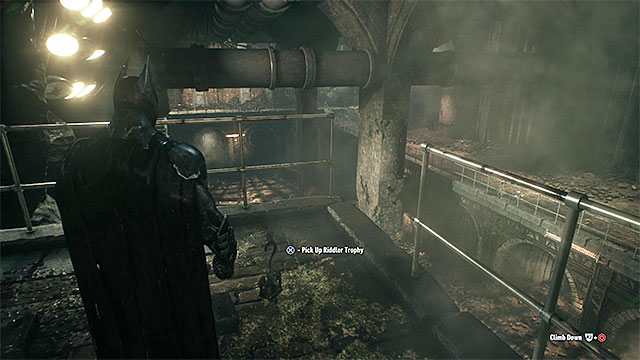 Reach the small balcony
Required gadgets: -
Trophy walkthrough: The trophy is located in the northeastern part of the tunnels. You will find it on the higher ledge with balustrades.
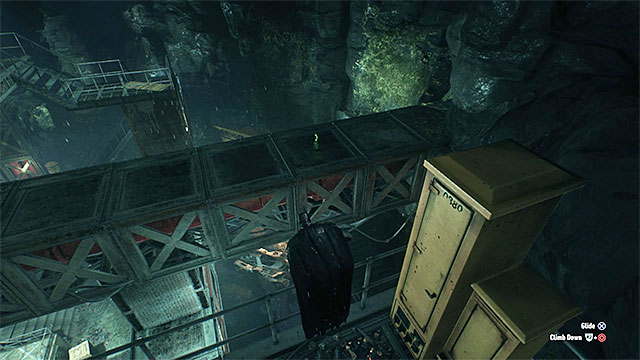 You can help yourself in reaching the secret with the grappling hook
Required gadgets: -
Trophy walkthrough: The trophy is located in the northeastern part of the tunnels. You will find it on the large metal construction at the ceiling.
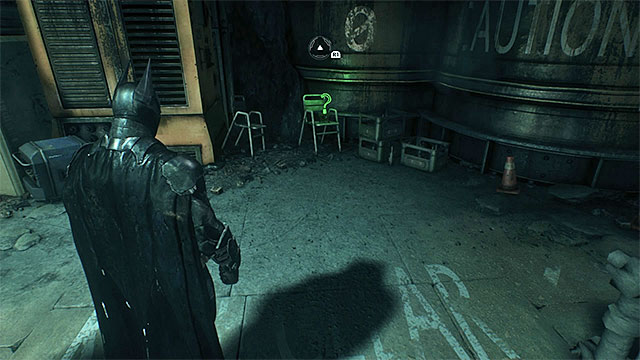 Investigate the darkened corner of the room
Required gadgets: -
Trophy walkthrough: The trophy is located in the northeastern part of the tunnels. You will find it on the small chair.
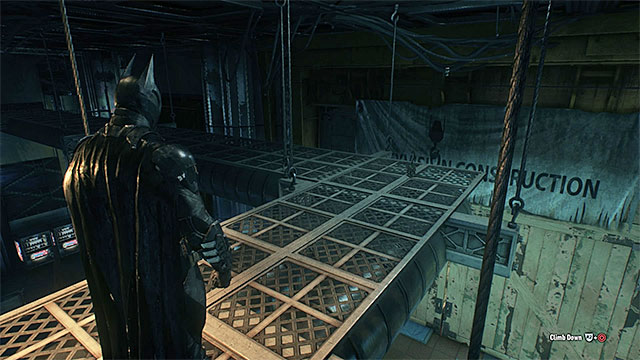 Check the ceiling
Required gadgets: -
Trophy walkthrough: The trophy is located in the northeastern part of the tunnels. You will find it on the metal construction hanging at the ceiling.
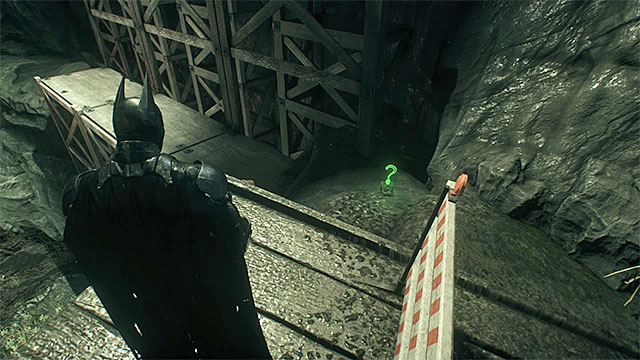 The place where you will find the trophy
Required gadgets: -
Trophy walkthrough: The trophy is located in the northeastern part of the tunnels. You will find it on the rocks near the wooden construction.
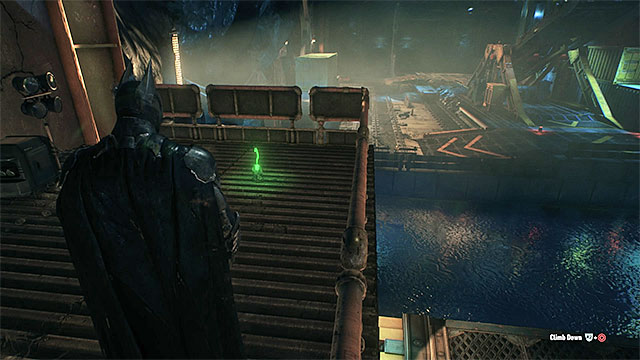 Check the roof of the small building
Required gadgets: -
Trophy walkthrough: The trophy is located in the northern part of the tunnels. You will find it on the roof of the small building with the lever used for blocking the nearby ramp.
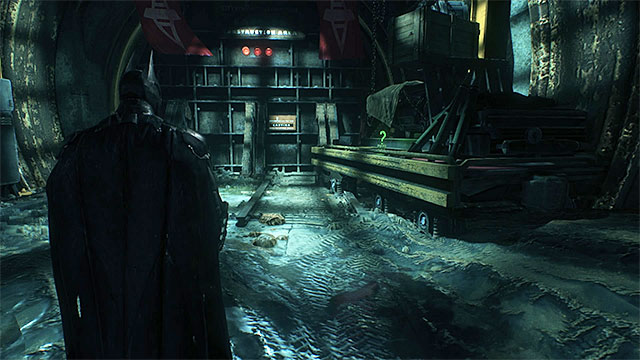 Turn to the side while exploring the main tunnel
Required gadgets: -
Trophy walkthrough: The trophy is in the central part of the tunnels. Check one of the branches of the main tunnel.
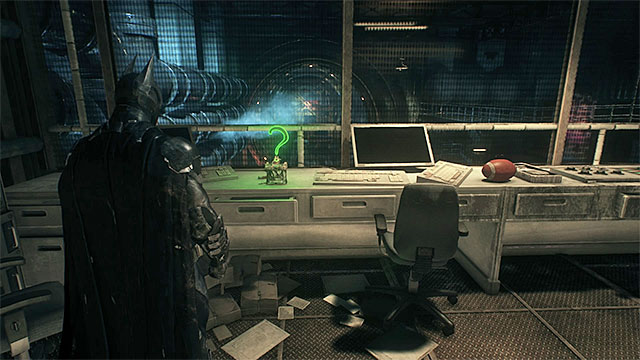 You must get into the control room
Required gadgets: -
Trophy walkthrough: The trophy is located inside the control room found near the elevator used to getting into the metro. Get to the roof of that room and jump inside through the hole in the ceiling.
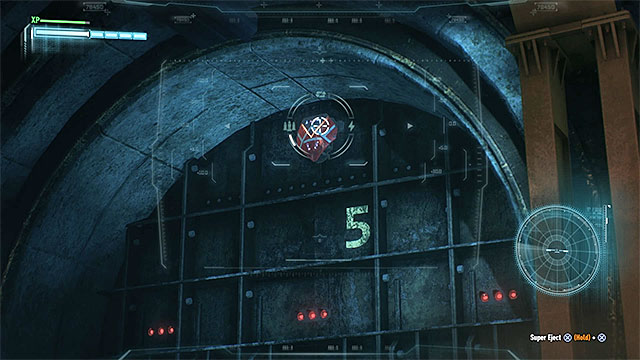 An example breakable object - use Batmobile main cannon
There are four breakable objects to destroy in underground metro tunnels. Eliminating them won't increase your counter of solved riddles by four because the game increase the counter of solved riddles each five destroyed objects. Objects in the metro are counted as part of the secrets of Founders' Island and you will find eleven more on the surface. This means that you will solve the total of three riddles (15 broken objects - 11 on the surface and 4 in the metro).
Use Batmobile's 60mm cannon on the objects. They are painted in red and can be found mostly on building's walls. You shouldn't have much trouble with finding them, help yourself with zooming the screen.
The above screenshot presents the map of Arkham Knight's Headquarters underneath the Founders' Island. Initially, this location is inaccessible to you and you can explore it later into the main storyline. It is then that Batman unlocks all of the levels of the shaft and finally visit the headquarters. It is best to explore this area thoroughly only after you complete the main storyline.
The Arkham Knight's HQ becomes fully accessible only after you have defeated him in a direct fight. Making it inside is not as obvious as, e.g. Making it into the GCPD building so, it is worthwhile to learn the below information.
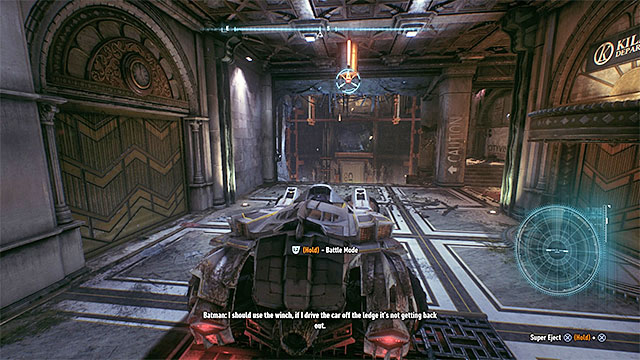
The HQ is underneath the Founders' Island and you can take two different routes to get inside - the Northern one and the Southern one (both of them are marked with blue icons on the world map). Through the Northern route, you get into a huge five-story shaft and which you have ridden the batmobile along, in the main storyline. To take this route, you need to reach the underground and locate the big hole in the wall, shown in the above screenshot , across which to get into the shaft (you need to glide here and use the grapple, or latch the batmobile under the ceiling.
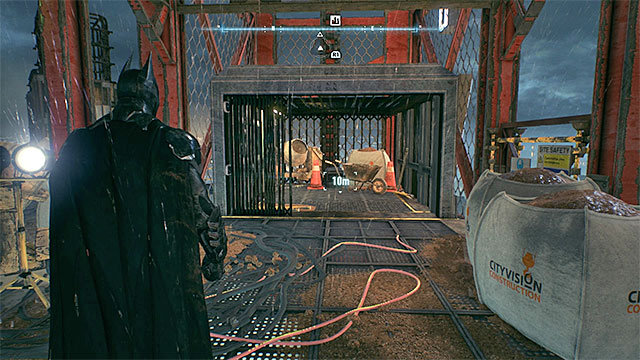
Through the Southern access, you make it into the HQ proper, i.e. The location where you had to defeat the Arkham Knight during the storyline. This is a medium-sized, one-level are. In order to make in there, you need to climb onto one of the highest floors of the skyscraper and find the elevator shown in the above screenshot. Using the elevator lets you reach the destination safely.
Note - Both the shaft and the HQ proper are not joined together, because it is separated by the tunnels Batman used to escape from the huge drilling machine. If you have obtained all of the collectibles in a given part of the base, return to the surface (by using the grapple in the shaft or by using the elevator in the HQ, and go to the other entrance).
 See under the table
Required gadgets: -
Trophy walkthrough: The Trophy is under the long table and you only need to crouch to collect it. You are not going to need any gadgets here.
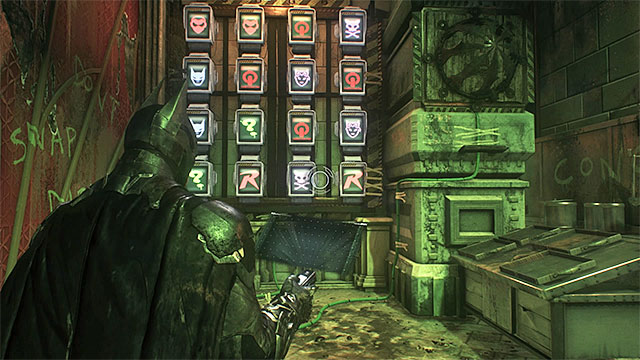 Find pairs of icons
Required gadgets: remote hacking device, batclaw
Trophy walkthrough: To gain access to the trophy, you need to solve a nice riddle. You need to use the remote hacking device and find pairs of identical icons. You do not need to race against time here and you will not be punished for taking too many attempts. After you solve this puzzle, get the trophy, using the batclaw.
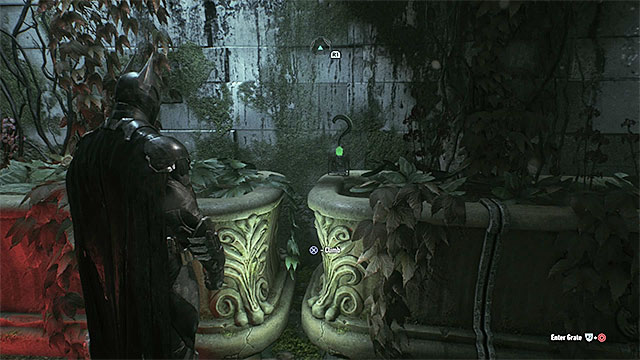 The trophy is well-exposed
Required gadgets: -
Trophy walkthrough: The Trophy is in an easily accessible location, where the plants are.
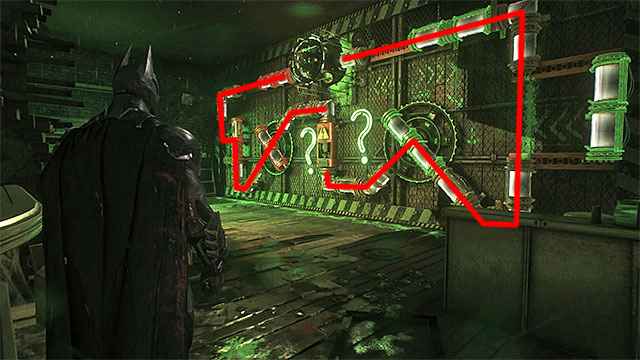
Required gadgets: remote hacking device, batarang, electrical charge, batclaw
Trophy walkthrough: Find the terminal on the wall and use the remote hacking device to break into it - the password is CONDUCTIVITY. You can now walk into the generator room with two question marks and tubes on the wall.
You need to solve a quite demanding puzzle here. The idea is that you "transport" simultaneously two charges from the starting point to the destination - the routes have been delineated in the above screenshot. The key to success is to manipulate the interactive tubes and turn/move them. For this, you use two question marks, which you need to hit with batarangs. AS soon as you decide you are ready, use the electric charge on the generator. After the charges start moving, fire at the left and right question marks, in turns, to change the situation of the tubes. Finally, you will have to hit both of the question marks simultaneously, for which you can quick launch batarangs. After you solve the puzzle, you can use the batclaw to get the trophy from the cage above.
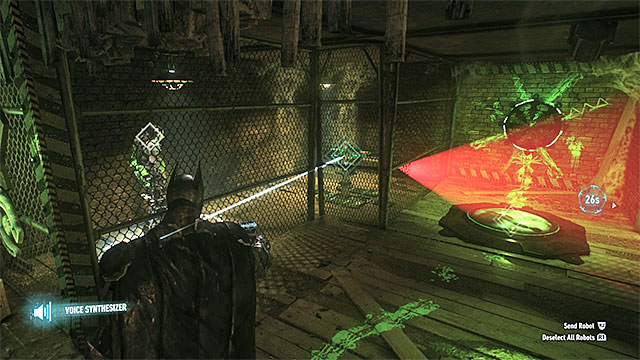 Dispatch the robot to destroying the left turret only after you have temporarily disabled the one on the right
Required gadgets: remote hacking device, voice synthesizer, batclaw
Trophy walkthrough: In the Southern part of the base, find the control panel and hack it with the remote hacking device - the password is ROBOTICS. In the next room, there is Riddler's robot and two turrets. In a moment, you will have to take control of the robot, for which you need a chip that enables you to give instructions to them. If you do not have one, focus on obtaining the rest of the collectibles, thanks to which you obtain it, sooner or later.
Start by using the remote hacking device to disable temporarily the right turret. Now, use the voice synthesizer on the robot and have it reach the left turret to destroy it. After the left turret is sabotaged, walk onto the pressure plate and use the batclaw to get the trophy.
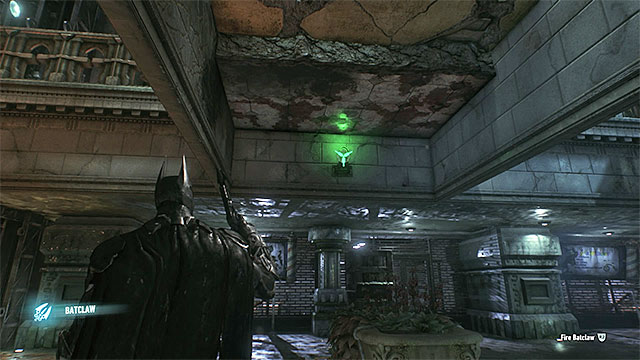 This is where you find the trophy
Required gadgets: -
Trophy walkthrough: Explore the lower level. The trophy is attached to the wall, under the ceiling and you need to use the batclaw to get it there.
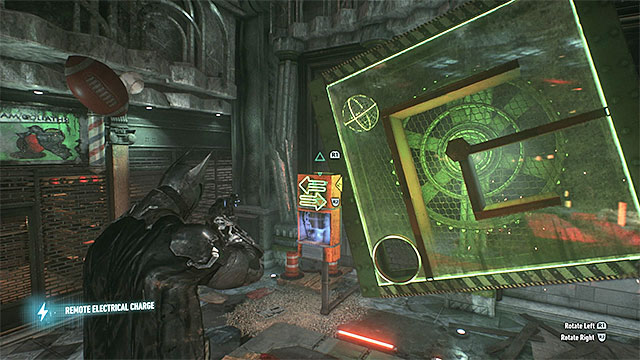 Spin the cabinet to make the sphere with the trophy reach the hole
Required gadgets: electrical charge
Trophy walkthrough: The trophy is inside the orb inside the big cabinet. To solve this puzzle, you need to use the electric charge on the left generator to spin the cabinet. This way, you complete a simple labyrinth. After the orb reaches the hole, approach and collect the item.
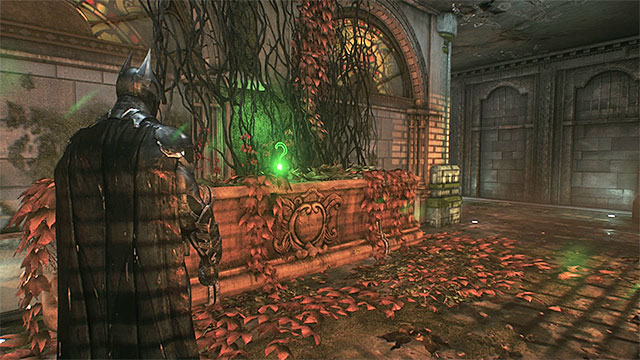 Smash the all and find the trophy
Required gadgets: explosive gel
Trophy walkthrough: The trophy is in a seemingly inaccessible location on the Western side of the Arkham Knight's HQ. To get it, you need to blow up the weakened wall, using the explosive gel.
 Stand in the central part of the base and jump into the shafts in the floor
Required gadgets: batclaw
Trophy walkthrough: The trophy is in the area between the Arkham Knight's HQ and the underground tunnels, where you have been escaping from the drilling machine. Start in the center of the HQ, where Commissioner Gordon used to be kept and enter the venting shafts here.
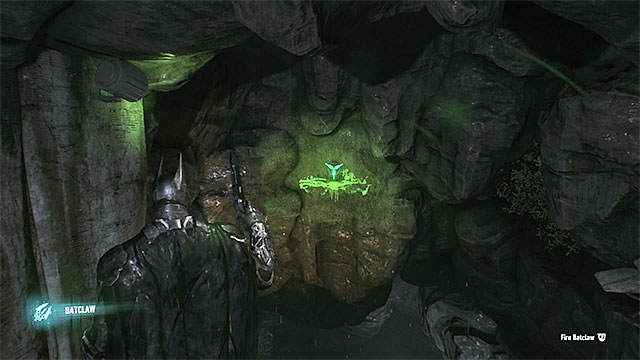 Use the batclaw on the trophy
Follow the shafts and then, follow the narrow corridors. Soon, you will notice the trophy in front of Batman and you need to catch it with the batclaw.
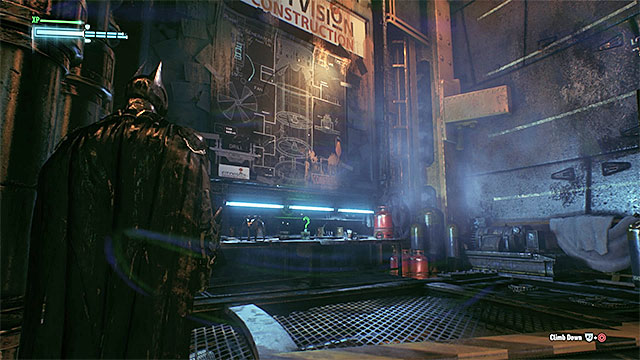 The trophy is well-exposed on level one
Required gadgets: -
Trophy walkthrough: The trophy is on level one of the shaft. After you get there, approach the table next to the big schemata and collect the item.
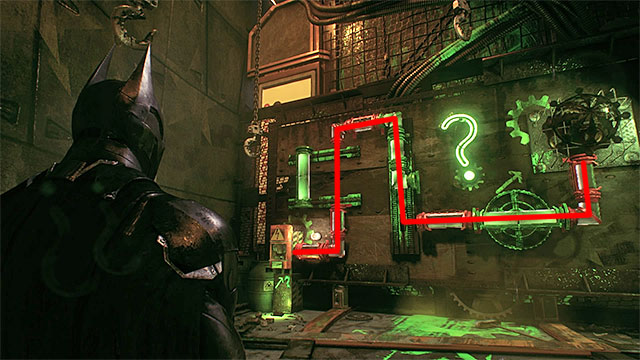
Required gadgets: remote hacking device, electrical charge, batarang, batclaw
Trophy walkthrough: Find the control panel on level one of the shaft and use the remote hacking device on - it the password is SEMICONDUCTORS. In the next room, you need to solve a puzzle that consists in transporting the electrical charge through the labyrinth of tubes. First of all, you need to use the electric charge and use the batarangs to hit question mark at the right moment. As a result, specific fragments of the labyrinth move. The correct route for the charge has been presented in the above screenshot. After you solve the puzzle, catch the trophy, using the batclaw.
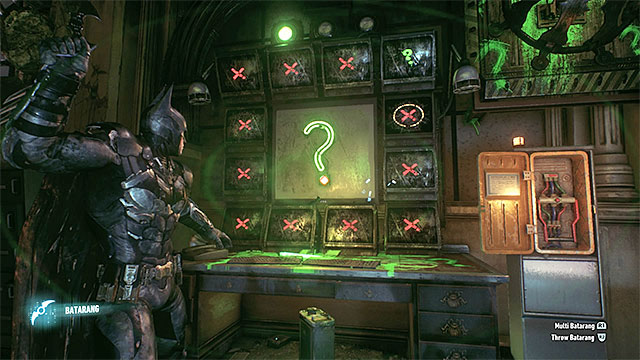 wait for the right moment to throw the batarang
Required gadgets: batarang, batclaw
Trophy walkthrough: The trophy is in the Southern part of the level two of the shaft. Here, you need to complete a simple puzzle, for which you use batarangs. You need to complete three trials and to start each one, you need to hit the central green question mark. Then, you need to use the batarang again, but at the moment, at which the impact of the batarang is accompanied by a circle appearing on the monitor with the question mark. The puzzle itself requires good timing, especially that you need to throw the batarang a bit "ahead" (especially later on, when the sequence speeds up). Remember to stand as close to the question mark as possible, thanks to which the route of the batarang is shorter. After you complete this puzzle, use the batclaw to catch the collectible.
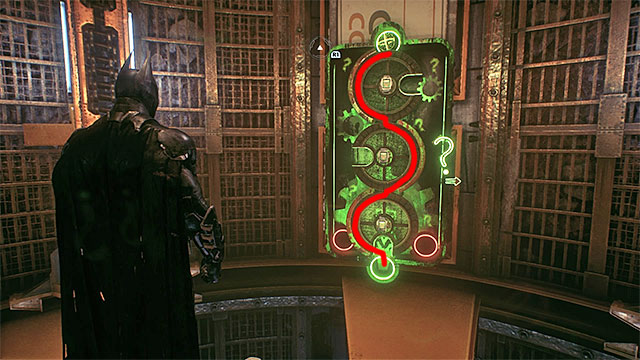
Required gadgets: remote hacking device, batarang
Trophy walkthrough: The trophy is inside the orb on the third level of the shaft and to get it, you need to lead the orb through a big metal structure. For this, you are going to need two gadgets - remote hacking device is for moving and stopping the three rotating elements of the structure, whereas the batarang is for changing the direction in which they rotate. The route for the orb has been presented in the above screenshot. Remember to stop the entire mechanism before you change the rotating direction, which decreases the risk of having the orb fall away from the central mechanism (the puzzle resets when the orb reaches one of the red holes). After the orb falls into the green hole, come up and collect it.
 Park the batmobile on the big pressure plate
Required gadgets: batmobile, hoist, batclaw
Trophy walkthrough: This is one of the more demanding puzzles in the game. Start on the second level of the shaft, around the entrance to the Arkham Knight's HQ. Get into the batmobile and just like during the main storyline, use the vehicle's hoist on the latch under the ceiling, so you can lower yourself down the shaft. Stop around the third level, on the big vertical pressure plate.
 Use the batmobile's board cannons to hit the green question marks that raise the blockades
Direct yourself towards the huge metal structure opposite the shaft's wall. The plan is that you have the orbs reach the green hole at the very bottom of the "ramp". The difficult part is that all of the blockades are lowered by default and, as a result, the orbs keep falling into the red holes. You need to prevent that by firing the batmobile's cannons at the nearby green question marks, which will raise the blockades for a short period of time.
The most difficult thing about this puzzle is that you need to have, as many as, three orbs reach the holes and not let them fall into the red holes, in the meantime. At the beginning of the puzzle, there should be only two orbs there so, shoot at the question marks at a regular basis. After you have two of the orbs in place, look up quickly and handle the third orb. After you have completed the puzzle, reach any of the nearby ledges and get the trophy using the batclaw.
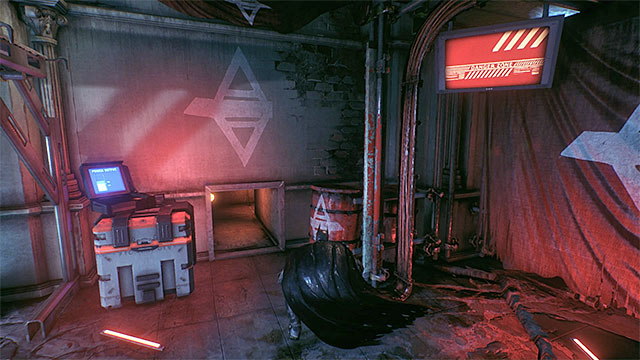 The venting shaft entrance
Required gadgets: electrical charge
Trophy walkthrough: The trophy is in the room in the Eastern part of the fourth level of the shaft. Find the venting shaft to the North-West of the collectible and follow it. After you get to the other side, prepare the electrical charge and use it on the generator. You need to rotate the metal structure in the way that allows the orb to reach the green hole (fortunately, this is not too complicated).
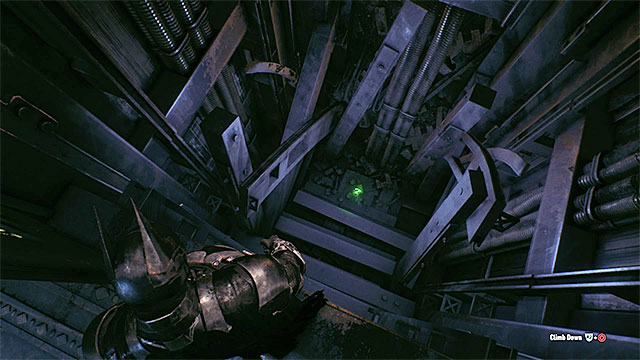 The trophy is at the bottom of the elevator shaft
Required gadgets: -
Trophy walkthrough: The trophy is marked on the map as one of the collectibles on the fifth level but, as a matter of fact, you need to start off in the Southern part of the fourth level (close to the rabbit outfit exhibition). Here, find the vertical elevator shaft and jump down to reach the collectible.
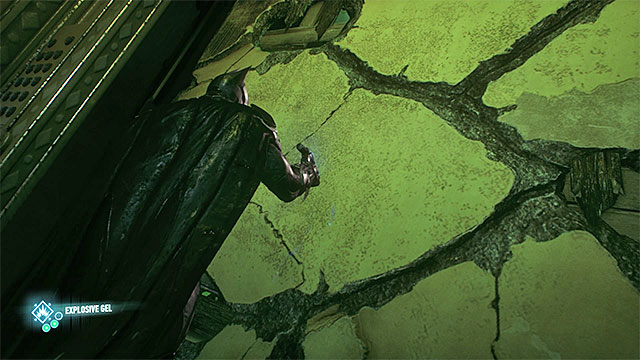 Spray the explosive gel over the weakened wall, after the elevator ride
Required gadgets: electrical charge, explosive gel
Trophy walkthrough: Reach the North-Eastern part of the fourth level of the shaft and enter the elevator. Use the electric charge on the generator to take a ride to the higher level. Here, you find a weakened wall that you need to spray the explosive gel over. Behind the wall, you find the trophy.
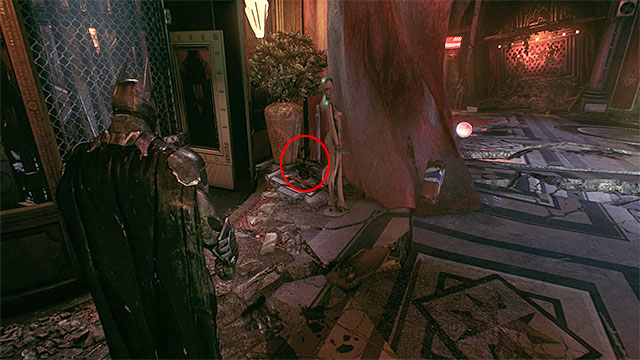 After you exit the elevator, check out the area on the left
Required gadgets: -
Trophy walkthrough: The trophy is on the ground right next to the elevator that you travel on between level four and five.
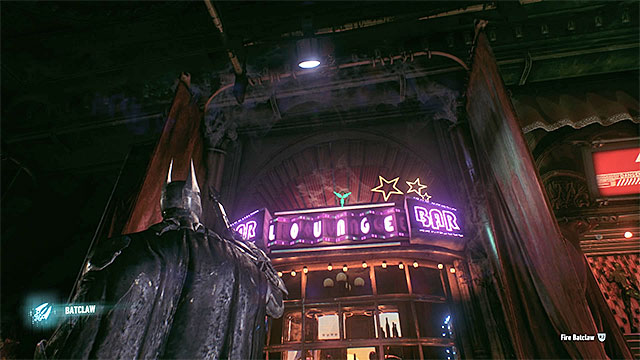 The trophy is on the rooftop of the bar
Required gadgets: batclaw
Trophy walkthrough: The trophy is on the rooftop of the small bar in the Northern part of the fifth level of the shaft. Get it using the batclaw.
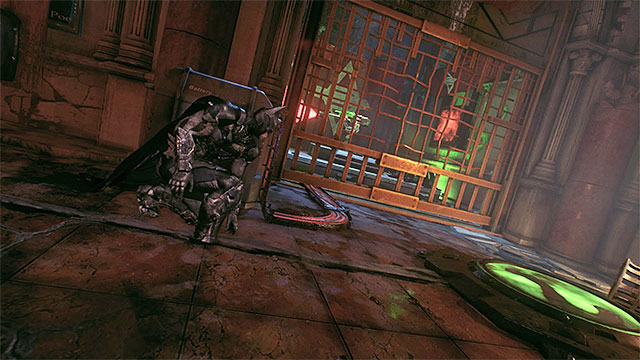 Hack the turret before you walk onto the plate
Required gadgets: remote hacking device, remote controlled batarang
Trophy walkthrough: Reach the Western part of the fifth level, i.e. The area where there is the turret. Hack the turret using the remote hacking device to disable it for thirty seconds. Quickly, walk onto the pressure plate, which unlocks a small venting shaft.
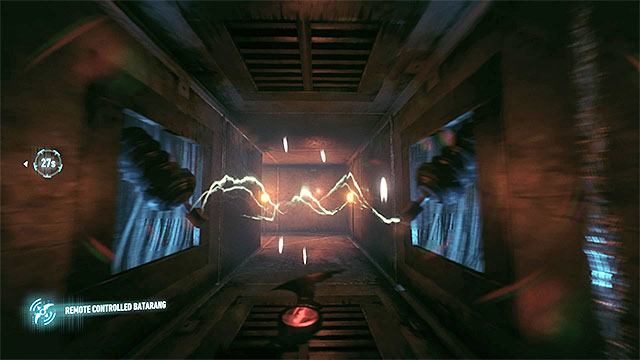 After you throw the batarang for the second time, you need to fly it into the electrical discharges in the shaft
Throw the remote controlled batarang into the shaft and direct it towards the question mark in the shaft. Then, throw it again. This time around, after you control the batarang into the shaft, it needs to cross the electrical discharges. After that, fly the batarang towards the hacked turret. Namely, you need to fly it into the fuse box next to the turret. You can now go for the trophy.
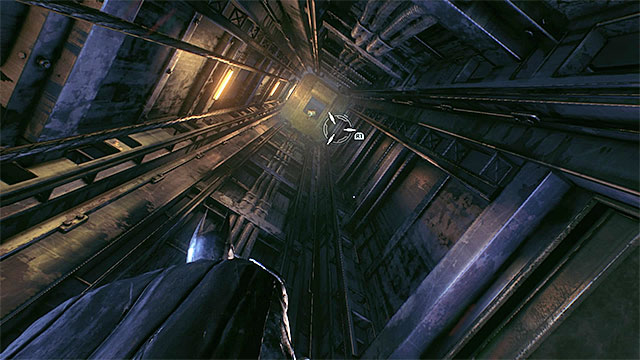 Use the elevator shaft only after you have hacked or destroyed the turret
Required gadgets: grapple, remote hacking device, batclaw
Trophy walkthrough: The trophy is in a seemingly inaccessible part of the fourth level of the shaft. To get there, in the Western part of the fifth level of the shaft, you need to hack, or destroy (which is a better idea - the description of how to get to it is in the walkthrough for 20) the turret. Then, walk into a small elevator shaft, look up and use the grapple.
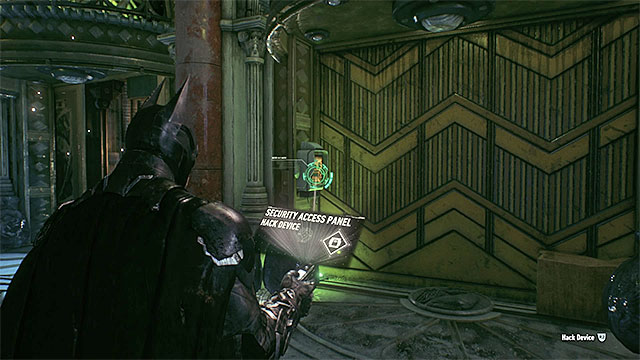 You need to use the remote hacking device twice
After you reach the fourth level of the shaft, locate the control panel and hack it using the remote hacking device - the password is UNDERNEATH. Walk into the next area, check out the glazed flooring and hack into the console that you can see below. You can now use the batclaw to get the trophy.
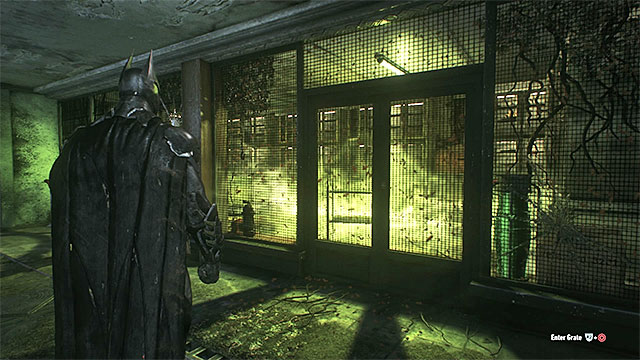 Take a picture of the insects in the yellow room
Required gadgets: -
Riddle solution: Explore the Southern part of the Arkham Knight's HQ. You need to scan the yellow room with insects inside.
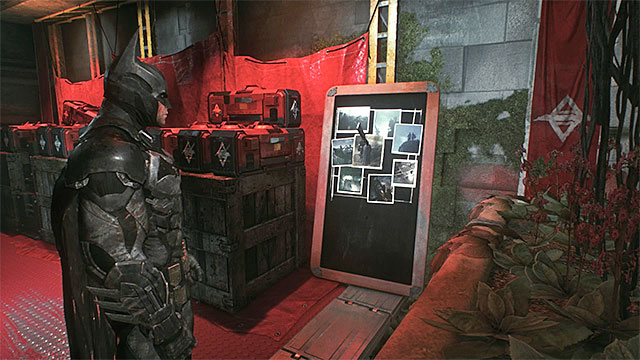 Find the board next to the weapons crate
Required gadgets: -
Riddle solution: Explore the Western part of the Arkham Knight's HQ. You need to scan the board with photos next to the weapons crates.
 The shop window that can be scanned
Required gadgets: -
Riddle solution: Explore the Southern part of the fourth level of the shaft. Here, you need to find and scan the shop window with rabbit outfits behind it.
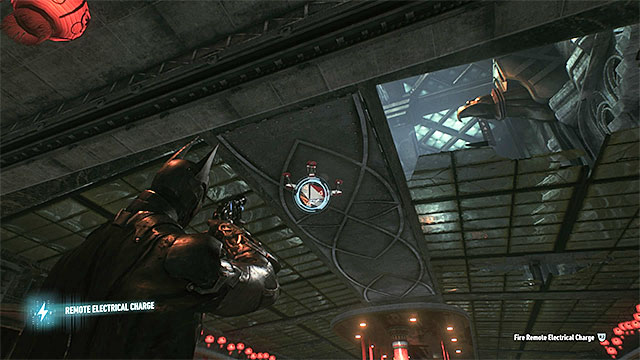 An example spider drone - keep an eye mainly on walls and ceilings to find them
In the Arkham Knight's HQ, there are fifteen Spider Drones that you need to find and destroy. Destroying them all means completing three new Riddler puzzles (the counter updates every five objects).
It may be difficult to find the drones, because only some of them are on the floor. Usually, they cling to walls and ceilings so, explore the specified areas thoroughly and zoom whenever necessary (you do not need the detective mode here). After you find a drone, you need to use the electric charge to blow it up.
 The easiest way to review the challenges is to access them in the main menu
Augmented Reality challenges are an additional attraction in Batman: Arkham Knight. If training challenges are excluded, there are 23 of them and they differ in terms of their objectives. They may test the Batman's combat skills, require stealth elimination of the opponents, or have you drive the batmobile . Further in This chapter, you can find descriptions of the individual challenges. Below, you can also find some information in connection with the challenges.
In This category of challenges, you do not obtain any stars, because their only purpose is to familiarize you with the select elements of the game (reminding you of the previous solutions and presenting some new ones). For completing each challenge, you receive one development point.
Availability: This challenge is available from the beginning of the game.
Completion requirements: You need to perform five throw counters on the opponents. These are special variations of counters, which you perform by leaning the analog stick towards the opponent, or by holding down an appropriate direction key, and by pressing the counter key/button, at the moment at which the opponent starts his attack (the warning icon over his head). The challenge ends after fifth successful attempt (you do not need to take them all down).
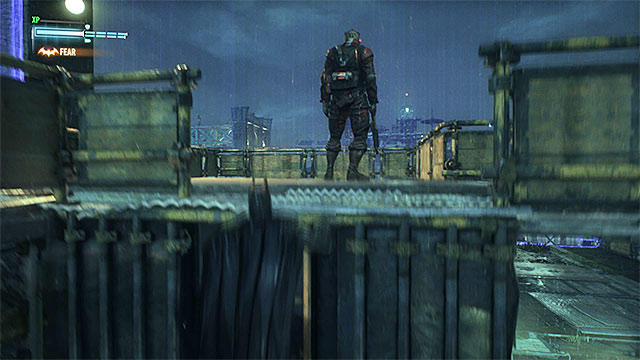
Availability: This challenge is available from the beginning of the game.
Completion requirements: You need to complete four scenes, where you use fear takedowns. The first three are very easy, because you simply need to get the opponents from behind, or sneak up along venting shafts. Only the last one is demanding, because you need to wait for the opponents to align in a straight line on the balcony. When This happens, attack the guard on the left shown in the above screenshot and dash towards the other two.
Availability: This challenge is available from the beginning of the game.
Completion requirements: You need to eliminate three armored opponents, while remaining in shadows. You can rely on the "regular" silent takedowns.
Availability: This challenge is available from the beginning of the game.
Completion requirements: You need to use the grapple launcher and glide though all of the circles, after which you glide for one minute, without touching to the ground. This challenge is very easy. You only need to watch out for the moments, where you need to dive at the right moment.
Availability: This challenge is available from the beginning of the game.
Completion requirements: You need to summon the batmobile, eject from the vehicle, glide through all of the circles and summon the batmobile again.
Availability: This challenge is available from the beginning of the game.
Completion requirements: You complete This challenge during the game's storyline (Batmobile Combat Mode Diagnostics), so it is impossible to miss it. The goal here is to test combat features of the batmobile, with special attention to the rockets.
Availability: This challenge unlocks after you, anywhere in the game, run and go seamlessly into a glide from a rooftop.
Completion requirements 3 stars: You need to score 16000, at least. The key to success here is to win the entire fight without having the score multiplier reset. Therefore, you need to land successive blows without any interruption and, additionally, make sure that you are not hit by any of the opponents.
Availability: This challenge becomes available after you use the ground takedown on an opponent. Additionally, you need to make sufficient progress into the storyline.
Completion requirements 3 stars: You need to score, at least 16000. To score that high, you need to ensure appropriate diversity of you attacks so, apart from the regular attacks, also rely on gadgets, press the key combinations for quick launching and use supercombos (pressing two key simultaneously, after the score multiplier goes sufficiently high)
Availability: You need to complete the Heir to the Cowl side mission, which is connected with Azrael and the combat trials that you complete for him. This challenge becomes available regardless of how that mission ended.
Completion requirements 3 stars: You need to score, at least 30000. During This challenge, Azrael may take no damage or you will fail. However, This is not too much of an obstacle, because you need to keep bringing up the score multiplier anyways, in order to obtain enough points.
Availability: This challenge becomes available after you quick launch three different gadgets within one fight. Additionally, you need to make sufficient progress into the storyline (meet up with Nightwing).
Completion requirements 3 stars: You need to score, at least 20000Just like in the case of the abovementioned challenges, make sure that the score multiplier does not reset, as a result of taking damage or interrupting the streak of attacks. Apart from that, use team attacks on a regular basis.
Availability: You need to complete the Two-Faced Bandit side mission, connected with Twoface and bank heists by his men.
Completion requirements 3 stars: You need to stop a bank heist within 1 minute and 15 seconds. This means that you need to hurry. You cannot afford careful planning on how to take down the individual men. Take a more risky approach, which are going to be easier, thanks to the alarm that goes off in the bank. It is a good idea to perform takedowns through ceilings and use gadgets, e.g. batarangs or electric pulse, to take down the opponents quickly. Also, wait for opportunities to use fear takedowns, thanks to which you can take down as many as five opponents, in one take, if you are lucky.
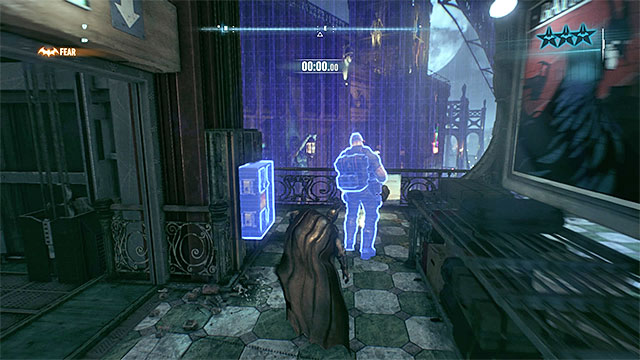
Availability: This challenge becomes available after you knock down a thug (a standard one or the one with a minigun), with a environment attack (i.e. using elements of the environment). Additionally, you need to make sufficient progress into the storyline.
Completion requirements 3 stars: There are three different objectives to This challenge and each one is rewarded with a star.
1. Use the remote hacking device to take an opponent down - I recommend that you use the voice synthesizer here and issue orders to any of the opponents. A good idea is to command such an opponent towards a weapons crate and use the remote hacking device, thanks to which it explodes and stuns the opponent.
2. Perform a fear takedown through a wall - you can wait at a weakened wall for an opponent to happen by, or try the voice synthesizer to lure him to the wall. You simply need to stand at the other side, then.
3. Eliminate the opponent with the minigun with an environment takedown, i.e. using elements in the environment - This is the most demanding objective and it is a good idea to take care of it at the beginning of the challenge. Find the minigunner, drop down to his level and start following him carefully. Wait for the opponent to reach the box on the wall and is highlighted in blue. At This moment, press simultaneously X and square (in the PS4 version), which activate an environment attack. Also, you can pick any other blue object in the environment, but you would also have to make the minigunner approach it, e.g. using the voice synthesizer.
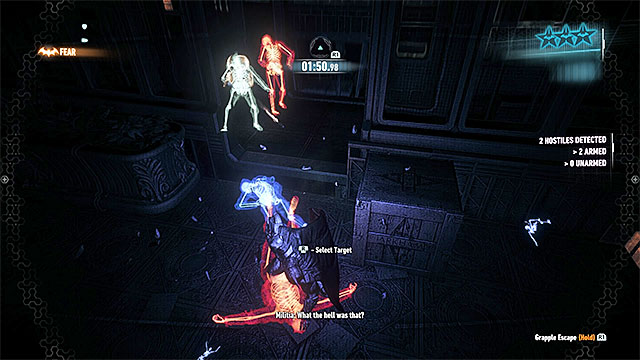
Availability: This challenge becomes available after you use fear takedowns on the opponents (is a single take). Additionally, you need to make sufficient progress into the storyline.
Completion requirements 3 stars: There are three different objectives to This challenge and each one is rewarded with a star.
1. You cannot take any damage during the challenge - This is not too difficult to achieve. By default, avoid direct confrontations with opponents, because they pack firearms and even using a smoke pellet may not help, if you are detected. The only exception are the occasions on which you perform a fear knockout. In such a situation, after a successful attack, get away from the site, before the rest of the opponents arrive.
2. You need to eliminate the paramedic as the last one - This objective makes the whole thing discernibly more difficult, because the paramedic can revive the knocked-down opponents that he finds. Do not worry if some of the opponents that you have taken down with the fear takedown, are revived This way. Later into the challenge, try to eliminate opponents without letting anybody know and in spots that are not frequented by the paramedic.
3. You need to perform two fear takedowns - It is best to perform the first one at the very beginning of the challenge, e.g. on two opponents only (you can use a voice synthesizer to make two opponents come together). As for the other takedown, you should try it towards the end of the challenge, i.e. when there are only 3-4 opponents left. After you attack the opponent with fear takedowns, make sure that the paramedic is the last one that you take down This way (an example of such an action in the above screenshot).

Availability: This challenge becomes available after you use the voice synthesizer to lure an opponent into a spot where you set a trap. Additionally, you need to make sufficient progress into the storyline.
Completion requirements 3 stars: There are three objectives to This challenge and each one is rewarded with a star.
1. Perform a fear takedown on four opponents - The important piece of information is that you need an upgraded version of fear takedowns here (buy an appropriate upgrade in the development menu), because they can be used to stun a maximum of three opponents at once. As for the objective itself, it is a good idea to handle it at the beginning of the challenge, because it is easier to plan the attack when there are more opponents around. You can group the opponents after you make some noise or after you use the voice synthesizer on them.
2. Use the voice synthesizer to lure an opponent to a weakened wall that has been sprayed with the explosive gel and detonate. If executed properly, This should knock out the opponent.
3. Eliminate the drone operator as the last one. It is a good idea to find him at the very beginning of the challenge (he is staying on one of the lower levels) and steer clear of him, while completing the challenge. As for the drone itself, you can hack it, of course, because the only requirement is that the operator is unharmed (up until the moment when he is the last man standing). To get close to the operator and download the codes necessary to hack into the drone, use venting shafts (the above screenshot).
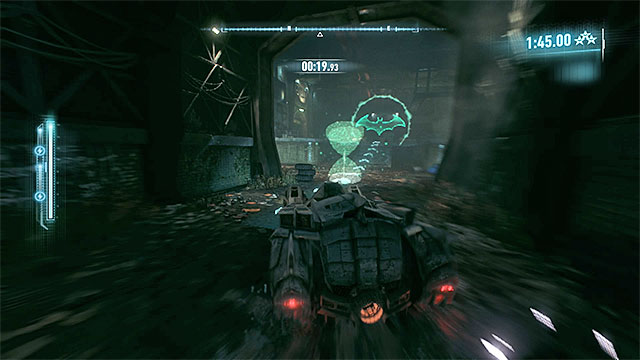
Availability: This challenge becomes available after you have completed a glide of, at least, 300 meters, after being ejected from the batmobile. You can make things easier by buying an upgrade to increase the velocity at which Batman is ejected. Additionally, to unlock the challenge, you need to make a sufficient progress into the storyline.
Completion requirements 3 stars: You need to finish the course within 1 minute and 45 seconds. Take the ride several times to learn the best shortcuts. Additionally, keep an eye out for hourglasses that replenish several seconds - an example hourglass in the above screenshot.
Availability: This challenge becomes available after you use three different gadgets in one attack, while gliding. Get new abilities that diversify gadget attacks, which you can activate in mid-flight. Then, use any three of them. Additionally, to unlock the challenge, you need to make sufficient progress into the storyline.
Completion requirements 3 stars: You need to complete the course within 1 minute and 5 seconds. Take the course several times to learn the best shortcuts and the spots where you need to watch out. Then, try to complete the track flawlessly.
Availability: This challenge becomes available after you complete one of the Riddler's time trials in the Riddler's Revenge side mission.
Completion requirements 3 stars: You need to complete the course within one minute. Take the course several times to learn about the most demanding obstacles (use Riddler blockade to manipulate some of them, because colliding with one rules out winning). Apart from that, try to drift on turns (use the handbrake, thanks to which you will be able to win single seconds)
Availability: This challenge becomes available after you complete one of Riddler's time trials in the Riddler's Revenge side mission.
Completion requirements 3 stars: You need to complete the course within one minute. Take the course several times to learn about the most demanding obstacles, which you cannot manipulate This time around (the Riddler does it). Just like before, try to drift as often as possible, because This will win you additional time.
Availability: This challenge becomes available after you complete one of Riddler's time trials in the Riddler's Revenge side mission
Completion requirements 3 stars: You need to complete the course within 42 seconds. You have less time than in the case of the previous challenges so, you cannot allow yourself any mistake. Again, you need to use the Riddler blockade to manipulate obstacles and drift to win additional seconds to complete the challenge.
Availability: This challenge becomes available after you attain a critical hit for three times, in a tank battle. Additionally, you need to make sufficient progress into the storyline.
Completion requirements 3 stars: You need to survive the enemy rocket for six minutes. The basic handicap here is that you cannot get hit at least once, during this challenge. As a result, you need to perfect two basic defense techniques - using thrusters and using the Vulcan cannon for taking the enemy projectiles down.
Availability: This challenge becomes available after you cover, at least, 50 meters in the air, after you have used the batmobile's turbo charge. Find any ramp and take the jump. Additionally, you need to make sufficient progress into the storyline.
Completion requirements 3 stars: You need to score, at least 8000. You get the points for destroying the enemy tanks. If you want more points, try destroying the enemy tanks within short intervals and avoid their projectiles.
Availability: To unlock this challenge, you need to make sufficient progress into the storyline.
Completion requirements 3 stars: You need to score, at least 10000. You receive the points for destroying the enemy drones in all variations. How many points you get depends on the variety of your attacks. Apart from the 60mm cannon, also use the Vulcan cannon, electromagnetic pulse and barrage.
Availability: To unlock this challenge, you only need to make sufficient progress into the storyline.
Completion requirements 3 stars: You need to score, at least 24000. Base on your experience with the previous challenges of this group - use thrusters, try to destroy enemy tanks and drones quickly and remember about the variety of your attacks. It is a good idea to get as many upgrades for the batmobile as possible, before you start the challenge which increases its combat capabilities. This also goes for the rest of the challenges in this category.
Availability: This challenge becomes available after you stop an enemy car without using the batmobile. The easiest way to do this is by gliding up to such a car and land on the roof by pressing the appropriate button. Additionally, you need to make sufficient progress into the storyline.
Completion requirements 3 stars: In the allotted time, you need to destroy, at least, twelve enemy vehicles. Before you start this challenge, it is a good idea to get upgrades that increase the batmobile's combat capabilities, thanks to which eliminating the opponents get easier. Also, you can follow the game's suggestion and search out mainly the rightful armored vehicles, because it is them that replenish more time. However, do not ignore the smaller vehicles, especially that they can be destroyed very quickly, by using the thrusters and pushing them off the road.
Availability: This challenge becomes available after you score two perfect hits in a row, while fighting tanks. Additionally, you need to make sufficient progress into the storyline.
Completion requirements 3 stars: You need to finish the course within 2 minutes and 15 seconds. While completing this challenge, you need to master both fast driving and effective elimination of the enemy vehicles on the road. Before you start this one, buy as many upgrades for the batmobile as you can, which will increase its combat capabilities and general handling.
Availability: This challenge becomes available after drift on the batmobile for, at least, 3 seconds. Find an open area, gain speed and use the handbrake at the right moment. Do not release the handbrake and let the batmobile spin.
Completion requirements 3 stars: Within a time limit, you need to destroy, at least, ten enemy armored vehicles. The vehicles will be on the run for the whole time so, you need to master both the technique of catching up with them and stopping them. It is worth adding here that destroying the vehicles restores some of the seconds in the time limit for this challenge.
Availability: This challenge becomes available after you fire a fourth-tier batmobile weapon You need to wait until you can upgrade a weapon and also make sufficient progress into the storyline.
Completion requirements 3 stars: You need to destroy six Cobra tanks within 2 minutes and 30 seconds. Do not waste too much time finding new targets and try to make each attempt a successful one. Additionally, you need to remain undetected for the whole time or the you will fail the challenge.
Availability: This challenge becomes available after you counter for three times within battle. Additionally, you need to make sufficient progress into the storyline.
Completion requirements 3 stars: You need to destroy six Cobra tanks within 2 minutes and 30 seconds. This challenge is quite different from the one above. First of all, the Cobra tanks come in waves. Additionally, at all costs, you need to avoid direct confrontation. What is even more, when you get hit, it replenishes 10 seconds of the available time, but do not go too far with that.
Availability: This challenge becomes available after you jump into the batmobile after free gliding. Additionally, you need to make sufficient progress into the storyline.
Completion requirements 3 stars: You need to complete the course within 3 minutes. While completing this challenge, you need to display both perfect driving skills and effective elimination of the enemy vehicles. Before you start this challenge, buy as many upgrades for the batmobile as possible, which will increase its combat capabilities and handling in general.
Below, you can find a list of all the achievements available in Batman: Arkham Knight (the base campaign). They are common for the PC version (Steam achievements), the Xbox One and the PlayStation 4 versions (trophies). In the description of each achievement, you can find information on the requirements to unlock the achievement and optionally, how to do it the easy way.
Way to unlock: You need to complete the Heir to the Cowl side mission, connected with Azrael and his trials. The achievement is awarded regardless of how this mission ends.
Way to unlock: You obtain this achievement automatically, as a result of your progress into the storyline. You receive it after you have destroyed the first group of Cobra tanks.
Way to unlock: While gliding, you need to fly under three main bridges between islands. The bridges have been marked in the above screenshot, alongside with the suggested order in which you glide under them.
 An example glide under a bridge
This is one of the most difficult achievements in the game, because you cannot use gadgets to help you glide, in the course of it. Start by using a maxed out grapple launcher on the rooftop of one of the skyscrapers, or cranes near bridge 1. After you glide closer to the bridge, dive and at the right moment start stabilizing your flight. You can neither collide with the bridge, nor slow down too much, or you will fail the challenge. Glide then towards bridge 2, while diving and rising in turns. The purpose of all of this is to maintain appropriate altitude. Glide under bridge 2 and head towards bridge 3. After you glide underneath, land in a safe spot and wait for the achievement to be unlocked.
Way to unlock: You need to complete the Creature of the Night side mission, connected with the huge bat (doctor Langstrom) flying around Gotham.
Way to unlock: You receive this achievement automatically, as a result of your progress into the storyline. More precisely, it is awarded after you perform a series of team attacks with Robin in Panessa Studios.
Way to unlock: You need to complete the Occupy Gotham side mission, which is about destroying all of the militia watchtowers.
Way to unlock: You need to complete the Gotham on Fire side mission, connected with the firefly and the fire stations that he sets o fire.
Way to unlock: You receive this achievement automatically, as a result of your progress into the storyline. It is awarded in the initial phase of the campaign, after you have identified the ACE Chemicals building as the Scarecrow's hideout.
Way to unlock: You need to complete the game in the New Game + mode, which becomes available after you beat the storyline for the first time (a new item in the main menu). The characteristics of this mode is higher difficulty level, but it allows you to keep all of the skills that you have obtained previously (try to get as many of them as possible), as well as Riddler's collectibles.
Way to unlock: You need to complete the Gunrunner side mission connected with Penguin, arresting him and destroying his weapon caches.
Way to unlock: You need to complete the Armored and Dangerous side mission where you need to destroy enemy armored vehicles.
Way to unlock: You need to complete the first trial of the Riddler. You gain access to it during Riddler's Revenge side mission .
Way to unlock: You receive this achievement automatically, as a result of your progress into the storyline. You receive it after you have escaped the huge drilling machine controlled by the Arkham Knight.
Way to unlock: You need to complete the final, tenth, trial of the Riddler. It unlocks during the Riddler's Revenge side mission.
Way to unlock: You need to push ten enemy transport vehicles off the road, without disabling them. This is not too difficult, because after you catch up with a given vehicle, you only need to use thrusters to slam into it with the side of the batmobile. In the majority of cases, this leads to the enemy vehicle being driven out of the road and crashing. Note - remember to pick small militia vehicles, instead of the big armored ones. This also excludes cars driven by bandits.
Way to unlock: You receive this achievement automatically, as a result of your progress into the storyline. You receive it after you have found one of the Poison Ivy's plants and defended her from the enemy attacks.
Way to unlock: You need to complete the eighth trial of the Riddler. It becomes available during the Riddler's Revenge side mission.
Way to unlock: You need to obtain any 46 of the 69 stars available in the AR Challenges. The challenges have been discussed in a separate section of this guide (note - training challenges do not count here).
 Glide right above the ground level
Way to unlock: You need to glide for 400 meters at the altitude not higher than 20 meters. It is best to complete this at the Bleake Island or Miagani Island, because there are no significant fluctuations in the ground level (on the Founders' Island there are numerous descents into underground areas). Start by ejecting Batman or using the grapple launcher on a rooftop. Dive towards the street and at the last possible moment, stabilize your flight. You need to glide right above the ground and if you have maintained high speed, the Batman does not touch the ground too early. The achievement will be awarded only some time after you have landed, so do not let this discourage you, if you do not receive it right after you complete the challenge.
Way to unlock: You need to obtain any 23 out of 69 stars available in the AR Challenges. The challenges have been discussed in a separate section of this guide (note - training challenges do not count here).
Way to unlock: You need to complete the Two-Faced Bandit side mission , i.e. stop all the bank heists in Gotham and capture the mastermind Two-Face.
Way to unlock: You need to complete the second trial of the Riddler. It becomes available during the Riddler's Revenge side mission.
Way to unlock: You need to complete the third trial of the Riddler. It becomes available during the Riddler's Revenge side mission.
Way to unlock: You receive this achievement automatically, as a result of your progress into the storyline. You receive it after you destroy the huge tank controlled by the Arkham Knight.
Way to unlock: You need to complete the Lamb to the Slaughter side mission, i.e. the one where you need to free Jack Ryder from the cultists.
 An example ramp
Way to unlock: You need to take eight different jumps of the length of, at least, 100 meters each. You can complete this challenge only after you have maxed out of the batmobile's afterburner in the character development menu. In the game world, there are a dozen-or-so different ramps. After you have found one, gain speed and use the afterburner right before you get off the ramp. Note - the game does not provide you with the length of the jump so, you need to make sure it is perfect and that the batmobile flies as far as it is possible.
Way to unlock: You receive this achievement automatically, as a result of your progress into the storyline. You receive it after you have been protecting the Poison Ivy, and her plants, in the batmobile.
Way to unlock: You need to complete the Campaign for Disarmament side mission, i.e. destroy the Deathstroke's tank and arrest him.
Way to unlock: You need to score a total of 50 perfect hits with the Vulcan cannon, on enemy tanks. You do that by hitting weak points of the enemy tanks, which you learn about during the main storyline.
Way to unlock: You receive this achievement automatically, as a result of your progress into the storyline. You receive it towards the end of the game, after the successful defense of the police precinct.
Way to unlock: You receive this achievement automatically, as a result of your progress into the storyline. You receive it after you have destroyed Arkham Knight's long range rockets.
Way to unlock: You receive this achievement automatically, as a result of your progress into the storyline. It is connected with the poison cloud over Gotham.
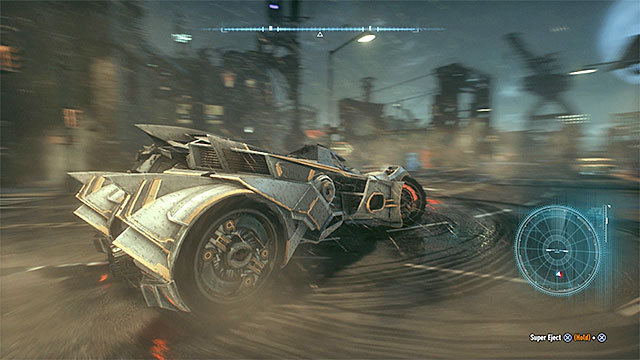 You can drift in a spot
Way to unlock: You need to drift the batmobile for a total of 3 minutes (this does not need to be one long drift). This one is very easy. Build up speed in an open area, use the handbrake and do not release it. Thanks to this, the batmobile will spin in one spot, which you need to keep doing up until you receive the achievement.
Way to unlock: You need to complete the fifth trial of the Riddler. It becomes available during the Riddler's Revenge side mission.
 You need to get right above the vehicle to land on it
Way to unlock: You need to stop 20 vehicles without using the batmobile. First of all, it needs to be said that it is about the regular cars that the bandits drive on. There are two ways to stop the vehicles. The one that is better, in my opinion, starts with gliding. You need to glide up to the vehicle and maneuver in the way that allows you to land on the roof of the vehicle. Then, you need to press the attack key to make Batman land onto it and deal with the bandits.
 Dodge backwards when the attack icon appears
IN the other method, you stand in the middle of the road in front of the car. In this case, you need to press the counter button at the last possible moment before the car bumps into you, i.e. when you notice the counter-attack icon. As a result, the car will crash.
Way to unlock: You receive this achievement automatically, as a result of your progress into the storyline. You receive it after ease the crisis in the Panessa Studios resulting from the appearing of Harley Quinn.
Way to unlock: You receive this achievement automatically, as a result of your progress into the storyline. You receive it in the initial phase of the game, after you have interrogated the driver of the armored vehicle.
Way to unlock: You need to complete the sixth trial of the Riddler. It becomes available during the Riddler's Revenge side mission.
Way to unlock: You receive this achievement automatically, as a result of your progress into the storyline. You receive it right at the beginning of the game, after you have summoned the batmobile for the first time.
Way to unlock: During a single fight, you need to use fifteen different fighting techniques. For the purposes of this challenge, select a fight participated by several dozens of opponents. Apart from that, try to unlock as many combat and gadget upgrades as possible. Note - The list includes, among others, supercombos, special attacks with the batmobile, team attacks with Robin, Nightwing or the Catwoman.
Way to unlock: You need to complete Friend in Need side mission, i.e. rescue Lucius Fox ad arrest the identity thief.
Way to unlock: Find and destroy all the mines in the Campaign for Disarmament side mission.
Way to unlock: You need to complete the Perfect Crime side mission, where you hunt down the murderer that leaves corpses in various parts of Gotham.
Way to unlock: You need to complete the seventh trial of the Riddler. It becomes available during the Riddler's Revenge side mission.
Way to unlock: Score five perfect hits with the Vulcan cannon in a row, without damaging the batmobile. You do that by hitting weak points of the enemy tanks, which you learn about during the main storyline. Remember that in-between the individual attacks, you should use the thrusters to prevent any of the enemy attacks from connecting.
Way to unlock: Obtain all of the 69 stars in the AR Challenges. These have been discussed in a separate section of the guide (note- training challenges do not count here).
Way to unlock: You need to complete the Riddler's Revenge side mission, i.e. complete all of the Riddler's trials, solve all of the 243 of his puzzles and win the direct battle with his machine. Thanks to this, you will arrest the Riddler.
Way to unlock: During your fights, you need to quick-launch gadgets for a total of 100 times. Remember which keyboard shortcut launch the individual gadgets and use them on a regular basis. Sooner or later, you will obtain this achievement.
Way to unlock: You receive this achievement automatically, as a result of your progress into the storyline. You receive it after the series of encounters with the Arkham Knight and the Scarecrow towards the end of the campaign.
Way to unlock: You receive this achievement automatically, as a result of your progress into the storyline. You receive it after you have rescued the workers of the ACE Chemicals (do not worry that some of them are dead already after you reach them, because this will have no effect on the achievement).
Way to unlock: You need to complete the fourth trial of the Riddler. It becomes available during the Riddler's Revenge side mission.
Way to unlock: You receive this achievement automatically, as a result of your progress into the storyline. You receive it in the initial phase of the game, after you have arrested Poison Ivy.
Way to unlock: You need to eliminate a total of 20 opponents with fear takedowns. This one is very easy, especially that, after you have upgraded the fear takedown, you can eliminate as many as five opponents in one take. You should be able to obtain it without any problems, during the campaign.
Way to unlock: You need to complete Service side mission, i.e. find and rescue all of the missing firemen.
Way to unlock: You need to complete the ninth trial of the Riddler. It becomes available during the Riddler's Revenge side mission.
Way to unlock: Perform all of the predator takedown types, i.e. the ones that are performed in the sneaking sequences. The list of the attacks is as follows:
Way to unlock: You need to complete Own The Roads side mission, where you secure all of the militia outposts.
 This is where you initiate the Knightfall protocol
Way to unlock: Initiate the Knightfall protocol, i.e. unlock the second additional game ending. This becomes possible only after you have completed all of the side missions in 100% (including those connected with the Riddler.
You then need to reach the police precinct and interact with the large headlight. This will start the ending.
Way to unlock: You receive this achievement automatically, as a result of your progress into the storyline. You receive it towards the end of the exploration of Stagg airships.
Way to unlock: You receive this achievement automatically, after you have completed the main storyline.
Way to unlock: During a single battle using the batmobile, you need to use all five weapons. You should take interest in this achievement only later into the game, because it is then that all of the weaponry is unlocked. You need to use the 60mm cannon, the Vulcan cannon, drone virus, missile barrage and the EMP.
Way to unlock: You receive this achievement automatically, as a result of your progress into the storyline. You receive it after you escape from the ACE Chemicals.
Way to unlock: You receive this achievement automatically, as a result of your progress into the storyline. You receive it after you sabotage one of the watchtowers and unlock the bridge to the Miagani Island.
Way to unlock: You receive this achievement automatically, as a result of your progress into the storyline. You receive it after you destroy the Penguin's first weapons cache.


 Broken Sword: The Angel of Death Game Guide & WalkthroughBorderlands 2 Game Guide & Walkthrough
 Burnout Paradise: The Ultimate Box Game Guide & Walkthrough
 Batman: Arkham City Game Guide & Walkthrough
 Broken Sword: The Serpents Curse Game Guide & Walkthrough