
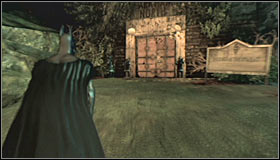
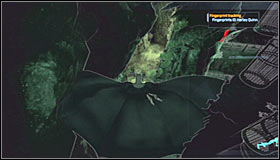
This unofficial guide to Batman: Arkham Asylum video game contains all the information on Batman's latest adventure. To be more precise - about his journey to the asylum that's being taken over by Joker and his crew. Using hints provided by this guide you'll be able to recapture the madman, as well as to uncover all the darkest secrets of the Arkham asylum itself. This guide has been divided into three main chapters. The first chapter contains a very detailed walkthrough of the main singleplayer mode of the game. Reading it will allow you to find out how to complete main quests, how to get rid of Joker's thugs and how to avoid many traps scattered throughout the entire building complex. The second chapter should provide a much needed help for players in need of finding all the secret items. Each zone of the island has been described with large attention to detail. Maps and pictures provide additional assistance in locating collectibles from six primary groups. The final third chapter explains the rules of the Challenge Mode, as well as provides hints for less experienced players and tells a lot of useful things about choosing the best upgrades for the main character.
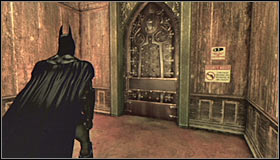
Stranger
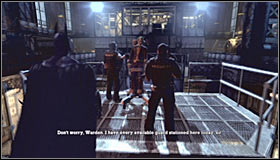
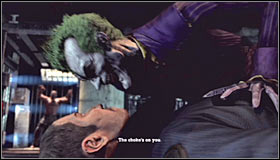
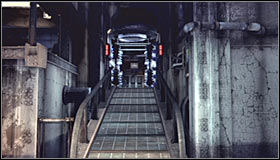
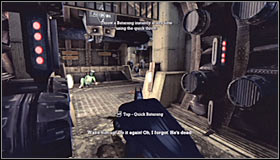
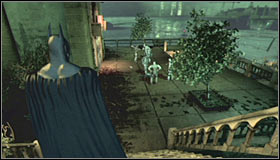
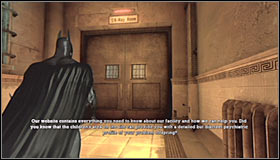
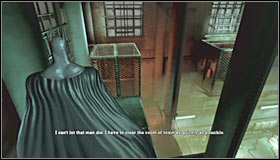
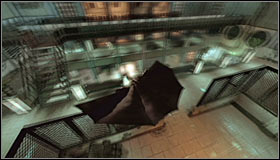
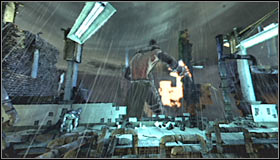
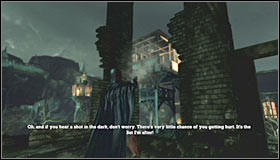
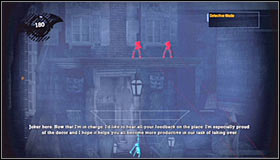
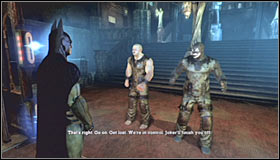
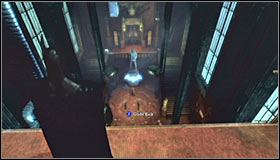
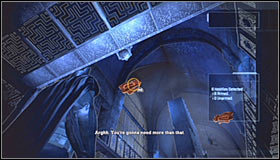
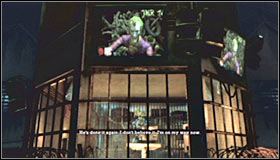
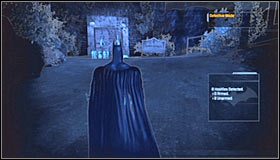
This introductionary sequence will show Joker after he's been recaptured by Batman. The madman is being transported back to his cell and all you're allowed to do at this moment is to move around. The only exception is the screen zoom function and you might want to try it out if you can't see Joker's face clearly from the normal perspective. You'll have to wait for Joker to break free in order to gain access to Batman's other moves.

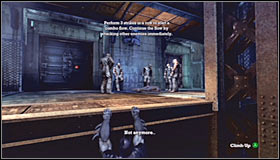
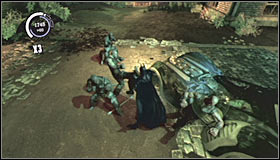
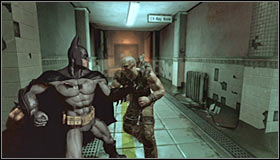
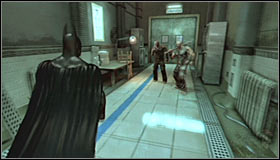
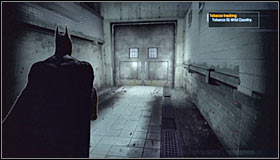
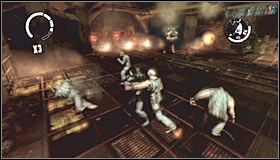
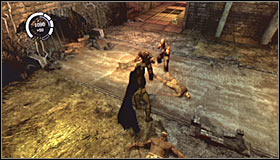
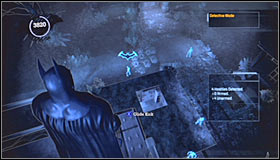
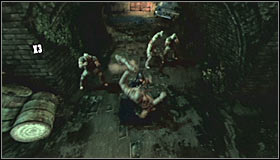
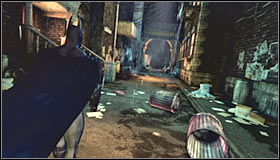
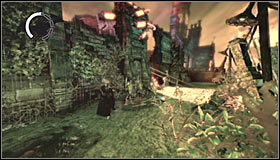
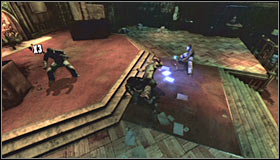
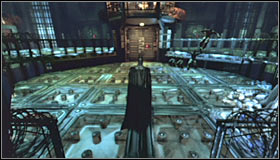
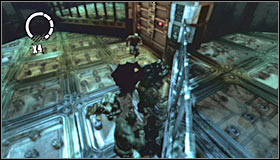
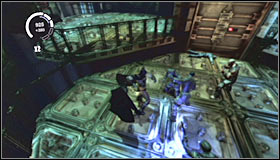
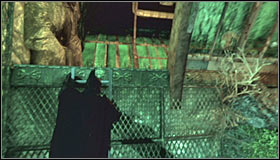
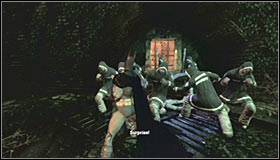
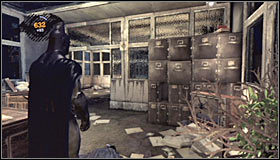
You start the game in an area called Holding Cells (use your personal map for navigation) and your first objective will be to defeat two groups of thugs. Thankfully both fights are going to be extremely easy. Notice that you can combine your punches to create combinations of hits. It would also be a good idea to practice counterattacks. You can perform a successful counterattack each time you've noticed that a blue icon has appeared over the head of one of your opponents.
Once you've defeated the first group you'll have a few seconds to prepare to for an arrival of the second group. The basic structure remains the same, however you can also practice stunning thugs with your cape and performing takedowns. Each time you begin a new fight try scoring good combos, so you'll earn more experience points. Joker will unlock a new passageway once you've dealt with his men.
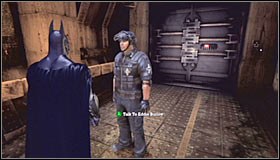
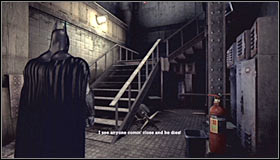
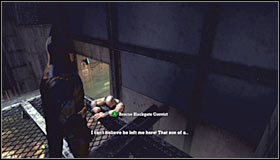
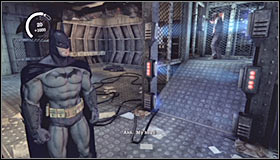
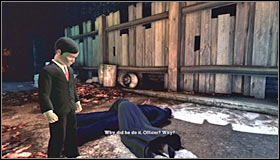
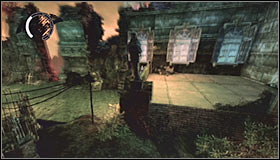
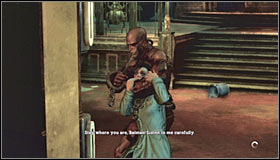
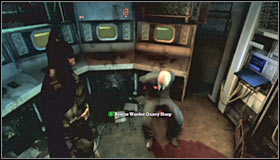
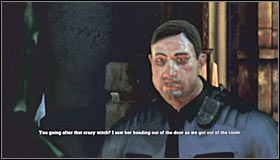
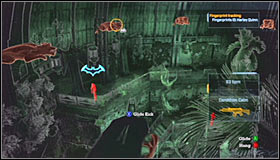
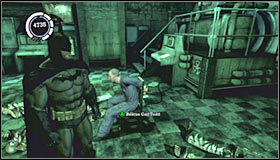
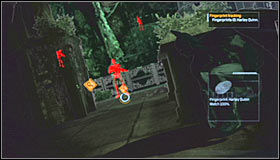
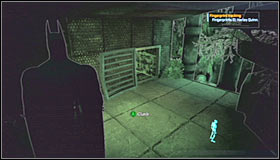
Head north and you'll soon arrive in the Processing Corridor. Keep going straight until you encounter two thugs. Getting rid of them should be a piece of cake. You can now turn left and find Eddie Burlow. If you don't want to talk to him (it's not mandatory) proceed to your right without any further delays.
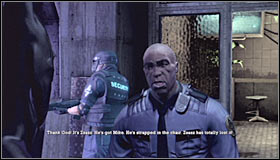
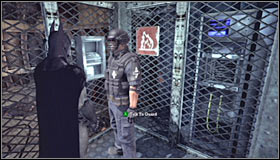
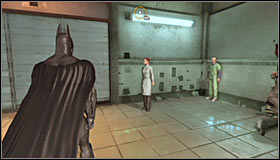
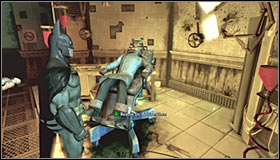
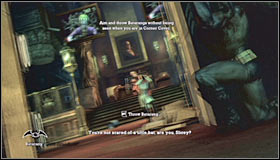
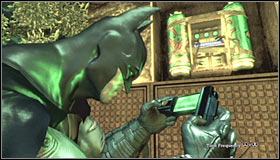
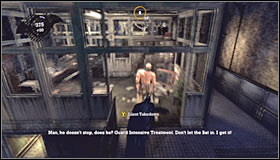
Turn left in a short while and go to the area marked as the Patient Pacification Chamber. It would be a good idea to talk to Zach Franklin here (one of the guards) and you'll find out that an inmate called Zsasz is holding his colleague hostage. Ignore the left corridor and instead proceed north. Locate a small staircase and proceed to the upper floor where you'll be allowed to talk to Gretchen Whistler.
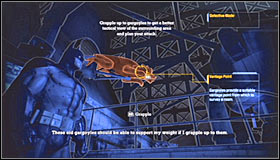
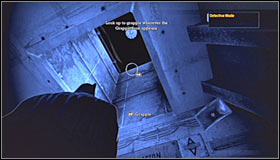
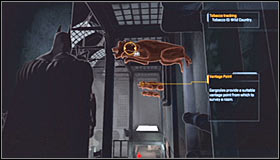
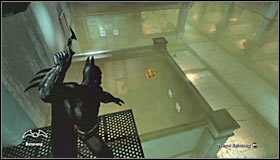
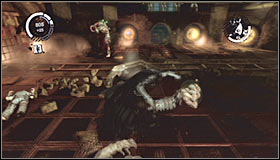
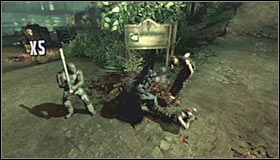
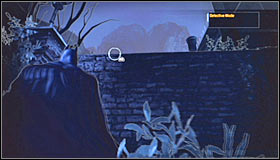
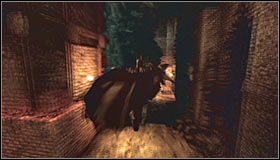
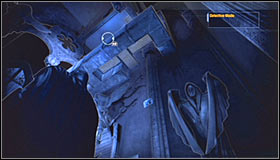
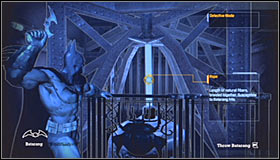
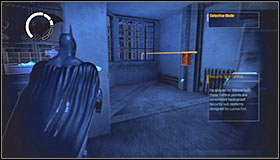
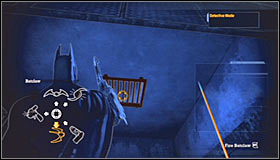
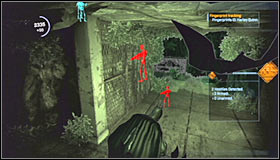
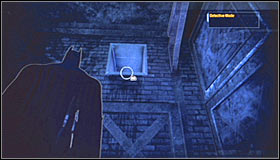
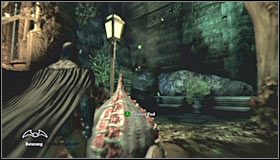
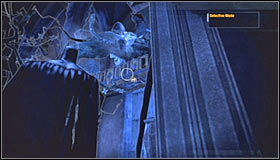
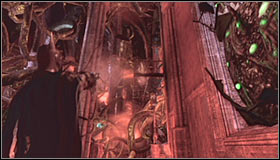
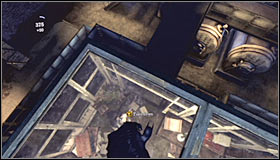
Head on to a nearby balcony. You'll come across new guards here and you'll be allowed to talk to one of them. Go left once the conversation has ended, turn on your detective mode and look up. Press a corresponding key to grapple up to one of the gargoyles. Thankfully it's all going to be performed automatically, so you won't have to worry about losing balance. Use the hook again to reach other gargoyles located in the vicinity of your character.

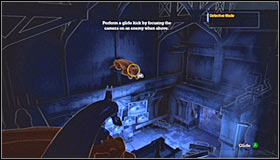
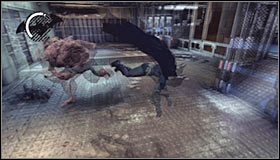
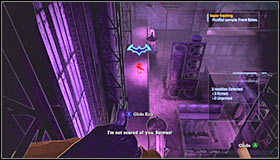
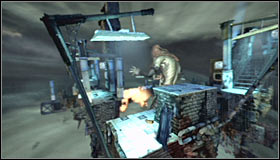
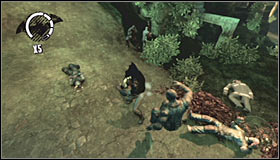
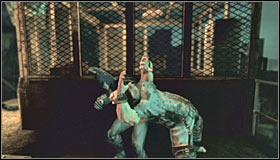
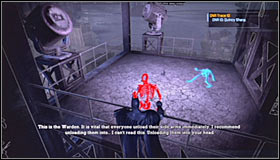
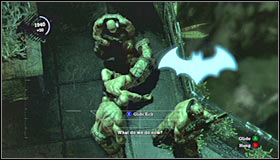
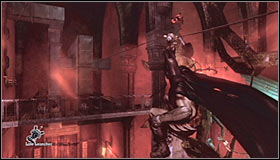
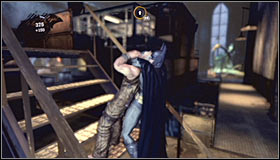
Eventually you'll end up on a gargoyle on the side of the room. If you look down you should notice that you're stationed directly behind Zsasz. You must now perform an action called a Glide Kick. This is also triggered by pressing a single key and all you have to do is to what for a large icon to appear above Zsasz's head. Once you've stunned your opponent perform a quick takedown to finish him-off.
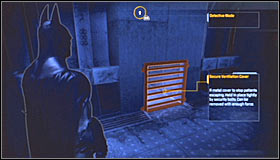

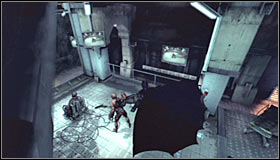
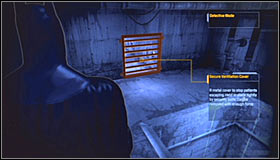
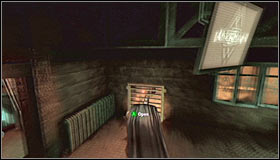
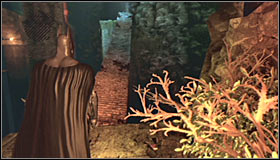
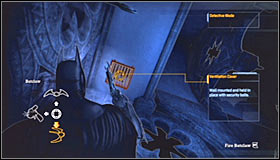
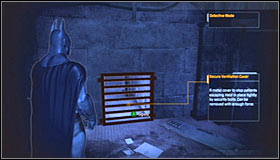
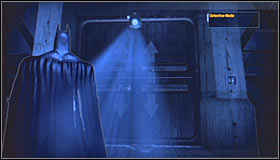
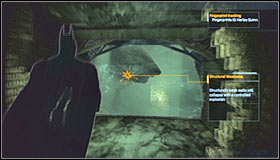
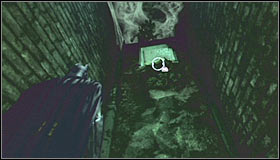
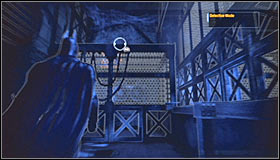
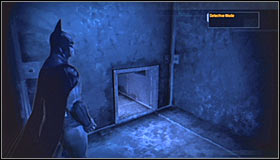
Activate detective mode again and inspect the northern wall of the room. Doing this should allow you to locate a new entrance to a ventilation shaft. Use the tunnel and kick a new grate at the opposite end. You'll end up standing in the Processing Corridor. Head straight and you'll soon arrive in an area called Decontamination.
Approach one of the guards. You may take your time to see what's happening on the other side of the glass. Sadly you won't be allowed to rescue those guards. Don't worry, because other allies are still alive and you'll reach their positions in a short while. Look up and grapple up to a higher ledge. You must enter a new ventilation shaft here.
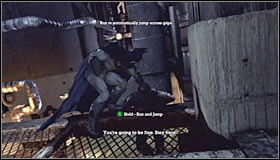
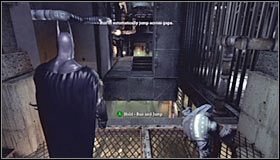
Exit the vents, turn right and rescue the first guard before he loses grip and falls. If you arrive too late consider returning to the last checkpoint, because you ought to rescue everyone. Stand in the middle of the platform and HOLD the run key. Doing this will allow Batman to perform a jump automatically once he's close enough to the ledge. Make a few steps forward and look around.
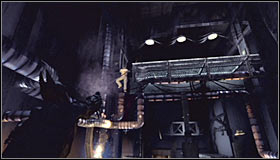
You'll now have to use your hook to grapple up to a higher platform. Once you're there turn left and rescue a second guard. You'll now have to glide to a nearby platform seen in the distance. The idea here stays the same - press and hold one of the action keys and Batman will automatically begin gliding once he's close enough to the ledge. You can also make small adjustments while still in flight, but it shouldn't be necessary.
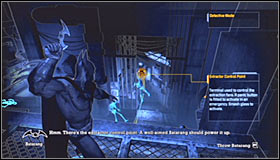
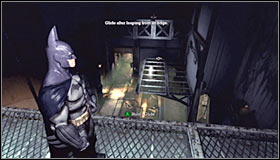
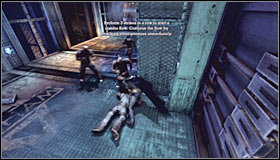
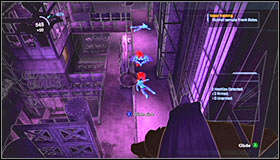
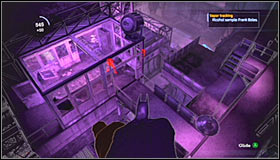
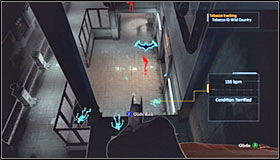
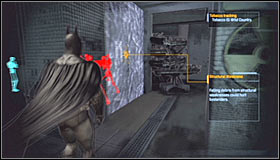
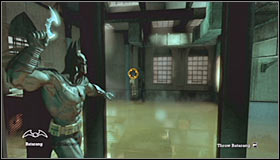
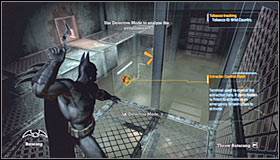
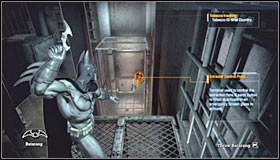
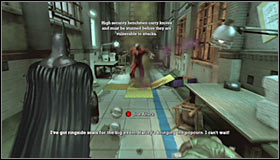
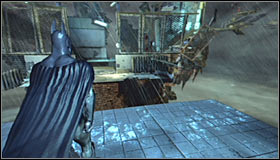
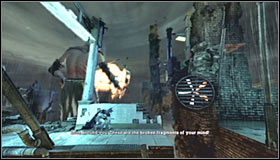
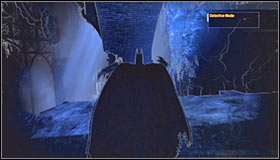
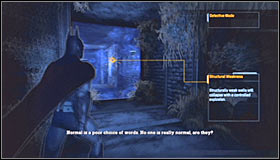
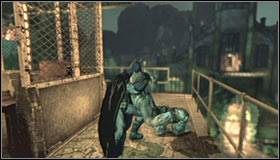
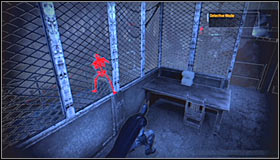
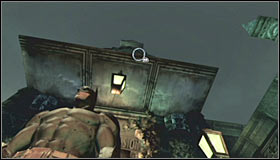
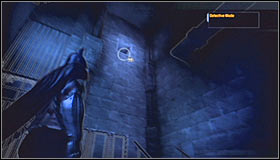
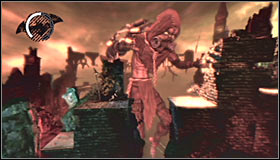
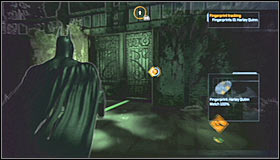
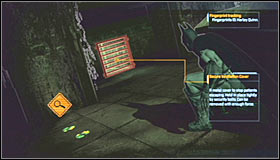
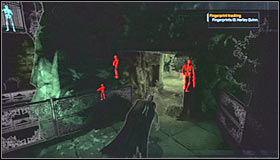
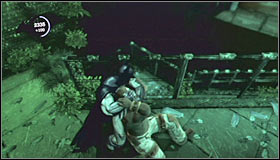
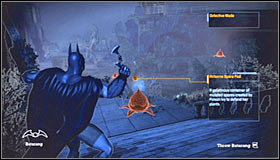
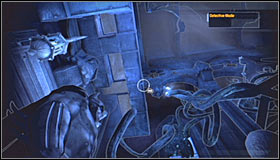
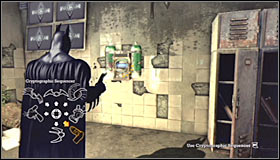
The third person you must rescue is a convict. Don't worry, because Batman will automatically stun him one he's safe on the ledge. Activate your detective mode and turn left (screenshot #2). You must use a Batarang here, aiming it at a nearby control panel. Hitting the panel with your gadget will turn on nearby fans and therefore you'll get rid of the deadly toxins left by Joker.
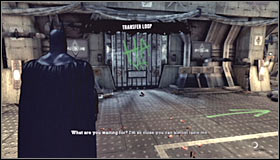
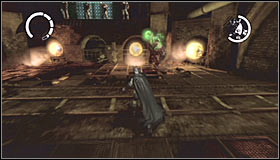
Proceed to the ground floor and head south. Eventually you should end up in a zone called Transfer Loop. Follow the route using green arrow seen on the floor and on the walls. This means you'll continue moving south. Watch out, because Batman is going to be attacked by two inmates along the way.
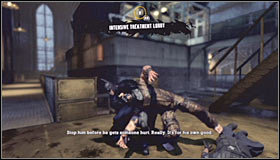
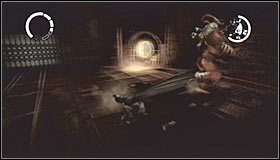
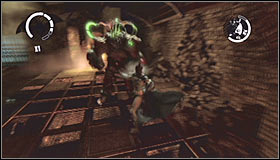
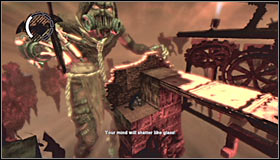
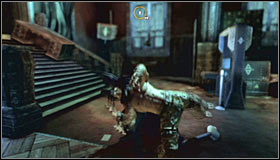
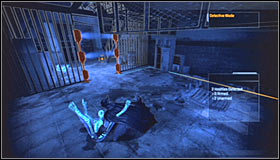
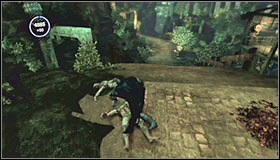
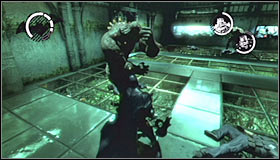
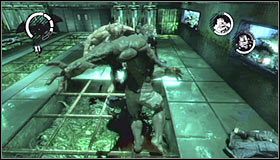
Upon your arrival in Secure Treatment Transfer you'll be forced to go up against a mini-boss. DON'T attack the mutant sent by Joker. All you have to do is to dodge its attacks by performing successful jumps. Aside from trying to ram you the beast will occassionaly throw bodies at Batman and you'll have to continue moving to stay alive.
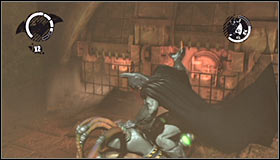
Keep defending yourself until the beast stops and dies. You'll be rewarded with a short cut-scene and afterwards you'll be greeted by one of the guards. Wait for the guard to unlock a new passageway for you. Talk to him if you want to or return to the Transfer Loop zone right away. This time you'll want to head north.
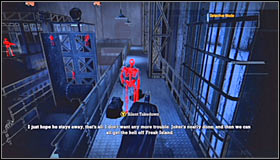
Eventually you'll have to return to a small junction where you've been attacked by the inmates the last time you were here. Head west. New inmates occupy the western section of this area and it would be a good idea to surprise them by using Batarangs. You can also attack them without any delays if you feel confident about your win. Once they're pacified go north and return to Holding Cells.
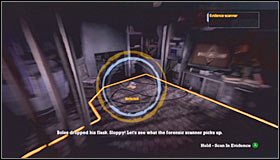
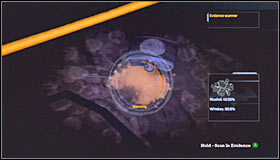
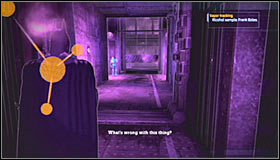
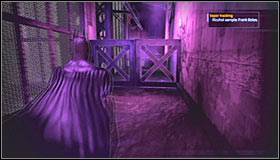
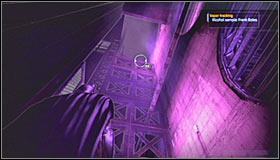
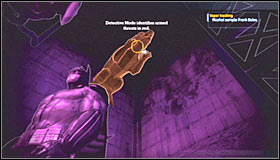
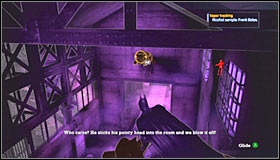
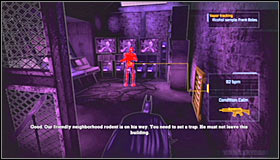
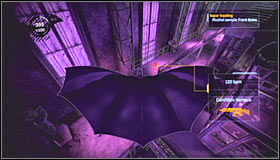
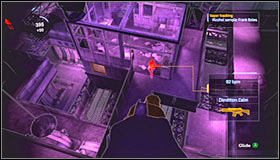
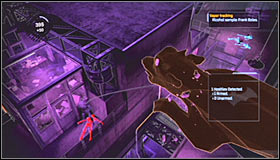
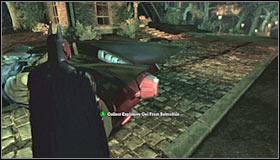
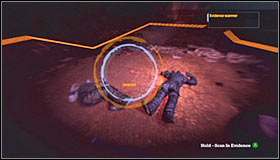
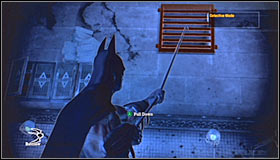
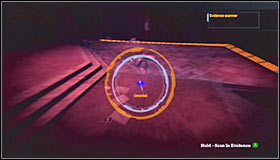
Listen to a new radio conversation with Oracle along the way and once it's ended enter a large room located to your left. Turn on your detective mode and scan the area in the search for a whisky bottle. Press and hold the scan key while targeting the fluid. Doing this will isolate a forensic trail, allowing you to continue your investigation and the search for Frank Boles.
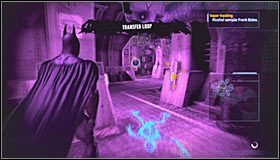
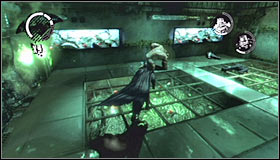
Exit the room and proceed south. This means you'll be returning to Transfer Loop. It would be a good idea to use detective mode from now on, because you'll encounter a lot of clues on where to go next. Choose the corridor leading south and once you've reached a new door proceed to an area called Security Transit. Approach a guard here and witness a new cut-scene.

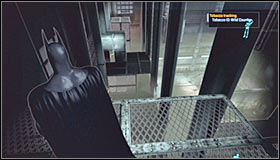
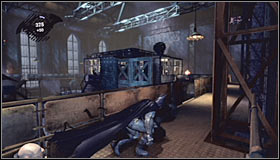
Get ready for a rather challenging section of the game. Your objective will be to reach the top floor of this elevator shaft. Start off by using your hook twice to grapple up to higher platforms. Once you're standing on the higher platform run forward and Batman will automatically jump in order to grab a nearby ledge.

Notice that Batman can't climb up so as a result you must move to your right. Don't worry, because the main character won't lose grip at any point of the game. Climb up when you have the chance, turn left and move forward. Kick the grating to leave the shaft and use your hook once again in order to reach a higher platform.
There's a large hole in front of you and you'll obviously have to jump over it which shouldn't be a problem. Once you're on the other side press the crouch key and head forward, ignoring a ventilation shaft seen along the way. Climb up to a higher platform and grab the ledge. This time you'll be moving to your left.
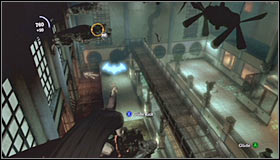
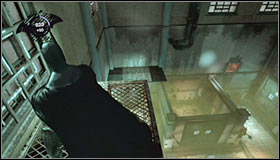
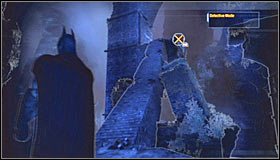
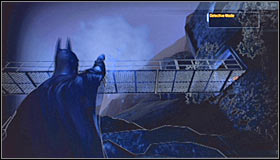
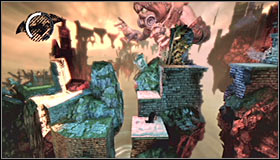
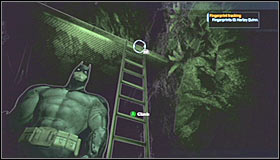
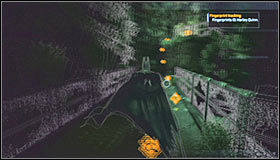
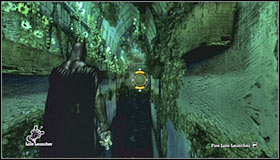
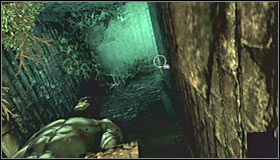
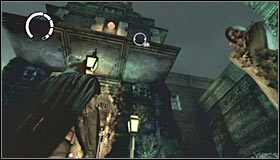
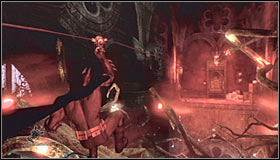
Keep heading in the direction mentioned above until you'll be allowed to climb up to a new platform. Move forward and use your hook several times more to continue your approach to the top floor. Don't worry if you can't locate your destination right away, because in some cases (screenshot #2) you'll travel a long way.
Continue moving forward, passing by a tablet which can be scanned to uncover one of the secrets. When you get close enough to the main shaft use your hook to grapple up to a new platform. Don't climb up right away. Instead take your time to observe the convicts and planning your approach.
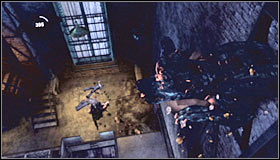
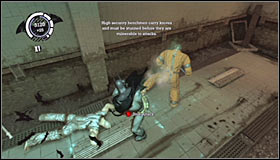
During this new battle you'll have plenty of opportunities for performing successful counterattacks. Try scoring good combos and don't forget to use takedowns in order to finish off stunned opponents once and for all. Once you've won talk to Oracle again and inspect the western wall in the search for a new ventilation shaft.
Approach the exit from the shaft without any delays, because you won't be seen by the convicts. Leaving the shaft will result in entering an area called Cell Block Transfer. Listen to an another conversation with Oracle. Once it's ended activate your detective mode and look up. Grapple up to the nearest gargoyle.
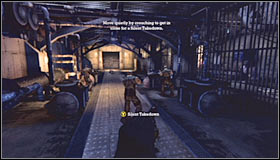
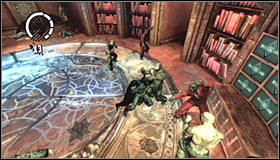
You must now use the rope to reach other gargoyles located in your vicinity. Doing this will allow you to avoid the convicts and to end up behind their backs. Land on the ground quietly, press and hold the crouch key and start moving towards the inmates. You'll have incapacitate them one by one by using silent takedowns. This can be achieved by standing close enough to each target and pressing a corresponding key. Use this method to get rid of all three thugs.
You may now proceed north after which turn right. Make sure that you're holding the crouch key all the time, so you won't make too much noise. You can wait for one of the inmates to end his conversation with Joker or you can eliminate him right away. Once he's been dealt with watch a new cut-scene and locate an entrance to a ventilation shaft. Travel through the shaft to find your way to the Intensive Treatment Lobby.
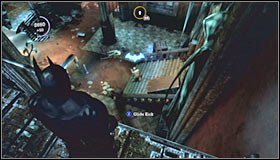
Approach the exit from the shaft and press the action key to move the grate. Batman will do this slower than usual, because the surrounding area is swarming with enemy troops. Drop down on the ground, approach the first inmate quietly and perform a silent takedown. Once he's gone use your hook quickly to grapple up to one of the nearby gargoyles.
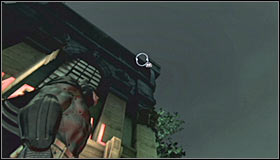
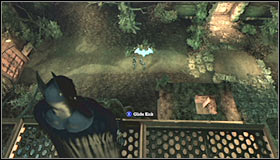
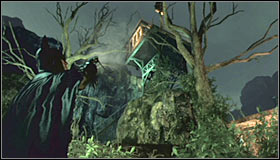
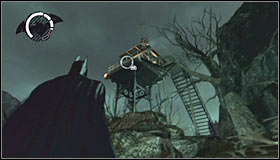
Your next target should be a guard patrolling a nearby building. Wait for him to exit the structure and surprise him while he's standing on a balcony using your Glide Kick ability. Don't forget that you also have to finish him off by performing a takedown. Once he's neutralized return to the nearest gargoyle before your position is compromised.
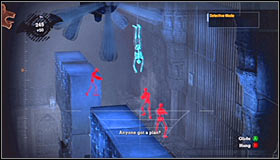
As for the third opponent, you can wait for him to find bodies of his fellow inmates or you can attack him right away. I would also recommend using Glide Kick followed by a successful takedown. You'll now be rewarded with a cut-scene, informing you that new hostiles have arrived in the lobby area. You'll probably start on top of the central structure, so use your hook to get to one of the gargoyles as soon as possible.
You must be very careful from now on, because new inmates are organized and more careful than the last group. Start off by taking out a single guard from one of the side balconies. Return to the gargoyle quickly and don't attack his colleagues right away. Instead wait for them to scout the area near the body and eventually they'll return to their usual routine.

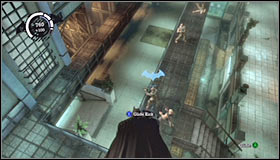
It's crucial that you take your time while dealing with other hostiles. Each time focus on neutralizing a single target and escape before you're noticed. Once you've secured the area head on to a new corridor (screenshot #2). Inspect the body of a dead guard. He's been killed by the Riddler.
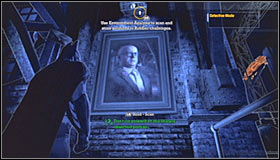
You'll now have to solve your first riddle. Bear in mind that there are other riddles to be found in Arkham Island (more on this can be found in the Collectibles chapter). In order to solve this particular riddle you must head back a few steps and scan a painting located on a nearby wall. Once this is done drop down and talk to one of the guards. Follow William to a small room.
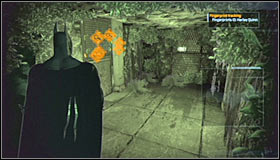
Use the stairs to get to the basement and head through a long corridor. Turn left and in order to leave the building use a nearby ventilation shaft (screenshot #2).
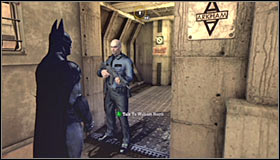
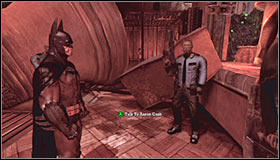
Reaching the opposite end of the shaft shouldn't take too much of your precious time. Once you're outside use your hook and grapple up to an upper ledge found directly in front of you. Eventually you'll find your way to Arkham East. Watch a new cut-scene and glide towards the ground level. Talk to Louie Green there (one of the guards).
Take your time to look around, however you'll soon receive a warning that your batmobile is in danger. Familiarize yourself with your current goal and don't forget to check your personal map in order to find out where you must go next. As you've probably noticed, you'll be moving north-west, towards the Arkham North area. Approach a large gate and enter a short tunnel. Stop for a second and listen to a new radio transmission.
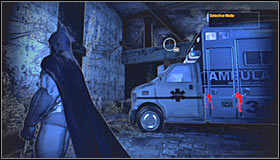
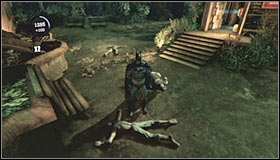
Get closer to an ambulance. Activate detective mode to locate two armed thugs and wait for them to turn around. Once this has occurred use your hook to reach an upper ledge quickly. Make a few steps forward, drop down and perform silent takedowns on both inmates. Don't forget to keep using the crouch key while trying to surprise them.
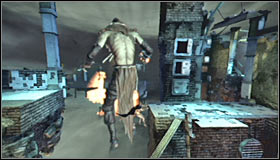
You may now head through a large gate leading to Arkham North. Start moving towards your batmobile, however I would recommend that you get on top of one of nearby structures. Doing this will allow you to surprise inmates surrounding your vehicle by using a Glide Kick ability. Deal with the rest using standard attack methods. Use counterattacks to prevent Batman from losing health.
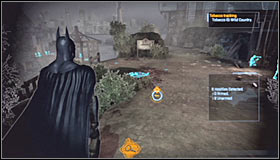
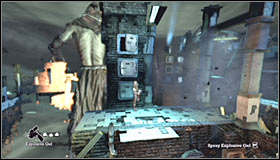
Once you've defeated all hostile units approach the trunk area of your car and press the action key to add Explosive Gel to your inventory. Listen to what Batman has to say and turn on your detective mode. Search the area in the vicinity of your batmobile to find a pipe. Scan this object to initiate a new investigation.
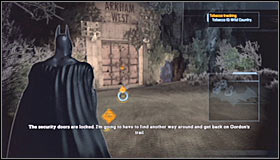
Once again you'll have to follow the trail, however this time DNA samples are going to be easier to spot. Eventually you'll have to travel to a gate leading to Arkham West, however upon your arrival you'll find out that the entrance is locked.
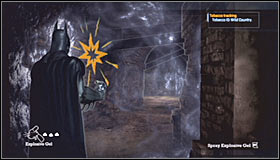
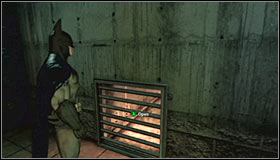
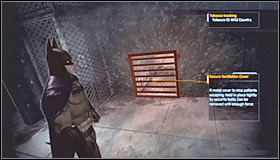
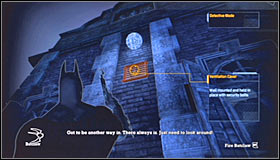
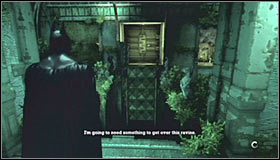
Proceed to your right and make sure that you're still using your detective mode. Find a weak section of the wall (screenshot #1), choose the explosive gel from your inventory and apply the gel by pressing the action key. You must now detonate the gel, unlocking a nearby passageway. Find a door leading to Arkham West.
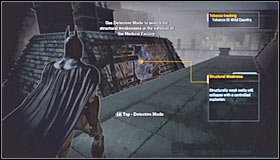
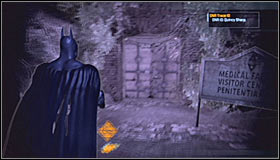
You can now keep following the trail closely or you can proceed directly to your destination which is going to be the Medical Facility building. The entrance to the building is being guarded by a large group of thugs and obviously your objective will be to get rid of them. It shouldn't be a problem as long as you don't forget to use counterattacks.
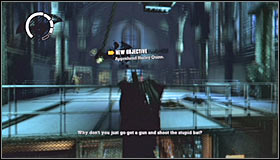
Open the main door leading to the Medical Facility building and you'll find yourself standing inside a zone marked as the Medical Foyer. Make a few steps forward to trigger a cut-scene with Harley Quinn. You can't do anything from here, so head back outside to the main area of Arkham West.
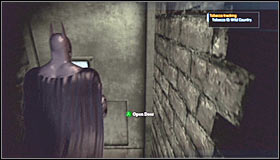
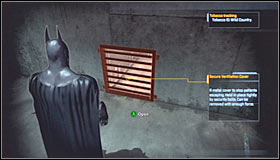
Once you're back outside use the hook to grapple up to the roof of this building. Head forward and turn left. Eventually you should be able to locate a weak section of the wall (screenshot #2). Use Explosive Gel to blow up the wall and head inside. Open a small door in order to enter the Medical Facility building (Maintenance Access area to be more precise).

You won't encounter any enemy units in your immediate vicinity, so you won't have to spend a lot of time scanning the area. Start off by jumping over two fences. Locate an entrance to a new ventilation shaft afterwards which can be found to your right. Head forward and eventually you'll be forced to enter a second shaft.
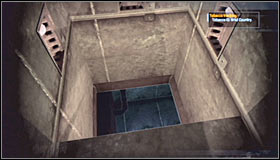
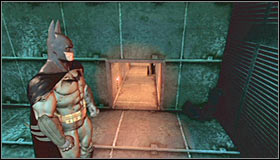
Follow the second tunnel to its end. Drop down to a lower section without any additional delays. The entrance to third and final shaft is located to your left. Use this shaft to reach Sanatorium area. You'll have to decide here whether you want to travel left or right. The latter seems like a better idea.
Exit the shaft and quickly use your hook to grapple up to the nearest gargoyle. You should now take your time to look around and to scout enemy positions. It'll be to quite difficult to succeed here, because the room is being patrolled by several armed thugs.
I would strongly recommend that you use the exact same tactics as during your previous "silent encounter". Eliminate enemies one by one using Glide Kick abilities and takedowns. Each time you've successfully neutralized an opponent return to the gargoyles and wait for the situation to cool down before attacking other foes.
Make sure to remain hidden all the time, because you may lose a lot of health points as a result of enemy gunfire. If you do get caught move between gargoyles quickly to confuse enemy units. Once you've dealt with all the inmates drop down to the ground floor and locate a small group of rescued doctors (near the elevator). Talk to them in order to find out about their taken friends.
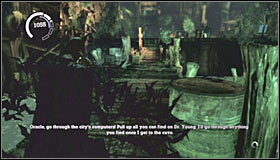
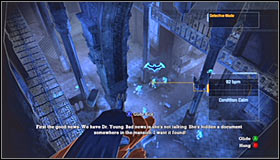
Turn around once the conversation has ended and proceed to the lower floor. Move north to find an exit from this area. You should end up standing in the Upper Corridor. There are three doctors for you to rescue and you can visit their locations in any order you want. I would recommend heading towards doctor Young first, so you should be moving east. Use the yellow line painted on the floor if you're having problems finding the correct path.
Keep moving east, however you will turn south-east in a short while. A couple of thugs will attack you near the door, but eliminating them shouldn't be a problem. Once it's safe locate a door leading to the X-Ray Room.
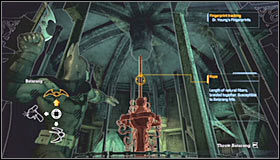
You'll have to act quickly here, because otherwise doctor Young is going to be executed by her captors. Your objective will be to plant two explosive devices on the weak walls of the central room. The walls are located on the western and on the northern side and you can take a look at my screenshots for additional help. Use an Explosive Gel on the first wall and then run to the second wall to repeat this action.
Once you've planted the second device detonate both charges without any additional delays. The explosions will stun all the inmates, so you won't have to worry about finishing them off. Enter the room and talk to doctor Young.
You may return to the Upper Corridor. Head back to the junction you've past through while leaving the Sanatorium area and proceed towards an unexplored corridor. This time you'll be following the red line to the area where doctor Chen is being held. Keep moving north until you find a door leading to the Surgery Room.
Approach the doctor which will initiate a short cut-scene. You'll now have to defeat a small group of thugs. They won't be using any melee weapons, so it shouldn't be a big problem. Once they've been defeated free the doctor by pressing the action key. Return to the Upper Corridor when he's safe.
There's only one more doctor for you to rescue (Kellerman). Go back to the previous junction and choose an unexplored corridor with a blue line painted on the floor. Just as before you shouldn't be too surprised to find two inmates guarding this corridor. Eliminate them both and open a nearby door to arrive in the Patient Observation area.
Two other thugs are guarding a nearby passageway and obviously you'll have to defeat them before moving on. Head on to a large glass wall and listen to what one of the friendly guards has to say. Your objective for the time being will be to get rid of deadly toxins left by Joker. Turn on your detective mode, look up and grapple up to a small ledge.

Once you're at the top choose a nearby ventilation shaft and eventually you'll end up standing above the room filled with the deadly gas. Proceed to your right and aim at the first control panel (screenshot #2). Naturally you must use your Batarang to hit the panel.
This time you'll want to travel to your left. Approach the ledge and keep holding the action key to glide to a lower platform. After you've landed make your way to a nearby balcony. You'll be allowed to hit one of the inmates from here (screenshot #2), but instead of aiming at him try hitting the rope with your Batarang. If you've done everything according to the plan the inmate should land inside a small room located beneath him.
You must now make your way to other platforms located nearby. Be careful, because if you fall you'll only have about a second to return to safety. Once you've reached the last platform position yourself towards the western wall and throw your Batarang at the second control panel.
Your next step is to glide to a lower platform located in your vicinity, so you'll get closer to the room with the stunned inmate. Turn right once you've safely landed and locate the final third control panel from here. Once it's been destroyed you'll get rid of the toxins. Drop down to the ground level and talk to Aaron Cash (one of the guards).
You may exit this room in order to return to the Upper Corridor. Start heading east, towards the Sanatorium area (blue line on the floor). A single opponent is going to attack you along the way, however this isn't going to be an easy fight. For the first time you'll have to use your cape to stun him and to prevent him from using his knife. All you have to do is to press a corresponding key when a red icon will appear above his head.

Choose the door leading back to the Sanatorium and you're going to be automatically rewarded with a new cut-scene. Grapple up to the nearest gargoyle once the cut-scene has ended. Notice that there are three armed guards here. WAIT for them to begin patrolling different sections of the room, making themselves easier targets.

Theoretically you could try leaving this area right away, however I would recommend that you spend some time eliminating enemy troops. Be patient, neutralize single targets and wait for the situation to calm down after each attack. Once it's safe drop down to an area where you've talked to the doctors the last time you were here. Use the elevator to travel to a different floor.
Exit the elevator and witness an interesting cut-scene featuring the Scarecrow. You're in an area called Secure Access Go to your left and use Explosive Gel to destroy a nearby wall (screenshot #1). Walk through a short corridor of the Maintenance Access area. Drop down to a lower level and enter the Lower Corridor.
Start off by entering a new ventilation shaft which is going to be located to the left of your current position. Once you've used the shaft make a few steps forward and watch a new cut-scene. Choose the corridor located to the left of Gordon. Eventually you'll have to locate a door leading to the Morgue.
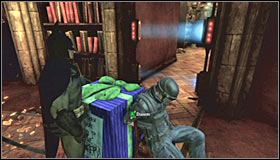
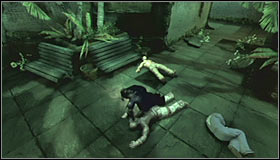
You can spend some time looking around, however the only real solution is to go back to the passageway you've used to come in. Open the door and you'll end up... again inside the morgue. This time approach three bodybags found in the central area of the room. Opening bodybags on both sides will reveal Bruce's parents and opening the last one will feature a surprise guest. :-)

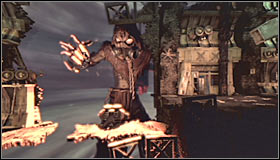
Notice that you've found yourself in a very weird place. Start off by making a jump towards a new platform located directly in front of you. Perform a second jump not long after that, however this time you'll only grab a ledge. Move to your right and climb up. Doing this will result in a cut-scene featuring your main opponent for this section of the game - Scarecrow.

The idea here will be to stay out of Scarecrow's sight. Notice that the boss is slowly rotating clockwise, so each time you plan on making a move you'll have to wait for him to "scan" your area. Start off by running to your right and using the stairs. Take cover behind the wall, drop down and CROUCH. Move slightly to your right.

Once again you'll have to wait for a right moment to make a move. Take cover behind a small brick wall (screenshot #1) and get ready to make a jump towards a platform seen to your right. When you get to this new platform grab a nearby ledge and move to your right. Don't climb up right away. Instead wait for Scarecrow to complete yet another sweep of this area.
Climb up once the Scarecrow has turned away. Start running to your right and take cover behind a small brick wall (screenshot #1). You'll now have to perform a much larger jump, but thankfully Batman will grab a new ledge automatically. Take cover behind a large wall before the boss sees you.
Choose an Explosive Gel from your inventory and wait for a right moment to leave cover. Approach the right wall quickly and apply the gel. Don't detonate the charge unless you've returned to cover. The explosion will obviously attract Scarecrow's attention, so you'll have to be even more careful from now on.
Wait for Scarecrow to scan the area to the left of the wall and only then make your move. Run to your right and perform a single jump along the way. You'll now have to cover behind a small brick wall located in one of the corners.
Wait for Scarecrow to complete a scan and climb up quickly. Go to your right, performing yet another jump along the way. Take cover behind a brick wall when you can. Wait for Scarecrow to scan your area and approach the searchlight seen in the background. Pressing the action key will allow you to achieve victory. After the cut-scene you're going to be returned to the Morgue area.
Listen to a new radio conversation with Oracle and return to the Lower Corridor. Start moving north-west. Get ready, because one of the nearby doors will open and enemy units will appear near your position. Some of the thugs will be carrying melee weapons, so you'll have to use your cape attacks in order to prevent Batman from losing health.
Proceed towards the corridor where enemy units have appeared in the first place. Eventually you'll have to reach a staircase and use it to travel to an upper floor. Open a nearby door to go to Experimental Chamber. Keep heading forward, listening to an interesting conversation along the way. Once you're inside a small room choose a shaft located to your right.


You'll have to avoid being seen from now on, because otherwise you'll fail your primary objective. Thankfully it'll be easier than it sounds. Travel through two ventilation shaft and move the grating to exit the tunnel. The first guard is standing nearby and obviously you'll have to perform a silent takedown on him.

I would recommend moving left from here and neutralizing a guard patrolling the eastern section of this room. Once he's been dealt with return to the area where you've neutralized the first guard and wait for a new inmate to pass by your position. He'll appear on a lower platform (screenshot #2), so make sure he doesn't see you.
Head down and carefully approach your enemy. It would be a good idea to neutralize him before he gets closer to the second unconscious guard, because there's a slight chance he may find his body. There's only more opponent for you to take care of and he'll be standing close to the western wall. Head south once he's pacified.

Take your time to find a staircase leading to an upper floor. Eventually you should be able to come across a barrier. Look up and use your hook to grapple up to the roof area. Head on to your right and make a stop on the glass section of the roof. Pressing the stun button will allow you trigger a cut-scene during which you'll be presented with a new boss - Bane. The fight itself is going to take place in the Boiler Room.
Focus all of your efforts on finding a good spot, so you'll be standing in front of one of the walls of this room. Wait for Bane to start running towards your character and perform an action called Quick Batarang. This means you'll want to throw it without actually aiming the Batarang at the boss. Once Bane has been hit, evade his attack by jumping to the side.
If you've done everything according to the plan Bane will hit the wall and that will stun him for a few seconds. Use this opportunity to approach him and to throw several punches at him. Don't stay close too him for too long, because otherwise he'll fight back. If you punch him sufficient number of times you'll trigger a short cut-scene showing that Batman has ripped off a part of Bane's armor.
Sadly Joker will soon interfere, sending his goons to kill you. It would be a good idea to switch your attention to them, however you'll have to avoid Bane's attacks at the same time. You can also use him to your advantage by allowing him to stun other inmates while running towards Batman.
Once you've eliminated all of Joker's men you will be allowed to continue attacking Bane. Just as before, use Batarangs to stun him and afterwards punch him a few times. You will have to rip off three pipes from his armor to succeed. Once you've won you'll be rewarded with a cut-scene and you'll be transported back to Arkham West.
You must now begin moving north-east, towards the passageway leading back to Arkham North. Batman will probably encounter two groups of inmates along the way. The first group will be small, however the other one is considered to be a serious threat.
Keep heading towards a large door and then go through a short corridor. Instead of using a second gate proceed to your left. Open a small door in order to be transported to Arkham North. Head south-east and get ready to defeat a new group of thugs along the way. It would also be a good idea to surprise them using the Glide Kick ability.
Once you've dealt with all enemy units head south and use your hook to climb over a large brick wall. You may now proceed towards a nearby entrance, leading to a small cave complex. You'll have to use your hook several times while inside the caves, as well as open a new door. A cut-scene will be displayed on your screen upon your arrival in a larger cavern.
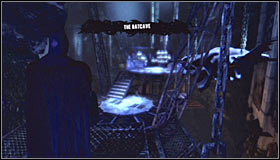

You start the game inside The Batcave. Keep moving forward without any delays, because you won't encounter any inmates in this section of the caves. Use the glide ability to make your way to a lower platform and after that take the stairs to reach Batman's computer. Watch a new cut-scene before moving on with the mission.
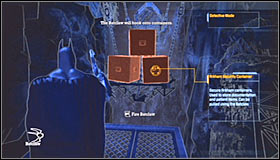
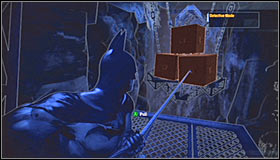
Notice that you've been equipped with a new gadget, called a Batclaw. Return to the lower platform and find a bridge with a large gap located in the middle. Choose the Batclaw from your inventory and grab one of the crates. Each of these objects needs to be pulled towards Batman by pressing the action key. Repeat this once or twice to clear a path and perform a jump towards a new section of the balcony.
Head forward and open a new door to make your way to the Old Sewer. You must choose the Batclaw from your inventory and use it to pull a grating located directly above you. Once this is done use your standard hook to reach the ventilation shaft. Head forward and exit the vents carefully when you reach the other end.
One of the inmates is standing to the left of your current position. Make sure that you're holding the crouch key. Approach him slowly and perform a silent takedown. Head straight and then turn right. More enemy units are stationed nearby and you'll have to attack them. Use gadgets if you want to and don't forget to defend yourself with a cape against opponents equipped with knives.
Proceed to the east and then turn north. Eventually you should be able to find a new door leading to the Main Sewer Junction. Head forward here and after that turn right. Approach the left wall and grab the ledge to climb up.
You'll have to perform a single jump here in order to land on a nearby metal balcony. Turn right and perform a second jump. You should be careful in this section of the caves, because it'll be easy to make a mistake. Head towards a brighter area, performing two other jumps along the way. It shouldn't be a problem as long as you're running in a straight line.
Once you've finished jumping you'll end up in the corner of the room. Turn left and use the first collapsed column to reach an upper platform. Turn left here and make a jump towards a new structure. From there perform a second jump, landing on a small concrete platform (screenshot #2).
Turn left for the last time. Use the second collapsed column to reach an upper ledge. Once you're at the top and perform the last jump in order to reach a nearby platform. Head on to your left and locate a door leading to Surface Access.
Turn right upon your arrival in the new area. Keep going straight until you'll be forced to use an Explosive Gel to blow up a small section of the wall. Don't forget to use detective mode to find this wall. Detonate the charge and jump over a small abyss. Opening the door will return you to Arkham North.
It would be a good idea to wait for a few seconds to listen to what Joker has to say. Enemy snipers have appeared in the area and you should activate detective mode to locate them. One of the snipers is occupying a nearby tower. Ignore the laser beam, because obviously his line of sight is much bigger. Generally you'll have to try and surprise the snipers from the back or from one of the flanks. Use your hook to get to the first tower quickly.
Snipers usually move between two different spots, so you can't be too certain about what you're doing. I would recommend hiding inside the tower and waiting for the first sniper to move. Once he's stopped exit the tower and surprise him from the back. Perform a silent takedown, so he won't make too much noise.
The second guard tower is located to the east from your current position. In this case you should wait for the sniper to look the other way and approach the tower from the north-west. Use the hook to grapple up and perform a silent takedown on an armed opponent.

There are also four inmates on the ground level. I would recommend stunning the first one with a successful Glide Kick. One he's down eliminate the rest and make sure to perform successful cape attacks against the opponent armed with a knife. Once you've secured this area head east and locate a passageway leading back to Arkham East.

More thugs will appear once you reach the area where an ambulance was parked the last time you were here. You shouldn't have problems neutralizing them as long as you remember to perform counterattacks and to use your cape whenever necessary. New sniper is occupying the left tower, so you should use your hook to get to it quickly.
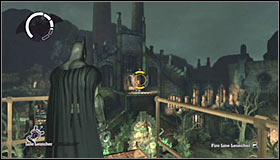
Just as before you should wait for the sniper to look the other way. Jump over the railing and perform a silent takedown. A second tower is located to the south and it would be a good idea to grapple up to a long metal balcony leading to it (screenshot #2). Wait for a right moment and neutralize the second sniper.
There are also two other snipers in the area and they're occupying a small roof section above the entrance to Arkham Mansion (screenshot #1). I would recommend approaching their positions from the north, however watch out, because one of them may see you. Take cover behind a large obstacle (screenshot #2) and wait for him to turn around.
Wait until it's safe and start running towards the balcony. Obviously you must use the hook to get there. There are many different ways for you to get rid of the snipers, including grabbing them while hanging on the ledge, using Batarangs or performing silent takedowns. Either way they must be neutralized before you'll be allowed to proceed with your current mission.
Drop down and use the main entrance to Arkham Mansion. I guess you won't be too surprised to find a new force field (screenshot #1). You can't enter the mansion from here, so you must head back outside. Use the hook to grapple up to the roof of this building.
Once you're standing on the roof look up and you should be able to notice a ventilation shaft. Use your newly acquired Batclaw to pull the grating and then use the hook to enter the shaft itself. You'll soon end up inside a small room. Open the door to enter Arkham Mansion. You'll find yourself standing in an area called Mansion Entrance Hall.
You'll find yourself standing above e very large room that's being guarded by three thugs. Take your time to locate the only inmate armed with a gun and use the Glide Kick ability to stun him. Once he's down take care of the remaining two before he gets up and picks up his weapon. Eliminating him as well will allow you to secure this area.
Look up and focus on finding a small edge. Use your hook to grapple up to that platform. Once you've found your way to the top find a grating and use your Batclaw to get rid of it. You may now use your hook to find your way inside the ventilation shaft. Eventually you should be able to reach the Main Hall.
Head down and you should end up standing above a large hall. There's a group of inmates beneath you and you'll have to attack them. Use the Glide Kick ability to stun one of the enemies and then take care of the rest. This is going to be a challenging battle, so don't forget to rely on counters and cape attacks.

Head north once you've eliminated all hostile units. Use the stairs to reach an upper section and then proceed through the left door to end up in the West Wing Corridor. Press the crouch key upon your arrival in this new area. Head forward and perform a silent takedown on one of the inmates who was holding hostage some friendly guards.
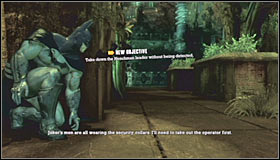
Familiarize yourself with the info on how the collars work and notice that a new upgrade called Sonic Batarang has been unlocked (you still have to purchase it if you're interested). Once you're ready proceed through the door located in front of you and you'll end up in the Arkham Records Room. Use your hook to immediately grapple up to the nearest gargoyle.
There are a couple of armed thugs in the room and you'll have to eliminate them one by one. It would be a good idea to use other moves aside from the Glide Kick ability. The newly unlocked Sonic Batarang is an interesting gadget when you want to distract enemy units and you should also consider acquiring Inverted Takedown ability (screenshot #2). Bear in mind that the collars have alarms, so you'll have to move away each time to avoid detection.
Obviously your objective here is to eliminate all the inmates without receiving any major injuries. Once it's safe leave the gargoyles and inspect the central area to find the hostages. All you have to do is to press the action key and Batman will automatically free them. Listen to their statements and then proceed through the northern door to the North Corridor.
Keep heading north and locate the stairs to reach your current destination. Eventually you'll have to find a new ventilation shaft. Use the shaft to travel to a new location. Find the second shaft in the north-west which will be located near the ceiling (screenshot #2).

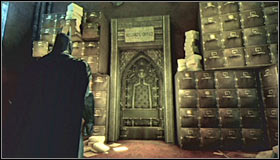
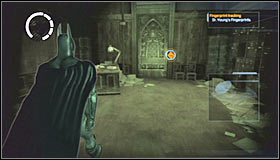
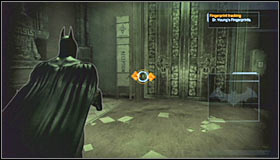
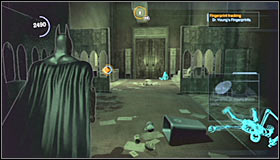
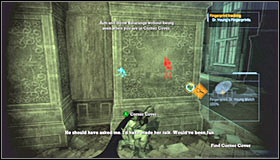
Walk through the second shaft and once you're inside a larger room with a lot of pillars proceed to your left. The final third ventilation shaft is located near the floor. Use the tunnel to reach Dr. Young's Office and don't forget to listen to an interesting conversation along the way. Head down and approach three thugs stationed outside of doctor Young's room.
Land on the ground without making too much noise and approach the inmates. One of them is standing a little further away from the door and he'll be using a gun, so eliminating him should be your top priority. Once he's gone focus on his colleagues. Head on to your right when it's safe and use your Batclaw on a nearby grating. Doing this will gain access to a new ventilation shaft.
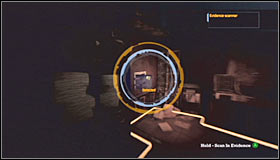
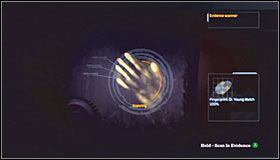
Use the ventilation shaft to find your way to the main office (the same one the inmates were trying to get into). Turn on your detective mode and examine the safe located in the corner of the room. Zoom in the view on the handprint and perform a complete scan to initiate a new investigation. Use the shaft again to return to the morgue.

Watch out, because new inmates will storm through a nearby door and some of them will be carrying melee weapons, so it'll be easy to lose a lot of health points. Get rid of all of them and find a door leading to the West Wing Corridor.
Don't forget that you should be using your detective mode skills, because it'll make finding the path to your current destination a lot easier. Head south and then turn east. Eventually you'll have to return to the Main Hall. Get ready to defeat three new thugs here (screenshot #2).
Head east once it's safe again and this time locate a door leading to the South Corridor (screenshot #1). Enter this new area and proceed to the east. An armed opponent is stationed just around the corner. The easiest way to get rid of him will be to approach the left wall and to press a corresponding key for a corner cover move. Choose a Batarang from your inventory and use it to stun the guard. Don't forget to finish him off with a takedown, as well as to take care of his colleague. Open a nearby door to go to the Library.
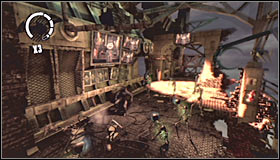
Make a few steps forward and engage new bandits in direct combat. Be careful, because there's going to be a lot of them here and some of them will be using dangerous melee weapons. Once it's safe use your hook to travel to upper balconies. Your objective for the time being is to locate an entrance to a new ventilation shaft (screenshot #2).
Joker should start a countdown to the moment when he kills the hostages, but you may as well ignore it. The guards aren't in any danger. Walk through a short tunnel and use your hook to find your way to an upper ledge(screenshot #1). Once you're there turn around and use the hook for the second time.
Leave the vents and choose a Batarang from your inventory. Aim your gadget at a nearby rope. Doing this will result in a huge chandelier destroying a section of the floor. Proceed to the lowest level and approach the hostages to disarm "the bomb". Listen to a short conversation with one of the guards before moving on.
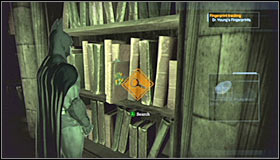
Remain where you are and make sure that you're using your detective mode. Inspect one of the bookshelves located to the left of the rescued guards and you'll find an interactive book. Pressing the action key will allow you to pick up this item. You may exit the library via the main door. I guess you may be surprised to see that instead of returning to the previous room of the mansion you'll end up inside the... Wayne Manor!
You shouldn't be surprised too hear that you're minutes away from the second encounter with the Scarecrow. Before you meet him you'll have a chance to look around. Keep heading forward and enjoy weird occurrences along the way. You'll even be playing as young Bruce Wayne for a while. You won't have to do anything in particular while moving as a boy. Just remain in the same place and listen to dialogues.
Once you've been returned to Batman's body proceed towards a dark alley located directly in front of you and then open the left door. Start off by moving forward and performing a single jump. When you get to a new platform turn right and use the stairs to get to an upper floor.
Once again you'll be forced to avoid being seen by the Scarecrow. The first section of this scene is going to be a little more challenging than usual, because Scarecrow will only move to the sides of the screen. Wait for him to begin scouting the area to your right and jump over the abyss. Take cover behind a small brick wall.
Run to your right when it's safe and choose a Batclaw from your inventory. You must now aim the Batclaw at a large crate located directly in front of you. Press the action key a few times to pull the crate towards yourself, creating a much needed cover. Head towards the crate, hide behind it and repeat all the actions mentioned above with a second crate found nearby.
This time you'll want the boss to turn to your left before leaving cover. Head on towards a small brick wall. You'll have to climb up and proceed forward. Sadly you'll only have a short moment of peace, because you're going to be attacked by skeletons sent by Scarecrow to hunt your down.

This fight is going to be very similar to what you're used to in your time spent in the asylum. Don't forget to perform perfect counterattacks, so you won't get hit too many times. Once the skeletons have been defeated move forward and notice that the Scarecrow has returned to his previous routine.
Keep heading forward until you come across a new gap (screenshot #1). You'll have to wait for Scarecrow to turn around and then act quickly. Perform a single jump, however notice that Batman has only grabbed the ledge. This means you must immediately move to the right. Don't climb up right away. Instead wait for Scarecrow to complete a new scan. You may now proceed to your right where you'll be forced to jump again. Take cover behind a brick wall afterwards.
Wait until it's safe and get on top of the highest platform. I would recommend making another stop here just to make sure that you'll be safe. Wait for Scarecrow to start turning left before you make a new jump. Grab the ledge and move to your right before you're seen by the boss. Wait for Scarecrow to complete yet another cycle and only then head over to your right.
Proceed towards a lower platform and head on to your right. You'll soon arrive in a much larger area where you'll be forced to defeat the second group of skeletons. All the basic rules will remain the same, so you'll have to perform a lot of counterattacks while trying to get rid of the monsters. Don't leave this arena prematurely, because the Scarecrow may see you.
Head forward once you've killed the skeletons and climb on top of a nearby balcony. This area isn't guarded by the boss, so it'll be easier to stay alive. Get ready to use a rope to climb on top of a nearby ledge. Continue heading towards the right edge of the screen, making a single jump along the way.
Eventually you should be able to find a large opening. You'll be dealing with two problems at the same time here, because not only you'll have to remain undetected but you'll also have to avoid a moving object. Time your jumps perfectly, especially the second jump. Once you've landed on a new platform take cover behind a large brick wall.
Wait for Scarecrow to turn around before making a move. Proceed to the upper platform quickly and begin moving towards the lower edge of the screen. Take cover behind a small brick wall and head right once it's safe. Once again you should consider using a brick wall to remain hidden.
You can finally climb up to a new platform. Head forward and it shouldn't take too long for you to find a new searchlight. Pressing the action key will allow you to end this scene and Batman will be returned to the Main Hall. Notice that you're standing inside a small, dark room. You must throw a Batarang at a nearby rope.
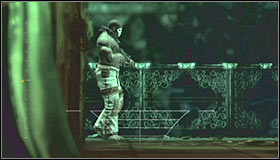
You can now jump over the railing and glide for a few seconds until you've reached the ground level. Open a door located near your position (screenshot #1) which will allow you to enter the area marked as the East Wing Corridor. Be careful, because an enemy with a stun gun is waiting for you just around the corner. There are two ways of defeating him. You can make a jump TOWARDS him, allowing Batman to stun him while he's in the air, or you can grab him with your Batclaw. In any case avoid getting stunned, because you would lose health.
Before you leave this area you might also want to visit the bathrooms, because you'll encounter a new thug there. Perform a silent takedown on him before moving on. Once you're ready proceed to a new door leading to the Warden's Office. Watch an interesting cut-scene upon your arrival to find out that Zsasz is holding doctor Young hostage.

Make sure to follow my instructions, because otherwise doctor Young may end up dead and you'll have to replay the entire scene. Press the crouch key and carefully approach the room where the hostage is being held. Press a corresponding key to order Batman to take cover behind the right wall (corner cover).

You must now choose a Batarang from your inventory. Aim the Batarang at Zsasz. Don't throw it just yet, because the inmate is hiding behind doctor Young. Instead wait for Zsasz to turn his head and use this opportunity to hit him with your gadget. Witness a new cut-scene after which you'll be forced to take on a large group of enemies.
You should focus on eliminating the inmate with a stun gun for obvious reasons. Once he's been neutralized take care of the rest. Activate detective mode when it's safe to explore. Your objective will be to scan a small object found on the ground. Doing this will initiate a new investigation, allowing you to continue with your main mission.

The tracks will lead you outside, so you'll have to return to the East Wing Corridor. Proceed to the opposite end of the hall and find an entrance leading to the Main Hall. Make sure to grapple up to one of the gargoyles as soon as possible, because enemies equipped with assault rifles have arrived in the area.

I wouldn't recommend raising the alarm prematurely, because the enemies would stand close to each other, making it next to impossible to surprise them. Instead use the gargoyles to get closer to the entrance. Drop down quietly and perform a silent takedown on an enemy standing close to your position. Once he's down return to the gargoyles before his collar sounds an alarm.
There are two other inmates for you to take care of. It would be a good idea to drop down to a metal balcony and to perform a Glide Kick from there (screenshot #1). Once you've knocked out the first guard quickly punch his colleague. Don't forget to finish off both enemies before they have a chance to stand up and fight back. You may return to Mansion Entrance Hall and from there to Arkham East.
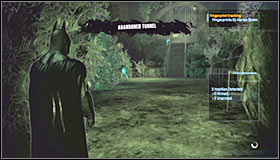
Make sure that you're still using detective mode and follow the trail by searching for yellow icons near the ground. The trail will lead you to a passageway to Arkham West which is going to be marked as the Abandoned Tunnel. Use your hook along the way in order to get past a closed gate.
Enemy units are stationed nearby and if you look closely you'll notice that two of them are carrying guns. Obviously you'll have to plan your attack by using the Glide Kick against one of the armed opponents. Once he's been hit quickly take care of his colleague. Make sure that threat has been neutralized and eliminate the rest of the goons.
You may proceed to Arkham West without any other delays. It's important to remain cautious here, because the nearest guard tower is now being occupied by an enemy sniper. CAREFULLY approach the tower from the south-east and use your hook on the structure. You can now wait for the sniper to turn around or you can throw him over a balustrade when he's near you.
You've now got two options - you can keep following the trail closely or you can proceed directly to the Penitentiary. You can locate this building easily, because the main entrance is going to be heavily guarded. Attack the inmates. Be careful, because one of them will be carrying a stun gun. Once you've won talk to one of the civilians and proceed to the large door. You'll find yourself in an area called Cells Access.
Start off by heading forward. You'll want to act quietly here, because there's an armed guard nearby. Make sure to hold the crouch key, so he won't hear you coming. Once he's been eliminated take care of his colleagues. Winning shouldn't be a problem and once the fight has ended proceed towards the lockers. This passageway will be located to your left (screenshot #2).
You won't encounter any additional enemy units in your vicinity, so you won't have to make any stops along the way. Eventually you should be able to reach a passageway leading to the next area (screenshot #1). Wait for Batman to be scanned and enter the Main Cell Block. You should use your detective mode here to continue following the trail. You'll be lead to the southern passageway.
Continue moving south and it shouldn't take too long before you enter The Green Mile. Head on to the main room where you'll be rewarded with a cut-scene featuring Poison Ivy. Ignore Ivy and choose the southern corridor. This time focus on finding a door leading to the Security Control Room.
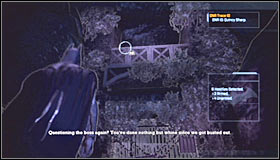
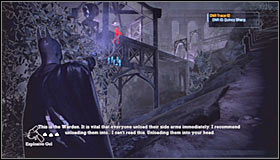
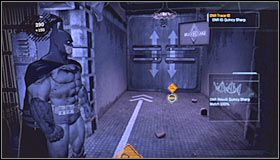
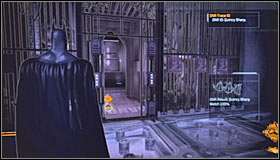
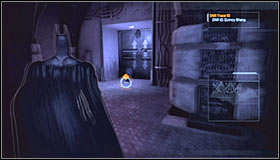
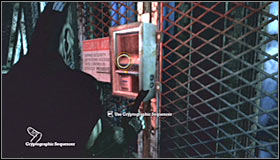
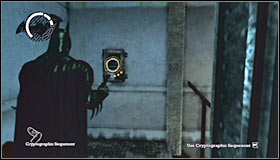
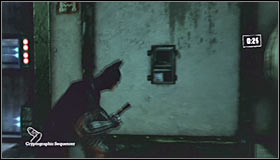
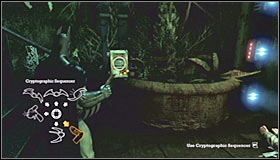
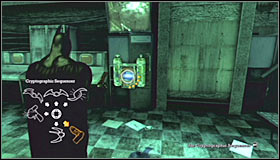
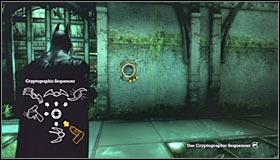
Once you're inside a new room you may as well ignore a man seen behind the glass wall, because he's a shapeshifter. Instead use the stairs to get to the top of the security tower. Approach Quincy and press the action key to rescue him. In return you'll unlock a very useful gadget - a Cryptographic Sequencer.
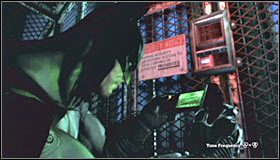
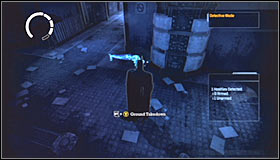
It shouldn't come as a big surprise that you'll have to test this new gadget right away. Approach a nearby control panel and use the sequencer. The idea of this mini-game is to make the display of the sequencer turn bright green and to keep it that way for about a second. This will hack the mechanism, making the panel explode and unlocking the passageway.
Leave the guard tower and return to The Green Mile. You'll have to be very careful, because you're going to be attacked by an insane convict here. If you don't want to fight him (you would have to start pressing the action key rapidly) press the counterattack key when a blue icon appears over his head. Don't forget to finish him off with a takedown!
Head on to the Main Cell Block area. Make a few steps forward after your arrival and enjoy a new cut-scene involving Harley Quinn and other inmates. Once the cut-scene has ended QUICKLY use your hook to reach one of the upper platforms. Start attacking the inmates, however bear in mind that some of them will try accessing gun lockers. They have to be eliminated before they get their hands on guns.
Once you've taken care of the immediate threats you may focus on attacking other inmates, however prevent them from picking up weapons from the ground. Watch a new cut-scene when this is all over. Head on to a nearby control room. You'll have to turn left and use the newly acquired sequencer on one of the control panels.

You'll now have to return to the ground floor. This can be done either by jumping over a railing or by hacking into yet another control panel located near the stairs. Once you're there find a small passageway (screenshot #2) leading to the western section of the cell block. Watch out for other insane inmates and use tactics mentioned earlier on to take them out.

Keep heading west and eventually you should be able to find the stairs. Use the stairs to travel to the Guard Room. Make a few steps forward upon your arrival and listen to what Harley Quinn has to say. Start off by turning left and hacking into a control panel (using a sequencer) located close to the window.
You'll have to act quickly from now on, because otherwise the guards are going to be killed. Once you've hacked into the first panel move to the right quickly and find the second control panel (screenshot #1). Use the sequencer again and after that choose the Batarang from your inventory. You must now cut two ropes to free the hostages. Once you've rescued the second of the guards you'll be informed that you have only 30 seconds left.
Turn around quickly and return to the door you've used to enter this room. The doors are locked, however you'll want to hack into a nearby control panel. Assuming you didn't make any mistakes you should have more than 10 seconds left on the clock after you've successfully disabled the terminal. You'll soon end up in a safe place where you'll be allowed to talk to Louie Green.
Turn around once the conversation has ended and return to the Main Cell Block. Be careful, because you'll encounter one more insane person along the way. Proceed to the eastern cell block and keep heading forward. You'll soon receive info from Harley, informing you that a new passageway is now open. Go straight ahead to end up in Controlled Access.
Continue moving forward. Once you've reached the opposite end of the corridor use a Batclaw on a nearby grating. Watch out, because your action will result in one of the crazy inmates landing near your position. Neutralize him quickly and then use your hook to find your way to an upper floor.

You should end up standing inside a control station and obviously you'll have to use your sequencer again. Interact with a nearby control panel and once it's been destroyed a nearby door is going to be opened. You can now spend some time visiting nearby balconies in the search for a second inmate or you can proceed to the ground level right away and enter Extreme Incarceration.
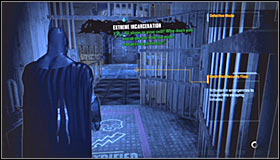
Get ready for a challenging battle. Don't be fooled by the fact that you'll be going only against standard thugs, because it'll be easy to die. Make a few steps forward and listen to what Harley Quinn has to say. Once the monologue has ended the first group of enemies will arrive.
The biggest difficulty here will be the electricity, because certain sections of the room will be electrified from time to time. As a result not only you'll have to keep attacking enemy units, but you'll also have to prevent Batman from being fried. Whenever you notice floor panels charging up go to a different section of the room. There's a central platform and two balconies, so you'll have to plenty of space to choose from.
Three areas mentioned above will become electrified in a certain sequence, so you should memorize the pattern to know where to go next. Defeating the first wave of inmates is going to be easy, however you'll soon start encountering enemies equipped with melee weapons and stun guns. Don't forget to perform jumps and to use your cape to achieve victories. You have to keep defending yourself until all the inmates have been eliminated. This will trigger a new cut-scene, showing the capture of Harley Quinn.

There's nothing else for you to do here (aside from collecting secrets, of course :-)), so you can return to Controlled Access without any other delays. From there travel to the Main Cell Block. Be careful, because you'll encounter an insane patient in the dark corridor. Defeat him and proceed to Cells Access.

Three other inmates have arrived in the meantime and there's all of the insane kind. One of the inmates can be found in the bathroom and the remaining two will attack you on your way to the exit (screens 1 and 2 respectively). Neutralize them all and use the main door to head back to Arkham West.
You must now travel to Arkham East and to do so I would recommend choosing the southern road, marked as the Abandoned Tunnel. Before you'll reach your destination you'll have to eliminate a couple of mental patients along the way. The first one will be waiting for you near the Penitentiary building and his colleagues are scattered throughout this entire area.

Once you've found your way to the Abandoned Tunnel watch out for a new inmate stationed to your left. Once he's gone start using your hook to get past closed gates. A second insane person is standing not far from here, however you will be allowed to use the Glide Kick to knock your target out. Eventually you should be able to arrive safely in Arkham East.
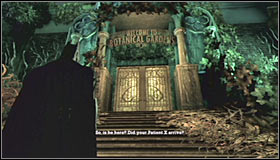
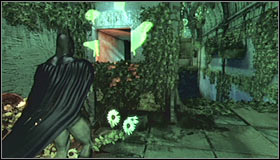
It's now up to you whether you want to eliminate seven other mental patients running around asylum grounds or focus solely on completing your mission. Either way you must be heading towards the Botanical Gardens building. Choose the main door and you'll end up standing in the Glasshouse Entrance.
Start off by moving forward. I would recommend turning on the detective view and choosing the left corridor, however the one on your right would also lead you to your destination. Approach two armed thugs carefully and take cover behind the corner. If you have a Twin Batarang ability you'll be able to knock them out at the same time. Otherwise you'll have to throw the second Batarang immediately after the first one.
It doesn't really matter which method you'll choose, because you'll have to stun both guards. Approach their positions quickly and disable them for good using takedowns. Once this problem has been solved choose a sequencer from your inventory and use it on a nearby control panel. You may now proceed to the Botanical Glasshouse.
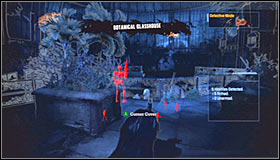
Once you're inside a new room IMMEDIATELY grapple up to one of the nearby gargoyles. This entire area is being patrolled by armed inmates and once again you'll have to begin eliminating them slowly. Glide Kicks are allowed here, however you can also use safer methods like Inverted Takedowns or Sonic Shock Batarangs.
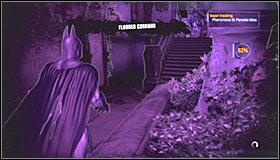
It doesn't really matter which methods you'll choose, because you'll have to secure this entire area. Once this is done drop down to one of the nearby balconies and use the northern door to travel to the Flooded Corridor. Watch a short cut-scene featuring the Joker himself and return to the Botanical Glasshouse. This time you'll want to find the door leading to the Statue Corridor.
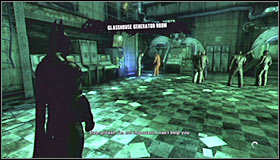
There aren't any enemy units in your vicinity, so you may start moving right away. Head east and then turn north. Eventually you'll have to find a door leading to the Glasshouse Generator Room. There are new inmates near your position and you should start off by disabling the one carrying a stun gun. Once he's gone take care of the rest which should be easier since you won't be interrupted by weapon attacks.
Once the battle has ended approach Carl Todd and press the action key to free him. You'll also be allowed to have a short conversation with this civilian. Once you're done talking approach a new control panel and use the sequencer. Notice that the mini-game is going to be harder this time. You'll have to act quickly and disable three countermeasures instead of only a single one. Each time focus on receiving a green screen.

A short cut-scene will inform you that the electricity is gone, so you can return to the Flooded Corridor via Statue Corridor and Botanical Glasshouse sections. Once you've arrived head on to the other side and locate a small entrance to a ventilation shaft.
Keep heading forward and it shouldn't take too long for you to leave the ventilation shaft. Proceed to your right and prepare an Explosive Gel. You'll have to blow up a nearby wall and as always you can only find it by using detective mode. After the explosion proceed to a lower platform and find a door leading to the Abandoned Chamber.
Reaching the next area shouldn't take too much of your time. You'll have to use several staircases along the way, as well as to perform a single jump (screenshot #2). Once you're ready to move on open a nearby door. You'll return to the Flooded Corridor, however this time you'll be allowed to explore the northern area of this section of the building.
Climb up a few times and after a short while you'll have to use a hook to move on. Walk through the tunnel and deal with inmates harrassing one of the civilians. Once you've defeated the thugs talk to Jordan Fraser.

Your next destination is an area marked on your map as the Aviary, so as a result you'll have to choose the eastern passageway and pass by a headless statue. Once you've arrived make a few steps forward and watch a short cut-scene informing you that you'll have to remain undetected in order to keep the guards alive.
Start off by taking cover behind a small brick wall. Use the zoom function to monitor movements of a nearby guard. I would also recommend having the detective mode turned on, so it'll be easier to spot other goons. Obviously you'll have to wait for the first thug to stop looking your way. Once he's turned around head towards the second brick wall located closer to his position.
There's an entrance to a ventilation shaft to your left. Wait for the guard to turn around for the second time and approach the grating quickly. Press the action key to get rid of the obstacle and enter the ventilation shaft. You'll have to use the hook when you exit the tunnel which shouldn't be a problem.

Eventually you should be able to locate a second ventilation tunnel. Walk through it and kick the grating at the end. You'll find yourself in the top section of the room and obviously it's going to be easier to monitor enemy movement from here. Proceed to your left (screenshot #2).
Approach the ledge while holding the run key and Batman should automatically glide towards a lower platform located in front of you. Grab the nearest ledge, however don't pull yourself up right away. Instead turn on detective mode and wait for a nearby guard to start moving the other way (a little to your right).
Make a few steps forward and drop down to a lower platform. You should now consider grabbing a new ledge. Remain in this position and begin moving to your right. You can't jump over the railing, because you would have nowhere to hide. Keep heading right until you come across a wall. You'll now have to decide how you want to proceed.
The first method would require you to climb up to the balcony and to use a nearby ladder (screenshot #1). The biggest disadvantage is that you would have to avoid being seen by two guards at the same time (the one on the balcony and the one inside the control booth). The second method would require you to drop down to a lower platform and to use a small shaft (screenshot #2). The tunnel would lead you to an isolated area where you would have to use the hook several times.
It doesn't matter which method you'll choose, because both versions end the same way - with you performing a silent takedown on the inmate inside the control booth. Don't worry if you're seen from now on, because the guards are safe. If the guy from the lower balcony sees you wait for him to use the ladder and stun him immediately when he's near you. Otherwise return to the balcony and sneak up on him.
Aside from the enemies mentioned above, there are three more convicts for you to eliminate. In order to reach the first inmate you should use the nearest balcony. Make sure that he's looking the other way before attacking him. His buddy is standing nearby (screenshot #2), so it'll be even easier to neutralize him.
The final third opponent is patrolling the area beneath your current position. It would be a good idea to eliminate him without any additional delays, so he won't get spooked by the alarm. Eliminating all inmates will allow you to rescue the guards automatically. Talk to Robert Stirling and once you're done turn on the detective mode to continue with your investigation.
Eventually you should be able to find a hidden alcove in the wall. Remember that it can only be seen if you're using detective mode. Press the action key and use your sequencer on the panel. Just like when you were trying to disable the electricity you'll have to go through three stages in order to complete the mini-game.

Notice that hacking the panel has unlocked a nearby passageway. Use it and you'll end up standing in the Titan Production Facility. Make a few steps forward to be rewarded with a cut-scene after which you'll have to start a battle with two mutants (similar to Bane from one of the previous levels).

Make sure that you're standing in a correct spot, so you'll have a wall behind you. Wait for one of the monsters to begin moving your way and throw a Batarang at it. Follow it by jumping to the side and the mutant should hit the wall. This is your chance to throw a few punches, however watch out for the other mutant at the same time and prevent it from injuring Batman.
I would recommend that you focus on inflicting injuries to both mutants and not only one. Thankfully their health bars can be seen in the upper right corner of the screen. You can also use an additional trick when you notice that one of the beasts has kneeled down. Approach the monster quickly and press the action key to climb on its back. You can now control the monster (not fully) and you should use this opportunity to harm the other monster.
Once you've eliminated the first mutant you should go back to your standard pattern, using Batarangs and throwing quick punches to inflict some minor injuries. It shouldn't take too long for you to neutralize the second beast as long as you're careful. Proceed towards a nearby control panel and use the sequencer to destroy it.
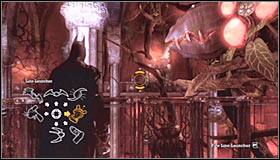
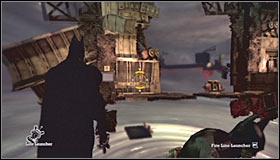
You may now approach a large cap. Listen to Batman's statement concerning his inability of reaching the other side of the abyss. Wait for Batman's jet to drop a package into the factory and press the action key to take it. Doing this will allow you to acquire a new gadget. It's going to be a Line Launcher.
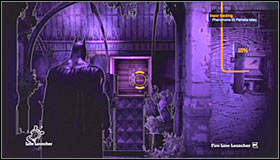
Turn around and use your newly acquired toy to get to the other side safely. Remember to aim directly at the door, not at the surrounding walls. Return to Aviery and then head back to the Flooded Corridor.

You'll now have to return to the area where you've rescued Jordan the last time you were here. Proceed to your right and approach another large gap. You'll have to use the Line Launcher for the second time to get to the other side. Proceed to your right and open a nearby door. A short cut-scene will feature Poison Ivy, however you won't fight her at this moment of the game.
Once you've returned to the Flooded Corridor go back to the large gap. There are some inmates in front of you and you can attack them using Batarangs or take on directly after using a Line Launcher. It shouldn't take too long for you to eliminate them. After you've won return to the ventilation shaft and go back to the Abandoned Chamber.
Return to the Flooded Corridor the same way you came before. Notice that the central area is now electrified again, so you can't reach the other side on foot. There are some inmates in front of you. Attack them from here (using Batarangs) or after you use a Line Launcher to reach their positions. Once they've been pacified head on to the Botanical Glasshouse.
Five new inmates have appeared in the area and they're all heavily equipped, so it won't be easy to succeed. Start off by performing a surprise attack on the nearest guard (screenshot #1). Once he's gone start using gargoyles and eliminate the thugs one by one. Don't forget to use Glide Kicks, Inverted Takedowns and other stealth actions.
Once you've won return to the Glasshouse Entrance area. Start moving forward, however you'll soon notice that Poison Ivy's roots have blocked the main path. Thankfully it's not a major problem, because there's a small hole in the floor. Choose the tunnel and you'll soon be allowed to use your hook. Open the main door to return to Arkham East.
There are new insane inmates in this area, however you should be more concerned about Ivy's plants. Each time you'll approach one of the plants it'll release glowing spheres. Your objective will be to destroy these objects using Batarangs before they hit you. I would recommend destroying the plants as well, however you'll earn only small amounts of experience points.
Start moving towards the Arkham Mansion building. The main entrance is going to be blocked by large roots, so as a result you'll have to find your way to the roof and from there to a small ventilation shaft. Walk through the tunnel and open a new door to travel to Mansion Entrance Hall area.

You won't encounter any enemy units inside the mansion, however it's still going to be difficult to stay live. You can't allow Batman to get closer to the ground, because Ivy's plants have released deadly fumes. Use your Line Launcher to reach a balcony located on the other side of this room. Once you're there drop down to an area below you.
You may open a nearby door to travel to the Main Hall. Use your hook here in order to find your way to a metal balcony located to your right (screenshot #1). Start moving forward and once you've reached some obstacles turn left and use the Line Launcher to travel to an adjacent balcony. Don't forget to aim the device properly, so you won't hit any obstacles and fall.
Proceed to the opposite end of the balcony, jump over the balustrade (screenshot #1) and glide towards the staircase seen in the distance. You'll have to proceed to your right from here. Talk to some of the nearby guards, including Aaron Cash.
Once you've acquired the necessary information you'll have to go back to the first room of the mansion. Return to the stairs and use your hook to grapple up to a metal balcony. Make a few steps forward and this time use the Line Launcher to travel to the second balcony. Drop down somewhere near the door (not too close to the toxins!) and travel to the Mansion Entrance Hall.
You'll have to use your hook again to return to a small roof section located directly above you (screenshot #1). Once you're there choose a Line Launcher from your inventory and aim this gadget at a small platform seen in the distance. You may go back to Arkham East.
Exit the Arkham Mansion building and proceed to the north-west, towards a well-known passageway. Once you're inside the tunnel you'll discover that the surrounding area is heavily guarded. Start off by attacking the only inmate equipped with a stun-gun and once he's pacified deal with his colleagues. Proceed towards Arkham North when it's safe.
You should soon hear a sniper warning and I wouldn't recommend ignoring it. Grapple up to the nearest guard tower. You'll now have to wait (while hiding behind a cover) until a nearby sniper turns his back on you. Use your Line Launcher quickly to get to the roof area of the Intensive Treatment building (screenshot #2). Land on the balcony and eliminate the sniper before he fires his rifle. Once he's gone choose a nearby passageway to travel to Maintenance Access.
There aren't any enemy units in the area, so you're free to look around. Proceed to the northern section of this room. You'll have to use your hook to get to the upper platform (screenshot #1) and you'll find a new ventilation shaft soon after that.
Once you've left the shaft proceed to your right (screenshot #1). Head down to a lower platform and enter the second shaft (screenshot #2). Make a few steps forward and watch a cut-scene informing you that all the nearby gargoyles have been booby-trapped. As a result you'll have to use different methods to deal with all the armed thugs in the next room (you could try using the gargoyles, but it would be VERY risky).
Start off by moving the grating, so you'll be allowed to enter Intensive Treatment Lobby. Wait here for the first guard to begin moving the other way. Drop down quietly and approach him while still holding the crouch key. Perform a silent takedown. Don't wait for the alarm to be raised and instead continue moving forward while remaining on the balcony (screenshot #2).
You can now try eliminating the second guard who should be patrolling the area near the entrance to the main building (screenshot #1). It's quite risky, because Joker will sound the alarm once he's noticed the body of the first guard. The only area where you'll be safe is the roof of the central building (screenshot #2). Return here each time you've attacked the inmates, even if it was a failure.
You'll now have to begin securing this entire section of the building. You probably won't have a lot of opportunities to use your Glide Kick ability, so instead you should focus on performing direct silent takedowns. You can also consider using your gadgets. Sonic Shock Batarang is always a good idea (screenshot #2), especially if it will explode near a larger group of inmates.
It'll also be possible to perform takedowns by landing on opponents through the glass roof of the main building. I would recommend using this method only if you're close to the end, because otherwise you would be vulnerable to enemy attacks after the landing and it wouldn't be easy to return to the roof section. Once you've won enter the main building and look around.

Your current objective will be to locate a large control panel on one of the walls. Use your sequencer on the panel and advance through all three stages. Disabling the panel will unlock two passageways leading to the Cell Block Transfer and you can choose either one of them. Proceed north, ignoring strange noises heard along the way.

You'll soon have to take part in a series of new visions provided by Scarecrow. Don't be frightened by image distortions after which you'll be presented with a new version of the introductionary film. Notice that this time you'll be moving as Joker, however the camera will soon show action from Batman's perspective. Wait for the game to inform you about your "failure" and choose the 'retry' option from the list. :-)
Wait for Batman to free himself from his grave and proceed towards the nearest passageway. Perform a single jump over a small gap, ignoring the second Batman seen to your right. Choose a Line Launcher from your inventory and aim your gadget at a small balcony located in the distance (screenshot #2). Don't forget not to hit a moving object while taking a ride on the rope!
Once again you'll be forced to avoid the Scarecrow. Start off by running to your right. You'll have to perform a single jump and take cover behind a small brick wall (screenshot #1). Wait until it's safe and climb up to a higher platform. Get ready, because you'll soon have to defeat the first group of skeletons.
I would strongly recommend that you prevent Batman from losing any health points in this fight, because you're going to need those later on. Once you take care of the skeletons proceed to the next section. Keep heading to your right until you'll be forced to climb up to a higher platform.

Get ready for a challenging sprint. Wait for Scarecrow to begin turning around, climb up to a new platform and then immediately take cover behind a small brick wall located not far away. Once again you must wait for a right moment to make a move. You'll soon be forced to make a jump and to run a few meters before finding cover (screenshot #2).

Move to your right and wait for Scarecrow to complete yet another cycle. Continue moving forward, performing a new jump along the way. You'll also have to climb up to a higher platform. Once you're at the top start running right away, because you'll be allowed to use a large moving block for much needed cover (screenshot #2).
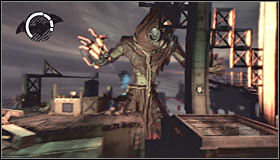
When you get to a hiding spot you'll have to prepare yourself for a new jump after which you'll climb up to an upper platform. When you're at the top immediately move to your right, taking cover behind a small brick wall. Eventually you'll have to make your way to a large elevator. Ignore the fact that the elevator will fall, because everything is advancing just like it should.
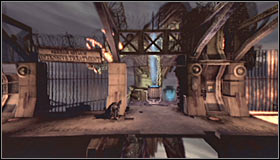
Naturally you'll have to return to the top, HOWEVER don't use your hook unless the boss has completed a new cycle. Once you're on a new platform move to your right. Eventually you should be able to locate a new spotlight, but sadly using it will end in a failure. Instead get ready for a new battle.
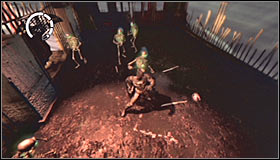
You'll end up standing inside a small arena. The first phase of this battle will require you to defeat a couple of skeletons. Just as before, prevent Batman from losing too much health by performing a lot of successful counterattacks.
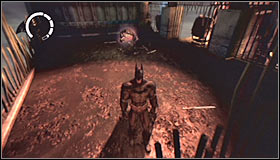
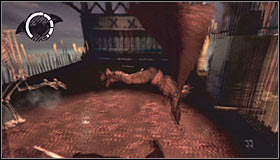
The second phase will require you to take on a much larger skeleton. The monster will behave in a similar manner to other mutants encountered before, including Bane. It's going to be easier to injure the beast. All you have to do is to use the Batarang and avoid being hit and the skeleton will be destroyed when it'll crash into a wall.

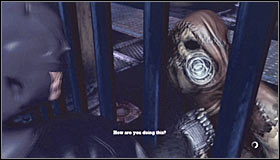
The final third phase is by far the most difficult one. You'll have to fight several smaller skeletons and a bigger one at the same time. Use Batarangs and jumps to deal with the larger creature and then focus on the rest. Keep fighting until you're the only left standing. Doing this will allow you to defeat Scarecrow and Batman will return to Cell Block Transfer.

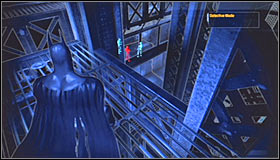
Once you've regained control over the main character proceed to the north and you'll end up standing in Secure Transit. Watch a short cut-scene showing the escape of the Scarecrow. Proceed down the shaft using the glide ability to avoid injuries. Turn on your detective mode when you've landed and locate enemy troops. You'll have to find them in order to proceed with the mission.
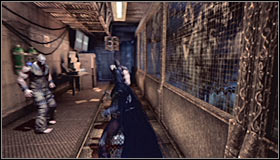
Focus on finding the stairs located near the area where you've landed. Use this new passageway and eventually you'll find the location of the inmates. Focus on eliminating the only thug armed with a gun and once he's been taken care of deal with his remaining colleagues. They shouldn't be a problem, because they won't be carrying any weapons.
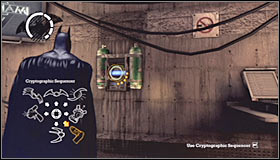
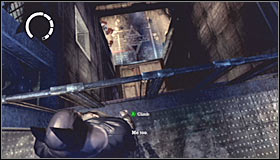
Once the fighting has ended find a new control panel on one of the nearby walls and break the encryptions using your sequencer (three stages). You may head back to the main shaft. Notice a large hole. Jump over the railing and glide down to find yourself in a new area, next to enemy units.
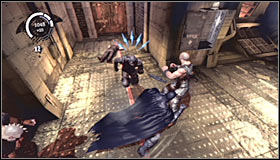

Attack the inmates when you're ready. During the course of this battle you'll have to prevent your enemies from opening nearby gun lockers, because you would a lose of health to due to gunfire. If they do manage to pick up weapons punch them quickly to make them drop the guns. Once they're all neutralized find a nearby door (screenshot #2) leading to the Caves. You'll end up in an area marked as the Control Room Access.
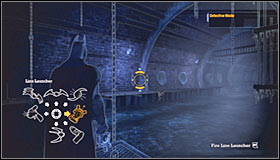
Use the stairs shortly after your arrival in this entirely new area. Proceed to your right and it shouldn't take too long for you to find a new door. You'll end up standing in the Croc's Lair. Watch a short cut-scene featuring the Scarecrow and Killer Croc after which proceed to your right. Use a Line Launcher to travel to the left metal balcony.
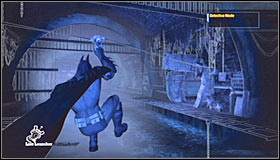
Make a few steps forward and use the Line Launcher again, this time aiming at the platform located to your right. Proceed to the north until you're awarded with a new cut-scene. Wait for Batman to plant Explosive Gel and proceed to the next section. You'll soon end up in the canals.
During your time spent in the sewers you will be forbidden from running, because this would attract the Croc to your position. Thankfully you'll see a special meter on your screen, informing you if you're acting too loud. I would recommend walking slowly or even crouching to avoid unwanted problems. The meter will also show the distance to your current destination and the whole system will be very user friendly, because the numbers will turn red if you choose a wrong corridor at any point of the game. Start off by heading north and jumping over a metal gate. Head east after that.
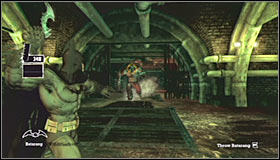
It doesn't matter whether you're stealthy or not, because you'll be a target for Croc's attacks on a regular basis and he'll be appearing in random areas. Each time you see him running you'll have plenty of time to prepare yourself and the solution will be to throw a Batarang at the Killer Croc. A single hit should be more than enough, but you must prevent the Croc from getting too close or otherwise you'll die. Keep moving east and jump over a second gate along the way.
You'll soon have to turn south and then move east. Keep running forward and don't forget to use your meter to find out if you're heading in the right direction. Eventually you should be able to find a glowing object (screenshot #2). This is one of five spore containers and it can be found near the ceiling.
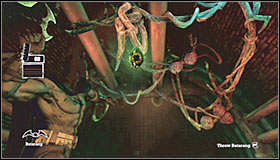
Choose a Batarang from your inventory and aim your gadget at the glowing object. Throwing the Batarang will allow you to approach the spore and to collect material for analysis (all you have to do is to press the action key). There are four more spores for you to find.

Turn around and start moving east after which turn north. You shouldn't have any major problems locating a new gate (screenshot #1). Get to the other side and you'll soon find the second container. Use the Batarang and then examine the spore to collect more samples. You should also know that Killer Croc is likely to appear near the spore, so you should be ready to fend him off.
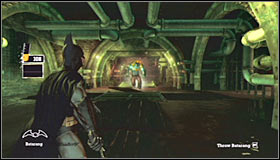
Reaching the third spore is also going to be very simple. Make sure to use your device, so you'll know whether you're heading in the right direction or not. You'll also have to climb over a fence along the way. Watch out for Killer Croc's attacks and use the Batarang on the spore in order to be able to collect more samples.
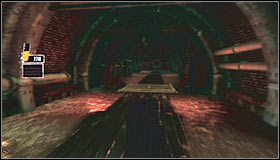
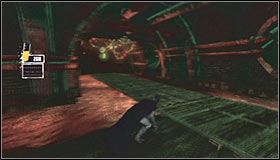
You shouldn't be too surprised to hear that Killer Croc will probably appear near your position when you collect new samples. Choose the northern corridor (screenshot #1) and then turn west. The fourth container is located nearby, so it won't take long to find it. Ignore the cut-scene informing you about the destruction of the wooden planks, because it won't be a major problem.
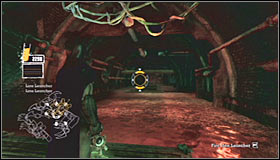
Once you've collected the fourth sample use your Line Launcher in order to return to the main path. Killer Croc will now use an entirely new trick, destroying nearby planks. All you have to do is to run forward without making any stops along the way and you should be fine. You even won't have to remain on the main path during the course of your escape. Once in you're in a safe zone head east and then turn north (screenshot #2).
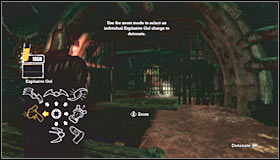
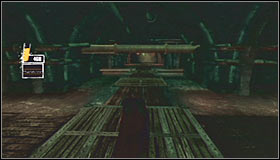
Turn east after a short while and jump over a new fence. This is also an area where Killer Croc's appearance is almost certain. Don't forget to use your Batarang before the monster gets too close to Batman. Shortly after that you'll have to make a run for it for the second time. Once you've reached a new corridor turn south and begin moving forward.
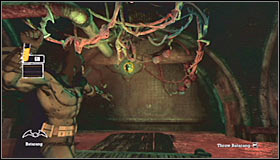
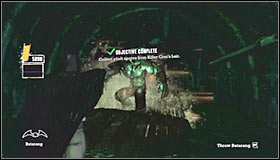
Keep moving south and it shouldn't take too long for you to locate the final fifth container (screenshot #1). Use your Batarang and then collect the last sample. You'll now witness a short cut-scene informing you that Batman has activated a beacon which will lead him to the exit. Watch out for Killer Croc, because he'll appear soon after the cut-scene has ended.
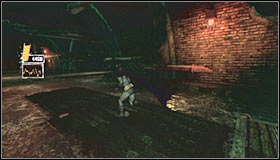
Start off by heading north. During your final moments spent in the sewers you should be using your meter to find the correct path. Don't forget that you'll be informed the second you've picked the wrong path. You'll also have to sprint a few times to avoid being killed by the Croc, but it shouldn't be a tough challenge.
Batman will pass by one of the containers along the way, so you'll know that you're on the right track. Don't forget that Killer Croc aside from destroying the wooden planks will also use his previous attacks. Use Batarangs each time to prevent him from getting too close. You'll trigger a checkpoint when you're about 140 meters away from your destination.
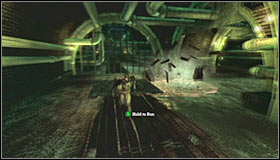
Soon after your progress has been saved the camera will change its position, informing you about a new chase sequence. Your primary concern from now on will be to keep running in order to avoid getting caught by the boss. Don't worry about all the gates you'll find along the way, because Batman will automatically get past them.
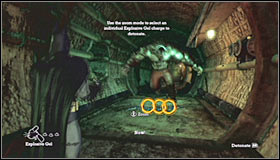
It shouldn't take too long for you to return to the large tunnel where you've started exploring the sewers. Keep running until you come across a closed gate. QUICKLY choose an explosive gel from your inventory. Wait for the Killer Croc to make his way to the explosives and once he's close enough detonate the charges (screenshot #2) to trigger a new cut-scene.
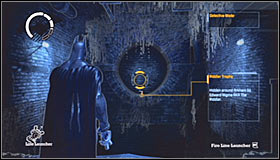
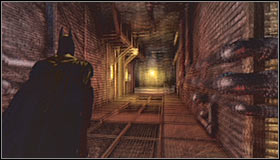
Once you've returned to the partially flooded corridor make a few steps forward and turn right. Use the Line Launcher and open a nearby door to travel to the Old Sewer. Here you'll want to travel east (screenshot #2).
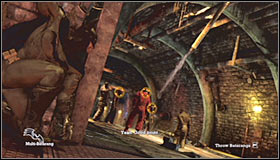
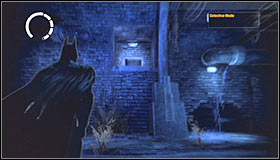
A large group of enemy thugs is stationed just around the corner. It would be a good to surprise them, especially since one of the prisoners is carrying a firearm. During the fight itself prevent other inmates from picking up his weapon and once you've succeeded proceed towards the second ventilation shaft (screenshot #2).

Make a few steps forward and stop close to a wall. Wait for one of the devices to scan Batman after which you'll be allowed to enter The Batcave. Head forward and don't forget to jump over a small gap. Eventually you'll have to use the stairs again leading to Batman's computer. Watch a cut-scene and notice that you've been equipped with a new toy. It's going to be an Ultra Batclaw (upgraded Batclaw).
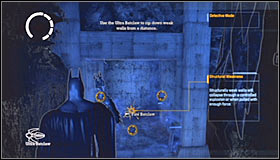
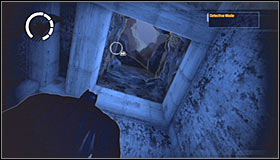
The primary functions of your new gadget include grabbing up to three inmates at the same time and ripping off weak sections of the wall. You'll want to test it out immediately on a nearby object (screenshot #1). Once you've created an opening hop inside and use your hook to reach higher platforms.
It shouldn't take too long for you to reach an exit from this large cave. Once you're outside approach the cliff and make sure not to fall. Your objective will be to glide towards a smaller island located to the east. Land on a small path (the one with a trophy).
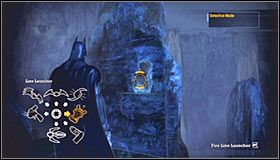
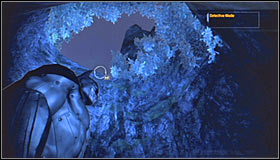
Proceed to the north and once you've made your way to the top use the Line Launcher in order to reach a nearby island (screenshot #1). Enter the cave and use the hook several times to reach the highest ledge of the island.
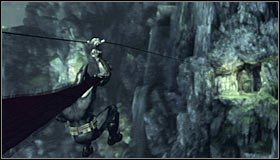
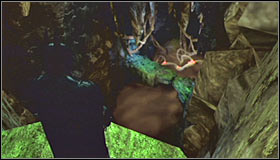
Eventually you should end up standing on a small platform. You'll have to use the Line Launcher again, this time aiming your gadget at the cliff located to the north-west of your current position. Land on a new platform safely and enter a large cave. Once you're inside glide towards a passageway located next to Ivy's roots.
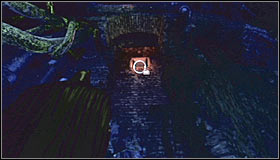

Turn around and look up where you should notice an entrance to a small ventilation shaft. Use your hook to gain access to the vents and proceed towards the next area - Old Sewer. You'll now have to begin moving north, however notice new plants along the way. Those plants will be deploying two glowing orbs at the same time, so you'll have to be using Twin Batarang ability or keep throwing two gadgets manually within a short amount of time.
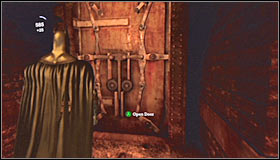

Eventually you'll have to reach the northern door in order to return to the Main Sewer Junction. Listen to a short radio transmission upon your arrival and then proceed to your right (screenshot #2). One of Ivy's plants is here and you should destroy it before moving on.
You'll now have to retrace your steps. Start off by climbing on top of a platform located to the left of the first plant (screenshot #1). Perform a jump towards a metal balcony seen in the distance and then turn right. Before you get to a new platform (screenshot #2) wait for the flying orbs to show up and once you've landed destroy a new plant.
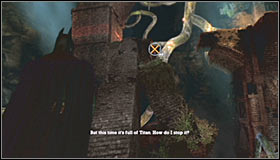
You may proceed forward until you've reached the first collapsed column. Just as before you should use this column to get to an upper platform. You'll have to perform two jumps from there - the first one towards a tower and the second one towards a new platform. Turn left for the second time and use a new collapsed column to get to the top.
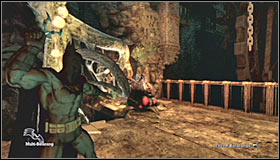

You'll have to turn right here. Wait for the plant to release glowing orbs and once they've exploded destroy Ivy's trap. When you've taken care of the plant turn right once again. This time you'll want to use a Line Launcher to get to a new platform seen in the distance (it was previously inaccessible).
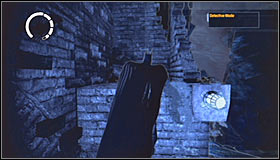
Proceed to your right after you've landed and get ready to destroy a new plant. You'll now have to climb up to a nearby platform and from there to a second one. Once you've reached the top proceed forward and perform a successful jump along the way. You'll have to get to the top of this entire structure.
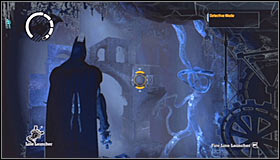

Look around a little and you should notice a new set of platforms in the distance. Use your Line Launcher to get there (screenshot #1) and after you've landed proceed to the top. Head west and eventually you'll find yourself close to a control room that's being occupied by four inmates.
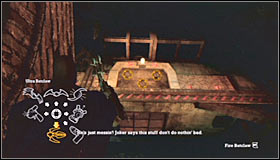
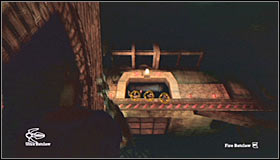
Start off by choosing the newly unlocked Ultra Batclaw from your inventory. Aim the gadget at the loose part of the wall and then rip it off without any additional delays. Move back a little and wait for three inmates to arrive in order to see what's happened. Grab them using the Ultra Batclaw and then pull them all together towards Batman.
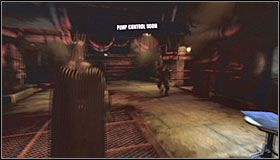
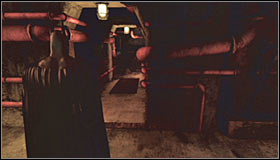
Once you've taken care of the inmates use your hook to get to the control station, marked as the Pump Control Room. One other inmate is guarding this area, however getting rid of him should be extremely easy. You'll secure this room automatically when he's neutralized and so you can choose a nearby corridor leading to the Pressure Control Junction.
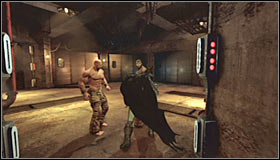

Head north and once you've reached a much larger room you'll have to defeat two inmates. They aren't carrying weapons, so you should end it quickly. You can now go either left or right. I would recommend choosing the eastern corridor in the first place. This path will lead you to the Control Room.
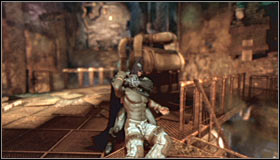
It's going to be very difficult to secure the area you've just entered, mostly because enemies will be standing close to each other and the gargoyles will be placed in bad spots. Start off by quickly moving forward. The first guard should appear directly in front of you. Perform a silent takedown on him and then immediately retreat to the corridor you've just used. Fire a hook at the upper balcony and once you're there Batman should automatically hold a crouching stance.
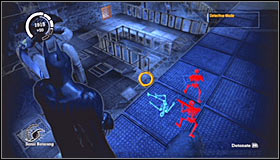
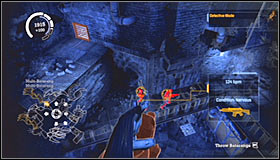
If you have an upgrade called Sonic Shock Batarang you can now use it to disable at least one guard or preferably an entire group (in this case make sure that they're standing close to each other). Otherwise you'll have to wait for them to split up and eliminate them one by one. Remember that you can use Batarangs as long as you stay away from the gargoyles. It's always a good idea to stun a few targets with successful hits.
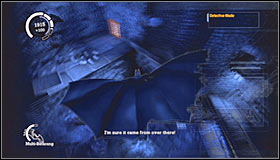
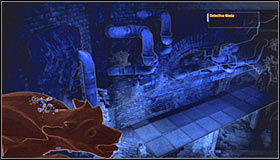
Once you've been successful at stunning someone glide to that area and perform a finishing takedown. Make sure to return to safety as soon as possible, because it's very likely for the reinforcements to show up almost instantly. Thankfully the gargoyles won't be booby-trapped, so it'll make your life a lot easier. Prevent Batman from losing health due to enemy gunfire.
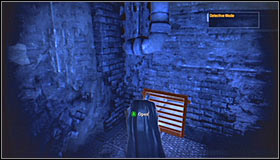
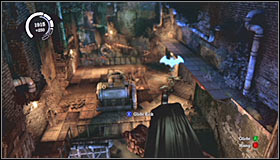
There are also other ways for you to get rid of at least some of your opponents. One of the ideas is to use Explosive Gel, especially since you'll find a lot of breakable floors and walls. Take special attention in the area with two guards, because you can eliminate them both with a single charge. Use ventilation shafts to move around freely. You can also ignore Batarangs and rely on Glide Kicks, however in most cases it will be more dangerous than usual.
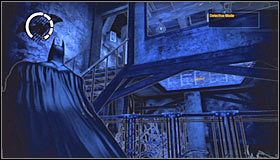
Once you've secured this entire area proceed to the main control room (screenshot #1). Enter the room and find a control panel on one of the walls. Obviously you must use the sequencer to hack into the system. Return to the main area and notice that two inmates have arrived in the meantime. Thankfully eliminating them will be very easy, even if you don't sneak up on them.


When you've finally succeeded you can return to the Pressure Control Junction. This time head west and once you've returned to the main room choose the unexplored passageway, leading to an area marked as the Pump Room. Head inside.
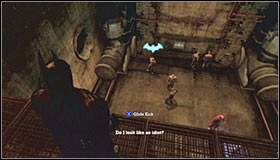
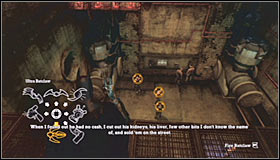
There are a couple of inmates below your current position. Focus on three of them - the ones carrying a rifle, a stun gun and a knife. There are two ways for you to initiate combat. You can use a Glide Kick on the thug armed with the rifle (screenshot #1) and immediately finish him off with a takedown or you can stun him and two other inmates with a Triple Batarang (screenshot #2).
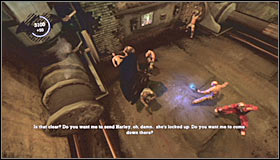
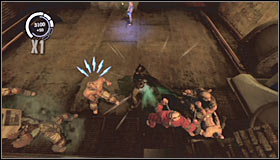
Either way you'll have to be extremely careful during the fight. Don't forget to use cape attacks against more experienced thugs and prevent other inmates from picking up the assault rifle. You'll also have to watch out active pumps on both sides of the room, because coming in contact with them can have serious consequences.
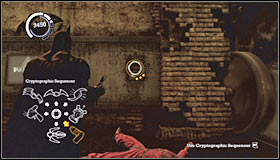
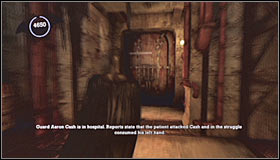
Look around once you've been able to defeat all the hostiles. There are two control panels nearby and you'll have to use a sequencer to shut them down. You may now return to the upper balcony and open the door leading back to Pressure Control Junction. Head forward.
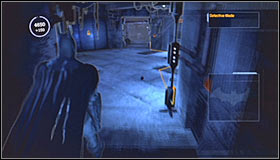
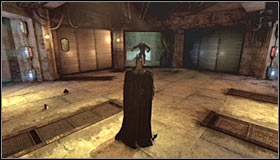
Once you've reached the central area you'll find out that you've been trapped by Joker and that you'll have to defeat his allies to proceed with the mission. Your objective will be to defend yourself against waves of enemy attacks and aside from the standard inmates you'll also be dealing with a new mutant.
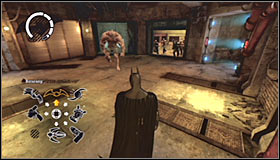
Make sure to use the same tactics as before, so you'll have to move away from the beast and wait for it to start running towards Batman. Throw a Batarang at the creature followed by an evasive maneuver. Approach the stunned beast and throw a few punches for additional injuries. It's also a good idea to encourage the mutant to hit one of the electrified barriers instead of a standard wall.
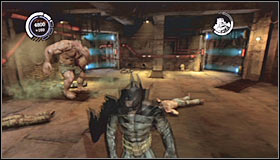
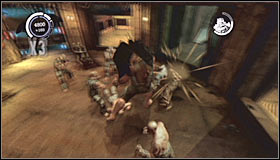
Once you've stunned the beast once or twice the monster will kneel down, giving you an opportunity to hop on its back. Notice that new inmates have arrived in the arena and it would be a good idea to attack them before you'll be forced to get off.
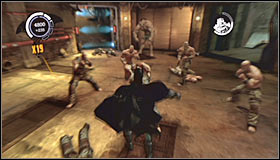
Sooner or later you'll have to start attacking the inmates on your own. During this battle watch out for the mutant, dodging its attacks whenever necessary. You can also ignore the thugs entirely and just run around the room in hopes that you'll be able to ride the beast again or that the mutant will harm enemies without your assistance.
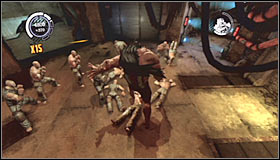
Next phases of this battle are going to be very similar to the first one. Each time when you'll find your way to the monster's back you'll be attacked by a new group of inmates. Defeat the creature only if you've already dealt with other enemies. Doing this will allow you to move on with your current assignment.

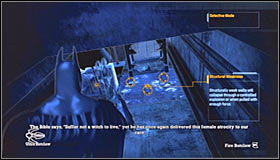
Proceed towards the northern corridor and look up with detective mode turned on. You should notice a weak section of the wall and you'll have to get rid of it using your Ultra Batclaw. Grapple up to the new platform, turn around and use the Ultra Batclaw for the second time. Ripping off the second weak wall will allow you to proceed to the top.
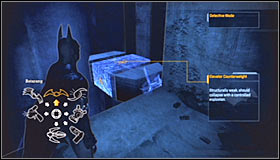
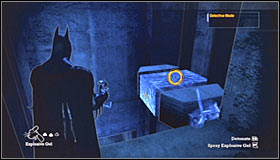
You'll have to make a jump towards a smaller platform from here. Choose the Explosive Gel from your inventory and plant the charge on the weak section of the floor. Once this is done return to the previous platform and detonate the charge. You may now witness a cool cut-scene.
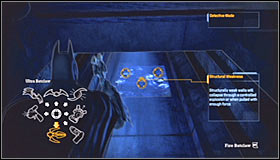
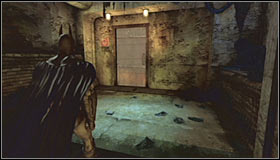
Look up again and use your Ultra Batclaw for the last time in this area. Once you've destroyed this section of the wall grapple up to a new platform and head forward. You'll soon find a door leading back to Arkham West.
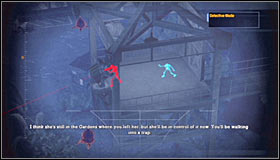
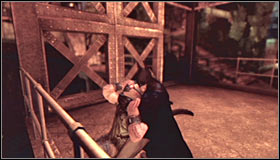
Start off by blowing up a new wall located close to your current position. After that approach the ledge and notice that new Ivy's plants have appeared in the area. There's also a new sniper here (screenshot #1). Make sure he's not looking your way and glide towards his tower. You shouldn't have problems figuring out what do next, because all you have to do is to perform a well-known silent takedown.

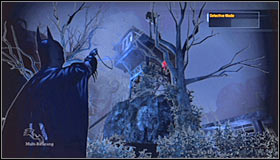
Eventually you'll have to return to the Botanical Gardens building located in the Arkham East district. I wouldn't recommend travelling through Arkham North, because you would have to eliminate two new snipers there. It would be possible to neutralize them, but you would only waste your precious time.
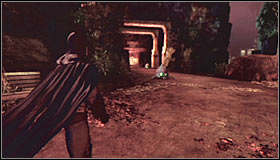
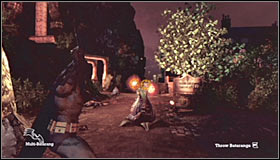
I would recommend heading towards the southern passageway to Arkham East (screenshot #1) which is going to be the well-known Abandoned Tunnel. Don't forget to destroy the plants along the way. Thankfully it'll be very easy to spot them.

Once you're inside the tunnel keep heading east and watch out for new plants. In this case you should be more careful, because some plants will be well hidden. You'll also have to use your hook several times in order to avoid large obstacles. Reaching Arkham East shouldn't take too much of your time.
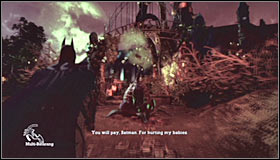
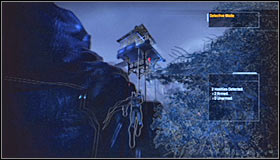
Start off by destroying a nearby plant, so you won't get surprised by it later on during the game. There are two snipers in the area and you'll have to play it all out correctly if you want to avoid sustaining injuries. Use your hook to get to the first tower located to your left (screenshot #2). Don't climb over the balustrade and instead remain in a hanging position.
You'll have to wait for first of the snipers to move slightly to your right (screenshot #1), closer to your current position. Approach him quietly and perform a silent takedown. If you would decide to attack him right away you would risk being seen by his colleague. Take cover behind the left wall and zoom in the view (from cover) to locate the second sniper (screenshot #2). You must wait for him to start moving to your right before you leave this structure and move towards his tower.
Approach the second guard tower from the west. It would be a good idea to grapple up and to grab the sniper. Doing this would allow you to hang him on the rope. If you feel confident try performing a silent takedown on him. Once it's safe return to the ground level and head over to the Botanical Gardens building. Open the door to end up in the Glasshouse Entrance.
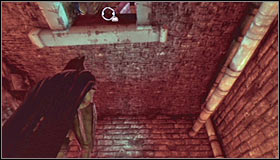
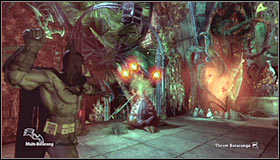
As you've probably noticed the roots are still here, so you'll be forced to head through a short tunnel. Use the hook to grapple up to a small opening (screenshot #1) and continue with your approach. Be careful, because all the plants found in the building will be releasing three orbs instead of two. Having a Triple Batarang ability really helps, because otherwise you'll have to be very fast in order to avoid any injuries.
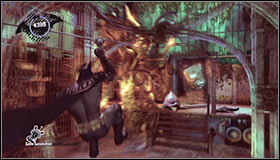
Keep moving forward until you'll get to a door leading to the Botanical Glasshouse. Once you're inside you'll have to get rid of a new set of plants. Focus on finding the door leading to the Flooded Corridor (screenshot #1). You'll have to use the Line Launcher here to reach the other side of the pool safely. Once you've landed destroy the glowing spheres and then a new plant.
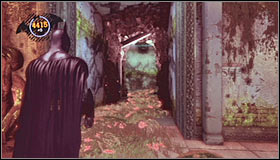
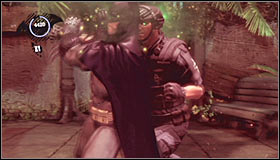
Notice than Poison Ivy has unlocked the main corridor for you, so you won't have to go through the side room to get to the northern section of the building. Keep heading forward until you encounter two guards. They're the same ones you've rescued before, but in the meantime Ivy has taken control over them. Thankfully defeating them is very easy and can be done without any health losses.

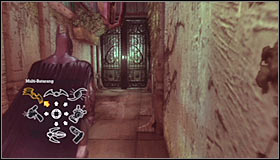
Knock out both guards and proceed to your left. You'll end standing near a large gap again (screenshot #1), so you'll have to use the Line Launcher to cross to the other side. Head on to your right and open the door to find yourself in Elizabeth Arkham Glasshouse. Get ready for a challenging boss battle with Poison Ivy!
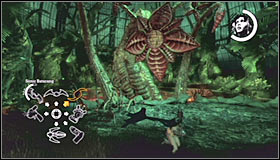
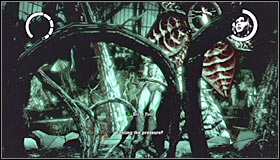
This battle will be split into two parts, however the first part will be much easier. Each part will also consist of two phases and they will be starting alternately. The first phase will require you to remain on the move while Poison Ivy will try to catch you with her roots. When you notice the plants appearing near Batman leave that area immediately before you're caught. If you fail you won't die right away, however you will lose some health trying to free yourself.


Ivy's roots will be appearing in one of three spots - in the left section of the arena, in the middle and in the right section. You must keep moving until you'll automatically advance to phase two. In this case you'll also be running a lot, however Ivy will begin firing red orbs at you. Each hit can take a lot of your health points, so obviously you'll have to focus on staying alive.
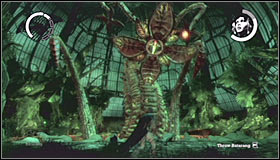
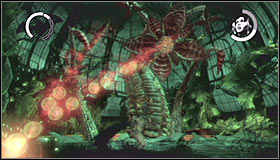
During the second phase you'll have to wait for Ivy to reveal herself for a short period of time. Once you see her inside the large plant throw a quick Batarang at her (the one without having to aim manually). Ivy will be hit and she'll lose a lot of health points. Notice that you've made her angry and you'll have to avoid more orbs being fired at you.
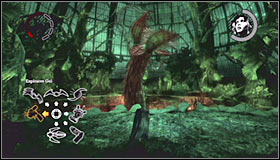
Keep repeating all the actions mentioned above, constantly switching between both phases. You'll have to wait for Ivy's health bar to be drained completely. Notice that the large plant has fallen. Approach Ivy quickly and use the Explosive Gel to plant a device on her. The rest will happen automatically. Once you've witnessed a cut-scene you'll advance to the second part of this battle. Thankfully the game will create a checkpoint here, so if you fail from now on you won't have to start from the beginning.
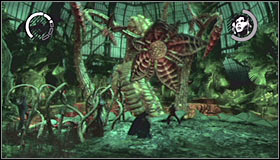
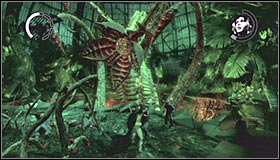
The biggest difference in the second part of the battle is that you'll have to keep defending yourself against Ivy's thugs each time you've advanced to the first phase. Obviously this will make matters worse. Avoid using complex combos, because you'll have to focus on avoiding Ivy's roots at the same time. Instead keep running and throwing single punches.
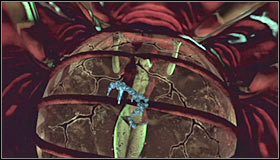
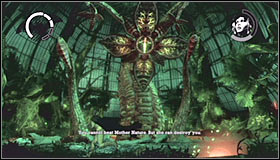
You can use a trick to help you in staying alive. Notice that if you attack enemies standing close to the abyss they'll lose balance and fall. Having all the abilities which improve Batman's fighting skills may also prove to be useful. You should know that each second phase will remain the same, so you'll have to wait for Ivy to reveal herself and avoid the fireballs.
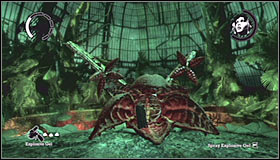
Just as before you must drain Ivy's healthbar before you'll be allowed to finish her off (for good this time). Choose the explosive gel and approach the boss. This time Ivy's plant won't return to life. Watch a new cut-scene after which you'll end up in Arkham North.
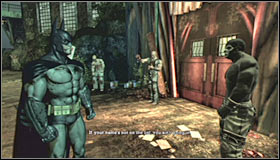
Once you've returned outside take your time to enjoy the fireworks and you can also listen to what Joker has to say. Your next objective will be to reach the Penitentiary building, so you'll have to travel to Arkham West. Notice that Joker's thugs are standing next to the entrance. They won't attack you, but you can attack and defeat them without any problems.

Choose a smaller entrance to the building which is going to be painted in red (screenshot #1). You'll enter a corridor where you'll encounter even more of Joker's thugs. Just as before you should consider attacking them. You'll have a chance to score a lot of points here, especially since your enemies won't be carrying any melee weapons. Once you've won proceed through a nearby door and you'll end up in the Visitor Room.

Ignore the fact that you'll be observing your surroundings from the first person perspective, because everything is proceeding according to the plan. Approach the glass wall and listen to Joker's statement. Once the explosion has occurred enter the next room and proceed to your right. Watch a new cut-scene and get ready for a battle to take place in the Throne Room.
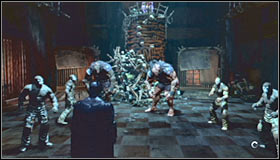
This is going to be an extremely challenging fight during your which you'll not only have to defeat two mutants but also a lot of Joker's thugs. Standard inmates will keep appearing constantly, so you won't have too much time to rest. Another important factor is that the arena you're fighting in is going to be small, so it'll make dodging enemy attacks more complicated.
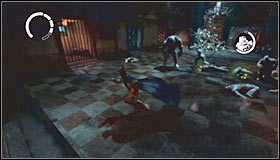
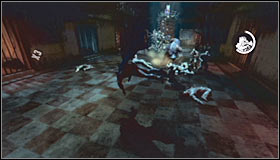
During the initial phase of this battle you should focus your attention on avoiding mutant attacks by performing successful jumps. Make sure to stay close to the inmates, so there's a chance they'll be hit by the beasts. You can also encourage the monsters to smash into one another. When you have a free moment attack the inmates, but each time make sure you're not in any danger from the mutants.
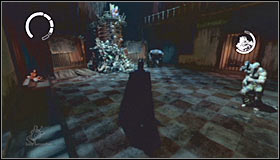
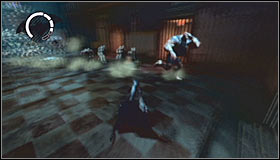
Once you've been able to defeat most of the inmates you can start using Batarangs to stun the beasts. Make sure to do this only when they're running towards Batman. After each hit you may want to attack the stunned beast, however you'll have to watch out for the other mutant at the same time. Don't forget that your primary concern should be to keep Batman alive.
Sooner or later you'll be given a chance to climb on the mutant's back. Use this opportunity to defeat as many inmates as possible and to inflict major injuries to the other monster. Don't forget that defeating both mutants is the key to your success. Once you've returned to the ground continue performing all the actions mentioned above.

Once you've been successful in defeating the first mutant it should become much easier to stay alive. Don't forget to use Batarangs and watch out for the inmates. Neutralizing the second mutant as well will allow you to advance to the final battle with Joker.
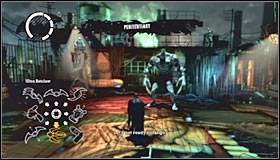
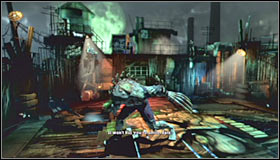
The action of this second battle will take place on the roof of the Penitentiary building. Once the battle has begun start running around Joker and avoid his claws. Thankfully your opponent won't even try that hard to get you. Keep running until Joker decides to climb on top of a nearby balcony. You'll advance to the first (and easiest) phase of the battle.
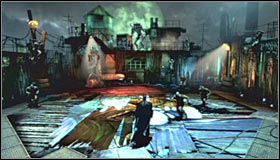
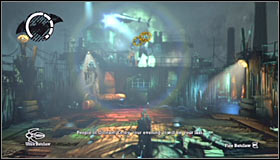
Joker will now send his goons to finish you off. I assume you've mastered your fighting skills by now, because otherwise you'll have a lot of problems winning this entire battle. Keep attacking Joker's men. Don't forget to perform successful countermoves and cape attacks. You should also focus on using your special combo moves in order to dispose of enemy units quickly.
The only real problem during this first phase of the battle are going to be Joker's teeth. They're rigged with explosives, so you'll have to be very careful while moving on the arena. Whenever you hear a cruel laugh perform an evasive maneuver, because an explosion will occur in about a second. It would be a good idea to wait for the teeth to show up near enemy units, so the explosions will stun them.
Once you've eliminated all the inmates Joker should turn around, because he'll be distracted by a helicopter. MAKE SURE that there aren't any additional thugs in the area. The same goes with Joker's teeth. It's extremely important, because otherwise you wouldn't be able to end this phase properly. Quickly choose an Ultra Batclaw from your inventory and fire it at Joker's back. You'll now have to keep pressing the action key rapidly to pull him from the upper balcony. If you're interrupted you would have to remain in the same phase and eliminate a new (smaller) group, so that's why it's important to secure the area before focusing on Joker.
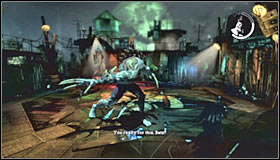
If you've done everything according to the plan you'll watch a short cut-scene showing Joker's fall. Approach the boss quickly and perform a standard 3-hit combo. Joker should lose 1/3 of his initial health. Once again you'll have to avoid his direct attacks which shouldn't be a problem. Once Joker has returned to the upper balcony you'll advance to phase two.
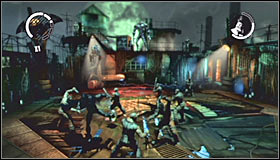
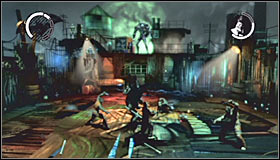
The only real change during this second phase of the battle is that aside from standard inmates you'll also be dealing with thugs armed with stun guns and knives. Obviously you should focus your attacks on them. Use cape attacks to disarm enemies with knives and jumps to outsmart goons with stun guns.
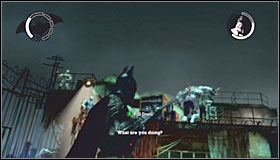
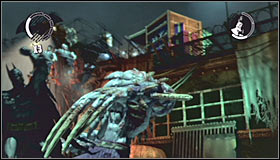
Don't forget about the bombs, especially since you'll be dealing with even more teeth than the last time. Once you've neutralized ALL enemy units wait for Joker to turn around, use the Ultra Batclaw on him and throw a few punches. Before you'll advance to the last third phase you'll have to avoid his claw attacks again.
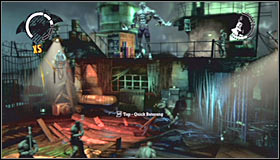
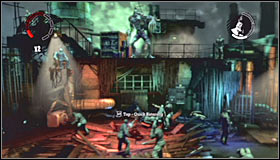
The third phase of the battle will feature one new element - a gun locker. It's crucial that you prevent your enemies from opening the locker. It'll be located directly beneath Joker's balcony. If they do somehow manage to do that make sure that the gun remains on the floor, because otherwise you'd be facing a serious threat.
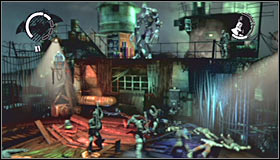
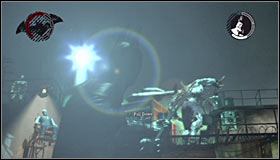
There are also electrified barriers near the locker, so you'll have to be careful not to touch them. On the other hand you may try pushing the inmates towards the barriers to make your job easier. Once you've eliminated all the inmates and allowed all the bombs to explode grab Joker for the last time and pull him from the balcony. This time you won't have to finish him off yourself.
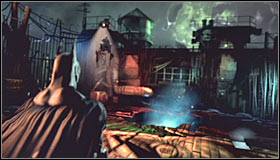
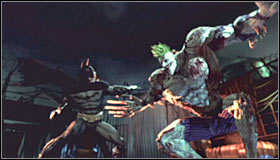
That's it! Sit back and enjoy the ending. Congratulations!
This chapter contains the information you need to find the collectibles hidden in all the main sections of Arkham Asylum. In order to find the treasures you're looking for you must first choose the area (for example - Arkham East). You can then use the map with marked locations of all collectibles from six categories or proceed to their full descriptions. If you decide to read the full info you'll also be presented with screenshots showing you the surrounding area.
Bear in mind that not all the collectibles are available right away. There are two type of restrictions you'll be dealing with during the course of your game:
1) Collectibles from the Teeth category appear during certain moments of the game, so you won't find all of them right away. Make sure to keep using my guide to find out when is the best moment to go and look for them.
2) Collectibles from five remaining categories may be inaccessible due to lack of proper equipment. For example you can't get to a collectible hidden behind a wall unless you have an Explosive Gel and you can't cross the large gap if you haven't unlocked the Line Launcher. Make sure to read the requirements section added to the description of each collectible to find out what types of gadgets you must have.
I would recommend that you collect as many collectibles as possible during your first playthrough. The reason for that is an obvious one - you'll receive experience points for each find and so you'll advance to higher levels of experience sooner than expected.
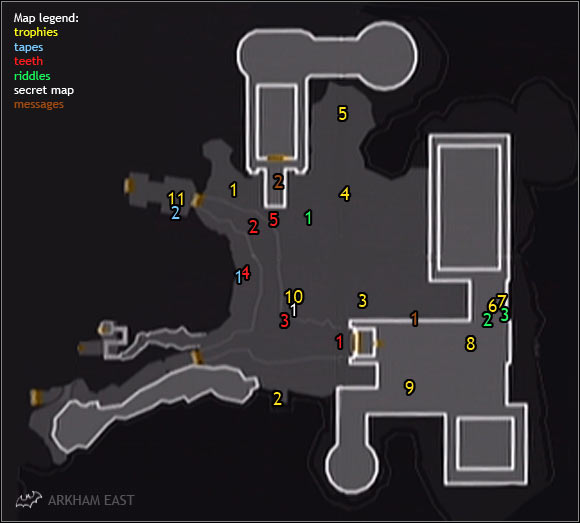
Tapes
![[#1] Location: Arkham East - Collectibles - Arkham East - part 1 - Collectibles - Batman: Arkham Asylum - Game Guide and Walkthrough](https://game.lhg100.com/Article/UploadFiles/201512/2015121216290226.jpg)
[#1] Location: Arkham East
Inside the southern guard tower.

![[#2] Location: Arkham East - Collectibles - Arkham East - part 1 - Collectibles - Batman: Arkham Asylum - Game Guide and Walkthrough](https://game.lhg100.com/Article/UploadFiles/201512/2015121216290204.jpg)
[#2] Location: Arkham East
Requirements: Cryptographic Sequencer
Get to the balcony located close to one of the guard towers. Proceed to your right and use the sequencer on a control panel (screenshot #1). The tape can be found inside.
Secret map

![[#1] Secrets Map - Arkham East - Collectibles - Arkham East - part 1 - Collectibles - Batman: Arkham Asylum - Game Guide and Walkthrough](https://game.lhg100.com/Article/UploadFiles/201512/2015121216290218.jpg)
[#1] Secrets Map - Arkham East
Location: Arkham East
Requirements: Cryptographic Sequencer
You must break into a small guard post located in the center of Arkham East.
Teeth
![[#1] Location 1: Arkham East - Collectibles - Arkham East - part 1 - Collectibles - Batman: Arkham Asylum - Game Guide and Walkthrough](https://game.lhg100.com/Article/UploadFiles/201512/2015121216290262.jpg)
[#1] Location 1: Arkham East
Once you've returned from the caves explore the area in front of the entrance to Arkham Mansion.
![[#2] Location 2: Arkham East - Collectibles - Arkham East - part 1 - Collectibles - Batman: Arkham Asylum - Game Guide and Walkthrough](https://game.lhg100.com/Article/UploadFiles/201512/2015121216290362.jpg)
[#2] Location 2: Arkham East
Once you've returned from the Penitentiary explore the area near the stairs leading to Botanical Gardens building.
![[#3] Location 3: Arkham East - Collectibles - Arkham East - part 1 - Collectibles - Batman: Arkham Asylum - Game Guide and Walkthrough](https://game.lhg100.com/Article/UploadFiles/201512/2015121216290321.jpg)
[#3] Location 3: Arkham East
Once you've returned from the Botanical Gardens explore the area near the statues in the southern section of Arkham East.

![[#4] Location 4: Arkham East - Collectibles - Arkham East - part 1 - Collectibles - Batman: Arkham Asylum - Game Guide and Walkthrough](https://game.lhg100.com/Article/UploadFiles/201512/2015121216290317.jpg)
[#4] Location 4: Arkham East
Before you enter the Botanical Gardens building for the second time (in order to defeat Poison Ivy) explore the inside of one of the guard towers.
![[#5] Location 5: Arkham East - Collectibles - Arkham East - part 1 - Collectibles - Batman: Arkham Asylum - Game Guide and Walkthrough](https://game.lhg100.com/Article/UploadFiles/201512/2015121216290341.jpg)
[#5] Location 5: Arkham East
Before you enter the Botanical Gardens building for the second time (in order to defeat Poison Ivy) check the stairs leading to that structure.
Trophies
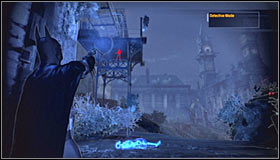
![[#1] Location: Arkham East - Collectibles - Arkham East - part 1 - Collectibles - Batman: Arkham Asylum - Game Guide and Walkthrough](https://game.lhg100.com/Article/UploadFiles/201512/2015121216290378.jpg)
[#1] Location: Arkham East
On top of the northern guard tower.
![[#2] Location: Arkham East - Collectibles - Arkham East - part 1 - Collectibles - Batman: Arkham Asylum - Game Guide and Walkthrough](https://game.lhg100.com/Article/UploadFiles/201512/2015121216290451.jpg)
[#2] Location: Arkham East
In the southern section of the area, near the shore.
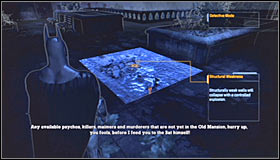
![[#3] Location: Arkham East - Collectibles - Arkham East - part 1 - Collectibles - Batman: Arkham Asylum - Game Guide and Walkthrough](https://game.lhg100.com/Article/UploadFiles/201512/2015121216290454.jpg)
[#3] Location: Arkham East
Requirements: Explosive Gel
To the north of the entrance to Arkham Mansion. You'll have to find a weak section of the floor and blow it up.

![[#4] Location: Arkham East - Collectibles - Arkham East - part 2 - Collectibles - Batman: Arkham Asylum - Game Guide and Walkthrough](https://game.lhg100.com/Article/UploadFiles/201512/2015121216290409.jpg)
[#4] Location: Arkham East
Once you've entered cemetery ground be on a look out for an open crypt in the middle.
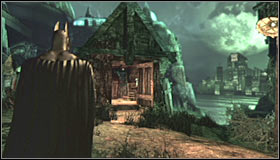
![[#5] Location: Arkham East - Collectibles - Arkham East - part 2 - Collectibles - Batman: Arkham Asylum - Game Guide and Walkthrough](https://game.lhg100.com/Article/UploadFiles/201512/2015121216290477.jpg)
[#5] Location: Arkham East
Remain in the cemetery, however this time explore the bushes to the north of the large crypt.
![[#6] Location: Arkham East - Collectibles - Arkham East - part 2 - Collectibles - Batman: Arkham Asylum - Game Guide and Walkthrough](https://game.lhg100.com/Article/UploadFiles/201512/2015121216290498.jpg)
[#6] Location: Arkham East
Make your way to the inner courtyard of Arkham Mansion (use the hook on a brick wall). Focus your efforts on finding a small balcony (screenshot #1) and grapple up. Once you're on the balcony make a few steps forward and you'll find the trophy behind a pillar.
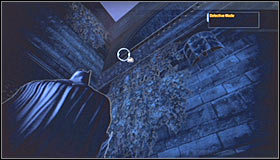
![[#7] Location: Arkham East - Collectibles - Arkham East - part 2 - Collectibles - Batman: Arkham Asylum - Game Guide and Walkthrough](https://game.lhg100.com/Article/UploadFiles/201512/2015121216290535.jpg)
[#7] Location: Arkham East
Make your way to the inner courtyard of Arkham Mansion (use the hook on a brick wall). Focus your efforts on finding a small balcony (screenshot #1) and grapple up. You must now turn around and aim your hook at the second balcony. Once you get there move forward and collect the treasure.

![[#8] Location: Arkham East - Collectibles - Arkham East - part 2 - Collectibles - Batman: Arkham Asylum - Game Guide and Walkthrough](https://game.lhg100.com/Article/UploadFiles/201512/2015121216290595.jpg)
[#8] Location: Arkham East
Get to the clock tower (screenshot #1) which is located near the Arkham Mansion. Start climbing using your hook. Once you reach the top of the tower explore the balcony to find the trophy.
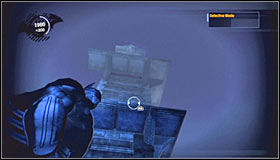
![[#9] Location: Arkham East - Collectibles - Arkham East - part 2 - Collectibles - Batman: Arkham Asylum - Game Guide and Walkthrough](https://game.lhg100.com/Article/UploadFiles/201512/2015121216290594.jpg)
[#9] Location: Arkham East
Get to the clock tower (screenshot #1) which is located near the Arkham Mansion. Start climbing using your hook. Once you reach the top get to the western balcony and look down. You'll have to land on a roof located below your current position (screenshot #2). Proceed to your left after the landing. The trophy can be found on top of a lower section of the roof.

![[#10] Location: Arkham East - Collectibles - Arkham East - part 2 - Collectibles - Batman: Arkham Asylum - Game Guide and Walkthrough](https://game.lhg100.com/Article/UploadFiles/201512/2015121216290521.jpg)
[#10] Location: Arkham East
Requirements: Cryptographic Sequencer
You must break into a small building located in the center of Arkham East.
![[#11] Location: Arkham East - Collectibles - Arkham East - part 2 - Collectibles - Batman: Arkham Asylum - Game Guide and Walkthrough](https://game.lhg100.com/Article/UploadFiles/201512/2015121216290688.jpg)
[#11] Location: Arkham East
Requirements: Cryptographic Sequencer
Get on top of a metal balcony located near one of the guard towers. Proceed to your right and use the sequencer on a nearby control panel (screenshot #1). The trophy is hidden inside.
Messages
![[#1] Location: Arkham East - Collectibles - Arkham East - part 2 - Collectibles - Batman: Arkham Asylum - Game Guide and Walkthrough](https://game.lhg100.com/Article/UploadFiles/201512/2015121216290681.jpg)
[#1] Location: Arkham East
Make your way to the inner courtyard of Arkham Mansion (use the hook on a brick wall). Explore the southern section of the courtyard to find the tablet.
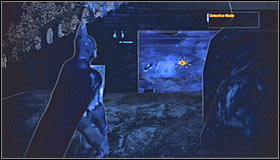
![[#2] Location: Arkham East - Collectibles - Arkham East - part 2 - Collectibles - Batman: Arkham Asylum - Game Guide and Walkthrough](https://game.lhg100.com/Article/UploadFiles/201512/2015121216290613.jpg)
[#2] Location: Arkham East
Requirements: Explosive Gel
Explore the area below the stairs leading to Botanical Gardens building and you should be able to find a weak section of the wall. Blow it up using the gel.
Riddles
![[#1] The legacy of this island has been well and truly buried - Collectibles - Arkham East - part 2 - Collectibles - Batman: Arkham Asylum - Game Guide and Walkthrough](https://game.lhg100.com/Article/UploadFiles/201512/2015121216290670.jpg)
[#1] The legacy of this island has been well and truly buried.
Location: Arkham East
Go to the cemetery and scan one of the graves (the glowing one).

![[#2] My challenges appear to those with the correct position in life - Collectibles - Arkham East - part 2 - Collectibles - Batman: Arkham Asylum - Game Guide and Walkthrough](https://game.lhg100.com/Article/UploadFiles/201512/2015121216290662.jpg)
[#2] My challenges appear to those with the correct position in life.
Location: Arkham East
Get to the clock tower (screenshot #1) which is located near the Arkham Mansion. Start climbing using your hook. Once you reach the top find a small dot painted on the balcony. You'll have to position yourself correctly, so you'll complete a question mark with the rest painted in the background (screenshot #2).

![[#3] Gotham's greatest family towers over the city - Collectibles - Arkham East - part 2 - Collectibles - Batman: Arkham Asylum - Game Guide and Walkthrough](https://game.lhg100.com/Article/UploadFiles/201512/2015121216290793.jpg)
[#3] Gotham's greatest family towers over the city.
Location: Arkham East
Make your way to the inner courtyard of Arkham Mansion (use the hook on a brick wall). Focus your efforts on finding a small balcony (screenshot #1) and grapple up. Head forward and find a hole in the fence (to your right). Approach the ledge, turn left and zoom in the view. You must scan the building with a large W.
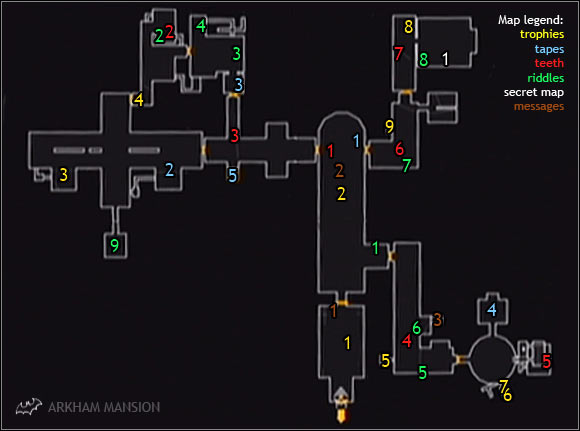
Tapes
![[#1] Location: Main Hall (Arkham Mansion) - Collectibles - Arkham Mansion - part 1 - Collectibles - Batman: Arkham Asylum - Game Guide and Walkthrough](https://game.lhg100.com/Article/UploadFiles/201512/2015121216290764.jpg)
[#1] Location: Main Hall (Arkham Mansion)
Explore the northern section of the main hall. You'll have to find a small guard post (screenshot #1) and kick the grating to get inside.
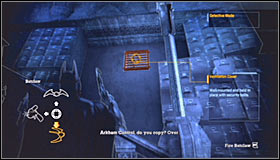
![[#2] Location: Arkham Records Room (Arkham Mansion) - Collectibles - Arkham Mansion - part 1 - Collectibles - Batman: Arkham Asylum - Game Guide and Walkthrough](https://game.lhg100.com/Article/UploadFiles/201512/2015121216290721.jpg)
[#2] Location: Arkham Records Room (Arkham Mansion)
Requirements: Batclaw
Explore the southern section of the records room to find a grating on the wall. Use the Batclaw to rip it off and then use the hook to gain access to a nearby room. When you find yourself standing on a balcony drop down and look for the tape (it's on the table).
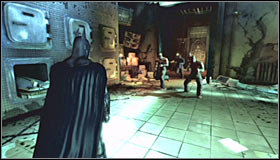
![[#3] Location: Dr - Collectibles - Arkham Mansion - part 1 - Collectibles - Batman: Arkham Asylum - Game Guide and Walkthrough](https://game.lhg100.com/Article/UploadFiles/201512/2015121216290729.jpg)
[#3] Location: Dr. Young's Office (Arkham Mansion)
You'll encounter thugs in the morgue soon after you've started a new investigation. Defeat them and search the area for the tape. It can be found on a desk to your left.
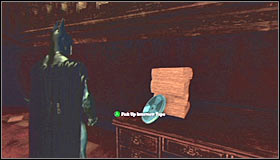
[#4] Location: Library (Arkham Mansion)
Requirements: Cryptographic Sequencer
Explore the northern section of the library and you'll find a small corridor (screenshot #1). Use the sequencer on a nearby terminal, enter a new room and pick up the tape from the table.
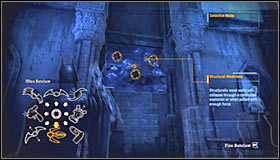
![[#5] Location: West Wing Corridor (Arkham Mansion) - Collectibles - Arkham Mansion - part 1 - Collectibles - Batman: Arkham Asylum - Game Guide and Walkthrough](https://game.lhg100.com/Article/UploadFiles/201512/2015121216290835.jpg)
[#5] Location: West Wing Corridor (Arkham Mansion)
Requirements: Ultra Batclaw
Find a weak section of the wall and rip it off using the Ultra Batclaw. The tape can be found inside a dark room.
Secret map
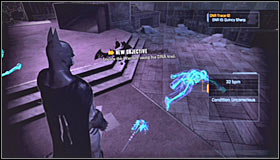
![[#1] Secrets Map - Arkham Mansion - Collectibles - Arkham Mansion - part 1 - Collectibles - Batman: Arkham Asylum - Game Guide and Walkthrough](https://game.lhg100.com/Article/UploadFiles/201512/2015121216290899.jpg)
[#1] Secrets Map - Arkham Mansion
Location: Warden's Office (Arkham Mansion)
You can pick up the map after you've defeated Zsasz and a couple of thugs.
Teeth
![[#1] Location 1: Main Hall (Arkham Mansion) - Collectibles - Arkham Mansion - part 1 - Collectibles - Batman: Arkham Asylum - Game Guide and Walkthrough](https://game.lhg100.com/Article/UploadFiles/201512/2015121216290844.jpg)
[#1] Location 1: Main Hall (Arkham Mansion)
Explore the northern section of the main hall. Joker's teeth can be found near the stairs and two smaller rooms.
![[#2] Location 2: North Corridor (Arkham Mansion) - Collectibles - Arkham Mansion - part 1 - Collectibles - Batman: Arkham Asylum - Game Guide and Walkthrough](https://game.lhg100.com/Article/UploadFiles/201512/2015121216290830.jpg)
[#2] Location 2: North Corridor (Arkham Mansion)
Exit the shaft and look around.
![[#3] Location 3: West Wing Corridor (Arkham Mansion) - Collectibles - Arkham Mansion - part 1 - Collectibles - Batman: Arkham Asylum - Game Guide and Walkthrough](https://game.lhg100.com/Article/UploadFiles/201512/2015121216290879.jpg)
[#3] Location 3: West Wing Corridor (Arkham Mansion)
Joker's teeth will appear in the corridor once you've already been to doctor Young's office and when you're heading back to the Main Hall.
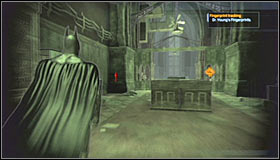
![[#4] Location 4: South Corridor (Arkham Mansion) - Collectibles - Arkham Mansion - part 1 - Collectibles - Batman: Arkham Asylum - Game Guide and Walkthrough](https://game.lhg100.com/Article/UploadFiles/201512/2015121216290968.jpg)
[#4] Location 4: South Corridor (Arkham Mansion)
At about half way through to the Library.
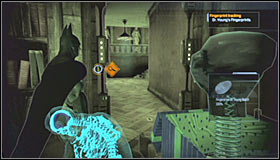
![[#5] Location 5: Library (Arkham Mansion) - Collectibles - Arkham Mansion - part 1 - Collectibles - Batman: Arkham Asylum - Game Guide and Walkthrough](https://game.lhg100.com/Article/UploadFiles/201512/2015121216290978.jpg)
[#5] Location 5: Library (Arkham Mansion)
Once you've already rescued the hostages explore the eastern section of the library. Joker's teeth can be found near the stairs.
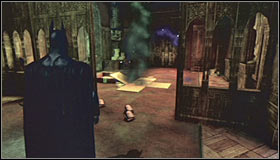
![[#6] Location 6: East Wing Corridor (Arkham Mansion) - Collectibles - Arkham Mansion - part 2 - Collectibles - Batman: Arkham Asylum - Game Guide and Walkthrough](https://game.lhg100.com/Article/UploadFiles/201512/2015121216290974.jpg)
[#6] Location 6: East Wing Corridor (Arkham Mansion)
Only if you're already defeated Zsasz (while returning to the Main Hall).
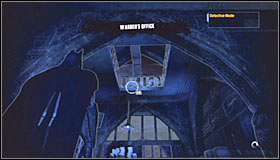
![[#7] Location 7: Warden's Office (Arkham Mansion) - Collectibles - Arkham Mansion - part 2 - Collectibles - Batman: Arkham Asylum - Game Guide and Walkthrough](https://game.lhg100.com/Article/UploadFiles/201512/2015121216290956.jpg)
[#7] Location 7: Warden's Office (Arkham Mansion)
Once you've entered the office look up and use your hook to gain access to upper balconies. Explore this entire section to find three targets.
Trophies
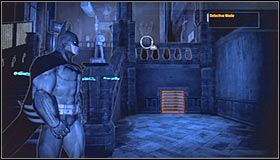
![[#1] Location: Mansion Entrance Hall (Arkham Mansion) - Collectibles - Arkham Mansion - part 2 - Collectibles - Batman: Arkham Asylum - Game Guide and Walkthrough](https://game.lhg100.com/Article/UploadFiles/201512/2015121216291083.jpg)
[#1] Location: Mansion Entrance Hall (Arkham Mansion)
Once you've landed in this first area and eliminated the inmates look for an entrance to a ventilation shaft. It can be found to the right of the stairs.
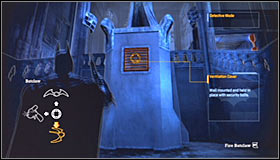
![[#2] Location: Main Hall (Arkham Mansion) - Collectibles - Arkham Mansion - part 2 - Collectibles - Batman: Arkham Asylum - Game Guide and Walkthrough](https://game.lhg100.com/Article/UploadFiles/201512/2015121216291067.jpg)
[#2] Location: Main Hall (Arkham Mansion)
Requirements: Batclaw
Examine the large statue and you should be able to notice the grating. Rip it off using your Batclaw and head inside.
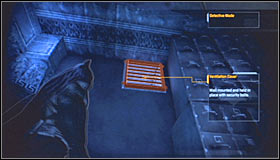
![[#3] Location: Arkham Records Room (Arkham Mansion) - Collectibles - Arkham Mansion - part 2 - Collectibles - Batman: Arkham Asylum - Game Guide and Walkthrough](https://game.lhg100.com/Article/UploadFiles/201512/2015121216291022.jpg)
[#3] Location: Arkham Records Room (Arkham Mansion)
Requirements: Batclaw
Explore the western section of the records room and find the grating on one of the walls. Rip it off with the Batclaw and use this newly unlocked ventilation shaft to make your way to a new room. Jump over the railing and take the trophy from one of the tables.
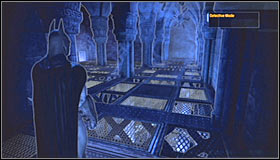
![[#4] Location: North Corridor (Arkham Mansion) - Collectibles - Arkham Mansion - part 2 - Collectibles - Batman: Arkham Asylum - Game Guide and Walkthrough](https://game.lhg100.com/Article/UploadFiles/201512/2015121216291020.jpg)
[#4] Location: North Corridor (Arkham Mansion)
The trophy can be found in the southern section of this area and you must pick it up before using the ventilation shaft to reach Dr. Young's Office.
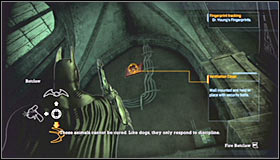
![[#5] Location: South Corridor (Arkham Mansion) - Collectibles - Arkham Mansion - part 2 - Collectibles - Batman: Arkham Asylum - Game Guide and Walkthrough](https://game.lhg100.com/Article/UploadFiles/201512/2015121216291077.jpg)
[#5] Location: South Corridor (Arkham Mansion)
Requirements: Batclaw
Use the Batclaw in the south-western corner of the room. You'll have to aim your gadget at the grating located near the ceiling. Once this is done use the hook to make your way to a small cave.
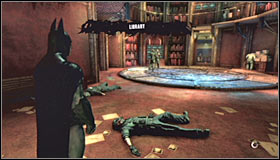
![[#6] Location: Library (Arkham Mansion) - Collectibles - Arkham Mansion - part 2 - Collectibles - Batman: Arkham Asylum - Game Guide and Walkthrough](https://game.lhg100.com/Article/UploadFiles/201512/2015121216291194.jpg)
[#6] Location: Library (Arkham Mansion)
Requirements: Batclaw
Defeat all the inmates and look around. Use your Batclaw on a nearby grating (screenshot #2) and the trophy can be found inside.
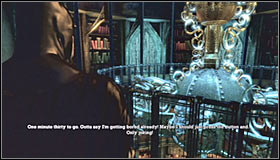
![[#7] Location: Library (Arkham Mansion) - Collectibles - Arkham Mansion - part 2 - Collectibles - Batman: Arkham Asylum - Game Guide and Walkthrough](https://game.lhg100.com/Article/UploadFiles/201512/2015121216291148.jpg)
[#7] Location: Library (Arkham Mansion)
Reach the highest level of the library and locate a ventilation shaft. The trophy can be taken before you destroy the chandelier or after you've rescued the hostages.

![[#8] Location: Warden's Office (Arkham Mansion) - Collectibles - Arkham Mansion - part 2 - Collectibles - Batman: Arkham Asylum - Game Guide and Walkthrough](https://game.lhg100.com/Article/UploadFiles/201512/2015121216291190.jpg)
[#8] Location: Warden's Office (Arkham Mansion)
Once you've defeated Zsasz and other thugs look around to find the trophy on a table.

![[#9] Location: East Wing Corridor (Arkham Mansion) - Collectibles - Arkham Mansion - part 2 - Collectibles - Batman: Arkham Asylum - Game Guide and Walkthrough](https://game.lhg100.com/Article/UploadFiles/201512/2015121216291154.jpg)
[#9] Location: East Wing Corridor (Arkham Mansion)
Requirements: Ultra Batclaw
Find a breakable wall and use the Ultra Batclaw to unlock a new passageway. Climb up and it shouldn't take too long for you to find the trophy.
Messages

![[#1] Location: Mansion Entrance Hall (Arkham Mansion) - Collectibles - Arkham Mansion - part 2 - Collectibles - Batman: Arkham Asylum - Game Guide and Walkthrough](https://game.lhg100.com/Article/UploadFiles/201512/2015121216291100.jpg)
[#1] Location: Mansion Entrance Hall (Arkham Mansion)
Requirements: Batclaw, Explosive Gel
Look around a little to find an upper balcony and use your hook to reach it. From here you'll have to use the Batclaw to rip off the grating. Head inside and move forward until you end up inside a small room with a breakable wall. Plant an explosive gel on it.
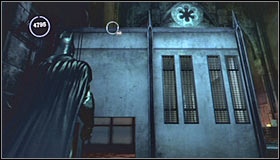
![[#2] Location: Main Hall (Arkham Mansion) - Collectibles - Arkham Mansion - part 3 - Collectibles - Batman: Arkham Asylum - Game Guide and Walkthrough](https://game.lhg100.com/Article/UploadFiles/201512/2015121216291262.jpg)
[#2] Location: Main Hall (Arkham Mansion)
Get on top of a small guard post located in the northern section of the Main Hall (screenshot #1). Once you're there use your hook to reach an upper balcony (screenshot #2).
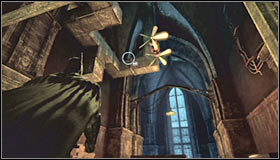
![[#3] Location: South Corridor (Arkham Mansion) - Collectibles - Arkham Mansion - part 3 - Collectibles - Batman: Arkham Asylum - Game Guide and Walkthrough](https://game.lhg100.com/Article/UploadFiles/201512/2015121216291237.jpg)
[#3] Location: South Corridor (Arkham Mansion)
Requirements: Explosive Gel
At about half way through to the Library use the hook to get to an upper balcony. Locate a weak wall and plant an explosive device on it.
Riddles
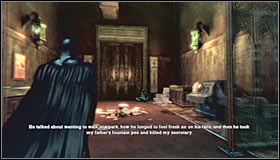
![[#1] Who is the main man in the main hall - Collectibles - Arkham Mansion - part 3 - Collectibles - Batman: Arkham Asylum - Game Guide and Walkthrough](https://game.lhg100.com/Article/UploadFiles/201512/2015121216291232.jpg)
[#1] Who is the main man in the main hall?
Location: Main Hall (Arkham Mansion)
Check the eastern corridor in the southern section of the main hall. You'll have to scan one of the paintings (screenshot #2).
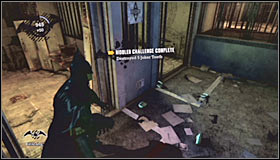
![[#2] Did Amadeus go mad, or was he just dizzy - Collectibles - Arkham Mansion - part 3 - Collectibles - Batman: Arkham Asylum - Game Guide and Walkthrough](https://game.lhg100.com/Article/UploadFiles/201512/2015121216291209.jpg)
[#2] Did Amadeus go mad, or was he just dizzy?
Location: North Corridor (Arkham Mansion)
Once you've left the first ventilation shaft inspect a small room to your left and scan the signs seen on the wall.
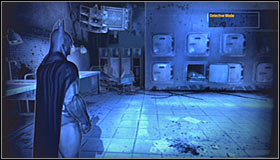
![[#3] It'll be a cold day in Hell when this Ghul rises again - Collectibles - Arkham Mansion - part 3 - Collectibles - Batman: Arkham Asylum - Game Guide and Walkthrough](https://game.lhg100.com/Article/UploadFiles/201512/2015121216291208.jpg)
[#3] It'll be a cold day in Hell when this Ghul rises again.
Location: Dr. Young's Office (Arkham Mansion)
Before you decide to use the Batclaw to access doctor Young's office look around the morgue. You'll have to zoom in on corpse's foot (screenshot #2).
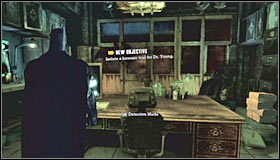
![[#4] How do you mask your feelings without losing control - Collectibles - Arkham Mansion - part 3 - Collectibles - Batman: Arkham Asylum - Game Guide and Walkthrough](https://game.lhg100.com/Article/UploadFiles/201512/2015121216291382.jpg)
[#4] How do you mask your feelings without losing control?
Location: Dr. Young's Office (Arkham Mansion)
During your time spent inside the office scan the mask hanging on one of the walls.
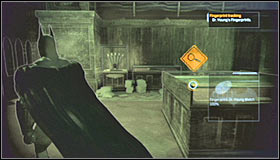
![[#5] What does a bird need in the rain - Collectibles - Arkham Mansion - part 3 - Collectibles - Batman: Arkham Asylum - Game Guide and Walkthrough](https://game.lhg100.com/Article/UploadFiles/201512/2015121216291360.jpg)
[#5] What does a bird need in the rain?
Location: South Corridor (Arkham Mansion)
When you're about half way through to the Library examine and scan the left showcase.

![[#6] This fiendish puzzle literally appears out of thin air - Collectibles - Arkham Mansion - part 3 - Collectibles - Batman: Arkham Asylum - Game Guide and Walkthrough](https://game.lhg100.com/Article/UploadFiles/201512/2015121216291343.jpg)
[#6] This fiendish puzzle literally appears out of thin air.
Location: South Corridor (Arkham Mansion)
Remain in the central area of the South Corridor and use the hook to gain access to an upper balcony. Locate a small dot on the vent and match it with a question mark seen in the distance.
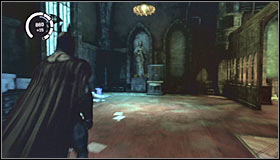
![[#7] A game of Cat and mouse can be painful - Collectibles - Arkham Mansion - part 3 - Collectibles - Batman: Arkham Asylum - Game Guide and Walkthrough](https://game.lhg100.com/Article/UploadFiles/201512/2015121216291371.jpg)
[#7] A game of Cat and mouse can be painful.
Location: East Wing Corridor (Arkham Mansion)
This is the same corridor where you've defended yourself against the first opponent with a stun gun. All you have to do is to scan a nearby showcase.
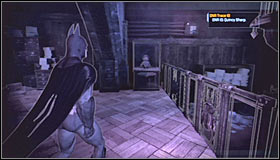
![[#8] Isn't the Warden too old for a puppet show - Collectibles - Arkham Mansion - part 3 - Collectibles - Batman: Arkham Asylum - Game Guide and Walkthrough](https://game.lhg100.com/Article/UploadFiles/201512/2015121216291485.jpg)
[#8] Isn't the Warden too old for a puppet show?
Location: Warden's Office (Arkham Mansion)
Once you've defeated Zsasz and other thugs scan the showcase with a doll.
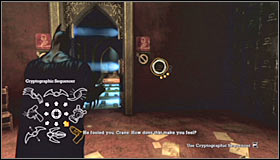
![[#9] Our records show that a Strange transfer request was made in this room - Collectibles - Arkham Mansion - part 3 - Collectibles - Batman: Arkham Asylum - Game Guide and Walkthrough](https://game.lhg100.com/Article/UploadFiles/201512/2015121216291411.jpg)
[#9] Our records show that a Strange transfer request was made in this room.
Location: Arkham Records Room (Arkham Mansion)
Requirements: Cryptographic Sequencer, Line Launcher
In the southern section of the records room you'll have to use the sequencer. Choose the Line Launcher after that in order to get past the electrified floor. Once you're inside a small room scan the right wall (screenshot #2).
Tapes
![[#1] Location: Arkham North - Collectibles - Arkham North - part 1 - Collectibles - Batman: Arkham Asylum - Game Guide and Walkthrough](https://game.lhg100.com/Article/UploadFiles/201512/2015121216291412.jpg)
[#1] Location: Arkham North
The tape can be found inside one of the buildings.

![[#2] Location: Arkham North - Collectibles - Arkham North - part 1 - Collectibles - Batman: Arkham Asylum - Game Guide and Walkthrough](https://game.lhg100.com/Article/UploadFiles/201512/2015121216291474.jpg)
[#2] Location: Arkham North
Requirements: Cryptographic Sequencer
Use the sequencer to break into a small guard post. The tape is inside and you'll have to pick it up from a table.
Secret map
![[#1] Secrets Map - Arkham North - Collectibles - Arkham North - part 1 - Collectibles - Batman: Arkham Asylum - Game Guide and Walkthrough](https://game.lhg100.com/Article/UploadFiles/201512/2015121216291595.jpg)
[#1] Secrets Map - Arkham North
Location: Arkham North
Requirements: Explosive Gel
Get on top of a small guard post located next to your batmobile. Choose the Explosive Gel from Batman's inventory and plant it on a weak section of the roof. Once the explosion has occurred head inside and take the map from the table.
Teeth
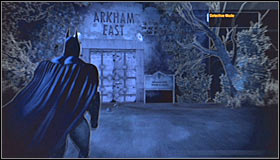
![[#1] Location 1: Arkham North - Collectibles - Arkham North - part 1 - Collectibles - Batman: Arkham Asylum - Game Guide and Walkthrough](https://game.lhg100.com/Article/UploadFiles/201512/2015121216291505.jpg)
[#1] Location 1: Arkham North
Once you've left the Caves check the passageway leading back to Arkham East.
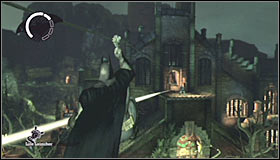
![[#2] Location 2: Arkham North - Collectibles - Arkham North - part 1 - Collectibles - Batman: Arkham Asylum - Game Guide and Walkthrough](https://game.lhg100.com/Article/UploadFiles/201512/2015121216291517.jpg)
[#2] Location 2: Arkham North
Requirements: Line Launcher
Check the balcony where you've encountered one of the snipers. You'll have to visit the Botanical Gardens and the Arkham Mansion (for the second time) in the first place.
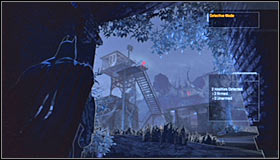
![[#3] Location 3: Arkham North - Collectibles - Arkham North - part 1 - Collectibles - Batman: Arkham Asylum - Game Guide and Walkthrough](https://game.lhg100.com/Article/UploadFiles/201512/2015121216291591.jpg)
[#3] Location 3: Arkham North
Inside one of the guard towers, when you've returned from the Caves (for the second time) and just before the fight with Poison Ivy.
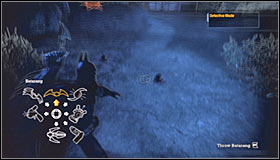
![[#4] Location 4: Arkham North - Collectibles - Arkham North - part 1 - Collectibles - Batman: Arkham Asylum - Game Guide and Walkthrough](https://game.lhg100.com/Article/UploadFiles/201512/2015121216291537.jpg)
[#4] Location 4: Arkham North
Near the passageway leading back to Arkham East, when you've returned from the Caves (for the second time) and just before the fight with Poison Ivy.
Trophies
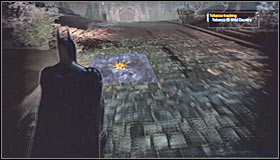
![[#1] Location: Arkham North - Collectibles - Arkham North - part 1 - Collectibles - Batman: Arkham Asylum - Game Guide and Walkthrough](https://game.lhg100.com/Article/UploadFiles/201512/2015121216291604.jpg)
[#1] Location: Arkham North
Requirements: Explosive Gel
Use the gel on a weak section of the ground. The trophy is hidden close to your batmobile.

![[#2] Location: Arkham North - Collectibles - Arkham North - part 1 - Collectibles - Batman: Arkham Asylum - Game Guide and Walkthrough](https://game.lhg100.com/Article/UploadFiles/201512/2015121216291696.jpg)
[#2] Location: Arkham North
Inside a destroyed building in the north-western section of Arkham North.
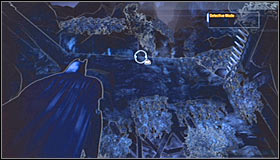
![[#3] Location: Arkham North - Collectibles - Arkham North - part 1 - Collectibles - Batman: Arkham Asylum - Game Guide and Walkthrough](https://game.lhg100.com/Article/UploadFiles/201512/2015121216291629.jpg)
[#3] Location: Arkham North
Above the entrance to the caves (southern section of Arkham North).
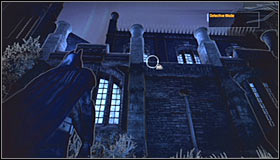
![[#4] Location: Arkham North - Collectibles - Arkham North - part 2 - Collectibles - Batman: Arkham Asylum - Game Guide and Walkthrough](https://game.lhg100.com/Article/UploadFiles/201512/2015121216291685.jpg)
[#4] Location: Arkham North
On the roof of the Intensive Treatment building.
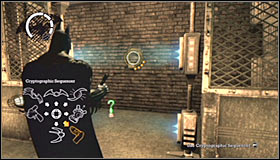
![[#5] Location: Arkham North - Collectibles - Arkham North - part 2 - Collectibles - Batman: Arkham Asylum - Game Guide and Walkthrough](https://game.lhg100.com/Article/UploadFiles/201512/2015121216291651.jpg)
[#5] Location: Arkham North
Requirements: Cryptographic Sequencer, Cryptographic Range Amplifier
Proceed towards a small guard depot located to the north. You'll have to hack into a terminal from the distance (make sure to purchase Cryptographic Range Amplifier upgrade).
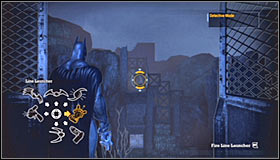
![[#6] Location: Arkham North - Collectibles - Arkham North - part 2 - Collectibles - Batman: Arkham Asylum - Game Guide and Walkthrough](https://game.lhg100.com/Article/UploadFiles/201512/2015121216291701.jpg)
[#6] Location: Arkham North
Requirements: Line Launcher
Head on to the western section of Arkham North, climb up and find a spot from where you'll be able to use the Line Launcher to travel to a new ledge.

![[#7] Location: Arkham North - Collectibles - Arkham North - part 2 - Collectibles - Batman: Arkham Asylum - Game Guide and Walkthrough](https://game.lhg100.com/Article/UploadFiles/201512/2015121216291740.jpg)
[#7] Location: Arkham North
On top of one of the guard towers.
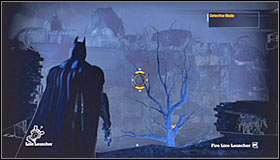
![[#8] Location: Arkham North - Collectibles - Arkham North - part 2 - Collectibles - Batman: Arkham Asylum - Game Guide and Walkthrough](https://game.lhg100.com/Article/UploadFiles/201512/2015121216291727.jpg)
[#8] Location: Arkham North
Requirements: Line Launcher
Make sure that you're standing inside the destroyed building and look to the east. There's a small cliff in front of you and you can get there using the Line Launcher.
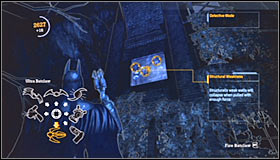
![[#9] Location: Arkham North - Collectibles - Arkham North - part 2 - Collectibles - Batman: Arkham Asylum - Game Guide and Walkthrough](https://game.lhg100.com/Article/UploadFiles/201512/2015121216291732.jpg)
[#9] Location: Arkham North
Requirements: Ultra Batclaw
Explore the western section of Arkham North. You'll have to use the Ultra Batclaw on a weak section of the wall.
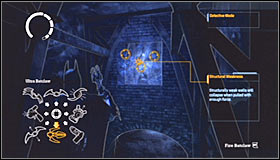
![[#10] Location: Arkham North - Collectibles - Arkham North - part 2 - Collectibles - Batman: Arkham Asylum - Game Guide and Walkthrough](https://game.lhg100.com/Article/UploadFiles/201512/2015121216291785.jpg)
[#10] Location: Arkham North
Requirements: Ultra Batclaw, Line Launcher
You can acquire this treasure once you've dealt with Ivy. Explore the caves located in the southern section of Arkham North and find a weak wall. You can rip off this fragment using the Ultra Batclaw and to get to the trophy you'll also have to use the Line Launcher.
Messages

![[#1] Location: Arkham North - Collectibles - Arkham North - part 2 - Collectibles - Batman: Arkham Asylum - Game Guide and Walkthrough](https://game.lhg100.com/Article/UploadFiles/201512/2015121216291857.jpg)
[#1] Location: Arkham North
Inside the destroyed building (north-western section of Arkham North).
![[#2] Location: Arkham North - Collectibles - Arkham North - part 2 - Collectibles - Batman: Arkham Asylum - Game Guide and Walkthrough](https://game.lhg100.com/Article/UploadFiles/201512/2015121216291883.jpg)
[#2] Location: Arkham North
You can find the tablet during the exploration of the caves.
Riddles
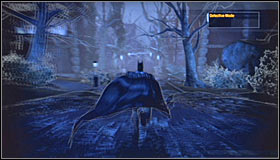
![[#1] Tweedledum and Tweedledee SAW it, can you SEE it - Collectibles - Arkham North - part 2 - Collectibles - Batman: Arkham Asylum - Game Guide and Walkthrough](https://game.lhg100.com/Article/UploadFiles/201512/2015121216291817.jpg)
[#1] Tweedledum and Tweedledee SAW it, can you SEE it?
Location: Arkham North
Scan the see-saws found near the northern edge of Arkham North.
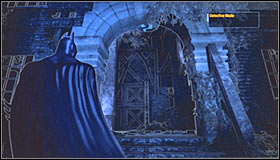
![[#2] Now I see it, now you don't - Collectibles - Arkham North - part 2 - Collectibles - Batman: Arkham Asylum - Game Guide and Walkthrough](https://game.lhg100.com/Article/UploadFiles/201512/2015121216291836.jpg)
[#2] Now I see it, now you don't!
Location: Arkham North
Stand close to the main entrance to the destroyed building. Zoom in the view and match the dot found on the arc with the rest of the question mark.
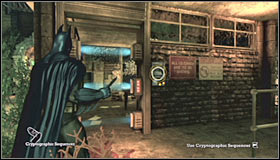
![[#3] Let's face it, there are two Dents on the wall - Collectibles - Arkham North - part 2 - Collectibles - Batman: Arkham Asylum - Game Guide and Walkthrough](https://game.lhg100.com/Article/UploadFiles/201512/2015121216291913.jpg)
[#3] Let's face it, there are two Dents on the wall.
Location: Arkham North
Requirements: Cryptographic Sequencer
You'll have to break into one of the smaller buildings using the sequencer. Once you're inside turn right and scan some of the posters found on the wall.
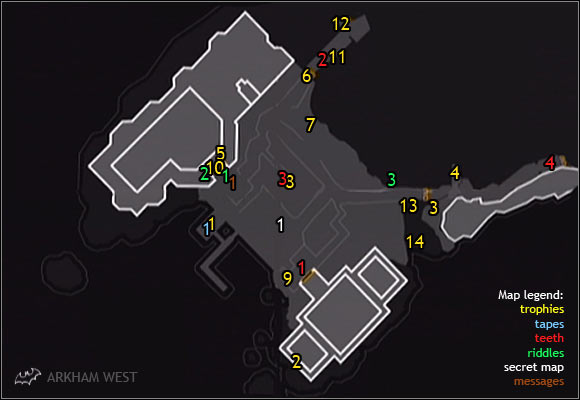
Tapes
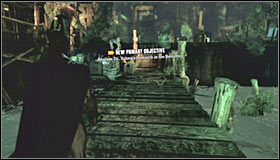
![[#1] Location: Arkham West - Collectibles - Arkham West - part 1 - Collectibles - Batman: Arkham Asylum - Game Guide and Walkthrough](https://game.lhg100.com/Article/UploadFiles/201512/2015121216291977.jpg)
[#1] Location: Arkham West
The tape can be found instead one of the buildings located close to the docks.
Secret map
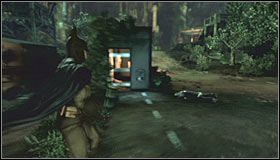
![[#1] Secrets Map - Arkham West - Collectibles - Arkham West - part 1 - Collectibles - Batman: Arkham Asylum - Game Guide and Walkthrough](https://game.lhg100.com/Article/UploadFiles/201512/2015121216291955.jpg)
[#1] Secrets Map - Arkham West
Location: Arkham West
Requirements: Cryptographic Sequencer
You can acquire this map once you've returned from the Penitentiary building. Use the sequencer on the control panel and enter a small hut.
Teeth
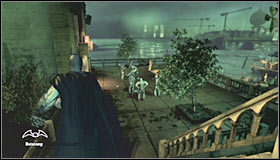
![[#1] Location 1: Arkham West - Collectibles - Arkham West - part 1 - Collectibles - Batman: Arkham Asylum - Game Guide and Walkthrough](https://game.lhg100.com/Article/UploadFiles/201512/2015121216291978.jpg)
[#1] Location 1: Arkham West
Near the main entrance to the Medical Facility building. It's the same area where you had to defeat a large group of villains.
![[#2] Location 2: Arkham West - Collectibles - Arkham West - part 1 - Collectibles - Batman: Arkham Asylum - Game Guide and Walkthrough](https://game.lhg100.com/Article/UploadFiles/201512/2015121216291939.jpg)
[#2] Location 2: Arkham West
Once you've defeated Bane inspect the northern passageway leading to Arkham North.

![[#3] Location 3: Arkham West - Collectibles - Arkham West - part 1 - Collectibles - Batman: Arkham Asylum - Game Guide and Walkthrough](https://game.lhg100.com/Article/UploadFiles/201512/2015121216292029.jpg)
[#3] Location 3: Arkham West
Inside the guard tower, after your return from the Arkham Mansion.
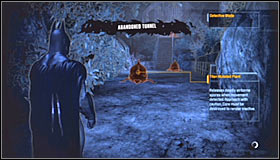
![[#4] Location 4: Abandoned Tunnel (Arkham West) - Collectibles - Arkham West - part 1 - Collectibles - Batman: Arkham Asylum - Game Guide and Walkthrough](https://game.lhg100.com/Article/UploadFiles/201512/2015121216292013.jpg)
[#4] Location 4: Abandoned Tunnel (Arkham West)
You'll find the teeth during your journey through the tunnel. It should occur after your second trip to the caves and prior to engaging Poison Ivy in a battle.
Trophies

![[#1] Location: Arkham West - Collectibles - Arkham West - part 1 - Collectibles - Batman: Arkham Asylum - Game Guide and Walkthrough](https://game.lhg100.com/Article/UploadFiles/201512/2015121216292079.jpg)
[#1] Location: Arkham West
On a roof of a small building. This structure is located near the docks.
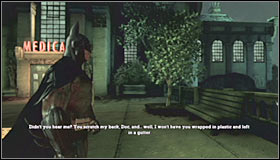
![[#2] Location: Arkham West - Collectibles - Arkham West - part 1 - Collectibles - Batman: Arkham Asylum - Game Guide and Walkthrough](https://game.lhg100.com/Article/UploadFiles/201512/2015121216292072.jpg)
[#2] Location: Arkham West
On the roof of the Medical Facility building. You'll have to explore the section located close to the water.
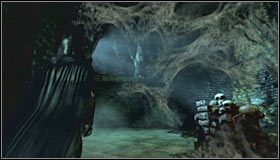
![[#3] Location: Arkham North/Arkham West - Collectibles - Arkham West - part 1 - Collectibles - Batman: Arkham Asylum - Game Guide and Walkthrough](https://game.lhg100.com/Article/UploadFiles/201512/2015121216292005.jpg)
[#3] Location: Arkham North/Arkham West
Requirements: Explosive Gel
You'll find the treasure if you start in Arkham North and head towards the Caves (for the first time). Destroy one of the walls once you've entered a larger cave with some skulls (screenshot #1).
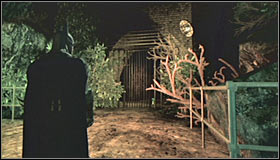
![[#4] Location: Abandoned Tunnel (Arkham West) - Collectibles - Arkham West - part 1 - Collectibles - Batman: Arkham Asylum - Game Guide and Walkthrough](https://game.lhg100.com/Article/UploadFiles/201512/2015121216292147.jpg)
[#4] Location: Abandoned Tunnel (Arkham West)
Requirements: Explosive Gel
You'll have to enter the tunnel connecting Arkham West with Arkham East. Be on a look out for a large gate. Look up and use the hook. Once you're there activate the detective mode to find a weak section of the floor. Blow it up, drop to a small cave and take the trophy.
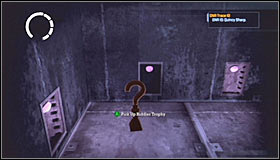
[#5] Location: Arkham West
Requirements: Batclaw
Explore the area to the west of the entrance to the Penitentiary building. Use the Batclaw on a grating, enter the ventilation shaft and collect the treasure.
![[#6] Location: Arkham West - Collectibles - Arkham West - part 1 - Collectibles - Batman: Arkham Asylum - Game Guide and Walkthrough](https://game.lhg100.com/Article/UploadFiles/201512/2015121216292112.jpg)
[#6] Location: Arkham West
The trophy is hidden above the gate leading to Arkham North and you'll have to use the hook to get there.
![[#7] Location: Arkham West - Collectibles - Arkham West - part 2 - Collectibles - Batman: Arkham Asylum - Game Guide and Walkthrough](https://game.lhg100.com/Article/UploadFiles/201512/2015121216292175.jpg)
[#7] Location: Arkham West
There's a large waterfall to the right of the passageway to Arkham North. Check the lower area near the waterfall to find the trophy.
![[#8] Location: Arkham West - Collectibles - Arkham West - part 2 - Collectibles - Batman: Arkham Asylum - Game Guide and Walkthrough](https://game.lhg100.com/Article/UploadFiles/201512/2015121216292148.jpg)
[#8] Location: Arkham West
Search the area to find a guard tower (the same one that was being used by one of the snipers). The trophy can be found under the tower.
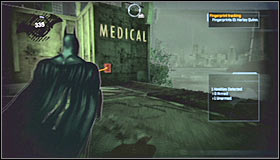
![[#9] Location: Arkham West - Collectibles - Arkham West - part 2 - Collectibles - Batman: Arkham Asylum - Game Guide and Walkthrough](https://game.lhg100.com/Article/UploadFiles/201512/2015121216292222.jpg)
[#9] Location: Arkham West
Requirements: Cryptographic Sequencer
Explore the Medical Facility building. You'll have to find a control panel (screenshot #1) and use a sequencer on it. Once the panel has exploded wait for the elevator to move and to reveal the trophy.
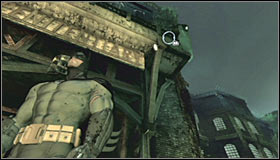
![[#10] Location: Arkham West - Collectibles - Arkham West - part 2 - Collectibles - Batman: Arkham Asylum - Game Guide and Walkthrough](https://game.lhg100.com/Article/UploadFiles/201512/2015121216292245.jpg)
[#10] Location: Arkham West
Requirements: Cryptographic Sequencer, Cryptographic Range Amplifier
Make your way to a small roof section located above the entrance to the Penitentiary building. Approach the barrier and use the sequencer from here (screenshot #2). Hacking into the system will disable the defences and you'll be allowed to collect the treasure.
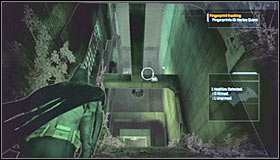
![[#11] Location: Arkham West - Collectibles - Arkham West - part 2 - Collectibles - Batman: Arkham Asylum - Game Guide and Walkthrough](https://game.lhg100.com/Article/UploadFiles/201512/2015121216292246.jpg)
[#11] Location: Arkham West
Requirements: Batclaw
Proceed towards the passageway leading to Arkham North. Before you open the door look around to find long concrete beams. Use your hook to get there and once you've arrived rip off the grating with a Batclaw. The trophy is hidden inside the ventilation shaft.
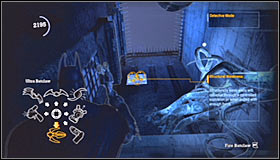
![[#12] Location: Arkham West - Collectibles - Arkham West - part 2 - Collectibles - Batman: Arkham Asylum - Game Guide and Walkthrough](https://game.lhg100.com/Article/UploadFiles/201512/2015121216292224.jpg)
[#12] Location: Arkham West
Requirements: Ultra Batclaw
Proceed towards the passageway leading to Arkham North. Before you open the door look around and use the Ultra Batclaw on a weak section of the wall.
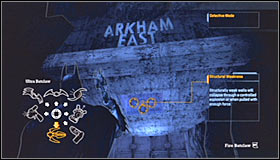
![[#13] Location: Arkham West - Collectibles - Arkham West - part 2 - Collectibles - Batman: Arkham Asylum - Game Guide and Walkthrough](https://game.lhg100.com/Article/UploadFiles/201512/2015121216292228.jpg)
[#13] Location: Arkham West
Requirements: Ultra Batclaw
Proceed towards the passageway leading to Arkham East. Don't enter the Abandoned Tunnel. Instead use the Ultra Batclaw on a ceiling in front of the large gate. Use your hook afterwards and collect your prize.
![[#14] Location: Arkham West - Collectibles - Arkham West - part 2 - Collectibles - Batman: Arkham Asylum - Game Guide and Walkthrough](https://game.lhg100.com/Article/UploadFiles/201512/2015121216292311.jpg)
[#14] Location: Arkham West
Requirements: Line Launcher
Get on top of the Medical Facility building and explore its northern part. You should be able to notice a small platform in the distance and you can get there using the Line Launcher.
Messages
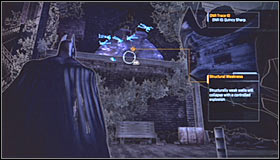
![[#1] Location: Arkham West - Collectibles - Arkham West - part 2 - Collectibles - Batman: Arkham Asylum - Game Guide and Walkthrough](https://game.lhg100.com/Article/UploadFiles/201512/2015121216292318.jpg)
[#1] Location: Arkham West
Requirements: Explosive Gel
Find a small opening under the entrance to the Penitentiary building. Use the Explosive Gel on the wall.
Riddles
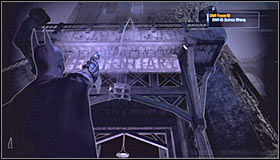
![[#1] Do you see what I can see - Collectibles - Arkham West - part 2 - Collectibles - Batman: Arkham Asylum - Game Guide and Walkthrough](https://game.lhg100.com/Article/UploadFiles/201512/2015121216292326.jpg)
[#1] Do you see what I can see? No? Then maybe I am in a stronger position.
Location: Arkham West
Grapple up to a small balcony located directly above the main entrance to the Penitentiary building. Once you're there turn around and match the dot from the balustrade with the rest of the question mark seen on the ground.
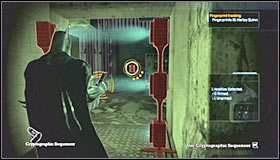
![[#2] Zsasz is counting on you finding his work - Collectibles - Arkham West - part 2 - Collectibles - Batman: Arkham Asylum - Game Guide and Walkthrough](https://game.lhg100.com/Article/UploadFiles/201512/2015121216292330.jpg)
[#2] Zsasz is counting on you finding his work.
Location: Arkham West
Requirements: Cryptographic Sequencer, Cryptographic Range Amplifier
Make your way to the section of the roof located above the entrance to the Penitentiary building. Stand close to the barrier and overload the control panel with a sequencer from a larger distance. You may now enter this small room. Scan the guards killed by Zsasz to complete this riddle.
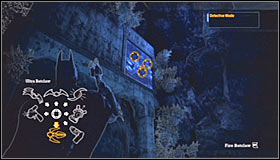
![[#3] Does Scarecrow's gas break down barriers as it drives you insane - Collectibles - Arkham West - part 2 - Collectibles - Batman: Arkham Asylum - Game Guide and Walkthrough](https://game.lhg100.com/Article/UploadFiles/201512/2015121216292367.jpg)
[#3] Does Scarecrow's gas break down barriers as it drives you insane?
Location: Arkham West
Requirements: Ultra Batclaw
Examine the left wall near the southern passageway leading to the Abandoned Tunnel. You'll have to use the Ultra Batclaw on a weak section of the wall (screenshot #1). Once this is done grapple up and scan the tanks left by Joker.
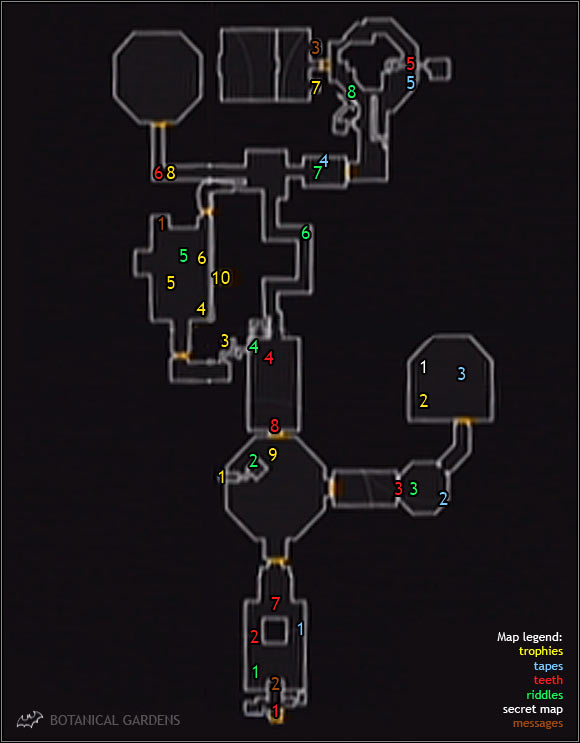
Tapes

![[#1] Location: Glasshouse Entrance (Botanical Gardens) - Collectibles - Botanical Gardens - part 1 - Collectibles - Batman: Arkham Asylum - Game Guide and Walkthrough](https://game.lhg100.com/Article/UploadFiles/201512/2015121216292497.jpg)
[#1] Location: Glasshouse Entrance (Botanical Gardens)
The tape can be found on the bench and you can collect it before you attack two armed thugs.
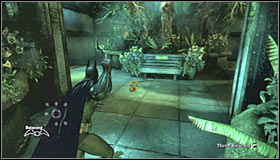
![[#2] Location: Statue Corridor (Botanical Gardens) - Collectibles - Botanical Gardens - part 1 - Collectibles - Batman: Arkham Asylum - Game Guide and Walkthrough](https://game.lhg100.com/Article/UploadFiles/201512/2015121216292426.jpg)
[#2] Location: Statue Corridor (Botanical Gardens)
Search for the tape when you're about a half way through to the Glasshouse Generator Room. It's on a bench behind the large statue.

![[#3] Location: Glasshouse Generator Room (Botanical Gardens) - Collectibles - Botanical Gardens - part 1 - Collectibles - Batman: Arkham Asylum - Game Guide and Walkthrough](https://game.lhg100.com/Article/UploadFiles/201512/2015121216292493.jpg)
[#3] Location: Glasshouse Generator Room (Botanical Gardens)
Once you've eliminated all the inmates you'll find the tape on one of the tables.

![[#4] Location: Flooded Corridor (Botanical Gardens) - Collectibles - Botanical Gardens - part 1 - Collectibles - Batman: Arkham Asylum - Game Guide and Walkthrough](https://game.lhg100.com/Article/UploadFiles/201512/2015121216292416.jpg)
[#4] Location: Flooded Corridor (Botanical Gardens)
The tape can be found on the bench, near the passageway leading to the Aviary.
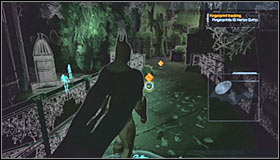
![[#5] Location: Aviary (Botanical Gardens) - Collectibles - Botanical Gardens - part 1 - Collectibles - Batman: Arkham Asylum - Game Guide and Walkthrough](https://game.lhg100.com/Article/UploadFiles/201512/2015121216292545.jpg)
[#5] Location: Aviary (Botanical Gardens)
Once you've rescued the civilians look around to find the tape on a bench.
Secret map
![[#1] Secrets Map - Botanical Gardens - Collectibles - Botanical Gardens - part 1 - Collectibles - Batman: Arkham Asylum - Game Guide and Walkthrough](https://game.lhg100.com/Article/UploadFiles/201512/2015121216292531.jpg)
[#1] Secrets Map - Botanical Gardens
Location: Glasshouse Generator Room (Botanical Gardens)
Requirements: Cryptographic Sequencer, Cryptographic Range Amplifier
Start off by securing this entire area and then proceed to the upper balcony. Stand in front of the barrier (screenshot #1) and hack the terminal from a larger distance. Obviously you'll have to use your upgraded sequencer. Enter the room afterwards and take the map.
Teeth
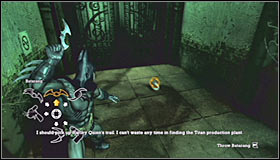
![[#1] Locations 1 & - Collectibles - Botanical Gardens - part 1 - Collectibles - Batman: Arkham Asylum - Game Guide and Walkthrough](https://game.lhg100.com/Article/UploadFiles/201512/2015121216292505.jpg)
[#1] Locations 1 & 2: Glasshouse Entrance (Botanical Gardens)
Near the entrance and near the first killed guard (the one on the bench).

![[#3] Location 3: Statue Corridor (Botanical Gardens) - Collectibles - Botanical Gardens - part 1 - Collectibles - Batman: Arkham Asylum - Game Guide and Walkthrough](https://game.lhg100.com/Article/UploadFiles/201512/2015121216292583.jpg)
[#3] Location 3: Statue Corridor (Botanical Gardens)
Be on a look out for the teeth while trying to get to the Glasshouse Generator Room.

![[#4] Location 4: Flooded Corridor (Botanical Gardens) - Collectibles - Botanical Gardens - part 1 - Collectibles - Batman: Arkham Asylum - Game Guide and Walkthrough](https://game.lhg100.com/Article/UploadFiles/201512/2015121216292525.jpg)
[#4] Location 4: Flooded Corridor (Botanical Gardens)
Make sure this is your second visit (after disabling the generator). Inspect the area near the entrance to a ventilation shaft.
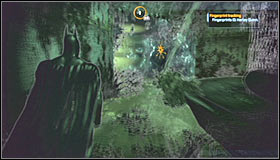
![[#5] Location 5: Aviary (Botanical Gardens) - Collectibles - Botanical Gardens - part 2 - Collectibles - Batman: Arkham Asylum - Game Guide and Walkthrough](https://game.lhg100.com/Article/UploadFiles/201512/2015121216292643.jpg)
[#5] Location 5: Aviary (Botanical Gardens)
Inside the control room which was being guarded by one of the inmates.
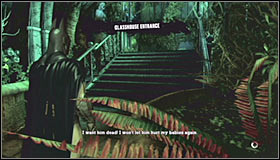
![[#6] Location 6: Flooded Corridor (Botanical Gardens) - Collectibles - Botanical Gardens - part 2 - Collectibles - Batman: Arkham Asylum - Game Guide and Walkthrough](https://game.lhg100.com/Article/UploadFiles/201512/2015121216292624.jpg)
[#6] Location 6: Flooded Corridor (Botanical Gardens)
Requirements: Line Launcher
You can get to this area after you've unlocked the Line Launcher. Destroy the teeth before you talk to Poison Ivy in her chamber.
![[#7] Location 7: Glasshouse Entrance (Botanical Gardens) - Collectibles - Botanical Gardens - part 2 - Collectibles - Batman: Arkham Asylum - Game Guide and Walkthrough](https://game.lhg100.com/Article/UploadFiles/201512/2015121216292606.jpg)
[#7] Location 7: Glasshouse Entrance (Botanical Gardens)
Find the teeth once you've already talked to Poison Ivy and when you're on your way back to Arkham East.
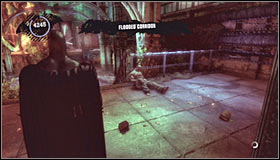
![[#8] Location 8: Flooded Corridor (Botanical Gardens) - Collectibles - Botanical Gardens - part 2 - Collectibles - Batman: Arkham Asylum - Game Guide and Walkthrough](https://game.lhg100.com/Article/UploadFiles/201512/2015121216292691.jpg)
[#8] Location 8: Flooded Corridor (Botanical Gardens)
Destroy the teeth before you start a fight with Ivy during your second visit to the Botanical Gardens building.
Trophies
![[#1] Location: Botanical Glasshouse (Botanical Gardens) - Collectibles - Botanical Gardens - part 2 - Collectibles - Batman: Arkham Asylum - Game Guide and Walkthrough](https://game.lhg100.com/Article/UploadFiles/201512/2015121216292640.jpg)
[#1] Location: Botanical Glasshouse (Botanical Gardens)
Requirements: Explosive Gel
Proceed to the lowest level and use your detective mode to locate a weak section of the wall. Plant the gel and look for a ventilation shaft after the explosion.

![[#2] Location: Glasshouse Generator Room (Botanical Gardens) - Collectibles - Botanical Gardens - part 2 - Collectibles - Batman: Arkham Asylum - Game Guide and Walkthrough](https://game.lhg100.com/Article/UploadFiles/201512/2015121216292753.jpg)
[#2] Location: Glasshouse Generator Room (Botanical Gardens)
Requirements: Cryptographic Sequencer, Cryptographic Range Amplifier
Proceed to the upper balcony once you've eliminated all the inmates. Stand close to the barrier and use your sequencer to hack into a control panel from a larger distance. Once the field has been shut down enter the room and look for the trophy to your left.
![[#3] Location: Flooded Corridor (Botanical Gardens) - Collectibles - Botanical Gardens - part 2 - Collectibles - Batman: Arkham Asylum - Game Guide and Walkthrough](https://game.lhg100.com/Article/UploadFiles/201512/2015121216292768.jpg)
[#3] Location: Flooded Corridor (Botanical Gardens)
While you're exploring the vents wait for a possibility to turn right (screenshot #1) and eventually you'll get to the treasure.
![[#4] Location: Abandoned Chamber (Botanical Gardens) - Collectibles - Botanical Gardens - part 2 - Collectibles - Batman: Arkham Asylum - Game Guide and Walkthrough](https://game.lhg100.com/Article/UploadFiles/201512/2015121216292790.jpg)
[#4] Location: Abandoned Chamber (Botanical Gardens)
Proceed to the lowest level while in the northern section of the room. Turn south and press the crouch key to go through a small tunnel (screenshot #1). Keep moving south until you find the trophy.
![[#5] Location: Abandoned Chamber (Botanical Gardens) - Collectibles - Botanical Gardens - part 2 - Collectibles - Batman: Arkham Asylum - Game Guide and Walkthrough](https://game.lhg100.com/Article/UploadFiles/201512/2015121216292720.jpg)
[#5] Location: Abandoned Chamber (Botanical Gardens)
Explore the central area of the chamber and locate a movable floor piece (screenshot #1). Use this opportunity to enter a small tunnel and head forward to find yourself in an area with a trophy.


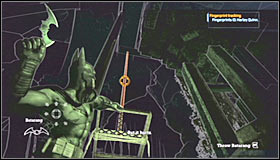
![[#6] Location: Abandoned Chamber (Botanical Gardens) - Collectibles - Botanical Gardens - part 2 - Collectibles - Batman: Arkham Asylum - Game Guide and Walkthrough](https://game.lhg100.com/Article/UploadFiles/201512/2015121216292892.jpg)
[#6] Location: Abandoned Chamber (Botanical Gardens)
Requirements: Batclaw
Start off near the doorway to the next room (screenshot #1). You should be able to notice a new platform in the distance and you'll have to glide towards it. Once you've landed make a few steps forward and press the action key to grab the ledge (screenshot #2). Move to your left until you get to a small waterfall. Climb up, turn around and perform a jump towards a metal balcony. From there you should move to your right. Use a Batarang on a nearby rope (screenshot #3) which will allow you to use a new metal platform. Keep heading forward until you find the trophy (screenshot #4).
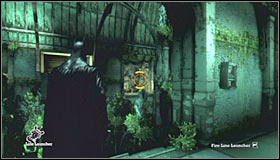
![[#7] Location: Titan Production Facility (Botanical Gardens) - Collectibles - Botanical Gardens - part 3 - Collectibles - Batman: Arkham Asylum - Game Guide and Walkthrough](https://game.lhg100.com/Article/UploadFiles/201512/2015121216292821.jpg)
[#7] Location: Titan Production Facility (Botanical Gardens)
Requirements: Line Launcher
Soon after you've acquired the Line Launcher use this gadget to reach a small ledge located to the right of the exit from the facility.

![[#8] Location: Flooded Corridor (Botanical Gardens) - Collectibles - Botanical Gardens - part 3 - Collectibles - Batman: Arkham Asylum - Game Guide and Walkthrough](https://game.lhg100.com/Article/UploadFiles/201512/2015121216292886.jpg)
[#8] Location: Flooded Corridor (Botanical Gardens)
Requirements: Line Launcher
You'll find this trophy almost automatically, because you can't miss it while trying to get to Poison Ivy's hideout.

![[#9] Location: Botanical Glasshouse (Botanical Gardens) - Collectibles - Botanical Gardens - part 3 - Collectibles - Batman: Arkham Asylum - Game Guide and Walkthrough](https://game.lhg100.com/Article/UploadFiles/201512/2015121216292881.jpg)
[#9] Location: Botanical Glasshouse (Botanical Gardens)
Locate movable floor panels while visiting this area. One of the tunnels contains a trophy.


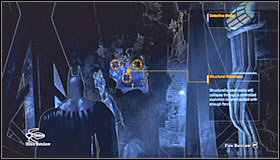
![[#10] Location: Abandoned Chamber (Botanical Gardens) - Collectibles - Botanical Gardens - part 3 - Collectibles - Batman: Arkham Asylum - Game Guide and Walkthrough](https://game.lhg100.com/Article/UploadFiles/201512/2015121216292913.jpg)
[#10] Location: Abandoned Chamber (Botanical Gardens)
Requirements: Ultra Batclaw, Line Launcher
Start off near the doorway to the next room (screenshot #1). You should be able to notice a new platform in the distance and you'll have to glide towards it. Once you've landed make a few steps forward and press the action key to grab the ledge (screenshot #2). Move to your left until you get to a small waterfall. Climb up, turn around and perform a jump towards a metal balcony. From there you should move to your right. Use a Batarang on a nearby rope (screenshot #3) which will allow you to use a new metal platform. Remain where you are and grab the ledge located to your left (screenshot #4). Move to your left until you'll be able to climb up to a new platform. Turn right here and use the Ultra Batclaw to rip off a weak section of the wall (screenshot #5). All there's left to be done is to get to the trophy using the Line Launcher.
Messages
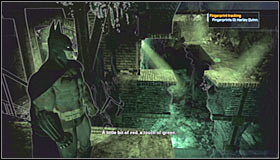


![[#1] Location: Abandoned Chamber (Botanical Gardens) - Collectibles - Botanical Gardens - part 3 - Collectibles - Batman: Arkham Asylum - Game Guide and Walkthrough](https://game.lhg100.com/Article/UploadFiles/201512/2015121216293068.jpg)
[#1] Location: Abandoned Chamber (Botanical Gardens)
Requirements: Batclaw
Start off near the doorway to the next room (screenshot #1). You should be able to notice a new platform in the distance and you'll have to glide towards it. Once you've landed make a few steps forward and press the action key to grab the ledge (screenshot #2). Move to your left until you get to a small waterfall. Climb up, turn around and perform a jump towards a metal balcony. From there you should move to your right. Use a Batarang on a nearby rope (screenshot #3) which will allow you to use a new metal platform. Remain where you are and grab the ledge located to your left (screenshot #4). Move to your left until you'll be able to climb up to a new platform. Move forward here and don't forget to press the crouch key to get past the brick wall (screenshot #5). Once you're on the other side jump forward, grabbing a nearby ledge (screenshot #6). All you have to do right now is to move to your left in order to climb up. The secret object is now right in front you.
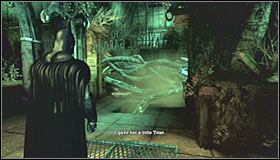
![[#2] Location: Glasshouse Entrance (Botanical Gardens) - Collectibles - Botanical Gardens - part 3 - Collectibles - Batman: Arkham Asylum - Game Guide and Walkthrough](https://game.lhg100.com/Article/UploadFiles/201512/2015121216293018.jpg)
[#2] Location: Glasshouse Entrance (Botanical Gardens)
Once you've already talked to Poison Ivy (for the first time) you'll want to return to Arkham East. Notice that you won't be allowed to use the main entrance. Instead drop down to a dark tunnel and turn around to find the tablet.

![[#3] Location: Titan Production Facility (Botanical Gardens) - Collectibles - Botanical Gardens - part 3 - Collectibles - Batman: Arkham Asylum - Game Guide and Walkthrough](https://game.lhg100.com/Article/UploadFiles/201512/2015121216293041.jpg)
[#3] Location: Titan Production Facility (Botanical Gardens)
Requirements: Ultra Batclaw, Line Launcher
You'll have to start off by returning to the large arena where you've defeated two mutants. Turn around and this time aim your Ultra Batclaw at a weak section of the wall seen to your left. You can then reach the secret using the Line Launcher.
Riddles

![[#1] Is the number up for these guards - Collectibles - Botanical Gardens - part 4 - Collectibles - Batman: Arkham Asylum - Game Guide and Walkthrough](https://game.lhg100.com/Article/UploadFiles/201512/2015121216293056.jpg)
[#1] Is the number up for these guards?
Location: Glasshouse Entrance (Botanical Gardens)
Scan a guard found on one of the benches.

![[#2] What time is tea time in Wonderland - Collectibles - Botanical Gardens - part 4 - Collectibles - Batman: Arkham Asylum - Game Guide and Walkthrough](https://game.lhg100.com/Article/UploadFiles/201512/2015121216293034.jpg)
[#2] What time is tea time in Wonderland?
Location: Botanical Glasshouse (Botanical Gardens)
Find a tea set and scan it to complete this riddle.
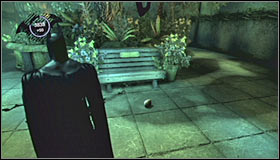
![[#3] Remember the Waynes - Collectibles - Botanical Gardens - part 4 - Collectibles - Batman: Arkham Asylum - Game Guide and Walkthrough](https://game.lhg100.com/Article/UploadFiles/201512/2015121216293141.jpg)
[#3] Remember the Waynes? How could anyone forget?
Location: Statue Corridor (Botanical Gardens)
Keep moving slowly, so you won't miss a new bench along the way. Zoom in on the sign attached to the bench and perform a scan.

![[#4] The Ratcatcher needed more than just his charm to lead his army - Collectibles - Botanical Gardens - part 4 - Collectibles - Batman: Arkham Asylum - Game Guide and Walkthrough](https://game.lhg100.com/Article/UploadFiles/201512/2015121216293104.jpg)
[#4] The Ratcatcher needed more than just his charm to lead his army.
Location: Flooded Corridor (Botanical Gardens)
While still inside the ventilation shaft be on a look out for an opening located below you (screenshot #2). Scan the objects seen inside to complete this riddle.


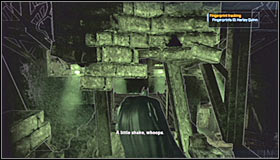
![[#5] This challenge can only be seen by those with a different view on life - Collectibles - Botanical Gardens - part 4 - Collectibles - Batman: Arkham Asylum - Game Guide and Walkthrough](https://game.lhg100.com/Article/UploadFiles/201512/2015121216293221.jpg)
[#5] This challenge can only be seen by those with a different view on life.
Location: Abandoned Chamber (Botanical Gardens)
Requirements: Batclaw
Start off near the doorway to the next room (screenshot #1). You should be able to notice a new platform in the distance and you'll have to glide towards it. Once you've landed make a few steps forward and press the action key to grab the ledge (screenshot #2). Move to your left until you get to a small waterfall. Climb up, turn around and perform a jump towards a metal balcony. From there you should move to your right. Use a Batarang on a nearby rope (screenshot #3) which will allow you to use a new metal platform. Remain where you are and grab the ledge located to your left (screenshot #4). Move to your left until you'll be able to climb up to a new platform. Move forward here and don't forget to press the crouch key to get past the brick wall (screenshot #5). All you have to do right now is to move slightly to your left. Put together two parts of a question mark and scan the whole thing to solve this riddle.
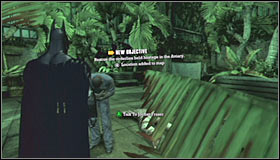
[#6] Looks like all the king's horses trampled all the king's men.
Location: Flooded Corridor (Botanical Gardens)
This is the northern section of the Flooded Corridor (after you've been to the Abandoned Chamber). Search for toy soldiers on one of the benches and scan them.

![[#7] Is this a tribute to what a mad dog left behind - Collectibles - Botanical Gardens - part 4 - Collectibles - Batman: Arkham Asylum - Game Guide and Walkthrough](https://game.lhg100.com/Article/UploadFiles/201512/2015121216293247.jpg)
[#7] Is this a tribute to what a mad dog left behind?
Location: Flooded Corridor (Botanical Gardens)
You must scan a plaque and a handprint found under the headless statue. The statue itself can be found near the passageway leading to the Aviary.
![[#8] There's no closet in the Gardens, so someone is using the roof instead - Collectibles - Botanical Gardens - part 4 - Collectibles - Batman: Arkham Asylum - Game Guide and Walkthrough](https://game.lhg100.com/Article/UploadFiles/201512/2015121216293207.jpg)
[#8] There's no closet in the Gardens, so someone is using the roof instead.
Location: Aviary (Botanical Gardens)
Once you've already rescued the civilians look around to find a hanging skeleton on one of the walls. Zoom in on the skeleton and perform a scan.
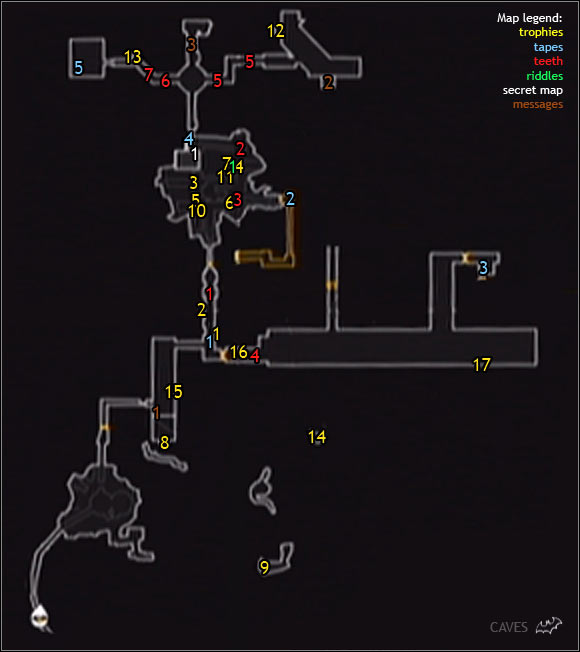
Tapes
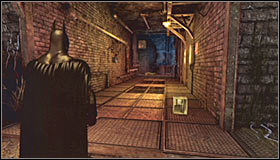
![[#1] Location: Old Sewer (Caves) - Collectibles - Caves #2 - part 1 - Collectibles - Batman: Arkham Asylum - Game Guide and Walkthrough](https://game.lhg100.com/Article/UploadFiles/201512/2015121216293255.jpg)
[#1] Location: Old Sewer (Caves)
The tape can be found near the corridor leading to the Main Sewer Junction. Check the area next to the body.
![[#2] Location: Surface Access (Caves) - Collectibles - Caves #2 - part 1 - Collectibles - Batman: Arkham Asylum - Game Guide and Walkthrough](https://game.lhg100.com/Article/UploadFiles/201512/2015121216293338.jpg)
[#2] Location: Surface Access (Caves)
Once you've entered this area check the crates found to your left.
![[#3] Location: Control Room Access (Caves) - Collectibles - Caves #2 - part 1 - Collectibles - Batman: Arkham Asylum - Game Guide and Walkthrough](https://game.lhg100.com/Article/UploadFiles/201512/2015121216293364.jpg)
[#3] Location: Control Room Access (Caves)
The tape can be found inside a small room. This is the first area you'll explore after you leave the Intensive Treatment building to visit the Caves for the second time.
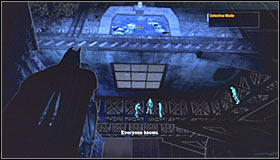
![[#4] Location: Pump Control Room (Caves) - Collectibles - Caves #2 - part 1 - Collectibles - Batman: Arkham Asylum - Game Guide and Walkthrough](https://game.lhg100.com/Article/UploadFiles/201512/2015121216293365.jpg)
[#4] Location: Pump Control Room (Caves)
Requirements: Ultra Batclaw
During your exploration of the Main Sewer Junction you'll be forced to rip off a weak section of the wall. Once you've taken care of that problem and disposed of three guards grapple up to the control room and defeat the last bad guy. The tape is hidden inside a dark corridor leading to the Pressure Control Junction.
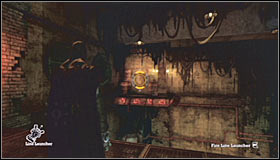
![[#5] Location: Pump Room (Caves) - Collectibles - Caves #2 - part 1 - Collectibles - Batman: Arkham Asylum - Game Guide and Walkthrough](https://game.lhg100.com/Article/UploadFiles/201512/2015121216293369.jpg)
[#5] Location: Pump Room (Caves)
Requirements: Line Launcher
Once you've eliminated all the hostiles use the Line Launcher while standing on an upper balcony. The tape can be found on one of the large barrels.
Secret map

![[#1] Secrets Map - Caves - Collectibles - Caves #2 - part 1 - Collectibles - Batman: Arkham Asylum - Game Guide and Walkthrough](https://game.lhg100.com/Article/UploadFiles/201512/2015121216293308.jpg)
[#1] Secrets Map - Caves
Location: Pump Control Room (Caves)
Requirements: Ultra Batclaw
During your exploration of the Main Sewer Junction you'll be forced to rip off a weak section of the wall. Once you've taken care of that problem and disposed of three guards grapple up to the control room and defeat the last bad guy. The map can be found to your right.
Teeth
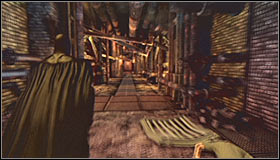
![[#1] Location 1: Old Sewer (Caves) - Collectibles - Caves #2 - part 1 - Collectibles - Batman: Arkham Asylum - Game Guide and Walkthrough](https://game.lhg100.com/Article/UploadFiles/201512/2015121216293441.jpg)
[#1] Location 1: Old Sewer (Caves)
Inside the main corridor leading to the Main Sewer Junction.
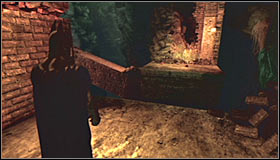
![[#2] Location 2: Main Sewer Junction (Caves) - Collectibles - Caves #2 - part 1 - Collectibles - Batman: Arkham Asylum - Game Guide and Walkthrough](https://game.lhg100.com/Article/UploadFiles/201512/2015121216293423.jpg)
[#2] Location 2: Main Sewer Junction (Caves)
Corner of the room, near the first collapsed column.
![[#3] Location 3: Main Sewer Junction (Caves) - Collectibles - Caves #2 - part 1 - Collectibles - Batman: Arkham Asylum - Game Guide and Walkthrough](https://game.lhg100.com/Article/UploadFiles/201512/2015121216293404.jpg)
[#3] Location 3: Main Sewer Junction (Caves)
Near the door leading to the Surface Access.
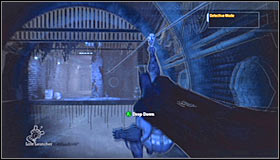
![[#4] Location 4: Croc's Lair (Caves) - Collectibles - Caves #2 - part 1 - Collectibles - Batman: Arkham Asylum - Game Guide and Walkthrough](https://game.lhg100.com/Article/UploadFiles/201512/2015121216293566.jpg)
[#4] Location 4: Croc's Lair (Caves)
Requirements: Line Launcher
Near the passageway leading to the Old Sewer.

![[#5] Location 5: Pressure Control Junction (Caves) - Collectibles - Caves #2 - part 2 - Collectibles - Batman: Arkham Asylum - Game Guide and Walkthrough](https://game.lhg100.com/Article/UploadFiles/201512/2015121216293556.jpg)
[#5] Location 5: Pressure Control Junction (Caves)
Right corridor leading to the Control Room (not in only one spot).
![[#6] Location 6: Pressure Control Junction (Caves) - Collectibles - Caves #2 - part 2 - Collectibles - Batman: Arkham Asylum - Game Guide and Walkthrough](https://game.lhg100.com/Article/UploadFiles/201512/2015121216293576.jpg)
[#6] Location 6: Pressure Control Junction (Caves)
Left corridor leading to the Pump Room (not in only one spot).
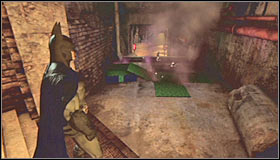
![[#7] Location 7: Pressure Control Junction (Caves) - Collectibles - Caves #2 - part 2 - Collectibles - Batman: Arkham Asylum - Game Guide and Walkthrough](https://game.lhg100.com/Article/UploadFiles/201512/2015121216293567.jpg)
[#7] Location 7: Pressure Control Junction (Caves)
Also left corridor, but only if you've already been to the Pump Room.
Trophies
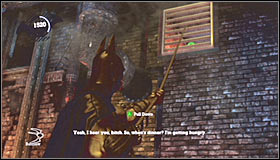
![[#1] Location: Old Sewer (Caves) - Collectibles - Caves #2 - part 2 - Collectibles - Batman: Arkham Asylum - Game Guide and Walkthrough](https://game.lhg100.com/Article/UploadFiles/201512/2015121216293517.jpg)
[#1] Location: Old Sewer (Caves)
Requirements: Batclaw
Explore the corridor leading to the Main Sewer Junction and find a grating. Use your Batclaw on it and then climb up to a small ventilation shaft.
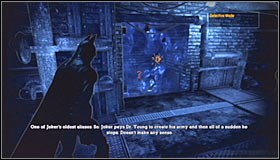
![[#2] Location: Old Sewer (Caves) - Collectibles - Caves #2 - part 2 - Collectibles - Batman: Arkham Asylum - Game Guide and Walkthrough](https://game.lhg100.com/Article/UploadFiles/201512/2015121216293693.jpg)
[#2] Location: Old Sewer (Caves)
Requirements: Explosive Gel
Explore the corridor leading to the Main Sewer Junction and find a weak section of the wall using the detective mode. Blow up the wall and collect the trophy.
![[#3] Location: Main Sewer Junction (Caves) - Collectibles - Caves #2 - part 2 - Collectibles - Batman: Arkham Asylum - Game Guide and Walkthrough](https://game.lhg100.com/Article/UploadFiles/201512/2015121216293672.jpg)
[#3] Location: Main Sewer Junction (Caves)
Once you've landed on the first metal balcony turn left and proceed to a lower platform. You'll have to perform a second jump here (screenshot #1) towards a balcony seen in the distance. The trophy is just around the corner.

![[#4] Location: Main Sewer Junction (Caves) - Collectibles - Caves #2 - part 2 - Collectibles - Batman: Arkham Asylum - Game Guide and Walkthrough](https://game.lhg100.com/Article/UploadFiles/201512/2015121216293668.jpg)
[#4] Location: Main Sewer Junction (Caves)
Turn left once you've landed in a brighter area (screenshot #1). Approach the wall, grab the ledge and move to your left until you find a small opening.

![[#5] Location: Main Sewer Junction (Caves) - Collectibles - Caves #2 - part 2 - Collectibles - Batman: Arkham Asylum - Game Guide and Walkthrough](https://game.lhg100.com/Article/UploadFiles/201512/2015121216293650.jpg)
[#5] Location: Main Sewer Junction (Caves)
This is where you'll have to perform two jumps and before you proceed towards the second collapsed column. The treasure is directly in front of you and you'll have to jump for the third time to get to it.
![[#6] Location: Main Sewer Junction (Caves) - Collectibles - Caves #2 - part 2 - Collectibles - Batman: Arkham Asylum - Game Guide and Walkthrough](https://game.lhg100.com/Article/UploadFiles/201512/2015121216293676.jpg)
[#6] Location: Main Sewer Junction (Caves)
Start off by heading towards the second collapsed column. Stop somewhere in the middle of the column and turn right. You'll have to glide from here (screenshot #1). Focus on reaching a small platform seen in the distance. Explore the alcove to find the treasure.
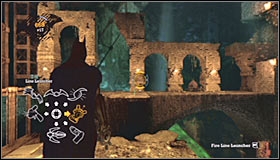
![[#7] Location: Main Sewer Junction (Caves) - Collectibles - Caves #2 - part 2 - Collectibles - Batman: Arkham Asylum - Game Guide and Walkthrough](https://game.lhg100.com/Article/UploadFiles/201512/2015121216293761.jpg)
[#7] Location: Main Sewer Junction (Caves)
Use the second collapsed column to get to the top. You'll now have to grab a nearby ledge (screenshot #1). Keep moving while holding on to the ledge until you'll find an opening.

![[#8] Location: Old Sewer (Caves) - Collectibles - Caves #2 - part 2 - Collectibles - Batman: Arkham Asylum - Game Guide and Walkthrough](https://game.lhg100.com/Article/UploadFiles/201512/2015121216293741.jpg)
[#8] Location: Old Sewer (Caves)
Requirements: Line Launcher
Once you've dealt with all enemy units user the Line Launcher to cross a large gap and to get to the collectible.
![[#9] Location: The Batcave (Caves) - Collectibles - Caves #2 - part 2 - Collectibles - Batman: Arkham Asylum - Game Guide and Walkthrough](https://game.lhg100.com/Article/UploadFiles/201512/2015121216293727.jpg)
[#9] Location: The Batcave (Caves)
You'll have to exit the caves and end up standing near a huge cliff. Glide towards the first island and look for the treasure after you've landed. It's nearby, so it shouldn't take long.
![[#10] Location: Main Sewer Junction (Caves) - Collectibles - Caves #2 - part 2 - Collectibles - Batman: Arkham Asylum - Game Guide and Walkthrough](https://game.lhg100.com/Article/UploadFiles/201512/2015121216293784.jpg)
[#10] Location: Main Sewer Junction (Caves)
Requirements: Line Launcher
You can get to this treasure soon after you've unlocked the Ultra Batclaw. Use the Line Launcher to cross a large gap and pick up the trophy after you've made your way to the other side.

![[#11] Location: Main Sewer Junction (Caves) - Collectibles - Caves #2 - part 3 - Collectibles - Batman: Arkham Asylum - Game Guide and Walkthrough](https://game.lhg100.com/Article/UploadFiles/201512/2015121216293799.jpg)
[#11] Location: Main Sewer Junction (Caves)
Requirements: Line Launcher
Keep heading towards the top until you'll be forced to reach a new platform seen in the distance (screenshot #1). Use the Line Launcher and pick up the item after you've landed. You can't really miss this one, because you'll have to get to other side if you want to proceed with your main quest.
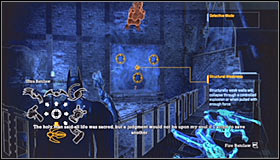
![[#12] Location: Control Room (Caves) - Collectibles - Caves #2 - part 3 - Collectibles - Batman: Arkham Asylum - Game Guide and Walkthrough](https://game.lhg100.com/Article/UploadFiles/201512/2015121216293861.jpg)
[#12] Location: Control Room (Caves)
Requirements: Ultra Batclaw
Once you've defeated all the inmates use the Ultra Batclaw on a weak section of the wall. You can reach the alcove using the Line Launcher or by gliding from one of the gargoyles.
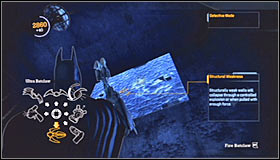
![[#13] Location: Pressure Control Junction (Caves) - Collectibles - Caves #2 - part 3 - Collectibles - Batman: Arkham Asylum - Game Guide and Walkthrough](https://game.lhg100.com/Article/UploadFiles/201512/2015121216293879.jpg)
[#13] Location: Pressure Control Junction (Caves)
Requirements: Ultra Batclaw
Explore the left corridor leading to the Pump Room and be on a look out for a breakable wall. Use the Ultra Batclaw on the wall and head inside to find the trophy.
[#14] Location: The Batcave (Caves)
Requirements: Line Launcher
You'll have to make your way to the second island. Enter the cave and grapple up to the NEAREST ledge (screenshot #1). Head outside and glide to the north-east. It shouldn't take too long for you to notice a smaller island in the distance. You'll have to land on it and that's where you'll find the trophy. Use the Line Launcher when you'll want to return to the previous island.
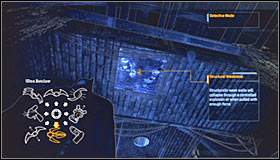
![[#15] Location: Old Sewer (Caves) - Collectibles - Caves #2 - part 3 - Collectibles - Batman: Arkham Asylum - Game Guide and Walkthrough](https://game.lhg100.com/Article/UploadFiles/201512/2015121216293807.jpg)
[#15] Location: Old Sewer (Caves)
Requirements: Ultra Batclaw
Explore the area where you've defeated the inmates and find a weak section of the ceiling. Naturally you must use the Ultra Batclaw to create an opening. Use the hook afterwards and collect the trophy.
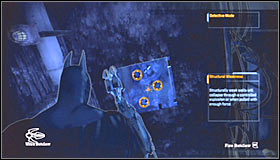
![[#16] Location: Croc's Lair (Caves) - Collectibles - Caves #2 - part 3 - Collectibles - Batman: Arkham Asylum - Game Guide and Walkthrough](https://game.lhg100.com/Article/UploadFiles/201512/2015121216293975.jpg)
[#16] Location: Croc's Lair (Caves)
Requirements: Ultra Batclaw
Look around near the passageway leading to the Old Sewer. Find a breakable piece of the ceiling and rip it off using the Ultra Batclaw.
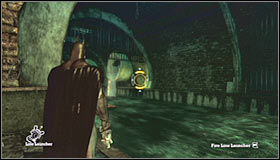
![[#17] Location: Croc's Lair (Caves) - Collectibles - Caves #2 - part 3 - Collectibles - Batman: Arkham Asylum - Game Guide and Walkthrough](https://game.lhg100.com/Article/UploadFiles/201512/2015121216293907.jpg)
[#17] Location: Croc's Lair (Caves)
Requirements: Line Launcher
Explore the eastern section of the sewers and use the Line Launcher to make your way to an isolated ledge.
Messages
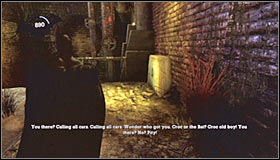
![[#1] Location: Old Sewer (Caves) - Collectibles - Caves #2 - part 3 - Collectibles - Batman: Arkham Asylum - Game Guide and Walkthrough](https://game.lhg100.com/Article/UploadFiles/201512/2015121216293926.jpg)
[#1] Location: Old Sewer (Caves)
Once you've quietly neutralized the first opponent turn around and make a few steps forward.
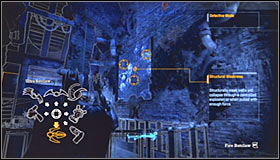
![[#2] Location: Control Room (Caves) - Collectibles - Caves #2 - part 3 - Collectibles - Batman: Arkham Asylum - Game Guide and Walkthrough](https://game.lhg100.com/Article/UploadFiles/201512/2015121216293978.jpg)
[#2] Location: Control Room (Caves)
Requirements: Ultra Batclaw
Once you've successfully secured this entire area use the Ultra Batclaw on a weak section of the wall (screenshot #1). You can make your way to the tablet either by using the Line Launcher or by gliding from one of the nearby gargoyles.
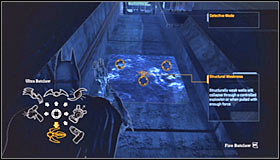
![[#3] Location: Pressure Control Junction (Caves) - Collectibles - Caves #2 - part 3 - Collectibles - Batman: Arkham Asylum - Game Guide and Walkthrough](https://game.lhg100.com/Article/UploadFiles/201512/2015121216294096.jpg)
[#3] Location: Pressure Control Junction (Caves)
Requirements: Ultra Batclaw
Once you've defeated the mutant use the Ultra Batclaw on a nearby wall.
Riddles
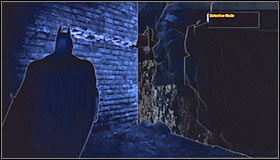
![[#1] A puzzle has many sides, but only some are visible - Collectibles - Caves #2 - part 3 - Collectibles - Batman: Arkham Asylum - Game Guide and Walkthrough](https://game.lhg100.com/Article/UploadFiles/201512/2015121216294076.jpg)
[#1] A puzzle has many sides, but only some are visible.
Location: Main Sewer Junction (Caves)
Use the second collapsed column to get to the top. You'll now have to grab a nearby ledge (screenshot #1). Make your way to a new platform and stand correctly to put both pieces of the question mark together. Scan the whole thing to solve this riddle.

Tapes
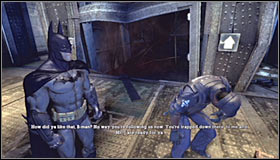
![[#1] Location: Secure Transit (Intensive Treatment) - Collectibles - Intensive Treatment - part 1 - Collectibles - Batman: Arkham Asylum - Game Guide and Walkthrough](https://game.lhg100.com/Article/UploadFiles/201512/2015121216294052.jpg)
[#1] Location: Secure Transit (Intensive Treatment)
The tape can be found in the southern section of this area and you can pick it up right after you've seen the elevator getting destroyed.
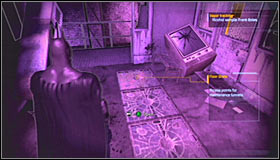
![[#2] Location: Intensive Treatment Lobby (Intensive Treatment) - Collectibles - Intensive Treatment - part 1 - Collectibles - Batman: Arkham Asylum - Game Guide and Walkthrough](https://game.lhg100.com/Article/UploadFiles/201512/2015121216294049.jpg)
[#2] Location: Intensive Treatment Lobby (Intensive Treatment)
The tape is hidden inside the main structure and it can be found on one of the tables.
![[#3] Location: Cell Block Transfer (Intensive Treatment) - Collectibles - Intensive Treatment - part 1 - Collectibles - Batman: Arkham Asylum - Game Guide and Walkthrough](https://game.lhg100.com/Article/UploadFiles/201512/2015121216294013.jpg)
[#3] Location: Cell Block Transfer (Intensive Treatment)
Requirements: Cryptographic Sequencer, Cryptographic Range Amplifier
Once you've defeated Scarecrow explore the northern side of the right corridor. You should be able to find a barrier and you'll have to use the sequencer to hack into a terminal from a safe distance. Proceed to the booth and find the tape.
![[#4] Location: Secure Transit (Intensive Treatment) - Collectibles - Intensive Treatment - part 1 - Collectibles - Batman: Arkham Asylum - Game Guide and Walkthrough](https://game.lhg100.com/Article/UploadFiles/201512/2015121216294105.jpg)
[#4] Location: Secure Transit (Intensive Treatment)
Watch a cut-scene showing an elevator (once you've already escape from Scarecrow's vision) and examine the desk to your left.

![[#5] Location: Decontamination (Intensive Treatment) - Collectibles - Intensive Treatment - part 1 - Collectibles - Batman: Arkham Asylum - Game Guide and Walkthrough](https://game.lhg100.com/Article/UploadFiles/201512/2015121216294107.jpg)
[#5] Location: Decontamination (Intensive Treatment)
Requirements: Cryptographic Sequencer
Break into one of the control panels (screenshot #1). Once it's safe head inside and inspect the area to your left to find the tape.
Secret map
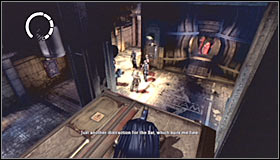
![[#1] Secrets Map - Intensive Treatment - Collectibles - Intensive Treatment - part 1 - Collectibles - Batman: Arkham Asylum - Game Guide and Walkthrough](https://game.lhg100.com/Article/UploadFiles/201512/2015121216294162.jpg)
[#1] Secrets Map - Intensive Treatment
Location: Secure Transit (Intensive Treatment)
Once you've defeated Scarecrow proceed to the lowest level. A large group of inmates is stationed near the passageway leading to the Caves. Defeat them and once it's safe look around to find the map.
Teeth
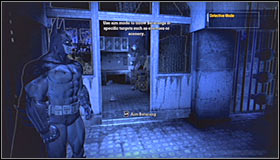
![[#1] Location 1: Holding Cells (Intensive Treatment) - Collectibles - Intensive Treatment - part 1 - Collectibles - Batman: Arkham Asylum - Game Guide and Walkthrough](https://game.lhg100.com/Article/UploadFiles/201512/2015121216294124.jpg)
[#1] Location 1: Holding Cells (Intensive Treatment)
Once you've taken care of Joker's men (at the beginning of the game) head forward and check a small room to your left.
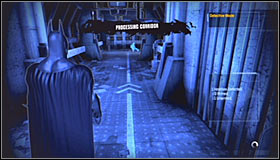
![[#2] Location 2: Processing Corridor (Intensive Treatment) - Collectibles - Intensive Treatment - part 2 - Collectibles - Batman: Arkham Asylum - Game Guide and Walkthrough](https://game.lhg100.com/Article/UploadFiles/201512/2015121216294144.jpg)
[#2] Location 2: Processing Corridor (Intensive Treatment)
One of the corners of the corridor.
![[#3] Location 3: Processing Corridor (Intensive Treatment) - Collectibles - Intensive Treatment - part 2 - Collectibles - Batman: Arkham Asylum - Game Guide and Walkthrough](https://game.lhg100.com/Article/UploadFiles/201512/2015121216294255.jpg)
[#3] Location 3: Processing Corridor (Intensive Treatment)
Near the area where Eddie Burlow is standing. Turn left when you reach the junction.
![[#4] Location 4: Decontamination (Intensive Treatment) - Collectibles - Intensive Treatment - part 2 - Collectibles - Batman: Arkham Asylum - Game Guide and Walkthrough](https://game.lhg100.com/Article/UploadFiles/201512/2015121216294267.jpg)
[#4] Location 4: Decontamination (Intensive Treatment)
The teeth can be found just after entering this zone (while heading from the Processing Corridor).
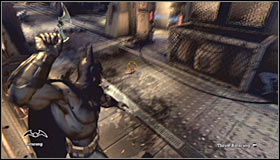
![[#5] Location 5: Decontamination (Intensive Treatment) - Collectibles - Intensive Treatment - part 2 - Collectibles - Batman: Arkham Asylum - Game Guide and Walkthrough](https://game.lhg100.com/Article/UploadFiles/201512/2015121216294242.jpg)
[#5] Location 5: Decontamination (Intensive Treatment)
Once you've disposed of the deadly toxins return to the ground level and look around a little.

![[#6] Location 6: Transfer Loop (Intensive Treatment) - Collectibles - Intensive Treatment - part 2 - Collectibles - Batman: Arkham Asylum - Game Guide and Walkthrough](https://game.lhg100.com/Article/UploadFiles/201512/2015121216294293.jpg)
[#6] Location 6: Transfer Loop (Intensive Treatment)
Soon after you've entered this zone (while heading from the Decontamination).
![[#7] Location 7: Transfer Loop (Intensive Treatment) - Collectibles - Intensive Treatment - part 2 - Collectibles - Batman: Arkham Asylum - Game Guide and Walkthrough](https://game.lhg100.com/Article/UploadFiles/201512/2015121216294234.jpg)
[#7] Location 7: Transfer Loop (Intensive Treatment)
In the southern section of the area, near the arena where you'll encounter your first boss.
![[#8] Location 8: Transfer Loop (Intensive Treatment) - Collectibles - Intensive Treatment - part 2 - Collectibles - Batman: Arkham Asylum - Game Guide and Walkthrough](https://game.lhg100.com/Article/UploadFiles/201512/2015121216294353.jpg)
[#8] Location 8: Transfer Loop (Intensive Treatment)
In the southern section of the area, near the elevators.
![[#9] Location 9: Secure Transit (Intensive Treatment) - Collectibles - Intensive Treatment - part 2 - Collectibles - Batman: Arkham Asylum - Game Guide and Walkthrough](https://game.lhg100.com/Article/UploadFiles/201512/2015121216294379.jpg)
[#9] Location 9: Secure Transit (Intensive Treatment)
On the top level. This is the place where you had to eliminate a larger group of Joker's thugs.
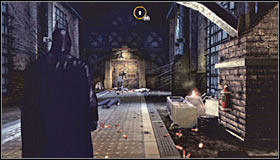
![[#10] Location 10: Intensive Treatment Lobby (Intensive Treatment) - Collectibles - Intensive Treatment - part 2 - Collectibles - Batman: Arkham Asylum - Game Guide and Walkthrough](https://game.lhg100.com/Article/UploadFiles/201512/2015121216294336.jpg)
[#10] Location 10: Intensive Treatment Lobby (Intensive Treatment)
Near the first riddle (the body and the painting).
Trophies
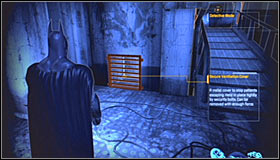
![[#1] Location: Holding Cells (Intensive Treatment) - Collectibles - Intensive Treatment - part 2 - Collectibles - Batman: Arkham Asylum - Game Guide and Walkthrough](https://game.lhg100.com/Article/UploadFiles/201512/2015121216294308.jpg)
[#1] Location: Holding Cells (Intensive Treatment)
You can acquire this secret at the beginning of the game. Deal with Joker's thugs and before you decide to leave this area find a ventilation shaft. Move the grating, enter the shaft and it won't take too long before you locate the trophy.
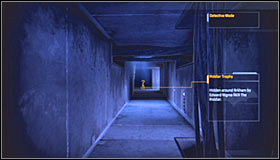
![[#2] Location: Patient Pacification Chamber (Intensive Treatment) - Collectibles - Intensive Treatment - part 2 - Collectibles - Batman: Arkham Asylum - Game Guide and Walkthrough](https://game.lhg100.com/Article/UploadFiles/201512/2015121216294414.jpg)
[#2] Location: Patient Pacification Chamber (Intensive Treatment)
Once you've defeated Zsasz you'll have to use a ventilation shaft to reach the next area. The trophy can be found near the exit.
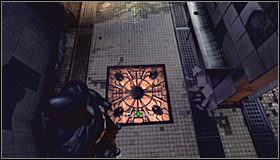
![[#3] Location: Decontamination (Intensive Treatment) - Collectibles - Intensive Treatment - part 3 - Collectibles - Batman: Arkham Asylum - Game Guide and Walkthrough](https://game.lhg100.com/Article/UploadFiles/201512/2015121216294471.jpg)
[#3] Location: Decontamination (Intensive Treatment)
Get rid of the toxins, head down and look around this entire area to find a floor panel. Move the panel and drop down to a small shaft.
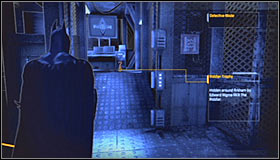
![[#4] Location: Secure Treatment Transfer (Intensive Treatment) - Collectibles - Intensive Treatment - part 3 - Collectibles - Batman: Arkham Asylum - Game Guide and Walkthrough](https://game.lhg100.com/Article/UploadFiles/201512/2015121216294460.jpg)
[#4] Location: Secure Treatment Transfer (Intensive Treatment)
Once you've survived the battle with the first mutant ignore a friendly guard and instead look around. Check the other control booth and the trophy will be hidden to your right.
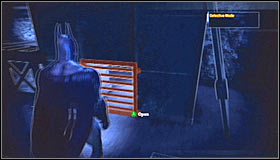
![[#5] Location: Maintenance Access (Intensive Treatment) - Collectibles - Intensive Treatment - part 3 - Collectibles - Batman: Arkham Asylum - Game Guide and Walkthrough](https://game.lhg100.com/Article/UploadFiles/201512/2015121216294463.jpg)
[#5] Location: Maintenance Access (Intensive Treatment)
You can acquire this trophy once you've returned to the Intensive Treatment building (from Arkham North). Choose a nearby ventilation shaft (screenshot #1) and locate the treasure.
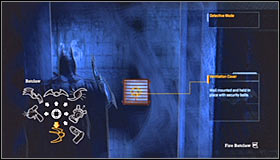
![[#6] Location: Secure Transit (Intensive Treatment) - Collectibles - Intensive Treatment - part 3 - Collectibles - Batman: Arkham Asylum - Game Guide and Walkthrough](https://game.lhg100.com/Article/UploadFiles/201512/2015121216294417.jpg)
[#6] Location: Secure Transit (Intensive Treatment)
Requirements: Batclaw
When you're about half way through the shaft find the grating, pull it off using the Batclaw and grapple up to collect the trophy.
![[#7] Location: Patient Pacification Chamber (Intensive Treatment) - Collectibles - Intensive Treatment - part 3 - Collectibles - Batman: Arkham Asylum - Game Guide and Walkthrough](https://game.lhg100.com/Article/UploadFiles/201512/2015121216294588.jpg)
[#7] Location: Patient Pacification Chamber (Intensive Treatment)
Requirements: Batclaw
Rip off a grating found on one of the walls using the Batclaw and head inside the shaft.
![[#8] Location: Patient Pacification Chamber (Intensive Treatment) - Collectibles - Intensive Treatment - part 3 - Collectibles - Batman: Arkham Asylum - Game Guide and Walkthrough](https://game.lhg100.com/Article/UploadFiles/201512/2015121216294509.jpg)
[#8] Location: Patient Pacification Chamber (Intensive Treatment)
Move the grating found near the floor panels and enter the shaft to find the treasure.

![[#9] Location: Decontamination (Intensive Treatment) - Collectibles - Intensive Treatment - part 3 - Collectibles - Batman: Arkham Asylum - Game Guide and Walkthrough](https://game.lhg100.com/Article/UploadFiles/201512/2015121216294519.jpg)
[#9] Location: Decontamination (Intensive Treatment)
Requirements: Cryptographic Sequencer
Break into one of the control panels (screenshot #1). Once it's safe head inside and find a hole in the wall. Grapple up and collect the trophy.
![[#10] Location: Utility Corridor (Intensive Treatment) - Collectibles - Intensive Treatment - part 3 - Collectibles - Batman: Arkham Asylum - Game Guide and Walkthrough](https://game.lhg100.com/Article/UploadFiles/201512/2015121216294530.jpg)
[#10] Location: Utility Corridor (Intensive Treatment)
Requirements: Explosive Gel
There's a breakable wall near the stairs. Plant the gel and detonate the charge.
Messages
![[#1] Location: Secure Transit (Intensive Treatment) - Collectibles - Intensive Treatment - part 3 - Collectibles - Batman: Arkham Asylum - Game Guide and Walkthrough](https://game.lhg100.com/Article/UploadFiles/201512/2015121216294505.jpg)
[#1] Location: Secure Transit (Intensive Treatment)
You will find this tablet during your ascent in the beginning of the game. You'll find it not long before you engage a group of convicts in direct combat.
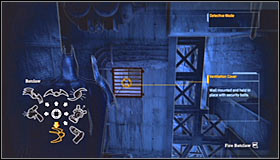
![[#2] Location: Transfer Loop (Intensive Treatment) - Collectibles - Intensive Treatment - part 3 - Collectibles - Batman: Arkham Asylum - Game Guide and Walkthrough](https://game.lhg100.com/Article/UploadFiles/201512/2015121216294699.jpg)
[#2] Location: Transfer Loop (Intensive Treatment)
Requirements: Batclaw
You'll have to start off by climbing on top of a few large objects (screenshot #1). Head forward and perform a single jump along the way (screenshot #2). Proceed to the platform located close to the grating and use the Batclaw to get rid of it (screenshot #3). You may now perform the last jump to find yourself standing close to the tablet.
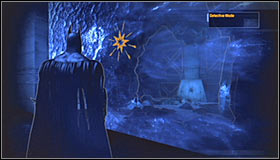
![[#3] Location: Secure Transit (Intensive Treatment) - Collectibles - Intensive Treatment - part 4 - Collectibles - Batman: Arkham Asylum - Game Guide and Walkthrough](https://game.lhg100.com/Article/UploadFiles/201512/2015121216294617.jpg)
[#3] Location: Secure Transit (Intensive Treatment)
Requirements: Explosive Gel
You can find this tablet while exploring upper levels of an elevator shaft. Inspect the southern wall to find two breakable walls. Blow up the left wall (screenshot #1).
Riddles
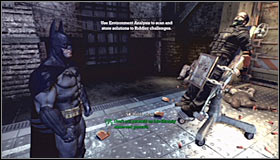
![[#1] Don't cut yourself on this Sharply observed portrait - Collectibles - Intensive Treatment - part 4 - Collectibles - Batman: Arkham Asylum - Game Guide and Walkthrough](https://game.lhg100.com/Article/UploadFiles/201512/2015121216294629.jpg)
[#1] Don't cut yourself on this Sharply observed portrait.
Location: Intensive Treatment Lobby (Intensive Treatment)
This is the only riddle you'll have to solve in order to proceed with the main quest. All you have to do is to examine a body left by the Riddler and to scan a painting found on a nearby wall.
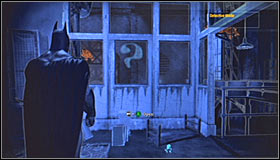
![[#2] A puzzle has many sides, but only some are visible - Collectibles - Intensive Treatment - part 4 - Collectibles - Batman: Arkham Asylum - Game Guide and Walkthrough](https://game.lhg100.com/Article/UploadFiles/201512/2015121216294606.jpg)
[#2] A puzzle has many sides, but only some are visible.
Location: Intensive Treatment Lobby (Intensive Treatment)
You can solve this riddle during the early stages of the game. Secure the entire lobby and return to the main building. You'll have to be standing inside one of the rooms with glass walls and glass roof. Look for an incomplete question mark, zoom in the view and move Batman, so that you'll find the missing dot on a far wall. Perform a scan of both parts.
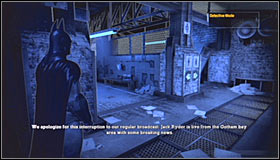
![[#3] You don't know Jack about Gotham - Collectibles - Intensive Treatment - part 4 - Collectibles - Batman: Arkham Asylum - Game Guide and Walkthrough](https://game.lhg100.com/Article/UploadFiles/201512/2015121216294759.jpg)
[#3] You don't know Jack about Gotham. Tune in to find out.
Location: Intensive Treatment Lobby (Intensive Treatment)
Once you've talked to the guard use the stairs and head on to your right. You'll have to find and scan a radio. It's on one of the benches.
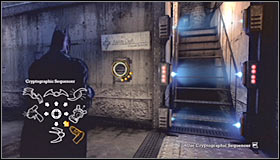
![[#4] Hook up with the relatives before you're transferred out of here - Collectibles - Intensive Treatment - part 4 - Collectibles - Batman: Arkham Asylum - Game Guide and Walkthrough](https://game.lhg100.com/Article/UploadFiles/201512/2015121216294789.jpg)
[#4] Hook up with the relatives before you're transferred out of here.
Location: Cell Block Transfer (Intensive Treatment)
Requirements: Cryptographic Sequencer
Once you've successfully defended yourself against the Scarecrow check the southern section of the right corridor. There's going to be a barrier here and you'll have to use a sequencer on a nearby wall. Enter the booth and scan the family picture found on a desk.
![[#5] A top hat and tails is the only dress code for this party in the North - Collectibles - Intensive Treatment - part 4 - Collectibles - Batman: Arkham Asylum - Game Guide and Walkthrough](https://game.lhg100.com/Article/UploadFiles/201512/2015121216294729.jpg)
[#5] A top hat and tails is the only dress code for this party in the North.
Location: Transfer Loop (Intensive Treatment)
Be on a look out for a partially opened door in the center of one of the corridors (screenshot #1). Press the crouch key, enter the room and scan a large poster found on the right wall.
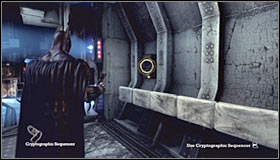
![[#6] Where would you find my home sweet home - Collectibles - Intensive Treatment - part 4 - Collectibles - Batman: Arkham Asylum - Game Guide and Walkthrough](https://game.lhg100.com/Article/UploadFiles/201512/2015121216294796.jpg)
[#6] Where would you find my home sweet home?
Location: Holding Cells (Intensive Treatment)
Requirements: Cryptographic Sequencer
You can solve this riddle only when you're visiting the Intensive Treatment building for the second time and when you've defeated the Scarecrow. Use the sequencer on a nearby control panel (screenshot #1) and examine the cells. One of the cells contains green question marks and that's what you'll have to scan (after zooming in the view).
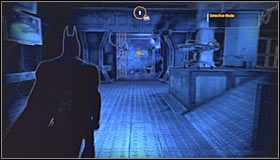
![[#7] Even I was shocked when I saw how Maxie Zeus was treated - Collectibles - Intensive Treatment - part 4 - Collectibles - Batman: Arkham Asylum - Game Guide and Walkthrough](https://game.lhg100.com/Article/UploadFiles/201512/2015121216294726.jpg)
[#7] Even I was shocked when I saw how Maxie Zeus was treated!
Location: Patient Pacification Chamber (Intensive Treatment)
Requirements: Explosive Gel
Blow up one of the weak walls found inside the chamber. Head inside and scan a wall.
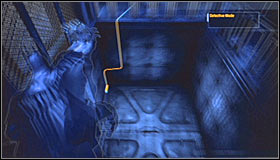
![[#8] Dr - Collectibles - Intensive Treatment - part 4 - Collectibles - Batman: Arkham Asylum - Game Guide and Walkthrough](https://game.lhg100.com/Article/UploadFiles/201512/2015121216294863.jpg)
[#8] Dr. Jonathan Crane plans on elevating fear to new depths.
Location: Secure Transit (Intensive Treatment)
Once you've defeated the Scarecrow approach elevator shafts and head down the one with a floor intact (screenshot #1). Find a small tunnel which will lead you to a cave. Scan the drawing upon your arrival to the cave.
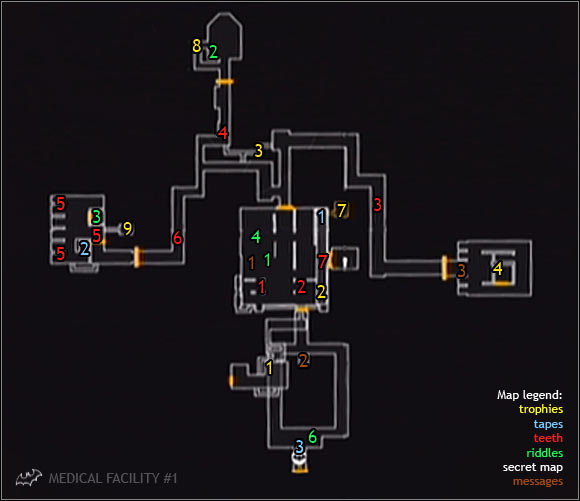
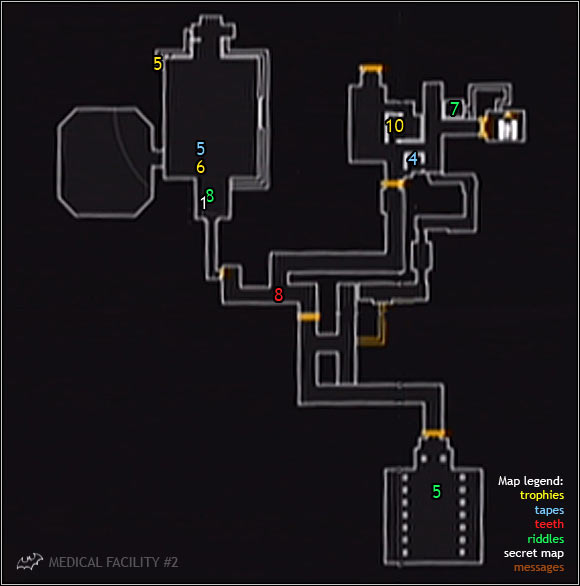
Tapes
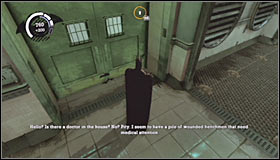
![[#1] Location: Sanatorium (Medical Facility) - Collectibles - Medical Facility - part 1 - Collectibles - Batman: Arkham Asylum - Game Guide and Walkthrough](https://game.lhg100.com/Article/UploadFiles/201512/2015121216294835.jpg)
[#1] Location: Sanatorium (Medical Facility)
Once you've dealt with all the inmates explore the surrounding area and check one of the tables for the tape.
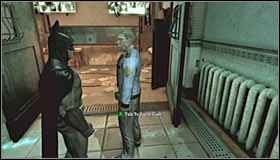
![[#2] Location: Patient Observation (Medical Facility) - Collectibles - Medical Facility - part 1 - Collectibles - Batman: Arkham Asylum - Game Guide and Walkthrough](https://game.lhg100.com/Article/UploadFiles/201512/2015121216294868.jpg)
[#2] Location: Patient Observation (Medical Facility)
You can take this tape once you've disposed of the toxins.

![[#3] Location: Medical Foyer (Medical Facility) - Collectibles - Medical Facility - part 1 - Collectibles - Batman: Arkham Asylum - Game Guide and Walkthrough](https://game.lhg100.com/Article/UploadFiles/201512/2015121216294855.jpg)
[#3] Location: Medical Foyer (Medical Facility)
Choose the main entrance leading to the Medical Facility. The tape can be found on the table and you can take it once the barrier has been disabled.
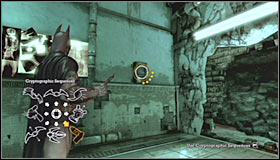
![[#4] Location: Secure Access (Medical Facility) - Collectibles - Medical Facility - part 1 - Collectibles - Batman: Arkham Asylum - Game Guide and Walkthrough](https://game.lhg100.com/Article/UploadFiles/201512/2015121216294938.jpg)
[#4] Location: Secure Access (Medical Facility)
Requirements: Cryptographic Sequencer
Use the sequencer on one of the control panels (screenshot #1) and then head inside the newly unlocked room. The tape can be found on a desk.
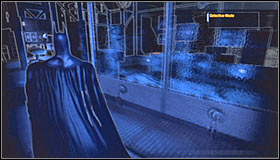
![[#5] Location: Experimental Chamber (Medical Facility) - Collectibles - Medical Facility - part 1 - Collectibles - Batman: Arkham Asylum - Game Guide and Walkthrough](https://game.lhg100.com/Article/UploadFiles/201512/2015121216294989.jpg)
[#5] Location: Experimental Chamber (Medical Facility)
You'll have to enter a large glass chamber in order to acquire this tape. I would recommend returning here after you've defeated Bane.
Secret map
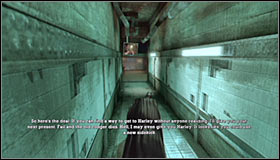
![[#1] Secrets Map - Medical Facility - Collectibles - Medical Facility - part 2 - Collectibles - Batman: Arkham Asylum - Game Guide and Walkthrough](https://game.lhg100.com/Article/UploadFiles/201512/2015121216294937.jpg)
[#1] Secrets Map - Medical Facility
Location: Experimental Chamber
The tape can be found on a table located to your left and it's hard to miss since you'll walk past it. Make sure to pick it up before entering the ventilation shaft.
Teeth

![[#1] Locations 1 & - Collectibles - Medical Facility - part 2 - Collectibles - Batman: Arkham Asylum - Game Guide and Walkthrough](https://game.lhg100.com/Article/UploadFiles/201512/2015121216294929.jpg)
[#1] Locations 1 & 2: Sanatorium (Medical Facility)
There are two sets of teeth for you to take care of (screenshots 1 & 2). Don't forget to eliminate all the inmates in the first place.
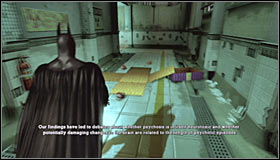
![[#3] Location 3: Upper Corridor (Medical Facility) - Collectibles - Medical Facility - part 2 - Collectibles - Batman: Arkham Asylum - Game Guide and Walkthrough](https://game.lhg100.com/Article/UploadFiles/201512/2015121216294942.jpg)
[#3] Location 3: Upper Corridor (Medical Facility)
You won't find the teeth until you'll be returning from the X-Ray Room (after rescuing doctor Young).
![[#4] Location 4: Upper Corridor (Medical Facility) - Collectibles - Medical Facility - part 2 - Collectibles - Batman: Arkham Asylum - Game Guide and Walkthrough](https://game.lhg100.com/Article/UploadFiles/201512/2015121216295027.jpg)
[#4] Location 4: Upper Corridor (Medical Facility)
You won't find the teeth until you'll be returning from the Surgery Room (after rescuing doctor Chen).
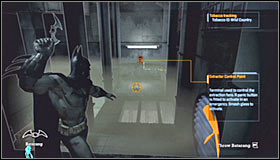
![[#5] Location 5: Patient Observation (Medical Facility) - Collectibles - Medical Facility - part 2 - Collectibles - Batman: Arkham Asylum - Game Guide and Walkthrough](https://game.lhg100.com/Article/UploadFiles/201512/2015121216295079.jpg)
[#5] Location 5: Patient Observation (Medical Facility)
Teeth can be found in three different places. Two objects can be destroyed even before you take care of the toxins. The last target (screenshot #2) is the only one you'll have to dispose of later on (after hitting all three control panels with Batarangs).
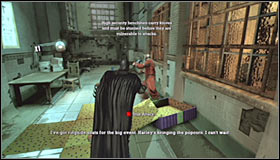
![[#6] Location 6: Upper Corridor (Medical Facility) - Collectibles - Medical Facility - part 2 - Collectibles - Batman: Arkham Asylum - Game Guide and Walkthrough](https://game.lhg100.com/Article/UploadFiles/201512/2015121216295004.jpg)
[#6] Location 6: Upper Corridor (Medical Facility)
You won't find the teeth until you'll be returning from Patient Observation (after rescuing doctor Kellerman). This is the same area where you'll be attacked by a new type of an opponent.

![[#7] Location 7: Sanatorium (Medical Facility) - Collectibles - Medical Facility - part 2 - Collectibles - Batman: Arkham Asylum - Game Guide and Walkthrough](https://game.lhg100.com/Article/UploadFiles/201512/2015121216295047.jpg)
[#7] Location 7: Sanatorium (Medical Facility)
Once you've rescued all three doctor you'll find your targets in front of the elevator.

![[#8] Location 8: Lower Corridor (Medical Facility) - Collectibles - Medical Facility - part 2 - Collectibles - Batman: Arkham Asylum - Game Guide and Walkthrough](https://game.lhg100.com/Article/UploadFiles/201512/2015121216295029.jpg)
[#8] Location 8: Lower Corridor (Medical Facility)
You'll be heading towards the Experimental Chamber after the scene with Scarecrow. Look for the teeth near the stairs.
Trophies
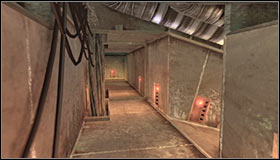
![[#1] Location: Maintenance Access (Medical Facility) - Collectibles - Medical Facility - part 2 - Collectibles - Batman: Arkham Asylum - Game Guide and Walkthrough](https://game.lhg100.com/Article/UploadFiles/201512/2015121216295160.jpg)
[#1] Location: Maintenance Access (Medical Facility)
Once you've made your way into the vents you'll have to turn right instead of moving forward (screenshot #1). Use this alternative tunnel to get to a small area with the treasure.
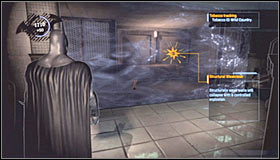
![[#2] Location: Sanatorium (Medical Facility) - Collectibles - Medical Facility - part 2 - Collectibles - Batman: Arkham Asylum - Game Guide and Walkthrough](https://game.lhg100.com/Article/UploadFiles/201512/2015121216295188.jpg)
[#2] Location: Sanatorium (Medical Facility)
Requirements: Explosive Gel
Use an Explosive Gel on one of the walls and head inside to pick up the trophy.
![[#3] Location: Upper Corridor (Medical Facility) - Collectibles - Medical Facility - part 3 - Collectibles - Batman: Arkham Asylum - Game Guide and Walkthrough](https://game.lhg100.com/Article/UploadFiles/201512/2015121216295157.jpg)
[#3] Location: Upper Corridor (Medical Facility)
This collectible is hidden inside a ventilation shaft which links all the main corridors of this area.
![[#4] Location: X-Ray Room (Medical Facility) - Collectibles - Medical Facility - part 3 - Collectibles - Batman: Arkham Asylum - Game Guide and Walkthrough](https://game.lhg100.com/Article/UploadFiles/201512/2015121216295178.jpg)
[#4] Location: X-Ray Room (Medical Facility)
Rescue doctor Young, leave the central room and use your hook to travel to the roof.
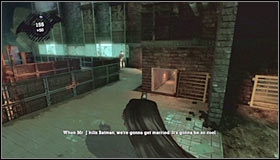
![[#5] Location: Experimental Chamber (Medical Facility) - Collectibles - Medical Facility - part 3 - Collectibles - Batman: Arkham Asylum - Game Guide and Walkthrough](https://game.lhg100.com/Article/UploadFiles/201512/2015121216295113.jpg)
[#5] Location: Experimental Chamber (Medical Facility)
The trophy can be found in a ventilation shaft to the right of the first opponent (the one who was standing in one place instead of patrolling the area).

![[#6] Location: Experimental Chamber (Medical Facility) - Collectibles - Medical Facility - part 3 - Collectibles - Batman: Arkham Asylum - Game Guide and Walkthrough](https://game.lhg100.com/Article/UploadFiles/201512/2015121216295226.jpg)
[#6] Location: Experimental Chamber (Medical Facility)
Grapple up when you get to the barrier and take the trophy before dropping on Harley Quinn's head.
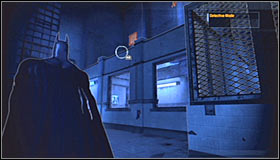
![[#7] Location: Sanatorium (Medical Facility) - Collectibles - Medical Facility - part 3 - Collectibles - Batman: Arkham Asylum - Game Guide and Walkthrough](https://game.lhg100.com/Article/UploadFiles/201512/2015121216295214.jpg)
[#7] Location: Sanatorium (Medical Facility)
Requirements: Batclaw
Check the northern section of the Sanatorium and you'll find a grating on the right wall. Rip it off using the Batclaw, head inside and take the trophy.
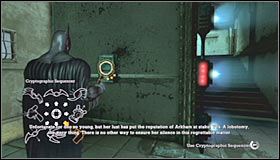
![[#8] Location: Surgery Room (Medical Facility) - Collectibles - Medical Facility - part 3 - Collectibles - Batman: Arkham Asylum - Game Guide and Walkthrough](https://game.lhg100.com/Article/UploadFiles/201512/2015121216295205.jpg)
[#8] Location: Surgery Room (Medical Facility)
Requirements: Cryptographic Sequencer
Once you've entered the room turn left and use the sequencer on a nearby control panel. Proceed to the upper floor and pick up your reward.
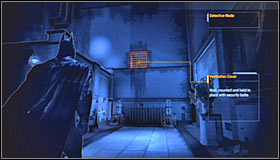
![[#9] Location: Patient Observation (Medical Facility) - Collectibles - Medical Facility - part 3 - Collectibles - Batman: Arkham Asylum - Game Guide and Walkthrough](https://game.lhg100.com/Article/UploadFiles/201512/2015121216295257.jpg)
[#9] Location: Patient Observation (Medical Facility)
Requirements: Batclaw
Examine the eastern wall of the room. Find the grating and use the Batclaw to gain access to a small room.
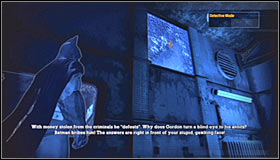
![[#10] Location: Secure Access (Medical Facility) - Collectibles - Medical Facility - part 3 - Collectibles - Batman: Arkham Asylum - Game Guide and Walkthrough](https://game.lhg100.com/Article/UploadFiles/201512/2015121216295237.jpg)
[#10] Location: Secure Access (Medical Facility)
Requirements: Ultra Batclaw
Examine the center of the room and use the Ultra Batclaw on a fragile wall.
Messages
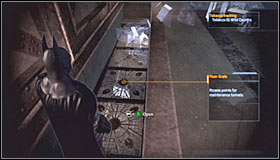
![[#1] Location: Sanatorium (Medical Facility) - Collectibles - Medical Facility - part 3 - Collectibles - Batman: Arkham Asylum - Game Guide and Walkthrough](https://game.lhg100.com/Article/UploadFiles/201512/2015121216295362.jpg)
[#1] Location: Sanatorium (Medical Facility)
The tablet is inside a small dark room and you can get to it using the tunnels located below floor panels.
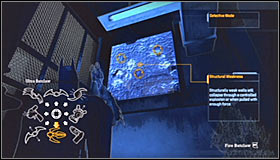
![[#2] Location: Medical Foyer (Medical Facility) - Collectibles - Medical Facility - part 3 - Collectibles - Batman: Arkham Asylum - Game Guide and Walkthrough](https://game.lhg100.com/Article/UploadFiles/201512/2015121216295334.jpg)
[#2] Location: Medical Foyer (Medical Facility)
Requirements: Ultra Batclaw
Choose the main entrance leading to the Medical Facility. The secret can be accessed once the barrier has been disabled. Examine the northern side of the room and use your Ultra Batclaw on a weak wall.
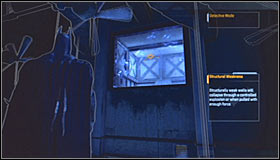
![[#3] Location: X-Ray Room (Medical Facility) - Collectibles - Medical Facility - part 4 - Collectibles - Batman: Arkham Asylum - Game Guide and Walkthrough](https://game.lhg100.com/Article/UploadFiles/201512/2015121216295393.jpg)
[#3] Location: X-Ray Room (Medical Facility)
Requirements: Ultra Batclaw
Make your way to the upper balconies and locate a weak section of the wall. Rip off the fragment using the Ultra Batclaw and then use the Line Launcher to cross a large gap safely.
Riddles
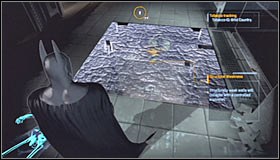
![[#1] A question can only be answered from a new perspective - Collectibles - Medical Facility - part 4 - Collectibles - Batman: Arkham Asylum - Game Guide and Walkthrough](https://game.lhg100.com/Article/UploadFiles/201512/2015121216295330.jpg)
[#1] A question can only be answered from a new perspective. Don't you agree?
Location: Sanatorium (Medical Facility)
Requirements: Explosive Gel
Look around the Sanatorium to find a weak spot on the floor (screenshot #1). After the explosion go back to the same level, zoom in the view and match the dot with the rest of the question mark.
![[#2] Shhhhsshh - Collectibles - Medical Facility - part 4 - Collectibles - Batman: Arkham Asylum - Game Guide and Walkthrough](https://game.lhg100.com/Article/UploadFiles/201512/2015121216295385.jpg)
[#2] Shhhhsshh! Rumors persist that Tommy Elliot operates in Arkham. Can it be true?
Location: Surgery Room (Medical Facility)
Once you've rescued doctor Chen use the hook to grapple up to an upper balcony. Go to your right and zoom in the view on a large board, specifically on doctor T. Elliot. Perform a scan of the board to solve this riddle.
![[#3] Was this fire fly too hot off the press - Collectibles - Medical Facility - part 4 - Collectibles - Batman: Arkham Asylum - Game Guide and Walkthrough](https://game.lhg100.com/Article/UploadFiles/201512/2015121216295464.jpg)
[#3] Was this fire fly too hot off the press?
Location: Patient Observation (Medical Facility)
You can solve this riddle when you've disposed of the toxins. There's a newspaper article hanging on a wall and you'll have to scan it.
![[#4] TICK - Collectibles - Medical Facility - part 4 - Collectibles - Batman: Arkham Asylum - Game Guide and Walkthrough](https://game.lhg100.com/Article/UploadFiles/201512/2015121216295481.jpg)
[#4] TICK! TOCK! News flash! Someone is not getting out of here alive.
Location: Sanatorium (Medical Facility)
Explore the lower level of the Sanatorium and scan the human bones seen next to the cage.
![[#5] What silent killer of the oceans can be found in a tiny jar - Collectibles - Medical Facility - part 4 - Collectibles - Batman: Arkham Asylum - Game Guide and Walkthrough](https://game.lhg100.com/Article/UploadFiles/201512/2015121216295446.jpg)
[#5] What silent killer of the oceans can be found in a tiny jar?
Location: Morgue (Medical Facility)
You'll end up in the real Morgue once you've defeated the Scarecrow. Find a jar with a label on it and perform a scan.
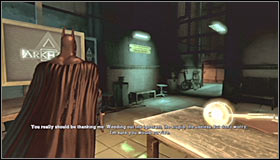
![[#6] In the generosity of our benefactors on the Wayne - Collectibles - Medical Facility - part 4 - Collectibles - Batman: Arkham Asylum - Game Guide and Walkthrough](https://game.lhg100.com/Article/UploadFiles/201512/2015121216295403.jpg)
[#6] In the generosity of our benefactors on the Wayne?
Location: Medical Foyer (Medical Facility)
Choose the main entrance leading to the Medical Facility. The secret can be accessed once the barrier has been disabled. You must scan a plaque found on the left wall (don't forget to zoom in the view).
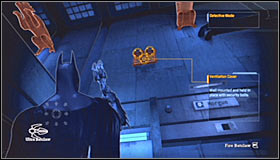
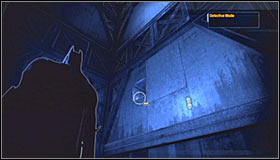
![[#7] Are you going to take your hat off to Harley, Bats - Collectibles - Medical Facility - part 4 - Collectibles - Batman: Arkham Asylum - Game Guide and Walkthrough](https://game.lhg100.com/Article/UploadFiles/201512/2015121216295560.jpg)
[#7] Are you going to take your hat off to Harley, Bats?
Location: Secure Access (Medical Facility)
Requirements: Batclaw
Start off in the Sanatorium. Instead of entering the elevator use your Batclaw to rip off a nearby grating (screenshot #1). Doing this will allow you to gain access to a ventilation shaft. Once you're inside the elevator shaft (screenshot #2) drop down to a lower floor. Find the entrance to a new ventilation shaft (screenshot #3) and use it to find your way to a small room marked as the Secure Access. Perform a scan of Harley's head found on the desk.

![[#8] Is the bear the Bane of his life - Collectibles - Medical Facility - part 4 - Collectibles - Batman: Arkham Asylum - Game Guide and Walkthrough](https://game.lhg100.com/Article/UploadFiles/201512/2015121216295558.jpg)
[#8] Is the bear the Bane of his life?
Requirements: Experimental Chamber (Medical Facility)
Scan the teddy bear found on the left table. This is the exact same spot where you've collected the secret map.

Tapes
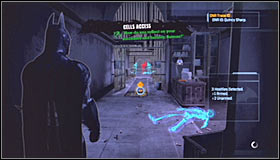
[#1] Location: Cells Access (Penitentiary)
This tape can be found in the first corridor of the Penitentiary. Check the desk to your right.
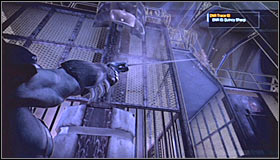
![[#2] Location: Main Cell Block (Penitentiary) - Collectibles - Penitentiary - part 1 - Collectibles - Batman: Arkham Asylum - Game Guide and Walkthrough](https://game.lhg100.com/Article/UploadFiles/201512/2015121216295568.jpg)
[#2] Location: Main Cell Block (Penitentiary)
Once you've made your way to the upper balconies check one of the control rooms.
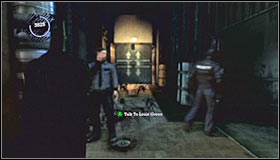
![[#3] Location: Guard Room (Penitentiary) - Collectibles - Penitentiary - part 1 - Collectibles - Batman: Arkham Asylum - Game Guide and Walkthrough](https://game.lhg100.com/Article/UploadFiles/201512/2015121216295610.jpg)
[#3] Location: Guard Room (Penitentiary)
You have to rescue the hostages and check the corridor located next to them.
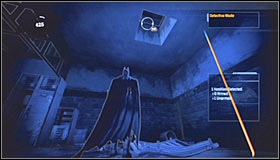
![[#4] Location: Controlled Access (Penitentiary) - Collectibles - Penitentiary - part 1 - Collectibles - Batman: Arkham Asylum - Game Guide and Walkthrough](https://game.lhg100.com/Article/UploadFiles/201512/2015121216295652.jpg)
[#4] Location: Controlled Access (Penitentiary)
Requirements: Batclaw
Once you've ripped off a grating and dealt with the inmates head upwards. The tape can be found on a table.
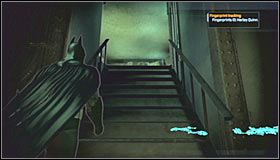
![[#5] Location: Extreme Incarceration (Penitentiary) - Collectibles - Penitentiary - part 1 - Collectibles - Batman: Arkham Asylum - Game Guide and Walkthrough](https://game.lhg100.com/Article/UploadFiles/201512/2015121216295618.jpg)
[#5] Location: Extreme Incarceration (Penitentiary)
Eliminate all the thugs and inspect the upper control room.
Final secret
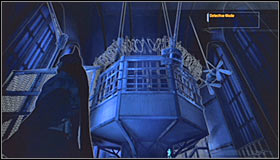
![[#1] Location: Security Control Room (Penitentiary) - Collectibles - Penitentiary - part 1 - Collectibles - Batman: Arkham Asylum - Game Guide and Walkthrough](https://game.lhg100.com/Article/UploadFiles/201512/2015121216295607.jpg)
[#1] Location: Security Control Room (Penitentiary)
Requirements: You can proceed with the final challenge only if you've already found all the previous secrets from the Messages category.
Once you're inside the control room use the stairs to return to a small booth (screenshot #1). You'll have to perform a scan of the drawings seen on the ground.
Secret map

![[#1] Secrets Map - Penitentiary - Collectibles - Penitentiary - part 1 - Collectibles - Batman: Arkham Asylum - Game Guide and Walkthrough](https://game.lhg100.com/Article/UploadFiles/201512/2015121216295603.jpg)
[#1] Secrets Map - Penitentiary
Location: Extreme Incarceration (Penitentiary)
Check the main room when you've dealt with all the inmates.
Teeth
![[#1] Location 1: Cells Access (Penitentiary) - Collectibles - Penitentiary - part 1 - Collectibles - Batman: Arkham Asylum - Game Guide and Walkthrough](https://game.lhg100.com/Article/UploadFiles/201512/2015121216295772.jpg)
[#1] Location 1: Cells Access (Penitentiary)
You'll find the teeth during your first stay in the Penitentiary. Destroy all the targets before moving on to the Main Cell Block.

![[#2] Location 2: Main Cell Block (Penitentiary) - Collectibles - Penitentiary - part 1 - Collectibles - Batman: Arkham Asylum - Game Guide and Walkthrough](https://game.lhg100.com/Article/UploadFiles/201512/2015121216295770.jpg)
[#2] Location 2: Main Cell Block (Penitentiary)
Once you've made your way to the upper balconies check one of the control rooms.

![[#3] Location 3: Guard Room (Penitentiary) - Collectibles - Penitentiary - part 2 - Collectibles - Batman: Arkham Asylum - Game Guide and Walkthrough](https://game.lhg100.com/Article/UploadFiles/201512/2015121216295789.jpg)
[#3] Location 3: Guard Room (Penitentiary)
Corridor near the rescued guards.
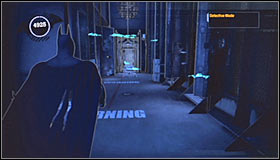
![[#4] Location 4: Main Cell Block (Penitentiary) - Collectibles - Penitentiary - part 2 - Collectibles - Batman: Arkham Asylum - Game Guide and Walkthrough](https://game.lhg100.com/Article/UploadFiles/201512/2015121216295718.jpg)
[#4] Location 4: Main Cell Block (Penitentiary)
Once you've returned from the Guard Room look for the teeth near the passageway to the eastern cell block.
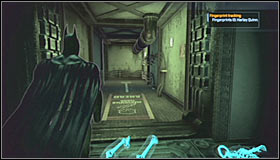
![[#5] Location 5: Extreme Incarceration (Penitentiary) - Collectibles - Penitentiary - part 2 - Collectibles - Batman: Arkham Asylum - Game Guide and Walkthrough](https://game.lhg100.com/Article/UploadFiles/201512/2015121216295790.jpg)
[#5] Location 5: Extreme Incarceration (Penitentiary)
Inspect the main corridor after dealing with the thugs.
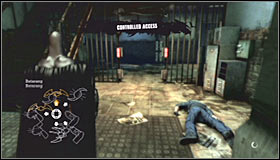
![[#6] Location 6: Controlled Access (Penitentiary) - Collectibles - Penitentiary - part 2 - Collectibles - Batman: Arkham Asylum - Game Guide and Walkthrough](https://game.lhg100.com/Article/UploadFiles/201512/2015121216295830.jpg)
[#6] Location 6: Controlled Access (Penitentiary)
After you've returned from the Extreme Incarceration.
Trophies
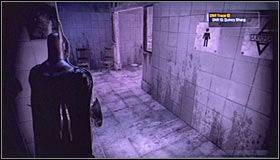
![[#1] Location: Cells Access (Penitentiary) - Collectibles - Penitentiary - part 2 - Collectibles - Batman: Arkham Asylum - Game Guide and Walkthrough](https://game.lhg100.com/Article/UploadFiles/201512/2015121216295880.jpg)
[#1] Location: Cells Access (Penitentiary)
Before you proceed to the Main Cell Block inspect the corridor located in front of you. Once you've made your way to the toilets check the section for men.

![[#2] Location: Main Cell Block (Penitentiary) - Collectibles - Penitentiary - part 2 - Collectibles - Batman: Arkham Asylum - Game Guide and Walkthrough](https://game.lhg100.com/Article/UploadFiles/201512/2015121216295864.jpg)
[#2] Location: Main Cell Block (Penitentiary)
Requirements: Explosive Gel
You'll have to proceed to the southern section of the cell block and stop near the passageway leading to The Green Mile. Blow up the left wall and take the trophy.
![[#3] Location: Security Control Room (Penitentiary) - Collectibles - Penitentiary - part 2 - Collectibles - Batman: Arkham Asylum - Game Guide and Walkthrough](https://game.lhg100.com/Article/UploadFiles/201512/2015121216295843.jpg)
[#3] Location: Security Control Room (Penitentiary)
Requirements: Cryptographic Sequencer
Once you've rescued the warden inspect the surrounding area and break into one of the terminals.
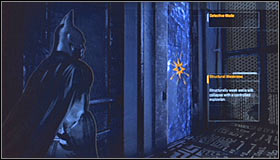
![[#4] Location: Security Control Room (Penitentiary) - Collectibles - Penitentiary - part 2 - Collectibles - Batman: Arkham Asylum - Game Guide and Walkthrough](https://game.lhg100.com/Article/UploadFiles/201512/2015121216295944.jpg)
[#4] Location: Security Control Room (Penitentiary)
Requirements: Explosive Gel
Once you've rescued the warden inspect the surrounding area and blow up one of the breakable walls.

![[#5] Location: The Green Mile (Penitentiary) - Collectibles - Penitentiary - part 2 - Collectibles - Batman: Arkham Asylum - Game Guide and Walkthrough](https://game.lhg100.com/Article/UploadFiles/201512/2015121216295927.jpg)
[#5] Location: The Green Mile (Penitentiary)
You can collect this treasure once you've returned to The Green Mile from the control room (after you've rescued the warden). Check one of the cells.

![[#6] Location: Main Cell Block (Penitentiary) - Collectibles - Penitentiary - part 2 - Collectibles - Batman: Arkham Asylum - Game Guide and Walkthrough](https://game.lhg100.com/Article/UploadFiles/201512/2015121216295966.jpg)
[#6] Location: Main Cell Block (Penitentiary)
Proceed to the western cell block and search the surrounding cells.
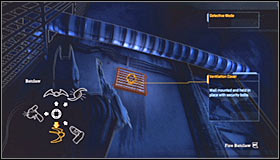
![[#7] Location: Guard Room (Penitentiary) - Collectibles - Penitentiary - part 2 - Collectibles - Batman: Arkham Asylum - Game Guide and Walkthrough](https://game.lhg100.com/Article/UploadFiles/201512/2015121216295907.jpg)
[#7] Location: Guard Room (Penitentiary)
Requirements: Batclaw
Find a grating and rip it off using the Batclaw. Grapple up and use the ventilation shaft to reach your destination. Ignore the fact that you'll be informed about reentering the cell block. The treasure you're looking for is inside a small room.
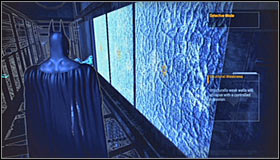
![[#8] Location: Controlled Access (Penitentiary) - Collectibles - Penitentiary - part 3 - Collectibles - Batman: Arkham Asylum - Game Guide and Walkthrough](https://game.lhg100.com/Article/UploadFiles/201512/2015121216295902.jpg)
[#8] Location: Controlled Access (Penitentiary)
Requirements: Explosive Gel
Make your way to the upper balconies and look around to find three breakable walls. Blow up the first wall from the left and drop down to a small cell.

![[#9] Location: Extreme Incarceration (Penitentiary) - Collectibles - Penitentiary - part 3 - Collectibles - Batman: Arkham Asylum - Game Guide and Walkthrough](https://game.lhg100.com/Article/UploadFiles/201512/2015121216300072.jpg)
[#9] Location: Extreme Incarceration (Penitentiary)
Requirements: Cryptographic Sequencer
Defeat all the inmates and then proceed towards the upper control room. Use your sequencer on a control panel for cell number five (screenshot #1). Hacking into the system will allow you to open this cell. Head back down, enter the cell and take the trophy.


![[#10] Location: Guard Room (Penitentiary) - Collectibles - Penitentiary - part 3 - Collectibles - Batman: Arkham Asylum - Game Guide and Walkthrough](https://game.lhg100.com/Article/UploadFiles/201512/2015121216300009.jpg)
[#10] Location: Guard Room (Penitentiary)
Requirements: Explosive Gel, Ultra Batclaw, Line Launcher
Start off by moving to your left. It shouldn't take long until you'll have a chance to use your hook in order to grapple up to an upper ledge (screenshot #1). Use the Explosive Gel to blow up a wall found to your right. Make sure that you're standing in front of a newly created opening (screenshot #2) and use the Ultra Batclaw to rip off a new wall seen in the distance. You can then use the Line Launcher to get to the other side safely (screenshot #3). Make a few steps forward after you've landed and find the trophy inside a dark corridor.
Messages
![[#1] Location: Extreme Incarceration (Penitentiary) - Collectibles - Penitentiary - part 3 - Collectibles - Batman: Arkham Asylum - Game Guide and Walkthrough](https://game.lhg100.com/Article/UploadFiles/201512/2015121216300015.jpg)
[#1] Location: Extreme Incarceration (Penitentiary)
Requirements: Cryptographic Sequencer, Explosive Gel
Defeat all the inmates and then proceed towards the upper control room. Use your sequencer on a control panel for cell number five (screenshot #1). Hacking into the system will allow you to open this cell. Head back down, enter the cell and blow up the wall using your gel.
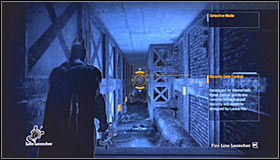
![[#2] Location: Main Cell Block (Penitentiary) - Collectibles - Penitentiary - part 3 - Collectibles - Batman: Arkham Asylum - Game Guide and Walkthrough](https://game.lhg100.com/Article/UploadFiles/201512/2015121216300060.jpg)
[#2] Location: Main Cell Block (Penitentiary)
Requirements: Explosive Gel, Line Launcher
This is the exact same area where you've found one of the trophies. Don't forget to blow up the wall in the first place. Stand near the electrified floor and use the Line Launcher to reach the opposite end of the corridor (screenshot #1). Once you've landed in Generator Access turn right and find the tablet. You can return to the cell block either by using the Line Launcher again or by using the sequencer to shut down power to this section of the facility.
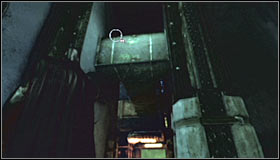


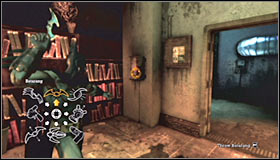
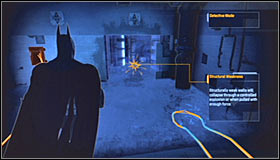
![[#3] Location: Guard Room (Penitentiary) - Collectibles - Penitentiary - part 3 - Collectibles - Batman: Arkham Asylum - Game Guide and Walkthrough](https://game.lhg100.com/Article/UploadFiles/201512/2015121216300167.jpg)
[#3] Location: Guard Room (Penitentiary)
Requirements: Explosive Gel, Ultra Batclaw, Line Launcher
Start off by moving to your left. It shouldn't take long until you'll have a chance to use your hook in order to grapple up to an upper ledge (screenshot #1). Use the Explosive Gel to blow up a wall found to your right. Make sure that you're standing in front of a newly created opening (screenshot #2) and use the Ultra Batclaw to rip off a new wall seen in the distance. You can then use the Line Launcher to get to the other side safely (screenshot #3). Choose the Batarang from your inventory and use it to destroy a control panel found to your left (screenshot #4). Doing this will activate large fans and effectively dispose of the toxins. Drop down to a previously inaccessible area of the Guard Room. Move to the south-west and blow up one of the walls (screenshot #5) to gain access to the secret.
Riddles
![[#1] How do you reflect on your successes and failures, Batman - Collectibles - Penitentiary - part 3 - Collectibles - Batman: Arkham Asylum - Game Guide and Walkthrough](https://game.lhg100.com/Article/UploadFiles/201512/2015121216300143.jpg)
[#1] How do you reflect on your successes and failures, Batman?
Location: Cells Access (Penitentiary)
Before you proceed to the Main Cell Block inspect the corridor located in front of you. Once you've made your way to the toilets check the section for women. In order to solve this riddle scan Batman's reflection in the large mirror.
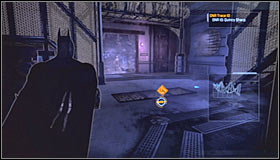
![[#2] A case of mistaken identity - Collectibles - Penitentiary - part 4 - Collectibles - Batman: Arkham Asylum - Game Guide and Walkthrough](https://game.lhg100.com/Article/UploadFiles/201512/2015121216300108.jpg)
[#2] A case of mistaken identity?
Location: Security Control Room (Penitentiary)
Look around before you head up to the control booth. A shapeshifter can be found behind a glass wall (he'll turn into different people). Scan him and you'll solve the riddle.
![[#3] The room is the end of days for even the most celebrated killer - Collectibles - Penitentiary - part 4 - Collectibles - Batman: Arkham Asylum - Game Guide and Walkthrough](https://game.lhg100.com/Article/UploadFiles/201512/2015121216300263.jpg)
[#3] The room is the end of days for even the most celebrated killer.
Location: Main Cell Block (Penitentiary)
Proceed to the western cell block and scan the cell filled with calendars.
![[#4] Two people, one voice, no gun - Collectibles - Penitentiary - part 4 - Collectibles - Batman: Arkham Asylum - Game Guide and Walkthrough](https://game.lhg100.com/Article/UploadFiles/201512/2015121216300226.jpg)
[#4] Two people, one voice, no gun?
Location: Main Cell Block (Penitentiary)
Search the upper control room and find a Tommy Gun on a display.
![[#5] What has four walls, two sides, and one ex-DA - Collectibles - Penitentiary - part 4 - Collectibles - Batman: Arkham Asylum - Game Guide and Walkthrough](https://game.lhg100.com/Article/UploadFiles/201512/2015121216300238.jpg)
[#5] What has four walls, two sides, and one ex-DA?
Location: Controlled Access (Penitentiary)
Explore all the nearby cells and be on a look out for a poster. Scan it to solve this riddle.
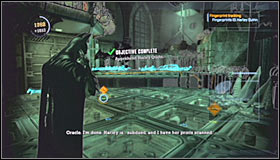
![[#6] All alone in your cell - Collectibles - Penitentiary - part 4 - Collectibles - Batman: Arkham Asylum - Game Guide and Walkthrough](https://game.lhg100.com/Article/UploadFiles/201512/2015121216300205.jpg)
[#6] All alone in your cell? Why don't you break the ice with the most dangerous prisoners?
Location: Extreme Incarceration (Penitentiary)
Defeat all the inmates and scan the icy cage found nearby.


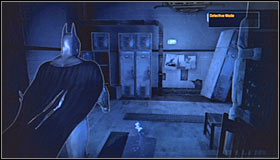
![[#7] Prometheus, Arkham guards' most wanted and most hated - Collectibles - Penitentiary - part 4 - Collectibles - Batman: Arkham Asylum - Game Guide and Walkthrough](https://game.lhg100.com/Article/UploadFiles/201512/2015121216300322.jpg)
[#7] Prometheus, Arkham guards' most wanted and most hated.
Location: Guard Room (Penitentiary)
Requirements: Explosive Gel, Ultra Batclaw, Line Launcher
Start off by moving to your left. It shouldn't take long until you'll have a chance to use your hook in order to grapple up to an upper ledge (screenshot #1). Use the Explosive Gel to blow up a wall found to your right. Make sure that you're standing in front of a newly created opening (screenshot #2) and use the Ultra Batclaw to rip off a new wall seen in the distance. You can then use the Line Launcher to get to the other side safely (screenshot #3). Choose the Batarang from your inventory and use it to destroy a control panel found to your left (screenshot #4). Doing this will activate large fans and effectively dispose of the toxins. Drop down to a previously inaccessible area of the Guard Room. Go to the north-east (screenshot #5) and scan a small poster found on a wall.

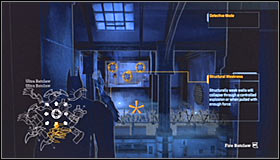

![[#8] When is something right in front of you but still hidden from view - Collectibles - Penitentiary - part 4 - Collectibles - Batman: Arkham Asylum - Game Guide and Walkthrough](https://game.lhg100.com/Article/UploadFiles/201512/2015121216300335.jpg)
[#8] When is something right in front of you but still hidden from view?
Location: Guard Room (Penitentiary)
Requirements: Explosive Gel, Ultra Batclaw, Line Launcher
Start off by moving to your left. It shouldn't take long until you'll have a chance to use your hook in order to grapple up to an upper ledge (screenshot #1). Use the Explosive Gel to blow up a wall found to your right. Make sure that you're standing in front of a newly created opening (screenshot #2) and use the Ultra Batclaw to rip off a new wall seen in the distance. You can then use the Line Launcher to get to the other side safely (screenshot #3). You must now turn around so you'll be facing the southern wall where you blew up the wall. Zoom in on the question mark and scan the whole thing.
I would strongly recommend that you start completing challenges after you've successfully finished the story mode. The main reason is that you'll have all the upgrades in your disposal. Having all the combo upgrades will make combat challenges easier and having all the gadget upgrades will be required to complete some of the predator challenges.
HINTS - COMBAT CHALLENGES
In my opinion combat challenges are more difficult than predator challenges. Assuming you'll want something more than a bronze medal you'll have to perform flawless counterattacks and score good combos. It will also be important to do a lot of jumps and cape attacks against armed opponents which you'll encounter mostly during the final rounds of each challenge. As I've already mentioned, having all the combat upgrades may come in handy, especially since you'll be allowed to choose unblockable special attacks. Don't forget that you'll have to be flexible in order to score good results. Don't repeat the same attack countless times, but instead constantly try different things. Here's the list of the biggest problems you'll be facing in this mode:
1) Inmates armed with knives and stun guns - The key to success here is to perform QUICK jumps and/or cape attacks. Don't forget that if you take too long you'll end the current chain and lose a chance for a good result.
2) Inmates using firearms - You won't encounter armed opponents right away, however some of the arenas will feature gun lockers and obviously you'll have to prevent enemies from using them. If someone was successful focus on stopping other inmates from picking up the weapon from the ground.
3) Mutants - The main issue here is that you'll have to keep scoring hits to maintain a good chain. I would recommend leaving the mutants for later. Notice that you can hit an injured mutant more than ten times. The alternative is to hop on the beast's back and to attack the inmates, however it may be difficult to sustain a combo after you've landed on the ground.
4) Time limit and death - Some of the arenas will require you to defeat all the opponents within a given time limit. This means you won't be allowed to choose slow attacks, even if they're usually effective. It'll also be important to start attacking the inmates as soon as possible. This is very important in the Extreme versions of the challenges, because you'll have even less time to prevail. As for dying, you must prevent Batman from losing all health points. If you die you'll have to restart the entire challenge. The ideal situation is that you don't allow the inmates to hit you at all, because each hit stops you from scoring a lot of points.
HINTS - PREDATOR CHALLENGES
You shouldn't have any major problems with the first four challenges. It's the Extreme versions you should be worried about, especially since much like in one of the stages in the singleplayer campaign you won't be allowed to use gargoyles. Thankfully each map will feature other ledges you'll be allowed to use to plan your attacks, including bookcases and guard posts. Don't forget that you can also move around freely using ventilation shafts and tunnels located beneath the floor panels. Instead of scoring points you'll be receiving medals in all predator challenges. Each medal is tied to one action. Ignore the time limit seen on the screen unless you want to send your best time to the leaderboards. Don't forget that it's always crucial to scout the entire area, so you'll know where to surprise enemy units and where to escape in case something goes wrong. There are two types of problems you'll be facing here:
1) Required items and upgrades - Many of the challenges will require you to use certain gadgets you'll unlock during the course of the story mode. The same goes with certain upgrades. For example you may be forced to upgrade your Batarangs or the Cryptographic Sequencer.
2) Traps - All the gargoyles in the extreme challenges have sensors and they will explode after a second or two after you've landed on them. As a result you'll have to remember about avoiding them and use other objects from the environment.
CHALLENGES - COMBAT
CHALLENGE
GOLD
SILVER
BRONZE
Intensive Treatment
18000 points
12000 points
6000 points
Sewer Bat
18000 points
12000 points
6000 points
Shock and Awe
30000 points
20000 points
10000 points
Rumble in the Jungle
30000 points
20000 points
10000 points
Intensive Treatment (Extreme)
30000 points
20000 points
10000 points
Sewer Bat (Extreme)
50000 points
30000 points
10000 points
Shock and Awe (Extreme)
30000 points
20000 points
10000 points
Rumble in the Jungle (Extreme)
50000 points
40000 points
30000 points
CHALLENGES - STEALTH
CHALLENGE
REQUIREMENTS
Silent Knight
1) Silence is Golden - Sneak up on a guard from behind and perform a silent takedown.
2) Blast Zone - Blow up a breakable wall so that the explosion will stun an opponent standing nearby. The right wall for this assignment can be found in one of the corners of the room.
3) Mind Your Head - Use a Batarang to stun an opponent and drop down to finish him off with a takedown. It would be a good idea to purchase an upgrade which extends the amount of time an opponent needs to come back to his senses.
Record Breaker
1) Fall Guy - Grab an opponent using the Batclaw or the Ultra Batclaw and then throw him off the balcony. Obviously you'll have to attack one of the guards patrolling the metal platforms. Notice that you can't use this gadget while hiding on a gargoyle.
2) Over the Ledge - Grab an opponent while hanging on a ledge. Just as before you must target one of the inmates from the upper balconies.
3) Round the Bend - Take cover behind an object and perform a takedown once an enemy is nearby. This will work on a ground level.
Survival Tactics
1) Smash Landing - Perform a takedown by landing on your opponent through a glass roof. I would strongly recommend that you wait until there's one or two inmates left. Otherwise you may have problems returning to safety after the takedown.
2) Hang Time - Use an Inverted Takedown ability to eliminate one of the inmates.
3) Break Your Fall - Drop directly on an opponent to knock him unconscious. It would be a good idea to try this challenge right away, because you'll be exposed to enemy attacks if you land in a bad spot.
Invisible Predator
1) Watch Your Step - Use an Explosive Gel on the floor and wait for the device to explode. The charge must be triggered automatically, so as a result having an Auto Proximity Detonation upgrade is mandatory.
2) Crowd Control - Stun three guards at the same time by blowing up a single element of the environment. Make sure to wait until they stop near the trap before setting off the charge.
3) Grate Moves - Raise one of the floor panels and take cover inside the tunnel. Wait for one of the inmates to show up, exit the vents when he's nearby and eliminate him quickly.
Silent Knight (Extreme)
1) Three for Three - Blow up three breakable walls at the same time, knocking out three guards (one for each wall). I would recommend that you focus on completing this objective when you start the challenge, so you won't mess up any of the guard's routes.
2) Break Through - Use the Line Launcher to break through a glass wall and kick an opponent standing on the other side.
3) Aerial Assault - Perform a Glide Kick and then a takedown to finish off an opponent. Don't forget that all the gargoyles are in fact traps, so you'll have to look for a different place to start gliding.
Record Breaker (Extreme)
1) Chain Reaction - Eliminate two enemies in a row using the Line Launcher. Obviously you'll have to wait for them to form a line before using your gadget.
2) Three in a Row - Stun three opponents with a single Batarang. The requirement is that you use the Remote Control Batarang upgrade. For best effects wait for the inmates to stand close to each other.
3) Sonic Boom - Use the Sonic Shock Batarang ability to knock out at least one opponent. This is an extremely easy challenge, especially since you've probably used this upgrade many times in the past.
Survival Tactics (Extreme)
1) The Magic Number - This is going to be an easy task. Make sure that you've purchased the Triple Batarang ability. Remain on the upper platform, wait for enemies to stand close to each other and target all of them. The best moment to complete this challenge is after you've taken care of the first inmate and when his colleagues are going to inspect his body.
2) Kick Off - Use the Line Launcher to knock the opponent off the platform and then perform a takedown on him. Make sure to be standing relatively close, so you won't arrive when it's already too late.
3) Hit and Run - All you have to do is to punch an opponent with a standard move. I would recommend performing an entire 3-hit combo to stun him for a longer period of time. This will give you a chance to escape.
Invisible Predator (Extreme)
1) Two for the Price of One - Use the Ultra Batclaw to rip off a section of the floor while two inmates are standing on it. You'll have to be very patient and avoid raising any alarms. Check the eastern side of the room to find the object needed to fulfill this challenge.
2) Shock Tactics - Appear out of nowhere to scare a terrified opponent. There are many ways for you to complete this assignment. You can start following one of the inmates and wait for him to turn around or you can take cover behind the corner and wait for him to show up. Either way make sure he's scared prior to meeting Batman face to face.
3) Tug of War - Use the Ultra Batclaw to grab three enemies at the same time and pull them towards Batman.
CHARACTER
REQUIREMENTS
Aaron Cash
After disposing of the toxins in Patient Observation (Medical Facility).
Alfred Pennyworth
Solve In the generosity of our benefactors on the Wayne? riddle in Medical Foyer (Medical Facility).
Amadeus Arkham
Solve The legacy of this island has been well and truly buried riddle in Arkham East (Arkham Island).
Bane
After you've defeated Bane in the Boiler Room (Medical Facility).
Batman
Available right away.
Black Mask
Solve How do you mask your feelings without losing control? riddle in Dr. Young's Office (Arkham Mansion).
Bruce Wayne
Solve Gotham's greatest family towers over the city riddle in Arkham East (Arkham Island).
Calendar Man
Solve The room is the end of days for even the most celebrated killer riddle in Main Cell Block (Penitentiary).
Catwoman
Solve A game of Cat and mouse can be painful riddle in East Wing Corridor (Arkham Mansion).
Clayface
Solve A case of mistaken identity? riddle in Security Control Room (Penitentiary).
Commissioner Gordon
After you've defeated Joker's thugs in the Holding Cells (Intensive Treatment).
Dr. Penelope Young
After you've used the computer in The Batcave (Caves).
Firefly
Solve Was this fire fly too hot off the press? riddle in Patient Observation (Medical Facility).
Frank Boles
After you've defeated a mini-boss in the Secure Treatment Transfer (Intensive Treatment) and had a conversation with the Oracle.
Harley Quinn
After you've defeated Zsasz in the Patient Pacification Chamber (Intensive Treatment).
Humpty Dumpty
Solve Looks like all the king's horses trampled all the king's men riddle in Flooded Corridor (Botanical Gardens).
Hush
Solve Shhhhsshh! Rumors persist that Tommy Elliot operates in Arkham. Can it be true? riddle in Surgery Room (Medical Facility).
Jack Ryder
Solve You don't know Jack about Gotham. Tune in to find out riddle in Intensive Treatment Lobby (Intensive Treatment).
Joker
Available right away.
Killer Croc
Solve TICK! TOCK! News flash! Someone is not getting out of here alive riddle in Sanatorium (Medical Facility).
Killer Moth
Solve There's no closet in the Gardens, so someone is using the roof instead riddle in Aviary (Botanical Gardens).
Mad Hatter
Solve What time is tea time in Wonderland? riddle in Botanical Glasshouse (Botanical Gardens).
Maxie Zeus
Solve Even I was shocked when I saw how Maxie Zeus was treated! riddle in Patient Pacification Chamber (Intensive Treatment).
Mr. Freeze
Solve All alone in your cell? Why don't you break the ice with the most dangerous prisoners? riddle in Extreme Incarceration (Penitentiary).
Oracle
After you've had your first conversation with the Oracle, in the Processing Corridor (Intensive Treatment).
Poison Ivy
After you've talked to Poison Ivy in The Green Mile (Penitentiary).
Professor Hugo Strange
Solve Our records show that a Strange transfer request was made in this room riddle in Arkham Records Room (Arkham Mansion).
Prometheus
Solve Prometheus, Arkham guards' most wanted and most hated riddle in Guard Room (Penitentiary).
Ra's Al Ghul
Solve It'll be a cold day in Hell when this Ghul rises again riddle in Dr. Young's Office (Arkham Mansion).
Ratcatcher
Solve The Ratcatcher needed more than just his charm to lead his army riddle in Flooded Corridor (Botanical Gardens).
Scarface
Solve Isn't the Warden too old for a puppet show? riddle in Warden's Office (Arkham Mansion).
The Great White Shark
Solve What silent killer of the oceans can be found in a tiny jar? riddle in Morgue (Medical Facility).
The Penguin
Solve What does a bird need in the rain? riddle in South Corridor (Arkham Mansion).
The Riddler
After you've collected the first trophy.
The Scarecrow
After you've defeated the Scarecrow in the Morgue (Medical Facility).
The Spirit of Arkham
After you've scanned the first message in Secure Transit (Intensive Treatment).
The Ventriloquist
Solve Two people, one voice, no gun? riddle in Main Cell Block (Penitentiary).
Thomas Wayne / Martha Wayne
Solve Remember the Waynes? How could anyone forget? riddle in Statue Corridor (Botanical Gardens).
Tweedledum and Tweedledee
Solve Tweedledum and Tweedledee SAW it, can you SEE it? riddle in Arkham North (Arkham Island).
Two-Face
Solve What has four walls, two sides, and one ex-DA? riddle in Controlled Access (Penitentiary).
Victor Zsasz
After you've had a conversation with doctor Gretchen Whistle in the Patient Pacification Chamber (Intensive Treatment).
Warden Sharp
Available right away.
Each time you advance to a higher level of experience you'll be allowed to pick one upgrade from the list of twenty abilities. Check the description below to find out which upgrades are worth adding to your list of skills right away and which ones can wait. You should also know that achieving the highest 20th level of experience is fully possible during your first playthrough, however you will have to find a lot of collectables along the way. Don't forget that you're awarded with experience points for each find, so you shouldn't focus only on your primary goals.
UPGRADE
CATEGORY
ADDITIONAL INFO
Special Combo Throw
combat
The main reason you'll want to pick this upgrade is because it unlocks Special Combo Boost. The throw itself isn't that useful, however it may come in handy when you're trying to achieve a good result.
Special Combo Takedown
combat
Similar meaning to the upgrade described above, so you'll want to choose this one to unlock Special Combo Boost. Unique takedowns are useful in the Challenge Mode, however not that much in the story mode (main singleplayer campaign).
Special Combo Boost
combat
A very interesting upgrade which allows you to activate special combo moves once you achieve x5 combo rating (instead of usual x8 combo). Very useful in the Challenge Mode, less useful (but not worthless) in the story mode.
Combo Batarang
combat
Poor skill which allows you to load up your Batarang in order to help you in maintaining your current combo. I would recommend choosing it at the end of the game, because to be honest you'll only need it in the Challenge Mode.
Critical Combo Strikes
combat
I would recommend choosing this upgrade once you think you've mastered combat skills, because it'll work only if your punches are timed perfectly. The reward is that your multiplier will be increased for each good punch and once gain it'll all come in handy while trying to complete some of the more difficult combat challenges.
Inverted Takedown
stealth
This is the only true stealth upgrade, because the rest will come with certain upgrades. Having inverted takedowns unlocked will make your life a lot easier, however it is possible to rely on Batarangs and other skills (Glide Kicks are always useful).
Armor Upgrade V1-V4
armor
I would STRONGLY RECOMMEND that you purchase all four upgrades from this category as soon as possible, especially if you're playing on a high difficulty setting. Having an extended health bar always helps, especially while going against large group of inmates and when trying to defeat bosses.
Batarang Power
batarang
Not too useful. Having this upgrade gives you more time to finish off an opponent after you've stunned him with a Batarang. Consider adding this to your list to skills only if you prefer using Batarangs to Glide Kicks and other stealth moves.
Twin Batarang
batarang
This is a very interesting ability. Being able to throw two Batarangs at the same time may prove to be useful when you have to stay in the shadows or if you're being attacked by a lot of inmates and when you want to knock some of them out for a short period of time.
Triple Batarang
batarang
I would recommend adding this ability only if you liked Twin Batarang. Aside from a few unique situations (Poison Ivy's plants) you won't find much use for three Batarangs.
Remote Control Batarang
batarang
The possibility of manually controlling your Batarang sounds cool, but it's not something I would recommend early on during the course of the game. Having a good armor and acquiring combat skills will make Batman more powerful.
Sonic Batarang
batarang
The only reason why you'll want to have this upgrade is to unlock Sonic Shock Batarang. The ability to distract enemies with collars is not a big deal.
Sonic Shock Batarang
batarang
This is one of the best upgrades in the game and it becomes available later on during the course of the singleplayer campaign. Each time you plan on using the Shock Batarang make sure to wait for enemies with collars to stand next to each other for better effects. You should also know that you'll be allowed to use this upgrade only once per area (because it's THAT great :-)).
Multiple Frequency Detonator
gel
This is a rather useless upgrade which allows you to detonate specific charges instead of all of them at the same time. I would only recommend choosing this ability if you like to "play around" with the Explosive Gel. Otherwise you're better off with something else.
Auto Proximity Detonation
gel
This is a slightly more interesting upgrade than the previous one. The ides is that the charges will be detonated automatically. Choose this only if you're planning on completing predator challenges.
Cryptographic Range Amplifier
sequencer
I would strongly recommend choosing this ability right after you've unlocked the sequencer, because it will allow you to gain access to new collectibles.
Cryptographic Power Amplifier
sequencer
In this case you don't have to be in a lot of hurry. Upgrading your sequencer is generally a good idea, but you may want to purchase something else first.
The hints shown below should help less experienced players in completing the main story mode. Don't forget that you can find out more about defeating tougher opponents (including mutants and bosses) and solving primary quests from the first chapter of my guide.
- Use your time spent in the Intensive Treatment building to familiarize yourself with the basic features of the game. Learning how to fight and how to keep Batman alive is crucial to your success. Don't forget that it's always welcome to create chains and score a lot of points, making your progress faster. Aside from the standard moves you should also practice jumps and special cape attacks which will come in handy after you start encountering armed opponents. You shouldn't have any problems figuring out how the entire stealth mechanism works, however you'll also have a chance to practice some of the basic evasive maneuvers in the lobby.
- Aside from completing primary objectives you should also spend some time looking for collectibles. You'll be rewarded for each find with valuable experience points and this will allow you to unlock new upgrades faster than expected.
- I would strongly recommend using the detective mode as often as possible. Doing this will not only allow you to find secret passageways and interactive items, but you'll also locate enemy units easier and much faster. This is crucial when you want to remain hidden and check positions of all nearby inmates.
- Spend your initial upgrades on Batman's suit, because an extended health bar will allow you to feel much safer during most of the fights and you won't have to repeat the toughest battles too often. Once you've taken care of your armor focus on developing combat skills and upgrading your Batarangs with new features.


 Batman: Arkham Knight Game Guide & Walkthrough
 Batman: Arkham Origins Game Guide & Walkthrough
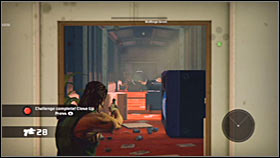 Bionic Commando Game Guide & Walkthrough
 Borderlands 2 Game Guide & WalkthroughBatman: Arkham Asylum Game Guide & Walkthrough