This is the guide for the Assassin's Creed: Brotherhood game. It contains a complete description of how to complete the game. In addition you will learn what to do to achieve the full synchronization in all tasks. In the section Side Quests you will find all additional tasks (Romulus Lair, Leonardo's Quests and hidden Cristine's memories). Moreover a big part of this guide is about all additional items that can be found in the game world (flags, glyphs and feathers are marked on appropriate maps). In some chapters, you will be able to learn about merchant's quests, some logic games and many more.
Legend:
[1], [2] - numbers that are referring to the images shown above the text (one to the left one and two to the right one).
Michal "Kwisc" Chwistek (www.gry-online.pl)
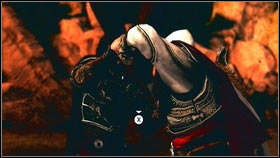
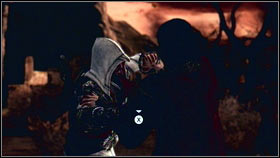
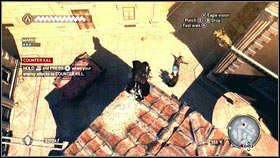
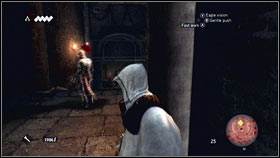
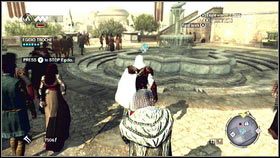
In the film you will be able to learn about some events from the previous parts of the game. You task is to kill one templar [1]. To do this press X as fast as it is possible [2].
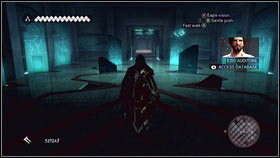
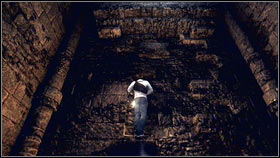
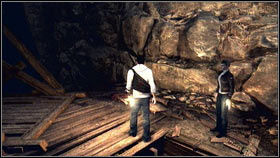
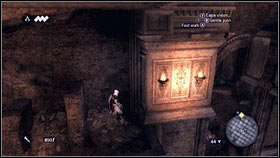
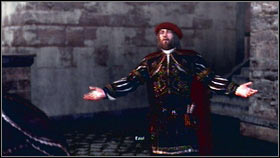
![When you will be done, you will be able to see the next cut scene and you will find yourself in the underground chamber [1] - Sequence 1 - Peace at Last - p. 1 - Walkthrough - Assassins Creed: Brotherhood - Game Guide and Walkthrough](https://game.lhg100.com/Article/UploadFiles/201512/2015121216061606.jpg)
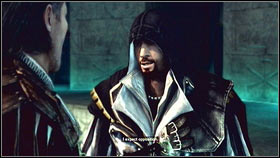
When you will be done, you will be able to see the next cut scene and you will find yourself in the underground chamber [1]. Go straight ahead to meet your uncle [2].
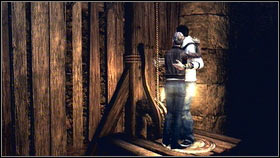
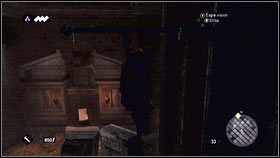
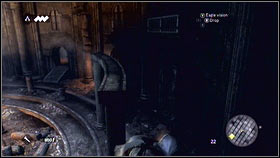
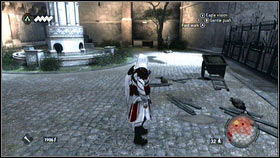
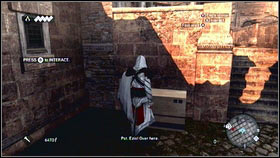
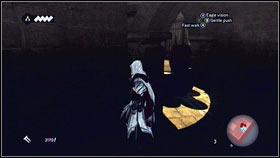
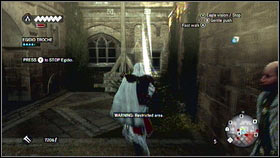
![To go upstairs, you have to use your Eagle Vision by pressing Y [1] - Sequence 1 - Peace at Last - p. 1 - Walkthrough - Assassins Creed: Brotherhood - Game Guide and Walkthrough](https://game.lhg100.com/Article/UploadFiles/201512/2015121216061707.jpg)
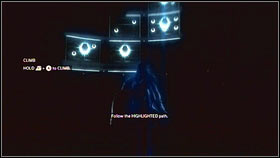
To go upstairs, you have to use your Eagle Vision by pressing Y [1]. As a matter of fact, you will see some glowing elements [2].
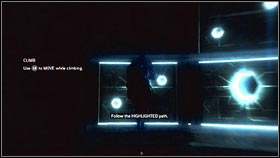
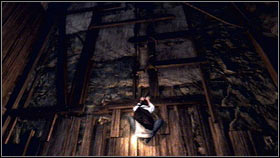
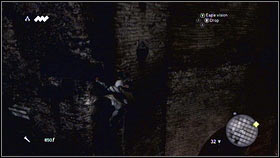
Get close to them while holding RT and press A. Ezio will start to climb [1]. Move with your left analogue stick (LS) and go upstairs [2].

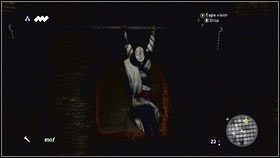
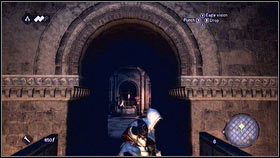
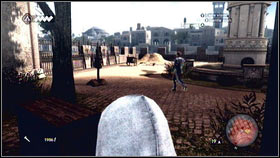
![After speaking with Mario go to the exit [1] - Sequence 1 - Peace at Last - p. 1 - Walkthrough - Assassins Creed: Brotherhood - Game Guide and Walkthrough](https://game.lhg100.com/Article/UploadFiles/201512/2015121216061723.jpg)
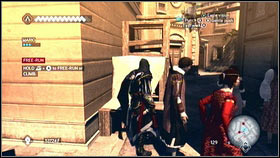
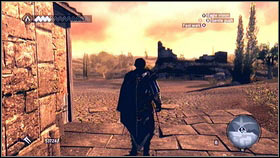
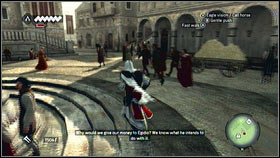
After speaking with Mario go to the exit [1]. You can run by pressing RT or RT + A [2].
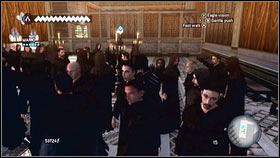
When you will be outside, listen to the monks and follow your uncle. You can go through the crowd by pressing B [1]. Localization of your friend is marked on the main map (SELECT) [2].
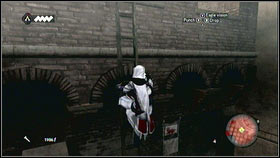
![When he will open the door, you will be attacked by some guards [1] - Sequence 1 - Peace at Last - p. 1 - Walkthrough - Assassins Creed: Brotherhood - Game Guide and Walkthrough](https://game.lhg100.com/Article/UploadFiles/201512/2015121216061769.jpg)
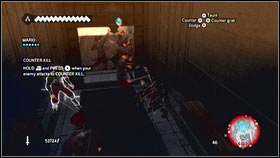
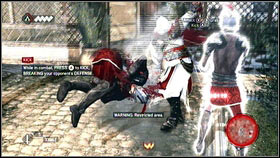
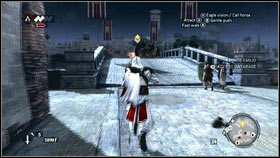
When he will open the door, you will be attacked by some guards [1]. To attack press X and RT to block. The best way to kill your opponents is to counter attack [2]. During the fight press RT all the time. When your enemy will attack then press X.
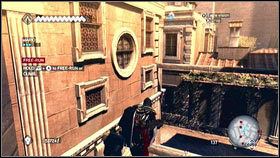
After the fight follow your uncle. Some time later, your uncle will start to climb [1]. Do the same by pressing RT and A. When you will hold A then you will be able to climb on the higher wall [2].
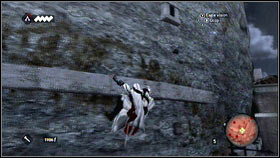
![Do the same to jump down [1] and land on the cart [2] - Sequence 1 - Peace at Last - p. 1 - Walkthrough - Assassins Creed: Brotherhood - Game Guide and Walkthrough](https://game.lhg100.com/Article/UploadFiles/201512/2015121216061824.jpg)
Do the same to jump down [1] and land on the cart [2]. If you won't be able to climb on the building, then use a ladder.
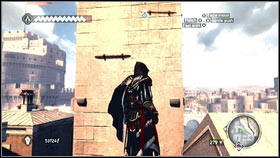
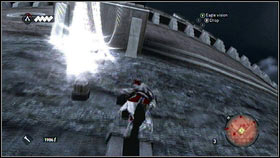
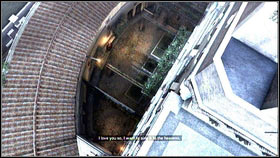
Kill other enemies and move forward. Few seconds later, you will get close to the huge tower [1]. Ezio will jump to the water from it [2] and the next part of the journey will begin.
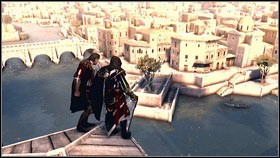
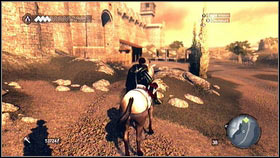
![Follow your uncle [1] and you will get to the Monteriggioni villa [2] - Sequence 1 - Peace at Last - p. 1 - Walkthrough - Assassins Creed: Brotherhood - Game Guide and Walkthrough](https://game.lhg100.com/Article/UploadFiles/201512/2015121216061840.jpg)
Follow your uncle [1] and you will get to the Monteriggioni villa [2].
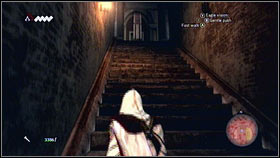
![Get inside [1] and go to the huge stairs [2] - Sequence 1 - Peace at Last - p. 1 - Walkthrough - Assassins Creed: Brotherhood - Game Guide and Walkthrough](https://game.lhg100.com/Article/UploadFiles/201512/2015121216061817.jpg)
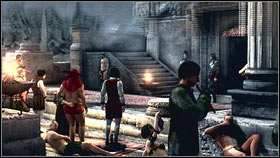
Get inside [1] and go to the huge stairs [2]. After watching a short cut scene, you will be able to do some quests. All of them are marked on the main map.
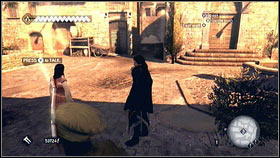
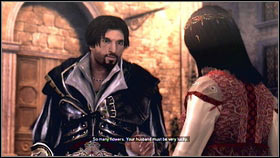
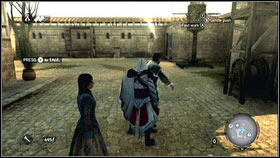
At the beginning try to complete the closest mission. You can get it from one woman. Get close to her and press Y [1]. She will ask you to help her with her flowers [2].
![Take the box by pressing B [1] and follow the woman - Sequence 1 - Peace at Last - p. 1 - Walkthrough - Assassins Creed: Brotherhood - Game Guide and Walkthrough](https://game.lhg100.com/Article/UploadFiles/201512/2015121216061937.jpg)
Take the box by pressing B [1] and follow the woman. When you will be at the proper place, the quest will be over [2].
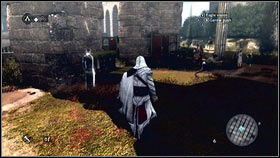
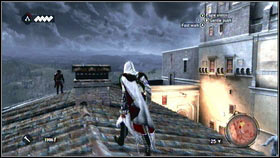
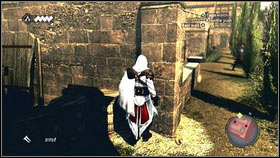
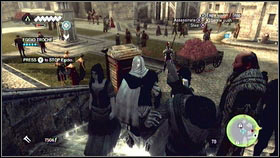
![For the next mission, you have to go to the souther part of the fortress walls [1] - Sequence 1 - Peace at Last - p. 1 - Walkthrough - Assassins Creed: Brotherhood - Game Guide and Walkthrough](https://game.lhg100.com/Article/UploadFiles/201512/2015121216061997.jpg)
For the next mission, you have to go to the souther part of the fortress walls [1]. Two soldiers will be standing near the cannon [2].
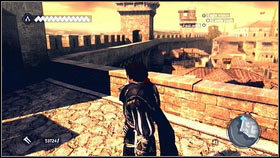
They will ask you to find the mechanic. He is inside one tower in the western part of the walls [1]. Speak with him and take him to the soldiers [2].
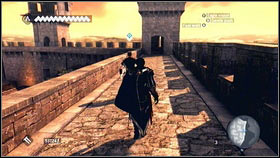
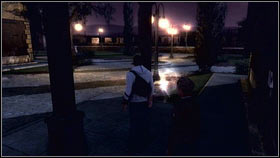
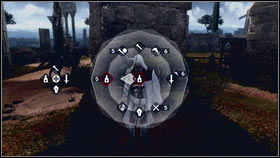
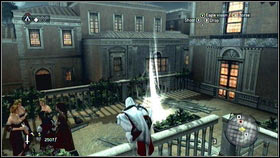
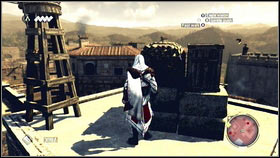
![After watching a short cut scene [1] get close to the cannon and press B [2] - Sequence 1 - Peace at Last - p. 1 - Walkthrough - Assassins Creed: Brotherhood - Game Guide and Walkthrough](https://game.lhg100.com/Article/UploadFiles/201512/2015121216062097.jpg)
After watching a short cut scene [1] get close to the cannon and press B [2].
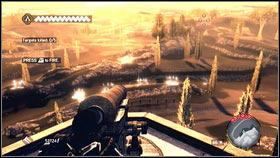
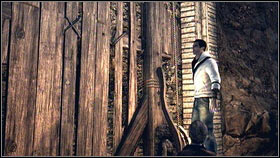
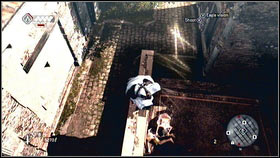
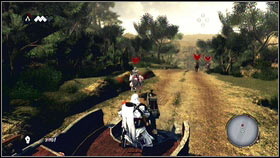
Now your task is to shoot all marked targets. Focus on them [1] and shoot by pressing RT [2]. After destroying five "branches" the quest will be over.
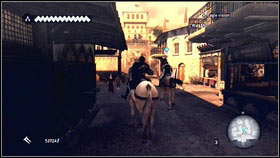
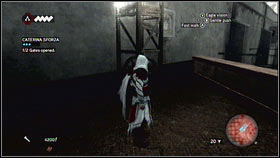
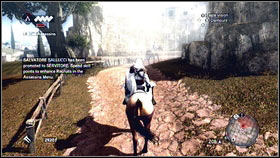
![The last simple quest will be waiting for you at the stables [1] - Sequence 1 - Peace at Last - p. 2 - Walkthrough - Assassins Creed: Brotherhood - Game Guide and Walkthrough](https://game.lhg100.com/Article/UploadFiles/201512/2015121216062069.jpg)
The last simple quest will be waiting for you at the stables [1]. Groom will ask you to find your uncle's horse [2].

Animal is marked on the map. Get close to him [1], press B and go to the stable [2].

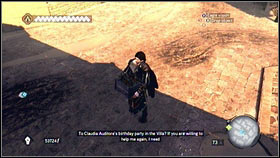
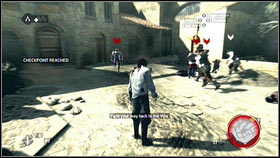
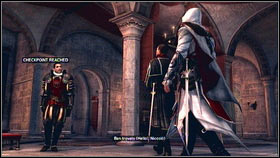
![After dealing with all tasks go to the palace [1], when you will be able to attend an important meeting [2] - Sequence 1 - Peace at Last - p. 2 - Walkthrough - Assassins Creed: Brotherhood - Game Guide and Walkthrough](https://game.lhg100.com/Article/UploadFiles/201512/2015121216062084.jpg)
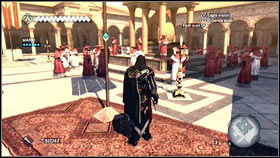
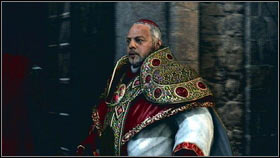
After dealing with all tasks go to the palace [1], when you will be able to attend an important meeting [2].
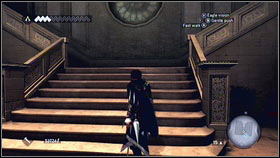
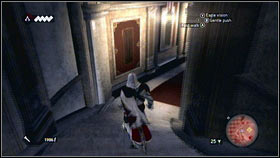
![After the cut scene, go upstairs [1] and open the door leading to the bed room (B) [2] - Sequence 1 - Peace at Last - p. 2 - Walkthrough - Assassins Creed: Brotherhood - Game Guide and Walkthrough](https://game.lhg100.com/Article/UploadFiles/201512/2015121216062153.jpg)
After the cut scene, go upstairs [1] and open the door leading to the bed room (B) [2].
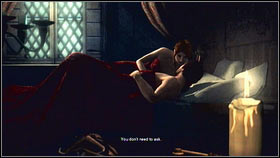
You will meet Catharina here. After the night [1] the town will be attacked by Borgia's army [2].
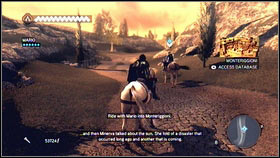
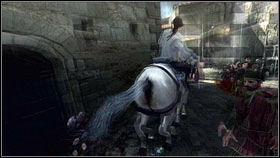
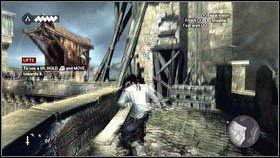
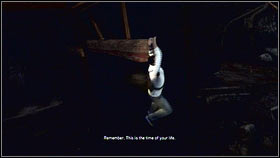
![Your horse will ride alone until one of the building will collapse [1] - Sequence 1 - Peace at Last - p. 2 - Walkthrough - Assassins Creed: Brotherhood - Game Guide and Walkthrough](https://game.lhg100.com/Article/UploadFiles/201512/2015121216062196.jpg)
Your horse will ride alone until one of the building will collapse [1]. Ezio will jump on the wooden beam [2].
![Press RT and A to jump on the other buildings [1] - Sequence 1 - Peace at Last - p. 2 - Walkthrough - Assassins Creed: Brotherhood - Game Guide and Walkthrough](https://game.lhg100.com/Article/UploadFiles/201512/2015121216062125.jpg)
Press RT and A to jump on the other buildings [1]. Few moments later, you will find yourself near the building with the ladder [2].
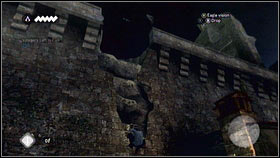
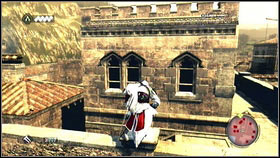
![When you will be there, a cannon bullet with fly near your character [1] - Sequence 1 - Peace at Last - p. 2 - Walkthrough - Assassins Creed: Brotherhood - Game Guide and Walkthrough](https://game.lhg100.com/Article/UploadFiles/201512/2015121216062172.jpg)
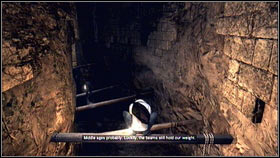
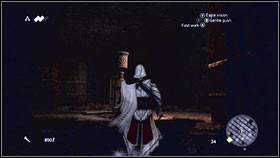
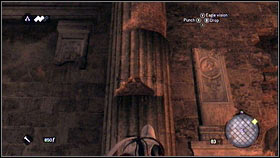
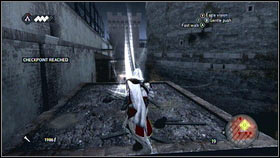
When you will be there, a cannon bullet with fly near your character [1]. Use the hole in the wall to go upstairs and then turn left [2].
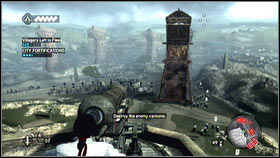
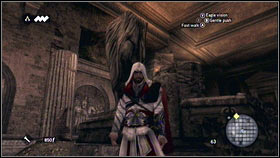
![At the end, you will find a cannon [1] - Sequence 1 - Peace at Last - p. 2 - Walkthrough - Assassins Creed: Brotherhood - Game Guide and Walkthrough](https://game.lhg100.com/Article/UploadFiles/201512/2015121216062217.jpg)
At the end, you will find a cannon [1]. Use it to destroy cannons located on the left [2].
![After dealing with them, try to eliminate enemies located on the right [1] - Sequence 1 - Peace at Last - p. 2 - Walkthrough - Assassins Creed: Brotherhood - Game Guide and Walkthrough](https://game.lhg100.com/Article/UploadFiles/201512/2015121216062299.jpg)
After dealing with them, try to eliminate enemies located on the right [1]. After some time, one of your mates will be shoot. Get close to his cannon and destroy last enemy units [2].
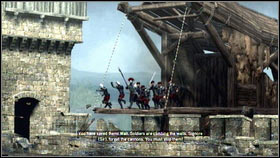
When you will do this, the second part of the siege will start. Enemy soldiers will start to attack your town [1]. Go there and get close to the wooden pole located near the tower [2]. As a matter of fact, you will be transported above.
![Jump down on the other side [1] and then kill all enemies using your counterattacks [2] - Sequence 1 - Peace at Last - p. 2 - Walkthrough - Assassins Creed: Brotherhood - Game Guide and Walkthrough](https://game.lhg100.com/Article/UploadFiles/201512/2015121216062211.jpg)
Jump down on the other side [1] and then kill all enemies using your counterattacks [2].
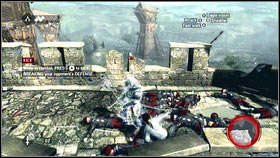
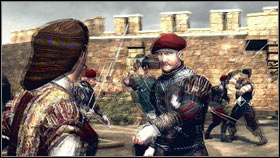
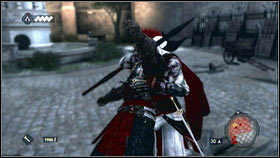
![At one moment, a knight in the plate armor will appear [1] - Sequence 1 - Peace at Last - p. 2 - Walkthrough - Assassins Creed: Brotherhood - Game Guide and Walkthrough](https://game.lhg100.com/Article/UploadFiles/201512/2015121216062380.jpg)
At one moment, a knight in the plate armor will appear [1]. Dodge his attacks with RT and attacks with A. After successful dodge release RT, attack him with A and X. Counter attacks are very useful here. Remember that you can change your weapons with D-pad [2].
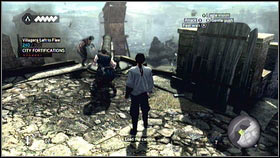
Your character will be wounded but he still can fight. Defeat more enemies [1] and go to the villa [2] that is marked on the map.
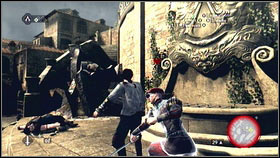
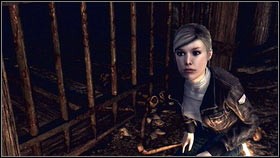
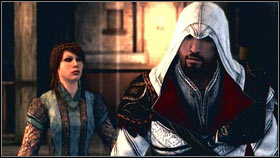
![When you will be upstairs, you will see your sister who will be fighting with some soldiers[1] - Sequence 1 - Peace at Last - p. 2 - Walkthrough - Assassins Creed: Brotherhood - Game Guide and Walkthrough](https://game.lhg100.com/Article/UploadFiles/201512/2015121216062348.jpg)
When you will be upstairs, you will see your sister who will be fighting with some soldiers[1]. Help her (you must be very quick to save her) [2].
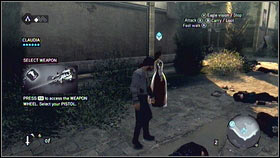
![Fallow Claudia and you will get close to the building [1] - Sequence 1 - Peace at Last - p. 2 - Walkthrough - Assassins Creed: Brotherhood - Game Guide and Walkthrough](https://game.lhg100.com/Article/UploadFiles/201512/2015121216062357.jpg)
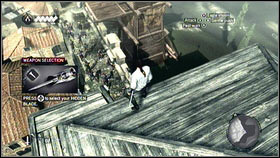
Fallow Claudia and you will get close to the building [1]. Hold RB and choose the gun icon. Kill two nearest enemies [2].
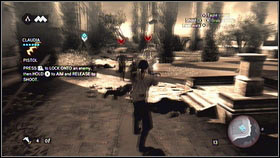
![Target them with X and then shoot by releasing this button [1] - Sequence 1 - Peace at Last - p. 2 - Walkthrough - Assassins Creed: Brotherhood - Game Guide and Walkthrough](https://game.lhg100.com/Article/UploadFiles/201512/2015121216062337.jpg)
Target them with X and then shoot by releasing this button [1]. After the fight follow your sister and enter the building [2].
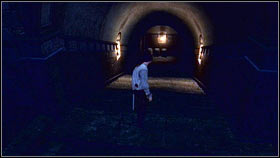
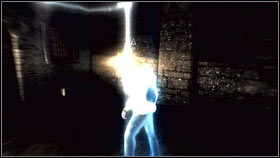
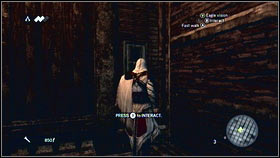
![When you will be inside the corridor go straight ahead [1] until you will get to the glowing point [2] - Sequence 1 - Peace at Last - p. 2 - Walkthrough - Assassins Creed: Brotherhood - Game Guide and Walkthrough](https://game.lhg100.com/Article/UploadFiles/201512/2015121216062416.jpg)
When you will be inside the corridor go straight ahead [1] until you will get to the glowing point [2]. You will see a longer cut scene now and after the film you will return to the Desmond body.
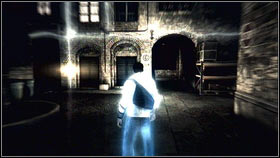
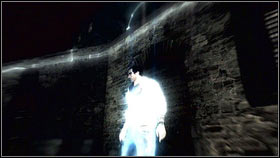
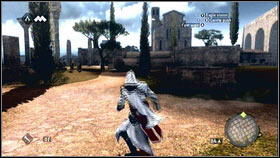
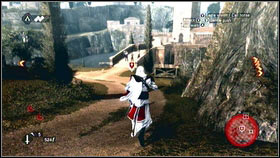
![When the quest will start, follow the Ezios ghost [1] - Sequence 2 - A Wilderness of Tiger - p. 1 - Walkthrough - Assassins Creed: Brotherhood - Game Guide and Walkthrough](https://game.lhg100.com/Article/UploadFiles/201512/2015121216062419.jpg)
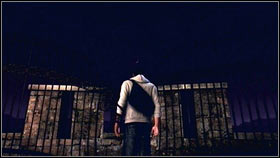
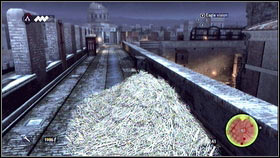
When the quest will start, follow the Ezio's ghost [1]. It will lead you to the broken fence [2].
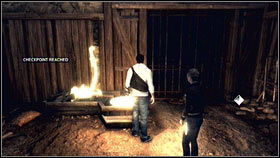
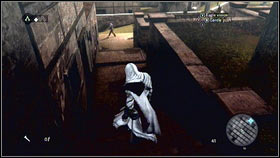
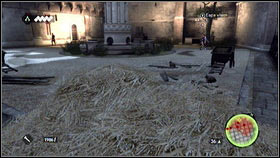
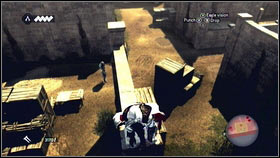
![Climb on it (RT + A) [1], and jump down landing on the hay [2] - Sequence 2 - A Wilderness of Tiger - p. 1 - Walkthrough - Assassins Creed: Brotherhood - Game Guide and Walkthrough](https://game.lhg100.com/Article/UploadFiles/201512/2015121216062440.jpg)
Climb on it (RT + A) [1], and jump down landing on the hay [2].

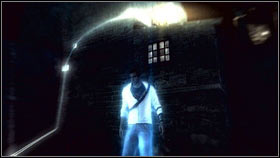
![When you will be inside the building, go straight ahead until you will get close to some ghosts [1] - Sequence 2 - A Wilderness of Tiger - p. 1 - Walkthrough - Assassins Creed: Brotherhood - Game Guide and Walkthrough](https://game.lhg100.com/Article/UploadFiles/201512/2015121216062471.jpg)
When you will be inside the building, go straight ahead until you will get close to some ghosts [1]. Few moments later, you see another cut scene [2].
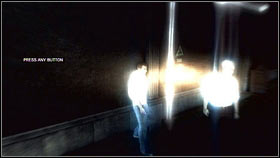
After the film. Get close to the lever glowing gold [1] and use it by pressing any button. You friend will get to the other side [2] but Desmond will have to take another way.
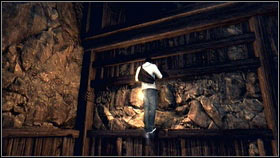
![Get close to the wall [1], hold RT and go up [2] - Sequence 2 - A Wilderness of Tiger - p. 1 - Walkthrough - Assassins Creed: Brotherhood - Game Guide and Walkthrough](https://game.lhg100.com/Article/UploadFiles/201512/2015121216062520.jpg)
Get close to the wall [1], hold RT and go up [2].
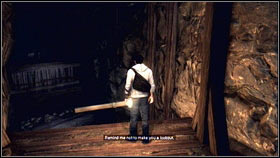
![After few moments you will get to the hole [1] - Sequence 2 - A Wilderness of Tiger - p. 1 - Walkthrough - Assassins Creed: Brotherhood - Game Guide and Walkthrough](https://game.lhg100.com/Article/UploadFiles/201512/2015121216062573.jpg)
After few moments you will get to the hole [1]. Use the beams to get to other side [2].

![After a while, jump down [1] - Sequence 2 - A Wilderness of Tiger - p. 1 - Walkthrough - Assassins Creed: Brotherhood - Game Guide and Walkthrough](https://game.lhg100.com/Article/UploadFiles/201512/2015121216062530.jpg)
After a while, jump down [1]. You will find yourself near the lake. Use the wall to climb up [2] and soon you will meet your friend.
![Go straight ahead until you will get to the next chamber [1] - Sequence 2 - A Wilderness of Tiger - p. 1 - Walkthrough - Assassins Creed: Brotherhood - Game Guide and Walkthrough](https://game.lhg100.com/Article/UploadFiles/201512/2015121216062586.jpg)
Go straight ahead until you will get to the next chamber [1]. Get close to the gate and climb up to the next level [2].
![You will see another mechanism there [1] - Sequence 2 - A Wilderness of Tiger - p. 1 - Walkthrough - Assassins Creed: Brotherhood - Game Guide and Walkthrough](https://game.lhg100.com/Article/UploadFiles/201512/2015121216062552.jpg)
You will see another mechanism there [1]. Step on it and you will be transported higher [2].
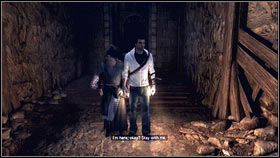
![Follow your companion [1] - Sequence 2 - A Wilderness of Tiger - p. 1 - Walkthrough - Assassins Creed: Brotherhood - Game Guide and Walkthrough](https://game.lhg100.com/Article/UploadFiles/201512/2015121216062633.jpg)
Follow your companion [1]. When you will be hanging on one beam press RT and A to jump in the proper moment. Soon you will get to the next elevator [2].
![On the next level, you will get to the room with the ladder [1] - Sequence 2 - A Wilderness of Tiger - p. 1 - Walkthrough - Assassins Creed: Brotherhood - Game Guide and Walkthrough](https://game.lhg100.com/Article/UploadFiles/201512/2015121216062695.jpg)
On the next level, you will get to the room with the ladder [1]. Go down and jump over the holes. At the end of the corridor catch the wall [2]. Go down and press B when you will be at the safe altitude.
![Use the mechanism in the next chamber [1] and wait for your companion to do the same [2] - Sequence 2 - A Wilderness of Tiger - p. 1 - Walkthrough - Assassins Creed: Brotherhood - Game Guide and Walkthrough](https://game.lhg100.com/Article/UploadFiles/201512/2015121216062675.jpg)
Use the mechanism in the next chamber [1] and wait for your companion to do the same [2].
![Climb up using the wall located on the right and jump on the other side of the lake [1] - Sequence 2 - A Wilderness of Tiger - p. 1 - Walkthrough - Assassins Creed: Brotherhood - Game Guide and Walkthrough](https://game.lhg100.com/Article/UploadFiles/201512/2015121216062647.jpg)
Climb up using the wall located on the right and jump on the other side of the lake [1]. If you will find yourself in the water then use the scaffolding to get out [2]. You will find another switch so use it. Wait until the girl will do the same, jump into the water and go upstairs.
This is not the end. Still you have to climb, use the beams next to the lever [1]. Soon, you will get to the next mechanism [2].
Use it by pressing any button [1]. After using another elevator [2] and jumping above the gulf, you will get to the broken bridge.
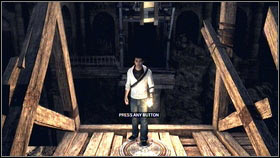
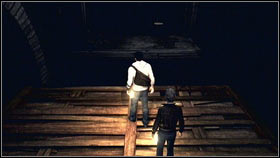
![Stay on the edge and press any button [1] - Sequence 2 - A Wilderness of Tiger - p. 2 - Walkthrough - Assassins Creed: Brotherhood - Game Guide and Walkthrough](https://game.lhg100.com/Article/UploadFiles/201512/2015121216062772.jpg)
Stay on the edge and press any button [1]. After few seconds you will be able to get to the other side [2].
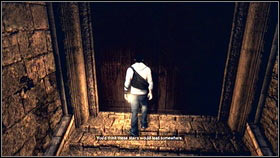
Few step later you will get to the stairs. Unfortunately they are closed [1] so go to the tunnel [2].
![Use the boards to climb on the wall [1] and then turn right - Sequence 2 - A Wilderness of Tiger - p. 2 - Walkthrough - Assassins Creed: Brotherhood - Game Guide and Walkthrough](https://game.lhg100.com/Article/UploadFiles/201512/2015121216062790.jpg)
Use the boards to climb on the wall [1] and then turn right. Soon, you will get to another mechanism [2].
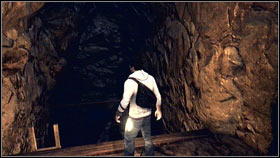
![Use it and follow your friend [1] - Sequence 2 - A Wilderness of Tiger - p. 2 - Walkthrough - Assassins Creed: Brotherhood - Game Guide and Walkthrough](https://game.lhg100.com/Article/UploadFiles/201512/2015121216062817.jpg)
Use it and follow your friend [1]. After few steps, you will get to another bridge. Do the same thing and jump to the other side [2].
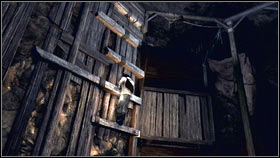
![Use the ladder to get down, jump over the lake and use some boards to go up [1] - Sequence 2 - A Wilderness of Tiger - p. 2 - Walkthrough - Assassins Creed: Brotherhood - Game Guide and Walkthrough](https://game.lhg100.com/Article/UploadFiles/201512/2015121216062887.jpg)
Use the ladder to get down, jump over the lake and use some boards to go up [1]. You will see another mechanisms there [2].

![Use it and cross the bridge [1] - Sequence 2 - A Wilderness of Tiger - p. 2 - Walkthrough - Assassins Creed: Brotherhood - Game Guide and Walkthrough](https://game.lhg100.com/Article/UploadFiles/201512/2015121216062814.jpg)
Use it and cross the bridge [1]. After a while you will be in the Sanctuary [2].
![Follow Lucy, go upstairs and find closed door [1] - Sequence 2 - A Wilderness of Tiger - p. 2 - Walkthrough - Assassins Creed: Brotherhood - Game Guide and Walkthrough](https://game.lhg100.com/Article/UploadFiles/201512/2015121216062868.jpg)
Follow Lucy, go upstairs and find closed door [1]. Use your Eagle Vision to get to the other side (Y) [2] and press any button.
After watching a short cut scene, follow the men and press any button when you will be close to him [1]. You will be asked to find four electricity boxes. Turn on your Eagle Vision and you will see the item [2]. Use it by pressing any button.
To find another box, turn right and the left. Go straight ahead and you will see the box at the end of the stairs [1]. When you will fix it turn right and then left. Keep to the right side and get to the third target [2].
Repair it and go to the road located opposite to the box. Turn right and you should see a wire [1]. Jump on the building and you find the fourth box at the top of it [2]. Use it and you will be transported to the Sanctuary automatically.

![Get close to the animus [1] and press any button - Sequence 2 - A Wilderness of Tiger - p. 2 - Walkthrough - Assassins Creed: Brotherhood - Game Guide and Walkthrough](https://game.lhg100.com/Article/UploadFiles/201512/2015121216062900.jpg)
Get close to the animus [1] and press any button. You will start the first training mission. Your task is to kill as many opponents as you can in only 45 seconds [2]. After the quest you will learn couple interesting facts about the animus and you will be able to play as Ezio once again.
Full synchronization: Your life bar should be above one square.
Your first task is to find the doctor that will be able to cure your wounds. Go down by using the stairs located on the left [1] and go to the place marked on the map [2].
After a short conversation you will get the cure. To use it press and hold RB, choose the Medicine [1]. As a matter of fact Ezio will gain some health immediately [2].
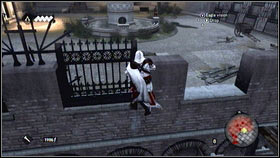
![Now you can go to the church [1] - Sequence 2 - A Wilderness of Tiger - p. 2 - Walkthrough - Assassins Creed: Brotherhood - Game Guide and Walkthrough](https://game.lhg100.com/Article/UploadFiles/201512/2015121216063043.jpg)
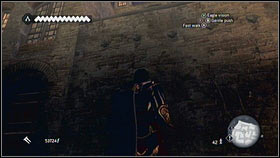
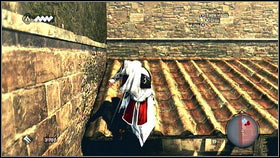
Now you can go to the church [1]. Go to the backyard and climb on the building [2].

![When you will get to the glowing point [1], press Y as a matter of fact, you will see next part of the map - Sequence 2 - A Wilderness of Tiger - p. 2 - Walkthrough - Assassins Creed: Brotherhood - Game Guide and Walkthrough](https://game.lhg100.com/Article/UploadFiles/201512/2015121216063054.jpg)
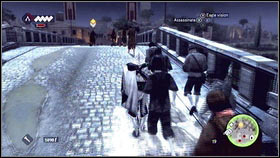
When you will get to the glowing point [1], press Y as a matter of fact, you will see next part of the map. You can jump down now. Stay in the hay until the guards will go away [2].
![When it will happen, follow them [1] - Sequence 2 - A Wilderness of Tiger - p. 2 - Walkthrough - Assassins Creed: Brotherhood - Game Guide and Walkthrough](https://game.lhg100.com/Article/UploadFiles/201512/2015121216063021.jpg)
When it will happen, follow them [1]. You have to stay in the proper distance (not too close and too far). When you will be to close, you will be warned by the yellow thing above their heads [2]. Hide for a while because you will be uncovered. When the sign will disappear follow them once again.
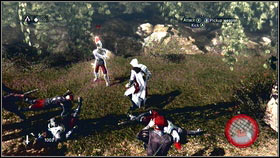
During your journey, you will learn many important moves. After some time you will get to the place when the guards will attack one man [1]. Help him by killing all opponents and then speak with him [2].
Full synchronization: kill the target with your hidden knife.
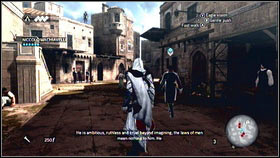
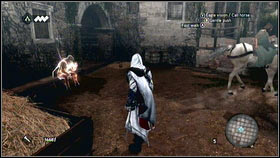
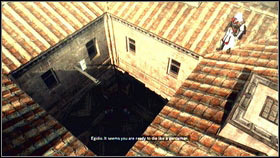
![He will ask you to kill Il Carnefice, that can be found in the building located on the hill, east of the gallows [1] - Sequence 2 - A Wilderness of Tiger - p. 3 - Walkthrough - Assassins Creed: Brotherhood - Game Guide and Walkthrough](https://game.lhg100.com/Article/UploadFiles/201512/2015121216063144.jpg)
He will ask you to kill Il Carnefice, that can be found in the building located on the hill, east of the gallows [1]. He was marked by the green dot on the map [2].
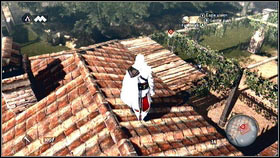
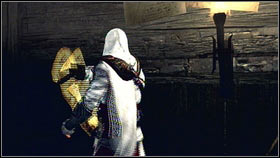
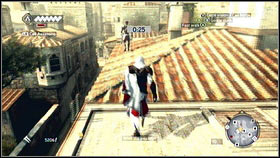
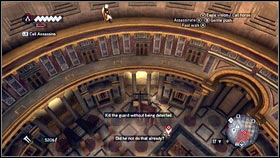
![Get on the roof and get close to the edge (you must see your target) [1] - Sequence 2 - A Wilderness of Tiger - p. 3 - Walkthrough - Assassins Creed: Brotherhood - Game Guide and Walkthrough](https://game.lhg100.com/Article/UploadFiles/201512/2015121216063118.jpg)
Get on the roof and get close to the edge (you must see your target) [1]. To complete the quest, you will have to draw your knife (up arrow on the D-pad), hold LT and choose your victim. When it will be marked press X. Ezio will jump of the roof and kill Il Carnefice [2].
![After the job, draw your sword and deal with another people [1] - Sequence 2 - A Wilderness of Tiger - p. 3 - Walkthrough - Assassins Creed: Brotherhood - Game Guide and Walkthrough](https://game.lhg100.com/Article/UploadFiles/201512/2015121216063129.jpg)
After the job, draw your sword and deal with another people [1]. Then get to the next exclamation mark glowing on the map [2].
Full synchronization: Throw Borgia captain on the scaffolding to kill him.
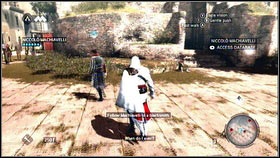
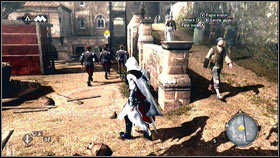
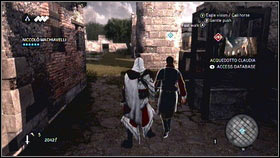
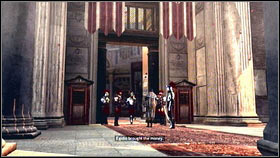
![After speaking with Machiavelli fallow him and try not to draw attention of other people [1] - Sequence 2 - A Wilderness of Tiger - p. 3 - Walkthrough - Assassins Creed: Brotherhood - Game Guide and Walkthrough](https://game.lhg100.com/Article/UploadFiles/201512/2015121216063174.jpg)
After speaking with Machiavelli fallow him and try not to draw attention of other people [1]. After a while, you will get to the store where he will give you a small amount of money [2].
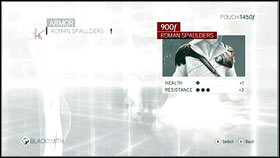
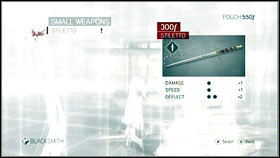
Get close to the merchant and press Y and you will start trading. By (Armor) Roman Spaulders [1] and weapon (Small Weapons) Stiletto [2].
![When you will get them, follow Machiavelli [1] - Sequence 2 - A Wilderness of Tiger - p. 3 - Walkthrough - Assassins Creed: Brotherhood - Game Guide and Walkthrough](https://game.lhg100.com/Article/UploadFiles/201512/2015121216063244.jpg)
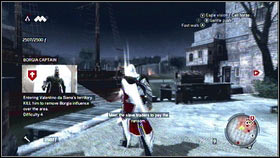
When you will get them, follow Machiavelli [1]. During your trip you will learn that red areas are under Borgia control and you will be attacked as soon as you will enter them [2].
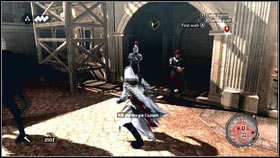
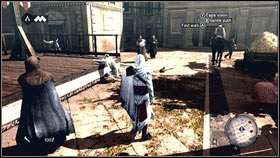
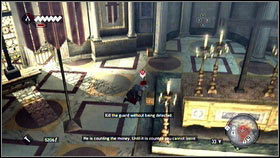
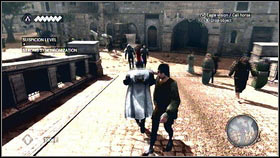
![Go to the stables and try to get close to the marked captain [1] - Sequence 2 - A Wilderness of Tiger - p. 3 - Walkthrough - Assassins Creed: Brotherhood - Game Guide and Walkthrough](https://game.lhg100.com/Article/UploadFiles/201512/2015121216063275.jpg)
Go to the stables and try to get close to the marked captain [1]. To achieve full synchronization, you will have to kill him by throwing his body body on the scaffolding [2]. First of all eliminate his comrades and use counter attack when he will try to charge. Kick him when he will be lying on the ground (A). When he will be close to the scaffolding, stun him and throw his body by pressing B.
![When the quest will be completed [1] return to Machiavelli [2] - Sequence 2 - A Wilderness of Tiger - p. 3 - Walkthrough - Assassins Creed: Brotherhood - Game Guide and Walkthrough](https://game.lhg100.com/Article/UploadFiles/201512/2015121216063251.jpg)
When the quest will be completed [1] return to Machiavelli [2].
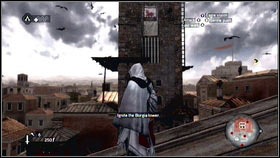
Now you will have to destroy Borgia's tower. To do this, climb on the stable [1] and get to the tower from the south side. You will see a ladder there so you will be able to get to the highest part of the tower [2].

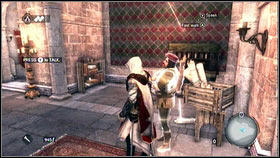
You will find some barrels there. Get close to them by pressing B [1]. When the quest will be over [2] fallow Machiavelli, get close to the glowing point and examine the stables (Y). You will be asked to repair this building. When you will be done, the next mission will start.
Full synchronization: Keep the health bar at the maximum.
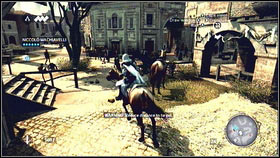
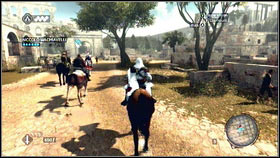
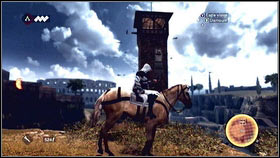
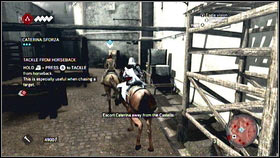
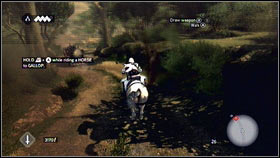
![After you will start this quest, jump on the nearest horse and follow Machiavelli [1] - Sequence 2 - A Wilderness of Tiger - p. 3 - Walkthrough - Assassins Creed: Brotherhood - Game Guide and Walkthrough](https://game.lhg100.com/Article/UploadFiles/201512/2015121216063358.jpg)
After you will start this quest, jump on the nearest horse and follow Machiavelli [1]. If you want to get the full synchronization, then you have to avoid the guards [2].
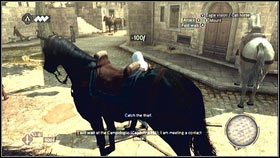
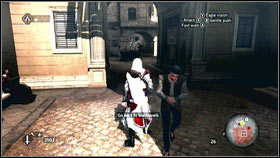
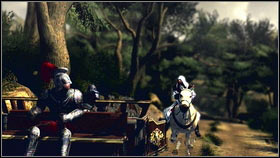
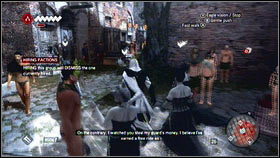
![In one moment Ezio will be robbed by some thief [1] - Sequence 2 - A Wilderness of Tiger - p. 3 - Walkthrough - Assassins Creed: Brotherhood - Game Guide and Walkthrough](https://game.lhg100.com/Article/UploadFiles/201512/2015121216063365.jpg)
In one moment Ezio will be robbed by some thief [1]. Follow him and when you will be close enough, press RT + B. The man will fall on the ground and you will get your gold back [2]. Now you can go for the next quest.
Full synchronization: Catch Borgia's messenger in less than one minute .
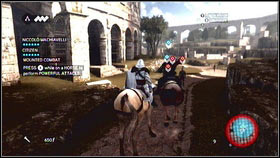
![Like as before, follow Machiavelli and try to avoid guards [1] - Sequence 2 - A Wilderness of Tiger - p. 3 - Walkthrough - Assassins Creed: Brotherhood - Game Guide and Walkthrough](https://game.lhg100.com/Article/UploadFiles/201512/2015121216063336.jpg)
Like as before, follow Machiavelli and try to avoid guards [1]. After a short trip, you will see that some soldiers are harassing one man [2].
![Kill guards [1] and follow Borgias messenger [2] - Sequence 2 - A Wilderness of Tiger - p. 3 - Walkthrough - Assassins Creed: Brotherhood - Game Guide and Walkthrough](https://game.lhg100.com/Article/UploadFiles/201512/2015121216063347.jpg)
Kill guards [1] and follow Borgia's messenger [2]. To get the full synchronization, you have to catch him in less that one minute. Do the same thing like in the mission with the thief. When you will catch the man, the mission will be over. Now return to Machiavelli. Press Y to call your horse.
Full synchronization: stay at full HP all the time.
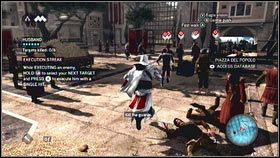
![At the beginning you will see a short cut scene [1] and you will be surrounded by some soldiers - Sequence 2 - A Wilderness of Tiger - p. 3 - Walkthrough - Assassins Creed: Brotherhood - Game Guide and Walkthrough](https://game.lhg100.com/Article/UploadFiles/201512/2015121216063443.jpg)
At the beginning you will see a short cut scene [1] and you will be surrounded by some soldiers. They are very weak but remember that they cannot hit you (if you want to get the full synchronization). The best option to do that is to counterattack them all the time. Press RT, wait for the good moment and then press X [2]. Now you will have a chance to learn new ability called kill streak. While doing counter attack release RT and mark your target with analog stick, then press X. As a matter of fact you will do two executions and few moments. It is much faster but also more risky way - your enemies can hit you while doing this combo.
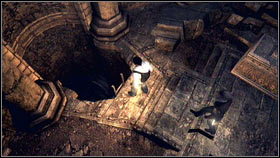
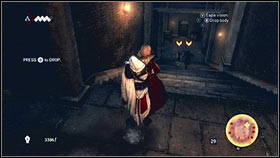
![After the fight go to the place marked on the map [1], press B and do downstairs [2] - Sequence 2 - A Wilderness of Tiger - p. 3 - Walkthrough - Assassins Creed: Brotherhood - Game Guide and Walkthrough](https://game.lhg100.com/Article/UploadFiles/201512/2015121216063456.jpg)
After the fight go to the place marked on the map [1], press B and do downstairs [2].
Full synchronization: Complete this mission in 8 minutes.


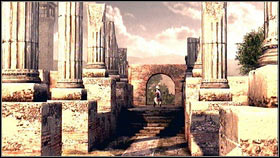
Now you have to get to the other side of these ruins. This is a very simple task but it can take you some time. I advise you to train it first and then restart to get the full synchronization. At the beginning jump on the highest pillar [1] and turn left [2].
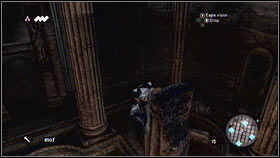
![While holding RT, press A and you will jump on the other pillar [1] - Sequence 2 - A Wilderness of Tiger - p. 4 - Walkthrough - Assassins Creed: Brotherhood - Game Guide and Walkthrough](https://game.lhg100.com/Article/UploadFiles/201512/2015121216063473.jpg)
While holding RT, press A and you will jump on the other pillar [1]. Now you have to get on the platform located north [2].

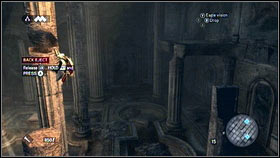
![You will find some levers located on the left and on the right [1] - Sequence 2 - A Wilderness of Tiger - p. 4 - Walkthrough - Assassins Creed: Brotherhood - Game Guide and Walkthrough](https://game.lhg100.com/Article/UploadFiles/201512/2015121216063406.jpg)
You will find some levers located on the left and on the right [1]. Use it and return to the first pillar [2].
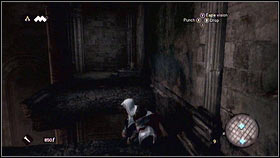
![Now turn north and use the pillar to [1] get to the wall [2] - Sequence 2 - A Wilderness of Tiger - p. 4 - Walkthrough - Assassins Creed: Brotherhood - Game Guide and Walkthrough](https://game.lhg100.com/Article/UploadFiles/201512/2015121216063558.jpg)
Now turn north and use the pillar to [1] get to the wall [2].
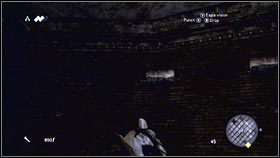
![Move left and you will find third mechanisms [1], the fourth one will be located on the right [2] - Sequence 2 - A Wilderness of Tiger - p. 4 - Walkthrough - Assassins Creed: Brotherhood - Game Guide and Walkthrough](https://game.lhg100.com/Article/UploadFiles/201512/2015121216063572.jpg)
Move left and you will find third mechanisms [1], the fourth one will be located on the right [2].
![Use all of them, watch the cut scene and jump to the hole [1] - Sequence 2 - A Wilderness of Tiger - p. 4 - Walkthrough - Assassins Creed: Brotherhood - Game Guide and Walkthrough](https://game.lhg100.com/Article/UploadFiles/201512/2015121216063545.jpg)
Use all of them, watch the cut scene and jump to the hole [1]. Now go to the corridor [2].
While going to the right, you will get close to the statue which located near the exit [1]. Climb on it [2].
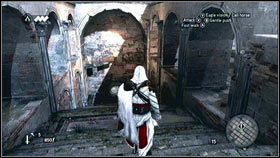
![While going to the right you will get to the stone portal [1] - Sequence 2 - A Wilderness of Tiger - p. 4 - Walkthrough - Assassins Creed: Brotherhood - Game Guide and Walkthrough](https://game.lhg100.com/Article/UploadFiles/201512/2015121216063634.jpg)
While going to the right you will get to the stone portal [1]. Jump to the other side and climb on the wooden pillar [2].

![Now you will be able to catch the lamp and jump over the gate [1] - Sequence 2 - A Wilderness of Tiger - p. 4 - Walkthrough - Assassins Creed: Brotherhood - Game Guide and Walkthrough](https://game.lhg100.com/Article/UploadFiles/201512/2015121216063693.jpg)
Now you will be able to catch the lamp and jump over the gate [1]. At the end of the corridor you will see another statue. Climb on it and catch nearby stick. Use the wall and some lamps to get to the huge doors [2].
![Get close to the mechanisms located on the right, to open the door[1] press B [2] - Sequence 2 - A Wilderness of Tiger - p. 4 - Walkthrough - Assassins Creed: Brotherhood - Game Guide and Walkthrough](https://game.lhg100.com/Article/UploadFiles/201512/2015121216063678.jpg)
Get close to the mechanisms located on the right, to open the door[1] press B [2].
![On the other side climb on the pillar located near the lake [1] - Sequence 2 - A Wilderness of Tiger - p. 4 - Walkthrough - Assassins Creed: Brotherhood - Game Guide and Walkthrough](https://game.lhg100.com/Article/UploadFiles/201512/2015121216063646.jpg)
On the other side climb on the pillar located near the lake [1]. Now you can jump on the nearby statue [2].
![Climb on the head [1] and jump in the direction of the pillar located on the other side of the room [2] - Sequence 2 - A Wilderness of Tiger - p. 4 - Walkthrough - Assassins Creed: Brotherhood - Game Guide and Walkthrough](https://game.lhg100.com/Article/UploadFiles/201512/2015121216063628.jpg)
Climb on the head [1] and jump in the direction of the pillar located on the other side of the room [2]. Climb on it and go right.

When you will be at the end hold RT and press A. As a matter of fact you will get to the next statue [1]. Climb on it [2] and jump on the other side of this room. Go left and you will land on the floor. Climb on the statue and jump on the wall.
![Soon, you will get to the flaming torches [1] - Sequence 2 - A Wilderness of Tiger - p. 4 - Walkthrough - Assassins Creed: Brotherhood - Game Guide and Walkthrough](https://game.lhg100.com/Article/UploadFiles/201512/2015121216063706.jpg)
Soon, you will get to the flaming torches [1]. Catch the edge and try to get to the other side [2].
![Move to the left and you will see a wooden stick [1] - Sequence 2 - A Wilderness of Tiger - p. 5 - Walkthrough - Assassins Creed: Brotherhood - Game Guide and Walkthrough](https://game.lhg100.com/Article/UploadFiles/201512/2015121216063705.jpg)
Move to the left and you will see a wooden stick [1]. Catch it and jump on the stone block [2].

![Jump further and you will get to the next chamber where you will see a cut scene [1] - Sequence 2 - A Wilderness of Tiger - p. 5 - Walkthrough - Assassins Creed: Brotherhood - Game Guide and Walkthrough](https://game.lhg100.com/Article/UploadFiles/201512/2015121216063718.jpg)
Jump further and you will get to the next chamber where you will see a cut scene [1]. When it will end enter the entrance located under the torch [2].

![Use sticks and stone statues to move further until you will get to the next whole [1] - Sequence 2 - A Wilderness of Tiger - p. 5 - Walkthrough - Assassins Creed: Brotherhood - Game Guide and Walkthrough](https://game.lhg100.com/Article/UploadFiles/201512/2015121216063714.jpg)
Use sticks and stone statues to move further until you will get to the next whole [1]. Turn right and you will see some bricks [2].
Catch them to get to the other side. Then turn left and climb on the iron ring located above [1]. Now jump on the stone pillar located in the middle. Move left and jump on the wooden stick [2]. As a matter of fact you will get to the room with the fire camp.

![Climb on the wall located left of the statue [1] and then use wooden sticks and iron rings to get further to the left [2] - Sequence 2 - A Wilderness of Tiger - p. 5 - Walkthrough - Assassins Creed: Brotherhood - Game Guide and Walkthrough](https://game.lhg100.com/Article/UploadFiles/201512/2015121216063863.jpg)
Climb on the wall located left of the statue [1] and then use wooden sticks and iron rings to get further to the left [2].
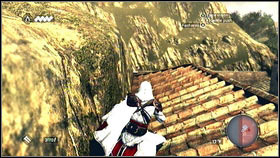
![At the end, turn left and jump to the ruins [1] - Sequence 2 - A Wilderness of Tiger - p. 5 - Walkthrough - Assassins Creed: Brotherhood - Game Guide and Walkthrough](https://game.lhg100.com/Article/UploadFiles/201512/2015121216063814.jpg)
At the end, turn left and jump to the ruins [1]. You should see a balcony on the right [2]. Go there.

![Stay close to the wall and use sticks to move further [1], soon you will get to the demolished balcony - Sequence 2 - A Wilderness of Tiger - p. 5 - Walkthrough - Assassins Creed: Brotherhood - Game Guide and Walkthrough](https://game.lhg100.com/Article/UploadFiles/201512/2015121216063848.jpg)
Stay close to the wall and use sticks to move further [1], soon you will get to the demolished balcony. Turn left to see the ruins [2].
Jump on it and use pillars [1] to get to the wall. Climb up, turn left and use the sticks to get to the entrance located over the throne [2].

![Open all chests located here (B) [1] and exit the place using the ladder [2] - Sequence 2 - A Wilderness of Tiger - p. 5 - Walkthrough - Assassins Creed: Brotherhood - Game Guide and Walkthrough](https://game.lhg100.com/Article/UploadFiles/201512/2015121216063927.jpg)
Open all chests located here (B) [1] and exit the place using the ladder [2].
![When you will be outside go to the next underground entrance [1] - Sequence 2 - A Wilderness of Tiger - p. 5 - Walkthrough - Assassins Creed: Brotherhood - Game Guide and Walkthrough](https://game.lhg100.com/Article/UploadFiles/201512/2015121216063905.jpg)
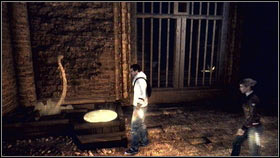
When you will be outside go to the next underground entrance [1]. They will help you to travel through the city very fast. Before you will be able to use the portal, you will have to activate it first. Get close to the first one, press B and choose the first location [2].
![After a short conversation [1], leave the room [2] - Sequence 2 - A Wilderness of Tiger - p. 5 - Walkthrough - Assassins Creed: Brotherhood - Game Guide and Walkthrough](https://game.lhg100.com/Article/UploadFiles/201512/2015121216063936.jpg)
After a short conversation [1], leave the room [2]. As a matter of fact you will end this sequence.
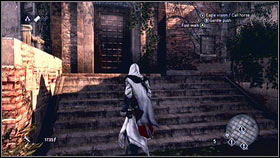
You can choose three missions here. One is located on the west, one on the east and the last one - in the south. Go south, get close to the marked building and knock on the door [1]. The mission will start automatically [2].
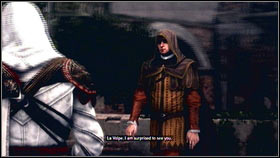
Full synchronization: Stay under cover until you will meet with La Volpe in Thieves Guild for the next time.
![After speaking with La Volpe go to the place marked on the map [1] - Sequence 3 - The Fighter, The Lover and The Thief - p. 1 - Walkthrough - Assassins Creed: Brotherhood - Game Guide and Walkthrough](https://game.lhg100.com/Article/UploadFiles/201512/2015121216064066.jpg)
After speaking with La Volpe go to the place marked on the map [1]. Climb on the building and speak with one thief [2].
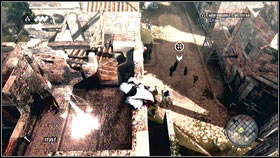
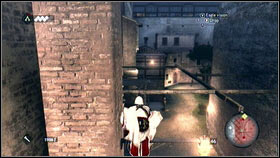
![After the cut scene you will have to kill guards located on the other side of the street [1] - Sequence 3 - The Fighter, The Lover and The Thief - p. 1 - Walkthrough - Assassins Creed: Brotherhood - Game Guide and Walkthrough](https://game.lhg100.com/Article/UploadFiles/201512/2015121216064074.jpg)
After the cut scene you will have to kill guards located on the other side of the street [1]. Hold RB, choose throwing knives, then throw them by holding LT [2]. Kill the rest with your sword.
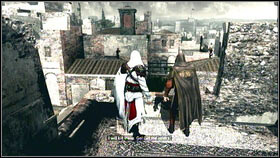
![After the fight speak with the man [1] and lead him to the marked place - Sequence 3 - The Fighter, The Lover and The Thief - p. 1 - Walkthrough - Assassins Creed: Brotherhood - Game Guide and Walkthrough](https://game.lhg100.com/Article/UploadFiles/201512/2015121216064040.jpg)
After the fight speak with the man [1] and lead him to the marked place. Try to avoid all guards and do not jump on buildings because your companion is in bad condition. You will learn some informations about notoriety. During this procedure guards will be attacking you on sight so avoid them. Fortunately they are marked on the map [2].
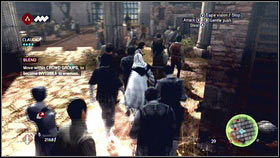
![To stay under cover you can always stay among other people [1] or just hide in the hay [2] - Sequence 3 - The Fighter, The Lover and The Thief - p. 1 - Walkthrough - Assassins Creed: Brotherhood - Game Guide and Walkthrough](https://game.lhg100.com/Article/UploadFiles/201512/2015121216064056.jpg)
To stay under cover you can always stay among other people [1] or just hide in the hay [2].
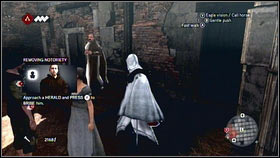
![When you will be there [1] you will have to lower Notoriety - Sequence 3 - The Fighter, The Lover and The Thief - p. 1 - Walkthrough - Assassins Creed: Brotherhood - Game Guide and Walkthrough](https://game.lhg100.com/Article/UploadFiles/201512/2015121216064023.jpg)
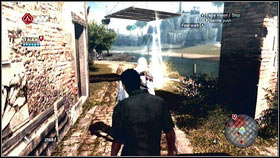
When you will be there [1] you will have to lower Notoriety. You can achieve it in three different ways. The first one is to get rid of the posters located all over the city. The are marked with squares on the map. When you will be close to the poster press B [2].
The next method is much more expensive. You can find a speaker and give him 500 gold pieces (Y) [1]. The last one is about killing all witnesses [2]. They will be marked on the map, but remember that you can be uncovered while fighting
![When the Notoriety will be close to zero speak with Volpe [1] [2] - Sequence 3 - The Fighter, The Lover and The Thief - p. 1 - Walkthrough - Assassins Creed: Brotherhood - Game Guide and Walkthrough](https://game.lhg100.com/Article/UploadFiles/201512/2015121216064134.jpg)
When the Notoriety will be close to zero speak with Volpe [1] [2].
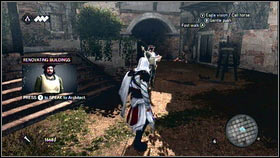
![After a short conversation, get close to the architect [1] who will build the inn - Sequence 3 - The Fighter, The Lover and The Thief - p. 1 - Walkthrough - Assassins Creed: Brotherhood - Game Guide and Walkthrough](https://game.lhg100.com/Article/UploadFiles/201512/2015121216064183.jpg)
After a short conversation, get close to the architect [1] who will build the inn. Leave his home and start the next mission [2].
Full synchronization: Do not enter the water.
![After speaking with one prostitute [1] go to the place marked on the map - Sequence 3 - The Fighter, The Lover and The Thief - p. 2 - Walkthrough - Assassins Creed: Brotherhood - Game Guide and Walkthrough](https://game.lhg100.com/Article/UploadFiles/201512/2015121216064181.jpg)
After speaking with one prostitute [1] go to the place marked on the map. To complete this quest you will need 2,500 florins. If you do not have enough money, rob some citizens [2]. When you will be passing near a person, press and hold A. Ezio will take their money automatically. This will make your Notoriety much higher so try to avoid this kind of behavior.
![When you will have enough money, go to the marked place [1] - Sequence 3 - The Fighter, The Lover and The Thief - p. 2 - Walkthrough - Assassins Creed: Brotherhood - Game Guide and Walkthrough](https://game.lhg100.com/Article/UploadFiles/201512/2015121216064133.jpg)
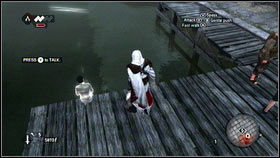
When you will have enough money, go to the marked place [1]. You will be attacked by some hijackers [2]. They are quite weak but remember to stay on the board all the time to get the full synchronization.
![After the battle battle return to courtesans [1] and tell them what happened - Sequence 3 - The Fighter, The Lover and The Thief - p. 2 - Walkthrough - Assassins Creed: Brotherhood - Game Guide and Walkthrough](https://game.lhg100.com/Article/UploadFiles/201512/2015121216064261.jpg)
After the battle battle return to courtesans [1] and tell them what happened. After speaking with your family [2], find architect and repair the brothel.
Full synchronization: Kill Borgia captain (only him).
![Speak with Bartolomeo and his wife [1] you will find yourself outside and you will have to catch Borgias captain [2] - Sequence 3 - The Fighter, The Lover and The Thief - p. 2 - Walkthrough - Assassins Creed: Brotherhood - Game Guide and Walkthrough](https://game.lhg100.com/Article/UploadFiles/201512/2015121216064210.jpg)
Speak with Bartolomeo and his wife [1] you will find yourself outside and you will have to catch Borgia's captain [2]. Your enemy will be marked with red icon.
![When you will get close to him [1], knock him on the ground and kill with your hidden dagger - Sequence 3 - The Fighter, The Lover and The Thief - p. 2 - Walkthrough - Assassins Creed: Brotherhood - Game Guide and Walkthrough](https://game.lhg100.com/Article/UploadFiles/201512/2015121216064265.jpg)
When you will get close to him [1], knock him on the ground and kill with your hidden dagger. You can attack him by jumping from your horse too. Try to avoid nearby guards [2], because killing only one of them will disallow you to get the full synchronization. To exit the fight mode press LT.
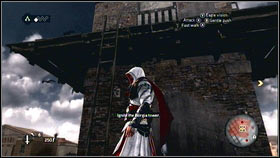
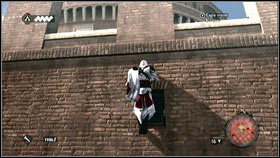
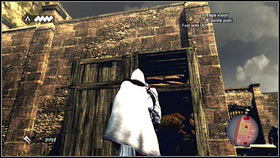
![After the execution, you will have to set fire under one of the Borgias tower [1] - Sequence 3 - The Fighter, The Lover and The Thief - p. 2 - Walkthrough - Assassins Creed: Brotherhood - Game Guide and Walkthrough](https://game.lhg100.com/Article/UploadFiles/201512/2015121216064222.jpg)
After the execution, you will have to set fire under one of the Borgia's tower [1]. It will be marked on the map. To get upstairs you will have to use windows located on the building [2].
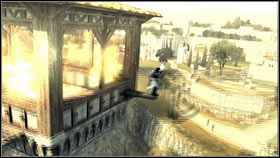
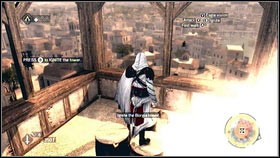
![When you will be there, set the fire [1], jump to the water [2] and return to Bartolomeo - Sequence 3 - The Fighter, The Lover and The Thief - p. 2 - Walkthrough - Assassins Creed: Brotherhood - Game Guide and Walkthrough](https://game.lhg100.com/Article/UploadFiles/201512/2015121216064281.jpg)
When you will be there, set the fire [1], jump to the water [2] and return to Bartolomeo.
![After speaking with him go to the architect [1] - Sequence 3 - The Fighter, The Lover and The Thief - p. 2 - Walkthrough - Assassins Creed: Brotherhood - Game Guide and Walkthrough](https://game.lhg100.com/Article/UploadFiles/201512/2015121216064362.jpg)
After speaking with him go to the architect [1]. As a matter of fact you will renovate the barracks [2]. When you will be done go to the last marked point.
You will learn some many important things now. Speak with all new friends [1] and go to the man marked on the map [2]. Speak with him and end the sequence.
Full synchronization: Stay undercover.
![After watching a short cut scene and speaking with Machiavelli [1] go near the canal [2] - Sequence 4 - Den of Thieves - p. 1 - Walkthrough - Assassins Creed: Brotherhood - Game Guide and Walkthrough](https://game.lhg100.com/Article/UploadFiles/201512/2015121216064306.jpg)
After watching a short cut scene and speaking with Machiavelli [1] go near the canal [2].
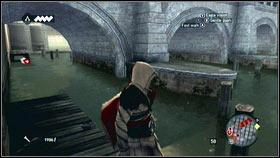
![You should see some wooden pillars there [1] - Sequence 4 - Den of Thieves - p. 1 - Walkthrough - Assassins Creed: Brotherhood - Game Guide and Walkthrough](https://game.lhg100.com/Article/UploadFiles/201512/2015121216064376.jpg)
You should see some wooden pillars there [1]. Jump on them to get to the other bank [2].
![Catch the wall and go to the other side [1] - Sequence 4 - Den of Thieves - p. 1 - Walkthrough - Assassins Creed: Brotherhood - Game Guide and Walkthrough](https://game.lhg100.com/Article/UploadFiles/201512/2015121216064387.jpg)
Catch the wall and go to the other side [1]. Then go to the pace marked on the map [2].
Now you have to get to other side of the square (avoid the guards). At the beginning hide in the hay [1] and wait when the guard will be looking another way. Kill him with your hidden dagger. [2].
![You next victim will be the soldier wandering near the tree [1] - Sequence 4 - Den of Thieves - p. 1 - Walkthrough - Assassins Creed: Brotherhood - Game Guide and Walkthrough](https://game.lhg100.com/Article/UploadFiles/201512/2015121216064403.jpg)
You next victim will be the soldier wandering near the tree [1]. When he will turn left hide near the wall [2].
![When he will get close to the barrow [1] get close to him and kill [2] - Sequence 4 - Den of Thieves - p. 1 - Walkthrough - Assassins Creed: Brotherhood - Game Guide and Walkthrough](https://game.lhg100.com/Article/UploadFiles/201512/2015121216064497.jpg)
When he will get close to the barrow [1] get close to him and kill [2]. To eliminate the last guard you have to lure him to the center of the square. When he will be going back to his position, kill him.
![Now use the ladder to get upstairs [1] and listen to the conversation [2] - Sequence 4 - Den of Thieves - p. 1 - Walkthrough - Assassins Creed: Brotherhood - Game Guide and Walkthrough](https://game.lhg100.com/Article/UploadFiles/201512/2015121216064420.jpg)
Now use the ladder to get upstairs [1] and listen to the conversation [2].
![After watching a cut scene, climb on the wall on the right [1] and kill the guard [2] - Sequence 4 - Den of Thieves - p. 1 - Walkthrough - Assassins Creed: Brotherhood - Game Guide and Walkthrough](https://game.lhg100.com/Article/UploadFiles/201512/2015121216064546.jpg)
After watching a cut scene, climb on the wall on the right [1] and kill the guard [2]. Press X to do it.
![Now turn left [1] and jump down to the place marked on the map [2] - Sequence 4 - Den of Thieves - p. 1 - Walkthrough - Assassins Creed: Brotherhood - Game Guide and Walkthrough](https://game.lhg100.com/Article/UploadFiles/201512/2015121216064591.jpg)
Now turn left [1] and jump down to the place marked on the map [2].
![Now use the sticks to get to the nearby wall [1] - Sequence 4 - Den of Thieves - p. 1 - Walkthrough - Assassins Creed: Brotherhood - Game Guide and Walkthrough](https://game.lhg100.com/Article/UploadFiles/201512/2015121216064593.jpg)
Now use the sticks to get to the nearby wall [1]. As a matter of fact you will get to the building patrolled by two guards [2].
Stay close to the wall [1] and wait until your enemy will get close to the edge. Then kill him by pressing X. Run to the other side. Upstairs you will find another lightning point [2].
![After killing the second guard stay close to the wall [1] - Sequence 4 - Den of Thieves - p. 1 - Walkthrough - Assassins Creed: Brotherhood - Game Guide and Walkthrough](https://game.lhg100.com/Article/UploadFiles/201512/2015121216064503.jpg)
After killing the second guard stay close to the wall [1]. Watch out until the another guard will turn round and run to the ladder [2].
![Climb up and kill your enemy with the hidden dagger [1] - Sequence 4 - Den of Thieves - p. 1 - Walkthrough - Assassins Creed: Brotherhood - Game Guide and Walkthrough](https://game.lhg100.com/Article/UploadFiles/201512/2015121216064687.jpg)
Climb up and kill your enemy with the hidden dagger [1]. After the execution, return to the last point and go to the other side of the street [2].
![Go upstairs and turn left [1] - Sequence 4 - Den of Thieves - p. 1 - Walkthrough - Assassins Creed: Brotherhood - Game Guide and Walkthrough](https://game.lhg100.com/Article/UploadFiles/201512/2015121216064621.jpg)
Go upstairs and turn left [1]. Jump between wooden sticks and you will get to the next phase of this mission [2].

![Listen to the Borgias conversation [1] and jump right [2] - Sequence 4 - Den of Thieves - p. 2 - Walkthrough - Assassins Creed: Brotherhood - Game Guide and Walkthrough](https://game.lhg100.com/Article/UploadFiles/201512/2015121216064699.jpg)
Listen to the Borgia's conversation [1] and jump right [2].
Press B to get down and hold this button. As a matter of fact you will catch the stick. Watch a short cut scene and catch the wall [1], then go right [2].
![The next save point is above you [1] - Sequence 4 - Den of Thieves - p. 2 - Walkthrough - Assassins Creed: Brotherhood - Game Guide and Walkthrough](https://game.lhg100.com/Article/UploadFiles/201512/2015121216064636.jpg)
The next save point is above you [1]. Go there and watch the cur scene [2].

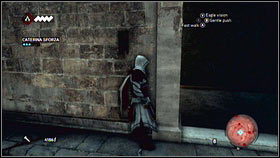
Now you have to rescue Catharina Sforza. Climb to the top of the wall [1]. You will find two guards located on the right [2]. Kill them and jump down (watch out for the third soldier). You do not have to kill him. Before he can notice you, run to the point marked on the map.
![Go downstairs [1], turn right - Sequence 4 - Den of Thieves - p. 2 - Walkthrough - Assassins Creed: Brotherhood - Game Guide and Walkthrough](https://game.lhg100.com/Article/UploadFiles/201512/2015121216064714.jpg)
Go downstairs [1], turn right. Soon, you will meet a guard. Lure him, but stay undercover. Then run upstairs as fast as possible [2].
Soon guard will be returning to his starting position [1]. Kill him from behind [2].
![Now you have to go left, until you will see Catherine prison [1] - Sequence 4 - Den of Thieves - p. 2 - Walkthrough - Assassins Creed: Brotherhood - Game Guide and Walkthrough](https://game.lhg100.com/Article/UploadFiles/201512/2015121216064726.jpg)
Now you have to go left, until you will see Catherine prison [1]. You will find two enemies here. Hide for a while and wait until they will stop talking [2].
![When one of them will get close to you, kill him fast [1] and hide [2] - Sequence 4 - Den of Thieves - p. 2 - Walkthrough - Assassins Creed: Brotherhood - Game Guide and Walkthrough](https://game.lhg100.com/Article/UploadFiles/201512/2015121216064723.jpg)
When one of them will get close to you, kill him fast [1] and hide [2]. The second guard will be alarmed so execute him with the same way.
Full synchronization: do not loose more than 10 HP squares.
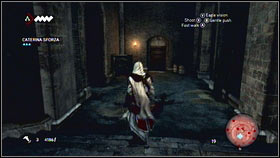
![After speaking with Catarina exit the underground [1] and turn right [2] - Sequence 4 - Den of Thieves - p. 2 - Walkthrough - Assassins Creed: Brotherhood - Game Guide and Walkthrough](https://game.lhg100.com/Article/UploadFiles/201512/2015121216064847.jpg)
After speaking with Catarina exit the underground [1] and turn right [2].
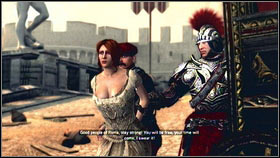
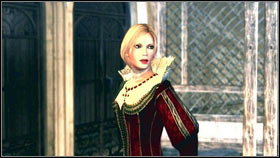
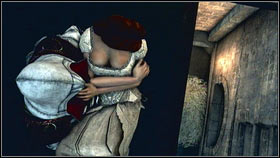
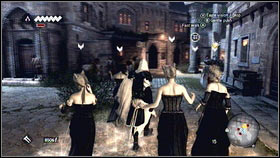
![You will find yourself in the alcove [1] and you will be able to see Borgias wife and her lover [2] - Sequence 4 - Den of Thieves - p. 2 - Walkthrough - Assassins Creed: Brotherhood - Game Guide and Walkthrough](https://game.lhg100.com/Article/UploadFiles/201512/2015121216064846.jpg)
You will find yourself in the alcove [1] and you will be able to see Borgia's wife and her lover [2].

![Listen to their conversation and catch the wall located on the right [1] - Sequence 4 - Den of Thieves - p. 2 - Walkthrough - Assassins Creed: Brotherhood - Game Guide and Walkthrough](https://game.lhg100.com/Article/UploadFiles/201512/2015121216064885.jpg)
Listen to their conversation and catch the wall located on the right [1]. As a matter of fact you will be able to enter the garden [2].
![When Licorice will notice you, a short cut scene will start [1] - Sequence 4 - Den of Thieves - p. 2 - Walkthrough - Assassins Creed: Brotherhood - Game Guide and Walkthrough](https://game.lhg100.com/Article/UploadFiles/201512/2015121216064813.jpg)
When Licorice will notice you, a short cut scene will start [1]. Listen to her and kill her with your hidden dagger [2].
![Now, you will have to kill all guards [1] - Sequence 4 - Den of Thieves - p. 2 - Walkthrough - Assassins Creed: Brotherhood - Game Guide and Walkthrough](https://game.lhg100.com/Article/UploadFiles/201512/2015121216064860.jpg)
Now, you will have to kill all guards [1]. Draw your weapon and eliminate all opponents [2].
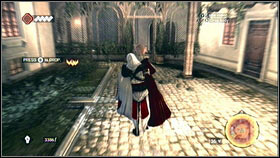
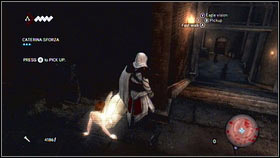
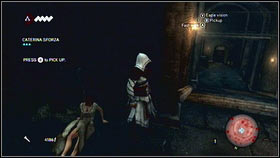
![After the fight take Licorice (B) [1] and go to the Catarinas cell - Sequence 4 - Den of Thieves - p. 2 - Walkthrough - Assassins Creed: Brotherhood - Game Guide and Walkthrough](https://game.lhg100.com/Article/UploadFiles/201512/2015121216064985.jpg)
After the fight take Licorice (B) [1] and go to the Catarina's cell. When the next guards will come, put her away - she will start running after the fight [2].
![Catch her [1] and go to the prison [2] - Sequence 4 - Den of Thieves - p. 2 - Walkthrough - Assassins Creed: Brotherhood - Game Guide and Walkthrough](https://game.lhg100.com/Article/UploadFiles/201512/2015121216064962.jpg)
Catch her [1] and go to the prison [2].
Full synchronization: Stay undercover.
Catarina is very weak so you have to help her. At the beginning put her near the wall [1]. After a while kill the guard [2].
![After the execution hide near the corner [1] - Sequence 4 - Den of Thieves - p. 3 - Walkthrough - Assassins Creed: Brotherhood - Game Guide and Walkthrough](https://game.lhg100.com/Article/UploadFiles/201512/2015121216064973.jpg)
After the execution hide near the corner [1]. The second guard will come to examine the body. When he will turn his back to you - kill him fast [2].
Return and take Catharine. Transport her to the stairs that will lead you down [1]. You will find two guard there - kill them [2].
![Put the woman around the corner [1] and kill the man who is standing - Sequence 4 - Den of Thieves - p. 3 - Walkthrough - Assassins Creed: Brotherhood - Game Guide and Walkthrough](https://game.lhg100.com/Article/UploadFiles/201512/2015121216065045.jpg)
Put the woman around the corner [1] and kill the man who is standing. After the execution return upstairs - other soldiers will examine the body. Go down and kill the enemy who had turned as the second one [2]. You have to be very fast here.
![Now return to Catharina [1] and kill the last soldier in the same way [2] - Sequence 4 - Den of Thieves - p. 3 - Walkthrough - Assassins Creed: Brotherhood - Game Guide and Walkthrough](https://game.lhg100.com/Article/UploadFiles/201512/2015121216065023.jpg)
Now return to Catharina [1] and kill the last soldier in the same way [2].
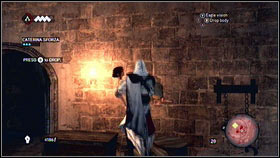
![Take the woman, turn right and put her to the hole [1] - Sequence 4 - Den of Thieves - p. 3 - Walkthrough - Assassins Creed: Brotherhood - Game Guide and Walkthrough](https://game.lhg100.com/Article/UploadFiles/201512/2015121216065033.jpg)
Take the woman, turn right and put her to the hole [1]. You will find yourself in the hay, soon the guard will come [2]. When he will be close press X and kill him.
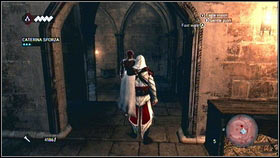
![The next enemy is in the corridor around the corner [1] - Sequence 4 - Den of Thieves - p. 3 - Walkthrough - Assassins Creed: Brotherhood - Game Guide and Walkthrough](https://game.lhg100.com/Article/UploadFiles/201512/2015121216065099.jpg)
The next enemy is in the corridor around the corner [1]. Wait until he will turn round and kill him. Another enemy is located near the exit [2]. Kill him and remember to take Catharine.
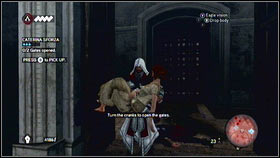
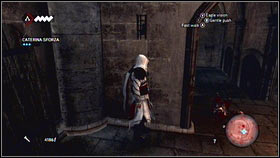
![When you will transport her to the exit [1] she will show you the lever that will open the gate - Sequence 4 - Den of Thieves - p. 3 - Walkthrough - Assassins Creed: Brotherhood - Game Guide and Walkthrough](https://game.lhg100.com/Article/UploadFiles/201512/2015121216065046.jpg)
When you will transport her to the exit [1] she will show you the lever that will open the gate. One guard is located there. Use the mechanism located on the right [2]. Wait until your enemy will turn round and use the lever. Do not kill him.
The second mechanism is on the other side of the square. Put Catharine near the wall [1] and climb on the tower where the guard is located [2]. The best option is to catch the edge and to press the X button in the proper moment.
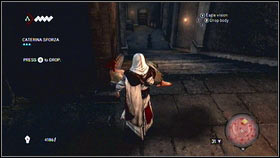
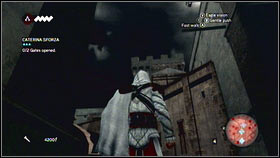
![When you will end [1] take your friend outside [2] - Sequence 4 - Den of Thieves - p. 3 - Walkthrough - Assassins Creed: Brotherhood - Game Guide and Walkthrough](https://game.lhg100.com/Article/UploadFiles/201512/2015121216065172.jpg)
When you will end [1] take your friend outside [2].
Full synchronization: Gain kill streak from at least 5 guards.
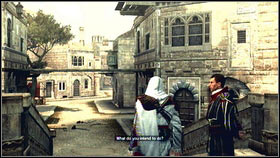
![Follow Cathrine [1] until the cut scene will start [2] - Sequence 4 - Den of Thieves - p. 3 - Walkthrough - Assassins Creed: Brotherhood - Game Guide and Walkthrough](https://game.lhg100.com/Article/UploadFiles/201512/2015121216065196.jpg)
Follow Cathrine [1] until the cut scene will start [2].
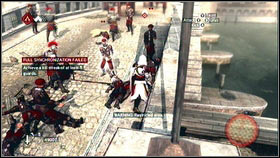
![After the film you will be attacked but many guards at once [1] - Sequence 4 - Den of Thieves - p. 3 - Walkthrough - Assassins Creed: Brotherhood - Game Guide and Walkthrough](https://game.lhg100.com/Article/UploadFiles/201512/2015121216065122.jpg)
After the film you will be attacked but many guards at once [1]. You have to fight with them [2]. If you have to gain full synchronization then you have to do 5 kill streaks. This is quite difficult so try to choose opponents with glowing icon. It means that they will attack you soon so you have to be faster. Remember that to gain kill streak you have to eliminate many opponents without any break. If you will be attacked - counterattack.
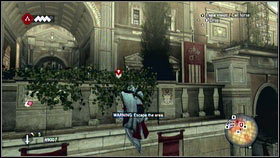
![Leave the place after the fight [1] and lower your Notoriety [2] - Sequence 4 - Den of Thieves - p. 3 - Walkthrough - Assassins Creed: Brotherhood - Game Guide and Walkthrough](https://game.lhg100.com/Article/UploadFiles/201512/2015121216065251.jpg)
Leave the place after the fight [1] and lower your Notoriety [2]. Then find another mission.
Full synchronization: Do not loose more than 5 HP squares.
![After speaking with Machiavelli [1] people harassed by Borgias guards will be marked on the map [2] - Sequence 4 - Den of Thieves - p. 3 - Walkthrough - Assassins Creed: Brotherhood - Game Guide and Walkthrough](https://game.lhg100.com/Article/UploadFiles/201512/2015121216065298.jpg)
After speaking with Machiavelli [1] people harassed by Borgia's guards will be marked on the map [2].
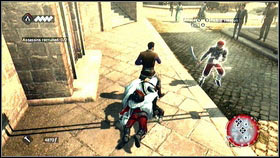
![Kill all the guards and help them [1] - Sequence 4 - Den of Thieves - p. 3 - Walkthrough - Assassins Creed: Brotherhood - Game Guide and Walkthrough](https://game.lhg100.com/Article/UploadFiles/201512/2015121216065262.jpg)
Kill all the guards and help them [1]. After the job recruit them by pressing Y [2]. After recruiting two of them the mission will be over.
Full synchronization: Kill your targets using new recruits.
![When you will be at the place, speak with the courtesan [1] - Sequence 4 - Den of Thieves - p. 3 - Walkthrough - Assassins Creed: Brotherhood - Game Guide and Walkthrough](https://game.lhg100.com/Article/UploadFiles/201512/2015121216065212.jpg)
When you will be at the place, speak with the courtesan [1]. You will learn who had killed her friend. Find the target and it with the help of your new recruits. Follow the man and press LB, when he will be marked [2]. Your companions will appear in the matter of seconds and they will finish him.
Full synchronization: Kill your targets using new recruits.
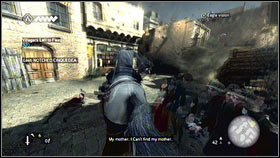
![The next quest will be given by a boy crying near the bank [1] - Sequence 4 - Den of Thieves - p. 4 - Walkthrough - Assassins Creed: Brotherhood - Game Guide and Walkthrough](https://game.lhg100.com/Article/UploadFiles/201512/2015121216065271.jpg)
The next quest will be given by a boy crying near the bank [1]. He will ask you to find his mother [2].
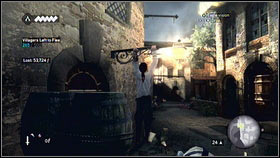
![Go to the marked place and use your Eagle Vision (Y) to find your target [1] - Sequence 4 - Den of Thieves - p. 4 - Walkthrough - Assassins Creed: Brotherhood - Game Guide and Walkthrough](https://game.lhg100.com/Article/UploadFiles/201512/2015121216065358.jpg)
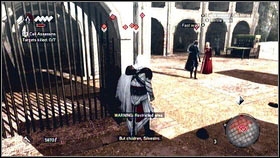
Go to the marked place and use your Eagle Vision (Y) to find your target [1]. Follow the man and try to stay undercover [2].
![When the bar above his head will become yellow, stay close to the other people [1] - Sequence 4 - Den of Thieves - p. 4 - Walkthrough - Assassins Creed: Brotherhood - Game Guide and Walkthrough](https://game.lhg100.com/Article/UploadFiles/201512/2015121216065321.jpg)
When the bar above his head will become yellow, stay close to the other people [1]. Try to stay quite close to him, because he will be moving faster from time to time [2].
![After a long walk your target will stop and he will start talking [1] - Sequence 4 - Den of Thieves - p. 4 - Walkthrough - Assassins Creed: Brotherhood - Game Guide and Walkthrough](https://game.lhg100.com/Article/UploadFiles/201512/2015121216065302.jpg)
After a long walk your target will stop and he will start talking [1]. Mark him and send recruits to finish him (LB) [2].
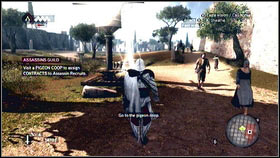
![Go to the marked pigeon cage [1] and send a letter [2] - Sequence 4 - Den of Thieves - p. 4 - Walkthrough - Assassins Creed: Brotherhood - Game Guide and Walkthrough](https://game.lhg100.com/Article/UploadFiles/201512/2015121216065372.jpg)
Go to the marked pigeon cage [1] and send a letter [2]. You will receive an information about trained recruits [1] and about new interface option - Assassin Signal [2]. This red bar will show you how many friends you can call to help you. The bar will be longer if you will recruit more assassin's.
![Pigeon cages are located all over the city and you can use them to enter the guild menu [1] - Sequence 4 - Den of Thieves - p. 4 - Walkthrough - Assassins Creed: Brotherhood - Game Guide and Walkthrough](https://game.lhg100.com/Article/UploadFiles/201512/2015121216065383.jpg)
Pigeon cages are located all over the city and you can use them to enter the guild menu [1]. You can check your assassins here and send them for a mission [2]. It is good to do some jobs to gain some experience points.
You task is to find someone who is calling you. Go to the point marked on the map [1] and get close to the nearby box [2].
![Leonardo DaVinci will appear and he will give you some very important informations [1] - Sequence 4 - Den of Thieves - p. 4 - Walkthrough - Assassins Creed: Brotherhood - Game Guide and Walkthrough](https://game.lhg100.com/Article/UploadFiles/201512/2015121216065497.jpg)
Leonardo DaVinci will appear and he will give you some very important informations [1]. To meet him again get close to the bench and sit in the proper place [2].
![When you will do that, he will sit near you and you will be able to buy some important things [1] - Sequence 4 - Den of Thieves - p. 4 - Walkthrough - Assassins Creed: Brotherhood - Game Guide and Walkthrough](https://game.lhg100.com/Article/UploadFiles/201512/2015121216065493.jpg)
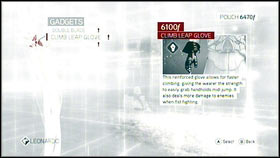
When you will do that, he will sit near you and you will be able to buy some important things [1]. Take a look at Double Blade, because that will allow you to kill two people at one time [2]. Buy anything and you will end this mission.
Full synchronization: Send mercenaries for the battle.
![Go to the point marked on the map [1] - Sequence 4 - Den of Thieves - p. 4 - Walkthrough - Assassins Creed: Brotherhood - Game Guide and Walkthrough](https://game.lhg100.com/Article/UploadFiles/201512/2015121216065416.jpg)
Go to the point marked on the map [1]. Before you will get to the green zone, speak with the mercenaries a pay them [2]. Give them 150 florins and order them to Follow (Y).
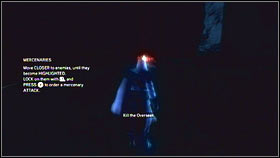
![When you will be at the place, localize your target with Eagle Vision [1] and attack - Sequence 4 - Den of Thieves - p. 4 - Walkthrough - Assassins Creed: Brotherhood - Game Guide and Walkthrough](https://game.lhg100.com/Article/UploadFiles/201512/2015121216065447.jpg)
When you will be at the place, localize your target with Eagle Vision [1] and attack. Your mercenaries will do the same [2]. Kill the captain to end the quest. The next quest will be available near the gate.
Full synchronization: Do not kill anybody until you won't destroy the plans.
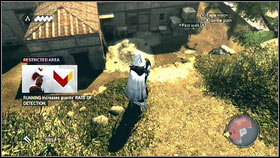
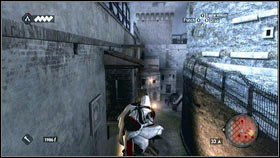
Your task is to find weapons plans that Leonardo had prepared for Borgia. They are marked on the map, but Ezio cannot be uncovered during this mission. Moreover, you cannot kill anybody to gain the full synchronization. At the beginning jump from the eastern part of the cliff [1] and go south [2].
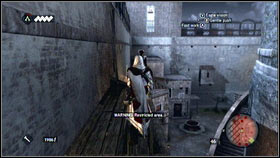
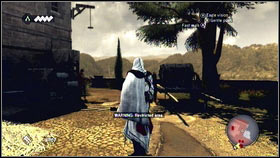
![Stay behind the corner and watch the guard [1] - Sequence 4 - Den of Thieves - p. 5 - Walkthrough - Assassins Creed: Brotherhood - Game Guide and Walkthrough](https://game.lhg100.com/Article/UploadFiles/201512/2015121216065528.jpg)
Stay behind the corner and watch the guard [1]. When he will turn round, hide and them go left [2].
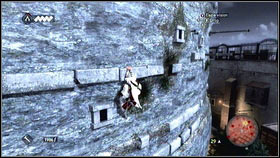
![On the first crossroads turn right [1] and climb on the building located on the right - Sequence 4 - Den of Thieves - p. 5 - Walkthrough - Assassins Creed: Brotherhood - Game Guide and Walkthrough](https://game.lhg100.com/Article/UploadFiles/201512/2015121216065574.jpg)
On the first crossroads turn right [1] and climb on the building located on the right. At the top of it, you will see a guard [2].

Wait until he will turn round, climb from the western side [1] and hide yourself near chests [2].
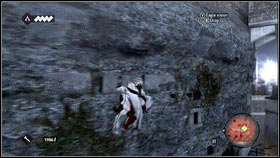
![When the path will be unblocked once again, jump north [1] - Sequence 4 - Den of Thieves - p. 5 - Walkthrough - Assassins Creed: Brotherhood - Game Guide and Walkthrough](https://game.lhg100.com/Article/UploadFiles/201512/2015121216065581.jpg)
When the path will be unblocked once again, jump north [1]. Climb on the building located on the left and run to the west [2].
When you will be at the safe position, look north. There will be a cart with the hay [1]. Hide there and when the guards will go away, run to the marked area [2].
Plans are hidden in the northern - west part of the building. Climb on the wall and watch the guard [1]. When he will turn round, take the plans [2]. Now, you have to stay undercover, but you can kill your enemies if you want to.
Your next task is to destroy the machine constructed by Leonardo. Enter the roof [1] and go north (stay in the western part of the area)[2].
![When you will be on the other side of the building, jump down and you will land near some barrels [1] - Sequence 4 - Den of Thieves - p. 5 - Walkthrough - Assassins Creed: Brotherhood - Game Guide and Walkthrough](https://game.lhg100.com/Article/UploadFiles/201512/2015121216065626.jpg)
When you will be on the other side of the building, jump down and you will land near some barrels [1]. Blow them up and run to the marked point [2].
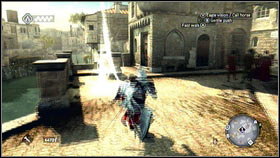
![After a short cut scene you will be on the horse once again [1] - Sequence 4 - Den of Thieves - p. 5 - Walkthrough - Assassins Creed: Brotherhood - Game Guide and Walkthrough](https://game.lhg100.com/Article/UploadFiles/201512/2015121216065725.jpg)
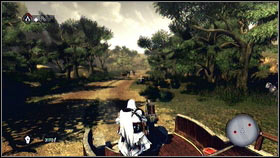
After a short cut scene you will be on the horse once again [1]. Now you have to chase the cart. Gallop (RT + A) and do not care about the noise. Try to avoid rock and trees [2].
![After a while, you will see another cut scene [1] - Sequence 4 - Den of Thieves - p. 5 - Walkthrough - Assassins Creed: Brotherhood - Game Guide and Walkthrough](https://game.lhg100.com/Article/UploadFiles/201512/2015121216065736.jpg)
After a while, you will see another cut scene [1]. Snow, you will have to take control over the cart and try to run away from soldiers [2].
At the end you will have to shoot soldiers that are chasing you. Target them with your right analog stick and shoot with RT [1]. Try to kill your enemies when they will appear on the road [2] and when you will loose too many HP use Medicine.
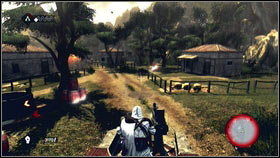
![After some time, you will get to the small village, when soldiers will be shooting to you from the roofs [1] - Sequence 4 - Den of Thieves - p. 5 - Walkthrough - Assassins Creed: Brotherhood - Game Guide and Walkthrough](https://game.lhg100.com/Article/UploadFiles/201512/2015121216065722.jpg)
After some time, you will get to the small village, when soldiers will be shooting to you from the roofs [1]. To kill them target barrels that are standing near them [2]. After a while the escape will be over and your task will be done.
![Return to your main residence and speak with your allies [1] - Sequence 4 - Den of Thieves - p. 5 - Walkthrough - Assassins Creed: Brotherhood - Game Guide and Walkthrough](https://game.lhg100.com/Article/UploadFiles/201512/2015121216065750.jpg)
Return to your main residence and speak with your allies [1]. When they will come out, get close to the documents lying on the table and upgrade your recruits [2].
Full synchronization: Stay undercover while escorting the senator.
![After speaking with Claudia [1] go to the place place marked on the map and find the senator [2] - Sequence 5 - The Banker - p. 1 - Walkthrough - Assassins Creed: Brotherhood - Game Guide and Walkthrough](https://game.lhg100.com/Article/UploadFiles/201512/2015121216065899.jpg)
After speaking with Claudia [1] go to the place place marked on the map and find the senator [2].
The man will be harassed by some guard. Kill them and start your mission [1]. You have to lead him to the safe place. The problem is that he will be attacked by any guard [2].
![If you do want to stay undercover, avoid them and kill them with your recruits [1] or pay courtesans to draw their attention from you [2] - Sequence 5 - The Banker - p. 1 - Walkthrough - Assassins Creed: Brotherhood - Game Guide and Walkthrough](https://game.lhg100.com/Article/UploadFiles/201512/2015121216065843.jpg)
If you do want to stay undercover, avoid them and kill them with your recruits [1] or pay courtesans to draw their attention from you [2].
![Going from point to point you will get close to the senators brothers house [1] - Sequence 5 - The Banker - p. 1 - Walkthrough - Assassins Creed: Brotherhood - Game Guide and Walkthrough](https://game.lhg100.com/Article/UploadFiles/201512/2015121216065871.jpg)
Going from point to point you will get close to the senator's brother's house [1]. After a short conversation give him 3,000 florins and start another mission [2].
Full synchronization: Stay undercover and do not touch the ground while following the senator.
At the beginning climb on the roof and follow the senator [1]. When the timer will appear, change the camera view to see the man all the time [2]. Distance is not important here - you have to see him.
![During the trip you will meet some guards [1] - Sequence 5 - The Banker - p. 1 - Walkthrough - Assassins Creed: Brotherhood - Game Guide and Walkthrough](https://game.lhg100.com/Article/UploadFiles/201512/2015121216065956.jpg)
During the trip you will meet some guards [1]. Kill them with your hidden blade or with the help of your recruits. When you will come to the huge square [2] get close to the edge and observe. After a short cut scene, you can land on the ground.
![Now you have to enter the Pantheon roof - the building where the gold is hidden [1] - Sequence 5 - The Banker - p. 1 - Walkthrough - Assassins Creed: Brotherhood - Game Guide and Walkthrough](https://game.lhg100.com/Article/UploadFiles/201512/2015121216065934.jpg)
Now you have to enter the Pantheon roof - the building where the gold is hidden [1]. Go to the back and find the broken pillar [2].
![Climb on it [1] and go to the top [2] - Sequence 5 - The Banker - p. 1 - Walkthrough - Assassins Creed: Brotherhood - Game Guide and Walkthrough](https://game.lhg100.com/Article/UploadFiles/201512/2015121216065991.jpg)
Climb on it [1] and go to the top [2].
![Now you have to kill the guard inside the Pantheon [1] - Sequence 5 - The Banker - p. 1 - Walkthrough - Assassins Creed: Brotherhood - Game Guide and Walkthrough](https://game.lhg100.com/Article/UploadFiles/201512/2015121216065977.jpg)
Now you have to kill the guard inside the Pantheon [1]. Go down and stay undercover all the time [2].
![When you will be close enough, mark your victim [1] and send your recruits [2] - Sequence 5 - The Banker - p. 1 - Walkthrough - Assassins Creed: Brotherhood - Game Guide and Walkthrough](https://game.lhg100.com/Article/UploadFiles/201512/2015121216070015.jpg)
When you will be close enough, mark your victim [1] and send your recruits [2].
Full synchronization: Get to the cell in less that 3 minutes.

Your task is to transport the gold to the Baker. The problem is that you don't know the way. To get there, you have to listen to your friends [1]. When you will choose wrong way, the guard will warn you, turn around and run in another way [2]. During your trip, watch out for other citizens. You will drop the package when you will hit them.
Full synchronization: Kill the baker and stay undercover.
![When you will be among the courtesans [1] follow the marked soldier [2] - Sequence 5 - The Banker - p. 2 - Walkthrough - Assassins Creed: Brotherhood - Game Guide and Walkthrough](https://game.lhg100.com/Article/UploadFiles/201512/2015121216070087.jpg)
When you will be among the courtesans [1] follow the marked soldier [2].
![Women will leave you soon so try to pay them as often as it is possible and try to avoid guards [1] - Sequence 5 - The Banker - p. 2 - Walkthrough - Assassins Creed: Brotherhood - Game Guide and Walkthrough](https://game.lhg100.com/Article/UploadFiles/201512/2015121216070097.jpg)
Women will leave you soon so try to pay them as often as it is possible and try to avoid guards [1]. When you will get close to the stairs, pass them from the right side [2] and call all available prostitutes.
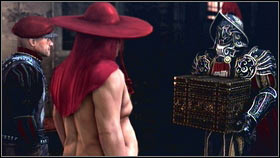
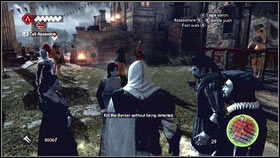
After a longer trip, you will find half-naked banker [1]. Watch the cut scene and hire courtesans [2].
![Pass the guards with them [1] and use them on another guards (LT + Y) [2] - Sequence 5 - The Banker - p. 2 - Walkthrough - Assassins Creed: Brotherhood - Game Guide and Walkthrough](https://game.lhg100.com/Article/UploadFiles/201512/2015121216070113.jpg)
Pass the guards with them [1] and use them on another guards (LT + Y) [2].
Get back and pay some money to other women. Follow the banker and, as a matter of fact, you will get to the square [1] where you will see a cut scene [2].
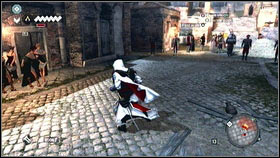
![After the film, kill the guard [1] and jump on the wall located on the right [2] - Sequence 5 - The Banker - p. 2 - Walkthrough - Assassins Creed: Brotherhood - Game Guide and Walkthrough](https://game.lhg100.com/Article/UploadFiles/201512/2015121216070143.jpg)
After the film, kill the guard [1] and jump on the wall located on the right [2].
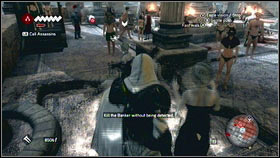
![You should see some courtesans from here [1] - Sequence 5 - The Banker - p. 2 - Walkthrough - Assassins Creed: Brotherhood - Game Guide and Walkthrough](https://game.lhg100.com/Article/UploadFiles/201512/2015121216070168.jpg)
You should see some courtesans from here [1]. Pay them and cross the square. You will find some benches near your target [2].
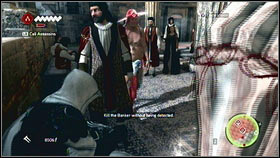
![Sit down there and wait for the moment [1] - Sequence 5 - The Banker - p. 2 - Walkthrough - Assassins Creed: Brotherhood - Game Guide and Walkthrough](https://game.lhg100.com/Article/UploadFiles/201512/2015121216070120.jpg)
Sit down there and wait for the moment [1]. When he will be close to you, kill him with your dagger [2]. After the execution, run away and end this mission.
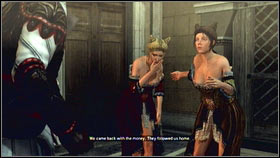
![This will be only a one cut scene [1] - Sequence 5 - The Banker - p. 2 - Walkthrough - Assassins Creed: Brotherhood - Game Guide and Walkthrough](https://game.lhg100.com/Article/UploadFiles/201512/2015121216070223.jpg)
This will be only a one cut scene [1]. Watch the film and start another sequence [2].
Full synchronization: Do not loose any HP.
![Go to Bartolomeo residence [1] and help him to defend him fortress - Sequence 6 - The Baron De Valois - p. 1 - Walkthrough - Assassins Creed: Brotherhood - Game Guide and Walkthrough](https://game.lhg100.com/Article/UploadFiles/201512/2015121216070296.jpg)
Go to Bartolomeo residence [1] and help him to defend him fortress. To do this, close all three gates [2].

![At the beginning climb on the wall located in front of the first gate [1], move left and jump in the same direction - Sequence 6 - The Baron De Valois - p. 1 - Walkthrough - Assassins Creed: Brotherhood - Game Guide and Walkthrough](https://game.lhg100.com/Article/UploadFiles/201512/2015121216070226.jpg)
At the beginning climb on the wall located in front of the first gate [1], move left and jump in the same direction. You will fly above your enemies heads and you will get to the first lever [2].
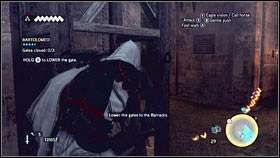
![Kill your opponents and use the mechanism [1] - Sequence 6 - The Baron De Valois - p. 1 - Walkthrough - Assassins Creed: Brotherhood - Game Guide and Walkthrough](https://game.lhg100.com/Article/UploadFiles/201512/2015121216070282.jpg)
Kill your opponents and use the mechanism [1]. When it will be closed go to the other side of the fortress [2].
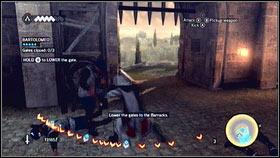
![You can repeat the same operation here [1] - Sequence 6 - The Baron De Valois - p. 1 - Walkthrough - Assassins Creed: Brotherhood - Game Guide and Walkthrough](https://game.lhg100.com/Article/UploadFiles/201512/2015121216070242.jpg)
You can repeat the same operation here [1]. Remember to kill everybody before you will pull the lever - in other way you would be hit. More enemies can be found near the last gate [2]. To kill them use your assassins. When they will be fighting, Ezio will use the mechanism.
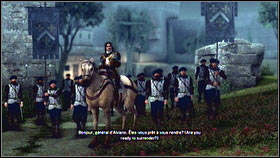
![When the fortress will be safe, watch the cut scene [1], take your horse and follow Bartolomeo [2] - Sequence 6 - The Baron De Valois - p. 1 - Walkthrough - Assassins Creed: Brotherhood - Game Guide and Walkthrough](https://game.lhg100.com/Article/UploadFiles/201512/2015121216070323.jpg)
When the fortress will be safe, watch the cut scene [1], take your horse and follow Bartolomeo [2]. As a matter of fact, you will get to the enemy camp and the mission will be over.
Full synchronization: Stay undercover.
![After speaking with Bartolomeo [1] you will have to find 20 French suits - Sequence 6 - The Baron De Valois - p. 1 - Walkthrough - Assassins Creed: Brotherhood - Game Guide and Walkthrough](https://game.lhg100.com/Article/UploadFiles/201512/2015121216070391.jpg)
After speaking with Bartolomeo [1] you will have to find 20 French suits. To get them, you have to kill some soldiers [2]. The problem is that when they will see you, you won't be able to get the full synchronization.
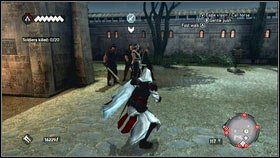
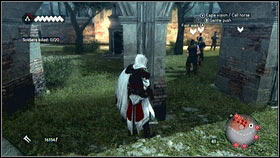
The best option to do it properly is to use some mercenaries and other assassins. You can hire them in one corner of the fortress [1]. Go with them to the camp and attack small opponents groups [2]. Single soldiers can be killed with your hidden blade.
Full synchronization: Do not loose any HP.
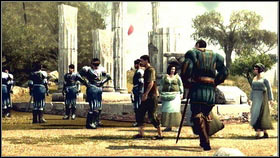
![Speak with Bartolomeo [1] and go to the French fort with dressed soldiers [2] - Sequence 6 - The Baron De Valois - p. 1 - Walkthrough - Assassins Creed: Brotherhood - Game Guide and Walkthrough](https://game.lhg100.com/Article/UploadFiles/201512/2015121216070363.jpg)
Speak with Bartolomeo [1] and go to the French fort with dressed soldiers [2]. During the trip remember that every soldier must stay alive.
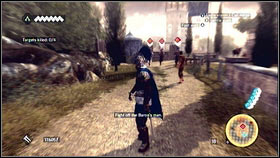
![After few meters, you will be attacked by some enemies [1] - Sequence 6 - The Baron De Valois - p. 1 - Walkthrough - Assassins Creed: Brotherhood - Game Guide and Walkthrough](https://game.lhg100.com/Article/UploadFiles/201512/2015121216070348.jpg)
After few meters, you will be attacked by some enemies [1]. Kill them fast and go straight ahead [2].
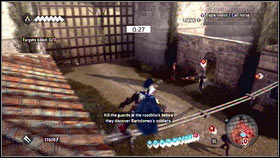
![In the village, your troops will be stopped again [1] - Sequence 6 - The Baron De Valois - p. 1 - Walkthrough - Assassins Creed: Brotherhood - Game Guide and Walkthrough](https://game.lhg100.com/Article/UploadFiles/201512/2015121216070430.jpg)
In the village, your troops will be stopped again [1]. Your task is to kill three guards and stay undercover. If someone will see you, the quest will be over. The best way to do it is to kill you enemies before your friends will come to the village. At the beginning, kill the guard located on the left [2].
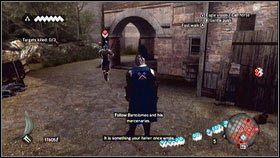
![Follow him and when he will be walking under the stone portal [1] strike him in his back - Sequence 6 - The Baron De Valois - p. 1 - Walkthrough - Assassins Creed: Brotherhood - Game Guide and Walkthrough](https://game.lhg100.com/Article/UploadFiles/201512/2015121216070444.jpg)
Follow him and when he will be walking under the stone portal [1] strike him in his back. The second target is located on the roof [2]. Kill him too and eliminate the enemy located near the gate. You can do it with your gun or with the help of your recruit.
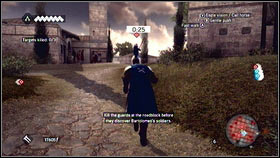
![Speak with Bartolomeo and go right [1] - Sequence 6 - The Baron De Valois - p. 1 - Walkthrough - Assassins Creed: Brotherhood - Game Guide and Walkthrough](https://game.lhg100.com/Article/UploadFiles/201512/2015121216070446.jpg)
Speak with Bartolomeo and go right [1]. You will find another group of enemies here [2].
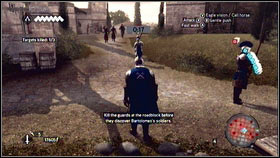
First of all, kill the guard located near the gate [1]. Climb on the roof and shoot him with your gun. Your next target will be the soldier that is patrolling the building on the right. Kill him when he will be under the stone portal [2]. Your last enemy can be eliminated with the help of your recruit.
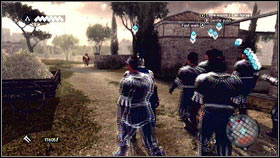
![Sometimes Bartolomeo can stuck among his people [1] - Sequence 6 - The Baron De Valois - p. 1 - Walkthrough - Assassins Creed: Brotherhood - Game Guide and Walkthrough](https://game.lhg100.com/Article/UploadFiles/201512/2015121216070588.jpg)
Sometimes Bartolomeo can stuck among his people [1]. Help him by going there and pressing B. After a while, you will have to kill another three guards. First of all kill the one located in the middle. Then, climb on the roof and eliminate your second target [2]. The last enemy can by found on the ground.
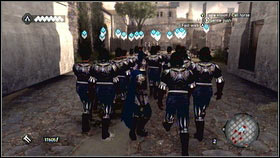
![Now try to stay close to your comrades [1] and go straight ahead - Sequence 6 - The Baron De Valois - p. 1 - Walkthrough - Assassins Creed: Brotherhood - Game Guide and Walkthrough](https://game.lhg100.com/Article/UploadFiles/201512/2015121216070533.jpg)
Now try to stay close to your comrades [1] and go straight ahead. Watch some cut scenes [2].
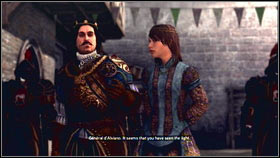
![Listen to the conversation [1] and kill all French soldiers [2] - Sequence 6 - The Baron De Valois - p. 1 - Walkthrough - Assassins Creed: Brotherhood - Game Guide and Walkthrough](https://game.lhg100.com/Article/UploadFiles/201512/2015121216070561.jpg)
Listen to the conversation [1] and kill all French soldiers [2].
Full synchronization: End this mission in less than 5 minutes.
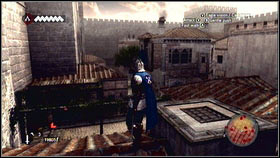
![When the cut scene will come an end, climb on the roof[1] and go the area marked on the map - Sequence 6 - The Baron De Valois - p. 2 - Walkthrough - Assassins Creed: Brotherhood - Game Guide and Walkthrough](https://game.lhg100.com/Article/UploadFiles/201512/2015121216070539.jpg)
When the cut scene will come an end, climb on the roof[1] and go the area marked on the map. You will see some enemies on the guard towers [2].
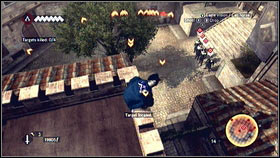
![Kill them all and use your Eagle Vision and then kill other enemies standing near the gate [1] - Sequence 6 - The Baron De Valois - p. 2 - Walkthrough - Assassins Creed: Brotherhood - Game Guide and Walkthrough](https://game.lhg100.com/Article/UploadFiles/201512/2015121216070570.jpg)
Kill them all and use your Eagle Vision and then kill other enemies standing near the gate [1]. When they will be dead use the mechanism [2].
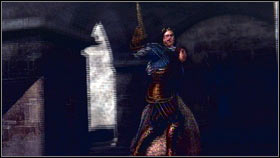
![On the other side, you will see the French man that is running with Bartolomeos wife [1] - Sequence 6 - The Baron De Valois - p. 2 - Walkthrough - Assassins Creed: Brotherhood - Game Guide and Walkthrough](https://game.lhg100.com/Article/UploadFiles/201512/2015121216070654.jpg)
On the other side, you will see the French man that is running with Bartolomeo's wife [1]. You must follow him, but remember to stay undercover. In other way, he will kill the woman. First of all turn right and eliminate one guard [2].
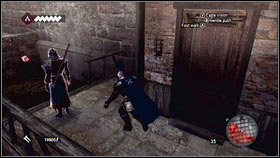
![Wait until he will turn round [1] and climb on the wall [2] - Sequence 6 - The Baron De Valois - p. 2 - Walkthrough - Assassins Creed: Brotherhood - Game Guide and Walkthrough](https://game.lhg100.com/Article/UploadFiles/201512/2015121216070693.jpg)
Wait until he will turn round [1] and climb on the wall [2].
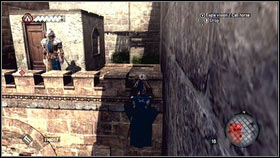
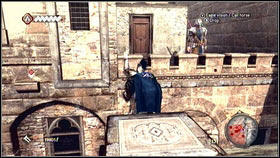
When he will change his position jump in the direction of the palace. You will find a wall there and you will be able to get upstairs [1]. When you will be on the edge, watch the guard. When he will turn left, go there and climb on the wall located on the left.
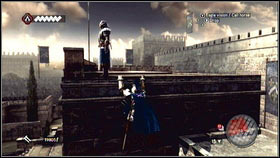
![When you will be at the top, you will see the last soldier [1] - Sequence 6 - The Baron De Valois - p. 2 - Walkthrough - Assassins Creed: Brotherhood - Game Guide and Walkthrough](https://game.lhg100.com/Article/UploadFiles/201512/2015121216070640.jpg)
When you will be at the top, you will see the last soldier [1]. Kill him fast and eliminate French commander from the air [2].
Full synchronization: Kill your HP above 5 bars.
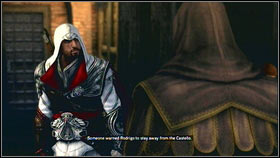
![Enter the thief guild and speak with their leader [1] - Sequence 7 - The Key to the Castello - p. 1 - Walkthrough - Assassins Creed: Brotherhood - Game Guide and Walkthrough](https://game.lhg100.com/Article/UploadFiles/201512/2015121216070649.jpg)
Enter the thief guild and speak with their leader [1]. You will learn some informations so leave the room. Outside, you will be attacked by three groups (they will appear one after another) [2].
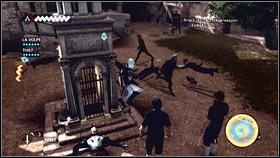
![You shouldnt have any problems with first two [1] - Sequence 7 - The Key to the Castello - p. 1 - Walkthrough - Assassins Creed: Brotherhood - Game Guide and Walkthrough](https://game.lhg100.com/Article/UploadFiles/201512/2015121216070721.jpg)
You shouldn't have any problems with first two [1]. Kill them fast and prepare for the third one [2]. The best way to eliminate them is to run away and kill when they will be fighting with some thieves.

![Get on your horse and follow De Volpe [1] - Sequence 7 - The Key to the Castello - p. 1 - Walkthrough - Assassins Creed: Brotherhood - Game Guide and Walkthrough](https://game.lhg100.com/Article/UploadFiles/201512/2015121216070732.jpg)
Get on your horse and follow De Volpe [1]. You will get to the wall and you will be attacked by another soldiers [2]. Kill them and watch out for your health (it shouldn't be lower than 5 squares). Use medicine if it will necessary.
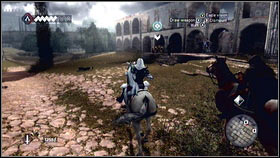
![The next patrol is waiting for you near the road [1] - Sequence 7 - The Key to the Castello - p. 1 - Walkthrough - Assassins Creed: Brotherhood - Game Guide and Walkthrough](https://game.lhg100.com/Article/UploadFiles/201512/2015121216070705.jpg)
The next patrol is waiting for you near the road [1]. Follow the guild master [2].
![After the fight follow De Volpe until you will get to the marked location [1] - Sequence 7 - The Key to the Castello - p. 1 - Walkthrough - Assassins Creed: Brotherhood - Game Guide and Walkthrough](https://game.lhg100.com/Article/UploadFiles/201512/2015121216070718.jpg)
After the fight follow De Volpe until you will get to the marked location [1]. Find the last thief there, kill the guards and end this mission [2].
Full synchronization: Kill all targets using your recruits.
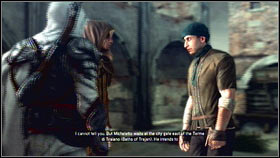
To start this quest, you will need at least 4 recruits. Destroy some Borgia's towers to unblock new soldiers [1]. When you will be ready speak with the thief [2].
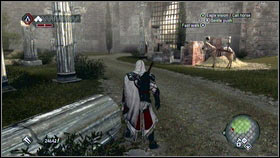
![Go to the marked gate [1] and watch the cut scene there [2] - Sequence 7 - The Key to the Castello - p. 1 - Walkthrough - Assassins Creed: Brotherhood - Game Guide and Walkthrough](https://game.lhg100.com/Article/UploadFiles/201512/2015121216070864.jpg)
Go to the marked gate [1] and watch the cut scene there [2].
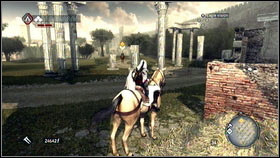
![When it will be over, take on your horse [1] and follow your target [2] - Sequence 7 - The Key to the Castello - p. 1 - Walkthrough - Assassins Creed: Brotherhood - Game Guide and Walkthrough](https://game.lhg100.com/Article/UploadFiles/201512/2015121216070863.jpg)
When it will be over, take on your horse [1] and follow your target [2].
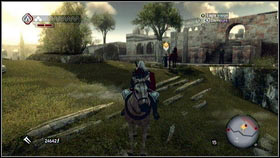
![In one moment Michelette will take off his horse [1] - Sequence 7 - The Key to the Castello - p. 1 - Walkthrough - Assassins Creed: Brotherhood - Game Guide and Walkthrough](https://game.lhg100.com/Article/UploadFiles/201512/2015121216070814.jpg)
In one moment Michelette will take off his horse [1]. Do the same. Follow him and watch out for guards. When he will end his conversation, kill the man marked with the red icon [2].
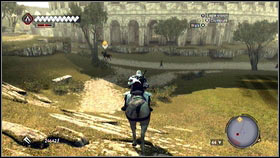
![After the execution, follow your target [1] - Sequence 7 - The Key to the Castello - p. 1 - Walkthrough - Assassins Creed: Brotherhood - Game Guide and Walkthrough](https://game.lhg100.com/Article/UploadFiles/201512/2015121216070848.jpg)
After the execution, follow your target [1]. You get to the ruins - kill all enemies marked with red icons [2].

![Repeat this sequence in another location [1] and go to the Colosseum [2] - Sequence 7 - The Key to the Castello - p. 1 - Walkthrough - Assassins Creed: Brotherhood - Game Guide and Walkthrough](https://game.lhg100.com/Article/UploadFiles/201512/2015121216070996.jpg)
Repeat this sequence in another location [1] and go to the Colosseum [2].
Full synchronization: Do not kill anybody apart from the shooters.
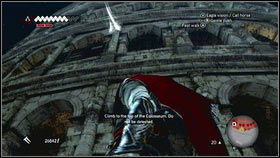
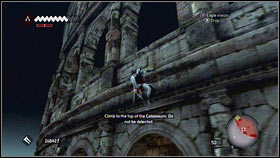
Now you have to climb on the of the ancient theater. Remember that you have be undercover all the time. Moreover to get the full synchronization, you cannot kill anybody apart from the shooters. At the beginning go to the point marked on the map [1]. When you will be there, go to the edge [2].
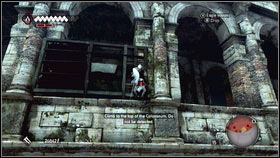
![Now, you have to go upstairs - use pillars to do that [1], wooden scaffoldings and holes [2] - Sequence 7 - The Key to the Castello - p. 2 - Walkthrough - Assassins Creed: Brotherhood - Game Guide and Walkthrough](https://game.lhg100.com/Article/UploadFiles/201512/2015121216070904.jpg)
Now, you have to go upstairs - use pillars to do that [1], wooden scaffoldings and holes [2].
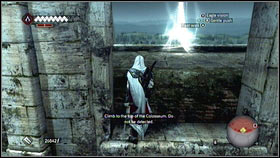
![On the top, you will see another glowing point [1] - Sequence 7 - The Key to the Castello - p. 2 - Walkthrough - Assassins Creed: Brotherhood - Game Guide and Walkthrough](https://game.lhg100.com/Article/UploadFiles/201512/2015121216070969.jpg)
On the top, you will see another glowing point [1]. Watch a short scene and go left, in the direction of marked shooters [2].
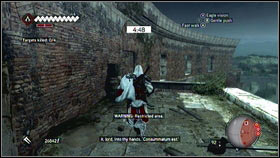
![You should see some barrels near the wall [1] - Sequence 7 - The Key to the Castello - p. 2 - Walkthrough - Assassins Creed: Brotherhood - Game Guide and Walkthrough](https://game.lhg100.com/Article/UploadFiles/201512/2015121216070949.jpg)
You should see some barrels near the wall [1]. Climb on the top [2].

![When you will come to the end [1], jump in the direction of the theater and catch the edge by pressing and holding B [2] - Sequence 7 - The Key to the Castello - p. 2 - Walkthrough - Assassins Creed: Brotherhood - Game Guide and Walkthrough](https://game.lhg100.com/Article/UploadFiles/201512/2015121216071012.jpg)
When you will come to the end [1], jump in the direction of the theater and catch the edge by pressing and holding B [2].
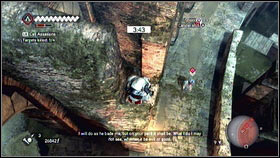
![When you will be there, kill all shooters [1] and go to the backyard of the building - Sequence 7 - The Key to the Castello - p. 2 - Walkthrough - Assassins Creed: Brotherhood - Game Guide and Walkthrough](https://game.lhg100.com/Article/UploadFiles/201512/2015121216071000.jpg)
When you will be there, kill all shooters [1] and go to the backyard of the building. You will meet your friends there [2].
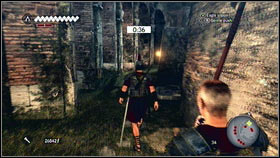
![Turn left [1] - Sequence 7 - The Key to the Castello - p. 2 - Walkthrough - Assassins Creed: Brotherhood - Game Guide and Walkthrough](https://game.lhg100.com/Article/UploadFiles/201512/2015121216071070.jpg)
Turn left [1]. After few step, you will find yourself near the gate [2].
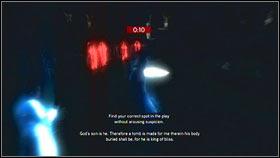
![Go there and use your Eagle Vision to see the place where you have to go [1] - Sequence 7 - The Key to the Castello - p. 2 - Walkthrough - Assassins Creed: Brotherhood - Game Guide and Walkthrough](https://game.lhg100.com/Article/UploadFiles/201512/2015121216071081.jpg)
Go there and use your Eagle Vision to see the place where you have to go [1]. You have only 20 seconds so stay focused. Soon, you will get the task to eliminate Micheletto. Get close to him and press X [2].
Full synchronization: Do not swim.
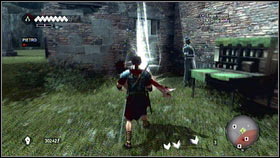
![When you will start the quest, you will have to find the point marked on the map [1] - Sequence 7 - The Key to the Castello - p. 2 - Walkthrough - Assassins Creed: Brotherhood - Game Guide and Walkthrough](https://game.lhg100.com/Article/UploadFiles/201512/2015121216071075.jpg)
When you will start the quest, you will have to find the point marked on the map [1]. Avoid the guards and when you will be attacked, call your recruits and run away [2].
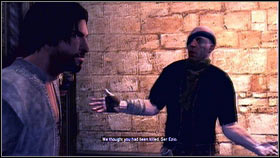
![When the doctor will take care of Pietro, Ezio will see a well known man [1] - Sequence 7 - The Key to the Castello - p. 2 - Walkthrough - Assassins Creed: Brotherhood - Game Guide and Walkthrough](https://game.lhg100.com/Article/UploadFiles/201512/2015121216071195.jpg)
When the doctor will take care of Pietro, Ezio will see a well known man [1]. Now you have to catch him. At the beginning use your horse to get close to the victim [2]. When you will be close enough kill him with your blade.
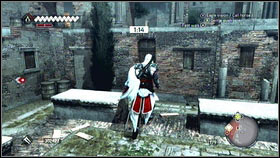
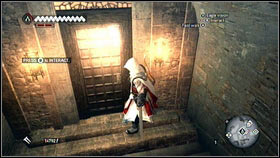
When he will kill himself, you will have to stop De Volpe from killing Machiavelli. Run to the point marked on the map [1], jump through the wall and call your horse [2].
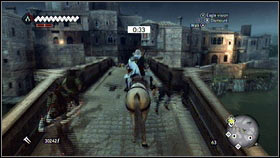
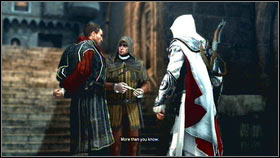
When you will be near the canal do not enter the water. Get close to the nearest bridge [1], go to the other side and rescue your friend [2]. As a matter of fact, you will get the full synchronization.
![Go to your headquarters [1] and watch the cut scene [2] - Sequence 7 - The Key to the Castello - p. 2 - Walkthrough - Assassins Creed: Brotherhood - Game Guide and Walkthrough](https://game.lhg100.com/Article/UploadFiles/201512/2015121216071133.jpg)
Go to your headquarters [1] and watch the cut scene [2]. After the film the eight sequence will start.
Full synchronization: Stay undercover
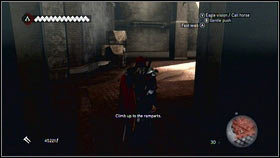
![At the beginning hide near the corner [1] and wait until the guard will turn over - Sequence 8 - The Borgia - p. 1 - Walkthrough - Assassins Creed: Brotherhood - Game Guide and Walkthrough](https://game.lhg100.com/Article/UploadFiles/201512/2015121216071267.jpg)
At the beginning hide near the corner [1] and wait until the guard will turn over. Get close to him and him with your hidden blade [2].
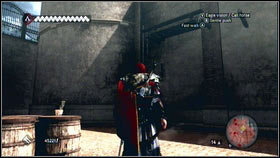
![When he will be dead use the ladder located on the right to get upstairs [1] [2] - Sequence 8 - The Borgia - p. 1 - Walkthrough - Assassins Creed: Brotherhood - Game Guide and Walkthrough](https://game.lhg100.com/Article/UploadFiles/201512/2015121216071268.jpg)
When he will be dead use the ladder located on the right to get upstairs [1] [2].

![You will see another two soldiers there, kill them silently [1] - Sequence 8 - The Borgia - p. 1 - Walkthrough - Assassins Creed: Brotherhood - Game Guide and Walkthrough](https://game.lhg100.com/Article/UploadFiles/201512/2015121216071243.jpg)
You will see another two soldiers there, kill them silently [1]. When they will be dead, climb on the tower and watch the cut scene [2].

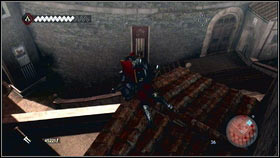
Now you have to go to the marked point. Go near the wall and you should see a soldiers standing on the building [1]. When he will turn round, kill him [2].
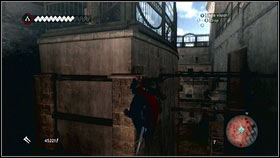
![Now go to the northern-east part of this location [1] - Sequence 8 - The Borgia - p. 1 - Walkthrough - Assassins Creed: Brotherhood - Game Guide and Walkthrough](https://game.lhg100.com/Article/UploadFiles/201512/2015121216071249.jpg)
Now go to the northern-east part of this location [1]. You will find another opponent there [2].
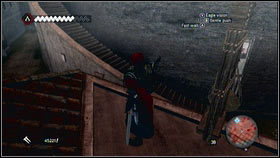
![When he will be dead, jump to the stairs [1] and go to the door [2] - Sequence 8 - The Borgia - p. 1 - Walkthrough - Assassins Creed: Brotherhood - Game Guide and Walkthrough](https://game.lhg100.com/Article/UploadFiles/201512/2015121216071383.jpg)
When he will be dead, jump to the stairs [1] and go to the door [2].
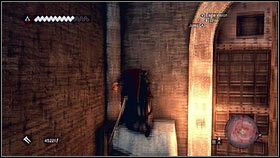
![When you will be inside, climb on the wall located near the door [1] and go right until you will get to the iron bar - Sequence 8 - The Borgia - p. 1 - Walkthrough - Assassins Creed: Brotherhood - Game Guide and Walkthrough](https://game.lhg100.com/Article/UploadFiles/201512/2015121216071362.jpg)
When you will be inside, climb on the wall located near the door [1] and go right until you will get to the iron bar. Swing up and catch another one. Catch the wall and go in the same direction [2].
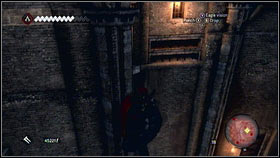
![Jumping from building to building, you will get to the bar that cannot be reached [1] - Sequence 8 - The Borgia - p. 1 - Walkthrough - Assassins Creed: Brotherhood - Game Guide and Walkthrough](https://game.lhg100.com/Article/UploadFiles/201512/2015121216071325.jpg)
Jumping from building to building, you will get to the bar that cannot be reached [1]. Go down on another side and go right [2].
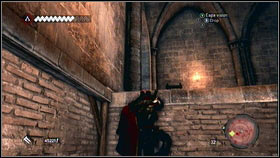
![When you will be on the wooden platform run upstairs [1] - Sequence 8 - The Borgia - p. 1 - Walkthrough - Assassins Creed: Brotherhood - Game Guide and Walkthrough](https://game.lhg100.com/Article/UploadFiles/201512/2015121216071399.jpg)
When you will be on the wooden platform run upstairs [1]. In one of the corner of the room, go down [2]. Before you will go there, wait until the guards will go away.
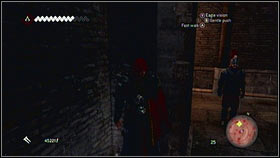
![When they will be gone, hide near the corner and wait for the soldier [1] - Sequence 8 - The Borgia - p. 1 - Walkthrough - Assassins Creed: Brotherhood - Game Guide and Walkthrough](https://game.lhg100.com/Article/UploadFiles/201512/2015121216071390.jpg)
When they will be gone, hide near the corner and wait for the soldier [1]. When he will turn round, kill him with your blade [2].
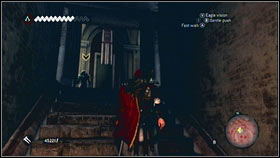
![Upstairs, wait until all guards will go away and run higher [1] - Sequence 8 - The Borgia - p. 1 - Walkthrough - Assassins Creed: Brotherhood - Game Guide and Walkthrough](https://game.lhg100.com/Article/UploadFiles/201512/2015121216071476.jpg)
Upstairs, wait until all guards will go away and run higher [1]. The next stairs will lead you to the room full of books [2].
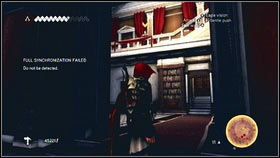
![You will see only one opponent there, but two more shooters are looking from above [1] - Sequence 8 - The Borgia - p. 1 - Walkthrough - Assassins Creed: Brotherhood - Game Guide and Walkthrough](https://game.lhg100.com/Article/UploadFiles/201512/2015121216071470.jpg)
You will see only one opponent there, but two more shooters are looking from above [1]. First guy can be killed with ranged weapon, then run under the balcony as fast as it is possible. When other guards will calm down, go up [2] and eliminate them.
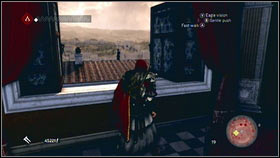
![When the area will be clear, go away through the open window [1] - Sequence 8 - The Borgia - p. 1 - Walkthrough - Assassins Creed: Brotherhood - Game Guide and Walkthrough](https://game.lhg100.com/Article/UploadFiles/201512/2015121216071483.jpg)
When the area will be clear, go away through the open window [1]. Climb on the wall [2].

![More right and you will get to the marked point [1] when you will see a cut scene and the next quest will begin [2] - Sequence 8 - The Borgia - p. 1 - Walkthrough - Assassins Creed: Brotherhood - Game Guide and Walkthrough](https://game.lhg100.com/Article/UploadFiles/201512/2015121216071479.jpg)
More right and you will get to the marked point [1] when you will see a cut scene and the next quest will begin [2].
Full synchronization: Do not kill anybody.

![Run to the point marked on the map, go down [1] and jump to the open window [2] - Sequence 8 - The Borgia - p. 2 - Walkthrough - Assassins Creed: Brotherhood - Game Guide and Walkthrough](https://game.lhg100.com/Article/UploadFiles/201512/2015121216071428.jpg)
Run to the point marked on the map, go down [1] and jump to the open window [2]. You do not have to care about the guards, but try not to kill anybody here.
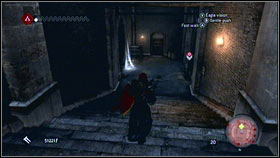
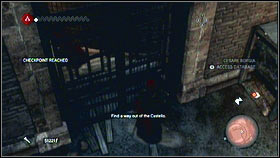
Former Borgia's lover will tell you where your opponent is. Follow him [1] and watch another cut scene [2].
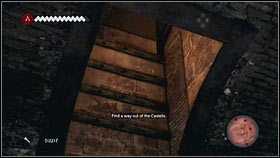
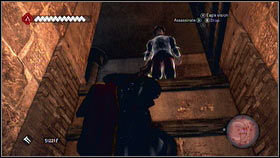
After the film, go upstairs and climb on the wall located on the right. You will be able to jump on the wooden platform. Few meters further catch iron bar located on the wall. Jump to the last one and climb on the wall on the left [1]. Corridor will be patrolled by one guard [2].
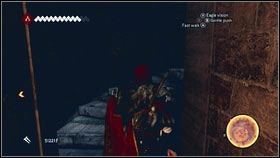
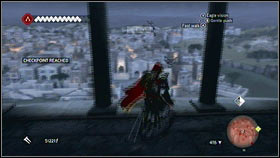
Do not care about him, go upstairs and turn right. To get the full synchronization, you cannot kill him so go upstairs [1] and jump down, to the hay [2].
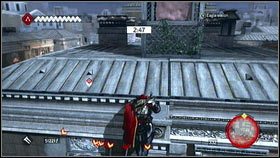
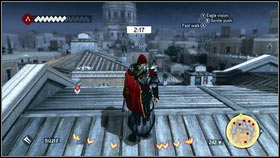
Now go right until you will get to the wall. Jump above the moat and press B to catch the edge located on the other side [1]. Now go in the direction marked on the map. You have to hurry here [2].
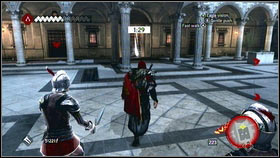
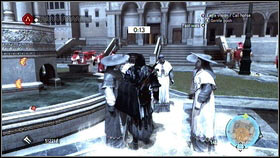
To complete this mission, you have to get close to the target alone. The best option to lose guards is to kill them, but you cannot do that in order to get full synchronization [1]. Try to avoid guards then by going into crowds of other people [2].
Full synchronization: Do not loose any HP.
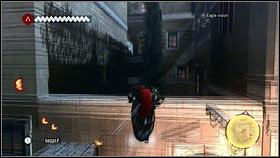
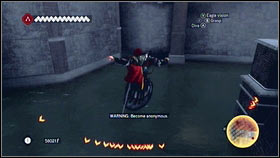
You will start this quest with a very powerful artifact - Apple Of Eden. When you will use it, you will lose HP, so don't do that if you want to get full synchronization. Go east and when you will be at the square, turn left [1]. Avoid guards by jumping on the buildings. If someone will try to harm you, press RT + A. Ezio will dodge the attack. The most important thing is to leave yellow area and stay undercover. The best option to achieve that is to jump to the moat and swim [2].
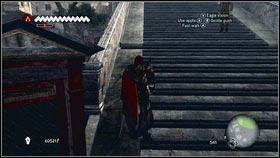
![Go to the marked area [1] and watch the cut scene [2] - Sequence 8 - The Borgia - p. 2 - Walkthrough - Assassins Creed: Brotherhood - Game Guide and Walkthrough](https://game.lhg100.com/Article/UploadFiles/201512/2015121216071695.jpg)
Go to the marked area [1] and watch the cut scene [2]. When the film will be over, you will be attacked by many soldiers. Kill them with Apple Of Eden, press X and release it after 3 seconds.
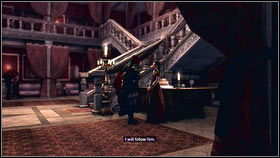
![After speaking with your sister [1] run to the green zone, use Eagle Vision and localize the cardinal [2] - Sequence 8 - The Borgia - p. 2 - Walkthrough - Assassins Creed: Brotherhood - Game Guide and Walkthrough](https://game.lhg100.com/Article/UploadFiles/201512/2015121216071674.jpg)
After speaking with your sister [1] run to the green zone, use Eagle Vision and localize the cardinal [2].
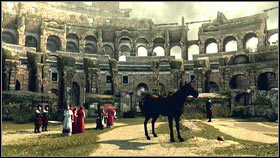
![Follow him until you will get to the Colosseum [1] - Sequence 8 - The Borgia - p. 2 - Walkthrough - Assassins Creed: Brotherhood - Game Guide and Walkthrough](https://game.lhg100.com/Article/UploadFiles/201512/2015121216071642.jpg)
Follow him until you will get to the Colosseum [1]. After a short cut scene, you will be attacked by many soldiers [2].
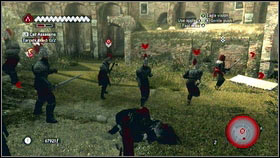
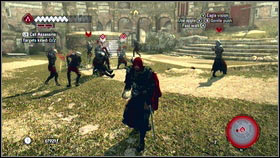
You enemies will be coming in waves. When one group appears, move them to one location and use Apple of Eden [1]. You can use your recruits too [2].
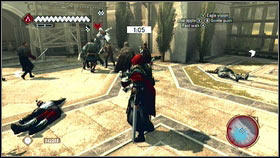
![After speaking with Bartolomeo, go to the marked gate where you will have to with with some Borgias soldiers [1] - Sequence 8 - The Borgia - p. 2 - Walkthrough - Assassins Creed: Brotherhood - Game Guide and Walkthrough](https://game.lhg100.com/Article/UploadFiles/201512/2015121216071717.jpg)
After speaking with Bartolomeo, go to the marked gate where you will have to with with some Borgia's soldiers [1]. Kill them all [2] and watch the cut scene.
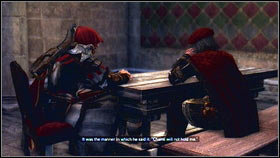
![After speaking with Leonardo [1], go outside and you will be transported to the battlefield [1] - Sequence 8 - The Borgia - p. 2 - Walkthrough - Assassins Creed: Brotherhood - Game Guide and Walkthrough](https://game.lhg100.com/Article/UploadFiles/201512/2015121216071728.jpg)
After speaking with Leonardo [1], go outside and you will be transported to the battlefield [1]. Kill all enemies and watch the cut scene [2].
Full synchronization: Ezio must have at least 5 HP squares.
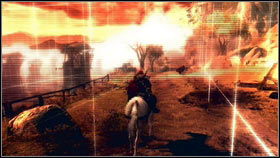
![Get on your horse [1] and go to the marked place [2] - Sequence 9 - The Fall - p. 1 - Walkthrough - Assassins Creed: Brotherhood - Game Guide and Walkthrough](https://game.lhg100.com/Article/UploadFiles/201512/2015121216071794.jpg)
Get on your horse [1] and go to the marked place [2].
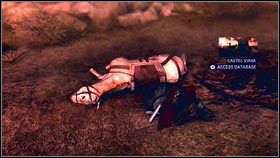
![You horse will be killed soon [1] and you will have to walk now [2] - Sequence 9 - The Fall - p. 1 - Walkthrough - Assassins Creed: Brotherhood - Game Guide and Walkthrough](https://game.lhg100.com/Article/UploadFiles/201512/2015121216071741.jpg)
You horse will be killed soon [1] and you will have to walk now [2].
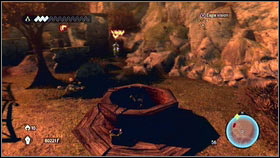
![You will meet many soldiers in the ruins, so try to avoid them [1], because you have to be alone (not followed) to continue the quest [2] - Sequence 9 - The Fall - p. 1 - Walkthrough - Assassins Creed: Brotherhood - Game Guide and Walkthrough](https://game.lhg100.com/Article/UploadFiles/201512/2015121216071737.jpg)
You will meet many soldiers in the ruins, so try to avoid them [1], because you have to be alone (not followed) to continue the quest [2]. Look at your HP all the time.

![Going from point to point, you will get to the siege tower [1] - Sequence 9 - The Fall - p. 1 - Walkthrough - Assassins Creed: Brotherhood - Game Guide and Walkthrough](https://game.lhg100.com/Article/UploadFiles/201512/2015121216071854.jpg)
Going from point to point, you will get to the siege tower [1]. Climb on the first floor and then on the top [2].

![Soon, you will see another tower [1] - Sequence 9 - The Fall - p. 1 - Walkthrough - Assassins Creed: Brotherhood - Game Guide and Walkthrough](https://game.lhg100.com/Article/UploadFiles/201512/2015121216071886.jpg)
Soon, you will see another tower [1]. Climb on the top of it [2].
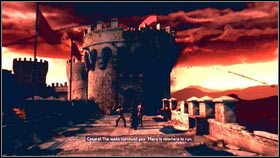
![Kill some soldiers and get inside the tower when you will be forced to fight with Borgia [1] - Sequence 9 - The Fall - p. 1 - Walkthrough - Assassins Creed: Brotherhood - Game Guide and Walkthrough](https://game.lhg100.com/Article/UploadFiles/201512/2015121216071804.jpg)
Kill some soldiers and get inside the tower when you will be forced to fight with Borgia [1]. Kick your enemy from time to time and attack with your sword [2].
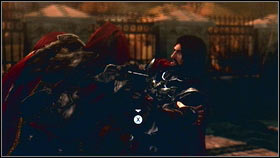
![When you will have to, press X to destroy his armor [1] - Sequence 9 - The Fall - p. 1 - Walkthrough - Assassins Creed: Brotherhood - Game Guide and Walkthrough](https://game.lhg100.com/Article/UploadFiles/201512/2015121216071832.jpg)
When you will have to, press X to destroy his armor [1]. From time to time, you will have to fight with some soldiers too [2]. Kill them first and then focus on the boss.
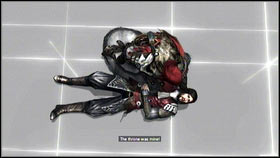
![Soon, he will be dead [1] and you will bee able to leave Animus [2] - Sequence 9 - The Fall - p. 1 - Walkthrough - Assassins Creed: Brotherhood - Game Guide and Walkthrough](https://game.lhg100.com/Article/UploadFiles/201512/2015121216071986.jpg)
Soon, he will be dead [1] and you will bee able to leave Animus [2].
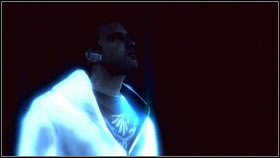
![As a Desmond go upstairs and use Eagle Vision [1] - Sequence 9 - The Fall - p. 1 - Walkthrough - Assassins Creed: Brotherhood - Game Guide and Walkthrough](https://game.lhg100.com/Article/UploadFiles/201512/2015121216071944.jpg)
As a Desmond go upstairs and use Eagle Vision [1]. You will see a strange symbol that will lead you to the Colosseum [2].
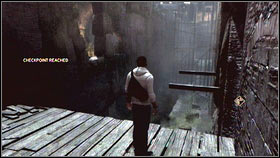
![After the cut scene, jump to catch the bar [1] and turn left [2] - Sequence 9 - The Fall - p. 1 - Walkthrough - Assassins Creed: Brotherhood - Game Guide and Walkthrough](https://game.lhg100.com/Article/UploadFiles/201512/2015121216071900.jpg)
After the cut scene, jump to catch the bar [1] and turn left [2].
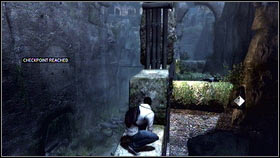
![Soon, you will get to the broken wall [1] - Sequence 9 - The Fall - p. 1 - Walkthrough - Assassins Creed: Brotherhood - Game Guide and Walkthrough](https://game.lhg100.com/Article/UploadFiles/201512/2015121216071959.jpg)
Soon, you will get to the broken wall [1]. Climb and go straight ahead [2].
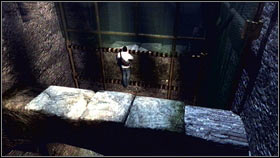
![From here, you will be able to jump on another ruin fragment [1] - Sequence 9 - The Fall - p. 1 - Walkthrough - Assassins Creed: Brotherhood - Game Guide and Walkthrough](https://game.lhg100.com/Article/UploadFiles/201512/2015121216071938.jpg)
From here, you will be able to jump on another ruin fragment [1]. Soon, you will find a hole in the wall [2].
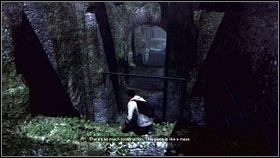
![Catch it and go straight ahead [1] - Sequence 9 - The Fall - p. 1 - Walkthrough - Assassins Creed: Brotherhood - Game Guide and Walkthrough](https://game.lhg100.com/Article/UploadFiles/201512/2015121216072089.jpg)
Catch it and go straight ahead [1]. Soon you will get to the wall with the lightning sign [2].
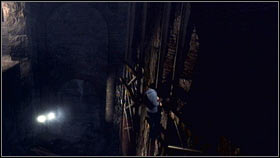
![Climb above, jump on the other side and go left [1] - Sequence 9 - The Fall - p. 1 - Walkthrough - Assassins Creed: Brotherhood - Game Guide and Walkthrough](https://game.lhg100.com/Article/UploadFiles/201512/2015121216072071.jpg)
Climb above, jump on the other side and go left [1]. Soon you will get to the room with some boxes [2].
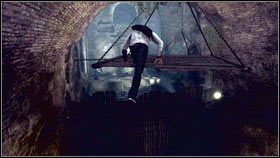
![Climb and go to the wooden platform [1] - Sequence 9 - The Fall - p. 1 - Walkthrough - Assassins Creed: Brotherhood - Game Guide and Walkthrough](https://game.lhg100.com/Article/UploadFiles/201512/2015121216072042.jpg)
Climb and go to the wooden platform [1]. On the other side, you will see a lift [2]. Use it and go upstairs.
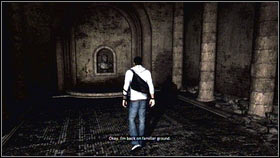
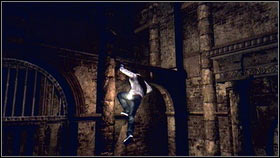
When you will be at the place, turn right and jump on the hay. When you will be downstairs [1] use Eagle Vision and press two yellow marks [2].
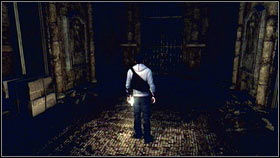
You will open the passage to the gate [1]. You cannot open it so climb on the wall on the right [2].
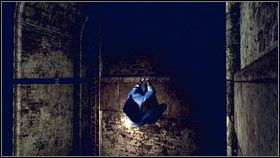
![Jump on the other side and catch the bar [1] - Sequence 9 - The Fall - p. 2 - Walkthrough - Assassins Creed: Brotherhood - Game Guide and Walkthrough](https://game.lhg100.com/Article/UploadFiles/201512/2015121216072173.jpg)
Jump on the other side and catch the bar [1]. When you will get to the 5th deck catch the wall located on the right [2].
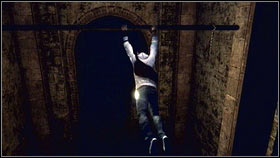
![You will get to the scaffolding [1] and you will be able to continue your journey - Sequence 9 - The Fall - p. 2 - Walkthrough - Assassins Creed: Brotherhood - Game Guide and Walkthrough](https://game.lhg100.com/Article/UploadFiles/201512/2015121216072169.jpg)
You will get to the scaffolding [1] and you will be able to continue your journey. At the end of the corridor, you will see a room [2].

![Listen to the ghost and use Eagle Vision to see two yellow points [1] - Sequence 9 - The Fall - p. 2 - Walkthrough - Assassins Creed: Brotherhood - Game Guide and Walkthrough](https://game.lhg100.com/Article/UploadFiles/201512/2015121216072190.jpg)
Listen to the ghost and use Eagle Vision to see two yellow points [1]. Use them to unblock another hidden passage [2].
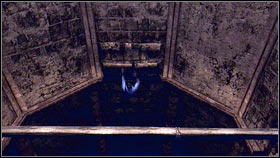
![Climb to the top [1] where Desmond will meet his friends [2] - Sequence 9 - The Fall - p. 2 - Walkthrough - Assassins Creed: Brotherhood - Game Guide and Walkthrough](https://game.lhg100.com/Article/UploadFiles/201512/2015121216072116.jpg)
Climb to the top [1] where Desmond will meet his friends [2].
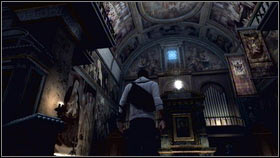
![Get close to the altar [1] - Sequence 9 - The Fall - p. 2 - Walkthrough - Assassins Creed: Brotherhood - Game Guide and Walkthrough](https://game.lhg100.com/Article/UploadFiles/201512/2015121216072167.jpg)
Get close to the altar [1]. Climb up and use the mechanism located there [2].
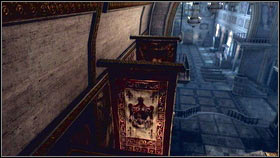
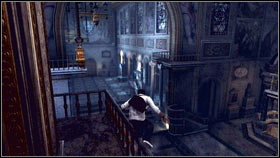
Now you have to get to another side of this area. Get close to the wall and jump on banners [1] to get to the balcony. When you will be there, catch the item located above [2] and jump to the left.
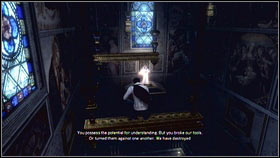
![Go near the wall [1] until you will get to the mechanism [2] - Sequence 9 - The Fall - p. 2 - Walkthrough - Assassins Creed: Brotherhood - Game Guide and Walkthrough](https://game.lhg100.com/Article/UploadFiles/201512/2015121216072251.jpg)
Go near the wall [1] until you will get to the mechanism [2].
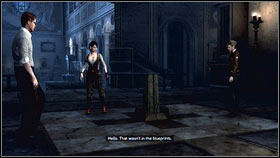
![Use it and return to your friends [1] - Sequence 9 - The Fall - p. 2 - Walkthrough - Assassins Creed: Brotherhood - Game Guide and Walkthrough](https://game.lhg100.com/Article/UploadFiles/201512/2015121216072280.jpg)
Use it and return to your friends [1]. Now use the item located on the ground [2].
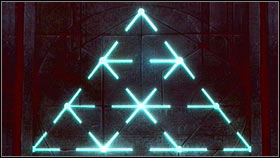
![When you will be underground go to the end of the room [1] - Sequence 9 - The Fall - p. 2 - Walkthrough - Assassins Creed: Brotherhood - Game Guide and Walkthrough](https://game.lhg100.com/Article/UploadFiles/201512/2015121216072263.jpg)
When you will be underground go to the end of the room [1]. As a matter of fact you will be able to get to the Apple of Eden [2].
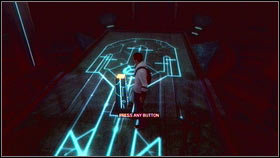
![Use another mechanism located there [1] and you will see some blue stairs [2] - Sequence 9 - The Fall - p. 2 - Walkthrough - Assassins Creed: Brotherhood - Game Guide and Walkthrough](https://game.lhg100.com/Article/UploadFiles/201512/2015121216072397.jpg)
Use another mechanism located there [1] and you will see some blue stairs [2].
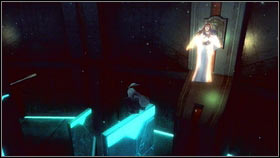
![Use them to get to the ghost [1] - Sequence 9 - The Fall - p. 2 - Walkthrough - Assassins Creed: Brotherhood - Game Guide and Walkthrough](https://game.lhg100.com/Article/UploadFiles/201512/2015121216072383.jpg)
Use them to get to the ghost [1]. You have to hurry because stairs will disappear soon. Soon, you will be able to catch some bars and use levers [2]. You will have to choose the right switch so use the Eagle Vision to decide.
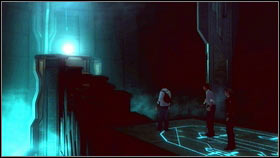
![After unblocking all elements get close to the artifact [1] - Sequence 9 - The Fall - p. 2 - Walkthrough - Assassins Creed: Brotherhood - Game Guide and Walkthrough](https://game.lhg100.com/Article/UploadFiles/201512/2015121216072352.jpg)
After unblocking all elements get close to the artifact [1]. A short cut scene will start and you will have to use your analog stick. When Desmond will be close to his friend [2], press any button to end the game.
Side quests will become available after completing sequences or after speaking with guild masters. When any of these quest givers are not marked on the map, then speak with De Volpe, Ezio's sister or Bartolomeo's wife
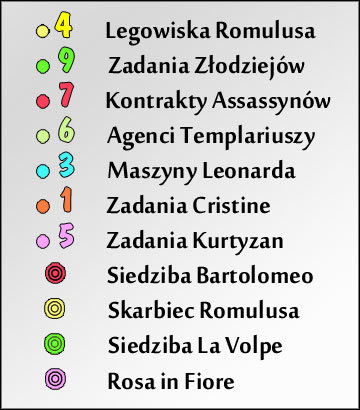
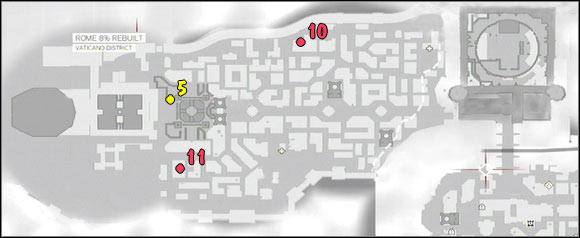
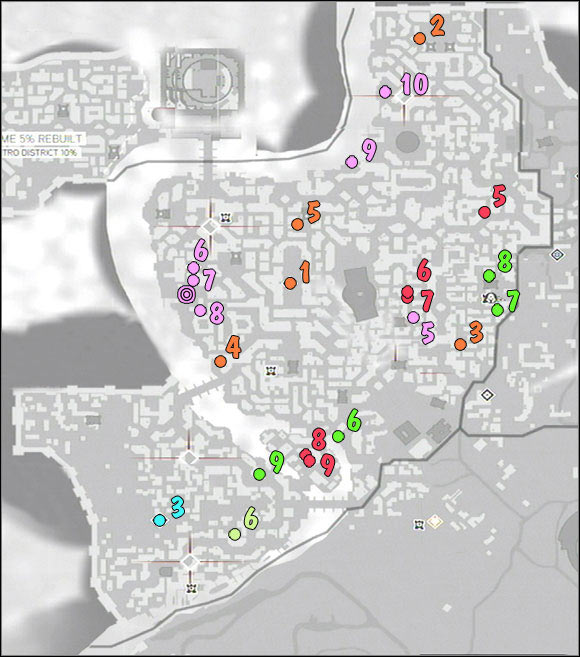
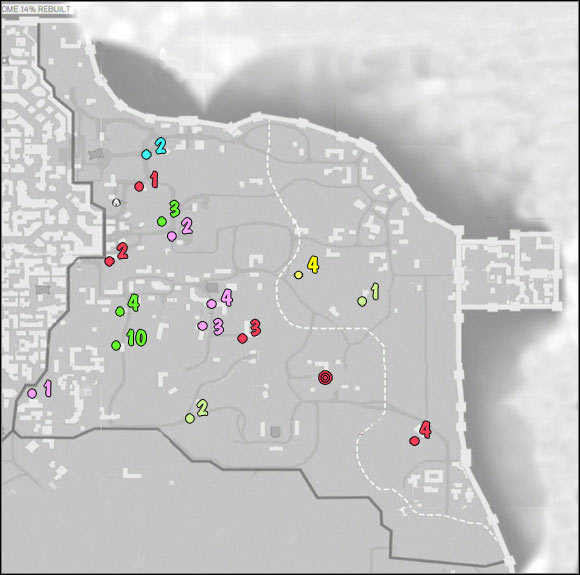

Requirements: Total Synchronization 15%
Localization: Centro District
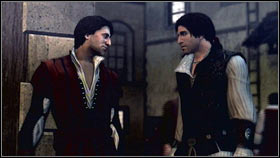
![After watching a cut scene [1] follow the woman but remember that she cannot see you [2] - Cristine Quests - Side Quests - Assassins Creed: Brotherhood - Game Guide and Walkthrough](https://game.lhg100.com/Article/UploadFiles/201512/2015121216072467.jpg)
After watching a cut scene [1] follow the woman but remember that she cannot see you [2].
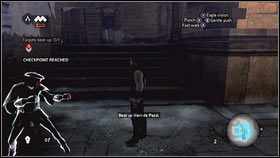
![When she will get to her house another cut scene will start and then you will have to fight [1] - Cristine Quests - Side Quests - Assassins Creed: Brotherhood - Game Guide and Walkthrough](https://game.lhg100.com/Article/UploadFiles/201512/2015121216072445.jpg)
When she will get to her house another cut scene will start and then you will have to fight [1]. Win the man and end the quest [2].
Requirements: Total Synchronization 30%
Localization: Centro District
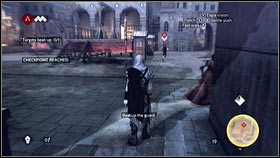
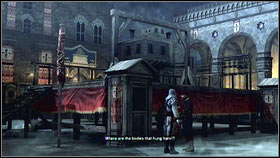
The second mission is about escorting Cristine to the marked location. You will find a guard there [1]. Fight with him and learn some informations [2].
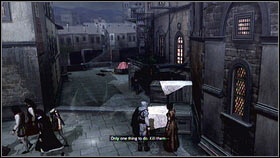
![Follow the woman once again and stay undercover [1] - Cristine Quests - Side Quests - Assassins Creed: Brotherhood - Game Guide and Walkthrough](https://game.lhg100.com/Article/UploadFiles/201512/2015121216072439.jpg)
Follow the woman once again and stay undercover [1]. When you will be at the place, climb on the building located on the left and go to the port [2].
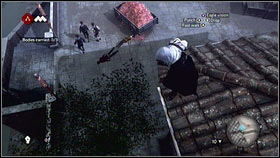
![You will find three bodies here [1] - Cristine Quests - Side Quests - Assassins Creed: Brotherhood - Game Guide and Walkthrough](https://game.lhg100.com/Article/UploadFiles/201512/2015121216072597.jpg)
You will find three bodies here [1]. When you enemies will be gone take one body (B) and take it to the boat [2]. Transport all your family members and end the quest.
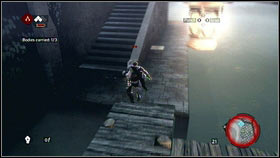
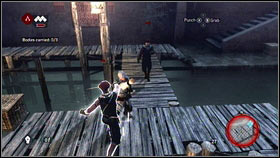
There is one better option to avoid the guard - eliminate them. You cannot kill them but you cam force to make suicide. Take your enemies to the bridge and fight only with your hands [1]. When they will try to dodge your hits, they will probably fall into the water and die [2]. Remember that you cannot pull them into the water.
Requirements: Total Synchronization 45%
Localization: Centro District
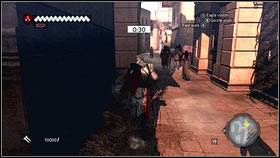
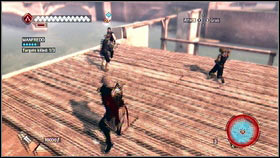
After speaking with your former lover go to the marked map. Go south and then turn east [1]. As a matter of fact you get to Cristina's boyfriend [2]. Kill all enemies and end the quest.
Requirements: Total Synchronization 60%
Localization: Centro District
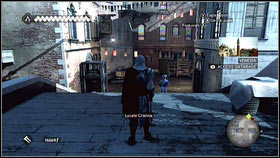
![When you will be moved to the Venice go to the marked location [1] - Cristine Quests - Side Quests - Assassins Creed: Brotherhood - Game Guide and Walkthrough](https://game.lhg100.com/Article/UploadFiles/201512/2015121216072537.jpg)
When you will be moved to the Venice go to the marked location [1]. Use your Eagle Vision and find Cristine [2].
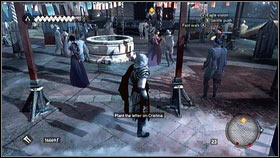
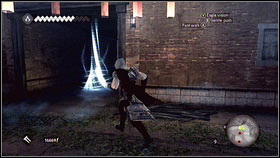
Your task is to give her a letter. You will do that by getting close to her and pressing A [1]. Run to the marked area [2] and end the quest.
Requirements: Total Synchronization 75%
Localization: Centro DIstrict
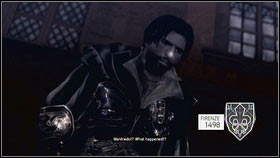
![After starting this mission [1] go to the marked location - Cristine Quests - Side Quests - Assassins Creed: Brotherhood - Game Guide and Walkthrough](https://game.lhg100.com/Article/UploadFiles/201512/2015121216072629.jpg)
After starting this mission [1] go to the marked location. You will find Cristine there [2].
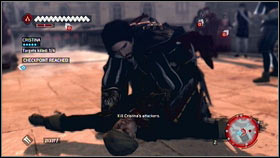
![When the woman will start running kill all her enemies [1] and try to stay close to your friends as much as it is possible - Cristine Quests - Side Quests - Assassins Creed: Brotherhood - Game Guide and Walkthrough](https://game.lhg100.com/Article/UploadFiles/201512/2015121216072657.jpg)
When the woman will start running kill all her enemies [1] and try to stay close to your friends as much as it is possible. The best option is to use some ranged weapon [2]. When you will will eliminate all thugs the final cut scene will start.
Full synchronization: Kill you victim and stay undercover.
Localization: Campagna District
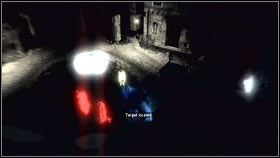
![After speaking with one courtesan go to the marked location and use your Eagle Vision [1] - Courtesans Quests - p. 1 - Side Quests - Assassins Creed: Brotherhood - Game Guide and Walkthrough](https://game.lhg100.com/Article/UploadFiles/201512/2015121216072662.jpg)
After speaking with one courtesan go to the marked location and use your Eagle Vision [1]. You will find Juliette near the well [2].
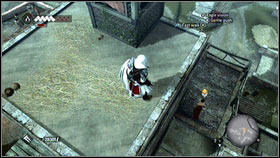
![Your task is to follow her, but remember that she cannot see you now [1] - Courtesans Quests - p. 1 - Side Quests - Assassins Creed: Brotherhood - Game Guide and Walkthrough](https://game.lhg100.com/Article/UploadFiles/201512/2015121216072650.jpg)
Your task is to follow her, but remember that she cannot see you now [1]. Hide when a yellow mark will appear above her head. After a long walk, she will get to her lover [2]. You have to kill him and stay undercover.
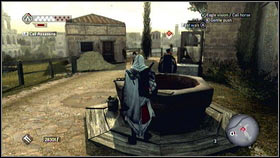
![At the beginning go down and get close to your victim from the back [1] - Courtesans Quests - p. 1 - Side Quests - Assassins Creed: Brotherhood - Game Guide and Walkthrough](https://game.lhg100.com/Article/UploadFiles/201512/2015121216072689.jpg)
At the beginning go down and get close to your victim from the back [1]. You will see a small well there. Get inside and get close to your victim [2]. Press X and kill your target. Now speak with the courtesan and end the mission.
Full synchronization: Kill all targets in less than 60 seconds.
Localization: Campagna District
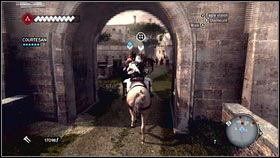
![After speaking with the courtesan get on your horse [1] - Courtesans Quests - p. 1 - Side Quests - Assassins Creed: Brotherhood - Game Guide and Walkthrough](https://game.lhg100.com/Article/UploadFiles/201512/2015121216072750.jpg)
After speaking with the courtesan get on your horse [1]. You will get to the small house surrounded by some soldiers [2]. This will be a very simple fight but you have to kill them all in 60 seconds.
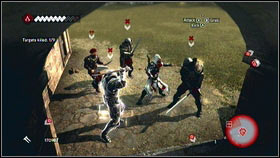
![Use counterattacks and kill streaks [1] - Courtesans Quests - p. 1 - Side Quests - Assassins Creed: Brotherhood - Game Guide and Walkthrough](https://game.lhg100.com/Article/UploadFiles/201512/2015121216072755.jpg)
Use counterattacks and kill streaks [1]. After the fight speak with the courtesan and end the quest [2].
Full synchronization: Complete the mission in 2 minutes and 20 seconds.
Localization: Campagna District
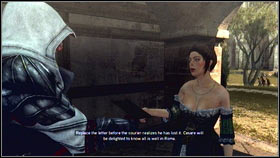
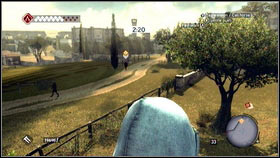
Courtesan will ask you to steal the letter. Go to the marked location [1] and do the job (you have to be undercover) [2].
![After the job, return to woman [1] - Courtesans Quests - p. 1 - Side Quests - Assassins Creed: Brotherhood - Game Guide and Walkthrough](https://game.lhg100.com/Article/UploadFiles/201512/2015121216072744.jpg)
After the job, return to woman [1]. She will change the letter and you will have to give it back to the owner. Find the man and do the same thing [2]. Remember to avoid the guards.
Full synchronization: Complete the quest with two mercenaries with at least 50% HP.
Localization: Campagna District
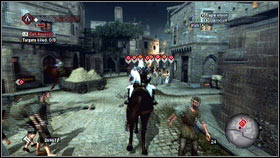
![At the beginning go to the marked place [1] and kill your first target - Courtesans Quests - p. 1 - Side Quests - Assassins Creed: Brotherhood - Game Guide and Walkthrough](https://game.lhg100.com/Article/UploadFiles/201512/2015121216072836.jpg)
At the beginning go to the marked place [1] and kill your first target. Use the kill streak to eliminate other soldiers [2].
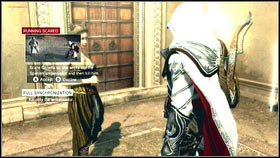
![After the fight you will be attacked by more enemies [1] - Courtesans Quests - p. 1 - Side Quests - Assassins Creed: Brotherhood - Game Guide and Walkthrough](https://game.lhg100.com/Article/UploadFiles/201512/2015121216072872.jpg)
After the fight you will be attacked by more enemies [1]. There will be many of them and to get the full synchronization you have to watch out for your mercenaries HP. When you will see that they are loosing their health. Stop the fight (LT) and help them [2]. You can have some problems with the enemy on the horse. Get close to him and press B to take him down. To be sure, you will handle that, you can always call your recruits. When your allies will be fighting, you can take care of your mercenaries. After the fight, you will see a cut scene.
Full synchronization - Stop Santino, before he will beat a courtesan.
Localization: Centro District
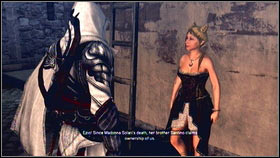
![Speak with one prostitute [1] and go to the place marked on the map - Courtesans Quests - p. 1 - Side Quests - Assassins Creed: Brotherhood - Game Guide and Walkthrough](https://game.lhg100.com/Article/UploadFiles/201512/2015121216072830.jpg)
Speak with one prostitute [1] and go to the place marked on the map. You will see Santino there [2].
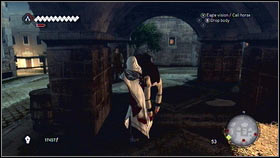
![Beat him with a hand to hand fight [1] and put him in the fountain (B) [2] - Courtesans Quests - p. 1 - Side Quests - Assassins Creed: Brotherhood - Game Guide and Walkthrough](https://game.lhg100.com/Article/UploadFiles/201512/2015121216072805.jpg)
Beat him with a hand to hand fight [1] and put him in the fountain (B) [2]. When you will do that, the mission will be over.
Full synchronization: Complete the quest in less than 400 seconds.
Localization: Centro District
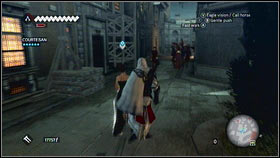
![Follow the courtesan [1] - Courtesans Quests - p. 2 - Side Quests - Assassins Creed: Brotherhood - Game Guide and Walkthrough](https://game.lhg100.com/Article/UploadFiles/201512/2015121216072828.jpg)
Follow the courtesan [1]. She will mark you men that you will have to beat [2]. Do it fast and you will complete this quest in less than 400 seconds.
Full synchronization: Kill only the ambassador.
Localization: Centro District
![One courtesan will ask you to kill the Spanish ambassador [1] - Courtesans Quests - p. 2 - Side Quests - Assassins Creed: Brotherhood - Game Guide and Walkthrough](https://game.lhg100.com/Article/UploadFiles/201512/2015121216072977.jpg)
One courtesan will ask you to kill the Spanish ambassador [1]. Go to the marked location and find Juliette [2].
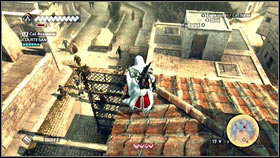
![She will start running so follow her [1] - Courtesans Quests - p. 2 - Side Quests - Assassins Creed: Brotherhood - Game Guide and Walkthrough](https://game.lhg100.com/Article/UploadFiles/201512/2015121216072933.jpg)
She will start running so follow her [1]. In other way, she will alarm the guards and you will have to run away. After a short trip, you will find the ambassador [2]. Kill him and speak with the woman. If the soldiers will see the execution then run away and return later.
Full synchronization: Do not kill the doctor.
Localization: Centro District
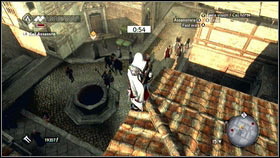
![Go to the point marked on the map [1] - Courtesans Quests - p. 2 - Side Quests - Assassins Creed: Brotherhood - Game Guide and Walkthrough](https://game.lhg100.com/Article/UploadFiles/201512/2015121216072967.jpg)
Go to the point marked on the map [1]. You will have only 2,5 minutes to get to the target and return. When you will see the doctor, stand near the nearest wall [2], get close to the target and rob him (A without pressing RT). After the job, return to the girl.
Full synchronization: Kill the target with your hidden blade.
Localization: Centro District
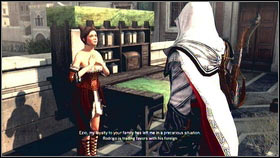
![Go to the place marked on the map [1] and use your Eagle Vision there to localize your target [2] - Courtesans Quests - p. 2 - Side Quests - Assassins Creed: Brotherhood - Game Guide and Walkthrough](https://game.lhg100.com/Article/UploadFiles/201512/2015121216072988.jpg)
Go to the place marked on the map [1] and use your Eagle Vision there to localize your target [2].
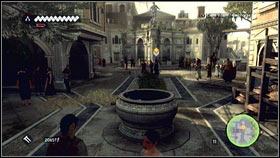
![Follow him and try to stay undercover [1] - Courtesans Quests - p. 2 - Side Quests - Assassins Creed: Brotherhood - Game Guide and Walkthrough](https://game.lhg100.com/Article/UploadFiles/201512/2015121216072968.jpg)
Follow him and try to stay undercover [1]. You will get to the place when he will meet the courtesan [2].
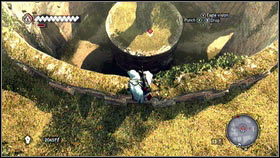
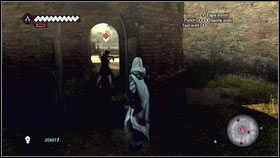
The man will disappear in the ruins and you will hear the scream. Climb on the wall on the right [1] and get to your victim from behind. Now just kill him with your hidden blade [2].
Full synchronization: Kill your target while hanging on the edge.
Localization: Centro District
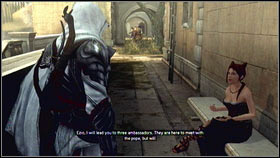
![Courtesan will ask you to kill three ambassadors that she have to meet [1] - Courtesans Quests - p. 2 - Side Quests - Assassins Creed: Brotherhood - Game Guide and Walkthrough](https://game.lhg100.com/Article/UploadFiles/201512/2015121216073023.jpg)
Courtesan will ask you to kill three ambassadors that she have to meet [1]. Follow her until she will stop near the first target [2].
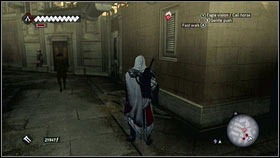
![Climb on the building using the wall located on the left [1] and move to the proper position [2] - Courtesans Quests - p. 2 - Side Quests - Assassins Creed: Brotherhood - Game Guide and Walkthrough](https://game.lhg100.com/Article/UploadFiles/201512/2015121216073081.jpg)
Climb on the building using the wall located on the left [1] and move to the proper position [2]. When you will be close enough, press X and you will kill the man.
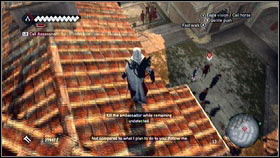
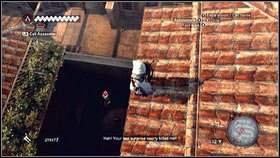
After the execution, follow the courtesan and avoid the guards. As a matter of fact, you will get to the third ambassador [1]. When she will speak with him, they will go to the alley [2]. Stand on the roof and kill the target from above.
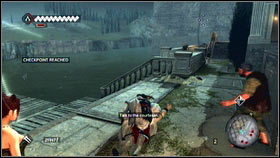
![Repeat the same operation on the third target [1] and speak with the woman to end the quest [2] - Courtesans Quests - p. 2 - Side Quests - Assassins Creed: Brotherhood - Game Guide and Walkthrough](https://game.lhg100.com/Article/UploadFiles/201512/2015121216073091.jpg)
Repeat the same operation on the third target [1] and speak with the woman to end the quest [2].
Full synchronization: Stay alive. None of your comrades can be knocked down.
Localization: Antico District
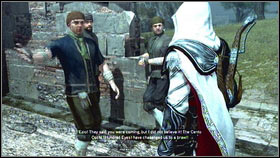
![Speak with the thieves [1] and you will be attacked by the gang - Thieves Quests - p. 1 - Side Quests - Assassins Creed: Brotherhood - Game Guide and Walkthrough](https://game.lhg100.com/Article/UploadFiles/201512/2015121216073164.jpg)
Speak with the thieves [1] and you will be attacked by the gang. Your task is to knock down all enemies - do not kill them [2]! At the beginning press RB and choose your hands. You have to beat each man until he will be knocked down. If you will have any problems then press (B) do knock them down and (X). Be as fast as it is possible - the more are you fighting the better chance than one of your comrades can be knocked down.
Full synchronization: End the run in less than 60 seconds.
Localization: Antico District
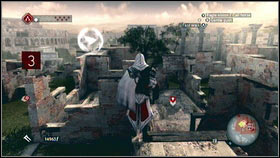
![This task is about running as fast as it is possible [1] - Thieves Quests - p. 1 - Side Quests - Assassins Creed: Brotherhood - Game Guide and Walkthrough](https://game.lhg100.com/Article/UploadFiles/201512/2015121216073155.jpg)
This task is about running as fast as it is possible [1]. You have to run from one glowing point to another [2]. This quest is not very difficult but you can have some problems with the camera.
Full synchronization: Rescue Aldo in less than 2 minutes.
Localization: Campagna District
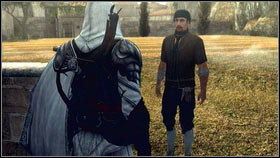
![One thief will ask you to rescue his brother Aldo [1] - Thieves Quests - p. 1 - Side Quests - Assassins Creed: Brotherhood - Game Guide and Walkthrough](https://game.lhg100.com/Article/UploadFiles/201512/2015121216073190.jpg)
One thief will ask you to rescue his brother Aldo [1]. Go to the point marked on the map and kill two archers located there [2]. If any guards will follow you, hire mercenaries.

![After the job [1] kill other soldiers and speak with Aldo [2] - Thieves Quests - p. 1 - Side Quests - Assassins Creed: Brotherhood - Game Guide and Walkthrough](https://game.lhg100.com/Article/UploadFiles/201512/2015121216073122.jpg)
After the job [1] kill other soldiers and speak with Aldo [2].
Full synchronization: Kill Cento Occhi bosses with your hidden blade.
Localization: Campagna District
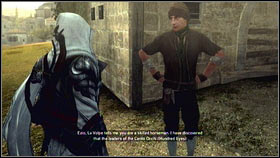
![Speak with the thief [1], get on your horse and go to the Circus Maximus [2] - Thieves Quests - p. 1 - Side Quests - Assassins Creed: Brotherhood - Game Guide and Walkthrough](https://game.lhg100.com/Article/UploadFiles/201512/2015121216073226.jpg)
Speak with the thief [1], get on your horse and go to the Circus Maximus [2].
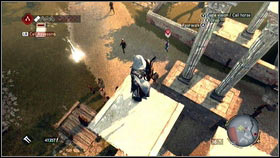
![You will find gang leaders there [1] - Thieves Quests - p. 1 - Side Quests - Assassins Creed: Brotherhood - Game Guide and Walkthrough](https://game.lhg100.com/Article/UploadFiles/201512/2015121216073242.jpg)
You will find gang leaders there [1]. To get the full synchronization, you have to kill them with your hidden blade. To do it get close to the enemy and press X. Ezio will kill the target and he will change the horse automatically. After the fight, run away [2].
Full synchronization: Complete the test and stay at 100% HP.
Localization: Antico District
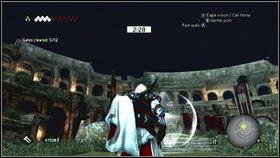
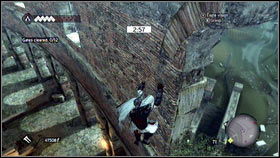
This is the next quest where you have to run from point to point as fast as it is possible. The first point is in the ruins [1]. Go there fast [2]. Remember to jump from safe distance in order to get full synchronization.
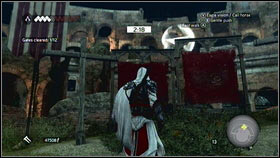
![When you will get to the first point, climb on the wooden construction [1] and jump further [2] - Thieves Quests - p. 1 - Side Quests - Assassins Creed: Brotherhood - Game Guide and Walkthrough](https://game.lhg100.com/Article/UploadFiles/201512/2015121216073246.jpg)
When you will get to the first point, climb on the wooden construction [1] and jump further [2].
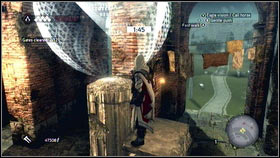
![The next point is located in the ruins located on the left [1] - Thieves Quests - p. 1 - Side Quests - Assassins Creed: Brotherhood - Game Guide and Walkthrough](https://game.lhg100.com/Article/UploadFiles/201512/2015121216073279.jpg)
The next point is located in the ruins located on the left [1]. Jump to the bar located on the left [2].
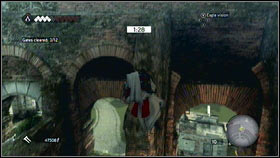
![When you will get to the last one, turn right [1], climb upstairs and run to the left [2] - Thieves Quests - p. 1 - Side Quests - Assassins Creed: Brotherhood - Game Guide and Walkthrough](https://game.lhg100.com/Article/UploadFiles/201512/2015121216073309.jpg)
When you will get to the last one, turn right [1], climb upstairs and run to the left [2].
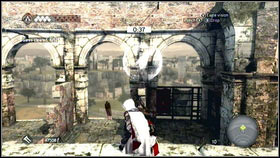
![After two point, you should see another point [1] - Thieves Quests - p. 1 - Side Quests - Assassins Creed: Brotherhood - Game Guide and Walkthrough](https://game.lhg100.com/Article/UploadFiles/201512/2015121216073382.jpg)
After two point, you should see another point [1]. Climb on the wall and then catch the bar [2]. You will see another glowing point on the right.
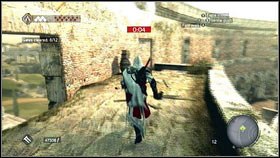
![To find another one, you have to move straight ahead [1] - Thieves Quests - p. 1 - Side Quests - Assassins Creed: Brotherhood - Game Guide and Walkthrough](https://game.lhg100.com/Article/UploadFiles/201512/2015121216073376.jpg)
To find another one, you have to move straight ahead [1]. When you will be at the place, climb on the wall and turn left [2].
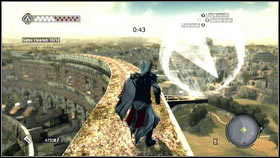
![Another point in on the platform [1] - Thieves Quests - p. 1 - Side Quests - Assassins Creed: Brotherhood - Game Guide and Walkthrough](https://game.lhg100.com/Article/UploadFiles/201512/2015121216073341.jpg)
Another point in on the platform [1]. Jump down and end the race [2].
Full synchronization: Stay undercover while stealing the box.
Localization: Centro District
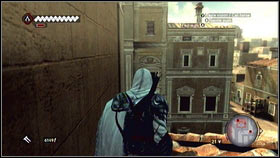
![Go to the building marked on the map [1] - Thieves Quests - p. 2 - Side Quests - Assassins Creed: Brotherhood - Game Guide and Walkthrough](https://game.lhg100.com/Article/UploadFiles/201512/2015121216073374.jpg)
Go to the building marked on the map [1]. Get on the roof and kill the guard [2].
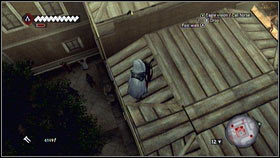
![Beware of two other guys, look down on the square [1] - Thieves Quests - p. 2 - Side Quests - Assassins Creed: Brotherhood - Game Guide and Walkthrough](https://game.lhg100.com/Article/UploadFiles/201512/2015121216073414.jpg)
Beware of two other guys, look down on the square [1]. If it will be safe, go down and stay among other people [2].
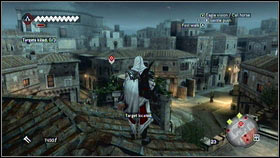
![When you will be in the safe place, wait for the soldiers [1] - Thieves Quests - p. 2 - Side Quests - Assassins Creed: Brotherhood - Game Guide and Walkthrough](https://game.lhg100.com/Article/UploadFiles/201512/2015121216073407.jpg)
When you will be in the safe place, wait for the soldiers [1]. When they will be gone, search the chest (B) [2] and return to the thief. He is waiting for you on the roof.
Full synchronization: Kill all bandits with your gun.
Localization: Centro District
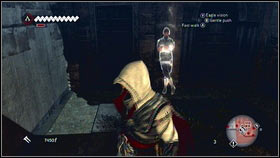
One of the thieves [1] will ask you to find three thugs. You will find them on the building - they are marked on the map [2].
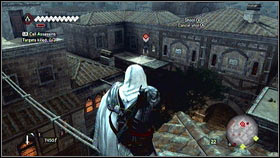
![When you will see the man, he will start running away [1] - Thieves Quests - p. 2 - Side Quests - Assassins Creed: Brotherhood - Game Guide and Walkthrough](https://game.lhg100.com/Article/UploadFiles/201512/2015121216073480.jpg)
When you will see the man, he will start running away [1]. Follow him and soot him with your gun [2]. You will need three bullets so remember about reloading.
Full synchronization: End the race in less that 60 seconds.
Localization: Centro District
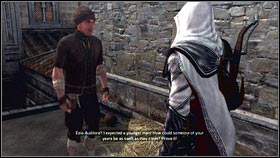
![You will have to start running after the conversation [1] - Thieves Quests - p. 2 - Side Quests - Assassins Creed: Brotherhood - Game Guide and Walkthrough](https://game.lhg100.com/Article/UploadFiles/201512/2015121216073525.jpg)
You will have to start running after the conversation [1]. You have to do the same job as always - run from point to another point. This is a quite difficult run and to complete it, you have to have zero Notoriety [2]. In other way guards will attack you and the run will be more difficult. The other thing is that it is good to do this race before the quest. You should succeed after few tries.
Full synchronization: Kill the betrayer with your hidden blade.
Localization: Centro District
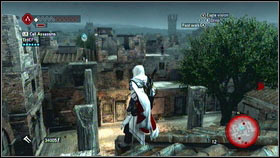
![Follow the thief and look out for the guards [1] - Thieves Quests - p. 2 - Side Quests - Assassins Creed: Brotherhood - Game Guide and Walkthrough](https://game.lhg100.com/Article/UploadFiles/201512/2015121216073555.jpg)
Follow the thief and look out for the guards [1]. When you will get to the place, your companion will turn out to be a betrayer. Kill him with your hidden blade and eliminate other opponents [2]. After the fight run to the yellow zone to end the quest.
Full synchronization: Stay undercover.
Localization: Campagna District
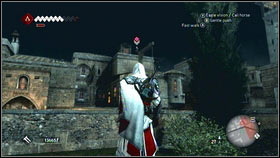
![Your first target is a man that is patrolling the building [1] - Thieves Quests - p. 2 - Side Quests - Assassins Creed: Brotherhood - Game Guide and Walkthrough](https://game.lhg100.com/Article/UploadFiles/201512/2015121216073558.jpg)
Your first target is a man that is patrolling the building [1]. Climb on the roof and kill him with your recruits [2]. Then eliminate opponent located on the right.
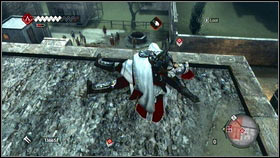
![After the job, search the body [1] and throw it on the street [2] - Thieves Quests - p. 2 - Side Quests - Assassins Creed: Brotherhood - Game Guide and Walkthrough](https://game.lhg100.com/Article/UploadFiles/201512/2015121216073553.jpg)
After the job, search the body [1] and throw it on the street [2]. As a matter of fact you will get one item.
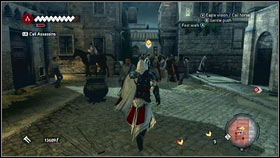
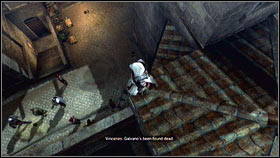
Now you have to give it to your "friend". The man is marked on the map. Get close to him without holding RT and press A [1]. A short cut scene will start [2] and the quest will be over.
Full synchronization: Kill three guards with your hidden blade.
Localization: Campagna District
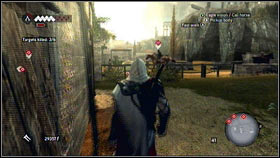
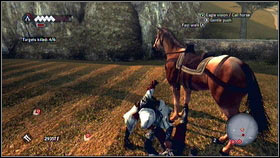
Go to the green zone and you will find 6 targets there. First soldiers can be killed while wandering alone [1]. Get close to him and use your hidden blade [2].
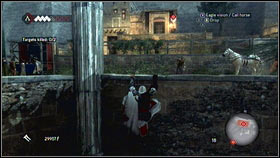
![Now, you can kill two guys standing near the building [1] - Assassins Contracts - p. 1 - Side Quests - Assassins Creed: Brotherhood - Game Guide and Walkthrough](https://game.lhg100.com/Article/UploadFiles/201512/2015121216073601.jpg)
Now, you can kill two guys standing near the building [1]. Both of them are turned so kill at least one with your blade. If you want to be sure that you will get full synchronization, then climb on the roof and kill him with your hidden blade from above [2].
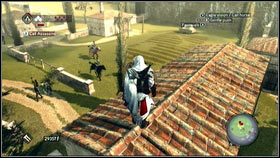
![The next task is to kill three soldiers in one group [1] - Assassins Contracts - p. 1 - Side Quests - Assassins Creed: Brotherhood - Game Guide and Walkthrough](https://game.lhg100.com/Article/UploadFiles/201512/2015121216073629.jpg)
The next task is to kill three soldiers in one group [1]. If you want to use the blade, hide in the cart [2] and kill one of them. Another two can be eliminated with normal sword.
Full synchronization: Kill three targets in two minutes.
Localization: Campagna District
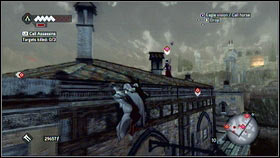
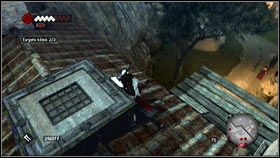
Now you have to kill three targets. First soldier can be eliminated while standing on the nearest building [1]. Climb on the top, get close to him from behind and eliminate. Another guard is located on the north. Kill him from above [2]. The last target is very simple, but you have to be very quick to get the full synchronization.
Full synchronization: Kill two targets with your hidden blade.
Localization: Campagna District
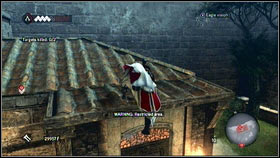
You have to kill two guards that are patrolling the area in two parts of the town. First, kill the guard located on the north. He is wandering near one building. Wait until he will turn round [1] and climb on the top of the building [2].
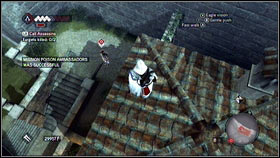
![While standing on the edge, find your target [1] and eliminate him from above [2] - Assassins Contracts - p. 1 - Side Quests - Assassins Creed: Brotherhood - Game Guide and Walkthrough](https://game.lhg100.com/Article/UploadFiles/201512/2015121216073742.jpg)
While standing on the edge, find your target [1] and eliminate him from above [2].
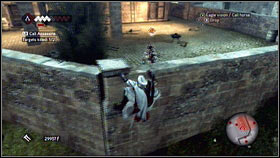
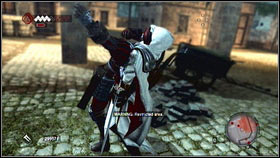
The next victim is located in the south. Climb on the wall and wait until he will turn round [1]. Now kill him [2].
Full synchronization: Kill one Brute, one Seeker and one pope guard with their own weapons.
Localization: Campagna District
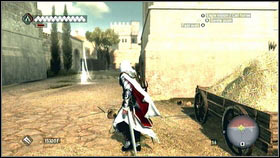
![When you will go to the marked fortress [1] the game will mark targets for you [2] - Assassins Contracts - p. 1 - Side Quests - Assassins Creed: Brotherhood - Game Guide and Walkthrough](https://game.lhg100.com/Article/UploadFiles/201512/2015121216073706.jpg)
When you will go to the marked fortress [1] the game will mark targets for you [2]. Each group is consisted from other soldiers.
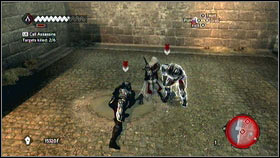
![To get the full synchronization, kill one man [1], take his weapon (B) and kill another one [2] - Assassins Contracts - p. 1 - Side Quests - Assassins Creed: Brotherhood - Game Guide and Walkthrough](https://game.lhg100.com/Article/UploadFiles/201512/2015121216073732.jpg)
To get the full synchronization, kill one man [1], take his weapon (B) and kill another one [2].
Full synchronization: Kill both targets in less than 60 seconds.
Localization: Centro District
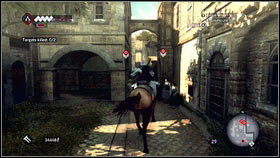
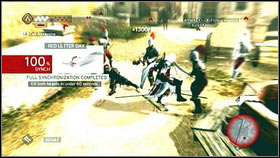
Go north to find your victims. You have to kill them in 60 seconds so be quick [1]. Kill the first target while being undercover. The second enemy has some guard. Use kill streaks and it should be OK [2].
Full synchronization: Do not let the target to call reinforcements.
Localization: Centro District
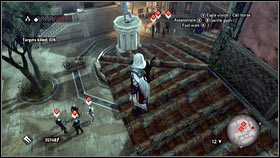
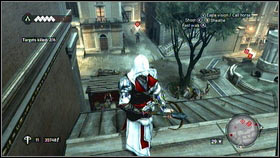
You have to kill six targets west of the pigeon crate. You will see that they are in two groups [1]. The best way is to kill man from each group with ranged weapon [2] and eliminate the rest of them later. You have to kill them silently.
Full synchronization: Use recruits in diversion.
Localization: Centro District
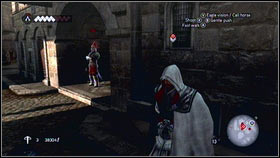
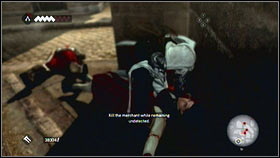
You have to kill the trader while being undercover. The best way is to use recruits to get the full synchronization. Go to the place marked on the map [1]. Kill one guard with ranged weapon, the second one will leave the position. You can now kill the target [2].
Full synchronization: Kill the target with your hidden blade.
Localization: Centro District
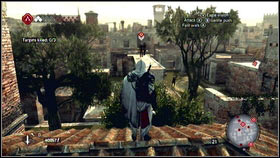
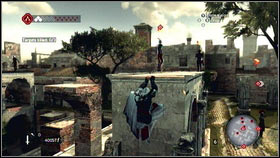
Your task is to kill three guards with your hidden blade. You can do it silently but it isn't necessary. The first target is located south west. He will be hiding near one building [1]. Run to him and use your blade [2].
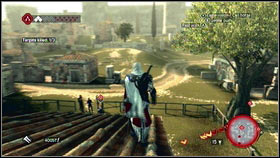
![The second victim is the pike men [1] - Assassins Contracts - p. 2 - Side Quests - Assassins Creed: Brotherhood - Game Guide and Walkthrough](https://game.lhg100.com/Article/UploadFiles/201512/2015121216073864.jpg)
The second victim is the pike men [1]. To kill him with the blade, kick him and then attack. Do the same with the last target [2]. After the job, the mission will be over.
Full synchronization: Kill all targets in less than 15 seconds
Localization: Centro District
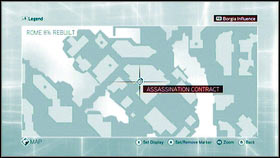
![Zoom to see the exact localization [1] - Assassins Contracts - p. 2 - Side Quests - Assassins Creed: Brotherhood - Game Guide and Walkthrough](https://game.lhg100.com/Article/UploadFiles/201512/2015121216073955.jpg)
Zoom to see the exact localization [1]. You have to kill some well armored soldiers in less than 30 second (15 if you want to get full synchronization) [2]. The best way is to call your recruits and kill some of your enemies with ranged weapon.
Full synchronization: Do not loose any HP.
Localization: Vaticano District

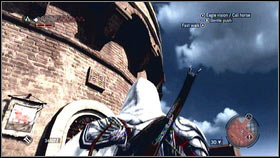
You have to kill some pope guards. Go to the square [1] and climb on the wall located on the right. You will find a tower there [2].
![Use stairs to get to the top [1] and catch a small brick [2] - Assassins Contracts - p. 2 - Side Quests - Assassins Creed: Brotherhood - Game Guide and Walkthrough](https://game.lhg100.com/Article/UploadFiles/201512/2015121216073980.jpg)
Use stairs to get to the top [1] and catch a small brick [2].
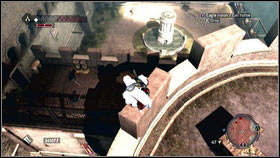
![When you will be on the top [1] jump on the other side and kill all enemies [2] - Assassins Contracts - p. 2 - Side Quests - Assassins Creed: Brotherhood - Game Guide and Walkthrough](https://game.lhg100.com/Article/UploadFiles/201512/2015121216073913.jpg)
When you will be on the top [1] jump on the other side and kill all enemies [2]. It is good to call your recruits in order to stay at 100% HP.
Full synchronization: Kill only the cardinal.
Localization: Vaticano District
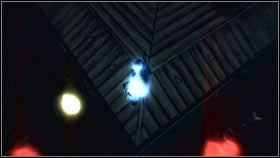
![Go to the marked area and find your target [1] - Assassins Contracts - p. 2 - Side Quests - Assassins Creed: Brotherhood - Game Guide and Walkthrough](https://game.lhg100.com/Article/UploadFiles/201512/2015121216073935.jpg)
Go to the marked area and find your target [1]. You have to kill him silently. Stand between the priests [2]. When he will be passing by, kill him with your hidden blade.
Full synchronization: Complete the quest in two minutes.
Localization: Antico District
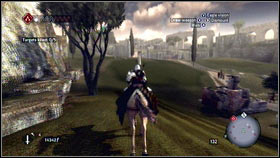
![Get on your horse and go to the marked place [1] - Assassins Contracts - p. 2 - Side Quests - Assassins Creed: Brotherhood - Game Guide and Walkthrough](https://game.lhg100.com/Article/UploadFiles/201512/2015121216074010.jpg)
Get on your horse and go to the marked place [1]. You will find some soldiers there and their leader. This will be a very simple fight but use some kill streaks to get the full synchronization [2].
Full synchronization: Kill your target with your hidden blade.
Localization: Campagna District
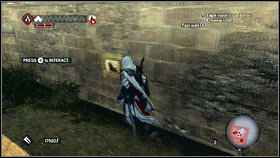
![After the conversation you will have to find the posters and destroy them [1] - Templars Agents - Side Quests - Assassins Creed: Brotherhood - Game Guide and Walkthrough](https://game.lhg100.com/Article/UploadFiles/201512/2015121216074097.jpg)
After the conversation you will have to find the posters and destroy them [1]. Do it by pressing B. When you will be done, the man will appear. Kill him with you hidden blade [2].
Full synchronization: Kill your target with your hidden blade in less than 45 seconds.
Localization: Campagna District
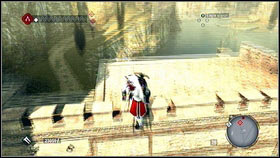
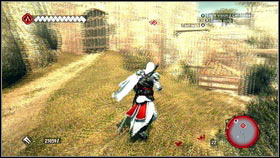
Follow the man. Jump over the first gate [1], pass the second one by jumping on the bars located on the right [2]. When you will be close enough, use your hidden blade.
Full synchronization: Kill only Donato Mancini.
Localization: Antico District
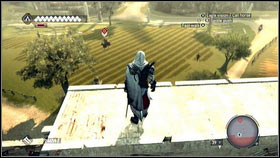
![Speak with the trader and go to Circus Maximus where you will find your victim [1] - Templars Agents - Side Quests - Assassins Creed: Brotherhood - Game Guide and Walkthrough](https://game.lhg100.com/Article/UploadFiles/201512/2015121216074083.jpg)
Speak with the trader and go to Circus Maximus where you will find your victim [1]. Enemy is on the horse so press B [2].
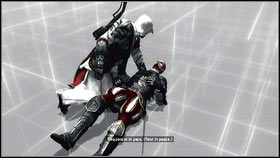
![When he will be on the ground, counter attack to kill him [1] - Templars Agents - Side Quests - Assassins Creed: Brotherhood - Game Guide and Walkthrough](https://game.lhg100.com/Article/UploadFiles/201512/2015121216074094.jpg)
When he will be on the ground, counter attack to kill him [1]. You will be attacked by some guards [2]. Do not kill them if you want to get the full synchronization. Dodge their attacks (RT+A) and run away.
Full synchronization: Kill Ristoro brother by an air attack.
Localization: Antico District
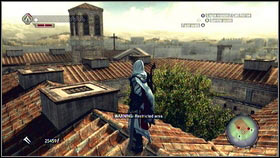
![Go to the church marked on the map [1] - Templars Agents - Side Quests - Assassins Creed: Brotherhood - Game Guide and Walkthrough](https://game.lhg100.com/Article/UploadFiles/201512/2015121216074115.jpg)
Go to the church marked on the map [1]. You will find two guards standing on the roof [2]. Kill them while being undercover.
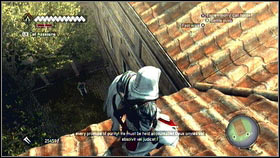
![Your target is located outside [1] - Templars Agents - Side Quests - Assassins Creed: Brotherhood - Game Guide and Walkthrough](https://game.lhg100.com/Article/UploadFiles/201512/2015121216074185.jpg)
Your target is located outside [1]. Use Eagle Vision, stand on the edge and kill the man with your hidden blade [2].
Full synchronization: Kill your target with your hidden blade.
Localization: Antico District
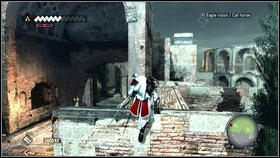
After speaking with a widower [1] go to the area marked on the map and enter the building located in northern east part [2].
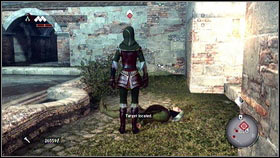
![You should see your victim on the square [1] - Templars Agents - Side Quests - Assassins Creed: Brotherhood - Game Guide and Walkthrough](https://game.lhg100.com/Article/UploadFiles/201512/2015121216074180.jpg)
You should see your victim on the square [1]. Wait until the man will run to you and kill him with your blade [2].
Full synchronization: Kill your target with your hidden blade.
Localization: Centro District
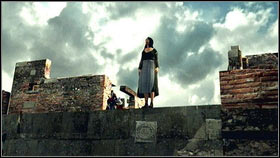
![After the talk [1] go to the marked area and use Eagle Vision [2] to localize your victim - Templars Agents - Side Quests - Assassins Creed: Brotherhood - Game Guide and Walkthrough](https://game.lhg100.com/Article/UploadFiles/201512/2015121216074131.jpg)
After the talk [1] go to the marked area and use Eagle Vision [2] to localize your victim. When you will see the man, he will start running. Follow them and kill.
Full synchronization: Do not loose more that one HP square.
Localization: Antico District
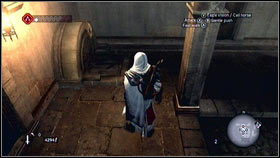
![Entrance to the first lair can be fund in the corridor [1] marked on the map - Romulus Lairs - p. 1 - Side Quests - Assassins Creed: Brotherhood - Game Guide and Walkthrough](https://game.lhg100.com/Article/UploadFiles/201512/2015121216074235.jpg)
Entrance to the first lair can be fund in the corridor [1] marked on the map. Use the rope hanging near the wall [2].
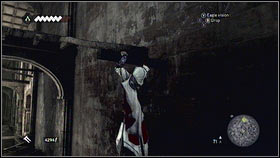
![You get on the roof [1] so sou will be able to jump to the garden and find the entrance [2] - Romulus Lairs - p. 1 - Side Quests - Assassins Creed: Brotherhood - Game Guide and Walkthrough](https://game.lhg100.com/Article/UploadFiles/201512/2015121216074225.jpg)
You get on the roof [1] so sou will be able to jump to the garden and find the entrance [2].
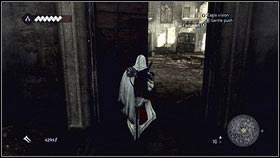
![Go straight ahead and keep to the Wright side [1] - Romulus Lairs - p. 1 - Side Quests - Assassins Creed: Brotherhood - Game Guide and Walkthrough](https://game.lhg100.com/Article/UploadFiles/201512/2015121216074293.jpg)
Go straight ahead and keep to the Wright side [1]. At the end, turn left.[2].
Sou will find a hole there [1], use wooden beams to go over it. On the Rother side, go to the corridor. Climb on the wall and jump in the direction of the wooden beam [2].
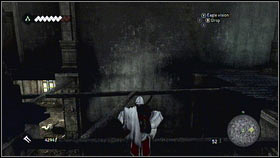
![Soon, sou will get to the crossroad [1] - Romulus Lairs - p. 1 - Side Quests - Assassins Creed: Brotherhood - Game Guide and Walkthrough](https://game.lhg100.com/Article/UploadFiles/201512/2015121216074268.jpg)
Soon, sou will get to the crossroad [1]. Take the right path. As a matter of fact, you will get to the room full of chandeliers [2].
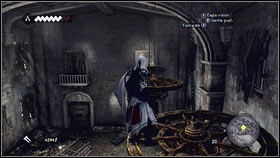
![Use them to get to the other side [1], then jump to the left [2] - Romulus Lairs - p. 1 - Side Quests - Assassins Creed: Brotherhood - Game Guide and Walkthrough](https://game.lhg100.com/Article/UploadFiles/201512/2015121216074325.jpg)
Use them to get to the other side [1], then jump to the left [2].
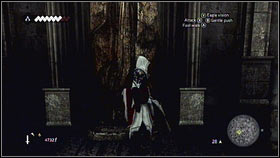
![You will find a statue there [1] - Romulus Lairs - p. 1 - Side Quests - Assassins Creed: Brotherhood - Game Guide and Walkthrough](https://game.lhg100.com/Article/UploadFiles/201512/2015121216074305.jpg)
You will find a statue there [1]. Climb up and catch the handle located on the left [2]. When you will be in the air, press B to catch the edge.

![Now jump in the direction of the standard [1] - Romulus Lairs - p. 1 - Side Quests - Assassins Creed: Brotherhood - Game Guide and Walkthrough](https://game.lhg100.com/Article/UploadFiles/201512/2015121216074391.jpg)
Now jump in the direction of the standard [1]. You will be able to catch nearby stick and get to the other side of the gate [2].
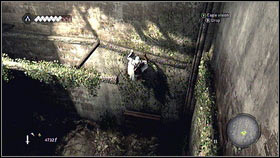
![In the next room, sou will find small scaffoldings [1] - Romulus Lairs - p. 1 - Side Quests - Assassins Creed: Brotherhood - Game Guide and Walkthrough](https://game.lhg100.com/Article/UploadFiles/201512/2015121216074337.jpg)
In the next room, sou will find small scaffoldings [1]. Climb up and go to the next room [2].
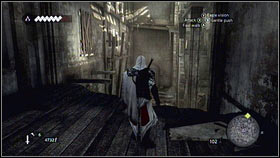
![Keep to the left side, jump using these wooden beams to get to the other side [1] - Romulus Lairs - p. 2 - Side Quests - Assassins Creed: Brotherhood - Game Guide and Walkthrough](https://game.lhg100.com/Article/UploadFiles/201512/2015121216074485.jpg)
Keep to the left side, jump using these wooden beams to get to the other side [1]. When you will catch the last edge, some boards will get broken [2].
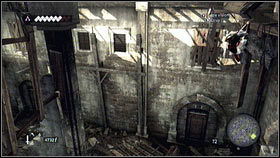
![Move to the right side and jump on another pillar [1] - Romulus Lairs - p. 2 - Side Quests - Assassins Creed: Brotherhood - Game Guide and Walkthrough](https://game.lhg100.com/Article/UploadFiles/201512/2015121216074496.jpg)
Move to the right side and jump on another pillar [1]. While going to the left, you will get to the hole in the wall [2].
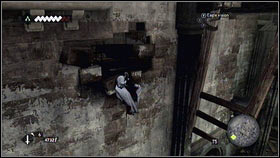
![Catch the hole and climb up [1] - Romulus Lairs - p. 2 - Side Quests - Assassins Creed: Brotherhood - Game Guide and Walkthrough](https://game.lhg100.com/Article/UploadFiles/201512/2015121216074416.jpg)
Catch the hole and climb up [1]. On the crossroad, turn left. You will get to the room with glowing gates [2].

![Examine it and shoot to the sack located on the left [1] - Romulus Lairs - p. 2 - Side Quests - Assassins Creed: Brotherhood - Game Guide and Walkthrough](https://game.lhg100.com/Article/UploadFiles/201512/2015121216074491.jpg)
Examine it and shoot to the sack located on the left [1]. You will open one gate [2].
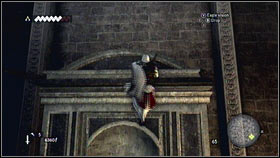
![Go to the shrine and climb on the monument [1], then jump on the another Wall located on the left [2] - Romulus Lairs - p. 2 - Side Quests - Assassins Creed: Brotherhood - Game Guide and Walkthrough](https://game.lhg100.com/Article/UploadFiles/201512/2015121216074483.jpg)
Go to the shrine and climb on the monument [1], then jump on the another Wall located on the left [2].
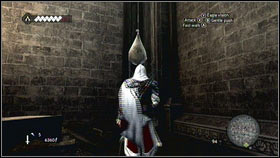
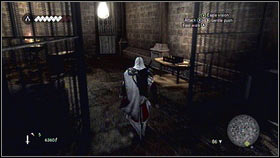
When sou will be on the balcony, turn right. Look at the another sack [1]. Shoot it too. If you do not have any ammo, take it from the table [2].
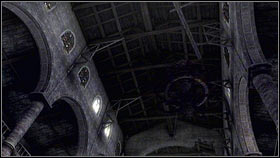
![As a matter of fact a huge chandelier will move [1] - Romulus Lairs - p. 2 - Side Quests - Assassins Creed: Brotherhood - Game Guide and Walkthrough](https://game.lhg100.com/Article/UploadFiles/201512/2015121216074558.jpg)
As a matter of fact a huge chandelier will move [1]. Turn round and climb on the railing on the right [2].
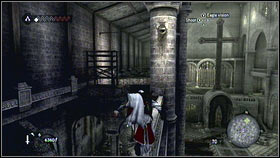
![Sou will get to another pillar [1] - Romulus Lairs - p. 2 - Side Quests - Assassins Creed: Brotherhood - Game Guide and Walkthrough](https://game.lhg100.com/Article/UploadFiles/201512/2015121216074566.jpg)
Sou will get to another pillar [1]. Climb on it and jump to the wooden scaffolding [2].

![Soon, you will get to the wooden platform [1] - Romulus Lairs - p. 2 - Side Quests - Assassins Creed: Brotherhood - Game Guide and Walkthrough](https://game.lhg100.com/Article/UploadFiles/201512/2015121216074556.jpg)
Soon, you will get to the wooden platform [1]. Climb on the pillar located on the right, move to the right and try to get to the top [2].
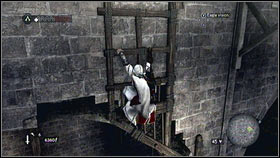
![Jump to another scaffolding [1] and to another room [2] - Romulus Lairs - p. 2 - Side Quests - Assassins Creed: Brotherhood - Game Guide and Walkthrough](https://game.lhg100.com/Article/UploadFiles/201512/2015121216074531.jpg)
Jump to another scaffolding [1] and to another room [2].
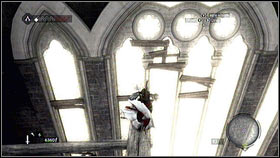
![At the end, jump straight ahead and catch some beams on the other side [1] - Romulus Lairs - p. 2 - Side Quests - Assassins Creed: Brotherhood - Game Guide and Walkthrough](https://game.lhg100.com/Article/UploadFiles/201512/2015121216074694.jpg)
At the end, jump straight ahead and catch some beams on the other side [1]. Go down and enter the room located on the left, then shoot the last sack [2].
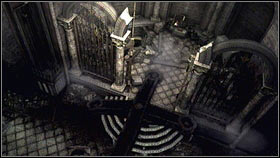
![Chandelier will fall on the gate [1] - Romulus Lairs - p. 2 - Side Quests - Assassins Creed: Brotherhood - Game Guide and Walkthrough](https://game.lhg100.com/Article/UploadFiles/201512/2015121216074602.jpg)
Chandelier will fall on the gate [1]. Go there to take your reward [2].
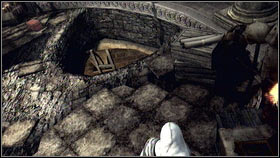
![To leave these dungeons, go to the hole [1] and open the gate [2] - Romulus Lairs - p. 2 - Side Quests - Assassins Creed: Brotherhood - Game Guide and Walkthrough](https://game.lhg100.com/Article/UploadFiles/201512/2015121216074629.jpg)
To leave these dungeons, go to the hole [1] and open the gate [2].
Full synchronization: Complete it in less than 8 minutes.
Localization: Antico District
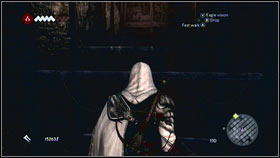
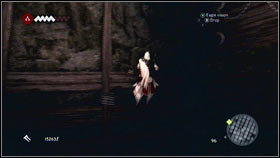
When sou will get to the underground, find the room with wooden scaffolding. Jump on the beams and get to the wall located on the other side [1], then move to the right [2].

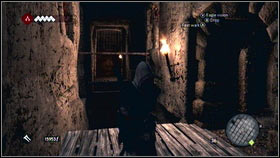
Now it will be very easy too. Hold RT + A and run, jumping over some holes [1]. Soon you will get to the crossroad [2]. Two paths will lead you to the same end, but they are quite different. I advise you to go straight ahead - it is less difficult so it will be easier to get the full synchronization. The left road will lead you to the Borgia flag.

![When you will go straight ahead, you will get to the elevator [1] - Romulus Lairs - p. 3 - Side Quests - Assassins Creed: Brotherhood - Game Guide and Walkthrough](https://game.lhg100.com/Article/UploadFiles/201512/2015121216074782.jpg)
When you will go straight ahead, you will get to the elevator [1]. Go up and enter the room with wooden platforms [2]. Soon, you will get to the next corridor. On the next crossroads go: left, right, straight ahead and right.
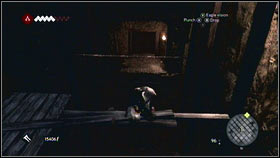
![You will get to the room with the bards and a stick [1] - Romulus Lairs - p. 3 - Side Quests - Assassins Creed: Brotherhood - Game Guide and Walkthrough](https://game.lhg100.com/Article/UploadFiles/201512/2015121216074736.jpg)
You will get to the room with the bards and a stick [1]. Go to the left and run straight ahead. At the end of this corridor, climb on the wall and turn left. You will find a room with a big hole there [2].
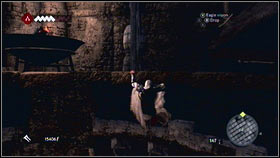
To get down, jump and catch the wall located on the right [1]. Go down and you will get to the wooden stick. Jump to opposite wall. You will find a small hole there. Turn round and jump to the other side [2].
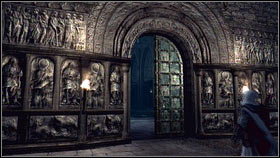
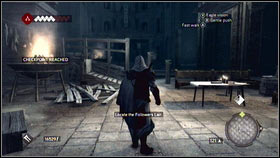
As a matter of fact you find yourself in a small labyrinth. Good path is marked by flaming torches. When you will get to the room, climb on the wall located on the right. Jump on the sticks and platforms to get to the next corridor. At the end, you should see the open gate [1]. There, you will see a short cut scene. Watch it and climb on the scaffolding located on the left [2].
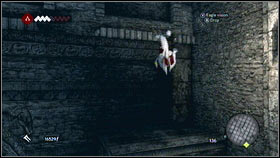
![When you will be at the top, turn left and get to the stone wall [1] - Romulus Lairs - p. 3 - Side Quests - Assassins Creed: Brotherhood - Game Guide and Walkthrough](https://game.lhg100.com/Article/UploadFiles/201512/2015121216074850.jpg)
When you will be at the top, turn left and get to the stone wall [1]. When you will climb on it, jump left until you will get to the huge pillar [2].
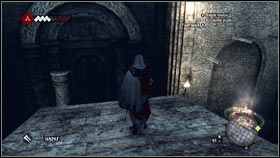
![Jump from the pillar to the ruins and then, to the next stone pillar [1] - Romulus Lairs - p. 3 - Side Quests - Assassins Creed: Brotherhood - Game Guide and Walkthrough](https://game.lhg100.com/Article/UploadFiles/201512/2015121216074816.jpg)
Jump from the pillar to the ruins and then, to the next stone pillar [1]. Jump on the sticks, until you will get to the altar [2]. You will find a cross there.
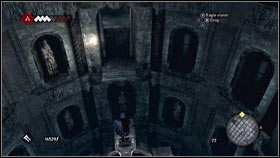
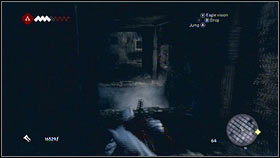
Climb on it. From the top, you should see a wooden platform [1]. Jump there, climb on the wall and enter the underground corridor [2]. On the crossroads turn where you will see torches.
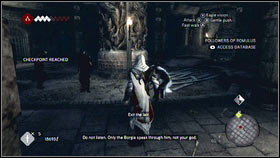
![After a longer run, you will get to the room when you will be attacked by few enemies [1] - Romulus Lairs - p. 3 - Side Quests - Assassins Creed: Brotherhood - Game Guide and Walkthrough](https://game.lhg100.com/Article/UploadFiles/201512/2015121216074815.jpg)
After a longer run, you will get to the room when you will be attacked by few enemies [1]. Kill them all and climb on another pillar [2].
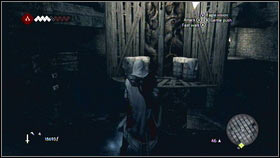
![When you will be on the top, jump on the construction located in the middle [1] - Romulus Lairs - p. 3 - Side Quests - Assassins Creed: Brotherhood - Game Guide and Walkthrough](https://game.lhg100.com/Article/UploadFiles/201512/2015121216074896.jpg)
When you will be on the top, jump on the construction located in the middle [1]. You will climb to the another level. After defeating another group of enemies, jump to the outer ring and then get to the wooden platform and return to the middle [2]. Repeat the same procedure and get to the top.
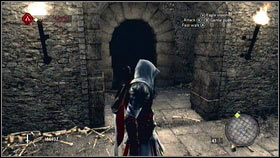
![Now get to corridor [1] that will lead you to the room full of the treasures [2] - Romulus Lairs - p. 3 - Side Quests - Assassins Creed: Brotherhood - Game Guide and Walkthrough](https://game.lhg100.com/Article/UploadFiles/201512/2015121216074921.jpg)
Now get to corridor [1] that will lead you to the room full of the treasures [2]. Take them and leave these underground.
Full synchronization: Do not loose more that 3 HP squares.
Localization: Antico District
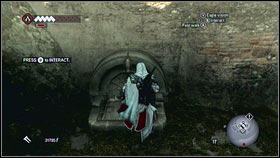
![Entrance to this lair can be found near the Colosseum [1] - Romulus Lairs - p. 4 - Side Quests - Assassins Creed: Brotherhood - Game Guide and Walkthrough](https://game.lhg100.com/Article/UploadFiles/201512/2015121216074969.jpg)
Entrance to this lair can be found near the Colosseum [1]. When you will be inside, climb to the stick located on the left [2], run to the wall and use the scaffolding.
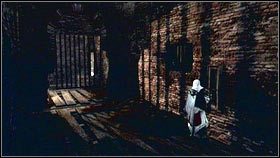
![You will get to the closed gate, that can be opened with the nearby mechanism [1] - Romulus Lairs - p. 4 - Side Quests - Assassins Creed: Brotherhood - Game Guide and Walkthrough](https://game.lhg100.com/Article/UploadFiles/201512/2015121216074957.jpg)
You will get to the closed gate, that can be opened with the nearby mechanism [1]. On the other side, jump on the stick and turn right [2].
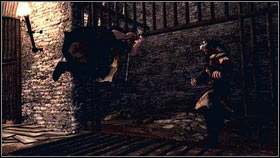
![Soon, you will attacked by new enemies [1] - Romulus Lairs - p. 4 - Side Quests - Assassins Creed: Brotherhood - Game Guide and Walkthrough](https://game.lhg100.com/Article/UploadFiles/201512/2015121216074970.jpg)
Soon, you will attacked by new enemies [1]. Kill all cultists and follow their leader [2].
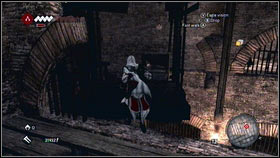
This road is very simple, but your enemy is very fast. Jump from stick to stick [1] and use chandeliers to move faster [2].
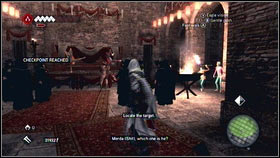
![After a longer run, you will get to a small group of people [1] - Romulus Lairs - p. 4 - Side Quests - Assassins Creed: Brotherhood - Game Guide and Walkthrough](https://game.lhg100.com/Article/UploadFiles/201512/2015121216075007.jpg)
After a longer run, you will get to a small group of people [1]. Turn on your Eagle Vision (Y) and find your target [2].
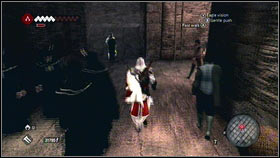
![When you will find him, jump down and continue your chase [1] - Romulus Lairs - p. 4 - Side Quests - Assassins Creed: Brotherhood - Game Guide and Walkthrough](https://game.lhg100.com/Article/UploadFiles/201512/2015121216075099.jpg)
When you will find him, jump down and continue your chase [1]. Soon, you will get to the closed door. Use the ladder [2] and you will see your enemy on the horse.
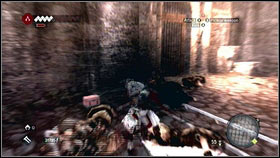
Follow him and hold RT and A [1]. Your opponents will close some gates but you can always use another path. Prepare to kill your enemy from the horse (follow the instructions that are appearing on the screen [2].
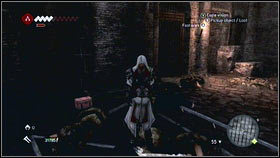
![Aftre the execution, you will be attacked by another soldiers [1] - Romulus Lairs - p. 4 - Side Quests - Assassins Creed: Brotherhood - Game Guide and Walkthrough](https://game.lhg100.com/Article/UploadFiles/201512/2015121216075005.jpg)
Aftre the execution, you will be attacked by another soldiers [1]. Kill them all and climb on the wall located on the left [2].
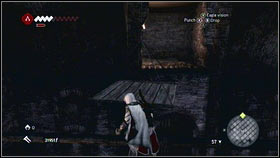
![Using some wooden beams, you will get to the roof [1] - Romulus Lairs - p. 4 - Side Quests - Assassins Creed: Brotherhood - Game Guide and Walkthrough](https://game.lhg100.com/Article/UploadFiles/201512/2015121216075111.jpg)
Using some wooden beams, you will get to the roof [1]. Go left and jump down [2].
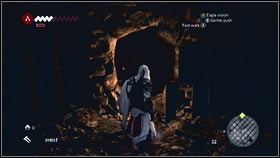
![You will find a narrow hole there [1] - Romulus Lairs - p. 4 - Side Quests - Assassins Creed: Brotherhood - Game Guide and Walkthrough](https://game.lhg100.com/Article/UploadFiles/201512/2015121216075131.jpg)
You will find a narrow hole there [1]. Go through it and go straight ahead. At the end of the corridor, turn round and open the door [2].
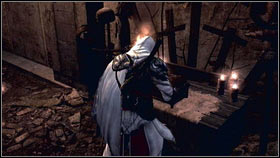
![Collect all the valuable items [1] and exit through the hidden passage [2] - Romulus Lairs - p. 4 - Side Quests - Assassins Creed: Brotherhood - Game Guide and Walkthrough](https://game.lhg100.com/Article/UploadFiles/201512/2015121216075107.jpg)
Collect all the valuable items [1] and exit through the hidden passage [2].
Full synchronization: Do not loose more that 10 HP squares.
Localization: Campagna District
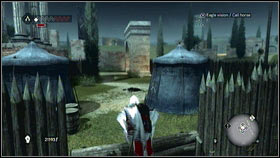
![In the marked area, you will find a small camp [1] - Romulus Lairs - p. 5 - Side Quests - Assassins Creed: Brotherhood - Game Guide and Walkthrough](https://game.lhg100.com/Article/UploadFiles/201512/2015121216075178.jpg)
In the marked area, you will find a small camp [1]. Move to the east and you will see a hole with some sticks and a ladder [2].

![Stand in the middle, opposite to the ladder and go down [1] - Romulus Lairs - p. 5 - Side Quests - Assassins Creed: Brotherhood - Game Guide and Walkthrough](https://game.lhg100.com/Article/UploadFiles/201512/2015121216075296.jpg)
Stand in the middle, opposite to the ladder and go down [1]. Then press and hold B to catch the edge located lower [2].
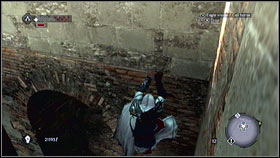
![When you will be hanging, move to the right and do the same [1] - Romulus Lairs - p. 5 - Side Quests - Assassins Creed: Brotherhood - Game Guide and Walkthrough](https://game.lhg100.com/Article/UploadFiles/201512/2015121216075254.jpg)
When you will be hanging, move to the right and do the same [1]. Then go left and jump into the corridor [2].
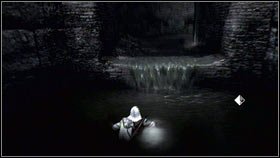
![When you will be in the canals, go out from the water and go straight ahead [1] - Romulus Lairs - p. 5 - Side Quests - Assassins Creed: Brotherhood - Game Guide and Walkthrough](https://game.lhg100.com/Article/UploadFiles/201512/2015121216075237.jpg)
When you will be in the canals, go out from the water and go straight ahead [1]. Few moments later, you will see a cut scene [2]. Watch it and follow your enemy.
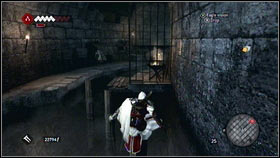
![Use the sticks and pillars to get to the other side of the river [1] - Romulus Lairs - p. 5 - Side Quests - Assassins Creed: Brotherhood - Game Guide and Walkthrough](https://game.lhg100.com/Article/UploadFiles/201512/2015121216075258.jpg)
Use the sticks and pillars to get to the other side of the river [1]. You have to stay close to your opponent, so avoid other enemies and just run. Soon, you will get to the crossroad. Keep to the left side [2].
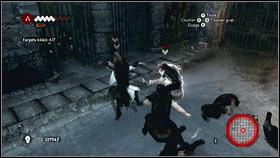
![After watching another cut scene, you will have to fight for a longer time [1] - Romulus Lairs - p. 5 - Side Quests - Assassins Creed: Brotherhood - Game Guide and Walkthrough](https://game.lhg100.com/Article/UploadFiles/201512/2015121216075207.jpg)
After watching another cut scene, you will have to fight for a longer time [1]. When they all be dead, another soldiers will come. Kill them fast and get to the wall [2]. Follow your target.
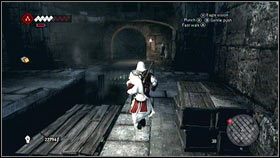
![The path is very simple, but you will have to cope with another enemies [1] - Romulus Lairs - p. 5 - Side Quests - Assassins Creed: Brotherhood - Game Guide and Walkthrough](https://game.lhg100.com/Article/UploadFiles/201512/2015121216075396.jpg)
The path is very simple, but you will have to cope with another enemies [1]. Kill them fast or just leave them. After another cut scene, kill all enemies and run the ruins, where you will see a rope [2].
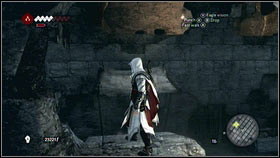
![Go to the other side and jump on the roof [1] - Romulus Lairs - p. 5 - Side Quests - Assassins Creed: Brotherhood - Game Guide and Walkthrough](https://game.lhg100.com/Article/UploadFiles/201512/2015121216075311.jpg)
Go to the other side and jump on the roof [1]. When you will be in the niche, turn right. You will see a vessel hanging from the ceiling [2]. Catch it and go straight ahead.
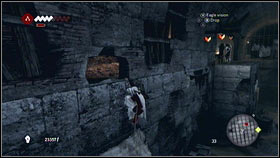
![As a matter of fact, you will get to another enemies [1] - Romulus Lairs - p. 5 - Side Quests - Assassins Creed: Brotherhood - Game Guide and Walkthrough](https://game.lhg100.com/Article/UploadFiles/201512/2015121216075338.jpg)
As a matter of fact, you will get to another enemies [1]. Get close to the and kill them all. After the fight move near the wall. When you will see you opponents, follow him [2].
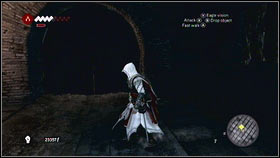
After a longer run, you will get to closed door [1]. Go above it using nearby chests [2].
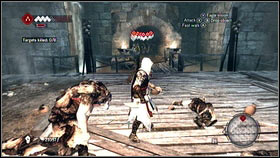
![In the next room, you will be attacked by many enemies [1] - Romulus Lairs - p. 5 - Side Quests - Assassins Creed: Brotherhood - Game Guide and Walkthrough](https://game.lhg100.com/Article/UploadFiles/201512/2015121216075332.jpg)
In the next room, you will be attacked by many enemies [1]. Kill them all and you will be able to fight with their leader [2]. To defeat him, kick him couple of times, and kill him with one fast counter attack.
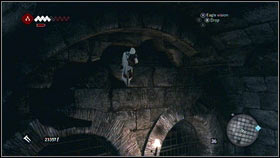
![After the fight, climb on the wall located on the left [1] and go right - Romulus Lairs - p. 5 - Side Quests - Assassins Creed: Brotherhood - Game Guide and Walkthrough](https://game.lhg100.com/Article/UploadFiles/201512/2015121216075472.jpg)
After the fight, climb on the wall located on the left [1] and go right. When you will get near the waterfall [2], jump on the nearby platform.
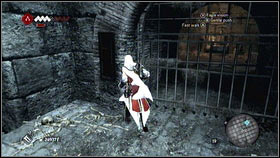
![You will find a gate there [1] - Romulus Lairs - p. 5 - Side Quests - Assassins Creed: Brotherhood - Game Guide and Walkthrough](https://game.lhg100.com/Article/UploadFiles/201512/2015121216075432.jpg)
You will find a gate there [1]. Get inside and take the treasure [2].
Full synchronization: End this memory in less than 8 minutes.
Localization: Vaticano District
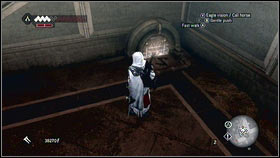
![An entrance to this dungeon can be found under the stairs near one of the building in Vaticano District [1] - Romulus Lairs - p. 6 - Side Quests - Assassins Creed: Brotherhood - Game Guide and Walkthrough](https://game.lhg100.com/Article/UploadFiles/201512/2015121216075436.jpg)
An entrance to this dungeon can be found under the stairs near one of the building in Vaticano District [1]. Go there [2].
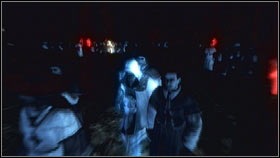
![At the beginning, turn right [1] - Romulus Lairs - p. 6 - Side Quests - Assassins Creed: Brotherhood - Game Guide and Walkthrough](https://game.lhg100.com/Article/UploadFiles/201512/2015121216075462.jpg)
At the beginning, turn right [1]. In small room, you will find a stairs that will lead you to the chamber full of priests [2].
![Use your Eagle Vision to localize your target [1] and stand among cardinals that will be standing near the entrance [2] - Romulus Lairs - p. 6 - Side Quests - Assassins Creed: Brotherhood - Game Guide and Walkthrough](https://game.lhg100.com/Article/UploadFiles/201512/2015121216075540.jpg)
Use your Eagle Vision to localize your target [1] and stand among cardinals that will be standing near the entrance [2].
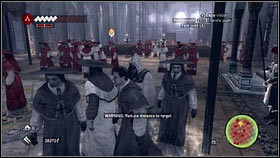
![Soon, these men will stop [1] - Romulus Lairs - p. 6 - Side Quests - Assassins Creed: Brotherhood - Game Guide and Walkthrough](https://game.lhg100.com/Article/UploadFiles/201512/2015121216075598.jpg)
Soon, these men will stop [1]. Wait with them until your victim will get close to the side aisle. Follow him [2]. Try to stay undercover all the time, because the mission will be desynchronized when the guards will see you.
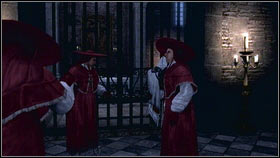
![Watch a short cut scene and open the gate [1] - Romulus Lairs - p. 6 - Side Quests - Assassins Creed: Brotherhood - Game Guide and Walkthrough](https://game.lhg100.com/Article/UploadFiles/201512/2015121216075542.jpg)
Watch a short cut scene and open the gate [1]. When the cardinal will see you, he will start running [2].
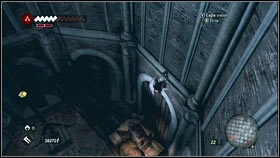
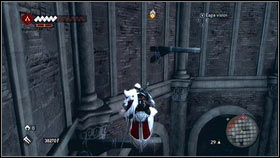
Follow him and he will escape to the elevator. Climb to the wall located on the right [1] and catch the nearby stick [2].
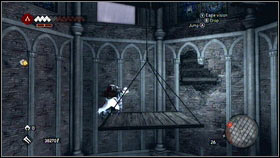
![Jump between obstacles and get to the wooden platform [1] - Romulus Lairs - p. 6 - Side Quests - Assassins Creed: Brotherhood - Game Guide and Walkthrough](https://game.lhg100.com/Article/UploadFiles/201512/2015121216075580.jpg)
Jump between obstacles and get to the wooden platform [1]. Jump on the wall and get to the top [2].
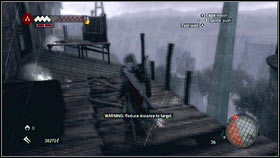
![On the left, you will see an exit that will lead you to the cardinal [1] - Romulus Lairs - p. 6 - Side Quests - Assassins Creed: Brotherhood - Game Guide and Walkthrough](https://game.lhg100.com/Article/UploadFiles/201512/2015121216075698.jpg)
On the left, you will see an exit that will lead you to the cardinal [1]. Follow him and he will disappear in another building [2].
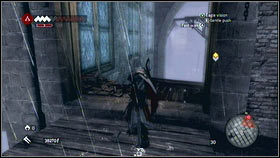
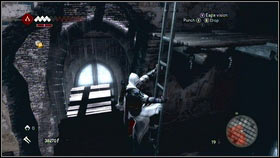
Turn left. Soon, you will find another entrance [1]. Follow your target [2] and you will get to the place where one stick will be broken. Choose the path located on the right.
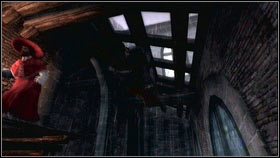
![In one moment Ezio will fall on the ground [1] - Romulus Lairs - p. 6 - Side Quests - Assassins Creed: Brotherhood - Game Guide and Walkthrough](https://game.lhg100.com/Article/UploadFiles/201512/2015121216075602.jpg)
In one moment Ezio will fall on the ground [1]. Climb on the wall located on the right and jump to the wooden platform [2].
![Soon, you will get to the room with the ladder [1] - Romulus Lairs - p. 6 - Side Quests - Assassins Creed: Brotherhood - Game Guide and Walkthrough](https://game.lhg100.com/Article/UploadFiles/201512/2015121216075642.jpg)
Soon, you will get to the room with the ladder [1]. Go upstairs and follow the man [2].
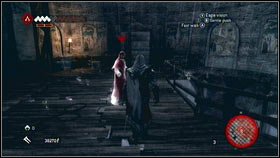
![You will get to the room where the man will attack you [1] - Romulus Lairs - p. 6 - Side Quests - Assassins Creed: Brotherhood - Game Guide and Walkthrough](https://game.lhg100.com/Article/UploadFiles/201512/2015121216075676.jpg)
You will get to the room where the man will attack you [1]. Kick him couple of times and use your sword to execute him [2].
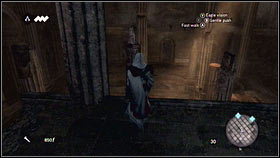
![Jump into canals [1] and go in the marked direction - Romulus Lairs - p. 6 - Side Quests - Assassins Creed: Brotherhood - Game Guide and Walkthrough](https://game.lhg100.com/Article/UploadFiles/201512/2015121216075751.jpg)
Jump into canals [1] and go in the marked direction. You will find a treasure there [2].
Full synchronization: Complete this quest in less that 8 minutes.
Localization: You will do it during one of the main missions
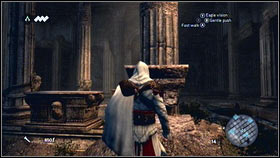

Now you have to get to the other side of these ruins. This is a very simple task but it can take you some time. I advise you to train it first and then restart to get the full synchronization. At the beginning jump on the highest pillar [1] and turn left [2].

![While holding RT, press A and you will jump on the other pillar [1] - Romulus Lairs - p. 7 - Side Quests - Assassins Creed: Brotherhood - Game Guide and Walkthrough](https://game.lhg100.com/Article/UploadFiles/201512/2015121216075710.jpg)
While holding RT, press A and you will jump on the other pillar [1]. Now you have to get on the platform located north [2].

You will find some levers located on the left and on the right [1]. Use it and return to the first pillar [2].

![Now turn north and use the pillar to [1] get to the wall [2] - Romulus Lairs - p. 7 - Side Quests - Assassins Creed: Brotherhood - Game Guide and Walkthrough](https://game.lhg100.com/Article/UploadFiles/201512/2015121216075882.jpg)
Now turn north and use the pillar to [1] get to the wall [2].
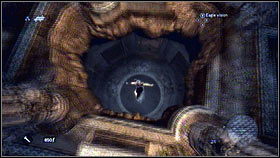
![Move left and you will find third mechanisms [1], the fourth one will be located on the right [2] - Romulus Lairs - p. 7 - Side Quests - Assassins Creed: Brotherhood - Game Guide and Walkthrough](https://game.lhg100.com/Article/UploadFiles/201512/2015121216075881.jpg)
Move left and you will find third mechanisms [1], the fourth one will be located on the right [2].
![Use all of them, watch the cut scene and jump to the hole [1] - Romulus Lairs - p. 7 - Side Quests - Assassins Creed: Brotherhood - Game Guide and Walkthrough](https://game.lhg100.com/Article/UploadFiles/201512/2015121216075858.jpg)
Use all of them, watch the cut scene and jump to the hole [1]. Now go to the corridor [2].

![While going to the right, you will get close to the statue which located near the exit [1] - Romulus Lairs - p. 7 - Side Quests - Assassins Creed: Brotherhood - Game Guide and Walkthrough](https://game.lhg100.com/Article/UploadFiles/201512/2015121216075849.jpg)
While going to the right, you will get close to the statue which located near the exit [1]. Climb on it [2].
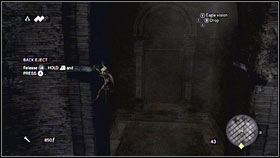
![While going to the right you will get to the stone portal [1] - Romulus Lairs - p. 7 - Side Quests - Assassins Creed: Brotherhood - Game Guide and Walkthrough](https://game.lhg100.com/Article/UploadFiles/201512/2015121216075891.jpg)
While going to the right you will get to the stone portal [1]. Jump to the other side and climb on the wooden pillar [2].
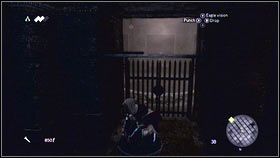
![Now you will be able to catch the lamp and jump over the gate [1] - Romulus Lairs - p. 7 - Side Quests - Assassins Creed: Brotherhood - Game Guide and Walkthrough](https://game.lhg100.com/Article/UploadFiles/201512/2015121216075924.jpg)
Now you will be able to catch the lamp and jump over the gate [1]. At the end of the corridor you will see another statue. Climb on it and catch nearby stick. Use the wall and some lamps to get to the huge doors [2].

![Get close to the mechanisms located on the right, to open the door[1] press B [2] - Romulus Lairs - p. 7 - Side Quests - Assassins Creed: Brotherhood - Game Guide and Walkthrough](https://game.lhg100.com/Article/UploadFiles/201512/2015121216075933.jpg)
Get close to the mechanisms located on the right, to open the door[1] press B [2].

![On the other side climb on the pillar located near the lake [1] - Romulus Lairs - p. 7 - Side Quests - Assassins Creed: Brotherhood - Game Guide and Walkthrough](https://game.lhg100.com/Article/UploadFiles/201512/2015121216075954.jpg)
On the other side climb on the pillar located near the lake [1]. Now you can jump on the nearby statue [2].
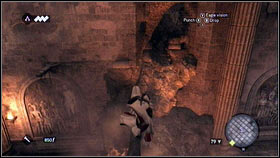
![Climb on the head [1] and jump in the direction of the pillar located on the other side of the room [2] - Romulus Lairs - p. 7 - Side Quests - Assassins Creed: Brotherhood - Game Guide and Walkthrough](https://game.lhg100.com/Article/UploadFiles/201512/2015121216075903.jpg)
Climb on the head [1] and jump in the direction of the pillar located on the other side of the room [2]. Climb on it and go right.
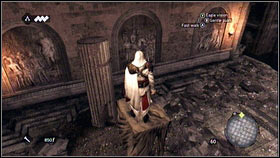
When you will be at the end hold RT and press A. As a matter of fact you will get to the next statue [1]. Climb on it [2] and jump on the other side of this room. Go left and you will land on the floor. Climb on the statue and jump on the wall.

![Soon, you will get to the flaming torches [1] - Romulus Lairs - p. 8 - Side Quests - Assassins Creed: Brotherhood - Game Guide and Walkthrough](https://game.lhg100.com/Article/UploadFiles/201512/2015121216080081.jpg)
Soon, you will get to the flaming torches [1]. Catch the edge and try to get to the other side [2].

![Move to the left and you will see a wooden stick [1] - Romulus Lairs - p. 8 - Side Quests - Assassins Creed: Brotherhood - Game Guide and Walkthrough](https://game.lhg100.com/Article/UploadFiles/201512/2015121216080004.jpg)
Move to the left and you will see a wooden stick [1]. Catch it and jump on the stone block [2].

![Jump further and you will get to the next chamber where you will see a cut scene [1] - Romulus Lairs - p. 8 - Side Quests - Assassins Creed: Brotherhood - Game Guide and Walkthrough](https://game.lhg100.com/Article/UploadFiles/201512/2015121216080082.jpg)
Jump further and you will get to the next chamber where you will see a cut scene [1]. When it will end enter the entrance located under the torch [2].

![Use sticks and stone statues to move further until you will get to the next whole [1] - Romulus Lairs - p. 8 - Side Quests - Assassins Creed: Brotherhood - Game Guide and Walkthrough](https://game.lhg100.com/Article/UploadFiles/201512/2015121216080076.jpg)
Use sticks and stone statues to move further until you will get to the next whole [1]. Turn right and you will see some bricks [2].


Catch them to get to the other side. Then turn left and climb on the iron ring located above [1]. Now jump on the stone pillar located in the middle. Move left and jump on the wooden stick [2]. As a matter of fact you will get to the room with the fire camp.
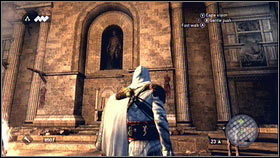
![Climb on the wall located left of the statue [1] and then use wooden sticks and iron rings to get further to the left [2] - Romulus Lairs - p. 8 - Side Quests - Assassins Creed: Brotherhood - Game Guide and Walkthrough](https://game.lhg100.com/Article/UploadFiles/201512/2015121216080183.jpg)
Climb on the wall located left of the statue [1] and then use wooden sticks and iron rings to get further to the left [2].

![At the end, turn left and jump to the ruins [1] - Romulus Lairs - p. 8 - Side Quests - Assassins Creed: Brotherhood - Game Guide and Walkthrough](https://game.lhg100.com/Article/UploadFiles/201512/2015121216080120.jpg)
At the end, turn left and jump to the ruins [1]. You should see a balcony on the right [2]. Go there.
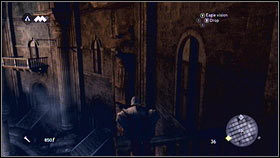
![Stay close to the wall and use sticks to move further [1], soon you will get to the demolished balcony - Romulus Lairs - p. 8 - Side Quests - Assassins Creed: Brotherhood - Game Guide and Walkthrough](https://game.lhg100.com/Article/UploadFiles/201512/2015121216080119.jpg)
Stay close to the wall and use sticks to move further [1], soon you will get to the demolished balcony. Turn left to see the ruins [2].
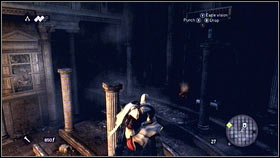
![Jump on it and use pillars [1] to get to the wall - Romulus Lairs - p. 8 - Side Quests - Assassins Creed: Brotherhood - Game Guide and Walkthrough](https://game.lhg100.com/Article/UploadFiles/201512/2015121216080189.jpg)
Jump on it and use pillars [1] to get to the wall. Climb up, turn left and use the sticks to get to the entrance located over the throne [2].
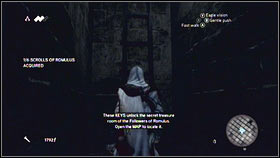
Open all chests located here (B) [1] and exit the place using the ladder [2].
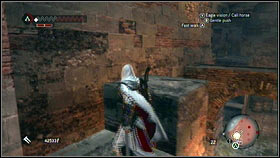
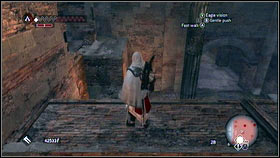
If you have all Romulus scrolls, then you can go to the location marked on the map. To find it, look for the chamber with a very high ceiling [1]. Climb on the nearest platform [2] and you will get to the room with bars.
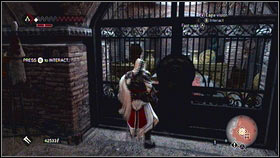
![Entrance is on the other side [1] - Romulus Lairs - p. 8 - Side Quests - Assassins Creed: Brotherhood - Game Guide and Walkthrough](https://game.lhg100.com/Article/UploadFiles/201512/2015121216080242.jpg)
Entrance is on the other side [1]. Inside, you will find Romulus armors and weapons [2].
Full synchronization: Use smoke bombs to stun the overseer.
Localization: Antico District
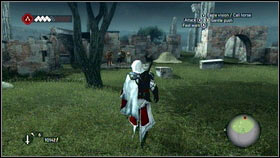
![Your task is to get to the officer that patrolling nearby ruins [1] - Leonardos Machines - p. 1 - Side Quests - Assassins Creed: Brotherhood - Game Guide and Walkthrough](https://game.lhg100.com/Article/UploadFiles/201512/2015121216080251.jpg)
Your task is to get to the officer that patrolling nearby ruins [1]. Go there and use Eagle Vision to localize your victim [2]. To get the full synchronization you have to stun him with Leonardo's bombs.
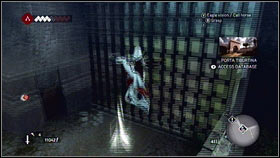
After completing this quest, go to the gate marked on the map [1] and you will start another part of this quest [2].
Full synchronization: Do not get hit while using the bomber.
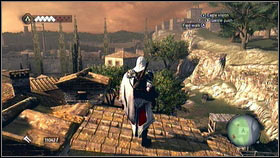
![After starting this quest, jump on the roof in the south-western part of this area [1] - Leonardos Machines - p. 1 - Side Quests - Assassins Creed: Brotherhood - Game Guide and Walkthrough](https://game.lhg100.com/Article/UploadFiles/201512/2015121216080318.jpg)
After starting this quest, jump on the roof in the south-western part of this area [1]. You have to find architect now. Use Eagle Vision and look to the left. The man should appear in the moment [2]. Remember to stay undercover.
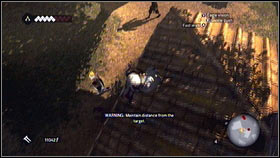
![Follow the architect [1] and wait until he will get to his home [2] - Leonardos Machines - p. 1 - Side Quests - Assassins Creed: Brotherhood - Game Guide and Walkthrough](https://game.lhg100.com/Article/UploadFiles/201512/2015121216080373.jpg)
Follow the architect [1] and wait until he will get to his home [2].
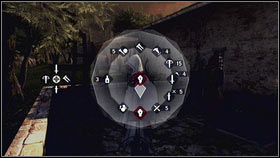
![Jump on the ground [1] and beat the architect with your hands [2] - Leonardos Machines - p. 1 - Side Quests - Assassins Creed: Brotherhood - Game Guide and Walkthrough](https://game.lhg100.com/Article/UploadFiles/201512/2015121216080313.jpg)
Jump on the ground [1] and beat the architect with your hands [2].
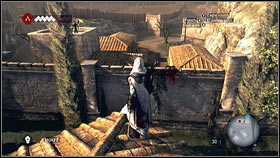
After watching a cut scene go to the marked point. You will find plans there [1]. To stay undercover, stay in the western part of the building and kill all guards [2].
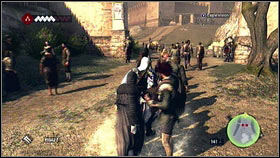
![When the plans will be destroyed, stay among other people and try to get to the gate located on the other side of the street [1] - Leonardos Machines - p. 1 - Side Quests - Assassins Creed: Brotherhood - Game Guide and Walkthrough](https://game.lhg100.com/Article/UploadFiles/201512/2015121216080416.jpg)
When the plans will be destroyed, stay among other people and try to get to the gate located on the other side of the street [1]. Go to the end of the path and turn right [2].
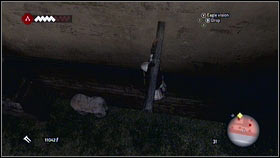
![You will find some barrels, so use them to catch the stick [1] - Leonardos Machines - p. 1 - Side Quests - Assassins Creed: Brotherhood - Game Guide and Walkthrough](https://game.lhg100.com/Article/UploadFiles/201512/2015121216080410.jpg)
You will find some barrels, so use them to catch the stick [1]. Climb on the wall, catch the edge and kill two guards [2].
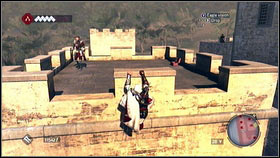
![When they will be dead, enter the tower located on the left and kill another soldier [1] - Leonardos Machines - p. 1 - Side Quests - Assassins Creed: Brotherhood - Game Guide and Walkthrough](https://game.lhg100.com/Article/UploadFiles/201512/2015121216080455.jpg)
When they will be dead, enter the tower located on the left and kill another soldier [1]. Then jump on the platform located on the right [2].
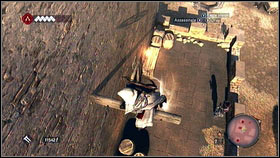
![You will get to the glowing point and you will find another guard there [1] - Leonardos Machines - p. 1 - Side Quests - Assassins Creed: Brotherhood - Game Guide and Walkthrough](https://game.lhg100.com/Article/UploadFiles/201512/2015121216080408.jpg)
You will get to the glowing point and you will find another guard there [1]. Kill him fast and enter the tower [2].

![Climb to the top, until you will get to a small window [1] - Leonardos Machines - p. 1 - Side Quests - Assassins Creed: Brotherhood - Game Guide and Walkthrough](https://game.lhg100.com/Article/UploadFiles/201512/2015121216080413.jpg)
Climb to the top, until you will get to a small window [1]. Soon, you will meet another soldiers [2].
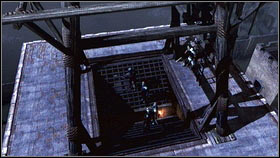
![Kill them by using the mechanism located on the right [1] - Leonardos Machines - p. 1 - Side Quests - Assassins Creed: Brotherhood - Game Guide and Walkthrough](https://game.lhg100.com/Article/UploadFiles/201512/2015121216080540.jpg)
Kill them by using the mechanism located on the right [1]. When they will fall, use the ladder and use the Leonardo's machine [2].

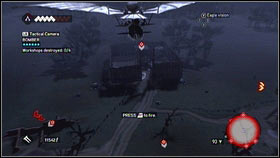
Flying on this machine can be difficult. To get up, you have to use warm oxygen from the fire camps [1] that can be started with your bombs (RT). When you will be ready, destroy four buildings marked with red icons [2]. Each factory must be hited two times and is guarded by two soldiers. Try to kill them fast, they cannot hit you.

![When the building will be destroyed, you will have to destroy four carts [1] - Leonardos Machines - p. 1 - Side Quests - Assassins Creed: Brotherhood - Game Guide and Walkthrough](https://game.lhg100.com/Article/UploadFiles/201512/2015121216080501.jpg)
When the building will be destroyed, you will have to destroy four carts [1]. You have to do it before they will reach the fortress. Your last target will be the messenger on the horse [2]. This is the most difficult task - he is very fast.
Full synchronization: Use the pistol go kill the overseer.
Localization: Campagna District
![Go to the marked area and use your Eagle Vision to find the target [1] - Leonardos Machines - p. 1 - Side Quests - Assassins Creed: Brotherhood - Game Guide and Walkthrough](https://game.lhg100.com/Article/UploadFiles/201512/2015121216080544.jpg)
Go to the marked area and use your Eagle Vision to find the target [1]. When you will see her, follow her for some time and shoot in the proper moment [2]. After the execution, run to the marked area.
Full synchronization: Do not get hit while being in the tank.
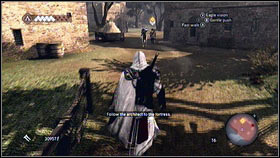
![At the beginning go to the architect [1] - Leonardos Machines - p. 2 - Side Quests - Assassins Creed: Brotherhood - Game Guide and Walkthrough](https://game.lhg100.com/Article/UploadFiles/201512/2015121216080562.jpg)
At the beginning go to the architect [1]. Your task is to follow him while staying undercover. At the beginning enter the building located on the left and jump to the hay [2]. Now you will be able to kill the guard with easy.
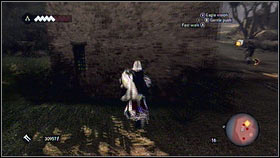
![When he will be dead, follow the architect (keep on the left side) [1] - Leonardos Machines - p. 2 - Side Quests - Assassins Creed: Brotherhood - Game Guide and Walkthrough](https://game.lhg100.com/Article/UploadFiles/201512/2015121216080672.jpg)
When he will be dead, follow the architect (keep on the left side) [1]. Try to stay undercover and kill all guards that can be killed [2].
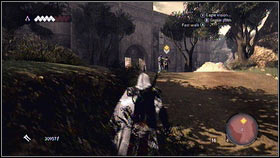
![After some time, the man will get close to the gate [1] - Leonardos Machines - p. 2 - Side Quests - Assassins Creed: Brotherhood - Game Guide and Walkthrough](https://game.lhg100.com/Article/UploadFiles/201512/2015121216080662.jpg)
After some time, the man will get close to the gate [1]. Hide in the hay and get to the barrels located near the wall [2].

![Jump to catch the wooden stick and go straight ahead [1] until you will get to the hole [2] - Leonardos Machines - p. 2 - Side Quests - Assassins Creed: Brotherhood - Game Guide and Walkthrough](https://game.lhg100.com/Article/UploadFiles/201512/2015121216080630.jpg)
Jump to catch the wooden stick and go straight ahead [1] until you will get to the hole [2]. Get inside and look for the architect.
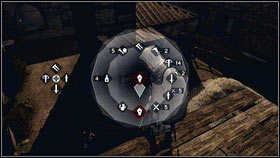
![When he will be alone, change the weapon for your hands [1], jump down and beat the man [2] - Leonardos Machines - p. 2 - Side Quests - Assassins Creed: Brotherhood - Game Guide and Walkthrough](https://game.lhg100.com/Article/UploadFiles/201512/2015121216080692.jpg)
When he will be alone, change the weapon for your hands [1], jump down and beat the man [2].
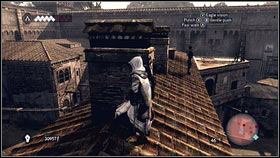
![After a short cut scene, enter the building located in the east and kill the soldier who is standing there [1] - Leonardos Machines - p. 2 - Side Quests - Assassins Creed: Brotherhood - Game Guide and Walkthrough](https://game.lhg100.com/Article/UploadFiles/201512/2015121216080626.jpg)
After a short cut scene, enter the building located in the east and kill the soldier who is standing there [1]. When another enemy will appear, hide near the chimney and wait until he will go away [2].

![Go to the east and kill another two soldiers [1] - Leonardos Machines - p. 2 - Side Quests - Assassins Creed: Brotherhood - Game Guide and Walkthrough](https://game.lhg100.com/Article/UploadFiles/201512/2015121216080743.jpg)
Go to the east and kill another two soldiers [1]. Plans can be found in the southern-east corner of the area [2].
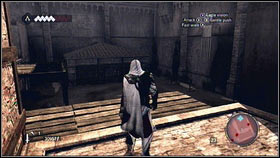
![Destroy them and go to the square [1] - Leonardos Machines - p. 2 - Side Quests - Assassins Creed: Brotherhood - Game Guide and Walkthrough](https://game.lhg100.com/Article/UploadFiles/201512/2015121216080717.jpg)
Destroy them and go to the square [1]. Only one guard is located there, so it will be a very easy fight [2].

![After rescuing these prisoners, follow them and fight with all enemies [1] - Leonardos Machines - p. 2 - Side Quests - Assassins Creed: Brotherhood - Game Guide and Walkthrough](https://game.lhg100.com/Article/UploadFiles/201512/2015121216080704.jpg)
After rescuing these prisoners, follow them and fight with all enemies [1]. After few battles you will get to the hole leading underground [2].
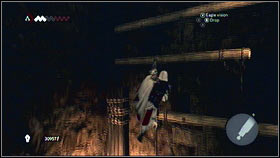
When you will be downstairs, enter the wall located near the gate [1] and use wooden sticks to get to another room [2].
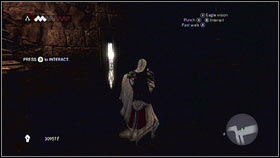
![On the right, you will find a mechanism [1] that will open the gates that are blocking your friends - Leonardos Machines - p. 2 - Side Quests - Assassins Creed: Brotherhood - Game Guide and Walkthrough](https://game.lhg100.com/Article/UploadFiles/201512/2015121216080703.jpg)
On the right, you will find a mechanism [1] that will open the gates that are blocking your friends. The next gates can be opened with the same way. Enter the wall located on the left, jump on the other side and use the mechanism [2].
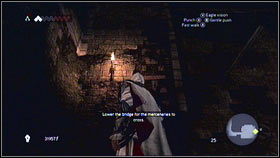
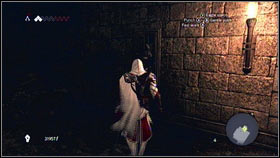
The next thing is to cope with the bridge. Climb on the wall located on the left [1]. Move left until you will get to the wooden stick. Jump and catch it and use the mechanism [2]. Enter the unblocked passage and watch the film.
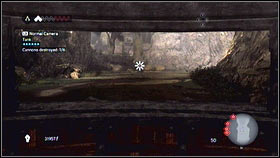
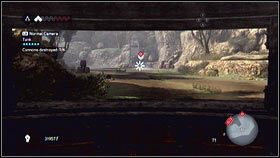
After the film, you will be able to drive Leonardo's tank. It is quite simple. Use your left analog stick, target with the right one, shoot with RT and change the view with LB [1]. Your task is to kill enemy troops and their cannon [2].
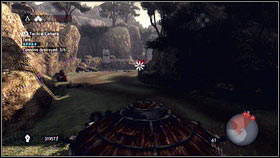
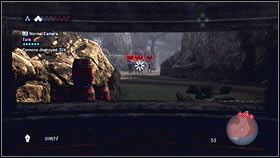
When the first target will be destroyed, go straight ahead and shoot another enemies. At the beginning try to eliminated soldiers [1], then cannons. Watch out for the barrels full of the powder [2].
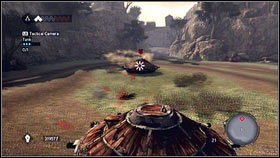
![After destroying couple of cannons, you will be attacked by another tank [1] - Leonardos Machines - p. 2 - Side Quests - Assassins Creed: Brotherhood - Game Guide and Walkthrough](https://game.lhg100.com/Article/UploadFiles/201512/2015121216080895.jpg)
After destroying couple of cannons, you will be attacked by another tank [1]. Try to move around him and he will nor harm you [2]. Change the direction only after his shot.

![After the battle, destroy the gate [1] and enter the fortress - Leonardos Machines - p. 2 - Side Quests - Assassins Creed: Brotherhood - Game Guide and Walkthrough](https://game.lhg100.com/Article/UploadFiles/201512/2015121216080907.jpg)
After the battle, destroy the gate [1] and enter the fortress. Kill all soldiers and take care of another two tanks [2]. The fight is more difficult but the tactic is the same. The best situation is when your enemies are close to each other.
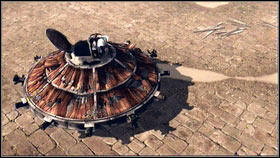
![After the fight, you will see a short cut scene [1] and the mission will be over [2] - Leonardos Machines - p. 2 - Side Quests - Assassins Creed: Brotherhood - Game Guide and Walkthrough](https://game.lhg100.com/Article/UploadFiles/201512/2015121216080964.jpg)
After the fight, you will see a short cut scene [1] and the mission will be over [2].
Full synchronization: Kick the overseer.
Localization: Centro District
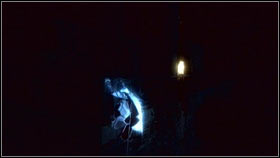
![Go to the marked location and use your Eagle Eye to localize your target [1] - Leonardos Machines - p. 3 - Side Quests - Assassins Creed: Brotherhood - Game Guide and Walkthrough](https://game.lhg100.com/Article/UploadFiles/201512/2015121216080966.jpg)
Go to the marked location and use your Eagle Eye to localize your target [1]. When you will find the overseer, catch the edge [2]. As a matter of fact, you will be able to watch the victim.
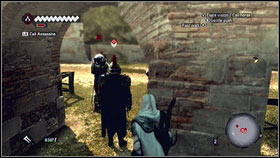
![When the soldier will turn round, target him [1], kick him in the back and kill - Leonardos Machines - p. 3 - Side Quests - Assassins Creed: Brotherhood - Game Guide and Walkthrough](https://game.lhg100.com/Article/UploadFiles/201512/2015121216080962.jpg)
When the soldier will turn round, target him [1], kick him in the back and kill. After the execution, run away [2] and go to the marked location.
Full synchronization: Open one of the first three gates.
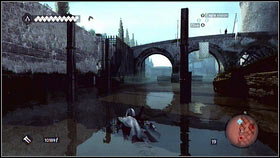
![At the beginning go to the marked location [1] - Leonardos Machines - p. 3 - Side Quests - Assassins Creed: Brotherhood - Game Guide and Walkthrough](https://game.lhg100.com/Article/UploadFiles/201512/2015121216080931.jpg)
At the beginning go to the marked location [1]. Avoid all guards by going underwater [2].
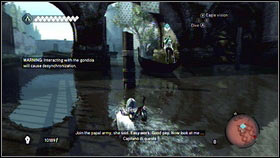
![When you will be at the place, speak with the man and follow him [1] - Leonardos Machines - p. 3 - Side Quests - Assassins Creed: Brotherhood - Game Guide and Walkthrough](https://game.lhg100.com/Article/UploadFiles/201512/2015121216081094.jpg)
When you will be at the place, speak with the man and follow him [1]. Watch out for gondola - you will be desynchronized when you will touch it. The boat will lead you to the tunnel located under the castle [2]. Overtake it, kill the soldier located near the gate and climb on the ceiling.
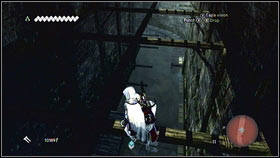
![Jump using the wooden sticks and avoid all soldiers [1] - Leonardos Machines - p. 3 - Side Quests - Assassins Creed: Brotherhood - Game Guide and Walkthrough](https://game.lhg100.com/Article/UploadFiles/201512/2015121216081002.jpg)
Jump using the wooden sticks and avoid all soldiers [1]. Soon, you will get to another gate. Try to stay close to the boat for all the time. You will meet another guard neat the passage [2].
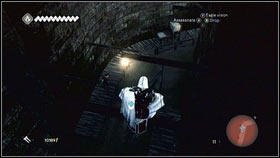
![Kill him, climb on the wall and kill the man located on another side [1] - Leonardos Machines - p. 3 - Side Quests - Assassins Creed: Brotherhood - Game Guide and Walkthrough](https://game.lhg100.com/Article/UploadFiles/201512/2015121216081055.jpg)
Kill him, climb on the wall and kill the man located on another side [1]. After the execution, use the mechanism to get the full synchronization [2].
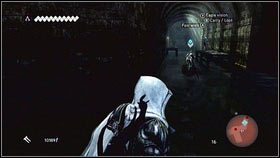
![Now you can stay close to the boat [1] - Leonardos Machines - p. 3 - Side Quests - Assassins Creed: Brotherhood - Game Guide and Walkthrough](https://game.lhg100.com/Article/UploadFiles/201512/2015121216081035.jpg)
Now you can stay close to the boat [1]. Kill all guards, open the gates, until you will get to the place when the ceiling is located much lower [2].
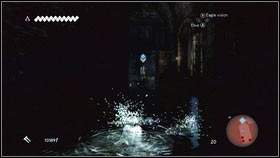
![Swim near the boat and try to avoid all guard by going under water [1] - Leonardos Machines - p. 3 - Side Quests - Assassins Creed: Brotherhood - Game Guide and Walkthrough](https://game.lhg100.com/Article/UploadFiles/201512/2015121216081137.jpg)
Swim near the boat and try to avoid all guard by going under water [1]. You can kill your enemies but it is very risky. When you will get to the closed gate, turn left, dive and swim under the bridge. Do the same with the next obstacle, but avoid the guards this time. Remember to take a breath from time to time - when Ezio will do it for his own, you will not be able to dive for couple of seconds. When you will get to the last gate, climb on the wall located on the right and use the mechanism [2].
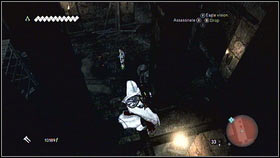
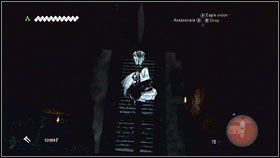
On the other side, use the ladder located on the right. Under the ceiling you will find some sticks and you will be able to go further. In the chamber with two guards [1], jump on the sticks located on the right. You will get to the third soldier [2]. Kill him and open the next door.
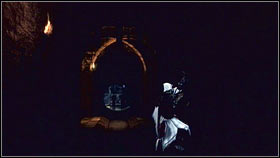
![Soon, you will find the exit from the canals [1] - Leonardos Machines - p. 3 - Side Quests - Assassins Creed: Brotherhood - Game Guide and Walkthrough](https://game.lhg100.com/Article/UploadFiles/201512/2015121216081136.jpg)
Soon, you will find the exit from the canals [1]. Kill all enemies and jump on the Leonardo's machine [2] and then on the higher level.
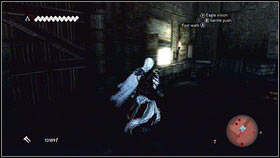
![Find the plans [1] and burn them [2] - Leonardos Machines - p. 3 - Side Quests - Assassins Creed: Brotherhood - Game Guide and Walkthrough](https://game.lhg100.com/Article/UploadFiles/201512/2015121216081146.jpg)
Find the plans [1] and burn them [2].
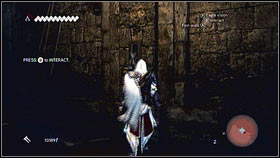
![Go east, where you will find a mechanism that can lift the chests [1] - Leonardos Machines - p. 3 - Side Quests - Assassins Creed: Brotherhood - Game Guide and Walkthrough](https://game.lhg100.com/Article/UploadFiles/201512/2015121216081172.jpg)
Go east, where you will find a mechanism that can lift the chests [1]. Use them to jump up, kill the guard and get close to the glowing point [2].
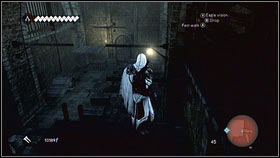
![Using wooden stick and platforms, stay close to the wall [1] - Leonardos Machines - p. 3 - Side Quests - Assassins Creed: Brotherhood - Game Guide and Walkthrough](https://game.lhg100.com/Article/UploadFiles/201512/2015121216081244.jpg)
Using wooden stick and platforms, stay close to the wall [1]. After killing all soldiers, you will get to the next mechanism [2].
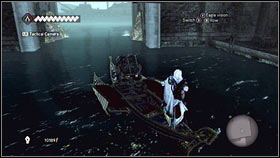
![Use it and you will be able to use a special battle ship [1] - Leonardos Machines - p. 3 - Side Quests - Assassins Creed: Brotherhood - Game Guide and Walkthrough](https://game.lhg100.com/Article/UploadFiles/201512/2015121216081236.jpg)
Use it and you will be able to use a special battle ship [1]. Press B to go straight ahead and steer with left analog stick. You can shoot by pressing X (target) and RT [2].
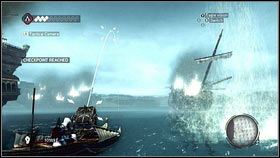
![Try to shoot the nearby boat [1] - Leonardos Machines - p. 3 - Side Quests - Assassins Creed: Brotherhood - Game Guide and Walkthrough](https://game.lhg100.com/Article/UploadFiles/201512/2015121216081251.jpg)
Try to shoot the nearby boat [1]. You have to destroy 3 masts [2]. It is a quite simple task.
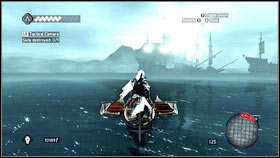
After destroying this ship, you will have to destroy the rest [1]. Get close to each of them and destroy three masts [2]. After the battle, the mission will be over.
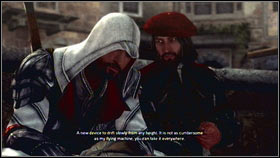
![As a reward, you will get a para-shoot plans [1] - Leonardos Machines - p. 3 - Side Quests - Assassins Creed: Brotherhood - Game Guide and Walkthrough](https://game.lhg100.com/Article/UploadFiles/201512/2015121216081205.jpg)
As a reward, you will get a para-shoot plans [1]. You will be able to buy it from any tailor available in the game. To use it, you can press the X button [2].
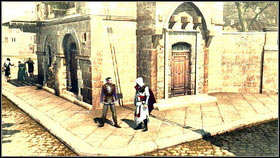
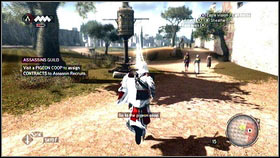
You will be able to recruit new assassins in the game. To do it, you have to get close to the recruit and defend him. When you will do it, the man (or woman) will join you [1]. You can manage your guild from a special menu that can be enabled by getting close to one of the pigeon cages [2]. You will have 4 options here.
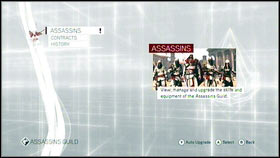
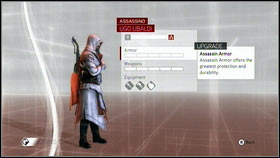
In the tab "Assassins", you can watch your pupils [1], add some points to their stats and change their clothes [2]. The total number of assassins depends on the number of destroyed Borgia's tower. One tower is a one new recruit.
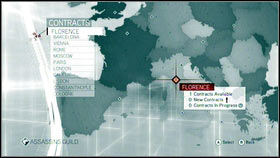
In the tab "Contracts", you can send your pupils for some missions [1]. When you will choose a task, prepare one or more recruits and you will get an information about chance of success (it should be higher than 80%). Sometimes, you will be able to take part in missions with red stars [2] - apart from EXP, you will get gold and items from them. The last tab is called "Mission" and it is available only in few places.
Some special stores are opened near Ezio's hideout. Go there and you will be able to get some unique items from some simple quests. In all of these tasks, you will have to get some ingredients and take them to the merchant shop. These items can be found in some special chests, near some guards and such places (all of them are described below). A very good idea is to send recruits for special missions marked with stars.

1. Buddhist Prayer Beads
2. Cardinal's Purple Dye
3. Nutmeg
4. Pomander
5. Pomander
6. Tomato
7. Prayers Beads
8. Cardinal's Purple Dye
9. Nutmeg
10. Totem
11. Tomato
12. Ambergris
13. Terracotta Pot
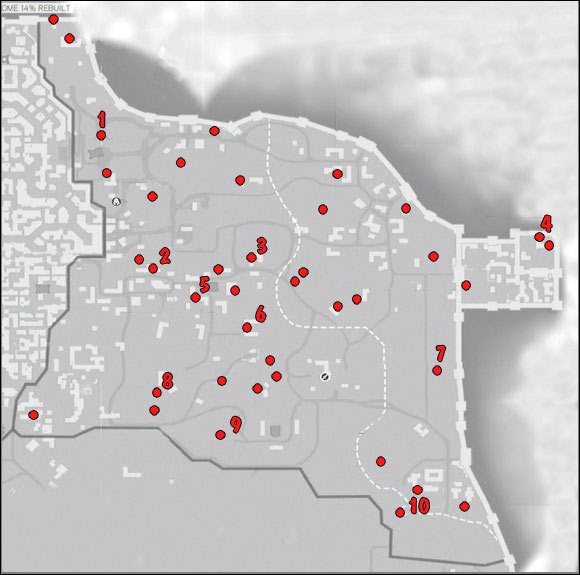
1. Terracotta Pot
2. Pomander
3. Totem
4. Silk
5. Indian Diamond
6. Totem
7. Prayer Beads
8. Vlad Coins
9. Vlad Coins
10. Tomato
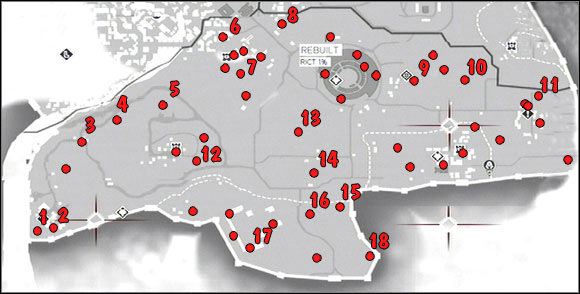
1. Nutmeg
2. Totem
3. Terracotta Pot
4. Shrunken Head
5. Terracotta Pot
6. Prayer Beads
7. Terracotta Pot
8. Tomato
9. Totem
10. Papaver Silvaticum
11. Terracotta Pot
12. Papaver Silvaticum
13. Totem
14. Terracotta Pot
15. Silk
16. Elephant Ivory
17. Ambergris
18. Prayer Beads

1. Silk
2. Ambergris
Some of the Assassin's Quests are marked with red stars. For completing them you will get EXP, gold and many interesting items.
Mission
Localization
Reward
Exodus
Lisbon
Terracotta Pot
Destructive Criticism
Paris
Totem
Picking up the Pieces
Barcelona
Ambergris
My Enemy's Enemy
Constantinople
Pomander
Man Down
Paris
Cardinal's Purple Dye
Dousing Fires
London
Vlad the Impaler Coin
Star Chamber
London
Indian Diamond
Closure
Barcelona
Elephant Ivory
Scapegoats
Moscow
Vlad the Impaler Coin
Many treasures are hidden in Romulus Lairs. Complete description of these areas can be found in other part of this guide. Here, we will tell you how to find some items that can be interesting for some merchants.

In the treasure hall, you will find many chests with tomatoes.
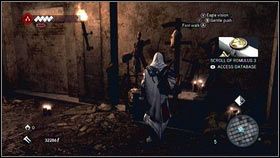
![Inside the last room [1] you will find some Buddhist Prayer Beads - Romulus Lair - Treasures and Merchant Quests - Assassins Creed: Brotherhood - Game Guide and Walkthrough](https://game.lhg100.com/Article/UploadFiles/201512/2015121216081431.jpg)
Inside the last room [1] you will find some Buddhist Prayer Beads. It is good to examine the room, where you were fighting with many [2].
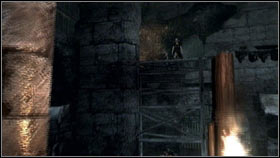
![In the second room, where you will be attacked by some enemy soldiers [1], there is a chest with Papaver Silvaticum - Romulus Lair - Treasures and Merchant Quests - Assassins Creed: Brotherhood - Game Guide and Walkthrough](https://game.lhg100.com/Article/UploadFiles/201512/2015121216081476.jpg)
In the second room, where you will be attacked by some enemy soldiers [1], there is a chest with Papaver Silvaticum.
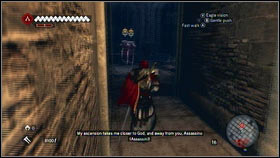
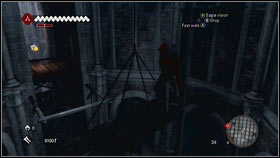
After few seconds of the chase, the man with use the "elevator" [1]. Climb on the wall on the right and get to the room located on the right [2]. Jump down and open the chest with Cardinal's Purple Dye. In the treasure room you will be able to find Pomander and Buddhist Prayer Breads.
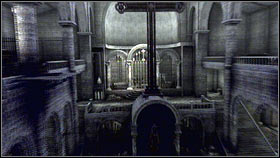
![In the hall with a huge cross, go in the direction of the closed gate [1] and turn right when you will pass the stairs [2] - Romulus Lair - Treasures and Merchant Quests - Assassins Creed: Brotherhood - Game Guide and Walkthrough](https://game.lhg100.com/Article/UploadFiles/201512/2015121216081542.jpg)
In the hall with a huge cross, go in the direction of the closed gate [1] and turn right when you will pass the stairs [2]. Find a chest with Shrunken Head.
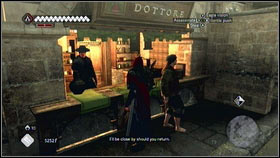
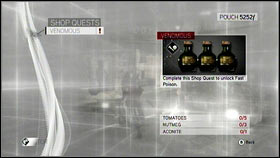
Required items: Tomatoes x5, Nutmeg x3, Acontie x1
Reward: Fast Poison
Localization: Tomatoes and Nutmeg can be found in many places. IF you have any problems with the, go to the The Halls of Nero. Aconite can be found near many guards and massager - the drop chance is very low.
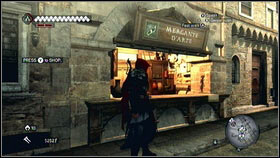
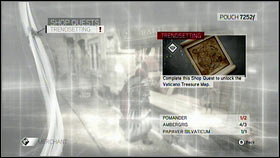
Required items: Pomander x2, Ambergris x3, Papaver Silvaticum x1
Reward: Vaticano Treasure Map
Localization: All items can be found in chests.
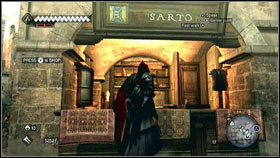
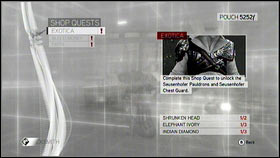
Required items: Shrunken Head x2, Elephant Ivory x3, Indian Diamond x3
Rewards: Seusenhofer Pauldrons and Seusenhofer Chest Guard
Localization: Most of these items can be found in chests and enemy bodies. You can have some problems with the Shrunken Head. It can be found in Atico District and Remulus Lair: Sixth Day.
Required items: Vlad the Impaler Coins x7
Reward: Spada Lunga
Localization: These items can be found in chests, near enemies bodies and from recruits quests.
Required items: Terracotta Pot x3, Totem x2, Buddhist Prayer Beads x2
Reward: Captain's Sword
Localization: All items can be found in chests.
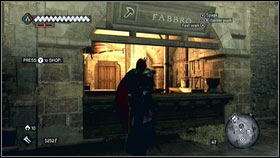
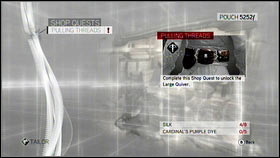
Required items: Silk x8, Cardinal's Purple Dye x5
Reward: Large Quiver
Localization: All items can be found in chests, near enemies bodies and from recruits quests.
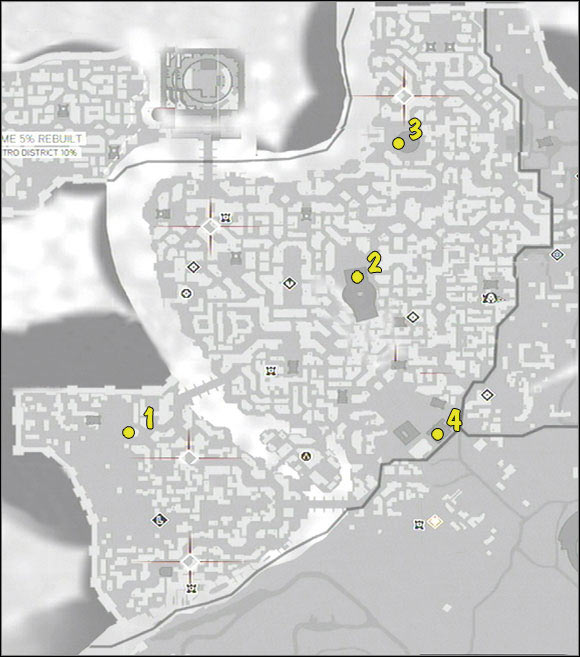
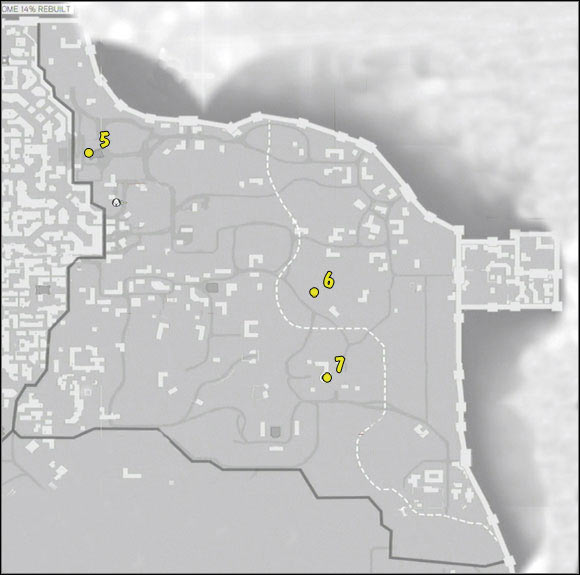


![To get to this feather, climb on the nearest pillar in the souther part of the square [1] - Detailed Description - Feathers - Assassins Creed: Brotherhood - Game Guide and Walkthrough](https://game.lhg100.com/Article/UploadFiles/201512/2015121216081632.jpg)
To get to this feather, climb on the nearest pillar in the souther part of the square [1]. Jump from the object to another object and you will get to the treasure [2].
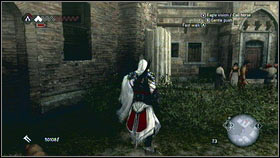
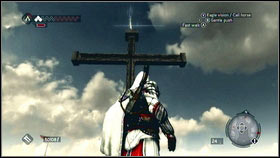
The next feather can be found on the top of the Pantheon. To climb on the building, get close to it from the south. You will find a destroyed pillar there [1] so climb on it. The item is located on the cross [2].
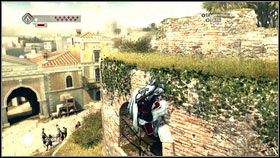
![The third feather is on the top of the ruins [1], in the western part if the area [2] - Detailed Description - Feathers - Assassins Creed: Brotherhood - Game Guide and Walkthrough](https://game.lhg100.com/Article/UploadFiles/201512/2015121216081715.jpg)
The third feather is on the top of the ruins [1], in the western part if the area [2].
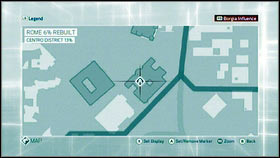
![This feather is on the floor, south from the fountain [1] - Detailed Description - Feathers - Assassins Creed: Brotherhood - Game Guide and Walkthrough](https://game.lhg100.com/Article/UploadFiles/201512/2015121216081752.jpg)
This feather is on the floor, south from the fountain [1].
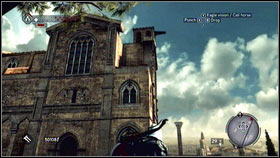
![The first feather in Campagne District is located on the church [1], in the northern part of the area [2] - Detailed Description - Feathers - Assassins Creed: Brotherhood - Game Guide and Walkthrough](https://game.lhg100.com/Article/UploadFiles/201512/2015121216081728.jpg)
The first feather in Campagne District is located on the church [1], in the northern part of the area [2].
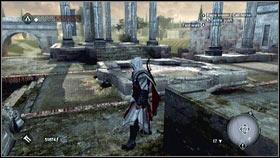
![The second feather is in the ruins [1] - Detailed Description - Feathers - Assassins Creed: Brotherhood - Game Guide and Walkthrough](https://game.lhg100.com/Article/UploadFiles/201512/2015121216081767.jpg)
The second feather is in the ruins [1]. Very easy to find.
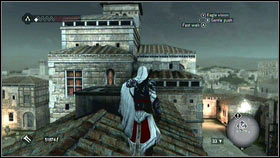
![The third feather is in the souther tower [1] [2] - Detailed Description - Feathers - Assassins Creed: Brotherhood - Game Guide and Walkthrough](https://game.lhg100.com/Article/UploadFiles/201512/2015121216081746.jpg)
The third feather is in the souther tower [1] [2].
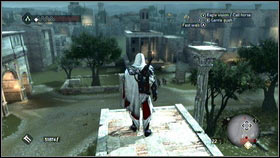
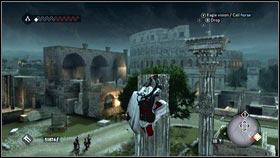
This feather is hidden on the huge pillar. To get there, get on the ruins and jump to the next pillar [1]. Press and hold B and Ezio will catch the edge [2]. When he will be upstairs, jump once again and take the feather.
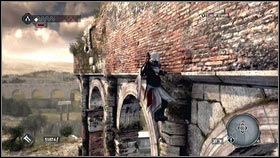
![The next item is on the top of the Colosseum [1], in the western part [2] - Detailed Description - Feathers - Assassins Creed: Brotherhood - Game Guide and Walkthrough](https://game.lhg100.com/Article/UploadFiles/201512/2015121216081897.jpg)
The next item is on the top of the Colosseum [1], in the western part [2]. It is described in the quest "For The Fans".
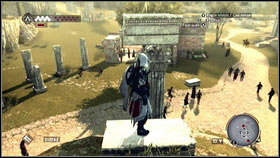
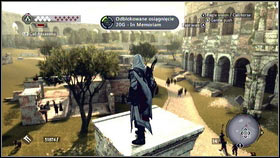
The last treasure is located on the pillar. To get there, enter the nearby hill [1]. From this location, you will be able to get the feather [2].
Before, you will get to the 8 sequence, you can leave the Animus at any time. You will return to Desmond body. Moreover, you will be able to get 5 artifacts. To get them, go outside. You will have ten minutes to find them all.
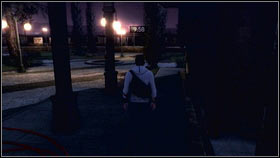
![Turn round near the entrance [1], enter the room and turn right - Introduction & Detailed Description - Artifacts - Assassins Creed: Brotherhood - Game Guide and Walkthrough](https://game.lhg100.com/Article/UploadFiles/201512/2015121216081806.jpg)
Turn round near the entrance [1], enter the room and turn right. The artifact is on the ground [2].
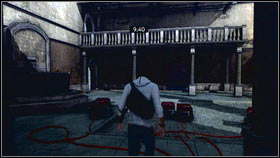
![When you will be outside, go straight ahead [1] and climb on the roof [2] - Introduction & Detailed Description - Artifacts - Assassins Creed: Brotherhood - Game Guide and Walkthrough](https://game.lhg100.com/Article/UploadFiles/201512/2015121216081878.jpg)
When you will be outside, go straight ahead [1] and climb on the roof [2].
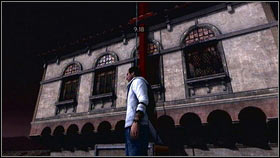
![Find a red pillar located on the right [1] - Introduction & Detailed Description - Artifacts - Assassins Creed: Brotherhood - Game Guide and Walkthrough](https://game.lhg100.com/Article/UploadFiles/201512/2015121216081906.jpg)
Find a red pillar located on the right [1]. Use it, get on the top and find the item [2].
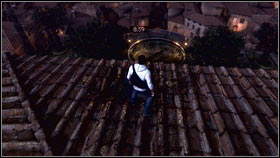
![Jump down from the building on the opposite side from the red pillar [1] - Introduction & Detailed Description - Artifacts - Assassins Creed: Brotherhood - Game Guide and Walkthrough](https://game.lhg100.com/Article/UploadFiles/201512/2015121216081903.jpg)
Jump down from the building on the opposite side from the red pillar [1]. Go straight ahead and look for the white car [2]. Turn there and find the artifact under the tree.
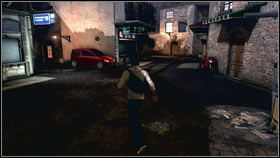

To get the fourth artifact, get back a few steps. Look for the red car [1]. The item is hidden in a very dark alley [2].
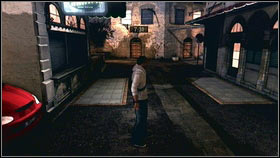
![Go back and go straight ahead [1] - Introduction & Detailed Description - Artifacts - Assassins Creed: Brotherhood - Game Guide and Walkthrough](https://game.lhg100.com/Article/UploadFiles/201512/2015121216081949.jpg)
Go back and go straight ahead [1]. Soon, you will get to the crossroads [2].
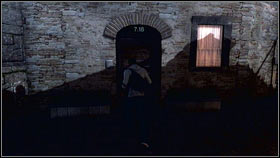
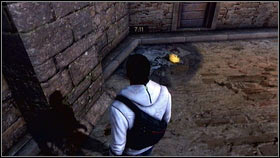
Take the right path. When you will get to the wall [1], climb on it and take the item from the balcony [2].
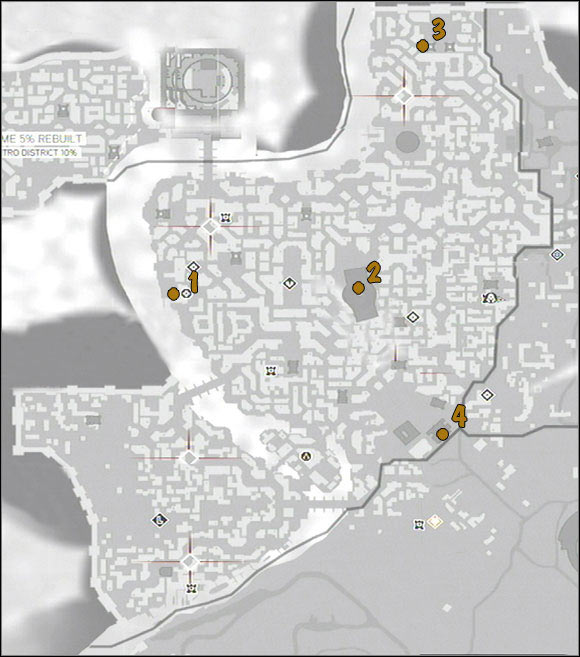
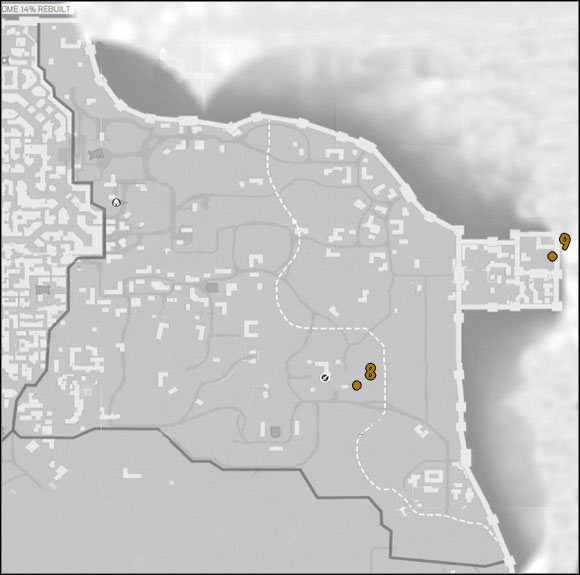
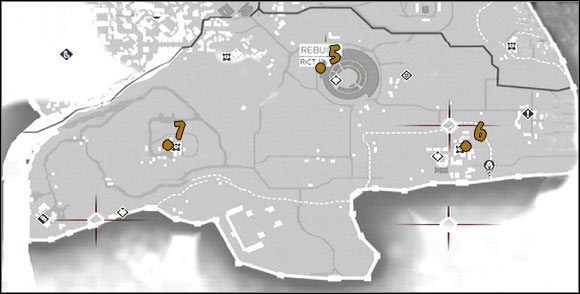
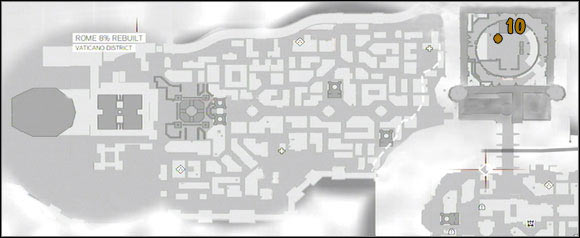
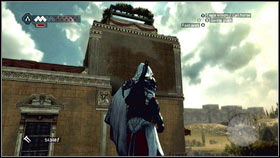
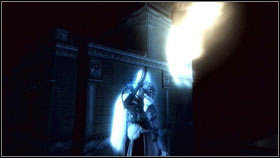
The first glyph is located on the north wall of Rosa In Fiore, under the roof.
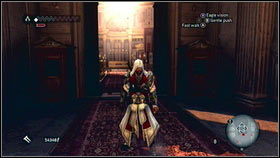
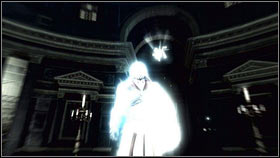
Second glyph is in Pantheon. After entering the temple, turn round [1]. Glyph is located near the gate [2].
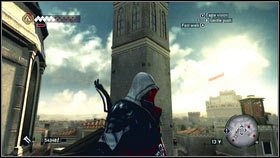
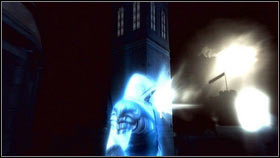
It is located near the northern wall of one church.
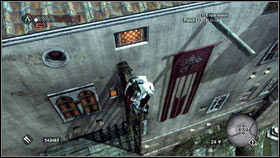
The fourth glyph is on the southern-east of a huge building. Near the flag.
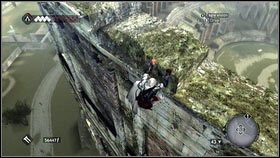
The fifth passage is in the Colosseum. To get there, you have to climb on the top of the building.
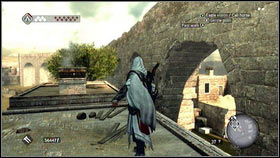
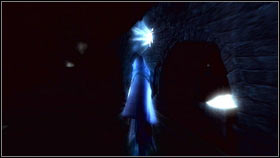
The next glyph is on the northern wall of the aqueduct.
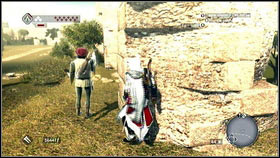
![To get there, speak with the architect [1] and rebuild the building [2] - Detailed Description - Glyphs - Assassins Creed: Brotherhood - Game Guide and Walkthrough](https://game.lhg100.com/Article/UploadFiles/201512/2015121216082215.jpg)
To get there, speak with the architect [1] and rebuild the building [2].
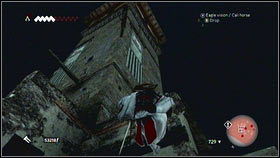
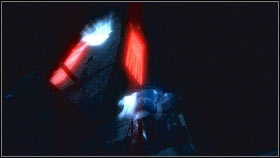
The next glyph is located on the northern wall of the Borgia's tower.
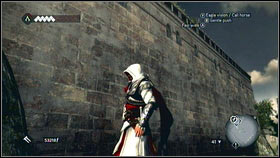
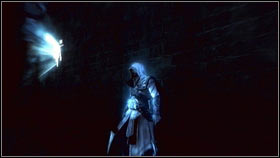
The next glyph is located on the eastern wall of the Bartolomeo fortress.
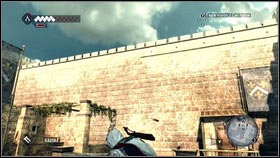
The next glyph in on the inner wall of the fortress. In the northern-east part of the area.
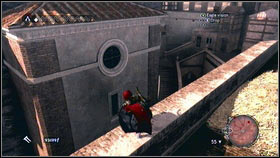
The last glyph is on the southern wall of the Castel Sant'Angelom, near the round window. If you have any problems in getting into the fort, load the Femme Fatale memory.
After activated each glyph, you will have to complete a puzzle. They are always in the same sequence.

![In the first phase, you have to separate pictures (masters and their servants) [1] - Detailed Description - p. 1 - Puzzles - Assassins Creed: Brotherhood - Game Guide and Walkthrough](https://game.lhg100.com/Article/UploadFiles/201512/2015121216082377.jpg)
In the first phase, you have to separate pictures (masters and their servants) [1].From the first row pick the numbers 1, 3 and 4. From the second one: 3 and 5. After completing this task, a chess board will appear. Move the pawn from the E column for two squares [2].
![In the last phase, you will see a white circle [1] - Detailed Description - p. 1 - Puzzles - Assassins Creed: Brotherhood - Game Guide and Walkthrough](https://game.lhg100.com/Article/UploadFiles/201512/2015121216082309.jpg)
In the last phase, you will see a white circle [1]. Move it to the upper right corner and press A [2].
![In the first phase, you have to restore 3 pictures, by moving the rings [1] - Detailed Description - p. 1 - Puzzles - Assassins Creed: Brotherhood - Game Guide and Walkthrough](https://game.lhg100.com/Article/UploadFiles/201512/2015121216082353.jpg)
In the first phase, you have to restore 3 pictures, by moving the rings [1]. Use your analog stick to move them. Remember that sometimes two ring can move in the same moment. You have to make a picture from them [2].

![The second phase is the chess board [1] - Detailed Description - p. 1 - Puzzles - Assassins Creed: Brotherhood - Game Guide and Walkthrough](https://game.lhg100.com/Article/UploadFiles/201512/2015121216082360.jpg)
The second phase is the chess board [1]. Now, you have to move the pawn from the F column [2].

In the last part, you have to activate all red dots. The first one can be found in the lower right corner [1], second one in the upper left [2].
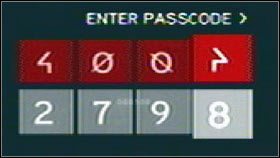
![In the first phase, zoom the picture [1], target the cursor on the left tower [2] and press A - Detailed Description - p. 1 - Puzzles - Assassins Creed: Brotherhood - Game Guide and Walkthrough](https://game.lhg100.com/Article/UploadFiles/201512/2015121216082485.jpg)
In the first phase, zoom the picture [1], target the cursor on the left tower [2] and press A.
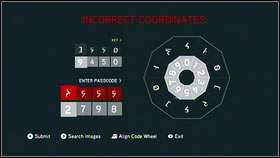
A circle will appear - a key for the password [1]. Move it and remember that symbol and digit from the first column must be close to each other. The symbol located over the 2 will be the first part of the key. Repeat the operation and you should see the whole password [2].
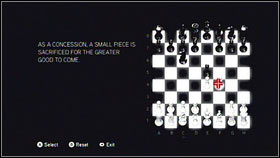
![When the chess board will appear [1], move the pawn from the F column on the black pawn from the E column [2] - Detailed Description - p. 1 - Puzzles - Assassins Creed: Brotherhood - Game Guide and Walkthrough](https://game.lhg100.com/Article/UploadFiles/201512/2015121216082407.jpg)
When the chess board will appear [1], move the pawn from the F column on the black pawn from the E column [2].
In the last phase, mark two red dots. The first one is in the upper right corner [1] and the second one is in the lower left corner [2].
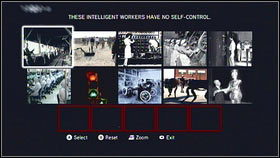
![In the first phase, you have to choose 5 pictures [1] - Detailed Description - p. 1 - Puzzles - Assassins Creed: Brotherhood - Game Guide and Walkthrough](https://game.lhg100.com/Article/UploadFiles/201512/2015121216082562.jpg)
In the first phase, you have to choose 5 pictures [1]. In the upper row pick no. 2, 3 and 5. in the lower row: 4 and 5 [2].
![The next phase is about making some pictures [1] - Detailed Description - p. 1 - Puzzles - Assassins Creed: Brotherhood - Game Guide and Walkthrough](https://game.lhg100.com/Article/UploadFiles/201512/2015121216082550.jpg)
The next phase is about making some pictures [1]. First of all, move outer rings and then inner rings [2].
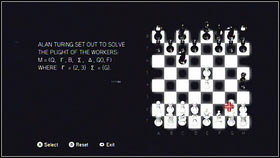
![In the third riddle, the chess board will appear [1] - Detailed Description - p. 1 - Puzzles - Assassins Creed: Brotherhood - Game Guide and Walkthrough](https://game.lhg100.com/Article/UploadFiles/201512/2015121216082547.jpg)
In the third riddle, the chess board will appear [1]. Move the pawn from the G column by one square [2].
![You will see some audio waves - pick the left one and then, the one located in the middle [1] - Detailed Description - p. 1 - Puzzles - Assassins Creed: Brotherhood - Game Guide and Walkthrough](https://game.lhg100.com/Article/UploadFiles/201512/2015121216082537.jpg)
You will see some audio waves - pick the left one and then, the one located in the middle [1]. As a matter of fact, you will be able to hear the message [2].
In the last phase, you will have to find red dots. The first one is in the middle [1] and the second one a bit lower [2].
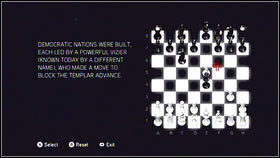
![In the first phase, you will have to play chess [1] - Detailed Description - p. 1 - Puzzles - Assassins Creed: Brotherhood - Game Guide and Walkthrough](https://game.lhg100.com/Article/UploadFiles/201512/2015121216082665.jpg)
In the first phase, you will have to play chess [1]. Move the queen by only one square to the right [2].
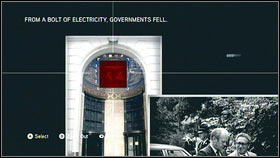
![In the second riddle, you have to pick the electric beam [1] - Detailed Description - p. 1 - Puzzles - Assassins Creed: Brotherhood - Game Guide and Walkthrough](https://game.lhg100.com/Article/UploadFiles/201512/2015121216082666.jpg)
In the second riddle, you have to pick the electric beam [1]. As a matter of fact, you will see the circle. The password must be looking exactly like in the second picture [2].
In the last phase, mark all three red dots. The first one is located in the lower left corner [1], second one - in the lower right corner and the last one is located on the left [2].
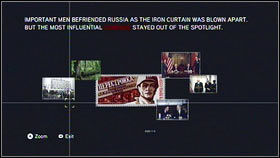
![In the first phase, zoom the picture located in the left [1] and mark the men in the T-shirt with the cross [2] - Detailed Description - p. 2 - Puzzles - Assassins Creed: Brotherhood - Game Guide and Walkthrough](https://game.lhg100.com/Article/UploadFiles/201512/2015121216082621.jpg)
In the first phase, zoom the picture located in the left [1] and mark the men in the T-shirt with the cross [2].
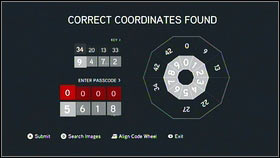
![You will see a circle now [1] - Detailed Description - p. 2 - Puzzles - Assassins Creed: Brotherhood - Game Guide and Walkthrough](https://game.lhg100.com/Article/UploadFiles/201512/2015121216082773.jpg)
You will see a circle now [1]. The password should look like in the picture number two [2].
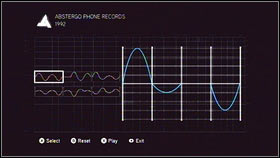
![The third element is about choosing correct voice waves [1] - Detailed Description - p. 2 - Puzzles - Assassins Creed: Brotherhood - Game Guide and Walkthrough](https://game.lhg100.com/Article/UploadFiles/201512/2015121216082702.jpg)
The third element is about choosing correct voice waves [1]. In the upper row, choose the left and the middle wave. In the lower row, choose the left wave [2].
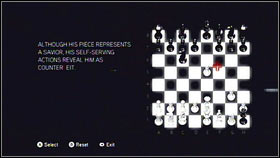
When the chess board will appear [1], move the right horse by two squares straight ahead and one square left [2].

![The last phase is about finding correct red dots [1] - Detailed Description - p. 2 - Puzzles - Assassins Creed: Brotherhood - Game Guide and Walkthrough](https://game.lhg100.com/Article/UploadFiles/201512/2015121216082710.jpg)
The last phase is about finding correct red dots [1]. Look at the second picture to find them [2].
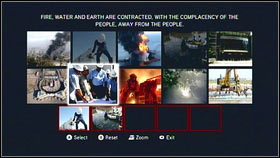
![To complete the first phase, you have to choose pictures number 2 and 4 in the upper row [1] and 2, 3, 5 in the lower row [2] - Detailed Description - p. 2 - Puzzles - Assassins Creed: Brotherhood - Game Guide and Walkthrough](https://game.lhg100.com/Article/UploadFiles/201512/2015121216082887.jpg)
To complete the first phase, you have to choose pictures number 2 and 4 in the upper row [1] and 2, 3, 5 in the lower row [2].
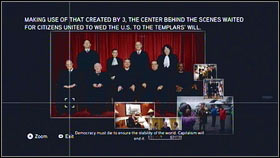
![In the next phase, you will see more pictures [1] - Detailed Description - p. 2 - Puzzles - Assassins Creed: Brotherhood - Game Guide and Walkthrough](https://game.lhg100.com/Article/UploadFiles/201512/2015121216082834.jpg)
In the next phase, you will see more pictures [1]. Zoom the picture with these men wearing black suits and pick the man sitting in the middle [2].
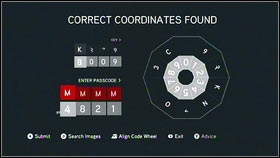
![You will see another riddle [1] - Detailed Description - p. 2 - Puzzles - Assassins Creed: Brotherhood - Game Guide and Walkthrough](https://game.lhg100.com/Article/UploadFiles/201512/2015121216082818.jpg)
You will see another riddle [1]. The password is shown on the picture [2].
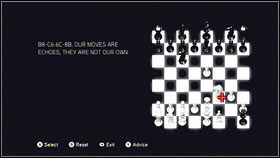
![When you will see the chess board [1], move the left horse by two squares straight ahead and one to the right [2] - Detailed Description - p. 2 - Puzzles - Assassins Creed: Brotherhood - Game Guide and Walkthrough](https://game.lhg100.com/Article/UploadFiles/201512/2015121216082886.jpg)
When you will see the chess board [1], move the left horse by two squares straight ahead and one to the right [2].
![The last phase is about finding red dots [1] - Detailed Description - p. 2 - Puzzles - Assassins Creed: Brotherhood - Game Guide and Walkthrough](https://game.lhg100.com/Article/UploadFiles/201512/2015121216082801.jpg)
The last phase is about finding red dots [1]. Look at the picture [2].
First of all, you will have to make a picture. This could be quite challenging. At the beginning pick two inner circles and move them to the right (4 times) [1]. Now pick the middle and the inner circle - move them to the right. At the end mark the outer and the inner circle [2]. Move them to the left (3 times).
![In the next phase, you will have to handle with the waves [1] - Detailed Description - p. 2 - Puzzles - Assassins Creed: Brotherhood - Game Guide and Walkthrough](https://game.lhg100.com/Article/UploadFiles/201512/2015121216082996.jpg)
In the next phase, you will have to handle with the waves [1]. Pick the left one in the first row, middle one in the second row and the right and the middle one in the last row [2].
![Now the chess board [1] - Detailed Description - p. 2 - Puzzles - Assassins Creed: Brotherhood - Game Guide and Walkthrough](https://game.lhg100.com/Article/UploadFiles/201512/2015121216082969.jpg)
Now the chess board [1]. Move the white king one square straight ahead and then right - to the car [2].
![In the last phase, you will have to pick 5 red dots [1] - Detailed Description - p. 2 - Puzzles - Assassins Creed: Brotherhood - Game Guide and Walkthrough](https://game.lhg100.com/Article/UploadFiles/201512/2015121216082989.jpg)
In the last phase, you will have to pick 5 red dots [1]. Look at the picture [2].
![In the first phase, you will have to pick 5 pictures [1] - Detailed Description - p. 3 - Puzzles - Assassins Creed: Brotherhood - Game Guide and Walkthrough](https://game.lhg100.com/Article/UploadFiles/201512/2015121216083092.jpg)
In the first phase, you will have to pick 5 pictures [1]. In the upper row pick images number 2 and 3. In the lower row pick 1, 3 and a 5 [2].

![The next phase is about choosing correct waves [1] - Detailed Description - p. 3 - Puzzles - Assassins Creed: Brotherhood - Game Guide and Walkthrough](https://game.lhg100.com/Article/UploadFiles/201512/2015121216083042.jpg)
The next phase is about choosing correct waves [1]. Pick the first and the third wave in the first row; third one in the second row, none in the third row and third one in the fourth row [2].
![You will see a white board on the screen [1], pick the bishop from the F column and move it to the right [2] - Detailed Description - p. 3 - Puzzles - Assassins Creed: Brotherhood - Game Guide and Walkthrough](https://game.lhg100.com/Article/UploadFiles/201512/2015121216083046.jpg)
You will see a white board on the screen [1], pick the bishop from the F column and move it to the right [2].
![In the last phase, you will have to mark all red dots [1] - Detailed Description - p. 3 - Puzzles - Assassins Creed: Brotherhood - Game Guide and Walkthrough](https://game.lhg100.com/Article/UploadFiles/201512/2015121216083004.jpg)
In the last phase, you will have to mark all red dots [1]. Look at the picture [2].

![Now, you will have to make a picture [1] - Detailed Description - p. 3 - Puzzles - Assassins Creed: Brotherhood - Game Guide and Walkthrough](https://game.lhg100.com/Article/UploadFiles/201512/2015121216083032.jpg)
Now, you will have to make a picture [1]. Move the outer ring and the third ring to the right (5 times). Then pick the second and the fourth row and move them twice to the right. Repeat the same procedure on the third row and fourth row and the riddle will be solved [2].
![In the next phase, you will have to choose correct pictures [1] - Detailed Description - p. 3 - Puzzles - Assassins Creed: Brotherhood - Game Guide and Walkthrough](https://game.lhg100.com/Article/UploadFiles/201512/2015121216083180.jpg)
In the next phase, you will have to choose correct pictures [1]. Mark the third and the fourth one in the first row. In the second row choose: 3 and 5 [2].
Zoom the pictures and look at the picture located in the upper part. You will see a bird there [1]. Pick it (A) and read the password [2].
![Now handle with the waves [1] - Detailed Description - p. 3 - Puzzles - Assassins Creed: Brotherhood - Game Guide and Walkthrough](https://game.lhg100.com/Article/UploadFiles/201512/2015121216083193.jpg)
Now handle with the waves [1]. Look at the picture to choose them correctly [2].
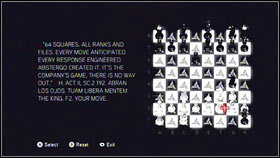
![Now the chess board [1] - Detailed Description - p. 3 - Puzzles - Assassins Creed: Brotherhood - Game Guide and Walkthrough](https://game.lhg100.com/Article/UploadFiles/201512/2015121216083153.jpg)
Now the chess board [1]. Pick the white king and move them out of the board [2].
![Pick the right red dots [1] - Detailed Description - p. 3 - Puzzles - Assassins Creed: Brotherhood - Game Guide and Walkthrough](https://game.lhg100.com/Article/UploadFiles/201512/2015121216083297.jpg)
Pick the right red dots [1]. They are connected now, Begin from one side to mark them all [2].
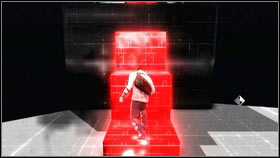
![Press A after the cut scene and you will be teleported to the area with red objects [1] - Detailed Description - p. 3 - Puzzles - Assassins Creed: Brotherhood - Game Guide and Walkthrough](https://game.lhg100.com/Article/UploadFiles/201512/2015121216083260.jpg)
Press A after the cut scene and you will be teleported to the area with red objects [1]. Try to run to them [2]. In one moment, you will find some items. Take one of them to reset the mission. You have to take all of them. After the job, go straight ahead until you get to the strange man. Speak with him to end the quest.
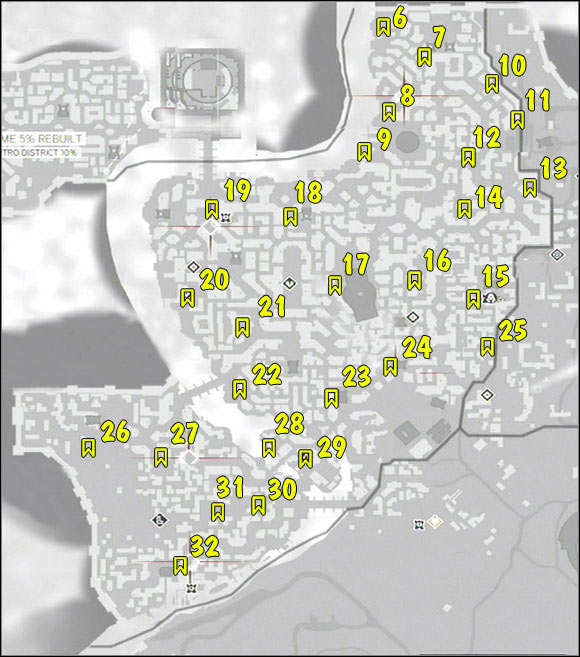
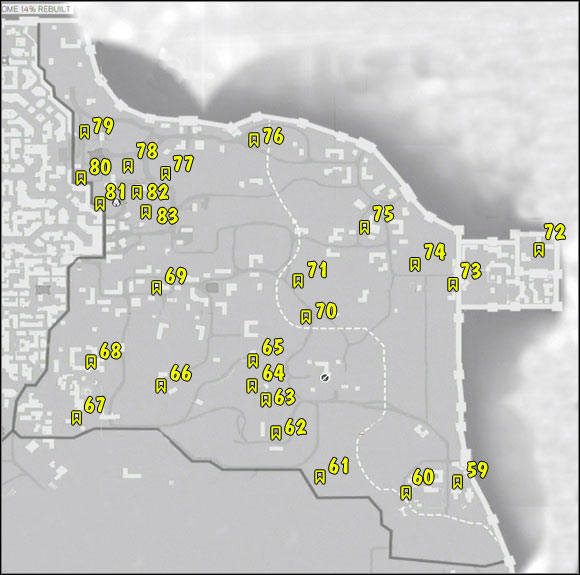
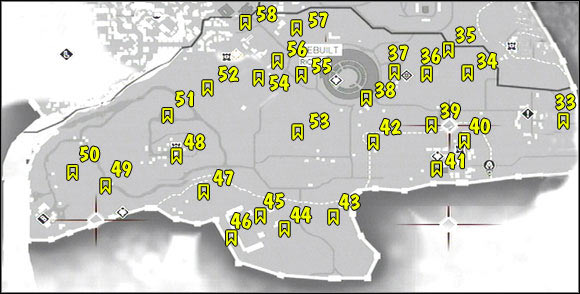
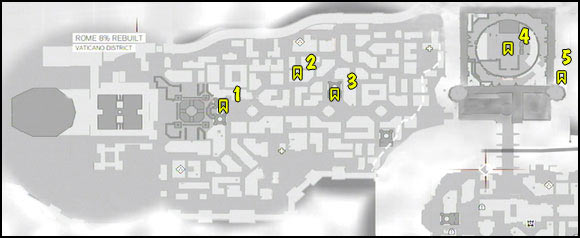
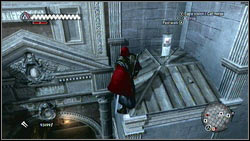
Flag #1
You will find it on the eastern wall of the building.
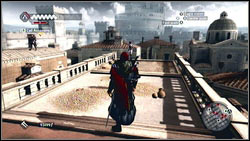
Flag #2
It is located in the wide passage.
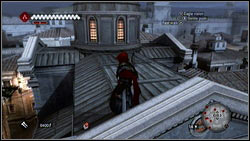
Flag #3
It is located on the roof.
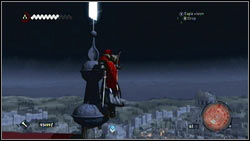
Flag #4
Repeat the Femme Fatal mission and get to the top of the castle.
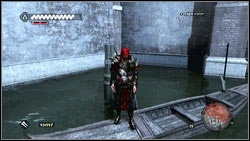
Flag #5
It is located in the moat. Jump on the stick from the gondola.
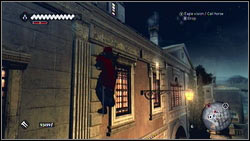
Flag #6
Located on the western wall of the building.
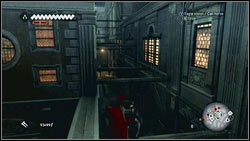
Flag #7
Located on the wooden stick that is connecting two buildings.
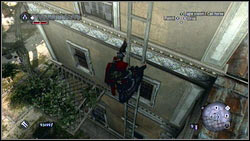
Flag #8
On the western wall of the building. Near the canal, you will find a ladder. There is the flag.
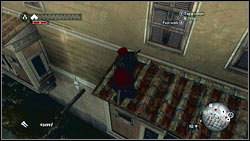
Flag #9
Located on the wooden stick near the canal.
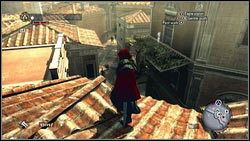
Flag #10
Located on the wooden cage, neat the wall.
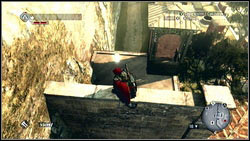
Flag #11
Between the wall and the hideout.
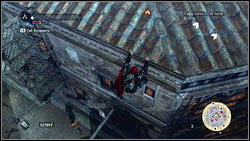
Flag #12
Located on the wooden stick.
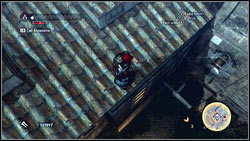
Flag #13
On the wooden stick in the corner.
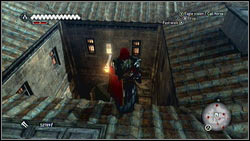
Flag #14
It is located in the square among four buildings.
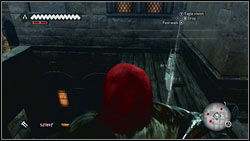
Flag #15
It is located on the wooden stick above the street.
Flag #16
Get into the alley and climb on the wooden platform.
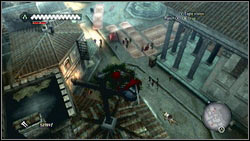
Flag #17
Located on the cross.
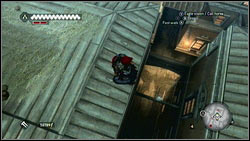
Flag #18
Located on the wooden stick that is connecting two buildings.
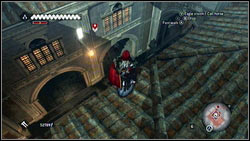
Flag #19
It is located on the lantern, above the street.
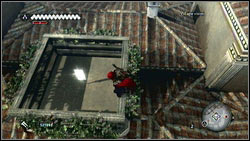
Flag #20
Located on the roof.
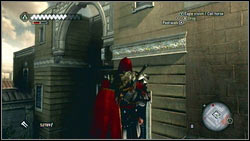
Flag #21
It located on the wooden stick, above the square.
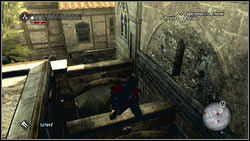
Flag #22
It is located on the small portal that is connecting two buildings.
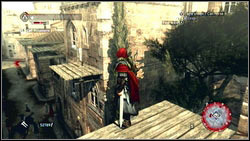
Flag #23
It is located on the wooden platform.
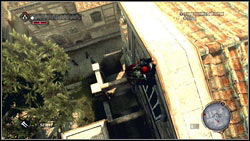
Flag #24
It is located on the portal that is connecting two buildings.
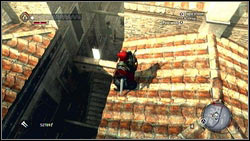
Flag #25
It is located on the portal that connecting two buildings.
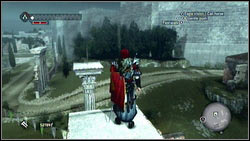
Flag #26
Climb on the pillar, located north of the flag. During the jump, press B.
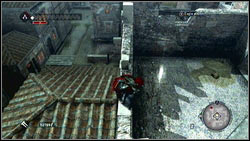
Flag #27
Located on the top of the building.
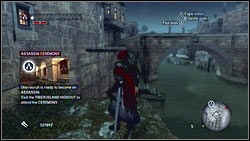
Flag #28
It is located on the wooden stick, near the canal.
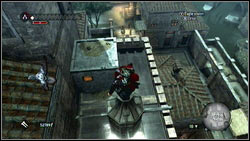
Flag #29
It is located near the Ezio's hideout, near the pigeon cage.
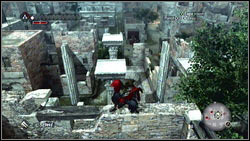
Flag #30
It is located on the pillar.
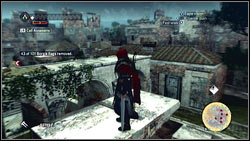
Flag #31
It is located on the top of the ruins.
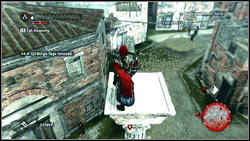
Flag #32
Flag is located on the pillar.

Flag #33
The flag is located on the pillar. At the beginning enter the lower structures.
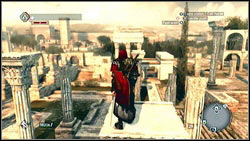
Flag #34
It is located on the highest pillar. Find the wall located in the south and get to the western part. Enter the first wall and try to get to the second one. Then run to the east. You will find stone pillars there - they will lead you to the flag.
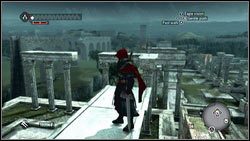
Flag #35
Flag is located on the pillar. Climb on the wall located to the west and jump to the nearest pillar. Now, move clockwise to get the item.
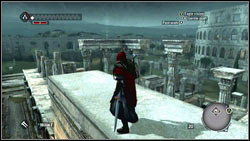
Flag #36
It is located on the pillar. Start from the lowest pillar to get there.
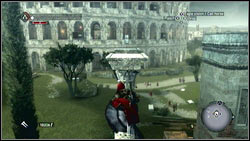
Flag #37
Jump to the pillar from the ruins. Then get close to the flag.

Flag #38
It is located at the top of the Colosseum, in the southern-east part.
Flag #39
Start from the lowest pillar and get to the highest one.
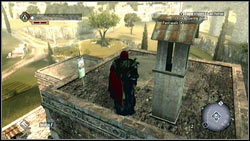
Flag #40
It is located on the roof of the building.
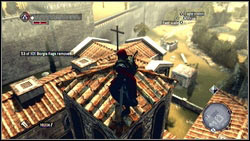
Flag #41
At the top of the tower.
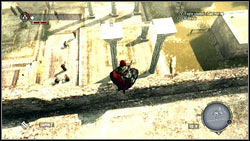
Flag #42
Rebuild the aqueduct to be able to get to the flag.
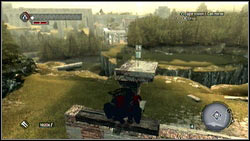
Flag #43
It is located on the ruins.
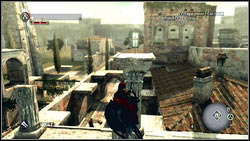
Flag #44
You will get to it, by jumping from pillar to pillar.
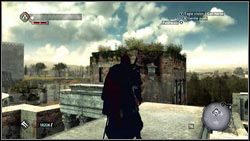
Flag #45
At the top of the ruined tower.
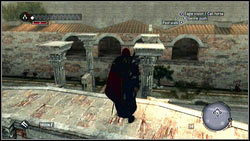
Flag #46
Climb on the circle shaped wall. The flag is in the west.
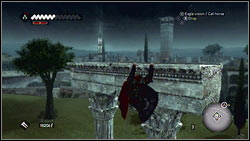
Flag #47
At the beginning take the flag number 48. You will find the aqueduct nearby. Use the horse to jump over the abyss. On the other side, turn left and you will get to the pillar with the flag. Start from the pillar located in the south.
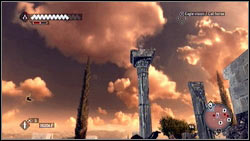
Flag #48
It is located on the highest pillar.
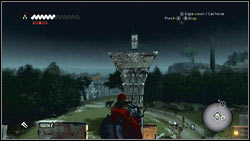
Flag #49
It is located on the pillar.
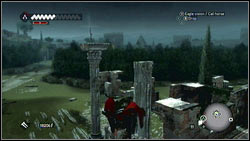
Flag #50
Climb on the ruins and jump to the pillar. Then climb higher to get the flag.
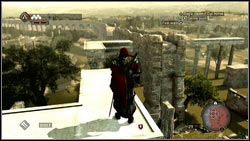
Flag #51
The next flag is located on the pillar.
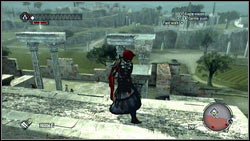
Flag #52
You will find it in the ancient ruins. To get there, jump on the pillar and find the flag.
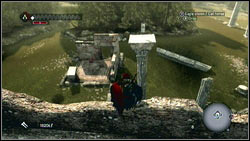
Flag #53
You can get to the flag from the aqueduct. The ladder is located somewhere there.
Flag #54
Jump on the pillar to get to the flag.
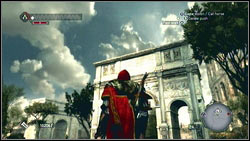
Flag #55
It is located on the portal, near the Colosseum. Start the climbing process from the eastern part of the wall, then enter the side wall.
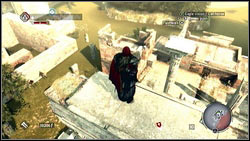
Flag #56
Jump on the pillar from the ruins.
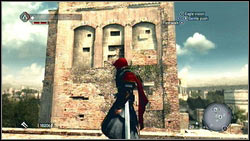
Flag #57
It is located on the high building. Start your climbing from the north side.
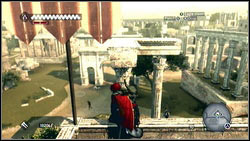
Flag #58
It is hidden on the top of the pillars that can be found from the northern side.
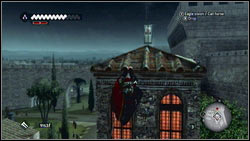
Flag #59
It is located on the top of the building.
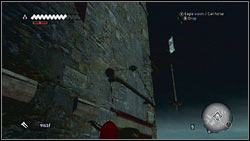
Flag #60
It is located on the top of the tower, near the previous flag. Start the climbing process from the southern wall. Then turn north and move to the northern wall.
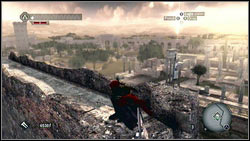
Flag #61
To get the flag, you have to climb on the top of the ancient aqueduct. Start from the western wall.
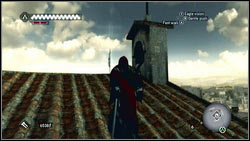
Flag #62
It is located on the roof.
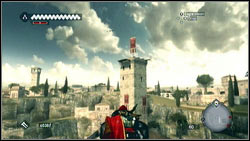
Flag #63
It is located on the top of the Borgia's tower.
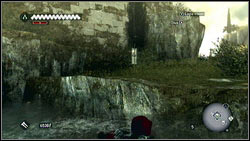
Flag #64
It is located on the souther shore of the island with the Borgia's tower.
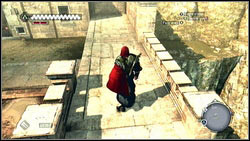
Flag #65
After finding the previous flag, swim north and use the mechanism. The flag is located on the top.
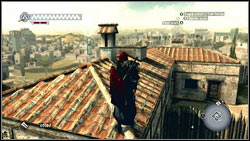
Flag #66
It is located on the roof, near the chimney.
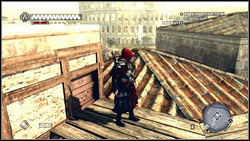
Flag #67
It is located on the roof.
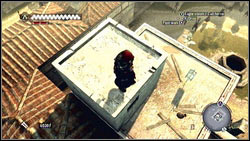
Flag #68
It can be found on the building, near the square.
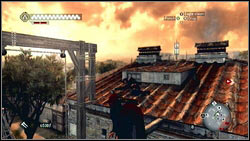
Flag #69
Use the mechanism to get to the roof, where the flag is hidden.
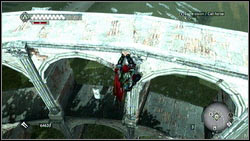
Flag #70
It is located in the middle of the portal.
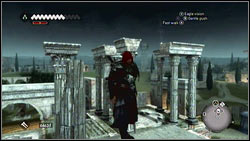
Flag #71
Jump form the portal to the pillar. Now, get close to the flag.
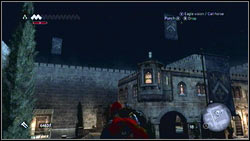
Flag #72
Go to the inner part of the the fortress and climb on the building with the flag.
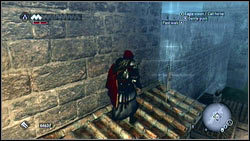
Flag #73
After leaving the fortress, turn right and climb on the building located near the gate. Go in the direction of the gate. The flag is located on the small roof.
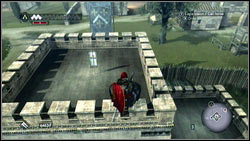
Flag #74
It is located on the top of the tower.
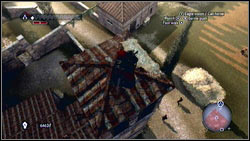
Flag #75
It is located on the tower.

Flag #76
It is hidden behind a stone pillar.
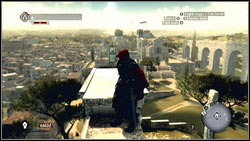
Flag #77
Jump from the pillar to pillar until you will get to the flag.
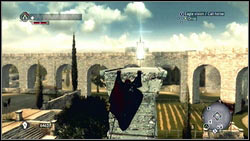
Flag #78
Repeat the same operation, but this time start from the wall located in the south. The flag is located on the highest pillar.
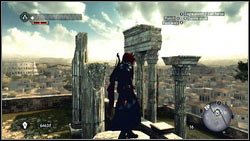
Flag #79
It is located on the stone aqueduct. Climb on it from the west side.
Flag #80
It is located on the connected pillars. Start jumping from the lowest one.
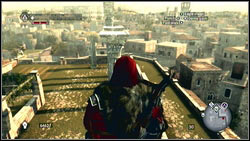
Flag #81
Get on the hill, located north of the flag and jump to the pillar. Now get to the flag.
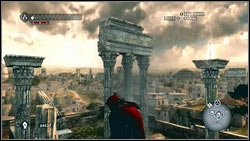
Flag #82
Climb on the chimney and jump to the pillar. Go west and you will get to the flag.

Flag #83
It is located on the pillar, east of the last flag.
Flag #84
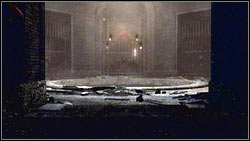
![After leaving the first room and jumping to the hole [1] enter the chamber and turn left - Detailed Description - p. 4 - Borgias Flags - Assassins Creed: Brotherhood - Game Guide and Walkthrough](https://game.lhg100.com/Article/UploadFiles/201512/2015121216084173.jpg)
After leaving the first room and jumping to the hole [1] enter the chamber and turn left. The flag is located on the statue [2].
Flag #85
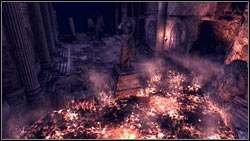
![When you will cross above the fire [1], go to the next chamber, climb on the stone blocks and enter the eastern wall - Detailed Description - p. 4 - Borgias Flags - Assassins Creed: Brotherhood - Game Guide and Walkthrough](https://game.lhg100.com/Article/UploadFiles/201512/2015121216084102.jpg)
When you will cross above the fire [1], go to the next chamber, climb on the stone blocks and enter the eastern wall. Go left and you will get to the flag [2].
Flag #86
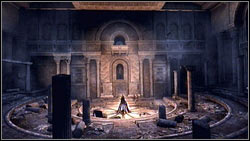
![After entering the chamber with the fire camp [1], climb to the exit - Detailed Description - p. 4 - Borgias Flags - Assassins Creed: Brotherhood - Game Guide and Walkthrough](https://game.lhg100.com/Article/UploadFiles/201512/2015121216084210.jpg)
After entering the chamber with the fire camp [1], climb to the exit. When you will be on the eastern wall [2], go south where you will find a small balcony. Jump to the pillar and take the flag.
Flag #87
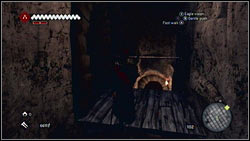
![At the beginning, you will be passing some wooden platforms [1] - Detailed Description - p. 5 - Borgias Flags - Assassins Creed: Brotherhood - Game Guide and Walkthrough](https://game.lhg100.com/Article/UploadFiles/201512/2015121216084204.jpg)
At the beginning, you will be passing some wooden platforms [1]. Find a path near the third one and get to the flag [2].
Flag #88
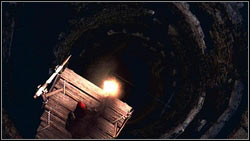
![After entering the hole [1], go through the corridor and enter the grotto with some platforms - Detailed Description - p. 5 - Borgias Flags - Assassins Creed: Brotherhood - Game Guide and Walkthrough](https://game.lhg100.com/Article/UploadFiles/201512/2015121216084248.jpg)
After entering the hole [1], go through the corridor and enter the grotto with some platforms. At the end, turn right. Go straight ahead and take the flag [2].
Flag #89
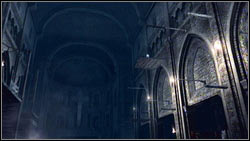
![In the huge room with the cross [1], climb to the exit until you will get to the northern wall - Detailed Description - p. 5 - Borgias Flags - Assassins Creed: Brotherhood - Game Guide and Walkthrough](https://game.lhg100.com/Article/UploadFiles/201512/2015121216084202.jpg)
In the huge room with the cross [1], climb to the exit until you will get to the northern wall. Climb on the wall located in the east. Catch the stick and get to the platform [2].
Flag #90
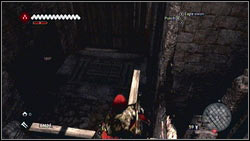
![Enter the eastern wall and some sticks [1] - Detailed Description - p. 5 - Borgias Flags - Assassins Creed: Brotherhood - Game Guide and Walkthrough](https://game.lhg100.com/Article/UploadFiles/201512/2015121216084320.jpg)
Enter the eastern wall and some sticks [1]. Stand on them and jump to the western wall. Find flag - it is located below [2].
Flag #91
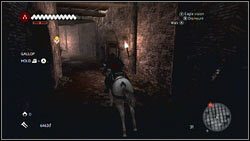
![In the room full of other people [1], run upstairs, turn right and jump to the left - Detailed Description - p. 5 - Borgias Flags - Assassins Creed: Brotherhood - Game Guide and Walkthrough](https://game.lhg100.com/Article/UploadFiles/201512/2015121216084346.jpg)
In the room full of other people [1], run upstairs, turn right and jump to the left. You will find red curtain there [2].
Flag #92
![At the beginning of the ride [1], watch the right side - Detailed Description - p. 5 - Borgias Flags - Assassins Creed: Brotherhood - Game Guide and Walkthrough](https://game.lhg100.com/Article/UploadFiles/201512/2015121216084316.jpg)
At the beginning of the ride [1], watch the right side. The flag is located on the platform [2]. Jump there from your horse.
Flag #93
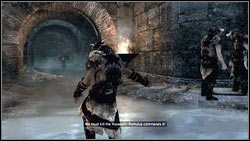
![During the chase, you will get to the room, where you will be attacked by some enemies [1] - Detailed Description - p. 5 - Borgias Flags - Assassins Creed: Brotherhood - Game Guide and Walkthrough](https://game.lhg100.com/Article/UploadFiles/201512/2015121216084380.jpg)
During the chase, you will get to the room, where you will be attacked by some enemies [1]. Kill them all and climb on the western wall. Move left and you will get to the stick with the flag [2].
Flag #94
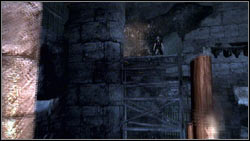
![You will get to the room full of enemies [1] - Detailed Description - p. 5 - Borgias Flags - Assassins Creed: Brotherhood - Game Guide and Walkthrough](https://game.lhg100.com/Article/UploadFiles/201512/2015121216084324.jpg)
You will get to the room full of enemies [1]. When you will get on the western wall, go south. You will find the flag near the gate [2].
Flag #95
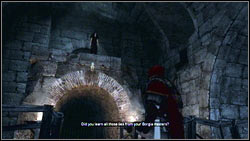
![After killing the leader [1], jump into the water - Detailed Description - p. 5 - Borgias Flags - Assassins Creed: Brotherhood - Game Guide and Walkthrough](https://game.lhg100.com/Article/UploadFiles/201512/2015121216084482.jpg)
After killing the leader [1], jump into the water. Find a crate [2], dive and get to the flag.
Flag #96
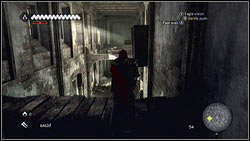
![When you will be in the higher part of the room, you will pass some open door [1] - Detailed Description - p. 5 - Borgias Flags - Assassins Creed: Brotherhood - Game Guide and Walkthrough](https://game.lhg100.com/Article/UploadFiles/201512/2015121216084464.jpg)
When you will be in the higher part of the room, you will pass some open door [1]. Jump to the other side and turn right. At the end, you will find the flag [2].
Flag #97
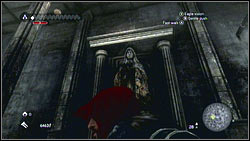
![Use chandelier to get to the statue [1] - Detailed Description - p. 5 - Borgias Flags - Assassins Creed: Brotherhood - Game Guide and Walkthrough](https://game.lhg100.com/Article/UploadFiles/201512/2015121216084499.jpg)
Use chandelier to get to the statue [1]. Climb on the monument, turn right and take the flag [2].
Flag #98
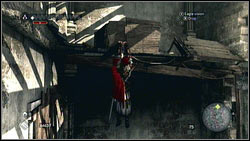
![Climb to the top of the room with no floor [1] and go south - Detailed Description - p. 5 - Borgias Flags - Assassins Creed: Brotherhood - Game Guide and Walkthrough](https://game.lhg100.com/Article/UploadFiles/201512/2015121216084447.jpg)
Climb to the top of the room with no floor [1] and go south. As a matter of fact, you will find the flag [2].
Flag #99
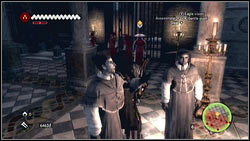
![While chasing the cardinal [1], you have to climb on the top of the tower - Detailed Description - p. 5 - Borgias Flags - Assassins Creed: Brotherhood - Game Guide and Walkthrough](https://game.lhg100.com/Article/UploadFiles/201512/2015121216084531.jpg)
While chasing the cardinal [1], you have to climb on the top of the tower. When you will be there, turn right. You will see a stone pillar there and a flag [2]. Climb on the wall and jump in the direction of the pillar. Ezio will catch the edge.
Flag #100
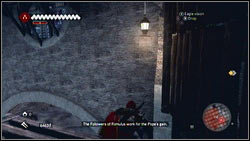
![During the chase, you will catch some lanterns [1] - Detailed Description - p. 5 - Borgias Flags - Assassins Creed: Brotherhood - Game Guide and Walkthrough](https://game.lhg100.com/Article/UploadFiles/201512/2015121216084545.jpg)
During the chase, you will catch some lanterns [1]. After the third one, turn left and take the flag [2].
Flag #101
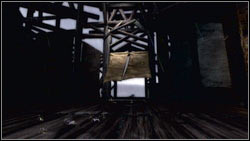
![After the fight, pass the curtains [1] - Detailed Description - p. 5 - Borgias Flags - Assassins Creed: Brotherhood - Game Guide and Walkthrough](https://game.lhg100.com/Article/UploadFiles/201512/2015121216084573.jpg)
After the fight, pass the curtains [1]. Before, you will jump on the ground press B and jump to the wooden stick [2]. Take the last flag.
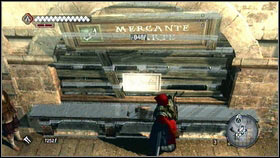
![During your trips in Rome, you can rebuild some buildings [1] - Introduction - Rome Restoration - Assassins Creed: Brotherhood - Game Guide and Walkthrough](https://game.lhg100.com/Article/UploadFiles/201512/2015121216084578.jpg)
During your trips in Rome, you can rebuild some buildings [1]. It is good to do it [2], because it is the best way to earn some money. Each restored building will generate some money from time to time. Remember that you can have only limited amount of money. Buy more bank slots to extend the limit.
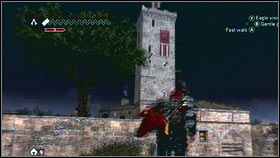
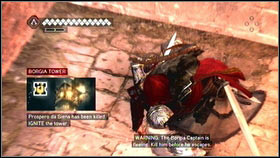
Sometime you won't be able to restore the building because it will be in the Borgia's area. To change this - destroy his tower [1]. At the beginning, find the commander and kill him [2]. If you will be too slow, he will run away - wait few minutes and try again.
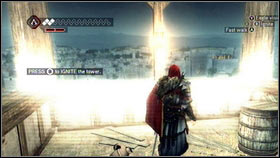
![After the execution, climb on the top [1] and press B to set the fire [2] - Borgias Towers - Rome Restoration - Assassins Creed: Brotherhood - Game Guide and Walkthrough](https://game.lhg100.com/Article/UploadFiles/201512/2015121216084619.jpg)
After the execution, climb on the top [1] and press B to set the fire [2]. As a matter of fact, you will unblock nearby buildings.
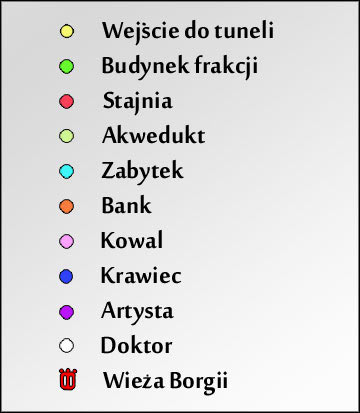
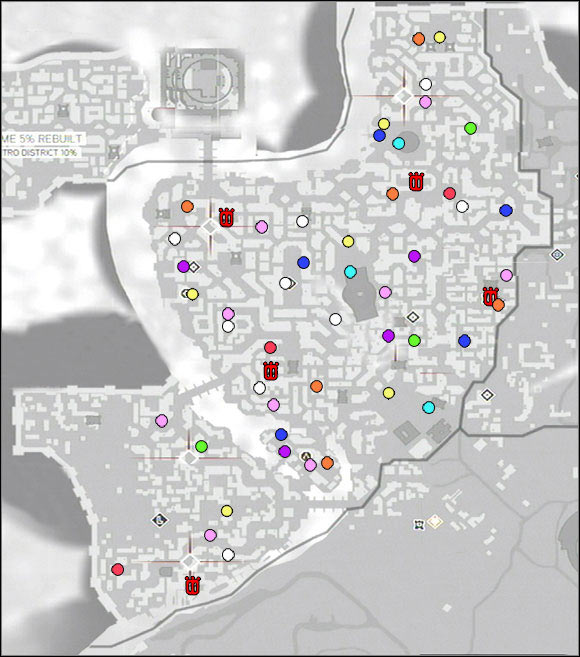
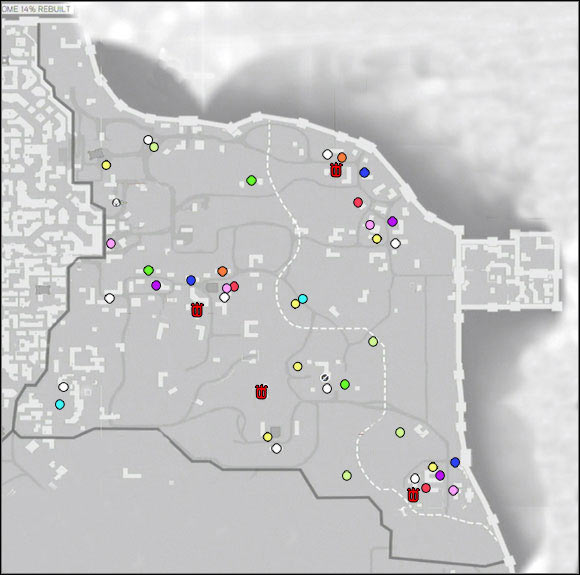
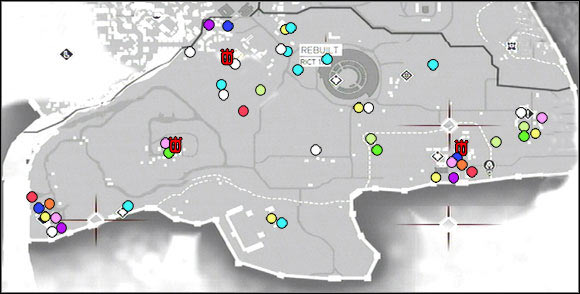
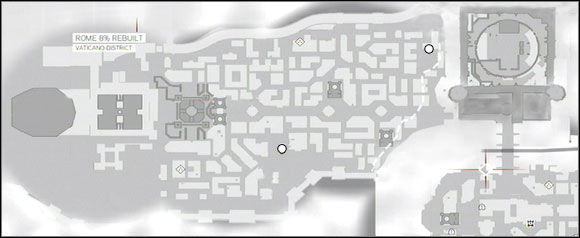


 Assassins Creed Walkthrough Memory Block 1
 Anna Game Guide & Walkthrough
 Aliens: Colonial Marines Game Guide & Walkthrough
 Assassins Creed IV: Black Flag Game Guide & Walkthrough
 Alien: Isolation Walkthrough Closing the Book