Guide to the Assassin's Creed IV: Black Flag will contain a complete description of the main storyline walkthrough with all secondary missions. What is more, you'll find here a list of ship wrecks and treasures with map to localize them easier. Richly illustrated solution will help you also hunt for rare animals and give hints about fighting enemies. In this guide you can find:
- description of completing storyline and secondary missions;
- list of hidden treasures and ship wrecks;
- hints concerning fight, both on land and on the sea;
- suggestions about managing the Jackdaw ship;
- description of other ships;
- the world map.
This unofficial strategy guide to Assassin's Creed IV: Black Flag contains all the basic information you need on the game. The guide explains the basics of melee combat and naval battles, contains a description of all of the main character's abilities and also tells about his equipment. You can also find a complete list of controls for all the major platforms as well as information on the system requirements for the PC version.
Using this strategy guide will allow you to learn easily how to become a skilled hunter, whether you're planning to look for prey in the jungle or in the sea. It's important to add that this guide contains a lot of high quality illustrations which should be helpful in understanding the major principles of the game.
Assassin's Creed IV: Black Flag - Strategy Guide is the first part of our enormous guide for Assassin's Creed IV: Black Flag game. The other two are Assassin's Creed IV: Black Flag - Walkthrough and Assassin's Creed IV: Black Flag - Maps & Secrets. Check them out!
This Assassin's Creed IV: Black Flag strategy guide includes:
UV & Lukasz "Salantor" Pilarski(www.gry-online.pl)

World map

Pause menu

Free aiming mode

Reload pistols

Sprint/shoot (while in the free aiming mode)

Information panel (hold down)

Weapon and item selection

Jump

Interact/Counterattack

Attack

Use the item/Fast shot

Movement

Eagle vision

Camera controls

Reset camera position

World map

Pause menu

Aiming mode (hold down)

Mortar (hold down)

Quick shot/Precise shot (hold down)

Telescope (hold down)

Weapon and tool selection

Accelerate/Travel through the Animus

Decrease speed/Leave the steering wheel (hold down)

Hide (hold down)
Swivel gun(hold down)

Ship controls

Camera controls

Reset camera position

World map

Pause menu

Fast-paced walk

Minimize/Maximize the communicator

Interact

Access recent messages

Movement

Camera controls

World map

Pause menu

Free aiming mode

Reload pistols

Sprint/Shoot (in free aiming mode)

Information panel (hold down)
Weapon and item selection

Jump

Interact/Counterattack

Attack

Use item/Fast shot

Movement

Eagle vision

Camera controls

Reset camera position

World map

Pause menu
Aiming mode (hold down)

Mortar (hold down)

Quick shot/Precise shot (hold down)

Telescope (hold down)

Weapon and tool selection

Accelerate/Travel through the Animus

Decrease speed/Leave the steering wheel(hold down)

Hide (hold down)

Swivel gun(hold down)

Controls

Camera controls

Reset camera position

World map

Pause menu

Fast-paced walk

Minimize/Maximize the communicator

Interact

Access recent messages

Movement

Camera controls
Assassin's Creed IV: Black Flag begins in 1715, soon after the Spanish Succession War. Player is a young and brave captain of pirate ship called Edward Kenway, who takes part in everlasting war between Templars and Assassins. Your hero will have to withstand dangers which may destroyed everything that pirates achieved.
Edward, first of Kenways to become an Assassin, was at the beginning a soldier in the navy, but at the end of Golden Era of pirates, he became a pirate. Trained to fight with Templars, who wants to find a mysterious place, which, according to the rumors, hides a power to take control over the whole world.
Storyline of Assassin's Creed IV: Black Flag, like in the previous parts of this series, refers to the real characters and historical events. Thanks to that, you'll meet the most famous pirates like Edward Teach, known as a Blackbeard, Benjamin Hornigold or Charles Vane.
For the first time in series, the game offers fully open world. Caribbean offers about 50 unique locations with plenty of activities.
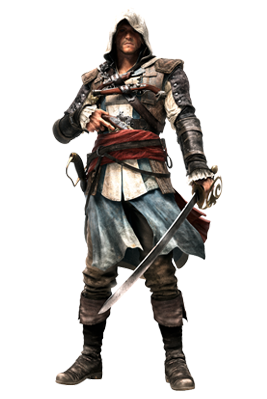
Edward Kenway - main character in Assassin's Creed IV: Black Flag, grandfather of Connor Kenway from Assassin's Creed III. He was trained by Assassins and later became a captain of pirate ship called Jackdaw. Young, brutal, charismatic and anxious for fame pirate who earned respect of the others.
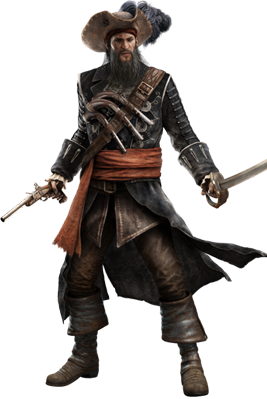
Edward Teach - known better as a Blackbeard. One of the most famous and fearsome pirates in the history. Born in 1680 in England, died in 1718 during one of fights. In this game, he is a companion of Edward Kenway.
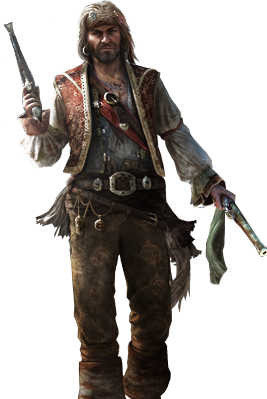
Calico Jack (Jack Rackham) - another famous pirate who appears in Assassin's Creed IV: Black Flag. Born in year 1682, from 1718 served under Charles Vane. Sentenced for death and killed in 1720.
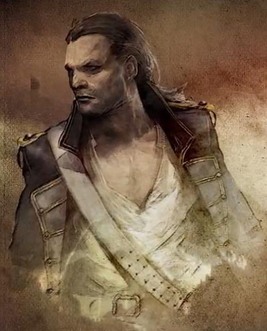
Benjamin Hornigold - English pirate and member of Templars, who was spreading fear and terror in years 1715 - 1718. Later on, he abandoned unlawful life and started chasing his old companions. In Assassin's Creed IV: Black Flag he appears as a companion of Edward Kenway.
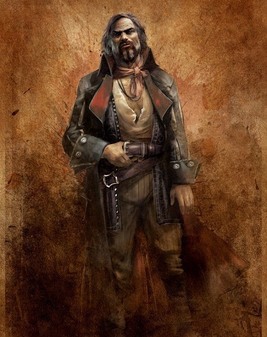
Charles Vane - British pirate and companion of Edward Kenway who was hunting Caribbean for few long years. In 1720 his ship was destroyed by a hurricane. Only two persons survived, including Vane, who was found after several months on a small island. One of the rescue crew had recognized him as a famous pirate - Vane was imprisoned and hanged in the November of the same year.

Anne Bonny - Irish pirate, born in 1702 in Kinsale. Her history is a bit mysterious and in the game she plays a role of the main character's lover. She was captured in 1720 but due to her pregnancy her death sentence was delayed until she gave birth to a child.
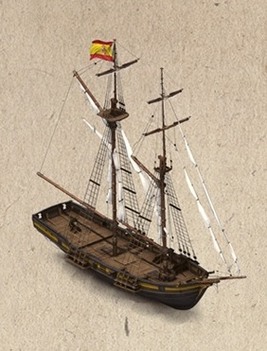
Assassin's Creed IV: Black Flag allows you for a free exploring of the Caribbean Sea. Due to this fact, game creators prepared several class of ships which may be found during sailing. The main ship is the Jackdaw of Edward Kenway, but it's not the only one boat you'll find in this game.
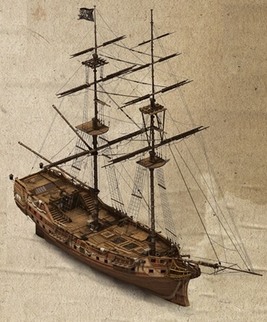
Edward Kenway's, the main character of Assassin's Creed IV: Black Flag, ship. Well equipped unit with a lot of cannons (from 16 up to 50), ram, flammable barrels, mortar and catenary and cannon balls.
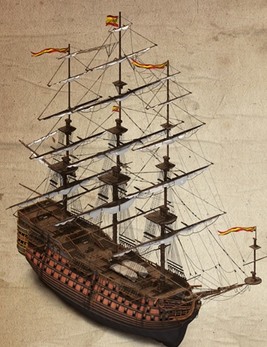
Powerful warship able to destroy smaller units with one attack. It uses the same weaponry as Jackdaw, which is: cannons (from 16 up to 50), ram, flammable barrels, mortar and catenary and cannon balls.
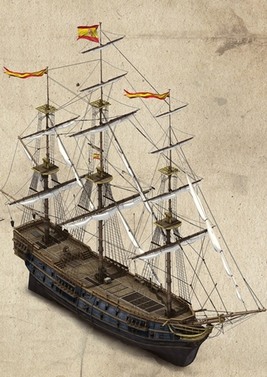
Medium-sized ship with a good mobility and lot of a battle possibilities. While fighting, it uses cannons (24 up to 46) and cannonballs.
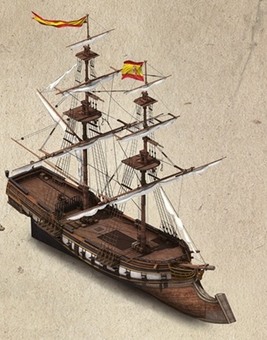
Brig is a medium-sized unit used mainly for flanking and cleaning up damaged ships. Crew of this ship may use 24 cannons and a ram.
Small unit, supporting fleet during getting enemies into ambush. It has small firepower due to having only flammable barrels and 6 to 8 cannons.
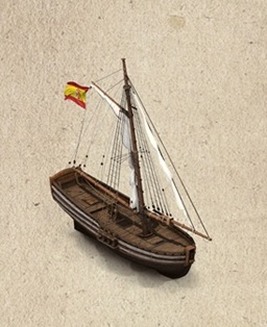
Gunboat is the smallest unit which you may find in Assassin's Creed IV: Black Flag. It has only two cannons, but is very mobile.
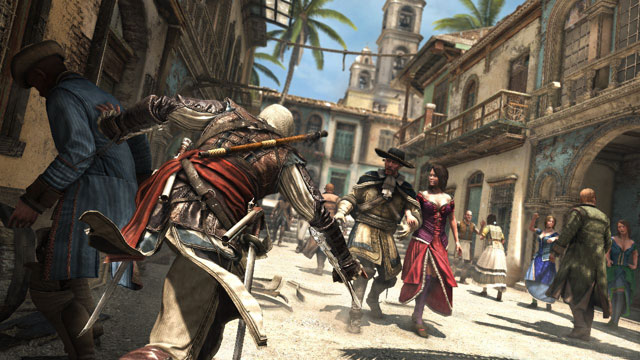
Assassin's Creed IV: Black Flag takes place on over 50 islands of Caribbean Sea, on which you can land. There you can find abandoned ruins, fish men villages, smugglers hideouts or small plantations. You will also visit three big cities: Kingston, Havana and Nassau. Each of them is characterized by the different architecture what will affect your character's way of moving.
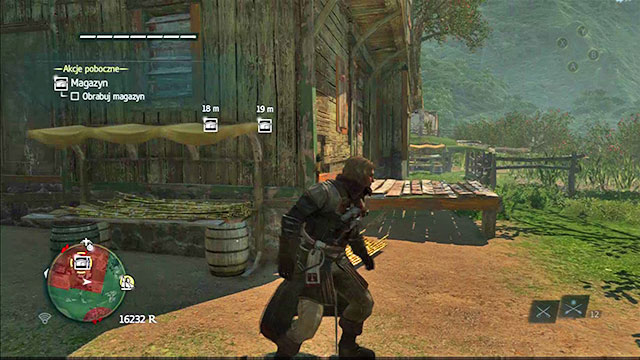
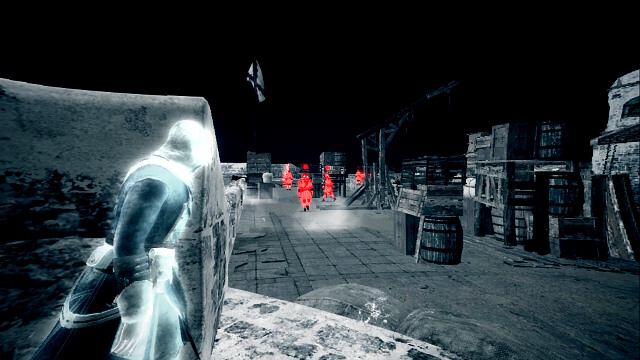
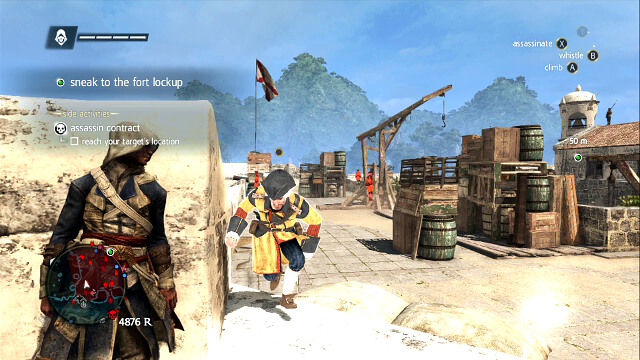
Edward learns how to loot forts in the third mission of sequence 5 but, he can do that earlier. After you reach the coast full of warehouses, a mission will start. It is divided into several stages. First, you need to find the person with the key. Enter the restricted area around the warehouse and initiate the eagle vision. After you have found the right person, you need to pickpocket them, or kill and loot the body. After you acquire the key, you need to approach the warehouse door and open it, while in the incognito mode. If everything works fine, Edward will steal from the warehouse.
You are additionally rewarded if you stay in hiding, which in the case of warehouses means that no soldier starts the alarm. The alarm bells can be destroyed after you approach them in the incognito mode.
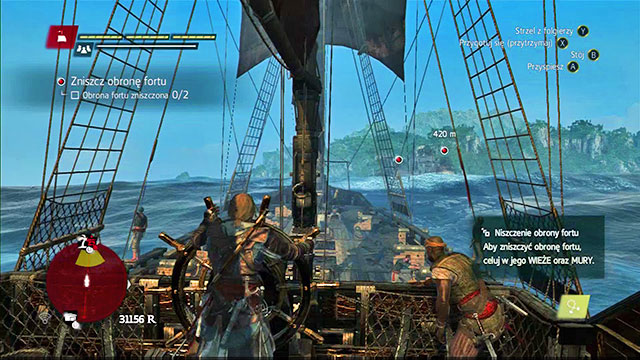
In order to attack a fort, sail up into its region. Note that the fortifications are in the restricted areas. There is a chance that the enemy ships join in also. The forts cannot be taken by surprise and that is why the barrage starts after you sail up to it.
There are three means of defense to each fort. The towers shoot cannon salvos at large distances. The walls shoot heavy shots salvos at short distances. Mortars attack over the longest distance and they are the only ones that cannot be damaged. Your aim, at this point, is to destroy all of the designated towers and walls.
The best tactics to adopt is to avoid the mortar fire and discharging your own mortar. Destroy the leftmost, or the rightmost tower and sail up to that spot. Once there, you can sail ahead, slowly, and destroy the successive fortifications, carefully, or sail ahead fast, avoid the cannon and mortar fire, while taking frequent U-turns. Be careful at the high-difficulty forts, because one salvo is capable of inflicting heavy damage to the Jackdaw's hull.
After you have destroyed the fortifications, the coast will be highlighted. Moor there and go up. The gates will always be locked so, you need to climb up. Depending on the kind of the fort, on the left, or on the right, there is a wall that you can climb onto.
Inside, there is a fight under way, between the pirates and the fort's crew. Your aim is to kill one to three officers, depending on the individual fort. The crew does not realize your presence, so you can sneak past them to reach your targets and eliminate them quietly. You can also attack them in an open fight but, with larger numbers of soldiers, this may be problematic. If necessary, use your allies support.
After you have killed the officers, you need to reach the conference room. After you force the door open, you only need to assassinate the fort's commander, and Edward will claim the fort for himself.
A seized fort works in the very same way as beauty spots. It reveals the hidden collectibles and places on the map of the Caribbean. Additionally, each fort becomes a field base for the Jackdaw. In there, Edward will be able to upgrade or repair the ship, as well as to take up the naval missions.
 Naval battles are visually stunning
Fighting naval battles is one of the key matters in Assassin's Creed IV: Black Flag. Being unable to defeat the enemy ships, you will make it more difficult for yourself to acquire valuable resources and money. Each captain of a pirate ship needs to know how to eliminate the other marine units and, this is what this chapter is devoted to explaining.
In comparison with its predecessor, which was innovative in this respect, in the fourth installment the options of conducting fire are very numerous. Suffice it to say that now you do not need to set your vessel with the side board to the enemy sailing ship, various actions can also be performed during pursuits or while escaping from the enemy.
The Jackdaw offers the following means of destruction:
Round shot - the basic long-ranged weapon, which allows you to strike the enemy with the onboard cannons. The game allows you, not only, to determine the attack's direction, but also to correct the projectiles' trajectory, using the right analog stick. It is strongly advisable to increase the parabola, while exchanging fire on rough sea, over which the discharged cannonballs move. The projectiles are in no way limited, preparing the cannons to be fired again takes merely several seconds.
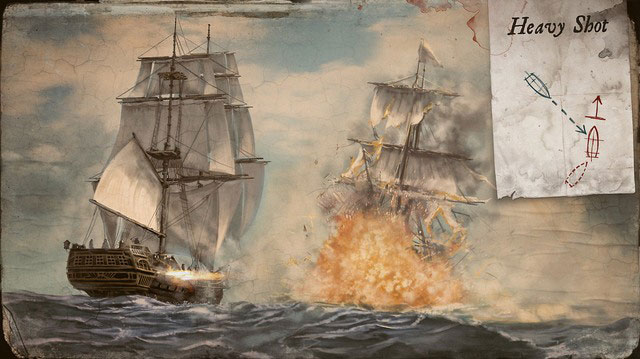
Heavy shot - it becomes available after you buy the upgrade. They wreak immense destruction in the enemy ship's hull, but they need to be fired at close range. There is no way in which Kenway could control the trajectory, which is why firing them requires quite a lot of skill at maneuvering the ship (you need to set the Jackdaw with its board side towards the enemy and take care in order not to aim the shot at water). The Jackdaw can pack a limited number of the cannonballs but, the limit can be increased after the appropriate investments with boat builders.
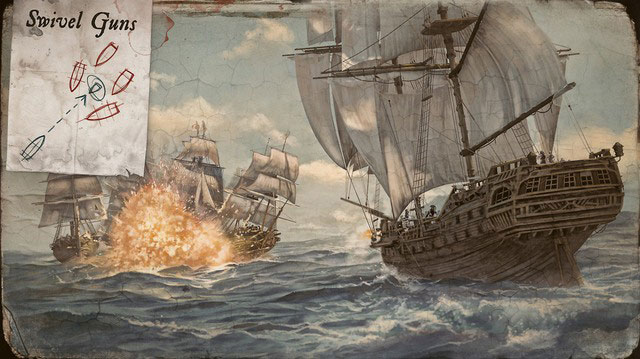
Swivel gun - an excellent tool for the demolition of the hulls and masts of the enemy ships. You will be able to fire this weapon only after the vulnerable spots in the enemy vessel are exposed. Using the swivel gun requires pressing the Y button on the game pad (you will be notified of the possibility of using it, by means of an icon) and releasing it at the moment at which the two reticles displayed on the screen overlap. The skillful use of this weapon makes the battle easier and it often tips the scales to Kenway's advantage. Upgrading the swivel gun enables Edward to fire more shots per turn.
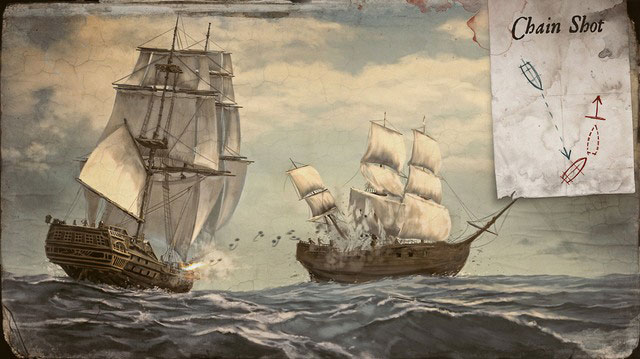
Chain shot - firing of the cannons on the bow, on the bowsprit's both sides. Due to the specificity of their situation, this kind of shots is predominantly used during pursuits, or while approaching the enemy ship. The chains demolish the mast and, what follows, they influence the vessel's speed. Therefore, they are an ideal weapon for the initial phase of the battle. The number of shots that you have is heavily limited - to increase the limit, you need to buy the appropriate upgrades. Just like in the case of the round shots, Edward can correct the trajectory before firing the cannons.
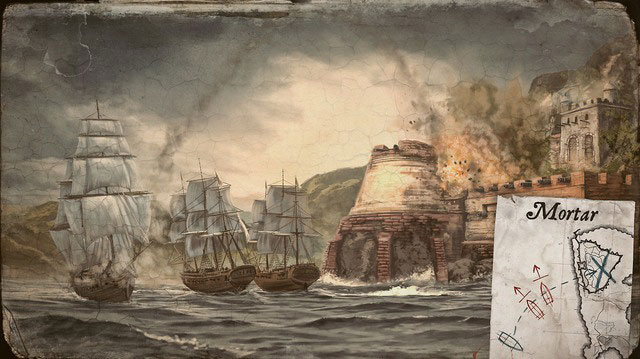
Mortar - a long-range weapon that is unavailable as a standard, used chiefly at the beginning of the battle (often it is the mortar salvo that opens the skirmish). The projectiles take quite long to reach their target but, they in turn wreak immense havoc in the hull of the enemy ship. Using this weapon takes some practice , while attacking you need to consider the speed of the ship that you are firing at. The supply is, of course limited but the limit can be increased by investing in upgrades.
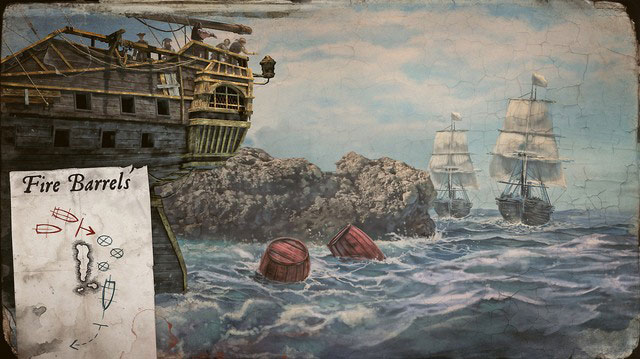
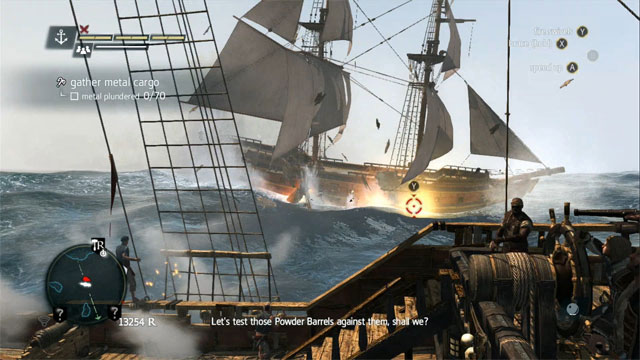
Fire barrels - thrown off the stern in pairs. They float on water and explode on contact with the enemy ship. Edward is also capable of exploding the barrels, using the swivel gun, on condition that the target is within reach. The yield of the explosives can be increased by making appropriate investments into upgrades. The weapon of low popularity, due to the problems with using it properly, but of big value during escapes. A smart player may use them to mine the area of the fight, and maneuver the ship in a way that allows for the effective use of their potential, afterwards.
Ram - a sturdy reinforcement to the bow makes it a serious argument in naval battles. If upgraded in an appropriate way, the ram is capable of dealing heavy damage at each contact with the enemy ship. Still, using this "weapon" properly requires a bit of ado - setting the ship for ramming is usually time-consuming and not as profitable as the classical barrage. Nevertheless, it is a good idea to invest in this upgrade - it is relatively cheap and can be useful at the least expected moment.
Boarding is a process that allows Edward take control of the ship that he attacks, and loot it for its cargo. This the only effective way to acquire the entire loot. If, during the fire exchange, you sink the ship, only half of its cargo will float on the water's surface - the other half goes to the bottom alongside with the smoldering vessel.
To think about boarding in the first place, you first need to immobilize the ship, i.e. damage it to the state where the condition meter is at its critical level. (marked in red). Destroying the ship makes it defenseless in the sea battle - the crew is unable to conduct fire from the deck guns. While wreaking havoc, you need to be extra careful, because one accidental salvo will send the ship to the bottom. You also need to know how to sail up to such a ship to prevent ramming into it by accident.
 The bleeding out.
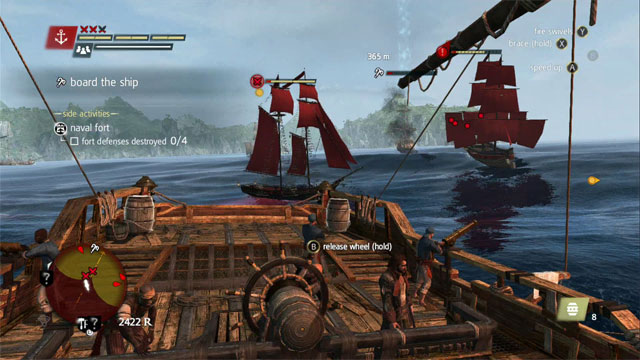
Once the Jackdaw is sufficiently close to its victim, the game will inform you that you can start boarding the ship. Starting the process causes Edward to leave the steering wheel automatically, the crew to throw the hook-and-ropes who, after coming closer to the vessel, start to jump aboard the enemy ship. To seize the ship, you need to perform all of the following:
Before you make it over to the enemy unit, it is a good choice to use the swivel guns, which are located on both side-boards of the ship, near the steering wheel. The number of projectiles is restricted to five so, you should shoot only when you are sure that the cannonball will not go to waste. Hitting directly into the hull, automatically eliminates the enemy from further battle - still, you can achieve even better results by aiming into the deck, right next to several enemies standing in a group.
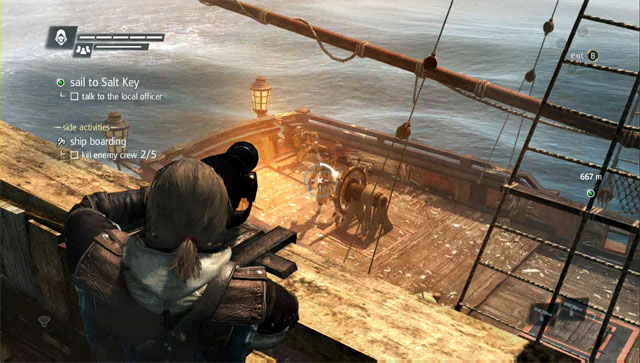 Before you go aboard, it is a good idea to shoot the crew with the swivel gun
The game allows you to seize the enemy ship without the necessity to engage in the naval fight, regardless f the size of the vessel. To use this option, Kenway needs to make it over to the ship and kill out all of the crew, before he lays down the fire from the Jackdaw. The sailing ships move faster than Edward and that is why your character needs to be present at the projected course of the vessel selected for the attack, and climb onto the hull.
The greatest threat are the gunners, who are located on the masts, that is why you need to dispose of them in the first place. Then, you need to start eliminating the enemies on the deck - best by using the pistol to shoot at them safely from above, or employ the classical attacks from above. Of course, there is also an option of foolhardy landing among the opponents and dealing with one-by-one with your blades. In this case, however, you need to watch yourself, especially while around the officers who, apart from blades and pistols, are also packing bombs. The larger the vessel the more difficult the crew to eliminate.
Disposing of everyone will immobilize the sailing ship. The enemies will not only be incapable of sailing ahead, but also to defend against possible attacks. Therefore, it suffices to return to the Jackdaw, take the steering wheel and launch a salvo towards the immobile ship. Regardless of its size, a well-aimed shot will deplete its energy down to the red region. If you approach the unit after you have fired at it, and start the process of boarding, you will seize it immediately, without the necessity to fight the crew again.
 Do not put the friends in harm's way and get to it yourself
Regardless of how you seized the ship, a successful boarding will grant you the right to decide on the ship's further purpose. There are three available options:
You can aboard at any given moment, also when you are fighting not only one ship, but more of them. After you issue the order to seize the enemy vessel, the Jackdaw becomes invulnerable to damage, the remaining ships deal no damage. An approach like this means that, with a bit of thought, you could repair your ship during the battle. It only takes seizing the immobilized ship, decide to make the repairs and voila! - after you resume fighting, your health bar fill be back to full.
What works very well while boarding is the smoke bombs, because the battles take place in a limited area and Edward is almost always surrounded by enemies. Of course, this facilitates their elimination.
The carefree destroying of ships will attract the attention of the European powers. Its level is called, in Assassin's Creed IV, the infamy. The higher it is, the stronger forces are set out to get you at sea.
Infamy is divided into several levels, symbolized by the crossed-swords icons in the upper-right corner of the screen. The game cannot tell the difference of between the ships that you destroy and equal treatment is applied to all acts of violence towards merchant ships, both Spanish and British. This means that in Black Flag you can get on the nerves of more than one nation.
 The hunter ships with the characteristic crimson sails
Achieving the first infamy level (the red icon) means the appearance of hunter - a well armed ship with the characteristic crimson sails, which will start chasing you straight away. The ship appears only a few hundred meters off the Jackdaw so, in most cases, the battle is unavoidable. You can, of course, escape from the hunters but, as long as the infamy level is active, the nations will not cease in their attempts to get you. New units will be appearing in the place of the old ones, in various time intervals - this also concerns the ships that you manage to send to the bottom.
Depending on the infamy level that you achieve, various units will be assigned to the aim of hunting you down. At first, this is going to be the brig only but, if your deeds increase your pirating score, also different ships will join the hunt. All of the hunter ships come equipped with upgrades, when compared to the basic units of this type, but for an experienced captain these should pose no problem. In fact, what seems most problematic is the necessity to fight itself, because most hunters appear at the most inopportune moments, e.g. while sending merchant vessels to the bottom.
Infamy level can be brought down in two ways. You decrease the level by one by boarding any ship, on condition that you are not on a mission at that point. This also goes for the hunter ships - therefore, you can seize the pursuing ships and obviate another threat straight away.
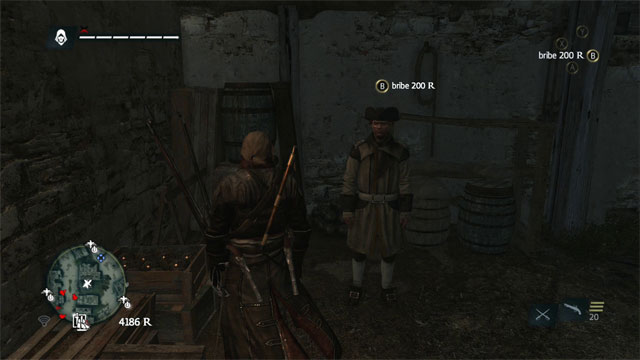 The amount of the bribery depends on the infamy level but, the amount is not steep
Also, royal envoys can bring down the infamy level. These emissaries can be encountered in most harbors scattered around the Caribbean, and also in every fort. The corruptible officials are marked on the map with an icon of white crossed swords.
Keeping the infamy level low is profitable only at the initial stages of the game, when each potential battle poses a threat. Then, it actually pays off to keep the level high, because the hunter ships are an excellent source of metal - a material that is sought after, in the context of upgrading the Jackdaw. If well armed, Kenway's ship is strong enough to eliminate the enemy before he manages to come close.
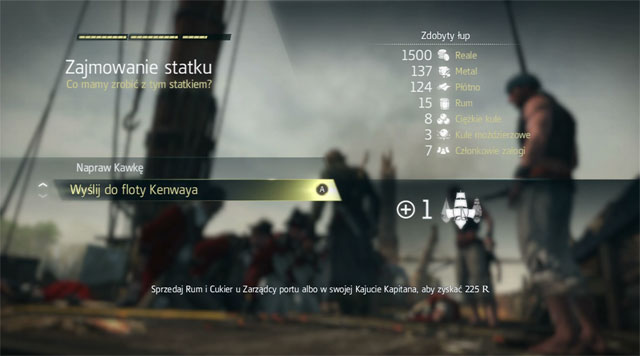 The seized liner will be dispatched to join Kenway's fleet
The ships that you seize, by boarding, can be enlisted in Kenway's fleet, on condition that your computer, or gaming console, has a direct connection with Ubisoft's servers (you are notified about that by the highlighted connection icon, right next to the minimap). It is worth mentioning that, in the case of Xbox 360, you do not need the Xbox Live gold membership. Using this functionality, however is not possible in the offline mode, the system must be hooked up to the internet.
 The overview of ships in the fleet
The fleet can be managed in the Jackdaw's cabin. The ships that you seize make it to the virtual pool immediately and, it is up to you if you sink the vessel or include it in the fleet. Including the ship requires you to own an empty dock - if you do not have ne, you can buy it by paying the amount required by the program (the amount increases over the course of the game). There also is an option to exclude one of the ships from the fleet, and replace it with another one. Each instance of destroying a ship gives you gems, the basic currency within this module. In the fleet management mode, you never spend the real money, also completely different goods function here.
Money is earned by means of dispatching the ships, included into the fleet, to cities located in both Americas, Europe and Africa. At your disposal, there are several trading routes of various length - the more distant the destination harbor, the longer you need to wait for the ship to return. The routes are to be unlocked successively, with your progress with the missions, which means that you gain access to another route after you complete the missions of the previous route.
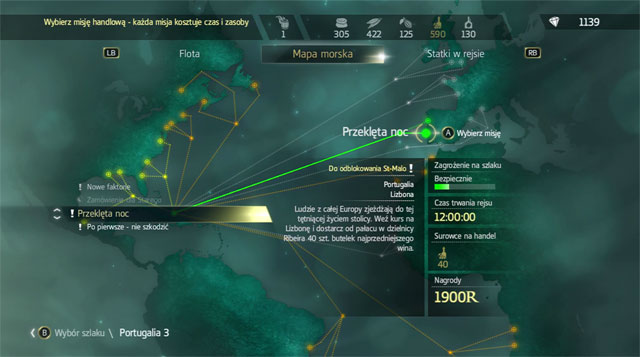 The Cursed Night mission is available, and you meet the requirements to start it
To start a mission, you need to meet two basic requirements - the ship selected for this route must have its hold spacious enough, it is also necessary to have the necessary amount of resources, to barter with. The game automatically calculates your chances for the successful completion of the mission, and also the time required for the voyage. Both of these factors are influenced by the ship's class. A bigger vessel will have less problems dealing with all the adversities, but it is slower. The duration of the longest voyages can exceed the real-time 24 hours.
 Each ship offers bonuses that can be useful in fight
The experience says that it is better not to take unnecessary risk and, that is why, you should always dispatch the ships that provide a 90% success probability. You should also remember that the voyage may be speeded up, by asking your friends for help. A one-time favor like this can speed up the entire escapade by as much as several hours. The additional advantage in helping is the guarantee that you receive a fire barrel, which proves useful in the course of the battles in this mode. This also concerns you so, speed up your friends' voyages, always when you get such opportunity.
In the Kenway's Fleet mode there also is a minigame of the naval battles, in which the ships of your fleet participate. There is only one purpose of such battles - decreasing the risk of taking such routes, which only increases your chances to complete the mission. To be able to operate on the major routes without any obstacles, it is enough to maintain the risk factor at the medium, yellow, level.
 Each ship offers bonuses that can be useful in fight.
Only ships that currently are not on their run, may take part in naval battles. Both you and your opponent can select up to three ships, of any type. The ship's class determines how fast it is going to enter the fight (the battles are turn-based), what damage it can deal and how much it is resistant to the damage dealt by the enemy. Experience proves that it is best to use liners and frigates for this purpose - there is no point in entering the fights with schooners or brigs, because the risk of losing them is too great.
 The liner has already taken two salvoes and saved the accompanying frigates from taking damage.
If you have fire barrels at your disposal, you can use them regardless of the order in which the ships joined the fight. Unfortunately, you have no influence on where the barrel lands so, you need to count on your luck here. The same goes for the standard fire. The captains of ships determine the targets for their attacks on their own and you do not have say here. The minigame is simple enough for you to learn its rules in no time at all and, if you use liners only, the chances that you lose practically drop to zero. Finally, it is worth remembering that after each battle, you need to repair the ship. In the case of liners, the repair costs are high but, the gem supply can always be replenished, by seizing more ships by means of boarding, and exchanging them for the trinkets afterwards.
The lack of money is one of the main problems that you need to face in Assassin's Creed IV: Black Flag at the initial phase of the game. The lack of cash impedes your actions considerably - without it, you are, not only, unable to get new equipment for Edward, but also to upgrade his ship, replenish ammo, hire courtesans that facilitate the city exploration or hire bodyguards. Making money quickly is, therefore a key matter, especially at the beginning when your needs are the greatest.
In Assassin's Creed IV there are many various ways to obtain money. Below, however, we have focused on those that you should take into consideration, predominantly at the beginning of the game.
 The telescope allows you to see what kind of goods the enemy ship is carrying
Sugar and rum are the two goods that you can sale without any restrictions, because they are not required to upgrade the Jackdaw. The easiest way to obtain goods is by seizing enemy ships (a successful boarding lets you obtain 100% of the cargo; in case of sinking the ship you only get 50%). You get to know about what a ship is carrying by means of the telescope. At the initial stages of the game, there is not much opportunity to show what you are made of, because the Jackdaw is too weak to take on frigates and liners but, schooners and brigs are within its capabilities. You can also obtain goods by looting plantations - however, you will obtain this way less sugar and rum than you would have during naval battles. You can sell the looted goods at merchants, who are stationed in each major location, or directly at the captain's cabin aboard your ship, if you are far away from the mainland.
It would seem as though opening chests is not too profitable, because there is not much money inside (you need to be lucky to loot a chest for more than 500 reals). This is not true, however. As much as it is true that the containers are not filled with gold up to brim, but there are many of them, on the other hand, especially in major settlements and cities and, what is even more, reaching them causes virtually no problems at all. There is one more, important , asset to them - it is easy to determine their whereabouts using the map. You only need to climb onto a beauty spot to reveal the locations of all the chests around. At the initial stages of the game, chest hunting should be your priority.
 Chests - there is not much gold in them, but they are plentiful
On many islands and in cities, you can find pigeon coops, where you can receive simple assassination contracts. The assignments are about eliminating a target and they always carry a considerable bonus if you manage to complete the assignment without being detected. And this is not too much of a problem, in Black Flag, due to the numerous spots where you can hide and use the elegant weapons, like darts. The pigeon coop contracts can be completed virtually since the beginning of the game, which is its arguable asset.
Apart from the regular ships, across the Caribbean Sea, you can also find the ships marked on the map with "R", which carry nothing but gold (the amount varies, usually it is around several thousand reals). Attacking such ships is quite risky, they are always escorted, and the sailing ships themselves are well armed. At the initial stages of the game, it is best to swim up to such a ship, eliminate the entire crew and take to the traditional attack afterwards. This saves a lot of problems and makes the entire process easier.
You can forget about gambling - it is time consuming and not as profitableRight at the outset, it is a good idea to teach yourself to loot corpses, and it is not necessarily because of the money, because you do not get much from that. Corpses are, first of all, a perfect source of ammo (bullets, smoke bombs and various darts) so, thanks to looting, you can save a lot of money.
What is the most profitable is destroying a legendary ship - the yield is 20000 reals. However, there is no point in attacking such ships at the very beginning of the game. As soon as you are able to pose threat to such ships, the money will not be your problem anymore.
In the Abstergo headquarters, there are 33 hackable computers. You hack some of them during the main campaign mode, and the remaining ones are optional. You gain access to all four floors of the company, and also to the computers, only after you complete the game's storyline.
The computers are divided into the regular ones and servers. The difference lies in the method of hacking. In the case of the regular computers, you only need to complete one minigame and two, in the case of servers. After you complete the minigame, you gain access to the Abstergo files, concerning the Black Flag project, as well as the older ones.

In the Abstergo headquarters, there also are 20 sticky notes. They become visible, and available for collection, only after the completion of the game's main storyline.
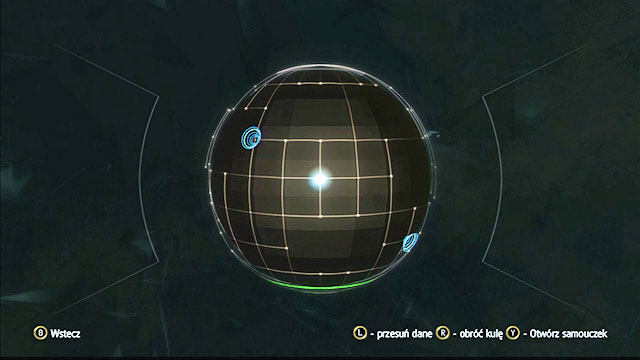
Your task is to carry the sphere towards the green line and cause endless looping, which means a situation in which the sphere rolls only over the green line. The sphere rolls in the direction determined by you, in a straight line and stops only after the further rolling is impossible. The size of the sphere and the number of green lines depend on the difficulty level of the puzzle. With the easier puzzles, there are two.
On some stages, there also are portals. After you reach them, the sphere transfers you into the other one, marked with the same color and it will continue rolling. The sphere transfers between the portals in the same direction - if, it rolled to the left while moving towards the first one then, after it is transferred into the other one, it will continue rolling to the left.
In the descriptions of each puzzle of this kind, it has been stated in which direction the sphere should roll, from the moment that the minigame starts.

The easiest of the minigames. Your task is to arrange five digits in such a way, so as their product is equal to the number displayed on top. The description of each puzzle has been supplied with the appropriate combination.
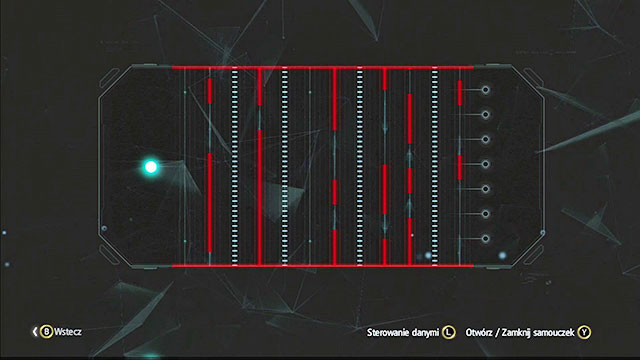
The most difficult of the minigames. Your task is to carry the sphere over from the left to the right. The sphere moves only to the right, up and down, and always one step at one time, towards the destination.
What you see on the screen is a series of vertical lines, which are stops on your way to the other side. The thin gray lines are the safe spots. They also are the only ones which do not move. The remaining ones move constantly up or down. The sphere is also moving towards a given direction, which means that if you wait for too long, you may be caught by the red line on the edge of the display.
The red lines are the dangerous ones. After you touch to them, the sphere will appear back at the beginning. Your task is to put the sphere into the gray gap between the red lines and make it over onto the next line, before the sphere hits the edge of the screen. Note that the sphere is influenced by the direction and the speed with which the line moves. The gray lines are static so, the sphere moves in an ideal straight line. In the case of the moving lines, if moved, the sphere moves slightly in the direction, in which the line that it is leaving moves. For this reason, you may miss the safe spot and have to start over.
The crooked white lines turn into red ones, at the predefined intervals. Your task is to hop to them when they are white, and leave them before they turn red.
It does not matter which slot on the right is your destination. After you reach any of those, the minigame finishes.
Each land animal in the Caribbean drops two things: a bone and fur, hide that is characteristic for that animal, or something alike. You need to hunt for each one of them twice, or even three times sometimes, before you are able to craft all upgrades. The exception are the bones that you can use to craft darts.
 Edward the assassin, crocodile hunter.
Rabbits, ocelots, hutias and iguanas are small and easy to scare. Iguanas and hutias are a bit slower, thanks to which you can catch up with them and kill them with the blades. But rabbits are much faster and escape as soon as they see you come closer. The most effective tactics is to skulk in waiting for them, wait until the animal stops and shoot it. One bullet should do. The situation is similar in the case of deer and boars, but these are larger and easier to shoot.
Capuchin , howler monkeys and red howler monkeys are the only ones that live on trees. They hide well and that is why you should use the eagle vision to spot them and kill them from the appropriate distance. Chasing them over trees makes not much sense especially that Edward will not be able to use his weapons anyways. Apart from that, they are quite sluggish so, there is no need to chase them.
Regardless of the color of its fur, the jaguar is an aggressive animal and will launch at Edward at sight. Whenever you are attacked, you need to complete a QTE event. If you succeed, the animal will fall to the ground and escape, to be back after a while. If you fail, the animal will kill you. A properly performed QTE event lets you avoid taking damage. You need to approach the jaguar silently, and shoot just like the smaller animals. Another method is to succeed at the QTE, catch up with the animal and slay it with the saber but, due to its speed, the animal can easily escape you.
Crocodiles behave similarly to jaguars, with the exception that they swim in the marshes. They do not attack if you do not enter the water. That is why, in their case, it is best to stop on the bank and use the pistol. The animal is quite big so, you should not miss.
Each one of the five big fishes is to be encountered in two spots in the Caribbean. The exception is the Bull Shark that can be found in four of them. This is how many times you need to hunt for each of the fishes to be able to craft all of the upgrades that require the trophies which you won on them. The map gives you spots where you can find each fish, right at the beginning. After the first hunting, the fish changes its location. The new spot where you need to hunt for it is near the previous one. This way, the fish cannot leave the area assigned to it. In other words, there is no such situation in which the Great White Shark from the South of the map moves over to the North, after several hunts.
If the new spot is in the area controlled by a seized fort, it will be shown on the map.
Each of the hunts for the big fish consists of several phases. The first one is the attempt to shoot the animal with harpoon, with rope tied to it. If successful, the animal starts to flee and drag the boat behind it. Keep shooting harpoons at it but, be prepared that, sooner or later, the animal breaks loose, regardless of whether you kept shooting at it or not. After it escapes, the animal will attempt to attack the boat. If you manage to hit it again, you will attach the rope and the whole thing starts over. If not, the boat will be damaged. The hunt finishes after the animal has lost all of its health points.
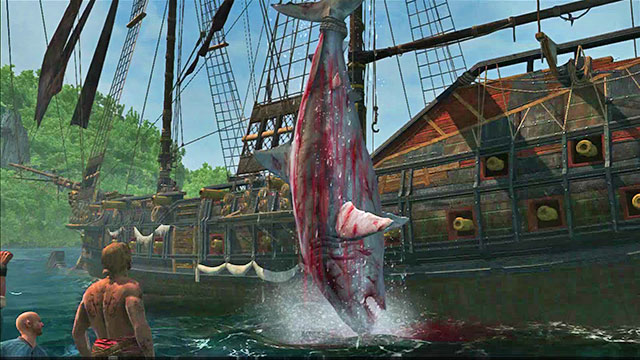 A successful hunt.
Keep looking for the pools of blood that the wounded animal is leaking, they will make the hunt easier. In the case of some of the fishes, it is very important because, apart from blood, you will be able to spot nothing else. Also, remember that you need to correct the course in which you should steer. Throw the harpoon a bit in front of the fish, instead directly into it. Do not wait for the opponent's move, because the fish will attack the boat even if you leave it alone. The exception is the situation in which you have just started the hunt. In such a case, the fish will show no interest in you.
You can hunt for the Bull Shark and the Hammerhead Shark without any upgrades. When it comes to the Killer Whale, it is best to upgrade both your harpoon and the boat. If you do not feel up to it, hunt for the Humpback Whale only after you have upgraded to the elite harpoon. A supply of harpoons also will come in handy in any case, because the smaller fishes are difficult to hit, due to their speed, and the bigger ones have more health points.
The Bull Shark
During the chase, it jerks to the sides strong. Also, often changes directions, which make it difficult to hit it again. In spite of that, it takes quite a lot of time for it to break the rope. Its attack consists of swimming up to the boat and ramming against it. It will be perfectly visible then, as it swims right below the surface.
The Hammerhead Shark
This one is quite big and well visible, just like the Bull Shark, it jerks the rope a lot after it is hit. Still, a lot of time needs to pass before it manages to break loose. After it does, it approaches you in zigzags and rams the ship. Its health is at the level of the Bull Shark.
The Great White Shark
This is a more difficult target to get, than the Bull Shark. It is fast and it jerks a lot and also has more health points. After it breaks loose, it attacks in two ways: by ramming into the ship, which gives you some time for a counterattack, or jumps out of water right in front of it. In the latter case, you will have very little time to respond.
The Killer Whale
Attacks in a way similar to the Bull Shark or the Great White Shark, but it inflicts more damage and has more health points.
The Humpback Whale
This huge, and the toughest fish is the most difficult to hut. In the initial phase, it swims far away from the boat and rarely appears above the surface. It can also be spotted as it is hiding under the surface but, it is difficult to do that. The easiest way to hit it is when it moves its tail above the surface. After it breaks loose the whale does not charge, but it jumps out of water right in front of the bow. You'd better be prepared for that, or the boat will sustain heavy damage.

This guide to Assassin's Creed IV: Black Flag - walkthrough, is a complete source of knowledge about the game's main plot. This guide decries, step by step, the successive elements of the individual missions and focuses on the thorough description of the most difficult moments in the game. It also includes an explanation of the less obvious gameplay rules and informs what to do to perform a given action. It also includes a number of hints that concern the methods of completing individual missions. The guide will lead you through all of the sequences in the game and help you choose the quickest and the most effective paths and fighting tactics. A lot of attention has been paid also to the optional missions in each main mission, so as to enable the player to complete the game in 100% without any problems. Apart from the main sequences in the game, also the short tasks in the Abstergo Entertainment office that serve as an interlude to the main story line, including the mini-games.
Assassin's Creed IV: Black Flag - Walkthrough is the second part of our enormous guide for Assassin's Creed IV: Black Flag game. The other two are Assassin's Creed IV: Black Flag - Strategy Guide and Assassin's Creed IV: Black Flag - Maps & Secrets. Check them out!
This walkthrough includes:
Arek "Skan" Kaminski (www.gry-online.pl)
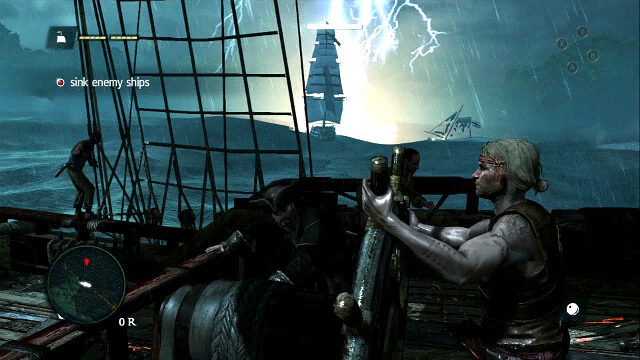
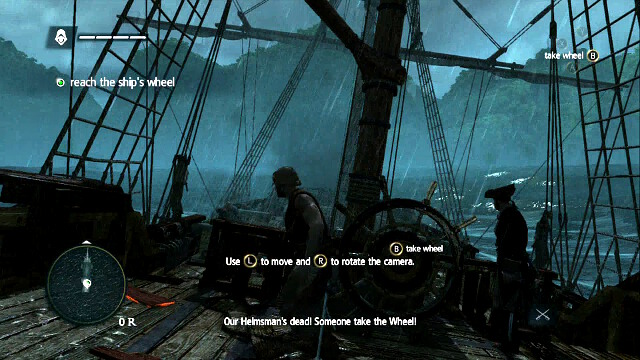 Pay attention to the information about the controls
Quite literally, the game tosses you right in the middle of the action. You first need to take over the steering wheel. Ignore the nearby explosions and get towards the bridge straight away. Remember that you can use the "run" button straight away to give speed to your actions.
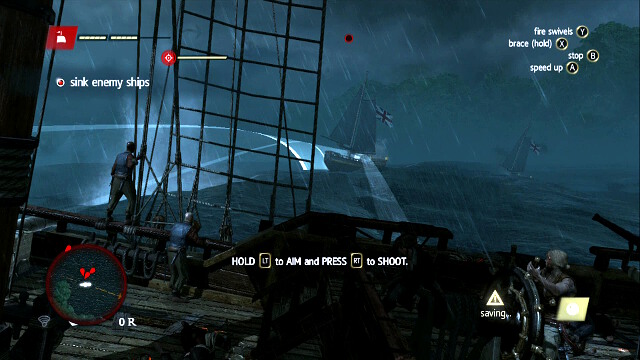 Try to aim at the hull
After you have taken the steering wheel, you will have to destroy the enemy units. You first need to aim the cannons by holding down the aiming button and determining the flight path for the cannonball, using the right analog stick. You shoot with the right trigger. If the distance to the target is greater, also take into consideration the time necessary for the cannonball to reach its target and aim a bit ahead of the ship, instead of at the hull itself. You can deal the most damage by hitting the hull itself. Remember that, apart from controlling the cannons, you are still steering the ship itself, using the left analog stick. Keep an eye on the minimap to prevent colliding with the mainland and to set the ship at the right angle, relative to the other ships.
 The enemy ship will be thunderstruck
The smaller ships are not too much of a challenge and they can be destroyed with a single, well-aimed shot. Afterwards, you will have to square off against the enemy's flagship. Fortunately, it will soon be thunderstruck, which will damage it severely at the very beginning of the battle. Still, the enemy will remain relatively dangerous and he will respond with fire from the cannons. Whenever you are under fire, press and hold down, the button for hiding, in order to minimize damage. Shoot whenever it is possible (the cannonball icon in the bottom-right corner of the screen lets you know when the cannons are loaded). To destroy the enemy ship, you are going to need, around, four salvos.
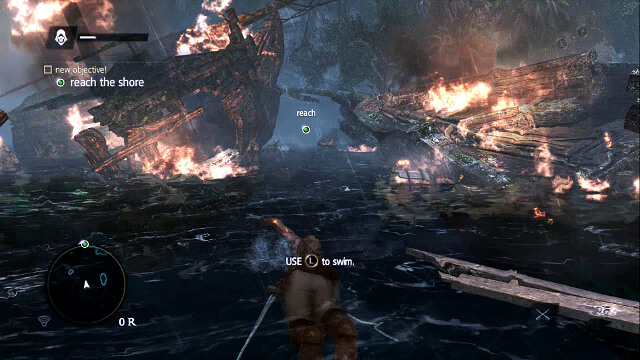 Press and hold down the run button to swim faster
Reach the shore after you watch the cutscene.
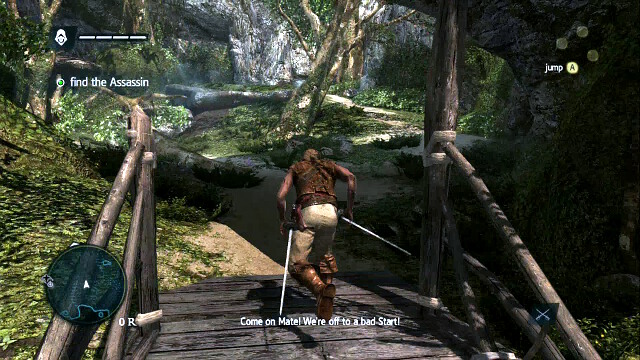 Follow the assassin
Start your chase. Remember that you need to hold down the run button, which allows you not only to run, but also to climb trees, buildings, rocks, etc. Keep along your path, up the slope.
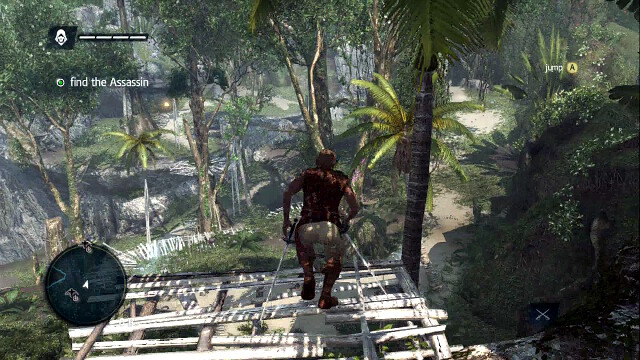
You will reach some primitive developments in the form of huts. To keep ahead, you need to get to the peak. Start climbing until you reach the passage shown in the screenshot. Remember that you only need to hold down the run button for your character to climb/jump, indicate the direction and approach the wall/edge. The rest will virtually do itself. Reach the other end where you need to climb again, over the tower that you can see in the background.
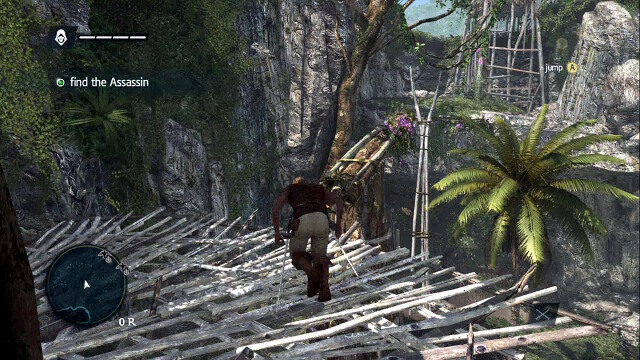
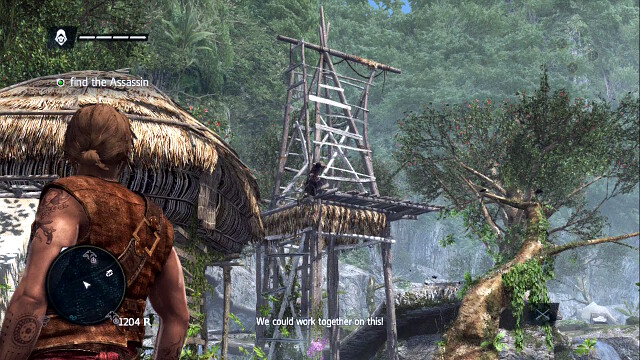
 Follow the assassin straight ahead
Directly past the tower, run ahead deeper into the island. To find your target you need to keep pushing ahead and up the path. Still, at first, you can get off the path a bit to explore this area and find the nearby treasures, or skin the nearby animals. You will be able to explore the entire area in the future, right after you complete this mission so, depending on which you prefer, you can focus only on the mission itself or try to kill two birds with one stone and pick up the collectibles along your way. This rule is unchangeable throughout the game. You will be able to return to, virtually, any location you want to collect what you have missed earlier.
 The assassin is still escaping
After you make it to the next, higher, level you will notice your target for a moment again. Climb onto the hut and follow him towards the waterfall.
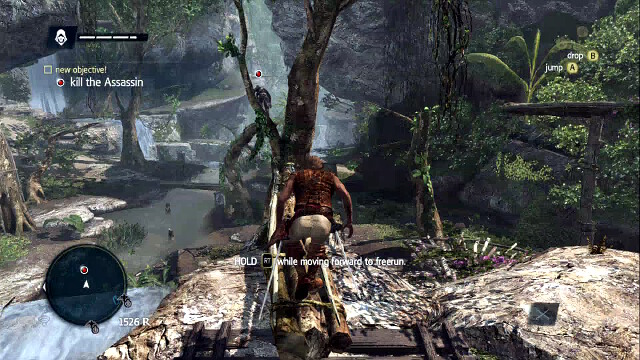 You will have to kill the target
Once at the waterfall, the assassin will open fire at you and will resume his escape. Now, you will have to kill him. Follow the same path as he does. The whole trick is to choose the direction in which you are running correctly. All of the jumps and tricks are performed by your character automatically.
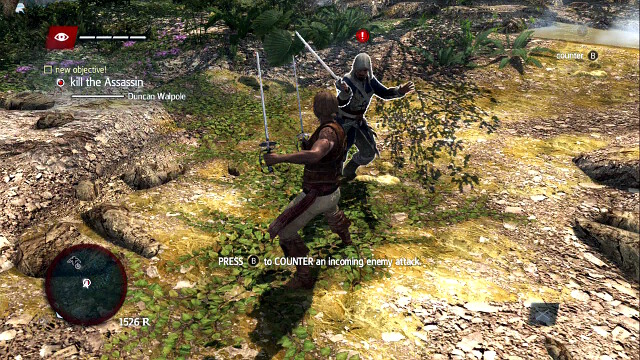 The red mark is an opportunity to counter-attack
After a bit of running, the target will give up the escape and a battle will ensue. The easiest method is to wait for the right moment to counter the strike and kill the enemy quickly. Press the counter-attack button when you notice the red exclamation mark above the his head and, right after time briefly slows down, press the attack button to finish the assassin off with one blow.
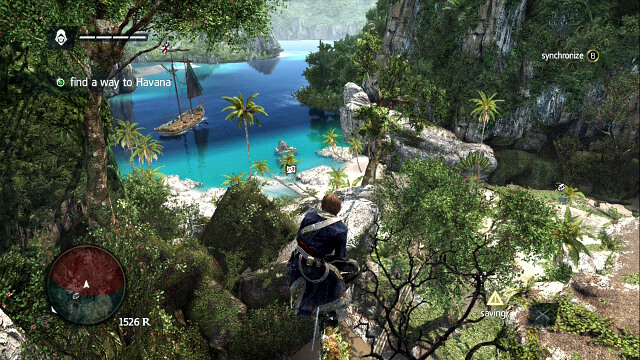
You will find the way to get to Havana below the place where you have just fought. Note the red glow on the minimap. This means that it is a closed area where you have no right to be. If you happen to walk in there, you will be immediately attacked after you are detected by the enemy. That is where you need to go to reach the only ship around. So, start your descent.
 Greenery makes you invisible to the enemy
Soon it will turn out that there is a lot of guards there. And also a lot of thick bushes that you can hide among. All of the spots where you can hide will highlight if you initiate the eagle vision. Climb down when there is nobody around and take down silently the solitary guards when there is nobody to see you. You should remember about the very useful function of whistling to lure guards to you. Once such a guard comes round, use the attack button immediately to perform the assassination. You should watch out, however, and do not whistle when the guards are near each other because you will, this way, attract more than one.
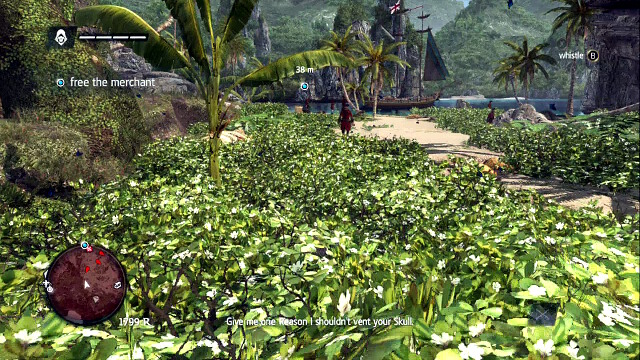
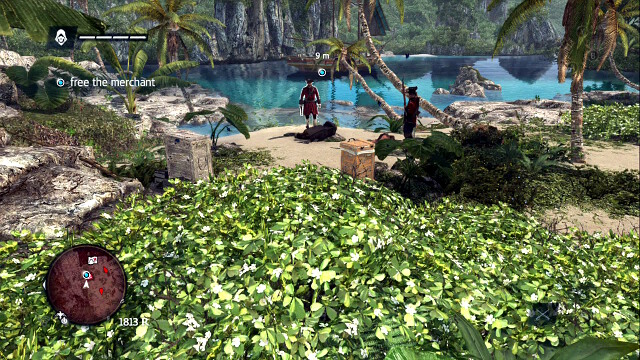 A group watching over the merchant
Unlike others, the three soldiers directly near the merchant are not patrolling the area alone so, taking them down silently is not an option. Additionally, you will find there a gunner equipped with a musket, who may be problematic if left alive for too long. Therefore, he should be pacified as quickly as possible. The best option is to approach them, as much as possible, from the right and dash towards them to take them two out by surprise, before they realize what struck them (i.e. before the red circle above their heads fills up). To do that, simply run towards them and press the attack button once you get close enough. The remaining guard will react, naturally, and you will have to fight with him. The best idea is to copy the strategy from the previous fight you have just had and counter the blow, to kill the enemy afterwards. Once all three are dead, approach the merchant on the ground.
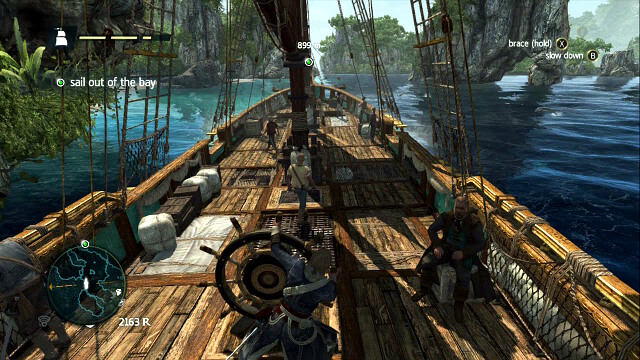 By slowing the ship down, you increase its maneuverability
After you watch the cutscene, swim up to the ship and take the steering wheel. Then, you will have to sail away from the island over a course that resembles slalom a bit. To prevent running aground, you need to slow down to increase the ship's maneuverability. Once you sail out of the quay, you will leave the isle and sail towards Havana.
 The surroundings will change a bit
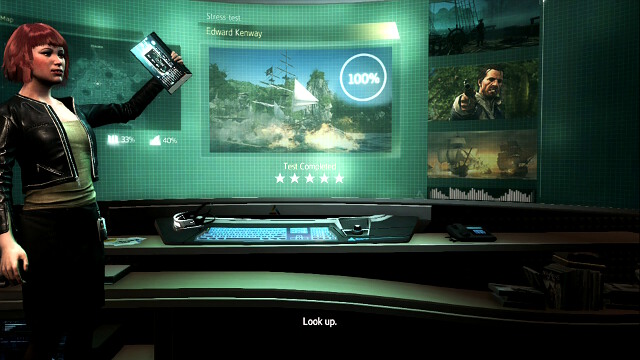
It is time to forget about the Caribbean for a moment and return to the reality. Now you will play in the first person perspective. Follow the commands of the Frenchwoman and follow her.
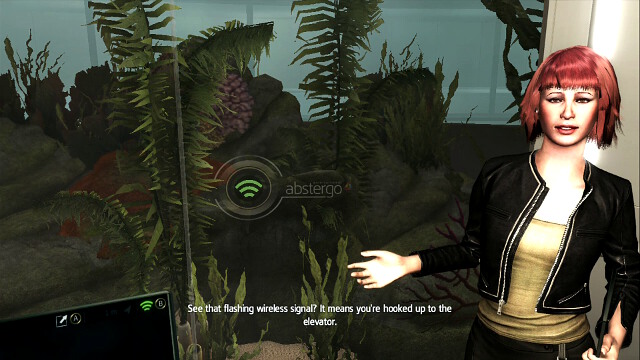 The Wi-Fi symbol is for activating the nearby devices
You will be equipped with a special communicator which is used for activating the individual elements in the Abstergo office. Once you will be capable of using something, the Wi-Fi symbol will flash green. Go to the elevator and take a lift.
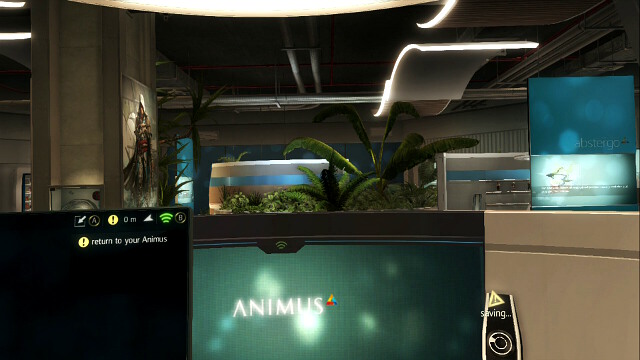 Resume the simulation
Upstairs, you will get the opportunity to meet your co-workers. Once all the cutscenes end, you will be able to take a look around the office or resume the simulation and return to pirating.
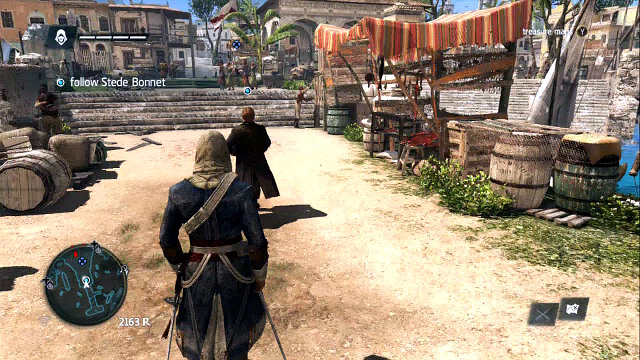 Bonnet will lead you
After the mission starts, follow Bonnet.
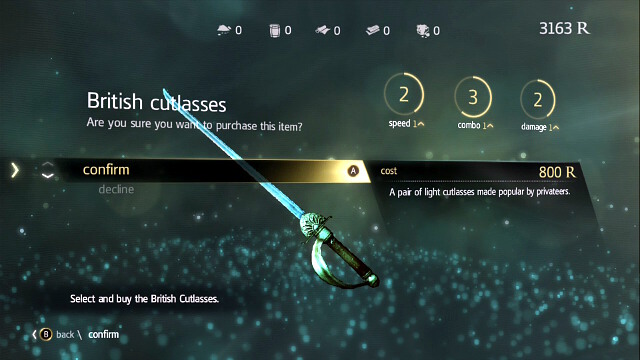
While you are passing by a store, Bonnet will suggest that you buy a weapon. Approach the salesman and buy the cutlasses shown in the screenshot.
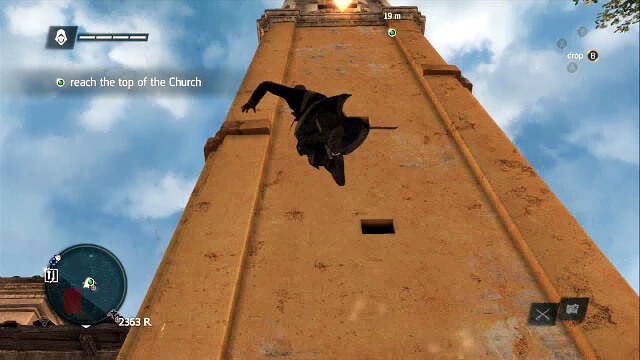 Climb up the tower
You now need to get onto the top of the church spire. Use the projecting ledges and holes while directing your character towards them. Once you are on top, synchronize by pressing the appropriate button. Once you synchronize with a given location, you will be able to fast-travel to that location by selecting it on the map.
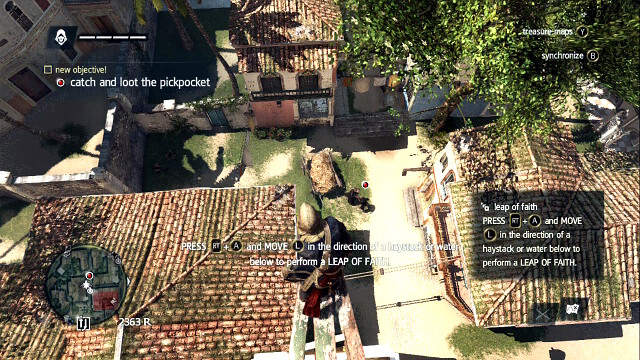 Bonnet will be attacked
Bonnet will be attacked. To get to the street level quickly, press the run button and jump button simultaneously and specify your direction towards the cart with hay, next to Bonnet. You will land safely on the hay and you will come to no harm.
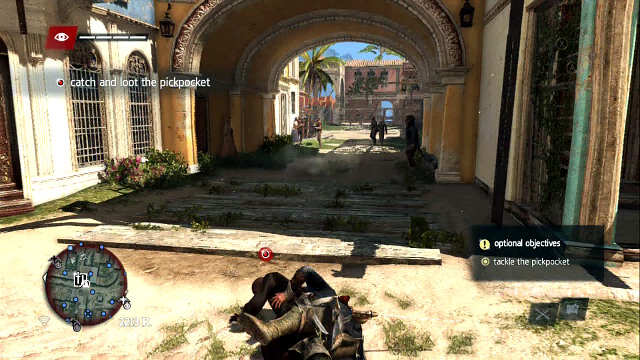 Knock the pickpocket over to gain a bonus
OPTIONAL OBJECTIVE- knock over the pickpocket
Start chasing the pickpocket. Once you are close enough, you will notice in the upper-right corner of the screen the possibility to knock the enemy over. Then, press the interaction button to perform the action. Then, finish the pickpocket off and run through his pockets by holding down the interaction button.
After you are done, return to Bonnet and continue along your path.
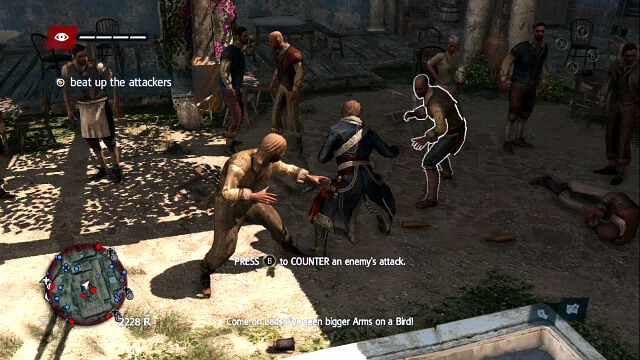 The fight with pirates
After you reach the tavern, you will start a fight where you will have to defeat several pirates in melee. You especially should pay attention to the instructions on the screen, to learn individual combos. The fight itself should not be too demanding. You should remember about utilizing counter-attacks. If you are cornered, simply escape to the other end of the bar.
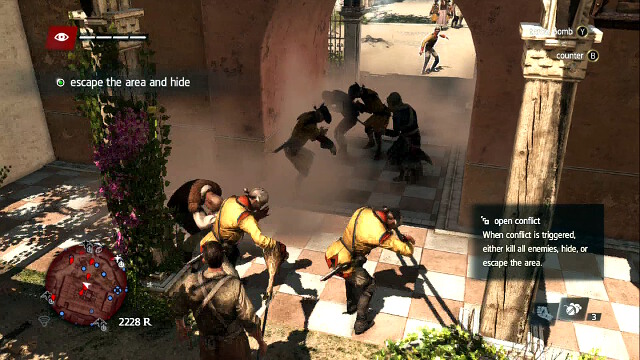 Use the bomb to escape easily
OPTIONAL OBJECTIVE- use the smoke bomb to escape from the fight
There will be soldiers to arrive at the tavern so, you will have to flee. Select the smoke bomb from the inventory and use it by pressing the shot button to blind the nearby soldiers. Once you are not seen by anybody, (no red symbol above the head) you can hide e.g. in the carts with hay or in the bushes, just like in the previous mission. You will find one of these directly in front of the tavern's entrance. Alternatively, you can blend in with the crowd by stopping next to groups of people out in the street. Wait for a moment, until the soldiers give up searching for you, to complete this mission.
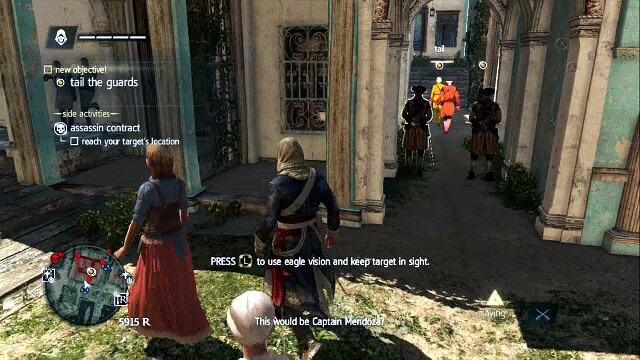
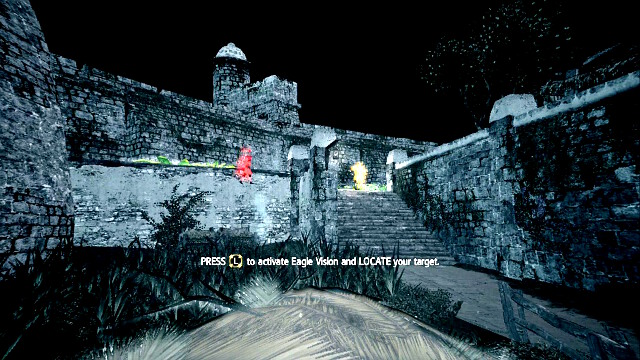
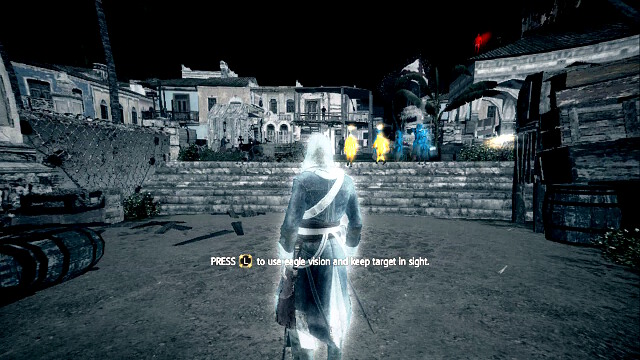 The eagle vision
You need to follow a couple of guardsmen without raising any suspicion on their part. First of all, initiate the eagle vision and keep the camera panned onto the two. When there will appear yellow symbols above their heads, you will be able to see them also through walls. Follow them.
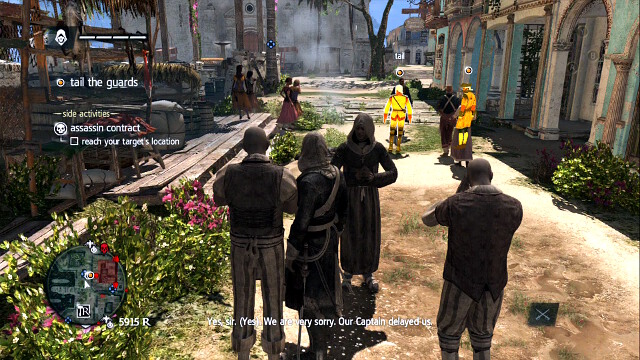 Blend in with the crowd
Walks slowly after the guards and walk among the people groups to blend in. Note that your character becomes grayed out then, which means that you are indiscernible for the guards, even if they are looking directly at you.
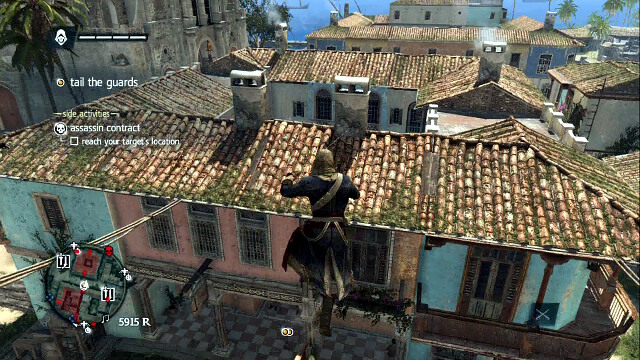
 The guards will enter a closed area
At some point, they will enter a closed house. You need to climb onto the rooftop and continue there. You will also find another guard on the roof. Run into him and attack him by surprise to knock him down with one blow.
 Jump over onto another building
A bit ahead, the situation will be similar and the two guardsmen will enter a guarded area again. Jump over onto the roof of that building. Also here, you will find a guard, which you will have to deal with, should the necessity arise.
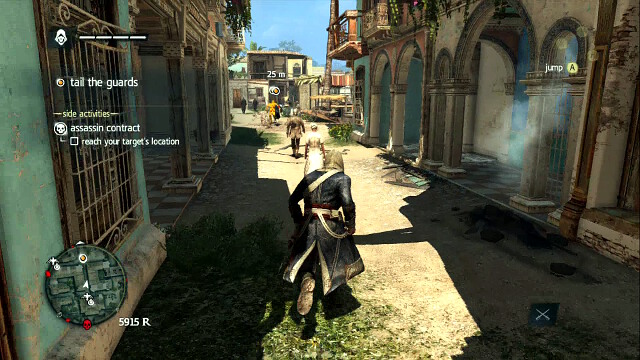 The targets will start to run
From now on, the guards will enter no guarded area anymore so, you can simply return to the street level to make it easier for you to follow them. They will be speeding up and slowing down on a regular basis so, you need to keep that in mind. Just like at the beginning, whenever necessary, stop by groups of people in the street to disappear from their sight.
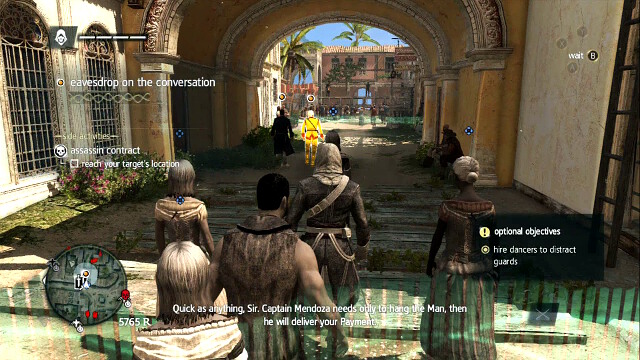 While with the dancers, you will be permanently undetectable
OPTIONAL OBJECTIVE- hire the dancers to divert attention.
Once they reach their destination, you will have to eavesdrop on their conversation. Around, you will find a group of dancers. Hire them (150R) to follow them undetected and complete the bonus task at the same time.
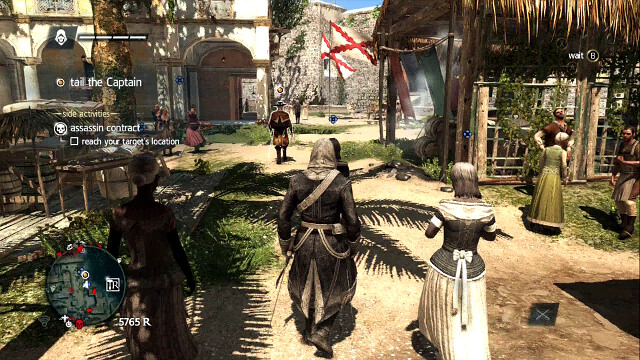 Follow the Captain
After the execution, the target that you need to follow will change. Follow him while still taking advantage of the girls' help.
As it will soon turn out, the captain will enter another guarded building. Ignore this, however and stop next to a nearby cart with hay shown in the above screenshot.
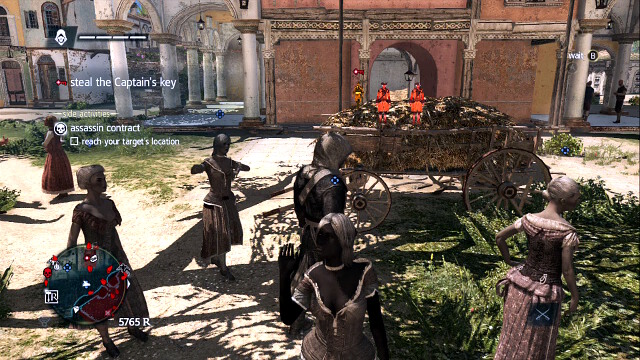
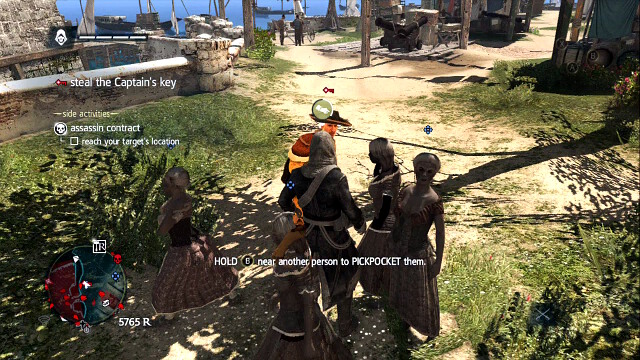 Steal the key
After several moments, the Captain will leave the building and will pass by the cart at which you are hiding. Use the cover provided by the dancers to rob him without any problems. Remember that you need to hold down the button until the circle fills up.
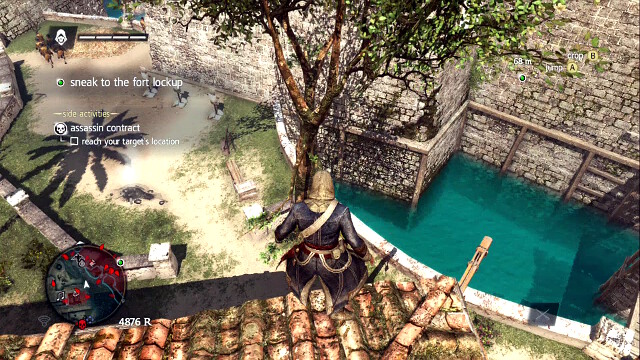
OPTIONAL OBJECTIVE- avoid getting into fight
You now need to steal into the fort and the best way to pull it off is by sneaking, to be able to perform the bonus objective. Climb onto the building where the Captain with the key hid a moment earlier. From here, jump onto the tree shown in the screenshot, and then onto the fort wall, over which you need to climb up. On the roof, there is a guard so, you need to make sure that you are not spotted by accident. If you are near him, you can sneak kill him but, if he is at the other side of the building, you can ignore him and jump onto the tree.
Once on the fort, hide behind the wall ahead of you. There will be quite a lot of guards on the right but, you will be too far for them to spot you so, you do not need to worry. Ahead of you, however, as you can see in the screenshot, there are three soldiers which you need to deal with to be allowed to go ahead.
 The first guard falls into the trap
While patrolling, the first guard is walking near the wall that you are hiding behind. Wait for him there and, once he is near you, whistle to attract his attention, and kill him silently once he approaches you.
The second guard is patrolling between the left and the right side of the wall. As soon as he turns to go right, just like in the screenshot, run behind him immediately and finish him off while running. If you push him down, you will attract attention of the guards patrolling below but, you do not need to worry because they will not come checking anyways.
 The last guard here
Hide behind the boxes and whistle to attract the last guard's attention and eliminate him right after he comes close.
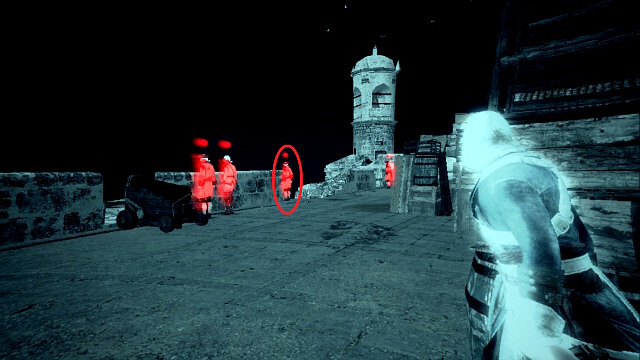
Right before your destination, there are four more guards. The problem is, however, only the marked one, is a threat because he is patrolling the nearby area. The other two will be staying put and staring into the void and, if you do not provoke them, they will not turn back so you can easily ignore them. Keep watching the patrolling guard and, once he walks away, dash ahead where you will find a heap of leaves, where you will be able to hide.
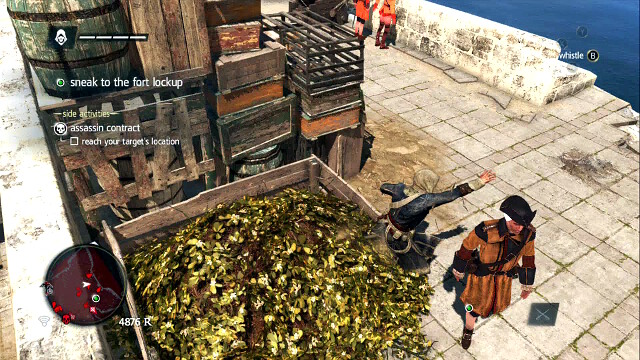 Kill the patrolling soldier
While hidden in the heap of leaves, wait for the guard to start returning and murder him as he is passing you by. NOTE - over the rooftop which you need to gain access to, there is patrolling another guard, armed with a musket. Before you perform the assassination out from the leaves, look onto the rooftop and make sure that he does not see you because, otherwise, you will be spotted and fail to complete the optional objective.
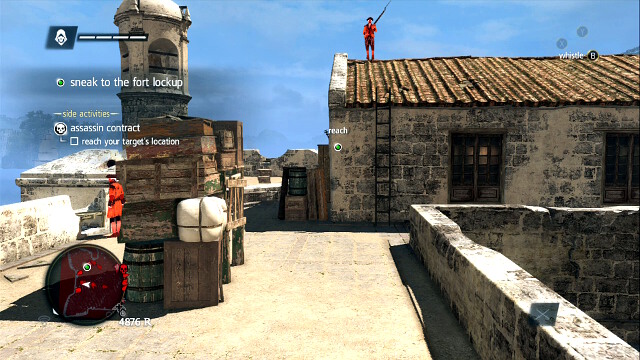 Observe the soldier on the rooftop
After you kill the guard, turn your attention to the one on the rooftop again. Once he turns and walks away, dash towards the door. After you enter, you will watch a short cutscene.
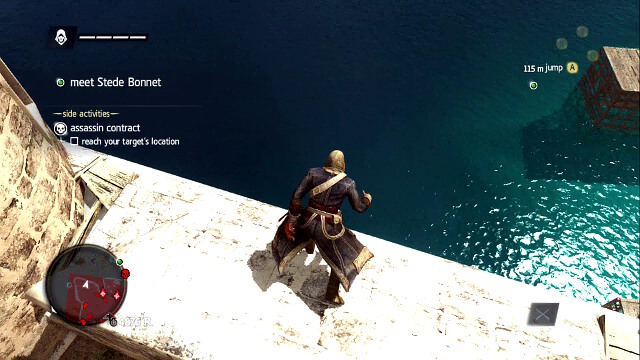 Escape in the water
After the cutscene, walk onto the wall on the right and jump into water. Swim up to Bonnet's ship to complete this mission.
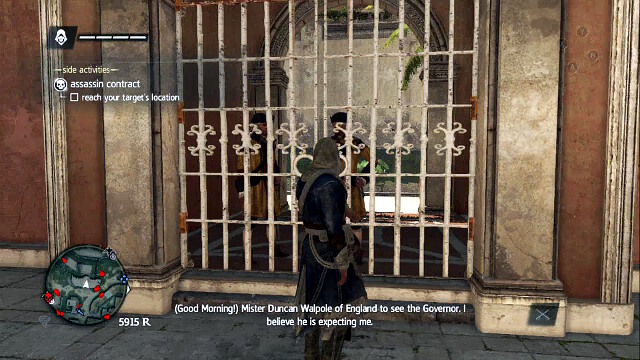 The gate to the residence
A quick and simple mission. After you talk to the guards behind the gate, go to the marked location.
OPTIONAL OBJECTIVE- complete Roger's shooting challenge
After the conversation, you will be able to try out your pistols. Select them from the inventory. There are two ways in which you can shoot - automatically with your target selected by means of pressing the shoot button, or by aiming manually using the left trigger and shooting with the right one. After several shots, you will be able to continue but, before that, it is a good idea to complete the bonus objective. Talk to your host to start the shooting challenge. You need to hit each target within the allotted period of time. Before you start, make sure that your secondary weapon is fully loaded. Position yourself on the left and target manually the dummy that is the farthest away shown in the screenshot. Take a shot after you notice the clock. This is the only target which cannot be targeted automatically. It is a lot easier to shoot at the remaining ones, simply position yourself so that you are facing them directly and move the view to the next one immediately. After the challenge finishes, talk to Juan to continue.
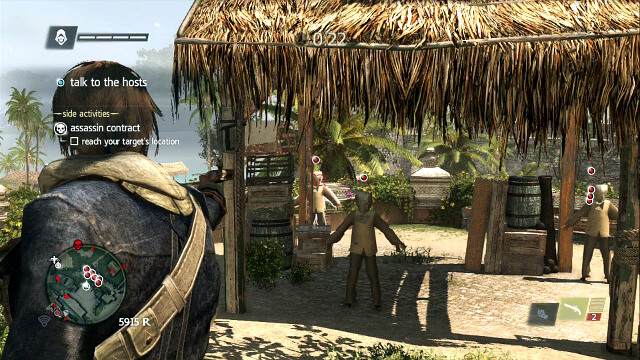
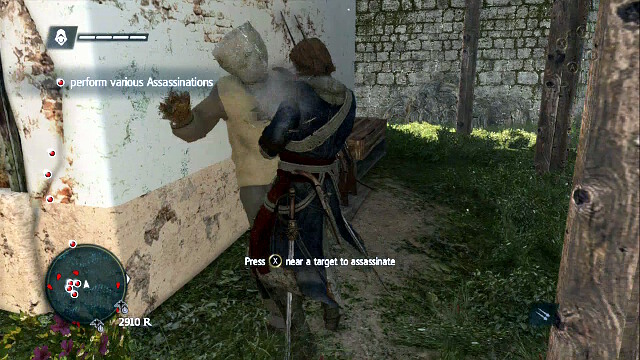 Perform several silent executions
Now you will have to give several presentations of silent assassinations on the dummies. First off, the standard assassination from a short distance. After that, hide among any groups of hay and :kill" the next dummy. Afterwards, blend in with a group of workers to send, from there, another dummy to the dummy heaven. Deal with the next one by means of an attack from above and the last one after a run-up. You have probably already employed all of the strategies before so, this should not pose a problem to you. Then, follow your host.
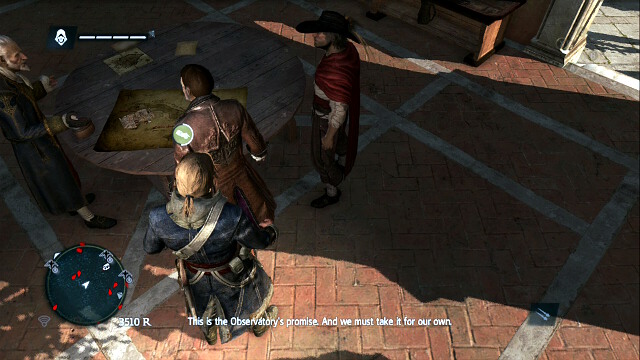 Observe the symbol above your head
OPTIONAL OBJECTIVE- steal from all three templars
After another serving of animations, you will have a moment to complete another bonus objective by robbing all three, as they are busy looking at the maps on the table. Approach each one from behind and hold down the interaction button until the circle fills up. Soon after, you will which another cutscene, after which the mission will conclude.
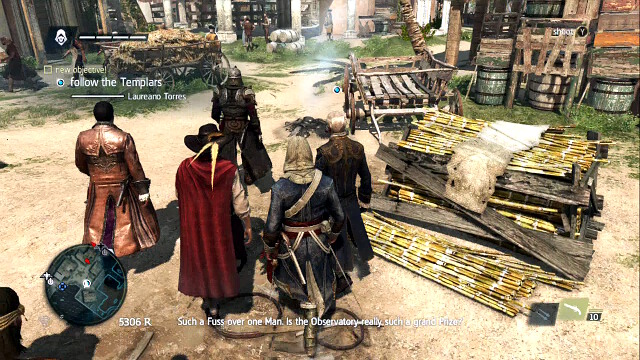 Follow the group
Another short, yet difficult mission where you will have to face quite a lot of enemies. Before you start it, make sure that you have the best possible fighting equipment on you so, it is a good idea to visit a shop. Also, having smoke bombs on you won't harm. After you start, follow the group of Templars.
 Counter attacks and protect yourself from shots
OPTIONAL OBJECTIVE- use your pistol in a fight
You will soon be attacked by a quite numerous group of assassins. What is even more, you will have to watch out not only for yourself, but also your allies so, you will have to deal with the enemies as quickly as possible. First of all, you need to watch out for the shooters on the roof. You need to remember about the, very useful, option of human shield, to protect yourself against shots using the other enemies. You need to pay attention to the symbols of the shots being loaded and, when it is imminent, make sure that you are standing next to an enemy that you can use to protect yourself, and eliminate him at the same time. You should also remember to use the pistol to complete the bonus objective.
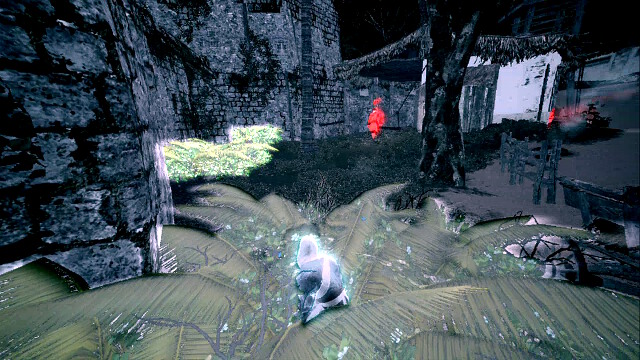
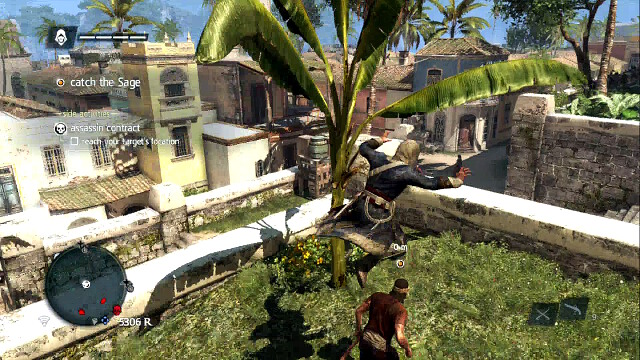 An attack from above
OPTIONAL OBJECTIVE- eliminate the Sage from above
Sage will seize the opportunity and try to flee. Follow him and try to be higher than he is at all times, to the extent it is possible. Do not get down to the street level and even if he is, keep to the rooftops. Once you are close to him, use the appropriate button to knock him over. If you are experiencing problems with completing the bonus objective, try to run a directly behind him and climb up a bit onto something once you are catching up with him. It can be a tree, a pole or anything else . It is enough to be not more that 10 cm above the ground. The range of your leap is pretty big so, you should have enough time. Once you start climbing, perform the leap.
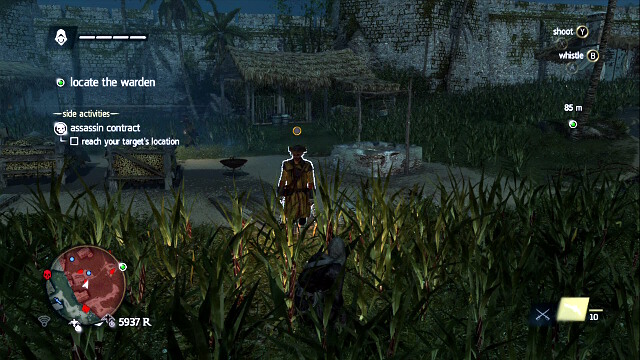 Eliminate the first group of guards
OPTIONAL OBJECTIVE- avoid getting into fight
OPTIONAL OBJECTIVE- sneak-kill three guards
After you start this mission, you will leave Havana and you will not be able to come back until you have complete several more missions! Right after you go over the fence, you will notice two guards. Use the nearby greenery to eliminate them quietly. Remember to whistle when they are not next to each other to prevent luring two of them at the same time.
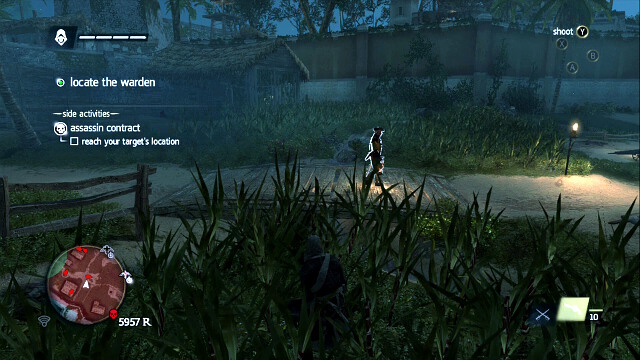 The bridge is being patrolled
Go ahead, while keeping to the left, until you reach the bridge. It is regularly being patrolled. Wait around until he comes, whistle and eliminate him quietly.
 Go towards the stairs.
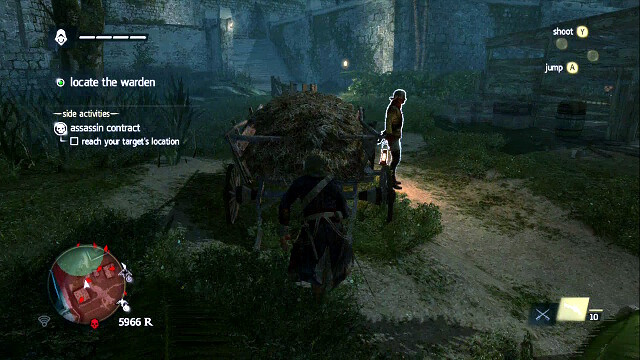
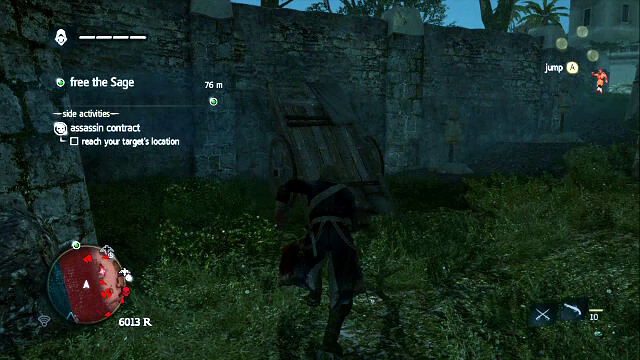
Behind the house, there is another guard, but you can ignore him. Run ahead to the carriage, where you will take out the soldier next to it. Then, dash ahead towards the heap of leaves under the stairs.
 The guard with keys will be coming down the stairs soon after you approach them
Initiate the eagle vision to identify the steward who you need to deprive of the key. As it turns out, he will be going down the stairs soon. Run up to him and hide around the corner to take him down quickly as he is climbing down the stairs.
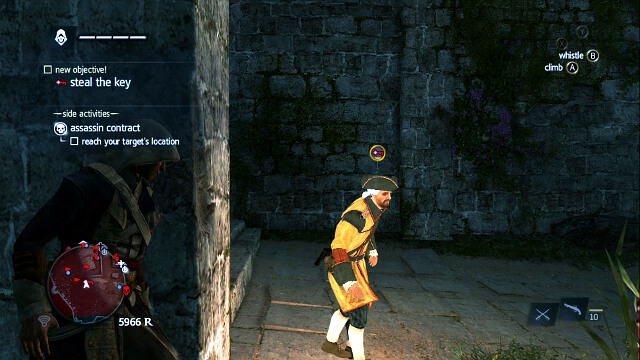 Kill him quickly from around the corner to prevent engaging him into a fight
As you are running towards the stairs, you will be probably spotted by your target but, if you hide immediately, this will be too short an occurrence to engage him into a fight, which would prevent you from completing the bonus mission. He will by trying to find you, you can easily deal with him from behind that corner once he comes close. You need to watch out for the guard above, who may also notice you for a fraction of second then, repeat this action and hide behind the corner again to finish him off when he comes down.
If you have problems pulling that off, a slower and more safe option is to remain hidden in the heap of leaves and killing the steward from there. Regardless of which variant you employed, do not forget to collect the key, once you kill him.
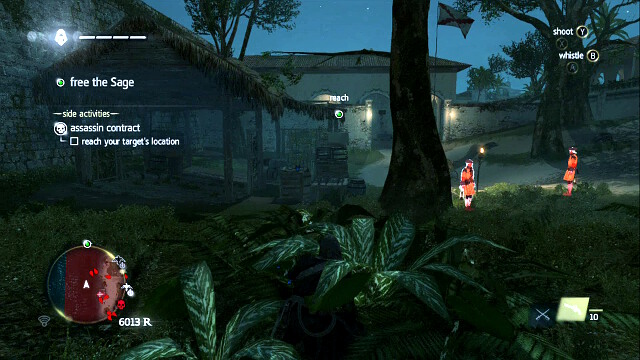
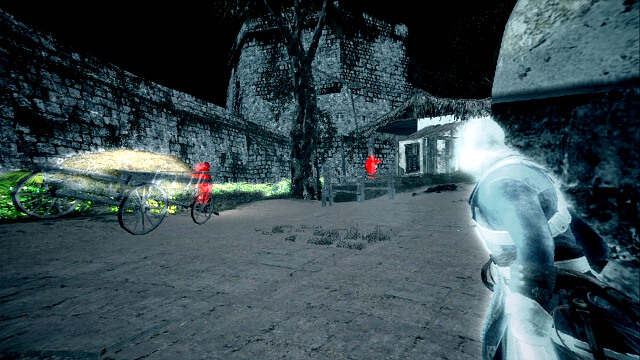 Check the area thoroughly
On top of the stairs, before you move ahead, check out on the area carefully. If it is empty, dash towards the wall immediately, into the region of the cart and the nearby guard, who you of course need to kill straight away. If there are more soldiers around, wait for them to walk their ways.
Continue along the wall and avoid the guard patrolling this region, then kill him. You can use the thickets at the wall for that, or the wardrobe at the house's wall.
 Use the carriage to climb up
Dash ahead towards the cart, over which you can climb up and avoid all the soldiers in the main passage. Directly after you jump over the wall, you will land in bushes which will provide you with cover.
 Stick to the wall on the left
From here, the path is easy. If there is no patrol around, you can simply run along the wall on the left and ignore everything until you reach the entrance. Otherwise, wait for the soldiers to return downstairs and there are only the two guardsmen left. Once you reach the right area, you will watch a cutscene and the mission will conclude.
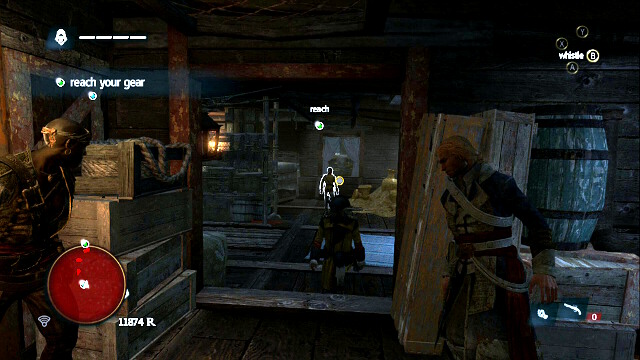
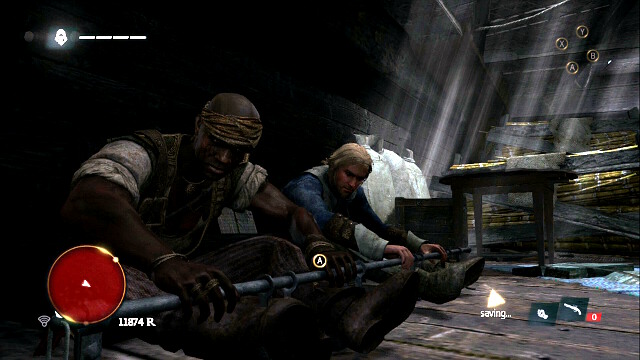 You are imprisoned and without your gear
First of all, shake off your shackles by tapping the jump button...
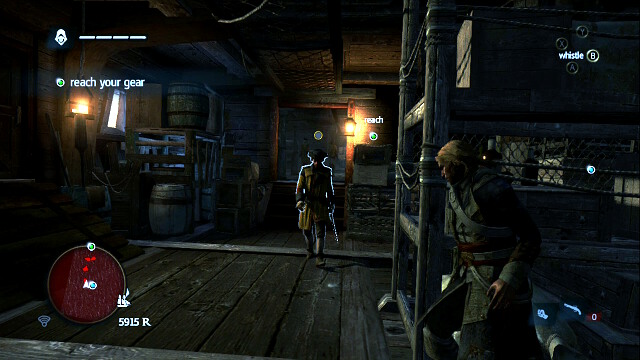
 Hide around the corner to complete the bonus objective
OPTIONAL OBJECTIVE- kill three guards from behind a corner
Right after you start, take cover next to the passage and whistle to attract the guard's attention, and kill him quietly. Your colleague will deal with the other one.
 The second guard
Then, repeat the action with the next one. You do not need to worry about the two in the back.
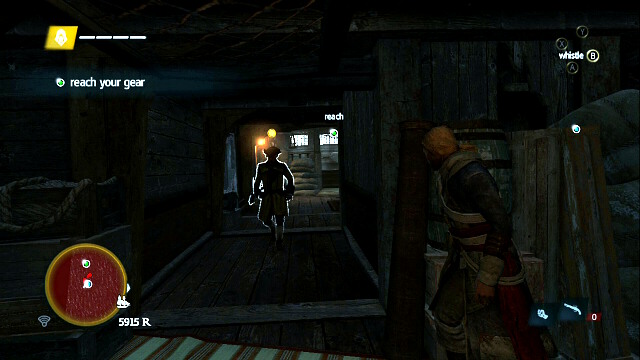 The last guard
Hide behind the corner once again when you see the last two to complete the bonus objective. Then, collect your gear and climb the ladder to reach the deck.
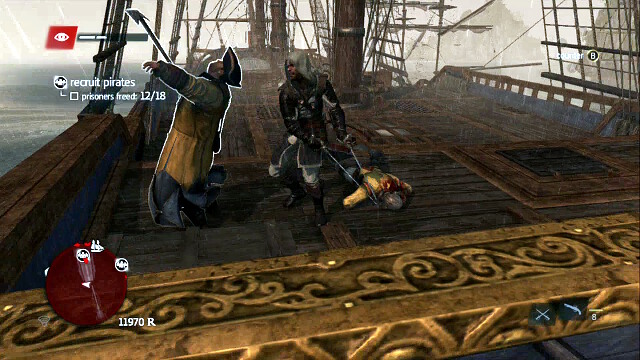
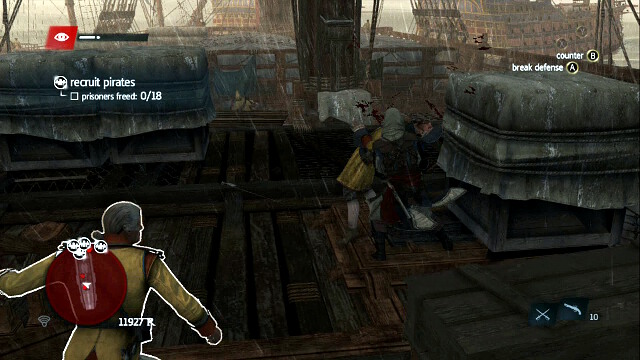 This part of the mission boils down mainly to combat
OPTIONAL OBJECTIVE- free 23 pirates
If you have not yet completed the objective with the killing from behind the corner, there will be plenty of opportunities on the board. First of all, now the game is mainly about combat, Use the attacks from above and run-up attacks for quick elimination of successive opponents. If you find yourself surrounded, run back a bit. Clear the entire deck. You will find a soldier also on top. To get to him, run onto the crane near the main mast. To dismount the mast, jump onto the hook. Once you have cleared the entire ship, approach the pirates and free them.
 Attack from above
Use the rope aboard the ship to your advantage to swing over to the other ship quickly and eliminate the soldiers on the bridge straight away. One of them is the huge brute equipped with an axe and grenades. If everything goes well, you will kill him momentarily, by surprise. Still, if you have to fight with him, you should watch out for the grenades and run away from them. Furthermore, his attacks cannot be countered in a traditional way and you can, at best, dodge his attack. The best solution is to try to break his defense (the jump button) and attack the exposed back. You will also find the pistol useful.
After you have cleared the entire deck free the pirates and get to the next ship.
 It is best to attack the brutes' backs
The situation on the next ship is similar. Additionally, you will find here two brutes. To the extent it is possible, attack by surprise and if this fails, try to attack the back. Once you clear the deck, free the pirates and hurry to catch the last ship.
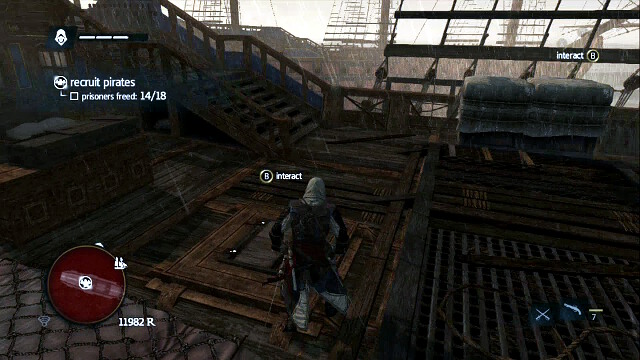 On the next ship, walk under the deck
On the deck, there are only the regular soldiers. After you have cleared this area, you need to walk under the deck.
Once down there, cut through several groups until you reach the pirates. The situations should be stable and you should have no problems reaching the end. Once you have freed everyone, return to the upper deck.
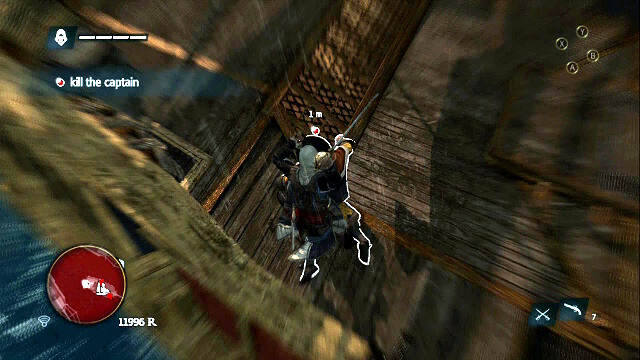 Attack from above to eliminate the captain straight away
Now you will have to kill the captain. Right after you go out, take the rope to swing over to the second ship and kill him, as quickly as possible, from above. You will not need to kill all the rest of the crew. Simply approach the steering wheel and take the control.
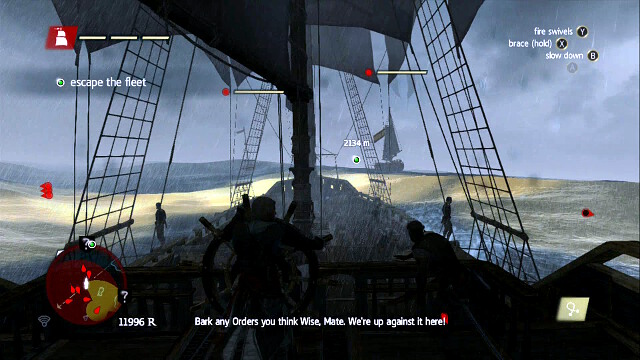
Observe the color of the waterStart your escape and steer towards the green point. There is definitely too many of the ships for you to fight. Therefore, focus mainly on avoiding taking damage. When you are under the cannon fire, remember to hold down the attack button to cower and keep the damage you take to a minimum. First of all, however, you need to watch out for mortars. Watch the ripples on water and their color. The yellow ones signify the spot that will in a moment be under fire; the red ones mean that you are taking damage and you need to change the course immediately.
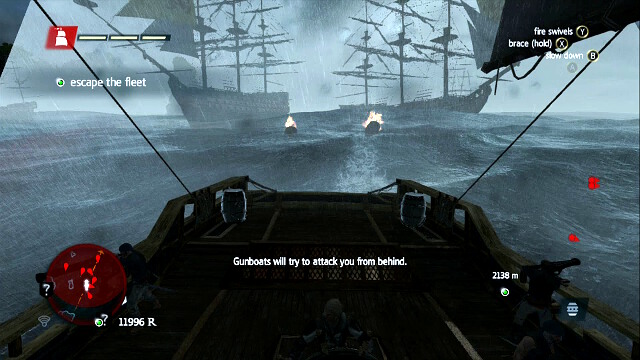 Use the barrels to destroy the chasing ships
You can destroy the gunboats with blazing barrels. To enable them, set the camera so that you see the back of the ship. You aim using the left trigger and shoot them with the right one. To explode them near an enemy ship, you need to give a salvo by holding down the shot button.
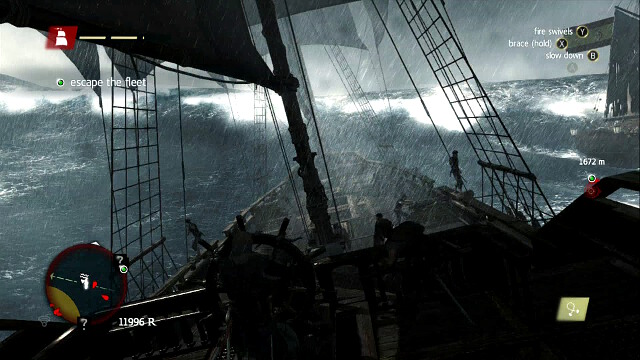 The wave needs to be entered with the ship's bow
Another problem is the high wave coming towards the left board. To withstand it, you need to cut into it with the bow of the ship so, change direction straight away. If you are too late and do not manage to change the course, hold down the attack button to cower and keep damage to a minimum.
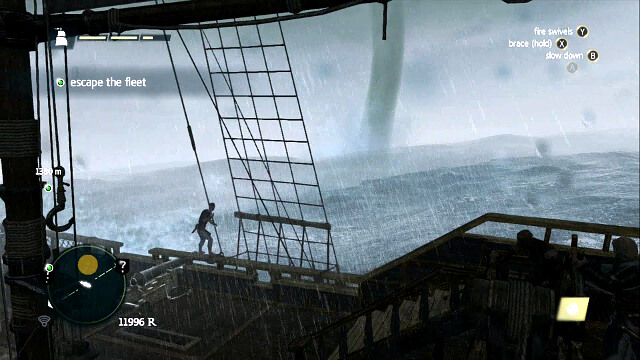 Finally, maneuver among tornadoes
The wave will sweep your tail away, but this is not the end to your problems. Now you will have to avoid waterspouts effectively. Watch over the minimap, steer away from the yellow spots and towards the green one. Once you reach your destination, the mission will conclude.
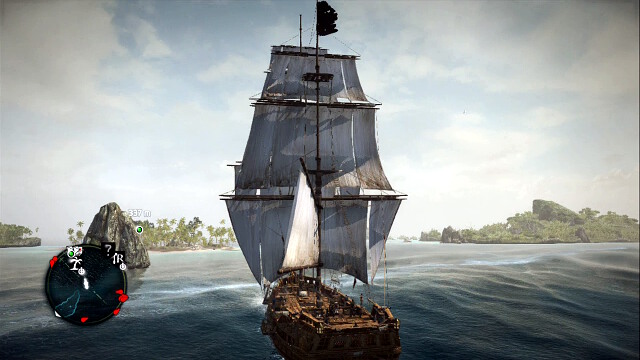 Steer towards the island
A simple mission whose aim is to learn the system of item creation. Start by setting the course towards the correct island. Try to ignore and avoid all of the ships along your way. Their role is similar to that of soldiers in cities. If you bump into any, or simply fire your cannons at it, you will attract attention and get into a sea fight.
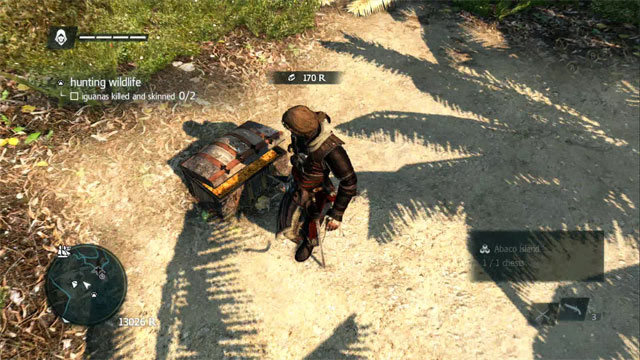
 You can easily find animals using the eagle vision
OPTIONAL OBJECTIVE- shoot an iguana
OPTIONAL OBJECTIVE- kill an ocelot from above
You need to kill two iguanas and two ocelots. Use the eagle vision to locate them. The animals are easy to scare so, do not run and walk up instead, best using camouflage. To complete the second bonus objective, it is best to climb a tree and wait for the kitten to stroll by. After you kill an animal, do not forget to approach the body and collect materials for crafting.
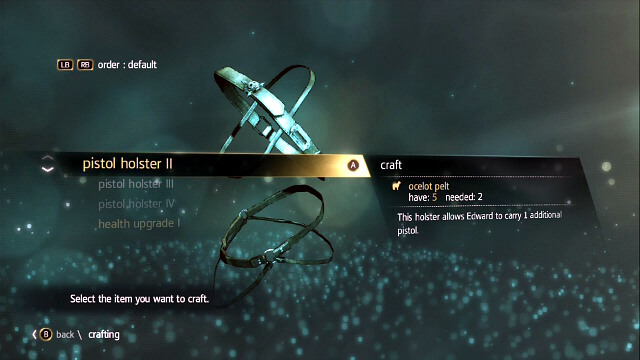 The crafting menu
Then, select the crafting option after you access the menu and create the highlighted items. After you craft them, return to the ship and talk to Adewal to complete this mission.
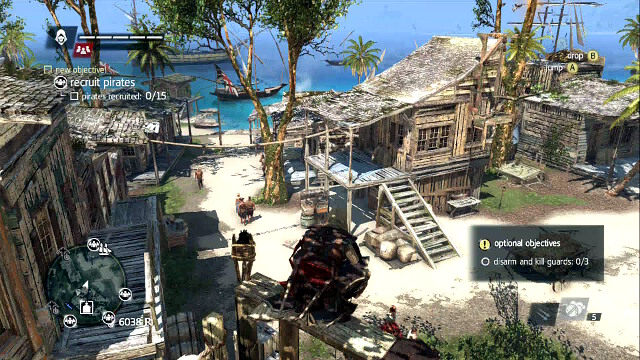 The crew status can be found under the healthbar
Your task now is to collect the crew for your ship. You can check out how many sailors you need and how many you currently have, on the bar under your healthbar. You can recruit in taverns,, or by saving pirates, when you notice an appropriate icon on the minimap. In those spots, pirates will be fighting soldiers, or will soon be executed. If you kill all the soldiers before all the pirates die, the survivors will join your crew. In this mission you do not need to bother with failures too much. If you have failed to save at least one pirate in one spot, soon there will appear another icon on the map, where you will find another group to rescue. Go towards any of such icon to start the recruitment process.
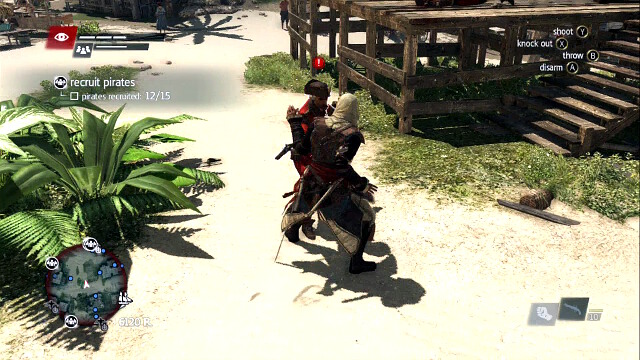 By countering an attack if unarmed, you get the opportunity to disarm the enemy
OPTIONAL OBJECTIVE- disarm and kill three guardsmen.
During the fights, you can complete an optional objective by killing three soldiers after disarming them. To do that, you need to be unarmed. Counter attack the enemy and, then time slows down, press the jump button to disarm the enemy and use the weapon yourself.
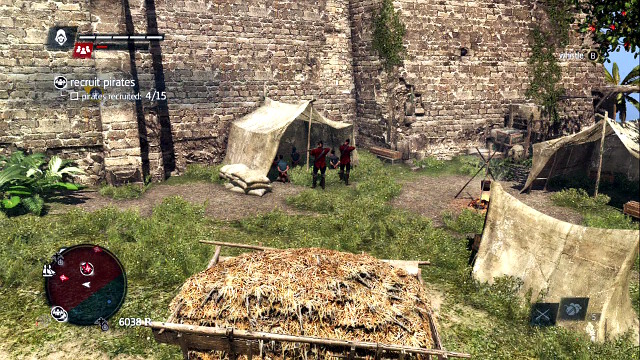 Kill by surprise
In a situation in which the pirates are to be shot, in spite what it may seem, it is not the speed that is the most important, but secrecy. As long as you stay in hiding, the pirates are safe. But, as soon as the soldiers spot you, they will start shooting the imprisoned immediately. Sneak up to them and kill by surprise, best by charging at them. Remember that you can take out a couple, standing next to each other, simultaneously.
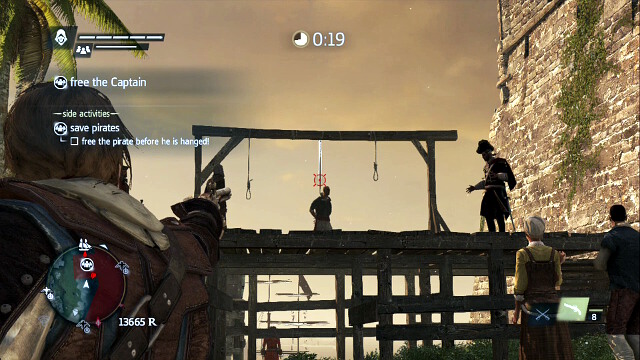 Shoot through the rope
OPTIONAL OBJECTIVE- free the pirate before he is hanged
After you have collected the entire crew, go to the hanging site and shoot through the rope before you run out of time. This will provoke the nearby guards and a fight will ensue. You need to watch out, above all, for the gunner from the nearby fort. The best idea is to walk towards the door to that fort, which is on the right. Then, the musketeer will not be able to spot you from above and you can focus on shooting the nearby soldiers. Once you kill everyone, free the pirate and return to the tavern to complete this mission.
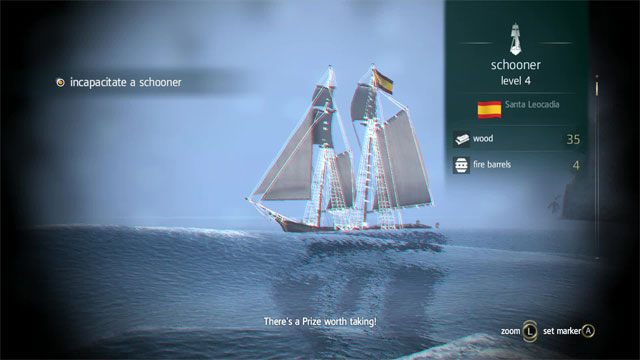
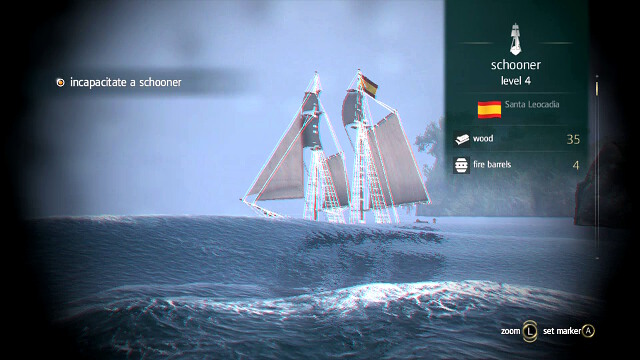 Identify the other ships with the telescope
After you sail out into the sea, use the telescope to identify a schooner. Remember that you can zoom in and out with the telescope. This way, you can find out about the type and the level of the ship (the higher the level, the more difficult it is to defeat), its weaponry and what cargo it is carrying. Sugar and rum are purely commercial goods, which it is good to sell later on. All of the remaining ones are used for crafting.
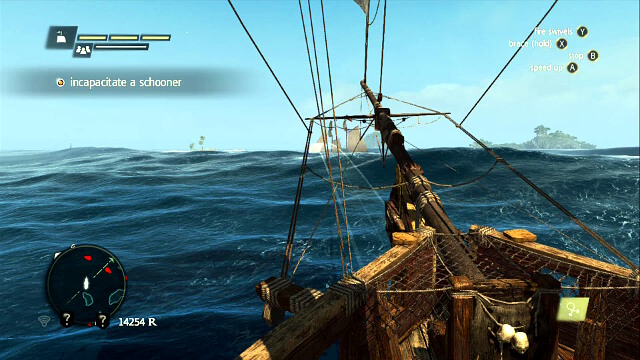 Lay fire on the ship
Set the course towards your victim and launch the attack. Remember that you have access to three basic types of weaponry, that you switch between by switching between camera modes. While targeting ahead, you select chains that inflict minimal damage. On the side, you gain access to cannons, i.e. the basic weapon for sea fights, whose purpose is to destroy the enemy vessel. By setting the camera onto the stern, you gain access to gunpowder barrels, which serve mainly as traps. When the enemy ship is close enough, you can fire at them to cause a big explosion. Furthermore, whenever you get the opportunity, you can discharge aimed fire at the weak point. Once you notice an appropriate icon on the screen, hold down the shot button to target and fire.
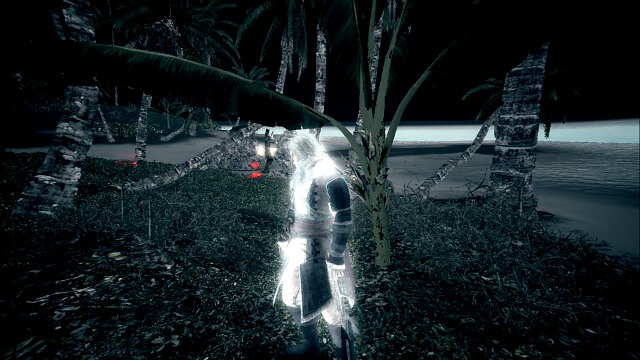
 The blazing ship is not going to escape any longer.
When the enemy ship bursts into fire, it will be immobilized. You can then start boarding the ship to attempt seizing it, with all the goods that it is carrying, or send it to the bottom with another salvo from the cannons. In such a situation, however, you will only receive a half of the ship's cargo. Additionally, by seizing the ship, you will get the opportunity to fix your old tub, which is not going to happen if you destroy the ship. In this case, select the first option. Approach the boat and hold down the interaction button to start boarding.
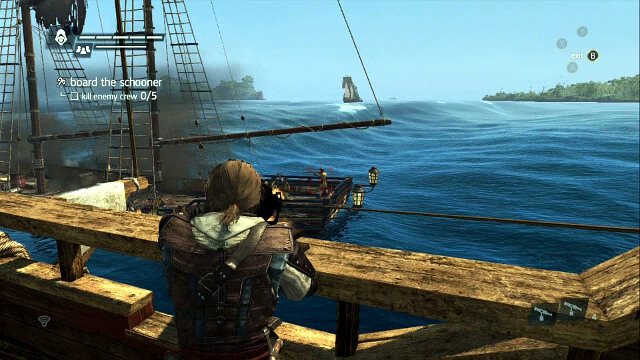
OPTIONAL OBJECTIVE- kill three sailors using the swivel gun.
When the boarding starts, you need to kill a pre-determined number of the enemy sailors to make them give up. In the case of a small ship, it suffices to kill 5 deckhands, but bigger vessels will require a longer fight. Additionally, while hooking up to another boat, you can use the swivel gun, a small cannon located in the steering wheel's side, to take several shots. While targeting, you can zoom in with the left trigger. When you will not be able to shoot anymore, jump over to the other ship and engage into direct fighting. Kill five members of the enemy crew to take over the ship.
 Search for another target
OPTIONAL OBJECTIVE- loot 20 barrels of rum
After you have dealt with the first ship, you will have to repeat the situation on the other ones, until you loot 60 pieces of goods. You will receive an additional bonus for looting 20 barrels of rum. Produce the telescope and look for some other ships, which you need to lot until you gather the required amount.
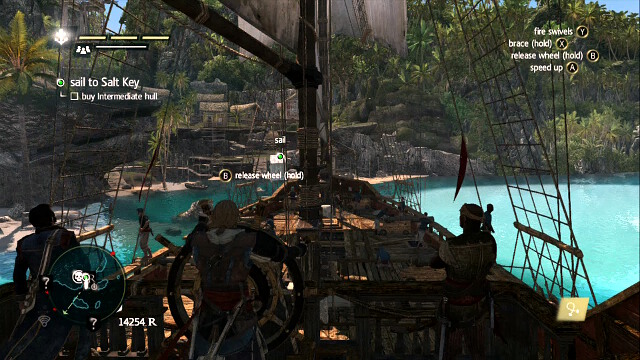 Salt Key
After you have amassed enough goods, sail towards the nearby pirate harbor in salt Key, where you need to visit the merchant to purchase upgrades for your ship's hull (100R). Once you do that, this mission will conclude.
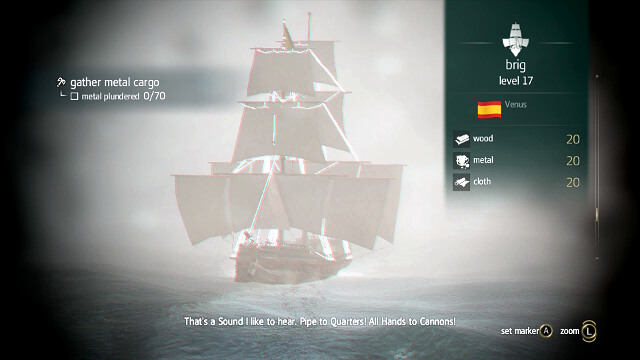 Search for the brig out at sea
OPTIONAL OBJECTIVE- loot 30 units of sugar
This mission is similar to the previous one, but this time you will have to enter the lists with some better boats. You need to collect 70 units of metal and 30 of sugar, if you want to complete the bonus objective. Sail into the sea and search for a brig.
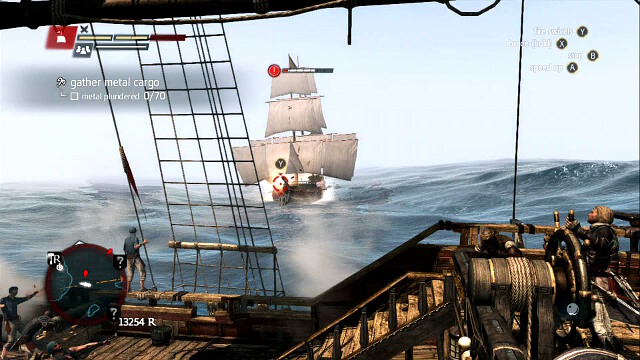 The brig will be trying to ram into you
In the case of these vessels, you need, first of all, watch out for the ramming attempts, which will prove to be most fatal for you. Try to avoid colliding with the ship and remember to cower from traditional fire (remember to pay attention to the color of water). You can use the continuous attempts to ram to your advantage, by throwing off a barrel, and destroying it, once the ship comes close. Once you render it immobile, board it just like in the case of the previous one. This time you will have to kill 10 crew members. Continue by searching for some other ships.
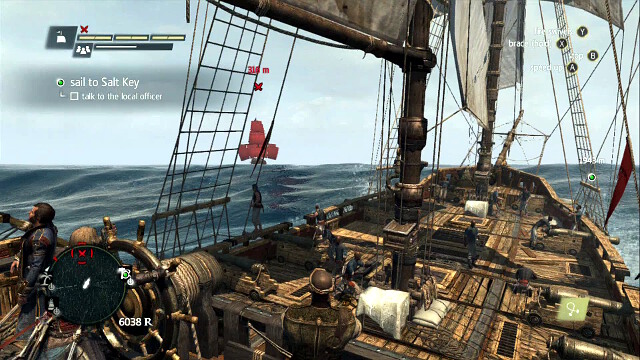 Hunter
OPTIONAL OBJECTIVE- plunder hunter
At this stage, you should already be wanted. This is represented by the icons of red, crossed swords above the healthbar. This will mean that special ships are dispatched, whose task is to hunt you down. You can easily recognize them by red sails and crossed swords. These ships, however, are richer than the regular ones so, purposeful increasing of the wanted level may be a good way to profit.
Defeat the hunter and loot it to complete the optional objective. The fight should not be much tougher than the previous ones, because this is the same type of vessel.
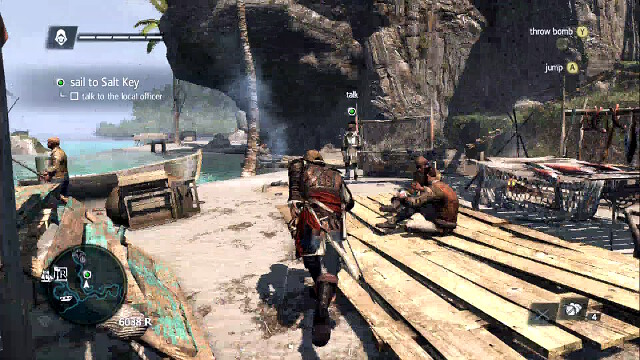 Bribe the officer
Return to Salt Key and go for a talk with the officer. By bribing him, you will lose your wanted level and complete this mission.
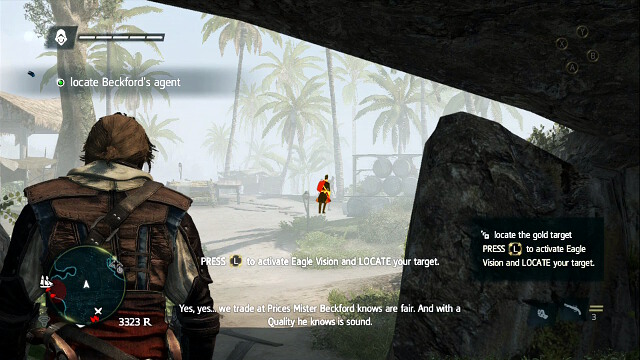 The agent, which you need to follow
After you start the mission, follow James Kidd. Then, use the eagle vision to locate your target. You need to follow him. Use the greenery to hide and make stops near the groups of people to blend in.
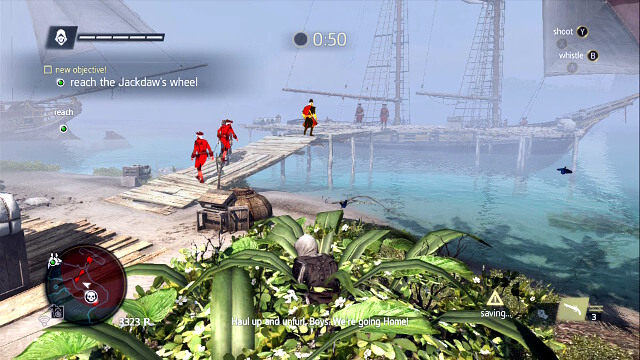 Within less than a minute, you need to reach Jackdaw
When the agent goes aboard the ship, you need to get to your own before this one sails away, so that you can keep following it. The ship is close, in a straight line. Walk out of your hiding and start running towards it and ignore the guards. Even if they spot you, right after you go aboard your ship, you will easily lose them. Start sailing after the agent's ship.
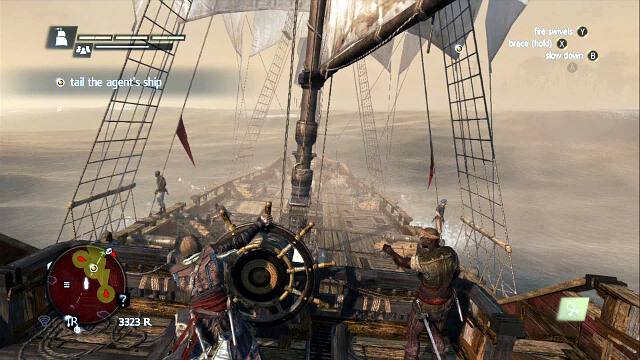
OPTIONAL OBJECTIVE- avoid engaging into fight
Following someone at sea is similar to following them on the land. The difference is that you cannot camouflage yourself. Note the minimap in the screenshot. The enemy ships have a bright glow to them, which symbolizes their range of vision. If you stay within that range, you will be spotted and they will open fire. The fun is that you need to maneuver your ship in a correct fashion, to prevent being spotted. Most importantly, watch out and do not sail in front of the enemy vessel. While sailing directly on the side, you also need to avoid getting too close but the error margin is wider in this case and, even if you are spotted, (the filling red circle) you should be able to escape from their range before they launch an attack (the red circle). The route is quite simple, peppered with small islands, which are easy to circumnavigate, and which you can hide behind at the same time. (the enemy ships will not spot you through the land). At all times, try to keep close to the agent's boat because, in an extreme situation, it may happen that three patrol ships will be steering close to each other and you will have to make a sharp turn to steer clear of them. If, while starting such a maneuver, you are far away from your target, the time necessary to escape the pursuers will tip the scales and you will lose the agent and you will have to start over. If you are close, on the other hand, even if you increase the distance to lose the patrol, you will not lose much enough to lose him. Remember about the speed adjustment. Sail almost as fast as possible and slow down only if you need to perform a sharp turn, to increase maneuverability.
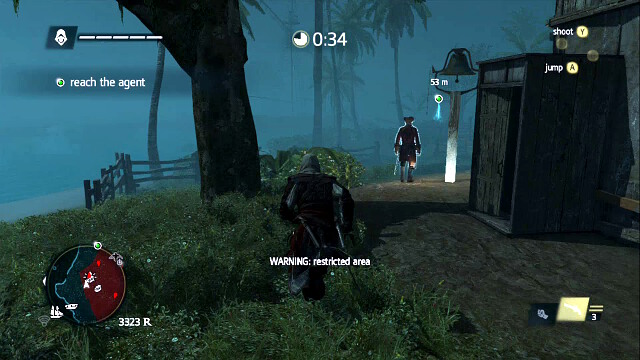 Before you run up to the place, deal with the alarm
OPTIONAL OBJECTIVE- sabotage two alarm bells
When the agent reaches his destination, moor the ship in the marked area (remember that you can jump out of the ship even before it moors, to save several seconds) and run to the plantation straight away. You r time will be limited, but you should be able to make it anyways. Right after you enter the plantation, you will notice one of the alarms and a nearby guard. Eliminate the guard quickly with a run-up attack and damage the bell. Then leave the plantation and use the thickets alongside the water end to reach the destination.
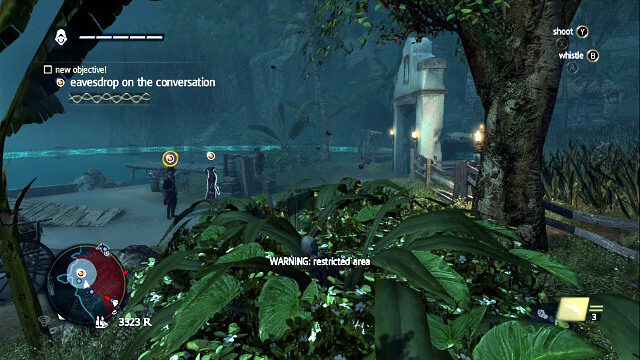 Eavesdrop on the conversation
You will have to stick close to the agent to eavesdrop on the conversation. Once the march deeper into the plantation starts, hop over the fence and use the tall sugar cane to hide. You do not Reed to worry about the workers, they will not Reach to your presence and, what is even more, you can stop by them to blend in.
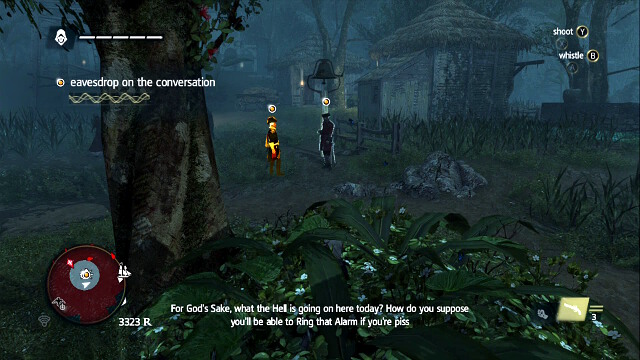 The second alarm
Wile following the agent, you will reach the second bell and a guard. Wait for a moment until the agent goes away and knock the guard down with the run-up attack, deal with the bell and immediately hop over the nearby fence to hide in cane.
 The guard with the key
Once you are done following the agent, you will have to find the soldier with the warehouse key. Use the eagle sight for that. It is best to wait near the entrance. The steward will finally come. Pickpocket him silently while staying among bushes, or knock him down by surprise, alongside with his bodyguards. When you already have the key, it is enough to approach the door and loot what is inside.
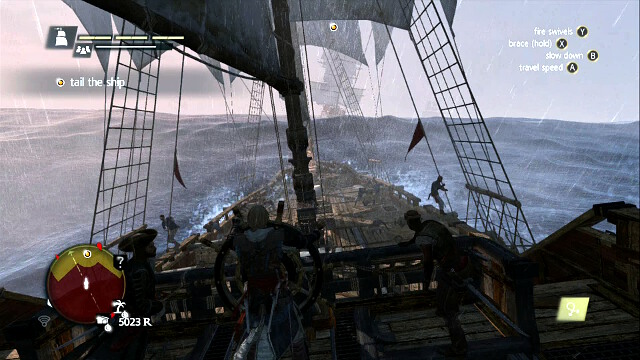 Follow the galleon
After you start the mission, return to Jackdaw using the nearby boat and sail towards the marked area. You will have to locate, and then follow, a huge galleon. The ship should be, more or less, in the middle of the green area on the minimap. Use the telescope to identify it. Then, follow it because, unlike in the case of the ships in the previous mission, the range of this one is long also to the sides. Along your way, you should also watch out for the other brigs and gunships, but this time, you do not need to worry about being spotted by them. The best method is simply to stick close to the galleon and ignore the rest. Even f you are spotted, you can simply sail ahead and you should be able to avoid all, or at least most of the attacks and lose quickly the ships that spotted you.
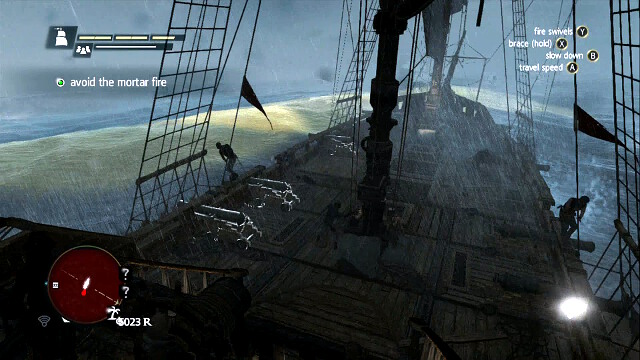 Yellow water means that a cannonball will soon fall there
After a short chase, the galleon will be attacked by another pirate crew. Your objective is to stay away and watch out for the mighty mortars, which would have no difficulties sending you to the bottom. The principles are similar to the regular cannons. Watch the water color nearby Yellow means that this is the area that will soon be under fire. The red if it is currently under fire. If you are currently staying within this area, you need to change course immediately. Remember that the salvos go in steps. First the first circle is hit, then the second, etc. Sail with the cruise speed and balance between individual series. In some time, the attack will stop.
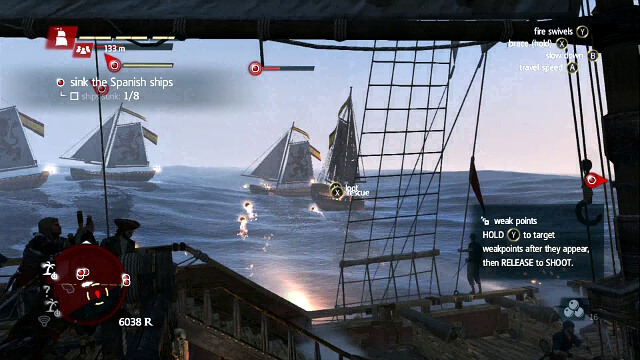 Heavy shot
OPTIONAL OBJECTIVE- sink two ships with one salvo
OPTIONAL OBJECTIVE- sink a ship with the heavy shot
Finally, you will have to deal with eight small ships. The battle should be very easy because, in spite of a bigger number, these are pretty harmless boats. To complete the bonus objectives, you need to sink two ships at the same time, using cannons, and two ships at a time using the heavy shot. It is best to complete both objectives at the same time. The heavy shot is a short-ranged cannon shot without aiming. Although you do not aim in this case, and the range is shorter, than in the case of the regular shots, the damage that you deal is greater. Simply press the right trigger when the ships are close to you. Note that the cannonballs that you shoot are flaming. After you destroy all eight of the ships, the mission concludes.
 Climb to the very top
After you start, climb up the ruins after you reach the top. At some moments, to add some heat , the climbing will be scripted and, e.g. the rope bridge will break. Do not worry about that. These are not the traps that you need to pay attention to, and which could kill you. These only are the elements beautifying the spectacular game. Your character will be able to climb on, over the broken bridge.
 The first guard
OPTIONAL OBJECTIVE- avoid engaging into fight
After the climbing and a stroll deeper into the island, you will bump into the first soldier. Kill him with the run-up attack.
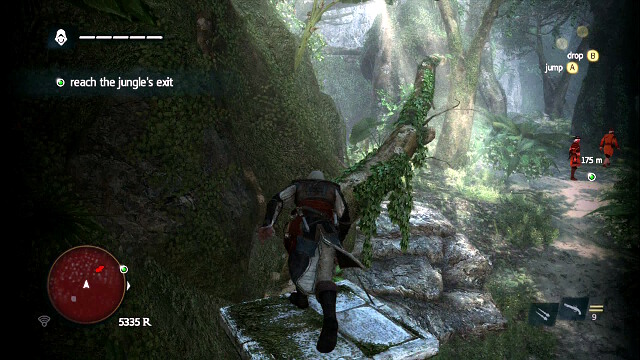 The tree that you will easily kill the other two from
Behind the next turn, you will bump into two guards. Note the columns over which you can jump , and over which you can make it to the tree right above one of the guards. The other one is patrolling the area round and round. You can wait for him to return and take them both out from above, or attack them one by one when they are away from each other.
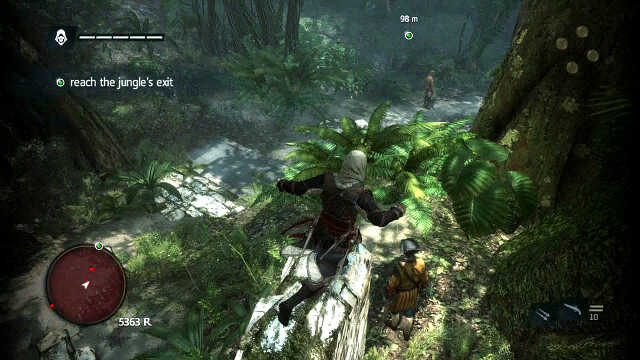 Another two soldiers
Further, the situation is similar. One of the guards is patrolling the nearby area with the other one turned away, fortunately. Deal with both of them by exercising parkour.
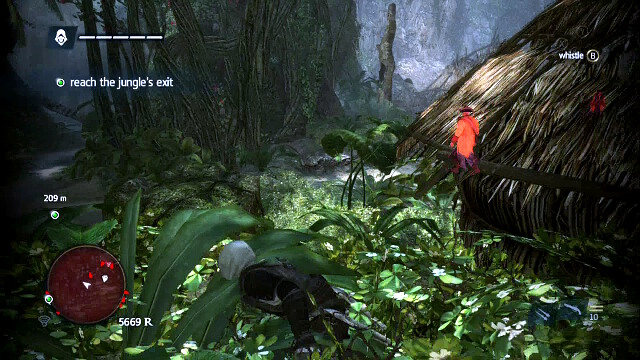 The way onwards is a series of further climbing
Along your way, you will find one more patrolman, who you should also treat with the run-up attack. Then you will have to do some climbing again. The way is simple, without any alternative routes so, you will have no problems here.
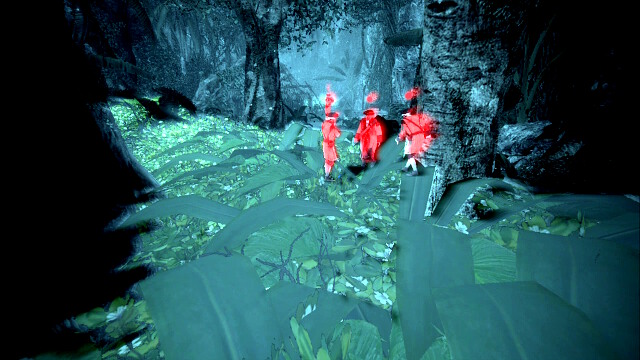
After a longer walk, you will reach a small rocky passage with a larger group of soldier behind it, including one patrolling brute. Use the greenery on the left side of the screenshot, which trails up to the curved tree over the house. Once you make sure that the patrol is behind, climb up the tree. For a fraction of second, you will be discernible. Not for a long enough to enter combat mode.
 Watch out for the soldier on the tree
After you jump down from the tree, dash into the bushes before you are spotted by the musketeer on the nearby tree.
The way deeperIn spite of what it may seem, the way ahead is not too demanding, due to abundant thickets which you can hide in. Keep to the left until you walk past all the huts. Remember that even if you have to run while exposed for a moment, most probably this is going to be too short for you to be spotted. If someone will come to check out, kill him silently in the bushes. Run then, until you reach a settlement. When you reach it you will complete the bonus objective and you will be able to fight in the next part of the mission.
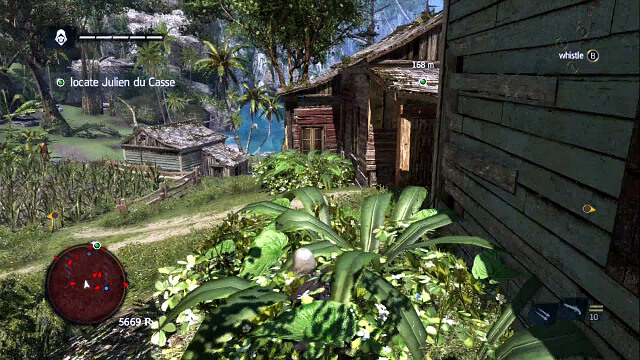 Use the garden to walk around the settlement's main part
Go left to walk around the village's center. Move among bushes towards the water. If necessary, remember that you can whistle to lure a guard towards yourself and be allowed to walk on. Alternatively, simply cut your way through with your sword.
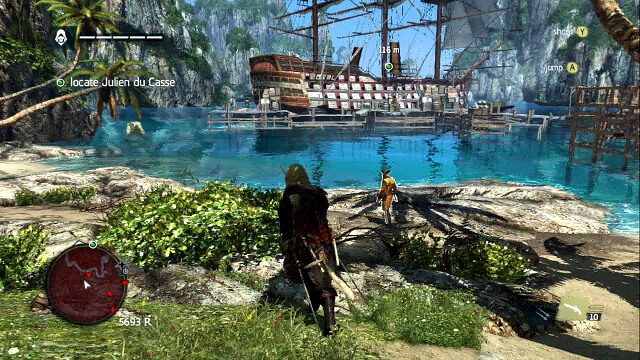 Swim to the ship
Reach the water, walk around the ship's main entrance. And start reach the ship by swimming around it. If you are spotted by the quay's guard, remember to press the interaction button to dive. You can still swim then so, keep pushing forward towards the ship. When you need to resurface due to lack of oxygen, you will already be too far away from the guard.
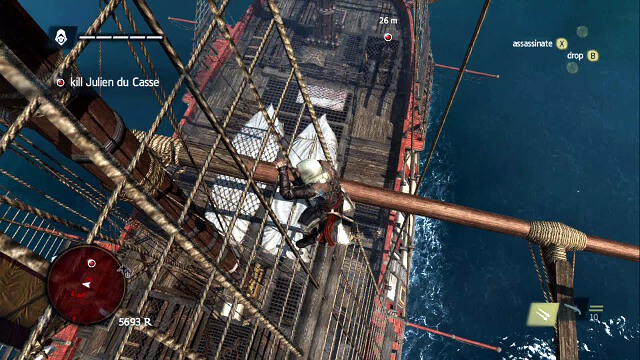 Climb onto the mast
OPTIONAL OBJECTIVE- Kill Julien du Casse from above
Swim around the ship and start climbing over the hull. Make sure that there is nobody around after you reach the deck level, and start climbing over the rope onto the mast. If you are spotted, by accident, jump out of the ship into water and wait there for things to calm down. Then, repeat.
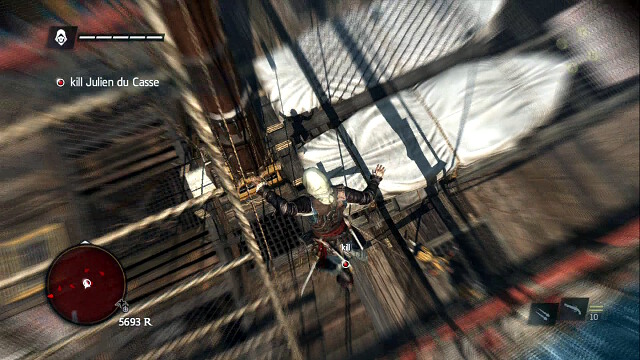 Jump when he is within range
Du Casse is strolling on a regular basis, all around the galleon so, instead of going for him, simply wait until he happens to pass nearby. Then dive and eliminate him. It is easy to make a mistake here and kill someone else instead so, you need to be absolutely sure that there is a glow about him which means that this is the target. If so, press the attack button when the assassination option appears and eliminate the templar.
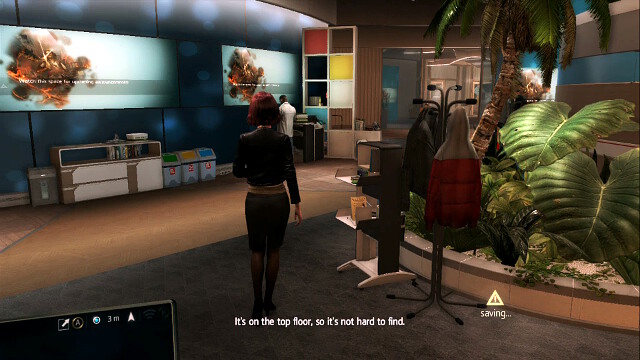 Attend the meeting with C.O.O.
You will have to meet up with your boss. Go towards the destination point and use the elevator along your way. Once you get there, a short cutscene will start.
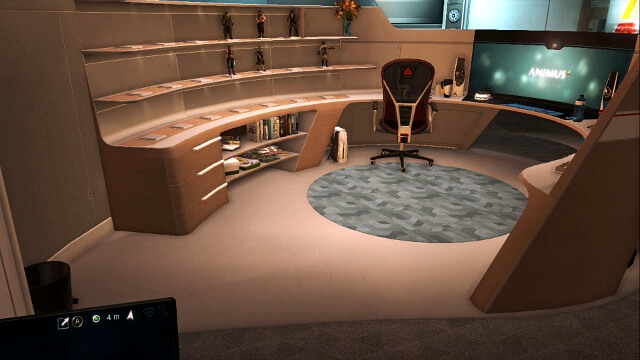 The workstation that you need to hack into
Then, John of the IT will ask you to hack into the computer of one of his co-workers. Follow the pointer and you will get there.
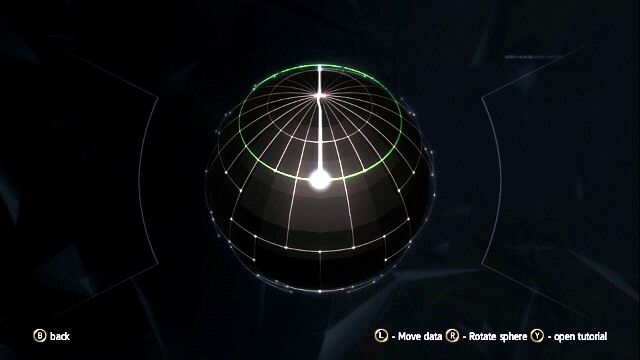 A simple minigame
It is time to play a simple mini-game. You need to slide the data along the lines, until you reach a green one. The larger white dots on the lines determine boundaries that the file will stop on. You will complete the game by, e.g. sliding the data to the right, up, to the right, up and down. After you break the security system, you will see a cutscene. You then need to take the elevator to the bottom floor and hand the data to the courier. Then you will be able to resume the simulation.
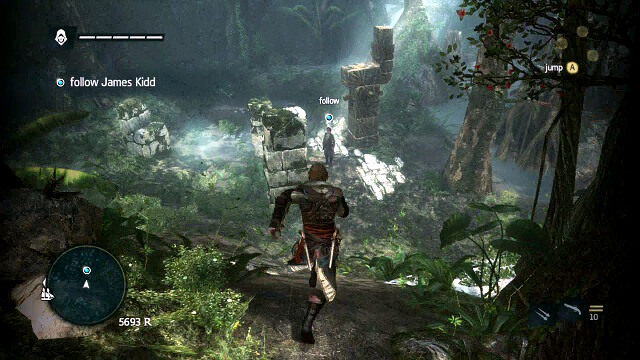 Follow Kidd
This one is a short and easy mission. After it starts, follow Kidd. You will reach the old Mayan ruins. Climb up.
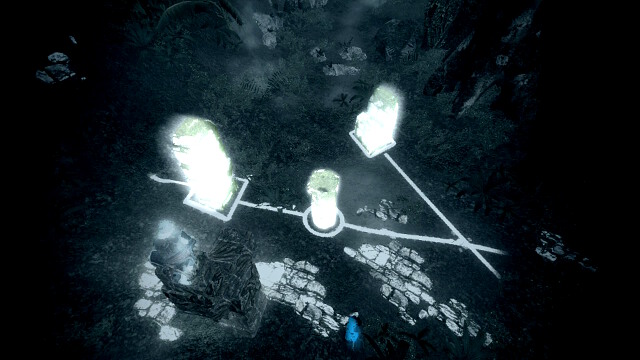
Your task here is to match the shapes of the white silhouettes with the highlighted columns. Move them appropriately to make them look like the ones in the screenshot. Then, jump down and dig out the treasure from the marked place. Then, follow Kidd again.
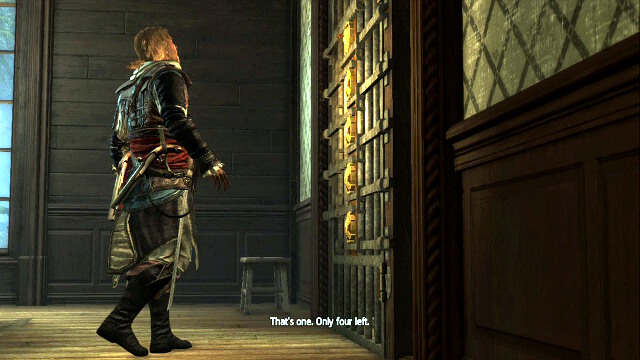 The locked door
In the residence, you will find a grate with the Templar Armor behind it, which offers you an increased protection against the enemy attacks. To open the grate, you need to get hold of five templar keys. You already have one and you need to obtain four more. You need to complete 16 Templar Hunt missions (four per each key) to open the locks. The missions take place in Havana, Nassau, Kingston and in the Caymans. These are side missions and it is not necessary to complete them to beat the game, but the gear is good and, although what it may seem, collecting the keys is not going to be time consuming. So, it pays off to focus on that.
To complete this mission, you need to meet up with Kidd in the harbor.
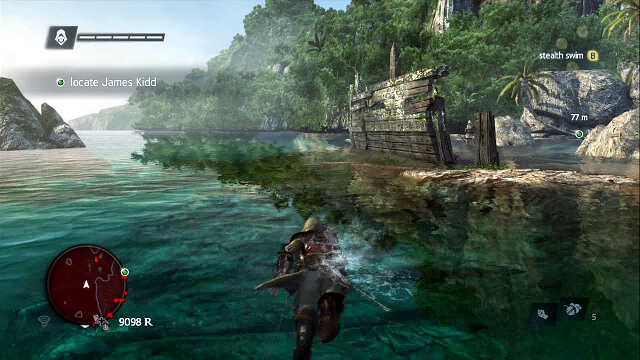 Avoid everyone while swimming
OPTIONAL MISSION- knock out 3 assassins
OPTIONAL OBJECTIVE- loot four coves
In this mission you cannot kill anyone, so you'd better switch to fists at the very beginning, to prevent stabbing someone with the knife. Right next to the starting point, there is the first one of the four coves. Once you open it, run into the water and swim towards the shore while avoiding .
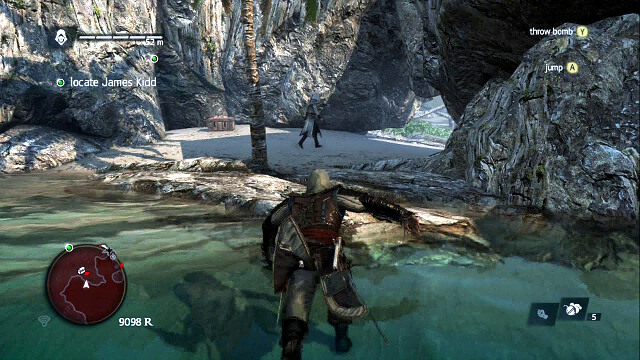 The cove and the guard
At the other end, you will find the second cove with a nearby guard. Knock him down after running up to him (remember to have your weapon concealed!) and loot the cove.
 As soon as it is clear, run for the checkpoint
Keep to the left wall and go towards the checkpoint. Watch out for the guard patrolling this area. If necessary, wait in the thickets until it is safe, then run.
 Climb over the trees into the next part
As soon as you reach the location with more enemies, climb onto the column and climb over the trees towards the Animus fragment, without bothering with anything. Up on the trees, you are safe so, you do not need to worry about the guards.
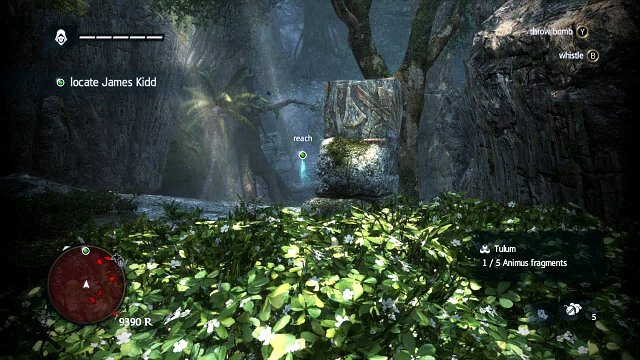 Climb onto the next column
Jump into the bushes right behind the guard and climb onto another column. From there, jump over to the trees and reach the next checkpoint safely, by jumping among branches.

The situation will complicate here, and you will have to approach the matter more methodically, instead of running headlong. Keep to the wall on the left and stay in bushes until you reach the stairs. The marked guard is doing his beat between the stairs and two other guards at the lake on the right of the screenshot. Once he turns away from the stairs and walks towards the twosome, climb over the stairs, while glued to the wall on the left, and climb over at the top.
Eliminate the first obstacleKeep to the bushes. You will notice here two people talking. Wait around until the conversation ends. One of the two will walk away, which is your chance to neutralize the other assassin in the bushes.
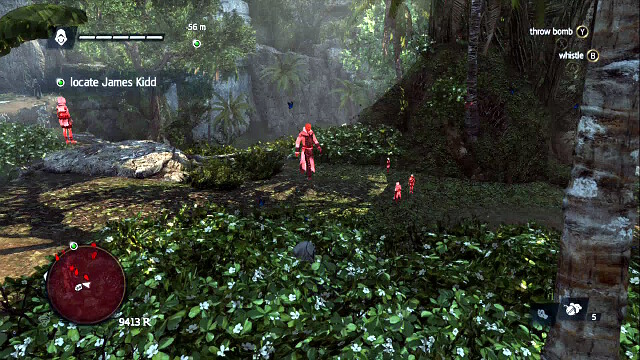 Eliminate the patrol once it turns back
Run up to the next bushes straight away and deal with the guard standing next to them. The assassin that used to be busy with the conversation, with the one that you have just dealt with, will be returning towards the spot where he had the conversation. Run up to him and knock him down. It is important to allow him to return a bit before you take him down, because otherwise, you may get within sight of the last guard at the edge of the elevation. Once you have cleared the area, loot the nearby third cove.
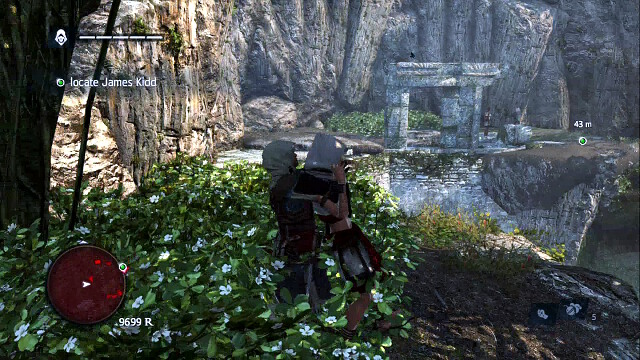
Deal with the last, third guard and jump towards the ruins in the background of the screenshot, where you need to hide immediately next to the assassins here.
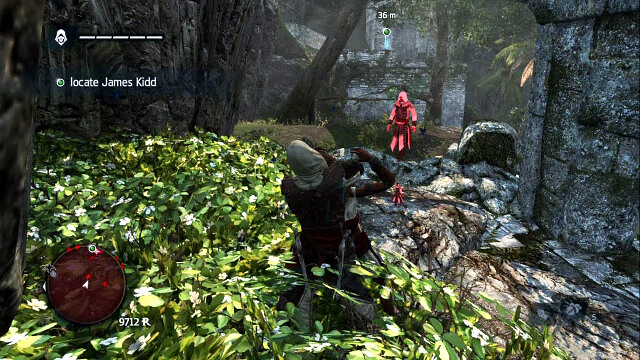 Eliminate the last two silently
Of the two here, one of the guards is patrolling the area and he walks away to the edge. Take advantage of that and, once he strolls away, whistle to attract his attention and eliminate the other one. Then, repeat this action with the second guard. Do not run up to attack them. It is important that you drag them into the thickets because you will get within the sight of the gunner at the other end of the map otherwise.
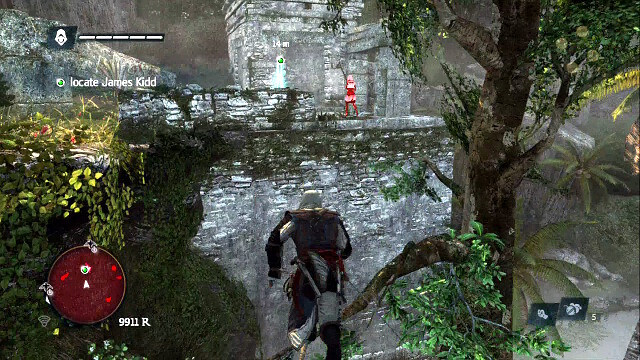 Get around the gunner by jumping to the left
The gunner is strolling around his area while and watches over the entire area. Remember that you do not need to be concealed in the thickets to disappear from his vision. If necessary, you can simply stand behind a tree or a column. When he starts going back, jump onto the tree and make it over to the left, where you need to hide in the bushes again, to prevent being seen by the guard patrolling that area, or knock him down by running up to him.
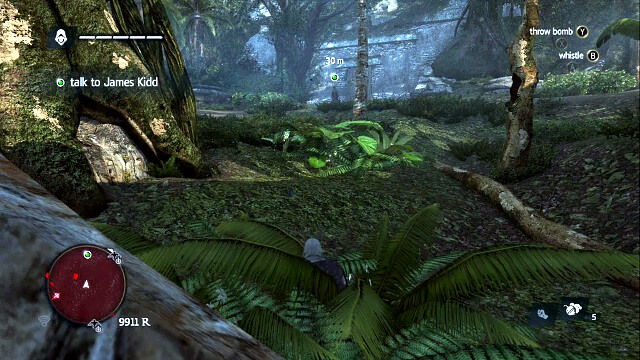 James Kidd
Keep going up and dash from a cover to another. Initiate the eagle sight to locate Kidd. Once you spot him, it is enough to approach him to complete this mission but do not do that yet.
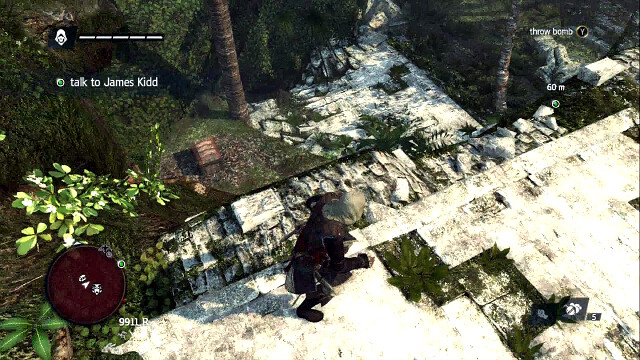 The last cove
Instead, go left (with Kidd ahead) towards the ruins. There is nobody here so you can move around freely. Around the Mayan ruins, you will find the last cove. Loot it and return to the pirate to complete this mission.
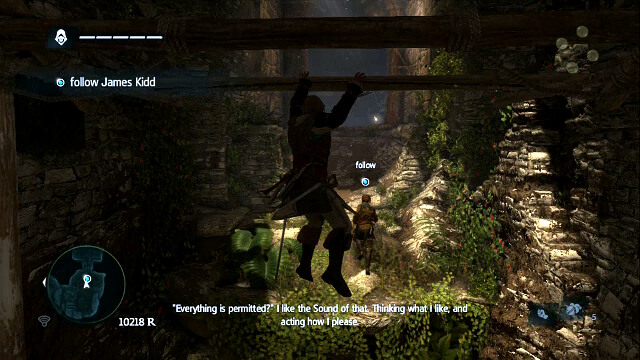 Follow Kidd
Follow Kidd and take the same route as he does.
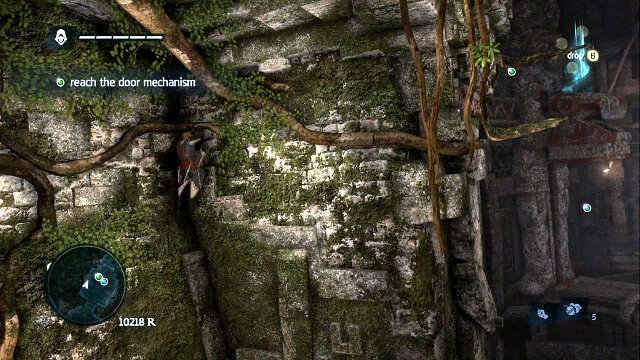 Climb up the wall
At some point, the bridge that Kidd runs over collapses and you will need to search for a way around. Climb onto the wall on the left and reach the stony block by moving among the branches. Once you climb onto it, it will slide down to open the door into the temple. Then, follow Kidd and copy his route.
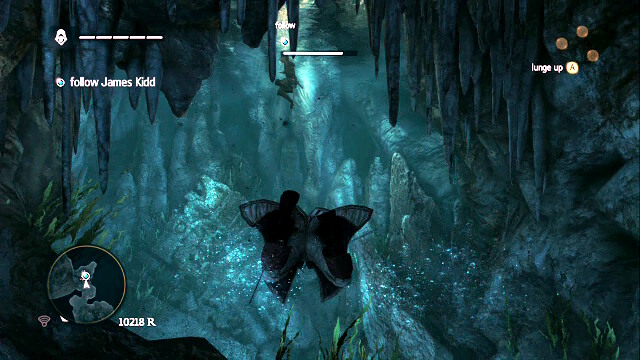 Toy need to swim over an area
Once you jump into water, dive and swim underwater. Remember to hold down the run button at all times. Pay attention to the bar at the middle top of the screen, which determines how much oxygen you have left. The way to swim is short so you do not need to worry that you will run out of oxygen. Follow Kidd and resurface in the appropriate spot to replenish oxygen. Then, continue the swimming.
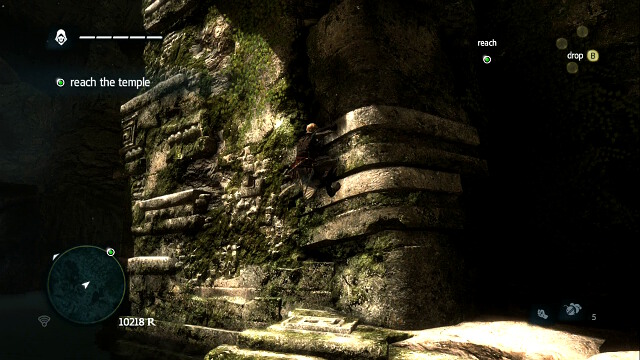 Climb up onto the top
You will need to climb up a bit again. Remember to take the direction towards the recesses in the face of the wall, or wherever there is something sticking out.
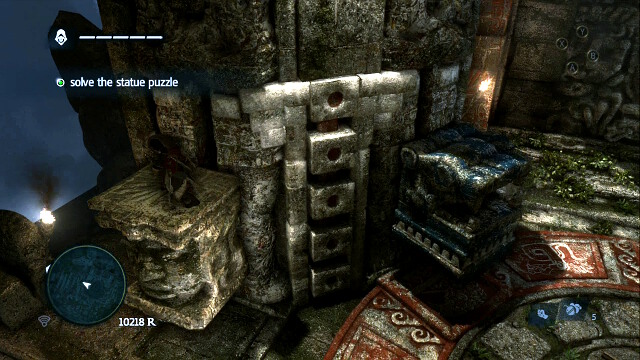
You will have to mach the colors of the stones with the appropriate colors on the wheel. Start by putting the blue stone at the foot of the column. Jump over to the gray stone. The mechanism works on the principle of scales and, while you are standing on the gray stone, you will make the blue one go up, just like in the screenshot.
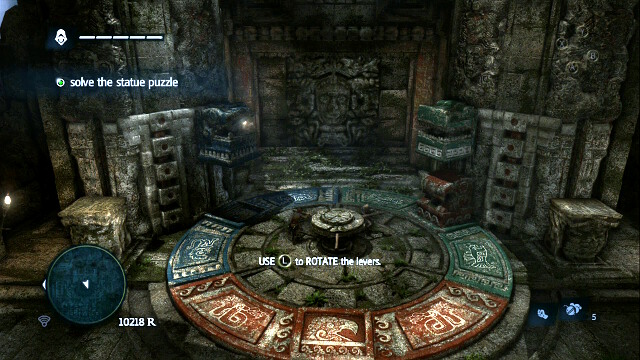 Put the blue stone in the correct position
Move the blue stripe under the blue stone. Then, jump onto it to lower it and put it in the correct position.
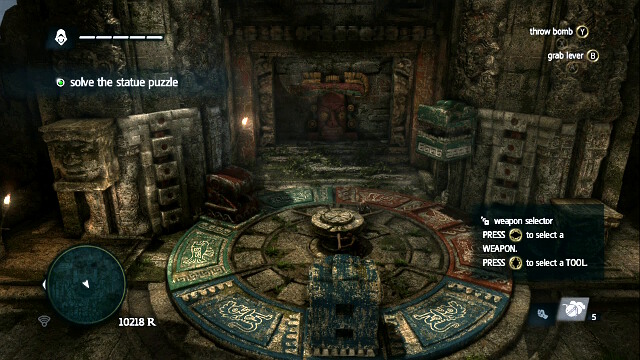 Lift the red stone
Position the red stone at the foot of the column and, just like before, elevate it to make space. Then, move the red stripe here and lower the stone.
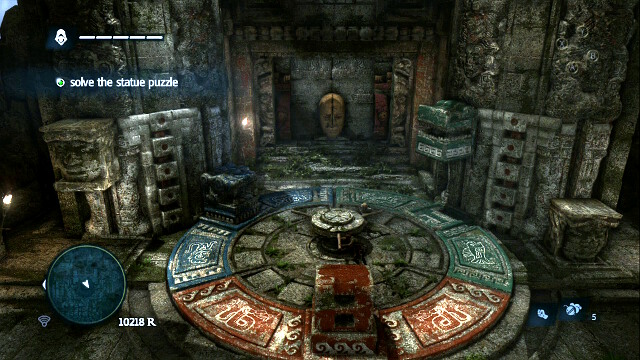 Lower the last stone
Finally, move the green stripe to the foot of the column on the right and lower the last stone. You will open the door and the mission will conclude.
You will receive a new weapon, the blowgun, including two types of darts - sleeping and berserk. The sleeping darts put the target to sleep for a moment (note the circle above the head, which informs you how much time there is left, before the target wakes up). If you fail to run up to him, and neutralize him for good, the guard will get up. Additionally, if another guard notices the sleeping one, he will react and start searching for the threat, which is why it is best to use it on single opponents at vulnerable spots especially on the musketeers on watchtowers The other type of darts introduce the target into a battle rage and make him attack everyone around him, including his allies, of course.
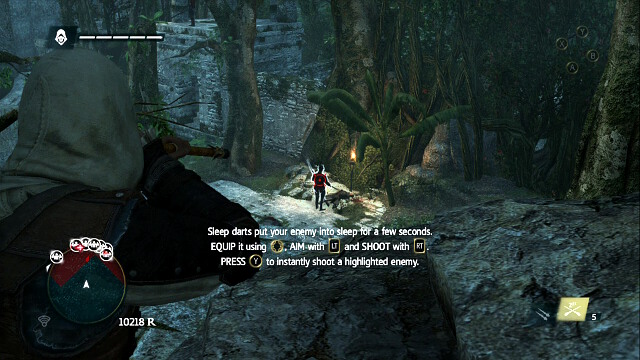 Shoot at the nearby guard
You use the blowgun just like the ordinary gun. Target a nearby enemy and shoot.
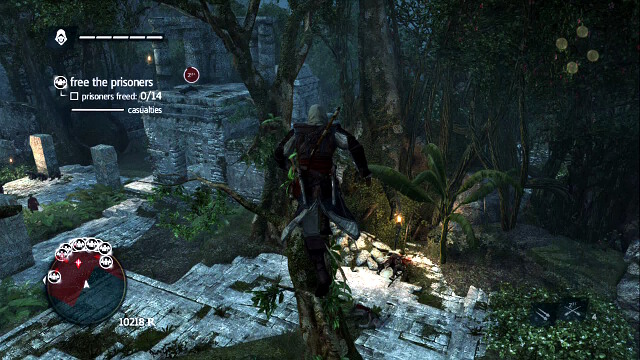 Put the gunner at the other side to sleep
OPTIONAL OBJECTIVE- use 8 sleeping darts on guards
OPTIONAL OBJECTIVE- use 2 berserk darts on guards
Right after the beginning, go, over the trees, to the left. Ahead, you will notice a gunner. Shoot him with the sleeping dart and jump there immediately to neutralize the enemy at close quarters.
In this mission, you need to save the prisoners, without letting more than five of them die. You do not need to fight from hiding and, in case of emergency, you can kill the enemies in a direct fight. Still, try to restrict that, especially around the prisoners.
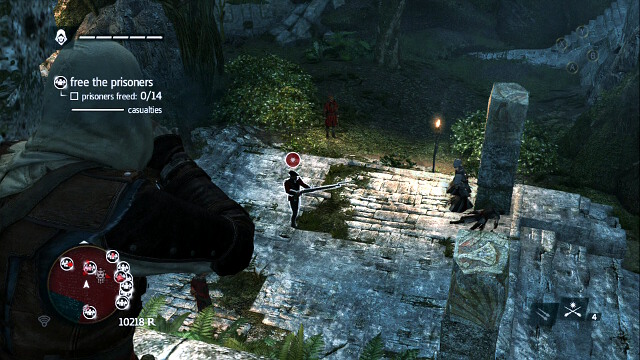 The soldiers will start fighting each other
From the gunner's tower, you have a view over the first group of prisoners. Aim the berserk dart at the guard targeting the prisoners. The guards around will launch at him and probably kill him. The regular soldiers will not attack the prisoners. Only the ones that target them will. Thanks to this, you can simply jump down and kill off the remaining soldiers; then, free the prisoners. In an extreme situation, the soldier that you shot at, kills the others and survives. That is why, for safety, you should keep the sleeping dart prepared, to put him to sleep, in case of emergency, before he launches at the prisoners. After you are done, climb the nearby stairs into the building with the treasure, where there is one more prisoner.
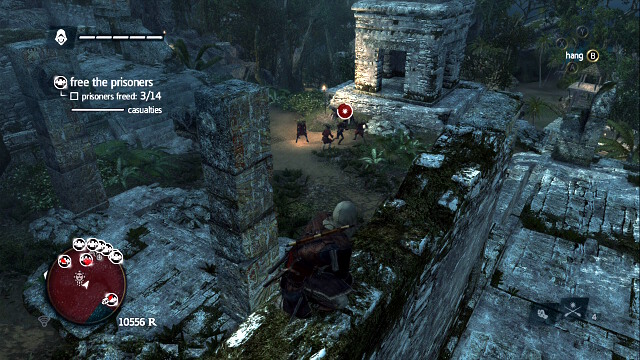 Implement this strategy again in the next location
Return to the tower, from which you have been shooting, and make it over the walls to another big group. The situation is the same as previously. Shoot at the soldier with the musket and the rest will start attacking him. Again, keep an emergency sleeping dart prepared, just in case. After the fighting finishes, finish out the remaining ones and free the prisoners.
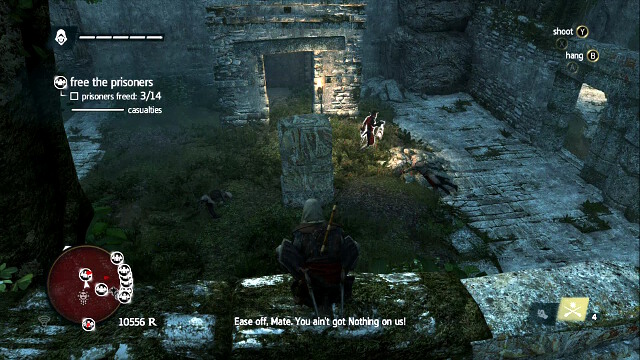 Put the single soldiers to sleep
You will find a prisoner on the left, and on the right of the most recent group. It is a good idea to use the sleeping darts on the single soldiers, to bring the bonus mission completion closer.
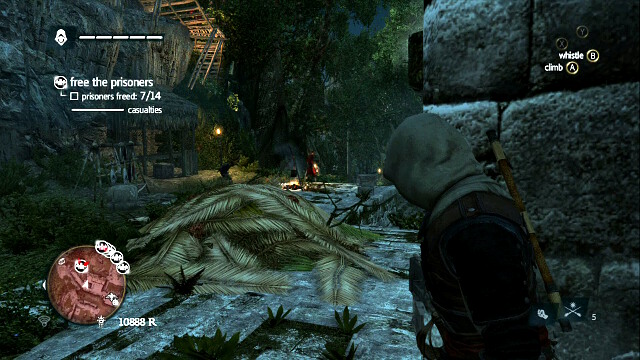 Another prisoner that needs to be freed
After you have cleared the entire upper region, follow the synchronization point down and reach the closest icon from there. Around, there should be one patrol and one guard on the wooden stairs above. Put both to sleep, using the darts, and go deeper into the village, towards the cottages.
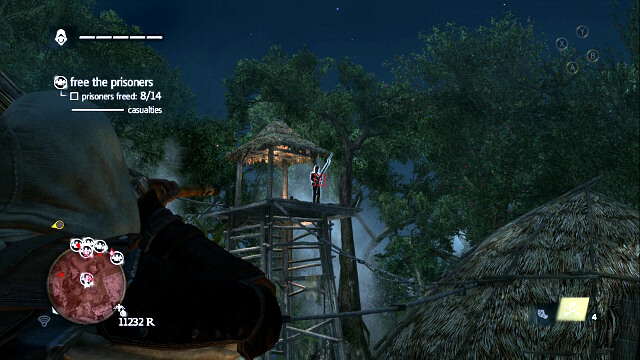
Right next to the cottages, there are towers with musketeers on top. Note the connection between the roofs of the cottages and the tower in the screenshot. Put the guard to sleep and jump onto the cottage immediately and make it onto the tower before he wakes up.
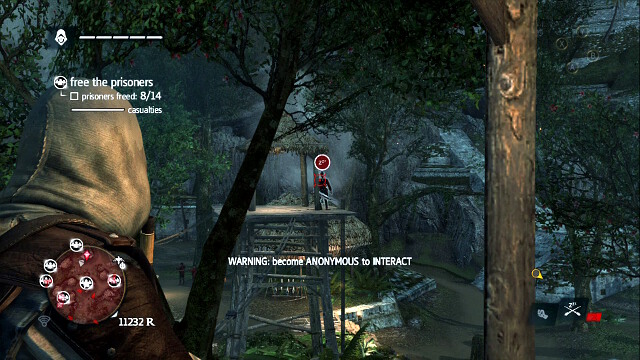 Take on the second tower
The tower is directly connected with another one, where there is another gunner. Once you will climb onto the top, shoot at him and start running there to deal with the sleeping musketeer.
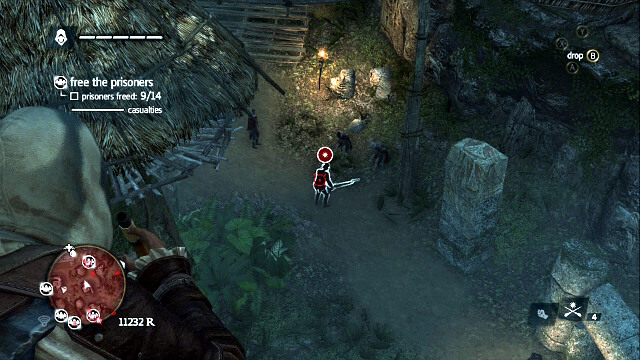 Continue your strategy from the beginning of the mission until you complete it
Once both of the towers are disabled, you will be able to move around the village more freely. At this point, you should have freed 9-10 of the 14 prisoners that you need to free. From the towers, you will have several nearby group within range so, take them down, one by one, from above by implementing the same strategy as before - shoot the berserk dart at the soldiers targeting the prisoners, and eliminate the remaining ones. There are more prisoner groups that you actually need to free to complete the mission so, at this point, the order is up to you. Simply, approach the groups one after another until you free enough prisoners. Also, make sure that you have met the requirements of the bonus mission, concerning the sleeping darts, and use some more of them, if necessary. Once you free 14 prisoners, this mission, and sequence 4, will conclude.
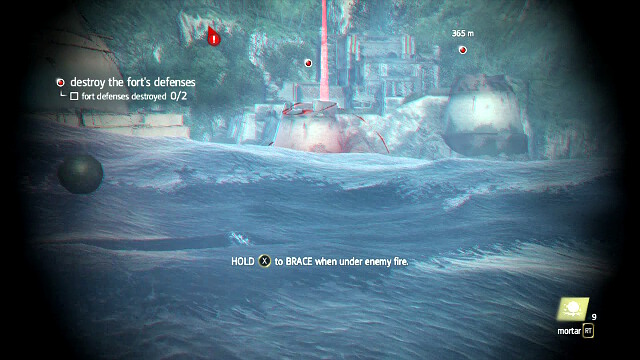 First, take care of the ship
Before you start this mission, make sure that you are in the possession of mortars, and buy more if necessary. The objective is to seize the fort which is additionally guarded by a brig. First, deal with the enemy ship, best by swimming out of the range of the fort mortars (around 550 meters). If you have been hit, after you seize the ship, use it to repair possible damage.
Use the mortar to destroy the towersOPTIONAL OBJECTIVE- use the mortar to damage the fort
Once you have dealt with the ship, it is time to turn to the fort itself. The best method is to use the mortar for that. Not only because of the bonus objective. The mortar is, arguably, the most formidable naval weapon. Additionally, while targeting the fort, you can be sure that you hit it, because it will not sail away, unlike the enemy ship. The mortar is activated with the left bumper. Aim at the enemy towers and pound at them until you destroy them. For the whole time, you need to watch out for the enemy fire from the fort. Remember to keep an eye on the color of the water. The best strategy is to sail fast, to the side and go in crescents in front of the fort. Also, at closer distances, the heavy shot, plus a shot into the weak point, will be very effective. Once you have destroyed both towers, start running towards the fort.
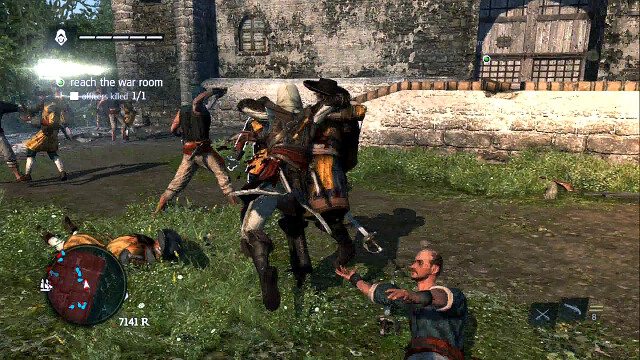 Use a running assassinate to kill the officer
OPTIONAL OBJECTIVE- use a running assassinate to kill the officer
Once inside the fort, ignore all the fights and focus directly on the officer that you need to kill. Kill him by surprise by running into him. If he realizes that you are around, escape to lose him and try again. After you kill the officer, the remaining soldiers will give up. Use this to search the chests and the Animus fragments in the fort. Once you are ready, walk inside the keep to complete this mission.
 Follow Prins and Torres
Before you start this mission, make sure that you have the smoke bombs! After you start, initiate the eagle vision to mark the two that you need to follow. Then, go after them. Just like usually, use the passer-bys and all kinds of thickets to prevent being spotted.
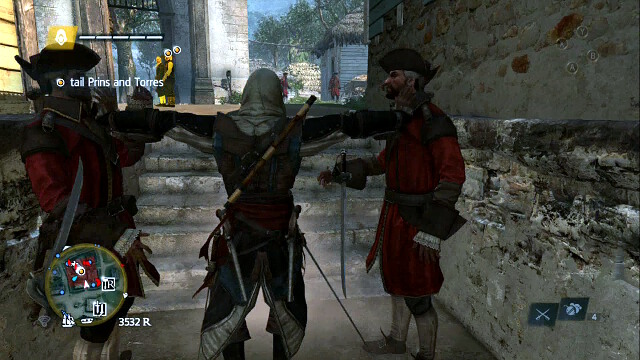 Using the bombs, you will easily lose the guards
OPTIONAL OBJECTIVE- kill guards stunned by smoke bombs
Prins and Torres will soon enter the closed area guarded by two guards. Make sure that they are a few meters ahead and simply walk in between the two guards, throw a smoke bomb and press the attack button for your character to kill both of them at the same time. Nobody should react to that but, just in case, run down and hide behind the corner. If it is clear, simply run ahead and hide in the thickets. Then, resume following the group.
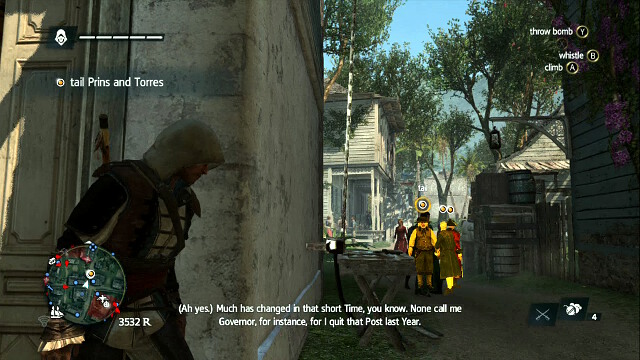
OPTIONAL OBJECTIVE- kill four gunners
A few meters ahead, the men that you follow will be going through a road where you will find a rope. To make it easier to locate, note that it Is glowing in the screenshot. Once it is clear, use the rope to make it onto the rooftop. Once there, run ahead, from the screenshot's perspective, and jump over to another building, where you will find a musketeer, which you need to kill to meet the optional objective's requirements.
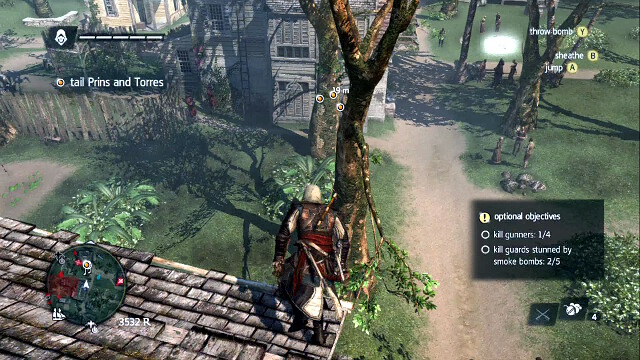 Continue in the air
From the rooftop's corner, you can jump onto the trees, over which you will make it onto the next rooftop with another gunner, which also needs to be dealt with. Return then to the street level by jumping into the nearby cart with hay, by which Prins and Torres will walk.
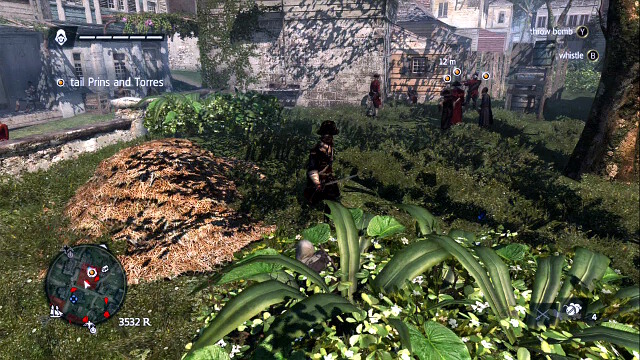 The execution
The two that you follow will make a short stop to see the execution.
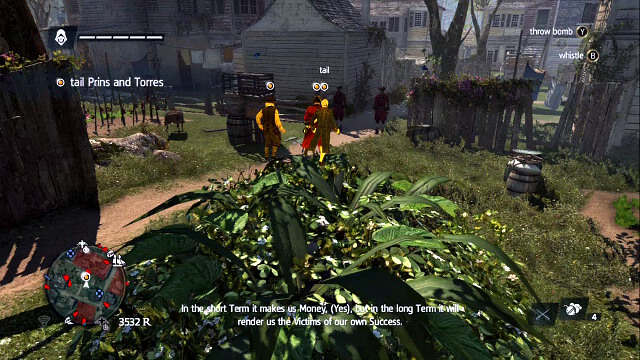 Another couple of guards
Soon, they will be passing by another couple of guards. Deal with them in a manner similar to the previous one and kill them also, while they are stunned with the explosion of the bomb. You need to remember, though, that you need to wait for the targets to walk away a bit, some 8 meters, and jump into the nearby thickets right after killing them.

At the next turn, they will be passing by a house where you will find another musketeer. As soon as you get the opportunity, climb up the ladder and kill him.
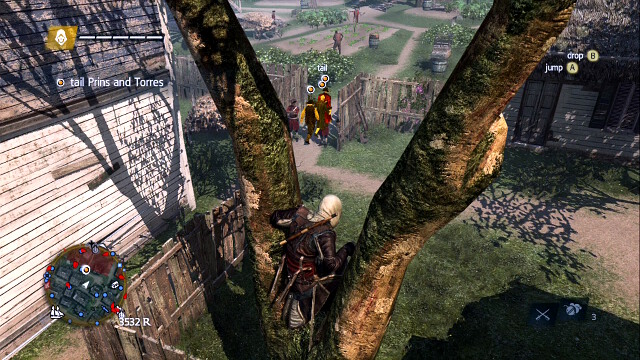 Guards again
A bit further, there will be another plantation entrance and the last two to kill, after you stun them with the bomb. Once you kill them, walk inside and hide in the bushes.
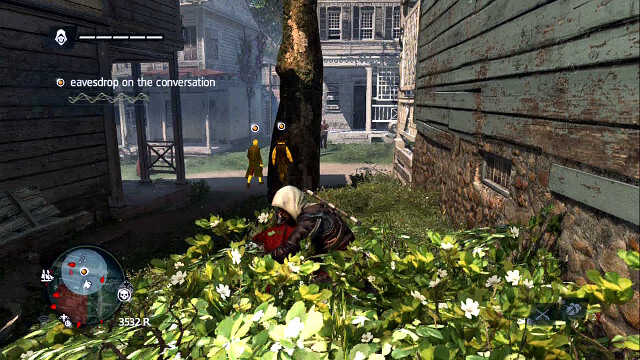 Stay close to eavesdrop on their conversation
You will have to keep close to eavesdrop on their conversation. Keep moving among the hiding places and eliminate the nearby guards at the same time. Once the targets return to the main road, jump onto the rooftop and follow them from above.
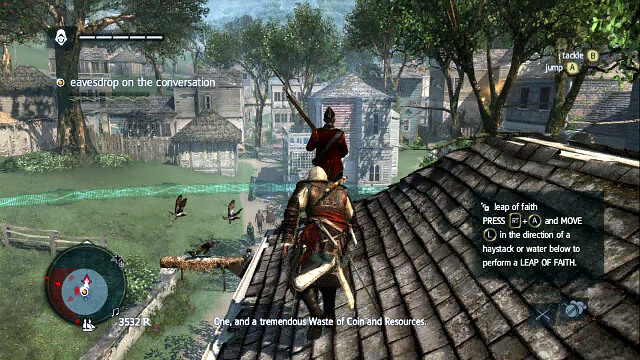 The last gunner to meet the bonus requirements
Keep jumping from a rooftop to another using the trees. Right in front of the entrance to Prins's estate, there are two buildings connected with a log, where you will find the last gunner for the optional objective. From the tops of both buildings, you will be able to jump down into the haystack in the closed area, where the two have just entered. Do that and continue along your path between bushes. Once Prins and Torres reach the end, a cutscene will start.
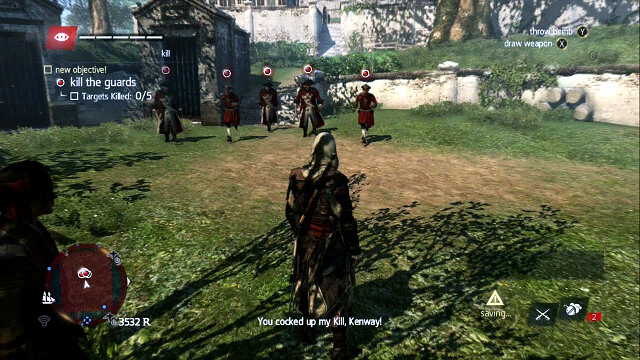 The guards to kill
Finally, you will have to face five soldiers, including three English versions of the Spanish brutes with grenades. You should still have two smoke bombs so, use them to eliminate the enemies quickly. If you have no bombs left, run away in a way that will allow you to have, not more than, one enemy next to you, and break his defense (the jump button) and hit the exposed back. Also, run away from grenades.
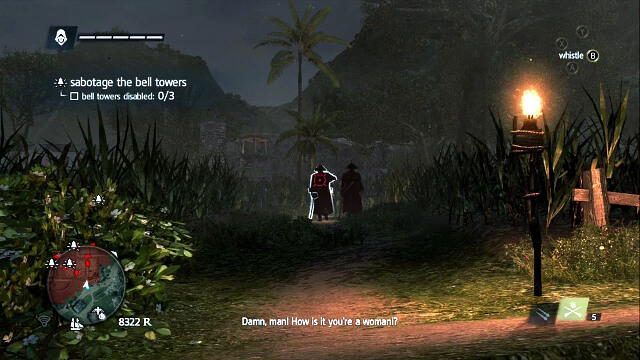 Cause commotion to clear the bell region
OPTIONAL OBJECTIVE- use the berserk darts on two brutes
Close to the entrance to the mission zone, at the first bell, you will find a patrol of two brutes. Shoot at either of them, which will case the all of the nearby soldiers to react and launch at him. Use the commotion to run up to the alarm and deactivate it. After that, jump immediately into the bushes. As soon as berserk wears off, and there will still be many guards remaining, shoot one more. If the fight has been fruitful and there is only one or two soldiers remaining, keep the second dart for later, and finish off the survivors in a more traditional way.
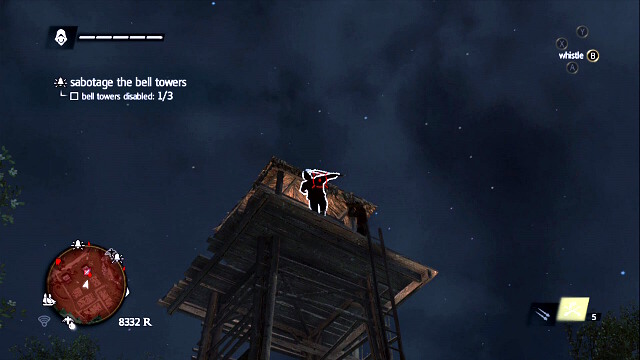 Put the guard o the tower to sleep
OPTIONAL OBJECTIVE- use the sleep darts on two gunners
Right next to the first alarm, there is a tower. Put the guard on the tower to sleep. You do not need to climb up to finish him off. Your old-new ally should do that for you.
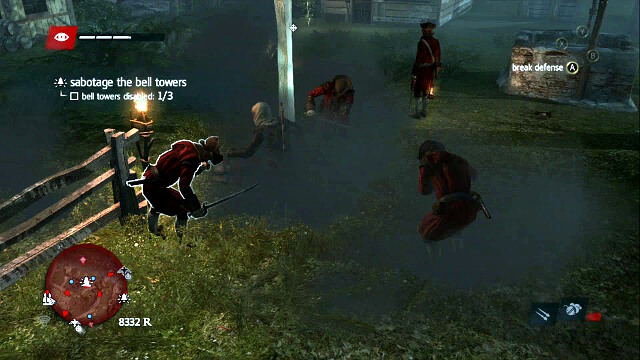 Clear the area around the second alarm
A bit ahead, there is another alarm, and another tower, with a gunner, behind it. Put the gunner to sleep to complete the bonus objective. Deactivate the bell in a more standard way, after you cut through the soldiers. They are the regular guards so, they should be no problem. Implement the old strategy and wait for the attack, after which you press the counter-attack, and then the attack to finish off the enemy. If necessary, use the smoke bomb to your aid. Also, watch out for the soldiers who want to activate the alarm. You will be able to recognize them by the red bell above their heads. Kill them in the first place, preferably by using the pistol. Once you deactivate the alarm, run for the last one.
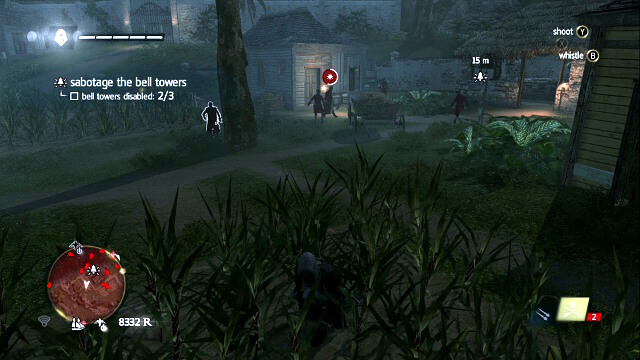 Start commotion and use it to your advantage again
Another tower with a gunner and another group of soldiers around the alarm, including one brute. Put the gunner to sleep and use a berserk dart on the brute. Then allow the soldiers to fight among themselves. At the same time, deal with the alarm. Once all of them are disabled, run to the gate to meet up with the Kidd girl to complete the first part of the mission
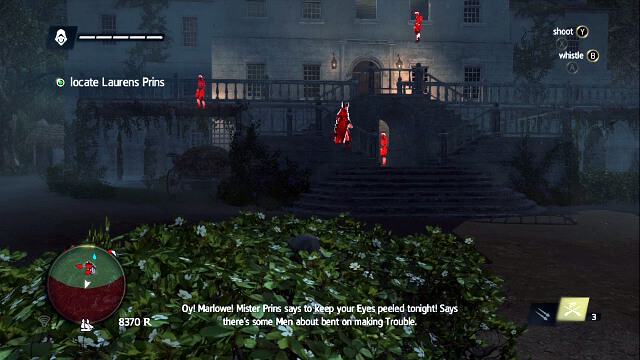 The residence front
In front of the residence, you will find a brute patrolling the area. Shoot him with a berserk dart, or whistle, and kill him in the bushes, if you are out of darts. Once the guards start fighting among themselves, climb onto the rooftop. Ignore the regular soldiers, even if you are spotted.
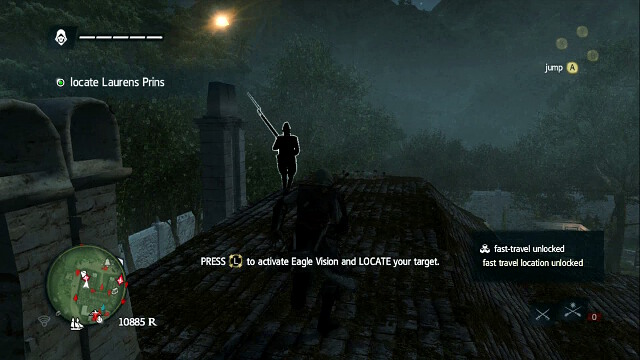 The guards on the rooftop
On the rooftop, there are two gunners, on the left and on the right. Run along the left wing and eliminate the musketeer on flight. Then, dive headlong into the cart with hay below.
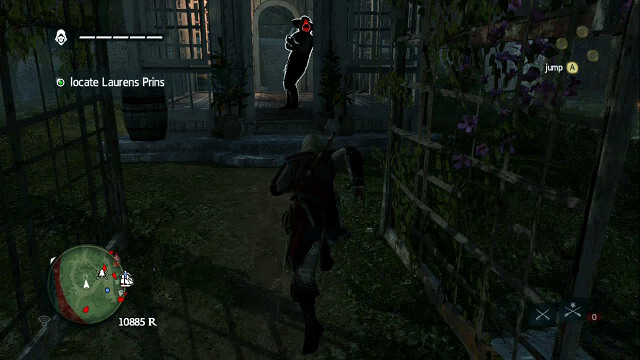 Kill Prins
Prins is in the garden house in the middle of the garden. From the cart that you are in, it is a short way off. Sneak up and get him down with running assassinate, by running inside through the entrance on the left. This will initiate a cutscene.
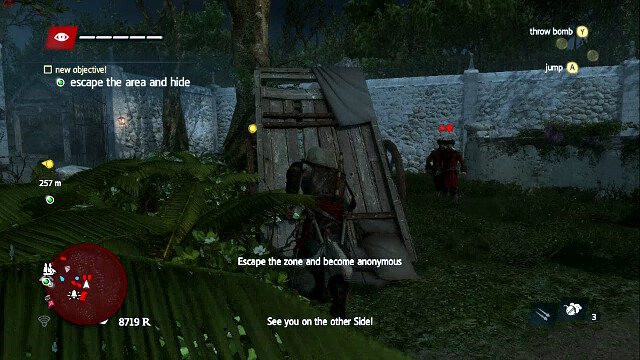
After you regain control over the character, look to the right. You will notice there a tipped cart from the screenshot. Run up onto the cart and onto the tree. Go ahead by jumping from a tree onto another, until you return onto the ground near the wall.
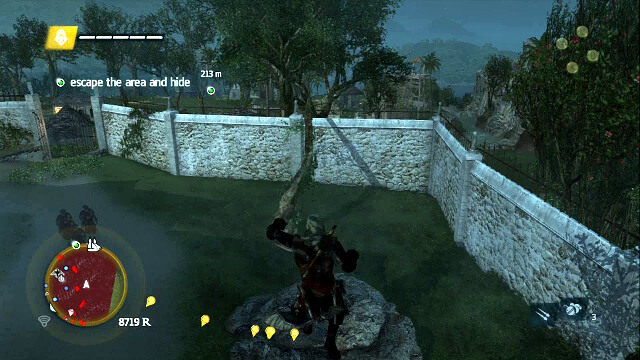 Reach the other side
Here, you will find a fallen tree leaning against the wall. Run onto the tree and you will find a cart with hay at the end of the path, where you can wait until the search for you, around the residence, stops.
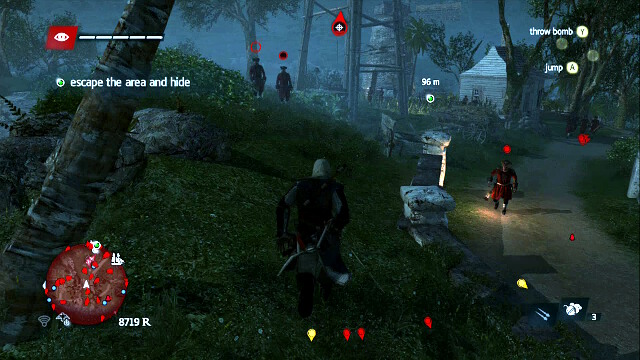 Run Edward, run
The path ahead is difficult and full of soldiers. If you want to, you can try moving around silently, by using the trees and thickets until you make it put. Still, it is faster to ...run. Climb out of the cart and start running ahead towards the green point and ignore everything. It may happen that you will be knocked down several times, by the guards. In such a situation, do not worry about anything and definitely do not fight. Simply, get up and continue running ahead.
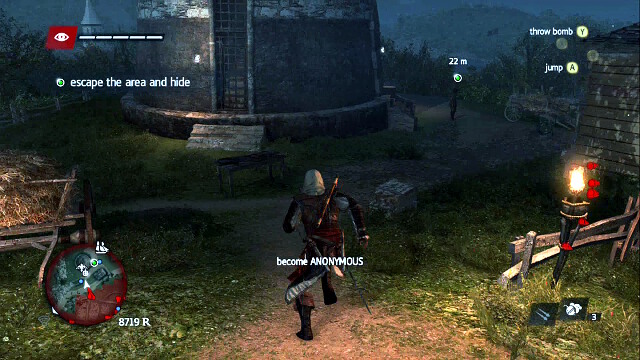 Run inside from the right and run around the mill
Once you reach the mill, run inside from the right and turn left to run around the mill. The soldiers should be trailing behind you, just like on the Benny Hill Show.
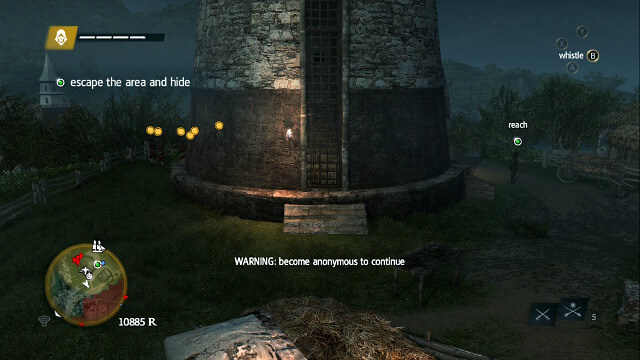
After you run a full circle, run out at the other side and jump into the hay cart, just like in the screenshot. While behind the mill's wall, you should be able to lose them all. If necessary, take one more circle around the mill and make sure that you left all of them behind. Wait in the cart until the search is cancelled and approach the pirate to complete the mission.
 Equip yourself with the diving bell
To start, go to Nassau. After the cutscene, take a stroll with your friends. After you are done walking, you will have to buy a diving bell (5000R) before you can move ahead. If you have the money, go shopping straight away and also upgrade the ship. Otherwise, complete a few side missions, or sell goods, to make a quick cash. Once you have bought the bell, set away into the marked area on the map, where you will find Blackbeard's ship and you will start the main part of the mission.
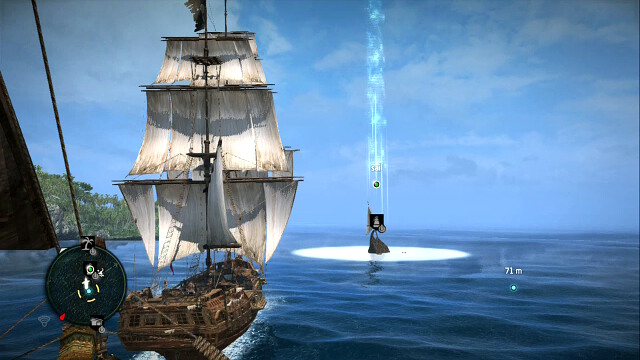 The spot of submersion
Using the bell, you will be able to explore shipwrecks in the appropriate spots on the map. Steer towards the marked area and hold down the interaction button to submerse.
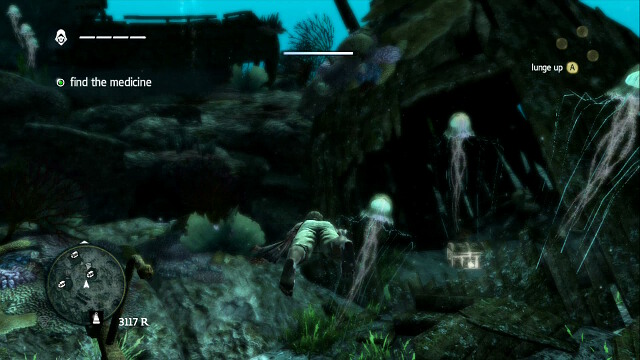 Medusas and the treasure
OPTIONAL OBJECTIVE- loot three treasure chests
Once underwater, steer from one treasure to another and open the chests. Watch out for medusas and avoid them to prevent being shocked.
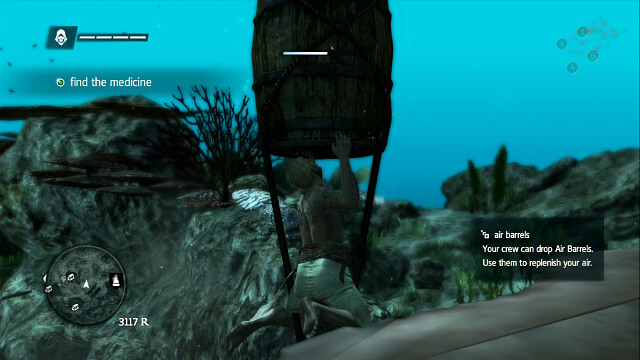
On the map, there also are special barrels marked, like the one in the screenshot, filled with breathing air. Use them to replenish oxygen when you are running out of it.
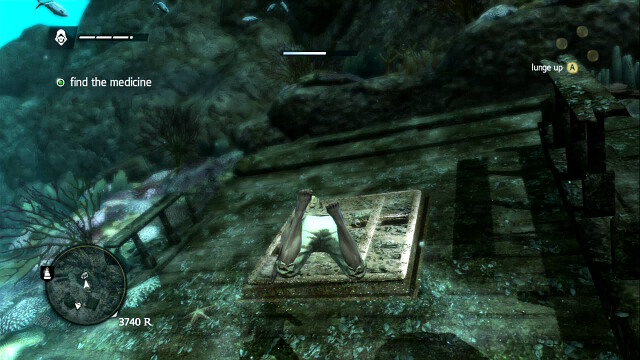
The medicine is in the locked-out area, sealed off with the lid, from the screenshot. If you have already searched through all of the nearby chests, swim inside and try obtaining the medicine.
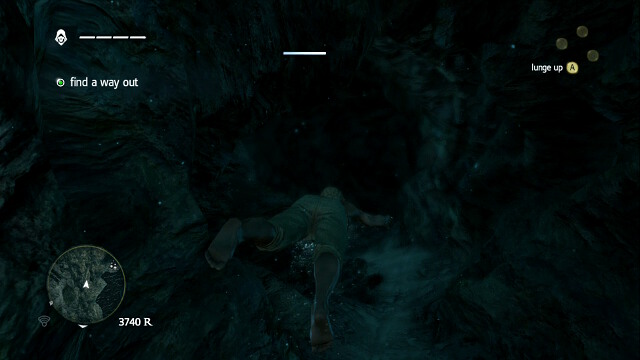 Swim deeper into the cavern
You will become blocked off. Swim into the nearby cavern. Along your way, you will find spots where you will be able to surface to catch a breath.
 Watch out and do not hit the rocks
At some point, you will get into a current and you will start to drift away. Use the buttons on the D-pad to avoid the obstacles. In a moment everything will return to normal.
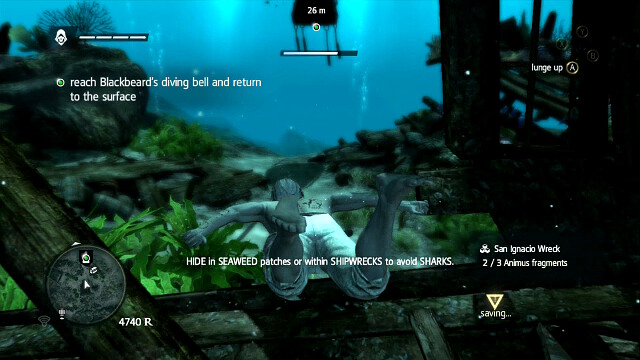 Hide from sharks
OPTIONAL OBJECTIVE- avoid the shark attack
Finally, you need to return to the bell and watch out for the nearby sharks. Swim among seaweed and ship fragments to exit their range of vision. Even if they spot you, after you swim into a hiding place, you will be safe. Reach the bell and return to the surface to complete the mission.
Before you start this mission, you invest quite a lot of money into upgrading the Jackdaw, if you haven't already. What you will find useful is the fully upgraded swivel gun; you should also make sure that you upgrade the heavy shot. It also pays off to increase the boat's durability and invest in the battering ram. You should also remember to replenish ammo. Also, make sure that you have smoke bombs on you.
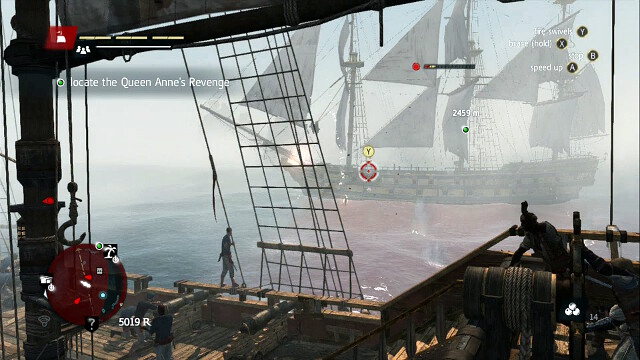 Loot the ships that you encounter
The way is long and full of opponents. Surely, you can steer away from them, or ignore even after they have opened fire, by sailing ahead. Still, with the upgrades that you have bought, they should be no threat to you (as long as they do not outnumber you greatly) so, it pays off to smash several enemy ships along your voyage and fill the holds with valuable loot. After you seize a ship, make sure that you use it to repair the Jackdaw , if it is damaged, or dispatch it to your fleet if it is in good condition.
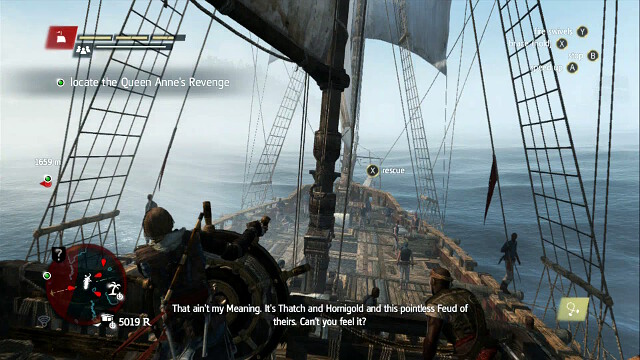 One of the survivors
OPTIONAL OBJECTIVE- rescue five survivors
It is a good idea to rescue pirate survivors along your way, to complete the optional objective. There is a lot of them so, gathering five should not be too difficult.
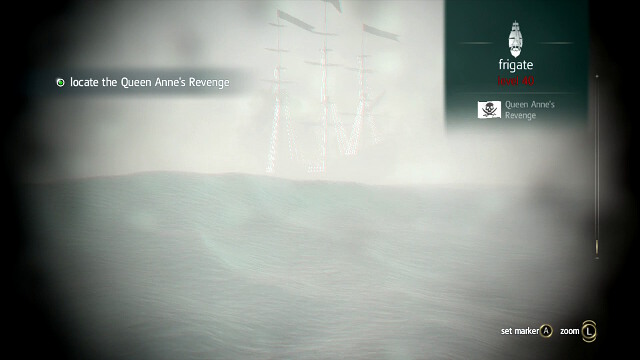 Queen Anne's Revenge
The Blackbeard's galleon can be found moored in the nearby harbor. Sail there and then, run ashore.
 Kill the stunned enemies
OPTIONAL OBJECTIVE- kill three guards stunned by the smoke bomb
Defend Blackbeard against the attacks of the nearby soldiers. If you use the bombs, this should be very easy. Simply, throw the bomb and kill enemies. If necessary, repeat until you succeed. Remember not to waste bombs on one or two soldiers. Instead, throw them when there are 4-5, especially if they surround Teach. After the fights finish, loot the corpses and when you are ready, go aboard the Blackbeard's ship to face the enemy ship.
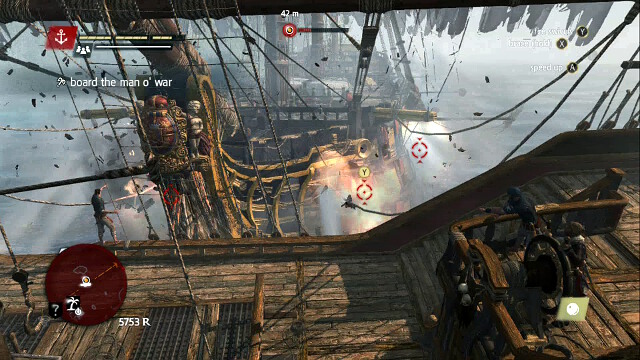
Watch out for the enemy ship's mortars, approach it by sailing towards its bow and shoot chains at it to slow it down. Position yourself at an angle of 90 degrees, relative to the enemy ship's bow and stop. Ram it whenever it comes close Even if it approaches you and you collide, the damage is not going to be too significant, which you can tell by the above screenshot. The ship blocked this way should be pounded with successive salvos strengthened with shots into any available weak point. The enemy's fall is a matter of several moments then. After the cutscene, jump onto the enemy ship and kill the captain by surprise to complete the mission.
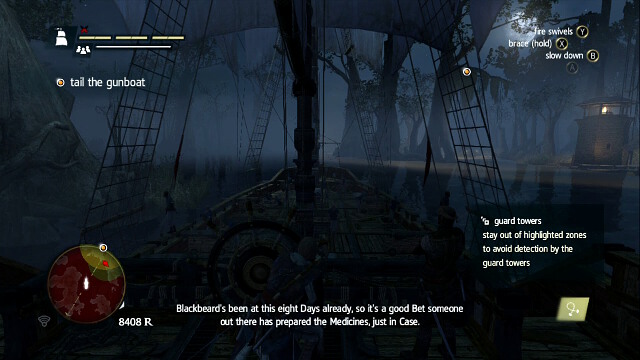 Keep to the left to get around all the watchtowers
You will have to follow a gunship over rough area. You need to watch out for watchtowers and steer clear of them. Already after you begin, there will be the first tower. Steer to the left to bypass it. Right afterwards, there will be another one, and two more, next to each other. You will bypass all of them easily if you keep to the left branch.
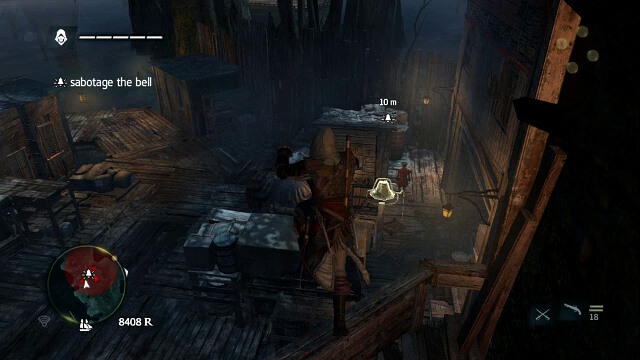 Deactivate the alarm bell
There is no way to bypass the next two towers. Jump out of the Jackdaw and run up to the alarm to disable it. There will only be the regular soldiers here so, you can cut through using force (this mission has no time limit on it). Once you damage the bell, return to your ship, which will in a moment stop nearby.
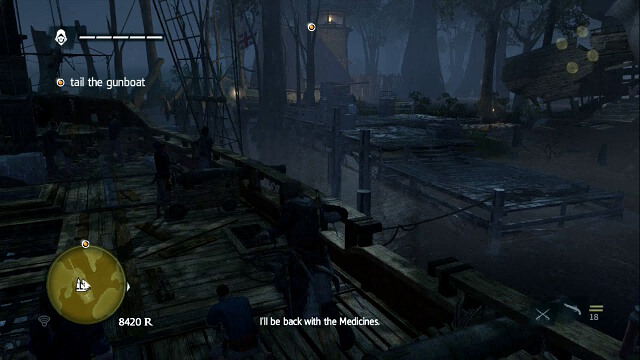 You need to continue on foot
Ahead, there will be no additional obstacles anymore, it is enough to sail ahead. A bit further, you will have to leave the Jackdaw again and go ahead on foot.
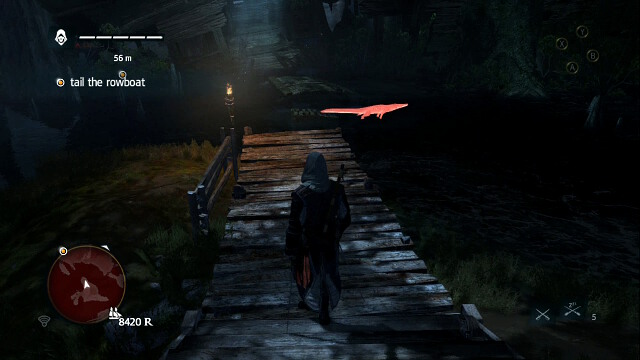
OPTIONAL OBJECTIVE- use sleeping darts on three crocodiles
OPTIONAL OBJECTIVE- skin a crocodile
Right at the first passage, you should encounter the crocodile shown in the screenshot. You especially need to watch out in this part of the map. Put it to sleep and skin it. Then, run ahead while still keeping to the boat.
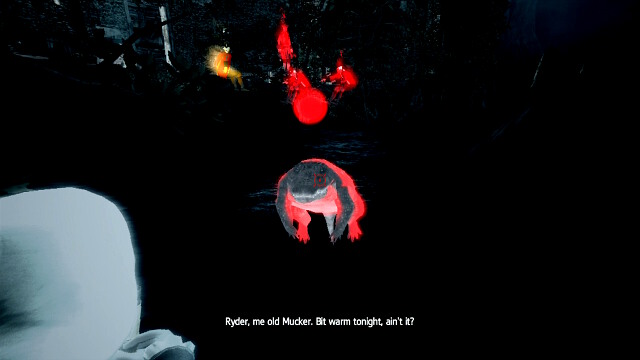 Use the eagle vision to spot the crocodiles
Here, you do not need to worry about the boat itself too much, because it should not spot you. Additionally, every now and then, it will stop and let you make up for the lost meters. The crocodiles are a bane here and you need to be extra careful about them, the best idea is to initiate the eagle vision frequently. Also, you need to remember to finish off a crocodile after you put it to sleep. If you don't it will soon wake up and pose a threat again. If one manages to come close to you, you will have to drive it away by tapping quickly on the buttons displayed on the screen, during a dynamic event. Note, however, that if you drive one away, it will soon come back so, you should hide in the meanwhile and prepare the blowgun.
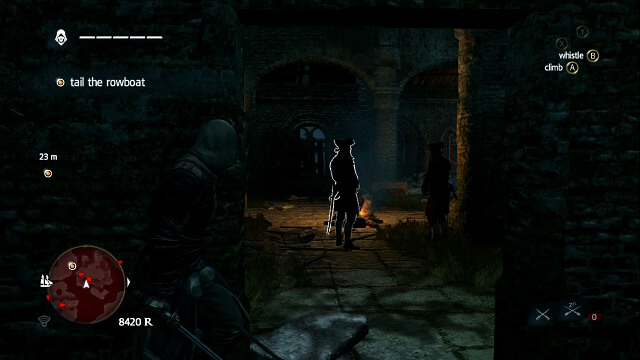 The ruins with the soldiers
A bit ahead, the boat will sail past ruins with a multitude of soldiers inside. Make your way onto the top and jump over columns, above the soldiers' heads.
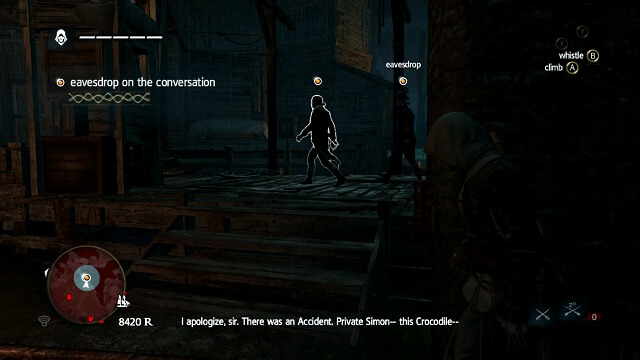 Hide and eavesdrop
In the next part, you will have to eavesdrop on a conversation. Follow the two soldiers and hide behind any available covers.
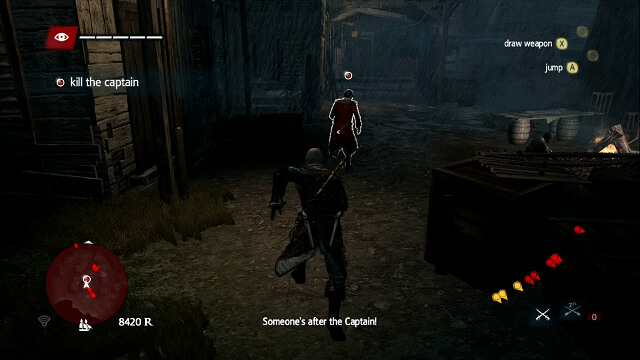 Knock the captain down and finish him off while he is on the ground
Finally, you will have to kill the captain This one is a very dynamic sequence including a series of explosions and other adornments but, basically it will be no different than the other chases that you took part in. Simply, run after the captain and ignore all that is going on around you. Even if the bridge is blown up, you will still be able to run over it. Simply, run for the captain. Once you are close, knock him down and finish off quickly, which will conclude this mission.
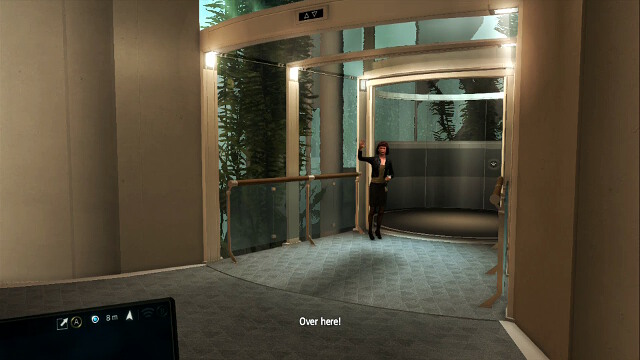 Follow the marker
Meet up with Melanie and take the lift to Olivier's office. Upstairs, you will receive instructions from John, to help him with one more thing. Follow the green point.
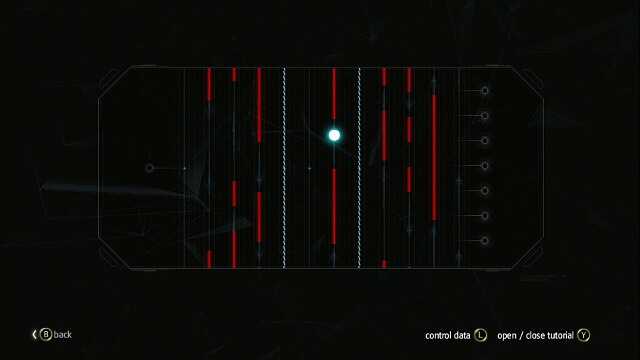
In this minigame, you will have to choose numbers in such a way, so as the final result is 70, if each successive number is multiplied by the previous one. And so, just like in the screenshot, set 572 (5x7=35x2=70) to complete this mission. You will then watch a short cutscene. Right after it finishes, follow the marker. Wait at the window until the crane comes. Mount it and it will take you to Olivier's office. In the office, hack into the boss's computer.
Watch out for "cars"To hack into the computer, you will have to play another minigame based on the rules of Frogger. You need to move the blue dot onto successive lines and avoid the red lines. The two white lines in the middle switch from closed to open on a regular basis. Carry the data over from one side of the "street" safely to the other, to complete the game.
After the game finishes, follow the marker and John's instructions. Take the lift to the ground floor, where you need to hand the saved frog, i.e. the date, to the courier. You can then return to your workstation and resume the simulation.
The seventh sequence of the game opens with the blockade set on Nassau by the British, which makes it impossible to leave the city! You will neither be able to leave the city by sailing away, nor by means of fast-travel, until the end of this sequence.
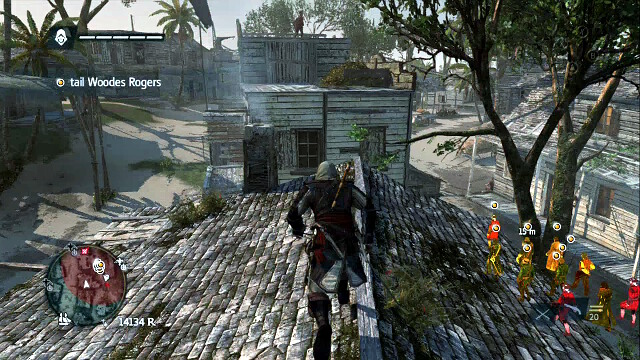 A rooftop with a gunner
After you start, you will have to follow a quite large group of people. The beginning is not too complicated. Then, the group will enter the Nassau market, which they will leave, after a moment, through the restricted area. Make it through the area over the rooftop, where you will find two gunners that you should deal with straight away.
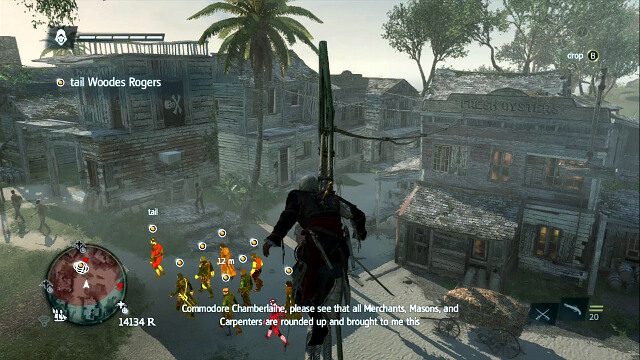
Use the connections between buildings, shown in the screenshot, to be able to move ahead safely. Dart onto the rooftop of the building with the "Fresh Oysters" sign on it and then towards the building with the pirate flag on it.. Jump to the street level there because you will get within a musketeer's sight. Dash from cover to another, on the ground, go ahead a bit past the fort gate.
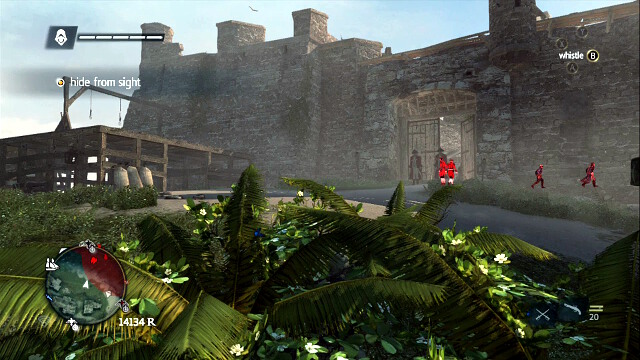 Go past the gallows
Once the group goes indoors, run left past the gallows. You will find there a tree, which you need to jump onto.
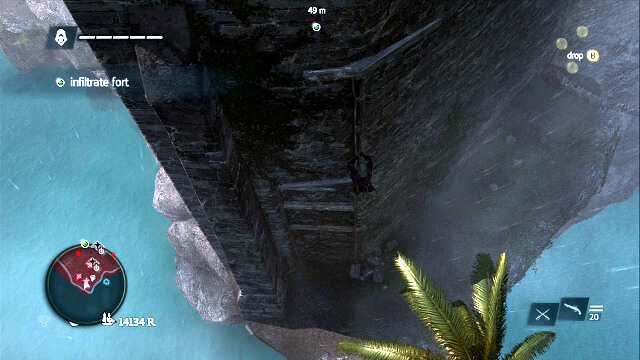
Over the trees, reach the end of the fort, until you reach the place shown in the screenshot. Use the planks on the walls here to reach the tower's top.
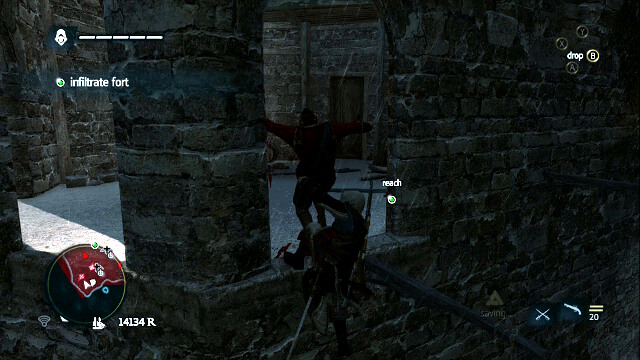 Throw the guard down
OPTIONAL OBJECTIVE- kill three guards while hanging down the ledge
Once you reach the "windows" you will find a guard. Wait for him to come closer and throw him down by pressing the attack button, as soon as the assassination option appears. From here, jump over onto the plank on the side, where there is an Animus fragment. From there, you can climb onto the top of the tower.
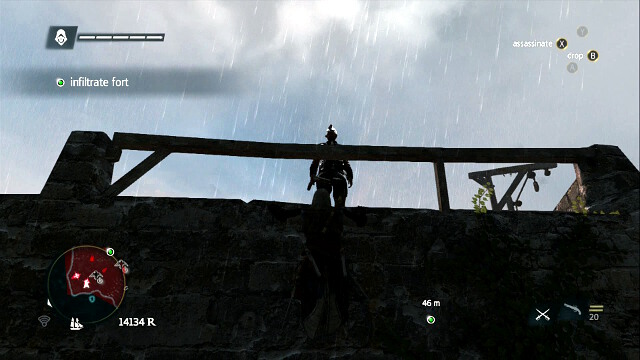
On top, you will encounter another two guards. Throw them off, just like the previous one to complete the bonus objective. Simply, press the attack button once the soldiers are close and you notice an assassination prompt in the upper-right side, just like in the screenshot.
 Go along the wall
From the synchronization point on the tower, jump down, into the pile of leaves below and go along the wall, while eliminating all of the guards there, as you go.
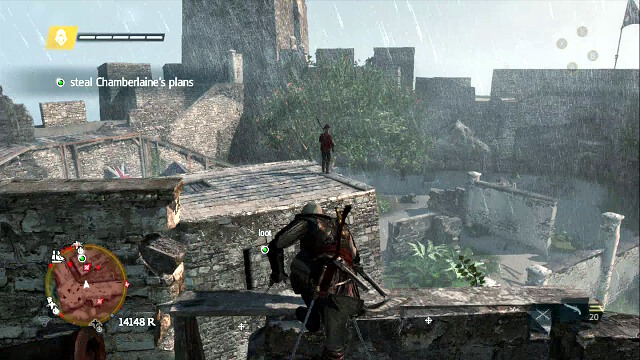 Make it over to the rooftop
After a while, you will get near a building with a gunner on the roof. Jump over to the roof, from the wall, and eliminate the guard.
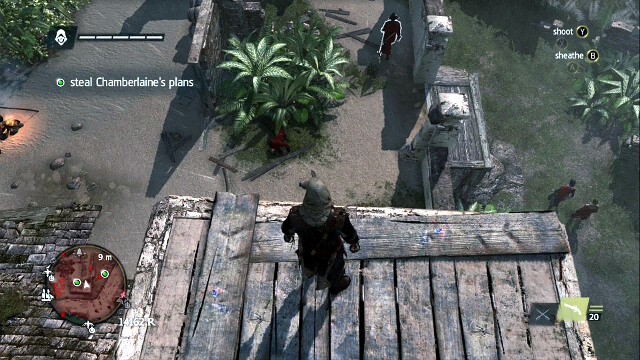 Jump down
OPTIONAL OBJECTIVE- sabotage the alarm bell
From the rooftop, jump down into the bushes and kill the patrolling brute from hiding. Then, walk behind the wall. You will find the alarm there, right next to the thickets, where you can hide. Deactivate the alarm and return to the building from which you jumped down, collect the plans and complete this mission.
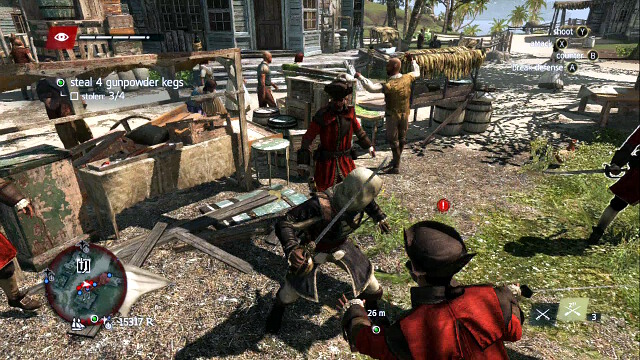 Kill four guards in one streak
OPTIONAL OBJECTIVE- Kill four guards in one streak
OPTIONAL OBJECTIVE- Use the blowpipe on ten guards
This mission, predominantly, focuses on action. You need to collect four of five gunpowder barrels. Simply, go through the successive points on the map and cut through the soldiers there. Each of the locations is heavily guarded (the middle one, I guess, has the weakest defense - all of the remaining ones are on the same level, more or less) so, be well prepared in terms of equipment. To complete the first optional objective, you need to kill 4 enemies within one attack streak. The easiest way to complete this one, is to perform it on the soldiers that guard the entrance to the restricted areas, of which there should be four. Provoke them to fight Wait for the moment of attack, counter and press the attack button during slow-motion. Once you kill the first guard, turn towards the second one immediately and press the attack button. You will kill him with one blow also, then turn to the third one and so forth. The streak will break if you are hit so, once you start it, try not to be surrounded or stay near a musketeer, or an officer.
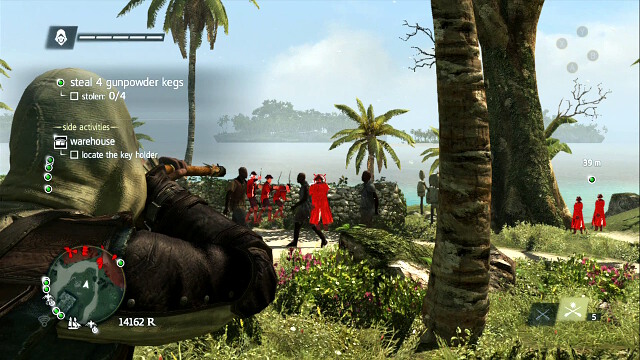 Use the blowgun to gain allies
Your second objective is to use 10 darts on enemies. The best method is use berserks on brutes. A good idea is also to put to sleep the gunners that are at a long distance.
During the fights, you should remember to implement all of the basic strategies - countering, breaking defense lines or the human shield. In case of problems, you can use a bomb. Once you have cleared the entire region, collect the barrel and go towards the next one, where you are supposed to fight again. Keep doing that until you have obtained all four barrels, which will equal to the completion of the mission.
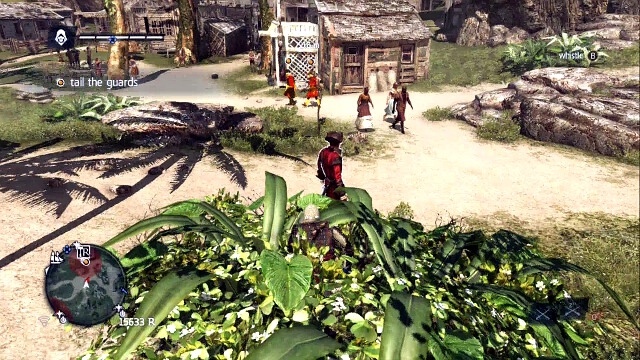 The first guard of the optional objective
OPTIONAL OBJECTIVE- kill three guards from stalking zones
Right after you begin, activate the eagle sight and jump into the nearby bushes, where you will find the first guard for the optional objective.
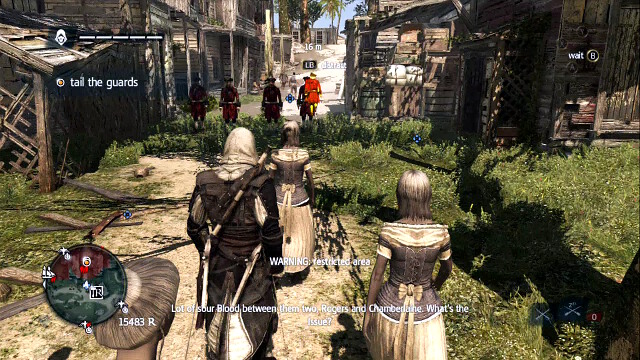 Stay among the girls to blend with the crowd
Before you enter the restricted area, you will find a group of dancers. Hire them and use them to distract the four guards in front of the area's entrance. Stay near the dancers and, as soon as you get the opportunity, kill two guards at the same time. By killing them this way, you will complete the bonus objective. Once you kill them, turn right of the soldiers to get at the building's back.
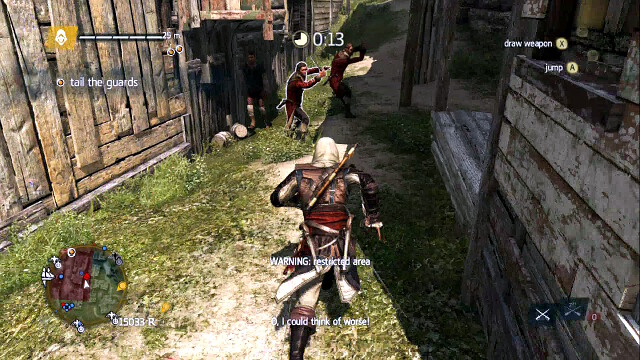 Kill the soldiers
Run along the backstreet. You will find two soldiers, who you need to tackle down quickly, as you run. Then, run towards the end of the street.
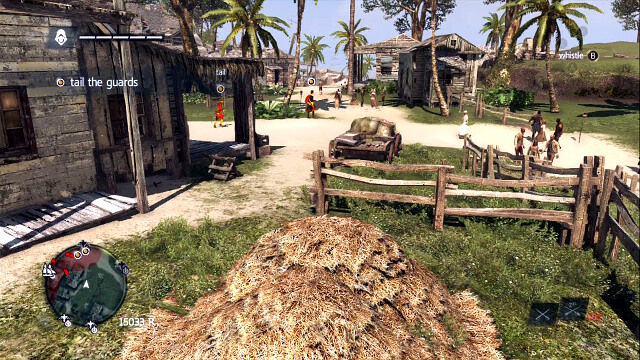
Turn right before the last house to leave the restricted area. You will find there a pile of hay, where you need to hide and wait for your targets. In a moment, they will go ahead, towards the coast. Take advantage of the houses shown in the screenshot, on the right, and walk behind them to remain undetected.
 Climb down the stairs
Once the soldiers go down the stairs, follow them and take advantage of the plants here to remain in hiding. If, by accident, you failed to kill the two guards, while among the dancers, you will find here a patrolling brute that you can kill from the bushes.
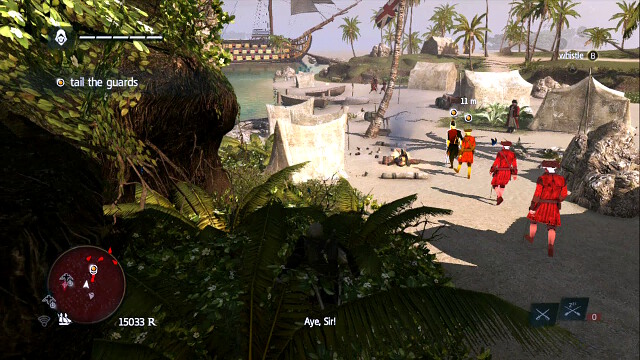 The Commodore's army's camp
Once your targets reach the camp jump into water on the left and swim around all of the tents, and dive if necessary. Past the tents, return onto the land, towards the guards. In a moment, you will have to go aboard the ship.
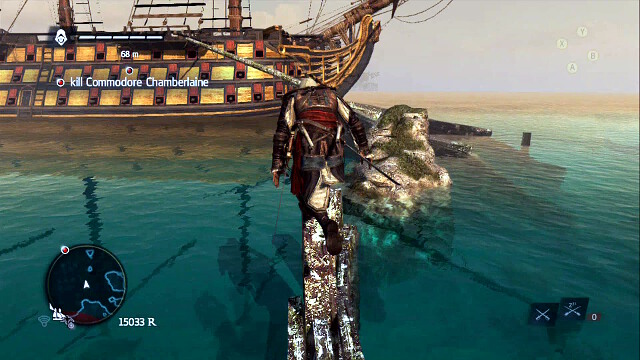 The path to the ship
OPTIONAL OBJECTIVE- Air assassinate Chamberlaine
Make it over to the commodore's ship along the path of rocks.
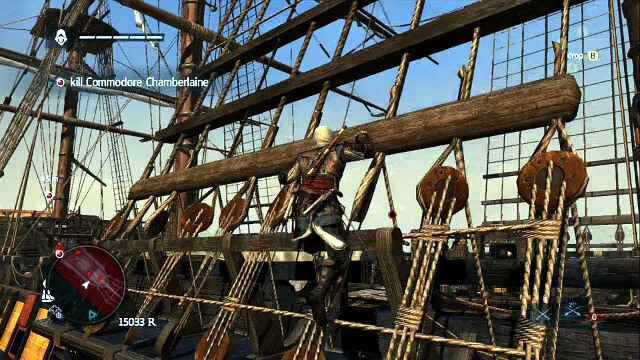 Climb onto the mast
Once Chamberlaine is at the back of the ship, start climbing. Do not bother with the deck guards.
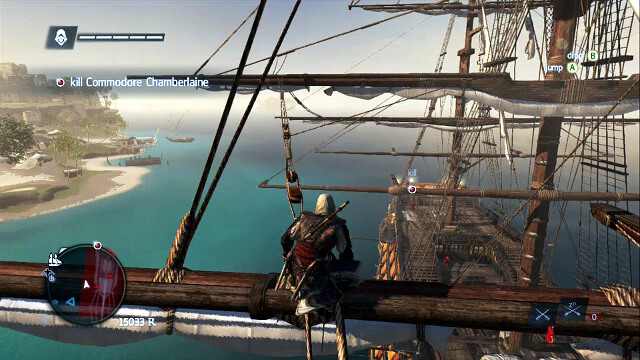 Make it over onto the middle mast
Use the connections between masts and make it over to the middle one. There is one guard here so, deal with him immediately.
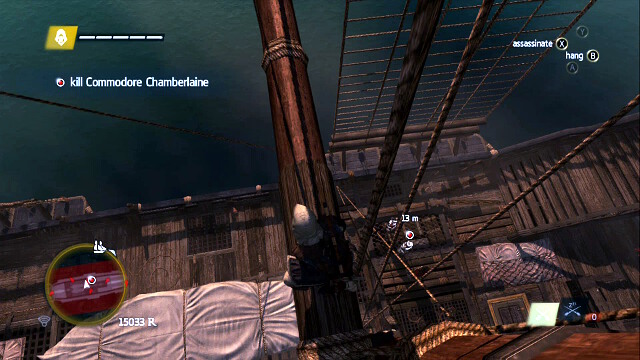
When Chamberlaine is passing nearby, jump down and kill him. Make sure that he is glowing, just like in the screenshot, to avoid killing somebody else. Once you tackle him down, a short cutscene will start, after which the mission concludes.
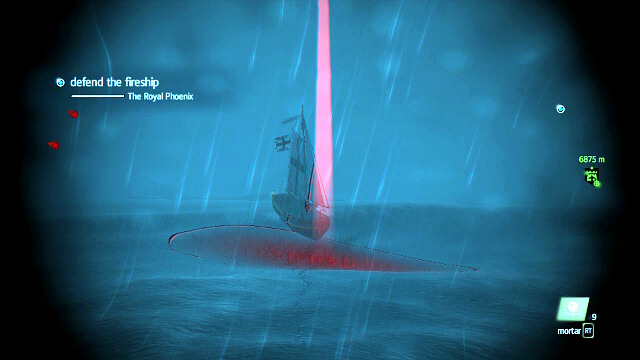 Use the mortar to quickly destroy ships from afar
OPTIONAL OBJECTIVE- use the mortar to sink the ships
OPTIONAL OBJECTIVE- use barrels to sink a ship
Keep relatively close to the ship, which you need to escort but, not too close, to avoid a situation in which it s caught in enemy fire. A moment late, the enemy units will arrive. Use the mortar straight away to bombard the enemy ships. Remember to aim a bit at the bow One well-aimed shot will destroy the ship so, there should be no problems with that.
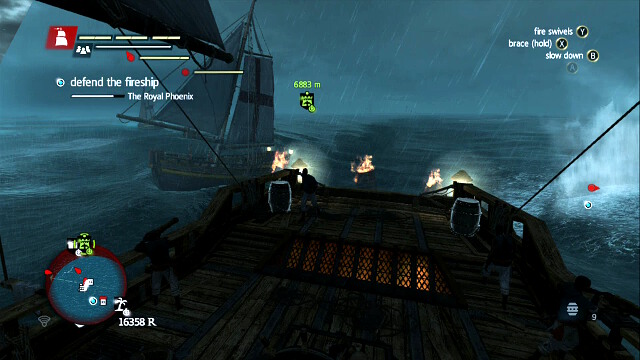 Barrels hitting the enemy
At this point, the greatest threat to the ship are your own cannons so, make sure that you do not hit the ally. Rely mainly on the mortar, shooting at the weak point and barrels, to complete the second optional objective. While using cannons, make sure that the ship with the gunpowder is out of reach.
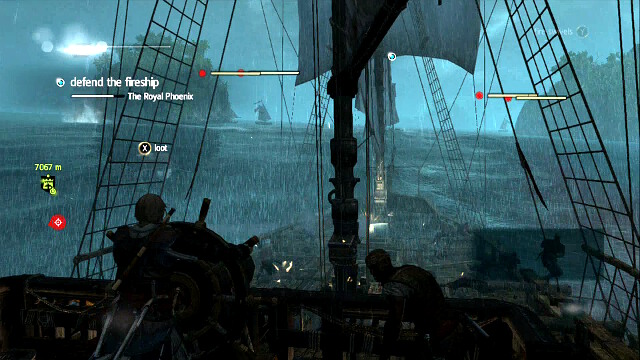 The ships will arrive from behind the isles
Once you sail into a narrow inlet with isles on the sides, there will appear two ships from behind corners on both sides. Be prepared for that and start aiming the mortars as you approach that spot. It should take one salvo to sink both of the ships.
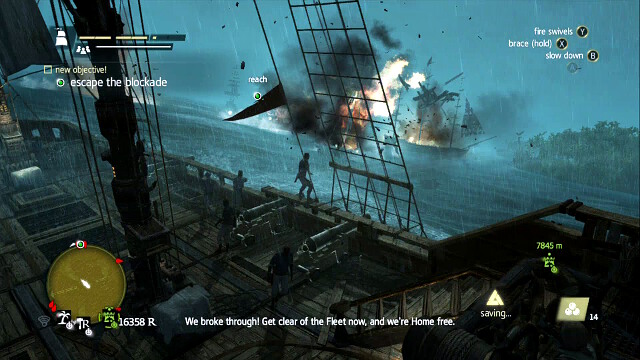 Stay far away at the moment of explosion
Then, it is only a bit away from the destination. Along your way, you will bump into several more ships that you will have to deal with. Now, you need to keep behind and allow the ship to sail away. Once it starts running into the blockade, you need to be at a sufficient distance behind it, to prevent getting within the range of the explosion.
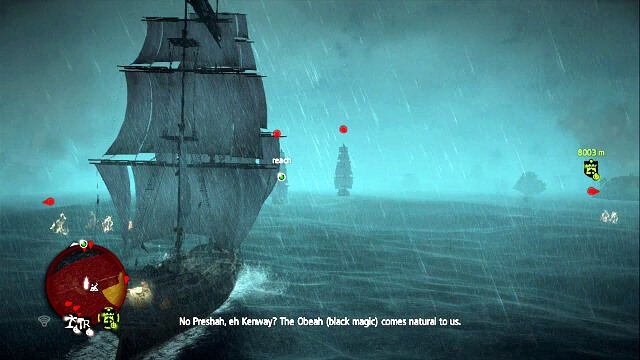 Pass the frigates over and get for your destination
After the explosion, frigates will join in. Ignore them and head towards the green point on the map, at top speed. Watch out for the enemy fire at all times and correct your course. Once you pass the frigates by and reach your destination, the mission will be over.
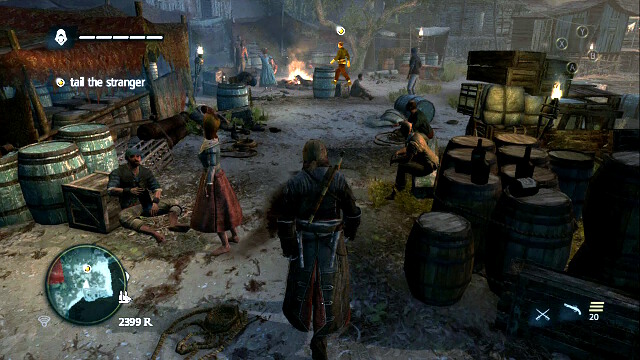 Follow the stranger
Follow the man. The streets are swarming with pirates, among which you can hide.
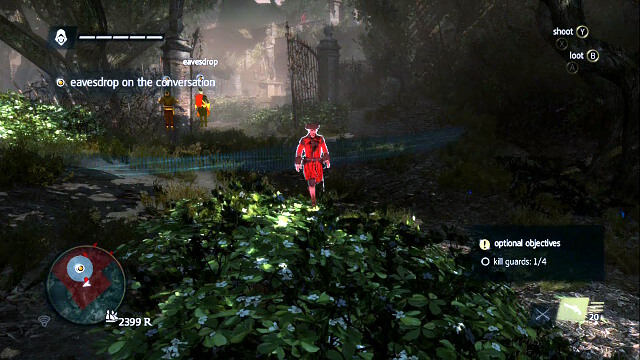 Kill the guards by jumping on them from bushes
OPTIONAL OBJECTIVE- kill four guards
You will have to keep close enough to eavesdrop on the conversation. Before you get within the eavesdropping range, and start the next stage of the mission, at the same time, take advantage of the nearby bushes to deal with the two guards here. Only after that, enter within the hearing range.
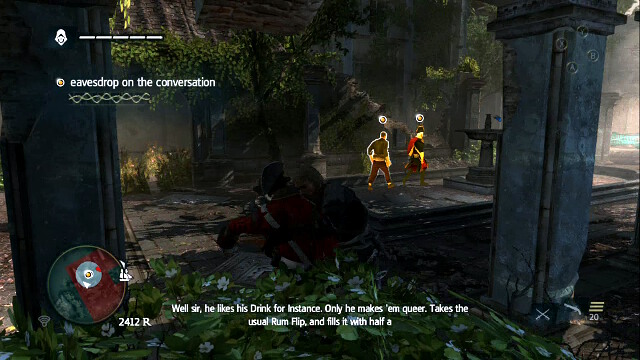 Kill the soldiers at the residence ruins
You will find another group of soldiers within the estate's premises. Kill the by jumping on them from among bushes or by running into them. The path is short and easy.
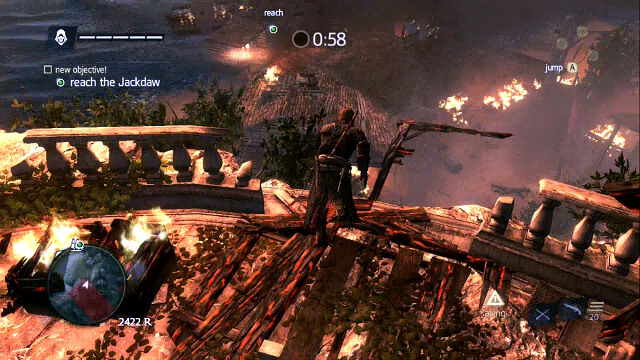 Return to the ship over the rooftops
You will have a spare minute to reach the Jackdaw. Run in a straight line. Jump over the rooftops and ignore all fired shots. If you get hit, simply get up and continue along your path.
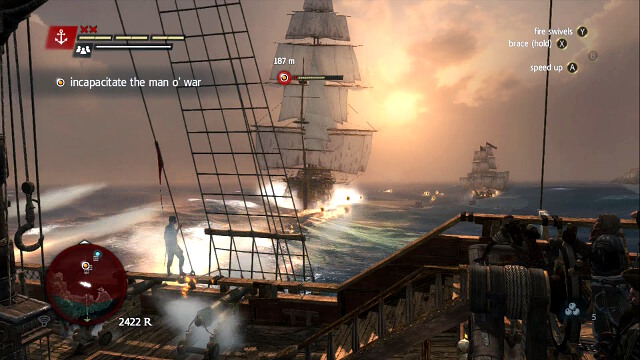 The fight with the galleon
OPTIONAL OBJECTIVE- Use the heavy shot to immobilize the enemy ship
Now, you will have to square off against an enemy galleon. Right after you start, send a salvo of two to three mortar shots. Position yourself with your side to the ship and allow it to near you, while conducting heavy shot fire and repeating with the heavy shot. Keep close to the enemy ship at all times. Once it has been sufficiently demolished, stop firing at the weak point and use the heavy shot only, to finish it off and complete the optional objective.
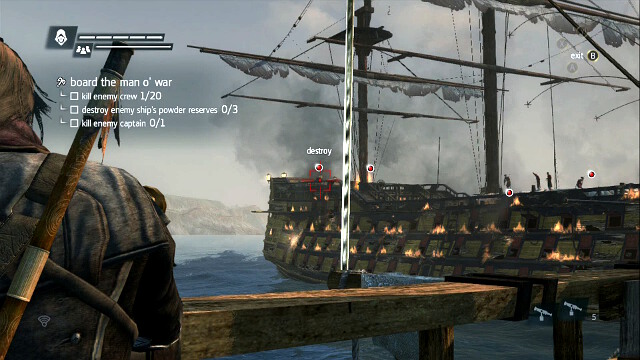 Aim at gunpowder
To take the galleon over, you will have to kill twenty crew members, explode 3 gunpowder reserves and kill the Captain. Use your side cannon straight away and aim at the gunpowder supplies, whose explosion should eliminate the nearby sailors. To the extent it is possible, shoot as quickly as you can because, after the enemy ship nears you, the difference in height between the two vessels will render you harmless. Once you deplete all of your cannonballs, jump over to the enemy ship and finish your job. If you have to cross the swords with the captain, try countering his attacks and strike when he bends.
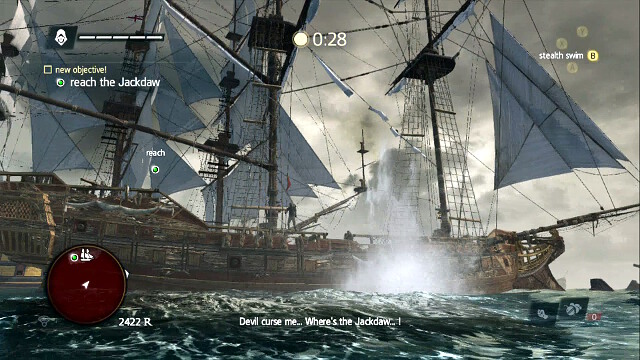 Return to the ship and escape the area
After the cutscene, return to your ship quickly and escape the red area. Once you leave the area, the mission will conclude.
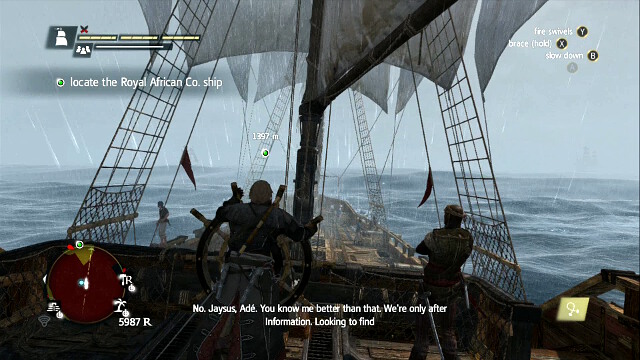 Sail towards your destination
Before you start this mission, ensure the Jackdaw's proper condition! First of all, invest in the ram and reinforced hull. Once you start, simply sail towards the marked area. Vane will attack a merchant ship but, do not bother with that and sail towards your destination. Once you locate the ship, approach it.
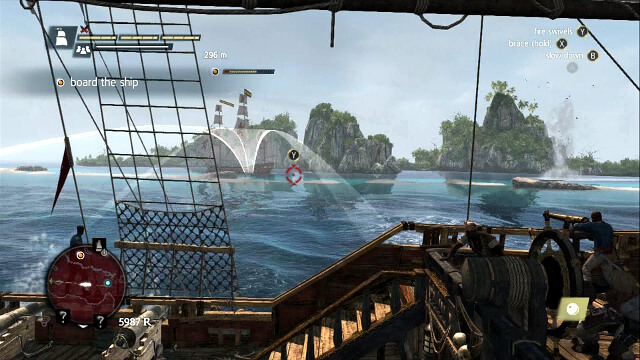 Keep hitting the ship
Eventually, the ship will start to escape. Sail along the left side and conduct every possible fire at the same time. The ship will be throwing barrels as it goes. Although you are at the other side and they will pose no threat to you, you can explode them anyways, to damage the enemy ship.
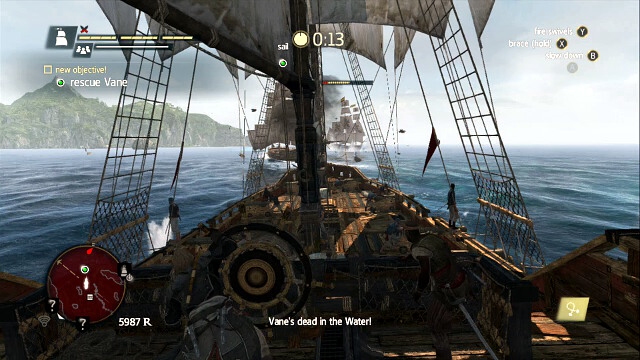 Rescue Vane
Soon after you sail out into the open sea, Vane's vessel will become critically damaged. Sail up to him, which ill start a short cutscene.
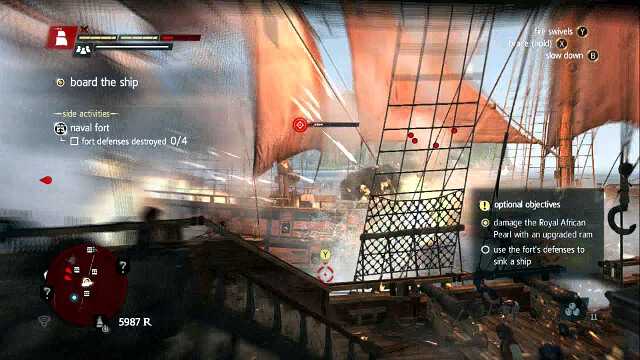 The battle with the ship
OPTIONAL OBJECTIVE- Damage the Royal African Pearl with an upgraded ram
Right after the cutscene, lay mortar fire on the Pearl and start sailing towards it to ram it. Along your way, you can discharge one or two chainshots. After you ram the vessel, stay closer. The Pearl's salvos are surprisingly strong so, sail in circles around it, in order to mitigate them. Serve it with heavy shots at all times, and repeat with shots into the weak point. Assuming that you have severely damaged the ship during the pursuit, the battle should be short. Once the ship is immobilized, the option to board will appear but, if you want to complete the second optional objective, you should wait with boarding, for now.
 The damaged brig
OPTIONAL OBJECTIVE- Use the fort's defenses to sink a ship
Around, there should be two brigs. You will have to bring about the sinking o one of the ships with the fort cannons. If you are heavily damaged after the battle with the Pearl, deal with one of them and, after you board, perform the necessary repairs. If you still are in a good shape, you should get about it straight away. Lure the enemy ships within the range of the fort mortars and lay fire on one of them, until you render it immobile. Make sure, at the same time, that you do not sink it. Once the ship is ready for boarding, sail up to it and wait for the fort cannons to lock on you and fire, which you will be able to tell by the water color. Then, set full sail and sail away to allow the salvo to reach the immobile brig. You can also search for some small schooners around, or a hunter if you are wanted, and try this out on them.
Completing the second objective may be problematic, especially if you do not have your ship properly upgraded. If you don't seem to be able to handle this mission, skipping the bonus objective and return to it after some time, once you have properly upgraded the Jackdaw. The alternative that will make things a lot easier, is to seize the fort before you actually start this mission.
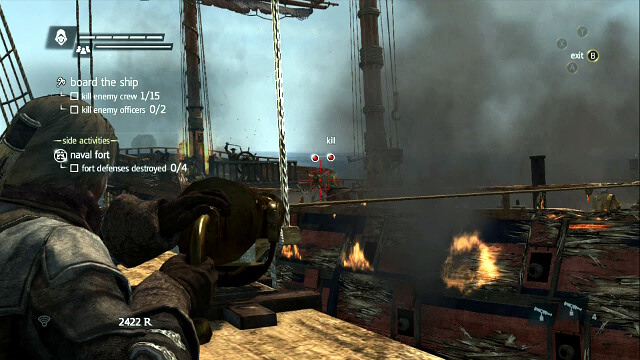 Seize the ship
Once you have completed the bonus objective, return to the Pearl and start boarding it. Use the gunpowder barrels to eliminate the soldiers quickly. Once you have seized the ship, the mission will conclude.
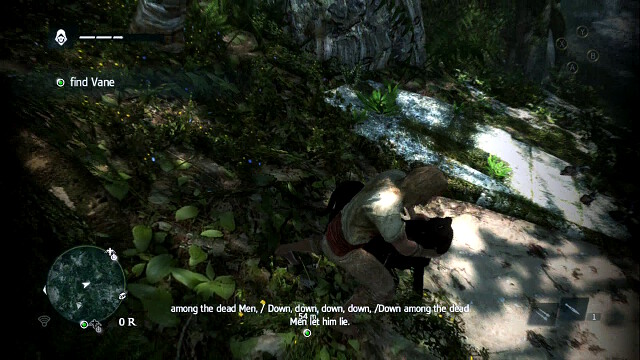 Kill the jaguar
OPTIONAL OBJECTIVE- skin three animals
After you start, heads deeper into the island. The path is simple so it is impossible to go astray. A bit past the first checkpoint, you will find a jaguar. Get into the bushes and kill the animal by surprise. If you fail to do that, throw it off by pressing buttons in accordance with the instructions on the screen. Then, follow it quickly to finish it off with your blades. Then, go towards the next point.
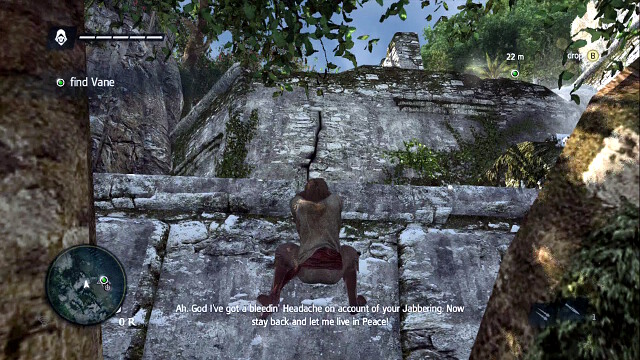 Climb the mountain
Use the trees and ruins on the left of Vane and climb onto the elevation. It turns out that you do that only to jump down. Jump into water from the synchronization point and continue along your path.
 Jump from a tree to another and avoid water
In the next area, run by using trees only. Underneath, there are crocodiles so, you should really avoid taking a bath. After you make it past this point, a cutscene will start.
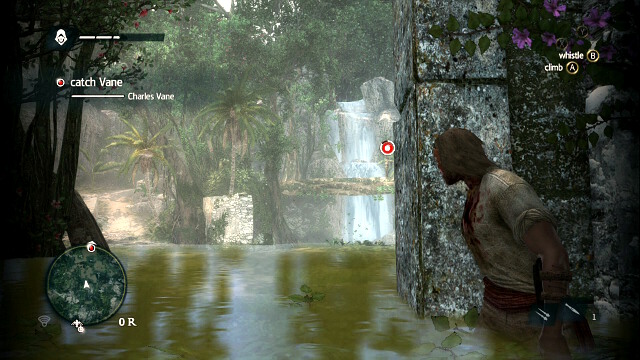 Watch out for gun-fires and grenades
Take the entrance to the left to reach Vane, watch out for grenades and gun-fires. He does that in turns so, you'd better start running right after he fires a shot, at the moment at which he starts to throw a grenade (keep an eye on the circle that fills up). After he takes a shot, run towards the next wall. Wait for the next shot and run, until you finally climb up. Once you are there, Vane will disappear so, follow him.
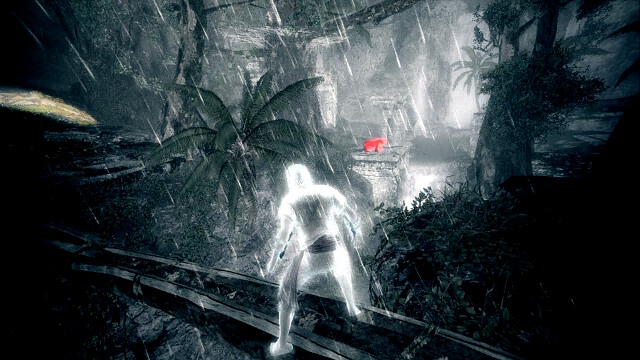 One of the jaguars
Once you reach the next ruins and wooden buildings, you will find another two jaguars. Deal with them just like you did with the previous one and you will complete the optional objective.
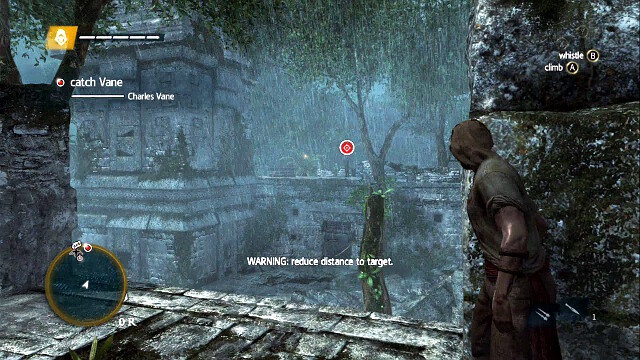
OPTIONAL OBJECTIVE- Air assassinate Vane
The situation is analogous with the previous one. Dash from cover to another, mind the shots and grenades. Keep to the left side and walk around Vane to get behind his back, just like in the screenshot. Jump down towards the watchtower with a pirate in front of it. Then, start climbing up.
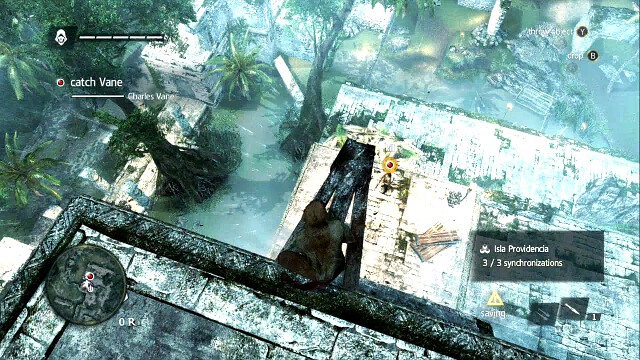 Jump down onto the pirate
Make sure that Vane is oblivious to your presence. Keep an eye on the marker in the upper-left corner of the screen. If it is white, you can jump down onto the pirate and finish him off. If it is yellow, take a few steps backwards and wait a moment. After you are done, a cutscene will start and the mission will conclude.
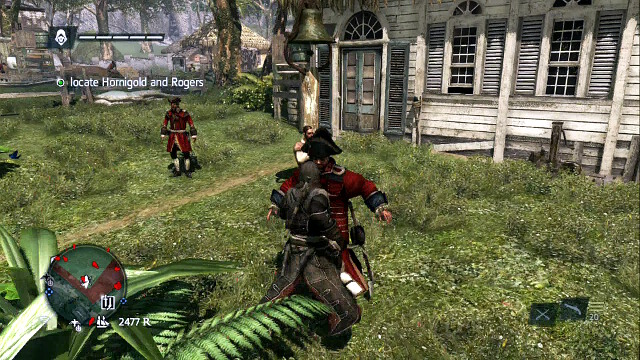 The first brute and a bell
OPTIONAL OBJECTIVE- kill four brutes
OPTIONAL OBJECTIVE- sabotage two alarm bells
Right after you start, run into the nearby plantation and hide among the bushes. You will find the first brute here and an alarm bell. Deal with both and make sure that the other two soldiers around do not spot you. Then, go into the middle of the plantation by moving from cover to cover.
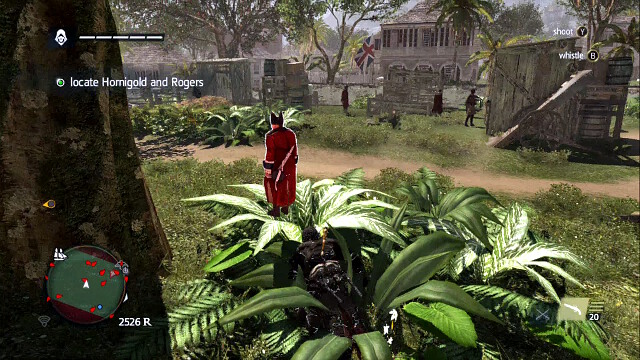 The second brute
Somewhere in the middle, you will find another brute. Walk up to him from behind and jump at him from the bushes next to him.
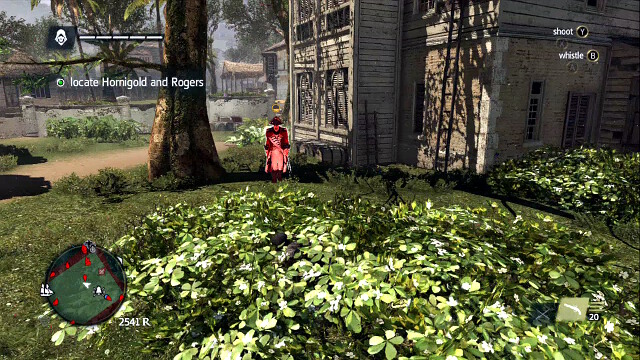 The third brute
A bit ahead, there is one more.
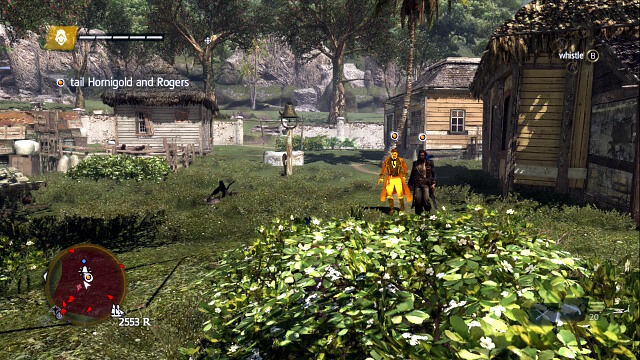 Deal with the bell when you are passed by
Remain among the bushes where you have killed the most recent brute, activate the eagle vision and locate your targets. They will start going towards you. Once they pass you by, run up towards the alarm bell, to complete the optional objective and follow Hornigold and Rogers. If there are any soldiers around the bell, either wait for them to walk away, put them to sleep, or simply kill in fight before you activate the eagle vision, which will start the next part of the mission.
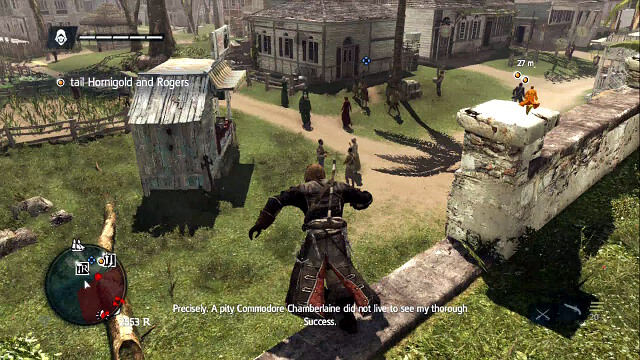 Jump out of the plantation
When they come close to the plantation's exit, use take the hole in the wall on the left and get out quickly. Then, follow the two. After you jump down, you will not have to bother with the soldiers guarding the plantation's entrance. You will be already outside of the restricted area so, they will not react to your presence.
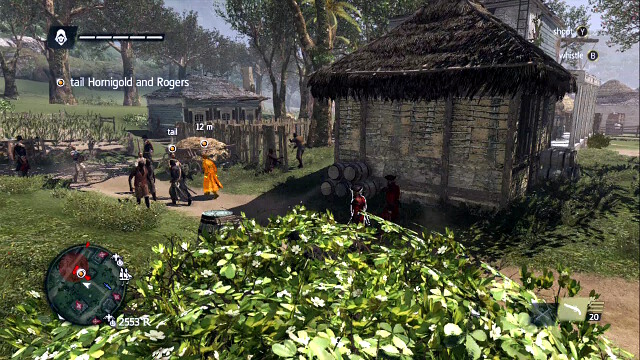 Follow Hornigold and Rogers
Blend in with the crowd, use side alleys and covers while following your targets. Soon, they will be joined by two soldiers, but this will not change the situation too much. Simply, do your job and go ahead. Also, remember that neither the regular soldiers, nor the gunners on the rooftops, will react to your presence out in the streets if only you simply walk along the street.
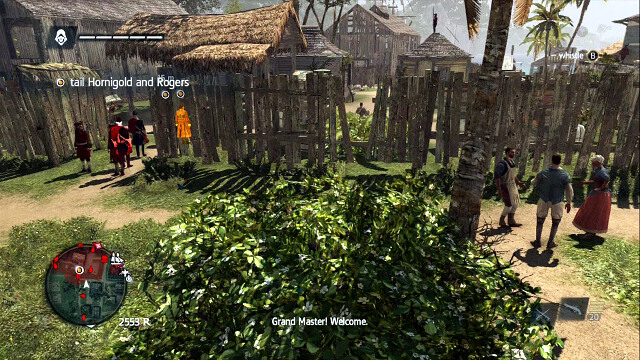
When they reach the restricted area, take the hole in the fence shown in the screenshot, on the right of the entrance. Right past the hole, there is a patch of bushes, with the last brute next to it, who you need to kill to complete the optional objective.
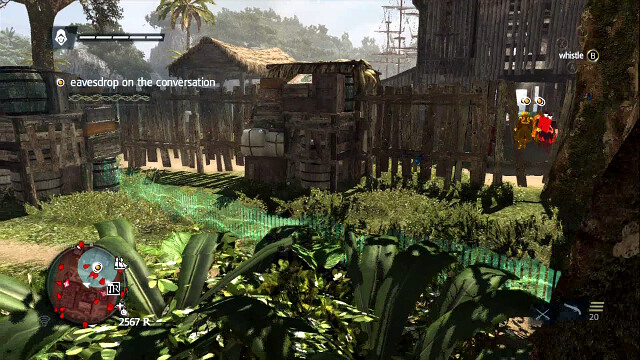
You will have to eavesdrop on the group. They will go to the back of the facility but you, instead, follow the marking in the screenshot. The eavesdropping range is very big so, you can easily allow yourself such a shortcut. Once there, you will find some thickets where you need to hide immediately. Around, there is one more brute patrolling, if you have missed any earlier.
Hop onto the shipyardOnce the group enter the shipyard building, go ahead towards the pile of rubbish at the fence. Over that pile, jump onto the building's rooftop. In a moment, a cutscene will start.
 Fight or flee
Finally, you will be attacked by several guard waves. You can escape into water and swim away to lose them, but you can also fight them , which should not be too difficult, especially if you are packing smoke bombs. If you decided for the former, swim towards the Jackdaw. If you decided for the latter, you can use the nearby boat after you killed all of the enemies, to leave the restricted area and complete this mission.
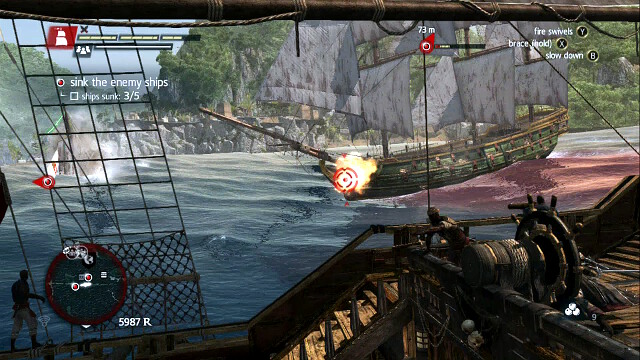 Sink the enemy ships
First, you will have to face off against five enemy ships, including four weak gunboats. The battle should not be a challenge for you. After you have destroyed all of them, go ashore and run deeper into the island.
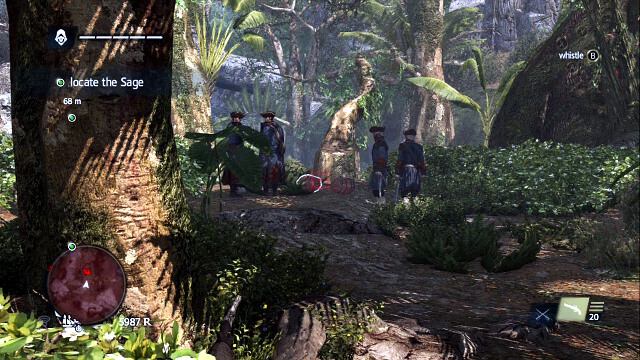 Use the gunpowder barrels
When you encounter a unit in the woods, take a shot at the gunpowder barrels around them, to kill all of them quickly. Then, climb onto the bent tree past them and reach the other side of the gates by jumping over trees. There, you will find Roberts.
 Kill the soldiers along your way
OPTIONAL OBJECTIVE- free two groups of pirates
You can complete this mission in a standard way, by moving ahead slowly, a group after another, but the faster and easier way is to storm the place. Access the map. You will find two nearby icons that mark the locations of the imprisoned pirates. First, mark the group on the left, then sprint towards the marker on the screen. Along your way, you can kill the soldiers that happen to be there, but the crucial thing is not to stay in one spot for too long, to avoid being spotted by too large a group of soldiers so, keep running at all times and run towards the pirates.
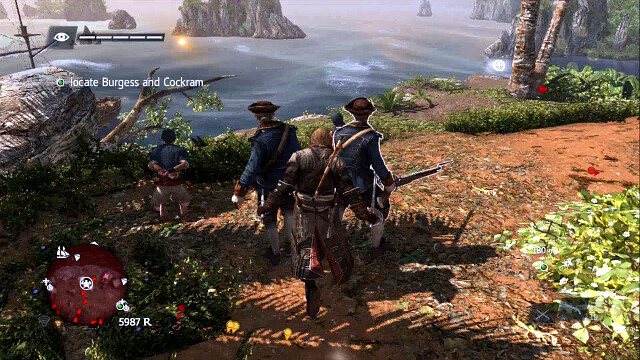 Kill both musketeers at the same time
Once you dart into the location where the pirates are being held, the most important thing will be to eliminate the two soldiers aiming at them. Run assassinate both of them. At this point, the pirates are already safe and the will come to no harm, even if the brute throws a grenade towards them. Now, simply kill all of the soldiers around. There is quite a lot of them but, in spite of what it may seem, the fight is not going to be too demanding, especially if you use smoke bombs and the pistol to your advantage. You need to watch out for the gunner on the nearby tower so, use the human shield on a regular basis.
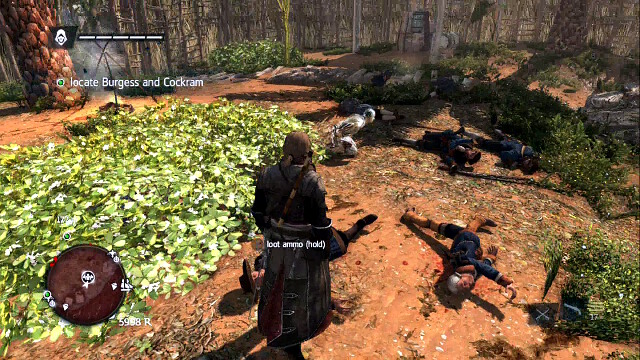 After you have cleared the area, free the prisoners
After you kill everybody on the ground, run up onto the tower and kill the musketeer. Afterwards, return to the pirates and free them. Then, mark the second pirate group on the map and repeat.
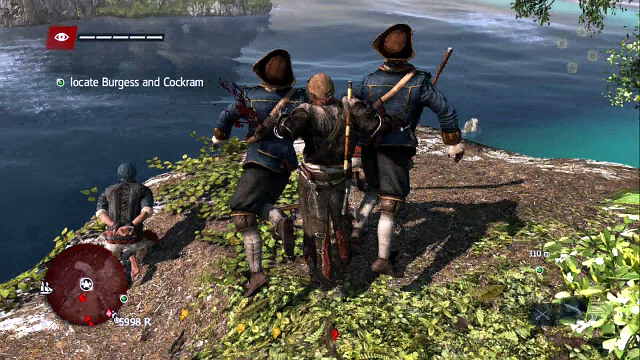 Kill the guards again
The situation is identical. Dash ahead, while keeping as far to the side as possible and kill those that you will be able to tackle down, as you go. Then, quickly assassinate the guards who are watching the pirates. Once again, you will have to fight around four, or five, soldiers but, this time, they should be the regular guards. Additionally, you are too far away from the tower and outside of the gunner's reach.
 Jump down into the cart with hay
From pirates, keep to the left side of the palisade, to prevent drawing the attention of the soldiers in the middle of the camp. Make it over to the watchtower and throw off the gunner. Then, get onto the rooftop, where there is the synchronization point. From there, jump down into the cart with hay. If anybody has been chasing you, they have lost your trace by now.
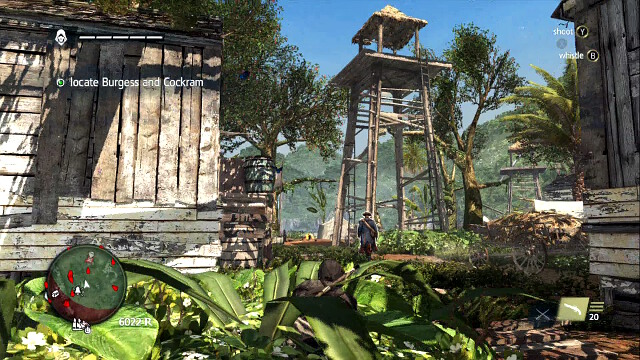
OPTIONAL OBJECTIVE- Double assassinate Burgess and Cockram
From the cart, make it over towards the tower in the middle of the area and climb onto the building shown in the screenshot on the left. On the rooftop, you will find a haystack. Hide in it. It is important that you act quickly now so, do not wait for too long. Even if someone noticed you for a fraction of second, after you climb onto the rooftop and hide in the haystack, you will lose them anyways. The same goes for the gunner on the watchtower.
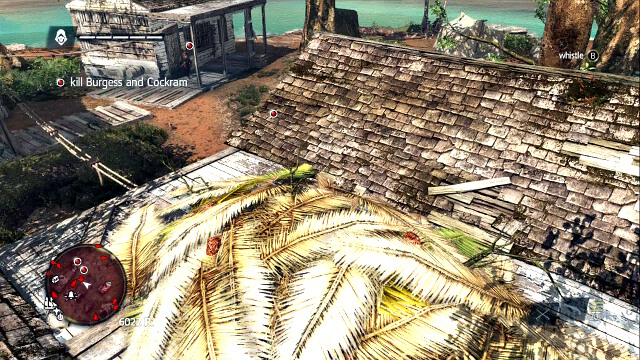
While in the haystack, activate the eagle vision, Burgess and Cockram should approach from the background. You need to kill them both at a time, if you want to complete the optional objective. Once they reach the street, at which you are hidden, one of them will stay near you, and the other will go behind the house at the other side, just like in the screenshot. After a while, however, he will come back and approach the other one. This will be, virtually, the only good opportunity to complete the bonus objective, because they will rarely be keeping close to each other and, additionally, they will be joined by soldiers, who will make things even more difficult. That is why you should act now!
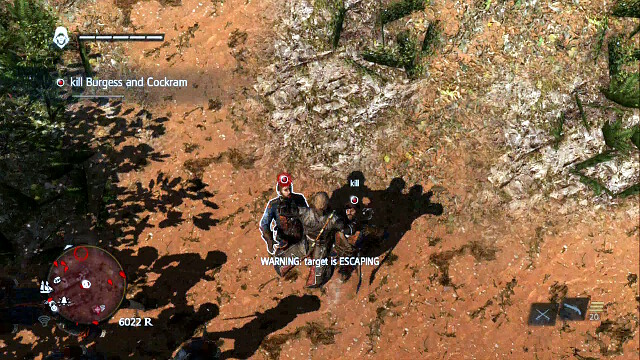 Kill both targets
Once they are close to each other (keep an eye on the red dots) dart out of the haystack and jump down onto them to kill them both. A short cutscene will start. After you watch it, you will still have to listen to Roberts' speech, after which the mission will conclude.
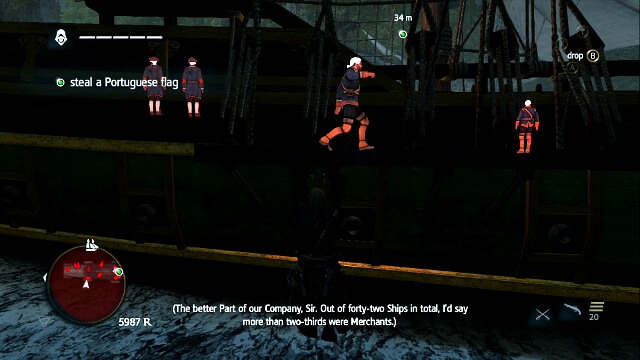
OPTIONAL OBJECTIVE- stay out of combat
You will have to locate the nearby Portuguese ship and steal the flag from it. Jump into water and swim around the vessel in a wide arch, to prevent being spotted (if you still are, dive). Once you get over to the other side, start climbing. Almost everyone on the ship is facing towards the Jackdaw, save one soldier, who is patrolling the ship between the bow and the stern. Once you notice him marching right, like in the screenshot, start climbing up the mast.
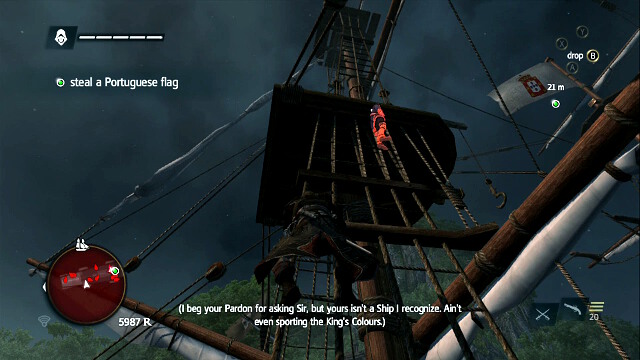 A guard on the mast
On the mast's top, you will find a guard, who you need to kill silently. Keep to the left to remain out of the sight of the gunner, who is standing on the top of the other mast.
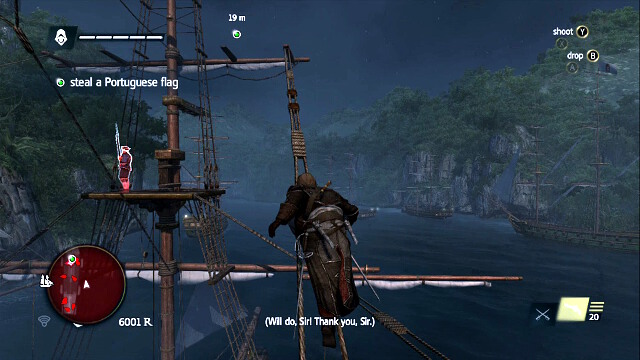 Run over to the other mast
When the gunner on the other mast is turned with his back at you, make it over quickly above him. From there, you can jump down onto him but, you can also ignore him and climb onto the very top straight away, where you will notice the flag. Rip it off and watch the cutscene.
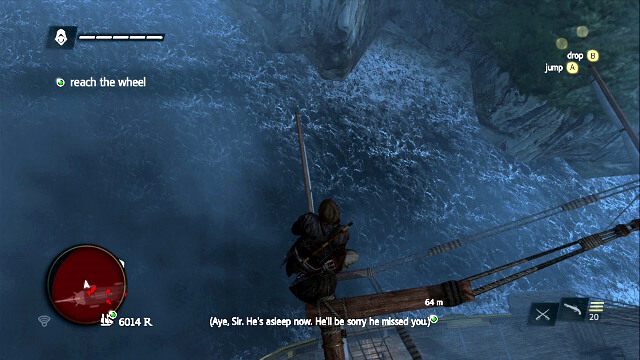 Jump down into water
Jump off the mast into water on the same side along which you climbed. Then, swimming in the arch, return to your ship.
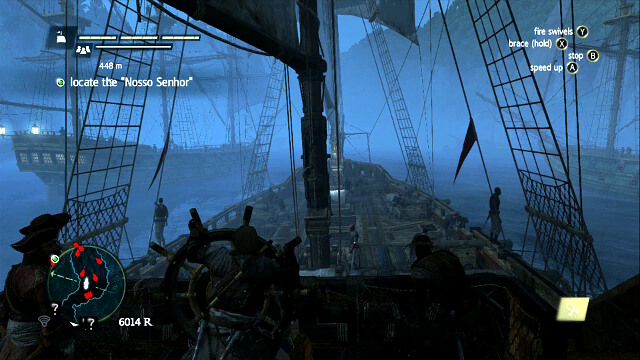 Sail deeper into the region
Sail slowly deeper into the region and keep your distance away from the nearby ships. In a moment, you will notice a large galleon and a chest carried down from it, whose content you will have to obtain.
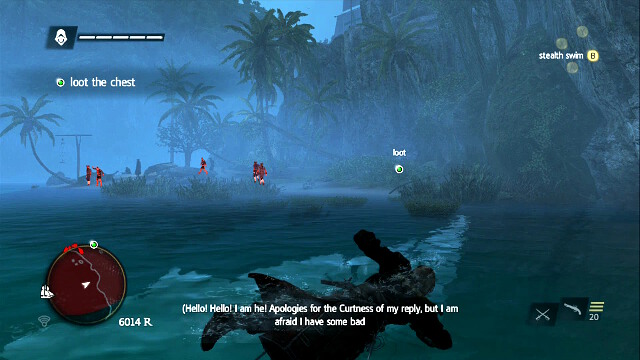 Make it over to the land from the right
Swim towards the right side of the shore and hide there among the nearby bushes, thanks to which you will avoid the two patrolmen.
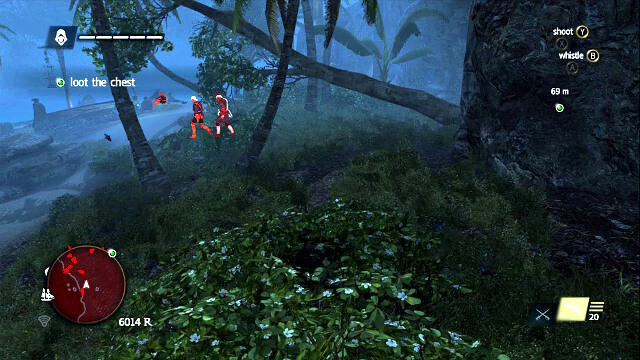 Go deeper into the land
Go deeper into the land and keep to the right wall. Keep an eye on the area around, when it is clear, run towards the next patch of thickets to hide among. If anybody spots you and follows you into the bushes, kill him quickly from hiding, after he comes close.
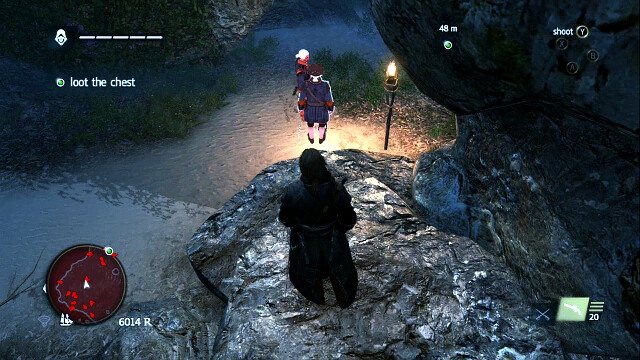 Two guards
You will reach a small passage with two guards in front of it. Jump down onto them and air assassinate them. Then, bolt to the other side and hide among the bushes on the left, past the exit.
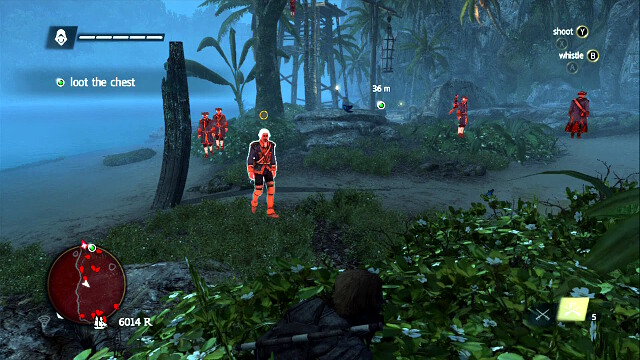
Keep to the left. The nearby area is being patrolled by three guards. A couple and a single one behind them, who you need to lure your way by whistling. Then, kill him. When the two remaining ones go away, into the background, run after them and hide among the bushes at the foot of the large tree in the background of the screenshot.
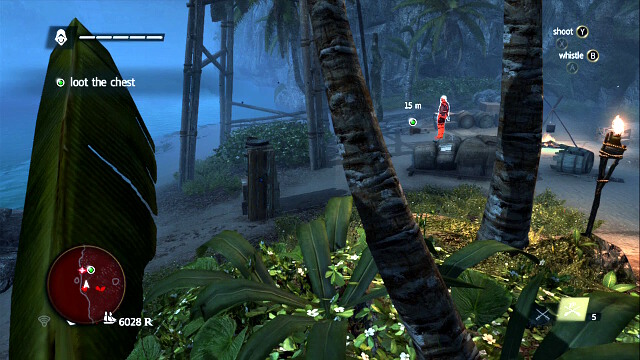 Make it over to the foot of the watchtower
From there, run directly to the watchtower (make sure that the two that you have just passed by , go into the background, before you start running). Before you do that, you can deal with the nearby brute.
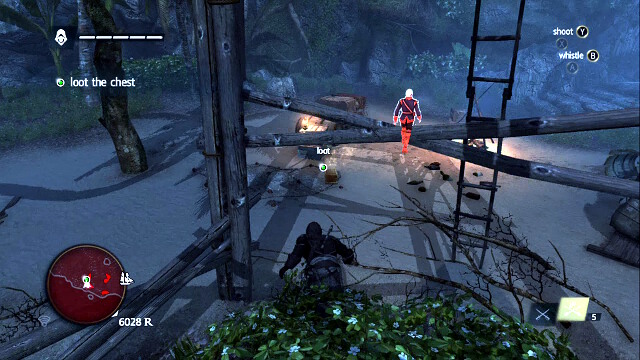 The chest and the guarding soldier
When the last soldier, at the chest, walks away into the background, dash towards the chest and loot it for its contents. Then, return to your cover.
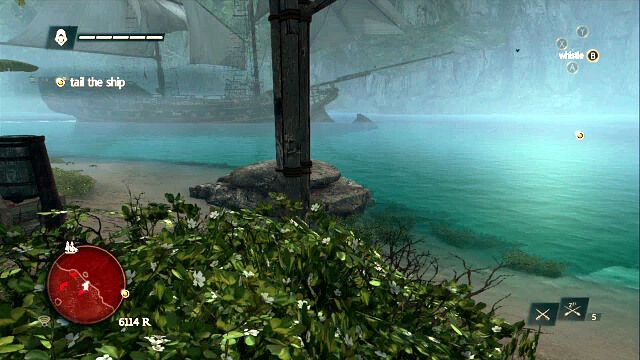 The approaching Jackdaw
In a moment, the Jackdaw will arrive. While swimming towards your ship, you may still have some problems with the gunner on the watchtower so, dive if necessary. Once aboard the ship, follow the galleon.
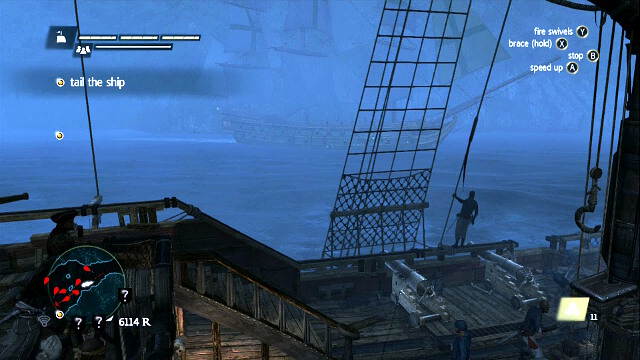 The approaching ship
Once you reach the spot where the river widens, sail to the left, where the way is blocked by two ships. Along the open way, on the right, there will be one ship sailing. Wait for it to pass you by and only then, sail back. The galleon that you are following stopped a bit ahead so, you do not need to worry about losing it.
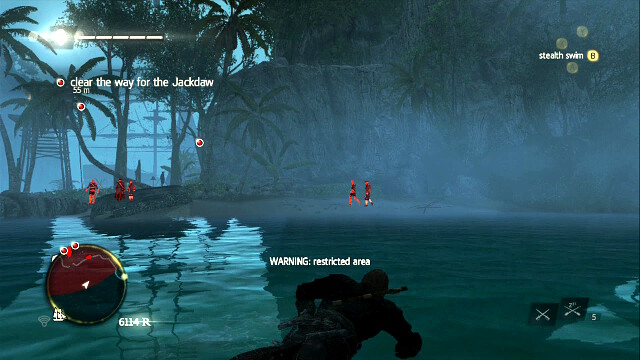 Swim towards the shore
You will have to deal with two gunners on watchtowers. Just like before, swim towards the right side of the shore. There are two soldiers patrolling the beach. Either run assassinate them, once they are far away from the rest, or simply swim around them and get into the nearby thickets.
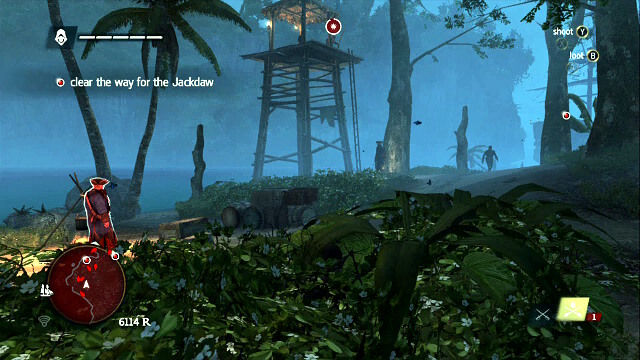 The gunner that you hit will probably bring death about to himself
While still keeping near the bushes, approach the tower enough to be able to shoot the musketeer with the blowpipe. Discharge the berserk dart at him. Some of the soldiers should kill him . If, he survives anyways, take another shot at him. Most probably this will spur some chaos, and someone might even raise the alarm. Still, you should not worry about that. You are safe and sound in the thickets that you are in. Start retreating as soon as the gunner dies and return to water. Then, swim around everybody on the shore, within a safe distance. Steer towards the next target.
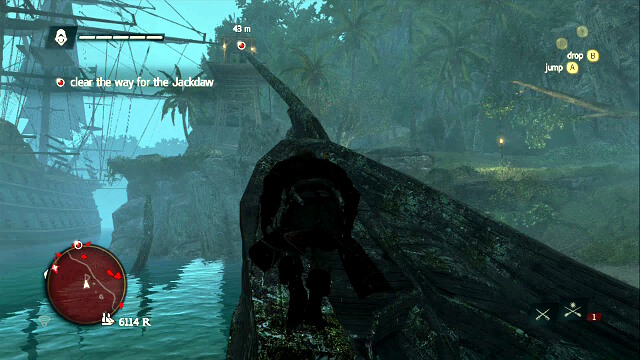 The shipwreck
Reach the shipwreck projecting above the water surface and run up to the very top. From there, discharge a berserk dart at the second gunner. This time, his death is not necessary because you will have to get to the tower anyways but, with a bit of luck, the numbers of the enemy soldiers guarding this area will go considerably thinner. Right after you take the shot, jump down into water to prevent being spotted. You may also be spotted by an enemy patrol still before you manage to climb onto the shipwreck and take the shot. In such a situation, jump down into water as well, and wait until the patrol go away. Then, try again.
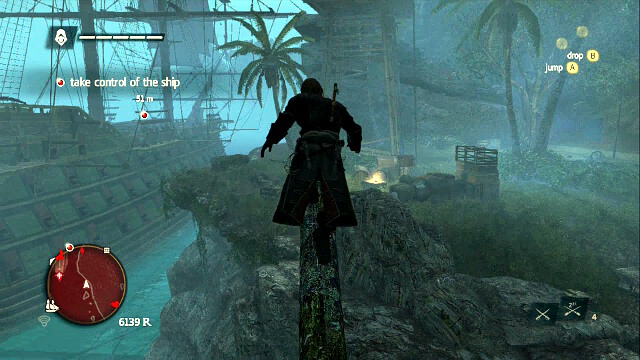 Make it over to the watchtower
Along your way, wait for the berserk to wear off and for the nearby guards to stop searching for threats. Then, climb onto the shipwreck again and jump from it, over to the tower's region. At the foot of the tower, there are thickets in which you need to hide.
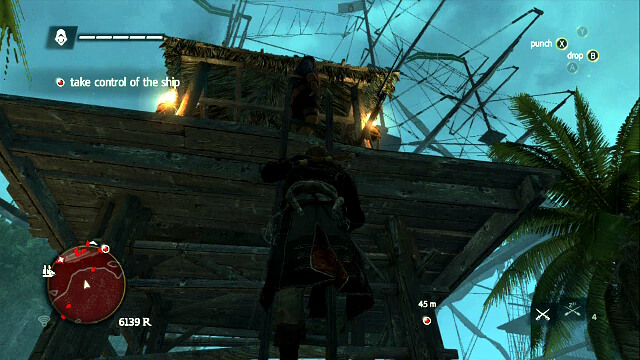 Make it over onto the tower
Depending on how effective the berserk was, getting onto the tower will be more or less complicated. If necessary, deal with the nearby soldiers while lurking in the thickets at the foot of the tower. Once it is clear, climb onto the tower. Even if the gunner is dead, most probably there is one more soldier there so, deal with him by surprise to avoid squandering the optional objective towards the end of the mission.
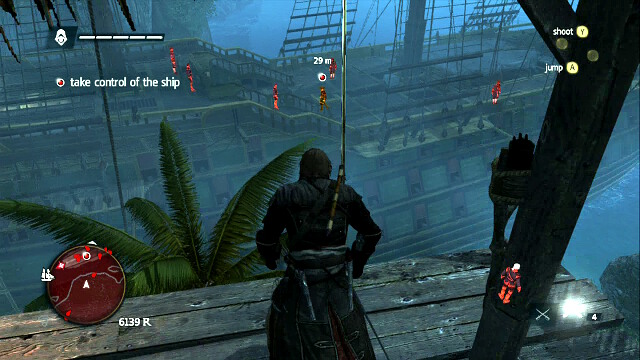
OPTIONAL OBJECTIVE- use a rope swing to kill the captain.
On the watchtower, there is a rope which you can use to gain access onto the ship easily. Wait for the target to appear at the level of the stairs, just like in the screenshot, run onto the rope and press the attack button, when you are close to the captain, to kill him. Another cutscene will start.
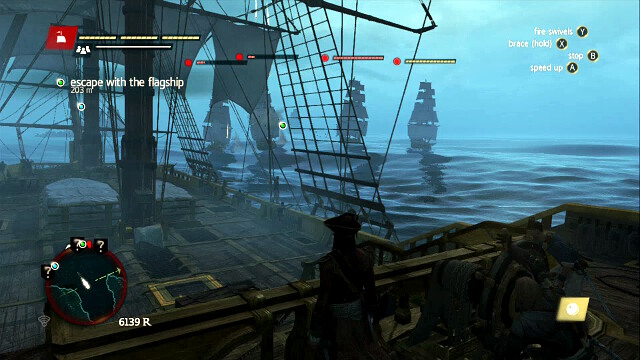 Mortars sending the enemy ship to the bottom
Finally, you will have to shake off a pursuit. You are commanding a slow, but formidable galleon so, ignore your escaping ally and stay in the area to deal with the company. First of all, you have, exceptionally strong mortars and an unlimited number of shots so, focus on that. With one salvo, you will be capable of destroying several ships close to each other! At close range, use the heavy shot and do not forget to aim at the weak point. Although the enemy is large in numbers, with the firepower that you pack, you should not have major problems. Sweep all away and follow your ally. Once you reach your destination, another cutscene will start, and the mission will conclude afterwards.
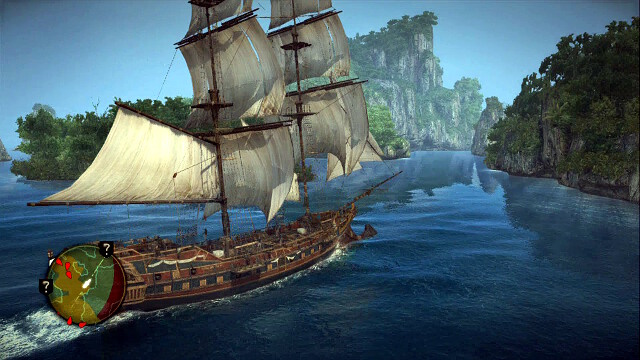 Avoid the enemy ships by observing the minimap
OPTIONAL OBJECTIVE- stay out of combat while finding Hornigold
While moving around a dangerous region and in fog, additionally, you will have to find Hornigold, while avoiding the enemy ships. Due to the fog, you will have to use the minimap, keep a careful eye on the rocks that you are passing by and the range of vision of the enemy ships. If you are staying within the sight for a short period of time, do not worry. Increase the speed and steer the ship to get it out of the range of vision. If necessary, do it even at the cost of bumping into land and damaging the ship. Continue deeper into the green area, at the end of which, you should find Benjamin.
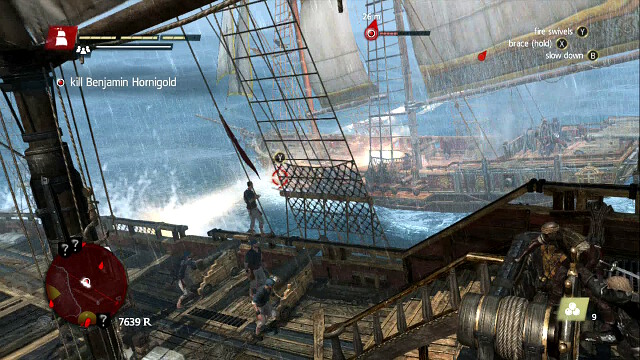 Sink the ship
The target itself is not too demanding. You should be more wary of the nearby units. Focus your offensive on Hornigold's ship, and try to avoid being attacked by the other boats. The pirate's ship is fast so, before you get entangled into the direct fight, it is a good idea to serve it with chain shots to slow it down. Once you damage it, a cutscene will start.
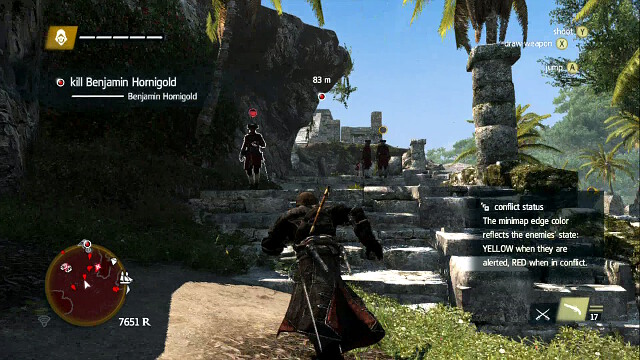 Cut through the stairs onto the hill's top
OPTIONAL OBJECTIVE- air-assassinate Hornigold.
Cut through deeper into the island to make it onto the hills' top. You can indulge yourself in fight, but the easiest way is to simply run up there while ignoring everyone in your way. The path is simple. You just need to run in circles, up the stairs.
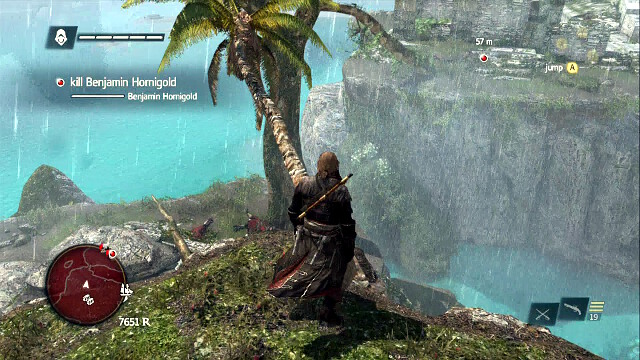
From the top of the hill, you will be able to make it over to the peak of the other one, where there is Hornigold. You can get there over the trees that you can see in the screenshot.
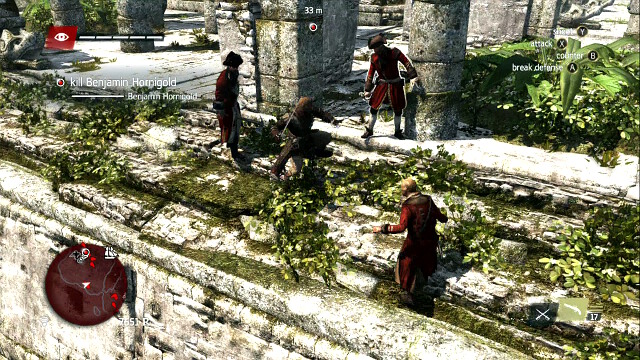 Kill the guards around , away from the rest
After you walk over the trees, keep to the left shore and kill the nearby soldiers. Do that at the very edge, to prevent being spotted by someone from Benjamin's personal retinue. The traditional fight is a better solution than killing the enemies silently where they stand, because you are risking the fact that someone notices the corpses, after which Hornigold will be alerted to your presence and it will be much more difficult to complete the optional objective then. Once you lure them to the edge and kill them there, one by one, you will be far enough not to alarm anyone.
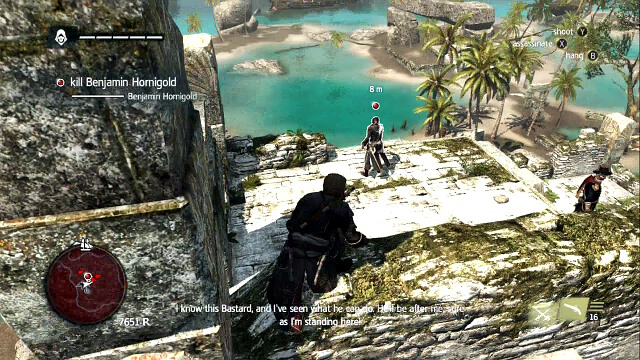 Kill Hornigold
Once you have killed everyone, approach the synchronization point, along the left shore. There, climb over the wall, to get directly behind Hornigold's back. Jump and kill the traitor to complete this mission.
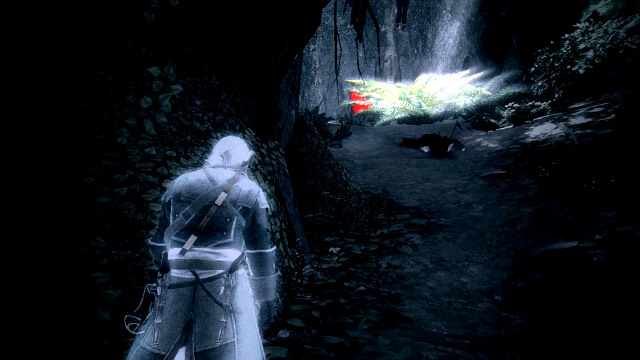 The scout that will notice you
OPTIONAL OBJECTIVE- incapacitate all guards while unarmed
OPTIONAL OBJECTIVE- incapacitate five guardians from stalking zones
Although long and, seemingly, difficult, this mission is quite easy. First of all, make sure that you have your weapons concealed and you are using your fits only. After you start, follow Roberts and the other pirates deeper into the area, where you will soon notice the first one of the guards. After he sees you, he will run downstairs. From now on, it is best to push forwards slowly and with your eagle vision active.
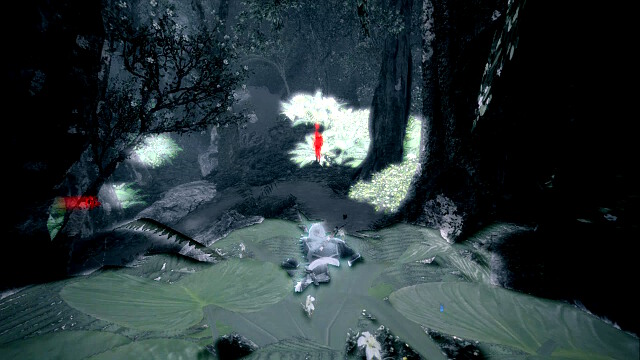 The first guard in the bushes
While keeping to the right, you will find the first one of the guards. Take advantage of the cat that he is standing in thickets and sneak up from behind to him. Then, incapacitate him.
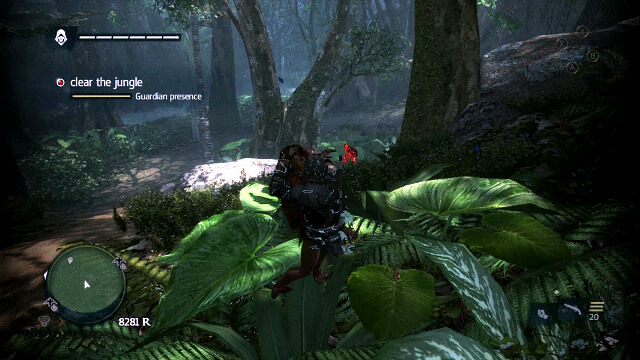
Directly below, there is another one. Use the elevation of the terrain on the right in the screenshot and jump down behind him. Then, sneak up and knock him down also.
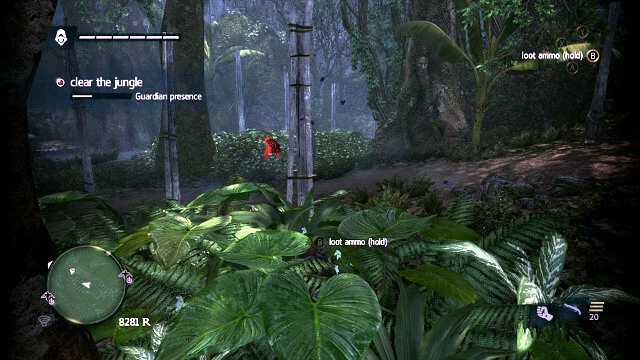 Another guard
Around, there are two more guards. One of them is directly across the "road" and, the next one at the road above. Knocking down one of them will clear the area (the other one will disappear). Note, that you do not need to be hidden, as a matter of fact so, if you failed to sneak up, simply defeat the enemy in a fist fight. Once you have cleared the entire zone, continue deeper into the isle.
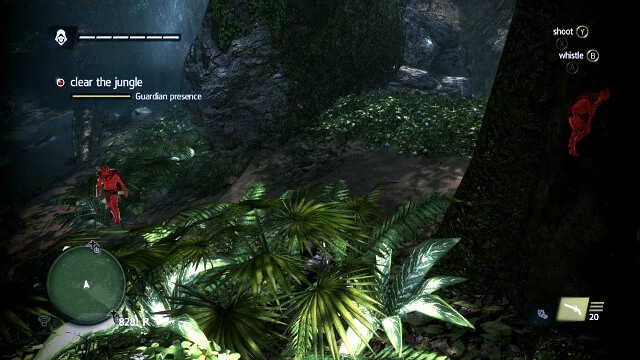 Another two
You are safe, up until the moment when you reach the next green zone. Once there, go right, where you will find another two in the thickets. After you have surprised them from behind and knocked them down, you should have already knocked down five. If, for some reason, you are short, you should continue your attempts to sneak up to consecutive guards, there are plenty of opportunities. But, if you have already met the requirements of the optional objective, there is really no point in sneaking and methodical elimination of the enemies, because this makes the mission unnecessarily longer. From now on, you can actually go ahead without worrying about how to sneak up to an enemy from behind. It does not matter for this mission if you are detected or not. Also, neither the order, nor the path you take do not matter that much because there are greater numbers of guards in each zone than you actually need to eliminate to clear the area. Additionally, the guards here come solo or in pairs, in most cases so, if you get into a fight, you will have no problems winning it at all, even f you fight unarmed. Simply, push ahead deeper into the area and spot them with the eagle vision. Then, run into them to knock them down, or defeat in a traditional fight (it is a good idea to disarm them to knock their blowguns off their hands). Once you have cleared the area, go ahead into the next region; then into another one.
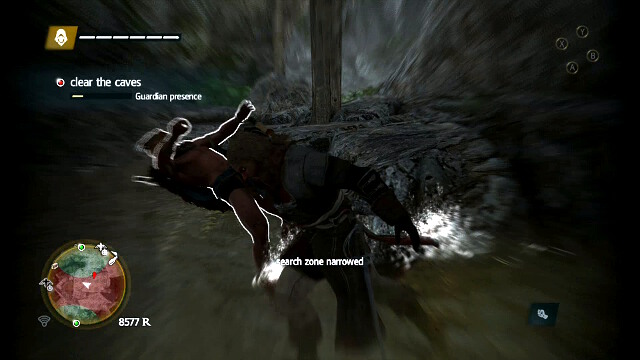 The notification of the narrowing of the search zone
Further areas, especially caves, are bigger and you can have some problems there to locate guards. You should then note that the green zone, on the minimap, will start getting smaller in size, which will point to the regions where there is someone left. It is also a good idea to explore all of the branches while in the caves , where there are treasures, etc. because there are quite a few guards hidden there. Finally, you should also remember that, although you can use no weapons, against the enemies, if you want to complete the optional objective, you can use them for different purposes, e.g. to lure enemies from their hangouts with the sound of a gunfire. It is a good idea to use this trick in situations in which you have problems finding guards hidden here and there.
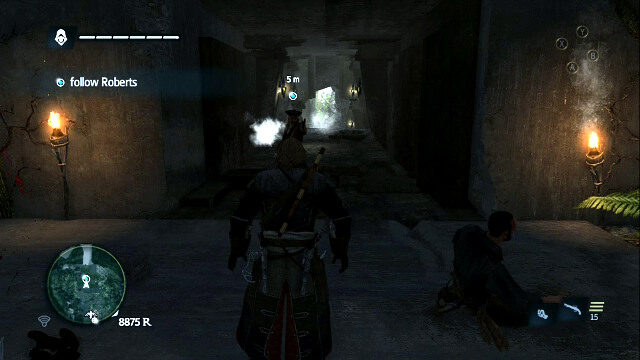 Roberts after he opens the door
Once you have cleared the entire area, Roberts will arrive with the rest of the crew. After a moment, he will open a door. When the conversation finishes, pick up the chest follow him deeper into the Observatory. Once you get there, put the chest down in the appropriate spot. Watch the holograms. After the entire show finishes, Roberts will throw you down.
 Climb up the columns
Climb over the columns to return where you used to be. Then, approach, more or less, the middle of the wall on the right and reach the rooftop using the notches.
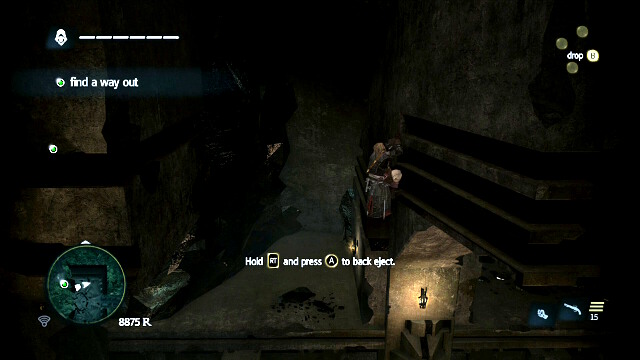
In the spot shown in the screenshot, you will have to jump over to the left side. You need to be sufficiently high. Then, a hint on how to jump back will appear. From here, the path is relatively simple. Move to the left, grab an Animus fragment along your way and you will get onto the surface soon.
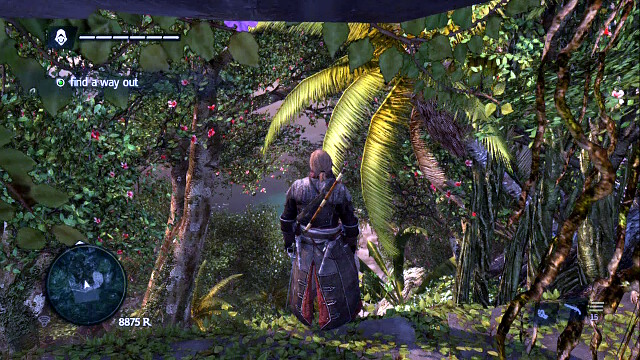 Slide down the slope
After you get back to the surface, slide down towards your crew. Along your way, you will get severely wounded, and you will be bleeding out once you get down. It is absolutely normal and you do not need to worry about that. Once your healthbar reaches zero, a cutscene will start and the mission will end after that.
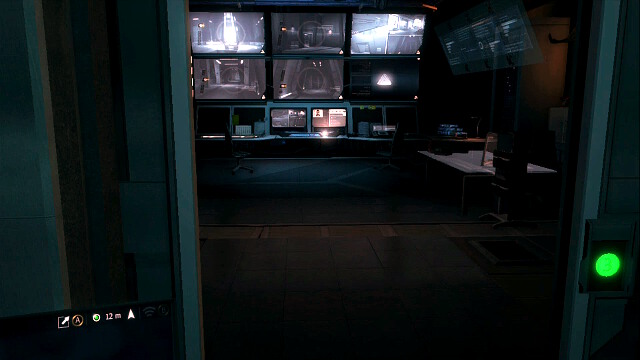 Follow the marker to the computer
Back in the XXI Century, after you listen to Melanie, once again John will contact you. He will provide you with third degree clearance. Use it to exit your little prison and follow the marker towards the next computer that you need to hack into.
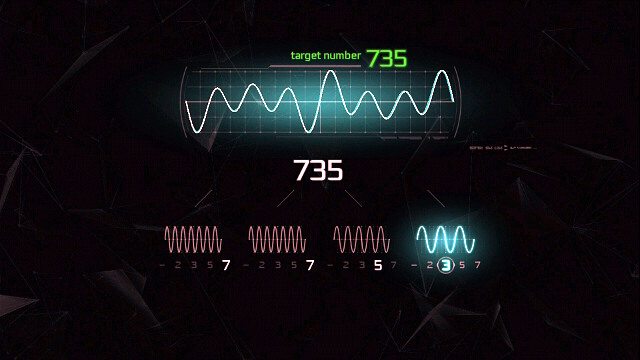 The first combination
Once again, you need to multiply numbers to arrive at the specific result. Select 7753, to see a cutscene. Then, follow the marker.
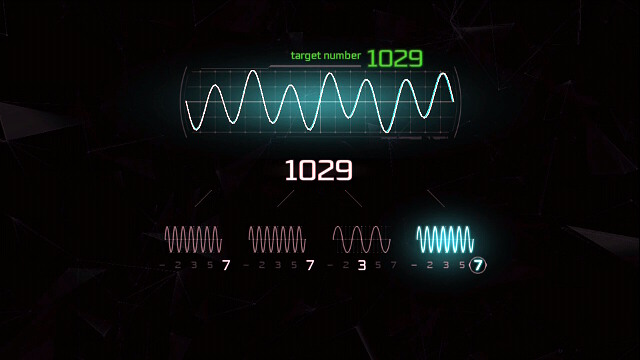 The second combination
You will find another supercomputer, whose hacking boils down to the selection of four digits. This time, the correct combination is 7737. After you tap it in, you will have to play Frogger once again. This time, however, it is going to be more difficult due to the faster movements of the stripes. When you manage to cross the road, another cutscene will start, after which an unexpected visitor will come. Once everything finishes, return to your workstation to resume the simulation.
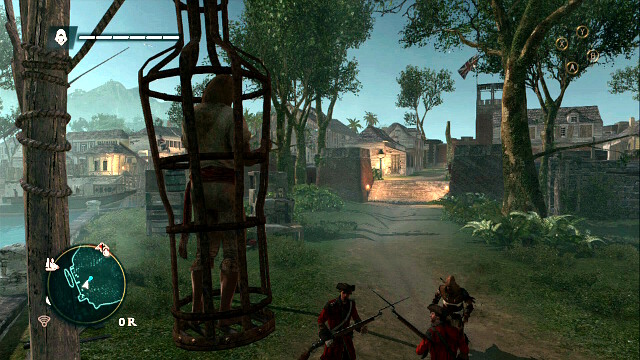 Shake the cage
After you start, shake the cage to draw the guards' attention. This will allow your unexpected savior to liberate you.
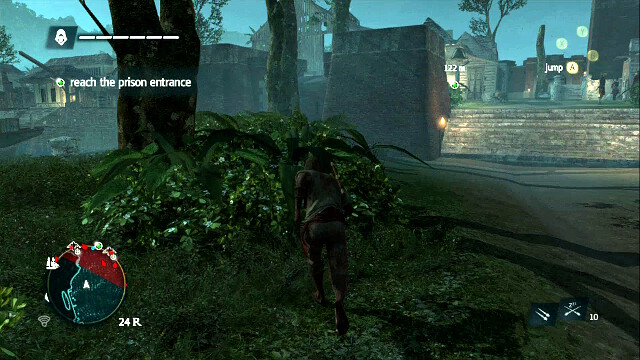 Climb onto the wall on the left
Once you are free, go deeper into the area. Climb onto the wall on the left of the stairs. On top, you will find a hay cart that you need to hide in.
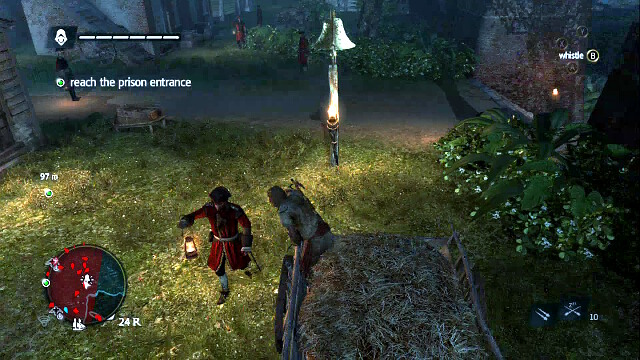 Clear the path to the bell
OPTIONAL OBJECTIVE- sabotage three alarm bells
OPTIONAL OBJECTIVE- visit the two old friends
In this mission, you do not need to sneak. Still, moving quickly among covers should make the mission faster and easier. Right next to the cart that you are in, there is the first alarm bell. Once of the guards patrols the area next to the cart . Deal with him. Then, watch the remaining ones and, when all of them are facing away, sabotage the bell and return quickly into the thickets. Move in the bushes, along the wall on the right of the entrance. If anybody notices you along your way, kill him quickly from the bushes when he comes close.
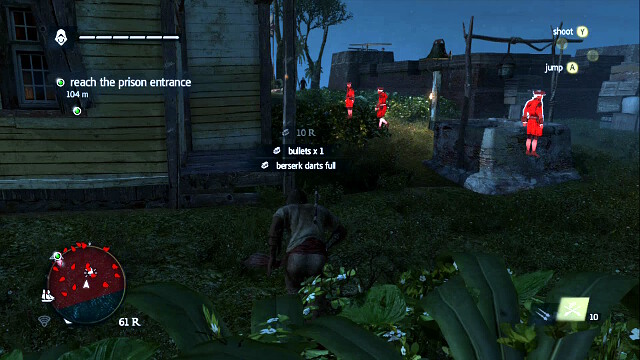
If you move along the wall on the right, you will quickly reach the second bell. Hide in the bushes shown in the screenshot. Next to you, there will a guard walk by. Deal with him. Around the bell, there are three more, including one patrolling the area. When all of them are turned away from you, just like in the screenshot, run into the thickets next to the bell. The soldiers farthest away may spot you while you are running. This is going to be advantageous to you, after all, because you will have the opportunity to deal with him, while in the thickets, after he comes close. If you remain undetected, lure him your way after the guard returns to the well. Then, deal with the patrolling one. When it comes to the soldier at the well, you can ignore him. Sabotage the bell and get to the other side of the wall.
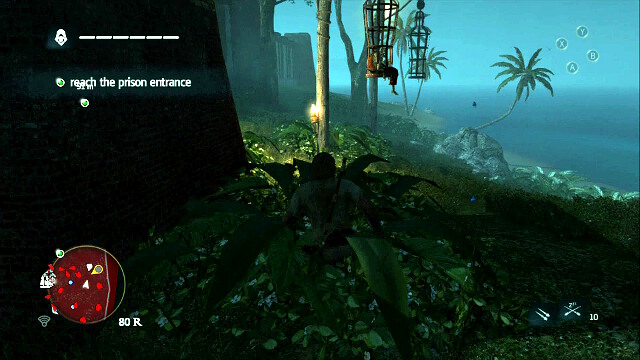 John Rackham
Keep directly at the wall. After several meters, you will reach a cage with the first one of your friends inside. Past the cage, go ahead and avoid all of the soldiers on the left.
 Jump onto the wall from the tree
You will reach a tree to climb up. Then, jump onto the wall.
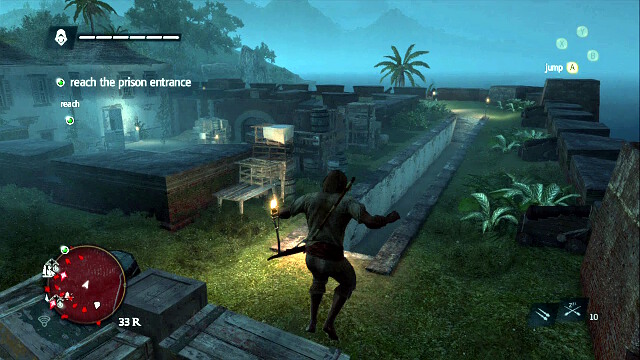 Walk over the walls in a semicircle
Walk along the right side, then turn left.
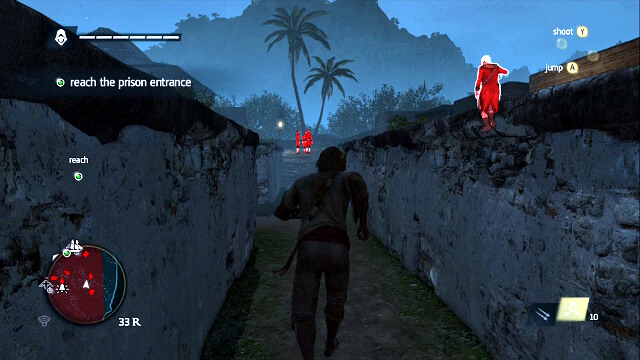 Run, once the area is clear
You will find a descent to the yard here. Keep an eye on the patrolling soldier and run down, when he turns away. Then, hide in the thickets immediately.
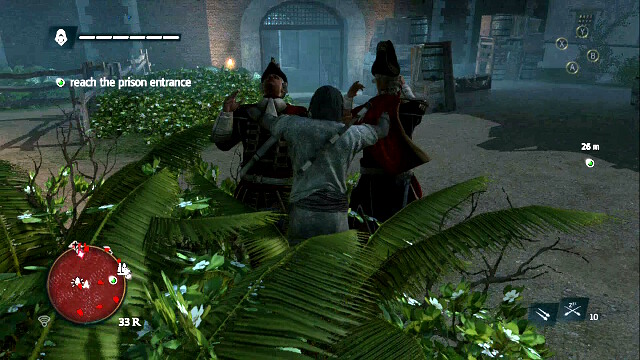 Clear the yard
There are four soldiers and an alarm bell here. Lure them, by whistling, to clear the entire area. Once all four are dead, deal with the alarm to complete the optional objective. Then, enter the prison.
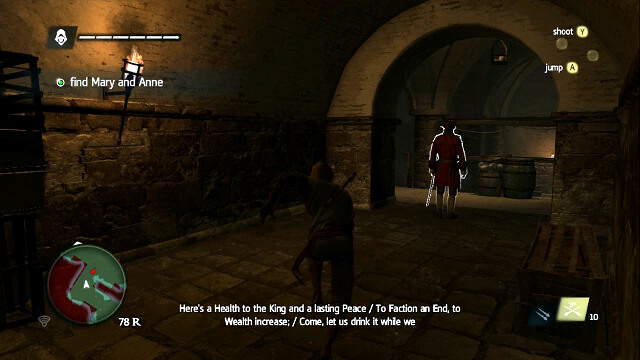 Keep pushing deeper into the prison
In the prison itself, there is no need whatsoever to keep silent. Keep running ahead, while killing the guards along the way. There are few and far between here.
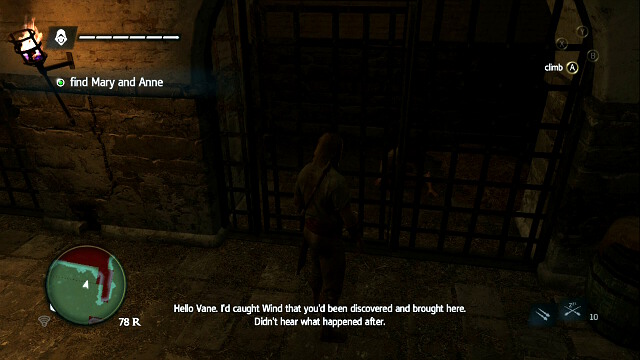 Charles Vane
In the first big hall, you will find Vane. Talk to him to complete the second optional objective. Then, continue along your path, until you find Mary and Ann. Once the nearby guards are dead, a cutscene will start.
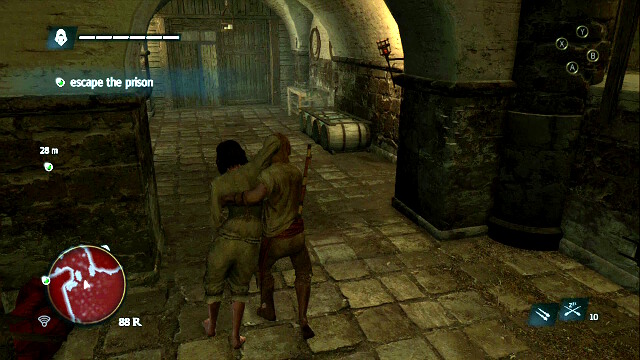
Go to the exit
Go with Mary towards the exit. After a few, exceptionally slow meters, you will watch another cutscene, in which the pirate girl will die. Afterwards, you will only need to reach the exit, and from there, the boat. The area outside is clear so, you should not have any problems here. You can carry Mary's body to the boat, or not. If you have actually carried her body to the boat, the final cutscene will show you placing the body in the boat. Still, this does have no bearing on the rest of the mission, or the storyline whatsoever.
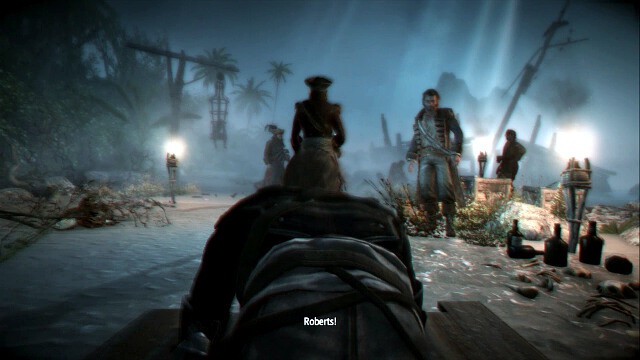 Follow Roberts
Directly after you have completed the previous mission, you will begin the next one, in this sequence. This is not a mission per se, and more like an interactive cutscene. Follow the drunken Edward through his visions. First, reach Roberts and, at the end of the tavern, attempt to kill him. Then, you will be moored on an island. Keep crawling after Roberts and pass by all of the remaining pirates, along your way. Once you reach him, you will find three Robertses. Approach each one of them and assassinate them. As it will turn out, you have made a bit of a mistake, because none of them was the actual Roberts. Finally, sail on the Jackdaw up to the big whirlpool in the middle of the sea. Afterwards, Ade will wake you up in a city street and will get you your ship back. The "mission" will end and you will be able to return to the game itself.
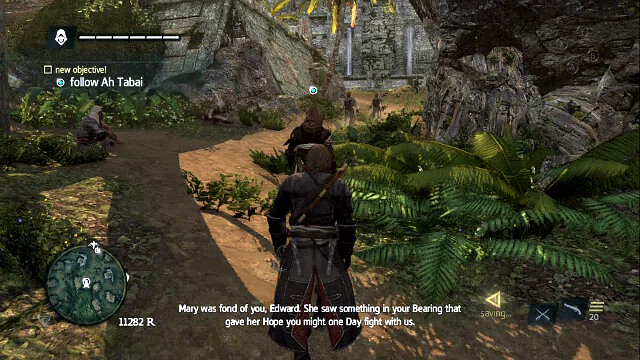 Follow Ah Tabai
After you start, follow Ah Tabai. He will give you another toy to play with - a rope dart. Using this one, you can hang the enemies up on trees, drag them to yourself, to be able to kill them at close quarters, etc. The attack will begin so, run towards the coast.
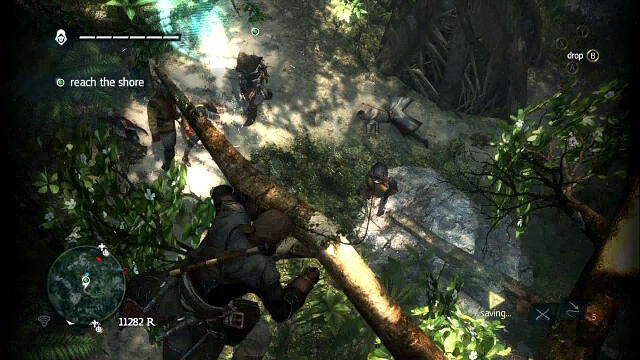 The hanging of a soldier
OPTIONAL OBJECTIVE- use the rope guards to hang two guards
OPTIONAL OBJECTIVE- use the rope dart to pull three guards
You will reach the first group of soldiers. Climb onto a tree to hang two of them. To do that, shoot at the target, using the shoot button, then lean the left analog stick towards yourself. Your character will jump down from the branch and leave the hanged soldiers there. Once you have already hanged two soldiers, there are still three more to pull. You do that in the very same way, but while on the ground. It should not be problematic for you to complete the optional objective, if you have used up all of the ropes before you do, remember that you can craft new ones (1 bone for one dart). After you have completed the optional objective, it will probably be more convenient for you to use pistols, smoke bombs, etc. Still, the rope is also very useful,, especially against brutes and officers. To all intents and purposes, the entire mission is about fighting. Additionally, you will receive reinforcements in the form of the other assassins so, it should not be too difficult. Keep cutting through the successive groups of enemies, until you reach the coast.
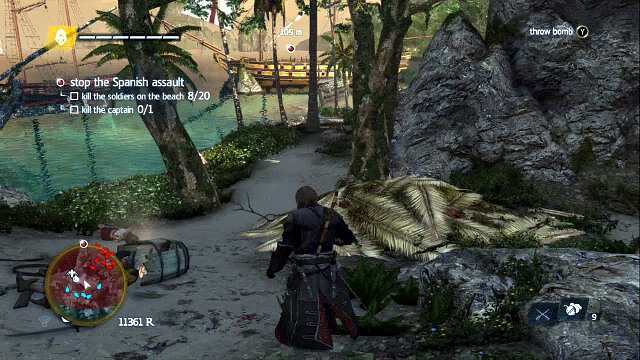 Run towards the ship
On the coast, you will have to kill twenty soldiers and a captain. The best thing to do is to run straight for the ship (and kill, along your way, whoever you can), because there is a plethora of soldiers and killing 20 is not going to be a problem at all.
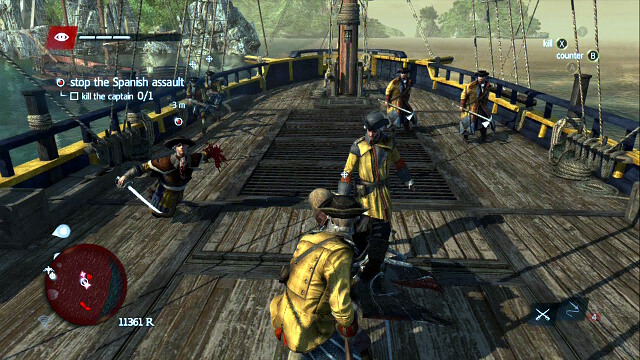 The rope pulling the captain
When it comes to the captain himself, the rope will come in handy. You do not even have to pull him, it is enough if he trips - then you will be able to strike while he is on the ground and kill him in one blow. Once you have killed everyone, the mission will conclude.
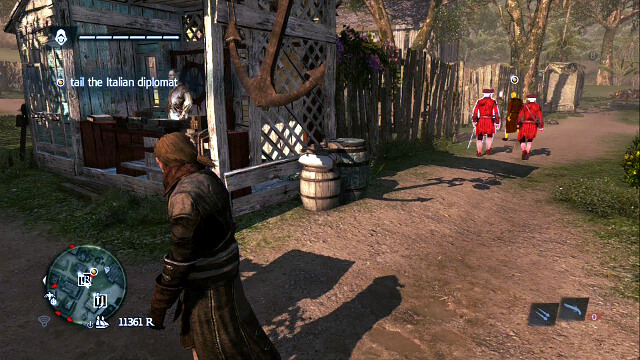
OPTIONAL OBJECTIVE- kill the diplomat from a haystack
After you start, mark the target using the eagle vision, and follow him for a bit. After a moment, he will turn left and go past the fence. Do not follow him there, and turn left a bit earlier, next to the store (the above screenshot) and reach the end of the road.
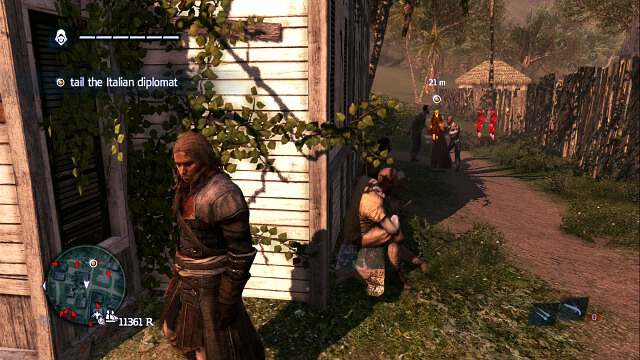 You are ahead of your target
By taking this shortcut, you will get ahead of the diplomat.
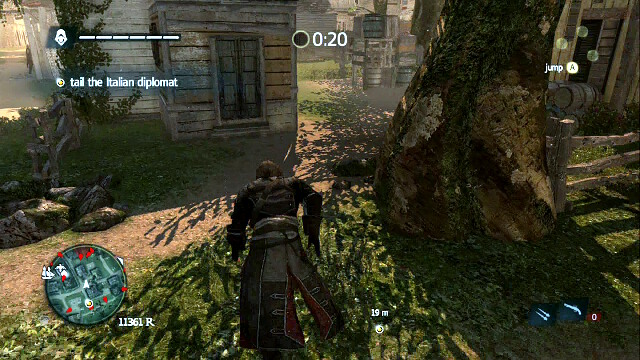
Walk into the place that you can see in the screenshot. There will be several soldiers there but, it is an unrestricted part of the city so, there is nothing to worry about, as long as you simply walk past.
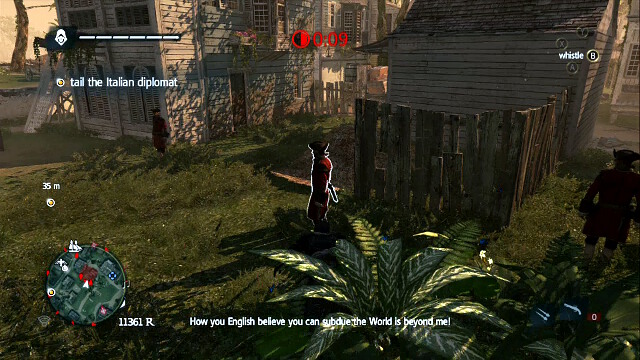
You will find a haystack there but, before you hide there, jump into the bushes, just like in the screenshot, and take down the soldier next to the bush. Then, jump into the haystack. Remember, if there appears the clock counting down the time, you simply need to pan the camera to the back, to catch a glimpse of the diplomat again, with the eagle vision. This will cancel the countdown.
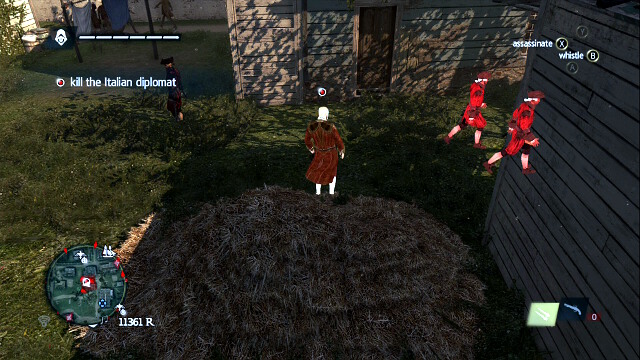 Assassinate the diplomat
The diplomat will arrive in a few moments. He will make a brief stop at the haystack that you are hidden in. Wait for his bodyguards to walk away and kill him to complete the first part of the mission.
 Be calm during the reception
You are at the reception. Go inconspicuously deeper into the estate. The soldiers will not react to you. Once you enter the ballroom, turn left.
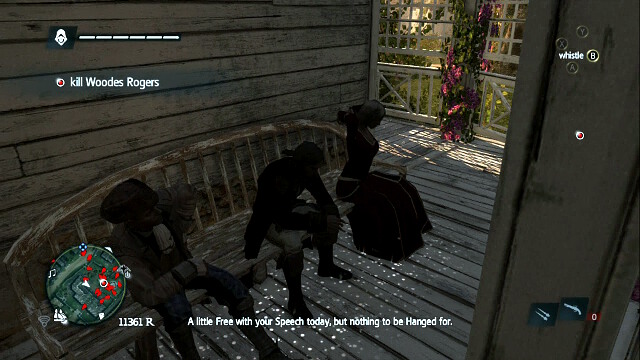
OPTIONAL OBJECTIVE- kill Rogers from a bench
You will find a bench and two guests here, who you can blend in with. Sit down on the bench and wait until Rogers' speech ends. Right afterwards, he will take a stroll among the guests and soon, he will walk next to you.
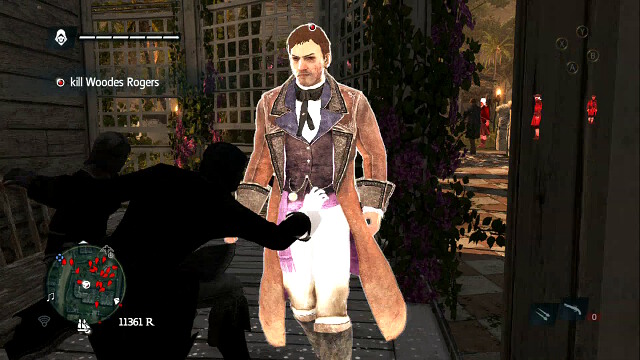 Assassinate Rogers as he is next to you
As soon as he passes you by, assassinate him. A cutscene will start. After it finishes, you will still have to escape from the party and return to your starting point. Blend in with the guests, which will allow you to leave the party easily. Then, the path is easy.
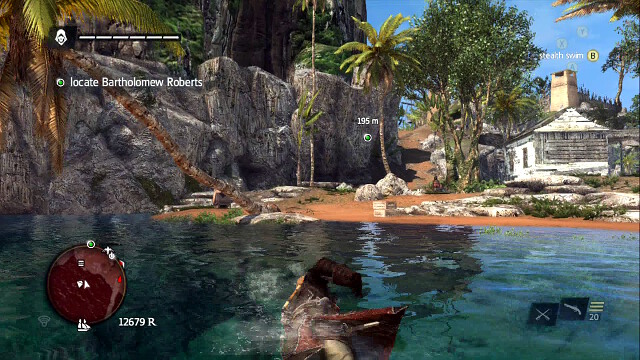 Swim towards the shore
Right after you start, jump into water and swim towards the left side of the shore.
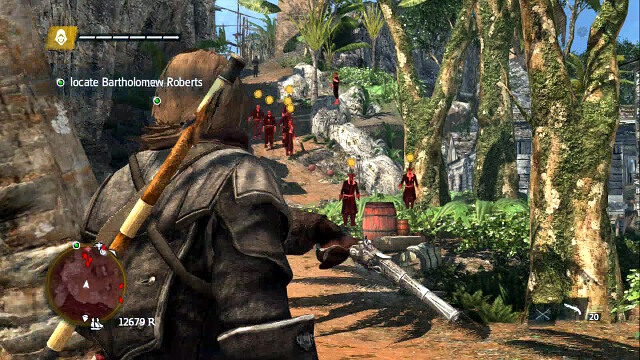
OPTIONAL OBJECTIVE- kill eight guards by destroying powder barrels
After you go out of water, you will find gunpowder barrels around. Along the path above, there is quite a numerous group of pirates. Wait at a safe distance, hidden behind a tree or rocks, until they start to walk down. Once they are low enough, discharge your pistol at them. Most probably, they are out of reach but, this is not the point. The noise of the gunshot should attract their attention, as well as of all the remaining pirates nearby. Note that as many as seven reacted to the gunshot in the screenshot.
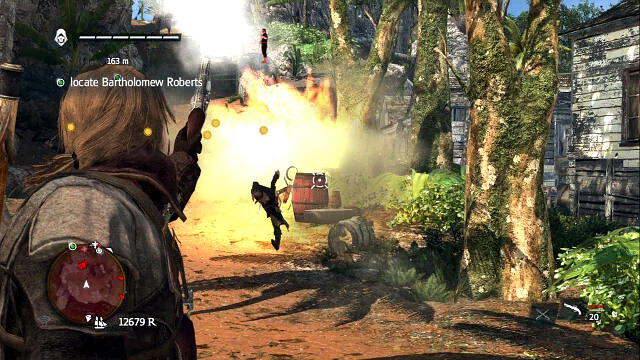 The barrel explosion
Immediately aim at the barrels with the other pistol. Wait for two seconds, so that as many pirates as possible approach them and take a shot. The explosion should claim the majority of them. Much depends on your luck but, if you have coordinated everything well, the explosion will kill 4-6 of them. The noise will attract the attention of the other guards in the region. Kill them in a more traditional way. If you decide that there is too many of them, retreat towards water as they come down and hide. Then wait for some of them to return and kill the remaining ones. After the action, loot the bodies and go up, towards the camp.
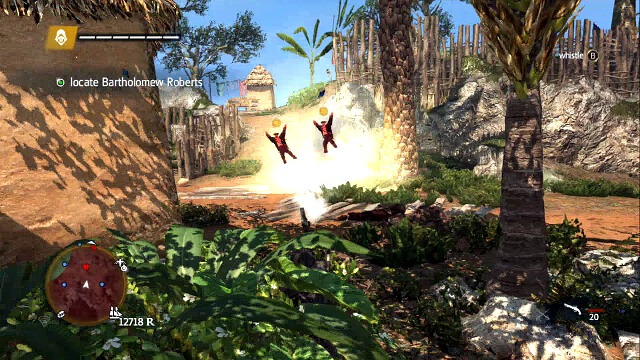 There are more barrels past the camp entrance
Under the big palm, a bit past the entrance to the camp, there are more barrels. There also is a group of three, patrolling. Deal with them and you should complete the optional objective. If you still need any barrels, there are quite a few of them in the camp. Some of them directly in front of the camp's gate so, you can encourage someone to chase after you, escape towards the barrels and blow them up afterwards.
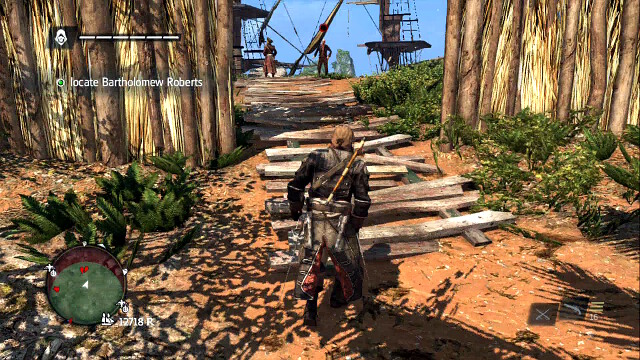 Roberts
After you complete the optional objective, the best idea is to ignore the rest of the pirates and focus on Roberts. You can find him in a specially fenced "mini-fort" from which you once saved pirates for him. Once you run inside, he will jump down onto his ship. Jump after him immediately. Under the cliff there will appear the Jackdaw.
 The way will be blocked off
Soon after the pursuit starts, Roberts will get into your way so, sail right, around him, while minding the rocks.
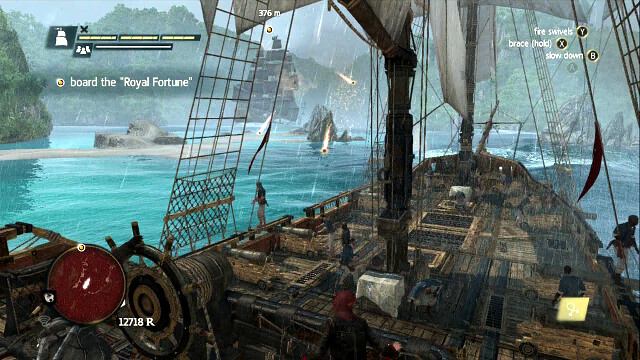 Keep attacking the enemy ship at all times
You will get under mortar fire. Cower from the shots, take cover and respond in kind.
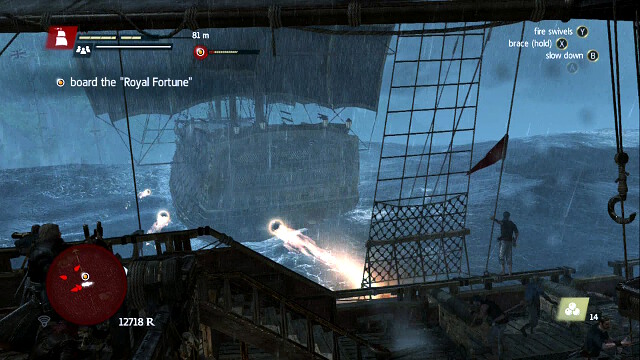 The fight with Roberts' ship
Once you get back behind him, watch out for the barrels that he throws and blow them up immediately. In the meantime, you should conduct mortar fire an chainshot fire. After some time, you will sail out into the open waters where both you and Roberts will be attacked by the English. Ignore their ships and focus all your attention on Roberts's ship. As soon as you are ready, board the ship.
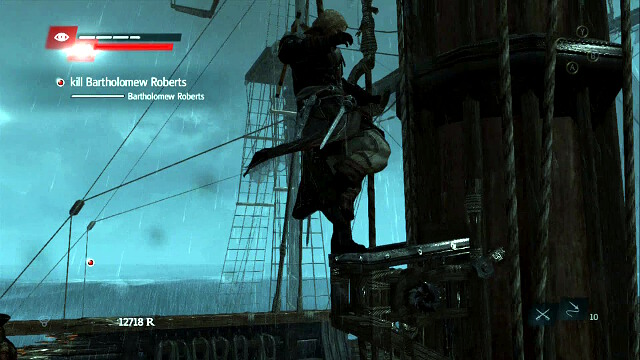 Make your way onto the mast
OPTIONAL OBJECTIVE- use the rope darts to kill Roberts
Once the fight ensues, use the crane to make it over to the mast quickly. Deal with the gunner there and jump onto the sails to slide down.
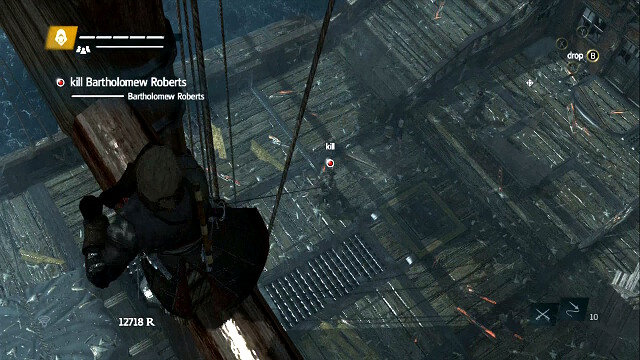 A rope shot at Roberts
Once you are as low as you can get, but still above the ground, wait until Roberts gets within range. Then, shoot at him and remember to pull the left analog stick towards yourself. Roberts will hang down from the mast. This will start a cutscene after which the mission will conclude.
Havana has been shut out for all civilians so, to start this mission, you will have to sneak your way inside. Before you start, make sure that you have, at least, 10 pistol bullets. It is also a good idea to expand the number of pistols that you carry, as much a s possible, and have on you a gun with the greatest punch.
 Move along the temple premises
Once you start, start jumping towards the cathedral. Around the cathedral, watch out for a gunner. Do not walk into the cathedral's premises and go along it, by jumping over rooftops.
 Tiburon with his entourage
Once you reach the end, you will notice your target on the rooftop. They will start going in the direction from which you came so, start backtracking and move back a bit, if necessary, to avoid being spotted.
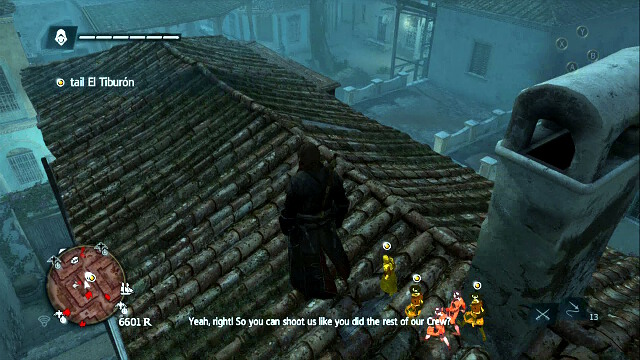 Follow your targets from above
Stay close while going above. The way is quite long but, as for now, uneventful. Once you start approaching the fort, there will appear gunners on rooftops. To the extent possible, try to eliminate them silently by attacking them from behind or using sleep darts.
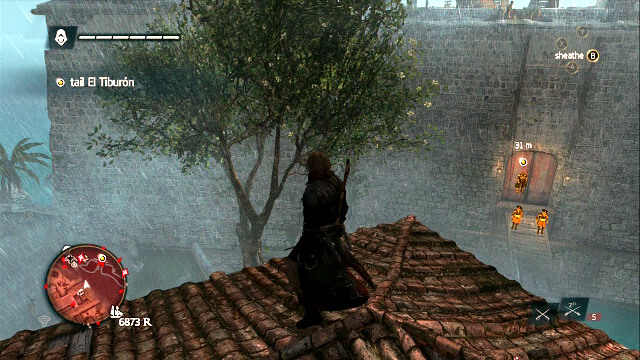
OPTIONAL OBJECTIVE- stay out of combat
Soon, you will reach another familiar location. Using the trees show in the screenshot, reach the fort, just like you once did it during the second sequence.

Before you jump over onto the fort check carefully where the local gunner is. Jump up when he walks to the right, just like in the screenshot, and knock him down quickly by surprise.
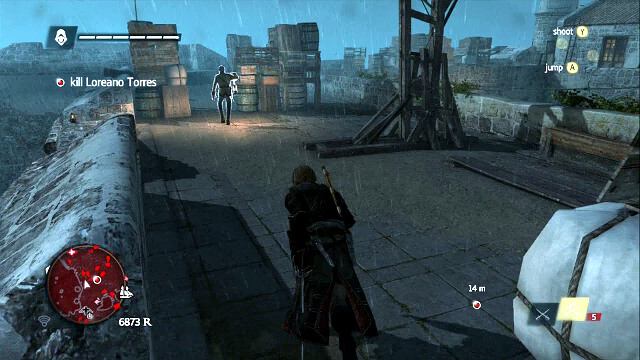 Assassinate the patrolling guard
Both on the right and on the left, there are soldiers patrolling the area, one at each side. You need to be especially careful when it comes to them. When the one on the right walks away, run quickly to the left and tackle down the guard here.
 Jump down onto Torres
If you are short of ammo, deal also with the guards above and loot their bodies. If you, on the other hand, are ready, make sure that you are shielded from detection on both sides and wait for Torres to walk nearby. Once he is within reach, jump down and air assassinate him. This will initiate a cutscene.
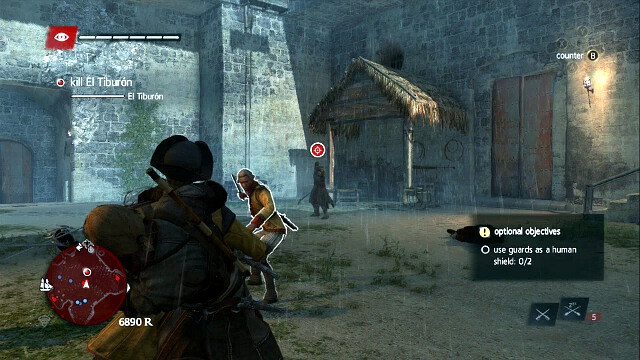 Use the guards as human shield
OPTIONAL OBJECTIVE- use two guards as human shield
You will have to fight a mighty knight, and four guards, here Keep at a distance from Tiburon and wait for him to aim his pistol at you. Then, use one of the guards to shield yourself from the bullet. Repeat then for the second time to complete the optional objective. If you are attacked by the regular soldiers, counter their attacks to avoid taking damage but, do not press the attack button because you can easily kill all of them before you manage to complete the optional objective. If necessary, run away towards the yard's other end.
 Shoot at Tiburon
Once you have completed the optional objective and killed all of the guards, El Tiburon will remain in the battlefield. The traditional hand-to-hand fight is pointless here, he is also immune to darts. Keep firing your pistol at him. Use up the whole series and reload while running around the yard, in circles, to avoid being attacked. Once you are ready, use up the ammo again and start playing cat and mice again, while reloading. How many shots you are going to need, depends on the model that you are using but, in general, 7-10 shots should do. Once you kill him, a cutscene will start.
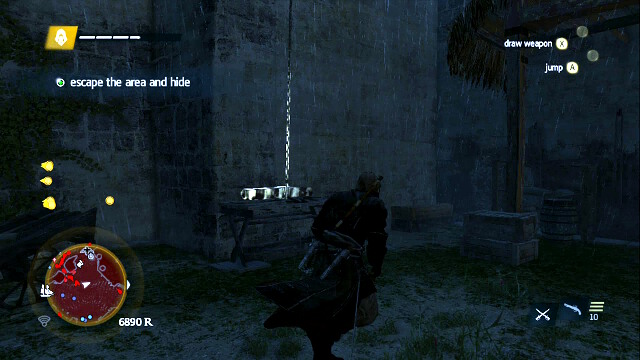
After the cutscene, large numbers of soldiers will dash in through the gate. To the right of the entrance, note the glowing rope shown in the above screenshot. Use it to climb up. From there, jump towards the sea and dive to hide. Wait until things go calm again. Finally, you will have to return to the area where you have started.
To start the last, as a matter of fact, mission in the game, you will have to cut through two heavy galleons on the 36th level, and a nearby fort (this is, if you haven't seized it yet) so, upgrade your ship properly, if you still have not.
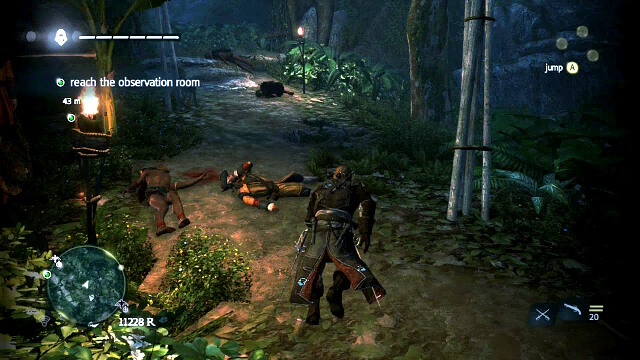 Head towards the Observatory
Go towards the Observatory. Along your way, you will be bumping into Spaniards murdering the locals but, there is nothing you can do about it. Simply, push forward. You will come to no harm here.
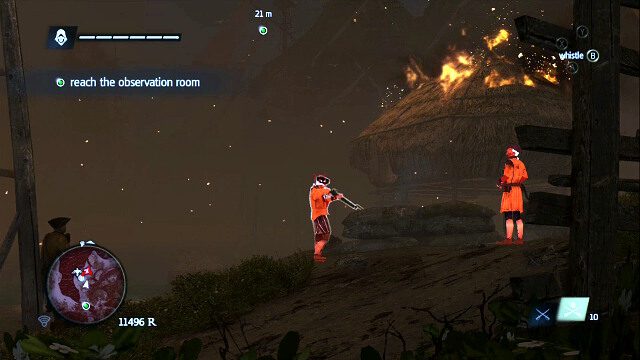 The first group of hostages
OPTIONAL OBJECTIVE- free seven guardian hostages
Before you enter the caves, turn left. You will find hostage guards here. Use a berserk dart on the guard that is watching them, to have him killed by the other guards. Just in case, keep a sleeping dart prepared to prevent the guard from killing the hostages, if he survives. Alternatively, you can simply charge at him and run assassinate him to deal with the others afterwards. Once it is clear, free the hostages and walk into the caves.
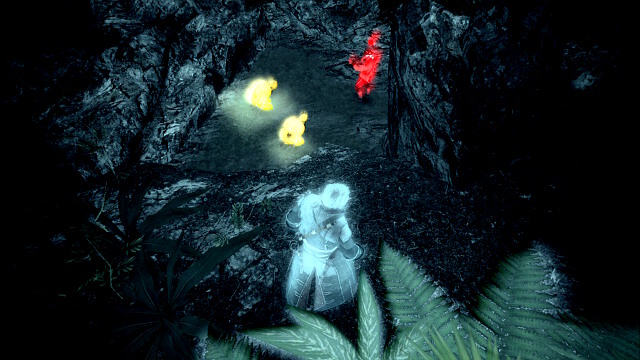 The second hostage group
Right at the beginning of the cave you will find two other hostage guards. Jump down to kill the soldier that watches them and, if necessary, deal with the remaining soldiers. Then free the hostages.
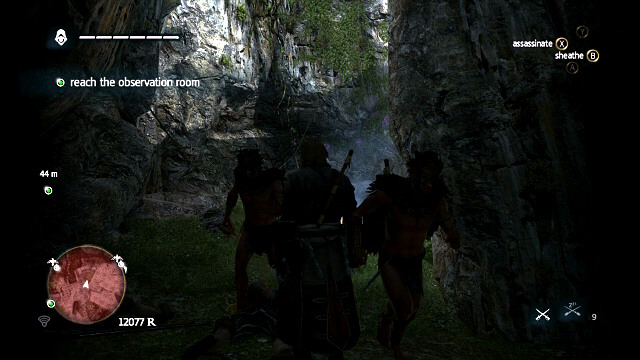 The third hostage group
A bit ahead, you will find the third group of hostages, watched by two gunners. The easiest way to handle them is to run assassinate them. From now on, the only thing that you need to do is run to the Observatory, because nothing else will happen here.
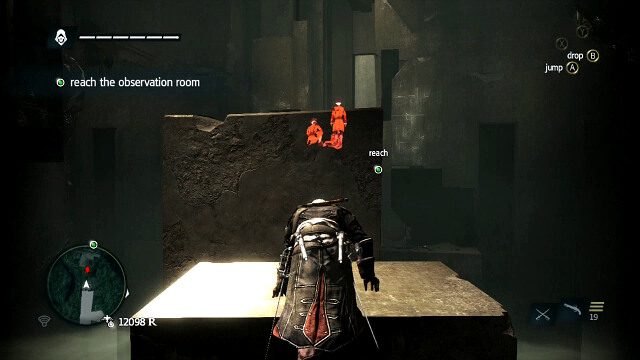 Reach the soldiers
The Observatory seem a little bit more livid than previously. Run over the movable columns up to the three soldiers and kill them.
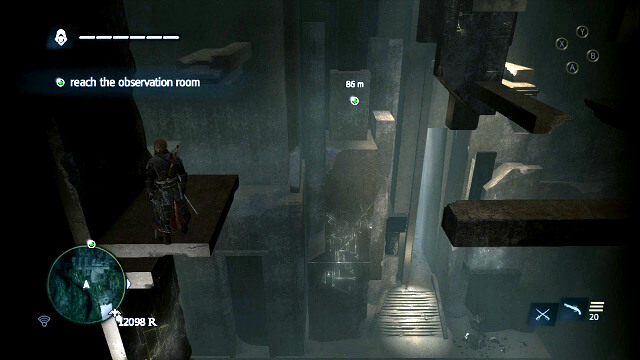
The large bloc that you killed the Spaniards on, will move from left to right and back again. Once you reach the next movable wall, climb onto it. You will have to use the fact that the columns go up and down to get to the very top. From there, jump towards the entrance to the center of the complex. The final part will break and, fortunately, you will land exactly into the entrance.
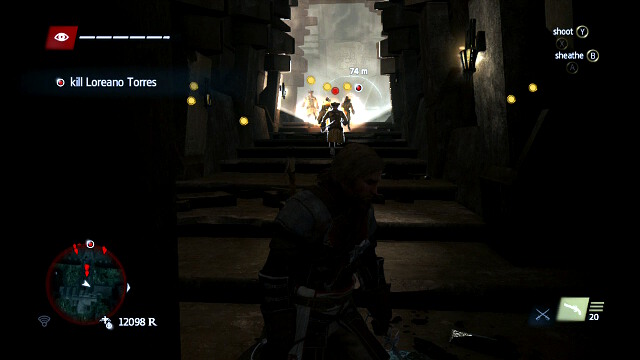 Use the walls to kill the enemies
OPTIONAL OBJECTIVE- use the Observatory defenses to kill four guards
In the next corridor, walls of light will be appearing on regular basis. You cannot cross them, but they will not kill you on contact. The easiest way to complete the optional objective, is to lure all the guards into this corridor and run around, back and forth, until the walls kill enough of them. Then, walk into the center and kill the remaining guards.
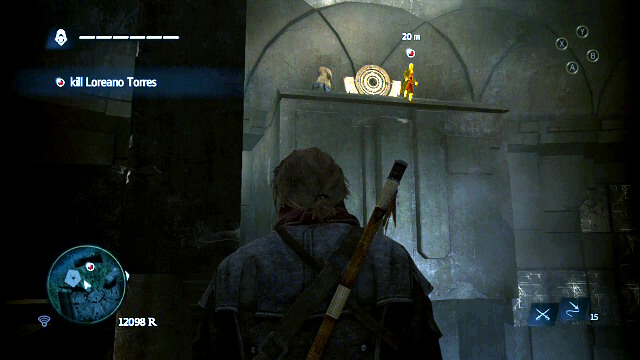 Make it over to Torres.
Over the moving columns, reach Torres. For now, you will not be capable of harming him. Try to come close to him. Soon, it will turn out that you will slide down. Turn right to make it over, while holding on to the pipes.
 Watch out for the light
Over the pipes, you will make it onto the wall with the walls of light appearing on, on a regular basis. If you touch to them, they will throw you off and you will die. Keep an eye on the holes in the wall. Each time they glow, this means that the light will strike again so, stop and go ahead as soon as it goes off. Keep going right at all times and climb onto the last column.
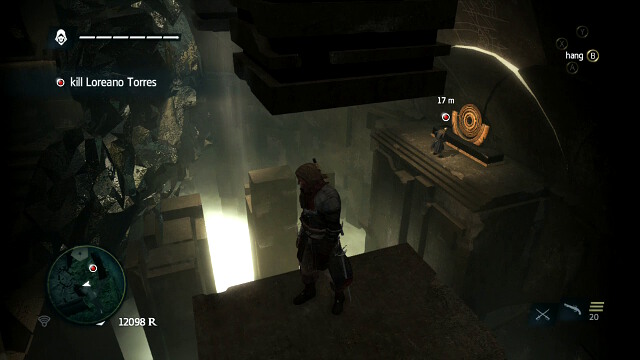 Go for Torres
Keep jumping over the moving columns to end up right in front of Torres.
 Kill Torres as soon as possible
Make it over onto the bar between the two columns that is moving back and forth, right in front of Torres. Once you reach Torres, make sure that he is not protected by a wall of light and it is clear around. Jump then to kill him and complete the mission.
 Finally, you will watch a string of cutscenes
Killing Torres will, practically, mean the end of the game. You will be back, for a moment, to the Abstergo office and watch the epilogue but, after all, these are only cutscenes. After you watch the epilogue, you will officially complete the Assassin's Creed IV: Black Flag! Of course, you can still return to the Caribbean to complete side missions and locate all collectibles, or simply to hoist the crossbones flag onto the mast and hack, slash burn down and loot for your own entertainment...
This unofficial game guide for Assassin's Creed 4, entitled Maps and Collectibles, includes detailed information about all of the side-activities available in the Caribbean region.
Assassin's Creed IV: Black Flag - Maps & Secrets is the third part of our enormous guide for Assassin's Creed IV: Black Flag game. The other two are Assassin's Creed IV: Black Flag - Walkthrough and Assassin's Creed IV: Black Flag - Strategy Guide. Check them out!
You can find here the following:
Lukasz "Salantor" Pilarski (www.gry-online.pl)
Each location on the world maps - with the exception of keeps- is hidden under a question mark until you swim up to it, or seize an appropriate keep.
Standalone locations mean the places that do not perform the function of a city, are big, and you usually cannot look them up on the world map.
In the Caribbean, there are 46 chests with money. Most of them come separately, and there are only a few that contain the Letters in the Bottle or the Animus Fragments.
The chests can be found on the microscopic islands or on the sandy coasts of bigger landmasses. The difference between the landmass where there is a chest, and the one where there are none, should be easy to tell at first sight.
If you have not seized a fort with collectibles in the region, the game will automatically mark the chests on the map, at the moment at which you sail by.
In the Caribbean, there are 30 Animus Fragments. Just like chests, they may be found on tiny islands or on the beaches, separately or together with the other collectibles. Just like in the case of chests, sailing by an Animus Fragment on an undiscovered island of the region, will result in remembering those fragments by the map.
In the Caribbean, there are 11 forts, which have been divided into three categories, depending on their difficulty level. In the upper part of the map, you can find easy forts: Dry Tortuga, Gibra, Eleuthera. In the middle of the map, there are the medium forts: Conttoyor, Castillo de Jagua, Cruz, Punta Guarico, Navassa. The forts of high difficulty level: Charlotte, Serranilla, Chinchorro, are at the bottom of the map. You can attack all of the forts with the moment in which you obtain the Jackdaw, with the exception of Punta Guarico, which will be unlocked in the main campaign mode, in sequence 5, mission 1.
A fort's difficulty level determines the speed with which the cannons are reloaded and the endurance of the fortifications. It does not translate into the numbers of the fort's crew.
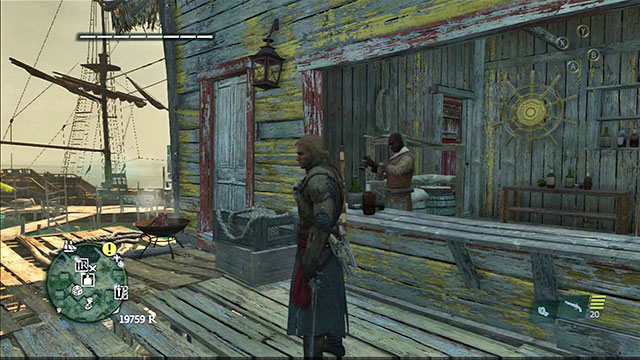
In the Caribbean, there are 8 taverns. Each one of them is initially blocked by a group of drunkards. To unlock a given tavern, you need to talk to the bartender and whoop the aggressive drunks. There always is four of them and they are not too demanding.
In each tavern, you can have a drink, talk to the owner, hire the crew or play a game. Each one of these activities costs you money. Drinking will cause the screen, and Edward, to become shaky. The more you drink, the more the pirate will stagger. A conversation to the owner may reveal the positions of treasure fleets and treasure maps. Hiring the crew will allow you to man the crew.
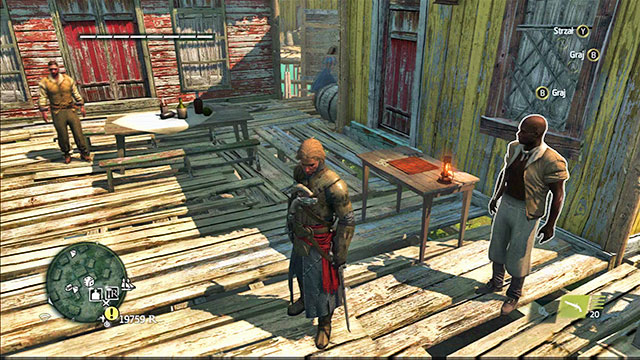 Won't you play a game?
In taverns, you can play one of three games: draughts, Nine Men's Morris or Fanorona. You play for money. Depending on the difficulty level, you can bet between ten and, as much as, one thousand regals. Each time before the game, its rules will be explained to you and, during the game, you will be receiving hints concerning the possible actions.
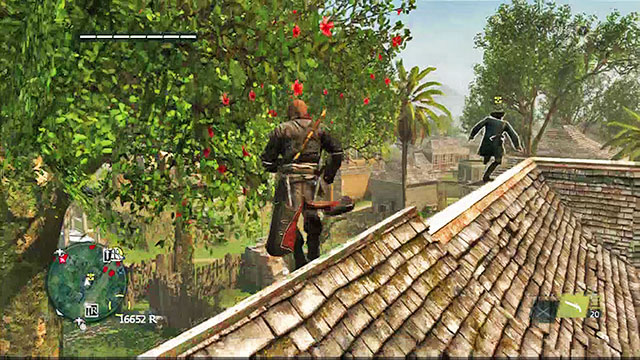 Chasing the courier
The couriers appear at random during your stays in big cities (Havana, Nassau, Kingston) and they start running only after they spot Edward. Therefore, you can sneak up to them over the rooftops. It is necessary that you run up to the courier and knock him down. As a reward, Edward receives a small sum of money and ammo for all the types of weapons that he currently owns.
If you do not feel like running, you can deal with the courier by shooting him or using a dart, and then search the body. You need to hurry, though. Some of the couriers run pretty fast, at short distances, and escape quickly from the range of shot.
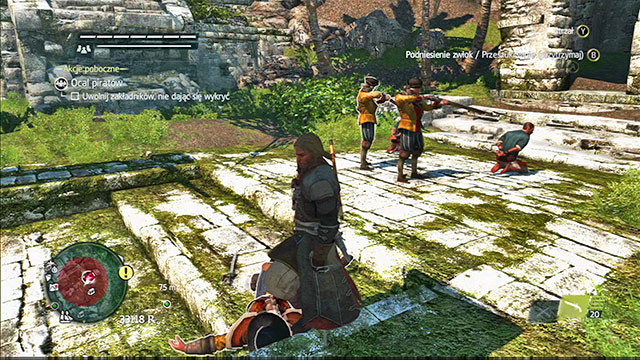 Soon, they will become new crew members
This activity activates when you come close to the pirates under threat. There are three variants of the event. In the first one, one, or two pirates are under attack from a group of soldiers Your task is to kill the soldiers before the pirates are killed. The second variant consists in a quiet elimination of soldiers guarding pirates who are tied up, after which you need to free the pirates. The third variant is similar to the second one, and the difference is that the pirates are executed after a predetermined amount of time passes. In each case, you receive additional men for your crew and a small amount of money.
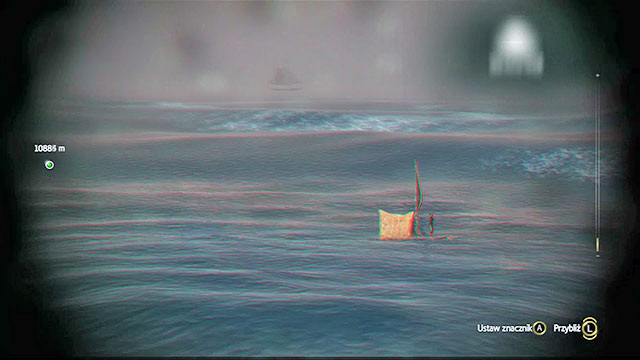 A survivor waiting to be rescued
Every once in a while, at sea, you can encounter a raft with a survivor on it. Taking him aboard results in the increased numbers of the crew.
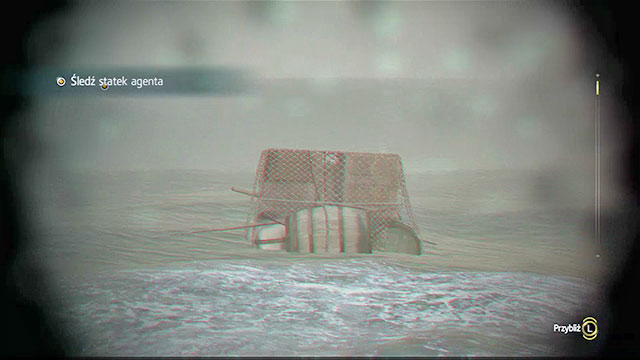 an abandoned cargo waiting for its rescuer
During the sea voyages, you will be encountering crates floating on the sea's surface. They appear at random, or where a ship was sunken. Inside, there is ammo or goods, numbering from several to several tens of units.
Sometimes, an abandoned cargo can also be found on the maps of locations. Such crates contain several units of goods of one kind.
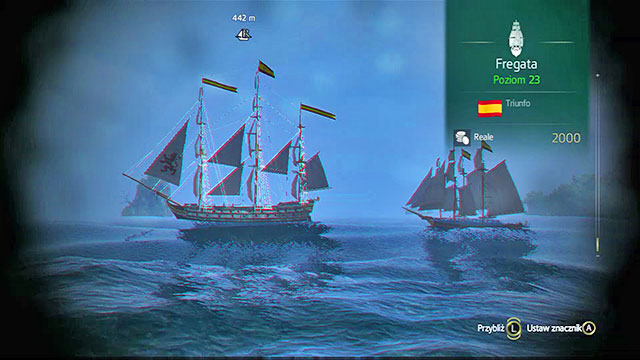 A small convoy carrying big money
You can learn about their whereabouts in taverns, or by steering nearby. Such a fleet consists of several guard ships and one ship loaded with Regals only, so do not engage them into fight if the Jackdaw is not strong enough. The fleets stay in one location for as long as you sail by, so you do not need to worry that they sail away.
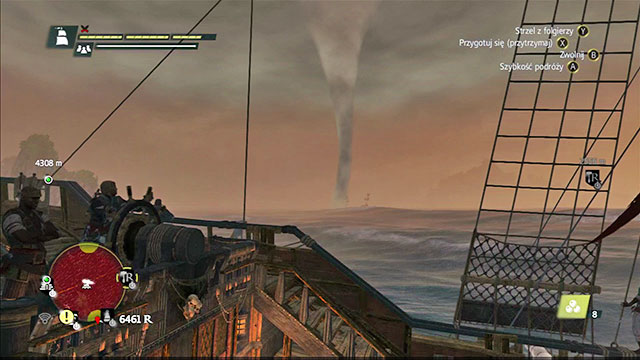 A waterspout circumvented at a safe distance
A weather phenomenon that obstructs sea voyages. After you near one, your control over the ship becomes obstructed and, after you approach it, you lose, temporarily, the control over the Jackdaw.
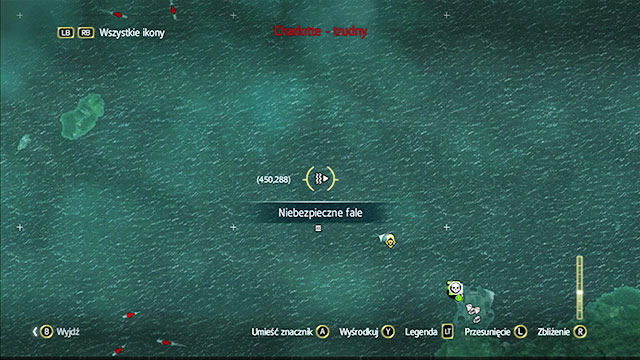
In spite of what the map suggests, the dangerous waves do not occur only in the spots where the marker appears. It is much wider and it can reach the Jackdaw even if you think you are safe.
After it hits, the wave damages the hull, and some of the crew fall overboard. to counteract that, press and hold down the X button at the right moment. The crew will then grab onto whatever is stable. Release the button when the wave moves away. Just in case, you should hold the button down for a bit longer than you actually should. The wave is quite tall and you may happen to release the button too early. In such a case, you will take damage and lose some of the crew.
In each bigger city, and a few smaller locations, there are two pigeon coops, where Edward ma5y take up a task to eliminate a designated person. Each such contract is worth 1000 Regals, plus additional 500 for remaining undetected.
The tasks are divided into two parts. The first one consists in reaching the spot and finding the target, and the second one in eliminating the target. The spot is marked on the map with a skull-shaped blip, and the target starts glowing after you find it with the eagle vision. Most usually, the target is in a restricted area so, you need to be prepared to fight soldiers or pirates.
Location: Northern pigeon coop
Enter the plantation and use the eagle vision to find the target. You can find him in the Northern part of the restricted area, a bit to the left. Kill him silently.
Location: Northern pigeon coop
The target is in the area marked on the map, on the top of the hill. Eliminate the guards at the gate in the assassin way, them climb onto the hill and stab the target.
Location: Western coop
The best method to complete this mission is to get onto the rooftop of the house, where there is a gunner, eliminate him and kill the target by jumping down from the roof. An alternative is to detonate the gunpowder barrels, which are plentiful around here.
Location: Western coop
The target is in the Southern part of the city so, you should be prepared to swim over there. Alternatively, you could use the fast travel option. This time around, there is no additional bonus for being stealthy. The target starts running at sight so, you could either climb one of the rooftops in this area and drop down from it, or be prepared for a chase around the city and for cutting through groups of passer-bys. the victim stops running once he has gained a certain distance from you so, a good method is to keep the distance and cut into his way. As a last resort, use the pistols.
Location: Southern Coop
In the region where you are to execute the contract, there are a lot of bushes so, after you kill the guard at the entrance, take cover in order to eliminate the remaining ones, and finally the target.
Location: Southern coop
The target is around the harbor in an exceptionally small restricted area. If your aiming is good, approach into the bushes close to the target and shoot him. If you are fast enough you will not raise the alarm and remain in hiding.
Location: Southern coop
Your target is at the beach. The restricted area is small enough for you to remain out of its limits and find the target with the eagle vision. Shooting the target requires twp bullets, which means that Edward will be detected after the first one and you will lose the bonus. A good method is to enter the area and climb, silently, onto one of the sheds and kill the target from there.
Location: Southern coop
The target is in the harbor, on the farthest of the piers in the designated area. Jump into water and swim undetected towards the pier. Emerge behind the target's back and eliminate him. The target is on the move, but he stops at the waterfront several times. That is when you can eliminate him, while hanging at the boat's side.
Location: Central coop
The target is among the tall buildings. The best method is to climb onto the rooftop and kill the officer with the pistols.
Location: Central coop
Unlike in the previous mission, in this one the restricted area is heavily guardedThe method is identical - climbing onto the rooftop and shooting the enemy dead. This time, however, you need to watch out for the guards on the rooftops, as well as for the target's companions. You need to aim with precision, or else the bullet hits a soldier instead of the target.
Location: Northern coop
walk over the rooftops near the restricted area and locate the target with eagle vision. If you bump into a guard along your way, eliminate him silently. The most convenient way is to eliminate the target with pistols. After the assassination, escape from the restricted area.
Location: Northern coop
This time, there is no additional bonus for staying out of fight. After you accept the job, reach the designated area and use the eagle vision. Your target is ducking near the bush, next to a group of soldiers. You can either chase him and kill in a direct fight, or shoot him dead. you need to mind the soldiers, who are not going to watch your actions without intervention.
The Captain is near the hunting grounds. He is taking a stroll at the Northern side, close to the large tree. The best way to eliminate him is to lurk behind the large tree and wait for the captain's head to appear in sight. You can also eliminate the pirates that surround him, and stab him from behind, instead.
The target is at the estate in the Western part of the city. Climb onto the rooftop, eliminate the guards and search the area, using the eagle vision. The best method is to attack the enemy and kill him by jumping onto him down from the roof or, if he is far away, shoot him dead.
Your target is as far as the Pinos Isle so sail, or fast-travel there, if you have already visited this island. After you get there, follow the skull symbol. Your target is at the topmost-but-one level of the pyramid, standing atop the stairs. It is best to eliminate the guards, at one side of the pyramid first, climb up and eliminate the target from above.
No reward for staying out of combat. The target is in a small restricted area, close to the coop. Over the rooftops, make it over to the target and attack him from above. If you fail, the target will escape to the frigate in the harbor and sail out into the sea. In such a case, you will have to catch up with the vessel, damage it and kill the target during boarding.
No reward for staying out of combat. The target is in the Chinchorro fort so, the basic condition is that you seize it. Enter the fortress. The target is in the inner yard, protected by gunners and pirates on both sides. Enter the restricted area from the East, make it over to the gunner staying there and eliminate him. Next, you need to locate the target with the eagle vision. Use the height to your advantage and kill him from above. At the same time, you need to watch out for the second gunner, who may spot you, and for the target's bodyguards. If you kill their boss with the attack from above, they will spot you straight away and kill you.
To complete this contract, you are going to need the diving bell and, in the course of the mission, you will be stripped of your armor and most gear. The target is to the south, near the underwater location Ambergris Key. After you get there, near the shipwreck, you will notice an entrance worked into the rock, leading into an Aztec building. Sail up to the entrance and moor the ship, and Edward will dive in the bell. In front of you, you will notice a tunnel. Avoid the medusas and swim into the tunnel. Keep swimming ahead, while watching out for medusas and sea urchins, until you reach a large cave with Aztec ruins in it. Climb up the pole on the right of the stairs and eliminate the guard on top. The best idea is to use a throwing knife for that. If you do not have any, climb up when the other guard is gone, deal with the first one and hide around the corner. With a bit of luck, you will stay unnoticed. Your target is in the next area. Watch out for the patrol, sneak up to him from behind and eliminate him. In the room, there are a lot of ledges and beams so, the best method is to attack him from above. The stairs on the right will take you back out. Go aboard the ship, take the wheel and Edward will change into his regular outfit.
Your target is staying Eastwards of here, on the Mariguana isle. Fast-traveling will make the Jackdaw appear right next to the target. In this case, jump down from the stern into the water, swim underwater to pass by the target, avoid the guards, approach him and kill him. Otherwise, you will have to walk around the guards in a standard way. The target is under a roof so, the regular air attack is out of question.
Another method, a bit tricky, is to let both your target and the gunner next to him, see you, after which you dive quickly. With a bit of luck, both of them will start to approach you, decide that they must have been seeing things and start returning. This will expose their backs If you have been lucky, the target will be, somewhat, lagging behind the guard so, you simply need to run up to him and stab him in the back.
No reward for staying out of combat. The target is staying at the Salt Lagoon Northwards. Sail up, go ashore and approach the designated zone. The target is all on his own and he will not spot you at first so, try sneaking up to reach the shooting distance and shoot him. There are a lot of thickets on the island, which will help you take cover. Otherwise, you are up for a run across the island.
In spite of the numbering, this mission is the first one on the Andreas Island.
The target is staying on the Abaco Island, to the North of the Andreas Island. The target is, more or less, in the middle of the restricted area, occupied by a dozen, or so, scattered guards. Use the bushes to approach the target and either stab him in the back or discharge your pistols quickly. With a bit of luck, you will kill him faster than you are spotted.
In spite of numbering, this mission is the second on the Andreas Island.
No reward for staying out of combat. The target is on the Andresa Island, close to the pigeon coop. Hide among the bushes next to the restricted area. After a while, there will arrive a British ship there (if you have arrived here by fast-traveling, you will notice that the moored Jackdaw tries to sail away. With a bit of luck, you will see both ships collide while trying to pass each other by). Onboard the ship, there is your target. The easiest method is to walk out onto the pier and shoot him but, if you feel like to, you can swim up to the ship and kill the target from above, by jumping down from the mast.
It may happen that, although you have killed the target, the contract will remain incomplete. In such a case, go aboard the Jackdaw and sink the enemy vessel. Then, the mission will be completed.
No reward for staying out of combat. The target is out at sea, Westwards of the Coast. Once you get there, you will notice your target: the schooner accompanied by another schooner and a frigate. Ignore the two other ships and follow your target, while sailing past the isle from the West. The schooner is a small and weak unit so, you do not need to worry about its fire. Still, you need to watch out for the fire barrels floating on the surface. You can attack the schooner by boarding it and killing the crew, or simply sink it. In both cases, the contract will go as completed.
Again, no reward for staying out of combat. The target is in the North-west, in the Dry Tortuga fort so, you should first seize it. The target is on the higher level of the fort, accompanied by two gunners, and a few soldiers. Climb over the scaffolding, eliminate the first one of the gunners and shoot at the gunpowder barrels. The explosion will kill all of the soldiers and also the target.
No reward for staying out of combat. The target or, the targets, are in the nearby tavern. Enter its premises over the rooftops and use the eagle vision. Select the first target for assassination and discharge the berserk dart at him. It is best to take the down the beefsteak with it and, as soon as the captain notices the situation and approaches, do the same to him.
After the first brother dies, the second one wakes up and starts running. In the harbor, there is no ship that he could board so, simply get him and kill him. He is accompanied by some weak soldiers so, you do not really need to worry about them too much.
To complete this one, you are going to need the dive bell and, while completing it, you will be stripped of your armor and most of your gear. The target is staying near the Anotto Bay, close to the Navassa fort. Reach there, moor the ship at the shipwreck and drop down the dive bell. Swim into the flooded mine and climb up the ladder. Watch out for the shark and follow the rusty rails. You will reach another ladder, which will take you up to a chest and another tunnel. Keep following the rusty rails again and replenish your air supply along your way, in the air bubbles. Finally, you will reach the third ladder and go ashore for a moment. Ahead, you will have to follow a flooded, damaged tunnel (follow the rails again) until you finally reach the restricted area. Your target, and all of the guards are occupying a large, wooden structure so, the easiest method is to climb up the structure, hang down, right next to the target and a silent assassination. You can also use the bridges and eliminate the guards quietly, one after another, which will clear your way to the target. The area is small so, after you resurface, you are bound to be spotted, which is why you should be careful and look out for the spaces where the guards will not be able to spot you. If you have eliminated the enemies, you will be able to fast-travel out of the cave.
The target is staying on the Cayman Sound isle. The island is swarming with pirates who walk in pairs or in threes so, if you do not want to be spotted, hide among bushes as often as possible. The target is in the middle of the island, near the spot where you hunt for hutias so, you can swim up to him and get around most of the enemies. The target is accompanied by only one guard so, eliminate him in the first place and get to the target himself then.
The target is staying in the Misteriosa's ruins. You will find him in the mayan ruins, in front of the building guarded by two gunners. The best method is to eliminate the two guards - one gunner and one footman, who are guarding the restricted area from the East. Then, sneak among the bushes, approach the target and eliminate him.
The target is in the Cumberland Bay, in the northern part of the restricted area, accompanied by a beefsteak and a gunner. Walk around the group of guards on the beach, deal with the single guard patrolling the region, sneak up to the target and stab him in the back.
No reward for staying out of combat. The target is on Tortuga. The plantation is the restricted area so, most probably, you will have to cut through the fire barrels scattered over the water and the enemy ships. Do not make too much noise, though, because you will drive the target away otherwise. In this case, you need to swim over into another location and backtrack. If you do not want to take too much risk, jump into water some distance off Tortuga and get there swimming. The target is in the Northern part of the isle, near the single household. There are no guards around so, if you do not want to get into a fight, sneak from bush to bush until you reach the target. He will not put up any fight.
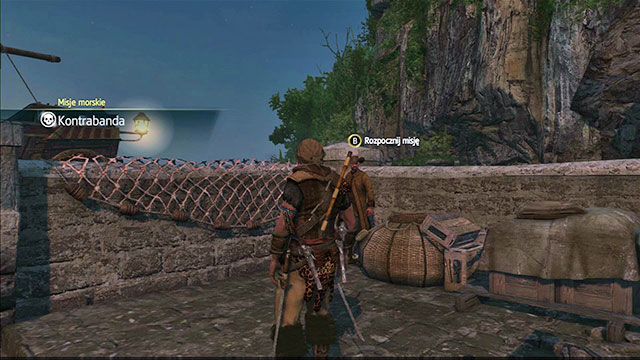
You can take up the naval missions in the forts seized by Edward. The mission giver always can be found at the pier and he offers between one and two assignments. Make sure that you have enough upgrades for your ship, because the Jackdaw may simply be not prepared for some of the missions.
A considerable portion of the missions consists in sinking the enemy ships however, the game does not recognize the difference between boarding or sinking the ship as a result of gunfire laid down on it so, to every reward for the completion of a given mission, you should also add the loot from the seized ships.
If, in a given location, you can take up two assignments, the first one available, will be the one with the lower ordinal numeral/higher on the list.
Location: Castillo de Jagua
Difficulty: 3/5
Your task is to sink the San Lorenzo frigate. Sail towards the marked area and use the telescope to find the ship. Lay fire down on it and board it afterwards. After you win, the mission will be completed.
Reward: 1800 regals
Location: Conttoyor
Difficulty: 3/5
Steer into the ambush site. After a moment, there will appear the enemy ship there, escorted by gunships. Dispose of the smaller ships damage the giant and board it.
Reward: 1800 regals
Location: Eleuthera
Difficulty: 1/5
Sail into the open sea and find any three Spanish ships. Sink them and you will complete this mission. There may be too few of them near Eleuthera so, if necessary, sail further, e.g. towards Havana.
Reward: 1800 regals
Location: Cruz
Difficulty: 4/5
You need to obtain 60 units of wood and give them over to the merchant. Wood is one of the more seldom used material so, most probably, you already have a lot of it. Otherwise, seize a ship that carries wood.
Reward: 1800 regals
Location: Gibara
Difficulty: 2/5
Reward: 1200 regals
You need to obtain 30 units of clothes, i.e. silk. If haven't, so far, done that, sai,l into the open sea and loot several ships. After you do that, return to the merchant.
Location: Chinchorro
Difficulty: 5/5
You need to sink two Spanish brigs and a frigate. It does not matter what kind of brigs and frigate these are going to be. Sail into the open sea and find the ships of the appropriate type and sink them.
In the case of this mission, sinking means damaging the ship to the boarding condition. In other words, if you do not feel like fighting anymore, you can leave the damaged ships to their fate.
Reward: 2400 regals
Location: Dry Tortuga
Difficulty: 5/5
Reward: 2400 regals
Sail towards the marked area until you reach the green zone. You will find there two gunboats fighting Neptuno. Sink the assailants, although you should not be surprised if Neptuno manages to deal with them on its own. After the two ships are sunken, there will appear three other gunboats. Destroy them. The next wave consists of four ships, including a brig and a schooner. After you have sunken them, the mission will end in success.
Location: Navassa
Difficulty: 4/5
Your target is the captain of a British liner. Liners are ones of the strongest ships so, you need to make sure first that your ship is sufficiently strong to face it.
Reach the marked area. What you will have to face in the first place, is a group of three brigs, the liner's reinforcements. Deal with them.
Your next aim is to board the liner, which should appear nearby. If necessary, follow the marker on the map. Damage the ship, board it and kill the captain.
Reward: 1800 regals
Location: Serranilla
Difficulty: 5/5
Reward: 2400 regals
Follow the marker towards the green zone. In the middle of the zone there is the Hollander, which is under the British attack. Sink the Brits before the severely damaged Hollander is destroyed. This is not too sure to happen, because, in the case of the first wave of the British ships that numbers four, because the Hollander is a liner and the Brits only have much weaker units.
After you have dealt with the first wave, there will appear the next one on the horizon. This one consists of two ships - two brigs and a frigate. This time around, you need to watch the Hollander.
The third wave will appear soon after you have destroyed the second one. This one includes two Spanish frigates and a liner. Sail in front of the Hollander, assume the burden of the attack and sink the enemies. Remember that you should not leave the designated area.
Location: Conttoyor
Difficulty: 5/5
Close to the fort, there are allies. Sail up to them. Take advantage of that and attack the Spanish convoy. Damage both of the marked ships and board them.
After you have sunken the two marked ships, there will appear three more here, including a liner. Defeat the. If necessary, take advantage of the protection of the allied ships. There is no penalty involved in losing them.
Reward: 2400 regals
Location: Charlotte
Difficulty: 5/5
Reward: 2400 regals
Your mission is to sink two ships of pirate hunters. The hunters appear only at the moment when you have already sunken enough British or Spanish ships, i.e. when your fame is high enough. If you are wanted by the pirate hunters, you should do some mess and wait for them to arrive. Otherwise, sail into the sea and keep destroying the ships that you encounter, until you attract the hunters' attention. For that, destroying ships without boarding them is effective.
In the case of this mission, a hunter ship is deemed sunken as soon as it is damaged enough to be boarded. You need to watch out, because there may appear another hunter ship while you are still chasing the first one. What follows is that you will have to fight two instead of one of them.
Location: Charlotte
Difficulty: 5/5
Reward: 2400 regals
Follow the marker until you reach the green zone. Sail around for a moment, until you find the "HMS Courage" liner. At first, the ship is not going to treat as an enemy so, attack it by surprise, damage it and board it. Boarding is not necessary but, thanks to it, you will loot the liner for ample cargo.
Location: Punta Guarico
Difficulty: 1/5
Reward: 1200 regals
Follow the marker towards the British ships, until you reach the green zone. You will find five British ships there, including three brigs. Sink all of them. They will be, at first oblivious to your presence, or even ignore you. Use this situation to your advantage and sink them whenever it is most convenient to you.
Location: Chinchorro
Difficulty: 5/5
Follow the marker towards the British ships, until you reach the green zone. There, somewhere in the middle, there are six ships waiting for you - 3 gunboats, 2 frigates and a liner. Sink them. At first, they are oblivious to your presence (unless you are doing this mission again, after a defeat), and what is more, their sails are not set. Therefore, you can simply lay down mortar fire on them and use the cannons afterwards. Due to their numbers, the enemy ships will be obstructing each other, by blocking each other and blocking fire line. Use this to your advantage and eliminate them one by one.
Reward: 2400 regals
Location: Navassa
Difficulty: 4/5
Sail towards the marked area and search out HMS Defiance. This shouldn't be too difficult, because this area is small .
Reward: 1800 regals
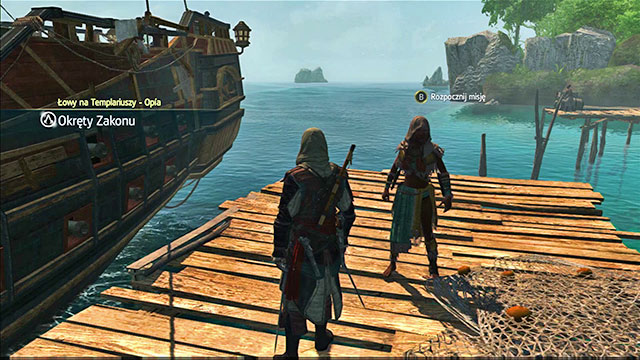
Templar Hunt is a series of missions where you will be performing missions for four members of the Assassin order. For the completion of each sequence of the Hunt,, you will be rewarded with regals and a key, thanks to which you will be able to open the door at Great Inagua. The Hunt becomes available after you complete the first mission of four sequences of the main campaign mode.
If not stated otherwise, successive missions, within a given thread, are in the same city as the previous one.
It is the only mission of this type, where the mission giver changes the place of his stay.
You need to hunt down and skin more animals than Opia. On the map, there will appear green blips, every now and then. Approach them, use the eagle vision to find the animal, kill it and skin it. You need to be careful if you are going to have more animals hunted than Opia. At some moment there will appear the white jaguar as your game. Kill and skin it. This will conclude this mission.
Follow Opia for a moment. After the conversation, go to the area marked in green. Once there, use the eagle vision to locate Alvin. Follow him, while staying undetected. The group will stop for a moment, after which Alvin will separate from the group. Approach him and pickpocket him. He will not be running so, you do not need to bother about being spotted.
Follow Opia until you reach Vargas' house. Hide in the bushes. Unfortunately, Vargas will escape onto a ship. Go aboard the Jackdaw and chase him. You need to come close to him, lay down fire and board. You do not need to kill the crew. It is enough to kill Vargas.
First of all, you need to follow a soldier. Keep hiding in the bushes, e.g. in the ones where Opia is. This is not too difficult, especially that the soldier rarely turns to look behind. Finally, you will reach a restricted area. Your next task will be to kill all of the guards and prevent Opia from dying. You need to be quiet or take Opia's suggestion and blow up some of the gunpowder barrels. There are not too many enemies here, so the fight itself should not be too demanding.
After you defeat the first group, another one will come. Your task is to protect Opia. Do not walk outside the blue zone and kill all of the soldiers. Among them, there is a beefsteak, a captain and an officer so, you should watch out.
Your final task is to kill Lucia. The woman has a gun, whose one shot takes 1/3 of Opia's health so, get her before the assassin is shot. After a short fight, Lucia should drop dead, and you will receive a key.
You will find Rhona in the Southern part of the city, Westwards of the warehouse.
Your first mission is to protect the bureau and Rhona. Remain within the blue zone and keep Rhona from dying.
After each wave, you will have 30 seconds more to carry over the gunpowder barrels into the appropriate spots. Rhona will be helping you. While doing this, you do not need to stop. Edward can throw them while walking or running. After the allotted time passes, another attack will follow. Shoot at the barrels you have just carried, to eliminate quickly big groups of enemies. Wave two and three are going to be six men strong, the fourth - nine. Eliminate all of them while keeping an eye on Rhona's health and the mission will be completed.
Go to the market place. While in the designated area, use the eagle vision and take a look around. Catch him. You will find a letter on him.
You need to destroy gunpowder caches in restricted areas. The further from the bureau, the tighter the security, including soldiers on the ground and gunners on rooftops. This mission can be completed in several different ways: attack the zones directly, cut through one of the gates, sneak up to the barrels or lurk on a rooftop and shoot at the barrel from there. After you have destroyed the barrels, the mission will conclude.
Follow Rhona. You will reach a restricted area, where you will be attacked by guards. Quickly, cut through to Flint and kill him. Remember that Rhona must survive so, do not take too long. After the cutscene, leave the zone and the mission will conclude.
Anto is in the Southern part of Kingston.
Your first mission is to follow two groups of British soldiers. Walk slowly after each, whenever necessary,, hide behind buildings or in the bushes. The soldiers are not going to walk through the restricted areas so, you should not bother about finding out about alternative routes. At some point, the two soldiers from the second group will start to run. Tackle down one of them and the mission will conclude.
In the second mission, you need to free three slaves. You are accompanied by Anto. Approach the guards in front of the entrance to the first prison and kill them. The next two are standing right next to the prisoner. Kill them also. Free the first prisoner.
The second one of the prisoners is being escorted by four guards. If you approach them from behind, you will be able to dispose of them without attracting attention.
The third guard is being watched by four soldiers, including two beefsteaks and a captain. The best method is to sneak into the area guarded by them, over the fence, eliminate the guards inside and free the prisoner. You do not need to worry about the guards at the gate. In the last resort, Anto will deal with them.
Your mission is to defend the bureau (the blue area) from the British soldiers. Do not walk too much away from Anto and defeat all of the enemies. After the first wave, you will have 25 seconds more to eliminate as many of the highlighted enemies as possible. Anto is going to help you with that. After the 25 seconds, the second wave will come. An exception is the situation in which you manage to eliminate all of the guards. In such a case, there will be no second wave and the clock will start to count down another 25 seconds. After that, the third wave will come.
Apart from Anto, the bureau will also be defended by the prisoners that you freed in the previous mission. You do not need to worry about them, because the game only focuses on Anto's health.
Use the eagle vision and follow the highlighted guard. After a moment, he will be joined by another two and then, three more. At all times, keep your distance. If necessary, hire the dancers that you will see along your way. Anto is going to accompany by walking over the rooftop and eliminate the guards there.
After a longer while, the guards will separate . Use the eagle vision and follow the highlighted targets. You will reach an entrance to a restricted area. Your task is to find the actual target If you have hired the dancers before, use them to distract the guards at the gate and walk into the restricted area. The green circles on the map suggest three locations where you should be searching for the target. While within each one of them, use the eagle vision. The target is in the last one, the farthest away from the entrance. After you have located him, eliminate him. Edward will find a key on the corpse. The only thing you need to do to complete this mission is escape from the restricted area and blend in with the crowd.
Vance is in the Southern part of Nassau but, for the most of the times, it is not him that will task you with assignments.
Reach the designated area and use the eagle vision. You will notice two people talking to each other. Follow them and eavesdrop on the conversation. You are not going to go through any restricted areas so, you should only focus on remaining undetected.
Finally, the smugglers will stop. Follow them into the marked area and use the eagle vision to find Upton. Climb onto the rooftop and kill Upton by jumping down onto him.
Follow Upton until you have to hide among bushes. After a while, another Vance will arrive. Follow the two and eavesdrop on the conversation. Remember that you need to remain in hiding so, take cover behind crates . You will receive the optional task of eliminating the thief silently for three times. Wait until he comes close to the talking people and stab him in the back. Do not worry about the corpse. Nobody will pay attention.
After a while, the conversation between the brothers ends, and you will have to follow Vance. After a while, he will be joined by a woman. Eavesdrop on their conversation from a safe distance and hide whenever necessary.
Once the conversation finishes, you will have a minute to reach the marked area, find and kill Upton's murderer. Use the eagle vision, find the killer and kill him before the time is up.
Your task is to protect Upton against the drunkards in the Tavern. There are ten of them, but they are not of the strong sort.
After you have defeated them, your next task is to protect Upton. The assassin is drunk so, instead of going ahead, he will be staggering and walking to the sides. At the church, you will be attacked by soldiers. You can use weapons to defeat them.
Another obstacle are the courtesans. You can either pay them or push Upton. The cost is not too steep, only 150 regals so, pay to have this off your head.
A bit further, Upton will stop to relieve his bladder. This will not be taken kindly to, by the guards walking by. Draw your swords and eliminate the threat, while making sure that Upton does not die. If necessary, use smoke grenades that will stun both the guards and Upton. After the fight, and a short conversation, the mission will conclude.
Vance is in a big restricted area, close to the place infested by crocodiles. There are a lot of guards here but, they are divided into small groups that are easy to kill. Use the covers and examine the area with the eagle vision to find the assassin. He is in the camp, at the South-Western side of the designated area. Choose your favorite assassination method and kill the traitor.
After the cutscene, Jing Lang will appear. Unlike Vance, she will not want to fight and will try to escape instead. Get her and kill her. After the cutscene, escape from the zone undetected to complete this mission.
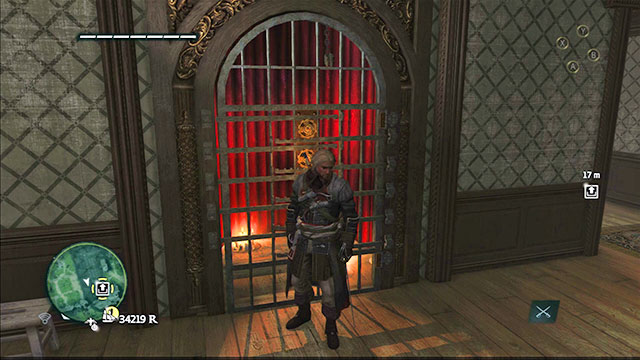 The assassin in a stylish armor
The reward for the completion of all the Templar Hunt missions, you receive an extremely durable templar armor. After you have obtained all keys, go to Great Inagua to the estate on the rock and approach the grate. After the instruction to open the grate, Edward will slide the keys into the locks. If he does not have all of them, he will slide all that he has available, and suggest that he needs to obtain more. After he opens all the locks, the Captain will automatically put on the Templar armor.
In the Caribbean, there are 16 Mayan Stelae, spread by themselves, or in pairs in some of the locations.
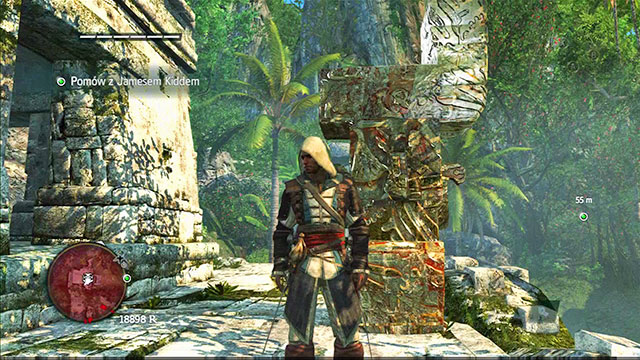 A Stela in its fullest.
After you find a Stela, you need to climb onto it and interact with it, using the B button. This will start a minigame. Your task is to match the elements highlighted in white, with the white elements of the drawing. The drawing can be tilted, using the sticks. After you start the puzzle, tilt the drawing once, or twice and you will find out how it needs to be matched with the highlighted elements. After you complete the puzzle, the game will point you to the spot, where you will find the Mayan stone.
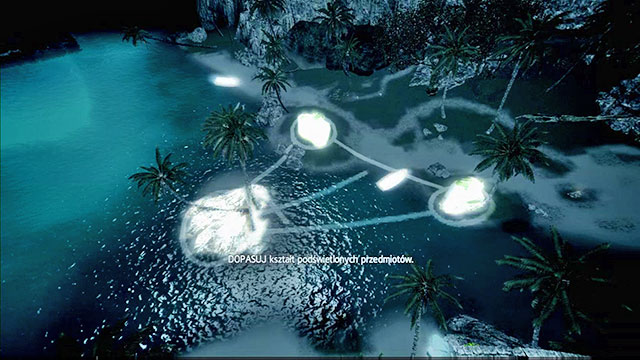 Match the drawing with the objects and you will be rewarded with a stone
Some of the locations with the Stelae are inaccessible, until you discover them during the main campaign so, you will obtain all of the stones only towards the end of the main storyline. The last Stela is on Long Bay, which you reach in mission 3 of the 10th sequence.
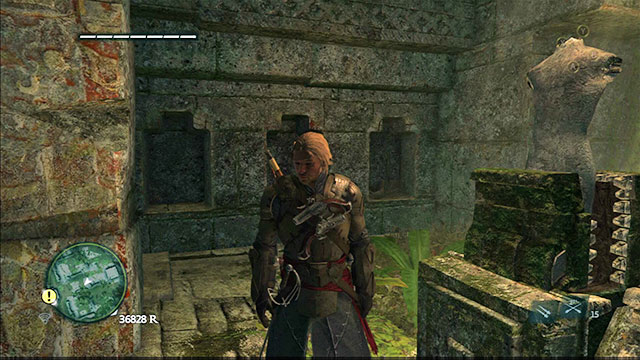 The Aztec bulletproof vest.
After you have obtained all of the stones, you need to go to Tulum to the door that you have visited with Kidd, on the North-Western side of the location. It is marked on the map. Approach the door and press B for Edward to start slipping the stones into the slots. In the room at the other side, there is a durable Mayan armor, impenetrable for bullets. After you put it on, Edward will be invulnerable to damage from pistols and muskets.
Note! You will not be able to obtain the armor until you complete mission 2 of the 11th sequence because, only then will you be able to roam around the Caribbean freely, and you will be able to go to Tulum.
In the Caribbean, there are 20 bottles with letters hidden inside them. 17 of them can be found by themselves in locations. The remaining 3 have been scattered all around the world map. In each bottle, there is a long letter of a person who stayed in the Caribbean before Edward, which explain some of the storyline's elements.
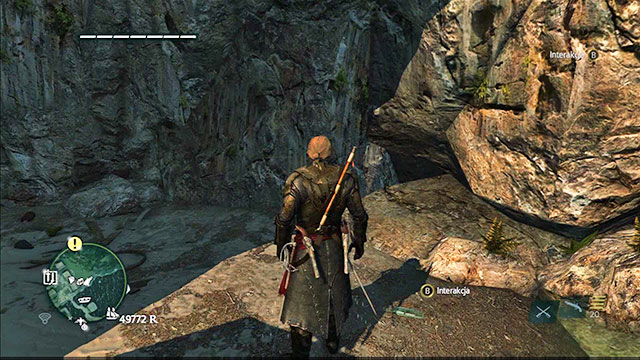 A bottle with paper stuffing
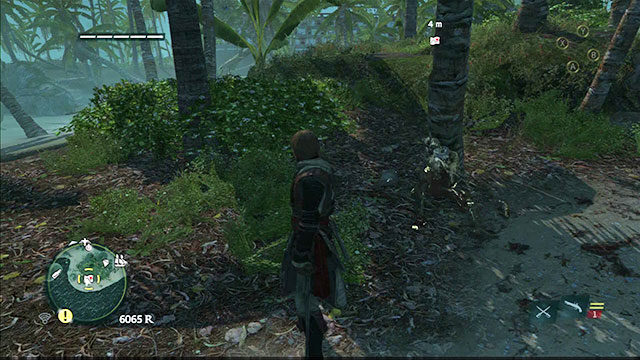
In the game, there are 22 hidden treasure coves. 19 of them can be found in the single player mode. The remaining 3 become available thanks to the Kenway's Fleet.
Each of the maps that can be obtained in the single player mode, has been marked on the world map as a "corpse" and it is held by a skeleton in its hand. Collecting the map will cause it to display, with the treasure coordinates.
If there is a treasure in a given area, to which you have the map, the game will notify you of that. Select the map on the toolbar and look for the one with the coordinates written down on it. Then, go to the location where the treasure is supposed to be. Take into consideration the locations of trees, boulders and the other characteristic elements. Take a look around the area until you find an interaction prompt on the ground.
In each treasure cove, there are regals. In some of them, you can also find decorative elements for the Jackdaw and design plans for upgrades.

The map is in the South-Western part of the Abaco Island.
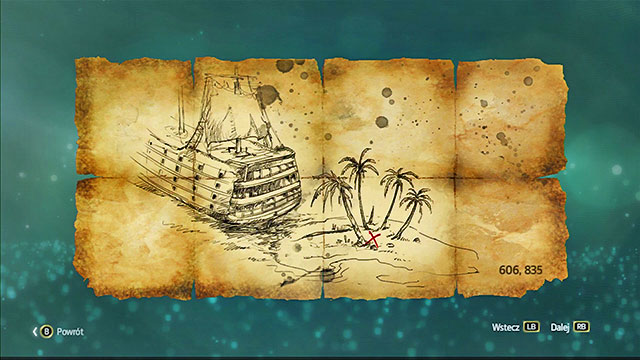
The treasure is in the North-Western part of the Salt Lagoon, under a large boulder.
Treasure's Coordinates: 749, 625
The treasure: 3000 regals, galleon with snake design plan.
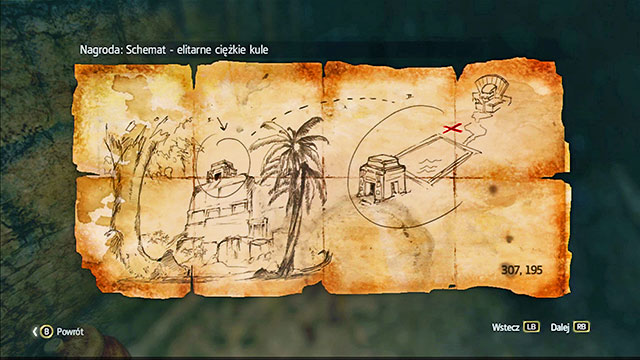
The map is in thr Western part of the restricted area, in the recess.
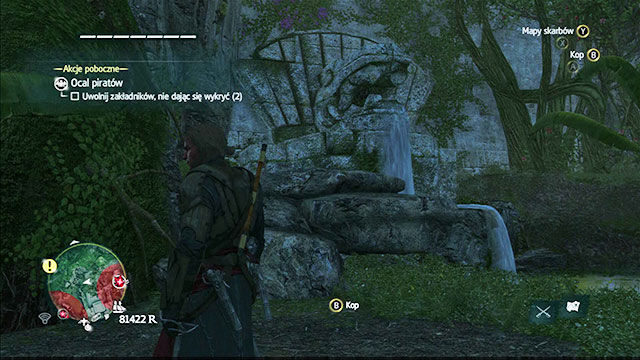
The treasure is on Misteriosa, a bit to the North of the largest ruins. It is easy to tell by the oblong pool. The treasure is on its Northern side.
Treasure's Coordinates: 307, 195
The treasure: 3000 regals, elite heavy shots design plan.
The map is in the South-Western part of the of the location, on its very rim, close to a small island.
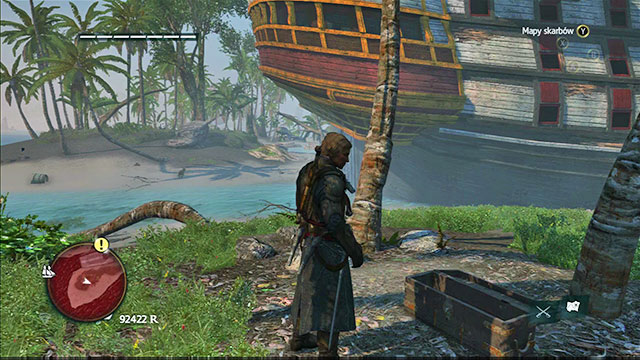
The treasure is on the Abaco Island, among the four palms, very close to the docked ship.
Treasure's Coordinates: 606, 835
The treasure: 4000 regals.
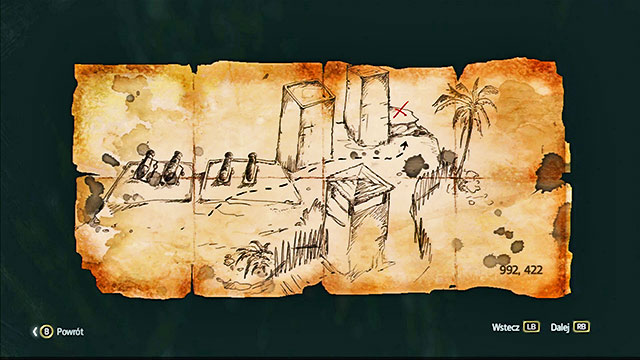
The map is in the Eastern part of the restricted area, in the hollowing. To reach it, you need to dive and swim along the underwater tunnels.
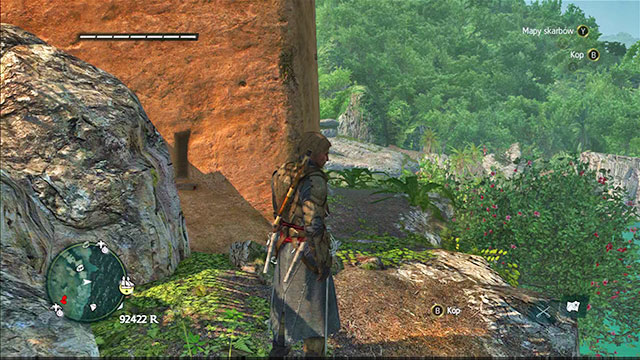
The treasure can be found in the fort on Principe. On the North side of this location, you will find two gun batteries and the square towards past them. The treasure is past the second tower, on the cliff's edge, next to the rocks.
Treasure's Coordinates: 992, 422
The treasure: 4000 regals
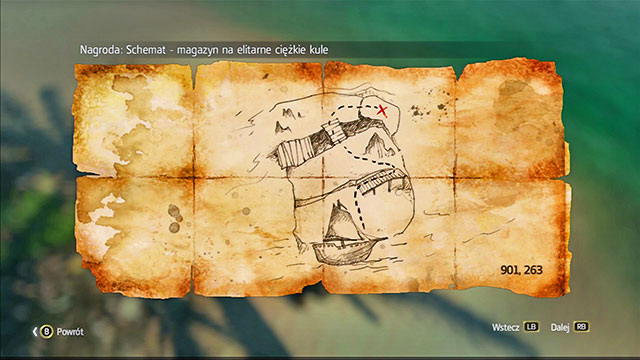
The map is in the North-Eastern part of the location, right next to the chest. Approach the discernible narrowing of the land there, turn to face North-East and go ahead.
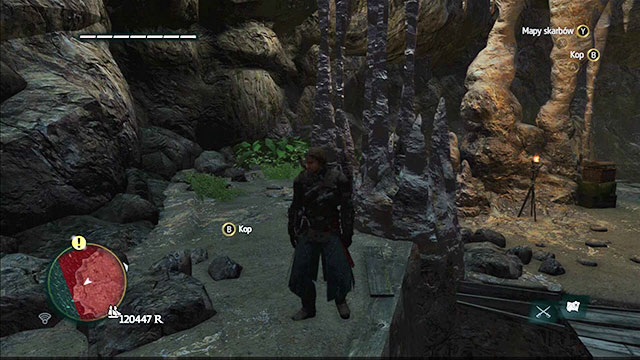
The map will take you to the Petite Caverne. In the South-Western part of the location, at the back of the smugglers' camp, there is a visible elevation of the ground. That is where the treasure is. Treasure's Coordinates: 901, 263
The treasure: 3000 regals, elite heavy shots storage design plan.
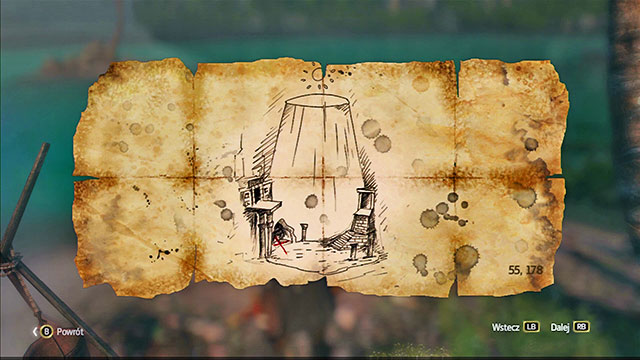
You can find the map on the island in the North-eastern part of the location, right next to the local official.
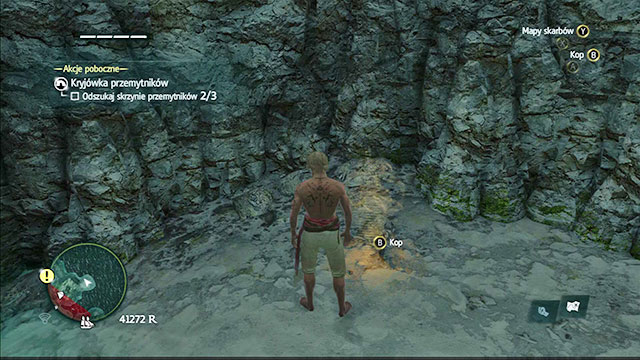
You need to dive for the treasure in Ambergis Key. After you leave the underwater tunnels, you will reach a big lake with the stony stairs going up and a guard on the top of the ruined ledge. The treasure is in the recess in the Southern part of this area.
Treasure's Coordinates: 55, 178
The treasure: 4000 regals
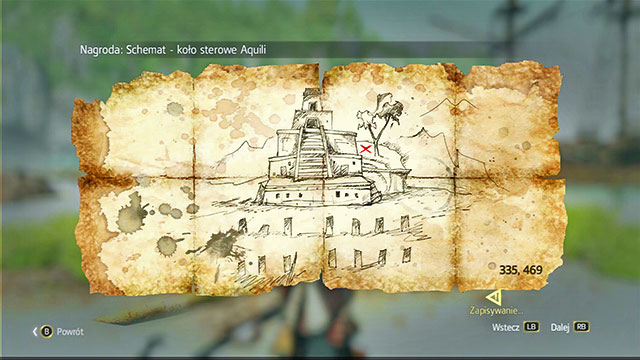
The map is in the South-western part of the location, close to the beach.
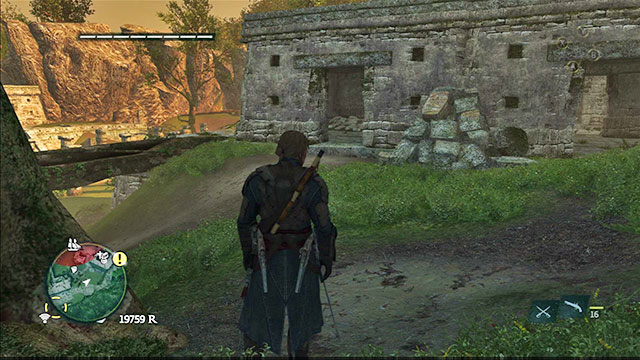
To find the treasure you need to go to the Pinos Isle. In the North-Western part of the location, there are ruins with a beauty spot. On the right, there is a heap of big stones leaning against a wall. Turn your back at it and go ahead. You will find the treasure after you take several steps.
Treasure's Coordinates: 679, 371
The treasure: 3000 regals, Aquila steering wheel design plan.
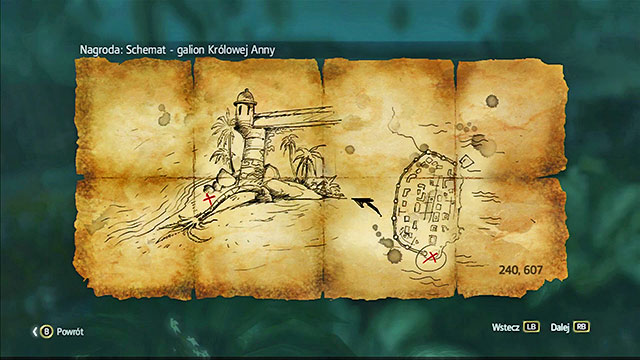
The map is in the North-Western part of Havana, in the bushes to the North of the cloister near the " High Barbara Coast" shanty.
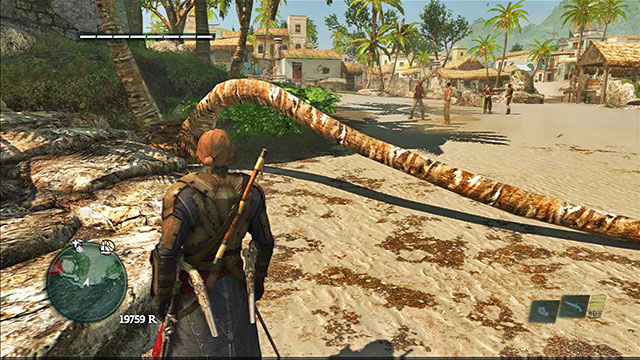
The treasure is also in Havana, in the Southern part of the city, right next to the rock with the tower built on it, next to the fallen palm.
Treasure's Coordinates: 240, 607
The treasure: 3000 regals, Queen Anna galleon design plan.
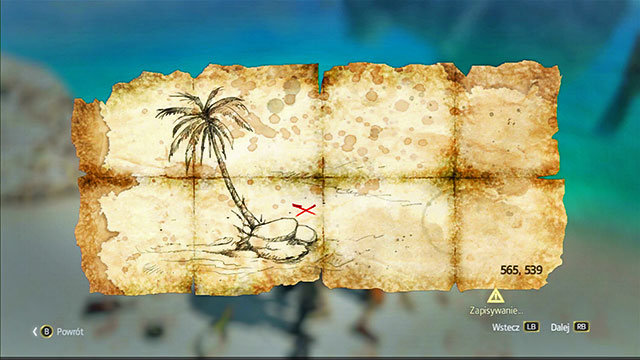
The map is in the North-Eastern part of the location.
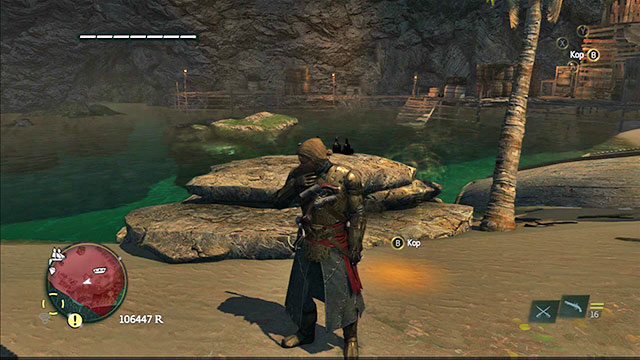
For the treasure you need to go to Jiguey. After you sail inside the smuggler's den, you will quickly notice a lonely palm at the beach, next to the heap of stones. The treasure has been buried next to the heap.
Treasure's Coordinates: 565, 539
The treasure: 4000 regals
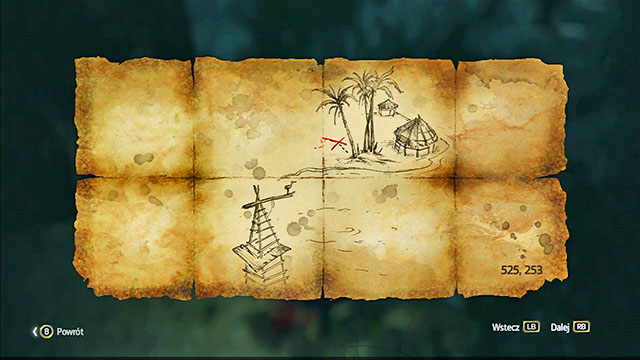
The treasure is in the North-Western part of the isle, w next to the Animus Fragment and a chest.
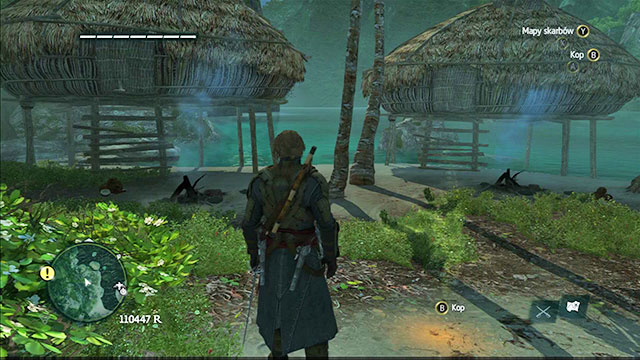
For the treasure you need to go to the Long Bay. It is located in the North-East, next to the beauty spot close to the two huts and the two palms between them.
Treasure's Coordinates: 525, 253
The treasure: 4000 regals
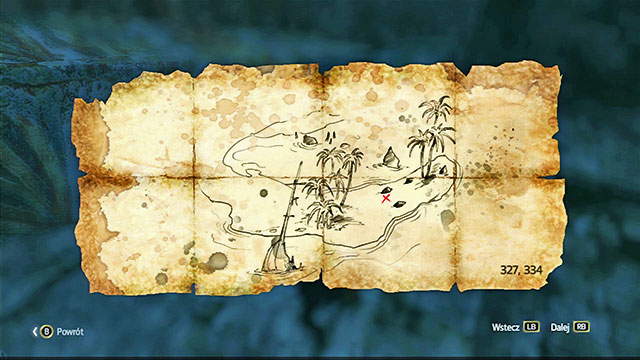
In the Western part of the isle, there are two life boats. If you draw a straight line between them, the map is, more or less in the middle.
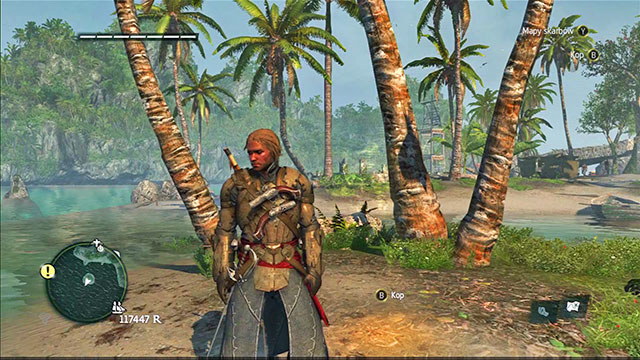
The treasure has been buried on the Andreas Island. To the south of the location, there is a small island. The treasure is right next to the two palms growing next to each other. .
Treasure's Coordinates: 579, 720
The treasure: 3000 regals, elite harpoons design plan.
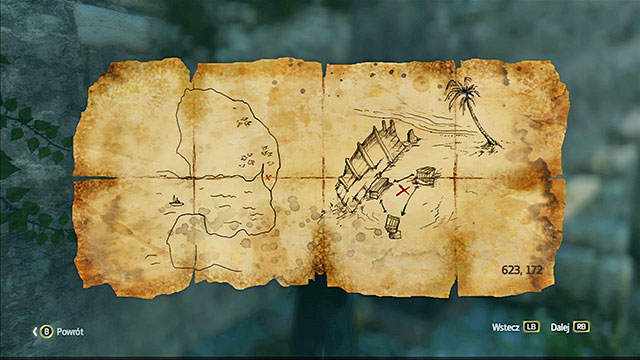
The map is in the Aztec ruins in the North of the location. It is between the Animus Fragment and the Mayan Stela.
The map will take you to Kingston. On the Eastern promontory, right next to the life boat you will find the ship board side and the three chests arranged in the shape of triangle. The treasure is in the middle.
Treasure's Coordinates: 623, 172
The treasure: 3000 regals, ebony steering wheel design plan.
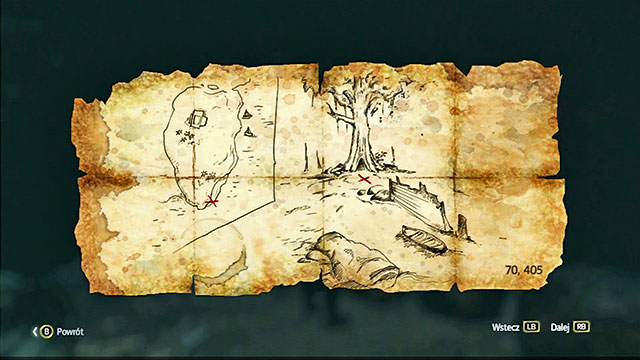
The treasure is on the Western side of the Petite Caverne. The location is small so, you should not have any problems finding it.
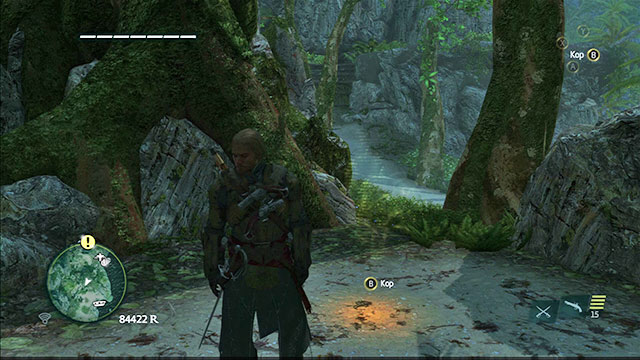
The treasure is buried in Tulum. To the south of the bottom beauty spot, there is the tree shown in the screenshot. The treasure is at the foot of the tree.
Treasure's Coordinates: 70, 405
The treasure: 4000 regals
In the Northern part of the location there are ruins with two chests next to each other. A bit to the South, there is the map.

The treasure needs to be searched for in Cayman Sound, in the North-Eastern part of the location. You need to reach the four palms at the very end of the isle. Right next to them, there should be a rock sticking out of water. The treasure should be on the land, right next to the stone that is the farthest away from the trees.
Treasure's Coordinates: 327, 334
The treasure: 4000 regals
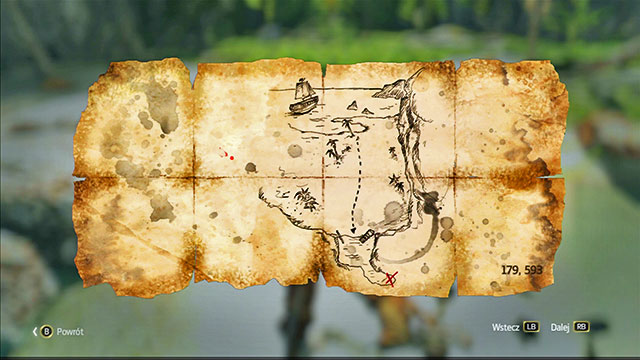
The map is in the Eastern part of the location, a bit to the South and to the east of the life boat, at the other side of the water.
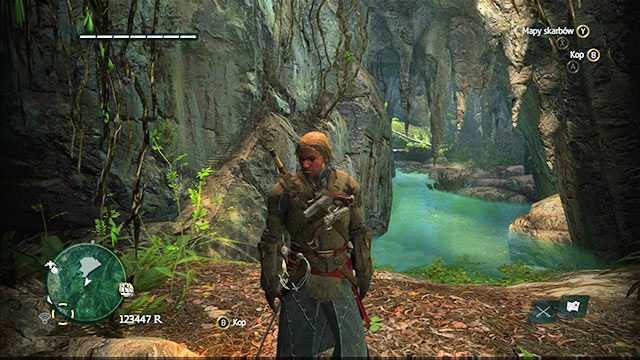
The treasure is also on Cape Bonavista. In the Eastern part of the location there is a beauty spot. You need to go South-West of it, towards the flooded cave. At the end of the cave, there is a patch of dry land. The treasure is next to the stone on the right.
Treasure's Coordinates: 179, 593
The treasure: 1500 regals
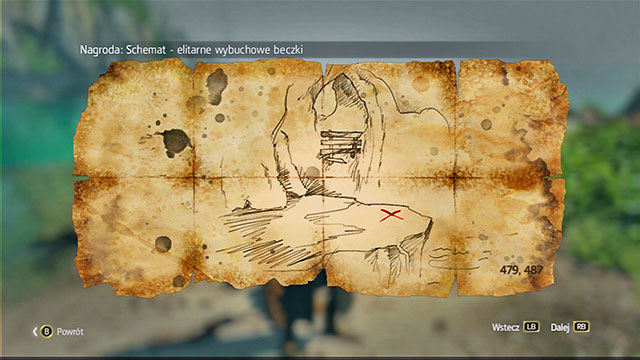
The map with the treasure is in the North-Eastern part of the location, right next to the chest.
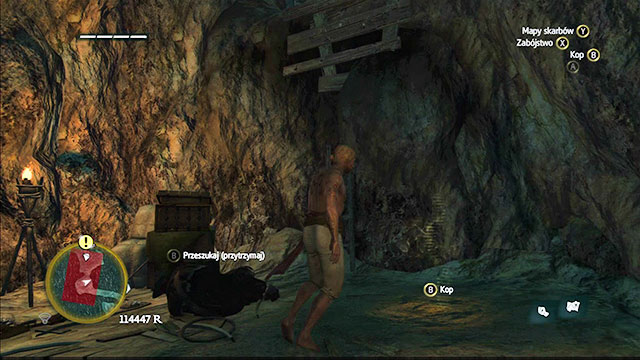
For this treasure you need to go to San Juan. After you get to the dry land, you ill notice that the path ahead leads up a destroyed ladder. The treasure is at the foot of the ladder.
Treasure's Coordinates: 479, 487
The treasure: 3000 regals, elite fire barrels design plan.

The map is in the North-Eastern part of the location, on the beach.
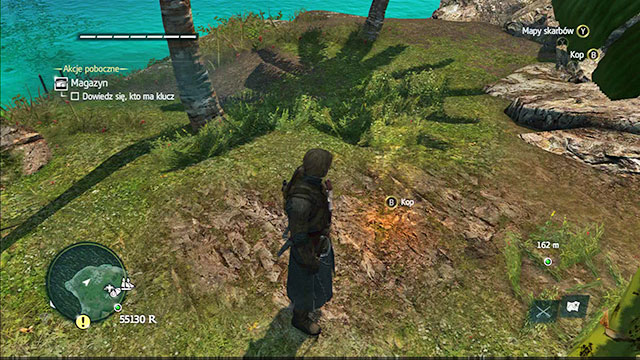
The treasure needs to be looked for in New Bone. Here, there is a mill at the edge of the cliff. Walk past the mill into the area with several trees. You are interested in two palms on the right, close to the boulders.
Treasure's Coordinates: 442, 118
The treasure: 4000 regals
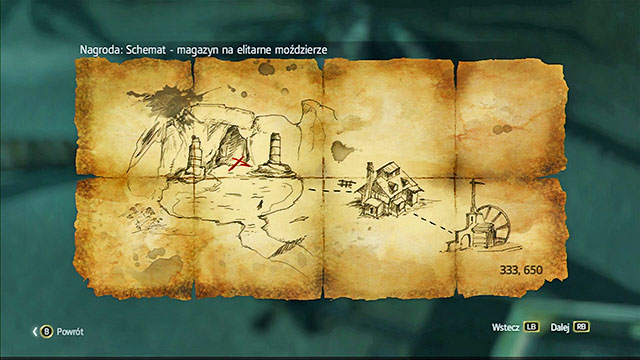
The map is in the North-Eastern part of the location. You will be able to tell the place by the incision into the restricted area and a fragment of land almost parallel to the coast.
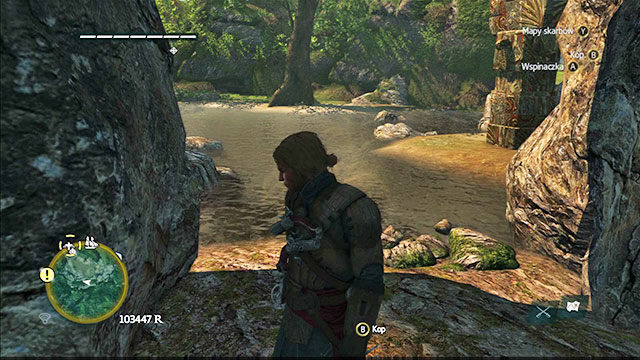
For the treasure you need to go to Matanzas. Past the warehouse, go South-Eastwards. Go past the mill and the house with slanting roof. You will reach a cave between two destroyed columns. The left one is a Mayan Stela. The treasure is in the cave.
Treasure's Coordinates: 333, 650
The treasure: 3000 regals, elite mortar projectiles storage design plan.
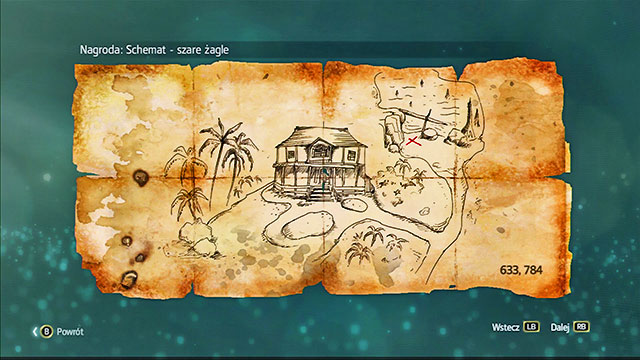
The map is in the North-Western part of the location, to the West of where the Jackdaw is moored.
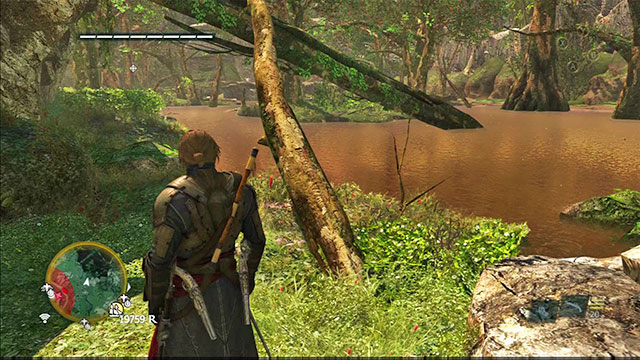
For the treasure you need to go to Nassau. In the western part of the city, in the restricted area, there is a single house. Go past it and walk towards the marshes. The treasure is right next to the stone and the lake.
Treasure's Coordinates: 633, 748
The treasure: 3000 regals, gray sails design plan.
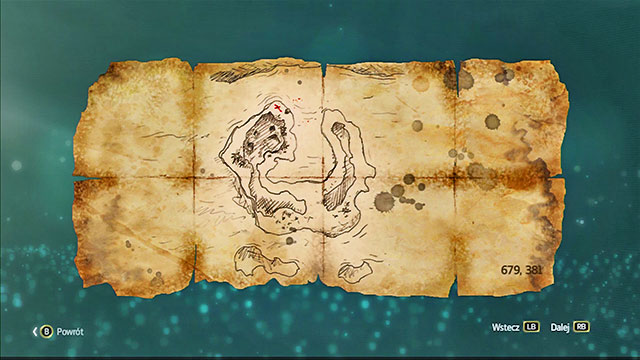
The map can be obtained thanks to the Kenway's Fleet. You need to dispatch it into the region of the British colonies and complete the Empty Cellars missions.
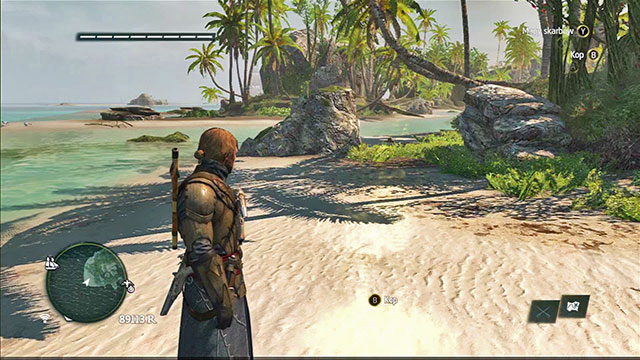
The treasure is in the North-Western part of Cumberland Bay, on the promontory to the left of the two boulders.
Treasure's Coordinates: 679, 381
Reward: 4000 regals
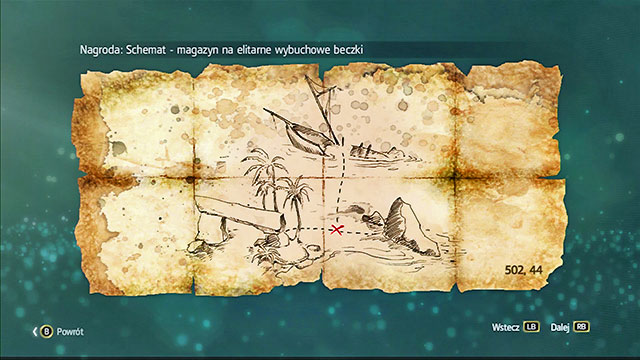
The map can be obtained thanks to the Kenway's Fleet. You need to dispatch it towards the region of the Eastern Canada and complete the Scarlatina missions.
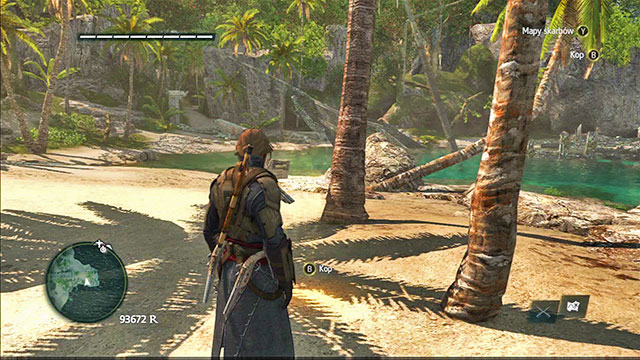
The treasure is on Isla Providencia. You can find it in the Southern part of the location, close to the ship wreckage that serves as a beauty spot. While on the spot's top, look onto the isle. You should see there a big stony formation, which resembles a stone gate. To the left of the formation, there are three palms close to each other. The treasure is at the middle one.
Treasure's Coordinates: 502, 44
Reward: 3000 regals, elite fire barrels storage.
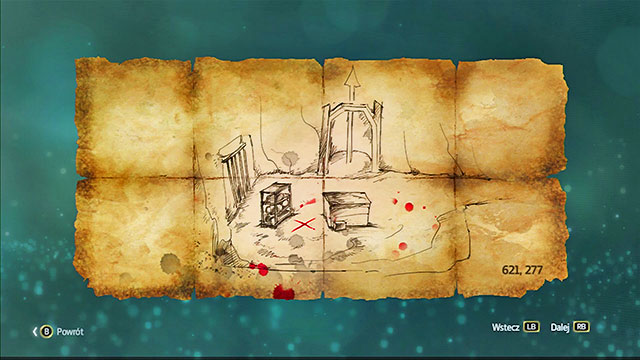
The map can be obtained thanks to the Kenway's Fleet. You need to dispatch it into the region of the Mediterranean Sea and complete the Great Reputation II mission. The Mediterranean Sea is one of the last regions the access to which you will gain so, this map is probably your last.
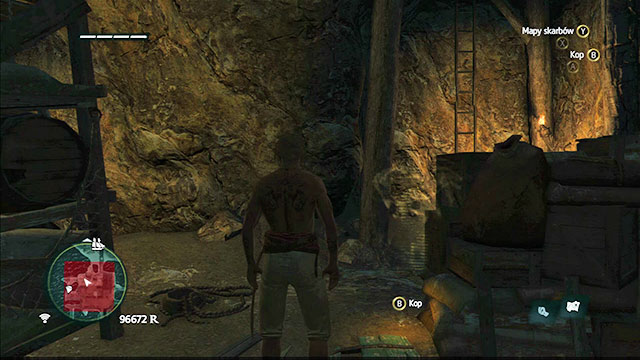
The treasure is in Anotto Bay. Inside the smuggler's den, after you have eliminated all enemies, you will find a ladder. The treasure is right next to it, at the heap of sacks and chests. .
Treasure's Coordinates: 621, 277
Reward: 4000 regals
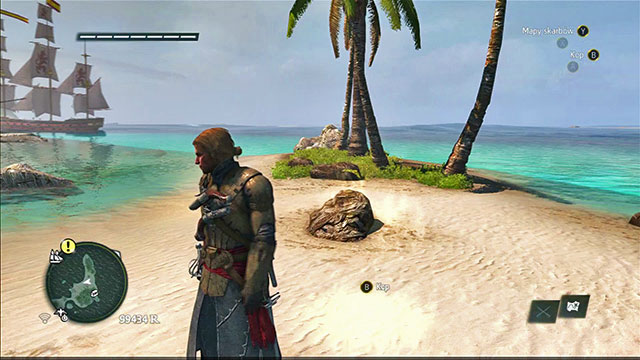
Te Caribbean is home for 12 species of land animals and 5 marine ones. By hunting for them, Edward obtains materials for crafting upgrades that increase his health, the number of holstered pistols, and ammo, and additional outfits. Without them, the game is definitely more difficult to complete. You can also sell the materials that you obtain from animals, for profit.
Each land animal in the Caribbean drops two things: a bone and fur, hide that is characteristic for that animal, or something alike. You need to hunt for each one of them twice, or even three times sometimes, before you are able to craft all upgrades. The exception are the bones that you can use to craft darts.
In the hunting grounds marked on the map, you can encounter one or several specimen of a given animal. You should keep that in mind, especially in the case of jaguars and crocodiles. Getting near two such animals involves the necessity to remain in hiding for the whole time and it can quickly result in Edward's death.
Each one of the five big fishes is to be encountered in two spots in the Caribbean. The exception is the Bull Shark that can be found in four of them. This is how many times you need to hunt for each of the fishes to be able to craft all of the upgrades that require the trophies which you won on them. The map gives you spots where you can find each fish, right at the beginning. After the first hunting, the fish changes its location. The new spot where you need to hunt for it is near the previous one. This way, the fish cannot leave the area assigned to it. In other words, there is no such situation in which the Great White Shark from the South of the map moves over to the North, after several hunts.
On the Caribbean waters, there are four (five, in practice) legendary ships. They are hidden in the four corners of the map, always in the same locations. Each of these has the 75th level, a lot of health points and formidable weaponry. The reward for defeating them is 20 thousand regals.
The legendary ships cannot be boarded. After you drain their health points to zero, they sink. The only thing they leave behind is the money.
You need to be properly prepared for fighting the legendary ships. It is compulsory that you equip the jackdaw with legendary hull and cannons. Depending on the vessel, it is also going to be important that you have legendary mortars, fire barrels, chase cannons cannonballs and swivel gun. Therefore, the best moment to attack them is when you already have all the legendary design plans and ship upgrades.
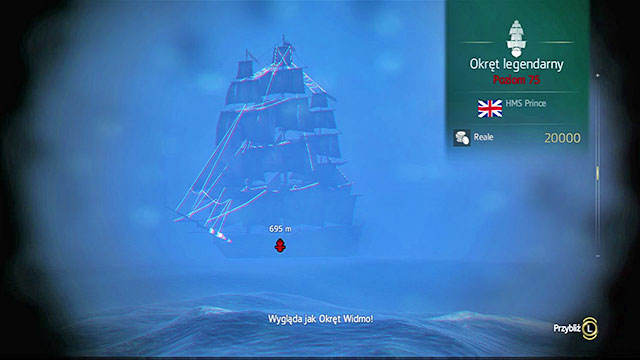 The British Prince
Due to fog, which increases during the battle, the ship is faintly visible. The ship has both broadside cannons and mortars. Although it is the fastest of all four, it is different from a regular liner only in that it has stronger cannons and more health points. After the battle starts, lay down mortar fire on it, sail up and use broadside salvoes. The heavy projectiles will deal a lot of damage in its hull, and the swivel gun will only make it worse for the ship. For the sake of safety, try to approach it from the bow's or the prow's side, where its weaponry is the weakest. Try avoiding its broadside salvoes, which can inflict heavy damage to the Jackdaw.
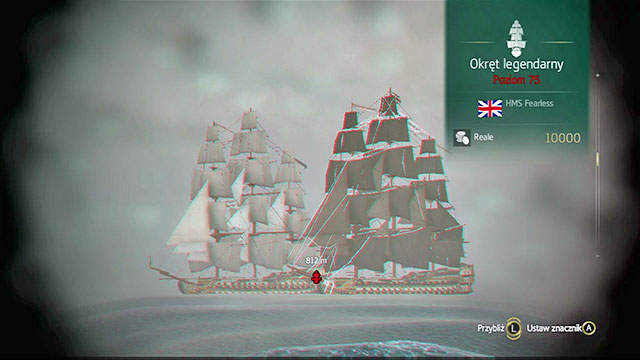 Twin ships in their fullest
The Englishmen's tactics consists of approaching the Jackdaw on both sides and launching a strong cannon salvo. Then, both ships leave outside of the Jackdaw's cannons' reach, and return to repeat the maneuver until they sink you. At the same time, they are very fast so, they will be escaping out of your canons' reach on a regular basis. They do not have mortars so, it is a good idea to soften them up with your. Try to sail in such a way, as to deal with one of them each time. Otherwise, one of them will lay don fire on you, while you are busy with the other one.
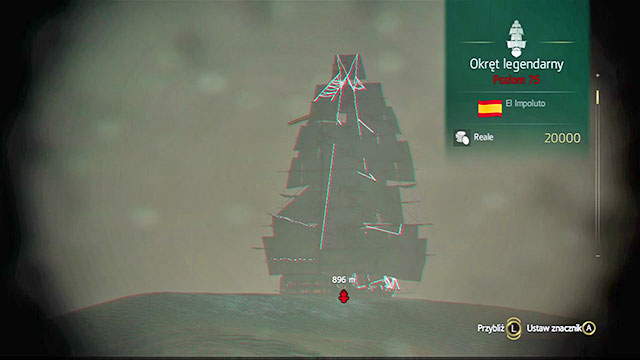 The mighty Spanish ram
The basic tactic of this ship is ramming and firing the heavy bow cannons. One hit can inflict immense damage, just like a hit with the broadside. The ram inflicts heavy damage even after a hit at a short distance so, try not to sail too close to the enemy. Additionally, it is exceptionally fast and it can fire a heavy sideboard salvo, if necessary. At the beginning of the battle, the enemy will be trying to ram the Jackdaw a good, although difficult tactic, is to sail up, fire a salvo of chase cannons, sail up broadside and fire a salvo of broadside heavy cannons. Even more risky tactic is to escape and attack the enemy with elite fire barrels. Risky, because the El Impoluto is exceptionally fast and, with good winds, it can reach the Jackdaw without any problems to ram its prow. Due to the speed, mortars are not too effective against this ship.
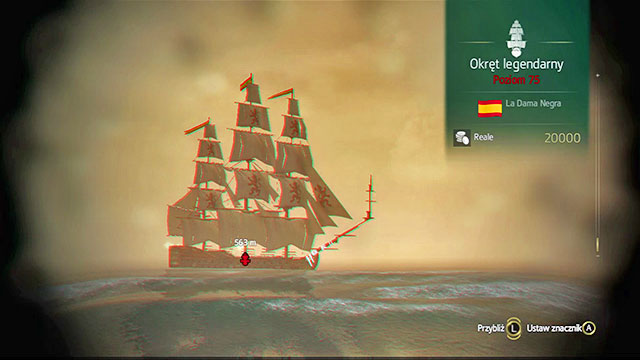 The Black Lady with mortar.
This fast ship's basic weapon is a long-range mortar, which has very short reload times. Additionally, both of its broadsides are covered with heavy armor and hosting a lot of cannons. The best tactic therefore, is to attack it from behind. You should fire the chase cannons at its stern. The slowed down ship can be further shot at from the chase cannons, or take a turn and fire heavy cannonballs, reinforced with the swivel gun but, do not let the enemy escape and respond with mortar fire. You can also attempt attacking from the side of the exposed bow but, it is going to be much more difficult, and additionally you might expose yourself to fire.
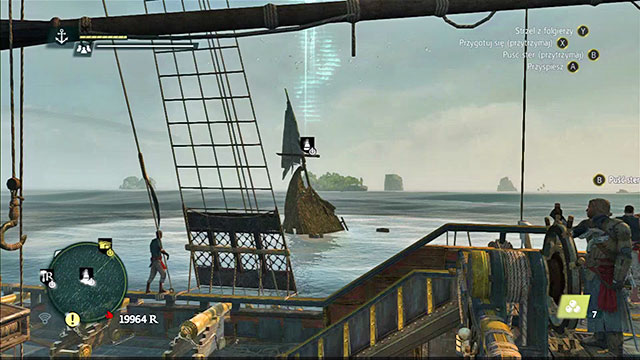
The Abstergo , there are 33 hackable computers. You hack into some of them during the game's storyline mode.
The computers are divided into the regular ones and servers. The difference lies in the method of hacking. In the case of the regular computers, you only need to complete one minigame and two, in the case of servers. After you complete the minigame, you gain access to the Abstergo files, concerning the Black Flag project, as well as the older ones.
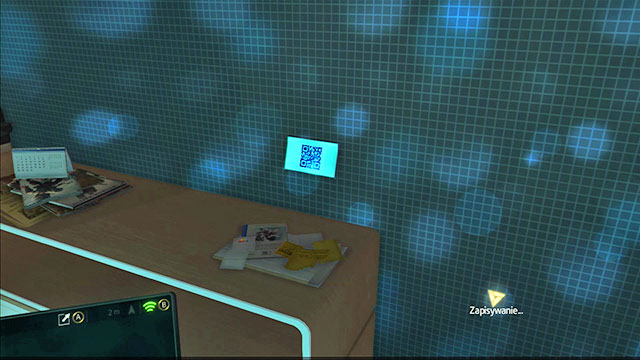
In the Abstergo headquarters, there also are 20 sticky notes. They become visible, and available for collection, only after the completion of the game's main storyline.
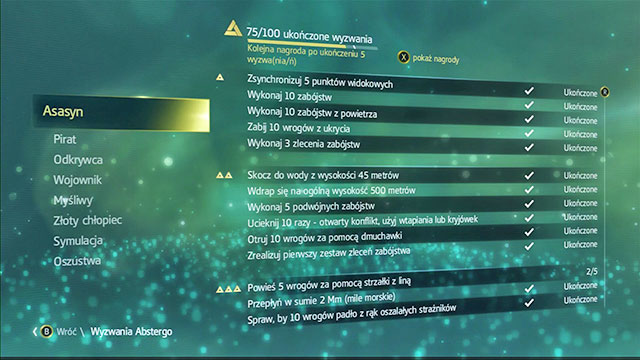
In the game, there are 100 Abstergo Challenges, divided into several categories. For completing challenges 5, 15, 25 and so forth, you are rewarded with portraits and emblems for the multiplayer mode. For the completion of challenges 10, 20, 30 and so forth, you are rewarded with cheats.

Cheats do not work during the main campaign missions and, after you use any of them, the game stops making saves. They are not permanent. They can be enabled and disabled, depending on what you prefer. Not all of them are beneficial.
Requires: 10 completed challenges
Allows you to control the day and night cycle. You can determine if it is eternal dawn, daylight, sunset or night.
Requires: 20 completed challenges
Thanks to it, Edward will be communicating with the "pirate" pop-cultural phrases.
Requires: 30 completed challenges
Dward's and the Jackdaw's health stops regenerating.
Requires: 40 completed challenges
Your infamy reaches its maximum level and does not fall.
Requires: 50 completed challenges
Edward is permanently drunk.
Requires: 60 completed challenges
Allows you to modify the dangerous waves. You can either disable them or turn on the superwaves.
Requires: 70 completed challenges
Edward become invincible. Their health does not ever drop.
Requires: 80 completed challenges
Turns enemies into the crazy rabbits from the Rayman series.
Requires: 90 completed challenges
Edward and the Jackdaw never run out of ammo.
Requires: 100 completed challenges
The Jackdaw's crew turn into skeletons.

In the Caribbean, there are 8 isles. On each, you can find Chests, Animus Fragments and hunting animals. Some of them also have the Mayan Stelas or the maps to the buried treasures.
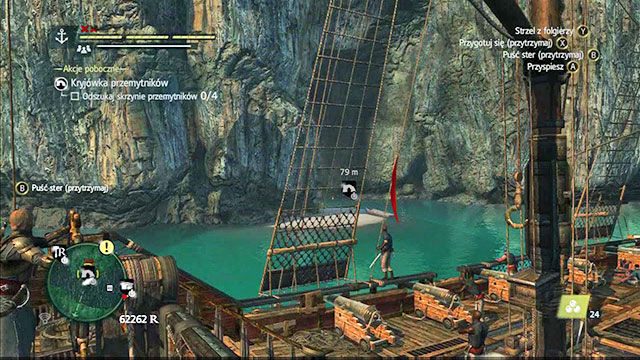
In the game, there are two smugglers' dens: Jiguey in the Northern Cuba and Petite Caverne to the south of Tortuga. Both are easy to recognize as you sail nearby.
Both smuggler's dens are big, single areas which are half-flooded. You cannot walk up to them, you need to swim. They also have no places to moor the Jackdaw. Inside, there always are four chests, two Animus Fragments and a secret - the Petite Caverne treasure map and the letter in the bottle in Jiguey. The locations are sufficiently small that you only need to walk around for a moment to find all of the collectibles. It is easy to return to the Jackdaw using one of the two life boats - one inside and one outside.
In both, there are a few scattered groups of pirates, including one beefsteak, one captain and a few gunners with muskets. They are, however deployed in positions that allow for their silent assassination one after another. In Jiguey, you will find the first enemy on the left, on the tall wooden structure, in Petite Caverne, on the right. Swim up to both silently, eliminate them and take a look around the cavern. You will quickly figure out how to get at the remaining smugglers.
There is an additional action that comes with the caves, which consists in finding all of the treasure chests. Inside, there are mainly marketable goods and ammo.
This type of locations become available after you buy the dive bell in the 1st mission of the 6th sequence in the main storyline. They are divided into two groups - near and away from the shore. The first ones include Ambergis Key, San Juan and Anotto Bay, and the other la Concepcion Wreckage, Black Trench, Blue Hole, Kabah Ruins, Atoch Wreck, San Ignacio Wreck. The last one is close to the shore but, in no way does this change its status. The underwater locations need to be sailed up to and moored at in the designated area. After a short cutscene, Edward will go underwater.
The main difference between the above types of locations is that the ones close t the coast are only partially flooded. You need to dive to get to them but, sooner or later, Edward goes out of water. Most often into a cave or ruins. In the case of the locations away from the shore, Edward will constantly be underwater.
There are more differences to follow. In the locations close to the shore, you will encounter pirates and smugglers. While diving, you are deprived of your armor and gear so, you will have to fight them hand to hand, using throwing knives or the obtained weapons. Being without you're your armor, you will have less health bars and the limited space makes it more difficult to flee. Additionally, you can return from such locations over land.
In locations away from the shore, you have no weapons, even your fist. Your enemies are sharks, sea urchins, morays and medusas. You cannot attack sharks so, your only tactic against them is hiding among seaweed and quick swimming. The motionless urchins and medusas that move around small areas, need to be avoided, just like the hidden morays.
In both cases, while underwater, you need to replenish your air, either thanks to air bubbles or barrels with air.
The locations away from the shore reveal their maps right after you visit them, they usually have more chests in them (5 to 8) and Animus Fragments (3), and they shelter one legendary design plan. The other kind are smaller but you need to explore them on your own.
Black Trench
There are two chests to the south of this location. In the second one, the Southern one, there is a design plan of flower sail.
Blue Hole
The chest with the design plan is in the North-Eastern part of the location. There is no other there so, you cannot mistake it for any other. Inside, there is a design plan for the elite cannons.
Devils' Eye Caves
The design plan is in the North-Western part of the location, where there are three chests and two air bubbles. The design plan on the rightmost of the three chests. You will be able to tell it by the fact that it is in the only dry spot in the cave. Inside, there is a design plan for elite swivel guns.
Kabah Ruins
The chest with the design plan is in the Eastern part of the location, in the ruins. After you regain control over Edward, look right. You should notice a flooded Aztec building. Inside, there is a chest with the design plan for the elite cannonballs.
Atocha Wreck
The chest with the design plan is in the Eastern part of the location. It is the Eastmost chest, at the very end of the wreckage. Inside, there is a design plan for the Elite mortar.
La Concepcion Wreck
In the Southern part of the location, at the bottom of the wreck, there are three chests. They have been arranged into a triangle. The design plan is in the one on the right. Inside, you will find the design plan for the elite ram.
San Ignacio Wreck
The chest is in the North-Western part of the location, right next to the Animus Fragment. It is the most forwarded chest in that direction so, you can easily tell it. Inside, there is a design plan for the elite hull.
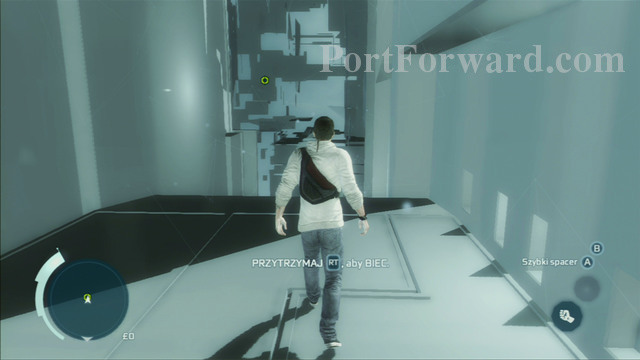
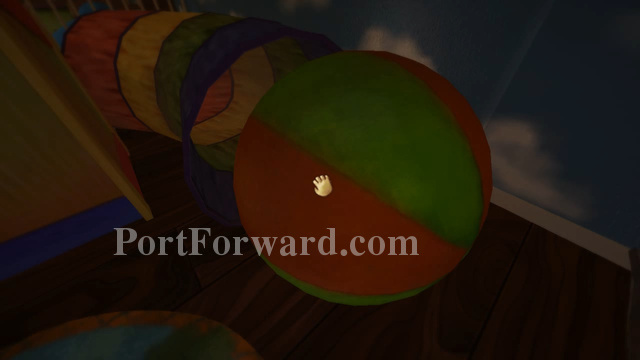 Among The Sleep Walkthrough Prologue
 Assassins Creed: Revelations Game Guide & Walkthrough
 Alpha Polaris Game Guide & WalkthroughAssassins Creed III Walkthrough The Beginning
 ArcheAge Game Guide & Walkthrough