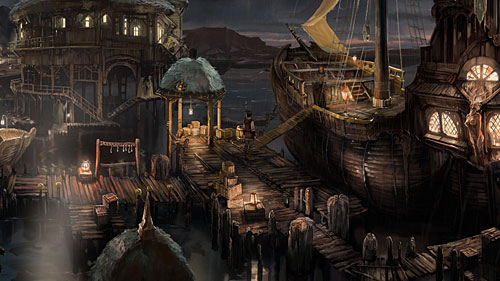
The following guide is a complete walkthrough for Daedalic Entertainement's game, titled The Dark Eye: Chains of Satinav. This is a classic point&click adventure game, which doesn't require any skill or reflex, but only an open mind willing to deal with dozens of logic puzzles.
The guide is divided into chapters corresponding to successive phases of the adventure described in main character's journal. This solution is enough to complete the game and in some cases explains issues, which can be confusing for those people, who do not speak English at least at medium level.
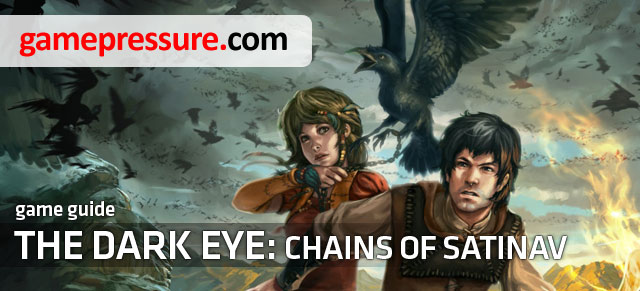
In The Dark Eye: Chains of the Satinav you can find a simple magic system consisting of two spells: breaking and fixing. Both spells are represented by small icons - yellow and blue one, located on the left side of the inventory. The player can all the time use the breaking spell. The fixing spell is available only in the presence of Nuri or later in the game.
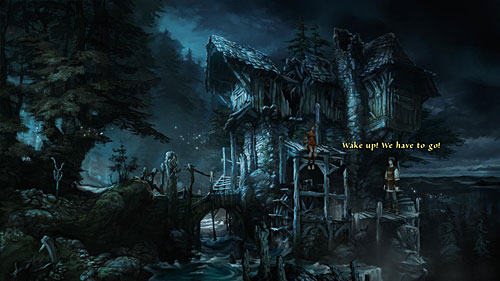
The main game Hero is named Geron. He takes an adventure and travels over the world accompanied by fairy named Nuri. Their mission is to find a way to defeat an evil prophet who wants to take over Andergast and its inhabitants' dreams. He also wants to take off the spell cast on him years ago.
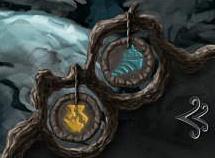
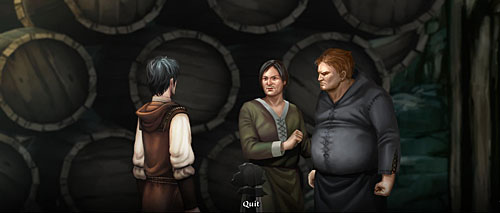
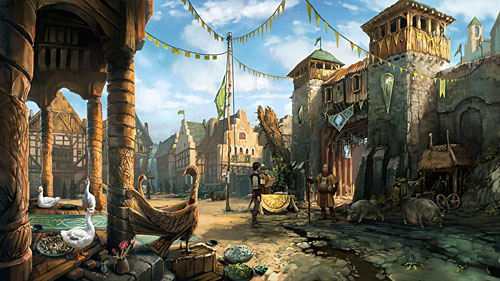
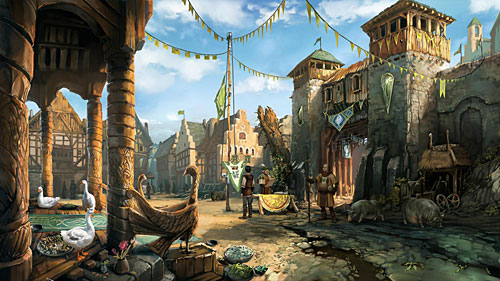
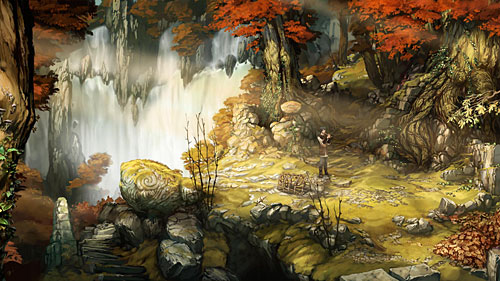
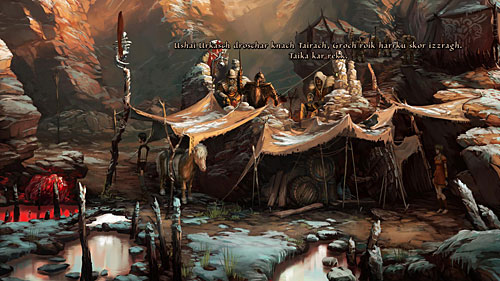
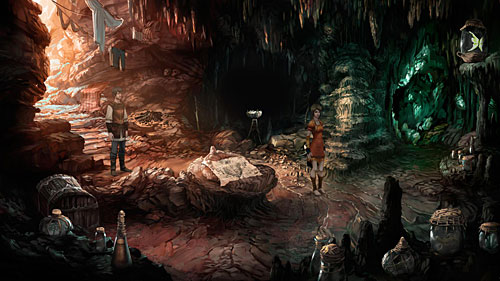
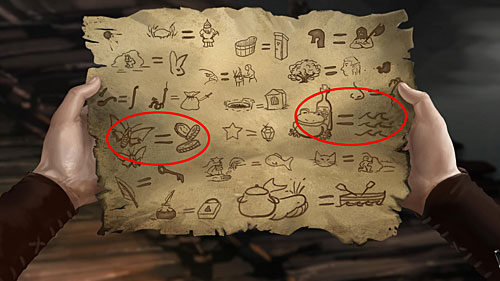
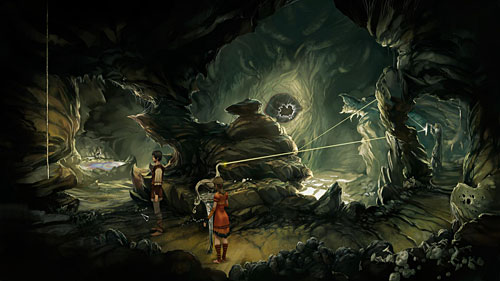
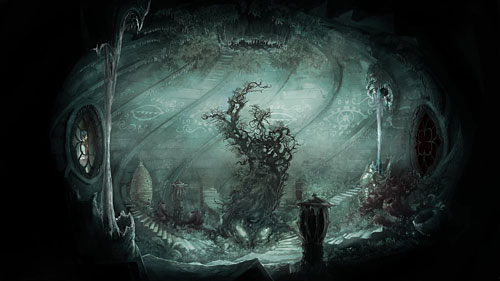
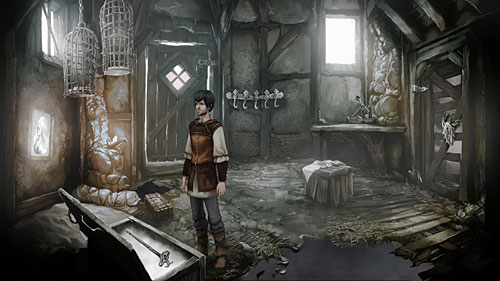
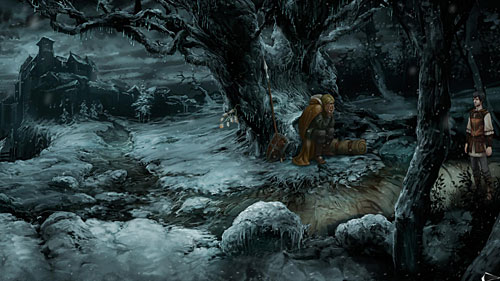
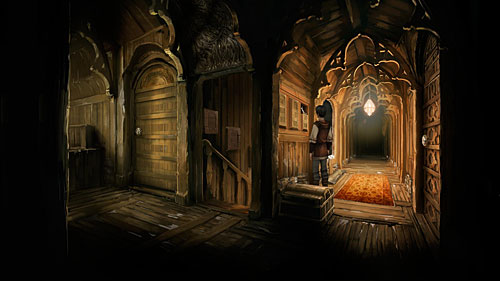
In honor of arrival of Queen of Nostria, a challenge was laid. All challengers have to find in the town four badges in a shape of oak leaves. These leaves are made of different materials, including copper and brass. You start the game in a moment when Geron, local bird catcher, is held by powerful Ulfried and asked by Olgierd, son of the dyer. He is in very uncomfortable situation, "diving" in the pig trough.
Malignant Olgierd wants to take away from Geron one of his badges, even despite the fact, that it is not useful for him because he has to find brass badges, while Geron has only copper ones...
g40st ()
Translated by: Maciej "Elrond" Myrcha
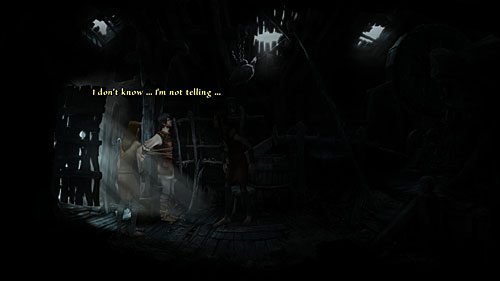
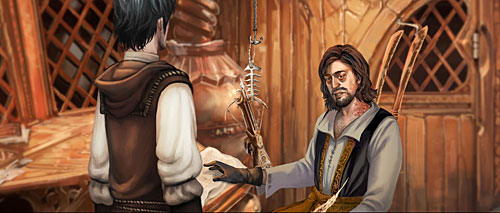
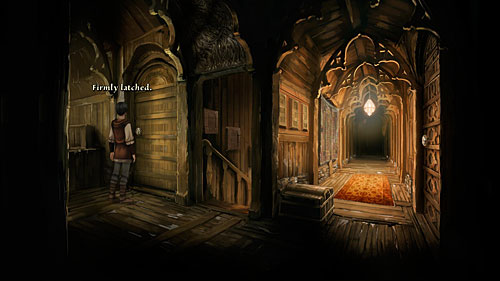
To start, talk to Olgierd, which will have no effect. After a while pick up the hammer and try to hit Ulfried. It won't work of course, because Geron is too weak. Maybe the boy has no exceptional physical strength, but his alleged ability to use magic is well known to local inhabitants. Well, Geron actually has some talent, namely he can make some things to break into pieces. Now it is time to use this talent. Cast your destruction spell on clay jug standing by the well and say goodbye to one of your badges.
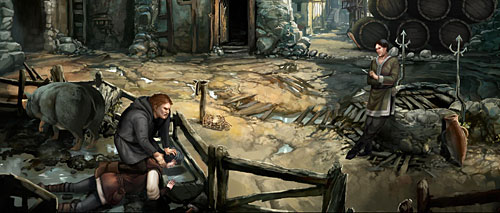
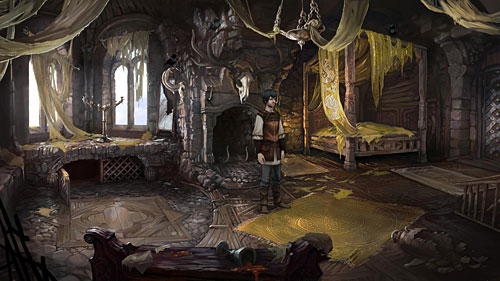
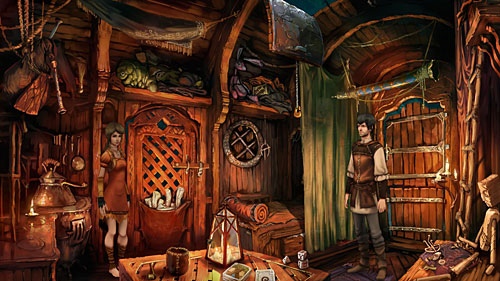
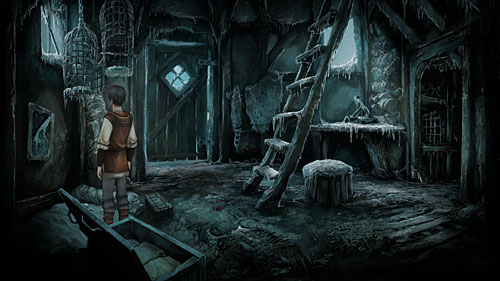
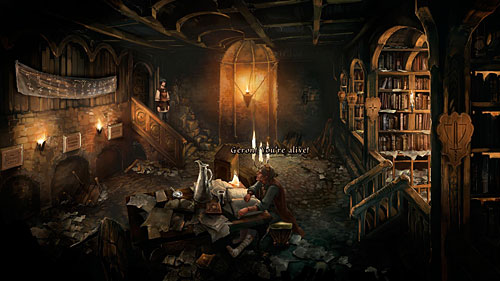
Beaten Geron returns to the lab of his teacher and mentor named Gwinnling. He is not happy about the broken cage and additionally he got problems with crows which lately appear everywhere. Talk to Gwinnling asking him in detail about everything. Unfortunately he will have no time to help Geron in his challenge, because as he claims he got more important thing to do. Look at the painting standing on the table and take the walking cane leaning on the opposite wall. Go down the ladder to Geron's bedroom.
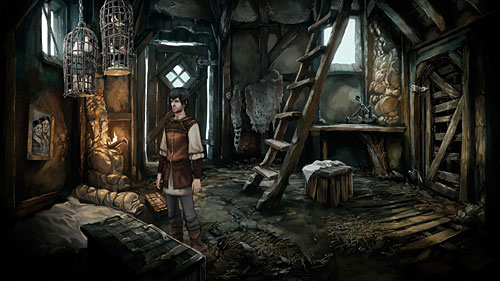
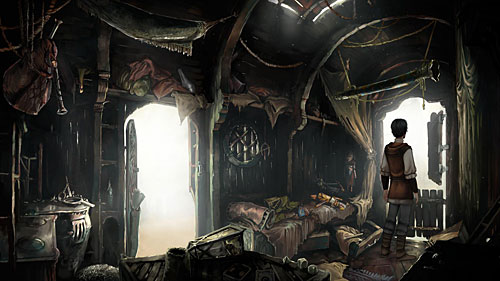
There are copper oak leaves badges lying on the bed. Pick them up. Now open the clothes trunk and take the flute. Now you can go outside.
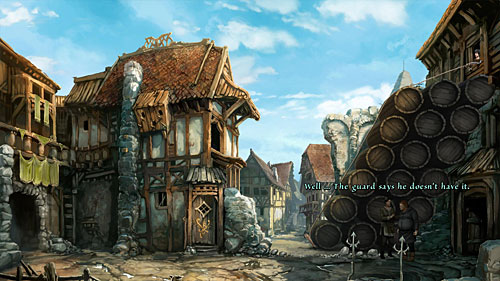
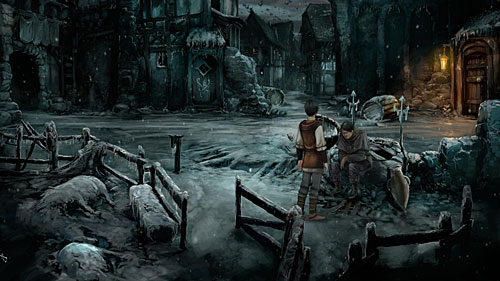
Notice Olgierd and Ulfried standing next to the pile of barrels. Talk to Olgierd using all dialog options. Once you finish the conversation go through the nearby door and Geron will find himself upstairs where he eavesdrops important conversation between Olgierd and Ulfried. Go downstairs and head to the market.
There are some clothes on the clothesline between booths. Use the walking cane and take the doublet out of the clothesline. Examine it closer to find a brass oak leaves badge inside. Maybe you could try to exchange with Olgierd?
Return to Olgierd and start conversation with him (Olgierd's oak leaf). Then try to swap oak leaves. It has succeeded - now you have three badges. Time to look for the last, fourth badge. In order to do this, Geron has first to see the Royal Chamberlain.
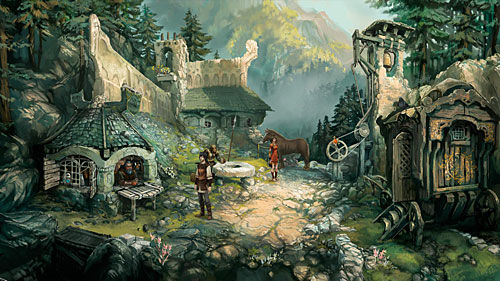
Go to the castle gate. There is Chamberlain Newcastle standing next to it. Talk to him, first of all asking about an advice on hidden fourth oak leaf. You'll hear a riddle, which Geron has to solve. To do this, you should go to the market.
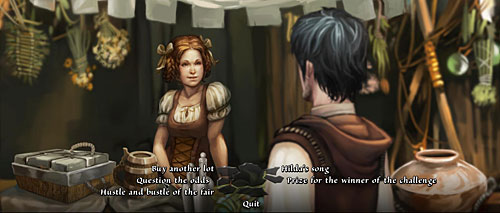
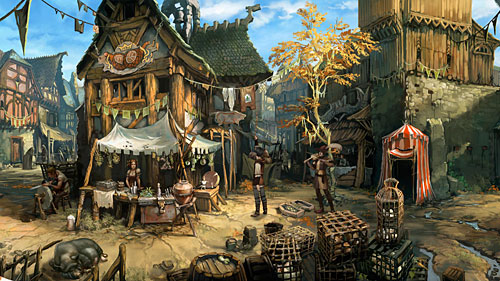
You're again on the market, where sweet Hilda listens to music coming from a violin. Talk to Hilda and ask her about pots with lots. Maybe you should try your luck? Buy a lot. Unfortunately, you've lost. Maybe you were cheated? Question the odds. Nope, you were probably not right. You need another way. Ask Hilda about music on the fair and then about Hilda's song.
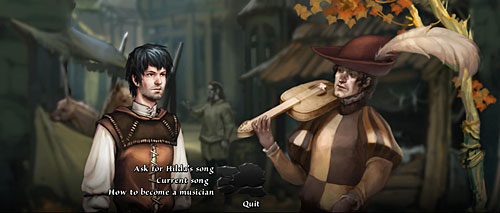
It is time to question minstrel Gleeman playing on the violin. Ask him for Hilda's song. Select any answer for his question. This probably works, because Hilda charmed by music pays even more attention to it. It is time for some action. Open the box with used lots and Geron will pick up winning lot. Talk to minstrel again and ask for some other song. After that talk to Hilda again and buy another lot. Swap lots. You have won! As a reward, collect plum spirit.
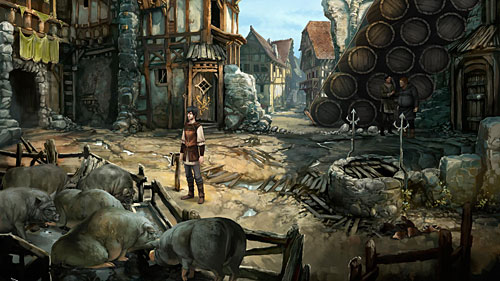
Go to location with barrels. There are some pigs there. Fill the pigs through with plum spirit and take the last badge. You've managed to find all four badges, so it is time to report it to chamberlain.
Show chamberlain 4 copper oak leaves by selecting proper option during the conversation (Four oak leaves). But this is not the end of your task. There is a pole next to the Chamberlain with pennant fastener. Hang the banner of Andergast on it and use the crank to raise it.
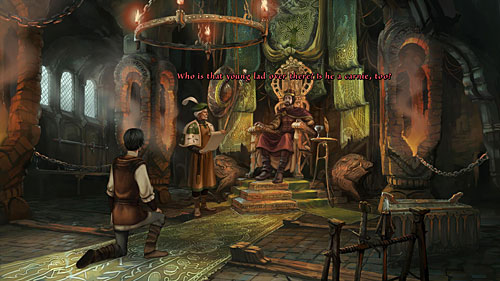
Geron will see the King. Before that, you'll be instructed by the Chamberlain how to behave, so if you do not want to be rude, you should follow instructions. Use very formal address as an answer for the first question, following by confirm and humility.
After then Geron will be taken to the chamber full of crows. In his inventory he can find net trap and dove's egg. Combine both items and you'll get proper net trap with bait. There is a rug on the floor in the center of the chamber. Put the trap on it.
One crow got caught and the other one has dropped down stag's head from the fireplace. Pick up bird trap with crop. Take chandelier from the stone table. Pick up the stag's head and place it back above the fireplace on the fixture. Put the chandelier on the fireplace. Geron has also in his inventory a cast net. Use it on the stag's head and a chandelier. Finally put there a caught crow as bait. Once you catch another crow, return to Gwinnling's lab.
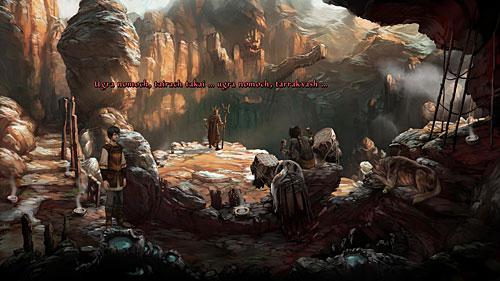
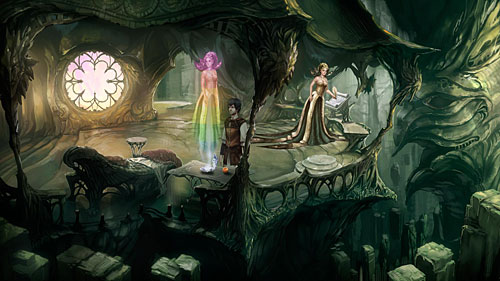
Gwinnling will tell you some interesting things about curse, magic harp and fairies. What's more, you'll have to catch one of them. Ask old man about everything you can and take a fixed cage from the table. Now go outside and go through the city gate.
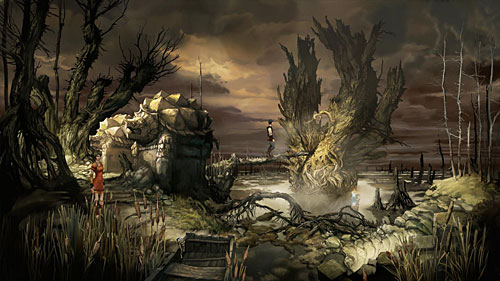
Geron will reach the forest and place the cage. After a while he will hear the fairy voice, who will tell him that he has to make up a forest friend in order to talk to her. There is a snail on rocks nearby. Pick it up and put it inside the cage. There is something moving in the pile of leaves. Pick up the cage with bait and put it on those leaves. A hedgehog is greedy, so he'll get caught in the cage. Now get some hedgehog spikes and then let him free. Get the snail shell in cage. Near the entrance to tree hollow, where fairy hides, you'll find chestnut twig. Pick them up and use them on hedgehog spikes to create a chestnut mannequin - Geron's forest friend. Show it to the fairy and enter inside the tree.
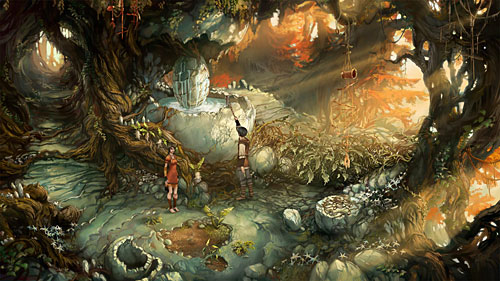
Talk to the fairy on all possible subjects and then get to work. There is a leather ribbon on the rock under the tree - take it. Tide it then to the walking cane, which you took from Gwinnling lab. After that combine walking can with leather ribbon with the snail shell. As a result you got a kind of fishing rod. Use it on the fairy gate, taking some water. Now use the blank acorn from your inventory to fill a hole in snail shell with well water. Give Nuri a snail shell amulet.
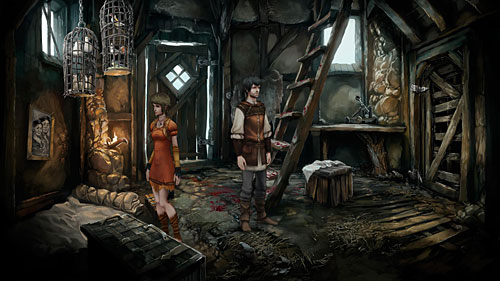
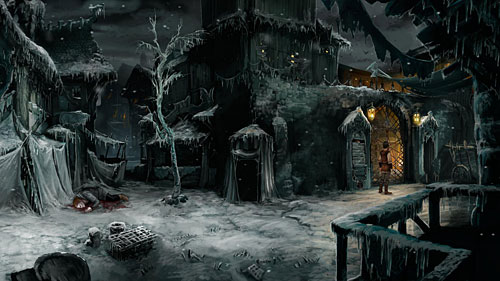
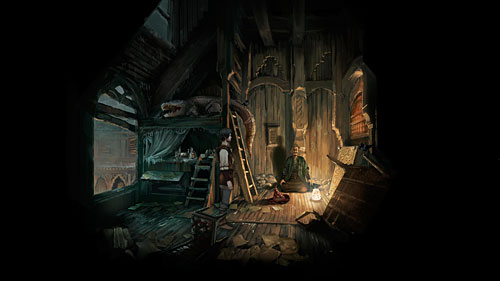
Once Geron gets back to the city, it will turn out that someone has broken into the house and there is blood all around. Before you enter the house, you have to hide Nuri. Open the door leading to the closet and nosy Nuri will get inside. Now go up the ladder.
You'll find dying Gwinnling there. He will tell you that either you have to kill a fairy or get her to the scholar at Red Lake at Blood Barrier. When Gwinnling dies, talk through the window to Nuri, who is sitting on city walls. Take a broken knife lying next to Gwinnling's body and go downstairs. Use the hammer on broken hinge on the closet and take the door. After that go outside and talk to the Raven. Go to the upper floor of the building with barrels next to it and talk to Nuri again. She will tell you more about her magic abilities. Ask her also to have knife fixed. Now go down again and use hammer on a stake next to pile of barrels. Go upstairs again and use the knife to cut off the rope holding barrels. Finally return to Gwinnling's lab, lean out through the window and use cabinet door on barrels.
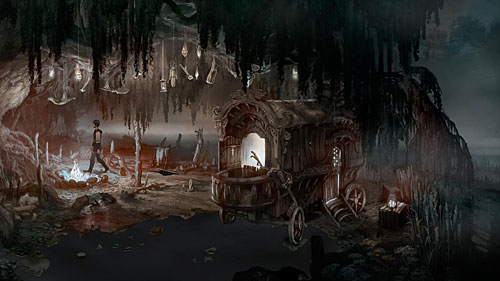
On their way to Red Lake, Geron and Nuri will meet an old woman named Isida. During the conversation tell the truth and tell her about fairy scholar. Use all dialog options and then offer help to fix her cart. Then talk to Nuri but do not forget to ask her about repair-spell.
Now go to other side of the cart and pick up two parts of cart wheel. Third part can be found at bank slope. Examine rushes and notice that there is something among them. Pick up the third part of cart wheel and open inventory. Select reassembling spell and use it on broken cart wheel. After short conversation return to the cart and place the fixed cart wheel on the axle. Return to Isida and tell her that the wagon is fixed now. She will give you its key. Open trailer door with the key and get inside.
The camp will be attacked by strange creatures. First check the curtain next to the bed. Pick up puppet's head from the bed and a rug from the drawer under the bed. Open the brass cauldron on the stove and use the puppet's head on magnesium inside cauldron. Roll puppet's head with magnesium with the rug. Look for a ladder on the right wall. Take it and place it near the cart's skylight. Go up the ladder.

Once creatures attack the wagon, use the ladder again. Throw the plugged puppet head into the camp fire. One of creatures will approach the camp fire. Now use the destruction spell on the puppet's head lying in the camp fire.
Return to the wagon and pull the door latch, where no creatures lurk behind. Lean outside. Release the wagon's brake and take horsewhip. Use it on draught horse.
Get inside the wagon and take staff of bells, lid, tin bottle, drumstick and reins. Go outside.
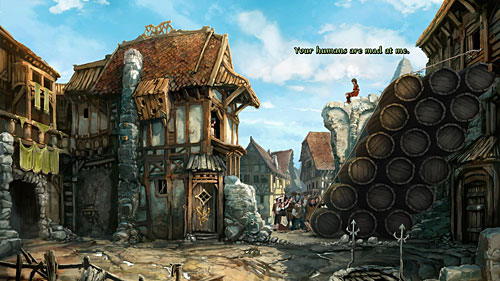
Talk to Nuri first and then use the staff of bells on mechanism next to the bell tower. Do the same with reins using them as wedge belt. Now use the mechanism. Dwarf Gram will open his store. Ask him about everything and then talk to Knight Wrathling sitting at the table. Ask him about everything and at the end offer to sell him a horse for one ducat. Ask Nuri for help (To Nuri: Gear) and select dialog options: (Remind Nuri of Home), (To the Knight: Help for Nuri), (One ducat for horse). Return to Gram's store and buy a gear.
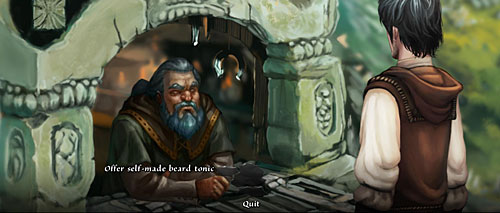
The only thing to do is to exchange something valuable for information. Take closer look at tin bottle in your inventory. Offer an elixir to Gram. Unfortunately he is not interested in it, because he got better one plus with proper color. So walk to the window at the side of Gram's store and use the destruction spell on the dwarf's vial. Examine oneberry bush growing on the wall and try to get it. No success. But there is the Raven over the wagon entrance. Talk to him and finally ask him to get some oneberries for you. Pick up the bush dropped by the bird and use it on the lid in your inventory. Now use the drumstick to create kind of juice. A result, lid with oneberry juice, should be used on a tin bottle. Now offer this "elixir" to Gram in exchange for information. After the conversation you can continue your journey.
Talk to Nuri selecting all subjects and you will learn why orcs are here. Pick up the wooden board and split skull, lying near the pile of rubbish next to the orcs' camp. Use the reassemble spell on the skull. Take the fodder bag from orc pony. Look closer at the red rock on the left and use the knife on it. Now pick up the red stone. There is a dry pole next to the pony with upper jaw stick to it. Examine the jaw and try to reach it. Ask the Raven to drop down the upper jaw. The Raven doesn't want to do this, so involve Nuri in this task. Pick up the jaw and go to the location on the left.
After eavesdropping orc shaman and examining all objects, put the skull to the puddle. You'll break the drum rhythm and the drummer will leave his place. Use the knife on the orken war horn tied to the empty pole.
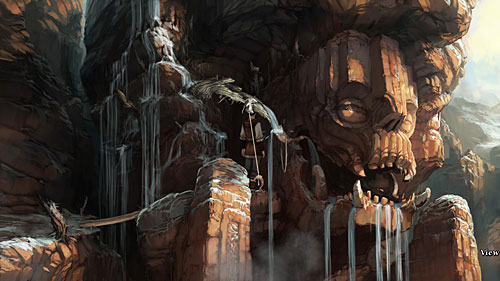
Go up the path. You'll reach a small water waterfall in front of large head of the orc god. Put the wooden board over the abyss and go to the right. Combine the rope with upper jaw in your inventory and you'll get improvised grappling hook. Throw the hook to the rotten tree in the waterfall. As a result you'll change a bit a direction of water coming from the waterfall. Now place the horn on the hole in gap in jaw of the Orc God. Finally put red stone on the war horn and return to orcs' camp. You can move further on!
Talk to Imp and then pick up the blossom, on which the butterfly sits. Return to orcs' camp and take orc shield and bracelet. There is also a roast on the spit. Use the knife on it and Geron will cut of a piece of meat. Go to the ritual area and give the meat to guard dog, so you can pick up pipe-weed. Return under the tree with an Imp.
Put the orc shield in a gap in rock and the butterfly will be eaten by a plant, leaving slime after that. Take a bit of that and use it on the red rock at the lake bank. Talk again to the Imp, who will get into your ambush. Once again talk to him but he will answer only if you get some hat and weed for his pipe. Give him pipe-weed you have. After that use the bracelet in your inventory on the fodder bag and you'll get decorated fodder bag. Give it to imp.
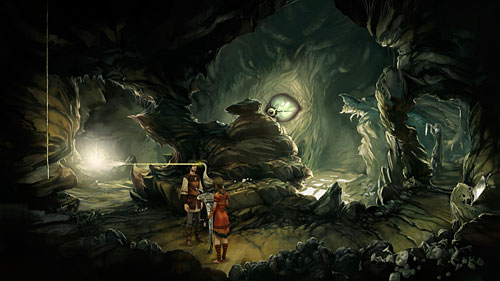
Nuri and Geron will reach the cave, but the scholar will be missing. You have to find him. Examine the fireplace and burrow in it - you'll find a piece of charcoal. Look at large drawing on the rock pedestal and pick it up. Open the chest in the corner of the cave and take one of tablets out of it. There is a jar with the butterfly inside on the right pedestal, but it is too high. Use the destruction spell on it and the butterfly will fly away. Now you have to destroy the dark niche. Place the blossom on the basin in front of the niche. Look at the stone tablet and examine the niche.
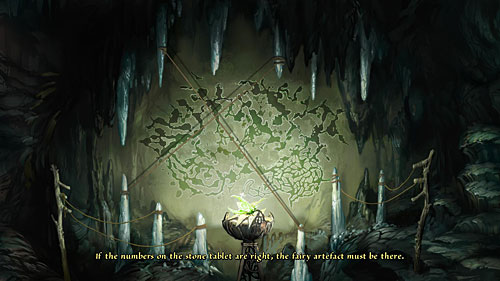
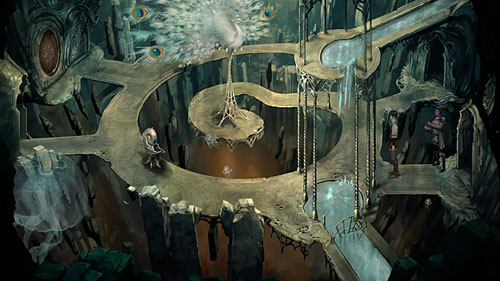
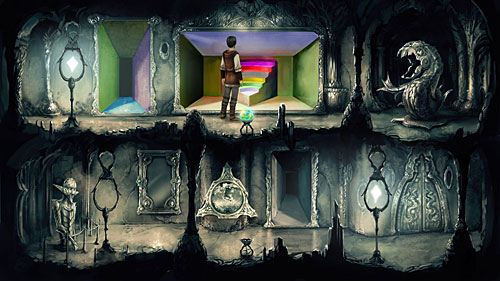
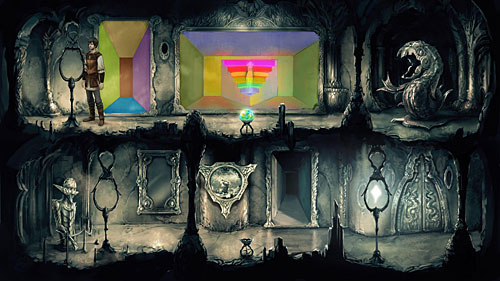
There is a plan of the cave inside the niche. Geron and Nuri have to get to the chamber with an artifact, where they probably will meet the scholar. Around the cave map there are 6 dripstones-stalactites on the ceiling and 6 stalagmites-posts. There are also threads tied to those stalagmites. Correct combination of groups of threads will show different places, with scholar location among them.
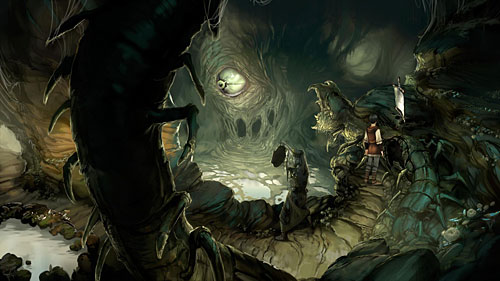
Examine again the stone tablet. There are four drawings and combinations of numbers on it. At the third drawing you can notice 4x1 | 2x4 numbers. By deduction we conclude that those numbers indicate stalactites and stalagmites. First number indicates a stalactite and the second one indicates stalagmite. So place the thread from the first stalagmite and connect it with the fourth stalactite. Then catch the thread from the fourth stalagmite and connect it with the second stalactite, as on the above screen. So now we know where the scholar is. The only thing to do is to draw the map. Use the charcoal on the drawing and enter the cave.
After a while it will turn out that the situation is a little bit complicated now. Pick up from the ground half a yardstick. Unfortunately the other part of it is under rubble on the left. Use the half of yardstick you have on the rubble and pick up the second part of yardstick. Use the reassemble spell on the broken yardstick. Now pick up the arm of knight's statue and try to talk to Jacomo Nauta. He got something in his throat. Give him water bladder and ask about everything. In order to draw a plan of exit path from the cave, Jacomo needs some notes. Use the yardstick on the arm of statue and then use the yardstick with arm to grab a backpack. Give it to Jacomo and you'll obtain directions on leaving the cave. Now throw the paper with directions into wicker basket on the other side of the abyss.
Talk to Jacomo and you'll learn much about a mystery from the past. You'll also learn about sealing all but one passage to the fairy land, about the seer and a character called Satinav and about swamp lands and strange swamp creature...
Enter the mill, which is not the best idea, because Geron will end up in complete darkness, tied up to the pillar. There are three holes in the ceiling. Talk to the one on the left, above the entrance door. Nuri will answer and you'll have to cooperate with her to free yourself. Nuri has thrown sharp shards on one of the plates of the scale behind Geron. Plus, she could use magic to concentrate moonlight on one of three holes. So you can see the entire location switching between them.
Switch to the right hole by clicking on it. There is a broken mill mechanism. Use reassemble spell on the gears. Now witch to the middle hole and use the destruction spell on the oil lamp, hanging in front of it. The lamp will crush on the ground but its shards will stay on the stool. Use the reassemble spell on them. Now use the twin saw which has just dropped on the ground and Geron will free his legs.
There is a damaged cupboard next to the wall. Kick the leg of cupboard and switch to the first hole on the left. Use the reassemble spell on the scale and then the destruction spell on the hourglass. Sand will appear on one of the scale plates. Now pick up Nuri's shard thrown on one of the plates and use it on hand fetters.
Keep switching between holes. Pick up fetters from the ground and then take the stool, twin saw, straw and gear. Activate the middle hole and examine the trapdoor. Use the reassemble spell on fetters and tie it to the trapdoor. Open it and put a blanket on it. A blanket is too small to cover the entire hole in the floor, so use the knife on it. Finally place straw on the blanket.
Exit the mill. Talk to Nuri and then put the stool on a catwalk, on which you're standing right now. Tell Nuri about Fanglari and use the twin saw on the broken beam under the roof, on which fairy is sitting.
After conversation with Jarre, examine nearby rubbish and pick up broken mirror. Go to the right. Next to the pier you'll notice a boat with a tarp over it. Use the knife on the tarp and take the grappling hook. Then use the reassemble spell on the slitted tarp.
At the end of the pier you'll meet drunkard. Try to talk to him and take a spirit bottle lying next to him. Enter the baths while Nuri will try to have conversation with a drunkard.
Talk to bath woman there. Ask her about Goswin and his House and you'll learn that it was bought by merchant Harm. Ask further and remember that she called Harm with name Honest Merchant. After that start conversation with injured woman and you'll learn that she was sent with a message to Harm. Guest, a boy in the tub, is her boyfriend. Talk to him and remember that he called Aarauken with name King of the Ghost Light Hill. Talk again to injured woman selecting dialog options: (Take the job to delivering message) and (Make messenger jealous).
Take the tap from the barrel and bucket from the bench on the right. Take also a towel from the tub next to the entrance door. Go outside and send Nuri to bathhouse. Enter it again. Use the reassemble spell on the previously found broken mirror. Use the towel on the mirror and give polished mirror to injured woman. Next to her you'll find a backpack on the ground. Try to pick it up and you'll obtain message to Harm.
Exit the bathhouse and talk to Jarre. Then go up the screen, to another part of the bay. On the boat you'll see the ferryman catching fishes, who can transport both of you to swamps. Try to talk to him and Geron will realize that the ferryman wants some alcohol in exchange. Move further to the right and take smoking hook from the wooden bench. Go to the ship ramp and start conversation with a guard. During talking select options: (Message from Aarauken) and (Honest Merchant). You do not know answers for the rest of questions, so Geron will be sent away. Go to Jarre again and ask him more questions: (More about Harm), (Best Liked Animals). The answer is Money. Go to the guard again and select dialog options: (Honest Merchant) and (Money). Hmm, that doesn't work. Once again go to Jarre and ask him about smugglers' bannter. Before he can teach Geron smugglers' bannter, he would like to have little something and carving of Kraken-Newt.
There is a beam on the house standing left to the ferryman. Throw a grappling hook on it and jump to the other side.
Geron has found site of the smugglers. Take a hammock hanging between poles. Take a look at petrified cat, carving of kraken-newt and water pipe on the top of the cabinet. Try to get any of these items. They are too high. Take off the cupboard bolt and use the destruction spell on the water pipe. Pick up the kraken from the floor.
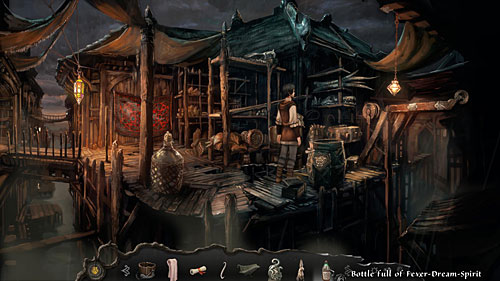
Now examine the barrel. Use the tap on it (you took it from the bathhouse). Take the petrified rabbit and hammer the tap with it. Use the empty spirit bottle and fill it with the contents of the barrel. As a result you'll get alcohol needed for exchange with ferryman - Bottle full of Fever-Dream-Spirit. Return to Jarre.
Give him carving of kraken-newt. In exchange you'll get crib notes from smugglers' banter, which will help you in conversation with the guard. Examine the note. You're interested in two words: one which means money and the other one which stands for alcohol. Both are marked above. Now you can go to the ship guard. When he will ask you questions select following answers: (Honest Merchant), (Moths), (Frog's wine). You'll be able to get into captain's cabin.
After conversation with Harm look around the cabin, but do not take anything - just go outside and head to the bathhouse. Hear complains of wounded woman and talk to the woman who takes care of her, asking for wound powder and then ask for used bandages. Also send Nuri to the ferryman. Exit the bathhouse. On the left, next to the bathhouse, you'll see iron ring. Place smoking hook on it and then hang the bucket on the hook. After a while a bandage will pop into the bucket. Take it.
Go to the ferryman. Ask Nuri about fish from ferryman and then send Nuri onto the lifeboat. Go to the Harm's cabin. Look into the sideboard and take bottles of cod-liver oil. Use the bandage on the medicine and Geron will "upgrade" it a little, getting cod-liver oil with itching powder. Give that medicine to Harm, who will take off the key from his neck and hang it on the side. Take a closer look at the key and also a hole in the window, above Harm.
Go outside and head to the ship's deck. There is a crank which is used to lower the lifeboat. Use the crank twice and Geron will lower the lifeboat to the very bottom. Go to Nuri. Use the knife on the herring and then use the fishbone on the miniature anchor obtained from Harm. Now give the miniature anchor with fishbone to Nuri and again go to the captain's deck. Use the crank once to get the lifeboat higher (in the middle).
Go to Harm's cabin. Start conversation with him to distract Harm from Nuri and you'll see the fairy swaps keys. Exit the cabin, go to the captain's deck, lower the lifeboat to the bottom (use the crank three times) and take Harm's key from Nuri. Tell her that she can get out of lifeboat.

Return to Harm's cabin. Open the window. From the armoire take the candle and the wooden box. Light the candle in the inventory using Flintstone and tinder. Take a closer look at the whale statue and notice that there is a strange light coming from it. Use the wax from the burning candle on mechanisms on jingle bells on the top of the whale. Now open the whale chest using the fishbone key. Take the prism out of it. Put the prism into a wooden box and throw it out the window. Leave the cabin and head to the ship's stern. You'll see prism in wooden box floating on the water. Use hammock to get it. Go to the ferryman and give him bottle full of fever-dream-spirit.
Get the hatchet from the post of the ruined house and pull out blade of spade from the ground near the campfire. Use the hatchet on damaged cart and pick up a handle. Combine it with blade of spade and you'll get spade. Finally use the reassemble spell on the boat wreck. Use the spade on the boat and you can sail away.
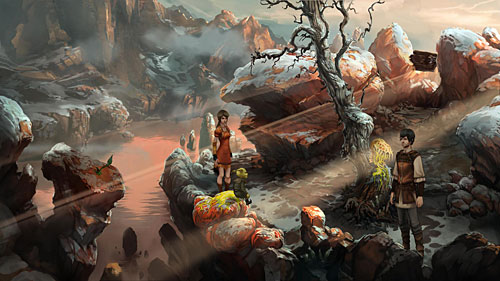
Take a rope from the boat. Pick up perforated boot from the ground and dig out strange spitting plant using the spade. Chop down the tree trunk with the hatcher and tie the rope to the hollow tree.
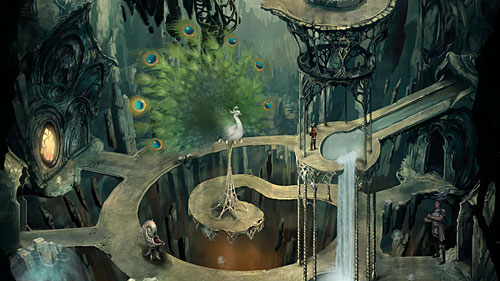
Take a look at statue of peacock and ask Nuri to touch peacock all the time. The large eye always follows the light beam. Turn the statue, so the beam is directed to the pool of lamp oil. Go to the right, take the mirror and go up the screen.
Now examine the large creature eye. Pick up mushroom from the ground. There is a dragonfly flying nearby. Catch it using the hammock. Right behind petrified woman you'll find petrified bat - pick it up. Now take a closer look at giant worm and use the strange plant on it. Place the mirror into the hole over the worm. Use the destruction spell on the creature eye and use the Flintstone and tinder on the plant to irritate it. The plant will spit into an eye, thus damaging it.
Return to Nuri and turn the peacock statue so the beam is directed to both mirrors - the one hold by petrified woman and the one, which Geron put into a hole over the worm. Move to the pool of lamp oil and take some into water bladder. Take also broken oil lamp and use the reassemble spell on it. Now go to the right, heading to the eye.
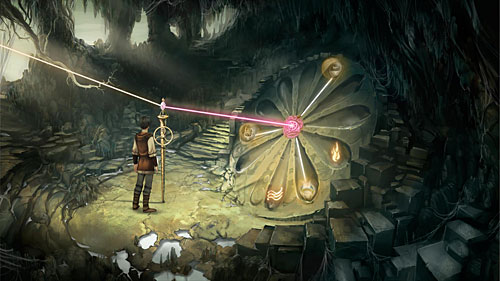
Place the prism at the top of contraption. Two symbols on the wheel will glow - waxing moon and bricks. There is a basin between them - put there fixed oil lamp. Move to the pole with prism and turn the gear. You'll see other symbols on the wheel - a beetle and a bird. Place a dragonfly in the upper basin. Turn the gear again and you'll see symbols of water and fire. In the last basin between them you have to pour lamp oil from water bladder. After that, light it with Flintstone and tinder. Move to the contraption and touch the prism.
Talk to the eye-creature and take a closer look at remaining elements of this location, particularly a well, chute in the ceiling and one of the light figurines whispering her daughter's name. Go to the next location.
You'll be stopped by a soldier and after short conversation brought to the Queen. In the first phase of conversation say nothing, selecting 'keep silent' option three times. Only when you're allowed to, start the normal conversation. In order to be released you have to complete three tasks. Bring an apple from the garden, make a life size statue of the Queen in all rainbow colors and fix the statue of bird man so he can see. After completing these tasks Geron will be allowed to get into dream chamber.
In the Queen's chambers take a goblet and wicker basket. Use also a rounded window to take a look into the garden. There is winter in fairies' land, so the garden looks extinct.
Leave the Queen's chambers and go to the central part of the palace. You'll find there a peacock on a high pedestal. Go to the other side and look through the rounded window. You can see the garden from the other side. Move back and go through the door near the rounded window, heading to the gallery.
Gallery consists of two floors. On the lower one you'll find a sculpture with two horns. Take both horns and one of the stakes. There is also a crystal next to the sculpture, placed in a strange setting. Take it and then place light crystal into a fixture on the other side. What initially was just a painting now turns into a passage to the upper floor of the gallery. Go upstairs and take the spear from the throat of the second sculpture. Pick up also colour-stone. Go downstairs and place the colour-stone on the basin.
Leave the gallery and use the reassemble spell on horns (halves of bow) taken from the sculpture. You'll obtain the bow. The only thing you're missing is an arrow and the spear is too big for this. So when you get to the central chamber of the palace, go upstairs, heading to the water basin located above the waterfall. Throw the spear there. It will fall down to the lower basin and it will get shorter. So go to the lower water basin and take the small spear. Use it as an arrow on the bow and you'll obtain fully usable weapon - bow and arrow.
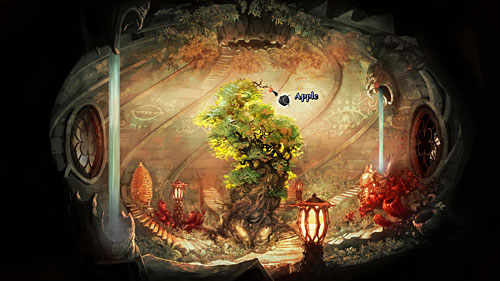
Look into the garden through the nearby rounded window. By replacing the colour-stone you've changed seasons and now there is summer. There is also an apple on the tree. Shoot an apple with the bow and go again to the gallery. In the center of the lower level you'll find a painting in triangle setting. Turn in upside down and go to the chamber with light figurines. Take the apple from well and give it to Queen. But before you exit the chamber, take a figurine of the Queen with you.
One task completed - time to complete another one. You need life size statue of the Queen, in all colors of the rainbow. Go to the gallery. Take a colour-stone from a basin and go upstairs. Place the colour-stone to the basin and take a closer look at large painting behind your back. Geron will notice that there are all rainbows colors, except orange.
Talk to the large peacock. Ask him about birthday of the eye-creature and a small creature on the top, showing the wind direction (sigh of the hermit). Use the stake on the goblet and you'll obtain goblet with handle. Go to the gallery. Head upstairs and take the colour-stone. Place it in the basin on the lower level, thus changing the season for summer again. Look into garden through rounded window next to the gallery entrance and use the goblet with handle on the honey under a hive. Return to the gallery and take the colour-stone back upstairs to make winter.

Go through the Queen's chambers to the upper level. You'll find there hermit crab, who sits on the top of wind rose. You can see north sign there, but other directions are also active. Put the goblet with honey on the south. The hermit crab will turn and the peacock should go to sleep. Go to the peacock and take peacock's feather from his tail. Go to the gallery and get the colour-stone to the lower basin to make summer again. Return to the wind rose and move the goblet with honey to the west. You'll notice that the path leading to the large statue of a bird man is now available. Take the goblet and go to the statue.
There is a pot of red paint on the ground. Open it and add some honey from your goblet. Now put the peacock's feather into orange paint. Carefully examine large eye-sockets in the statue's head and return to the gallery.
Take the colour-stone from the lower level and place it in the basin upstairs. Get the crystal from the setting on the left and use the feather with orange paint on the painting. Place the crystal back on its place and then place the Queen's light figurine on the painting. Now remove and place back the crystal into its setting. Take the rainbow-coloured light figurine and once again place the colour-stone to the lower basin.
In the central chamber throw the coloured figurine to the lower water basin of the waterfall and take the large figurine from the upper basin. Remember that rounded painting in the triangle setting in gallery must be turned upside down before that action. Now you can show figurine to the Queen.

It is time for the last task. Go to the chamber with light figurines and talk to eye-creature. Remember that earlier you have to examine all empty eye-sockets of the statue from the inside! During the conversation select these dialog options: (Place for the Eye-Creature), (Dark), (Empty eye socket), (Dream), (Birthday). The creature will be convinced and Geron will take him.
Inside the statue, put the wicket basket into the left eye-socket and place the creature on it. He will fall asleep. Despite this, start talking to him, selecting all dialog options. Finally the creature will open his eye and Geron can go to the Queen and tell her about completing the last task (Seeing Bird Man statue).
Geron will obtain the key to the dream chambers from the Queen. There is a stone pedestal next to the wind rose, in a shape of inverted cone. Use the key on it and go through the magic door.
You're inside the Dream Chambers. Move forwards until you reach the fairy gate leading to the real world. Try to go through it and then talk to the Queen's sister. Geron will learn that he has to face his own dreams.
Geron will fall asleep. Open the clothes trunk and take the magic flute out of it. Literally go inside the trunk and take the key from the wagon.
Exit through the door and take petrified fire from the fire pit. On one of the string on trees you'll see hanging hourglass. Use the destruction spell on it and pick up glass shard from the ground. Get inside the wagon.
Use the key to open the closet door and go through it. Pick up Raven's feather from the ground and use the magic flute on the Raven. Pull the curtain and talk to Nuri, who will give Geron the seer's artifact. Now cut the part of the curtain with the glass shard and go back to your room.

Next to the door you'll find hooks. Arrange items on them in this order (starting from the left): curtain, magic flute, Raven's Feather, Fire and the seer's artifact. You'll get back to the Dream Chambers and after short conversation with Queen's sister use the fairy gate.
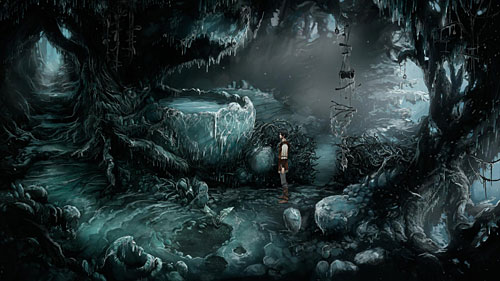
Use the knife to cut the path among thorny hedge. Pull the icicle from the frozen fairy gate and take the mandrake plant from the ground. Go outside and use the knife on rocks next to the nearby tree, obtaining lichen.
On your way back to the town you'll encounter knight Wrathling. Talk to him using all dialog options. Before you return to the town, take the oak twig from the tree trunk next to the knight.
The town looks terrible. You'll meet bereaved Olgierd sitting on well. The poor guy has killed Ulfried and now you have to persuade him to give you pitchfork plus calm him down. In order to do this, select these options during the conversation: (Talk out of suicide), (Win trust), (Not a bad luck charmer), (Deny fault), (Olgierd was hexed), (Have him hand over pitchfork). After that Olgierd will agree to give you bloody pitchfork. Now pick up clay jug standing on the ground next to the well.
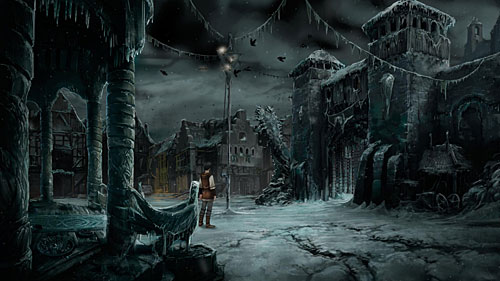
Geron has a meeting with scholar in academy of magic but unfortunately the gate is closed. Knock to the guard in guard's hut and you'll learn that you can enter only if you're a mage or you have permission from the king. Go to the castle gate.
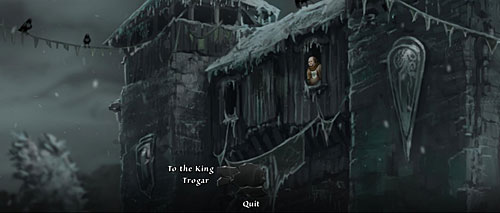
Use the winch to lower the town banner. Examine carefully crows flying around. Shout to the window above the gate to talk to Trogar. Now go to the abandoned marketplace. The herb stand is covered by some material, but this is not a problem. Use the knife on the material and Geron will take piece of white canvas. Move the washing bowl and pick up the root. Return home.
Open the clothes trunk on the ground floor and take a green doublet out of it. Take also needle and thread. Check the bird droppings under the ceiling and Geron will find dove's egg there. Go upstairs.
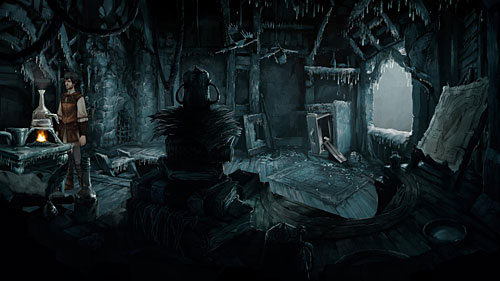
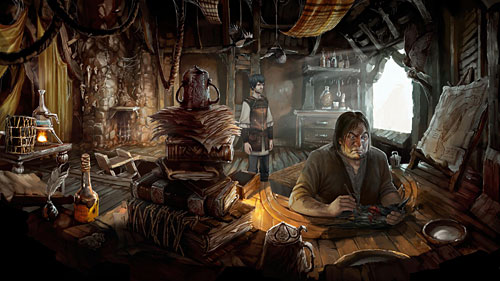
Pick up glass shards from the ground and use the reassemble spell on it. Place fixed glass bulb on the tripod and use Flintstone and tinder to light the oil lamp. Take the herbarium from the table. Open the upper drawer in the fallen bookcase and use the knife on it. Geron will find a second bottom with recipe on crows' bait. Open the inventory and use mandrake, root and lichen on the herbarium. Place these three ingredients into the bulb on the oil lamp and add the dove's egg and magic icicle. The bait is ready. Take the bulb from the fire. Now it's time for needlework.

Go to the knight Wrathling, who sits under the tree and ask him for pennant. Use the brown oak twig on the green doublet and then use the white canvas on the red crown fragment obtained from the knight. Use the knife on the green doublet with Oak Twig and put the oak twig from green cloth to the white cloth with red crown. Finally use the needle and thread on the white cloth with red crown and green oak twig and Geron will produce the town improvised flag.
Go the castle gate and use the improvised flag on the reverse-the-curse-remedy. Now hang this "trap" (improvised flag with reverse-the-curse-remedy) on the pennant fastener.
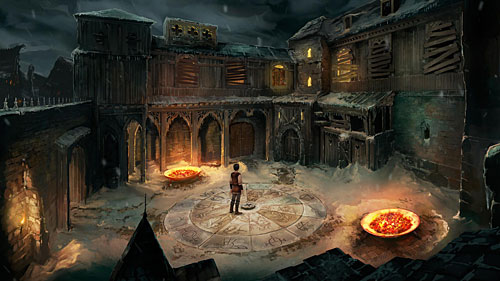
Show the academy guard a proper note from the inventory, by selecting 'royal charter' during the conversation and go inside. On the courtyard examine carefully the Circle of the Gods and the hole in the ground in the center of it. Enter the academy of magic.
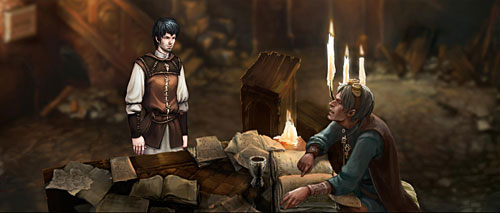
Try to open the door to the left on the screen, but it is closed. So enter the door on the other side of the corridor. You'll find yourself in the library.
Talk with Jacomo until you "get rid" of all dialog options and three which are left, will repeat. Take the decanter and the magic glass from the table. Read also writings on three tablets on the wall. Return for a moment to Gwinnling's lab on the floor and use the magic glass to read writing on the harp painting. Geron will learn about the place known as Raven's Peak. Return to the academy.
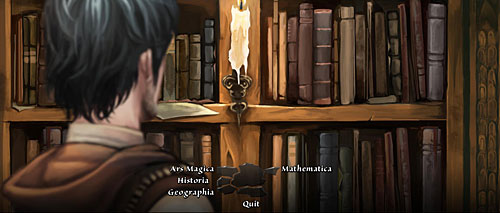
Go to the library and tell Jacomo about your findings (Raven's Peak). Start examining books on bookshelves. Read carefully fragments of all books, especially the one about Raven's Peak in Geographia department and the one about transmigration in Arc Magica department. Exit the library.
In the corridor you'll find a carpet - doublet of the guard. Take it off and exit through the window. Use the bloody pitchfork to remove boards on the boarded up window and get inside. Magician Onkward sits on the floor and repeats only one sentence: Eius cause discimus. You can't talk to him, so take the magician's hut from the floor and go back to the corridor.
Take a closer look at three tablets on the wall on the corridor. On the third of them (starting from the left) you'll notice the sentence which magician Onkward was repeating. Geron will examine it closer and find out, that there is something behind. Use the knife on the third eius-tablet and take the key from the niche. Go out to the academy courtyard.
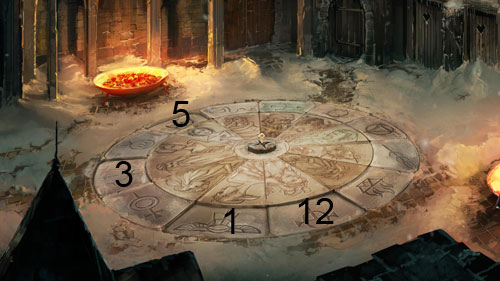
Examine the eius-tablet taken from the corridor. There are some numbers on it: 5 12 1 3. Now look at the Circle of Gods on the ground. Put the key in the hole in the ground. Now you can read names of all twelve Gods. The first and the highest one is Praios. Press symbols on the circle: Boron, Rahja, Praios and Efferd. A secret passage will open. Use it.
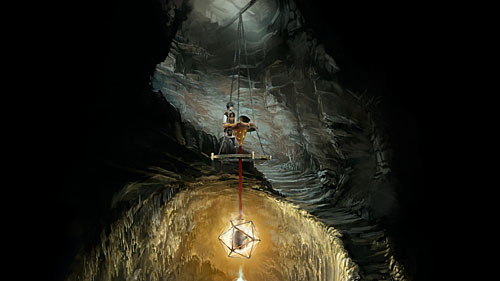
Inside the cave you'll find the artifact protected by magic barrier. Try to get it, but with no success. Take a look at chandelier above the artifact. Put there magician's hut. Place a decanter inside the hut. Now use the destruction spell on the clay jug and throw clay shards to the artifact cage. Use the reassemble spell on the clay shards in magic cage and cut off with the knife the top of the magician's hut with wine. Pick up the seer's artifact from the ground and return to the library.
During conversation with Jacomo select following dialog options: (The Seer's artefact), (Artefact as bait), (Change magic word), (Corvus), (Own suggestion), (Satinav), (Departure).

There is a raging blizzard all around. Unfortunately there are three creatures guarding the cave entrance - you have to get rid of them. Go up the screen. You'll find there damaged catapult and a frozen horse in the snow. Take a look at catapult's mechanism. It is frozen and one element is missing. Go down and examine statue of Raven in the center of frozen pond. It is made out of ice. Use the destruction spell on it, thus distracting creatures. Approach the second catapult and examine it. Pick up a lever from the snow and go back to the first catapult.
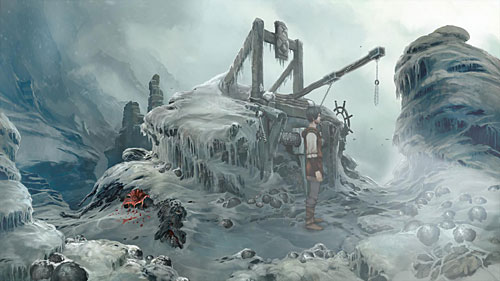
Use the Flintstone and tinder on the mechanism to melt the ice. Then put the lever in a mechanism and use the winch to lower catapult's arm. Use the knife on the frozen horse cadaver and you'll obtain kind of sling. Use the knife on the horse again to get some piece of meat. Combine horse's hide with chains. Pick up projectile from the ground and place it on the sling from hide. Now use the lever to shoot the catapult. Go down and approach the place which your projectile hit. Pick up the broken sacrificial pole and enter the cave.
Examine pile of rubble. Use the reassemble spell on the broken pole. Place the sacrificial pole into the pile of rubble and place the horse meat on its top. Move further.
Geron will be attacked by one of the creatures. You'll notice a skeleton a little further on your path with the large icicle above it. Use the destruction spell on the icicle. One of ribs will fall down and Geron will automatically pick it up. Use the reassemble spell on the nearby broken knife and use the rib to take the knife. Use the knife on the creature.
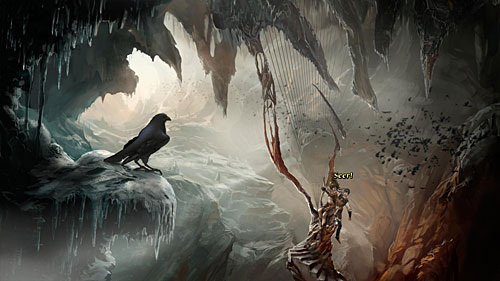
Start conversation with Nuri. After a while a Raven will come, who wants the ring. When you're left with one, repeating dialog option, stop the conversation with the Raven and talk to Nuri using all dialog options. Nuri will start crying, after Geron says that he wants to say goodbye. Use the ring on Nuri's tears. Now talk to the Raven and give him artifact.


 TERA Game Guide & Walkthrough
 The Elder Scrolls V: Skyrim - Dawnguard Game Guide & Walkthrough
 The Chronicles of Narnia Game Guide & Walkthrough
 The Sims 4 Game Guide & WalkthroughThe Cave Game Guide & Walkthrough