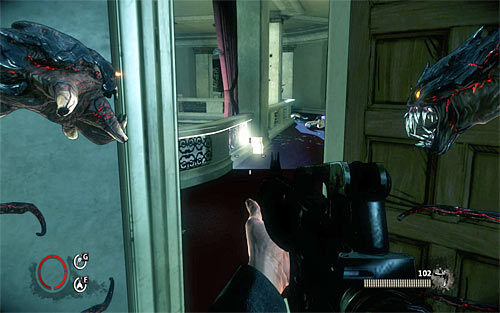
The Darkness II guide includes first of all a very detailed walkthrough for single player campaign. In next chapters you'll find information on completing missions' objectives, skillful usage of the Darkness powers, getting rid of enemies, defeating bosses and finding secrets (there is information on location of all 29 relics). It is complemented by detailed description of all Darkness powers, which can be possesses by Jackie Estacado, featuring most useful ones.
This guide doesn't ignore the entirely separate Vendettas mode, which offers a possibility of completing missions in cooperation of maximum of four characters. You'll find detailed information about all playable characters of this mode, as well as most difficult moments of Vendettas campaign. At the end of this guide you'll find also a summary of game achievements with many clues on how to get them.
Jacek "Stranger" Halas
Translation: Maciej "Elrond" Myrcha
Note! Before you start playing, you have to choose difficulty level. By default you start with Mobster (Normal) difficulty level and if you're not looking for too great challenge, it seems to be a most reasonable proposition. But if you want to get achievements, then you should try to complete the game on first try at low difficulty level, since it will be easier to automatically get achievements in this case. I recommend also agreeing to watch the summary of previous part of the game (YES option).
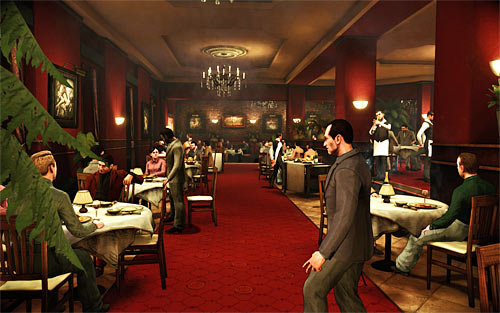
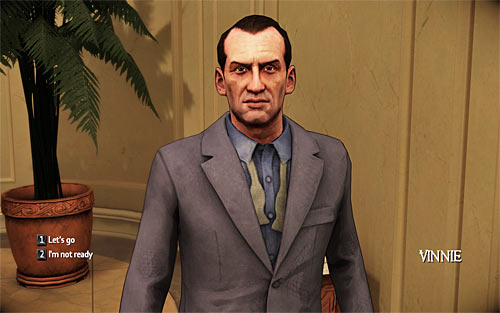
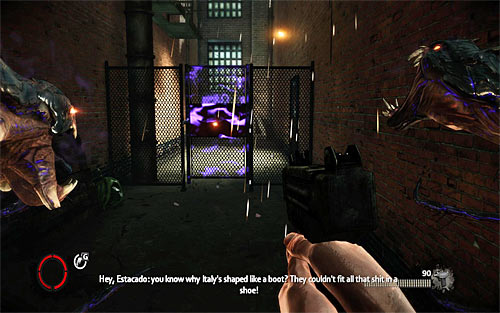
First stage of the game will begin with the walk in a restaurant in the company of Vinnie. Once you're inside the restaurant, turn left and then walk with him. You have nothing to do here, so just listen to conversations between people here (I recommend focusing on Swifty in particular).
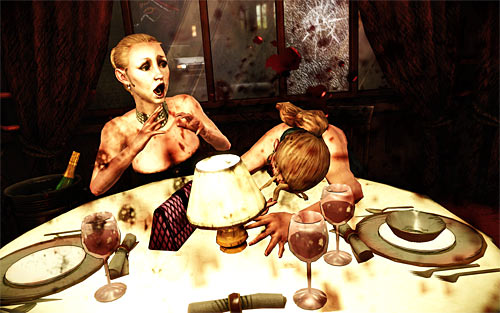
Vinnie takes you to the table, where two cute twins await you. But this idyll will not last forever, because the restaurant will soon be attacked by hitmen. Prepare for fight!
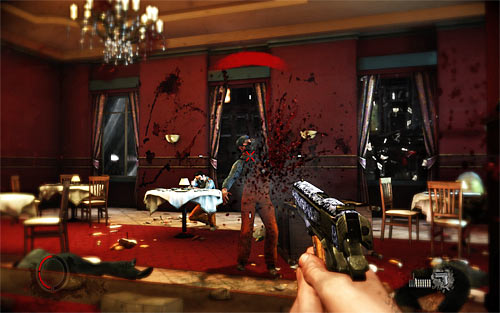
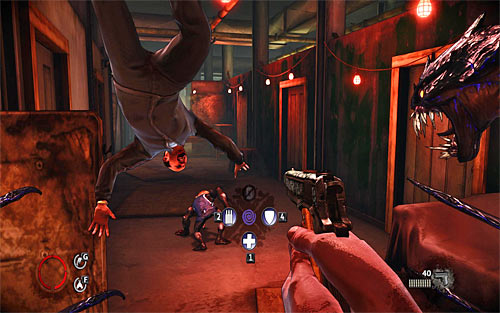
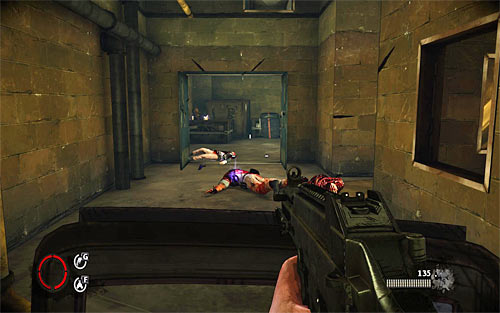
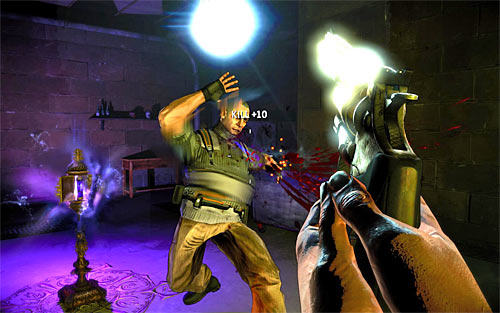
The game will not let you to take full control over the main character. Instead, you'll have to take part in only partially interactive scene, during which you'll be dragged by Vinnie through the destroyed restaurant. As you probably guessed, your job is to eliminate thugs emerging in front of you. Do not worry if you do not kill them all, because it is hard to die here. You should also know, that the gun you're using has unlimited ammo although you should properly choose moments to reload and do this between consecutive attacks.
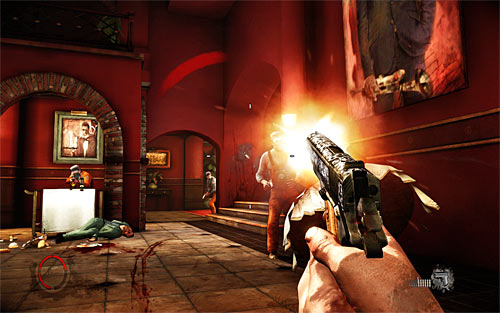
During playing this scene, try to aim at heads of your opponents if possible. You can help yourself using zoom, which is activated with right mouse button by default. It is also worth noting that enemies are wearing partially orange clothes, so this can help you locating them (you do not have to look to sides, although it is possible). After walking over small steps, watch out, because in the next restaurant room opponents will try to shoot you from behind covers.

Eventually you have to reach a place, where Vinnie wants to rest and a van breaks through the restaurant wall. Try to keep your opponents out of character you're controlling, trying to shoot their heads. After a while you'll get another weapon and as a result you'll be able to test the option of shooting two guns at time. In this case each mouse button corresponds to a separate gun. Continue shooting, keeping in mind that you do not have to save ammo.
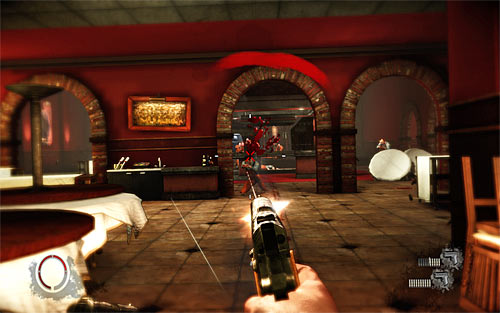
Vinnie should eventually resume the process of dragging the main character, heading towards the kitchen. Do not stop shooting and watch out for at least one opponent, who might try to surprise you from the right. Once you get into the kitchen, watch the interesting cutscene - unfortunately you do not have any influence on it.
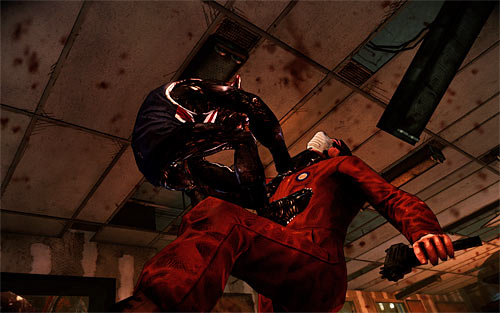
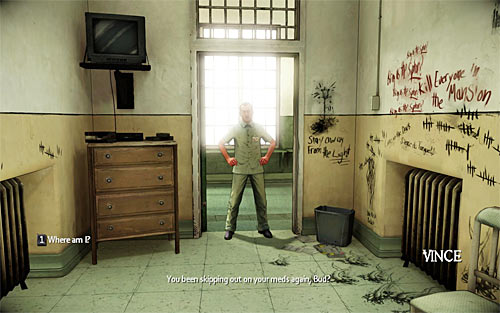
After regaining consciousness, listen to what mysterious man with a cane has to say and then start to move toward one of the thugs, holding the W key. When you get close enough to him, press E to release the Darkness within the main character and deal with surrounding enemies in effective way (without your actions).
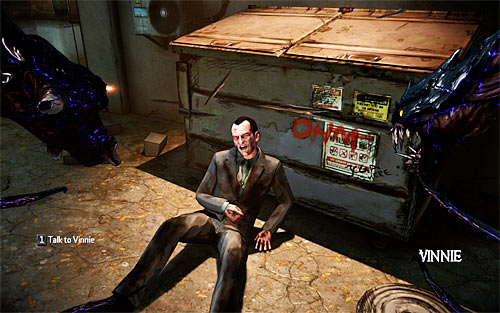
Notice that you are healed now and both your "tentacles" are active, but you do not have to learn instructions how to use them, because this will be precisely presented later in this chapter. Walk to wounded Vinnie and press the 1 key to initiate a conversation with him. From the gangster you'll learn that the other allies are gathered at the restaurant entrance and to reach them you have to go through nearby alleys.
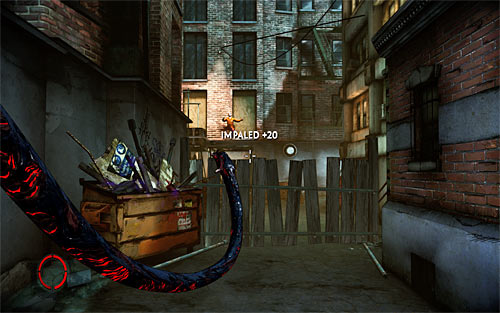
Turn left and go into the nearby alley, pressing the BACKSPACE key along your way in order to get familiar with current objectives. Go to the wooden fence and quickly press the Q key to use your left tentacle to catch a metal rod. Aim at the enemy who appears on the balcony visible in the distance and again press the Q key. If you've done everything according to the plan, the bandit will be nailed to the wall and you'll get your first essence points (it is used to unlock new Darkness powers). Deal with the second thug in a same way - grab a new metal rod with your left tentacle (Q) and throw it at your opponent.
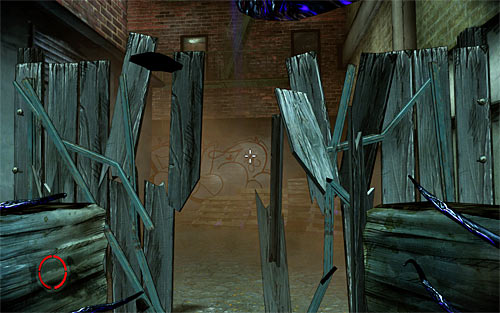
Go to the wooden fence now and press middle mouse button to use the right tentacle in order to destroy the obstacle and unlock further passage. The second fence needs a little more finesse. You have to hold the middle mouse button and perform vertical slash with your mouse (move it up or down). This should result in vertical tentacle swing and the destruction of the obstacle. You can move on.
Get ready because after a while two bandits with melee weapons will attack you. It would be good to test here an attack suggested by the game, so hold the middle mouse button and perform horizontal mouse slashes (move it to the left or to the right). After several attacks with the right tentacle your enemies should die in effective way. Keep going, performing a straight jump along your way (the SPACE key) and noting Jenny in the distance, Jackie's dead beloved.
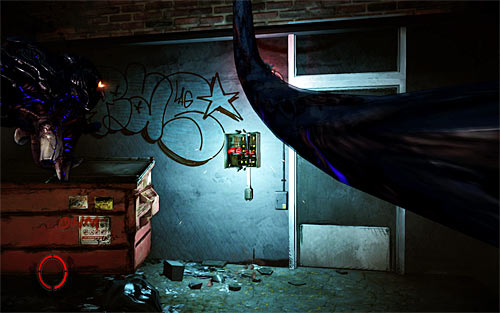
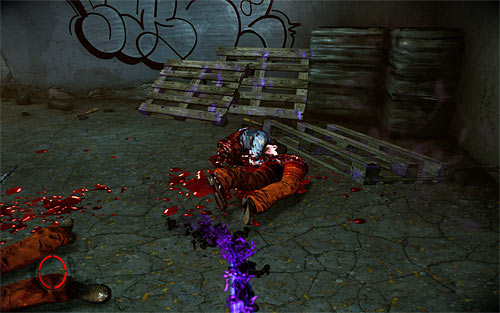
Ignore the vision with Jenny and move to the closed door - there is a fuse box nearby. Aim at the box and press the Q key to grab it with the left tentacle. Keep pressing the E key until you break its outer cover. But this is not over yet, because now you have to use the right tentacle (the middle mouse button and vertical slash) to produce a short circuit. You can now use a newly unlocked entrance to the hairdresser.
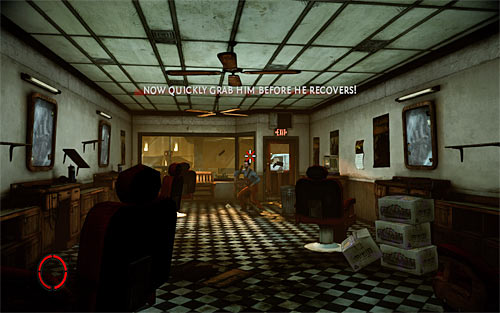
Carefully approach an opponent standing a bit further. The game will suggest at this point testing an option of catching opponents by surprise. Make sure that enemy's heart has been highlighted and press the Q key. Since you do not know any other movements, press the 1 key with the intention of performing standard execution on captured bandit.
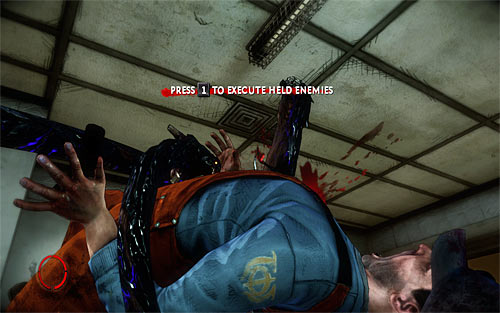
Go to the next room, which offers you another "training". This time you can practice the option of stunning opponents. Start by grabbing with your left tentacle (Q) a box lying on the floor and then throw it at the enemy. Quickly run to the stunned bandit, grab him with the left tentacle (Q) and them perform an execution (1). After successful action grab from a distance (Q) or pick up personally a gun lying near the exit from the hairdresser. A new opponent will run into the building soon and you can test a gun on him or deal with him using tentacles.
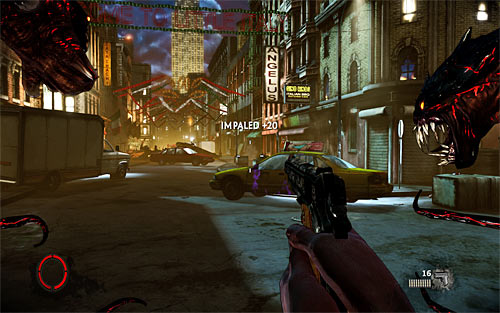
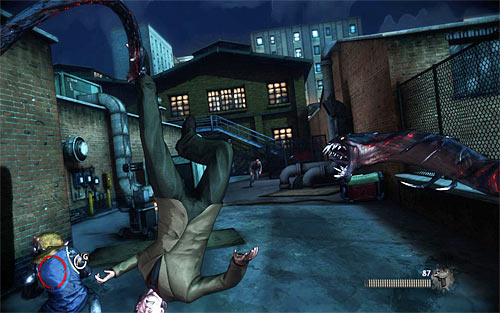
Exit the building and head to the left. Prepare for a series of fights, where you'll have a full freedom of actions. Personally I recommend using tentacles because such attacks are better scored (it is good to combine different types of attacks). Depending on your preferences, you can throw environment objects (car doors or parking meters for example) at your opponents or use bigger obstacles as a cover and rely on firearms. Regardless of chosen tactics, stay in the dark (the left side of the street), because otherwise powers of Darkness will not be able to function properly. Move forward until you reach the place, where you will witness a huge explosion and you'll be thrown into the right building.
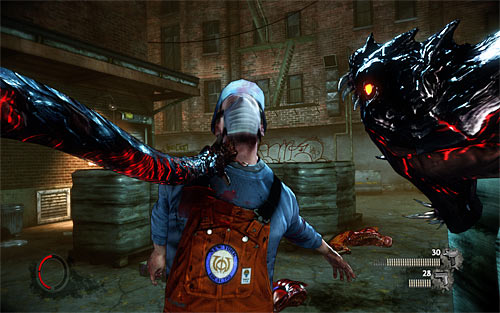
You'll learn now new feature, associated with having your own darkling. These creatures will help you through entire gameplay from now on in solving puzzles and eliminating opponents. In that way you'll be able to survive many bad situations. After you get up from the ground, start by taking (Q) micro UZI from darkling. Or, as suggested by the game, test the simultaneous use of two different weapons (the 4 key).

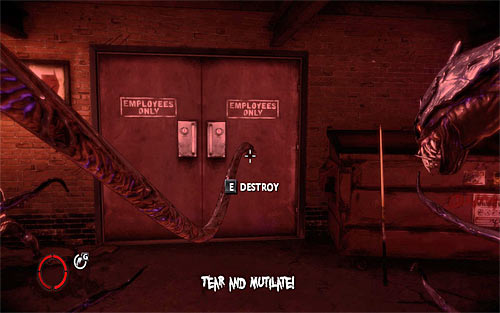
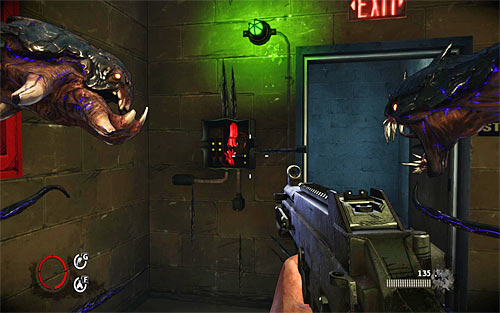
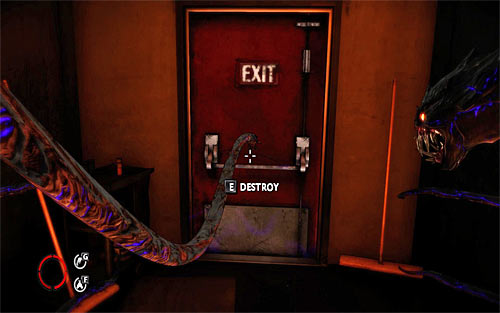
Head to the door with sign EXIT on it. It is closed, but that's not a problem - you can just pull it out with your left tentacle (Q and then rhythmically E). Exit the building and be sure to look to the left for the first relic (Roanoke's Bane - 1/29). This is one of the game secrets and you should know, that as a reward for finding every relic is 300 essence points.

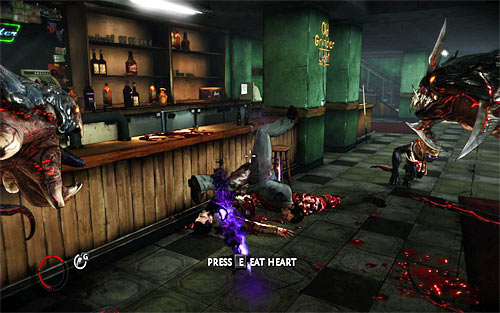
Turn right and move forwards. You can test now the sprint option (SHIFT) but it is not necessary. Move to your darkling, which will show you a Talent Shrine. Interact with a shrine, where you can spend your essence points for new powers. Buy the first power named Eat Hearts (it costs 50 essence points), that guarantees health recovery by eating opponents hearts. You can now close a purchase window or unlock another power (description of each of them can be found at the end of this guide).

You might test Eat Hearts right away on a dead bandit found nearby. This is done by moving close to such person and pressing the E key. You can now approach to a gate visible in the distance, where you should find your darkling. Wait until this nice creature unlocks a passage for you.
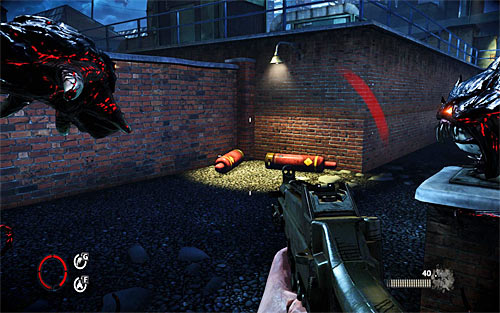
Go to the small yard and start fighting with a new group of enemies, using your weapons and/or tentacles attacks you know so far. I strongly suggest using tentacles to rip apart enemies' bodies (right tentacle) or throwing objects at them or grabbing them (left tentacle). Darkling should help you in winning this battle, jumping on some enemies and making them easy targets. After eliminating the main group of enemies, go to the side alley, which should be guarded by at least one bandit. Once you clear the area, go find enemies' bodies and eat their hearts.
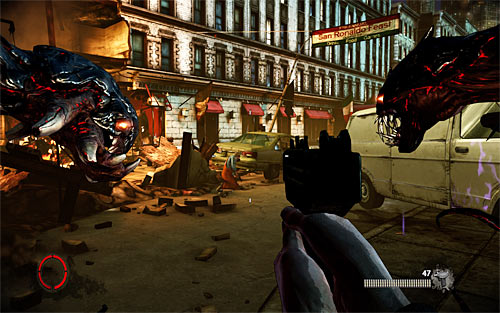
Choose the path leading to one of the main city streets and be ready to deal with few bandits along your way. Move forwards and notice that the game allows you to attack several enemies by surprise - this is a good occasion to earn some essence points for nice and perfect actions. Do not attack your allies hiding behind the cat but take care of gangsters visible in the distance. You can deal with them depending on your preferences from a distance (weapons, throwing objects) or get close to them (grabbing, right tentacle attacks), using the parked cars as cover. As usual do not forget to eat dead enemies' hearts after the fight.
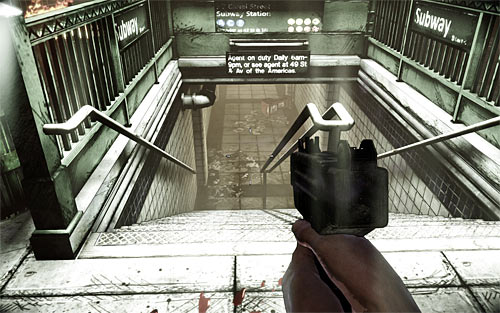
Ignore your allies because you do not have to talk to them. Instead, head to the stairs leading to the subway station. After a while the game will load further part of this chapter.
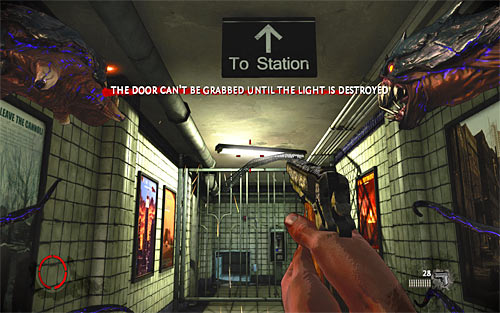
Move forward, reaching the place where you'll get to know another important game element for the first time. As you probably remember, all Darkness powers, including your darkling, can't work correctly in light places. So starting from this point you will have to remember about destroying surrounding light sources. To destroy the first light (and all subsequent) you can use your weapons or the right tentacle (middle mouse button). After this action go to the gate, grab it (Q) and then pull it (rhythmically E).
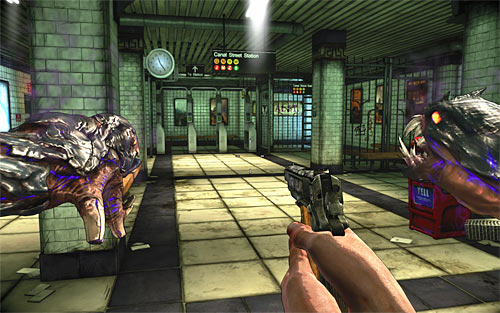
Ignore your darkling and turn right, destroying all lights along your way. Watch out, because on the other end of the corridor new enemies will appear soon. You can shoot them from a distance or (after destroying all lights), move close to them and help yourself with tentacles. Do not forget about eating their hearts. After securing the area, choose the only passage leading to the subway station. You'll encounter new enemies there, but it is easier to eliminate them because your darkling should help you with this.
Use the stairs leading to the platform and quickly hide behind one of the pillars. If possible, take out all light sources from a distance and then proceed to attack enemies. You won't find here too many objects that can be thrown at enemies, so you have to rely on firearms and attacks with your right tentacle. Be careful, because at least one of the bandits uses shotgun. After eliminating him, you should of course pick up this weapon.
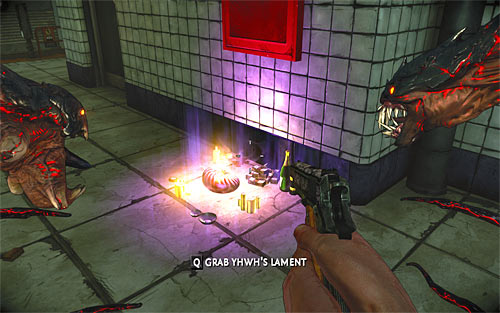
After securing the first platform go back to the stairs, which you used to get here. Use one of the side passages to get under the stairs. It is very important, because you'll find there another relic (Yhwh's Lament - 2/29). Now you can get back to previous battlefield and move forwards (you can choose left or right passage). Along your way you'll find another Talent Shrine, with which you might interact, especially if you gathered many essence points since your last shrine visit.
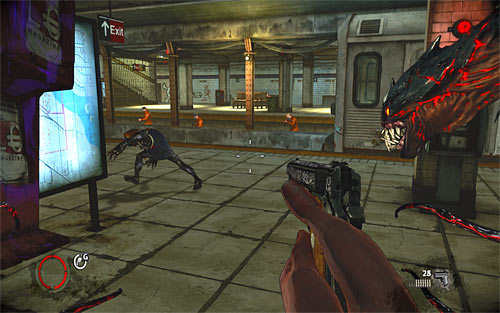
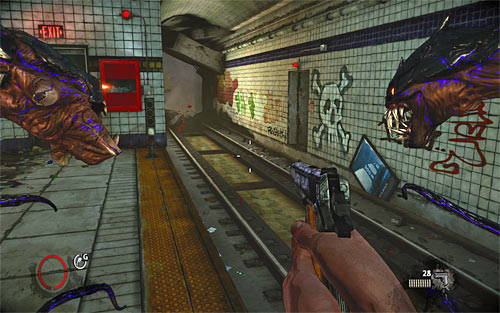
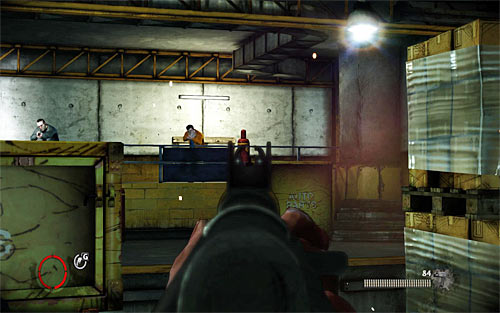
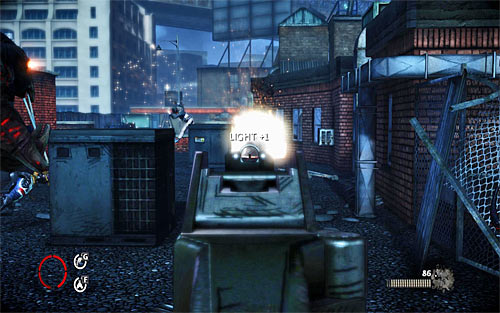
You can now start cleaning another part of the platform. Use same tactics as previously, so use pillars as covers and do not forget about destroying lights. WATCH OUT for enemies standing on tracks to the right (screen above). The easiest way to get rid of them is to get closer and thus forcing the train to come. These are not all enemies, because more thugs occupy a platform visible in the distance. I recommend using firearms here, because it is easier to win that way.
Get to the platform which was occupied by bandits (do not forget about consuming their hearts) and jump down to the right track suggested by your darkling. You'll see more enemies in the distance but you do not have to eliminate them personally. Move toward them, forcing another train to come and displaying spectacular cutscene.
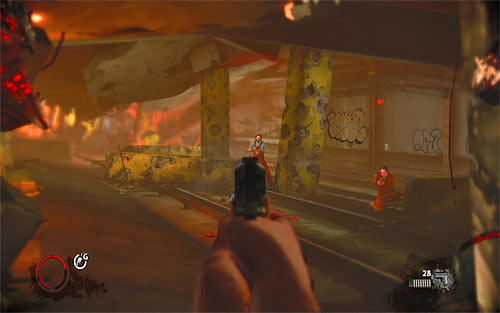
Turn right and go through the subway car, which was involved in the accident. Watch out, because right after leaving the car, you'll come up on the first bandit. What's more, more enemies are lurking a little further. I advise to keep an eye on your character during this fight, because your opponents are well equipped and additionally they may hide behind covers. Keep moving forward, remembering about collecting ammo and eating enemies' hearts. Eventually you have to get to the place where you'll see Jenny again (and a train after a while).
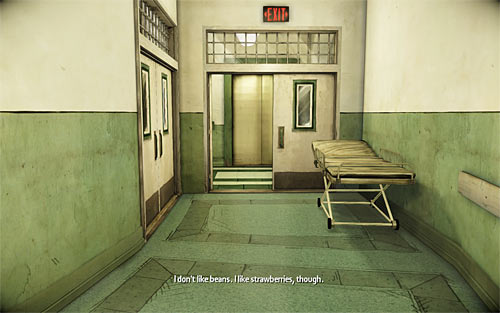
Wait until you'll be moved to a place that resembles a mental hospital. Keep going forward, optionally talking to people along your way. At the end head toward the exit door.
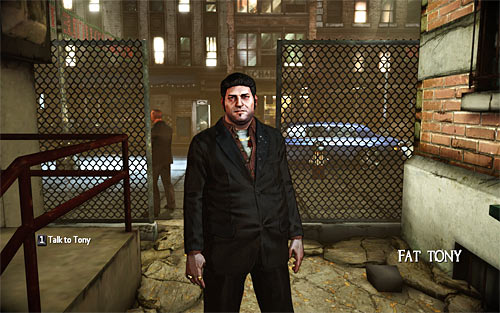
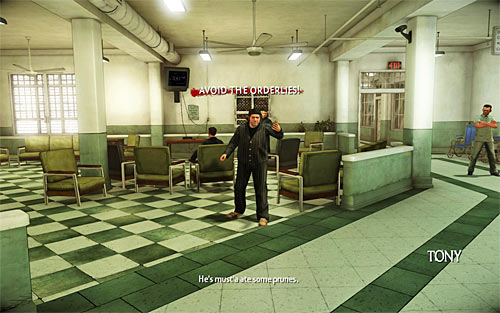
Wait until you get back to reality and your tentacles deal with attacked bandit. Move forward, reaching the place where you'll meet fat Tony. Press the 1 key to start a conversation with him. After few moments this chapter will be over.

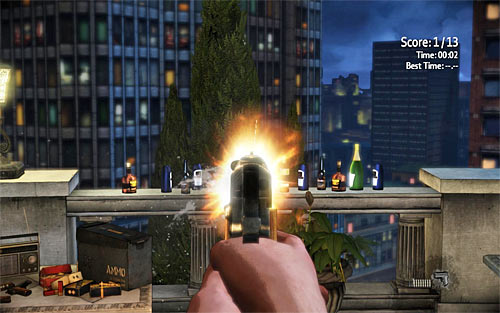
Listen to the conversation with Vinnie, during which Jackie will instruct his subordinate to hold a meeting with Jimmy. You can now spend some time to explore the whole mansion belonging to character you control, interacting with found objects and talking to fellow gangsters. In particular I recommend a funny conversation with people standing on the balcony and taking part in a kind of shooting tournament with Dolfo.

After exploring the area use the stairs leading to a first floor.

Once you get to the first floor, do not go forward right away, but instead turn right reaching the bedroom, which belongs to aunt Sarah. Look around for a new relic (The True Revelation - 3/29). Notice - you do not have to find this relic and pick it up now, because you can visit Jackie's mansion also later on during the game.
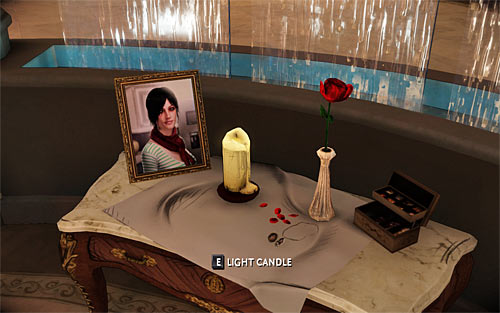
Go back to the stairs and choose a main corridor leading to the Jackie's bedroom. Once you get inside look around for a candle and interact with it. Now head towards the exit door, having a conversation with aunt Sarah. Depending on your preferences you can agree for a longer chat (the 1 key) or shorten it (the 2 key).
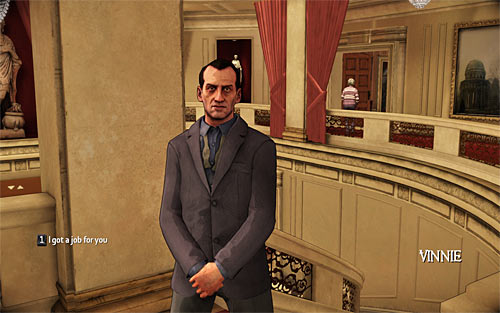
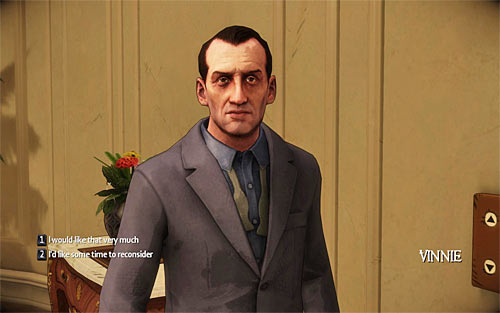
Now go again to the stairs, where you should meet Vinnie waiting for you. During the conversation Jackie will ask him for finding Johnny Powell. He will also learn that Jimmy waits for him in his office. Depending on your preferences you can go to meet Jimmy right away or visit aunt Sarah again (the bedroom where you found relic), having another conversation with her.
Go down the stairs to the ground floor and turn right, entering your office. Start a conversation with Jimmy, during which you'll learn that he suspects Swifty to be involved in the attack. Visiting this person will be your next objective.
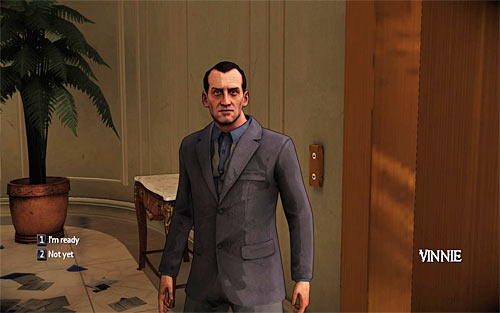
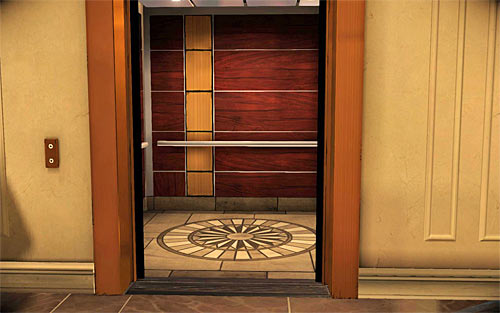
Go back to the elevator and talk to Vinnie, confirming that you want to leave the mansion (the 1 key). This chapter will end after a while.

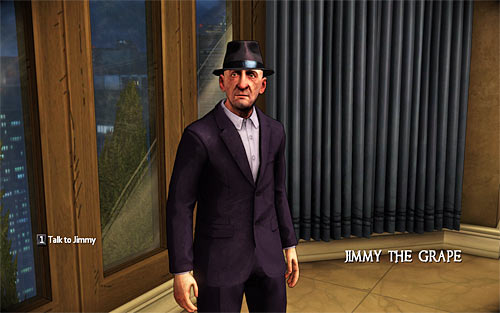
Ignore gangsters gathered around start place and head right away to Jimmy in order to talk to him (the 1 key). During the conversation you'll learn that Swifty is hiding in a nearby club and you have to get him first to interrogate him. Follow Jimmy listening to the plan on getting alone into a surrounded club to find Swifty.
Choose the only available passage, reaching the club entrance after a while. Before you do anything, you can make some purchase thanks to local Talent Shrine, but this is no "a must" of course. If you think that you're ready, approach the main entrance, grab the door with left tentacle (Q) and then pull it out (rhythmically E).
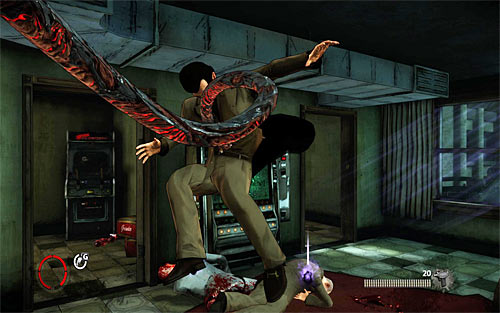
Start attacking bandits gathered inside the club. Note that you begin this chapter without any firearms, so it is good to rely on your tentacles at the beginning, to throw objects at opponents (billiard cues and fans hanging from the ceiling are perfect here) or perform slashes to tear apart enemies' bodies.

In the next phase of fight it would be good to get some firearms from one of the defeated enemies, but this is not absolutely required. Remember about destroying surrounding light sources (mainly lamps hanging over billiard tables), so you will not find yourself in the situation of inability of using Darkness powers. Keep fighting until you eliminate all enemies. Make sure, of course, to eat their hearts.
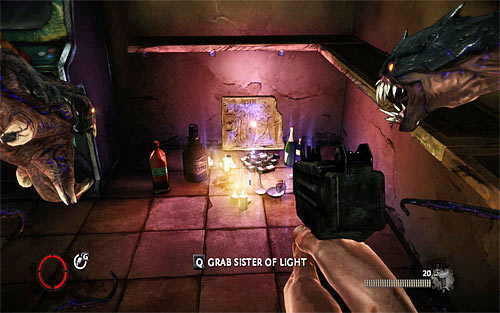
After the fight explore a small room with slot machines, located to the right from the club entrance. You'll find there a shotgun and a new relic (Sister of Light - 4/29). Now head to the stairs leading to the upper club floor. Once you get there listen to the conversation taking place in an adjacent room and then pull out the door (Q and then rhythmically E). Watch a short cutscene with running away Swifty.
Ignore Swifty because you won't be able to get him right now. Instead focus on eliminating enemies gathered in the room. Due to the fact that the battle is fought in a short distance, you should rely on your tentacles. You can also use firearms if needed. After the fight head to the corridor where Swifty was fleeing, eventually reaching the club exit.
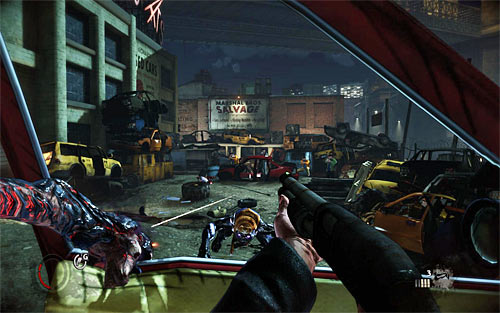
Go to the accompanying darkling and notice that you've come under massive enemy attack. As suggested by the game it would be good to grab with your left tentacle any car door (the Q key) and do not throw it but instead keep it with you, using as a cover (screen above). Move then towards enemies, shooting them with firearms. After reaching positions occupied by them, deal with survivors in any way.

Continue your walk until you reach a new Talent Shrine. Ignore for the moment a path marked by the darkling and go to the left. You should reach the place, where you'll find another relic (The Dark Man - 5/29). Return to the shrine and now choose the right path, walking over partially overturned fence.
Prepare for another series of fights with Swifty's bandits. Same as previously it is good to use grabbed car door as a cover to shorten distance to your opponents. But watch out for enemies with melee weapons, which can come running from the left. Also destroy light sources along your way, so you won't move accidentally to the illuminated zone. A little further you'll encounter enemies gathered on upper balcony and the best way to get rid of them is to throw at them metal bars found nearby.
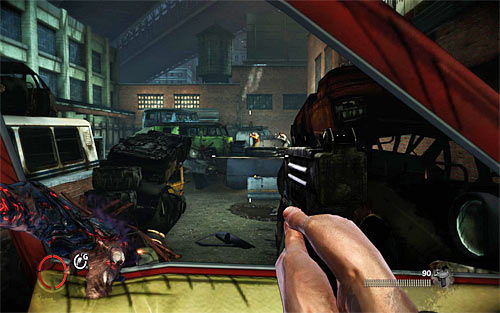
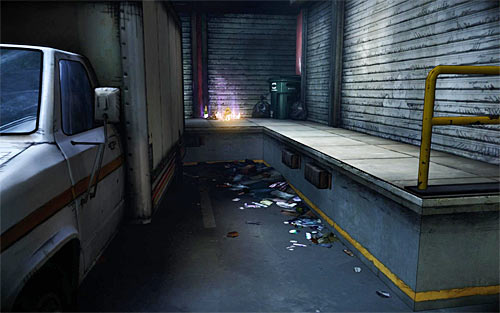
Head to the alley behind the damaged van, destroying nearby light source and then pulling out the gate (Q and then rhythmically E). Along your way you'll encounter several other lamps, but you do not have to destroy them at all costs. Soon you'll reach a place where the game will load the next part of this chapter. When the game resumes, look around for a Talent Shrine and ammo. After few moments you'll get to the construction site, where you'll fight with Swifty.
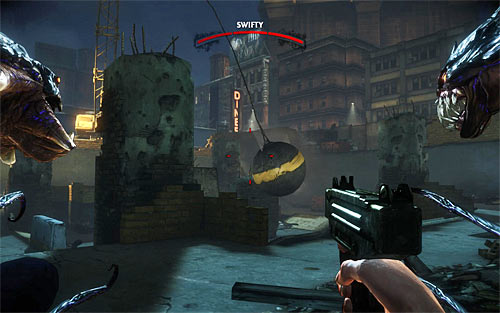
A duel with Swifty resembles a boss fight, because he controls a crane with a great demolish ball. Your task is to completely destroy this machine. Obviously most of the time you have to spend on avoiding the ball. To do so you might stay in site corners and crouch as often as you can.
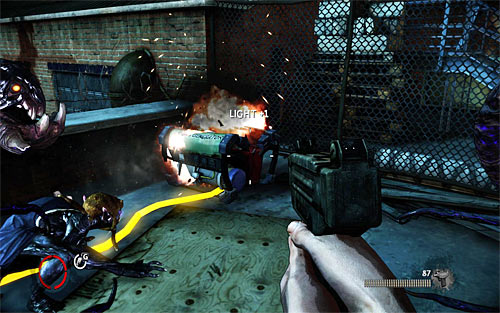
Do not try to approach the crane (machine lamps will prevent you from using Darkness powers) or shoot it, because you have to damage it in a different way. Wait until darkling with a propane cylinder appear on the left side (screen above). Quickly move to the creature, grab a cylinder with the left tentacle (Q) and throw it at the crane. If you've done everything properly, the crane will be partially damaged.
Do not count on this, that the duel will be limited to throwing cylinders only, because from now on Swifty's bandits will be appearing on the construction site on regular basic. During fights with enemies you can behave in many different ways. If you prefer firearms, you can shoot at them hiding behind walls or grabbed large object, visiting regularly ammo sheds, located in corners of the battlefield among others.
If you prefer to use tentacles, you can attack enemies from the distance, throwing at them different objects (for example metal bars found after destroying pillars) or run towards them and tear them apart. In the latter case it is important, of course, to watch out for crane ball movements and crouch or jump aside if needed. Regardless of the chosen tactics do not forget about the need of frequent regeneration of energy. This can vary depending on Darkness powers you've managed to unlock, but the most universal solution is to eat hearts of defeated enemies of course.
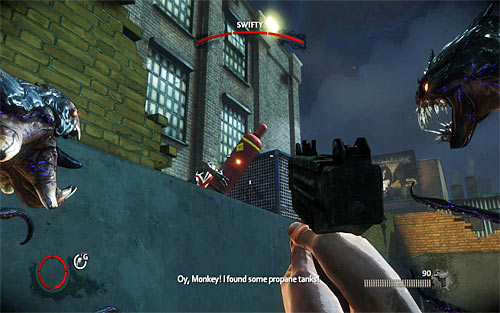
During the breaks between bandits' attacks do not forget about grabbing cylinders brought by darkling. A creature with the second cylinder will also appear on the left side, but later on he should appear to the right from the start place (screen above).
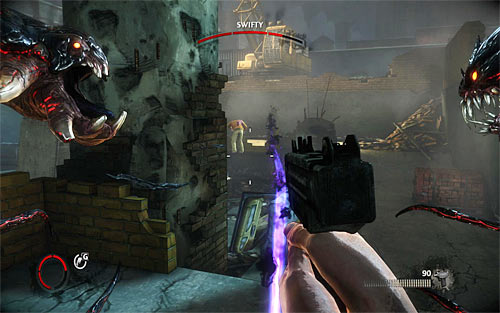
In the final phase of the battle you have to watch out also for attempts to light on your character by a crane lamp (screen above). In such situations hide and stay behind pillars and other large objects, which are not completely destroyed by a crane ball. Keep fighting until the crane is destroyed. Unfortunately it is not equivalent to catching Swifty, because the bandit will flee again.
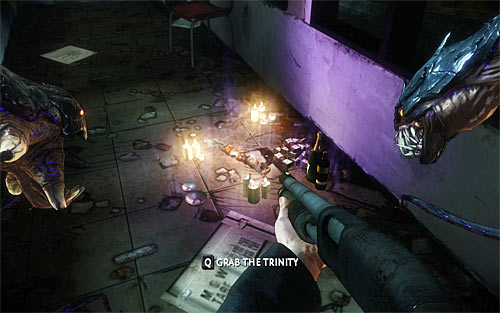
Leave the construction site, walking over the crane's damaged boom. Once you get to the top, take a moment to look inside a small barrack, and that's because you'll find inside a new relic (The Trinity - 6/29). Now destroy the local light sources and pull out the gate blocking the passage to next location with your left tentacle (Q and rhythmically E). Look for ammo and then head to the door leading to the bar entrance.
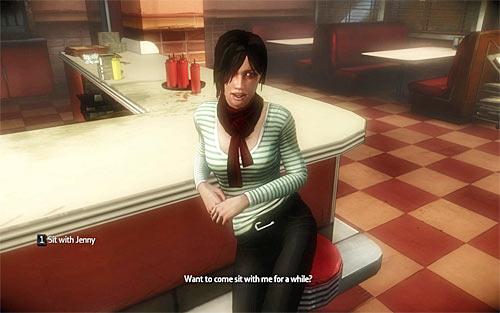
You'll see another vision with Jenny. After listening to a small chat, move closer to the girl and press the 1 key to sit on the bar stool.
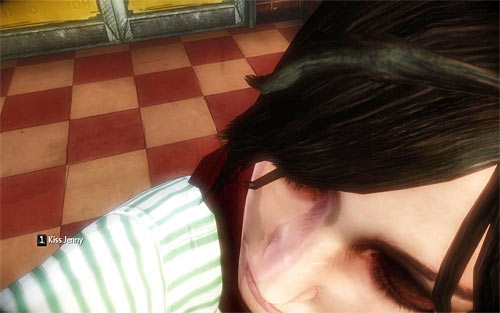
In the further part of this scene, Jenny will want to dance with the main character. The game will offer you opportunity to kiss a girl (the 1 key), and you can decide to do it right now or continue the dance until the song is over (it is required to get one of the achievements). Regardless of the chosen option, head to the door leading to the back, which will end the vision suddenly.
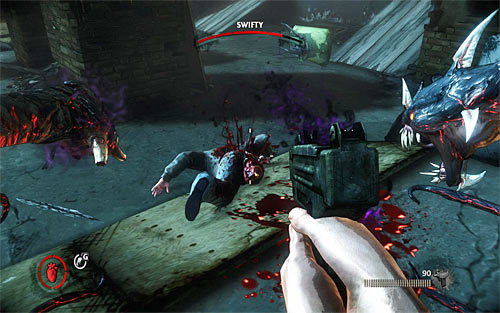
Go through the bar background and use the left tentacle (Q and rhythmically E) to pull out the door and end the second part of this chapter. After the game loads a new location follow tracks of your darkling, reaching the place where you'll meet two unarmed thugs. Due to a fact that they can't defend themselves against your attacks you should deal with them in a way securing maximum essence points (but after destroying a lamp hanging over them).
Ignore the door, where enemies were knocking to and head to the right. Look for a ladder leading to the rooftop and use it. You can watch through the window fleeing Swifty or continue your actions. Go to the left and locate a generator, which you have to destroy (screen above), using firearms or the right tentacle. Now interact with the right gate, which you have to pull out (Q and rhythmically E).
Go up the stairs, destroying the lamp on your way. Once you get to the rooftop, quickly destroy another generator and then start fighting thugs. Watch out for the guy with a melee weapon, because he will probably try to surprise you from the left. After winning the fight head to another closed gate and get rid of it in a well-known manner (Q and rhythmically E). Use the stairs, reaching the place where another Talent Shrine is located. After taking care of the business, jump into an open manhole.
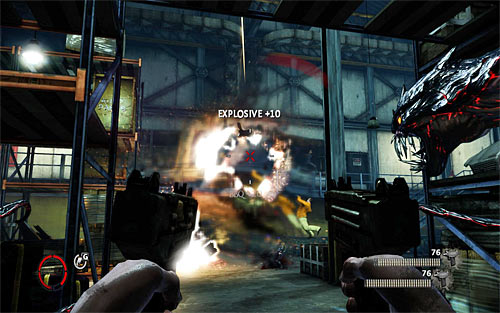
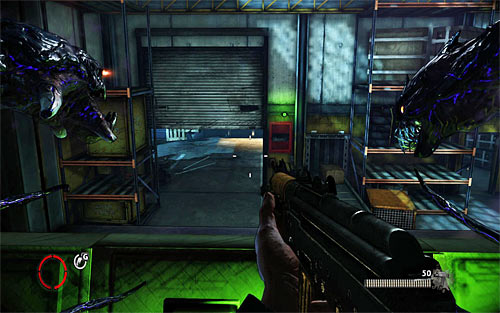
Go to the main warehouse room and be careful because the area is occupied by heavily armored opponents. To eliminate them it is best to use nearby propane cylinders, as a single explosion can kill even few people. You can lead the fight from the upper level or jump down to have greater mobility. Regardless of chosen tactics, try to destroy lamps in warehouse and watch out for enemies occupying upper balconies.
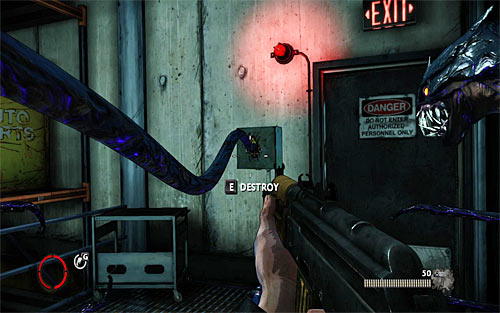
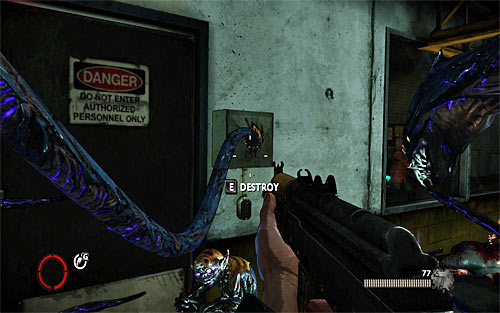
After the fight start eating the hearts of defeated enemies and then use the stairs leading to the balconies. I suggest looking around in the area, because you can find there Kalashnikov among others. Eventually you have to approach the door leading to another part of the warehouse. Grab with your left tentacle the cover of a fuse box, pull it out and then perform a vertical slash with a right tentacle. You can now enter the new area.
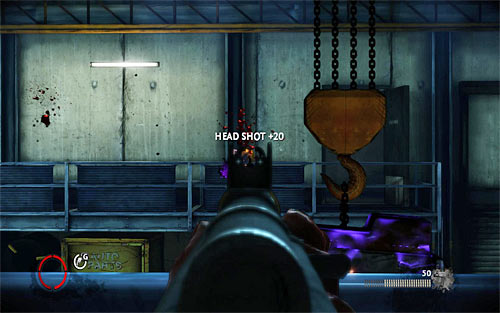
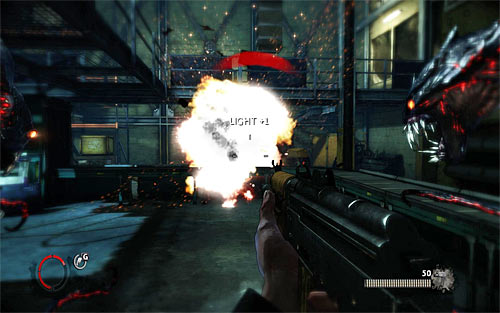
Start with shooting at enemies visible on an opposite balcony, aiming at their head if possible and using metal covers to avoid their bullets. After eliminating them, head to the ground floor, watching out for enemies running towards you, who try to involve you in a melee fight. Once you get to the bottom, you might use tentacles - you'll find there at least one propane cylinder.
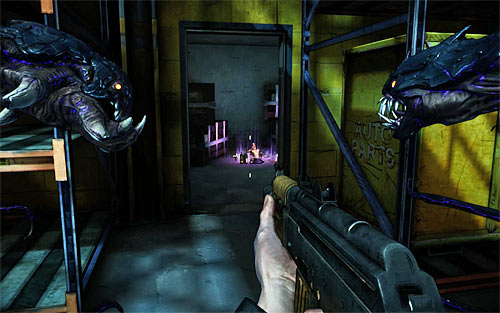
Stay in the hall where you fought your last battle and look around for a narrow passage shown on a screen above. It is located right under the balcony, on which you've appeared after opening the last door. Using the mentioned passage will allow you to reach the place with another relic (The Graven Image - 7/29).
Go back to the main warehouse part and use the stairs, which were fiercely defended by opponents. You should easily find the way to the control room and you have to interact there with a control panel. This action will result in raising the gate visible in front of you. Before you leave this place, consider using the local Talent Shrine.
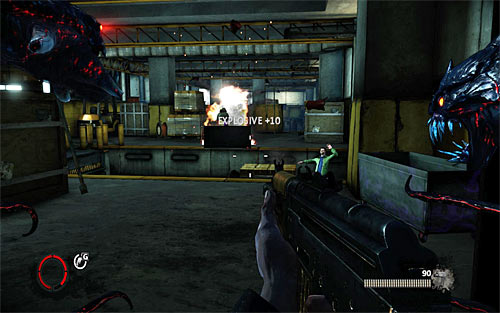
In the next room prepare for new fights. Start with throwing the propane cylinder and then carefully eliminate enemies, particularly watching out for thugs occupying upper balconies. After eliminating the first group of opponents, use the stairs but be ready to deal with new enemies, who will also appear on balconies. It is best to eliminate them with firearms, using metal balconies walls as covers. Go to the next control room and interact with a control panel.

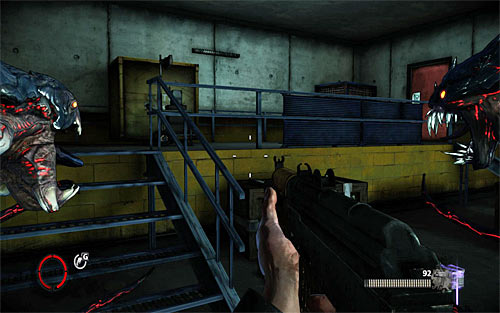
Look around for ammo and repeat the recent actions with a new fuse box - grab it, pull it out and perform a vertical slash with the right tentacle. Immediately jump down here and head to the passage unlocked by pressing a button in a control room. Along your way you'll find a Talent Shrine but probably you do not have to use it, because you've recently found another one. Destroy the local light source and carefully approach the loading bay.
Prepare for the last series of fights, which are quite challenging because Swifty has surrounded himself with a large group of buddies. Do not forget to look around for propane cylinders and other interesting objects to be thrown. You should definitely use also tentacles here, because initially you will not move in a straight line but rather slaloming.
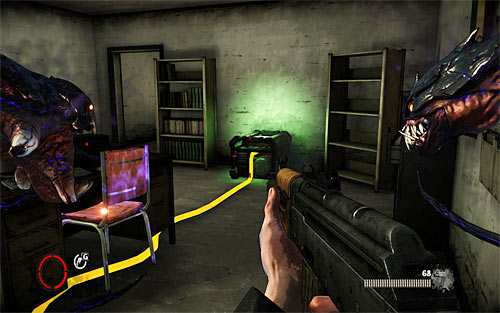
I strongly recommend stopping after reaching the place, where you'll see a working generator on the left. Destroy it, unlocking an access to the door shown on the screen above. Grab this door with your left tentacle and pull it out, so you can enter the room with another hidden relic (Chime of Deliverance - 8/29).
Depending on your preferences you can now return to the place where you've destroyed the generator or use the nearby passage and continue your walk through the loading bay. Take your time and do not let anyone to surprise you. After reaching the final part of the hall, shoot at the propane cylinder from the distance and then start attacking enemies. I suggest using firearms here because at the moment you can't destroy light sources and you shouldn't risk entering the illuminated zones. In particular watch out for enemies who will come running from the left room, appearing on the left balcony.
Keep fighting until you eliminate all opponents. Now approach the room, where Swifty is hiding. Ignore him for a moment and head to the left, staying on balconies all the time. Eventually you have to find a room with a generator powering local lamps (a yellow cable leads to it). Of course destroy the generator.
You can now return to the room, where Swifty is hiding. Position yourself in front of the door, grab a fuse box with the left tentacle, pull it out and then perform a vertical slash with the right tentacle. By entering the unlocked room you'll start a short cutscene with an interrogation. This will officially end this chapter.
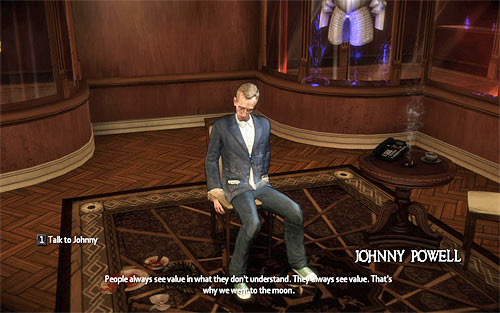
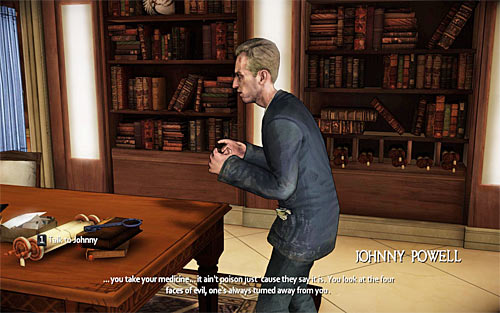
Listen to the conversation with Vinnie, during which you'll learn that he has found Johnny Powell and brought him to the mansion. Follow your friend, heading to the library and then entering the room with relics. Move to Johnny Powell to start a conversation with him (the 1 key).
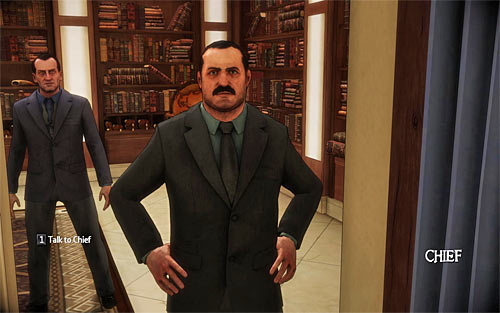
Listen to the whole conversation and after that ask Chief to free Johnny (the 1 key). Talk also to Vinnie, who will inform you about return of Frank and Eddie and that it would be good to listen to them. Before you leave the place, you might interact with Talent Shrine (it is located behind the chair Powell was sitting on).
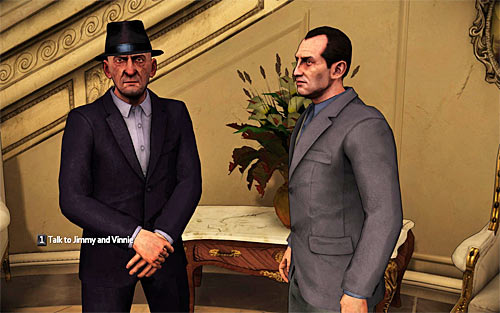
Head towards Jackie's office, which, as you probably remember, is located on the ground floor, left from the elevator. On your way you can talk to aunt Sarah, but this is optional of course. Enter the office, go to Jimmy and press the 1 key to listen to Frank and Eddie. Jackie's guys will confirm Swifty's testimony, saying that his superiors' HQ is located in Brimstone brothel.
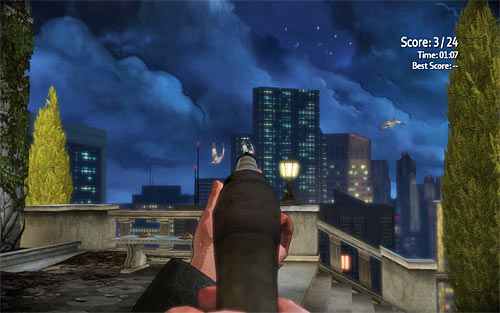
Leave the Jackie's office. Before you exit the mansion, I suggest looking around, because Dolfo will offer you a new type of shooting mini-game. This time you'll have to kill some pigeons with the shotgun.
Finally go back to the elevator. Same as with the previous visit in the mansion, you have to talk to Vinnie and confirm that you want to start a new mission (the 1 key). You will also set details of a plan on exploring the brothel and make a long conversation with apparently terrified Johnny Powell.
Right after beginning of this chapter, turn right and explore the area to the right from one of the trucks parked here. This will allow you to find another relic (The Brothers of Men - 9/29). After collecting the secret go back to the start place and use the building entrance suggested by the game (the one next to the parked Jackie's limousine). Go through the warehouse and a narrow corridor until you reach guards guarding the brothel entrance. Approach the right guard and let him search you for weapons. Wait until other guy opens the door and move forwards.
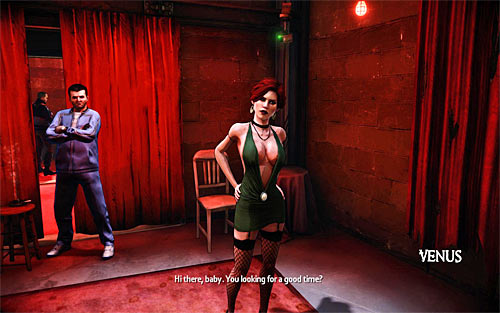
Enter the main brothel room and go to its end. You can see Venus on the screen above - she should approach you after she notice you. Press the 1 key to start a conversation with her, during which she will invite you to her room.
According to received instructions, follow Venus. During your elevator ride you'll learn that she got Vinnie's gun in her room, which she will give you. After getting to a new floor follow the only path, but on your way you can of course look into rooms you pass by (innocently ;)). Once you reach your goal, Venus will give you the gun and suggest exploring two upper floors and the game will start load the second part of this chapter.
Turn left. After a while you'll encounter a sleeping guard and it would be easiest to deal with him with the left tentacle. Start securing the rest of the floor now. Enemies you'll encounter here should be no challenge to you because they use only melee weapons. This is the very good opportunity to get rid of them in an effective way and earn a lot of essence points.

Follow linear corridors until you reach the door leading to the upper floor. After approaching the door it turns out, that it is impossible to destroy nearby lamps, so you're not able to open a fuse box. Wait until darkling appears here and talk to your subordinate (the 1 key), so you'll be able to control him for some time.
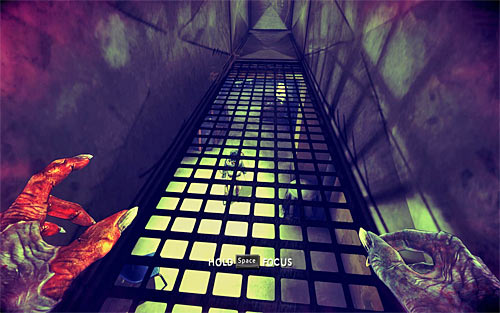
You'll start playing as a darkling in a ventilation shaft and the only thing to do now is to move forwards. Along your way you might stop at places where you can hear some conversations. After few moments you should reach the shaft exit.

Move towards the guard in front of you. After approaching him, hold the Q key as suggested to execute him.
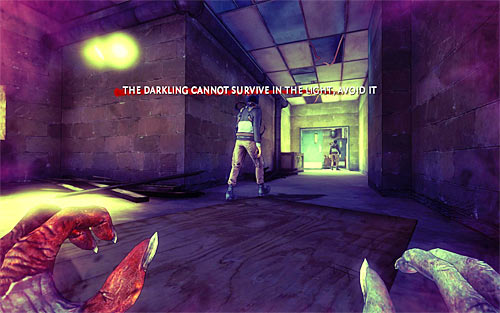
Go to the right now. Another guard patrols local corridor and depending on your preferences you can pass him by (wait until he goes to the right, hiding behind the door in the same time) or surprise him from the back (screen above) and execute him in previously known way. In ladder case watch out for illuminated areas, which you have to avoid at all costs. Luckily even if your darkling dies, he will respawn after few moments.
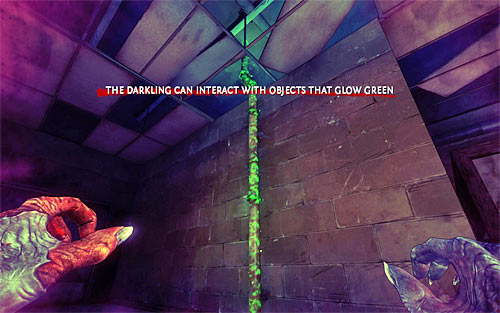
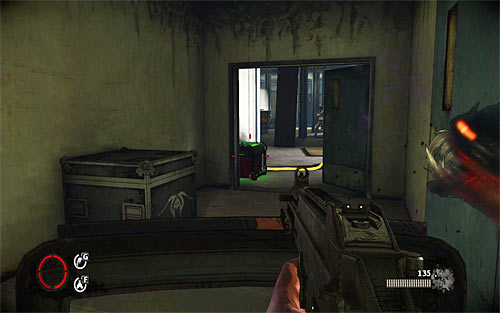
Whether you decided to attack the second guard or bypass him, go to straight to the door you were passing by before and interact with a tube marked with green, getting to the attic. Move now with the only way here, watching out not to fall down on your way.
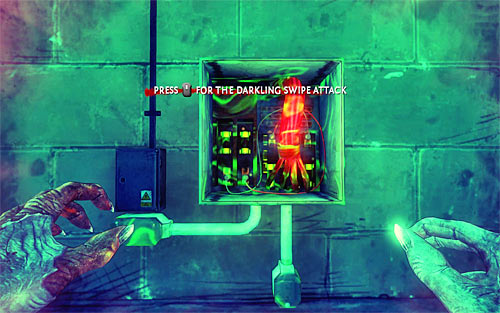
Eventually you have to get to the other end of the attic, finding an entrance to another ventilation shaft. Go through the shaft, jumping down to a small room. Eliminate silently the last guard (hold Q) and then approach generator and destroy it by pressing the middle mouse button. As darkling has done his job, you'll be moved back to Jackie's body.
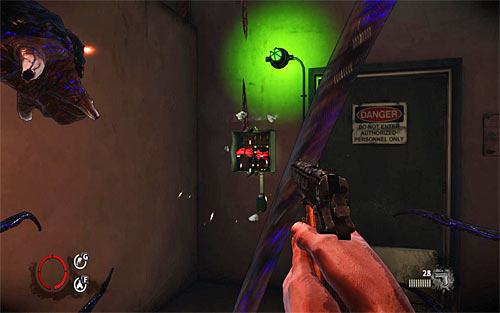
Next steps should be obvious for you. You have to aim at the fuse box, grab it with the left tentacle, pull it out and then make a short circuit by vertical slash with your right tentacle. Open the door and get familiar with further objectives.
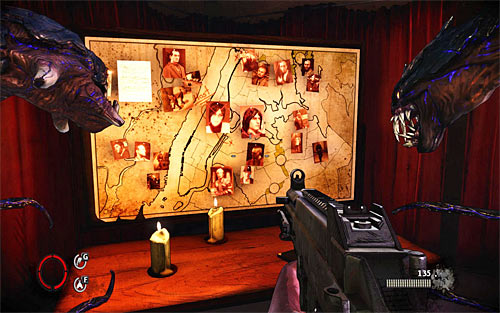
Move forward and then follow your darkling to the left room. You should take a closer look at weapons lying on the table and depending on your preferences you might pick up a shotgun or UMP gun. Also pick up ammo, take a look at the table board and interact with a Talent Shrine.
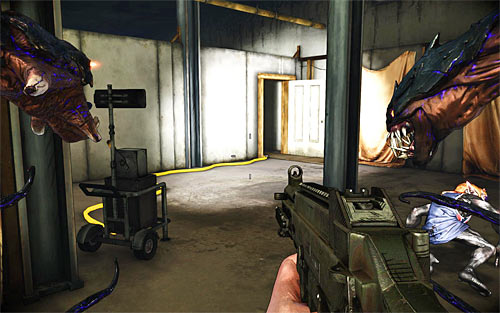
Leave the room and turn right. Notice, that there is an open door in a distance, through which new enemies came running. They are far stronger and better equipped than ordinary thugs, you met so far, so be careful. You can attack these enemies in two basic ways. If you prefer distance fight, then take a shield from the previous room and shoot at them while covering. If you prefer a melee fight then quickly approach opponents and start using the right tentacle, watching out for enemies trying to get closer to you.

Head to the room which was occupied by enemies and look for a relic (The Key of Mictlan - 10/29). Now quickly turn right and keep fighting. I suggest staying close to the room where you found relic, because the further part of the corridor is illuminated and you can't get to the generator easily (you should go through the left room). Destroy the generator only after eliminated visible enemies, finding it in the right room.
Move forwards, reaching a small door. Open it in a well-known manner - grab a fuse box with a left tentacle, open it and then slash it with the right tentacle. Use the staircase now, destroying light sources along your way. Eventually you have to reach the top floor, where you'll have to fight many enemies.

Your goal is to get to the other side of this floor, but on your way you'll encounter new "elite" enemies' troops. Same as previously you may consider hiding behind shield and shooting opponents from a distance or play aggressively tearing apart your enemies with the right tentacle, throwing sharp objects at them or grabbing them with the left tentacle.
Regardless of chosen tactics, it is vital to keep destroying local generators, unlocking the secure way to reach other areas of this floor. Remember that to locate generators you can use characteristic yellow cables. Do not hurry and do not let enemies to surround you. Watch out for enemies who want a melee fight and those throwing blinding grenades. Do not forget about frequent healing your character (by eating hearts for example).
After getting to the other side of this floor, turn left, choosing more linear path. Eventually you have to get to the passage shown on the above screen, illuminated by indestructible lamp. After entering the new room it turns out that you've got to the trap, where you can't use the Darkness powers. Do not restart the game, because your failure here was planned in advance and you can't change it in any way.
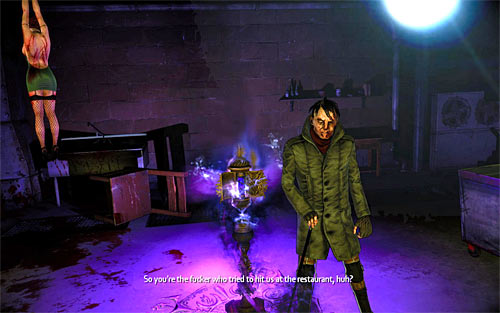
This chapter begins with a longer cutscene with crucified Jackie and a conversation with previously met crippled man, brother Victor. During the meeting it turns out that he wants to take away Darkness powers from the main character, but he can do it only if Jackie gives them to him voluntarily.
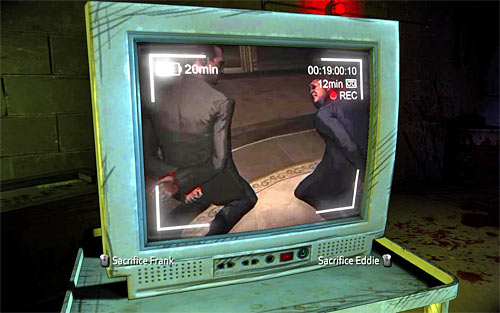
Prepare for tortures and threats of murdering of all people captured in Jackie's mansion. At some point you'll have to choose which of your subordinates will be killed. You can choose someone (left mouse button - Frank, right mouse button - Eddie), but you might as well do nothing and wait until character torturing you loses his patience (it is rewarded with an achievement).

Soon after tortures are resumed, action will move to another place. The only thing you have to do is to break through two walls, first grabbing them with a left tentacle (Q) and then pulling them out (rhythmically E). Eventually you'll reach the place, where you can see imprisoned Jenny. You'll also learn that Darkness possesses her soul.
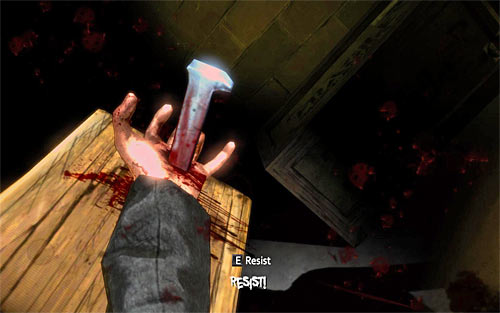
Soon action will return to the real world and your task will be to free yourself with the torture chamber. Wait for relevant information to be displayed and start pressing the E key rhythmically, so you'll be able to free yourself.
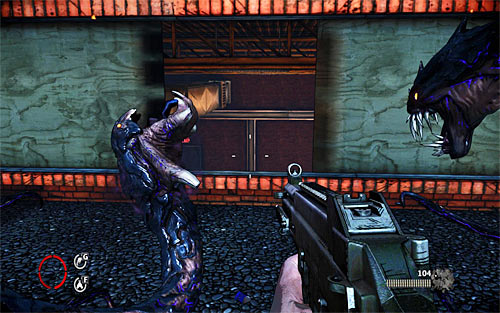
Prepare now to use the gun. You have to shoot the opponent, who will jump towards you - you have to do it before he can punch you. Fortunately you do not have to aim at his head, because shooting him at his chest is good enough. At the end use the firearms to destroy the lamp in one of the room's corners. Unfortunately Victor will manage to flee and additionally will order to burn down the brothel.
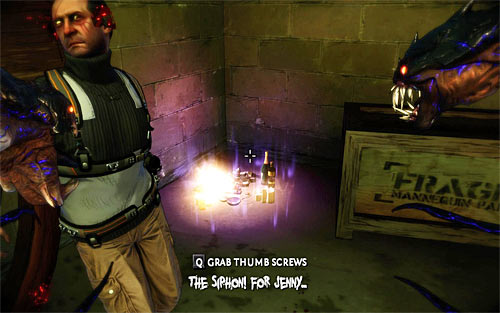
STAY at this place and that's because you'll find here a new relic (Thumb Screws - 11/29) and a Talent Shrine. Now you can move to the exit door, which are locked by Victor. You have to pull it out of course (Q and rhythmically E).
Start crossing through the burning brothel. There is no need to stress here or run. Follow the only path and help yourself by pressing BACKSPACE if necessary to get hints where to turn. Eventually you have to reach the destroyed elevator shaft shown on the screen above and use the ladder to get to the upper building floor.

Once you get to the new floor, prepare to eliminate several opponents with melee weapons. I suggest attacking them with a right tentacle and then finish them or grab them with a left tentacle to execute them. Do not let them get close to your character because they can inflict huge damage. After eliminating of a first group resume the crossing through the burning building, finding new door which can be pulled out (Q and rhythmically E).
Go inside a new burning floor and deal with another group of enemies, performing same attack as before. Find the stairs leading to the upper balconies and then turn left (when you try to cross through the right balcony, it will be destroyed). Head now to the passage marked with a green lamp and finally pull out the building exit door.
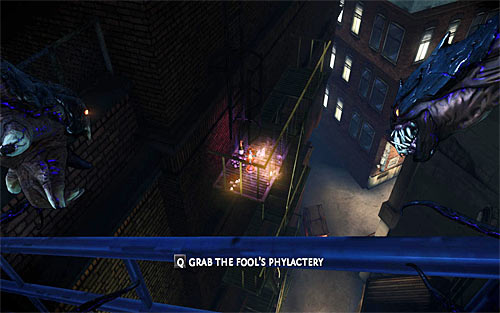
Listen to the short conversation with gangsters standing at the bottom, who will inform you about need to get to Jackie's mansion in order to save people imprisoned there. Jump down to the roof and follow your darkling. STOP after reaching longer stairs. Turn right and locate a balcony under you, where you'll find another relic (Fool's Phylactery - 12/29). This secret has to be picked up with the left tentacle so aim at it and press the Q key.
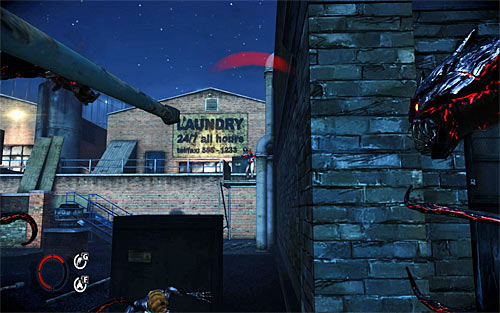
You can now go to the lower rooftop. Prepare to eliminate a new group of enemies, armed with melee weapons. Dealing with them shouldn't be a problem. Keep exploring rooftops, reaching the place where you can see in the distance enemies with firearms. To attack them use any throwable objects found here and especially large fans. Also watch out for two new enemies with melee weapons, eliminating them as soon as they appear (on the right).
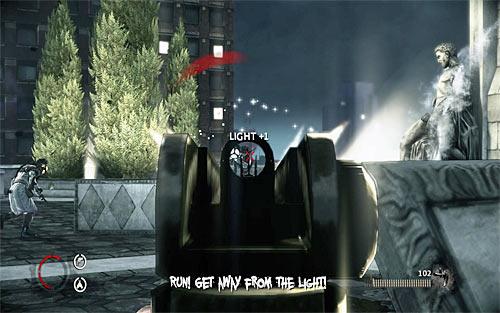
You can keep going, turning to the right. As soon as you jump down to the lower part of the rooftop, start RUNNING (hold the SHIFT key), because opponents will start illuminating this area with reflectors and as a result you'll be vulnerable to their attacks. Continue to sprint up to the point, where you'll land on the lower, unlit place.
Move forwards. After reaching the new location use the metal bars or fans to eliminate nearby enemies. But it would be good to let at least one enemy get closer to you in order to take his firearms. With the rest of enemies you can deal in any way, helping yourself with tentacles or shooting to them. Do not forget to pick up weapons after the fight.
Keep going, watching for new enemies, who can be killed with fast slashes of your right tentacle. After jumping to the adjacent rooftop quickly hide behind some cover, because you'll find yourself under massive shootout. You can now start shooting at your enemies from behind the cover or use tentacles. In the latter case I strongly recommend throwing at them propane canisters which can be found on the left side (screen above).
Slowly move forward, eliminating more enemies from the distance (aim at the propane canisters) or in direct fight (hide behind covers waiting for them to come closer). Be careful, because after approaching a catwalk between rooftops, new enemies will appear from behind the covers. You have to deal with them quickly.
Make sure that you've eliminated all enemies and approach the hole shown on the above screen. You have to crouch and then carefully get to the bottom. Move to the limousine parked inside the building to end this not very long chapter.
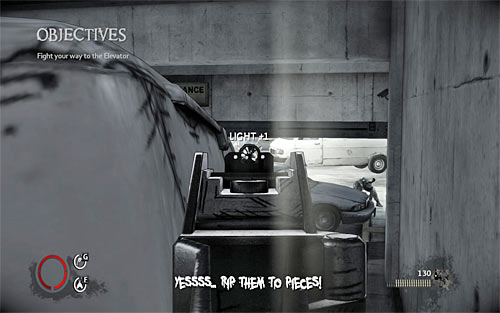
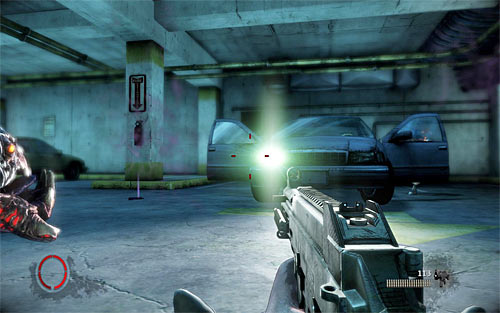
Follow your darkling, picking up ammo lying next to the van. When you try to approach the main part of underground parking, the gate will raise up and you'll be attacked by enemy. Before you do anything, I suggest hiding behind the van and shoot the reflector carried by one of the enemies to destroy it. It is very important, because otherwise you can be easily illuminated by him and thus unable to use Darkness powers.
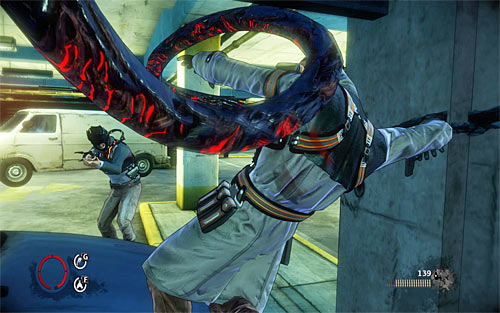
After destroying the reflector, you can join the fight. It would be good to use the left tentacle to pull out the van door and depending on your preferences, throw it at any opponents or (better idea) use it as a cover while shooting. Deal with all enemies at the barricade and then in a well-known manner (Q and rhythmically E) pull out the building door to unlock further way.

After reaching the new place, look around for a Talent Shrine and a fuse box shown on the above screen. Grab the box with a left tentacle, pull out its case and make a short circuit by slashing it with the right tentacle. This is very important, because you'll cut off the power on entire underground parking and you'll be able to focus only on attacking enemies. Finally in a well-known way (Q and rhythmically E) pull out the metal gate.
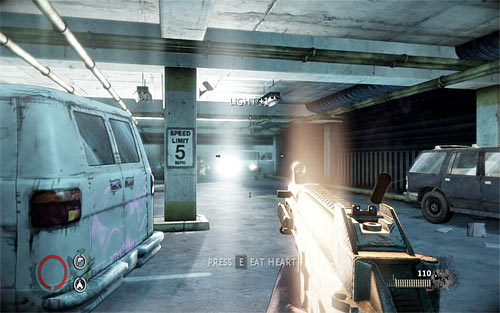
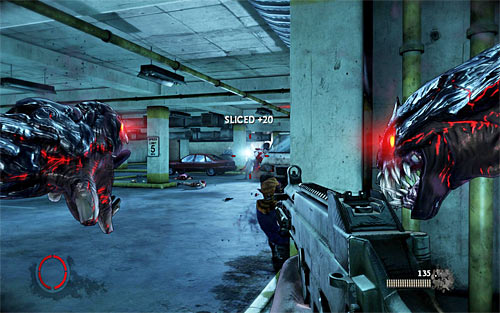
Move forwards and be ready to start a fight with new opponents. It shouldn't be too difficult - the game will allow you to pull out doors from almost every car on your way. After a while turn left and quickly destroy headlights of the van, which will park in the distance. After that action deal with rest of enemies, who were in the car.
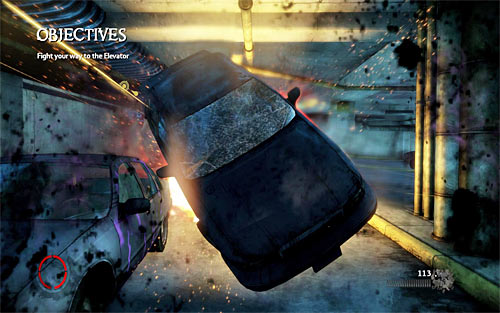
Move forwards and then turn right, preparing yourself with a good weapon. After a while you should notice that a quickly driving car approaches you. Start shooting at it aiming at its mask (you can use Gun Channeling here if you have one). If you manage to destroy the car, it will crash spectacularly (and you'll earn an achievement).
If you won't be able to destroy the car on time, then your character will be knocked down by it. In such situation you won't die but laying on the ground you'll have to quickly deal with opponents from the car. I suggest destroying car lights first and then take care of bandits.
Regardless of how you got rid of enemies from the car, keep walking through the underground parking. Watch out for at least one new enemy with a reflector - destroying it should be your primary goal. After doing that, start the "normal" fights, helping yourself with doors pulled out from parked cars. Remember about avoiding blinding grenades thrown by enemies (quickly move out from such place), because you can be blinded for few seconds and weaken.
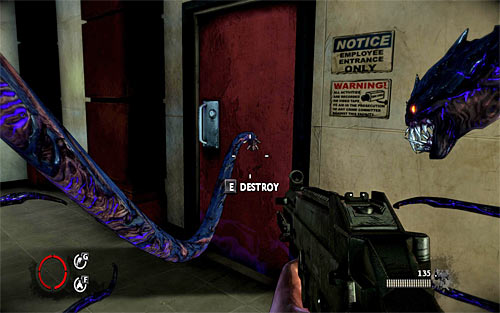
Keep fighting until you get rid of all enemies in the garage. After securing the area look around for ammo and find a passage on the right side, but first turn left. Search for the door shown on the above screen, which can be pulled out (Q and rhythmically E). After this action you'll unlock an access to another hidden relic (Winged Demon - 13/29).
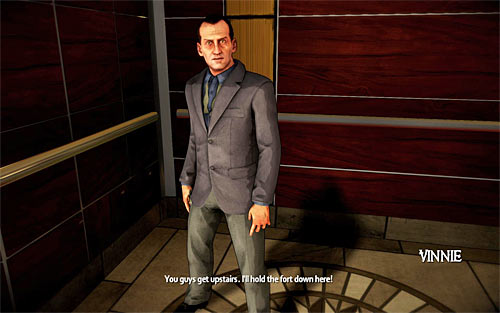
Go back to the corridor and now choose the right side, heading to the elevators. Make here a short conversation with wounded Dolfo and Vinnie, who will come here with an elevator. After talking go inside the elevator and wait until it takes you to the mansion. The next part of the chapter begins now.
Leave the elevator and spend some time for preparations. I strongly suggest looking around for weapons left by enemies in the area - you can find a very effective assault rifle among others. You can also use a Talent Shrine. Finally go to Johnny Powell to talk to him. He will tell you more about Brotherhood, led by previously met Victor.
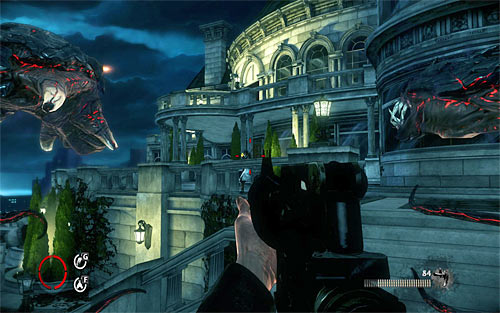
Turn right and go up the stairs, reaching after a while one of the mansion's outer balconies. Listen to the conversation with allies, from which you'll learn that aunt Sarah is hiding in Jackie's bedroom. Join the shootout here, remembering that your main goal is to eliminate enemies with reflectors and to avoid blinding grenades.
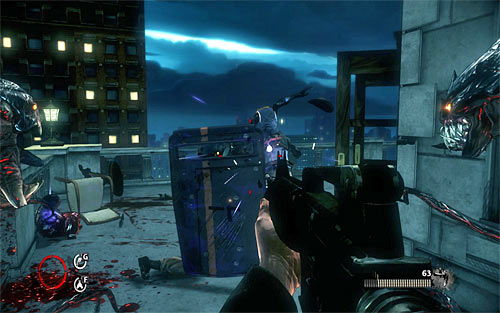
At first you might think that the only way to reach further areas of balcony is to hide behind low walls and shooting at enemies but you can also grab with your left tentacle large shields found on your way and depending on your preferences throw them at enemies or use them as covers, providing safe way of moving through the area. Eventually you have to reach the stairs leading to the upper mansion's balconies.
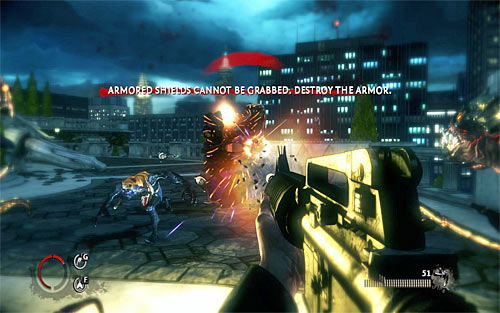
After getting to the upper balcony you'll meet not only regular enemy but also an opponent wielding a large shield. By default you can't grab it from him and only way to deal with him is to destroy the outer case of his shield. It is best to use a firearm to do this, shooting at him from a safe distance. After destroying the outer case run towards him in order to pull out his shield with the left tentacle. After that you can throw away this shield or keep it for next fights.
Move forwards, finding ammo and using the stairs. Now you have to turn left, preparing for next fights, because the area is full of opponents. Watch out for guys with reflectors and bandits pressing for a melee fights. Avoid also blinding grenades.
Go ahead but be ready to attack enemies who will come running from inside the building. Watch out particularly for a thug with a shield. Try to destroy its outer case as soon as possible and then pull out the shield from enemy. After securing balconies, go inside the mansion, killing a single enemy and picking up ammo hidden behind the left counter.
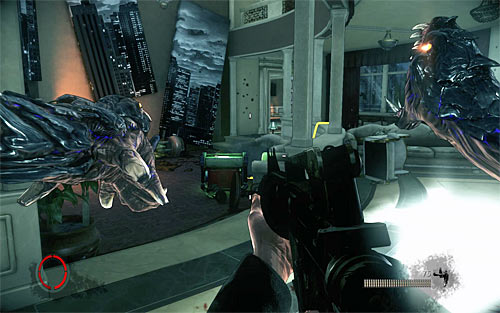
Be very careful, because the exit from this room is illuminated by a lamp. You can solve this problem in two basic ways - by showing yourself to enemies and encouraging them to come here or by running towards the fireplace and destroying the generator which powers up the lamp.
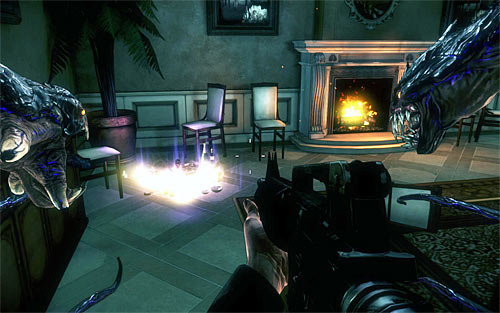
You can move forwards. After reaching the kitchen turn left to explore the adjacent room. You'll find there relic (The Blinding Sun - 14/29). Return to the kitchen and now go to the left. After a while you should get to the well-known Jackie's office, where you'll have a short conversation with Jimmy.
Pick up ammo and move towards the main chamber of the mansion. I suggest using the left stairs immediately and after getting to the floor you might run to the right, reaching one of the bedrooms (the one which belongs to Jackie's aunt is not available). This is the best solution in my opinion because if you stay at the ground floor, you wouldn't do much, because doors are locked automatically after you character goes through them.
Start the fight, remembering that your priority is to eliminate enemies with reflectors. After dealing with opponents on the floor you can take care of those, who are standing at the bottom. Because you are higher, eliminating them should be very quick. After the fight choose a corridor leading to the Jackie's bedroom. After reaching the place, the game will display a new cutscene, during which aunt Sarah dies.
You will face now another vision in a location resembling mental hospital. Start with a short conversation with Vinnie (the 1 key), who will send you to the local dispensary for medicines.
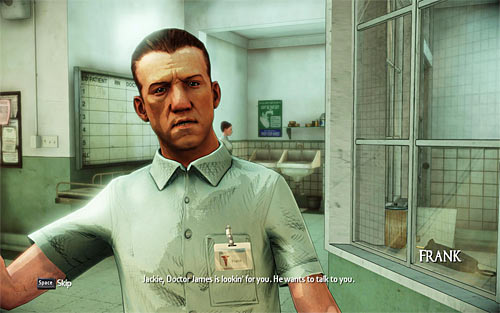
Exit the Jackie's room and turn right, passing by narrow corridors and eventually reaching the main area of this facility. You can of course talk to every person here, but this is optional. Finally move to Frank, who will send you to doctor James after a short conversation (note - you can omit this step and go to the doctor's office right away).
Move forwards. Doctor James' office is located on the left. Get inside and as requested by the doctor, sit down on the chair. Listen to a new conversation, during which James will try to convince Jackie that he is in the real world. At the end of the meeting you'll be sent to nurse Jenny.
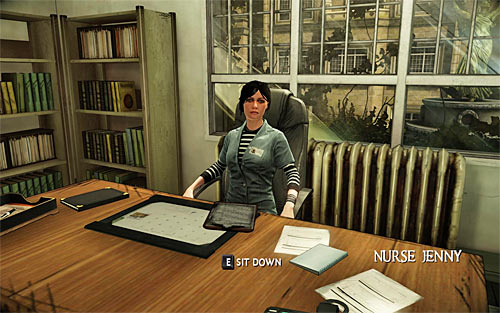
Leave the doctor James' office, turn right and then move forward, passing by the main room of the facility. Jenny's office is located on the right and you'll have another conversation there (you have to sit down first). This meeting has more interesting final, because Jackie will try to get out of this place and will attack paramedics.
Escape is not long or very complicated. Move forwards. You should pass by first paramedic on his left side. It is worth to now, that the chase will automatically fail if any of the facility workers get so close to you, that he can catch you. Fortunately they are not moving too fast. Additionally in such situation you'll continue the escape, so you won't lose your previous progress.
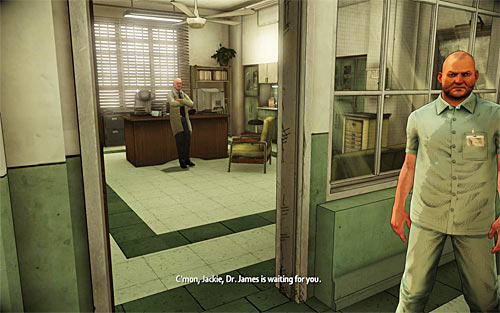
Pass by previously visited doctor James' office and run forwards. After reaching the junction, ignore the Chief and turn left, heading to the stairs and facility entrance door. Once you get close to the door, the chapter will be over.

Start with conversation with Johnny, who will be surprised by the fact that you've managed to heal your wounds. Powell will also tell you that all Brotherhood members who were involved in the attack are eliminated and that aunt Sarah's funeral will be held today. After the conversation I suggest visiting a Talent Shrine in this room, especially that you've probably gathered many new essence points.
Leave the relic room, talking to Vinnie on your way. You have to go to the main mansion room on a longer way and it is good to talk to all persons who survived the attack. Jimmy can be found next to the stairs. Start a conversation with him, telling him that you want to be on the funeral.
Same as previous scenes in the mansion, you have to go to Vinnie standing next to the elevator and confirm that you want to leave this location (the 1 key). Go to the elevator to finish this short chapter.
This chapter will start with yet another scene from a mental hospital, but it will be very short and without any interactive moments. Once you get back to the reality, go to Vinnie and start a conversation with him. Jackie will automatically follow his friend, so you can just listen what both characters have to say to each other.

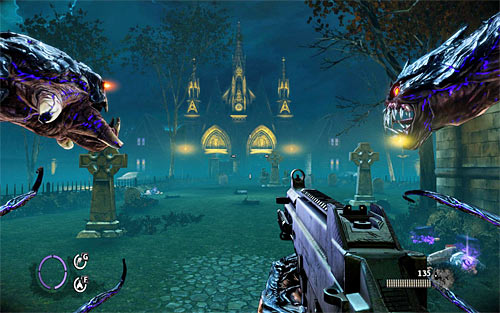
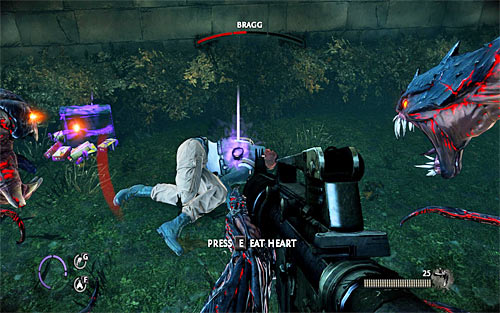
Head now towards the crypt, where you can find a coffin with aunt Sarah's body. On your way there you can of course talk to people gathered here, but it is optional. The most important thing is to get to Jimmy. What's interesting, the conversation will be interrupted by Bragg appearance, which will surprise all people on the cemetery.
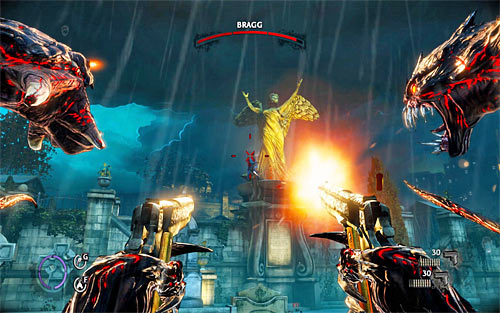
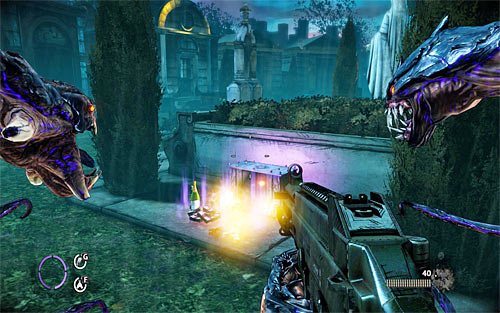
Start attacking Bragg. I strongly recommend using here guns selected by your character by default, because Bragg is in the long distance from Jackie. You can't attack him with the right tentacle, even if you get close to him and trying to throw environment objects at him with you left tentacle is very risky. Shooting is better also because Bragg after several shots will flee from this place (you have to wait a little bit for the duel with him).
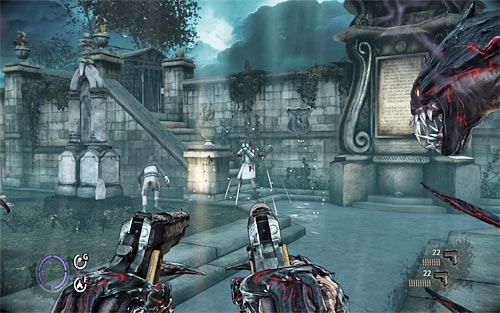
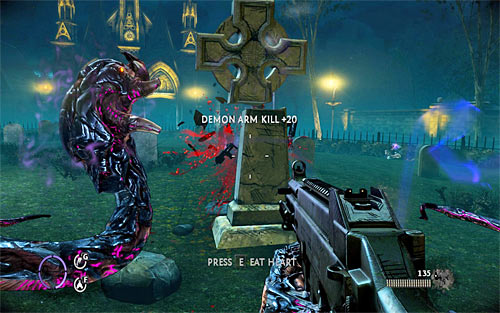
But the fight is not over yet, because other bandits will soon appear on the cemetery. During this fight try as soon as possible to destroy a reflector carried by one of the enemies. Watch out also for an opponent preferring the melee combat. You can still use guns or help yourself with tentacles, ripping enemies' bodies or throwing at them environment elements (crosses from graves or large vases for example).
After the fight start with examining the statue standing to the right from a place where Bragg appeared earlier. At the back of the statue is a hidden relic (Cain - 15/29). Now you can head to the stairs, choosing the one to the right and in a well know manner (Q and rhythmically E) pull out a metal gate blocking an access to further part of the cemetery.

Be careful because almost right away after destroying the gate you'll be forced to join a new fight. It is worth here to hide behind left wall. Additionally look around for a thug with a shield, which you have to damage first (the outer case) and then pull it out. After the fight move forwards, destroying all street lamps along your way. Take care also about ammo left on the left side - pick it up of course.
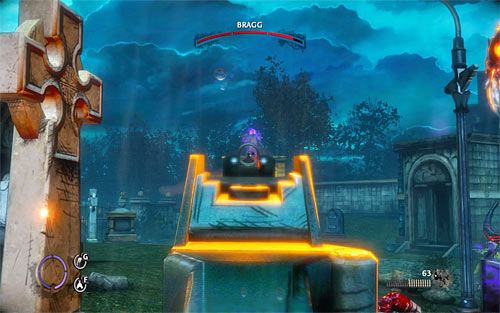
Soon you'll join new fights and during them it is good to hide behind shield pulled out from the crypts along your way. Watch out for another thus with the shield and Bragg, who will join the fight after a moments. Due to the fact that Bragg will appear only on crypts' roofs, it is worth to attack him with firearms. Attack Bragg until he flees again, opening the gate.
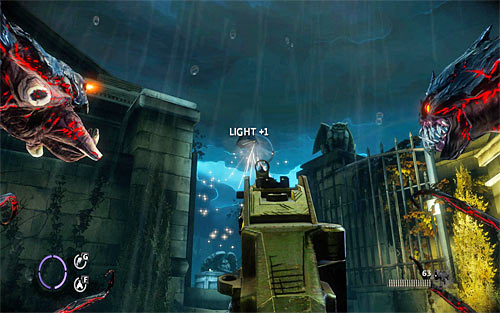
Head to the newly unlocked passage. You won't encounter any new foes there, so you can rush a bit. Soon the game will allow you to use a Talent Shrine located under one of the bridges. Prepare for fights only in the next part of the cemetery. I suggest starting with destroying the right lamp shown on the screen above. After that, attack your enemies.
Suring this battle the most attention should be given to an opponent moving with the reflector and a new enemy with a shield, which has to be damaged first and then pulled out. Watch out also for blinding grenades thrown from time to time, because it is hard to avoid them in such small area. After the fight look around for ammo.
You can move forwards. Be ready to quickly destroy new reflector and to deal with a small group of opponents. Ignore for now a large metal gate on the right because it is illuminated by indestructible lamp, so you can't pull it out now. Instead, move forwards.

Be careful, because around the corner you'll encounter a large group of enemies, with a new guy with a shield among them. Do not forget that you can also use shields, finding them on walls of most crypts here. Keep moving forwards, finding ammo on your way.
Eventually you have to reach the place, where you'll see a generator which powers up a previously passed lamp. Destroy of course this generator and after that action return to previously ignored metal gate. You have to unlock a passage here, so pull out the gate (Q and rhythmically E). Notice - before you go any further, prepare a good weapon and optionally take a shield with you.

You'll encounter now a new type of enemy - a thug using some kind of whip. The best tactics against him is to keep such enemies on a distance, shooting at them with firearms. If you allow him to get close to you he will probably pull out your weapons and then will deal damage. In such situation it is best to help yourself with a right tentacle. Regardless of chosen tactics remember that in order to defeat such enemies you have to destroy their armor first and then inflict them damage.
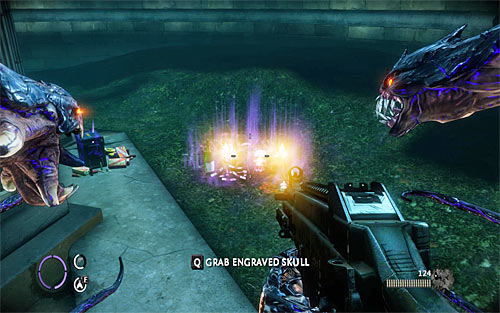
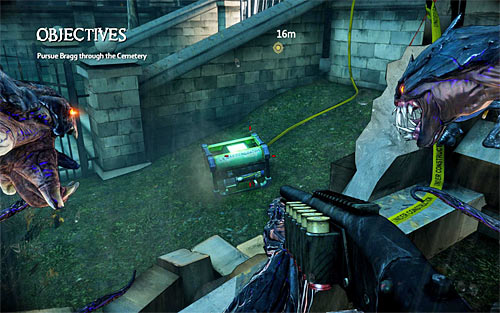
In addition to a "whip" guy, you'll have to defeat also a bandit with a shield, but you can take care of him later. After reaching the new area, ignore for now fleeing enemies and explore the back of mausoleum in front of you. In addition to valuable ammo you'll find there a new relic (Engraved Skull - 16/29).
Now you can resume exploration of cemetery. Remember to destroy local light sources and grab shields found along your way to use them as a cover. Watch for two new enemies with whips - it would be best to attack them one after another, withdrawing to previous locations if necessary. In addition you'll probably encounter here two more guys with reflectors. Needless to say that rapid destruction of reflectors is extremely important.
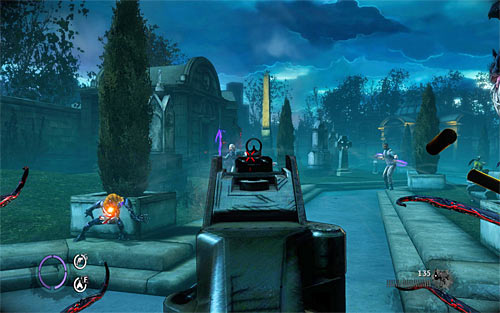
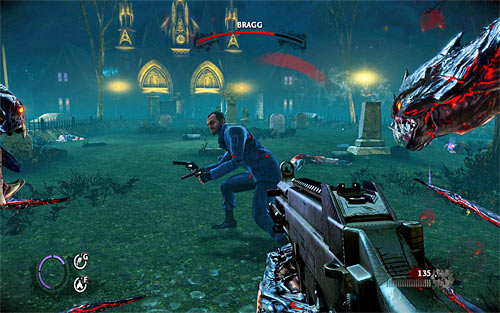
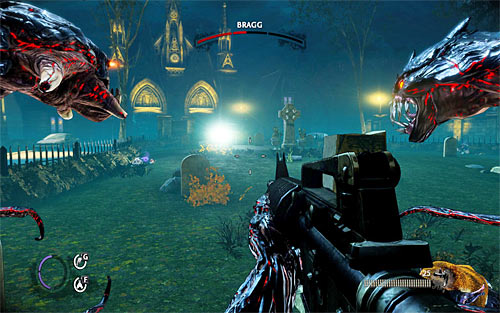
Keep moving forwards, carefully eliminating encountered enemies and looking for ammo and shields. Expect the next big fight after reaching the street adjacent to the cemetery, shown on the above screen. Quickly destroy the reflector and then start shooting at the enemy with the whip. After eliminating all ordinary thugs in the area, Bragg will appear again. You do not have to change your tactics, so attack him with firearms and carefully watch his actions.
Fight until you manage to "overtake" Bragg again and then head to the left. Soon you will fight Bragg for the last time, so I suggest preparing well. First of all use the Talent Shrine on your way. In addition it would be good to take some shield with you. If you decide that you're ready, go to the cemetery part adjoining the church, shown on the above screen.
At the beginning deal with some ordinary enemies on the cemetery. I strongly suggest not executing them, because after the start of boss fight you'll have to regularly renew your health bar. In the area you'll find several other murdered people and later on more bandits will join the fight, but more hearts to eat, the better. After eliminating of enemies, the game will start proper boss fight with Bragg.
You can attack Bragg in the same way as previously, so shoot at him with best guns you have. Notice however that the boss appears from time to time close to your character and in such cases far better idea is to use slashes with the right tentacle.
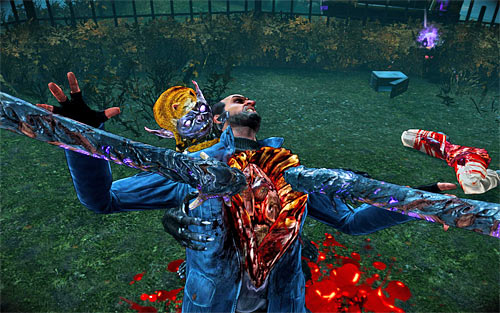
Notice also that Bragg very often performs a fast air attack and if it ends with success, Jackie will be pushed away and will lose many HP. Try to jump aside when you see that the boss prepares such an attack. An even better idea is to use Swarm power (if you have one - it is activated with the F key), because it stops that attack. You can also use this power during the normal fight, because Bragg becomes then vulnerable for few seconds.
Remember to monitor your character's health bar and use previously mentioned, murdered bandits, because in danger situation you can eat their hearts. It is also good to regularly visit ammo store located near the cemetery entrance.
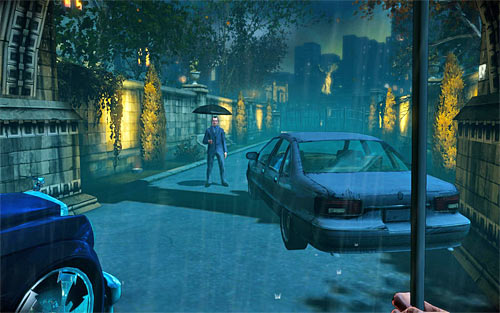
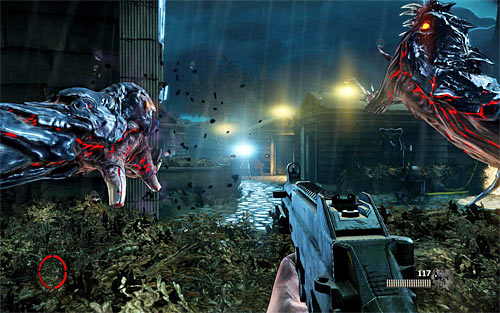
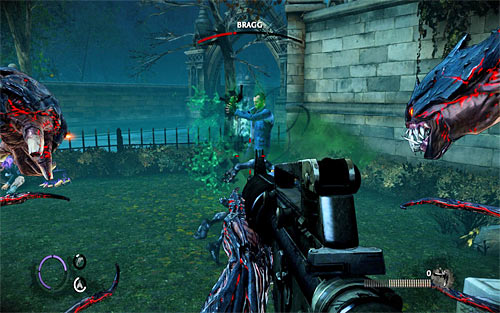
When Bragg loses about half the health bar, you'll get to the second phase of the fight. Note that the van broke through the cemetery wall and you have to quickly destroy its headlights. Also watch out for enemies from the van, because there is one bandit with a whip among them. Try to attack him from a great distance, helping yourself with throwable objects if necessary (shield, tombstones fragments).
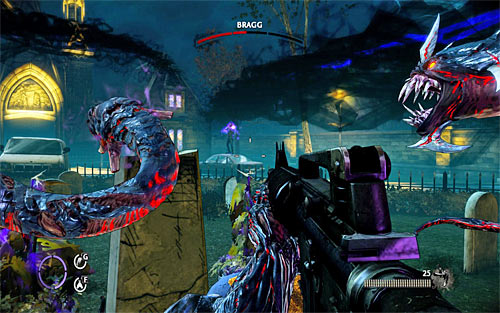
After dealing with the second group of Bragg's helpers, you can resume attacking him. Notice that the boss started to use a new attack - he is shooting projectiles at you. It is best to avoid damage from projectiles by skillfully standing between them.

A final part of this fight is nothing special. Use the previously described methods to avoid or block boss's attacks, using the firearms or tentacles to inflict him damage. Do not forget about renewing your health bar, healing Jackie when he is almost dead. Keep fighting until Bragg's health bar is empty.
Interrogation of Bragg is pure formality. Go to defeated boss and press the E key in order to start questioning him. After the conversation Bragg will be automatically murdered and you'll earn 300 essence points as a reward.
Start a conversation with Vinnie standing at the door (the 1 key). After it is over, head to the stairs leading to the ground floor. Turn left and enter the library, where you have to start a conversation with Johnny Powell. Depending on your preferences you can end this meeting after one conversation or talk to Powell again (twice), learning more about Angelus among others.
Exit the library and find friendly gangsters standing next to the stairs on the ground floor. During this conversation Jackie will inform his subordinates, that he is going on the next mission alone.
After taking care of all issues in the mansion enter the elevator and wait for the next chapter to be loaded.
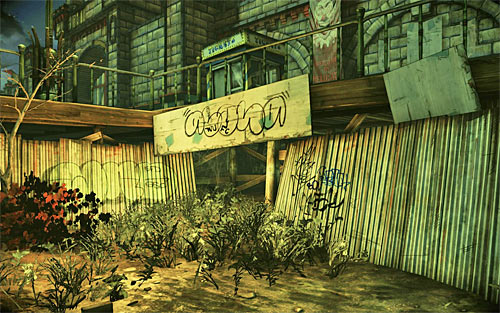
Follow the only possible path, to the abandoned carnival visible in a distance. Jump to the sand and head to the hidden entrance shown by Jenny. You have to crouch here and then go through several narrow tunnels. After reaching the barricaded passage use the left tentacle (Q and rhythmically E) to unlock you a further way.
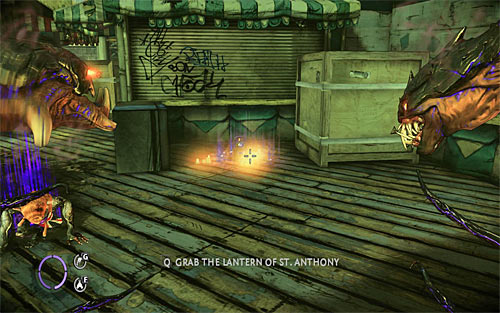
Walk over the ramp and once you get inside the building consider usage of a Talent Shrine. You can now choose another ramp, so you'll get to the main area of the carnival. You do not have to explore the entire location right now, because you'll have time for this later. Now head to the left BUT turn right after seeing the better-lit place (Cotton Candy and Peanuts stall), finding as a result a new relic (The Lantern of St. Anthony - 17/29). Notice - if you missed the secret and started a scene from the past too early (details can be found below), then nothing bad would happen, because you can pick it up on your way back.
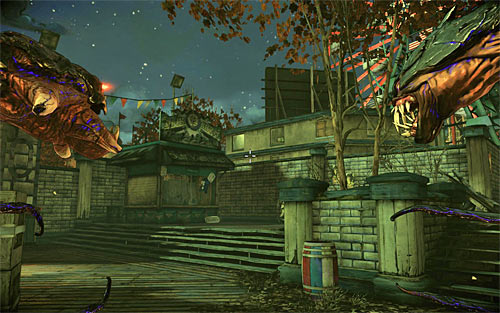
Keep exploring the left part of the carnival. Eventually you have to approach to the small stall shown on the screen above (Duck Shoot). Next to it you should see Jenny. Approaching the stall will result in displaying a vision from the past.
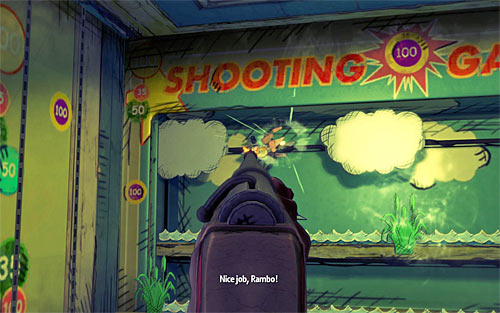
Listen to a short conversation and press the E key to start a shooting mini-game. Your task is to destroy moving ducks. If you hit targets on a bottom tier, you'll earn 35 points for each one. Ducks from a middle tier are worth 50 points each and the ones from the top tier - 100 points. Personally I suggest focusing on the middle and top tiers, aiming at the bottom tier only if you have time for that. If you get insufficient amount of points (not likely), then the game will force you to play the mini-game again. Otherwise you'll move further, getting back to the reality. Notice - I suggest earning at least 1000 points (their amount is shown in the bottom left corner), because this is one of two actions needed to get an achievement.

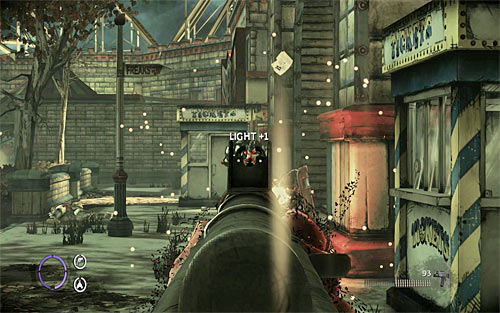
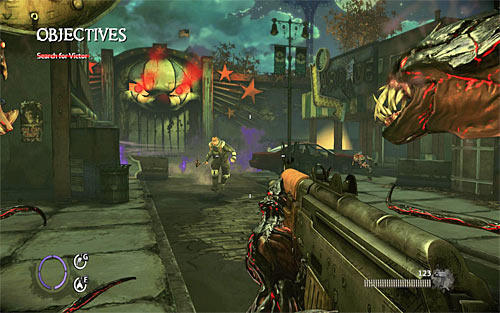
Move few steps forwards, noticing that there are enemies in the carnival now. Before you go any further, remember to destroy any lights sources you can find during this chapter. We are talking here not only about small lanterns, but also about large reflectors (as you can see it on the above screen).
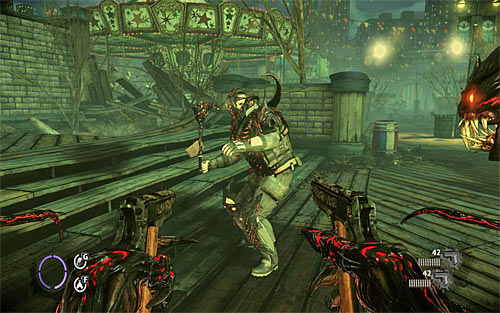
Starting from this chapter, you have to prepare to fight new type of enemies, who can quickly move from one place to another. First you'll meet only opponents with melee weapons but later you'll encounter also elite soldiers, using firearms. It is best to slow down such enemies by sending darkling onto them or using the Swarm attack (the F key), but you can also shorten a distance between you and enemy and perform a quick slash with the right tentacle (first you have to destroy armor elements).
Keep walking through the carnival, turning right and heading to the place, where you found relict. Remember about using covers and throwing environment elements. Be careful once you get near the stall shown on the above screen (Cotton Candy and Peanuts), because after you get close to it, it will be opened and you will be illuminated by indestructible lamp. The only solution to this problem is to quickly run towards the stall and destroy a generator hidden inside.
Bit by bit move to the place, where you've started exploration of the carnival. This is the place where you should first meet elite enemies, using firearms, so you have to be very careful. Remember about destroying lanterns and reflectors, so you will make your life easier.
Right after getting to the start place, a van should appear from the right side. Quickly stand behind some cover and try to destroy headlights as soon as possible. After that action attack enemies from the van (and others). I suggest looking after throwable objects, especially that you can find there at least one propane cylinder.
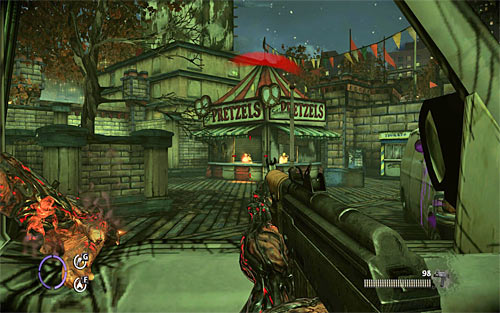
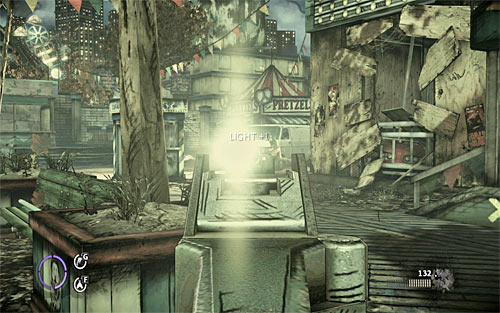
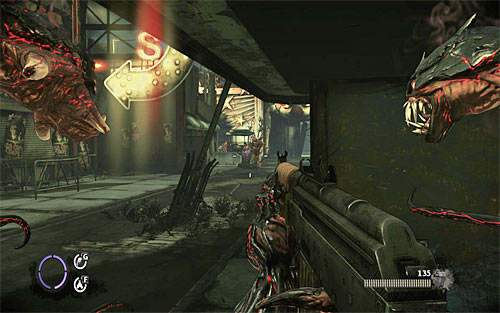
After the fight look around for ammo and head to the right. Watch out for new enemies hidden inside the stall Pretzels shown on the above screen. Pull out van door if necessary and use it as a cover. Make sure that you eliminated all enemies and go to the newly unlocked passage, located left from the stall.
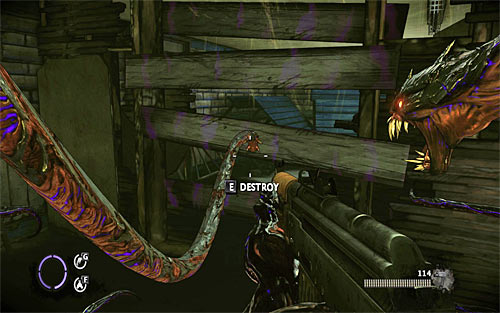
Do not worry that after reaching the closed gate you'll be illuminated by reflectors, because no one will attack you here. Move forwards and then turn right, entering a small room. Notice the barricaded passage - you have to destroy it by pulling out each board separately (Q and rhythmically E).
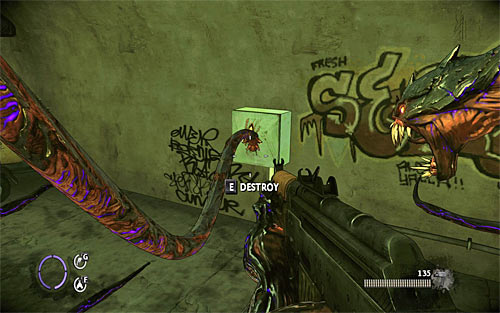
After unlocking the passage, go inside the adjacent room and destroy the generator, which powers up lamps you've passed by previously. Pick up ammo and return to the main tunnel. Grab a fuse box on the wall with your left tentacle. Pull out its case and then make a short circuit with the right tentacle. Go to the gate and crouch to move under it. Wait until the second part of this chapter gets loaded.
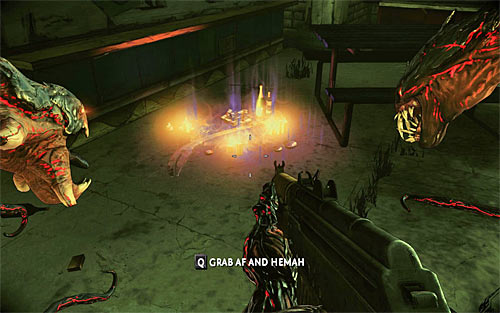
Move forwards. Ignore fleeing opponents and stop right now to explore an area to the right (after destroying upper reflectors). This will allow you to find another relic (Af and Hemah - 18/29). You can now start exploring the second part of the carnival, attacking enemies on your way. Watch out, because you'll encounter at least one elite soldier.
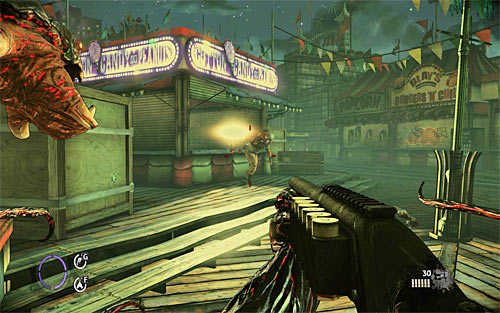
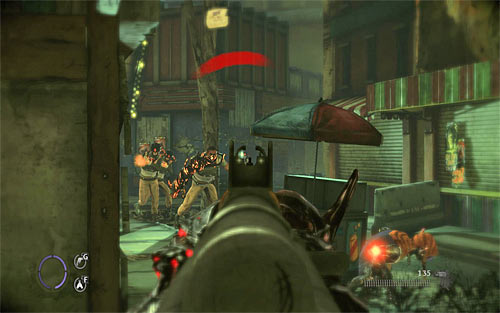
After elimination of first group of enemies, carefully move further. New enemies will appear next to the Popcorn stall and it would be good to use a propane canister on them. Be careful, because there is an opponent with a whip among them, so try to attack him from a distance. If he manages to take your weapon, attack him with tentacles and after the fight get back your gun.
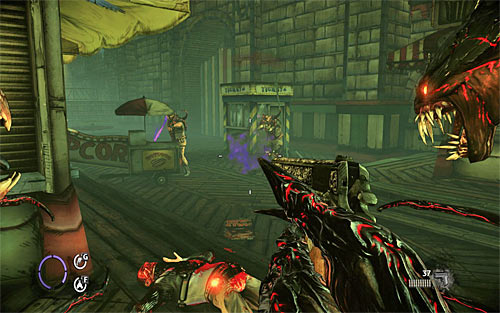
Look inside the Popcorn stall, picking up ammo. You can move forwards, but remember about destroying upper reflectors along your way (not only lanterns). Soon you'll have to join another fight and in this case, in addition to the elite opponent with firearms, you'll have to quickly locate an enemy with a whip and a thug walking with a reflector. After the fight explore the area, finding a ladder.
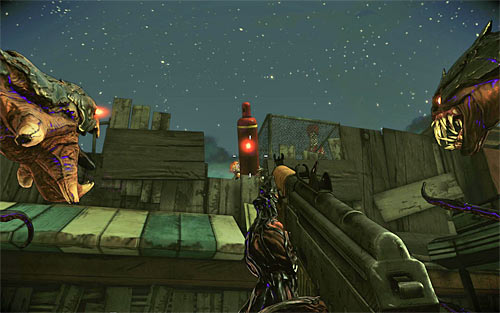
Once you get to the upper balcony, enter the right room, finding a Talent Shrine there. Now choose a right window shutter pointed by your darkling (and show on the above screen). Move over the rooftop and jump down, reaching a large yard.
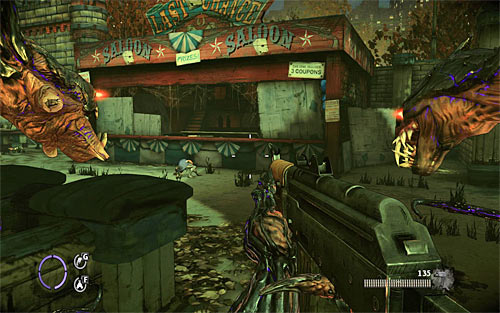
I suggest looking around area carefully because soon you will take a part in a large fight here. In particular you should remember places where ammo sheds are located, as well as good throwable objects. Eventually you have to approach Saloon Last Chance stall, which will result in another vision with Jenny.
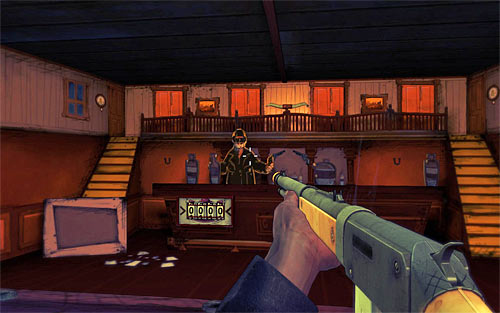
You have to participate in another shooting mini-game, which is started by pressing the E key (after the conversation). This time you have to shoot at appearing enemies. Remember to shoot only bandits, trying not to kill policemen (points are deducted then). At the beginning there is only one silhouette but in the final stage of the mini-game there will be even three of them, so you must react quickly. If you get insufficient amount of points (not likely), then the game will force you to play the mini-game again. Otherwise you'll move further, getting back to the reality. Notice - I suggest earning at least 1000 points, because this is rewarded with an achievement (only if you got at least 1000 points in a previous shooting mini-game).
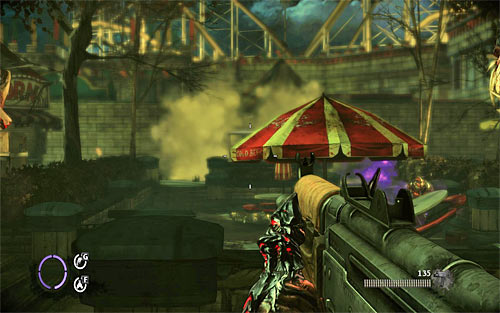
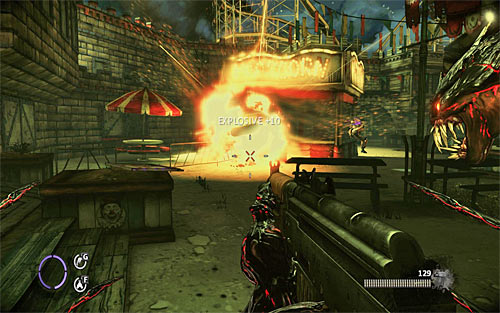
Soon after Jenny disappears and you approach a plush teddy bear lying on the ground, the battle begins. A first group of enemies will appear the opposite end of this yard, breaking through one of the walls with a van (this time you do not have to worry about destroying headlights).
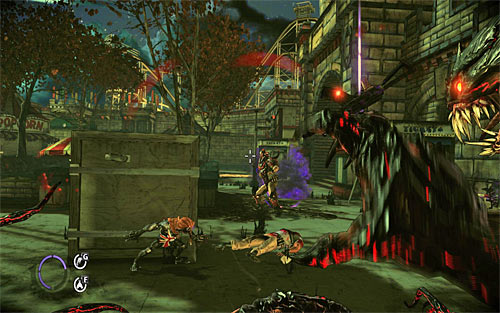
Start attacking enemies, which appear in a distance. I suggest focusing on eliminating an enemy with a whip, because if you let him get closer, he can easily pull out your weapon and thus make the fight tougher. At first it is good to attack your enemies from a distance, hiding behind covers or grabbed objects. But if someone gets closer then help yourself with the right tentacle.

Be careful, because after some time enemies will break through the wooden door of the building located to the right from a start place (screen above). This is very important because in that group you'll encounter an elite opponent with firearms and an enemy with a whip. After eliminating them you can use the interior of the right building as a hideout, but you might also destroy a reflector illuminating this area first.
Keep fighting. In the last stage of the fight first of all you have to deal with enemies with reflectors and also watch out for a thug with a shield. As you probably remember, you have to destroy shield's outer case first and then pull it out from him (with a left tentacle). No do forget to heal yourself and frequently use ammo sheds.
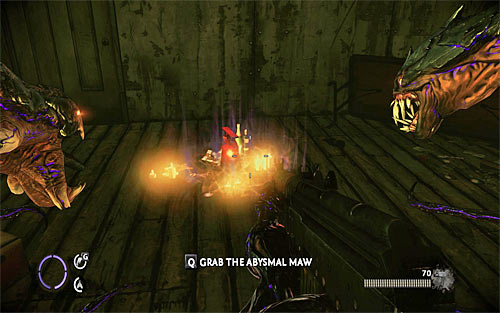
Fight until you eliminate all enemies' units. Before you leave this area, look again inside the previously mentioned right building, because you'll find there a new relic (The Abysmal Maw - 19/29). Now you can go to the opposite end of the yard and choose newly unlocked passage. After few dozens of meters the game will load the third part of this chapter.
Move forwards, finding a new Talent Shrine on your way. Ignore Victor, because you're not able to get him. But be careful after reaching the junction, because ne enemies will come running from the left. Start with attacking a guy with reflector and after killing him deal with the rest of opponents. After the fight head to the place, where enemies were coming from.
New enemies will appear right after you approach a large gate visible in a distance. Shoot at them from behind the cover and look after an opponent with a whip - try to attack him from a distance. If necessary try to retreat, hoping that enemies will go after you. It is also worth to throw at them environment elements (metal bars for example).
After the fights destroy nearby lamps and approach the gate. Unfortunately Victor will close it. Deal with the last group of enemies and after that start actions which will unlock a passage to further part of the carnival.
Move closer to the gate to examine it carefully. Wait until your darkling joins the action - he will go for a search of items, which can help to solve your problem. The creature will bring you back a propane canister, so you have to approach him, grab a canister with the left tentacle (Q) and throw it at the gate.
An attempt to destroy the gate will not only fail, but also will lead to appearance of well-armed opponents. So I suggest to retreat right after throwing the cylinder, so you won't be surrounded by opponents. Join the fight by attacking first the enemy with a reflector and a thug with a whip. Finally take care of an opponent with a shield and more common enemies. Remember about possibility of throwing environment objects at them, especially that there are plenty of them here.
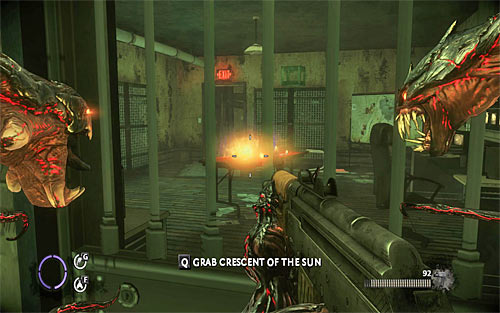
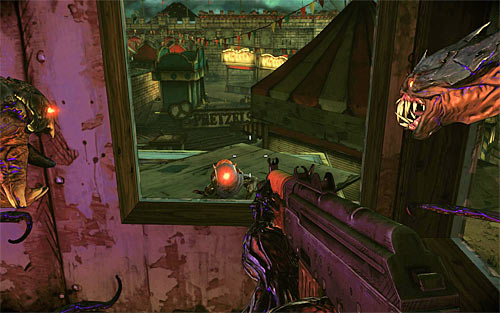
After the fight go back to the gate and choose previously inaccessible left passage, reaching after few moments an entrance to the building. Destroy a single lamp and go inside. You should see an opponent here, standing next to the closed door, which will start to flee when noticing you. If you hurry up, you'll be able to grab him with the left tentacle, but it is not required. Behind bars you should see a new relic (Crescent of the Sun 20/29). You can take it now (the Q key) or later, when you get to that room.
Carefully head to the left and notice that the adjacent corridor is illuminated by indestructible lamp. This problem can be solved in two basic ways. A first method is to lean out to encourage enemies to get closer to Jackie. The second (better) option is to lean out to destroy a generator visible in a distance (screen above). Performing this action will let you eliminate local enemies in easier way.
Move forwards carefully. You have to be ready to quickly deal with new enemies who will appear from the right room. Watch out for the opponent with a shield - damage it as soon as you can and then pull it out. If you haven't picked up a relic yet, you can now take a look inside the right room. Otherwise head to the exit door and pull it out (Q and rhythmically E).
After leaving the building use the nearby ladder and consider interaction with a Talent Shrine located on the left. Carefully enter the new building and notice that ne enemies stand in a distance. You can attack them from here or go to the right. In latter case you must hope that they come to you because the area where they are located, is illuminated by indestructible lamp (a generator is hidden behind the left table and you should destroy a crate blocking an access to it first).
Regardless of the chosen tactics, watch out for a new opponent with a shield, because on such small area he can be a real challenge. After the fight go to the building exit, reaching its rooftop.
Prepare for next "fun" with avoiding the light, because it is better to kill all enemies on the rooftop before reaching the generator. Stay in the dark part of the rooftop, trying to encourage enemies to shorten a distance between you and them.
MAKE SURE that you've killed all enemies before you decide to enter the illuminated area, because otherwise you'll be vulnerable to their attacks. Look around for the generator and destroy it.
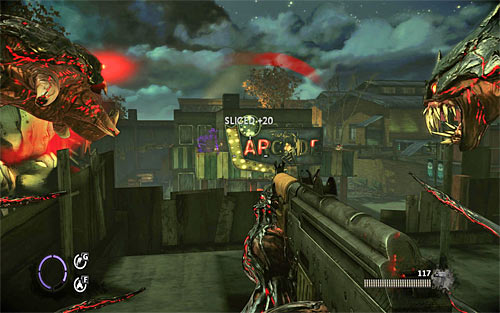
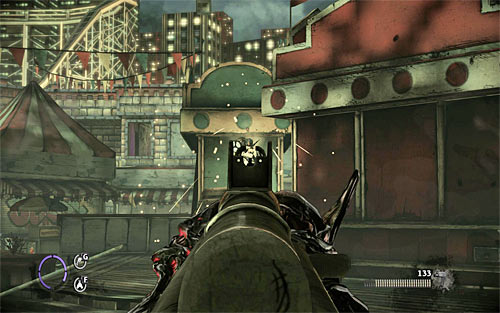
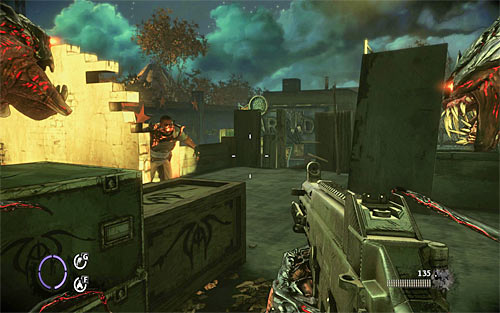
Listen to a new speech from Victor and notice that new enemies appeared around the building located on the other side of the street (Funland Arcade). I suggest starting with elimination of enemies standing on the rooftop of mentioned building. It is best to use metal bars to kill them, but you can also use the firearms (in this case you might aim at their heads).
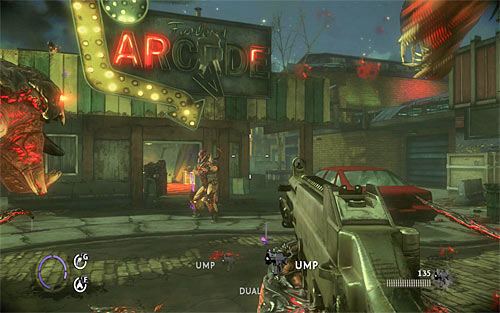
After elimination of visible opponents jump down and quickly move away from the entrance to the building occupied by them, because new enemies will come running from the building and there will be opponent with a whip plus a thug with a shield among them.
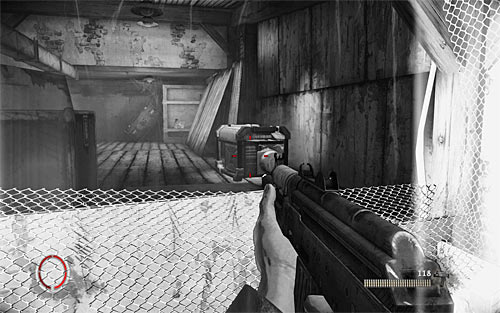
Make sure that you've secured area and then enter the building, picking up ammo on your way. Use the stairs leading to the rooftop. Once you get there, move forwards, noticing that down in the warehouse there is a parked truck, which could be used later to break through the gate.
Move forwards, finding a Talent Shrine on your way and stopping at the place where down below you'll see new enemies. This is a perfect opportunity for surprise attack, especially that there are many throwable objects in the area, with metal bars among others.

After killing all visible enemies, carefully jump down. Quickly turn to the warehouse entrance and destroy a lamp hanging there. This is important because you have to be ready as soon as possible to attack en enemy with a whip. After killing him take care of other enemies, guarding an access to the truck. Also in this case you have to be very careful, because you'll encounter a thug with a reflector among others.
Enter the warehouse and go to the front of the truck parked here, reaching the place with a hidden relic (Siddartha's Tears - 21/29). Now you can head to the door with sign EXIT on it. As you probably guessed, you have to pull it out (Q and rhythmically E).
After pulling out the door, go to the small control room and use the control panel (Locking Bays) to raise the warehouse gate. You can now watch a cutscene of breaking through the gate.

Leave the control room and exit the warehouse. Head to the passage unlocked thanks to the explosion. Now follow the linear path, listening to Victor's speeches. Eventually you have to reach the entrance to the Castle of Horrors. Using the only available passage will lead you to the fourth and last part of this chapter.
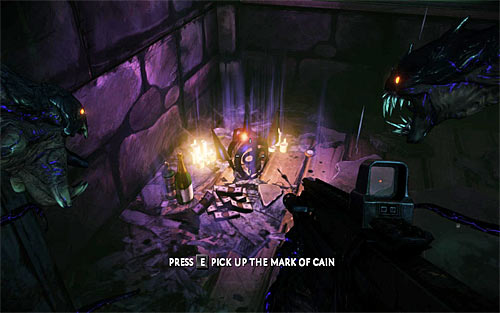
Once you get inside the Castle of Horrors, interact with a Talent Shrine. Move forwards but explore the right stall along your way. You'll find inside another relic (The Mark of Cain - 22/29). Move to the cart now to start a new sequence with Jenny.
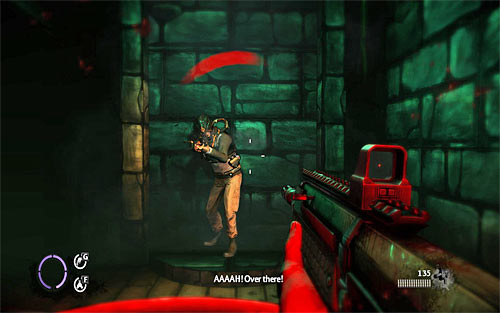
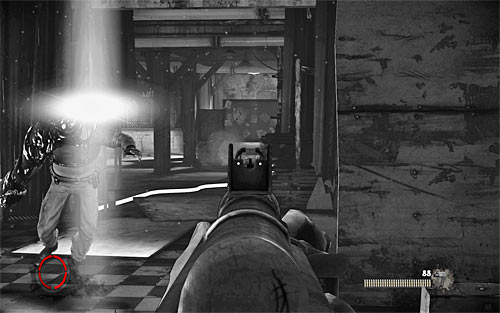
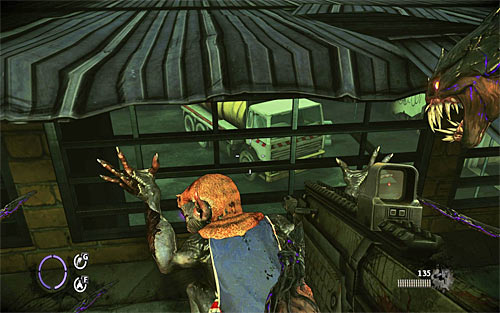
It is not accident that the game has left you with a possibility of using firearms, because flashbacks interlace present events. Initially you do not have to do anything. Prepare yourself only after getting to the tunnel with quickly lowering bars, killing an opponent who appears in front of you. Remember about longer shooting, especially that all enemies you encounter are heavily armored and you can't use your tentacles and thus heal yourself.
A second opponent will appear behind the thorn apart body.
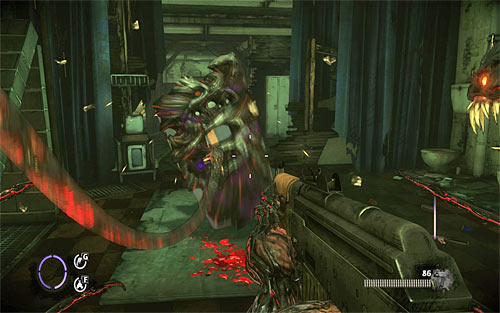
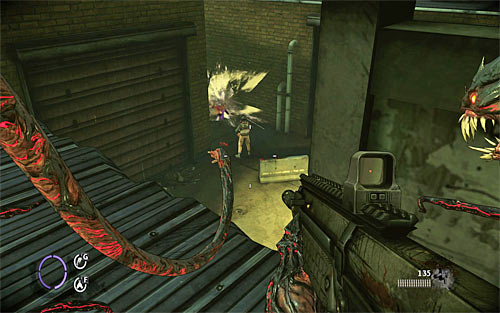
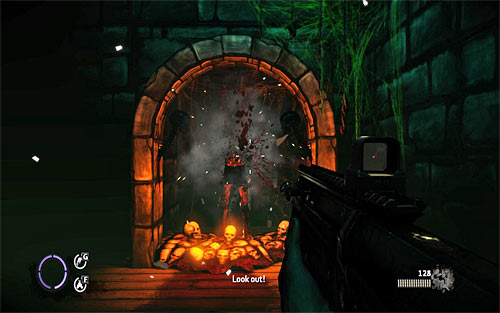
Prepare for an attack from another enemy after passing through the area with sticking hands. He will appear on your left.
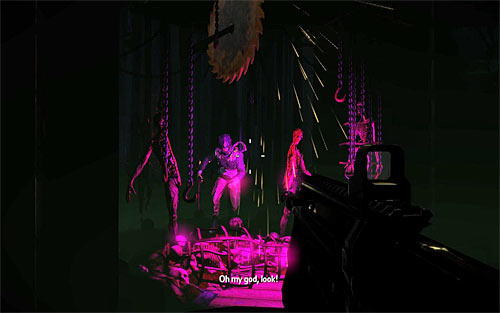
The fourth opponent will appear in gallows section, right after "hanging" of two dummies. Immediately after dealing with him, eliminate the fifth enemy, who will position himself next to the upper window shutter.
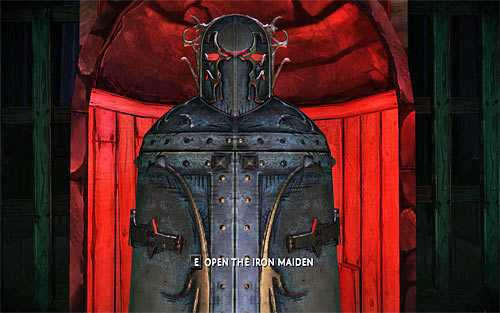
Continue your ride until it is over. Now you only have to approach the Iron Maiden and interact with her (the E key). Watch the cutscene ending this chapter, during which Victor will imprison Jackie inside the Iron Maiden.
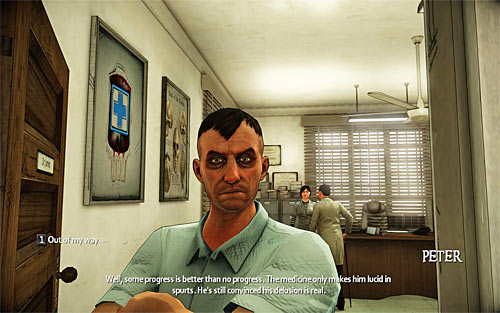
This is yet one chapter with action in a mental hospital. This time you'll start in a small storeroom. After being found by paramedics, head to the right and then to the left. Try to approach Jenny to start a conversation with her. After the girl runs into doctor James' office, have a short talk with the paramedic Peter.
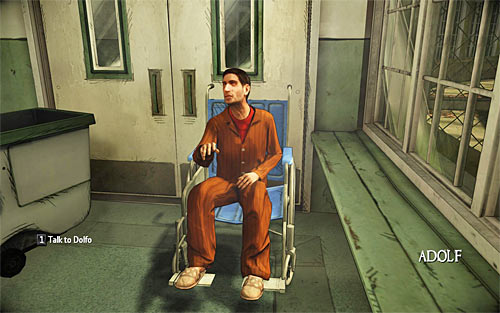
Turn left and move forwards, having an optional chat with doctor James on your way. Eventually you have to reach the Jackie's room, so walk through subsequent corridors. After reaching the target, talk to Dolfo sitting on a wheelchair, who will suggest looking for a weapon in janitor's closet.
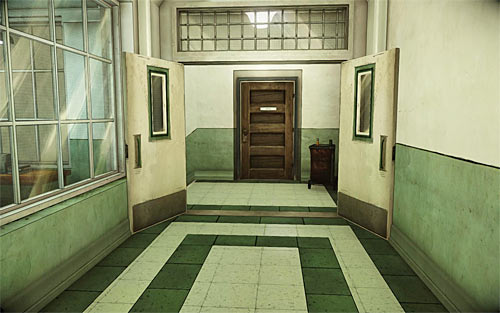
Turn around and move forwards. After reaching the junction turn right and you'll face janitor's closet (screen above). When you try to open it, a short cutscene will be displayed and this chapter will be over.
Leave the starting room and follow your darkling, who will tell you something about scenes from the mental hospital. After reaching the portal listen to the end part of the conversation and then try to go through the portal. You will be moved to the real world and get control over darkling who will try to free Jackie.
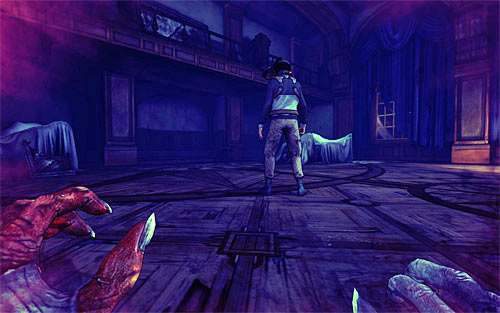
Head to the first room. According to the game instructions avoid illuminated areas for all costs, because darkling can easily lose the entire HP bar. Luckily, if you die, you'll be able to respawn quickly. Ignore opponents standing in light and those patrolling upper balconies. Focus on a single enemy shown on the above screen, who patrols the area. I suggest approaching him and then performing an execution (Q). Of course you could try to bypass him (and next opponents), but then you would lose a chance to get at least one achievement (and valuable essence points).
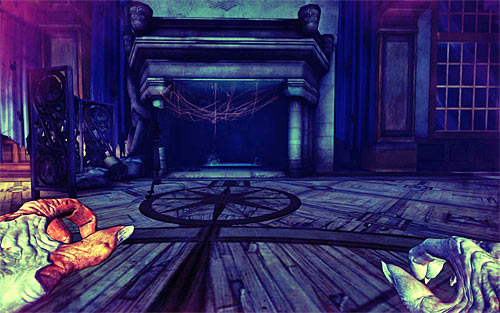
Whether you've killed the guard or passed him by, you have to head to the fireplace marked by the fame. After reaching the target stand next to the green colored barricade and press the middle mouse button. You can now jump down, reaching the cellar occupied by enemy units.
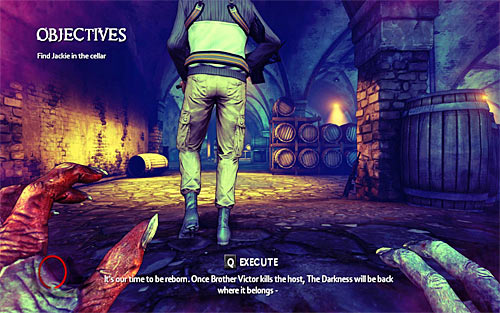
I suggest performing further actions according to instructions below, thanks to which you'll earn maximum essence points and additionally you won't be noticed. Go forwards right away and attack the enemy, who heads towards the light.
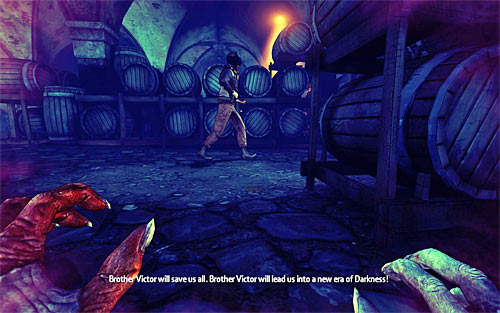
After first execution turn right, stand next to barrels and wait for another guard shown on the screen above. Turn right only after the enemy passes you by, executing him.
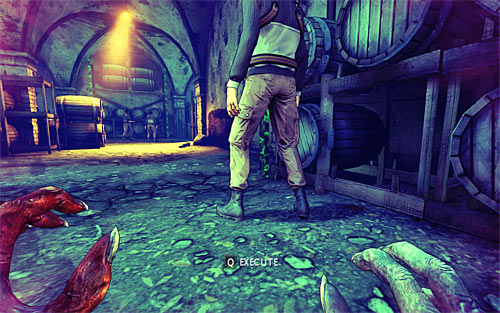
Now return to the earlier part of this room and go to the right. You should see a single guard there. Get him from behind and kill him. Notice also two other enemies standing in the light - you have to avoid them during further actions.
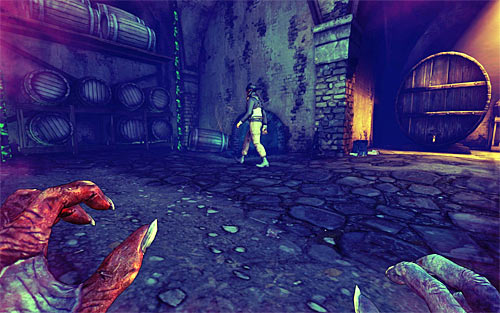
Go to another end of the cellar and wait for last, fourth guard coming from the right. You can lurk for him next to barrels on in one of the nearby tunnels. Same as before, make sure that you won't get into light during approaching the guard
.
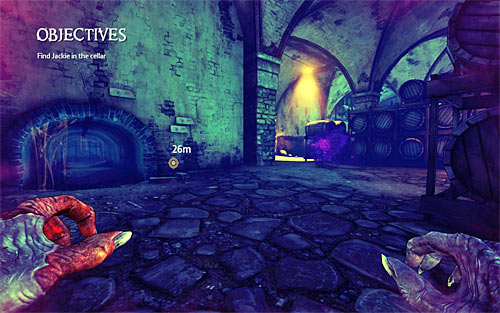
You can now go towards two previously mentioned guards, standing in the illuminated place. Ignore them and find a tunnel shown on the above screen. It is located left from the guards. If you go inside, you'll be able to go pass guards.
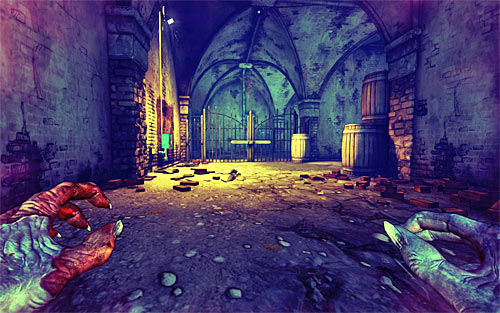
Make sure that you've bypassed two previously mentioned guards. Approach now to the open fuse box shown on the above screen and notice that it is illuminated from time to time by a damaged lamp. Wait until lamp turns off and quickly move to the box, helping you with a sprint option (SHIFT). Quickly hit it with the middle mouse button. If you've done everything according to the plan, you'll cut off the lamp power.
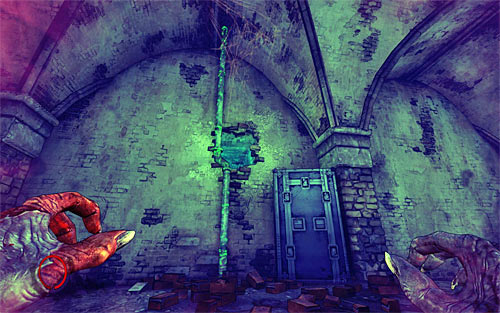
You can now approach to the metal gate located on the right. Stand next to the blockade and press the middle mouse button to destroy it, thus unlocking further way. A passage on the right is inaccessible, so grab the pipe in front of you in order to get into ventilator shaft. Go through the shaft and then pass the tunnel, approaching the room with imprisoned Jackie.
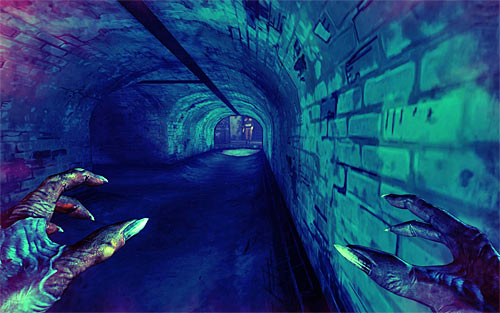
Keep going through narrow tunnels. After getting close to the room with two guards, retreat a little bit, standing in the place shown on the above screen (right from the junction). Wait until both guards go to the left.
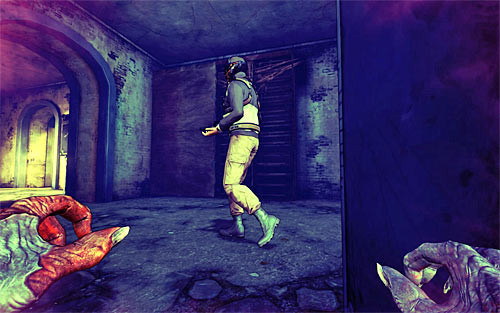
When the second guard disappears from your view, quickly exit the tunnel (you might use the sprint option here - the SHIFT key) and turn RIGHT (not towards guards!). Hide behind crates and wait for one of the guards to come here (screen above). Execute him of course.
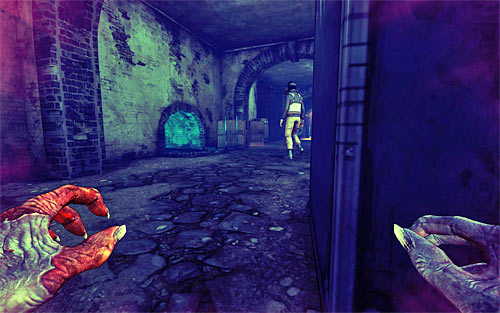
Lean out from behind the crate now and wait until the second guard finishes his patrol (screen above). You can approach him and then perform an execution.
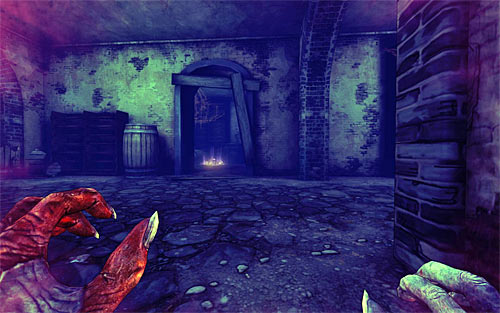
Ignore for a while your current objective and start exploring the room shown on the above screen. Its entrance is located in front of the desk, where one of the eliminated guards was stopping by. In this room you'll find another relic (Pope John XII - 23/29) and you can collect it in the form of darkling. After picking up the secret, resume exploring the cellar, choosing the path proposed by the game or a short tunnel.
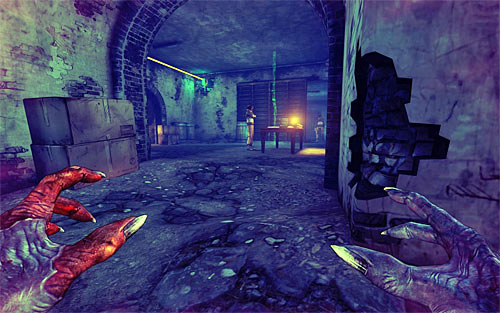
You won't encounter here any enemies temporarily, but you have to focus on avoiding many light sources. Follow a yellow cable visible on the ceiling, choosing at the end a new tunnel, thanks to which you'll reach a room with three opponents.
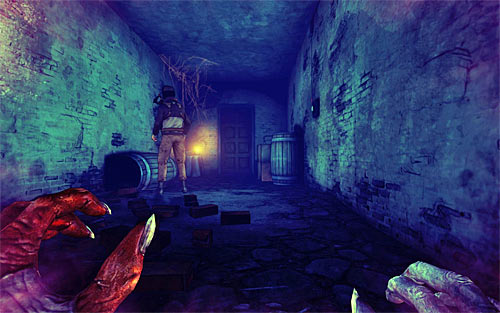
IGNORE for now the enemy standing next to the table and notice his colleague visible in a distance, who is the only one to patrol this area. Wait until he goes in the opposite direction and follow his trace, carefully bypassing from behind previously mentioned first guard. Execute selected enemy before he turns around (screen above).
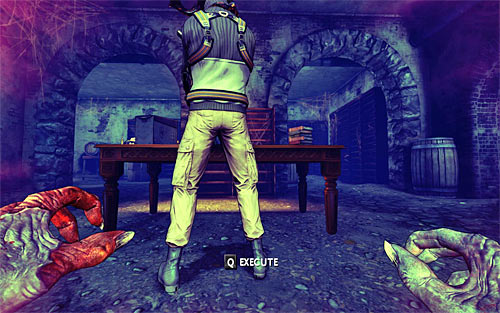
Now you can return to the first guard (the one standing next to the table) and execute him. Optionally you can also deal with third guard, occupying further part of this room. He doesn't change his position too, "showing" you his back by default.
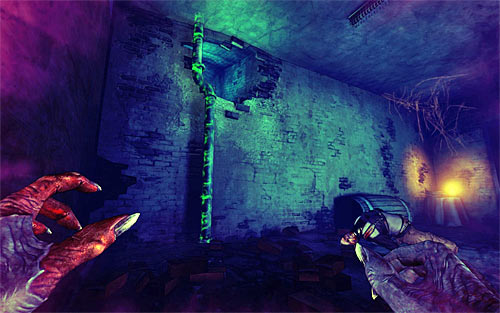
Regardless how many people you decided to kill, return to the room where you've committed your first murder. Examine here the left wall, looking for interactive pipe shown on the screen above. After getting to the top reach the fuse box and in a well-known way cut off the cables (the middle mouse button). You'll watch a short cutscene here, informing you about loss of Darkness powers by Jackie and plans to execute him. You have to thwart the plans of course.
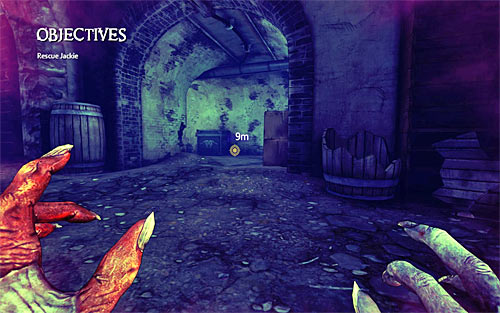
Notice - contrary to what you may think, you do not have to hurry up reaching the place, where Jackie is imprisoned. So I suggest careful elimination of enemies, staying unnoticed. Start with jumping out from the shaft and head towards the corridor you came here from (screen above). Stay focused, because four enemies appeared in the area which was safe till now. What's more, two of them are patrolling area with turned on reflectors!
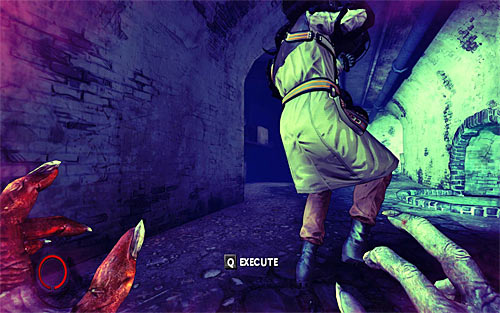
First opponent patrols the nearest corridor and if you hurry, you'll be able to surprise him from behind. In such situation choose the left tunnel when possible. If you haven't managed to kill him then wait until he illuminates the corridor and starts getting back. Whether moment of attack you choose, try to kill this person when he goes by a corridor leading to the room with damaged fuse box.
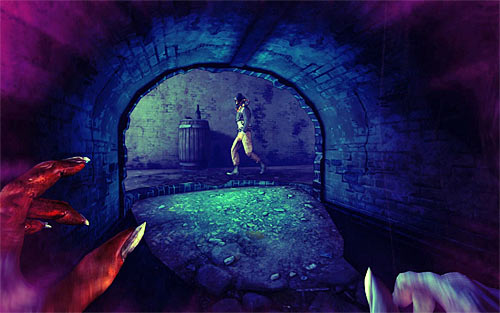
Head to the further part of the cellar, which was empty before but now is patrolled by three persons. This time try to enter to the right tunnel when it is possible. After using this hideout turn around and wait until new guard passes by (screen above), heading to the left. Follow him and perform an execution (a best moment for that is when he reaches the junction).
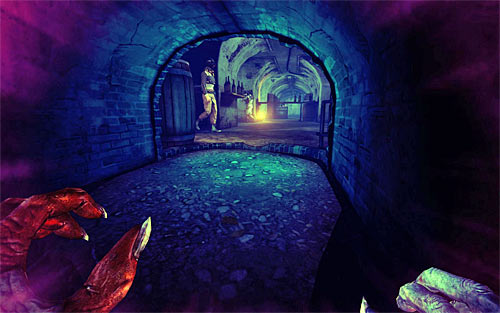
Now you're left with only two enemies to eliminate. I suggest hiding in the same tunnel you were waiting for the second guard, but this time look in the direction of adjacent cellar room. Wait until guard WITHOUT reflector passes the tunnel by (screen above) and execute him.
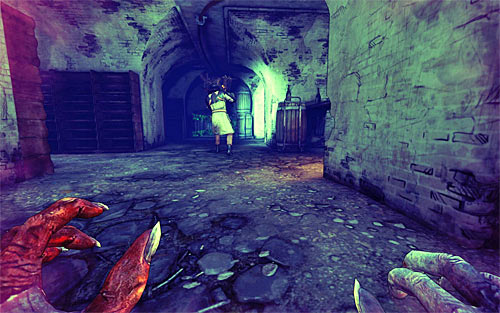
Now you have to surprise from behind the last guard with a reflector. His patrolling route resembles a rectangle. So you can easily get rid of him, risking nothing.
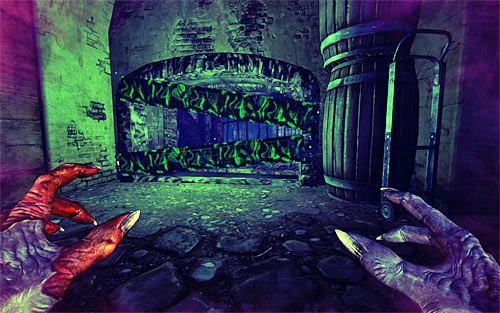
After elimination of all four guards, approach the barricade shown on the above screen, which you were not able to destroy because of the turned on lamp. This time you can destroy it, so press the middle mouse button to do so.
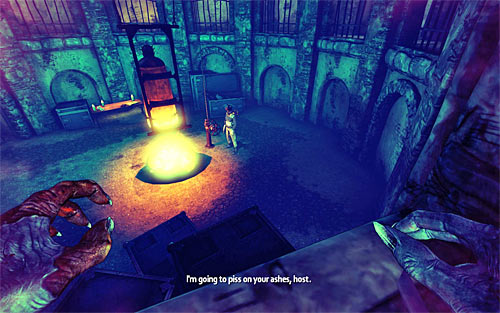
Move a little further and jump inside a small hole. Now head to the right, finding larger hole and getting through it (screen above). Carefully jump to the lowest level, trying to execute the last guard. You'll see a short cutscene now, after which you'll return to Jackie's body.
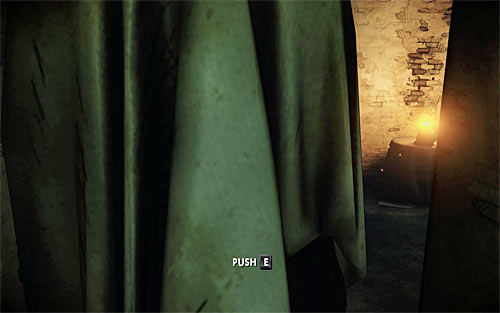
As you probably remember from one of the previous cutscenes, Jackie has lost all Darkness powers (luckily only temporarily), so for the next minutes you'll have to rely weapons. Do not worry that you do not have any firearms right now, because soon it will change. Follow darkling, walking through linear corridors. The game will force you to move one of the obstacles on the way, but it is enough to press the E key to do so. Eventually you have to reach the place, which Jackie will recognize as his father's office.
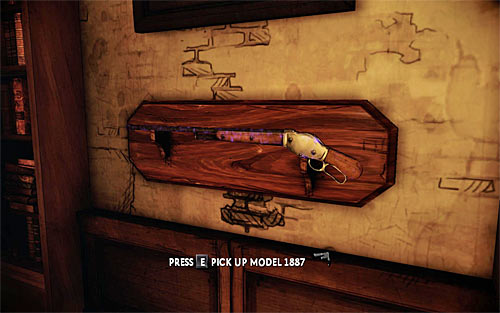
Before you take a shotgun, turn to the right and pick up a new relic (Reliquary of the Blessed Blood - 24/29). Now you can move to the shotgun (Model 1887) and take it with you.
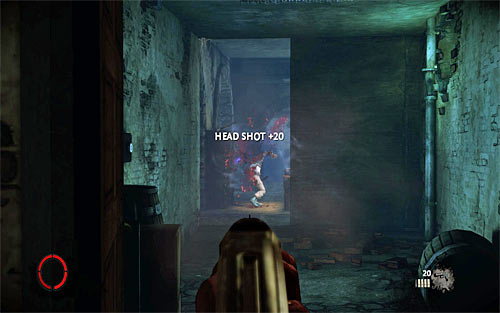
Use the newly unlocked passage. You'll encounter first enemy after few moments and watch out because he is accompanied by two more persons. I strongly suggest aiming at enemies' heads, so you'll not only eliminate them faster but also earn more essence points (20 instead of 10). Remember also not to hurry up and shoot them from behind the cover if possible.
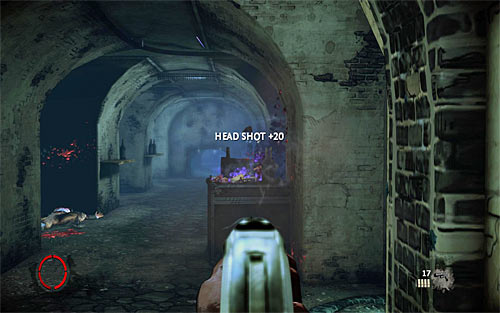
After elimination of first group of enemies, head straight ahead examining opponents' bodies in search for other weapons (UMP guns among others) and replenishing ammo. You should encounter another group of opponents after reaching the junction, where you have to turn right (screen above). Stay next to the wall, barrel or another cover, until you make sure that you've secured the area. After the fight leave the cover and do not forget to replenish ammo along your way.
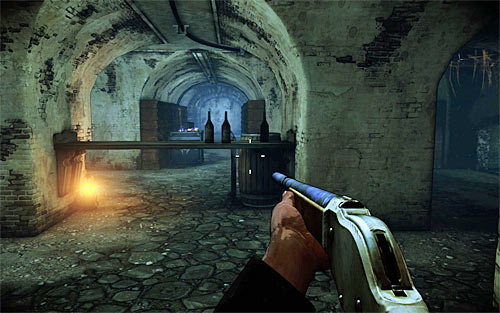
Third group of enemies can be encountered after approaching the counter shown on the above screen. Do not get surprised here by anyone, because enemies can approach you not only from a corridor in front of you, but also from the one to your right. So you should change your position regularly, checking both corridors. Same as before, stay in the area until you eliminate all local enemies.
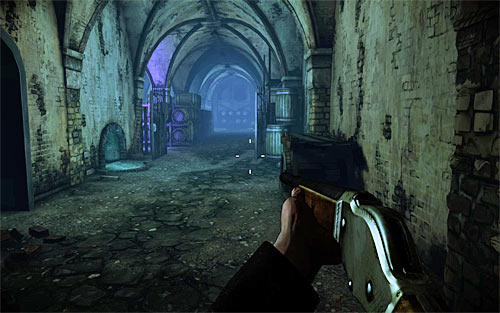
After the fight collect ammo and better weapons, because you'll have to prepare for the boss fight. Choose the only available passage. Prepare for "attractions" after reaching a new large cellar room, where you've previously killed four guards (screen above). You'll fight here with Peevish, who got some Darkness powers from Victor.
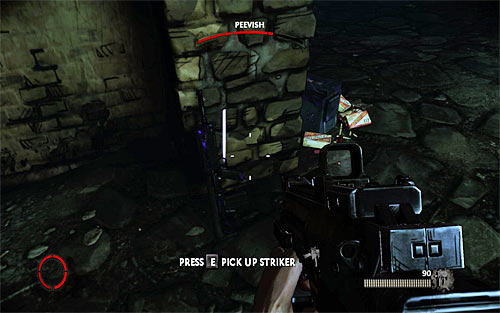
Fight with Peevish is surprisingly easy, which of course is a nice surprise, compared to the previous boss duel. Before you do anything, I suggest choosing the proper weapon. Jackie's father's shotgun is not really handful here. Instead I recommend UMP gun or look around for Striker rifle (if you do not have one yet). It is also good to remember where ammo sheds are located, because you'll have to replenish it quite often.
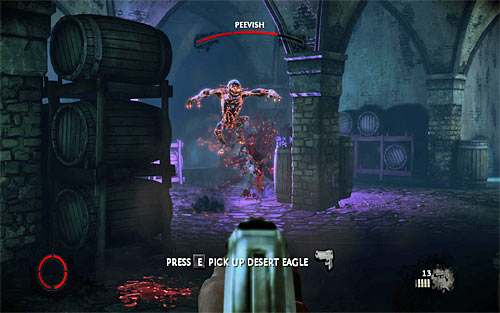
As mentioned before, Peevish has some Darkness powers and first of all he will be sending darklings on you (usually in pairs). I advise not to waste shotgun ammo on them. It is far better to eliminate them with a gun or a rifle especially that they die fast. Do not let them get close to Jackie, because it might result with loss of HP.
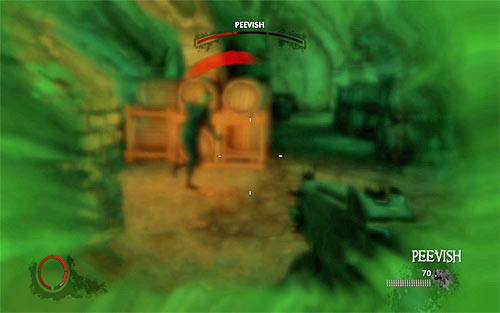
Keep Peevish on some distance, because he might use a Swarm against you. You can't defeat against this attack, so the only thing you can do then is to retreat from the boss's surroundings.
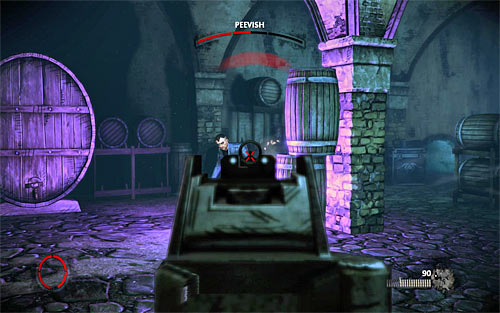
The only way to inflict Peevish damage is to shoot at him. Fortunately this opponent is not particularly resistant to your attacks, so he should lose HP quite quickly. To locate Peevish use the aura surrounding him. Do not forget about eliminating darklings and stop only when Jackie loses a little more health, because his energy bar can recover only within current quarter (so if you lose more, then this quarter will be no longer possible to recover).
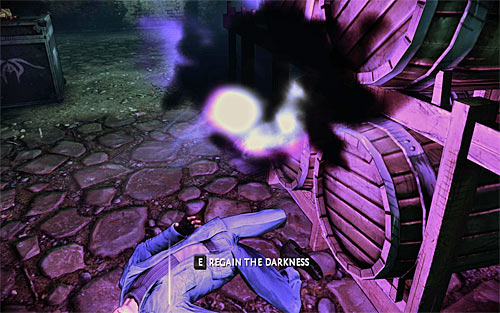
Keep fighting until Peevish loses his entire energy bar and dies. The game will allow you to recover you Darkness powers. In order to do this, you have to move to boss's body and press the E key.
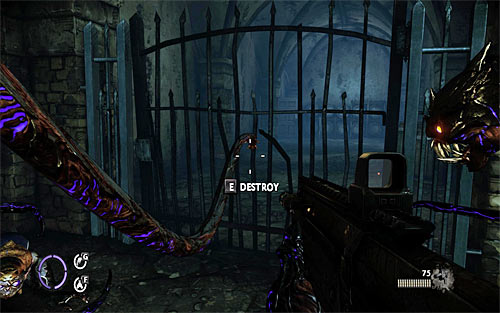
Replenish your ammo and look around from the exit from the cellar, located in one of the corners. As you probably guessed, you have to use the left tentacle here to pull out the gate (Q and rhythmically E). Use the stairs to leave the cellar and end this chapter.
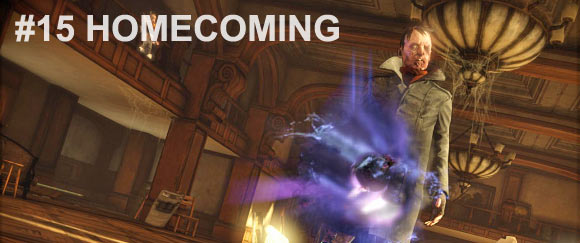
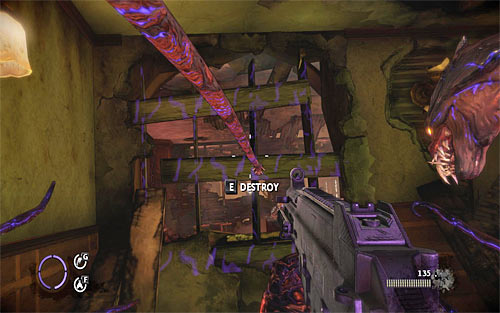
Start with using the Talent Shrine. Get rid of the left barricade with your left tentacle (Q and rhythmically E) and then enter a new room. Be careful, because soon enemies will start appearing in a distance. I suggest staying in this part of the room because in most situations during this chapter you won't be able to destroy light sources and make illuminated places safe for your character.
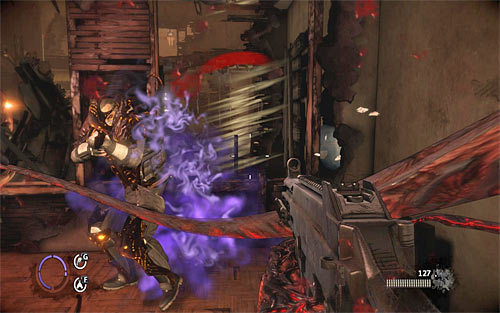
Initially watch out for opponents occupying the upper floor. To eliminate them you can use of course the firearms, but you can also use your left tentacle to throw some objects at them (metal bars and propane canisters among others). Prepare for an attack of elite enemies, who will take part in later phase of the fight, especially that there is at least one enemy with firearms among them. As you probably remember, to eliminate them quickly you should use the right tentacle, but you can also slow them down with Swarm (the F key).
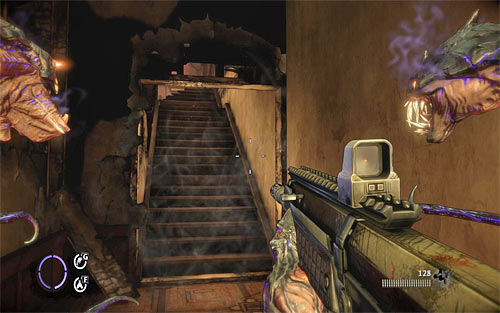
After the fight you should examine the corpses and look for ammo sheds and better weapons. Head to the illuminated passage. Look for ammo and then turn left and go up the stairs shown on the screen above.

Start with eliminating opponents visible in a distance. Notice, that there is a large hole in front of you, but you can solve this problem by catching a right wall with you tentacle (Q) and then pull it out (rhythmically E) to create sort of a bridge. Be careful, because new enemies will appear after your action. You should start with the guy who attacks you with a whip.
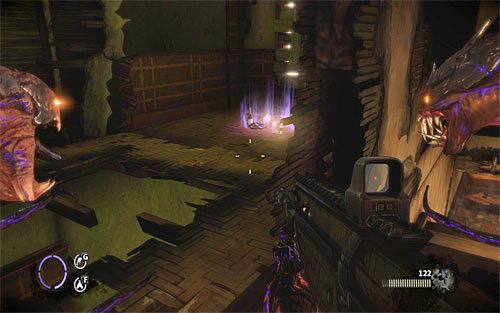
Depending on your preferences, you can now stay at this place, using the firearms and environment objects (metal bars for example), or run towards enemies and help yourself with tentacles. Regardless of your tactics, watch out particularly on elite opponents and a thug with a reflector. After the fight explore area to your right (behind the pulled wall) and that's because you'll find a relic there (The Silent Night - 25/29). Notice - if you fall down to the hole, you'll have to pull out a double door with your left tentacle and then return on the first floor.
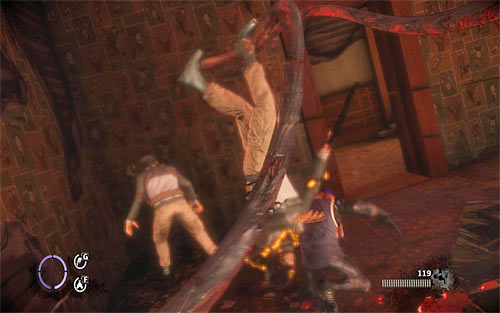
You can now go to the place, where enemies were coming from during the last fight. Watch out, because right after approaching the new passage, more enemies can approach in front of you, with en elite shotgun man. So you have to act fact and since you're close to the enemies, it is best to use tentacles to eliminate them.
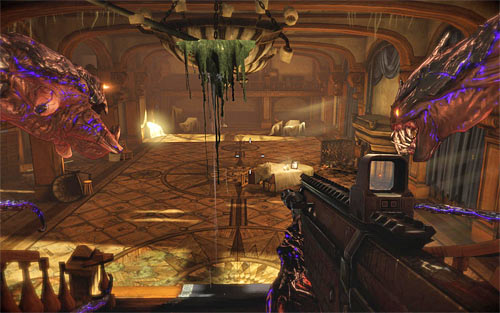
Move forwards, finding a Talent Shrine on your way, as well as ammo shed. Soon you should reach the ballroom and it is worth to look around here carefully because soon you'll fight here. Notice, that some parts of the room are permanently illuminated, so you'll have to avoid them. I recommend also remembering places with ammo and other interactive objects.
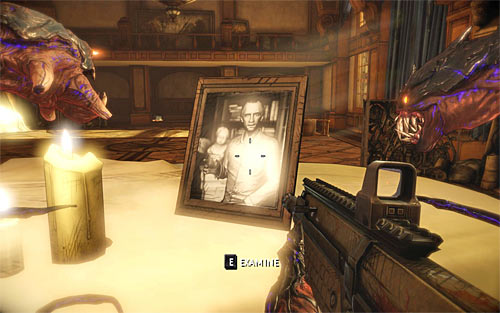
In order to start the battle, you have to approach the piano standing in the middle of the ballroom and view a photo left on it (the E key). The game will display a cutscene with Victor, who will send his men on you. There are four groups of enemies in total, and each of them is described in details below. A great thing is a fact that the game will save its state after elimination of each group, so if you even die, you won't have to start everything from the beginning.
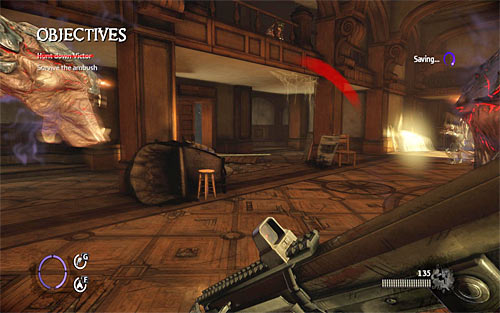
Right after the start of the first part of the battle, I propose to turn left and run towards the area shown on the above screen, which is located under the balcony. There are several factors for this decision - this area is fully in shade plus you'll find ammo here, as well as many interactive objects (very useful metal bars to attack enemies and shield for a defense).
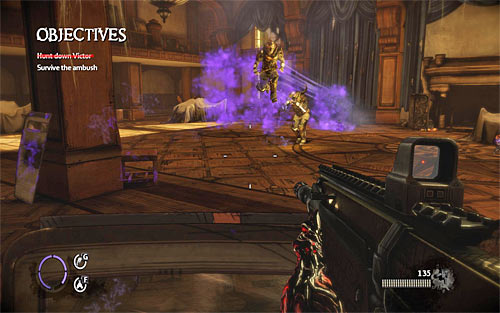
As for opponents, during this phase of the fight you have to watch for two elite enemies (one with the firearms and one with the melee weapon). Remember about using tentacles when fighting with these enemies, but you can also use a Swarm attack, which stops them for few seconds, making them easy targets.
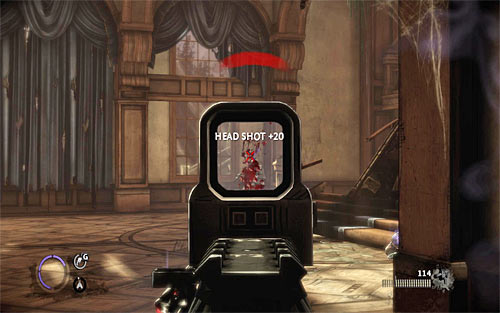
Finally deal with "normal" opponents, who should be no challenge for you. It is worth noting that you won't advance to the second part of the battle, until all enemies aren't dead. So you might keep at least one of them alive, until you replenish ammo and heal Jackie.
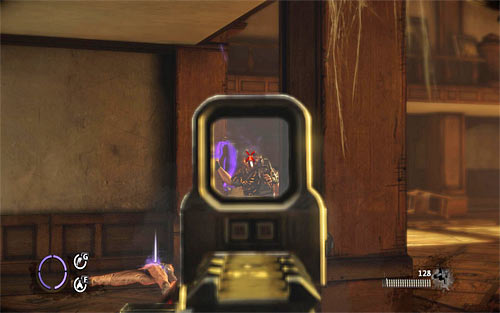
After advancing to the second part of the battle, focus mainly on attacking and keeping on distance TWO enemies with whips. Otherwise you could lose quickly all your weapons and become an easy target during your tries to get weapons back.
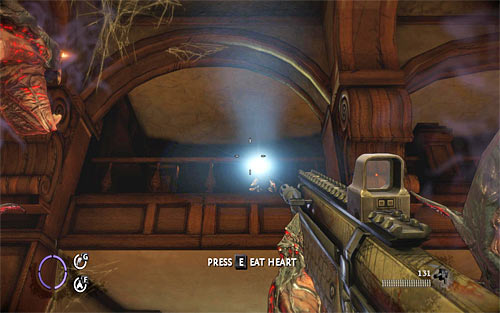
Equally important is to quickly and efficiently kill two enemies with reflectors. Luckily they should appear one after another, making their elimination easier. Same as before, leave weakest opponents till the end, using your time to replenish ammo and heal your character.
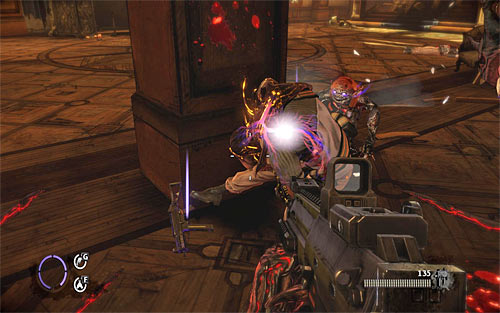
Third part of the battle is definitely easiest, because the only problem you'll have with quickly moving enemies with melee weapons. I suggest using the right tentacle to attack them especially that you do not have to focus on performing very precise attacks. Additionally you'll have to deal with group of ordinary enemies.
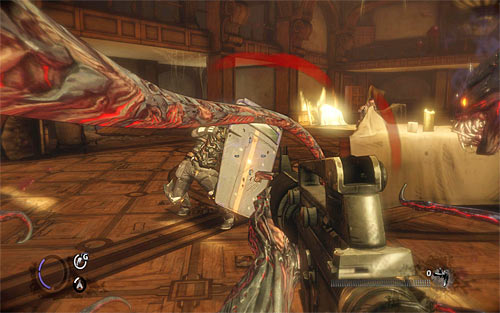
Surviving the last, fourth part of the fight requires a lot more effort. Watch out especially for a new elite opponent with the firearms and the enemy with a shield. For the sake of reminder, you have to destroy shield's outer case first and then pull it out from him (Q).
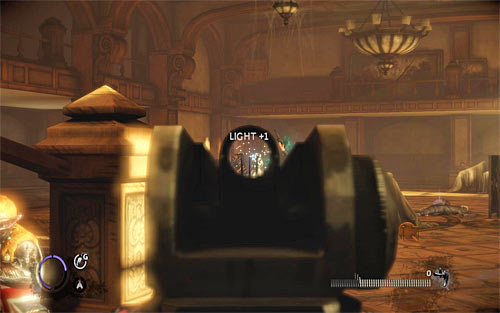
In addition to enemies mentioned above, watch out for another opponent with a reflector, so he won't stop you from using the Darkness powers. Finally deal with the weakest opponents, fighting until you'll get information on further objectives.

Pick up supplies and use the newly unlocked passage, located in the ballroom corner. Think about using a Talent Shrine along your way and then go up the stairs to the upper floor. Ignore Victor who appears for short amount of time, because you won't be able to deal with him during this chapter. Once you get to the floor, start with crossing boards located on the left. Look into a hole in the wall visible in the distance and grab with your left tentacle (Q) a new relic (The Deceiver's Grasp - 26/29).
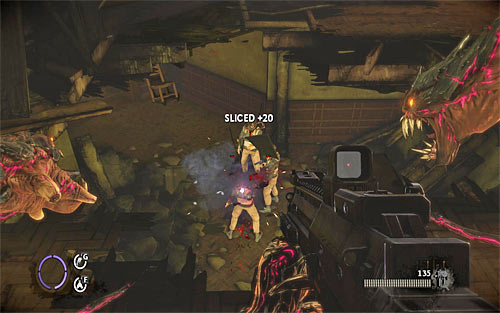
You can now return to the previously bypassed hole in the floor and focus on opponents standing below. Depending on your preferences you can shoot at them or throw at them a ventilator found in this area. After that jump down and finish them. Head to the entrance to the next large room.
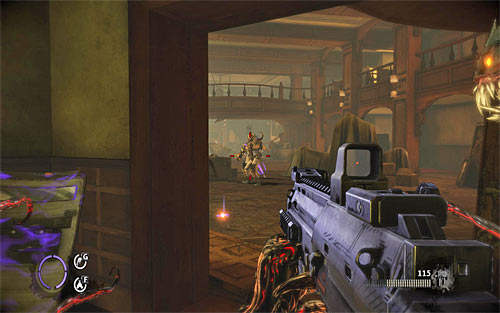
After getting inside focus on quick elimination of enemy with a whip, which should move towards you. After he dies attack the rest of enemies, helping you with metal bars or shield. In addition you might use nearby pillars as covers, and return to the corridor, where you met a first group of enemies, in case of danger.
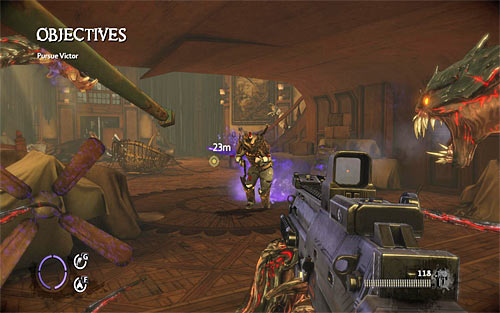
After reaching further part of the large room, prepare for an attack of elite enemy with a shotgun. It is of course not the only opponent, because he is accompanied by other thugs. After the fight look around for ammo and a good shield and then choose the stairs leading to the next floor. Prepare for more tough fights.
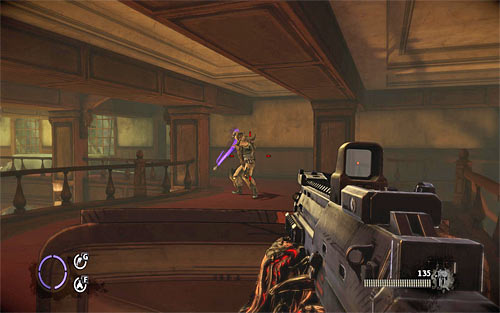
Once you get to the floor, start with eliminating yet another thug with a whip, trying to avoid his tries to pull out your firearms. But this is not over yet, because new enemies will appear near the stairs, with a shielded thug among them.
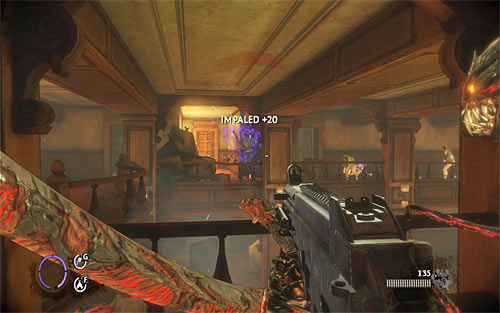
You won't be able to choose a shortcut to the exit, located on your left, so you have to CAREFULY walk through the entire floor, eliminating enemies appearing in a distance. I suggest using firearms to inflict deadly damage, but this is not the only option, because there are many throwable objects in the area.
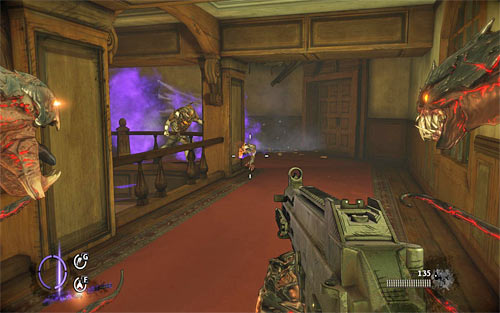
In particular I recommend being careful in the last part of your walk, because elite opponents will join fights then. Try to eliminate them one by one, with a help of tentacles and a Swarm attack, which slows them for a few seconds. Do not forget about healing Jackie regularly. After reaching the last balconies, destroy a lamp located to the right and then pull out the door in a well-known way (Q and rhythmically E). The only thing left is to walk through several linear corridors.
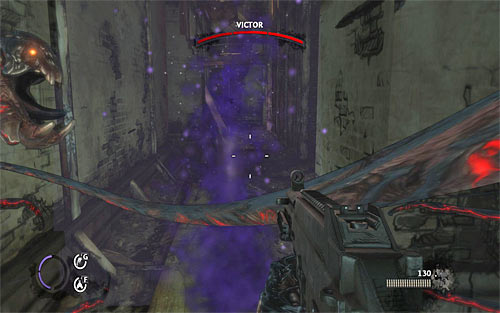
Follow your darkling. After reaching one of the corridors, you should notice that Victor started sending Darkness projectiles towards you. You can't avoid them standing on the side, because they are homing projectiles. Instead, according to the game's suggestions, you have to perform horizontal slashes with your right tentacles (hold the middle mouse button and move the mouse to sides).
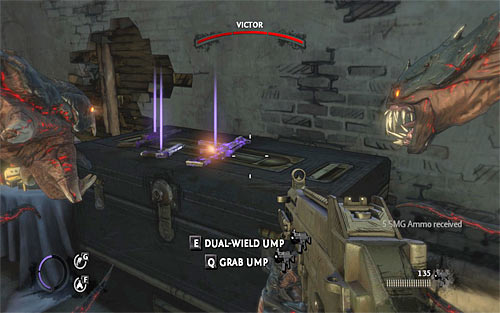
Do not count on that, that Victor will stop after sending out several projectiles, because he will keep sending them until you get closer. So you have to destroy projectiles, while moving towards him. After Victor flees, resume exploration of the area. In the next corridor you'll find weapons, ammo and a Talent Shrine. I suggest preparing well, because you'll be fighting boss soon.

When you decide that you're ready, start pulling out boards (Q and rhythmically E), which block access to a large room in the attic. Enter the new location, jump to the lower floor and explore the area to the right, picking up a relic (The First - 27/29). Use the fact that the duel with Victor won't start, until you approach the opposite end of the attic and remember positions of ammo sheds and optionally taking with you some large object to use it as a cover.
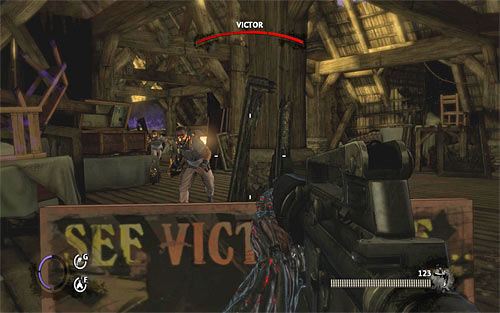
Try to approach Victor visible in a distance, which will result in appearance of his helpers. Their elimination should not be a problem. I suggest killing them in a traditional way, but avoiding executions, so you'll be able to eat their hearts later on to heal yourself.
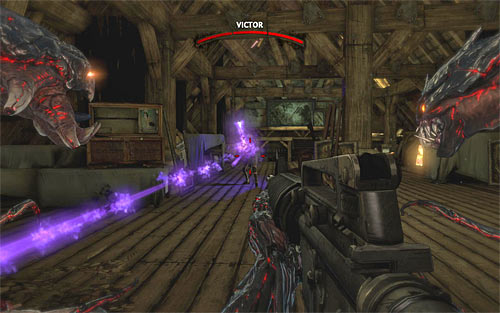
Victor will join the fight after you eliminate all his subordinates. Boss will use mainly Siphon to inflict you damage, so you should use covers wisely. You have also to watch his actions, because he likes to change his position on the battle field constantly. Luckily he is surrounded by characteristic aura (same as Peevish), so you can find him easily.
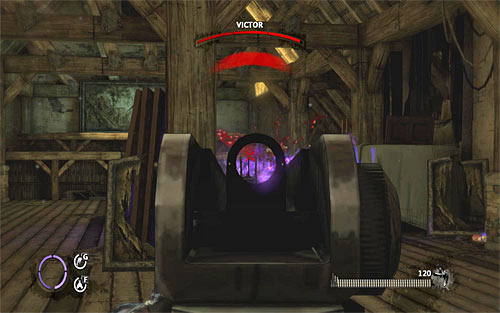
As for attacking Victor, I recommend using mainly firearms, because on this game stage you should have a very good assault rifle, plus there is plenty of ammo in the area.
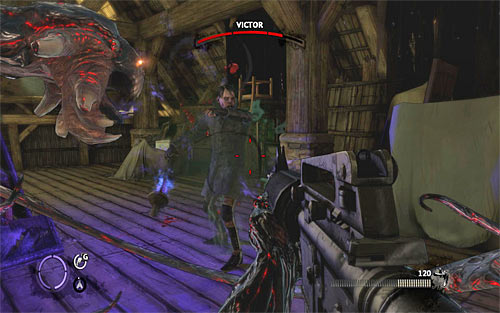
Using the firearms is not the only option, because from time to time Victor appears near Jackie, and in such situation you may use the right tentacle. Additionally I recommend using the Swarm attack (the F key), because Victor is not resistant to it and can be easily stopped for few seconds. Keep fighting until boss loses about half of his health. The game should save your progress at this point and you'll advance to the second part of the battle.
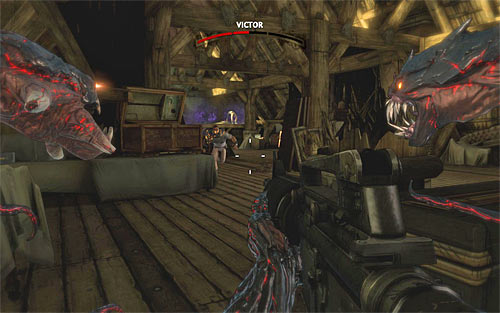
Boss will send his subordinates on you again, and elimination of them should not be too difficult, although one of the opponents could have a shield with him. Same as in the first part of the battle, make sure to leave several dead enemies to be used later and heal you thanks to eating their hearts.
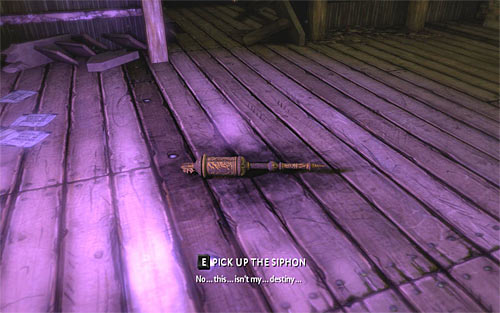
You can now return to attacking Victor. Notice though, that meantime he has "learned" few new moves. First of all boss will start sending out new projectiles and the main difficulty is a fact, that they can be horizontal or vertical. So you have to destroy them skillfully (with vertical or horizontal slashes, respectively).
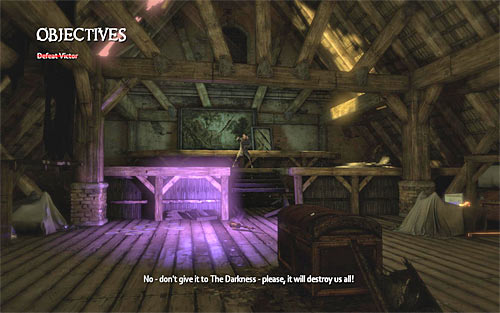
Victor can also summon darklings from time to time, but same as with Peevish fight, they die quickly and even if they can get closer to you, they won't inflict too much damage. Keep fighting until Victor loses entire health bar. Noteworthy is that defeating Victor is rewarded with 500 essence points.
There is only one more thing to do in this chapter. You have to approach the Siphon left by Victor and press the E key. You'll watch a short cutscene with Jackie committing suicide. He wants to be sent to hell to save Jenny.

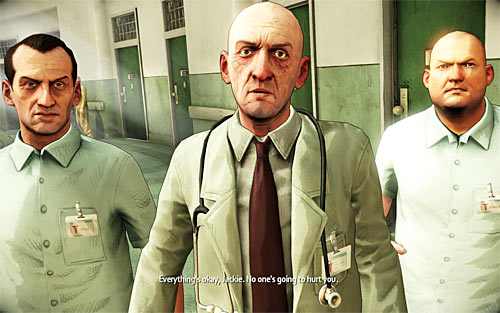
This is your last visit in an imaginary mental asylum and reaching its final part won't take long. Traditionally everyone will try to convince you that you're in the real world. Start with listening to the conversation with other patients and then leave your room, meeting more people. Finally you'll be sent to meet Jenny.
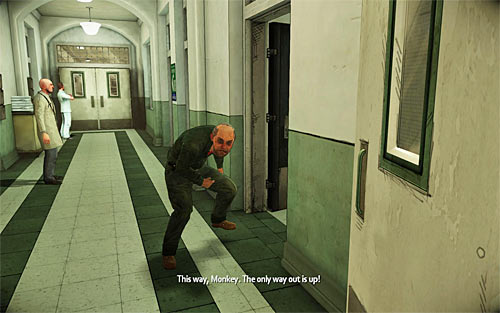
Head to the Jenny's office, meeting on your way doctor James and ... doctor Vick. Keep moving until you'll see darkling to the right, who will look like janitor (same as previously). According to the suggestion, go to the newly unlocked right passage, but you must hurry, because otherwise you'll be caught by a paramedic and you'll get back to the last control point.
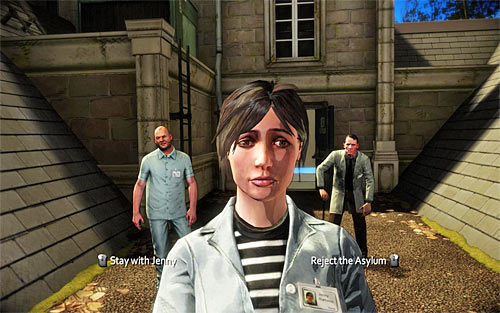
You'll watch another cutscene, where darkling managed to get Jackie to asylum's roof door, but he also dies. Once you get to the roof, you'll see another cutscene and a very important choice (screen above).
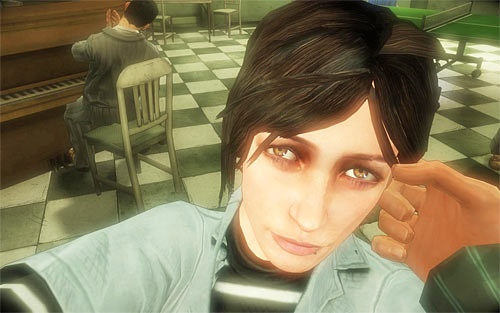
If you have nothing against the fact, that the asylum doesn't really exist and you want to stay with "fictional" Jenny, you have to press the left mouse button (Stay with Jenny). The game will display a short cutscene, after which your adventure ends. Notice - if you want to test the second variant (and finish the last game chapter), then you have to go to the main menu and select option to continue from the last control point (Continue).
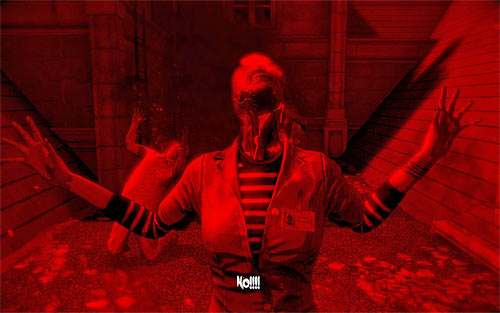
If you want to get out of this place and get to hell to save the real Jenny, you have to press the right mouse button (Reject the Asylum). Jackie will decide to commit a suicide by jumping down and you'll advance to the last game chapter - Heart Of Darkness.

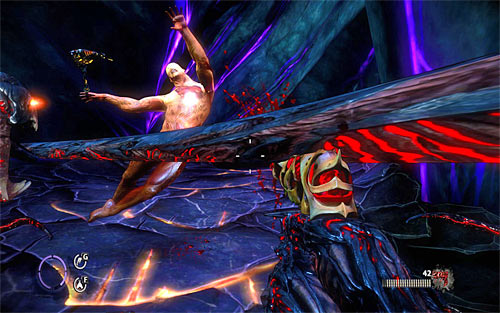
Move forwards. After few moments you should find yourself in a place, where the game will show you imprisoned Jenny, but before you approach her, explore the area to your right, because you'll find a new relic there (Prism of the Brothers - 28/29). Now you can go to Jenny.
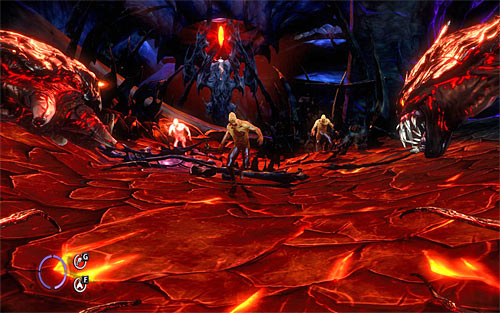
As you probably guessed, Darkness will stay on your way, sending monsters on you. These creatures are very similar to humanoid forms you were fighting through entire game, because they can use melee weapons or special types of firearms. As you do not have any objects by default, use both tentacles to defeat monsters.
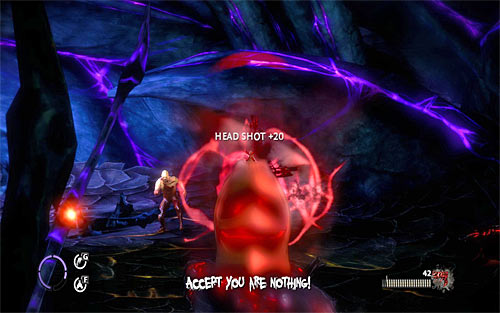
After the fight unfortunately Jenny will be taken by Darkness in another place, so you'll have to find her again and then rescue her. Make sure to replenish your health (you can eat opponent's hearts) and take at least one Kezef gun with you. Choose the only passage, preparing to eliminate new monsters. The game will offer you full freedom of movements here, so you can use firearms, throw environment objects or attack your enemies with the right tentacle.
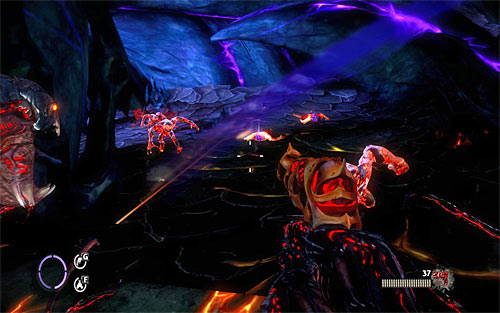
Darklings will soon join the fight, but they can be easily killed - same as their counterparts from the previous fights with bosses. Only make sure that none of darklings comes close to you, because otherwise you might lose some HP. Before you continue, I suggest using the last Talent Shrine.
Keep exploring the area, eliminating darklings and monsters jumping from the some kind of cocoons. I suggest killing enemies which use firearms first, because they are the greatest threat.
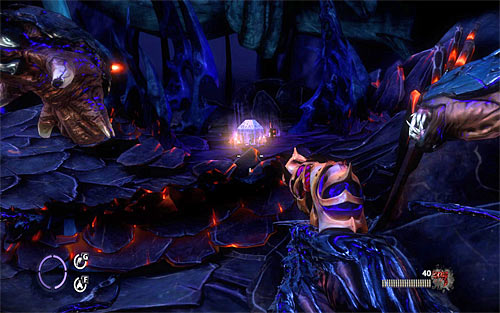
Look around very carefully because on your further way you'll see the last relic on your right (Ashes of the Unnamed - 29/29). Make sure that you've picked up this secret and then approach the nearby barricade, which you have to destroy with the left tentacle (Q and rhythmically E).
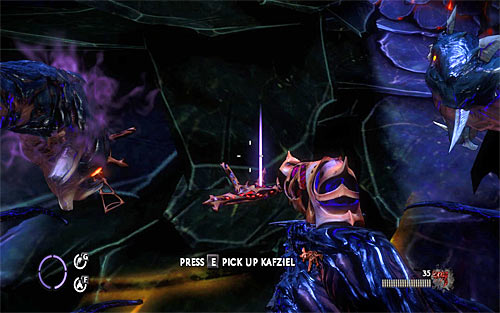
Prepare for new fight, because on your way to Jenny you'll encounter new monsters and darklings. These fights are not different from the previous ones, but you should keep looking for ammo and eat opponent's hearts. Some of enemies should left Kafziel machine guns and you might consider picking up at least one of such weapon. Soon you should appear to the place, where Jenny is kept.
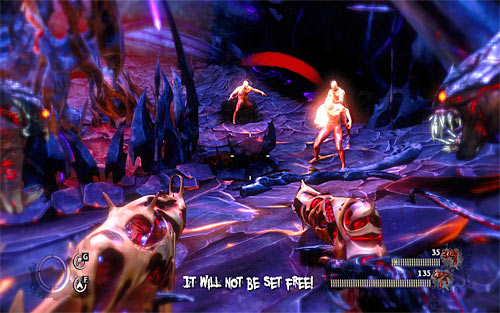
Ignore current objective temporarily, because first you have to deal with all enemies in area. Notice, that the passage behind you is blocked now, so as a result fights will be fought on a small area. So I suggest using your tentacles here, especially since enemies are not very tough. Try not to execute all of the monsters, so you'll be able to eat hearts if necessary.
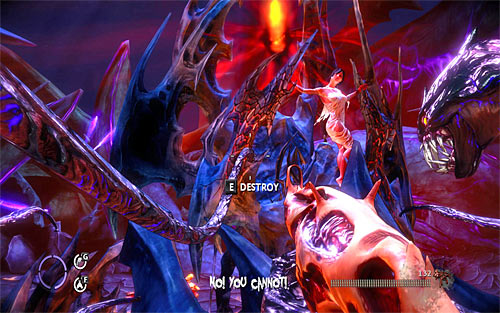
After securing the area, start preparing to free Jenny. Aim at the any of bindings and pull the put with the Q key and then press the E key rhythmically. The action will succeed but Darkness will again move Jenny to another place, so do not destroy the second binding right now.
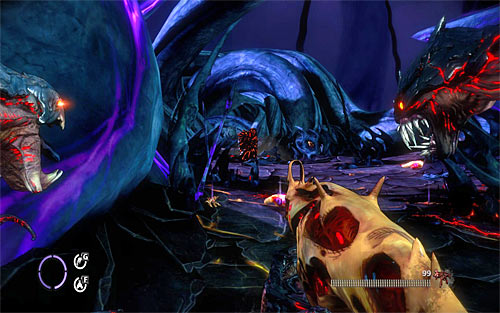
Now prepare for the next part of the chapter, where you will walk though linear path and eliminate Darkness monsters and darklings along your way. The game will force you to destroy a barricade at some points, but this should not be a big problem (Q and rhythmically E). Watch out for monsters using shields. Overall tactics doesn't change - you have to damage the shield first and the pull it out from the enemy
.
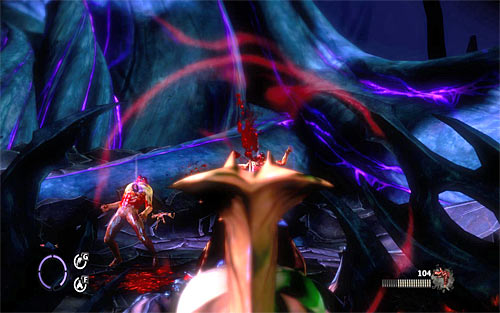
I suggest examining bodies of defeated enemies, because you can find very useful assault rifle Mashhit. Try to move forwards when possible, because in the final part of your walk Darkness will be sending regularly new darklings on you. After few moments you should reach a new place with imprisoned Jenny.

Prepare for the fight similar to the previous one. The "only" difference is the fact, that enemies with shields will join the battle. So I suggest not saving ammo (you won't need it anymore), use additional powers (Swarm attack for example) and remember about saving some bodies for later (to eat their hearts). However generally speaking, the victory here should come easy.
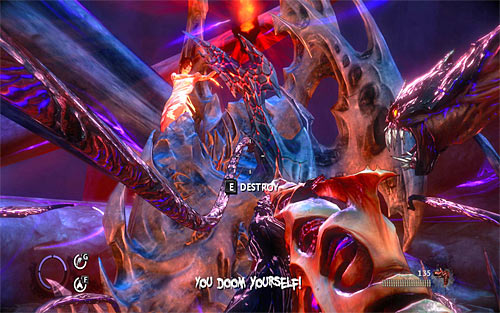
You can now approach Jenny and repeat steps described previously (Q and rhythmically E) on a second binding.
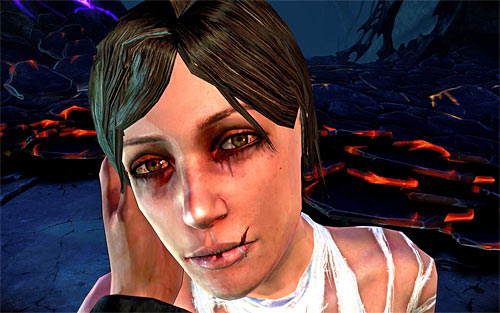
And that's over - CONGRATULATIONS! Notice - do not forget about watching a bonus scene after credits, which is activated by pressing the E key!
There are 29 different relics in the game in total to be found. They act as secrets. Information about finding them is included in the above walkthrough, so I suggest using following overview only if you've missed some relics and you want to get back for them after finishing the game. Noteworthy is that finding each relic is rewarded with 300 essence points (you need these to unlock new Darkness powers).
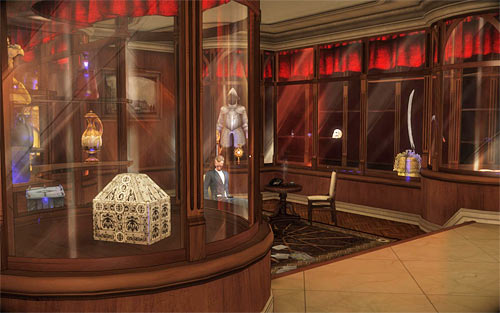
Relics you've already found can be seen in the Jackie's mansion, in the room on the ground floor, adjacent to the library.
RELIC 1 - Roanoke's Bane
Chapter: #1 - Payback
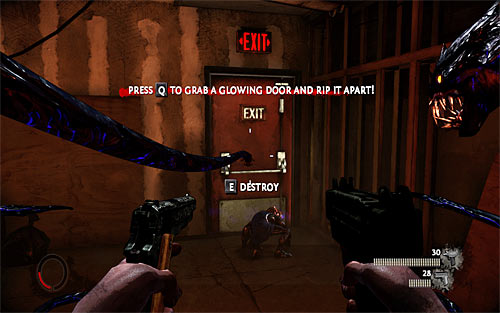
How you find the relic: During playing through this chapter you have to reach the place, where restaurant explosion will throw Jackie away, resulting in breaking through inside one of the building. After learning how to use darkling, pull out the building exit door (screen above).

After getting outside turn left.
RELIC 2 - Yhwh's Lament
Chapter: #1 - Payback
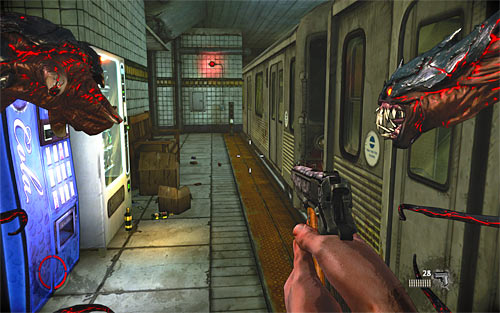
Later on in this chapter you'll get to the subway station. Deal with all enemies and then go back to the stairs and choose one of the side passages (screen above).

Relic is hidden under the stairs, which you've used to get to the subway station.
RELIC 3 - The True Revelation
Chapter: #2 - The Family
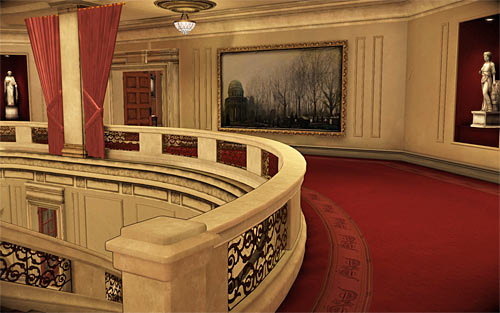
Use the stairs leading to the mansion's first floor and turn to the left (screen above), heading to the entrance of aunt Sarah's bedroom.
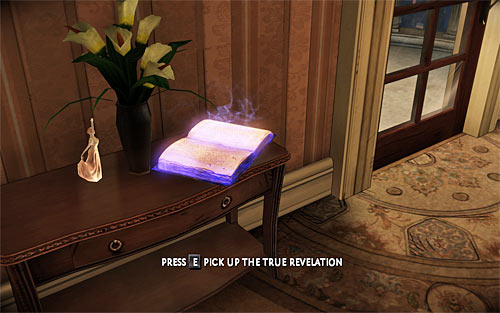
A book lying on the table to the left is relic you're looking for. Notice - you can collect this item also during future visits in mentions (but not during the chapter #7 Home Invasion, because aunt Sarah's bedroom is not available then).
RELIC 4 - Sister of Light
Chapter: #3 - Q and A
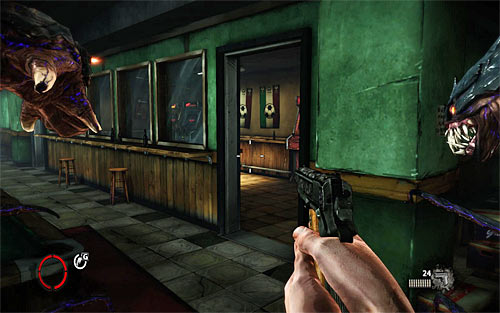
After securing club's ground floor (beginning of the chapter), decide to explore a small room located on the right (screen above).

Relic you're looking for is lying on the floor.
RELIC 5 - The Dark Man
Chapter: #3 - Q and A
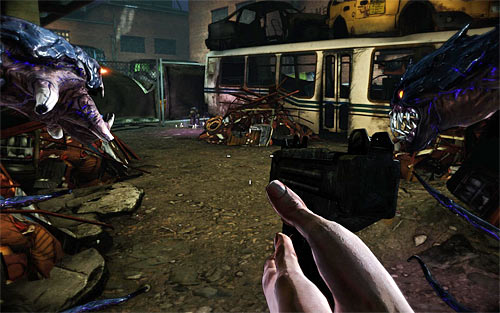
During exploration of junkyard in later stage of the chapter (after chasing Swifty), you have to reach the place where you'll find a Talent Shrine. Ignore your darkling who will head to the right and go to the left (screen above).
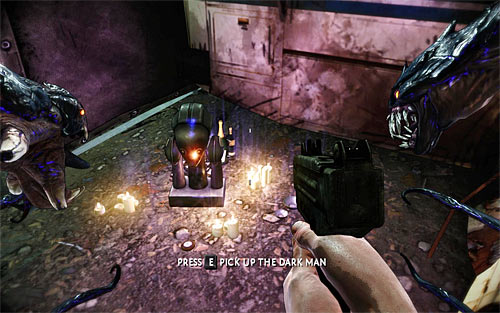
Relic is hidden next to the bus's wreck.
RELIC 6 - The Trinity
Chapter: #3 - Q and A
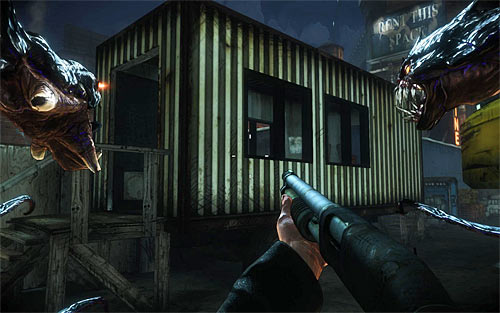
Right after finishing the fight with Swifty, go over the arm of the damaged crane and look for a small barrack (screen above). Do it before unlocking the passage and getting inside the bar!

Relic is hidden inside the barrack.
RELIC 7 - The Graven Image
Chapter: #3 - Q and A

After reaching warehouses you have to get to the hall destroying the fuse box. Look for a narrow passage on the ground floor. It is located under the balcony, where you've started exploration of the hall.
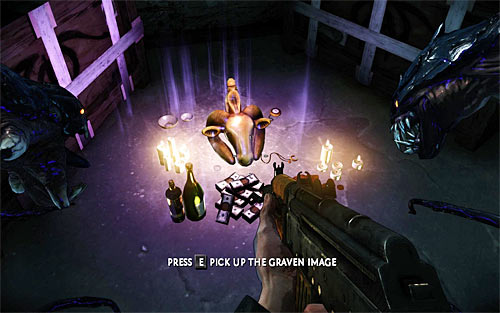
Relic is hidden in a small room and you will collect it before reaching the first control panel.
RELIC 8 - Chime of Deliverance
Chapter: #3 - Q and A
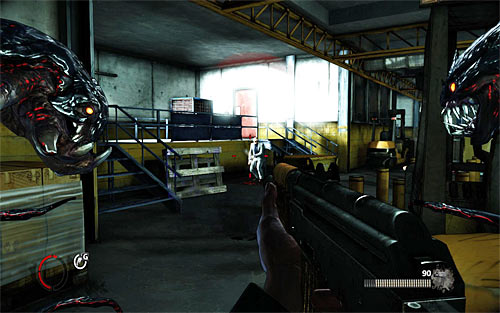
After reaching the loading zone in a final stage of the chapter, look around for door on the left, which are lightened by a reflector (screen above). Destroy generator powering the reflector and pull out the mentioned door with a left tentacle.
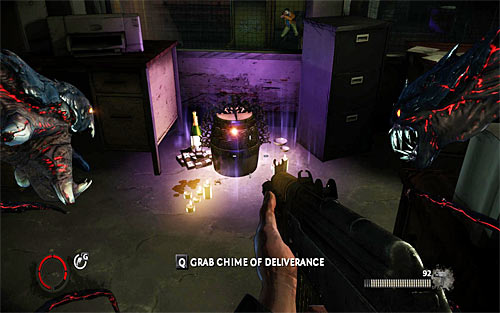
Relic is hidden in a small room.
RELIC 9 - The Brothers of Men
Chapter: #5 - Strong Silent Type
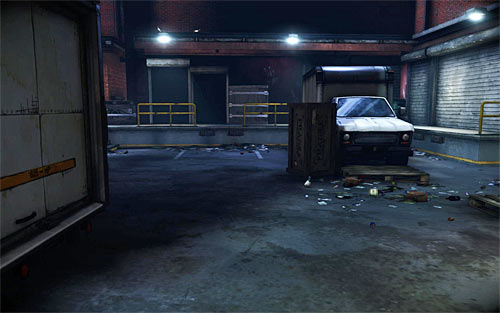
Shortly after beginning of the chapter turn right and approach a truck parked on the yard (screen above).
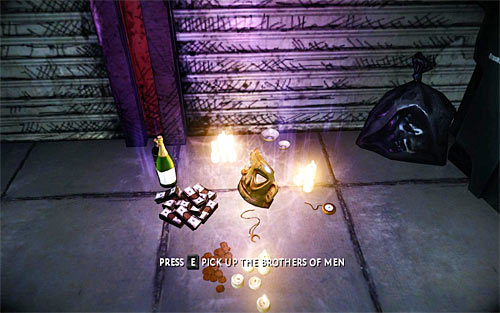
Relic is hidden to the right from a truck.
RELIC 10 - The Key of Mictlan
Chapter: #5 - Strong Silent Type
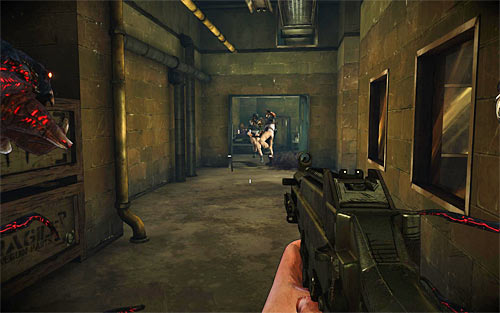
A chance for getting this relic occurs in the later stage of the chapter, after playing as a darkling and returning to Jackie's body. Deal with enemies, which will break through the double door (screen above).
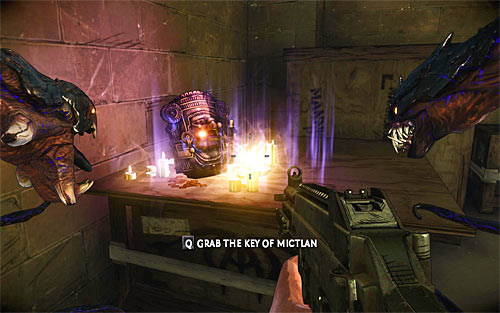
After eliminating enemies move forwards. Relic is lying on the crate.
RELIC 11 - Thumb Screws
Chapter: #6 - Deal With the Devil
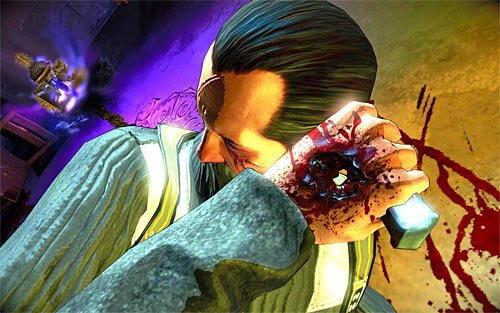
This relic can be collected after Jackie frees him and kills enemies in the room.

Examine the area to your left. Relic is lying on the ground, next to the cross.
RELIC 12 - Fool's Phylactery
Chapter: #6 - Deal With the Devil
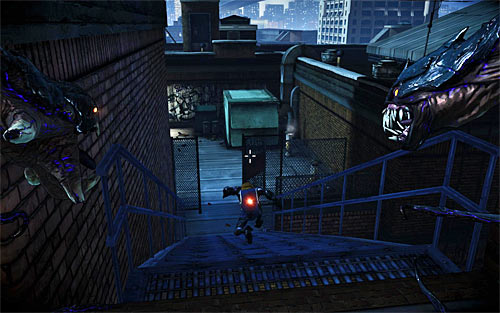
Shortly after leaving the burning brothel, you'll have to use blue painted stairs (screen above), in order to get to the adjacent rooftop.

STOP at about middle of the stairs. Turn right and lean over the railing, noticing relic on the lower balcony. You can't get there personally, so the only solution is to grab it with a left tentacle.
RELIC 13 - Winged Demon
Chapter: #7 - Home Invasion
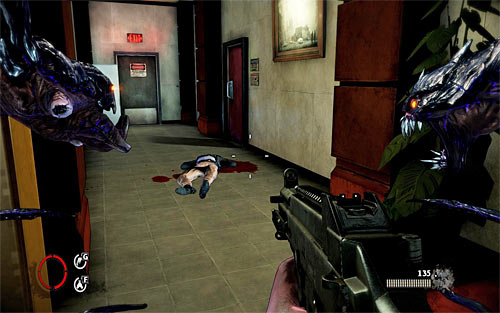
After dealing with all enemies in the underground parking you'll get to the building entrance (and a junction). Ignore the right corridor which leads to elevators and go to the left (screen above). Find a locked door and pull it out with the left tentacle.
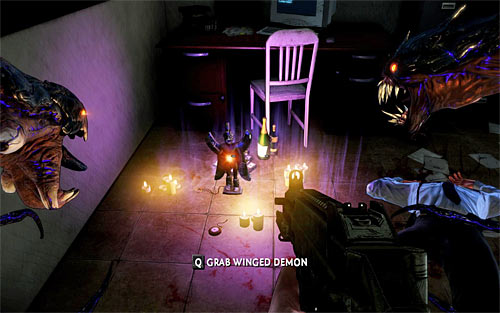
Relic is hidden in a small room.
RELIC 14 - The Blinding Sun
Chapter: #7 - Home Invasion
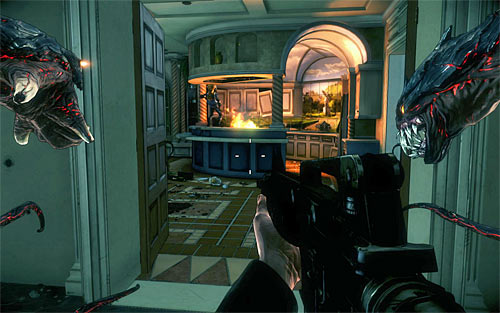
During crossing attacked Jackie's mansion, you should reach the kitchen located on the ground floor. It is not occupied by anyone (screen above).
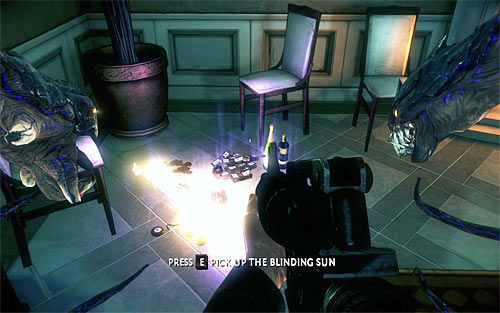
Instead of going to the Jackie's office, turn right deciding to explore the empty room adjacent to the kitchen. Relic is lying on the floor, next to chairs and fireplace.
RELIC 15 - Cain
Chapter: #10 - Saying Goodbye
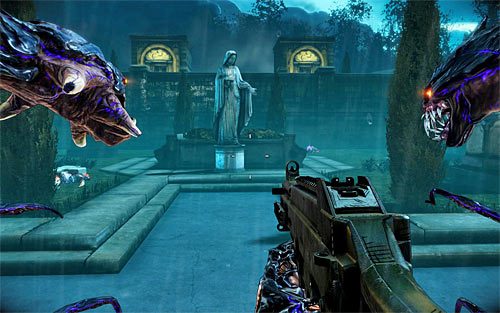
Look around in the location with aunt Sarah's coffin and search for a large statue (screen above).
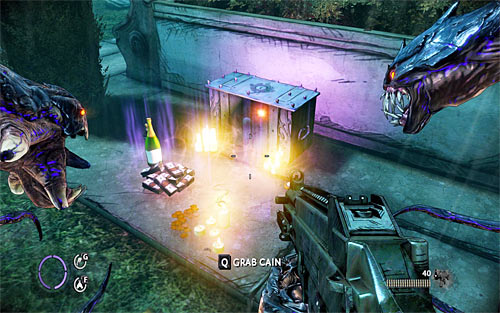
Relic is hidden behind the statue and you can collect it right on the chapter beginning or after the fight with Bragg and his thugs.
RELIC 16 - Engraved Skull
Chapter: #10 - Saying Goodbye
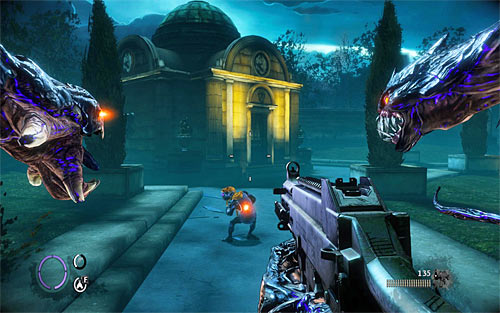
Soon after dealing f a first time with a bandit with a whip, you'll get to the place where you'll see a large mausoleum in front of you (screen above).

Relic is located at the back of the mausoleum, next to the ammo shed.
RELIC 17 - The Lantern of St. Anthony
Chapter: #12 - Fun and Games
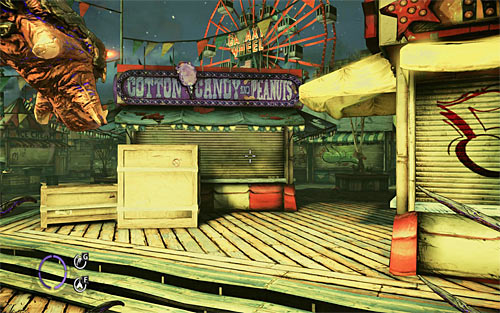
After getting inside the carnival (before fights and getting to the first shooting range0, go to the left. Stop in the place, where to your right you'll see lighten up Cotton Candy and Peanuts stall (screen above).
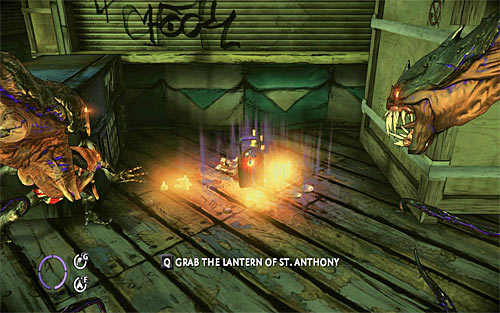
Explore the area at the stall's back, finding relic lying on the ground. Notice - you can collect this secret on your way back from the shooting range (but then you have to eliminate enemies).
RELIC 18 - Af and Hemah
Chapter: #12 - Fun and Games
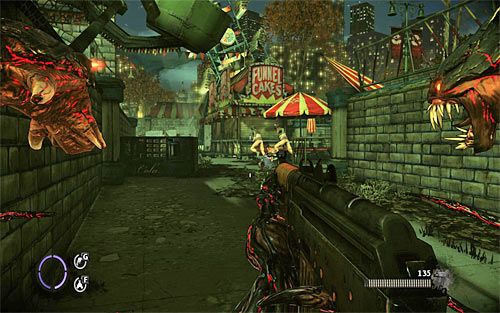
After leaving the first stage of the carnival (crossing under partially raised gate), you'll notice fleeing enemies (screen above).

Ignore them and explore the area to the right, which was guarded by them. Relic is lying on the ground.
RELIC 19 - The Abysmal Maw
Chapter: #12 - Fun and Games
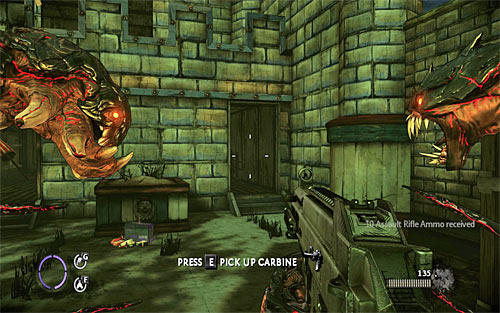
After completing the mini-game on second shooting range, the game will force on you the large battle with enemy. Look for a building shown on the above screen from which few enemies will come running during the battle (it will be accessible only after that).

Relic is lying on the floor, in the main room of the building.
RELIC 20 - Crescent of the Sun
Chapter: #12 - Fun and Games
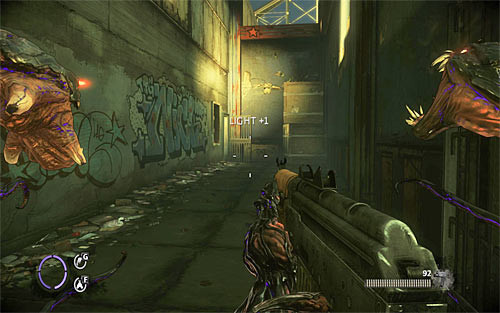
Shortly after failed attempt to destroy the large clown gate, you'll enter the new building (screen above).

Relic is located in a room near the entrance. You can grab it with you left tentacle (screen above) or after fight get inside the room from an opposite side and pick it up personally.
RELIC 21 - Siddhartha's Tears
Chapter: #12 - Fun and Games
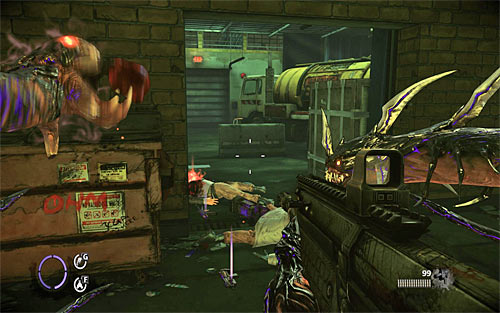
You have to reach a warehouse with parked large truck (screen above).
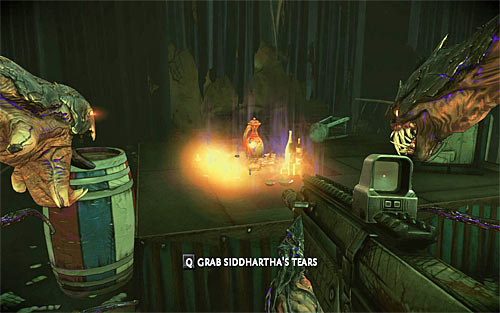
Walk to the truck's front and look for a relic.
RELIC 22 - Mark of Cain
Chapter: #12 - Fun and Games
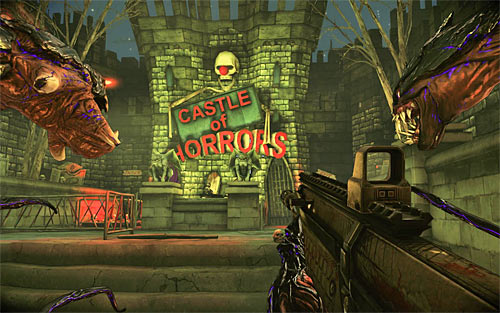
Go inside the Castle of Horrors (screen above).

Move forwards, passing by a Talent Shrine. Turn right when possible and collect relic lying in the stall used to sell tickets. You have to do it BEFORE you approach the cart and start cutsene with Jenny.
RELIC 23 - Pope John XII
Chapter: #14 - Rat in a Maze

Playing as darkling get to the room with two guards (screen above). After eliminating both enemies ignore your current objective and decide to explore the adjacent room (the entrance is located in front of the desk, where one of the killed guards was stopping by).

Relic is lying on the ground.
RELIC 24 - Reliquary of the Blessed Blood
Chapter: #14 - Rat in a Maze
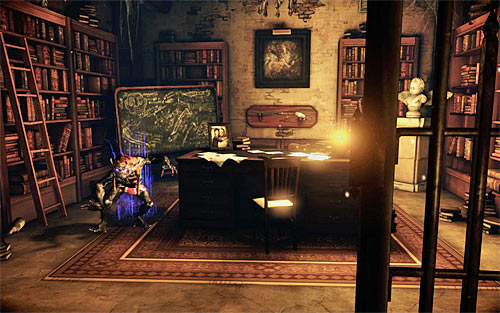
Playing again as Jackie go to the office of his father (screen above).
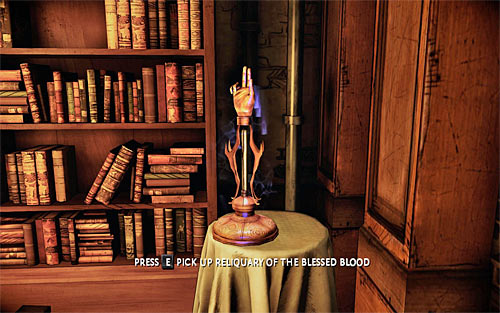
Reliquary left on the table right from the entrance is a relic you're looking for.
RELIC 25 - The Silent Night
Chapter: #15 - Homecoming
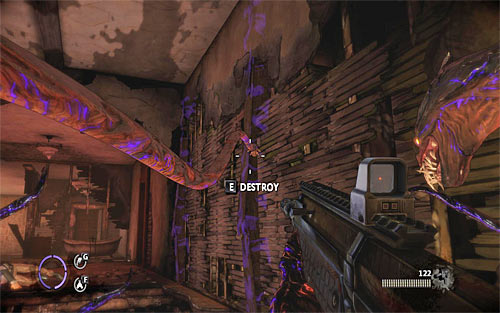
In one of the starting locations you'll be forces to grab the right wall with a tentacle in order to break it down and unlock a further passage (screen above).
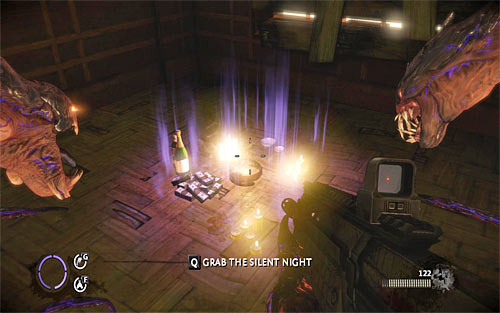
Eliminate all enemies and explore the room located behind the destroyed wall. Relic is lying on the ground, but you have to watch out and not to fall down to the nearby hole.
RELIC 26 - The Deceiver's Grasp
Chapter: #15 - Homecoming
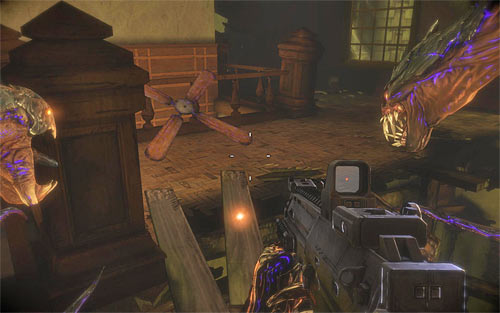
Shortly after winning the fight in a ballroom you'll reach the place, where you'll see three enemies under you. Ignore them staying on the current floor and walk over boards located on the left side (screen above).
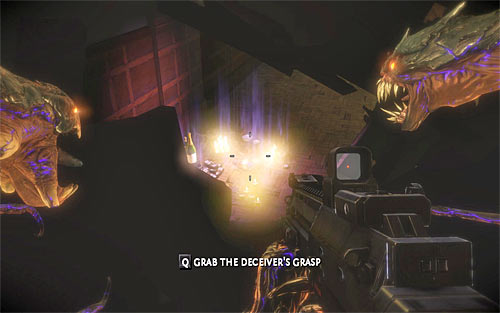
Look for a hole in the wall and grab relic with the left tentacle (you can't pick it up personally).
RELIC 27 - The First
Chapter: #16 - Last Stand
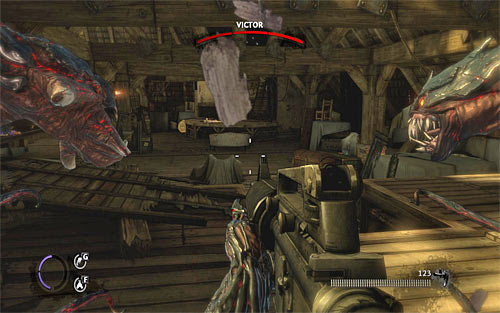
You have to get to the main room in the attic, where you'll fight with Victor (screen above).
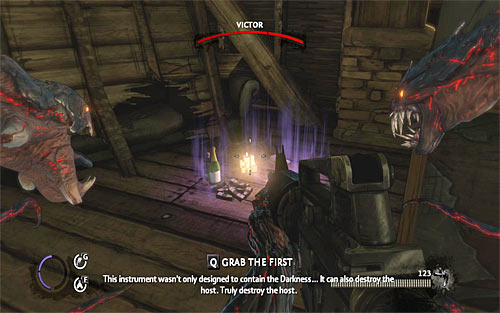
Jump down to the lower level and look for relic on your right. This secret can be picked after starting the battle, but you have to do it before Victor loses entire health bar and is defeated.
RELIC 28 - Prism of the Brothers
Chapter: #18 - Heart of Darkness
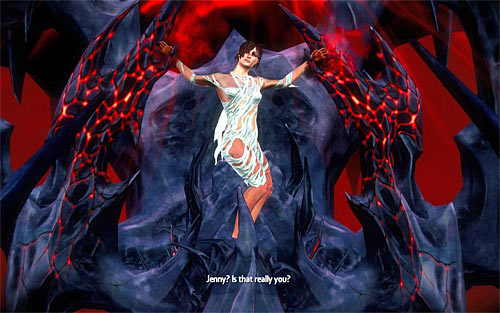
Shortly after starting this chapter move forwards, until you get to the place where game will zoom in imprisoned Jenny (screen above).
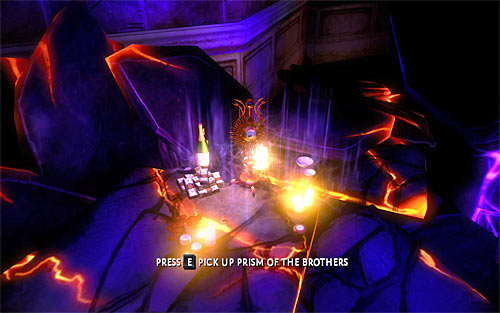
Ignore for the moment Jackie's beloved and look for a relic on your right.
RELIC 29 - Ashes of the Unnamed
Chapter: #18 - Heart of Darkness
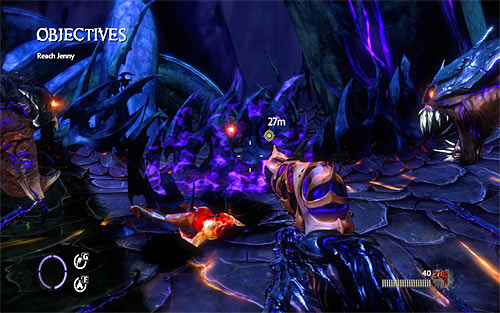
After Darkness takes Jenny, you'll have to look for her and eliminate hordes of enemies. Stop after reaching the place where you have to destroy a barricade with your left tentacle (screen above).
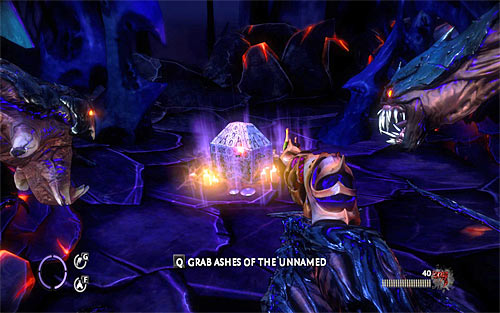
BEFORE you destroy the barricade, examine the area to the right, finding the last relic.
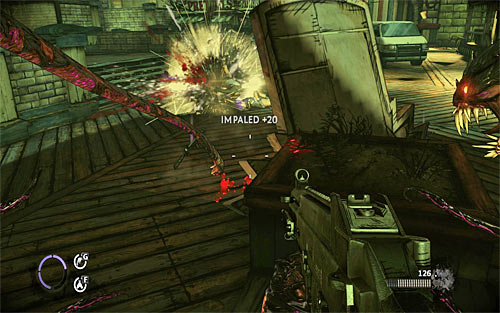
You unlock new darkness powers thanks to essence points, which can be earned for:
The amount of points you receive each time depends on the action you perform. For example if you kill enemy with the firearm you'll get only 10 points, but if you hit his head then you'll receive 20 points. A similar scheme applies to all other operations, so it is worth to combine different attacks (for example using darkling to kill enemy) and use the most effective variations.
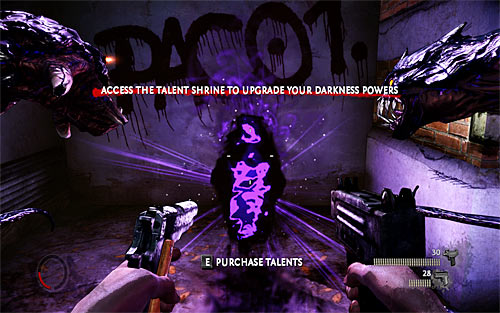
Collected essence points can be spend in Talent Shrines, and first one you'll encounter at the very beginning of the game (screen above). Information on locations of Talent Shrines can be found in above walkthrough, but you do not have to use each of shrines. So you can collect more essence points and then visit the shrine.

Darkness powers are divided into four different groups and each group is based on the talent tree. In order to unlock powers from the upper parts of the tree (for example Caustic Black Hole shown on the above screen), you have to buy all previous powers connected with this one.
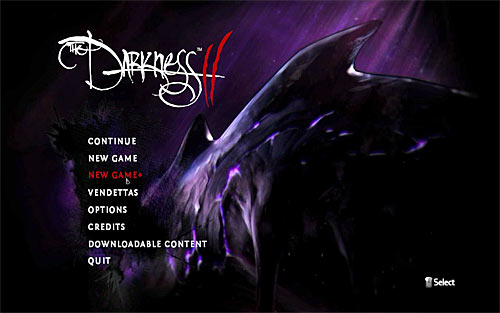
Unlocking of all Darkness powers IS NOT possible during playing for the first time, even if you try hard. Fortunately after finishing the campaign you'll be able to start a new mode - New Game+ (screen above), so you can start a game again (or play selected chapters) keeping all your current talents. So it is a good way to buy all the missing talents.
A complete description of all powers is included in the table below. We omitted Eat Hearts (its purchase is required to finish the first chapter) and Relic Hunter (overview of finding secrets is included in the walkthrough, in the Relics chapters).
CATEGORY
POWER NAME
REQUIREMENTS
DESCRIPTION AND COMMENTS
Demonic
Demonic Lift
400 essence points
If you toss your opponent with your right tentacle, he will be held there by Darkness for a moment. To do it, slash vertically with the right tentacle.
Demonic
Heart Health
1000 essence points + Demonic Lift
Recover more health by eating the hearts of opponents. This is a very useful power, especially later in the game when it is increasingly difficult to effectively treat.
Demonic
Ground Pound
600 essence points + Demonic Lift
Slash an enemy into air and then slash him to the ground and it will result in explosion which stun close enemies. It is not very usable because during the fight you do not have always time to perform both actions correctly.
Demonic
Air Darkling
600 essence points + Demonic Lift
Grab the darkling with a left tentacle and throw him at enemies, so he can attack them. It is very useful, especially for distracting or making opponents easy targets.
Demonic
Demon Blades
800 essence points + Heart Health
Additional blades appear on the right tentacle after eating the heart of an opponent. They stay active for some time and allow you to inflict greater damage. It is quite interesting power if you mostly eat hearts instead of executions.
Demonic
Dark Blast
1000 essence points + Air Darkling
Objects thrown with a left tentacle will explode on impact. It is very useful power, which should be unlocked early. This also concerns throwing darkling.
Demonic
Black Hole
1000 essence points + Demon Blades
A chance to create a black hole instead of the heart of opponent. After throwing it, it creates a vortex which attracts all nearby objects. It is one of the most interesting powers available in the game, especially that chances to create a black hole are high.
Demonic
Caustic Black Hole
1250 essence points + Black Hole
Makes black holes bigger. If you like the basic attack you should buy this talent, because you'll be able to deal easily with larger groups of enemies.
Demonic
Dark Armor
1250 essence points + Dark Blast
Using the armor granting you increased resistance to damage. This power is especially useful if you play on higher difficulty levels. It works only in dark so when you enter the illuminated area you will lose additional defense points.
Swarm & Channeling
Gun Channeling
1000 essence points
Possibility of using the Gun Channeling mode for few second (the G key), when guns do not use ammo and inflict more damage. It is important to buy this power, even if you do not use firearms often in the early chapters.
Swarm & Channeling
Swarm
1000 essence points
A possibility to use swarm against your enemies (the F key), thanks to which they are stunned for few seconds. This is one of the best powers available in the game, so I suggest unlocking it as soon as possible. It is best to use Swarm attack during the fights with groups of enemies and bosses.
Swarm & Channeling
Expert Channeler
1250 essence points + Gun Channeling
Faster regeneration of Gun Channeling. You do not have to buy this in the early stage of the game but later on you use guns more often so you should think about buying it.
Swarm & Channeling
The Destroyer's Channeling
1250 essence points + Gun Channeling
It extends the working time of Gun Channeling. I suggest buying this talent, because this power in its basic form doesn't last long.
Swarm & Channeling
Black Swarm
1250 essence points + Swarm
It extends working time of Swarm. It is not extremely important to buy this power, although it can be useful during fights with tougher enemies.
Swarm & Channeling
Expert Swarm
1250 essence points + Swarm
Faster regeneration of Swarm power. You do not have to buy it in early stages of the game, but do not wait with unlocking it till the end. Swarm power is very useful later on during the game.
Swarm & Channeling
Gun Kata
1500 essence points + Expert Channeler
A possibility of automatically targeting enemies, if during activating of Gun Channeling you wield dual guns. It is very interesting purchase, especially if you like to activate Gun Channeling during fights with groups of enemies.
Swarm & Channeling
Heart of Darkness
1500 essence points + The Destroyer's Channeling
A possibility of targeting and killing enemies through the walls, while using Gun Channeling mode. This is very useful power but you have to remember about its limited range.
Swarm & Channeling
Killer Swarm
1500 essence points + Black Swarm
Increases damage inflicted to opponents attacked by a swarm. It is very useful talent, which I strongly recommend to buy.
Swarm & Channeling
Swarms from Limbo
1500 essence points + Expert Swarm
A possibility of attacking larger amount of enemies by a swarm. I suggest buying this power, when you use swarm mainly during fights with groups of enemies and not to eliminate single, tough opponents.
Guns
Combat Belt
200 essence points
Increases ammo capacity. I strongly suggest unlocking this power especially that it is very cheap.
Guns
Active Pump
800 essence points + Combat Belt
If you press the right mouse button after shooting with shotgun, your next hit will be more accurate. You should buy this power only if you prefer shotguns than assault rifles.
Guns
Weapon Handling
800 essence points + Combat Belt
Faster reloading of weapons. It is not quite important power especially that in case of using worse weapons you can get rid of this problem by dual wielding.
Guns
Shotgun Darkness Mod
800 essence points + Combat Belt
Extend shotguns' clip. Noteworthy is that this powers works only if Jackie stays in dark.
Guns
Pistol Darkness Mod
800 essence points + Combat Belt
Extend pistols' clip. Noteworthy is that this powers works only if Jackie stays in dark.
Guns
Assault Rifle Darkness Mod
1000 essence points + Shotgun Darkness Mod
Extend assault rifles' clip. Noteworthy is that this powers works only if Jackie stays in dark.
Guns
SMG Darkness Mod
1000 essence points + Pistol Darkness Mod
Extends SMG's clip. Noteworthy is that this powers works only if Jackie stays in dark.
Guns
2 Handed Weapons Explosive Rounds
1250 essence points + Assault Rifle Darkness Mod
Shotguns and assault rifles shoot explosive round instead of standard ones. I do not have to add, that this is very useful power, greatly increasing effectiveness of those types of weapons. Unfortunately, unlocking it involves spending large amount of essence points on other, often less useful powers.
Guns
Small Arms Explosive Rounds
1250 essence points + SMG Darkness Mod
Pistols (regular and machine) shoot explosive round instead of standard ones. It is not as good power as 2 Handed Weapons Explosive Rounds, because pistols even in enhanced versions do not inflict so much damage you can expect. So you should think twice about buying this power and first decide to buy more useful talents.
Executions
Health Executions
400 essence points
When you press the 1 key after grabbing an enemy it will result with execution which regenerates some health. This is one of the MOST useful powers available in the game, which you should buy as fast as possible. Remember however that you are not able eat the heart of such executed enemy.
Executions
Health Execution Upgrade
800 essence points + Health Executions
Regenerate more health points thanks to executions performed with the 1 key. This enhancement is very useful in later stages of the game and/or if you selected one of the higher difficulty levels.
Executions
Hitman Executions
800 essence points + Health Executions
Pressing the 2 key after grabbing enemy results in execution which gives you some extra ammo. Such executions are less useful, but you should invest in this power anyway, because it unlocks an access to all remaining powers from this category.
Executions
Power Executions
1250 essence points + Hitman Executions
Pressing the 3 key after grabbing enemy results in execution which fasten the regeneration of active powers (Gun Channeling and Swarm). This power is used seldom because in most situations it is better to wait for power regeneration or use other attack types to kill enemies.
Executions
Hitman Execution Upgrade
800 essence points + Hitman Executions
You receive more ammo thanks to executions performed with the 2 key. It is not interesting talent, so it is better to spend essence points on something else.
Executions
Expert Grabber
800 essence points + Hitman Executions
Makes that stunned enemies are longer vulnerable for grabbing then with a left tentacle. This is very useful power, especially in later stages, when you have to try really hard to grab an enemy and execute him.
Executions
Demonic Executions
1250 essence points + Hitman Executions
Pressing the 4 key after grabbing enemy results in execution which creates the Darkness shield. I suggest buying this talent, because it is useful during completing these chapters where you can't find standard shield easily.
Executions
Power Execution Upgrade
1000 essence points + Power Executions
Extra regeneration of active powers thanks to executions performed by pressing the 3 key. It is not interesting talent, so it is better to spend essence points on something else.
Executions
Demonic Execution Upgrade
1000 essence points + Demonic Executions
It creates better Darkness shield thanks to executions performed by pressing the 4 key. If you like the basic power, then you should buy this talent, because it significantly increases its usefulness.
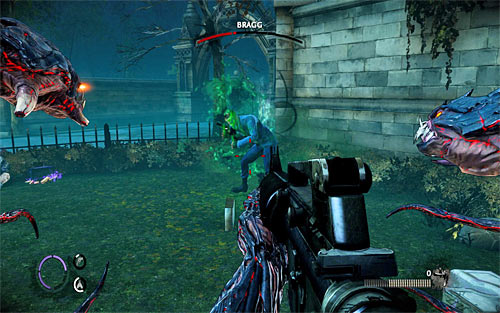
Which powers should you buy as soon as possible? I recommend mainly two active powers: Gun Channeling and Swarm, because their usage doesn't involve losing health nor essence points, so the only limitation is their cooldown time. Both mentioned powers, and Swarm especially, significantly reduce the difficulty level of fights with stronger opponents and bosses.
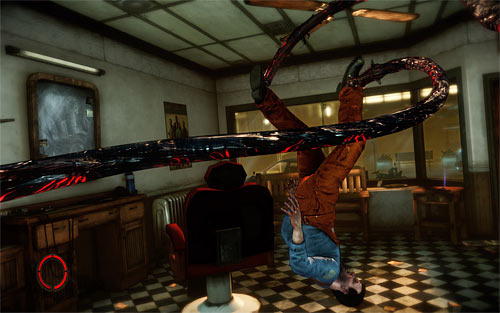
I strongly advise not to ignore the topic of effective healing of Jackie, because there are no mechanisms of automatically regenerating his HP over the time. I recommend purchasing powers associated with both methods of healing, that is eating hearts and performing executions (the 1 key), because each of them is useful in different situations. Eating hearts is a better solution if you're under attack. And executions should be performed when you fight with single enemies or small groups of opponents on larger area, because each execution takes few seconds.
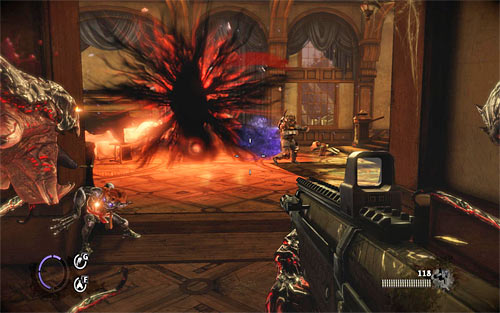
As for other powers, I suggest purchasing talents which increase the efficiency of weapons, and it is better to invest in development of assault rifles and shotgun than pistols. Another interesting propositions are Dark Blast (throwable objects explode on the impact), Dark Armor (additional armor), Expert Grabber (grabbing of stunned enemies is easier) and Black Hole. As for the latter talent it is worth to know that chances of finding black hole next to defeated enemies are quite high, because by average it is one hole for few dead enemies. This attack is also very effective itself, especially when the hole was formed near the group of enemy forces.
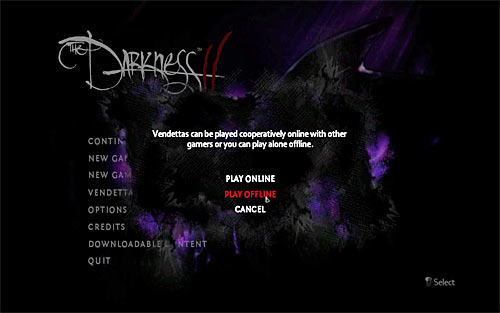
Vendettas is a completely separate mode, independent of the single player campaign. It offers additional adventure and simple missions, based on demanding skirmishes and it is prepared for maximum four players. You should not see that mode as a standard co-op, because all stages can be completed also as a single player or after gathering less than four players in a given session.
Choice of the game is made at the very beginning (screen above) and I definitely do not advise playing without other players (they won't be replaced by bots unfortunately), because Vendettas mode offers much tougher fights. So a single character can have lot problems with surviving many battles even on normal difficulty level (Mobster). Playing in two characters team is an absolute minimum in this case, though of course it is better to create a group of four.

Vendettas mode is basically divided into two categories. First one is a campaign (New Campaign option) and consists of 8 linked chapters, which are complementary to events presented in the main singleplayer campaign. The important information is that chapters are playable in given order and you do not have the possibility to choose which one you want to complete. So if you want to complete one of the earlier chapters, you have to start the Vendettas campaign from the beginning. The second category is Hit List missions. These are single mission, where you do not have to care about objectives - there are only battles with opponents or bosses. In this case you have fully freedom to choose the chapter, although some of them are initially locked.
Note - you should start the Vendettas more only after completing the singlepayer campaign. Of course it is not mandatory and you won't get any bonuses on the start, but you'll have some skill already in making the best use of the Darkness powers and you'll know the main storyline.
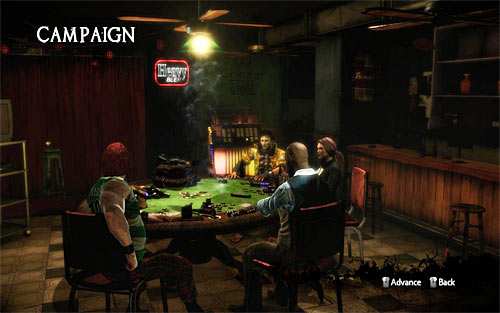
Whether you decided to choose a campaign or single missions (Hit List), you will have to select a playable character. There are four characters prepared for this mode, and they differ not only in their look, but also in equipment and skills. The important information is that each of this character is much weaker than Jackie, because they can't use tentacles and possess only one chosen Darkness power. A bright point is that there (anti)heroes use additional weapons powered by the Darkness energy. A detailed description of each character is listed below. Note - if you've chosen Hit List missions, then after selecting the character you have to select the mission. In order to do it, press ENTER and choose any mission.
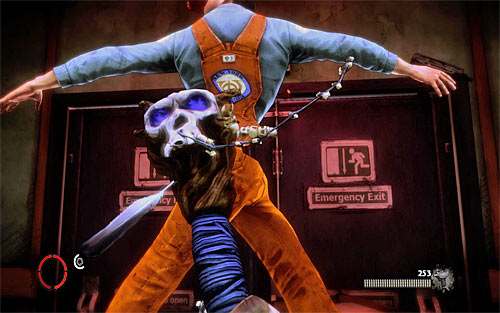
Playable characters in Vendettas mode have strengths and weaknesses similar to Jackie. First of all you have to remember about avoiding illuminated places, because this not only blinds the controlled character but also blocks regeneration of its health. Regeneration of health bar is done in two ways: thanks to executions (screen above) and destroying hearts of defeated enemies (same as eating them). It is worth noting the executions are performed in a slightly different way as in case of Jackie, because you do not grab your opponent with tentacles. Instead you have to stun him and then run towards him and press the Q key.
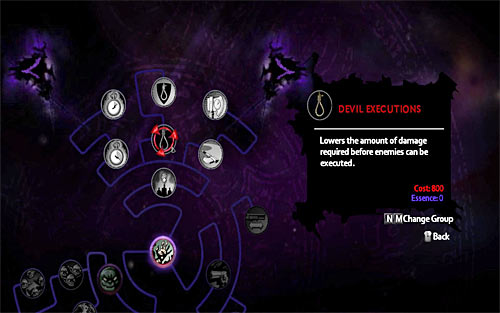
Playable characters can develop their powers, but talent trees are far simpler than Jackie's tree. I recommend of course collecting essence points to unlock all available powers. It is worth noting that gathered essence points are added to the same pool of points for campaign chapters and Hit List missions. As for finding Talent Shrines, these are located at the start of each mission.
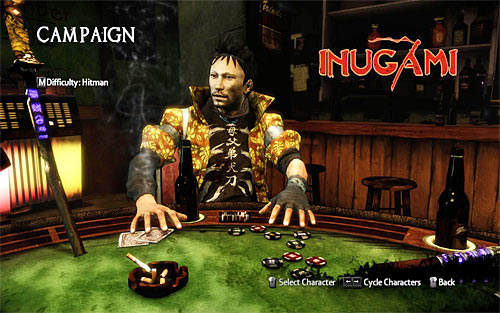
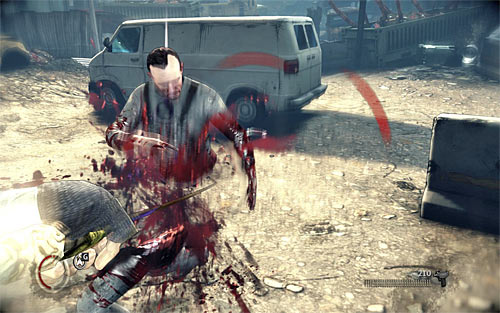
Inugami is a perfect character for a melee fight, because his favorite weapon is Kusanagi katana. This character has also some bonus to the sprint, so he can efficiently move on the battlefield or escape to the safe place in danger situation. It is worth noting that his katana is somehow similar to Jackie's right tentacle well know from the singleplayer campaign, because you can perform standard attacks or more precise slashes (these are faster but inflict less damage).
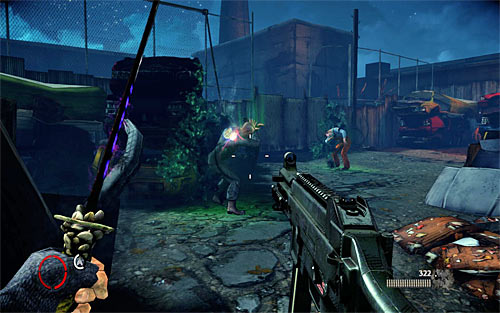
The Darkness power available for Inugami is Swarm. This attack perfectly integrates with eliminations of opponents with katana, because it is very easy to get rid of them after stunning them. I recommend using Swarm particularly in those locations where you have to fight at least several people, especially since it requires relatively long regeneration time.
Full list of Darkness powers:
CATEGORY
POWER NAME
REQUIREMENTS
DESCRIPTION AND COMMENTS
Demonic
Dark Aura
200 essence points
It raises maximum health limit of nearby players. This power is useful only in multiplayer and it is definitely worth to unlock it, because it increases chances of survival for your team.
Demonic
Demon's Rush
800 essence points + Dark Aura
You get less damage while sprinting. This is one of the most important powers for Inugami, because sprint is the most efficient way to approach enemies in order to attack them with katana.
Demonic
Dark Melee Aura
400 essence points + Dark Aura
Nearby players get bonus to melee attacks. It is not very useful talent, especially that other characters are not as efficient in melee fight as Inugami.
Demonic
Kusanagi Master
600 essence points + Dark Aura
Dealing more damage with katana. You can also hit multiply enemies with one slash. It is very important to buy this talent, even if you do not often use katana.
Demonic
Kusanagi's Wrath
1500 essence points + Demon's Rush
You're invincible for few seconds after performing execution. This is very useful talent, but you have to remember that this bonus doesn't count when you perform regular katana slashes.
Demonic
Demonic Melee Aura
800 essence points + Dark Melee Aura
Nearby players get large bonus to melee attacks. Same as with Dark Melee Aura, this talent is only useful only in multiplayer.
Demonic
Kusanagi's Power
1200 essence points + Kusanagi Master
Possibility of speeding up regeneration of Swarm attack by killing enemies with a sword and/or destroying their hearts. I suggest unlocking this power, because Swarm attack is very useful and you'll be able to use it more often with this talent.
Guns
Infidel Darkness Mod
300 essence points
Increases pistols' clip (regular and machine). It is worth noting that it works only when Inugami stays in the dark. I recommend unlocking this power as soon as possible, because it is cheap and perfectly fits if you prefer using katana and pistol at the same time.
Guns
Active Pump
600 essence points + Infidel Darkness Mod
If you press the right mouse button after shooting with shotgun, your next hit will be more accurate. It is not a priority to buy this talent, because it is far better to use katana and pistol instead of a shotgun.
Guns
Warlord Darkness Mod
600 essence points + Infidel Darkness Mod
Increases shotguns' and assault rifles' clip. It is worth noting that it works only when Inugami stays in the dark. You can buy this power, but only if you will use assault rifles and not shotguns.
Swarm
Swarm
-
You can send swarm on your opponents, so they will be stunned for few seconds. You do not have to buy this talent and of course you should use it from the very beginning.
Swarm
Black Swarm
500 essence points
Swarm attack lasts longer. This enhancement is useful in later stages of the campaign and during play on the higher difficulty levels.
Swarm
Swarms from Limbo
750 essence points
You're able to attack more enemies with Swarm. I recommend buying this talent, especially if you use swarm mostly during fights with groups of enemies and not to eliminate single tough opponents.
Swarm
Killer Swarm
1000 essence points + Black Swarm
Increases damage inflicted by Swarm. This is very useful enhancement and I strongly suggest buying it.
Swarm
Swarms from Hell
1500 essence points + Swarms from Limbo
Possibility of attacking a very large group of enemies with a Swarm. This is of course enhanced version of Swarms from Limbo and if you've unlocked it already, you should buy this one too.
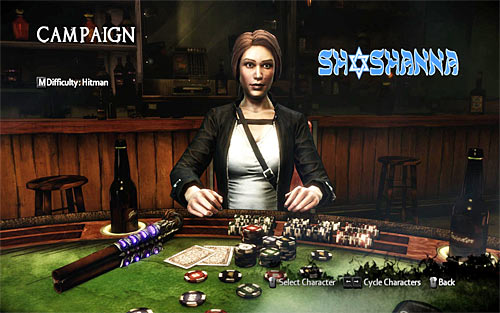
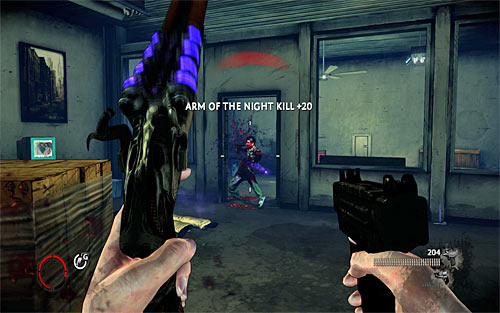
Shoshanna is the master of firearms and there are two major factors for it. First of all, the Darkness power available to Shoshanna is Gun Channeling, attack which provides unlimited ammo and inflicted damage after activation. Second, a unique weapon which she has, Arm of the Night, is a demonic version of sawed-off shotgun. It is perfect weapon which can inflict massive damage even from a relatively long distance. It is worth noting that you can adjust how many rounds you will shoot by pressing the mouse button or holding it until the desirable amount of them is loaded. The best results are guaranteed after shooting the entire cell (four rounds) with a single shot, because such attack is able to take down even stronger enemies. Valuable insight - sawed-off shotgun has unlimited ammo so you can use it even after you're out of supplies.
Additionally Shoshanna can reload weapon faster. What's more, Arm of the Night is automatically reloaded each time you use it to destroy some heart and it helps you of course to perform attack efficiently. I suggest choosing Shoshanna, especially if you want to complete Vendettas chapters alone, because in my opinion she is the best choice if you do not want a backup from other players.
Full list of Darkness powers:
CATEGORY
POWER NAME
REQUIREMENTS
DESCRIPTION AND COMMENTS
Demonic
Dark Aura
200 essence points
It raises maximum health limit of nearby players. This power is useful only in multiplayer and it is definitely worth to unlock it, because it increases chances of survival for your team.
Demonic
Dark Bullets Aura
400 essence points + Dark Aura
Nearby players get bonus to firearms attacks. It is very useful talent, especially that Vendettas mode characters rely on firearms more often than Jackie.
Demonic
Arm of the Night Charges
800 essence points + Dark Aura
Increases the sawed-off shotgun's clip. It should be your priority to buy this talent, because thanks to bigger clip you can shoot more rounds and inflict more damage.
Demonic
Arm of the Night Devotee
600 essence points + Dark Aura
Increases damage inflicted by a sawed-off shotgun. It is good to buy this talent along with Arm of the Night Charges, because thanks to them both your shotgun becomes more powerful.
Demonic
Demonic Bullets Aura
800 essence points + Dark Bullets Aura
Nearby players get large bonus to firearm attacks. Same as with Dark Bullets Aura, this talent is only useful only in multiplayer.
Demonic
Arm of the Night's Rage
1600 essence points + Arm of the Night Charges
You're invincible for few seconds after performing execution. This is very useful talent, but you have to remember that this bonus doesn't count when you perform regular sawed-off shotgun shooting.
Demonic
Arm of the Night's Power
1200 essence points + Arm of the Night Devotee
Possibility of speeding up regeneration of Gun Channeling attack by killing enemies with a shotgun and/or destroying their hearts. I suggest unlocking this power, because Gun Channeling attack is very useful and you'll be able to use it more often with this talent.
Guns
Infidel Darkness Mod
300 essence points
Increases pistols' clip (regular and machine). It is worth noting that it works only when Shoshanna stays in the dark. I recommend unlocking this power as soon as possible, because it is cheap and perfectly fits if you prefer using sawed-off and pistol at the same time.
Guns
Active Pump
600 essence points + Infidel Darkness Mod
If you press the right mouse button after shooting with shotgun, your next hit will be more accurate. It is not a priority to buy this talent, because it is far better to use sawed-off and pistol instead of a shotgun.
Guns
Warlord Darkness Mod
600 essence points + Infidel Darkness Mod
Increases shotguns' and assault rifles' clip. It is worth noting that it works only when Shoshanna stays in the dark. You can buy this power, but only if you will use assault rifles and not shotguns.
Gun Channeling
Gun Channeling
-
Possibility of using the Gun Channeling mode for few second, when guns do not use ammo and inflict more damage. You do not have to buy this power and you should use it of course from the very beginning.
Gun Channeling
Heart of Darkness
500 essence points
A possibility of targeting and killing enemies through the walls, while using Gun Channeling mode. This is very useful power but you have to remember about its limited range.
Gun Channeling
The Destroyer's Channeling
750 essence points
It extends the working time of Gun Channeling. I suggest buying this talent, because this power in its basic form doesn't last long.
Gun Channeling
Demon's Channeling
1000 essence points + Heart of Darkness
It increases damage inflicted to enemies in Gun Channeling mode. It is one of the most important purchases, which will allow you to eliminate enemies more efficiently before mentioned power stops working.
Gun Channeling
Gun Kata
1500 essence points + The Destroyer's Channeling
A possibility of automatically targeting enemies, if during activating of Gun Channeling you wield dual guns. It is very interesting purchase, especially if you like to activate Gun Channeling during fights with groups of enemies.

JP Dumond is different from other characters mainly because his Darkness power is far more useful than his unique weapon. We are talking here about Black Hole, which absorbs all nearby objects (including enemies). What's interesting, unlike the play as a Jackie black hole is created at once and not only after you find its "smaller version" next to opponent's body. Moreover in its basic form it is very powerful and this is not the end of its possibilities, because you can enhance it with proper Darkness powers. Unfortunately this is not an attack which can be used on regular basis, because its regeneration time is very long.
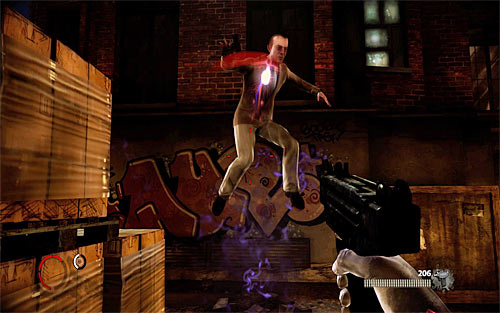
As for Dumond's unique weapon, it is voodoo Midnight Stick. This weapon doesn't inflict damage by itself (only after buying one of the talents), because its function is to hang in the air the targeted enemy. After doing this action your opponent becomes very easy target for further attacks. In addition Dumond is more effective than rest of characters in healing allies, so we suggest choosing this character only if you want to play in co-op and focus on supporting your team mates.
Full list of Darkness powers:
CATEGORY
POWER NAME
REQUIREMENTS
DESCRIPTION AND COMMENTS
Demonic
Dark Aura
200 essence points
It raises maximum health limit of nearby players. This power is useful only in multiplayer and it is definitely worth to unlock it, because it increases chances of survival for your team.
Demonic
Dark Endurance Aura
400 essence points + Dark Aura
Makes all nearby players more endured. It's one of the most valuable Dumond's powers, so I suggest unlocking it quickly, especially that it doesn't cost too much.
Demonic
Lifegiver
800 essence points + Dark Aura
Faster resurrection of other players. This power is definitely intended for multiplayer mode and I recommend buying it quickly, especially if your character has to support rest of the team.
Demonic
Midnight Stick Master
600 essence points + Dark Aura
Possibility of knocking down with voodoo stick enemies standing near the attacked person. It is obvious to buy this weapon, if you intend to regularly use Dumond's unique weapon.
Demonic
Demonic Endurance Aura
800 essence points + Dark Endurance Aura
Makes all nearby players more endured. Same as with Dark Endurance Aura, this power is useful only in multiplayer mode.
Demonic
Midnight Stick's Gift
1600 execution points + Lifegiver
You're invincible for few seconds after destroying a heart. This power is far better than its counterparts assigned to other character, because it doesn't force you to perform an execution. Despite of many essence points I recommend buying it.
Demonic
Midnight Stick's Power
1200 essence points + Midnight Stick Master
Possibility of speeding up regeneration of Black Hole attack by killing enemies with a voodoo stick and/or destroying their hearts. I suggest unlocking this power, because Black Hole attack is very useful and you'll be able to use it more often with this talent.
Guns
Infidel Darkness Mod
300 essence points
Increases pistols' clip (regular and machine). It is worth noting that it works only when Dumond stays in the dark. I recommend unlocking this power as soon as possible, because it is cheap and perfectly fits if you prefer using voodoo stick and pistol at the same time.
Guns
Active Pump
600 essence points + Infidel Darkness Mod
If you press the right mouse button after shooting with shotgun, your next hit will be more accurate. It is not a priority to buy this talent, because it is far better to use voodoo stick and pistol instead of a shotgun.
Guns
Warlord Darkness Mod
600 essence points + Infidel Darkness Mod
Increases shotguns' and assault rifles' clip. It is worth noting that it works only when Dumond stays in the dark. You can buy this power, but only if you will use assault rifles and not shotguns
Black Hole
Black Hole
-
Creates a black hole which attracts all nearby objects (including enemies). You do not have to buy this power and you should use it from the very beginning. Unlike the singleplayer campaign, the black hole is created immediately and not after finding its smaller version next to the body.
Black Hole
Infinite Darkness
750 essence points
Increases time of existing of black hole. It is not your priority to buy this power and it is better to invest your points in a talent described below.
Black Hole
Caustic Black Hole
500 essence points
It increases black hole's dimensions. This is very useful talent because it increases effectiveness of the black hole and you can then get rid of enemies standing in a distance.
Black Hole
Murderous Black Hole
1500 essence points + Infinite Darkness
A black hole can "suck in" more opponents. I strongly recommend buying this power, because it significantly increases the usefulness of black holes.
Black Hole
Soul-Destroying Black Hole
1000 essence points + Caustic Black Hole
It significantly increases dimensions of the black hole. This is of course enhanced version of Caustic Black Hole power and you should buy this talent, because thanks to that black hole become even more useful.
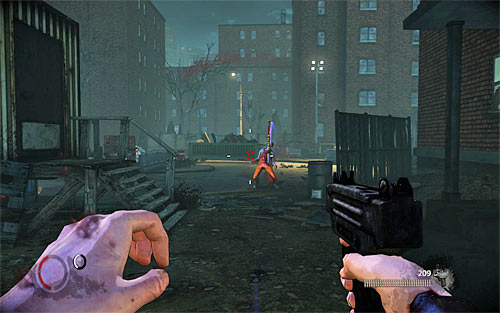
Jimmy does very well in a ranged combat, but he differs from Shoshanna in that he doesn't use unique firearms, but demonic throwing axe (Dark Axe). This object works a little like boomerang, because it thrust into enemy or environment object and you should press once again the mouse button to bring it back. The important information is that this weapon requires a good accuracy, because only hit in the head or other sensitive body area means opponent's instant death. Otherwise the enemy will be at most wounded or knocked down.
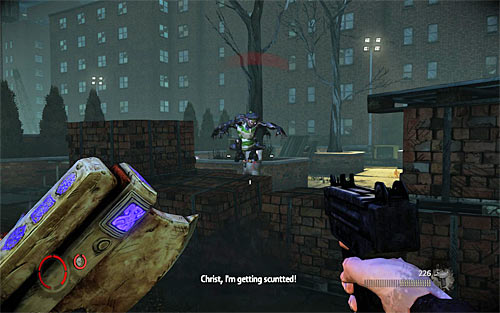
Jimmy is more resistant to damage than other characters. He can also summon darklings, which will attack enemies by default and in case of weaker enemies they might even kill someone. Stronger enemies will deal with them fairly quickly but then these creatures are also useful, because they can at least distract enemies for few seconds. Before summoning darklings I recommend destroying light sources. It is also worth to unlock all powers connected with darklings because they are very useful (especially summoning more darklings and their exploding types).
Full list of Darkness powers:
CATEGORY
POWER NAME
REQUIREMENTS
DESCRIPTION AND COMMENTS
Demonic
Dark Aura
200 essence points
It raises maximum health limit of nearby players. This power is useful only in multiplayer and it is definitely worth to unlock it, because it increases chances of survival for your team.
Demonic
Dark Power Aura
400 essence points + Dark Aura
Darkness powers of nearby players regenerate faster. It is very useful power, but your team mates should like using Swarm and Gun Channeling attacks.
Demonic
Devil Executions
800 essence points + Dark Aura
It lowers requirements for performing executions. It is useful only if you like executing enemies. The difference can be seen mainly with stronger enemies.
Demonic
Dark Axe Master
600 essence points + Dark Aura
Your axe inflicts more damage. It is very useful power especially that only most accurate throws result in immediate death of the enemy.
Demonic
Demonic Power Aura
800 essence points + Dark Power Aura
Darkness powers of nearby players regenerate faster. Same as with Dark Power Aura, this power is only useful in multiplayer mode.
Demonic
Dark Axe's Anger
1600 essence points + Devil Executions
You're invincible for few seconds after performing execution. This is very useful talent, but you have to remember that this bonus doesn't count when you perform regular axe throws.
Demonic
Dark Axe's Power
1200 essence points + Dark Axe Master
Possibility of speeding up regeneration of darkling summoning by killing enemies with a sword and/or destroying their hearts. It is not absolute priority, unless you like relying on darklings.
Guns
Infidel Darkness Mod
300 essence points
Increases pistols' clip (regular and machine). It is worth noting that it works only when Jimmy stays in the dark. I recommend unlocking this power as soon as possible, because it is cheap and perfectly fits if you prefer using axe and pistol at the same time.
Guns
Active Pump
600 essence points + Infidel Darkness Mod
If you press the right mouse button after shooting with shotgun, your next hit will be more accurate. It is not a priority to buy this talent, because it is far better to use axe and pistol instead of a shotgun.
Guns
Warlord Darkness Mod
600 essence points + Infidel Darkness Mod
Increases shotguns' and assault rifles' clip. It is worth noting that it works only when Jimmy stays in the dark. You can buy this power, but only if you will use assault rifles and not shotguns.
Darklings
Darklings
-
Summoning darklings (two by default), who jumps on enemies. You do not have to buy this power and it is worth to use it from the very beginning.
Darklings
Knockout Darklings
500 essence points
Possibility of knocking down enemies as a result of exploding darklings. This is very useful enhancement, which definitely makes using darklings good choice. I suggest unlocking it as soon as possible especially that it is not expensive.
Darklings
Darkling Squad
750 essence points
Summons three (instead of two) darklings. This is another very useful enhancement. The more darklings you're able to summon, the better, because you can create more confusion.
Darklings
Volatile Darklings
1000 essence points + Knockout Darklings
Increases the amount of damage inflicted by exploding darklings. If you have bought Knockout Darklings power then you should also buy this one, because it increases significantly effectiveness of darklings.
Darklings
Darkling Army
1500 essence points + Darkling Squad
Summons four (instead two or three) darklings. It is quite expensive but you should not ignore it, because four darklings can significantly help you. Even during fights with stronger enemies.
The campaign of Vendettas mode is constructed in such way, that you can play it many times. Battles which you'll fight during the play can radically differ depending on how many players take part in the game (it should be four of them), what characters they control, how these characters are developed and which style of playing they prefer (fight on a short range, shooting from a distance, relying on unique demonic weapons, etc.). Following tips are universal. I advise to read them regardless of how and in what company you're going to play Vendettas campaign.
Note: I strongly recommend not attempting to complete the campaign on your own. While the initial chapters are quite easy, then starting from like four chapters it is getting much more difficult and single character can have big problems there. It is worth noting that you can adjust difficulty level without restarting the campaign, only pausing the game and opening the options menu.
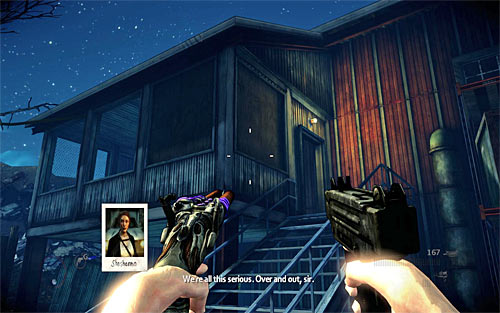
This chapter is very short and very easy. During the crossing through the junkyard I recommend regular destruction of local light sources, but you should know that some generators are very good hidden. For example the generator powering the first indestructible lamp is located inside the right building, on the floor (screen above).
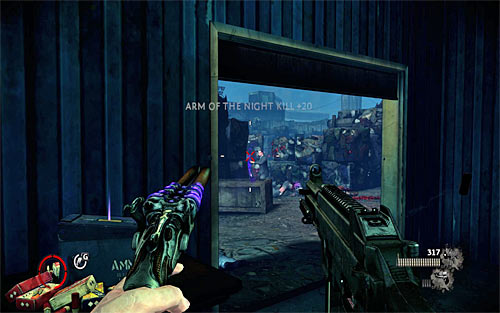
In the final part of this chapter you should defend yourself against enemies' attacks. If you play alone, then it is the best to hide inside the building with imprisoned Johnny Powell. And if you play with other players, then it is best to place your team members in the entire area or split in two groups.
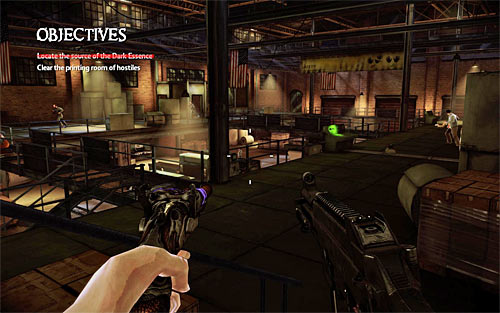
Also this chapter is not a big problem. Main fights are fought inside the large warehouse with printing press and you have to remember that enemies occupy not only the ground floor, but also upper balconies. There are two different paths leading inside the warehouse and during securing it, it is good to destroy lamps illuminating the warehouse.
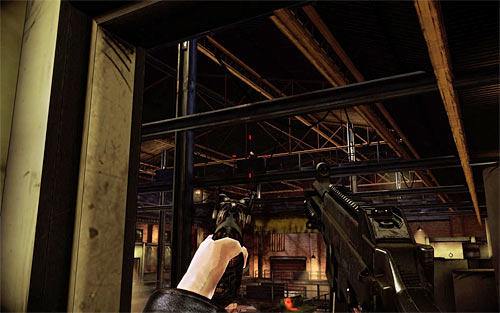
After overpowering the first fuse, new enemies will appear in the warehouse. I suggest retreating to the safe place because many enemies will start shooting from inaccessible balconies located at the warehouse roof (screen above).
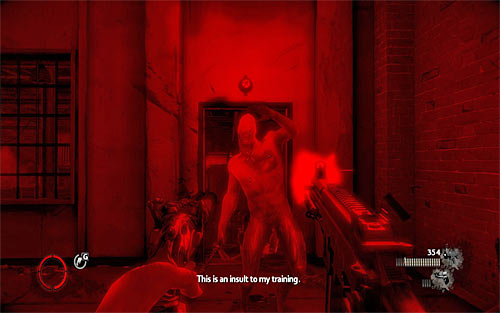
After overpowering the second fuse and collecting the artifact you have to prepare to deal with group of monsters, similar to those met during the last chapter of the singleplayer campaign. Regardless if you play alone or in the team, try to keep those monsters on a distance, because they can inflict only melee damage.
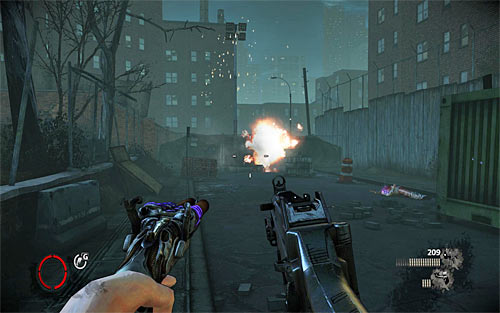
This is yet another easy chapter, during which you won't encounter any stronger enemies. During crossing between buildings you should remember about regular turning off the indestructible lamps. It is easy since generators which power them are located next to the lamps, so you do not have to waste time on searching them. Ordinary street lamps can be destroyed at once.
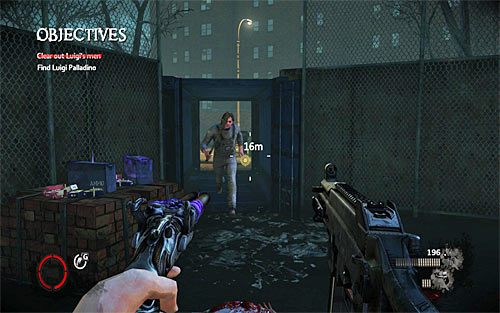
Watch out for enemies, who will come running from the left container, after reaching the basketball yard (screen above). Do not let them inflict huge damage to you or any other players.
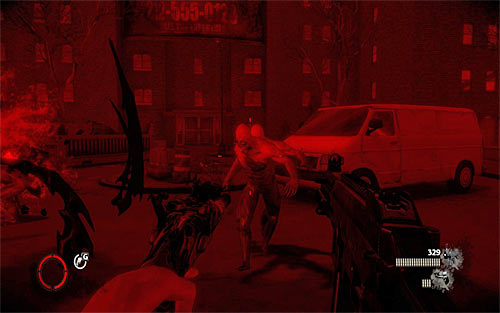
Do not count on the fact that on the way back (after picking up a package from Dolfo) the area will be secured, because many new enemies will appear. Their elimination is fortunately very easy. Be ready to deal with new group of demonic creatures, similar to those from a previous chapter. They will attack you after you kill Luigi and collect an artifact
.
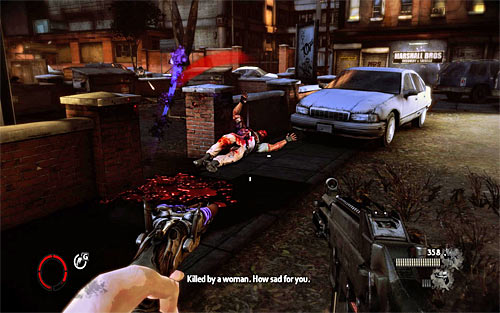
During playing through this chapter you'll meet Brotherhood members. Initially you'll encounter only weakest Brotherhood opponents, but expect troubles after reaching the location, where the final battle will take place. During the first stage of the fight you have first of all eliminate an elite enemy with a whip and destroy all upper lamps illuminating the area. Reflectors mounted on the right car can't be destroyed or turned off, so you have to ignore them.
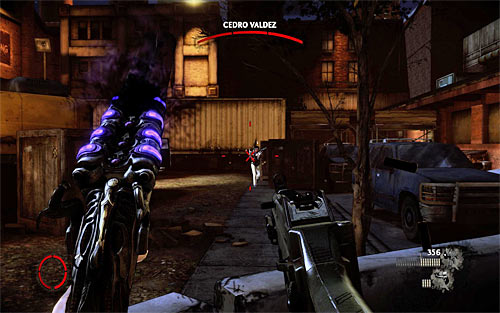
A second part of the battle is the duel with a boss - Cedro Valdez. Ignore the fact, that initially he doesn't lose any HP, because first you have to destroy his armor. As result it is better to play this chapter in a team, because in that case it would be easier to attack the boss from different sides and destroy his armor faster.
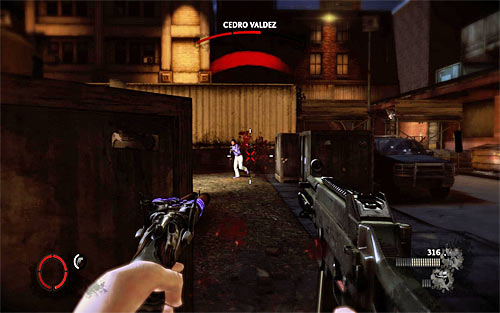
Valdez's health bar will start decreasing only after destroying all his armor. If you play solo, move constantly and try to attack him from behind a cover. If you play in a team, try to attack the boss from different sides, forcing him to focus his attention on only one of the players. You can find helpful Swarm (Inugami) and Black Hole (Dumond) powers, allowing you to stop the boss for few seconds and make him and easy target for rest of the players.
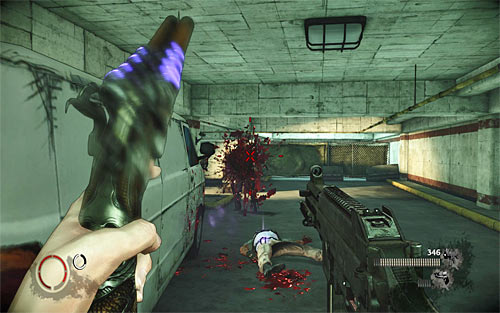
This is one of the longest and most difficult chapters in Vendettas campaign. Only crossing through the underground parking may be a problem for you, because the game doesn't allow you to destroy light sources. It is very important to use any opportunity to destroy a generator or get rid of a single lamp. You should also know that from the start you'll be encountering elite Brotherhood member, including opponents with whips. But you should also know that the parking is quite large location, so if you play in a team you can attack enemies from different sides.

At the end of crossing the parking you'll have to defend against massive enemy attacks. A single player may have big problems here, because those attacks are performed mainly by quickly moving elite enemies. In such situation you should use any possibilities to slow down enemies or distract them, trying to eliminate them one by one and using covers. If you play in a team, it will be easier to survive and depending on preferences players can try to defend themselves in one place or arrange themselves in different spots. Regardless of the tactics it is important to destroy all interactive light sources before the main fights, because it will make your life much easier.
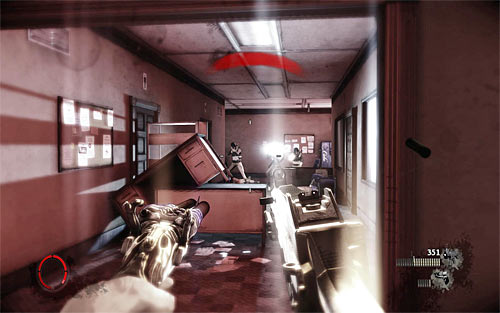
Watch out for enemies who will go out from one of the elevators! Once you get to the upper floor you should carefully secure all rooms and corridors, watching out for enemies with reflectors. You'll also encounter enemies with shield for the first time in Vendettas campaign and it is easier to deal with them playing as a team. None of available characters can take the shield away from the enemy in the same way as Jackie did, so you have to keep shooting at them until you destroy it completely or wait until the shielded opponent reveals himself.
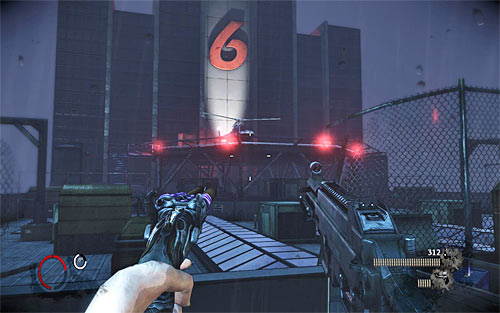
The last part of this chapter takes place on the rooftop, and the first area of this location is not problematic. But it is tougher to survive after approaching the heli landing pad visible on the above screen. First of all try to destroy a reflector mounted on the heli in the air, because otherwise you must keep hiding behind covers, looking for places where you can regenerate. If you play solo, then focus mainly on eliminating enemies which come running from the left and right side. If you are in team, then it is best when some players are securing sides and rest of the team attack enemies occupying the heli pad area. Regardless of the tactics you should try to recover from time to time by destroying hearts of defeated enemies.
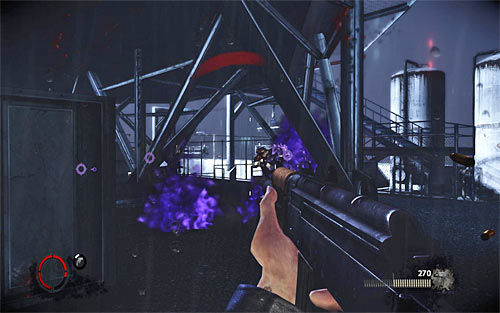
At the end you will be additionally forced to deal with a group of elite enemies, moving very fast in the area. I suggest using the fact, that you have an access to the entire area around the heli pad. If you play solo, you might have problems with winning this part of the fight, so it is important to efficiently use your Darkness power and best weapons available. It is much easier playing in the team and its members should stick together, also if you want to heal yourself. In both cases you should focus on shooting single target and not to attack all enemies at once.
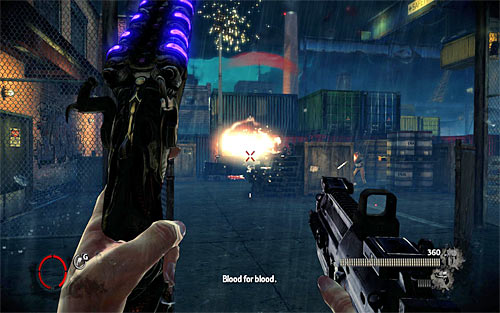
This chapter is shorter than previous one, but not easier. Initial walk through docks is very similar to the crossing through underground parking. So you can destroy only selected light sources (I recommend looking for generators located under some of reflectors) and you have to watch out for elite enemies that can be much easier to handle by a group than a solo player.
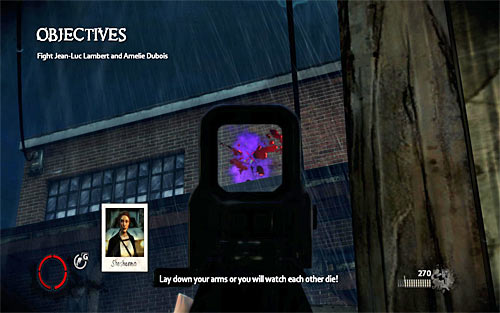
To complete this chapter you have to defeat two bosses - Amelie and Jean-Luc. A first encounter with these persons is some kind of patience test. Amelie and Jean-Luc will be using the advantage of their positions up in the building and you should consider hiding behind covers and using mainly firearms, even if you play in group.
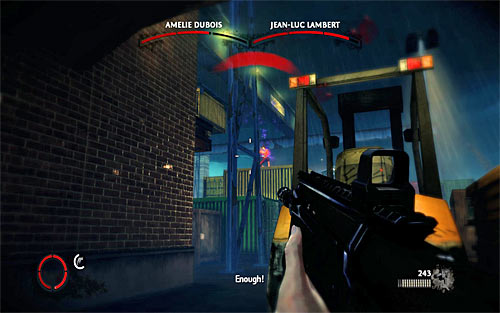
A further stage of this chapter is a chase after Amelie and Jean-Luc. You should focus then not only on inflicting them damage but also dealing with enemies, who might be encountered in the area. Be careful especially during securing the large warehouse, because it is occupied mainly by elite opponents.
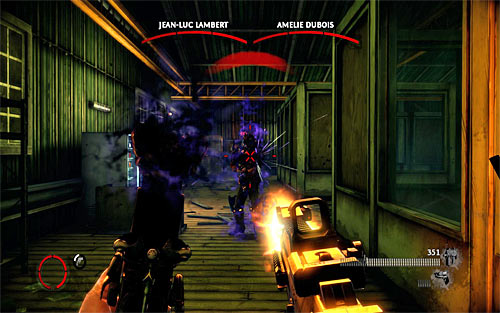
At the end of this chapter you'll have to fight very demanding battle with Amelie and Jean-Luc (this time they won't flee), which takes place in a rather small area on the warehouse floor. If you play solo, then again you have to be very patient and skillfully use covers. Check also your health bar often and heal yourself if needed. It is much easier to survive playing in the group, although its member shouldn't also risk too much. In both cases it is good to start with destroying lamps in office rooms and support yourself with best attack slowing bosses down - Swarm (Inugami) and Black Hole (Dumond). I recommend killing bosses one by one if possible, to make your chances even (solo player) or increase advantage in number (group of players).

This chapter is definitely easier than two previous ones. Its main objective is to cover Dolfo, and it shouldn't be a big problem, even if you play solo. Dolfo doesn't go too early to unsecured areas, so you have plenty of time to eliminate enemies. Remember about using covers and destroying light sources. You should also watch out during attacking elite Brotherhood members, not letting them to approach you.
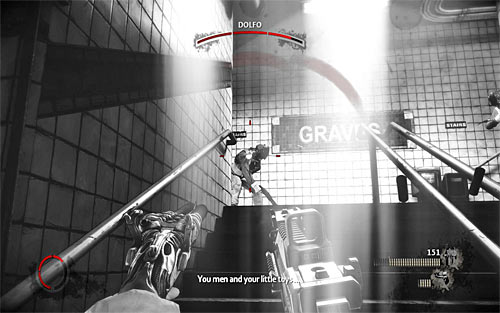
Do not get surprise by enemies during leaving the platform (screen above). The same applies to crossing narrow corridors. If you play in the team, than at least one player should stay all the time near Dolfo and protect him with his body if needed.
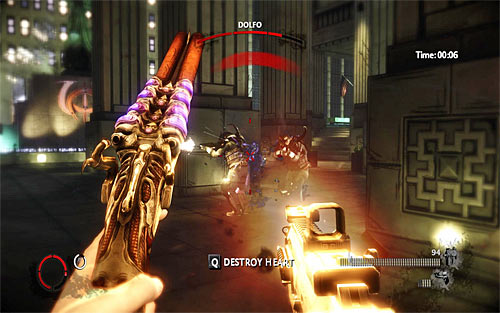
Last part of this mission is most difficult. You must protect Dolfo, while he is planting the explosives. If you play solo then focus only on eliminating near enemies, which are threat to Dolfo. The team can do much more, arranging themselves in the entire area and killing Brotherhood members before they come closer. You could also occupy a small area and make some kind of wall. Regardless of the chosen option it is very important to use near pillars as covers.
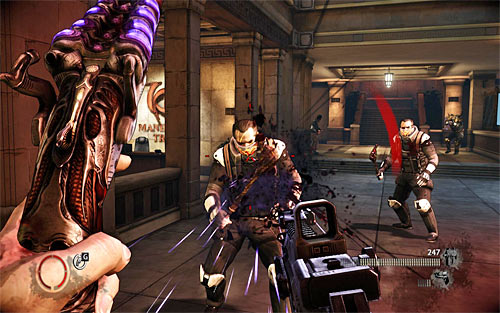
The last, eighth chapter is not too long but it consists of four demanding battles. First of them is fought at the beginning, in the main hall of attacked bank. If you play solo try to attack enemies one by one, retreating to a safe place each time when you have to regenerate. A group of players should deal with them easier, because you can arrange players in the entire hall or occupy one selected area and heal each other. Regardless of the chosen tactics, watch out for illuminated places, especially that many lamps can't be destroyed.
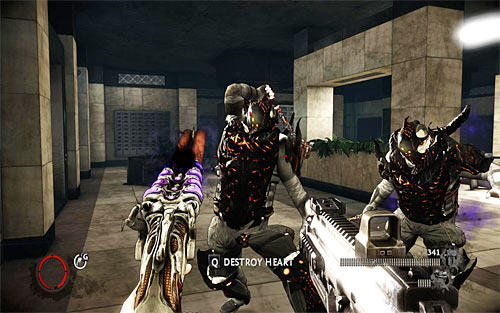
The second battle will take place after unlocking the way to the treasure room. It is a little bit easier than previous one, because enemies appear in waves and thanks to side corridors you can avoid shootout from all enemies and focus only on selected opponents. Do not forget to destroy all interactive lamps before the fight, so during it you won't suddenly get to the illuminated place. You should also remember about eliminating elite enemies first, because they are the main threat.
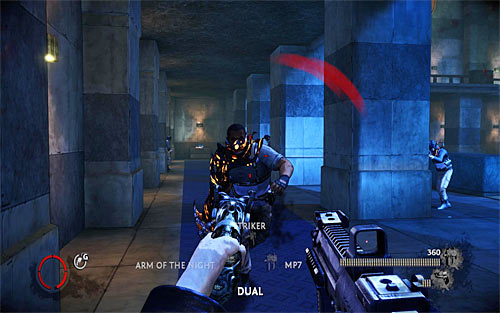
The third battle starts after reaching the large hall, shortly after using of the elevator and it should not be a big challenge. I suggest staying on the ground floor. Regardless if you play solo or in the team, I recommend using nearby pillars as covers, at the end dealing with enemies occupying the upper floor (after some time some of them might go down to the ground floor).
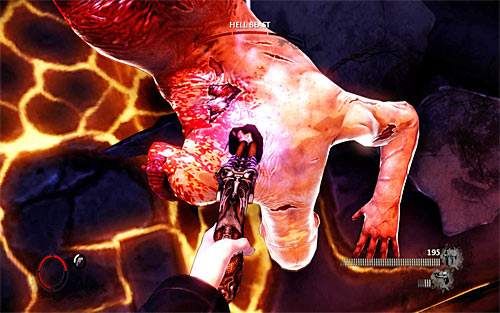
The only thing left is the final boss fight - Hell Beast. The most important information about this battle is the fact, the main boss is accompanied by demonic monsters know from previous chapters and Jackie's campaign. I do not recommend ignoring them, especially if you play solo, when they focus only on you. It is best to eliminate them in traditional ways, so they left hearts to be destroyed later when you need to regenerate. Of course, if you play in a group you have to reasonably divide them between all players, but there are so many monsters that it shouldn't be a problem. Later on the fight will be joined also by hostile darklings and in this case you should remember not to let them get closer.
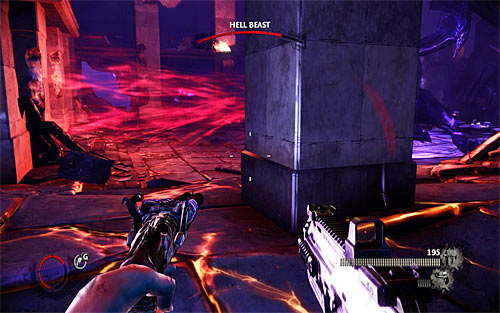
As for the boss himself, it is worth to know that you do not have to perform any specific attacks into his weak points. Hell Beast delights in spitting powerful energy waves (screen above) and surrounding pillars should help you to avoid these. Fortunately there are so many pillars here, and the arena is so extensive that even four players will find enough places for themselves to attack the boss.
In the Vendettas mode you can find six new relics in total. There is no achievement for collecting them, and you can't even look closer to them as in singleplayer campaign. However you should not ignore them, because same as with mentioned campaign, you'll earn 300 essence points for each relic and that can of course help you in developing your character.
RELIC 1 - Moon Rock
Location: Campaign, Chapter 4 - No Brothers of Mine
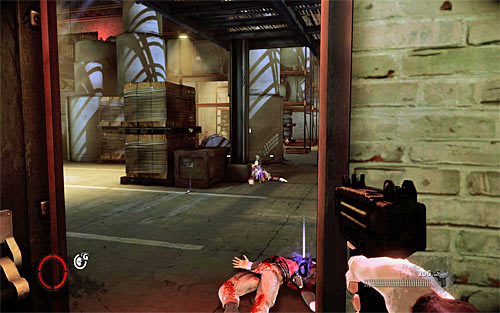
You have to look for this relic in the warehouse, where you fight with Brotherhood members (screen above).
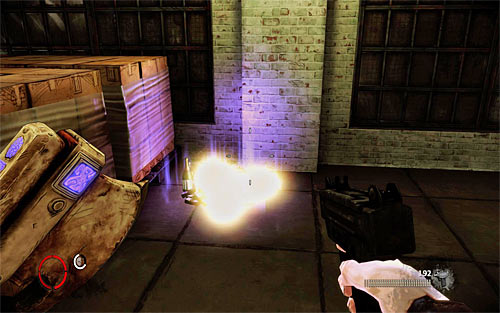
After the fight go to the floor and look for the side corridor, finding relic next to crates. You have to do it BEFORE you use the elevator, because it won't be possible later.
RELIC 2 - Mummified Cat
Location: Campaign, Chapter 5 - Hostile Takeover
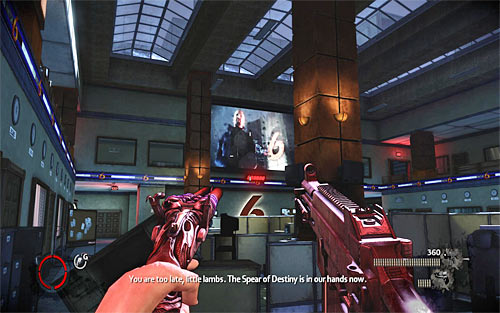
You have to reach one of the upper floors of the skyscraper, to the large hall with TV headquarters (screen above).

Relic is hidden in one of the booths to the right.
RELIC 3 - Two Headed Dragon
Location: Campaign, Chapter 6 - A Real Rain Has Come
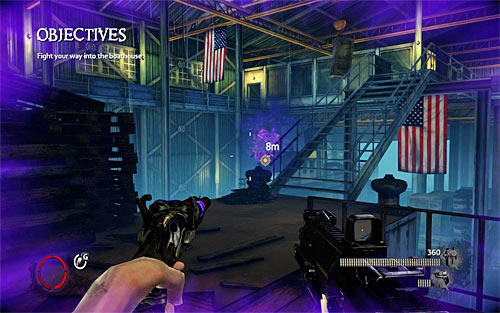
During chasing Amelie and Jean-Luc you have to reach the large warehouse, which is occupied by Brotherhood forces (screen above).
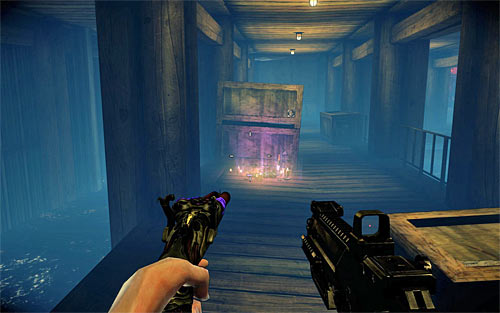
DO NOT GO to offices on the floor but instead jump down to wooden catwalks. Relic is lying on the ground next to crates.
RELIC 4 - Ouroboros
Location: Campaign, Chapter 8 - Sins of the Brothers

You can find this relic after breaking down the treasure room wall with explosives (screen above).

Go through the hole after explosion and look around for a relic on your left side (next to the table).
RELIC 5 - Horned Skull
Location: Chapter Hit List - Enter the Gauntlet
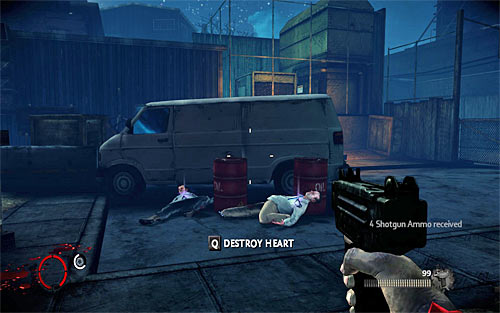
After leaving the warehouse stop at the place with parked white van (screen above).
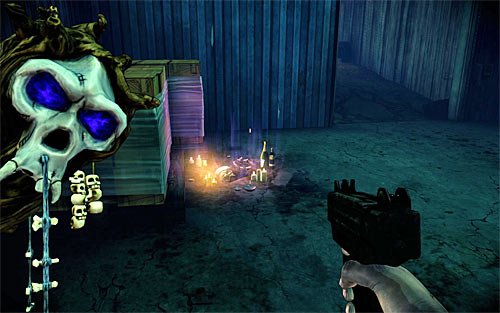
Go to the garage located right behind the van (you have to do it BEFORE you choose the left path leading to the next mission objective). Relic is lying on the ground to the left.
RELIC 6 - Varja Bell
Location: Chapter Hit List - Time To Take Out the Trash
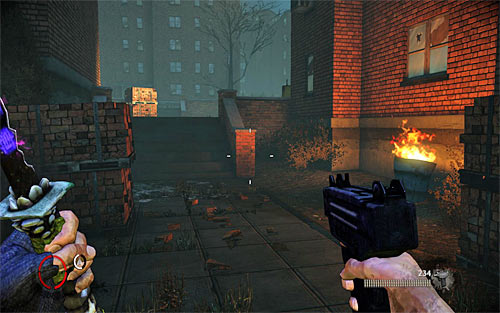
Shortly after start of the mission you'll reach the stairs shown on the above screen.
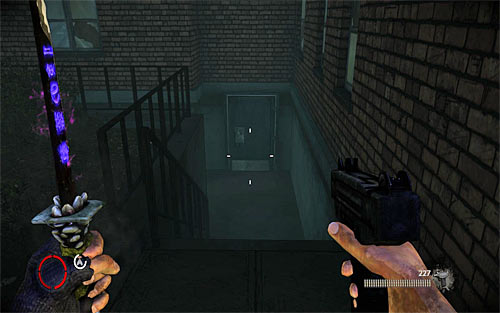
Go up the stairs and turn right, choosing the stairs leading down (screen above). Relic is hidden around the corner.
Note! Achievements are the same for PC (Steam achievements), Xbox 360 and PlayStation 3 (trophies).
Note! Singleplayer campaign chapter can be repeated only after completing the game (you have to select New Game+ from the main menu). So do not worry if you omit any achievement connected with the campaign, because you won't have to start the play from a scratch.
Note! Vendettas mode achievements can be earned by playing solo or with help of other players (it has no influence on unlocking them).
ACHIEVEMENT
REQUIREMENTS
NOTES
2 Guys 1 Pole
Kill 2 enemies with one javelin.
It is best to use the billiard cue and you'll find several of these objects at the beginning of third chapter (Q and A). After grabbing the cue make sure that opponents have lined in a straight line.
Allies in Strange Places
Escape the asylum with help from the inside.
This achievement is awarded automatically during the completing the singleplayer campaign.
At Home in the Dark
Finish all chapters in New Game+ on any difficulty.
New Game+ mode is available after completing the game. This achievement is awarded even on the lowest difficulty level, Thug.
Back in the Saddle
Rescue Jackie from the Iron Maiden.
This achievement is awarded automatically during the completing the singleplayer campaign.
Bonnie & Clyde Wannabes
Kill Jean-Luc Lambert and Amelie Dubois.
You kill Amelie and Jean-Luc at the end of the sixth chapter of a campaign (A Real Rain Has Come).
Burned His Mansion
Kill Luigi Palladino.
You kill Luigi at the end of the third campaign chapter (Dead-End Job).
Carnie Kid
Earn a score of over 1000 in each of the carnival games.
You visit carnival in the twelfth game chapter (Fun and Games). Remember to check your points counter at the end of each mini-game and return to the last control point and try again if needed.
Cheque Please!
Survive the hit.
This achievement is awarded automatically during the completing the singleplayer campaign.
Coward
Kill Cedro Valdez.
You kill Valdez at the end of the fourth campaign chapter (No Brothers of Mine).
Cut and Run
Kill 50 enemies with the Demon Arm Slash attack.
Right tentacle slashes are performed with the middle mouse button.
Dark Akimbo
Kill 100 enemies while dual wielding 2 different guns while playing as Jackie.
There are many pistols available in the game (normal and machine), so you have no problems with dual wielding two different guns (select them with the 4 key).
Dark Ninjutsu
Complete a mission as Inugami.
Might be done in the Vendettas campaign or in single Hit-List mission.
Date Night
Protect Jenny.
This achievement is awarded automatically during the completing the singleplayer campaign.
Decisions, Decisions
Refuse to cooperate with Victor in the Interrogation.
This choice will be made in the sixth chapter (Deal With the Devil). Do not press any mouse button and wait until person torturing Jackie loses his temper.
Don of Darkness
Finish the game on Don difficulty.
Remember not to change difficulty level during the game because otherwise you'll block an access to this achievement.
Embraced the Darkness
In Vendettas, acquire all the talents for one character.
It is not important which character you choose. Just unlock all available talents.
Escape the Brotherhood
Survive the interrogation.
This achievement is awarded automatically during the completing the singleplayer campaign.
Executioner
Kill 50 enemies with Executions while playing as Jackie.
It doesn't matter which executions types you use, because all count.
Free the Mind
Finish the game on any difficulty.
This achievement is awarded even on the lowest difficulty level, Thug.
Hell Hath No Fury...
Complete a mission as Shoshanna.
Might be done in the Vendettas campaign or in single Hit-List mission.
I'm Just Getting Started
Find and interrogate Swifty.
This achievement is awarded automatically during the completing the singleplayer campaign.
Impish Delight
Kill 15 enemies while playing as the Darkling.
You can play as darkling in fifth (Strong Silent Type) and fourteenth (Rat in a Maze) game chapter. Follow the walkthrough and you'll get rid of that amount of enemies.
It's 12pm Somewhere!
Complete a mission as Jimmy.
Might be done in the Vendettas campaign or in single Hit-List mission.
Jackie's Got Talent
Purchase a Talent in the single player campaign.
You can buy powers in Talent Shrines, spending on them essence points.
Karma's a Bitch
Kill a shielded enemy with his own shield.
Shielded enemies appear in later chapters. Remember that you have to pull out a shield with the left tentacle and it is only possible after destroying shield's outer case.
Mmmm Essence!
Pick up 5 Relics in the single player campaign.
Look into the walkthrough or Relics chapter to find a location of relic.
One Flew Over...
Return to reality...?.
This achievement is awarded automatically during the completing the singleplayer campaign.
One Man Army
Kill 25 enemies while being dragged from the restaurant, without dying or restarting checkpoint.
In the first chapter of the campaign (Payback) wounded Jackie is dragged through the restaurant. Remember that you have unlimited ammo and in order to earn this achievement you can't die (if you do however, then repeat the chapter).
Ready for the Big Leagues
Kill 50 enemies with thrown objects.
Select sharp objects (metal bars for example) and propane canisters, because in case of worse objects like chairs, you can only stun the enemy.
Relic Hunter
Find all 29 Relics in the single player campaign.
Look into the walkthrough or Relics chapter to find a location of relic.
Romantic
Real guys know how to dance.
This is about a scene from a bar in the third chapter of singleplayer campaign (Q and A). DO NOT decide to kiss Jenny but dance with her till the end of the song.
Should Have Called 555-2368...
Survive the battle against the Hell Beast.
It is not possible to omit this achievement because you have to complete the campaign first.
Skeet Shoot
Throw an enemy into the air and kill him with gunfire before he lands.
After grabbing an enemy, throw him in the air and use a good weapon to eliminate him.
Step into Hell...
Defeat Victor.
This achievement is awarded automatically during the completing the singleplayer campaign.
Storm the Mansion
Take back your mansion.
This achievement is awarded automatically during the completing the singleplayer campaign.
Suck It Up
Kill 50 enemies with Black Hole while playing as Jackie.
Make sure to unlock Black Hole as soon as possible, because you can't use black holes very often (they appear randomly next to opponent's bodies). Carefully choose places to create holes, so they can attract more enemies.
Sweet Revenge
Avenge your Aunt Sarah.
This achievement is awarded automatically during the completing the singleplayer campaign.
Talent Show
Max out all of Jackie's Talent Trees.
You can buy powers in Talent Shrines, spending on them essence points.
Technical Difficulties
Kill the NewsWatch 6 team of Tom Dawson, Bud Langley and Sara Stephens.
All these characters are bosses from the Hit-List chapter titled We Interrupt This Program.
That's Why I'm the Boss
Impress Dolfo in two different ways.
During completing of the second chapter (The Family), you'll unlock possibility to soot bottles and during the fourth chapter (More Questions Than Answers) you'll be shooting pigeons. Both mini-games are activated after conversation with Dolfo, who stand on the mansion's balcony. As for bottles you have to destroy them all less than 10 seconds. As for pigeons you have to kill at least 20 of them in the given time limit.
The Bird is the Word
Avoid being run over in the parking garage.
A scene with approaching car takes place in a seventh chapter (Home Invasion). To avoid being hit you have to damage the car attacking it with the firearms.
The Brotherhood Crumbles
Complete Vendettas Campaign.
This achievement is awarded even on the lowest difficulty level, Thug.
The Old Gibber
Kill 100 enemies with Gun Channeling while playing as Jackie.
Make sure to unlock Gun Channeling as soon as possible and use it regularly.
The Swarm King
Kill 50 enemies who are swarmed while playing as Jackie.
Make sure to unlock Swarm as soon as possible and use it regularly.
This Kid's Got Potential
Max out 1 of Jackie's Talent Trees.
You can buy powers in Talent Shrines, spending on them essence points.
Truly Talented
Max out 3 of Jackie's Talent Trees.
You can buy powers in Talent Shrines, spending on them essence points.
Versatile Killer
Kill enemies in 5 different ways within 30 seconds.
It is worth to make tries in the singleplayer campaign because you can use both tentacles. Besides you can also use one of the active powers, use the firearms or perform an execution.
Voodoo is More Than Dolls
Complete a mission as JP.
Might be done in the Vendettas campaign or in single Hit-List mission.
Whipping Boy
Kill Frank Marshall.
Marshall is a boss from a Hit-List chapter titled Enter the Gauntlet.
You've Made My Hit List
Complete 6 Hit List exclusive missions.
Only those mission which are not in Vendettas campaign count.
 The Last of Us Game Guide & Walkthrough
 The Elder Scrolls V: Skyrim Game Guide & Walkthrough
 The Godfather Game Guide & WalkthroughThe Cave Game Guide & WalkthroughThe Darkness II Game Guide & Walkthrough