Hello to all of you, both older and younger fans of the world of fairy-tales and fantasy. Before you is Narnia, legendary realm created by C.S. Lewis, inhabited by various creatures, not always friendly to us, humans. In this guide I included all the information you will need to help the children defeat the White Witch and free Narnia from her power (seeing her charms, however, one cannot help but wonder if a compromise beneficial to both sides could not be reached). Step right up into the old wardrobe... Adventure awaits.
Maciej "Shinobix" Kurowiak
Peter
Strongest of all the kids. He can fight pretty well, and as time passes, he becomes a good warrior. At first he fights with a stick, he can switch it with a sword later though.
Susan
Susan is the brain of the team. She also has excellent aim. She can use tennis balls and snowballs but she's really deadly with her bow.
Edmund
Edmund is smart and pretty agile. He can climb trees, but he copes well in a fight too. As with Peter, his weapon of need is a stick, while his weapon of choice is a sword.
Lucy
At first it's best to switch to Lucy only when you want to get something behind a narrow passage. Soon, however, she gains useful healing abilities which make her indispensable.
Each of the kids has a range of abilities which can be bought for coins. There are two types of abilities: permanent (used independently of player actions) and special (the use of which is left to the player). Key combinations can be found in Inventory.
Team Attack - Peter defends Susan. To use this ability, Peter and Susan must combine forces.
Valiant Heart - affects all children. Increases health permanently.
Ghoul Bane - effective use of this combo kills ghouls with one strike.
Phoenix Heart - affects all children. Increases health permanently.
Gift Sword - powerful sword, only available later in the game.
Lion's Roar - destructive attack, inflicting damage in a wider range.
Blade Spinner - close quarters attack. To use this ability, Peter and Edmund must combine forces.
Brave Heart - affects all children. Increases health permanently.
Double Damage - Peter does double damage while fighting with his fists.
Lion's Leap - Powerful close quarters attack .
Lion's Claw - similar to Lion's Leap.
Boggle Bane - effective use of this combo kills boggles with one strike.
Ogre Bane - effective use of this combo kills ogres with one strike.
Dryad's Cloak - thanks to this ability Lucy can cast a protective spell on Peter. To use this ability, Peter and Lucy must combine forces.
Minoboar Bane - effective use of this combo kills minoboars with one strike.
Lion Heart - affects all children. Increases health permanently.
Shield Slam - powerful attack with a shield.
Brave Heart - affects all children. Increases health permanently.
Panpipes - pipes with the power to make enemies fall asleep;
Valiant Heart - affects all children. Increases health permanently;
Rain of Fire - Susan shoots her arrows up in the air and makes fire rain down on enemies. To use this ability, Susan and Lucy must combine forces;
Gift Bow - powerful bow with unlimited arrow supply;
Ivory Horn - horn which allows Susan to call for help;
Lion Heart - affects all children. Increases health permanently;
Team Attack - Peter defends Susan. To use this ability, Peter and Susan must combine forces;
Stone Song - melody which allows Susan to discover hidden statues;
Full Circle - powerful attack. To use this ability, Susan and Edmund must combine forces;
Hawkspeed - Susan shoots arrows faster than her enemies;
Dryad's Melody - melody which allows Susan to discover hidden shields;
Fast Reload - just what it says. Susan grabs arrows faster.
Phoenix Heart - affects all children. Increases health permanently.
Brave Heart - affects all children. Increases health permanently.;
First Aid - Lucy heals all children;
Phoenix Heart - affects all children. Increases health permanently.;
Fire Flower Cordial - unlimited supply of healing potion;
Dryad's Cloak - thanks to this ability Lucy can cast a protective spell on Peter. To use this ability, Peter and Lucy must combine forces.
Lion Heart - affects all children. Increases health permanently.
Wolf Tame - Lucy can tame wolves and ride them.
Valiant Heart - affects all children. Increases health permanently.;
Ghoul Tame - Lucy can tame ghouls and ride them;
Boggle Tame - Lucy can tame boggles and ride them;
Fire Will - makes replenishing fire flower potion faster;
Minoboar Tame - Lucy can tame minoboars and ride them;
Sun Speed - makes replenishing fire flower potion faster;
Triple Tipple - makes fire flower potion more powerful;
Sun Fire - makes replenishing fire flower potion faster;
Double Drop - makes fire flower potion more powerful;
Shield Shower - thanks to this ability Lucy can cast a protective spell on all children. To use this ability, Edmund and Lucy must combine forces.
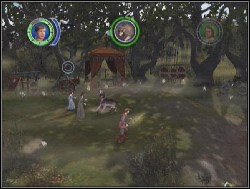
Those damned nazis started bombing the city again. Mom told us to take cover in the basement. Peter checked all the furniture looking for coins and when the room was empty, Edmund opened the door leading to the hall. We ran upstairs and opened the door on the left side.
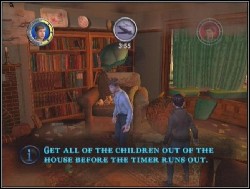
We warned Susan about the danger.
Susan: Boys warned me in time. But we still need to get little Lucy out of her bed. I took a flashlight and went to the room opposite of mine. I checked some places with my flashlight and found a lamp. We took Lucy and ran back to Mom.
Unfortunately, it didn't go as planned. A bomb must've hit somewhere close, because the house shook and a gaping hole opened in the floor. Only Edmund and Lucy were light enough to safely cross to the other side.
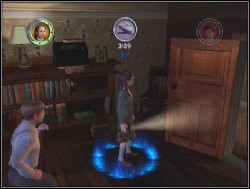
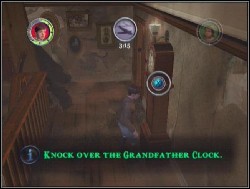
Edmund: I crossed the breach without any problems. I hit the old clock a few times and it fell, allowing the rest to use it as a makeshift bridge.
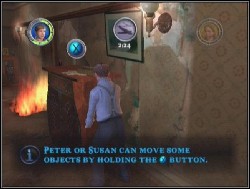
Peter: We couldn't go further. Fortunately, I learned a new ability (Double Damage). I opened the door, but we met with another hindrance.
Edmund: Fortunately, I can climb. I climbed the wooden pillar and made it fall, so the rest could cross over. In the next room Peter forced the door.
We got to the ground floor, where Mom was waiting. Peter moved the furniture, so he could extinguish the fire with it. In the kitchen Mom told Susan to find the key. She found it quickly, thanks to her flashlight..
Lucy: I proposed we play hide-and-seek. That old, beautifully carved wardrobe seemed like a perfect place to hide. I decided to go inside.
There was winter there! I met Mr. Tumnus, who seemed to be polite and kind. He even invited me for a tea. When I decided to go back home, I ran into Edmund! Was he talking with someone?

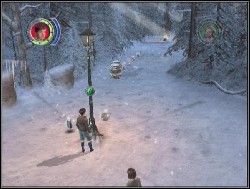
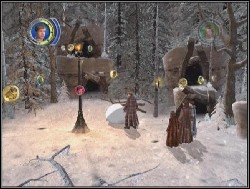
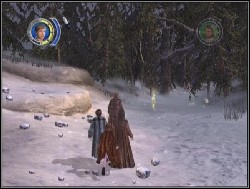
Edmund: I found a branch and I hit with it a few times to break through the trees. Lucy started running on a big snowball collecting items I couldn't reach. I climbed the trees and collected what was left. Then I moved a bunch of wood under that pile of stones. After that I lit the branch by the fire, and hit the wood. Now all that was left were those bushes near the bonfire. I put them on fire and took the last pink coin. Together with Lucy we used a special attack on that icy wall.
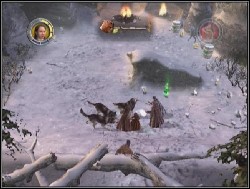
We were attacked by wolves, but we chased them away with a stick. Lucy got on a snowball to reach a shield. We entered the cave. On the other side I climbed the lamp-post to get the shield. Of course, I waited till the crows flew away. We had to combine our forces to go through the snowdrift. All that was left was to break that tree blocking our way...
Susan: Lucy went into hysterics because noone wanted to believe the wardrobe concealed an entrance to another world. We had to find her.
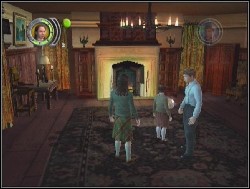
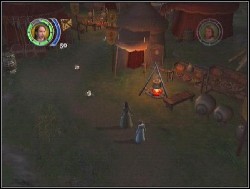
We quietly went downstairs, careful not to be noticed. On the other side of the gallery we found some useful items. Then we went deeper into the house. We didn't enter the room right away but we walked down the hall to find some empty boxes. Carelessly, we started destroying them and the noise reached the vigilant ears of Mrs. Macready. We shattered the rest of the boxes, I hid in the trunk and Peter got under the table. After Mrs. Macready left we headed for the room we missed earlier. Peter moved the tables, and found Lucy hiding under one of them. She was still upset, however, and she took off again.
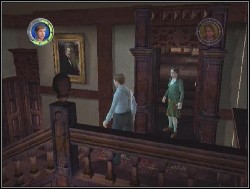
We followed her through the corridor. In the next room I found some tennis balls under a desk. Lucy hid in the wardrobe - to open it we had to dent it a bit by hitting in the marked place. We were surprised when a swarm of bats flew into the room. Luckily, I had my trusty tennis balls with me, so I could break the window and provide the bats with a way of escape.
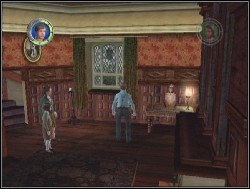
Lucy stopped crying. Together we headed upstairs, until we reached a room with a fireplace. I had to aim the balls carefully so I could close the air vents and make those irritating bats stay just where they were. After that we turned right and found ourselves in the hall again. Peter broke the railing on the right so Lucy could slip through the hole and open the door from the other side. In the next room I had to stop those bats from coming out again. Fortunately, I still remembered the location of those tennis balls when I ran out of them. Peter broke another railing and Lucy opened another door.
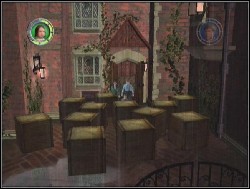
It was pouring outside. And those boxes again! As was easy to predict, while destroying them we made a lot of noise and to hide in time, we had to shatter as many boxes as we could, gain a bit more time and hide in the room we came from. Mrs. Macready fell for it again. When we came out we found Edmund - the only one of us who knows how to climb.
Edmund: I climbed the rain pipe and opened a passage for them. Unfortunately, we were too loud again so we fled as fast as we could. On our way I broke all the boxes so we could gain more time. We were in the house again. We ran upstairs to hide in that spacious wardrobe...
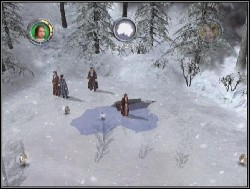
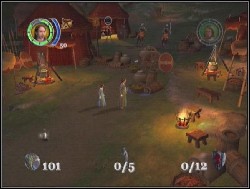
Lucy: If you could only see Peter and Susan's faces when we entered that wintry world. In one of the barrels Peter found a stick, which he then used to destroy those trees blocking our way. Wolves were no problem for him either. In the opening, on the stone ledges we could see some coins. To reach them Peter had to push a snowball from the start of our way up to this place. Thanks to that I could jump on the ball and collect those coins. I also slipped through those little holes and got the rest of the coins. Edmund climbed a tree and lit the stick he was holding. After that Edmund caught my hand and together we shattered the icy wall so we could proceed further.
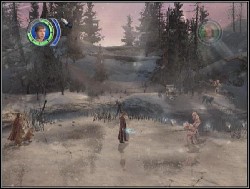
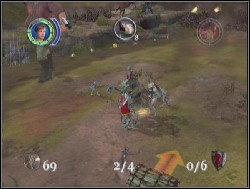
Edmund: Thanks to our torch going through the cave went smoothly. I put fire to the bushes blocking our way and together with Susan we destroyed the stone pillar. A band of wolves caught up with us, but we defeated them with no problems. Now we could cross over the precipice. Unfortunately, an avalanche forced us to make a crazy descent on our makeshift sledge. On our way we tried to collect as many coins as we could and to shatter icy barriers.
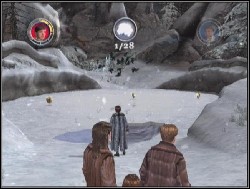
Lucy: We found ourselves on a shore of a frozen lake. Peter and Susan were too heavy to safely cross over, so it was me who had to take the responsibility and find a safe way. Carefully I tested the ice - when it started to crack I got back to the safe ground. On the other side Peter broke through the trees in our way.
Lucy: I got on the snowball and collected some coins. Then I slipped into the hole on the right side, and I found myself above the place my brothers and sister waited in. I hit the statue a few times, and then that bunch of wood got the same treatment.
Edmund: It was my turn. I jumped on the floating wood and then I knocked over the rotten tree on the other side of the river.
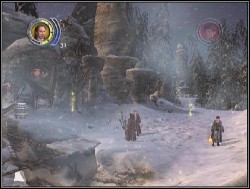
Peter: We reached a gate covered with ice. The make matters worse, wolves attacked us and we had to try to drive them away while breaking the ice. Then strange creatures appeared and lit fires all over the place.
Susan: That was my cue. I aimed my snowballs at the fire, so I could extinguish it. I had to be quick about it - the wolves were still coming and, to make matters worse, those creatures were firing arrows at us. When the fire went out I broke the grating and Peter quickly took care of the archers.
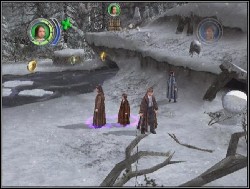
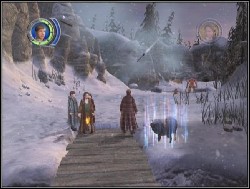
We faced another frozen lake. This time it was a bit harder to cross over - while looking for a safe way through thin ice, Lucy was exposed for an attack from our mysterious enemies. And those blasted birds..... On the other side trees blocked our way, but Peter quickly chopped them into pieces, so we could proceed. Unfortunately the road was guarded by archers. I had to aim my snowballs at barrels, filled with something explosive, apparently. A band of wolves took us by surprise, but we managed to chase them away.
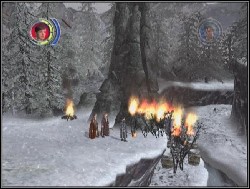
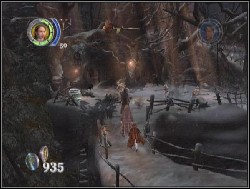
Susan: After going out, we met Mr. Beaver who promised us to take us to Mr. Tumnus. Near the furniture, I used my snowballs to put down the fire, Then we only had to make our way through the debris. In the remains, I found Mr. Tumnus's pipes. We had to move quickly - the wolves attacked again.
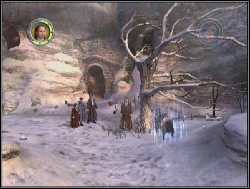
The situation that we found ourselves in was getting more and more dramatic. Mr. Beaver had to chomp through a tree blocking our way, and we tried to defend from another pack of wolves, but they just kept coming. There was no other choice, we had to stop them somehow. Peter lit a branch and put fire to bushes on both our sides. Unfortunately, the wind kept blowing the fire out, so we had to repeat it a few times. When Mr. Beaver got rid of the tree, we could finally run.
That wasn't the end of dangers, however. Dwarves with bows appeared. Luckily, I found a bow too, so I could snipe at the attackers from a safe distance. Then we had to shatter the ice on the drawbridge to make the mechanism go off. Edmund and Lucy did it splendidly.
Susan: Without Edmund's help, Lucy would never make it through the snowdrift. Those perfidious archers attacked all the time from their safe spots. It turns out those spots weren't so after all - my arrows finished all archers off, one by one.
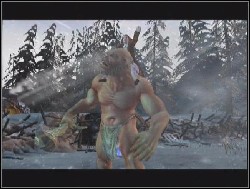
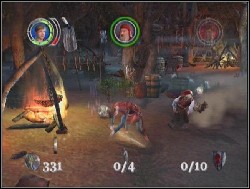
But our situation got worse when we ran into an ogre. The beaver told me to play the pipes I found near Mr. Tumnus's house. The melody put the ogre to sleep in a few seconds.
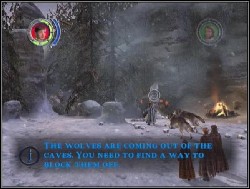
The road ahead of us was blocked (surprise, surprise), and, as usual, wolves chose that moment to attack. The wolves kept coming even as we fought. If we hadn't blocked their way, we would've never gotten out alive. Peter set the trees on our right on fire. Me, (Susan, that is) and Edmund performed our special attack near the bonfire, shattering the statue and blocking another cave. After that I shot that bunch of wood above the next cave, and Lucy sipped through a hole left to the last cave and hit the wooden pillar a few times. Unfortunately, the ruckus we made woke up the ogre. We only had about 30 seconds to find a hiding place.
Peter: We kept walking. When we reached the woods, strange creatures attacked us, descending from the trees. We fought fiercely, trying to end the fight us quickly as possible - the ogre was still somewhere out there. It came in the last minute and we had only a moment to hide again. Luckily, we made it...
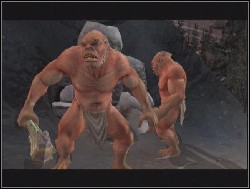
Boss: The ogre
Peter: The ogre turned out to be a dangerous opponent. I don't want to brag, but my role was the most important one here. A few words must be said about little Lucy's courage, though. After some of my well placed hits, Lucy quickly jumped on the ogre's head, disorientating the monster completely. I made the most out of this chance by hitting the ogre repeatedly till it shook Lucy off. That method, even though a bit unconventional, turned out to be really effective... When we tried it again, however, archers appeared. It was Susan's turn - and, believe me, she repaid them in kind. We could continue the fight again.
Unfortunately, more archers appeared after some time. Still, Susan made a quick job of it. In the last stage of our uneven battle, I held the ogre's leg, Lucy and Edmund were sitting on his neck, and Susan finished that beast off...
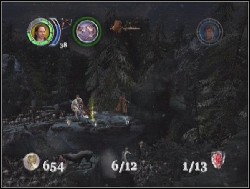
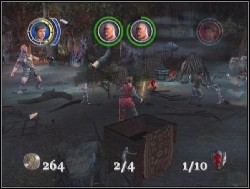
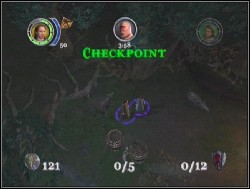
Peter: I don't deny it, we were scared... but we had to cope somehow. Just after we recovered from the fight, wolves attacked again. We had to act quickly... We got back to the cave we saw earlier and Susan shot the wolves through branches blocking the entrance. To our dismay, one of the monsters kidnapped Mr. Beaver, so we had to get back and save him. Some more monsters came through the gates, and the kidnapper disappeared into the darkness.
We chased the kidnapper through the dark tunnel. On our way we were attacked by ghouls. Susan finished off those two trying to push down a large boulder. After that, we ran quickly back to the cave where wolves tried to get through the braches. Susan shot them again. Another mad dash to kill those ghouls near the boulder before they kill us. Then wolves, beaver in dire straits again... we had to triple our efforts to get everywhere in time. We had to repeat all that a few times before Mr. Beaver eventually unblocked our way.
Susan: When we reached an opening, we noticed some cracks in the stone wall. Peter widened it a bit, so that Lucy could slip inside and collect some valuable items. On our right side there was a rotten, but still covered in ice, tree. Of course, we could depend on Peter, to chop it into pieces. Archers appeared, and what better way to take down an archer than to send him back his arrows with words of love. When they weren't making problems anymore, Peter finished his task.
When we got rid of another archer, me and Lucy used our special attack, to shatter ice blocking our way. Peter removed another fallen tree so we could proceed.
To get rid of the ogres I had to aim at the top of the rubble to the left of them. After that, I fired my arrow at the top of the stone heap on their right, so I could block the entrance and stop more enemies from coming. Ah, there was more... an archer set fire to a tree, but I had my snowballs, and there's noone better at making snowballs than me, Susan. With a lousy sense of timing, so typical for the species, an ogre scrambled out of the water. Instead of fighting him, Peter focused on hitting the tree, so we could get out of there.
We found ourselves in a seemingly hopeless situation. We fought off the ghouls till a chunk of floating ice got near. Quickly, Lucy crossed over to the next floe, testing the ice on her way. Enemies again and once more we waited for the next floe. After that, another dangerous crossing through the thin ice. Fighting again. This time it was a bit harder - there were more enemies and they seemed to get stronger too. I got rid of the archers by aiming at the barrels, and Peter took care of the rest of the swarm.
Lucy ran to the wall covered in ice and made some of it come down. She waited, however, for the ice to float in a way that made escape possible. When she inflicted enough damage, she quickly scampered off. Then, it was my turn... A few well-aimed arrows, and the wall started to crumble... After that, Peter, had to cut a tree which froze to the ground.

This part of our adventure required nerves of steel and quick reflexes. The most important thing was to avoid colliding with the rocks... easier said than done.
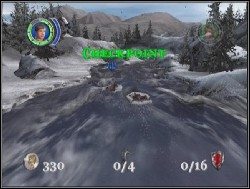
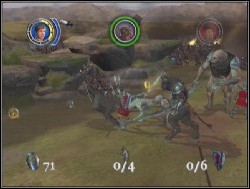
We faced a pack of angry wolves and their leader (Maugrim). First. we destroyed the cart. Then, Lucy tamed one of the wolves, and started a deadly ride, killing those unlucky enough not to be her pet. The leader could only be defeated in one way. When she spotted a chance, Lucy climbed a tree, after a while I, Susan, could do it too. The leader, wanted to drag us down at all costs, so, Peter could take advantage of the moment and hit him without any risk. Seeing that our tactic was working, we continued to apply it, and eventually defeated Maugrim.
Peter: I started by dealing with Edmund's torturer-wannabe. I have to admit he was really tough and knew how to defend. He had a weakness, though. When he used his spinning attack, he got dizzy, and I could hit him till he recovered his senses again.. As with any working strategy, I used and abused it, and eventually brought the fight to an end.
We were attacked by cyclopes and a minotaur. Cyclops' armor seemed impossible to pierce, but where sword fails, rolling wood seems to produce equal effects . When we finished off cyclopes, minotaurs jumped on us... only when we had slain ten of them, did we decide to beat a strategic retreat, and got on a tree. From there we had to hack and kick to ward off incoming minotaurs...
Susan: When the Lion left our sight, I looked around for a magical place, where I could play on my pipes. As it turned out, there was one nearby. Together with Lucy, we broke into pieces the cart that was in our way . A centaur guarding the camp immediately rushed in our direction, but I was quicker - I took two steps back to find myself in the magic circle. I played my lullaby and the centaur fell asleep.
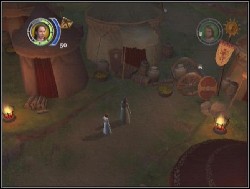
In the entrance to the nearby tent there was another guard. One arrow fired at the tent was enough to make a curtain above the entrance fall. The guard tried to get it up again, while we sneaked past. Another obstacle.. I used my lullaby again, but first I waited a bit so that the guard walked away from us, so I could reach the magical circle in time.
Careful not to be noticed by galloping centaurs, we sneaked closer to the guarded tent. I shot the curtain again, and got the guard busy. Then, we turned right. When we saw riders, we hid ourselves behind the tables. Another tent and another guard rolling the curtain. Fast run ahead and another sentry. Magical circle was under the rubble, but we had to act without hestitation. First, I activated the circle, then together with Lucy we destroyed the barricade, and quickly, before the circle faded away, I played my melody. The guards were asleep. One shot curtain later, we could leave the camp.
On the left side of the wall, just above the ground, Lucy found a small hole, which led to the hilltop. She pushed a rock, which enabled us to walk to the other side . Soon, we reached a magical circle and on time too, as I put to sleep a large, and no doubt dangerous, cyclop. We didn't have much time and the cyclop could wake up any moment. More enemies came, but I didn't really focus on the fight, and instead I lit my arrows in the bonfire and shot the thorns blocking our way.
Peter: The battle didn't go as planned. First, wolves and minotaurs attacked, but after that giants came and it wasn't funny anymore. A giant could only be harmed by bundles of wood pushed at him. After I defeated enough enemies, I approached a marked point to issue orders to archers. During the battle I used special attacks like Ogre Bane.
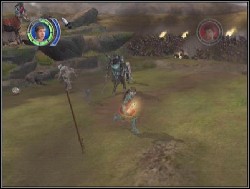
Another two giants were a prelude to the next attack when three giants emerged. There was a lot of running involved as I tried to hack trough enemies and to relieve our eagles and archers.
A giant beast charged on the battlefield. To stop it I had to crack it's armor by pushing bundles of wood at it. When it's armor was gone, my trusty sword did the rest...
Susan: To open a passage, I had to attack all the statues I could see. After that, a circle appeared, and I blew the horn. Having done that, I could enter the castle. To disperse attacking shadows, I fired my arrows at the stained glass windows, and the light made them disappear. I gained access to all statues.
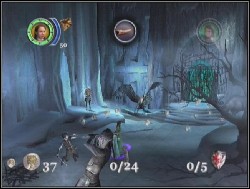
When we ran upstairs, we found another shadow enveloping a statue. I got rid of it the same way as last time. Then, together with Lucy we shattered the icy rock and moved on. In the next chamber I needed Lucy's help again. She slipped through both sides and weakened the walls. All I had to do, was to shoot the icicle above. After activating all statues I played the horn again.

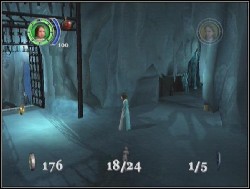
We had only entered the next chamber, when we were attacked. Luckily, Lucy had her taming skill. She tamed one of the enemies and defeated the rest. Together, we broke the icy rock, and when the passage behind us collapsed, we had to fight till another passage appeared. I set fire to my arrows and shot the shadowed statues. When I hit all of them, I began to pound on the door. An ogre tried to interfere, but just after the door broke, I quickly pushed the torch aside and played suitable melody.
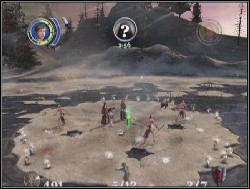
Peter: Before the battle started, we had to choose our support troops. When the battle got on we decided there's no point in trying to use support troops to quickly, but to try to fight as many enemies as we can by ourselves. Fiercely, we fended off incoming swarms of enemies. When archers appeared, Susan immediately eliminated them with her bow.
We won the battle but not the war. It was time to face the evil witch. Each of us knew what to do thanks to the marks above the Witch's head.
Peter: At first I dodged her attack, and only when she stopped I started to use my sword. After a while though, I clearly saw that Susan's bow would inflict more damage.
Susan: Immediately I fired all my arrows, so that the Witch would feel them for a long time.
Edmund: Then it was my turn. I charged at the Witch with all my might, until she backed up to the rocks.
Peter: After that, a horde of enemies attacked us. Cyclops could be only hurt in the way we learned in our first battle, all the rest didn't stand a chance with Peter. After our victory, we had to face the Witch again. First time of the fight looked similar to what we did earlier... Lucy healed us when need for that arose, but it still wasn't easy. We attacked in this order: when a bow mark appeared, Susan fired arrows at the Witch. After that, we could see a flame mark, which meant we should it her with bundles of wood, previously set on fire. When, the Witch burst into flames, I ran over and slashed her with my sword. Then a circle appeared - Susan knew what to do and played on her pipes.
 The Lord of the Rings: Conquest Game Guide & Walkthrough
 The Sims 4 Game Guide & Walkthrough
 The Movies Game Guide & Walkthrough
 The LEGO Movie Videogame Game Guide & Walkthrough
 The Elder Scrolls V: Skyrim - Dawnguard Game Guide & Walkthrough