This guide for The Lego Movie Video Game is a collection of information that makes it possible to complete the game in 100%. All of the whereabouts of the mini-sets, pants, red bricks and gold bricks have been provided. These have, additionally been provided with screenshots and detailed descriptions. The Lego Movie Video Game presents a hilarious story of Emmet and his companions on their quest to save the Lego-built world. The boy needs to become a hero, if he wants to save the plastic world from Lord Business's tyranny The diversity of locations that the protagonists explore prevents this game from becoming monotonous and makes it challenge the player with new logic and arcade tasks to perform. The story is interwoven with various characters drawn from the other game and movie franchises, of whom there is 96 in the game.
This guide for The Lego Movie Video Game includes:
Patrick "YxU" Homa ()
For some players the game may seem easy. There are, though, some things that you should pay attention to in order to complete 100% of the game.
As soon as you unlock Virtuvius character, go to Bricksburg to do the side quest for the red brick which grants you x2 stud multiplier. This will allow you to collect much more studs even in early game stages.
Once you purchase any bonus (red bricks), remember that every time you start the game, you need to turn on selected bonuses in the pause menu - Extras -change their status to active.
Gold bricks are awarded to you for completing missions with "The Special" status and finding all the collectibles on a given level. The remaining 10 collectibles are in the "Bonus Room"
You do not always have to try to achieve "The Special" status (for collecting a given number of studs). Once you unlock some stud multipliers, collecting enough studs will be much faster.
Do not try to find all the collectibles at the first play (pants and manual pages), since this is impossible. You will only be able to do that on replaying the mission in Free Mode, where you can use all the purchased and unlocked characters at any moment.
Take on some extra challenges while playing the main story line - these will help you to complete the game faster and more effectively.
Save your studs. If you want to buy characters and you have only few studs, wait. In order to accomplish all side quests and find all collectibles you will mostly need these characters which are unlocked along with the progress in the story mode, so you do not have to buy them. However, some are not, such as Lord Business, who is required to accomplish most side quests and unlock red bricks, and he costs 1,000,000 studs.

Movement

Jump

Switch character

Special

Jump

Action

Map

Switch to the previous character

Switch to the next character

Start / Pause
Pan camera

Look left

Look right

Look up
Look down

Raise/ change the beam's direction

Movement

View
Pan camera

Switch to the previous character

Switch to the next character

Pause / Menu

Map

Jump

Switch character

Special

Action

Raise/ change the beam's direction

Down

Left
Right

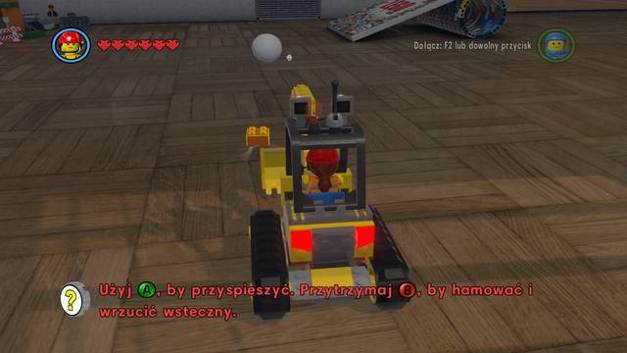
Vehicle: Accelerate

Vehicle: Decelerate

Movement

View

Pan camera

Switch to the previous character
Switch to the next character

Menu / Pause

Map

Jump

Switch character

Special

Action

Raise/ change the beam's direction

Down

Left

Right

Vehicle: Accelerate

Vehicle: Decelerate
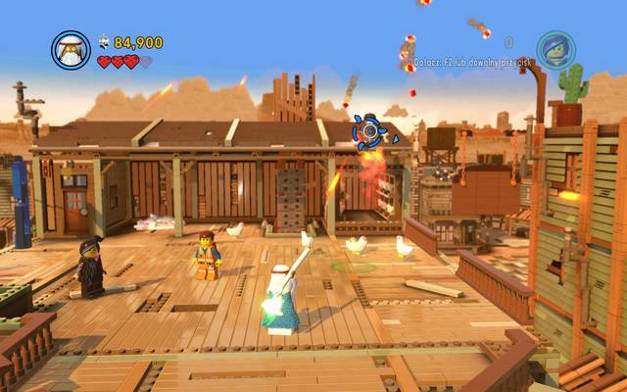
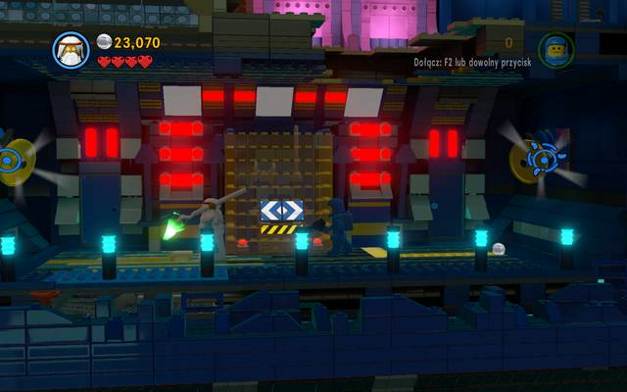
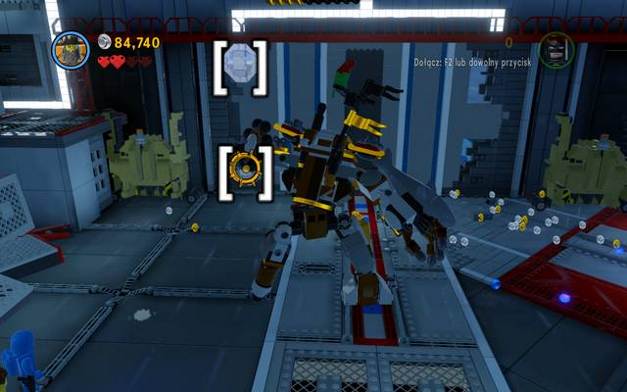
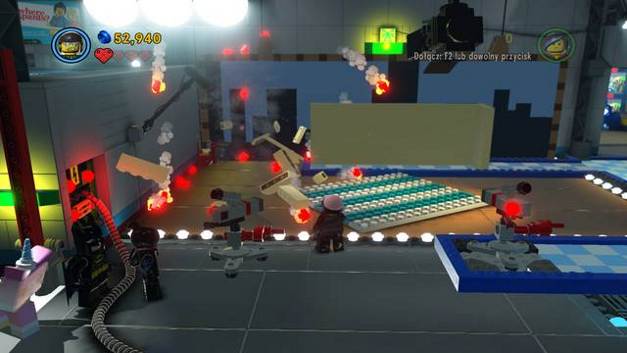
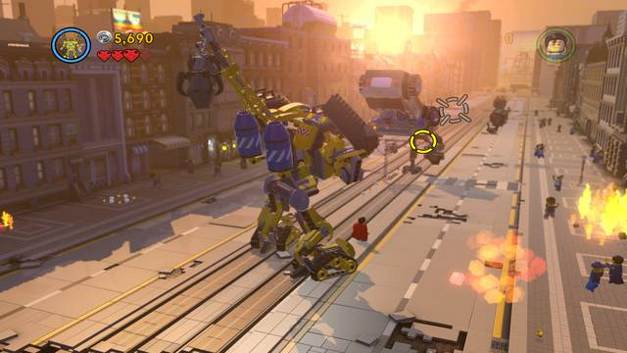
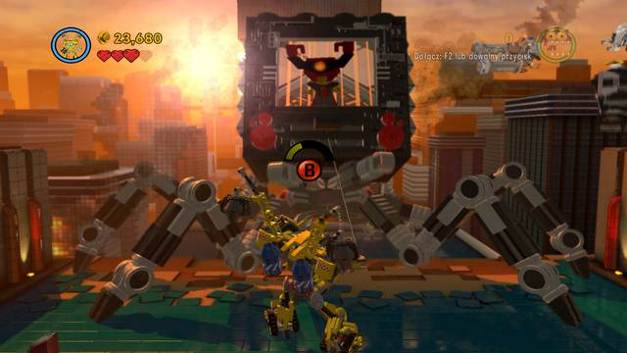
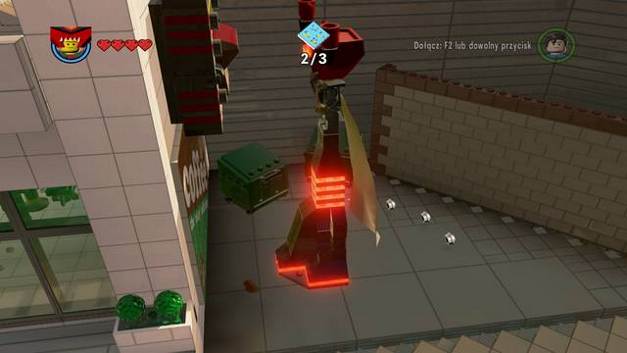
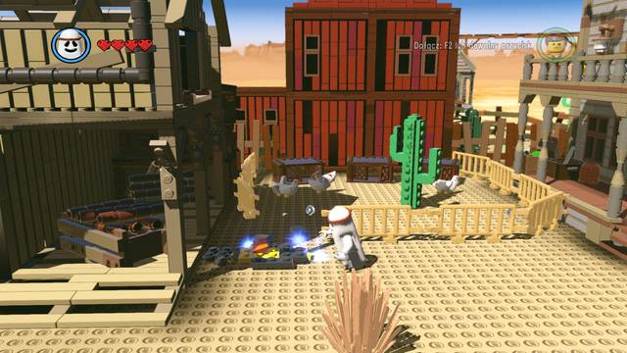
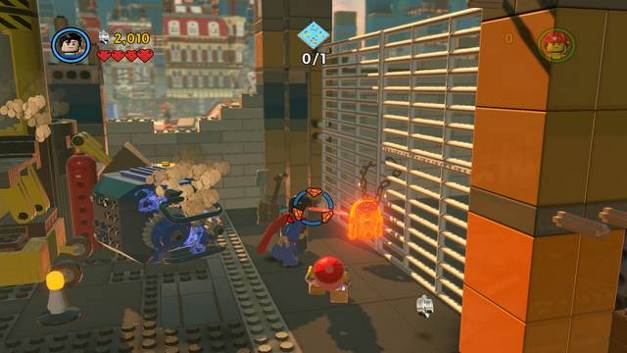
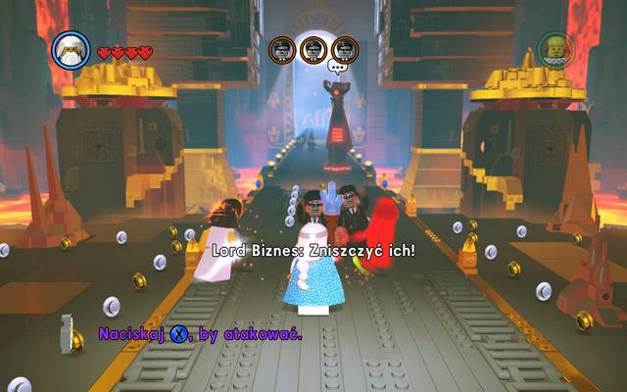 Destroy the incoming robots
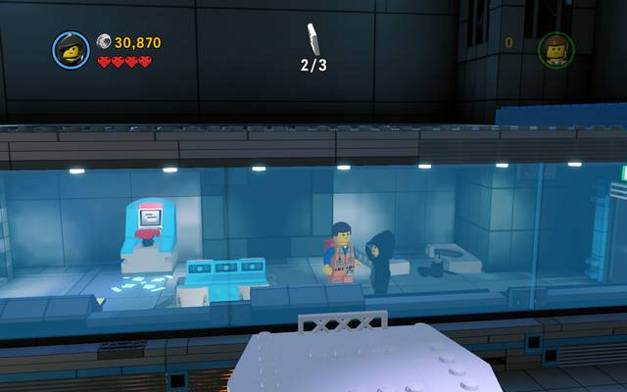
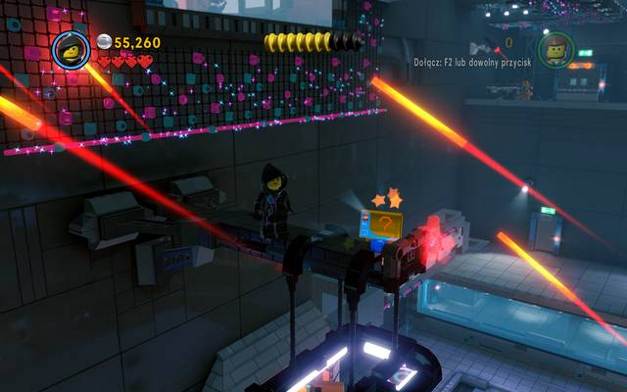
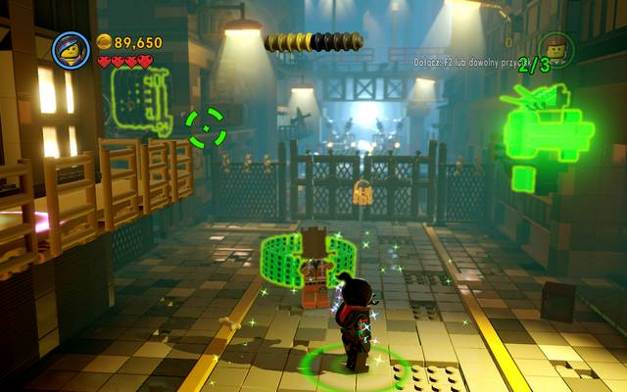
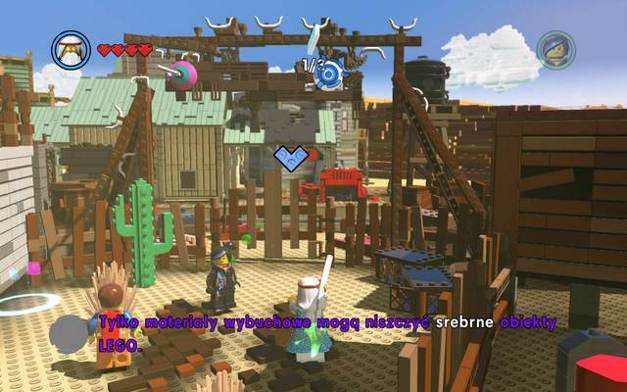
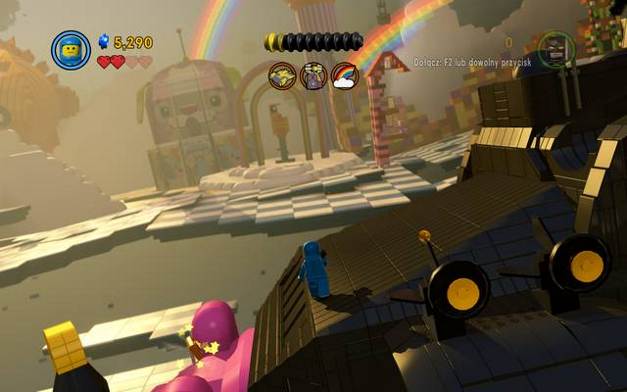
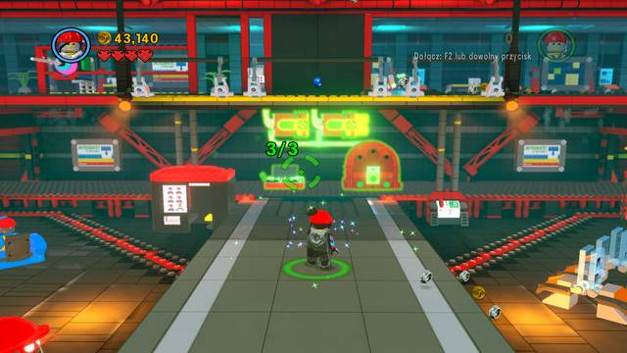
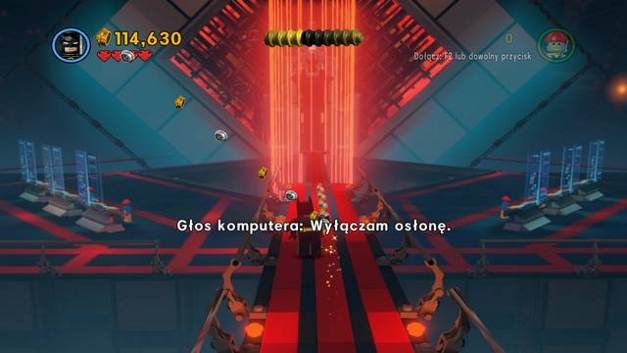
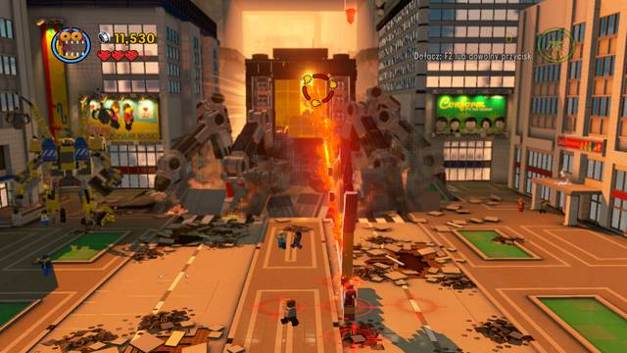
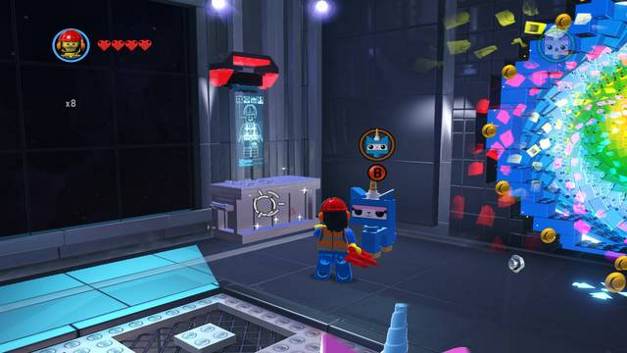
You start the game in the middle of the action. At the bottom of the screen, you will be getting hints concerning the game. First of all, destroy the four attacking robots. At any moment, you can switch between characters.
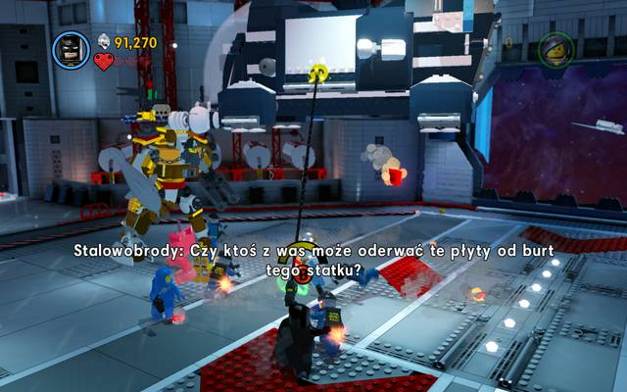
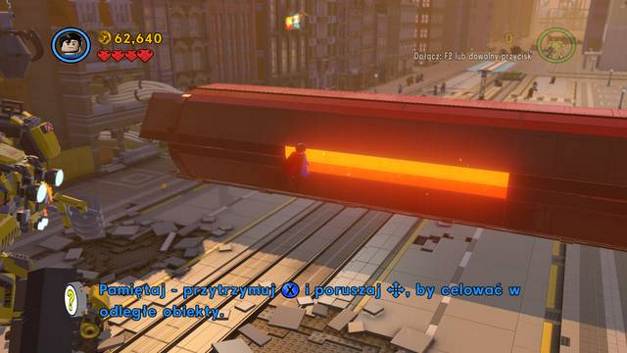
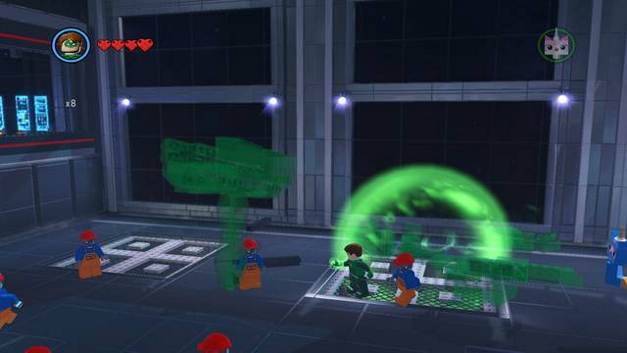
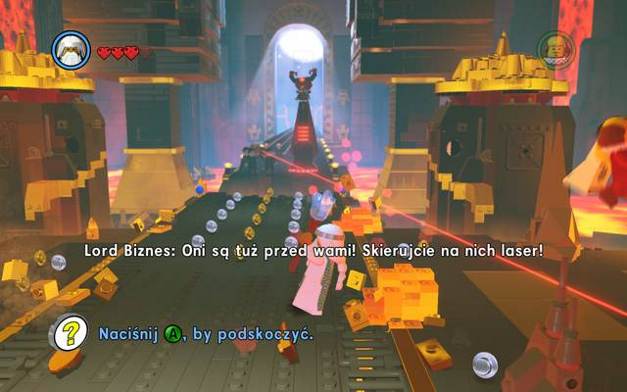 The laser's range is limited. You can hide behind objects
Avoid the laser beam. Do not worry about your companions. Even if you die, the only way in which you are going to be punished is losing some of your studs. This is why you need to collect them throughout the game. Apart from the ones on the road, you will also find them in the brick structures, after you destroy them.
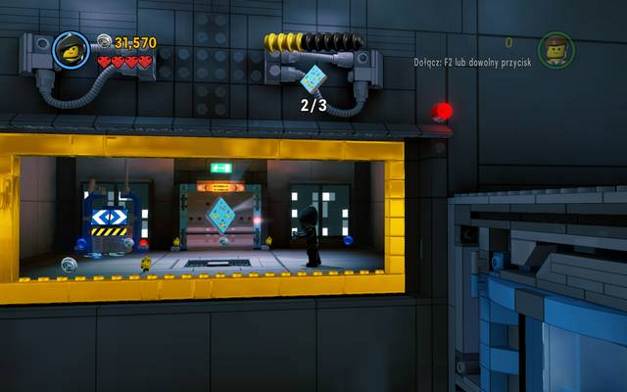
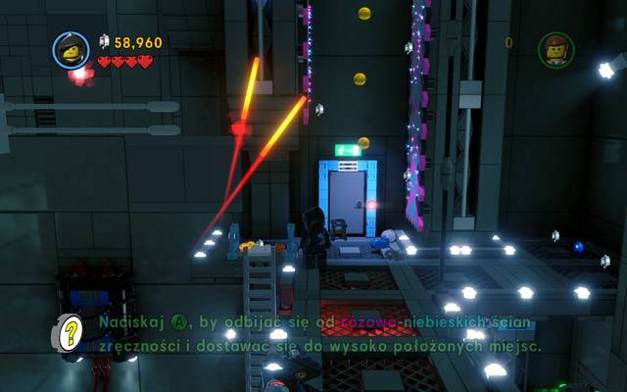
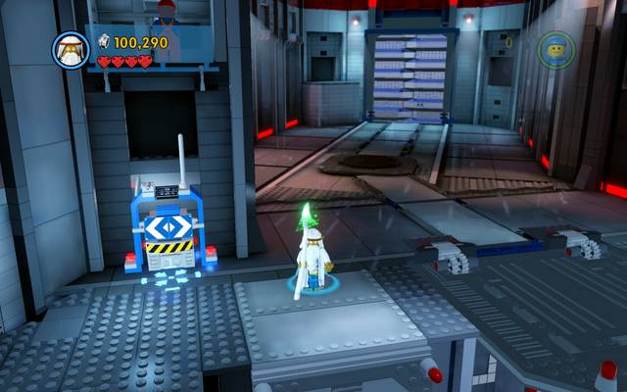
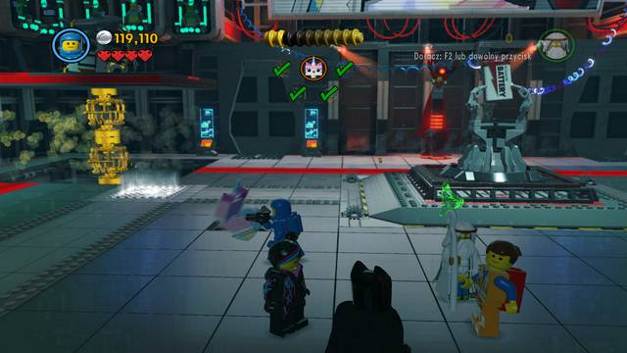
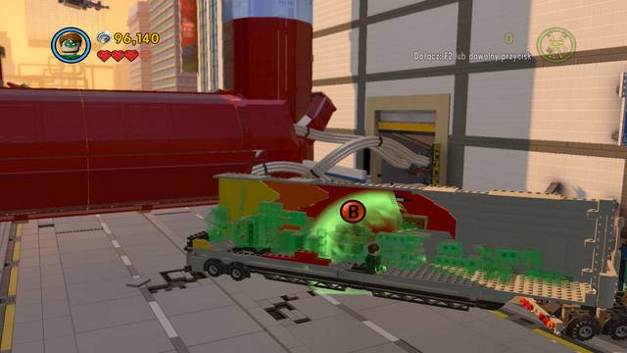
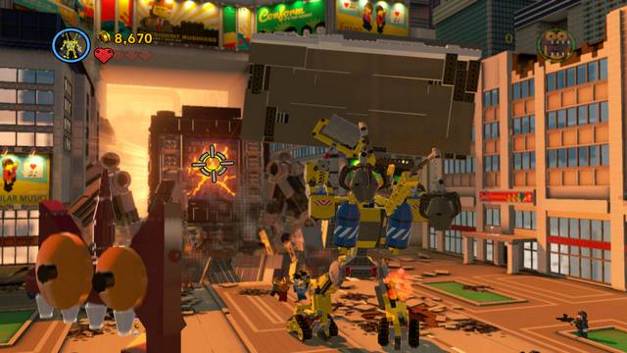
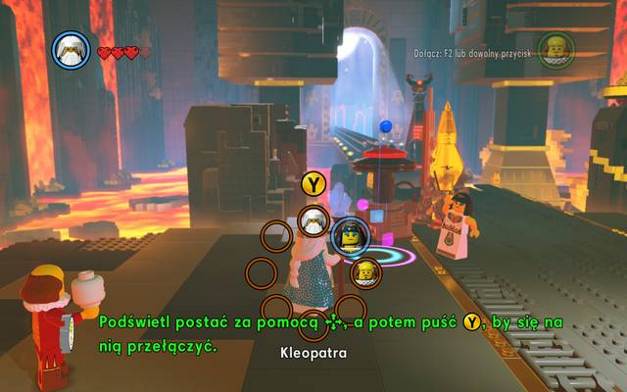 Switch between characters to be able to perform some actions
Then, approach the shivering bricks, scattered around - when they do that, you can use them to build a structure, by holding the Special button. Then, while holding down the selection key, switch to Cleopatra and jump onto the structure. When you notice a blue-pink structure, this means that the woman character is the only one that can perform an action here.
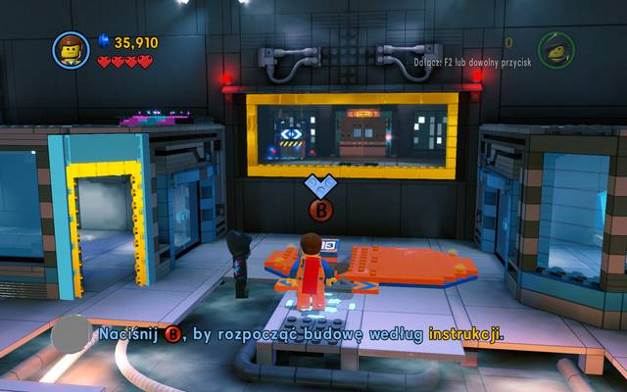
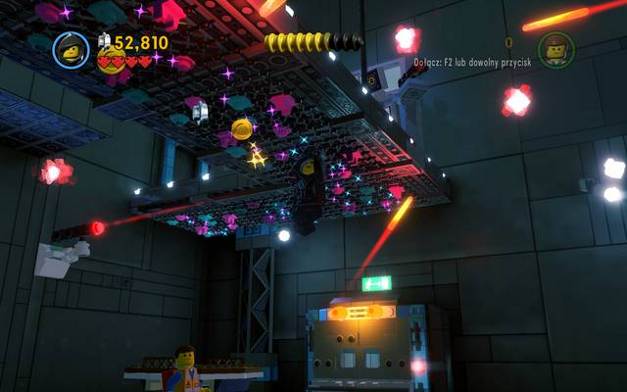
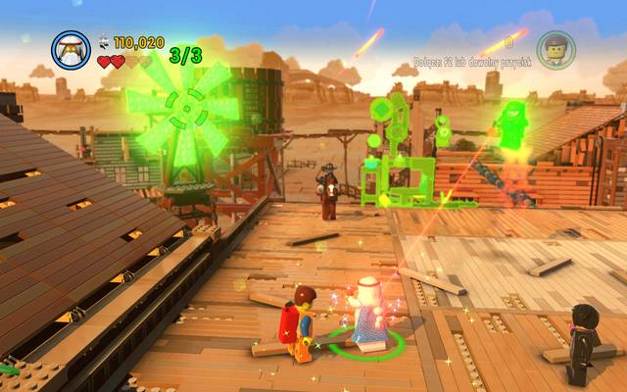
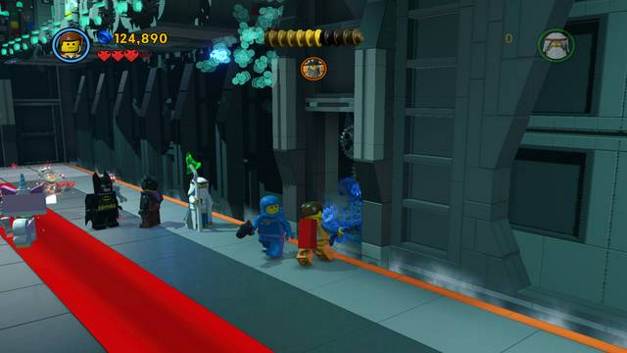
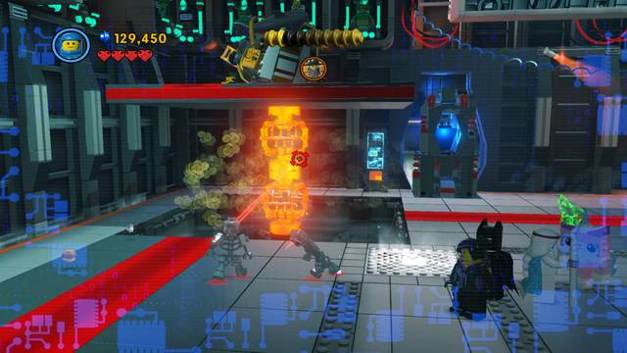
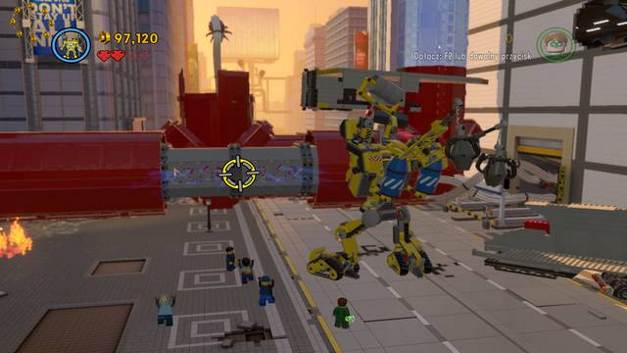
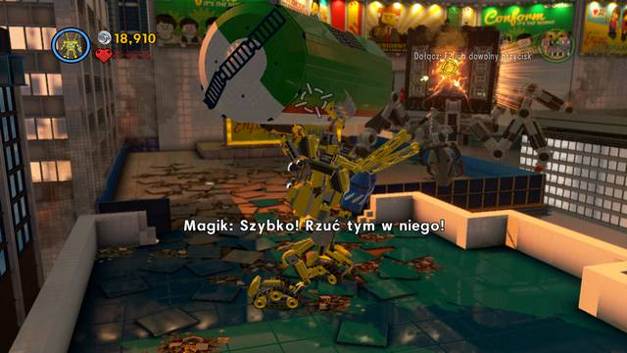
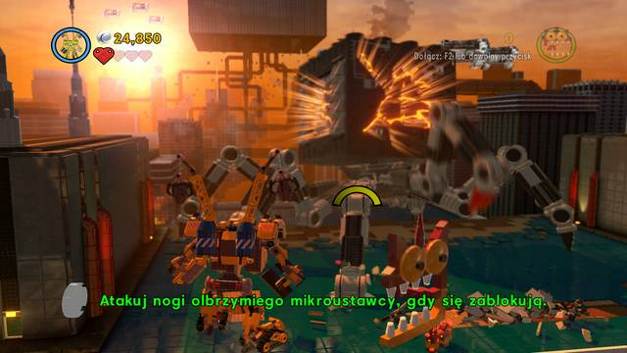
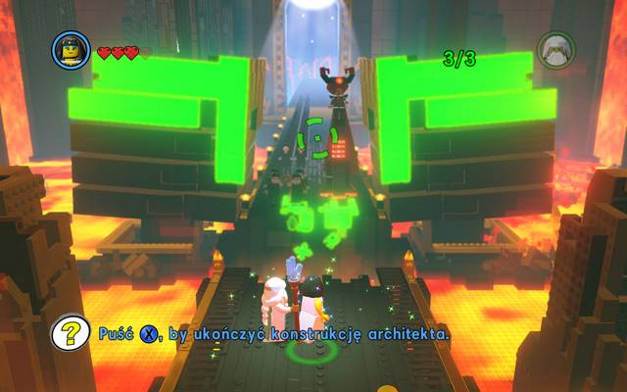 Architect mode
Repeat the sequence of actions - destroy robots, avoid the laser beam and activate the launchpad tat you have built. Stand in the green area and, while holding down the action key, roll the pointer over the bricks that glow green, to build a structure. After the cutscene, the prologue ends.
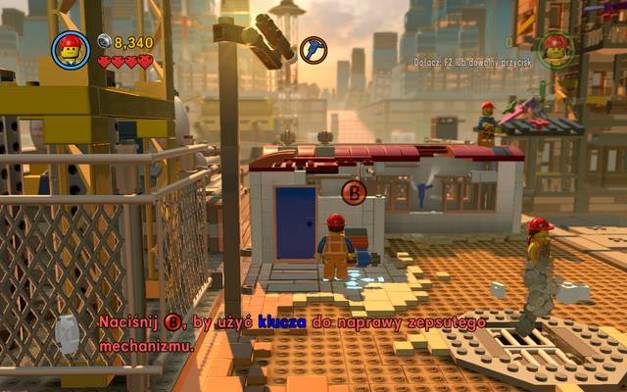
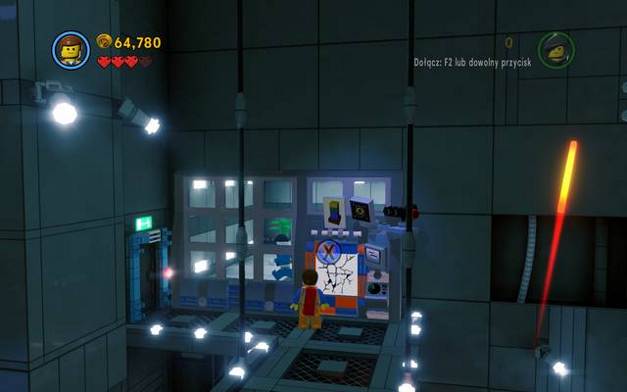
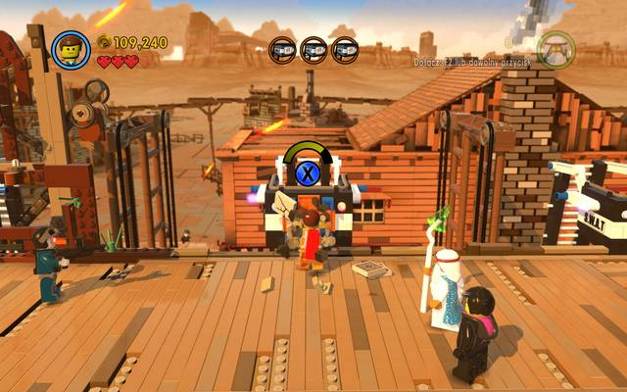
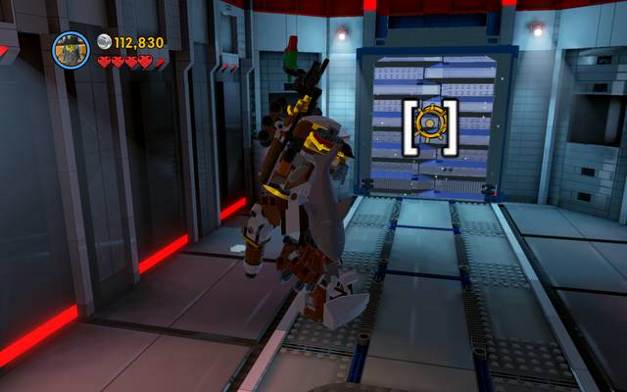
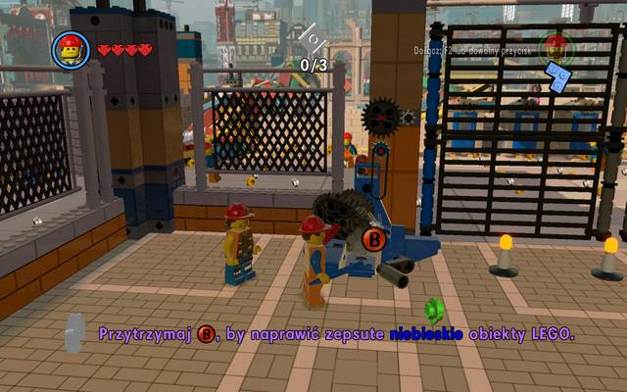 Fix the damaged machine in front of the gates
You are now in Bricksburg. This is the city where the main protagonist lives. Follow the green trail to reach the construction site. In front of the gate, repair the mechanism by holding down the Special key, while in front of the object.
 A damaged object
While at the construction site, go to the right, as far as possible, where you will notice a damaged piece of machinery. Fix it, switch to Gail and collect the plans.
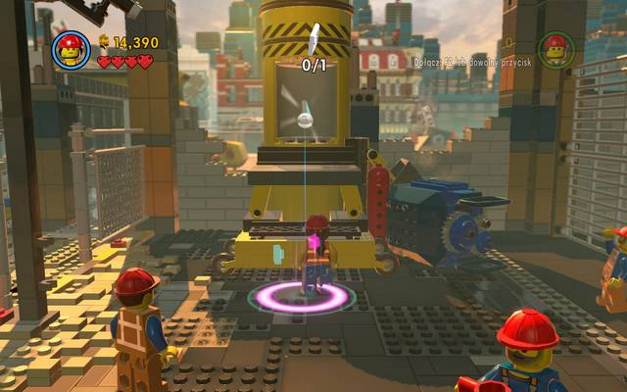
 The construction platform
Go left now, to the indicated area and press the Special button to initiate action.
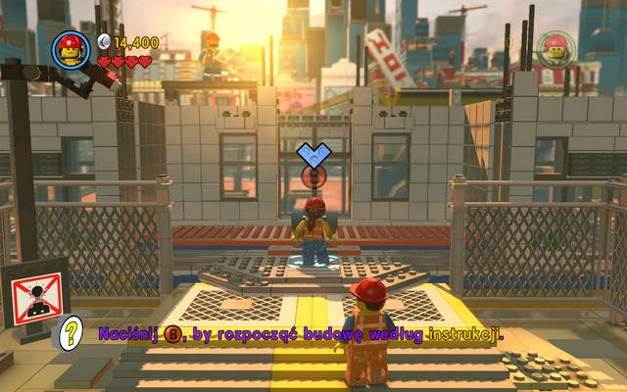
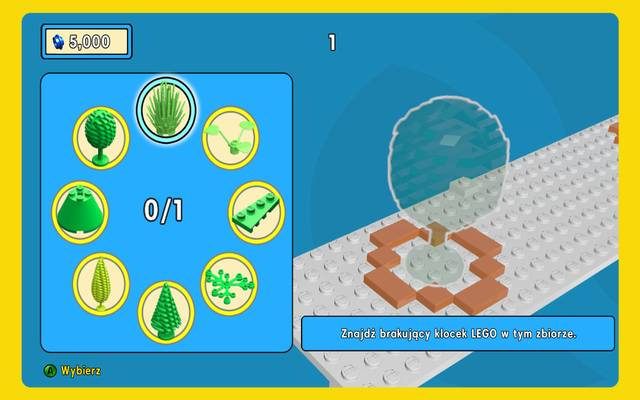 The construction screen
The construction screen will pop up, where you need to perform a simple action of matching the missing objects, shown on the right side of the screen, from the selection of items on the left. The faster you can find the missing element, the more studs you will obtain.
 The storage with the drill
In the next stage, walk over to the storage on the left and fix the door mechanism. Enter and collect the drill. This will allow you to destroy the cracked objects.
 The building to destroy
After you have taken the drill, approach the window of the building on the right, press and hold down the action button and destroy it. Repeat for the rest of the cracked windows.
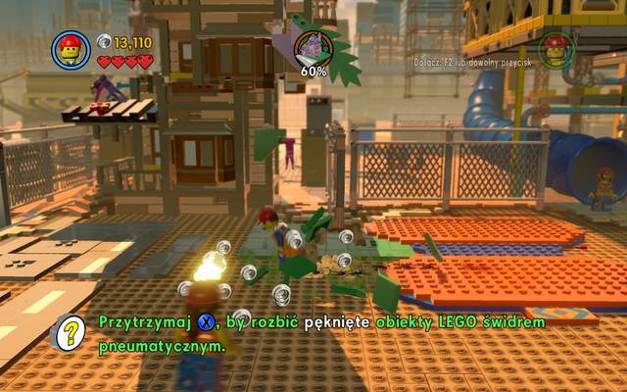 Also, destroy the garden and, optionally, the road
You also need to destroy the garden around the building. By holding down the action button, move around and destroy the bricks, until the progress bar reaches 100%.
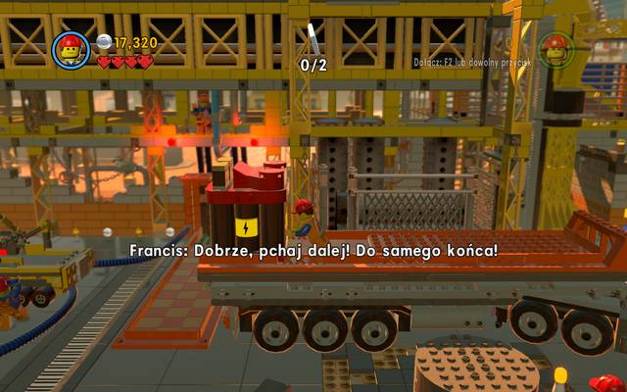
Jump onto the trailer and give the generator a pushBehind the gate, destroy the cracked object, next to the trailer, and jump onto the trailer. Push the generator over to the end and proceed with it towards the building. You can find the other generator over to the left, at the gate.
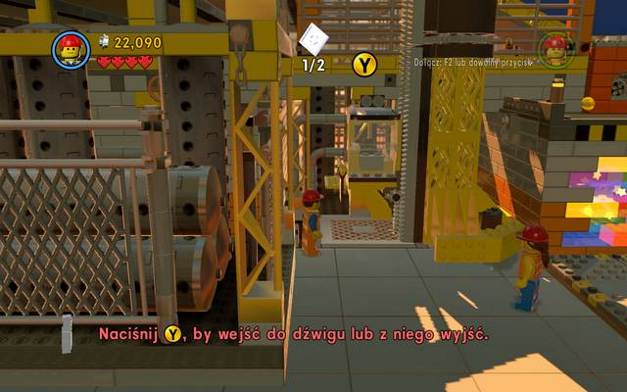 Entrance to the crane
Get over to the right now, where you will spot a crane. Switch to Gail now and fix the damaged object. This will allow you to get onto the building's rooftop.
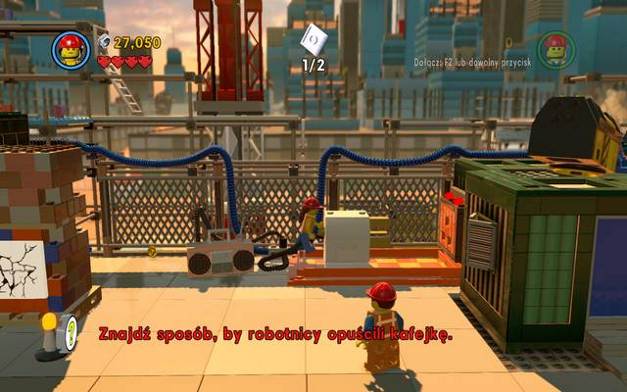 The plug- push it to the right
On the rooftop, move the plug towards the caf, jump onto the roof and fix the loudspeaker. Opposite, there is another one - to get to it, you need to destroy the cracked object to the left of the radio.
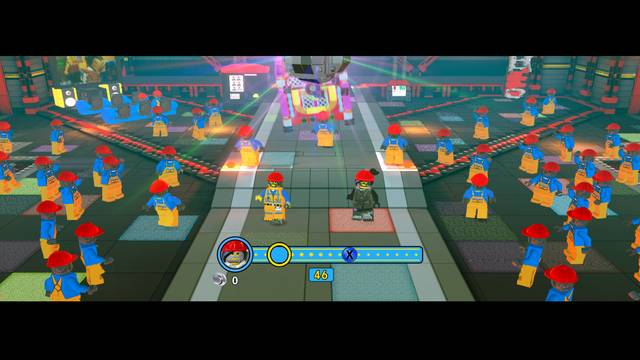
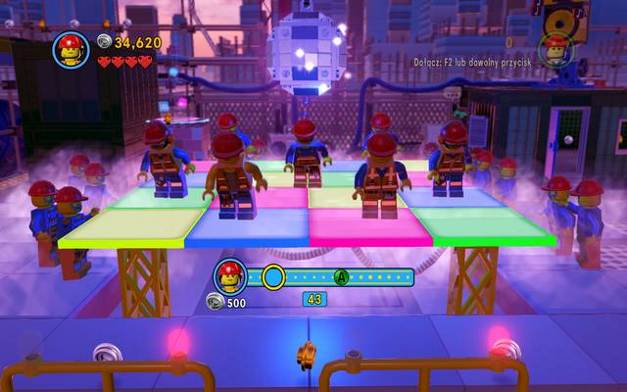 A dancing minigame
After you fix the loudspeaker, a dancing minigame will start. It consists in pressing the appropriate keys, whenever you see its icon in the yellow circle. Depending on the number of correct buttons that you have pressed, you will receive a proportionate number of studs.
 The unlocked pants
After you have completed this task correctly, you will receive pants- one of the elements that can be unlocked in the game, which can be later used. Now, take the other, missing, part of the plans from the worker on the left side of the roof and return where you have earlier demolished the building. Start building according to the plan.
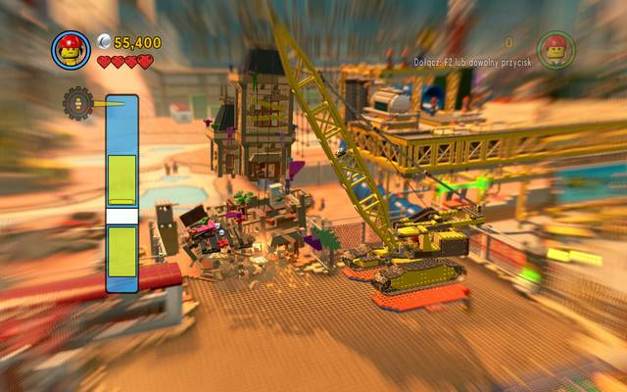 Demolish the building with the wrecking ball
After you have built the vehicle, get in and press Down, and then Up, when the yellow line enters the green field, as close to the white as possible.
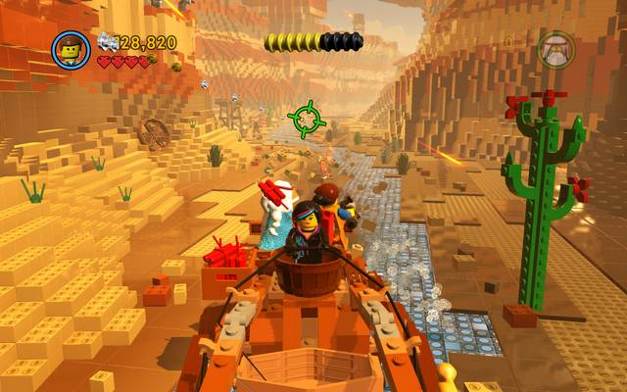
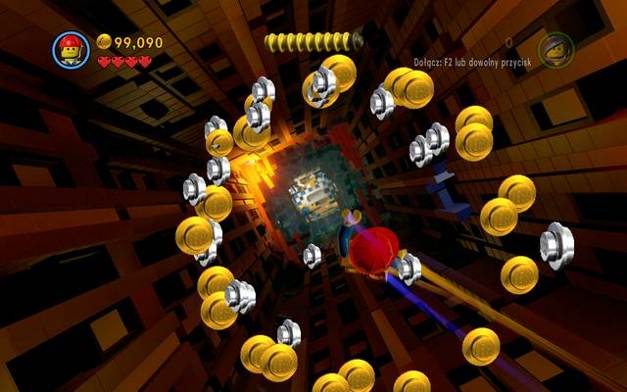 Avoid the obstacles and collect studs
After the cutscene, you will start falling down a hole. Collect studs while falling through the circles. Then, you will have to move down the tunnel. The studs are arranged in the form of a slalom, which is why they are easy to collect.
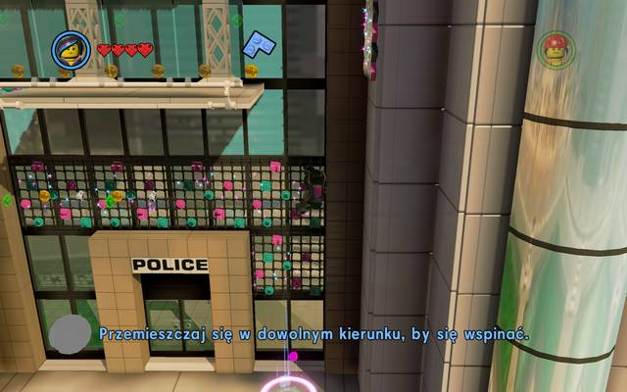 A new heroine - Wyldstyle
Now, as Wyldstyle, make your way to the police station, by following the trail of green bricks. This character will make it possible to take high jumps, climb and cling on to bars.
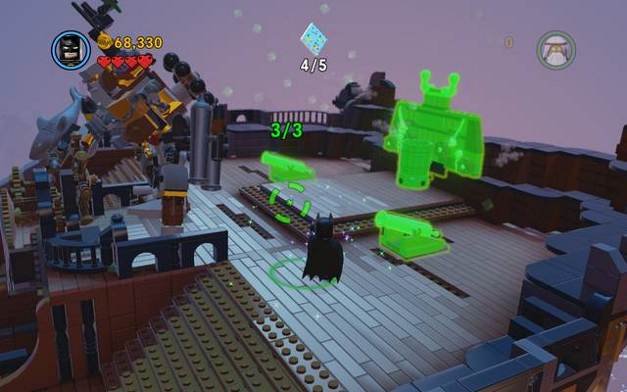
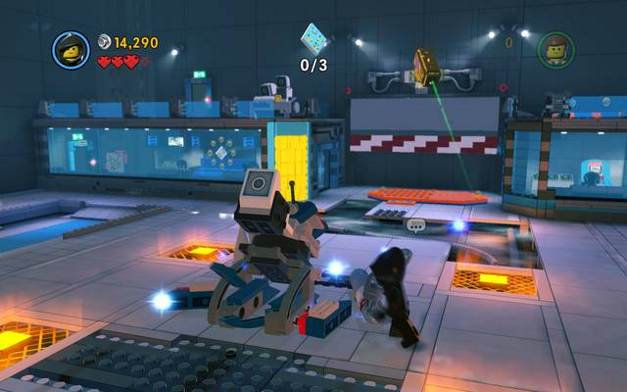 Build a cannon
While at the police station, you will be attacked by police robots. After you have eliminated them, approach the scattered bricks in the middle of the room and build a laser gun. This will allow you to destroy everything within sight - most importantly, the gold-brick constructions.
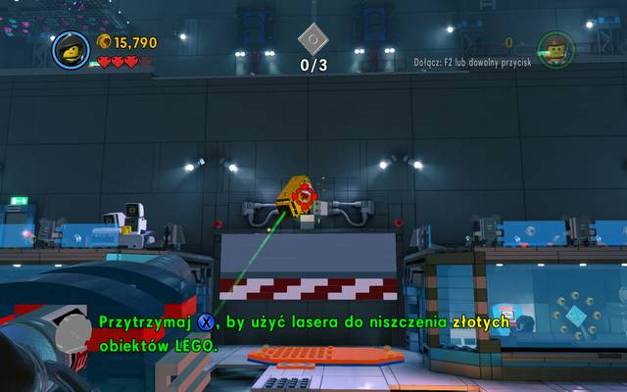 The laser gun
Start by destroying the laser gun opposite, then the wall on the left. The gun has no ammo or operation limit. Also, it eliminates the enemies in one shot.
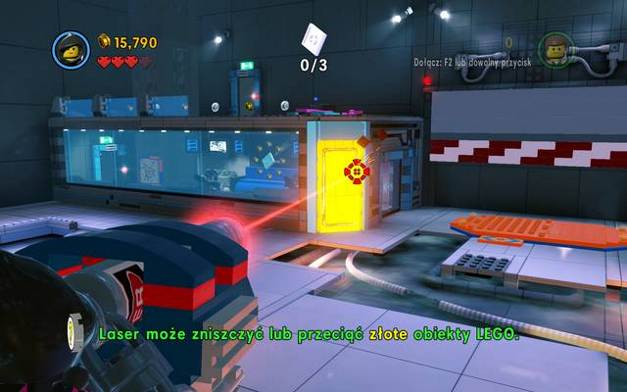 The laser can cut through gold bricks
To destroy the passage, you need to aim at the hollow area, which will cause the laser to block down. You can now move over the line on it, to cut a rectangular hole.
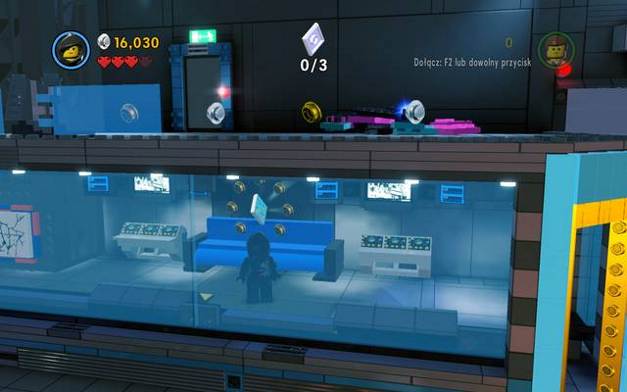 The first part of the plans
Inside, you will find one of three parts of the plans. In the corner on the left, destroy the support(as Emmet). Exit as Wyldstyle and jump over to the higher level, over the support.
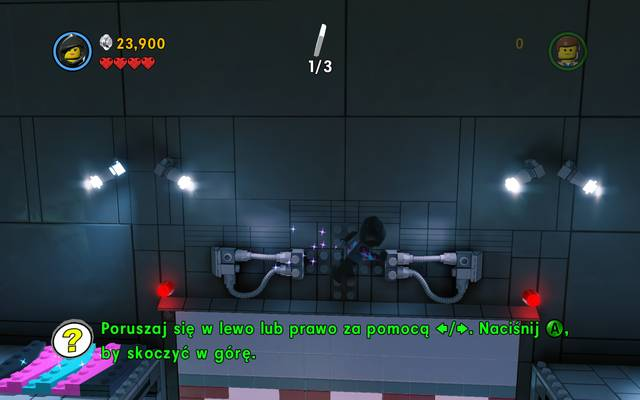 The trampoline makes it possible to run over walls
At the edge, build a trampoline, which will enable you to run over the wall to the other side. There, you will find and object at the wall, which you need to push down.
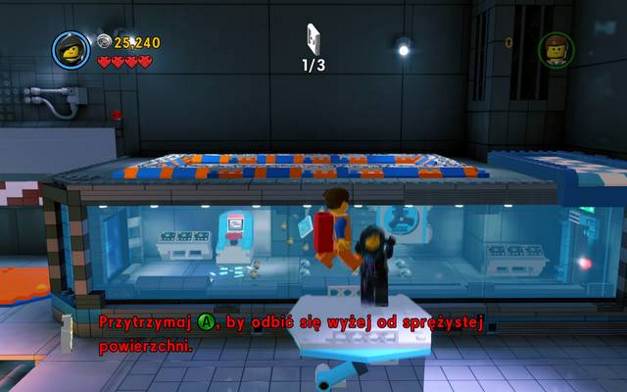 Thanks to the trampoline, you can reach the higher level
Get down and use the bricks to build a trampoline. Using it, jump to the higher level, with Emmet, by holding down the Jump key, in order to jump higher.
 The second part of the plans
Now, use the drill to destroy the blue-orange bricks and walk into the room. There, you will find the second part of the plans. Activate the switch on the left and destroy the fan. Rebuild it, thanks to which you will be able to leave the room.
 The third part of the plans
Use the laser to destroy the wall of gold bricks and get to work. Switch to Wyldstyle, and collect the last part of the plans.
 The construction panel
Approach the construction panel, as Emmet, activate the construction screen and build a ladder. After you are done, use the crank on its right side and go up.
 The climbing net can also be under the ceiling
On the higher level, destroy the object at the left wall and build a trampoline, as Wyldstyle. Jump off it and move along the ceiling.
 The first golden manual
Halfway across the ceiling, jump down onto the projecting support. At the end of the support, there is a golden manual. After you get back up, proceed to the right. One of the opponents is destroying the bridge - jump over to the other side of the bar. In the meantime, you will have to switch to Emmet, to eliminate the robot with a bazooka.
 Lower the ladder by hitting it
Lower the ladder and jump higher over the walls. There, you need to wait until you fix the power box as Emmet. Then, using the trampoline, run over to the other side, destroy the fan and reconstruct it with Emmet.
 Drill a hole - watch out for the robot inside
As Emmet, jump onto the platform and destroy the wall with the drill. Collect the studs and walk over to the corridor on the right.
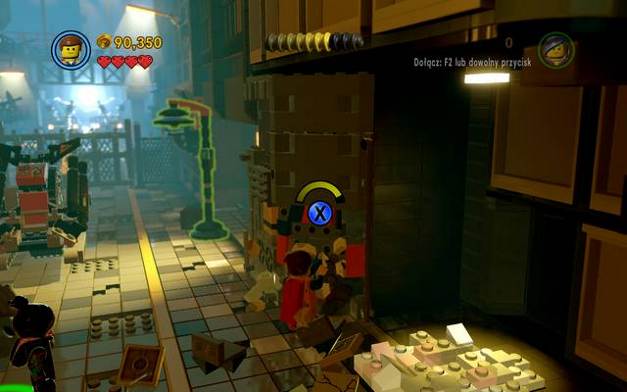
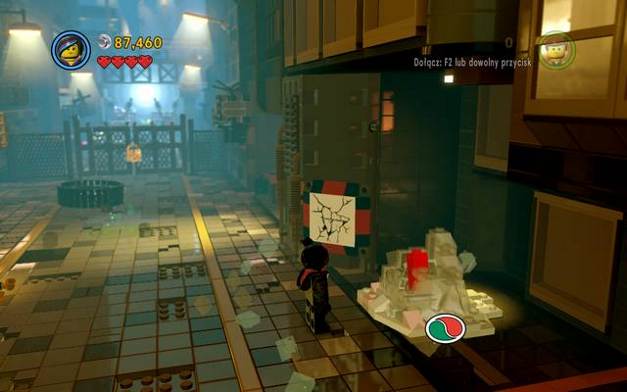 In each checkpoint, you can save the game
You are now in the backstreet, behind the building. The object on the right can be interacted with to save the game in that point.
 Build a motorcycle, by marking the highlighted items
Approach the green fence in the middle of the alley and enter the building mode, as Wyldstyle. Select the items highlighted in green and release the action button. This is not the end of the building, yet.
 Drill the cracked blocks
As Emmet, destroy the two cracked objects at both sides of the alley. At this point, enter the building mode again and complete the vehicle. Then mount it.
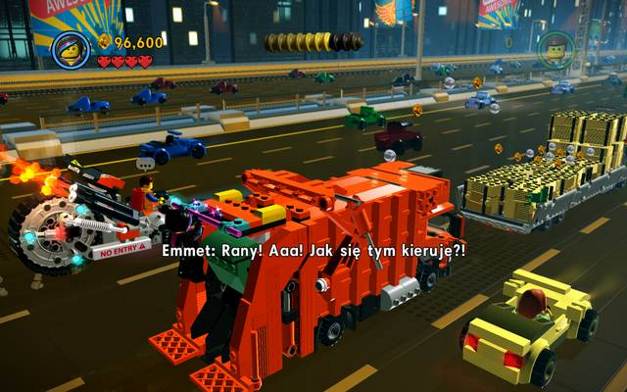 As Wyldstyle jump where there are studs
As you speed along the highway, you will often have to switch between the characters. Each time you see a trail of studs, you need to jump, as Wyldstyle, between vehicles and eliminate the enemy vehicles, by targeting them and pressing the action key.
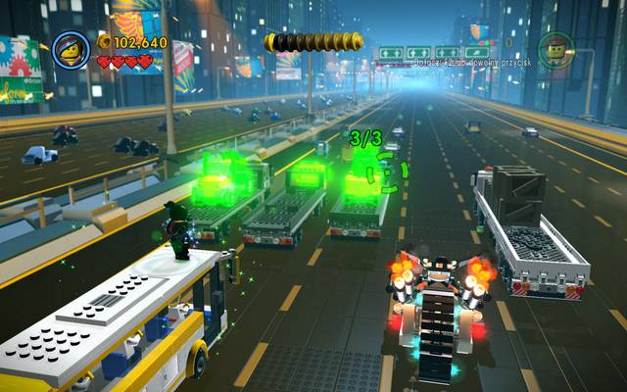 There always are 3 elements highlighted on the constructions
While atop the bus, you will notice a green circle, with which you need to mark, in the building mode, the cards on the flatbeds in front of you.
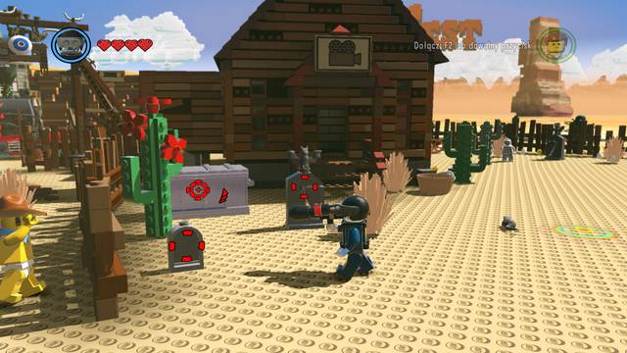
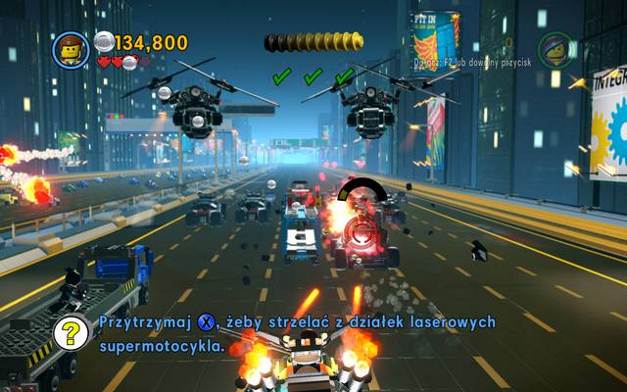 First, destroy the ground units
Finally, you will have to start destroying a lot of enemy vehicles, by shooting at their backs. Once you have destroyed all of the cars, start aiming at the helicopter backs (the spots will be marked with a blue arrow).
 A golden manual in the tunnel
You start the next stage while falling down narrow tunnels. Past the second turn, hold on to the lower ledge (the Down direction). Inside the circle of studs, there is a golden manual. Then, you will slide down the slope - collect as many studs as you can.
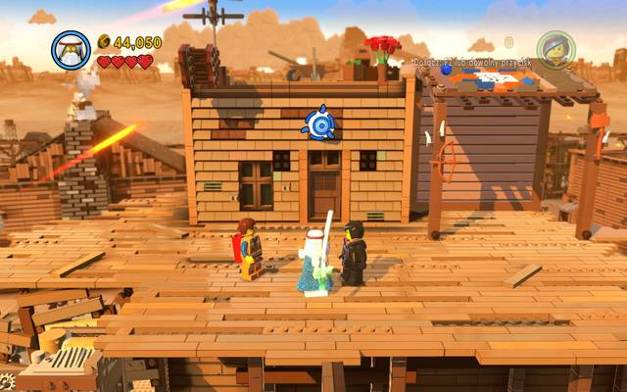
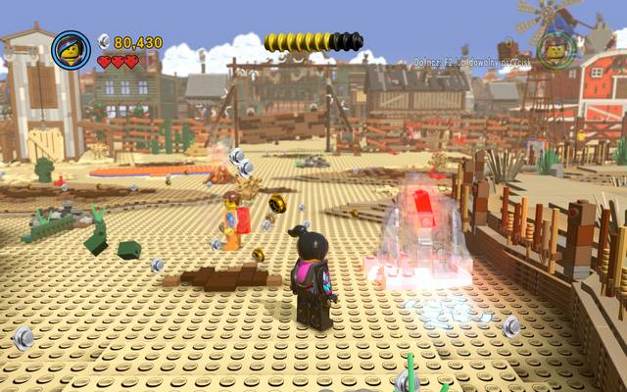 The old West
At the end of the slide, there are robots waiting. As long as you stay away from them, they will not attack you. The game can be saved at the object to the right.
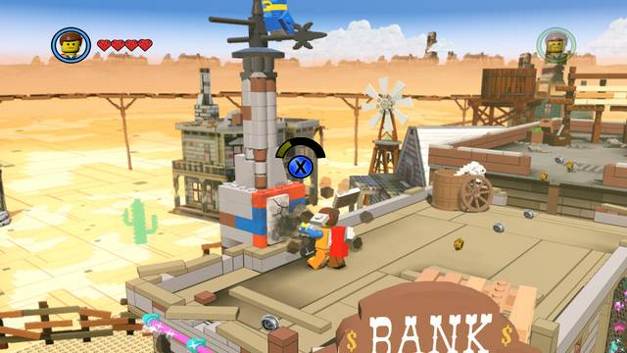
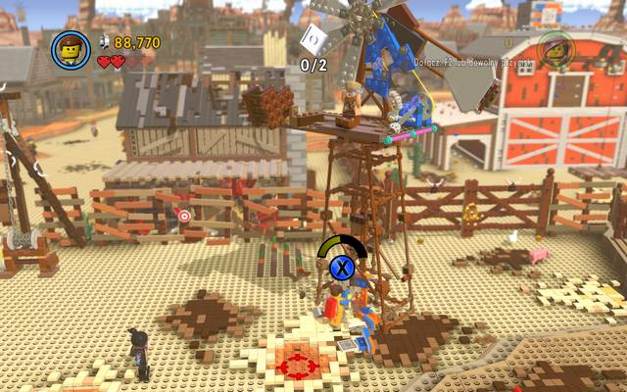 Destroy the tower with the robot on it
On the right of the square, there is a tower with a fan, and a robot throwing dynamite on it. At the foot of the tower, at the side of the pile of stones, and wait for dynamite to blow it up. Then, start drilling into the tower.
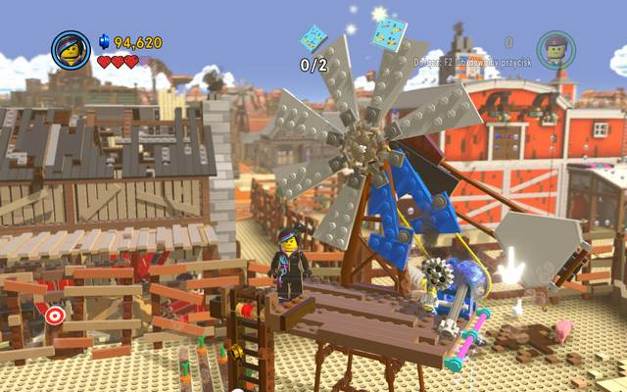 Jump onto the tower and lower the ladder
After the tower collapses, you can jump onto it, as Wyldstyle. To fix the mechanism on the blade of the fan, lower the ladder and fix the driving mechanism, as Emmet. Climb down and collect the first part of the plans.
 Pull up the bar, next to the building
You still need the second part of the plans - you will find it inside the shed, on the left. Jump up with the girl and grab onto the bar, to remove the chest. Inside, there also are robots.
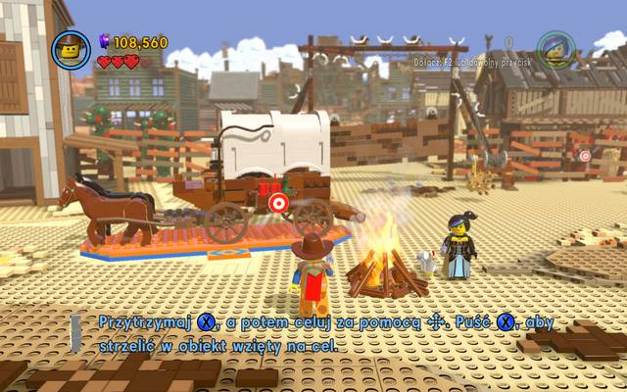 Build a carriage and destroy it, afterwards
After you have completed the plans, build carriage in the middle. After you change your clothes and eliminate the enemy robots, fire your pistol at the target on the side of the carriage (pull weapon with the "Special" key, aimed shot - hold down the action key and take your aim).
 To enter the architect mode, you first need to bring down the wall of the building
Then, aim at the target on the side of the building to the right of the gate. The explosion will enable you to get to the object inside. As Wyldstyle, build a new structure.
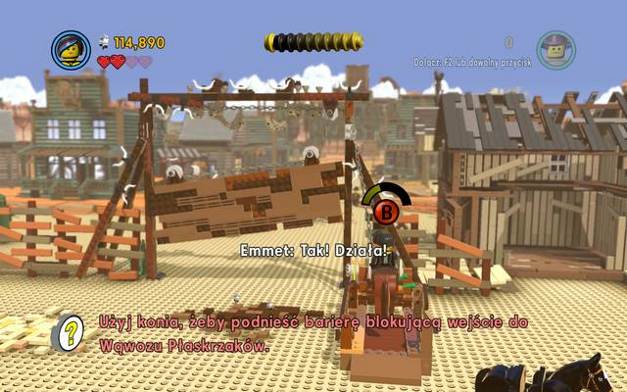 Open the gate while riding the horse along the track
Mount the horse now (with the character switch key) and ride into the mechanism. Keep tapping the Special key, quickly, to open the gate.
 Destroy the pillar at the counter
Apart from the elimination of robots, and collecting studs, in the bar, you need to perform several actions. First of all, stand on the table at the counter and wait until the red reticule, of the robot with the dynamite, appears. After the explosion, climb to the higher level. On the stairs you will find a violet stud (value: 10000)
 Build a ladder and fix the mechanism in the corner
At the other side, you will notice an action field, for construction. Mark the elements, which will result in a ladder being built. As Emmet, climb to the higher level and fix the mechanism in the corner of the room.
 Smash the object and put the elements on the net
Now, you are in the Old West. Follow the green trail to start another mission. At the building that the green pieces lead up to, destroy the colorful structure and turn it into a climbing wall. Climb onto the rooftop and move from building to building.
 Lower the ladder and fix the mechanism
On the balcony, lower the ladder to be able to fix the lock mechanism, as Emmet. After that, get inside.
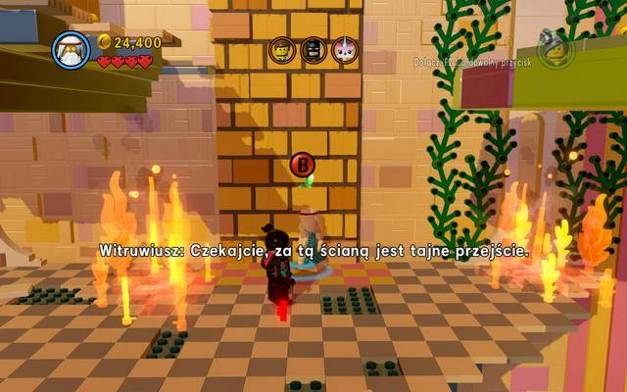
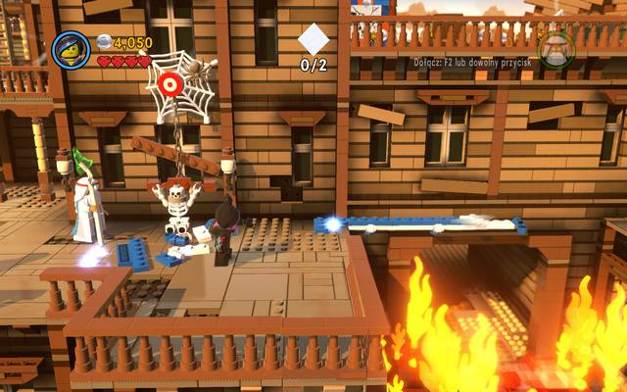 Vitruvius can walk over the blue beams
From now on, you are accompanied by a new character- Vitruvius. Thanks to his staff, he can very fight very effectively and throw it, to use it as a bar and stun the enemy. Smash the bricks at the skeleton and use them to build a bridge. Only Vitruvius may cross the bridge.
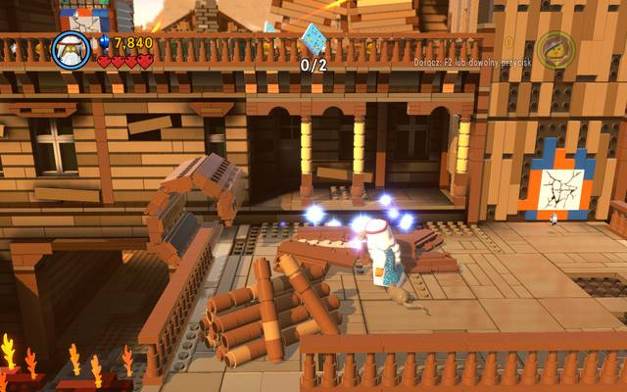 Build a bridge
On the second building, destroy the object and use the bricks to build a bridge. Then, use the drill to destroy the wall.
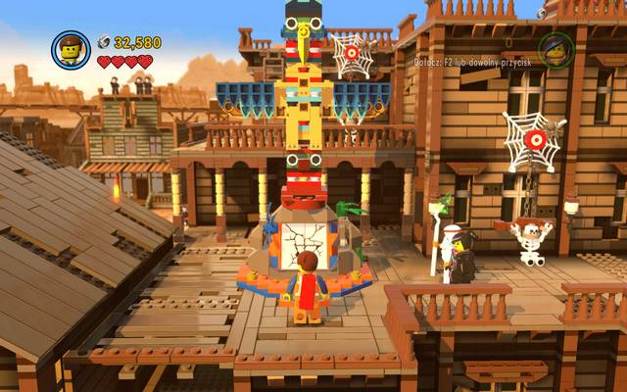 Build and destroy the totem
Further on, climb up and collect the part of the plans by going left. This will allow you to build a new structure later on, which will enable you to climb to the balcony.
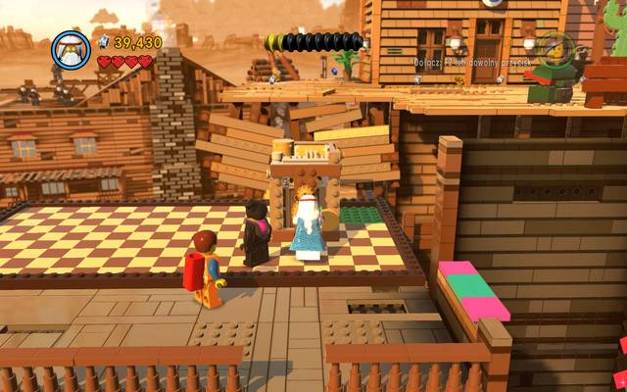 Move the block and climb up
Keep going right with the whole party. Free the object by using the drill, at the foot of the climbing wall, and move the block to the right, into the green field.
 Jab the cane into the specific spot
Above, you need to use Vitruvius's staff - press and hold down the action key to take your aim, and release it to throw the staff. Switch to Wyldstyle and climb up, using the staff and lower the ladder. Destroy the roof of the annex, as Emmet, and use the bricks to build a bridge, as another character.
 Vitruvius also is an architect
You can cross the bridge only as Vitruvius, again. He is also capable of entering the construction mode - use this to build a launchpad.
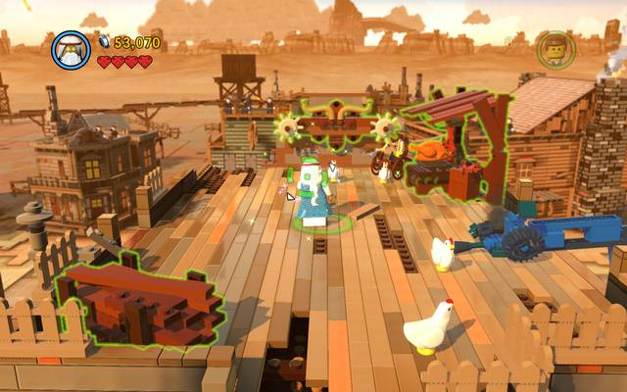
 Collect the plans at the balustrades
After you have built a bridge again and used Emmet's key, collect the three parts of the plans and examine the structure in the middle. The first two bits are at the balustrades. The third one is in the henhouse, Smash the boards to get inside and collect the last part.
 Barrels with dynamite
After you have built a catapult, approach the belt elevator and climb onto the dynamite barrel. You need to roll it over to the catapult and release the blockade. Repeat the action three times.
 Throw the cane after you have targeted the enemy
Stun the flying robot with jetpack, by throwing Vitruvius's staff at it and begin construction before the robot wakes up.
 Remove the police ladders
After you have crossed the rooftops, you will end up in a dead end. First, destroy the police ladders - before you can destroy the third one, you also need to destroy the nearby cages and use the bricks to build a missing element of the ladder.
 Defeat the sheriff
Finally, after you have dealt with the majority of the incoming opponents, stun the flying robot, which will arrive, with the cane and use it as a construction element.
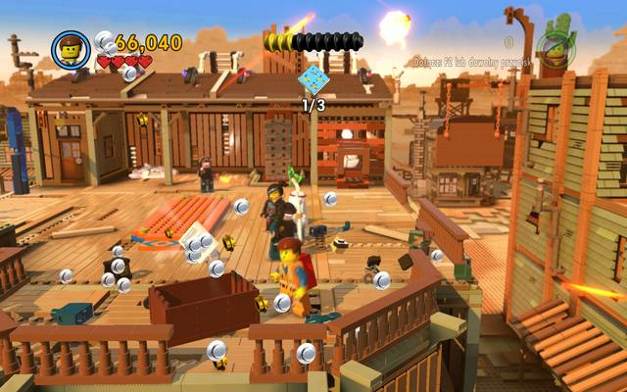
Defeat the last wave of robots. Use the remaining construction elements to build a vehicle. Mount it by pressing the character switch key.
 Flee from the city
The final minigame consists in shooting down the incoming enemies. Emmet has can use a machine gun and Vitruvius - dynamite. You will receive more studs by destroying the elements on the sides.
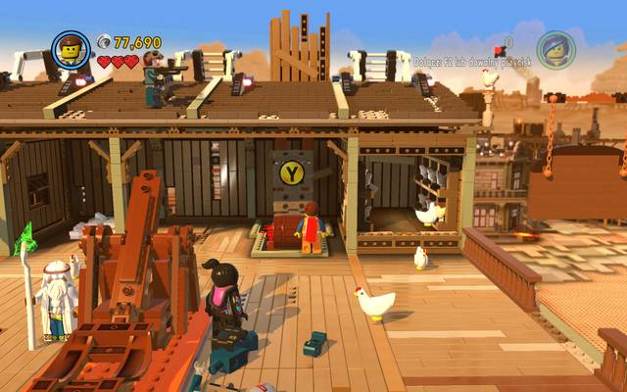
 Start another mission
To get to the next mission, you need to her onto the small building in the corner, to the right of the gate, as Wyldstyle. To do that, jump over, from the building on the left, to the other side, using Vitruvius's staff.
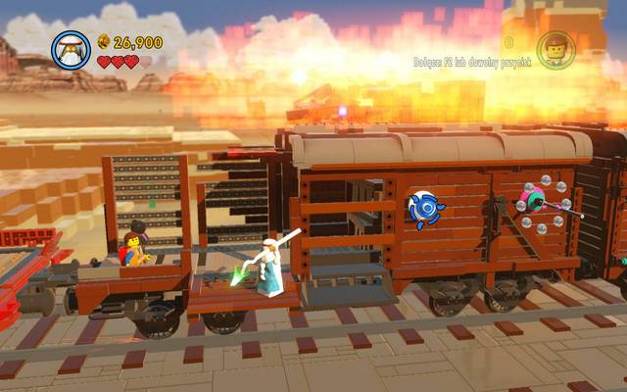
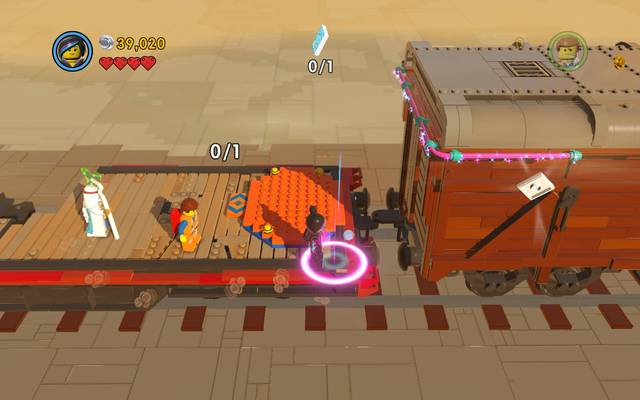
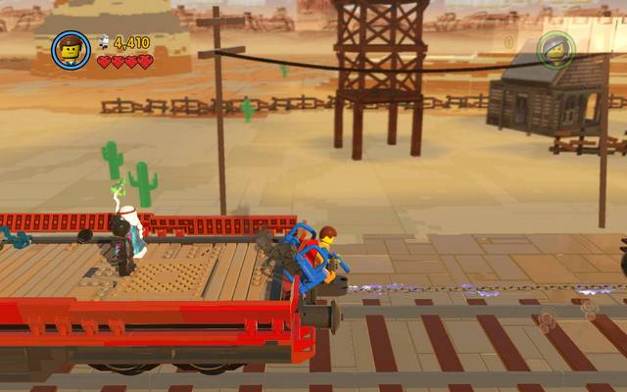 Fix the link between the railway cars
On the train, jump over the railway cars to the right, while destroying the robots that you encounter. At some point, a car will be released. Use Emmet's wrench to fix the link.
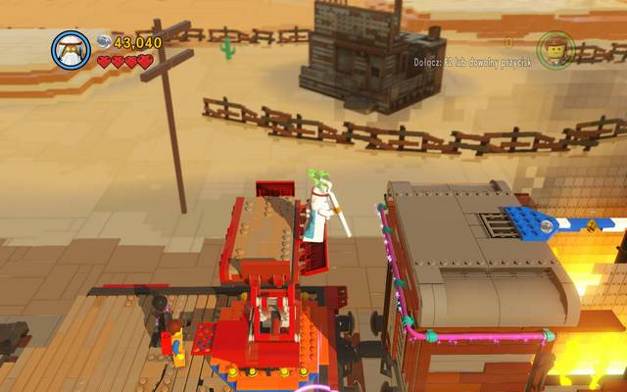
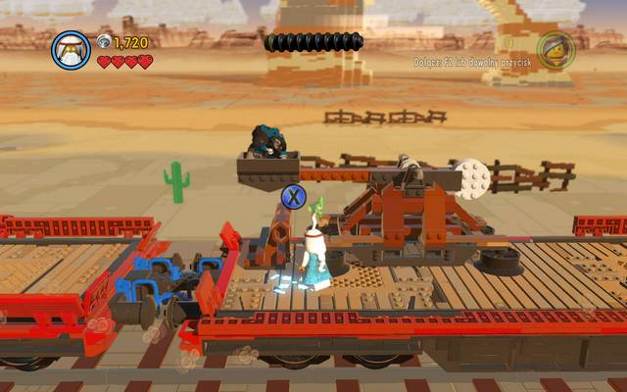 Build a catapult and activate it
Once you spot a robot hovering in the air, hit it with the staff and use it to build a catapult and the other elements.
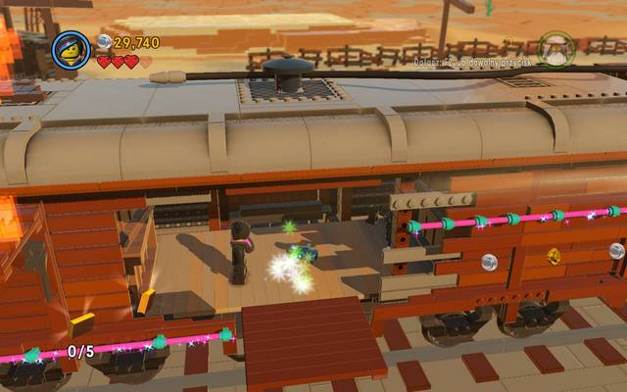
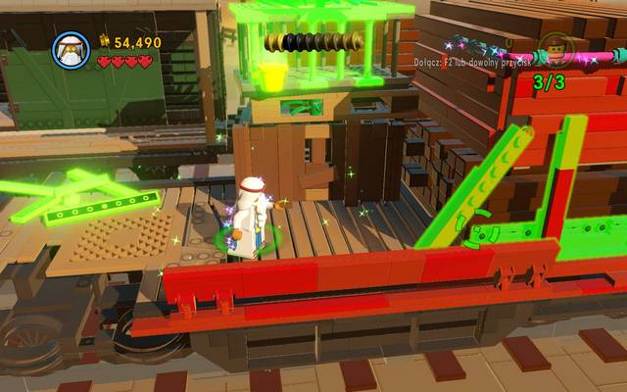
 Use the crates in the car to build a trampoline
Once you gain access to the car, destroy the crates inside and build a trampoline. To bounce off, use the jump button.
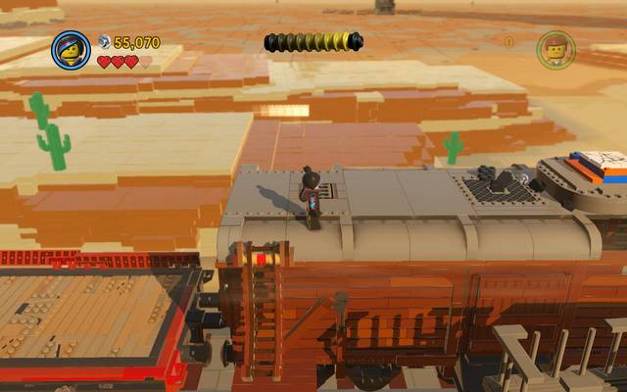
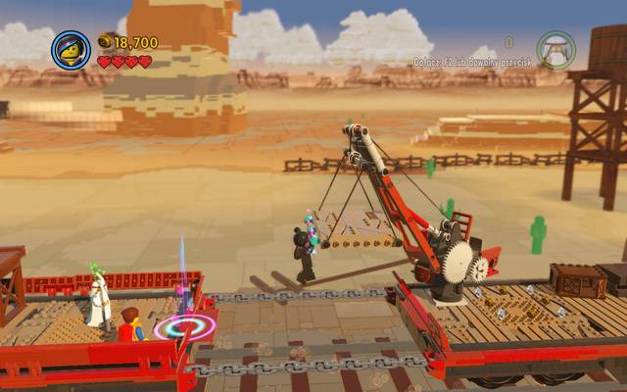 Make it over to the crane and lead your companions through
Once you reach a location where there is the biggest gap between the cars, use Wyldstyle to jump onto the staff. By doing that, you will be able to get into the crane and get the rest of your companions across the gap.
 Stab the staff into the marked spot
After the cutscene, where you will get under rocket fire, once you reach the blazing car, build a wooden platform and stab the cane into the side of the car. Further on Wyldstyle will be able to make it over onto the next car.
 The Golden manual appears after you destroy the robot
After you have eliminated the enemy in the neighboring car, you will be able to collect the golden manual, which appears in its remains.
 The valve for the hose
At the end of the next car, you will find a valve. Attach it to the hose on the rooftop of the previous car, to extinguish fire.
 Build the stairs and give them a push
Then, build stairs and push them off the roof, which will enable the remaining characters to climb onto the roof.
 Collect the plans for Emmet
At the blocked passage, fix the mechanism to lower the platform. Then, you need to watch out for fire conducted at the cars - the spot where the projectile hits will e marked for a brief moment, with a red reticule. Then, you need to build a structure - you need plans, which can be obtained by Wyldstyle, from the side of the neighboring car, with the use of the staff.
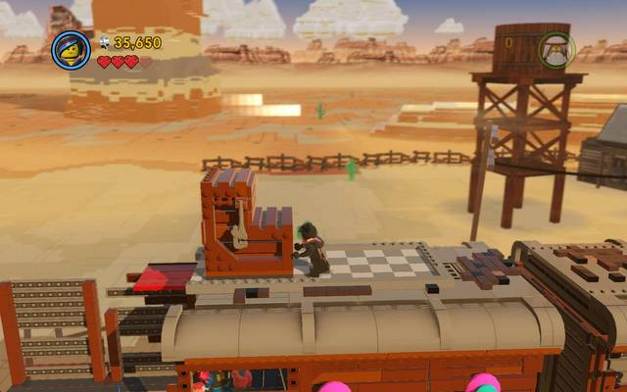
 Jump up and walk over the blue beam
To climb up, switch to Vitruvius, climb onto the structure and jump over to the neighboring car. Then, walk over the flames. You will then have to jump over to the car on the neighboring tracks and cut through the opponents to reach its end.
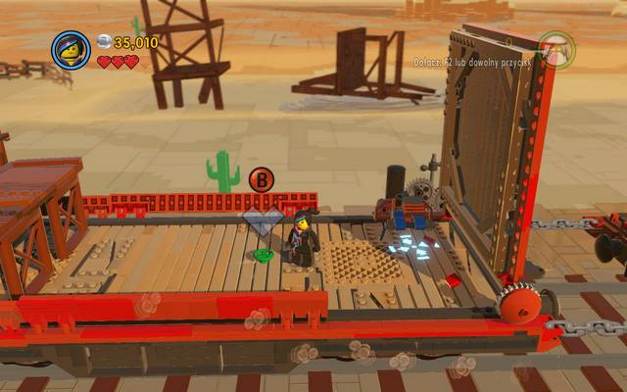
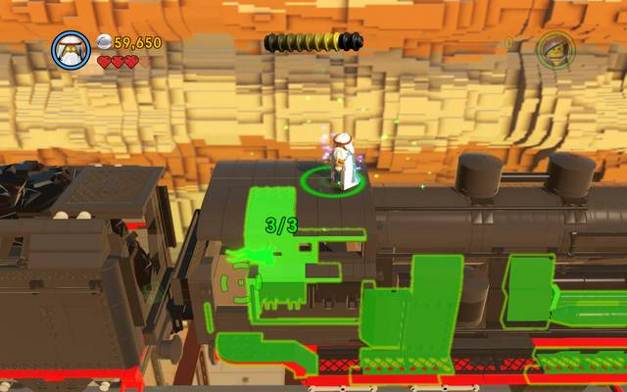
 Stop the train - build the brake in the architect mode
Enter the architect mode and build the brake. You can eliminate the enemies on the neighboring train with the staff (hold down the attack key).
 Climb up and lower the ladder
You then need to make it over to the rooftop, as the girl, and knock the ladder off. On the roof, Emmet needs to drill into the car's roof, in a specific spot. Follow up until you reach the railway engine.
 Build the last element off the railway engine's parts
On the railway engine, there is the last construction that you need to perform. Do this as either Wyldstyle or Vitruvius. After that, this mission will end.
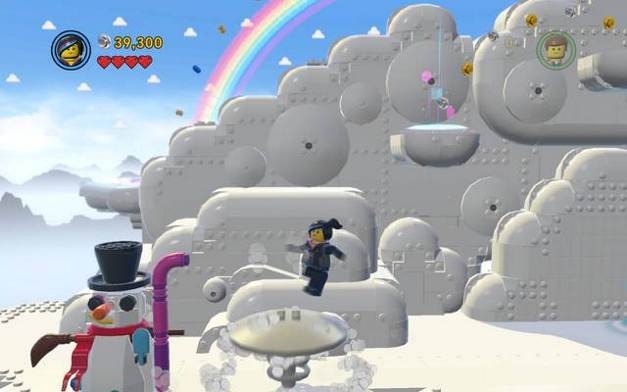
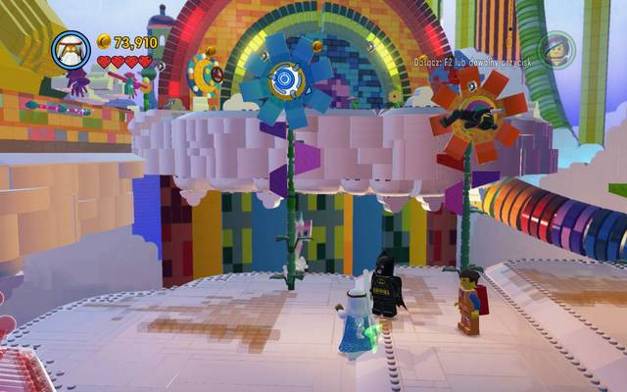
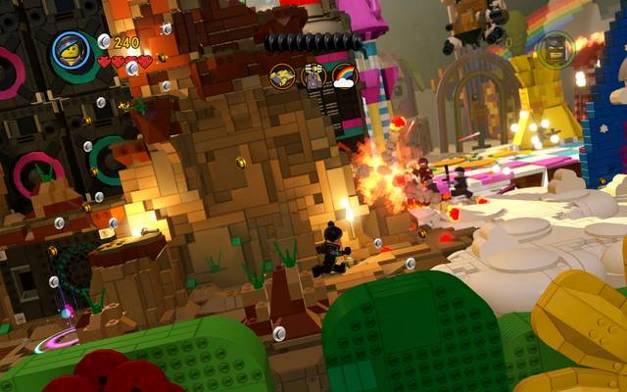
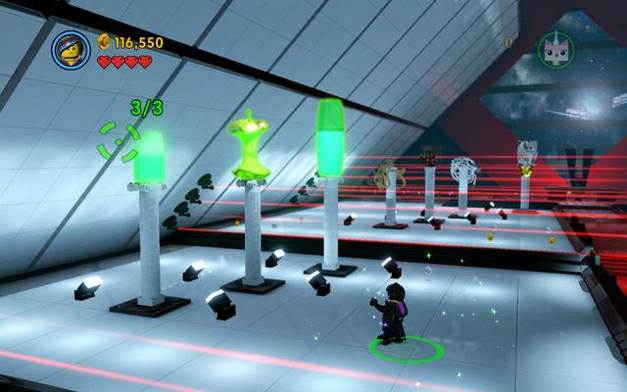
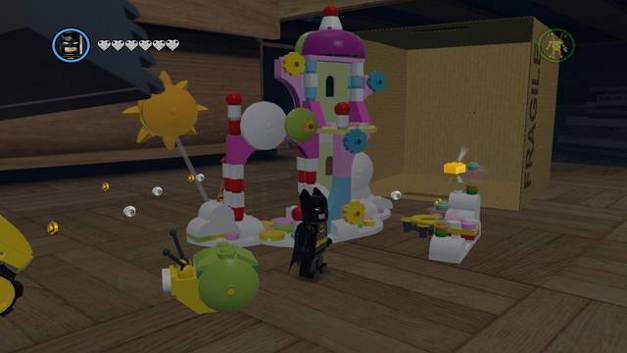
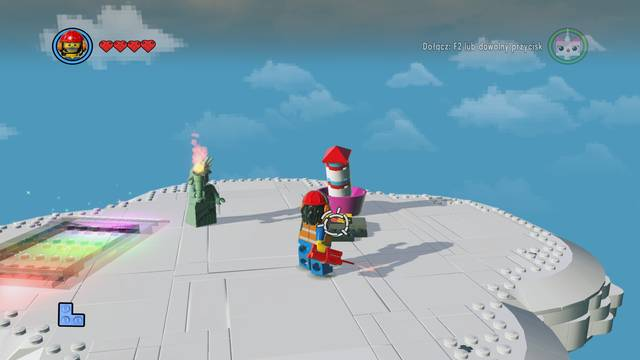
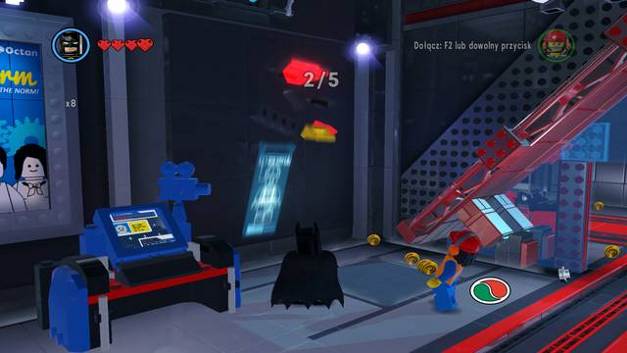
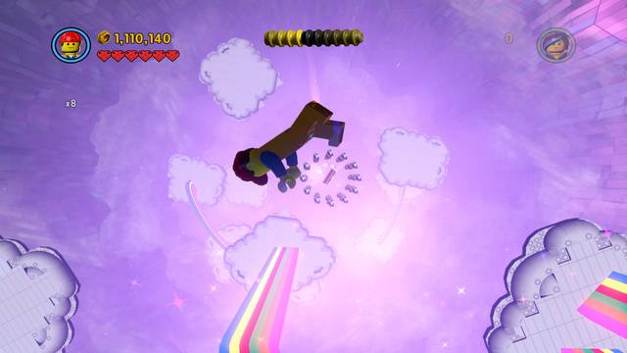
 Destroy all the colorful flowers with the target
IN the next land, you gain Batman, as a new companion. He can pull some of the elements to himself, throw the batarangs, climb into inaccessible areas, using the rope, and he is also an architect. On the clouds, there are 5 colorful flowers - throw the staff at them, or the batarang. After you have destroyed all of them, you will obtain a golden manual.
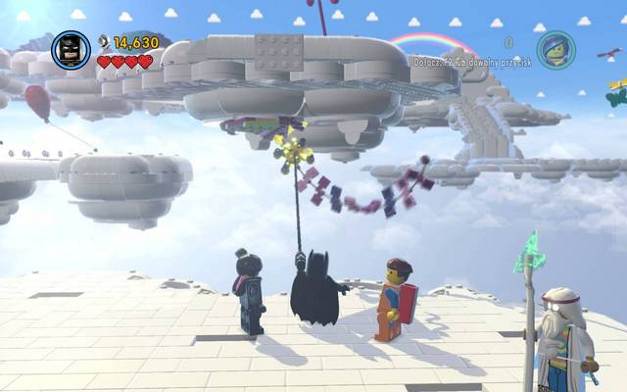 Grab onto the neighboring cloud with the rope
To move forward, you need to pull your way a cloud, as Batman, by targeting the gold object on the cord, and pull it your way, by tapping on the Special key.
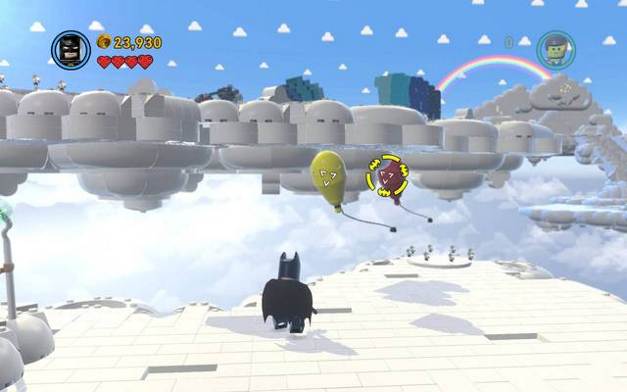 Pierce through all the balloons
To lower the neighboring cloud, and be able to mount it, pop all of the colorful balloons, with the batarangs, or the staff. You can mark three targets at a time.
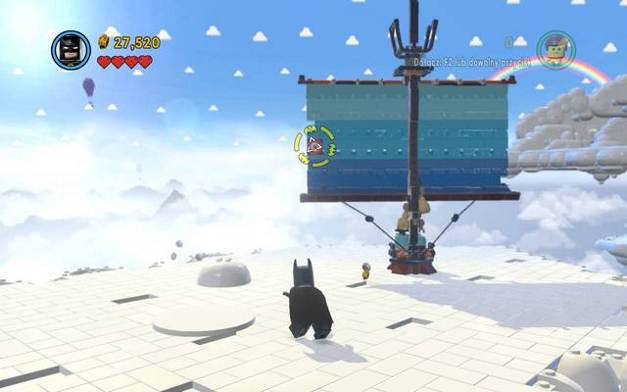 Build a sail and turn it
At the end of the cloud, build a sail, off the smashed bricks. Then, hit the target on the left to turn the sail.
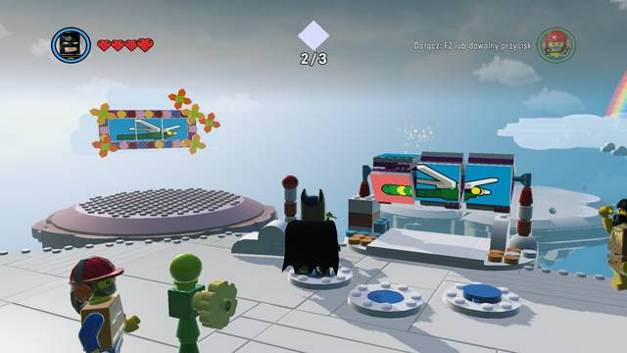
 Destroy and rebuild three various clouds
You will also find 3 colorful structures. Smash them and rebuild them into snowmen. As a reward, you will receive a golden manual.
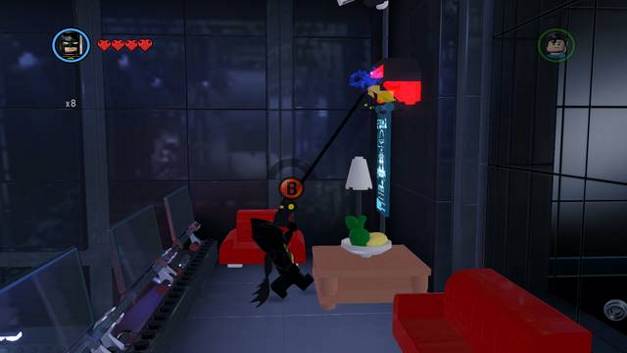
 There is a golden manual above the passage
Using the spring to the left of the passage, you can bounce off and jump onto the cloud wall. Climb higher - up there, you will find another golden manual. To enable the rest to climb up, push the Lego block down the stairs. At the foot of the stairs, by switching to Batman, you will be able to rebuild it into stairs.
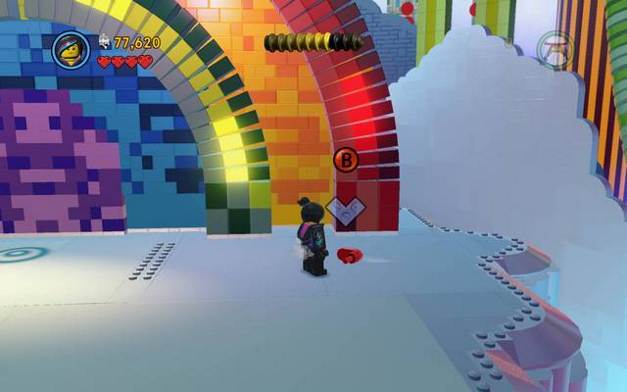
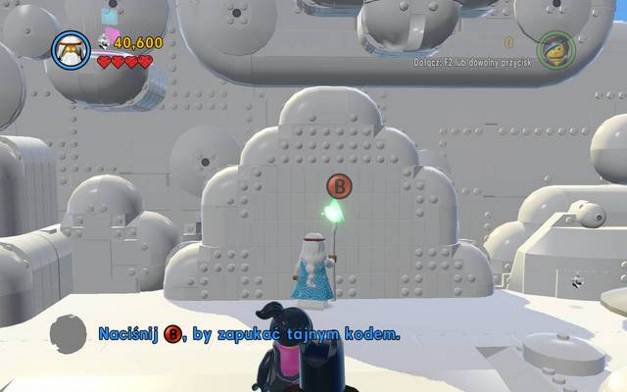 Enter the password
Some of the hidden passages can be unlocked by tapping the correct password into them. This can only be done by a character with a staff (here: Vitruvius). After you stop in the field, in front of the passage, and press the Special key, you will start a minigame where you need to press the correct sequence of Jump and Attack keys.
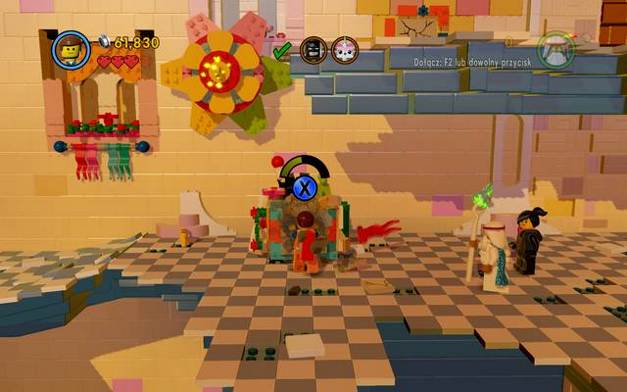
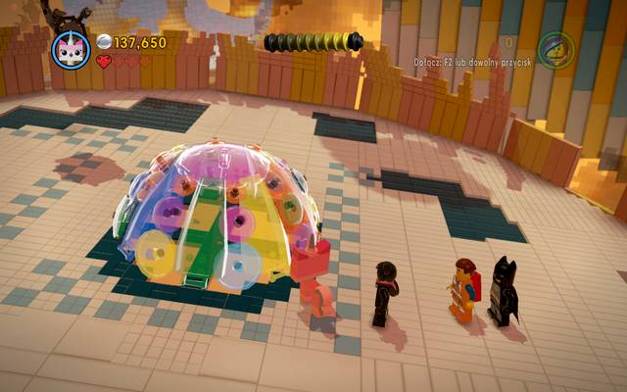
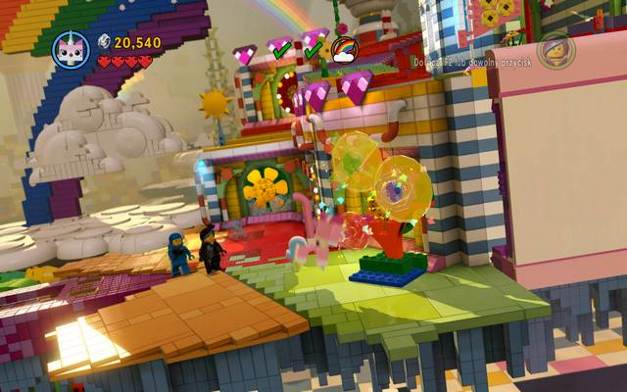
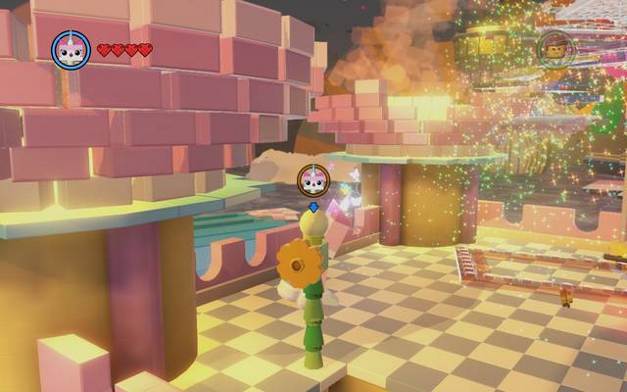
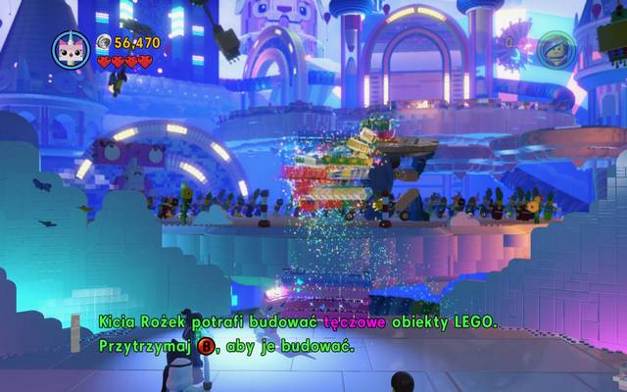 Uni-Kitty can reconstruct the rainbow-colored bricks
The party is joined by Uni-Kitty. She can reconstruct the rainbow-colored bricks and build them into specific structures. To smash the brick quickly, press and hold down the attack key and mark the two, semi-transparent, flowers, to destroy them.
 Damage the robot
At the top of the stairs, you will notice a blue waiter-robot. As Batman, aim at the golden hook and pull the lid. Repair the inside of the robot as Emmet.
 The second pink robot
Another robot will arrive - take a shot at the target on its right palm, and jab the staff into the middle of the blue robot. As Wyldstyle jump up and push down the colorful brick, which Kitty will use to build a trampoline.
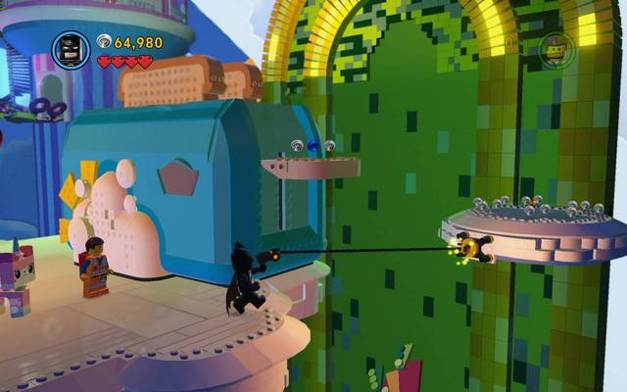 Pull the cloud
Ahead, approach the blue toaster and pull the platform. Off the platform, jump onto the toaster's button, as Kitty and Wyldstyle. Use the toasts that jump out and build a structure.
 Some of the clouds are darker - destroy them
At the next stage, destroy the rainbow arch (Batman) and use the bricks to construct a bridge. Be on a lookout for darker clouds. After you have destroyed five such clouds, you will receive a golden manual.
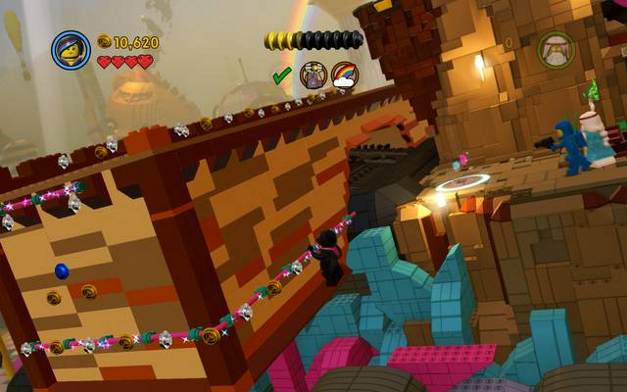
 Climb over the bars
Pull the kettle on the right as Batman. Climb by sticking the stick into the correct spots.
 Find the crank at the rainbow
On the top, to the right of the rainbow, you will notice a flower - destroy it and put the crank, which falls out, into the object next to the big yellow chicken.
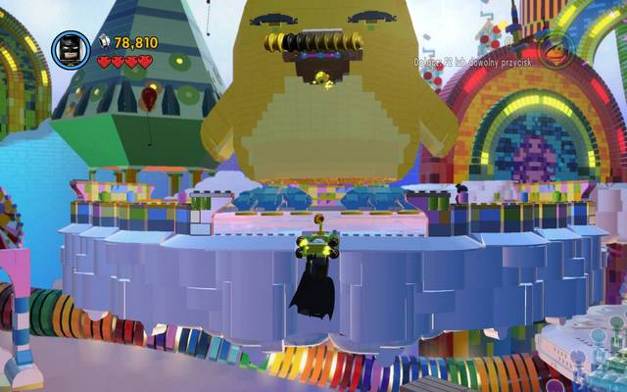 Climb higher as Batman
As Batman, climb higher and pull the chicken your way. You will now be able to walk, as Wyldstyle inside. She will exit through the chicken, inside the colorful egg - roll it down the edge and build stairs. Approach the rainbow arch now, as Vitruvius, and tap in the password. You will be able to proceed.
 Make the objects available for the architect mode
At the next stage, pull the block to the right of the elephant's head and destroy the bricks on the left, using the drill. Also, collect the plans at the balustrades.
 Scare the elephant and climb up
Now, as one of the architects, you can build a vehicle. Get into the vehicle and stop next to the elephant to scare it. Climb over the wall, as Wyldstyle and collect plans on top. With your plans complete, you can build a rocket that will take you away from this level.
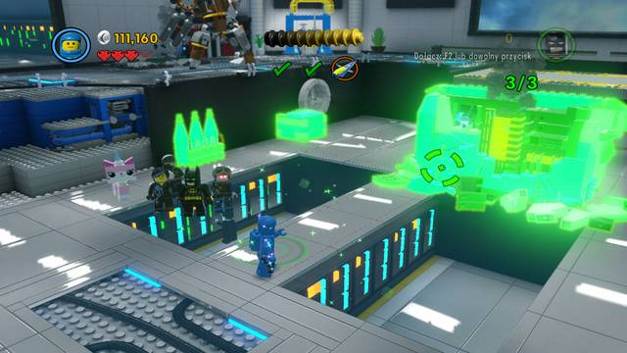
 Rebuild the rainbow-colored blocks in Cloud Cuckoo Land
To start the next mission, destroy the wall of the rainbow Bricks at the end of the green trail (the mission marker) and build them into stairs.
 The Micro Manager's laser will destroy the gold bricks
After the cutscene, you will be able to play only as two characters in the group. Put the staff into the wall and climb to the higher level, as Wyldstyle. You will be attacked by a robot with lasers - hide behind the golden pedestal to have the laser beam destroy it.
 Walk over to the wall of darker bricks
The water from the upper level will extinguish fire on the right of the starting point. Go there and, at the end of the path, open the hidden passage as Vitruvius.
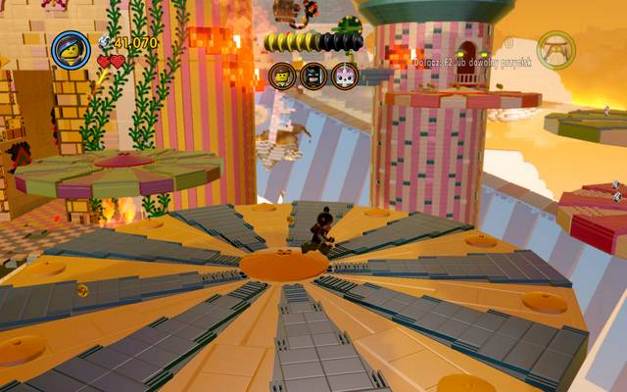 Jump over the turntables
Over the walls, get to the higher level and jump over the turntables. At the end, you will find Emmet imprisoned by the robot. While standing next to him, switch to him and attack the robot with the wrench, by pressing the Special key.
 Use the drill to free Batman
As you return, watch out for the laser beams. Backtrack to the beginning and free Batman from the block. Switch to him and pull the flower off the wall, which will allow you to climb up, after being reconstructed.
Then, destroy another object on the wall and climb to the higher level, as Wyldstyle. There, at the balustrade, catch onto the floating bar to bring it down. Enter the architect mode and build a construction that will enable the entire group to reach the higher level.
 Micro Manager
While above, apart from the necessity to eliminate big waves of robots, you will also have to eliminate the flying robots. To do that, use the batarangs on the red eye of the robots, after which they will turn away and you will be able to use the grapple to destroy them.
After you have eliminated them, a big chicken will appear - enter it.
 As Vitruvius, walk over to the other side
Your next task is to free Uni-Kitty. Use the drill on the pipes at the wall and build a beam. As Vitruvius, walk over to the other side and unlock a secret passage in the center of the brick wheel.
 Fix Abraham Lincoln's vehicle
As Batman destroy the lurking robot and fix Abraham Lincoln's vehicle as Emmet. You are now able to walk over the white bricks, through the jelly river.
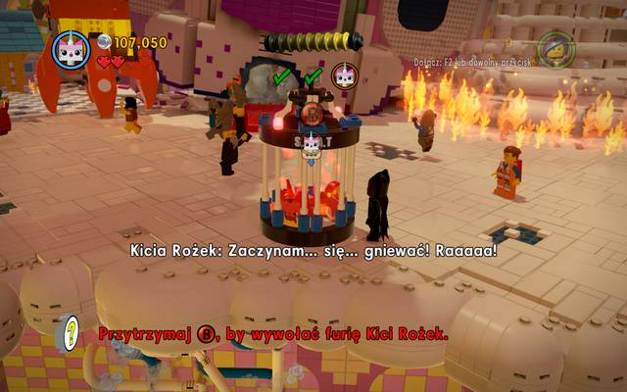 Free Uni-kitty
Approach Uni-Kitty. After you switch to her, hold down the Special key to activate Fury. Meanwhile, eliminate the approaching robots. Then, jump down the edge and free Wyldstyle from the egg.
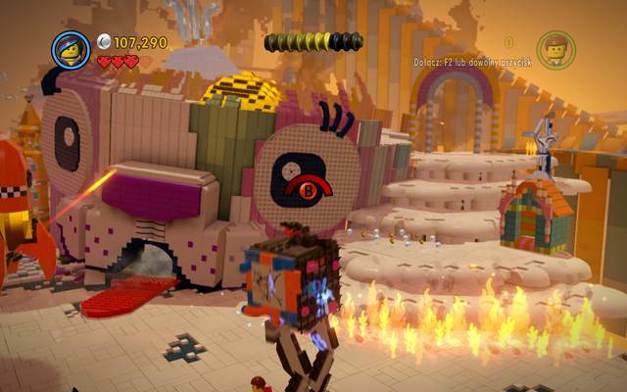 Destroy the Giant Micro Manager
You will be attacked by a larger robot. To eliminate it, you need to: throw the staff/batarangs at it, jump onto its back as Wyldstyle and drill it after it collapses.
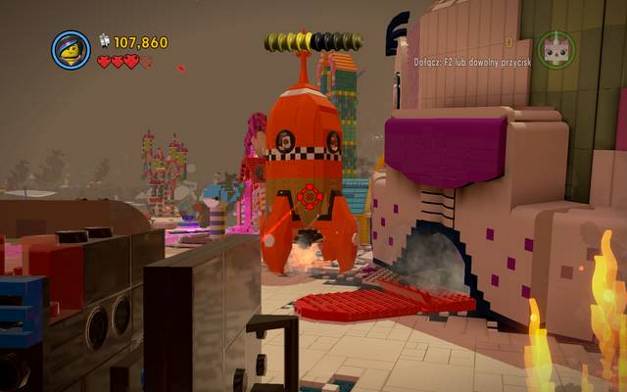 Use the cannon to cut through the rocket's gold brick
After you reconstruct the robot, you need to get inside and aim the laser at the golden part of the rocket. You are going to use its parts to build a vehicle in the architect mode.
 Put out fire at the stairs
After you have built the two cars, take your place in one of them and put out the fire at the other side of the map. Then, get out and climb up.
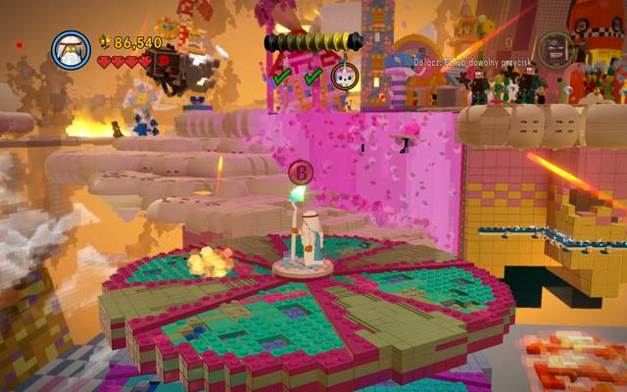
 Remove the golden stack and rebuild the rainbow-colored bricks
At the top, hide from the laser beam, behind the golden pyramid in the center. Smash the rainbow-colored bricks and build a trampoline off them.
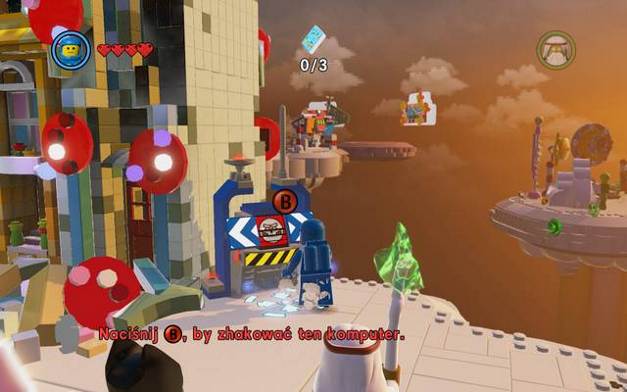 As Benny, hack into the terminal
A new character joins your team - Benny. He can hack into computer terminals, which activate special actions. In this case, this will make the cargo plane move between two clouds.
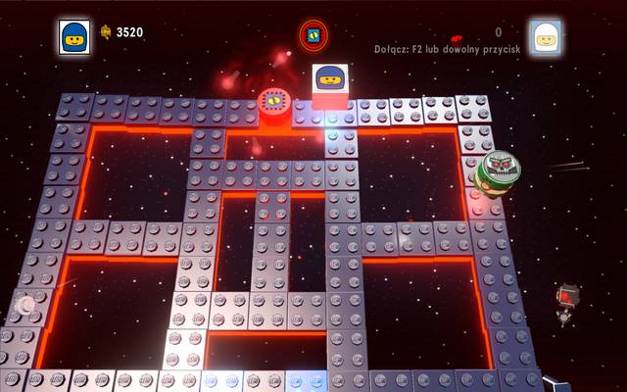 A hacking minigame
As a matter of fact, hacking itself consists in covering the way and reaching the red point. There, you need to start tapping the Special key to upload a virus. You should also avoid the enemy brick.
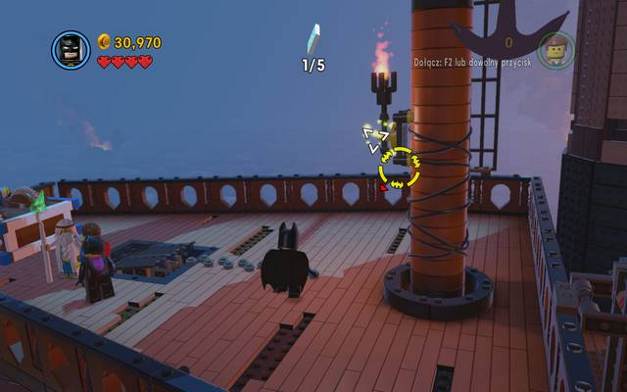
 Walk to the front and to the back f the ship to collect golden manuals
On the neighboring isle, you can start the net mission in the submarine. On the ship, you will find a golden manual. You can collect it with any character.
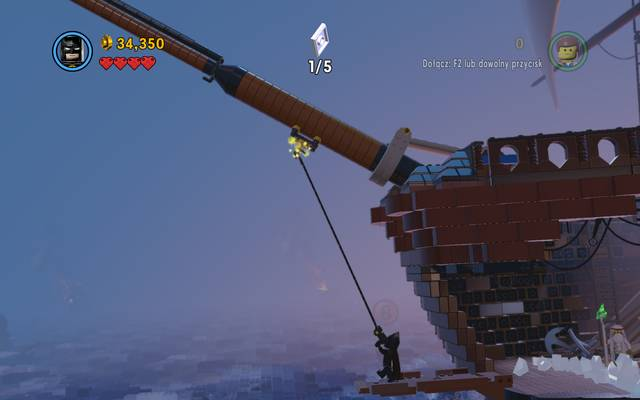
 The second golden manual
Similarly, the second golden manual is on the right wing, at the back of the boat.
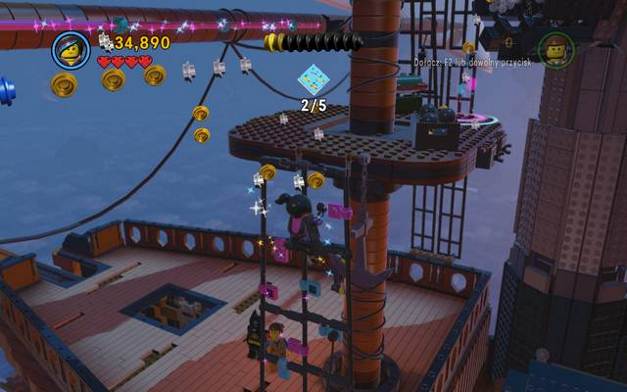
 Climb higher from the marked spot
You will now be playing your characters interchangeably. First, as Wyldstyle climb onto the spray can and jump on it. Then, make it over to the higher level as Batman. There, use the architect mode to eliminate the enemies.
 Proceed over the bars
Again, as Wyldstyle make it over the bars to the building's fragment, which has been attached to the boat. There, initiate the architect mode and combine the objects into a computer terminal. After you have hacked it, start the architect mode, as Vitruvius, in the green field.
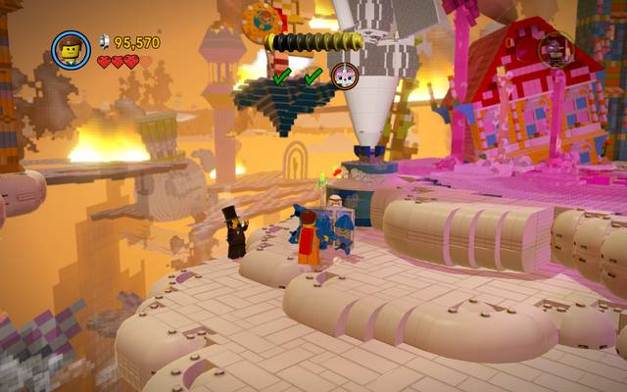
As Uni-kitty, locate 3 rainbow0-colored, flags to obtain a golden manual.
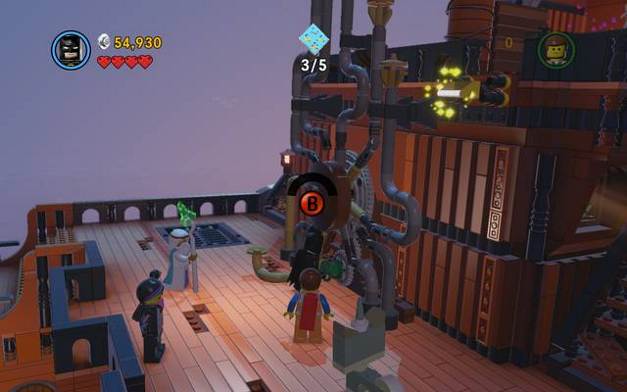
 Destroy the colorful flower to proceed to the other side
First, destroy and rebuild the structure in the corner. Thanks to this, there will appear a net on the wall, over which Wyldstyle will be able to make it onwards. Use the crank at the wall for the rest of the group to join you.
 Hide behind the silver objects
There will appear a robot with a rocket launcher. Hide behind the silver structures to destroy them. Use the scattered bricks to build a computer terminal and upload a virus. This will result in taking control over the robot.
 Destroy the Micro Manager with bazooka
First, destroy the Micro Manager with bazooka. Then, destroy the silver door, at the foot of the clock tower.
 Build the final fragment of the boat as Uni-Kitty
Use the clock's cuckoo to build access to the upper floor. Make it over to the rooftop and enter the architect mode (Uni-Kitty).
 Zip down the line and climb onto the bars
You can reach the next mission first by walking over the rope, as Wyldstyle and after you climb over the bars onto the small building. Jump onto the red button.
 Rebuild the table into a trampoline
As Uni-Kitty, climb up the ladder and smash the rainbow-colored bricks to build a trampoline. Climb over the bars aboard the ship.
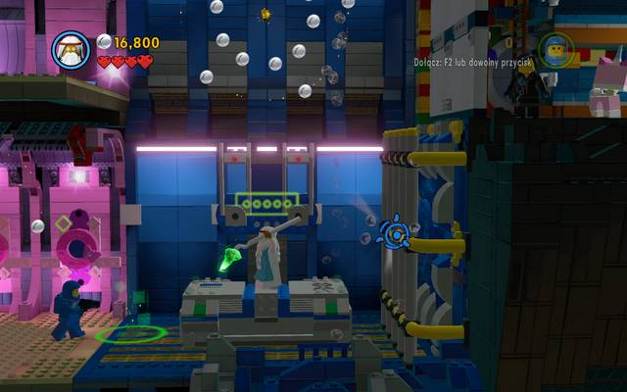
 Patch the hole and start the audio system
Inside the ship, you first need to patch the hole. Throw the staff at the TV set, next to the leakage and craft the scattered bricks into a patch. Then, smash the object in the left corner, at the wall. The plate that you find there, needs to be inserted into the audio system.
 Cross the hidden door
After you climb to the lower level, take to putting out fire and destroying it. In its place, tap in the password to the door, as Vitruvius.
 Destroy the pipes at the wall
Behind the passage, destroy the pipes at the wall. You are going to need them in the architect mode. Then, climb up and destroy the two highlighted pink bricks.
 Make it over to the computer
You now are at the lowest level. Destroy the two objects at both sides of the room, rebuild them and press them. You will unlock two levers this way, whose switching will provide you with access to the computer.
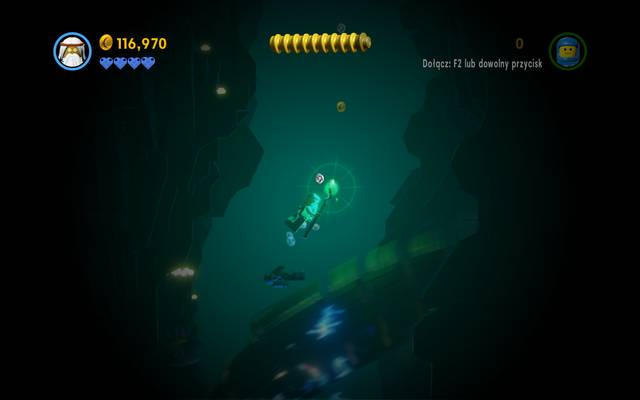
 Swim out of the ship
The ship will be flooded. Swim to the top to get out of it. You can also collect now the golden manual above the turntable, which was inaccessible earlier.
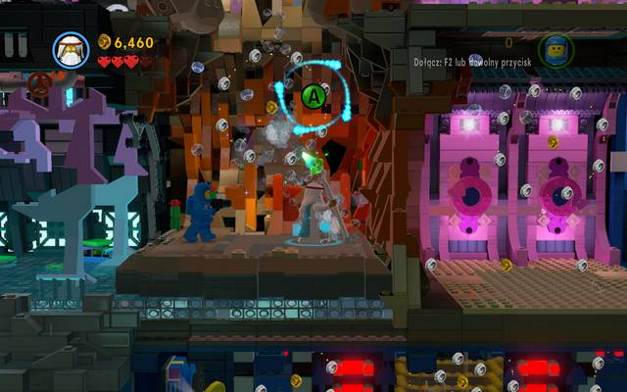
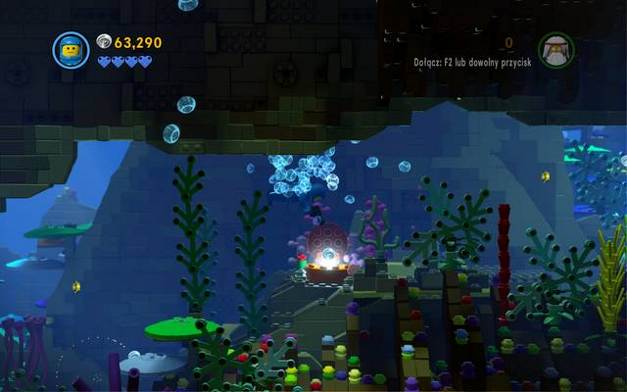
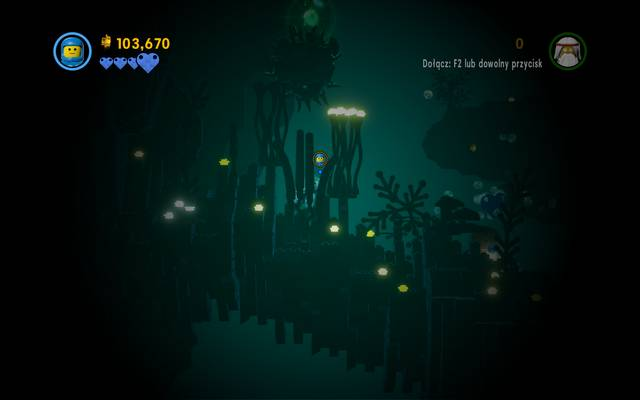
 Collect the blue oxygen hearts
As long as you are underwater, your health is represented by blue hearts, instead of red. At the same time, it is both your health and your oxygen supply. This is why, if not replenished, it will slowly decline. You can now regenerate the level by swimming into the bubbles with blue hearts inside, which you need to collect.
 Shoot at the torpedo
Swim now by keeping to the bottom-left side of the reservoir. You will find a torpedo, with a target on it, there. Shoot at it, which will unlock a passage to a tunnel.
 The blue hearts are in the shellfishes
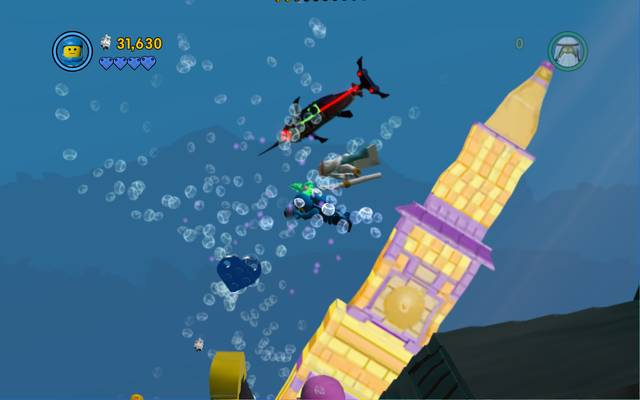
In the underwater tunnel, you need to follow the corridors and avoid the divers in the background. When it comes to oxygen reserves, you can replenish them in the shellfishes, which open after you swim up to them.
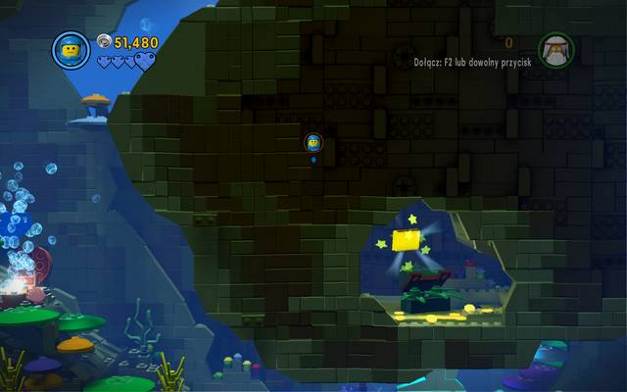 A Golden manual behind a hidden corridor
At the first bend going down-right, you can locate a passage hidden in the wall - you will find there a golden manual.
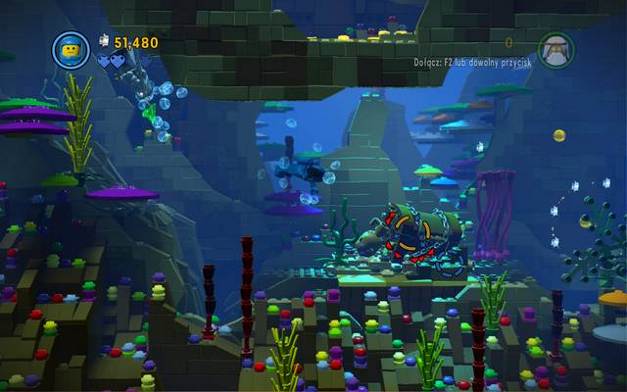 A treasure cove
Also, shoot at the treasure coves along your way. Hitting all 5 of them awards you with another golden manual.
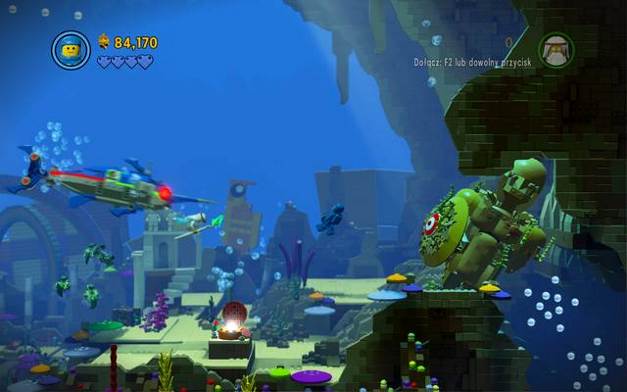 Provoke the fish to attack the figure
Once you reach a big underwater cave, you will notice a big fish there. Swim to the other side, where you will find a passage blocked by a statue with a shield. Provoke the fish to attack you and get out of its way at the last moment, so that it swims into the statue.
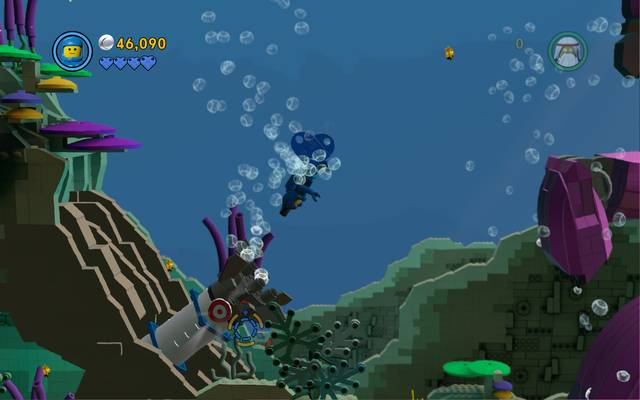
 A hidden passage to a golden manual
In the second stage of the cave level, avoid all the animals, and especially, the white heads sticking out from walls. Once you reach the very bottom, on the left, there is a hidden passage, halfway along the wall. You will find there several studs and a golden manual.
 Avoid the eel's attacks
At this stage, and the next one, there will appear a giant eel. Swim up, towards the exit and avoid its attacks. They are signaled by the bricks moving in the background. Keep swimming up, until you return to the ship. Onboard, free your companions by opening the passage as Vitruvius.
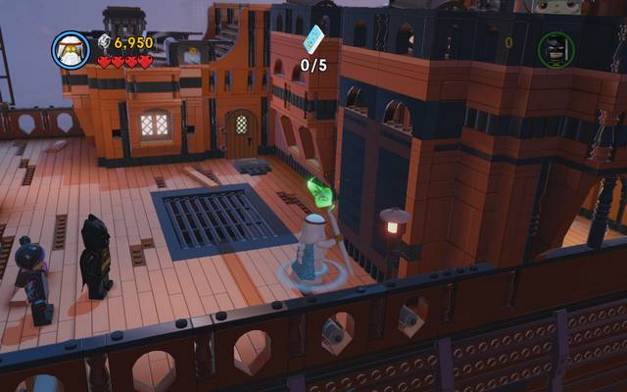 Collect the plans behind the door
Another location is Metalbeard's ship. The objective is to collect the five fragments of the plans. The first one is behind the hidden door, on the right side of the board.
 Activate all cannons
Keep looking for four cannons. Activating four of them will reward you with a golden manual, dropped by the last one.
 Fix the floor at the couch
You will reach the higher level by moving the couch. However, there are some bricks missing - to move the couch, fix the floor with the bricks off the object suspended from one of the funnels.
 Knock off the torch
As Wyldstyle, make it upstairs and smash the objects there. Using one of them, you will be able to build a ladder for the rest of your companions. With the parts of another - a fuse. As batman, shoot down the torch to blow up the lower deck.
 Use Batman's rope
Now, walk down to the lower deck and attach the rope to the marked hook. Go back up and use bricks to create a path, over which Vitruvius will be able to make it to the ship's bow, where there is the second fragment of the plans.
 Climb onto the mast
As Wyldstyle, climb onto the mast. You will be transferred to the backline. Collect the plans and smash the objects next to it. You will be able to use the elements to build a ladder for the rest of the team.
 Activate the furnace by finding the valve
As Batman, you now need to climb higher and higher to open the storage. There, you will find a faucet for the valve, which you need to build into the engine in the wall. Now, over the steam, make it higher, as Kitty, to smash the rainbow-colored bricks and use them to build stairs.
 Build a structure at the ship's stern
At the ship's stern, you will now have to build a structure in the architect mode, and collect the last fragments of the plans. Then, return to the center of the boat and build a vehicle, according to the plans, as Emmet.
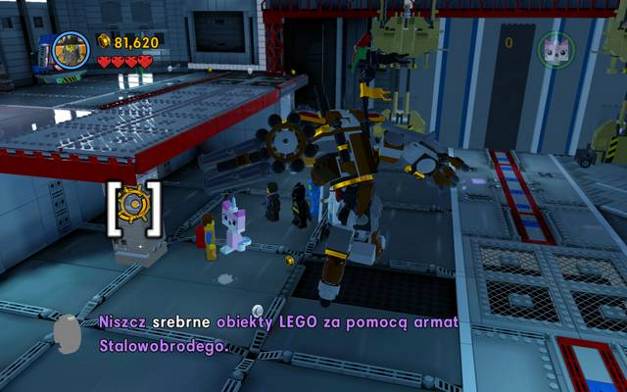 Use the cannon to destroy the silver blocks
In the hangar, you will be controlling Metalbeard. His unique abilities, apart from the speedy elimination of groups of enemies, are the ability to smash silver bricks, grabbing enemies and throwing them. First, you need to destroy the incoming robots. This will result in the rest of the team joining you. With the drill, destroy the pillar in the upper part of the hangar, and the silver layer under it, with Metalbeard's cannons - hold down the attack key and aim at the block.
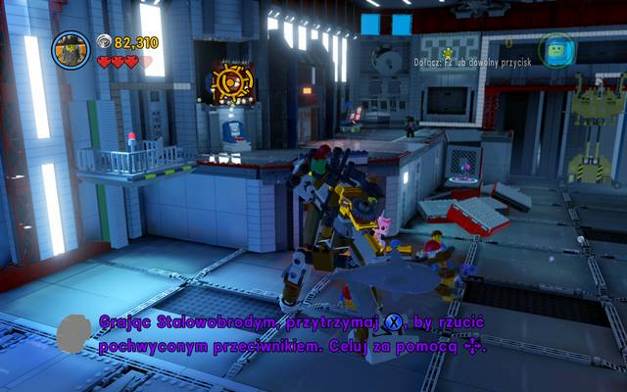 Throw the enemies at the electric boxes
As Wyldstyle jump onto the elevation and press the red button. This will open an electric box. Switch to Metalbeard and pick up the robot, with the Special button, and aim at the box, by holding down the attack key. The short circuit will make the elevator activate.
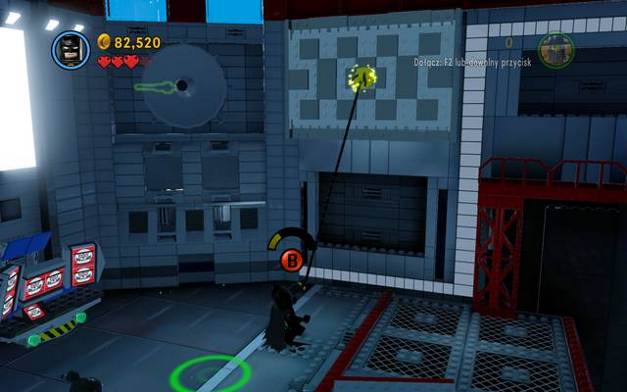 Remove the blocks that stand in the way to the bricks for construction
As Batman, go upstairs and use the rope to pull the blocks from the wall. Then, enter the architect mode and build a terminal. Switch to Benny and hack into it.
 Destroy the silver door hinges
To proceed on, you need to destroy the gate hinges. They are made of silver bricks so, you need to use Metalbeard's cannons for that.
 Demolish the assault ship
In the second part of the hangar, you will encounter a stronger resistance, by robot guards. Also, an assault ship will arrive. Destroy it, using Batman's rope. Using its parts, you will build a trampoline. As Vitruvius, jump up on the trampoline and walk over the flames, over the white-and-blue beam.
 As Vitruvius, get upstairs and open the passage for the rest
Stop in the blue field, next to the terminal, where you will be able to activate stairs. Then, switch to Benny and deal with the terminal - this will win you control over the robot above - grab the robot, as Metalbeard, and cause a short circuit in the electric box. This action will activate a bigger elevator for the pirate.
 Remove the last door in your way
Finally, approach the gate and smash it, using the cannons. You will walk into the last room.
 Build a passage above the laser beams
First of all, jump over the laser beams, as Wyldstyle, in the marked spot. Also, build a passage above them, for the rest of the team. At the other side, use the drill and build a passage, past the next barrier, with the remaining objects.
 Build a catapult and bring more bricks in
At the third stage, you first need to build a catapult and activate it with the crank. With the bricks that you obtain this way, and the elements on the pillars, build another item, which will make it possible for you to proceed.
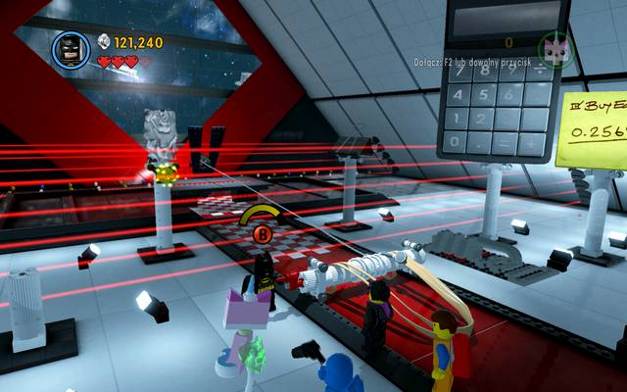
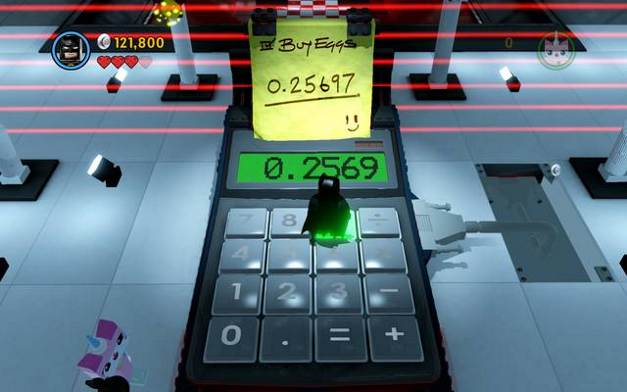 Tap the code into the calculator
You will be able to proceed with the password breaker, built from the calculator. You need to tap in the password on the note, by walking on the keys (0.25697).
 The assembly hall
To start the next mission in the Octan Tower, you need to open the door first. To do that, you need to fix the ramp, jump up as Wyldstyle and make it over to the lever using the bars on the wall.
 The photo booth
After you start the mission, first walk up to the left of the conveyor belt and destroy the two objects there. Use them to build a photo booth - enter, as Wyldstyle. After you are done, you will be able to collect a special card - slip it into the reader on the right.
 Use the objects to build a TV set
On the belt, there will appear two additional objects, thanks to which you will be able to build a TV set, in the architect mode. After you are done, a row of robots on the left will be released.
 Smash the objects and obtain plans
Now, once the elevator is available, get up and destroy three structures that hold parts of the plans inside. After you have destroyed the first object and robots, enter the room behind the glass pane.
 Put the bar in the available position
Here, move the brick with the bar. Then, exit and jump over to the other side, as Wyldstyle and open the door for Emmet. After you have destroyed the second object, build a trampoline and make it over to the third one. Build a ladder beforehand, so that the companion can join you. With all the fragments of the plans, build a structure in the middle of the hall.
 Build a jukebox
After you have built a loudspeaker, you will be attacked by robots. After a while, there will appear objects on the belt, which you will be able to use to build a jukebox.
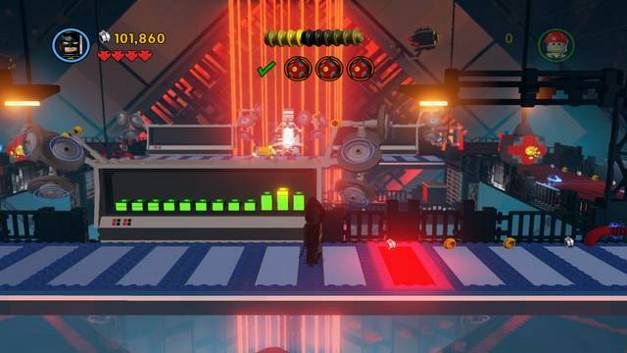
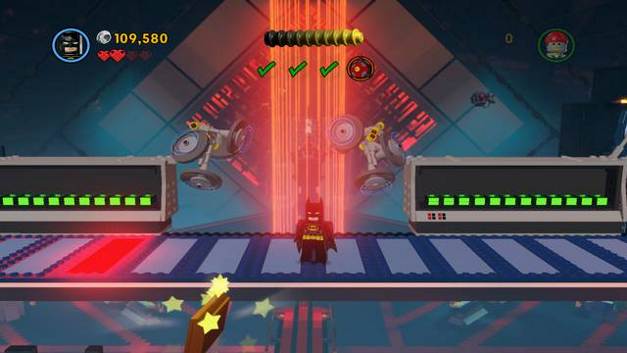
 A dancing minigame
Again, you will have to play through a dancing minigame. After you finish it, walk over to the right side of the room and use the drill on the crack on the wall. Then enter.
 The Kragle's alarm system
At the next stage, destroy the four blocks in the four corners of the hall. While trying to make it over to the other side, once you stand a the same level as the screen, the alarm system will go off. You need to get back and wait for the red block to be in front of you. Then jump over it and quickly, go ahead.
 A Golden manual
At the second passage, you need to get around the alarm system again. Halfway there, you will notice a golden manual. You can jump to reach it, from the position that you are in right now.
 The bridge to the exit
After you have destroyed all of the security systems, o to the red bridge and reach its end.
 Shoot at your companions to set them free
At the next stage, you need to set your companions free, by shooting/ throwing at them once. As soon as you free everybody, silver robots will arrive. You cannot destroy them, yet.
 Fix the mechanism at the wall
As Wyldstyle jump up in the marked area and make it over the bars. Then, approach the right wall and fix the damaged mechanism, using the wrench. Then, climb up the ladder, as Benny, and hack into the computer.
 Destroy the golden support
You will gain control over one of your opponents. While holding down the attack key, you will be able to shoot a laser beam. Destroy the golden support on the left side of the hall. Eliminate the remaining robots now, with Metalbeard's cannons.
 Defeat the Great Micro Manager
You can destroy the last robot by putting the staff in its legs first, and grabbing on to it as Wyldstyle. Then, with the intercepted robot, destroy the weapon of the golden robot. Finally get it onto the ground, with Batman's rope, and drill through it. As a reward for completing this level, you will receive a pair of pants.
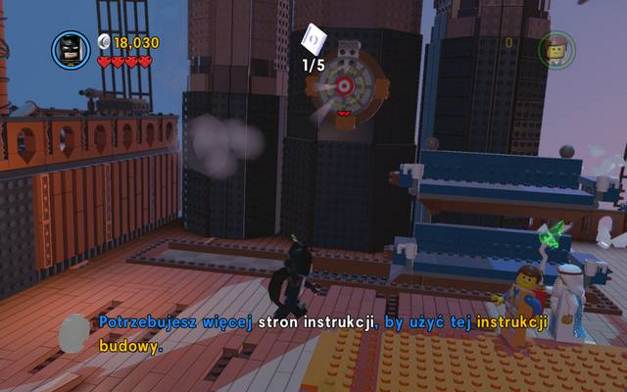
At the beginning of this mission, you need to jump on the buttons in the displayed order. The sequence changes three times.
Then, as Wyldstyle, jump up from the right corner of the room. After you jump to the right, you will be able to collect a golden manual.
Then, position the two reflectors correctly, by moving them to the end.
Then, position the camera by using the crank. Also shoot/throw at the reflector above the camera. The second camera needs to be moved closer to the filming set. Finally, destroy the clothes and rebuild the bricks, as Uni-Kitty, to position the next object.
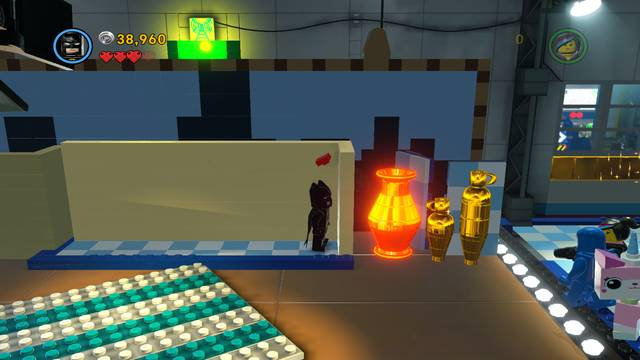
Then, a Micro Manager will arrive. Hide behind the wall in a way that enables the enemy to smash the golden vases with laser. Then, destroy the opponent and rebuild it. By moving the laser cannon, you will gain access to the terminal room.
After a cutscene, you will be joined by the Bad Cop. His pistol, after you hold down the action key, shoots laser beams. Destroy the painting in the golden frame and move the wall to the right. Behind, you will find a crank, which needs to be worked into the device in the left corner.
In the room with the wall, use the laser pistol to cut a passage in the gold bricks.
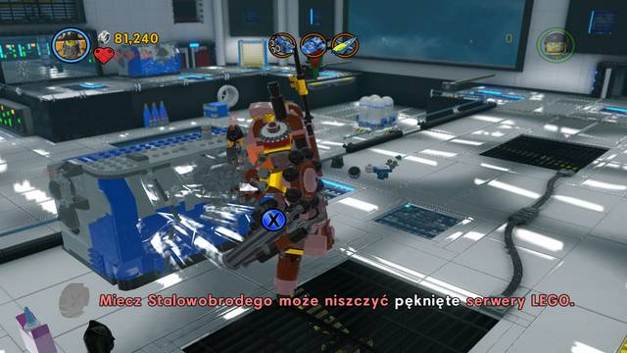
Destroy servers - the blue objects throwing sparksIn the next room, you need to destroy the cracked servers to use them o build the rocket. To do that, use Metalbeard. After you destroy it, and melt the golden block, exposed by the slam, with the Bad Cop's pistol, there will appear a robot with a jetpack. Hit it and use it in the architect mode, as a construction element.
 Destroy the white containers quickly as Metalbeard
Also, destroy the white containers to obtain a golden manual. In here, you will find 6 such containers.
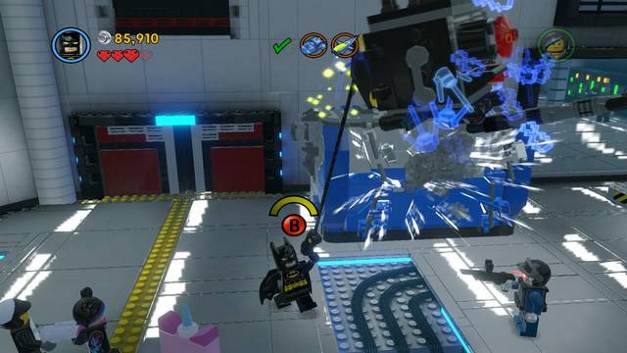 Micro Managers can be destroyed with Metalbeard's blow, Batman's rope or the laser
Climb to the higher level on the left and destroy the Micro Manager. Then, hack into the computer in the corner. This will make a bridge slide out, over which to walk as Metalbeard.
 The final set of objects for the rockets
Do the same thing in the case of the third server, on the right side of the hall. After you attach the last elements, the rocket will be ready.
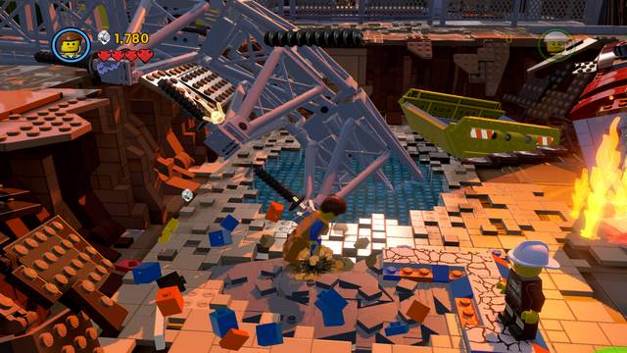 Destroy the cracked blocks
You will start playing in the crater. From now on, Emmet can use the architect ability - he can build new elements in the green fields. To crawl out of the hole, you first need to drill the cracked blocks and build a magnetic grapple, to remove the remains of the high-voltage post.
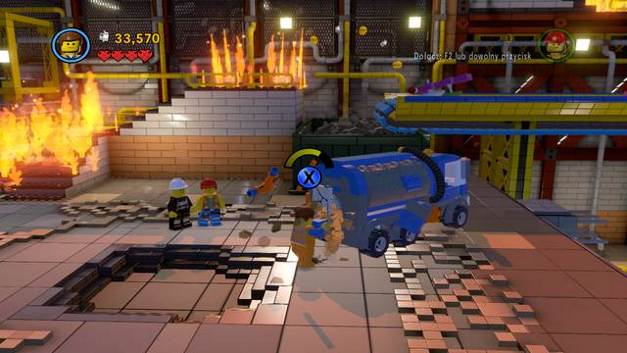
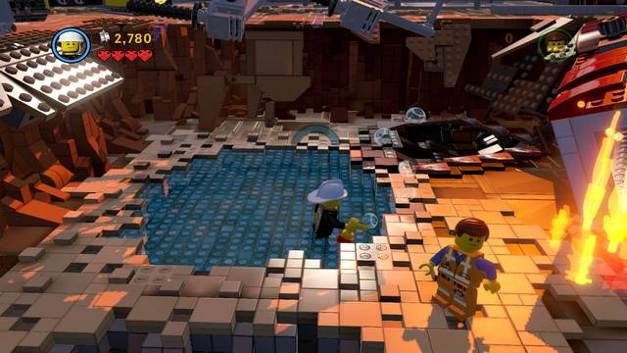 Fill the fire extinguishers
The new character - fireman - can put out fire with fire extinguisher. However, you first need to stand in the water reservoir to fill it. Then, put out the fire by holding down the action key.
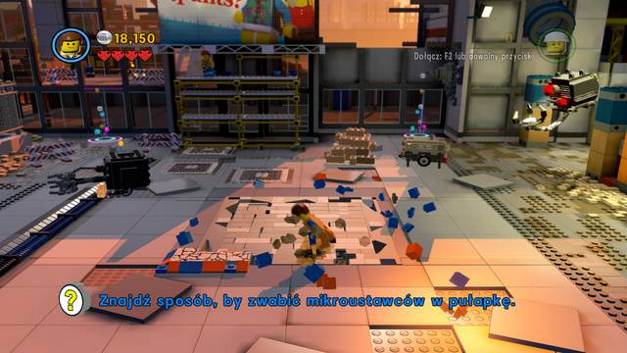 Build a robot trap
Then, using the drill, destroy the cracked bricks in the middle of the square. This will create a hole, where you need to lure the two hostile robots.
 Collect the golden manual
You will be joined by Gail. Climb onto the bar on the left. You will find a golden manual there. Then, pull up on the second bar to eliminate the Micro Manager and proceed onwards.
 Destroy the back of the tank and get to water
Destroy the back of the tank - this will cause the leakage of water. Fill the fire extinguisher with water and put out the flames on the stairs.
 Destroy the water machine
As Gail, climb higher and lower the ladder. You will obtain another water container by smashing the water machine in the corner of the room. On the higher level, hide behind the golden pillar to make the Micro Managers destroy it with laser beams and build a launchpad.
 Fix the lock mechanism
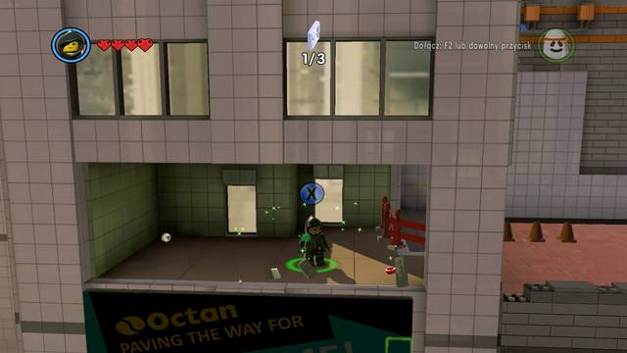
After you walk into the next location, fix the lock mechanism in the door and move the brick, which is blocking the way, as much to the right as possible. Once you have moved it, there will appear a golden manual behind it.
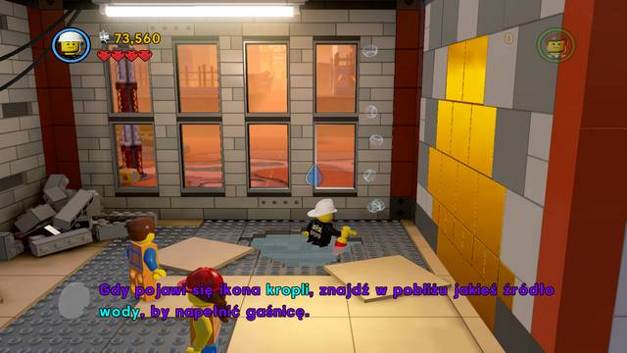
 Collect the golden manual hidden in the toilet
Now, as Gail, climb up and destroy the toilet. In the neighboring stall, you will find a hidden golden manual. Put out the flames and walk to the next stage.
 Unblock the water pipe
In the first place, you need to smash the cracked block on the right. This will unblock water flow. Put out the flames on the left and mount the faucet on to the concrete mixer. Then, push the roadroller towards her.
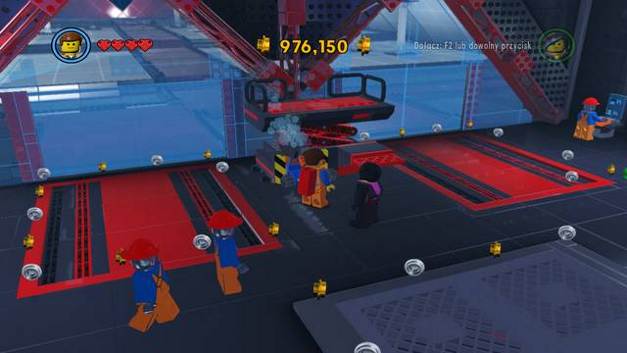
 Fix the ramp
Put out the flames next to the building and fix the ramp. Above, destroy another cracked block.
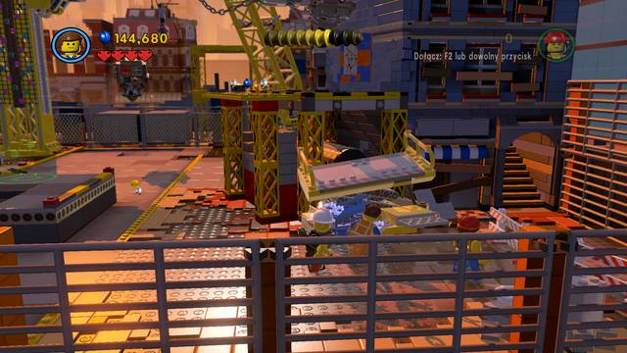
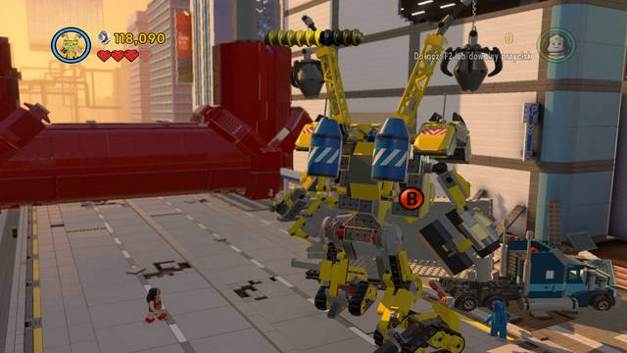
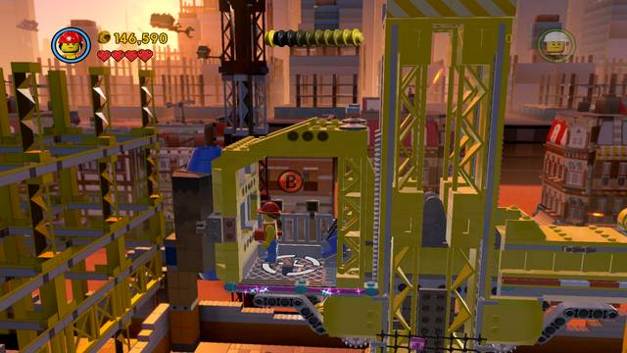 As Gail, lower the crane
Finally, as Gail mount the crane and lower it to the very bottom. Now, off the available objects, build a mech, as Emmet.
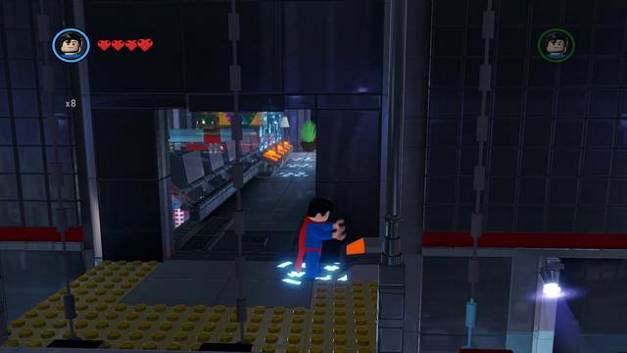
 A battle in the streets of the city
In the next level, you will start in the streets of Bricksburg. You need to get to the other end of the road, while defeating the hordes of hostile Micro Managers. You will also receive help from Superman. He can fly (double-tap the Jump key) and shoot laser beams, which he destroys enemies quickly with. Emmet can also lift bigger objects and throw them at enemies.
 A road block
Along your path, you will encounter a road block. You can remove it by destroying the first layer of golden bricks, as Superman. Destroy the second layer by throwing a tank at it.
 Build a statue between buildings - you will receive a golden manual
At the end of the road, you will be joined by Green Lantern. He also can fly and modify the green Lego blocks. First, walk to the right corner of the square and build a statue off the blocks. For that, you will receive a golden manual.
 Green Lantern can use the green bricks
Then , destroy the tank and use Green Lantern's ability on the green bricks. To start destroying another road blockade.
 Destroy the remains of the blockade
The remains of the blockade can be destroyed with remains of the trailer thrown at it. For that, use Emmet's robot.
 Battle on heights
The action now moves to the rooftops. Eliminate the Micro Managers and modify the car in the corner, as any character.
 Pull the antenna off the wall
You now need to get to the antenna on the building's wall. Get there as Wyldstyle, over bars, or fly up to it as Wonder Woman and cling to the edge. Once the antenna falls, use the bricks to build a terminal.
 Use bazooka to destroy the silver blocks
After you hack the computer, you will seize control over the robot with the rocket launcher. Fire it towards the silver block of the blockade.
 Throw the second part of the trailer at the blockade
Finally, complete destroying the blockade by throwing the second part of the trailer, at the second vertical point at the blockade. After you do that, you start the final showdown.
 Throw the object at the building with the target on it
To start the final stage, pick up the block in the center of the square and throw it at the building with the target on it. Then, walk through the hole.
 Destroy the golden blocks on Lord Business's robot
In the final battle with the boss, you have Emmet in the mech and Uni-Kitty, who is in the fury mode for the whole time, at your disposal. In the first place, destroy the Micro Managers and, after each wave, on the boss's screen, there will appear golden blocks. Destroy them as Kitty, by using flames. You fire them by holding down the Special key.
 Keep attacking the robot's screen
Once you destroy all of the golden blocks, use Emmet's mech to throw a big object at the cracked screen. One well-aimed hit is enough.
 Throw the tank at the robot
You will make it onto the rooftops. Again, just like earlier, you need to destroy the robot's golden blocks and throw a big object, supplied by the other characters, at the robot's screen.
 Destroy the robot's legs
At the top level, you need to avoid the robot's legs and, when they jam in the rooftop, attack them. The fastest way to destroy them is with Emmet's basic attack.
 A Golden manual for destroying fans in the right corner of the rooftop
At the right side of the rooftop, you will find three fans arranged in a row. Smash them to receive a golden manual.
 Finish off the mech with Special action
After you have destroyed the robot's two legs, you will be able to perform the special action. Keep tapping the Special key quickly to finish off the boss.
Completing the game in 100% takes much more time than just finishing the main story line. From the very beginning it is worth to pay attention to studs and unlock x2 and x4 multipliers from red bricks.
To complete the game in 100% you have to:
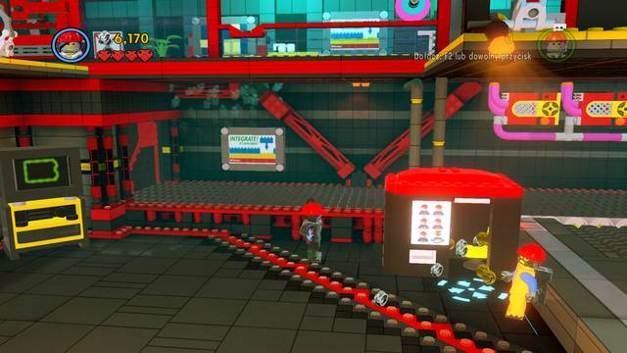
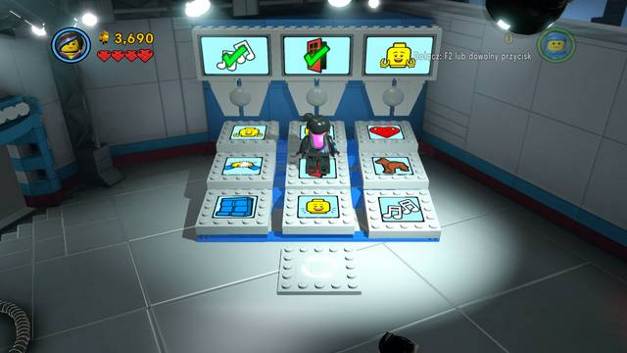
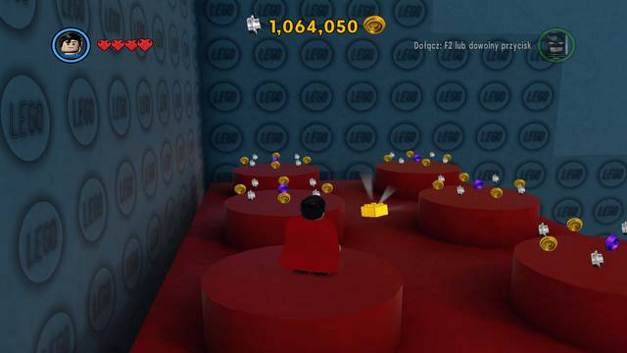
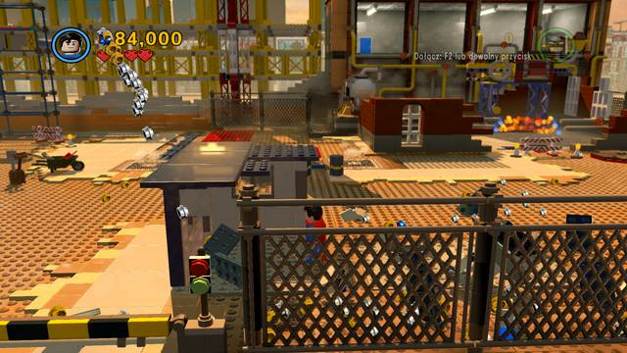
In the Bonus Room you can do whatever you like. There is a lot of interactive items as well as the construction panel where you can use the instruction pages collected in the story mode chapters to create drivable vehicles. You can also find here many easy-to-collect studs and, above all, gold bricks, which are either hidden throughout the room or unlockable for completing specific actions.
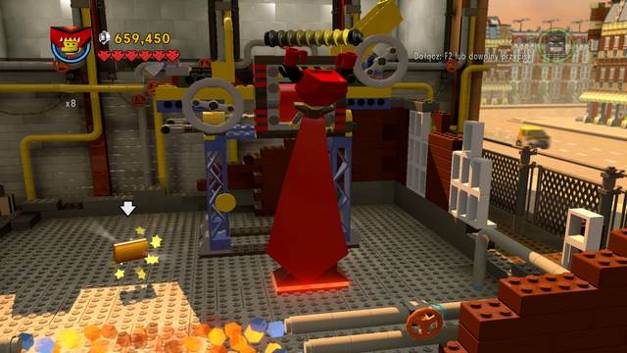
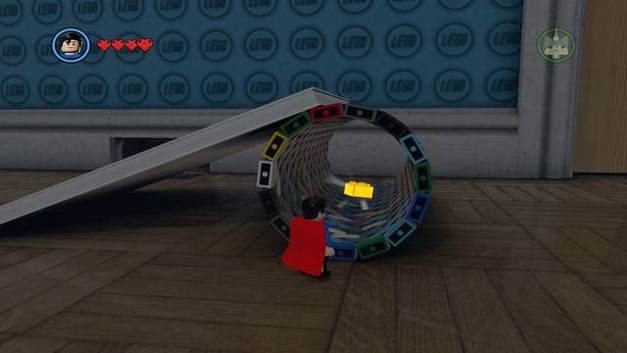 The first golden brick
One of the bricks can be found inside the cylinder made of Lego bricks, which is laying by the door.
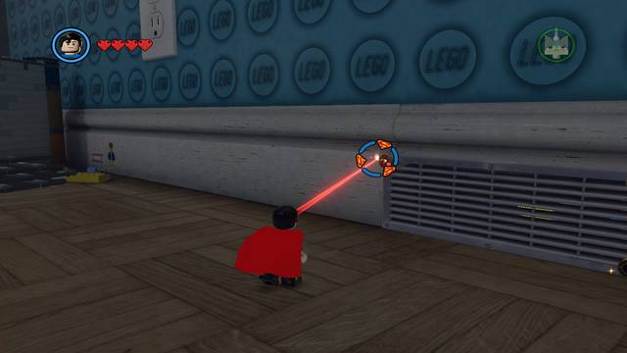 The second golden brick
Another brick is to be found near the door, under the gable vent. To get inside, you need a character with a laser weapon/ability.
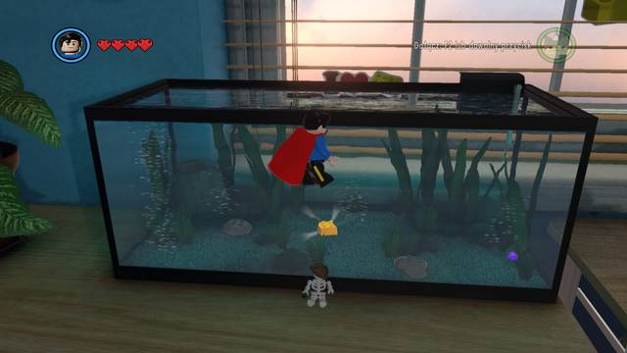 The third golden brick
The third brick is inside the fish tank on the top of the dresser.
 The fourth golden brick
Yet another brick can be revealed by pushing the car off the stereo. This will cause a book to fall into the trash can, from which a previously unreacheable brick drops out.
 The fifth golden brick
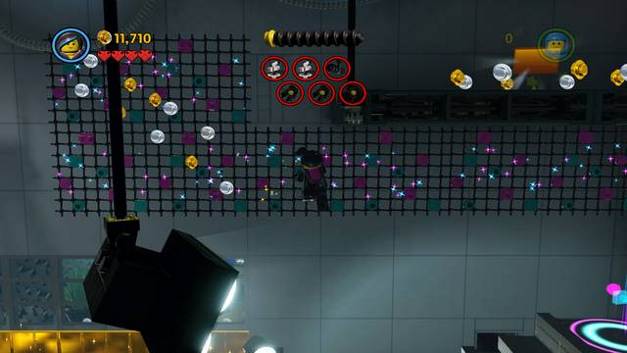
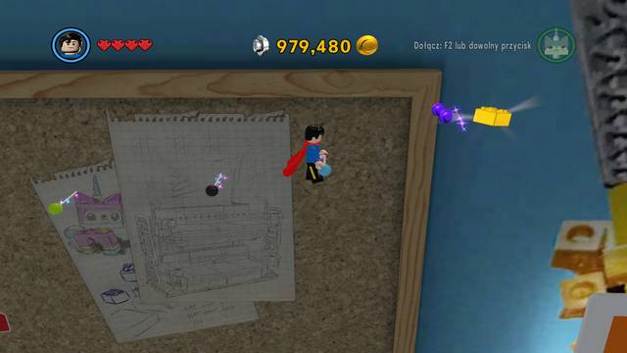
The fifth golden brick is to be found in the corner of the cork board hanging over the computer. You can get to it by jumping from pin to pin or by flying.
 The sixth golden brick
Near the bed there is a piece of furniture in shape of a Lego brick. The sixth brick is on the top of it.
 The seventh golden brick
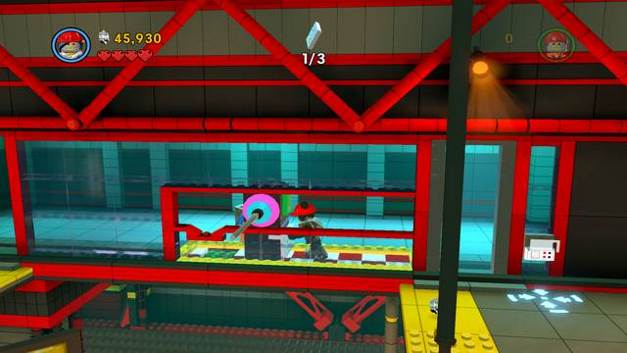
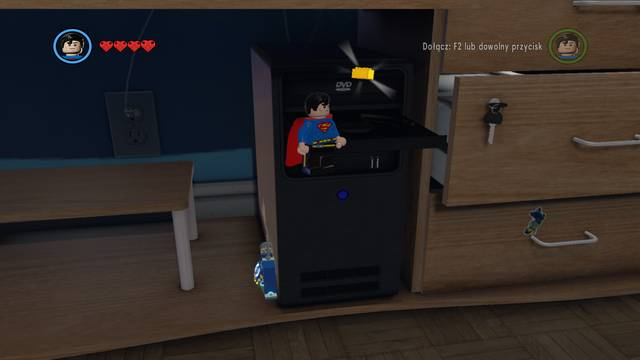
In order to get the next brick you need to activate the terminal near the computer case, under the desk. The brick will appear on the DVD disc drive once it is open.
 The eighth golden brick
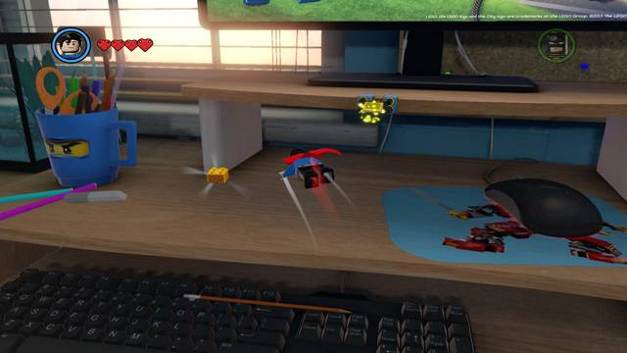
To reveal this brick you need to climb the dresser following the stud trail - i.e. climb at the top using socks hanging from the open drawers. Then, the camera will move to show the brick's location - which is on the desk.
 The ninth brick
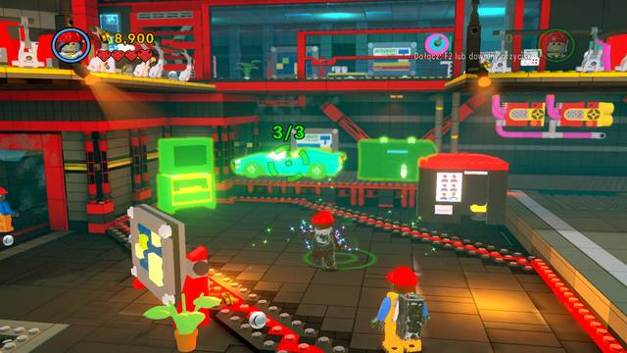
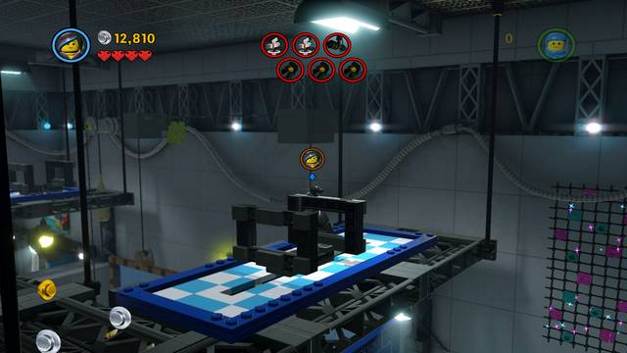
The ninth brick is given as a reward for following the stud trail. This will show up after you build any car. Once you drive to the end of the trail and collect the last stud, your reward will appear right before you.
 The tenth brick
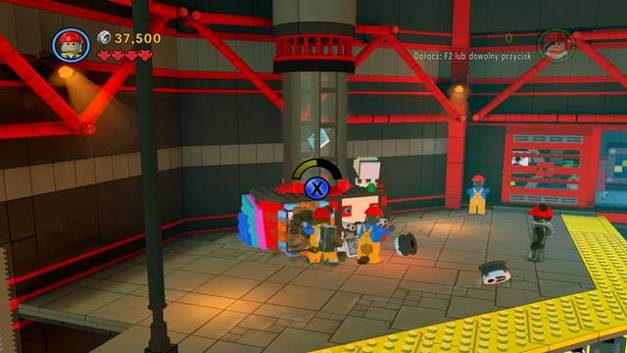
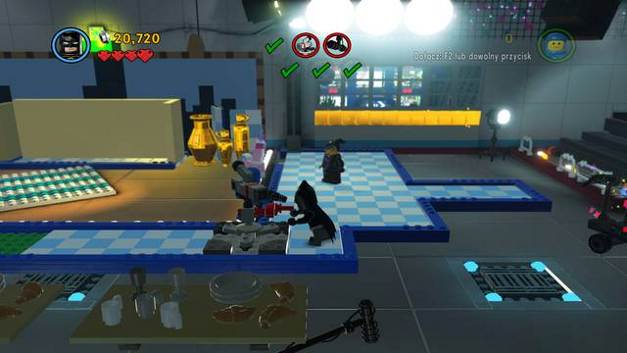
The last golden brick is under the bed. Use a rope to pull over the box, then rebuild the broken construction from the bricks laying around. After that, the brick will appear inside the box.
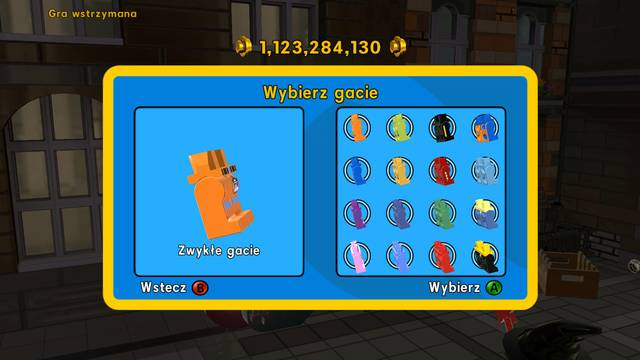 Your wardrobe with pants
Pants are collectibles which can be found during missions, but apart from that, they serve another role in the game. Any character who wears them (as long as they can wear pants) gets specific abilities. All pants and the perks they grant are described below:
Standard pants - put on default clothes.
Faster build pants - speed up the process of building/repairing constructions.
Power pants - smash objects with one hit.
Pneumatic pants -a jackhammer effect, which may be a little bit annoying. Good for destroying objects quickly - just walk past them.
Cold pants - slow down the tempo of walking, add slide effect while turning, and also cause transparent studs (imitating ice) to drop from the character.
Golden - you literally drip with gold.
Tight pants - your character can jump a little bit higher.
Super pants - enable flying.
Disco pants - they play dance music when you start fighting, and while you are standing still the character starts dancing.
Agility pants - male characters gain some female characters' abilities (jump higher, climb, use bars).
Stinky pants - allow higher jumps and create a stink cloud around the character.
Thunder pants - apart from causing sparks to fly from the character's feet, they create an impressive thunder strike after destroying an opponent.
Rainbow pants - add Uni-Kitty's abilities, that is ability to destroy and build with rainbow bricks
Wet pants - similarly to cold pants, these cause blue studs (imitating water) to drop from the character.
Exploding pants -jump attack causes explosion.
Speedy pants - the character wearing these pants gets much faster.
Reward: x10 stud multiplier, Cost: 5,000,000
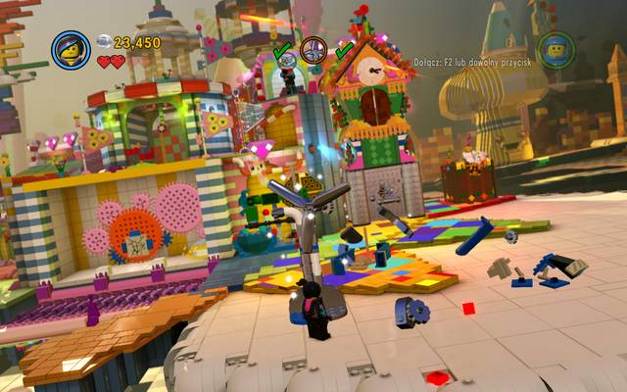
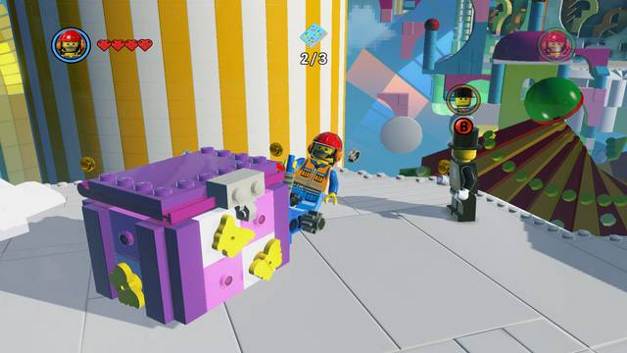
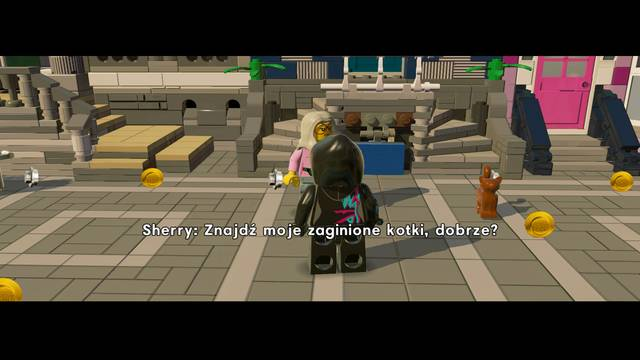 Mrs. Scratchen-Post
In Bricksburg, near Emmet's house there is Mrs. Scratchen-Post. She offers you a red brick as a reward for finding 5 of her cats. It is not an easy task, but the price is high.
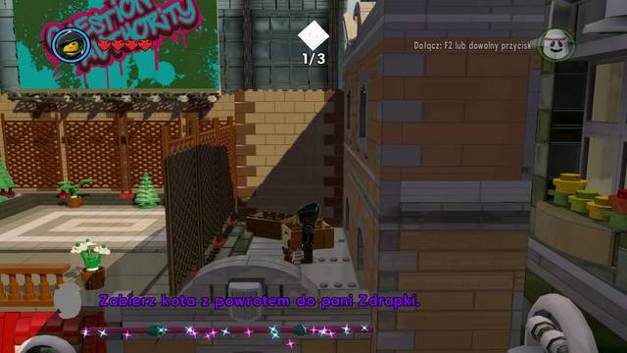 The first cat
First, head on the roof of the building with a coloured fence in front of it. There, on the roof, you can find a cat, which is on the other side of a fence. The cat will follow you.
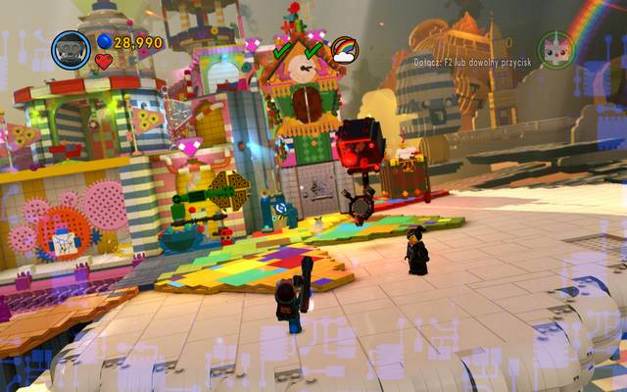
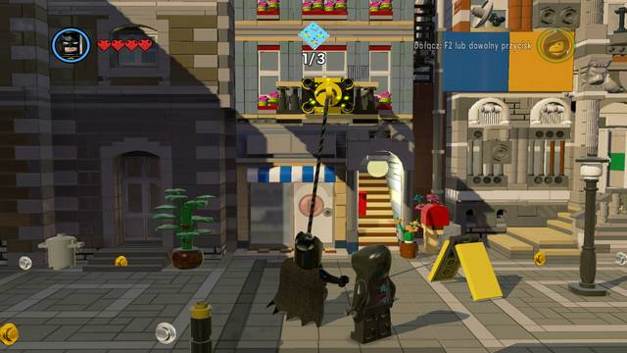 The second cat
The second cat is trapped on the balcony on the left from Emmet's house. You can build a latch on the balcony, by destroying the object on the right. The latch can be grappled by Batman.
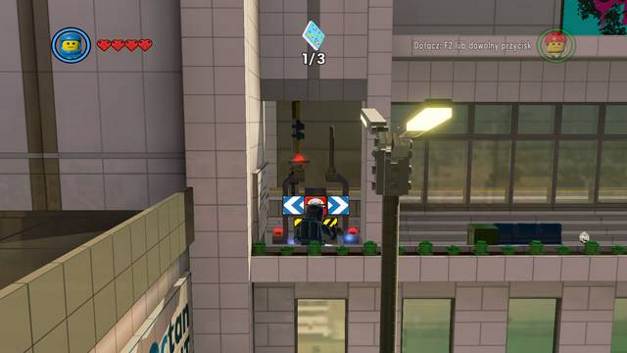 The third cat
The next pet will get to you by train. Go to the top floor of the platform and hack the terminal. After that, take the cat to its owner.
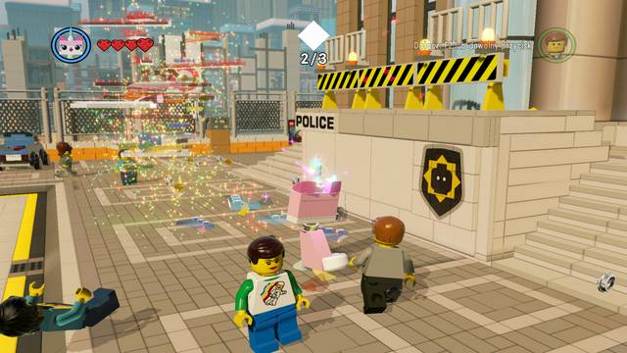 Build a catapult
To get to another cat, build a catapult using rainbow bricks near the police station.
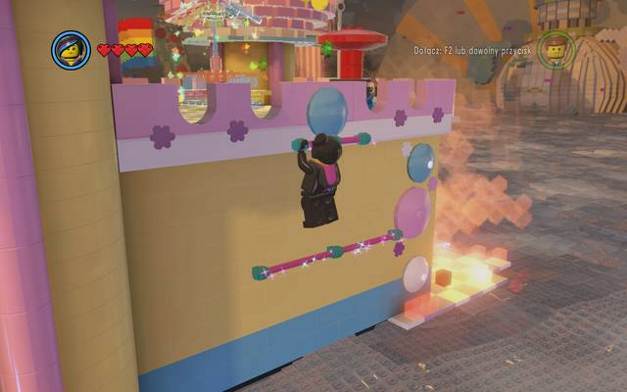
 The fourth cat
Jump up and you will land on the rooftop. The cat is inside the toilet. Free the animal by hitting the target.
 The fifth cat
On the wall on the right side of the station, there is a red switch. Only Lord Business can use it. This will open the door to the store at the ground floor of the building. Inside, there is the last cat.
Reward: Fast repair, Cost: 100,000
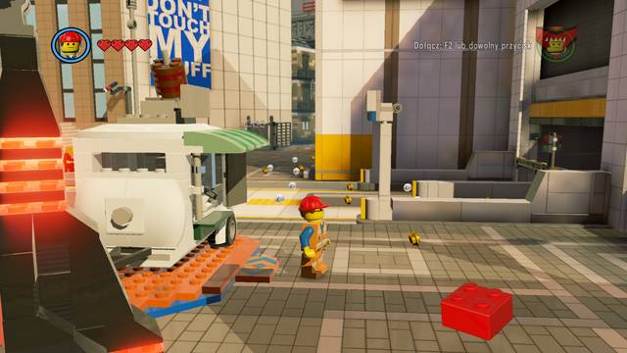 Ice cream cart
To get this brick you need to collect three instruction pages. Once you have located them, go to the construction site (in front of the train station). When the construction is ready, you will get the red brick.
 The first page
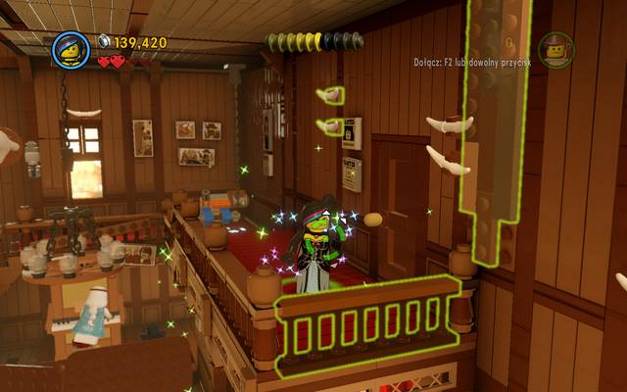
The first page can be found on the balcony of the building which is in the same row as Emmet's house. To get there stick a staff (e.g. Virtuvius's) into the hole on the building and jump on the balcony with Wyldstyle. If you have a character who can fly, you can easily get there flying.
 The second instruction page
The second instruction page can be found in the construction site with road workers around. Destroy the cracked paving stone - under that you will find the instruction.
 The third instruction page
On the right wall of the station there is a red switch. Only Lord Business can use it. This will open the door of the store on the ground floor of the building. Inside you will find the instruction page.
Reward: Green studs (normally used to guide the player) have value, Cost: 50,000
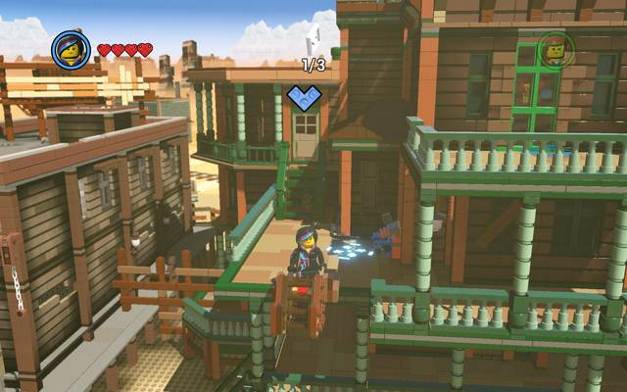
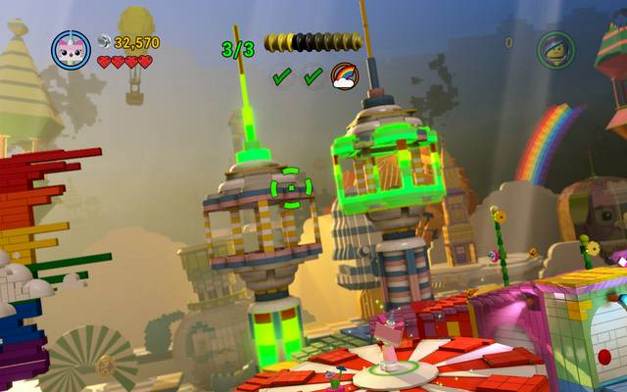
 The first billboard
The next mission is to rebuild three billboards while in Architect mode. Construction sites are usually hidden behind other objects, which you first have to destroy. The first one is on the roof the building with coloured, destructible fence, in the corner of Emmet's district.
 The second billboard
The second billboard can be found on the top floor of the train station.
 A way to the roof
To get to the next billboard you first need to get on the roof of the tallest building. Reveal the stairs behind the secret passage and climb up top. Once over there, use Virtuvius to cross the blue balks in order to get to the roof of the adjacent building.
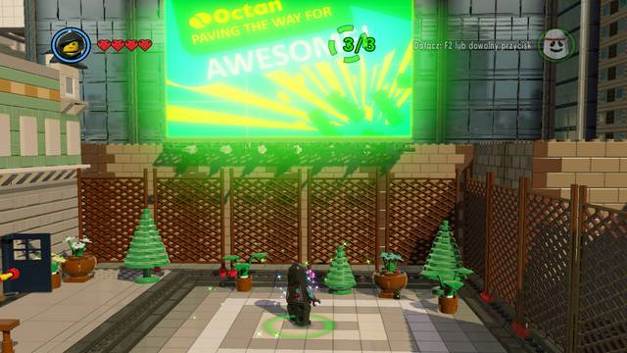
 The third billboard
Get to the lower floor and approach its edge. You will see the last billboard on the wall. A red brick is on the lawn on the left side of the building.
Reward: Pants detector (works only once the story line is complete), Cost: 200,000
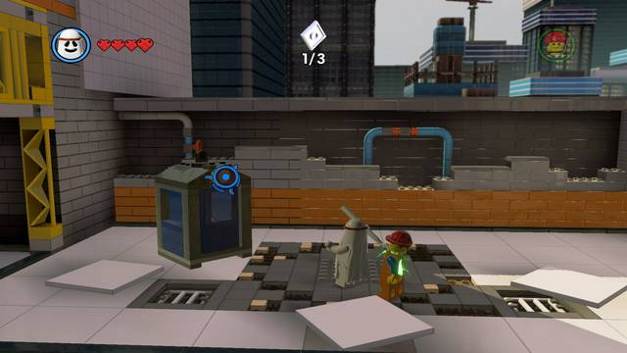
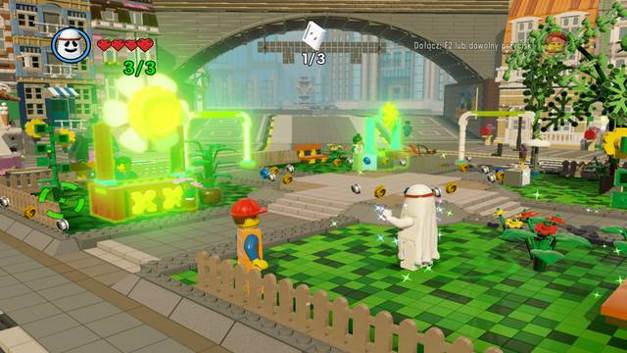 An Architect's spot
Go to the park. Destroying one of the trees there will give you access to a spot where you can enter Architect mode. You will build a driveable kettle-like vehicle and a red brick will spawn on the right.
Reward: x2 stud multiplier, Cost: 250,000
 A way on the roof
First, get to the rooftop of the tallest building. Reveal the stairs behind the secret passage and climb up top. Once over there, use Virtuvius to cross the blue balks in order to get to the roof of the adjacent building.
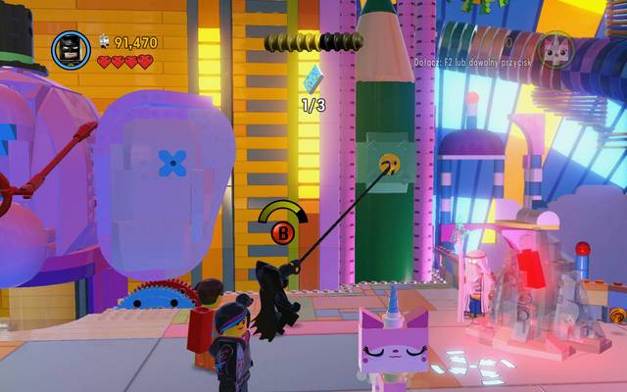
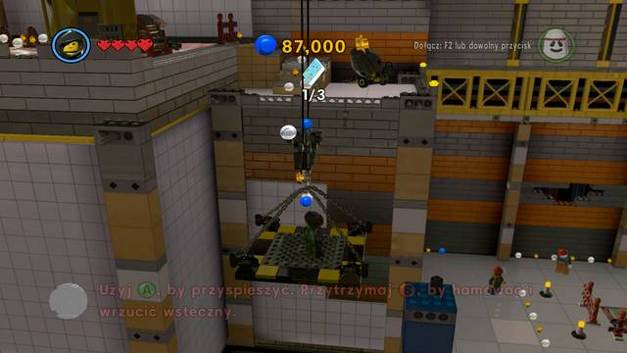 The crane
You may activate the crane with a platform so to easily get up and down, but the essential thing is to activate the crane on the lower floor - this will cause a large object to fall near the fountain.
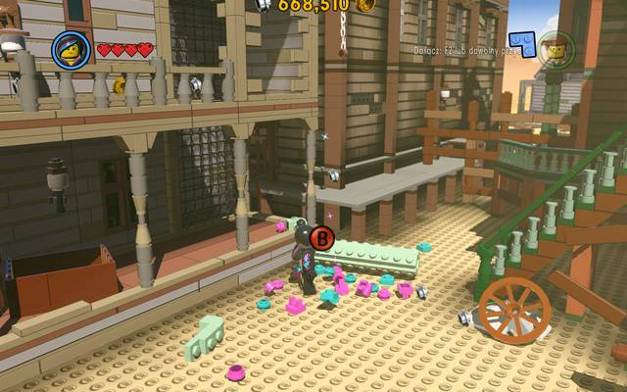
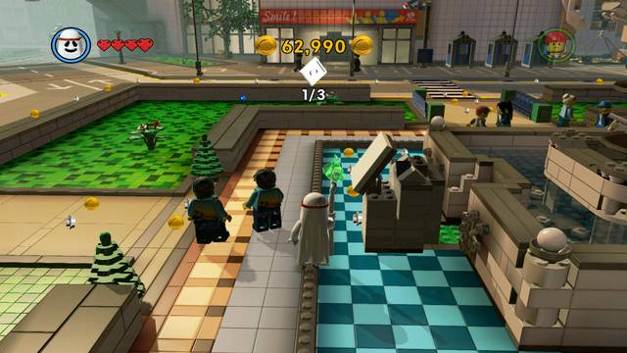 Fit the object into the fountain's front side.
Push the object around the fountain to its front and fit it in where the green platform is. A red brick will appear nearby.
Reward: Gold manual pages detector, Cost: 600,000
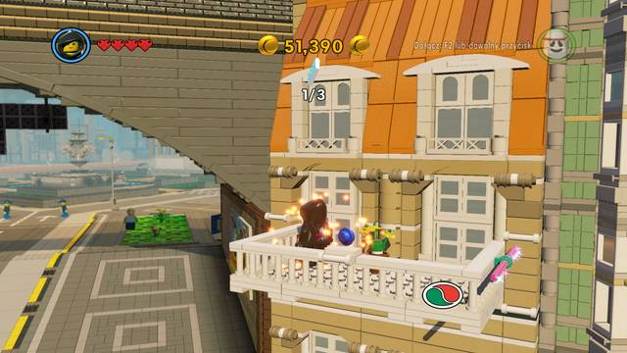
 A brick on the roof
There is a red brick on the roof of the saloon. This will help you to find gold manual pages more easily. If you have not yet completed the game and have no flying character, you can get to the roof with a female character using the bar.
Reward: Enemies drop studs, Cost: 100,000
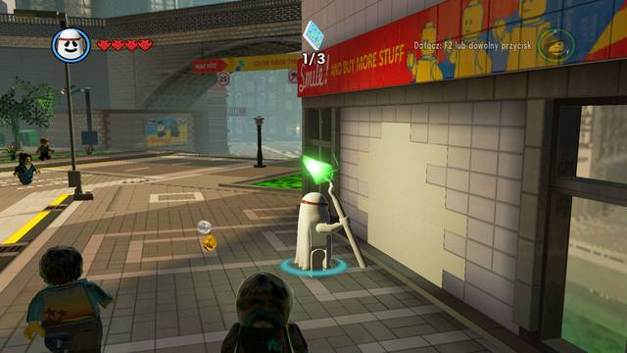
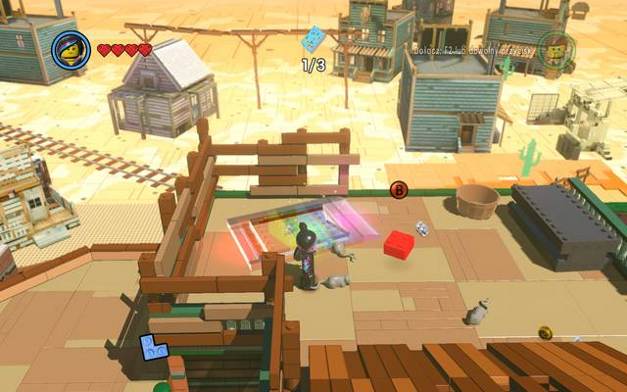
 The first instruction page
To build the well you need three instruction pages. The first can be found on the roof, hidden inside the water tank.
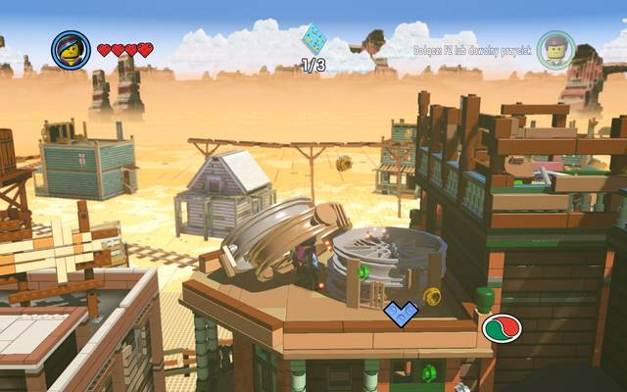
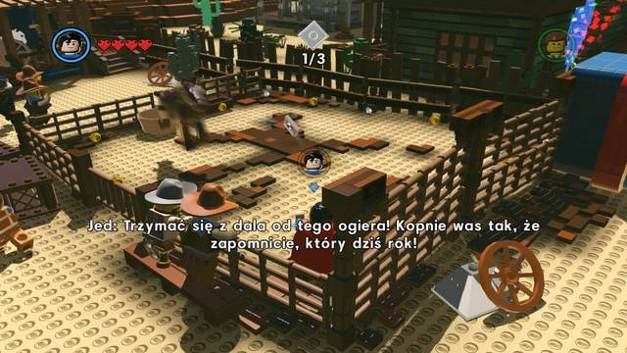 The second instruction page
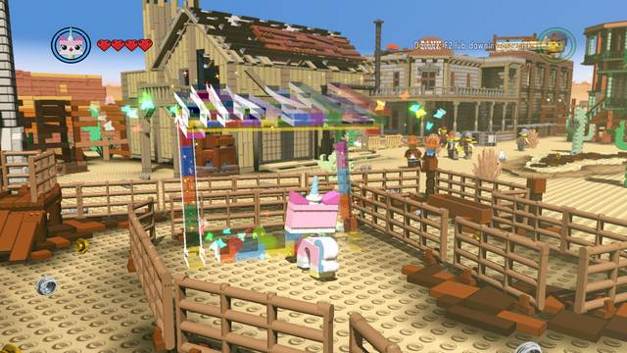
The second page is inside the corral with a raging horse. It is difficult to grab it, since the horse will not let you get inside easily.
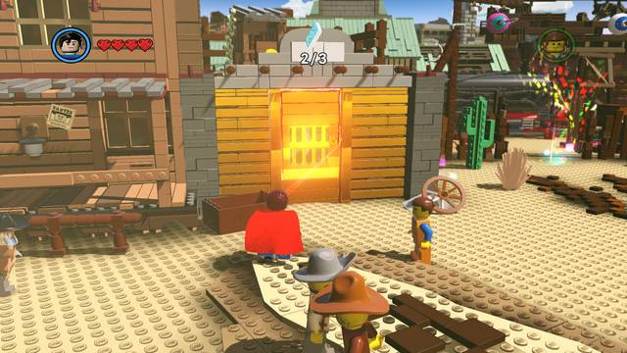 The third instruction page
The last page is near the sheriff's office, behind the gold door, which you have to cut through with a laser.
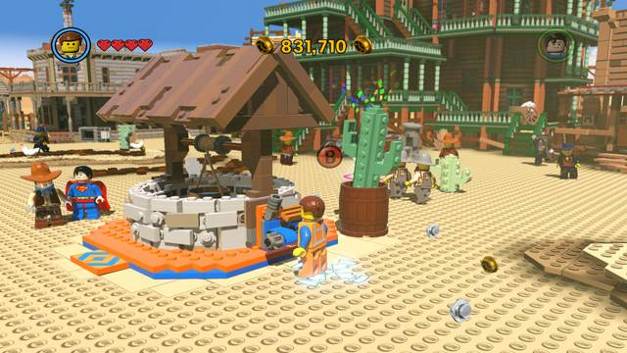 The well
After collecting all instruction pages, build the well in the centre of the square. Then, use the crank and a red brick will come from the inside.
Reward: x4 stud multiplier, Cost: 500,000
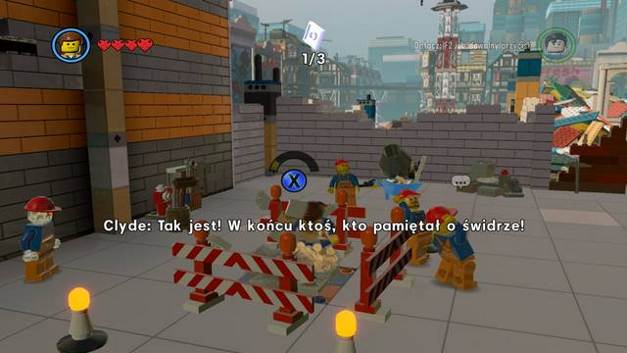
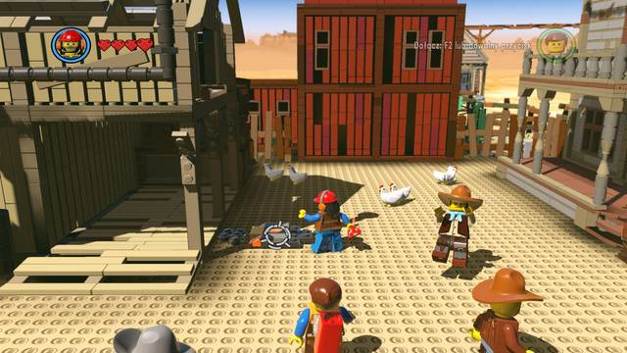
 The first robber
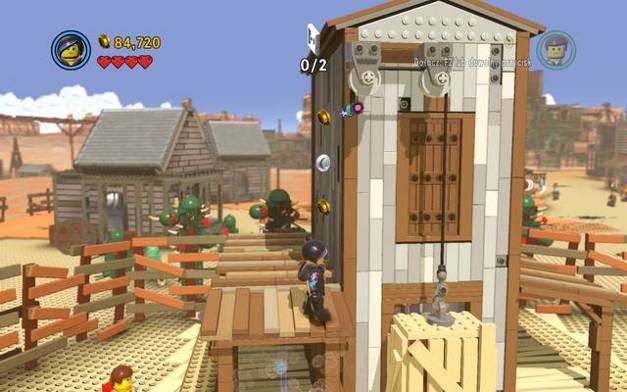
On approaching the bank, sheriff will talk to you. He asks you to capture three robbers. He offers a red brick as a reward. The first villain can be found in the outhouse on the roof, next to the office. Use the grappling hook to get him out of there.
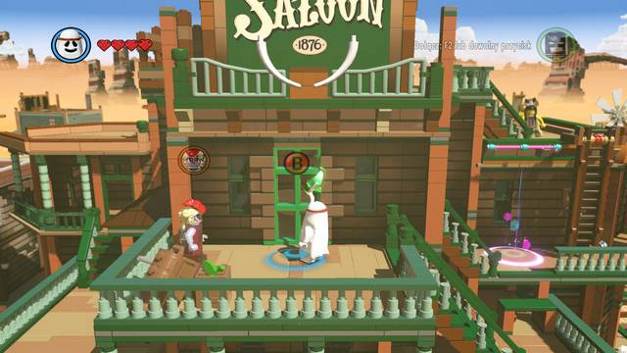 The second robber
The second robber is hiding inside the saloon. Use a character with a staff to knock the code on the top floor and lure him into a trap.
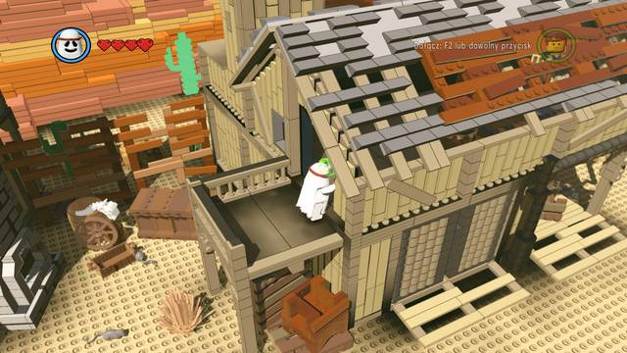
 The third robber
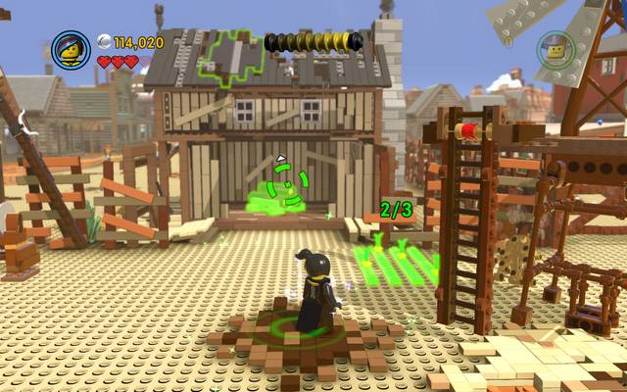
The last of the wanted men is inside the barn. First, get to the attic and push the box off the ledge.
 Set the barn on fire
Now you need Demolition Man or another character with explosives, which you have to throw at the platform with fire icon. Once the robber rushes outside the building, head inside to take his gold and return it to the safe.
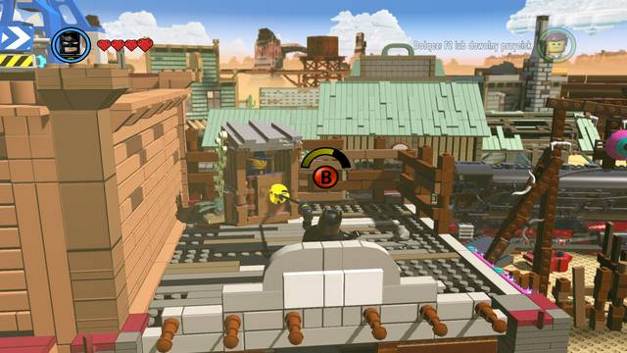
Reward: Fast drill , Cost: 100,000
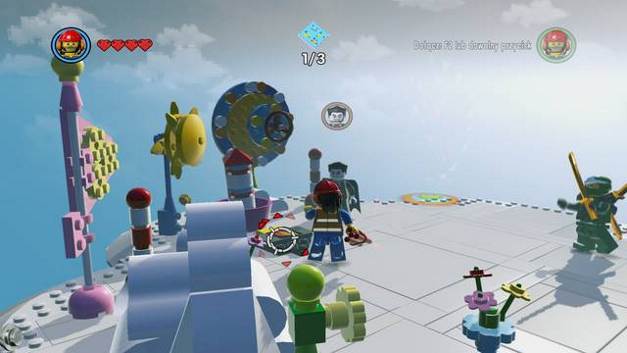
 The first bird
To earn a red brick in the next mission, you have to startle all five blue birds. The first one is on the roof of the bank. Use the drill to destroy the object on which it is sitting.
 The second bird
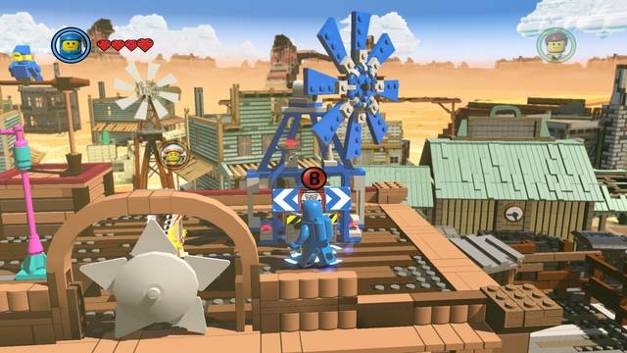
You can use the windmill on the roof of the saloon to startle the second bird. To turn it in the right direction you have to hack the terminal.
 The third bird
The third bird is sitting over the town gate. You can startle it with a butterfly built out of rainbow bricks.
 The fourth bird
The last bird is on the barn chimney. First, head to the attic and push the box off the ledge.
 Build a steam pipe
Then, build a steam pipe to startle the bird. This will activate a whistle which will cause the bird to fly away.
 The fifth bird
The last bird is on the building on the cemetary. In order to startle it, you have to destroy the silver block next to the building. To do this, you need explosives or a bazooka. Your reward appears near the cemetary.
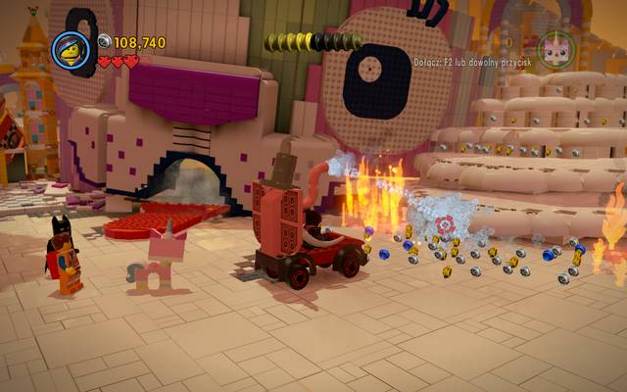
Reward: Fast build, Cost: 100,000
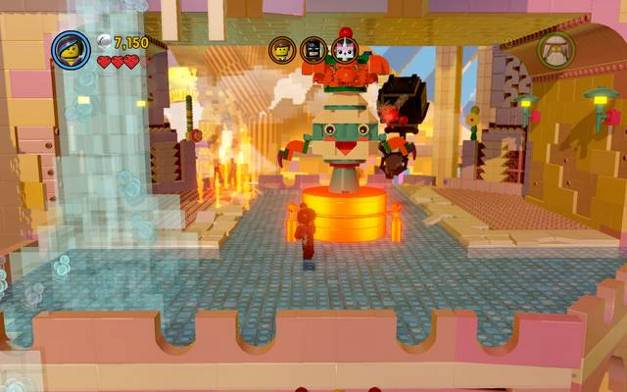
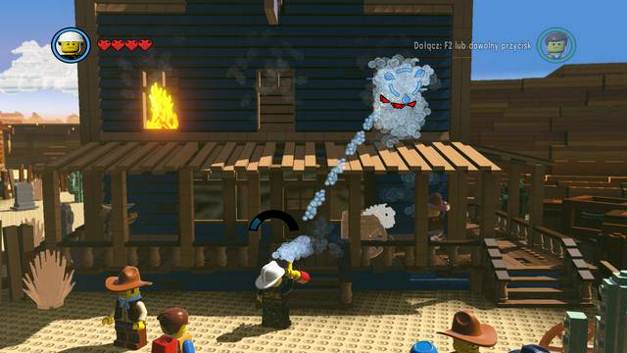 The building on fire
You can see fire coming out of the window of one of the buildings near the cemetary. Put out the fire using a character with an extinguisher, by aiming at the three windows with fire coming out of them. A red brick will appear next to the entrance.
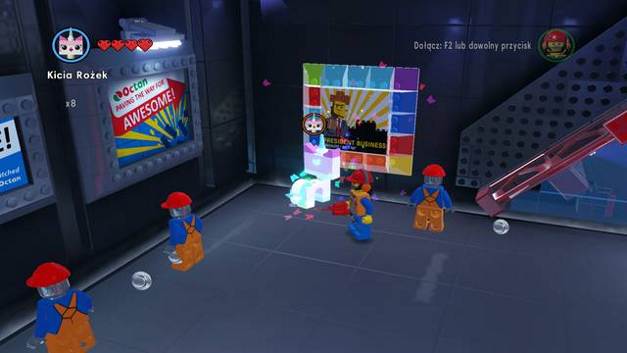
Uni-Kitty Jack-in-the-Boxes
Reward: Attract studs, Cost: 600,000
 The first box
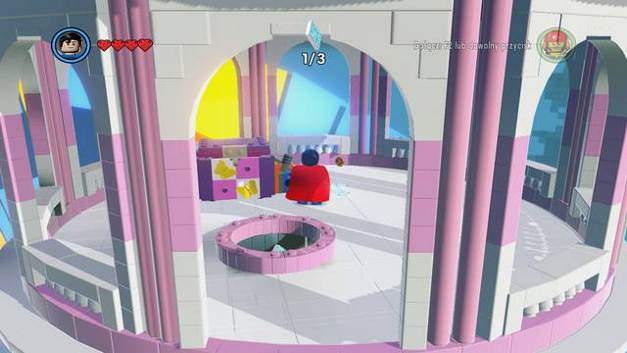
This red brick enables you to attract studs from a longer range. You need to locate 3 boxes with Uni-Kitty portraits inside. In order to find the first one head left after you come out of the portal. Use the grappling hook to pull over the teacup and activate the mechanism.
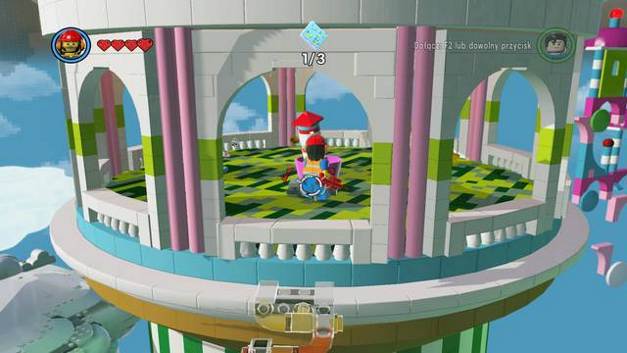
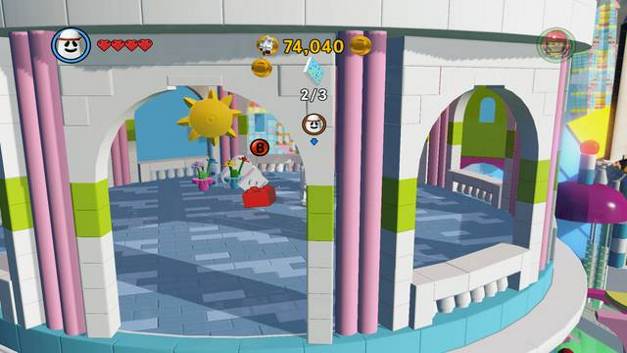
 The second box
The second object is to be found in the tower. Destroy the gold wall in the corner of the palace to get there.
 The third box
The third box can be found right behind the silver wall in the left corner of the palace.
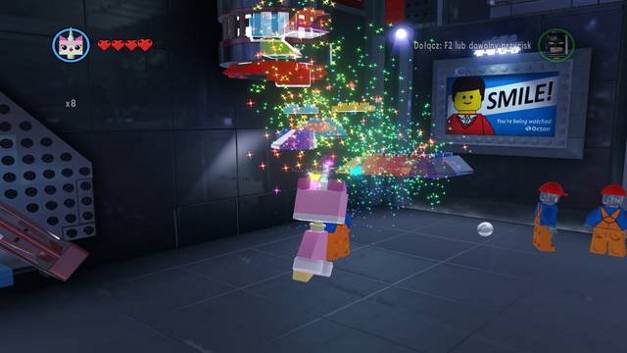
Reward: Fast boomerangs , Cost: 100,000
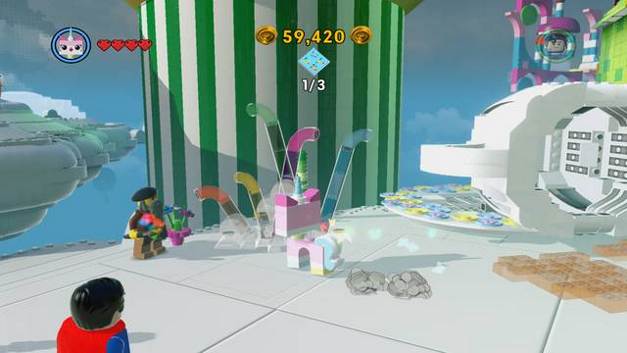 The green tower with fireworks
This brick allows characters with boomerangs or similar type of weapons (e.g. Wonder Woman) perform really fast attacks. The first object is on the top of the green-white tower, on the left from the portal. Destroy rainbow bricks in front of it and build a ladder to get up top.
 The first fireworks set
To launch the fireworks you need a character with explosives (e.g. Demolition Man).
 The second fireworks set
You will find another set on the island on the right from the portal. You can get there by the plane which keeps flying back and forth.
 The third fireworks set
The last one can be found on the last island beyond the silver wall. You have to build a catapult out of rainbow bricks to get there.
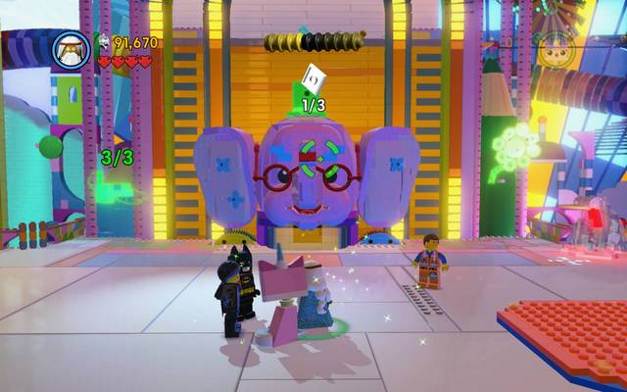
Reward: x6 stud multiplier, Cost: 1,000,000
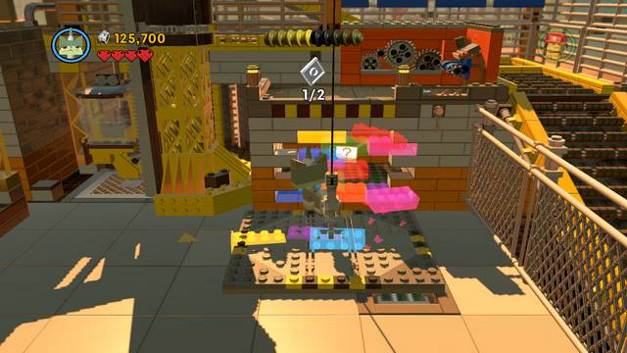
 Puzzle mechanism
On the cloud beyond the gold wall you will find a mechanism with buttons. You have to set the panels so that they created a picture that would match with the one displayed in the background.
Reward: Red brick detector , Cost: 200,000
 The first instruction page
You need three instruction pages to build the carousel. Buying the brick enables you to quickly locate the red bricks - it points them with a red arrow. The first page is behind the wall in the yellow building next to the gate of silver bricks.
 The second instruction page
Another instruction page can be found inside the tower beyond the gate of gold bricks.
 The third instruction page
The last instruction page, along with a red brick, is on the tower beyond the gate behind silver bricks (at the left side of the palace).
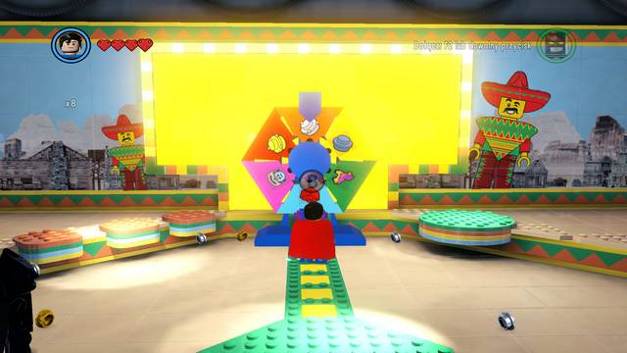
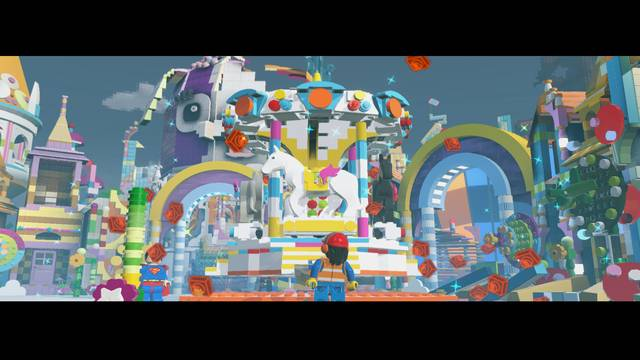 The carousel
Finally, having all three instruction pages collected, approach the construction site in the middle of the square and build the object.
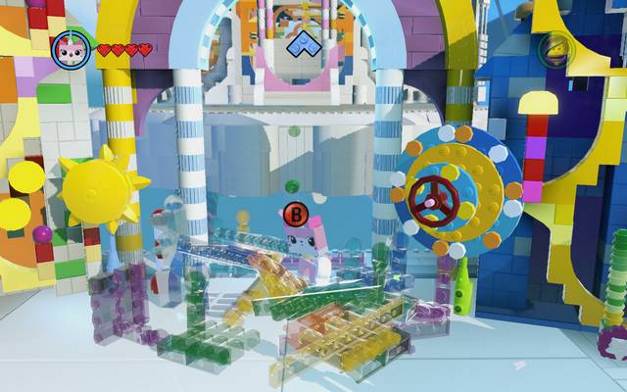
Reward: Fast secret knock, Cost: 100,000
 The red brick on the tower
On the tower beyond the silver wall you will find another red brick. You can get there either by flying or jumping with a female character.
Reward: Regenerate health, Cost: 100,000
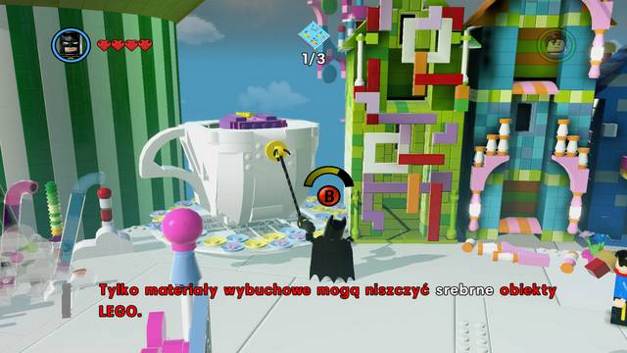
 The bricks hidden behind the gold wall
Build three dance pads out of rainbow bricks. In the first room they are hidden behind the gold wall.
 The second dance pad
There is a picture in the adjacent room - destroy it and use the debris to build the second dance pad.
 The third dance pad
The last dance pad can be built in the last room on the ground floor.
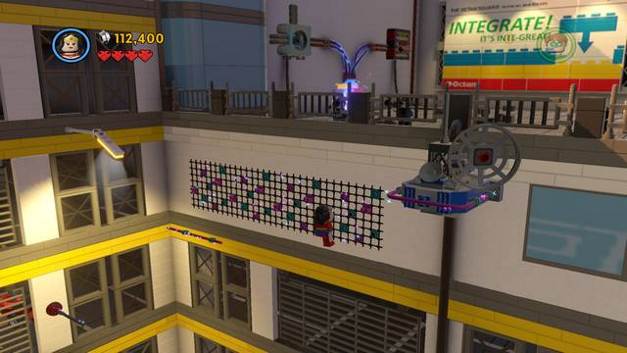
Reward: Extra hearts (health), Cost: 100,000
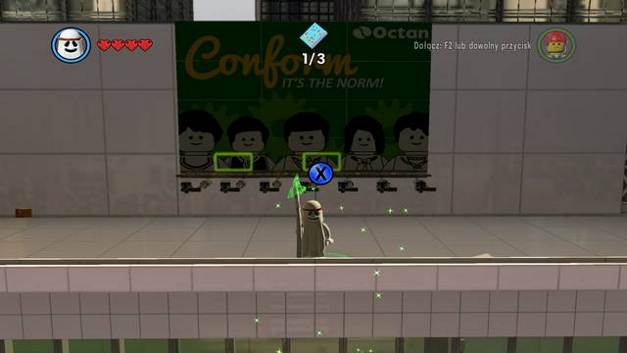
 The first sign
The first sign is hidden behind the silver block, which can be destroyed with explosives.
 The second sign
In order to destroy the second sign in the other room, first you need to repair the computer next to it and destroy the object that appears after you interact with the terminal. A hook will appear - mount it over the sign, then pull the sign down with a grappling hook.
 The third sign
On the first floor in the corner you will find another sign. It is directly above the second room of the ground floor.
 The mechanism keeps the door to the room with sign closed
The fourth sign is on the wall inside the closed room in the main hall. To get there, you have to activate the lock mechanism on the first floor, which is beyond the hidden wall (you can also get there by flying through the main hall).
 The fifth sign
The final sign is hanging on the wall in the last room. First though, you have to complete the sign - climb up (or fly) and push the red object off the ledge.
Reward: Fast hack, Cost: 100,000
 The hammer made of green brick
To get this brick you first have to open the door to the closed room by using the mechanism on the first floor. Then, construct a huge hammer out of green bricks (Green Lantern) which will activate the panel for Lord Business.
 A red switch
While inside the first room, use the switch on the wall (playing as Lord Business). This will disable the barrier guarding the entrance on the first floor. You can get there with any character by the elevator. There is a red brick in the middle of the room.
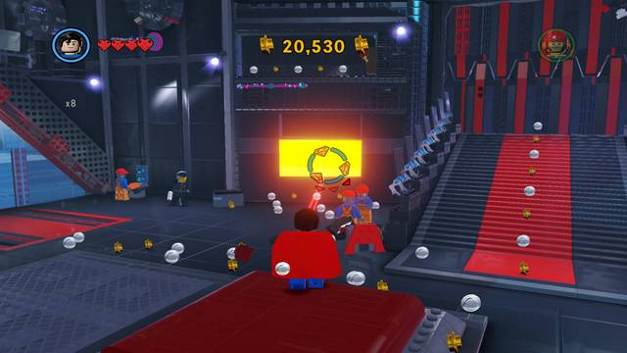
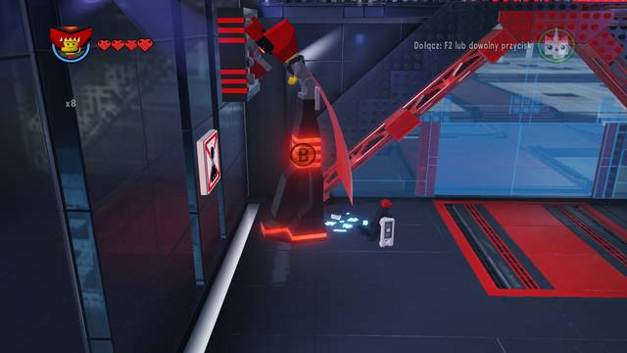
Reward: x8 stud multiplier, Cost: 2,500,000
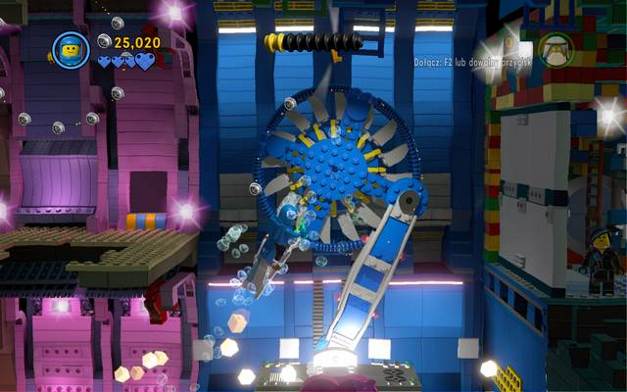
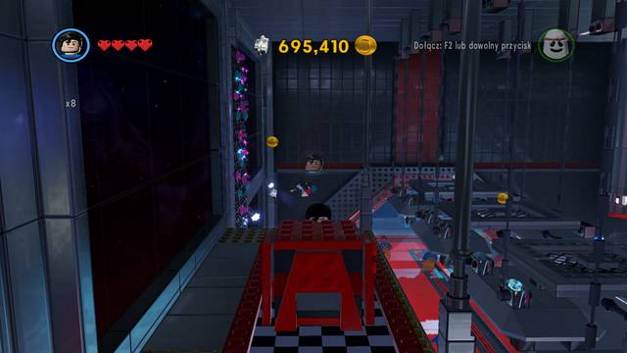
 Wheel of Fortune
In the farthest section of the hall you will find an entrance to the recording studio. Inside there is a Wheel of Fortune. When activated it drops a red brick.
Reward: Invincibility, Cost: 100,000
 The door lock mechanism
In the upper hall there is a closed door. Fly up or walk through a hidden door to get to the door lock mechanism. Apart from opening the door, this will release a huge ball of green bricks. Behind the previously closed door there is a red brick.
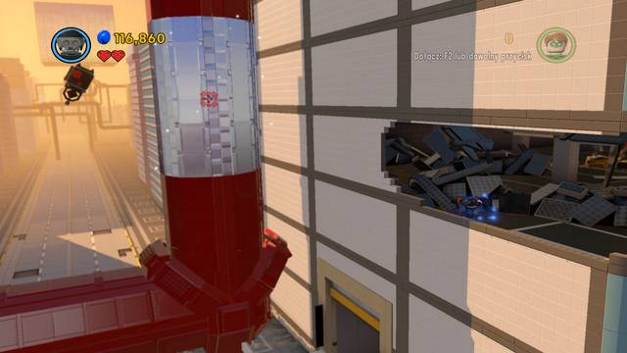
 The gold padlock
In the first level, you can find a gold padlock near the broken machine. Melt it to enter the square beyond the gate.
 The first page
This page is rewarded for destroying (entirely) 11 buildings on the square.
 The second page
The second page is beyond the locked gate too. Using the switch as Lord Business will release the page.
 The third page
The next page is near the crane that can be found behind rainbow bricks in the second part of the mission.
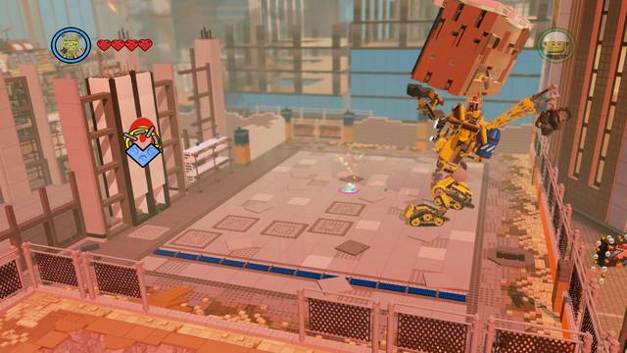
 The fourth page
The fourth page is received for destroying security cameras on the poles - only on this level though.
 The fifth page
Near the end of the mission, while you are falling down, keep pressing the action button - this will put you on the right side. When you are falling down again in a rainbow-coloured tunnel, keep an eye for a page which will be in one of the stud rings.
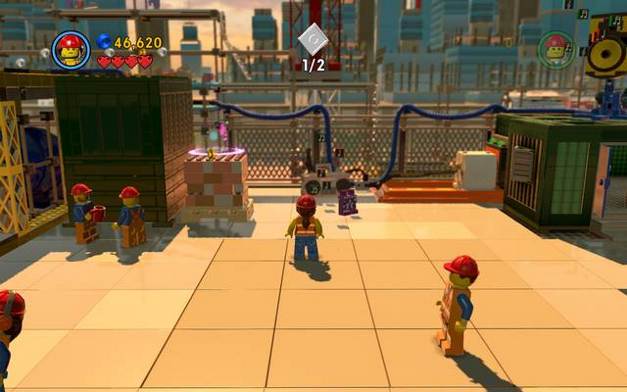 Disco pants
You get the pants for good performance in dancing mini-game in this chapter. They will appear behind your character.
 The first page
The first page can be collected by jumping off the climbing net onto the balk with a lamp.
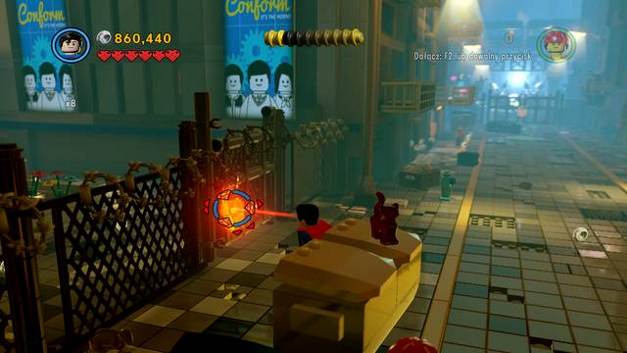 The second page
Another two pages can be found in the back alley. The first one is beyond the gate with the gold padlock. Melt it to get through.
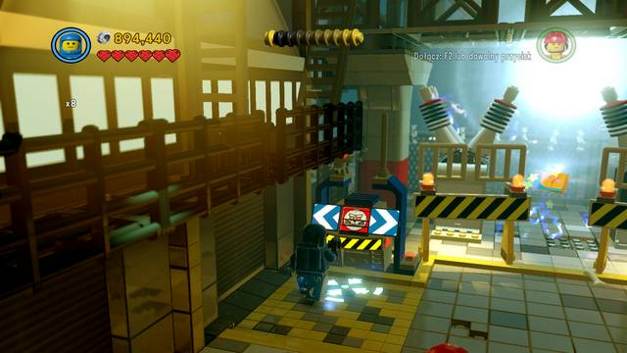 The third page
Another one is beyond the gate, at the far end of the alley. You also have to turn off the electricity via the nearby terminal.
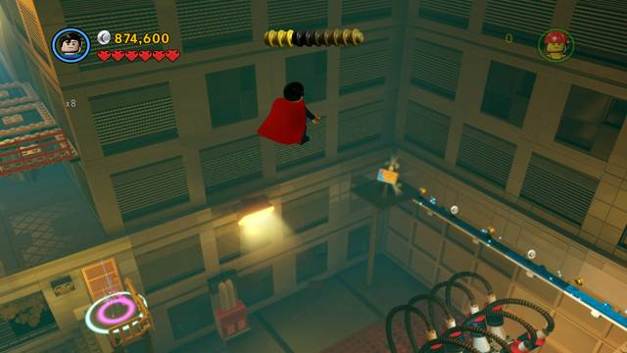 The fourth page
The fourth page is on the right side of the first floor. You need to get to it with Virtuvius, or, if you have a proper character, fly to it.
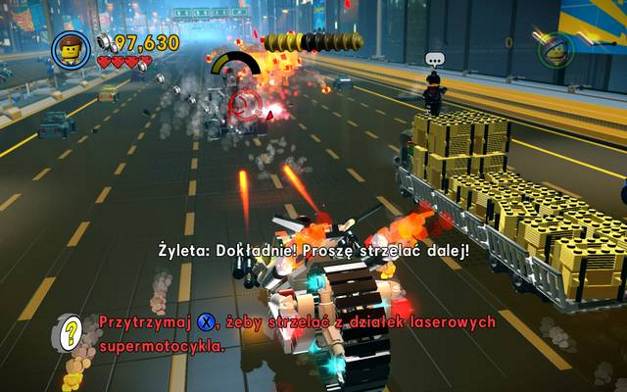 The last page
The last page is rewarded for destroying four robots advancing toward you on motorbikes.
 Get to the control room
After you destroy the gold wall, you can use the terminal to get to the control room. Once there, go through the door in the corner and repair the broken generator.
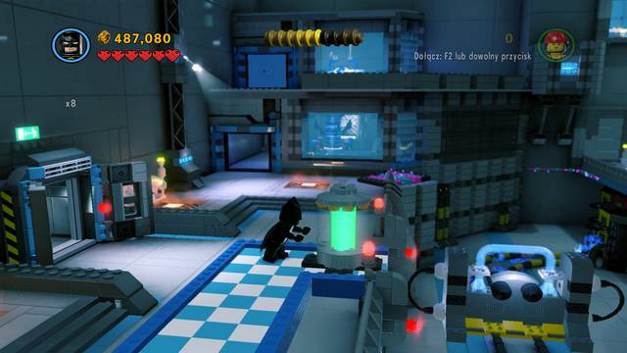 Push the core
Once on the other side, build a construction using rainbow blocks and then get up top and walk back to the previous location, so to get to the last computer on this floor. Then, you just need to push the core in order to get the pants.
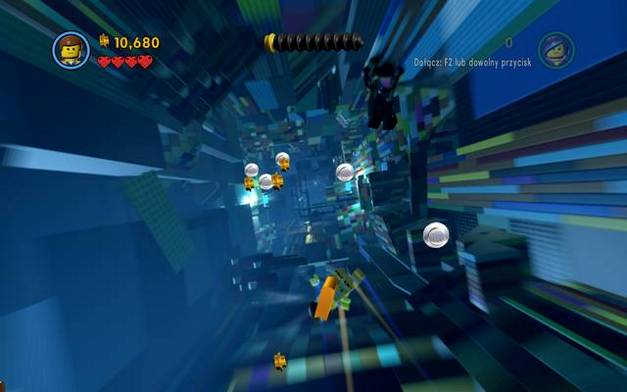 Manual page inside the tunnel
On the beginning of this mission you are falling down. Keep close to the back wall - in one of the stud circle you will find the page.
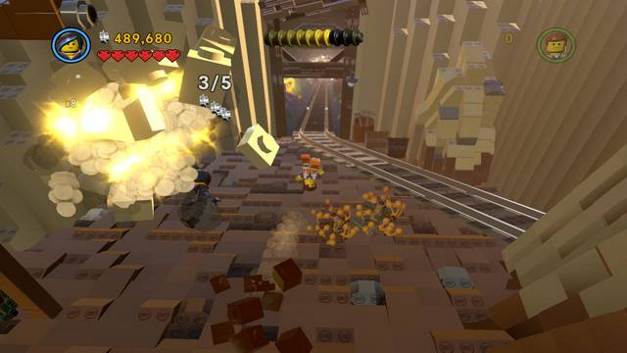 The second page
The first page can be found while sloping down the hill, by destroying five bags hanging on balks.
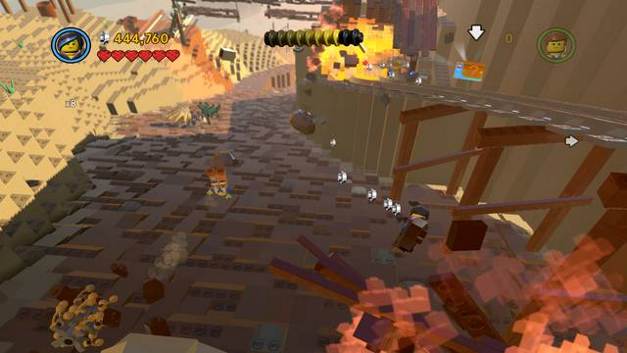 The third page
In order to get the second page, you have to stick to the rails and after jumping over the gulf, get to the page.
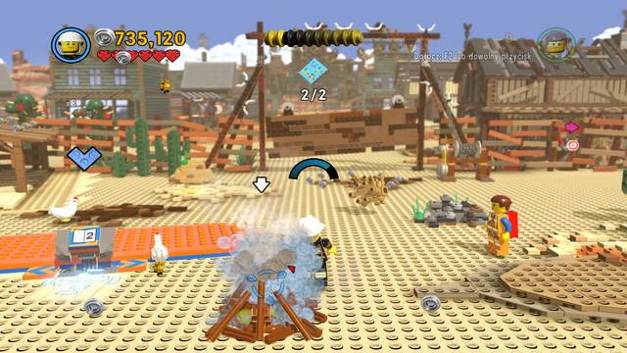 The fourth page
When you get to the bottom, you can put out the bonfire with an extra fire-fighter character, in order to collect another page.
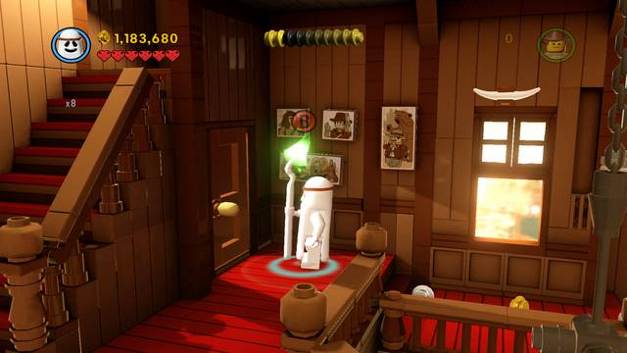 The fifth page
The last page is behind the door over the bar. Only Virtuvius can open it.
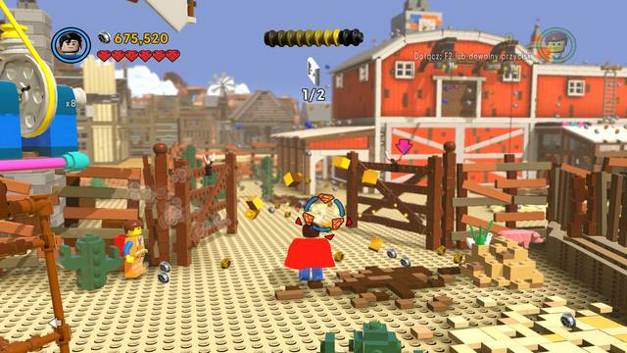 Stinky pants
The pants are behind the gate closed with a padlock. Head to the rooftop and drill through the cracked spot and collect the pants from the barn.
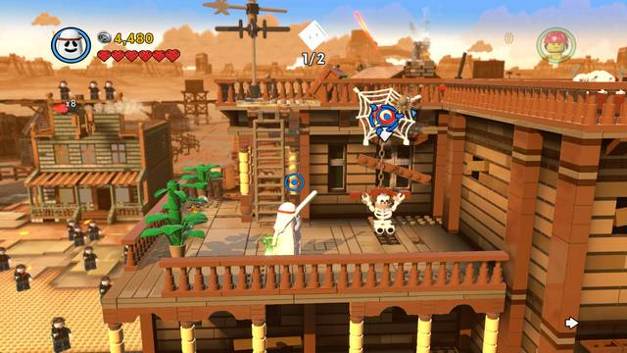 Destroy the skeletons
The first page is awarded for hitting three targets above hanging skeletons. Two of them are close to each other (on the first floor and on the balcony). The last one is received for the duel with sheriff (beyond the silver gate, in the right corner)
 A secret room
Defeat the flying robot and build a bridge to the other building. There you can go down to the balcony. Smash the rainbow blocks to get inside the building.
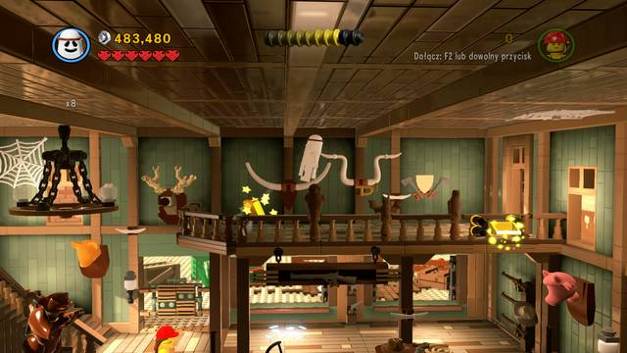 The second page
On the gallery there is the second page.
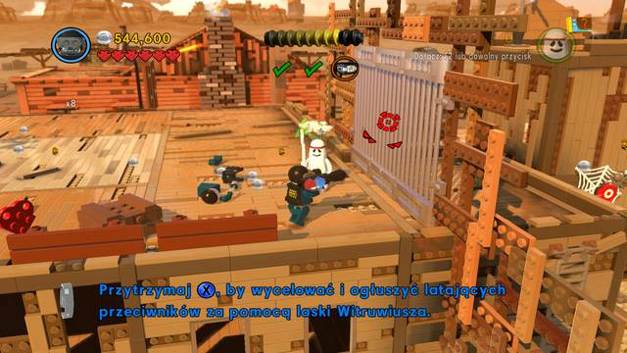 The third page
Another page is on the roof of the adjacent building with a silver gate outside (where you dueled with the sheriff). Once you destroy it, you can collect the page and hit the final target over the skeleton.
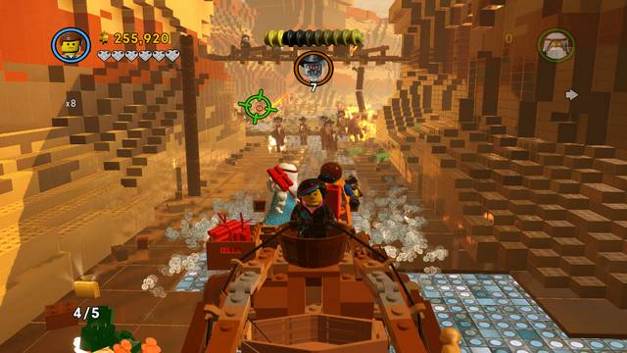 Pages fourth and fifth
You can collect last two pages during the escape from Flatbush while you are on the train car. Destroy 3 carts and 3 men with bazookas. You may do this either with a dynamite or the machine gun. If you miss one of the targets, do not panic - a second lap will begin in a moment, so you will have another chance to shoot them.
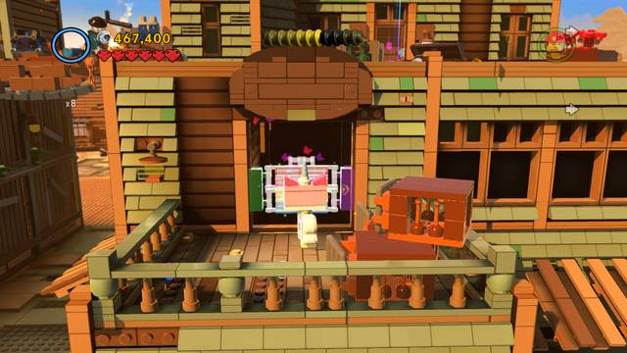 A secret room
Defeat the flying robot and build a bridge to the other building. There you can go down to the balcony. Smash the rainbow blocks to get inside the building.
 Pneumatic pants
You can perform an action by the window. Beginning an interaction will start a mini-game of shooting robots. Once you finish it, you get the pants.
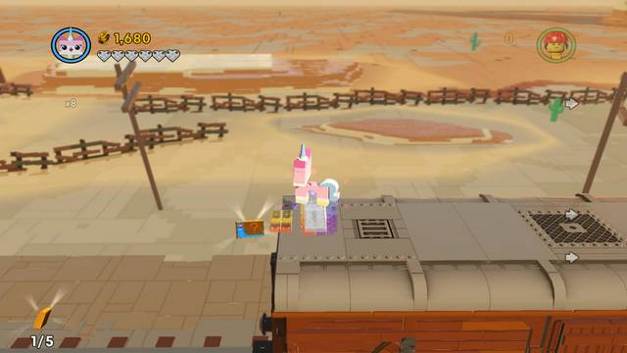 The first page
You get the first page on interacting with rainbow bricks at the far end of the train.
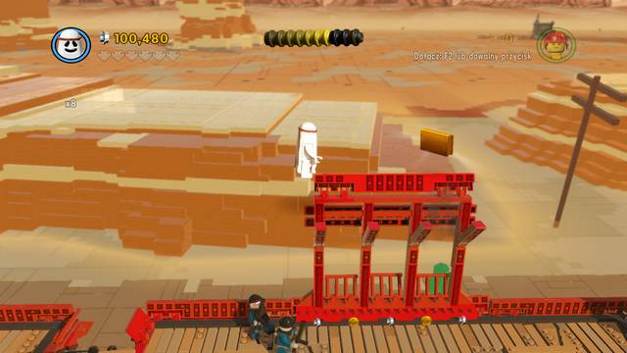 The second page
To get the next page you need a flying character. Once you are in the empty train car with red balks at its side look up to see the page over the car.
 A manual page will appear after destroying the robot
Once you eliminate the opponent in the next car, you will be able to collect the manual page that he drops.
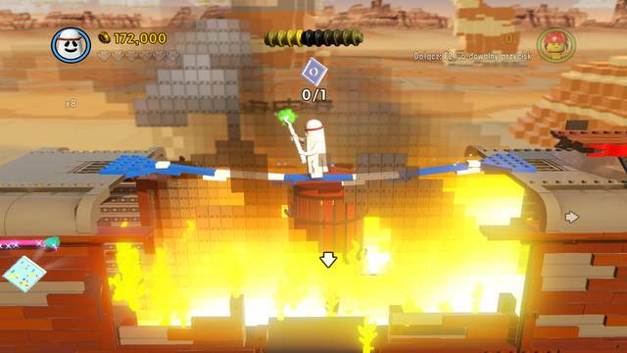 The fourth page
The fourth page is surrounded by flames inside the car. Remember this place, because when another train gets near, the fire will stop.
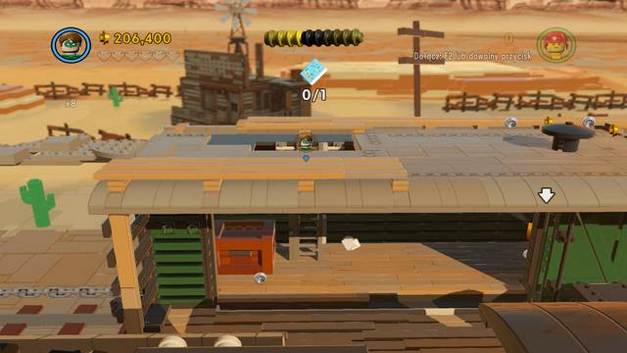 The fifth page
When you jump back from the other train to the first one, look for the next page in one of the nearest cars. The page is in the right corner of the car, and it is almost unseen.
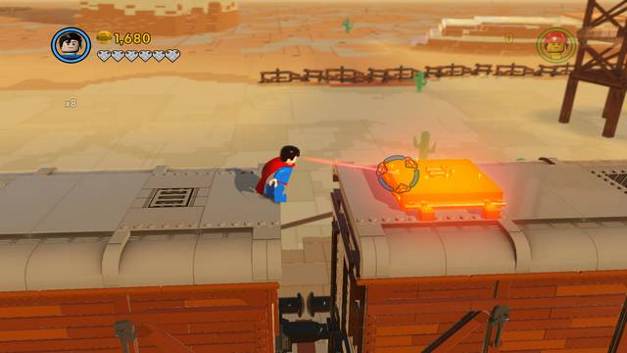 Entrance to the car
To get to the pants, destroy the gold hatch on the roof.
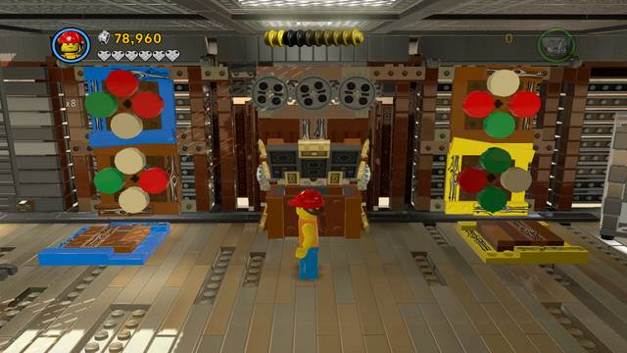 The pressure mechanisms
Then, repair the second pressure mechanism and set the wheels according to the pattern on the picture above. Wheels of the same colour should meet in two adjacent sets. The pants are in the box which opens when the mechanism is set right.
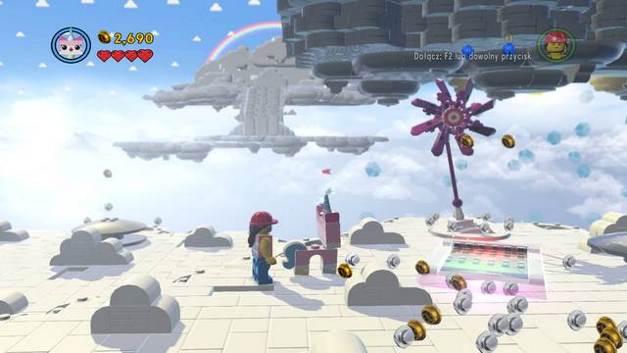 The catapult
Right after entering this level, you will see rainbow blocks on the first cloud. Rebuild them into a catapult and jump on the storm cloud. There, on the upper level, you will find the page.
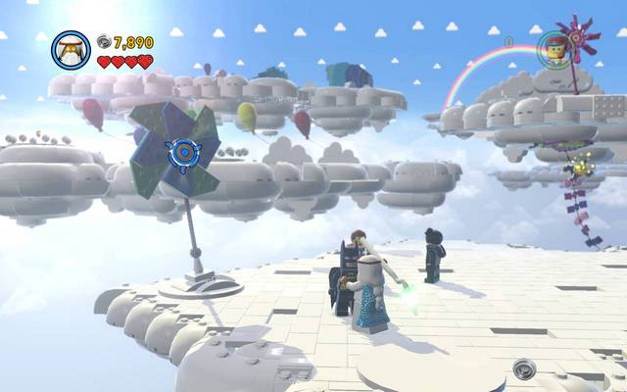 Destroy all coloured flowers with targets
On the clouds there are 5 high coloured flowers - throw a staff/batarang at them. Once you destroy all of them you will get the manual page.
 Destroy and rebuild three different clouds
You will also find 3 coloured constructions. Destroy them and rebuild into snowmen. As a reward you will get a manual page.
 There is a manual page over the passage
You can use the spring on the left from the closed passage to catapult yourself on the cloud wall by the entrance to another level. Go up - there you will find another manual page.
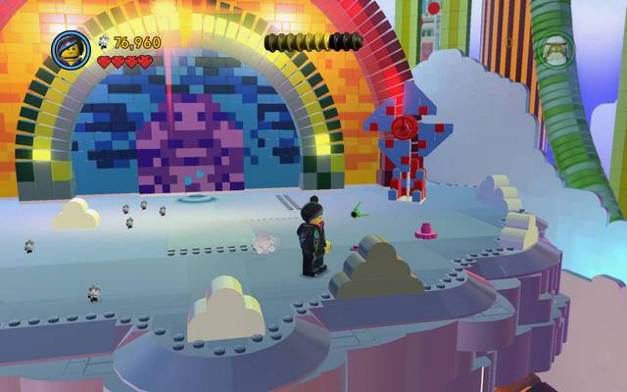 Some clouds are darker than others - destroy these
Now, look for dark storm clouds. Once you destroy five of these, you will get a manual page.
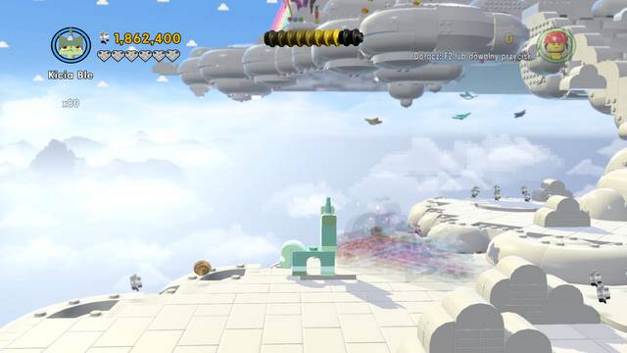 Rainbow pants
To get the pants on this level use rainbow bricks to build a catapult on the left from the stairs. The pants are at the top of the rainbow - you will collect them automatically during the flight.
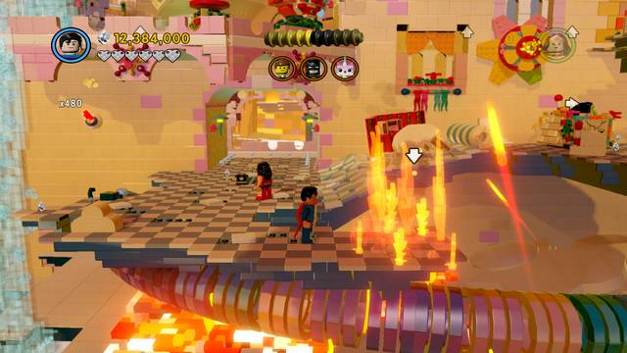 The first page
The first page is granted for putting out six fires on this level.
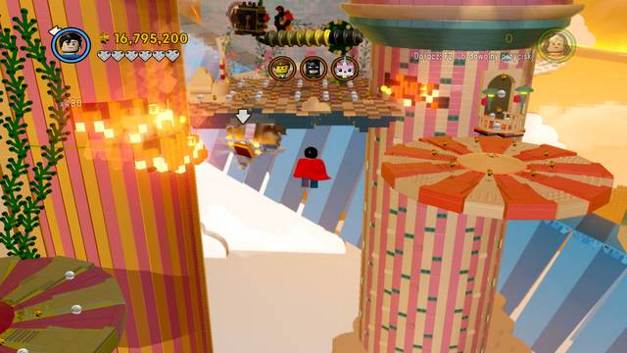 The second manual
The next manual is in the space between the rotating circles in the right side of the map.
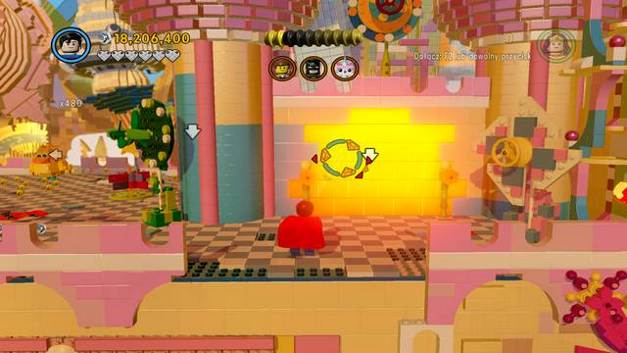 The third page
The third manual is on the first floor beyond the gold wall.
 The fourth page
The last but one page is to be received for putting out three small fires on this level (not including the fires on the lower level). Still, you can use the same vehicles to put out the remaining fires on this level.
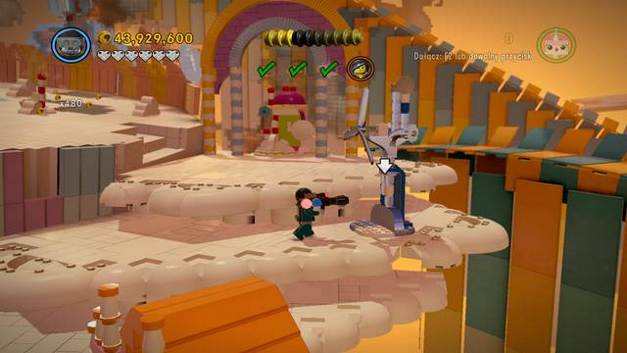 The fifth page
The last page in this mission can be acquired near its end, after destroying the silver windmill.
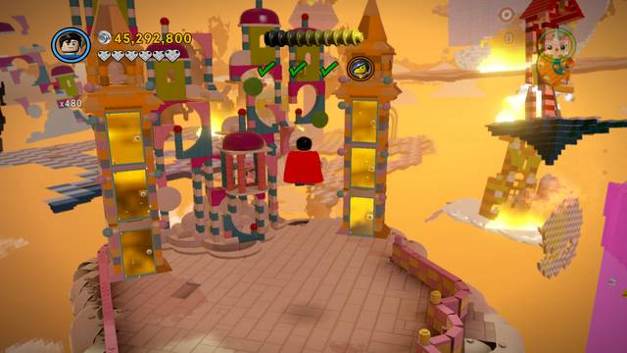 A bonus cloud
In the left corner of the map there is an unseen cloud with golden doors. Destroy them all with a laser.
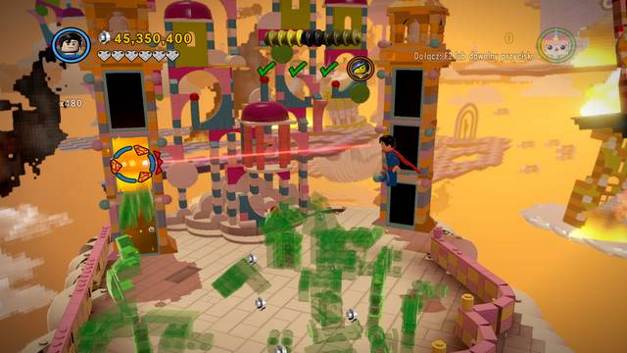 The pants between the two towers
In order to collect the pants, you have to construct a hammer out of green bricks, which will then destroy the blocks that are preventing you from getting near to the collectible.
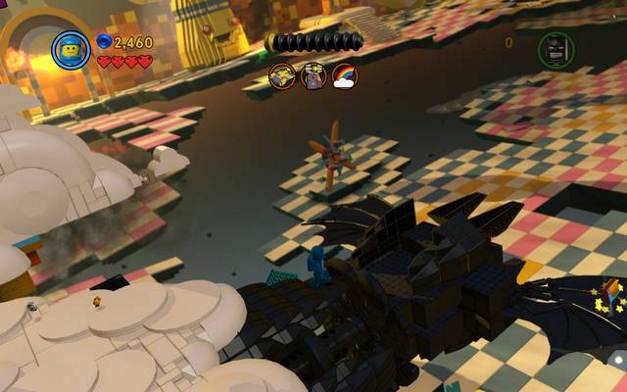 The first and the second manual page
First two pages are located at the two sides of the ship - on its bow as well as on its right boardside in the back.
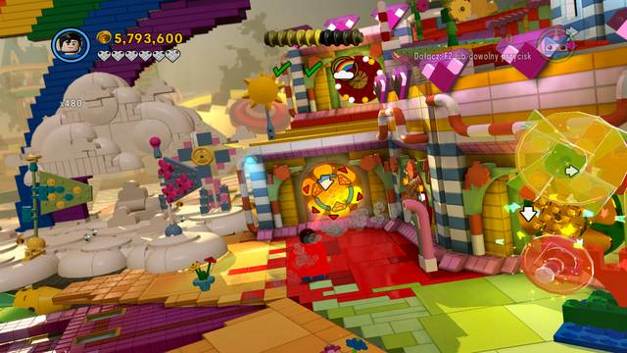 The third page
You will get the third page after destroying three gold fans. Two of them are on the lower level (next to each other) and the third one is on the upper floor, near to the spot where the robot with a bazooka spawns.
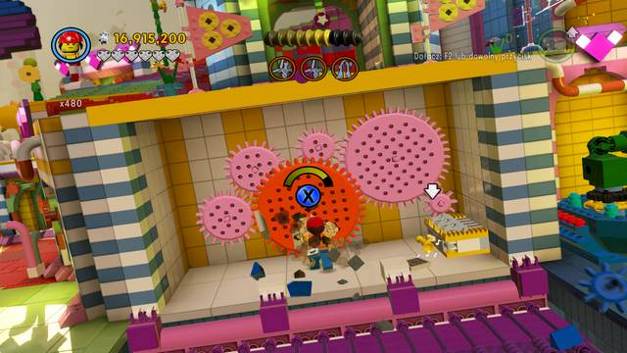 The fourth page
The next page is beyond the wall which you must destroy on your way through the level (the one with a broken mechanism on its other side). When you destroy the cracked object on your right, the page will appear.
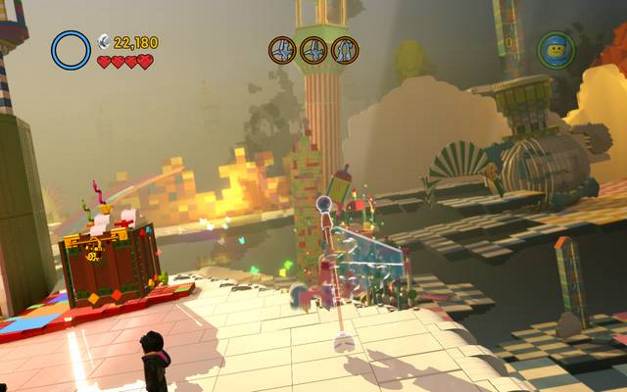 Destroy the transparent flags
While playing as Uni-Kitty, locate 3 flags made of rainbow bricks in order to get the manual page. Two are on the lower level, one is on the upper floor.
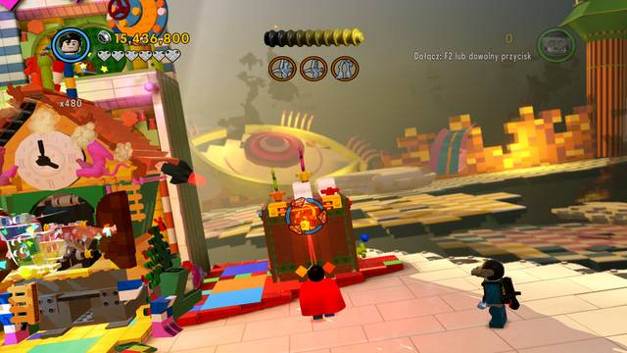 Destroy the padlock
First, you have to use a laser to destroy the gold padlock on the chest.
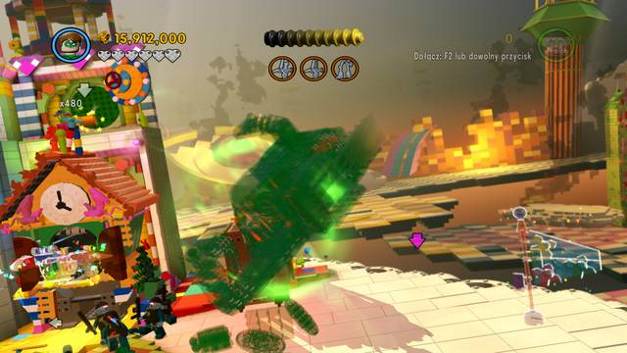 Build the construction and get the pants
As the next step, build a construction out of green bricks. A craft full of robots will appear. Once you eliminate them you will get the pants (spawned near the chest location).
 The first page
The first page can be collected either by a flying character or when the water gets into the ship, so you can swim there. This is over the blue rotating wheel inside the boat.
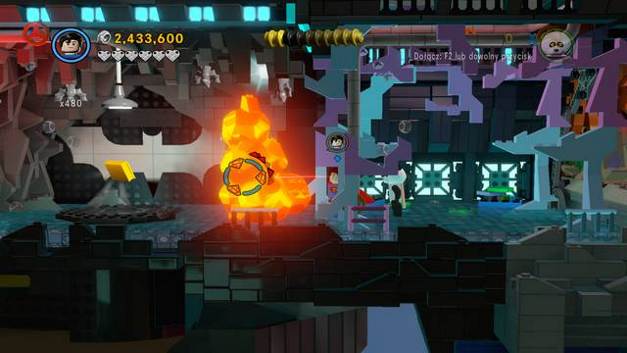 The second page
The next page is somewhere in the middle level of the ship, in a corridor on the left. You can collect it after melting gold rocks with a laser.
 The manual page behind the hidden passage
On the first bigger curve of the corridor leading down-right you can find a passage hidden behind a wall - there is a manual page.
 The fourth page
The fourth page is granted for destroying all the treasure chests in the corridor.
 A secret passage leading to a manual page
When you get to the bottom of the cave in the second part of the Dark Depths, look for a hidden passage on the left, somewhere on the halfway of the wall. You can find there some studs as well as a manual page.
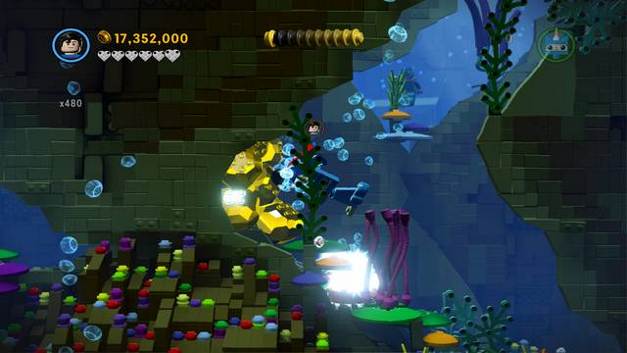 A way into the other cave
To get the pants you need to get behind the gold wall which is in the corner of the tunnel.
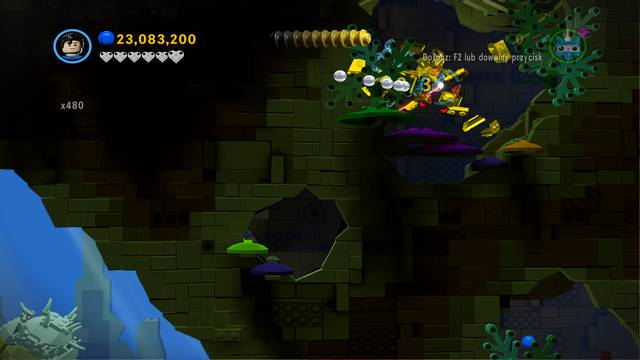 Cold pants
You get the pants for destroying three gold fish. The third one is in the top-right corner behind the hidden passage.
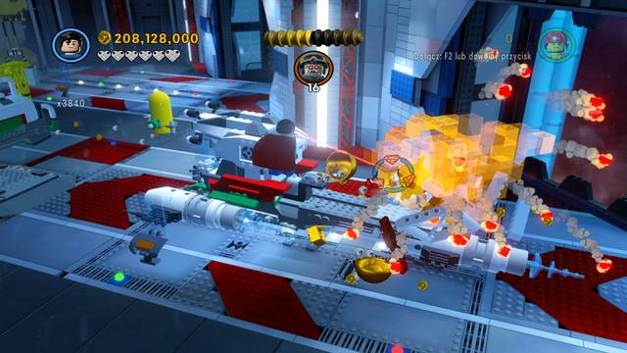 A closed door
While on the ship a character with explosives can throw these at the platform (marked with a flame icon) next to the door.
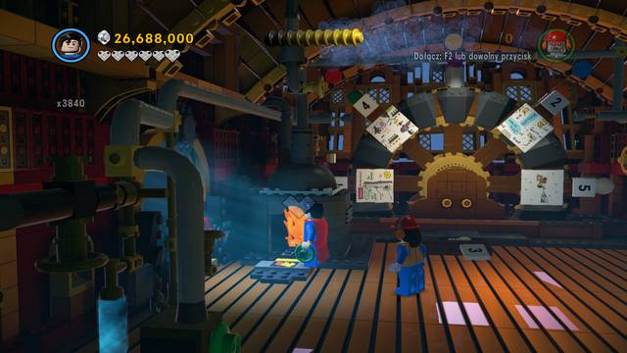 Stokehold
Inside the room there is a broken mechanism on the right side which should be repaired. On the left there is a flame icon, where you have to start a fire with a dynamite. Then, pick up the green gear and mount it on the furnace. The big gear in the middle will turn and the pants will appear. This, however, breaks the pictures on the gear - repair them to get a manual page.
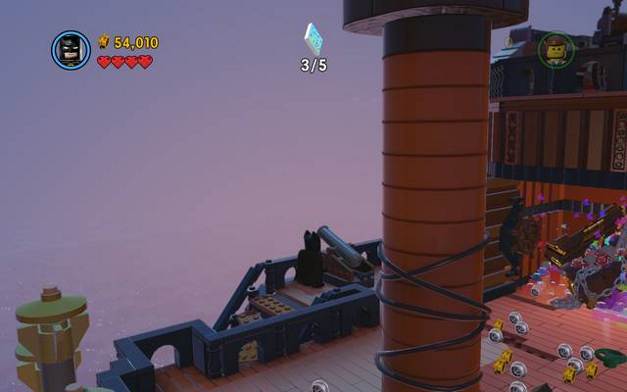 Destroy the cannons to get the manual page 2
The second page is rewarded for destroying three cannons. These are not the ones made of multiple bricks nor the ones on the barriers, but those made of a single element. There is one of the kind in each part of the ship.
The third pageIn the hangar, on the right from your ship, there is another vehicle, where two golden objects are laying. Destroy them and you will get another page in return.
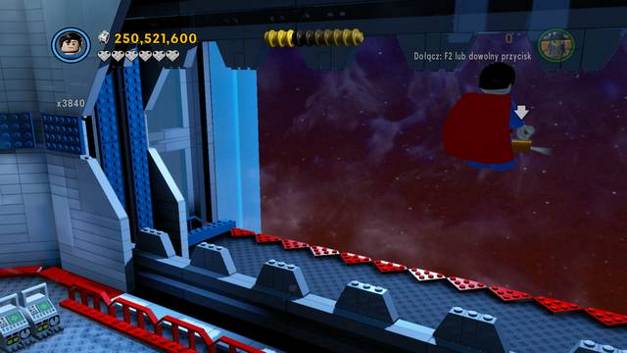 The fourth page
In another room in the hangar, you can fly out of through the gate in the corner using a flying character. There you will see another page hung in the air.
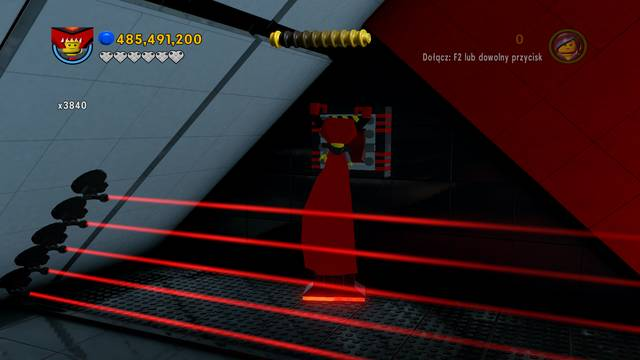 The fifth page
The fifth page is in the room with lasers. By the wall, behind the last layer of lasers, there is a switch which can be used by Lord Business. He can also just walk through the lasers. The page will appear on the right.
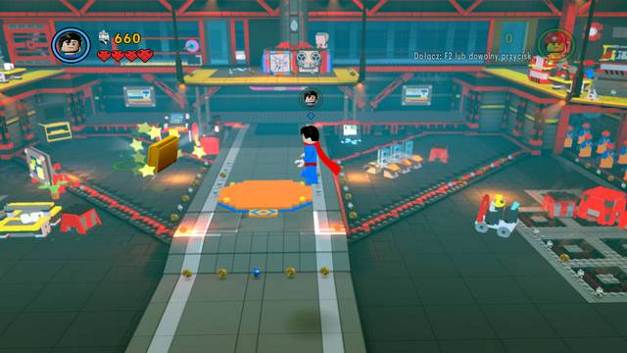 The first page
Four pages can be found in the assembly room. The first one is floating in the air over the column of robots in the centre of the room.
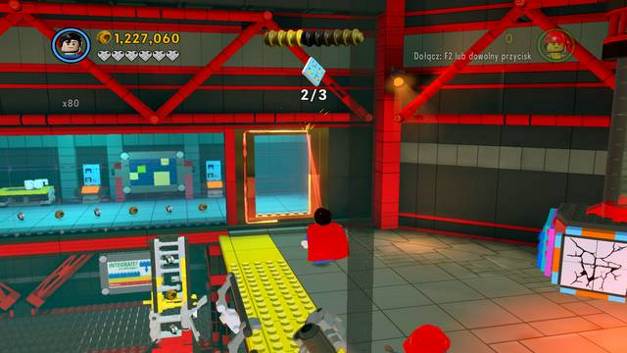 The second page
The second page is hidden behind the glass. The smaller pane has golden frames - you have to cut through them to get inside and collect the page.
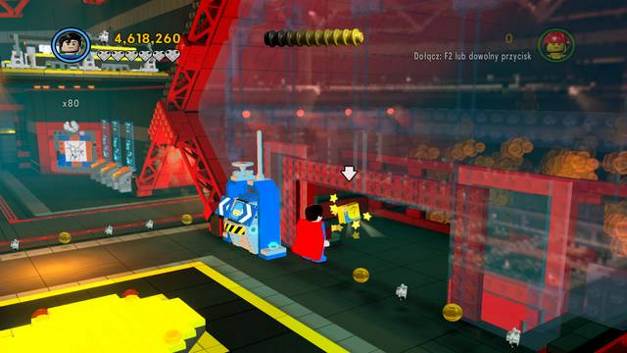 The third page
To access another page you need to hack the terminal in the right corner of the room. This will open the door.
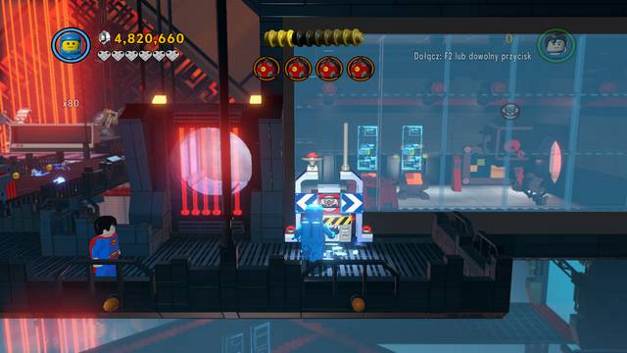 The fourth page
The fourth page is in the Kragle's chamber the entrance to which is protected by lasers. Putting a virus in the computer will grant you control over the Micro Manager in the room. Use him to pick up the collectible.
 The fifth manual page
Playing the mission for the second time you still have to walk around the alarm system. On the halfway you will notice a manual page. You can jump to it from the place you are standing at.
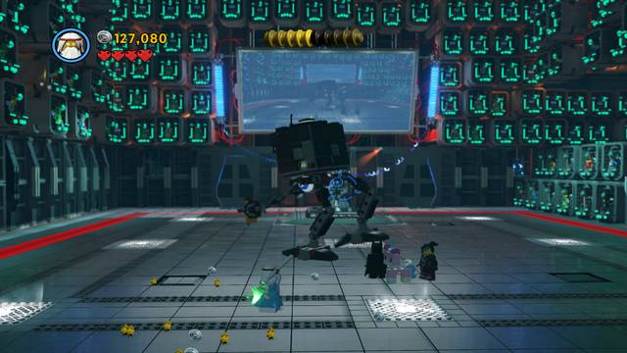 Pants for completing the level
As a reward for completing Think Tank level, you will get another pants.
 The first page
When playing as a female character go to the right corner of the room and jump up. Climb to the right to collect the manual page.
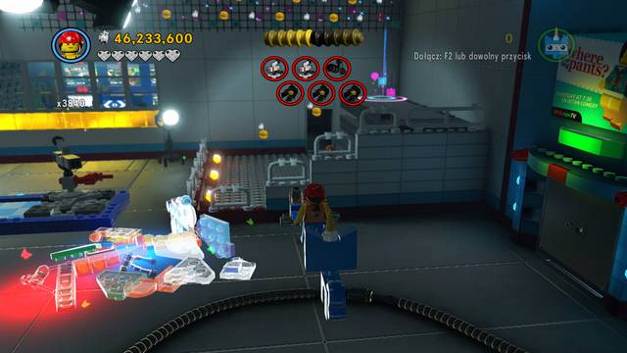 The mechanism reveals a secret passage
By the stairs you can notice a mechanism which opens a secret passage hidden behind the stairs. Walk through the just revealed door to find the second page.
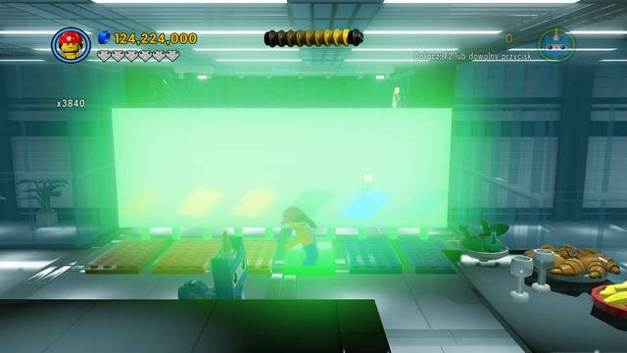 The third page
The third page is rewarded for jumping at the bricks in the right order as presented at the screen in front of the character.
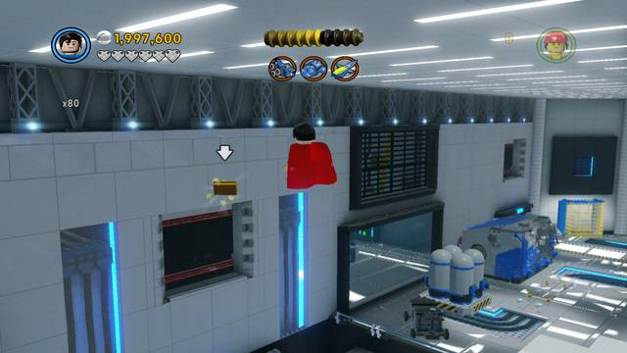 The second page
Another page is hung in the air by the wall on the left from the spacecraft in construction.
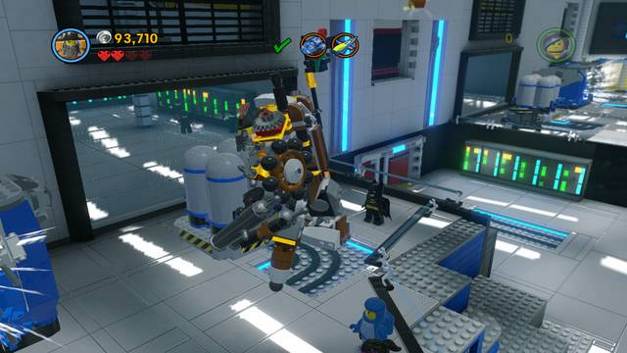 The fifth page
The last page is rewarded for destroying all the white tanks scattered across the hall.
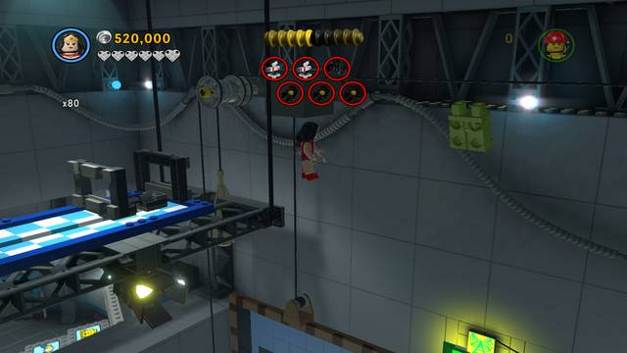 Pants over the stage
While moving spotlights over the stage, you will notice pants hanging by the wall. You need a flying character to grab them.
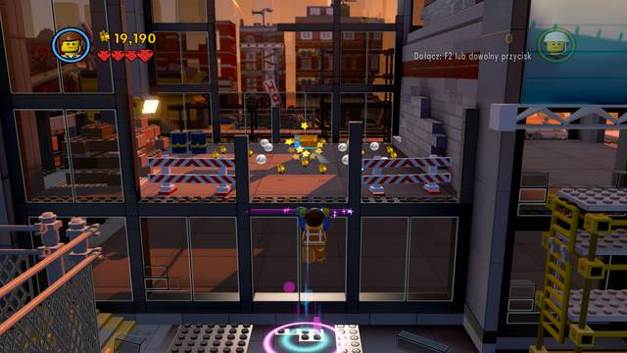 The first manual page
Once Gail joins you, climb at the rod on the left. There you will find the page you are looking for.
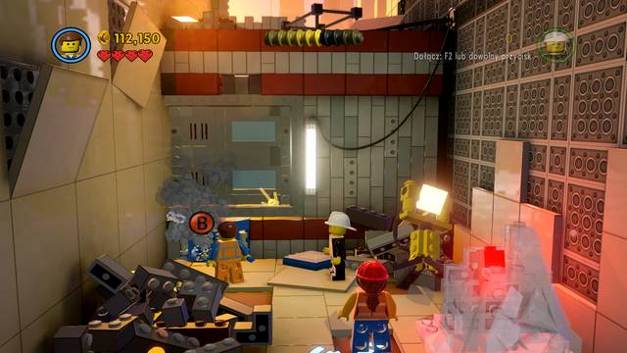 Repair the lock mechanism and then collect the manual
When you get to another room, repair the door mechanism and move the lift as far to the right as you can. Once it is moved, a manual page will appear inside.
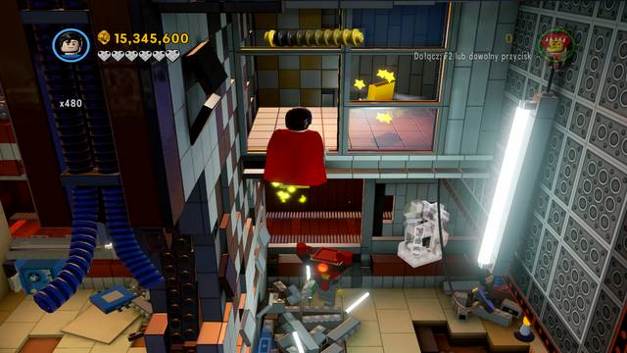 The third manual
The third manual can be found after you walk through the blocked door in the adjacent room above the exit.
 The fourth page
While playing as Gail go up and destroy the toilet. In the adjacent cubicle there is a manual page.
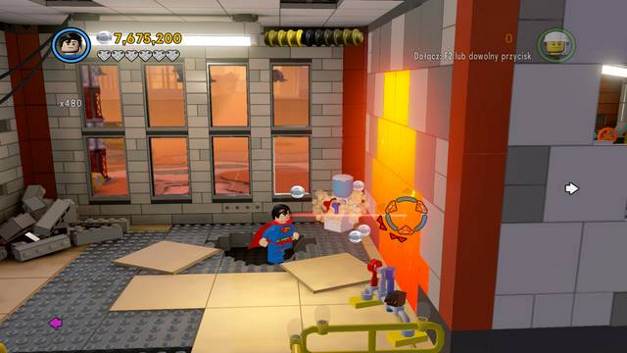 The fifth manual
In order to collect the third page, walk across the belt to get to the next building. Then, destroy the gold wall on the right.
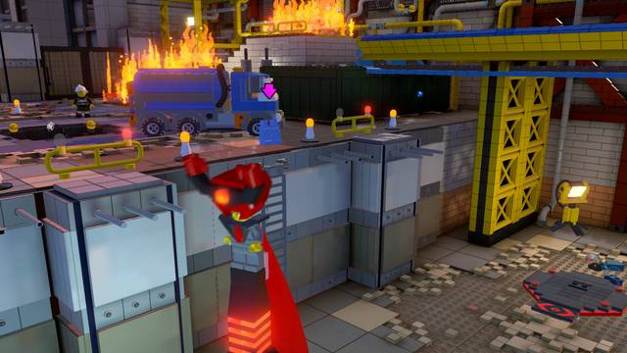 Pants
PantsThis level's pants can be acquired outside the building with a tank truck standing next to it. Go to the lower position and switch characters to Lord Business. An army of robots will appear - when you beat them, a collectible will spawn at the top of the stairs.
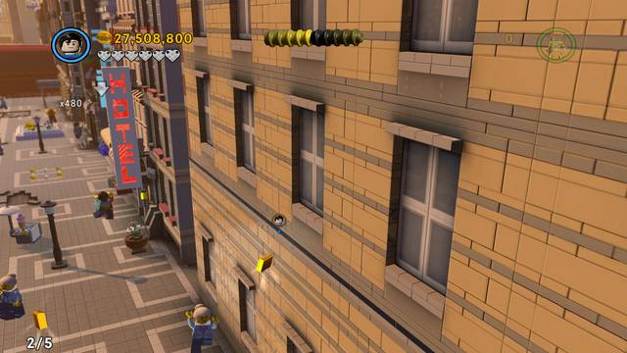 The first page
Put out the fire in the streets to get the manual page.
The second pageThere is a gap between the buildings on the right (before the hotel). In there, another page can be found.
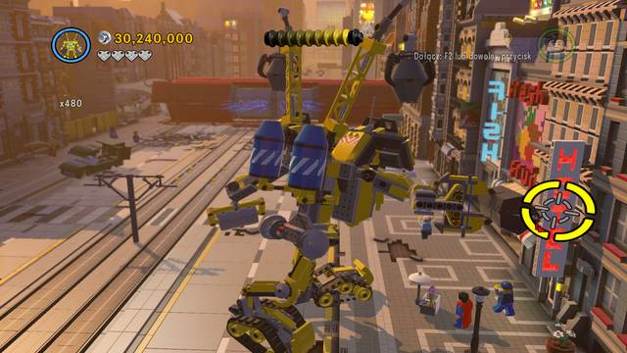 The third page
While playing as a mech, you can pull down two neon signs - 'hotel' and 'fish'. As a reward you will receive another page.
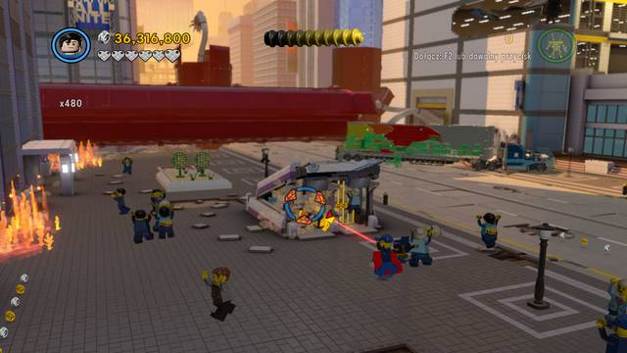 The fourth page
The next gold page is in the metro station. To get there, you have to destroy gold grille.
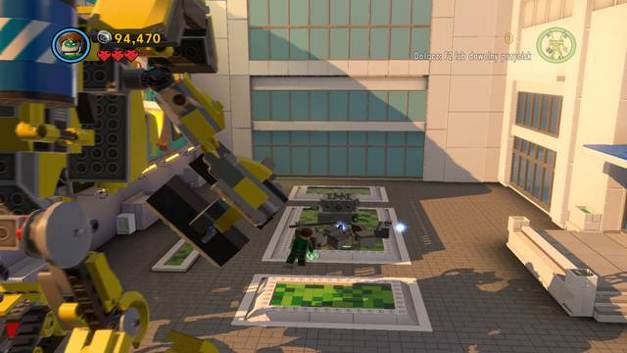 Build a statue between the two buildings - you will get a manual page
Move to the right corner of the square and build a statue out of bricks. This will grant you a manual page.
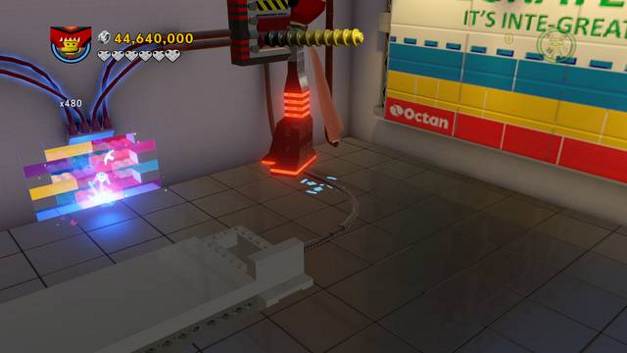 Pants
PantsTo get the pants on this level, head to the roof of the highest building where the police is shooting from. There, as Lord Business, use the switch and destroy the rainbow bricks. Behind them you will find the pants.
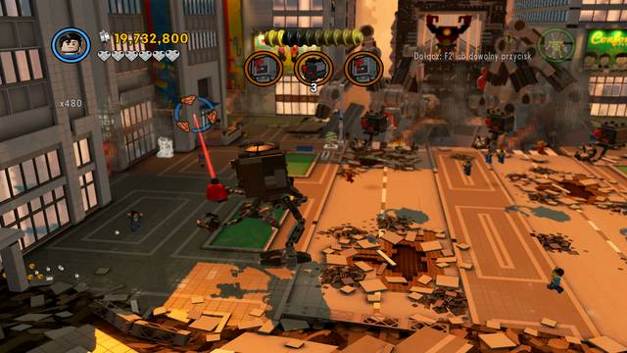 The first page
You can get the first page for destroying three white objects in the three corners of the square.
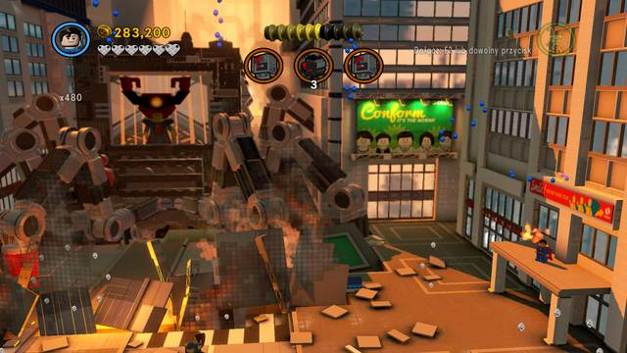 The second page
You need a flying character to get the next page. Get to an elevated position by the building on the right and activate the white action field. A stud trail will appear in the air at the end of which there is the second page.
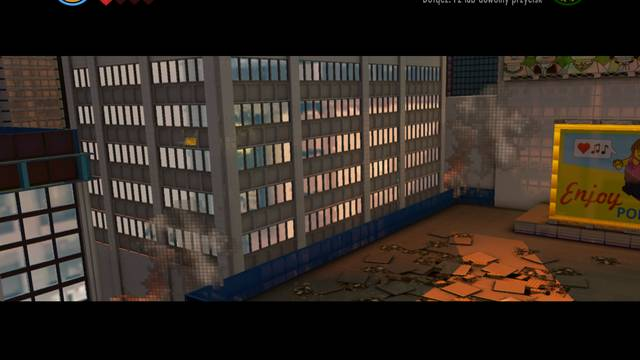 The third page
Another page is hung in the air on the left side over the roof of a building with a billboard. You need a flying character to collect it.
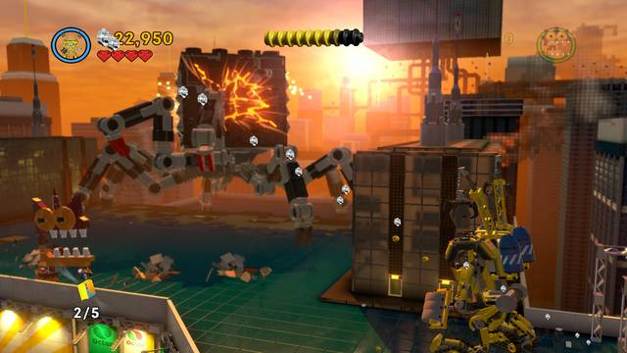 The fourth page
The next page is rewarded for destroying three fans in the right corner of the tallest building.
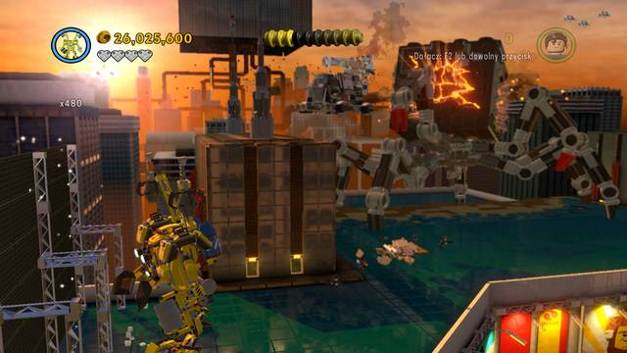 The fifth page
You can get the last page for destroying silver constructions at both sides of the roof of the tallest building.
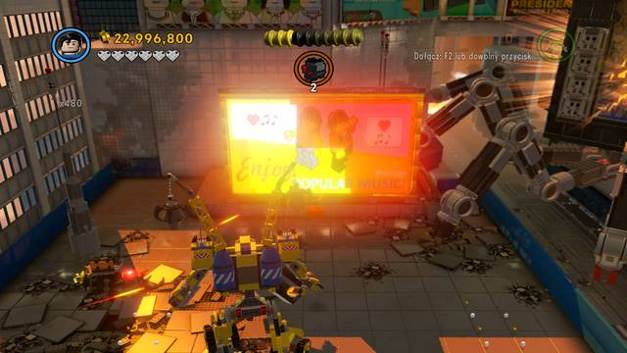 Pants behind the billboard
When you get to the first buildings on the left you will see a large billboard with golden frames. Cut through these in order to collect the last pants.
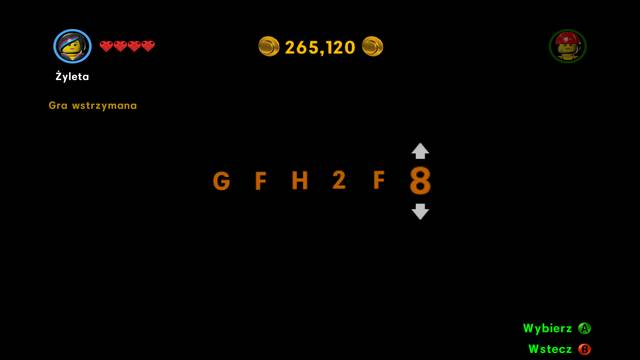
The game designers offered players a short cut in form of cheats, which unlock some characters before finishing particular story chapters related to them. Cheats can be typed in the "Extras" menu, in "Enter Code" field.
HJ4C21 - Emmet (pajamas)
UOOAQY - Emmet (lizard)
FNHLTK - Emmet (clown)
NIHX2B - Emmet (Old West)
BC2XJ5 - Virtuvios (young)
OSSVNI - Green Ninja
P4YX22 - Cleopatra
A76DN7 - Lady Liberty
F3VG47 - Abraham Lincolin
31S3I5 - Shakespear
BID12F - Swamp Creature
KGJ4DU - Lord Vampyre
NG73OM - Panda Guy
V4P96P - Yeti
UP7HJQ - Mrs. Scratchen-Post
K7TDXJ - Larry The Barista
FXP9AN - Gallant Guard
FHNCD1 - Prospector
GFH2F8 - Robo SWAY (with laser)
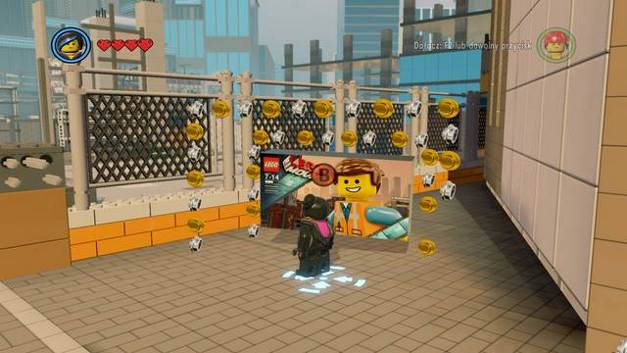
Extra content, similarly to cheats, unlock some elements which help players to finish the game more easily, however, these characters and pants are not to be found in game or be unlocked in any other way. A code should be typed in Bricksburg, after you start interaction with a large object to the left from the police station. Unlocking extra content is not necessary for 100% game completion.
6LKMNDHR / HVLLRX6R - Blacktron Fan and Musical Pants (musical notes doping from the character while moving)
6LK78NN9 / HVLH63VL - Angry Kitty and Construction Pants (similar effect to Pneumatic Pants - drill effect while moving)
6LK3FRL6 / HVL4TQT4 - Johnny Thunder and Super Secret Pants (almost invisible)
6LK3RRY4 / HVL4TB94 - Robo Pilot and Astro Pants (allow to hack terminals)
The Lego Movie Video Game is not too demanding, from the technical point of view. A sooth gameplay can be ensured even on the older PC computers or laptops. This guide has been drawn up using Lenovo Y500 laptop. The gameplay went without any problems. No compatibility issues cropped up either.
Singleplayer: Yes
Offline co-op (split screen/hot seat): Yes
Internet co-op: No
Multiplayer: Yes, common screen.
For the PC version, the guide has been drawn up using the Lenovo Y500 laptop, of the following specifications:
Occasionally, the game would suffer from problems to start through Steam and it displayed an error message. Restarting the game solved this problem. Apart from that, the game played smoothly and without issues.
OS: Windows XP SP3/Vista/7/8
CPU: AMD Athlon 64 X2 2.0GHz / Intel Pentium Dual Core E2180 2.2GHz
RAM: 2 GB
GPU: NVIDIA GeForce 7600 GS / ATI Radeon X1950 Pro
DirectX: Ver. 10
HDD: 10GB of free space
OS: Windows XP SP3/Vista/7/8
CPU: AMD / Intel four core, 4*2,6GHz
RAM: 4 GB
GPU: NVIDIA GeForce GTX 480 / ATI Radeon HD 5850
DirectX: Ver. 11
HDD: 10GB of free space

 The Elder Scrolls IV: Oblivion Game Guide & Walkthrough
 The Darkness II Game Guide & Walkthrough
 TERA Game Guide & Walkthrough
 The Inner World Game Guide & WalkthroughThe Last of Us Game Guide & Walkthrough