
This guide for Grey Goo has been conceived basing on the release version of the game and the campaign mode at the medium difficulty level. It is designed for both those of the players, who often play real-time strategy games, as well as for the ones who have had little previous experience with the genre. The majority of units and buildings in the game are identical for both humanoid races. In practice, they differ only in their name. For this reason, appropriate fragments of the guide describe only those of the buildings that are characteristic for the individual race, or those that require a separate commentary. Grey Goo is a real-time strategy game, developed by the veterans of the business - the Petroglyph studios. It tells the story of a conflict between the technologically-advanced race of Beta, the Humans who use intelligent machines and nanobots, known as Goo.
This guide for Grey Goo includes:
Lukasz "Salantor" Pilarski ()
Do not underestimate the AI. Unlike in many other strategy games, the AI can get on your nerves. It knows how to conduct reconnaissance, is capable of attacking in multiple directions simultaneously and does not cease producing units even for a moment. It stays in constant movement, puts up fortifications, takes advantage of terrain formation and bushes. Take it seriously or you will be defeated quickly.
Remain active. Just like in Starcraft, playing Grey Goo conservatively and reinforcing one base only does not pay off. When you are busy building your only base, the enemy will seize the best resource deposits and will harass you with constant attacks. To win, you need to seize the entire map, build bases, take resources over and destroy nearby enemy outposts. By retreating into your base, you let the AI take the initiative, which is the first step to failure.
Be flexible. The situation on the map changes quickly. Strategies utilized throughout the first half of the game may prove ineffective in the second one, and the technologies picked, useless. Instead of building the same units over and over again, match them to the opponent. Change your technologies, if only other sets turn out to be more useful. If attacking from a direction proved ineffective, pick another one. If you failed on the ground, strike from the air, or from both sides at the same time. Changing your tactics will surprise the enemy and will make it easier to defeat him.
Remember about the victory conditions. On majority of the maps, your primary objective is to destroy the enemy HQ. You do that by destroying key buildings - refineries, factories and HQ/Core. In the case of Beta, also all of the hangars need to be destroyed, whereas in the case of Goo, only Mother Goo are key buildings. For this reason, it does not pay off to destroy all of the walls or attachments for factories. Focus on what brings you closer to your victory.
Save the game. Before you launch each major attack, fight a superunit, attack the enemy base or take to a difficult mission objective. Thanks to this, in case of failure, you will not need to start the mission over.
Use the encyclopedia. The in-game encyclopedia can provide you with information on all the basic mechanics of the game, strong and weak points of each of the races, technologies and many others. If there is something that you do not know, you have forgotten something, not when you want to compare two separate units, you should consult the encyclopedia. Do that especially if you rarely play the RTS games. In there, you can find an eight-minute long tutorial that explains all of the basic issues connected with the genre, such as scrolling the map, selecting units or building your HQ.
Forget the building units. Grey Goo uses the mechanics known from, e.g. the Red Alert series. This means that you are going to build everything from the level of the GUI. Also, you are not going to manage resource-gathering units. Your job is only to point to the building location and wait for the job to be finished. The same goes for repairs and selling buildings. Both of the orders can be issued with the buttons in the bottom panel, instead of with the building units. This is important, because it makes useless some of the tactics, used in the other strategy games, which consist in attacking builders and production centers.
Forget about harvesters. While playing as either Beta or Human, provide the vehicles due for the mines with protection. Apart from that, you do not need to supervise them, because they work automatically. The Refinery provides as many vehicles as necessary, for the proper functioning of the mine. If one is destroyed, a new one will be built for free. For this reason, in the long run, more than destroying the harvesters, it is more profitable to destroy the mine.
Use hotkeys. Learn controlling the bottom panel with the keyboard. Put units in groups, thanks to which it will be easier to control them in the battlefield. Group factories to have more control over their production. Use hotkeys to develop your HQ quickly and to create the units that you require. Thanks to this, you will be able to react to the situation, in the battlefield, more efficiently and build structures faster.
Use the options of the interface. The game menu provides you with access to two options. Thanks to idle refinery on the left-hand side, you will select the first inactive refinery. Thanks to this, you will be able to build a new mine, without the necessity to search for the inactive refineries in your own. This option is especially useful, if you have more than four refineries. In the case of Goo, this allows you to select Mother Goo outside of resource deposits. The Toggle resource display option tells you where there are resource deposits on the map. It is important because, thanks to this, you can assess where your enemy is, or which direction of development they have adopted. To win, you require resources.
Swap technologies. By right-clicking on in the upgrades menu, you can cancel out the technology you have. Thanks to this, you can work out a new one. Use this option if the previous upgrade ceases to be useful.
Put up silos. At the beginning of the game, your maximum limit of resources is set low. You will quickly find out that it is definitely too low and too easy to get. This will cause you problems, in the case of greater numbers of mines, because harvesters stop working, in such a situation. Apart from that, the more resources at hand, the lower the risk of losing, due to unexpected, high expenditures. For this reason, put up two silos, at least and, in the case of bigger maps, four or more. Sooner or later, you will be in dire need of them. The only exception is the situation, in which your resource level constantly is below zero. In such a case, there is not much point in putting up those. For obvious reason, this does not apply to playing as Goo.
Save up on your supplies. Big factories, use up lots of resources, especially if you have two or more. Building each new structure, or repairing it, is going to do that also. For this reason, try to put up only what you really need and plan on your expenditures well. Building three factories at a time, or ten units, depletes your supplies quickly. If this happens, production comes to a halt. By developing the base and new units will,. Most often, delay both, which decreases your chances of winning.
Put up mines on the biggest resource deposits. While picking the location to build a new mine, note the figures under the building. In some spots, it is going to be 7; 10 or 13 in others. The higher the number, the richer the deposit is and the more you receive with each transport. This is why, before you build a mine, check out on all the sources and pick the ones that provide you with the highest bonus.
Put up mines, even far away from the HQ. Harvesters will easily find their way and they move fast enough that you will not even notice the delay resultant from long distances. Just remember to ensure the mines with protection, or build them where they are hard to spot. This may be difficult, if the enemy is using the option to view resource deposits.
Destroy enemy mines. The deposits near the HQ are going to be the most heavily guarded, but they also exhaust pretty quickly. This will make your enemies set small mining outposts, or move Mother Goo to new areas. Find out which of the mining outposts away from the base are poorly guarded and attack them. It will be very painful, for the enemy, to lose each one. If, instead of the HQ, there only is a mine there, destroy it and retreat quickly. Do not worry about the harvesters, each refinery produces them for free. The only exception is when you want to exhaust the deposit and seize the enemy's profit from it. In such a case, leave the mine alone and attack the harvesters that leave it.
Do not build everything. Do not construct Stealth Attachment, if you are not going to use covert units. Do not build a hangar, if you are not going to attack from the air. Unnecessary structures consume your resources and time,. Which, in the case of a big HQ is of significance. Build them if you have surplus resources and you want to divert the opponent's attention from the more important targets, or block off a passage.
Fix your buildings. Several depleted durability points, on your buildings, is not much, but in a major battle it may tip the scales of victory. This is why, just in case, fix vital structures, even if they have been slightly damaged. It may turn out that, after the enemy attack, they are still standing, with only a fraction of their health points, which they would not be, without having been fixed earlier. This especially goes for battlements and turrets, which often are exposed to regular enemy fire.
Scatter your structures. Many of the buildings are similar in shape and they are easy to confuse. This especially goes for the ones put up by the Beta but, for example, the turrets of the Humans are difficult to tell apart, at first sight. By putting them side by side, you will often find it difficult to manage them. This especially goes for the structures of the Humans, who may put up structures side by side. This is a great advantage of this nation, which may be easily turned into their downside, if you do not do that with consideration.
Sell your surplus. If you have three big factories, you are not going to need a small one anymore. Sell it and you will reclaim the spot, as well as some resources.
Use smaller bases to protect the HQ. In the game, there are three types of buildings, which you need to destroy, in the majority of cases, to win - HQ/Core, refineries and factories along with hangars. In the case of the Goo, this is the Mother Goo. As the Beta or the Humans, losing the main building does not mean automatic failure. If you trapped a field base with a factory, you can return to the HQ and rebuild the HQ/Core. For this reason, it is a good idea to build a single factory in a part of the map that is rarely frequented, in case your HQ falls to the enemy. Apart from that, it can be used for production of additional soldiers.
Focus your defenses. If there are two access paths to your HQ, find out where they meet and build a wall there. If the HQ is on big flatlands, block off access routes. Do not build walls around the entire HQ, especially if it is located in the middle of a desolate area. Instead, focus on several key points. The less spots there are to defend, the easier and more effective the defenses will be. If you can decrease their numbers, do that, even at the cost of moving fortifications away from the HQ.
Use walls and turrets in your defense system. The Beta may change the contents of their turrets, at will, whereas the Humans have turrets for all sorts of needs. Put them up alongside the walls, in the spots that are the most exposed to the enemy attack. Even one turret is better than no defenses at all.
Defend the HQ itself. Occasionally, a single unit may fight its way through fortifications and approach the HQ. IT does not wreak much havoc, but it is irritating and, in the worst case scenario, it attacks harvesters. It is for such situations that you could leave several turrets at the HQ. Apart from that, key structures also need to be defended with turrets, against air raids. In case of larger air raids, you may not be able to knock off all of the planes so, it is better to have an additional AA defense.
Use units for your defenses. Stationary defenses are good, up until artillery, or a gap in fortifications appears. Always keep a quick response unit at hand, capable of fighting both ground and airborne units. It is especially useful in situations, in which the enemy attacks the base from the direction, from which you expected no attack.
Use patrols in your defenses. Thanks to issuing an order to patrol, you will not need to keep an eye on each defending group. Also, it allows you to guard strategic passages, without the necessity to block them off. The only condition is that you determine reasonable routes for your patrols and regularly reinforce the ones, which have already been attacked by the enemy.
Use buildings in your defenses. At the beginning of the game, all of the buildings are difficult to destroy. Attack strength of units is low and the enemy forces are small. Later on, the enemy units become stronger and special demolition attacks will also be used. In spite of that, at any point into the game, you can also try using buildings in the form of fortifications. Build a Small Hub or a factory so you can block, or narrow, the passage to your HQ. The upside of this strategy is that you impede the progress of the enemy forces, or make it completely impossible. The downside is that you may have problems leaving the HQ. Therefore, you should use this tactic with moderation, so you do not make things more difficult.
Use the minimap for scouting. There are two types of fog of war - primary, which covers the map at the beginning of the game and secondary, which appears whenever your units change their positions. However, you will soon note that the majority of the map is revealed, at the beginning of the game. The only things that you cannot see then is enemy units and buildings, but you can see hills or bushes. Thanks to this, scouting is restricted, in Grey Goo, mainly to searching for the enemy and checking out, from the map level, whether there still are deposits that can be seized. The shape of the map, without the deposits marked, can also be viewed while creating the game, in the skirmish mode, or while it is being loaded. The map will then be displayed on the right side of the screen.
Use ground scouting. It is impossible, for airplanes, to spot the enemy forces among bushes. Also, they are more exposed to attacks and unavailable at the beginning of the game. However, even later into the game, on-ground scouting proves to be very useful, especially against the scouts with the stealth ability. It suffices to hide among bushes to get a relatively stable view of the area around, including the enemy HQ, if he does not have any units or buildings with stealth detection.
Use airborne scouting. Planes are faster and more mobile than ground units. You only need to leave them up in the air, above an area that is difficult to access, and they should not be harassed. Additionally, the majority of units in the game can attack ground units, whereas airborne ones are much more difficult to get. This does not go for the Goo.
Check bushes. After you spot bushes in front of you, select a light unit and approach them. If it is destroyed, this means that there are enemies inside. You can also dispatch several units and try to drive them into the bushes. Thanks to this, you will reveal the enemy forces and their strength. The former can be used to your advantage immediately, by deploying artillery nearby and waiting for it to start firing. However, if you want to get it done quickly, simply drive the majority of your forces into the thickets. If there is something in there, it will quickly be destroyed. Also, remember to scout the thickets with a unit with stealth detection. It may turn out that there is an enemy there, just you are not capable of seeing him. The intelligent opponent issues, to the scout, the order to hold fire so, without the detection, you will not learn that he is there.
Scout the bushes around the HQ. This is a perfect hiding spot for both visible and stealth enemy scouts. You should especially take interest in the bushes right next to the key buildings, even if they are heavily guarded. The tricky enemy can find a way to hide a scout, or two, there.
Dispatch your scouts in pairs. Thanks to this, you will always have the view provided by the second one, if one of them is destroyed.
Use combat movement. The unit that has been ordered to move, does not engage anyone in its path. The only exception is the units that are capable of simultaneous movement and combat, but thy are few in the game. By holding down the CTRL key, and selecting the movement direction, you have your units engage the opponents that they encounter. Thanks to this, they do not die for nothing, while defenseless. With the enemy defeated, the units continue to their destination so, you do not need to keep an eye on them.
Progress step by step. Units that move over great distances may get stuck. They may also be attacked by an enemy patrol, or artillery. They may form a line and let themselves be shot like ducks, by artillery occupying a higher position. They can also pass by bushes and be destroyed by the units lurking in the thickets. For this reason, it is better to determine shorter routes for them and keep an eye on them, on the go. Thanks to this, more of them will reach the destination.
Separate your armies. Units will head towards the destination in a group. If you have selected 100 tanks, they get clustered together, which is ineffective in combat, because the units in the front are in the line of fire of the ones behind them. Therefore, it is better to put the 100 tanks into several smaller groups that progress close to each other. Thanks to this, you will be able to take the full advantage of your numbers. Also, this eliminates the risk of obstructing each other, by the units, while marching.
Send tanks ahead, keep artillery behind them. Artillery is slow and therefore, easy to destroy and it cannot attack at short range, due to the limited minimum range. For this reason, they will not survive for long, in the first line of fire, and their effectiveness low. Have artillery follow right behind tanks and lighter units, thanks to which it will be capable of backing them up in battle.
Do not leave artillery unprotected. The firerate, speed and armoring of artillery is low. Without being protected by lighter units, they will soon fall victim to the enemy. Always leave several units to protect the artillery and, at least, one unit with stealth detection. It may turn out that, in spite of strong defenses, you lose artillery because you were unable to fire at the invisible enemy.
Use AA weaponry. In each assault team, you should have, at least, several units capable of engaging airborne units. One bomber attack can eliminate, as much as, a half of your army, including the fragile, targets, such as artillery. Apart from airborne units, also long-range units, such as Crescent may be used. Anti-aircraft weaponry will be able to deal with them, before thy even reach you.
Form diversified armies. Large groups of tanks are useless against bombers, siege engines soon fall down to hordes of smaller units and fighter jets are of little use against buildings. While forming an army, use various types of units and mix them up, so they back up each other.
Form specialized armies. Do you want to destroy the enemy HQ? Try that with siege engines, use tanks in the form of curtain and back them up with fighter jets. Do you want to destroy multitudes of weak enemy units? Build artillery and tanks to back them up. Do you need to scout the map, before the raid? Airborne and ground scouts, as well as multitude of bombers will get the job done. Do not produce everything that you would like to have. While forming the army, consider what the goals, which it is to achieve, are. Basing on this, create the production queue.
Take higher positions, while fighting. While on hills, your artillery can pound at the enemy with impunity and, without its air support, or taking higher positions, he will not be able to see you. For better defense, take the hill with the artillery and AA units, and block the passage with tanks. Nearby, deploy invisible scouts. Or ones hidden in bushes. Thanks to this, you will be capable of destroying many enemy units, whereas the enemy will be defenseless.
Do not fight near bushes. There is a chance that there is, or will soon be, an enemy inside. This way, he will be able to attack you and leave you defenseless.
Fight from bushes. Turrets attacked by units hidden in thickets, do not respond with fire. The enemy will have to enter the thickets and take heavy beating before he does. Therefore, keep your units in bushes, as often as possible. If you see an approaching enemy and bushes nearby, take cover. This wins you several seconds of unpunished fire.
The only exception are the elite units. They are too big to be concealed in bushes.
Fight on the move. Some of the units can attack on the move. Focus the attention of the enemy units on such units and start to retreat. Sometimes, the opponent rises to the bait and starts chasing you, whereas the rest of your army will be attacking hi, without any repercussions. Another way is to form small groups of units that are capable of attacking in movement and with decent range. Approach the enemy, attack him and retreat immediately. If the enemy's firepower is not strong enough, he will be taking damage without the possibility to respond with counterattack. This tactics is especially effective when you are using several units that back up each other.
Fight from shadows. Units with stealth are mainly weak, but their invisibility makes them perfect hunters. Form a small assault group and send them to the enemy ground. Have them destroy harvesters, hunt artillery down and eliminate airborne targets. Attack, destroy the target and move to a different area quickly. Without the appropriate units, the enemy will not even realize what hit him and where it went afterwards. This type of groups is especially effective against more fragile targets, such as artillery or conduits that conjoin Human buildings, especially if they build oblong HQs that are easy to deactivate.
Concentrate your fire. Focus your attacks on the biggest and the strongest opponents. Wait for them to be destroyed, and issue an order to attack another one. Do not leave this decision for the AI to make, because it will start attacking the closest units. While fighting eight tanks, it is better to destroy two, instead of damaging all eight., because damage does not affect their combat value. A damaged tank is as dangerous as one in full health, which makes scattered fire not worth the time. The exception is the situation, in which the enemy has lots of units protecting a superunit. In such a case, dispatch some of your units to attacking the superunit, and have the rest eliminate the defenders. Destroying Alpha or Hand of Ruk is so time consuming that the defenders deal severe damage, if left alone.
Spare superunits. All of the Epic units have long reload times and the attack takes long. For this reason, they may have problems dealing with big groups of enemies. Simply, they do not have enough time to deal with them all. For this reason, always dispatch them with numerous guards. The guards will deal with smaller targets, whereas the superunit will deal with the more important ones.
Destroy buildings with consideration. While attacking the enemy base, remember to adhere to the proper order. First, attack turrets and walls, where you attack the latter only if they stand in your way. If you are attacked by a garrison, separate your troops. Have siege engines destroy buildings and the rest destroy the enemy units. Then, deal with the enemy factories. Finally, destroy the HQ/Core. Thanks to this order, you deprive the enemy the possibility of defending, of creating new units and finally, of buildings. Apart from that, your chances to be victorious increase, because you will not have your enemies massacred by the enemy turrets. Leave refineries for the very end, because they are defenseless anyways.
In the case of attacking the Humans, find out about the way in which the buildings are joined together. If they are close to each other, utilize standard order. If not, you can try destroying conduits, especially if they are used to join Core to factories, refineries or turrets. Remember that some of the technologies allow the Humans go, even without the connection with the Core.
Ignore secondary buildings. Factory attachments are not as important as the factories themselves. Silos are less important than refineries. The majority of walls are completely unimportant. If you do not have to destroy them, ignore such structures and focus on the more important ones. Leave destroying them for the end, when there is nothing more pressing to do.
Destroy walls with consideration. Each wall consists of two elements: joining elements, such as turrets in the case of Beta, and walls between those elements. Destroying walls is reasonable if they are big and it is easy get across the breach in them. Otherwise, it is better to get rid of one of the joining elements, which also destroys nearby walls. Joining elements are more durable but, in majority of the cases, you will not even notice the difference.
In both cases, do not destroy entire walls and only specific fragments, because your goal is to cross the walls, and not destroying everything in your way. The exception are the walls of the Beta, whose joining elements also play the role of turrets. In their case, it is best to get rid of all the turrets but, only if they are manned, or may be manned soon.
Pick the order in which to destroy bases. Beta and Humans, to some extent, can set up outposts independent of the HQ. This makes you decide - either destroy the smaller outposts first and the HQ later, or the other way around. Outposts are mainly used for mining resources and building new factories. The HQ, in the case of the Humans, has the HQ/Core, one of the buildings that you need to destroy to win. Therefore, it may both pay off to destroy outposts (which cuts the enemy off resources) and to launch an assault on the main base, in order to destroy the HQ/Core. Your decision should be determined by the situation on the map. If the outposts are plentiful and they are built along your way to the HQ, it is better to start with them. If there are few of them and they do not play any vital role, you can leave them for later. Just remember to find out where they are located, beforehand. Otherwise, you will have to search the entire map to find the last outpost, which makes the game unnecessarily longer.
You have five units that can man turrets. At first, it is a good idea to invest in Commando, which will soon be replaced by Predator. For AA defense, you can either use Cloudburst or the more versatile Guardian. It is a good idea to keep one Seeker unit in a vulnerable spot, in order to detect stealth units.
Guardian is a specific unit. It cannot shoot, if you do not put it in a turret. While manning one, it can both target ground and airborne enemies, in both directions at the same time. Thanks to technologies, it is turned into artillery gun. Therefore, later into the game, you may want to replace all of the units in the Guardian turrets. With the exception of the Seeker that detects stealth enemy units.
While picking offensive units, you often have to make a choice between firepower and firerate. Stalker attacks often, but it is weak, whereas Predator strikes hard, but rarely. Predator can also attack and move simultaneously but, its power is limited then, whereas Stalker is faster, which makes it easier to retreat from the battlefield. Of course, both of the units should be backed up by Avalanche and Hailstorm. Commando is good at the beginning of the game, but it becomes too weak later into the game, and not vigorous enough to be used as the main offensive force.
In the case of planes, your choice has been limited to fighter jets and bombers. In both cases, however, you should remember that there is a limited space in your hangar and limited ammo storage capacity. Warbird does less damage, but it can engage other planes and has higher ammo capacity, whereas Nimbus can only drop two bombs before it has to return to the base. Only Stratus does not need to be stored in hangar and it can circle around in the sky for the whole time. Which plane you choose should depend on the situation but, if you have ground anti-aircraft units, Nimbus may prove the most effective. Mainly because its bombs are an effective weapon against the enemy ground units and they deal AoE damage, whereas Warbird attacks the selected targets only. Stratus is useful in any situation, mainly thanks to the buoys that allow you to fire the area of the targeted units. Thanks to this, you do not need to keep an eye on the opponent constantly. You only need to mark his positions, every now and then. For example, you can drop a buoy that goes through bushes, on enemy positions. Thanks to this, you can check out if there is a trap prepared for you, inside.
Hand of Ruk is your best weapon. It costs a fortune and it requires six minutes to be built, but it has many advantages. It can attack with long-range rockets that are capable of destroying entire teams at a time. It has six turrets that can be manned with any units that are capable of that, it can fight in movement and it has stealth detection. Additionally, it can produce any units itself , with the exception of the airborne ones. Therefore, it is a powerful defensive tool and it is perfect for replenishing forces weakened in battle. It is surrounded by strong units and has good scouting abilities. Hand of Ruk may first cause a breach in the enemy positions, destroy a garrison and finally deprive it of production abilities. By itself, it does not win the war, but within a well, orchestrated team, it can deal with any situation. If you can build at least one Hand of Ruk, do that. If put to a proper use, it tips the scales to your advantage. You only need to ensure its safety. The rockets of Hand of Ruk are of limited range and without manned turrets, it is an easy prey to the enemy units that attack it at short range.
Beta bases consist of HQs and Hubs. There are three types of Hubs:
In the space provided, you can build everything, with the exception of walls. This means that a Small Hub may hold both a refinery with a silo, as well as a small factory with attachment for tanks. This requires specialization and building Hubs for specific tasks. Medium Hub with a small factory, hangar and an attachment is going to be less useful, than a Medium Hub with a big factory and three attachments.
This mainly goes for Hubs that you build away from the HQ, which may play one of the three roles - a mining station, a forward factory of ground troops or a hangar. In such a case, you should follow a pattern of building. If you want to use it for mining, then you should put up a refinery and silos. If you mean it for production, build one or two factories with appropriate attachments. All of the outposts should be protected with walls and spotted with turrets.
IT is possible to build forward bases of two or more Hubs, but you need to be careful, while doing this If there are six factories working at the same time, at the main base, there is no point in building a seventh one, near a forward refinery. At the additional bases, it is best to build buildings that you need most, at the moment, or the key buildings that would surely be destroyed, in the event of an attack on the main base. Also, it is a good spot to build the Hand of Ruk.
In the case of factory attachments, you need to keep the specialization in mind. Have one factory produce Avalanche only, have another one produce Predators. Thanks to this, the Hub is not going to require all of the attachments, and only the ones required for building specific units. There is not much point in stocking up. If you do not use, and you are not going to use Seekers, building Stealth Attachments will only be a waste of resources and space.
Beta walls also play the role of turrets and they can be manned with some units. For this reason, it is a good idea to build them as often as possible - at the main base, in forward outposts, in narrow passages. If put up at the gates, they block all units, except for your own and allied ones so, you do not need to worry that the enemy will simply cross your fortifications. On the other hand, the walls, thanks to their durability, can hold enemy attacks for long.
You can build turrets without the walls between them, but this does not make much sense. After you put two turrets next to each other, the game will automatically conjoin them with a wall. Also, there is not much point in forming two rows of turrets, one behind the other. The only exception is AA defenses. You are going to need two rows of walls, if you man the front one with units that attack ground targets (Predator, Commando), and the other with AA units (Guardian, Cloudburst). Also, you can man both of the rows with Guardians. With proper upgrades, or artillery backup, they will pose an effective defense against the majority of enemy attacks.
The last building that is worth mentioning is the Repair Pad, which allows you to fix your units. It is useful in the case, in which you have lots of wounded units. On the other hand, battles in Grey Goo are usually very bloody. In spite of that, it is a good idea to put up such a building, e.g. for the sake of repairing the valuable units, such as Hand of Ruk.
Detonation Pack. Commando explodes at the moment of death and wounds the enemy's nearby ground units. It is useful early into the game, when Commando are an important part of your army. Later into the game, as long as you keep building them, it is better to replace this upgrade with another one.
Autocannon. Avalanche may attack while in movement. It is useful if you utilize the tactic of mobile combat, or you often have to flee from the battlefield. Otherwise, you can ignore it, especially that Avalanche are siege units whose first purpose is to destroy buildings. They do not necessarily need to move, while doing that.
Target Acquisition. Predator fires in single shots, instead of in bursts. Without this upgrade, the unit uses up all of its ammo on a single target, even if it has been destroyed. This often leads to a situation, in which Predator wastes some of its ammo and has to wait until the weapon is reloaded. Therefore, if your army mainly consists of Predators, buy this upgrade. This will boost their effectiveness in the battlefield.
Ground Assault. Cloudburst becomes capable of attacking ground targets. A situational upgrade. Cloudburst is a strong unit of low durability. If you have many of them, because of the enemy's air forces, buy this upgrade. Thanks to this, you will also be able to use the units against bases and ground forces. Otherwise, ignore it.
Long-range Ballistics. The Guardian's ground attack turns into a long-range artillery attack. Guardians are only used for stationary defense, Their range is lower than that of the enemy artillery, which makes them require backup, in combat against it. If you play a defensive game and/or your defenses would use a greater firepower, this upgrade is worth choosing. Otherwise, pick one of the remaining ones.
Platform stability. Hellstorm can attack while in movement. It is a useful upgrade, if you want to use the tactic of fighting in movement, and artillery is a big chunk of your army. It is especially useful while retreating, when Hellstorm can engage enemies outside of their reach. It is useless if you do not ensure artillery with backup, which makes it fight at short distance, much shorter than their minimal range.
Air Canister. Commando may shoot into the targets up in the air. Select them, if it is them that your army relies on and you are dealing with an opponent that relies on air raids. Also, if you are not using Warbird jet planes, and you would use an additional unit that shoots airborne units. Otherwise, ignore this upgrade because you will not be building too many Commandos.
Incendiary Catalyst Bomb. Nimbus receives incendiary bombs that burst into flames for several moments, after the impact. It is a highly valuable upgrade, if you are using bombers. You lock on the incoming army, drop bombs onto the first lines and, if the rest of the army does not change its route, they walk into the flame trap. Also, it is valuable while bombarding buildings, especially turrets, because it allows you to destroy them faster. Useless, if you do not use bombers.
Explosive beacon. The Stratus buoys explode after they cease to function. After hitting the enemy unit, Stratus marks it with a signal buoy. The buoys are impossible to detect and they move along with the enemy unit. There is a chance that at the moment of explosion, the target will be among thick crowd, which increases the effectiveness of the bomb considerably. It is a useful upgrade that is worth buying, especially in a situation, in which you rely on air reconnaissance and you do not use bombers.
Stealth sniper. Stalkers become invisible in movement. Stalker is a fast quite durable and strong unit, at least up to the moment, in which Predators start being used. Equipping it with invisibility and an additional weapon raises its effectiveness. Unfortunately, the necessity to stay in movement decreases its ability to set traps, but turns them into perfect scouts.
Mass cloaking. Seeker loses invisibility and ensures it to the nearby units, as long as it stays still. It is an immensely useful upgrade, for setting traps and hiding units where the opponent does not expect them. It requires some training, but it yields great effects, both in defense ad in offense. Check out if you are fully capable of using the possibilities it offers and if so, buy it without hesitating.
Cloaking sensors. Stratus starts detecting invisible units. Buy it if you often rely on airborne reconnaissance and the opponent often attacks you with invisible units. Otherwise, leave it out.
Auto repair. Hangar repairs airborne units that have been parked in it. Airborne units have low durability. Against strong AA defenses, in the best case scenario, only a half of them return to the base. Also, they are quite expensive, when compared to the other units, especially bombers. Therefore, if you rely on air forces and you want to curb your expenses, invest in this upgrade.
Armored casing. Upgrades the armoring of Harvesters. It may be useful if you often lose your harvesters. Also, if you need lots of resources and each unit that you lose means a catastrophe. Otherwise, it is useless, mainly because refineries produce harvesters for free and in the numbers that they need. You can also choose this one when no other upgrade is to your liking.
Defensive utility. Small Hubs receive additional armoring and heal the buildings attached to them. It is very useful, if you build small mining outposts or bases behind the enemy lines. This upgrade allows them to hold for longer, in case they are spotted. It is useless if you more often use Medium Hubs and Large Hub, especially later into the game.
Build small, forward outposts. Your great advantage is that you can build actually anywhere, as long as the spot remains within the sight of units. Dispatch airborne units and use them to build a Small Hub near a deposit, in areas that are difficult to access, or behind the enemy lines. Then, attach refineries, factories and fortifications to them. Have such outposts mine for you or build armies that attack the opponent from the least expected directions. Lots of small bases will distract him and, in many cases, will allow you to continue your game, after you have lost your HQ.
Build fortifications. Take advantage of your building capabilities and surround the base with wall. Man turrets with defenders, put artillery behind them and see the enemy attacks get shattered. Also, build fortifications in narrow passages, on hilltops and other spots, where you can vex your enemy. It is especially useful at the beginning of the game, when the opponent still does not have units for speedy destruction of buildings. Turrets, especially the ones with on unit on top, will be difficult to take out, then.
Attack with your fortifications. Combine both of the above tactics. First, fly up to the enemy base, outside of his sight. Find a spot at the side of the enemy base and start building a Small Hub with factory there, and surround it with a wall. Wait for the enemy to leave the base, find a weak point in his defenses and attack him. Even if the enemy fights you back, your base should prevail, thanks to the fortifications. Thanks to this, the enemy will have to fight on two frontlines, which will make it difficult for him to win.
Also, you can block the only passage to the enemy base with fortifications. This maneuver requires you to have enough resources and good timing, because putting up walls takes more than 25 seconds. Apart from that, the units that are to man turrets should also wait there. However, if you manage to pull that off, you will put an abrupt halt to the enemy expansion, whereas you gain freedom to build more bases. This tactic is especially effective against Humans, who are incapable of building forward bases, without the necessity to connect them to the main base.
Use your factories to fight. Hand of Ruk can be used in a multitude of ways. You can build this unit behind enemy lines and use it as a mobile factory and a turret. You can build it at the base and dispatch it into combat, while building soldiers along your path. You can hide it in thickets and slowly form the army from there. You can send it into an allied base and create reinforcements for him there. Think of where the Hand of Ruk will be of most use and dispatch it there, even if this means that you will have to use it in direct fights.

As for unit creation, one factor that is important for Beta - the ability to man turrets - is insubstantial for Humans. From the perspective of statistics, Humans build longer and at a higher cost, but their units have more health points and they deal more damage. The differences have been balanced in such a way, so as in 1 on 1 battle, both sides have equal chances. Apart from that, Humans have one unit less than the Beta, i.e. they lack a counterpart for the Guardian. The rest of them is, more or less, the same and, for that reason, it does not require any special commentary. The only exception is the Howitzer, which fires mines, instead of regular ammo, which stay put in the targeted area, for some time. Therefore, the unit can both be used as artillery, as well as a mine-laying unit, which is capable of forming additional, temporary, defenses for the base.
You can note the greatest differences in the case of technologies used. Thanks to the upgrade to artillery, the Beta siege unit can move. Counterpart Human units cannot do that. Out of the ground units, only Gladius is capable of simultaneous movement and combat. This makes the army of the Humans more stationary, than the rest and they are compelled to fight in a standstill. For this reason, you should more often use it to set traps and attack from higher positions. Fighting while escaping is out of the question. If you need to retreat, leave some of the forces behind, to occupy the enemy with them. Otherwise, remain in the battlefield and fight until the last man standing. This is more advantageous than escaping and dying an unnecessary death.
Airborne units of Humans need to land on standalone Air Pads, which can hold only one plane. This ensure a higher flexibility than the Beta hangars, because it allows you to spread your units all around the base. Apart from that, the Human air forces are built in factories, and not hangars. This means two important things. First of all, - losing an Air Pad does not mean that you cannot produce planes anymore. Secondly. You can build up to three big planes in one factory whereas hangars can build only one. The Human air force, i.e. Scythe fighter jet, may receive a bigger ammo compartment, which makes it a superior unit, in comparison to its counterpart in the Beta, because it can fight for longer. Additionally, it deals AoE damage where, for comparison, Scimitar, a Human bomber, only attacks single targets. What is even worse, the human scout, Monitor, cannot mark targets, unlike the Beta airborne scout.
The Alpha superunit as strong and very weak, at the same time, but its range is limited with the linear attack. It suffices, for the enemy, to strafe to the side, quickly enough, and he can avoid being destroyed. On the other hand, the additional attack of the unit pushes away and wounds everything within close range. Unlike the Hand of Ruk, Alpha cannot be destroyed by a single Mother Goo. The superunits of the Humans can also detect units with stealth and defend against airborne units but, outside of the battle, its usefulness is limited. Apart from that, it needs to be built in a factory of specific structure (it needs all four attachments; an example of such a factory can be viewed in the in-game encyclopedia) so, building it behind the enemy lines and launching a surprise attack is out of question. Also, it is not as tough as Hand of Ruk and it has shorter range. For this reason, you may have quite a problem defeating in a 1 on 1 fight. The unit is not that bad, but its capabilities are limited, if compared to the other epic units.
All of the Human buildings need to be connected to the Core and form a network. The only exception are walls and turrets with appropriate technologies. Conduits are buildings and of low durability, at that so, they are the vulnerable spot of the base. Additionally, they can only be built like the rest of them, i.e. within the sight and along their entire length. Therefore, two units cannot be built at two sides of a plain, with a Conduit between them, because the game does not recognize this action. Also, you cannot draw a Conduit onto the areas higher than the Core itself. For this reason, a part of the map is inaccessible for your buildings.
Breaking the Conduit results in deactivating all of the buildings on the disconnected side. In spite of that, you still can build buildings next to the disconnected parts. Some of the buildings may not work, due to this, but turrets with appropriate technologies will. To remedy the situation, you need to fix it and everything will return to normal.
Also fortifications are different than in the case of Beta. Walls are standalone units and they do not require gates. Your units can pass through at will, which makes things easier, in the case of long battlements. Also, you have access to four turrets but, to build them, you first need to build Attachments. Each turret is specialized so, it is a good idea to build them one next to another, so they can complement each other. The lack of universal turrets is made up for with the firepower and the ability to put them next to each other. Four Anti-Heavy Sentinel next to each other, supported by Artillery Sentinel are capable of massacring the enemy forces, before they even come close. Also, it is a good idea to build Detector Sentinels. These turrets dissipate the fog of war around them and allow you to keep an eye on grounds above them, without you having to send units there. Apart, they veil in the fog of war, the buildings that have already been discovered by the enemy. In extreme situations, they allow you to conceal the entire base and have the enemy dispatch reconnaissance units, on a regular basis. Otherwise, he will have no idea about the current condition of your base and its defenses.
Buildings, including turrets, can be built freely, along Conduits, thanks to which you are capable of forming long defense lines for fortifications and factories. In the case of the latter, you need to watch out. While building a factory note the arrows that determine the direction, in which new units leave it, as well as the green crosses. The crosses mark the locations, in which you can build attachments to the factory - two for a small one and, at least, three for a big one. While building Attachments, the crosses turn into pulsating stars so, at each moment, you will know where you can build them. This is important., because attachments remain active only in these spots and nowhere else, even if you still locate them near factories. Therefore, if you make a mistake, you will have to sell the attachment and build it again. Or teleport it. Apart from that, this makes locating factories, in thickly developed areas, or ones covered with a thick network of Conduits, unprofitable. This is so, because it may turn out that the factory can only have two, or even one attachment, which is especially painful in the case of big factories.
The last noteworthy building is the Teleporter. It is expensive and construction lasts a minute and a half. To unlock it, you need to have, at least, one Air Pad, and each time it is used, it requires a two-and-a-half minute cooldown, In return, it allows you to teleport any six ground units anywhere on the map, visible either to you, or to your allied units. The number of teleporters permissible around the base depends only on your finances, because there is no limit on the number of these.
Power Generator. Anti-Heavy Sentinel remains active even after the connection with the base is broken. It is a very useful upgrade, when you have a sprawling network of Conduits, reaching far outside of the base, which makes it susceptible to be destroyed. Otherwise, it is useless.
Railgun Systems. Lancer receives a new weapon that damages everyone within range. Lancer is a siege unit meant to destroy buildings. This upgrade makes the unit stronger in battle, but only against big groups of lightweight opponents. Heavy units will still pose a problem to it. Additionally, it needs to be motionless, at the moment of firing and it does not become stronger against buildings. You can buy it, if you see no use for the rest of the upgrades.
Repair Subroutine. Gladius, Howitzer, Lancer and Trident units will be automatically repaired, outside of combat. The condition is that they cannot take damage. The majority of units in the game have low durability, and are quickly destroyed in battle. In the best case scenario, repairing extends their life span by several seconds. In the case of big and regular battles, this upgrade is of little usability, because only a handful of remnants after the battle will be able to use it. This will not save you too much. It works much better in the case of small groups of units for quick raids and immediate retreat. The upgrade allows them to remain active for longer, without the necessity to return to the base that often, to replenish the losses.
Proximity Mine Radar. Mines of the Howitzer unit receive a wider range of vision and they stay in one spot for longer. Mines of the Howitzers are useful for clearing bushes and setting traps. Thanks to this upgrade, their effectiveness increases. Buy the upgrade if you use artillery for more than attacking enemy buildings and units.
Power Systems. Artillery Sentinel remains active even if the connection with the base is terminated. The functioning is identical with Power Generator.
Ground Battery. Longbow can engage ground units also. It is a good upgrade if you fight against the opponent that uses ground and airborne units in equal proportions. It is useless if he relies only on one type.
Mine Drop. The Scimitar bomb becomes a mine that you can drop anywhere. Scimitar is a bomber, whose projectiles explode on impact with the ground. This makes it useless for combat reconnaissance, because it needs to see the enemy units in the first place. Thanks to this upgrade, you can use it for setting traps in bushes, narrow passages and for mining spots along the route of the opponent.
Scythe Payload. Increases the capacity of Scythe ammo to 8. It is important if jets are an important part of your army. Otherwise, it is better to buy one of the remaining upgrades.
Aircraft Repair. Air Pads repair the units docked in them. It is a must-have if your main weapon are airborne units. It is less useful if the enemy has a strong AA defense. During air raids, the majority of your units will be decimated so, the savings that you make this way, will be low.
Cloaking Systems. Monitors receive stealth. Airborne units are very useful scouts, later into the game so, it is a good idea to buy this upgrade for them. Thanks to this, you can view the base without being detected. At least, for as long as you avoid the units equipped with stealth detection.
Cloak and Dagger. Dagger receive stealth. Buy this upgrade early into the game, when Dagger is your main scouting unit. Also, buy it if you do not have access, or you do not want to use air reconnaissance, or if the enemy defenses are too strong. Otherwise, it is better to buy the Cloaking Systems.
Catalyst Mine. All Conduits drop respawning mines. In the case of thickly developed bases, the number of Conduits will be low, which affects the number of mines. This upgrade is useful in the case of wide sprawling bases, but there is one downside - it blocks your access to remaining two. All this depends, therefore on your preferences. If you prefer to play a defensive game, buy the mines. If you require a better reconnaissance, get one of the remaining two upgrades in this category.
Structural Integrity. Mines receive additional durability and they are fixed, spontaneously, with time. It is useless for a simple reason - mines are free of charge and the building time takes a dozen-or-so seconds. Losing them may, in the worst case, delays in delivering resources, but your economy will not collapse from this. This also goes for the mines far away from the base. The upgrade makes them more resistant, but a strong enemy attack wipes them out anyways. It is better to buy something else.
Harvester Camouflage. Endows stealth on harvesters. In the case of thickly developed bases, it is useless, because harvesters are protected by garrison and turrets then. It is much better in the case of mines away from the base, which makes the harvesters cover a long route. Thanks to this, they receive additional armoring and makes the enemy get special units to detect them. If you locate your mines with consideration, this upgrade allows you to use them, stress-free, throughout the entire mission.
Sentinel Repair. All of the turrets get repaired automatically, if they take no damage. The staple of a defensive game. Thanks to this upgrade, you do not need to keep an eye on the condition of Sentinels, and additionally, you save up on repairs. Which can be costly, in the case of frequent enemy attacks.
Use turrets to fight. Build a line of Conduits, up to the enemy base. Covered by units, build two lines of Sentinels that fight ground units. With the help from the turrets and scouts, reveal the enemy base and attack it. This tactics requires lots of resources and it may be interrupted due to the unevenness of the ground. Still, the option to build many units next to each other, makes this tactic useful for offensive uses. Especially if you buy technologies that allow turrets to function in the case when they are disconnected from the Core. You can then keep buildings inactive Conduits and attach fully-functional turrets to them.
Use turrets to dissipate the fog of war. Detector Sentinel is the best turret that you have. Using it, you can scout elevations, find enemies moving at the other side of the hill and hide your base from enemies. While building more Conduits, attach a Detector Sentinel at the end of each, as well as several support turrets. This way, you create a network of scouting outposts, whose main purpose is to scout the area and let you know of the enemy actions. If any one is destroyed, you will know that a large enemy offensive is approaching.
Teleport your units. Build, at least, three portals, for speedy teleportation of your units. Deploy them near the fighting units. Teleport them to the allied base, whenever he needs help. Move them over to the walls of the enemy base, during a siege. Send a scout into the enemy base and teleport your armies near him. Place independent turrets and, if necessary, teleport reinforcements there. Thanks to teleportation, you can get to, virtually, any spot on the map. Thanks to this, you can attack the enemy from the least expected direction. Use this to your advantage
Teleport buildings. You can teleport the majority of buildings, within the network of Conduits. This takes five seconds and is free. You can use this to teleport your turrets into the hottest spots, for escaping factories or improving on the outlay of your base, if you have made a mistake, while building Attachments. After you have bought appropriate technologies, you can create forward clusters of turrets, away from the base. You only need to teleport new ones straight from the base, which is much faster and easier than building them on site.
This race has only two units that are capable of shooting in movement - the scouting Drover and the AA Tempest. There are no technologies to change it. Additionally, the two basic units - Drover and Strider, cannot be upgraded in any way. For this reason, your army will have to be stationary and fight on positions chosen beforehand and, rather, not retreat, because this will turn out to be disadvantageous.
Apart from that, there are only six regular combat units. Dweller is a mobile mine. Once it buries into the ground, it activates stealth and, after being stepped on by the opponent, it explodes and deals considerable damage. Bastion is a blocking unit that may encourage the enemy to attack it. Both of them may be upgraded, thanks to which they get stronger in combat and turn into Protean, after they are destroyed. Thanks to this, even suicide units may prove useful to you, by first weakening the enemy and then, by letting the Protean finish him off.
Out of the remaining six units, Destructor is noteworthy. Thanks to upgrades, it is capable of engaging multiple targets. Also, there is Crescent. It fires artillery projectiles that can be destroyed in mid-air, but they leave a dark pool on the ground, on impact. All of the units near the pool, take damage for some time. This makes Crescent especially useful against moving targets. You only need to lay fire on the front units and see the rest of them take damage, as they walk into the contaminated area. The unit is also highly effective in narrow passages. Use it to fire at the columns of the enemy troops. This way, you make him choose - either split the forces, which weakens them, or head onwards, and take damage on the contaminated grounds. This is a choice difficult to make, if there are your forces in the passage.
Also this race lacks any airborne units, which makes it impossible to, e.g. scout the area from above. On the other hand, your main strength lies in numbers, the capability of fighting with the help from the highly flexible Mother Goo and regeneration. Goo is the only race whose units do not need any technologies for fixing, nor specialist buildings. You simply need to leave them alone for some time to have them get back to full health. The only exception is Purger, the Goo superunit.
Purger is the weakest elite unit. It cannot engage airborne units, is inferior to others, in terms of range and the attacking area is not too wide either. On the other hand, it has the most health points and it can be used as a target for the enemy and divert its attention from the rest. Apart from that, it heals Mother Goo and attacks the enemy units, provided they are sufficiently close. In case of being surrounded, it can simply change positions, instead of firing the primary weapon. Which it is not going to be able to use, due to the predetermined minimal range.
This race does not have buildings, in the traditional meaning of the word. Instead, it has three mobile units that play the role of production plants - Mother Goo, Small Protean and Large Protean. De dependency between them is simple - Mother Goo creates more Mother Goos and both Proteans, and these turn into the selected units. Small Protean produces light units, the Large one creates heavy units. All three production units are capable of movement and attacking the enemies encountered, which slows them down, at the same time, but only Mother Goo profits from that. Also, only Mother can use resource deposits, in order to replenish its health. Apart from that, the Small Protean and Mother Goo have stealth detection so, they can be used for scouting. Especially the Small Protean is good at that, thanks to the high speed of movement.
To produce units, Mother Goo needs to be located on a resource deposit. This way, the pool of potential health points increases. When they reach a certain level, the Mother may create another Mother Goo or a Protean. With the maximum capacity of points, it can turn into Purger. Morphing into the Purger makes you lose the Mother Goo, and does not create another one. Creating an unit decreases the pool of points. Because of production, the amount of points cannot drop below a certain level. Proteans turn into groups of units, instead of single ones. The only exception is Bastion. The rest of the units appear in pairs, or in groups of four (Drover).
All of the buildings are mobile, where Mother Goo can climb cliffs. This makes it a versatile unit, good both for combat and for reconnaissance.
Bastion Volatility. Bastion enters rage mode, after it takes enough damage. It wounds everyone around and, in case of death, it explodes. After being enraged, the unit does not regenerate its health and cannot be healed. Buying this upgrade should depend on whether you use this unit. If so, and you have many of them, it is worth considering the upgrade. Especially for battles against big groups of opponents and against fortifications. Otherwise, ignore it.
Goo Splash. Projectiles of the Destructor also wound the units around the target. It is very good for fighting big groups of lightweight units. If you do not use Bastion, pick either this or the other upgrade.
Contagious Goo. Projectiles of the Destructor rebound off the target and wound the two closes opponents. Choosing this upgrade, or the above one, should depend on the situation. If the enemy has many lightweight units, choose Goo Splash. If he relies on the heavy ones, choose Contagious Goo.
Symbiotic Pool. The pools resultant from the Crescent fire heal allied units. This upgrade is difficult to use. It requires you either to move your units manually, of fight the enemy face-to-face, when the targeted units are close to your troops. It is useful, but you may be unable to use this upgrade to its fullest.
Projectile Endurance. The blast area and the power of the blast, from the Crescent projectiles are decreased. The projectiles can no longer be shot down from the skies, by AA units. This is a contextual upgrade. If you have lots of artillery, their projectiles will, sooner or later, penetrate the enemy defenses and the upgrade becomes useless. Still, it is a good idea to consider buying it, if you have little artillery, or the enemy has strong AA defense, which shoots down all of your projectiles. However, keep in mind that damage dealt by Crescent is much lower then and the general combat value of this unit drops dramatically, in different situations.
Catalytic Barrage. Tempest may attack ground targets. It is highly useless upgrade. As artillery, Tempest has long range, but low firepower. Fighting even lightweight units takes lots of time, not to mention attacking buildings. Buy it only if you are not going to use the rest of the upgrades.
Surveillance Virus. Airplanes hit by the Tempest reveal the area around them, for some time. A contextual upgrade. In order to use it effectively, you would have to hit the enemy vehicle once and let it go. You would have to do this with a single Tempest from an ambush, e.g. hidden in a forest. Strong AA defenses do not let any plane escape so, potential scouts will soon be eliminated. The only exception is the situation, in which the enemy has lots of aircraft and attacks you on a regular basis. In such a situation, it is worth knowing what the enemy units, returning to the base, see.
Goo Corruption. Hitting from a Tempest deals additional, temporary, damage. It is a useful upgrade that increases AA firepower. Worth buying.
Aerial Defence. Radiants can shoot down airborne units. Not too useful. Radiant is a scout of low firepower. In comparison with Tempest it is useless in dogfight, even if it attacks opponents while invisible. You can buy it if you have lots of these and you are unable to deal with enemy air raids. Otherwise, ignore it.
Stealth Sensors. Radiant receives stealth detection. Buy it if the enemy uses invisible units. Otherwise, ignore it.
Veiled Surveillance. Radiant receives stealth. It is a very useful upgrade. You do not have airborne scouts, but the ones on the ground, equipped with invisibility, are capable of making up for that. Deploy several of them on hills and in bushes, and you will gain the upper hand over the opponent.
Enhanced Cloaking. Dwellers remain invisible also while moving. In spite of tat, they still need to stop to attack. If you use them frequently, buy this upgrade. Thanks to this, Dwellers can also be used for scouting, or even like offensive units. You simply need to send the hidden mines into the enemy base, thanks to which you avoid being detected, and deploy them at the factory exit points, so they can destroy freshly-produced enemy units. Still, if you use living mines, take one of the abovementioned technologies.
Advanced Mitosis. Dwellers, at the moment of dying, drop two Small Proteans. It is useful, if you use mobile mines. It allows you to replace your lost units. Especially useful for traps and destroying enemy bases, especially in combination with the Enhanced Cloaking technology. Ignore, if you do not use mines.
Catalytic Residue. If Small Protean, Large Protean or Mother Goo eats a unit, or a building of the enemy, the neighboring Goo units are healed. It is highly useful, but only if you use Mother Goo and Proteans in combat and for destroying bases. Especially that the Goo units have little health. This upgrade allows them to survive in the battlefield or longer, and it allows you to save up on new ones. Ignore it if you do not use Protean nor Mother Goo in combat.
Progenitor Conversion. If the Large Protean or Bastion dies, it drops a Small Protean. Large Proteans should be rarely used in battle, unlike Bastion. If you use the latter, this upgrade will allow you to replace your losses quickly. Buy it if you fight with Bastions. If you fight with Mother Goo, it is better to buy the previous upgrade. It is more useful, in the long run.
Be mobile. Mother Goo and all of the building units of the Goo are mobile. Both the Mother and some of your troops are capable of going over mountains. Use this to your advantage. Position your artillery out of reach of the enemy. Retreat with Mother Goo from those of the places, which you cannot hold. Capture resource deposits, at the enemy's back and prepare your army for attack there. Move Proteans to the enemy's back and turn them into units there. Distract the enemy with attacks, deploy Proteans at the back of his base, turn them into combat units and attack. Use to your advantage the fact that you can quickly get to any location, around the map.
Be flexible. You can use all of the construction units of the Goo later on. Do not turn them into combat units straight away. Wait for the enemy to take action and match your action with his. The downside of this tactic is that the newly-created units are not in full health. The upside is the option to create units that are best-fitted for dealing with the incoming threat.
Use Mother Goo in combat. Mother Goo attacks everything in its closest proximity. The destroyed units are then consumed for resources. While attacking enemy positions, take one, or two Mother Goos along. They will e highly useful, while destroying enemy fortifications and big groups of enemy units. With a good supply of health points, they can even create new units in the battlefield. Remember to ensure them with protection, especially AA defenses. Mother Goo is easy to destroy.
For this reason, it is best to deploy them into battle with their health points pool full. Thanks to this, not only will they survive for longer, but also will be able to create new Mother Goos and Proteans in order to replace the destroyed ones.
Flood the enemy with your armies. Goo can quickly produce lots of lightweight units. If the enemy has no artillery, or other units capable of AoE attacks, this will pose quite a problem for him. Especially if you staccer your units and start attacking him from all sides at once. This way, you will be able to win at an early stage. Later on, numbers cease to matter that much and quality of units it becomes more important.
Combine Mother Goo with Purger. The superunit attacks the enemy forces and, at the same time, it heals Mother Goo. Mother Goo, thanks to the health points it obtained, creates Proteans, that then turn into combat units. A big group of Mother Goos, in combination with Purgers is, therefore, a self-sufficient combat unit. This tactic requires you to keep the superunit alive, which may be a problem, in the case of enemies that rely on air forces.
Primary objectives:
Secondary objectives:
You start in the bottom0left corner of the map [1]. First, build a refinery, and then a Small Factory. Create, at least, five Commandos and Raptors. During the creation process, you will be attacked. The enemy forces are small so, you should not have too much problems with them.
![Gather your army and take the only passage to the North [2] - Mission 1 - Hunters Valley - The Beta campaign - Grey Goo - Game Guide and Walkthrough](https://game.lhg100.com/Article/UploadFiles/201512/2015121519331301.jpg)
Gather your army and take the only passage to the North [2]. In the bushes [3], you may encounter a small group of opponents. They are not too strong, but they may decimate your forces, by attacking by surprise. From there, go north, towards the corner of the map. Eliminate the single enemy units. In the marked area [4], build a Small Hub and destroy the Catalyst Vent Plug blocking your access to the resources. To the Small Hub, attach a refinery and a Small Factory.
While constructing a new base, produce new units. With 10 Commando and Raptor units, head towards the second thickets. To the South of it, you reach a wall [5]. Lay your fire on it, while hiding in bushes. The enemy should send his forces your way. Defeat them and make a breach in the wall. Move along.
![You will reach a destroyed outpost with a Large Hub and a Tank Attachment [6] attached - Mission 1 - Hunters Valley - The Beta campaign - Grey Goo - Game Guide and Walkthrough](https://game.lhg100.com/Article/UploadFiles/201512/2015121519331349.jpg)
You will reach a destroyed outpost with a Large Hub and a Tank Attachment [6] attached. Eliminate the nearby enemy units that are destroying the walls. If you want to, you can man turrets. Attach the factory to the Large Hub and produce, at least, one Predator. You also find a Repair Pad there, if you want to repair the units damaged in the battle.
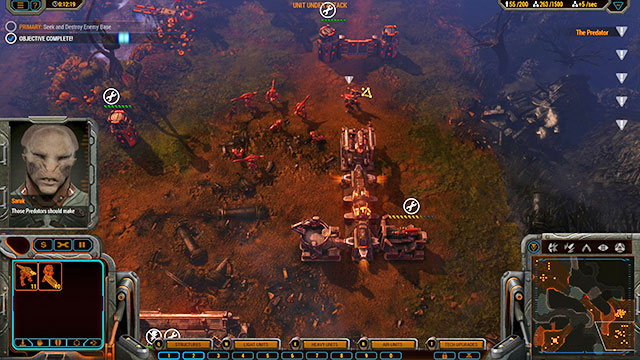
Increase your forces to, at least, 30 units of each type, including several Predators. Do not rely on Predators only, because producing them is too time consuming and the mission is over soon anyways. From the third base [6] go northwards. You will reach enemy fortifications [7].
First, destroy the turret and then, the units that have been guarding it. After that, move your armies to the North-West, towards the enemy base [8]. Destroy three more turrets and then, the enemy's key structures - factories, refineries and the Core.
Primary objectives:
Secondary objectives:
You start in South-Western part of the map [1]. There are three paths to the base. The enemy uses the Northern and the Eastern ones, most frequently, which lead up to his positions. Still, do not forget to fortify the North-Eastern one, just in case.
Start building your base and quickly produce several Raptors. This is when the enemy should strike for the first time. Fight him back and send all of your armies Northwards. Near the thickets, you encounter the first civilian group, guarded by a small enemy team [2]. Eliminate the opponent. After a while, the civilians will be taken away and you receive support from a group of Commandos.
Expand your base. Next to the HQ, there are two deposits of resources so, build mines over them, as quickly as possible. Block the Northern and the Eastern passage with walls. Man turrets with Commandos or Raptors. The enemy will strike regularly, but the teams are weak enough for you to fight them back. Remember to fix walls on a regular basis. In the North-Eastern passage, build two turrets only, hardly anyone is coming that way.
After you have assembled a big assault team, it is time to strike. First of all, go eastwards. In the bottom-right corner of the map, there is the first enemy base [3]. It is small and with poor defenses. Additionally, it has been built right next to bushes, which you can use for cover. Enter the bushes and, while invisible to the enemy, destroy as many of his buildings and units as possible. Leave the bushes then and deal with the rest.
If you need the resources, leave several units in the bushes and, in the place of the enemy base, build a Small Hub and a refinery. If not, you can still leave several units in the bushes, as a form of an ambush for the enemy forces coming from the North.
Northwards of the base, there is the second civilian group [4]. Rescue them.
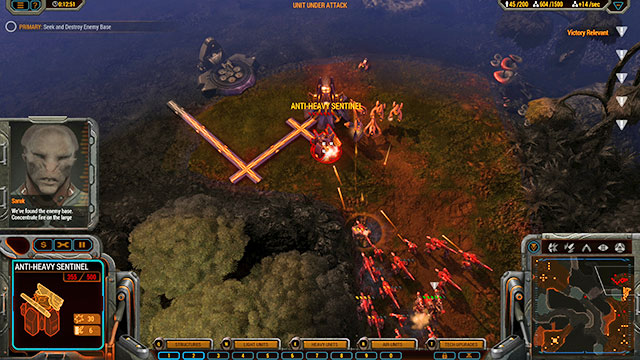
Return to your base. Up until now, you should already have Predators so, produce, at least 15 of them. You can back them up with several Avalanche and Hellstorm units, which speeds up destroying buildings. Gather your army and head Northwards, along the left edge of the map. Right past the North-most thickets, there is a wall, and the enemy base, up ahead [5]. Use the cover of the bushes and make a breach in the walls. Attack the base immediately. Still, leave several units in the thickets, in case of the enemy counterattack. Focus on factories, refineries, and finally destroy the Core.

If you want to, build another base in the place of the destroyed one. Especially factory, may prove useful, but also a refinery will do good. Replenish your losses. If you have not built the Avalanche and Hellstorm yet, it is high time you do that. You will be able to win with Predators only, but this will be much more difficult, without artillery and siege units.
Gather your army on the ruins of the second enemy base [5] and head East. You reach another wall there [6]. Destroy it and be on your path. After you cross the river, you find the last group of civilians, along with guarding enemy units [7]. Defeat it and you receive reinforcement for the last time.
![There are several ways to reach the last enemy base [8] - Mission 2 - Ruks Bend - The Beta campaign - Grey Goo - Game Guide and Walkthrough](https://game.lhg100.com/Article/UploadFiles/201512/2015121519331551.jpg)
There are several ways to reach the last enemy base [8]. All four of them are blocked off with a wall. In your situation, the easiest one is the Eastern, up until you reach the enemy fortifications. Destroy it and turn South. The enemy base is being guarded by a small group of units. Defeat them and deal with the base. Again, destroy factories and refineries first, and finally deal with the Core. After you have destroyed the key buildings, the mission will end.
The order of bases to destroy, suggested in this guide, may be different. If you want to, you can start with the Northern one [5], then take to the central one [8], and finally deal with the Eastern one [3]. Just remember to rescue all the civilians, along your path.
Primary objectives:
Secondary objectives:
This is an exceptionally easy mission. You start in the South-Western part of the map [1]. Additionally, you have three poorly guarded mining posts for Catalyst [2]. After you add three mining sources to these, you will have a total of five mining outposts, where you can mine for resources. Try to start exploiting them all, as soon as possible. Thanks to this, not only will you complete the primary objective of the mission, but also you will have a surplus of resources. Additionally, some deposits can be doubly exploited, which only makes the end of the mission more imminent.
Every several minutes, there will be an earthquake, which damages the majority of buildings As soon as this happens, have them all repaired. The magnitude of the earthquakes varies so, the buildings that you do not repair, may "suddenly" be destroyed, even though they have been damaged to a slight extent.
There are two ways to complete the mission. The easiest one requires building mines, in marked areas, and fortifying them. The enemy attacks are weak, but they occur on a regular basis, and of varying intensity. Still, it suffices to build several turrets to protect all Depot Hub, and man them with Predators, and to remember to fix them regularly. The main base will be attacked sporadically, with weak forces and, thanks to the resource income, defending it will only be a formality. It should not take more than half an hour to send all of the crates. You can kill the time with air raids on the enemy refineries, which allows you to complete the secondary objective. If you start building your mines at the beginning of the mission, and you will be regularly dispatching crates, the enemy will not manage to gather the required amount of resources.
The second way consists in destroying the enemy base [3] and it is much more difficult than defending your base. First of all, forget air raids. The enemy's AA defenses are too strong and destroys all of your aircraft, before thy manage to cause any damage. Ground attack is going to be more successful, but only if it is launched properly. You can get into the enemy base from the West or from the South. All of the access routes are protected with walls, artillery and turrets, as well as single units, concealed in bushes. This goes for all of the bushes on the map so, you should progress with care. You can try to cut through the enemy defenses, but you are going to need lots of units and time. It is highly possible that the mission will end, before you manage to do that. To get inside, you to do that in a certain way.
There are several ways to do that, but the easiest one is to enter the enemy base from the West [4]. Fly up there with Stratos and position it outside of the reach of the turrets. You will note that the wall is only blocking off the lower access, whereas the upper one is free. There are several enemy units in the bushes there, but there are few of them.
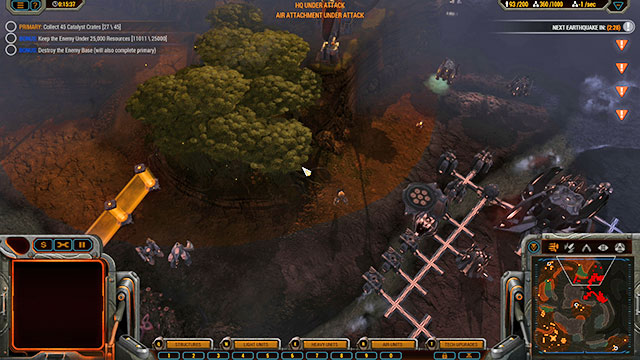
To launch the attack, you require lots of Predators, Avalanches and Hellraids, as well as several Raptors with stealth. Deploy your armies Westwards of the bushes and enter them with scouts. Have artillery destroy all of the enemy units hidden there. If there is any approaching too close to your main forces, destroy it with Predators. After you have cleared the bushes, enter them and destroy the nearest enemy units.
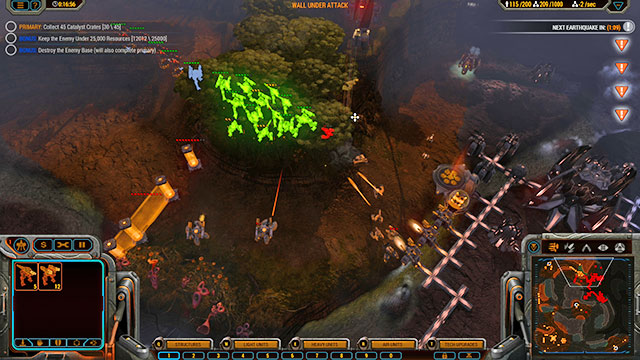
Direct Avalanches and Hellraids against the enemy turrets. Have Predators cover them. Next to the Core there are Anti-Heavy Sentinels and Artillery Sentinels, several units of each type. Destroy them with mass fire and deal with the Core. It is devoid of protection from the North and from the East, it is protected by several turrets only. Therefore, with the right deployment, none of your units will be damaged. Destroying the building deactivates the remaining installations of the base. From now on, the only threat are the enemy units that remain active. Eliminate them before you take to the enemy's key structures.
![You can also infiltrate the enemy base from the South, after you remove the debris [5], or from the east, which requires you to keep to the edge of the map and enter the back of the enemy base carefully [6] - Mission 3 - The Quarry - The Beta campaign - Grey Goo - Game Guide and Walkthrough](https://game.lhg100.com/Article/UploadFiles/201512/2015121519331676.jpg)
You can also infiltrate the enemy base from the South, after you remove the debris [5], or from the east, which requires you to keep to the edge of the map and enter the back of the enemy base carefully [6]. The first method boils down to launching a direct attack and its only upside is that you walk around the artillery and walls. The second method, on the other hand, requires you to fight your way through the enemy artillery, and allows you to walk around the enemy turrets.
Primary objectives:
Secondary objectives:
You start to the West [1]. Right after you build a factory, put a turret next to the base and man it with a Predator. After a while, the base will be attacked but, thanks to the turret, you will fight it back. If you do not put it there, the enemy destroys the Predator, the strongest of your units at the beginning of the mission. Without it, your chances to defend drop drastically.
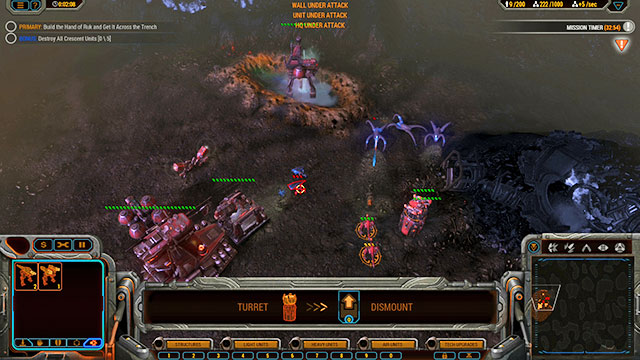
The enemy will launch regular attacks with small groups of units and, occasionally, he will launch a bigger attack. For this reason, during the first minutes, you need to focus on your defenses. Build walls on the two access routes to your base and man them with your units. Then, form two smaller combat teams and dispatch them to the North and to the South. In the corners of the map, there are three resource deposits [2][3][4]. Start mining there with the refineries attached to the Small Hub. Protect the mines with turrets and small groups of units. If you have sufficiently enough resources, block off the remaining two passages to the base [5][6]. The additional mines will ensure you with enough resources to complete the mission.
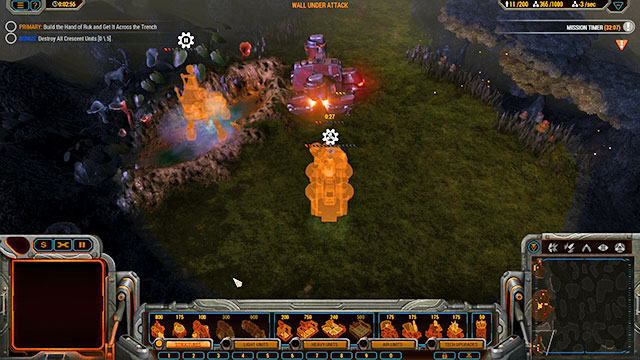
Expand the main base. Your objective is to unlock the Large Hub. In the meantime, build a hangar and four bombers. Dispatch them to the East. In five spots on the map [7][8][9][10][11], there is enemy artillery. Reach each of the points and bombard the unit. Some of them, have slight AA defenses. You can destroy it earlier, or ignore it. In the worst case, you lose one of the bombers.
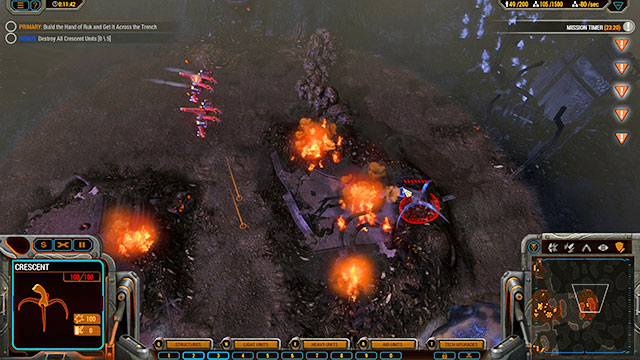
While bombarding and defending the base, start building the Large Hub along with all the buildings that are required for you to build the Hand of Ruk. Try to do that with, at least, 20 minutes of spare time, or you will run out of time to complete the mission. If you have to, hold your production of units and research. Right after you get the building built, issue an order to build the Hand of Ruk. After six minutes the unit will be ready. In the meantime, prepare a big group of Avalanches and Predators to serve as your protection.
With Hand of Ruk and, at least, 10 minutes spare, form an assault team. If you have Guardians, use them to man the Hand. If you do not, order the Hand to build them. Then, team your superunit with the rest of the army and order them to go east [12]. The route you take is up to you. You can reach the target both over the Northern and the Southern paths. Just make sure that you have dealt with artillery, or you will expose the Hand of Ruk to enemy fire.
Right after you have built the Hand of Ruk, large groups of weak units will start approaching the superunit. You can destroy them with the Hand's rockets, or with its defenses.
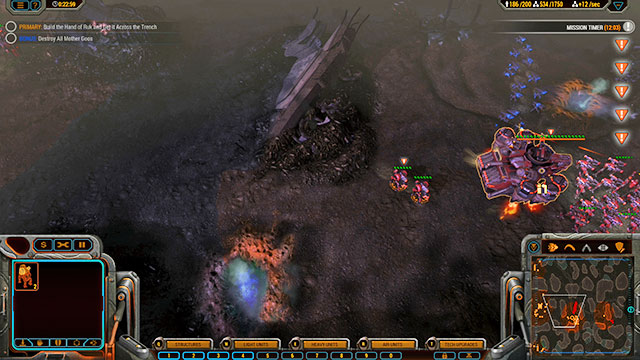
Keep pushing east. You will reach Goo fortifications (Reinforced Goo Nest). There is no other way to destroy them, than with the rockets of the Hand of Ruk. Do not approach them, because they wound all of the units within close proximity. Using the Hand, clear the path and then, eliminate the opponent that blocks the marked place [12]. You can do that with frontal attack, as well as use rockets of the Hand of Ruk. Place one unit in the marked area to complete the mission.
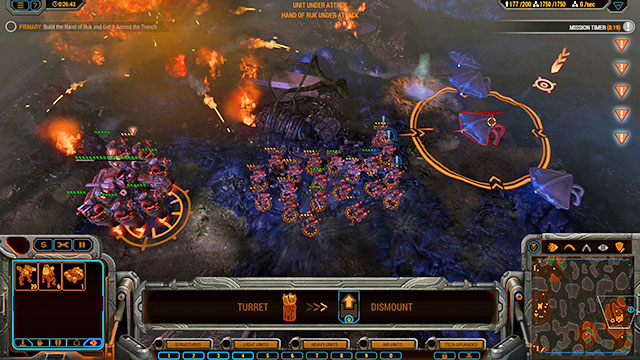
The other secondary objective requires scouting, from the air, at best. Mother Goos may be located in any place all over the map, but they area most frequently encountered on deposits. Most of the times, their defenses are poor. Find them, send a big group of ground units against them, or bombers, and destroy them. If you do that quickly, you should find only one unit of this type.
Primary objectives:
Secondary objectives:
With the right approach, it is a very simple mission. At first, you have a base and lots of turrets, as well as the Hand of Ruk [red 1]. You can use the Hand as a factory, so do that immediately and start producing units. Focus on Guardians and Predators to man the turrets with. Also, remember to man the Hand of Ruk. One of the units is severely damaged, but it can still fight. Deploy it next to the walls, along with artillery.
Throughout the next 15 minutes, your base will be attacked from the North and from the east. The attacks are strong, incessant and they make you unable to counterattack. For this reason, man all of the turrets, repair walls regularly and slowly expand your base, in wait for reinforcements. Leaving outside of walls will end up in a massacre on your units so, there is even no point in trying. For defenses, also produce some artillery and deploy it right behind the walls. In case your defenses are broken, rebuild turrets and place the Hand of Ruk or Predators in wall breaches.
If possible, build the Repair Pad and fix the Hand of Ruk with it. Losing the unit at this stage of the mission will be painful. Also, watch out while using rockets of the Hand. A projectile that explodes too close to the walls may damage them and cause unnecessary costs of repairs.
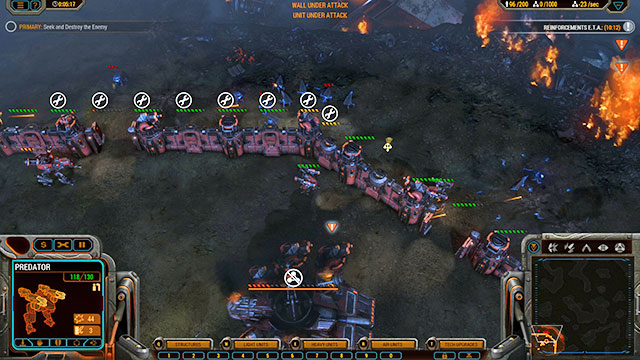
If you want to, you can try to go outside the walls and build another base, before the arrival of reinforcements. First of all, you are going to need a Repair Pad. Fix the Hand of Ruk, up to the level of 2000 health points. Then, man all of its turrets with Predators. Then, direct the unit Northwards [red 4], destroy the Goo Nest there and start building a base. Hand of Ruk ensures it with basic defenses. Thanks to the base, you gain more resources and you will be able to produce more units. Remember that you can win the mission without putting up an additional base. Things will, simply, get more difficult without it.
After 15 minutes, reinforcements will arrive [red 2]. It turns out to be another Hand of Ruk. Direct it Eastwards and destroy all of the enemy units along your path. One of them is the underground Dweller mine. At the moment, at which you encounter the first one, you receive an order to destroy the remaining ones. After a while, the Hand of Ruk reaches a resource deposit, occupied by the Mother Goo [red 3]. Destroy the unit and build a small base there. This is not required, but will ensure you with additional resources.
The rest of the mission is about exploring the map and destroying more Mother Goos. The mission ends only after you have destroyed the last one. It is an exceptionally ungrateful, because these Goo units are mobile, capable of moving over mountains and highly durable. Therefore, they may be anywhere on the map and make you play hide and seek. Additionally, you should destroy all of the Goo Nests, because they regularly form small groups of units. IT is them that produced the waves of units that you have been attacked by earlier.
The easiest way to complete the mission is to clear the map methodically. Defend the main base and produce lots of Predators in the other one. Enable viewing resource deposits. Gather your forces, including the Hand of Ruk and dispatch them towards the nearest source. Clear it and leave several Predators around. At the same time, produce new units, both in factories, and both of the Hands of Ruk. With everything ready, replenish your army and head towards the next deposit. This way, you will be clearing the map systematically, of the enemy units and Mother Goos. Leave no unguarded deposits behind. This will only encourage the enemy to recapture them and you only waste your time on clearing the map again.
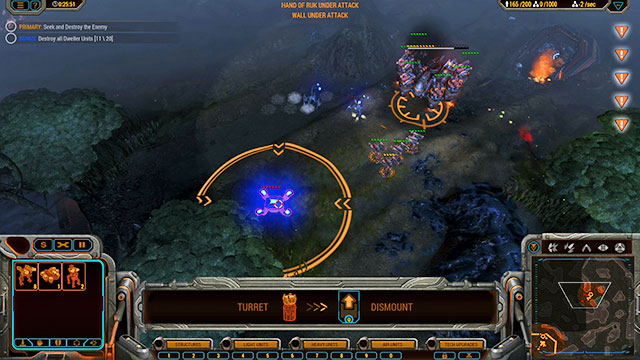
Mother Goo requires resources to function. After you attack, the AI will try to leave the ones it has been occupying and head units towards others. By securing all of the deposits that you have, you make the opponent have nowhere to go. Just remember to move each of the Predators defending each of the sources. Mother Goo attacks everything within close proximity so, motionless defenders, or turrets, will soon be destroyed. If, after you have destroyed all of the Mothers, build several Stratoses and dispatch them on a scouting mission. Moist probably, you have missed one, hidden somewhere in the mountains. Dispatch a Hand of Ruk, to deal with it.
To complete the secondary objective, you need to find Dwellers which can be found all around the map [Blue 1-19]. You should be able to find them, while eliminating Mother Goos. If there is one surviving, dispatch a unit with stealth detector, e.g. Stratos with appropriate upgrade.
Primary objectives:
Secondary objectives:
First of all, build a refinery and a factory. Ignore the enemy units roaming around, for the time being, because they will not attack. Apart from that, they are scouts so, damage that they deal is low. Build several light units and eliminate the enemy. In the meantime, build a silo and develop any upgrade. Also start building turrets. The enemy attacks will be weak so, it does not matter where you put them.
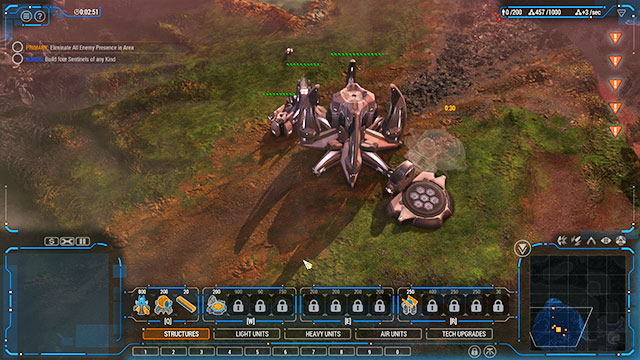
Form an army of, at least, fifteen units and head Eastwards. At the shipwreck, you find the first Fabrication Matrix [2], defended by the Mother Goo. After you get it, you will be able to build factories Tank Attachment.

Seize the opportunity, which will allow you to build Gladiuses. In the meantime, build the second, and then the third factory. To obtain more resources, mine for them near the shipwreck. You should have enough resources to make the three factories work continuously. Also, remember to build turrets to the North of the base. It is possible that the enemy will arrive over the hill and attack you from the North.
Increase your army to 30 units and head North, along the only path. On your way, you will encounter some resistance. At the next deposit, you encounter the second Mother Goo [3]. Eliminate it and head Westwards.
![In the Northern part of the map, at the river, there is the second Fabrication Matrix [4], thanks to which you can build an Artillery Attachment - Mission 6 - The Headwaters - Human campaign - Grey Goo - Game Guide and Walkthrough](https://game.lhg100.com/Article/UploadFiles/201512/2015121519331857.jpg)
In the Northern part of the map, at the river, there is the second Fabrication Matrix [4], thanks to which you can build an Artillery Attachment.
![At the last resource deposit, you find another Mother Goo [5] - Mission 6 - The Headwaters - Human campaign - Grey Goo - Game Guide and Walkthrough](https://game.lhg100.com/Article/UploadFiles/201512/2015121519331896.jpg)
At the last resource deposit, you find another Mother Goo [5]. Gather a big army and destroy it, as soon as possible. Otherwise, the unit retreats and you will have to follow it. Also, it is possible that the Mother builds another one, under way, which heads then towards your base.
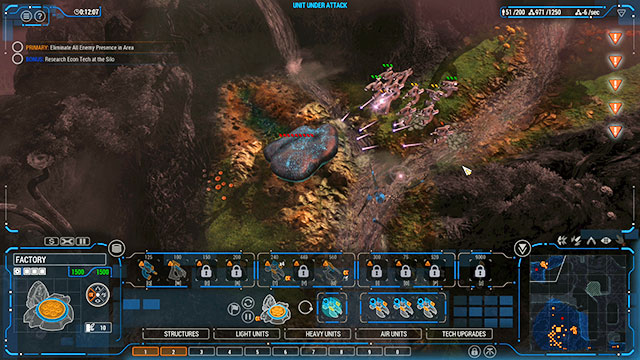
It is turrets that should deal with the attack, then. Make sure that there is a mine within reach, If not, move several Gladiuses over there. After you have destroyed all of the Mother Goos, and Goo units, the mission should end in success.
Primary objectives:
Secondary objectives:
On the map, there are five possible Singleton's locations. In the remaining four, there are small groups of allied units. There are five spots, but their pool is slightly bigger (blue points on the above map), due to which each mission is a bit different. If the outlay is disadvantageous to you, e.g. all of the points are far away from the base, start the mission again. Each time, you should assume that Singleton is in the most distant point, as viewed from the base. If there are more such points, the chances are 50-50.
During the mission, at regular intervals, the trapped machines activate. All of them are hidden behind walls and they will be attacked by the enemy, who split the area with walls and turrets. If there are units from the enemy base around [red 2], they join the attack. Exposed units may be destroyed nearly immediately, or after some time, depending on the numbers of the attackers. If it is also the ones from the enemy base, the trapped units will not last long. For this reason, waiting for allies to activate makes no sense. Before you get there, they will long be destroyed and you will fail the secondary objective. This is why you need to remain active, during the mission.
Additionally, much depends on the situation of points. Some of them have stronger defenses so, in some cases, you need to hurry up, whereas you do not, in the other. To be on the safe side, assume that all of them are well protected and without your help, the allied units there die.
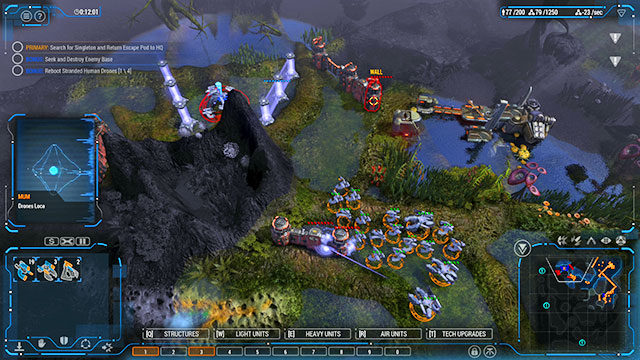
First of all, build two mines on the nearby deposit. Te northern base approach will rarely be attacked so, you can wall it over. Next to the middle entrance, put several Sentinels. For the time being, defend the Southern one with units.
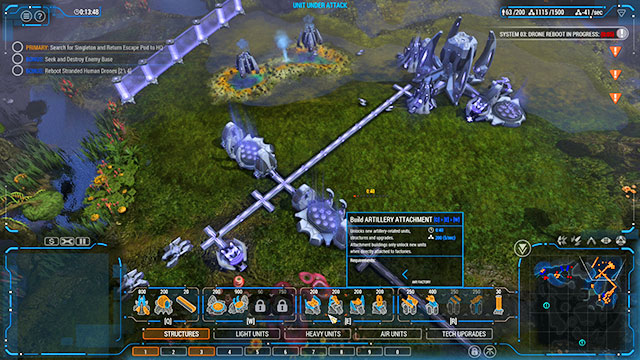
As quickly as possible assemble a strong assault team and go South. The passage will be defended by three manned turrets. Destroy them and construct Conduits this way. As quickly as possible, start to exploit the deposits. They should last until the end of the mission.
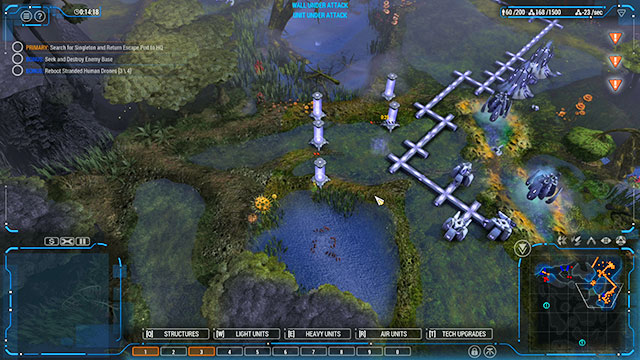
As soon as possible, launch the production of Gladiuses. Leave a small quick response group at the base and head towards the nearest suspicious point, as soon as possible. Along your path, you will have to destroy manned turrets, and small groups of opponents. These will be progressing towards your base continuously. Therefore, you should expect being attacked at any moment.
After you approach the suspicious location, a fragment of the area will be revealed. In the middle, you will notice five allied units, hidden behind a wall, and a group of opponents. Quickly, eliminate the attackers and approach the allied units. They activate after 30 seconds and they join you. Before the activation, you can lose, at most, four of them. Losing five means failing the secondary objective.
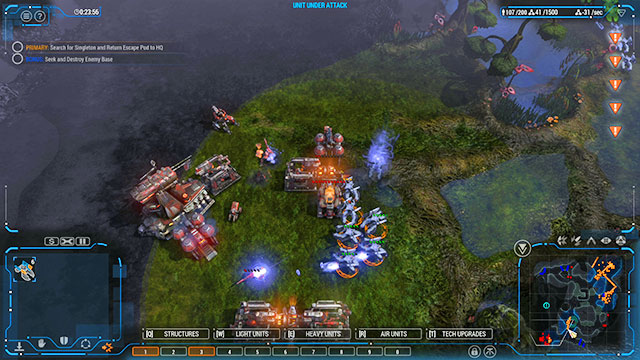
More or less, at this point, you should receive another secondary objective, whose completion makes the mission much easier. The enemy base is in the South-Western part of the map [red 2]. Along your path, you are sure to pass by some suspicious points. While determining the route, start with them and end at the enemy base. The factories at the base keep producing units so, you are going to need a strong assault group. 30 Gladiuses, supported by Lancers and Howitzers should do the job.
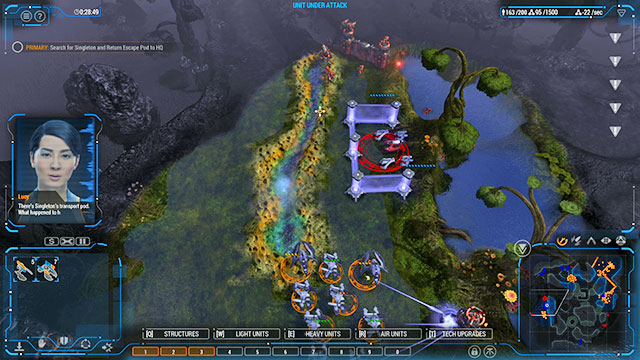
After you discover the fifth point and rescue Singleton, escort him to the base. To complete the mission, you need to stop next to the Core.
Primary objectives:
Secondary objectives:
The beginning of the mission is tough. Your base [1] is being raided regularly from the North and from the East, both from ground and airborne units. You will have to prepare decent defenses and soldiers for destroying enemy installations, at the same time. Start by expanding your base in the Eastern direction, where you find the second deposit [2]. In the meantime, produce defenders. The starting turrets should do, for as long as new buildings remain within their reach. Build Longbow units in the way that enables them to cover the majority of your base with their range.
![The most pressing problem is eliminating airborne units that start from the Eastern enemy base [3] - Mission 8 - The Observatory - Human campaign - Grey Goo - Game Guide and Walkthrough](https://game.lhg100.com/Article/UploadFiles/201512/2015121519331915.jpg)
The most pressing problem is eliminating airborne units that start from the Eastern enemy base [3]. It is a very good direction to launch your first attack towards, because you find more deposits along your path [4]. Focus your defenses of the Eastern part there.
Mass-produce Gladiuses and Longbows. Amass big forces, at least thirty Gladiuses and several Longbows strong. The enemy base [3] is being protected by several turrets that you should be able to destroy easily. Get rid of the rest of the enemy installations. Including turrets to the south, by the resource deposits and bushes [5]. This way, you will halt enemy raids and you win a new spot to build your mine. You do not need to draw a connection wit the Core, refineries create plenty enough harvesters for you to make profit from the mines far away from the base.
After you have destroyed the eastern base, leave small defensive units and take the rest to the man base. During your attack, the factories should keep producing so, after you return,, you should expect to find reinforcements. Gather your armies and go North. The Western Beta base [6] is protected with a wall, which it is best to bring down with a mass attack. Destroy the Southern turrets, make a breach in the wall and head for the base. It produces ground units so, you can reinforce your attack with air force. Keep destroying the HQ and all the nearby buildings, up until you receive the information of the mission being successful.
![Along your path, towards both of the bases, you will stumble across Catalyst containers [blue markers on the map] - Mission 8 - The Observatory - Human campaign - Grey Goo - Game Guide and Walkthrough](https://game.lhg100.com/Article/UploadFiles/201512/2015121519332087.jpg)
Along your path, towards both of the bases, you will stumble across Catalyst containers [blue markers on the map]. In each one, there are 200 units of resources, which go to waste, if your supply is full. Containers come in clusters of two or three and they can be picked by any ground unit.
![The enemys main base is to the North-East [7] - Mission 8 - The Observatory - Human campaign - Grey Goo - Game Guide and Walkthrough](https://game.lhg100.com/Article/UploadFiles/201512/2015121519332057.jpg)
The enemy's main base is to the North-East [7]. There are no fortifications around it and only a big garrison. The easiest way is to attack it from the West,, or from the South. If only you have a huge army, you can try splitting the forces and attacking from both sides, but an attack from one side only is also going to be successful.
Eliminate the units first and focus on factories, and refineries, and finally destroy the HQ. If this does not complete the mission, check out the nearest vicinity. It is possible that you have missed one of the refineries or factories.
Primary objectives:
On the map, there are three bases that accept refugees [2][3][4]. Each one has a specific area that it covers, which is marked in a separate color. Every several minutes, refugees from nearby bases will leave towards those bases. Your mission is to protect them. If a base is destroyed, refugees head for one of the remaining ones. F you lose all three bases, you fail the mission. All three bases ale well guarded, but none of them is capable of producing new turrets or units. If any one of them is destroyed, this is permanent.
First of all, forget about saving all of the refugees. This is going to be an option with the first three waves, and the successive three also, although more difficult. It is at this stages that the first losses will occur. The seventh and the eighth waves are bound to end up in losses. All because of the enemy, who may be lurking everywhere. The map is big, resource deposits, narrow passages and hills are plentiful here. Goo units may be waiting in any of these spots. Additionally, there is no way to control the refugees, and to specify optimal routes for them. Therefore, expect losses, because you cannot avoid them.
Refugees leave their homes in the following order:
1. The Southern zone.
2. The Eastern zone.
3. The Northern zone
4. The Southern and eastern zones.
5. The Northern and Southern zones.
6. The eastern and Southern zones.
7. All zones.
8. All zones.
There are three ways to protect them. The first one is to form a strong army and deploy them in the zones of danger. Wait for the civilians to start running, protect them from threats and move the army to the next zone. Thanks to this, you will always be ready to fight back the enemy attack. The downside of the tactic is that you will be, this way, ignoring the rest of the map, whereas the enemy is developing his bases, and also the necessity to separate your armies during the fourth, the fifth and the successive waves.
The second way requires you to dispatch small patrols into the map, whose job will be to destroy the enemy forces on a regular basis. The patrols need to be strong enough to withstand the Goo attacks, and numerous enough to back up each other, in combat. Three groups of 50 units will be too scattered to be able to support each other. 15 groups of 10 units stand a higher chance. This solution is good for regular clearing of the map but, this forces you to move your units regularly, which makes it difficult to manage the base, among others. Also, patrols need to be despatched in a way that ensures safety for the civilians which again makes it difficult to control them all.
The third tactic is a combination of the above two. You dispatch patrols of ten. At the same time, maintain numerous assault teams in the center of the map which, if necessary, you need to dispatch to back up whoever is in need. The downside of this method is that the cost of it is the highest, whereas the upside is that this ensures you with much flexibility, because you can appear whenever you are needed.
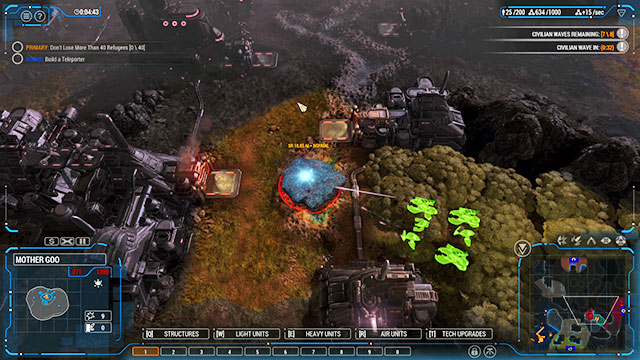
Regardless of the tactic that you adopt, keep an eye on the refugee camps. They have turrets and they will rarely be under attack but, the more Goo on the map, the more frequent, and stronger the attacks. This, in turn, makes refugees flee elsewhere, which exposes them to danger. Also, remember abut deposits outside of your base. In this mission, you will have to bear high costs so, one refinery will soon prove to be insufficient. Also, try to eliminate all of the Mother Goo that you stumble across. Destroying them decreases the opponent's military potential considerably.
Primary objectives:
Secondary objectives:
In this mission, for the first, and the only time, you will have an ally. The Beta forces are to the North of your own [2]. The ally is smart but he may require some help at the very beginning. Therefore, while producing your first units, be prepared to send them Northwards, as a backup. Goo may attack Beta or leave them alone; it is different for each game. Either way, you should defend your ally for as long as he puts up a wall and man turrets. From that point on, you can take it for granted that the AI will take care of its business on its own. In spite of that, keep a team of Gladiuses at the base, just in case.
![While expanding the base, try to seize deposits, to the North of the Core, as soon as possible [3][4][5] - Mission 10 - The Terminal - Human campaign - Grey Goo - Game Guide and Walkthrough](https://game.lhg100.com/Article/UploadFiles/201512/2015121519332155.jpg)
While expanding the base, try to seize deposits, to the North of the Core, as soon as possible [3][4][5]. In this mission, the opponent outnumbers you and he will launch strong attacks. For this reason, each mine is worth its value in gold. Near the marked deposits, there also is a narrow passage that is easy to defend. Block it off with walls and turrets, add a group of Gladiuses and remember to fix the damaged buildings on a regular basis. In reality, turrets and units only would do, but walls make the opponent stop, which always wins you several seconds to bring reinforcements there.
![By exploring the map, you will quickly locate the first Goo Nest [blue 1-8] - Mission 10 - The Terminal - Human campaign - Grey Goo - Game Guide and Walkthrough](https://game.lhg100.com/Article/UploadFiles/201512/2015121519332128.jpg)
By exploring the map, you will quickly locate the first Goo Nest [blue 1-8]. They block access to the best deposits on the map. After you locate the first one, leave it alone. If attacked, it releases lots of enemy units. If you dispatch small forces there, they will quickly be shattered. The Goo Nest regenerates quickly and the remaining defenders will head for your base. Do not attack until you gather a strong army. You can either use Gladiuses, Howitzers and Scimitars, or Gladiuses only. In the latter case, you need around 20 of them. In the former case, tanks block off the enemy defenders and destroy them right after they appear, whereas artillery and bombers eliminate the Goo Nest. In the latter case the first line of tanks destroys the building, whereas the second one takes on the defenders.
In itself, the building is easy to destroy. It has lots of health points, but its armoring is weak. The only problem are the defending units. If you are capable of destroying them fast, destroying the building should not be a problem.
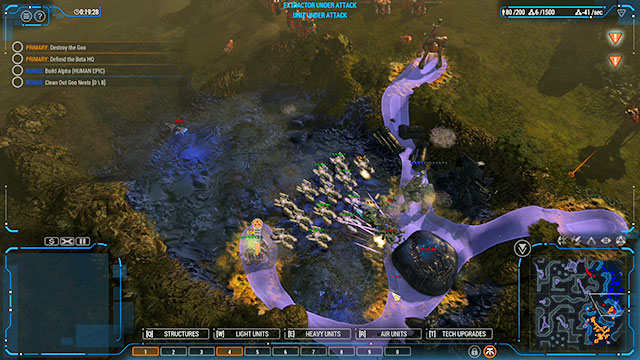
The enemy forces occupy the Western and the Northern part of the map so, the direction in which you attack is up to you. If your ally tries to attack from the north, the best thing to do will be to attack from the south. Thanks to this, you make the Goo split their forces. Always move in strong groups, use air reconnaissance and do not attack the Goo Nest without appropriate preparations. At the same time, do not hesitate to destroy Mother Goos. You can find especially many of them near your base, especially later into the mission. This is so, because deposits on the enemy's ground are exhausted. In such a situation, Mother Goos head towards new ones, even if they have been seized by you.
During the mission, you will be receiving a report of an exceptionally big Goo unit. This means that the enemy has built a Purger, which is currently heading your way. The unit moves alone and it is an immense threat to your ground units. However, its speed of attack is low, it cannot engage airborne targets and its mobility is low. Apart from that, it is all by itself, because the AI does not provide it with backup. Therefore, you will only be able to destroy it with a mass attack of ground and air forces. You only need to watch out for the Purger's AoE attack, which is capable of wiping out most of your units, in the blink of an eye. What proves helpful, while fighting the unit is Alpha.
Building Alpha, just like any other elite unit, requires lots of resources and time. To create an Alpha, you are going to need a factory with all four Attachments. To build one, you are going to require appropriate arrangement of Conduits (see the below screenshot). First, you need to build the Conduits, then the factory, and finally all four Attachments. The order, in which you do that does not matter, but it is better to stick to the above, because you can easily make a mistake, otherwise. With Alpha, your chances of succeeding are much higher.

Expand your armies up until you reach the upper limit for units. In the meantime, you should be clearing the map of the enemy units. Remember to watch the deposits you have, because Mother Goo will try to seize them. After you have formed the army, you should launch the ultimate attack. With the help from the airborne units, scout the area and find all of the Mother Goos. Split the emy into three teams. Deploy two of them near Goo Nests [3] and [4] and have them ready to start their pursuit after Mother Goos. With the main forces, which the Alpha should be a part of, first clear the Southern part of the map and then, start pushing North-Westwards. Keep eliminating the enemy forces, up until you have cleared the entire map. If you still have not completed the mission, conduct a standard reconnaissance from the air. Maybe, there is a single Mother Goo left.
Primary objectives:
Secondary objectives:
You start with small forces [1]. Move them over into the nearby bushes. Northwards of them, you notice two Daggers patrolling the area. Observe them for a moment. You will note that one of them is moving on the brink of the bushes, whereas the other is patrolling areas by the wall [2]. Both of them come together at the intersection to the right of the bushes [3]. Wait for the units gathered in [3] split (one of them moves several seconds after the other) and head Eastwards.
![After a while, you reach a heap of stones blocking your path [4] - Mission 11 - The Cauldron - Goo campaign - Grey Goo - Game Guide and Walkthrough](https://game.lhg100.com/Article/UploadFiles/201512/2015121519332246.jpg)
After a while, you reach a heap of stones blocking your path [4]. Destroy them and keep going. In the marked area [5], you find a Light Goo Nest. Destroy it to free the Mother Goo.
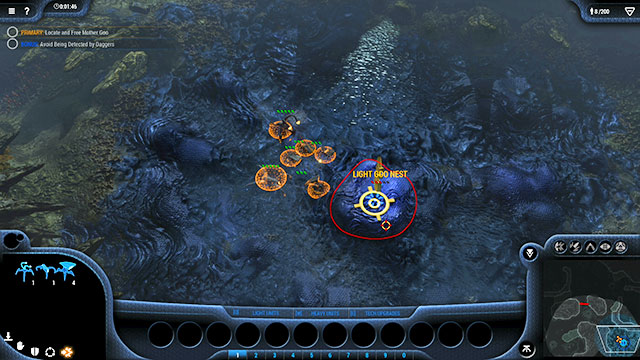
Move the Mother Goo over onto the resource deposit. Collect enough resources to create another Mother Goo. Using this one, seize the deposit to the North [6].
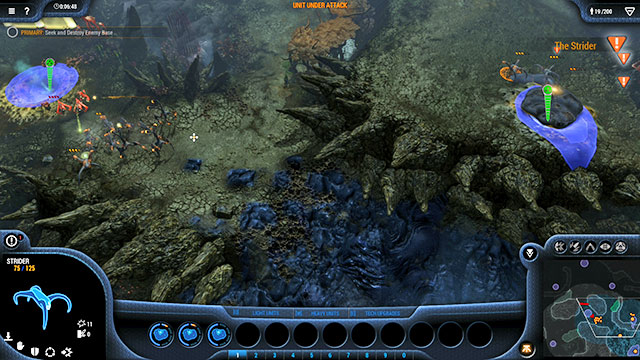
Keep amassing resources, for which you should build Small Proteans. Do not worry about the enemy attacks, because they are incapable of causing too much harm to you. Gather, at least, 30 units of various types and head Northwards, towards the enemy base [7]. It is best to get there over the path to the East of the wall, which saves you the necessity to destroy it. Along your path, get rid of all the enemy units that you stumble across.
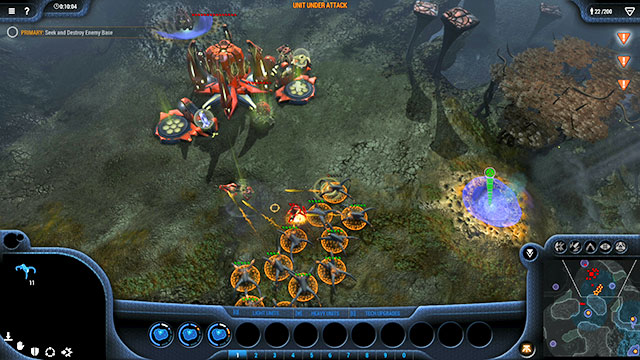
There are several turrets in the base, from the South. Focus your fire on one of them, destroy it and take to the factories, and destroy the Core. In the meantime, create new Mother Goos. You can dispatch them to new deposits or use them in the attack on the base. Destroy all of the key buildings to complete the mission.
Primary objectives:
Secondary objectives:
It is a quite simple mission. Start by amassing resources for 2 more Mother Goos. Use them to seize two deposits in the corners of the map [2][3]. Start the production of Small and Large Proteans. Mainly the latter, because you will require a strong assault team. As of now, ignore enemy attacks. They will occur occasionally and are weak. Prepare several Tempests for destroying the enemy Monitors. The first airborne scout appears above the Southern part of the map, soon after you start the mission. The second one joins in, a moment later. The three remaining ones are patrolling the Northern and central part of the map. You are sure to run into them, while looking for the Encryption Nodes.
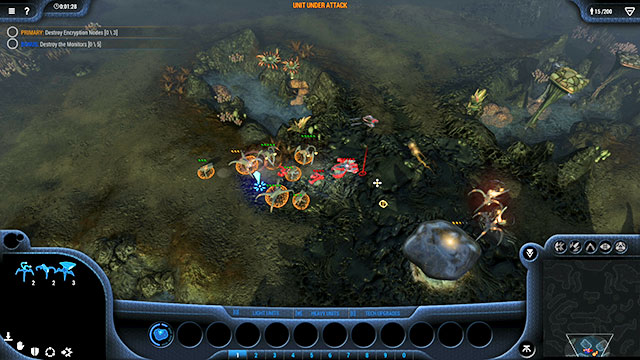
All three targets travel over predefined routes in the Northern part of the map (see: the map) The green and the blue Nodes return to the base, stay there for a moment and got on the way again. The red Node goes around the base. Each one of the nodes has a guard of four Gladiuses. Nodes will continue their beat, regardless of the situation, also in the case of an attack. For this reason, it is best to stop them with a Mother Goo and finish it off with the other units. During the attack, first deal with the guarding units, and deal with the main target afterwards. Also, you can destroy Gladiuses with surprise raids. At no point into the mission, will the guards of the Nodes receive reinforcements.
If you have no other units than Mother Goos around, do not worry and attack the Node with it. First, eliminate the Gladiuses in the front, then engage the target. The attack of the Mother Goo brings it to a standstill. There is quite a chance that, for this very reason, the rest of the guards also stop, I spite of the short distance between the Mother and the Node. Of course, after you have eliminated the targets, remember to eliminate the Gladiuses.
The routes of the patrols are fixed. This means that you can both follow the targets and wait for them along the route, and wait for them to approach. To spot them quickly, use Radiants with stealth. Along each route, there are lots of bushes, which are going to be a perfect cover for the scouts.
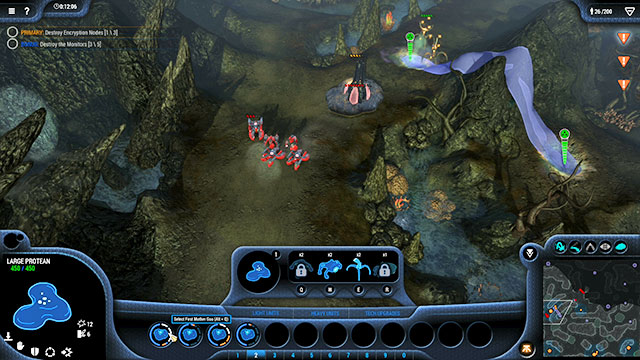
While hunting down the Encryption Nodes seize all of the deposits in the Southern and the central part of the map. In total, you should have eight of them. Soon, you are going to need them.
After you have destroyed all three targets, you get the opportunity to hack into the enemy base [4]. Form a big assault team (it is best to exhaust the units limit) and attack the enemy base. You can destroy everything there, apart from the indestructible Core. After you destroy all, fill your forces in, at least to a half of the limit, and gather all the units around the Core. Split your forces in such a way, so as to guard all four routes leading up to it. Also, remember about Tempest to destroy the enemy aircraft. As soon as everything is ready, approach the building with a Mother Goo.
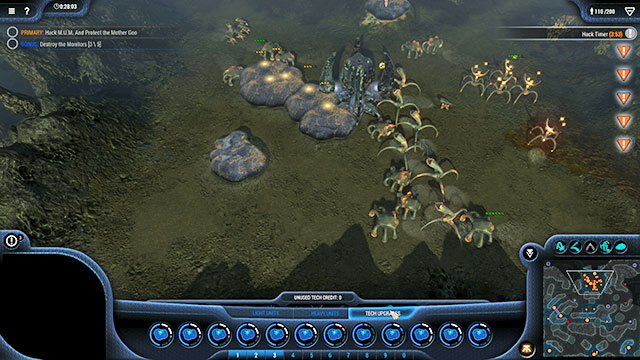
This starts a countdown. For the next 5 minutes, the Mother Goo needs to be deployed by the Core, while the rest of the army is protecting it against the enemy attacks. If you have exhausted your units limit, the enemy is not going to be able to fight through your defenses. It is going to be too many of them, simply put. Try to replace the destroyed units, on a regular basis, because the enemy attacks with a sizeable army. After five minutes of fighting the attackers back, the mission will conclude.
If, up to the moment of hacking, you have not destroyed all of the Monitors, dispatch a Tempests to scouting the area. It is best to start with the two top corners of the map, move slowly towards the South and split units, whenever necessary. The enemy presence on the map will be limited to several mines so, there is no need for reinforcements for your units. After you have destroyed the Monitors start hacking the Core.
Primary objectives:
Secondary objectives:
Destroy 5 enemy outposts.
You start in the North-Eastern part of the map [1]. The entire area is criss-crossed with Beta fortifications that are guarded by small groups of units. The disadvantage here is that wherever you go, you run into the enemy. The advantage is that you are not going to be attacked too often.
At the beginning of the mission, move the Radiant eastwards of the Mother Goo. You will find the first enemy fortifications [2]. Destroy them with the Crescent. This will require you to fire at it for some time, but you have plenty of time. You note that the enemy is taking blows and not responding. The only exception are the single scouts, but they should not pose too much of a problem to you.
![Follow the pattern - scouting with the Radiant and laying Crescent fire - and clear the immediate vicinity [3][4][5] - Mission 13 - The Grotto - Goo campaign - Grey Goo - Game Guide and Walkthrough](https://game.lhg100.com/Article/UploadFiles/201512/2015121519332334.jpg)
Follow the pattern - scouting with the Radiant and laying Crescent fire - and clear the immediate vicinity [3][4][5]. Seize the opportunity and learn the opponent's reactions - if, and when, the units leave turrets and whether they attack, after they leave, or maybe they stay still and so on. Along your path, create additional Crescents and several Destructors to protect you against enemy patrols. Do not approach too close to the enemy positions, or you will be attacked. Instead, destroy them from a safe distance.
At all costs, protect your Crescents. Also, develop the technology to provide Radiants with stealth. Thanks to this, they will be capable of revealing artillery targets without being engaged by turrets. If you encounter turrets defended by Guardians, dispatch more Crescents against them. Sooner or later, their projectiles will penetrate the enemy AA defenses.
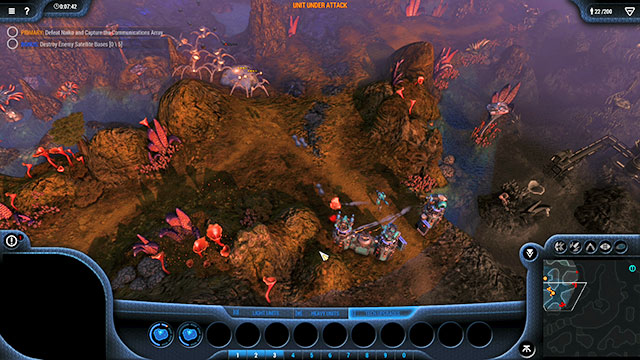
After you have cleared the nearest vicinity of the enemy reinforcements, head Southwards. In the meantime, create another Mother Goo and keep it near the main army. The first Beta outpost [6] does not have any additional fortifications, but its factory keeps producing new units. Therefore, remember about the Destructor guardians for your army. Also, remember to form n additional air protection, in the form of Tempests. Quite quickly, the enemy starts dispatching bombers in your direction. One effective air raids is capable of eliminating the majority of your units, including artillery.
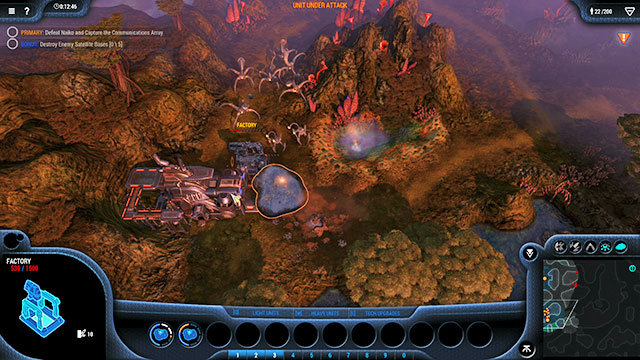
After you have destroyed the first outpost, seize the nearby deposit. Approach the thickets [7], and small reinforcements will appear there. For the units attacking from the South, you can wait near the Mother Goo, but it is much better o hide among the bushes to the south of the destroyed outpost. Gather the remaining forces there and create new Crescents and Destructors, and also prepare new Mother Goo. You can also develop new technologies.
Another outpost [8] can be found Southwards. It consists of a big factory and several attachments. Watch out for raids, approach it with the artillery and start your fire. If there are enemy units around, use the Destructors to eliminate them. If not, dispatch all your forces to destroying the base. After that, seize the deposit.
![You find another outpost in the center of the map [9] - Mission 13 - The Grotto - Goo campaign - Grey Goo - Game Guide and Walkthrough](https://game.lhg100.com/Article/UploadFiles/201512/2015121519332308.jpg)
You find another outpost in the center of the map [9]. Eastwards of it, there are many turrets, and there are quite a few of them in the outpost itself. Again, use the Crescent. Also, reinforce AA defenses, because the frequency and the strength of air raids will intensify. If, in the previous battles, you have lost of your units, retreat and replace the losses. At this stage, you should have filled the limit of units to a half, at least. During the attacks, reinforcements should arrive in the nearby thickets [10].
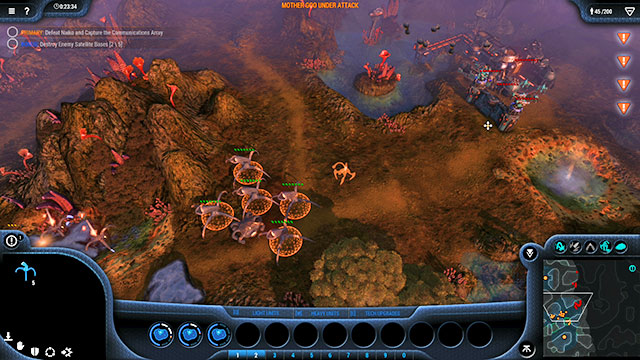
After the battle, seize both of the deposits. Hide Tempests in the thickets [10], from where they will be defending your units against the enemy air raids.
The fourth outpost is in the South-Eastern part of the map [11]. There are two ways in which you can get there - over the path from the West, which is walled and protected with turrets, or from the North - it is a longer route, but devoid of any defenses. For this reason, it is easier to attack from the North. Eliminate the factory and seize the deposit. The Western fortifications can be destroyed, but leaving them intact should not be to your disadvantage.
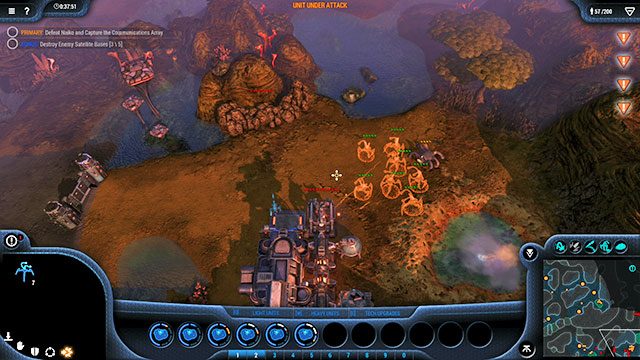
At this point, you should have reached the limit of your population. From the fourth outpost, head North. Both of the paths are fortified so, clear the right one first, and then the left one. The enemy will be trying to shoot down your artillery projectiles so, make sure that you have, at least, 10 Crescents. Destroy the turrets and then the outpost itself [12]. The enemy attacks, at this point, should be weak, but keep several Destructors for defense. Also, remember about Tempests, because the fifth outpost produces airborne units.
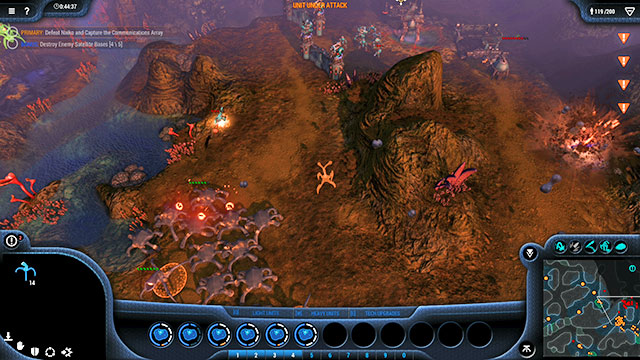
From the ruins of the fifth outpost, head North. There is one fortification line and your main target here [13]. After you have destroyed the previous targets, the enemy's main base should pose no challenge to you. If you have sustained small losses, you can attack straight away. If not, replace your losses first. Remember to scout the area beforehand. In front of the base, there are thickets that are perfect for that purpose. If, however, you do not feel like scouting, you can launch the onslaught straight away. At this point, the enemy will not be able to fight back anyways.
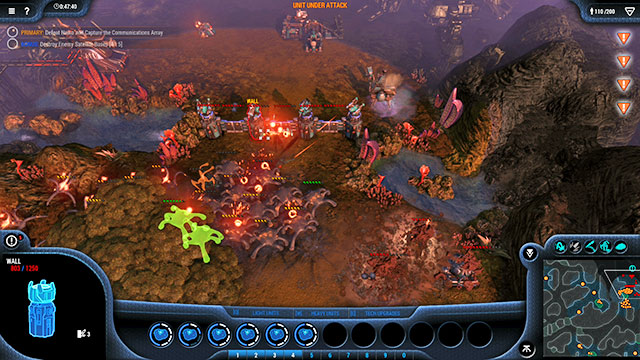
Finally, direct the Mother Goo into the marked area.
Primary objectives:
Secondary objectives:
Arguably, this is the most difficult mission in the entire game. Your mission is to destroy all of the enemy bases Northwards of the barricade [2]. In practice, this means that you will have to clear the entire Northern half of the map, because all of the resource deposits there, and mountain passes, have been seized by the Beta. The enemy has lots of units, developed bases and fortifications. All of the turrets are manned, all of the factories keep producing units. All in all - it is going to be an ordeal, especially in the other half of the mission.
You start in the South-Western part of the map [1]. Immediately, move your units Eastwards, towards the two deposits [3]. Hide Tempests in thickets, block all of the passes with Dwellers, and gather the rest of the units on the Northern side of the hill. As of now, they will have little to do, because the enemy attacks are weak but still, keep them alerted. Create a second Mother Goo, then more. Seize all six of the deposits on the Southern part of the map. One of them [4] is being mined by the enemy mine. Have the Mother Goo destroy it and exploit it. Dispatch a small backup there, especially AA units, because the enemy may launch a small counterattack.
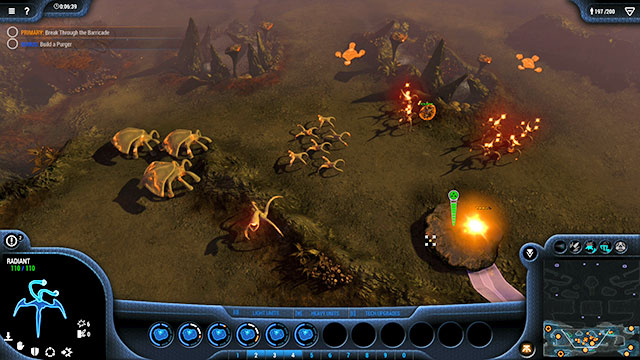
Take your time and expand your forces. Issue an order to build two Purgers. Meet the upper limit by producing Tempests, Destructors for protection, and several Radiants. Develop stealth technology for the Radiants. Apart from that, research into everything that you deem the most necessary. With both Purgers ready, attack the barricade [2]. Have scouts reveal the area and both elite units launch the attack. Keep the rest of the forces nearby, in case of enemy air raids. If you do not want to use Dwellers or Bastions, dispatch them with the first assault team. In their place, create units the most useful to you.
Another method is to create six additional Mother Goos. Send the remaining Bastion units ahead, to keep turrets occupied, and destroy fortifications with Mother Goos. The cooperation of six of them should bring the Beta defenses down.
![After you cut through fortifications, you will have to destroy the first fortified enemy bases [5][6] - Mission 14 - The Barricade - Goo campaign - Grey Goo - Game Guide and Walkthrough](https://game.lhg100.com/Article/UploadFiles/201512/2015121519332435.jpg)
After you cut through fortifications, you will have to destroy the first fortified enemy bases [5][6]. Their defenses are not too strong, but you may have some problems with them. The reason is that the enemy will be attacking from all the possible directions. Therefore, expect attacks both from the bases and from the North. You should especially watch out for the Tempests and their guards, which will suffer from regular air raids. Also, leave some of the forces where the destroyed barricade was [2]. The enemy will be sending single units that way and they will be marking targets for bombers.
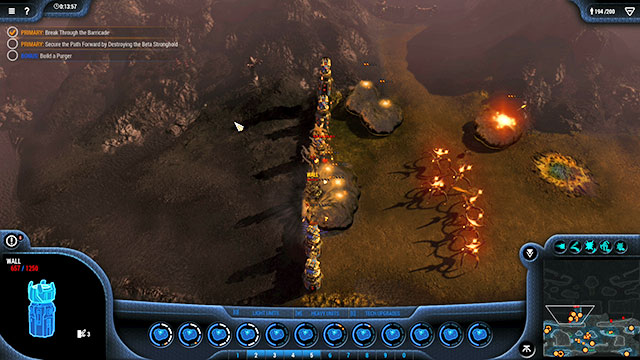
After you have destroyed both of the bases, regenerate your losses. Also, You need to have six Mother Goos. You can choose from two fortified passes [12][13]. Take the Western one, form a breach and head on. More or less, after you reach the Northern end of the passage, you should receive a message of the activation of the Hand of Ruk. Retreat, scatter Mother Goos, to keep a considerable distance between them and deploy them to the North of the barricade. To the East of them, on the ruins of the enemy base [6], position two Purgers, the rest of the armies and wait. Sooner or later, there will travel a rocket, towards the West-most Mother Goo. This means that the Hand of Ruk is close and heading your way. To make things easier, you can position your Radiants on the hills, which will let you know about the approaching enemy, early enough. And they will be destroyed immediately after that, because the Hand of Ruk can detect stealth units.
Have Mother Goos head towards the breach. They need to be scattered, while moving. In case one of them gets hit with a rocket, the rest will survive. Have the rest of the forces wait. If everything went according to the plan, the Hand of Ruk heads towards Mother Goos and ignores the rest of your units. As soon as it reaches the barricade [2], immediately attack from both sides. It is possible that it notices Purgers before that. Attack also in such a case. Just remember to scatter your forces beforehand. It is important to get o the Hand of Ruk and destroy it, before your army is destroyed with its rockets.
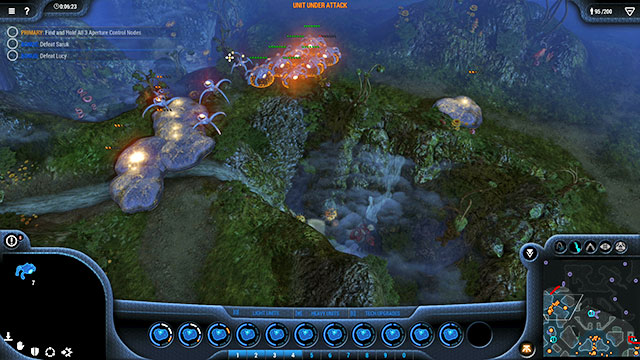
After you notice the Hand of Ruk attack it with all you have. Have Mother Goos take on its fire, while the Purgers attack. Do not approach with your smaller units, or they will be quickly destroyed with the rockets. Keep them close to both Purgers, in case of the enemy air raid. The battle is long, most probably, you lose all of your Mother Goos in the course of it. In spite of that, do not retreat, up until the Hand of Ruk is destroyed. Remember that rockets cannot be launched at short distance. Therefore, if Mother Goos get near the Hand of Ruk, they will be able of destroying it quickly.
Of course, there is a chance that the Hand of Ruk follows the eastern passage [13] and spots your ambush. In such a case, attack it with all your forces, also lightweight units. Two Purgers are capable of destroying a Hand of Ruk, all by themselves, whereas with reinforcements, your victory is a sure thing. Also, just in case, you can put both Purgers with a Mother Goo to the North of the barricade [2] and, as soon as the Hand of Ruk appears, attack it with all you have. It is important that you do not attack this unit while scattered and to prevent it from using rockets too often. First of all, you cannot lose your superunits that are the best weapon against the Hand of Ruk. If this happens, you can, just as well, start the mission over, because your chances of defeating the enemy have just dropped drastically.
After you have destroyed the enemy superunit, prepare for the second one to arrive, immediately. You should have enough resources to produce another six Mother Goos. Do that, replenish your army and prepare another ambush. Do not put both of the Purgers to strain. Rebuilding them will take time, which you have little of, as of now. Have the scattered Mother Goos take on the entire fire again. This also goes for the smaller units arriving with the Hand of Ruk, as well as the regular air raids of the enemy bombers.
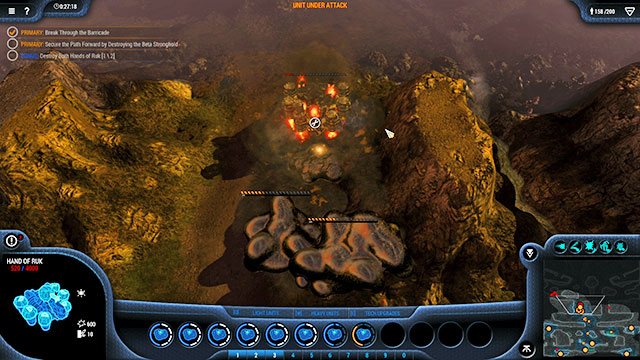
As soon as the other Hand of Ruk falls, you can take some breath. The most difficult part of the mission is a thing of the past, now. Replenish your armies and follow the Western path. You will run into another fortified enemy base, and one more, to the North of this one [7][8]. The area is well-defended so, prepare Radiant to mark targets for the Purgers. Destroy the enemy buildings, at a safe distance, and watch out for the enemy aircraft at all times. The closer to the enemy base, the more of them you encounter. If the Purgers got a severe beating, while fighting the Hand of Ruk, you can dispatch them on a suicide mission and do either of the following- replace both of them, which is time-consuming, or produce Destructors and Crescents to replace them.
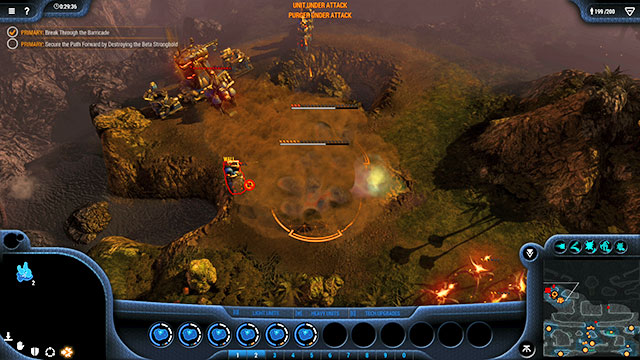
After you have destroyed both of the enemy bases, you reach the main enemy base. Along your path, you will still have to cut through heavy fortifications that defend both central routes to the enemy base [14][15]. On the left, there are several poorly guarded buildings, on the right, there is the HQ [11]. Finally, you will have to destroy the last two fortified enemy bases [9][10]. They are not as well-protected as the previous two. At this stage, the enemy has no more resources to build armies. There are chances that he has earlier removed six units from turrets. Destroy all of the key buildings to complete this mission.
Primary objectives:
Secondary objectives:
With the right approach, this is a very easy mission. Your task is to seize three key points and hold them for 5 minutes. In theory, you can do this at the very beginning of the mission. In practice, however, you will not be able to fight back the enemy forces/ Without proper preparations, do not even attempt doing that, or you will have to start over.
Start by seizing two deposits in the Southern part of the map. The two to the West [2] are being defended by three Beta turrets, the two next to them [3] and to the South [4], are devoid of any defenses. Especially the central deposits proves to be of value, which can be mined by several Mother Goos. Seize them all and ensure protection of several small groups of Tempests and Destructors.
There are many ways, in which to destroy both bases. The majority of them, however, require time. Which you do not have too much of. For as long as both of them are operational, the enemies are dispatching their teams and elite units. The Hand of Ruk, with the Alpha support is a challenge that you, rather, cannot stand up to. This is why you should gather a group of six, or more, Mother Goos, to the South of Saruk's base [5]. Reinforce them with several Destructors. Gather all these forces in one spot and have them attack the enemy fortifications. Mother Goos are not the strongest units in the world, but they are perfect for destroying fortifications, if acting in a group. Keep them close to each other and pick targets yourself, and the enemy wall will fall in no time at all. During the attack, you may lose one of the Mother Goos.
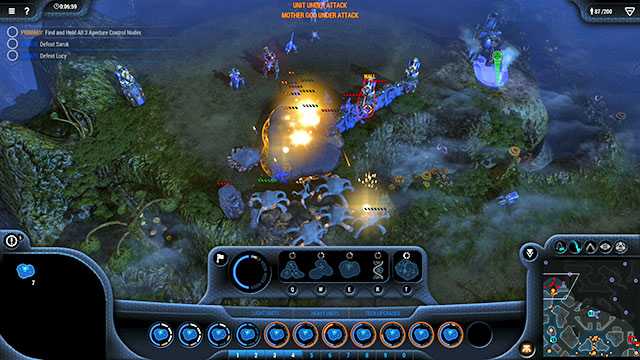
After you get into the base, ignore the fortifications to the East. Head Northwards, while keeping to the left edge of the map. Along your path, you run into enemy units and single turrets. Destroy all that moves, up until you reach the HQ. Destroy all of the key buildings and Saruk ceases to be a problem. If, in the meantime, you receive a message of the Hand of Ruk, do not lose your head. The unit appears by the Aperture Device [7] so, go out to meet it. It attacks you with rockets, but this is its only offensive weapon, because the turrets are empty. Get to it with, at least, one Mother Goo, and the Hand of Ruk will be immobilized and, after some time, destroyed.
While destroying Saruk's base, you should start producing two Purgers. If your population limit permits one only, gather all of the Bastions and Dwellers and dispatch them on a suicide attack on Lucy's base. Make haste, because an Alpha appears on the map soon and you will be unable to destroy it without the Purger support. With this type of unit, you will easily destroy Lucy's base. It is not even going to need any support, because, although Lucy's base is well defended, it is not defended well enough, to withstand an elite unit.
If the Alpha has not appeared so far, good for you. If it did, send a Purger against it. If you do not have any, or they are being produced, you will have to attack with the other units. Use the Bastion to distract the Alpha, and Destructors and Crescents to destroy it. Remember that the beam of the superunit can be dodged and approaching to close will result in an attack with a shockwave.
At this point, you should have the entire map under your control. Therefore, it is time to get prepared. For each Control Node you need one Mother Goo. You should also produce two Purgers. Fill the rest of the limit with Destructors and Crescents. You will defend the central and the Eastern Control Node [3][4] with single superunits. Deploy the rest of the armies by the Western point [2]. After you have deployed Mother Goos next to the Control Nodes, you need to defend them for five minutes. If any Mother Goo is destroyed, during that time, you need to start over.
To defense to start, you need to issue the patrol order. Without this, the Purger will take no action and will soon fall to the enemy. While patrolling the area, it will attack everything in sight. The enemy groups are highly concentrated so, a single attack destroys the entire group. In the worst case, one or two units survive it. This way, one Purger is enough to defend the entire Control Node.
After you issue the orders, save the game and near the Mother Goos to Control Nodes. Countdown does not start, for as long as Mother Goos are not near all three of them. From now on every, around, 30 seconds, you will be attacked by strong groups of enemy units. The Purger in the patrol mode, right next to the Control Node, is going to deal with them with flying colors so, the most difficult is the defense of the Western point [2]. Gather as many Destructors and Crescents there as possible. Ignore the AA units, the enemy is not going to use aircraft.
If you want your chances of victory to go up a bit, save the game before the countdown starts. During the attacks, take a mental note of where the units appear. There are several such spots and they are always the same. Remember their location, load the game, deploy an extra Mother Goo there, as well as the rest of the units, and see the enemy units being destroyed, right after they arrive. The only exception is the central Control Node [3], which is attacked from three different directions. After you deploy a Purger right next to the building, you will not be able to see where the enemy units come from. But, you do not really have to, because the superunit will deal with them, without any problems.
After the attack is over, you only need to send the Mother Goos to the marked location. If you have destroyed both of the enemy bases, the last objective is pure formality.
Grey Goo requires a lower-end PC. 1 GB VRAM and 15 GB free HDD space is not much nowadays. The minimum and recommended requirements for the graphics card are from, around 2009, whereas for the oldest of the CPU units from 2011. To enjoy the game in its fullest, you need a computer that it is difficult to call "modern" these days.
With full graphics settings and 1920 x1080 resolution, Grey Goo ran smoothly. Some greater issues occurred, while loading and on some of the maps. The game chopped at some moments and even freeze. Also, the game slightly chopped, while viewing the game menu and while switching between missions on the campaign map. However, after being loaded, the game ran without major issues. At least, before the ESC key was pressed, when it started to chop again, for several seconds. Again, the game required some time to return to the normal state. The game slowed down more, only with progress into the game, when there were more than a hundred buildings present on the map and moving units, especially during intensive fights, where artillery and elite units were used.
The bottom line is that at the moment, at which the guide was under creation, many players reported that the game slows down. By the time this guide is ready, this might have been remedied with patches.
The game requires Steam registration, but playing solo, offline, is also possible. In the online mode, the game offers co-op and all against each other, for four players. The control input devices are the keyboard and the mouse.
Single player: Yes
Offline Co-op (split screen/hot seat): No
Multiplayer: Up to 4 players in co-op mode or all against each one, through:
This guide has been prepared on PC of the below specifications:
The game ran smoothly in 1920 x 1080 resolution, in full screen/window mode the highest graphics settings. In both cases, it allowed for the use of the ALT-TAB hotkey, and for returning to the game without any drop in performance or error messages. The only problems occurred while opening the game menu and while loading the individual maps. Also, the game may slow down, if there are too many thing going on simultaneously and the map was full of units.
Yes. The game has been stable on high graphics settings, on a computer with Intel I3 2370m 2,40ghz, Radeon HD 7650M and 6 GB RAM.


 Grand Theft Auto Online Game Guide & WalkthroughGrey Goo Game Guide & Walkthrough
 Gears of War 3 Game Guide & Walkthrough
 God of War 3 Game Guide & WalkthroughGrand Theft Auto: Chinatown Wars Game Guide & Walkthrough