In Gray Matter you will be helping two characters - Samantha Everett and David Styles - in solving a mystery of strange, almost paranormal activities. Both of them keep diaries, but in fact all they contain is a record of the dialogues - it can be found in the inventory, on the bar in the upper part of the screen.
Manipulating items looks a bit differently than in most point & click games. Clicking an item with the LMB in the inventory will result in a comment referring to it or a zoom in case of fragments of puzzles and documents. The latter ones can be magnified with the mouse wheel. To combine two items, you have to click one of them with RMB in the inventory - it will land in a symbolic hand (upper right corner of the screen) - and afterwards LMB on the other possessed or external item.
During the game it's worth to check your progress (P or a special icon in the left corner of the inventory) on a special screen which will display which missions are still ahead of your character and to what extent are they completed. Apart from missions needed to complete a given chapter, there are also additional activities, the completion of which is optional.
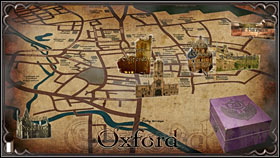
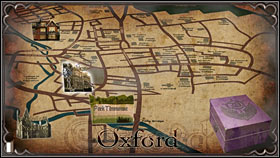
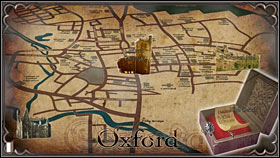
There is an in-game map (M or a special icon in the left corner of the inventory), which apart from letting you move quickly (without having to move between location) will also give you important information. The colour in which the name of a given location is written indicates if there are any main missions left to complete (golden letters), bonus missions left (silver letters) or if there's nothing there for you to look for (gray letters).
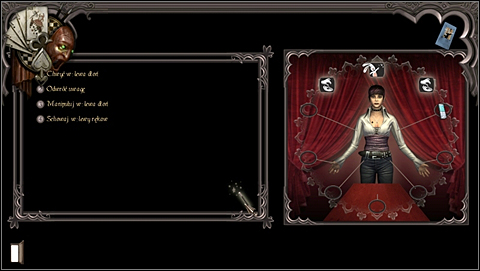
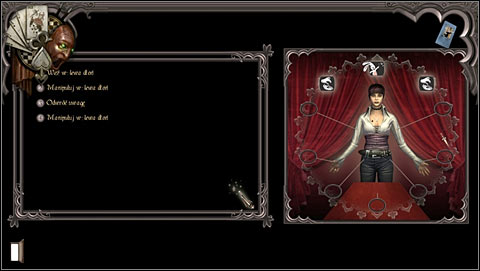
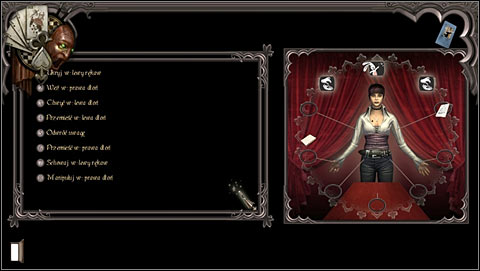
A special screen is used for planning magic tricks, on which you mark the moves which Sam should make. You can also have a look at her magic book (on the inventory bar) by pressing LMB (it will appear on the left) to check if you're doing everything in the right order.
Traditionally, active points are accessible by pressing space, double pressing LMB speeds up the character's movement and a single click scrolls the dialogues.
The construction of the guide is adjusted to the mission received by the characters. Most of them can be completed at any order and at the same time, but sometimes you have to complete a certain task before you can move to the next one. If you can't perform one of the actions described in the guide, make sure you've completed all the previous ones.
Red has been used for marking items, blue for premium actions and bold marks solutions and important information.
Katarzyna "Kayleigh" Michalowska ()
Translated to English by Jakub "cilgan" Lasota
Missions:
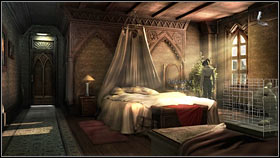
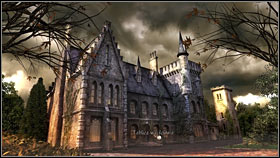
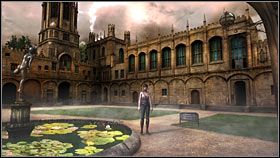
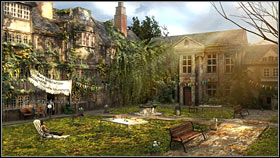
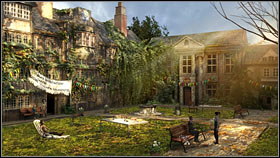
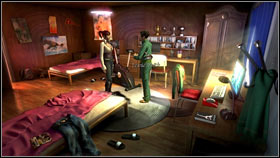
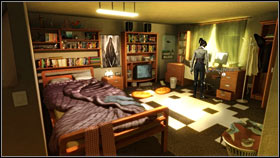
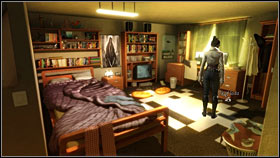
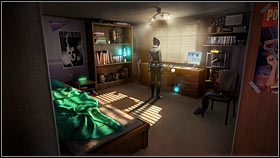
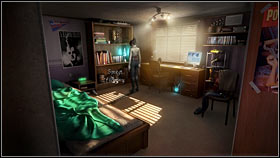
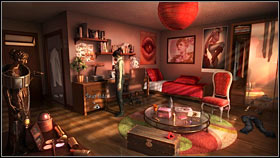
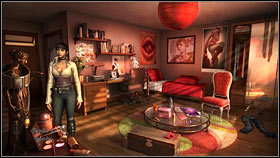
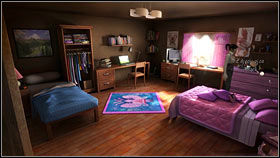
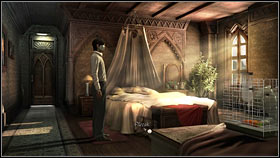
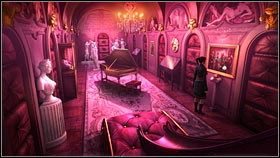
After the first night spent in Dread Hill, Sam decides to get out of the house into which, truth be told, she did get using a trick. Help her find her white rabbit Houdini, without which she won't go any further.
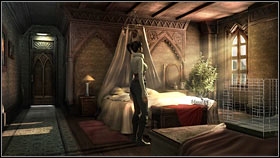
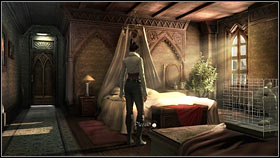

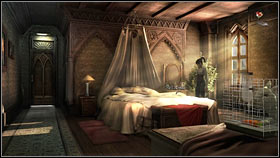
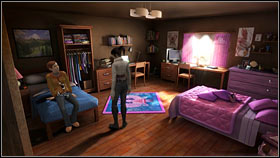
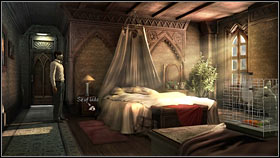
The animal can be found on the right side of the bed, click the lower right corner of the bedding (5 points). Now it's time to feed the little refugee, so approach Sam's backpack lying by the lower left corner of the bed and look inside (2 points). Take out the carrot (2 points) and water bottle (2 points) and exit the zoom by pressing the icon in the lower left corner of the screen.
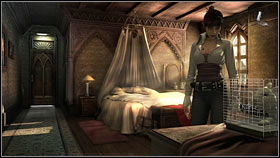
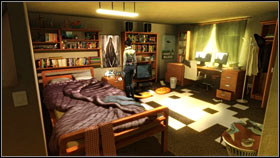
Head to the pitcher standing on the table (to the right of the bed) and pour some water into the bottle (in the inventory at the top of the screen, click the bottle with RMB - it will land in a symbolic hand in the upper corner of the screen - and click on the pitcher - 2 points). Install the water bottle on the rabbit's cage (similarly to how you've poured water into it - 3 points). Give the rabbit a carrot (3 points) to end this task (19/19 points).
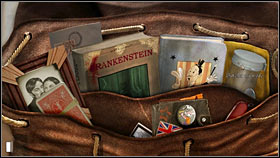
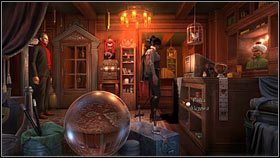
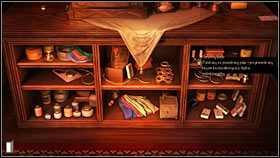
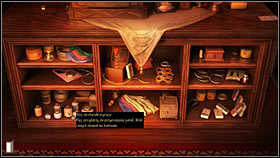
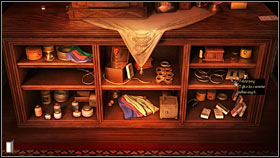
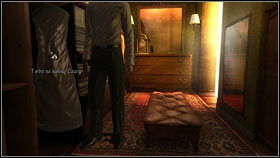
Take the Deck of Cards (2 points), Magic Handbook (2 points), Wallet (2 points), Swiss Army Knife (2 points) and Matchbook with the Daedalus Club logo (2 points) out of the backpack. Go out of the room.
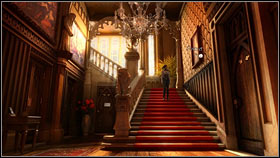
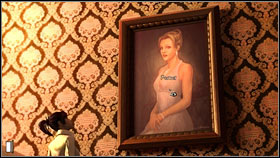
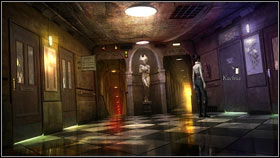
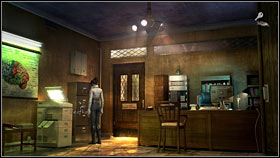
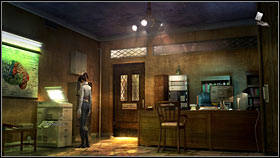
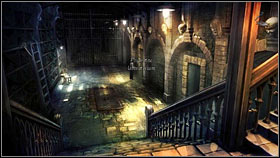
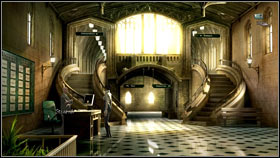
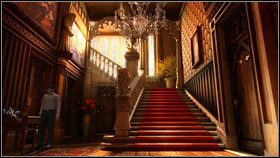
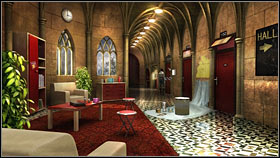
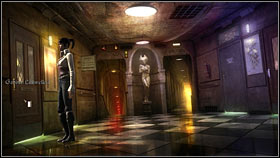
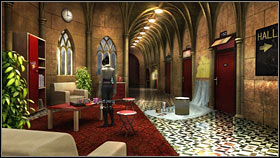
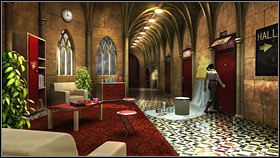
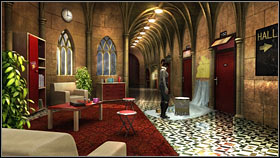
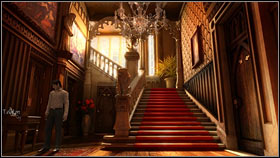
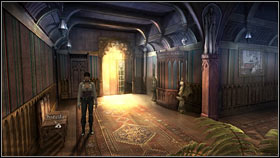
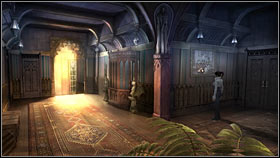
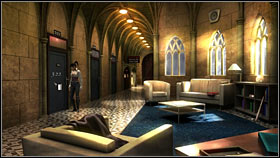
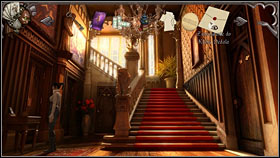
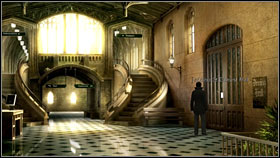
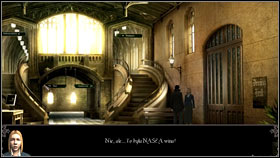
From the corridor upstairs, go down into the hall using the stairs right beside Sam's bedroom. While going down the stairs, have a look at the portrait of a beautiful woman hanging on the wall on the right (3 points).

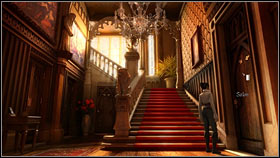
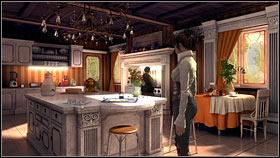
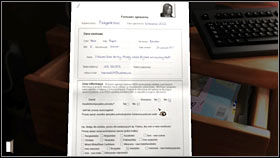
There's an envelope for the doctor's new assistant attached to the door on the left side of the stairs - have a look at it (2 points). However Sam won't want to read it, as she doesn't think of herself in such a way. There's someone in the kitchen so the girl won't want to enter it. The door beside leads to the dining room and the opposite (on the other side of the stairs) to the living room - go there.
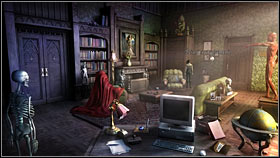
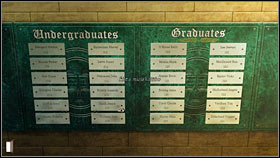
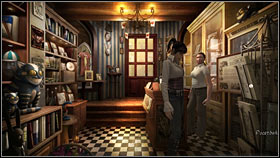
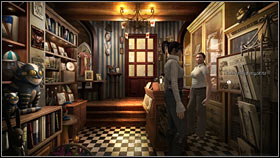
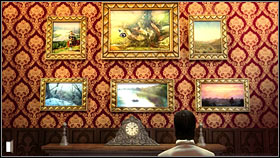
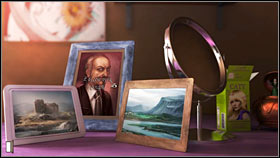
Take a look at the diplomas on the wall (2 points) and the patients photos on the table behind the sofa on the right (2 points). Return to the hall and go outside (arrow at the bottom of the screen).
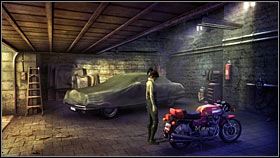
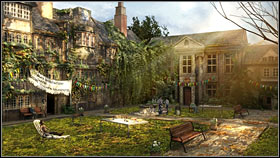
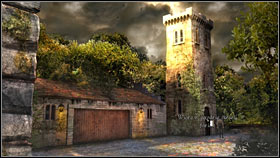
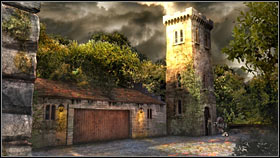
Take a look at the board on the front of the building, right beside the entrance (3 points) and afterwards head to the outer garden (on the right), towards the tower. You will reach the garage with Sam's motorcycle inside. Go inside and try to start it (2 bonus points). It won't work. Return inside the house.

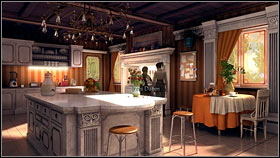
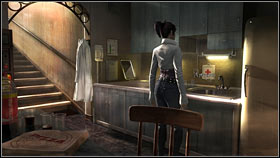
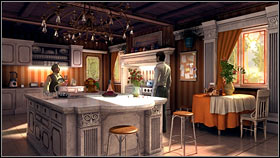
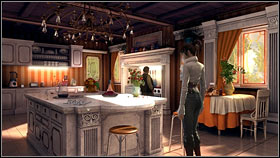
Samantha will be noticed by the housemaid, Mrs. Dalton, who will ask her to the kitchen for breakfast. Go there and talk about everything during the meal (other inhabitants, portrait in the e hall, London, Oxford, the research centre, the assistant - 21 points). Apparently the conditions aren't so bad, as Sam will decide to stay.
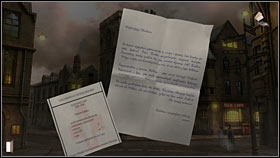
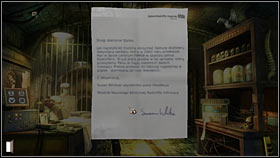
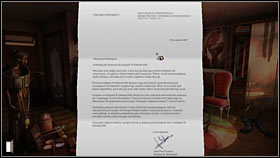
Go to the hall and take the New Assistant envelope (10 points). Read the letter from your new employer. It turns out that Dr. Styles wants Sam to recruit six research candidates from among the students. Return to the kitchen and talk about the cell phone - unfortunately Sam doesn't have one. Mrs. Dalton will give you a Cell Phone (5 points).
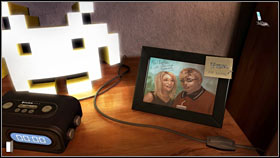
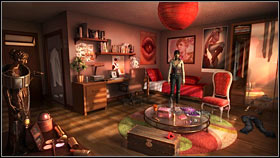
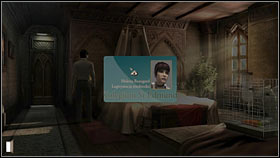
Take a peek into your room and take out the photo of Mom and Dad out of your bag (3 bonus points), which Sam will automatically put onto the nightstand.
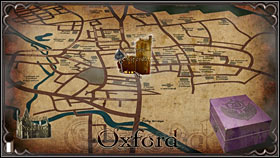
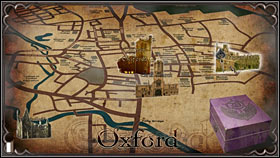
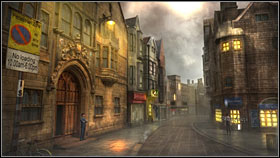
Once you press the special icon in the upper left corner of the screen (or M), a map will appear. Choose Oxford Town Center on it (in the middle - 5 points) to end this mission (63/63 points).
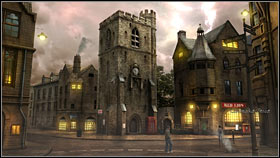
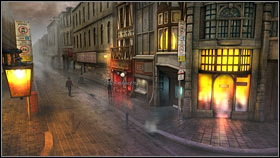
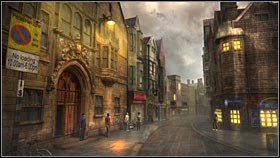
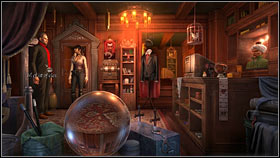
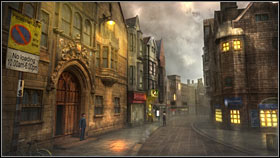
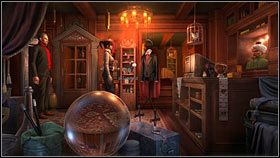
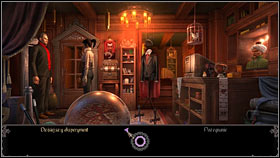
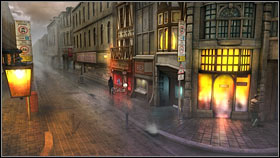
Go to Cornmarket Street (to the right). On the right you will notice a shop called "Black Wand". Examine it (zoom) - it will turn out that it's a magic shop. Of course go inside.
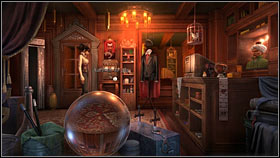

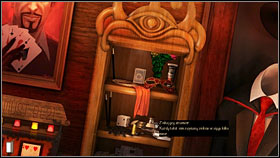
Examine the machine by the door - take a look at the logo in the lower part. It's the Daedalus Club logo. Mephistopheles will enter the shop. Talk with him about the club (9 points) - Sam would really like to become a member.
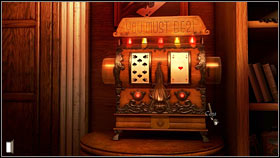

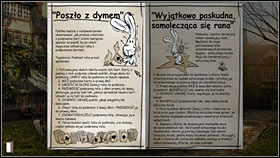
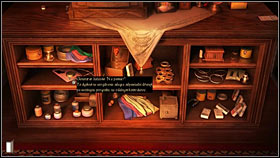
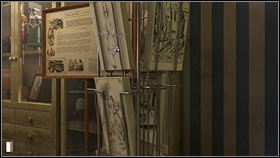
After the conversation ends, take a look at the painting above the machine. Sam will recognize her interlocutor on it. Return to the machine - in order to win, you have to gain 21 points. Press the buttons below the cards until you reach the desired score - first one until an Ace or 10 appears and then the second to reach 21 (15 points). Take the Prize (price - 2 points) from the right side of the machine. It's the Daedalus Club Riddle "The Betrayer's Price", the content of which includes a hint on the solution. Talk to Mephistopheles about the "scholar's heart" (3 bonus points). Take a look at the tall shelf (beside the machine - 4 bonus points).
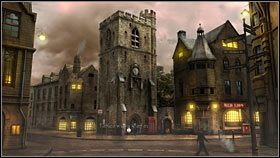
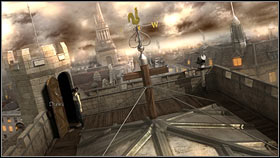
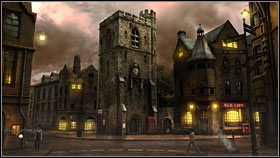
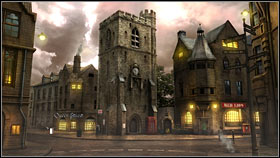
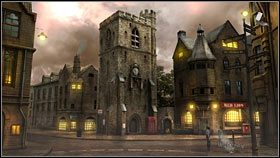
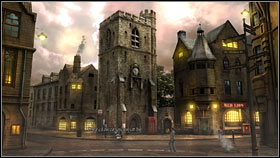
Leave the shop and head towards the Carfax Tower (down the screen). Approach it and take a look at the plaque (2 points). Sam will come to the conclusion that it's the place described in the riddle. Go to the top of the tower and close the door (5 points).
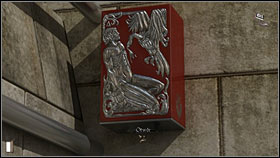
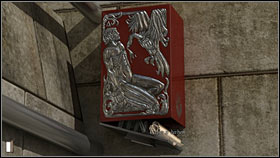
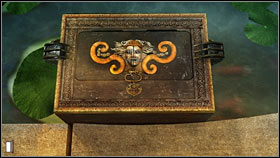
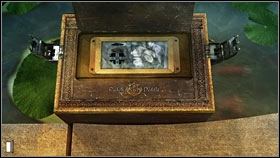
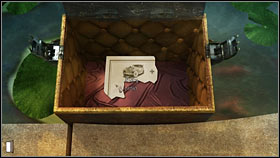
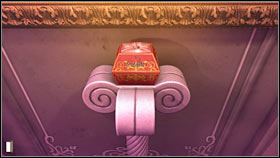
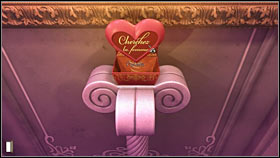
Behind it there's a red box - examine it (2 points). Sam will notice the Daedalus Club logo. Use matches on the hole at the bottom of the box (in accordance with the riddle - fire). The box will open (5 points). Take the Coat of Arms and the Jigsaw - one of five (2 points). Leave the tower.

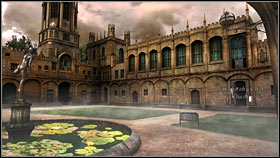
Go to the left, where on a building (on the corner) there's a Coat of Arms Plaque, which you should examine (2 points). Holding the Coat of Arms in your hand, find it on the plaque (6th from the top on the left - 5 points). A new location will appear on the map (Christ Church) - move there.
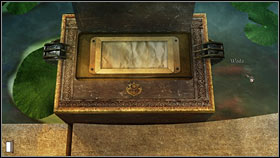
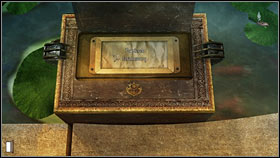
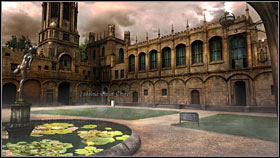
Examine the Black Box in the fountain (on the right - 2 points). The Daedalus Club logo is on it. Open the lid - inside there's a Litmus Paper, which you should treat with water (in accordance with the riddle) from the fountain - take a couple drops with your hand (2 points) and pour it onto the paper (5 points).
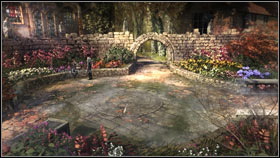
Examine the symbols that have appeared on the paper (Coat of Arms and a flower). Lift the upper part of the box and take the second Jigsaw (2 points). In accordance with the suggestion, go to the gardens to the right.
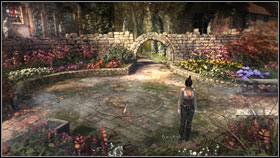
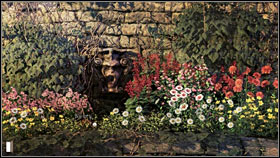
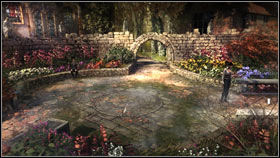
Examine the flower bed at the bottom of the screen and then the flowers below the carving of a terrible face (2 points).

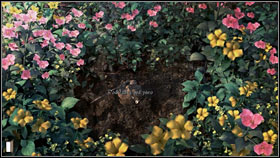
You will find some fresh dirt there (in accordance with the riddle). Dig it up and take out the Beer Coaster and the third Jigsaw (7 points) which will end the first part of the mission (69/69 points).

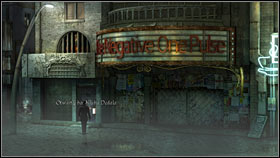
Return to Oxford Town Center. Head to Queen Street (to the left of Carfax Tower). Around the middle of the street, on the left you will see the "Windy Dog" pub - without doubt it's connected with the next part of the riddle (wind). Go there (2 bonus points) and examine the door. Unfortunately it's locked. As far as the club riddle goes, you have to stop here for the time being.
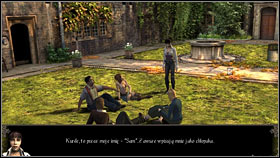
Time to take care of your assistant duties. Talk with the students on Queen Street (3 points). Unfortunately the have all heard about Dr. Styles and won't even want to talk with Sam about participating in the experiments. The third will drop a Freshman Flyer (9 points), informing about a party at the St. Edmund Hall (new location on the map). Maybe it's a chance to find volunteers?
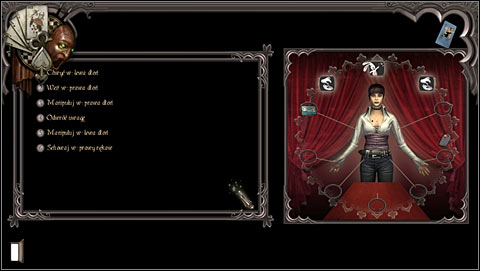
Once there, you will witness Lisa and Harvey arguing about a move that the girl took from him. Afterwards talk with him (17 points). If you get back his movie, Harv will participate in the experiment. You will receive a Spare cartridge. Click on Lisa who's sitting by the table (the cursor should resemble a top hat, which means that you can perform a magic trick). A magic handbook will appear. Search for (switch pages with RMB) the "Up in Smoke" trick (3 points) - click the page and - if only you have all the required items - a magic interface will appear. On it you must set how the trick will look like, step by step.
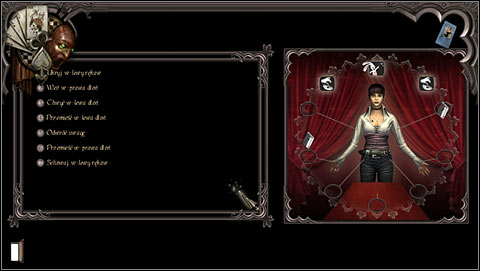
The proper order is:
1) Load Spare cartridge in Left sleeve
2) Take Lisa's cartridge in Right hand
3) Palm Spare cartridge in Left hand
4) Move Lisa's cartridge to Left hand
5) Misdirect (upper middle icon)
6) Move Spare cartridge to Right hand
7) Vanish Lisa's cartridge in Left sleeve
If you've made a mistake during any of the moves, you can always unmark the proper point (or all) on the left and make a correction or start from the beginning. If you're sure that the order and kinds of moves are correct, click on the magic wand icon in the lower right corner of the screen.
Sam will perform the trick (10 points) and gain a volunteer for Dr. Styles' experiment.
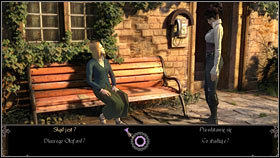
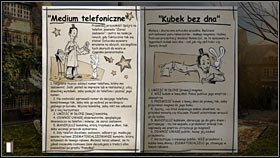
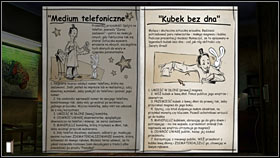
Now approach Angela who's sitting on a bench by the building. Talk with her (17 points). Of course Sam will want to encourage her to participate in the experiment with a magic trick as well. Click on Angela with the proper cursor and choose the "Psychic Telephone" (3 points). You need to prepare for it.
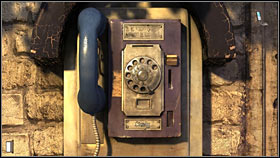
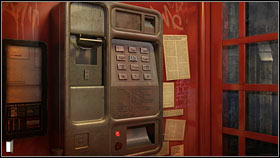
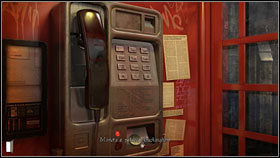
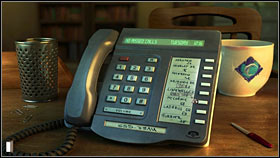
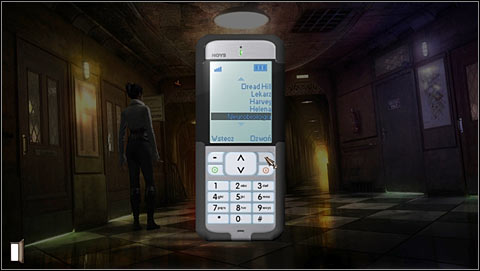
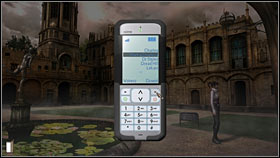
Examine the payphone on the wall beside (2 points). Note that its number is written at the bottom (click on it while holding your cell phone in hand - 3 points). Now you have to switch off the button sound (3 points).
Choose it in the inventory (LMB).
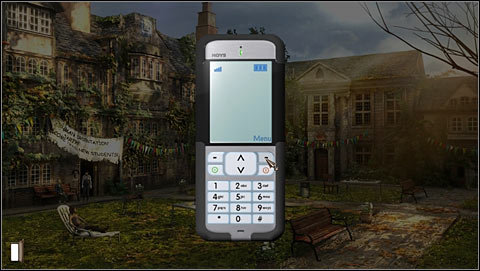
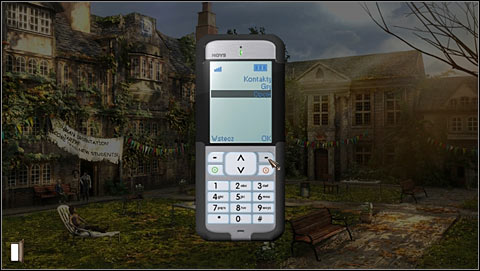

In zoom, go into Menu (right "line" at the top of the keyboard), choose Options by pressing the down arrow twice and confirm with OK (right "line" at the top of the keyboard). The Mute option will appear: activate it with the right "line" at the top of the keyboard. Exit the zoom by pressing the red circle.
Click on Angela with the top hat cursor and once the magic interface appears, perform the following actions:
1) Palm Cell phone in Left hand
2) Misdirect (upper middle icon)
3) Manipulate Cell phone in Left hand (upper left icon).
4) Vanish Cell phone in Left sleeve
Thanks to a properly performed trick (of course confirm it with the magic wand) you will gain another volunteer (10 points).

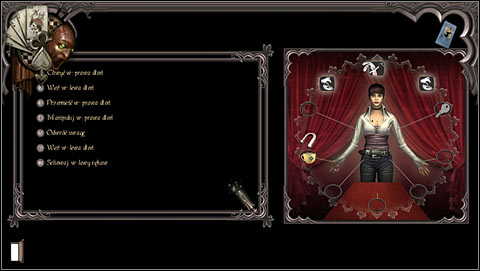
Afterwards talk with Helena (she's sunbathing on a deckchair - 17 points). During the conversation another student (Charles) will appear. Approach him after you finish talking with Helena. Talk to him - it turns out he really is shy (2 points). Take a look at the book lying beside him on the bench (2 points) and the letter (2 points). Use these themes to start a conversation and talk with him (9 points). Afterwards click Charles with the top hat cursor and choose the " Ominous Mailbag" trick (3 points).
Perform the following actions on the magic screen:

1) Distract (upper middle icon)
2) Take Charles's letter in Left hand
3) Vanish Charles's letter in Left sleeve
Having obtained Charles's mother letter (5 points), move to Oxford Town Center and open it above any steam vent (5 points). Examine its content. Note the health convention leaflet and switch it with Dr. Styles' notice (5 points). Return onto the campus.
You have to perform the second part of the trick, which is placing the letter back onto the bench. Click on Charles and perform the following actions on the magic screen:

1) Palm Charles's letter in Right hand
2) Misdirect (upper middle icon).
3) Plant Charles's letter (lower middle icon).
Now Sam is certain that the boy will appear in the Doctor's house (10 points). Now inform Helena about it and she will recognize that she should be there as well (10 points) - this will end the mission (150/150 points).
1) Try to start the motorcycle (2 points), in the garage of the Dread Hill mansion
2) After talking with Mrs. Dalton, take out the photo of Mom and Dad from the backpack (3 points).
3) Inside Mephistopheles' shop, examine the tall shelf beside the machine (4 points).
4) Talk with Mephistopheles after winning on the machine and reading the riddle (3 points).
5) Try to get inside the Windy Dog Pub on Queen Street after finding the beer coaster (2 points).
Missions:
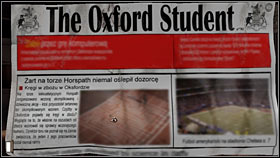
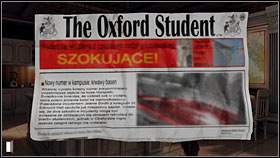
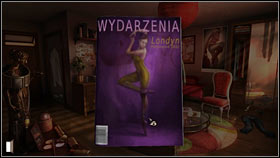
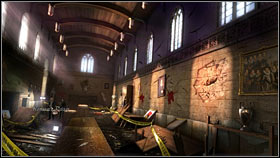
Take the newspaper about which the housemaid said from the table (on the left). Read the article about the strange marks which have appeared on the Horspath (5 points). Sam will of course want to investigate the phenomenon, which has an obvious relation with yesterday experiment (new location on the map). Go to the Horspath (upper right part).

Examine the patterns and talk with Eddie who's trying to clean them. Ask about yesterday night, about what has happened and what did he see (17 points). Head to the Magic Shop on Cornmarket Street. Talk with Mephistopheles about the Daedalus Club and the big games (18 points) to end this mission (40/40 points).
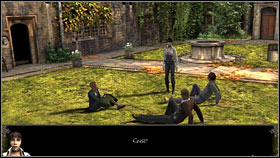
Move to the campus and talk with the people on the grass (3 points). In effect a new location - Bodleian Library - will appear. Go there to learn something more about Styles. Unfortunately there's a gate guarding the entrance - you need a student card to get through it.

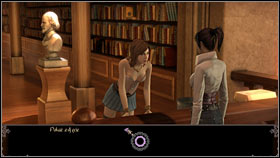
Note Helena sitting by the first table and call her. Ask her to borrow you her card - she won't agree. However it will turn out that she has two cards - she didn't like the photo on the first one so she made herself another one. Insist on wanting to see how she looks on the photos (17 points).
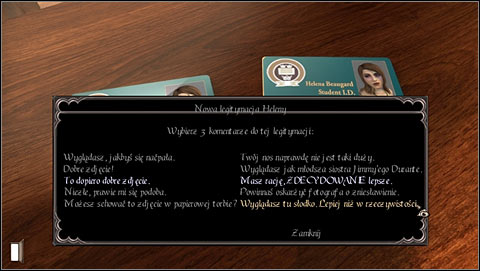
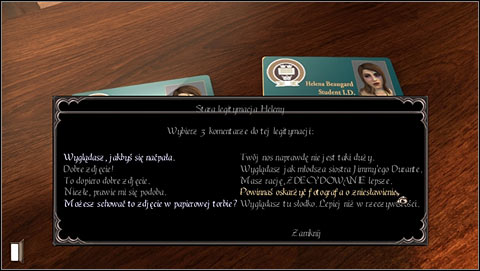
Once Helena places both on the table, you have to assure her that she looks much better on the new (left) one than on the old (right). Choose three positive opinions about the first one (Helen should react - if she doesn't, you've chosen bad answers) and three negative about the second (3 points).

That way you've prepared a base for another magic trick - click Helena with the top hat icon and choose the "Destroyed and Restored Ring" trick (3 points). You will learn that you need a requisite. Head to Oxford to get it.
Before you head to the Magic Shop, stop by the Tower and buy flowers from the shopkeeper (3 bonus points). Afterwards head to Cornmarket Street (to the right). Choose the Paper Noisemaker from the shelf on the right (2 points). Click on the door and Sam will automatically pay. Return to the Library.


Place the generator in the shredder to the right of the entrance (3 points). Click on Helena with the top hat again and the magic interface will appear:
1) Palm Noisemaker remote in Left hand
2) Take Helena's old ID card in Right hand
3) Manipulate Helena's old ID card in Right hand
4) Misdirect
5) Manipulate Noisemaker remote in Left hand
6) Vanish Helena's old ID card in Right sleeve

Having obtained Helena's ID card (10 points), use it on the scanner by the entrance (3 points) - it will end the mission (41/41 points).
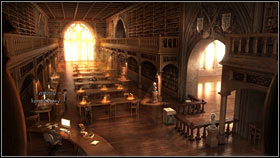
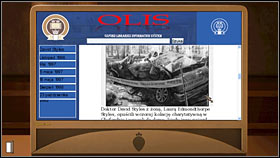
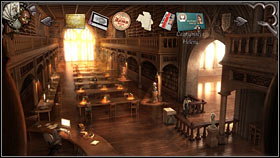
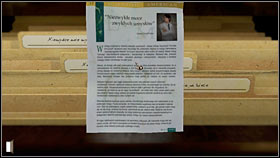
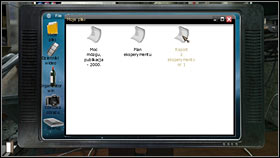
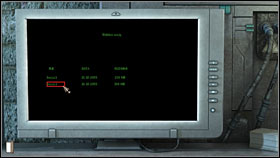
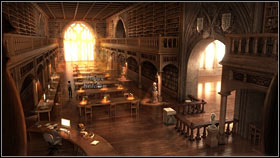
Talk with the librarian sitting by the desk on the left (5 points). Approach the computer by the tables on the left. Read all the articles (6) regarding Styles, the headlines of which have appeared on the left - note that most of them require you to scroll the text in order to gain all the information (26 points). Afterwards approach the librarian and ask about the missing article. Unfortunately she doesn't have it anymore. Return home.
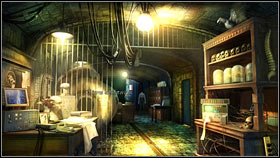
Go inside the mansion and go to Sam's bedroom after the phone call. Put the flowers bought at Oxford Town Center into the vase on the dressing table (beside Sam's parents photo) (3 bonus points). Afterwards go to the kitchen and talk with Mrs. Dalton about the accident (3 bonus points). Go into the cellar (door behind the stairs) and into the Main Lab (first door on the right).

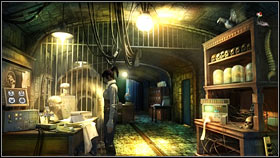
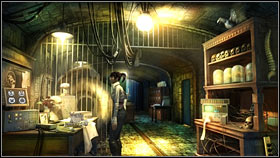
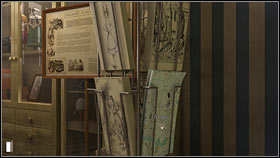
Place the other flowers into the vase standing behind the photo of Styles' wife (3 bonus points). Read the Note of Instructions left by your boss on the table on the left and Radcliffe Infirmary Letter from Headley's assistant, Susan Whittier (4 points). Sam has to sort the files, find a certain document and bring it to the clinic.

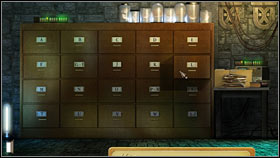
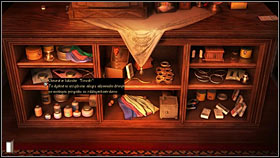
Go deeper inside the room, to the filling cabinet. Click on it - you can once more read Style's instructions again - and files will start to appear. You have to put them into the proper drawers (by clicking on it), usually corresponding to the file's name. If you press the wrong drawer the file won't be put there, so you can complete this task using trial & error.


After placing 9 files (10 points), find the MRI Receipt in the F cabinet - it's what Susan asked for in the letter (2 points). Time to head to Radcliffe Infirmary (upper part of the map).

Enter Susan's office (door on the left, with a proper plate beside). Talk with the woman about the document she needs. Giving it to her (3 points) will end the mission (19/19 points).
Talk with Susan about Dr. Styles (5 points). The woman will refer Sam to her boss, Headley. Ask him about the experiment, the gossip on the campus and of course about Styles (23 points). After talking with Susan's boss, talk with the assistant once again (9 points) - Sam will conclude that it would be handy to have the plan of the experiment, so she'll try o get rid of Susan by sending her to get coffee for Headley. However in order to take a look at the files held in the office, she first needs to obtain the key. It will of course require performing another trick.

Click on Susan with the proper cursor and choose the "Bottomless Coffee Cup" trick (3 points) - it turns out that Sam needs a magnet. Of course head to Oxford, to Mephistopheles' shop. Take the magnet from the shelf on the right (2 points) and return to infirmary.
Click on Susan once again to bring up the magic screen, on which:
1) Pal Hand magnet in Right hand
2) Take Coffee cup in Left hand
3) Move Coffee cup to Right hand
4) Manipulate Coffee cup in Right hand
5) Misdirect
6) Take Cabinet key in Left hand
7) Vanish Cabinet key in Left sleeve
However using the key (5 points) is not all - now Sam needs to get rid of Susan from the office.
Click on the woman again with the special cursor and choose the "Wound" trick (3 points). Afterwards head to Oxford to get the needed accessories. Inside Mephistopheles' shop, take the Thumb (2 points) and Spirit Gum from the shelf on the right (2 points) and Stage Blood from the shelf beside the machine (2 points). Return to the infirmary.
Once there, head to Staff Kitchen (on the right). Take the First Aid Kit (5 points), which Sam will automatically hide behind the plate on the left. Use stage blood (2 points) and spirit gum (2 points) on the fake thumb. Go to Susan's office and click her to switch on the magic screen:
1) Take Letter opener in Left hand
2) Manipulate Letter opener in Left hand
3) Misdirect
4) Manipulate Letter opener in Left hand
As a result of this trick (5 points), Susan will run to get a first aid kit for the allegedly hurt Sam. Use this occasion to open the cabinet with the previously obtained key. Copy the Experiment Plan (10 points) using the nearby copy machine. You will make it just in time for Susan to return with the first aid kit. Once in the corridor, talk with Malik, the 6th experiment participant, about Dr. Styles (28 points). Return home.
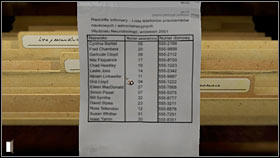
Head to the Main lab and examine the filling cabinet. In the "N" cabinet, find Styles' article "Extraordinary Powers of Ordinary Minds" from Scientific American (first from the top - 5 points). Read it and click on it to hear Sam's comment. Check out Linkweller article (5 points) hidden in the "A" cabinet as well. From the "L" one, take out the Neurobiology Phone List (2 points). From the "K" cabinet, take the Condolence Card (2 points) and open it. Use it on the phone list in the inventory.
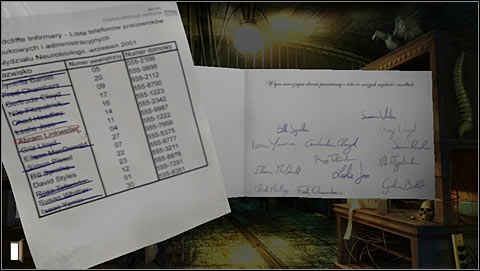
Take a look at both of them and cross out (by clicking) the names which are also present on the condolence list (10 points). This way, apart from Styles, only Abram Linkweller will remain - this will end the task (166/166 points).
It's time to solve the Daedalus Club riddle. Head to Oxford Town Center.
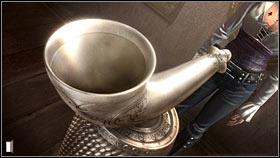
Go to Queen Street (to the left of the Tower), and into the "Windy Dog Pub". Examine the hunting horn to the right of the bar (3 points). Blow into it (in accordance with the riddle - wind - 4 points). Talk with the bartender and you will get the Mouthpiece (14 points). Mount it into the horn and blow again. This way the bartender will give you the Christ Church Postcard and the 4th Jigsaw (13 points).
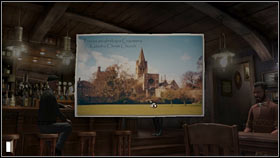
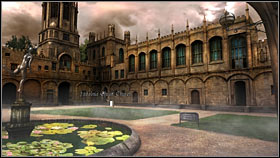
The postcard shows the Christ Church, so go there.

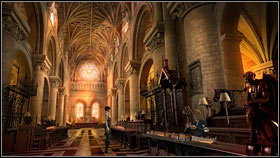
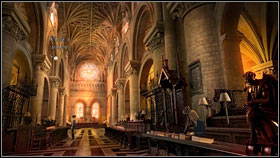
Go inside through the nave on the right and talk with the guide (8 bonus points).
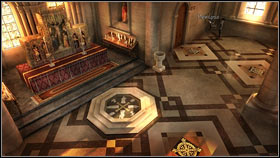
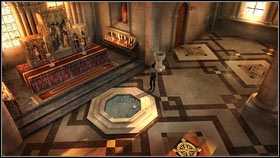
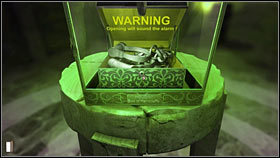
Afterwards go further into the church, to the altar. Examine the baptism pool right in front of the altar. Approach the Switch on the right wall. Use it and the baptism pool lid will open (5 points). Take the Baggie (5 points). Inside of it you will find the last Jigsaw.
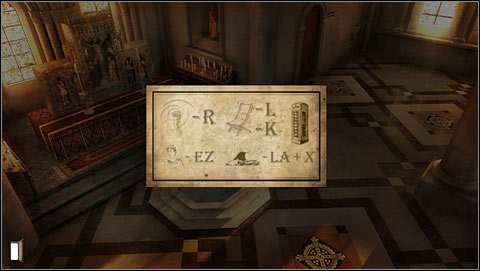
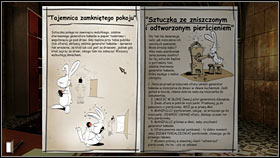
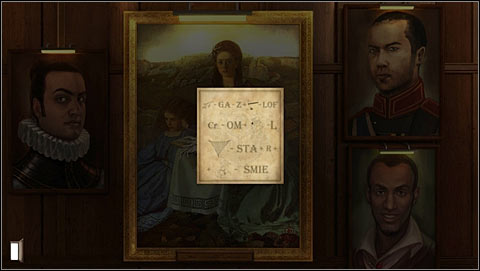
Assemble them - move the pieces with LMB and turn with RMB - the proper solution can be seen above (15 points). As you see, it's a rebus.
Solve it to reveal Carfax Tower Phone Booth. Close the baptism pool lid and head to Oxford Town Center.
Enter the booth, grab the phone receiver and input Judas, whose name is the solution of the riddle, on the keypad. (J-5, U-8, D-3, A-2, S-7), which gives you 58327. Take the coin (25 points) from the bottom of the machine. It will end the mission (84/84 points). Exit the booth.
1) Buy flowers from the florist beside Carfax Tower (3 points).
2) Put some of the in to the glass standing inside Sam's room (beside her parents photo) (3 points).
3) Talk with Mrs. Dalton about the accident (3 points).
4) Put the rest of the flowers inside the vase (beside Styles' wife photo) in the lab (3 points).
5) Talk with the guide in Christ Church College (8 points).
Missions:

This time you will take control of Dr. Styles. Leave the bedroom and go to the garage. Examine Sam's motorcycle (2 points). Return home and go into the kitchen. Talk with Mrs. Dalton about Sam and her piece of junk (15 points). Push the topic as far as you can to end this mission (17/17 points).

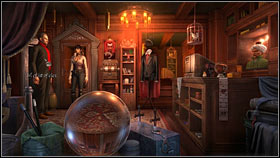
Speak with Mrs. Dalton about the unusual occurrences and Laura (12 points). Go to the cellar and into the Main lab. Examine the filling cabinet - Styles will appreciate Sam's work (2 bonus points). Afterwards go to the private lab (second door in the cellar) which can be opened with the possessed key (3 points). At this point you will hear a bell at the entrance door, so head upstairs. Styles will receive a package and will automatically take it to his lab (5 points, mission 4).
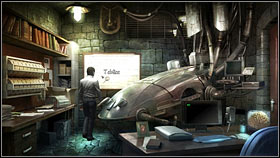
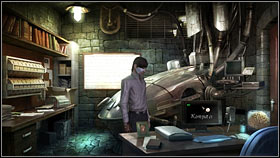
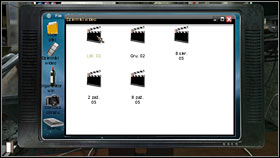
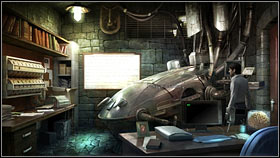
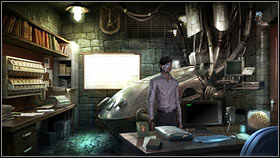
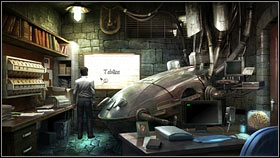
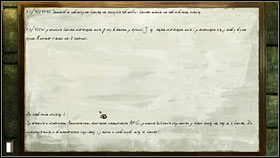
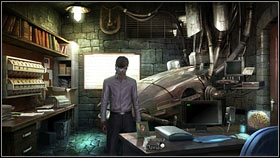
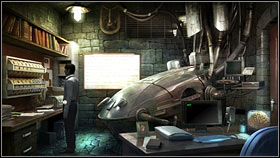
Examine the whiteboard about presence (3 points and 3 bonus points). Afterwards approach the desk with the computer and use it (2 points). From among the icons, choose video logs. Play all available recordings (10 points). Leave the lab and cellar.

Go to the bedroom and examine the mirror (3 points). Click it (2 points) - it will be enough to end this mission (35/35 points).
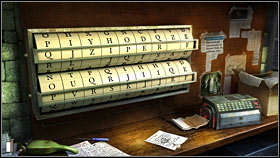
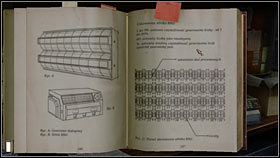
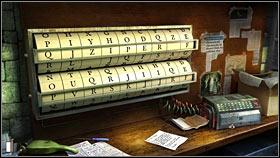
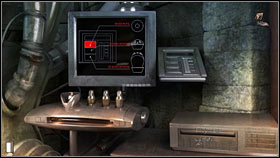
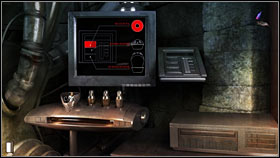
Return to the private lab and examine the work counter (RNG Rolodex - 3 points). Read the letter from Ramusskin, lying to the left of it (3 points) and look through the Psi book (beside), clicking on the bookmarks (5 points). The book contains hints required to set the motor (on the right) controlling the Rolodex (on the left). Click the motor to connect both machines and click on it again to zoom in.
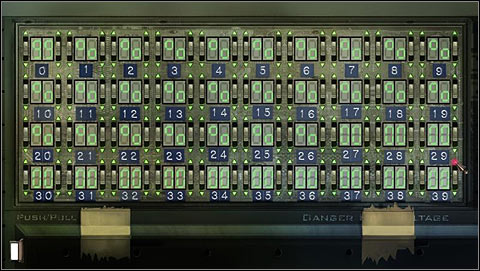
With accordance with the instructions found in the book (page 145 and 147), set 99 above zero (clicking at the top or bottom of the knobs on the left and right). Leave % in 1 to 26. Set 00 from 27 to 39 (10 points).

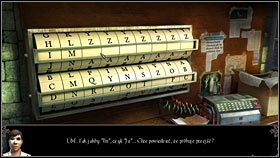
Press the red button (on the right) - you will reset the letters. Click the counter again and then the Rolodex (on the left) - you will receive a message from the otherworld: "I". Now keep pressing the Rolodex until "M" appears (unfortunately there seems to be a bug, sometimes the second letter will appear after pressing a couple times and sometimes you have to alter between pressing the counter and Rolodex - 6 points) to end the mission (32/32 points).
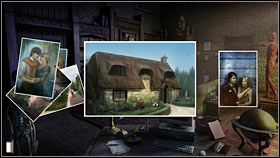
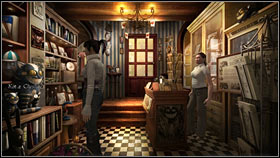
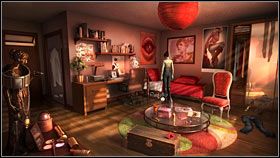
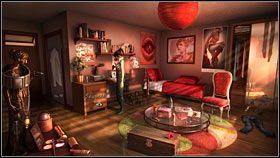
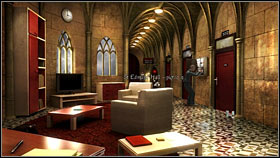
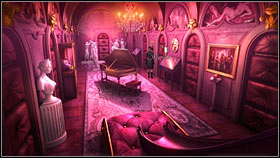
Enter the parlor (to the right from the hall). Examine the box of photos standing on the desk right behind the monitor. Look through them until David finds the cottage photo (8 points).
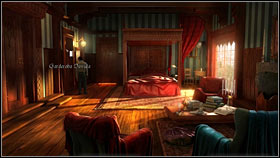
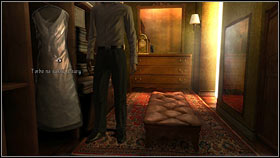
Go to the bedroom and enter the closet (to the left of the mirror). Examine Laura's wedding dress (2 bonus points).
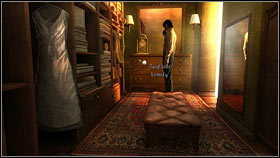
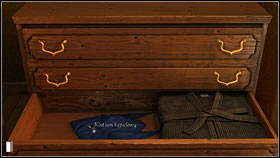
Check the first (2 bonus points) and second (2 bonus points) dresser drawer. Click on the clothing (7 points) and take Laura's bathing suit from below (5 points). Return to the bedroom and go to the bathroom (door to the left of the bed).
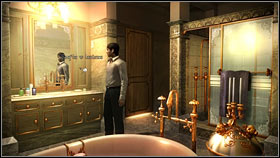
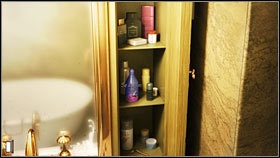
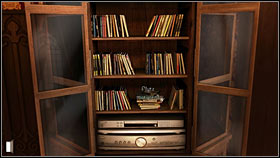
Open the cabinet to the right of the mirror (3 points) and take the shampoo from inside (5 points). Go down to the hall and enter the dining room (door on the left). Approach the stereo (to the left of the entrance), open the cabinet (3 points) and take the music CD from the third shelf from the top (5 points). Return to the private lab in the cellar.
Approach the computer once again. Choose the wine icon. Now you have to decide on which wine David and Laura were drinking that night.
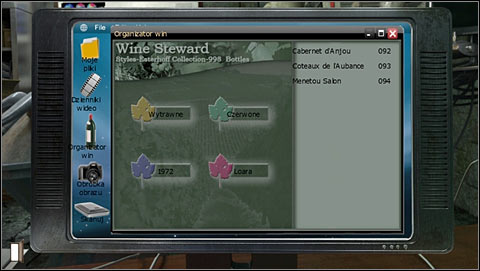
Luckily David remembers that it was dry and red. Choose this kind in the window by the yellow leaf and the colour in the window by the green leaf. From one of the videos you learned that Laura would celebrate her 33rd birthday in 2005, so she was born in 1972. Choose this year in the window by the purple leaf. From the comments on one of the photos you know the region in which the Styles' cottage is, so choose Loara in the window by the pink leaf. On the right three possible wines will appear, marked 092-094 (13 points).

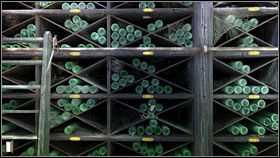
Leave the lab and examine the wine rack (on the left). Choose wine number 94 (5 points).
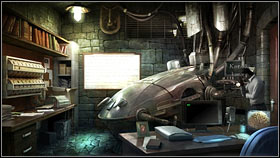
Return to the lab and approach the tank, which looks like a mysterious vehicle. Choose the control panel. Press the upper button (CD) on the panel on the right to open the CD slot (3 points). Insert the CD (at the bottom - 3 points).
Pour Laura's shampoo into the container on the left (3 points). Press the open lid button (the lower one) on the panel on the right. Lift the lid to enter the tank (10 points) - it will be enough to end the mission (73/73. points).
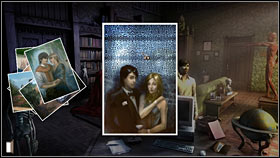
Afterwards go into the living room and take a look at the photos once again - this time you need to find the one in which David and Laura are at a benefit dinner. Take it (5 points). Return to the private lab and place the photo in the scanner (3 points).
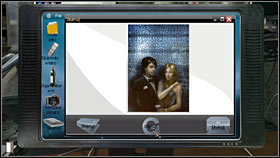
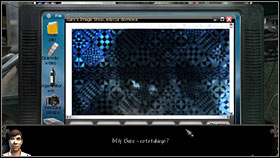
Press the scanner icon in the computer screen (at the bottom on the left) and choose Scan (at the bottom on the left). Once the photo is scanned, start editing it. Choose the following options: Colors, Sharpen and Contrast (15 points). Leave the cellar.


Go to the kitchen and approach the notice board hanging on the wall between the window and the cooker. Observe the Detective Inspector Paiser card attached to it (5 points). Go to the hall and call the inspector (8 points) - it will end the mission (36/36 points)
1) Observe the filling cabinet in the main lab (2 points).
2) Examine the whiteboard about presence in Styles' private lab (3 points).
3) Observe Laura's wedding dress in the closet (2 points).
4) Check the 1st (2 points) and 2nd (2 points) dresser drawer in the closet.
Missions:
After talking with David go to the kitchen, talk with Mrs. Dalton and afterwards take the newspaper from the table. Read it in zoom (5 points). Choose St. Edmund Hall on the map and go into the go into the dormitory (in front of you).
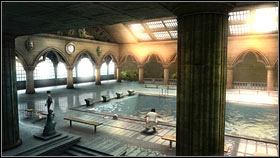
In order to move on, you have to show Helena's ID Card to the guard (5 points). Go deeper into the hall. On the left there's the pool entrance.
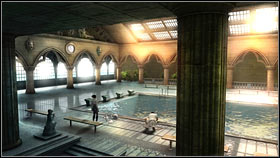
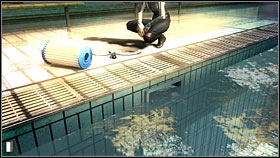
Speak to the pool man twice (6 points), examine the water in the pool (twice - 2 points) and finally take a look at the filter (2 points). Examine it.
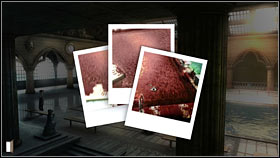
Take the polaroids left on the bench (2 points). Take a look at the clock (it has stopped during the time of the incident). Return to the hall.
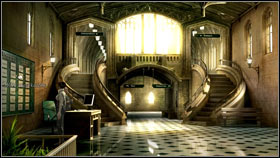
Look at the board above the porter. Find Jeanie Smith - she lives in room number 106 (3 points). While you're at it, check where the experiment participant live (Helena - 102, Charles - 204, Harvey - 302, Angela - 322, Malik - 326). Take the stairs on the left onto the first floor.
Go through the third door (nr 106). Talk with Jeanie about the incident that she witnessed - speak with her until you run out of topics (18 points). As a result you will end the mission (43/43 points).
After leaving room 106, Helena will call to tell you that Dr. Styles' "lambs" are waiting on the lawn outside the building. Go there.


After talking with the experiment participants, return to St. Edmund Hall dormitory. Go deeper into the hall and this time turn right to the gym. After all it's supposed to be the theme of the next experiment. Above all check the opening hours - the board on the right side of the entrance door (2 points). Observe this door or the locker door - it's a good place to set a trap, but Sam needs to do go to Mephistopheles' shop first. Move to Oxford Town Center and go on Cornmarket Street.
Take the flash powder trap from the tall shelf by the machine (4 points), leave the shop and return to the gym. Look at the new item in our inventory - it turns out the trap consists of three elements: Flash Pots, Flash Powder and Trigger Line. Pour the powder into the pot (2 points) and attach the line (2 points).
Use the assembled trap on the locker room door (3 points) and afterwards on the lobby door (3 points) - it will end the mission (16/16).

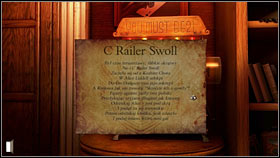
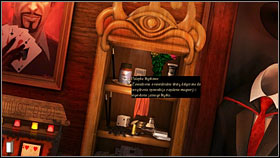
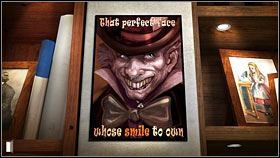
Head to Mephistopheles' shop. Inform him that the previous Daedalus Club riddle has been solved (you need to use up all the topics to end the conversation, so talk also about the events on the campus - 5 points mission 2). Approach the machine and once again try to get 21 points. Get your reward (at the bottom right - 2 points). It's of course another riddle, this time "C Railer Swoll" which is written with strange twisted words (to learn the actual content, you have to anagram the words) referring to Alice in Wonderland.

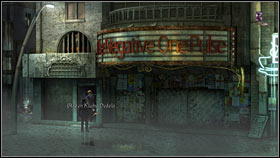
Leave the shop and head onto Queen Street (to the left of the Tower). Enter Alice's shop (on the corner on the right). Examine the postcard rack (on the right - 2 bonus points) and choose Map of London (2 points). Take a look at the Dodo postcard and the history poster with Lewis Carroll's biography (to the left of the rack - 2 bonus points).
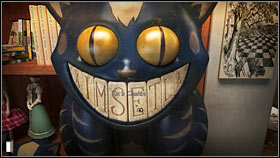
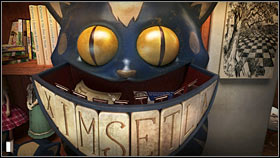
Now examine the Cheshire Cat (2 points). You have to spell the right password on his fabulous teeth. The above poster with the Mad Hatter can give you a hint (click on it in zoom - 2 bonus points), with the "smile" word standing out. Click the teeth with S-M-I-L-E letters (10 points). Take the Jigsaw (2 points) and the Natural History Museum Ticket (5 points).
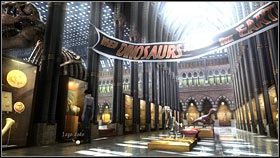
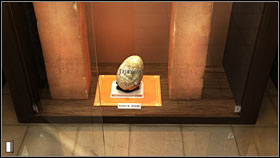
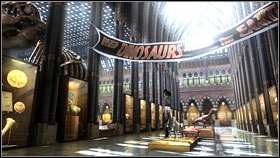
Choose the new location of the map - University Museum. Approach the Dodo display case (on the left, zoom on the egg at the bottom - 2 points). Open the glass door behind which the egg is and examine it - Sam will note the Daedalus Club logo on it (5 points) - and take it (2 points).
Put it on the red bench in the middle of the room. Once Sam "broods" it (14 points), the egg will automatically open. Take out the next Jigsaw and Hogwarts Invitation (7 points), which will end this mission (53/53 points).

Put the egg back into the display case and head to the library. Use Helena's ID Card on the gate and approach the librarian. Talk with her (3 bonus points) to learn that the movie has been shot, inter alia, in Christ Church College. Move there to find out that the dining hall entrance is blocked (3 bonus points).
If you're already in Chris Church College, go to the cathedral and talk with Angela who's sitting on the right (14 points). You will receive a Paper Fairy.

Now it's time to learn something about Malik. Head to Susan's office in Radcliffe Infirmary. Ask the woman about the boy and you will learn that he's Dr. Linkweller's assistant (3 points). Take a look at the telephone on Susan's desk (2 points), at the bottom there's the number to the department and below numbers to the individual employees. Note the number by clicking on it while holding your cell phone in hand (2 points). Click the other numbers as well for Sam to remember that Linkweller's extension is 11.
Move to the Magic Shop once again. Take the Telephone Spy from the shelf on the right (2 points). Return to Radcliffe Infirmary.
Take out your cell phone in the hall (LMB) and choose Contacts in Menu (press the right line below the screen). Scroll down to the name of the department (Neurobiology) and make the call (press the right line below the screen). Press 1 two times once the telephone exchange answers the call.

Lure Linkweller out of the office with whichever dialogue option and enter his office once he goes to Susan (5 points). Locate the phone on the large desk and use the telephone spy (10 points). If you won't make it in time and Sam will decide to retreat, carry out the whole operation once again from the beginning and afterwards leave the room.
Return to St. Edmund Hall and go up the stairs on the left onto the 1st floor and from there onto the 2nd (icon in the depth of the corridor). Charles lives here in room 204 (the middle door). Try to get into his room - of course it's locked. The Proctor sitting on the couch is sure to have the key - talk with him on this matter. Unfortunately it won't give the expected result, so it's time for a magic trick.
Click him with the top hat cursor and choose the " Divide and Conquer" trick (5 points).
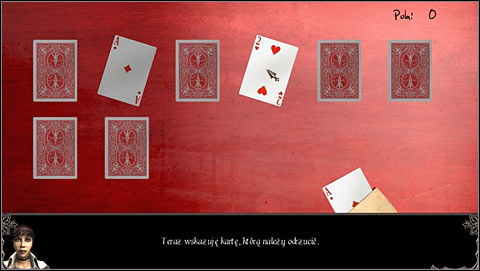
Firstly, Sam points out the card which will stay on the table till the end (whichever one, it will automatically appear at the bottom of the screen). Afterwards the players choose two cards each, out of which the enemy discards one. Of course you shouldn't point the one that you've chosen to stay in the game and if it's pointed by the other player, you of course have to throw away the other one. The key to winning lies in choosing who begins - if the number of cards is even the Proctor should begin and if uneven - Sam. After winning three games he will open Charles's room for you (10 points). Go inside of course.
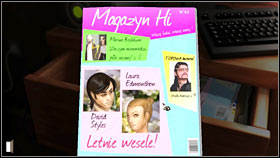
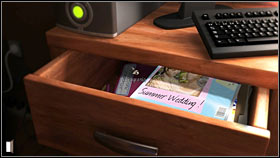
Approach the desk and examine the magazine in zoom (4 points). Examine the content of the open drawer (2 bonus points). Take a look at the photo on the nightstand (4 points) to which the number to the boy's mother is attached. Save it in Sam's cell - just lick the number while holding the phone in your hand (2 points). Finally - take out the photo from the frame (3 points). Leave Charles's room.


In the hall, notice the open door to room 202 - examine the latch and the bolt twice (3 bonus points). Head onto the 3rd floor (cursor in the depth of the screen - look out not to return onto the 1st floor, as the cursors appear next to each other).
Harvey's room is on the 3rd floor (302 - the first on the right). Of course it is locked and of course the Proctor won't agree to open it for you. You will have to use a trick to get there as well. Click the man and choose the "Locked Room Mystery" trick (5 points). You will of course need a proper requisite, so head to Mephistopheles' shop and take the Cry-for-Help Noisemaker from the shelf on the right (2 points). Return onto the campus.

While passing through the 1st floor corridor, take some pink toilet paper from the table on the left - you will need it in just a moment (2 points). On the third floor, wrap the paper around the generator (2 points) and slip it under the door of room 302 (3 points). Afterwards use (LMB In inventory) the pilot.


Once the Proctor enters the room, examine the door lock (5 points) so that they won't shut - just like the door on the floor below. After the corridor is clear, go into Harvey's room (5 points).
Take a look at the scenario left on the desk (2 points) and read a couple sentences from it (5 points). Additionally check the film gear at the bottom shelf of the closet on the left (2 bonus points).
Return to the 1st floor and examine the locked door leading into Helena's room (102). Push the paint bucket to the door (3 points). Sam will climb onto it and enter Helena's room, where she will automatically pick up the key from the floor (5 points).

Note the photo camera on the desk, examine the drawer (2 bonus points) and eventually take out from under the bed (2 points) and examine (2 points) the box hidden there. It's locked and you don't have anything which could open it. Once you exit the zoom, Helena will enter the room. Talk with her (5 points) - as an effect the girl will lend Sam her camera and share new information on the other four experiment participants (12 bonus points, 3 for each person. If you haven't yet checked all four, finish this conversation after doing so).

Move to Dread Hill. Sam will automatically head to the lab, where she will come across an affair. After Mrs. Dalton leaves, talk with Styles and talk with him on all the topics (12 points in total).
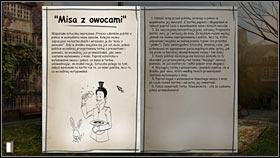
Move to St. Edmund Hall, where all the experiment participants are waiting on the lawn. Once Sam convinces them to play a lottery, you will have the last chance to complete the remaining points (for example if you haven't checked all the dorm rooms). Afterwards click one of them with the top hat cursor. Choose the " Fruit Bowl" trick (10 points). It will end this mission (141/141 points).
1) Examine the postcard rack in Alice's shop on Queen Street (2 points).
2) Examine the history poster with Lewis Carroll's biography in Alice's shop on Queen Street (2 points).
3) Examine the Mad Hatter poster in Alice's shop on Queen Street (2 points).
4) Talk with the librarian about Hogwarts (3 points).
5) Try to get to the Christ Church dining hall (3 points).
6) Examine the desk drawer In Charles's room (2 points).
7) Examine the lock in the opened door of room 202 - after visiting room 204 (3 points).
8) Examine the film gear on the bottom shelf in Harvey's room (2 points).
9) During Helena's absence, examine the desk drawer in her room (2 points).
10) Talk with Helena about her discoveries on Angela, Malik, Charles and Harvey (12 points).
Missions:


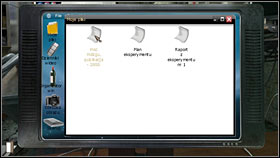
After waking up, go to the closet and look at the Laura's dress bag (5 bonus points). Go to the ground floor and into the private lab (3 points). Take a look at the computer and examine My Files/Experiment Report #1 and #2 (5 bonus points).

Examine the desk on which the counter lies (3 points) and afterwards click on the Rolodex (5 points).
Eventually examine the whiteboard on the left (6 points). Click on it to familiarise yourself with David's plans for today. A new location will appear: Dr. Ramusskin's House.
Pay him a visit. Talk about everything there is to (35 points), which will end the mission 52/52 points).
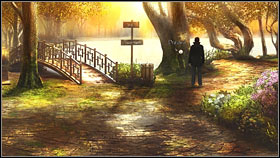
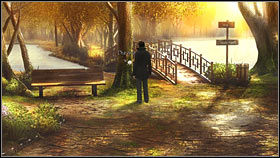
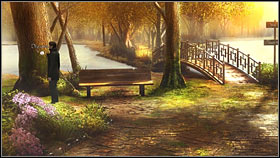
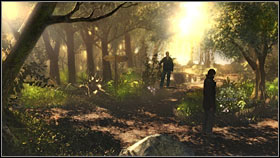
After returning home, head to the dining room (on the left). Examine the watercolours on the wall; they all illustrate Timmons Park (you just need to press one of them - 10 points). David will decide that it's where he should reconstruct the next memory and a new location will appear on the map. Head to the park.
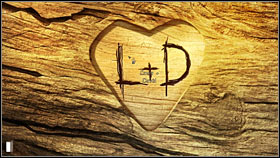
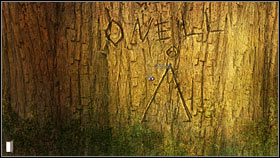
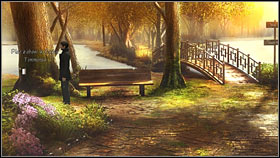
Go into the park through the gate. Examine the tree to the left of the bridge (3 points). There's a heart and "L + D" engraved on it - take a look at it (5 points) and afterwards touch to bring back a memory (10 points).
Examine (2x2 bonus points) and click in zoom (2x3 bonus points) the two other trees on both side of the bench as well.
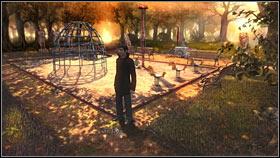
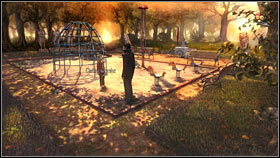
Head left onto the playground. Note the Ice Cream Vendor (in the background, beside a bench - 3 points). Talk to him and buy an ice-cream (8 points). Lick them (LMB in the inventory - 10 points) to bring back a memory.
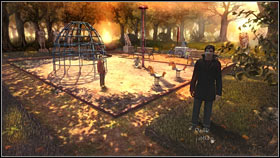
Go to the Gardenia (upper right corner of the screen). Examine the blossoming bush (on the right - 3 points). Try to pick a flower (5 points). Unfortunately the gardener will object. Afterwards the girl which you have seen by the gate and on the playground will appear and pick a flower without worrying too much. Follow her onto the playground (to the left). Talk with her (32 points).
Take the apple from the ground (3 points). Use it on the girl (5 points). Once she puts the gardenia on the ground, take (3 points) and smell it (LMB in the inventory - 10 points) to bring back a memory.
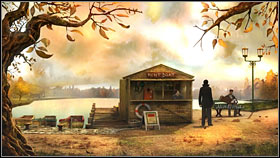
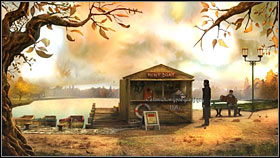
Return to the bridge (to the right) and from there move to the boathouse (on the other side of the bridge). Notice the accordion player sitting on the bench (3 points). Ask him to play a certain song (10 points).
Eventually talk with the boat rental attendant. Rent a boat (16 points) to end this mission (139/139 points).
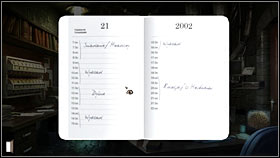
After returning home, go to the private lab and note the appointment book lying on the left side of the desk (the one with a computer) (3 points). Check out what David has been doing the day before the accident. He will remember that he and his wife have been eating dinner with the Helborns (5 points).
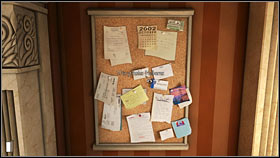
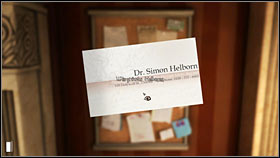
Go to the kitchen and examine the notice board by the window (3 points). Find Simon Helborn's card (5 points).
Go to the hall and call your buddy (10 points). A new location will appear on the map: Dr. Helborn's Office. Go there.
During the conversation David will decide to undergo a hypnosis in order to reconstruct the day. Choose the following dialogue options (35 points):
This will end the mission (61/61 points).

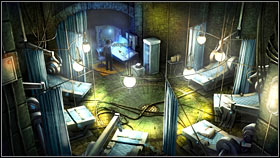
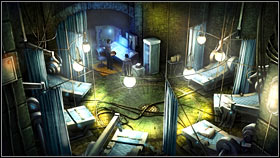
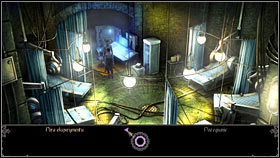
Having returned home, go to the kitchen and talk with Mrs. Dalton about Sam (10 points). Head to the main lab and into the experiment room in the background. Approach the computer (5 points). Wait a moment for information to appear on the screen.
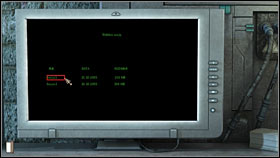
Choose session 1 or 2. For each of them, you have to set the time during which the incidents on the Horspath and at the pool occurred. You know the exact times from Sam's report, which you have read on the computer in the other lab.
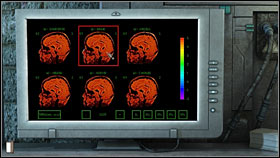
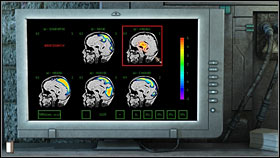
In case of Horspath, set 11.30 by clicking on the "+" sign (to the right of the display). If you overdo, correct with "-" (to the left of the display). Now by pressing the windows on the right you can analyse how the brain functions of the experiment participants have been changing. When you choose the fourth window (45 s), you will receive a surprising image (5 points). Afterwards choose whichever brain for David to comment on what he's seeing.
Do the same for the second session (you won't gain any points, but you'll hear an additional comment). As for the second incident, the time given in Sam's report differs between 11.40 and 11.45. Set 11.42 (the time at which the clock at the pool has stopped) and check the brain functions after 30 second (choose that window on the right). The same image as before will appear and the mission will end (20/20 points)
1) Observe Laura's dress bag in the closet (5 points).
2) Examine Experiment report #1 and #2 on the computer in the private lab (5 points).
3) In Timmons Park, examine and click in zoom the signs engraved in the two trees on both sides of the bench by the bridge (2x2 points and 2x3 points).
Missions:
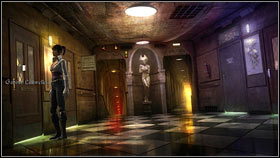
After waking up, go to the cellar. You will meet Mrs. Dalton and Dr. Helborn there. Once Mrs. Dalton leaves, talk with Simon (12 points). As an effect, Sam will obtain the Note about Laura Sightings. The girl will recognize the need for checking the upper floor of the house - after all it's where the "ghost" whom she has seen with her own eyes went.


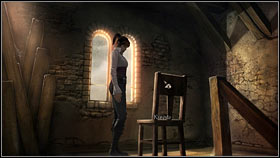
Go to the corridor by Sam and David's bedrooms. Examine the chairs by the left wall (3 points), the wardrobe opposite to them (3 points), the gargoyle beside it (3 points) and the painting beside Styles' room (3 points).
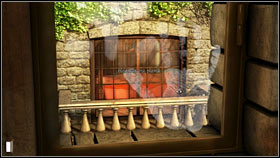
Afterwards go to the ground floor and leave the house. Head towards the tower, its windows are opposite to David's bedroom. The door is locked (examine it), so look for a key. It can be found under the statue by the door (5 points). Open the tower with it and go inside (5 points).

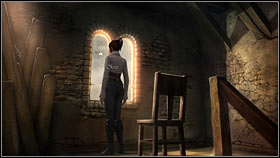
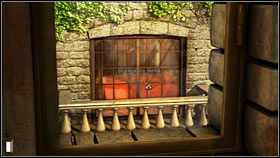
Note a path treaded in the dust on the stairs (5 points). Go to the top of the tower (the upper left cursor) and take a look at the chair (3 points) and window (10 points). Check the view of David's bedroom and the stain on the window. Leave the tower and go into the garage. Try to start the bike - it will work.
Go to the kitchen and talk with Mrs. Dalton about the bike (3 bonus points), ghost of Laura and the tower key (11 points). It will end the mission (63/63 points). Take a bag of flour (3 bonus points) from the counter in the back of the kitchen and return to the tower (you once more have to open the door with the key). Treat the stain on the window with flour (5 bonus points).
Once you leave the house for the first time, the effects of the phone tap Sam has placed will show. Listen to Linkweller talking with one of his students (3 points). Afterwards of course head to Radcliffe Infirmary. Enter Linkweller's office and talk with him (5 points).


Afterwards head to the library where you will meet Harvey. Use Helena's ID Card on the gate to pass by and talk with the boy (5 points). Sam will decide to get the truth from him with a trick, so lick him with the top hat cursor and choose the " Shredded and Restored Newspaper" trick (5 points). You will only need a requisite, so approach the counter behind which the librarian is sitting and take some sheets from the stack of papers (3 points). Click Harvey once again and choose the following tricks on the magic interface:
1) Load Paper stack in Left sleeve
2) Take Harvey's paper in Right hand
3) Palm Paper stack in Left hand
4) Move Harvey's paper to Left hand
5) Misdirect
6) Move Paper stack to Right hand
7) Vanish Harvey's paper in Left sleeve
8) Manipulate Paper stack in Right hand
Sam will convince the boy to tell the truth (10 points)
Go to St. Edmund Hall (3 points). After some initial problems with the guard, Sam will manage to distract him. Once on the 1st floor, check out Helena's room (102). After making sure she's not there, open the door with the possessed key. Check the desk drawer again (3 points) to find a letter which proves that the girl is on the 1st year.
Take the hairpin from the table with cosmetics (on the left) (5 points). Once again take out the mysterious box from under the bed (3 points) and open it using the hairpin (15 points). You will learn of its content. Note the theatre program and take it (3 points).
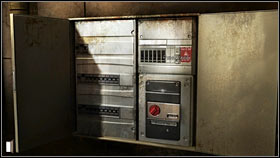
Leave Helena's room and go to the 3rd floor. A handy man is repairing the fuse box. Examine the door with the red alarm (in the back of the corridor - 5 points). Sam wants to get there, but first you should disable the alarm. Examine the fuse box (5 points) and press the alarm switch (beside the red warning on the right) - undoubtedly it needs to be switched off, but not while the handy man is around. You need to get rid of him and what can work better than another magic trick?

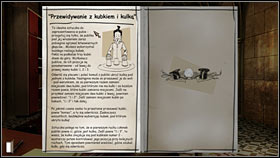
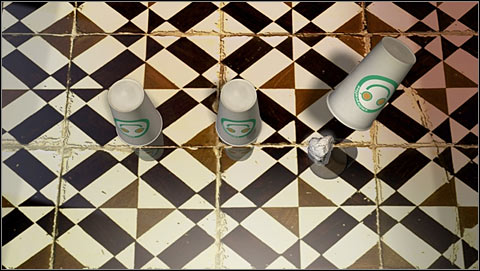
Note the cups and ball beside the door to room 302. Of course take them. Click the man with the proper cursor and choose the " Cup and Ball Psychic" trick (3 points).
The whole game is about getting the other player to reveal to you where he has hidden the ball and then follow its movements. As he cannot touch the cup with the ball in the first move and he keeps telling Sam which cups he has moved, it's obvious that the ball is in the cup which he hasn't mentioned during the 1st move. The riddle is random so it's impossible to give a solution, but in case of the following moves the ball's fate looks like this:

Winning the game (10 points) will give you the chance to solve the handy man problem (4 bonus points). In return for telling him the secret of the trick, ask him to count to 100 with closed eyes or to bring coffee. Once the man disappears (or stops paying attention to Sam), approach the fuse box (3 points), flip the switch (5 points) and head to the previously inaccessible part of the third floor (5 points).
You will meet Malik. After the conversation, follow him into room 322, where Angela lives. Talk with her roommate Kelly (17 points).
Of course you need to get rid of her in order to be able to look around the room freely. Speak with her and click her with the top hat cursor. Choose the "Last Great Disappearing Ink" trick (3 points). Head to Mephistopheles' shop to get the needed requisite - the Disappearing Ink (3 points) - from the shelf beside the machine. You will also receive a magic lantern as a present.
After leaving the shop Sam will notice Helena, apparently heading to Mephistopheles (5 points). Return onto the campus. If you told the handy man to count to 100, he's still on the 3rd floor and will finish counting just as Sam return. This time you have to send him for coffee (if you've done during the first time - the way is clear). Go to the Graduate Wing. Click Kelly with the proper cursor and Sam will perform a trick which will cause the girl to go to the bathroom (10 points).

Use her absence and look into the drawer of the desk by the window (3 points). Inside you will find a magazine with Laura and David on the cover (5 points) and student record (5 points), click it in the upper and lower part.
Take a look at the photos on the pink dresser by the bed (3 points) - Angela's father photo (5 points) and the sights beside (3 points). Note the hair dye (3 points). Try exiting the room - Kelly will return, so talk with her about Angela (3 points).
Go to the Christ Church and into the gardens. You will find Charles there - talk with him (17 points). In order to clear all doubts, go to the courtyard and call Charles's Mummy (you've got her number in the cell: Menu/Contacts/Charles's Mummy). Ask her about his sudden change of appearance (5 points).
Eventually return to Dread Hill, head to the main lab, into the room with beds and talk with David (3 points mission 1) about what Sam managed to learn on Helena (3 points) and Angela (3 points). It will end the mission (195/195 points).
Start off by visiting Alice's shop in Oxford on Queen Street and examine the postcard rack once again. Watch the one called "long neck" - it's a hint on what you should search for in the Christ Church Dining Hall.
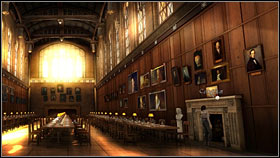

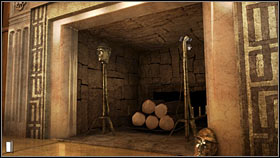
Go there and head right, to the fireplace. Take a look at the certificate standing on it and read it (5 bonus points). Afterwards take a look inside the fireplace (4 points) and examine the firedogs. Examine (twice) the upper part of the right statue; you will notice the Daedalus Club logo on it (2 points). Turn it three times to unscrew the head (5 points). Take the Jigsaw (5 points).


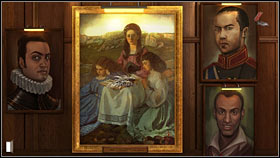
Approach the opposite wall with pictures of three girls on it. Zoom and examine them (2 points). Note the Daedalus Club logo (2 points) in the lower right corner (2xLMB). Observe (Two times) the book which Alice is holding and scratch the painting with the pocketknife four times in that place (10 points) until Samantha finds the last Jigsaw (5 points). It will land in your inventory.
Assemble the four parts (move them with LMB and turn with RMB). You will end up with a rebus. Solve it to receive Christ Church Meadows.
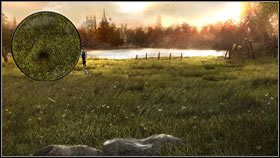
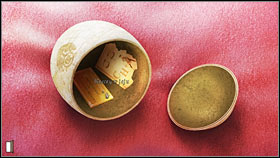
Leave the building, go to the gardens and from there onto the meadows (cursor in the corner of the screen - 3 points). With accordance with the riddle, you have to find a rabbit. Move left and a bit towards the water, looking at the magnification on the left side of the screen. Once you find the rabbit hole (3 points), it will be automatically zoomed. Go inside of course (2 points).
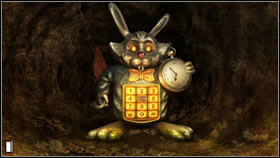
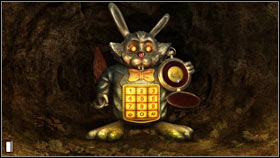
Inside you will find a white rabbit with a keypad on it belly. Input the solution of the riddle, which is the name of Alice in Wonderland writer, Lewis Carroll (anagram of the riddle's title: "C Railer Swoll"). You need to assign numbers to the letters, just like on the keypad of a cell phone: L - 5, E - 3, W - 9, I - 4, S - 7, C - 2, A -2, R - 7, R -7, O - 6, L - 5, L - 5 (539472277655). Properly entering the code (10 points) will result in the rabbit's clock to open. Take the coin (15 points).

Return home and take the Daedalus Club Invitation from the table with the phone (5 points). Click it in the inventory to learn that there's no address. You need to use both coins and the Map of London to figure out the location. Examine the coins from both sides. On one there's St. Paul's Cathedral and House of Parliament and on the second - Buckingham Palace and British Museum.
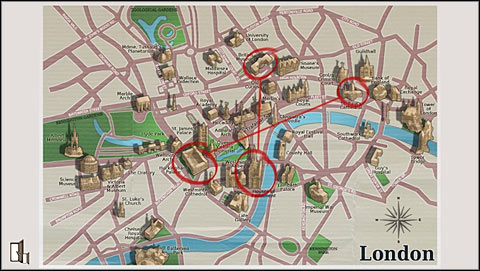
Choose the Map of London in your inventory (5 points) and mark all four points and then join (by clicking them) the House of Parliament with the British Museum and the Buckingham Palace with the St. Paul's Cathedral. The Daedalus Club is where the lines cross (10 points). It will end the mission (103/103 points). A new location will appear on the map, but you can't go there for now.

Go to Mephistopheles' shop and talk with him about what happened at the gym yesterday. The man will suggest to change the place and time of the next experiment (11 points). Go to the Horspath. Talk with Eddie (5 points). Take one of the discuses (5 points) from the pile beside him.

Return to Dread Hill talk with David (you get 3 points for just talking with him for the first time) about the change of plans (5 points) and using the discus (5 points). Leave the lab and call Helena (Menu/Contacts/Helena) to confirm the old time of the experiment (3 points). Afterwards return to Mephistopheles and tell him that David wasn't fond of his idea (3 bonus points).
Afterwards head to St. Edmunds Hall and tell the folks on the grass (Helena and Harvey are missing) that today the experiment will take place a little earlier (3 points). It will end the chapter (40/40 points)
1) Speak with Mrs. Dalton about the bike after Sam checks on it in the garage (3 points).
2) Take flour from the kitchen (3 points).
3) Use the flour on the stain on the window in the Dead Hill tower (5 points).
4) Perform the "Cup and Ball Psychic" on the handyman on the third floor of St. Edmunds Hall (5 points).
5) Note the certificate standing on the fireplace in Christ Church Dining Hall and read what's written on it (5 points).
6) Inform Mephistopheles that Styles didn't like his idea of changing the place and time of the experiment (3 points).
Missions:
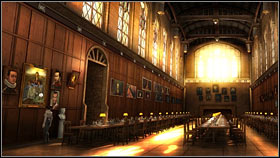
Talk with Harvey (3 points) and head to St. Edmund Hall. Greet with the guard and go to the dining hall (on the right). Speak with Detective Inspector Paiser on all available topics (15 points).
Take a look around the room. Approach the hole in the wall on the right (5 points). Examine it and use the discus on it (10 points). It will end the mission (33/33 points). Leave the room.
In the hall, David will bump into Angela, who will make him start having doubts towards Sam (3 points). Approach the guard and ask him about a student named Everett (5 points).
Return home and talk with Mrs. Dalton in the kitchen (5 points). Afterwards go upstairs and enter Sam's bedroom (3 points). Check the backpack by the bed (3 points) - observe the book (3 bonus points) and take the letter (5 points).
Afterwards check the nightstand drawer and David will find Helena's ID (5 points). Observe it in zoom (5 points).


Go down and call the case worker (5 points). It will end the mission (39/39 points). Go into the girl's bedroom once again. Take a look at the photo of Mom and Dad standing on the nightstand (3 bonus points).

Go to the cellar and into the private lab. Approach the work counter (on the left) and click on the dialogue generator in zoom (5 points).
Go to the computer (3 points), select My Files (3 points) and choose " Brain Power Report" (5 points). Print it (upper left option - 3 points).
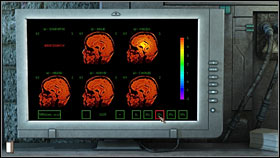
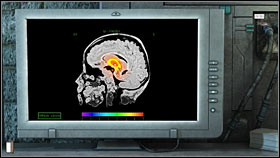
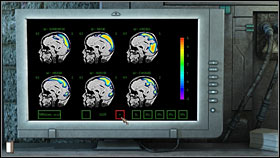
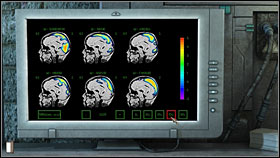
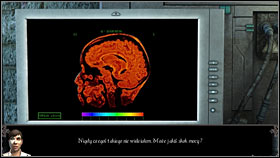
Afterwards go to the room with beds in the main lab. Use the computer there (6 points) and choose the third or fourth session. In case of the third one, set the time on 11.30 and check the 45th second (6 points) and then the 30th (5 points). Take a closer look at Angela's brain (6 points). Compare it with the Brain diagram (5 points) and click on Angela's Scan with the diagram in the background (10 points).
In case of the fourth session (it won't change your score through), set the time on 4.30 and check the 60th and then 45th second of the experiment. Examine Angela's brain and compare it with the printout. It will end the mission (57/57 points).
Move to St. Edmund Hall and talk with the Lambs sitting on the grass (3 points). Right afterwards the case worker will call (3 points). David will learn Samantha's stage name.

Go to Oxford Town Center and onto Cornmarket Street. Mephistopheles' stop will be locked, but take interest in the poster (2 points). Take it (5 points).
As David was unable to obtain the Daedalus Club number, return to the St. Edmund Hall Dining Hall and talk with detective. Ask for help in this case (8 points). It will end the mission (21/21 points).
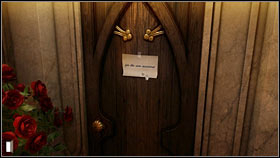
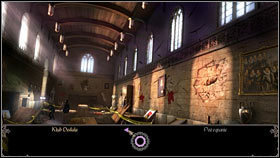
Choose Daedalus Club on the map. Once there, try entering (the door on the left). Speak with the Trickster. Show him Sam, or rather Lady Byron picture.
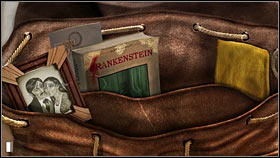
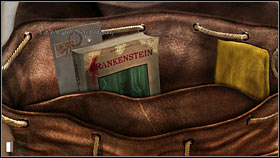
Observe the "Frankenstein" book in Sam's back pack (3 points).
Observe photo of Mom and Dad on the nightstand in Sam's bedroom - only after talking with the case worker (3 points).
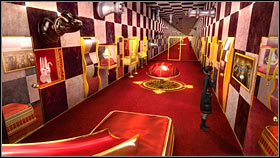
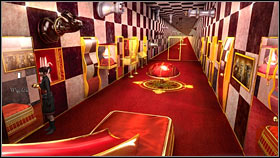
Missions:
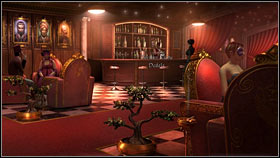
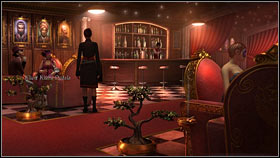
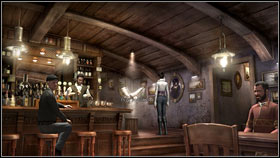
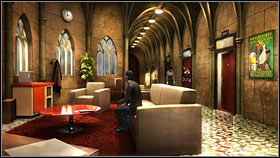
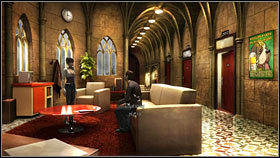
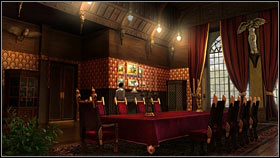
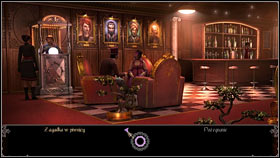
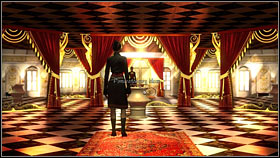
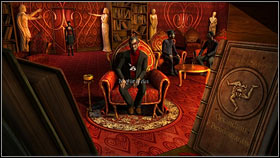
Go to the bar (cursor at the bottom of the screen). Talk with the bartender - ask him about the events in Oxford (3 bonus points) and Mephistopheles (6 points). Afterwards talk with the two clients on the left (6 points and 3 bonus points). Speak with the Trickster behind them (9 points and 3 bonus points - ask him about everything to get 3 points of mission 1).
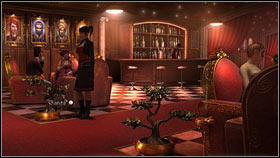
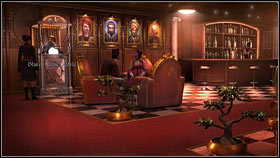
Only afterwards pick up the newspaper (5 points) lying between the chair on which the woman is sitting and the plant and read the interesting fragment. If you read the newspaper before asking the characters mentioned above about the St. Edmund Hall incident, you won't be able to receive the bonus points (Sam will learn everything from the newspaper and won't need to ask for anything more).
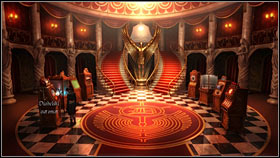
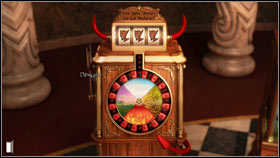
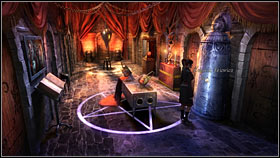
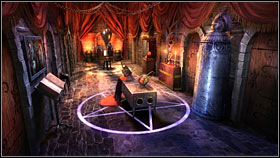
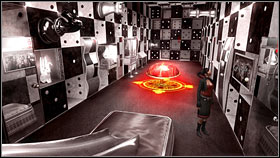
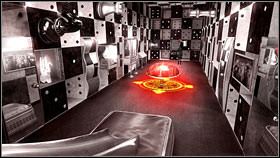
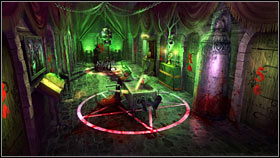
Return to the hall with game machines (to the right). Examine the devil machine game (first on the right - 3 points). In order to go down, you have to arrange three red devils. Click the left horn and once the devil appears there, click the right horn three times - two other (the middle and right ones) devils will appear. Then you have to quickly press the lever on the left for the ball to stop on the flaming part of the circle. If you won't make it in time, you will have to start all over again. If everything goes according to plan however, Sam will fall down into the underground part on the club (5 points).
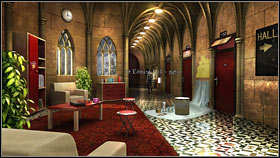
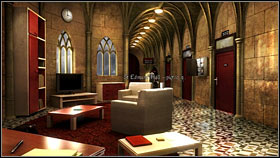
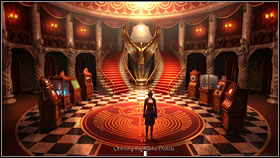
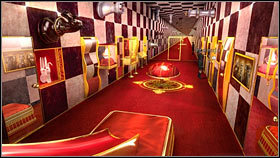
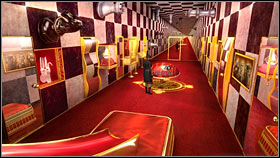
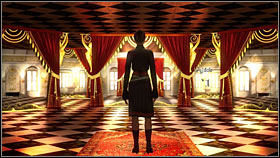
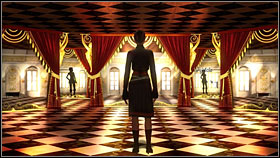
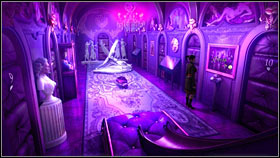
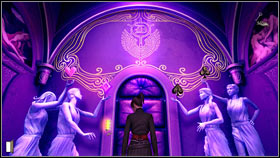
In the underground, you will end up in the pink Queen of Hearts room. As you see, the room has five doors on the left and right side. However most of them lead right back into the same room. The important ones are the first (closest to the bottom of the screen) on the left (they lead to the green Queen of Clubs room), the third on the right (they lead into the purple Queen of Spades room) and fifth on the right (they lead onto marshes with large chessboards).
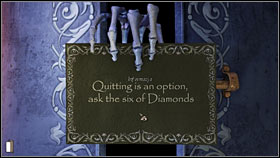
Approach the middle door in the back of the room (5 points). You have to obtain three keys from all the other Queens (Spades, Clubs and Diamonds). In order to see what cannot be seen, you need to use light.

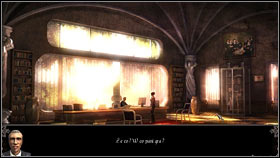
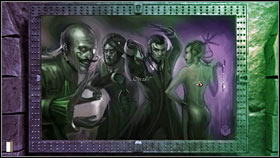
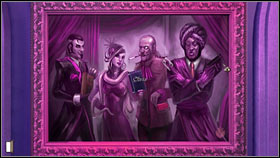
Approach the message prepared for Sam (on the right, below the painting). Open the box - you will learn that you are to look for a woman. Examine the painting - Sam will recognize that something is hidden here.
Take the third door on the right into the room of the Queen of Spades. Observe the painting (on the left). Approach the iron maiden (on the right). Open it to receive another information - the exit is under the Six of Spades (2 bonus points).
The important doors in this room are: the third on the left (they lead into the pink Queen of Spades room), the second on the right (the lead into the orange Queen of Diamonds room) and the third on the right (leading onto the chessboards swamps).
The door in the back of the room (in the front) lead into a very interesting room (go there - 3 points), out of which, after getting scared, will get to the Queen of Diamonds room. Of course take a look at the painting (on the right) and find the information (in the background on the right). This time you will learn now to believe everything you read.
The important doors are: the first on the right (the chessboards swamps), fourth on the right (Queen of Clubs), second on the left (Queen of Spades) and the first on the left (they lead outside the Club building). Go through them (3 bonus points) and return to the bar through the front door. Talk with the Trickster about the riddles in the cellar (3 bonus points). Afterwards go to the machines hall, set the three red devils, pull the lever and fall into the cellar onto again.

In the Queen of Hearts room, take the first door on the left into the Queen of Clubs room. Traditionally, take a look at the picture (on the right). The door in the back lead onto the chessboards swamps and the other important ones are: the fourth on the left (Queen of Diamonds) and the first on the right (Queen of Hearts).
As you have checked all the rooms, it's time to change the illumination (following the suggestion found in the Queen of Hearts room). Return to the Queen of Diamonds room (fourth door on the left) and examine the big, red, round button in the middle (lever). The inscription tells you to press it, but you did receive a hint not to listen to everything you read.
Use the button (5 points) and the room will drastically change its appearance (ant the information from the iron maiden will become clear - the door leading outside is marked with the Six of Diamonds). Take another look at the picture. You can now see that their fingers point onto the information at the top of the painting. Read them (5 points). You will learn that you need to head only left, only right, alternately and towards the more distant. Out of all there hints (and despite the appearance, they all make sense), you just need to follow the last one.
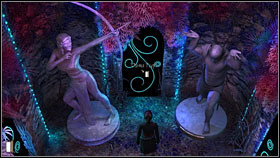
Go through the door in the back of the room. You will enter a room with mirrors and two visible exits. In each of them you can see a pedestal with what Sam is looking for - one of the three keys. However one of the pedestals is a bit bigger (it's closer) and the other smaller (it's further). In accordance with the hint from the painting, go (7x if you don't make any mistakes along the way) all the way towards the smaller (more distant) one. You will see that all the hints did in fact make sense, as there will be moments in which you will be going only to the right, left, or alternatively.
Once you reach the Orange Key, take it of course. Go towards whichever exit and you will notice Helena (3 points). In order to reach her, you need to follow the exact same rule - go towards the smaller (more distant) girl. Once you get a dialogue option (after three times), tell her to stay still (5 points) and continue, following the same rule (4x). After reaching Helena (3 points), the two women will talk and Samantha will end up alone in the Queen of Diamonds room.
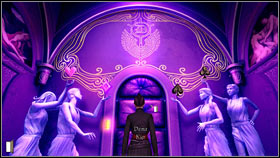
Go to the Queen of Spades room (second door on the left). Observe the painting (click on it to hear Sam's comment - 3 points). Each person is now holding an item, but the important thing is what the woman has in hand (the Queen of Hearts room hint) - handcuffs. Approach the showcase with them inside (in the back of the room - 3 points) and take them (3 points).
The handcuffs are needed to stabilise the planks on the chessboards swamps. As you have probably noticed, you can get there from any room, but the central chessboard-island is accessible only from the Queen of Hearts (third door on the left) on Queen of Diamonds (second door on the right) rooms. Afterwards take the first door on the left (if you started in the Queen of Hearts room) or the fourth on the right (Queen of Diamonds).
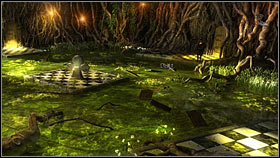

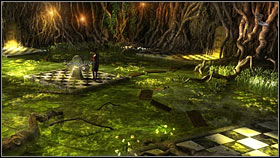
Once in the Queen of Clubs room, go onto the swamps through the door in the back (by the mythical statues - 3 points). Examine the dirty planks in the water and try stepping onto them. Using the handcuffs to stabilise them will prove necessary (3 points). Once you do that, walk along them and reach the middle chessboard (9 points). Take the Green Key from the pedestal (10 points). Go back across the planks onto the chessboard (click it) by the Queen of Clubs room and return inside.

From the Queen of Clubs room, head to the Queen of Hearts room (first door on the right). Observe the picture (click it) and note what the woman is holding in her hand (Atlas Shrugged) - it's a hint to use the strength of Atlas. Return to the Queen of Clubs room (first door on the left) and go to the back of the room, where the mythical statues are. Click on Atlas twice and Sam will try moving him (10 points).
Afterwards go to the Queen of Hearts of Diamonds room (appropriately the first door on the right on fourth on the left) and from there to the Queen of Spades room (third door on the right or second on the left).
In the Queen of Spades room, go to the door in the back - it's where Sam pushed the Atlas statue. It will stop the ceiling from falling down (3 points) and you will be able to take the Purple Key (10 points). Return to the Queen of Spades room (the exit on the left) and from there head to the Queen of Hearts room (third door on the left).
Approach the middle door in the back of the room. Use the three keys on the special lock on the left (3x5 points). It will end the mission (119/119 points).
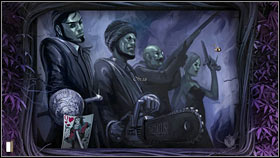
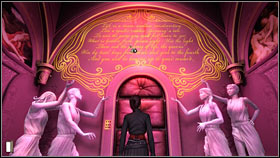
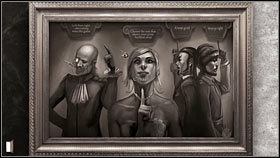
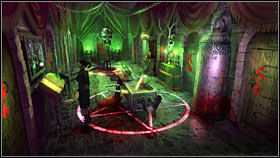
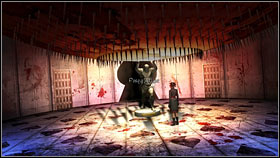
Go into the Club's private quarters and look at Mephistopheles (5 points). You need to have a good argument up your sleeve if you finally want to learn the truth. Return to the Queen of Hearts room (first door on the right). Look on the painting and traditionally note what the woman is holding in her hand - are you supposed to use a gun?
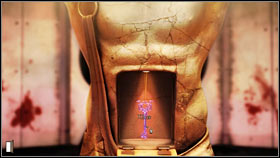
Head t the Queen of Hearts room (first door on the right) and from there to the Queen of Spades (third room on the right). Observe the gun showcase (on the left - 3 points). Take the gun (3 points), which will end the task. Go to the Queen of Hearts room (third door on the left) and go through the central door again. Use the gun on Mephistopheles.
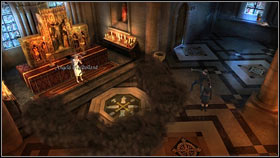
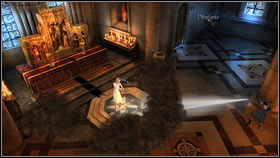
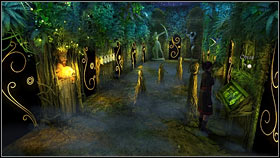
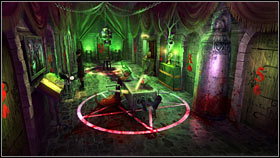
After finding the runaway's whereabouts (3 points) use Angela's paper fairy on the lantern you received from Mephistopheles (5 points). Afterwards use the lantern on the woman on the altar (5 points). Afterwards, as David, pull the lever in the wall to the left of the altar to open the baptism pool lid (10 points). It will end the mission (23/23 points).
1) Before reading the newspaper, talk with the bartender in the Daedalus Club about the events in Oxford (3 points).
2) Before reading the newspaper, talk with the two clients in the Daedalus Club about the events in Oxford (3 points).
3) Before reading the newspaper, talk with the Trickster in the Daedalus Club about the events in Oxford (3 points).
4) Find the hint hidden inside the iron maiden in the Queen of Spades room in the Daedalus Club's cellar (2 points)
5) Get outside the club from the Queen of Diamonds room (3 points)
6) Talk with the Trickster about the cellar riddles before pressing the red button which will change the lightning in the Queen of Diamonds room (3 points).


 Game of Thrones Game Guide & Walkthrough
 Gears of War (PC) Game Guide & Walkthrough
 Ghost Recon: Advanced Warfighter Game Guide & Walkthrough
 Gears of War 3 Game Guide & Walkthrough
 Grey Goo Game Guide & Walkthrough