
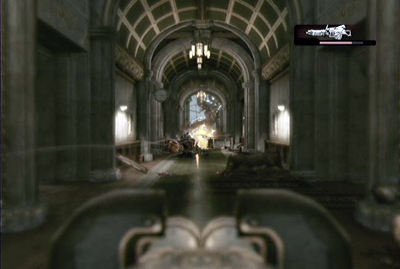
In guide you will find a detailed walkthrough of all missions in the single player campaign with exhaustive describes of hard moments and bosses fights. It also contain locations of all 15 cog tags, 42 collectibles and list of achievements. Orange color is link with the screen above the text, the blue one is reserved for cog tags and green shows collectibles.

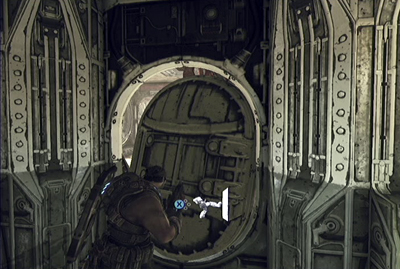
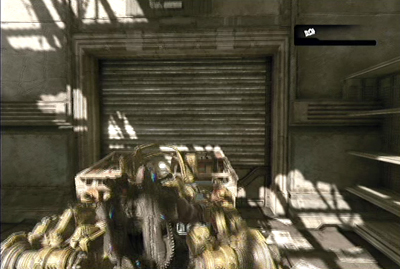
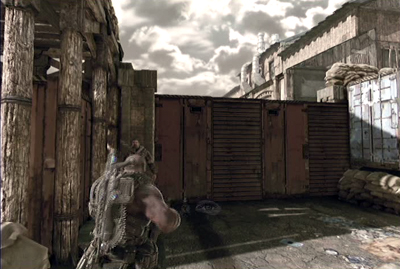
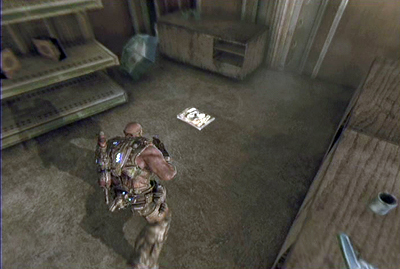
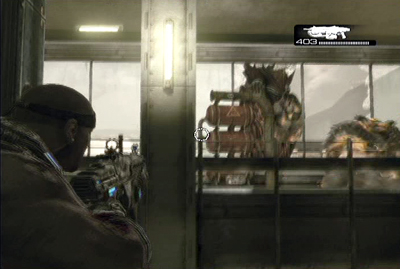
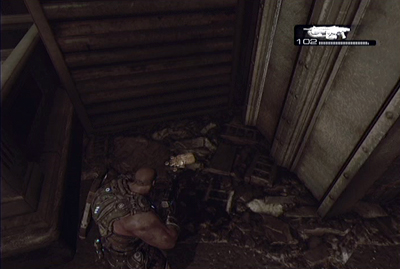
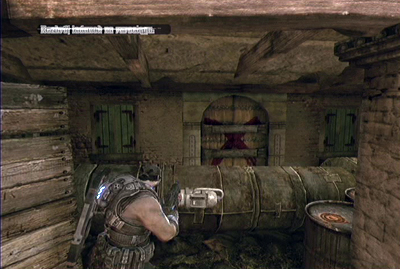
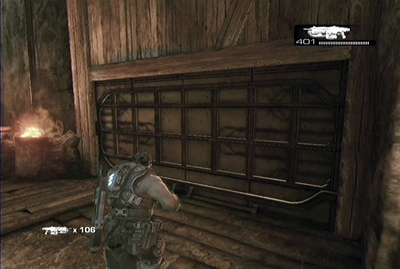
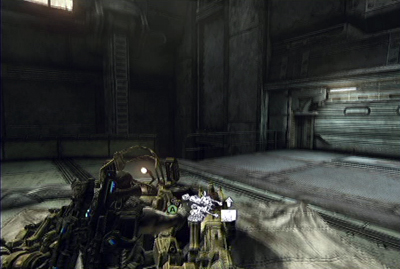
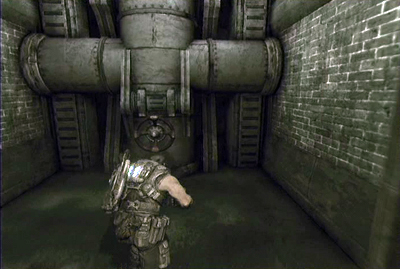
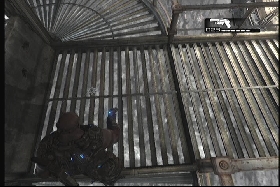
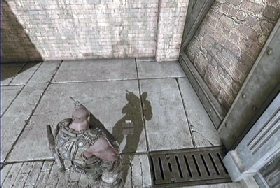
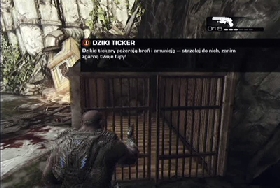
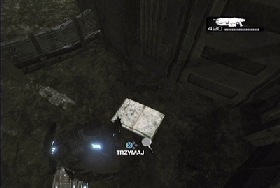
Afterward you leave the cell turn right, destroy the steel doors and pick up the Cog Tag #1, which is on the floor.
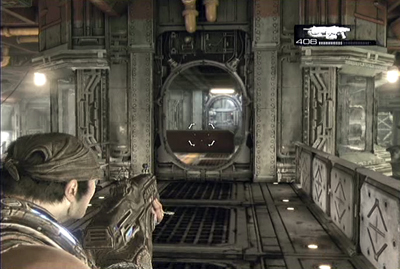
Then leave the room and start running toward to the girl, who is waiting at the end of corridor.
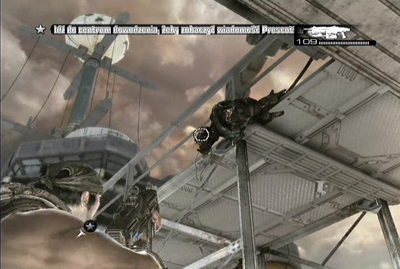
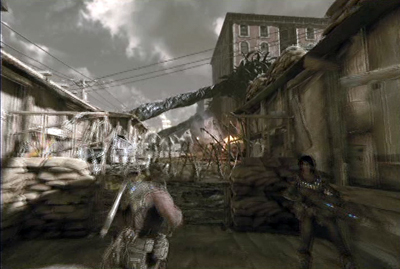
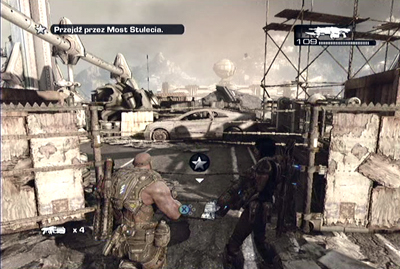
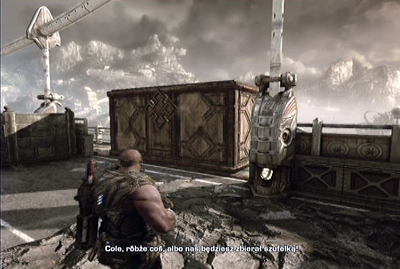
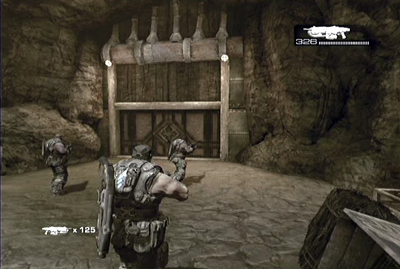
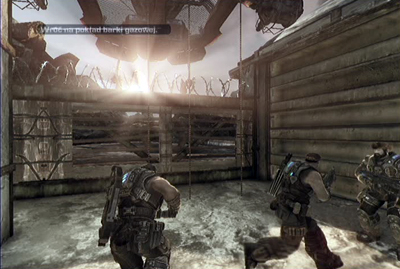
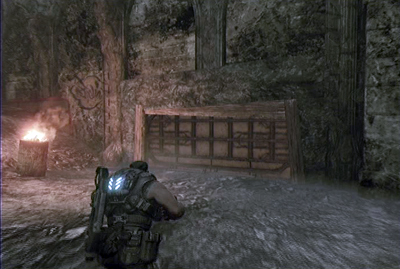
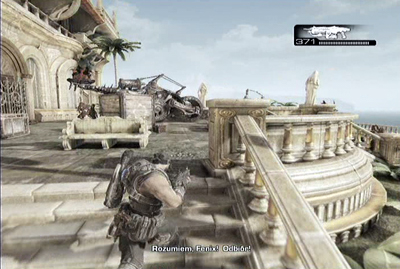
When you get outside go straight on and pass one of many self-creates gates.
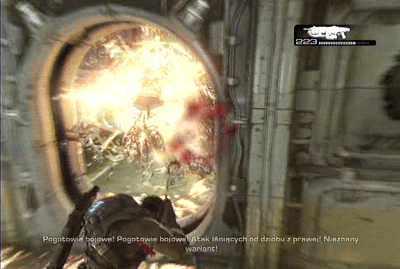
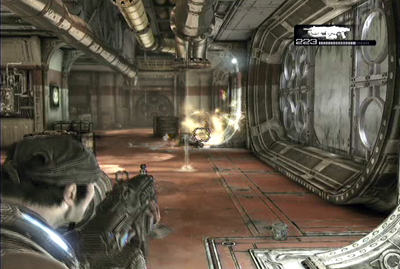
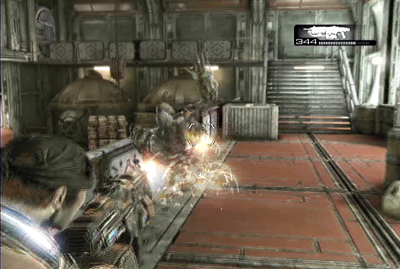
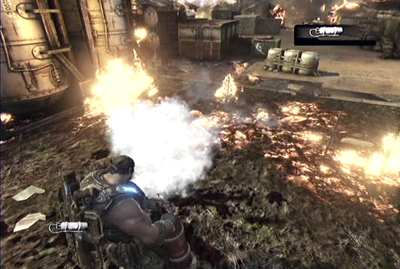
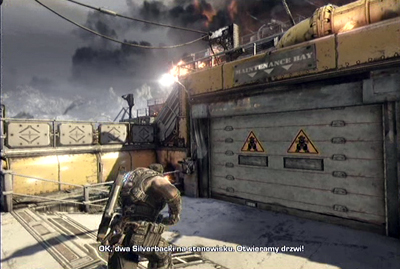
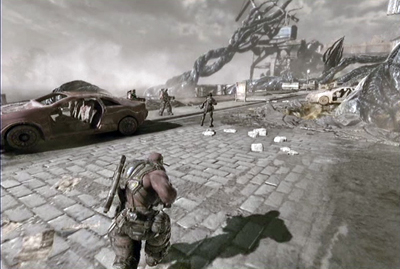
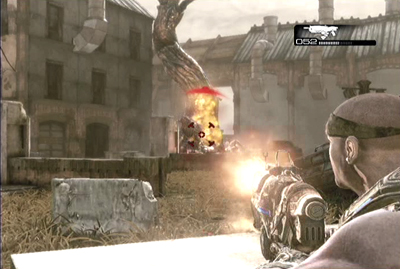
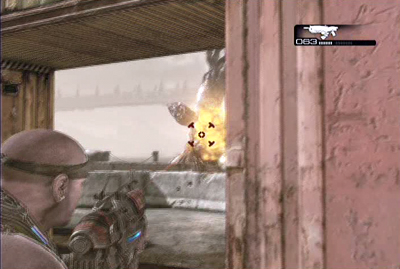
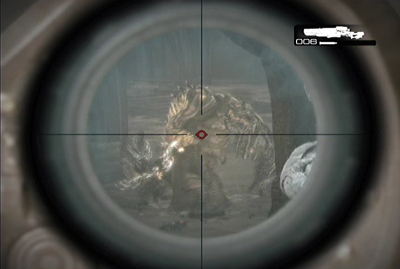
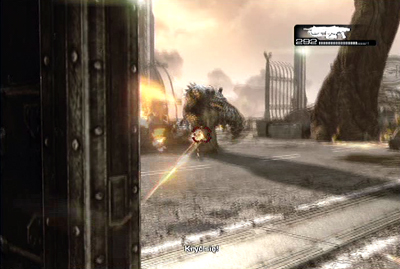
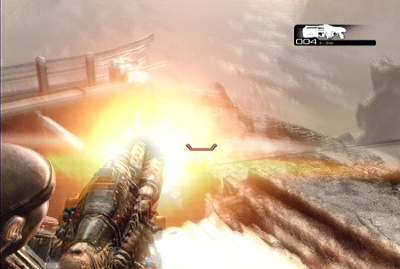
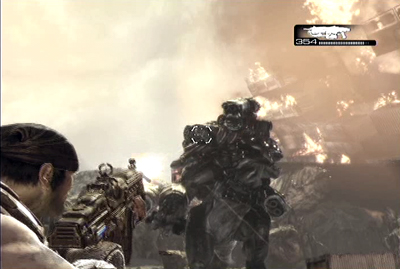
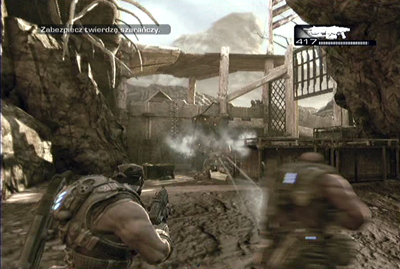
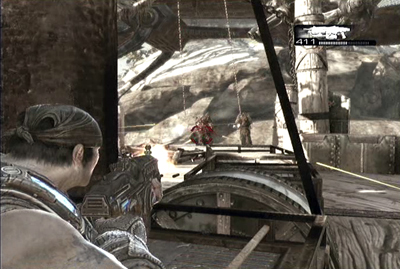
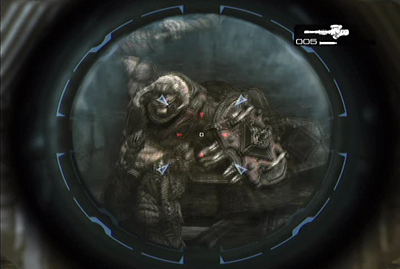
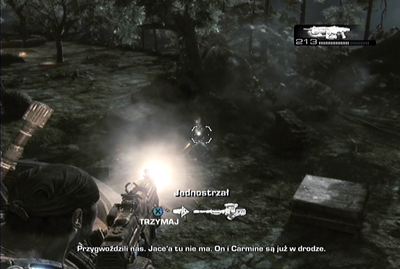
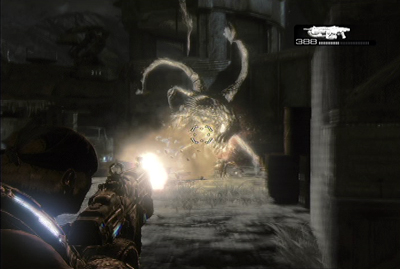
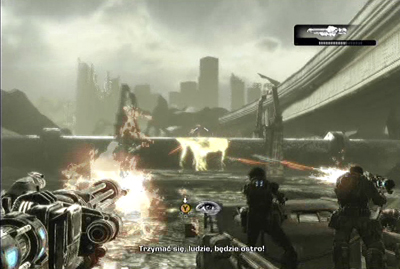
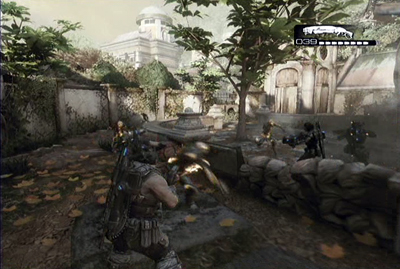
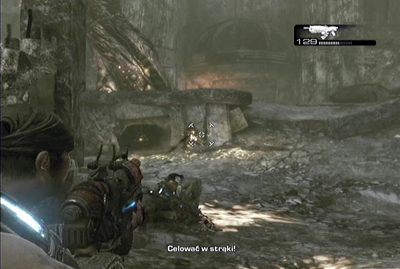
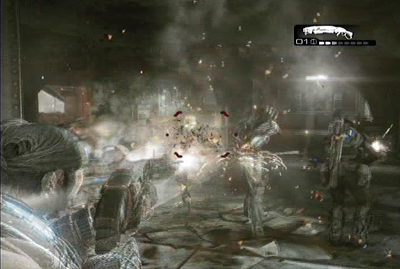
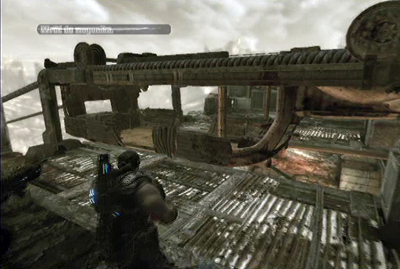
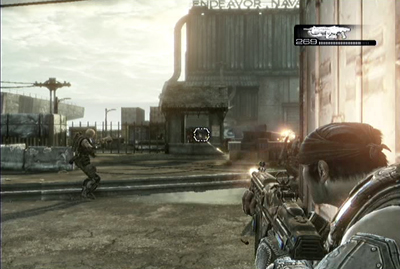
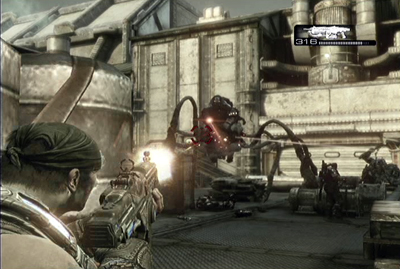
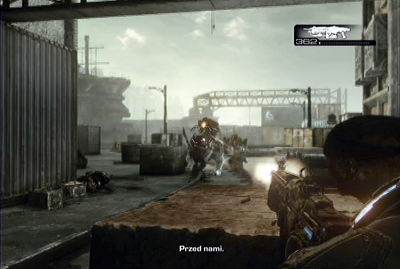
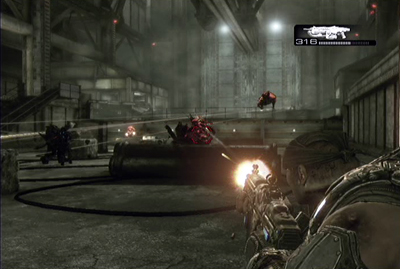
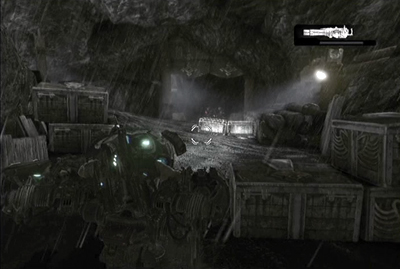
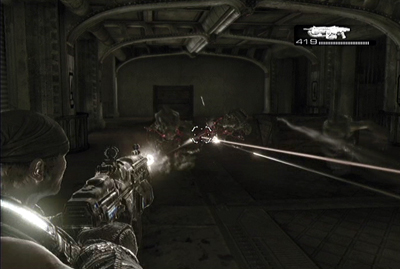
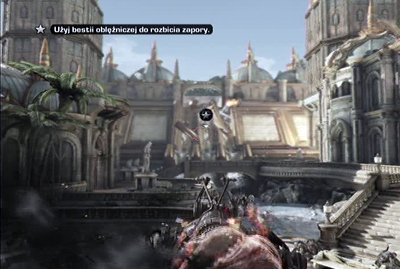
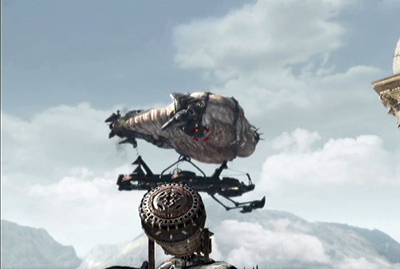
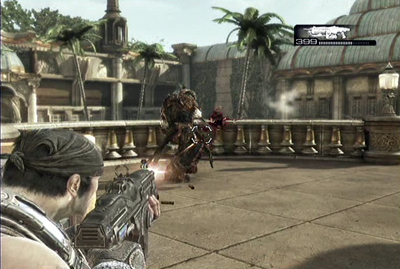
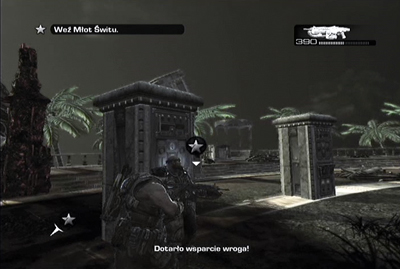
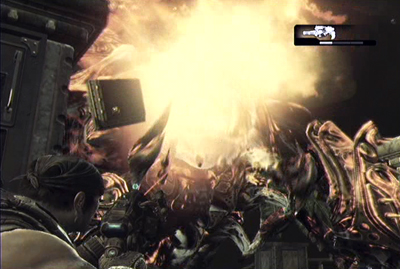
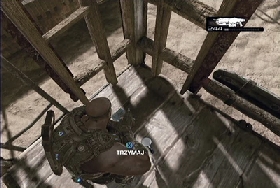
When you passed it run to the wall, cover behind it (press A button) and start shooting at the enemies standing in the bottom. In certain moment the enormous corpser and some opponents with rocket launchers will show up on the battlefield. Take out the rocket enemies and after few moments the mission will end.

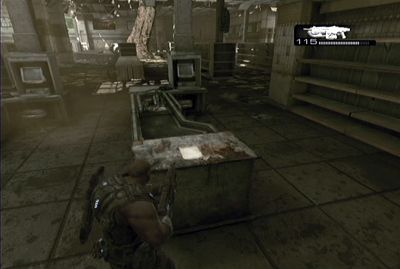
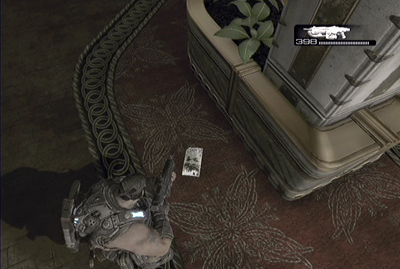
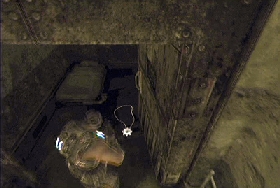
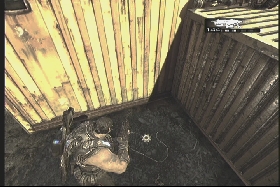
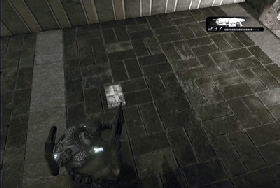
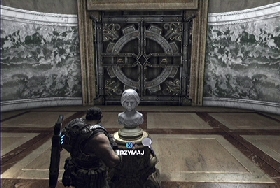
When you get up turn around and look on the table where you'll find collectible #1 ($20 Dollar Bill).
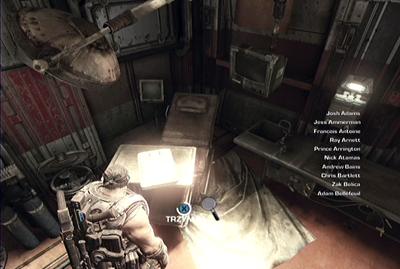
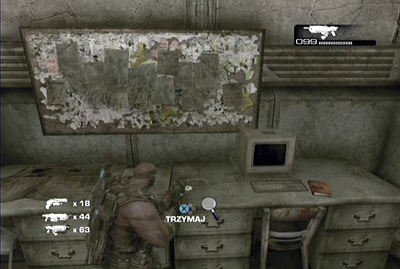
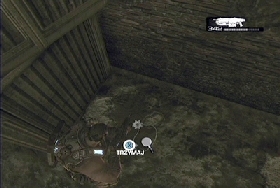
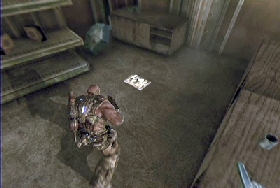
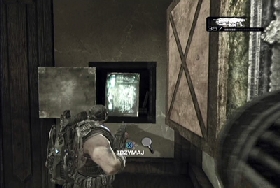
Leave your room and when you are in the corridor turn left and walk into first chamber. Look left and take collectible #2 (Dom's Psych Report), which is on the locker.
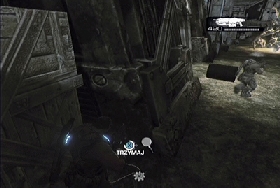
To find third collectible back to the corridor and pass through second door on left. When you get in there look right and pick up collectible #3 (Requisition Form) from table-top.
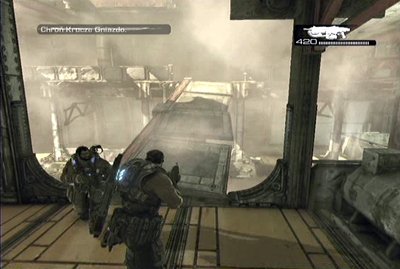
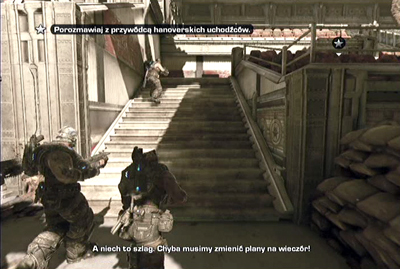
Back to the corridor and pass through the door with green light, which are on the right side of the passage. Inside you'll meet Dom.
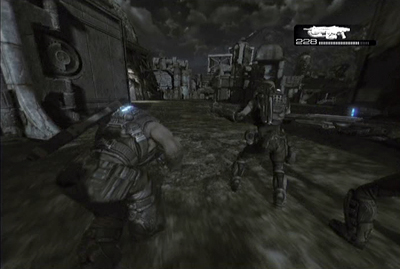
When the cut-scene ends go to the steps on the end of corridor, march on higher floor and continue with another staircase. Pass through the resting soldiers and join to the rest of the crew.
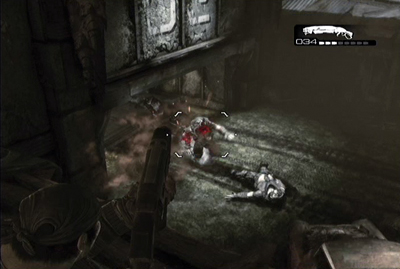
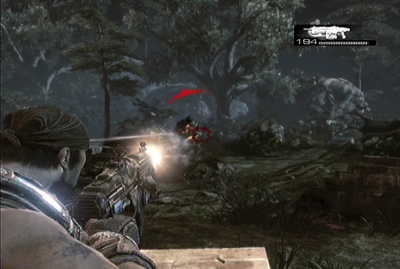
Continue walking along corridor. In certain moment you'll encounter with allied soldier who is being attacked by some creatures. Try to hit them using long burst from lancer or by using melee combat if they get close to you.
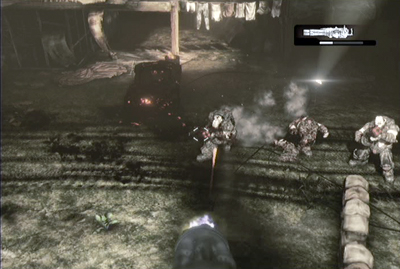
Afterward you deal with enemies continue march. When you'll get outside start shooting to assailant opponents.
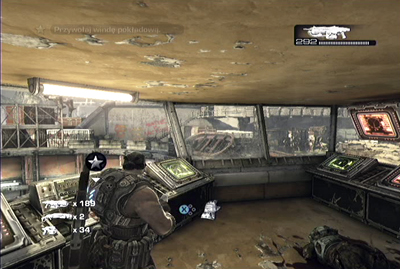
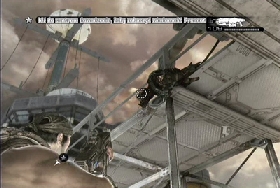
In certain moment you'll get to the helicopter which can't land. Go to the control tower and use panel to prepare the landing field.
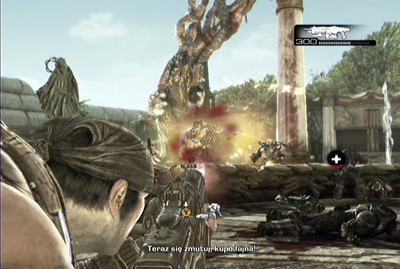
When the cut-scene with Prescott ends begin fight with waves of assaulting enemies.
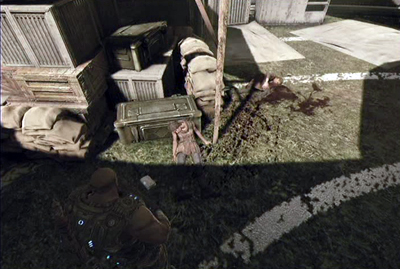
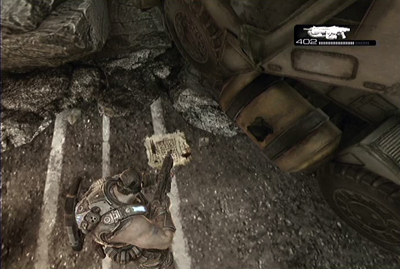
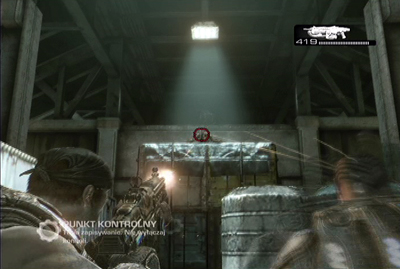
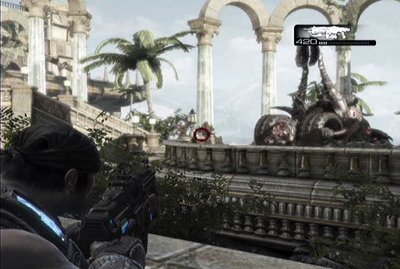
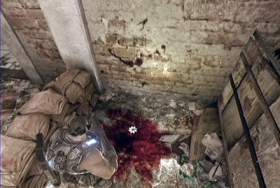
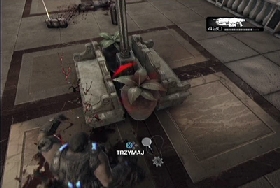
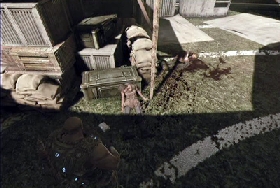
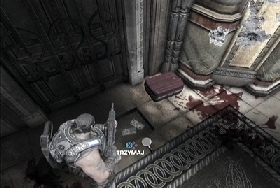
After you pass the green terrain you'll reach concrete square, turn left and head forward. You'll see a container with a red skull painted on it. Walk around him and look up. You'll see a body, fire some rounds to it and the Cog Tag #2 will fall on the ground.
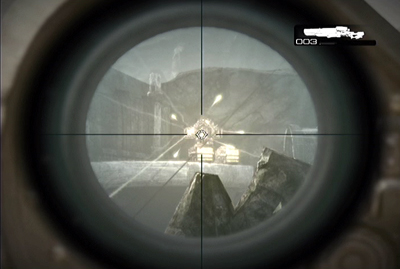
Now start running towards stairs on the right side of the concrete square. Get on the higher floor and pick up a sniper rifle. Head forward and after a while another cut-scene will begin. When it's over start returning to the landing field and kill another waves of enemies en route.
After few moments you'll reach stairs. Use them to get into the base.
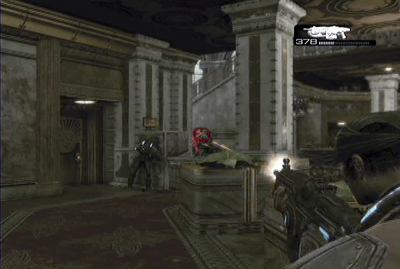
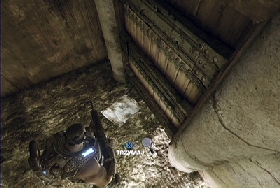
Pick up extinguisher from the ground and use it to extinguish fire in the hallway.

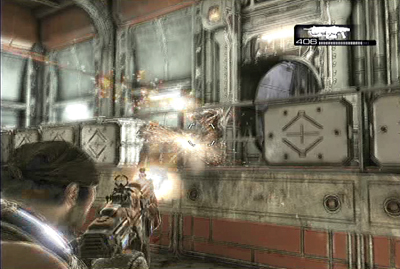
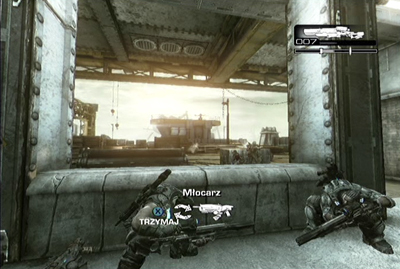
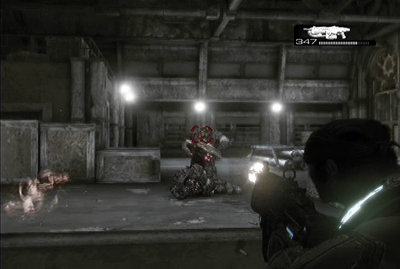
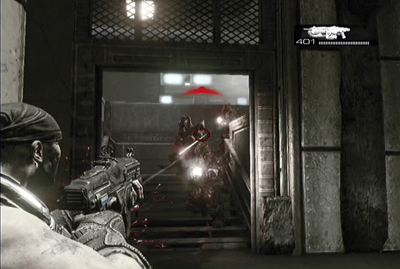
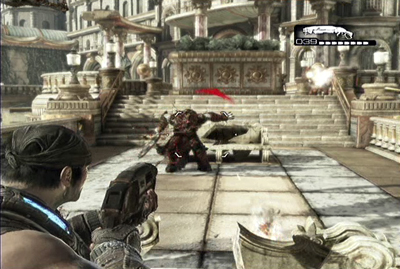
When you finish change the extinguisher for some gun and eliminate enemies. After that start heading forward corridor. He will lead you to the room with Prescott. Help him killing opponents. When enemies will be dead mission will end.
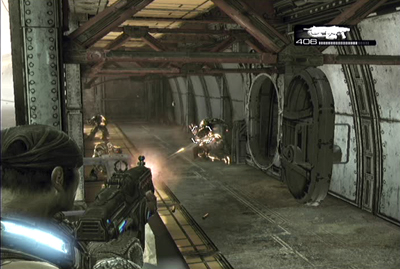
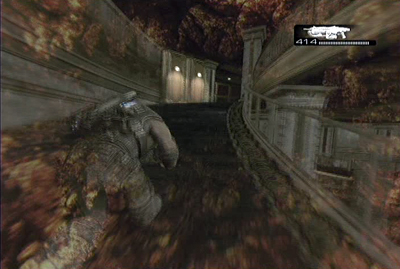
Start following through the corridor, when you reach the stairs get down. Some monsters will attacked you here. Kill them from distance but if they come close to your character use melee attack (B button).

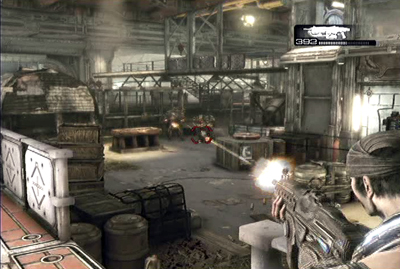
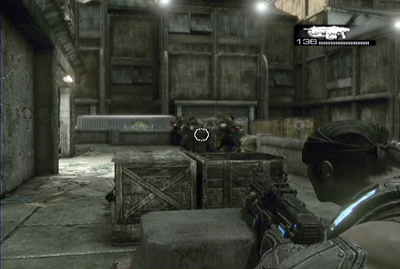
Once the corridor is clear pick up some ammo from the ground. Then walk to the mess (entrance is on the left side of the passage) and kill all the enemies inside.
When opponents are dead walk out to the next corridor and head toward to the metal doors. Open them and pass through to the next location.
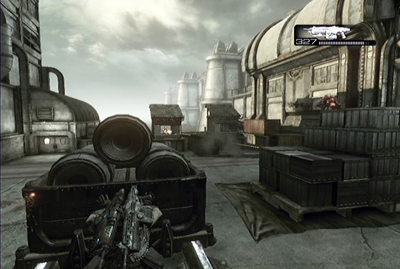
You'll get to the hangar filled with enemies. Instead of regular shootout run to the platform on the left. Cover behind barrier and flank opponents.
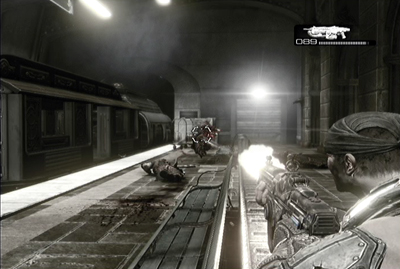
Then headway to the corridor which leads to the landing pad with a helicopter. Go to the right where you'll have to defeat a group of opponents who run through the steel doors.
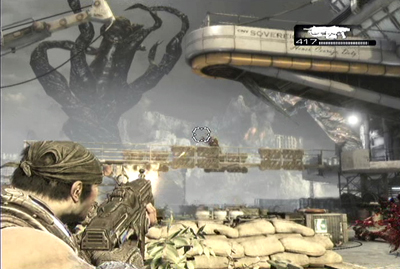
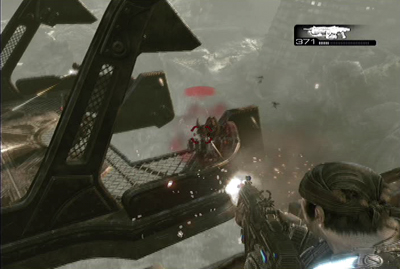
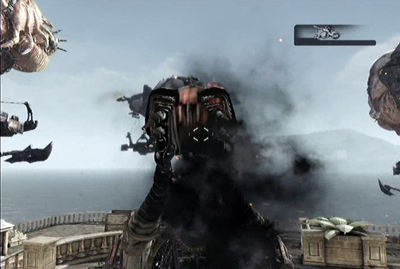
Once they are dead get to the top of the stairs and walk to the control room. Kill all enemies inside and turn the lever in the control panel on the right side. Head back downstairs and start shooting to the next wave of enemies. After a while helicopter will be destroyed by enormous tentacle and you'll be attacked by polyps. Fight with them and at the same time walk to the left. In the meantime tentacle should disappeared.
Now defeat all opponents who run from the steel doors on the left.
Continue march on the platform. When you approach to the next control room walk to the panel and use another lever.
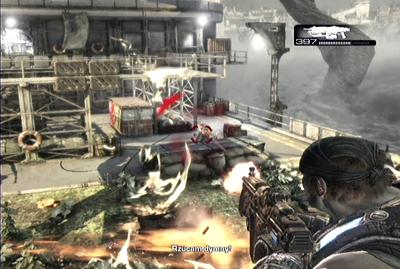
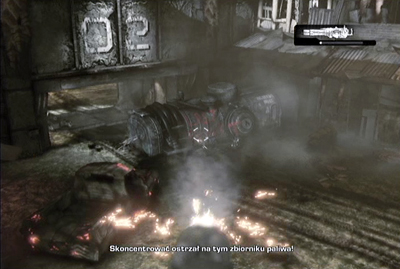
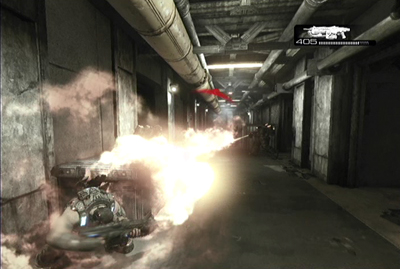
Go to the landing pad and wait until you get on the surface. Eliminate near opponents and head to the burning ground. On the right side you will see a big red valve. Use it to extinguish fire and go to the next location.
After you kill all the enemies use a second valve and march forward. Here you will see explosion of the soldier. Pick up dropped extinguisher and use it to extinguish the fire.
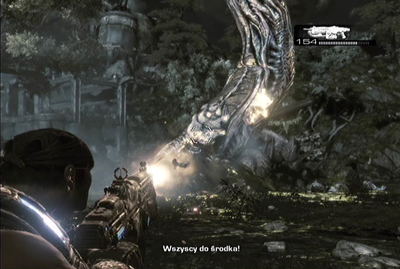
In the way to the third valve you'll be attacked by leviathan. After cut-scene you will get to the base again. Head forward and kick a metal door as you reach them.
In the next location get to the right and pass through the gap. It's a great place to start shooting enemies who will run into the room.
After you kill soldiers back to the other companions and help them in fight against polyps. As always, if they come too close to you use your melee attack. Once you get rid of all opponents a metal footbridge will collapse in the centre of the room. Use it to get on the other side.
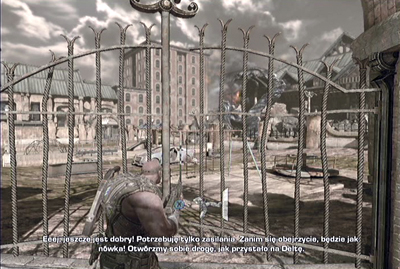
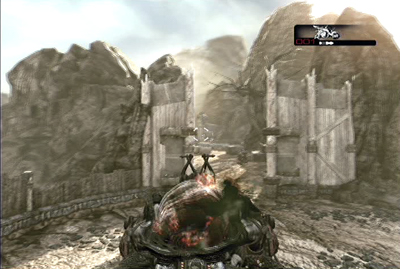
When you go outside kill nearby enemies and walk toward iron gate with two yellow triangles. Open it using lever on the left side and walk in.
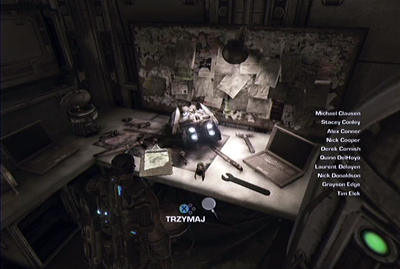
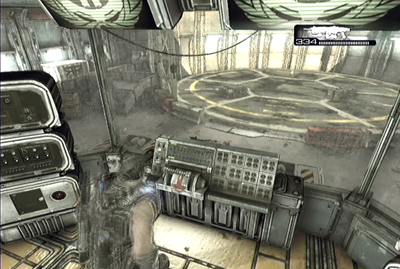
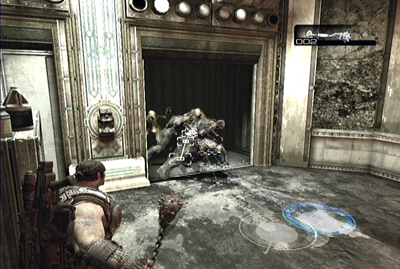
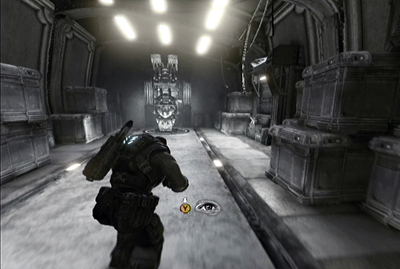
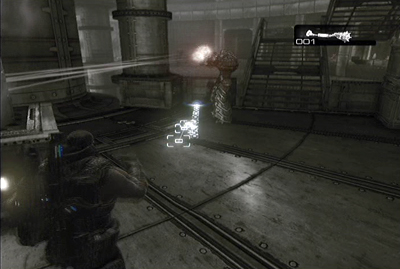
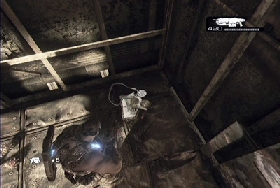
After you get into hangar look to the left. On the crates you will find collectible #4 (Silverback manual). When you read it turn right and get into one of combat robot.
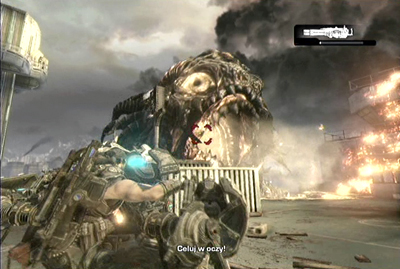
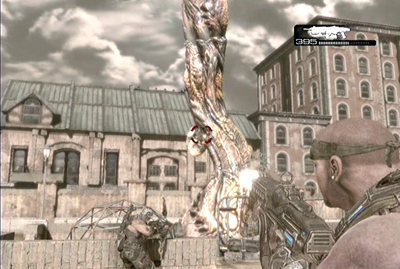
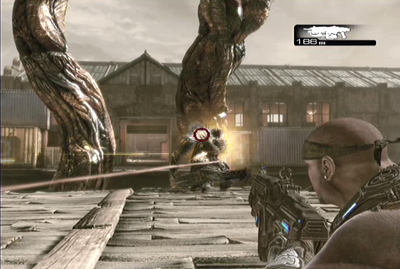
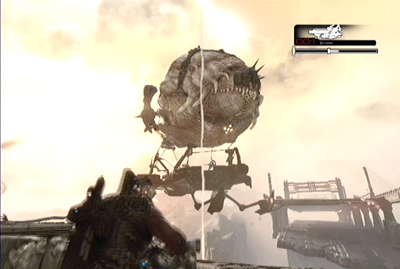
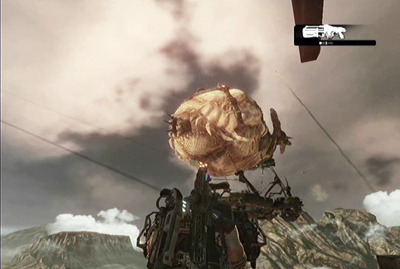
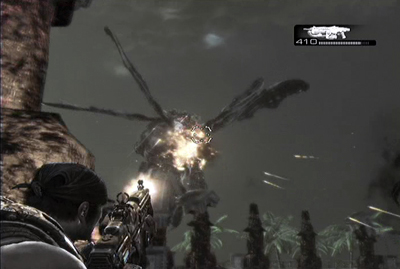
Exit the hangar and turn right. Destroy the obstacle using kick (B button) and start shooting leviatan's eyes. Silverback has two firing modes. First is a machinegun but in anytime you can deploy your robot (A button). In this mode you are immobile but you can using rockets. While using machinegun watch out not to overheat your gun (look on the stripe in the upper right corner, if it comes to the end you'll have to stop firing for a few seconds).
When leviathan lost his eye he will fly away for a moment. In the meantime polyps and boomers will enter on the battlefield. Eliminate them as fast as you can and if they damaged your robot get to the safe place for a while. When you finished with small enemies leviathan will come back. Aim in his second eye, next defeat another group of opponents and in the end shoot leviathan's throat.
After landing head way toward ruins of city. At the entrance you will see a devastated outpost. Turn left and go along the road.
When you reach the crossroad turn right and keep left side of the road. In certain moment you will come across a metal gate. Destroy it and go straight on. After few steps, on the ground near the corner, you will find collectible #5 (Journal).
Back on the street and continue to the outpost. After shot conversation turn into passage on the left. Pass through it and head toward iron gate. Open it and march in on the playground.
Take a few steps forward where you will be assaulted by the groups of enemies. There also will be giant stalks which can produce new opponents, to stop this you have to destroy all pods rising on the plant. When you do this the stalk will die.
After the battle go on the slide enclosed by wooden cottage standing in the centre of the playground. Climb to the little house and look at the corner where you will find collectible #6 (Child's Diary).
Leave the playground and purge the next street from enemies. Continue along the road and in the end pass the barbed wire.
After short break head forward. You will reach the next location with lots of enemies. Remember to eliminate pods growing on stalks in first place. Once you get rid of all opponents go toward white wide doors and pass them.
When you get in use your weapon (chainsaw on the lancer will be the best) to destroy wooden planks which are blocking the passage.
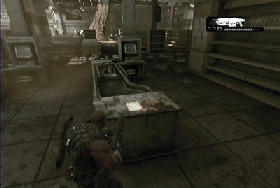
Enter the shop go straight on and when you pass first part of shelves turn right. Head forward to the ruined checkouts on the left of withered stalk. On the last top-table you will see collectible #7 (Grocery List).
Back to the main passage, head forward and eliminate all opponents on your way. While shooting use omnipresent furniture to get cover.
In the next area you will have to fight with some stalks. When you defeat them pass wide green exit doors.
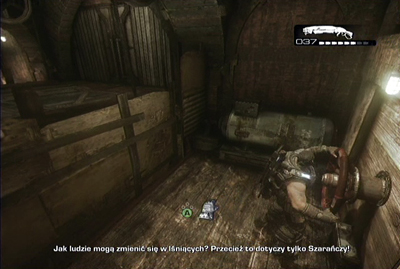
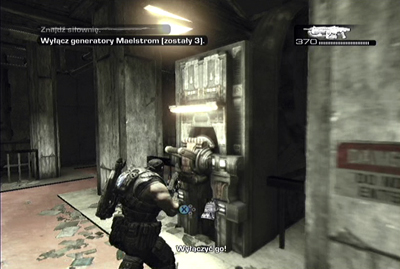
Pass next door and you will enter to the location with cupboard which blocking the passage. You will have to push this obstacle. To do it destroy the wooden crate with white mark on it, then pull the uncovered lever and get into discovered location. Get into robot and use him to push the cupboard (when you are near it press B button).
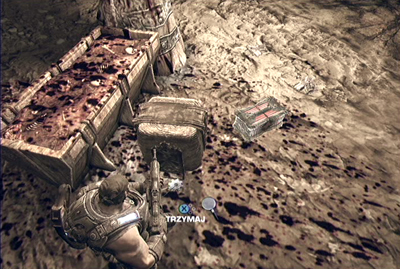
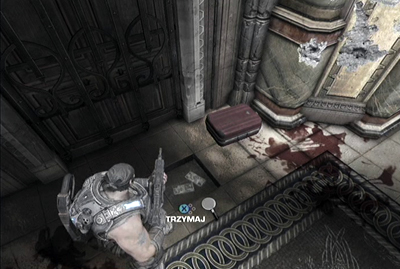
In the next location use robot to pick up crates with supply, which is standing in the middle of the ground. Leave the robot and head to the room on the right. Here you will find a grenade launcher, some ammo and on the table-top near monitor Cog Tag #3.
Back to the robot and use him to destroy (B button) one of three metal gates leading outside (the best choice is first gate on the left because it's the only passage where robot won't block). Before you go outside with your supplies clear the whole area from enemies on your foot.
Once it is done back to the robot get outside, push the wreck of the car (B button) and head toward green beacon. You will have to push one more wreck, when you do this deliver supplies to the marked place.

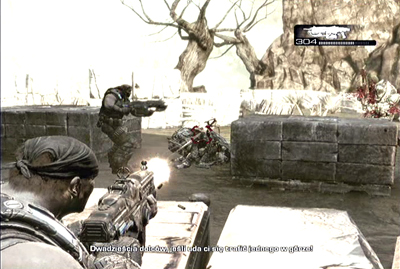
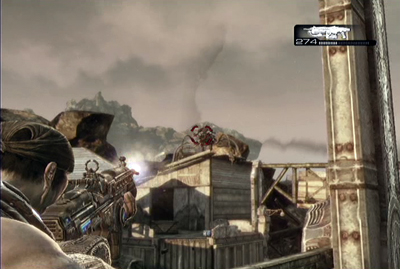
Head forward, pass through destroy part of the street and continue toward square, where allies fight with opponents. For the first time you will meet gunkers - these opponents are though and are very dangerous in melee combat. Besides they fire deadly explosive balls. When you see it immediately dodge.
The best way to defeat gunkers is shooting them from long distance. Eliminate them in the first place and then start fighting with other enemies. Look out because after defeat the first wave on the battlefield will grow some stalks. Destroy the pods and rest of the opponents and in the end head forward to the allies camp.

Start walking behind the girl. After few moments you will get into armory (it's the last indoor location in the camp). When you get there turn right and go straight on. As you reach the wall with plate turn right. Behind the container on the ground will be collectible #8 (Clipping Times-Tribune).
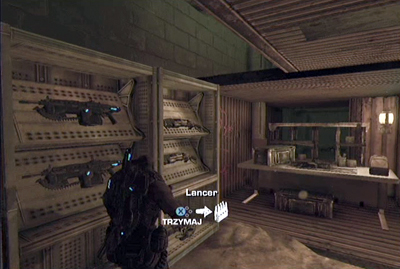
If you want to you can also arm with new weapons, which can be find in the armory on the left.

In the end pass through the iron gate which will be opened by your guide. When you are outside you can fill up ammo in the supply truck standing in the middle of the square. Wait a second for report and go right.
Get through the next red gate which will be opened by guard.

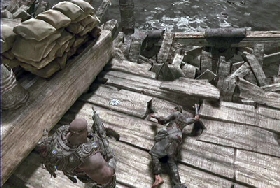
After you get outside turn left and go straight on along the wall. After few whiles you will get to the devastated jetty. You will find here a corpse and near them Cog Tag #4.
Go to the main square where lots of enemies are waiting for you. Among them is one gunker. The best way to beat him is to cover behind red containers on the right and shooting him from this position. When he is dead get rid of other enemies.
Start heading toward stadium. After short cut-scene near the gate you will be assaulted from behind. Quickly cover and begin eliminating foes. Look out for fire balls launched by gunkers (remember to dodge when you see it). Once you deal with opponents get to the stadium.
Start heading forward. After few moments you will meet group of your fans. Talk to them and decide which road you will choice. If you choose to go the upper floor, then pick up sniper rifle which is on the ground in front of you. Now go straight and kill all foes who are standing on the catwalk on the left.
Look to the right where is small room. Enter to it and pick up collectible #9 (Cougars Season Program) which is on the ground on the right side.
Now get to the catwalk, where you killed some foes a few moments ago. Get to the stairs on the left and start shooting at enemies in the bottom. In one moment the gunker will enter on the battlefield. Shoot him from your sniper rifle (as always look out on his fire balls). If he will still alive finish him off using some other weapon. Once the area is clear join to your squad.
If you choice alternative option and get to the down level, then quickly cover behind crates and shootout the enemies and the gunker from this position.
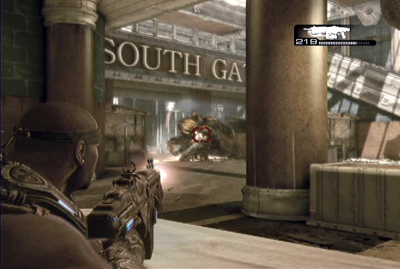
No matter what option you have chosen, after the battle get through the south gate.
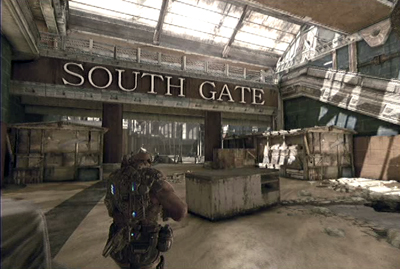
Immediately turn right and go to the drinks machine. In the corner near it you will find collectible #10 (Cougars player handbook). Pick it up go through the near doors and head forward.
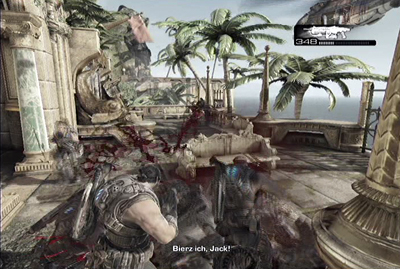
At the end of the road you will get into changing room. When Cole dressed up like American football player and you will gain control over him start running straight and pick up the bomb. After that head back to the marked place where effective final is waiting for you.
After the match go to the left side of the pitch (near the area where bomb was) and pick up collectible #11 (Cole's championship ring) which you will find near the corpse.
Then join to your squad and head to the rebels leader.
After the cut-scene you will land in the elevator. Cover behind one of the short walls and start shooting at enemies. On the last floor aim into red barrels with fuel and pull the trigger.
After impressive slide on the rope you will land on the street. As soon as you can cover behind metal wall on the left. It's a great and safe place for start shootout with enemies (among them will be one gunker).
Once the area is clear head to the bridge. At the end you will encounter machinegun nest so it's necessarily to take cover when you get close to it. Wait for a good moment and shoot the enemy or throw him a grenade. Simultaneously watch out for snipers who are standing on the high platforms on the right and left side.
When you get close to the empty machinegun nest watch out because on the right side is second bunker. You can easily destroy it by firing the explosive barrels which are standing on the right side. Once you get rid of enemies quickly get into machinegun and wait for boomers who will assaulted you from the left. Shoot them down with long burst.
After that leave the machinegun nest and turn left. In the small alley you will see collectible #12 (Toll booth tokens).
Get through the passage that boomers used and when you get to the bridge go to the right side. You will see a container with wooden crate inside. Destroy it and pick up collectible #13 (Bayonet).
The next part of the bridge has a roof. When you approach to that place turn left, where you will see an iron stage and a ladder on the left side. Use it to get down and go to the centre of the platform. On the ground behind stone wall you will find Cog Tag #5.
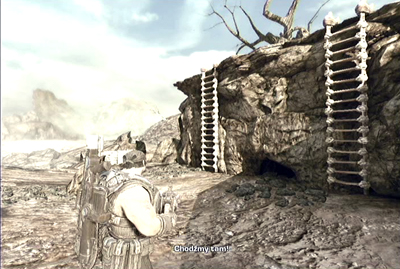
Head back to the top of the bridge and follow along the road. At the end you will get into the room with two ladders. Use one of them to get above and continue.
When you get to the bridge pass the barbed wire and continue along the road. At the end the bridge will collapse. Turn left and enter to the building. After short cut-scene you will be able to chose one of the road - go to the catwalk or down.

First road is a little bit longer. Go straight on all the time and kill every opponent that will stand on your side.

Soon you reach the ladder. Climb up and get back to the bridge. Join to the squad and eliminate nearby enemies.
If you chose to go by lower deck you'll start at the bridge. Be careful because at the end of him is machinegun nest. You can shoot gunner, throw him a grenade or wait for your allies who will help you in the fight.
After the battle get to the iron gate and destroy a padlock.
After another cut-scene head forward along destroyed bridge. While marching look out for tickers - they are small and fast foes, who explode when they near they target. So the best way to eliminate them is shooting from long distance or kicking when they get to close.

In the next section you will be fired by mortars. Go forward but when you'll see missiles on the sky quickly hide in the containers. After bombardment get out and run to next part of the bridge. You can also pick up a grenade launcher which is lying down on the ground.
At the end of the bridge kill all opponents attendant the mortars. Once you have done this pick up one of the mortar.
In a short period of time the gas barge will show on the sky. Use mortar or grenade launcher to destroy it.
Get to the bottom part of the bridge and go forward. Be careful because you will be attacked by leviathan's tentacles. In that cases wait a moment and when they disappeared continue along the road.
In the end you will reach a ladder. Climb up and when you get outside turn right. On the ground you will find collectible #14 (Sightseeing book). Pick it up and back to the main road on the bridge.

After few steps the next cut-scene will begin. When it ends enter the bridge and start killing enemies. Watch out especially on the right side of the road, where is a machinegun nest. Shoot the gunner and use that heavy weapon to suppress foes (look out for those who will attack from behind).
Once the area is clear go to the next part of the bridge and throw off the container with tickers.
Go forward and pick up guns from the ground (you have to be hurry because wild tickers will eat it). Near rocks you will find the container, force the grating, get inside and pick up collectible #16 (Tomatoes a beginner's guide).

Head forward, after a while you reach extensive square with enemies. Ignore them and go along rocks on the right. You will get to the crash site. Near the burning chopper you will find collectible #16 (Octus medal diploma).
Now get to the square and start killing foes. Once you get rid of first group the another one will attacked from behind collapse platform on the left.
When you finished the battle pass through the collapse platform and get to the next location. Here, between the crates, another wave of enemies will attacked you. Kill them and head forward.
After the cut-scene you will control Marcus. Your task is to eliminate wild boomers who have created defense line in front of you. Be careful because they have special underground rocket launchers. When such missile will come to you it will jump from the ground and explode, so you have to dodge often. Near the wall on the right, just on the beginning of the fight, is a sniper rifle. It's very useful to kill enemy boomers and snipers standing on the bridge.
After you crushed the first line of the defense go to the right passage. Kill the survivors and march along the path. It will lead you to the second defense point with catapult in it. Take out the defenders and get into the catapult.
Use it to destroy two hostile catapults. After that brumak will enter on the battlefield. Two well aimed shoots should take him down. Once the area is clear get off the catapult and go to the path on the right.

Look right and you will see two wooden crates and some enemies. Kill them and look at the top of the rock in front of you. There is a crate with collectible #17 (Captain's log). Shoot it a couple of times and item will fall on the ground.

While getting down eliminate all enemies. At the end you'll reach extensive square where allied soldiers defend against opponents. Help them.
Once the square is clear watch a cut-scene. After that go to the metal container with red skull painted on it. Walk around and in the corner you will find Cog Tag #6.
After the cut-scene you will have to defend against assaulted foes. Firstly you will have to fight against normal soldiers but later brumak will enter on the battlefield. Head back and cover behind sandbags. Then start shooting at big gun and rucksack which are on the back of brumak. It will take some time and lots of bullets to destroy it but sooner or later brumak will fall.
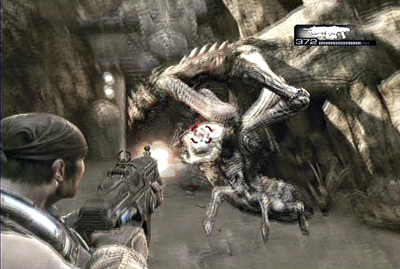
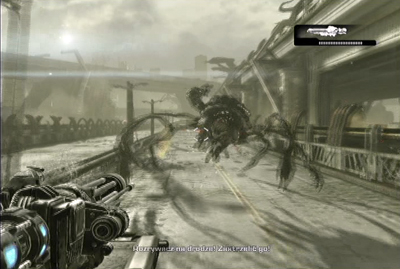
Start walking ahead. After few moments you will get to the extensive square with some cages hanging on the tree. When you enter to that location you will be attacked by little corpser. This monster is moving underground and suddenly get on the surface and attack from close range. When his limbs are near head you can't damage him. You have to wait until he put them down and you will be able to shoot his head.
After the battle pass through open gate in canyon on the left. In the next location you will attacked by lots of foes. Cover in safe place and eliminate them all. It will be a little hard because they are entrenched on the elevation. Watch out especially for gunner with machinegun and boomers with underground rocket launchers.
Once the square is clear go ahead toward gate. When you get near you will be attacked by another wave of enemies. Quickly hide in safe place and kill them all.
Then go toward to the big gate in wall rock.
In the next area you will have to eliminate catapult. Immediately start running down on the path on the left.

When you get to the bottom find some cover and kill nearby opponents. Then head way into the tunnel on the left. Pass it and stand on the path. It's a great point to eliminate enemies standing on the rock platform.
Take off others enemies and walk along the path which leads to two ladders. Chose one of them and climb up.
Get into catapult and fire into enemies who are behind wooden gate in front of you.
Then leave the vehicle, pass the gate and finish survivors. Go ahead, in the next location you will find some weapons and ammunition. Take what do you need and pass through wide gate.
Your task is to get into enemy base. You can do it in two ways - quiet (it's only way to get the Cog Tag #7 in this mission) or loud. If you want to get in the base quietly you can't let any guard to blow into a horn (Marcus can't do it too). Start walking down and quickly shoot down first enemy.
Now you will have to eliminate two guards on the wall. You can use it sniper rifle (you will find it on the way to the wall but be quick, because wild tickers can eat it) or normal rifle like lancer.
Now head right. You will reach extensive square which is leading to the main gate. Stand on the square and look how two snipers patrol the wall. When they will be standing in the most distant places quickly shoot them down. You can use yellow explosive barrels to help perform your task. If you are using sniper rifle the task can be a little hard because after take down the first guard you will have to reload very fast and immediately shoot down the second soldier. But you can also use normal rifle, wait to the moment when guards will be in the most distant points, shoot down the first one and then quickly kill the second one.
Of course there is no problem to get into the base in loud way. Then just get on the square and start shooting to the enemies. After few seconds lots of opponents will show on the battlefield so cover in some safe place and start shooting them. In the first place eliminate snipers and gunners in machinegun nests on the wall (the best weapon to do it is sniper rifle). Then you will have kill soldiers, boomers and corpser.
Now pass the main gate and in frontal attack start conquering the base. Look out for machinegun nests, because they will shoot you when you pass the gate.
If you choose quiet way then eliminate some soldiers who will enter to the area from the right and pass through small entrance.
When you will be inside go the right path in tunnel. After a while you will reach a bath with blood and remains. On the ground just near it you will find Cog Tag #7.
Continue forward along tunnel which will lead you to the base. When you get inside the alarm will Activate but you will be in much better position to eliminate opponents than in the frontal attack.
Eliminate all opponents. After that the nearby entrance will open and some boomers will enter to the area. Kill them as fast as you can and pass the gate.
Quickly find some cover and start shooting to the enemies in the last foothold. Watch out especially on the gunner in the machinegun nest. Once the area is clear pull the lever.
In the first part of this mission you will have to avoid bombardment from enemy gas barge. Run into entrenchment and wait few moments. When the fire ends immediately run to the next trenches. Wait to the end of another bombardment and run to the next safety place. Repeat that to the end of trenches.
When the gas barge will fly away begin killing big group of foes which will try to kill you.
Once the area is clear head forward and pass the rock gate.
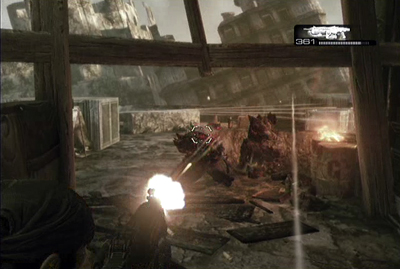
You will enter to the cave, where explosive tickers are being made. Start walking forward and eliminate opponents. It's a good idea to shoot into tickers on chains. When he falls down he will explode which is good way to kill enemies.
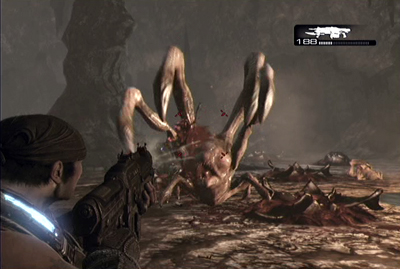
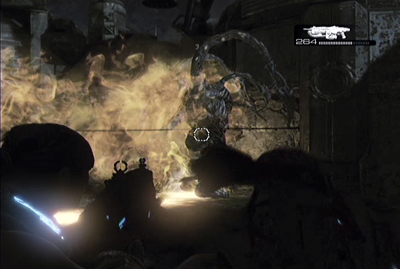
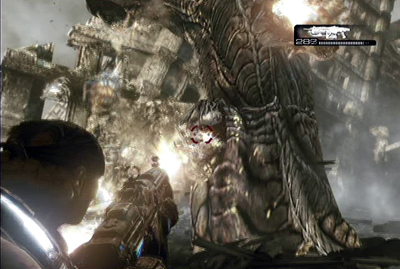
In the next location you will have to fight with corpser. When he will assault you quickly dodge and when he raise his limbs shoot in his head.
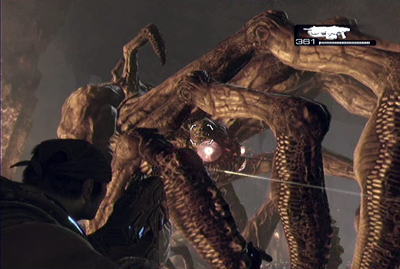
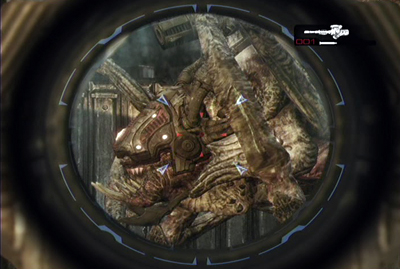
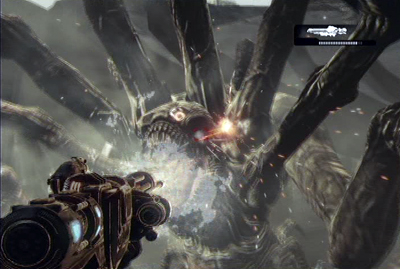
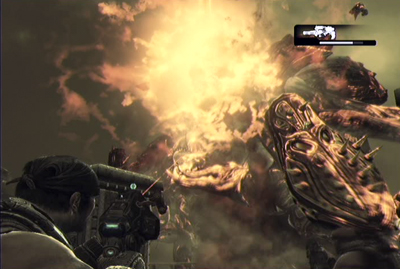
Kill the corpser and pass through the gate. You will center to the cave with the eggs and young corpsers. Kill one and mother will come to the battlefield. Watch out for her attacks and aim in her eyes.
When she lost one of the eye you will have to fight with young corpser. Defeat him and continue shooting into mother's eyes watching out for her attacks. Repeat that strategy until mother lose all the eyes.
After that mother will try kill you in furious attacks. She will be running around location and destroy pillars. Dodge all the time and when time will show in upper part of the screen start running into entrance. You must do it before ceiling collapse.
Defend the flying enemies and head left. You will see a gate and enemies run out through it. Eliminate them and pass the entrance. You also can pick up a sniper rifle which you can find on the ground.
The sniper rifle will help you in eliminating a gunners in machinegun nest. You can also flank him by walk into the tunnel on left side of the area.
When you get to the location quickly go right. You will find here a small room with iron grating. Destroy it and pick up collectible #19 (Queen's Symbol). You can do after you eliminate a gunner in machinegun nest.
When you clear the area from enemies pass the rock gate.
Go ahead and at the end of the road get in to the elevator. Activate it by pulling the lever.
When you reach the top you will have to fight with gas barge. Watch out for missiles, to avoid them dodge and hide behind covers. At some moment the enemies will disembark and attacked you. Shoot them down as quickly as you can.
After a few rounds the barge will land. Now you only have to kill survivors and get on board.
Wait to the moment when you will be close to the opponents' barges. Then use one of stationary grenade launchers to attack flying vehicles.
Land and start running to Dizzy. En route you will have to kill some opponents. At some moment reaver will land at the roof of a nearby building. This monster if firing missiles so be careful. Use ladder on the left to climb up, hide behind cover and start shooting to the opponent. After few long bursts reaver will fall.
Kill any survivors and get to Dizzy. After the cut-scene go to the armory and resupply yourself. On the ground is one-shot, a powerful sniper rifle which can kill most of the enemies in one shoot. After few moments you will attacked by opponents, mostly guards at the beginning. Eliminate them by using normal weapon. Don't use one-shot until reavers won't enter on the battlefield, because it's a great weapon to eliminate this monsters.
During defend you can walk out from base and get to the road. Turn left and go ahead, you will see destroyed truck and near it will be collectible #20 (Manifest).
After you leave the base you can also cross the street and get to the top of the stairs. Turn right and walk into the small room at the end. In left corner on the ground you will find Cog Tag #8.
At the end of the mission the last reaver will show on the roof of nearby building. Eliminate him by using one-shot or any other weapon.
Once all the enemies are dead go toward to the lines hanging from the gas barge.
It's very short mission. Firstly use stationary grenade launchers to eliminate opponents' gas barges. A few accurate shots will take down every flying unit.
In the second part you will have to dodge Myyrah's attacks. She will try to kill you with dangerous laser. You only have to dodge and hide behind covers. After few attacks the barge will fall down and the mission will end.
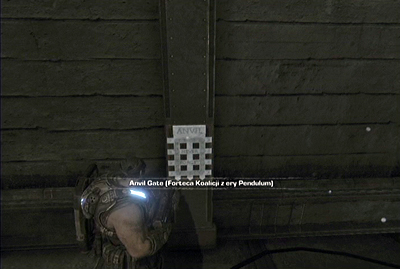
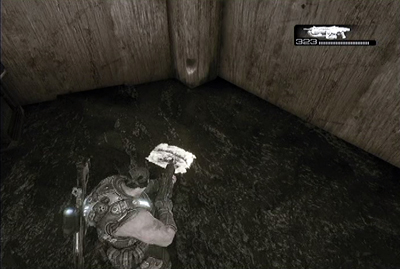
At the beginning turn around and look at the metal pillar, when you will find collectible #21 (Anvil gate plate).
Use stairs on the right and go forward. At some moment you will see a small room on the right. Get in and take collectible #22 (Watercolor painting) which is hanging on the wall.
Leave the room, turn right and continue forward. In the end you will get into small room without roof. On the ground in the corner you will find collectible #23 (Sam's father's medal).
Now start walking toward to the front gate. When you get there find some cover and start shooting at enemies who assault the fort. Be careful because there are lots of enemies and they can easily suppress you to the ground.
At some moment the reavers will join to the attack. You can easily kill them by using one-shot, which are on the ground.
A few moments later on the battlefield will enter a catapult. Leave your cover and start heading into the base picking up the one shot en route (one of them is near the stairs leading to the courtyard that you have to defend). If you won't be quick enough you will die from catapult missile. When you are inside start shooting the enemies at the courtyard. In the second wave of foes some of them will have shields - you can easily take them down by using one-shot.
When enemies capture the courtyard start heading to the next location inside the base. You will have good point to shoot enemies from the top.
You can also use a stationary machinegun which is in the circle room. It's a great weapon to eliminate boomers who will enter on the battlefield at the end of the fight. When they get in watch out because you won't be able to move (if you are using stationary machinegun) so you will be easy target for foes.
In the end of the mission shoot into fuel tank when it falls on the ground.
At the beginning you will have to chose between staying in fort and provide fire cover to other soldiers or get into the truck and rescue companions. If you chose the first way go to the edge of the wall and start shooting at the enemies at the bottom. Unfortunately your Act ions won't change anything and truck will crash. Now you have to protect allied soldiers by shooting at the enemies.
If you chose to rescue soldiers you will land in the truck. From this position shoot at enemies.
When the car will crash start running toward to soldiers and kill all the opponents en route. Watch out especially at boomers with heavy weapon.
When you reach to the soldiers start returning to the fort. It won't be so easy because stalks will grow up from the ground. Remember to shoot down the pods so the enemies won't be able to replenish their army.
When you will be near the fort the berserker will show up on the battlefield. Dodge his attacks and head toward to the fort's main gate.
You will have to fight against the berserker after the cut-scene ends. Aim at his stomach when it gets yellow. If you fire him in normal state the bullets will bounce from berserker's skin. At the same time watch out for his attacks and dodge when enemy is charging.

At the beginning of the fight look left. In the gloomy place on the door's left you will find Cog Tag #9.
You also should walk round building standing in the centre of the area. Behind it you will find collectible #24 (Journal).
When you hurt berserker enough he will attack more frequently and with fire trail. Tactic is still the same - shoot his stomach when it's getting yellow and dodge when berserker begin his charge. Sometimes enemy can jump and set fire on the nearby ground while landing. So when you see he starts jumping quickly run to the safe distance. After long battle berserker will finally die.
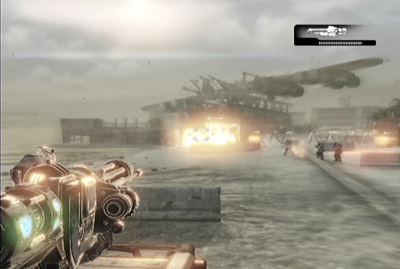
This time you will only firing a machinegun mounted on the vehicle. After few whiles the reaver with show on the road. Shoot him down and do the same with other enemies. You can also try kill reavers when they are flying.
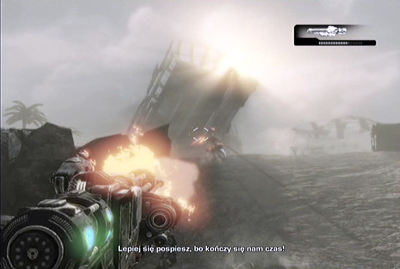
Later vehicle will pull of the road and start to direct toward to steel pipes. Your task is to destroy the yellow parts covered with imulsion. It will bring on the explosion and vehicle will be able to drive to the next sections.
In the next part of the mission you will have to deal with little corpses. If you won't be fast enough they will jump on your car and start attacking you. At the end of this section you will also have to fight with corpses' mother. To defeat her you must eliminate all her eyes.
Later on you will reach to the section with outposts with enemy soldiers. The best way to neutralize them is firing at the orange barrels which explode and caused big damages.
At one moment the vehicle will get stuck in the sand and you will have to repulse enemy attacks for several dozen seconds. There will be plenty of foes but with accurate fire you should deal with them easily. In the end you will pass through the outpost and ride will end in very attractive way.
At the beginning just walk along the path. In some moments you will have to disarm bombs on the fuel pipe.

At the end of the road you meet a man who have planted the bombs. Talk to him and move forward. After few steps you reach a building with entrance blocked by wooden beams. Destroy them and get into the room on your right. Pass to the another one and look left, behind sandbags you will find Cog Tag #11.
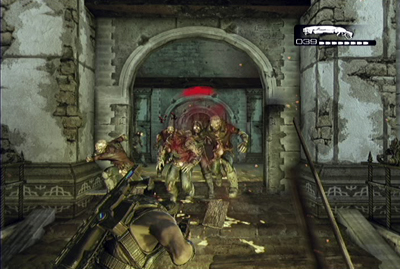
Back to the main path and continue to the sewers where you have to defeat lots of mutated humans. You can easily kill them by using shotgun.
In the end step into small room with red valve. Turn it several times and get into the open passage.

On the outside start walking along main path. In the end you will reach a building with balcony. Pick up a vulcan gun (it's lying on the ground) and use it to kill every mutated human who will attacked you. When they are all dead use the ladder to get into the building.
When you are in go to the end of the left corridor and pick up collectible #26 (Message).
Kill every enemy who will enter to the location. After that get outside and eliminate all opponents on the square. The shotgun is very effective weapon against this type of foes.
Once the area is clear move on along the path. Pass the metal gate and continue your journey in the city.
Soon you will reach building with blocked doors. When enemies crush it start shooting at them. There are lots of foes but you should take them down very fast. After you've done this enter the building.
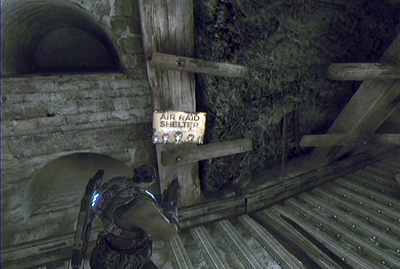
Destroy wooden beams on the left and enter to the cave with imulsion. Head left and look at the beam on the left where you will see collectible #27 (Air raid shelter sign).
Pass through the cave and get outside where the last battle awaits. Your task is simple - you have to kill every opponent who attacked you. First of them will come out from the cave in front of you but be careful because after few moments another waves of enemies will assaulted you from behind. There will also be some stalks and soldiers trying to get climb on your platform. You must hold off foes until the final cut-scene starts.
Start walking through the city. In some moment you will see that one of the ash character is running away from you. Start chase after him but be careful because you will encounter first trap. It is a machinegun hiding in the barrel. Find some cover and wait until it use up all ammunition. After that continue your journey.
After few steps you will encounter another trap - a gas canister. Don't get to close and wait until it explodes. Later you will have to face with the last trap - polyps who will attacked you. Kill them all.
Don't go to the building yet. Instead turn left and enter a ruined building where the fire is burning in barrel. Near corpse you will find Cog Tag #11.
Now back to the path and pass through the wide gate. Later you reach the square where somebody will shoot you from one of the window.
Quickly find some cover because the stalk will rise on the square. Shoot into the pods and eliminate all the opponents. After the battle head to the elevator.
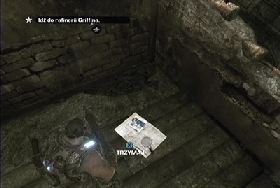
Start walking behind your guide who will lead you to the boss named Griffin.
After the conversation leave the room and pass through the big gate.
At the beginning of the mission you will see a destroyed stone building on the right side. Destroy the crate and pick up collectible #28 (Journal).
Go along the abyss edge which leads to the square where you will be attacked by stalks. Destroy them and all other opponents.
Once you have done it go forward. After a while you have to decide to go left or right. It doesn't matter because both paths lead to that same place but if you chose the left path enter the wagon and pick up a gatling gun. It will help you in killing all enemies in the area.
Move forward, get to the top of the stairs and start running when the ground begin to collapse.
The path leads to the open square. Once you get there quickly find some cover and start shooting at the enemies who will attacked you.
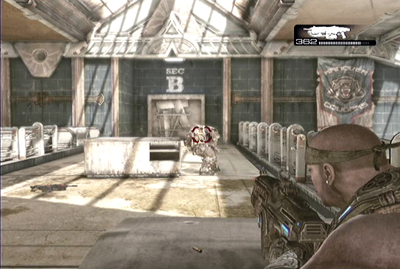
When they are all dead enter the building. Get into the room on with generator (it's on the right side of the entrance), activate it and press the button to call one of the few elevators. It will be full of the mutated people. Kill them by your rifle or grenade and prepare to repulse other attacks
Once the area is clear go to the stairs at the end of corridor and get to the higher floor.
When you get to the higher floor push aside a car. In this way you activate an elevator. Watch out because in some moment the gunker will appear. Start shooting at him and look out on his lambs. After you kill him the mission will end.
It's time to meet Dizzy and Griffin. Start walking forward, enter the wagon and try to pull the lever. It will prove that the mechanism is blocked so leave the wagon by left exit.
Now you will be attacked by mutated people. Shoot them down and walk along the path which leads to the wall. Near the corpse you will find collectible 29 (Fuel order).
After you take it head back and enter to the building. Once you are inside prepare to the battle with lots of mutated people. Pass through next rooms and kill another enemies on your side.
At the end you reach the area in which you will see the line which is blocking the wagon. Cut it with lancer's chainsaw and after you have done this pick up the gatling rifle.
Gatling rifle it's a great weapon to quickly eliminate all opponents who will attacked you.
Head back to the wagon, enter it and pull the lever. Now everything will work properly and you will start journey to the building on the other side of the abyss.
During the journey you will be attacked by soldiers in gas barges. Find some cover and kill them. Try don't get into the cross fire.
Some moments later the barges will fly away and you reach the building. Start walking forward and in some point you will approach to the ladder. Use it to get to the higher floor and continue along the path.

During march you will finally get into the room with 2 couches and a desk. Under the coach standing farther from the entrance you will find collectible #30 (Old magazine).
Now you only have to advance and eliminate all encountered opponents and meet with Dizzy.
The enemies will attacked you at the beginning of the mission. Find some cover and start shooting at them. Watch out especially for a machinegun gunner and flying foes. After you killed enemies move forward toward the hangar. After a while you will reach another foothold with machinegun nest. Kill the gunner and the rest of the soldiers.
Before the hangar is another foothold. If you don't want to attack in frontal way then go to the left and climb on the platform with enemies. It's a great place to shoot them down.

Once the area is clear pass through the steel gate and enter the hangar. Unfortunately it will be empty so leave it by the exit on the opposite side.

When you are outside move forward along footbridge.
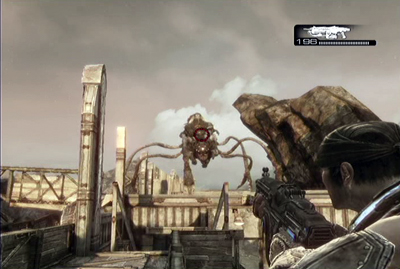
It's end on the square where you will be attacked by enemies. One of them is something like big insect. When he assault you start quickly running on the square in order to lose him. The only way to kill him it's shooting his green point at the end of his body. Shooting in any other point won't give any results. During the battle watch out also on soldiers who are standing on the nearby high platforms.

Once the square is clear look right where you will see a blue container. Go round it and on the ground you will find collectible 31 (Tabloid).
Pick it up and get through the iron gate.
Advance to the hangar, enter to it and fight with enemies. Kill all of them and move forward.
Go outside and move to the outpost with two machinegun nests. There is a quick way to eliminate the left one. You only have to push a wagon with fuel canisters which is on the left.
When you clear the square move on, enter the building and use the elevator to get on the higher floor. Pass through doors, hide behind metal obstacle and start shooting enemies in the dockyard. You can use sniper rifle which is lying on the ground near you. It's a good way to eliminate the most dangerous foes.
You can also go to the left and flank your enemies. When you finish with the first group of foes the another one will come in the gas barge. Kill all of them and get into the hangar passing through the doors on the left. Now you have to find some submarine's elements - rotor and fuel. If you chose the rotor you will get into the area with the passage full of the opponents. Eliminate them all and get into the small room on the left. You will find here collectible 32 (Bulletin).
Now move through the passage and use stairways to get on the higher floor. In the centre of the ground you will find a rotor. Use robot to pick it up and pass through two gates.
When you are outside get off the robot and kill all enemies. Besides normal soldiers there will also be one reaver. Once the area is clear get back to the robot and move to Dizzy who is waiting for you.
Now pass through the doors on the right. After a while you will reach the room with lots of enemies. Try to run on the right side and eliminate them from the flank.
When you get to the ship deck look right. You will see a container with red skull painted on it. Walk round it and on the ground you will find Cog Tag #12.
Pass through the gate on the left and start moving toward to docks. Near exit hide behind some cover and defend yourself from enemies attacks.
Now run through the docks and eliminate as many enemies on the ship as you can. At the end of the road you will find a lever which activates gangway. Use it to get onto the deck.
After you get on the deck move to the control room and pull the lever to activate the crane.
Leave the room and quickly move to the ship's side. It's a great place to shooting at the enemies who are trying destroy the fuel canisters. You can also use stationary machinegun but watch out because you are an easy target then.
Once the area is clear head back to Dizzy who will activate the submarine. Your next task is to eliminate all opponents who will attack you.
After you clear the first room go to the second one. There will be some tougher but you can easily kill them by using vulcan rifle which is lying on the ground. When you kill everybody move to the exit but before you leave pick up some grenade launchers (they are near boomers corpses).
Finally you get outside. For the first time you will meet with kantus - they are fast moving units with great armor. Only way to defend them is shooting them by heavy weapons like grenade launcher or gurad's bows. When kantus get hit by one of this bullet he will open his mouth. It's a great moment to fire it with normal rifle or hit him with heavy weapon once again.
Besides kantus on the battlefield will also be giant electrical insects - to kill them you have to aim in their green part of the body.
After the battle move to the small room on the right and turn a big valve. Now you can begin your underwater journey.
In this mission you will be a deck gunner. After a while submarine will encounter some creatures which start attacking your vehicle. Kill them before they damage the submarine.
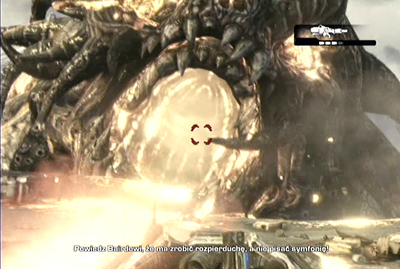
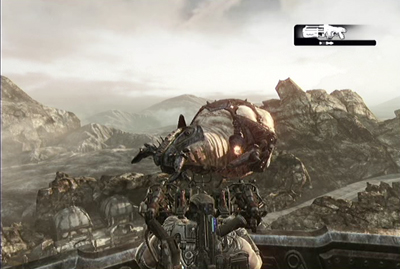
The next opponent will be leviathan. Firstly he only swims near the submarine but later he starts attacking so shoot in his throat. Leviathan will attack several times but always aim in the same point.
After few moments Dizzy will swim on the minefield. Your task is to shoot down the mines before the submarine can swim on it. In one moment leviathan attacks once again so try to shoot the mines which are close to the creature.
The next obstacle are torpedoes launching from underwater launchers. The torpedoes are quite slowly but sometimes there are lots of them so be careful. In the same time destroy all launchers on your way.
At the end destroy the gate, swim through it and shoot down two more launchers. After that the mission will end.
When you leave the port get upstairs. You will see some guards patrolling the area. Get on the good shooting position and attack enemies.
After that move forward. You will reach to the foothold on the top of the stairs. The best way is to flank it from the left side.
When you get to the top of the stairs go to the sidewalk before the station and go left. On the ground is lying collectible 34 (Pamphlet).
Go to the station and kill all enemies near the train. You can also shoot down the fuel tanks, which are on the left side of the train.
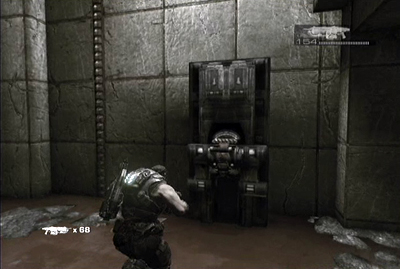
After the cut-scene you start inside the building. Go down and turn left where you find a silverback. To activate it you have to pull the lever on the right side. Then get into the robot and walk forward.

When you leave the building turn left, enter the tunnel and eliminate all opponents.
In moment when the mortars start shooting at you should see a big cave in the rock on the left. Get inside kill all enemies and use robot's kick to destroy the grating on the left. Leave the robot and search the room. On the ground is collectible 35 (Assault plans).
Get into the silverback and continue your march. After short march you will reach the trenches. Start walking along them and kill all enemies on your way (watch out because some of them have heavy weapons). In one moment the gas barge with soldiers will show up. Eliminate new opponents and get into the trenches by the passage on the left.
Go along the trenches which is leading to the dead end. Return to the big gate which will be open by two boomers. Kill them and pass through the open entrance.
On the station kill all enemies. Leave the robot and pass the railway tracks. Move to the lever on the right and pull it. In that way you will open entrance to the next part of the tunnel.
Go along the railway tracks and when you reach the second station quickly run on the top of stairs on the left and eliminate all nearby enemies.
Now run onto stairs on the right and continue marching forward toward the area with enemies. Hide behind some cover and start shooting at the foes. Once they all will be dead the chapter will end.
If you want to get a Cog Tag #13, before you enter the elevator go to the opposite corridor and look left. Press the button and the doors on the left side will open. Enter the room and get in the silverback. Go to the elevator and when it reach the next floor kill all the wretches which will attack you.
Once you kill enemies go to the corridor marked by number 3. You will quickly orient that one the cell is without the grating. Enter it and use silverback to knock down the cupboard. Go to the small room behind it and on the ground you will see Cog Tag #13.
Now go the next section of the jail. In one room you will find a generator, use it and you will turn on the light.
Move to the corridor marked with number 1 and continue to the stairs with guards. Kill them and pick up bows remained by them. It will be usage in the next part of the mission.
Get on the higher ground and kill encounter enemies (most of them have flamethrowers so eliminate them from distance). Later use the ladder.
You will reach the square with enemies. In the first place kill the reaver and after that eliminate others enemies. Enter the square and repulse enemy attack with another reaver.
Continue along the path which leads to the strong defended stairs. Beside guards there are also kantus. The best way to eliminate them is using the bow with explosive arrows.
When you eliminate all opponents go to the top of the stairs and get into the building. Enter the study, kill the guards, walk round the first desk and press the button on the left side. In that way you will open the safe on the right wall. Walk up to it and take collectible 36 (Schematics).
Use an elevator, leave it and kill opponents in the first location. After the cut-scene get into the narrow corridor. Be careful because it's patrol by soldiers with flamethrowers.
The corridor leads to the room with three generators. First of them is near the entrance on the left side. The next one is in the second row on the right side and the last one is at the end of left corridor. Be careful because there are some enemies in the area.

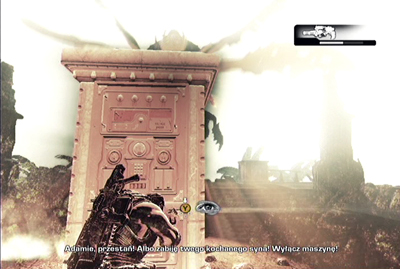
After shut down the generators pass through the doors which will open at the end of the room. Then start walking on the top of the stairs. After the cut-scene end you will have to turn five valves.

First of them is at the beginning of the location. The second one is a little farther on the right. Be careful because there are enemies at all over the place and they will attack you also from outer covers.
Start walking right and down to the lower floors. The third valve will be at the first floor below and the next two are on the last floor. Sometimes you will have to fight with kantus. To make the battle easier use bow with explosive arrows. If you don't have any heavy weapon you can also use grenades which are lying on the every floor.
After you've turned all the valves start running from the base. At the end of the road you will encounter a soldier with machinegun. Don't fight with him instead just pass through the last doors.
At the beginning of the mission just move on and with fire support from chopper eliminate all enemies on your way.
At some point you will reach square with the catapult which will destroy your air support. Get at the stairs on the left and kill all enemies near the catapult.
Then get into it and bring down all the gas barges which are on the sky.
You will start next section in the hotel. Start walking along devastated corridor. Near the last doors on the left is loose plate. Pick it up and in the hole you will find collectible 37 (Money stack).
After you exit the hotel kill all enemies standing near the next catapult.
Turn left and get along the path until you reach the catapult. Get in and start shooting at reavers and other catapults. At the end destroy the dam which is in front of you.

Leave the catapult and pass through the entrance. You will see the statue of angel and on one of the small tables surrounding it is collectible 38 (Diary).
You will get into the corridor with lots of enemies. The best way to kill them is get on the podium on the right side. After eliminate fist group of opponents go the doors on the left and prepare to defend against another wave of enemies who will get inside the building.
Once the area is clear head right. Behind the last pot you will find Cog Tag #14.
After the battle pick up guard's bows and exit the building by the doors on the left. In the garden, filled with enemies, quickly run on the left, flank them and start shooting. Watch out especially on kantus. Remember that you have to use heavy weapon against them (bow for example).
When you kill enemies get in the catapult which is standing on the circle platform on the left and use it to bring down the gas barge. Then eliminate all survivors and push the catapult to the water. After the cut-scene get in elevator.

At the beginning pass the first corridor. At the end you will see bust which is collectible #39 (Memorial Announcement).
Head way to the elevator in big room on the left. When you get to the higher floor push the elevator button again. Pass through the left doors and pick up collectible #40 (Announcement) which is on the wall.
Leave the building, find some cover and start shooting at assaulted opponents. At the same time watch out for mortar missiles. When you see them quickly dodge.
Then head your way toward to the stairs leading to the palace and kill all enemies en route. Among them are some kantus so be ready to use some heavier weapon like guards' bow.
After you get rid of all enemies get to the top of the stairs and go on the circle platform situated in the centre of the pool. Eliminate the guard who has been firing from the mortar and walk toward entrance to the palace.
In this point enemies will attacked you. Quickly get behind cover and start shootout with them. When you killed everyone of them enter the palace.
Pass through devastated corridor and move on. After a while you will encounter with some enemies. Find some cover and start shooting at them. Then use stairs to get the higher floor and eliminate all enemies in the area (there will be some soldiers and one reaver who fly through the window).
Now go toward elevators. There are damaged and you have to wait a while until Braid will repair it. At the same time eliminate any opponent who will attack you.

Then enter one of the elevator and get some cover. Sometimes the guards will try get into the elevator using ropes but you can easily take them down in melee combat. In some moment the elevator will damaged so jump on the next platform.
After the section with two elevators you will get to the area with round balconies. Go to the lowest level and look for collectible 41 (brochure) behind one of the pillars.
Take it and start walking on the higher floors. During this journey eliminate all encounter enemies.
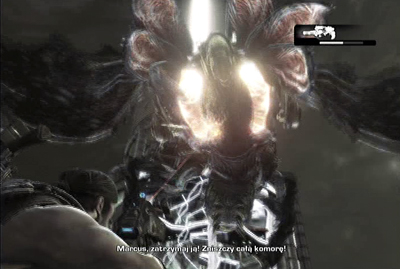
At some point in the centre of the area the Myyrah will show up and her monster will attack you by using laser beam. When you only see that creature is opening it's mouth immediately hide behind some cover and after the attack quickly run to the higher floor.
At the last floor you will have cut three ropes which are holding up the roof. Look for some cover and wait until the creature will stop attacking you.
Then quickly get to the first rope and cut it off using lancer's chainsaw. After that hide in safe place and when the attack ends run to the second (afterward wait in safe place) and third rope.

After the cut-scene wait until the elevator stops and enter to the gloomy shaft. Turn right and get into the dark alley. Destroy the wooden crate and pick up Cog Tag #15.
Walk along the shaft. It will lead you to the room with unwary enemies. Attack them from behind and kill them all. Then get to the corridor on the right side and eliminate gunner in machinegun nest at the end of the passage (you can do it by sniper rifle or by some heavy weapon). After his death go to the doors at the end of the corridor.
They are blocked by lasers so go to the room on the left, kill all enemies in it and pull the lever in security panel. Repeat it in the room on the right side of the corridor and in the end pass through the central doors.
After the cut-scene pick up collectible 42 (Fenix research) - they are lying just near the telescope.
Then back to the corridor and start walking toward exit. During march opponents will get into the building by the broken window at the end of the passage. You can start shooting at them using normal rifle or use a stationary machinegun which is standing in front of the study. Once the road is clear go to the end of the corridor and call an elevator.
It's time for a big final. Start from killing every enemy on the square.
When all enemies are dead Myyrah will show up on the battlefield. When her monster open his mouth to shoot laser beam immediately find cover behind some column and wait to the end of attack.
Then lean out and shoot at the monster's mouth shinning on the yellow.
When you lard enough bullets at the enemy he will fall down on the ground. Quickly get to the marked column and pick up hammer of dawn.
Use this powerful weapon and aim you laser beam fallen enemy. In this way you will seriously hurt him.
After that Myyrah will fall from platform but quickly back and start attacking you again. Don't change anything in your tactics and still look for cover behind columns. Then shoot at the monster's mouth and when it's fall aim boss with hammer of dawn. At the same time watch out for others enemies who can attack you.
It's quite possible that the monster will fly on the tower where Marcus' father is working. In that case you have to shoot at yellow points on the back of the monster.
Repeat that tactic all the time. In the end you will have to use hammer of dawn for the last time to definitively eliminate the boss.
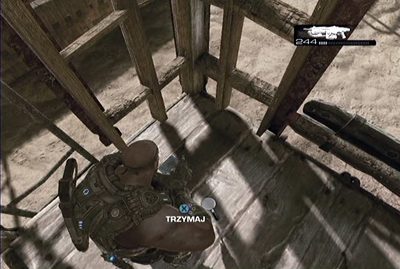
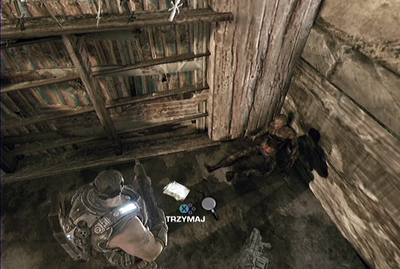
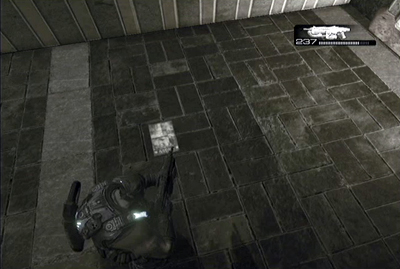
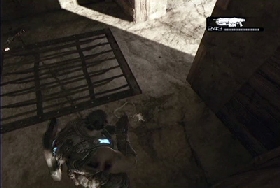
Cog Tag #1
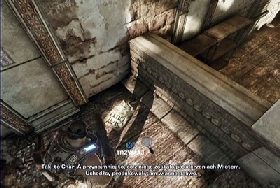
Act I Prologue - After you leave the cell turn right and destroy the metal doors. On the ground is first Cog Tag.
Cog Tag #2
Act I Chapter I - After the cut-scene with Prescott walk through green ground with sandbags and on the concrete square head left. Go round the container with red skull and look up on the catwalk. Shoot at the body and next Cog Tag will fall on the ground.
Cog Tag #3
Act I Chapter 3 - In the supermarket, after you have passed a cupboard, go to the room on the right. Cog Tag is lying on the desk near monitor.
Cog Tag #4
Act I Chapter 4 - When you leave the allied camp head left and go along the wall. At the end you will find corpse and near it will be next Cog Tag.
Cog Tag #5
Act I Chapter 6 - When you kill the boomers near machinegun nest pass the gate and enter on the devastated bridge. After you reach the section with the "roof" turn left and walk on iron catwalk. Use the ladder to get on the lower floor. Cog Tag is behind small concrete wall.
Cog Tag #6
Act II Chapter 1 - In the last location where you have to defend against waves of enemies, is yellow container with red skull painted on it. Pass round it and you will find Cog Tag in the corner.

Cog Tag #7
Act II Chapter 3 - You can find this Cog Tag only if you chose to get into the base in quiet way. When you enter to the small side entrance go along right path. After few steps you will find bath with bones and blood. On the ground near it is lying another Cog Tag.
Cog Tag #8
Act II Chapter 6 - In the section where you must defend the base leave the outpost and cross the street. Run on the stairs in front of you, turn right and forward to the end. You will enter to small room. Cog Tag is in the left corner.
Cog Tag #9
Act III Chapter 2 - At the beginning of the battle with berserker look left. Cog Tag is on the ground in gloomy space.
Cog Tag #10
Act III Chapter 4 - After the conversation with man who has tried blown up the pipes with fuel you get to the building in which entrance is blocked by wooden beams. Destroy it enter to the location on the right and pass to the next one. Look left, there are some sandbags and behind them is another Cog Tag.
Cog Tag #11
Act IV Chapter 1 - In the first part of the mission when you approach to the first doors leading into the building don't pass the yet. Instead look left where you will see a small ruined house. Enter it and pick up Cog Tag which is lying near corpse.
Cog Tag #12
Act IV Chapter 5 - It's in the first area when you are looking for the fuel. Running through the ship. During that action look at the right side where is yellow container with red skull. Cog Tag is behind it so when you pass the ship turn right and move on until you find the item.
Cog Tag #13
Act V Chapter 2 - To get this Cog Tag you'll need a silverback. So when the chapter begins don't go to the elevator yet. Instead get into the passage opposite to the elevator and look left where you will see a button on the wall. Press it and the entrance to the little hangar on the left will open. Get in silverback and enter to the elevator. When you reach the right floor go to the corridor with number 3. Grating to the one of the cell is broken. Enter to this room and use robot to move metal cupboard. Enter to the room behind it where you will find next Cog Tag.
Cog Tag #14
Act V Chapter 3 - After you destroy the dam enter to the locations with statue of the angel. Get to the next area and run to the end of the corridor. Cog Tag is behind the last pot.

Cog Tag #15
Act V Chapter 5 - Leave the elevator and enter to the dark shaft. Turn right where is small recess. Destroy wooden crates and pick up Cog Tag which is lying on the ground.

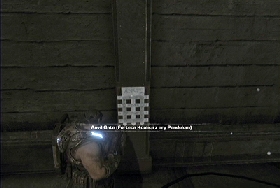
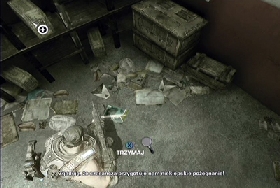
#1 $20 Dollar bill
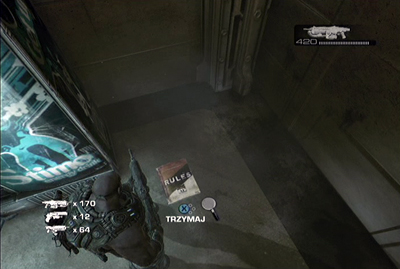
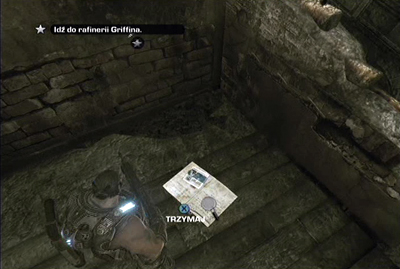
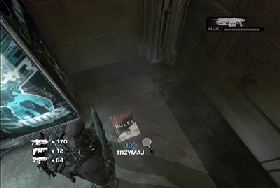
Act I Chapter 1 - After wake up look at the table near the bed. You will find here first collectible.
#2 Dom's psych report
Act I Chapter 1 - In the first corridor enter the first room on the left and pick up collectible which is lying on the table on the left.
#3 Requisition form
Act I Chapter 1 - Head back on the corridor and get into the second room on the left. You will find this collectible on the top-table on the right.
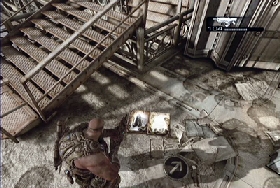
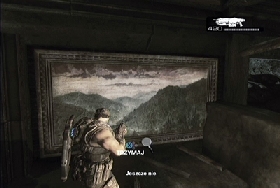
#4 Silverback manual
Act I Chapter 2 - At the end of the chapter you will get into the hangar with two war robots. Look at the crate on the left where you will find another collectible.
#5 Journal
Act I Chapter 3 - Before you meet with the first people walk on the left sidewalk. Soon you will see a gate leads on the yard. The collectible is in the corner in front of you.
#6 Child's diary
Act I Chapter 3 - At the playground. You just have to get in the little house with slide. Collectible is on the floor.
#7 Grocery list
Act I Chapter 3 - When you get into the devastated supermarket move forward and turn right. On the left of withered stalk are ruined checkouts. On the top-table on last of it you will find next collectible.

#08 Clipping Times Tribune
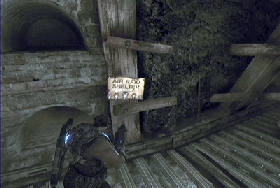
Act I Chapter 4 - When you enter to the war camp start going behind local commander. In some moment you will get into the armory. Turn right and move on until you reach the wall with the plate. Turn right once again and on the ground you will find this collectible.
#09 Cougars season program
Act I Chapter 5 - At the beginning of the mission chose the upper path and turn into the little room on the right. Collectible is on the ground behind the desk.
#10 Cougars player handbook
Act I Chapter 5 - After you defeat the gunker pass through the south gate and turn right. Collectible is in the corner next to the drinks machine.
#11 Cole's championship ring
Act I Chapter 5 - After the "match" go to the place where you have picked up the bomb. Few steps farther you will find corpse and near it the next collectible.

#12 Toll booth tokens
Act I Chapter 6 - This collectible is in the little alley on the right from entrance to the first machinegun nest which you will encounter in this mission.
#13 Bayonet
Act I Chapter 6 - After the battle with boomers get on the bridge and keep right side. You will find here a container with crate. Destroy it and pick up the collectible from the ground.
#14 Sightseeing book
Act I Chapter 6 - When you leave the tunnel where leviathan attacks you use ladder to get on the higher floor. When you are outside turn right and pick up collectible which is lying on the ground.
#15 Tomatoes: Beginners Guide
Act II Chapter 1 - At the beginning of the mission open the container standing in front of you. Collectible is inside it.
#16 Octus medal diploma
Act II Chapter 1 - When you reach the first battlefield walk along mountain on your right. It will lead you to the square with destroyed chopper. You will find this collectible just near it at the ground.
#17 Captain's log
Act II Chapter 1 - After you shoot down the brumak from catapult go on the path on the right and look at the top of the mountain on the right. You will see wooden crate. Shoot it down and pick up the collectible which will fall down on the ground.
#18 Locust hammer
Act II Chapter 4 - At the beginning of the mission when you enter the last bunker in section with gas barge. Before you leave this room walk around crates on your right. Collectible is on the ground.
#19 Queen symbol
Act II Chapter 5 - After the first battle pass through wide gate where gunner from machinegun nest will shoot at you. Turn right knock off the grating in small building and enter it. Collectible is lying on the ground.

#20 Manifest
Act II Chapter 6 - While fighting against the opponents leave the base and on the street turn left. Move on and you will find this collectible near the truck.
#21 Anvil Gate Plaque
Act III Chapter 1 - At the beginning of the mission turn around and look at the metal pillar. The collectible is hanging on it.
#22 Watercolor painting
Act III Chapter 1 - At the beginning of the mission walk on the right stairs. At some moment you will see a small room on your right. Enter it and pick up a painting from the wall.
#23 Sam's father's medals
Act III Chapter 1 - Leave the room and continue you walk. At the end of the road you will reach small room without roof. Enter it and pick up this collectible.
#24 Journal
Act III Chapter 2 - You will find it during the battle with berserker. Just walk around the small building standing at the centre of the area. Collectible is behind it.
#25 Panicked note
Act III Chapter 4 - After you enter the house where you meet old crazy man get to the staircase and use stairs on the left to get on the landing. On the left part of it you will find this item.
#26 Message
Act III Chapter 4 - After the last battle with mutated people use ladder to climb to the building. Then turn left and go to the end of the corridor. Collectible is lying on the ground.
#27 Air raid shelter sign
Act III Chapter 5 - When you eliminate all mutated people who will run out from the church, enter the building and destroy wooden beams on the left. Get into the cave turn left, walk few steps and look on the left wall where you will find this collectible.
#28 Journal
Act IV Chapter 2 - At the beginning of the mission you will see a building on the right side of the path. Walk toward it, destroy wooden crate and pick this collectible.
#29 Fuel Order
Act IV Chapter 3 - Pass through the wagon and barbed wire. After that kill all mutated people but when the battle ends don't go to the building on the right. Instead continue along the path which leads to the wall and corpse. Near that you will find this collectible.
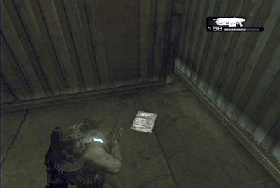
#30 Old Magazine
Act IV Chapter 3 - At one point you will enter into the room with two coaches and desk. The collectible is lying under the second coach.
#31 Tabloid
Act IV Chapter 4 - After you walk through wooden footbridge you will reach the square with soldiers and electric worm. Kill them all and walk round the blue container on the right. On the ground you will find the next collectible.
#32 Bulletin
Act IV Chapter 5 - While looking for the rotor for the submarine you will enter to the area with iron passage filled with enemies (one of them is using shield). Get down and turn left where you will see a small room. Enter it and look at the ground where is lying another collectible.
#33 Contractor report
Act IV Chapter 5 - When the submarine starts moving outside you will pass through big metal gate. In this area use stairs on the left to get on the higher floor. Start walking forward and you will soon get to the small room with number 1. Enter it and look left.
#34 Pamphlet
Act V Chapter 1 - Before you enter the first train station turn left and go to the end of corridor. You will find this collectible on the ground.
#35 Assault plans
Act V Chapter 1 - To get this collectible you need silverback. After you leave the base and enter the jungle walk forward. At some moment you will be fired by mortars. Look left where you should see a cave. Enter it and when you see grating on the left, destroy it and get in the room. Collectible is lying in the corner.
#36 Schematics
Act V Chapter 2 - At some point you will enter to the room with two desks and guards. Eliminate opponents, walk round the first desk and look at it left side. Push the button which will open the safe on the right wall. After that get to the safe and pick up this collectible.
#37 Money stack
Act V Chapter 3 - During march along the devastated corridor in the hotel look at the loose plate near the last doors on the left. Pick it up and in the hole you will find this collectible.

#38 Diary
Act V Chapter 3 - Destroy the dam with catapult and enter to the building. You will see an angel statue and some small tables around it. On one of them is lying this collectible.
#39 Memorial announcement
Act V Chapter 4 - At the beginning of the chapter you will enter the corridor. Get to the end of it and look at the statue which is your next collectible.
#40 Announcement
Act V Chapter 4 - Use the first elevator and when you get to the higher floor press the button on the right. Enter to the open elevator and pick up this collectible from the wall.

#41 Brochure
Act V Chapter 5 - After the dynamic section with two elevators you will get to the area with round balconies. Go to the lowest level and look for this collectible behind one of the pillars.
#42 Fenix Research
Act V Chapter 5 - The last collectible is in the Marcus' father's study. It's lying on the crate near the telescope.
Achievement
Points
Description
Marcus, It's Your Father
5
Story Progression in Prologue (Standard or Arcade)
Swimmin' in Glowie Gravy
10
Story Progression in Act 1 Chapter 2 (Standard or Arcade)
We Struck Gold, Son!
10
Story Progression in Act 1 Chapter 3 (Standard or Arcade)
My Turf! Cougars Territory!
10
Story Progression in Act 1 Chapter 5 (Standard or Arcade)
Putting it Scientifically...
10
Story Progression in Act 1 Chapter 6 (Standard or Arcade)
Okay, Now We Find Hoffman
10
Story Progression in Act 2 Chapter 1 (Standard or Arcade)
Oh Yeah, It's Pirate Time
10
Story Progression in Act 2 Chapter 5 (Standard or Arcade)
Thanks For Flying GasBag Airways
10
Story Progression in Act 2 Chapter 7 (Standard or Arcade)
Anvil Gate's Last Resort
10
Story Progression in Act 3 Chapter 1 (Standard or Arcade)
Was it Good For You?
10
Story Progression in Act 3 Chapter 2 (Standard or Arcade)
Lost Your Good Driver Discount
10
Story Progression in Act 3 Chapter 3 (Standard or Arcade)
Brothers to the End
10
Story Progression in Act 3 Chapter 5 (Standard or Arcade)
Think You Can Handle That?
10
Story Progression in Act 4 Chapter 3 (Standard or Arcade)
Baird's Favorite Kind of Toy
10
Story Progression in Act 4 Chapter 5 (Standard or Arcade)
Welcome To -redacted-
10
Story Progression in Act 4 Chapter 6 (Standard or Arcade)
Look at That, Instant Summer.
10
Story Progression in Act 5 Chapter 2 (Standard or Arcade)
Ok. Faith. Yeah. Got It.
10
Story Progression in Act 5 Chapter 5 (Standard or Arcade)
You're Dead! Now Stay Dead!
10
Story Progression in Act 5 Chapter 6 (Standard or Arcade)
Ready for More
50
Complete all campaign Acts on Casual or Normal Difficulty (Standard or Arcade)
Ain't My First Rodeo
50
Complete all campaign Acts on Hardcore Difficulty (Standard or Arcade)
That's Just Crazy
75
Complete all campaign Acts on Insane Difficulty (Standard or Arcade)
Collector
5
Recover 5 Campaign Collectibles (any difficulty, Standard or Arcade)
Pack Rat
10
Recover 20 Campaign Collectibles (any difficulty, Standard or Arcade)
Hoarder
15
Recover all 42 Campaign Collectibles (any difficulty, Standard or Arcade)
Remember the Fallen
15
Recover all 15 COG Tags during the Campaign (any difficulty, Standard or Arcade)
My Fellow Gears
50
Complete all Campaign Acts in Co-op (any difficulty, Standard or Arcade)
We Few, We Happy Few...
50
Complete all Campaign Acts in 4 player Co-op (any difficulty, Standard or Arcade)
Level 5
5
Reach level 5
Level 10
10
Reach level 10
Level 15
15
Reach level 15
Level 25
25
Reach level 25
Level 50
50
Reach level 50
Judge, Jury and Executioner
10
Get a kill with every possible execution finishing move (any mode)
Wreaking Locust Vengeance
10
Get a kill with every Locust monster in Beast mode (any difficulty)
Enriched and Fortified
10
Complete all 50 waves of Horde mode (any difficulty, any map)
It's All About the Loot!
25
Earn the Bronze "Loot Courtesan" medal
All for One, One for All
10
Earn the Bronze "Force Multiplier" medal
First Among Equals
25
Earn the Silver "Number 1" medal
Award Winning Tactics
25
Earn at least one Onyx medal
Seriously 3.0
100
Reach level 100 and earn every Onyx medal
Welcome to Versus
10
Kill 10 enemies in Team Deathmatch (Standard or Casual)
The Versus Sampler Platter
10
Complete one match of all six Versus game modes (Standard or Casual)
Welcome to Horde Mode
10
Survive the first 10 waves of Horde mode (any difficulty, any map)
Welcome to Beast Mode
10
Survive all 12 waves of Beast mode (any difficulty, any map)
Welcome to Arcade Mode
10
Complete 5 Arcade Campaign chapters in co-op (any difficulty)
Welcome to the Big Leagues
0
Demonstrate your skill in Casual Versus multiplayer
Wait, What Time is it?
10
Earn the maximum Consecutive Match Bonus in Versus multiplayer (Standard or Casual)
Lambency
50
Execute an Epic employee, or someone who already has Lambency, in Versus multiplayer (any mode)
Socialite
70
Earn the Onyx "War Supporter" medal
Respect for the Dead (Secret)
5
Your respect for the dead earned you access to Griffin's special weapons stash


 Grand Theft Auto Online Game Guide & WalkthroughGame of Thrones: A Telltale Games Series Game Guide & Walkthrough
 Grand Theft Auto IV: The Lost and Damned Game Guide & Walkthrough
 Grand Theft Auto: Chinatown Wars Game Guide & Walkthrough
 God of War 3 Game Guide & Walkthrough