Welcome to the unofficial guide to "Dracula: Origin" PC video game. This guide consists entirely of a very detailed walkthrough of all four chapters of the game. I've described all the necessary actions, as well as marked some of the important things. Red color was used to designate new objects available for pick up. Once you've taken them, they can be found in the ITEMS section of your diary. Blue color was used to mark some of the important documents and pictures. You shouldn't be surprised by the fact that you'll be allowed to read them by opening your diary. Finally, green color marks some of the reports you'll be presented with during the course of the game. These clues appear automatically in your diary once you've performed necessary actions to proceed. I would recommend that you follow my instructions right from the start. Otherwise you may have some problems finding out what you might have missed along the way. It's also wise to use the SPACE key each time you've entered a new room, so you'll know exactly where to go. The eye icon will tell you that you can only take a look at an item. The hand icon means you that you can use it or that you can take it. Have fun playing the game!
Stranger
The game is going to begin with an interesting cut-scene. You'll be playing as Van Helsing, famous vampire hunter. Listen to what our main hero has to say about possible ways to get rid of these creatures. The second part of his speech is far more important, because he'll tell you which methods he prefers himself. Maria will arrive at Van Helsing's office. The main character won't allow her to enter the room. Instead, he'll order her to slip the documents under the door. You will receive two items - a letter from Jonathan Harker and a newspaper (screen).
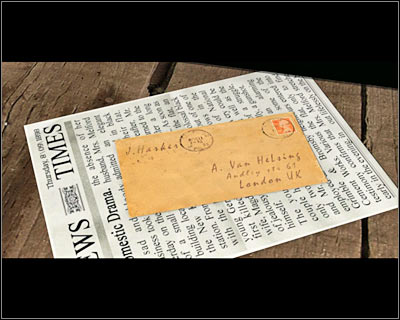
Both of these items are going to be added to your inventory automatically. You can find them in the DOCUMENTS section. Start off by reading the letter from J. Harker. It can't be fitted on a single page, so you'll have to use the arrow buttons to open other pages. Once you've read it, press the right mouse button or the ESC key to close this window. Next up, you'll have to read a newspaper clip - News Times, Thursday, September 8, 1898.
You should be transported to Mina's apartment automatically, so you won't have to choose this area of London manually. Listen to the conversation. You'll be allowed to choose a topic after a few initial statements. Ask mina what's going on. You'll find out that a sister of one of her maides was attacked and brutally murdered. Also, you'll find out that one of local newspapers has an article about the attack. Wait for this conversation to end, because that's when Mina is going to leave the room, allowing you to look around. You should know that you can review this conversation by using your diary and opening the DIALOGUES section. The same goes with all other conversations you'll have in the future.
There are many interactive objects inside Mina's apartment and you can approach them in any order. I would recommend that you start exploring the room from the right. Click on an armchair and you'll receive a second newspaper clip -The Courier. Thursday, September 8, 1898. I'd strongly recommend that you read this article and listen to what Van Helsing has to say about its content. You can also take a look at the vase, however it's optional.
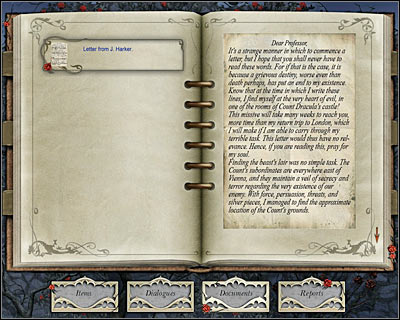
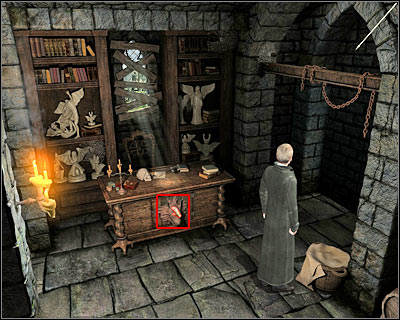
Don't click on any of the doors, because you aren't allowed to leave this room just yet. Instead, focus your attention on a small table. Start off by clicking on a pile of newspapers (first hotspot from the right). You'll be presented with a close-up view. Your task here will be to choose a correct newspaper by clicking on it (screen). Once this is done, open your inventory and read the article -News Times. Tuesday, September 6, 1898.
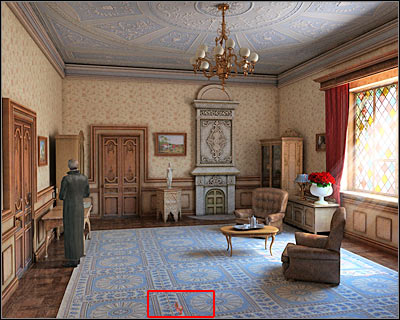
You'll also find two other important items on the table. Start off by collecting a fourth newspaper -Daily Big Mirror, Thursday, September 7, 1898. Obviously you should consider reading the article, because it's as important as the other three. Once this is done, pick up a photo of Jonathan Harker. You may proceed to the lower area of the screen (screen). Wait for the game to change views and familiarize yourself with this side of the apartment. Approach the curtain and click on it. You'll be presented with a map of London. Wait for the game to zoom in on the map.
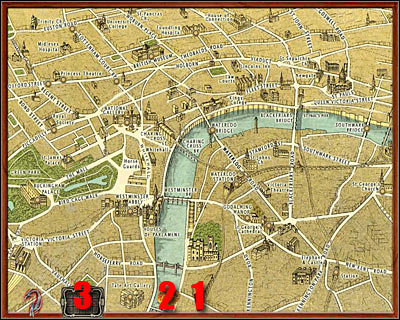
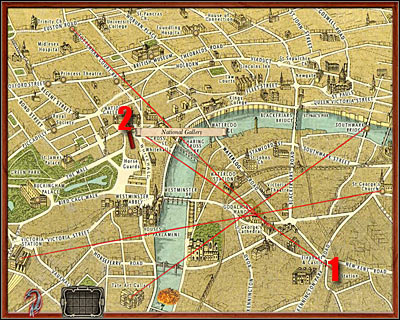
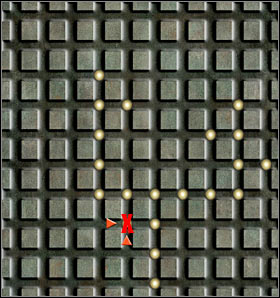
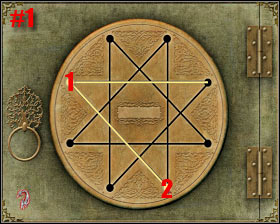
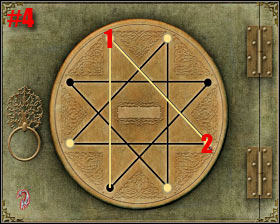
Start off by listening to a short statement by Van Helsing. You'll have to solve this first riddle. Thankfully, it's going to be an easy one. Your task will focus around understanding all four articles. You will have to find information on two things in each article - area of the crime and direction where the assailant was seen headed. You'll be allowed to use two items here. A pencil (1) is going to be used to draw lines and an eraser (2) will allow you to delete incorrect moves. You can also access the inventory (3) without having to close this window and start all over again.
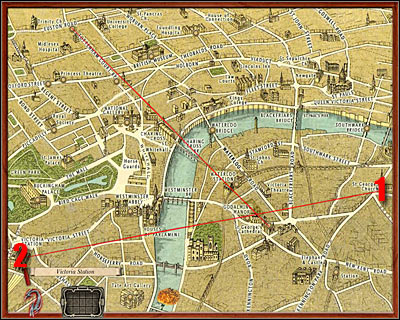
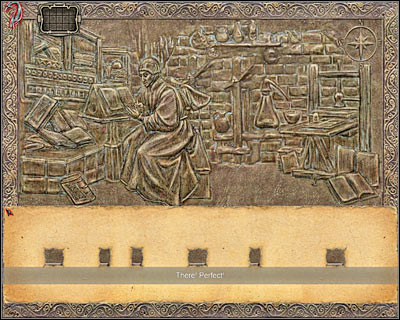
You can draw the lines in any order, so it doesn't really matter which article you'll decide to correspond to in the first place. I would recommend starting off with the last newspaper clip you were able to collect (Daily Big Mirror). The crime scene is near Tottenham Court and Euston Road (1). Find this place on your map. Click and hold the left mouse button over a small circle. Now you will have to draw a line towards a destination area which is St. George's Cathedral (2). Release the mouse button there. Van Helsing should confirm this action as a correct one by saying "There, perfect!" or something similar.

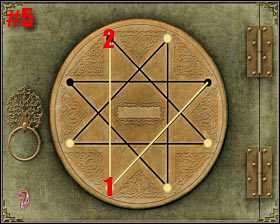
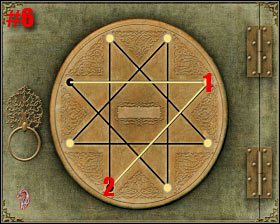
The next article is from News Times (September 6th). The area where the woman was attacked is located near one of the churches (1) on the eastern side of the city (screen). As for the destination area, you will have to choose Victoria station (2).
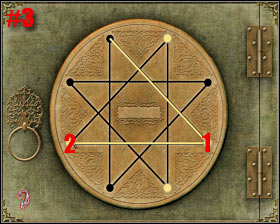
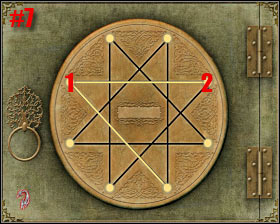
The third document in your inventory is a newspaper clip from The Courier magazine (September 8th). The crime scene is located under the Southwark Bridge (1) and the area where the assailant has fled is Tate Art Gallery (2) which can be found in the southern section of the city.
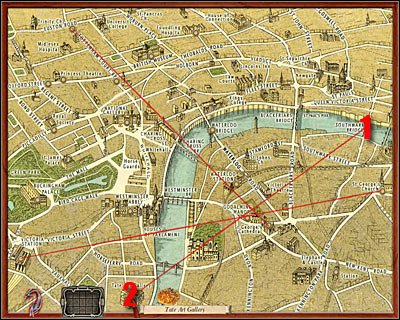
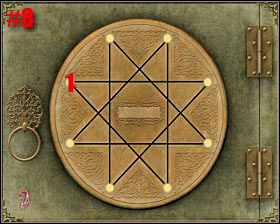
The final fourth article is from News Times magazine (September 8th). In this case, you will have to find New Kent Road (1), because this is the crime scene. As for the second area, click on National Gallery (2).
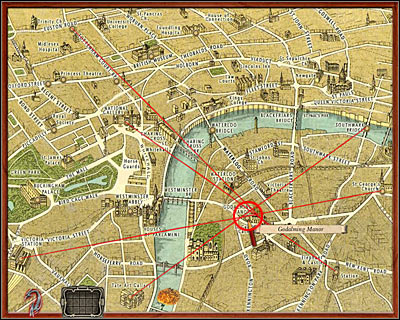
As you've probably noticed, all the lines intersect in a certain area of the map. You should be able to find a single hot spot here - Godalming Manor (screen). Click on this location and wait for the game to close this window. Listen to a short statement by Van Helsing. You'll also be presented with your first report -The link between the recent attacks in London. I'd strongly recommend that you read all reports, especially if you tend to skip conversations and cut-scenes. Talk to Mina once again. Once the conversation has ended, Van Helsing will decide to head over to Godalming Manor.
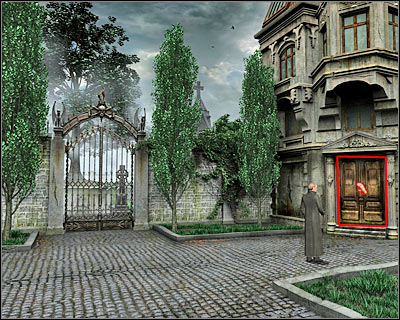
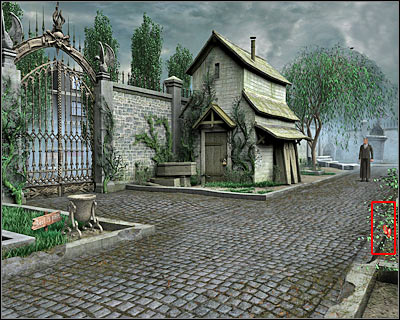
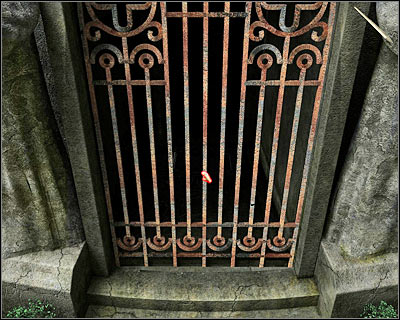
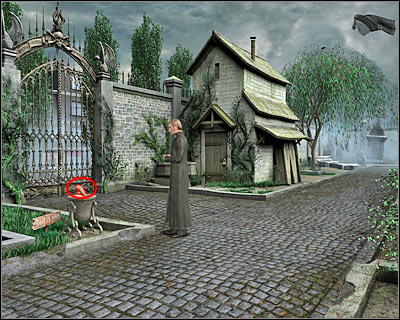
You will arrive at the Godalming Manor which is located next to Bloomsbury Cemetery. Look at the gate if you want to. It's important that you click on the main door leading to the manor. Wait for a butler to show up. Van Helsing will try to persuade the butler into letting him inside, however he will fail miserably. As a result, you will have to find another way inside the manor. Click on the gate in order to enter the cemetery.
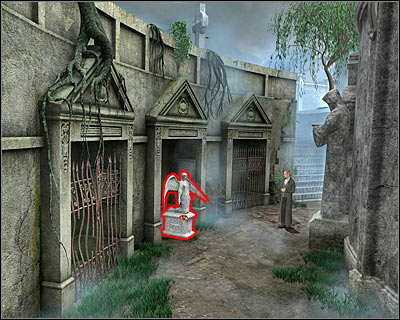
You will be given a lot of freedom here, however for now you should focus on exploring this first area of the cemetery. Click on the shed and you'll find out that the entrance is protected by a sophisticated lock. Take a closer look at the urn, as well as a bunch of flies above the urn. Proceed towards the upper exit (screen).
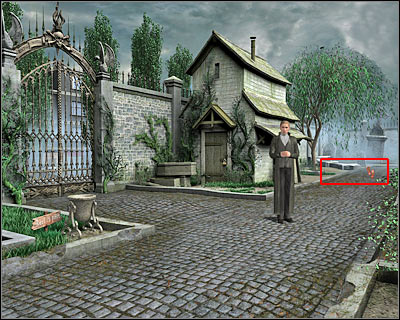
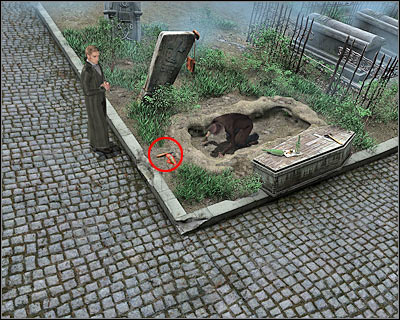
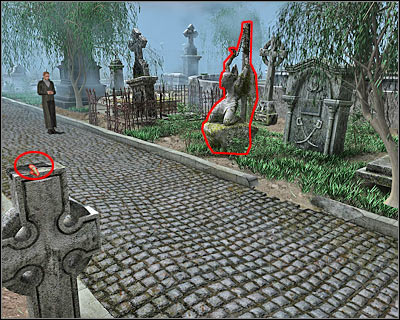
You should be able to get to an area with a gravedigger. Start off by inspecting the bottles on the coffin. Once this is done, talk to the gravedigger. You'll find out that he's missing a few tools and that he can't get inside the shed on his own. Choose two topics from the upper list - 'Sir?, The Combination' and 'Opening the Shed'. You'll find out that you can find your answers at the mausoleum of Mr and Mrs Lemon. End the conversation and pick up a Scraper from the ground.
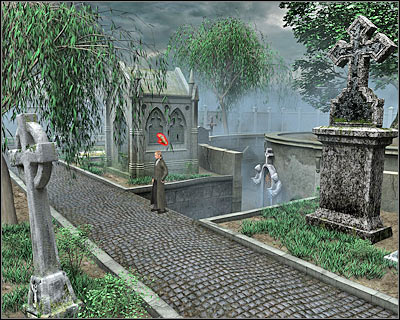
Go back to the first area of the cemetery, near the large gate. You can reach the mausoleum using two available routes. I would recommend staying on the main path, however you could also go right. Either way, you shouldn't have any problems finding the mausoleum the gravedigger was talking about (screen). Click on the area where a hand icon appears and wait for the game to zoom in on the engravings.
Solving this puzzle is also going to be extremely simple. There's a scraper icon in the lower section of the screen. Choose this tool and use it to scrap some of the dirt (screen). Your objective will be to reconstruct both gravestones. Keep using the scraper until you've heard a statement by Van Helsing. Your diary will receive a new report -Tomb Inscriptions Mentioned by Long. Make sure that you've read it!

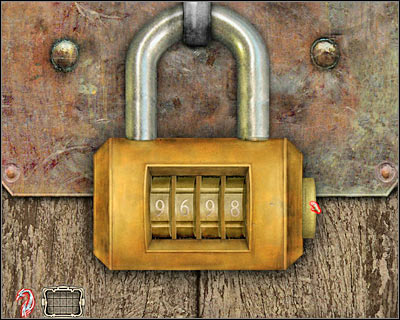
Go back to the start area once again. Click on the door leading to the shed and wait for the game to zoom in on the lock which protects the contents of the shed. You will have to perform some calculations in order to find out the correct combination of the lock:
1) John Bruce Lemon - 1703-1772 - it means he died in the age of 69
2) Suzy Ice Lemon - 1722-1790 - it means she died in the age of 68
3) The gravedigger has mentioned that 6 and 9 should switch places. You've received a combination of 6968, so you must change it to 9698. Input these numbers (screen) and you'll be granted access. Enter the shed right away.
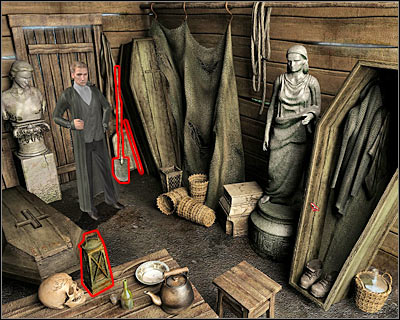
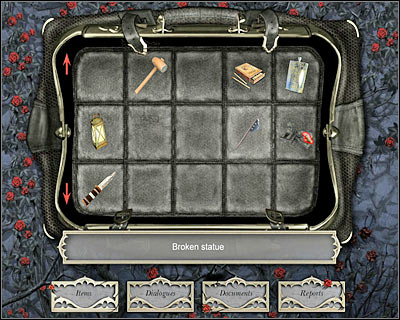
You'll find yourself standing inside a small room, however you'll find plenty of interesting items here. You'll be allowed to inspect three of them. Take a look at the statue, the coffin and the basket. As for other three items, you can take them. Pick up a Shovel, an Iron Bar and a Lantern. You may exit the shed.
Go back to the gravedigger and try talking to him again. You'll find out that he doesn't need the shovel anymore, so you may as well keep it. Ask him a few other questions, concerning the Godalming Manor, the Other Entrance and the Watchman. You'll find out that you should look for some additional clues near the main crypt of the cemetery. End this conversation and go back to the area with the shed. Choose the passageway near the bushes (screen) and use the stairs to get down to a lower level.
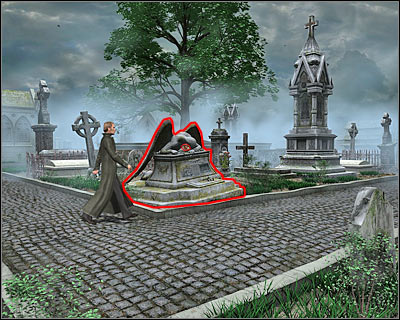
You'll end up standing next to a large tomb with two angels "guarding" the entrance. Obviously you should consider taking a closer look at the angels, as well as the main gate. Listen to what Van Helsing has to say about it and read a new report which can now be found in your personal diary - The Crypt's Inscription. Press the right mouse button in order to open your inventory. Choose the metal bar (it's going to be highlighted) and close the inventory window. You should notice the icon of the metal bar at the top right corner of the screen. It means this item is active. Click on other metal bars and you'll be able to stretch them.
Now you will have to combine two items from your inventory. Start off by opening it. Click on the matches and drag them to an icon of a lantern. You will end up having a lit lantern. Now you will have to combine the lantern with a shovel which you have found in the shed. Choose this new object and close the inventory.
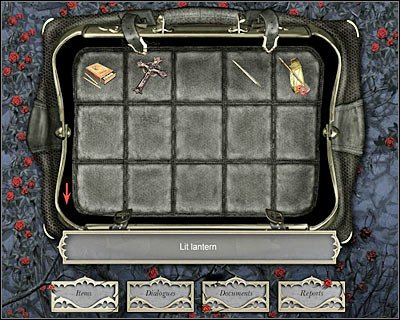
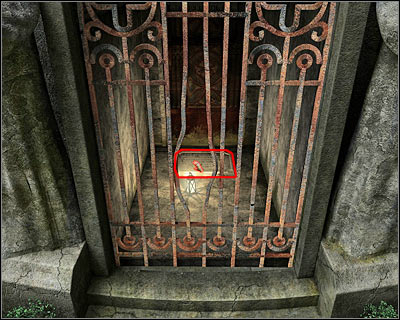
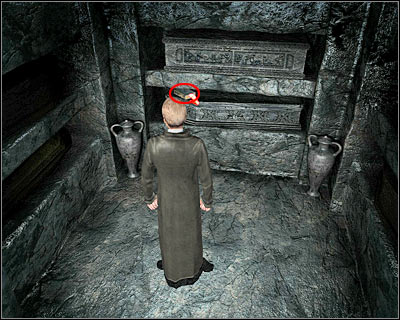
Use the lamp on an opening (where you were able to stretch some of the bars). Van Helsing should automatically place the lamp inside the tomb. Your next challenge will be to read the inscriptions on the gravestone (screen). Click on the tomb and you'll be rewarded with a new document - Poem from the crypt. Make sure that you've read the poem (especially the second verse), because it contains important clues on how you should act next. You may close this window. Go back to the view with the angels.
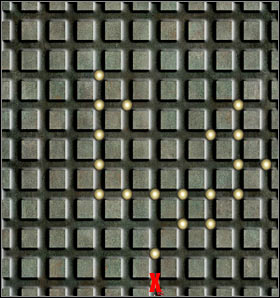
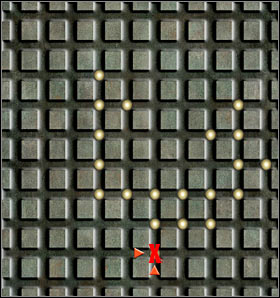
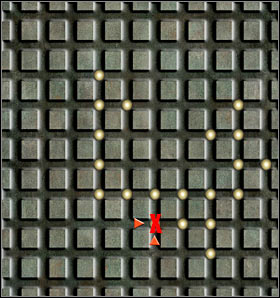
Your next task will be to solve four riddles. All the puzzles are connected to angel statues which can be found throughout this entire area. The first statue of an angel is on your right, so you'll only have to go there (screen). Click on an angel and wait for the game to display a new screen. Read the inscription and familiarize yourself with a clue on how to solve this problem.
As you've probably noticed, there are some figures on the screen. Some of them represent angels and some of them represent demons. Start clicking on small icons located next to each figure. Choose K for demon (chalice icon) and choose L for angel (tear icon). Look at my screen if you're having some difficulties finding the differences between angels and demons. End this puzzle by clicking on angel icon found in the upper left corner of the screen. You should hear some sounds (working machinery) which means you've been successful.
Now you should consider going back to the start area. Once you're there, proceed to the bottom of the screen. You can click on the statue right away (screen) or you can take some time by looking at the flowers. Just as before, you should consider reading a short description of the riddle.
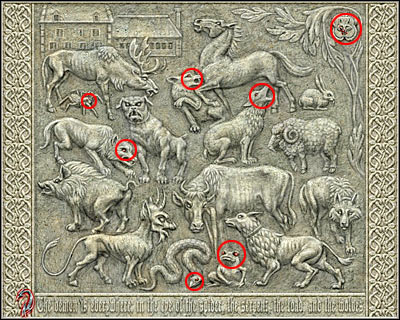
Your primary task here will be to mark the eyes of some of the visible animals. You'll know which ones have to be designated if you've read the clue. Pressing the left mouse button will result in their eyes turning from white to red. You will have to locate a spider, a snake, a toad and THREE wolves (screen). Don't mistakes some of the dogs for wolves! Dogs have collars! You won't have to press any buttons to confirm your choice. Instead, Van Helsing will congratulate you on a job well done.
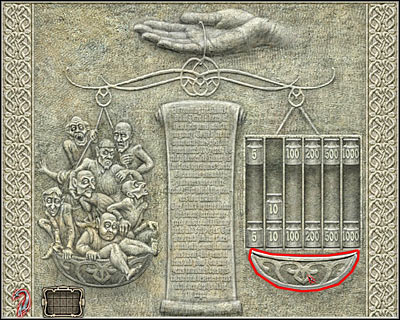
I'd recommend that you go to your right and eventually you'll come across a third statue (screen). Click on it right away. It's extremely important that you familiarize yourself with the clue by clicking on the middle section of the screen. You'll be rewarded with a new document in your diary -St. Peter's Judgement. Read it before you decide to proceed with the puzzle.
Once again, you will have to use a calculator, a pen and a piece of paper to determine an answer to this riddle. Let's review the document together, shall we?
1) To the three to whom wrath was their sin, he announced 100 years. 3 sinners x 100 years each = 300 years.
2) He told the conceited sinner his fault was three times worse. Three times the amount of years given to a standard sinner = 300 years for the fourth sinner.
3) The envious one and the gluttonous one each received their half of the previous four combined. The envious one and the gluttonous one each received half of punishment given to sinners from 1 and 2. This means half of 600 years for the first sinner and half of 600 years for the second sinner. Total: 300 (envious) + 300 (gluttonous) = 600 years.
4) (...)the greedy miser, with clammy hands and shifty eyes. The Saint told him two times the total of the wrathful men plus twenty-five years of tears and pain. The punishment is the number of years given to wrathful sinners + additional 25 years = 625 years.
TOTAL NUMBER: 300+300+600+625 = 1825 years.
Now you'll have to use this knowledge to solve the problem. Your task will be to choose weights which corresponds to the number of years. As a result, start clicking on these objects. They can be found to your right. Click on 1x5, 2x10, 1x100, 1x200, 1x500 and 1x1000. Look at my screen for confirmation. End this puzzle by clicking on a large button.
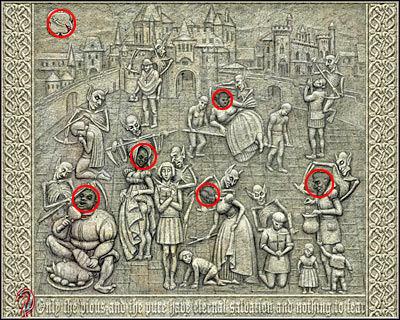
You've got only one more puzzle to solve. Proceed to your right until you've reached the fourth angel statue. Before you decide to click on an angel, consider picking up a Black veil which can be found to your left (screen). Once this object is safely in your inventory, click on the statue and familiarize yourself with the clue.
The message will say that sinners won't receive redemption and it'll be up to you to mark their faces. It's a fairly easy task, especially if you'll take your time to look at the picture. Each sinner is being accompanied by a demon. Look at my screen for a full solution to this problem. Once you've clicked on all sinners, click on a sword icon (it's in the upper left corner of the corner). Van Helsing will make a new comment concerning how you've dealt with all four cemetery puzzles.
Before you'll decide to go back to the main crypt, I would recommend heading towards the entrance to the cemetery. You weren't able to interact with an urn before, but now's your chance. Choose the veil from your inventory and use it to catch a couple of flies (screen).
You may proceed towards the entrance with two angels. As you've probably noticed, the gate has risen, allowing you to enter the tomb. You'll end up standing inside a very dark room, however you don't have to use a lantern here. Instead, take a Book from the crypt. Obviously you should familiarize yourself with what the book says, because it contains instructions on how to find the hidden passageway to the manor.
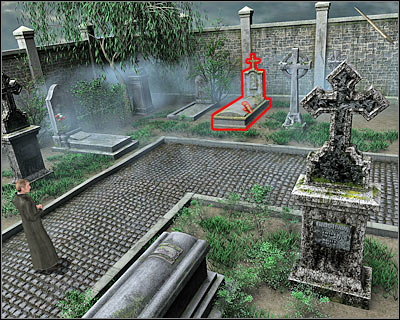
Exit the crypt and proceed to an area with a yellow tomb and a large cross (screen). The easiest way to get there is to stay on the main path. Choose a metal bar from your inventory and use it to open one of the graves. Listen to what Van Helsing has to say and enter a dark corridor.
You'll end up standing inside a room with a large reinforced door. Click on the door and you'll find out that it's closed. Thankfully, you'll be given a chance to participate in a new riddle. The objective will be to brake the lock, allowing you to enter the manor. Your only task is to click on two objects which have been pointed out on the screen. Start with the top object and then click on the lowest one. Hear the click and enter the building.
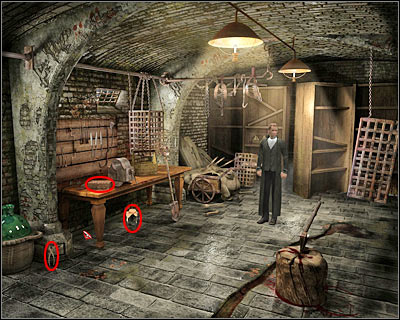
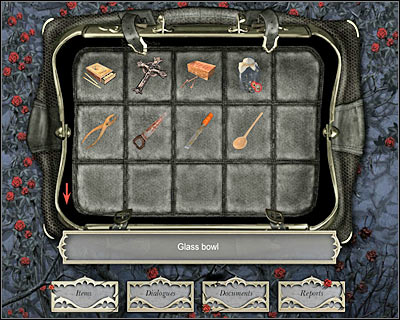
As you've probably noticed, you're standing inside a large cellar. You will have to be ready to collect A LOT of items from now on, so make sure you've taken all of them. Inspect some of the nearby cages. You can also click on a bear trap, some tools and an axe. Once this is all done, pick up some Nails, a Glass bowl and Pliers. Proceed to your left until you've reached a new area of the cellar. There's a Saw here and you must take it. After that, use the stairs to reach an upper level.
You should be able to reach a small corridor. You won't find any interactive objects here, so proceed towards the left door. This will allow you to reach the kitchen. Sadly, you'll come across the watchman here. Listen to what Van Helsing has to say about his presence. Start off by picking up a File and a Spoon. Don't bother clicking on the left door, because you wouldn't be allowed to leave the kitchen. Van Helsing would say that it's too risky.
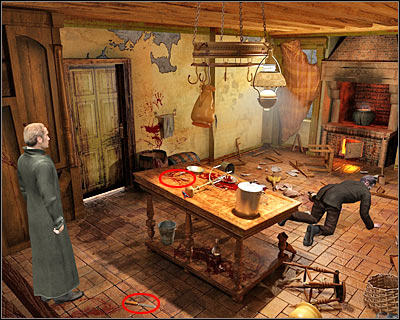
Obviously you will have to open your inventory. Choose the black veil (the one you've used to catch a few flies with). You will have to combine this item with a glass bowl (screen). Now you must choose the bowl and use it on the watchman. Wait for a funny cut-scene and use the left door to leave the kitchen safely.
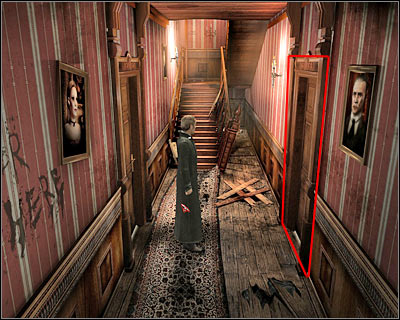
Start off by moving towards the bottom of the screen. You won't be allowed to open the main door leading to the manor. Instead, you will have to pick up a Cane which can be found to your left. Go back to the kitchen door and head on to the room to your right (screen).
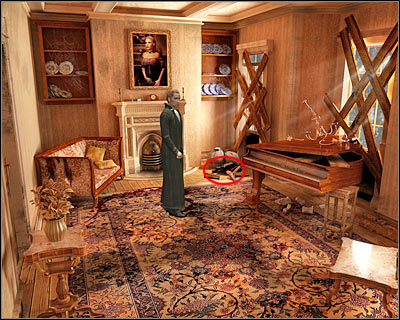
There's a safe near this door, but you might as well ignore it. You don't possess the necessary items nor knowledge to open it. Click on a destroyed mirror and proceed further. Inspect the windows and pick up Pieces of wood. You can't perform any other activities here, so you may as well go back to the main corridor. Click on the stairs, because you won't find any other rooms on this floor.
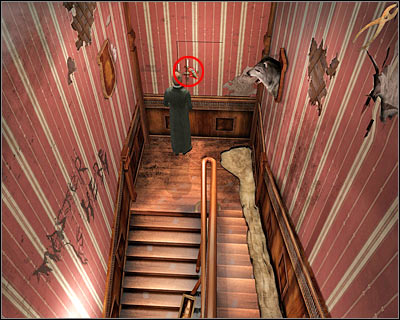
You will probably notice a chandelier along the way, however you won't have to perform any actions here at the moment. Proceed towards the first floor and go to the room on your left. You'll end up standing inside a small bedroom. There are two interactive items near the door. It would be wise to take them right away. Pick up a Message from the Lady's Chamber, as well as Spool of thread. Proceed to the left and inspect the area around the large bed. Notice the jacket and some objects near the nightstand. Pick up a Tape measure and a Hammer.

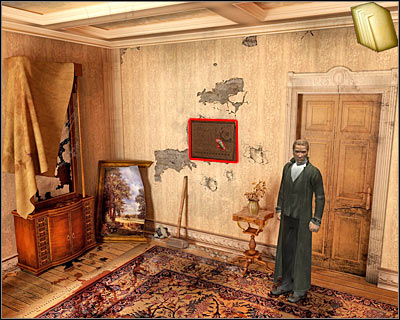
You may exit the bedroom, because you won't find any other objects of interest here. Proceed to the right door. This is a much larger library. Inspect a small cabinet and go to your right. Click on some blood stains, as well as on the right table. There's a second chandelier here, however you can't take it. Pick up a Writing paper and go back to the left area of the library. You should notice a familiar panel on the wall.
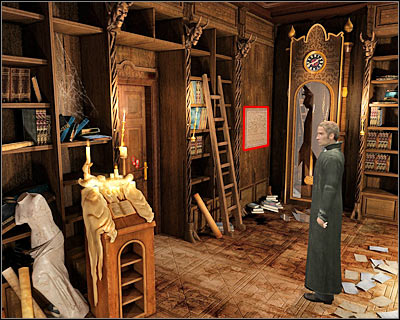
Wait for a close-up view of the panel and listen to what Van Helsing has to say. Click on the sentence written in Latin. Once this is done, open the inventory by clicking on a small icon located in the upper left corner of the screen. Choose a writing paper from your inventory and close this window. As you've noticed, the paper has already been placed, so all you have to do is to move it all the way down. Click the left mouse button and a few holes will be made (screen). You may close this window. Also, don't forget to deselect the piece of paper, because you won't need to have it as an active object at the moment.
You may exit the library. Try heading towards the bottom of the screen, however you'll reach a closed door and you won't be able to open it in any way. You've already inspected both rooms on the first floor, so you may go back to the ground floor. Head over to the room with the safe (screen). Obviously you will have to click on the safe to be able to solve this part of the puzzle.
Once again, you will have to start by opening your inventory. Choose a blank piece of paper and place it above some of the signs in order to create new holes. Once this is done, go back with this piece of paper to the library and use it on the panel (screen). If you move the piece of paper to a correct spot, you'll notice a few letters (screen). Thankfully, you won't have to make notes by yourself, because you're going to be rewarded with a new report in your personal diary - Encoded Letters on safe at the second floor.
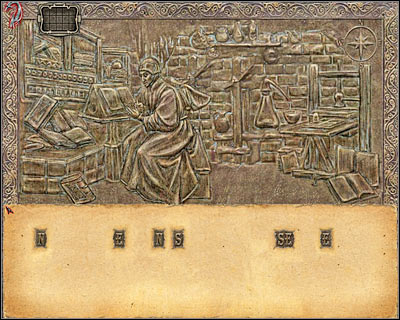
Go back to the ground floor and head over to the second panel. You will have to perform a very similar action. Choose the piece of paper from the library and use it to make notes of other letters (screen). Once again, you will receive a report - Encoded Letters on safe at the first floor.
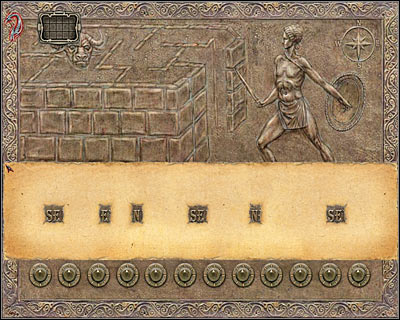
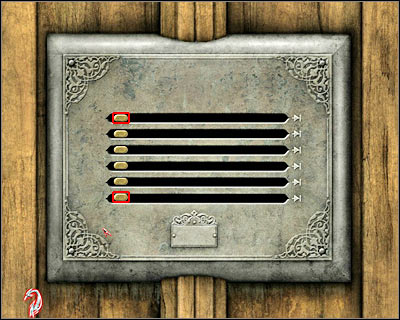
You've got two sets of letters - from the ground floor and from the first floor. You will have to combine them together and you'll receive: SE E N SE N SE N E N S SE E. I think that you know the solution by now, but let's be thorough. All letters stand for directions. N is north, SE is south-east and E is east. You will have to turn the knobes found at the bottom of the screen, so they'll correspond to your combination (screen). Wait for the safe to open itself and take the Key.

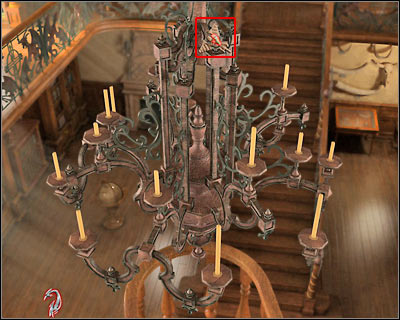
Exit this room and go back to the stairs. This time you really should inspect a chandelier which can be found on the wall (screen). Click on this object and listen to what Van Helsing has to say. Choose the pliers from your inventory and click on the chandelier once again (screen). Ignore the fact that it's now broken and wait for the game to zoom in on what was behind the chandelier. You'll find a new mechanism here and it's going to be your next big puzzle.
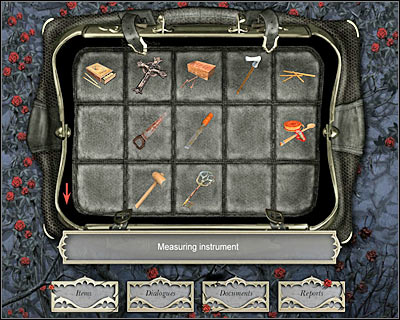
Listen to a new suggestion made by our main character. Your task here will be to measure the depth of each hole. As a result, you will have to open your inventory. Combine a tape measure with a spoon and a spool of thread (screen). Choose this new tool, so it'll become your active object.
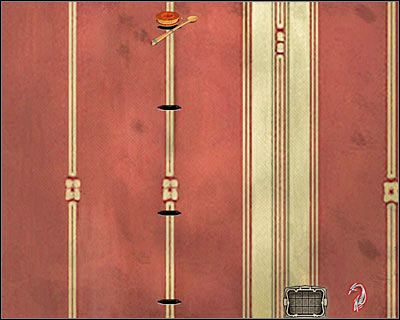
As you've probably noticed, your new tool is in the lower left corner of the screen. Click on it and use it on all four holes (screen). Each time you've used your tool, you will have to listen to a short statement made by Van Helsing. Measure all four holes and you're going to be rewarded with a new report - Key to Make. Read the report right away and you'll find out that the holes have to be 10, 8, 12 and 5 centimeters deep.
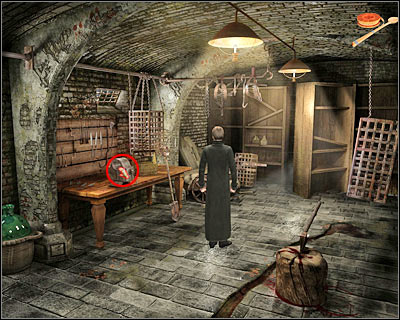
Now you're going to have to go back to the first area of the cellar. You've been there after you've disabled the lock on the large door leading to the manor. This means you'll have to go through the kitchen. Thankfully, you won't come across the butler. Once you're inside the cellar, click on the vise (screen). This tool was previously inactive, but now you're free to use it. Wait for the game to zoom in on the workbench area and take your time to familiarize yourself with the available tools. They can be found to your right and you're going to need all of them to make a spare key.
I guess I should warn you that you're going to spend quite a lot of time creating a new key and you won't be allowed to make any mistakes. Thankfully, if you follow my exact instructions, you're going to make a spare key without having to worry about anything else. Start off by picking up a piece of wood (1). Drag this object and place it directly under the ruler (red area on the screen).
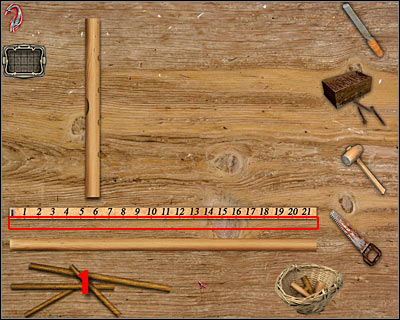
Now you will have to pick up a saw (last item on the list of tools). Make the cut directly under the 10-centimeter mark, because that's how deep the first hole was. Once this is done, pick up this piece of wood once again and place it in the main area of the workbench (screen). It'll occupy the first slot from the top.
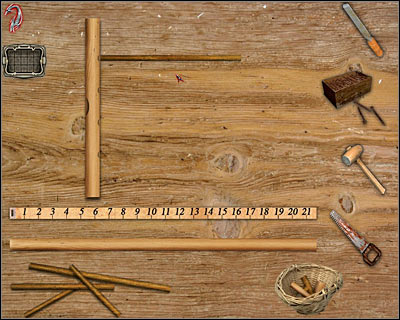
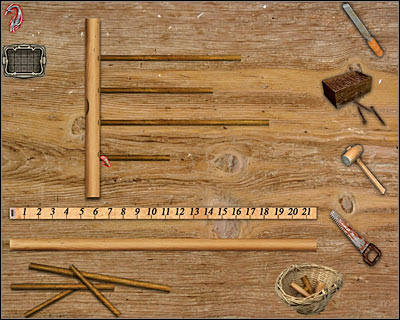
You will have to repeat these actions with three other pieces of wood. The only difference is that they won't be similar in size. The second piece has to be eight centimeters long, the third one - 12cm, and the fourth one - 5cm. Place them on the workbench. Look at my screen for confirmation. That's how your key should look like before you proceed with the next step.
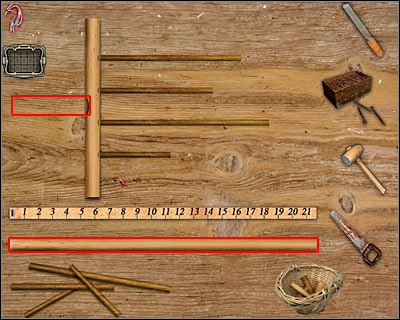
Now you will have to choose a brighter piece of wood (screen). Just as before, place it directly under the ruler. Pick up a saw and make a cut at the five-centimeters mark. Take this smaller fragment and attach it to the single LEFT slot (screen).
Now you will have to make some adjustments to all five pieces of wood. Thankfully, it's going to be an extremely simple task. Choose a file from the list (first item from the top). Use the file on all five pieces (red dots on the screen). Once this is done, put the file away, because you won't need it anymore.
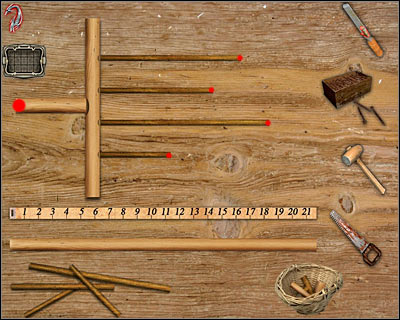
Finally, you will have to combine all the elements together. Start off by choosing the nails and click near all five elements. Look for the red dots on my screen if you can't do it on your own. Each time you've clicked correctly, a nail will appear on the screen. Once you've placed all five nails, choose a hammer and start clicking on them. Thankfully, Van Helsing will knock them in automatically. If you've done everything correctly, you will receive a Makeshift wooden key. Otherwise check my description from the start - maybe you've forgot about something.
As you've probably suspected, you will have to go back to the mechanism with your newly acquired makeshift key. Choose the key from your inventory and click on the mechanism. You'll end up inside a dark corridor. Look at the trap if you want to. Open your inventory and choose the other key (the one you've obtained from the safe). Use it on the door and enter a new room.
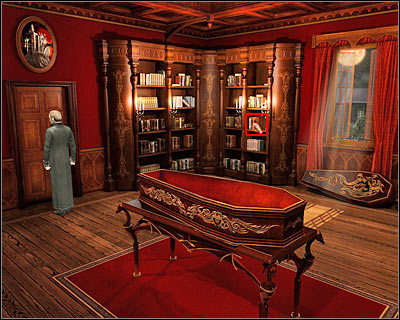
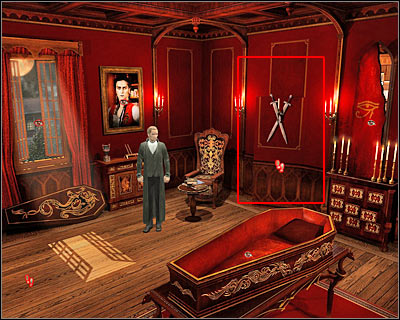
You'll end up standing inside Dracula's personal room. Thankfully, you won't come across the prince of darkness, so you'll have plenty of time to look around. Inspect some of the nearby objects, including a mirror, a coffin, Dracula's picture and an open window. Ignore a large book for the time being and proceed to your left. Try clicking on the door and pick up a book from the bookcase (screen). Van Helsing will find an interesting Page of the blood stained book.
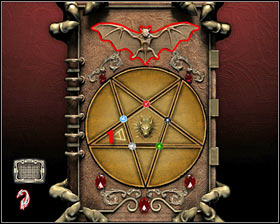
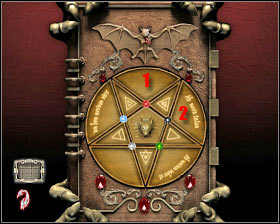
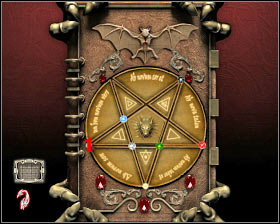
You may go back to the large book you've ignored before. You can find it under Dracula's picture. This is going to be a new riddle and you'll have to complete three stages of this puzzle in order to succeed. Before you decide to proceed any further, take your time to familiarize yourself with the book. You can reset this puzzle at any time by pressing the button at the bottom of the screen. You'll be also presented with an inventory icon. Use it if you want to look for additional hints in your diary. Don't forget not to close this window, because you'll reset the entire puzzle!
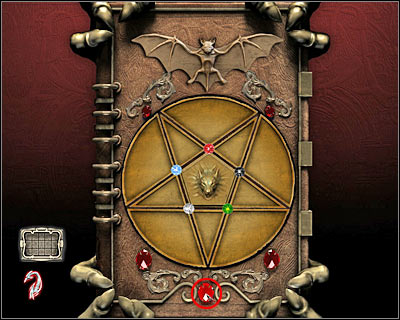
The first phase of the puzzle requires you to display five symbols inside the triangles. This means you'll have to interactive with these objects. Here's a full solution to this problem:
STEP 1. Click on the bat and the first symbol will appear inside the first triangle.
STEP 2. Triangles 1 and 2 must switch places. Use the mouse to perform this action. Click on the bat icon. Two other symbols will appear on the screen.

STEP 3. Triangles 1 and 2 must switch places. Use the mouse to perform this action. Click on the bat icon. Two final symbols will appear on the screen. OK... you've finished the first stage. The final result is that you see five symbols inside the small triangles.
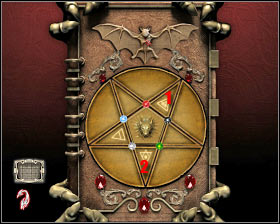
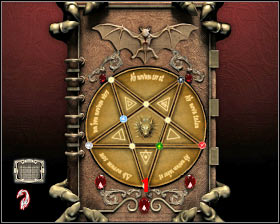
The second phase of the puzzle requires you to display text on the inside of the large circle. There are five fields here. Just as before, you should follow my instructions closely:
STEP 1. Fields 1 and 2 must switch places. Use the mouse to perform this action. Click on the bat icon. A text will appear inside the second field.
STEP 2. Fields 1 and 2 must switch places. Use the mouse to perform this action. Click on the bat icon. A text will appear inside the first field.
STEP 3. Fields 1 and 2 must switch places. Use the mouse to perform this action. Click on the bat icon. A text will appear inside the second field.
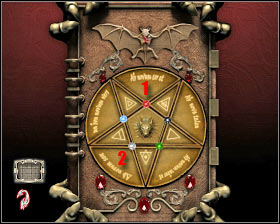
STEP 4. Fields 1 and 2 must switch places. Use the mouse to perform this action. Click on the bat icon. Both fields are going to be filled with messages. This is the end of the second phase. You should see five messages on the screen.
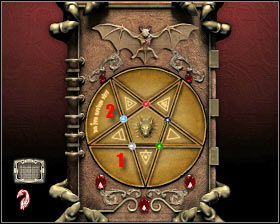
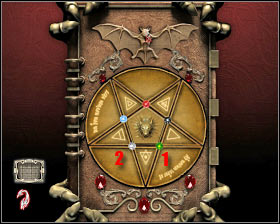
The final third phase of the puzzle will require to interact with five different jewels which can be found inside the large circle. You will have to place the jewels on the outside by moving them in a correct order. Here's a full description of what has to be done:
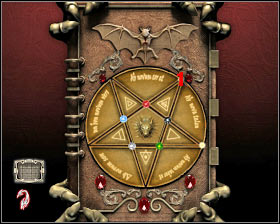
STEP 1. Click on the black jewel and choose 1 for its destination. Wait for the rock to be transported to that location.
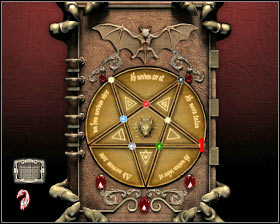
STEP 2. Click on the red jewel and choose 1 for its destination. Wait for the rock to be transported to that location.
STEP 3. Click on the white jewel and choose 1 for its destination. Wait for the rock to be transported to that location.
STEP 4. Click on the blue jewel and choose 1 for its destination. Wait for the rock to be transported to that location.
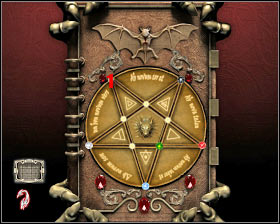
STEP 5. Click on the white jewel once again and choose 1 for its destination. Wait for the rock to be transported to that location. Ignore the fact that it won't be moving in a straight line.
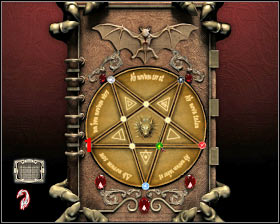
STEP 6. Click on the green jewel and choose 1 for its destination. Wait for the rock to be transported to that location. Once you've moved all five jewels, click on the bat icon. This is the end of the final phase.
I guess I won't surprise you by telling that you'll be rewarded for your efforts. Open your inventory, because a new document has been added to the list - Count Dracula's Book. This book consists of a large number of pages, however I would still recommend reading it. Thankfully, if you decide to skip this action, you will be given a short summary, containing all the important things from the book - Dracula's Book.

Listen to a short statement made by Van Helsing. Once he stops talking, a short cut-scene is going to be displayed on your screen, informing you that the butler is heading your way. Thankfully, you won't have to do anything out of the ordinary. Click on the passageway you've used a few minutes ago (screen). Once you're in a dark corridor, proceed towards the exit and you're going to be transported back to Mina's apartment.
You won't encounter anyone once you'll enter Mina's apartment. Start off by taking a closer look at the basket filled with garlic. Once this is done, try clicking on door leading to Mina's bedroom (screen). Van Helsing feels a presence of a vampire. As a result, you'll have to choose a crucifix from your inventory. Click on the door once again and you'll be rewarded with a very interesting FMV sequence. Dracula is able to bite Mina and he escapes in time to avoid being stopped by Van Helsing.
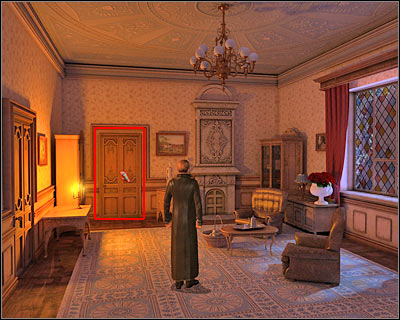
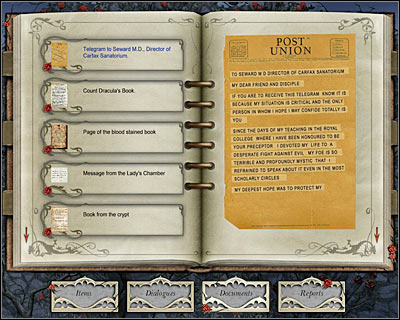
You'll automatically exit Mina's bedroom. Take your time to read a new document - Telegram to Seward M.D., Director of Carfax Sanatorium. Seward will show up in the apartment once you've closed your diary. Listen to what he has to say about Mina's current condition, as well as Van Helsing's plans.
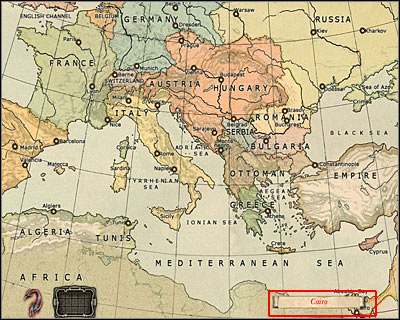
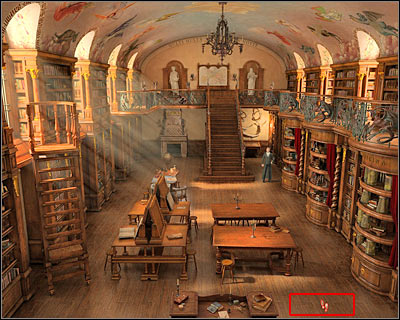
Your final task here will be to choose your next destination. Proceed to the bottom of the screen and click on the map. Van Helsing will place the map of Europe on the stand. Click on it and wait for the game to display the map on your screen. You will have to choose Cairo which is the capitol of Egypt (screen).
You'll start the game in a small alley, not far from the marketplace. Take your time to enjoy your surroundings. Look at some of the nearby buildings if you want to. Try talking to some of the natives. Unfortunately, they don't know English, so you can't communicate with them. Proceed towards the only available passageway.
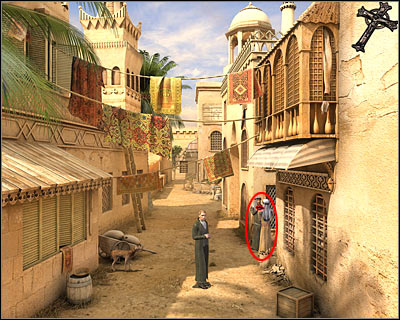
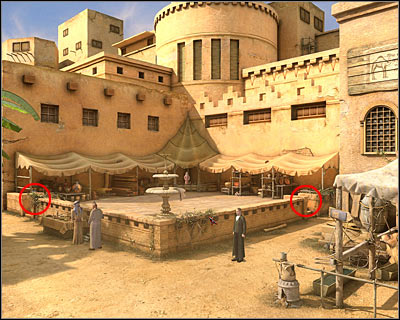
You'll reach a fairly large marketplace. There are many paths here, however you won't have to visit all these locations right now. Start off by taking a closer look at two signs (screen) - a small one and a very large one. Listen to what Van Helsing has to say. As for your next destination, choose a pathway located in front of the camels.
You will find yourself standing next to the camels, however you may ignore these animals, because you won't be going into the desert anytime soon. Pick up a Casserole dish and try talking to one of the natives. Thankfully, Mustapha knows English very well. Talk about renting a room in his building. Van Helsing must also ask him how to reach the Egyptian museum.
You won't find any other items of interest here, so go back the same way you came. You will have to end up standing in the middle of the marketplace. Look at the small sign if you want to, because it points out direction to the museum. You will have to choose a passageway located in the bottom of the screen.
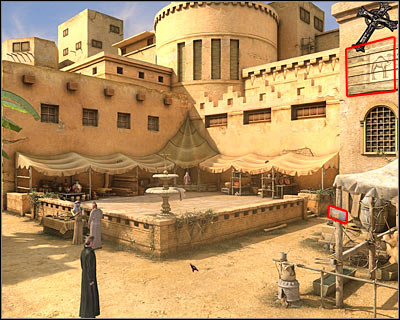
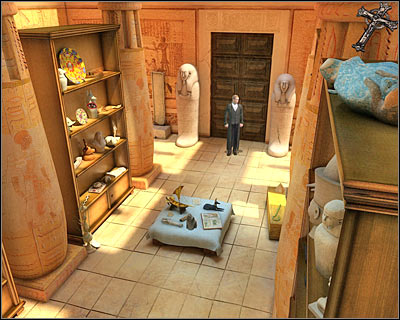
Once inside the museum (screen), listen to what Van Helsing has to say about some of the artefacts stored here. I would strongly recommend that you take your time to explore the surroundings. There are three main alleys within the museum, however each alley can be observed from two different angles. That gives of a total of six places to visit. You can ignore this for the time being, because you won't be allowed to pick up any items. Nevertheless, you don't have to be in a lot of hurry.
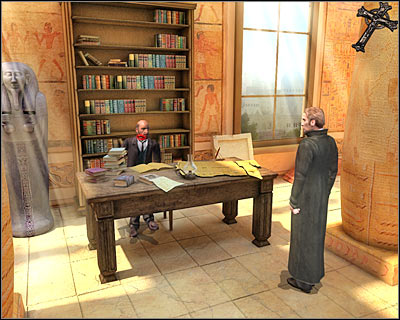
Sooner or later you will have to move on with your current assignment - finding and stopping Dracula. Start moving towards the opposite end of the museum. You will encounter one of the employees of the museum. Sadly, the assistant will tell you that the director isn't here and that he won't be back for a long period of time. Van Helsing will offer his help you to find some of the artefacts in exchange for valuable information. The employee will give you the List of the Director's Artefacts. You won't have to read the list, because you'll inspect the entire museum anyway, so you'll collect all the necessary objects.
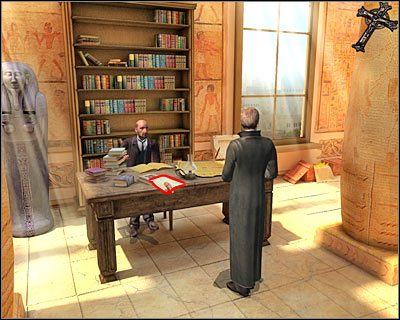
Don't end this conversation just yet. Instead, choose a new topic from the list - Deban. You will find out more about the metric system used in ancient Egypt. The assistant will also provide you with two items. You will receive a Copper deben - weight benchmark, as well as Scribe's stylys. 15 inches long, 1.44 ounces. Finally, pick up a flyer from the table -The Giza Pyramids.
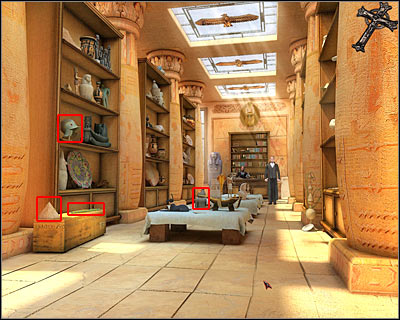
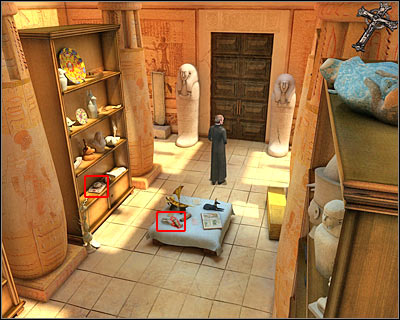
Now you will have to explore the entire museum, collecting all new things which became active once you've ended the conversation. I'd strongly recommend that you take a closer look at my screens, so you'll know that you haven't missed anything along the way. Start off by retreating to the bottom of the screen and you'll end up standing close to assistant's desk (screen). You will come across four interactive items here. Pick up a Pharaoh with broken head, a Spanish helmet, a Pyramid and a Heka, insignia of the Pharaohs.
Once again, you should consider going towards the bottom of the screen, so you'll end up standing close to the entrance to the museum (screen). There are two interactive items in this area of the museum. Pick up a Small pyramid, as well as a Small scarab - gift of M. S. Chang Caine. Now you should consider going left, however remember that you can explore all the available areas in any order.
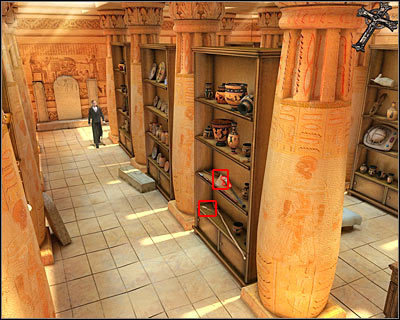
You will find some new items here as well. Pick up a Pyramid. Also, one of the drawers contains a Knife with a mother-of-pearl handle. Make sure that you're collecting all items, because you're going to need them sooner or later during the course of the game. Now you will have to change the view. You can do this quite easily by clicking on a stone plate. It can be found in the lower left corner of the screen. Alternatively, you could go back to the assistant and choose a passageway to his right.
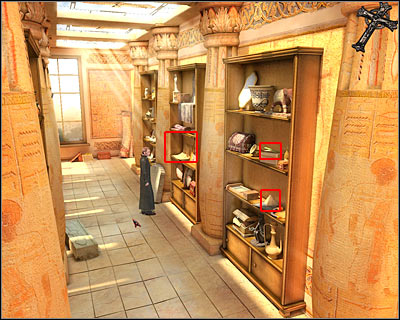
Once again, take your time to familiarize yourself with the surroundings. This time you'll be allowed to collect four new items. Pick up a Papyrus - excavated 1852, a Nekhnekh, insignia of the Pharaohs), a Pyramid and a Key which was hidden under the pyramid. Once this is all done, go back to the main entrance and proceed to your right, because this is the only remaining area of the museum you'll yet have to explore.
I guess you won't be surprised to find some new items here. Obviously you will have to collect all of them. Start off by picking up a Small Pyramid and a Head with solar disk. Once this is done, click on a large box. You'll find out that it's closed, but thankfully you've obtained a key a few seconds ago. Use the key to open the box and collect a new Pyramid.
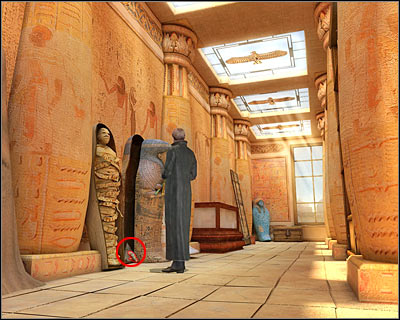
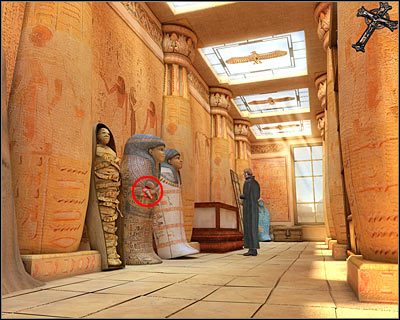
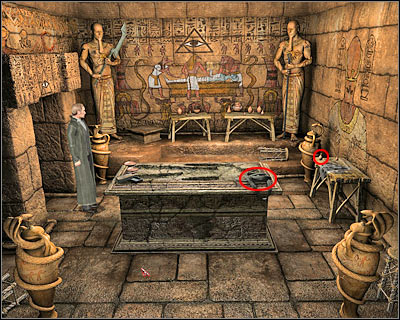
There's only one more area for you to explore and it's the opposite wall of this corridor. Start off by clicking on the sarcophagus and the mummy. Notice that the sarcophagus in the middle is missing a few important items (screen). You will have to choose two objects from your inventory and use them on the sarcophagus - a Heka and a Nekhnekh. Each time you should hear a short statement made by Van Helsing, so you'll be certain that you've chosen correct items from the inventory.
Once you've attached both items, you will have to wait for the sarcophagus to open. Doing this will allow you to collect a new item. Pick up a Large Pyramid. You should possess all the items from the museum by now, so you may go back to the assistant. Talk to him again and Van Helsing will automatically give him all the objects he was looking for. You will be allowed to ask him about a few questions - 'My Questions', 'The Demonomicon' and 'How to get to the tomb?'. Your main result is that you'll find out the exact location of the tomb. It can be found in an area called Blood Rocks. Apparently no one has returned from there. Your next objective will be to establish means of transport. You can't do anything else in the museum, so you might as well go back to the marketplace.
Now you will have to go back to Mustapha. I assume that you remember where to find him (he's standing next to the camels). Start the conversation and choose some of the available topics from the list - 'What is going on?' and 'The Blood Rocks'. You'll find out that Mustapha will provide you with one of his camels, as long as you'll be able to heal the sick animal. Mustapha will advise you to meet up with one of the local healers, because he might be in possession of a remedy.
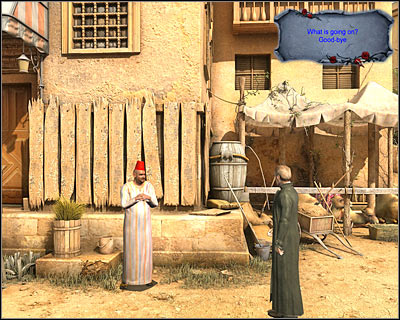
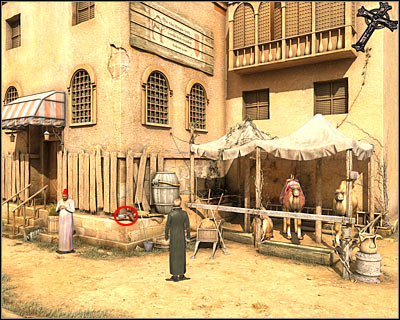
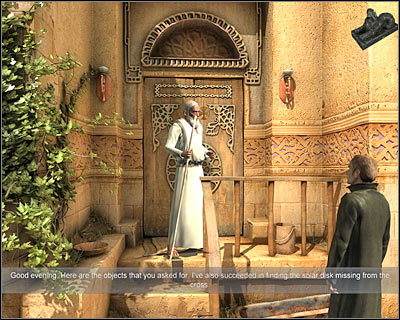
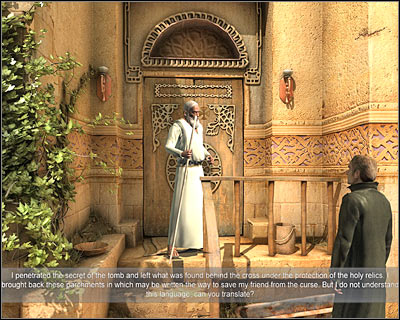
Thankfully, you won't have to spend a lot of time trying to find the healer. Click on a passageway located to the left of Mustapha. Once you're there, start moving towards the bottom of the screen and talk to an old man wearing a white robe (screen). Choose two topics from the list - 'Take care of the camels' and 'The Blood Rocks'. The old man will provide you with a remedy, but first you must find the source of the poison. You can't perform any other activities here, so go back to Mustapha right away.
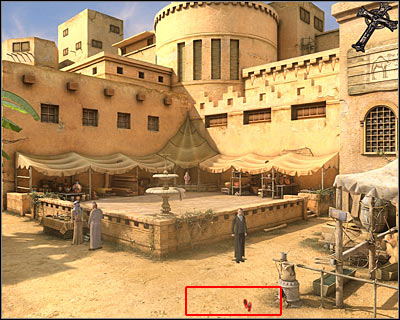
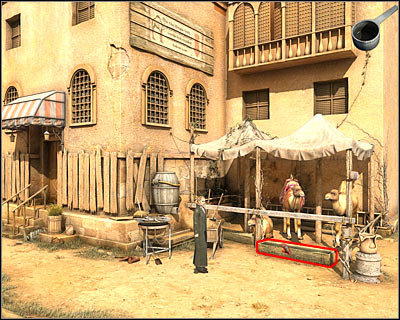
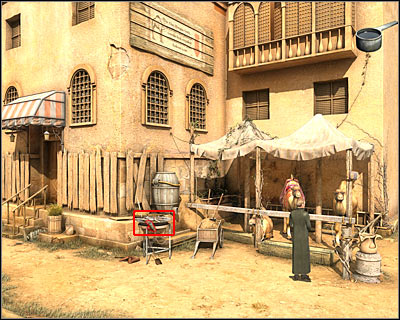
You don't have to talk to Mustapha again, because you haven't obtained any new information since the last time you've spoken to him. Pick up a Fork and choose it from your inventory right away. Use the fork to collect some Curious plants. The plants can be found in front of the camels. Go back to the healer and show him the plants. Ask the old man to give you a remedy for one of the camels. As a result, you will receive Medicine for camels. Return to Mustapha and talk to him about your new findings. You are going to be transported to the tomb.
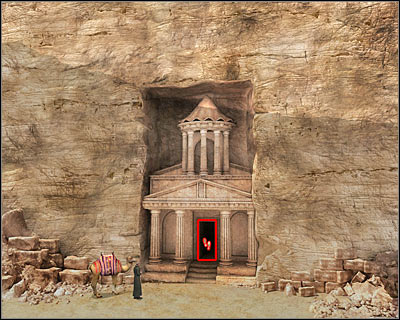
You won't find any items here, so you may proceed towards the tomb right away. There's only one entrance (screen), so you really can't get lost. Wait for the game to display an interesting cut-scene. One of Dracula's slaves blows up the entrance to the tomb, trapping you inside. As you've probably suspected, your next big challenge will be to find an alternative exit out of the tomb. Thankfully, it's not going to be too difficult.
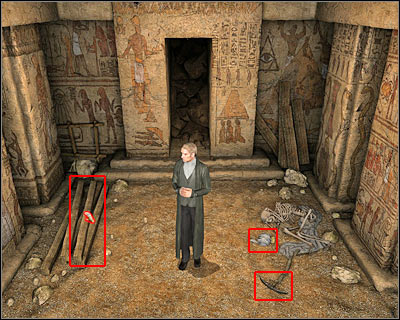
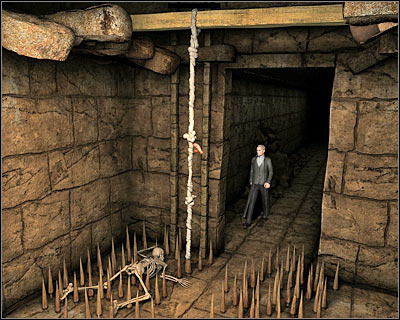
You'll end up standing inside a small dark room. There are some interactive objects here and it'll be up to you to collect them. Take a Plank, a Turban and a Pick head. You can also take a closer look at the skeleton and the blocked exit, however it's option. Proceed to the bottom of the screen and start moving towards a new corridor. You'll end up standing near a trap. Listen to what Van Helsing has to say about your current situation.
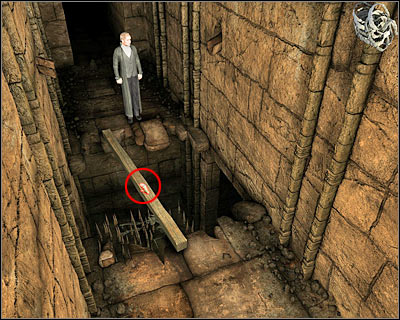
As you've probably noticed, there's a passageway near the spikes, however you can't reach it at the moment. Instead, choose the plank from your inventory and use it on the other side of the gap (screen). Once this is done, click on the plank and you'll reach the new area safely. There's a Lantern here. Pick it up and proceed to a new corridor.
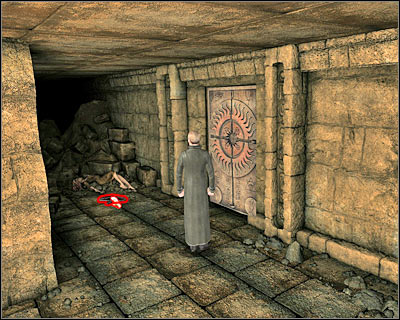
You will come across a small junction. Start off by moving to your left. You should be able to find one collectible item here. Pick up a Belt which can be found next to a body of a young girl. You can try clicking on the door while you're at it, however you won't be able to solve this riddle at the moment. Nevertheless, examine five hotspots (a sun icon in the middle and four branches). Each time you've clicked on an interactive element, you're going to be rewarded with a short opinion stated by Van Helsing himself.
Go back to the junction. It won't come as a surprise to you that you will have to explore the right corridor. You'll end up inside an interesting room where bodies were prepared for mummification. Look at the signs above the door and examine the painting seen in the background. Now you will have to collect a few times. Pick up some Linen stripes, as well as a Flask of oil. Once this is done, go back to the corridor with the hole in the ground.
Open your inventory, because you will have to perform an important action here. Combine your newly acquired linen stripes with a turban. As a result, you will receive a rope. Activate this item and use it on the wooden plank (screen). Open the inventory once again. Use the matches to lit the lantern. After that, use the lantern on the rope. Van Helsing will automatically get down to a lower level.
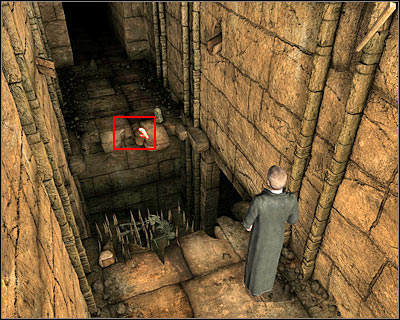
You should be able to find a Spike here. Once this item is in your inventory, proceed to your right and you'll end up standing in a very small room. There are some Curious plants here and it'll be up to you to collect them. Open the inventory and combine a pick head with a spike. This will allow you to gain possession of a very useful tool. Use the pick axe on a small opening (screen).
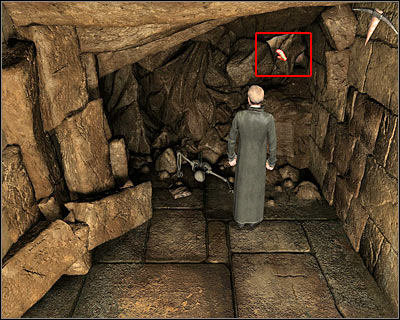
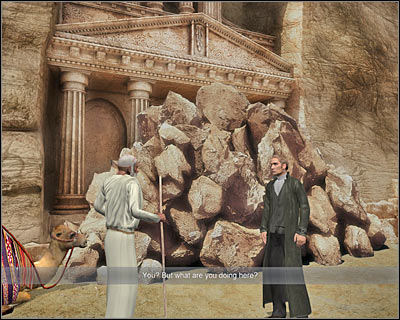
Sadly, you'll lose your pick axe while trying to get out of the tomb. The good news is that the spike will reappear in your inventory, because this is the only item you were able to retrieve from the damaged pick axe. You'll find yourself standing outside of the tomb. Talk to the old man (screen) and he'll introduce himself to you as Herodotus. This is a very important conversation, so you shouldn't skip it. You'll find out more about the tomb and what's hidden inside it. Your next objective will be to retrieve some of the key artefacts in order to rebuild the seal. Herodotus will give you a document - Herodutus' list. This is the list of items you'll have to find before going back to the tomb. Wait for the game to transport you back to Cairo's marketplace.
Once again, you will have to talk to one of the main characters. This time it's going to be Mustapha. Don't forget to mention his niece whenever it's possible. Listen to what Mustapha has to say about his niece disappearance and the reaction of his wife to her absence. You've already found the body of this innocent girl in the tomb, however you can't share this knowledge with Mustapha, so you'll have to play along as if nothing ever happened. End the conversation and listen to what Van Helsing has to say about the current situation. Go right and proceed to the main area of the marketplace. You can choose between two passageways (screen).
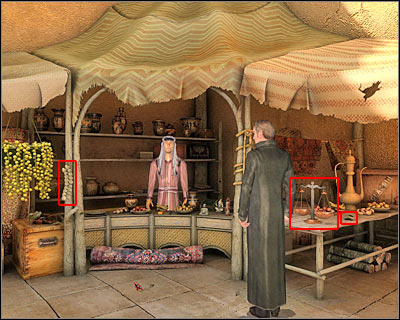
You will be transported to one of the stands. Sadly, you aren't allowed to talk to the merchant, because he also doesn't know English. Instead, pick up some of his things (it's weird that he won't complaint :-)). Take a Scale, a Flask and a Clove of garlic. You may go back to the previous area. Head over to the museum.
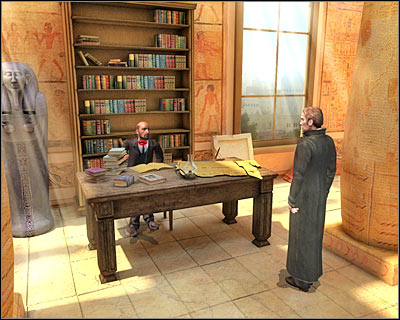
Once inside the museum, ignore some of the new objects and proceed to the assistant right away (screen). Open your inventory and choose the list of artefacts received from Herodotus. Show the list to the assistant by clicking on him. You will be rewarded with an interesting cut-scene. Someone tries to kill Van Helsing, but thankfully our main hero manages to survive. The assailant fleds the museum before you're able to catch up to him.
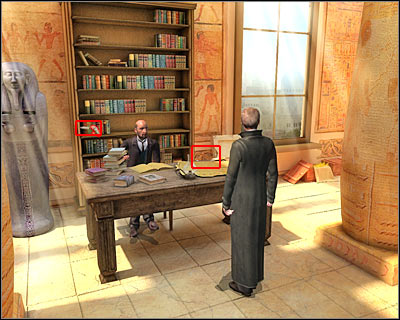
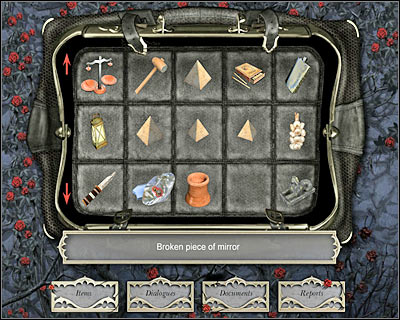
Before you decide to talk to the assistant again, you should consider taking two new objects. Start off by pulling a Knife from the wall. After that, take a Broken piece of mirror. You may talk to the assistant now, however make sure that the list of artefacts is your active item. You will be allowed to take the artefacts you need in exchange for finding some of the stolen goods. This means you will have to find the thief in the first place. Read a new report in your diary - The Necklace. You should also open your inventory, because two items have been added to your list - a Receptacle, the capacity of a hinu and a Necklace. Exit the museum.
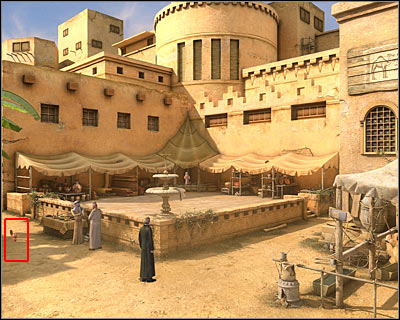
Start off by going back to Mustapha, so you'll have to choose a passageway located near the camels. Open your inventory and show your newly acquired knife to Mustapha. You will have to choose new topics from the list - 'Knife' and 'House'. As a result, you will find out that this knife probably belongs to a Turk, chief of the local gang of thieves. End the conversation and go back to the main square. Now you will have to go to your left (screen). This is going to be your first time you've visited that location, so you shouldn't have any problems finding the correct passageway.
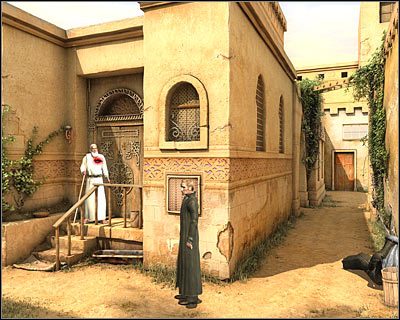
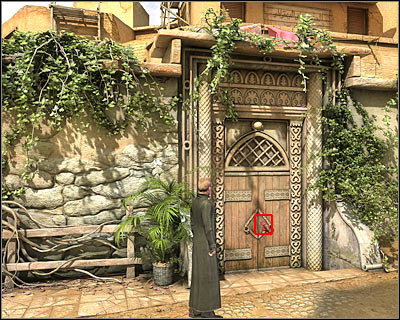
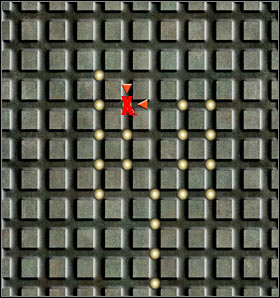
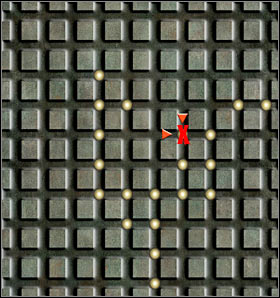
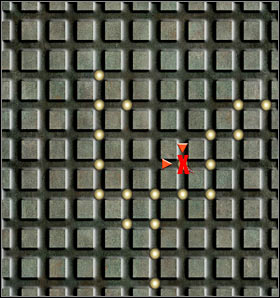
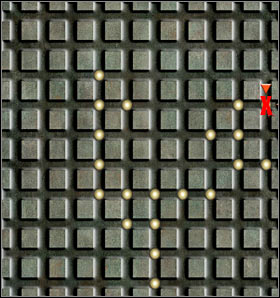
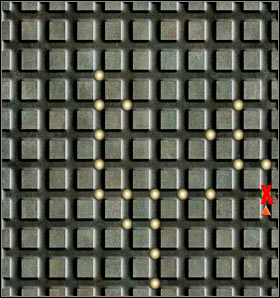
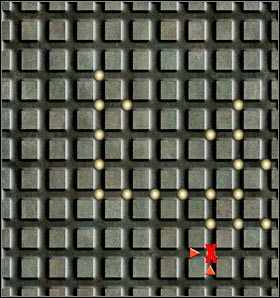
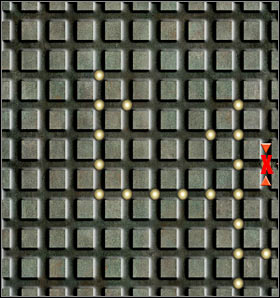
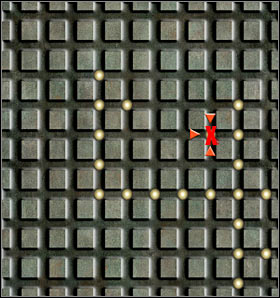
Once you've arrived at the new area, proceed towards a large house located in the background. Click on the door and you'll find out that it's locked. Now you will have to click on a lock (screen) in order to initiate a new puzzle. It's going to be a tricky challenge, so you should consider following my instructions closely. Take your time to familiarize yourself with the controls. Note that each time you hover over a ball, you are presented with a few possibilities to move it. Also, sometimes you're going to have to move more than one ball. Use a small red button whenever you need to reset this puzzle.
The result of the puzzle is seen next to the reset button and your objective will be to create an ideal copy. Here are the steps you have to take in order to prevail:
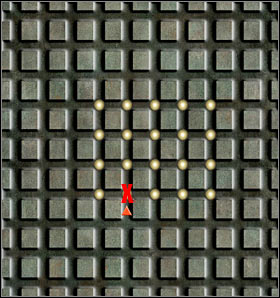
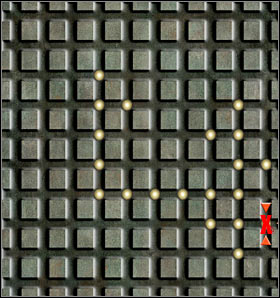
1) Hover over X and move the ball upwards. Three other balls are going to be moved as well.
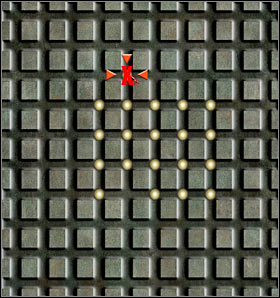
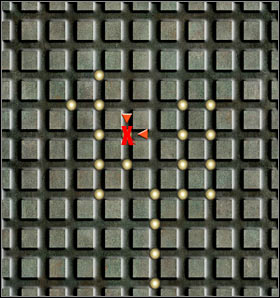
2) Hover over X and move the ball to your left.
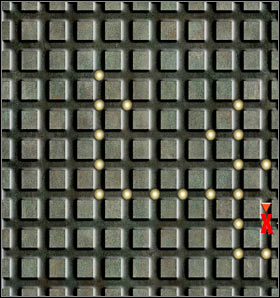
3) Hover over X and move the ball downwards three times. . Three other balls are going to be moved as well.
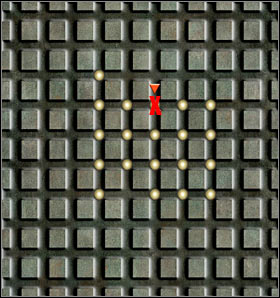
4) Hover over X and move the ball to your left. One other ball is going to be moved as well.
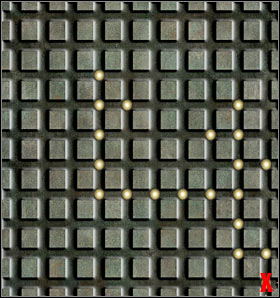
5) Hover over X and move the ball downwards two times. One other ball is going to be moved as well.
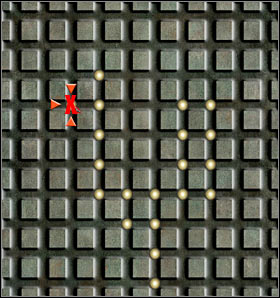
6) Hover over X and move the ball to your right. One other ball is going to be moved as well.
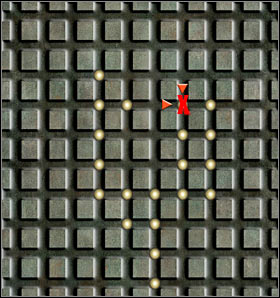
7) Hover over X and move the ball to your right twice. One other ball is going to be moved as well.
8) Hover over X and move the ball to your right. One other ball is going to be moved as well.
9) Hover over X and move the ball to your right twice. One other ball is going to be moved as well.
10) Hover over X and move the ball downwards twice. The first action will move only one ball, however the other one will move two balls.
11) Hover over X and move the ball to your left.
12) Hover over X and move the ball to your right twice. One other ball is going to be moved as well.
13) Hover over X and move the ball upwards. One other ball is going to be moved as well.
14) Hover over X and move the ball to your right twice.
15) Hover over X and move the ball to your right twice. Two other balls are going to be moved as well.
16) Hover over X and move the ball to your right.
17) Hover over X and move the ball downwards.

18) Hover over X and move the ball to your right. One other ball is going to be moved as well.
19) Hover over X and move the ball downwards. One other ball is going to be moved as well.
20) Hover over X and move the ball to your left.
21) Hover over X and move the ball downwards.
22) Hover over X and move the ball to your right. One other ball is going to be moved as well.
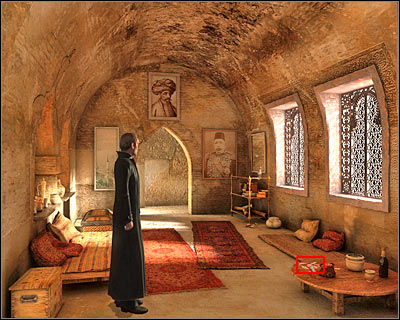
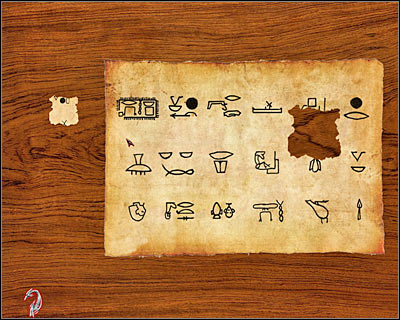
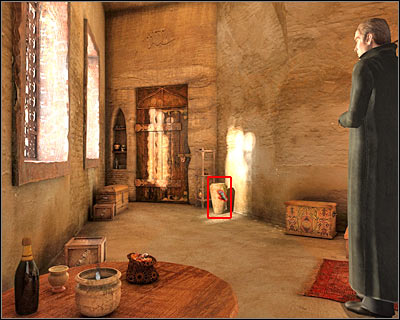
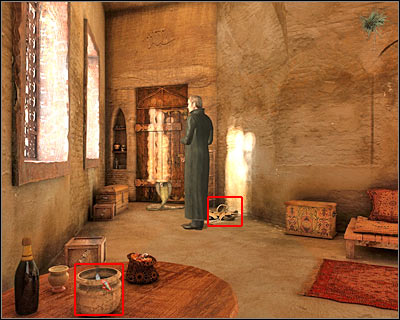
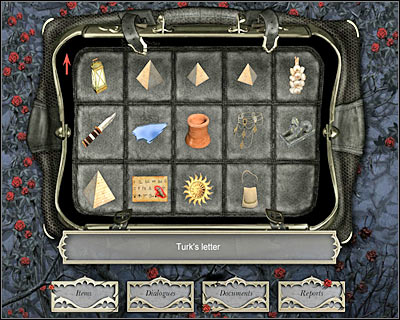
Congratulations! You've solved the puzzle and you're allowed to enter Turk's house. You can do this by clicking on the door. Once inside, take a closer look at the kettle, as well as some jewels. As you've probably noticed, a new report has been added to your diary - The Turk's Bag. Now let's focus on some of the available items. Take an Axe, a Large Pyramid and a Sphinx. Once you've taken the sphinx, you will also be rewarded with a new document - Hieroglyphs of the Black Sphinx. Finally, click on the parchment (screen). This will initiate a new puzzle and it'll be up to you to solve it.
Thankfully, it's going to be a much easier challenge than the lock on the door. Additionally, you can't get "stuck" here if you make some kind of a mistake. Look at my screen for a full solution - that's how the parchment looks like. Here are some clues on how to put the pieces together:
1) First of all, you will have to remember the position of the parchment. It's going to be much wider and you'll have to make some adjustments while putting the pieces together. Also, you won't be given any empty slots, so you'll have to fill in the pieces exactly where they belong.
2) The easiest way to solve this riddle is to start with the corners and some of the edges of the parchment. Leave the middle parts for later. Also, don't forget that you can rotate all the pieces to fit them into the puzzle.
Once you've completed the puzzle, the parchment is going to be added to your diary as Hieroglyphs on a Parchment Found at the Turk's. Head on to the second part of the room. You will have to click on a small vase which is located next to a large door (screen). Get ready to watch a new cut-scene. A deadly cobra will prevent you from reaching your destination.
Obviously you will have to get rid of the cobra somehow, because the snake blocks the entrance to a hidden room. Open your inventory and choose the plants from the tomb. Use curious plants on the kettle (screen) and you'll be rewarded with a new FMV sequence. Click on a destroyed vase, because you can find a Key there. Pick it up and choose it from your inventory right away, because you're going to have to use this key to open the door. Enter a new room.
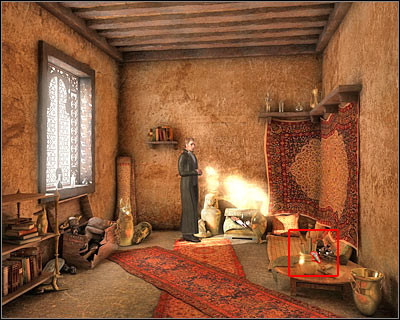
You could take a closer look at some of the stolen goods, however it's optional. It's important that you collect two items. Take a Sachet of gold powder and a Solar disk. Click on a highlighted area on my screen. It's important, because you're going to find two documents there -Letter Found at the Turk's (it's from Count Dracula) and Piece of a Letter Found at the Turk's. Obviously you should spare a few minutes to read both of these letters. You'll also going to be rewarded with a new report - The Turk's Documents. Listen to what Van Helsing has to say about your findings and go back to the museum.
You won't have to approach the assistant by yourself, because a cut-scene is going to be initiated right away. This is going to be an important conversation. You'll learn the name of the thief - Suleiman. Ask the assistant about Coptic Artefacts and you'll be granted access to these objects. As a result, your inventory will expand. Open it and you'll see that you've received a Bag containing the Copts' treasure. Don't close the inventory window just yet. Instead, choose the parchment from Turk's house and show it to the assistant. He will allow you to use his book to translate some of the hieroglyphs. Take this book from his table and wait for the game to display a close-up view of the parchment.
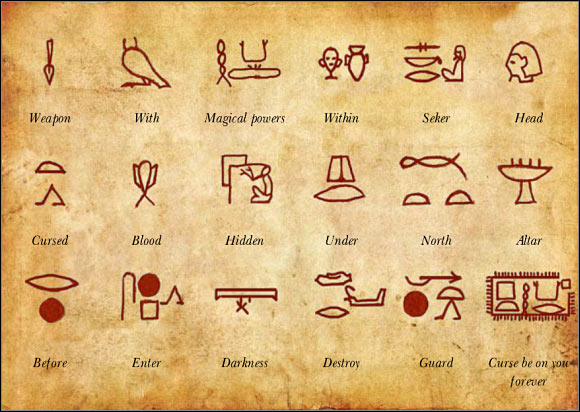
This is by far the most difficult puzzle of the entire game. You will be given only a few hints and your objective will be to translate three sentences. The parchment takes most of the screen and it consists of various symbols. The hints can be found above and under the parchment, however you're going to have a lot of problems understanding their meaning. As for the words, they are to your left and you'll have to start placing them in correct slots.
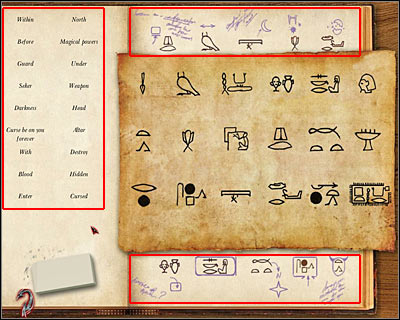
Full solution (I would also recommend taking a look at the screen):
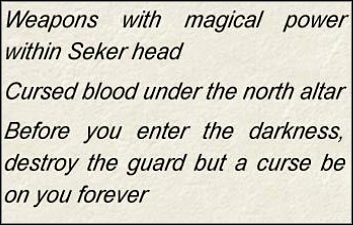
First verse - Weapon, With, Magical Powers, Within, Seker, Head
Second verse - Cursed, Blood, Hidden, Under, North, Altar
Third verse - Before, Enter, Darkness, Destroy, Guard, Curse be on you forever
If you've done everything according to the plan, you are going to be rewarded with a full translation of the hieroglyphs (screen). You will also receive one new document -Translation of Hieroglyphs on a Parchment Found at the Turk's.
Don't exit the museum just yet. Instead, open your inventory and choose a black sphinx which you have found in Turk's house. Talk to the assistant again. Obviously you will have to ask him about the statuette. As a result, you will receive some new info on the hieroglyphs on the sphinx. Before you decide to leave to museum, you should consider performing two other actions. Combine a knife with a necklace and you'll receive a diamond. After that, use the diamond on the broken piece of mirror (screen).
Obviously you will have to choose a path near the camels. Talk to Mustapha along the way and listen to his complaints on being kicked out of his own house. Once this conversation has ended, go to your left and approach Herodotus (screen). Talk to the old man and you'll find out that you'll have to obtain pure water, so he'll be able to bless it. Don't forget to ask Herodotus about the sphinx and you'll find out more about the hieroglyphs. Wait for this conversation to end and go back to Mustapha. You should also check your inventory, because you were given one new item - a Host.
I assume that you've already obtained a mirror by using a diamond. Start off by choosing a casserole dish from your inventory. You've collected this item a long time ago, when you were here for the first time. You will have to fill the dish with water (screen).
Open your inventory once again and choose a casserdole dish filled with water. Look at my screen - that's where you'll have to use this item. Two final steps of this riddle will require you to use a mirror on the casserole dish and to combine the mirror with a flask. You may now go back to Herodotus. Give him the flask and wait for him to bless the water. A flask of Holy Water should appear in your inventory. Also, you're going to be transported back to the tomb.
I assume that you still remember when you were here for the first time. You will have to click on a small opening to go back to the crypt, because the main entrance has been sealed off. Enter the tomb and reach the area with the rope (screen). Use the rope to get to an upper level. Go up and turn left at the junction. Click on the door which protects you from entering the main area of the tomb.
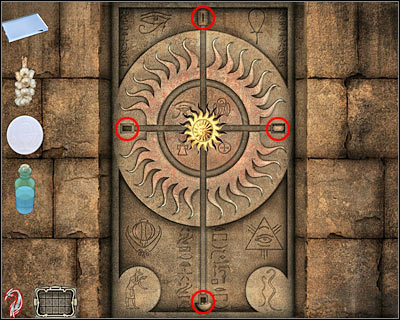
Thankfully, it's going to be extremely easy to solve this riddle, because you know possess all the necessary items. All you have to do is to place them correctly:
disk - central area of the door (screen)
mirror - western branch
garlic - eastern branch
sphere - northern branch
holy water - southern branch
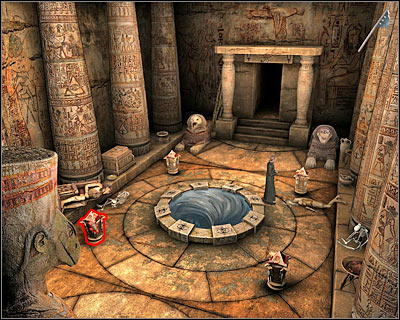
You'll find yourself standing inside a very interesting room with a large object that looks like a portal to an alternate dimension. I would recommend that you follow my instructions and perform all actions carefully. Your first task will be to obtain a weapon. As you probably remember from the first verse of the riddle, you will have to find god Seker. Click on a fallen statue (screen) and when you're unsuccessful, use an axe on it. Pick up a Silver spear tip.

The second verse of the riddle tells about a bloody altar. You can find this object to the left of the portal (screen). Click on it and wait for Van Helsing to get there. There are some hieroglyphs on the altar and you will have to compare them with those from the black sphinx.
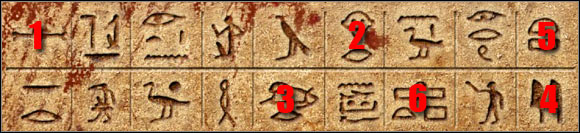
This is going to be a very simple challenge. All you have to do is to compare symbols from your diary with those on the screen. Start by clicking on 1 (screen) and finish the puzzle by clicking on 6. Wait for the altar to turn around, allowing you to collect a sample of the blood. You will have to use Receptacle here.
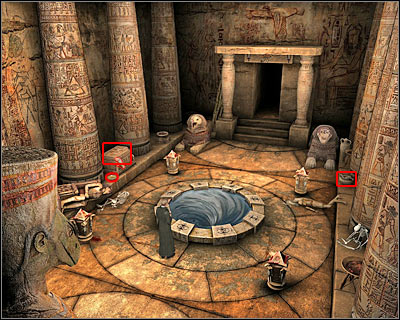
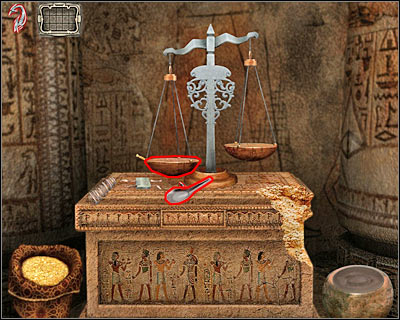
Now you should focus on collecting two other items (screen). Pick up a Bowl and a Copper deben. Once this is done, open your inventory and choose a scale. You will have to place the scale between two pillars seen on your left. Finally, use the bowl on a scale and wait for the game to zoom in the view.
This riddle is going to be more challenging. Your objective here will be to measure some of the visible objects in order to receive proper weight. Make sure that you've read a new entry in your diary - The Golden Deben. You'll find out that you must receive exactly 13,6 units. Now you should take a few seconds to look around. Notice some of the tools near the scale. Also, you can reset this puzzle by clicking on a large button (screen).

I would recommend that you start off by taking weight of three objects - copper debens and the measuring tool. Place the debens on the left side of the scale. Once this is done, pick up a small spoon which can be found among other interactive objects.
You will have to use the spoon to collect some golden powder from the lower left corner of the screen. Start placing the powder on the right side of the scale until both values are equal. Reset the scale each time you've collected new data. You'll find out that:
1) each deben weighs 27,30, so both debens weigh 54,60
2) the measuring tool weighs 41,00
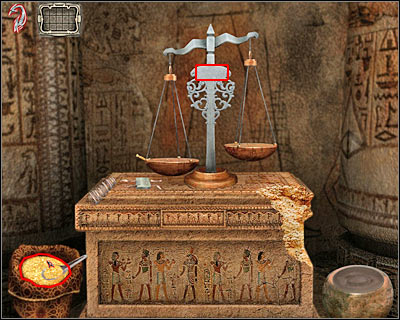
Since you've made all the necessary arrangements, you may proceed with completing this puzzle. Place two copper debens on your left. As for your right, place a tool on the scale. Now you will have to start gathering gold powder until both sides are balanced (screen). As you've probably noticed, a bowl has appeared in the lower right corner of the screen.
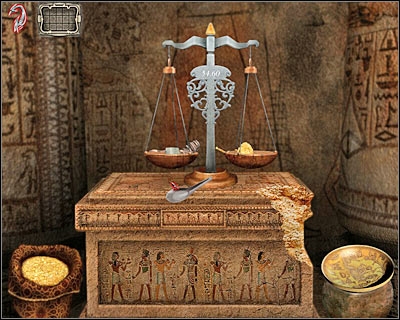
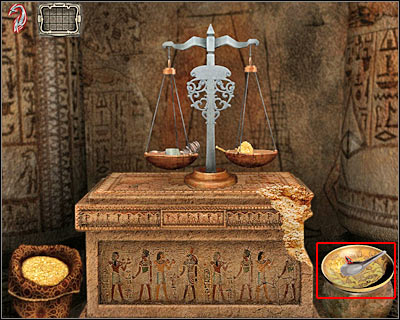
Your final task will be to transfer the golden powder from the scale to the bowl (screen). You will have to perform this task three times. This will allow you to receive a value of 13,60 units. You should hear Van Helsing saying that he's done it. Wait for the game to transport you back to the main view. You will also receive a new item - Gold Deben.
Open your inventory and start off by choosing your newly acquired gold deben. You will have to use this object on the main portal (screen). Once this is done, open the inventory again. This time you'll have to choose blood. Use the bowl on the portal and you'll notice that it has changed to sand. Listen to what Van Helsing has to say about this discovery.
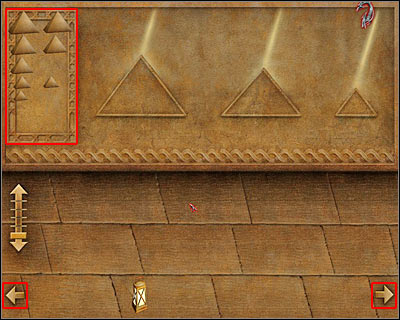
Open your inventory and choose a lantern. Use the lamp on the left column and wait for the game to zoom in on that location. Now you'll have to participate in a new challenge. The objective of this riddle will be to choose correct pyramids from your inventory. Take your time to familiarize yourself with the objects on the screen. The pyramids you were able to collect can be found to your left. You should also notice a lantern in the bottom of the screen. You'll use arrow buttons to move it. For now it should remain where it was when you've started this puzzle.
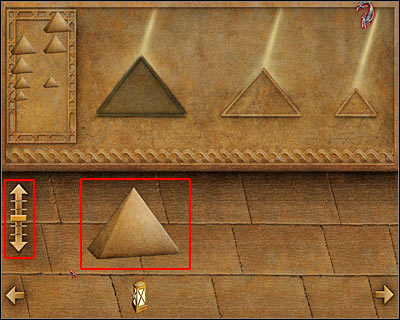
Start off by choosing a large pyramid from your inventory. Place the pyramid above the lantern (screen). As you've probably noticed, a shadow has appeared above the upper pyramid. You will have to adjust the location of your pyramid by using the left control bar (screen).
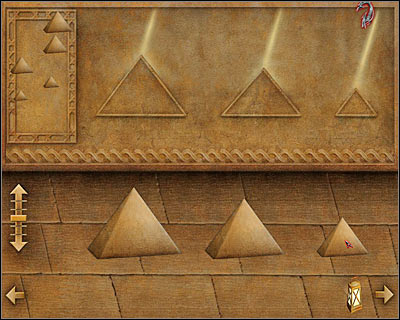
Use both arrows to place your first pyramid in a correct spot. Once this is done, choose a standard pyramid from the left list. Place it to the right of the first pyramid (the large one). You will also have to move the lantern to that location. If the shadow doesn't fit, try choosing another pyramid from this category. Don't use the bar to move the shadow, because you would have ruined the whole thing. Finally, choose a small pyramid and place it in a correct spot (screen). If you've done everything correctly, you will be allowed to proceed further.
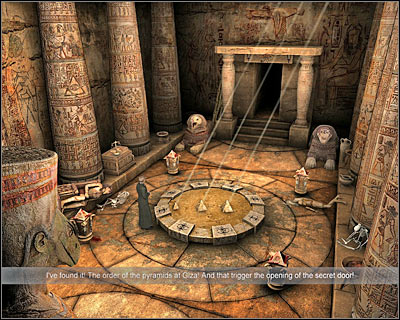
If you take a peek in your inventory, you should notice that you've been left out with only three correct pyramids. Your next task will be to place them on the sand (that's where you saw a portal earlier). The large pyramid must be placed to your right, the standard one in the middle, and the small one to your left. Look at my screen for confirmation. You are going to be rewarded with a short cut-scene, showing you that a secret passageway is now accessible.
Head on towards the bottom of the screen. Start off by taking a large Metal bar. Once this is done, click on the left passageway and listen to what Van Helsing has to say. Enter the new corridor. A short FMV sequence is going to be displayed on your screen, warning you about the crocodile. You won't be able to pass through, so go back to the main chamber of the tomb.
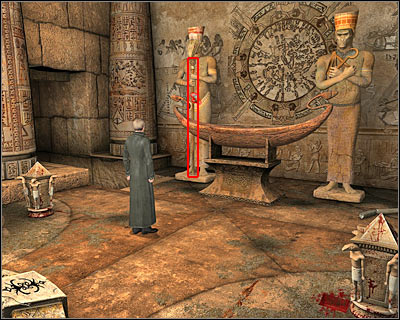
You can take a closer look at some of the nearby statues, however this is optional, so you may as well proceed with the main task. Pick up a Piece of column which can be found next to the right statue. Open the inventory and choose an axe. You will have to use the axe on the left support (screen). Doing this will allow you to place the boat in a correct position.
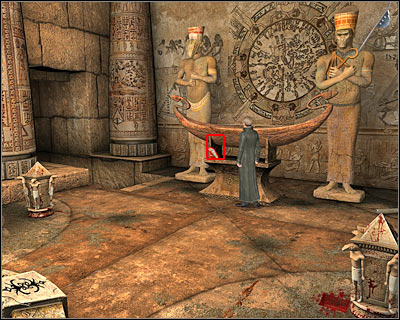
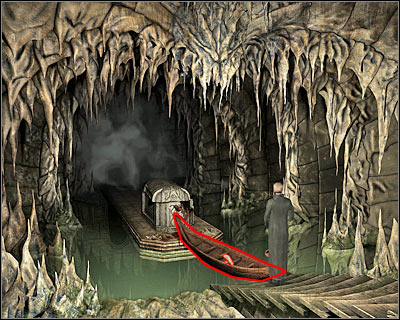
Open your inventory once again. Choose a piece of column and use this object on the boat. After that, choose a metal bar from your inventory. You will have to use this item on the boat as well. Doing this will allow you to push the boat towards the flooded room. Proceed to that area. Click on the boat (screen) and you'll be allowed to approach the sarcophagus without having to worry about the crocodile. Click on the sarcophagus and read a new report - The Mystery of the Temple.
You may proceed to your left. Try clicking on a mysterious mist which blocks the access to the next room. Listen to what Van Helsing has to say about the mist. Open your inventory. Use the axe on the black sphinx. Once this is done, choose the broken sphinx statue from your inventory and use this object on the mist. You will be allowed to enter the final area of the tomb. You will have to perform only one action here. Take the Papyrus by clicking on it. Ignore the warning about an incoming earthquake. Try going back to the previous room and you'll automatically return to the surface. Also, you'll be transported back to Cairo.
Once you've safely returned to Cairo's marketplace, go to your left and try talking to Herodotus. Van Helsing will share his knowledge with the old man (screen). Sadly, Herodotus won't be able to read the symbols from the papyrus. Herodotus will advise you to go to Father Alberto which can be found in Vienna. End this conversation. Go back to Mustapha and talk to him. Van Helsing will give him false information regarding his niece. Once this is done, you will be allowed to travel to Vienna.
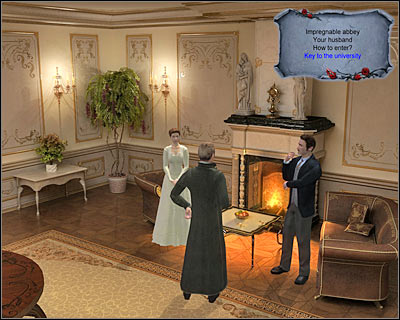
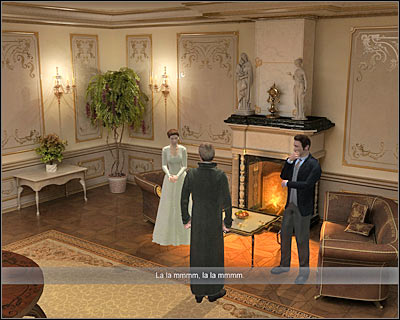
This chapter of the game is going to begin with a long conversation. Seward is here with you, but you can also talk to Madam Orlowski (screen). Here are some updates on your progress:
- Mina seems to be in good health (especially since she ignored taking food for a few days), however her mental state is getting worse.
- Van Helsing wasn't able to gain access to the abbey where Father Alberto currently resides. As a result, he couldn't talk to him about the papyrus.
- Madam Orlowski tells about a secret passage which links the library with the abbey.
- Van Helsing is informed that he'll have to find a key to the library before he'll be allowed to search for the hidden entrance.
Let's get back to work, shall we?
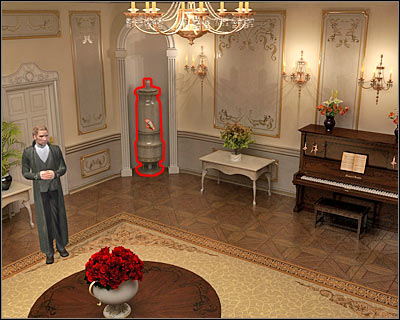
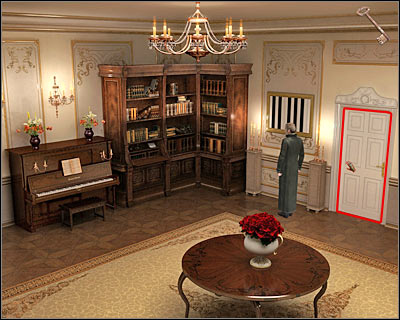
You're standing inside a fairly small room, however you will be allowed to move around to explore it a little. I would recommend that you take your time, especially since you aren't rushed by anyone nor anything. Start off by choosing a passageway located next to Seward. Look at the flowers and try using the left door. Van Helsing decides that it's best not to disturb Mina while she's resting. Click on a small object in the corner of the room (screen). You will notice that there's a safe here, however you can't open it at the moment. Look at the piano which can be found to your right.
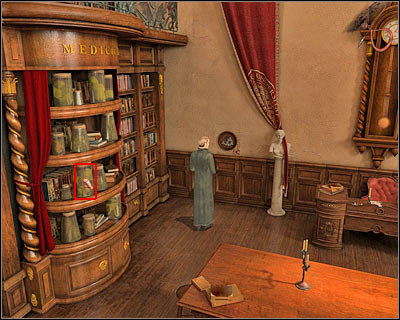
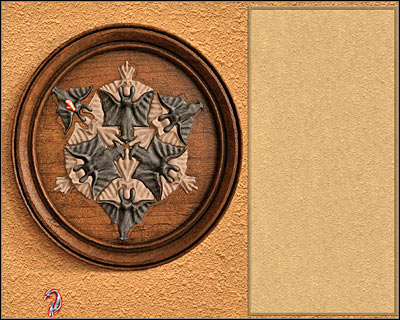
Proceed to your right once again. Take your time to locate all the available hot spots. There's a small chemistry lab here. You should also click on one of the books from the bookshelf (screen), because you are going to be rewarded with a new document - Chemistry Book. There's an interesting painting on the wall. Take a closer look at it and Van Helsing will make a copy of it in your diary - Professor Orlowski's Painting. Try opening the second door. Sadly, you don't have to necessary key.
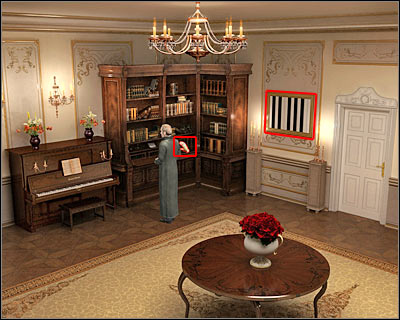
Go to the right and you'll go back to where other characters are standing. Try talking to Madam Orlowski. As soon as you've started this conversation, you'll notice that she's humming some kind of a melody (screen). Obviously you will have to choose some of the new topics from the list. Ask her about the painting, about the strangle melody and about the safe you've encountered before. End this conversation and notice that you've received a new report - Duchess Orlowski's Song. Examine the notes, because this is one of the clues for an upcoming puzzle.
Go back to the piano and click on a small science lab which can be found to the right. You should be able to receive a new report. Open your diary to read it - Chemistry Laboratory. This is going to be a very challenging puzzle. You will have to familiarize yourself with how pianos work. Understanding some of the available clues is equally important here. Take a closer look at the page taken from the chemistry book. There are some vials at the bottom of the screen and you'll be allowed to use litmus papers to conduct experiments. You can also use the reset button if you want to start over.

Your objective will be to recognize some of the substances and associate them with piano keys. It's a tricky challenge, so make sure that you've read this section of the walkthrough very carefully:

1) Click in the lower right corner and pick up a litmus paper. Use the paper on X vial (yellow one). 2 will appear under the vial.
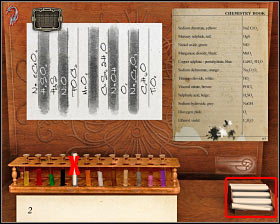
2) Click in the lower right corner and pick up a litmus paper. Use the paper on X vial (blue one). 6 will appear under the vial.

3) Click in the lower right corner and pick up a litmus paper. Use the paper on X vial (green one). 8 will appear under the vial.
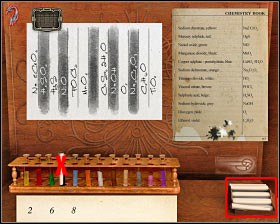
4) Click in the lower right corner and pick up a litmus paper. Use the paper on X vial (black one). 12 will appear under the vial.
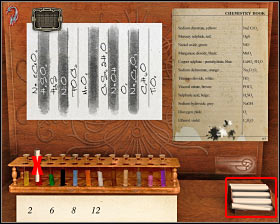
5) Click in the lower right corner and pick up a litmus paper. Use the paper on X vial (red one). 14 will appear under the vial.

6) Click in the lower right corner and pick up a litmus paper. Use the paper on X vial (orange one). 15 will appear under the vial.
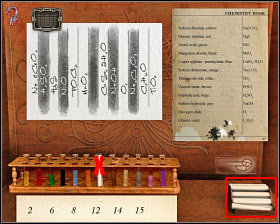
7) Click in the lower right corner and pick up a litmus paper. Use the paper on X vial (white one). 18 will appear under the vial.
Check your diary for a new report - Results of Professor Orlowski's Riddle. As you've probably noticed, this is the combination to the safe - 2, 6, 8, 12, 14, 15, 18. Go back to the safe which can be found near the left door (screen). Before you decide to proceed any further, familiarize yourself with a close-up view of the safe.

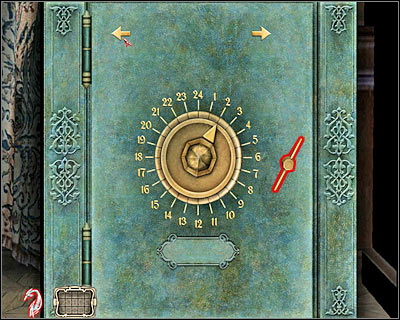
Solving this riddle is going to be extremely easy, because a combination to the safe is already in your possession. Each time you will have to move the pointer using arrow buttons, so it'll face a correct number. Once this is done, use the handle (screen) to input this number. You will have to input 2,6, 8, 12, 14, 15 and 18. Wait for the safe to be opened.
Listen to what Seward has to say about Van Helsing's findings. Click on an open safe and you'll receive a new document which will automatically appear in your diary - Duke Orlowski's Letter. You can also pick up two standard items - a Key and an Angel. Choose the newly acquired key from your inventory and use it on a nearby door (screen).
This section of the library is quite large and you'll be allowed to choose between many different passageways. Thankfully, finding the secret entrance isn't going to take you too long. Start off by moving towards the bottom of the screen and you'll find yourself standing next to a large desk. Examine the jars to your left.
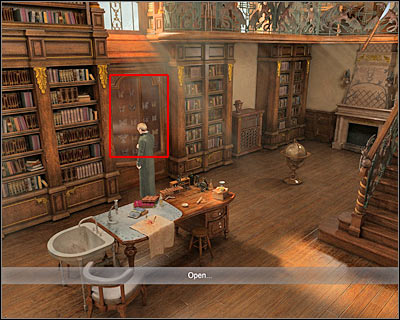
Your first task here will be to click on a red curtain (screen). Doing this will allow you to unravel a new mechanism. Click on it and wait for the game to zoom in the view. You should notice a lot of angel and demon figures. Start dragging them towards the main field. You will have to find a correct slot for each figure. Don't worry, because you can't put a figure in an incorrect slot, so you'll just have to keep clicking until you've succeeded. I would also recommend that you return here each time you've found a new figure. Close this window and go back to the main area of the library.
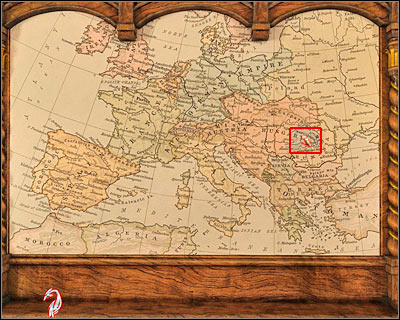
Use the stairs to get to the upper balcony of the library. There's a large map in front of you and you should consider clicking on it. Wait to get a close-up view of the map. Your objective here will be to find Transylvania. Look at my screen for a full solution to this problem. Click on Transylvania and notice that a small part of the map has moved. Pick up a new Angel figure.
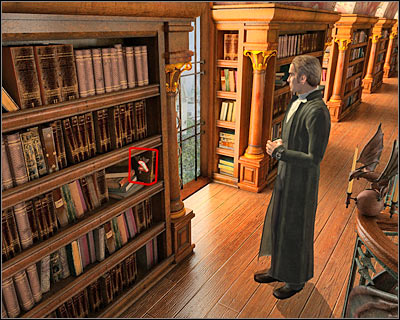
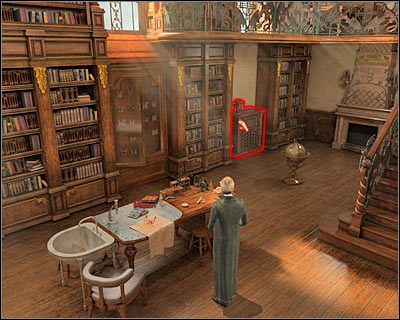
Don't think about going back to the ground level just yet. Instead, proceed to your right. There are a lot of books here, but you may as well ignore them. Click on a single book (screen) and wait for Van Helsing to pick it up. A new document is going to be added to your personal diary - Robert "Bob" Herzog's Work. Also, you will find a new Angel.
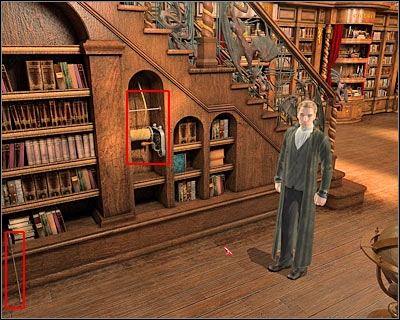
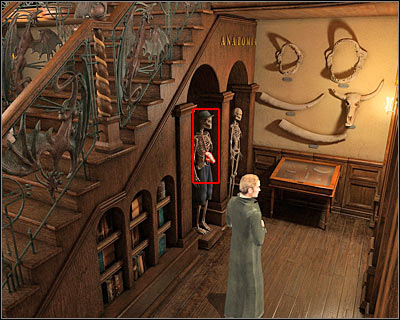
You may finally proceed to the lower level of the library. I would recommend that you start off by choosing a passageway located to the right of the stairs. There are some trophies on the wall, but you may as well ignore them. Instead, click on the left skeleton and you'll be awarded with Braces. Go back to the stairs and this time go to your left.
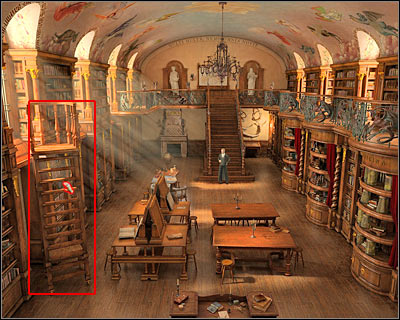
You should start off by collecting some of the available items. Pick up a Paper cutter which can be found on the main table. You'll also come across Dissection tweezers here. Once the paper cutter is in your inventory, choose this object to be your active item. Use the cutter on a display seen in the background (screen). Open the display and pick up a new Angel.
Don't leave this area of the library just yet. Click on the radio which can be found in the background (screen). Wait for the game to zoom in the view on the radio. You should be able to notice an Angel in the upper right corner of the screen. Pick it up and close this window. Finally, choose a passageway located to the left of the stairs (it leads to the fireplace).
You will have to perform two actions here. Use the handwheel (screen) and you'll notice that the chandelier has been lowered a little (you will be rewarded with a short cut-scene). After that, pick up a Poker. You may go back to the main area of the library.
Try clicking on the lowered chandelier and listen to what Van Helsing has to say about this object. Now you will have to click on a Rolling staircase (screen) which you weren't able to interact with before. I guess you might be surprised a little to actually find this object in your inventory. Choose the staircase and use it on the chandelier. As a result, Van Helsing will place the staircase directly under this object.
Now you will have to click on the ladder. This will allow Van Helsing to get closer to the chandelier. You'll be given a chance to have a closer look at this object. All you have to do here is to pick up a new Angel figure (screen). Go back to the ground level.
Go back to the area where you found the puzzle with angels and demons. Open your inventory and choose a poker. Combine this object with the braces taken from the skeleton. Choose this completely new device and click on one of the jars (screen). Once this is done, take tweezers and use them to acquire the final figure from the jar, representing a Demon.
Now you may finally go back to the panel with angels and demons. Since you've got all the figures in your possession, you will have to start placing them in the main field (screen). It shouldn't take you too long, especially since the game will prevent you from placing a figure in an incorrect spot. A passageway will open, granting you access to the abbey.
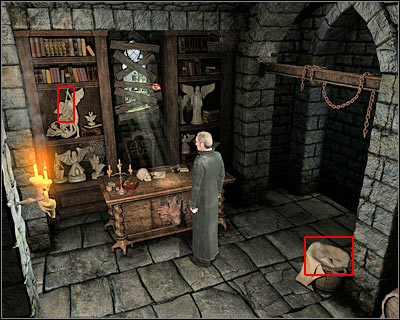
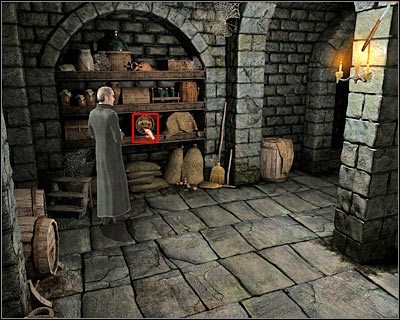
You will find yourself standing inside the cellar of the abbey. You won't have to be in a lot of hurry, so take your time to explore your surroundings. Click on the desk with a dragon head twice and you'll find out that it's locked. Now you will have to pick up two new items - Saint Michael's spear and a Linen cloth.
Take a look at the window if you want to and listen to what Van Helsing has to say about this situation. Open the inventory and choose your newly acquired spear. Use the spear on the head of the dragon (screen). Doing this will allow you to find a safe. Click on the device. As you've probably suspected, you will have to solve a new puzzle.
This is going to be a quite challenging puzzle. Your objective will be light up eight spots located on the outside of the structure. Follow my instructions closely if you don't want to encounter any problems. Each screen shows two areas. 1 is where you'll have to start and 2 is where you should click to confirm your move. Only the last move will force you to perform a single action. Use the button in the middle if you want to reset the puzzle at any point of the game.
Obviously you should take a look at what's inside the locker. Pick up two objects - a Key and a Chalice. You may now proceed to the bottom of the screen and you'll end up standing in a new area of the cellar. Open your inventory and activate the paper cutter collected in the library. Use the cutter on one of the barrels (screen). Ignore the fact that a lot of wine has been spilled all over the floor. Take a Broomstick while you're at it.
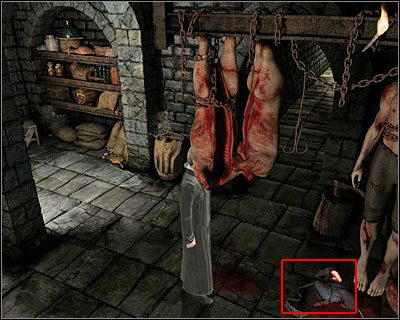
You may proceed to your right. Notice the body hanging on your right. This is a clue that evil is present in the monastery. Try inspecting the area below the body. Sadly, you won't be able to scare off the rats. Open your inventory. Combine the linen cloth with the broomstick and you'll receive a torch. Use the matches on the torch and choose this object to be your active item. Use the torch on the rats (screen) and you'll scare them away. Examine the bag and you'll find some Holy water.
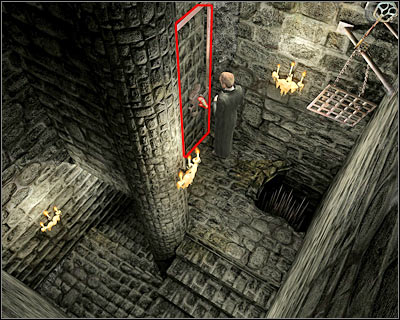
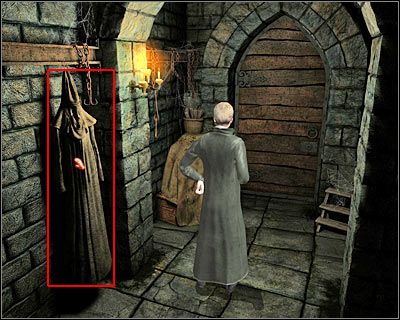
Now you will have to go to a nearby corridor and eventually you'll end up standing in front of a closed door. You won't have to examine the door. Instead, pick up Monk's robe. As you've probably noticed, Van Helsing has decided to put on the robe right away. You may go back to the area where you've spilled some wine.
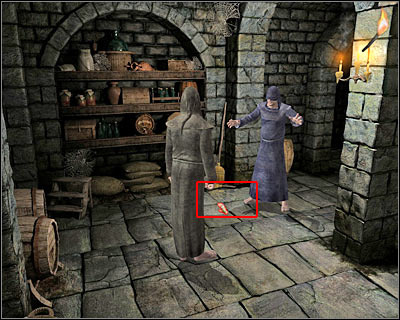
Once you've arrived at the cellar, a new cut-scene is going to be displayed on your screen. One of possessed monks will arrive here, preventing you from going back to the large door. Choose a torch from your inventory and use it on spilled wine (screen). Watch a funny cut-scene. Inspect monk's ashes and you'll find a new Key. Take this item and go back to the large gate. Use the key to open this door and enter a new area of the monastery.
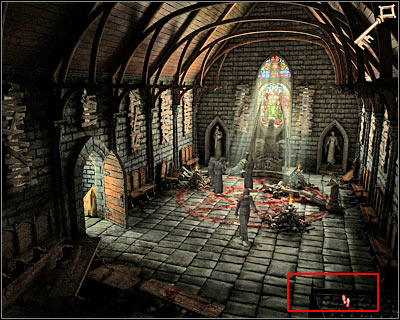
You'll arrive near the main altar. As you've noticed, other monk's have been possessed as well and they've currently worshipping some demonic creature. Thankfully, you won't have to worry about getting caught, so you may as well approach the altar and observe what they're doing. Once you're done, head over to your right (screen).
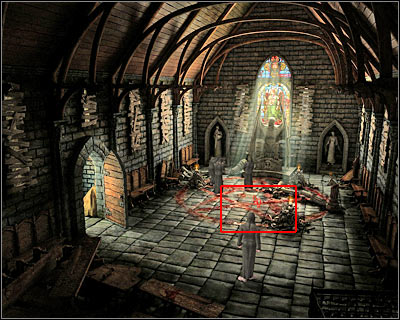
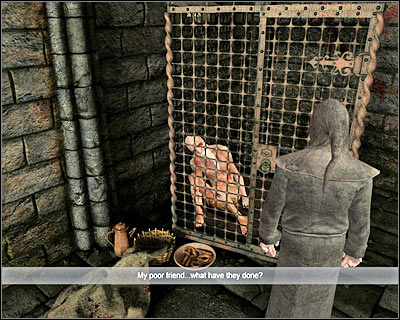
You will come across a large cage here and you'll notice that Father Alberto is being held by other monks. Try talking to the old man, however you won't be allowed to obtain any information. You will have to deal with the monks in the first place, so go back to the altar and try clicking on the pentagram (screen) to get closer to them.
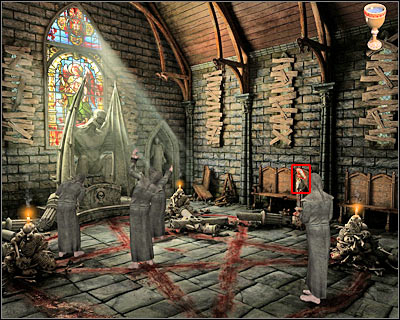
As you've probably noticed by now, one of the possessed monks is using a chalice to drink blood. You will have to use this to your advantage. Open the inventory. Combine holy water with a chalice which you have found inside the locker. Choose the chalice with water from your inventory and switch it with an object used by the monk (screen).
Go back to the previous screen and wait for the monk to drink from the new chalice. The man is going to die and other monks will... um... well, they will start feeding on him. ;-) Go back to Father Alberto. Thankfully, this time you'll be allowed to talk to him (screen). Alberto will reveal that he lost his eyes during the torture, so he won't able to translate the papyrus for you. Instead, you'll find out that you'll be able to defeat Dracula only on his own soil.
Choose a key from your inventory (the one from the locker). You won't be able to free Father Alberto. Instead, you will have to click on a large gate which can be found to your right (screen). Van Helsing will automatically escape from the abbey. Once he's returned to the manor, he will find out that Mina's missing. Van Helsing decides to travel to Transylvania!
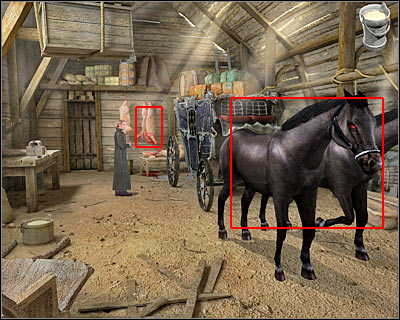
I guess you won't be surprised by the fact that you'll be presented with a new cut-scene while trying to get to Transylvania. It appears that Seward is very sick, so he won't be able to help you to defeat Count Dracula (not a big surprise :-)). You'll start this final chapter of the game standing in front of a small tavern. Talk to Seward (screen) and you'll automatically enter this building. Talk to your sick colleague once again. Van Helsing decides to leave Seward here and to defeat the monster on his own.
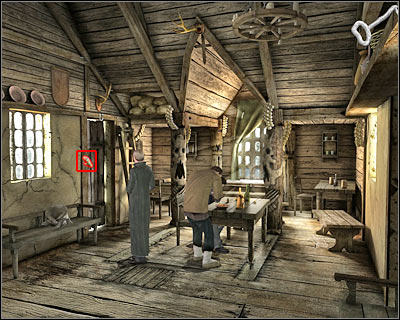
Obviously you should consider talking to the owner of the inn, a man called Abraham du Varmin. Sadly, Van Helsing won't receive any new intel on Mina's whereabouts. Go back to Seward and examine the small table. Pick up a few items - a Spoon and a Silver paper. Now you will have to click on a small bowl (screen). Two additional items will be added to your inventory - Straight pretzel and Round pretzel.
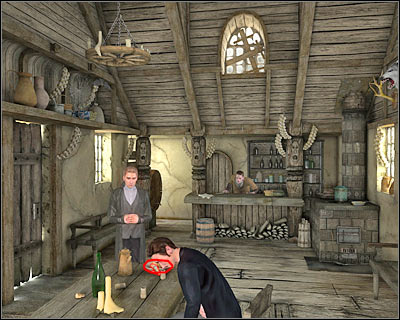
Try picking up a small document which can be found to the left of the owner of the inn (screen). Sadly, you won't be allowed to examine it. Choose a passageway located near Seward. Try picking up a key and opening a door - no luck. Seward's condition is going to get worse in the meantime. This will trigger a new conversation.
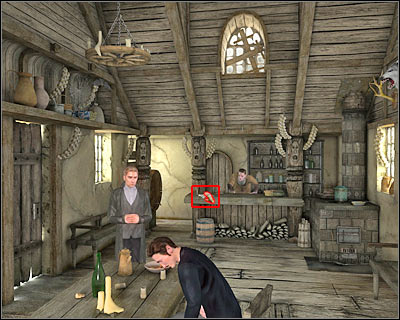
You will have to talk to the owner of the tavern again. This time Van Helsing is going to ask him to bring some kind of a remedy for Seward (you will have to choose a new topic from the list). As you've noticed, Abraham has left the tavern for a short while. This will allow you to pick up a document which you couldn't examine before. You'll gain possession of Extract from Harker's Journal. Get ready for some shocking news - Harker has been turned into a vampire. The extract also says that you can find information on how to kill Dracula in his diary. Close this window and you'll receive a new report - The Documents from Garroten's Tavern.
Varmin should be back in a few seconds and he'll bring a remedy for Seward. Van Helsing will automatically ask his colleague to distract the owner of the tavern. Choose a spoon from your inventory and use it on one of the benches (screen). You'll gain possession of a Sticky substance. Also, you will have to take Wild boar's molar which can be found to the left of Varmin.
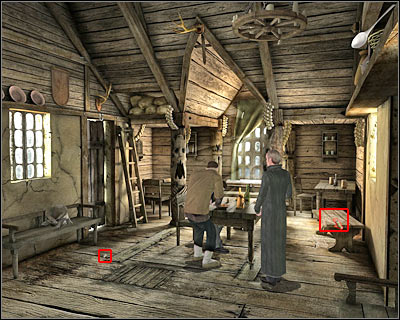
Open your inventory and get ready to mix a few items in order to create a false key. Start off by choosing a sticky substance from the spoon. Use the substance on the silver paper. Now you must combine the silver paper with three other items - wild boar's molar and two pretzles. Also, combine two pretzles together in order to receive a larger one. Finally, mix a large pretzel with wild boar's molar (screen). You'll end up having something that looks like a key.
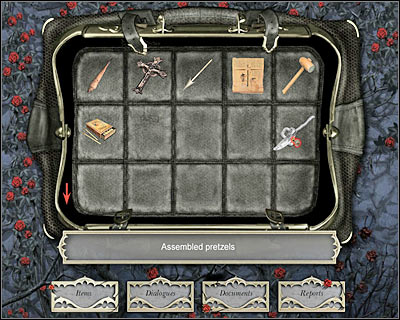
Choose the sticky key from your inventory and click on the original to make the exchange (screen). You'll end up having a Stable key in your possession. Go back to Abraham and talk to him. Van Helsing will persuade the owner of the tavern to leave for a few seconds. Use the key to gain access to the stables area and go there right away.
Start off by taking closer look at the chunks of meat. Examine Count Dracula's horses if you want to and notice their red eyes. Listen to what Van Helsing has to say about the stage-coach. Click on the coach and wait for the camera to change its position. Examine the coach more closely, as well as the barrel on top of it (screen). Van Helsing will say that he could fit inside, however he would have to get rid of the substance from the barrel in the first place. Notice a drain in the lower left corner of the screen.
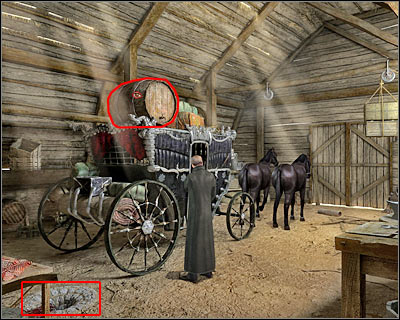
Go back to the main view of the stables area and proceed towards the left table. Pick up an Empty bucket and use this object on a bucket filled with oat. That's not all. Use the bucket with oat on the blood dripping from the meat (screen). Once you've gained possession of this new mixture, use the bucket on the horses by clicking on the left horse (screen). You'll be allowed to calm the animals down.
Click on a passageway located near the horses. You weren't able to get here before, but since the horses have calmed down, now's your chance. There are a lot of important items here (screen) and you must start picking them up. Take a Beaver carcass, a Chest, a Funnel, a Trough and a Tube. You can also inspect the main gate. Once this is all done, go back to the stage-coach.
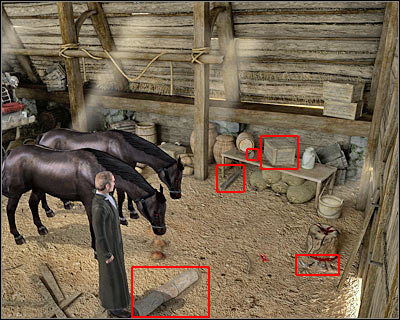
Get closer to the stage-coach. You will have to construct a drain for the substance from the barrel. Remember that you can't spill it on the ground, because the coachman would have noticed that. Choose the crate from your inventory and use it near one of the wheels (screen). Now you'll have to start using other items. The correct order is (from the bottom): tube, chest, trough, beaver carcass and funnel. Look at my screen for confirmation.
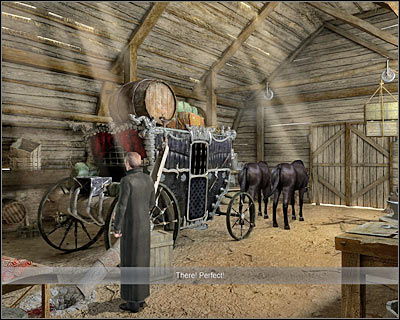
There's only one more thing for you to do here. Click on the valve (screen) and wait for the substance to pour itself down the drain. Van Helsing will make a short statement. Click on one of the objects and he'll automatically disassemble the whole structure. Thankfully, our main hero will hide inside the barrel without your help. It's time to visit Count Dracula's castle.
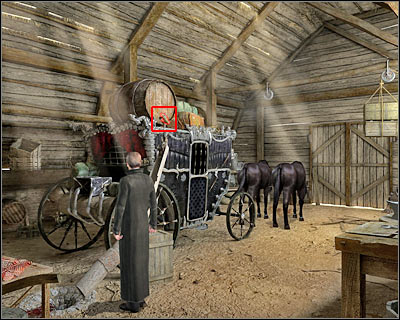
Once you've arrived at Count Dracula's castle, listen to what Van Helsing has to say. Your first task here will be to get rid of the coachman, because only then you'll be allowed to explore the main areas of the castle. Start off by picking up a large Leghold trap. Ignore the bucket filled blood for the time being and proceed to your right. You will come across a door here. Sadly, you aren't allowed to enter the castle at the moment.
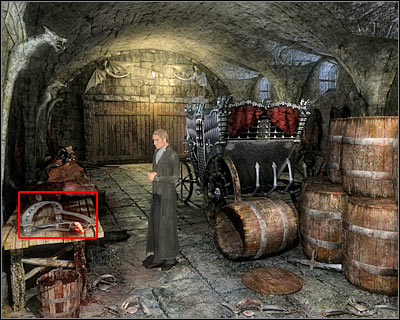
You can take a closer look at some of the trophies if you want to, however it's optional and you wouldn't anything of interest there. You will have to pick up a Vase. Also, you should come across two Ropes. They can be found to your left (screen). You will probably notice that these objects will occupy different slots. Choose one of the ropes from your inventory.
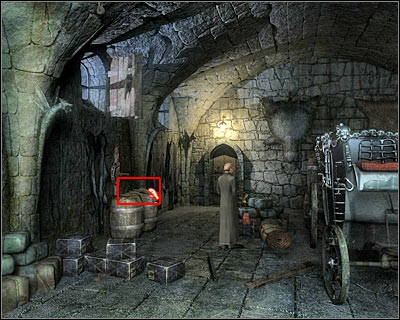
Your task here will be to use the rope on a hook which can be found near the ceiling. It's difficult to spot, so you should use my screen to find it. Thankfully, the rope is going to be attached automatically. Now you will have to choose a trap from your inventory. Use this item on the hanging rope and Van Helsing will automatically combine those together. Choose a second rope from your inventory and use it on the trap on the floor. Go to your right.
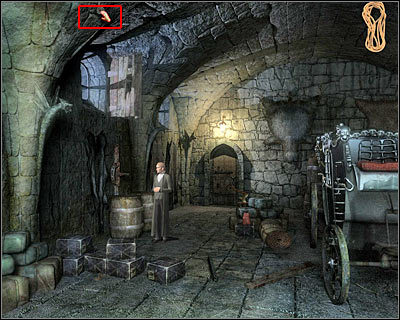
Start off by picking up two Meat hooks. These objects can be found in the lower right corner of the screen. Just as before, they will occupy different slots in your inventory. Click on the second hook (screen) and Van Helsing will automatically attach the second rope to it. Now you should click on a small table located near the carriage. Wait for the game to zoom in the view on the table.
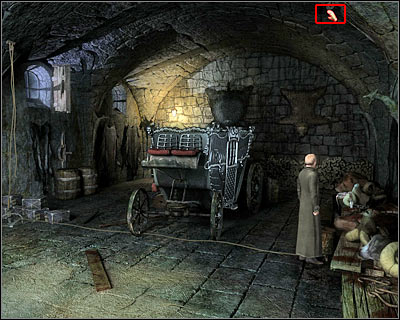
You will have to solve a simple puzzle here. Your task will be to neutralize two traps. Meat hook icons are located at the bottom of the screen. Use them to disable both traps (screen). Doing this will allow you to pick up a Dead rat. Close this window, because you won't find any other items of interest here.
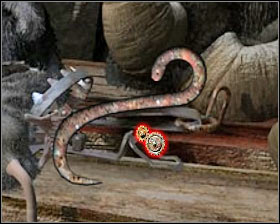
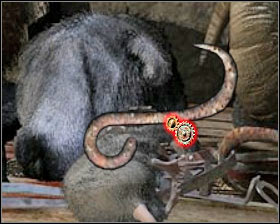
Choose the dead rat from your inventory and head back to your left. Place the rat near the leghold trap (screen). Once this is done, go back to the right and hide behind the coach. If you've done everything according to the plan, you are going to be rewarded with a new cut-scene. The coachman tries to take the rat, but he ends up getting trapped by Van Helsing. Once the cut-scene has ended, talk to the coachman and ask him about Mina. You'll find out that Mina and Dracula are being protected by a woman with black hair. Talk to the coachman once again and you'll notice that he's hungry.
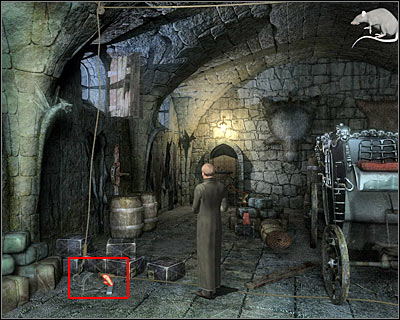
You may pick up an Axe which was being carried by the coachman. Open your inventory and choose the arrow for the crossbow. Use the arrow on a red object (screen). You will find a jar here and obviously you will have to pick it up. A new item will appear in your inventory - Jam pot. Choose the pot for your active item and give it to the coachman.
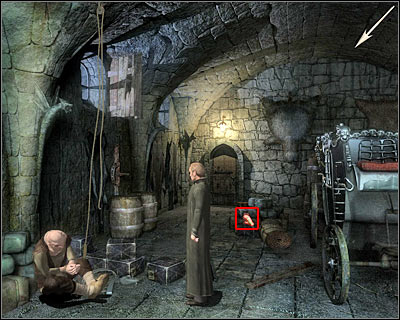
Head over to your right - this is where you've started exploring Dracula's castle. Choose the vase from your inventory (you've collected this item a few minutes ago). Use the vase on the bucket filled with blood (screen), so you'll be allowed to take a sample with you. Go back to your right and use the door to leave the stables. You'll finally enter the main area of the castle.
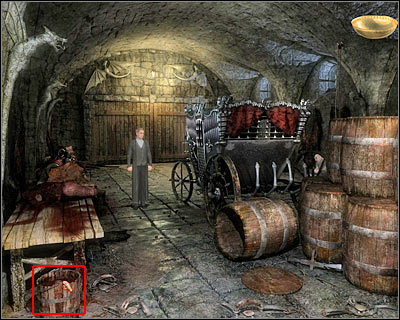
You'll end up standing inside a large empty room. I wouldn't recommend leaving this area just yet. There are two interactive items here and it'll be up to you to find and collect them. Pick up a Fur coat and a Golden thread curtain cord. There are two doors here. Start off by choosing the door in the middle (screen). You'll find yourself standing in a dark corridor with a large metal gate. Ignore the gate and focus on a small panel. Click on it and get ready to solve a new puzzle.
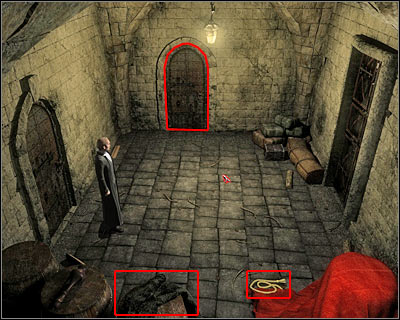
This puzzle consists of a very large number interactive elements, so I'd strongly recommend that you take your time to familiarize yourself with the board. Follow my instructions to avoid any unwanted problems. Take a look at the upper bar (screen) which contains four objects. Each time you hover a mouse over an object, it will reveal part of the puzzle. Notice that these elements are identical to objects from Dracula's picture (left side of the screen).
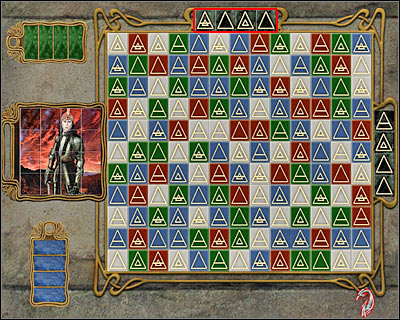
You will have to memorize all four pictures from the upper bar and delete them from Dracula's picture (screen) by clicking in the right places. You should end up having a picture with four slots missing from it. Compare your result with my screen - you must be very precise here and you aren't allowed to make any mistakes.
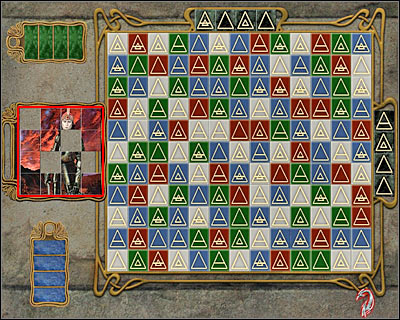
Click and hold over a small handle to the left of the picture. This will allow you to move the entire picture to the central board. Your objective will be to place the picture, so that the icons under the holes correspond to objects from the upper bar. Check my screen for a complete solution to this problem. Also, you should know that you won't be allowed to choose any other areas of the board. This is the only possible solution to this part of the puzzle.
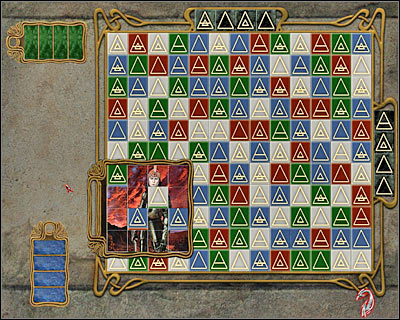
Your final task here will be to change colors, based on what you've received from the board. The bar you will now have to modify is located in the upper left corner of the screen. All fields are green, however it's your job to change their appearance. The correct combination is (starting from the left); green, white, blue, blue. Don't worry if you don't hear a standard confirmation sound by Van Helsing, because you've only completed a half of this puzzle. Drag the picture to its original position and fill all the holes again by clicking on them.
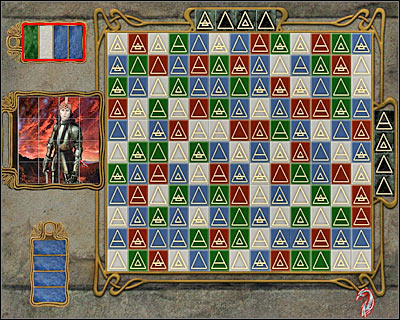
The second part of the puzzle is going to be very similar to the first one, however this time you'll have to focus on examining the side bar (screen). Just as before, you will have to take a look at each symbol and delete a slot from Dracula's picture. Compare your result with mine.
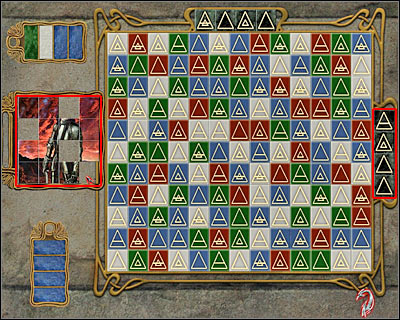
Once you've made four holes, drag the picture to the central area of the board (screen). I'm sure that you know what your next step is - analyze the colors and modify the bar found in the bottom left corner of the screen. The correct combination is (starting from the top): green, white, red, white. You will finally receive a confirmation that you've succeeded and you'll be allowed to move forward, because the gate has been raised.

Enter the new area of the castle. You'll find yourself standing inside a fairly large crypt. You should notice five coffins here and obviously you'll have to examine all of them. I would recommend moving counter-clockwise, starting with the nearest coffin (screen). Wait for the game to zoom in on the coffin. Read the inscription (Moana) and memorize the numbers (12176).
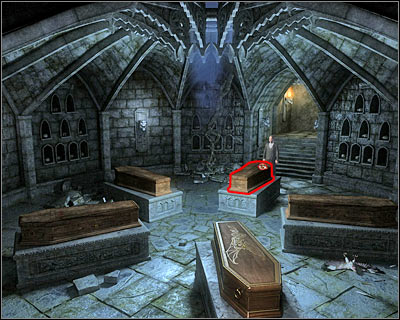
Once you've examined the top of this coffin, try opening it. You will notice a vampire inside (Moana). A new report is going to be added to your personal diary- Moana. Go left and inspect the second coffin. It's going to be empty, however you may decide to open it just to be certain of that. Proceed to the third coffin. Just as before, you will be presented with a close-up view. This will allow you to read an inscription (Illona) and memorize new numbers (8954).
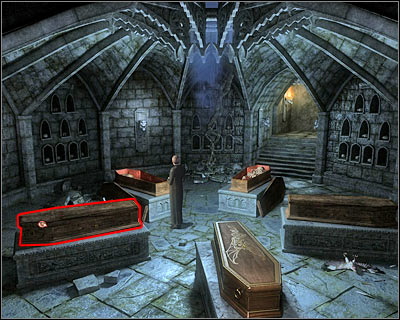
Open the third coffin and you'll notice a body of Illona. Once again, you will receive a new report. This time you'll receive some information on Illona. Try clicking on the fourth coffin and Van Helsing will say that it probably belongs to Dracula himself. Check a new report in your diary -Count Dracula's Castle. As you've probably suspected, you will have to destroy this coffin. Choose an axe from your inventory and use it on the coffin. Examine the body of a dead bird while you're there.
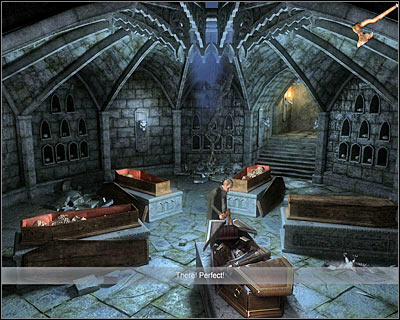
You may proceed towards the final fifth coffin. Open it and you'll see a familiar face - it's Harker! If you've been reading documents in the past, it shouldn't come as a surprise to you that he's been turned into a vampire. Start off by picking up some of the documents. Take Harker's Journal, as well as book on Myths and Legends from the First Order of Knights. Obviously you should consider reading both documents, especially since they are fairly short. I wouldn't recommend ignoring them, because you'll find out a few important things.
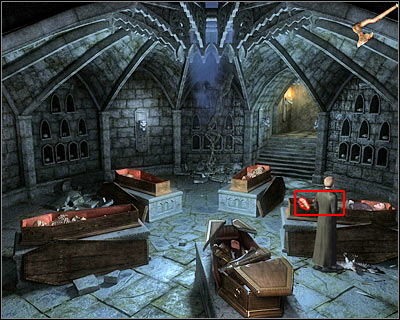
Take Harker's Glasses while you're there. Sadly, you will have to put your friend out of misery by dealing with him the same way you would have dealt with any other vampire. Open your inventory. Combine a hammer with a stake (screen). Choose the new item and click on Harker's body to kill him (cut-scene). You can't perform any other actions here, so you may as well go back to the entrance to the castle.
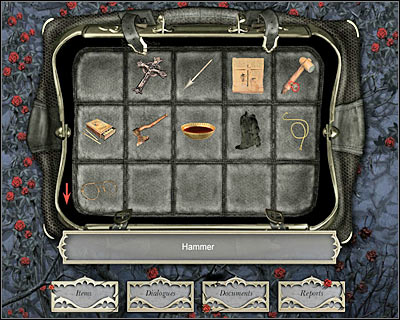
As you probably member, you haven't clicked on the right door, so that's where you'll have to go. You'll end up standing in a very large hall. There are two paintings to your right (screen). One of them shows Illona (click on the painting and on its description) and the second one is a portrait of Count Dracula himself. Choose the left passageway, so you'll get closer to a second group of paintings.
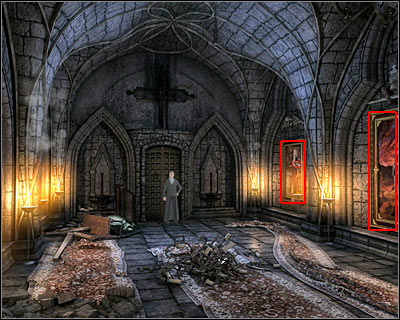
There's a small painting on the ground (screen). Examine it and listen to what Van Helsing to say. He'll notice that it's different from the rest, because it has religious references. A new report is going to be added to your personal diary, called Genesis. Click on a large tapestry (screen) and wait to get a close-up view of this masterpiece.
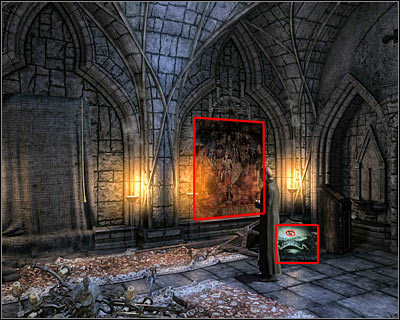
This tapestry shows a group of knights and Count Dracula is among them. You can see him in the middle of the painting. Your objective here will be to find two hot spots on the tapestry. Click on Dracula's shield and on a pink ribbon which is wrapped around the hand of the left knight. Read a new report in your diary (The Large Tapestry) and close this window.

There's a third painting to the left, however you won't be able to see it right away. Click on a small rope in order to pull the curtain. Before you'll look at the picture, notice that the rope has fallen off. Obviously you should pick it up. Thanks to that, you now have two Golden thread curtain cords in your possession. Look at the picture of a young woman.
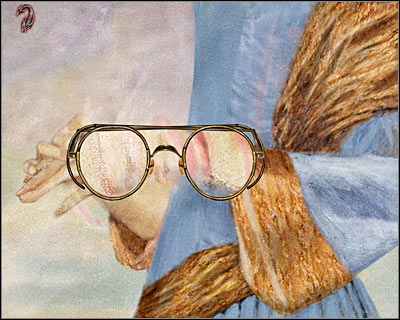
Examine the left hand of the woman and you should notice some scratches. Click there and you'll look at the markings from a smaller distance. Choose the glasses from the bottom bar and drag them over to the pink scratches (screen). Once this is done, press the left mouse button and listen to a short statement made by Van Helsing. Also, a new report is going to be added to your diary -The Painting Behind the Curtains.
Move back to the main hall and try going to your right. You should be able to notice one more painting from here (screen). The girl on the picture is Moana. Just as before, examine the painting and the label underneath it. Listen to what Van Helsing has to say about the connections between women found in the crypt and girls seen in this hall. Additionally, you will receive one new report - Count Dracula's Creatures.
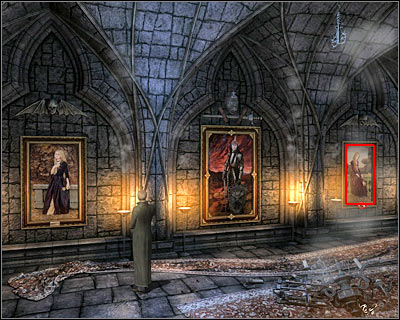
Keep heading right until you've reached an opposite end of the hall. Start off by clicking on the left door (screen). You will be awarded with a very interesting cut-scene. One of Dracula's slaves will prevent you from moving forward. This is the woman Harker was warning you about. I guess you may be a little excited to hear that you'll be allowed to talk to her. Sadly, you won't be allowed to ask her any specific questions. Once the conversation has ended, she will move back to her bedroom and you won't be allowed to follow her without making any preparations. Ignore the main gate (it's locked) and proceed to your right.
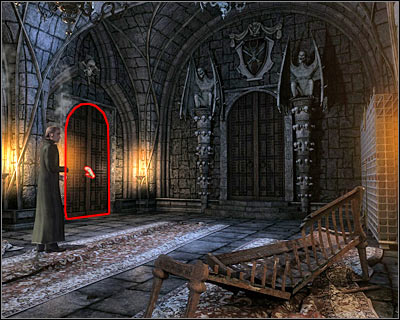
You should end up standing in front of a small armory (screen). Try clicking on the lock. Even though you'll be allowed to examine it, you can't solve this puzzle unless you've collected the necessary data. Close this window and go back to the stables.
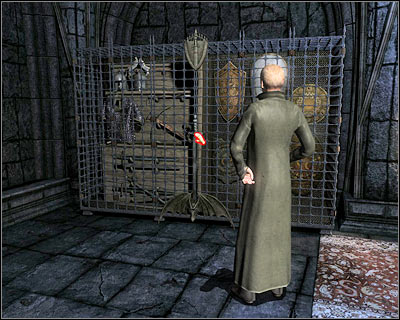
Going back to the stables means you'll have to choose the left door after leaving this hall. Talk to the coachman. Ask him about the Numbers and the Arsenal. It's very important that you listen to his final sentence, because this is a clue on how to figure out the combination. Head back to the armory and click on the lock again.

You can't guess the right combination right away. Like I've already said, you'll have to make some preparations. Here's the solution to this problem:
1) three times the nights with a white moon - Number of nights spent with Illona - 8954 (written on her coffin). You will have to multiply this by three - 26862.
2) two times the nights with a red moon - Number of nights spent with Moana - 12176 (written on her coffin). You will have to multiply this by two - 24352.
3) five times the nights with a black moon - Number of nights spent with Jada - 5777 (she told you that during the conversation). You will have to multiply this by five - 28885.
The coachman also said that you will have add these numbers together: 26682 + 24352 + 28885 = 80099. Input the final number (screen) and you'll be allowed to inspect the armory.
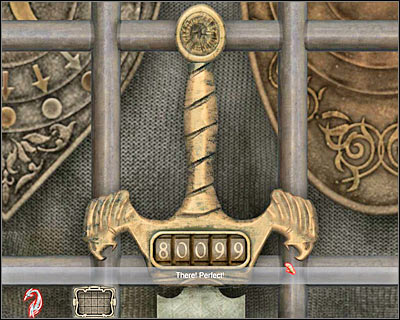
Take two items from the armory - a Coat of mail and a Crossbow without bow string. There are some shields to your right (screen) and obviously you should examine them more carefully. You will receive a new report, regarding the Pelor shield. Your objective will be to find this artefact among other shields and you can use some of the carried documents to get additional clues.
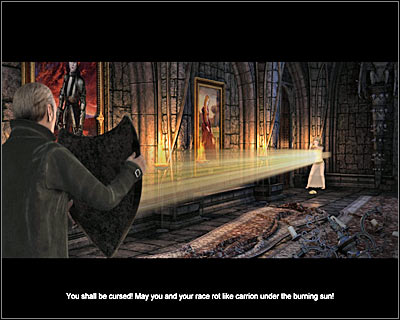
Like I've mentioned before, solving this final riddle of the game will require you to familiarize yourself with a few documents. The shield you're looking for is in the middle of the screen, however you will have to perform a few actions in order to full identify it. Your first task will be to start clicking on two crescents in the middle. Keep doing that until they're facing each other (screen).
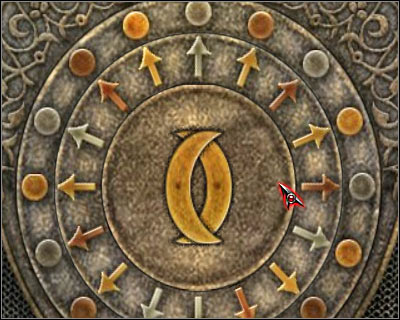
The second step in the identification process is to mess around with some of the circles on the surface of the shield. Click on the largest circle (screen) TWELVE times. Once this is done, click on the inner circle (the one with arrow icons) three times. If you've done everything according to the plan, a new item is going to be added to your inventory - Pelor, legendary shield.
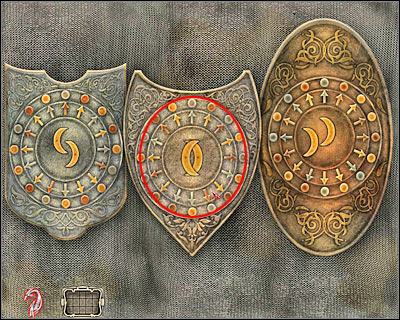
You may exit this area. Go back to the door protected by one of Dracula's mistresses. Open your inventory and choose the bowl filled with blood. Use the blood on the door leading to her bedroom. You'll be rewarded with a very interesting cut-scene. Van Helsing manages to get rid of Jada (screen). Enter her bedroom without any other delays.
Examine the body of a young man. As it turns out, Jada has probably kept him as a slave and drank his blood. Pick up a Grease pot which can be found next to the body. Click on the nearest coffin and listen to what Van Helsing has to say. Follow his instructions and use an axe to destroy this coffin. You will find a few interesting items inside - a document called De Vermis Mysteris - Mysteries of the Worm and a Key. Make sure that you've read the book, because it contains some clues on how to defeat "the prince of darkness".
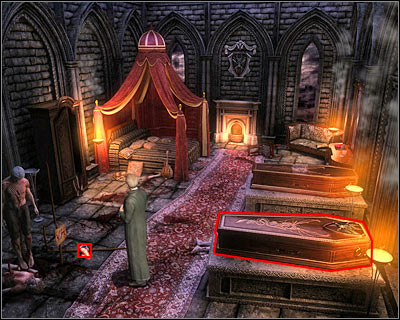
You will have to destroy the second coffin as well, even though you've already killed Jada. Once again, you must you use an axe and click on the coffin. This object will contain only one item. It's going to be a picture of Jada Dahmer before she became a vampire. Now you must choose an arrow for crossbow from your inventory. Use it near a large bed (screen). Combine the string from the mandoline with a crossbow. Thankfully, it won't take too long for you to use this weapon against your greatest foe.
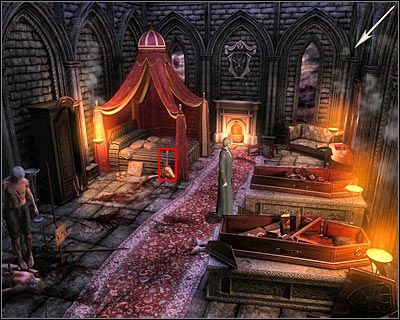
You may leave the bedroom, because you won't find other items here. Open your inventory and choose your newly acquired key. Use the key to open the main gate (screen). Once you've arrived at the new area, you'll notice that Dracula is almost finished with his ritual. Listen to a short statement made by our main hero.
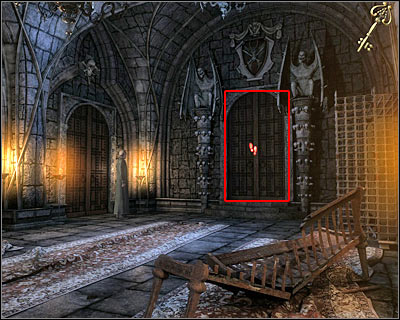
Thankfully, you won't have to worry about Dracula finishing the ritual. You'll have plenty of time to look around and to stop him. Examine a very large bookcase. Notice the metal top of the bookcase. I would also recommend clicking on both knights and the mysterious green mist. Choose a sticky substance from your inventory and use it near the bookcase (screen). Click on the bookcase and Van Helsing will automatically move it to the right. Now you must get closer to the left knight.
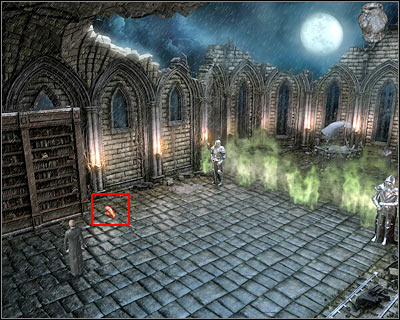
Choose a coat of mail you've collected in the armory. Use this object near the bookcase and a small puddle. The objective of what you're doing is create some kind of a conductor. Open your inventory once again. Combine two curtain cords together. Once this is done, use them near the left foot of the knight.
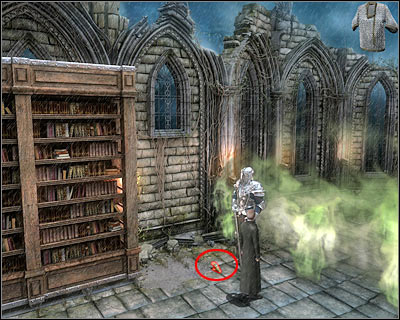
You may proceed to your right. Notice that a small portion of the supernatural barrier has vanished, creating a hole. Sadly, you won't be allowed to approach Dracula right away. Instead, choose a fur coat from your inventory (the one you've found near the stables). Use it near the mist (screen) and Van Helsing will automatically place it on the ground.
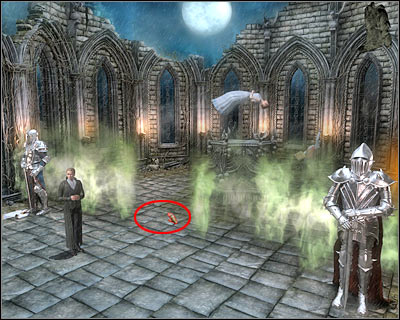
Open your inventory again. This time you will have to choose an arrow and combine this object with the crossbow (screen). Choose this weapon to be your active item and click on the fur coat. That's it... you've just finished the game!
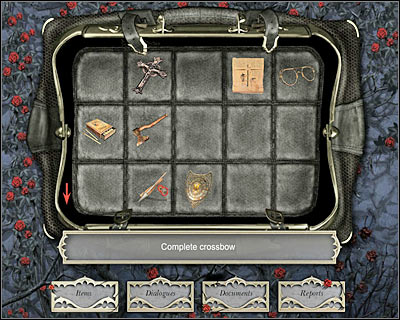
Enjoy the outro. You will be rewarded with two cut-scenes. The first cut-scene takes place inside Dracula's castle...
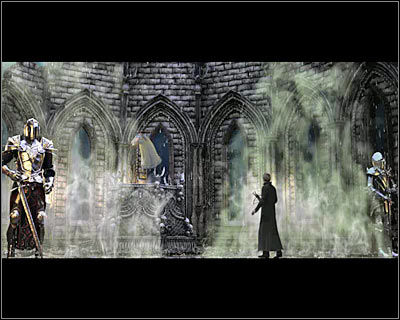
...and then you'll witness a very interesting conversation in Vienna. Surprise! :)
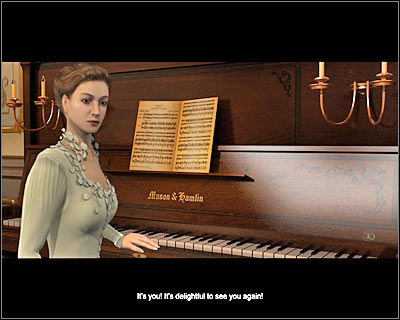

 Dark Souls II Game Guide & Walkthrough
 DARK Game Guide & Walkthrough
 Darksiders II Game Guide & Walkthrough
 Devil May Cry 4 Game Guide & WalkthroughDragon Age II: Legacy Game Guide & Walkthrough