The guide to Call of Duty: Black Ops III is, most of all, a comprehensive walkthrough for the game. Each mission has been described in such way that no player should have trouble with completing it. In addition to the single player campaign walkthrough, the guide also contains the location of collectibles hidden in the game. The secrets have been described with details and many images will help you in finding them. In the guide you will also find advices useful in other game modes, system requirements of the PC version and controls description. Call of Duty: Black Ops III is the direct continuation of the plots started in the previous installments of the series developed by Treyarch studio. The action takes place forty years after the events described in Black Ops II, in a futuristic world in chaos, where the climatic changes, the lack of natural resources and the ideological split of the society are the main problem. In difference to the previous installments, the game has a slightly more open map structure and the possibility to play the campaign in cooperative mode.
Grzegorz "Cyrk0n" Niedziela ()
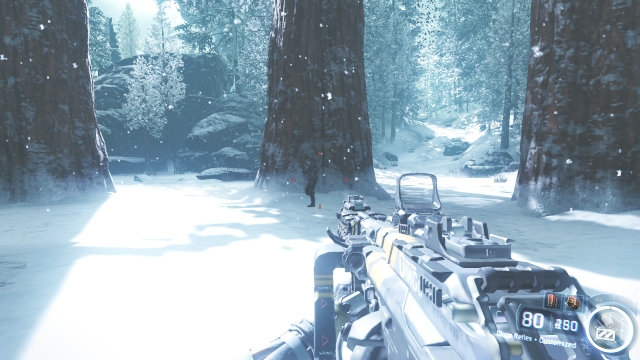
In a manner similar to other story-driven games, the first mission starts with a several minutes long cinematic intro. The story takes place in 2065 - 40 years after the drone strike organized by Raul Menendez in Call of Duty: Black Ops II.
 The first gunfight
When the whole introduction is over, you will have four enemies to eliminate. Follow the designated points to the next fight. In the following part, you will control the camera. It's fairly simple, because the screen shows what key to press next.
 Interrogation of the Minister
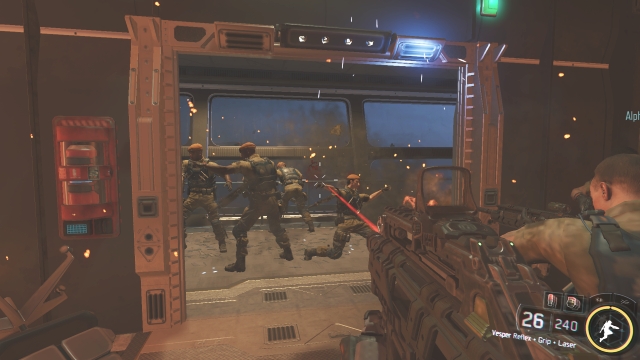
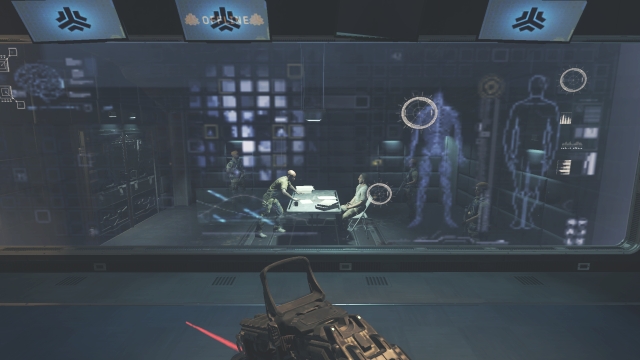
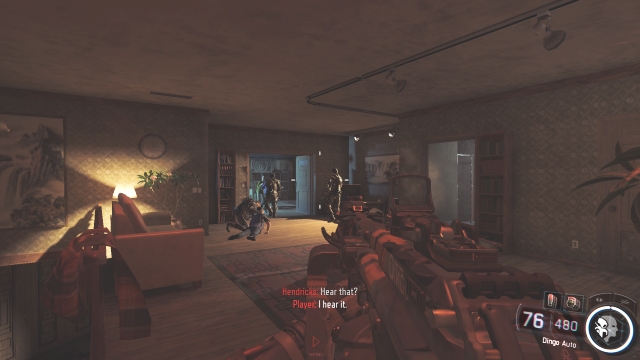
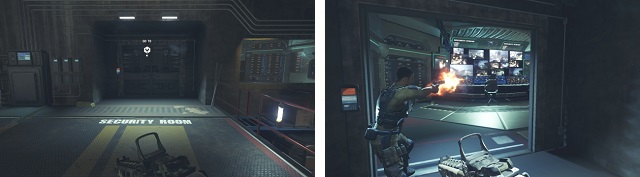
When you get to the room where you see the Minister being interrogated, hold your fire. Wait until your partner gives you the signal to attack the enemies. You'll have to get through a few typical fights, prevalent in this installment of CoD. You need to have some patience not to try to fight several enemies at once. Watch out for the grenades as well. If one gets tossed towards you, you can throw it back with the throw key. Be careful to do it early enough.
 The hangar
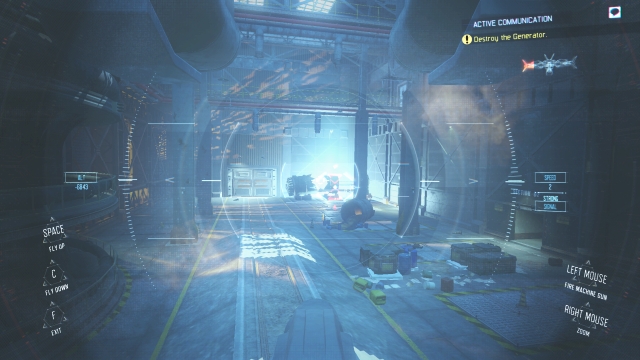
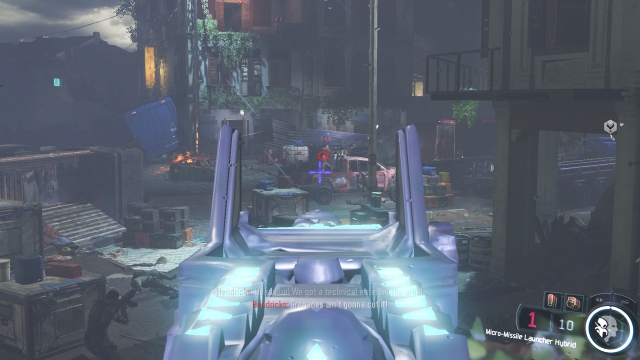
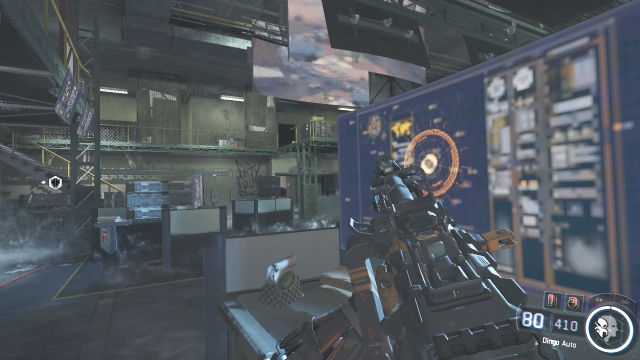
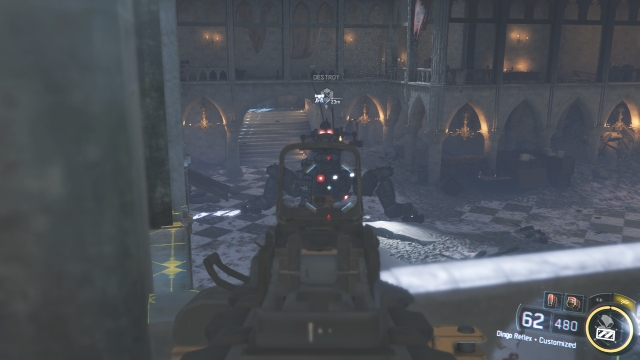
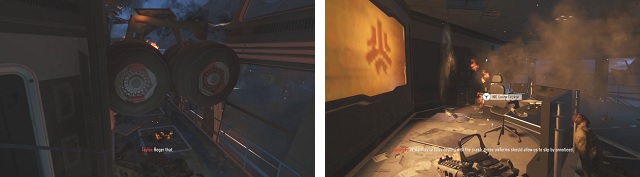
After reaching the part when you are attacked with a machine gun after leaning around the corner, hide and wait a moment. An icon labeled "destroy" will appear above rockets of the plane hanging near the ceiling. Shoot them and they will fall on the hostile vehicles.
 Objective: destroy the bridges
Your objective will change to destroying the bridges after you leave the hangar. Do not get close to them because the plans will change and you'll have to retreat.
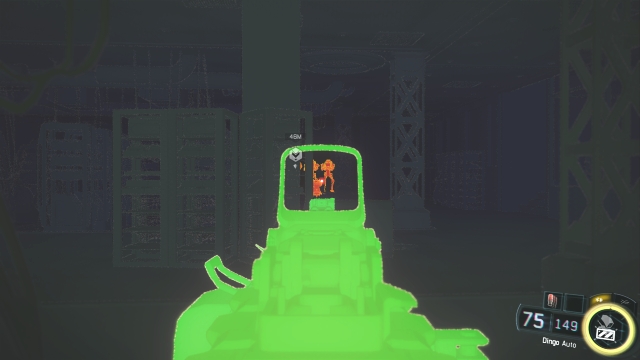
 Thermal vision
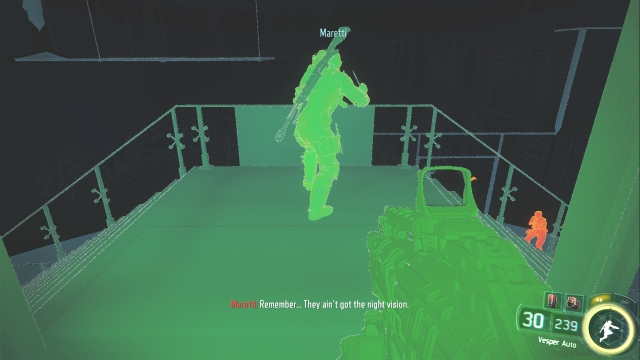
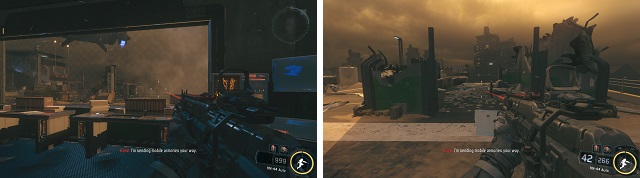
You need to use thermal vision in the next mission. You can trigger it with the key shown on screen. Your enemies can be seen in orange. You can shoot the enemies even when they are behind walls in this mission, because most walls in the office can be pierced.
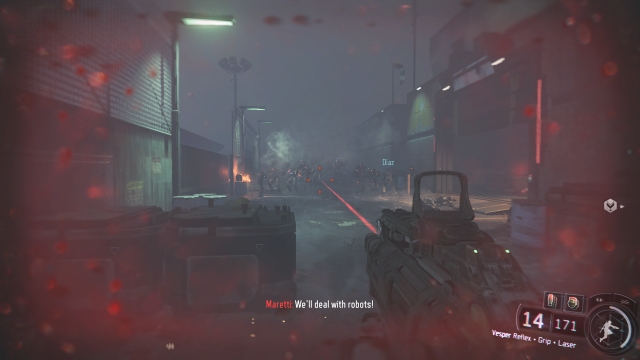 A horde of robots
If you see a group of robots heading your way, run to the building on your right instead of fighting them.
 Shooting from the APC
You should shoot virtually everything from the cannon on the APC, especially vehicles and robots.
 The final part
Now your only objective - and the hardest one - is to survive. Find a proper cover so the enemies will see you only from one side when you shoot.
Most of the mission is filled with repetitive fights. Sometimes you'll shoot soldiers, sometimes robots.
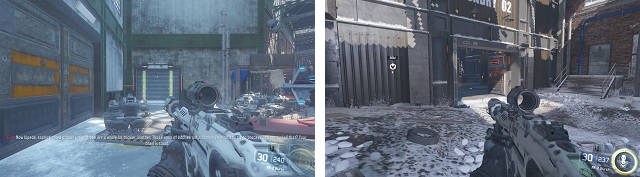
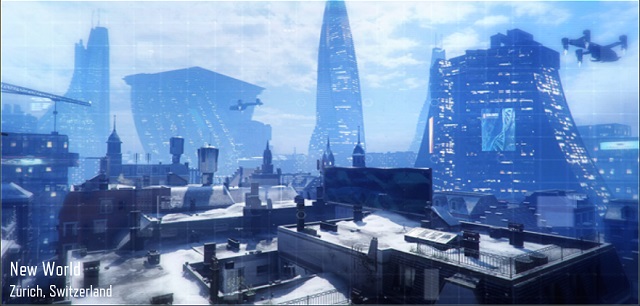 02 - New World
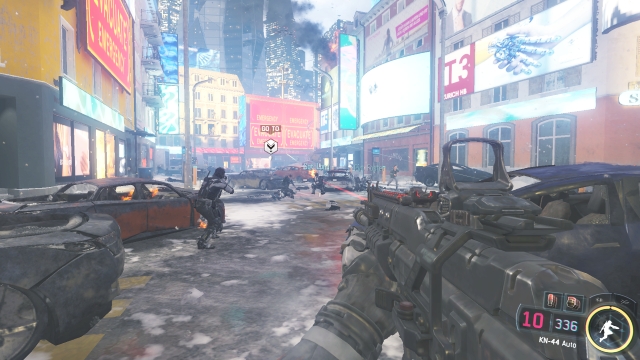
The mission starts with an easy shooting. Take your time and move forward between covers. Remember to use burst fire instead of full auto when shooting at a long distance. Watch out for explosives (shown below). If you stand too close to them, the enemy might hit it, which can result in your instant death. You can use it to your advantage, detonating the explosives with bullets and grenades.
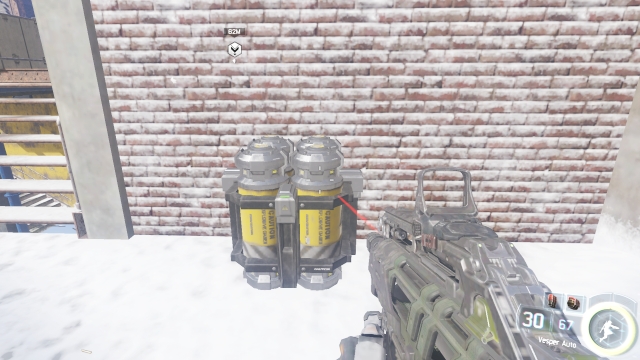 The explosives
When the fight is over, you will be able to use a drone. It's not hard, but you can complete the mission on foot, too. Drone controls are shown in the bottom corners of the screen.
 Radio-controlled UAV
Another part of the mission, another gunfight. It can be made easier by taking control over the enemy turrets. Just aim at one and press the key shown on screen.
 RC turret
Long gunfights are over, so it's time for the episode in the train. Watch out, robots will appear all around you. Melee attacks are often the best solution.
 The train
The third mission of Black Ops 3 consists of relatively few gunfights. There is much more walking and cutscenes here. In the beginning, the player is given a weapon that shoots homing bullets. To shoot an enemy, aiming somewhere near him should be sufficient. When a red circle appears on the enemy, pull the trigger and the bullet will hit him.
 Shooting with homing projectiles
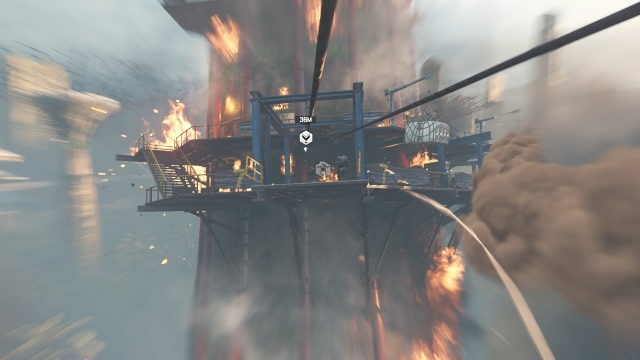
In the next part, you need to keep moving forward despite the wind and waves. To do it, hold on to the ground with a corresponding key when wind or a wave is approaching (a notification will appear).
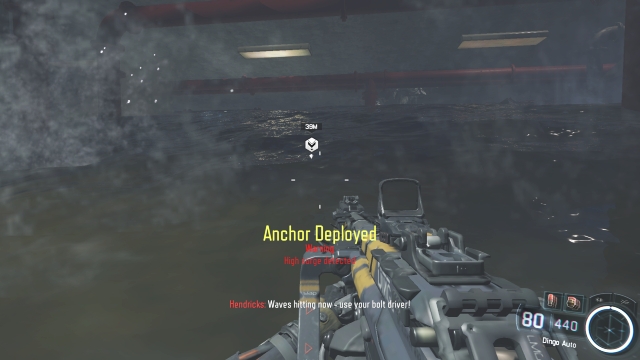 Using the anchor
Remember that the weapon you got at the beginning stays with you until the end of the mission. It's perfect for shooting at a longer distance.
 Another fight
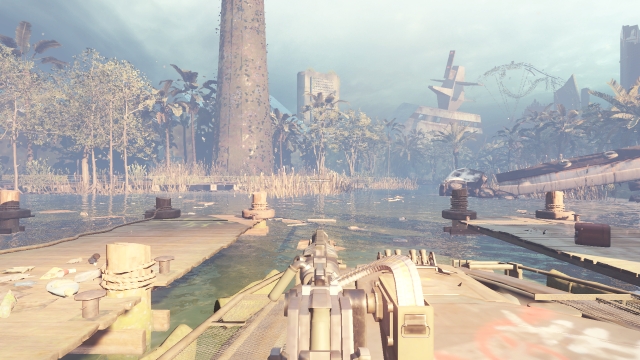
The next part requires you to swim underwater a bit. Controls are the same as on the ground, but keys responsible for crouching and jumping now make you down and up.
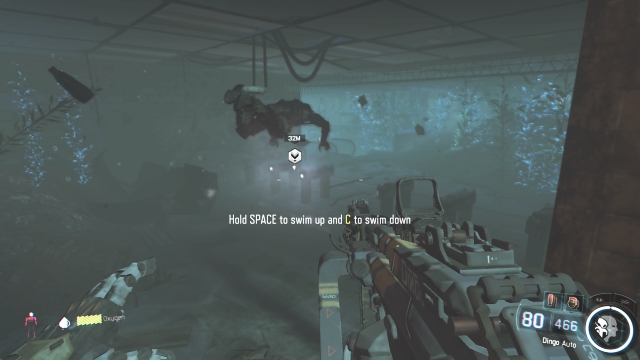 Diving
Your special abilities, for example hacking robots, come in handy in the following part.
 Yet another gunfight
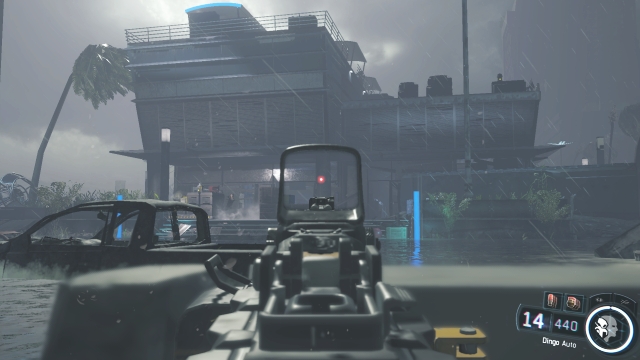
The next part is a battle preceded by using a zipline. You can choose between the left and the right rope. Choose the left one, because there are more places to hide on this side.
 Ziplining
The last part consists of a pretty regular fight. Remember not to use just your gun - grenades, side weapons and special abilities are useful as well.
 One more fight
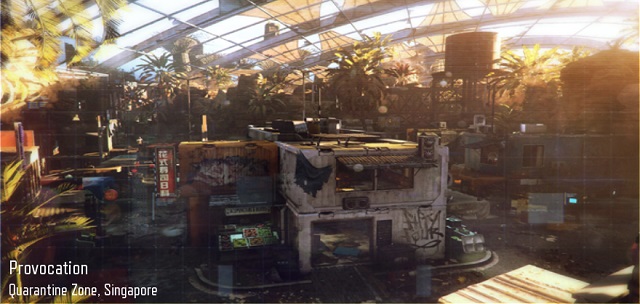 4 - Provocation
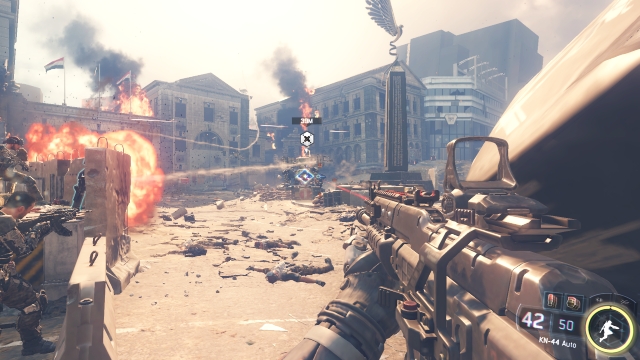
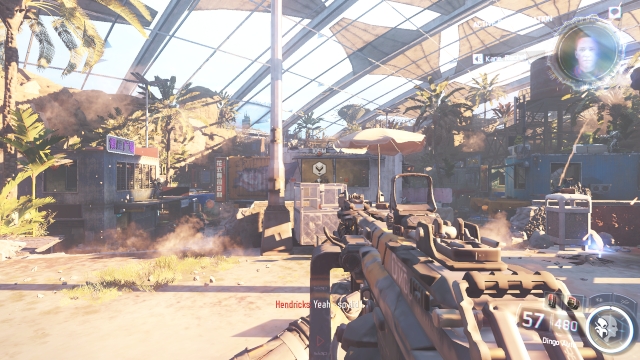 The beginning of the mission
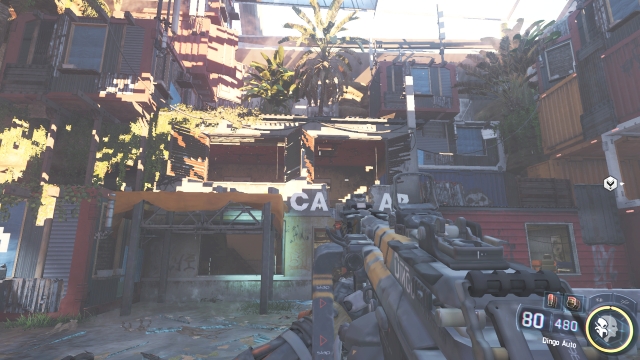
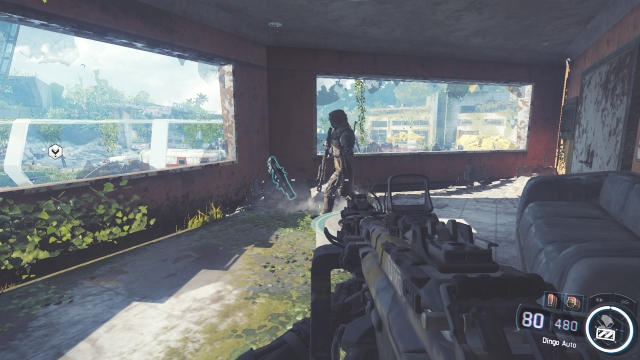
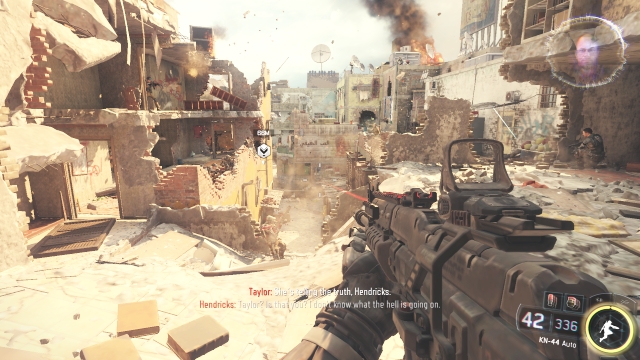
The mission starts with a gunfight. Try to eliminate the enemies from the buildings first. Remember that walls are thin here and piercing them should not be a problem.
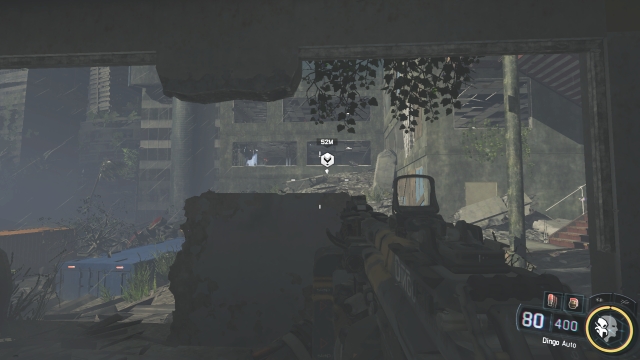
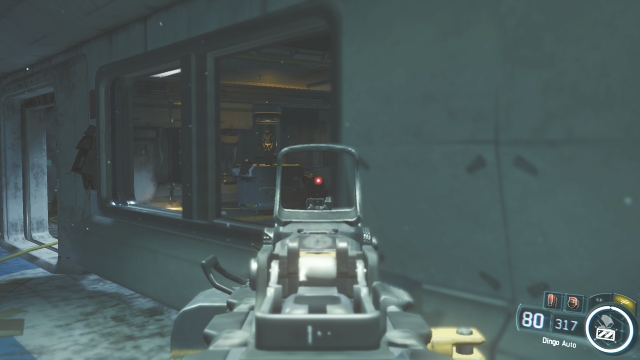
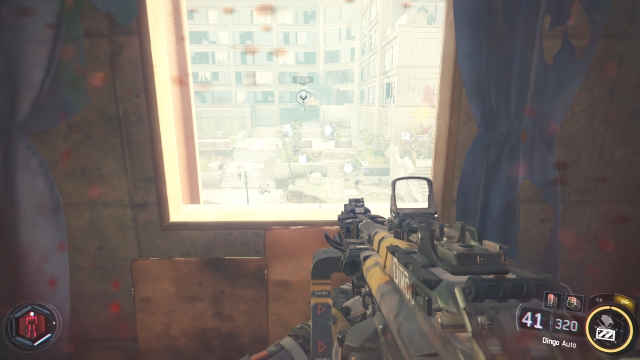
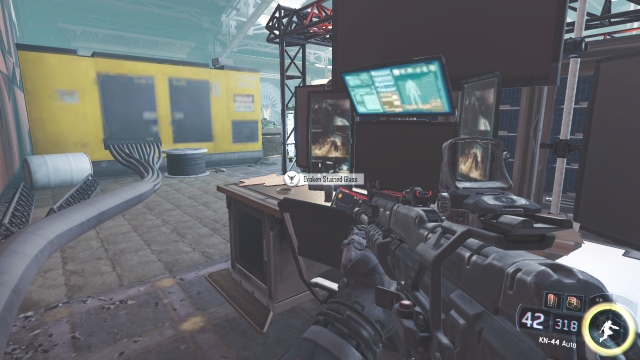
 A broken window is all that's left of a turret
After the gunfight, when you reach stairs, another wave of enemies will appear. Your primary target, however, should be the turret standing in the window.
 Shooting between the containers
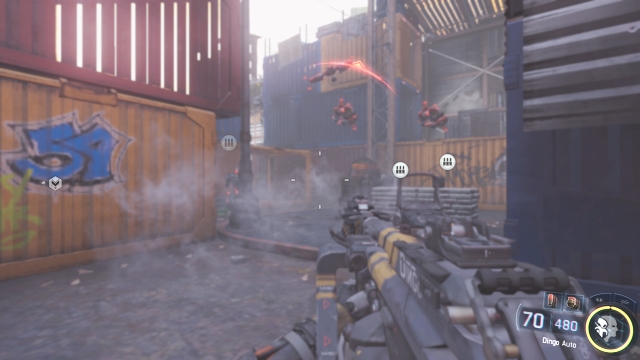
You need to face a lot of enemies between the containers. Patience and checking all dark places thoroughly is the key to winning.
 Fighting the robot
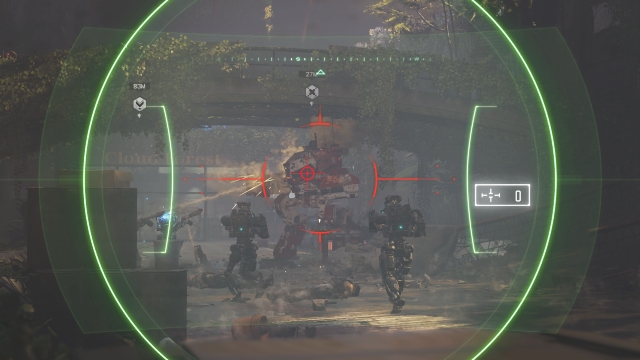
In the following part, your team will have to fight a robot. Find a good cover and shoot the enemy several times if you have a grenade launcher. If you don't, look for one on the ground.
 A tough fight
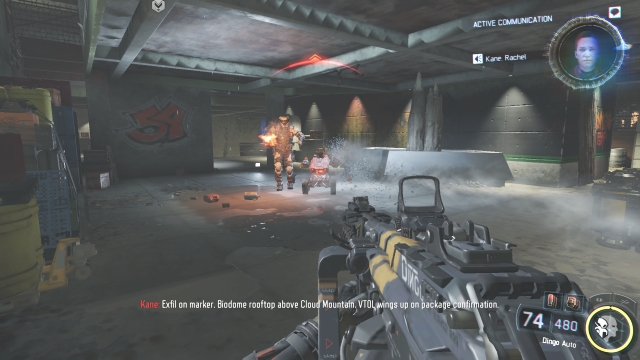
Fighting everyone might turn out to be extremely difficult. As soon as you reach the top of the stairs, go back down - the enemies will come out one by one, so the whole thing gets much easier.
 Defending the place all alone
After a short fight you'll reach a place where you have to defend yourself from several waves of incoming enemies. Find a cover and stay behind it during the fight. Be careful with leaning out, you don't want too many enemies to see you.
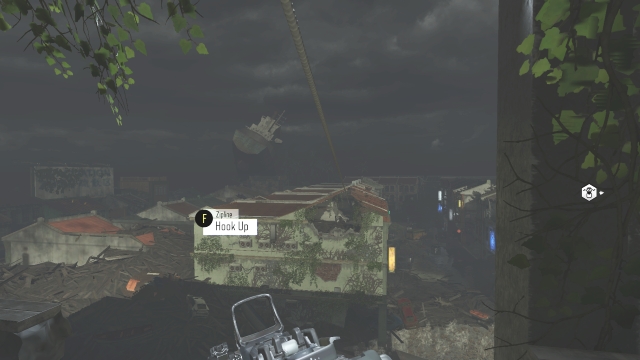
 Ziplining between trees
The last part consists of fighting on top of gigantic trees. Remember about eliminating as many enemies as possible and destroying drones before using the zipline. While using it, the player becomes vulnerable, which makes him an easy target.
 Shooting from the deck
The fourth mission ends with shooting enemies from a boat. There is no objective, just shoot all of the enemies.
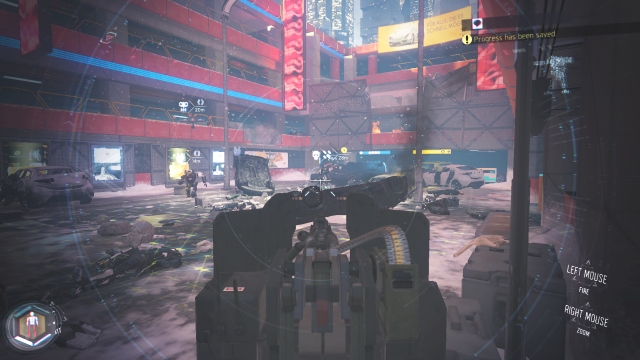
 Circling the enemy
In the beginning, you may avoid most of the combat by sticking to the left side and using melee attacks. You won't be noticed since it's quiet. There is a rocket launcher in the building on the left, on the higher floor.
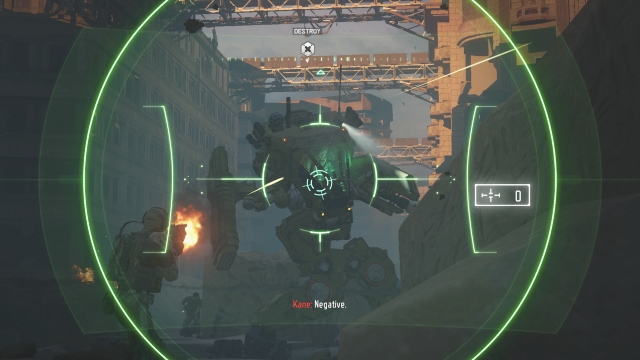
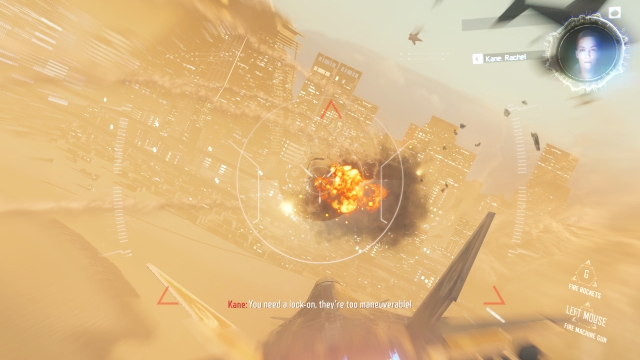
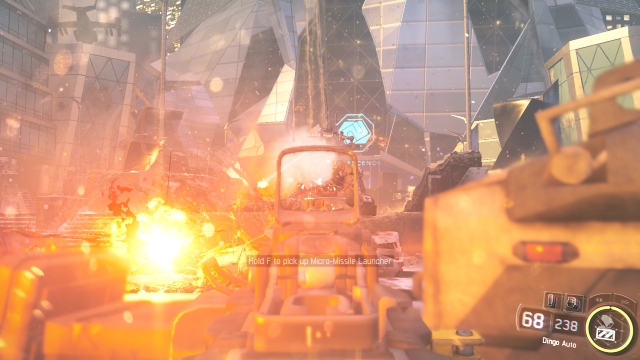
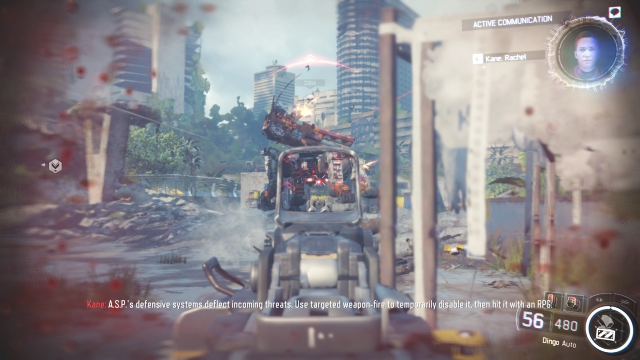 Neutralizing the robot
Suddenly, a large, dangerous robot exits gets out of the building. You can't simply hit it because its countermeasures are on. First, shoot the area designated on the robot with a gun. You can use the launcher when a rocket icon appears and you hear a message from Kane.
 Fighting at the bottom of the core
Your next task is to descend down the crater. To do it, follow the drone. Two brief fights will occur at the end.
 A dangerous passage
While you cross the passage shown above, wait until rocks fall down before you proceed.
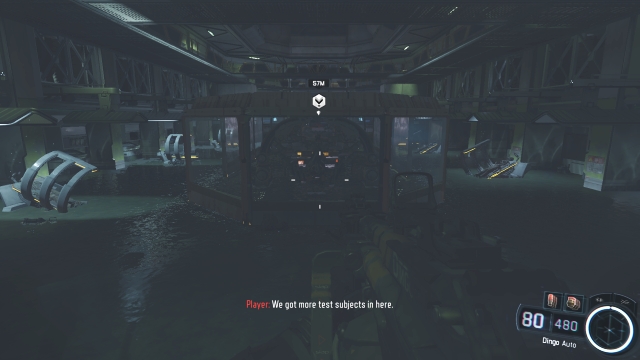
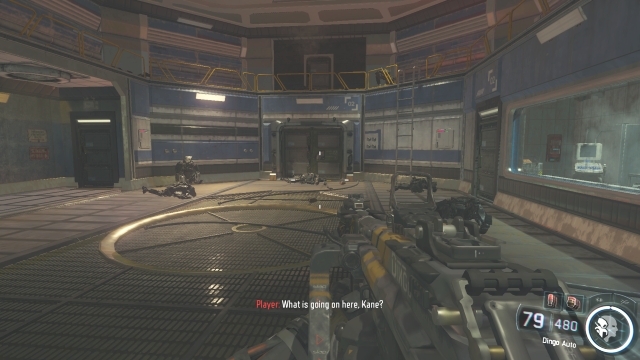 An inconspicuous danger
The next part sends you into a room with seemingly inactive robots, however they regenerate and start fighting, so shoot them, even the ones lying on the ground. The easiest way to verify the threat is to aim at an inactive machine. If the crosshair turns red, the robot will stand up and fight against you.
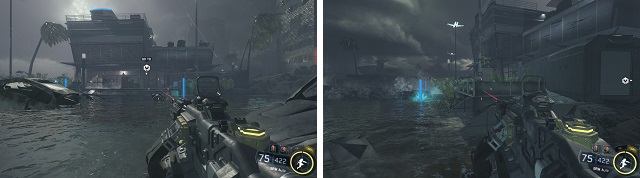
 A difficult crossing
The subsequent part requires you to cross a flooded room. It's quite difficult, because this room also contains robots that are going to activate. The robots appear every time you walk a few meters, so the best strategy is to walk two meters forward and one back.
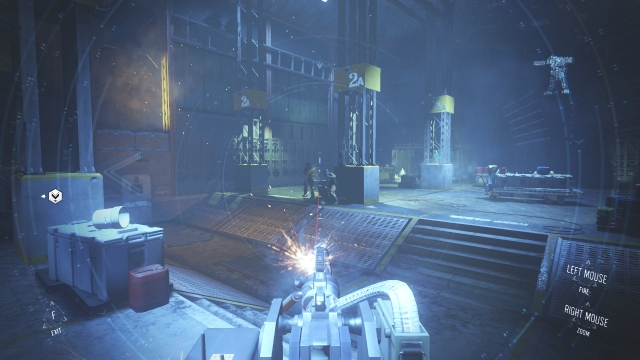
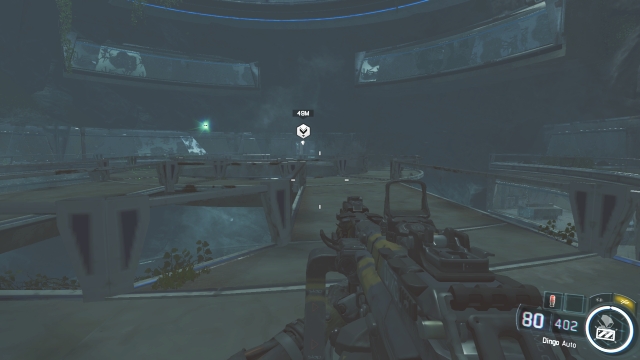
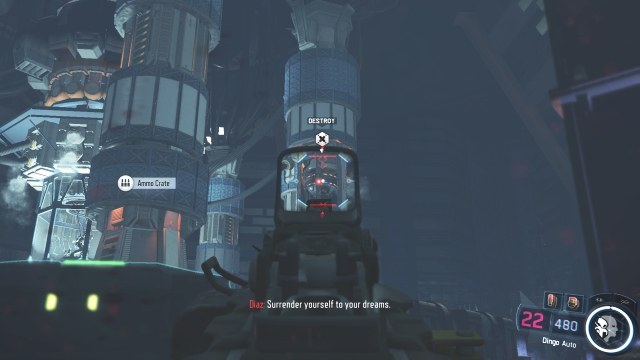 Destroying the tower
Your next task is to destroy the towers. To do it, when Diaz gives you the sign, an icon and a point to aim at will appear above one of them. Then, approach the center of the room and the rest will happen automatically.
 Protecting Diaz
After destroying the two towers, you will need to defend the room with Diaz inside.
 Mine
MineThen, after a longer fight, you'll end up in the water. Watch out for mines that will explode when you get too close. You can shoot them down with your gun.
 The end
The mission ends when you eliminate the final enemies who are also in the water.
The sixth mission in Call of Duty BO3 can be completed in two completely different ways. You can either stay quiet, avoiding combat, or just shoot everything, but then it will become much more difficult.
 First targets
At the very beginning, three enemies will wait to be eliminated.
 Shooting
During the fight in the next part, start with eliminating the enemy who uses the car-mounted gun, then take care of the rest.
 The sniper
While walking around the building, have your eyes in the back of your head. Snipers are everywhere.
 Walking quietly
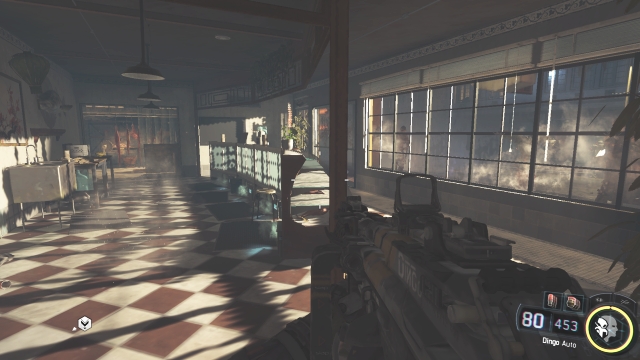
You can avoid fighting in the next part if you cross the room while crouching. It will stop the enemies from seeing you.
 A hidden sniper
You will get a silenced sniper rifle in the next part. If you stay hidden while taking down the enemies, the mission will become much easier. Alternatively, you can use your regular weapon, but then you'd have to fight a lot of enemies at once.
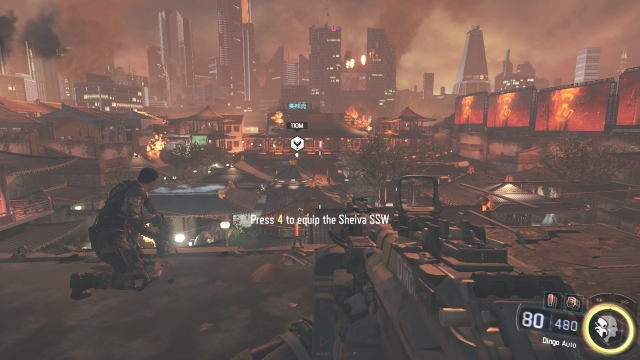 A perfect place for a sniper
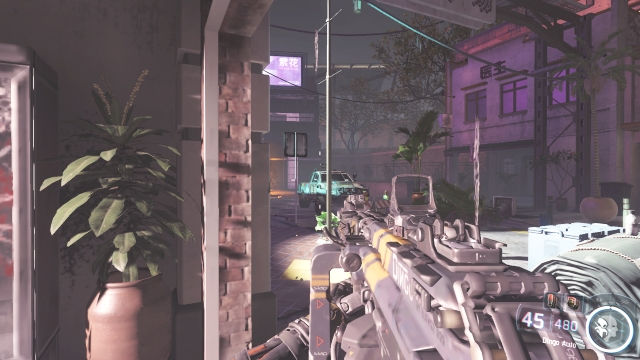
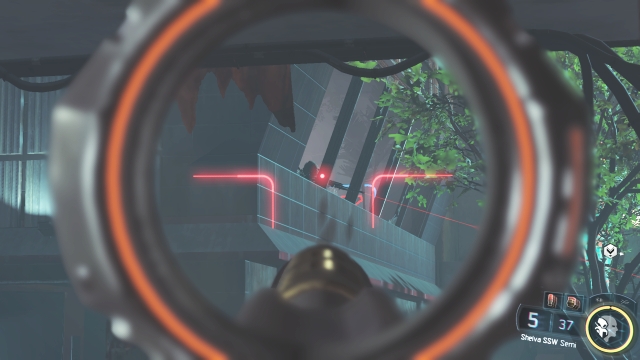
Now you need to get through Chinatown. Before you climb down the roof, take out your sniper rifle that you were using in the previous part. Eliminate all of the snipers and as many enemies as you can see from the roof. If you use only silenced weapons and melee attacks, you will remain undetected and you won't have to fight lots of enemies at once.
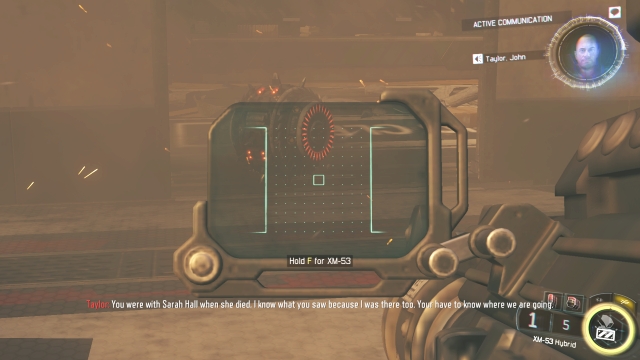
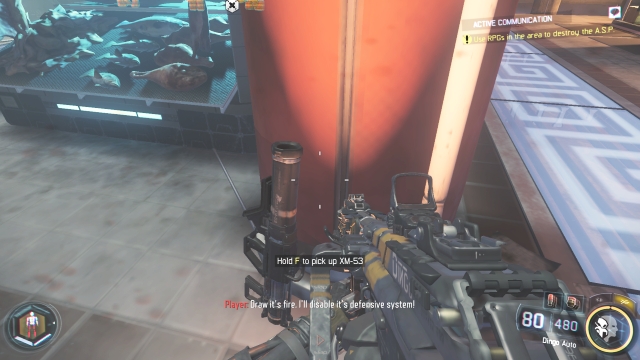 XM-53 launcher
After a short fight, you will face a robot. The way to destroy it is exactly the same as in the previous mission. Shoot it with a rifle a few dozen times, then attack it with rockets.
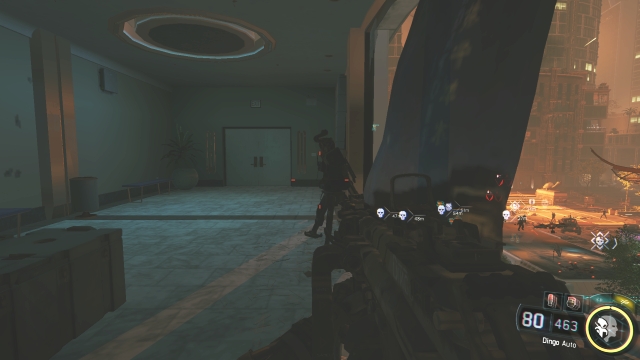 A turret
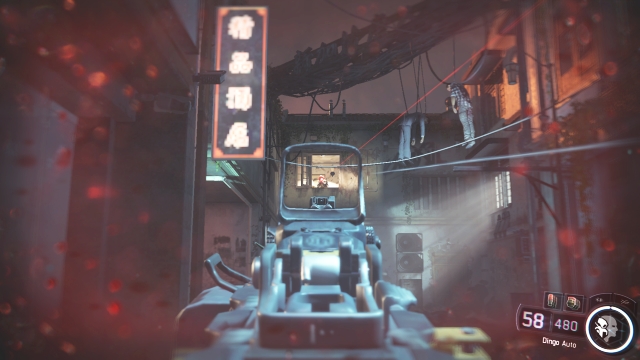
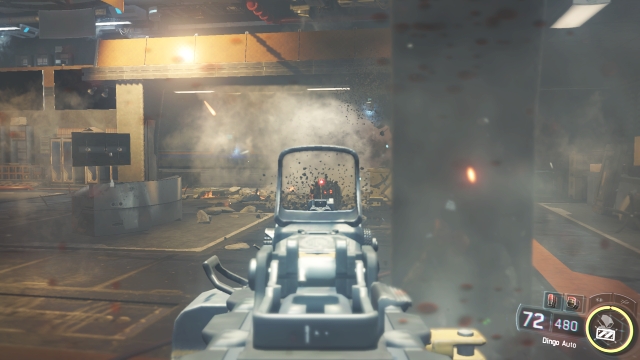
Then you'll have to engage in a fight by a burning building. There are turrets in the windows. If you can take control over the machines, use it and eliminate at least part of the enemies with machine guns.
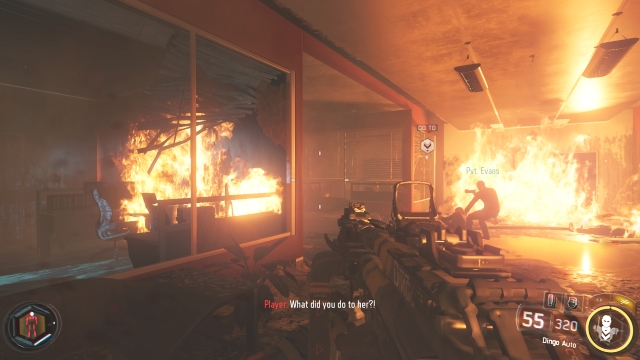 Gunfight in a burning building
The mission ends with a fight against several robots inside the building.
The seventh mission is almost the opposite of the sixth one. There is just a lot of fighting and not much more. The developers focused mostly on the number of enemies, not the quality of objectives.
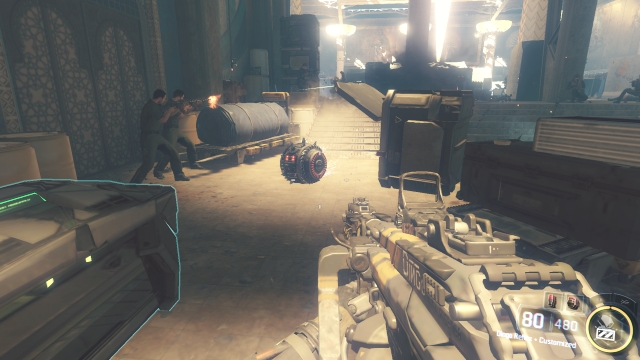 Getting too close to such an object is quite an unpleasant experience
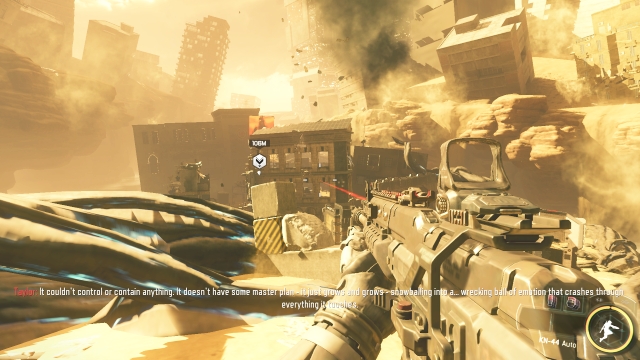
The enemy has a new weapon - spike balls. Watch out for them and neutralize them so they don't kill you.
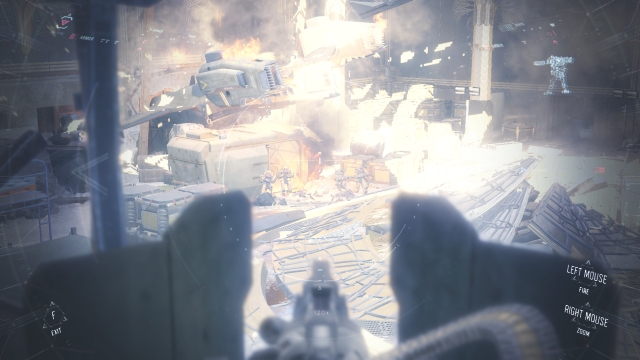 A turret on the platform
When you reach the platform, try to get to the stairs on the left. There is a turret next to them - it will help you eliminate the enemies.
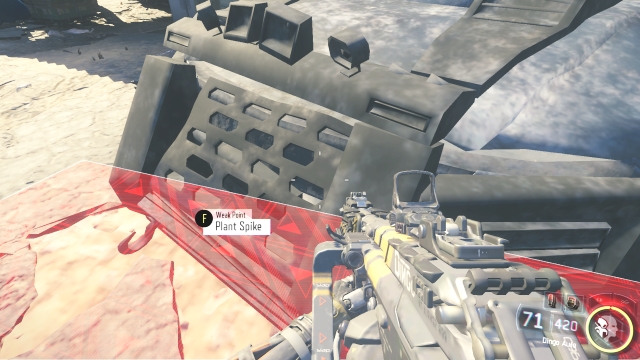 Planting the explosives
The next part requires you to walk between the designated spots and plant explosives. To do it, hold the action key when you are in the red area, then detonate the explosive with a key shown on the screen.
 Another fight
The next part is a long, monotonous firefight.
 Yet another fight
The seventh mission ends with a gunfight where you need to destroy robots as well. The first and third can be destroyed like the ones in previous missions - first shoot them with a rifle, then attack with rockets. The second robot does not use countermeasures, so you can use rockets from the very beginning.
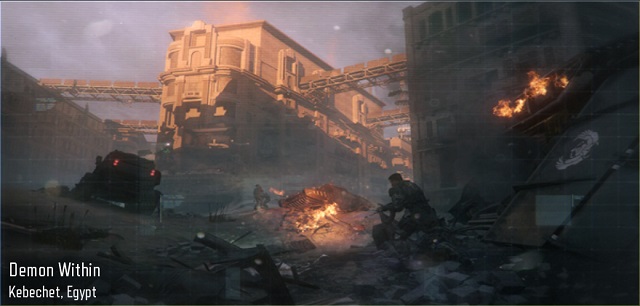 8 - Demon Within
A mission entitled "Demon Within" adds a lot to the plot, but when it comes to gameplay it doesn't differ much from all the other missions. Being moved to the past makes it even easier, because enemies do not have modern weapons and they are not as well armed as enemies in other missions.
 Beginning of the mission
The first thing that you need to do in the mission is destroying a robot. If you are not equipped in a rocket launcher, don't worry because there are few XM-53 launcher lying around. Remember to stay in cover and lean out only to take a shot.
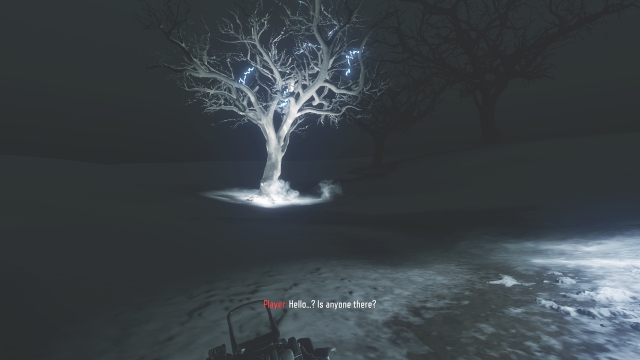
Once you destroy the robot, you will find yourself in a dark world in which you will only see a few trees. Follow them.
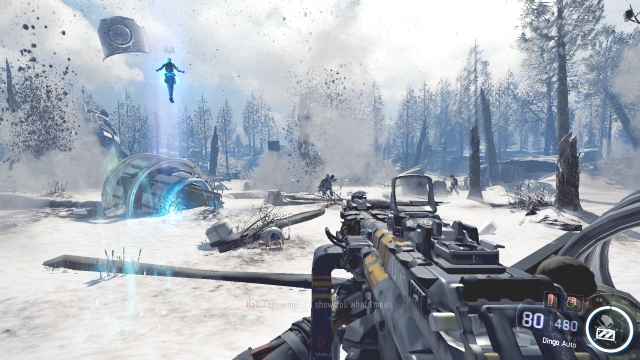 Combat in the past
In the next part of the mission you will be moved to the past. Combat on this terrain is a bit easier because of a rather weak enemy equipment.
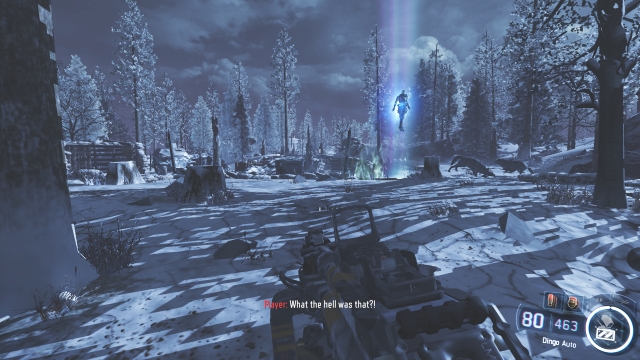 Watch out for the wolves
After the combat it will get dark and you need to stay vigilant - wolves will attack you from all sides.
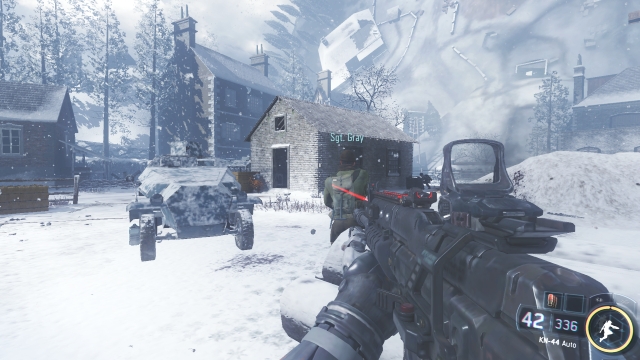
 Another shootout
After that, another skirmish with the Soviet troops awaits you. Remember that even though you traveled in time, you can still use your regular gadgets and skills.
 A tank
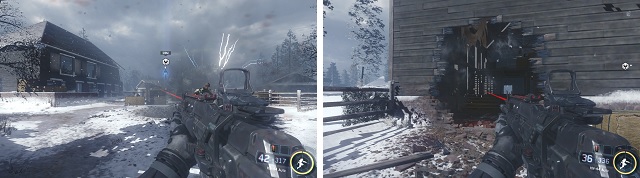
After one shootout, another one awaits you. This time around, your enemies even have a tank. Use a rocket launcher to destroy it.
 A skirmish in a church
A robot in a church will be your next enemy. In order to destroy it - just like before - you need to use your rifle to deactivate its anti-missile systems and only then attack it with heavy weaponry.
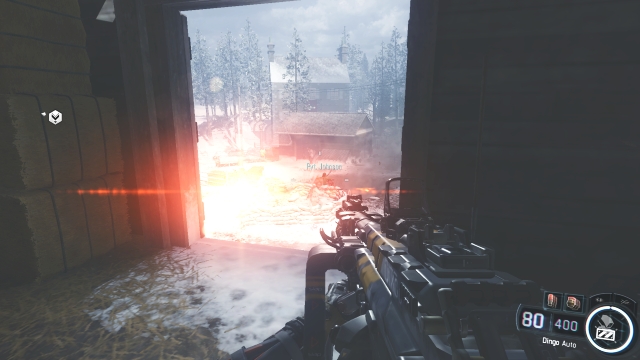
 A siege in a house
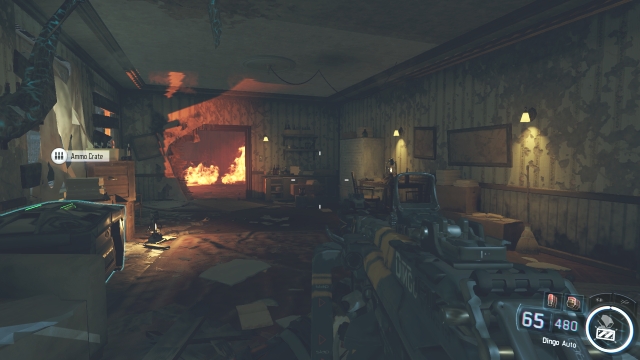
Another step is defending the house. Monsters from Hall's mind will attack you here. Place yourself in the corner of the house, right next to the ammo box. Don't waste too much ammo. It is enough to use 4-5 bullets for a single enemy. You are the most vulnerable when you reload. In case you have some difficulties, use melee attacks.
 Killing Hall
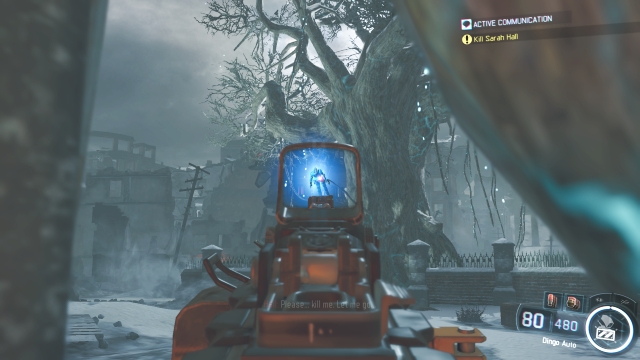
At the end of the mission, kill Hall at her own request.
The ninth mission in Black Ops 3 is diversified by shooting from a plane. There are, however, several firefights here.
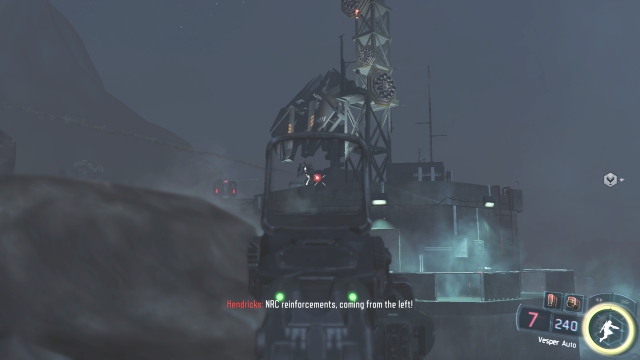
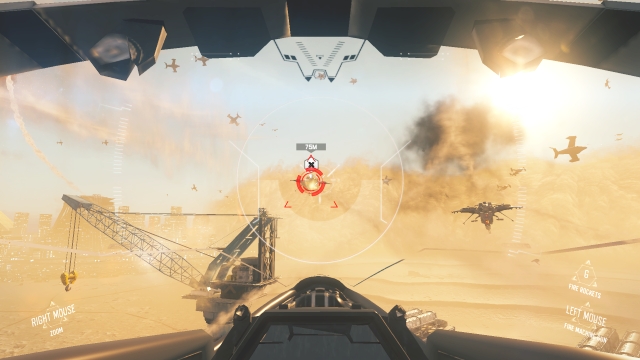
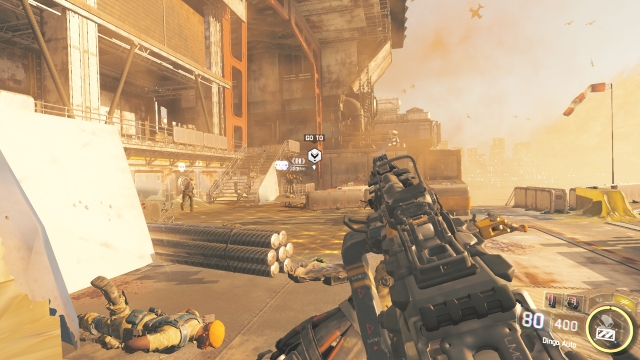
 Beginning of the mission
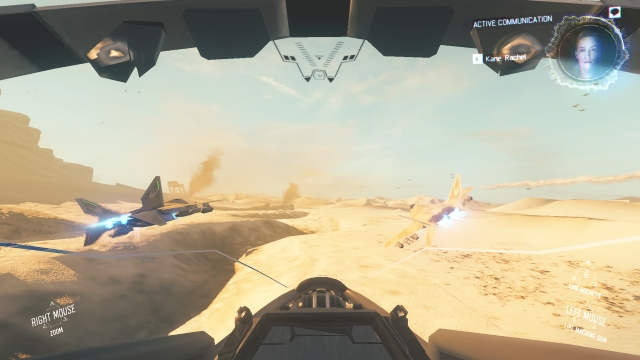
The mission starts when you're in a fighter jet. You do not have complete control over it, you can just correct the position of the crosshair. Bottom corners show you the controls. You can use the cannon while the enemy is directly in front of you, while the rockets are useful when the enemy is targeted and there is a red icon on his plane.
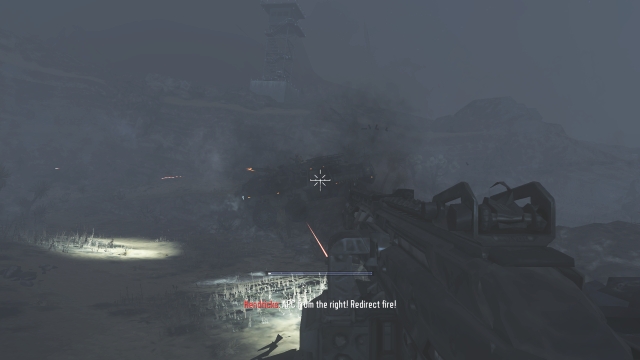
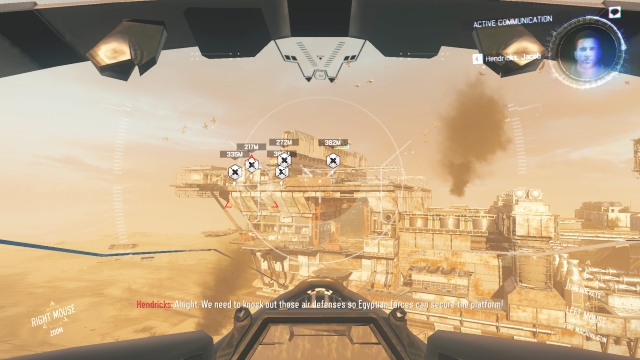 Destroying the ground targets
The next part requires you to destroy some ground targets. Now you have a complete control over the vehicle.
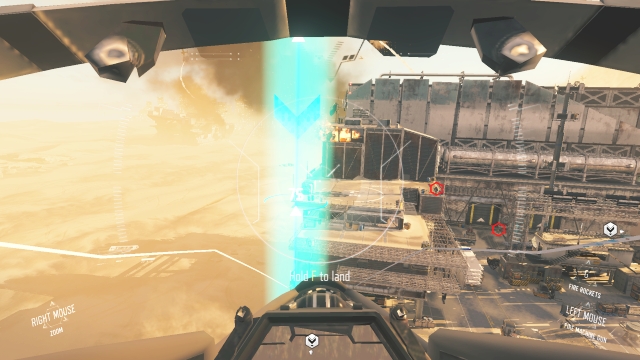 The line that shows where to land
When you have completed your tasks, approach the blue line and press the action key to land.
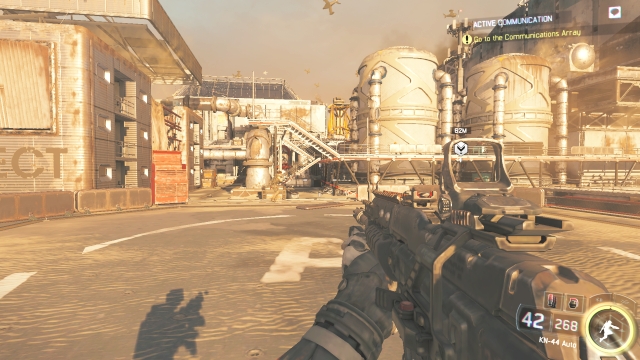
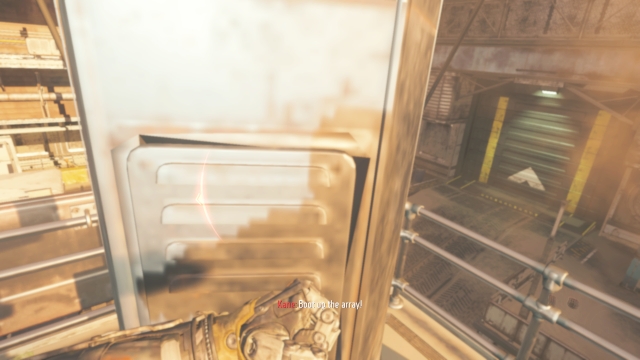 Gaining access to the panel
After landing, you will have to engage in a firefight. First you'll have to reach the panel, then protect your partner who will be hacking.
 Repeating the task
Now repeat the flight, the battle and the hacking.
 Thermal vision
Then, when you enter the room with water on the floor, you will have to fight a couple robots. Use thermal vision to see them better.
 Another flight
You'll come back to the plane. Similarly to the beginning of the mission, you'll have to destroy several hostile planes and some ground targets.
 A gunfight at the end
A longer battle happens at the end of the mission, but this time it's just a regular fight.
The tenth mission is sort of a test of what you have learned throughout the campaign. Most of the mission consists of really boring firefights. The only thing that changes is the number of enemies. Your combat skills will be put to the test. Patience and moving slowly between covers are vital for completing this part. Remember to use grenades and special skills.
 An enemy with a shield
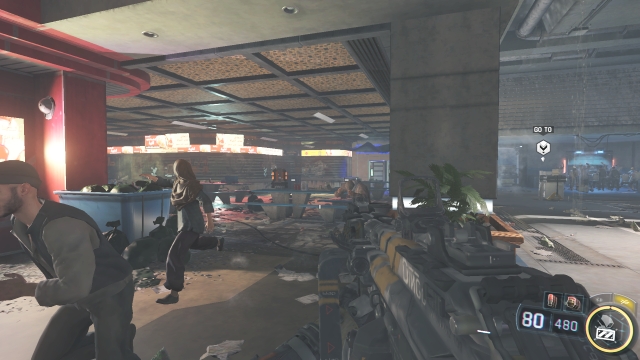
First, you'll have to fight several enemies using shields. The most effective way to take them down is to shoot their legs. Alternatively, you can throw grenades or try to get so close that they won't be able to cover themselves.
AlliesBe careful not to shoot civilians. It might result in a failure.
 Spike balls
In the subsequent part, the enemy will use the well-known spike balls.
 The end
In the end you'll have to destroy the aerial vehicle. XM-53 rocket launchers can be found in a small building 10 meters from the starting point. To immobilize the vehicle, shoot each engine twice.
 Spike balls
Be careful not to pay all your attention to the vehicle, because spike balls might attack you from behind.
The last mission of Call of Duty: Black Ops 3 contains the most difficult firefight in the whole game. Aside from that, the mission has a regular level of difficulty.
 The beginning
Obviously, the mission starts with a brief gunfight. Watch out for snipers located on the balconies of the building in the distance.
 A turret
During the next fight, try to reach the turret on the right. It will make combat much easier.
 The beginning of the battle
Then the battle will start - definitely the hardest part of the mission. You need to be quick and careful at the same time. The enemies do not stop showing up when you stand still. You need to fight against soldiers, robots and drones.
 Flanking
Pick a side to attack from. You'll find covers and ammo in the rooms on both sides.
 More firefights
Now eliminate a few enemies in the building
 The first world
The second half of the mission is much easier. You have to visit three different worlds. The enemies are not really challenging, but they can appear anywhere. You need to listen - when an enemy appears, you'll hear crows.
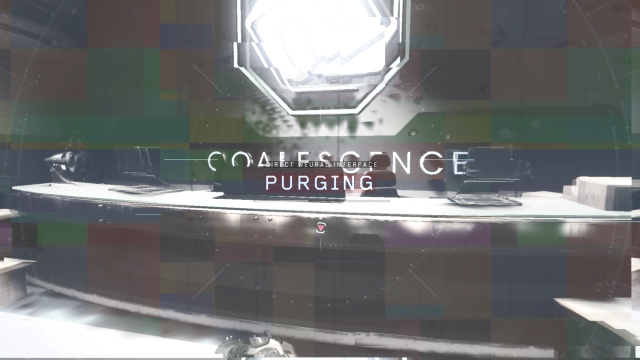
The very endIn the very end of the mission, the screen will say purging - just walk forward and you'll finish the game.
Five collectibles are hidden in the first map.
 1/56
1/56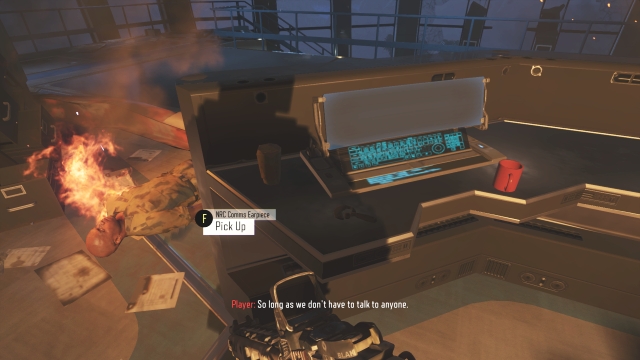
1/56
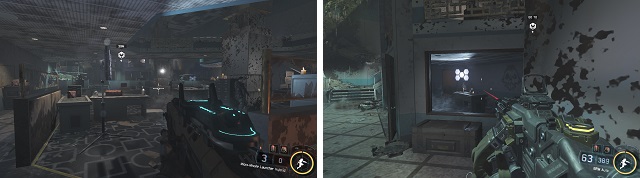
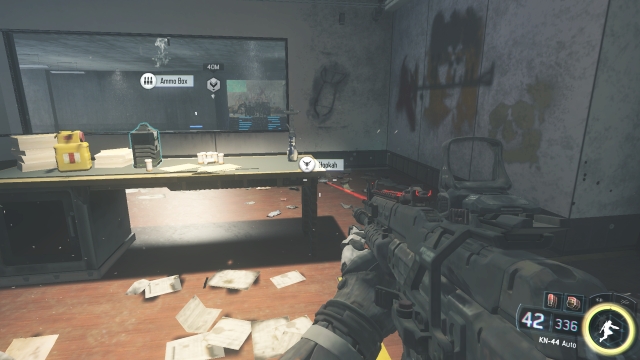
In order to find the first collectible, go left after killing four enemies at the start of the mission and pick up the earpiece lying on the desk.
 2/56
2/56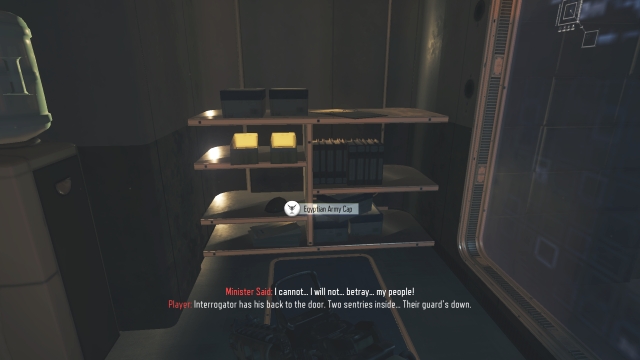 2/56
2/56The second hidden item is in the same room as the console which you will use to locate the Prime Minister.
 3/563/56
Egyptian hat is in the room in which you are observing the interrogation of the Minister. It is lying on the shelf on the left side, near the entrance.
 4/56
4/56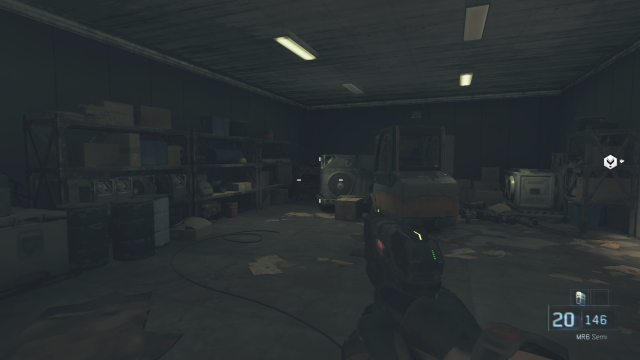 4/56
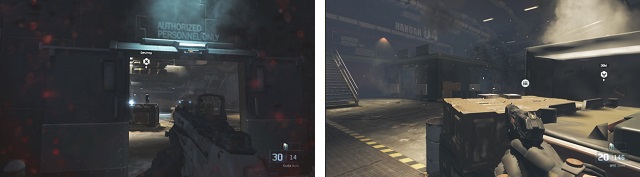
4/56In order to find the fourth collectible, after killing all enemies in the hangar with hanging plane you must walk to the room on the left side. The drone replica is hidden in the corner of the room.
 5/56
5/56 5/56
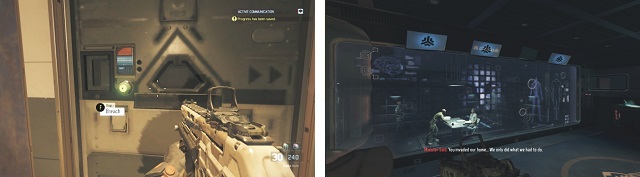
5/56The last collectible in the first mission is available when you must go drive the APC. The panel V-TOL is located in the far corner of the room. You must remember to pick it up before entering the vehicle.
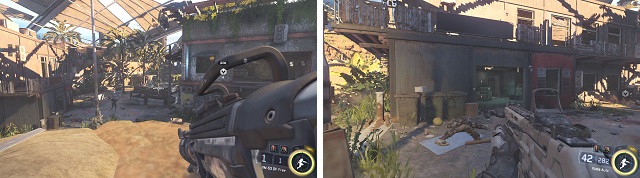
During the second campaign mission you can find another five collectibles.
 6/56
6/56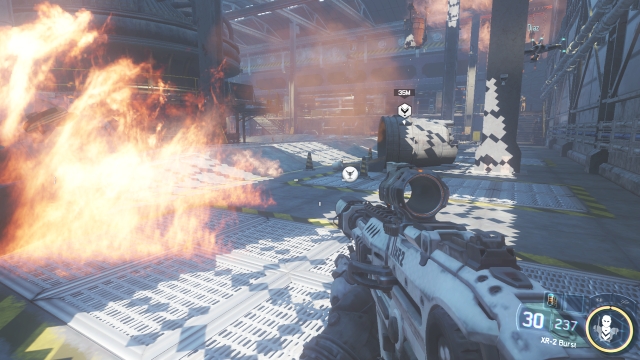 6/56
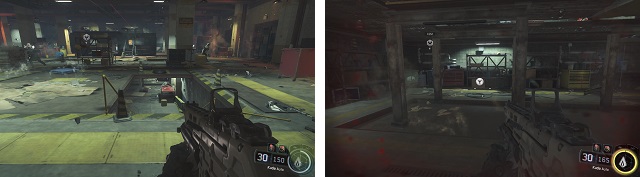
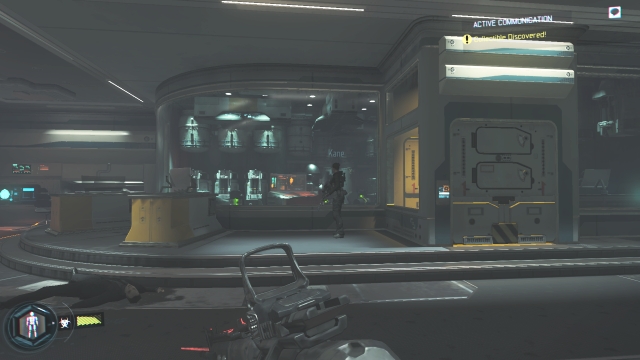
6/56In order to find the first collectible, move your soldier to the place where you have previously fought using the remote controlled drone. The secret can be easily located thanks to the large cell nearby.
 7/56
7/56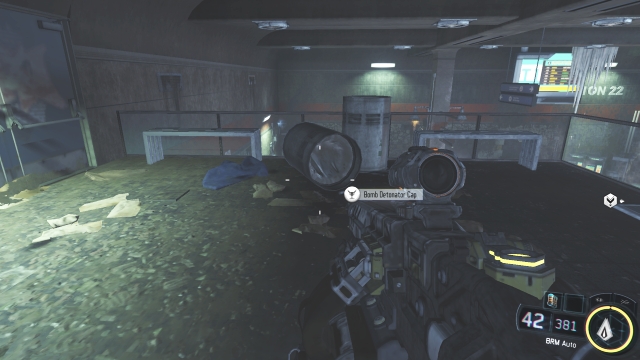 7/56
7/56The second collectible in this mission can be found on the station. Once the battle ends, walk up the moving stairs on the left side. Another collectible will be lying next to the bin.
 8/56
8/56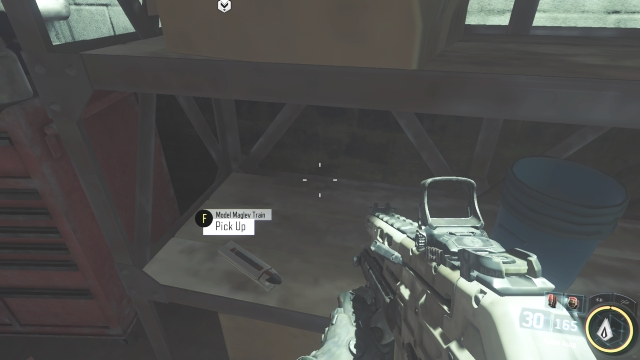 8/56
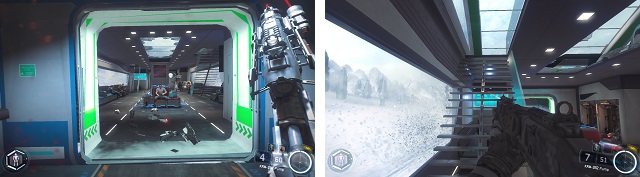
8/56During the battle in the hold, walk downstairs and go ahead to the end of the room. Not far from the left corner you will find the hidden item on the shelf.
 9/56
9/56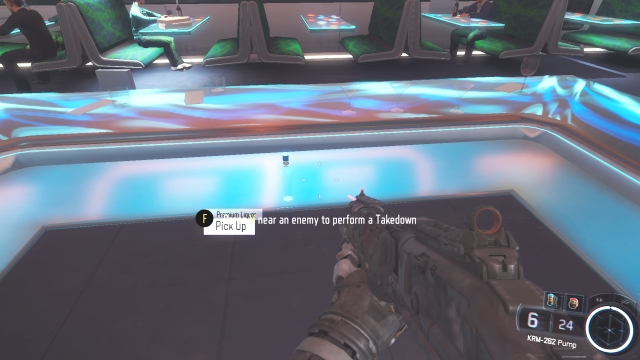 9/56
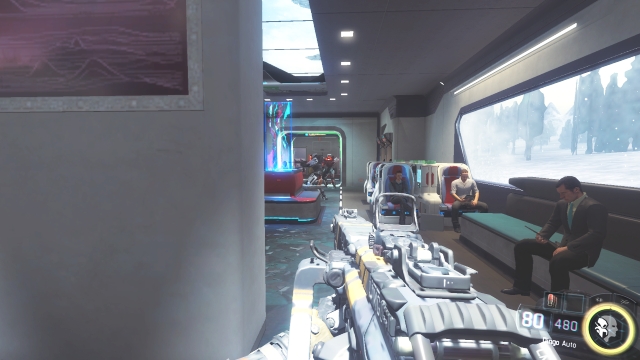
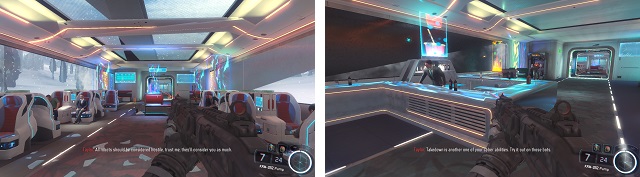
9/56One of the easiest collectibles to obtain. Just after the part of the mission that takes place in the train starts, you must jump over the counter and take the drink.
 10/56
10/56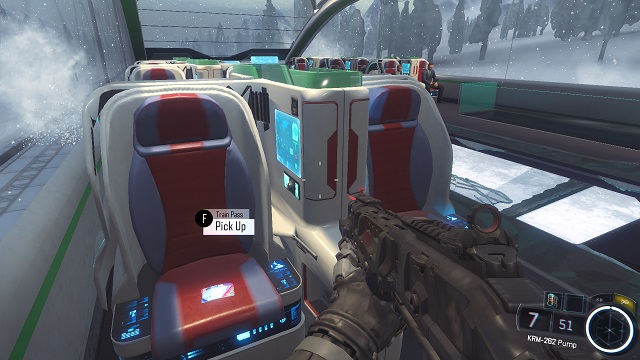 10/56
10/56The last collectible in this mission is hidden on the second floor of one of the wagons (there's only a single two-level wagon).
During this mission you can find six collectibles.
 11/56
11/56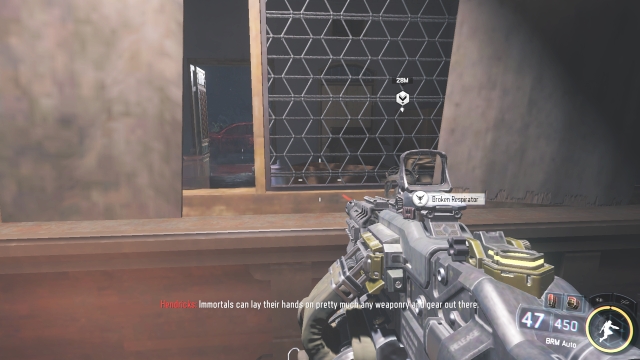 11/56
11/56After participating in the first battle in this mission, enter the room at the end of the building, on the right side.
 12/56
12/56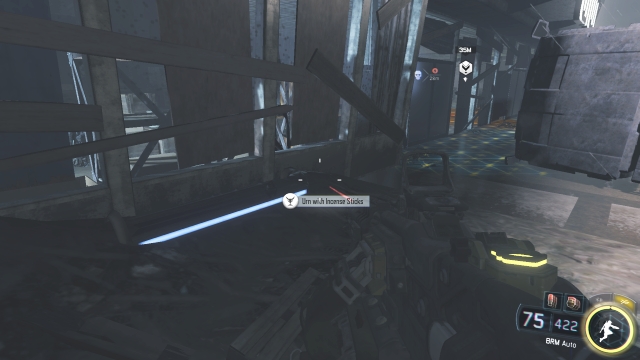 12/56
12/56In order to find the second collectible, instead of going through the center after the battle in the water, go the right side. Under the windows of the building you will find another secret.
 13/56
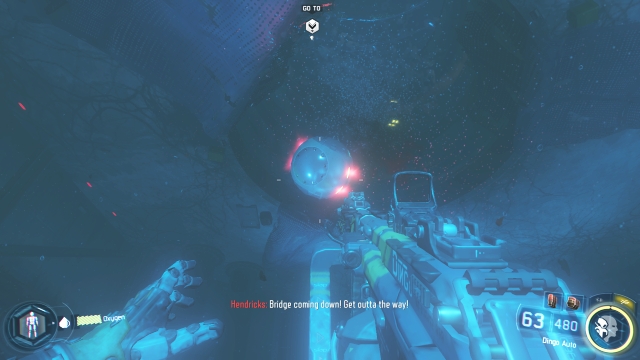
13/56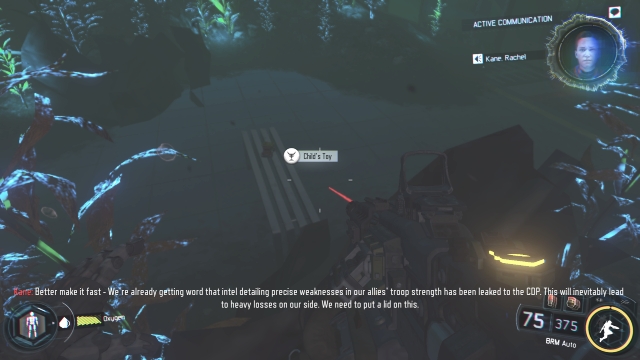 13/56
13/56You will find the child's toy during diving. Instead of following Hendrix to the right, swim ahead and at the bottom you will find a toy lying on a bench.
 14/5614/56
You will obtain the fourth collectible in this mission if, after the battle in the pub, instead of going upstairs right or left, you will enter the room in between and then to the room on the left.
 15/56
15/56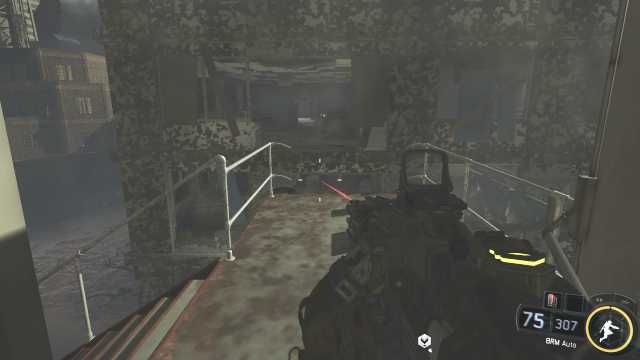 15/56
15/56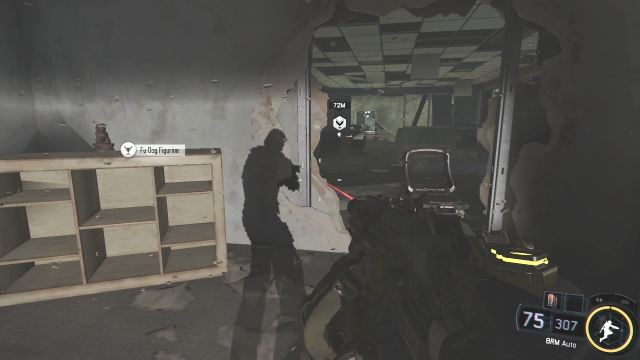 15/56
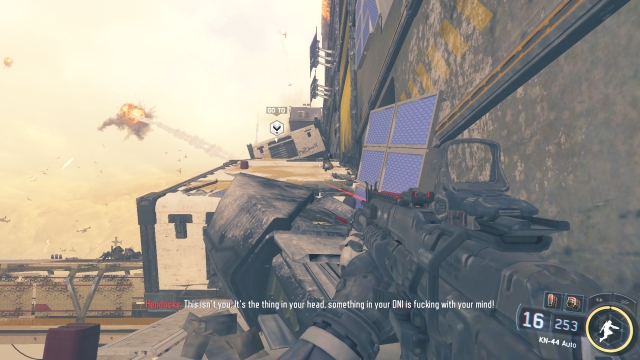
15/56In order to find the fifth collectible in this mission, you must walk right, upstairs, when you will see the ruins of the building. Jump to the neighboring building instead of going in the direction of the next mission objective. After walking around 20 meters, on the right side you will notice the drawer on which the figurine is standing.
 16/56
16/56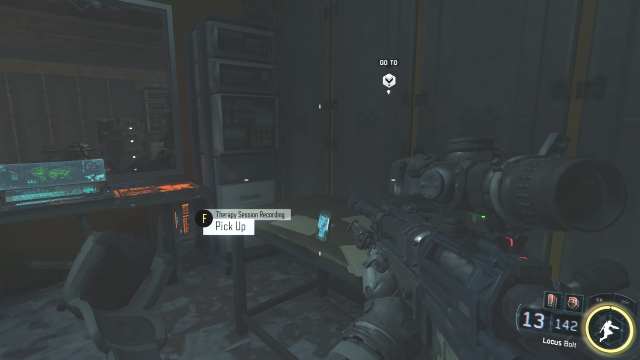 16/56
16/56Getting the last collectible is rather easy, it is lying on the desk next to which you will be walking anyway. The icon marking the secret will appear even when you're quite far away from it.
Four collectibles are hidden in the fourth mission of the game.
 17/56
17/56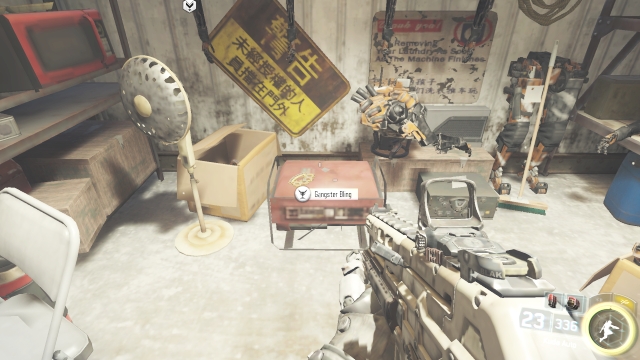 17/56
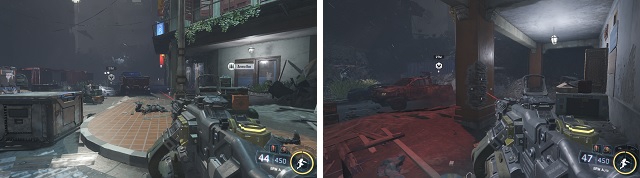
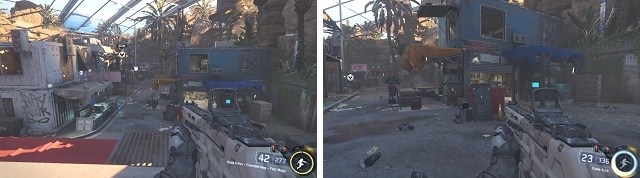
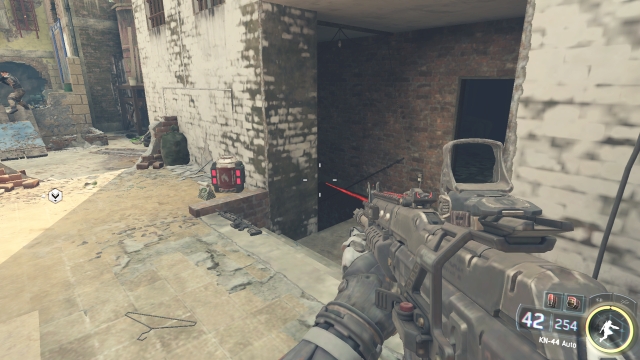
17/56The first collectible is on the field of the first battle in this mission. More specifically, in the blue building on the right side.
 18/5618/56
The second hidden item is located very close to the first one - On the same battlefield, behind the stand with vegetables on the right side.
 19/56
19/56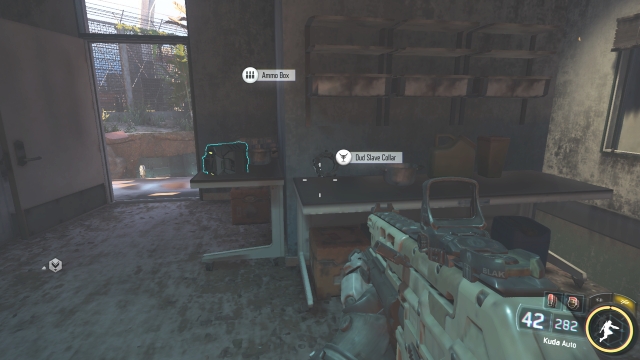 19/56
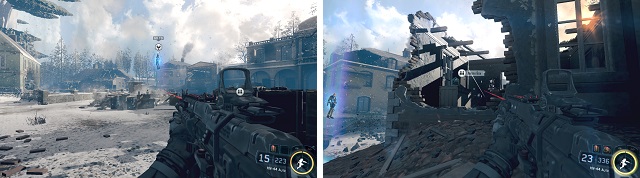
19/56The item can be found after completing the second large battlefield in this mission. Jump above the damaged bridge and enter the second floor of the building on the left side.
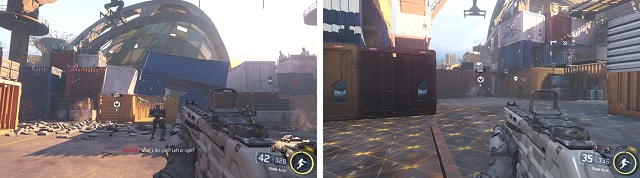 20/56
20/56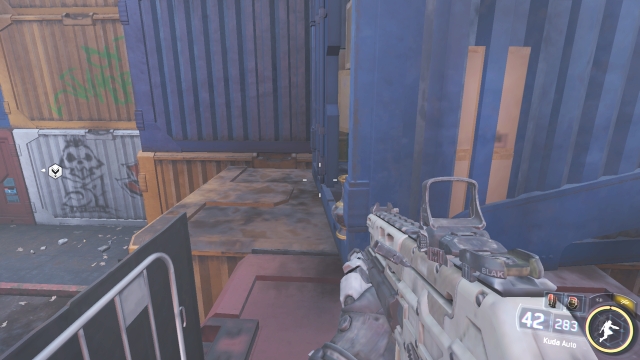 20/56
20/56Once you reach the containers, select the path through the right side. After you will walk around part of the containers and you will start returning to the center, walk on the red container that blocks the way.
 21/56
21/56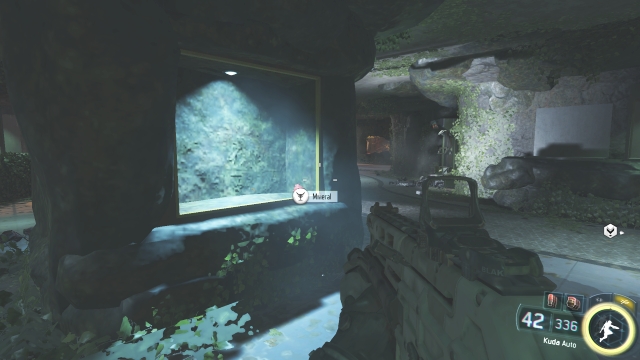 21/56
21/56After entering the botanic park, turn around after passing the second pillar. You will see a lying mineral.
 22/56
22/56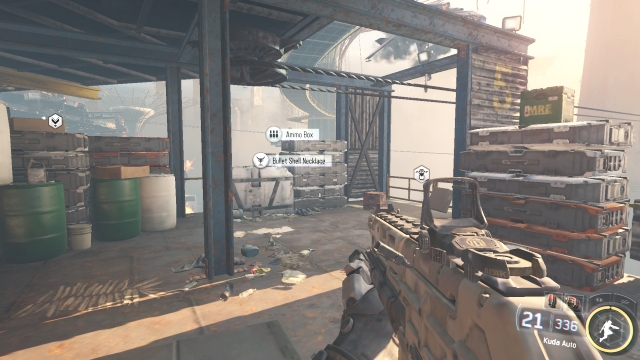 22/56
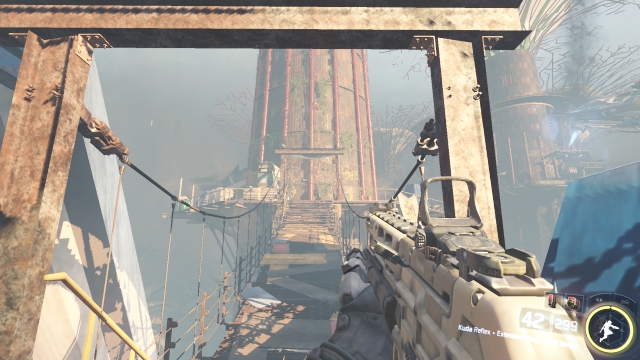
22/56Use the bridge to get from the first tree to the second one. There you can choose between riding on the rope to the right or left. Ride left. From the third tree you can use the bridge to get to the fourth tree. There, on the lower level, on an ammunition package you will find the next object.
In the fifth mission there are six collectibles.
 23/56
23/56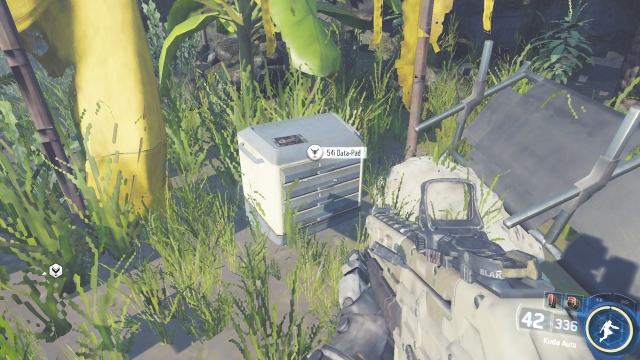 23/56
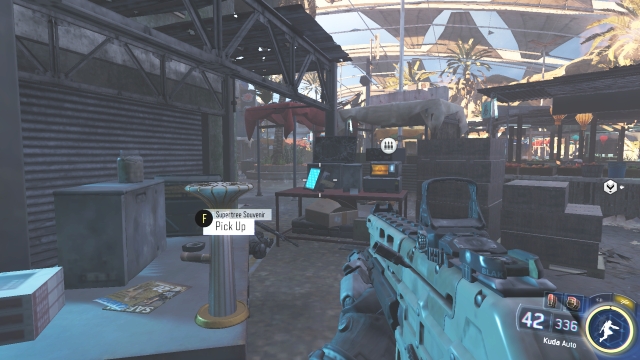
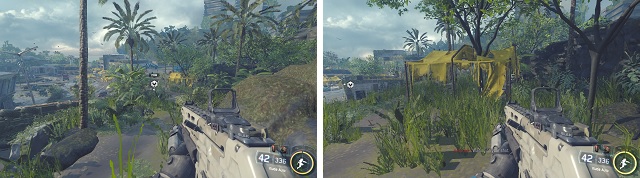
23/56At the start of the mission you will see a yellow tent. Walk inside in order to find the first collectible.
 24/56
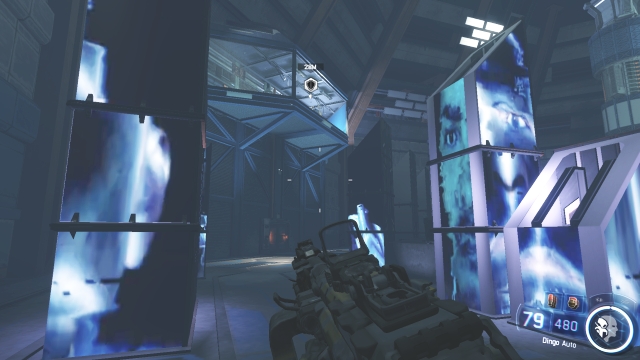
24/56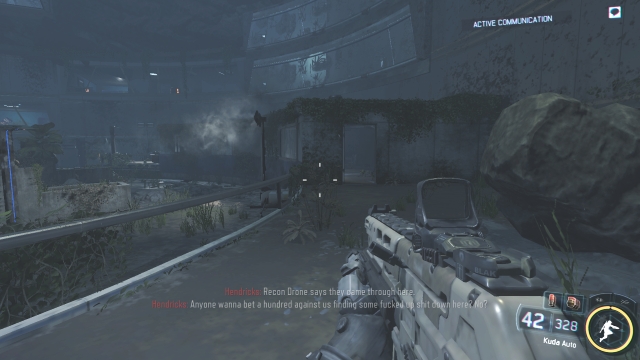 24/56
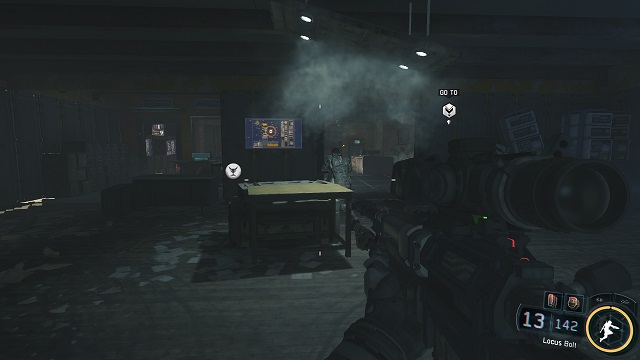
24/56Once you enter the building with many TVs, go left and in the corner you will find the hidden item.
25/56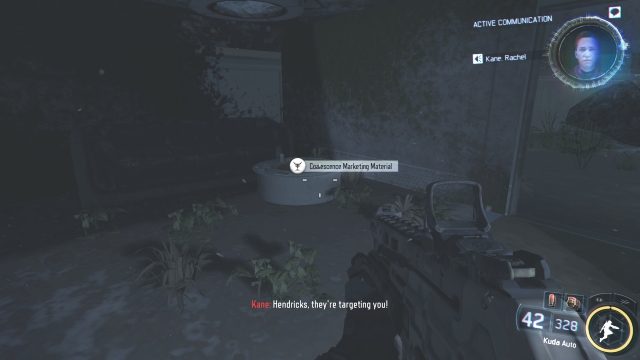 25/56
25/56Enter the small building on the right side after walking down the core. Another collectible will be located just behind the entrance.
 26/56
26/56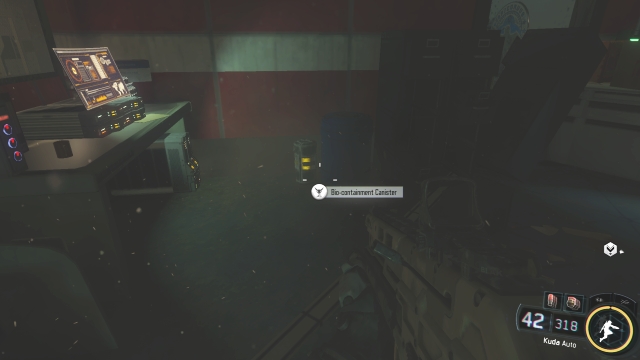 26/56
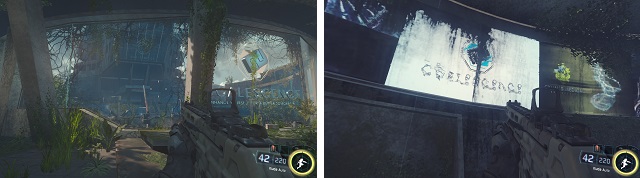
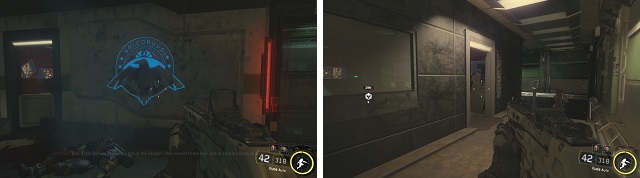
26/56After you get to the room with a blue logo on the wall, the door on the right will open and behind them you will see a room on the left. Get inside and collect another secret.
 27/56
27/56 27/56
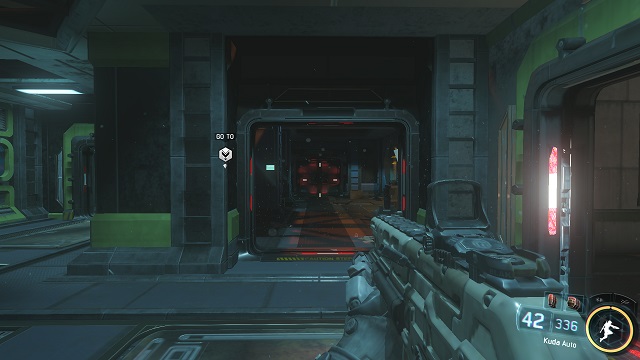
27/56In the room with many inactive robot skeletons, deep on the right side you will find another hidden item.
 28/56
28/56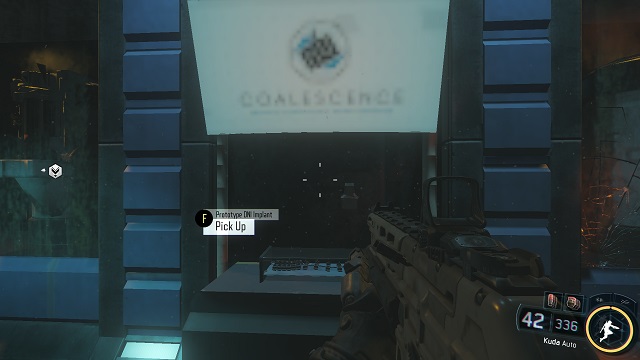 28/56
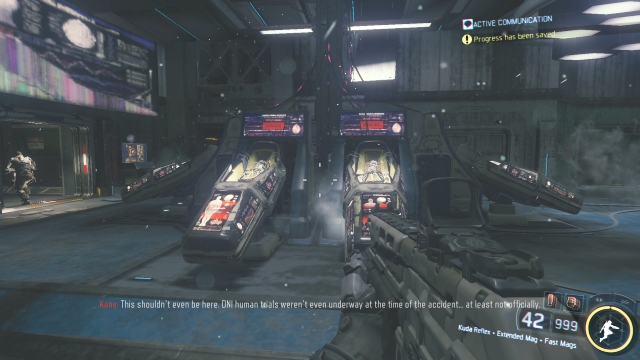
28/56After the battle in the water, walk into the room on the right side. The collectible will be lying under the monitor hanging on the wall.
Only four collectibles can be obtained during the sixth mission.
 29/56
29/56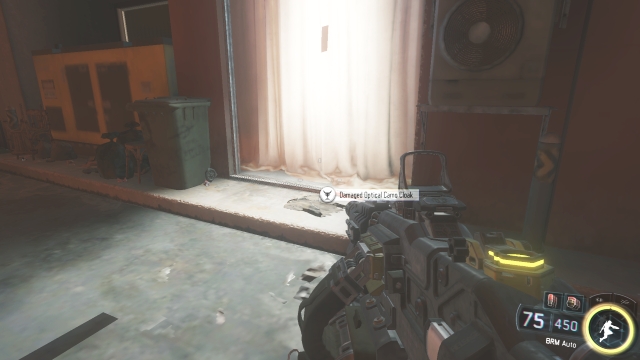 29/56
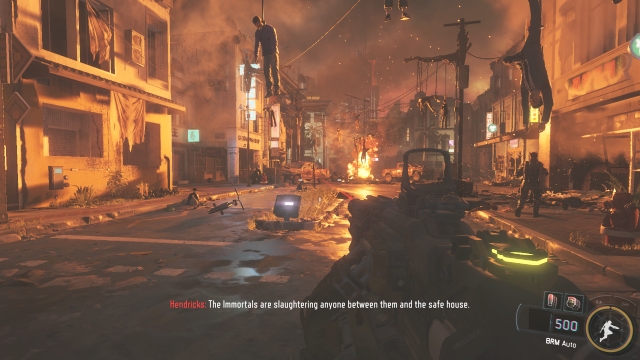
29/56At the start of the mission, just as you gain control of your character, go left. At the end of the side alley, on the left side you will find the lying cloak.
 30/56
30/56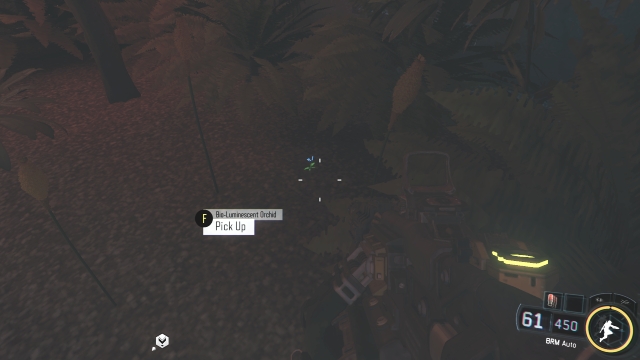 30/56
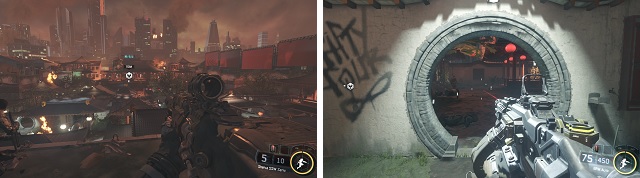
30/56During the mission in the Chinese housing, stick to the right side of the map. The flower you seek is on the right side, behind one of the round passages.
 31/56
31/56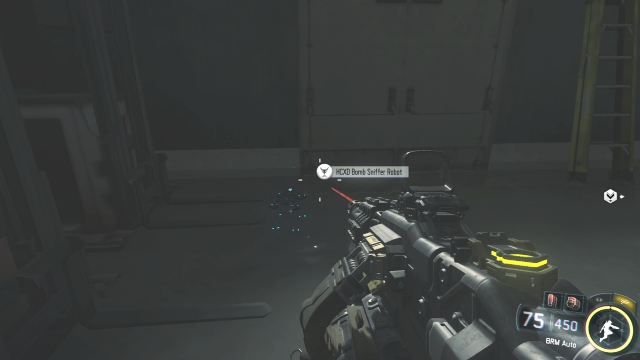 31/56
31/56Destroy the robot that will walk from the building, making a large hole in the wall. Walk through this hole and on the left side you will see another collectible.
 32/56
32/56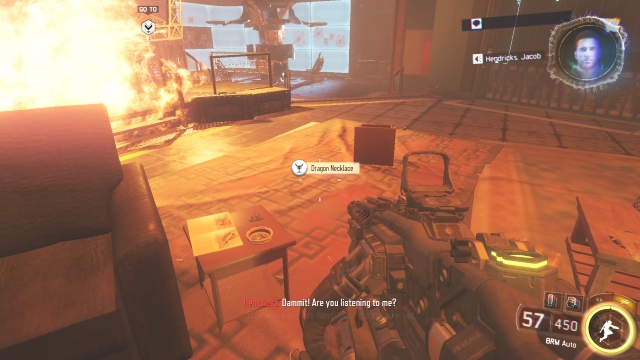 32/56
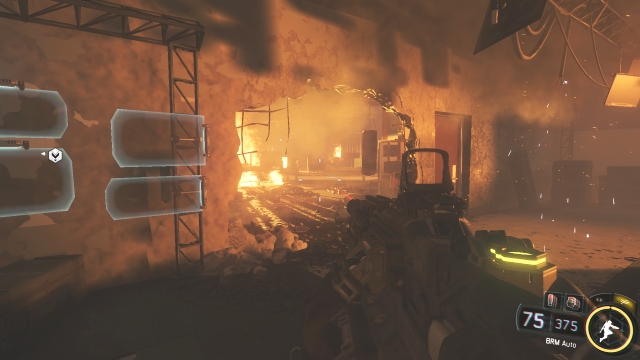
32/56After you enter the burning room through the hole in the wall, walk towards the chair on the right side. On the chair next to it you will see the necklace.
 33/56
33/56
 33/56
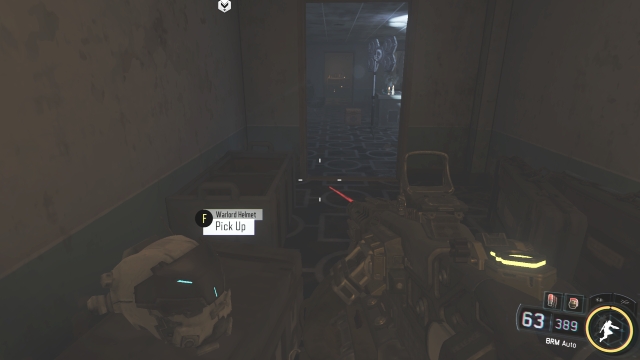
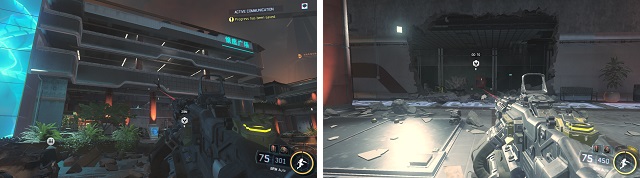
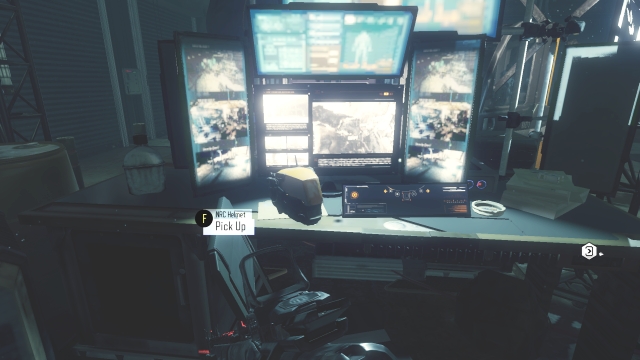
33/56Turn right and walk towards the desk at the start of the mission, when the characters will stop talking. A helmet will be lying on it.
 34/5634/56
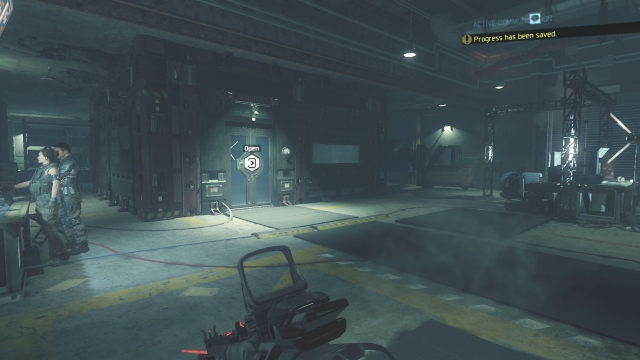
Further in the mission you will notice an escalator on the left side. Walk on it and go under the wall until you notice the collectible on the desk.
 35/56
35/56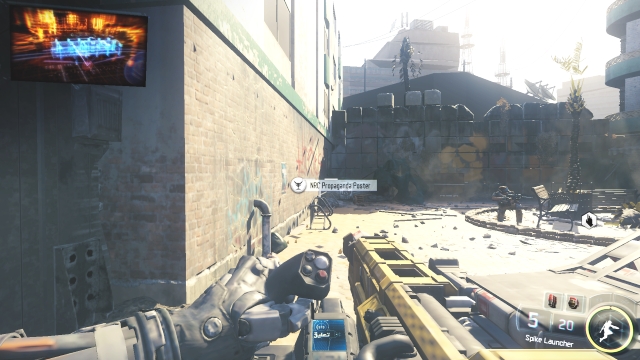 35/56
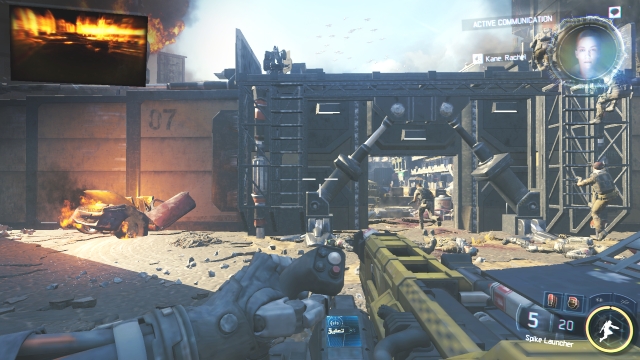
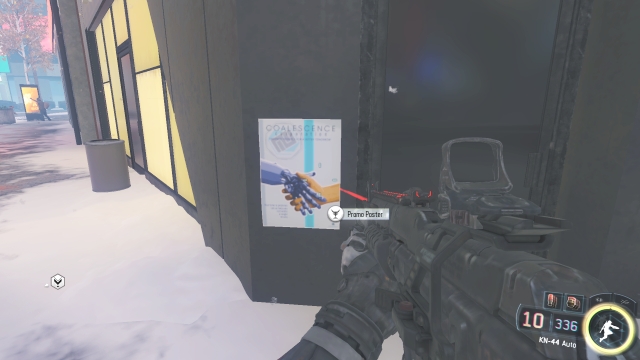
35/56After driving the car and walking through the gate, turn left and you will notice a poster on the wall - it's another collectible.
 36/56
36/56
 36/56
36/56 36/56
36/56Once you will reach the destroyed apartments, go right side and then downstairs. Keep walking ahead and you will see another collectible on the shelf.
37/56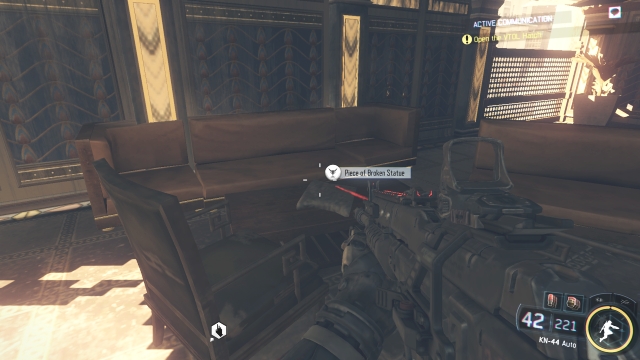 37/56
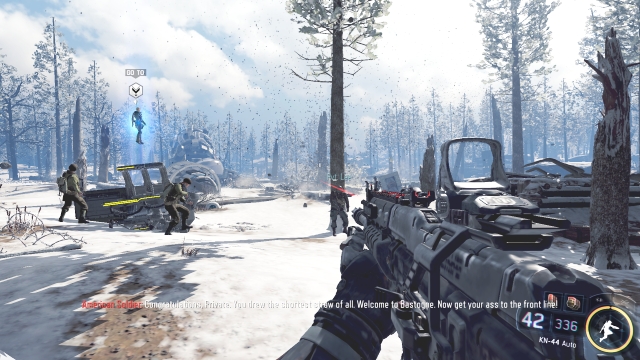
37/56After your team will find the VTOL's wreck, go right. Another collectible is on a chair. Remember that you must collect it before you open the hatch of the wreck.
 38/56
38/56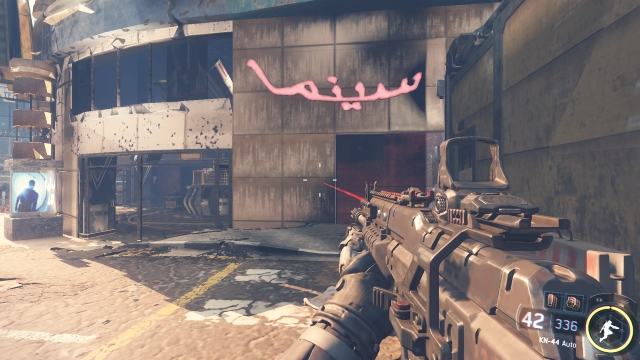 38/56
38/56 38/56
38/56The last collectible is on the second floor of the building on the right side of the battlefield on which you will fight the ASP.
 39/56
39/56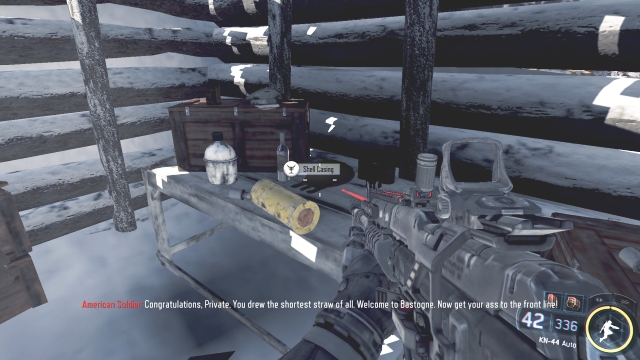 39/56
39/56At the start of the mission, when you travel back in time, on the right side you will see a small bunker. Inside you will find the first collectible.
 40/56
40/56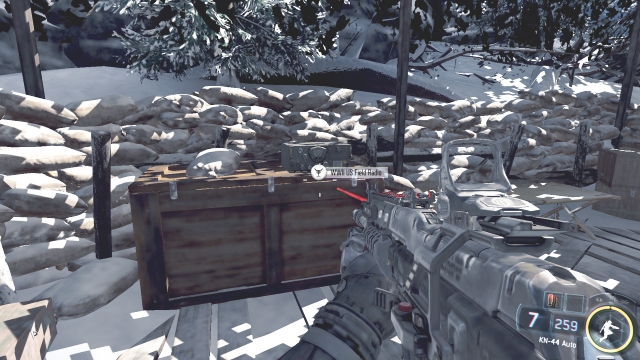 40/56
40/56Another collectible is about 100 meters further, on the left side, near the machine gun stand.
 41/56
41/56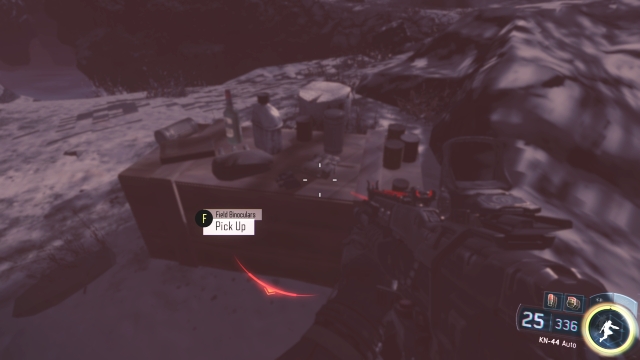 41/56
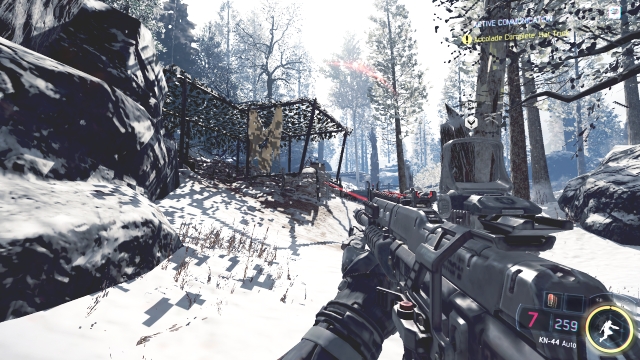
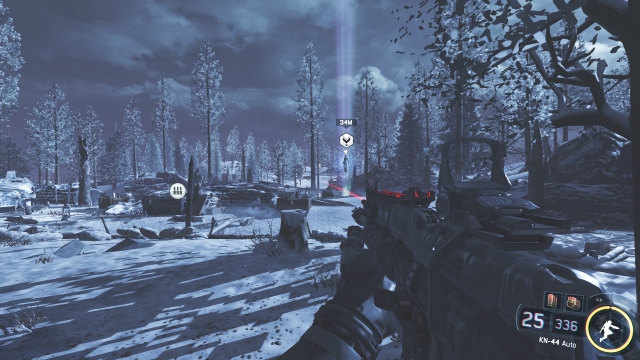
41/56The binocular is on a small wooden bar. You will see it just after you meet the wolves for the first time.
 42/56
42/56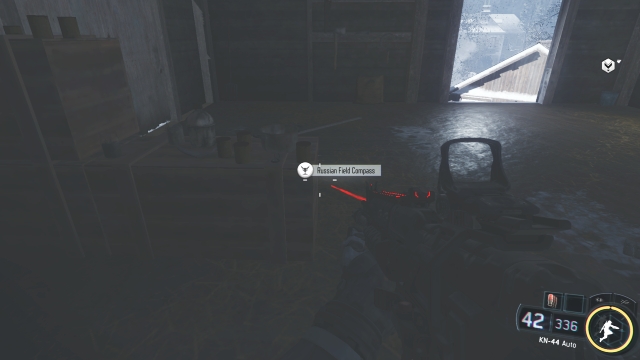 42/56
42/56The compass is located on the second floor of the stable which is on the left side from the place where you start this part of the mission.
43/56 43/56
43/56
Another collectible is near the previous one, in a small brick building.
 44/56
44/56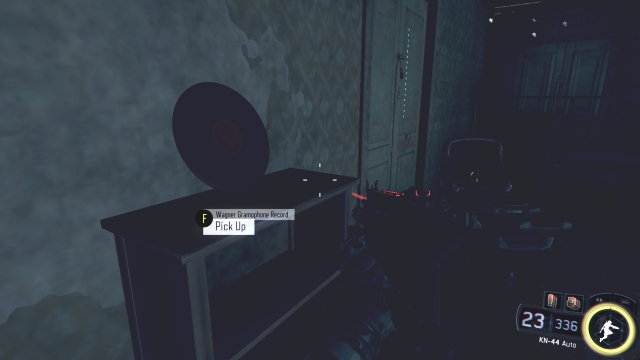 44/56
44/56After destroying the tank, enter the partially destroyed building on the right side. Walk through the rubble and turn right. The record will be lying on the shelf.
 45/56
45/56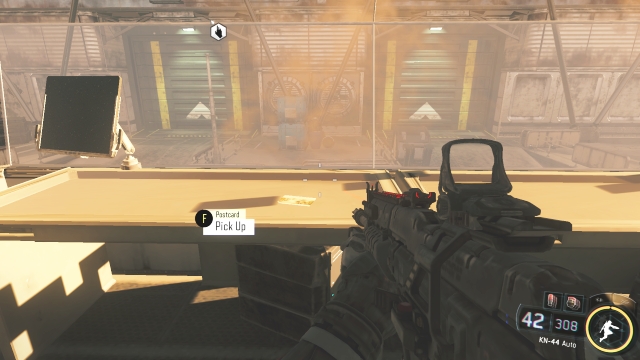 45/56
45/56After you land, enter the tower directly under the point to where you must get. The first collectible will be hidden there.
 46/56
46/56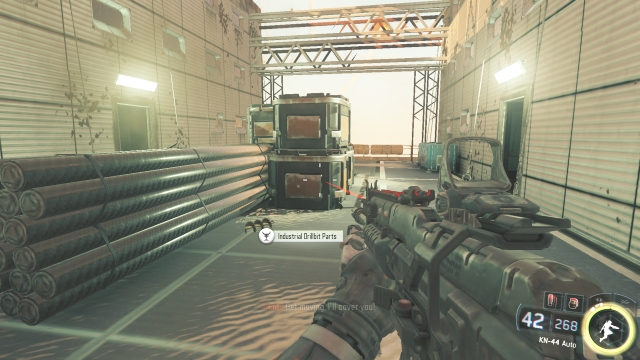 46/56
46/56Walk left after the second landing. You will see pipes between two buildings. Next to them there's another collectible.
 47/56
47/56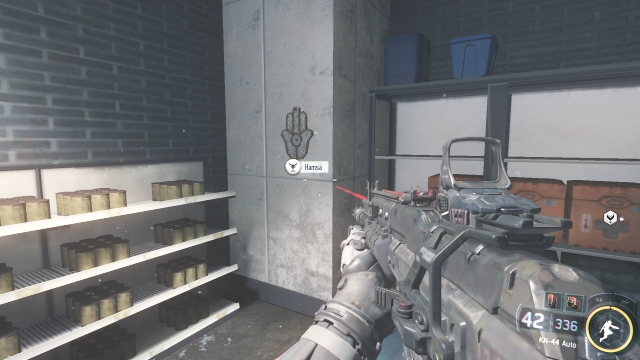 47/56
47/56The first collectible is hanging on the wall of the small shop on the left side. It can be easily recognized by the billboard and the sign.
 48/56
48/56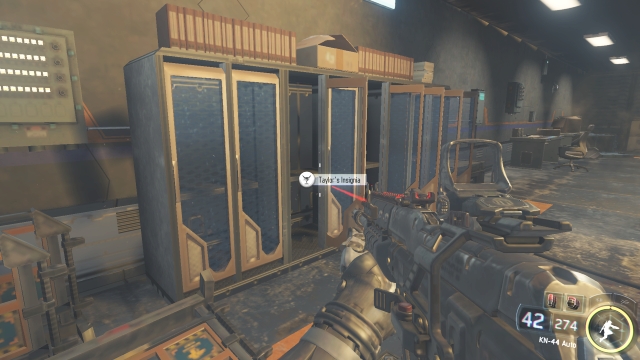 48/56
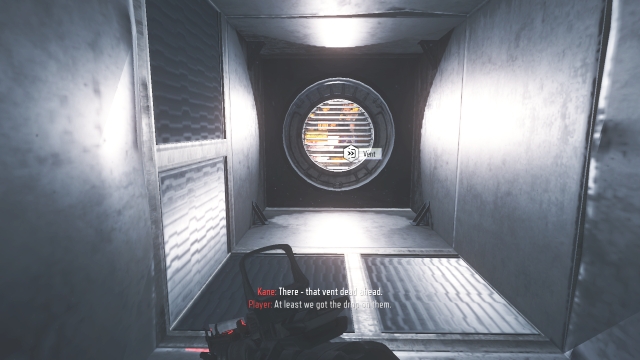
48/56After walking out of the ventilation shaft, on the left side you will notice some drawers. Inside one of them the insignia is hidden.
 49/5649/56
In order to find the next item, go up the blue stairs on the right side. They will lead you to a small office.
 50/56
50/56 50/56
50/56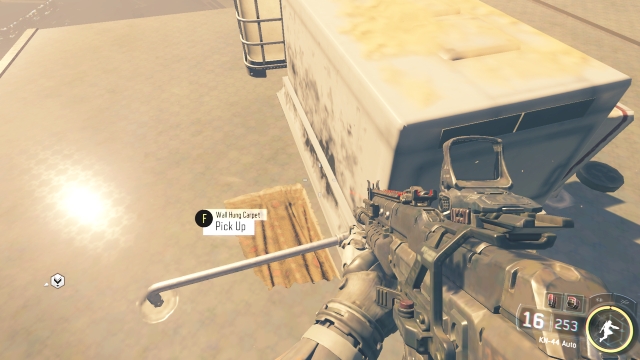 50/56
50/56Once you're on your way to the second tower, turn left and walk on the roof of the tunnel. There you will find another item.
 51/56
51/56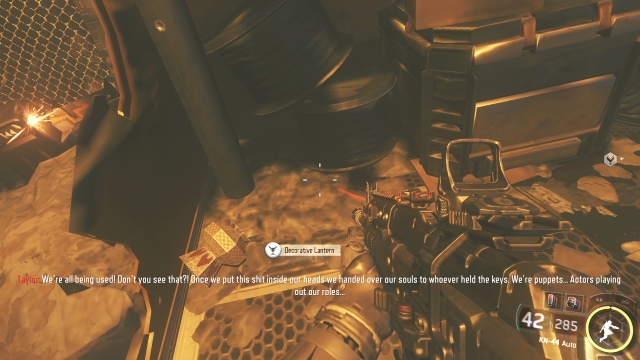 51/56
51/56This collectible is near the burning platform. It's lying at the left wall.
 52/56
52/56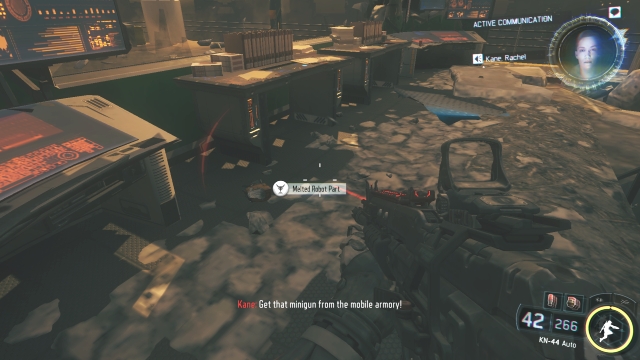 52/56
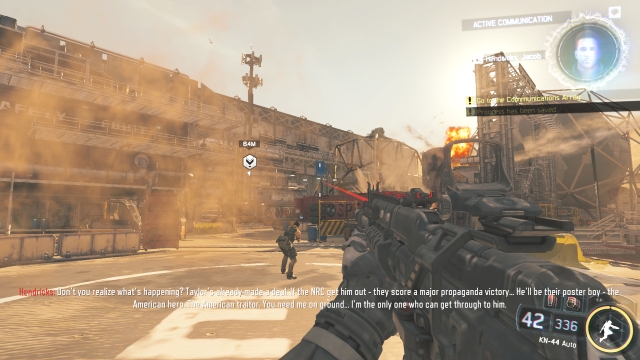
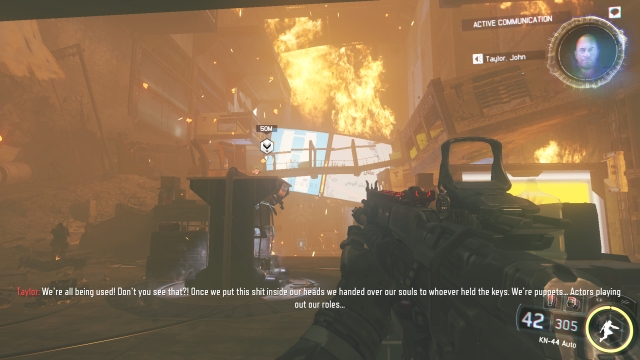
52/56When your objective is to fight the VTOL Leviathan and Taylor will take control of the NRC, enter the ruins of the building on the right side. There you will find the last collectible in this mission.
 53/56
53/56
 53/56
53/56Immediately after gaining control of the character at the start of the round, turn right and you will see a poster at the wall.
 54/56
54/56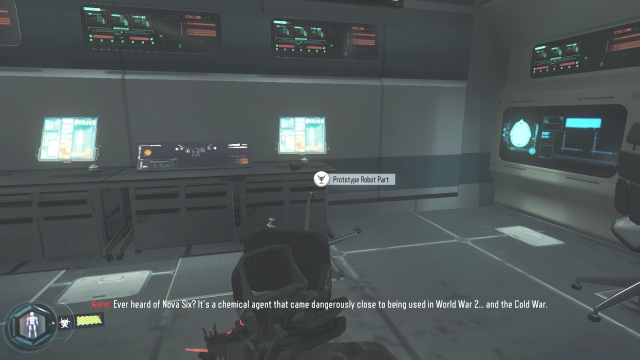 54/56
54/56Another collectible is lying on one of the desks in the room in which you will hack into the terminal.
 55/56
55/56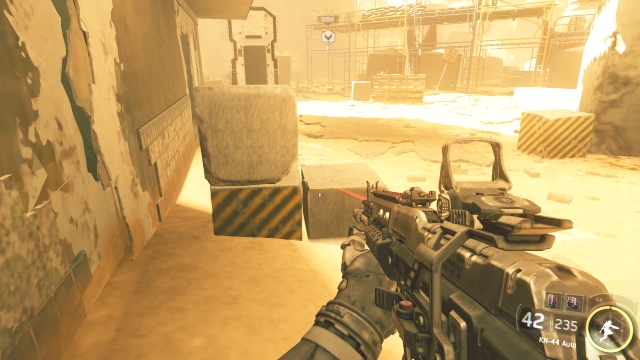 55/56
55/56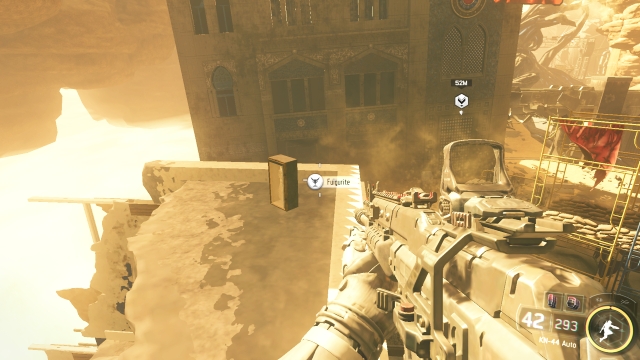 55/56
55/56Obtaining this collectible is not easy. First you must jump on the rocks, then on the first and the second balcony, then on the wall. There you will gain access to the penultimate collectible.
 56/56
56/56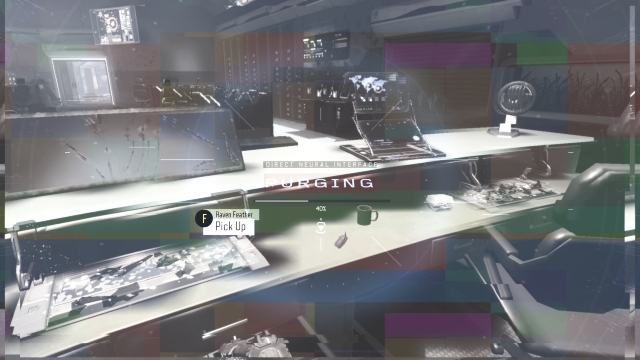 56/56
56/56At the end of the mission, a "purging" sign will appear on the screen. When it happens, walk under the wall with "Coalescence" logo. On the desk under that wall you will find the final collectible.
 Castlevania: Lords of Shadow 2 Game Guide & WalkthroughCar Mechanic Simulator 2014 Game Guide & Walkthrough
 Call of Juarez: Gunslinger Game Guide & Walkthrough
 Colin McRae: DIRT Game Guide & Walkthrough
 Company of Heroes: Tales of Valor Game Guide & Walkthrough