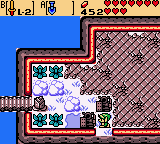
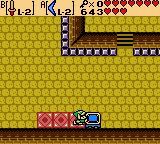
This chapter finally has Link obtaining the L-2 Sword and Shield, as well as gathering the final jewel needed to access the yet unexplored north-western region of Holodrum containing the Tarm Ruins and Lost Woods.
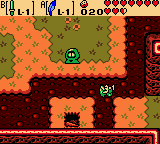
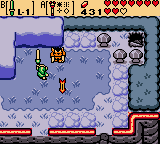
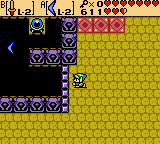
Link needs to already have the L-1 Shield in order to upgrade, so warp to Horon Village and buy one at the Shop if needed. Now, use a Gale Seed to warp to Sunken City. Swim up one and left two screens, then take the underwater path to Mt. Cucco. Once you resurface, climb the vines and head up one, right one, and up one more screen. Walk up the steps one screen and hop off the rightmost break in the ledge to fall into the portal to Subrosia below.
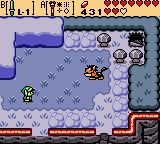
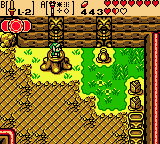
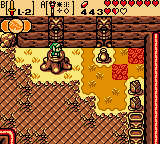
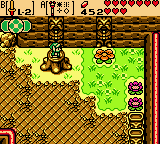
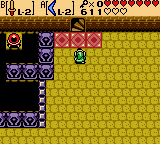
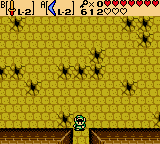
Jump across the lava above and head up one screen. Continue left two screens and up one more, then hop across the pits and head left one and down one more screen into the Subrosian Wilds. Equip the Magnetic Gloves to pull Link across the first row of pits against the pole on the right, then head right one screen. Open the chest here to obtain the Blue Ore, then walk back left one screen. Stand at the bottom of the pole which we pulled to just a moment ago and use the Magnetic Gloves to repel Link down across the pits to the bottom of the screen. Use the Roc’s Feather and jump over the pit on the left, then dig in the bare spot to unearth a Magical Ring. This ring will appraise as the Whisp Ring, which prevents Whisps from jynxing Link’s ability to use his sword.
Hop back across the pit and use the Magnetic Gloves to pull Link to the pole above. Stand on the left side of this pole and use the gloves again to repel left across the next set of pits, then head up one screen out of the Subrosian Wilds. Continue right one screen, jump back across the pits and then down one, right two, and down one more screen. You should be back at the screen with the portal you came through to reach Subrosia. From this screen, head right one screen and use the Roc’s Feather to jump across the river of lava over to the piece of land on the bottom-right, then continue right another screen. Toss aside the boulder and use the Magnetic Gloves to pull Link over to the pole on the other side of the lava stream.
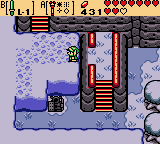
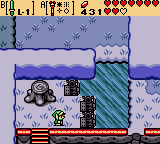
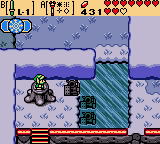
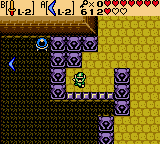
Head right two, up one, and right one more screen. Use the Magnetic Gloves to pull Link across the pits to the pole on the right, then head down one screen. Use the gloves again to pull Link left across the pits at the bottom of this screen and enter the cave. Use the staircase at the other end of this cave to reach the roof, where Link can access a chest containing the Red Ore.
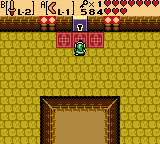
Make your way back out of this cave and repel away from the pole across the pits to the right, then head right two, up one, and left one screen. Enter the Great Furnace factory and head up one screen, then speak to the Blue Subrosian. Tell him you came to mix the Red and Blue Ore and he will do so, creating the Hard Ore in the process. Walk up and grab the Hard Ore, then exit the factory.
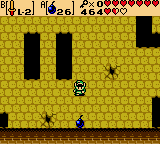
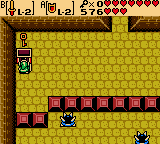
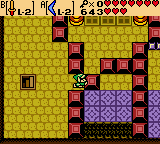
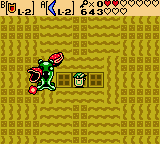
Head right one and down one screen. Walk down the steps on the right and continue left one, over the lava and left another screen. Continue up one screen from here, then use the Magnetic Gloves to repel across the pits to the left. Keep going left for three more screens. If you do not have the L-1 Shield, enter the Subrosian Shop and buy one for 5 Ember Seeds, then exit the shop. Continue up one and enter the hallway, passing through and exiting on the left side, then head left two more screens. Enter the Subrosian Smithy’s building here. Speak with the Subrosian at the counter and when he asks Link what he wishes to do with the Hard Ore, choose “Do whatever”. The Subrosians will upgrade Link’s shield to the L-2 Iron Shield! The improved shield can deflect more attacks than the Wooden Shield, such as fireballs from River Zoras. However, this shield can still be eaten by Like-Likes, though it can be purchased from Horon Village Shop again for
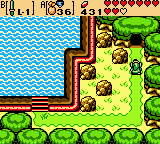
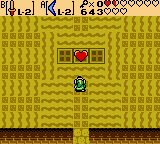
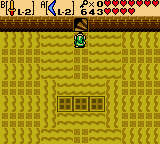
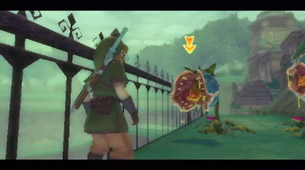
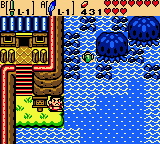
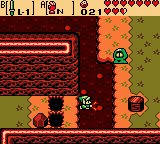
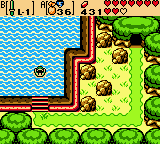
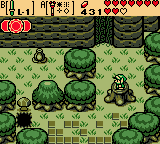
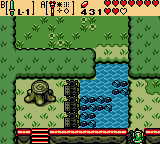
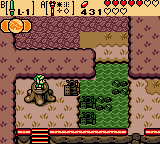
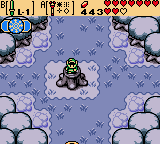
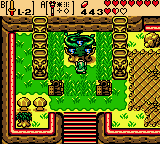
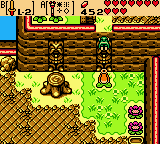
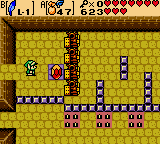
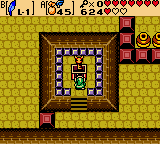
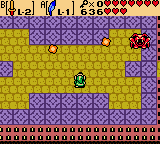
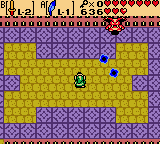
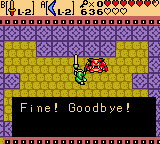
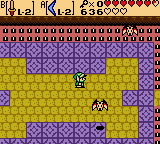
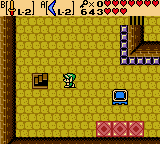
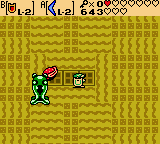
Leave the Subrosian Smithy, then head right two and up three screens. Enter the vortex and travel to the Woods of Winter. Use a Gale Seed and warp to North Horon, then head down one, left one, and up one screen. Walk down the steps on the left and enter the water, then swim left one and down five screens. Walk up the steps and enter the tree-house on the right. Speak with the Old Man inside who will give Link the Round Jewel! With all four jewels now obtained, Link’s next destination will be the Tarm Ruins, located in the yet unexplored upper-left region of Holodrum.
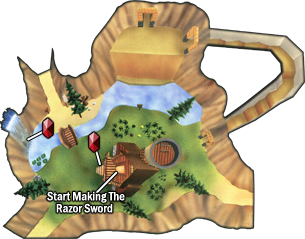
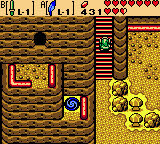
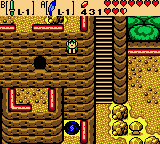
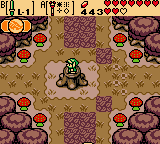
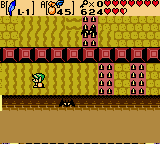
Exit the Old Mans house and use a Gale Seed to warp to Spool Swamp. Head right one screen, then head up through the hollowed log one screen. Walk up and press against each of the indentions in the wall to place all four jewels. When the gate opens, head up one screen into the Tarm Ruins.
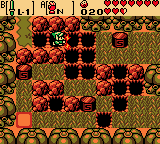
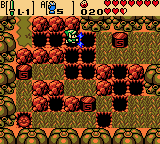
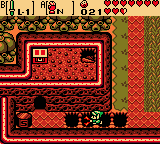
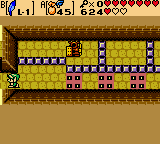
Hop on the stump and change the season to Summer, then climb the vines up one screen. Continue left one screen and climb down the vines one screen here. Push the Armos Statue in any direction to make some steps appear on the leftmost wall. Climb back up the vines you descended, head right one screen and descend the vines here one screen down.
Use the stump to change the season to Winter, then head left one screen and walk up the steps. Cross the path of snow and walk up the steps on the left wall one screen. Push the bottom two Armos Statues “right” once each, then use the stump in this screen to change the season to something other than Winter. The statues, now in the water, can be crossed over to reach the other side.
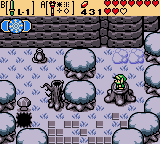
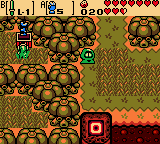
Use the stump to change the season back to Winter, then cross the frozen pond right one screen. Replacing the Red Armos Knights will be a Golden Lynel, the third golden beast. Defeat the Lynel and head back left one screen.
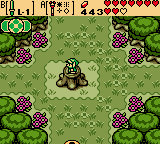
Hop on the stump and change the season to Autumn, then swim across the pond and head right one screen. Defeat the Red Armost Knights, then toss the mushrooms growing here aside to access the stairwell in the corner. Inside this cave, use your shield to deflect seeds shot by the Deku Scrub back at him. He will give Link a hint about directions needed to take in the Lost Woods.
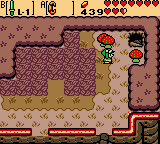
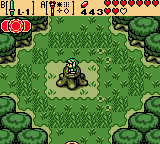
Exit the cave, then head left one screen. Swim through the pond, then walk north across the submerged Armos Statues up one screen. Toss the mushrooms aside and head left one screen. You can bomb the cracked wall to the north which leads to a Great Fairy Fountain if needed.
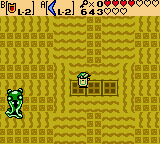
Continue down two screens and burn down the lone shrub growing here to discover a stairwell. Inside is a singing Deku Scrub who will ask you to play the Phonograph for him. The Deku Scrub will become so inspired by the tune that he will teach Link directions to his “secret spot”. This is actually the final part of the trading sequence. Exit the hideout and head left one and up one screen.

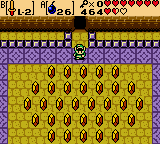
This screen is the start of a maze known as the Lost Woods. Link must head the correct directions, while changing the season in each area, to reach a desired destination. Like-Likes will spawn infinitely from the openings around the screen, so be careful not to run into them when taking a route.
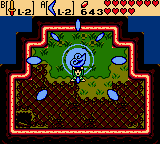
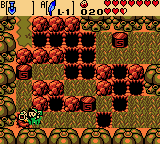
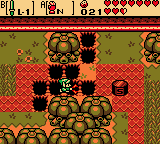
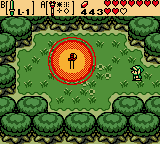
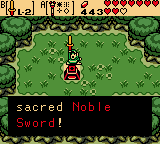
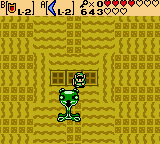
The first path to take is that which leads to the L-2 Sword. Link needs to start by changing the season to Winter in the current, first screen. Head left once and change the season to Autumn, then left again and change the season to Spring. Continue left another screen and change the season to Summer, then head left one last screen. Link will reach the “grove” of the L-2 Noble Sword! When Link has full health, the Noble Sword can shoot “sword-beams” in the direction Link is facing. Walk up and touch the pedestal to grab the sword, then head right one screen.
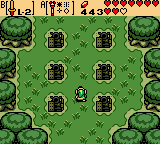
The next destination is more the actual “ruins” of the Tarm region. Change the season to Winter and head left once, then to Autumn and down one. Change the season to Spring and go right one screen, then change to Summer and head up one screen. Be careful not to get close to the Armos Knights here as they will awaken and continue up two screens.
Head right one screen and use the stump to change the season to Summer, then head back left one screen to the Gale Seed tree which has now sprouted Gale Seeds. Swipe the seeds down from the tree, securing this spot as a warp point, then head back right one screen to the stump.
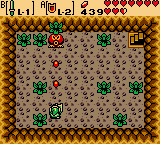
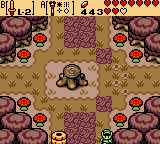
Change the season to Autumn this time and again, head back left one screen. Toss the mushrooms aside and burn the shrub growing in the lower-left corner of this screen to uncover an underground room. Inside, Link will find a chest containing a Gasha Seed! Leave this and head right one screen to the stump again.
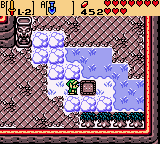
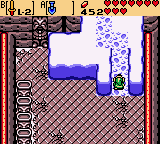
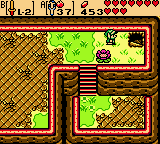
Change the season to Winter, then head down one and right one screen. There is a bunch of snow here. Just north of the horizontal row of three snow patches, roughly in the middle of this screen, hides a Soil Patch that can be cleared with the Shovel. Continue up two screens from here, then climb the steps and go left one screen. Push the lower Armos Statue of the two either “left” or “right” and jump off the ledge Link now has access to down one screen. Change the season to Spring, then use the big flower to shoot Link back up onto the ledge he just came down.
Right one screen from here, be warry of the Old Man hiding out beneath the rightmost shrub as he will take 200 Rupees from Link if spoken to. From the screen with the Armos Statues, head left one screen and cross the bridge. A mysterious old woman will appear and warn Link of the impending doom Holodrum will suffer should he rescue the Din, then disappear. With that, the tower which stands before Link is actually the sixth dungeon in his quest: The Ancient Ruins.
~First Floor~
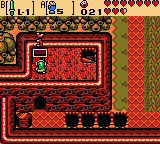
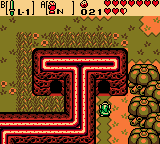
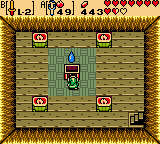
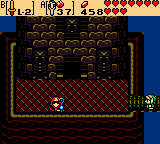
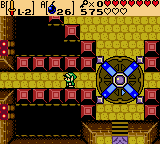
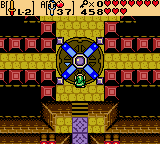
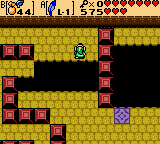
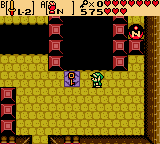
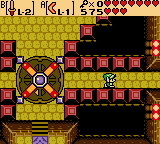
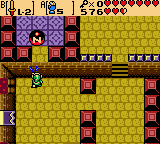
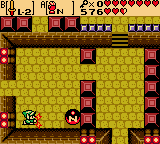
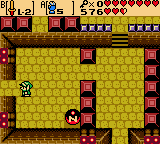
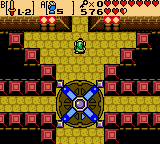
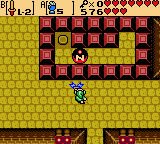
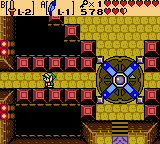
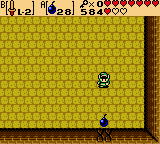
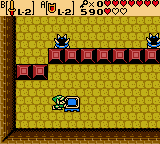
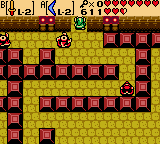
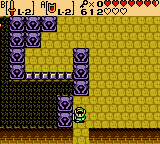
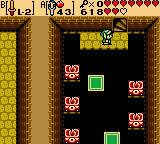
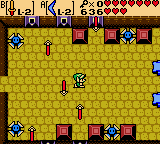
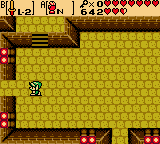
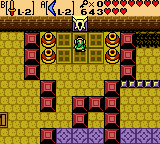
Link enters this dungeon at room 1F-D3. Head straight up two screens to room 1F-B3, where you’ll notice a peculiar circular platform in the center of the room. The direction of the flashing arrows indicate which direction the platform will turn if Link steps onto it from either side. Once it turns, the direction of the arrows will shift opposite of what they were, so stepping into the platform again would rotate it the opposite direction. Walk up and step onto the platform and it will turn clockwise, facing Link down the rightmost path. Continue right two screens from here to 1F-B5.
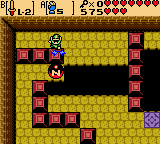
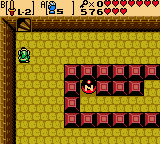
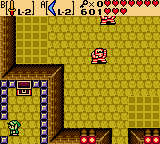
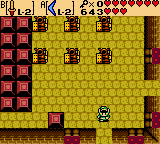
Be careful to avoid the Blue Blade Traps that will shoot at Link as soon as he enters this room and make your way to the right side. Open the chest to obtain a measly 5 Rupees, then head down one screen to room 1F-C5. Bomb the middle portion of the lower wall in this room to reveal a hidden passage and head through to 1F-D5. There are rupees scattered about which equal about 100 in total, so gather them and head back up one screen to 1F-C5.
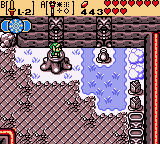
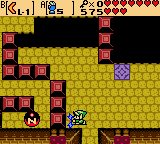
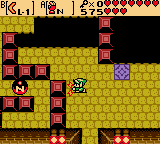
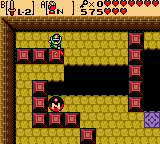
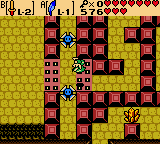
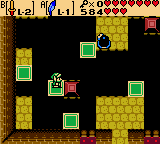
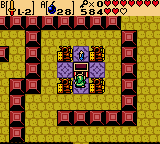
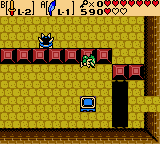
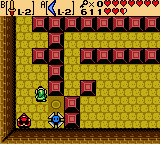
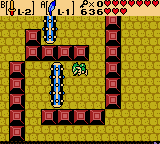
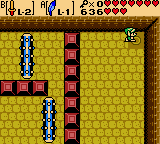
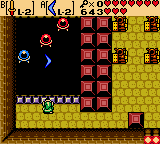
Head left two screens to the right side of room 1F-C3. Walk up the steps and up one screen back to the rotating platform, room 1F-B3. Step onto the platform, this time turning it “left”, then head left one and up one screen to 1F-A2. You may want to go ahead and defeat the enemies that will get in the way during this next part, then equip the Magnetic Gloves. Stand across from the magnetic ball on the left and use the gloves to attract the ball towards Link. Walk up so that the ball is now beside the third block going up, then repel the ball away. Use a combination of Pegasus Seed and Roc’s Feather to long-jump across the gaps and make your way to the upper-left corner of the room. Use the Magnetic Gloves again to attract the ball up towards Link and walk to the right, pulling the ball up onto the ledge with Link. Repel the ball away onto the other side of the gaps, then head back across and pull the ball onto the purple square. Stand below the ball and repel it away from Link across the gaps above, but keep holding down on the button and walk to the right. Now, pull the ball using the opposite polarity down and onto the switch on the right side of the room to have a Small Key fall onto the purple square. Grab it and head down two screens to room 1F-C2.
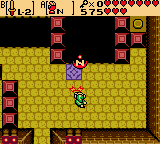

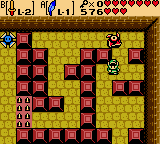
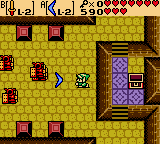
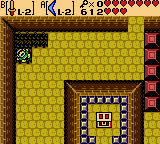
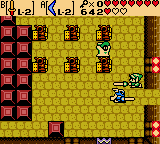
Defeat all the Ropes in this room and push the block in the lower-right any direction to unlock the door on the rightmost wall. Head over to the left side of this room and walk up the steps, then up one screen along the path to access a chest containing the Dungeon Map! Head back down one screen and then right one through the unlocked doorway to the left side of room 1F-C3. Use a Small Key on the locked block and continue up the steps, up one screen to room 1F-B3. Step onto the rotating platform and head right one screen to room 1F-B4.
Continue around right one, down one, and left two screens to 1F-C3. Walk up the steps and over to the left side of the room, then use the Magnetic Gloves to pull the ball towards Link. Attract and repel the ball while walking down the leftmost set of steps to get it off the ledge, then continue maneuvering it onto the switch at the bottom. Head left one screen through the opened doorway to room 1F-C2.
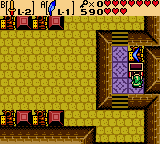
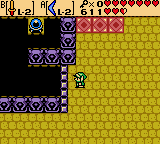
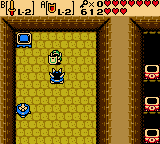
Head up one and right one screen to 1F-B3 and step on the rotating platform, this time turning Link to the northern path. Head up one screen to 1F-A3. Use the Magnetic Gloves to move the ball within the blocked center of this room onto the switch, opening a staircase in the upper-left corner leading to the upper level. Head up this staircase to the second floor, room A3.
~Second Floor~
Make your way to the right side of this room by jumping over the spiked floors while also being quick enough to avoid the Blue Blade Traps. Follow the path up and around towards the bottom of this screen while avoiding the red Spinning Blade Traps that will follow and head down one screen to the northern side of 1F-B3. Open the chest on the left to obtain a Small Key, then head back up one screen and make your way back to the left side of the room. Fall down the pit at the bottom to the first floor, room A3.
~First Floor~
Head down one screen to 1F-B3 and step onto the rotating platform which turns Link towards the leftmost path. Follow it left one screen, then continue down one more screen to 1F-C2. Defeat all of the Ropes in here and push the lone block in the lower-right as before, then head through the unlocked door right one screen to 1F-C3. Make your way up one screen back to the rotating platform in room 1F-B3 and use it to take the leftmost path again. Make another circle around to this platform as you just did to have the it turn towards the rightmost path when Link steps onto it. Once you do so, head right one screen to 1F-B4.


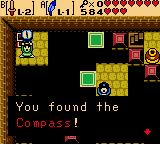
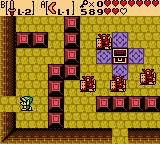
Use a Small Key to unlock the door at the top of this screen and head through 1F-A4. While avoiding the Beamos’ attacks, make your way across the moving green platforms towards the upper-left side of the room. Link will reach a chest containing this dungeon’s Compass! Now, ride the green platform going left to right against the top of the room and make your way onto the area with the Beamos. From there, continue across the platforms and over to the right side of the room, then continue right one screen to 1F-A5.
Follow the lower path to the right and then up to reach a switch. Equip the Pegasus Seeds and step onto the switch, then head back down and through the first path going “left” at the fork. The floor will begin to disappear throughout the room, so quickly follow this path towards the top of the room and left one screen to the upper-right section of 1F-A4. The vases here will contain Bombs, so stock up if Link is low and head up the staircase to the second floor, room A4.
~Second Floor~
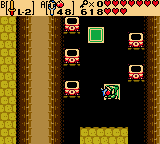
Open the chest on the left side of this room to obtain 10 Bombs. Use one on the cracked portion of wall in the lower-right of this room and head through to 2F-B4. Make your way to the chest in the center of the room to obtain 5 Rupees from it, though this will also awaken the four Armos Statues guarding the chest so quickly move back out of the way to avoid contact. The room connected to the south is merely a trap that locks Link inside until he defeats all of the Shrouded Stalfos, so avoid it and make your way clockwise around the path to the left side of 2F-B4. Head through the passage left one room to 2F-B3.
Defeat the Spiked Beetles to get them out of Link’s way and push the trampoline over to and on top of the purple square in this room. Jump on it and hold “up” or “left” to land safely on the ledge above in room 3F-B3.
~Third Floor~
Head down one and right one screen to room 3F-C4, where the door to the previous room will close behind Link. Walk to the right side of this room and open the chest on the ledge to obtain the L-2 Magical Boomerang! This upgraded weapon can damage more enemies, be thrown for longer distances, and also have its flight path controlled by keeping the button held down to throw while simultaneously pushing any direction. Obtaining the boomerang will cause the Armos Statues in the room to awaken, though they can now be defeated easily with a couple of hits from the Magical Boomerang itself. Once they are all defeated, head back through the now unlocked door left one screen to 3F-C3. Fall down the pit at the bottom-left of this room and Link will fall all the way down to the first floor.
~First Floor~
Head left one screen to 1F-C2. Walk up the steps on the far left side of the room and continue up one and left one screen to 1F-B1. Walk down the steps here and head straight up to the upper-right corner of this room to access a chest containing 10 Rupees. Now, make your way through the path in this room, avoiding the Spinning Blade Traps along the way, until you reach a switch in the lower-left section. Step on it the switch to unlock the doorway at the top, then head up and through it one screen to 1F-A1.
Stand against the small purple blocks surrounded by statues in this room and toss the Magical Boomerang, controlling its direction so that it strikes the blue switch at the top. A staircase leading to the second floor will then appear in front of the red tiles. Head up the staircase to 2F-A1.
~Second Floor~
The room to the right is another “trap room” filled with spinning Green Blade Traps, so avoid entering as nothing useful can be obtained here. Instead, head down one screen to 2F-B1. Stand against the small purple blocks and, as before, use the Magical Boomerang to hit the moving blue switch. This will unlock a door at the bottom. Use Link’s Shield to deflect the arrows shot by the devices on the upper wall while you walk down towards the unlocked door, then head through down one screen to 2F-C1. Fall down the pits to the left and Link will end up back on the first floor, room C1.


~First Floor~
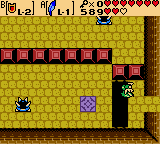
Continue down one screen, avoiding the Spiked Beetles, to room 1F-D1. The vases at the bottom of this room will contain two Fairies and some Ember Seeds if needed. Circle around and head up one screen via the rightmost path at the top back to 1F-C1, this time on the right side with moving green platforms and unlit torches. While riding either green platform, use the Slingshot with Ember Seeds to light all the torches, causing a staircase to appear on the ledge at the top of the room. Head up the staircase to the second floor, this time in the blocked-off upper-right section of 2F-C1.
~Second Floor~
Grab the Pegasus Seeds and Fairy from the vases below and head right one screen to 2F-C2. Equip the Pegasus Seeds and use one after grabbing the big red rupee here. The Armos Statues will disappear and the walls to the north and south will begin to collapse. While running with Pegasus speed, and also using the Roc’s Feather to jump over spiked floors and avoid Keese, head right one screen, then continue counter-clockwise around and via the lower path left one screen. Once you get all the way to the left, exit the collapsing room left one more screen to reach the lower section of 2F-C1. Climb the stairs here and open the chest to obtain the Boss Key!
Head right one screen to 2F-C2 again where the room will have returned to normal. Enter the staircase at the lower-left corner to the third floor, room C2.
~Third Floor~
Defeat all the Shrouded Stalfos in this room, then push the upper-left block in any direction to unlock the door at the top. Head up one screen to 3F-C1. Defeat all the Ropes in this room and lift the vase at the top to reveal a Fairy. Fall down the pits at the upper-right corner of the room to fall to 2F-C2 for a brief moment.
Be careful not to fall off the ledge with red tiles and follow the path to reach a chest. Open it to recieve a Small Key, then make your way back around this path and use the blue trampoline to return to the floor above. Unlock the door at the top of this room and head through to 3F-A2, where Link will face the mini-boss of this dungeon.

* Mini-Boss: Vire *
Vire will fly around the room edges of the room, shooting either red or blue orbs towards Link and also charging towards him during the early parts of the battle. The red orbs will split into multiple, smaller orbs that scatter in all directions. Both orbs can be destroyed by slashing them with the Noble Sword. Early on, Vire will charge at Link, making it easy to slash him once each time. Later, try to stand on the outter edges of the room where Vire tends to fly and slash him when he comes close. Eventually, Vire will separate into two smaller Keese-like creatures. Do the same with these smaller portions of Vire until he is defeated.

Grab the Fairy released by Vire and head right one screen to 3F-A3. Keep walking to the right in this room without pause and Link should avoid all the arrows and Blue Blade Traps that attempt to hit him. Continue right one screen to 3F-A4 and use the Roc’s Feather to jump over the rollers while making your way through the path. Once you reach the right side of the room, step on the switch in the upper-right corner to open the door at the bottom. Head through this passage, down one screen, to 3F-B4.
There are two switches in this room that will be random as to what they activate when Link steps on them. Either Ropes will fall from the ceiling, which must be defeated to try the switches again, or a staircase will appear in the lower-right section of the room leading to the fourth floor. Once you get the staircase to appear, head up to 4F-B4.
~Fourth Floor~
Defeat or avoid the four Floormasters that spawn in this room as you make your way to the passage at the top and head up one screen to 4F-A4. Use the Magnetic Gloves to pull the ball from the ledge at the top of the room and use it to make contact with and destroy the two Beetles. This will unlock a doorway on the left, so head through it left one screen to 4F-A3.
Defeat the two Blue Armos Knights and Green Wizzrobe in this room, then head over to the left side. Stand against the small purple blocks and use the Magical Boomerang to make all the blue switches “red”, opening a door at the bottom. Head down one screen through it to 4F-B3.
Push the trampoline “down” twice and “right” four times and hop on it, holding “up” to land on the floor above safely. Walk up against the small purple blocks and use the Magical Boomerang to hit the blue switch, turning it “red”, then head back down the pit to the floor below. Walk over to the left side of this room where a staircase now appears. Head up the staircase to the fifth floor, room B3.
~Fifth Floor~
Now on the left side of the room from just a moment ago, push the out-of-place block to the “right” to access the center of the room. The top vases above each will contain a Fairy if needed. When ready, head through the locked door here leading to the boss’ lair.
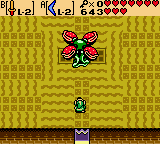
** Main Boss: Manhandla **
Like Buzzblobs, Manhandla will electrocute Link if he is hit with a sword. Instead, Link must use the Magical Boomerang to hit the heads of Manhandla while their mouths are open three times each to knock them off. The best strategy to use is to try and stay on a section of floor that is not moving and toss the boomerang on the opposite side of Manhandla from Link, allowing it to come back to Link while hitting as many heads on the boss as possible. Manhandla will often shoot fireballs towards Link and move about the room, increasing in speed with each head it loses.. When all the heads have been knocked off, hit Manhandla’s body with the boomerang until it splits apart, revealing a red “heart” inside. Slash the heart with your sword once and the boss will be defeated.
Pick up the Heart Container in the center of the room and head up the staircase that opens at the top. Link will emerge on the roof of the tower, where the sixth Essence of Nature, the Blowing Wind, can be obtained.