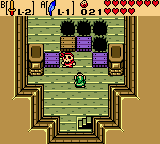
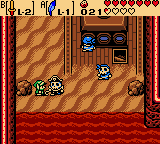
Link should first check back in with Bipin and Blossom to see how that baby is doing. Use a Gale Seed to warp to Horon Village, then head up one, left two, and down one screen to reach their house. Inside, Blossom will tell Link that her baby has had trouble sleeping and ask what he thinks she should do with the child to solve this. Select either “Sing him a song” or “Play with him” to satisfy Blossom, then leave the house. This will be the last time Link will have to check in on the baby during his current quest.
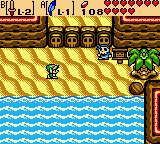
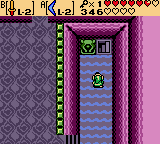
Head up one and right four screens, exiting Horon Village into the Eastern Suburbs. Continue down one screen through the log into the Eastern Coast area, then go right two screens and speak with the pirate at the gate. He will tell Link that he wishes to get back to his pirate buddies but has been put on assignment to find the Captain’s Bell. Afterwards, use a Gale Seed and warp back to Horon Village, then head up one, left one, and down one final screen to reach a staircase. Head down and enter the portal to travel to the Pirate’s House in Subrosia.

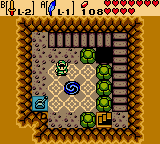
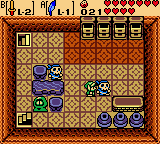
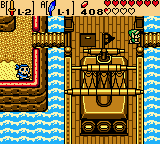
Jump off the ledge and enter the House of Pirates from the entrance. Walk up and speak with the Captain, who will, after completing the Ancient Ruins dungeon, sense Link is a “competent adventurer” and task him with finding a lost bell. Walk upstairs and speak with the Pirate on the far right, who will press the drawers in on the shelves in this room in a specific order. This will be the pattern needed to get through the skull gate on the Eastern Coast later. The pattern is: From the left, 3rd drawer (x2), 2nd drawer (x1), 1st drawer (x2), and 4th drawer (x3). Continue up the next flight of stairs to the roof and enter the portal to Horon Village.
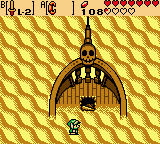
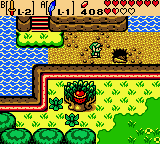
Exit the underground room and head up one and right three screens into the Eastern Suburbs. Continue down one screen into the Eastern Coast from there, then head right two screens and speak with the Pirate again. Having been relieved of his duties, the Pirate will run off to help his friends dig their ship out of the sand in Subrosia. Press against each skull head in the gate above in the same order as the drawers from the Pirate House earlier, and the gate will sink into the sand. Head up one screen into the Samasa Desert.

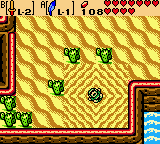
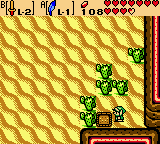
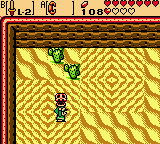
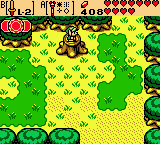
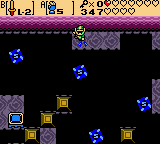
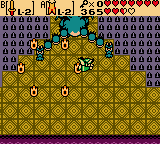
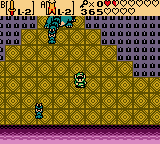
Each area in the desert is littered with cacti that, when bumped into, will damage Link and take a quarter-heart of his health. There are also infinitely spawning Orange Leever and, sometimes, Pokey’s: Cactus-like creatures that have a three-sectioned body, each of which must be destroyed in order to kill the monster completely.
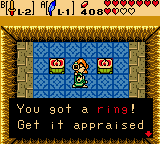
Aside from the bell, there are many more items Link can gather by exploring this desert. Start by heading right one and down one screen. Drop into the quicksand to be sucked into a cave below, then dive down the deeper square of water into an underwater cavern. Navigate the cavern right one screen, slashing the Cheep-Cheeps out of your way as you go, until you can resurface. Link will be in a small cave with a staircase. Head up the staircase and open the chest to recieve a Magical Ring! This ring appraises as the L-1 Rang Ring which increases the damage done by the Boomerang by 1.


Hop off the ledge and continue left one and up one screen. Enter the half of the pirate ship here and speak to the Pirate Ghost, who talks about perishing in the harsh desert while searching for the Captain’s Bell. The Pirate Ghost will ask Link to find and retrieve his physical body’s skull for him before searching for the bell, so that item will have to come first.

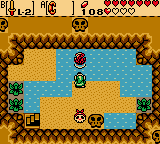
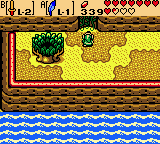
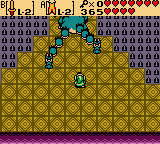
Leave the ship and head right one screen, where a Soil Patch can be accessed in the spread of cacti to the lower-right. Continue up three screens, avoiding being sucked into the quicksand along the way, to reach an oasis of sorts. The cracked portion of the upper wall leads to a Fairy Fountain if needed. Speak to the Pirate Skull on the right and he will agree to help Link look for the bell. Using the Power Bracelet, carry him about the desert and get close to the portions of quicksand throughout to see which makes the Pirate Skull . When he does this, sink down in that portion of quicksand to find and obtain the Rusty Bell.


Head up the staircase and out of this cave. Get back to the pirate ship by heading right one, down one, and right one screen. Enter, and push the brown box “up”, making it drop inside the hole, then take the staircase at the top out of the ship on the other side. Somehow, the other end of the ship is sticking out of the sands in Subrosia…

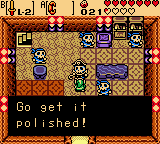
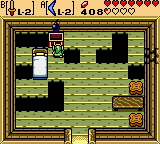
From the ship, head up one screen, left one, down one, and left one more to reach the House of Pirates. Enter and speak to the Captain who will not accept his bell in such a rusty condition and insist Link get it polished. Leave the House of Pirates and head up two and right two screens. Make your way over the lava and continue right one screen, then use the magnetic pole to pull Link over the lava and continue up two screens. Walk through the pathway and out of the left side and continue left two more screens to reach the Subrosian Smithy.

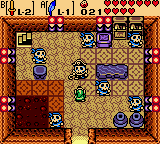
Enter the Subrosian Smithy and speak with the Subrosian at the desk. When he asks Link if he would like them to fix his bell, choose “Do It!”. The Subrosians will fix the Rusty Bell and it will become the Pirate’s Bell. Leave the Subrosian Smithy and head right two screens, then back through the path and down two screens. While standing on the left side of the magnetic pole, use the Magnetic Gloves to repel Link to the left over the lava and pits. Head left three and down two screens to reach the House of Pirates and enter.

Speak with the Captain, who will be happy to finally have retrieved his bell and decide to set sea with his crew. Link will tag along and after a cutscene showing the ship getting “unstuck” from between the realms of Holodrum and Subrosia, the ship will port at the Western Coast in Holodrum. Head down one screen after Link exits the ship.


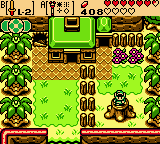
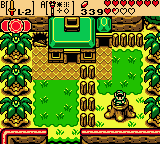
Head left two screens from the ship to reach a Soil Patch, then head back right two screens. Go up one and right one screen to find a chest containing a Magical Ring which appraises as the Blast Ring. Using it increases the damage Bombs do to enemies. Continue left one and up one screen and burn the shrub next to the house to uncover an Old Man’s hideout. Walk in and speak with the Old Man who will give Link 300 Rupees!
Leave the Old Man’s hideout and enter the house. Open the chest inside to recieve 10 Bombs, then use one on the cracked portion of the rightmost wall. Head through right one screen to small room, then exit the house at the bottom. Outside, use the stump to change the season to Spring, then head back through the house and out the front door.

Go down two screens and cross the ship right one screen. Continue up two and right two more screens from there to come to an area with the fourth golden beast, a Golden Darknut. Once defeated, Link will have slain all four golden beasts and can now claim his prize for doing so.


Use a Gale Seed to warp to North Horon and head down three screens. Toss the boulder aside and head right one screen to the stump, then use it to change the season to Summer. Head left two screens from there to the location of the first dungeon, then take the steps at the bottom-left down one screen. Head down the stairwell into the Golden Old Man’s hideout and speak with him. For defeating all four golden beasts, the Old Man will grant Link a Magical Ring and disappear. This ring appraises into the Red Ring, which is perhaps the best ring Link will find on his quest as it increases overall sword damage by two with no negative side effects.
All that’s left now is to find the seventh dungeon, so use a Gale Seed and warp to Horon Village. Make your way to the upper-left section of the village and exit left one screen to the Western Coast area. Continue left one and down three screens, then cross the bridge and Pirate Ship left one screen. Head up two screens from the ship and go back through the house to reach the stump on the other side. Use it to change the season to Summer, then backtrack through the house again and out the front door.
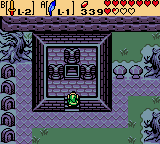
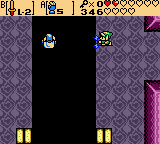
Head down two and left two screens where vines will now be growing up the wall. Climb them up one screen to reach the Graveyard. Simply head up one screen in the Graveyard to reach the Explorer’s Crypt.
~First Floor~
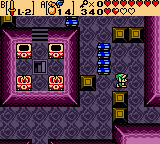
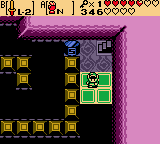
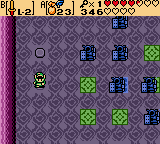
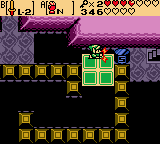
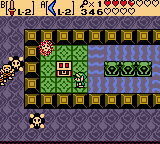
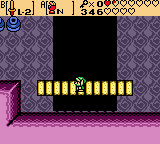
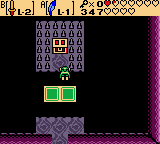
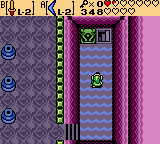
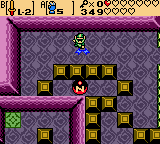
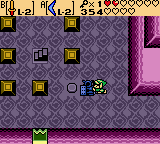
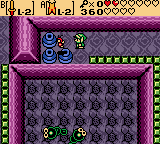
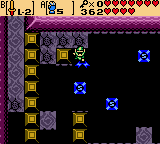
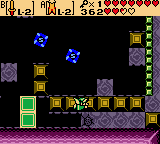
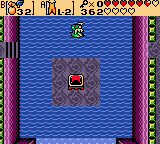
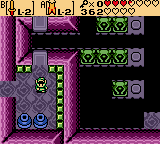
Link enters this dungeon on the first floor, room D3. Head up one and left one screen to room 1F-C2, then continue clockwise around the blocked off portion in the center right one room via the path on the upper side. Equip the Pegasus Seeds and continue up two screens to 1F-A3. If you let all four torches go out, Link will be sent back to the start of the dungeon, so use a Pegasus Seed to run right one screen to 1F-A4.

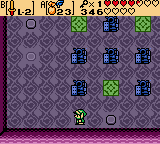
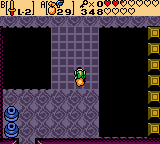
Defeat all the Wizzrobes in this room and a chest will appear in the center. Open it to recieve a Small Key, then backtrack left one and down two rooms. Make your way left one screen and along the lower path back right one screen to 1F-C2. Use the Small Key Link just acquired to unlock the door on the far right wall of this room and head through to 1F-C4.

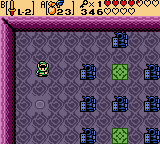
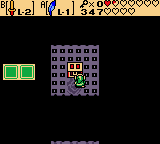
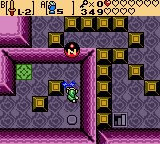
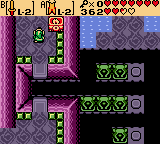
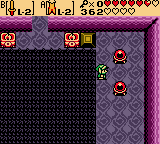
Defeat the Shrouded Stalfos and Red Zols in this room to have a chest appear on the upper-rightmost ledge containing a Magical Ring. This ring later appraises as the L-1 Power Ring, which increases Link’s sword damage by 1, but also increases the damage he takes by 1. Head up the leftmost steps and go left one and up one screen to 1F-B3.

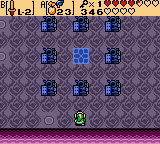
Be careful not to fall off this ledge and use the Slingshot with Ember Seeds to light the two torches ahead. A ghost with a sword will appear and, after a few words, attempt to charge at Link. Strike the Ghost until it goes away and the torch curse in the next room will be broken. Head up one screen to 1F-A3. Move the roller on the right side of the room and enter the stairwell on the ledge, leading down to the first basement floor.


~Basement First Floor~
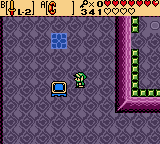
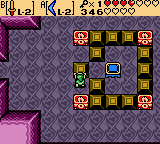
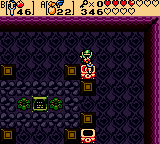
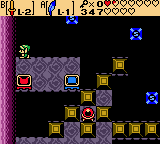
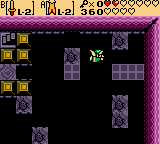
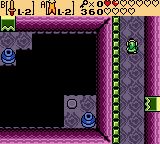
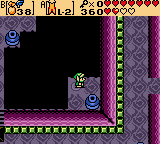
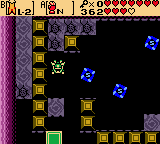
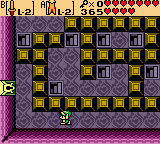
Ignore the Armos Statues for now and head left one screen to B1F-A2. Walk up the steps and be warry of the Green Zols that spawn as you walk across the ledge to the switch. Step on the switch to make a trampoline appear to the left. Hop off this ledge and push the trampoline “down” twice and “left” once, then jump onto it. Hold the “left” button down to fall safely on the switch above, causing a key to fall into the lone pit above. Fall back down the pit to the floor below and grab the Small Key that falls onto the blue tile, then head back right one screen to B1F-A3.
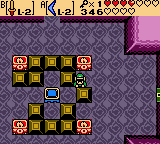
Walk against each of the Armos Statues until you find the true statue of the bunch which will not awaken. Push this statue onto the switch, unlocking the doorway at the bottom, and head through down one screen to B1F-B3. At the bottom of this room, head down the steps on the right and make your way up across the flowing water to reach a staircase. Head down to the second floor of the basement.
~Basement Second Floor~
Equip the Magnetic Gloves and make sure their polarity is set to “S”. Step onto the upper half of the green platform and ride it until it stops in front of the magnetic pole. Use the gloves to repel Link away from the pole and safely onto solid ground on the left, then equip the Pegasus Seeds and head up one screen B2F-A3.

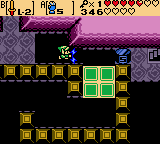
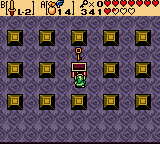
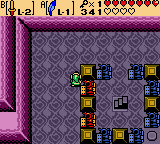
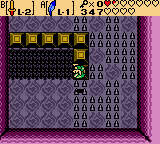
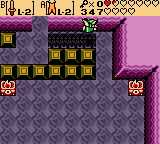
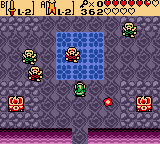
Use a Pegasus Seed to run quickly across the bridge to the top part of this room before it starts to disappear into floating tiles, then head left one screen to B2F-A2. This room has a pretty tough puzzle if you do not already know how to solve it. The buttons on the floor will move groups of Armos Statues in a certain direction. The key is to get all the statues on top of the green tiles throughout the room using this method. To solve the puzzle, step on the bottom of the two switches on the far left, then step on the leftmost switch of the bottom two. Step on the upper switch on the left next, then finally step on the last switch. A Small Key will fall onto the blue tile in the middle of the statues, so grab it and head right one screen, then back across the bridge and down one screen to B2F-B3.

Using the Magnetic Glove, pull Link to the magnetic pole and continue holding the button down until the green platform is under him. Release the button and ride the platform back around to the staircase, then head up one floor to B1F-B3.


~Basement First Floor~
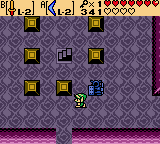
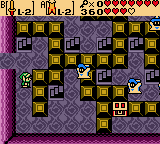
At the bottom of this room, unlock the door using a Small Key and head through to B1F-C3. Of the vertical row of blocks to the left of the trampoline, push the top and bottom blocks “right”, then the middle one “up”. Now, on the vertical row to the right, push the top and bottom blocks “left” and the middle one “down”. With a path cleared, push the trampoline “left” three times and “up” once, then jump onto it and hold Left or Down to land safely on the upper floor.


~First Floor~
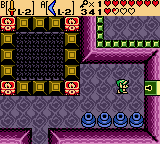
Walk left one screen and open the chest to obtain the Dungeon Map! There’s nothing more here for now, so head back right one screen and drop down the pit to the basement level again.
~Basement First Floor~
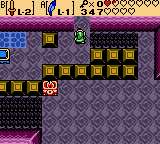
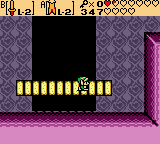
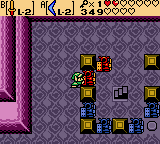
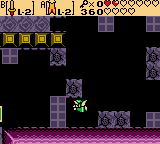
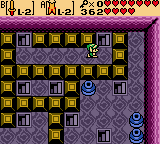
On the right side of this room, use a Small Key to unlock the door and head through to B1F-C4. There are four torches in this room which all must be lit quickly before one goes out to solve the puzzle. Use a Pegasus Seed to speed Link up, then equip the Ember Seeds and light the torches. Another Poe will appear as before, this time one that throws walls of fire around Link. Strike the Poe until it runs away to break a “torch curse” in one of the next rooms.


Head left two screens to room B1F-C2. Swim along the path, diving under the spiked rollers to avoid contact, and head down the staircase at the end to the second basement level.

~Basement Second Floor~
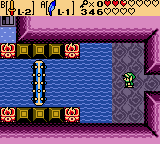
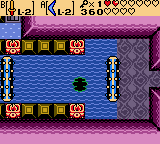
Walk left one screen to B2F-C1 and defeat the Darknut closest to Link first. Next, equip the Magnetic Gloves and use them to pull the other two Darknuts on the left side of the room into the pit in the center. Having defeated all three Darknuts, a bridge will connect between the two sides of the room. Cross over it to the left side, then continue up one screen to the left side of B2F-B1.
Strike the blue switch, turning it red, and causing the magnetic poles seen above to rotate. Head back down one screen and cross the bridge to the right side of the room, then head up one screen from there to the right side of B2F-B1.
Equip the Magnetic Gloves and pull Link to the rotating pole above. Keep holding the button down until Link is safely over the ledge on the right, then release. Use a Pegasus Seed and equip the Roc’s Feather, enabling Link to long-jump to the next strip of floor above, then onto the one just left of this. Use the Magnetic Gloves again to attract Link towards the pole just below him now and continue holding the button until he is turned onto the left side of the pole. Release and press the button down again to repel Link away from the pole to the left. As Link passes the next pole to the left, release the button and face up towards it, then press the button again all in one quick motion and Link should pull himself to the pole without falling into the pit. Continue holding the button down until Link is on the botton of the pole, then release and press the button again to repel away and onto the floor below with two trampolines. Jump onto the blue trampoline first, holding Right to land on the ledge above.

~Basement First Floor~
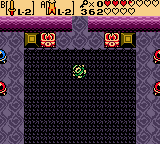
Defeat the two Stalfos in this room, then drop back down the pit to the level below. Hop onto the red trampoline now, sending Link up two whole floors back to the first, and hold Down to land safely on the floor above. Use the Roc’s Feather to safely navigate this room, avoiding the spiked floors, and make your way towards the top. Fall down the pit here to the room with the Stalfos earlier, this time having access to the door you unlocked. Head up one screen through this doorway to B1F-B1.

Use any effective weapon to defeat the Keese in this room and jump onto the moving green platform. Without defeating the Keese first, they will attempt to make contact with Link and knock him into the bottomless pit. When the green platforms crosses in front of the middle section of floor, where there are no spikes, jump onto this portion of floor to access the chest. Open the chest to obtain the Roc’s Cape! This item replaces the Roc’s Feather, still allowing Link to jump, but also giving him the ability to glide when the button is held down. Use it to glide down towards the section of floor below and leave this room back to B1F-C1.

Soar over the pit to the right, then fall down the pit on the left side of this room to B2F-B1.


~Basement Second Floor~
Using the Roc’s Cape, soar towards the section of floor at the bottom and exit this room down one screen to B2F-C1. Cross the bridge to the right side of the room and continue right one screen, then walk up the staircase back to B1F-C2.


~Basement First Floor~
Swim back around the path of water and head right one, then up one screen to B1F-B3. Head down the steps on the right and follow the path up until you reach the staircase. Head down to B2F-B3.

~Basement Second Floor~
Navigate this room as before and head up one screen to B2F-A3. Use a Pegasus Seed to quickly cross the bridge, then use the Roc’s Cape to glide over the pits and head right one screen to B2F-A4. Defeat all the Magnites in this room to have a trampoline appear, then push it “up” three times and jump on it, holding Up to land on the moving green platform above.

~Basement First Floor~
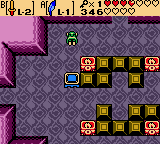
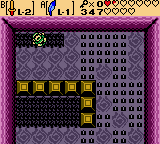
Hop off the green platforms and walk up the steps on the left. Use the Magnetic Glove to attract the ball towards Link while walking left. Continue attracting the ball and jump off the ledge to have it fall along with Link, then move it on top of the switch in the bottom-right. A chest will appear on the green tile containing a Small Key. Grab it and head left one screen to B1F-A3.
Once again, Link must find and push the true Armos Statue onto the switch to unlock the door below. When done, head through it down one screen to B1F-B3. Continue down one and left one screen from here, then swim under the rollers along the path and head down the staircase to B2F-C2.
~Basement Second Floor~
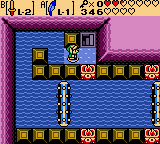
Wait until all seven tiles come towards Link and crash into the blocks, then unlock the locked block using a Small Key. Equip the Roc’s Cape and soar onto the platform on the right, then continue across the pieces of floor clockwise until Link reaches the moving green platform in the bottom-left. Ride it down and head down two screens to B2F-E2.

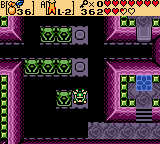
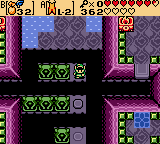
Continue along the path counter-clockwise and up one screen, now to the right side of B2F-D2. There are four vases here, one of which contains a Fairy if needed. Hop off the ledge and defeat the Mini-Moldorms, then head down one screen through the unlocked door to the center area of B2F-E2.

Use a Pegasus Seed, then glide towards the switch on the right. When stepped on, a door on the rightmost wall will open. Glide back over to the steps on the left and head up them, pushing the block out of your way at the top. Head right until you reach the opened doorway, then head through right one screen to B2F-E3, the location of the dungeon’s Mini-Boss.


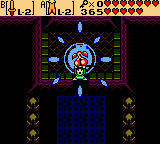
* Mini-Boss: Poe Sisters *
Start by equiping the Slingshot with Ember Seeds as Link must keep all the torches lit to avoid being sent back to the start of the dungeon. The Poe Sisters will often try to blow out the torches, so make sure to keep an eye on them as the battle progresses. Both Poes will attack Link as they did when he met them earlier in the dungeon. Keep the torches lit and slash the Poe Sisters when they come close until they are defeated.


Head through the newly opened doorway on the right one screen to B2F-E4. This room is a maze containing many staircases leading to the floor above, which is also a similar room with staircases leading back down. Multiple Wizzrobes will attempt to attack Link in both rooms as well, so it may be best to take care of them first.
Head up the lower of the two accessible staircases first, then down the staircase directly to the right. Head up the staircase to the right. The two vases on the right will contain a Fairy if needed. Head down the lower of the three staircases and open the chest to obtain 1 Rupee, then head back up the staircase you came through. Head down the upper of the three staircases, then head follow the path up and to the left and climb the staircase at the end. Descend the staircase on the right, then head up one screen to B2F-D4.

Use Magnetic Gloves to pull Link against the first magnetic pole accessible on the left. When it turns Link to its left side, repel away from it. Just as he moves above the far-left magnet pole, let go and face towards it, then attract Link to it. When it turns him to the upper-side of the pole, repel away onto the ledge with the cracked floors. Quickly equip the Roc’s Cape and soar from this ledge to the one below it and hop on the moving green platform. Ride it left and soar to the platform above, then head up one screen to B2F-C4.

Defeat all the enemies in this room and a Small Key will fall onto the blue tile in the center. Grab it and head back down one screen to B2F-D4. Soar down to the moving green platform and right it to the right, then soar over to the section of floor on the right. Push the far-right block above Link at the end of this path “up”, then follow the path up one screen to B2F-C4.
Unlock the door on the right and head through to room B2F-C5. Head over the gap above and continue up one screen to B2F-B5. Walk down the steps at the end of the path then swim to the shallow water at the bottom of the room. Head down one screen to B2F-C5, where three switches lay before Link. These switches must be stepped on in a specific order. Use a Pegasus Seed and long-soar to the bottom switch first. Soar back up to the first switch next, then step on the middle switch last. A jump-platform will appear to the right in front of the blue tile. Head up the steps on the right and use this platform to cross the gap, then continue up one screen to B2F-D5.
Follow the path and step on the switch at the end. A red trampoline will appear on the section of floor in the middle of the water to the left. Jump off the ledge and use the trampoline to head up two floors, holding Down when you reach the first floor, room B5, to land on a moving green platform.


~First Floor~
Hop off onto the left side of this room and head down the staircase at the bottom to B1F-B5.
~Basement First Floor~
Strike the switches so that the top one is “blue” and the bottom one is “red”, then head back up the staircase. Ride the moving green platform to the right side of the room head down the staircase at the bottom of this side. Strike the lower switch, making both on this side “red”, and the doorway at the top of this room will open. Soar over to it using the Roc’s Cape and head up one screen to B1F-A5.


Defeat all the Stalfos in this room and a chest will appear. Open it to obtain the Boss Key! Now, leave this room down one screen to B1F-B5 and fall down the pit in the middle.

~Basement Second Floor~
Walk up the steps on the left and head down one screen to B2F-C5. Cross the gap using the jump-platform and continue left one and down two screens to B2F-E4. Head up the staircase on the left, then follow the path to the left and head down the staircase here. Head down and to the right until you reach the staircase at the very bottom, then head up it. Follow this path left until you reach the locked boss room door. When ready, head through it to the boss’ lair.

** Dungeon Boss: Gleeok **
Gleeok will shoot two different fire attacks from each head which Link can easily avoid by soaring over them with the Roc’s Cape. Link quickly knock off both heads as after knocks one off, it will move either vertically or horizontally across the room (depends on which way you knocked it off) and will re-attach if the other head is not defeated.


Once his first form is defeated, Gleeok will take on a second form that will jump and slam itself into the ground, stunning Link if he is on the ground when this happens and then charging at him while stunned. Jump just before Gleeok slams into the ground to avoid being stunned and slash him with the sword until he is defeated.


Grab the Heart Container for defeating the dungeon boss and head through the doorway on the left. Walk up the steps to the altar and claim the seventh Essence of Nature, the Seed of Life.

 Assassin’s Creed IV: Black Flag – Money Making Guide
 The Wind Waker Walkthrough – Forest Haven –
  Feature: Mastering The Basics Of Spirit Hunters Inc.The Wind Waker Walkthrough – Tower of the Gods –
  Skyward Sword Walkthrough – Eldin Volcano –