Follow Hirgon to the enemy-occupied territory and move forward through it stealthily by traveling between the various foliage cover points while using Wraith World to keep track of enemies patrolling nearby.
Head left to search for the green beacons of light that symbolize herb locations amongst the other color-highlighted figures that symbolize enemy patrols, then approach these spots carefully with the help of cover and assassinate any nearby enemies before picking the plant.
Climb on top of the ruins to reach an area under better stealth conditions or to quickly escape a situation in which you might soon be discovered, then use the elevated vantage point to scout out your next herb target and watch the patrols shift around below until a window opens long enough to drop back to the ground for an assassination or silently-executed retrieval.
After collecting the three herbs, follow Hirgon into the next enemy camp by staying low to remain undetected and pick the herb directly to his left after he comes to a stop behind a stack of barrels.
Climb on top of the barrel stack to look towards the second herb in the distance ahead and get the attention of the cargoar to drop down onto its back, then tame the beast to safely pick the plant and continue following Hirgon to next clearing.
Head towards the first section of ruins on the left to collect the first herb in this area and move to the cage across from you to pick the second plant behind it, then move towards the cart lit up by a small lantern on the ground to grab the third herb and follow Hirgon to Uruk’s Hollow.
Fire an arrow into the the heads of the guards in the two towers that stand in front of the village and climb the one on the left to access the rooftops covered with red canvas, then run forward across them to find the first available bush to drop into on the left and attract the nearest enemies to dispose of them quietly.
Move towards the cluster of objective markers to shoot the cage door in the back left corner ahead and let the cargoar clear the area before proceeding towards them, then use Wraith World to locate and assassinate the enemies on the surrounding rooftops by hanging from the ledges below them before poisoning the grog barrels.
Use the surrounding rooftops to stay out of sight above the enemies that arrive to patrol the ground level again and take them out by firing arrows into their heads or into nearby distraction objects, then finish poisoning the grog barrels without being detected to complete this mission.
The Dark Monument
Follow Hirgon into the enemy-occupied territory and duck behind him to enter stealth mode as you approach the guards ahead, then wait for the leftmost one to turn around and creep around the stack of crates to assassinate this creature without being seen.
Climb to the top of the ruins on your right to look down towards the guard on the ledge below and drop beside him to execute another stealthy assassination, then enter the Wraith World to scan the clearing ahead of you and locate the grog cart.
Aim the bow to the right of the bonfire and break open the Caragor’s cage with a well-placed arrow to unleash the beast upon the enemies, then jump over the red-lit gap on your left to stand on top of the narrow stone wall and shoot the archer on the ledge above to the right.
Assassinate the next closest guard below and climb up to the ledge where the previous archer you picked off was stationed, then target the enemy patrolling the ruins directly across from you to eliminate him with Shadow Strike and shoot the explosive container below to clear out the remaining hostiles.
Follow Hirgon by matching his speed as you travel towards the next location and stop when he says so to encounter the enemies that burst from the ground, then use focus mode to slow the action down and start picking off the closest enemies with well-placed arrow shots to their heads.
Stay near Hirgon to protect him with your sword or bow against the surrounding enemy ambush until the area is clear, then continue following your companion to reach the Uruk camp and enter Wraith World to track the guards patrolling ahead.
Sneak around the left side of the ruins ahead to assassinate the first guard patrolling near the wall and climb up it to draw your bow at the top, then pick off the enemy in the open archway across from you and the one on the ledge below to the left.
Shoot the door off the cage directly beneath you to release the Caragor and use your sword to fend off any creatures that try to ambush from behind, then climb to the top of the tower at the center of this camp to fire down on the remaining enemies by the bonfire and finish clearing the area.
Follow Hirgon again to sneak through the next enemy-occupied territory with him and stop on the bridge to start defending the area with your sword, then use Shadow Strike to fight back groups of creatures approaching from the distance.
Stay near Hirgon to protect him whenever necessary and finish clearing the area, then follow your companion to the next area with a Caragon cage at its center and climb on top of it to start shooting arrows into the surrounding enemies that swarm about.
Shoot the door off the cage to tame the Caragon and finish clearing the area with the creature’s help, then follow Hirgon to reach the next outpost and attract the Caragon to tail behind so you may use this advantage in the next battle.
Ride the Caragon down towards the closest burning container to pick off the nearby guards by detonating it with a well-placed arrow shot, then climb to the top of the hill on your right and turn to look so that you have a level view on the upper ledges of the fort.
Enter Wraith World to find the guards patrolling the tops of the ruins and pick off the nearest one with Shadow Strike, then move stealthily around this wooden landing to assassinate additional enemies nearby and look down towards the Uruk on the ground to detonate another explosive container.
Shoot down the hornet nest on the left to create a further nuisance for the enemies on the ground and look across the gap to execute a Shadow Strike on the Uruk patrolling the top of the opposite landing, then drop to the ground to finish clearing the area by detonating the remaining explosive containers nearby and activate the next cut scene.
Defend the grog cart with your sword or shadow strikes and enter Wraith World to locate the surrounding archers, then pick them off one at a time and push the cart the rest of the way forward to complete the mission.
The Black Captain
Block the The Hammer’s initial strike, then use your skills with a sword to build up your hit streaks by deflecting or engaging each of the oncoming Uruk warriors one-at-a-time.
Continue battling these enemies to enable Execution finishing maneuvers which will help you remove hostiles with quick and gory efficiency.
Vault over the larger enemies in the group to take out the smaller ones first and build your hit points that way, then deflect The Hammer’s attacks from behind to make him vulnerable and execute a finishing maneuver to cause maximum damage.
Sprint towards The Hammer whenever you see him isolated from the rest of the group and vault over his head to unleash a flurry of sword strikes from behind, then quickly prepare to block a counter-attack after scoring your third or fourth hit and return to fighting the orcs to build up abother hit streak.
Roll or sprint to a safe distance whenever you are low on health and search the surrounding area for plants that can heal, then enter focus mode to slow down time and use this opportunity to pump multiple arrows into The Hammer.
Repeat the combat tactics listed above to defeat the Hammer, then follow the on-screen prompts to execute him and complete this mission.
<
The Messenger
Proceed towards the current objective marker and use a Shadow Strike assassination on the furthest of first two enemies you encounter ahead, then sneak up behind the second guard to take him out quietly as well.
Enter Wraith World to reveal and activate the nearby Fast Travel tower, then proceed towards the current objective marker located in the valley below to sneak past the left side of the wooden bridge ahead without being seen and reach the indicated wreckage of the Uruk caravan to receive your next objective.
Enter Wraith world to locate the Ghul tracks highlighted in blue that lead towards the right and follow them by climbing up the grassy ledges on the nearby cliffside to reach the top of it.
Climb on top of the ruins you see ahead to look down on the enemies sitting around a campfire within this stone structure, then fire a charged arrow into the flames to cause a massive explosion and clear the vicinity of all hostiles.
Follow the blue-lit Ghul tracks forward past the ruins to walk along the narrow line of cables on the left and ascend the ledge on the other side to take out the enemies above with your sword skills, then continue following the tracks to assassinate each of the next three guards you see from behind.
Continue tracking the Ghuls to eventually enter a cave system and enter stealth mode to navigate this new area without raising any alarms, then enter the first available cavern on your left to climb up the ledges against the wall across from you and proceed forward through the tunnel at the top.
Wait for enemies blocking your path to walk away before proceeding forward to avoid being detected at all times and remain on elevated ground whenever possible for the same reason.
Follow the Ghul tracks along the safest pathway through this cave system to reach the treasure room without activating the Ghul Swarm and approach the current objective marker to activate a cut-scene in which you encounter a Ghul Matron, then immediately fire an arrow into this enemy from long-distance and follow it up with a quick Shadow strike.
Each time you swing your sword into the Ghul Matron, quickly hit the counter button to dodge the creatures immediate follow-up attack, then roll back towards the bonfire in the previous room to goad the enemy into pursuit and shoot an arrow into the flames as it closes in on you to cause damage via explosion.
You can also slow down time to get a better bead on the Ghul Matron and launch as many arrows into its head as possible until the creature is defeated, then exit this small cavern the same way you came in to sprint consistently towards each of the current objective markers that appear and ignore the Ghuls trying to attack along the way.
If you run into a particularly large crowd of Ghuls that make it impossible to pass safely, look for a nearby bonfire to shoot with an arrow and clear the area with a massive explosion to continue moving towards the exit.
Use rolling maneuvers to quickly slip through the gaps in oncoming Ghul waves and continue moving towards the current objective marker without stopping until a cut-scene is activated to complete this mission.
<
The Power of the Wraith
Travel towards the indicated captain’s location to get a visual on his exact position and locate another captain to interrogate first before proceeding so that you may learn your enemy’s weaknesses.
Take cover amongst any bushes you can find across from the captain’s location and start opening fire on the guards that surround him with well-placed arrow shots.
Look for towers nearby that look down on the captain’s location and execute a Shadow Strike on the sniper occupying this post to take his place, then continue clearing the area below to reach the indicated target and defeat him using swordplay.
Instead of using Shadow Strike to eliminate the previously referenced sniper, you can also use your Command ability to take control of this enemy and force him to fire down on his own comrades.
Take command of the defeated captain to have him murder another captain above his rank and create a Power Struggle Mission to brand your new follower, then travel towards the Power Struggle icon that appears to reach the stronghold and activate a cut-scene.
Afterwards, look down from an elevated position on your new minion’s location and fire arrows into the enemies that surround him.
Continue using the upper ledges of the stone forts to travel alongside the captain you now command without being seen and watch for snipers in the surrounding towers along the way to take control of them as well so that your army may grow.
Help your captain defeat his three challengers without being seen to see his power increased, then travel towards the fort in front of you by passing through the bushes ahead on the left and ascend the wall on the other side to hang from the uppermost ledge until a sniper walks by for a silent ledge kill.
Look towards the sniper occupying the next tower in the distance ahead and take command of him with a Shadow Strike to clear the long gap, then climb the left-side wall to cross the line of three cables and reach the tower adjacent to the sea shore below.
Use the next line of three cables ahead to proceed in the direction of the current objective marker and fire an arrow from the top of the wall on the other side to release the Caragon from its cage on the ground below, then make your way towards the left to climb the tower at the end and take command of the sniper inside.
Command the sniper you just took control of to attack the nearby enemies patrolling the ground below, then use a Shadow Strike to help finish clearing out this group and ascend to the indicated vantage point above to activate a cut-scene.
Send the captain you control into battle against the Warchief who just arrived at the stronghold, then draw your bow to aim it down towards the opposing enemy force and shoot the doors off both nearby Caragon cages.
As soon as your captain needs help, use Shadow Strike to enter the battle below and defeat the Warchief with swordplay to take control of his army and complete this mission.
The Cure
Climb up the side of the stone bridge on your left to hang from the edge and start moving across it towards the right to remain unseen or execute silent ledge assassinations, then drop down at the opposite end to ascend to the top of wooden tower in the adjacent corner and take command of the sniper above.
Jump towards the structure on your right to proceed in the direction of the yellow skull-shaped icon and climb onto the uppermost roof of the structure, then head left across the connecting line of three cables in the corner and stop at the midpoint to eliminate the enemy archer on the other side with a Shadow Strike.
After reaching the next rooftop ahead, hit the archer below on your left with a Shadow Strike and drop off the edge in front of you to proceed forward across the ground in the direction of the yellow objective marker furthest towards the back of this area.
Walk past the left side of the iron-gated entrance ahead to climb the wooden building in the next corner and look down on the area marked with the current objective marker from the rooftop above, then
Shoot an arrow into the cage door below to release the Caragor and watch as it tears through the surrounding enemies, then shoot down any stragglers that try to escape or any of the remaining archers on the rooftops and drop to ground the ground to finish searching the area.
Proceed back towards the yellow objective marker without a skull attached to it and use the rooftops to reach the next area by executing Shadow Strikes on the archers you see along the way, then fire an arrow into a hornet’s nest to cause a distraction on the ground below and finish the search by moving left across the line of three cables ahead.
Approach the remaining objective marker via the rooftops and three cable tightropes to locate the Veteran Captain and enter Wraith World after every transfer between structures to Shadow Strike any archers surrounding the area.
Once you have a visual on the Veteran Captain, climb to the top of the tallest stone tower that looks down directly on him and shoot the bonfire closest to the group of enemies to cause a massive explosion.
Fire arrows into the remaining guards and climb down the ledges below to get a better shot on these enemies if necessary, then drop down to finish off the Captain with the help of your sword skills and complete this mission.
The Rescue
As soon as the timer starts, sprint forward to turn left at the first cart you see parked on the side of the dirt road and climb the wall made from a row of wide wooden planks to reach the top of it.
Walk towards the right across the top of the wooden wall to brand the first enemy in front of you from behind, then remain in stealth mode as you approach the ramp in the opposite corner ahead and hang down from the side to descend it without being seen by the guard below.
Wait for the nearby guard to move past your current location before you climb back up onto the wooden platform and sneak up behind this enemy to brand him, then walk across the top of the adjacent wall that’s made of interlocking tree branches and stop at the end to watch the Uruks patrolling the ground below.
Remain at the end of the line of tree branches until there is only guard standing directly beneath you and execute a stealth brand without being seen, then climb on top of the blue tarp covering the large stack of crates nearby and look down over the other side to brand the fourth enemy.
Return to the area where you branded your third enemy and climb on top of the crate stack behind him to brand the guard kneeling by the bonfire, then fault back over the crates before any of the other hostiles become suspicious.
Wait for the two guards patrolling the wooden ramp to split up before sneaking up behind the one that remains and executing your final branding, then approach the corner across from the nearby bonfire to climb the ladder concealed against the rock wall and take out the enemy located at the top.
Turn the corner between the two rock formations on your right to eliminate another guard from behind and turn back around to make a right in front of the torch on the opposite wall, then slide down the cables above the edge of cliff to reach the tower below and activate a cut scene.
Afterwards, walk forward across the tree branch on your right to reach the opposite end and jump down towards the enemy closest to Lithariel to assassinate him.
Use your swordsmanship combined with the occasional Shadow Strike to defeat the surrounding group of enemies and approach Lithariel to help her up, then make your way towards the current objective marker in the distance and call in all the hostiles you previously branded to aid in the upcoming battle.
Once the waves of enemies start coming towards you, retreat behind the hostiles you turned to let them hold off as many as possible before any can break through and reach your current location with Lithariel.
Release Lithariel once the enemies get too close and remain near her while to defeat the oncoming hostile wave with swordsmanship or archery skills, then continue fighting until all threats cease to appear and pick up your companion again to continue in the direction of the current objective marker.
Repeat the previous steps each time a new enemy wave appears to eventually reach the current objective marker and complete this mission.
Big Game
Follow Torvin until he stops to show you a Caragor grazing on the grassy ridge in the distance below and the Caragor Hunter ability becomes unlocked.
Sprint down off the ridge at full-speed to approach the Caragor at close-range and stop a few feet away once you have the its attention, then wait for the beast to leap in your direction and press the indicated button to counter the Caragor so that it becomes stunned.
Approach the fallen Caragor to tame it and wait for Torvin to do the same before you begin to follow him again, then ride your steed into the battle against the Uruk guards and take them out by attacking from a mounted position.
Remain on the Caragor to finish clearing the area of Uruk guards and stay near Torvin whenever possible to protect him from being ambushed, then follow your comrade into battle with another group of guards and use the bow to shoot down the archers atop the surrounding stone structures.
Fire arrows into the archers from a safe distance to avoid immediate retaliation and follow Torvin towards the enemy camp to clear it out from a mounted position, then continue moving across the grasslands in step with your companion to attack the Uruk patrol.
Move quickly with the Caragor in a circular path around the enemies to eliminate more Uruks in the patrol than Torvin does, then ride at full speed towards the next yellow objective marker that appears to cut down the Uruk on the run with your sword.
Press the indicated button while in motion to perform a leaping attack on the Uruk currently assaulting Torvin and complete this mission.
Hunting Partners
Follow Torvin to the edge of the cliff ahead to look down on the Graug in the valley below and cross the wooden bridge nearby with your companion to listen to his instructions.
Descend into the next valley you stop to look down on and use stealth mode to travel towards the Graug without being seen, then approach the monster as it feeds from a nearby corpse to bleed it from the hind legs at close-distance and quickly roll backwards to avoid any follow-up attacks.
Climb onto the nearby rock formation to hide in the bushes growing on top of it and wait for the Graug to pound the ground as a means of knocking nearby Caragors unconscious, then quickly approach the fallen beast to mount it and ride towards the next objective marker that appears to reach Torvin’s location.
Make sure the Graug follows you to Torvin’s location by slowing down every once in while to make sure it maintains a clear line of sight, then turn around to watch the monster pass your companion’s current position and fire an arrow into the Graug’s head while it’s still distracted.
Once you’ve stunned the Graug with an arrow shot to the head, fire a second one into the same spot to activate a cut scene and watch as Torvin drives a chain into the monster’s skull to unlock your Graug Hunter ability.
Approach the stunned Graug to mount it and follow the on-screen commands as they appear to successfully tame the beast, then ride the monster forward to attack and clear out the entire squadron of Uruks marching ahead of you.
Press the indicated buttons to kill the Graug and complete this mission.
The Great White Graug
Counter the Caragor charging straight towards you to mount it and follow Torvin to the entrance of the Graug cave to activate a cut-scene, then retreat backwards from the monster to avoid the initial attack and make a wide around behind it to pull the arrow out of the mossy wall on the left.
Draw your bow to slow down time before firing an arrow directly into the charging monster’s head and roll sideways to dodge this oncoming attack, then press the indicated button near the stunned Graug to stab the creature in the chest.
Roll away to a safe distance before the Graug manages to strike you at close-range and run towards the waterfall in the foreground to find the arrow sticking out of the rock on the floor of the cave, then use your bow to shoot the monster in the face or hand before it’s able to devour the Ghuls that be eaten for a health recharge.
Continue shooting the Graug in the face to interrupt its meal each time until it comes charging towards you again and use the combat tactics listed above to remove another chunk of health from the monster’s life bar.
Use swordplay to eliminate the poison-spewing Ghuls until the area clear of them again, then stab the Graug in the chest for the third time and continue using this strategy as a means of weakening the monster until you defeat it for good to complete this mission.
Lord of Mordor
After the opening cut-scene, charge straight forward into battle to meet the army of enemies head-on and immediately begin slashing them down as a team with the help of your sword skills.
Use your ability to leap over enemies’ heads and execute Shadow Strikes to move quickly between opponents without being surrounded by other hostiles for very long.
Try to eliminate the larger and more shielded enemies first before taking on the war chief in one-on-one combat and follow the on-screen commands to block his crow bow shots, then use swordplay and wraith attacks defeat this final nemesis.
Proceed forward into the fort above by heading in the direction of current objective marker, then continue towards the orange icon by climb up the rear wall onto the bridge overhead and enter the doorway on the right to activate a cut scene.
Afterwards, proceed in the direction of the current objective marker to spot the Black Captain in the next area below you and climb the wall at the end of the ledge to reach the top of the tower.
Look down on the Black Captain beneath you to execute a diving attack and follow the on-screen commands to follow it up with a stealth drain that will remove health from the life bar of The Tower, then climb back up onto the ledge you previously entered the area from to vault over the adjacent wall and face towards the spiked circular platform attached to three separate chains.
Walk across the closest chain to reach the circular spiked platform and look down into the area below as the Black Captain passes beneath you, then execute your second stealth drain by diving onto the enemy from above and remove another chunk of The Tower’s health.
Climb the wall behind the Black Captain’s previous position to spot him now patrolling the area on the other side and ascend up to the ledge on your left to get directly above the target once again, then execute a third stealth drain to weaken the Tower even further and sprint in the direction of the next objective marker that appears to reach Loreth.
Follow the on-screen commands during the next cut-scene to defeat your opponent and complete this mission.
Mordor in Flames
After the opening cut scene, ride your Caragor towards the objective marker ahead and ignore the battles happening around you to reach it quickly without taking damage.
Approach the area guarded by the Talons of the Black Hand to eliminate as many of the lesser enemies possible while mounted on the Caragor, then drop back to the ground to start taking on the larger hostiles marked with skull icons.
Use swordplay mixed with wraith attacks and shadow strikes to quickly eliminate each of Talons one at a time while the rest of your army keeps the other captains busy, then perform executions whenever possible to keep the combat methods efficient and eliminate all remaining enemies to receive a new objective.
Take the abilities left by the fallen Talons before heading in the direction of the current objective marker to reach the Black Gate, then climb the wooden scaffolding on the outside by using a series of ladder with red curtain backdrops and activate the cut-scene at the top.
Follow the on-screen commands to defeat Sauron and complete the game.




 Batman Arkham Knight quick and simple leveling guide
 Beginners Guide to Hunting in Final Fantasy 14
 Watch Dogs Release Date Rumours
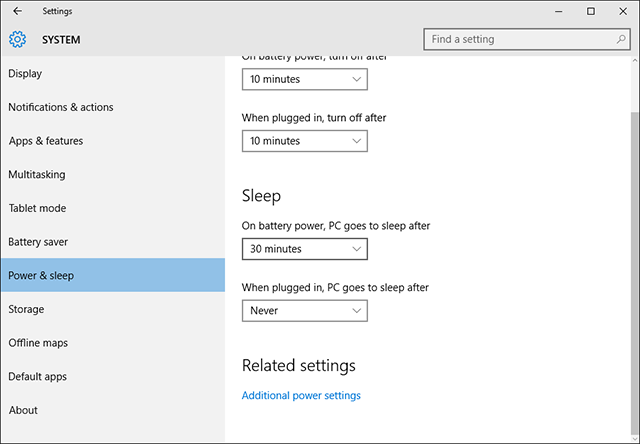 An Easy Way to Set Up a Sleep Timer Shutdown in Windows
 The Last of Us: Remastered Comic Book Locations Guide