Techs in Starbound are permanent power-ups that, once discovered, you can "lock in" to one of four slots in your character’s inventory, allowing you to switch between them throughout the game. To do this, you must return to your ship and use the wall terminal near the control room door. Although you can only have one of your four Techs active at any one time, you can reassign the slots as you discover more.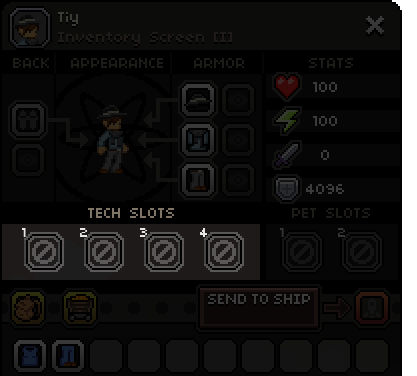 The time consuming thing in this endeavour can be to actually find the Techs, as they’re extremely rare. In order to help you in this endeavour, we’ve provided a handy list of coordinates where you can find each of the Techs, along with a description of what each one does.
Remember that although the planets are procedurally generated, they aren’t completely random (hence why these coordinates will work). Think of the coordinates like a seed: they give the basic information for the planet to generate with particular biomes, villages, vendors, or items, but the planet will generate slightly differently for each player so as to make it unique. With that in mind, you may have to search a little further than the directions listed below, as where we found it may not correspond to where it is on your version of the planet.
Now that’s out of the way, here are the list of Techs along with their locations.

Tech Descriptions, Coordinates, and Locations
 Energy Dash
Double tap the ‘a’ or ‘d’ keys to perform a dash to the left or right. You can use the Energy dash up to three times when in mid-air.
Known coordinates: Alpha Sector, Alpha Delta Hya 917, Planet V b (Forest)
X: -85587615
Y: -99795867
Location: Go to the left of the spawn point to find a dungeon containing a high-tech chest. 
 Pulse Jump
Effectively a double jump: tap space again while in the air to perform a second jump.
Known coordinates: Alpha Sector, Alpha Rotanev 872, Planet III a (Forest)
X: -52376552
Y: 15986387
Location: Walk to the right for a few minutes and you should come across a high-tech chest with a Pulse Jump blueprint inside. 
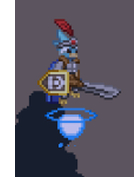
 Human Mech
Spawns you into a controllable Mech with machine guns. Although the Mech looks and sounds very cool, it’s unfortunately not all that powerful once you progress beyond level 3 planets.
Known coordinates: Delta Sector, Delta Sheliak Minoris, Planet V (Arid)
X: 82783430
Y: 19519886
Location: Walk right for a few minutes to find a high-tech chest containing a Human Mech blueprint. Also, if you go left you will find an Avian ship with a gun vendor. 
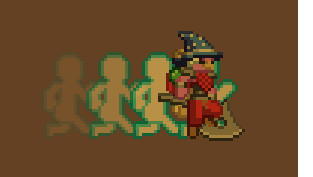
Butterfly Boost
Possibly one of the best mid-to-late game Techs, the Butterfly Boost allows you to press space again in accordance with any directional buttons to boost yourself in that direction. Once you have mid-tier equipment, your energy will regenerate fast enough to allow you to effectively fly by tapping space intermittently!
Known coordinates: X Sector, X Deneb Dulfim 43, Planet I (Desert)
X: -56694675
Y: -3441180
Location: Go left to find a high-tech chest with Butterfly Boost. Be wary as this is a level 10 planet! If you don’t have your tier 10 armour yet, you may want to carry some dirt blocks in one of your hotkey slots and quickly wall yourself in if you encounter an enemy. They can one-hit kill you if your armour is below around tier 7. 
Rocket Boost
A powerful boost that launches you high into the air, best used for reaching high places. Be careful, however, as you will still be affected by fall damage.
Known coordinates: Gamma Sector, Gamma Eta CrB Minoris, Planet III (Snow)
X: 92321840
Y: 70094330
Location: You should start in a Volcanic biome. Go right and once you reach the snow biome look for a dungeon containing a high-tech chest with Rocket Boost. 
Bubble Boost
Boosts your movement with bubbles, allowing you to fly for short periods of time. Press and hold space to use the Bubble Boost.
Known coordinates: X Sector, X Giausar 19, Planet IIa (Savannah)
X: -16470427
Y: 77840792
Location: There’s a mini boss to the right, but you’ll want to head left for the tech chest. It can be found just after a mine.

Gravity Neutraliser
This will temporarily negate the effects of gravity for your character.
Known coordinates: Gamma Sector, Gamma Delta Tri Majoris, Planet II b (Arid)
X: 10592822
Y: -58916433
Location: To the right of spawn, there are two torture chambers with a high tech chest between them. If you’re feeling brave, there is a Glitch castle to the left with an abundance of golden furniture, but heavily defended. 
 Morph Ball
Press F to transform yourself into a ball, allowing you to access narrow passageways. You can also drop mines by clicking when in the Morph Ball form.
Known coordinates: Delta Sector, Delta Gamma-2 Nor Majoris, Planet II (Forest)
X: 21788064
Y: -67133342
Location: A tech chest to the far right of the planet should yield the Morph Ball. 
Skyrail Rider
Allows you to connect to and travel on Skyrails.
Known coordinates: None – this is currently the only Tech in Starbound that you can craft.
Crafted at: Robotic Crafting Table
Cost: 30 Durasteel Bars & 1,000 Pixels 
Gravity Bubble
Pressing space in the air will deploy a gravity bubble around yourself, allowing you to fly for a short period of time.
Known coordinates: Gamma Sector, Gamma Geras 8734, Planet II a
X: 93990417
Y: -9124179
Location: Walk to the right to find the tech chest in a hole in the ground. To the left there is a huge Apex lab with a Matter Block Generator. 
Targeted Blink
Press F to teleport to the location of your cursor.
Known coordinates: X Sector, X Mekbuda 726, Planet II a
X: -8216438
Y: 26736554
Location: This is another level 10 planet, so be careful! If you walk to the right for a few minutes you should see a cave with a high tech chest in the entrance. This contains the Targeted Blink blueprint.

If you enjoyed reading this article, here are a couple more that you will definitely like:


 How to unlock a 'Very High' quality streaming in Windows 10 with Xbox one
 Browse Your Games In Style – Even ROMs – With LaunchBox
 Yakuza 4 Walkthrough
 FIFA 16 Guide: How To Use 7 New FIFA 16 Skill Moves, Commands Revealed
 Destiny: The Taken King How to – Get Yourself A Sword