For the fourth game running, Yakuza 4 puts you in the designer shoes of Kazuma Kiryu, a veteran criminal who is back on the streets of Kamurocho after a stint running an orphanage in Yakuza 3. As in the other games, the player will guide Kiryu through a complicated plot, full of intrigue, and also engage in a number of mini-games and side missions related to the challenges of operating in the fictionalized red light district of a major Japanese urban area.
This walkthrough will help you succeed, and ensure that you don’t end up in a back alley with a bullet in your brainpan. Check back on release day for the first installments. We’ve also got a pages with trophies and cheats (pieces of useful information about Yakuza 4).
Finale: Requiem
Part 1: Shun Akiyama
Chapter 1: The Mysterious Loan Shark
Enjoy the opening cutscene, you’ll get to the action soon.
It’s collection day. Go to the Hotel District.
A mysterious old man will stop you on the street. You’ll get a tutorial memo. Talk to the many bystanders on the street with glowing triangles above their heads, they’ll provide some gameplay tips.
Entering Theater Avenue, you’ll be accosted by some punks. Time for your first battle.
FIGHT: This first fight serves as a combat tutorial. First, you’ll be challenged to execute ten hits. String together combos by hitting “Square” in quick succession.
Next, you’ll be challenged to follow up light combos with a heavy attack. Experiment, try hitting “Square” once, twice, or three times followed by “Triangle”.
You’ll learn to grab next. “Circle” is the grab, to finish the challenge quickly, follow up a grab with “Square” for a light attack combo.
With all the challenges finished, just beat these enemies down. Experiment, and practice your moves. They won’t put up much of a fight, so have fun.
Once the fight is over, check your map or follow the minimap to your waypoint.
On the way you’ll run into Kamiyama. He runs a weapon store in the northeast corner of the map. Take his catalogue and continue.
You may notice citizens with blue triangles over their heads instead of the usual green. Blue triangles indicate that the citizen has a memo, try to seek these people out, your reward for talking to them is 500 experience points.
Near the convenience store, you’ll trigger a text crawl and a cutscene.
Trouble is brewing at Club Elnard. Head straight forward and take the first left turn, following your waypoint. It’s nearby, but prepare for another tutorial.
At the turn you’ll face the street punks again.
FIGHT: These street thugs are a little tougher than the last. You’ll also learn some new moves. Hold down “R1″ to enter the Fight Stance. Just hold onto that stance and move around, you’ll lock onto the nearest enemy and complete your challenge.
Next you’ll learn to guard. Hold “L1″ to guard, either approach an enemy or let them approach you. Just guard when they rear back to attack. Guarding is useful, but be aware that your guard can be broken by more powerful enemies later on.
The third challenge is quickstep. Enter your fight stance and press “X” to quickly dash in whatever direction you’re moving. This is very useful for circling enemies, escaping attacks, or just evading crowds of enemies.
The last challenge is to build up your HEAT Gauge. You build HEAT by attacking enemies, and you lose it when you take damage. String together a series of light combos, or grab a weapon, to gain HEAT quickly. Weapons are usually strewn around the periphery of the combat area. Check sidewalks, some of the most common weapons are street signs and bikes.
When your HEAT Gauge is full, you can pull off special moves called HEAT actions. Either grapple with an enemy and drag them towards a wall, or grab a weapon and approach an enemy. A “Triangle” prompt will appear in the upper right corner of the screen. Press it to execute a powerful special move.
You’ll learn more HEAT actions as the game continues, with various requirements to fulfill to pull them off. Keep checking your list of abilities, as you’ll learn new methods to unlocking HEAT actions.
Finally, simply beat these thugs down. If you’re having trouble, don’t get surrounded and pick on enemies further away from the group. Weapons can also be very helpful when controlling crowds of bad guys.
Continue down the street once the punks are taken care of.
Follow the waypoint towards the club, you’ll talk to the staff before hitting a cutscene.
FIGHT: Your first boss. Luckily, there are plenty of tables and chairs around the area. Grab them, you’ll be able to fight from a distance.
Ihara can be challenging, he’ll build up HEAT just like you. When he glows red, look out for his attacks – they’ll break your guard and stagger you. Dodge instead when you can and attack from behind.
Halfway through the battle, Ihara will hit you with a HEAT action. Follow the onscreen prompts to counter it, build up your own HEAT gauge, and unleash a powerful attack on him.
A health item sits in a corner directly behind Ihara as the battle begins. Grab it and use it if you need to.
A short conversation follows the cutscene. Just leave the club when you’re ready. You’ll get a call, so immediately rush back to Sky Finance.
There’s nothing stopping you, just run. Once you’re down the alleyway, you’ll get a cutscene to end the first chapter.
Chapter 2: The One
After the introduction, you’ll start on the southern edge of the map.
Follow along the edge until you reach Tenkaichi St. if you want to avoid a lot of random fights. The best way to avoid random fights is to keep an eye out for thugs standing on street corners. Alleyways are another option. Walking around instead of running can also avoid drawing enemy attention, but you’ve got places to be. Random fights are never too difficult, and you’ll always be rewarded with money or items.
At this point in the game, you’ll start to have more freedom to explore.
Remember, exploring, talking to people, and playing minigames can offer many special or unexpected rewards.
Around the city you might notice small glowing lights. These are locker keys, opening lockers located throughout the city. If they’re on the ground, approach and interact with “X”. If they’re up high or out of reach, press “R3″ to enter first-person mode, center on the light, and interact with “X”. Be on the lookout, while none of these keys are required to finish the game, they can provide some extra goodies.
Take this time to open your menu and check out the abilities menu. Here you can purchase new skills and combat techniques. Buy whichever sounds good to you, none are essential, it is only essential that you continue to unlock skills as you gain levels. One of the most useful abilities is the combo speed boost, every character has access to it, so pick it up when you can.
Head back to Sky Finance to meet a mysterious new client.
After a cutscene, some text, and another cutscene, Akiyama (You) will decide to take a stroll. You now have access to a safehouse, where you can save, heal up, or get some background from previous Yakuza games.
TROPHY: History Buff. Get this bronze trophy for watching all the Reminiscences from Yakuza to Yakuza 3. If you aren’t familiar with Yakuza, watching these will help you understand the plot. If you are familiar with Yakuza, it still helps to get a refresher course on these complicated plots.
Before leaving the alley you’ll get another call from Kido. He’ll want to meet ontop of the red building in Theater Square. Follow your waypoint to find him.
Heading north, you’ll get a call from Hana. Another customer has arrived at Sky Finance. This is an optional substory, either return to Sky Finance to talk with the customer, or continue the story by meeting Kido.
In Theater Square, look on your minimap for an “S” symbol. The “S” indicates a save point, where you can also move items to your safehouse storage if you’ve got too many. It’s important to always carry a few health items and a weapon or two.
Interact with the stairs inside the red building. After a cutscene you’ll be attacked by Yakuza hitmen.
FIGHT: Right away, be wary of their numerical advantage. Don’t let them surround you or you’ll take damage. Pick on the outside of the group. Notice that two of the goons are equipped with weapons. Target them with HEAT actions if you can.
One unique HEAT action on the roof – grapple an enemy and drag them towards the railings. Use your HEAT action to toss him over the side for an instant kill.
After the fight, the Police will surround and give chase. You’ll enter into a chase sequence.
CHASE: Run from the cops! You’ll be on the rooftops, follow the red line and keep moving. If the cops catch up, you have two options; press “Triangle” for a special escape, or hammer “X”, depleting a portion of your Chase Gauge. Think of the Chase Gauge as your stamina, as you run it will slowly deplete.
Follow the red line. Execute quickturns by tilting left or right while holding “R1″. This is a tricky move, but can be very useful at taking sharp corners.
After crossing two bridges, you’ll get a quick-time event (QTE). Press the correct button while leaping to keep your momentum, otherwise you’ll temporarily slow down.
Continue on the track until the glowing red line turns green. Then you’re safe.
After the chase, you’ll get a cutscene and another chance to save.
Chapter 3: Trouble in the Tojo Clan
Back in Theater Square. Enjoy yourself, buy some food or weapons, and return to Sky Finance.
Just kidding! Just as you move, you’ll enter into a text conversation with some punks. Provide them with a beat down.
FIGHT: These two aren’t anything special. They’re more aggressive than the enemies you’ve been fighting so far. Otherwise, give them the royal smackdown they clearly deserve.
While talking to a military man, Akiyama will be pickpocketed. Chase after the perpetrator.
CHASE: Instead of running, you’ll be chasing after someone. The goal here is to deplete your enemy’s Chase Gauge before your’s runs dry. Do this by either pressing “Square” to ram them at close range, or “Circle” by throwing bottles. As you run, you’ll receive a short tutorial on how chases work.
This chase isn’t particularly difficult. Wait for the pickpocketer to slow down when he’s tired to charge attack him. As you circle the area, you’ll come across a set of blue trash recepticles. Hop over them with “X” to gain on the pickpocket.
Back on the red building’s roof, you’ll get a chance to talk with the trainer. During the conversation, you’ll unlock Dash Kick.
Now you’re free to go. The trainer will be waiting on the roof, talk to him for some extra training whenever you want. Trainers, for every character, provide challenges that provide unique bonuses when finished. You’ll learn new moves, increase your strength or defense, and unlock new substories by completing Trainer challenges.
Follow your waypoint to return to the ground floor of the city. When you’re ready, head back to Sky Finance.
At Sky Finance, you’ll get some more plot. After that, Lily will return. Now it’s time to go out on the town.
Your first job is to buy a dress and accessories for Lily. There are a mess of waypoints on your map, but really there’s only two locations you need to go. Le Marche, an accessory store, and Milestone. Milestone is a dress shop located in the underground mall. Find Le Marche and the underground mall entrance on Showa St. on the southern edge of the city.
Go for Milestone first, the underground mall entrance is the closest.
You’ll have two options for dresses, both are free. Pick whichever and get back to the surface.
At Le Marche, you’ll have two options again. Both are free, so pick whichever you prefer.
Akiyama will send Lily off to finish preparing. Screw around or head straight for club Elise. Follow the waypoint, the club is near the city center, just across from Millennium Tower. Get to know Millennium Tower, most of the plot centers around this place.
Use the elevator to get into the Hostess Club. Time for a minigame.
For now, change Lily into the clothes and accessories you bought her. Some stats and other oddities will appear on screen. Don’t worry, you won’t have to participate in the minigame yet. You’ll learn more about Hostess Clubs and how to run them later. For now, just enjoy the cutscenes.
Now return to Theater Square to meet Lily after her shift. Go there or fool around the city.
After a conversation, lead Lily to the Champion District – right to the waypoint. Don’t worry if she’s actually following you, she’ll warp to your position once you’re at the waypoint.
Following the cutscene, Yakuza hitmen will attack.
FIGHT: The front-most hitman has a sword, the best way to take care of him is by rushing by and attacking the hitman armed with a gun. Focus on the gun-wielding hitman first. When he’s down, pick up his Crude Pistol and open fire on the other hitmen by pressing “Triangle” while in a fight stance. Using the Crude Pistol, you should be able to take out another one or two enemies. Clean up the rest.
Read the following conversation to end the chapter.
Chapter 4: The Promise
Now it’s time to head to Elise and start micromanaging the club. There are several steps to take, just take it one step at a time and try to learn the basics. You don’t need to do well here to continue the story.
As you approach Elise, you’ll enter a conversation with a shady man. This is another optional substory, follow it if you want, or walk into Elise to continue the story.
Inside Elise, you’ll start the Hostess Trainer minigame. You’ll be allotted 100,000 yen to fund the training. First, let’s discuss the minigame and figure out what the goal is.
MINIGAME: Right now, your goal is making Lily appealing to customers as a Hostess. A Hostess spends time with customers, and hopefully convinces them to purchase drinks and spend money at the club. By being more appealing, more customers will request to spend time and money on her. That’s the idea, at least. Hostess Clubs are like stripclubs, except the strippers hang out with you instead of taking their clothes off.
There are several options to changing Lily’s look. Most of these can be ignored for now, customers this evening want someone conservatively dressed. That means, just have her wear one of the evening gowns and necklaces previously purchased.
Next, you’ll need to make your way around the club to listen to customer comments. Comments appear as speech bubbles with suggestions of what they want to see.
If Lily is popular, she’ll be sitting with someone in the center of the club. If she isn’t, she’ll be sitting alone at the bar. To make her look conservative, don’t give her make-up or a lowcut dress.
After walking around the bar, you’ll be prompted to return to the dressing room. You’ll have the option to change Lily’s clothes or check her stats. Don’t do either, just return to the customers. Make your rounds a second and third time to finish the minigame, nothing else is required for now. Don’t worry, this will all make sense eventually.
When you’re finished, Akiyama will comment that he needs to see the owner of a bar called Marimba in the Champion District. Follow your waypoint and lookout for street punks.
No one’s at Marimba, but another bar, Drama Queen is open. Investigating inside, you’ll find the manager’s corpse in the back room. Check around for clues if you’re interested, or just leave the crime scene.
It’s time to return to Sky Finance.
You’ll get a cutscene. Time to hunt down the Yakuza thugs that turned the office over. Your first lead is a cheerful foreigner named Mack.
Mack will teach you about “Revelations”. Anytime you see something strange going down around the city, take a picture by pressing “R3″, centering on the person, and interacting with “X”. You’ll enter a quick-time event, enter the correct buttons to succeed. Afterwards you’ll be asked to focus on one of three events in order to learn a new move.
Your first revelation is right ahead. A girl is yelling on a rooftop just across from you. Take her picture to initiate the event. After the… strange event, choose your first option out of three to learn a new technique.
Periodically, Mack will send you clues on where to find revelations. They can be very useful, so try to unlock them whenever you can.
Take off towards the Theater District. Talk to the people around, they’ll point you towards a few Yakuza thugs hanging out infront of the “Tower Battle” sign. Talk to them to initiate a fight.
FIGHT: Six thugs means you’re outnumbered. Dash or run away, circling the group until one separates from the horde. Pick on the outliers, or grab a weapon to help control the crowd. Otherwise, they aren’t armed. Look out for the fat guys, you can’t grapple with them.
The street thugs will give you a clue. Follow the streets south to the lockers and take the path to continue under the theater.
Follow the path down until you see some homeless men infront the set of escalators. Talk to them.
You’ll get another clue. Head towards Millennium Tower, and find the waypoint around back leading to an elevator. Ride the elevator down.
COMBAT AREA: The Underground is a dungeon-like area. Instead of fighting a single battle, you’ll seamlessly fight thugs as you continue deeper through the tunnels. That means you won’t get a chance to rest between fights.
Once you enter the Millennium Tower Underground, follow the wall to your left until you reach an open passage. Take the stairs, continuing forward until you reach a doorway to your right.
Enter the doorway to encounter a group of punks. Beat them up, and you’ll be prompted to smash a glowing blue door. Smash it open and follow the stairs up.
As you enter the stairwell exit, you’ll be prompted to hit a button before a homeless man belts you in the head with a bottle.
After a short conversation, the old man joins you. Enter the open doorway to the left to face off against more thugs. Defeat these four to enter into another room where you’ll fight another group. Use the homeless man to your advantage. He can’t be hurt, when he attacks he’ll draw attention away from you.
Continue to brawl into the hallway. There are plenty of weapons laying around in the hall to use. Continue into the open doorway on the right side.
Inside is another encounter, this time with one particularly tough goon in a purple tracksuit. Focus on his weaker friends to lessen the load in these tight quarters.
One of his men wields a baseball bat. Take him out to get your hands on his weapon, then try its powerful HEAT action.
Continue forward to reach a locked door. You’ll need to backtrack through the decrepit storefront, down the hallway, and through another decrepit storefront to find the locksmith. He’ll be hiding in a corner behind piled up boxes.
Talk to him, and return to the locked door – fighting your way through a new combat encounter.
Use the locked door to call the locksmith. He’ll unlock it for you. One the other side, you’ll run into Purple Tracksuit again with friends. You’ve handled them once before.
At the end of the hallway, you’ll meet a fat man carrying a sofa. These enemies guard passages and will stand their ground. Attacks will not stagger them like other enemies. They simply absorb the hits and attack back. The best way to deal with these guys is carrying a weapon and hitting them with a HEAT action. Otherwise, you’ll need to pick at their health with quick attacks and quickstep before getting hit. Another option is throwing weapons at them, but this is only recommended for people with extreme patience.
You’ll run into another locked door. This time there’s no backtracking, just interact with the door.
Inside are two goons and another fat man wielding a sofa. Beat up both enemies, saving your HEAT for the fat man.
Through another lock door, you’ll run into a mad scientist (!) and some thugs. The scientist and locksmith will hide, allowing you to go to town on the thugs.
These enemies take a licking and keep on ticking. Wear them down, and be careful. When the room is cleared, you’ll continue forward alone to face down a boss. The mad scientist will come into play later in the game.
Before using the door, grab the health item in the very next room.
After a cutscene, you’ll face off against Midorikawa armed with a pistol. This part can be irritating, quickstep to the left or right to dodge his gunshots. If you’re hit, mash on “X” and dodge. Stay on the ground too long, and he’ll simply shoot you again. Rush him and sidestep his shots, you’re bound to take a few hits, but luckily his health is low. Don’t bother with weapons, they’re too slow for this section.
Midorikawa retreats, and three bad guys enter the room. Use the desks to quickly dispatch them.
Now, Midorikawa returns armed with a chainsaw. You’ll want to keep your distance now, just standing near him can do damage. Wait for him to charge or enter a combo animation, then quickstep around him and attack.
The desks can be useful for hitting him from afar. Take your time, every one of his chainsaw attacks will floor you.
Once you beat him down enough, he’ll perform a HEAT action. Follow the onscreen commands to deal the boss a finishing blow instead.
With the boss defeated, you’ll get a cutscene and return back to the surface. Return to Sky Finance when you’re ready.
Time to return to Elise and finish Hostess Training. It’s Lily’s last day, so more options will be available.
MINIGAME: This time, you’ve gained the “Training” option. This is how you raise one of three stats; Appearance, Wit, and Conversation. During these three shifts, you only need to worry about raising Conversation. Under “Training”, choose “Conversation Tips”. This will raise her stress level. The higher the stress level, the less effective at her job she’ll be. Raise the stress level too high and she’ll get angry at guests.
Another facet of this minigame is the Motivation Gauge. Increasing motivation increases work performance, increase the guage by changing around the hostess’ appearance and buying new pieces of clothing.
None of this is required for now. Run Lily through all three shifts, only train her in conversation once. Training twice in a row will only increase stress. If her stress is too high, choose the “Training” option, and pick “Free time” to give her a break and relieve stress. Any extra effort put into this section is optional. Put as much work into it as you want.
When you’re finished, head back to Sky Finance to get Lily’s results.
After the dialogue, take the briefcase to Millennium Tower. Walk inside, run down an escalator to the bottom floor, and take an elevator to the roof.
Enjoy another cutscene. Just as you leave Millennium Tower, you’ll get a phone call from Elise. Return to Elise for another substory or head back to Sky Finance to continue the main story.
At Sky Finance, Hana will run away. Follow her onto the street to enter a chase sequence.
Unlike other chase sequences, you really can’t fail here. Just follow Hana until she stops in a park. Try not to bump into too many people and you’ll be fine.
After the conversation, you’ll get another call from Elise’s Manager. This time there’s trouble, some Yakuza thugs are menacing the place. Head over there.
Prepare for a fight. Buy some healing items, such as meals from restuarants or health drinks from the drug store. Spend your experience points and save before entering Elise.
FIGHT: This is the final boss battle for Part 1, it’s also the most difficult.
Minami is fast, he can break your guard, and he’ll quickstep around your attacks. He’ll guard himself, and recover quickly if his guard is broken by a strong attack. Fight fire with fire, be faster than him. Rely less on your guard and more on quickstep, his combos propel him forward, making it easy to sidestep and perform a quick combo on his exposed back.
Always finish your light combos with a final blow. If his guard is broken, don’t delay, quickly strike him with a series of light attacks.
After taking some damage, Minami will begin to drink. He uses a form of kung-fu called Drunken Boxing, the more drunk he is, the better he fights.
Immediately attack him when he pulls out a bottle. It increases his HEAT gauge, making him faster and more powerful.
Minami can’t be grappled, so unlock a HEAT action that doesn’t require a weapon or a grapple to pull off. The ground HEAT action is very useful here.
When Minami’s health bar is taken down one bar, he’ll unleash a HEAT action. Be prepared for it to inflict extra damage on the boss.
Afterwards, Minami will glow purple. At this stage, he’s incredibly fast and powerful, his quickstep easily taking him far out of your reach, and able to attack in an instant from across the arena. Guard and dodge him if you’re having trouble, he’ll weaken over time and return to his normal level of fighting.
Keep at it and you’ve won.
TROPHY: Part 1 Clear. Enjoy your victory cutscene.
Part 2: Taiga Saejima
Chapter 1: Flight for the Truth
Part 2 introduces a new character; Saejima. He’s a little different, you’ll learn more about him soon.
After the cutscenes, you’ll face off against prison inmates in the cafeteria.
FIGHT: Saejima is a bruiser, he’s slow but powerful. Right away you’ll be introduced to his special fighting style, “Triangle” can be charged to produce powerhouse punches and kicks. Attack with light punches and follow through with a strong charge attack. Do it five times to finish the challenge.
The inmates serve as practice. The prison chapter is filled with combat, so spend as much time as you need practicing and growing accustomed to his moves. Unlike Part 1, Part 2 begins with some difficult fights and no chance to stock up on items.
You’ll get another healthy dose of story before reaching your next goal – finding a grappling hook in the prison yard.
COMBAT AREA: Now you’ll have some freedom. First of all, talk to the chubby man standing near your save point. He’ll give you a rundown of what he needs to construct a grappling hook. First, you’ll need a chain.
To find the chain, run down to the three inmates standing around a weight set. Talk to the flanking inmates, and then talk to the center inmate. You’ll get into a fight.
These three aren’t anything special. The only wrinkle is that you need to defeat them quickly before guards respond to the violence. Use your charge attack to smash through their block and you’ll have time to spare.
Return to the save point and talk with the weapon modder. He’ll take the chain and ask for a farm tool. Run back to the bleachers, two men are talking not so far away about farming duty. Talk to one of them, and then talk to his friend. He’ll ask for a cigarette before giving up his farm tool.
To find a cigarette, talk to the smoking man behind the basketball hoop. Ask him to bum a cigarette, and return to the farmer inmate. He’ll want a light. To find the lighter, you’ll need to cross the grounds and speak with a guard south of the save point. He’ll let you into a concrete exterior area. Turn left until you reach a dead end. Interact with the glowing object on the ground. You’ve got your lighter.
Return the lighter the farmer inmate, which starts another fight. These inmates are a pushover, finish them off and take the tool to the weapon modder. He’ll create a grappling hook.
Talk with Hamazaki on the bleachers, he’ll instruct you to hide the grappling hook. Follow the waypoint southeast and interact with the manhole.
When the chain and grappling hook are hidden, you’ll get another cutscene.
COMBAT AREA: This is when the chapter gets tricky. Five guards, several with batons, and the center guard is Saito. Immediately turn around and you’ll see a glowing health item, make sure to grab it before defeating all five guards.
Saito is especially powerful, his combos and lunge attacks can hit from long range, and at this point Saejima won’t have access to all his moves – like improved quickstep or ground recovery. Keep your distance from Saito and clean up the weaker guards first.
With all the guards down, interact with the fallen Saito to take his key. Deeper inside the prison you’ll get the goal to reach the Director’s Office where you’ll meet Hamazaki. Three guards are standing in your way. They’re tougher than inmates, just look out because they’re armed.
The wooden sword is useful, but it’s also very slow. If you plan on using it, give yourself plenty of room to wind up your swings. Also note that these back rooms contain fire extinguishers, which are very quick weapons.
Pick up the healing item before continuing down the hall once the guards are beaten. You’ll run into another quick time event. Press the correct button or take some damage.
Before continuing up the stairs, turn left to take a health item.
Up the stairwell, you’ll face another closing prison door. Across it is a second fight with Saito, this time he’s alone. He has all the same moves; you just have less space to move around. He’ll glow red when his pulls off powerful attacks, keep your distance and peck at him, his baton will blast through your block. Take the extinguisher in the corner for some extra damage.
Saito will also attempt to grab you, it’s very difficult to escape his grabs at this point, so just try not to stand too close for too long. Like all bosses, it’s safe to wait for him to attack then counterattack from behind. When his health is low enough, he’ll try to hit you with a HEAT action that you can counter. Follow the onscreen instructions and you’ll finish him off.
Take his keycard, and use it on the keycard reader near the wooden doors. Follow the hall down until you reach the Warden’s Office.
When you reach the office, two more guards will attack. Beat them up, and you’ll be able to continue the escape.
You’ll find another health item to the left of the stairwell. Follow the stairs to the roof, where you’ll come face to laser with a sniper.
The sniper’s laser sight glows green as it hones in on you. The laser will turn red the longer it lingers over you until firing. Run or quickstep out of the laser’s trajectory as it begins to change colors to avoid being shot.
Smash the destructible doors up ahead, dodge away from the laser and don’t stand still too long.
Continue forward towards a large stack of crates. Stand behind it, using it as cover as you fight the three guards ambushing you. Once they’re clear, zigzag forward and turn left where a single guard is waiting for you. Look out; he throws flashbangs – special grenades that stun you if they go off. While stunned, the sniper will has plenty of time to shoot, so try to avoid the grenade’s blast.
Beat the guard. Now there are two sets of doors here. The left doors lead to a health item, and the right doors lead forward.
Once you’re busted through the right doors, you’ll face a swarm of guards with little cover and a grenade thrower in the mix. To get rid of the sniper, just run by the group towards the next destructible door.
Now that the sniper is gone, try to take care of the grenade thrower and clear out the guards in relative safety.
Meeting up with Hamazaki again, follow the stairs down into another room. You’ll face off against a swarm of guards. Grab any weapons you can find and let Hamazaki draw some of the guards off of you. When they’re finished, interact with a door up ahead to enter the prison yard.
In the prison yard, simply rush for the manhole concealing your grappling hook.
After a cutscene, you’re against another swarm of guards with Saito in the mix. Saito is just as difficult as before, and one of the guards is armed with a Crude Pistol. Target the pistol guard first. Luckily the guards with Saito are fairly weak despite being armed with various weapons.
Saito will most likely be your last target. Go all out on him, now that you have more room to move, roll around to his back and hit him hard with charge attacks. One charge attack will cause him to stagger, take advantage of it with a light combo. Put Saito on the defensive to more easily handle him.
During this fight, try to save your healing items for Chapter 2. If you’re low on health, don’t worry, you’ll have full health at the beginning of Chapter 2.
Now that the boss is defeated, you’ve finished this chapter.
Chapter 2: The Tiger and the Dragon
Relax during a few cutscenes, you’ll be facing your toughest opponent yet.
FIGHT: The hero of Yakuza 1-3 is now your opponent. This is a true test of skill, so all that fighting practice back in Chapter 1 will pay off. Kazuma is a fast bruiser, and he’ll enter HEAT mode as he fights, glowing blue and then red. He’ll unleash undodgeable HEAT actions just like the player, and uses some powerful attacks.
This fight is all about momentum, try to keep your HEAT meter high and you’ll do well in this fight. Don’t be too aggressive, Kazuma will quickstep around your attacks and attack you from behind. When he begins to glow, fight defensively and hang back, it will eventually fade.
Keep track of your health items and use them when necessary. You will lose your items next Chapter, so don’t be afraid to use everything.
Once Kazuma is low on health, he’ll pull a HEAT action that can be countered. Counter it to knock him down to low health, and finish him off with a stomp or a few light attacks.
This is a short chapter, but be thankful after that fight. Watch the cutscenes and you’ll ride out of Okinawa and get back to Tokyo.
Chapter 3: The 25-Year Blank
Your goal is to find your old crime boss, Sasai. Follow the waypoint to investigate.
This is your first chance at freedom with Saejima. Talk to people and explore the city for more substories and hidden items.
Saejima has another problem while traveling around. As an escaped convict, the police are out looking for him. Keep an eye out for police cars, cops tend to hang out around those, and usually at street intersections.
If you stumble into the police, you’ll enter into a chase sequence. Just out run them, following the red line. These encounters are fairly short; just remember to stock up on food items if you run into too many.
To avoid police that are on patrol, just walk instead of run. Running draws suspicion, so hold “L1″ to walk by.
When you reach the northeast alley, talk to the homeless man looking at garbage. He’ll tell you to look in the Underground Mall for someone named Toku. Follow your waypoints south to find the entrances to the Mall.
Before entering the Mall, there’s a store just outside the entrance called Don Quijote. Go inside and buy a can of beer. Any booze will do.
Toku is waiting in the center of the Mall. He won’t talk until you give him some booze, though. Go ahead and give him some.
With that lead dried up, leave the Mall and follow the waypoint towards your old apartment. More cops will be on the lookout now.
Kido is waiting on the roof as you reach the waypoint. Prepare for a chase.
CHASE: Kido can be tricky, follow him left where he’ll jump over a bike. Take shortcuts and pound on Kido with your tackle. Eventually Kido will gain a speed boost and take off, just keep after him, he’ll eventually get tired long enough for you to get close.
After tackling him while tired, Kido will immediately take off in the opposite direction. Don’t let his sudden direction changes take you by surprise and eventually you’ll win.
With Kido caught, he’ll show you to his hideout. Follow him underground.
Remember the chainsaw fight? Their place is now your place. It serves as Saejima’s hideout for Part 2.
In the Theater Underground, you’ll need to learn more about an information dealer. There are several substories all around your hideout, but none of them can help with your information problem. Head up the escalator instead.
A homeless man will beckon you to follow him. He’ll lead you to a manhole, and into the sewer system.
In the sewers, more punks are hassling a homeless man. You’ll get a choice, but you’ll end up fighting either way. Take out the three punks to continue the story.
FIGHT: These three should be a pushover after everything you’ve dealt with so far.
With the old man saved, you’ll have access to another substory. You also now have access to the sewers. Explore the area; there are more substories and vendors available to you.
Check your map, and run down to the central sewer area. Cross over the bridge, and take a right. Two homeless men are sitting in the corner, talk to the man on the right to learn more about the info dealer.
He’ll give you a rumor that the bathroom in West Park has a secret entrance. It’s located in the northeast corner of the map; follow your new waypoint there.
Inside you’ll find a cutscene and a locked door. Back to square one.
You’ll find a new lead by talking to a construction worker across from the M Store on Shichifuku St. Look just north of the Theater District; the worker is standing right where Shichifuku meets the Hotel District.
Follow the waypoint, you’ll run into a crowd and a short conversation.
Once the scene ends, enter the Children’s Park. Street punks are standing over the manhole. Of course, they won’t leave without a fight.
FIGHT: The gang members are surprisingly resilient. One is armed with a bat, while another is armed with a bottle. The bottle is more dangerous than it looks, one swipe will knock you onto the ground.
Pick apart the weapon holding gang bangers or grab a weapon of your own. Even the weakest weapon is great at filling your HEAT gauge. Otherwise, the gang members are nothing special.
Interact with the manhole to enter the sewers. Follow the straight path forward towards your waypoint until you reach a ladder. Use it to reach Purgatory Underground.
Inside Purgatory, you’ll get a chance to ask Kage the Florist either about himself or about Purgatory. Enter both conversation options to continue to the Underground Coliseum.
While in the Coliseum lobby, take this chance to save before talking to Kage again. You’re about to enter a death match with the Coliseum’s champion, so take precaution.
Talk to Kage and choose the third option for some quick cash. Use it to prepare for the fight, you can leave Purgatory at any time if there are items you need. Just talk to Kage and tell him you’re ready to begin.
FIGHT: Ivan is an MMA fighter, so despite his huge size, he’s quick on his feet and can cover a large distance while throwing attacks at you. While Ivan is fast, he’s susceptible to your charge attacks.
Eventually, Ivan will begin to glow. He doesn’t significantly power-up and his attacks can be safely blocked. Look out for his wide kicks or inescapable HEAT attacks, though they aren’t extremely powerful.
Once he’s down to half his last health bar, he’ll become very aggressive until launching a counter-able HEAT action. Turn this attack around on him to finish Ivan off.
With Ivan defeated and the crowd shamed, you’ve finished Chapter 3.
Chapter 4: Oath of Brotherhood
Boss Sasai has seen better days. With one question answered, Saejima still needs to meet Majima. To begin, you’ll need to return to your Hideout, dodging the police as you go.
Follow the waypoint to another manhole. Back in the sewers, you need to run against the stream towards the ladder to the Children’s Park.
On the surface, a man will stop you and ask for help. This is another substory. He’ll take you to his dojo and explain how this Training Minigame works. The Dojo is entirely optional, decline to continue the story.
Leave the Dojo; this is when travel becomes tricky.
COMBAT AREA: The Police are out in force, and being caught leads to Game Over. Outside, you’ll notice police standing around with lights spinning over their heads. These officers block your path. Don’t even try to get close to them. They also show up as pink lights on the Minamip, just keep your distance and go where they aren’t.
Follow the street west, south, and west again to approach the red building. A police officer is patrolling just outside the alley, simply walk by instead of running. Take your time and don’t bump into the patrolling cop or else it’s all over.
Up top you’ll need to follow the waypoint until you reach Sky Finance. Take the fire escape to the ground floor. Leave the alleyway and cross the street into Tenkaichi Alley. Just before entering the park, there’s an entrance into the Central Parking Lot.
Follow the waypoint in the parking lot from entrance C to entrance E. Up top, head west and then south down the nearest alleyway until you find roof access. Immediately turn left and follow the path marked by a woman waiting.
Get out of the Pink Alley on the ground floor and head north towards another small parking lot. This one is also guarded by a patrolling cop. Take it easy and walk by him, then use the manhole cover to get underground.
Just run to the elevator and ride it up in the Millennium Tower Underground. Continue west towards another pathway towards the Theater Underground. Lookout as you near the broken escalators, another cop is watching nearby. Enter the basement floor to reach the hideout safely.
Arriving back at your safe house, you’ll run into an unwelcome guest. With control back, return to the hideout and choose to rest when you’re ready.
Kido will provide some complicated instructions for reaching Millennium Tower.
COMBAT AREA: Thankfully, this trip is shorter. Return to the surface via the shutdown escalators. Leave the tunnel the way you came, but look out for a patrolling cop as you exit. Walk just as you reach the top of the stairs, and continue east towards Millennium Tower Underground’s access elevator.
Turn right and follow the waypoint to the ladder out of Millennium Tower Underground. You’ll come out back in the Shichifuku Parking Lot. Walk south, looking out for the cop patrolling the parking lot entrance.
Take Senryo Avenue south, entering Pink Alley to find roof access. Follow the winding rooftop path to the waypoint. You’re now in Pink Alley again. Follow the alley north to reach parking lot access. Leaving entrance E, you’ll need to head towards the waypoint to find another manhole cover. Use it to gain access to the sewers. Cross the sewer bridge into another tunnel, toward the ladder leading up; in front of Millennium Tower.
Prepare for a big fight before entering Millennium Tower. When you’re ready, go ahead inside.
Inside Millennium Tower, you’ll face an army of Yakuza thugs with Minami.
FIGHT: The first phase of this battle is against fairly easy Majima Family Members. They aren’t armed or aggressive, feel free to go all out. They won’t be able to defend against Saejima’s charge attacks, so have fun. Don’t play around too much, this is a long stretch of combat, your number one goal is to try and not take damage.
As you fight, more Yakuza will enter the arena to replace the ones you’ve defeated. Eventually, once enough of them are gone, they’ll be replaced with more difficult opponents.
After clearing out enough thugs, a short cinematic will introduce new enemies. They aren’t as numerous, but these larger guys are more aggressive and might land a few hits on you. Just keep pummeling them with combos and charge attacks.
Once the second phase of enemies is thinned out, three enemies will attack. These last three Yakuza have two health bars and soak up damage. Don’t let them surround you and focus on taking them down one at a time..
Finally, you’ll face off against Minami himself. While his speed was dangerous during the first fight, this time he’s toned down. His most dangerous attack is a stunning crotch punch, so lookout when he goes for a low blow. Otherwise, he won’t be able to withstand Saejima’s powerful charge attacks.
Taking Minami down to his second health bar, he’ll add a new attack to his repertoire. Removing a bottle of alcohol and a lighter, he’ll start blowing flames. This attack in conjunction with his stunning crotch strike can be veru dangerous. When he takes out his bottle, just stand back and wait for him to finish blowing flames, you won’t be able to interrupt his attack. Just keep plugging away between his special attacks. You’ll get a chance to do serious damage while he rests after his fire-breathing attack.
With that lengthy battle finished, you’ll enter a cutscene.
As the cutscene ends, you’ll face off against the final boss of Part 2 – Majima.
FIGHT: Majima is a serious contender, right off the bat he’s wielding a knife – so your guard won’t help you here. There are two healing items in the arena, grab then when you can if you’re in need. Like Minami, Majima is fast. Unlike Minami, Majima is inhumanly fast, easily able to quickstep circles around you.
Check the corners of the arena to find baseball bats. They won’t last long, but they offer protection and a wide swing attack able to hit Majima while he’s trying to dodge. Be careful when you launch into a combo, Majima can easily swoop in and knock you down from behind. Don’t stay in your fight stance too long; being able to freely run and turn on a dime is important in this battle.
As Majima’s HEAT increases, he’ll become faster and stronger. This is when you’ll need to fight defensively, he moves with inhuman speed, so following him can be frustrating. Wait to unleash a combo while he isn’t quickstepping circles around you.
Majima will periodically strike with a HEAT action. You’ll need to follow four onscreen button prompts to escape his attack. He whips this attack out several times if you’re not lucky, so be prepared.
His most annoying attack is when he begins spinning wildly. You’ll constantly take damage so long as he’s touching you. Either run or try to dodge, the strikes aren’t especially powerful, but you’re bound to be hit by them.
Wear Majima down until you can finally counter his HEAT action with one of your own, finishing the battle.
Now that Majima is defeated, you’ll get some answers in the following cutscenes.
TROPHY: Part 2 Cleared. You’ve finished Part 2. Give yourself a pat on the back and save your game.
Part 3: Masayoshi Tanimura
Chapter 1: The Parasite of Kamurocho
Exit Saejima, enter Tanimura. When the cutscene ends, your first goal is to discover the informant that ratted you out. Start by following your waypoint to Orchid Palace Mahjong.
Before entering the Mahjong Parlor, stop at the pawn shop on the same street. Inside the pawn shop, you’ll want to buy two Fake Silver Plates. With your new items, run to the waypoint.
Talk to the man running the counter. When you’re finished, talk to the four men playing mahjong near the entrance door. They’ll want two Silver Plates. Give them the fakes you bought at the pawn shop.
You’ll find the rat in the northeast parking lot. Find him showing off at the center of a crowd. He claims to be especially fast. Prepare for a fight.
FIGHT: The first major difference you’ll see is Tanimura’s parry – press “L1” as an enemy attacks to send them tumbling by you. Using this power can be very advantageous; it stops an enemy’s combo and exposes their back to you for follow up attacks.
Tanimura is a more technical fighter than Saejima, take note of his significantly shorter health bar. He is faster, but he isn’t quite as quick or strong at Akiyama. Learn to use Tanimura’s shortcomings as an advantage.
In the abilities list, notice that Tanimura possesses several HEAT actions that follow finishing blows. These are some of the most useful in the game.
Tanimura also has the ability to parry from any direction with the purchase of a special ability. Try to pick it up early; being able to stop an enemy from launching combo attacks against your back will come in handy.
The enemy you’re actually faced is a pushover. His only distinguishing feature is that you must beat him in a minute. Launch into an all-out assault, he won’t stand a chance.
Take note of the major differences between Tanimura and Saejima, also remember that you have lost any of the items you gained when switching characters. Don’t worry; you’ll get a chance to get back all those items in time.
Leave the parking lot and you’ll get a message on your police scanner. Your next goal is in Theater Square, Tanimura will warp there to check out the disturbance.
Another street tough is picking on a poor businessman. You know what happens next.
FIGHT: This fight is your introduction to police scanner reports. All police scanner jobs are optional, though they’re a good way to get money and experience. This first incident shouldn’t be a problem at all, just use your new skills to beat down one punk.
The Community Watch will have a short discussion with you after the fight, letting you know they’re willing to pay for your help. After that, Tanimura will take a phone call.
Now is your first chance to enter the Little Asia District. The paths aren’t blocked anymore, so follow your waypoint into the cramped slum. Tanimura mentions that the easiest way to find Zhao’s restaurant, your next goal, is through Taihei Blvd East. Do that, Little Asia can be confusing the first time through.
Nearing the waypoint, you’ll enter a cutscene.
You now have access to a hideout in the backroom of the Chinese restaurant Homeland. This is your home base, so get used to traveling in and around the district.
Run towards the waypoint to a Korean salon called Midori in the center of the city when you’re ready.
More Shibata Family thugs will attack you after the cutscene.
FIGHT: These four shouldn’t provide too many problems. The fat Yakuza is the first Tanimura has faced, they don’t stagger easily, so they can provide some trouble. Take advantage of the weapons lying around the alley to build some HEAT.
Avoid knocking the many weapons around too much; the enemies might get the idea to use them too. None of the weapons here are particularly dangerous, just take your time and beat these guys down.
The girl you’ve been looking for, Yasuko, has been kidnapped. Like any good hero, it’s time to rescue her from an army of Yakuza goons. Stock up on a few healing items and do whatever else you need to first.
When you’re ready, take a cab to the Docks. You’ll be entering another long stretch of fighting.
COMBAT AREA: Right away, you’ll be thrown into combat. The criminal in purple is the most aggressive out of this group, and the weapons they use can be deadly. Grab the healing item across the arena if you’re in need.
The purple-suited thug is the heavy type, with a long range overhand strike that he can launch from long range. Wait for him to attack and parry to get in some easy hits.
When he’s finished, you’ll get a short scene showing a barrier being knocked away. Follow the path; just be ready for a timed event to pop up behind you. A truck tries to run you down, hit the correct button to dodge and face off against another batch of thugs.
Purple-suit is back with more heavy Yakuza. They’re more aggressive and can take a good beating before going down. Divide and conquer these bad guys, finishing off the weaker ones before moving onto the tough enemies.
Follow the path right into another corridor. Another timed event is waiting for you there, just be ready for it. Four unarmed dock workers will attack, but they’re nothing special.
Near where the dock workers attacked is another healing item, check in the corner blocked by a carelessly parked truck.
Following the path, you’ll run into oil slicks. You have to walk, not run, over oil. Otherwise you’ll fall and take damage. The easiest way to cross oil is by staying in your fighting stance. Quicksteps and combos don’t count, only running will make you fall.
A lone worker will attack followed by two armed friends. Stay back until you beat these three, then move into the oily area. Two workers wielding throwing knives will attack. You’ll need to sidestep or quickstep away, but knives are much easier to dodge than bullets.
After defeating the second knife-thrower, you’ll reach a third timed event.
Take out the three Yakuza heavies and smash open the broken wood gate. Another healing item and more goons will charge. Stay back, as further down one of the thugs is armed with a submachine gun.
Submachine gunners can be tricky, but they’re easy to take care of. You’ll need to hide behind cover, and then pop out just long enough for them to start firing. Wait for their shots to stop before charging forward and taking them down. They wait several seconds between burst attacks, so you’ll have plenty of time to safely run at them.
Moving past the unconscious gunner, you’ll have to dodge another timed event.
Run near the warehouse until you’re ambushed. This is the final battle of this section and can be pretty tricky. There are four normal thugs and two guys carrying a gun and katana respectively. The gunner and swordsman take too much damage to focus on, clear out the lesser criminals first even if it means taking a few bullets.
Pistols are always dangerous, if you’re not looking at the gunner it’s hard to tell when to dodge. One advantage to Tanimura is his arm bar hold, while he has an enemy in his hold he is effectively safe from bullets.
The Katana wielder is especially aggressive, and his forward lunge can strike from long distance.
When one of the two special Yakuza is low on health, you’ll enter into a counter HEAT action, press the correct inputs as they appear to damage both of these tough guys at once.
Once the tough thugs are taken down, you’ll reach a cutscene and the end of Chapter 1.
Chapter 2: The Mastermind
With the plot progression out of the way, it’s time to find Yasuko’s suitcase in the Central Parking Lot. The same suitcase containing 100 million yen loaned to her by Akiyama.
As you leave Homeland, you’ll meet with a woman named Nair. She serves as the trainer for Tanimura. Return to her to train, or talk about her investigation to follow an optional substory.
Nair also introduces Tanimura to revelations. Check your e-mail and keep a lookout for these special events.
Take one of the many entrances into the parking lot and keep an eye out for parked cars with their trunks facing outwards. Search for a black sedan located around center-north of the parking garage.
Now to get into contact with Katsuragi. Leave the parking lot. On the surface you’ll get a convenient phone call. Check your e-mail after the call to get a picture, you’ll find an informant if you can find where the picture was taken.
To find the spot, head up to Kamurocho Rooftops East, you can find an entrance to the roof from Pink Alley.
On the roof, follow the left path using the wooden boards as a ramp, cross the bridge, and head up the stairs. Cross the wooden bridge onto a green roof where a homeless man is carrying flowers. Talk to him to get your clue.
After talking to the man, you’ll get a call from Katsuragi. Return to Homeland and rest until your meeting. Talk to Zhao to rest for the night.
Leave Little Asia and make a beeline for Millennium Tower. As you near the tower, you’ll activate a cutscene.
After the cutscene ends, you’ll need to return to Homeland while fighting waves of Yakuza.
COMBAT AREA: This is your chance to have some fun. The metal briefcase counts as an infinite weapon, it’ll swat groups of goons away like flies. Even the big guys barely stand a chance against you. Keep building up that HEAT and unleashing actions to quickly clear out the bad guys on the street.
A continuous stream of thugs will continue to attack, don’t worry they aren’t infinite. Continue down the road, turning left and passing the cars obscuring your path. Fight against the stream, beyond the police car you’ll run into another group.
Five more will attack, they have longer health bars, but they don’t stand a chance against your infinite weapon. Continue past the cars a long Millennium Tower.
The next ambush is trickier, one of the goons will take your briefcase, leaving you unarmed against a group of Yakuza. Use the weapons strewn about the sidewalks to counter the extra muscle.
The fat Yakuza here will also display some new moves, like a flurry of punches that can be powerful if you’re caught off guard. Sidestep the punches and lay into them for some hits.
Defeating this group will lead to a chase sequence. Make sharp turns as you follow the goon up onto the roofs. After making a timed event jump between two buildings, he’ll begin to slow down. He’ll tire out before long, making him an easy mark for more charge attacks.
More Yakuza thugs will attack once you’ve got the briefcase. With your weapon back, they’re easier, just keep your distance in this tight arena and don’t let them close in too fast.
Next, you’ll enter into another chase sequence – this time you’re running away.
The twist here is that Yakuza goons will appear in front of you trying to block your path. Weave and dodge around them, using your HEAT action to ditch one of the goons if they close in, and leap over any of the receptacles blocking your path.
Back near Little Asia, you’ll face the last three Yakuza goons. These three have extra health bars, one is armed with a katana while another is armed with steel knuckles.
Don’t try to parry weapon-holders, you’ll just take hits. Instead, take advantage of the weapons lying around to get in some weak hit to build your HEAT gauge. They’re more aggressive, but be patient and you’ll manage to defeat them.
Back at Homeland, you’ll be greeted by the Chief of Police – finishing this chapter.
Chapter 3: Door to the Truth
When the conversation ends, you’ll be instructed to take a cab to Police Headquarters. You start near a taxi, so use it when you’re ready.
To find the documents you need, search three different stacks. You’ll get a little exposition, and then return to Kamurocho.
Back in Kamurocho, follow the waypoint to Homeland.
Before entering Homeland, a little girl will run to Tanimura asking for help. Some thugs took her dad, so it’s up to you to rescue him. She’ll also give you two healing items, which is always helpful.
Head south down Senryo Avenue to find her father. At the second turn take a left and approach the men in suits surrounding Zhao.
FIGHT: The shady men might have large frames, but they aren’t too aggressive. Handle them like you’d handle any other group of enemies. They won’t even both trying to surround you, just knock them down one by one.
With another bunch of thugs down, you can either follow the Nadine substory by talking to the fortune teller near Sky Finance, or return to Homeland and rest to continue the main story.
Returning to Homeland, you’ll move on to Chapter 4.
Chapter 4: As a Detective
Your first goal is to return the 100 million yen to Akiyama at Sky Finance.
After the cutscene, you’ll conspire with Akiyama to capture the crooked cop. Head to the Docks via taxi when you’re ready.
At the Docks, you’ll enter a cutscene.
CHASE: Now here’s a unique chase. Follow Sugiuchi on your boat, firing pistol shots to slow him down. First off all, don’t try to get fancy and cut him off, stick behind him and stay in his wake, otherwise it’s easy to lose him as he weaves between boats.
Periodically, Sugiuchi will turn and fire his pistol at you, slowing your boat down and interrupting your pistol reticule. The pistol reticule will appear automatically and begin to hover around Sugiuchi boat. Press “triangle” as the reticule lights up over the boat.
To stop Sugiuchi, the pistol won’t work. The pistol just slows him down. Follow him closely, continuously firing your pistol to slow his boat down and interrupt him from returning fire back at you. Once he hits a long stretch, press “square” to motor forward and collide with his boat.
Slam into his boat enough times, and you’ll win.
The chase ends with a cutscene, leading to the final boss for Part 3.
FIGHT: Sugiuchi begins by attacking through timed events. Be ready with the input to avoid taking damage, and then you’ll face him in a real battle.
The boss is a straight out brawl, he doesn’t have any clear advantages over you other than his extra health bars. He’s fast and can launch into some serious combo attacks. He’ll dodge your moves and try to grab you from behind, and features several unblock able attacks.
Don’t stand in front of him too long, he’ll try for a grab whether he’s behind you or not. If he knocks you down while in HEAT mode, he’ll enter into a dodge able HEAT action as you try to stand.
Use your parry to great effect when you can, while quickstepping around his combos. Don’t try to stand and exchange blows, he’ll always overpower your block.
This is the final boss of Part 3, so go ahead and use all the healing items you’ve stocked up. Also, make sure to snatch the healing item across from the bay inside the arena.
TROPHY: Part 3 Cleared. Sugiuchi is defeated, and the truth is revealed. Congratulations, you’ve finished Part 3.
Part 4: Kazuma Kiryu
Chapter 1: Reunion
With that cavalcade of cutscenes over, you’ll have access to a hideout at the orphanage.
Your first goal is to speak with Haruka. She’ll be waiting on the beach, just follow your waypoint and talk with her.
Several cutscenes later, you’ll be back in front of the orphanage. Speak with Hamazaki to reach your next goal; visiting the police station. Tell him you’re ready and off they go.
The following cutscenes lead to an abandoned office where you’ll be attacked by prison guards searching for the escaped Hamazaki.
COMBAT AREA: That’s right, Saito’s back and so are the prison guards. First of all, check out Kazuma’s fighting style. You’ll see he already has access to most of his moves, making him an absolute monster in combat. He’s fast on his feet and can dish out plenty of damage with a variety of HEAT abilities. Think of Kazuma as a combination of all the previous characters, without so much of a focus on their unique strengths. Kazuma is simply a powerhouse jack-of-all-trades.
All of the strategies useful to the previous characters are just as effective with Kazuma. Go ahead and begin clearing out prison guards, the lowly guards are barely a threat. Saito, though, still puts up a good fight in this cramped hallway.
By now you know Saito’s baton can be a pain, but he leaves himself open to attack by overreaching. Quickstep around his forward combo attack and launch into a combo followed by a finishing blow. Keep it up and you’ll win.
Continue out of the hallway into the stairwell. Head downstairs, clearing the next hallway of a few tougher prison guards. One of the guards is armed with a flashbang grenade. While it doesn’t hurt, it does stun, so avoid it.
Before leaving the hallway, enter a side room with an open door to collect another healing item.
Continue down to the next floor where you’ll face a fat guard carrying a sofa. These guys can be a pain, but thankfully this one has a short health bar. Just rush him.
Smash through the lockers, take out the two guards, and smash through a second set of lockers down the hall. The last guard past this barricade is armed with a pistol, but he won’t even get in a shot if you hurry.
Continue down the stairs, and watch out for another timed event. Saito will ambush you on the ground floor, with an expanded health bar.
The arena you face him in has a few extra weapons around, good for HEAT actions but nothing else.
Saito is more aggressive now, but the same strategies still apply. Attack him from behind, quickstep around his attacks, and lay some hurt down.
With Saito finally defeated, you’ll move onto the next chapter.
Chapter 2: To Kamurocho
Once the exposition is out of the way, you’ll be back in Tokyo with Kazuma. Head to New Serena, a bar just up ahead. Use the door just before passing by a truck.
Another character from the past is introduced in a lengthy conversation and cutscene.
You now have access to a new hideout in Kamurocho. Use the backroom of the New Serena to save and move equipment around.
Back on the street, you’ll get an e-mail about someone from the past. This is just another substory hook, follow it if you want, or simply move on.
Keep moving, you’ll get another e-mail from Kazuma’s old master Komaki. Visit him in the northern part of town to upgrade Kazuma’s abilities. His tests are pretty simple, so it’s recommended you get training – your power increases with every session you finish.
Your goal is located at Millennium Tower. Go to the entrance when you’re done poking around the city.
Nearing Millennium Tower, you’ll activate a cutscene, finishing this short chapter.
Chapter 3: The Encounter
Once you’re back in control, hurry to New Serena.
Inside, speak with Date to find out what happened. Now you’ll need to find Yasuko.
Outside, take the road north until you spot her in a cutscene. Follow her west into Taihei Blvd West, you’ll see her running north up Theater Alley. Take a turn east into Theater Square, you’ll see her again moving north up Theater Square Northwest. Finally, you’ll get your last glimpse of them running into Children’s Park.
Enter Children’s Park and use the open manhole to get into the sewers. Be prepared for a boss fight inside.
The cutscene will lead right into a fight with Tanimura and Akiyama.
FIGHT: This can be a tough fight. Keep in mind that Akiyama and Tanimura retain all their skills from when you played as them. Tanimura can parry your attack, and Akiyama offers fast kick combos. Neither one alone is as powerful as Kazuma, but when they gang up on you things get nasty fast.
First of all, try to keep them separated by moving. If possible, move so they’re always facing you in one direction, the problem comes when they surround you.
Focusing on one of them at a time can be effective, once one is defeated he will stand down, but it’s also helpful to switch up who you attack. When one of them is low on health, they’ll enter into a timed event – press the correct input followed by a button-mashing challenge. Mash hard enough, and both of them will take damage.
Tanimura’s parry can be annoying, try to interrupt his attacks with your own or counter him instead of launching into a series of light strikes. Final blows are especially useful against Tanimura, as they’ll break through his guard and stagger him.
Akiyama isn’t especially tricky, but he’ll put up a good fight. He has long reach, so keep your distance and be mindful of his position if you’re not engaging him.
When one of them is low on health, make sure to knock him out of the battle right away. It’s much easier dealing with one boss instead of two.
After the fight, continue into the sewers until you reach the ladder leading into Purgatory. An old man will stop you on the way and tell you where they were heading. You’ll also get a manhole opening tool.
Take the ladder up and enter the large building marked by your waypoint.
Watch the cutscene to reach the end of this chapter.
Chapter 4: Chain of Betrayals
It’s time for the big show, the longest stretch of combat in the game. Your goal is Kamurocho Hills, the large building still under construction located in the north east corner of the city. Enter through the West Park bathroom.
Take time to prepare for this one. Stock up on healing items. When you think you’re ready, go through the back door of the men’s bathroom.
COMBAT AREA: Begin knocking down the armed gangsters as they charge – the big problem in this first encounter is Horie. He’s easy to spot; he’s the fat guy carrying a sledgehammer.
Defeat the flunkies as they charge, keeping your distance from Horie as he approaches. The sledgehammer has long range but slows him down, making him easy to outrun.
Focus on the sword or knife carriers first, if only to get your hands on their weapons.
Take your time, Horie won’t fall easily. You’ll have to slowly whittle him down, your attacks won’t stagger or stun him, so quickstep away as he winds up for an attack.
Once Horie is down, cross the construction grounds towards a Yakuza thug carrying a pistol. Zigzag towards him and take him down, opening the gate into the large building’s front door.
Inside, you’ll run into a timed event.
Another miniboss rears his ugly head; Nakanowatari. This guy fights like Saito, using a baton to knock you down. The heavies with the miniboss are pretty tough, but it’s safest to try and finish them off first. The miniboss has a strong guard and you won’t be able to block his attacks.
Just like with Horie, you’ll have to be patience and do as much damage as you can before retreating. Quickstep his first attack and hit him from behind until he recovers, then retreat. Whittle him down until he’s defeated.
He’ll be thrown through the barrier and retreat. Follow him into the atrium for another fight.
Another group of five will attack, though without a miniboss to back them up they don’t put up too much of a fight. The fat Yakuza and his flurry of punches combined with his steel knuckles makes him the most dangerous of the bunch. Finish off the rest so you can focus on him.
Once they’re through, knock down the barrier blocking your way up an escalator. Up the escalator, you’ll want to enter an open shop to your right. Nakanowatari is back with a few friends.
Like before, take out the minor thugs before spending your time and HEAT on the miniboss. The various weapon pick-ups can help do extra damage and build your HEAT gauge in a pinch.
Continue into the open door leading back out onto the balcony walkway. You’ll face another goon holding a pistol at the end. Just charge him and take him down.
Enter the hall and turn right. Immediately turn left inside the stairwell and take the stairs up. Continue out the hall, onto the balcony, and into another open shop.
Another miniboss is revealed; Suzumiya. This guy can be a pain, but he also has the lowest defense out of all the minibosses. There’s a reason for that, he wields a shotgun and is quick on his feet. He’ll roll away from your attacks and knock you down at range with a shotgun blast.
If you don’t have it already, invest in unlocking the firearm disarm HEAT action. If you don’t have it yet, you’re likely to level up as you continue through this section. You’ll be faced Suzumiya again later on, so it will be handy.
Use the display cases as cover, rolling as the miniboss fires his shotgun. It takes a second to ready his weapon, so charge and try to string a powerful combo with a final blow.
This miniboss staggers easily, so keep him from running with short bursts of light attacks. Once he’s down, take his shotgun and continue down onto the balcony.
Eventually you’ll reach another barrier. Look out for two pistol-carrying Yakuza standing on construction scaffolding. Use the shotgun you picked up to take them out.
Past the barrier and into the hallway, turn left into an elevator lobby. Inside you’ll face another ambush from Suzumiya, who’s found himself a new shotgun.
Use the shotgun you brought to finish off a few of his thugs while keeping him staggered. If you lost the shotgun, it isn’t a bad idea to focus you attention on Suzumiya.
Once a few thugs are down, three more will enter from the elevator. They’re nothing particularly special, and when they’re done, another three will replace them. If you’re able to defeat the miniboss, grab his shotgun and blaze away while the thugs are clumped together to make easy work out of them.
When you’re finished, use the elevator to travel to the upper floors of the building.
Out of the elevator, you’ll immediately face a submachine gun carrying Yakuza. Take cover behind a wall, slowly scoot out and hide as the goon opens fire. Once he’s finished shooting, charge in and take the thug out.
Knock down the door behind the thug, and finish off both gangsters on the other side.
Continue down the hall, and turn right at the intersection. Knock down the door and continue into the open path to your immediate left.
This entire floor is scattered with useful weapons, so don’t forget to take advantage of them.
You’ll face off against another ambush of be-suited thugs. This closed space makes it difficult to dodge the baseball carrying goon. Take out the thugs, and exit through the door to your right to continue forward.
The next hallway is guarded by a goon with a pistol. Zigzag toward him, when he’s defeated take the pistol.
Into the intersection of doors, smash the door to your right, turn left and smash through those doors. Continue down, taking a left, while fighting the Yakuza all a long the way. Turn right to reach a goon with a submachine gun guarding the exit.
Through the door, you’ll activate a timed event followed by an ambush. The ambush features the return of another miniboss, as well as several knife wielding or sword wielding gangsters. Use the tools around you for help, traffic cone connectors are especially useful, as are sledgehammers.
With the last enemy unconscious, the exit door will open. Enter the hallway, fighting the four Yakuza that charge into the fray. You’ll pass by a side room down the corridor, enter it and turn around for two healing items.
One last Yakuza guards the exit door. He isn’t armed, so make easy work of him.
Through the open doorway, you’ll hit yet another ambush of enemies. The two most dangerous among them are the katana guy and the spear guy. Close space with the spear guy to make short work of him and use the superior spear weapon to control the crowd of enemies.
Continue your path forward, crossing an elevator shaft during a timed event. On the other side, interact with the door.
The next ambush can be tricky. Walk forward and look out for the timed event. In the darkness across the room is a pistol gunner taking potshots at you. Rush past the goons to try and find him, he’s an easy target and his pistol can easily clear some of the goons out.
Some of the Yakuza here have multiple health bars, but they’re not especially powerful. It’ll take a little longer, but nothing you can’t handle.
With the last thug down, take the key from the center unconscious Yakuza. Find the exit and interact to continue onto the roof.
Take the stairs up, and you’ll face your final ambush for this section. Four of the minibosses you’ve fought throughout the area are back to take you on. This can be difficult.
First of all, focus on Suzumiya – the shotgun miniboss. He’s the weakest and his long range attack will only make fighting the other three more difficult. The sledgehammer miniboss Horie is still very slow, so drag the other three away.
Ijuin is the one new miniboss. He’s also the most difficult; he’s very aggressive and is very quick on his feet. He specializes in martial arts, and he’ll lunge long distance to attack.
Defeat these guys piecemeal, dragging the faster minibosses away from Horie. Use the shotgun when you get your hands on it for some extra damage. Otherwise, don’t let them surround you, and play defensively until you’ve got a chance to strike.
Defeating the four minibosses opens the way to the roof. Take the stairs to reach the final cutscene.
TROPHY: Part 4 Cleared. You’ve completed Part 4!
Finale: Requiem
The four finally unite as one. This is your chance to complete any unfinished business you have before facing the final challenge of the game.
To switch characters, talk to them at New Serena.
Switch between each of the four characters to stock up on healing items and equipment. You can also take this chance to purchase new abilities.
It’s recommended you pick up a bulletproof vest for Tanimura before continuing into the final battle.
Everyone shares the same cash, and you’ll get bonus funds to help prepare. Don’t be shy about spending.
Everyone can go anywhere they want now, Kamurocho is completely open to every character, which means new substories are available for everyone. Take some time to explore if you want extra cash or experience.
When you’re ready, talk to Date at New Serena. Several cutscenes later, you’ll face off against the first of four opponents.
FIGHT: Akiyama vs. Arai.
Arai is a powerful opponent, he doesn’t spin circles around you but he’s still very fast. Be careful how you approach him, he’s very good at quickstepping around your attack and launching into a combo of his own.
He’ll almost always up with a multiple kick combo to interrupt your attacks, and landing a finishing blow can be difficult. Arai leaves himself open during his multiple kick assault, so playing defensively can help you find openings in Arai’s defenses. He’s a very intelligent opponent and will take advantage of your mistakes.
Otherwise, he isn’t a powerhouse, making Arai a perfect match for Akiyama. Hit Arai with powerful attacks, he doesn’t block as often as other fighters you’ve faced, and won’t be able to block your final blows.
Once Arai is down to a single health bar, he’s become more aggressive. This is bad for you, but also bad for him, he leaves himself open to attacks in this form.
Like many bosses, Arai’s HEAT will build. He has two levels of HEAT mode, blue and red. Just like you, HEAT boosts his strength and his blocking power. Whenever Arai is in HEAT mode, he’ll try to attack with a dodgeable HEAT action as you stand up from a fallen position.
Knock Arai’s last health bar to half to initiate a counterable HEAT action, to deliver a little extra damage to Arai and finish him off.
FIGHT: Saejima vs. Kido.
Kido is much, much more powerful than he looks. Right off the bat, Kido will attack with a massive combination attack, glowing red as he finishes with a jump kick. You’ll be able to block the opening punches of Kido’s combos, but always try to dodge before he hits you with a finishing blow – it will blow through your guard.
Kido can knock down your guard, but so can you. He’ll always guard your attacks, so hit him with charged final blows to do some damage.
This fight has two major challenges – both of them involve Kido’s HEAT mode. Kido will glow orange in HEAT mode.
While Kido is in HEAT mode, he’ll perform a lunging grab, usually running full speed before pulling it off. It only works if it lands on you forward, so run or dodge. If his lunging grab lands, he’ll always do damage, you’ll have to mash “X” to keep him from doing further damage. This is a powerful attack that can’t be blocked once he catches you, so look out.
The second move is a very powerful combo attack Kido performs while he glows dark red. He’ll stop on the ground to charge up then begin to yell as he attacks. Keep your distance and just wait for him to finish. After these attacks, he’ll rest for a few seconds, allowing you to get in a massive combo of your own.
Thankfully Kido’s huge combination attack will deplete his HEAT gauge instantly, making him a manageable fighter.
Kido is faster than Saejima, and will sidestep your attacks.
Finally, once you’re close to defeating Kido, he’ll recharge most of his health bar. There’s nothing you can do here, you’ll just have to continue fighting him.
Taking him down to low health again, he’ll recharge his health a second time. Again, there’s nothing you can do but wait for him to finish.
After the second recharge, you’ll immediately enter a timed event HEAT action. Follow the inputs onscreen to pound some sense into Kido.
Keep pounding Kido until he’s down for good – third time’s the charm.
FIGHT: Kazuma vs. Daigo Dojima
It’s Chairman versus Former Chairman now, and Dojima is no joke. He’s all equivalent to Kazuma, he’s a fast bruiser with some serious strength. He won’t start out too aggressive, but he’ll change fast.
Dojima will hop to his feet when knocked down and counter. His guard is breakable, except when he’s in HEAT mode, which is often. Don’t both hitting Dojima with too many of your HEAT actions, it’s safer to just keep those bars filled to help block his strikes and stay on your feet.
The extra power with HEAT mode will come in handy, this fight is all about balance. You’ll need to be aggressive to keep your HEAT gauge high, but you’ll have to be careful about blocking or taking too many hits as well.
There’s no trick here, just a fast and powerful opponent. Luckily you’re using Kazuma for this fight, the strongest of the four playable characters.
When Dojima’s first health bar is depleted, you’ll enter into a counterable HEAT action. Pound on the button input to succeed.
One of Dojima’s most annoying attacks is his quickstep counter, which stuns you for a second. Try to only attack while you have an opening, just launching wild combos on Dojima can end badly.
Take Dojima down to his last health bar, and you’ll initiate a two button input counterable HEAT action from Dojima. Succeed to deplete some of his health.
Keep up the fight, eventually Dojima will go down like everyone else.
FIGHT: Tanimura vs. Munakata + SWAT Team
This is it, the final battle of the game. You’ll be facing off against Munakata and his loyal bodyguards. There are eight regular unarmed bodyguards, two elite bodyguards, the body guard captain, and Munakata himself.
The bodyguards will begin attacking you. Don’t both trying to fight Munakata, he’s impossible to reach. His two elite bodyguards and bodyguard captain will stand in your way to protect him, and with every enemy still around, you’ll just take damage trying to.
No shortcuts here, the only way to win is by taking out every bodyguard. Right now, the elites and captain stand by Munakata and won’t attack. That’ll change later, for now you have two problems – the bodyguards themselves, and more importantly, Munakata’s double-action revolver. This is why bringing bulletproof armor is useful for Tanimura.
Take advantage of Tanimura’s grabs, like the armbar and throw. Every bodyguard is susceptible to grabs, including the elites and the captain. Move around the large group, using them to shield you from Munakata’s revolver attack. Also, grabbing and armbarring enemies will provide good protection from Munakata’s pistol.
When enough guards are beaten, Munakata will send out his elites and captain to fight you. The elites are armed with blades, while the captain will stun you with every strike.
Surrounded, the guards will launch into a counterable HEAT action. Follow the commands to do some extra damage to multiple guards.
If you get to close to Munakata the elites and captain will return to protect their boss. Just keep taking out the regular guards until they fan out to fight you again. When all the regular guards are defeated the elites and captain will focus on you.
Take out the elites first, they are very susceptible to grabs, making it easy to build your HEAT gauge and hit them with a powerful HEAT action. Try to time your attacks between Munakata’s gunshots, if you’re hit you’ll be interrupted.
Even the Captain can be grabbed, which is unlike nearly every boss in the game so far. Use that against him to easily take him down while he’s alone.
Munakata won’t stand and fight now that his guards are down. He’ll always keep his distance, running away from any of your attacks to shoot at you. To keep up with him, just run close and only attack with single or double combos. That will lock him in place and give you a chance to finish him off for good.
TROPHY: Thank you. You’ve finished the game, resolved every conflict and kicked more than your share of ass. Good job, you’ve made the Tojo Clan proud.


 Lowrider Car Tuning tips: GTA Online - Bennys Motorworks
 Dreamfall Chapters: The Longest Journey Wiki – Everything you need to know about the game .
 Witcher 3: Hearts of Stone - How to Get Ofieri Gear Diagrams
 Gran Turismo 5 Wallpapers in HD
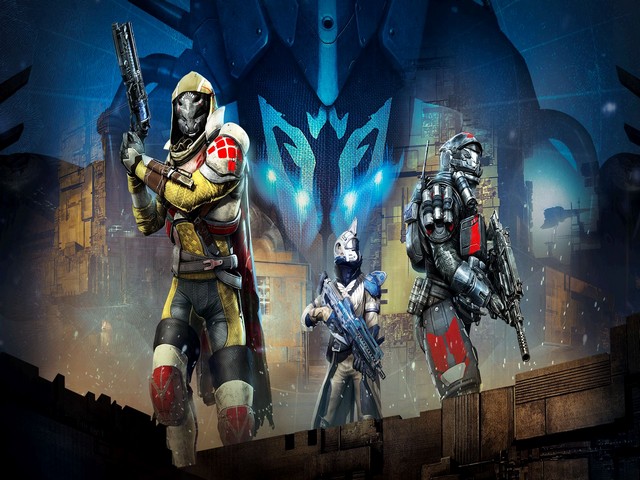 12 New Destiny: House Of Wolves Wanted Bounties Location Discovered