
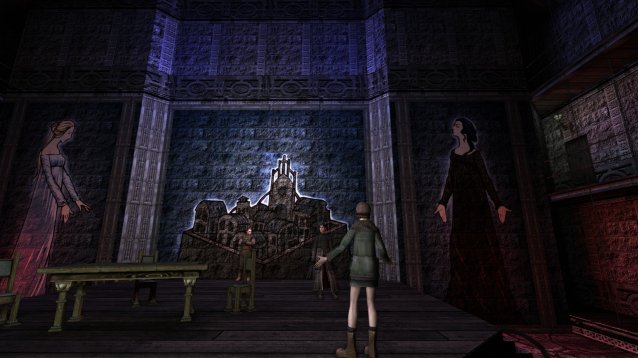
Dungeons have been the keystone of The Legend of Zelda since the start, and this entry is no different. We told you what we think of the game in our The Legend of Zelda: A Link Between Worlds review, but we want to do more. We want to help you get through each of the game's challenging dungeons.
Follow along, and we'll guide you through every puzzle and boss battle. Let's save the princess together!
Note: There may be alternative solutions to some puzzles. In the case of puzzles requiring certain items, we only mention said items. You may find shortcuts or alternative solutions if you rent extra items from Ravio. Also, you may choose to take the dungeons in a different order; we went with the "classic" route for this guide.
Table of Contents
Need help tracking down all 100 MaiaMia Babies? We've got a guide for that. Searching for every Master Ore? We've got a guide for that too. Want to find every heart piece in the game? Oh yes, we've got a guide for that too!

From the palace start, move right and step onto the bright tile. Head through the door it opens to find a few Rupees.
Return to the entry room and shoot the orb across the gap with an arrow. Move across the new platforms and head through the door. Look left to see another orb. Shoot it open the leftmost door in the entry room. Head through that door to grab a Red Rupee from the chest.

Head back through the center door in the entry room. Cross over the bridge in the following room to reach an area with rolling boulders.
Carefully make your way up the boulders' path, then take a left. Head through the door on the left wall. In here, you'll battle a group of Like Likes. This will spawn a chest on a ledge you can't reach from in here. Exit through the lower door.

Head up the stairs and exit through the northern door. You're now on the ledge with the new chest. Open it for the Compass. Drop from the ledge and walk south into it to find you can pass through. Hit the tile in the room you reach to spawn a chest containing a Red Rupee.
Make your way back to the outer part of the same room and step on the tile on the upper right. Head through the door it opens to find yourself on ledges above the rolling boulders. Follow the platforms to cross over the boulder's path. Head north between the Armos to find a tile you can step on. Head through the door it opens.

In this room, there are two orbs: one you can shoot while the platform is low, and one you can shoot when it rises. Hit them both then quickly move into the corner of the room you can now access. There's a Small Key in the chest here. Exit to the left to return to the rolling boulder room.
Head to the locked door at the north end of the room and use your Small Key to reach the second floor. Step on the switch and battle the Armos to open the doors and spawn a shortcut portal.

Take a right from the portal room. Step up to the narrow ledge, then follow it southwest to find a tile you can step on. This opens the way out. Also, note that there are a few Like Likes that appear if you explore the room. Kill them all to spawn a chest containing Monster Guts.
Now take a left from the portal room. Dodge the boulders in here and step on the light tile to slowly extend some stairs. Dash up them before they retract, and follow the bridge down to the other side of the room. Step on the right light tile here to retract the stairs you just descended. Step on the tile they reveal a chest containing Monster Guts. Step on the left light tile to open the way out of here.

Head through the door. In the next room, head up the stairs, then down the second set. Move to the northeast corner of the room. From here you can shoot an orb to the left. Do so to activate a moving platform. Step onto that platform, then fire an arrow at the northern orb when high enough. Head through the door this opens.
Step onto the moving tiles and ready your shield and bow. You need to shoot the four orbs in the middle of the room while darts shoot at you from the walls. Keep your shield handy, and it won't be too tough. Once all four are hit, a chest containing a Small Key appears. Grab it and return to the previous room.

Step up to the center platform and move toward the big locked door. Turn left and shoot the orb to activate a second rising platform. Use it to reach a locked door which can be opened with your Small Key.
In the proceeding room, take out the trio of Stalfos to lower the chest to your level. Open it for the Big Key, then exit through the southwest door. Slash the orb here to lower a block surrounding one last orb near the big door.

Return to the room with the big door and ride the left platform up. Fire an arrow at the last orb when high enough to flip the center platform, giving you access to the big door. Use your Big Key to enter the boss chamber.
Yuga is pretty easy to best in this battle. Fire an arrow over the pit to stun him, then get in a few swipes. Take out any Soldiers he spawns, and keep hounding him. The battle will end quickly.
Return to the dungeon entry room with your new Merge power. Slip through the crack on the right side of the room to find a Silver Rupee in a chest.

In the opening room, use the Hammer to pound the frowning faces out of the way. Swipe the blue orb to lower the blue walls, then move forward. Swipe a red orb to lower the red wall and continue forward. Use the Hammer to pound the frowning faces to the left, then step onto them. When they pop back up, you'll be bounced to the platform in the corner. Merge into the wall and slip through the bars to find a chest with a Purple Rupee outside.
Head back inside and merge back into the wall. This time, move to the left to reach the side of the room. Continue around the room in this fashion, using the frowning faces in conjunction with the Hammer to reach the last platform. Pound the giant frowning face with the Hammer, then use it to launch yourself to the second floor.

Drop into the hole in the middle of the room to reach the chest blow - it holds the Compass. Pound the giant frowning face with the Hammer and use it to return to the second floor. Do the same with the face on the left side of the second floor to reach the third.
If the blue walls are up, merge with them to reach the blue orbs on either side of the room. Strike one to lower the blue walls. Now step onto the lowered wall and fire and arrow at a red orb. This will raise the wall and you with it. Grab the Small Key from the raised platform in the middle of the room. Use it to open the locked door on the right side of the room.

Ride the circling platforms outside, taking out any attacking crows. When you reach any brick obstacles, merge and move around the corner to stay on the platform. When you reach the left side of the tower, step off.
Merge with the wall and move onto the moving red bricks. Ride them to the fourth floor, then hop off onto the ledge. Head back inside.

Take out the two Stalfos, then swipe the blue orb at the top of the room if you haven't already. Take out the trio of Mini-Moldorms and use the Hammer on the big frowning face to reach the upper ledge. The chest on the other side of the dip contains a Blue Rupee.
You need to stand on the lowered blue wall then fire an arrow at an orb to raise yourself. At this height, you can merge into the wall and exit through the bars on the right side of the room.

You've got more platforms to ride out here. Dodge the spinning spikes, and merge with any obstacles to stay atop the platform. When you reach the left side of the tower, you need to merge again and ride the red block to the sixth floor.
You'll have several Stalfos to battle in here, but the fight shouldn't be too tough. Take them out to create a warp portal and an elevator platform. You're half way there!

Ride the elevator to the seventh floor. There are many cracked tiles up here. Use the Hammer to bust through the ones in the northwest corner. Drop through to grab a Small Key, then use the Hammer on the frowning face to return. If you drop through the northeast tiles, you find a chest containing Monster Guts. Use your Small Key on the locked door on the left side of the seventh floor.
Outside, step onto the tile and wait for it to move. When you near the high ledge, use the Hammer on the frowning face to launch yourself up. If you merge with the wall here, you can move right and drop to a lower ledge with a chest containing a Silver Rupee. From the ledge after the first Hammer jump, ride the next frowning face platform. Use another well timed Hammer pound to launch yourself to the ninth floor.

Keep your shield up as you enter: several tiles will fly at you. After their attack, the center platform will start to rise and fall. Drop under it when it's elevated to find a nice fairy spring and a chest containing a Purple Rupee. Heal if you wish, then ride the moving platform to the tenth floor.
There are four orbs that need to be struck up here. Hit them all to lower a frowning face to your level. Use a Hammer pound to launch yourself to the eleventh floor.

You've got a pair of moving platforms with frowning faces up here. Time your Hammer strikes to launch to the chest on the right side of the room - it contains the Big Key. Then use the same tactic to reach the left side of the room. Open the door with the Big Key.
Outside, use Hammer strikes to reach the tower's top. Use a final strike on any of the frowning faces to launch to one last upper platform and start the boss battle.

Battling Moldorm is really quite simple. Just keep on your toes and avoid his random charging. Slash the red orb on the tip of its tail to do damage, and after enough strikes, the boss will go down. Grab your Pendant of Power and say goodbye to the tower!

In the opening room, break the pots to reveal a switch. Step onto it to start up some fans above, then use the Tornado Rod to launch yourself up into the stream and be carried to the high ledge. Head through the doorway.
In the next room, head to the north end. Use the Lamp to light the torches and create a chest containing a Red Rupee. Exit the room via the doorway in the northeast corner.

In this room are some fans and Like Likes. Strike the orb to stop the fans, then take out the baddies. You can now reach the chest past the fans; it contains Monster Guts. Exit through the same door.
In the previous room, head to the dip in the southeast corner. Swipe the orb here to lower a wall to your right. Make your way to the ledge on your left, then merge with the wall to cross over the ledge you just lowered. Exit through the door here.

In here is a trio of Bubbles. Use the Tornado Rod to put out their flames, then land a few sword strikes to defeat them. Once they're gone, a chest containing a Small Key will spawn. Grab it and exit the room.
Head directly left to find a locked door. Use your Small Key to head through.

Inside this room are a few Biri and a moving red block. Merge with the block to reach the chest to the north; you'll find the Compass inside. Merge and ride the moving blocks to reach the northwest corner of the room. From here, you can take some stairs to reach the upper part of the room. Ride the blocks from their tops now to reach a switch on the right side of the room. Hit it to activate a shortcut fan, then exit via the door here.
Back in the central room (on the catwalks this time), look south for a switch. Step on it to activate a nearby fan. Use the Tornado Rod to ride its stream to a northern catwalk. Merge with the wall to your left to reach the doorway in the northwest corner. Head through.
In this room is a narrow catwalk and several rats. Take them out then head through the door to the south.

You're back in the room with the moving red blocks. Merge with the wall to your left and follow it to reach a chest with a Silver Rupee. Now make your way back to the northern walkway in the central room.
From the walkway, head right and merge with the wall to reach a ledge to the south. On this ledge is an orb; strike it to activate the giant fan in the middle of the room - your ticket to the second floor.

Ride the fan to the second floor. Head south and use the Tornado Rod to dodge the rolling spikes. Break the pots in the southwest corner of the room to reveal a switch; step on it to reveal Small Key on a narrow ledge. We can't grab this yet, but we will soon. Head through the door south of the key.
In this room, make your way to the door left of the giant fan. Head through to return to the central room. Merge with the wall here to reach the Small Key, and then drop down and open the locked door at the southern end of the room.

You'll enter the next room atop a high ledge. Drop to the right and head to the far right of the room. Pull the handle here to reveal a big chest and activate the pair of Armos. Take them out and open the chest for the Big Key. Take out the other pair of Armos and use the Tornado Rod to kill the flames in your way. If you pull the other handle by accident, use the Tornado Rod to temporarily kill the flames it generates. With the Big Key in hand, you need to make your way back to the ledge in the middle of this room.
Return to the ledge, and drop to the left this time. Pull the handle on the far left (the other two spawn Like Likes) to get the little platform to your right moving. Use the Tornado Rod to hop aboard, then merge with the wall left of the locked door. Follow this around the corner to find a well hidden switch. Hit it to spawn a Small Key in the flame circle back on the main ledge. Return there, kill the flames with the flames with the Tornado Rod, grab the Small Key, and head through the locked door on the walkway above.

You've got a pair of fiery Dodongos to battle in here. Use the Tornado Rod to cool them off, then get in some good strikes with your sword. Avoid the heat trails they leave, and this battle will end without too much difficulty. Once they're gone, you get a nice warp portal, and the exit door opens. Head through.
You're back in the central room, but below the walkway with the rolling spikes. Follow the path to exit to the northwest room.

This room is full of switches which will activate fans and carry you away. Stepping on the wrong one will send you back the room's beginning. Star by stepping on the left switch on the starting ledge. Then step on the upper left switch on the next ledge. Finally, step on the upper switch on the third ledge to reach the exit door.
You're back in the central room yet again. Follow the path to step on a switch and deactivate all fans in the room. Drop forward, then merge with the wall and head left. Leave the wall and head up the stairs. To your right are the ledges the fan streams were previously blocking. Use them to reach the upper right door.

You're back in the room with the big fan, but in a section you couldn't access before. Head up the stairs and fire an arrow at the orb - fan activated! Now drop into the pit to your right and take out the one-eyed Armos. Step on the switch to get a platform moving, then use the Tornado Rod to reach it. Ride it to a ledge in the southern part of the room, then hop into the big fan to reach floor three.
There are rats and Like Likes to battle here. Take them out, then head for the southeast corner. Merge into the wall to slip past the blowing fan, then exit via the southwest door.

Take out the one-eyed Armos and pull out your Lamp. Light the torches to open the left door, and head through.
The next room is full of Bubbles. Use the Tornado Rod to kill their flames, then take them all out. The easiest way is to knock them into the pit. When the room is cleared, exit through the newly opened door (you'll have to backtrack for the chest).
The next room is the pre-boss chamber, but you can't reach the big door yet. Instead, merge into the wall to cross the gap and return to the eastern room.

Take the steps and open the chest for a Small Key. Head to the room's southwest exit to return to the room with the one-eyed Armos and the torches. Pop through the left door to grab a Purple Rupee from the chest, then head through the locked door.
Back in the pre-boss room, step onto the moving platforms. Watch out the red Biri, and use the Tornado Rod to hop to the second platform when the pair starts moving. Head through the big door to face the dungeon's boss.

The boss is actually quite easy to topple. Use the Tornado Rod to leap to its top as it moves around the room, then deliver some sword strikes. After a few blows, it will spin around the room with extra layers. Fire arrows into the layers' holes to take the boss back to normal size. You can now hop to the eyeball again with Tornado Rod. Repeat this process to make short work of the big baddie. Enjoy your new Pendant of Wisdom!

This dungeon is pretty straightforward, but it still has some tricks up its sleeve. Head right through the opening chamber into the second room where a Ball and Chain Soldier awaits. Be careful of his weapon of his choice, but a few strikes will take him down. Proceed to the next room.
Take out the soldiers and head up the stairs to the second floor. The floor up here is packed with more soldiers. Take them out to open the door on the left side of the room.
Head through to find a hallway lined with inactive Armos. As you approach the next door, they will wake up in waves. Take them all out to open the way forward.
The last room on this floor is simply a balcony leading to the next level. Continue forward.

On the fourth floor, you'll encounter Yuga and Zelda. After the cut scene, Yuga will spawn some Soldiers. Take them out, and chase him up the next floor.
Take out the Soldiers and head for the door at the southern end of the room. Cross the balcony and head through the door to other side of the previous room. Head to the next set of stairs to reach floor six.
Head through the winding path here, taking out Soldiers as you go. When exit to the balcony, head through the northern door to return to a part of the previous room you couldn't reach. Head up the stairs here to floor seven.
This floor is just an inner room and balcony. Head out side and take the steps to reach the boss chamber.

Yuga hasn't improved much since your last encounter. He'll merge into the wall and split into some copies, but the real one has a glow to his staff. A few sword strikes will teach him his lesson, ending the fight quickly.

Start out by heading up the rightmost path from the dungeon entrance. Bomb the cracked wall here, then step through to find a chest containing a Blue Rupee. Head back through the blown wall.
Now head to the leftmost path. Place a Bomb by the orb, then rush back to the platform over the pit. When the Bomb explodes near the orb, the platform will quickly take you across the pit. Throw another Bomb at the boarded window to the right to let light in and open the way forward.

Pull your Lamp and cross the bridge - watch out for the Iron Mask on your way. At the other side, head left. Bomb the cracked bricks here (you'll thank us later) and step onto the switch to generate a Small Key on a narrow ledge in the room. Merge with the wall and move left until you reach the point where the arrows meet each other. Pull away from the wall to land on the platform where the key lies. Use it to open the locked door at the northern end of the room.
This next room has a narrow hall where boulders will roll. Use the Lamp to light the torch to the right of this, then make your way up the hall, dodging boulders along the way. Exit through the door on the right.

In here are three Goriya, enemies which mimic your movement. Carefully take them out to activate a lift at the southern end of the room. Ride it up, then bomb the wall directly ahead (you can see the cracks if you merge). This leads to a secret room; the chest up here contains a Purple Rupee.
Return to the lift. When it descends, run directly south to enter the bottom part of the same hidden room. The chest here contains a Monster Tail. Bomb the cracked tiles down here too, then drop through the hole.

The chest near you contains a Monster Horn. Merge the wall and move clockwise. Detach from the wall above a door frame to land on the invisible walkway in the room. Swipe at a torch to kill the flame and reveal the walkway. Follow it to the northeast corner of the room to find a Small Key. Exit through the northwest door.
Take the steps in here to return to the rolling boulder room above. Head through the door to your left.

This room has a lift platform and two fenced-in orbs. Toss bombs at the orbs to activate them, spawning a chest. Open it for the Compass, then exit to your right.
Back in the boulder room again, move to where the boulders begin their path. To the right of this is a little inlet with a cracked tile. Bomb it and drop through to find another Small Key. Now we need to head to the top floor. Head up the stairs to the boulder room, then use one of your Small Keys to open the way to the next floor.

Swiping the orb up here will spin panels on the walls facing you. Drop a Bomb near it, then merge with the wall to the left. When the Bomb detonates, you'll be flipped to the other side. Bomb the cracked tile here, then drop through. Bomb the next cracked tile you land near, and drop again. You'll land on a ledge with lots of Rupees.
Return to the top floor and move left again. This time, head through the door. In this room, quickly move south and swipe the orb; it will temporarily open the exit. Merge with the wall as the floor starts to disappear and make a beeline for the way out.

In the following room are lots of windows, some boarded up. Start by tossing a Bomb onto the high ledge directly south of the entrance. That's one boarded window clear. To get the others, you'll have to swipe the orbs that raise ledges to the upper area of the room. Ride one up, then merge with the wall. Follow it to reach the last windows that need clearing, and use Bombs to do the job. Before you leave, merge with the wall from the lower section to reach a chest with some Monster Guts along the eastern wall. When you're finished, exit through the right door.
Head straight this room to the next - it's only a challenge when moving the other way. Back in the room with the rotating panels, bomb the last cracked tile and drop through. You'll land near a chest containing a Purple Rupee.

We're headed back to the bottom floor now. Take the left door from the staircase. This room has several invisible walls; put out the torch to see them. This is all we can do in the room for now, however. You need to head back to the room with the invisible walkway. Take the southern exit this time.
This is the pre-boss room, but we've got more to do before we can face it. Use your other Small Key to open the southeast door.

In here is another trio of Goriya, but this time they're above you. Use your movements to drop them through the hole in the center of the walkway above, then take them out. Once they're defeated, a lift will activate and a warp portal will spawn. Take the lift up and exit through the upper door.
Back in the pre-boss room, merge with the wall and follow it clockwise. Eventually, you'll reach an orb. Swipe it to reveal an eyeball, and if you've followed along with us and bombed those cracked tiles, light will now stream to each eye, opening the way to the boss room. Well, the door itself is still locked. Head through the northwest door.

You're in a different corner of the room with invisible walls. From here, however, you can merge to squeeze through slits along said walls. Do so, then make your way to the northwest corner. Under the skull is a switch; step on it to spawn a chest containing a Small Key. Grab it and return to the pre-boss room.
Open the door in the bottom left corner. In here, a platform moves back and forth by some steep ledges. You have toss Bombs over the ledges to hit the three orbs. This will spawn a large chest containing the Big Key. Grab it and head for that boss door.

The Armored Dodongo can be pretty tough. Start the fight by chucking Bomb after Bomb at him; avoid his trampling and occasional crystal shots during this time. After enough explosions, his armor will be destroyed. Now the real fight begins. Slash at the red orb on his forehead, and after a few hits, he'll use his ram attack. Merge with the wall whenever he nears to avoid damage. You need to re-light the torches to bring him out of this state. Once done, slash the red orb a few more times to end the battle.

Start by grabbing the handle across the gap with the Hookshot. This will drain water into the room, allowing you to reach the stairs and enter the next room.
There's nothing we can do in here either (unless you feel like diving for Rupees in the top right), so head through the door to your right.

Make your way to the northern end of this room. That's about all you can do right now, so head down the staircase.
In this room with multiple streams of water, use the Hookshot on the periodic poles to safely cross the streams. When you see the orb, hit it to shut off the water flow. Head up the stairs in the middle of the room and grab the key.
Exit through the northwest door to find a small connecting room. Open the chest here for the Compass, then head through the left doorway.

The proceeding room has lots of chests and a Small Key you can't reach. Hop onto the raft and use the Hookshot to guide it around the room. The chests contain a Red Rupee and some Monster Guts. Head to the southern exit (under the face) when you're done. In the next room, you'll find an orb standing inside a pit. A well timed Bomb throw will spawn a chest containing a Gold Rupee.
With a nice Rupee collection in your pocket, return the connecting room in the upper middle of the floor. Use your Small Key to unlock the door here.

Start by hitting the orb to the upper left of your entrance. This diverts the water flow of the stream to your right. You can now reach another orb in the body of water where the flow is now heading. Hit it to activate a second stream in the room. Merge with the wall to reach the second stream; ride it to the left side of the room. Strike the final orb here to activate one last stream. Use the body of water it creates to reach the exit staircase.
Down here, you'll face a Giant Biri. Get in sword strikes when its electricity is turned off, and it will eventually split into lots of Tiny Biri. Again, strike them when it's safe. This fight is really pretty easy. Once over, you'll have a nice warp portal, and the doors will open.

Head through the left door. The walking bombs here are a good way to get rid of the cracked tile on the ledge, but don't drop through just yet. Hit the switch to activate a shortcut back to this ledge. Now drop through to reach the Small Key you saw on the walkway earlier. Grab it with the Hookshot, then open the locked door on the same walkway.
In this room, you can change the water depth throughout the dungeon. Start by grabbing the left side of the machine to take the water to its lowest level, then hop in and enter the northern door. Duck under the rolling spike here to reach a large chest containing the Blue Mail: you now take half as much damage! Exit to the previous room.

Head to the lower door to the southwest. In the proceeding room are a few baddies and a rotating statue that fires a laser. Be mindful of said laser, and time your Hookshot to grab the left handle. Pull it to open the exit door, then head through.
Start in this room by dropping off the ledge to your right; the switch here opens the exit door. Now drop in the water and swim back to the platform you started on. Use the Hookshot to slam into the wall panel, then quickly merge and follow the wall to a high ledge. Up here, you can change the water level again. Grab the right side twice to raise the water to its highest. Now you can hop onto the raft and open the chest for a Small Key. Grab the left side to lower the water once, then exit through the northeast door.
Back in the main chamber, swim through the center left door.

With the water raised, you can now reach the chest in here. Open it for a Small Key. Head for the similar hall on the opposite side of the dungeon; you can reach the chest here too. Open it for some Monster Guts. Use the walking bomb on the left side of the room to bust through the cracked tile, then drop through. Take the walkway through the locked door back into the first water-changing room. Raise the water to maximum height, then swim to and open the locked door to the southeast.

In this room are four of those seashell-wearing enemies. If you haven’t fought any by this point, the strategy is simple: yank them from their shells with the Hookshot, then slice them with the lovely Master Sword. You can pass through a doorway under the water-spitting face here to find some fairies, but when you do defeat all four enemies, a stream will spawn and carry a Hookshot post into range. Latch onto it and exit the room via the stairs.
Here is one last room where we can change the water level. Swim to the western platform, then use the Hookshot to slam into the wall tile. Merge and move counterclockwise to reach the water changing spot. You have to first take it to its lowest level; this allows you reach the switch that opens the exit. Now raise the water to max level and exit the room.

The water is finally maxed out in the main chamber. Swim north and bust up the skulls to find a switch. Hit it to raise the water even further, bringing a massive platform with it. Lower the water once from the left side of the new platform, and you'll have access to the big chest. Open it for the Big Key, then use it straightaway to enter the boss chamber.

This boss isn't tough at all. Start by using the Hookshot to rip the eyeballs away from him. Slash one a few times to defeat it; you can even snatch up the ones fired at you. With the eyeballs gone, the boss will bounce around the room. Slash whenever it lands to deal damage. When it fires lasers, simply keep moving to dodge the attack. Just keep moving during the fight, and it will end soon.

As soon as you enter the dungeon, there will be continually spawning Wall Masters. Be aware of this, but head through the left door.
Head straight down the hallway, past the closed door, to find a switch. Step on it to open the door you passed, then head through.

This room will have some rotating fire and a few enemies. You're only option is to follow the winding narrow ledge south, so do so to actually exit the dungeon to Lorule.
Outside, head right and follow the path to find a hole in the ground. Jump in to return the dungeon proper.

You're now on an upper ledge of the room you just left. Ride the moving platforms to the ledge to your right, and open the chest there for a Small Key. Head through the door nearby.
The next room is dark; take out your Lamp. Follow the narrow path to the southeast corner of the room, taking out enemies as you go. Open the locked door here, then head through the hall to exit the dungeon again.
Follow the path north and drop into the first hole you see.

You'll land near a chest; open it for a Silver Rupee. Drop off the ledge to the south and take out the Stalfos. Open the chest here for the Compass, then exit through the door.
This room should look familiar. Head to the southeast door again, and exit the dungeon through the hall. Past the first hole are some purple flowers; chop them up to reveal another hole. Drop through and take the door to the southwest.

Move north from you entrance to find a cracked tile. Use a Bomb to break through, or wait for a Wall Master to appear and let it slam through. Either way, you'll end up on the ground. Step onto the red switch and move left then up. Over here is another lovely cracked tile. Break through, then open the chest for a Small Key. Hit the switch to get a bridge across the gap, then circle to the locked door in the southwest corner of the room. Head through.
You're back in the opening chamber, but up on the ledge you couldn't reach before. Pull the handle to the right to reveal a staircase. Head down.

Start by merging into the wall and following it to a larger platform. Here, there are four switches and two statues. Push the statues onto the leftmost switches; this extends a board above. Climb the stairs to the left, then merge. Cross to your right, over the boards you released, to reach a handle. Pull it for a set of stairs that make it easier to get back here, then head through the door.
Step on the switch to the south to get the nearby block moving. Merge and ride it to the center platform. From here, you have to get a Wall Master to slam the red switch on the walkway above. Stand under it until this happens to activate a second moving block. Merge and ride it to the northern edge of the room. Hit the switch here to move the railing above, a shortcut if needed. Head through the door.

In here are many enemies, all separated from you. Start by tricking the Wall Master into slamming the Stalfos Mummies in the upper corners. Just stand under the great to get the job done. With these two gone, step onto the red switch. Take out the remaining enemies it releases to open the exit and activate a warp portal.
Head through the door to enter a hallway with slowly moving platforms. Ride the right one to the stairs, then quickly run down and step onto the lower part of the left one. Open the chest it takes you to for a Small Key. Use it to exit the room through the locked door.

This hallway is nearly empty. Follow it past the big locked door to find a torch. Light it with the Lamp, then take out the Stalfos Mummies that appear. When the door opens, head through the next hall to return to the upper floor via a staircase.
Start out by merging through the bars at the end of the small room you appear in. Move right and merge to reach the loose eyepiece on the isolated platform. Toss it to the main platform, then merge back over. Toss the eyepiece onto the right statue to activate a bridge and reveal a large chest. Cross the bridge and make your way through the winding passageways to find some bars. Merge through and exit the dungeon one last time.
Outside, there's a chest to your left with a Purple Rupee. Head north, then make a right at the fork. Chop up the purple flowers to the southeast to discover a hidden hole. Drop through.

When you land, merge into the wall to the south and move west. Toss the eyepiece to the ground, then merge a little further along the wall to reach that large chest; inside is some Master Ore. Now grab the eyepiece and take it all the way back across the bridge to the other statue. This allows you to reach the other large chest and snatch up the Big Key.
Merge through the bars to your left and head back downstairs. Head through the hall and use your Big Key to enter the boss chamber.

This boss is incredibly easy to beat. When he revs up for a punch, merge into the wall. He will smack into the brick and stun himself; use this time to land several sword strikes. After two rounds of this, he'll start using slam attacks. These too can be dodged by merging, but you can just keep moving to avoid them otherwise. Be aware that he will create pits if he slams into cracked tile. After a few slams, he'll rev up for more punches. Merge so that he stuns himself, then get in more hits. After two rounds, he'll repeat the same slam attack, just with more speed. A few more rounds like this, and he's down for the count.

The opening room puts you right by the boss door, but it'll be a while before you can do anything with it. Start this dungeon by making a left.
In the proceeding room, merge through the bars to the north to reach a chest containing a Purple Rupee. The orb in the middle of this room changes which set of bars is down. Place a Bomb and move left. When it detonates, you'll have access to the gargoyle statues to the southwest. Push one directly north of their starting space to place it atop a tile. You'll need to use your shield to avoid damage from the arrows here. Merge through the bars to strike the orb again; now you can push the second statue to the middle tile. Finally, merge through the bars where the chest was to step on the last tile yourself. Head through the finally opened door.
There's nothing in this room to do yet, so just move through the next door.

This room has a bunch of narrow walkways. Ignore them and drop to the right side of the pit. Open the chest on the grate you land on for a Purple Rupee. Drop off the grate and make your way south; be sure to smack the orb to change the direction of the conveyor belts. Exit through the south door.
In here are more conveyor belts and a walking bomb. Ride the conveyor belt east, then quickly merge and follow the wall to an orb. Smack it to change the conveyor belt direction again. Now drop down and daze a walking bomb. Toss it onto the conveyor belt to the southwest. When it detonates on the orb at the belt's end, the exit door will open.
Head straight through the next room, not bothering with the orb. It just activates a floor trap. In the next hall, take the first door north.

You'll spot the Thief Girl as soon as you enter. Move to the cell past hers and merge through the bars. The chest in here contains the Compass. Now merge through the bars into Thief Girl's cell. After a brief conversation, step onto the switch, then enter the cell it opens.
Use the walking bomb to blow the cracked wall at the northern end of the cell, then move left and follow the passageway. Use the red and blue orbs with their corresponding platforms to reach the top of the cells. Move north and drop through the hole in the ceiling to reach the small room to the north.

In this dark room are several one-eyed statues. Whip out your Lamp for a better view, then get to fighting. Clear the room to spawn a warp point and access a chest containing a Small Key.
Use the Small Key to open Thief Girl's cell. You now have a dungeon companion! Move to the northern end of the room. Have her stand on one switch; stand on the other. This opens the way out.

In the next hall, enemies will ambush you. Keep them at bay; if they grab Thief Girl, she returns to her cell. Fight through to open the exit door, then head downstairs.
Lead Thief Girl through the next hall. Split up at the first gap to merge and reach the switch, extending a bridge. At the second gap, merge through the bars then loop back to the gap. Merge and pop out from the wall into the resting board to create a bridge. Use Thief Girl to push the two switches and open the gate in the water, then hop in.
Follow the stream to a handle, then pull it to drain the water. Merge through the bars near the two switches to reach a chest holding a Silver Rupee. Lead Thief Girl across the red and blue platforms into the last stretch of the room. When enemies appear, leave her atop the red platform to make the fight less dangerous. When it's over, step onto the dual switches to reveal a hidden passageway. Open the large chest at its end for more Master Ore. Use the red platform to cross the grey ledge to the final platform down here. Merge and pop out on the eastern wall to knock down the last bridge. Grab Thief Girl and head upstairs.

Leave Thief Girl on the ground level switch up here. Head up the stairs and merge your way across the gap. Follow the walkway to the second switch, opening the door below. Drop down and take out the pair of enemies that appear, then head through the open door. Open the chest here for some Monster Guts, then exit through the southwest door.
You're back in the hallway before the cells. Head straight through to the room with the floor trap. When enemies appear, lead Thief Girl to the orb and slash it. The floor will open, dropping all the enemies away from you. Lead here through the next two rooms to return to the top floor.

Leave Thief Girl standing by the fan. Merge and head south onto the walkway. Follow it and step on the switch to activate the fan and carry Thief Girl east. Hop into the stream to follow her. Repeat the process for the fan here, then cross the bridge out of here.
In the next room, step onto the two switches to spawn a shortcut portal and open the way to a chest. Open it for a Silver Rupee, then exit south. Take out the two enemies in the statue room, then head east into the opening room.

Cross the big walkway to the two switches. Pop through the doorway on the left for a chest with a Purple Rupee, then return.
Step on the dual switches to get the mirror above moving. Merge and ride it to the left ledge; open the large chest there for the Big Key. Now grab Thief Girl and head through the big door in the southeast corner of the room.

This boss is intimidating, but actually quite easy to beat. Start by merging into his shield; he'll lose track of you and become vulnerable. Deliver a few sword strikes, and he'll move away. Avoid his inky spit attack and sword strikes, then try to attack him. When he defends, merge into the shield again. After a few rounds, he'll ditch the shield and remain vulnerable. In this stage, he delivers two attacks: a straight slash and a spinning move. Both are heavily telegraphed, so attack and dodge as normal. After more damage, he'll send his head spinning around the room, spewing ink. The headless body will occasionally swipe its sword, but it's largely defenseless. Deliver a few more hits to end the battle.

As soon as you enter, melt that annoying ice cube with the Fire Rod. Move forward and pull the statue's tongue to activate lift blocks throughout the entire dungeon. Before taking a proper ride, use the blocks to slip under the stairs at the southern end of the room. There's a well hidden chest here holding a Gold Rupee. Now you can ride the lift blocks.
Disembark at floor B3. The two chests here contain a Green Rupee and a Monster Horn. Hop back on and ride down to floor B5. The only thing for you here is a large chest; open it for the Big Key. Yes, already.

On your way back up, hop off at floor B2. Use the Fire Rod to melt the icicle on the wall, dropping the Small Key to you. Hop back onto the blocks.
Ride to floor B1. Hop off and head north to find a locked door. Head through and pull the left statue's tongue. This opens the door and awakens an ice monster. Take it out and head through the door.

In this slippery room are several gliding enemies. Take them out, then light the four torches to spawn a Small Key. You can't reach it yet, so exit through the south door.
Outside the tower, open the chest to your right for the Compass. Follow the ledge south and step onto the narrow blue walkway. Head north at the fork, and when you reach the wall, merge. Move left to get to the Small Key you spawned earlier. Backtrack along the blue walkway and head south at the fork. Follow this to reach a locked door; use your Small Key to head through.

Now you're on the upper ledge of the lift room on floor B2. First, head north and merge across the gap. The chest here holds a Blue Rupee. Now merge across the gap to the opposite ledge. Pull the statue's tongue to create a pit in the middle of the room. We're headed there now, so drop down and hop into the pit.
Now you're on floor B3. Head through the door to your right; watch out for the Bubble in here. If you merge with the wall in the top right, you can follow it to some fairies. Use the Fire Rod to melt the southernmost icicle and reveal a switch. Head through the door it opens and drop into the pit in the room.

This will drop your to floor B4. Step onto the rotating blue platform and watch out for the Bomb-spitting enemy. You need to use one if its Bombs to hit the four orbs just north of the blue platform. Doing so spawns a chest containing a Silver Rupee. After grabbing it, exit south from the blue platform.
Ride the moving ice platform in here, watching out for Keese. Use the Fire Rod to light torch in the center and spawn another lift block to the north. Before heading to it, ride the ice platforms to the southeast platform. Follow the narrow blue ledge here to a chest containing Monster Guts. Now you can hop aboard the new lift block.

This will take you to floor B3. Follow the blue ledges, but stop when you reach the first moving blue block. If you drop west from its southernmost point, you can reach a chest containing a Purple Rupee on the lower floor. Do so, then make your way around the entire series of ledges and blocks.
When you reach the closed door, move north. Inside this room is a series of ice blocks. Use the Fire Rod to melt them and reveal an orb. Now backtrack to the lift that brought you up from the previous floor. Move through the doorway here, then merge across the gap to reach the orb you revealed. Strike it to summon another block; ride it up another floor.

Back on floor B2, you'll be facing a one-eyed statue. Take it out, then follow the ledge. The four skulls are hiding a switch; bust them up, then step on it to open a door nearby. Head for the door, taking out two more one-eyed baddies along the way.
You'll find yourself near a statue. Pull its tongue to open a hole in the floor to your right. Drop through to reach a big chest containing a Stamina Scroll. Drop off the ledge to find yourself in a familiar place; ride back up to floor B2.

Look north and merge into the wall. Follow the long, winding wall to reach a doorway. Inside, on a protected ledge, is a chest containing a Silver Rupee. Head back and return to the main ledge. Enter the door to your right.
Merge across the gap and drop to the lower ledge. Head through the door; this room should also look familiar. Head through the northern door. The pit is now covered up. Drop from the grate and pull the statue's tongue. This re-opens the pit, but something has changed. Drop in.

You're now in a different part of floor B3. Take out the Bubble, then prepare for a fight. A giant version of this ice-gliding enemies will appear, flagged by some of the regular gliding guys. Take them all out to create a warp portal and open the doors on either side of the room. Head through the left one.
This section is tricky. There are several pieces of ice that make up a path, and they will shatter if you stand on them too long. There are also enemies along the path. We recommend firing off the Fire Rod to deal with them, then hanging out on the ledge until the ice path respawns. Once you get across, pull the statue's tongue to move another piece of the tower around.

Return to the warp room and head through the right door; this is where the piece moved. Head for the center of the room - be aware that some of the ice monsters along the walls will attack. Use the Fire Rod to light the torch in the middle of the room. Head through the door this opens.
Step on the switch out here to open a door that's not accessible from your current location. Head back to the warp room and use the portal to return to the opening room. Ride the lifts to floor B3.

The door to your right is what opened. Head through and drop through the small hole to floor B4. Open the chest near your landing to find a Small Key. Follow the narrow blue ledge left to find a switch; step on this to create a shortcut.
Follow the path north to return to the lift blocks. Ride to B2, then move north and drop into the pit to B4. Hop off of the ledge and ride the moving block to B3. Head through the doorway here, merge across the gap, and use your Small Key on the locked door in the eastern room.

In here is - you guessed it - another hole to drop through. Hop down and use the Fire Rod to melt the ice block you land near. This allows wind to stream into the room, carrying you to a platform with a statue. Pull its tongue to drop out the floor from the room you just exited.
Drop off the ledge and head north into said room; the ice monster here will attack. Drop in to return to B4. Follow the path past the Bomb-spitting enemies; make sure you light the torch you pass. Cross the narrow blue beam and head north at the fork - the part you just created by lighting the torch. Pull the statue's tongue here to shift a part of the tower yet again. Step onto it, then head north. The switch here creates one final shortcut. When you're ready, head west from the tower part that shifted to enter the boss chamber.

The toughest part about this boss is the arena; moving along the slippery ice is a pain. As for the fight, dodge the boss's beam attacks until he stops, then use the Fire Rod to melt the ice he is covered in. After a few fire sprays, he'll be completely exposed. Use this time to deal sword damage. He will speed up and add more ice armor with each round, the but strategy remains the same. Mind the slick terrain, and you'll win this fight in no time.

In the opening room, step to the end of the ledge. Use the Sand Rod to create a sand bridge and cross the gap. Take a left and use the Sand Rod again at the end of the ledge. Merge across the gap and open the chest for a Blue Rupee. Merge around the corner of the sand blocks to exit the room through the northern door.
In the next room, hop into the lower area and head northeast. Head up the stairs and move south. When you reach the laser-spitting statues, merge and head south to avoid damage. Exit through the door here.

Head north and use the Sand Rod to cross east over the gap. Move a little ways north on this ledge, then turn west. You need to use a Sand Rod to create a path right between the four orb ledges. Do so, then run out there and quickly slash all four to remove a wall just south of you. Drop down and head that way; use the Sand Rod to create a shielding wall from the eye beam statues. Exit to the south.
In this room, head up the stairs to upper ledge. You need to move the three gargoyle statues onto the tiles up here. The first is easy, as it's on the same ledge. For the northernmost one, use the Sand Rod to make a bride to reach it, then drag it back onto the tile ledge. For the last one, push it onto the sand, then head back up the to the ledge. Use the Sand Rod to raise the sand, bringing the statue to your level. Place all three, then head through the door that opens.

You're back in the opening room. Step on the switch to create a shortcut back here. Use the Sand Rod to cross the gap west, then head through the door.
In here, you've got an annoying enemy to best. Start by ripping him from the ground with a well-aimed Sand Rod block. Then, slash away his layers. As they bounce around the room, take out the head and each part to defeat the thing. This spawns a chest you can't get to yet, so exit through the north door.

In this room are several enemies. The scorpion one will have to be yanked up with the Sand Rod before you can damage it. Drop off the north ledge, then head up the stairs and follow the ledge back south. Use the Sand Rod to cross the gap here; the chest contains a Monster Tail. Now use the Sand Rod to cross the gap north. Follow the path into the next room.
Open the chest in here for the Compass, then pull the handle. This dumps more sand into the previous room. Return and drop into the high sand to open the chest here for a Small Key. Use it to head through the locked door on the eastern wall.

You're back in a familiar room, but on a higher ledge. Pull the handle just north of you to fill the room with sand. Use this in conjunction with the Sand Rod and pillars to reach the platform by where the sand is falling down. Step onto the switch here to slide a wall just east of you. Fire the Sand Rod west, then merge across the sand blocks onto the wall. Follow it to the ledge you just opened. Open the chest here for the Titan's Mitt. Now you can lift big boulders!
Return to the room with the chest you couldn't reach. Fire the Sand Rod south to reach the platform where the chest lies. Here, you can use your new Titan's Mitt to move the boulders and open the chest for a Small Key. Now clear the boulder by the locked door in this same room; head through with your key.
This hallway is just an exit out of the dungeon. Head out, then turn north. The cave here is actually the dungeon's second floor.

Immediately upon entering, tiles will fly at you. Keep your shield up until they settle. Two of the scorpion enemies will then appear. Use the Sand Rod to expose them, then take them out. This will spawn a warp portal and create a bridge to the next section of the room. Head over there and move up the stairs. You can use the Sand Rod to create blocks and merge to either side. Both are hallways full of enemies, and both lead to the same place. We're going to go right.
In the hallway, head north past the enemies. Head through the left door at the end of the hall. Open the chest in this connecting room for a Silver Rupee, then head back and through the right door.

This next room is one big puzzle; head downstairs to start. Make your way south and stand on the left red platform, then slash the orb to raise yourself up. Use the Sand Rod to cross to the next ledge, then look south to spot a gargoyle statue. Use the Sand Rod to bring it to your level, then pull it into solid ground. The darts firing throughout the room can now continually hit the orb, keeping the red and blue platforms switching back and forth.
Use the southeastern set to reach a chest containing a Small Key. Now head to the northern pair of platforms. Ride them to the top right ledge and exit the door to the north.
Here's another large room. Head down the stairs and move the boulder to the right. There's a chest in the sand here. Dig it up with the Sand Rod, then open it for a Silver Rupee. Move west.

Over here are some rolling boulders; you need to use them to break the cracked blocks above. Plug the lower hole with the Sand Rod to destroy the first one. Head upstairs, and from here you can create a second set of sand blocks to send a boulder into the second cracked block.
Follow the path to reach the third boulder. Move the large rock from the second patch of sand, then get ready to move. As the boulder rolls, you have to plug the gaps with the Sand Rod as it moves east. Take it over all three gaps, and it will destroy one last block. This sends sand into the previous room. Before heading there, look for a hidden doorway along the southern wall. This leads to a little area with a boulder you can toss out of the way. Lift the chest underneath with the Sand Rod to grab a Silver Rupee from inside. Now return to the room newly filled with sand.

With more sand in the room, you'll be able to use the Sand Rod to reach the large chest in the center of the room. Open it for the Big Key. You can also head through the hidden doorway at the southern end of the room to find some fairies.
You now need to head to the hallways filled with enemies. If you backtrack and take the left hall, merge near the stairs to reach a hidden area. Clear out the boulder here, then raise the chest underneath with the Sand Rod to find a Silver Rupee inside. If you use the connecting room where the Silver Rupee was, you'll need to use the Sand Rod to move the eye beam statue out of the way. Either way, you'll end up at the locked door. Use your Small Key to head through.

Head down the steps and toward the eye beam statue. When it starts its laser, use the Sand Rod to elevate it. As it rotates, it will hit all three orbs above and open a door. Head through that door.
In here is a large room where enemies will spawn. Take them all out to reveal a chest. Grab the Small Key from inside, then return to the previous room.
Head north to find a second eye beam statue. When it fires, use the Sand Rod to raise it to the blue and red orbs above. Stand on the matching platforms to your right; as the laser rotates, you'll eventually end up atop a raised red platform. Merge across the gap here to reach the locked door. Use your Small Key to reach the third floor.

The western wall is constantly falling sand, but look for a place where you can slip through. On the other side is a chest with another Silver Rupee. Return and head through the south exit.
In this next hall is a lot of stuff you can’t do yet. Head through the closest door south.

In this room is a sand pit and a few gargoyle statues. Use the Sand Rod to cross the gap, but be aware that the statues will attack as you cross (if you fall, just exit north and return up the stairs). On the ledge across the gap is a chest containing a Small Key. Grab it and exit.
Back in the long hall, head east. No, you can't reach the boss room yet, even though it looks like you can. Instead, use your Small Key to head through the locked door.

Use the walking bomb to blow through the cracked block here, then move into the sandy area. Blow through the northern block to reach a few Rupees, then blow through the block just to the left. There's a passageway here with more Rupees.
Your challenge now is to blow up the cracked blocks above. How do you do it? Stun a walking bomb near one, then use the Sand Rod to elevate it to the block's height. With the blocks cleared, the darts flying through the room can hit the blue/red orb above. This allows the corresponding platforms near the room entrance to continually shift. Use them to exit through the upper door.
Back in the long hall, pull the handle to flood the room with sand. Head across it and enter that boss room.

This "boss room" is actually just a sand pit. Use the Sand Rod to cross over, clearing the boulder out of the way. At the end of the chamber is another exit. Head outside, then merge through the wall out here to reach Lorule.
Drop down the ledges and head south to face the boss proper.

This boss is only tricky because of the reliance you need on the Sand Rod; keep moving to avoid falling into the pit. As the boss moves around, create blocks to reach him, and attack with your sword. After a few hits, he'll start spitting out some enemies. After a few more, he'll sprout some eyes and learn a new sand blast attack. Your strategy doesn’t change: create sand blocks to reach him, and keep hounding him with your sword. He'll go down without much trouble.

Start out by the using the Ice Rod to cross over the lava pool. Enter the massive room beyond.
In here are lots of seesaws, platforms, and doors. If you use the Ice Rod on a seesaw, it will hold its angle for a moment. Use this to take the first seesaw up and to the right. Follow the walkway, and make a left at the fork. Use the Ice Rod on the lava jet to create a bridge block to the central platform. Now use the Ice Rod on the four orbs above you to spawn a chest containing the Compass.

Next, cross east over the same walkway. Merge and move north to reach a ledge where a Small Key sits. Now merge and head south to the upper door in the southeast corner.
Up here is a teleporter. Use it, then use the next teleporter you spawn near.

In this hidden room, use the Ice Rod to cool the lava jets that spurt up. Merge across the cooled blocks to find a dungeon exit. Out here are some fairies you can grab.
Now backtrack to the upper southeast ledge in the main room (where you reached the first teleporter). Merge and move clockwise to find a ledge with a Monster Horn, a Monster Tail, and Monster Guts. Drop to the ledge below and step onto the switch; head through the door that opens at ground level.

This room contains a huge seesaw. Tip it towards the ledge above where you entered, freeze it in place, then head up and step onto the teleporter. When you spawn, step onto the next teleporter you see.
This hidden room is just a twisting lava pool. Use your Ice Rod to create platforms to reach the exit door. Outside, you'll find a Piece of Heart. For more information on these, see our Piece of Heart locations guide.
Backtrack to the seesaw room that got you here, but this time drop off the high ledge and step onto the teleporter here. This takes you to a ledge with a Small Key. Grab it, drop down, and exit the room.

We've got a chest to grab before we move on. It's found in the southeast room - where the first teleporter was. Use the Ice Rod to take out the fire-spitting enemies on the upper ledge; this spawns a chest.
Now you need to make your way back to the teleporter above. On the other side, drop from the ledge and use the teleporter here. Now you can reach the chest for a Purple Rupee.

Now we're going to head back up the southern seesaw in the central room, again going to the right. Head back to the central platform, but this time, move to its left edge. Use the Ice Rod to cool the lava jets that rise here, then follow the path to a second seesaw. Freeze it in place, then follow it to reach a switch. This opens a door on the north end of the room.
To reach said door, return to the upper ledge where we grabbed the Small Key. Merge left to reach door, then head through to find a Purple Rupee inside a chest. Drop to the hallway below; a few ghost enemies will appear. Take them out - you may need to use the Ice Rod in some cases - to reveal a staircase, then head downstairs.

Take the hallway into another massive chamber. We'll start in here by entering the northwest door. (Also, note the Wizzrobes that appear throughout the room. Take all four out to reveal a big chest that we'll get to later.)
In here are several moving gargoyle statues, but these are red hot. Use the Ice Rod to cool them down, stunning them. Take them all out to spawn a warp portal, then return to the large chamber outside. This time, head through the northeast door.

In here are a few enemies, an eye beam statue, and a Small Key. Use the Ice Rod to cross the lava stream, then quickly grab the Small Key. When the statue starts firing its laser, merge to avoid damage. Head back out to the central room.
Use the Ice Rod on the seesaws to the west to cross the massive lava pool to the locked door in the southwest corner. Use one of your Small Keys to pass through.

In here, use your Ice Rod to cross the lava streams. Bust up the skulls in the corner to reveal a switch; step on it to create a bridge in the lava pool in the central room.
Exit the room and cross that bridge. Use your Small Key to open the other locked door over here.

In this room are some moving spikes and a few lava streams. Cross over the streams with the Ice Rod, then bust up the skulls to reveal a switch. Step on this one to create a second bridge near the earlier one.
Exit to the central room, but don't cross your new bridge yet. Instead, starting crossing the seesaws to the north side of the room. Stop at the spinning fire, and look to your left. When the lava jets rise, cool them to reach the wall. Merge and move to the right. From this ledge, merge and move right again. Drop when you reach the locked door and enter the lower door here. In the room beyond is a chest containing a Purple Rupee. Grab it, then return to the central room.

See that orb below? Drop down and smack it; this raises the ledge you just left. Follow the path your just took to the Purple Rupee chest, and it will now take you to the locked door. From this point, you can also reach the big chest you generated earlier - it contains the Hylian Shield. In either case, use your Small Key to pass through locked door over here, then open the large chest beyond for the Big Key.
Return to the central room. Take out the ghost to your right, then merge and emerge on the bridge piece here to create a shortcut. Now head to the second bridge in the southern part of the room. You can pass through the southernmost doorway here now.

You'll see the boss chamber door upon entering; we're almost there. Merge to reach the metal platforms, then hit the orb to make the platforms continually rise. When they reach their new height, merge to reach the big door. Use your Big Key to pass through.
Move past the rolling spikes and bust up the skulls at the end of the walkway. Step onto the exposed switch, then take out the two ghosts that spawn. This opens a big drop to the boss chamber. Drop down when you’re ready.

This boss is pretty easy to take down if you can avoid the lava jets that dot the area. Start by tracking the boss as he moves below the walkway. When he reaches an exposed area, drop ice onto it with the Ice Rod. After a few hits, he'll spew lava and chase you around; keep moving until he cools down, or hit him with the Ice Rod - if you can - to end the chase early.
After a few rounds, he'll hop up onto the grate and face you one on one. Slash at his exposed head, dodging his occasional biting attacks. When he enters his shell, back away to avoid the steam he's about to shoot. If he enters his shell and starts moving, keep moving to avoid the spinning attack. A few more hits on his exposed head, and this fight is over.

Start by following the stairs to the left. Push the rightmost gargoyle statue off the platform, then merge into the wall. Head right to reach a chest containing a Red Rupee. Merge back across the gap, head through the door.
In here is a Ball and Chain Solider, but this time, his weapon is on fire. Fight him as you would any other enemy, taking care to avoid his flaming weapon. Defeat him to open the way forward, then take the stairs up.
Head straight through the hall to central room of the second floor.

Follow the path clockwise until it ends. Merge to keep moving clockwise and reach a chest containing a Monster Horn. Now move back across and enter the eastern door.
Take out the enemy in here and open the chest for a Red Rupee. Move south to spot a pit, but there's actually an invisible walkway over it. From the center of the ledge, head south until about halfway across the pit. Move east to the wall, then south to reach a second chest containing a Silver Rupee.
Head back to the central room, then take the stairs at its southern end.

Take out the enemy, then slash the orb just ahead to create a warp portal. Push the gargoyle statues out of the way, then drop off the ledge back to the first floor. Open the chest here for a Small Key.
Head back up to the third floor; use your new warp portal to do it quickly. Step on the tile in the upper left, then head through the door it opens.

This hallway seems puzzling, but it's really not. Use Bombs (or the walking enemy bombs) to hit the red/blue orbs and change around the active platforms. Ignore the locked door and follow the path as it snakes around. Take the right red platform at the fork to find a chest with a Red Rupee.
When you reach the Bomb Flower, you'll need to take it through the rest of the corridor to the giant cracked rock to the north. (To separate from the Bomb Flower without detonating it, merge into a wall.) The chest here holds another Small Key. Now you can drop down and head through the locked staircase.

Down here is a familiar boss. Fight him just like last time, attacking the red orb on his tail. The only difference is that the size of the room will shift.
Once he's gone, hit the teleporter to return to the third floor. Now head to the upper right, step on the tile, and hear through the door.

This room is much simpler than the one with the red/blue orbs. In here, platforms will emerge from the lava as you move forward; just go carefully. Follow them northwest to find a chest containing a Monster Tail, then move the northern platform with the gargoyle statue. Pull it away to let spikes freely roll down the path. Lead one across the platforms to clear out the spike blocking your way. Keep moving, then merge across the gap to enter the southern room.
In here, tile after tile will fly at you. Keep your shield up until they stop, and the upper exit will open. Head through.

Now on the upper part of the previous room, follow the platforms north to another spot where spikes will roll. Guide one back to the southern end of the room (you'll need to merge at some points). Once it clears the still spike, follow the path the rolling spike took to reach a chest containing another Small Key.
Now head for the locked staircase in the northwest corner of the room. Take it downstairs.

In here is another old boss buddy. Defeat him simply by slashing when the electricity is off; the same goes for when he splits into small copies. The only difference is the shifting platforms. Keep out of the lava, and the battle will end soon.
After the fight, take the teleporter back the central room on the third floor. With two boss fights down, you're probably in need of some health. You've also probably noticed the fenced-in pit in the southeast corner up here. Head up the eastern stairs a bit, then merge into the wall. Move right, then emerge from the wall to fall into that pit. This will drop you onto a high ledge on the lower floor. Merge again and move clockwise through the room to reach another high ledge; through the doorway here are some fairies. Once you're nice and healed up, head back to the third floor and use your last Small Key on the locked staircase.

Welcome to the fourth floor. Cross the walkway to the chest; open in for the Compass. Slash to extinguish the fire on the nearby torches, and a shadow path will be revealed immediately south of you. Follow it to reach a large chest containing the Red Mail.
You have two doors you can go through now; we'll start with the left one. Step on the left tile and head through.
This next room seems tough, but it only has one trick up its sleeve. When the lights are out, you can see the invisible walkway; when the torches are lit, the walls move so that you can actually cross said walkway. The key is to extinguish the flames, memorize the walkway's path, rekindle the flame with your Torch, then move along the path. Do this to reach the chest in the middle of the room. Grab the Small Key inside, then continue the process to reach the locked door on the northern wall.

This room actually isn't the home to a recycled boss. Instead, you'll find another Ball and Chain Solider inside. Thing is, the room is dark, and the Soldier's weapon is again aflame. Battle it just as you did the earlier one, noting the invisible walls (visible when not in direct light) in the room.
Once he's down, hit the teleporter to return to floor three. Head back upstairs and move to the eastern door. Use the Hookshot to grab the handle across the gap, then head over the platform it generates into the next room.

This room has some Soldiers, continually spawning Wall Masters, and lots of lava. Turn right and use Hookshot to cross the small gap by latching onto the silver wall ahead. Head to the moving platform, and ride it north. Open the chest on the landing platform for a Purple Rupee. Now use the Hookshot to pull the handle in the lava; this gets another platform moving. Ride it to find some eyeball-less statues.
You need to find eyes for these. For the first, head left, merge into the wall, and cross the gap. Wait for a Wall Master to spawn, then stand under the cracked tile where the eye sits. When the Wall Master attacks, it will break through the tile and drop the eye to you. Now the tricky part is to toss the eye to the top left corner of the platform your standing on. Merge back across the gap, then use the Hookshot to pull the eye over the lava to you. Toss this into the first statue, then head north.
Hop onto the metal raft and ready the Hookshot. You have to latch onto the walls to guide the raft through these canals. When you reach a switch overhead, wait for a Wall Master to spawn. Trick it into hitting the switch to open the gate ahead. When you reach the end platform, bust up the skulls to reveal three switches. Push the gargoyle statue onto the first, then wait for another Wall Master. Trick into slamming into another switch, then quickly step onto the last to open the way forward. Finally, wait for one last Wall Master to spawn, then use him to break the cracked tile overhead, dropping the second eye to you.
Take the second eye to the second statue, and a chest will spawn. Grab the Small Key from inside, then immediately use it on the nearby locked door.

In here is the Swamp Palace boss. Just like last time, yank away the eyeballs with the Hookshot, then slash to defeat them. Once he's exposed, keep moving to avoid his slamming attacks and eye beams. Keep delivering sword blows to finish the job.
With the last boss defeated, hit the teleporter to once again move to floor three. The large door will open; head through to reach the ransacked room you first saw upon entering Lorule. Slip through the crack in here to return to Hyrule, where some fairies are flying about. Heal up, then slip back to Lorule and head through the right door.
Cross the bridge and head north to enter the throne room. After a nice cut scene, you'll be facing a most unexpected, yet probably obvious boss. Does that even make sense?

Either way, you're now facing Yuga, infused with Hilda and Ganon's power. He'll begin the fight with sweeping lance attacks. Get in a few sword slashes, then back off to avoid his attacks. Keep this up as he teleports around the arena. Take extra care to dodge when he charges up with dark energy; this attack deals heavy damage.
As you attack, he'll add new attacks. For the first, crystals will fall from above; keep moving to dodge. For another, he'll throw his lance like a boomerang. Again, keep out of its path while you dole damage to Yuga. Continue to pound him, and he'll eventually fall.

And now the final battle begins. Yuga will fire a ball of dark energy - you can probably guess the next step. Swipe it to send it flying back at him. After a few volleys, he'll be stunned. Zelda will then hand over the Bow of Light, usable only when merged into the wall.
Merge into the wall and fire the Bow of Light at Yuga. This will send him stumbling backwards. Emerge, move behind him, then merge again. Fire into his back while he's stumbling to kick him out of the wall, stunned. Emerge and deliver some sword strikes. Now he'll unleash a really annoying energy attack. Beams while fire from the walls while dark fairies hone in on you. Keep moving to avoid damage.
When the attack ends, it's back the volleying. Send him into the wall, then merge. This time, he charges at you. Wait for him to get close, then pop out. When he slides past, quickly merge and fire an arrow into his back to kick him out again. Deliver more sword damage.
For the final energy volley, he'll toss out two energy balls. Keep slashing to send him into the wall one last time. He'll be on high alert, but the last hit is quite simple to land. As he approaches you, turn around and fire and arrow away from him. It will circle around the room and hit him from behind, booting him from the wall. Pop out and deliver the finishing slash.


 Dying Light: Zombies, and Parkour, and Heart Attacks! Oh, My!
 Diablo III Does Not Need to be First Person
 Top 15 Characters Who Should be in Sonys Title Fight
 Green Soup Room Walkthrough
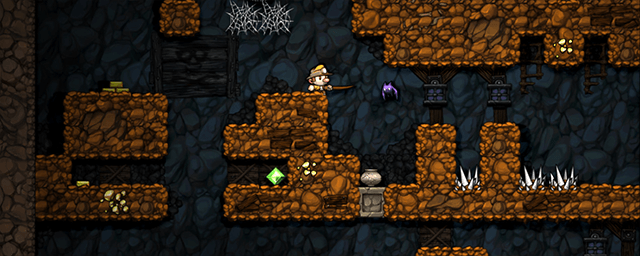 8 Steam Curators You May Have Missed