

Before time began, before spirits and life existed, three golden goddesses descended upon the chaos that was Hyrule...
Din, the goddess of power...
Nayru, the goddess of wisdom...
Farore, the goddess of gourage...
Din, with her strong flaming arms, she cultivated the land and created the red earth. Nayru poured her wisdom onto the earth and gave the spirit of law to the world. Farore, with her rich soul, produced all life forms who would uphold the law.
The three great goddesses, their labors completed, departed for the heavens. And the golden sacred triangles remained at the point where the goddesses left the world. Since then, the sacred triangles have become the basis of our worlds providence. And, the resting place of the triangles has become the Sacred Realm.
This is the story of Hyrule, as told in Ocarina of Time.
Since the telling of that tail to a young hero, over 100 years of relative peace have past in Hyrule...that is, until you press start...
No, this isn't the Zelda series back story, sorry. That story is far to long and convoluted. Further, though there is a chronological order to the Zelda games, no one has officially confirmed a timeline yet. The only thing we know about this game is it takes place “100 years after Ocarina of Time.”
With that out of the way, back the purpose of this section. This game was originally set as a Gamecube release title, due out in 04. However, because the Gamecube was on it's last legs anyway and Nintendo's new console (Wii) was coming very soon, they delayed and delayed till it was finally announced as a launch title for the Wii.
This caused a problem, however, as they couldn't leave Gamecube owners hanging. So, they released the original version of Twilight Princess on the Gamecube.
Since the Wii's version used the Wii Remote to control Link's sword, they determined that Link should hold his sword in his right hand to correspond to the majority of people playing. This caused a problem. It would be to time consuming to re-program the game to actually make Link left handed (yes, link is RIGHT HANDED in other Zelda titles), so instead they took the entire game coding, and mirrored it.
*THIS IS THE IMPORTANT PART*
So in the Wii version, left is right and right is left. Since this guide is written for the Wii version, if you are playing the Gamecube version every time I say “right” read it as “left” and vise-versa.
Other then this and the control scheme, the Gamecube and Wii versions are identical, though the Wii version does support 480p and Widescreen modes, while the Gamecube version does not.

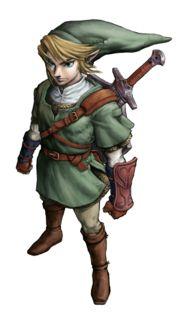
Link
Wii Remote
A – Special actions (climb, push, jump attack)
B – Item slot
D-pad – Item slots
Up (D-pad) – Call Midna
- - Brings up item menu
- Pause menu
2 – toggles the mini map
1 – toggles the big map
Nunchuck
Joy stick – Move
Z – Lock on/raise shield
C – First person view
Combat:
Shake the Wii Remote for regular attacks
Z A for a jump attack
Shake the Nunchuck for a spin attack
Z Joy stick A to dodge
Jumping always confuses people. There is no jump button. Link jumps automatically when you run over a cliff or walk up to a ledge he can reach. If the ledge is too high, he wont jump to it.
Pressing the Z button centers the camera behind you when theres nothing to lock on to, and as such can be used to get a better camera angle.
Some actions will use the pointer (like aiming the Bow). If you point at the screen when not aiming a weapon, Navi (or a Navi-like fairy) will appear on the screen.
To assign an item to a slot, press the – button, point at an item, and press the button you want to assign it to.
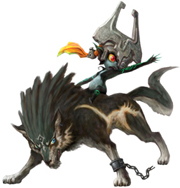
Also Link
Wolf Link has almost the exact same controls, except the D-pad and B.
Left and right – Animal sense
Down – dig
B – Have Midna “paint” targets
Up still calls Midna. Also, tap the A button while moving to move faster.
In wolf form, you cant talk to humans any more, but you can talk to animals.
You wont have the B button attack right away, but you'll be using it a lot later. Hold down the B button and a circle will come out around you. Any enemy that enters that circle gets “painted” for an attack. Release B to lunge at all the enemies within the circle.
Wolf Link cant use items, but he can use his senses to see things Link cant. He can also dig in the ground to uncover items.
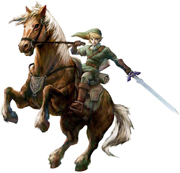
Epona
Your trusty steed. You have much more control over Epona then before. Now you can use just about any item while riding her, including your sword. The controls are the same as in human form.
The A button enables a dash while you're moving. If you're standing still, A button mounts/dismounts her. Dash also allows you to jump over gates.

Your HUD
1)- Your heart gauge. Each heart consists of 4 parts. When all the hearts are empty, it's game over.
2)- Midna. Press up at any time to call on Midna. She'll give you advice and, later in the game, can teleport you or transform you between wolf and human.
3,4)- Item slots. Press the button to use the item.
5)- action button. At certain points, some context-sensitive actions will appear beside the button. Press A to do the action.
6)- Your wallet. You can only hold so many Rupees, so don't bother trying to collect past that point.
7)- Mini-map. Yellow arrow shows your location, blue arrows show where you entered the area from, red dots are objectives.
8)- Your pointer. Where you are pointing on the screen.
9)- Link.
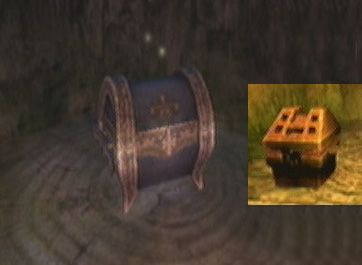
Large Chest
Chests come in two sizes: large and small. They also only come in a couple different colors. The large chests generally hold something very important, while small chests rarely hold anything necessary to your quest.
Golden Bugs
Golden bugs are needed for a side quest. Often you'll see them before you can actually catch them.

Poe lantern
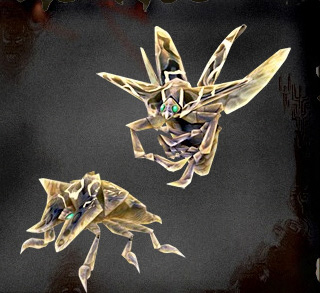
The real Poe
Poes are also needed for a side quest. When in human form, avoid them at all costs. They can take a whole heart away in one attack that you cant even see. In wolf form, you can use your animal sense to sniff them out and fight back.

Heart Piece
Heart pieces increase your overall health. Collect 5 for another heart.
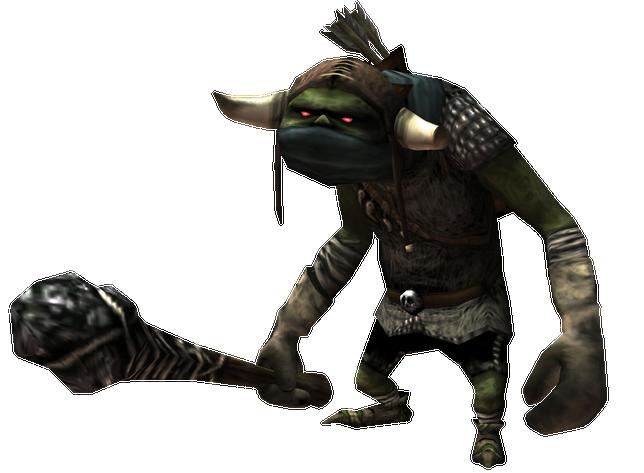
Enemies
Enemies come in many shapes and sizes. You don't have to fight most of the enemies you come across, but it can make your life easier. Overall, I'd just run past all of them when in Hyrule Field.

Shadow Insect
Shadow insects are found only in the twilight. They drop the Tears of Light when defeated.
Misc. Field items
Rupees, bombs, arrows, hearts. You can find these by defeating enemies or cutting down tall grass. They restore their respective areas. Hearts heal health by 1. Rupees are used as money and come in several sizes.
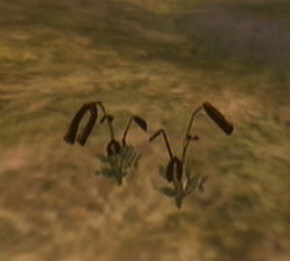
Horseshoe Grass
These are special pieces of grass that can call nearby animals. They are used to call Epona. There is another type of grass very similar to Horseshoe grass that is used to call nearby birds.
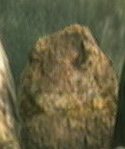
Bombable rock
Bombable rocks are easy to tell apart from other rocks, do to their crumblier or cracked appearance and the suspicious location. These rocks can be cleared out by any explosive force (bombs, bomblings, bomb arrows, ect)

Torches
Torches usually all look about the same. Some need to be put out with the boomerang, while others need to be lit with the lantern. Not all torches are used to solve puzzles, some just light the way.

Jars
Jars come in several shapes and sizes. They never hold anything important (except Ooccoo), but often hold hearts, rupees, and even pink fairies.
Pink Fairy
If bottled and saved, pink fairies can revive you up to 8 hearts if used at a later time. If you die while you have a pink fairy in a bottle, they will automatically revive you and heal up to 8 hearts. Pretty handy little thing, eh? You can usually find them just before the door to a boss fight. After the Cave of Ordeals, pink fairies can be found abundantly throughout Hyrule (specifically around fairy fountains).
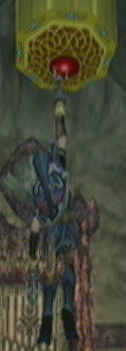
Clawshot Target
You wont be able to use these till later in the game, once you get the Clawshot. The Clawshot acts like a grappling hook, and these targets are pretty much the ONLY thing the Clawshot will stick to. So you cant go playing Tarzan like you did with the Hookshot.

Spinner Track
Another one you wont be using for even longer into the game. This track has grooves which are a perfect fit for the Spinner. Just activate the Spinner and coast into one of these to rocket off along the wall.
When Nintendo makes a game, they go all out, creating entirely new planets and species.
If you've never played a Zelda game before (though you'll like this game much more if you play Ocarina of Time before playing this), it can all be a little confusing at first, but you'll get used to it.
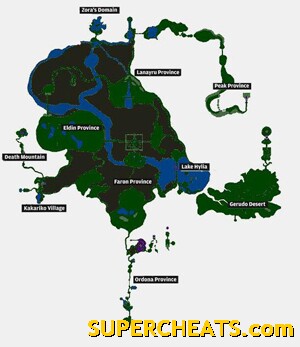
Land of Hyrule
In Hyrule, there are 7 noteworthy areas, situated around 3 main provinces:
Ordon Province - This is the area that our hero is from. It is a large forest area south of Hyrule. Forests conceal many secrets in their thick trees. It's very easy to get lost...
Death Mountain – Located in the west, it's known for being the highest peak in Hyrule, and having a lava-filled interior. Also home to the rock-like Gorons.
Zora's Domain/Lake Hylia – This is the main water source of Hyrule, located in the east. The two are normally directly connected, but the Zora's have moved upstream in the last 100 years.
Kakariko Village – This seems to be the only place in Hyrule where the common people live (Ordon Province is not part of Hyrule). A dusty little town that has sat at the base of Death Mountain for as long as anyone can remember.
Castle Town – Located in the center of Hyrule, Castle Town is the main city in Hyrule. It's were all the largest shops and merchants can be found. It's a rather bustling city, with people roaming the streets even at night. Of course, lets not forget the huge castle located at the north end of town where the Hylian royalty live.
Gerudo Desert – A large desert area, just to the east of Hyrule. The Gerudo once lived here, but they seem to have vanished; though their slot was filled when more ruthless bandits moved in. Many things have been covered up in the ever shifting sands...
Peak Province – North of Hyrule, this area is a winter wonderland. Covered in snow year round and engulfed in constant blizzards, this area is very treacherous. They say there is a mansion hidden at the peak...
Hyrule Field – This is a sort of in-between place, it's the fields that connect all the towns and places in Hyrule. Hyrule Field consists of all the providences (except Ordon).
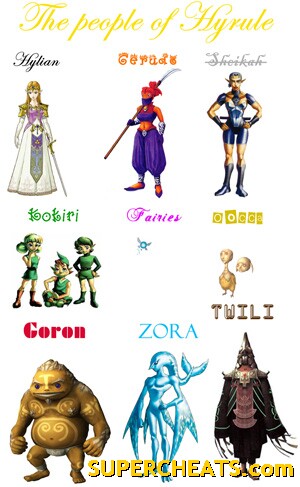
Hylian – Hylian are your basic humans. They make up most of the games townsfolk.
Gerudo – Gerudo are only hinted at in Twilight Princess. They were an all-female tribe of bandits that inhabited Gerudo Desert. Once every 100 years, a male would be born into their society. Tradition stated that this he would be their king. 100 years ago, tradition was set again, and this new king was named Ganondorf...
Sheikah – Literally “Shadow folk”, these are the ninjas of Hyrule. Most were killed over 100 years ago, before even Ocarina of Time. They were the bodyguards of the royal family, and the founders of Kakariko Village.
Kokiri – Kokiri don't make an appearance in Twilight Princess, but while we're here... Kokiri aren't so much living beings as they are manifestations of the forest spirits. Though they appear to be children, they never age and are actually hundreds of years old. They live deep within the forest.
Fairies – Fairies come in all shapes, colors, and sizes in the Zelda series. However, there are two main types: Fairies and Great Fairies. Regular fairies serve as guards and guides to the Kokiri. They also have mystical healing powers. Great Fairies are ancient fairies whom are more human-like and pre-date Hyrule. They have strong magical powers that they often share with our hero.
Oocca – Oocca are an ancient race believed to be the ancient ancestors of the Hylians. According to legend, long ago the Oocca lived in a floating city in the sky.
Goron – Goron are large rock-like creatures that live on Death Mountain. Their diet consists of... rocks (go figure). Their physical strength and weight are unmatched in all of Hyrule. They also have the ability to thrive in high-heat environments.
Zora – Zora are fish people. They live in water, and though they can live on land for a time, they eventually have to return to crystal clear water to live. Zora's have been charged with the task of keeping Hyrules water supply safe from evil forces, a task they take great pride in.
Twili – A race banished from the Land of Light (our world) to the Twilight Realm by ancient sages for trying to use “old magic” to obtain the Triforce for themselves.
Twilight Princess experiences time-lapse in the same way as OoT. An entire day consists of 10 minutes, roughly 4 minutes of night and 6 of day (it isn't even).
This is important as some events (Poes, stores) only occur at night or day.
Every place in Hyrule experiences time-lapse except for caves, dungeons, shops, Kakariko Village, and Ordon Village, or if you have the pause screen up.
Ordon Village
Ok, so after the cutscene that's obviously setting the tone for the story (cryptic “their world” message and “your adventure begins tomorrow”), you are now outside your house, noticing your horse is missing.
You cant go into the village yet, so turn around and take the northern path out. In the next area, about half way down is a pond. Turn in and talk to Llia. She'll ask you to play a song for Epona. Turn about and pick the grass behind you (it's horseshoe grass). Blow into it to attract Epona. Get on her and ride back to your house (take a left), then take the southern exit this time.
You can talk to some people here if you like, but really theres not anything to do. Follow the dirt path left, over the small bridge and through the gate just ahead.
Now you have to herd goats. It's not that hard once you get the hang of it. Remember that you have to stay on Epona or else the goats wont move. The goats move in the opposite direction at which you come at them, and they are fairly sensitive, so make large circles to get around and get in position. I also wouldn't move too quickly, as the faster you move, the quicker things can get out of hand.
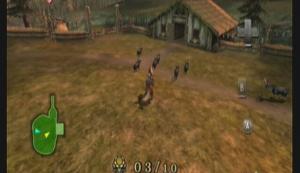
Something like this
Now that that's over with, Fado will set up some gates for a sort of obstacle course. This is good practice if you're still not used to riding Epona (trust me, you'll HAVE to be VERY good with her later in the game). To get over gates, you have to press A while moving to dash. You cant dash just a few feet from the gate, it has be to a little farter back, but not so far that your dash runs out before you reach it. When you're done, just jump the gate in the north.
Save your game.
You are now in your house. Climb down the ladder behind you and the one after that. There's not much (read: anything) to do here, so exit out the door and go talk with your callers.
We need a slingshot, apparently. Go into town. As you walk in, talk to the guy ahead on the left staring at the sky. He'll tell you about his bee problem, which we'll fix later, and his wife problem, which we'll also fix (cant any do anything themselves anymore?).
Veer a little bit right to talk to be caught by someone on a rock. He'll tell you to climb up the vines on the side of the rock. Walk up to them and press forward to climb up. Once up there, he'll tell you about a cat and the Flacon Grass over on the right. Jump across till you get to the grass. Don't stop here, however. Jump to the roof of the building and then to the two platforms on the left. Once you get to the one on the end, there should be some more grass.
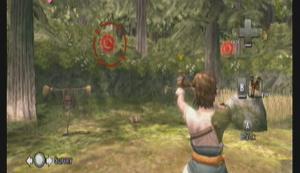
Position yourself like so
Pick the grass and blow to call in an flacon. Face downstream (opposite the picture) to see something jumping in the distance. Point at it and send the flacon after it with A. He should fly off and grab a basket and bring it back to you. You cant do anything with it where you are now, so turn about and face the grass on the other rock you pasted. You wont be able to jump that far, but we're not aiming for the rock. Jump down into the river. You'll drop the basket and start to swim, but that's ok. Climb out and climb back up vines on the rock over to the first patch of grass. Use this grass to call the flacon, and this time pick the basket up out of the water.
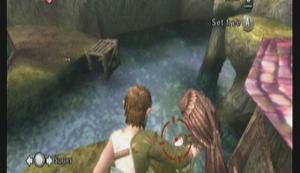
Like so
(Note: if you cant get the basket, you can jump down and swim into it to push it into position) Now that you have the basket again, jump back to the rock behind you then down to dry land. Carry it to the little bridge you crossed yesterday and talk to the woman there.
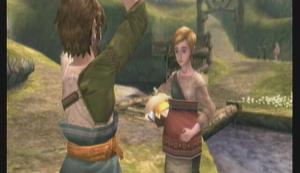
Uli
She'll ask you to follow her back to her house. She walks REALLY SLOW, but you don't have anything else to do at this point. Upon arrive, you get the fishing rod. Equip it and run back to the large bridge you've pasted several times now (near the water wheel). Go around the side of the building on the right to a pier where the cat sits.

You got fish!
Get on the pier and catch 2 fish (the first fish attracts the cat to you and make him follow you around. The second it grabs and runs back to the shop with). We're not quite ready to follow the cat yet, however. Go back around the building and climb the ladder near the bridge.
Jump down to the left between some fences to find a couple pumpkins. Pick up the pumpkins and throw them at something to break them. One of them should contain a blue rupee (5). Climb back up and this time go across the ledge to find some boxes.
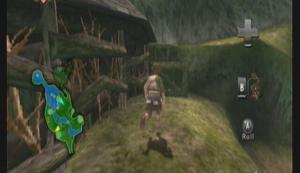
Boxes.
Climb on them and use them to get over to the ledge. Now climb the ladder on the side of the building. Up top is a yellow rupee (10) and some grass. Pick the grass and blow to call your falcon friend. Aim straight across to the bees nest the guy was talking about
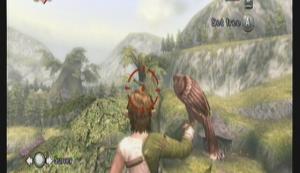
Bees nest
Launch the falcon and he should knock the nest down. Jump down and go over to the nest (theres a small path that winds up to it). Before you get to the nest, there is a couple rupees over behind you. Behind the nest are some vines. Climb up.
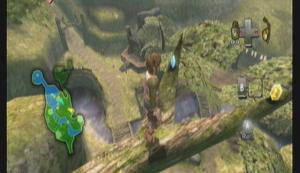
Now's when you learn Links afraid of heights...
Walk across the branches carefully to claim a total of 15 rupees (you should now have at least 30 total, if not 33). Jump down and go into the building that cat ran to (should be straight across from you).
It's the shop. The owner will give you a bottle of Lon Lon Milk, which you'll probably need soon, so save that away and talk to her again. This time, buy the slingshot off the shelf. Go back out and exit the village to talk with your friends.

Target practice!
Your friends will tell you everything you need to know about controlling the slingshot. There are 2 scarecrows and 5 red targets. If you aim to the far right, you can Z-target a spider on the ladder to your house.
After taking down all the targets, they'll tell you Rusl left something in your house. Climb up and go in to find a large chest. Open it to get your wood sword back! Exit out and talk with the kids again to get a crash course in swordsmanship. (one thing they don't tell you have to wait for it to recharge, which is when a gleam goes up your sword accompanied by a “shing” noise).
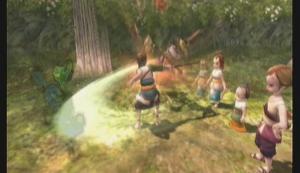
I so abuse this move throughout the game...
After that's over, everyone runs after the monkey. Hop on Epona and run after them. Just keep heading straight (no one has anything interesting to say) and cross the bridge.
Ok, in this first area, jump the fence with Epona. Make note of the pond over on the right, you'll need to know where these are later. Take the cave to the left (it's kind of dark and hard to see).
Out of the cave there is a path that goes left. Go down and dismount near the strange man. Talk to him to get a lantern. To turn the lantern off, set it to B and use it, then wait a second. An A button command will come up and say “put away.” Also, you can walk around with it on your belt by taking it out and then swinging your sword. Careful not to run out of oil!
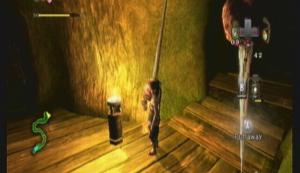
Very shred, except for the fact that oil is abundant around Hyrule.
Get back on Epona and head back out to the path. Take a left. Kill the Deku Baba guarding the entrance. You'll need to dismount Epona before you enter the cave. You'll find Talo's stick at the entrance.
In the cave, you'll encounter Deku Baba, Keese, and some rats. Keep your sword handy. When you reach a spider web, use the lantern to burn through it, just like how you lit the pot.

You can also light the lamps with the lantern.
About halfway through, you'll find a path that splits off near some hanging pots (pictured above). Go in and follow it to the end to find a small chest that contains 10 rupees. Go back to the main hall.
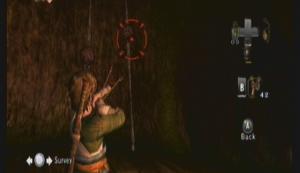
Oh, and you can destroy the pots with the slingshot
Take a right and continue down until you see the light. Exit the cave.
This area has Deku Baba, Keese, and Bokoblins. Bokoblins are going to be the main threat, though the Keese do seem to come out of nowhere.
Head west to the left red dot on your map.
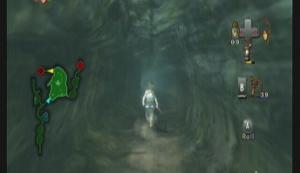
It's a cave.
Inside, open the small chest for a key. You'll need this in a minute. Now light both the lamps with your lantern to reveal a large chest up above. Climb up and open it for your first heart piece (3 1/5)!
Jump down and head out. Now go to the other red dot on your map.
A couple Bokoblins guard the gate. A spin attack followed by a jump attack or two should get rid of them. Now, before you unlock the gate, there is another Bokoblin on the other side. You can use your slingshot to shoot through the gate and kill him before he ever even gets close!
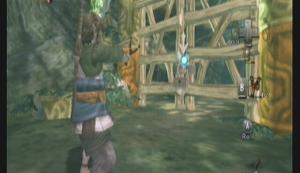
Just Z-target and let it rip!
Now open the gate and go through the tunnel.
Couple more Bokoblins in your path. You're probably getting used to this by now. A little bit more north and you'll be caught by a bird in a strange little shop.
This shop uses the honor system. You can take oil, red potion or both (though I doubt you have the cash), but you have to pay in the donation box by the bird. If you don't, the bird will chase after you and inflict minor damage (plus it'll never let you shop there again). DO NOT ANGER THE PARROT! You'll need to buy some stuff here later. Unless you REALLY need health (you do have some Lon Lon Milk, remember?), I wouldn't bother with this right now. You wont be needing your lantern again for a while (at least not more then a second).
Continue up the path a bit more. Just before the narrow part is a chest on the right.
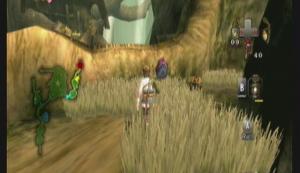
Chest.
It's guarded by a Deku Baba. Open it to get 10 rupees. Continue to the top of the path.
Talo and the monkey are trapped by two Bokoblins. Defeat them, then use a spin attack to open the cage.
A cutscene ensues, wrapping up the day.
Back to herding goats. Use the Horseshoe Grass to call Epona. This tiem, there are more goats and you have a timer. The time to beat is 3 minutes. Any slower and Fado will comment about your lack of speed, though you can still progress through the game. So, herd them up again (get in some good practice. Next time we do this, you'll have to beat a time of 2:00, and it's for a heart piece) and head out into the village.
A cutscene takes place where Link is getting ready to head out, but Llia steals Epona again. Chase after her back to your house. Upon arrival, head in to your house. There should be a hole in the floor near the back that leads to the basement. Jump down and light your lamp to find a chest that contains 50 rupees (no, you couldn't have gotten it any earlier. I've tried.)
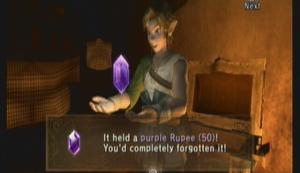
Lovely...
Go back out and talk to Talo. You'll have to give him your sword to pass.
Head to the spring where Epona is to find that Llia locked the locked the gate, and the only way in is through a tunnel. The tunnel can be hard to spot, so heres a picture:
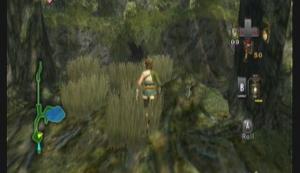
Tunnel
Crawl through and talk to Llia. A cutscene follows.
Whoa, didn't see that one coming... Well, actually, kind of did. I mean, SOMETHING had to happen... That's ok, the next part is even worse.
Told you :P
Ok, so, you're a wolf, locked in a dungeon at an unknown location, and now this weird girl says she can help you. ... just go with it, man @_@
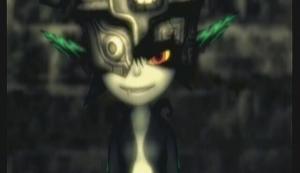
Enter: Midna
Alright, there are some boxes on the right. Attack them to break them, then use dig where they were to dig up under the cell bars. The door to the cell next to yours is open. Head in. Midna will prompt you about the chain hanging down. Lock on and press A to jump onto it and pull it down. The gate beside you will open. Follow the passage down.
Alright, your first spirit. Use your senses to listen in. I don't think any spirit anywhere in the game has anything useful to say, so I wouldn't bother with most unless you're prompted to do so.
In the next few areas, you'll encounter mostly just Shadow Vermin (basically a rat), but there are also some Shadow Keese down here.
**Just so I don't get complaints later, there are other areas you can explore down here, and maybe earn a few rupees. But with all the Shadow Vermin, high waters, and cramped spaces, it's not the best place for a fight.
Opposite the spirit should be a raised section of land heading north. Follow that down and jump across at the end. Turn left and continue through the gate. At the end of the platform, jump down and head opposite the spikes (south). When you get to the end, jump back up on the platform to your right and grab the chain
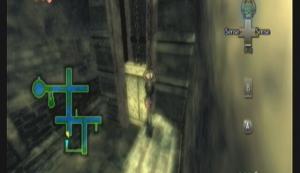
Chain
This should release the water and allow you to swim over the spikes to the north. Stay on the left and climb up on the platform.
When you come to the next spirit, take a left. Midna will leave and hover behind a gate, leaving you to figure things out on your own (she was helping?).
Turn about and head directly behind you. Swim across the gap and get back up on the platform on the other side. Keep going till you reach the end. Turn to the north and you'll see a chain across the water. Jump over and grab it to lower the water.
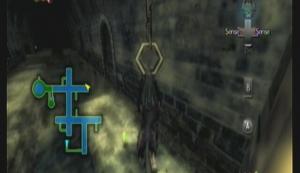
Chain #2
Now head back to the gate (west). Under the gate is a hole on the left. Go through the tunnel and around to come out near Midna. Keep east into the decaying stairway.
First thing, go right and kill the 2 Shadow Vermin so they don't get you later. Now head up the stairs and try to jump the gap. You'll fall through and Midna will yell at you (you'll get used to it). Go back up, but this time pause before the gap. You'll be prompted to hit up on the D-pad.
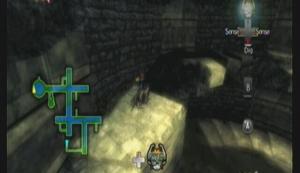
Prompt. You'll be seeing it a lot, so get used to it.
Midna will show you stable ground that you can jump to, so just lock on to her and tap A. You'll need to repeat using the prompt several times on the way up. When you come to your first tight rope, ignore it. At the second rope, walk across it to get higher (just walk into it and Link should auto-balance on it). One more prompt and you should be at the top.
Watch for the Shadow Keese. There are several of them in here.
You'll see the window, but you cant reach it. You have to be standing here:
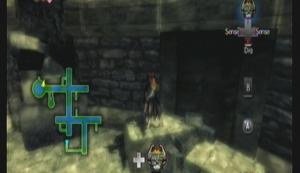
Here
To get the prompt. Once through the window, you'll see you're in a large castle. Jump down and go straight till you have to listen to another spirit.
To the east is a create. Walk up to it and hold A to push it forward. Once it wont move any more, use it to get up and over the wood structure. Hop down and watch for the Shadow Kargarok. They're pretty hard to hit without jumping, and you don't want to fall off. I'd just run past them.
Keep heading north, over a gap, up a wall, and over another gap till you come to here:
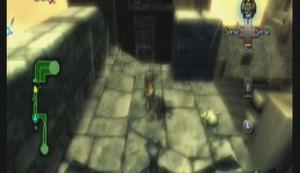
Here
Head out onto the wood on the right to get a prompt. Jump a few times onto the roof top. Follow the crest of the roof around and climb in the window. Go up and in the door for a long cutscene that sort of explains things.
Back in the spring. Head back to your house (south). Once there, you'll have to fight two Boblins. After, you'll start conversing with a squirrel (don't they have medication for this?). Anyway, enter the village.
Cross the large bridge to see the Mayor talking about a shield. Sneak up beside them (use the tall grass) and listen in. After they finish talking (you have to get pretty close. If they don't talk about a sword and shield in detail, you're not close enough) they'll spot you and run inside.
Back across the bridge, don't head right for the mill or the crazy guy on the rock will launch a Falcon at you. Instead, head right for the shop. You want to get here:
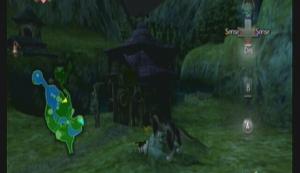
Here
To get the prompt to jump on the roof. Once on the roof, you can jump across and get behind him and spook him off. Now jump down and face the water wheel to get another prompt. Use that to jump up to the roof and go in the window.
Inside, hop down and get on the table to spot the shield.
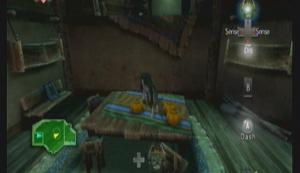
Prompt
Jump up and you may or may not see the shield hanging from the back wall. Regardless, Z-target nothing and press A to jump attack into the wall a few times. This will knock the shield loose. Pick it up and exit through the window beside you.
Now for the sword. Remember the house you escorted the pregnant lady to? Head there, only this time take the upper path. You need to wait for Rusl to pass you before moving in. If he or his wife sees you, you'll be chased off and have to wait for him to pass again. I made a little montage below that shows what to do:
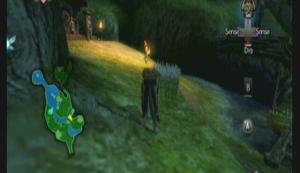
Waiting...
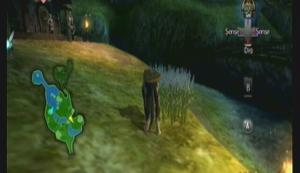
Ok, now
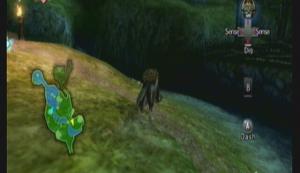
Run this way
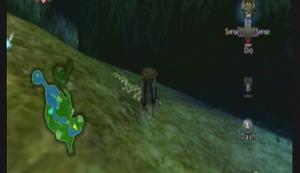
still running
stop just up ahead beside the house
Now use your animal sense. You'll see some glimmers in the ground. There are hundreds, if not thousands of these all over Hyrule. If you dig in these places, you'll get a rupee or maybe a heart. Hardly worth it. However, up next to the house is a large spot by some wood. Dig here to get into the house. Walk up to the sofa and grab the sword. Now go out the way you came (still staying in the shadows and taking the high road).
Head back to the spring and towards the bridge. Before you get to the bridge would be a good time to scavenge for hearts if you need one. Just attack the tall grass. Once you reach the spring, you get pulled in by a voice and are forced to fight a Shadow Beast.
Shadow Beasts are tough. The do one hearts damage per hit and can take a beating. Best bet is to use a jump attack. If done correctly, you'll latch on to it and then can repeatedly press A to bit it like crazy. Doing this once or twice normally brings one down.
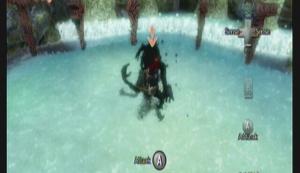
Jump on and start attacking
Once it's down, you'll get a cutscene that explains the a bit about the Light Spirits.
Head across the bridge and go into the twilight (don't know why it asks, you don't have anything else to do)
Onward to the Forest Temple!
Faron Woods
You should be in the twilight again, just inside Faron Woods.
A little ahead, you get ambushed by 3 Shadow Beasts. This time, using a jump attack wont work well, as when you're attacking one, another will knock you off. Also, if you leave just one left standing, it will howl and revive it's friends. You can almost do it with a spin attack if you time it right (you have to hit all of them at the same time, twice).
If you take two hits, or if you win, Midna will intervene and teach you a new move (hold B to paint your targets). You'll use this move A LOT.
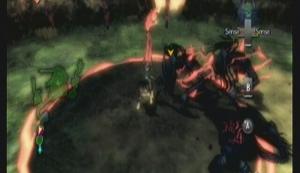
Go get ‘em
Anyway, after they're gone, search the grass for some hearts if you need and continue north into the spring. Examine the glowing light for more info on Light Spirits. You now have to go collect the Tears of Light from the Shadow Insects. So, lets get started:
Shadow Insect Locations
Remember what the spirit said, you have to use your senses to see the bugs. Further, you have to kill the bugs to get the tears.
1-2: Should be right in that tunnel. Cant miss them. Watch for the Shadow Baba.
3: Remember the guy that sold you the lamp? Go to his house (on the left). Circle around to the northern side. You should see an insect on the side of the house. Lock on and ram the wall to knock it off.
4-5: Go to the southern side of his house.
3-5 are inside, through this window. Walk up and use the prompt to get in
Once inside, talk to the lantern guy and two bugs will rush out. Kill them and go out the same way you came in.
6-7: Back out on the path, take a left to find a locked gate. Use your sense to see a patch of dirt on the right side you can dig in. The bugs are on the other side.
8-9: You have to go through the tunnel. It's not dark and is easy to dash through. As soon as you enter the woods, turn left. The bugs are on the wall. Ram it with a jump attack to knock them down. (I missed this, so the number of tears I have will be two less then yours in the screens).
10-12: Line up here:
Prompt
To jump across. Now, climb up the cliff to here:
Prompt 2
And jump across. Use your senses to get 3 bugs on this stump.
13-14: First we need to finish getting across this lake of gas. Use the montage below to line up correctly. Most of these jumps have an enemy or two along the way that want to knock you off, so jump quickly before they attack:
Here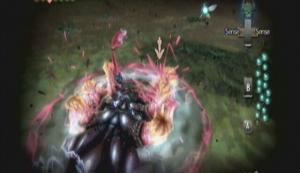
Then here
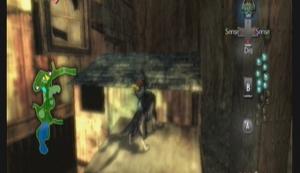
Don't get hit by the log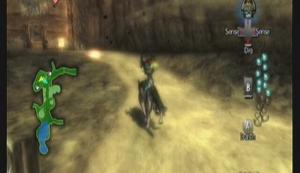
Finally, here
Once on the ground, you'll see the insects are underground. Use your senses to see a black spot on the ground that looks like the insect. Dig there to get them. Be sure to get both. Continue through the gate.
NOTE: If you missed a bug in this area, use this pier:
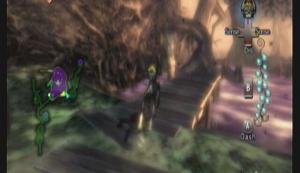
Pier
To jump back to the entrance.
15-16: First thing through, and you're forced to fight 3 more Shadow Beasts.
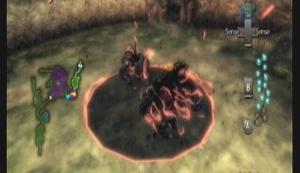
Carefully paint your targets
Also note the large slat of wood propped up there. More on that later. Continue north, all the way till where you rescued Talo before. Use your senses to get the final two bugs. After a scene, you should get warped back to the spring.
After a cutscene, you're back to your old self, a cool tunic, sword and shield.
Go back through the tunnel toward the forest again. Watch out for the Deku Baba. The gate is locked, so you'll have to take to the lantern guy to get the key (he also tells you about a “great deal” on lantern oil. Don't do it, it's a rip off).
With key in hand, continue through the gate and into the forest. As always, watch the Deku Baba, Keese, and rats in the tunnel.
Though the twilight is gone, the purple fog is still here. Take out your lantern and approach the fog. The monkey should come and steal the lantern, leaving you to get scolded by Midna again.
Follow the monkey through the fog, as she clears it away with your lantern. Several times she'll stop and you'll have to protect her from Keese and a Deku Baba. In the end, you get your lantern back, completely out of oil. Pick it up and head deeper into the forest.
Watch the two Bokoblins. Keep north till you reach that honor system shop again. Hopefully, you have 40 rupees. If not, search the grass, leave the area, and come back. Repeat till you do. Dip your lamp in the oil to fill it up. Now empty out your bottle and dip it in the oil to fill it up. Put 40 in the box (I wouldn't anger the parrot), and continue up the narrow ramp again.
You get ambushed by a glowing wolf.
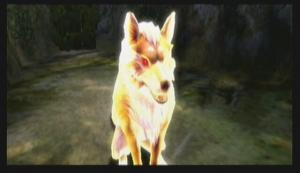
Excellent block there Link...
Turns out this wolf is actually some ancient solider that wants to teach you fighting techniques. More on him in the Hidden Skills section, though it is just speculation.
Not a wolf, just as scary
Anyway attack him and he knocks you over. After his speech, he teaches you the Ending Blow, very useful for enemies that fall over and you have to wait for them to get up. Just knock them over then get close and press A. You'll see him several more times throughout the game, so get used to this as well.
With that over, continue up. Use your lantern to burn down the spider web and enter the temple.
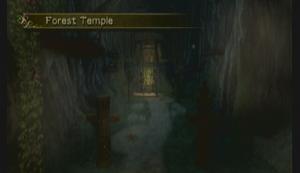
Forest Temple
Yay, your first temple! I'll put a little note here, the way I do the temples is room-by-room, as such, I give the rooms names so you can tell if you really are where I tell you to be. I also put a picture of what the room looks like as soon as you walk in, so if you go through a door and what you immediately see doesn't match up to the picture, something's not right (sometimes I'll skip the picture if it's just a quick thing).
Anyway, the forest temple is centered around number and wind manipulation puzzles.
--== Room 1: Entrance Hall ==--
Enemies: Keese, Walltula, Bokoblin, Deku Baba
Chests: 1 (10 rupees)
Quest items: 1 (Monkey)
First in the room, watch the Keese that attack in the dark. Once out into the main room, careful walking around as there are several Deku Baba in the grass. Up ahead you'll see the monkey, but don't rush there yet. First, take out the Walltula on the vines just to the west. Climb up for your chest.
Look back toward the entrance from this high platform. You should see a vase on a pillar. Shoot it with your slingshot for a blue rupee (5). Ok, now jump down and rush ahead. Before getting too close, use your slingshot to provoke the Bokoblin. This way you don't get ambushed by Deku Baba. After defeating him, use a spin attack to free the monkey. Take out the Walltula on the vines and climb up. Enter the door (it rolls to the side).
--== Room 2: Temple Hub ==--
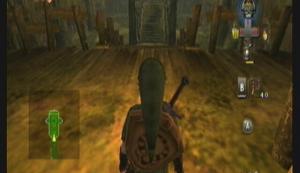
Temple Hub
Enemies: Skulltula, Deku Baba, Bombling
Chests: 3 (Map, two not reachable)
Quest items: 2 (Map, one not reachable)
You're going to be coming back to this room a lot (hence the name). Walk forward down the stairs. At the bottom, take out your sling and look up at the ceiling above the platform ahead. You should see a Skulltula hanging there. Shoot it down so it doesn't fall on your head. Kill it (if it starts blocking, back up a bit and make it chase you, then attack again), and go up on the central platform.
Use your lantern to light all the un-lit torches. Some platforms rise up, granting entrance to the northern room. Before entering the door, there is a chest just to the left of it containing the map.
--== Room 3: Windy Room ==--
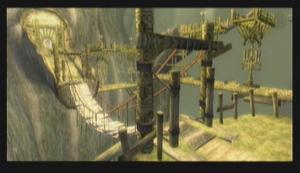
Windy Room
Enemies: Kargarok, Bokoblin
Chests: 0 (not reachable)
Quest items: 1 (not reachable)
Darn it, every time I see the name, I think “Demon Wind Shuriken: Windmill of Shadows” >_<
Anyway, not much to do here at this point. Walk in, and Ook will knock down the bridge. Retreat back into Temple Hub.
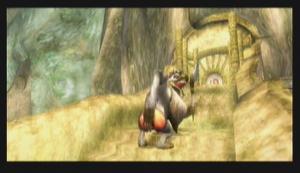
Anyone remember I.R Baboon?
--== Room 2: Temple Hub ==--
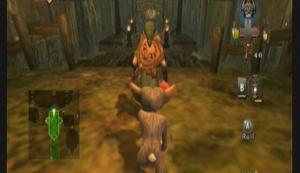
Temple Hub
Enemies: Deku Baba, Bombling
Chests: 2 (not reachable)
Quest items: 1 (not reachable)
Well, that was a bust. This time, follow your monkey friend west.
She'll create a sort of monkey bars (lulz, pun) for you to swing across. Jump off to grab onto her, then press A when prompted to land.
--== Room 4: Flooded Room ==--
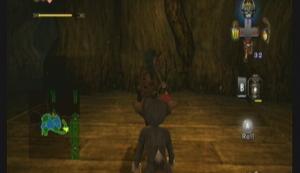
Flooded Room
Enemies: Deku Baba, Skulltula, Bombling
Chests: 2 (not reachable)
Quest items: 2 (Ooccoo, one not reachable)
Head right. Use your lantern to see Bombling by some rocks. Hit the bombling to ignite it, then pick it up and set it by the rocks. RUN! After it explodes, go through the opening and break the jars to find Ooccoo. She says she's trying to find something, and that you should team up. Overall, I've never used her, but I guess she could come in handy.
Anyway, continue west into the main room (use the lantern on the web). Watch out for the Deku Baba and follow your monkey across the gaps. Once across, look left across the gap and shoot down the Skulltula (it should then fall in the water and die).
For now, don't follow the monkey. Instead, go through the northern door.
--== Room 3: Windy Room ==--
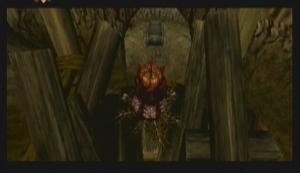
Windy Room
Enemies: Kargarok, Bokoblin
Chests: 0
Quest items: 1 (not reachable)
Walk across the bridge and into the next room.
--== Room 5: Revolving Bridge ==--
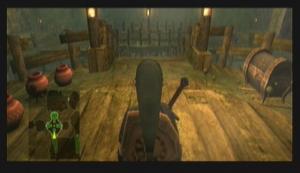
Revolving Bridge
Enemies: Bokoblin
Chests: 1 (small key)
Quest items: 1 (small key)
Nothing to do here yet but grab a key. Chest on your right. Exit back to the Flooded Room.
--== Room 4: Flooded Room ==--
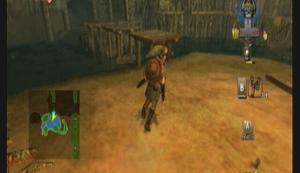
Flooded Room
Enemies: Deku Baba, Bombling
Chests: 2 (not reachable)
Quest items: 1 (one not reachable)
Now follow the monkey west across the gap. Enter the door.
--== Room 6: Monkey #2 ==--
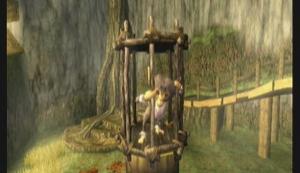
Monkey #2
Enemies: Bokoblin
Chests: 1 (10 rupees)
Quest items: 1 (Monkey)
Walk in and across the collapsing bridge. Drop down to the ground. From here, don't go straight for the monkey. Go back underneath the platform where the entrance is to get your chest. Now go back for the monkey.
Get a running start and roll into the pillar the monkey is on. Once more and the cage falls. However, you seem to have awakened a couple Bokoblins. Take them out (don't worry about the monkeys, they cant get hurt).
Follow the monkeys up towards the door. They form another chain. Swing across and go back through the Flooded Room into the Temple Hub.
--== Room 2: Temple Hub ==--
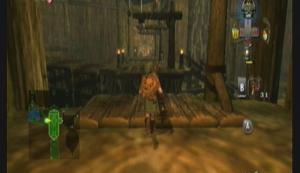
Temple Hub
Enemies: Deku Baba, Bombling
Chests: 2 (not reachable)
Quest items: 1 (not reachable)
Jump across to the center platform, then use the other monkey to get to the eastern platform. Burn the web and enter the door.
--== Room 7: Deku Like Room ==--
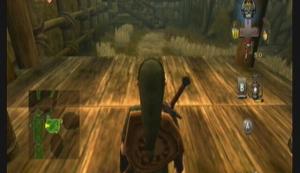
Deku Like Room
Enemies: Deku Serpent, Deku Like, Bombling, Walltula
Chests: 1 (Heart Piece)
Quest items: 0
*shudders* I hate this room. Deku Like are evil if you don't know how to deal with them. Walk down to the floor and watch the Deku Serpents. They're like Deku Baba, only bigger and will chase after you if you cut their stems off. Keep heading straight and go up the ramps on the left.
Make note of the Deku Like you see on your way up. Keep going till you find a Bombling. Hit the bombling to ignite it, then pick it up and head across the platform on your right (it should take you above the Deku Like). Toss the bombling into the gap to kill the Deku Like, allowing you to pass.
Jump across and head right. You'll see some vines with Walltula on them. Shoot them down then jump across to the vines. Climb up. To the right of the door is another bombling. Activate it and toss it in the gap behind it (south), killing the Deku Like there as well.
Jump down to claim your prize: Heart Piece (H02, 3 2/5)!

H02, 3 2/5
Now climb back up to the vines and through the door you pasted (if you end up in the Windy Room, you took the wrong door).
--== Room 8: Monkey #3 ==--
Monkey #3
Enemies: Big Deku Baba, Bombling
Chests: 0
Quest Items: 1 (monkey)
While it may look scary, Big Deku Baba is really easy to kill. Just take out the Deku Baba sprout first (wait for it to attack and roll out of the way. It will pause for a moment before going back up. Hit it with your sword a few times), then search the room for a bombling and throw the bombling into the Deku Like. Pick up your key.
Use the key to free the monkey in the back of the room.
--== Room 7: Deku Like Room ==--
Deku Like Room
Enemies: Deku Serpent, Bombling
Chests: 0
Quest items: 0
Back in here, look ahead across the gap. You should see a bombable rock on a platform. Grab the bombling on your left (the one you used for the heart piece). Jump the gap and toss the bomb by the rock. Either land it beside the rock (hard to do) or wait and throw it so that it explodes in mid-air beside the rock (dangerous).
Either way, it will clear the rock and reveal a door. Enter.
--== Room 9: Monkey #4 ==--
Monkey #4
Enemies: Tile Worm, Skulltula
Chests: 3 (20 rupees, small key, one not reachable)
Quest items: 2 (small key, monkey)
This room is annoying if you don't know about the tile worms. The tile worms hide under the tile on the floor below and take joy in sending you flying through the air if you step on them.
But first things first. Take the left ramp down. You should see two pillars. One of them has a chest on top. Roll into it a couple times to get a small key.
Now for the tile worms. You cant kill them with your current equipment, so you'll just have to avoid them.
On the thing strip going across the water, take the right path. No worms on it. Back on land, approach the southwestern torch from the west and light it. Now approach the northwestern torch from the south. Light it and turn east. Go straight for the stairs that raised up. At the top of the stairs, pause and use the slingshot to knock down the skulltula. Finally, free the monkey.
On your way down, jump off to the right. Use the vines to get up to the other chest that contains 20 rupees.
And we're done here... for now. Go back to the Temple Hub.
--== Room 2: Temple Hub ==--
This is just an honorable mention so you don't get lost. Follow the monkeys through the northern door into the Windy Room.
--== Room 3: Windy Room ==--
Same as above. Use the monkeys to get across the gap. Break the Deku seeds to get some health if needed. Enter the door for the temples mini-boss.
--== Room 10: Mini-Boss: Ook ==--
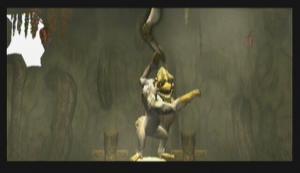
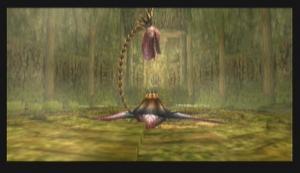
Ook
This boss is really easy. Firstly, watch out for the Deku Serpents he knocks down from the ceiling from time to time.
To defeat Ook, you have to knock him down. Looking at the pillars, you would think just roll into them like we have been so far, but it's not that simple. You have to follow him around and wait for him to stop and throw the boomerang, THEN roll into the pillar he's on. It'll knock him off-balance and his own boomerang will knock him off the post. His only weak spot is his buttocks, so you'll have to get behind him after he falls. A couple more times and he should go down.
With him out of the way, you now have the Gale Boomerang!
With this, there are several rooms we need to re-visit to get some stuff we couldn't before, then we move on to the rest of the temple.
But first, we need to get out of this room. Take out the boomerang and target the fan over the door. Hit it a few times to lift the gate.
--== Room 3: Windy Room ==--
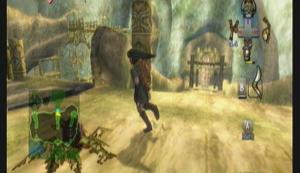
Windy Room
Enemies: Kargarok, Bokoblin
Chests: 0
Quest items: 1 (monkey)
Head left. To get the bridges to move, target the fan on top with the boomerang. They wont stay in that position for very long, so run across (if you get stuck on one, just target the fan again).
This next platform has a monkey in a cage guarded by a Bokoblin. Take out the Bokoblin, then use the boomerang to target the web above the cage. The boomerang will cut the web and drop the cage.
All right, you have two more bridges to get across before you're back in...
--== Room 11: Beku Like Room ==--

Deku Like Room
Enemies: Deku Serpent, Bombling
Chests: 0
Quest items: 0
Cool huh? Head east, into Monkey #4's room (with the tile worms).
--== Room 9: Monkey #4 ==--
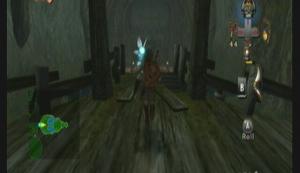
Monkey #4 (tile worm room)
Enemies: Tile Worm
Chests: 1 (heart piece)
Quest items: 0
Jump down. If you want some revenge, the boomerang has the ability to rip the tile worms right out of the ground and land them at your feet, allowing you to dice them up.
Anyway, once you're back on the ground just before where the monkey was, use the boomerang to put out the fire, rather then light it (and after all the work we went through...). Once the fire is out, the platforms drop to reveal a chest. The chest contains a heart piece (H03, 3 3/5)!
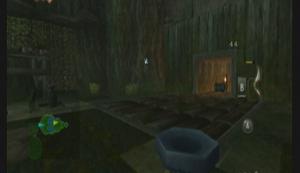
Heart Piece H03, 3 3/5
Ok, we're done here. Go back to the Temple Hub.
--== Room 2: Temple Hub ==--
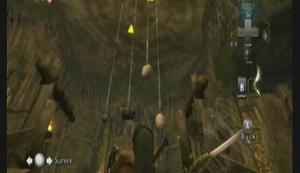
Temple Hub, hanging chest
Enemies: Deku Baba, Bombling
Chests: 2 (Compass, 20 rupees)
Quest items: 1 (Compass)
Match your screen with the picture above. Use the boomerang to knock down the chest. This gets you the Compass. Now use the boomerang to put out all the flames around the central platform. Just as before, this lowers the wooden stairs, revealing a bombable rock. Use the bombling beside it to detonate the rock and score 20 rupees from the chest.
K, we're going west now, into the Flooded Room.
--== Room 4: Flooded Room ==--

Flooded Room
Enemies: Deku Baba, Bombling
Chests: 2 (Boss Key, 10 rupees)
Quest items: 1 (Boss Key)
Mind the Deku Baba and get across the gaps on the right. Ignore the door and go left, over the gap. Turn again (facing south). You should see some fans on pillars and an interesting carving on the ground.
Take out the boomerang and lock onto the fans in the order carved into the ground (front left, front right, back left, back right). You have to chain the targets, that is, point at one and press Z, then point at another and press Z, ect, in order until all 4 are targeted. Release to raise the gate.
The chest contains the Big Key (AKA: Boss Key). You'll need this.
Still not done here yet, though, as your compass still shows one chest in this area. Drop down into the water west of the big chest. There should be a small alcove in the wall with a chest containing 10 rupees.
Ok, now we're done. Climb out of the water (there are vines and steps around the room that will let you climb out) and take the northern door into the Windy Room.
--== Room 3: Windy Room ==--

Windy Room
Enemies: Kargarok
Chests: 0
Quest items: 0
Go across the bridge and into the Revolving Bridge room.
--== Room 5: Revolving Bridge ==--
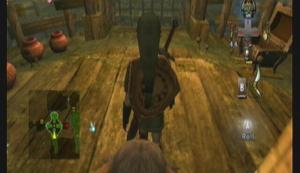
Revolving Bridge
Enemies: Bokoblin
Use the boomerang to swing the bridge to you. Once on the bridge, use the boomerang again to swing the bridge back west-east. Two Bokoblins will attack, they're no threat. Take the east door.
--== Room 12: Monkey #5 ==--
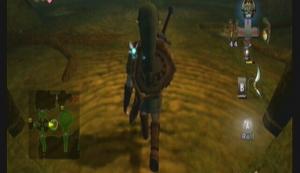
Monkey #5
Enemies: Skulltula, Deku Like, Bombling
Chests: 0
Quest items: 1 (monkey)
A few steps in and stop to look up. Use the boomerang to take down two Skulltula that have perched on the ceiling (one at a time, of course)
Take out your lantern. Under the Skulltula that was hanging in the north was a small web covering a hole. Use the lantern to burn the web (just stand on top and press B). You'll fall down right beside a monkey. Break his cage.
If you turn about and face east, you should see a pillar with some vines on it. That's your way out. Careful jumping down, however, as there is a Skulltula on the ground below, as well as a Deku Like in the south.
Once up and out, go back to the room before (Revolving Bridge.)
--== Room 5: Revolving Bridge ==--
Get on the bridge and spin it to enter the northern door.
--== Room 13: Monkey Gorge ==--
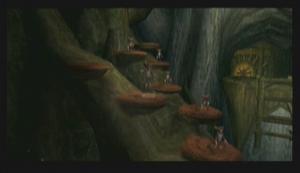
Monkey Gorge
Enemies: Walltula, Bokoblin
Chests: 0
Quest items: 0
There should only be two platforms missing monkeys. If there are any more missing, you missed a monkey somewhere.
Now then, take the right path onto the swinging bridge. Spin it with the boomerang to face another swinging bridge. Get on, then spin it to get off onto the eastern platform.
Take out the Bokoblin, then use your slingshot to get rid of all 3 walltula on the vines in front of you (if you didn't get three, reposition yourself to get a better view. One of them is high up on the southern edge.)
Climb both sets of vines till your at the top. Another Bokoblin guards the door.
--== Room 14: Monkey #6 ==--
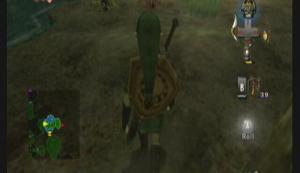
Monkey #6
Enemies: Bombling, Deku Like, Deku Serpent
Chests: 1 (small key)
Quest items: 2 (small key, monkey)
Take out the Deku Serpents right in front of you. Over to the north, in the water, is a Bombling. Over to the south, a Deku Like. Target the bombling with the boomerang to have it bring the bomb to you, then throw it in the Deku Like. Jump over and grab the chest for a small key.
Next, climb the stairs (Deku Serpent at the top) and note the bombable rock above the vines. You cant set a bombling up beside it, too tall. So, lock on to the bombling with the boomerang, then turn and lock onto the rock. Let it fly. It should pickup the bombling, then slam it into the rock.
Climb the vines and open the door to release monkey #6. One left!
--== Room 13: Monkey Gorge ==--
Jump down below and navigate the swinging bridges to get back to the southern door.
--== Room 5: Revolving Bridge ==--
Use the bridge to enter the western door.
--== Room 15: Monkey #7 ==--
Monkey #7
Enemies: Tile Worm, Skulltula, Walltula, Deku Serpent
Chests: 1 (20 rupees)
Quest items: 1 (monkey)
Start out by randomly launching the boomerang over the tile worm tiles. You should pull 3 out.
There should be a cave to the west. Enter. Drop down at the end to fight a Skulltula. Look for some vines on the wall. Take out the Walltula on them and climb up.
A Deku Serpent hangs from the ceiling, but don't worry about it for now. Turn and face west. Use the boomerang to target the two fans on either side of the gate, thus releasing the monkey.
Turn east. NOW worry about the Deku Serpent. Use the slingshot to shoot him down and finish him with your sword. Walk through the doorway and head left around the room. Jump the gap to get to a chest containing 20 rupees (we're raking in the money here!).
Exit into the Revolving Bridge, then head north into Monkey Gorge.
--== Room 13: Monkey Gorge ==--
You should see a cutscene where all the monkeys form a chain, allowing you to jump across. If you don't, you didn't free all the monkeys.
Anyone every play with a Barrel of Monkeys when they were little?
Use them to cross.
Don't enter the door just yet. Bring out your bottle. Use whatever you had in it, because this is WAY better. The jar on the right contains a pink fairy. Pink fairies can revive you up to 8 full hearts after you die, meaning you don't even have to have it set to an item slot. Break the jars. Once the fairy is out, scoop it up with your bottle. The other jars contain some hearts, so break them if you need healing right now.
--== Room 16: Boss Fight: Twilight Parasite: Diababa ==--
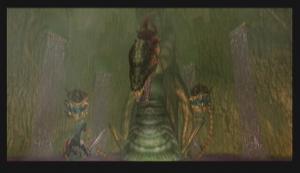
Diababa
It only has two attacks:
- the heads will try to ram you. Just stay a little ways back and you don't even have to dodge, as they cant reach you.
- The main head will spray an acid substance that can do fair damage, but it sprays it in a zig-zag pattern that's easy to predict.
Set your boomerang, as that's the only item you'll need for this fight. Target one of the bomblings in the water, then target one of the Deku heads and let it fly. The head should eat the bomb and explode. Do the same for the second head.
The main body comes out now, and you're without bomblings... until *dun dun dun dun* Ook to the rescue! Whenever Ook swings by, target him, then target one of the (smaller) heads. Once both small heads are down, do the same with the large head (make sure you target the head, not the body).
The main head should fall in front of you, allowing you to chop at it's eyeball. After a few swings, it will get up and the battle will start again. Do the same just one more time should be enough. This time, look to the A button to give the prompt “Finish” when attacking the eye.
And that's it. :)
Midna will appear and tell you to pick up your heart container (4 3/5). Talk to her again to be warped out (just don't miss the heart container!)
--== Onward to Hyrule! ==--
You get warped out back to the spring. Go north to the lantern salesman, and use the path north from his house to get out in Hyrule and start on your way to the next temple!
You're journey is just getting started...
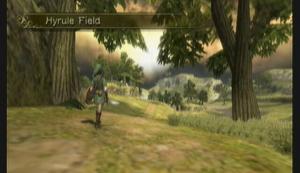
Hyrule Field
Well, here you are. Your first trip into Hyrule Field. Don't worry, in just a few more hours play time, you'll be very sick of this place.
Anyway, we have a few little things to grab here before moving on with the story.
First, walk down the path. Just before you get to the bridge, there is a tree to the left. Look up in the tree (from a small distance) and you should see a heart piece on a lower branch. Use the boomerang to snatch it down.
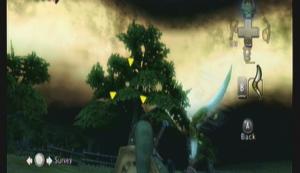
H04, 4 4/5
If you're having problems finding it, wait till night when its easier to spot. It'll make your next few finds easier as well.
Next is a Golden Insect.
Head east. Jump off the ledge. There should be a plateau in front of you with some trees on top. On the ground between the plateau and the ledge are a couple trees. The southern tree has a Golden Insect on the side of it.
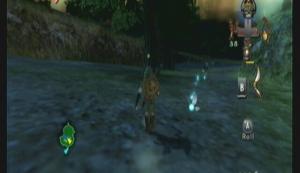
Male Beetle
Last one. Another Golden Insect. Its on a plateau on the western edge of the area. Check your map against this picture:
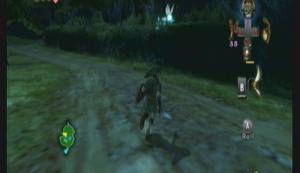
Female Beetle
Use the boomerang to get it down then chase it until you can catch it.
Alright, we're done with this area. Head west, back into the twilight.
Oh, and you'll get stopped by the Postman on the way. He gives you all sorts of letters throughout the game, only a few of which are even worth reading >.>
So, back in the twilight. There are some things to get in this area, but we cant when in Wolf form, so later. For now, just walk up to the stick in the road ahead and sniff it. Midna says use your senses to track down the kids, but come on, really? There's only one path through the area...
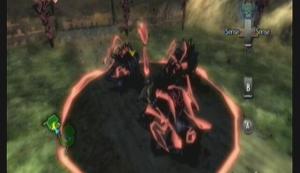
More Shadow Beasts ahead
Keep down the path till you run into some more Shadow Beasts. Take them out with Midna as always, only to find the bridge is out. Lovely. But, Midna proves useful again and introduces you to the concept of warping! Yay! There are some catches, but for now just warp to N. Faron Woods (remember?). Once there, walk up to the bridge and cue Midna to warp it back.
As cool as this is, you'll only do it a few more times
With the bridge in place, walk across and keep on the path. When the path splits, take the left (west) path. Once up to the gate, dig in the soft dirt on the left and enter the next area.
Kakariko Village
The last hundred years have not been kind to this place...
Course, doesn't help that it's covered in twilight.
Well, no sooner then you walk in, you get attacked by three more Shadow Beasts, but it's ok now that we know they serve a purpose. Dash past the first two to take out the lowly straggler in the back, then use Midna on the remaining two.
And where there is twilight, there is an all-powerful spirit that couldn't protect itself... Time for more insect hunting! Look at the bright side, after this, you'll only have to do this one more time!
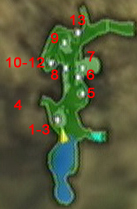
Map
1-3: They are inside the house. Go around to the back and get in the wooden cart there to have a Midna prompt. Once on the roof, stand on the hay to fall through. Use your senses to have a great reunion with your friends, but more importantly learn about the basement. Pick up the stick and light it. Now get up on the ledge and run around the rim of the room, jumping the gaps and lighting the candles.

make sure you light the right end of the stick...
Go into the gap that opens. Once below, the insects are easy to find. At the end of the tunnel there is a another prompt to get out of the cave.

Twilight doesn't suit this place either...
4: after the last set, you are now in Kakariko Graveyard. The insect is hiding in the ground. Dig him up and swat him. Exit in the east.
5: It's in the house again. There is a small nook on the southern side of the house between it and the cliff. Go there and you'll see a space you can crawl through.

Here
Once inside, the insect is on the wall right above the hearth. He is NOT on the highest section in the house. Use the same hole to crawl back out again.
6: Once out, a few feet to the south is a ramp that leads along the cliff. Follow it up. At the end, jump off and onto the wood platform (just like the sign tells you not to).

In twilight, yes means no!
Enter the door that's right in front of you. The insects are in the hearth on the ground. You'll have to smoke ‘em out. Grab a stick and light it on the torch, then light the logs. He'll come running out. Don't exit just yet.
7: One more in this house. By the torch is a doorway to a new area. There are some enemies in here, but nothing to worry about. There is a chest under the stairs that has 20 rupees, however.

Chest and stairs
Take the stairs in the south to the upper level. The insect is in a bedroom on the left, over the bed. To get out of here, go back to the first room and use the table and shelves to climb back up and out the window.
8: to get to this insect, you'll have to start at the start of the row of houses south of it. You'll see a ramp that you can run up, and can then jump from roof to roof till you reach the end.

here
Some more unsteady hay roofing will let you in. Push the create at the foot of the bed to reveal the insect. Get near the bookcase to prompt your way out.
9: He is in the bomb shop. To get in, you'll need to climb onto a platform just north of the shop, then jump from there through a window into the shop.

here
Wind up to the top. The insect is behind a bookcase. Dash into it to tip it and reveal the insect. Climb onto the shelf, and from there to the platform with the window above it to get out.
10-12: you should now be on the roof. Head around northwest to the cliff to see a insect run off into that shed. Follow it in.

Follow the leader
They're in the hearth again, so you'll have to light it to get them out. However what you don't know is that this is a bomb shed... yeah. After officially lighting the fuses of dozens of bombs, crawl back out and watch the fireworks. Well, at least you killed the insects...
13: Follow the path on the cliff upward to your final objective. At the very peak is a building. Dig in the dirt on the side. The insect is in one of the vases. Exit and jump down off the cliff.
Wait, that's only 13 insects... there are 16 total right? Yeah, we're not crazy. Its just that the spirit forgot to mention that the other three are at the top of Death Mountain. Take the northern (not northeast) path out of town. I'm not going to bother with a map, as this area is VERY linear.
14: Use the ramp on your left to prompt up to the path above. Just keep heading north till you reach the first dot. Watch for the steam jets, as they'll blow you aside. The insect is in the ground, you'll have to dig him up. Before you leave this area, note the stone that whistles with the wind.
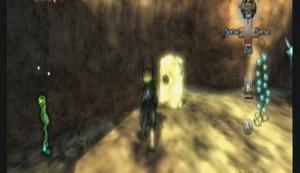
Howling Stone #1

Pattern
Walk up to it and press A to listen. Now use the A button to howl and the joy stick to control your pitch. Match each note to get a concert with the Hero's Spirit from before. Match the pattern once more to instigate another training session once you turn human again (the song is Zelda's Lullaby from OoT. It could also be Song of Healing from Majora's Mask). Anyway, that's for later, so lets move on up the mountain.
15: After a rather twilighty shot of Death Mountain, jump down to get into another fight with 4 Shadow Beasts. This one is special, though, as there is one beast that is hidden off in a corner and the others cannot be lured over to it, so you'll have to take him out first, then get the other three. Once that's done, the insect is on a grate just ahead.
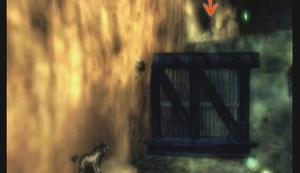
here
After, use Midna to jump up. Time your jump so the geyser doesn't knock you down!
16: Follow the path east. At the end, you'll need to climb the ramp of ruble near the edge and use Midna to prompt your way up. The insect is in the hotspring, down below on the right.
And that wraps up the insects.
You have to go on a little journey before you can enter the temple. A journey that includes... sumo wrestling with old Gorons! Yep.
Well, lets get started. Go back up Death Mountain. You'll get attacked by a Goron and thrown off. Pack up your shame and go back out into town, to be told that Bo has a secret that he used against the Gorons.
Start heading out (south) of the village, when Epona comes out and zips past you. Link will grab on automatically the first time (if you fall off, you'll have to find a way to approach her an get back on. It's doable, but hard). Use the prompt commands and press left/right on the joy stick in time. At the end you'll get a prompt to press A to finally mount her and stop the rampage.
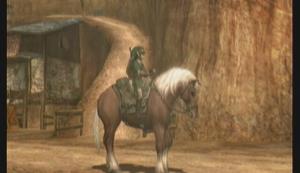
Good girl.
Well, this will make travel way easier to say the least. Head out of the village (south). You'll have to jump the gate.
--== Hyrule Field ==--
Back out in Hyrule Field, we have a couple more things to take care of (three, actually). 2 bugs and a heart piece.
First bug: right over the gate, follow the wall west. You should end up near some trees and flowers. The bug is around this area somewhere (they tend to fly around, so an exact location is hard). If you have to, mill around till night when you can easily spot them.
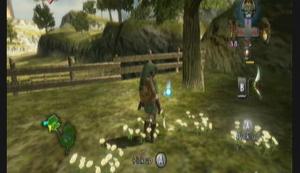
Female Pill Bug
Second bug: Just over the bridge you warped. Literally.
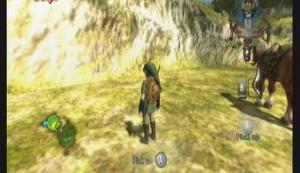
Male Pill Bug
Heart Piece: Off the ledge in the east on the southern side. There is a pillar sticking up out of the void. Its on top (use the boomerang).
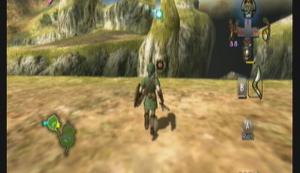
H05, 5 0/5
Now that you have an extra full heart, head back to Ordon Province.
--== Ordon Province ==--
Before heading to town, don't forget the Hero's Spirit is waiting!

Secret Skill 2: Shield Attack
After a round with him, and a new skill that is REALLY going to come in handy here in a bit, head into town and talk to the mayor (he is in the southwestern side of town).
After a couple questions, he challenges you to a sumo match (...it makes sense once you watch the scene). You have to beat him twice before you get your prize. The game is played out like rock-paper-scissors: slapping -> dodging -> pushing -> slapping. The only move that can actually push your opponent out of the ring, however, is pushing. The other two just make an opening for you. I find the easiest way to win is just jam down on the A button repeatedly. It might take a few tries, but normally works.
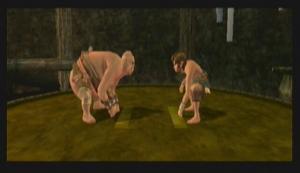
Something about this just doesn't seem right...
After the fight, you learn that he cheated the Gornons by using Iron shoes, and gives you the Iron Boots, which you will be using a lot throughout the game.
Well, you're done here, but there's still a heart piece to be found in Ordon. Take Epona to the ranch (south of the mayors house) and talk to your friend. At first he just talks, but the second time he asks you to round up his goats again. I *think* you have to beat a time limit of 2 minutes to actually get the heart piece, but I've never come in at over 1:40, so I wouldn't know. Just try your best. Once all the goats are in, talk to him again to get your prize.
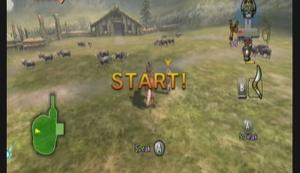
H06, 5 1/5
Alright, now we're finished. Go ALL the way back to Kakariko Village.
Honey, I'm home!
He's back and ready to steal your friends again. Equip your slingshot and give chase out the north end of town. Jump the gate to get into a very good horse battle.
This takes some practice, but it's actually really fluid once you get it. Basically the same as on foot, only you're moving a lot faster and aren't quite as maneuverable.
Little Bollbo will ride along side you and try to force you away from King Bulblin. Use your sword to knock them away (spin attacks work well). When they are in front of you, you can use your slingshot to knock them off. Your slingshot wont work on the King though.

Yeha!
To catch the king, you have to use your dash to get up along side him. Use them with good timing to get up to him, hack a few times while waiting for a couple to recharge, then use them again to keep pace. Keep doing this, and in about 10 blows he retreats to the bridge.
The bridge battle is actually a lot harder. First, you should know the basics:
1) if you touch the king with anything but your sword, you die via falling off the bridge.
2) you cannot leave the bridge till after the battle.
3) every death costs you 1 heart and the bridge battle starts over till your out of hearts.
4) hits on his war hog don't count, you have to hit him.
Epic
Ok, now to win this fight, you simply have to land about 2 blows on the king. To do this, charge down the bridge hugging one side (left or right) then, at the last second, dodge in the opposite direction and do a spin attack. Once at the other side, stop Epona and pull back on the joy stick to quickly turn about and start another run.
--== Kakariko Village ==--
Alright, time to get back to what started this whole mess. Real quick here, we need a new shield, one that wont burst into flames. Malo Mart meets all your heroic needs! The first building on the right side, with Malos picture on it. Try to pick up the shield and Malo will yell at you. They only thing you really need is the Hylian Shield (200 rupees. Hope you've been saving), but if you have an empty bottle some red potion wouldn't kill you.
Onward to Death Mountain!
--== Death Mountain ==--
Hope you enjoyed the easy time you had here as Wolf Link, because it just got a whole lot harder. Climb the net. At the top is a Goron that charges you. Quickly equip the iron boots and wait for the A prompt. Press and hold A to throw him aside. You'll be doing this A LOT (five times) all the way up the mountain, so keep the iron boots handy.
At the location of the howling stone is a bunch of archers. You can ignore them for now and just run past. Rocks will start raining from the sky, so watch for shadows. Note how the Goron jumps in the cutscene, because that's what we're going to be doing for a bit.
Walk up to the Goron on the left (about the time you get to him, a huge rock will probably fall from the sky. Don't worry about it for now), anyway, use the shield attack to stun him, then give him a whack to make him curl up. Hop on and position yourself facing the ledge behind him. You'll rocket into the air and land on the ledge.

Wheee~
Do the same to the Goron on the left. Oh, and watch for gyssers, they can push you over the edge. Use the iron boots to get through them without falling.
Through the cave is another jumping Goron. Once on the upper path, use the boots to get through. You enter another cave with another rolling Goron you'll need to toss aside.
The next two jump have very narrow margins for error, so be careful.
Once up top, enter the doorway. The old Goron will come out and challenge you to a sumo match. The first match you get tossed out, but then equip the iron boots and request a rematch. Beat him once to gain entrance to the Mines.
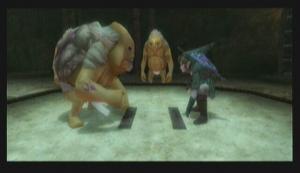
Again with the wrongness...
Before entering the mines, however, try to exit the area and you'll be stopped by a Goron that tells you to take the elevator. Take him up on the request and use the iron boots to activate the switch.
Once down, go both east and west and push the stones away from the entrances. This will allow easy access later. Take the elevator back up and enter the mines.
Goron Mines
Goron Mines favors magnetic and switch based puzzles.
--== Room 1: Entrance Room ==--
Enemies: Toadpoli, Torch Slug
Chests: 1 (20 Rupees)
Quest items: 0
Navigate around the path to the left. Now carefully jump onto the platform in the center. Turn left and jump to the next platform (wait for the pillar of fire to die down first!). cross the rock “bridge” to the next platform then jump to the main land.
Walk to the left side and into the steel cage. Use your sword to break the wooden barricade and proceed forward. Break the wood barricade ahead; by now you should see the flame pillar blocking your path. Turn around and look for a button in the floor on the west side of the cage. Stand on top of it and equip the iron boots; this should deactivate the flame. Now unequipped the boots and run past the flame (it will only stay deactivated for a limited time). To the left is another button. Equip the iron boots to deactivate the next flame. This time, run past the flame, then turn around and cross the bridge, passing the flame again (if you run out of time and don't make it, there is a ladder to the east, climb it and jump back down to the button).
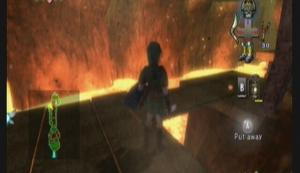
Tic-Toc
Climb the ladder ahead and jump to the next platform. Open the chest for 20 rupees. Now jump back and turn east. Jump across and turn south. There should be another button ahead. Use the iron boots to deactivate the flame blocking the path to the north. Run back across and past the flame before it reactivates (watch out for the slug just before the flame).
Follow the path around. Before jumping down to ground level, look north. You should see a small platform hanging out the side of the wall beside the door. Jump on it and equip the iron boots to lower it and unlock the door. Go through the door.
--== Room 2: Electro-magnetic Cranes ==--
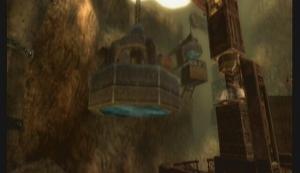
Electro-magnetic Cranes
Enemies: Boblin
Chests: 1 (small key)
Quest items: 1 (small key)
Alright, walk forward and turn left (west). Down the ramp and fight the three Bolblins. Open the chest of a small key . Walk back up the ramp and this time go east. Up the ramp and HOLD IT RIGHT THERE! You are now faced with a series of 4 jumps. Be careful! The platforms rotate. Wait for the platform to rotate flat and lock in place then quickly jump on it then off it to the central platform. Do the same for the next. Enter the door to the right (east) (KEY 0).
--== Room 3: Quick-jump Room ==--
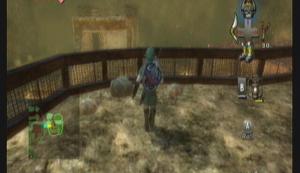
Quick-jump Room
Enemies: Didongo, Torch Slug
Chests: 1 (not reachable)
Quest items: 0
Ok, to the right, down the ramp. You can kill the didongo if you want, but there isn't a need. Be careful and time your jumps as to not run into a pillar of fire, jump west, west, north, west. You should now be on solid ground with another didongo, you should kill this one. Now go to the northern side of the platform and jump east, east. Now you're on land again. Follow the wall until you come across a chain sticking out. Grab the chain and pull the wall back along its track. Pull it all the way back and hold it there; now watch through the steel cage off to the south (in front of you), you should be able to see a pillar of fire come up every so often. Wait for the fire to shoot up into the air for a sec, then let go of the chain and run back to the island you jumped here from, then jump again onto the central platform. Turn east jump for the platform to the island then to the door without pause. If you are fast enough, you should reach the door before the wall you pulled out closes. If not, go back and try again.
--== Room 4: Water Room ==--
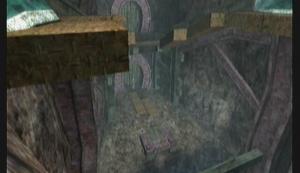
Water Room
Enemies: Torch Slug
Chests: 0
Quest items: 0
This room is very simple. Run to the edge and jump in the water. Equip the iron boots and sink to the bottom. Now look for an opening in the steel fence and go through. Walk forward and step on the switch. This should activate a magnet, thus pulling you out of the water. DON'T UNEQUIP THE BOOTS UNTIL YOU ARE RIGHT SIDE UP! Walk around to the top of the magnetic slab and enter the door.
--== Room 5: Old Guy #1 ==--
Old Guy #1
Enemies: 0
Chests: 2 (20 Rupees, Map)
Quest items: 3 (Big Key Shard, Map, Ooccoo)
Talk to the old guy in the middle of the room, he will give you the first part of the bosses room key. Now open the chest behind him to find the map. Just to the left there is another chest containing 20 rupees. Onward! Up the ladder in the south east and around to over the door we entered from. On your way, pick up the rattling bottle to re-unite with an old friend Ooccoo. Enter the door.
--== Room 4: Water Rooom ==--
Water Room
Enemies: Torch Slug
Chests: 0
Quest items: 0
Equip the iron boots and walk along the right magnetic slab. Watch out for the slug as it can create a fire sphere around it, if you touch it you'll fall off the wall. After walking off, take off the boots and enter the door ahead.
--== Room 3: Quick-jump Room ==--
Quick-jump Room
Enemies: Didongo, Torch Slug
Chests: 1 (Heart Piece)
Quest items: 0
Walk forward and equip the iron boots on the button. This will activate a magnate overhead and pull you to the ceiling. Walk around the path to the right (north-west) (watch out for slugs) to obtain a heart piece. Now back to the left (south-east). You should see a small (magnetic) path that leads to over the door in the west. Follow this path and enter the door.
H07, 5 2/5
--== Room 2: Electro-magnetic Cranes ==--
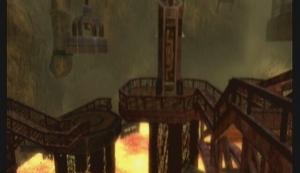
Electro-magnetic Cranes
Enemies: Boblin
Chests: 0
Quest items: 0
Walk down the ramp and kill the 4 Bolblins. Activate the switch Then crane above should now rotate from the entrance door, to near where you are not, to a platform further north. Walk over to where it stops near you, equip the iron boots and take a ride to the northern platform. One it stops, take off the boots and fall to the platform. Follow the ramp up. Kill the two Bolblins and two fire bats that come after you. Activate the switch to activate another crane. This one will take you to the northern most platform. Kill the two Bolblins and any remaining bats. Go through the door.
--== Room 6: Underwater Adventure ==--
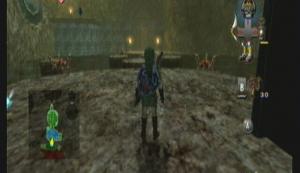
Underwater Adventure
Enemies: Tektite
Chests: 2 (20 rupees, small key)
Quest items: 1 (small key)
Kill all 4 Tektites that come after you. Jump in the water and swim northwest until you see a chest. Sink down and open it to find a small key. Next, jump off the east side of the platform you came in on. equip the iron boots and sink to the bottom. Look for an opening in the steel fence. There is a block in your way, so push it out of the way. Enter the steel cage and take off the boots. Float to the surface and climb up to dry land.
Climb up the small step and activate the switch. Walk over to the magnet that activates. Follow it north and fall off at the end. Walk west and activate the next switch. Now walk over to the steel grate beside you, equip the boots and jump off toward the magnate. Follow the magnetic slab around and fall at the end. Use your sword to hit the diamond shaped switch. This will open the way to the door below. Jump off and run through.
--== Room 7: Beamos ==--
Beamos
Enemies: Beamos, Bolblin
Chests: 1 (Heart Piece)
Quest items: 0
(this isn't really its own room, as its connected to room 6, but whatever)
Kill the two Bolblins. Watch out for the Beamos, as they will shoot lasers at you. Climb the magnetic slab in the east. Follow it up and take a right for a heart piece. Climb back up and take a left. Follow the platform around and cut the rope with your sword. Jump down and take the newly opened path. Enter the door (KEY 0).
H08, 5 3/5
--== Room 8: I_hate_archers ==--
I_hate_archers
Enemies: Bolblin, Beamos
Chests: 3 (small key, 2 not reachable)
Quest items: 1 (small key)
Walk forward and break the wooden barricade with your sword. Follow the path around and take the first two rights. Watch out for the moving stone statue, open the chest to the right for a small key . Go back out onto the bridge and run straight across to the door ahead.
--== Room 9: Flipping Platforms Magnets = Fun ==--
Flipping Platforms Magnets = Fun
Enemies: Tektite
Chests: 0
Quest items: 0
Jump across the platform ahead when it locks in place. Turn right and go up the ramp. Hop onto the small raised platform. Note that the flipping platform ahead is to long to cross by just running when it locks. Instead, run across to the nearest (you may have to wait for it to flip over) magnetic strip, equip the iron boots, then wait for it to flip back over, unequip the boots, and start running again. Repeat until you are on solid ground. Enter the door.
(Note: if you fall off, you can get back up via a ladder in the north, but you'll have to fight through some Tektite)
--== Room 10: Old Guy #2 ==--
Old Guy #2
Enemies: 0
Chests: 1 (10 Rupees)
Quest items: 1 (Big Key Shard)
Walk forward and talk to the old man to get another piece of the key. there is a chest behind and to the left of him that contains 10 rupees. Now that that's done, take the ladder behind the old guy and exit through the upper door.
--== Room 9: Flipping Platforms Magnets = Fun ==--
Turn right and follow the magnetic slab around to the next door. Drop down and enter the door.
--== Room 11: Mini-boss: Guardian ==--
Guardian
Enemies: Guardian
Chests: 0
Quest items: 0
Walk forward and activate a cut scene. Now, run forward until you are just a few inches from the goron, equip the iron boots and wait for him to hold his hands up in the air. When he does, attack him with your sword. Hit him 5 times in a row to make him fall over and curl up in a ball. When this happens, quickly press and hold A. you will grab him and throw him behind you. Repeat until you throw him off the edge 3 times.
After the battle, the platform will rise back up. Enter the door to the south.
--== Room 12: Prize Room ==--
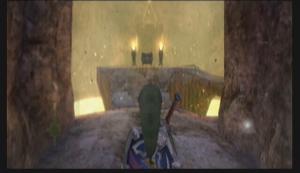
Prize Room
Enemies: Bemos, Torch Slug
Chests: 2 (Hero's Bow, Compass)
Quest items: 2 (Hero's Bow, Compass)
Walk forward and open the chest. The chest contains the hero's bow. Use it to pick off the rope holding up the gate ahead. Enter the passage and run straight to the other side. This will activate the Beamos. Use the bow to pick off the red gem in there eyes, this will deactivate them and allow you to push/pull them.
Grab the statues and pull them back. each one hides a treasure. Enter each room to claim a prize. Just don't leave until you have acquired the compass. After, enter the door on the west side of the room.
--== Room 13: Old Guy #3 ==--
Old Guy #3
Enemies: 0
Chests: 1 (50 Rupees)
Quest items: 1 (Big Key Shard)
Walk forward and talk to the old guy for the final piece of the key. behind him is a chest containing 50 rupees. Exit the room through the same door you came from.
--== Room 12: Prize Room ==--
This time, exit the room by the door in the south.
--== Room 14: Ceiling Ambush ==--
Ceiling Ambush
Enemies: Torch Slug, Didongo, Keese
Chests: 0
Quest items: 0
Take the path right and kill the 4 fire bats that come after you. Roll into the gate ahead to make it fall over. Jump across to the platform on the left. Watch out for the three slugs that fall from the ceiling. Now follow the path up and turn left. There is a didongo on the platform ahead, but more importantly is the slugs on the ceiling over the platforms ahead. Use your bow to pick off all the slugs before proceeding (10 total).
After, jump around the platforms until you are near the gate. Walk up to the switch in the south, but don't activate it yet. Instead, take out your bow and pick off the didongo on the ceiling (about 4 shots to the tail.). Now activate the switch and be pulled to the ceiling. Walk around the magnetic slab until you notice a hole in the wall to the right. Look over to see a diamond switch. Use your bow to activate it, then drop down and enter the door.
--== Room 2: Electro-magnetic Cranes ==--
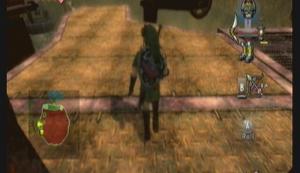
Electro-magnetic Cranes
Enemies: Boblin
Chests: 0
Quest items: 0
Yep. You're back to where you started, just... higher. Go to the right and open the chest for 50 rupees. Now go back and use your bow to lower the gate (aim for the strings). Jump forward and activate the switch. Let the crane take you back around to the northern most platform. Enter the door.
--== Room 6: Underwater Adventure ==--
Jump across the islands and over to the gate. Use your bow to activate the diamond switch and enter the door.
--== Room 7 Beamos ==--
Up the ramp then through the door. You can ignore everything if you want.
--== Room 8 I_hate_archers ==--
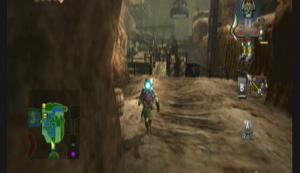
I_hate_archers
Enemies: Boblin, Beamos
Chests: 2 (50 Rupees x2)
Quest items: 0
This time, use your bow to pick off the archers. There should be 7 total. 4 straight ahead, one to the far left, one slightly to the right beside the crane, and one to the far right. After, walk forward and take the first two rights to where the moving stone statue is. Take it out, then pull it forward. Go through the newly opened path and up the ramp. Turn around and pick off the two archers (BE CAREFUL! The barrels ahead are explosive, if they hit them the barrels will explode. Make sure you are not near by). Continue on the path and activate the switch.
Jump down to the platform the magnate hangs over. Let it pull you up, then on your ride to the next platform pull out your bow and shoot the rope holding up the gate. When the crane stops, drop down.
Jump off to the left (north) and follow the platform down. In one of the jars is a pink fairy. You'll want to grab that before you go. Go back and jump to the door.
--== Room 15: The Bolblin Horde ==--
The Bolblin Horde
Enemies: Boblin
Chests: 0
Quest items: 0
Follow the path around, picking off archers as you go. Once you reach the bottom, shoot the ropes holding up the gate again and jump over. Draw your sword and prepare to fight! There is a horde of Bolblins on the other side, and they all rush you at once. Once that's over, enter the large door.
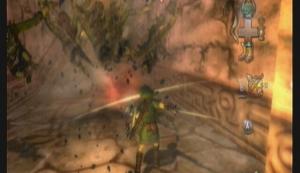
Awesomeness.
--== Room 16: Bosses Lair: Twilit Igniter – Fyrus ==--
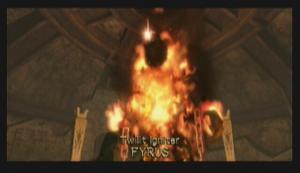
Twilit Igniter – Fyrus
This is it! the boss fight.
Twilit Igniter – Fyrus
Pull out your bow and shoot the shiny stone on its forehead. When he is hit, he will stammer about. Run over to one of the chains, equip the iron boots, grab and pull the chain. He will fall over. While he is down, run over to his head and hit the stone with your sword. Repeat a few more times until he goes down.
His attacks really aren't much, he just flails about mostly. Sometimes, however, he will start to gather energy into his gem stone. When he does this, RUN! He will just incinerate a huge circular area around himself.
Your prize? Another heart container (6, 3/5) and a fused shadow, what else? Now let Midna warp you out.
In need of a refreshment after taking a dip in all that lava? Well, you're about to get more then you could possibly ever use: onward, to the Water Temple!

Kakariko Village
We have some side-questing to do before moving on. A TON of heart pieces and some bugs, plus some stuff that you will actually need.
First, head to Barnes Bombs. (the north-most building on the ground level. It has a Goron standing out front). Talk to Barnes and try to buy a bomb. He'll tell you that you need a bomb bag and sell you a full one for 120 rupees (actually a really good deal), you don't have much of a choice, so pay up. He tells you about using Bomb Arrows, which I'll explain in a minute.
Next, exit out of the building via the window at the top of the store.
From here, take the winding path up again just like when you were hunting insects. At the top should be a Goron.
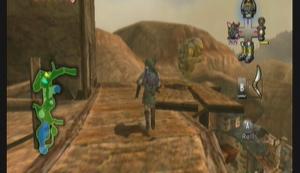
The village lookout
He'll tell you about being the village lookout, and offer to boost you up to the top of the building behind him. Take him up on the offer and aim for the roof. Climb the ladder and talk to the Talo. Say yes and you'll be put into an archery contest with Malo as the prompter.
You'll have to shoot 3 targets: One really close, one slightly farther, and one that's probably the farthest target you'll ever have to hit. To hit the pole that's insanely far away, you'll just have to put your pointer over it and fire, adjust by a tiny amount, and try again.
Hitting it will earn you a Heart Piece and a chance to buy a scope for your bow.
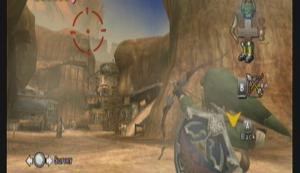
H09, 6 4/5
Next up, head to Malo Mart. He should have the Hawkeye in stock. Buy it and exit the store.
Now for the bomb arrows! To use bomb arrows, set your Bow to B, then point at the bombs and press Z. Bomb arrows use 1 bomb and 1 arrow per shot, so you have to have both in stock to use them.
Head south. To the left of the spring is a cliff with some bombable rocks on top. Shoot them with a bomb arrow to reveal a heart piece.
Use the boomerang to get it down.
H10, 7 0/5
You'll notice some more rocks below them. Blow those up as well and enter the cave. The small boxes in here usually have some high-dollar rupees in them. When you get to the end, jump in the spring. Use the iron boots to sink to the bottom. Quickly open the chest for another heart piece! Unequip the boots and swim up quickly before drowning.
H11, 7 1/5
Alright, I think we're done here for now. Grab Epona (she's by the spring) and exit out to the north.
--== Hyrule Field ==--
You'll be greeted by the postman shortly. After, look for a pile of rocks on the left side of the road. Use a bomb to blow them up and walk up the path behind them.
Keep going up, then you'll drop down and jump over a gap. Climb the vines. Now this is very important, look across left; you'll see some vines and a bombable rock sitting on top of them. Use your bomb arrows to destroy the rock. Now go towards it and jump the gap, grabbing onto the vines. Once at the top, look left to see a chest down below. Carefully jump down to that platform and open the chest for another heart piece.
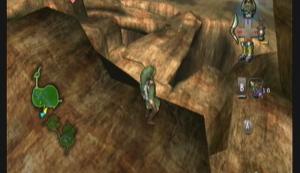
H12, 7 2/5
Jump back to the main road (don't fall in the pit) and get back on Epona. There are several bugs in this area to get. The move around a lot, so it might be best to wait till night when they're easier to spot.
The first one is still in the rocky-dirt area, just to the left of the paths exit.
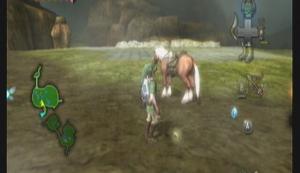
Male Grasshopper
The next is way out in the northeast.
Female Grasshopper
Next is in the archway on the south side of the Eldin Bridge (where you fought the King). Use the boomerang to get it down, then pick it up.
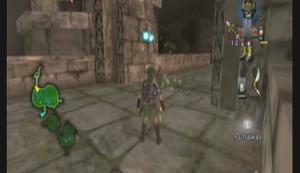
Male Phasmid
Finally, the last one is just across the bridge up above the ledge to the west. You have to position yourself south of the rock and get as close to the ledge as you can without losing site of him.
Female Phasmid
***NOTE: From this point, till when I say otherwise, DON'T SAVE YOUR GAME!!***
Alright, back to the story. Ride Epona to the rocks blocking the path north. Blow them up. A cutscene ensues where the Eldin Bridge is warped out and some Shadow Beasts claim the bridge. Run over and take out the beasts (spin attacks work well). The warp point is now yours, but its kind of pointless right now, considering you'd just fall to your death.
Oh, and reason we're not saving, is that there is a glitch where if you save and turn off your game after the bridge is destroyed, but before you enter the twilight ahead, you'll start back on the other side of the bridge with no way to get back.
So, head north. After a ways, you'll see another curtain of twilight. Enter in.
NOW you can save.
--== Twilight Hyrule Field ==--
Just keep dashing till you find a bag to sniff. Forget the pervious scent and learn this one. Now use your senses and follow the sent for a LONG way.
--== Castle Town ==--
Castle Town
The scent should eventually lead you into Castle Town.
Keep following the scent around town till you enter a building. This is Telma's Bar. Listen in on the spirits just inside the door for a reunion. Well, almost. Now go listen to the guards in the back, and check the map they talk about.
We're done here. Exit out of Castle Town (follow the scent if you have to).
--== Hyrule Field ==--
Back in Hyrule Field, cross the bridge and keep heading east (there should be a path). Follow it around and into the canyon headed south, towards your objective.
--== Great Bridge of Hylia ==--
Great Bridge of Hylia
Follow the path right, over to the bridge. Start running across the obviously oily bridge.
Once the oil is lit, push one of the boxes over to the side and use it to climb over the side.
Wheee~
--== Lake Hylia ==--
The lake is more of a mud puddle right now, but we'll fix that soon (cant have a water temple without water, right?).
Listen to the Zoras right near where you landed first. Run east and listen to the creepy clown guy (Fyer). He'll spot a Shadow Bulblin off in the distance.
Run over to it, only to have it call a Shadow Kargarok. He'll hop on the back and ride around flinging arrows at you. The only way to bring it down is wait for the Kargarok to fly down and try to grab you, then jump attack onto it and start biting. After a couple rounds, it should go down.
Bring him down!
After the fight, the Bulblin falls off. Kill him quickly before he gets back on the Kargarok. After, Midna tames the Kargarok and uses it to take you up to Zora's Domain.
--== Zora's River ==--
This is actually a mini-game later on. Where you aim the Remote is where you head. Use A to get a quick burst every so often. The Bulblin here use Bomb Arrows, but are very inaccurate. The worst they do is topple a pillar that you can dodge easily. Navigate the cave all the way up to Upper Zora's River.
--== Upper Zora's River ==--
There's really nothing to do here but jump down and head northeast into Zora's Domain.
--== Zora's Domain ==--
Zora's Domain
As you can see, it's quite frozen. Sadly, there is no Ice Caves dungeon to go through :(
Oh well. This next part requires pretty much nothing but prompt jumping. Straight ahead is a small ramp of ice. Get on it for your first prompt. Follow the path around for the next. This one is hard because ice will fall off and try to hit you mid-jump, so don't get too hasty with your jumps.
Once you're all the way at the top (sometimes you'll get stopped mid-prompt to activate another one before reaching the top), head into the cave (north).
You'll be ambushed by shadow beasts immediately. Again, this one takes some work, as you'll need to take the one in the back out first, then back around and use Midna on the first two.
Shadow Beasts
Now it's time to unfreeze the Zoras. Use your senses to see all the Zoras trapped in the ice. Use Midna to warp to Death Mountain (remember the large rock?). Walk up to the rock and use the prompt to warp the it back to Zora's Domain.
This is still really cool.
The rock will melt the ice and free the Zoras. Now we go back to Lake Hylia. Follow the water flow down stream.
--== Lake Hylia ==--

This is more like it
Still a bit... twilighty though. You're dropped off right at the entrance to this area's spirit spring.
You know the drill by now. However, these insects are so spread out and convoluted, A) I cant draw a map and B) I don't think this would be possible without a guide.
1: Follow the one you see going up the bridge. He'll end up on what is the main platform in this area.

#1
2: this one north from #1. on your way down, you'll be attacked by some more shadow beasts. The insect itself is on the back of the house.

#2
3: Due south. You cant get there by going straight for him, rather you'll have to do some fancy platforming. He's in the ground.
Up the path
over the gap and the one after
One last gap.
4: All the way over west. You cant miss him. Look around on the platform, however, for some grass. Use it to summon the Kargarok again.
5-8: Heading back up the river, you'll have to dash into the bugs to get them. If you miss one, you'll have to come back later.
9: Listen to the spirit sitting on the steps. An insect will come out from beside her.
Howling Stone: Cross the bridge behind the lady, and follow the path up. The stone is overlooking the water.
Howling Stone #2

Pattern
The song is Requiem of Spirit from Ocarina of Time.
So, moving on, continue upstream (but on land). You'll see some Zoras jump in the river, and we'll be following them soon.
10-11: These are in the water. You'll have to swim over to the lilly pads and use them to jump attack the insects. The tears take a bit to get back up to the surface.
12: On the west side of the lake. Go up the ramp to his dot. Sometimes he's underground.
13: This one is a PAIN. Follow the collage of prompts:
1
2

3
4
5
6
7
Few. Alright, after 7, take the lower path (the one that doesn't require a prompt). The bug is around in the alcove.
14: guess what? You have to go through all those prompts again! Take a flying leap off the edge back into the water and work your way all the way back up to 7, then use the other, upper path with the prompt.
You should be at the top. Head north into the Zora area again. The insect is on the western wall. You cant see him, you'll have to dash into the wall he's on to knock him into view.
15: Remember when I said we are going to be following those Zoras? Now is the time. Head down steam into the Upper River, then fight the current and take the southeastern stream. Once in Hyrule Field, find a way out of the water (should be some stairs), and go all the back to Castle Town (you can still follow the scent if you have to). You'll be attacked by some shadow beasts just outside of town, btw.
Back in Castle Town, follow the scent back to Telma's bar. In the ally outside the bar, the bug is in a box.

15
16: Midna makes a comment about 16, and trust me, these bugs do go out with a bang on this one. Have Midna warp you to Lake Hylia. *theme from Jaws plays* Swim out to where it is on your map.

Feeder of Darkness: Twilit Bloat
This one requires more work then the little insects. Stay on one of the larger platforms. He'll charge up and try to ram into you, which you should be able to dodge. He also likes to swim around, then jump out real fast and ram you.
When he is in the air and kind of moves over you while charged, dodge and wait for the charge to go down. You should have a half-second opportunity to jump attack him and start biting. Do this 3 times, and he'll go back first into the water. Quickly swim over and get on his belly, then stand dead center and use Midna to target all it's legs at once. If you don't do it right, he'll get back up and you'll have to start over.

Paint and go!
With that out of the way, you'll revive the spirit and then bear witness to one of the creepiest cutscenes in all of Zelda O.o
Now that we never ever have to see another shadow insect again... ever *throws party*, we still have some questing to do before the temple.
First head back to where the second insect was, that clown house. Talk to the guy out front to learn it's not really a house, it's a cannon, and currently the only way out of the lake. Pay him his ten rupees and catapult out of there.
You land on another house. Enter the door and drop down. From here, you can exit out to Hyrule Field if you'd like, but there's a heart piece to be had. Turn about and talk to the other clown. Pay him and grab a cucco.
When you jump off, don't try to follow the path. Rather, head straight for the platforms, using the joy stick to adjust your speed (you'll need to hold back for most of the way, or else you'll overshoot). Aim for the platform below the spinning one for your heart piece! I wouldn't go for the spinning one. Not only do we not need the rupees right now, but it would be hard to jump down to the platform below. On your way down the platforms, you can land on all the ones beneath you and open the chests for quite a lot of rupees.
H13, 7 3/5
Talk to the clown again and have him shoot you up. This time exit to Hyrule Field.
Follow the path north a bit and use the horseshoe grass to call Epona. Once on, head south, back to the bridge. There is a Golden Bug that likes to hang out on the southern arch. He can be hard to spot.
Use the boomerang to get him down, then you'll have to chase him till he lands to pick him up.
Male Mantis
Ride across the bridge to another bug. This one likes to sit under the roots of the large tree in this tunnel. Again, use the boomerang to get her down then pick it up.
Female Mantis
Alright, we're done here for now. Head north and exit to the larger section of Hyrule Field.
Couple things to do here. First, head south and pick up another Golden Bug. He'll be in a patch of flowers.
Male Butterfly
One more. Head north a bit. Up on a ledge in the west is the other one. You should be able to see the glimmer from a ways off. Technically, you're not suppose to get this one till you get the clawshot, but some clever boomerang action can usually get her down.
Female Butterfly
And we'll be turning a profit on all these bugs very soon, so don't worry. ;)
If you used the Howling Stone before, you get to learn a new skill as well. Go like you're heading for Castle Town, then head north along the wall. You should see him on the ledge (you can check your map). Climb the vines to learn the Backslice, a very, VERY valuable skill when in the Arbiters Grounds, though you wont be using it much right yet.

Hidden Skill #4
Alright, time to get on with the story for a change. Head into castle town.
Before anything, lets cash in some bugs. Head to Agitha's Castle
Agitha's Castle
Talk to the weird girl in the back and give her a bug. For your first bug, she'll give you the Big Wallet, increasing your rupee capacity to 600 (we REALLY needed that). Talk to her again and give her the matching set to the pervious bug, earning 100 rupees. That's all you'll need for now. Remember, we're going to a temple soon, and there is rupees galore in there, don't want to fill up the wallet before we get in.
Head out and across the street west into Telma's Bar again. You get roped into helping them back to Kakariko Village.
Next thing you know, you're riding to the lake bridge and Bridge Battle: Round 2. Charge on up to see you're old friend has gotten some upgrades.
Round 2: Now with more steel!
You cant hack him with your sword anymore (thank goodness, that was a pain), rather he makes it much easier for you. Just draw your bow and put a couple rounds into him. He'll stumble over the bridge and a drop a couple of keys.
Now for the hard part of this section. Make sure you have your bow and boomerang equipped. The catch here is Boblins will ride up beside the wagon and set it on fire with fire arrows. Your job is to kill them before that happens, and if you miss one, you can put out the flames by targeting the wagon and using the boomerang. Don't worry about running out of arrows, as you just need to run over a patch of grass to pick up 10 .
The first section out of the lake area isn't so bad, as there are just snipers on the cliffs that couldn't hit the broad side of a barn. At the end, unlock the gate and move into Hyrule Field.

Nice shooten tex.
This is where they start riding up on boars, so keep an eye out. Also watch for Kargarok that will also attack the wagon. When you approach Kakariko Village, ride ahead an unlock the gate. If you don't, the wagon will stop and the Boblins will spawn infinitely until you do.
In the village, you learn everything will be fine... and that Telma has a crush... anyway, the queens ghost will appear before you and lead you to the back of Kakariko Graveyard, where you'll be awarded the Zora Armor.
One step closer to the temple, but not yet. Head back to the village, specifically to Barns Bombs. He'll be selling a new type of bomb, the Water Bomb. If you try to buy them, he'll tell you to empty out your bag. Do so and buy 15 water bombs.
Go back to the Zora graveyard and sink down into the water. Use a water bomb on the rock over in the north to open a patch to the lake.
Rock
Last one before the temple, promise. Besides, this one is really important. Go back to the cannon clown and launch out of the lake. Call Epona and head north through the fields, up into the rocky area in the northern-most point, and into Zora's Domain.
You'll need to get past these rocks with a bomb
Inside, head north into a small cave on the right. Blow up the sets of rocks there to grant easy passage later. Jump into the water and ride the fall down. You'll want to swim right, over to the beach on the west side.
Up the ramp to find another Golden Bug. He's hard to catch because he flies around so much (guess that's why they call them DragonFLYS instead of Dragonwalks *rimshot*).
Male Dragonfly
Jump in the river and head down stream. Get up on dry land in the northern part of the area. Before wondering too much, hug the beach's edge and go toward the house. The other Dragonfly is flying around just above the water in front of the house. You'll have to use your boomerang to call her over.
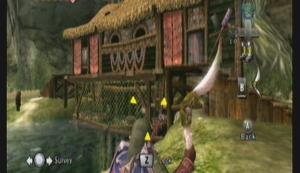
Female Dragonfly
From there, head north till you're ambushed by shadow beasts. Remember to use your spin attack to take out the group.
After, Iza will ask you to help clear some rocks. Take her up on her offer (which includes you getting 30 free arrows and bombs, as well as another bomb bag), and shoot out the rocks with bomb-arrows. She'll give you a boat and tell you to clear out the rocks down river as well.
In the river, just focus on not running into stuff. It wont hurt you, but it will slow things up. After a while, her assistant will show you the rocks to shoot. Clear them and continue down stream back to the lake.
Amazing how things come full circle here, huh?
Swim over to the ominous dark spot on your map and sink down. At the north end of the pit is a rock blocking a hole. On the ground is geyser that is also blocked. Plant a bomb on the geyser to activate it, then set a bomb in the geyser to have it raise the bomb up to the rocks level and blow it out.
Lakebed Temple
In here, it's all about the water level.
--== Room 1: Entrance ==--
Enemies: Bari, ChuChu, Shell Blade
Chests: 2 (Water bombs, arrows)
Quest items: None
Swim through the first area, being carful to avoid EVERYTHING. You cant hurt anything while underwater just yet unless you use bombs, which is a very bad idea.
Out of the water, walk around the perimeter to find the chests. Watch for the Chuchu, the like to drop off the ceiling right on top of you. Head north to the door. To open it, turn around and jump off the edge to grab on to a pulley.
--== Room 2: Stalactites ==--
Enemies: Helmasaur, Tektite
Chests: 1 (bombs)
Quest items: None
Use the bomb arrows (being sure to use your regular bombs, not the water bombs) and aim for the stalactites. Shoot them all down. Use them as steps to climb up the platforms. One should have fallen just west of the door out, use that to get to the chest.
--== Room 3: Water Escalator ==--
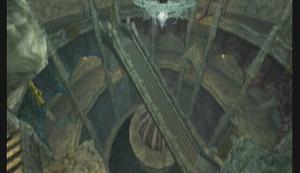
Enemies: Helmasaur, Tektite, Lizalfos
Chests: 2 (Map, Arrows, 2 not reachable)
Quest items: 2 (Map, Ooccoo)
Across the bridge and through the next door. Walk down the stairs and take a right till you're in the south. You'll meet a dead end with the arrows. Turn back a few feet and face the middle of the room. Jump off the edge and grab the pulley to shift the stairs.
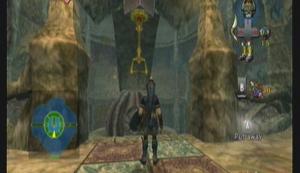
Jump and hang
Go up the stairs. Go left to find Ooccoo. Head around to the east side and grab the pulley there to swing the stairs again. Take them down. Take a left for the map, then enter the door and cross the bridge.
--== Room 4: Ruined Room ==--
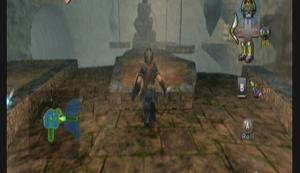
Enemies: Tektite
Chests: 2 (small key, 1 not reachable)
Quest items: 1 (small key)
There are two stalactites in this room to shoot down. One just to the right and one off in the distance on the left. Once they're down, turn about and look for a tunnel on the left. It will lead down to a pathway. Climb onto the vines at the end and follow them right across. Jump across the gap south when the geyser lifts the rock into the air. That chest holds the small key. Jump back across and back into room 3.
--== Room 3: Water Escalator ==--
Enemies: Helmasaur, Tektite
Chests: 2 (not reachable)
Quest items: none
Take the stairs up and go left to the western door. Unlock and enter.
--== Room 5: Cog #1 ==--
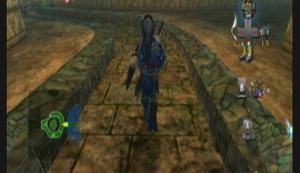
Enemies: Tektite, Lizalfos, Kesse, Chuchu, Helmasaur
Chests: 2 (bombs, small key)
Quest items: 1 (small key)
The left path leads to the bomb chest. Go back north. Use your bomb arrows and look up to shoot down a couple stalactites. One of them will enable you to reach the vines on the wall. Climb up and right till you're over the wall that was blocking your way. Drop down onto it and look for a pulley to the west, it opens the door below. Jump down and enter the first door on the right (the door leads south).
Watch the Lizalfos and don't fall off the cog. Make your way across to the southern door. Open the chest for the small key. Go back across the cog and through the door.
On the left is a bombable rock we past a minute ago. Blow it up and continue along the path. Enter the door at the end.
--== Room 6: Water Reservoir #1 ==--
Enemies: Tektite, Chu worm
Chests 1 (Water bombs, 1 not reachable)
Quest items: None
Best way to deal with a Chu worm is to launch a bomb arrow into it and burst his bubble (literally), then hammer him with your sword before he creates another bubble.
Once that's done, enter the locked door. Jump off to the right and grab the vines. Climb up, then climb over the ledge to your left. You'll need to hike all the way up and around this circular path, and I'd recommend you take out all the Tektite along the way.
At the top, open the chest for your bombs. You can probably see the other chest over on the ledge, but you cant get it yet and it's not worth coming back for later (20 rupees). So, climb the ladder on the arch near the bomb chest and jump over to the pulley. The water starts flowing and you get swept all the way down.
Swim over to the island in the middle of the pond, and jump to the pulley hanging there. This opens the gate and allows the water to flow through. Exit the room the same way you came in, then via the southern door.
--== Room 5: Cog #1 ==--
Enemies: Tektite, Lizalfos, Kesse, Chuchu, Helmasaur
Chests: None
Quest items: None
Jump down and go in the first door on the left (cog room). The water is now propelling the cog and spinning the platforms below. Fall through a gap into the room below.
--== Room 4: Ruined Room ==--
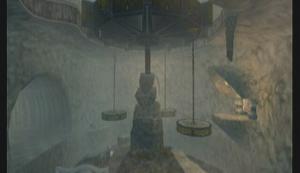
Enemies: Tektite
Chests: 1 (not reachable)
Quest items: None
Back in here. You need to get through the northern door. If you need to get back up to a platform, there are vines everywhere that will allow this.
--== Room 7: Crescent Hall ==--

Enemies: Helmasaur, Chuchu
Chests: 1 (small key)
Quest items: 1 (small key)
To the left is the key. That's all we need. Go back out into the Ruined Room and use the platforms to get over to the western door that also leads into Crescent Hall. Unlock the door and swim through the water.
--== Room 8: Jet Hall ==--
Enemies: Bari
Chests: 2 (20 rupees, bombs)
Quest items: None
Go through the hall, avoiding the bari. At one point, you'll be swept across south by a jet (if you're close to the ground and not wearing the boots). Here you'll find the rupees. If you equip the iron boots and walk back through the jet stream, you'll find the bombs.
Anyway, follow the hall down, blowing past the rock with a bomb.
--== Room 9: Mini-boss: Deku Toad ==--
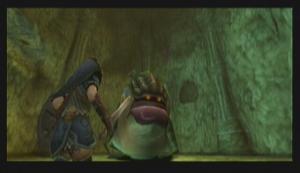
Enemies: Deku Toad, Toado
Chests: 1 (Clawshot)
Quest items: 1 (Clawshot)
Take out the couple small Toado on the ground, then press C and look up to start the real fight. (scene feels similar to Queen Gohma, no?)
This battle is actually really easy. Hold up your shield to defend against the Toado and use spin attacks to dispatch them. Once they are gone, Deku Toad will leap into the air and try to crush you. Just run way from the shadow and wait for it to land, then hack and slash it's tongue. Repeat a couple times to trigger a “Finish” command when you target his tongue.
After the battle, he spits up the Clawshot.
Around the room there are a few alcoves up high. These hold jars with rupees and hearts if you feel inclined. Otherwise, target the clawshot target over the gates in the south to get out.
Go all the way back to the Water Escalator.
--== Room 3: Water Escalator ==--
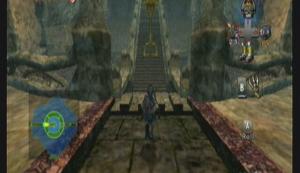
Enemies: Helmasaur, Tektite
Chests: 2 (Heart piece, 20 rupees)
Quest items: none
Walk up the stairs. Once at the top, turn abound the look at the chandelier in the middle of the room. Use the clawshot to get onto it and open the chest for a heart piece! The rupees are under the stairs.
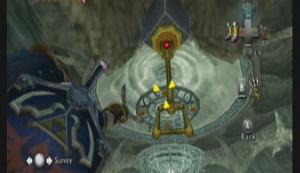
H14, 7 4/5
Jump down and head back up to where you were and go left. Go to the west side of the upper platform. Use the clawshot where the pulley used to be to swing the bridge. Follow the water and enter the door.
--== Room 10: Pitfall ==--
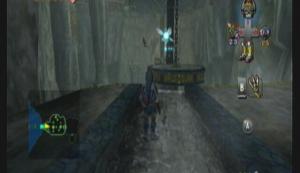
Enemies: Kesse, Chu worm, Chuchu, Tektite, Bari, Shell Blade
Chests: 5 (20 rupees x3, water bombs, bombs)
Quest items: None
This room is a pain. Here, just follow these pictures with your clawshot:
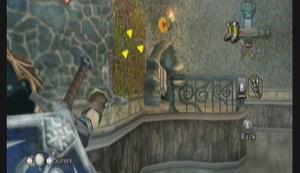

There. Enter the door :)
--== Room 11: Cogs x2 ==--
Technically, room 10 gives into room 11, they are the same room, just at different heights, but yeah, anyway...
Turn right and look up. Shoot down the stalactites and climb on to be shot up by the geyser. Jump over the wall and take out the tektite. Use your clawshot to get to the door on the ledge ahead.
--== Room 12: Water Reservoir #2 ==--
Enemies: Chu worm, Helmasaur
Chests: 2 (compass, water bombs)
Quest items: 1 (compass)
Use bomb arrows to take out the Chu worms, then use the clawshot and target some vines on the ceiling to get over the wall.
This is exactly the same as last time, only now the ramp is crumbling and you'll have to use the clawshot to get over the gaps on your way up. At the top, open the first chest for water bombs, then use the clawshot to get over the ledge and onto the platform with the compass. Climb the ladder to get onto the arch and pull the pulley.
Again, at the bottom swim over to the island and jump and hang from the pulley. Use the vines again to get out and exit through the southern door.
--== Room 11: Cogs x2 ==--
Enemies: Kesse, Chu worm, Chuchu, Tektite, Bari, Shell Blade, Lizalfos
Chests: 4 (20 rupees x3, water bombs)
Quest items: None
Jump down and into the water. Use the iron boots to sink down. At the western end is a chest with 20 rupees. Swim back up and out still headed south/west. Under the mill, then enter the door on the immediate right.
The cogs are turning here now as well. Head west and exit through the other southern door. Left is a chest with more rupees. Back behind you, use the clawshot on the pulley over the gate to open it.
Going back to the Water Escalator.
--== Room 3: Water Escalator ==--
Enemies: Helmasaur, Tektite
Chests: None
Quest items: none
Jump forward and grab the pulley. Follow the water flow down and through.
--== Room 4: Ruined Room ==--
Enemies: Tektite
Chests: 1 (Heart piece)
Quest items: None
Well? You saw the bridge raise. Go to it!
Across the bridge, stand on the raised floor tile to open the gate, then use the clawshot to get through before it closes. Fight the Lizalfo and open the chest for another full heart!
H15, 8 0/5
Use the clawshot to get back out (target over the gate).
--== Room 3: Water Escalator ==--
Enemies: Helmasaur, Tektite
Chests: None
Quest items: none
You need to head left, to the lower eastern exit. Use the clawshot to get over the fence, then use it again in front of the lower east door to change the water flow. Enter the door.
--== Room 10: Pitfall ==--
Enemies: Kesse
Chests: None we're getting
Quest items: None
This time, jump on the rotating platform and ride it around. The second cog does not have any platforms, so you'll have to use the clawshot to latch on as you spin past it. Ride it to the east side and enter the door.
--== Room 11: Underwater Maze ==--
Enemies: Bari, Shell Blade, Chu worm
Chests: 2 (water bombs, Big Key)
Quest items: Big Key
I really hate this room. It's really easy to get lost. I'll try.
Dive in and head north, through a small crack at the bottom. Through the crack, take a right. Take the upper path over the Bari. Blow the rock and continue through. Swim to the surface to get your bombs. Jump back in and go south-east.
Look for another bombable rock all the way down. Past the rock, swim to the surface and enter the door.
Phew.
Use the clawshot on the target in the middle of the room and drop down. The chest contains the Boss Key.
Jump in to the east and sink. Enter the door. We're back in the maze. Get past the Bari, then just re-trace your steps out, baring the last 4 sentences. It's actually a LOT easier getting out then in.
--== Room 10: Pitfall ==--
Enemies: Kesse
Chests: None we're getting
Quest items: None
Use the clawshot on the first cog, then lower yourself to a platform in the south. From there, grab onto another target on the other cog as it goes past. Again lower yourself to a platform as you pass (only this time skip the first platform) and use this point to grab onto the vines that lead to the door.
--== Room 3: Water Escalator ==--
Enemies: Helmasaur, Tektite
Chests: None
Quest items: none
Last time in here. Find a place where you can jump down into the center of the room without swinging the bridge. It's not a big deal if you do, it's just that you'd then have to find another place to try.
Once in the water, swim to the platform in the center and enter the door there.
--== Room 12: Boss: Twilit Aquatic – Morpeel ==--
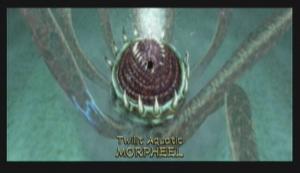
Twilit Aquatic – Morpeel
Sink down to the bottom of the room to disturb and enemy that very closely resembles Morpha. The fight is also very similar. It's tentacles will extend and try to grab you and eat you. All you have to do is do a spin attack whenever a tentacle gets close. To fight back, use the clawshot and target the eye that often travels inside one of the tentacles. Drag it toward you then slash it. After three times, the next stage starts.
Stage 2
This stage is even easier. Swim around with it and stay locked on to the eye. Try to predict where it's headed, then clawshot the eye and start slashing. Any contact with it's body outside of when you're cutting it will damage you, so stay sharp.
Grab your heart piece (9, 0/5) and prepare for a plot twist.
What's all this water without a little sand and sun? Well, we're going to find out where all that sand is in out next destination: Arbiter's Grounds!
This is a little brake from the dungeons for a bit. We have several goals, and a lot of side-quests to accomplish here.
- Save Midna
- Get the Master Sword
- 2 howling stones
- Entrance to Gerudo Desert
- Heart pieces, bugs, and Poe souls
- 2 Lantern Caves
- Item upgrades
Hike back to Castle Town. Everyone here is naturally afraid of you, but you can talk to the animals at least. Head over to Telma's Bar. Nudge the door open and go in only to get thrown out.
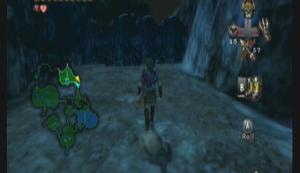
Ingrates
Her cat will then open a passage through the window. Push the create in the east over to the wall to climb up. Inside, be very carful not to knock off the vases, or else someone will spot you and you'll be thrown out again.
Climb across the first two ropes. You'll see a line of vases that you cant get past. Carefully walk up to the red one up against the wall and pick it up. Just carry it with you the rest of the way. Till you're in the passage.
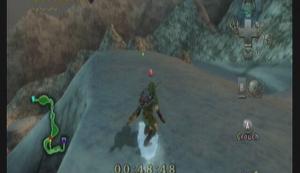
Who put these up here anyway?
You'll be met by a huge pile of gold, a floating lantern, and a man incased in gold. Use your senses to take down the Poe (lantern). Jump attack him twice, then bite his soul when he is on the ground.

Poe #1
Jovani will then ask you to track down the other Poes that cursed him so long ago. He'll then open the chest to the secret passage.
--== Sewers ==--
Stay on the ground against the north wall and go clockwise. You'll be prompted to bit a chain. Do so and ride the current. There is 2 skulltulla in this area. Run up the stairs and trigger the second one to come down from the ceiling. They're pretty hard to beat in wolf form, so instead lure them down the stairs and into the water. Run back up and grab the stick near the flame and light it, then use it to burn the web around the door.
Light the first torch on the right, then light all the other ones (2 total, just go clockwise around the room). Use the last one to re-light your stick and climb the rubble beside it. You'll need the stick to burn the web at the top.
Web and torch
In the dead-end circular room, dig in the soft soil to fall down.
You should actually know where you are now. They've outfitted the area with ropes so you don't have to use Midna. Pretty much just continue clockwise around the room, using the ropes to work your way up till your at the top. Enter the open door at the top.
--== Hyrule Castle Roof ==--
Follow the path down and use the create at the end to get over the wood wall. Keep on the path north till you get to what looks like a dead end. Wait for the wind to pick up, then jump over to the broken wood bridge.
Rather convenient storm
Jump down onto the blue room on the right. Follow the peak around and enter the tower at the end. Make your way up the stairs and into the room.
Now that that's over with, time for the next part, turning you human!
Now that Midna is back, you can warp anywhere again. Have her warp you to N. Faron Woods.
The monkey is in trouble... again... this time by some puppets. They are very east to take down, normally just one hit each. After, she'll tell you of a secret part of the forest deeper in the woods. Walk up the stump that she came from to have a Midna prompt all the way to a cave.
Here
At the ledge ahead, wait for the wind to blow and the bridges to turn around and face you. Walk across onto the second one, then wait for the wind to twist the bridges back to how they were. Walk off onto the ground east. Walk across the ropes, trying not to get hit by the logs.
At the end is the first Howling Stone of this trip.
Howling Stone #3

Pattern
Song is Prelude of Light from OoT.
Enter the cave behind it.
--== Sacred Grove ==--
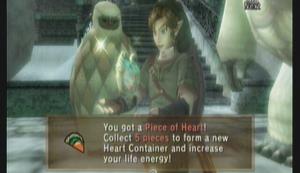
You'll find another howling stone in this area. However, this one doesn't summon the spirit. Howl into it (middle, high, low, middle, high. Zelda's Lullaby, OoT) to bring down the Skull Kid.
You'll first have to take out his puppets, then attack him. He'll then open a new passage deeper into the woods.
You'll have to hit him 3 more times before this ends, and each time he opens up a new section of the forest. I think where he goes is random, but I'll list where he took me anyway.
You can usually track him by the sound of the trumpet. It'll get loud if you're in the same area as him. Also note that his puppets will continually spawn, so don't bother with them unless you get boxed in.
--==--
Head straight along the path and into the next area, don't go in the water, just follow the path. This area, he's up on a ledge near the back.
#1
Follow him back the way you came into the water. There should be a new passage open by the water falls. Take an immediate right in this area (you can see a small worn path in the ground where you're going). He's up on the large hollow stump ahead. To get up there, swim left in the stream behind the waterfall. Climb up and come up behind him.
#2
Jump down and follow him back into the water area. Go back into the door by the falls. This time, climb the wood straight ahead in the area. Follow the tree to come up behind him.
#3
He jumps down and opens a new passage through a brick wall. Jump down after him. Time for the showdown.
He'll jump to a stump and summon some puppets. If you try to get close to Skull Kid, he'll warp away to another stump. Rather, keep a slight distance and destroy all of his puppets. He will then blow on his trumpet to summon more. Attack him while he is blowing (jump attack works best). Repeat three times.
--==--
A new passage will open up. Walk through and stand on the Triforce mark. Howl to activate the guardians.
Triforce Mark
This can be a tricky puzzle if not done right. Jump in the following order:
Left, down, right, right, up, left,
up, up, left, down, down, right, up.
They will now grant you passage to the Master Sword.
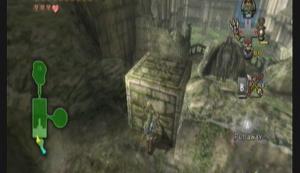
The Master Sword
Check the sword to turn back into a human. What's more, you also get the ability to freely transform from human to wolf.
We're not quite done here yet. Head back to where you faced Skull Kid.
You probably noticed the large bombable rock when fighting Skull Kid. Take out a bomb and blow it up.
A Poe will appear. Use Midna to transform into a wolf, then use your senses to take it down.
Poe #2
Wait, we're not done yet. Dig in the area where the rock was. You'll be taken underground. Defeat all the Deku Baba in this area to make a chest appear. The chest contains a heart piece!
H16, 9 1/5
NOW we're done here. Not totally, we'll be back, but there's nothing we can do for now. Use Midna to warp out to Castle Town.
There's a LOT of side questing mixed in here. It's a good thing.
Transform back into a human and start across the bridge. Mailman will deliver a letter from Telma. Go into Castle town.
Notice the priest on the right of the street as you go through. Talk to him and donate some rupees. You need to donate 1000 rupees to get a heart piece. You don't have that kind of money right now unless you sold off all your bugs, so just give him 100-200 or so and be on your way.
H17, Priest
Continue down to Telma's Bar. Inside, talk to Telma, then examine the map in the back. Talk to everyone there, and talk to the one on the right twice. :)
Go out and take the southern exit out of Castle Town to end up in a courtyard. Go down the first set of stairs on the left to find a Golden Bug in the trees.
Female Ladybug
If you scare her, she'll fly to the other side of the wall near the wolf.
Speaking of the wolf, he is just below you. Run down and talk to him to learn the Helm Splitter.
Another Golden Bug lurks in this area. He is over on the west side near a pillar with vines on it.
Male Ladybug
Hang out in this area till night fall. Once it gets dark, head back toward castle town to run into a Poe near the door.
Poe #3
Back into Castle Town. Take a right like you're going to Agitha's (and you can if you need some money), but keep following the alleyway around. You'll come to a tent. Enter and play the STAR minigame for 10 rupees.
STAR Minigame
Win the game by using the Clawshot. It's not hard to figure out the pattern. Winning nets you an upgraded Quiver that holds 60 arrows.
Exit castle town via the east.
--== Hyrule Field ==--
Back in the field, don't waste time as we have a lot to do tonight. Transform back into a wolf and head south into that small round area there. Amongst the wreckage is another Poe.
Poe #4
Go back north, all the into the northern Lanayru Province. There are 3 Poes in this area and 2 bugs.
First bug is on a tree. Follow the path you're on and you'll come to it.
Male Stag Beetle
Next, a Poe is on the bridge over the river.
Poe #5
Next 2 Poes are in a secret area to the east. Head due east from the bridge and look for a large patch of grass near where you entered the area. Dig in the center and kill the 2 Poes inside.
Poes 6-7
Final bug is in the rocks at the north end. Run north, but don't take the eastern path up the side of the cliff. Rather, take the western path closer to the ground. In an alcove at the end of the path is a bombable rock in the wall. The bug is above the rock (behind the rock is a puzzle that hides a heart piece. You need the ball and chain to get it).
Female Stag Beetle
Use Midna to warp you to Zora's Domain. If day has broken, wonder around Hyrule Field till night falls again, as time does not move in Zora's Domain.
--== Zora's Domain ==--
Ride the fall down. At the bottom, swim off to the left (east) side. Use Midna's prompts to go up a bit and spot a Poe.
Poe #8
Jump down and swim to the beach in the west. Work your way up the trail to find another Poe at the peak.
Poe #9
Hop in the river and swim down stream till you're in Zora's River.
--== Zora's River ==--
Poe is on the small patch of land at the south end, between the two streams.
Poe #10
Last Poe for this area. We have more to get later, however. Swim back across the stream north. Behind the howling stone is a door. Enter to come out at the fishing hole.
You can fish here if you want, but we came here for the heart piece. Find the pier and jump into the water off it. If it's still night, you should easily be able to spot the glow off the heart piece on the rocks in the middle of the lake. Swim over and use the clawshot to drag it down. It wont be given to you till you climb out of the water.
H18 9 2/5
Next is an empty bottle. Go to the bridge on the west side of the fishing hole. Throw your line in on the west side of the bridge and wait. After a couple tries you should pull up an empty bottle.
Empty Bottle
Alright. Go back out and go into the shack on the river (Iza's rapid ride). Talk to here and rent a boat. The point of this game is to shoot the jars with your bomb arrows (you have infinite) while avoiding running into things. Yellow jars are worth 1 point, red are worth 2. Every time you hit something, you lose a point.
At the end of the rapid, try to have more then 25 points for a bomb bag upgrade. If you don't, you'll get another chance very soon.
Bomb Bag Upgrade
Just behind where they drop you off, there is a bird flittering near some grass. Talk to him in wolf form then howl in the grass to be picked up by the giant Kargarok again. This time, it's a game, the Fruit Pop Flight.
The goal is to run into the fruit balloons to earn points. If you hit the same fruit in a row, you get the fruits normal worth times your fruit multiplier to a max of 10.
Watermelons = 1 points
Oranges = 3
Strawberries = 10
The best strategy is to go for a single balloon type the entire time. Watermelons are best avoided, as their max is only 512 if you get a x10. Oranges would be ok, their max being 1,536 for 10. Your best bet though is strawberries, the max being 5,120 for 10.
At the end of the game, you're goal is to have more then 10,000 points. This gets you a heart piece.
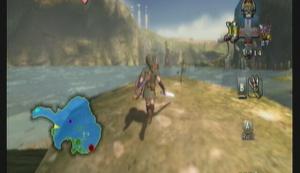
H19 9 3/5
At the top, warp to S. Faron Woods. Work your way up and talk to the lantern sales man again. This time buy his bottle of oil for 100 rupees. Go out into Hyrule Field (north of here) and wait for dusk.
--== Hyrule Field ==--
Next Poe soul is in the middle of this field, just past the bridge.
Poe #11
Run west to the west side of Hyrule Field. The next Poe is on the rise on the south east side of this area.
Poe #12
Warp to Kakariko Village.
--== Kakariko Village ==--
Go up to the third house on the west side. Open the door to find a golden bug.
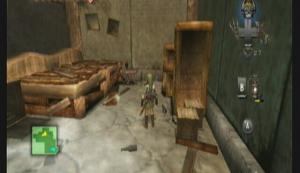
Female Ant
Go into the graveyard on the west side. The first Poe in this area is floating in the middle of the yard. The other is in the south-eastern most tombstone. Just push it back.
Poe #13
Poe #14
Head to the back of the graveyard. There is a tree with an ant on it's base.
Male Ant
Back out into the village. Go to Barn's Bombs shop and walk up the stairs. Exit though the top door onto the roof. Poe 15 is in the shed we blew up. Go up the cliff south. The other is at the second highest peak in the village. Head north up the cliff.
Poe #15

Poe #16
Run to Death Mountain.
--== Death Mountain ==--
Run up the mountain till you reach a Goron that offers to boost you up. When he does, turn and face east. You should fly up and grab a ledge. The next Poe is just to your left.
Poe #17
Now for a heart piece. Again, talk to the goron and grab the ledge. This time, go north. Hug the right wall till you find a cave. Walk in and drop down. You should be facing a chest. Open it for your heart piece.
H20 9 4/5
Warp back to Kakariko Gorge.
--== Hyrule Field ==--
Run to the southwest of this area. You should see a bombable rock. Destroy it and enter the cave.
The cave is dark, but a trick is to just turn up the brightness on your TV a bit and you should be able to see just fine ;)
Here is a map that show where everything is at. Cant give much better direction then that. Just look for lanterns to light along the way. They tend to help. Also, don't forget that you can use your lantern to burn down webs.

Lantern Cave 1
Should be day break by now. Warp to Lake Hylia.
--== Lake Hylia ==--
Transform back into a human. Turn south-east and look for a ladder to climb up. On top, look out north. You should see another howling stone.
Howling Stone #5

Pattern
There is one final note that is off screen: high.
Song is Oath to Order, MM.
Continue up toward the red dot on your map. Climb the tower and talk to Auru to get access to Gerudo Desert.
Climb back down. Don't go anywhere! Transform into a wolf and wait for night fall again. A Poe will appear right below the tower.
Poe #19
Jump down to where your warp in. Then next Poe is on the southern alcove. You'll have to hop over the islands to get there.
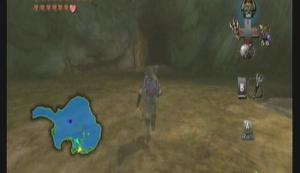
Poe #20
You can stop here if you want. 20 is enough to get you a jar and some Fairy Tears. But I want infinite rupees. We'll have to hike all the way to the other side of the lake. On the way, stop off at the spirit spring. Walk around the east side and grapple to the vines. There is a door right ahead. Inside, light the torches for a heart piece.

H22 10 1/5
Poe 21 is near where you played the Fruit mini game.
Poe #21
For 22, talk to the clown and have him blast you to the top. Then play the flight by fowl mini game. this time, land on any platform above the first two (you can aim for the spinning one if you want. Easy 100 rupees). Remember to hold back on the stick to slow down and go in a straight line. The Poe is on the second to last platform.
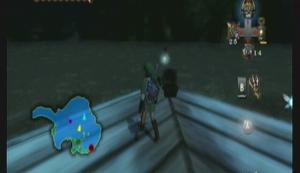
Poe #22
The 23rd Poe is on a small cliff UNDER the flight by fowl house. Launch back up, then play the game. Pull a U-turn and fly under the house. You should see the glow of the lantern.
Poe #23
While you're here, dig in the ground near the grass to enter another secret area. Use the iron boots to sink down and take out all the Shell Blades in the room. A chest will appear with 100 rupees inside.
While it's still night, we have one more Poe to get. Warp to Castle Town.
--== Castle Town ==--
Give the priest pretty much all your money. You'll make it back in the Lantern Cave soon, plus the dungeon right after.
Walk all the way west and exit via the west. A Poe is on this bridge.
Poe #24
Lets go collect our reward. Enter back into Castle Town and go south. Jovani's house is that little nook above Telma's Bar on your map.
Jovani's house
You can transform into a wolf in the corner. Dig in the soil to get into the house. He'll give you a bottle and Fairy Tears for your efforts so far. Exit and warp back to Lake Hylia.
--== Lake Hylia ==--
Go back up the ladder where the stone was. Turn south and look for a bombable rock. This rock reveals another Lantern Cave.
This cave is MUCH harder and MUCH longer. You'll need a lot of arrows and bombs, and some extra lantern oil (or at least an empty bottle) to make it through. Your prize is around 300 rupees, a heart piece, and 3 Poes.
There's really not much I can direct you in this cave. Turning the brightness up on your TV will eliminate light traps (hidden enemies, pits, ect), and having enough bombs means you can blow every rock in there up (definitely recommended. Every rock hides something). And remember to light every torch you come across. Several hide chests.
I will say that about half way through you'll bomb a rock and there will be a light leading to surface behind it. Don't take it! It's a fake exit. You'll exit before you complete even half the cave. Also, you can use the clawshot as a substitute for arrows to knock the torch slugs off the ceiling.
Once you're out, take Auru's notes to the clown and use them in front of him. He'll adjust the cannon and launch you into the desert.
That's it for that. Time for the dungeon!
All the other dungeons shouldn't have much to do between them anymore. We're almost half way done with Poes, only have 2 sets of bugs left to find, and only 9 heart pieces (that aren't in dungeons).
Gerudo Desert
This area is annoying for the amount of backtracking we'll have to do to get everything. Further, the enemies here are probably the most annoying in the series: Moldorm and Leever.
Good news is if you do all this stuff now, you'll never have to come here again... well, almost never.
If it's day time, waist some time by getting these golden bugs. If it is already night, head straight for the Poe's listed below and go back for the bugs later.
The female Dayfly is located in the south-center of the map near a large fissure.
Female Dayfly
The male is located just north-east of it in a ditch.

Male Dayfly
Has it started turning night yet? Good. We need to travel south east to a large rock formation on your map. This formation is not only the entrance to the Cave of Ordeals (not going there yet) but it is also the Eldin Bridge and has a Poe on top of it.
To get onto the formation, use your clawshot and look for a tree. Hook onto it. On top, look overhead for a Peahat. Grab onto that and let it take you over the next ledge. Once you drop, you'll have to fight some shadow beasts. The bridge is just a little further up.
Poe #25
Walk up to the large concrete structure and prompt Midna. Teleport it to the Eldin Bridge to fix it.
Warp back to Lake Hylia and have him shoot you back up (warp puts you a ways from the current objective). There should be a poe right near where you land.
Poe #26
In the dirt below it, you can score 100 rupees by defeating all the skultulla.
Use wolf link and hike all the way to the place marked below. Careful not to fall into any pits.
Here.
Use the clawshot again and look up to hook onto another tree. There should be a poe dead ahead.
Poe #27
There are also two more poes in the ground under him (dig), as well as another 100 rupees if you blow the rocks and light the torches.
Poes #28-29
Now day night doesn't matter for a bit. Go north. Watch for the archers on the towers. Try to pick them off before they hit you. As you approach the camp, a couple boars will rush you as well. Take out the riders and commandeer one of the boars.
You can use the boars dash to take out almost any wooden structure. There are a TON of rupees to be had in the area, two of the larger ones are right under the watch towers. You can ride around for a bit to find the others. They're on the outskirts of the area near the game's walls.
While still on the boar, go south and destroy the gate that separates the northern desert from the southern
Gate
Ride it due south till you meet another gate guarding a valley. This leads to another 100 rupees.
Gate #2
At this point, I would consider warping out and going back to Castle Town to donate some more money (maybe finish it off) or going to Kakariko Village and donate some money to the old Goron in Malo Mart to fund their expansion (which leads to the Magic Armor and a heart piece). The boar will be at the camp when you get back.
Anyway, break the wood gates in the north of the desert that lead to the main camp (cant miss them. Right behind the watch towers). Climb the ledge in the back.
Take the right path to run into the wolf again who teaches you Mortal Draw. Really cool, but you wont use it much... least not on purpose.
Wait for it to be night again. The path splits behind the wolf. The right path leads to a Poe and the left the enemy camp.
Poe #30
--== Enemy Camp ==--
This plays like a stealth game. Use your bow and carefully pick off all the Bolblins before they spot you. Work your way north till you see one Bolblin roasting a pig. Shoot him and he'll drop a key. While you're here, hit the pig a few times and he'll drop a heart piece
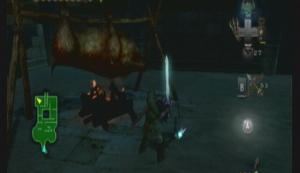
H24 10 3/5
Run back to the large gate you passed on the way here. Unlock it with the key. Inside is a boar you can use to break down the fences across the hall. Before you can get on, however, King Bolblin comes out and wants a dual.
He is really easy to defeat with the secret skills. The backslice and helm splitter work best. Jump attacks are also effective. He should take to long to fell.
He'll retreat and set the barn on fire. Grab the boar and rush out the way you came.
While it's still night, run up the stairs and take a right. Poe again.
Poe #31
Across behind you is some unlit torches. Light them for 50 rupees. Now go back down the stairs and back into the enemy camp. There should be a poe right in front of you in the barn.
Poe #32
Also, if you missed the heart piece in the cooked boar, now would be the time to get it (go out of the barn and take a left before heading to the temple entrance again).
And that's IT. If you did all that, you'll NEVER have to come here again, short of the Cave of Ordeals, but you can warp right to that. Go back to where Poe 31 was and enter the door to the Arbiters Grounds.
Arbiter's Grounds
This temple has a lot in common with the Forest and Shadow Temples from OoT, not the Spirit Temple as you would think. It's main key is tracking down 4 Poes that stole the key (flames) to the rest of the temple. It's main traps consist of over-the-top torture devices and quick sand pits. That said, STAY OUT OF THE SAND! The longer you're in it, the more you'll sink till you cant get back out.
--== Room 1: Entrance Hall ==--
Enemies: Moldworm, Stalkin, Poison Mite
Chests: 1 (small key)
Quest items: 1 (small key)
This room is the epitome of the rest of the temple, on a smaller scale. DON'T go in the sand, or you'll be sucked into the whirlpool. Also, be aware of the Moldorms that will leap out at you.
Look for a clawshot target on the right (east) and swing over. Jump to the platform to the west of there, then west again. Turn east and jump to the small block, then the platform after it. Roll across the sand to the gate north. Turn south and roll to the small opening in the fence.
You'll have to fight 3 Stalkin here before anything else. You should see a chain in the sand. DON'T walk to it. Rather, use the clawshot to bring it to you. Pull it back to open the gate to the next area.
In the west is a urn with some oil in it. Fill up your lantern, as you'll be needing it. Break the wood slates in the east, then jump across the sand and open the chest for a small key.
The platform you used to get over will collapse and a swarm of Poison Mite will appear. Either use the lantern to keep them away, or wait for them to cover you then use a spin attack to kill them. While they are on you, you'll be dragged down into the sand faster.
Go back across the sand and enter the locked door (north).
--== Room 2: Ghouls in the darkness ==--
Enemies: Stalkin
Chests: None
Quest items: None
This room has small sand traps and a LOT of Stalkin. You can more or less ignore both, light your lantern and look for the two torches (both right near the door out (north)) to light. Once lit, the gate opens and allows passage.
--== Room 3: Blue Flame ==--
Enemies: Bubble, Rats, Poe
Chests: 2 (Map, Heart Piece)
Quest items: 2 (Map, Blue Flame)
As soon as you walk in, 4 Poes will steal the blue flames, closing the gate to the rest of the temple. They all go off forcing you to find them. One stays behind. These are not normal Poes, however. Change into a wolf and use your senses.

Not your average Poe
To defeat these Poes, you have to wait until they are getting ready to attack. They'll glow brighter and raise their lantern into the air. When they do this, jump attack to grab onto them and start biting. After about 2 rounds, they'll go down and you can claim their soul, also returning the flame.
Once the first one is down, walk over and sniff him to learn the Poe scent.
There are two chests to get in here: the map is in the north east and requires you get across the sand quickly before the blocks sink, or else you wont be able to get back out.
The heart piece is in the north west. This one you have to grapple over to the platform, then use the blocks to get back across the sand.
H25 10 4/5
Turn back into a wolf and use your senses to track the scent. It should lead to a patch of sand beside the door in the west. Dig to reveal a chain. Go down the steps that appear.
--== Room 4: Dual-layered Room ==--
Enemies: Rats, Bubble, ReDead Knight
Chests: 1 (small key)
Quest items: 1 (small key)
Take out the enemies down here, then push the fin in the middle of the room clockwise. This will rotate the wall and open a passage to a chest north. Still at the chest, turn back human and use the clawshot to look up.
You should see a small opening in the ceiling with a clawshot target on the central pillar. Grapple up and take the northern door there.
--== Room 5: Poe Soul #2 ==--

Enemies: Bubble, Poe
Chests: None
Quest items: 1 (Blue Flame)
Destroy the Bubbles in this room first. Turn back into a wolf to sniff out the Poe. After defeating it, go back into Room 4.
--== Room 4: Dual-layered Room ==--
Enemies: None
Chests: None
Quest items: None
Drop through the hole and push the fin back counterclockwise, revealing the passage east. Go back out into Room 3, then take the upper door back into Room 4. Use the small key on the door west.
--== Room 6: Sand Trap ==--
Enemies: Flame Bubble, Bubble, ReDead Knight
Chests: 2 (small key, compass)
Quest items: 2 (small key, compass)
You have to navigate the sand in the north, getting from platform to platform. It looks like you can just run across, but there are spikes that will block your way. Carefully get across to the ledge in the north west.
See that wire grate thing?
This
Yeah, that's actually a box. Turn into a human and pull the box out north, then push it west between the two ledges above until it stops. Go back to where it was and climb up between the spike fence, west.
You should see a chain on the ground. Grab it and pull back over the box you pushed into place. The chandelier should lift up. Once the chain stops pulling any further, let it go and quickly get past the chandelier.
Run up the stairs to the next area. Open the chest behind the statue for the compass. Now grab the front of the statue and turn it clockwise to reveal another hall west. Break the wood and kill the ReDead to get the key. Use it on the east door.
--== Room 7: Poe Hall ==--
Enemies: Poe, ReDead Knight, Stalkin
Chests: None
Quest items: 1 (Blue Flame)
Walk around to the north end of the room, fighting off the stalkin (spin attacks work well) and the two ReDead at the end. Use Wolf form to find the scent leads to another small patch of dirt just before the northern corridor. Dig to reveal a chain. Pulling it lowers the wall on the left, revealing the next Poe.
Continue north to the next room.
--== Room 8: Ghouls Rats ==--
Enemies: Ghoul Rats
Chests: 1 (small key)
Quest items: 1 (small key)
Make sure you're in wolf form. Jump down and open the chest in the south. A bunch of Ghoul Rats will appear. Use your senses to find them, and spin attacks to get them off you. Open the door east.
--== Room 3: Blue Flame ==--
Enemies: None
Chests: None
Quest items: None
Jump across the chandelier to the other side. If you fall, you'll have to start all back over (minus the Poe fighting).
--== Room 9: Chandelier Drop ==--
Enemies: Moldorm, Bubble
Chests: 2 (20 rupees x2)
Quest items: None
Go right and drop down. Push the wire box east until it stops. It will reveal a passage north that has a chest in it, and also leads back to Room 3, so you now have easy access to this end of the temple.
Anyway, climb up on the box and pull the chain to raise the chandelier. If you want the other rupee, run all the way past it and open the chest, then face west and clawshot your way back.
To continue on, stand directly under the chandelier, right in the center (you'll see it marked on the ground) and let it fall. You are now inside it. Climb up the east side and jump the gap to the door.
--== Room 10: Stalfos ==--

Enemies: Stalfos
Chests: 2 (bombs x2)
Quest items: None
A really small room. Destroy the wood slates and enter. A stalfos will come to life. They look really menacing and were fairly hard to kill in pervious games, but here they're easy. A single bomb arrow will completely destroy them if it makes it past their shield. If not, the helm splitter and backslice are also very effective. If you don't use a bomb arrow, you'll have to plant a bomb on the bones that lay on the ground, or else they'll reassemble. After the fight, the doors will open and you can continue.
--== Room 11: Torch Trap ==--
Enemies: Stalkin
Chests: None
Quest items: None
This would be annoying if you didn't have a guide. The key here is to light the correct two torches. If you don't, an army of stalkin appears. The correct torches are: the one that's not in line with the others and the one in the west (right of the first). The door will open and you can go through.
--== Room 12: Poe Soul #4 ==--
Enemies: Poe
Chests: None
Quest items: 1 (Blue Flame)
This fight is very reminiscent of the Forest Temple in OoT. Sniff out the Poe, and the fight starts. Unlike the others, this Poe will create duplicates of himself. Your task is to find the real one. They will encircle you and spin around. Once they stop, look for the one that's glowing brighter then the rest. Quickly lock on and jump on him before they attack. Repeat once or twice more to win.
Exit via the northern door.
--== Room 9: Chandelier Drop ==--
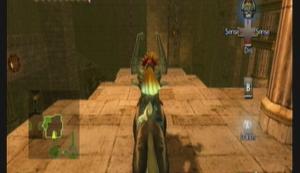
Enemies: Moldorm, Bubble
Chests: None
Quest items: None
Turn back human and target the clawshot target in the west. Enter the door below.
--== Room 3: Blue Flame ==--

Enemies: None
Chests: None
Quest items: None
The gate should now open to the rest of the temple.
For the record, we are roughly half way through the temple right now.
--== Room 13: Mechanical Gears ==--
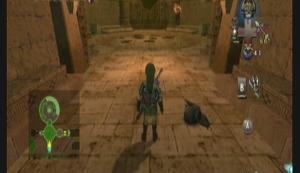
Enemies: Flame Bubble
Chests: 1 (not reachable)
Quest items: 1 (not reachable)
Enter the door on the west side.
--== Room 14: Corkscrew ==--
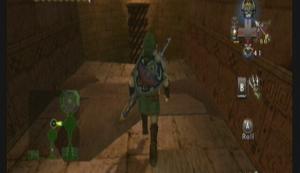
Enemies: Flame Bubble
Chests: 1 (small key)
Quest items: 1 (small key)
Drop down to the bottom of the room. Grab the fin and push it counterclockwise by 2 levels. Look for a passage that leads to the small key. Go back to the screw and turn it all the way down (clockwise) till it stops. Open the locked door.
--== Room 15: Invisible Spike Maze ==--
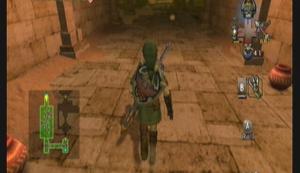
Enemies: Ghoul Rat, Blade Trap, ReDead Knight, Poison Mite
Chests: None
Quest items: 1 (Ooccoo)
This room is divided into two parts: the maze and the hall.
First in the maze, wonder around and kill all the Rat Ghouls in wolf form. Also get a feel for the spikes and kill the ReDead Knight in the southeast corner of the main room. In the south west corner is a chain that pulls a large wall out of the way, granting passage into the second part of the room (much like the fire temple), however you have to hurry before the passage closes off again. You'll have to navigate around the spikes to get in.
The second part is much more straight forward. Get from one end of the hall to the other without sinking in the sand or getting killed by the blade traps on the wall. Keep in human form with either your lantern or spin attack handy to keep the mites at bay. At the end of the hall, Ooccoo is in a vase.
--== Room 16: Torture Chamber ==--
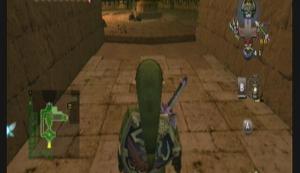
Enemies: Stalfos, Poison Mite
Chests: None
Quest items: None
First wait for the Mites to get on you so you can get rid of them. Next, to get around the spinning arms of death, just roll. You can roll right under them as they pass. Head north. In this area, there are three Stalfos. Two as soon as you enter, and one off in a corner in the west. You must kill all three (bomb arrows work well, as they have wood shields and cant defend) to open the gate back by the arms of death.
This hall has poison mites near the end, so take out your lantern and keep it lit till you're through. You'll need to run from unstable platform to the next till you're at the end. Jump the gap and enter the door.
--== Room 17: Mini-boss: Death Sword ==--
Enemies: Death Sword
Chests: 1 (Spinner)
Quest items: 1 (Spinner)
Walk into the room and cut one of the ropes with your sword. The sword will then appear to float in the air. Change into a wolf and use your senses to see otherwise.
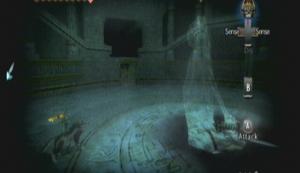
Frankly, this is less scary then a floating sword.
Like the Poes, you can only attack it once it is about to attack. It will swing it's sword down into the ground. Dodge it, then jump on and start biting. After a round or two, the next stage starts. He'll turn visible so turn back into human.
The next stage is a little harder. He'll float around the room erratically. Use your bow (or clawshot or boomerang) and hit him with it (you cant lock on, you'll have to dumb fire it). He'll then land (or float lower) and start to raise his sword again. Hit him with your sword first and he'll collapse. Start beating on his head till he gets back up. Repeat three more times to bring him down.
Your prize is in the next room: the Spinner.
The spinner allows you to travel over sand for short distances without sinking. It also can zip you along spinner track (the little notched rails in the walls).
When riding on a track, press the B button to jump off and onto an adjacent track. You can also press B when on the ground to use it as an attack.
Hop on and use it to get out of this room.
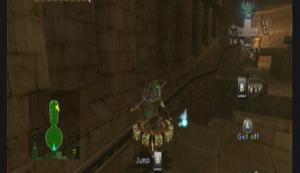
--== Room 16: Torture Chamber ==--
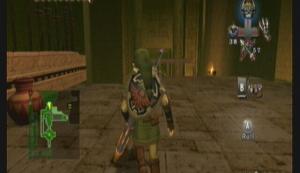
Enemies: None
Chests: None
Quest items: None
Should be spinner track on your left. Ride it around, then jump off when you see the other track on the right side of the sand pit. Use that track to get to the door.
--== Room 18: Spinner Madness ==--
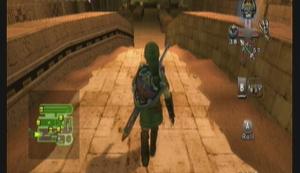
Enemies: ReDead Knight, Blade Trap, Stalfos
Chests: 5 (bombs, 20 rupees, 10 rupees x2, heart piece)
Quest items: None
Hop on the spinner track as you enter. Jump from track to track till you approach a circular track with a Blade Trap on it. There are several ways to do it, but the punchline is you need to get on the track past it. Note that if the Blade traps knock you off your spinner, it can actually make things easier if you can get to a wall in time.
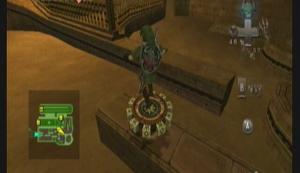
See? Now we just need to be on that track ahead.
Ride it up and fall off, dodging the spinning arms of death. Head straight for the chest at the end.
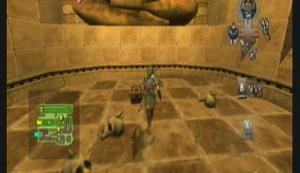
H26 11 0/5
Now you might want to kill the ReDead Knights before moving on. Hop on the northern track and travel east. Avoiding the spinning arms of death just comes down to luck. Jump from rail to rail till you fall into a round pit. In the pit, get back on the rail traveling clockwise.
You'll fall off into a new section. Defeat the Stalfos and open the chest for 10 rupees. Run up east till your at the top of the ramp, then go up the next ramp west.
Don't worry, this is FAR, FAR worse then it looks...
This is probably the hardest spinner track you will every encounter. Timing is sheer luck. Jump back and forth, dodging the Blade Traps.
Enter the door at the end.
--== Room 13: Mechanical Gears ==--
Enemies: Flame Bubble
Chests: 1 (Big Key)
Quest items: 1 (Big Key)
Open the chest, then use the spinner to get across the sand. Back in the main room, use your spinner in a spinner-shaped hole in the ground. Repeatedly press B to spin the gears and open the door.
In the next section, use the spinner on the track. You can ride it all the way up to the top to get a fairy, but alls you need to do here is get to a place where you can get off the spinner and jump to the center platform.
This looks good.
Use your spinner to power the gears again, this time raising a huge twisting spinner track. Ride it all the way up. Enter the door.
--== Room 19: Boss: Twilit Fossil – Stallord ==--
Enemies: Stallord, Staltroops, Blade trap
Chests: None
Quest items: None
Against your better judgment, walk down the ramp ahead toward the huge pile of bones.
Zant appears and re-energizes the beast, starting the fight.
Twilit Fossil – Stallord
Stage 1: Stallord
Use the spinner track on the outside rim of the sand to get behind him (and avoid his fire breath). Once you're at a good point, jump off the track and aim for his spin. He will summon Staltroops to try to bounce you back. Dodge them and once at his spin, press B to spin and attack it. As you damage him, he will summon more and more Staltroops, and Blade traps will start appearing on the track.
Careful not to be deflected by the Staltroops.
After a few hits, he goes down and the sand lowers. There is a spinner slot on the platform. Use it to raise a pillar in the middle of the room. Stallord will come back to life, but just his head, starting stage 2.
Stage 2: Stallord's Head
Stage 2: Stallord's Head
This part is NOTHING compared to what you went through in the spinner madness room. At the bottom of the room, use the spinner track on the pillar to catch up to Stallord. He'll come around the corner and start shooting fireballs at you. Jump from side to side to avoid them. As soon as you get close enough, jump off and hit him with your spinner. If you delay, he'll shoot a fireball at point blank range.
Now!
He'll fall to the ground along with you. Hack away at the sword in his head (why don't they let you just pull it out?). He'll come back up and the stage will start over. This time, there will be Blade Traps on the track that you have to dodge on the way up, and the window of opportunity to knock him down is small.
After the fight, get your heart (12 0/5) and go through the door that opens.
--== Mirror Chamber ==--
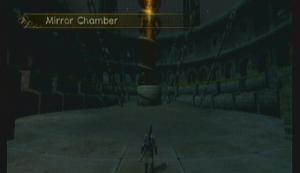
Nothing to do here but run up the stairs and down the hall to the top of the room.
At the top, you are attacked by 6 shadow beasts. Defeat them to open a portal. Now ride the spinner track to the top of the statue and use the spinner to turn the gears at the top.
A cutscene ensues that reveals a not-so-twisting plot twist: Ganondorf it behind everything. This means that Ganondorf came back between Ocarina of Time and Twilight Princess, only to be captured by someone who wasn't Link.
Well, that's that. Off on another quest for more magic items.
Tired of the hot, dry sun? We got a place for you to cool off: Onward, to Snowpeak Ruins!
We do have a couple side quests to wrap up before heading to the next temple: Magic Armor and Heart Piece 17. Not all of this is a side quest, however.
Warp to Castle Town. Give the priest the remaining money for heart piece 17 (use Agitha).

H17 12 1/5
Next, stock up on all the rupees you can hold and warp to Kakariko Village. While we're here, go to Telma's Bar and check the map in the back room to learn that Ashei has gone to Zora's Domain.
If it's night out, we can have a couple little things we can do before the Magic Armor. If it's daytime, skip to the Magic Armor and do this later.
Warp to Castle Town and run north to the northern part of the field. Look for a ramp that leads east. Blow up the rocks at the top.

Here.
You should see a spinner track on the left wall. Ride it up, jumping whenever the track is about to end. At the end of the track is a heart piece.
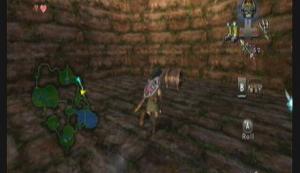
H27 12 2/5
Warp out to Zora's Domain. Use the Zora Armor and Iron boots to sink to the bottom of the pond. We're going to blow that huge rock we used to melt the ice. Plant a water bomb at it's base to destroy. A Goron pops out. Talk to him to get another bomb bag (you did get the letter about the new type of bomb, yes?)
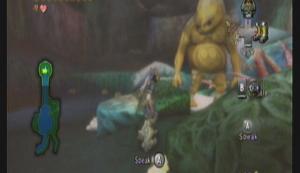
Third Bomb Bag
Swim down the waterfall. Go into the red dot on your map that you got from Telma's Bar. Talk to Ashei to get a drawing. Show the drawing to the Zora guard outside the cave you just came through. He'll tell you the fish is a Reekfish, and that only the prince is able to catch them... you know, the prince that owes you his life.
Is it day yet? Good. Warp to Kakariko Village.
First comes the prince. Go to his mothers grave at the back of the graveyard. He'll be there. Show him the drawing as well to get an fish hook made to catch reekfish.
Donate money to the Goron in Malo Mart. The want 1000 rupees to fix the bridge. Don't give them a rupee over 1000, however. Once you've donated it, talk to the old Goron outside the store. He'll ask you to take a barrel of spring water to a waiting Goron in Castle Town. Say yes and prepare to run.
Out in the field, don't run straight for Castle Town! The Leevers will hit you and break the barrel. Rather, hug the edges of the field, stopping every time you see a Bolblin archer to put down the barrel and snipe him really fast (you should only run into 2 total). Once you get to Castle Town's entrance, the Goron is waiting and tells you to throw the barrel on him Z-Target and throw it.
He'll be reenergized and open up shop in Castle Town, dropping a heart piece as he passes.
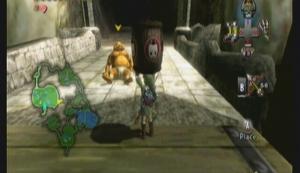
H28 12 3/5
Go into Castle Town. Go down the main ally south. The Goron has opened shop and sells Hotspring water. Buy a jar and quickly exit town south. At the southern end of this area, there is a Goron by a rockslide. Talk to him while the water is still hot and give it to him to clear the rocks.
He wont clear them right away, so we'll have to come back later. Go back to Kakariko Village with around 300 rupees. Go into Malo Mart to learn the next donation lowered from 2000 to 200, so give them that to open shop in Castle Town. Next, go see Barns and sell all the bombs in whatever bag is lowest (not the water bombs) and fill it back up with Bomblings.
Warp back to Castle Town. Go to the Overpriced store in towns center to find that it has been taken over by Malo Mart. The Magic Armor costs 598 rupees, just under what you can currently carry. You don't need it right now, but if you feel so inclined, you can sell off the rest of your bugs and buy the armor.
The Overpriced shop is no more
Quest complete
We've already completed most of this (Drawing, Reekfish Lure) all that's really left is the actual road leading to the ruins.
We need to catch a Reekfish, or else we wont be able to make it up the mountain. Take out your rod (the lure should already be on) and fish on the western bank in Zora's River.

Here
It should take no time at all to catch a reekfish. Remember, when the bobber sinks below the water, pull up on the Wii remote and hold it there so long as it says Fish On!. When the fish is on land, transform into a wolf and sniff it.
Go back to Peak Province where you met Aeshi. Jump down and start making your way up the peak. Engage your senses and follow the scent.
The first obstacle is a frozen lake. Touch the water, and you freeze. You'll have to make it across using the ice platforms.

Mmm, Linkcicle.
There are a lot of White Wolfs in this area, but don't bother with them. They have a hard time hitting moving targets. If you stray too far from the scent, you'll be warped out back to the start of the area, so stay close for now.
Just passed the small valley with rocks on either side is a Poe.
Poe #40
Keep following the scent.
Past the last Poe, you'll come to a rock wall. The scent will lead left to a place where you have to climb some ledges. Instead, to right following the wall. You should come to a Poe near a tree.

Poe #41
Go back and follow the scent up the wall. At the top, you'll have to break away and go right up a ramp (the scent goes up a sheer cliff). Once you're around and back on track with the scent, look across north to see a small grove with some trees. Another Poe hangs out here.

Grove

Poe #42
Should be a small path in the west that leads back to where you were. Keep on the scent. It leads to an area just above the grove that appears to be a dead end. Dash into where the scent leads to cause a collapse of snow.
Higher up, the scent should lead you RIGHT to a Howling Stone.
Howling Stone #5, Jump Strike

Pattern
Song is Wind's Requiem from Wind Waker
The scent will then lead to a dead-end. Dig in the dirt to enter a secret cave. You cant do anything in here now, so just pass through (you'll need to be a human to climb the ladder).
Exit the cave to be attacked by some Shadow Beast. This is good, as after the battle you can warp to Kakariko and learn your new skill, though you don't really need to. The Jump Strike isn't that useful.
Anyway, talk to Yeto at the peak (you must be in human form). He'll open a new mini-game: Snowboarding. Roll into the tree to get a board. You have to do it this once to get to the ruins, but later you can come back and earn a heart piece.

Killer air, dude!
Controls are simple:
Joy stick = movement and speed
A button = crouch and jump (longer you crouch, the higher the jump)
Basically just don't run into anything and don't fall off the edges. Survive to the end and you're at the ruins. Before you enter, however, there is a Poe lurking outside.
Turn into a wolf and walk back through the snow. You should see a spiral path leading up a round rock on the right side of the path. Carefully climb the path (It's a narrow path, don't fall off.) at the top is the Poe.
Poe #43
You can also dig around in this area for a bunch of Rupees.
Jump down and enter the house at the top of the stairs.
Snowpeak Ruins
Snowpeak Ruins isn't like the other temples: it's just a decaying house, not an ancient temple built to conceal a century-old evil power. As such, the puzzles are more based around enemy encounters and platforming then mind-boggling highly-advanced mechanics.
--== Room 1: Entrance Hall ==--
Enemies: ChuChu, Poe, Chilfos
Chests: 3 (Not reachable)
Quest items: None
Right in the main hall floats a lantern. Use Wolf Link to take down the Poe.
Poe #44
Turn back human and enter the northern door.
--== Room 2: Yeta ==--
Enemies: None
Chests: None
Quest items: 1 (Map)
Talk to Yeta to learn the supposed location of the mirror shard and the map. She tells you to take the south-west door.
--== Room 3: Kitchen ==--
Enemies: None
Chests: None
Quest items: Ooccoo
Yeto is making a soup. You can dip empty bottles into the soup to store some. In its current state, it heals 2 hearts per bottle. Ooccoo is in a pot at the south end of the room behind the shelf. Exit the room through the north door.
--== Room 4: Slide Puzzle ==--
Enemies: None
Chests: None
Quest items: None
This room is very annoying if you don't know what you're doing. The blocks on the ice can be slid around the room. Your objective is to slide the blocks onto the switches, opening doors. There are two switches, but only one is accessible right now.
Take the block in the south and push it west.
Push the block in the north south, east, south, west into the other block, then south onto the switch.
Not too bad... this time. Go through the unlocked door.
--== Room 5: Ice Hall ==--
Enemies: Mini Freezard
Chests: None
Quest items: None
Dig in the ground near the crack.
--== Room 6: Courtyard ==--
Enemies: White Wolf, Freezard, Chilfos
Chests: 4 (20 rupees, small key, 2 not reachable)
Quest items: 2 (small key, 1 not reachable)
Use your senses and dig in two areas: One in the north reveals a chest with a key. One in the south reveals a chest with some rupees. Enter the door on the west side.
--== Room 5: Ice Hall ==--
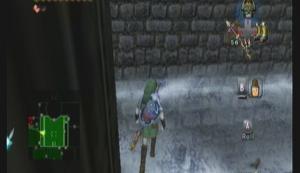
Enemies: Mini Freezard
Chests: None
Quest items: None
Make your way to the door in the north. Watch the mini freezards. You can only kill them with your sword for now, and touching them will freeze you and do constant damage till you're unfrozen by jamming buttons.
--== Room 7: Mini Freezard Fight ==--
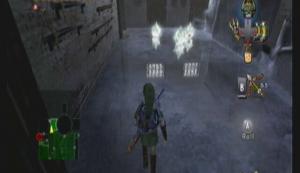
Enemies: Mini Freezard
Chests: None
Quest items: None
Use your sword and kill all the Mini Freezards in this room to open the doors. DON'T use jump attacks. Spin attack work well. Exit through the southern door.
--== Room 8: Pumpkin ==--
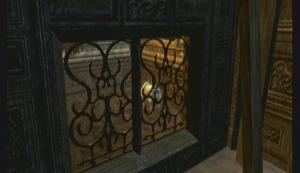
Enemies: Chilfos
Chests: 1 (Pumpkin)
Quest items: 1 (Pumpkin)
Approach the door that leads to the chest. Two Chilfos will appear and block your path. Defeat both of them to open the gate. Jump attacks work well to get in close and disarm them. After, spin attacks can take them down with ease. Helm Splitter and Backslice are also effective.
Open the chest for your prize: a.... Pumpkin? Well, open the southern door (Slide Puzzle) and the next southern door after.
--== Room 3: Kitchen ==--
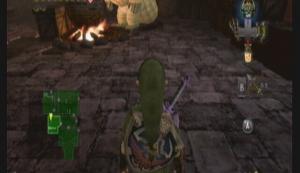
Enemies: None
Chests: None
Quest items: None
Talk to Yeto and give him the Pumpkin. He adds it to the soup, increasing it's potency to 4 hearts per bottle. Scoop some up if you want.
Return to Yeta in the next room (east) to get new coordinates. Exit through the northern door.
--== Room 6: Courtyard ==--
Enemies: White Wolf, Freezard, Chilfos
Chests: 2 (not reachable)
Quest items: 1 (not reachable)
Not much to do here just yet. Rather, there is a nook in the northeast that you can jump through. Enter the door there.
--== Room 9: Ice Maze ==--
Enemies: Mini Freezard
Chests: 2 (bombs, 20 rupees)
Quest items: None
Right in the ice in front of you should be a round piece of iron. This is a cannon ball. We'll be needing it. The puzzle here is you have to transport the ball to the cannon you saw, while avoiding the Mini Freezards. It's not that hard. You can either pick it up and dodge them, or work your way to the end, killing everything in sight, then coming back and getting the ball after.
Either case, turn the cannon using the handles so it faces south. Load the ball in the back of the cannon, then place a bomb in the back as well. The ball will launch through the ice revealing a path to the door.
--== Room 10: Collapsed Room ==--
Enemies: Mini Freezard, Ice Keese
Chests: 2 (20 rupees, Compass)
Quest items: 1 (Compass)
Trick here is to walk across the beams very carefully, trying not to fall of and avoiding the cracked sections that collapse. Take out your Bow or Clawshot and shoot off all the Keese and Mini Freezards first.
Walk across the far east beam, stopping after you slide down some ice (you'll know). Turn west and jump across, then jump again. Open the chest, then turn west again and follow this beam west to the chest with the compass.
If you look back to the door you came in from, there is a Clawshot target to the left of it. Grapple over and walk back out to the Courtyard.
--== Room 6: Courtyard ==--
Enemies: White Wolf, Freezard, Chilfos
Chests: 2 (small key, bombs)
Quest items: 1 (small key)
The compass reveals a chest in the ground. Dig in the ground twice to open the chest and get a Small Key. Use the key on the eastern door.
On the wall north of the door is a leaver. Pull it to lower a spoon. Pick up a cannon ball and place it on the spoon. Go back through the door. On this side of the door, pull the leaver north of the door to transfer the cannon ball through. Neat huh? Cant imagine why anyone would use such a device. A normal human could just carry the ball through the door.
Anyway, take the ball to the cannon west of the door. If you aim the canon south, you'll reveal a chest with 20 rupees. Aim it north to get the Freezard out of the way and continue through the dungeon.
--== Room 11: Miniboss: Dark Hammer ==--
Enemies: Dark Hammer
Chests: None
Quest items: Ball and Chain
Run through the hall to the other side, only to be locked in and assaulted by a Dark Hammer.
Dark hammer has two attacks: Throwing the ball and chain, and swinging it around him. Both of these will do a ton of damage if you're hit, so lets not.
He only has one weak point: his tail, and it's only vulnerable for the short time after he throws the ball and before he retracts it.
The key here is to stay on the opposite side of the hall as him, and wait for him to throw it. RUN over to him and attack his tail before he retracts the ball. If he starts closing in on you, you can clawshot the ceiling to get away.
This battle is fairly hard, given the small window of opportunity to attack. His tail is LITTERALLY invulnerable during any other time. You can actually hack and slash away at it for short periods before he starts swinging yet after he retracted it and you wont do any damage.
After the fight, take claim your prize of the Ball and Chain and exit through the north door.
--== Room 12: Say Cheese ==--
Enemies: Blue Bubble
Chests: 1 (Cheese)
Quest items: 1 (Cheese)
Use the ball and chain to destroy the ice and gain access to the rest of the room. The ball can also destroy Freezards and is fairly effective against Minis. Before we get our cheesy prize, use the ball and chain on the armor suits on the west wall. Hit them twice to completely destroy them. One of them hides a blue bubble, which defeating will get you 100 rupees.
Open the chest and get some cheese. Then go back to Yeto in the Kitchen (straight shot, just use your map).
--== Room 3: Kitchen ==--
Enemies: None
Chests: None
Quest items: None
Talk to Yeto and give him the cheese. Scoop up some more soup (now heals 8 hearts), and talk to Yeta in the room east. She'll open a new door.
--== Room 13: Frozen Spiral ==--
Enemies: Freezard, Ice Keese
Chests: 1 (Heart Piece)
Quest items: None
Before we head up, take the northern door into the courtyard. Push the block out of the way, opening the passage, then use the spoon thing in this room and the courtyard to bring in a cannon ball to the Frozen Spiral.
With that out of the way, pick up the ball and leave it on the floor. Destroy the ice with the ball and chain and head up the spiral ramp. There is a small opening the Freezards cage where you can throw the Ball and Chain. Wait for the spray to pass and hit it twice, fast.
Like so
Up the ramp is another one. Use the same strategy (you may have to take a hit, as the hole is in a harder-to-reach spot).
Destroy the ice at the top to reveal a cannon. We wont be using it yet. Take the door in the north.
--== Room 14: Chandelier Swing ==--
Enemies: Chilfos
Chests 1 (small key)
Quest items: 1 (small key)
Take out the chilfos on the right. Next, use the ball and chain to destroy the ice on the west wall, revealing a clawshot target.
Walk to the center and face across the gap. Between you and the chest is the top of a chandelier. Lock on and hit it with the ball and chain to start it swinging. Jump over with good timing, then again to the chest. Open the chest, and use the clawshot target to get back.
--== Room 13: Frozen Spiral ==--

Enemies: Freezard, Ice Keese
Chests: 1 (Heart Piece)
Quest items: None
Walk straight across to the south end of the room. Look at the floor to see an uneven section. Use the ball and chain to break open a hole and passage to a heart piece!
H29, 12 4/5
Use the clawshot to get back up. Open the locked door in the west.
--== Room 1: Entrance Hall ==--
Enemies: Chilfos, Ice Keese, Poe
Chests: 3 (Heart piece, 10, 20 rupees)
Quest items: None
Break the ice on the right. Use bomb arrows to take out the Chilfos across the gap.
Use the ball and chain to get the chandelier moving. Jump to it, but don't jump across. Rather, turn south to see two more chandeliers. Kill the ice keese with arrows. Get the next one moving and jump to it, then do the same with the next to reach the chest and a heart piece.
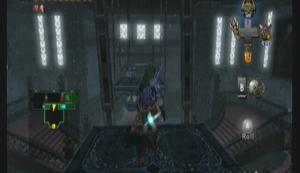
H30, 13 0/5
Jump down to the main floor. When you entered the ruins, remember those suits of armor on the left and right? Well, take the ball and chain to them. One holds a Blue Bubble with 100 rupees, two conceal chests with 10 and 20 rupees, and one hides a Poe.
Poe #45
Alright, enough of that. Climb the stairs on the east side and use the clawshot target you revealed to get back up. Across the chandelier and through the door west.
--== Room 3: Kitchen (upper level) ==--
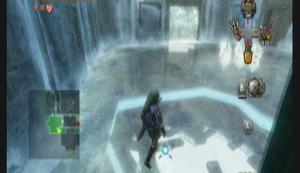
Enemies: Ice Keese, Mini Freezard, Poe
Chests: None
Quest items: None
Take out the Mini Freezards first, then break the ice wall in the west to find a Poe.
Poe #46
Exit through the northern door.
--== Room 4: Slide Puzzle ==--
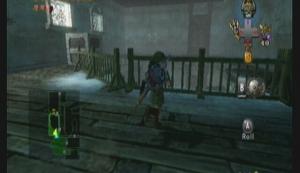
Enemies: None
Chests: None
Quest items: None
Push the block on the west side to the floor below. This will allow you to get back up. Jump down and start a new puzzle. Use the ball and chain to destroy the ice in the center, and to free the frozen block in the northeast.
Our objective is the switch in the center.
Push the block currently on the switch (south) up north.
Push the unfrozen block south, west, then north into the other block.
Push the north-most block (the first one you pushed) east, south, west, then north onto the switch.
The upper door is unlocked, but the lower one isn't. we don't really need it to be, but meh. Push the now north-most block east, south, west, and south again onto the switch.
Climb the block you pushed down back up to the top of the room and enter the newly unlocked door.
--== Room 6: Courtyard ==--
Enemies: White Wolf, Freezard, Chilfos
Chests: None
Quest items: None
Face north and use bomb arrows to kill all four Chilfos. Walk the path they were on to the end, then use the clawshot to get over the rubble in the north. Enter the door west.
--== Room 8: Pumpkin (upper level) ==--
Enemies: None
Chests: 1 (small key)
Quest items: 1 (small key)
Break the ice for a target, then start the chandelier moving. Jump to it and face south to start another chandelier. Jump to the chest and get your key. Exit via the southern door.
In Slide Puzzle, take the southern door back to Kitchen (upper), and use the key on the locked door.
--== Room 15: Freezards Room ==--
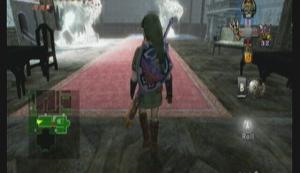
Enemies: Freezard
Chests: None
Quest items: None
Use the ball and chain to destroy both freezards in this room. There's really not trick to it, and you're probably going to take some damage.
Once they are down, go to where the eastern one was and push the two blocks there down below, opening a passage to the Frozen Spiral. Jump down and go grab your cannon ball from earlier (or use the door at the bottom and spoon thing to get one from the Courtyard). Load it into the cannon at the top and face the cannon west. Plant a bomb and launch the ball into the Freezards room.
Use the spoon thing in this room to get the ball into the Courtyard via the north door.
--== Room 6: Courtyard ==--
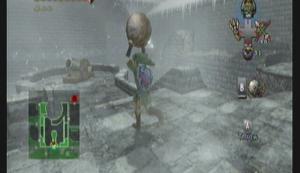
Enemies: White Wolf, Freezard, Chilfos
Chests: None
Quest items: None
Load the cannon and face it north-east. Plant a bomb and fire it at the Chilfos there. With it gone, take the east patch and jump down. Climb the ladder to where the Chilfos used to be and enter the door.
--== Room 16: Church Social ==--
Enemies: Chilfos
Chests: 1 (Bedroom Key)
Quest items: 1 (Bedroom Key)
Approaching the chest triggers ~8 Chilfos to appear in the room. Don't bother with anything fancy, just hack and slash, maybe some jumps and spins.
Once they're cleared, the doors open you can claim your prize: The Bedroom Key, which looks eerily like a Big Key...
Exit back to the courtyard to meet with Yeta. She'll take you to the Bedroom (you don't have to wait for her).
--== Room 17: Boss: Twilit Ice Mass – Blizzeta ==--

Blizzeta
Enemies: Blizzeta, Mini Freezard
Chests: None
Quest items: None
Another two-stage battle:
Blizzeta: Stage 1
Stage 1:
Not much to this stage. She's basically a giant Mini Freezard (which, by the way, she will launch at you from time to time). Use the ball and chain to break her down to size.
Blizzeta: Stage 2
Stage 2:
This stage is a bit harder, but not really. She'll fly up onto the ceiling and throw giant icicles down toward you. You can see them coming thanks to the reflective ice floor. Dodge them by running. She'll then call them back up and form a ring of them. When the ring comes down, you'll want to be on the outside. She'll then slam down in the center of the ring.
The trick is when the first icicles come down, break them with the ball and chain. Then, when she creates a circle with them, the ones you broke will make a gap in the wall, allowing you to target her with the ball and chain.
I find it easiest just to stand still and let the falling icicles hit me, rapidly pressing B to use the ball and chain whenever I get up. Doing this ensures a huge gap in Blizzeta's defense when she uses the ring, as you're sure to destroy 4-5 of the icicles. Run away when the ring falls, then quickly Z-target to turn and chuck the ball without having to aim.
Three hits is all it takes.
After, get your heart container (14 0/5) and warp out with Midna.
All this cold got you down? I hear this place was much warmer in the past... Onward, to the Temple of Time!
The side-quest leading up to this temple is probably the shortest in the game. We have a couple things to wrap up on Snowpeak, then we're done here forever. Warp to Snowpeak.
--== Snowpeak ==--
Climb up to the tree and talk to Yeto. He'll challenge you to a board race. Accept and beat Yeto with a time of 1:30 or better. After beating him, warp back to the top and talk to Yeta. She'll then challenge you. She is much faster and takes a shortcut that is impossible to beat unless you take it as well.
The shortcut is here:

Jump up on this ledge
To beat Yeta, you have to finish with a time of 1:15 or better. After the race, they give you a Heart Piece.

H31, 14 1/5
Warp back to the peak. In the cave that leads to the area, there is a Poe incased in ice. Break the ice with the ball and chain.
Poe #47
Also, you can get some rupees if you light both the candles in here.
And that's it. We are done with Peak Province, Zora's Domain, and Zora's River (unless you want to go fishing, which doesn't really get you anything).
Places left to finish (on map, not dungeons): Hyrule Field (Lanayru & Eldin), Lake Hylia, Castle Town, Hyrule Castle, Faron Province, Cave of Ordeals, and Kakariko Village.
--== Kakariko Village ==--
Go into the graveyard and meet with the Hero's Spirit to learn the Jump Strike. It sounds and looks cool, but it's really useless. It takes to long to charge and most enemies will either attack while you're charging, run out of range while you're charging, or hit you in mid-air after you swing.
--== Castle Town ==--
Warp to Castle Town. If you haven't bought the Magic Armor yet, now's a good time, as you wont be needing your Rupees for anything else for a while (or ever).
Anyway, go to Telma's Bar and look at the map to learn Rusl has went searching the Faron Woods. Warp there.
--== Faron Woods ==--
Talk to Rusl and he'll give you a Gold Cucco, which you'll need to reach the woods without Midna's help. Jump off aiming for the platform ahead.

Here

Then here

Finally here
Use the Gale Boomerang on the bridge ahead to turn it around then jump to it with the Cucco. Turn it again to get off. You'll need the Cucco to get past the swinging logs as well. Enter the forest.
--== Sacred Grove ==--
Well, here we are again. And so is Skullkid. >_<
This time, Skullkid DOES wonder around randomly, and if you don't find him fast enough, he'll move to a new area.
They made it a little easier though, as now you can watch for the glow of his lantern as well as the noise. However, now that you have a bow, he can be up in trees and other unreachable areas, forcing you to look high and low.
In one area, there is a Poe. This area was one of the areas Skullkid hid last time: on a hollow stump that the only way to get there is through a water fall that comes up behind it.
Poe #48
Well, happy hunting. After he takes around 3 hits, he'll retreat deeper into the woods for the final battle (again).

Skullkid
This time it's much easier as he stays out of sword range, but wont run when you try and attack. Pull your bow and you should be able to hit him all three times without even having to get close to his puppets.
After the fight he'll open a new passage and day will break, ruining the chance to get a Poe in the next area :/
--== Sacred Grove Part 2: Sacreder ==--
In this new area, push the block on the left down.

This block
Jump down onto it and follow the cave it fell in. There should be a Male Snail on the roof of the cave.
Male Snail
Go to the north end of the area where you got the Master Sword. Place the sword back in the pedestal to move a statue that was blocking a door (you could have done this sooner, but you wouldn't have been able to reach the door).
Walk back out to be attacked by some Shadow Beasts, opening a warp point. This is good. Climb back up the block you pushed down to get to the door.

Door of Time
Stepping through sends you back in time, when this place was more then just ruins. Not to ruin this epic moment, but there is the last Golden Bug on west side of the stairs.
Female Snail
Final Golden bug! Go to the north end of the room and place the sword back in the pedestal again. It will open a staircase further into the area. Ooccoo beats you up the stairs.
Temple of Time
Temple of Time looks small on paper, but you have to play the entire temple twice (work your way to the top, then back down lugging a statue), but it's still about the same length as Snowpeak. It's based largely on weight and scale puzzles.
--== Room 1: Entrance Room ==--
Enemies: None
Chests: 1 (small key)
Quest items: 2 (small key, Ooccoo)
Going to the north end of the room, Midna will comment on how there is suppose to be two statues. Use your senses to confirm. Just behind you there is a switch on a pedestal. Set one of the jars on it to raise a section of floor in the south. Use that to get up on the stairs.
Follow the stairs clockwise. You'll meet up with Ooccoo at the top. Keep going down the other side. Light both torches here to reveal a chest with a key. Go back to the top of the stairs and use the key to get through the door.
--== Room 2: Long Hall ==--
Enemies: Gohma Larva, Lizalfos, Armos, Keese
Chests: 3 (Arrows, Map, 20 Rupees)
Quest items: 1 (Map)
In the first room, take out the Gohma and set a jar on the switch. Run through the gate that opens (the other gate contains the arrows), then, between the gate that opened and the one that closed, take out your bow and shoot the jar. This will open the second gate.
Up the stairs, down a long hallway.
Next room, kill all the Lizalfos in this room. During the fight, you'll probably activate the Armos (if not, just walk in front of it). There are several ways to destroy and Armos, but the easiest is to walk counterclockwise around it with your bow drawn (locked on), once you get kind of behind it, unleash as many arrows as you can. Your target is the jewel on its back. Hit it three times and he explodes.
A chest will appear with the Map. Also in the room is the small chest with rupees in it. It's on a ledge.
Grab some jars or statues and set them on the two switches to open the gate. Continue north to the next room.
--== Room 3: Manual Elevator ==--
Enemies: Baby Gohma, Lizalfos, Beamos, Blade Trap
Chests: None
Quest items: None
First in, circle clockwise around the room and kill all the Lizalfos (as well as the Beamos just to the left of the entrance), taking the stairs you find up.
When you reach a gap, use the spinner on the left wall to continue up. At the top, face south. Watch the blade traps and go straight to the center of the ring. Push the fin clockwise to lower it. At the bottom, grab the statue and place it on the elevator, then push the fin counterclockwise to raise it back up.
Pick up the statue again and take it to the southern door. Set it on one of the switches, then head back into the ring. This time take the western route. You'll see another statue on a small platform outside the ring. Pick it up and set it on the other switch.
The second statue
There is a delay between setting the statues and the raising of the platform. Use that time to get on the platform before it raises. Enter the door.
--== Room 4: Twin Armos ==--
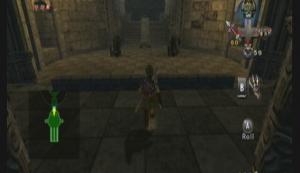
Enemies: Armos
Chests: 3 (20 rupees, small key, 1 not reachable)
Quest items: 1 (small key)
You must defeat both Armos to reveal a chest with a small key. The 20 rupees are in a chest at the far south of the room. Taking out two Armos at once isn't that hard, considering how slow they are. Just be sure to only focus on one at a time, as you don't want both of them going at top speed.
Exit out of here (Room 3) and go back across the ring (dodging the blade traps) and use the key on the door opposite you.
--== Room 5: Arrows and Beamos ==--
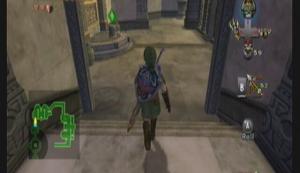
Enemies: Beamos
Chests: 1 (Compass)
Quest items: 1 (Compass)
Destroy the Beamos. Get up next to it, then turn around and shoot the crystal to move two walls. Go through the new opening.
Stand in the middle of this area and shoot through the hole to hit the crystal again, opening the next wall. Destroy the Beamos, and before shooting the crystal again grab the compass from where the northern wall was. Shoot the crystal through the hole and continue up the stairs.
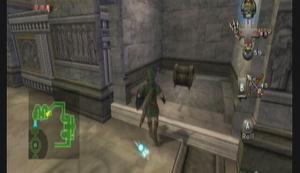
Compass
--== Room 6: Half a Room ==--
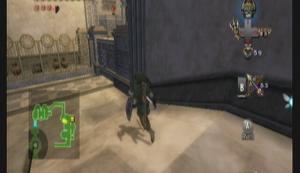
Enemies: Lizalfos, Armored Dynalfos
Chests: 1 (not reachable)
Quest items: None
There is no door between these two rooms, I used the hallway as a split.
Anyway, shoot the red crystal up on the pedestal across the room. Run through the open passage, kill the lizalfos (helm splitter works on the Armored ones) and shoot the crystal again. You'll have to do this one more time to get out.
--== Room 7: Scale of Light ==--
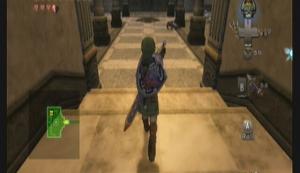
Enemies: Gohma Larva, Baby Gohma
Chests: 2 (20 rupees, 50 rupees)
Quest items: None
Take out all the Gohma first. The clawshot is a nice ammo-free weapon to use on the babies. A chest will appear with 50 rupees in it.
Climb the stairs and walk on the scale. It will tip, obviously. Pick up the statue on your scale and throw it onto the other one. They'll level out and allow you to get across.
We're not done yet. To the left of the door is a clawshot target on a wall. Grapple over and let go to land on a platform with another statue on it. Pick it up and haul it to the scale.
Third statue
Walk on the scale and throw the statue to the other scale (it should now have three statues on it). This will raise your scale even farther, allowing you to reach a clawshot target in the center of the room.
Target
Grapple up, then use the spinner on the track to get up to a higher ledge. Jump off and there should be a Poe near the door.
Poe #49
Enter the door behind it.
--== Room 8: Unique Weights ==--
Enemies: Armos, Helmasaur
Chests: 2 (20 rupees, Big Key)
Quest items: 1 (Big Key)
Take out the Helmasaur using the clawshot to snatch off their armor. Take on the Armos to open the gate higher up. Grapple to the point on the ceiling. Open the chest for some rupees. Set the two statues on two of the switches, but what to use on the other two? Look over the ledge and clawshot the Helmasaur armor up to you and use that on the other two.
The gate opens, grab the key, and exit out.
In room 7, walk along the ledge south to find more rupees. Exit via the southern door.
--== Room 9: Mundane Traps ==--
Enemies: Beamos, Blade Trap, Lizalfos
Chests: 1 (small key)
Quest items: 1 (small key)
Use an arrow on the Beamos, then navigate the Blade Traps west.
This area, kill the Lizalfos before trying the traps. The first is a spiked log. Wait for it to roll west, then quickly climb to the ledge with the pendulum, timing it so you can get past the pendulum. Open the chest for a small key. Jump back down when the log is in the east and travel west to the next log. Go straight north and grab the statue. Wait for the second log to be in the west and travel east to the new walkway. Set the statue on the switch to lower the energy field. Up the stairs.
--== Room 10: Gateway ==--
Enemies: Baby Gohma, Gohma Larva, Armos
Chests: 1 (50 rupees)
Quest items: None
Killing all the Gohma reveals the chest. Killing the Armos opens the gate. Well? Get to it. Past the gate is your door.
--== Room 11: Miniboss: Darknut ==--

Enemies: Darknut
Chests: 1 (Dominion Rod)
Quest items: 1 (Dominion Rod)
Walking forward starts the fight with the Darknut.
Darknuts are probably the hardest enemies in the game. Not the most annoying or deadly, but just hard to take down.
Stage 1
Stage 1:
The Helmsplitter is almost the only attack you have that will work consistently. The Backslice works from time to time. When he lunges his shield, as soon as you recover dodge away or you'll meet his sword. He doesn't attack much, but his defense is near perfect. He is open after every swing, so long as you don't attack his shield.
Stage2
Stage 2:
Breaking off most of his armor, he throws is shield and large sword in favor of a smaller (yet still huge) sword. He is much faster in this stage and tends to keep a distance. He likes to hold back, then jump forward for a couple quick swings. He is also able to block almost every attack you have. Try to get in close and use the backslice, it breaks his guard with a successful strike. Once his guard is down, hack away till he gets back on his feet. Repeat till down.
At the end of the battle, claim your prize of the Dominion Rod.
The rod allows you to take control of a statue. The statue mimics your every move, except jumping. If equipped with one, a statue can also swing a weapon by pressing B. To stop controlling, press A again.
Use the rod on the large statue at the top of the room. Guide it down and onto the glowing platform beneath the bell. These bells with transport the statue from room to room.
--== Room 10: Gateway ==--
Enemies: Armos
Chests: None
Quest items: None
Entering the room, the bell reveals your statue. Take control of it and use it's axe to destroy the yellow gate.
Can we keep him, mommy?
Also use him to destroy the Armos if they activate. Set him near the white platform in the south, then set a jar or something on the switch in the middle of the room to lower the platform. Walk him and yourself on it, then move the jar to raise the platform and your statue.
Walk him down the hall.
--== Room 9: Mundane Traps ==--
Enemies: None
Chest: none
Quest items: None
Walk the statue through the barrier and have him set on the switch to deactivate it. After, use him to demolish the room, getting past the logs (which he can destroy) and the Blade Traps (which he can destroy).
Smash the Beamos to reveal a switch. Use the rod to take control of another statue near the bell and walk it onto the switch. This lowers a white platform. Move your statue onto it, then de-activate the switch to raise the platform. Walk your statue onto the bell.
--== Room 7: Scales of Light ==--
Enemies: Gohma Larva, Baby Gohma
Chest: None
Quest items: None
Walk your statue onto the scale. It will tip. Go onto the scale and toss the small statue that is on it over to the other scale.
Get back off and grapple over to the ledge with the other statue on it (remember?). Grab that statue. The Gohmas are back and there's too many to just avoid. After you finish them off, go up the stairs and toss the statue onto the scale.
Still not enough. Look on the wall beside the scale to see more statues. Use the rod to get all three down, then toss all three onto the scale.
Yay! It worked. Use the rod to get your statue onto the next scale. Pick up all the small statues and toss them to the other scale to raise this one back up and get your statue down the stairs.
The bell is in the center of the room.
--== Room 6: Half a Room ==--
Enemies: None
Chests: 1 (heart piece)
Quest items: None
Use the rod on your statue through the fence. Use him to smash all the movable walls. Put him back on the opposite side of the electric barrier and set him on the switch to disable it. Walk through to the chest to get your heart piece.
H32, 14 2/5
Alright, get on the outside of the fence and move your statue through the hall.
--== Room 5: Arrows and Beamos ==--
Enemies: None
Chests: None
Quest items: None
Use your statue to small both movable walls, then set him on the bell and continue.
--== Room 3: Manual Elevator ==--
Enemies: Blade Trap, Baby Gohma
Chests: None
Quest items: None
Grab the fin and turn it counterclockwise to find your statue. Guide it over onto the elevator and turn it clockwise to go down one level. Set your statue on the switch that leads to the southern door (after destroying the blade traps, of course). Go back onto the ring and grab the other small statue and set it on the other switch. Get on and enter the door.
--== Room 4: Twin Armos ==--
Enemies: Gohma Larva, Baby Gohma
Chests: 1 (heart piece)
Quest items: None
First defeat all the Gohma.
Grab a statue and haul it to the southern end of the room. Throw it on the western ledge behind the fence. Use the rod to walk it down north till it falls on a switch. Go back up and do the same on the east side (there is already a statue there) to reveals a chest with a heart piece.
H33, 14 3/5
Go back to Room 3.
--== Room 3: Manual Elevator ==--
Enemies: Blade Trap, Baby Gohma
Chests: None
Quest items: None
Your statue is back up on the upper level. Get in the elevator and turn counterclockwise to get it back on the elevator. This time, go all the way down to the ground (turn clockwise twice). Here, kill all the Baby Gohma to open the electric barrier.
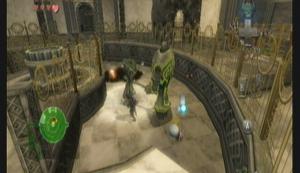
Numbers makes up for size, right?
Walk your statue past where the barrier was. Go to the east side of the room and have him smash the gate, revealing a Poe.
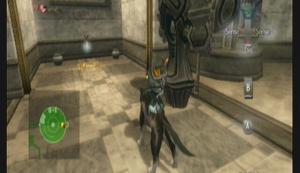
Poe #50
Get your statue again and break the gate in the north to access the bell. Exit the room west.
--== Room 2: Long Hall ==--
Enemies: Armos, Keese
Chests: None
Quest items: None
Use the clawshot to get over the gate. Grab your statue and walk him all the way down. Use him to smash the gate, then set him on the bell.
--== Room 1: Entrance Room ==--
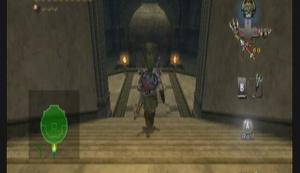
Enemies: None
Chests: None
Quest items: None
Full circle, man. It would have been annoying if it wasn't so much fun smashing stuff.
Grab your statue and walk him into his proper place beside the door. The gate opens, granting passage. Say goodbye to one of the best sidekicks in a Zelda game. We'll miss you, sir smash-a-lot.
--== Room 12: Torture Hall ==--
Enemies: Beamos, Gohma Larva
Chests: None
Quest items: None
It may look sort of menacing at first, but it really isn't. The traps are placed far enough apart that you can easily get by them one at a time.
Take out your bow and use it on the Armos. Near the end of the hall is a couple pendulums around a switch. Just behind you is a small statue. Use the rod to get the statue between the pendulums and set it on the switch, opening one gate but closing another. Get through the first, then turn and move the statue off the switch.
--== Room 13: Boss: Twilit Arachnid – Armogohma ==--
Armogohma
Enemies: Armogohma, Baby Gohma
Chests: None
Quest items: None
This battle is really easy. Armogohma has two attacks: Spawning Baby Gohma and firing a laser beam out it's eye.
When she spawns baby gohma, take them out with spin attacks (they are more aggressive then before, making it easier). The laser is easily dodged by running zig-zag or in circles.
Keep your bow out and aimed at Armogohma's eye. When she stops, wait for her eye to open and shoot it with an arrow (it doesn't matter if she is already firing a laser out it). She'll fall from the ceiling conveniently in front of one of the four large statues. Use the Dominion Rod on the statue and press B to have it pound the spider. Do this three times, and you win!
...Well, kind of. The eye then comes to life and runs around with a bunch of Baby Gohma. Hardly a “stage 2” as it doesn't even attack you. Target it with your bow and fire a few rounds into it.
Get your heart container and mirror shard and get out of there. Only one place left to go and Midna spoiled it, so no clever puns here.
Onward, to the City in the Sky!
This is a longer quest that will literally take us to almost every place in Hyrule Field. The good news is you'll get a lot of heart pieces, some souls, and a new skill.
You should still be in the Sacred Grove (past). Walk out into the main room and use the Dominion Rod on the statues to the left and right of the stairs. One is a heart piece the other a Poe soul.

H34, 15 4/5
Poe #51
Alright, go up the stairs and take the trip back to the future (Next Zelda game needs a Delorean instead of a horse).
Outside, Ooccoo talks to you about the Dominion Rod and her home in the sky. Warp to Castle Town and see if Telma knows anything.
--== Castle Town ==--
You now have all the Golden Bugs, so you can talk to Agitha and get the final wallet (holds 1000 rupees). If you don't feel the need, then head straight to Telma's Bar and view the map. Warp out to Kakariko Village.
Go to Renado's place and talk to Ilia and Renado. Warp back to Castle Town and talk to Telma again.
Show here the letter and she'll tell you about the doctor. The doctors place is near the western gate of Castle Town.

Doctors house
Show him the Invoice and he'll start talking. Once he waddles back to his room, transform into a wolf and push the box in the back of the house to get the Medicine Scent. Follow the scent back to Telma's Bar where her cat admits to having stole it, yet lost it to some Stalhounds out near the southern gate. Head out that way and wait for night. The Stalhounds appear in the path in the middle of the area.
Defeat all of them to get the statue.
Don't warp to Kakariko just yet, seeing as it's night, I know a Poe we can get really quick. Warp to the Sacred Grove. Go up to the place where you got the Master Sword to see a Poe hanging around.
Poe #52
Warp back to Kakariko Village and show it to Ilia. The Gorons tell of the hidden village in the north that is known by that symbol (Sheikahs). Warp to Eldin Bridge, closest to the marked spot.
--== Hyrule Field ==--
Stay in wolf form (it's faster) and dash all the way to the red mark. Jump up on the ledge and transform back into a human. Wonder through the cave till the Goron breaks through to the other side. He warns that there are 20 enemies in the village.
--== Hidden Village ==--

Hidden Village
The 20 Bulblins aren't that hard to spot. Just walking straight through town should spot you most of them. There are a couple inside buildings that may be harder to get, but I think you can spot all of them.
Don't be afraid to shoot or jump through windows. Also, DON'T howl at the stone if you stumble across it. We'll get it later. To get up on balconies, use the Clawshot and look around for some mesh.
After all 20 are down, Impaz will come out of her house. She'll give you Ilia's Charm. Warp back to Kakariko and show the charm to Ilia. Ilia will give you the charm, and tell you about the Dominion Rod and it's connection to Impaz. Warp and run back to the Hidden Village.
Now we have a couple things to get in the village. Go through the window of the second building in the west, then through another window in the back of the building to find the howling stone.
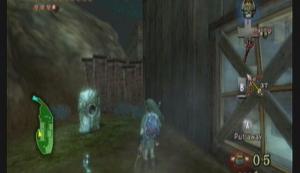
Howling Stone #7

Pattern
The most complex song in the game, also the only original song (Ballad of Twilight, a Twilight Princess original). The Hero's Spirit appears in front of Hyrule Castle and teaches the Great Spin. But that's later.
By the stone is a Cucco. Talk to it (in wolf form) and play his game of tracking down all 20 cats. The positioning of the cats is pretty much the same as the Bulblins. There are a couple you may have problems with.
There is one at the second story inside the house that lead to the Cucco leader:

Cat
And one in the barn at the end of town that you have to jump to from another ledge (after grappling up to the balcony).

Cat
Once you talk to all 20, see the leader again. He tells you your prize is near Impaz house. Run up there for a heart piece.

H35, 16 0/5
Assuming it's still night, there is a Poes soul on the balcony in the northeast edge of the village. He only appears after the Bulblins are gone and the cats are talked to.
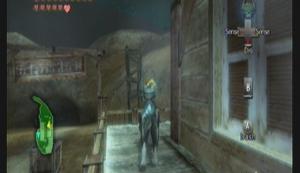
Poe #53
Finally, go to Impaz house and open the door. Show her the Dominion Rod and she'll give you a Book. Warp back to Kakariko Village. Fall down the hole in Renado's house and show the book to Shad. He says the magic words that revives the Dominion Rod.
Is it still night? Good. Warp to Faron Woods. Head to the lantern salesman. There is some bombable rocks in this area that lead to your first stone statue. Bomb them and move the statue at the end. Walk into the green light to restore one letter to the book.
Now, move the statue to a dip in the path. Once in place, it opens a route to get on top of the cliff and leads to a heart piece. You have to use Midna in wolf form to prompt your way up.
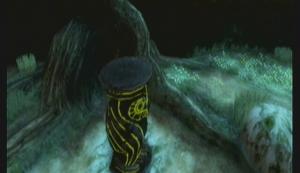
H36 16 1/5
Once you get the heart, drop down off the ledge. You are in the swamp. Walk up the hill and use Midna to prompt onto the stump in the middle of the swamp where a Poe awaits.
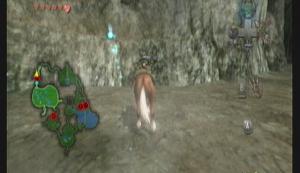
Poe #54
Warp to Kakariko Gorge.
--== Hyrule Field ==--
We are going to make a crescent run clockwise through Hyrule, ending in Lake Hylia. Use your new horse call to call Epona over (probably the only time we're ever going to use this item. They give it to you way to late in the game).
Ride her north to the red dot in this area. Climb up on the ledge and use the Dominion Rod to move the statue, revealing the second character.

Second Character
You can make 100 rupees here by moving the statue west of where it was, then jumping across the gap it bridges, re-animating the statue and walking along the ledge with it in tow. Place it in the east, bridging another gap, and jumping to the chest.

->

Get back on Epona and ride her to Eldin Bridge. Ride to the north end and take out the archer there. The next sentinel is on the eastern ledge. Move it and get the next character.

Third Character
Heart piece time. Animate the statue and walk it all the way back across the bridge. At the south-eastern end is a gap. Place the statue in the gap and use it to get across. Climb the ladder for a heart piece.
H37, 16 2/5
Walk back to Epona and ride a little further north. There is a clawshot target on the cliff wall.

Here
Grapple to it and follow the ledge to a cave.
The cave is much like Goron Mines. Jump off the end of the bridge and equip the Iron Boots in mid-air to be pulled to the wall. Do this two more times to reach the end. Light the two torches you land by for 100 rupees and open the other chest for a heart piece.
H38, 16 3/5
Exit is behind you. Use the grapple points to get back up to ground level. Ride Epona to the entrance to the hidden village. Opposite the cave near the rope bridge, you should notice a spinner track. Get on and ride it down to a small patch of grass. Dig in the center to find a secret area. Defeat all the Stalfos to win a heart piece.
H39, 16 4/5
Back out, use the track again to get out.
Ride Epona to the next province, north of Castle Town.
Go into the lower rocky area at the northern end. Remember where we caught that bug? Time to blow the rock below it.
Heart Piece inside
Use the ball and chain to clear the ice. You now have to complete 3 excruciatingly hard block-slide puzzles.
--==--
First Puzzle
Second Puzzle
Third Puzzle
--==--

H40, 17 0/5
Hop back on Epona and go to the southern red dot in this area, in the ancient amphitheater. The next sentinel is on one of the pillars. Walk it down, then place it between the steps and the pillar.

Fourth Character
Walk back up to Epona and ride to the Lake Bridge and the next sentinel on your map. Take control of the sentinel and walk it off the ledge, then grapple to the vines above it and drop down onto it.

Fifth Character
To get to the chest opposite it, move the sentinel near the ledge, then climb the vines again, this time trying to jump off onto the sentinel.
We have one thing left to get in this area: a Poe soul. Ride across the bridge. Pass under the tree and look for a ledge with bombable rocks on it. Blast them with an arrow, and grapple to the point the reveal. Turn east and do the same, then grapple to the ledge with the poe.

Rocks
Poe #55
There is also a chest here with 50 rupees. You can also dig in the grass behind the poe for a secret area. Kill all the bubbles for 100 rupees.
With that done, we are done with Hyrule Field for all but one heart piece that we cant get right now. Warp to Gerudo Desert.
--== Gerudo Desert ==--
Run to the point marked on your map. The sentinel is on a pillar. Walk it down between where it was and the north-western pillar. Climb up and jump over.

Sixth Character
That's it. It's a full book now. Go back to Kakariko.
--== Kakariko Village ==--
!!WARNING!!
SAVE NOW if you must. DO NOT save between after you enter the house and when I say or you'll have to restart your game!!
Drop down the hole again and talk to Shad. Show him the book. He'll say the magic words and release the statue, allowing you to animate it with the Dominion Rod. Move it aside and walk down the path. Shad will interrupt and talk about the cannon. Walk up and prompt Midna. Try to warp it and she'll say she cant with Shad here. Talk to Shad again and he'll leave. Use Midna again and warp it to Lake Hylia.
That's a big cannon
!!Ok, now you can save again. See, if you would have saved between these points, you wouldn't have been able to make Shade leave the room, meaning you couldn't warp the cannon and continue the story.!!
--== Lake Hylia ==--
Lets warp to Castle Town real quick. Go to the town center and enter the northern gates to find the Hero's Spirit waiting. He'll teach you the Great Spin. Go back out and resupply at Malo Mart's Castle Branch. Don't be stingy! Fully stock everything!
Ok, back to the lake. Talk to the clown and have him repair your cannon for 300 rupees. (you should have PLENTY). After several days of work (in loony toons fashion), your cannon is complete.
Grapple into the back to be launched into the sky!
Lock and load!
City in the Sky
Well, here we are. The fabled city. This place suffers from the same design of Snowpeak: it's just an old building, not an ancient temple. As such, the puzzles are more about navigating the ruins then traps and puzzles. This city differs in two areas, however: It's a whole city, not just one house, and it's in the sky, meaning any jump could be your last. City in the Sky is based around Clawshot puzzles and navigation.
--== Room 1: Landing ==--
Enemies: Deku Serpent
Chests: 2 (water bombs, 20 rupees)
Quest items: None
Lucky you landed in water. At the bottom of the pool are two chests. You don't need either. Go into the building in the west.
--== Room 2: Shop ==--
Every city needs a shop. Ooccoo is on the counter. Talk to her to have her come with you. If you didn't buy stuff back in Castle Town, stock up on arrows here.
--== Room 1: Landing ==--
Enemies: Deku Serpent
Chests: None
Quest items: None.
Go up the northern path. Above the gate is a crystal. Shoot it to open the gate and enter the door.
--== Room 3: Entrance Hall ==--
Enemies: Helmasaur
Chests: None
Quest items: None
The blue blocks in this room will begin to sink if you stand on them.
Grab an Oocca and use it like a Cucco to get across the first gap. Try not to land on the blue blocks. Use the clawshot and aim for the vines on the pillar on the ledge in the east. Grab another Oocca and use it to get across the next gap. Enter the door.
--== Room 4: Central Hub ==--
Enemies: Helmasaurus
Chests: None
Quest items: None
Defeat the Helmasaurus in the same way you do Helmasaurs without using the clawshot (wait for them to charge, dodge, and attack from behind).
Look for a window between the east door and the southern door. Clawshot to it and go through the hole in the grate.
--== Room 5: Eastern Bridge ==--
Enemies: Kargarok
Chests: None
Quest items: None
There should be a spinner slot right below where you entered. Use it to extend the bridge. Walk over to the gap in the north and look for some vines to grapple to. Once over, cross the bridge carefully, as the wind will blow you off if you don't fight it.
--== Room 6: Floorless Building ==--
Enemies: None
Chests: 3 (small key, 2 not reachable)
Quest items: 1 (small key)
Walk onto the small path in the south. Use the clawshot and aim for a target over the platform across the gap east. Drop down and open the chest for a small key. To get back out, aim for the grate to the north then walk back to the door.
--== Room 5: Eastern Bridge ==--
Enemies: Kargarok
Chests: None
Quest items: None
Run back across the bridge, only to have it destroyed behind you by the dragon. I think he just wants attention. Well, wont be going back there for a bit. Enter the door.
--== Room 4: Central Hub ==--
Enemies: None
Chests: None
Quest items: None
Walk to the edge of the solid platforms (but not on the blue blocks). Use the clawshot to look to the right of the gap ahead. You should be able to reach the vines on one of the pillars. Grapple over and go through the western door (running quickly over the blocks).
--== Room 7: Western Bridge ==--
Enemies: Deku Serpent
Chests: None
Quest items: None
Head south around the building's exterior. There is another spinner slot that extends the next bridge. Use it to get across and enter the door.
--== Room 8: Cross Breeze ==--
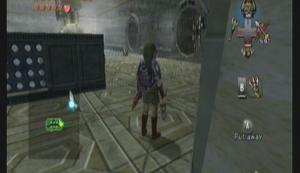
Enemies: Helmasaur
Chests: 1 (not reachable)
Quest items: 1 (not reachable)
Equip the Iron Boots and walk through the first fan's wind. Take them off and use the clawshot on the vines on the pillar to get past the next one. Enter the western door.
Open the chest for the map. Go back out to Room 8.
Get up to the edge of the western stream, and look for a stalactite covered in vines up above. Grapple to it and fall down, then use the Iron Boots to get past the next stream.
Head south around behind the wall. Look north to spot a crystal. Hit it to make the third stream stop blowing. Use the Iron Boots and Clawshot to get back over to it and run across the blue blocks. Enter the door.
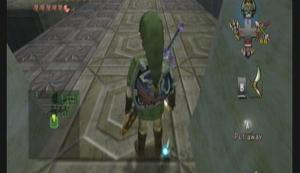
Crystal
--== Room 9: Winds, Snakes, and Oocca ==--
Enemies: Tile Worms, Keese
Chests: 3 (10 rupees, 2 not reachable)
Quest items: None
Here you have to navigate the gaps without jumping into the windstreams. Some of the tiles (marked with windmill like symbols) have tile worms hidden under them. Use the boomerang to inspect every tile before jumping.
Overall this is just a platforming room, not much I can do to direct you.
--== Room 10: Dual-leveled ==--

Enemies: Armored Dynalfos
Chests: None
Quest items: None
Two Armored Dynalfos attack in this room. There isn't a lot of space to encircle them, but you can fight to an extent. I like using a glitch wherein if you hit them with the clawshot, even if they block it they get pushed back. Repeatedly fire the clawshot till they get pushed off an edge.
A gate will open in the upper section of the room. Grapple to the vines beneath it. There should be this weird mesh-like chandelier thing there. Grapple to it to pull it down and start a fan blowing. Grab an Oocca and jump into the breeze to get enough height to make it to the upper northern door.
--== Room 9: Winds, Snakes, and Oocca ==--
Enemies: Tile Worms, Keese
Chests: 2 (20,50 rupees)
Quest items: None
Grab an Oocca and jump when the breeze is blowing to get to the next breeze in the east. Use that breezes boost to make it through the hole in the wall and land on the eastern platform there.
Clawshot to the mesh chandelier overhead to activate another fan. Grab your Oocca and use the two breezes to reach the northern door.
(the chests are blatantly obvious if you really want them)
--== Room 11: Bottomless Watchtower ==--
Enemies: Keese
Chests: None
Quest items: None
Your goal is a door in the west. There are many, MANY ways to get there, most involving blindly jumping with an Oocca. Don't care how, just get there. Don't get caught in the cross breezes.
--== Room 12: Mini-boss: Aeralfos ==--
Enemies: Aeralfos
Chests: 1 (Clawshot)
Quest items: 1 (Clawshot)
You need to get down to the lower level. To do this, clawshot to the mesh over the fan and equip the Iron Boots to stop the fan. Drop down to the lower level.
Aeralfos
To defeat it, wait for it to be in the air and getting ready to charge (it will flap it's wings faster and hold it's shield in front of it). Clawshot the shield before he charges to bring him down and knock him off balance. Hack away till he recovers. When this happens, jump away and keep a distance. If you try anything else while he is on the ground, you'll just get hurt. Wait for him to fly back up and repeat.
This battle is set apart from future Aeralfos fights because he not only has more health, but a sort of stage two takes place after a couple hits.
He'll now fly up and out a window, only to reappear in another window and immediately charge. You have to lock on to him fast before he charges and clawshot him down.
After about 4 rounds, he'll go down for good.
Clawshot to the gate that opened and open the chest for your prize:
Another Clawshot! You now have two, one in each hand, which will allow you to clawshot from one target to another like Spiderman.
Walk out to the edge of the platform and look for a target in the ceiling that you can reach. Clawshot up and lower your chain a bit, giving you a better view of one of the western targets. Grapple over, then look east for a vine hanging from the upper floor. Climb up and exit.
--== Room 11: Bottomless Watchtower ==--
Enemies: Keese
Chests: None
Quest items: None
This time, we are masters of this room. Use the clawshot targets on the left to grapple your way from one to the next, working clockwise.
On the fourth one, look up to see another mesh chandelier. Grapple to it.
Here
A gate will open. Grapple to one of the points beside the door.
--== Room 8: Cross Breeze ==--
Enemies: Helmasaur
Chests: 1 (compass)
Quest items: 1 (compass)
New twist: You have targets on the stalactites, but once on them, they begin to slide down, eventually falling off with you on. The trick? Lock on and grapple from one to the next, quickly. Holding down Z helps. On the last one, press A to drop off. Open the chest for the compass. Exit.
--== Room 7: Western Bridge ==--
Enemies: Deku Serpent
Chests: None
Quest items: None
We are now under the bridge. Use the clawshot to clear the serpents from your next target (once to stun, again to cut their vine). At the end, look for some vines off to the south and climb up.
--== Room 4: Central Hub ==--
Enemies: None
Chests: None
Quest items: None
Run across to the east side. Use the clawshot target overhead, then grapple to the one above the eastern door.
Use the Peahats to get across the bridge in room 5.
--== Room 6: Floorless Building ==--
Enemies: Deku Serpent, Chuchu
Chests: 2 (don't bother)
Quest items: None
There is a grapple point on the ceiling in the northeast. Grapple to it and lower yourself to the platform below.
Clawshot the sliding pillar to get across the gap. Drop off on the last one.
Look through the hole in the wall and clawshot to the target on the other side. Look up and clawshot to the upper left target. Clawshot to the grate on the right.
Go through the hole and jump across the gap. Clawshot to the LOWER grate in the west. You have to walk to the edge of the platform to see it.
Drop down and take out the serpents on the ceiling. Clawshot to the target they guarded. Lower yourself and look for a crystal on the north side. Shoot it to open the gate. Clawshot through the gate to the next target.
Look up and right to grapple to another grate. Up and left to a target, then across to another grate. Finally, on the ceiling across from you to a target.
Phew. Enter the door.
->
->
->
->
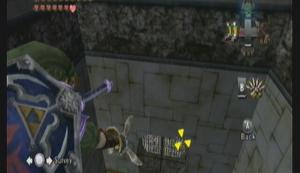
->
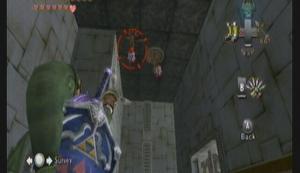
->
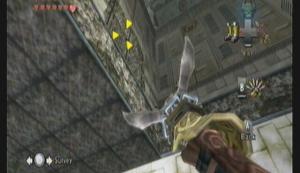
->
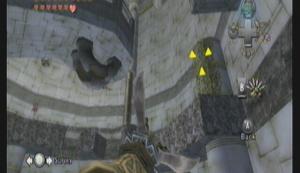
Finish
--== Room 13: Big Deku Baba ==--
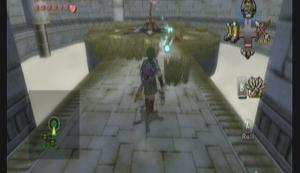
Enemies: Deku Serpent, Big Deku Baba, Keese, Armored Dynalfos
Chests: 2 (arrows, heart piece)
Quest items: None
You'll face another Big Deku Baba here. First take out all the Deku Serpent from the perimeter, then dodge the Deku's head when it lunges and cut away at it's vine. After the head is destroyed, throw a bomb in the remaining Deku Like.
Look for a target up high on the sliding stalactite (east). Grapple to it then off to some vines up and to the right.
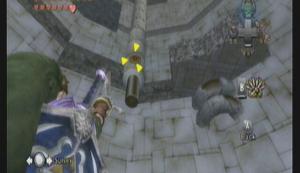
->

finish
Drop off and go counterclockwise. Climb up the stone ledge. You'll want to kill any Keese that are bothering you, as well as the Deku Serpent way down there. You'll have to navigate the thin walkway to the end.
Jump off at the end and look ahead to find some Keese sleeping in the nook ahead. Kill them both. Grab onto the ledge and shuffle across it (you cant pull yourself up). Open the chest in the nook for a heart piece!
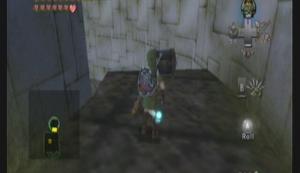
H41, 17 1/5
Walk to the edge of where you entered the nook. Look up to find a sliding stalactite. Grabble to it, then to another one to the right, then off to some vines.

->
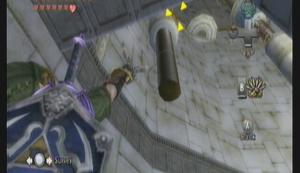
->
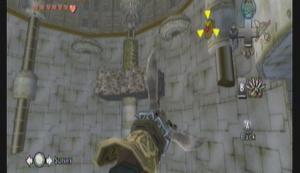
finish
Look out toward the center of the room and grapple to the point you see hanging down. Lower yourself to the walkway below.
There is an Armored Dynalfos on this walkway, and it aint big enough for the two of you. He should be fairly easy to kill with standard attacks.
--== Room 14: Peahat Insanity ==--
Enemies: Deku Serpent, Helmasaur, Helmasaurus, skullwalltula
Chests: 2 (20 rupees, 1 not reachable)
Quest items: None
Look for a Peahat to come over the wall in the south. Grapple to it and have it take you over the wall. Upon getting over the wall, don't drop off, but wait for the next Peahat to get in range of your clawshot. Grapple to it and have it take you over the second wall. Now drop off.
->
->
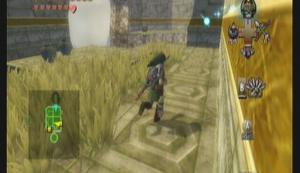
Finish
Grapple to the next Peahat only when it is traveling south and have it take you to the little island. Grapple to the Peahat over the island and drop down to find a Poe!
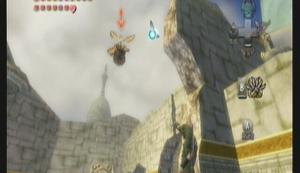
->
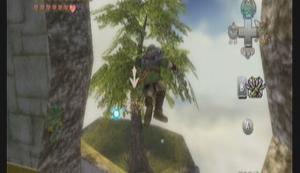
->
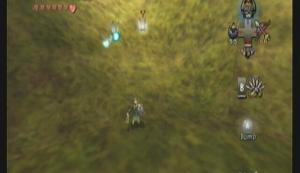
Poe #56
Grab your Rupees while you're here. Grapple back up to the Peahat over the island and then to the next Peahat. Ride this Peahat to the crack in the wall. Lower yourself so that you are under the wall itself. Grapple to the next Peahat on this side of the wall. Lower yourself again, but not to low, as you have to fit through a hole. On the other side, grapple to the grate.

->
->
->
->
->
Finish
Enter the door.
--== Room 5: Eastern Bridge (upper) ==--
Enemies: Kargarok
Chests: None
Quest items: None
Grapple to the Peahat overhead and keep going. You should notice that here is a second line of Peahats over to your left, that eventually merges with your path, forming a Y pattern. Get to the Peahat that merges the two, then turn and take the other path back.
Merging Peahat viewed from the west, you want the right path
Drop down to the ledge at the end and enter the door. Grab open the chest for a heart piece!
H42, 17 2/5
Go back out and take the Peahats to the western platform. Drop down and enter the door.
--== Room 15: Top of the World ==--
Enemies: Armored Dynalfos, Skullwalltula, Kargarok
Chests: 2 (20, 50 rupees)
Quest items: None
Take out both the Armored Dynalfos on the ground, as they'll get in your way later. Look for a vine to grapple to on the outer wall (east). Take out your bow and snipe all three Kargarok, as they will also get in your way.
Transform into a wolf to walk on the tightrope. Once on the center ring, transform back and walk clockwise. When you reach some vines, back up as far as you can and manually target the Skullwalltula (your lockon wont target right). Climb the vines and drop on the platform after.
Transform back into a wolf and walk the next set of tightropes over to a grassy platform with a poe on it and 50 rupees.
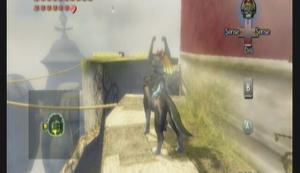
Poe #57
Jump down and grapple up to the vines in the east again. Walk the tightrope to the center ring and this time walk counterclockwise to the next set of ropes. Walk the ropes to the door.
--== Room 4: Central Hub (upper) ==--
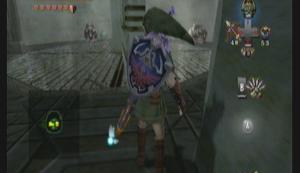
Enemies: Helmasaur, Helmasaurus
Chests: 2 (Big Key, 20 rupees)
Quest items: 1 (Big Key)
Get at a vantage point where you can see the mesh chandelier on the opposite side of the fan. Grapple to it and equip the iron boots to lower it and stop the fan. Drop down and open the chest for the Big Key.
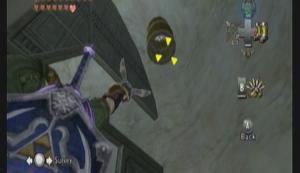
Mesh Chandelier
There should be a hole in the floor in the south with a grate above it. Grapple to the grate and lower yourself to the floor below.

Grate
Drop off and grapple to the large grate overhead. Lower down below the fan, but don't drop off. Look around in the ceiling for a mesh chandelier. You may have to pull yourself back up and reposition your clawshot on the grate to see it. Equip the iron boots to pull it down.
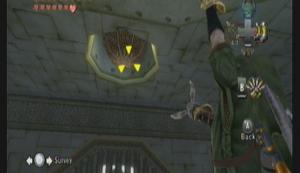
Second Mesh Chandelier
Drop down and enter the northern door.
--== Room 16: Northern Bridge ==--
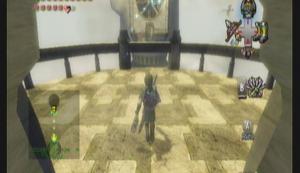
Enemies: Kargarok
Chests: 1 (20 rupees)
Quest items: None
Use your bow and snipe all the Kargarok first.
Now clawshot to the spinning fins overhead. Go from one to the next as they rotate around. The final one, grapple to the grate on the fan. There is a chest behind the fan if you want. Enter the door.
--== Room 17: Grapple Madness ==--
Enemies: Aeralfos
Chests: None
Quest items: None
First up is two Aeralfos. They're not as hard as the one earlier. Focus on one at a time. Let the other hit you if need be.
Once they're down, grapple to the grate above the door, then to the fins opposite it. From the fins, target the crystal above the grate to start them moving.
From here on to the top, you are going to be grappling from fin to spinning fin with a very small window of opportunity of when you can reach the next one. Do your best, and keep going up.
When you reach another fin that isn't spinning, look for a crystal opposite it to start it up. When it spins around, clawshot to the target. Drop down and enter the door.
--== Room 18: Boss: Twilit Dragon – Argorok ==--
Enemies: Argorok
Chests: None
Quest items: None
Immediately in, there is a pillar on the right. Grapple to the grate on it, then from there to some vines. Climb up onto the upper platform.
A few steps in, and Argorok attacks!
Argorok
Stage 1:
Grapple to one of the four pillars on the platform. Wait to be able to Z-lock onto his tail. Once you can, clawshot it (your range has been greatly increased, being able to reach him from across the stage) and equip the Iron Boots to bring him to the ground.
The second time you do this, the rest of his armor will come off, including your grapple point.
Stage 2
Stage 2:
During stage 2, he will breath fire at you. To damage him, grapple from pillar to pillar, working your way to the top. Once at the top, grapple to one of the Peahats that sprung up. On a Peahat, wait from his head to rear up (meaning his about to breath fire) and start locking on and grappling from Peahat to Peahat. He'll eventually stop, and when he does he hold still long enough for you to grapple behind him. Manually target the glowing orb on his back and grapple over. Start swinging your sword to bring him down. Repeat once more.
After the second time, he will start a new tactic: in the middle of him breathing fire, he will stop, turn to face just ahead of you, and start breathing to opposite direction. You have to then stop, turn, and start grappling the opposite way to avoid getting hit. You have to be fast to still get around behind him in time. After just this one time, he goes down for good.
Grab your heart container (18 2/5) and warp out with Midna. She places you at the cannon in the first room of the city. Grapple into the cannon and be shot back to Lake Hylia.
Tired of being this close to the sun? You'll be happy about where we're headed then.
Onward, to the Palace of Twilight!
Back in Hyrule, we have just a couple things to wrap up before starting the end-game. Warp to Castle Town.
You'll get a letter about the STAR minigame being re-opened. Go in and with your double-clawshot you can easily steal the show, along with an even larger Quiver (100 arrows).

STAR minigame
Also, this is a good chance to complete any unfinished sidequests: Flight-by-fowl, Fruit Pop, Iza's Rapid Ride, Magic Armor, Golden Bugs, any outstanding Heart Piece, Poe Soul, or Howling Stone. Get them all done now.
You'll still have another chance after the Palace of Twilight (technically end-game doesn't start will Hyrule Castle), but beating the Palace wont get you anything new except for 2 more hearts, so you might as well do them now.
Finally, if you have the Magic Armor and a wallet full of rupees, you can try out the Cave of Ordeals in Gerudo Desert. If you cant beat it now, you simply need more practice.
Good luck
One last thing before we continue, warp to Kakariko Bridge.
There is a heart piece off the cliff's edge. Use the double clawshot to get down to it.
H43, 18 3/5
Well, that's it. Warp to the Mirror Chamber and enter the Twilight Realm.
Palace of Twilight
Kind of strange that the portal would lead right to their palace O.o
Anyway, it's time for your epic showdown with Zant, but first you must get past his inane palace. The palace is based heavily on light/dark puzzles and defeating enemies.
Note that all the enemies that appear here are in Shadow form. This doesn't really change them other then appearance.
--== Room 1: Courtyard ==--
Enemies: Kargarok
Chests: None
Quest items: None
Go to the east side and enter the door.
--== Room 2: Infested Ramp ==--
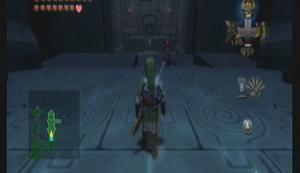
Enemies: Keese, Deku Baba, Zant Head
Chests: 2 (small key, 1 not reachable)
Quest items: 1 (small key)
Work your way past the Deku and Keese. At the end of the hall is a Zant Head. These things have the power to teleport about the room. Their only attack is to fire a very slow magic ball. Reflecting the projectile back at them can stun them. Only standard sword/fang attacks will hurt them.
Defeat the Zant Head to make a chest appear. Claim the key, then use the clawshot (the red grates are targets) to get up to the platform north. Open the door.
--== Room 3: Enter: Dark Fog ==--
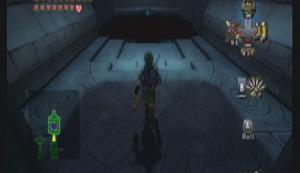
Enemies: Zant Head, Shadow Vermin
Chests: 3 (100 rupees, compass, small key)
Quest items: 2 (compass, small key)
The fog in the center of the room will automatically turn you into your wolf form. The only way to get back to normal is to get out of the fog and have Midna transform you. While in the fog, the only way to see clearly is to use your senses.
Defeat the Zant Head to make two chests appear. Go back to the south end and open the chest (watch, it's rigged with shadow vermin) for your compass. Go back through the fog and clawshot your way to the upper platform to get the key.
Your 100 rupees is at the south end on the western platform. You can reach the clawshot target from where you are now.
Exit through the northern door.
--== Room 4: Sol #1 ==--
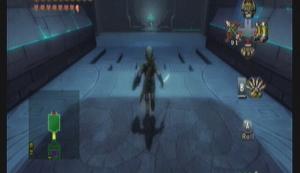
Enemies: Holo-Zant, Deku Baba, Keese, Shadow Beasts, Shadow Vermin
Chests: None
Quest items: None
Upon entering the room, a holographic form of Zant will appear. This Zant will throw energy orbs into the air, creating portals through which any number of enemies can appear.
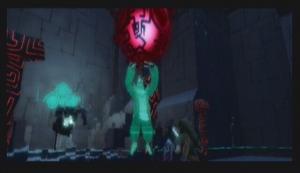
Holo-Zant
The trick to defeating him is wait for him to start powering up the energy ball, then attack him. You can also learn his warp pattern (he warps around the room in a constant fashion, not random) and wait for him at one of his warp points. When he appears, start slashing before he flees.
After a bit, he goes down, but not before giving a parting gift of more fog.
At the north end of the room is the first Sol. The Sols are the light of this realm. Use the clawshot to make the hand drop it, then pick it up using the clawshot as well.
The hand will come to life and begin chasing after you to get the Sol back. The hand moves very slowly, but s invulnerable. If he gets a hold of the Sol, he will carry it back to its earlier resting place. However, if you're quick, you can shoot it with a couple arrows after it picks up the Sol and make him drop it again.
Shadow Hand
The Sol will also dispel the fog, allowing you to walk through it. With Sol in hand, run to the center of the fog and place it in the circular groove. The power will make some stairs appear. You must run up the stairs to sturdy ground, then use the clawshot to reclaim Sol before the hand gets to it.
Like so
--== Room 3: Enter: Dark Fog ==--
Enemies: Shadow Beast, Shadow Vermin, Keese
Chests: None
Quest items: None
Jump down and set the Sol in the center of the fog again. Climb the stairs and reclaim Sol before the hand gets to it.
From here.
Once you have Sol again, go south to the door. You'll have to toss it up on the ledge then climb up and pick it back up. Jump off the platform and enter the door.
--== Room 2: Infested Ramp ==--
Enemies: Shadow Vermin, Keese, Deku Baba
Chests: 1 (not reachable)
Quest items: None
Run up the ramp avoiding the enemies as best you can. It's fairly likely that one of them will hit you. Just ignore it and pick up Sol quickly before it rolls back down.
--== Room 1: Courtyard ==--
Enemies: Kargarok
Chests: None
Quest items: None
Walk Sol up to the center platform where there is another slot for it. Set it down to activate a moving light platform that can take you west (you can also run around with Sol and release the dark curse put on the Twili people).
--== Room 5: Fog Pool ==--
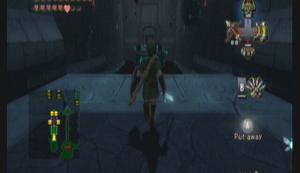
Enemies: Keese, Shadow Vermin, Zant Head
Chests: 4 (small key, 50 rupees, 2 not reachable)
Quest items: 1 (small key)
Use the clawshot on the target hanging down from the ceiling in the middle of the room. Lower yourself to the moving platform and jump off to the platform with two black orbs. A Zant Head will appear and start firing at you from across the platforms. Don't worry about him just yet. Focus on timing your jumps and getting to the stable ground near the door.
Once there, wait for the Zant Head to be near enough to you that you can reach him without jumping. After he goes down, grab the key and enter the door.
--== Room 6: Alcoves ==--
Enemies: Zant Head, Keese, Shadow Beast
Chests: 4 (small key, map, 50 rupees x2)
Quest items: 2 (small key, map)
Walk into the fog in the center of the room. Use Midna to paint all the shadow beasts to take them down at once.
Unlike the other rooms, there are multiple Zant Heads in this room. You must defeat all of them to continue. I wouldn't worry about focusing on one at a time, as they teleport at random and aren't really that hard.
Once they are down, grapple to the clawshot target at the north end of the room by the door. Use that target to get to the target hanging from the ceiling. Grapple from target to target on the ceiling to get to the alcoves on the east and west side of the room. Some hold rupees, some hearts, some quest items. Once you get the small key and the map, exit through the northern door.
--== Room 7: Sol #2 ==--
Enemies: Holo-Zant, Deku Baba, Keese, Shadow Beasts, Shadow Vermin
Chests: None
Quest items: None
This fight against Holo-Zant plays out exactly like it did before. Use the same strategy. He even gives you the same present (cheapskate >.>)
Again, use the clawshot to retrieve Sol from it's guardian. Place it in the center of the room and run up the stairs. Turn back and grab Sol with the clawshot and run out of the room.
--== Room 6: Alcoves ==--
Enemies: Shadow Vermin, Keese, Shadow Beasts
Chests: None
Quest items: None
Setting Sol down in the center of the room will raise some stairs circling around. Problem is, you cant get to any of them (too high).
You're SUPPOSE to use the stairs to block the hand while you work your way around the room with the clawshot. That, however, is a pain.
Solution: Pick up Sol again, then put it back down onto its groove Run over to one of the platforms on the west side BEFORE it rises up, so that when it does rise it takes you with it. At the south end there is some solid ground you can retrieve Sol from and safely jump down to the southern door.
From here
--== Room 5: Fog Pool ==--
Enemies: Shadow Vermin, Keese, Shadow Beast
Chests: 2 (not reachable)
Quest items: None
Fall down into the pit. There should be a dark orb in the fog right near where you landed (up against the north wall). These are light-sensitive orbs. Hold Sol up to it long enough for it to activate.
Run Sol to the north end of the room and set it in a place where it wont roll. Grapple to the target on the ceiling and lower yourself to the moving platform. On the platform with the two light-sensitive orbs, grapple Sol to you and wait for the orbs to activate. A platform will appear under you and transport you to the door.
--== Room 1: Courtyard ==--
Enemies: Kargarok
Chests: None
Quest items: None
Step on the glowing platform to be taken back to the center. Set Sol in its place. You now receive the Light Sword. This sword only works in the Twilight Realm, and is super powerful against shadow creatures (taking out most with one hit). With this sword, you now have the power to clear away the fog on-demand. It's not like Sol, however, you have to swing the sword for the fog to clear.
With this in hand, we need to return to rooms 2 and 5.
--== Room 5: Fog Pool ==--

Enemies: Keese, Shadow Vermin
Chests: 2 (heart piece, 50 rupees)
Quest items: None
Grapple to the center platform again and stand for a second. On the left and right side of the shadow pool there should be two glowing platforms in the ground. Use the sword to clear the fog. Ride the west one up and jump off into the northern alcove to claim a piece of heart.
H44, 18 4/5
Use a spin attack on the center platform to activate both orbs and exit.
--== Room 2: Infested Ramp ==--

Enemies: Keese, Deku Baba
Chests: 1 (Heart piece)
Quest items: None
There are waterfalls of dark fog on the left and right of this room. Go to the second one on the east side and clear it away. Clear the fog from the hall behind it and use the clawshot to get up to the chest.
[thumb=H45.jpg titleH45, 19 0/5]
And that's it! That was the last heart piece!
Now to make our way through the rest of the palace. Go back to the courtyard.
--== Room 1: Courtyard ==--
Walk up the northern path and use the sword to clear away the wall of fog. Jump across and enter the door.
--== Room 8: Mini-Sols ==--
Enemies: Shadow Beasts, Keese, Shadow Vermin, Deku Baba, Zant Head
Chests: 1 (small key)
Quest items: 1 (small key)
Use the sword to clear the fog. At the back of the room are two smaller Sols. Pick them up and put them in the grooves inside the fog.
Walk up the stairs that appear. Use the sword on the light-sensitive orb at the top to activate a floating platform. Ride it to the next ledge.
This ledge has multiple Zant Heads on it. Defeat all of them to get the key. Stand in the center of the light orbs and use a spin attack to activate all three. Ride the platform up and enter the door.
--== Room 9: Twilight Balcony ==--
Enemies: Zant Head, Kargarok, Shadow Beasts
Chests: 2 (small key, big key)
Quest items: 2 (small key, big key)
There is a large dark fog waterfall in the west side. Clear the fog and jump through. Use the double clawshots to work your way to the top to get the Big Key. Clear the fog again and jump back through.
You'll now want to kill all the Kargarok in this room. Use arrows to get their attention (but not necessarily to kill them, as that would take 4 arrows per).
After they are all down, activate the orbs on the east platform and ride the light platform to a small island with a Zant head. Destroy the head to make more appear on the main platform. Activate the light orbs here to get back over and destroy the other Zant Heads. Grab your key and exit.
--== Room 10: Light Platforming ==--
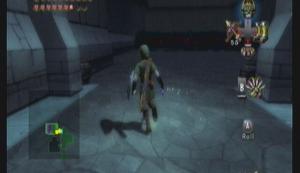
Enemies: Zant Head, Shadow Vermin, Keese, Shadow Beasts, Deku Baba
Chests: 1 (small key)
Quest items: 1 (small key)
Just in, you'll be assaulted by shadow beasts. Take them all down. Clear the fog to find more light orbs. Use a spin attack to activate them all.
Ride the platform up. More platforms will appear around it. Jump to the eastern one. It will lead to two more platforms. Take the northern one. As it approaches the ledge, grapple to it. Jump to the next light platform and ride it up.
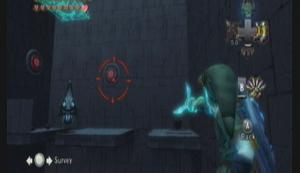
The first Zant Head
As it approaches the next ledge, grapple to it like before. Defeat the Zant Head on this ledge. After the head goes down, another one appears on the eastern platform. Grapple to the point south of you, then use that to get to the point hanging from the ceiling in the middle of the room. Lower yourself to the moving platform below. Defeat the Zant Head and claim the key. A new light platform will appear. Use that to reach the door.
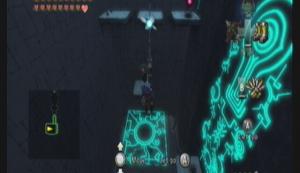
The second Zant Head
--== Room 11: King's Hall ==--
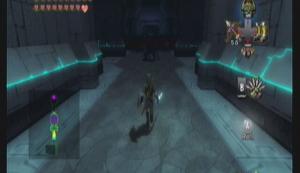
Enemies: Shadow Beasts
Chests: None
Quest items: None
You will be assaulted by several waves of Shadow Beasts. You can easily defeat them all with the light sword.
--== Room 12: Throne Room: Boss: Usurper King - Zant ==--
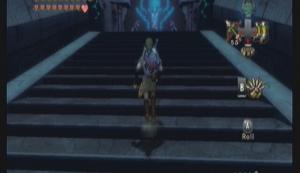
Enemies: Zant
Chests: None
Quest items: None
Zant will tell the history of his madness, and reveal is his but an unwitting pawn in Ganondorf's quest.
Usurper King – Zant
The fight against Zant will take you to several of the old temples. Each stage takes on a drastically different form. However, what he should realize is that you've bested all the bosses in these areas already, what chance does he have repeating a losing strategy?
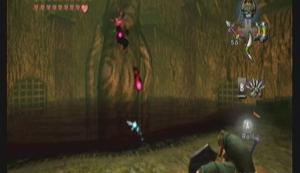
Stage 1: Forest Temple
Stage 1:
This stage is very easy. Dodge his energy shots and use the Gale Boomerang to draw him to you. Hack away till he warps back and starts over. Note that if you try to block all the energy shots, the last few will knock you off balance and hurt you.
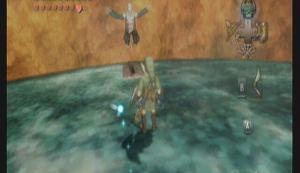
Stage 2: Goron Mines
Stage 2:
He will try to fling you off the platform by jumping on it. Use the Iron Boots to stay on. Wait till he starts firing energy balls. Block them, then unequip the boots and rush over while his is taking a breath. Repeat till the next stage.
Stage 3: Lakebed Temple
Stage 3:
You'll need to immediately equip the Zora Armor. Besides that, you'll need the clawshot and iron boots. Zant will appear in a large stone head. Block or dodge his energy shots, then use the clawshot and iron boots to drag him out. Hit him a few times and he'll retreat.
The next part he summons multiple stone heads. Get in the center of the area and try to predict which one he'll be in. when he starts firing energy balls, swim past them towards him. When he stops, anchor yourself and pull him out again. Repeat till he gives up on this area.
Stage 4: Forest Temple Revisited
Stage 4:
This time he uses the mini-boss room. Watch him as he teleports around on the pillars. Wait for him to stop and start firing. Roll into that pillar twice to knock him off and attack.
Stage 5: Snowpeak Ruins
Stage 5:
He'll grow huge and float in the air above you. Keep moving to avoid getting stomped on. When he comes down, turn about and use the Ball and Chain on his foot. He'll shrink down and hop about. Track him and give him a good whack.
Stage 6: Hyrule Castle
Stage 6:
This is the final stage. Don't touch the barrier around the area or you'll get hurt. Zant has two main attacks: spinning and slashing. He'll teleport in and start doing one of them. If he starts slashing, use the backslice to get behind and strike. If he is spinning, dodge him a couple times till he stops to get a breather; attack him while he isn't moving.
The last stage is the hardest as you never really get a good attack in and it takes longer to bring him down. Once he does though, you are put back in the throne room.
Grab the heart container for a full 20 hearts and use Midna to warp out.
The final showdown is upon us! Onward, to Hyrule Castle!
No side-quests, no scavenging, no ornate keys to find, straight to the point. If you have ANYTHING else that needs to be done in the game, do it now. This is it, this is the end.
Now, after you finish the game you cant save, so if you start up this save file later you'll be at Hyrule Castle entrance (assuming you save inside the castle).
Walk out of the Twilight Realm via the glowing circle in the south of the Courtyard. Have Midna warp you to Castle Town. Turn back into a human and walk right up to the castle.
Negating the fact that the guards let kid who is obviously armed to the teeth into the castle ramparts, Midna will break the barrier, granting you passage to the castle.
--== Room 1: Southern Courtyard ==--
Enemies: Red Bokoblin, Kargarok
Chests: None
Quest items: None
Walk the east path. A barrier will drop and you'll be forced to fight a bunch of Red Bokoblin. The are fairly hard to kill, considering you almost have to use the Ending Blow to make them stay down, and the Ending Blow doesn't work will in groups. However, you should have far and away more hearts then they could possible take down, so hack and slash.
Enter the eastern door after the fight.
--== Room 2: Eastern Courtyard ==--
Enemies: Red Bokoblin, King Bolblin
Chests: 2 (20 rupees x2)
Quest items: 1 (small key)
Walking to the center instigates another fight. Clear them out and continue to the north end of the room.
When you reach the north chamber, walk onto the arena to be confronted by King Bolblin yet again. He's not on his boar and fights with his giant hammer. The backslice is still the best way to take care of him. However, be much more weary of his attacks, as he can do 5 hearts in one swing.
After the fight he gives you the small key. The chest in the back of the area has one of the 20 rupees, and there is another one up on the wall that separates north from south (you can see the stairs on your map).
--== Room 1: Southern Courtyard ==--
Enemies: Red Bokoblin, Kargarok
Chests: None
Quest items: None
Now we go west. Another army of Red Bokoblin attacks.
--== Room 3: Western Courtyard ==--
Enemies: Red Bokoblin, Bulblin
Chests: 2 (10 rupees, Map)
Quest items: 1 (Map)
Archers will spot you as you enter. Use your bow to snipe them while keeping the Bokoblins at bay. Make your way to the nook between the east and west sides. There should be a passage in the east that leads to a Boar pen. Hop on a boar and start wreaking havoc in their camp while going north. Remember to press A to dash and crush things.
At the north end of the room there is another windmill puzzle like in the forest temple. Stand a few feet in front of the east most pillar. Target the east most pillar first, then the one just to your north, the one south of that, then the one in the center of the back row. Let it fly to open the gate to the map.
In the alcove with the map is a ladder that leads on top of the wall. Way south is the chest with the rupees, but it's not worth it.
One the ground near the windmills, get up against the north wall as wolf link and look for a place to dig near some leaves. This leads to the Graveyard. (it might take a couple tries to actually enter).
--== Room 4: Graveyard ==--
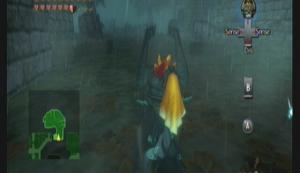
Enemies: Stalkin, Stalfos
Chests: 4 (1,10,20 rupees, small key)
Quest items: 1 (Small key)
Go to the northwest end of this area, killing any bony foe that gets in your way. There are two large tombstones up against the south wall here. One tells of a cursed grave, the other about stopping the rain.
South of the large tombstones is a tree. There is a bombable rock at it's base. Pant a bomb and step on the switch under it. (want to see something creepy? Use your senses as a wolf around the rock).
The gate opens. Go in and light the torch. The rain will stop temporarily. You must run across to the east side of the graveyard and light the two torches there before it starts raining again. Once lit, the gate between them will open and reveal two stone sentinels.
Use the Dominion Rod and walk the sentinels to the southern end. You should see two notches in the ground against the southern wall. Place them in the notches. Get up on the rubble and jump across using them as a bridge. Open the chest for a key.
Midna will remark about having gotten everything out here, and she's right. Dig in the soil beneath where you currently are to get back to the western courtyard.
--== Room 3: Western Courtyard ==--
Enemies: Doesn't matter
Chests: None
Quest items: None
Walk back west. The gates are back up (someone's been busy). There is a boar near the wood gates. Get on it and use it to get back to the southern courtyard.
--== Room 1: Southern Courtyard ==--
Enemies: Kargarok
Chests: None
Quest items: None
Enter the large door in at the north end.
--== Room 5: Castle Foyer ==--
Enemies: Red Bokoblin, Lizalfos
Chests: 3 (Compass, 2 not reachable)
Quest items: 1 (compass)
The enemies in this room swarm you. Even if the barrier wasn't there, you wouldn't be going anywhere fast. Red Bokoblins come in first, then the Lizalfos. The Lizalfos are slightly easier, since they take the same strategy but there are fewer of them.
Once all the enemies are down, look for a ramp in the west. Stand at the top and use your clawshot to hang onto the chandelier. Drop down and open the chest for the Compass. Keep going clockwise till you reach the north door.
--== Room 6: Lantern Puzzle ==--
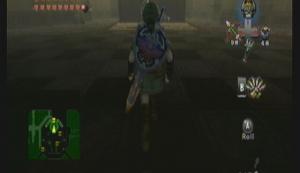
Enemies: Darknut
Chests: 1 (50 rupees)
Quest items: None
Defeat the Darknut just as before, using the Helm Splitter and Backslice until his armor is off, then just spam the Backslice.
Once he goes down, light the two torches in the west corner. Now go stand near the one that did not raise and face east. Use the boomerang and target the lit torch in the east corner. While your boomerang is in mid-flight, step onto the platform. It will raise as soon as the torch goes out. If you miss your chance, re-light the torch and try again.
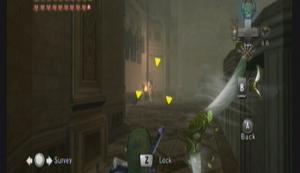
Torch
Grab your chest. You now have two choices: East or West. East pays off better (250 rupees) but you have to fight two Darknuts, no easy task. West gets you no rupees, but you only have to fight two Armored Dynalfos.
--== Room 7: Candle Jack ==--
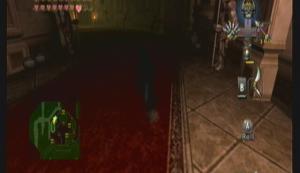
Enemies: Keese
Chests: None
Quest items: None
Use the bow to shoot down the painting in the dark section. Behind the painting is the solution to opening the door. Light the torches in this order:
Southeast, Northwest, Northeast, Northwest.
You have to light them quickly before the first one burns out.
--== Room 8: Double Dynalfos ==--
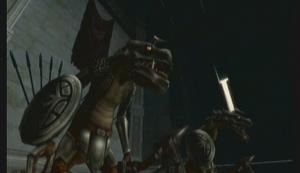
Enemies: Armored Dynalfos
Chests: None
Quest items: None
Killing Dynalfos should be easy to you now. You took on more then this in the Temple of Time.
The eastern door leads to a switch that lowers a chandelier, making it easier to get back up later if need be.
The west door leads out.
--== Room 7: Ghostly Art ==--
Enemies: Lizalfos, Chuchu
Chests: None
Quest items: None
After defeating the Liazlfos, the doors still don't open. Get some help from your elders, use your senses as a wolf. The spirits will be pointing at one painting. Use your bow and shoot the string holding it up, then shoot the crystal behind it. If you want some Chu jelly, shoot down the other paintings to make some drop.
--== Room 8: Double Darknut ==--
Enemies: Darknut
Chests: None
Quest items: None
You have to fight two hammer Darknuts at once. Try to focus on just one at a time. One he sheds his armor, lure him far away from the other Darknut.
Good luck. Once they are both down, you can take the western door to go back out to the foyer. Here you can grapple counter-clockwise to find a chest with 200 rupees (the other chest is right in front of the door). The eastern door continues the quest, however.
--== Room 9: Castle Walls ==--
Enemies: Aeralfols
Chests: 2 (Big Key, small key)
Quest items: 2 (Big Key, small key)
Regardless of the path you took, you end up here.
At the east end, you get attacked by a lot of enemies at once. However, Telma's army shows up and blasts them all sky high. The chest at the end contains the Big Key.
The west, you have to fight an Aeralfols to get the small key. Remember to grapple when it is about to charge, and to keep your distance when on the ground.
Once you have both, go through the northern door.
--== Room 10: Dead Reckoning ==--
Enemies: Ghoul Rats
Chests: None
Quest items: None
Transform into a wolf. Wait for all the Ghoul Rats to get on you then shake them off at once. Now look around with your senses. You should see more spirit soldiers pointing which way to go. Follow their instructions over the gaps. If you step on the wrong one, you'll fall through.
I start a new room a the north hall.
--== Room 11: Shattered Stairs ==--
Enemies: Lizalfos, Blade Trap, Darknut
Chests: None
Quest items: None
At the first set, jump from platform to platform to make it up.
First room, defeat the two Lizalfos (easy if you have full hearts, like me. Great Spin! ^_^)
Second set, the lamps act as clawshot targets. Grapple your way up.
Second room, more Lizalfos.
Third set, time the Blade Traps and use the spinner just as the first left hand trap approaches it's apex.
Third room, a Darknut. This should be nothing to you now.
The western door leads to an armory that holds everything imaginable, even stuff you don't need for this fight. The southern door leads to the boss fight.
--== Room 12: Throne Room ==--
Enemies: Zelda, Ganon
Chests: None
Quest items: None
I would save now. Walk up the stairs to start the final fight.
Ganon takes over Zelda in an attempt to catch you off guard.
Ganon's Puppet – Zelda
Zelda has three attacks:
1) Illuminates a triangle on the floor that then explodes with light
2) Lunges at you with her sword
3) Throws a ball of energy at you
The first two are simply paying attention and dodging. The last you don't want to dodge, rather draw your sword and bat it back at her. You'll start playing ping-pong with it till one of you misses. Make her miss three times to start the next stage.
Midna uses her power to squeeze the dark energy out of Zelda. Ganondorf re-forms, but in his beast form. (the stress from having to reform probably caused him to draw too heavily on the triforce, resulting in him taking on his true form)
Dark Beast – Ganon
Stage 1:
Ganon will rush around the area crushing things. He also likes to teleport out of the room and teleport back in. When he goes to teleport back in, he makes several fake teleporters first. The real one will turn blue. Draw your bow. You cant lock on, so hopefully you've practiced. Whenever you can get a clear shot, fire at the jewel on his forehead. He'll crash and burn, allowing you to hack at his vulnerable stomach.
Stage 2:
You'll know when stage 2 starts when he starts teleporting whenever you fire an arrow. Transform into a wolf and wait for him to teleport. Get right in his path and wait for the prompt to press A. Press A to have Midna hold him, then tap either left or right repeatedly to have Midna toss him to the side. Walk over and bit his stomach (jump attacks work well)
A cutscene ends this stage.
Zelda is revived, but Ganon comes back in his spirit form. Midna uses the last of her strength to teleport Link and Zelda out, then to transform into that beast once more in an attempt to end this for good.
It doesn't work. Ganondorf, reformed, finds Link and Zelda in Hyrule Field with his ghost riders.
Dark Lord – Ganondorf
Stage 1:
You have to ride behind him on horseback while Zelda tries to snipe him. This can be very hard at first as the slightest tap can knock you off Epona. Try to stay behind him to get Zelda a clear shot. Once he is stunned, dash beside him and slice him with your sword. After a couple rounds, he wipes out.
Stage 2:
Now you're on foot face to face with Ganondorf. The Backslice is pretty much the ONLY way to hurt him.
Don't get two close or he'll knee you. If you try a jump attack, he jumps away then thrusts, you can dodge the thrust but lets not tempt fate.
He likes to warp away, then reappear and do a spin attack. He normally doesn't appear anywhere near you, but I would still run when he disappears.
Sometimes he'll run at you with his sword held up. If you stand in front of him, you can use a prompt called “Chance.” You and Ganondorf will lock swords. You can win by rapidly pressing A, knocking him off balance and allowing for a good combo. But if you lose, you can suffer a fair amount of damage.
Other then that he doesn't do much. This fight takes a really long time. Good luck.

The End
But wait, what are the light spirits doing?
Watch the credits to get the full ending :)
There is nothing to do after the end screen. You cant save. If you re-load your file, you'll start back at the castle courtyard (assuming you saved while you where inside). This will give you the chance to go out and do some things you may not have finished, or just go fishing.
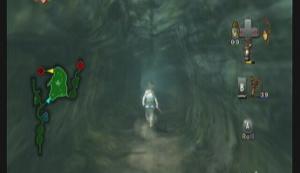

Heart Piece
Heart piece collecting has been in every Zelda game I can think of. Collecting 5 heart pieces will give you an extra heart. And who doesn't like being harder to kill?
Some of them are blatantly obvious, while others will take you into dark areas of Hyrule you wouldn't have known existed otherwise.
While all the locations are listed in the main guide, it requires you play through using the guide. Here I'll list all the locations again, along with any requirements for reaching it.
In this guide, the pieces are split up into sections of Hyrule (like the Poe souls), but the heart piece number is the same as in the main guide.
Remember when calculating your heart pieces and remaining hearts that you get a full heart container at the end of every temple, except for Hyrule Castle. That's 8 hearts. AND don't forget the 3 you started the game with. That's 11 hearts that don't come from pieces.

H01
H01:
Items required: None
Location: Faron Woods
Enter the swamp at the north end of the woods, before the forest temple. There is a cave at the northwest end. Inside, light the two torches to reveal a chest. If you do this after the poison fog, you'll need to use your lantern to stave off the fog in order to enter the cave.

H06
H06:
Items required: None
Location: Ordon Village
In Ordon Village, go to the ranch at the south end. Talk to Fado while on Epona. He'll ask you to herd his goats into the barn. The time to beat is 1:30, I think. I've never completed it over that and I always get the heart piece.

H36
H36:
Items required: Dominion Rod
Location: Faron Woods
In the area of the lantern salesman, there are some bobmable rocks. Blow them up to reveal a passage that leads to a stone sentinel where you get a character for the Sky Book. Use the Dominion Rod to move the statue in the hole in the ground, as shown. Transform into a wolf and use Midna to leap to the ledge with the heart piece.

H16
H16:
Items required: Bombs
Location: Sacred Grove
After obtaining the master sword, return to the place you fought Skullkid. There is a bombable rock in that area. Blow it up and use wolf link to dig under it. Defeat all the enemies to make a chest appear.

H04
H04:
Items required: Gale Boomerang
Location: Hyrule Field
By the south end of the bridge in the middle of the field is a tree. Look up in the tree to see the heart piece.

H05
H05:
Items required: Gale Boomerang
Location: Hyrule Field (south)
Near Kakariko Bridge, go up the cliff east. Look over the edge to see this piece precariously perched on a stone pillar.

H43
H43:
Items required: Double Clawshot
Location: Hyrule Field (south)
The same place as H05, use the clawshot target and grapple around to the east side of the southern pillar.
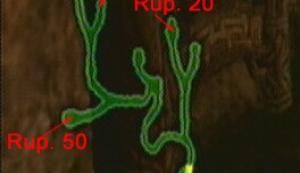
H21
H21:
Items required: Bombs, lantern
Location: Hyrule field (south)(lantern cave)
At the southern most point in the Eldin Province is a bombable rock up against the sheer cliff walls. Blow it up to reveal a cave. Use the map above to find the heart piece.

H09
H09:
Items required: Bow and Arrow
Location: Kakariko Village
After your Goron Mines adventure, return to Kakariko Village and seek out Talo at the highest point in the village (get a boost from the Goron below him). He'll ask for Bow lessons. Jump back down and find Malo near the spirit spring. Talk to him and accept the challenge. If you complete it with out using the Hawkeye, you get a heart piece.

H10
H10:
Items required: Bomb arrow, Gale Boomerang
Location: Kakariko Village
At the south end of the village beside the spirit spring are some bombable rocks on the cliff. Blow them up with a bomb arrow, then use the Gale Boomerang to get it down.

H11
H11:
Items required: Bombs, Iron Boots
Location: Kakariko Village
Below where H10 was, blow up the bombable rocks at ground level. Wonder the path behind them to come out at the spirit spring. Jump in an sink to the bottom with the boots. A chest at the north end is what you seek.

H20
H20:
Items required: None
Location: Death Mountain
On your way up Death Mountain (after Goron Mines), you'll meet a Goron that asks if you want a boost up. Say yes and hop on. Face east and grab onto the ledge above when he throws you. Walk the cliff around north till you come to a hole in the wall. Fall down the hole and open the chest.

H12
H12:
Items required: Bomb arrows
Location: Hyrule Field (north)
Take the northern exit out of Kakariko Village. As you exit the valley, there are some bombable rocks on the left side of the road. Blow them up and walk up the path behind them. Keep going up, then you'll drop down and jump over a gap. Climb the vines. Now this is very important, look across left; you'll see some vines and a bombable rock sitting on top of them. Use your bomb arrows to destroy the rock. Now go towards it and jump the gap, grabbing onto the vines. Once at the top, look left to see a chest down below. Carefully jump down to that platform and open the chest for another heart piece.

H28
H28:
Items Required: Master Sword
Location: Kakariko Village/Hyrule Field (north)
This is part of the Magic Armor sidequest. Donate 1000 Rupees to the Goron in Malo Mart, then talk to the Goron sitting outside the store. He'll ask you to transport some spring water. Say yes. When hauling the water, stay on the southern edge and follow the cliff around or else the Leevers will get you. Stop and put down the barrel when you come to the Bulblins to snipe them. After you deliver the water, the Goron rolls past and leaves a heart piece.

H37
H37:
Items Required: Dominion Rod
Location: Eldin Bridge
There is a stone sentinel at the north end of the bride (you had to move it to get a character for the Sky Book). Take control and walk it all the way to the southern end of the bridge. Place it in the gap on the west side as shown. Jump across and climb the ladder.

H38
H38:
Items required: Clawshot, Iron Boots
Location: Hyrule Field (north of Eldin Bridge)
Use the clawshot on the target above. Walk the cliff to a cave. The cave is much like Goron Mines. Jump off the end of the bridge and equip the Iron Boots in mid-air to be pulled to the wall. Do this two more times to reach the end. Light the two torches you land by for 100 rupees and open the other chest for a heart piece.

H39
H39:
Items required: Spinner, bombs
Location: Hyrule Field (north of Eldin Bridge)
Opposite the entrance to the Hidden Village near the rope bridge, you should notice a spinner track. Get on and ride it down to a small patch of grass. Dig in the center to find a secret area. Defeat all the Stalfos to win a heart piece.
H35
H35:
Items required: None
Location: Hidden Village
Go through the window of the second building in the west, then through another window in the back of the building to find the Cucco Leader. Talk to it (in wolf form) and play his game of tracking down all 20 cats. The positioning of the cats is pretty much the same as the Bulblins. There are a couple you may have problems with.
There is one at the second story inside the house that lead to the Cucco leader:

Cat
And one in the barn at the end of town that you have to jump to from another ledge (after grappling up to the balcony).

Cat
Once you talk to all 20, see the leader again. He tells you your prize is near Impaz house. Run up there for a heart piece.

H17
H17:
Items required: None
Location: Castle Town
In north east side of Castle Town is a priest. He asks you donate money “for the sake of Hyrule.” Give him 1000 rupees and you get a heart piece. (I guess helping you does help Hyrule. Heart pieces are expensive in that case X_x)

H27
H27:
Items required: Spinner
Location: Hyrule Field
At the east side of the field there are two paths. Go to the north end of the eastern path. Ride the spinner track on the east wall, jumping as the track ends. After a few jumps, you come to the platform with your prize.

H40
H40:
Items required: Bombs, ball and chain
Location: Hyrule Field
At the north end of the field, look for a bombable rock in the lower rocky area (pictured). Inside, use the ball and chain to break the ice. You now have to complete three insane block sliding puzzles. Solution below:

First Puzzle

Second Puzzle

Third Puzzle
--==--

H18
H18:
Items required: Clawshot
Location: Fishing spot
Go to Zora's River. There is a door in the cliff at the north end of the area that leads to the fishing spot. The heart piece is on the rock structure in the middle of the lake. Swim out and use the clawshot to get it down. It wont be given to you till you get out of the water.

H13
H13:
Items required: None
Location: Lake Hylia
Talk to Fyer (the clown) and have him launch you up on a normal flight. In the building, talk to Falbi and play his game. Grab a Cucco and jump off, aiming for the second platform (the one that's not spinning). Go in a straight line, adjusting your speed with the joy stick.

H19
H19:
Items required: Master Sword
Location: Lake Hylia
At the west coast and before the clowns cannon are some howl grasses. At this point in the game, a little bird floats there. Talk to him to play the Fruit Pop Flight Challenge. You need 10,000 points to win. The trick is to aim only for strawberries.

H22
H22:
Items required: Bombs, arrows, lantern
Location: Lake Hylia (Lantern cave)
You must complete the Lantern Cave (entrance above). It's not that hard and it's linear. In the last room, light both torches to reveal the piece.
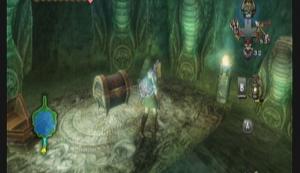
H23
H23:
Items required: Clawshot
Location: Lake Hylia (Spirit Spring)
Inside the Spirit Spring, walk the path clockwise. Use the Clawshot to get over the gap. At the back of the spring is a door. Light both torches in this room to get your heart piece.

H24
H24:
Items required: None
Location: Enemy Camp
In the North west corner of the enemy camp is a boar roasting over a fire. Turns out he swallowed a heart piece. Slice him open to retrieve it.
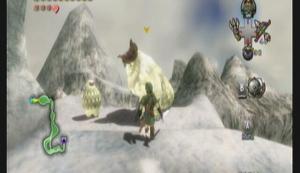
H31
H31:
Item requirements: None
Location: Peak Province
You must have beaten the ruins. Warp to the point there. Walk up the cliff to find Yeto and Yeta. Challenge Yeto to a race. Once you beat him (not hard), talk to Yeta and race her. She is much faster and takes a shortcut that is impossible to beat unless you take it as well. The shortcut is here:

Jump up on this ledge
This section goes over every heart piece found within a temple or dungeon. Since some can be pretty far in, it would be a wise idea to get them on your way through the dungeon, so you don't have to go all the way back through later.
--== Forest Temple ==--

H02
H02:
Items required: None
Location: Room 7: Deku Like Room
Throw a bomb in the Deku Like in the east to have him shrivel up and reveal the chest.

H03
H03:
Items required: Gale Boomerang
Location: Room 9: Monkey #4
Jump down and cross the tile worm bridge. Use the boomerang to put out all the torches in this area, lowering the way to the chest.
--== Goron Mines ==--

H07
H07:
Items required: Iron Boots
Location: Room 3: Quick-jump Room
You must enter from the upper east side. Use the iron boots in the magnet to get sucked to the ceiling. Walk the northern path to find the heart piece.

H08
H08:
Items required: Iron Boots
Location: Room 7: Beamos
Use the Iron Boots to walk up the magnetic wall. Take the right hand path to end up at a chest.
--== Lakebed Temple ==--

H14
H14:
Items required: Clawshot
Location: Room 3: Water Escalator
Use the clawshot on the target over the chandelier. Chest is on the chandelier.

H15
H15:
Items required: Clawshot
Location: Room 4: Ruined Room
Move the bridge in Room 3 so that the water flows into Room 4. Enter and walk across the bridge that is now floating in room 4. Stand on the switch in the floor to open the gates, then clawshot yourself to the target beside the chest.
--== Arbiter's Grounds ==--

H25
H25:
Items required: Clawshot
Location: Room 3: Blue Flame
Use the clawshot target to get over the sand in the northeast corner of the room.

H26
H26:
Items required: Spinner
Location: Room 18: Spinner Madness
You need to get to the middle of this room by getting over the sand and onto the track at the south west end of the room. The heart piece is just to the west of where you land.
--== Snowpeak Ruins ==--

H29
H29:
Items required: Ball and Chain, Clawshot
Location: Room 13: Frozen Spiral
Work your way to the top of the spiral. Enter the southern nook. Look for an uneven section of ground and hit it with the ball and chain. The hole in the floor leads to the heart piece.

H30
H30:
Items required: Ball and Chain, Clawshot
Location: Room 1: Entrance Hall
Upon entering the ruins, use the clawshot on the target hanging on the northeastern wall. Face west and target the chandelier. Use the ball and chain to get the chandelier moving. Jump to it, but don't jump across. Rather, turn south to see two more chandeliers. Kill the ice keese with arrows. Get the next one moving and jump to it, then do the same with the next to reach the chest and a heart piece.
--== Temple of Time ==--
NOTE: these next two hearts are written as if you do NOT have the large statue (needed to complete the temple) with you.

H32
H32:
Items required: Dominion Rod
Location: Room 6: Half a Room
Hit the crystal in to move the walls. Use the Dominion on a small statue on the other side of the fence. Walk the statue to the switch just behind the electric barrier to deactivate it. Hit the crystal again to move the walls, revealing the chest.

H33
H33:
Items required: Dominion Rod
Location: Room 4: Twin Armos
Grab a statue and haul it to the southern end of the room. Throw it on the western ledge behind the fence. Use the rod to walk it down north till it falls on a switch. Go back up and do the same on the east side (there is already a statue there) to reveals a chest with a heart piece.

H34
H34:
Items required: Dominion Rod
Location: Sacred Grove (past)
At the south side of the room by the stairs are two statues in the wall, one in the west and one in the east. The one in the west reveals a passage to the heart piece (note that if you are in the future, you can go to the area where the heart piece is [the area with the Male Snail] and see an old broken chest :) )
--== City in the Sky ==--

H41
H41:
Items required: Double clawshot
Location: Room 13: Big Deku Baba
Use the clawshots to get to a point where you have to walk along a narrow ledge. Get across the ledge, then look for another ledge just ahead that is hugging the wall and leads into a nook. Grab the edge and shimmy along it (you cant pull yourself up). In the nook is the heart piece.

H42
H42:
Items required: Double clashot
Location: Room 14: Peahat Insanity
It's technically in Room 14, but you can only get to it from Room 15: Eastern Bridge (upper). Grapple to the Peahat overhead and keep going. You should notice that here is a second line of Peahats over to your left, that eventually merges with your path, forming a Y pattern. Get to the Peahat that merges the two, then turn and take the other path back.
Merging Peahat viewed from the west, you want the right path
Drop down to the ledge at the end and enter the door. Grab open the chest for a heart piece.
--== Twilight Palace ==--

H44
H44:
Items required: Light Sword
Location: Room 5: Fog Pool
Grapple to the center platform again and stand for a second. On the left and right side of the shadow pool there should be two glowing platforms in the ground. Use the sword to clear the fog. Ride the west one up and jump off into the northern alcove to claim a piece of heart.
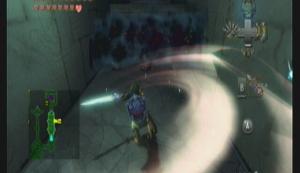
H45
H45:
Items required: Light Sword
Location: Room 2: Infested Ramp
There are waterfalls of dark fog on the left and right of this room. Go to the second one on the east side and clear it away. Clear the fog from the hall behind it and use the clawshot to get up to the chest.

The End
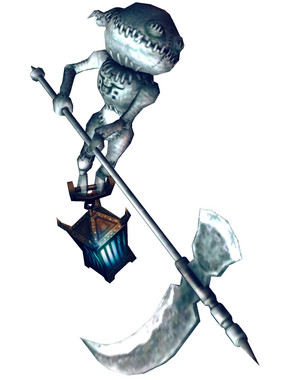
Poe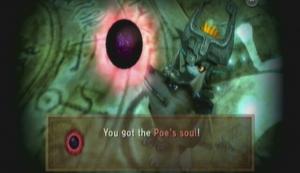
Poe Soul
Catching Poes can be tricky and deadly, so make sure you know what you're doing.
1) Poes will only appear at night (unless they are in a dungeon or cave).
2) Poes can only be seen when in wolf form and using your “sense” ability. You can spot a Poes lantern when in human form, but you cant fight him.
3) POES ARE DEADLY! They carry scythes and take away one heart per hit.
4) Poes can fly, giving them an advantage. Use jump attacks for the best effect.
5) Poes can be found at any point in the game, even before talking to Jovani... provided you have the items to reach them, which you wont except for a few.
6) After hitting the Poe a couple of times, it will fall to the ground and a black orb will rise out of its chest. Z-target the orb and hit A. You will leap into the air, land on the Poe, and rip out its soul (the black orb). If you don't, the Poe will come back to life after a few seconds and the battle will begin anew.
Ok, I think that covers it. Now lets re-kill some people!
REMINDER: IT MUST BE NIGHT TIME FOR A POE TO APPEAR (UNLESS IN A DUNGEON OR CAVE). KAKARIKO VILLAGE AND CASTLE TOWN ARE NO EXCEPTION.
NOTE: these are not listed in the same order that they are in the guide. They are listed in order by location.

P.1
P.1: Faron Woods: In the swamp area, transform into a wolf and follow Midnas lead to a big hollow stump. The Poe is right there, cant miss it.

P.2
P.2: Hyrule Field (Faron): This Poe floats over a cliff just north of a shallow body of water.

P.3
P.3: Sacred Woods: This Poe floats over one of the skull kids hiding places: on the large stump. You have to pass under a water fall and climb over some roots to get him.

P.4
P.4: Temple of Time: After optioning the Doman Rod, in the room with the giant scale, use the small statues to lift you up high enough to reach the grapple point in the middle of the ceiling. From there, use your spinner to reach the ledge above the scale. The Poe should be right in front of you.

P.5
P.5: Temple of Time: On the east side of the third floor there is a Poe behind a gold gate. Use the Domain Rod to guide a small statue on the wall behind the gate to the switch on the floor. Attack the Poe once the gate opens.

P.6
P.6: Temple of Time: Use the Domain Rod to move the statue in the opening chamber. A Poe lantern will fly out from behind the wall.

P.7
P.7: Sacred Grove: Go east from the main temple ground to where you first fought the Skull Kid. Destroy the rock in the middle of the room to reveal a Poe.

P.8
P.8: Sacred Grove: After completing the Temple of Time, return to where you found the Master Sword. There is a Poe floating near the pedestal.

P.9
P.9: Hyrule Field (Eldin): There is a Poe near a tree on the hill just east (of the south side) of the Kakariko Gorge Bridge.
P.10
P.10: Lantern Cave (1): The Lantern Cave is south-west from the Kakariko Gorge warp point in Eldin. You should see a bombable wall along the cliff. The Poe is in the northwest section of the cave.

P.11
P.11: Kakariko Village: This Poe is at the West end of Kakariko Village Graveyard.

P.12
P.12: Kakariko Village: go to Kakariko Village Graveyard, transform into a wolf, then push the gravestone in the southeast corner of the graveyard.

P.13
P.13: Kakariko Village: Remember that building you blew up when looking for the Tears of Light? Yeah, go back there (from inside Barns Bomb Shop, climb to the top and exit through the door in the roof, then follow the cliff south) and you'll see a Poe.

P.14
P.14: Kakariko Village: From the blown up building (see above), turn about and follow the zig-zaging path to the very top of the cliff. There is a Poe waiting for you there (careful not to fall off!).

P.15
P.15: Death Mountain: After obtaining the Clawshot, return to the Howling Stone on Death Mountain. From there, look north to see some moss hanging from a ledge. Clawshot onto it and follow the high ground south. Eventually, you will see a Poe (careful not to fall off again!).

P.16
P.16: Hidden Village: This Poe is on a balcony (what's with Poes and high places?) on a house in the villages northeast corner. There is a net you can clawshot onto on the west side of the house. Follow the ledge around and claim another Poe.

P.17
P.17: Castle Town: This Poe is in Jovani's house. Simple enough, right?

P.18
P.18: Hyrule Field (Lanyru): Use the Castle Town portal. From there go south. You'll find the Poe in the ancient amphitheater.

P.19
P.19: Zora's Waterfall: Warp to Zora's domain and ride the waterfall down. Now turn west and swim over to the small patch of land. Follow the incline around until you spot the Poe.

P.20
P.20: Zora's Domain: From the lake at Zora's waterfall, transform into a wolf and travel to the east embankment. With Midnas help travel up the side of the cliff. Somewhere along the way you will met up with a Poe.

P.21
P.21: Zora's River: Warp to Upper Zora's River. There is a small patch of land at the south end. Swim there to claim another soul.

P.22
P.22: Hyrule Field (Lanayru): There is a haunted bridge at the north end of Hyrule Field. De-haunt it.
Poe.23-24
P.23-24: Hyrule Field (Lanayru): From the haunted bridge (above) travel east. There should be a ring of tall grass near some trees. Use your senses and dig there. The Poe is inside the cave.

P.25
P.25: Hyrule Field (Lanayru): Take Castle Towns south exit. Continue heading south to confront another Poe.

P.26
P.26: Hyrule Field (Lanayru): Take Castle Towns east exit. The Poe hovers over the bridge before you.

P.27
P.27: From hyrule Field (Faron), take the North entrance into lake hylia. From there, follow the winding path and keep an eye on the western cliff. Eventually, you should see some bombable rocks. Destroy them with bomb arrows to reveal clawshot targets. Clawshot around until you come to a chest, and a Poe.

P.28
P.28: Lake Hylia: This Poe is at the south-west end of lake hylia. You'll see his lantern floating over a small patch of land just south of the waterfall.

P.29
P.29: Lake Hylia: warp to the Lake Hylia Warp point. Now go west along the path, then turn and look south. You should see a Poe lantern floating over one of the ledges. Carefully navigate the series of jumps and claim your prize.

P.30
P.30: Lake Hylia: In the southeast corner of Lake Hylia is a tall tower on a ledge. At the top of the tower (again with the high places!) is your next target.

P.31
P.31: Lake Hylia: This Poe is on a cliff on Lake Hylia's north wall just below the cabin. Take a ride in the cannon up to the cabin, then ride by Cucco to the ledge (take a sharp U-turn just after clearing the cabin).

P.32
P.32: Lake Hylia: Take Fabi's Flight-by-Fowl challenge and try to land on the prize platform with the Poe (you should be able to see his lantern).

P.33-35
P.33-35: Lantern Cave (2): South of the Howling Stone in Lake Hylia is another Lantern Cave. This one is much longer then the first. As such, make sure you stock up on bombs, lantern oil, arrows, and a bottled fairy never hurt. But because its bigger, it can house more Poes; three to be exact. Follow the cave from start to finish and bomb everything in your way to claim all three souls that are scattered throughout the cave.

P.36
P.36: Gerudo Desert: After landing Gerudo Desert (from the cannon in Lake Hylia), go south until you see a large rock. A Poe is waiting there.

P.37
P.37: Gerudo Desert: This Poe is located at the middle-southeast side of the Desert. You should see a mound of sand with a large stone structure on top. The stone structure is the West Eldin Bridge, so warp it to its proper location. Afterwards, return to the same spot. There is a Poe waiting for you there.

P.38=40
P.38: Cave of Ordeals: The crater you created (see above) opens the passage to the Cave of Ordeals. The first Poe is located on the 17th floor.
P.39: Cave of Ordeals: (see above) 31st floor.
P.40: Cave of Ordeals: (see above) 44th floor.

P.41
P.41: Gerudo Desert: There is a tree on a sand bluff at the middle-northeast side of the Desert (it should appear as a small outlined figure on the warp map). Grapple to the tree with the clawshot. You should now see a Poe hovering over three skulls nearby.

P.42-43
P.42-43: Gerudo Desert: In the exact same spot as P.41 was located, use your senses to spot a place to dig. Dig to uncover an underground cave where your next mark lays in wait.

P.44
P.44: Gerudo Desert: There are narrow, sandy paths between the main Desert and the enemy encampment in the northeast. Follow the path to the east to find a Poe.

P.45
P.45: Gerudo Desert: After you defeat King Bulblin (the axe wielding goblin thing), return to the scene of the battle to fight your next soul carrying Poe.

P.46
P.46: Gerudo Desert: When you're walking up the step toward the Arbiter's Grounds entrance, go east at the top. Just ahead should be another Poe.
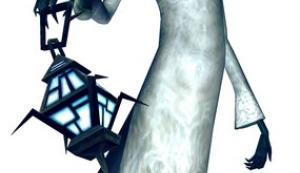
P.47-50
P.47-50: Arbiter's Grounds: The next four souls are key to the story line and function as mini-bosses. Capturing them means completing the Arbiter's Grounds Temple. Hence, if you want to know there location, see a game guide not a Poe guide.

P.51
P.51: Snowpeak Area: A Poe hovers near a tree in the southern-central area between the frozen lake and the warp point (near the bend on the map)

P.52
P.52: Snowpeak Area: A little farther up the road from P.51 is another Poe near a large rock.

P.53
P.53: Explore the Reekfish-scent area between P.51 and the cave at the top. Like P.51, this Poe haunts a tree.

P.54
P.54: Snowpeak Cave: In the cave between the Snowpeak Area and Snowpeak Summit, there is a Poe behind a wall of ice. Use the ball and chain to set it “free.”

P.55
P.55: Snowpeak Area: Go south after exiting the Snowpeak Ruins to find a large mound of snow... You guessed it, the Poe is on top. There should be a winding path along the edge of the mound... and try not to fall off.

P.56
P.56: Snowpeak Ruins: Right as you enter you should see a lantern floating in the foyer. Make it less floaty.

P.57
P.57: Snowpeak Ruins: Just inside the entrance, you will see 6 suits of armor (three on each side). One of them hides a Poe. Time to play hide-and-seek with a ball-and-chain.

P.58
P.58: Snowpeak Ruins: In the southwestern room on the second floor use your ball and chain to break the ice barrier on the west wall. A Poe is in the now-exposed alcove.

P.59
P.59: City in the Sky: A Poe is hiding on the east wing of the third floor in the City in the Sky. From the northern entrance, se the flying plants to hover over two walls, then grab onto a south-flying plant. Wile flying, grab onto one more plant and drop to face the Poe.

P.60
P.60: City in the Sky: There's a Poe near the room with the Big Key. Climb ivy as a human and walk ropes as a wolf to reach the east side of the fourth floors central room. You'll find the Poe near a treasure chest on a precarious platform.

Jovani's House
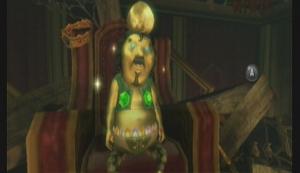
Jovani
Jovani. The reason you go through the trouble of tracking down 60 dead guys.
Jovai's house is located in West Castle Town, down the ally just before the one that leads to Telma's Bar. You first encounter Jovani on your way out of Hyrule Castle after completing the Lakebed Temple (you'll see). After this first encounter, you can enter his house by going to his front door, transforming into a wolf, then digging near the wall to the right of the door.
Now, down to business. After you collect 20 Poe souls, visit Jovani and he will give you a bottle with Fairy Tears inside. If you collect 60 Poe souls, he gives you 200 rupees then leaves his house. Go to Telma's bar to find him sulking in the corner. Talk to him, then return to his house and talk to his cat. His cat will give you another 200 rupees. Leave Castle Town, come back, talk to his cat, earn 200 rupees. Rinse and repeat as much as you like.
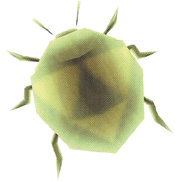
Golden Bug
Catching bugs is simple. Walk up to them and press A when prompted. Easy.
Tips:
Bugs glow a bright gold. This makes them very easy to spot at night, so it would be wise to catch the critters while you are hunting for Poes.
You will also hear a tingling sound when near a bug, so stay sharp and turn your speakers up.
The Gale Boomerang can grab a bug and bring it right to you. You wont catch it immediately, but it can be easier then hiking across a field and chasing it around for a while.
There are 24 bugs total. One of which you cant get to until extremely late in the game. So there really isn't a reason to go looking for these bugs until the time comes that you can catch the final bug... unless you need money for something.
Some bugs require certain items to reach/capture them. These items will be listed in the section below.
Bugs can move around. They don't stay in one place like most everything else. As such, I can only list a general area as to where they are. Search the area thoroughly to find your prize.
The Male and Female are normally within the same map as each other. There is only one exception: the Dragonfly.
Secret: some of the bugs have the tri-force mark on them, leading some to think they are the “Goddess bugs”... No idea, but they may facture into the story line of the next Zelda game... or it could just be a neat little easter egg the developers put in (the later seems much more likely).

1: Male Beetle: Hyrule Field (Faron)
Items required: none.
The Male Beetle is on a tree just south of the small eastern lake and in-between the two hills.

2: Female Beetle: Hyrule Field (Faron)
Items required: Gale Boomerang.
Just north of the western lake is a ridge. Follow the ridge of trees to the northern side. Turn and look up to see the Female Beetle on a tree. Use the Gale Boomerang to bring her down.

3: Female Pill bug: Kakariko Gorge
Items required: none.
North of the bridge, in the southwest corner of the field. She is by a tree surrounded by grass.

4: Male Pill bug: Kakariko Gorge
Items required: none.
He is just south of the Kakariko Gorge Bridge. He is much easier to find at night.

5: Male Grasshopper: Hyrule Field (Eldin)
Items required: none.
From Kakariko Village, take the north exit to Hyrule Field. Follow the winding path until you reach the open field. Right in front of you should be the Male Grasshopper on a dirt patch.

6: Female Grasshopper: Hyrule Field (Eldin)
Items required: none.
From Kakariko Village, take the north exit to Hyrule Field. Follow the winding path until you reach the open field. Travel to the northeast section of the field. She is much easier to find at night.

7: Male Phasmid: Hyrule Field (Eldin)
Items required: Gale Boomerang.
At the south end of the Eldin Bridge. He can normally be found inside the archway.

8: Female Phasmid: Hyrule Field (Eldin)
Items required: Gale Boomerang.
At the north end of the Eldin Bridge. She is normally way up high on the cliff wall to the west.

9: Male Mantis: Lake Hylia
Items required: Gale Boomerang.
This bug is at the north end of the great bridge. It is often on the inside of the archway. Use the Gale Boomerang to drag him down.

10: Female Mantis: Lake Hylia
Items required: Gale Boomerang.
At the south end of the great bridge is a tall tree. The roots come down and shade the area. Search high on the east side of the dirt wall near the roots.

11: Male Butterfly: Hyrule Field (Lanayru)
Items required: none.
Warp to the east entrance of Castle Town, then travel south. You should see a large group of flowers. The Male Butterfly likes to float around here.

12: Female Butterfly: Hyrule Field (Lanayru)
Items required: Clawshot.
Warp to the east entrance of Castle Town, then travel north. You should see an ivy covered ledge. Clawshot to it and climb up. She is near a patch of flowers.

13: Male Dragonfly: Zora's Domain
Items required: none.
Warp Zora's domain and ride the waterfall down. Swim to the west side and walk up the ramp. He likes to hover over the grass there.

14: Female Dragonfly: Zora's River
Items required: Gale Boomerang.
Warp to Zora's River. In front of the house there is a bridge. Look just above the water on the side of the bridge. She should be there. She flies around a lot and can be hard to get without the Gale Boomerang.

15: Female Ladybug: Hyrule Field (Lanayru)
Items required: none.
From Castle Town, take the south exit. She is on the eastern path that leads to the field near some trees.

16: Male Ladybug: Hyrule Field (Lanayru)
Items required: none.
From Castle Town, take the south exit. He is on the western side of the field on a rock formation near some flowers.

17: Male Stag Beetle: Hyrule Field (Lanayru)
Items required: none.
Due east of the bridge in northern Lanayru you'll find a tree. He is under that tree.

18: Female Stag Beetle: Hyrule Field (Lanayru)
Items required: Gale Boomerang.
In the rocky section of northern Lanayru. Above a bombable west-facing cave entrance.

19: Female Ant: Kakariko Village
Items required: none.
On the west side of the village is a row of three houses. The Female Ant is in the northern most house. Just walk through the door and look around.

20: Male Ant: Kakariko Graveyard
Items required: none.
Near the back of the graveyard on a tree.

21: Female Dayfly: Gerudo Desert
Items required: none.
West of the warp point, this bug is in one of those trenches. Good luck.
23: Male Snail: Sacred Grove
Items required: Gale Boomerang.
At the southern end of the Sacred Grove (opposite where you found the master sword). Enter the alcove of wreckage from the southwest. Turn and look up over the entrance. Use the Gale Boomerang to get him down.

24: Female Snail: Temple of Time
Items required: Gale Boomerang
After entering the Temple of Time, head down the stairs and to the rooms southwest corner. She is on the wall next to the stairs.

Agitha's Castle
Agitha
Agitha. The reason you run around Hyrule with bugs in your pocket.
Agitha's house is located in the southeast section of Castle Town. Enter Castle Town from the east and take the path down (south). Follow it until it turns west. Agitha's house is the first door on the left (north).
Agitha will give you 50 rupees for each bug you give her. If you complete a pair (you have given here the Male version, and are now giving here the Female, or vise-versa) you will receive 100 rupees for that bug. This make a total of 1800 rupees.
But wait, there's more. For the first bug you give her, she will give you the Big Wallet (which holds up to 600 rupees). If you complete her collection with all 24 bugs, she will give you the Giants Wallet (which holds up to 1000 rupees).
You have to give here the bugs one at a time... which is slow and annoying. But it lets you pick and choose how much money you receive at any one time.
Why does she want all these bugs? For a tea party of course. *cough*Aliceinwonderland*cough* She claims to be royalty... that seems unlikely though. In any case, she gives us money for catching bugs, who are we to argue? All hail the bug queen (at least until she goes broke)!
Upgrades
Most upgrades throughout the game don’t require a lot of explanation, just a time and place, so this is going to be a fairly short section.
However, the more important thing here is the Magic Armor which people seem to have a lot of trouble with.
Bomb Bag
There are 3 bomb bags in the game, and one bomb bag upgrade.
Bags:
1) Bought from Barnes after Goron Mines
2) Given to you by Iza in Upper Zora’s River after clearing the rocks
from her ride.
3) Warp to Zora’s Domain and sink to the bottom of the upper pool.
There is the rock you warped in to melt the ice. Blow it up to free
a Goron inside. He gives you the bag.
Upgrade:
1) Get a score of 25 or higher at Iza’s Rapid Ride. Allows you to
carry twice the number of bombs in all your bags.
Bottle
There are four bottles in the game.
1) Given to you during the start of the game
2) Bought for 100 rupees form Coro (lantern salesman in Faron)
3) Gotten from Jovani after collecting 20 Poe souls
4) Must be bobber fished for in the fishing hole.

Bottle #4
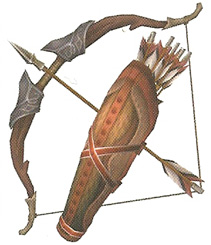
Quiver
There are two Quiver upgrades.
1) Play the STAR minigame. Holds 60 arrows.
2) Play again after the City in the Sky. Holds 100 arrows.
[img=magicarmor.jpg title=Magic Armor
Getting the magic armor is quite the little sidequest. You can initially find it in the Overpriced Store in Castle Town for an unreachable 10,000 rupees. Since you can never hold that many, we need to lower the price.
After obtaining the Master Sword (you may also have to complete the Arbiters Grounds. Some people do, some don't), go to Kakariko Village. Donate money to the Goron in Malo Mart. The want 1000 rupees to fix the bridge. Don't give them a rupee over 1000, however. Once you've donated it, talk to the old Goron outside the store. He'll ask you to take a barrel of spring water to a waiting Goron in Castle Town. Say yes and prepare to run.
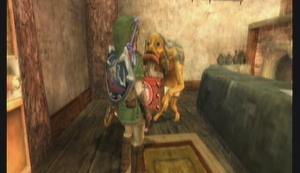
Malo Mart Fund Drive
Elder Goron
Out in the field, don't run straight for Castle Town! The Leevers will hit you and break the barrel. Rather, hug the edges of the field, stopping every time you see a Bolblin archer to put down the barrel and snipe him really fast (you should only run into 2 total). Once you get to Castle Town's entrance, the Goron is waiting and tells you to throw the barrel on him Z-Target and throw it.
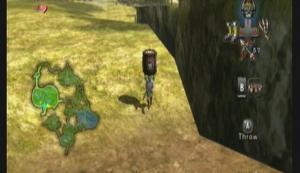
Stay along the edge
He'll be reenergized and open up shop in Castle Town, dropping a heart piece as he passes.

Goron
Go back to Kakariko Village with around 300 rupees. Go into Malo Mart to learn the next donation lowered from 2000 to 200, so give them that to open shop in Castle Town.
They must have gotten a donation from the Goron
Warp back to Castle Town. Go to the Overpriced store in towns center to find that it has been taken over by Malo Mart. The Magic Armor costs 598 rupees, just under what you can currently carry. You don't need it right now, but if you feel so inclined, you can sell off the rest of your bugs and buy the armor.

The Overpriced shop is no more

Quest complete

Gold Wolf
Hero's Spirit
In Twilight Princess, there are unique special attacks that can only be learned from a master. This master just happens to be dead.
To call him out, howl at a special stone while in wolf form, then find him after you return to your human form.
Here we'll take a look at the location of all these Howling Stones and look at the skills themselves a little closer.
Stand next to a Howling Stone and press A. Listen to the pattern and try to copy it. Hold A to howl and use the joy stick to change the pitch.
The skills taught are always taught in order, regardless of the stone used to initiate the fight. That is, you could use stone #6 first, but you'd still just learn the shield attack.

Stone 1

Pattern
Location: Death Mountain
Song: Song of Healing (Majora's Mask)
Wolf Appears: Ordona Province, Spirit Spring

Stone 2

Pattern
Location: Upper Zora's River
Song: Requiem of Spirit (Ocarina of Time)
Wolf Appears: Outside Castle Town (east)

Stone 3

Pattern
Location: Entrance to Lost Woods
Song: Prelude of Light (Ocarina of Time)
Wolf Appears: Hyrule Field (south of Castle Town)

Stone 4

Pattern
Location: Lake Hylia
Song: Oath to Order (Majora's Mask)
Wolf Appears: Gerudo Desert (outside enemy camp)

Stone 5

Pattern
Location: Peak Province
Song: Wind's Requiem (Wind Waker)
Wolf Appears: Kakariko Graveyard

Stone 6

Pattern
Location: Hidden Village
Song: Ballad of Twilight (Twilight Princess)
Wolf Appears: Outside Hyrule Castle gates
There are 7 hidden skills to learn. Each is more deadly then the last. Honestly, you could pretty much stop at the fifth one, as you never use the final 3 (except maybe Great Spin, but don't count on it).
Skills are taught in the same order regardless of the stone used to summon the Hero's Spirit.
--== Skill 1: Ending Blow ==--
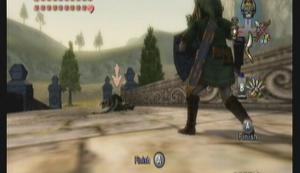
->
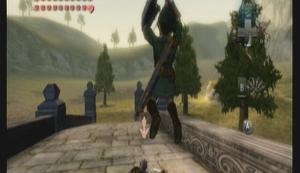
->
->
Finish
How to:
Lock onto an enemy after they've been knocked to the ground. Press A and use the “Finish” prompt to make it so they don't get back up.
Comments:
The only skill that is given to you as part of the game. This skill is actually required for most bosses. Overall you wont be using outside of boss fights much as the conditions for using it have to be just right.
--== Skill 2: Shield Attack ==--
->
thumb=helm1.jpg title=Finish]
How to:
Thrust the nunchuk forward to thrust your shield. I find it easiest to hold the nunchuk vertical (with the joy stick facing you) and flick the top of it in a downward crescent forward.
Comments:
On it's own, the Shield Attack isn't that useful. It MAY make an enemy go off guard, however this is used later in conjunction with another skill that is very deadly. It can also be used to reflect projectiles back at your opponents.
--== Skill 3: Backslice ==--
->
->
->
->
->
[title=back5.jpg title=Finish]
How to:
Dodge roll (lock on joy stick left/right A) twice to get behind your opponent, then swing your sword to strike their back.
Comments:
Easily the most useful and easy skill. Great on almost every enemy, especially armored foes like the Darknut. Also essential against some bosses (Ganon, King Bulblin)
--== Skill 4: Helm Splitter ==--

->
->
->
Finish
Lock on to an enemy and when prompted do a shield attack. If they get knocked off guard, use the prompt A to jump over their head, swinging as you spin.
Comments:
Another great skill against armored foes. Can take down Stalfoes in one shot.
--== Skill 5: Mortal Draw ==--
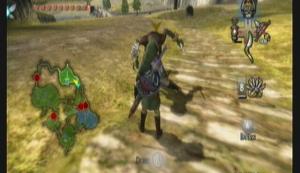
->
->
->
Finish
How to:
Sheath your sword and don't lock onto the enemy. Wait for him to get right next to you, then use the prompt A to perform a finishing blow.
Comments:
Abysmally useless. You almost always have your sword drawn (for good reason), and most enemies either hit you before you press A or before you make contact. Plus, you don't even look like Kenshin (your sword is on your back, not at your side) :(
Oh, and Mortal Draw does not work on boss or mini-boss enemies (or enemies that were once mini-bosses in another dungeon, like Darknuts).
--== Skill 6: Jump Strike ==--
->
->
->
->
->
->
->
Finish
How to:
Lock on to an enemy then press and hold A. When a light runs up your sword and reaches the top, release to fly though the air, swing on either side of you, and finish with a earth shattering overhead strike that sends out a shockwave.
Comments:
Not “absolutely” useless, as it does kind of maybe work on Darknuts and Stalfoes, but pretty much yeah. Most enemies will either strike you when you're charging the attack or when you are in the air. This attack could have been made tolerable had they made you invulnerable when in the air (the charging time would balance out the attack against it's obscene power). IF you can pull it off, however, it is immensely powerful.
--== Skill 7: Great Spin ==--
->
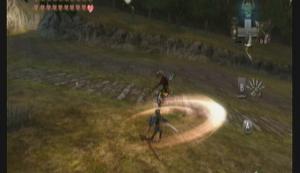
->
Finish
How to:
Do a regular spin attack when at full health.
Comments:
The only thing that makes this attack worth while is that you don't have go to through any special button combo to do it, just make sure your health is full. The drawback is... your health has to be full, which it never stays for long. This is, next to the Mortal Draw, the most powerful sword attack in the game if you can actually keep you health up during a fight where it would come in handy.

Hero's Spirit
!SPECULATION WARNING!
The next section is pure conjecture from fans of the game.
The Hero's Spirit is shrouded in mystery. No one knows his exact origins. Most speculate that he is an ancestor of Link. Maybe not Link from another Zelda game, but some other warrior from Links past.
It is almost certain that he is related to Link somehow, however, as he makes a comment about how these skills have never left “our” bloodline (“...do not leave our bloodline”), while talking to link. “Our” is a pronoun, however, and could refer to anything (especially if he wasn't using proper English). He might have been referring to his family, thereby stressing the fact that these are powerful secret techniques that few have ever seen, meaning Link should be honored to learn them.
He also makes a comment at the end about Link being his child (“Go and do not falter, my child”). This is pretty common in romanticized martial arts where the master would act as a father figure to his best pupil, often referring to them as son or child.
Appearance wise, the Hero's Spirit looks like a cross between a Darknut and a Stalfos, two of the most common yet menacing enemies in the Zelda series, perhaps exemplifying his skill.
I never took much to mini-games unless they get me something useful (like a heart piece).
Never the less, I will cover all the mini-games and explain how to beat ‘em. :)
Building
Instructor
Location: Lake Hylia
When to play: Any time after catching the shadow insects in the Lake.
Cost: 20
Prize: 200 rupees, heart piece
Objective:
Land on the floating platforms in the center of the lake.
Strategy:
Grab a Cucco and jump off. You can follow the holo-rupee trail around, getting the amount the rupee is worth when you fly through it, but it is a better strategy to fly straight to the platforms. Use the joy stick to adjust your speed accordingly. If you land on the top most platform, you can get a heart piece a bunch of rupees from the lower platforms. The spinning platform contains 100 rupees, but is hard to jump down from without missing the lower platforms.
There is also two hidden grottos you can reach only by playing this game. One is directly under the building you jump from, the other is on a pillar west of the cannon. They each give a fair number of rupees.
Building

Instructor
Location: Castle Town
When to play: After you get the clawshot
Cost: 10, 15 for the second round
Prize: Quiver upgrades
Objective:
Clawshot around the cage, collecting the orbs
Strategy:
For the most part, the stars are lined up in rows. If you can figure out the pattern, you can clawshot around the cage in no time. The second round requires that you have the double-clawshots and is much longer, but the time limit is less restricting.
Building
Instructor
Location: Upper Zora's River
When to play: Anytime after catching the shadow insects from the lake
Cost: 20
Prize: Bomb Bag, Bomb Bag upgrade, 50 rupees
Objective:
Use bomb arrows to smash large pots placed along the rapids.
Yellow = 1
Red = 3
Hitting something = -1
Strategy:
Your canoe is pretty stable for the most part, so if you don't mess with it, it normally wont hit much. Aim for the red pots at all costs. Remember that bomb arrows have a curved trajectory, unlike regular arrows, so to hit a far off target you have to aim slightly above it.
The first time you play, you get another bomb bag for just clearing out some rocks. The second time, the goal is to get a score of 25. that gets you a bomb bag upgrade (all bags hold double bombs), and after that 50 rupees.
Instructor
Location: Lake Hylia (near falcon grass)
When to play: After getting the Master Sword
Cost: 0
Prize: Heart Piece, 100 rupees
Objective:
Fly the large Kargarok through the cave that leads to Zora's River, popping fruit shaped balloons on your way.
Strategy:
You get bonus points for hitting the same fruit type in a row. The easiest way is to get all strawberries, as they are worth the most. If you hit a wall too hard, you'll fall off and end up back in Lake Hylia, so be carful. The goal is to get a score of 10,000 or better; that gets you a heart piece, then 100 rupees every time after.
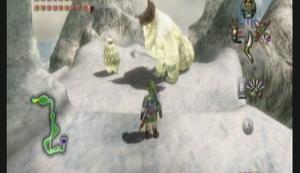
Instructor
Location: Peak Province (near warp point)
When to play: After Snowpeak Ruins
Cost: 0
Prize: Heart Piece
Objective:
Beat Yeto and Yeta in a snowboard race
Strategy:
Basically press A to crouch, release to jump, and don't hit anything. Once you beat Yeto, warp back and talk to Yeta to race her. There are a couple shortcuts you can take, but only one that makes a big difference. Shortcut:

Jump onto this ledge
You HAVE to take this shortcut to beat Yeta and get your heart piece.
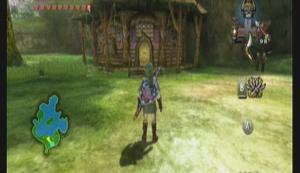
Building
Game
Location: Upper Zora's River (fishing hole)
When to play: After catching the shadow insects in the lake.
Cost: 5
Prize: 10 rupees, frog lure
Objective:
Roll a marble into a hole at the end of a maze. For every one you complete, you get 10 rupees and a chance to try a harder one. After all 8, you get a frog lure.
Strategy:
There is a time limit, so you have to get through quickly. There's really not much to this.
Fishing get's it's own mini section because a lot goes into it.
Bobber Fishing
This can be done all around Hyrule. Anywhere there is water, you can fish. Simply take out your pole, press B to cast, wait for the bobber to sink, then pull up so the Wii remote is facing straight up. Hold it there till the fish lands.
You'll mostly only catch Greengill without bait. Bait is most easily bought in Ordon Village, though you can find it around Hyrule (bee's nests, killing Bombskits). Bee larva and Worms have roughly the same success rate, so it doesn't matter which. To equip bait, take out your pole, then press the Dpad button the bait is assigned to.

Building

Instructor
This is where things get interesting. You can go into the fishing hole at the north end of Upper Zora's River. Enter the building and talk to Hena. Pay 20 rupees to fish as long as you want.
You get access to many different lures, each suited to a different fish. You also get a boat, whereby you can get out in deeper water and catch better fish. Finally, every record breaking fish you catch can be viewed in a fish tank inside the Hena's building.
The controls are different as well. Press B to pull out your rod, then old A and cast by throwing the Wii remote. You can wiggle the lure by moving the Wii remote around. Reel in by holding the Nunchuk sideways (with the buttons facing right) and make circular motions towards yourself.
Some fish are easier to catch in different seasons. The season will change every time you enter the fishing hole.
Also worth noting is all the stuff in the shop. Use C to look around. She even has a picture of the fishermen from OoT on the wall.
Spring, trees in bloom
Summer, leaves on trees
Fall, leaves turning
Winter, ice on trees
In the fishing hole you can use various lures, each suited to different fish.
Swimmer – All-round, not bad, not good.
Popper – Attracts deeper fish (this can take a while)
Spinner – Good for fish that dont want to bit any other lure
Special Lures (have to be found):
Frog Lure
– Good for Hylian Loach
- Obtained by completing all 8 levels of the Rollgoal game
Sinking Lure
- Good for catching huge fish of all types
- After catching one of every type of fish (by lure fishing), go to
the cove in the fishing holes northwest corner and bobber fish.
You'll pull up the Sinking Lure in a couple tries.
- Be warned, if Hena catches you using it (which is random), she'll
take it away.
There are 5 different fish to catch in Hyrule. The lures only count when fishing in the fishing hole.
- Greengill
Can be found: Any place there is water
Caught with: Any
- Hyrule Bass
Can be found: Kakariko Village
Caught with: Frog or Swimmer
- Hylian Loach
Can be found: Kakariko Graveyard
Caught with: Frog or Sinking (only in summer in the northern cove)
- Hylian Pike
Can be found: Upper Zora's River
Caught with: Spinner
- Ordon Catfish
Can be found: Ordon Village (deepest areas only)
Caught with: Popper
- Reekfish
Can be found: Zora's Domain
Caught with: Coral lure (can only be caught while bobber fishing)

Cave of Ordeals
The Great Fairy
Cave of ordeals is the hardest part of the entire game, and there is little reward other then bragging rights. You must face off against 50 enemies, pretty much every non-boss enemy in the game, without dyeing or being able to buy supplies between.
I'll cover all 50 floors, tips, hints, and glitches.
Before even thinking about the Cave, you need to have
- beaten the City in the Sky (double clawshots)
- All 4 bottles (1 pink fairy and 3 blue potions/tears)
- Fully upgraded equipment (bombs bags, Giant Quiver)
- Fully stocked equipment
- Magic armor and 1000 rupees
If you're missing any one of those, don't even try.
The Cave of Ordeals is located at the warp point in Gerudo Desert where you warped out the Eldin Bridge. It is under where the bridge sat.
- There are 50 floors in the Cave of Ordeals, each one has a unique combination of enemies in it. You must defeat all the enemies within the room to open the door to the next.
- At the start of any room, you are up high on a platform, relatively safe (though Bubbles and Bulblin archers will sometimes spot you) and can scope out the room before jumping in.

Room Entrance
- You will also be using this as a vantage point to snipe enemies with arrows. You need to be conservative, however, as there are 50 floors and only 100 arrows. Only use them when it makes sense.
- If you die or are forced to give up, you must restart back at the beginning.
- For every ten floors you complete, you find the Great Fairy. The Great Fairy will be pleased at your progress, and release infinite pink fairs at a Spirit Spring somewhere in Hyrule. If you complete all 50 floors, she'll give you Fairy Tears that can be refilled infinitely at any Spirit Spring.
- On floors 17, 33, and 44 are Poe souls.
- Sometimes you need to weigh your options. Use the Magic Armor to avoid taking damage? Use an arrow/bomb arrow to take him out without getting close? Just take the hit, it wont do much damage? All things you need to consider in any one floor.
- You only actually NEED bombs on a few floors, and never Water Bombs (though Bomblings can come in handy), so you can use them like there's no tomorrow (Bomb arrows work nicely against a lot of enemies).
- Take the damage early on, don't use up your magic armor till you hit around floor 30. Enemies do drop Rupees, but not enough to ever completely refill from constant use. Also, as SOON as you don't need the armor any more, take it off. No sense wasting rupees.
- The floors are pretty unforgiving. Most enemies only drop rupees, and not very many. However, some floors have hearts buried in the dirt. I'll list the floors that do.
- There is a glitch that works around 50% of time. When you first enter a floor, take out the Gale Boomerang and blow out the torches on the left and right. Sometimes, this will open the door without having to fight the enemies.

Cave of Ordeals
--== Floor 1 ==--
Enemies:
Blue Bokoblin x1
Strategy:
Jump down and swing.
Special:
None
--== Floor 2 ==--
Enemies:
Keese x?l
Rats x?l
Strategy:
Spin attacks work well
Special:
None
--== Floor 3 ==--
Enemies:
Deku Baba x6
Strategy:
Use the Gale Boomerang or clawshots to get the ones off the ceiling, then spin attacks work well on the ground ones.
Special:
Dig around for a heart
--== Floor 4 ==--
Enemies:
Skulltula x3
Strategy:
The clawshot can break their guard sometimes. Arrows definitely can, but it's not really worth it.
Special:
None
--== Floor 5 ==--
Enemies:
Bulblin Archers x4
Strategy:
You can snipe most of them from your vantage point. Be careful not to get hit in the process (if you position yourself right, they will hit the ledge)
Special:
None
--== Floor 6 ==--
Floor 6
Enemies:
Torch Slug x5
Strategy:
Use your vantage point and pick them off the ceiling with the Clawshot.
Special:
None
--== Floor 7 ==--
Enemies:
Fire Keese x?l
Dodongos x2
Strategy:
Jump down and try to attract the Keese while ignoring the Dodongos for now. Once the Keese are down, get close to a Dodongo and wait for it to breath fire. Sidestep a couple times then use a spin attack to hit his tail.
Special:
None
--== Floor 8 ==--
Enemies:
Red Tektite x3
Blue Tektite x3
Strategy:
Spin attacks take them out in one shot.
Special:
None
--== Floor 9 ==--
Enemies:
Bulblin Archers x2
Lizalfos x2
Strategy:
The archers are cleverly hidden under your platform. Drop down close to the platform and kill them first, then use spin attacks to take down the Lizalfos.
Special:
None
--== Floor 10 ==--

Great Fairy #1
Enemies:
None
Strategy:
None
Special:
The first Great Fairy encounter. She will release fairies to the Ordon Spirit Spring.
--== Floor 11 ==--
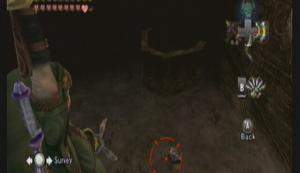
Floor 11
Enemies:
Helmasaur x2
Rats x?l
Strategy:
Hang from the Clawshot targets on the ceiling. Lower yourself, but not to the floor. Use the other clawshot to snatch the shield off the Helmasaurs. Raise yourself back up and drop down from a height so that your roll when you land (this gets you away from the rats). The rest is cake. To get to the door, use the spinner on the track around the room.
Special:
None
--== Floor 12 ==--
Enemies:
ChuChu x?l
Strategy:
There are other colored Chus here, but it would be a hassle to get to them before they were absorbed. Instead, hang back and use the clawshot to pick them apart.
Special:
None
--== Floor 13 ==--
Enemies:
Chu Worms x5
Strategy:
Jump down and use Bomb Arrows.
Special:
None
--== Floor 14 ==--
Enemies:
Bubbles x?l
Strategy:
Spin attack can kill in one shot
Special:
None
--== Floor 15 ==--
Enemies:
Bulblin Clubbers x10
Strategy:
You can pick some off with arrows, but don't go crazy. Drop down and one swing is all it takes.
Special:
None
--== Floor 16 ==--
Enemies:
Rats x?l
Keese x?l
Strategy:
Jump down and use spin attacks
Special:
None
--== Floor 17 ==--
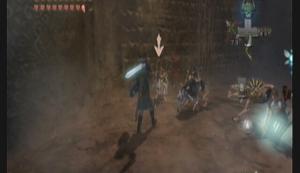
Floor 17
Enemies:
Poe x1
Stalhounds x?l
Strategy:
Try to keep your distance from the Poe for now and take out as many Stalhounds as you can in Human form (you don't fight as well in Wolf form). Once you're down to the Poe, use Wolf link to take it out.
Special:
Poe Soul
Dig for x3 hearts
--== Floor 18 ==--
Enemies:
Leevers x?l
Strategy:
Leevers are a nasty thing. You have to wonder around to get them to pop up, then the encircle and close in on you. Try to get out of the circle before they start spinning. Spin attacks are the best thing.
Special:
None
--== Floor 19 ==--
Enemies:
ChuChu x?l
Strategy:
There are other colored Chus here, but it would be a hassle to get to them before they were absorbed. Instead, hang back and use the clawshot to pick them apart.
Special:
None
--== Floor 20 ==--
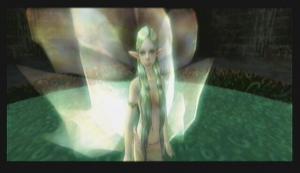
Great Fairy
Enemies:
None
Strategy:
None
Special:
Second Great Fairy encounter. This time she releases pink fairies to Faron Woods Spirit Spring.
--== Floor 21 ==--
Enemies:
Ice Keese x?l
Blue Bokoblins
Strategy:
You can take them all out with just a couple spin attacks
Special:
None
--== Floor 22 ==--
Enemies:
Keese x?l
Rats x?l
Ghoul Rats x?l
Strategy:
Focus on the Keese first, killing only the rats that wonder near. Once they are down, turn into a wolf to kill the Ghoul Rats and the regular ones if you want.
Special:
Dig for a heart
--== Floor 23 ==--
Enemies:
Stalkin x?l
Strategy:
Spin attacks kill in one hit.
Special:
None
--== Floor 24 ==--
Enemies:
ReDead Knight x5
Strategy:
Use the Ball and Chain on them. They will only activate when you get close, so try to only wake one up at a time.
Special:
None
--== Floor 25 ==--
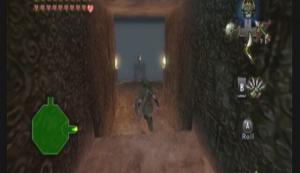
Floor 25
Enemies:
Bulblin Archers x3
Bulblin Clubbers x6
Strategy:
Watch out! As soon as the door opens there is a Bulbin Archer that can hit you. Take him out and use your vantage point to quickly snipe the ones on the ground.
Special:
Half-way through!
--== Floor 26 ==--
Enemies:
Stalfos x3
Strategy:
Use bomb arrows. No problem.
Special:
None
--== Floor 27 ==--
Enemies:
Skulltula x3
Bubble x?l
Strategy:
Stay close to your platform and just take out the bubbles (you can get their attention with the clawshot). Save the Skulltula for last. You can knock them down from safety with the boomerang.
Special:
None
--== Floor 28 ==--
Enemies:
Lizalfos x2
Red Bokoblin x6
Strategy:
Spin attacks
Special:
None
--== Floor 29 ==--
Enemies:
Stalkin x?
Bubbls x?
Strategy:
Spin attacks
Special:
None
--== Floor 30 ==--
Great Fairy
Enemies:
None
Strategy:
None
Special:
Great Fairy release pink fairies to Eldin Spirit Spring.
--== Floor 31 ==--
Floor 31
Enemies:
Beamos x5
Keese x?
Strategy:
Stay on your platform and snipe the red eye of the Beamos. You should be able to get them all.
Special:
Use the Dominion Rod to move the statues on the left and right side of the door.
--== Floor 32 ==--
Enemies:
Torch Slugs x5
Fire Keese x?
Fire Bubbles x?
Dodongos x2
Strategy:
Use the Clawshot to get the slugs off the ceiling first. Jump down and focus on the Keese and bubbles next, while staying away from the Dodongos. On the Dodongos, use spin attacks from the side while they are breathing fire.
Special:
None
--== Floor 33 ==--
Enemies:
Poe x1
ReDead Knights x4
Strategy:
Keep your distance as not to attract the Poe. Use the ball and chain on the knights then transform and take on the Poe.
Special:
Poe Soul
--== Floor 34 ==--
Enemies:
Chuchu x?
Goul Rats x?
Strategy:
Use the clawshot to pick appear the Chu first, it doesn't move very fast. Take out the rats with spin attacks as a wolf.
Special:
Dig for a heart
--== Floor 35 ==--
Enemies:
Ice Keese x?
Freezard x1
Strategy:
Jump down and encircle the Freezard while killing off the Keese. Once the Keese are down, wait for the freezard to finish an ice breath, then attack with the ball and chain. After two shots he breaks to mini-freezards. A couple tosses of the ball should deal with them.
Special:
None
--== Floor 36 ==--
Floor 36
Enemies:
Chilfos x3
Strategy:
Use Bomb arrows from the platform. One to break they spear then another to kill them before they draw another.
Special:
None
--== Floor 37 ==--
Enemies:
Ice Keese x?
Leever x?
Strategy:
Keep your guard up. Take out the keese as fast as possible while spin attacking any leever that appears.
Special:
None
--== Floor 38 ==--
Enemies:
Freezard x2
Ice Keese x?
Chilfos x3
Blue Bubbles x?
Strategy:
Use bomb arrows on the chilfos first. Watch the bubbles, as they may come up to your level. Jump down and try to stay at one end, away from the freezards. Use that point to take out any Keese or Bubbles that come your way. After, wait for a Freezard to finish a breath, take it out with the ball and chain, then the mini-freezards.
Special:
None
--== Floor 39 ==--
Floor 39
Enemies:
Darknut x2
Strategy:
Typical Darknut strategy. Backslice, Helmsplitter, Bomb arrows. Without armor, spam the backslice.
Special:
Dig for 200 rupees
--== Floor 40 ==--
Great Fairy
Enemies:
None
Strategy:
None
Special:
Great Fairy will release Pink Fairies to the Lanyaru Spirit Spring
--== Floor 41 ==--
Enemies:
Armos x9
Strategy:
Try to only activate one at a time. Get behind them by locking on and walking then use the clawshot if you are low on arrows. Three times in the back and they go down.
Special:
Use the double clawshot to get to the door.
--== Floor 42 ==--
Enemies:
Deku Baba x?
Red Bokoblin x?
Strategy:
Jump and slash.
Special:
None
--== Floor 43 ==--
Enemies:
Lizalfos x3
Bulblin Archers x6
Strategy:
Snipe several of the archers from the platform. Two are under your platform. Use spin attacks on the lizalfos.
Special:
None
--== Floor 44 ==--
Floor 44
Enemies:
Armored Dynofos x4
Poe x1
Strategy:
Pick off the Dynofos with bomb arrows (aim for the head). Use wolf link to take out the Poe.
Special:
None
--== Floor 45 ==--
Enemies:
Bulblin Archers x2
ReDead Knights x5
Chuchu x?
Strategy:
Snipe the archers before even entering the room. Use the ball and chain on the Knights next, then finally clawshot the chu.
Special:
None
--== Floor 46 ==--
Enemies:
Freezards x2
Chilfos x3
Ghoul Rats x?
Strategy:
Pick of the chilfos with bomb arrows. Jump down and attract as many rats as you can without getting hit, then shake them off as a wolf. Use the standard ball and chain strategy on the Freezards.
Special:
None
--== Floor 47 ==--
Enemies:
Red Bokoblin x?
Rats x?
Stalkin x?
Strategy:
Jump down and slash.
Special:
None
--== Floor 48 ==--
Enemies:
Aeralfos x2
Darknut x1
Strategy:
Focus on the Aeralfos first. You might want to use the Magic Armor if you're afraid of the Darknut sneaking up on you or the other Aeralfos charging you. Use the clawshot to drag the Aeralfos as it is about to charge, and slash. Two rounds takes one down.
The Darknut is new, as it is a Red Darknut. The red ones are more aggressive but cant take as many hits.
Special:
None
--== Floor 49 ==--
Floor 49
Enemies:
Darknut x3
Strategy:
You almost have to take them out all at once. Use bomb arrows to little effect (last room after all), and the Magic armor till it gives in. Proceed to attack them furiously. Whenever they swing, attack while they are recovering (very dangerous). Backslice and helm splitter still work.
Note the Blue Darknut. This is the only time you'll fight one. It exhibits the same aggressiveness as the Red variety, but even more armor then the black.
Special:
Final Room!
--== Floor 50 ==--

Great Fairy
Enemies:
None
Strategy:
None
Special:
Great Fairy gives you a bottle of Fairy Tears and the chance to refill it infinitely at any Spirit Spring.
And that's the Cave of Ordeals.
Hidden Grottos
These caves are hidden all around Hyrule. The only way in is to dig while in Wolf form. There is normally very little indication as to the location of most of them.
Most contain a large amount of rupees, while other contain heart pieces. Still others contain nothing at all.
Lets take a closer look at the locations and secrets of the hidden hide-a-ways.
Note: to get out of a grotto, climb on the rock with sun shining on it.
Grotto #1
#1
Location: Ordon Ranch (daytime only)
Items required: Lantern
Enemies: Rats, Chuchu
Prize: 50 rupees
Special:
Light the three lanterns to get the rupees.
Grotto #2
#2
Location: Southwest corner of the field, in the indent.
Items required: None
Enemies: Chuchu, Deku Babas, Keese, Rats
Prize: 50 rupees
Special:
Defeat all enemies.
Grotto #3
#3
Location: Northeast corner of the southern field, circle of grass
Items required: None
Enemies: None
Prize: Good bobber fishing place
Special:
None
Grotto #4
#4
Location: Place you fought Skullkid. Blow up the rock
Items required: Bombs
Enemies: Deku Baba
Prize: Heart Piece
Special:
Defeat all enemies
Grotto #5
#5
Location: North of the bridge (Gorge). In an alcove around some
flowers.
Items required: None
Enemies: Keese
Prize: None
Special:
None
Grotto #6
#6
Location: Center of the large northern area.
Items required: Lantern
Enemies: Chuchu, Bombskits
Prize: 50 rupees
Special:
Light the two torches
Grotto #7
#7
Location: East along the gorge on the south side of the Eldin Bridge
Items required: None
Enemies: Bombfish, Skullfish
Prize: 50 rupees, bee larva
Special:
None
Grotto #8
#8
Location: Near the Hidden Village, a spinner track by the small bridge
Items required: Spinner
Enemies: Stalfos
Prize: Heart Piece, Bombs
Special:
Defeat all enemies

Grotto #9
#9
Location: South of castle town, climb the vines on the pillar
Items required: None
Enemies: Tektites
Prize: 100 rupees
Special:
Defeat all enemies
Grotto #10
#10
Location: East of Castle Town, look for a ledge with vines
Items required: Clawshot
Enemies: Helmasaur
Prize: 100 rupees
Special:
Defeat all enemies
Grotto #11
#11
Location: North end, east side. In some grass near trees.
Items required: None
Enemies: Deku Baba, Poes
Prize: two Poe souls
Special:
None
Grotto #12
#12
Location: North end of the field, at the top of the stream on the east
side in some grass.
Items required: Lantern
Enemies: Skulltula
Prize: 50 rupees
Special:
Light the torches
Grotto #13
#13
Location: Northern field, west side, in some grass near the river
Items required: None
Enemies: Chuchu
Prize: None
Special:
None
Grotto #14
#14
Location: Southern end of the great bridge, look form some bombable
rocks hiding a clawshot target. Follow around till on the
third ledge.
Items required: Bomb arrows, Clawshot
Enemies: Bubbles
Prize: 100 rupees
Special:
Defeat all enemies
Grotto #15
#15
Location: Under the Flight-by-Fowl house. Fly there.
Items required: Iron Boots
Enemies: Shell blade
Prize: 100 rupees
Special:
Defeat all enemies
Grotto #16
#16
Location: Near the howling stone in some grass
Items required: None
Enemies: Toadpolis
Prize: 100 rupees, fishing spot, bee larva
Special:
Defeat all enemies
Grotto #17
#17
Location: Near where you land (from the cannon) between some skulls
Items required: None
Enemies: Skulltula
Prize: 100 rupees
Special:
Defeat all enemies
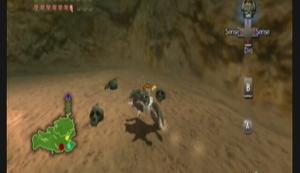
Grotto #18
#18
Location: Northeast of the warp point, at north (lower) end. By a rock
Items required: None
Enemies: Chuchu
Prize: None
Special:
None
Grotto #19
#19
Location: Before the enemy camp, by the tree on the plateau (grapple)
Items required: Clawshot, bombs, lantern
Enemies: Poes
Prize: two Poe Souls, 100 rupees
Special:
Light all torches
Grotto #20
#20
Location: West of the howling stone near a tree
Items required: Ball and chain
Enemies: Freezards, Ice Keese
Prize: 100 rupees
Special:
Defeat all enemies
Grotto #21
#21
Location: North of the howling stone near some trees
Items required: Bombs
Enemies: Chuchu, Ice Keese
Prize: None
Special:
None
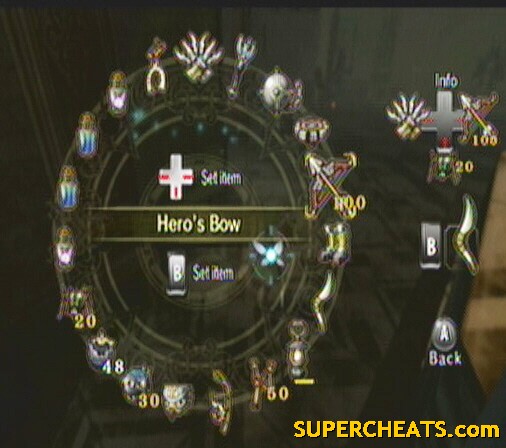
Inventory
You cant complete any game without something to complete it with.
Here we'll take an in-depth look at all the items in Twilight Princess.
List is alphabetized.
Ball and Chain
Found at: Snowpeak Ruins
Special abilities: Breaks icewalls, can kill Freezards
How to use: Press and hold B, then release while aiming at the screen
Description:
This is probably the most powerful weapon in the game, akin OoT's Megaton Hammer. However, it is very slow and unwieldy. Note that it can damage foes while being swung overhead, in air, and while being retracted.

Bee Larvae
Found at: Ordon Village
Special abilities: Attracts more fish, heals very small amount
How to use: Set your rod to B, then use this from the Dpad
Description:
Simple bait for fishing. Can be found after knocking down a bee hive. I've never done extensive searching, but I know you can buy it in Ordon.

Blue Potion
Found at: Castle Town Shop
Special abilities: Heals all hearts
How to use: Press B
Description:
A potion that heals all damaged hearts.

Bombs
Found at: Barne's Bombs (Kakariko Village), Malo Mart (Castle Town)
Special abilities: Blows up bombable rocks
How to use: Press B to light. Press again to set. Press B while
running to throw.
Description:
The bomb bag is used to hold your bombs. There are three total in the game, meaning you can hold one of each type of bomb. If you need a different type of bomb then what your bomb bag has in it, you'll have to sell off your current bomb type at Barn's to stock it with a new type. If you bow is equip, you can highlight a bomb type and press Z to make explosive arrows. Max load: 60.
Bombling
Found at: Barne's Bombs (Kakariko Village), Malo Mart (Castle Town)
Special abilities: Blows up bombable rocks
How to use: Press B to light. Press again to let go.
Description:
Same as regular bombs with one key difference: These make a way better offensive weapon. They will walk along the ground before exploding, and even hone in on enemies. Max load: 20.

Bottle
Found at: Ordon Village
Special abilities: Holds things
How to use: Press B to scoop
Description:
There are four bottles in the game: one is found in Ordon Village mart as part of the game. The second is sold to you by Coro (lantern salesman) for 100 rupees. Third comes from the fishing hole; walk to the west bridge and fish off the west side to catch a bottle. Fourth is given to you by Jovani after you obtain 20 poes.

Bottled Fairy
Found at: Various dungeons
Special abilities: Can heal 8 hearts automatically if you die
How to use: Don't have to
Description:
Fairs are the best healer in the game. they can automatically revive you. Scoop one up when you can if you have an empty bottle.
Bottled Milk
Found at: Ordon Village
Special abilities: Heals 3 hearts
How to use: Press B
Description:
Worst healer in the game. It is cheap though, and you get two doses per bottle.
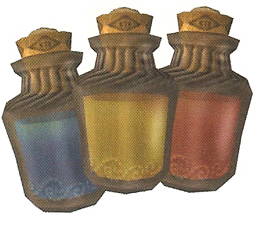
Chu Jellies
Found at: Various locations
Special abilities: Varies depending on color
How to use: Press B
Description:
Different colors do different things:
Purple Chu: Random effect
Yellow Chu: Acts as oil for Lantern
Red Chu: Replenishes 8 hearts
Blue Chu: Replenishes all hearts
Rare (gold) Chu: Replenishes all hearts and increases attack power
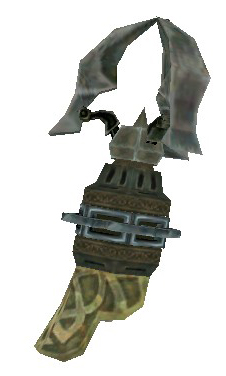
Clawshot
Found at: Lakebed Temple
Special abilities: Grapples you to things or things to you
How to use: Press B, aim, press again to fire
Description:
Clawhot is like a grappling hook. It only works on special surfaces, however (vines, grates, yellow/red targets). It can also be used to stun enemies and draw certain objects closer to you.
Compass and Map
Found at: All dungeons
Special abilities: Shows you the area and every chest in it
How to use: Don't have to
Description:
The map reveals all areas in the current dungeon while the compass shows the location of every chest.
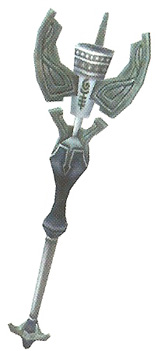
Dominion Rod
Found at: Temple of time
Special abilities: Can re-animate statues
How to use: Press B, aim, press again to fire
Description:
While controlling a statue, it mimics you except for jumping. Some statues that have weapons can use them with B.
Double Clawshot
Found at: City in the Sky
Special abilities: Can grapple from one object to another
How to use: Press B, aim, press again to fire
Description:
This will allow you to hang from one target and grapple to another, like spiderman.

Fairy Tears
Found at: Various locations
Special abilities: Heals all hearts and raises attack for a bit
How to use: Press B
Description:
The best non-auto healer. This will heal all hurt hearts and double your attack power for a few seconds.
Fishing Pole
Found at: Ordon Village
Special abilities: Fish with it
How to use: Press B to cast
Description:
Use this to catch basic fish. Once cast, wait for the bobber to sink. Once it is completely under the water, pull up on the Wii remote and hold it vertical till the fish lands.
Gale Boomerang
Found at: Forest Temple
Special abilities: Creates a gust of wind that turns things
How to use: Press and hold B, aim, release
Description:
This can act as a primitive clawshot early on as well, because it can draw things to you. More so it's just used to power wind-devices. Can also put out torches.

Hawkeye
Found at: Kakariko Village
Special abilities: Puts a scope on the Bow
How to use: Highlight in inventory and press Z to combine with bow
Description:
When combined with your bow, this will allow you to zoom in. However, the aiming feels really clunky as you have to use the joy stick. Aim at the screen and select the “zoom” buttons to zoom in and out.

Hero's Bow
Found at: Goron Mines
Special abilities: Shoots things
How to use: Press and hold B, aim, release
Description:
Used to inflict damage from a distance. What more do you want? It can be combined with Bombs and the Hawkeye for different effects.
Horse Call
Found at: Kakariko Village
Special abilities: Can call Epona from anywhere
How to use: Press B, then press again to blow
Description:
Pretty useless seeing as how late in the game you get it.
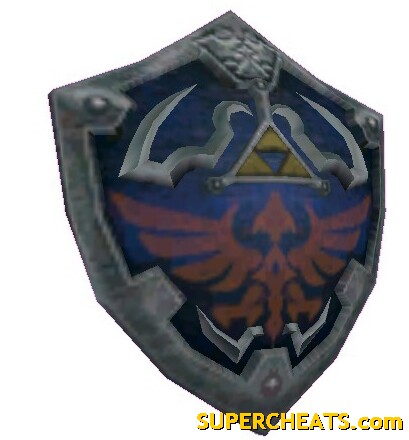
Hylian Shield
Found at: Kakariko Village (Malo Mart)
Special abilities: Blocks most attacks
How to use: Hold Z
Description:
More sturdy then the wooden shield. This can withstand fire attacks. It can block all attacks, but if an attack hits too hard it may knock link off balance.
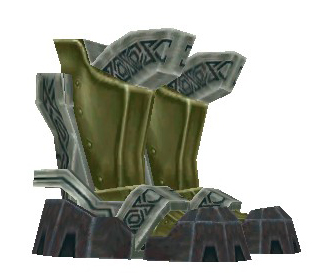
Iron Boots
Found at: Ordon village
Special abilities: Adds weight and magnetism to Link
How to use: Press the Dpad it is assigned to
Description:
The iron boots weigh you down quite a bit, but that can be a good thing if you want to hold your ground or sink in water. They also act as a magnetized source to pull link to magnetic surfaces (yet his other iron/steel items are totally unaffected >.>)
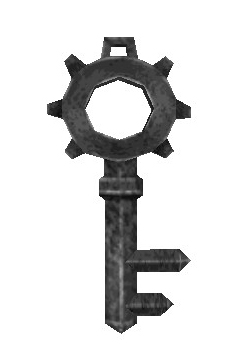
Key
Found at: Dungeons
Special abilities: Unlocks doors
How to use: Press A near a locked door
Description:
Keys are found in every dungeon. They unlock doors, but only in the dungeon they are found in.
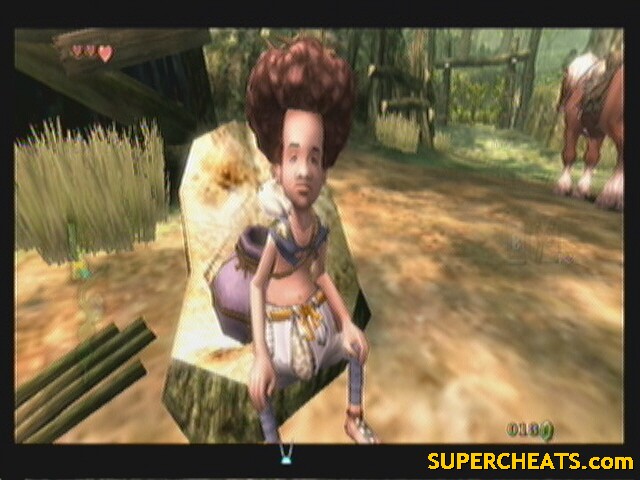
Lantern
Found at: Faron Woods
Special abilities: Lights torches and burns webs
How to use: Press B to draw and swing. Press A to put away.
Description:
Can be used to light the way, but is mostly used for puzzles that involve torches. When the lantern is on, a gauge showing how much fuel you have appears below your health.

Lantern Oil
Found at: Various locations
Special abilities: Adds fuel to the lantern
How to use: Press B or Dpad while lantern is out
Description:
Refills your lantern to full fuel.
Magic Armor
Found at: Castle Town Shop
Special abilities: When hit, subtracts rupees, not health
How to use: Equip in pause screen ( )
Description:
When equip, it slowly drains your rupees. When attacked, it drains rupees equal to the amount of damage absorbed. If you run out of rupees, it acts like regular cloths only it also weighs you down like the iron boots. To buy it, you must complete the Malo Mart side quest.

Red Potion
Found at: Various shops
Special abilities: Heals 8 hearts
How to use: Press B
Description:
Average healer.
Shadow Crystal
Found at: Sacred Grove
Special abilities: Allows you to freely transform from wolf to human
How to use: Ask Midna
Description:
After removing this from your body with the Master Sword, you can freely transform from wolf form to human form. It allows for warping on demand as well.
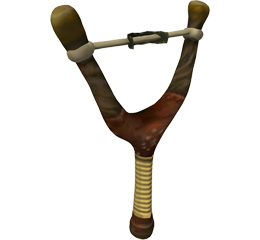
Slingshot
Found at: Ordon Village
Special abilities: Shoot things from a distance
How to use: Press and hold B, aim, fire
Description:
Like the Bow, but not as powerful. Used to strike from a distance. It gets ammo from pumpkin seeds, deku seeds, or you can buy pellets at the store.
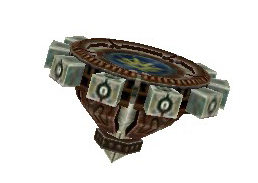
Spinner
Found at: Arbiter's Grounds
Special abilities: Rides on Spinner track and can spin gears
How to use: Press B to get on. Press B again to spin or jump off a
track. Press A to get off.
Description:
Not going to use it for much other then riding spinner track or turning gears in the spinner slots. It can be used to attack, but the power is low.
Water Bomb
Found at: Barne's Bombs (Kakariko Village), Malo Mart (Castle Town)
Special abilities: Blows up bombable rocks
How to use: Press B to light. Press again to set. Press B while
running to throw.
Description:
Same as regular bombs with one big difference: these can be set and used underwater. Max load: 40.
Wooden Shield
Found at: Ordon Village (can be bought at some shops)
Special abilities: Blocks some attacks
How to use: Hold Z
Description:
Blocks most attacks, but can be burnt if hit with a fire attack.

Worm
Found at: Shops, Defeating Bombskits
Special abilities: Attracts more fish
How to use: Use when fishing pole is equip
Description:
Simple bait.
Zora Armor
Found at: Kakariko Graveyard
Special abilities: Allows you to breath underwater
How to use: Equip at pause screen ( )
Description:
This blue armor allows you to breath underwater and swim much faster. However, it comes at the cost of Fire and Ice attacks doing far more damage, and your movement is slightly slower on land.
Yes, the ever ready quest to spend money.
Here lets take a look at the shops, inventory, and pricing.
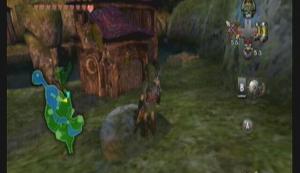
Building
Location: Ordon Village
Items -------------- Price
Milk 10 (must have empty bottle)
Bee Larva 10 (must have empty bottle)
Lantern Oil 20 (must have empty bottle)
!Special! Slingshot 30 (only at beginning of game)

Building
Location: South Faron Woods
Items -------------- Price
Lantern Oil 20 (must have empty bottle)
Bottle w/oil 100
!Special! Lantern Free (only at beginning of game)
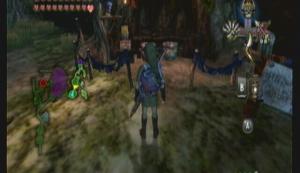
Building
Location: North Faron Woods
Items -------------- Price
Lantern Oil 20
Red Potion 30
Note: you only have to pay 1 rupee for stuff. Make payments near the bird. If you don’t pay anything, he will attack you next time you come.
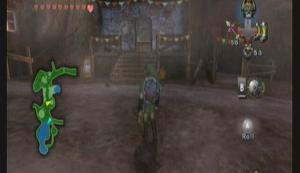
Building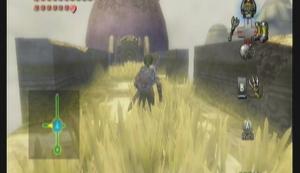
Sign
Location: Kakariko Village
Items -------------- Price
Red Potion 30
Wooden Shield 50
!Special! Hylian Shield 200
!Special! Hawkeye 100
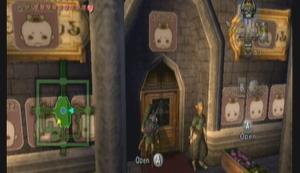
Building
Sign
Location: Kakariko Village
Items -------------- Price
Bombs 10 = 30 rupees 20 = 60 rupees, 30 = 90 rupees
Water bombs 5 = 30 rupees, 10 = 60 rupees, 15 = 90 rupees
Bombling 1 = 6 rupees, 5 = 30 rupees, 10 = 60 rupees
Buyback counter: he’ll buy back bombs (at no profit to you) so that you can restock your bomb bag with a different type of bomb.
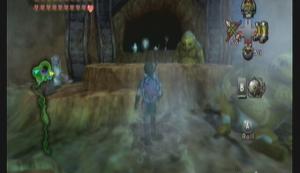
Building
Location: Death Mountain
Items -------------- Price
Arrows (10) 10
Lantern Oil 20 (must have empty bottle)
Wooden Shield 50
Milk 20 (must have empty bottle)

Building
Sign
Location: Castle Town
Items -------------- Price
Bombs (30) 45
Water Bombs (15) 45
Bombling (10) 30
Arrows (10) 5
Blue potion 50 (must have empty bottle)
Red potion 15 (must have empty bottle)
!Special! Magic Armor 578

Building
Location: City in the Sky
Items -------------- Price
Bombs(30) 90
Arrows(30) 30
Red potion 30 (must have empty bottle)
Blue potion 100 (must have empty bottle)
Lantern oil 20 (must have empty bottle)
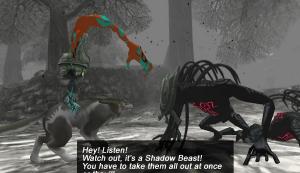
Enemy Guide
Here we'll take a more in-depth look at the enemies in the game, where to find them, how to avoid them, and how to take them down!
Bosses and any mini-enemies associated with them are listed individually in the Boss Guide.
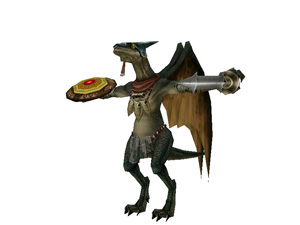
Aeralfos
Locations: City in the Sky, Hyrule Castle
Threat Level: 8/10
Effective weapons: Clawshot, Sword
Breakdown:
They like to fly overhead and dive bomb you. When they are about to charge, use the clawshot to draw them down and hack them. When on the ground, they cannot be hit safely, so keep your distance.
Armored Dynalfos
Locations: Temple of Time, City in the Sky, Hyrule Castle
Threat Level: 7/10
Effective weapons: Sword
Breakdown:
There's not much to these other then basic attacks. The armor makes them hard to damage and they can see through/are too fast for some hidden skills. Still, the Helm Splitter and Backslice work well. If you can, the Jump Strike also works, as well as a bomb arrow to the head if they haven't noticed you.
Armos
Locations: Temple of Time
Threat Level: 4/10
Effective weapons: Bow, Clawshot
Breakdown:
They will only come to life if you get too close in front of them. The trick is to only activate one at a time. Their weak spot is the jewel on their back. Circle strife them by locking on and sidestepping around their shield side, then use a projectile to get at the jewel. It takes three shots, and after every one they get a little faster. After the third they go hyper then explode.
Baba Serpent
Locations: Hyrule Field, Forest Temple, City in the Sky,
Twilight Palace, Hyrule Castle
Threat Level: 3/10
Effective weapons: Sword, Bow
Breakdown:
They'll lunge forward and grab you, sucking out health while holding you. Even after their vine is cut, they still chase after you on the ground. A spin attack can normally finish them off, vine and all. They often hang from the ceiling as well, so watch out.
Baby Gohma
Locations: Temple of Time
Threat Level: 1/10
Effective weapons: Sword, Clawshot, Bow
Breakdown:
Little scared spiders. Alls they have is numbers, and even that doesn't mean anything when you always run away.
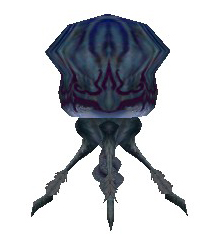
Bari
Locations: Lakebed Temple
Threat Level: 4/10
Effective weapons: Clawshot
Breakdown:
If you get close, they electrify themselves for a short time, making them invulnerable (the shock will even travel up the clawshot if you hit it). The trick is to stay back and use the clawshot to grab out the core.
I also think these look a lot like Metroids, which makes them awesome. :)
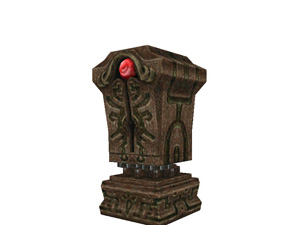
Beamos
Locations: Goron Mines, Temple of Time
Threat Level: 3/10
Effective weapons: Bow
Breakdown:
When you get close, they will fire a beam out their eye that can eat away at your health. However, these beam does not reach far. Keep your distance and shoot the red eye with an arrow.
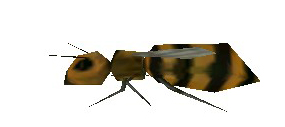
Bee
Locations: Hyrule Field, Ordon Village
Threat Level: 1/10
Effective weapons: None
Breakdown:
If you come near or otherwise agitate the nest without destroying it, the bees will swarm you. The only way to get rid of them is to leave the area or jump in water. To bring down the nest, hit it with something hard like the Bow, Bomb arrows, or Clawshot sometimes works.

Big Deku Serpent
Locations: Forest Temple, City in the Sky
Threat Level: 6/10
Effective weapons: Sword, Bombs
Breakdown:
These huge plants are unknown in origin. You have to take out the head with your sword first, then the Deku Like in the center opens up to bombs.

Blade Trap
Locations: Hyrule Field, Arbiter's Grounds, Hyrule Castle,
Temple of Time
Threat Level: 2/10
Effective weapons: None
Breakdown:
These go up and down Spinner track, blocking your way. They are impervious to most attacks, the only way to kill them is in the Temple of Time you can use the statue's hammer. 100% of the time you can dodge them by walking carefully or jumping to another spinner track.
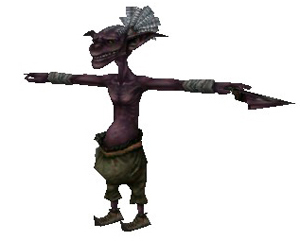
Red Bokoblin
Blue Bokoblin
Locations: Hyrule Field, Goron Mines, Hyrule Castle
Threat Level: 5/10
Effective weapons: Sword
Breakdown:
They're only so much of a threat because they are almost always in large groups. The blue will fall with a single strike, but the Red are much tougher, generally taking 4 hits and sometimes an ending blow.
Bombfish
Locations: Lakebed Temple
Threat Level: 1/10
Effective weapons: None
Breakdown:
These are here to help the people that run out of bombs while in the Lakebed Temple. You cant keep them, but where there is one there is usually a bombable rock nearby.

Bombling
Locations: Forest Temple
Threat Level: 1/10
Effective weapons: None
Breakdown:
These little bugs are here to help you before you get your bomb bag. Whack them to set the fuse, then pick it up and throw it at the target. Not the same as the Bomblings you buy in stores.

Bombskit
Locations: Hyrule Field
Threat Level: 1/10
Effective weapons: Bow
Breakdown:
These wonder Hyrule Field dropping little bombs when scared. They try to keep a huge distance, so hitting them with anything other then the bow is hard. After you kill them, they will drop a worm on the ground that you can scoop up and use as bait.

Bubble
Locations: Arbiter's Grounds, Snowpeak Ruins, Hyrule Castle
Threat Level: 3/10
Effective weapons: Sword, Bow
Breakdown:
The flying skulls you often see. These weird enemies generally stay grounded till something nears, then they take to the air and float around. They come in three varieties: regular, flaming, and frozen. Regular are no real threat, but the flaming can burn wood shield and set you on fire for a few seconds and the frozen can freeze you on contact (don't use the clawshot!).
The first swing you take will knock their wings off, and they'll start hopping on the ground. If you don't finish them, they will take flight again (only the next shot will kill them anyway).
Bulblin
Locations: Everywhere
Threat Level: 4/10
Effective weapons: Bow, Sword
Breakdown:
Twilight Princcess's answer to Zelda's standard Molblin enemy. Bulblin are semi-intelligent thieves. They use two basic weapons: clubs and bows. Clubs are easy to kill with just a hit or two. The bows are harder, as they are flaming bows with the same draw time as you, making them hard to snipe, yet they run away really fast as well, making them hard to get with your sword.
Chilfos
Locations: Snowpeak Ruins
Threat Level: 6/10
Effective weapons: Ball and Chain, Bomb Arrows, Sword
Breakdown:
They use Javelins as their main weapon; Javelins that they can regenerate after being thrown. They'll throw them from a distance and up close use it like a spear. The javelins are made of hardened ice, meaning they can take several hits from your sword before breaking. Best bet is to either disarm them with a bomb arrow, then use a second to finish them before they rearm, or use a jump attack to destroy the javelin, then unleash a flurry to finish them.
Chu Worm
Locations: Lakebed Temple
Threat Level: 1/10
Effective weapons: Clawshot, Sword, Bomb Arrows
Breakdown:
These little bugs roll around in bubbles made of, I would guess, Chu. These bubbles are impervious to damage from anything other then explosives. You have two options when killing them: use a bomb arrow to completely destroy the bubble, or use the clawshot to snatch them out then kill them before they get back in.
ChuChu
Locations: Everywhere
Threat Level: 1/10
Effective weapons: Sword, Clawshot
Breakdown:
These are actually a helpful enemy, as when you kill them they reduce to jelly that can be scooped up and stored. They like to cling to ceilings and drop on your head. They also have a nasty habit of absorbing one another to form a giant chuchu that takes much longer to kill (you have to break it into pieces first), and is always Purple, the most useless of the jellies.
Purple Chu: Random effect (usually hurts you)
Yellow Chu: Acts as oil for Lantern
Red Chu: Replenishes 8 hearts
Blue Chu: Replenishes all hearts
Rare (Gold) Chu: Replenishes all hearts and increases attack power
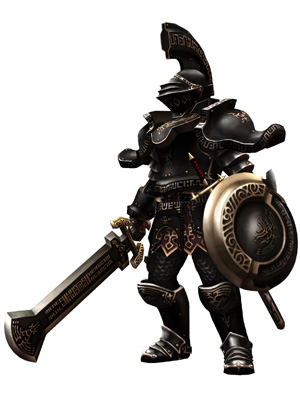
Darknut
Locations: Temple of Time, Hyrule Castle
Threat Level: 9/10
Effective weapons: Sword, Bomb Arrows
Breakdown:
Darknuts are probably the hardest enemies in the game, excluding bosses (even including bosses, they still rank up there).
In their first stage, they are clad head-to-toe in thick armor and carry a huge shield. They use one of two huge weapons: Club or Sword. Clubs do more damage, but are more open to counterattacks after swinging. Your only chance it to either get them after they swing for the brief window they are open, use the Backslice, or use the Helm Splitter. Bomb Arrows also kind of work if you can get at a distance and get them to stand up and start walking normally (when they are crouched over behind the shield they wont work).
After you knock off all their armor, they will throw their large weapon at you and draw a smaller (yet still huge) sword. You'd think them easier to hit, but not. They can block anything with the sword. Further, they are a lot faster, and favor lunging attacks that don't leave them open. Your only hope here is to use the Backslice or Jump Strike to break their guard.
Darknuts also come in three types: Black, Red, and Blue. Black is the weakest, yet the only one you'll face outside the Cave of Ordeals. Red is a lot faster and more aggressive, but wears less armor. Blue is the best; it shares the same traits as the Red, yet has more armor then the Black.
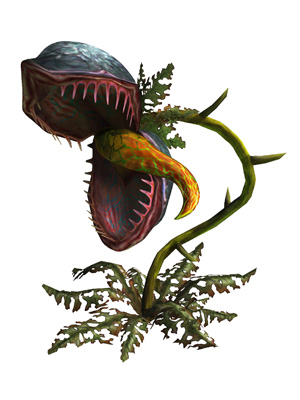
Deku Baba
Locations: Everywhere
Threat Level: 2/10
Effective weapons: Sword
Breakdown:
Use your sword to kill them. Not hard. They will lunge at you if you aren't careful, but you will usually kill them before that.
Deku Like
Locations: Forest Temple
Threat Level: 1/10
Effective weapons: Bombs
Breakdown:
If you get close or try to jump over them, they'll eat you and do some damage. However, this is easily avoided by paying attention and throwing a bomb (er, bombling, as you wont have bombs yet) into them.
Dodongo
Locations: Goron Mines
Threat Level: 4/10
Effective weapons: Sword, Bow
Breakdown:
These oversized lizards like hot places and breath fire (...or they just breath fire and MAKE it hot...). they are only vulnerable in the tail, but are too fast for you to get behind after the notice you (before that you can snipe them). You have to wait for them to start breathing fire, then strife beside them and use a spin attack.
Freezard
Locations: Snowpeak Ruins
Threat Level: 7/10
Effective weapons: Ball and Chain
Breakdown:
These giant ice sculptures cant move, but they are rock solid and cant breath a frigid breath that will freeze link and do constant damage. The ball and chain is it's only weakness. You have to hit it twice. Worse yet, the range of his breath is the exact length of the ball and chain, meaning you have to get in range to hit it. Wait for it's breath to stop, then roll in and swing quickly! After being demolished, they will reduce down to several mini-freezards.
Also, they get bonus points for looking like Sheegoths from Metroid Prime. :)
Gohma Larva
Locations: Temple of Time
Threat Level: 4/10
Effective weapons: Sword, Bow
Breakdown:
A slightly larger version of Baby Gohma. Still not a threat. They attack slowly and don't do much damage.
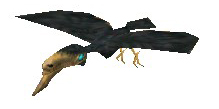
Guay
Locations: Hyrule Field, Gerudo Desert
Threat Level: 1/10
Effective weapons: Sword, Bow, Clawshot
Breakdown:
Annoyance level: 10/10. These things are like over-aggressive Keese that travel in swarms. Just as you climb to the top of a platform, bam! Back down again. Luckily, they are positioned in any key areas, so you likely wont run in to any at all.
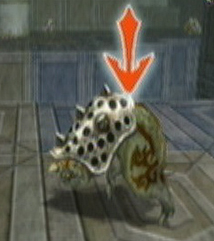
Helmasaur
Locations: Hyrule Field, Lakebed Temple, Temple of Time, City in the
Sky
Threat Level: 3/10
Effective weapons: Clawshot, Sword
Breakdown:
They wear a steel-type helmet on their head and charge at anything that moves. You can easily get behind it and attack, but you can also use the clawshot to snatch their helmet off, making them vulnerable from all sides.
Helmasaurus
Locations: City in the Sky
Threat Level: 5/10
Effective weapons: Sword
Breakdown:
An older Helmasaur, their bodies have formed around the steel helmet, making it part of their body. Their larger size also means more damage. Roll to the side and attack from behind.
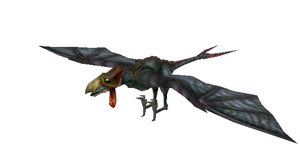
Kargarok
Locations: Hyrule Field, City in the Sky, Hyrule Castle
Threat Level: 3/10
Effective weapons: Sword, Bow
Breakdown:
They will fly around and attack anything that gets within their range. Their large size makes them much easier to snipe from a distance. Note that they take two sword attacks to bring down, so just because they've been lying on the ground for five minutes doesn't mean they're dead.
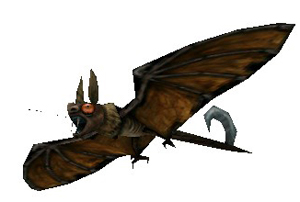
Keese
Locations: Everywhere
Threat Level: 1/10
Effective weapons: Sword, Bow, Clawshot
Breakdown:
The bats of the Zelda world. These annoying creatures are everywhere there isn't any light. They fly erratically and are so small they are hard to snipe. You'll have to get their attention and wait for them to get close before attacking.
They also come in three types: Regular, flaming, and frozen. As usual, the flaming will burn wood equipment and the frozen will freeze link (you can still use the clawshot, as it will push them back).
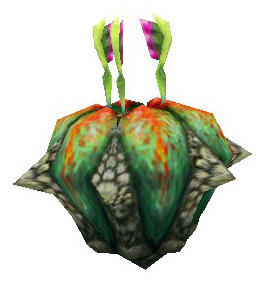
Leever
Locations: Hyrule Field, Gerudo Desert, Arbiter's Grounds
Threat Level: 6/10
Effective weapons: Sword, Bow
Breakdown:
Leevers stay underground and wait for vibrations of something above it. They also live in colonies and hunt in circular formations. If you wonder over one, they will pop up and surround you, circling around you, then close in and charge, only to dig back in afterward. Your best shot is to use a spin attack as they close in.
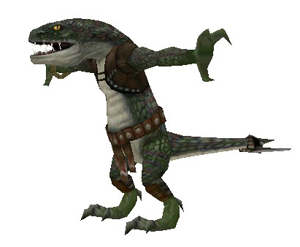
Lizalfos
Locations: Hyrule Field, Temple of Time, City in the Sky
Threat Level: 5/10
Effective weapons: Sword, Bow
Breakdown:
Lizalfos are aggressive and unrelenting, if not a little stupid. You can easily take them out with regular sword combos.

Mini-Freezard
Locations: Snowpeak Ruins
Threat Level: 4/10
Effective weapons: Sword, Ball and Chain
Breakdown:
These are more deadly on ice, as they slide around like a hokey puck when you hit them, and they'll freeze you on contact. Your best shot is to take a group out at once with the Ball and Chain. If you cant, spam the spin attack to prevent them from coming up behind you.
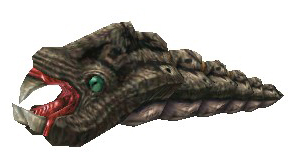
Moldorm
Locations: Gerudo Desert, Arbiter's Grounds
Threat Level: 2/10
Effective weapons: Sword, Bow, Clawshot
Breakdown:
These moles burrow through the ground at astonishing speed. Once by their prey, they leap up and bit. Your only chance is after they leave the dirt. Alternately, you can use the clawshot and pull them out yourself. The larger ones aren't any different, just easier to hit.
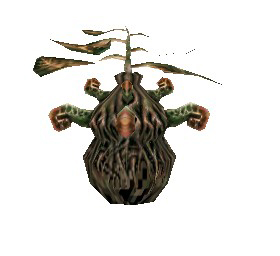
Peahat
Locations: Hyrule Field, Gerudo Desert, City in the Sky
Threat Level: 0/10
Effective weapons: Clawshot
Breakdown:
Not enemies in the least. They act as mobile clawshot targets. And to think, these are the razor-bladed, blood-thirsty things that chased you all around Hyrule in OoT.

Poe
Locations: Everywhere
Threat Level: 3/10
Effective weapons: Fangs
Breakdown:
Poes are special enemies that are needed for the Poe Soul side-quest. You can only attack them in Wolf form, and they only appear at night. In human form you can only see the lantern. You'll hear the menacing laugh and deep breath before they swing their large scythe. After two jump attacks, you HAVE to use the prompt to finish them.
Poison Mite
Locations: Arbiter's Grounds
Threat Level: 0/10
Effective weapons: Sword, Lantern
Breakdown:
Despite their name, they do no damage to Link. Rather, they just slow you down and make you sink faster. A simple spin attack will disperse them for good; the lantern will keep them at bay.
Puppet
Locations: Sacred Grove
Threat Level: 6/10
Effective weapons: Sword, Bow
Breakdown:
These wooden monsters are summoned by the Skullkid to keep you on your toes while wondering the Sacred Grove. They are literally infinite in number. It only takes two swings to bring them down however.
Rat
Locations: Everywhere
Threat Level: 1/10
Effective weapons: Sword, Bow, Clawshot
Breakdown:
Rats often travel in groups. They can be hard to spot due to their size and color. Listen for the squeaks. Easily dispatched with a spin attack.
They also have a cousin in the form of a ghost. Ghoul Rats appear in the Arbiter's Grounds and Hyrule Castle. They can only be seen and attacked in Wolf form and act similar to the Poison Mite.
ReDead Knight
Locations: Arbiter's Grounds
Threat Level: 7/10
Effective weapons: Sword, Ball and Chain, Bomb Arrow
Breakdown:
Basically the same as Redeads, only they carry a huge sword. I guess they prefer purée instead of soup. They'll only activate when you come near. They will let out an ear-shattering scream that leaves link frozen. Shake the controller to break free, then dodge quickly. The ball and chain can take them out with one shot, and the bomb arrows three. Their slow speed makes the sword work just fine, however.
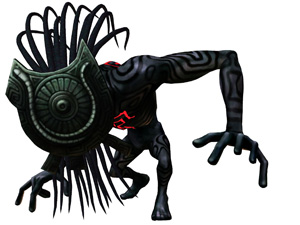
Shadow Beast
Locations: Everywhere
Threat Level: 8/10
Effective weapons: Sword
Breakdown:
Shadow Beast and Zant's right hand. They can create warp points and fall right on top of you. However, defeating them gives you power over the point they created. They are large and tough beast, taking several strikes to bring down. Further, if you only leave one left standing, it will revive his comrades, meaning at some point you have to take at least two out at once. Spin attacks work best.
There is also a special Shadow Beast shown during the cutscenes that are larger and obviously more powerful. While they have no official name, they are often called Twilight Assassins or Twilight Guards.

Twilight Assassin
Further, the disk contains what is an early beta version of a Shadow Beast that can give you nightmares O.o
Personally, I think they should have stuck with it.
Beta Shadow Beast
Shel Blade
Locations: Lakebed Temple
Threat Level: 5/10
Effective weapons: Clawshot, Sword
Breakdown:
Shell Blades are only vulnerable right before they attack. They'll open their shell revealing the adductor muscle. Hit it with the clawshot if you want to stun it, but you'll have to use your sword to finish it.
Skullfish
Locations: Lakebed Temple
Threat Level: 1/10
Effective weapons: None
Breakdown:
Piranhas. That's all. If you see them in the water, swim out! There's no way to kill them.
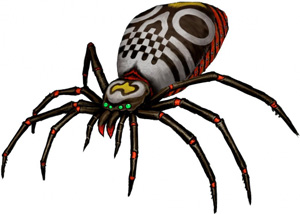
Skulltula
Locations: Hyrule Field, Forest Temple
Threat Level: 3/10
Effective weapons: Sword, Bow
Breakdown:
Skulltula will block most in coming attacks with it's front legs. You can knock it off balance with the bow, then hack away. I've never really been hit by one, so I guess they aren't that bit a threat :/
Skullwalltula
Locations: Everywhere
Threat Level: 1/10
Effective weapons: Bow, Clawshot, Slingshot
Breakdown:
These little spiders hang on the vines you often climb. If you don't take them off, they'll come over and knock you off. One shot is all it takes.
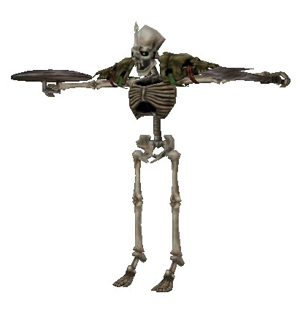
Stalfos
Locations: Hyrule Field, Arbiter's Grounds, Hyrule Castle
Threat Level: 2/10
Effective weapons: Bomb arrow, Sword
Breakdown:
They look really menacing, and in pervious games were really menacing, but in Twilight Princess the bomb arrows can kill in one shot. Otherwise, the Helm Splitter takes them down in one shot, but only reduces them to bones, you'll have to plant a bomb on the bones to finish them off.
Stalhound
Locations: Hyrule Field, Hyrule Castle
Threat Level: 4/10
Effective weapons: Sword
Breakdown:
They'll come out of the ground with little warning and often are in packs. They're not very aggressive, so no worries there. Spin attacks are most effective.
Stalkin
Locations: Arbiter's Grounds
Threat Level: 5/10
Effective weapons: Sword
Breakdown:
They're only a threat because they attack in droves. Seriously, I don't think you EVER fight less then 12 at once. Though they go down in one shot, their sheer numbers makes the fight difficult, little pointed sticks poking you (and we only learned how to defend against bananas :( )
Tektite
Locations: Hyrule Field, Lakebed Temple, Temple of Time
Threat Level: 3/10
Effective weapons: Sword
Breakdown:
Hoping around constantly, jump attacks are a bad idea. Spin attacks, however, are the answer to everything, just one cuts their legs. The difference between the red and blue is that the blue can travel on water while the red are more aggressive.
Tile Worm
Locations: Forest Temple, City in the Sky
Threat Level: 3/10
Effective weapons: Boomerang, Sword
Breakdown:
These nuisances disguise themselves by putting tiles on their head and digging in the dirt. Step on the tile and you're in for a ride. The trick here is the Boomerang will rip them right out of the ground, making them easy pray. However, if you don't take them down, they'll dig back in.
Toadpoli
Locations: Hyrule Field, Goron Mines
Threat Level: 1/10
Effective weapons: Bow
Breakdown:
Toadpoli are... strange frogs. Probably and older form of the Toado. They only appear in two places that I'm aware of: In Goron Mines in a couple lava pools, and in a Hidden Grotto in Lake Hylia. They'll spit rocks at you that are easy to dodge. (they're probably linked to the Octoroks).

Torch Slug
Locations: Goron Mines
Threat Level: 1/10
Effective weapons: Bow, Clawshot
Breakdown:
They apparently are animated lava. If you get close they let out a plume of the stuff. Keep your distance and snipe them.
White Wolfos
Locations: Snowpeak Ruins, Snowpeak
Threat Level: 6/10
Effective weapons: Sword
Breakdown:
Unlike the easy one from OoT, these hunt in packs and have the ability to pop out of the snow, attack, and go right back in. They like to encircle you, and wont attack if you're already swinging your sword or have Midna's energy ring up. They are rather hard to kill because of this and the fact that they can take a lot of hits.
Zant Head
Locations: Twilight Palace
Threat Level: 3/10
Effective weapons: Sword
Breakdown:
You'll have to defeat the Zant Heads to get keys to progress through the Palace. This is easy enough. They are large, relatively immobile targets. Their only real attack is a slow moving energy ball that is generally inaccurate to boot. The only thing they have going is that they can teleport around the room.
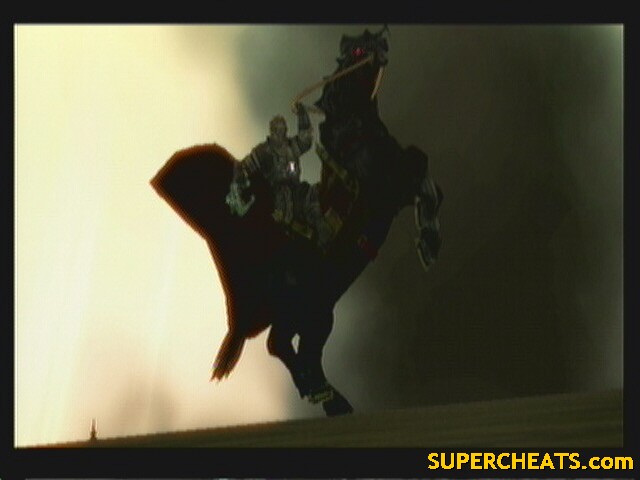
Boss Guide
So when the above happens, you know how to deal with it. ;)
We'll look at them in order of when they were faced. Sub-bosses only count if you never face them again (Aeralfos and Darknuts are out).
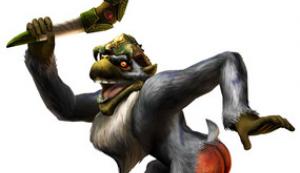
Ook

Weakness: Buttocks
Weapon: Gale Boomerang
Weapon of Choice: Sword
This boss is really easy. Firstly, watch out for the Deku Serpents he knocks down from the ceiling from time to time.
To defeat Ook, you have to knock him down. Looking at the pillars, you would think just roll into them like we have been so far, but it's not that simple. You have to follow him around and wait for him to stop and throw the boomerang, THEN roll into the pillar he's on. It'll knock him off-balance and his own boomerang will knock him off the post. His only weak spot is his buttocks, so you'll have to get behind him after he falls. A couple more times and he should go down.
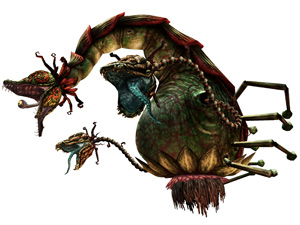
Diababa

Title: Twilit Parasite
Weakness: Eye
Weapon: Acid
Weapon of choice: Sword, Gale Boomerang
It only has two attacks:
- the heads will try to ram you. Just stay a little ways back and you don't even have to dodge, as they cant reach you.
- The main head will spray an acid substance that can do fair damage, but it sprays it in a zig-zag pattern that's easy to predict.
Set your boomerang, as that's the only item you'll need for this fight. Target one of the bomblings in the water, then target one of the Deku heads and let it fly. The head should eat the bomb and explode. Do the same for the second head.
The main body comes out now, and you're without bomblings... until *dun dun dun dun* Ook to the rescue! Whenever Ook swings by, target him, then target one of the (smaller) heads. Once both small heads are down, do the same with the large head (make sure you target the head, not the body).
The main head should fall in front of you, allowing you to chop at it's eyeball. After a few swings, it will get up and the battle will start again. Do the same just one more time should be enough. This time, look to the A button to give the prompt “Finish” when attacking the eye.
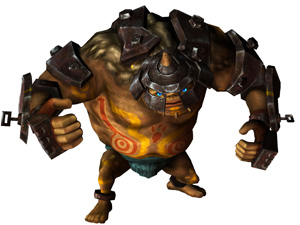
Guardian
Weakness: Lava
Weapon: Body
Weapon of choice: Sword, Iron Boots
Run forward until you are just a few inches from the Goron, equip the iron boots and wait for him to hold his hands up in the air. When he does, attack him with your sword. Hit him 5 times in a row to make him fall over and curl up in a ball. When this happens, quickly press and hold A. you will grab him and throw him behind you. Repeat until you throw him off the edge 3 times.
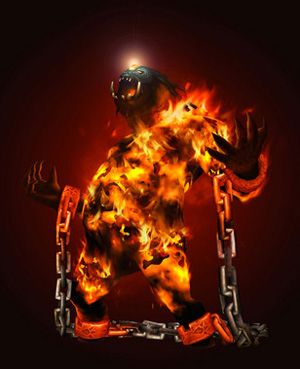
Fyrus

Title: Twilit Igniter
Weakness: Jewel on forehead
Weapon: Chains, Fire Blasts
Weapon of Choice: Arrows, Iron Boots, Sword
Pull out your bow and shoot the shiny stone on its forehead. When he is hit, he will stammer about. Run over to one of the chains, equip the iron boots, grab and pull the chain. He will fall over. While he is down, run over to his head and hit the stone with your sword. Repeat a few more times until he goes down.
His attacks really aren't much, he just flails about mostly. Sometimes, however, he will start to gather energy into his gem stone. When he does this, RUN! He will just incinerate a huge circular area around himself.
Deku Toad
Weakness: tail, tongue
Weapon: Body, Toado
Weapon of Choice: Sword
Hold up your shield to defend against the Toado and use spin attacks to dispatch them. Once they are gone, Deku Toad will leap into the air and try to crush you. Just run way from the shadow and wait for it to land, then hack and slash it's tongue. Repeat a couple times to trigger a “Finish” command when you target his tongue.
Morpheel
Title: Twilit Aquatic
Weakness: Eye
Weapon: Tentacles, Body
Weapon of Choice: Sword, Iron Boots, Clawshot
Stage 1:
This enemy very closely resembles Morpha. It's tentacles will extend and try to grab you and eat you. All you have to do is do a spin attack whenever a tentacle gets close. To fight back, use the clawshot and target the eye that often travels inside one of the tentacles. Drag it toward you then slash it. After three times, the next stage starts.
Stage 2
Stage 2:
This stage is even easier. Swim around with it and stay locked on to the eye. Try to predict where it's headed, then clawshot the eye and start slashing. Any contact with it's body outside of when you're cutting it will damage you, so stay sharp.
Skullkid
Weakness: Body
Weapon: Trumpet, Puppets
Weapon of Choice: Fangs, Bow
First fight (Wolf):
He'll jump to a stump and summon some puppets. If you try to get close to Skull Kid, he'll warp away to another stump. Rather, keep a slight distance and destroy all of his puppets. He will then blow on his trumpet to summon more. Attack him while he is blowing (jump attack works best). Repeat three times.

Second fight
Second fight (Human):
This time it's much easier as he stays out of sword range, but wont run when you try and attack. Pull your bow and you should be able to hit him all three times without even having to get close to his puppets.
Death Sword
Weakness: Body
Weapon: Sword
Weapon of Choice: Fangs, Bow, Sword
Stage 1:
Like the Poes, you can only attack it once it is about to attack. It will swing it's sword down into the ground. Dodge it, then jump on and start biting. After a round or two, the next stage starts. He'll turn visible so turn back into human.
Stage 2:
The next stage is a little harder. He'll float around the room erratically. Use your bow (or clawshot or boomerang) and hit him with it (you cant lock on, you'll have to dumb fire it). He'll then land (or float lower) and start to raise his sword again. Hit him with your sword first and he'll collapse. Start beating on his head till he gets back up. Repeat three more times to bring him down.

Stallord

Staltroop
Title: Twilit Fossil
Weakness: Backbone, Sword in it's skull
Weapon: Laser, fireballs, claws
Weapon of Choice: Spinner, Sword
Stage 1: Stallord
Use the spinner track on the outside rim of the sand to get behind him (and avoid his fire breath). Once you're at a good point, jump off the track and aim for his spin. He will summon Staltroops to try to bounce you back. Dodge them and once at his spin, press B to spin and attack it. As you damage him, he will summon more and more Staltroops, and Blade traps will start appearing on the track.
Careful not to be deflected by the Staltroops.
After a few hits, he goes down and the sand lowers. There is a spinner slot on the platform. Use it to raise a pillar in the middle of the room. Stallord will come back to life, but just his head, starting stage 2.
Stage 2: Stallord's Head
Stage 2: Stallord's Head
This part is NOTHING compared to what you went through in the spinner madness room. At the bottom of the room, use the spinner track on the pillar to catch up to Stallord. He'll come around the corner and start shooting fireballs at you. Jump from side to side to avoid them. As soon as you get close enough, jump off and hit him with your spinner. If you delay, he'll shoot a fireball at point blank range.
Now!
He'll fall to the ground along with you. Hack away at the sword in his head (why don't they let you just pull it out?). He'll come back up and the stage will start over. This time, there will be Blade Traps on the track that you have to dodge on the way up, and the window of opportunity to knock him down is small.
Dark Hammer
Weakness: Tail
Weapon: Ball and chain
Weapon of Choice: Clawshot, Sword
Dark hammer has two attacks: Throwing the ball and chain, and swinging it around him. Both of these will do a ton of damage if you're hit, so lets not.
He only has one weak point: his tail, and it's only vulnerable for the short time after he throws the ball and before he retracts it.
The key here is to stay on the opposite side of the hall as him, and wait for him to throw it. RUN over to him and attack his tail before he retracts the ball. If he starts closing in on you, you can clawshot the ceiling to get away.
This battle is fairly hard, given the small window of opportunity to attack. His tail is LITTERALLY invulnerable during any other time. You can actually hack and slash away at it for short periods before he starts swinging yet after he retracted it and you wont do any damage.
Blizzeta
[thumb=guid/the-legend-of-zelda-twilight-princess/temple30.jpg titl= ]
Title: Twilit Ice Mass
Weakness: Body
Weapons: Body, Ice Pillars
Weapon of Choice: Ball and chain
Blizzeta: Stage 1
Stage 1:
Not much to this stage. She's basically a giant Mini Freezard (which, by the way, she will launch at you from time to time). Use the ball and chain to break her down to size.
Blizzeta: Stage 2
Stage 2:
This stage is a bit harder, but not really. She'll fly up onto the ceiling and throw giant icicles down toward you. You can see them coming thanks to the reflective ice floor. Dodge them by running. She'll then call them back up and form a ring of them. When the ring comes down, you'll want to be on the outside. She'll then slam down in the center of the ring.
The trick is when the first icicles come down, break them with the ball and chain. Then, when she creates a circle with them, the ones you broke will make a gap in the wall, allowing you to target her with the ball and chain.
I find it easiest just to stand still and let the falling icicles hit me, rapidly pressing B to use the ball and chain whenever I get up. Doing this ensures a huge gap in Blizzeta's defense when she uses the ring, as you're sure to destroy 4-5 of the icicles. Run away when the ring falls, then quickly Z-target to turn and chuck the ball without having to aim.
Three hits is all it takes.
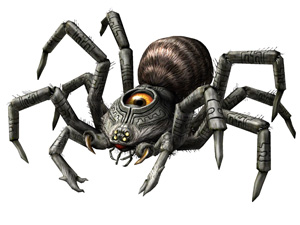
Armogohma
Title: Twilit Arachnid
Weakness: Eye
Weapons: Laser, Baby Gohma
Weapon of Choice: Bow, Dominion Rod
This battle is really easy. Armogohma has two attacks: Spawning Baby Gohma and firing a laser beam out it's eye.
When she spawns baby gohma, take them out with spin attacks (they are more aggressive then before, making it easier). The laser is easily dodged by running zig-zag or in circles.
Keep your bow out and aimed at Armogohma's eye. When she stops, wait for her eye to open and shoot it with an arrow (it doesn't matter if she is already firing a laser out it). She'll fall from the ceiling conveniently in front of one of the four large statues. Use the Dominion Rod on the statue and press B to have it pound the spider. Do this three times, and you win!
...Well, kind of. The eye then comes to life and runs around with a bunch of Baby Gohma. Hardly a “stage 2” as it doesn't even attack you. Target it with your bow and fire a few rounds into it.
Argorok
Title: Twilit Dragon
Weakness: Eye, tail
Weapons: Fire breath, claws
Weapon of Choice: Clawshot, Sword
Stage 1:
Grapple to one of the four pillars on the platform. Wait to be able to Z-lock onto his tail. Once you can, clawshot it (your range has been greatly increased, being able to reach him from across the stage) and equip the Iron Boots to bring him to the ground.
The second time you do this, the rest of his armor will come off, including your grapple point.
Stage 2
Stage 2:
During stage 2, he will breath fire at you. To damage him, grapple from pillar to pillar, working your way to the top. Once at the top, grapple to one of the Peahats that sprung up. On a Peahat, wait from his head to rear up (meaning his about to breath fire) and start locking on and grappling from Peahat to Peahat. He'll eventually stop, and when he does he hold still long enough for you to grapple behind him. Manually target the glowing orb on his back and grapple over. Start swinging your sword to bring him down. Repeat once more.
After the second time, he will start a new tactic: in the middle of him breathing fire, he will stop, turn to face just ahead of you, and start breathing to opposite direction. You have to then stop, turn, and start grappling the opposite way to avoid getting hit. You have to be fast to still get around behind him in time. After just this one time, he goes down for good.
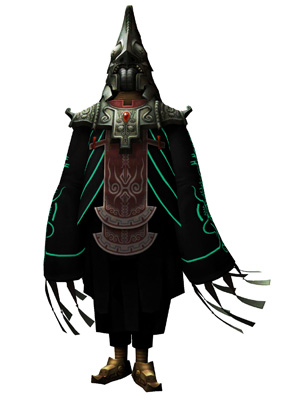
Zant
Title: Usurper King
Weakness: Depends
Weapon: Energy Machinegun, swords
Weapon of choice: Depends
The fight against Zant will take you to several of the old temples. Each stage takes on a drastically different form. However, what he should realize is that you've bested all the bosses in these areas already, what chance does he have repeating a losing strategy?
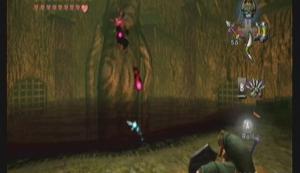
Stage 1: Forest Temple
Stage 1:
This stage is very easy. Dodge his energy shots and use the Gale Boomerang to draw him to you. Hack away till he warps back and starts over. Note that if you try to block all the energy shots, the last few will knock you off balance and hurt you.
Stage 2: Goron Mines
Stage 2:
He will try to fling you off the platform by jumping on it. Use the Iron Boots to stay on. Wait till he starts firing energy balls. Block them, then unequip the boots and rush over while his is taking a breath. Repeat till the next stage.
Stage 3: Lakebed Temple
Stage 3:
You'll need to immediately equip the Zora Armor. Besides that, you'll need the clawshot and iron boots. Zant will appear in a large stone head. Block or dodge his energy shots, then use the clawshot and iron boots to drag him out. Hit him a few times and he'll retreat.
The next part he summons multiple stone heads. Get in the center of the area and try to predict which one he'll be in. when he starts firing energy balls, swim past them towards him. When he stops, anchor yourself and pull him out again. Repeat till he gives up on this area.
Stage 4: Forest Temple Revisited
Stage 4:
This time he uses the mini-boss room. Watch him as he teleports around on the pillars. Wait for him to stop and start firing. Roll into that pillar twice to knock him off and attack.
Stage 5: Snowpeak Ruins
Stage 5:
He'll grow huge and float in the air above you. Keep moving to avoid getting stomped on. When he comes down, turn about and use the Ball and Chain on his foot. He'll shrink down and hop about. Track him and give him a good whack.
Stage 6: Hyrule Castle
Stage 6:
This is the final stage. Don't touch the barrier around the area or you'll get hurt. Zant has two main attacks: spinning and slashing. He'll teleport in and start doing one of them. If he starts slashing, use the backslice to get behind and strike. If he is spinning, dodge him a couple times till he stops to get a breather; attack him while he isn't moving.
The last stage is the hardest as you never really get a good attack in and it takes longer to bring him down. Once he does though, you are put back in the throne room.
Ganondorf
Title: Dark Lord
Weakness: Depends
Weapon: Depends
Weapon of Choice: Depends

Ganon's Puppet – Zelda
Zelda has three attacks:
1) Illuminates a triangle on the floor that then explodes with light
2) Lunges at you with her sword
3) Throws a ball of energy at you
The first two are simply paying attention and dodging. The last you don't want to dodge, rather draw your sword and bat it back at her. You'll start playing ping-pong with it till one of you misses. Make her miss three times to start the next stage.
Midna uses her power to squeeze the dark energy out of Zelda. Ganondorf re-forms, but in his beast form. (the stress from having to reform probably caused him to draw too heavily on the triforce, resulting in him taking on his true form)
Dark Beast - Ganon

Stage 1:
Ganon will rush around the area crushing things. He also likes to teleport out of the room and teleport back in. When he goes to teleport back in, he makes several fake teleporters first. The real one will turn blue. Draw your bow. You cant lock on, so hopefully you've practiced. Whenever you can get a clear shot, fire at the jewel on his forehead. He'll crash and burn, allowing you to hack at his vulnerable stomach.
Stage 2:
You'll know when stage 2 starts when he starts teleporting whenever you fire an arrow. Transform into a wolf and wait for him to teleport. Get right in his path and wait for the prompt to press A. Press A to have Midna hold him, then tap either left or right repeatedly to have Midna toss him to the side. Walk over and bit his stomach (jump attacks work well)
A cutscene ends this stage.
Zelda is revived, but Ganon comes back in his spirit form. Midna uses the last of her strength to teleport Link and Zelda out, then to transform into that beast once more in an attempt to end this for good.
It doesn't work. Ganondorf, reformed, finds Link and Zelda in Hyrule Field with his ghost riders.

Dark Lord – Ganondorf
Stage 1:
You have to ride behind him on horseback while Zelda tries to snipe him. This can be very hard at first as the slightest tap can knock you off Epona. Try to stay behind him to get Zelda a clear shot. Once he is stunned, dash beside him and slice him with your sword. After a couple rounds, he wipes out.
Stage 2:
Now you're on foot face to face with Ganondorf. The Backslice is pretty much the ONLY way to hurt him.
Don't get two close or he'll knee you. If you try a jump attack, he jumps away then thrusts, you can dodge the thrust but lets not tempt fate.
He likes to warp away, then reappear and do a spin attack. He normally doesn't appear anywhere near you, but I would still run when he disappears.
Sometimes he'll run at you with his sword held up. If you stand in front of him, you can use a prompt called “Chance.” You and Ganondorf will lock swords. You can win by rapidly pressing A, knocking him off balance and allowing for a good combo. But if you lose, you can suffer a fair amount of damage.
Other then that he doesn't do much. This fight takes a really long time. Good luck.


 How to get the 8-bit Sword in Hyrule Warriors
 MGS 5 - The Phantom Pain: mother base guide
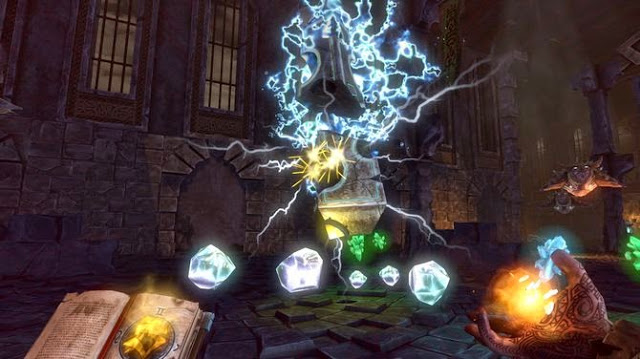 Ziggurat (PC) beginners guide and tips
 Best Gifts Under $30 for Wii U Gamers
 10 Raspberry Pi Projects for Beginners