

The Super Smash Bros. series started on the N64. Slated for the SNES, it was almost canceled do to the perception it would be poorly received. After finally being released years later on the N64 as a Japan-only title, it unexpectedly flew off the selves and was quickly translated for world-wide release becoming the fifth best selling N64 game with 4.89 million copies sold.
What made it such a smash hit? I think that can be narrowed down to two things:
First, it is a mega-clash of all (or most) of Nintendo’s first-party characters, thus settling the age old question of who was the most powerful (... or just adding fuel to the fire, what with everyone having his or her own preference).
Secondly, it re-defined the fighting genre. This fighter didn’t require mind numbing combo-button memorization to win. In SSB it was more about strategy with the addition of items and deceptively simple single-button attacks, all the while keeping the same intense fighting atmosphere.
Super Smash Bros. Brawl adds to the mix with new modes, including a deeper story mode, Co-Op modes, and online play. It doesn’t forget the classic game types though, as almost all the modes from Melee are still in Brawl. Third-parties have also started to take notice with the addition of 2 non-Nintendo characters and multiple non-Nintendo items and stages.
But I doubt you're here for any of the above. You just want to unlock something, or get a basic strategy for a level. ;) I hear ‘ya.
We open our guide with a look at the basicis. Here you'll find all the basics for the game. This is a good stop it you're a first-timer or a prospective buyer. Keep in mind that this section gives only an at-a-glance look at things like single-player mode. For a more in-depth walkthrough, see the modes respective section in the Main Walkthrough section.
Click on a section in the index to the left to get started.
From the main menu, select options.
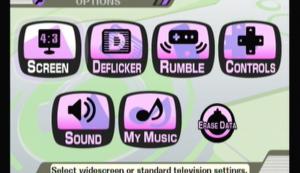
Options Menu
You will have the following settings:
Screen
Deflicker
Rumble
Controls
Sound / Sound test
My music
Erase data
Screen
Here is where you set the Widescreen or Full screen option. Odds are, if you have a widescreen TV, you know you have a widescreen TV and how to use it.
Just in case you don’t, select the one that the circle in the background is actually a circle. If it’s an oval or some other shape, you’ve got the wrong setting.
Deflicker
I’ve never heard of this, but toggling it on and off will make the screen either razor sharp and more detailed or smoother and easier on the eyes. Try toggling it on and off and see what you like best.
Rumble
Turn the rumble on and off for all connected controllers, or for logged user names. Remember that the classic controller doesn’t have rumble
Sound / Sound test
Adjust the volume of the games music versus the sound effects. The more the bar is to the right, the higher the music will be, more to the left, higher the sound effects.
From here you can also select sound test. In here you can play over and over your favorite music from stages and the sound effects of all the characters you’ve unlocked.
Erase Data
Seriously, why would anyone want to use this setting? You can individually clear save data for certain areas in the game, or just erase the entire save file. Again, I have no idea why you would want to do this.
My Music
Here you can set the likelihood of a song being played on a particular map. That is, every map as a certain number of songs pre-set to it (some of which will be locked). These songs will randomly play every time you play the stage. In this menu, you can choose the likelihood of a certain song being played on that map. The farther right the bar, the higher the chance. You can unlock more songs by finding the CD Item in any game mode.
In Super Smash Bros. Brawl, there are 4 different controllers you can use, with infinite possibilities, as the controls for each is fully customizable. I’ll lay out the default controls below. But don’t worry about not having the same controls at a friend’s house. In the options menu, you can transfer your control settings to your Wii Remote and easily upload the data to your friends Wii.
I’ll start with this, as they can greatly impact your control set-up.
Tap-jump:
When on, you can tap up on the control stick to jump. When off, you have to use the standard jump button to jump.Not available for the Wii Remote Only setting.
Default:
This will set the controls back to default for that controller.
To Test:
Press the button on the Wii Remote to go into a training-type mode allowing you to test your control scheme. (or press the START button when using the Gamecube Controller to enter test mode)
Save:
Obviously saves your new control scheme.
Shake Smash:
Only available for the Wii Remote Nunchuk setting. If this is on, you can quickly shake the Wii Remote in a direction and your character will do a smash attack in
that same direction; similar to the C stick of the Gamecube controller. The accuracy of the motion sensing is debatable though.
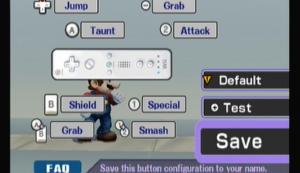
Wii Remote
D-Pad:
Up: Jump (press in mid-air to double-jump)
Left/right: Walk (double-tap to dash)
Down: crouch
A: taunt
B: shield
-: grab (any direction on the D-pad to throw while grabbing)
A B: grab (any direction on the D-pad to throw while grabbing)
Attacks:
Special: 1
Standard: 2
Smash: 1 2 and any direction of the D-pad simultaneously
Strong: Any direction on the D-pad 2
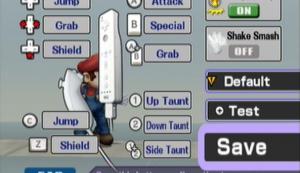
Wii Remote Nunchuk
Control Stick:
Up: jump (press in mid-air to double-jump)
Left/right: walk (double-tap to dash)
Down: crouch
D-pad:
Up: jump
Left/right: grab (any direction on the D-pad to throw while
grabbing)
Down: shield (press and tap the control stick to dodge)
C: jump (press in mid-air to double-jump)
Z: shield (press and tap the control stick to dodge)
A B: grab (any direction on the D-pad to throw while grabbing)
1/2/1 2: taunt
Attacks:
Standard: A
Special: B
Strong: tilt controls stick A
Smash: tap the control stick A
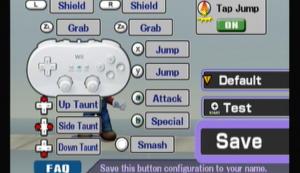
Classic Controller
Control Stick:
Up: jump (press in mid-air to double-jump)
Left/right: walk (double-tap to dash)
Down: crouch
D-Pad: Every direction is a different taunt
L/R: shield (press and tap the control stick to dodge)
Z1/Z2 : grab (any direction on the control stick to throw while
grabbing)
X/Y: jump (press in mid-air to double-jump)
Attacks:
Special: B
Standard: A
Smash: tap the control stick A or C-stick
Strong: Any direction on the control stick A
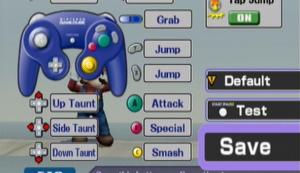
Gamecube Controller
Control stick:
Up: jump (press in mid-air to double-jump)
Left/right: walk (double-tap to dash)
Down: crouch
D-pad: Every direction is a different taunt
L/R: shield (press and tap the control stick to dodge)
Z: grab (any direction on the control stick to throw while grabbing)
X/Y: jump (press in mid-air to double-jump)
Attacks:
Special: B
Standard: A
Smash: tap the control stick A or C-stick
Strong: Any direction on the control stick A
If you haven’t played a Smash game before, you should probably read about the battle system before starting. It’s a very simple system, but different from most games.
Your objective is to knock your opponent off the stage far enough that he cant get back on. They can fall off in all four directions (hitting them really high in the air counts too). There is no life bar or HP meter, instead you have a percentage counter at the bottom of the screen. The more you hit them, the higher the percentage gets, the farther you can send them with each attack.
As per how to win a match, well that depends on the rules. A list of battle types is in the sub-sections on the left. But for the most part, just try to knock your opponent off as many times as possible.
There are many different rules you can play by. Each has a specific victory condition. However, this section will not list the battle types found in certain Event Matches, as those are special types you wont find outside of said Event Match. See the Event Match section for those. Equally, special rules can be set in multiplayer modes as well. These special rules are covered in the multiplayer section.
In Stock Battle, you start out with a pre-set number of lives. When you fall off, you lose a life. Last one standing wins. When you're playing as a team, then it's last person standing's team wins. The lives of the team aren’t combined.
No, you aren’t throwing coins at each other, rather you’re beating coins out of each other. The harder you hit an opponent, the more and larger coins they drop. Run into these coins to pick them up. First one to reach a set dollar figure wins. If a person has coins in their counter, a certain percentage of these coins will be dropped when they are hit. If a person has no coins, they will still drop the same amount of coins, but wont go into the negatives. When playing on teams, then the team’s coins are pooled together to get their over-all coin count.
A Time Match is where you can wale on each other for as long as the timer is set for. When time runs out, whoever has the most kills wins. When playing as a team, the team’s score is added together. Depending on the rules set, a death can subtract one kill from your counter, making it possible to go into the negatives.
What’s a battle without a way of killing each other? (even in a battle of wits you have your brain...). Here’s how to kill each other in THIS game.Remember that every character will unleash a different attack depending on what direction you press the control stick in when pressing the button. This gives you 4 different attacks per attack type (3 directions [left and right count as one, as they activate the same attack] 1 when not pressing the controls stick at all [called “standard position”]).
I will use the standard Gamecube controller set-up for these demonstrations, as it’s the most universal (it roughly applies to all types but the lone Wii Remote). Check your own control scheme for the exact buttons. Mario will be used in the demonstrations, which will appear after here after the game has been released.
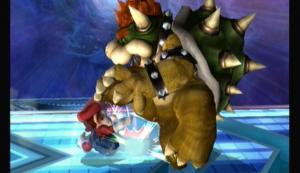
A large punch!
Button: A
This is your most basic attack, that doesn’t make it the worst though.Normally fast, just not very powerful.

Mario dives in
Button: double tap the control stick A
Dash attacks are good to quickly get to someone and knock them off their feet. Normally not very powerful, but extremely fast and has a high probability of knocking them in the air slightly. To use, start dashing by double tapping the control stick either left or right, then when you reach your destination press A.
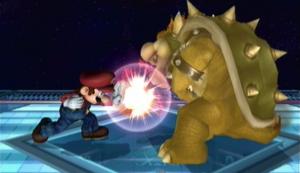
Explosion!
Button: Tap the control stick A or C-stick (short-cut button)
Smash attacks generally take people the longest to get down. This is because they have a lot of variables. To activate, you must tap the control stick in the direction you want to attack and press the A button at the same time. If preformed correctly, your character should now unleash an attack different from his standard or dash attacks.
There’s two things that get people here,
1) I don’t recommend using the short-cut buttons. This is because...
2) ... the attacks can be charged up for a more powerful smash attack by continuing to hold the A button. This will allow you to not only time your moves to, say, a falling opponent, but to deal more damage when it connects. If you use the short-cut buttons like the C-stick, you cant charge the attack up.
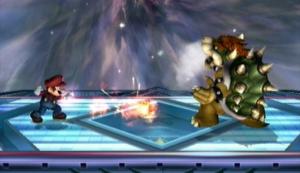
Fireball. A classic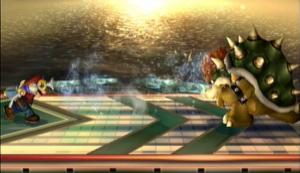
Call in F.L.U.D.D!
Button: B
These attacks vary greatly from character to character. They draw more on the character’s personality and arsenal then the Standard and Smash attacks, which are normally just punches and kicks. Even in just one character, the up, down, left/right, standard attack can vary quite a bit. It’s best to try all of a characters Special attacks the very first match you play as them. Some Special attacks can be charged, others can be controlled like a homing missile. Some focus on defense, while others are full-on offense. Either try the character for yourself, or read about their moves in the Characters section.
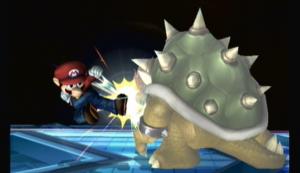
Leaps up and kicks!
Button: A (when in mid-air)
I never really found aerial attacks that useful, but you should know they exist. It’s basically a Standard Attack only in air. Your attacks do change though, so you should try them out to know your limits.
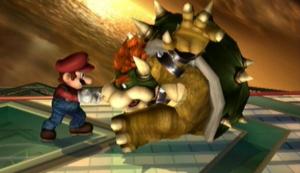
I got your nose...
Buttons: Z, then A and/or control stick (or press A when blocking)
For some characters, grabbing can be very advantageous. Mostly, the computer is just going to use it to annoy you, but if you can get the timing down, grabbing is an excellent counter-attack if you were guarding at the time of impact (see Advanced Techniques section).
First, get right up next to an opponent and press Z. You should grab a hold of them. You now have a couple options.
1) you could tap the control stick to throw them. If they have a high damage percentage, there’s a good chance you can throw them right off the stage. Throwing them into the ground can also be painful for them.
2) you can tap A a few times, bashing them with your weapon of choice. Doesn’t do a lot of damage, but works well before throwing them.
The only downside here is that the enemy can break your hold on them. Some people will be able to break free faster then others, and you’ll be open for an immediate counter-attack, so be sure to throw them before this happens.

Here it comes...
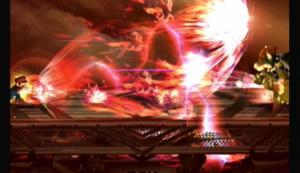
Final Smash! Mario Finale!
Final smashes deserve their own section, as they are rather intricate and a new addition to the series. Basically, a final smash is an all-powerful-nearly-undodgable-most-likely-going-to-kill-everyone-on-stage attack. But there are limits in place. For starters, the final smash is an item. You have to pick it up to use it. It’s not even that simple though. The Smash Ball (as it’s called) floats around the stage randomly, and fairly quickly. To pick it up, you have to attack it. It has sort of a shield around it, so it can take several attacks. The person to attack it after the shield breaks gets it. After getting the item, you don’t have to use it immediately. You can hold on to it if you want. Walk around stage with it, get yourself in the best position before unleashing it. Your character will glow yellow to let you know you still have it.
Now if someone where to hit you while you are walking around, you’ll lose the item and it will float around again (only with no shield). So be careful. Final Smashes, like Special Attacks, vary greatly form character to character and take advantage of that characters abilities. For a full list of final smashes, see the Character Section and look up the character you want to see it for.

Phew, that was close
This can be a crucial part to any strategy. I prefer to block with my fists and dodge by jumping, but that’s just my strategy.
Blocking can be done by using the Shield button. The shield (more like a bubble really) will protect you from just about any attack, but the shield will be drained with each hit it takes. It will also slowly drain on it’s own if you hold down the button for too long. To recharge the shield, just don’t use it for awhile. If the shield completely drains or “breaks” when using it, you will become paralyzed for a short time, turning you into a sitting duck.
Dodging is a bit more complicated and takes careful timing. You have to tap the shield button and one direction on the control stick at the same time. This will make your character step off the stage for a second, dodging the attack. Also good for getting behind an opponent by standing in front of them, then dodging towards them. You’ll strife beside them and end up on the other side.
Aerial dodging is done by taping the shield button in air. You will dodge that attack, but after the dodge you will be helpless till you touch the ground.
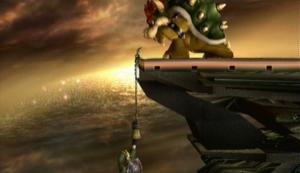
Bye bye!
Doesn't really need it’s own section, but it doesn’t fit anywhere else. You have three taunts in this game. Up, down, and side (left/right). The taunt you use depends on the direction you press the D-pad. When using the Wii Remote Nunchuck, the taunts are done by pressing the 1 (up), 2 (down), and 1 2 (side) buttons.
You can assign a small amount of text to each taunt per character in the options menu. This text will appear on screen when you use that taunt, even in online matches.
Some of these techniques are very advanced, some not so much, but they all require some practice. Their uses and usefulness vary but you should try them and be familiar with them. Also be warned that some of these are generally frowned upon by some Smash players.
Isnt any real order here. Alphabetizing them wouldn't help as you likely don't know its name. Organizing in accordance with difficulty wouldn't work as that would depend on your skill and specialties.
Stale-Move Negation
Not a technique, but it is something you should be aware of and I cant think of anywhere else to put it. Unlike in Melee where you can spam the same move over and over to win, Brawl uses this to slowly lower the attack strength of an attack if you use said attack too much. Say I use my B-up move five times in a row, and each blow did 10% damage. After about the fifth attack, it will now only do 8% damage. As the battle wears on, it will continue to get weaker the more I use it.
Triple Jump
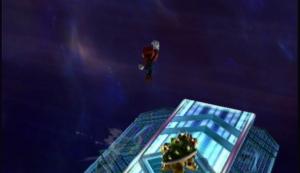
Wow...
Definitely worth mastering, though it can be hard since not all characters have one. Basically, you jump once off the stage, then again in mid-air (double jump) and finally use an attack (normally your up special move) that launches you even higher into the air (triple jump). This is imperative if you get knocked off the stage. The draw back is after you use your third jump (or any special attack or guard) in air, you are totally helpless until you reach the ground.
Guard grabbing
Guard grabbing another ability I recommend you master. Guard grabbing is done when you put up your shield to block an attack (a melee attack, it wont work with projectile attacks) and as soon as the attack makes contact, press the A button. This will cause you to grab the enemy. A perfect counter with almost no drawbacks if you miss your timing.
Ledge Hogging
Ledge hogging is an age-old, very cheap trick. It's actually quite easy and ingenuous. After you send an opponent off the stage, run over to the edge, quickly jump off turn around and grab onto the ledge. This way, you will block your opponent from grabbing onto the ledge in an attempt to recover. Hanging on the ledge will also make you invincible for the time you're hanging there.
Footstool Jump
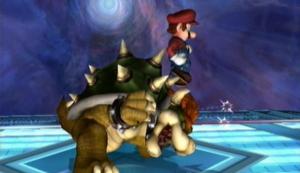
Pardon me, coming though.
This is something you'll more likely do on accident rather then actually trying. It's not hard though. Just jump up onto an opponents head, then as soon as you land press the jump button again. You'll bounce off their head. Kind of boring, but if you do it to them in mid-air, you will send them flying.
Tether Recovery

You cant get rid of me that easy...
Tether Recovery is pretty hard to get the hang of and requires a bit of luck. It only works with certain characters that have a long reaching grab attack (like Link's clawshot and Samus's grapple beam). When you fall off the edge, turn around and press the grab button. If you're not too far away, your chain should latch on to the ledge and pull you back over.
Gliding
All fighter form on me!
Another ability I recommend you master. Gliding can only be done with certain characters as well (characters with wings like Pit, Meta-Knight, and Charazard). Jump into the air and hold down the jump button (you can also quickly tilt the control stick left and right, but the jump button is easier). You will start to glide. When gliding, you can control your ascent and descent by tilting the control stick up or down respectively. The trick here is that if you are attacked or if you attack someone or if you try to glide for too long you will stop gliding without any warning, so try to stay over land.
Moving and Shooting
This is something new to the game. It's simple in text, but hard in practice. Basically, whenever you pick up a ranged weapon (like the Super Scope), you can fire it while moving around. The problem with moving around is it can be hard to line up your targets.
Ukemi
If you are sent flying, tap the shield button just before hitting a wall, ceiling, or floor to rebound quickly and avoid bouncing around. (Very similar to the Dynasty Warriors games).
Perfect Shield
Shield just a an attack connects. If you do it right, you should hear a “clink” sound. Now is your chance for a counterattack, as perfect shielding negates your recovery time.
Glancing Blows
I you are just barely within the range of an attack, the attack wont hit you for full damage and probably wont knock you back. It will be symbolized by a “clink” sound and a smaller hit animation.
Swimming
Swimming is only really useful in the Sub-space Emissary. When you get in water over your head, your character will start to swim. You can only swim before so long before starting to thrash about and drowned. The more damage you have taken, the less time you can swim.
Small Jump
If you just tap the jump button, you wont jump as high as you normally would, but will jump faster. This is great if you are like me and use jumping to dodge and counter at the same time.
Pivot Grab
Pressing the grab button while dashing at your opponent will increase the range of your grab. Kind of neat, but I don't find grabs that useful overall anyway.
Eating While Lying Prone
If you're lying on the ground and you find some food next to you, press the A button to eat it. Not that complicated.
Breaking Reflectors
Reflectors have the ability to reflect projectile attacks. The attack is sent back at double the power. The attack can be reflected again from x4 damage, and so on until the attack dissipates. Careful though, if the attack is reflected back and fourth too much, it can break your reflecting device and cause a lot of damage.
Single player is where you fight alone to beat up the computer. More exciting then it sounds. There are multiple modes to choose from, each with their own unique rules. One thing that has been brought back in Brawl is the on-screen appearances. This is, when a stage starts, your character will use a signature move to enter the stage (re: Mario enters through a pipe). Also, in almost every mode you can select your characters color by pressing X/Y while holding your curser over them.
Classic mode hasn’t really been changed any. A string of stages with varying enemies and slightly varying rules.
For those who have never played Smash Bros. before, in classic mode you select a single character, number of lives (it’s primarily and endurance/stock game type) and difficulty setting. Every stage has a different scheme with a total of 8 stages. In each stage you will be put up against varying enemies and varying rules, such as Giant melee (where your opponent is mega-sized), metal melee (your opponent is permanently metal), and team melee (you fight as two teams). It will tell you the stages rules before the match starts, so pay attention!
At the end of a match you will earn coins depending on how good you did. These coins can be used in the coin launcher.
You win by clearing all the stages. You lose by losing all your lives. You do not gain lives as you progress through the stages, so try to hang on. If you lose all your lives, you are given the choice to start back on the stage you died on with all your lives restored. The price is a substantial amount of coins and points. Choice is yours, but this isn’t the best way to get a high score worthy of showing off.
For a more in-depth look and stage listings, see the Classic mode section in the main walkthrough.
Sub-Space Emissary, the most in-depth and imaginative storyline of any Smash Bros. game. Not sure how they're going to top this.
Alright. In this mode, you play though various side-scrolling levels, defeating enemies and solving mild puzzles as you go. Every couple levels ends in a boss fight against a large enemy. It's not typical Smash Bros., it plays out more like a standard platformer.
At the map screen, there are three types of dots marking locations.
- A crown on the dot means you've cleared the level 100%
- A green flag means you've beaten the level, but didn't
collect everything.
- A dot with a red ! over it is a level you have yet to beat.
At the start of a level, you get to choose from some pre-selected characters. If you have more then one character to chose from, then when that first character gets KOed, the next in line will take it's place, and so on till you run out of lives.
Enemies can still be KOed by knocking them off stage, but all enemies also have an HP meter. When this meter hits zero, they will also be KOed. A KOed enemy will often go flying off, hitting other enemies and damaging them as well.
Item and objects in Adventure Mode
Yes, there are still your standard Smash Bros. items. Items can be found by defeating enemies or opening item boxes.
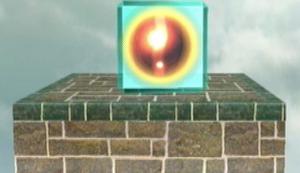
An item box
There are also various new objects that will help you along the way.
Yellow Item Box
Yellow item boxes hold trophies and count toward your percent completion in the Sub-space Emissary. Be sure to find them all!
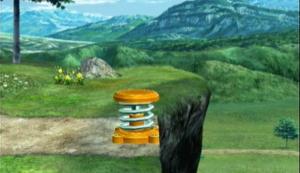
Springs
Springs allow you to jump up really high.
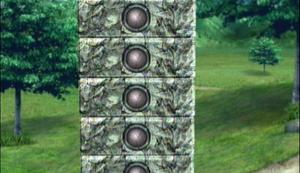
Ladders
Climb ladders by pressing Up. You can also double jump off of them.
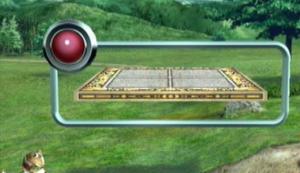
Rails

Rail Blocks
Rails are activated by hitting the red orb on them. They can destroy pretty much anything while spinning, and are the only thing that can destroy rail blocks.
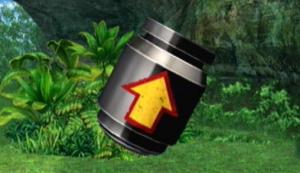
Barrels
Jump in a barrel to have it propel you forward. Some barrels will shoot you automatically, others you need to press the A button activate.
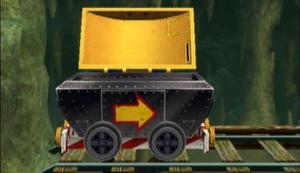
Mine Cart
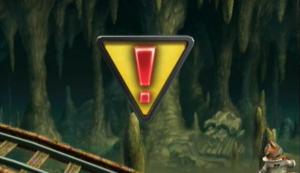
Warning Sign
Jump in a mine cart to start moving down the rails at high speeds, ramming enemies as you go. But watch for the warning sign, as that means its time to jump out with A, X, or Y.
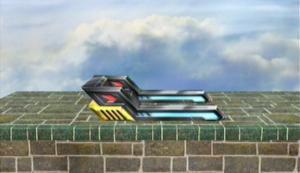
launcher
To activate a launcher, stand on it. The launcher will send you flying off in the direction it's facing, though unlike the mine cart, you aren't safe from harm, and any attack will send you crashing to earth. These are often used as traps, sending you fling in a direction you don't want to go.
When I first encountered the launcher, I called it “sliddy thing”, I tried to get rid of those references later when I came up with the new name, but a few eluded my notice. >.>
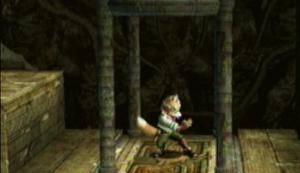
Elevator
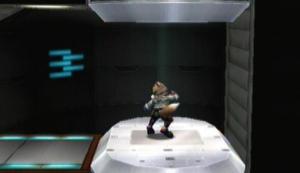
Elevator
Elevators come in two or three different looks, but you can always tell. To ride in an elevator, step in one and press up or down.
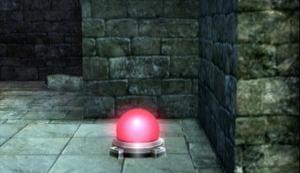
Switches
Switches can do many things. Hit them and see what happens.
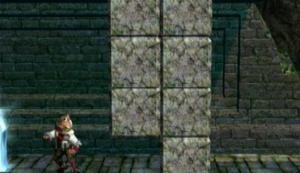
Blocks
Blocks come in a couple different forms, this is the most basic. They can also be seen as wooden crates. Blocks can be broken with a basic attack.
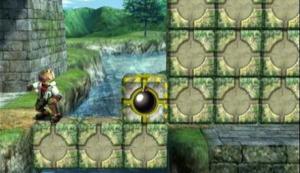
Bomb Blocks
Bomb blocks are impenetrable to everything except the block marked with a bomb. Hit that block to start a chain reaction.
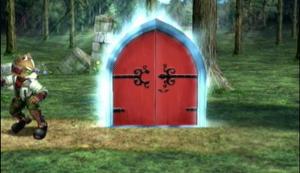
Standard Door
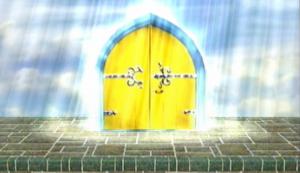
Yellow Doors
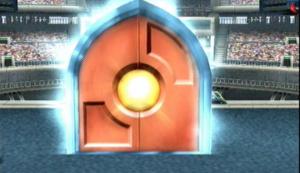
Save Point Door
Stand in front of a door and press up to enter. Doors can come in several varieties. Standard doors take you to a new area. Yellow doors end the level. Save Point doors are only found in the Great Maze level and lead to a save point. There are also doors with arrows on them, but they function the same as standard doors.
Event matches are nothing new and take on the same form as they did in Melee.
Event matches are no ordinary match. They pit you against anywhere from 1 to 50 opponents and put very special rules on the match.
These rules range anywhere from the simple stock match, to having to KO a certain number of enemies within an insane time frame using only a specific item.
Aside from the sometimes-almost-impossible difficulty, events put a fun spin on the game.
For a more in-depth look and stage listings, see the Event Mode section in the main walkthrough.
Stadium is different from the other modes, in that they aren't battles, or at least not battles like we've seen so far.
The return of Sandbag! You can use any character. Your objective is to send Sandbag flying as far as you can. You only have 10 seconds, a bat, and you cant leave the starting platform.
Your objective is to smash all the targets. This time there are 5 stages total and you can use any character with any stage. Try to destroy all the targets as fast as possible!
Here you'll face off against the fighting alloy team. The rules slightly vary, but your opponent and stage is always the same.
You can compete in six different modes:
10-Man: How fast can you KO 10 alloys?
100-Man: How fast can you KO 100 alloys?
3-Minute: Surviving, not KO's, is the name of the game.
15-Minute: Surviving for 15 minutes is harder then it sounds.
Endless: The ultimate test of endurance. How many KO's can you get?
Cruel: The enemy is far more powerful and harder to kill. How many can you take with you?
Wi-fi adds more depth to the game, as you no longer have to be in the same room as someone to play with them. You must have your Wii connected to the internet in order to play online. There are several modes to choose from.
In this mode, you can play with friends you've registered by exchanging friend codes. This goes by all the modes in Multiplayer mode. It's the hosts (person who started the match) choice as to what mode to play. There's no voice chat however.
This sets up a random battle between you and anyone that happens to be online worldwide. The game types, stages, ect, are voted on and are randomly picked by the server. No names will appear over the opponents head however, so it's kind of like fighting powered-up computers.
You can choose between either a team match or a standard free-for-all.
This mode can be fun if you're bored or have gambling issues. Here you can watch a random, live Wi-Fi match between other players. It's a good way to learn strategy. You can also bet coins on who you think will win. The payoff can be pretty good depending. If you don't like the idea of people spying on you (even though spectators cant see names or friend matches) you can turn off the spectator option via the online options menu. This will bar any spectator from watching your matches.
...share mode? More to follow after the release of the game.
There are three types of data you can send to your friends:
Replays
Screen shots
Stage Builder stages
In order to exchange this information, you must have them registered as both Wii friends and Brawl friends.
Like Forge in Halo 3 or various map-makers in other Wii games (Elebits or Dewy's Adventure), this allows you to make your own custom stages and play them at any time.
The stages are fully customizable, allowing you to place every block and part found in the game. You can choose the background, basic size (small, medium, large), and even the music. You can do just about anything: flip parts, shrink/enlarge parts, change the color.
Really, this gives infinite replay value to the game. Even more so since you can send and receive maps from your friends over the internet.
For a more in-depth look, see the Stage Builder section.

The Ancient Minister wants YOU! Join the Subspace Army today!
Knowing is half the battle. Here you will find detailed descriptions of enemies, where to find them, and how to beat them! Bosses are not listed, however.
Where the Subspace Army came from, we don't know. How they where drafted to fight, we also don't know. The above picture is the Subspace Army's symbol. Slight variations in color are present in different enemies, however all Subspace minions wear this symbol somewhere. The exceptions again are the boss, or I guess they could be seen as “Generals”.
Most of the Subspace Army is also taken from out of left field. Most of them have never been seen in any game before. You'll recognize a few though.
When increasing difficulty levels in Adventure mode, the number, size, power, ect., of enemies doesn't increase, the difference is the launch percentage. When playing on Easy, you can walk around with 200% damage and not have to worry. On Intense, you'd be lucky to make it to even 20% damage before losing a life.
Also, I'll get this out of the way so I don't have to repeat it in all the sections: ALL OF THE ENEMIES ARE EXTREAMALLY ANNOYING! NO EXCEPTIONS! There, I said it. It's true, and you know it.
Layout is pretty simple:
(name)
[pictue]
Threat level: (1-10, ten being instant kill)
Damage level: (1-10, 1 being hardly any damage done per attack)
Launch level: (1-10, 10 being sends you flying instantly)
Attacks:
(Description of attacks)
Weak point: (A place where, if it, they take extra damage)
Overview and strategy:
(General overview of the enemy, and how to defeat them)
Well then, lets get started. They are listed in alphabetical order.
Armight
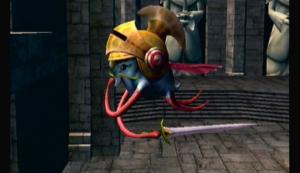
Armight
Threat level: 7
Damage level: 6
Launch level: 6
Attacks:
Throws both of it's swords
Double slash with both swords
Weak point: None.
Overview and strategy:
They'll fly around, making them hard to hit, and their swords generally reach farther then most other characters weapons. Since they can throw their swords as well, it makes them deadly even when not on screen. They are too strong to use projectiles to take them out, so you'll just have to rush them and hope for the best.
Name is a mashing together of “Armored Knight”.
Armtank

Armtank

Armtank pilot
Threat level: 3
Damage level: 7
Launch level: 7
Attacks:
Thrashes its arm about
Can ram you
Weak point: The pilot
Overview and strategy:
An Armtank is invulnerable when the top is down. However, take out the flaming arm to open the top and get at the pilot on the inside. Once the top is open, don't let anything distract you for attacking the inside. He'll fall after just a few strikes. The arm can be hard to hit, however, and if you're near it for too long you may get burned. If you stay on the ground, it will have trouble hitting you, though you'll also have trouble hitting it.
Auroros

Auroros
Threat level: 4
Damage level: 3
Launch level: 5
Dive bombs you from above
Found in:
Weak point: You can pick them up and throw them when their beak is stuck in the ground.
Overview and strategy:
They rarely lead to a KO, but they are placed ever so perfectly as to hit you when you aren't looking. Often they'll hover just out of site. If you can get up high enough, take them out when they are in the air. If not, dodge it's beak attack then pick it up and throw it at another enemy.
Autolance
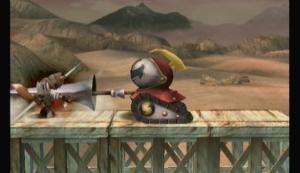
Autolance
Threat level: 7
Damage level: 8
Launch level: 7
Attacks:
A large lance comes out of the front and is either thrusted upward or thrown at you
Weak point: The yellow light under it's helmet.
Overview and strategy:
It's pretty slow moving, but it's lance has a large range. Use an upward attack or a downward aerial attack to take off it's helmet, revealing it's only weak point: The bright yellow light.
Big Primid
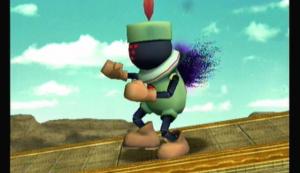
Big Primid
Threat level: 6
Damage level: 9
Launch level: 9
Attacks:
A rapid series of bunches (like Kirby)
A massive punch (like Captain Falcon)
Weak point: None.
Overview and strategy:
Don't let his size and damage/launch levels fool you, they are quite easy. It's punches take a long time to wind up, and often overshoot their target. Now, if it DOES manage to land a blow, they hurt! Stay in close and wail on it till it goes down.
Bombed
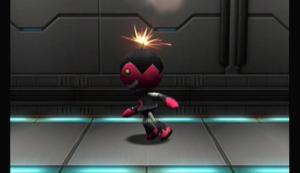
Bombed
Threat level: 7
Damage level: 8
Launch level: 3
Attacks:
Takes off it's head and throws it at you.
Weak point: none.
Overview and strategy:
It's head is a bomb that grows back in a few seconds. Don't attack them when they have their head on, or else the bomb will blow up in your face. Wait for them to throw it, dodge the throw, then rush them. They will run away till their head grows back, which can be a good thing as they often run off into pits.
Boom Primid
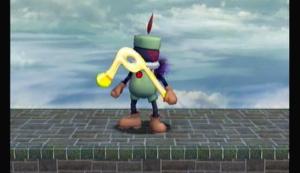
Boom Primid
Threat level: 5
Damage level: 5
Launch level: 4
Attacks:
Throws it's boomerang at you.
Bashes you up close with the boomerang
Weak point: None.
Overview and strategy:
Dodge the boomerang and get in close to attack. Neither of it's attacks do much damage, so don't worry about them too much. Remember that boomerangs return to the sender, so dodge the comeback as well. If you kill them before the boomerang comes back, it will disappear as well.
“Boom” is obviously short for “Boomerang”.
Borboras
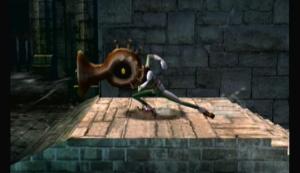
Borboras
Threat level: 1
Damage level: 1
Launch level: 1
Attacks:
Blows jets of wind, forcing you away.
Head butts you up close.
Weak point: None.
Overview and strategy:
Not an offensive enemy, it's goal is normally just to slow you down or push you into a trap. It can hit you up close, but that's rare. Jumping over them avoids the jet stream they create, and opens them for an aerial attack. They also love music, and are often found dancing before you interrupt.
Bucculus
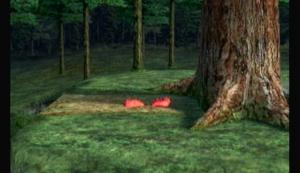
Bucculus in hiding
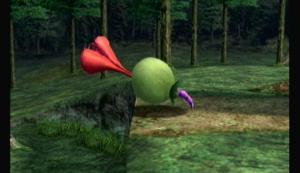
Bucculus above ground
Threat level: 3
Damage level: 7
Launch level: 1
Attacks:
Jumps up from the ground and sucks out your energy.
Weak point: None.
Overview and strategy:
Watch for it's lips on the ground. Get to close and it will jump up and suck out some energy. The good thing here is, once it sucks some out, it will detach and flail around on the ground a bit. If you can kill it before it re-buries itself, you get a tomato, healing the damage it did and then some!
Buckot
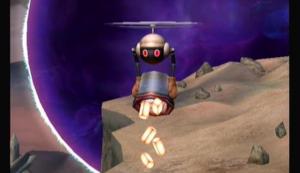
Buckot
Threat level: 3
Damage level: 6
Launch level: 1
Attacks:
Dumps molten shaft on you.
Weak point: None.
Overview and strategy:
They will fly overhead, usually just off screen, and dump molten metal on you. Very painful, but not life threatening. Don't attack them from underneath, they'll simply unload on you when you jump up. Instead, take them from the side. Beware, if you don't take them out, they will follow you to the next door.
It's name is a misspelling of Bucket.
Bullet Bill
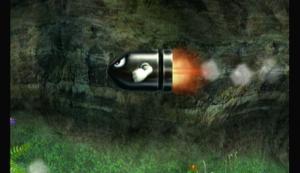
Bullet Bill
Threat level: 5
Damage level: 6
Launch level: 3
Attacks:
Flies in and rams you
Weak point: The back of it.
Overview and strategy:
Fired in from across the stage, they act like missiles with eyes. If you see one spinning, that one will hone in on you, so watch out. Reflectors work well against them. Other then that, just dodge them as they come. They blow up on impact, causing impact and fire damage.
Strangely, you never see a Bullet Bill Launcher throughout the game, which begs the question, where are these coming from?
Bytan
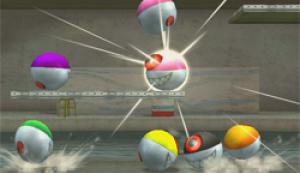
Bytan
Threat level: 3
Damage level: 3
Launch level: 4
Attacks:
Rams you
Duplicates itself
Weak point: None.
Overview and strategy:
Found in many colors and often in groups, on their own they aren't much of a threat, but once they start multiplying they can become deadly in hurry. They will start to glow when they are ready to duplicate, so take them out before then. When they ram you they'll jump up into the air.
Watch out for the giant sized Bytan as well. They share the same traits, but are less likely to duplicate.
Cymul

Cymul
Threat level: 7
Damage level: 8
Launch level: 6
Attacks:
Extends it's blades and spins rapidly
Weak point: Underside or top.
Overview and strategy:
Cymuls aren't offensive, they normally just guard things and get in your way. If you get too close, they will extent four razor sharp blades and start spinning them rapidly, causing massive damage and can send you flying at the end. They also have a special coating that reflects projectiles, so either just dodge them or hit them from underneath.
Feyesh
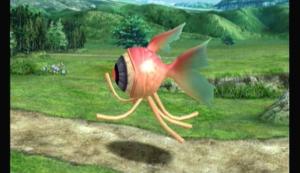
Feyesh
Threat level: 6
Damage level: 5
Launch level: 5
Attacks:
Swings its tentacles, causes electrical damage.
Weak point: None.
Overview and strategy:
Another flying enemy. They often attack in groups. They aren't that fast, but they can disable you for a moment with their electrified tentacles, making you easy pray for anther enemy.
Name is pronounced like “Fish”.
Fire Primid
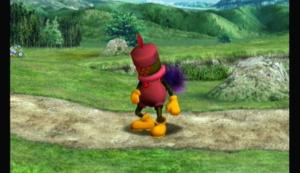
Fire Primid
Threat level: 5
Damage level: 7
Launch level: 4
Attacks:
Spits fireballs
Belches flames
Weak point: None.
Overview and strategy:
Fire Primid are an all-round primid. They can attack from a distance with fireballs or if you get in close can belch flames for massive damage. The later is rare though, so rush in and take them out as soon as possible. The fireballs wont travel far either, and they are slow and easy to dodge.
Floow
Floow
Threat level: 8
Damage level: 10
Launch level: 3
Attacks:
Screeches and unleashes evil spirit like things.
Weak point: None
Overview and strategy:
Floow cant attack till their HP reaches it's max. It will slowly rise on its own, but if you hit them it will rise faster. When you hit them, they will be stunned till their HP reaches max. Take that opportunity to finish them off. Alone they are harmless, but they often travel in groups.
When they attack, they screech and release this strange fog with eyes. If you get caught in this, you'll take MASSIVE damage, and they will release it without warning and very quickly. If you get caught up in three or four Floow, they can easily cause 200 damage in no time.
Gagogog
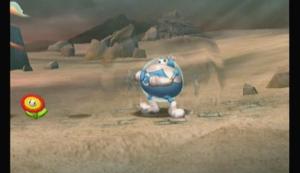
Blue
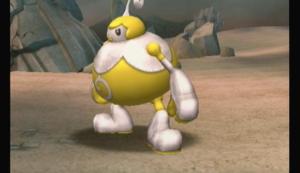
Yellow
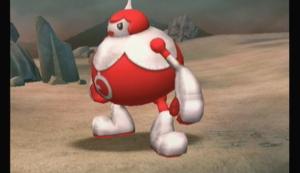
Red
Threat level: 8
Damage level: 8
Launch level: 8
Attacks:
Slams it's fists into the ground
Body slams you
Weak point: None.
Overview and strategy:
When attacked, if you don't follow up quickly, it will growl and emit waves for a second, then grow to it's next state (blue to yellow, then to red). While this is happening, it's invincible. Try to take it out while it's blue. If you cant, prepare for a hurting because its red form is very deadly. All its forms are slow though, so use some speed and get behind it.
“Gagogog” is the sound it makes when changing forms.
Gamyga
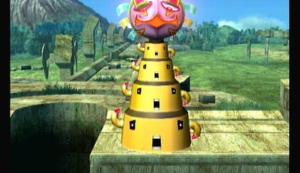
Gamyga
Threat level: 4
Damage level: 6
Launch level: 3
Attacks:
Fires lasers at you
Weak point: Head
Overview and strategy:
Don't bother attaching the base, that will only lower it down a bit. Focus your attacks on it's head. Watch for the lasers it fires from it's eyes, they often come without much warning. Not much of a threat, but there are only a few characters that can easily get over it to continue their journey.
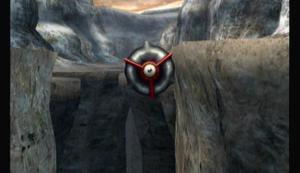
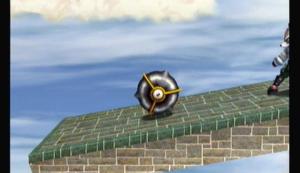
Glice, Glire, Glunder
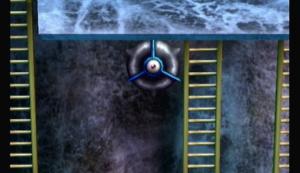
Glice
Glire
Glunder
Threat level: 7
Damage level: 7
Launch level: 5
Attacks:
Opens up and releases an elemental surge around it
Weak point: None.
Overview and strategy:
They stick to wall and roll around them. If you get too close, they will open their shell and release either ice (Glice) freezing you, fire (Glire) burning you, or electricity (Glunder) shocking and paralyzing you. Pretty much just don't get too close to them, or destroy them before they open.
Glice adds a “Gl” in front of the element, Glire replaces the first letter of the element with “Gl” and Glunder replaces the first two letters with “Gl”
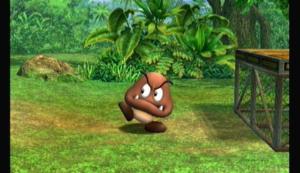
Goomba
Goomba
Threat level: 1
Damage level: 1
Launch level: 1
Attacks:
Rams you
Weak point: Jumping on it.
Overview and strategy:
Typical Goomba. One shot will kill it, don't let it run into you, and jumping on it will also kill it.
Greap

Greap
Threat level: 6
Damage level: 9
Launch level: 9
Attacks:
Jumps up and spins it's blades in a circle
Slams it's blades down on you
Weak point: Head
Overview and strategy:
If it hits you, it will hurt... a lot. But it is very slow. Just wait for it to get right up next to you, then dodge to the other side. It's blades will get stuck in the ground, then alls you have to do is jump up and hits its head a few times.
“Greap” is probably based on “Reap” or “Reaper,” “reaping” the fields used to be done with huge scythes, like the ones he carries.
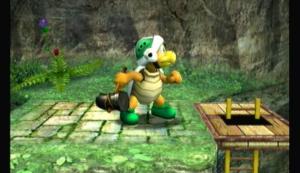
Hammer Bro.
Hammer Bro.
Threat level: 6
Damage level: 6
Launch level: 3
Attacks:
Throws hammers
Weak point: None.
Overview and strategy:
Throws hammers in random arcs, aiming for you. The hammers can be reflected. Dodge the hammers and get in close for quick strike. Just like in the old games, you cant kill it by jumping on it.
Jyk
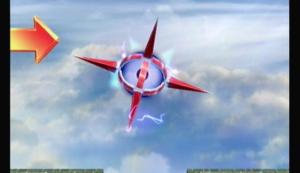
Jyk
Threat level: 1
Damage level: 1
Launch level: 1
Attacks:
Nothing.
Weak point: None.
Overview and strategy:
Jyks are invulnerable to attack and can reflect projectiles. They're more of a moving obstacle then an enemy. They don't target you move in pre-determined patterns. They come in two varieties: Electrical and Flaming.
... And here are the rest of the enemies. For instructions on how this page has been liad out, and the other set of enemies please see this page.
Metal Primid
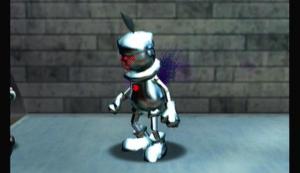
Metal Primid
Threat level: 7
Damage level: 7
Launch level: 7
Attacks:
Rapid punches (like Kirby)
A large punch (like Captain Falcon)
Weak point: None.
Overview and strategy:
Basically a Primid that got ahold of a Metal Box. You cant launch them, as they are too heavy, so you'll have to take their HP down to zero. That can take a bit. Besides that, they share everything in common with regular Primid. Watch when their fists start glowing, as that punch is going to hurt.
Mines (Blastballs)
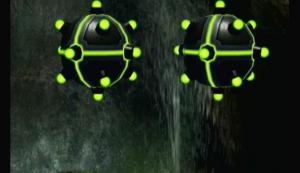
Mines
Threat level: 9
Damage level: 6
Launch level: 8
Attacks:
None.
Weak point: None.
Overview and strategy:
Technically called Blastballs, but lets face it, they're mines. More of a level hazard then an enemy, just like Jyks. Take them out from a distance to avoid being hit.
Mite
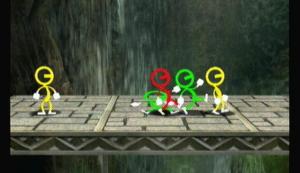
Mite
Threat level: 3
Damage level: 2
Launch level: 4
Attacks:
Jump kicks
Weak point: None.
Overview and strategy:
Mite are tiny and attack in hoards. They can hit pretty hard for their size, so don't let them fool you. Normally not much of an enemy, but they make a very irritating distraction.
Parakoopa and Paratroopa
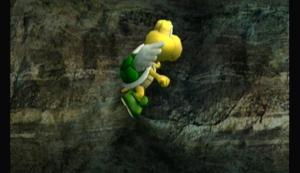
Parakoopa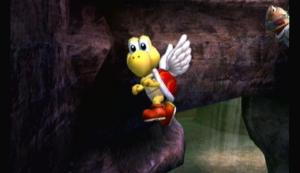
Paratroopa
Threat level: 4
Damage level: 3
Launch level: 3
Attacks:
Head butts you
Weak point: None
Overview and strategy:
A Koopa that can fly and likes to jump. Nothing more to it. The only difference between a Koopa and Troopa is the color. Hit them or stomp on them once to take off the wings, and again to turn them into a shell item.
Poppant

Poppant
Threat level: 1
Damage level: 1
Launch level: 1
Attacks:
Throws rocks
Weak point: none
Overview and strategy:
Poppant run from you. Doesn't matter if you attack them or not. While running, they throw rocks and food. The rocks hurt, but the food makes up for it. If you can kill them, they drop a plethora of food.
Name is probably taken from “Peppermint” as they look similar to the old peppermint hard candies, and the name is pronounced as if slurred.
Primid
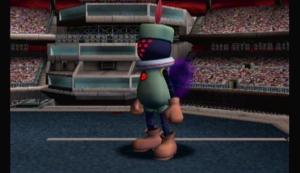
Primid
Threat level: 4
Damage level: 7
Launch level: 7
Attacks:
Rapid punches (like Kirby)
A large punch (like Captain Falcon)
Weak point: None
Overview and strategy:
Just like the rest, only simpler. Watch for it's fist to start glowing, as that punch is going to hurt. Often attack in hoards with other Primid. Slash away till it goes down. Nothing fancy here.
Name is probably derived from “Primitive”
Primid (and it's different varieties) have many different face patterns that change each time you go into Adventure mode.
Puppit
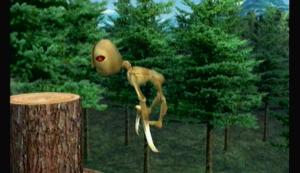
Puppit
Threat level: 7
Damage level: 7
Launch level: 8
Attacks:
Slashes you
Shoots a laser at you
Weak point: None
Overview and strategy:
Puppits hang down and attack rather clunky. Don't be fooled, though, their slashes hurt and they have some kind of power source that enables them to shoot large lasers from their eyes. Hit them repeatedly to keep them stunned. Their launch level is high, since they are normally so close to the edge of the level anyway. And who's pulling the string here anyway?
Names are taken from “puppets”, obviously.
Roader
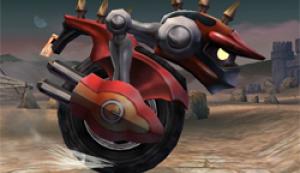
roader
Threat level: 8
Damage level: 5
Launch level: 8
Attacks:
Rams you
Weak point: None
Overview and strategy:
You never see a Roader till it's too late. It's even hard to jump over them, as they can jump up as well. You obviously cant outrun them and they will chase you for quite a ways. They have a tendency to lose balance and fall, though. That's probably your best chance to get at them.
R.O.B Blaster
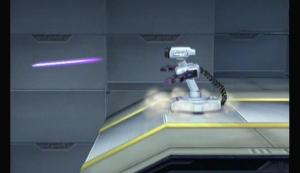
R.O.B Blaster
Threat level: 4
Damage level: 4
Launch level: 3
Attacks:
Shoots a small laser at you
Weak point: None
Overview and strategy:
Very slow and not very accurate. Get in close and take it out with one or two attacks. Lasers can be reflected, but I don't see the point, given their short range.
R.O.B Launcher
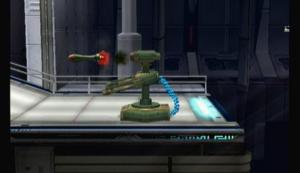
R.O.B Launcher
Threat level: 7
Damage level: 7
Launch level: 4
Attacks:
Fires homing missiles
Weak point: None.
Overview and strategy:
It fires the missiles rather slowly, but if you are facing more then one they can off set their fire to make it continuous. Get in from behind them to take them out. Don't try to reflect the missile, as it will just travel a few inches and explode in your face anyway.
R.O.B Sentry
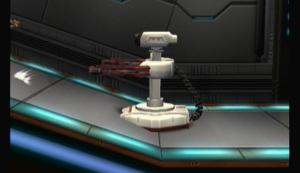
R.O.B Sentry
Threat level: 3
Damage level: 3
Launch level: 3
Attacks:
Hits you
Weak point: None.
Overview and strategy:
Definitely not a threat. They'll just wheel up and smack you, doing minimal damage. Take them out with a dash attack as you go by.
Roturret
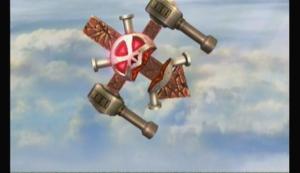
Roturret
Threat level: 6
Damage level: 6
Launch level: 3
Attacks:
Fires twin-barrel cannons
Weak point: None
Overview and strategy:
Roturrets are very menacing looking. They cant move, but they can rotate (hence the name) 360 degrees. They fire short bursts, so your best bet to get in close is as it reloads. It has a blind spot directly under it where its cannons cant reach. It will become stunned for a second after being hit, so using quick strikes from directly below is the best way to take one down.
Scope Primid
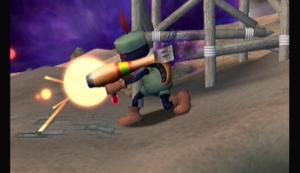
Scope Primid
Threat level: 5
Damage level: 6
Launch level: 8
Attacks:
Can fire three consecutive blasts or one large blast
Weak point: None
Overview and strategy:
A fully ranged Primid. The three little blasts aren't a big deal, though annoying. The big blast is one to watch out for however. The barrel will start to glow, that's your cue to get out of the way or hurry and kill it. It wont hit you at close range, though it may fire some shots, they normally just stand there. Get in close to take them out.
Its name comes from the “Super Scope” the item that his weapon is based on.
Shaydas
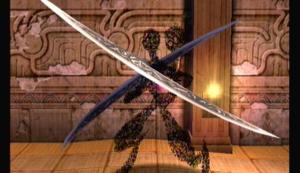
Shaydas
Threat level: 9
Damage level: 7
Launch level: 10
Attacks:
Scissor attack
Regular dual swings
Teleports
Weak point: The orb in its chest
Overview and strategy:
Shaydas are the most powerful regular enemy in the game. Their scissor attack can send you flying in one shot, even with low damage. The even have the ability to teleport around the field like Zelda's B Up. Their only weak point is the glowing orb in their chest. A few shots will normally bring them down, but they will block most attacks with their massive swords. When they stand still with one sword raised overhead and one below them is when they are most vulnerable, problem is this is also when they are warming up for their scissor attack.
Shaydas have two heads, and each side can act independently of the other, hence when referring to one, the name is always plural, though I make that mistake a lot.
Shellpod
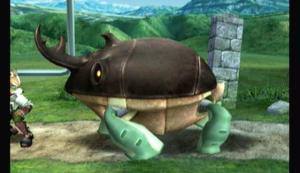
Shellpod
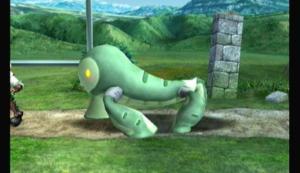
Shellpod with no shell.
Threat level: 3
Damage level: 7
Launch level: 9
Attacks:
Thrusts with its massive horn
Weak point: None
Overview and strategy:
Shellpod are slow, and you may go the entire game without even seeing them attack, but if they connect with that horn when you're in the air, you'll go a long ways. They are also very resilient, taking several blows just to get past their shell. Once their shell is off, they are quite weak and can no longer attack effectively. Come at them head on and quickly, before they have a chance to strike.
Spaak

Spaak
Threat level: 5
Damage level: 4
Launch level: 4
Attacks:
Fires a ball of electricity
Shoots a bolt of lightning
Weak point: The battery on its back.
Overview and strategy:
Spaak aren't much of an enemy. They are slow and easily dodged, they don't pursue you very far, and their attacks are weak. Once attacked, they can turn black, making them slightly better all-round, but still not a threat. Jump up and hit them once or twice to get them out of the way.
“Spaak” is obviously derived from “Spark”
Spawner
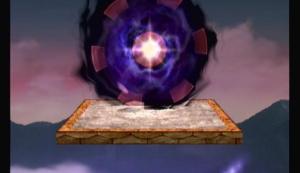
Spawner
Overview and strategy:
It's not an enemy, so it cant attack or defend. What it can do, however, is spawn enemies. Every spawner can only spawn one type of enemy, but they all look the same. When facing a hoard of enemies with a spawner, take out the spawner first.
Sword Primid
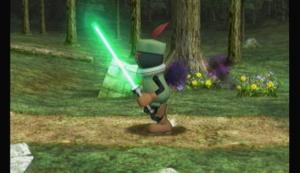
Sword Primid
Threat level: 7
Damage level: 7
Launch level: 7
Attacks:
Dives in with its sword
Swings its sword
Jumps up or down with its sword like a drill
Weak point: None
Overview and strategy:
Probably the most divers Primid, the Sword Primid attacks a variation of the Beam Sword. Taking them out from long range is recommended, but often hard.
Ticken
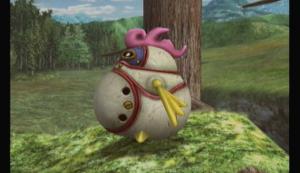
Ticken
Threat level: 3
Damage level: 5
Launch level: 7
Attacks:
Jumps up and pounds the ground
Rams you
Weak point: None
Overview and strategy:
Ticken are giant mechanical chicken (hence the name). Very slow, not very smart, and easy to dodge. They do, however, pack a punch and have good defense. They don't have any close range attacks, so dive straight in and start ripping them apart.
Towtow

Towtow
Threat level: 7
Damage level: 6
Launch level: 6
Attacks:
Rams and bites
Weak point: None
Overview and strategy:
Towtow are often found sleeping, and are rather cute. They don't like to be disturbed, however. When awake, they become vicious, ramming and thrashing about. Try to just get around them when possible, otherwise charge up a heavy attack and do as much damage to them when they are asleep as possible.
Trowlon

Trowlon
Threat level: 7
Damage level: 2
Launch level: 3
Attacks:
Head butts you
Weak point: None
Overview and strategy:
A Trowlons main objective isn't to send you flying, rather it's to pick you up and carry you off itself. They often sweep in from underneath and pick you up, carrying you off the stage. Jump off them as soon as possible. They can be hard to kill, but that's not really necessary if you can dodge them. Also, their head butt has a tendency to throw you right onto their back. Beware.
Items range from the mundane to the extraordinary. Offensive, defensive, and totally useless. Items can be used in a variety of ways depending on the stage, attacker, and target. Items are used by picking them up with the A button. After that depends on the item. Some you’ll throw at the target by tilting the control stick pressing A, some are activated by pressing A, some you merely pick up and they activate immediately. To drop or throw an item, press the Z (grab) button.
Items can further be broken down into 4 categories:
Normal (standard Smash Bros items)
Container Items (Items that hold other items)
Healing (heals the user)
Pokeballs (releases Pokemon)
http://www.supercheats.com/guides/super-smash-bros-brawl/assist-trophies (releases assist characters)
The items are listed in alphabetical order within their respective sections.
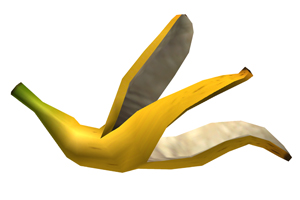
Banana Peel
Game:
If I had to pick a game, it would be Donkey Kong or Mario Kart, but more so it’s just a clichéd item.
How to use:
A the control stick to throw
Uses:
A trap item. Throw it on the floor and wait from someone to step on it. They’ll slip and fall and be dazed for a second. Works best when you can hide it via yellow surfaces.
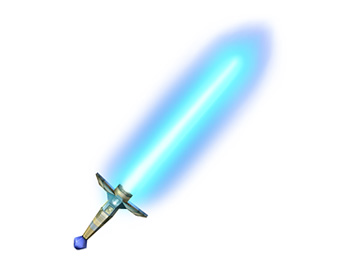
Beam Sword
Game:
Star W,err... I mean, Smash Exclusive
How to use:
Replaces (or at least augments) your standard and smash attacks with sword swings
Uses:
It’s been upgraded again to be more like its original Smash Bros. 64 counterpart. It’s longer and more powerful. You can wield it the entire match it you want. It’s length increases greatly when you swing it.
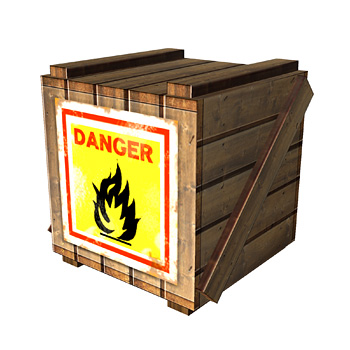
Blast Box
Game:
Smash Exclusive
How to use:
Hit it several times to activate.
Uses:
When activated, it makes a massive explosion. When you use fire-based attacks, it will explode faster.
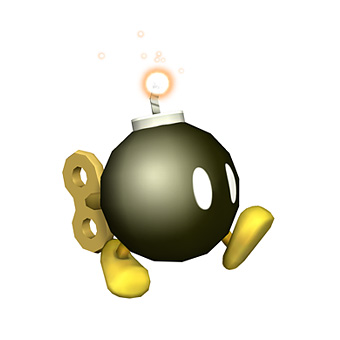
Bob-omb
Game:
Super Mario Bros.
How to use:
A to pick up and again to throw.
Uses:
Makes a massive explosion. They can explode while you’re holding them. If they sit on the ground long enough, they will activate and start walking around on their own. When they are walking, if someone touches them they will explode.

Bumper
Game:
Super Smash Bros.
How to use:
A the control stick to throw
Uses:
Ahhh, I love this item. It’s a bumper, like in a pinball game. If someone touches it, they will ricochet off. It’s been upgraded though, now you can stick it in mid air as well as on the ground.
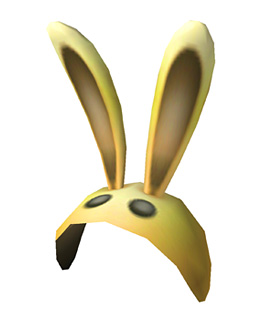
Bunny Hood
Game:
Legend of Zelda: Ocarina of Time
How to use:
A to put on.
Uses:
Once on, you become very fast for 10 seconds, or until knocked off. You’ll be very light, but it doesn’t seem to effect your flying distance. Plus, the bunny ears are cute ^_^

Coins and Bills
Game:
Smash Exclusive
How to use:
Run into them
Uses:
Only found in coin battles. Pick these up to increase your coin count.
Bronze = 1
Silver = 3
Gold = 6
Bill = 10
These are not the coins you use in the Coin Launcher.

CD
Game:
Smash Exclusive
How to use:
Activated on pickup
Uses:
Unlocks more music in the My Music selection menu.
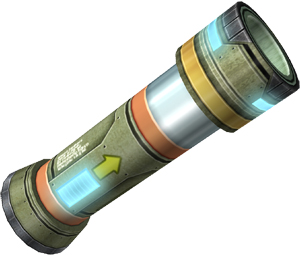
Cracker Launcher
Game:
Kirby: Air Ride
How to use:
Tilt the control stick up or down to aim. A button to fire. Can jump and move around while using it, but cant attack.
Uses:
Ohhh, fireworks!
The shots will go quite a ways before exploding in multicolor brilliance, they will also explode on contact. Great on stages like New Pork City or Hyrule Temple.
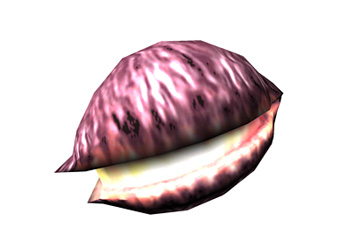
Deku Nut
Game:
Legend of Zelda: Ocarina of Time
How to use:
A to pick up and again to throw.
Uses:
If it explodes near or on an opponent, it will daze them just like if their shield shorted out. If you hit them in mid-air, it turns into a meteor smash.
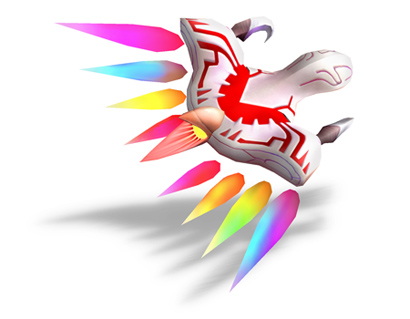
Dragoon
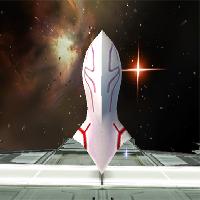
Head
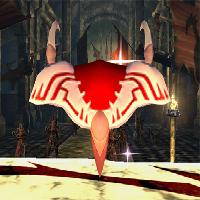
body
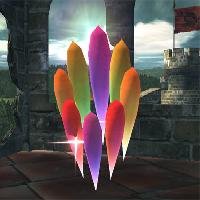
tail
Game:
Kirby Air Ride
How to use:
Gather all three parts to automatically activate
Uses:
Unlike other items, this one requires some prep time. You must first gather all the parts. If an opponent picks up a part you want, you can beat it out of him. The parts will appear above your damage counter. When all three are assembled, you hop on board and a giant sight will appear around the stage. Move the sight overtop of a fleeing opponent and press A to launch your assault. If you connect, it’s a one hit kill.
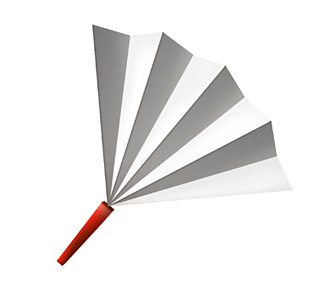
Fan
Game:
Smash Exclusive
How to use:
A to pick up. Replaces your standard and side smash attacks with fan attacks.
Uses:
Not very powerful, but extremely fast. Also very good at breaking shields. Can be a meteor smash when thrown at an opponent.
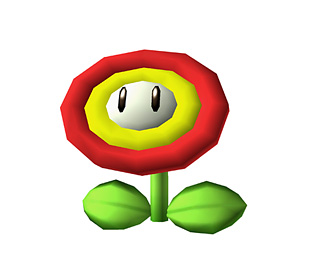
Fire Flower
Game:
Super Mario Bros.
How to use:
Hold down the A button
Uses:
Is basically a flame thrower. It can shoot continuous flames or short bursts. It does have a limited amount of fuel, so when it stops shooting be sure to get rid of it.

Franklin Badge
Game:
Mother (series)
How to use:
Automatically activated on pickup
Uses:
This small badge will prevent your character from taking any damage or knockback from projectile attacks. Lasts for 20 seconds or 100 damage, what ever comes first.
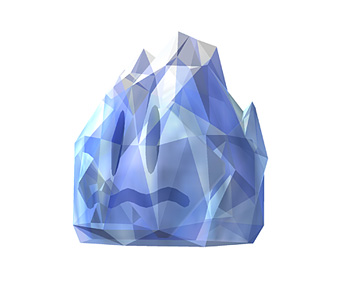
Freezie
Game:
Ice Climbers
How to use:
A control stick to throw
Uses:
Freezes opponent in a giant iceberg, immobilizing them for a short period.
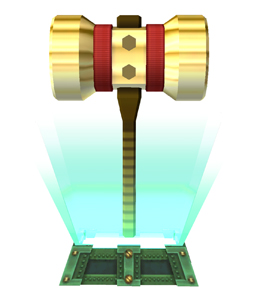
Golden hammer
Game:
Smash Exclusive
How to use:
Activated on pickup
Uses:
Your character will begin furiously pounding with hammer, making him almost invincible. It’s upgraded from the regular hammer in that it is faster, does more damage, you can float in mid air with it if you run off the stage, and it comes in gold on a shining important-looking platform. They didn’t fix all the problems though. Sometimes this hammer will get mixed up with a look-a-like that does no damage and squeaks on contact. Well, maybe they’ll laugh themselves to death...
Gooey Bomb
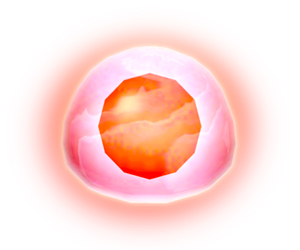
Game:
Smash Exclusive
How to use:
A control stick to throw it at an opponent
Uses:
When it hit, it will stick to the opponent. After a few seconds it will explode. If you are hit with one, try to run past another character. Sometimes it will rub off on them. Think of it as a game of hot potato.
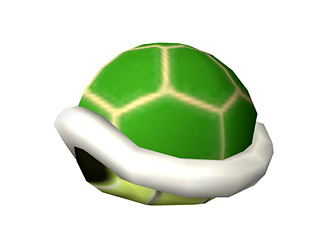
Green Shell
Game:
Super Mario Bros.
How to use:
A to pick up and again to throw, or just attack it or jump on it.
Uses:
Fairly powerful if it hits an opponent. If they attack it or it hits a wall, it could change direction and go back the other way.
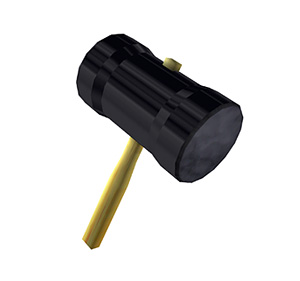
Hammer
Game:
Smash Exclusive
How to use:
Activated on pickup
Uses:
Your character will begin furiously pounding with hammer, making him almost invincible. You cant jump very high, though. If you hit an opponent, it is almost an instant death. Sometimes the head will fall off, leaving you with just a stick, and completely vulnerable. The head can be used as a throwing item as an almost instant kill as well.
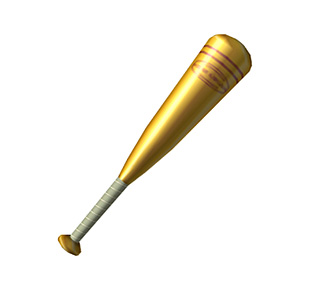
Home-run Bat
Game:
Smash Exclusive
How to use:
Replaces (or at least augments) your standard and smash attacks with bat swings
Uses:
Insanely powerful, not very useful. For its full effect you need to do a side-smash attack. If you can connect, it’s pretty much a one-hit-kill, the problem is the timing can be hard as it takes a second to wind up and if you miss you'll be totally open for a second.

Hothead
Game:
Super Mario World
How to use:
A to pick up and again to throw
Uses:
It will circle the platform it was thrown on for 20 seconds, causing damage to anyone that touches it. If hit with a fire or electric attack, it gets even bigger.
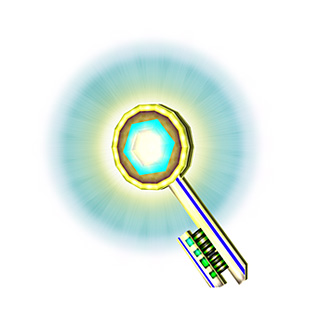
Key
Game:
Smash Exclusive
How to use:
A to pick up
Uses:
Only found in the Sub-space Emissary. Unlocks doors in the Sub-space Emissary.
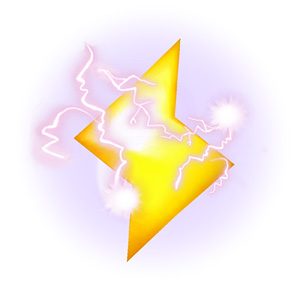
Lightning
Game:
Mario Kart
How to use:
Run into it.
Uses:
Lightning strikes all of your opponents and shrink them (just like the Poison Mushroom). They will be fast, but easy to send flying. Occasionally it will back-fire and you will be the one to shrink.

Lip’s Stick
Game:
Panel de Pon
How to use:
A to pick up. Replaces your standard and side smash attacks with stick attacks.
Uses:
Not weak, but not horridly powerful either. It’s main effect is, when someone is hit with it, a flower is stuck to their head. The flower will slowly do damage for 2 damage a second for 10 seconds for a total of 20 damage. The flower can be shaken off at times. If you hit them repeatedly, the flower will grow bigger and the damage (and time) increases.
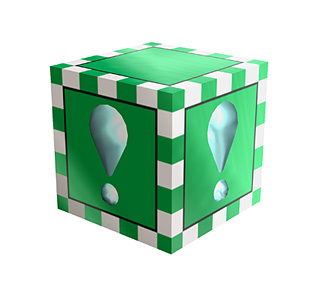
Metal Box
Game:
Super Mario 64
How to use:
Press A to pick up and activate
Uses:
Makes you very heavy for 10 seconds. You wont fly very far when hit, but you’ll fall like a ton of bricks... er, steel.
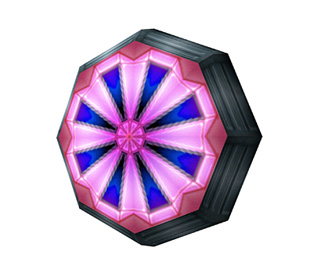
Motion Sensor bomb
Game:
Smash Exclusive
How to use:
A to pick up, A again to throw.
Uses:
When thrown, it will stick to the surface. Unlike in the old games, it wont blink, it will stay purple, making it even harder to see. If someone touches the bomb when set, it blows up. Not as powerful as a bob-omb, but works great as traps on large stages.
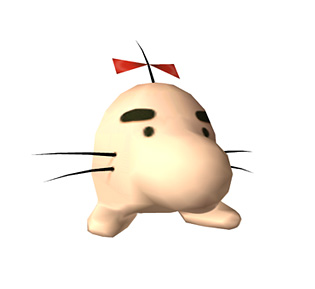
Mr. Saturn
Game:
Mother
How to use:
A to pick up and again to throw.
Uses:
Not really that useful. Can break shields fairly easily.

Pitfall
Game:
Animal Crossing
How to use:
A the control stick to throw it.
Uses:
Another trap. When it hits something, it will disappear. Now just wait for an unsuspecting player to wonder over where it was. PLUNK! They fall in. If you use it on a pass-through floor they’ll fall to the level below. If used on the main level they’ll be stuck and open to attack. If you throw it at them in mid-air, it becomes a meteor smash.

Poison Mushroom
Game:
Super Mario Bros.
How to use:
Run into it.
Uses:
Shrinks you on contact. You become very fast, but your attack is very weak and you can be sent flying really easy. Wears off after 10 seconds.
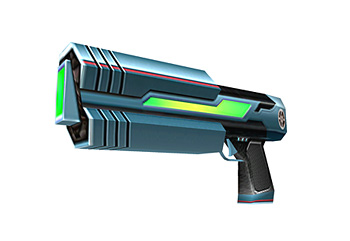
Ray Gun
Game:
Smash Exclusive
How to use:
A to pick up. Replaces your smash attack with Ray Gun shots
Uses:
Fires a large projectile in the direction you’re facing. It’s fairly powerful. You have 16 shots, make them count!

Screw Attack
Game:
Metroid
How to use:
A to put it on
Uses:
You wear it like the Franklin Badge. It turns your standard and mid-air jump into a screw attack from the Metroid series. Kind of hard to explain, but basically you spin on a horizontal axis while leaking energy that will damage your opponents.
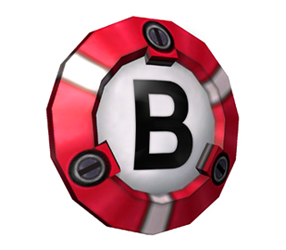
Smart Bomb
Game:
Star Fox
How to use:
A control stick to throw
Uses:
Smart bomb can be tricky. Once thrown, it SHOULD explode on contact, but not always. It sometimes wont explode at all or might take a few seconds to explode. In essence this item could backfire pretty easily, especially since the explosion encompasses most of the stage.

Smash Ball
Game:
Smash Exclusive
How to use:
Press the B button (Side-B and B-up wont activate it)
Uses:
Smash ball is used for activating your characters final smash. The Smash Ball floats around the stage randomly, and fairly quickly. To pick it up, you have to attack it. It has sort of a shield around it, so it can take several attacks. The person to attack it after the shield breaks gets it. After getting the item, you don’t have to use it immediately. You can hold on to it if you want. Walk around stage with it, get yourself in the best position before unleashing it. Your character will glow yellow to let you know you still have it. Now if someone where to hit you while you are walking around, you’ll lose the item and it will float around again (only with no shield). So be careful.
Final Smashes, like Special Attacks, vary greatly form character to character and take advantage of that characters abilities. For a full list of final smashes, see the [url]Character Section[/url] and look up the character you want to see it for.

Smoke Ball
Game:
Smash Exclusive
How to use:
A the control stick to throw
Uses:
Doesn’t do any damage or anything, it releases a smoke screen of varying colors.

Soccer Ball
Game:
Smash Exclusive
How to use:
Attack it.
Uses:
When attacked, it will pop and fly off in the opposite direction you attacked it. Will fly around like a leaking balloon after that.
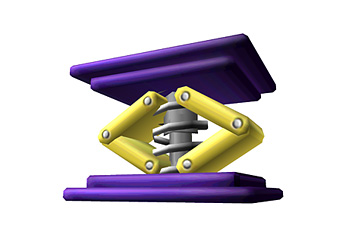
Spring
Game:
Super Mario Bros.
How to use:
Jump on it.
Uses:
Sends anyone that jumps on it very high in the air. Occasionally tips over. If it tips, anyone who comes in contact with the side will be launched in the opposite direction (like an extreme version of the Bumper).

Starman
Game:
Super Mario Bros.
How to use:
Run into it.
Uses:
Makes you invulnerable for 10 seconds. Will not damage your opponents.

Star Rod
Game:
Paper Mario
How to use:
A to pick up. Replaces you’re smash and side smash attacks with star rod attacks.
Uses:
Not very powerful when you’re just hitting people with them. It real power is when you charge it up with a side A. It then launches a projectile star across the field. You have 15 shots before it runs out.

Stickers
Game:
Smash Exclusive
How to use:
A to pick up
Uses:
Adds a sticker to your collection.

Stock Ball
Game:
Smash Exclusive
How to use:
Run into them
Uses:
Only found in the Sub-space Emissary. Adds an extra life to your stock.
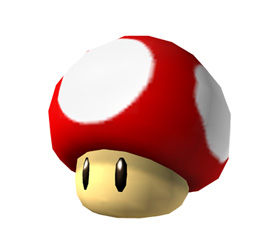
Super Mushroom
Game:
Super Mario Bros.
How to use:
Run into it.
Uses:
When picked up, your character grows huge. This amplifies your attacks and range. It wears off after 10 seconds.
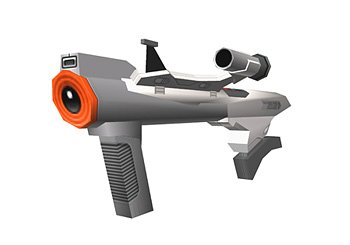
Super Scope
Game:
A light gun attachment for the NES.
How to use:
A to pick up. Replaces your smash attack with super scope attacks.
Uses:
A projectile weapon. Can fire up to 48 rapid fire shots, or three charged shots. Shots can be charged by holding the A button. The charged shots will fire off automatically after a few seconds, so check your timing. Charged shots are pretty much an instant kill if you can hit someone with them. Unlike in earlier games, you can move around while firing.

Superspicy Curry
Game:
Kirby (?)
How to use:
Activated on pickup
Uses:
This makes your character glow red with heat and shoot flames out their mouth. Not an attack itself, but rather makes your attacks do additional fire damage. Wears off after 12 seconds
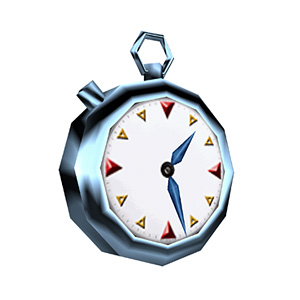
Timer
Game:
Super Paper Mario
How to use:
A to activate
Uses:
Will slow down all other characters. Sometimes it will back-fire, and you’ll be the only one to be slowed down. Other times, all characters will be slowed to a crawl. Effects last 10 seconds.

Trophy
Game:
Smash Exclusive
How to use:
A to pick up.
Uses:
Only found in the Sub-space Emissary. Gives you a random trophy.

Trophy Base
Game:
Smash Exclusive
How to use:
A to pick up and again to throw
Uses:
Only found in the Sub-space Emissary. Has a chance to turn an opponent into a trophy.

Unira
Game:
Clu Clu Land
How to use:
A to pick up and again to throw, or attack it.
Uses:
Once thrown or hit, it’s spikes extend and it functions like a bumper. If attacked again, its spikes will retract.

Warp Star
Game:
Kirby Super Star
How to use:
A to hop on.
Uses:
Will take you flying into the air, only to come crashing back down on your enemies. You can vaguely control where you land by using the control stick.
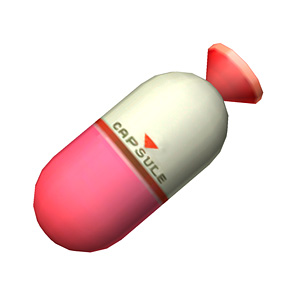
Capsule
Game:
Smash Exclusive
How to use:
A to throw.
Uses:
Does slight damage on impact. Releases one item when broken open. May explode on impact as well, so be careful.

Creates
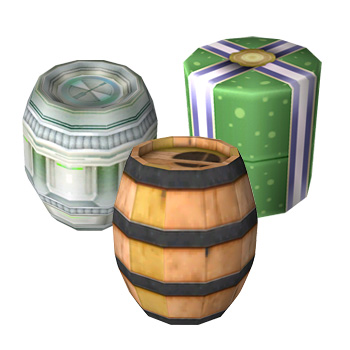
Barrels
Game:
Smash Exclusive
How to use:
A to throw or just bash it repeatedly without picking it up
Uses:
Creates and barrels are exactly what they sound like. They can be picked up, though they greatly hinder your walking, and thrown at opponents for a fair amount of damage. The real prize is inside, as they hold an item or two like the party ball.
Keep in mind that they may explode upon breaking open.
A new spin on these old items is they change their appearance from stage to stage and the creates will sometimes have wheels on them allowing them to roll into opponents.

Party Ball
Game:
Smash Exclusive
How to use:
A to throw, or just bash it repeatedly without picking it up
Uses:
Once activated, it will float up, play a merry tune, then open like a piñata releasing several varying items. Sometimes it will release nothing by Bob-ombs.
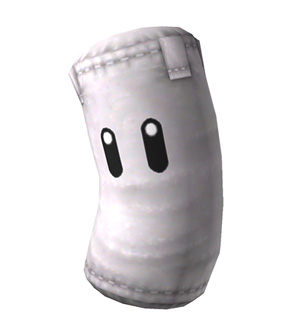
Sandbag
Game:
Smash Exclusive
How to use:
Hit him repeatedly
Uses:
Drops items with every attack that hits him. He will eventually run out of items... or go flying off the stage when you hit him to hard.

Food
Game:
Smash Exclusive. (you may recognize some from certain games)
How to use:
A to pick up
Uses:
Heals on pickup. Different foods heal by different amounts, but most do very little.
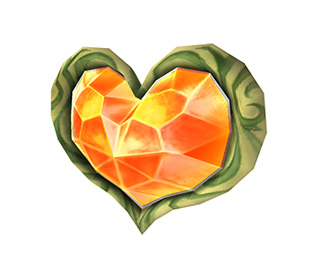
Heart Container
Game:
Legend of Zelda: Twilight Princess
How to use:
A to pick up
Uses:
Heals 100% damage on pickup (the ones in All-Star mode heal you fully)
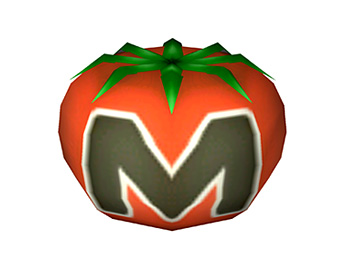
Maxim Tomato
Game:
Kirby Super Star
How to use:
A to pick up
Uses:
Heals 50% damage on pickup

Team Healer
Game:
Smash Exclusive
How to use:
A control stick to throw at a target
Uses:
Doesn't do anything for the person that picks it up. When thrown, however, it will heal a large percentage of damage to the person it hits. If it hits an opponent, it may damage or heal them. No, you cant throw it at yourself to heal yourself.
Pokeball
When thrown, they release Pokemon. The direction they are thrown are the direction they will face when released.
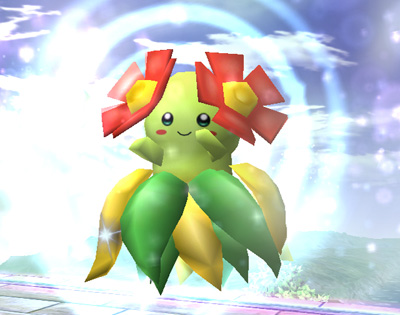
Bellosom
Attack:
Sweet Scent
Anyone that comes near this pokemon will fall asleep for a short period, making them easy targets
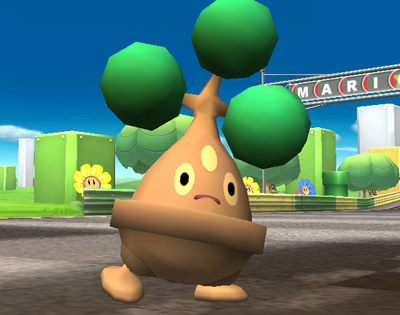
Bonsly
Attack:
Tackle
Bonsly doesn’t attack. Instead you have to pick him up and throw his heavy body at opponents. Extremely powerful, but hard to actually hit someone with.
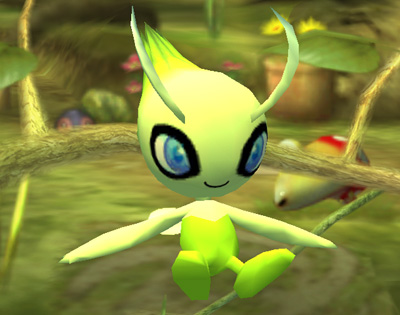
Celebi
Attack:
Fly
It doesn’t attack. Rather, it drops a few trophies and leaves.
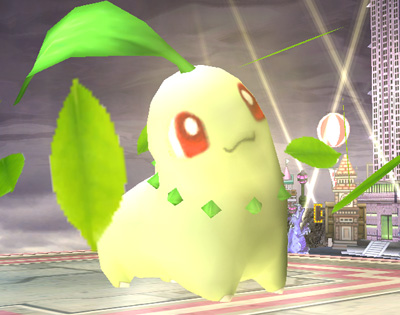
Chikorita
Attack:
Razor Leaf
Throws razor sharp leafs in one direction. Not very powerful, but does immobilize any opponent caught in the stream.
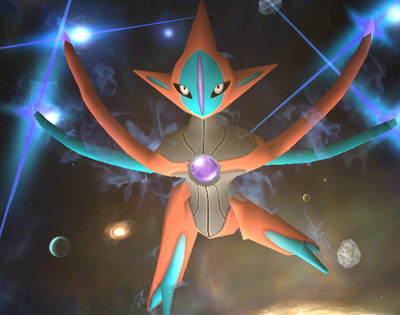
Deoxys
Attack:
Hyper Beam
When released, he will hover straight up into the air, turn about, and unleash a massive energy beam straight down on to the stage. The beams width isn’t very big, but it is devastating.
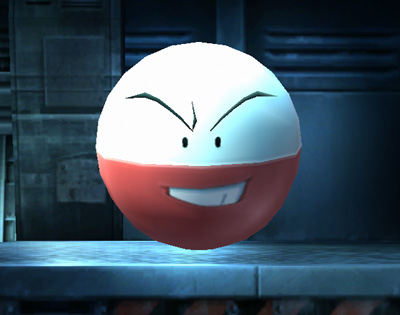
Electrode
Attack:
Explosion
Charges up and explodes! Can easily KO and opponent, but also you!
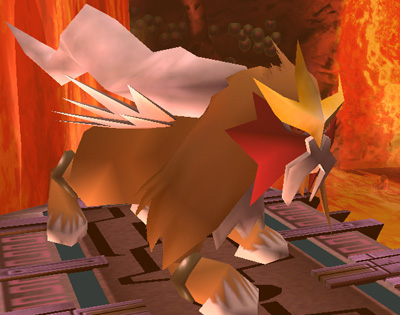
Entei
Attack:
Fire Spin
Like Suicune, a large whirlwind of flames circle around and above him, only this one does far more damage.
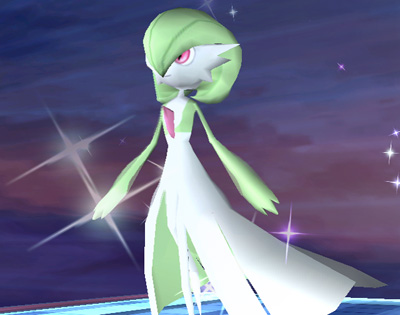
Gardevoi
Attack:
Reflect
Creates a shield that is impenetrable to projectiles.
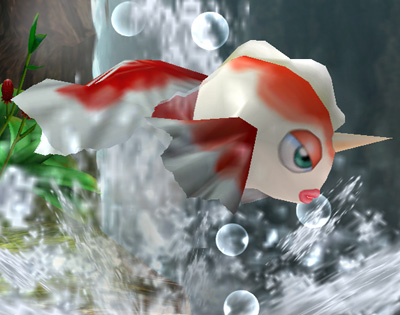
Goldeen
Attack:
Splash
Does. Absolutely. Nothing. Period.
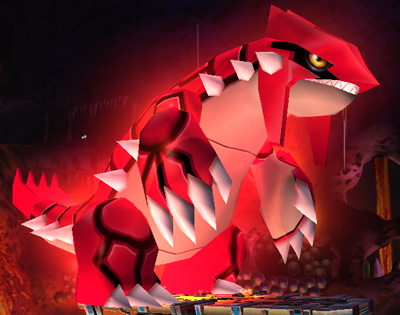
Groudon
Attack:
Overheat
His body is super hot. Anyone that touches it will take large amounts of damage. He’s hard to avoid as well, considering his size.
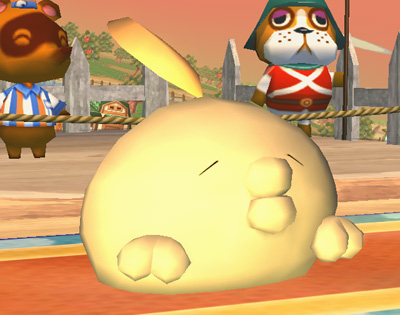
Gulpin
Attack:
Swallow
Eats any opponent that comes near it, holding him in place and doing moderate damage. You can also attack the blob to add to the damage.
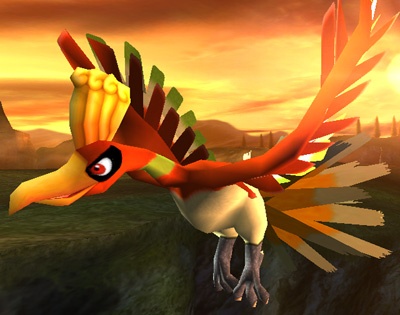
Ho-Oh
Attack:
Sacred Fire
Like Entei, it unleashes a huge plume of spiraling fire. Does far more damage then Entei.
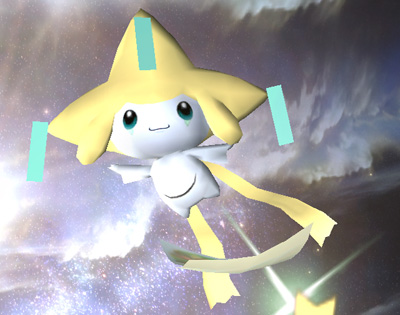
Jirachi
Attack:
Fly
It doesn’t attack. It comes and drops a lot of stickers then leaves the battle.
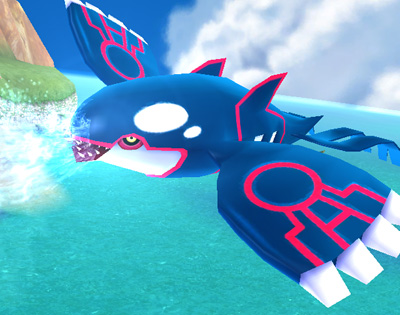
Kyogre
Attack:
Hydro Pump
Floats over the stage and flies back and fourth spouting a large stream of water.
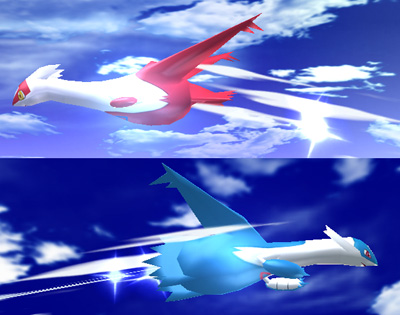
Latias and Latios
Attack:
Steel Wing
Zips across the stage diagonally, ramming opponents.
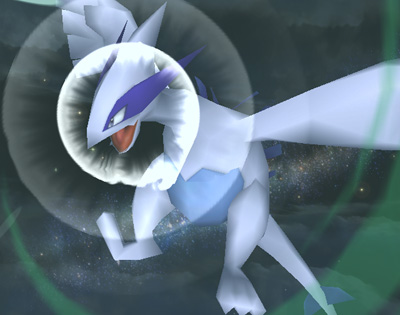
Lugia
Attack:
Aeroblast
Flies to the background and unleashes a contained whirlwind from its mouth. The attack is random, sparse, and very pin-point. Overall not a very good legendary pokemon.
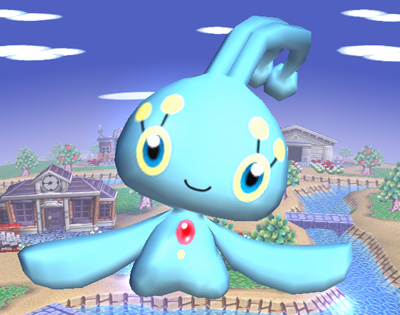
Manaphy
Attack:
Heart Swap
You and your opponent switch bodies for a bit. You keep your stock though, so if you die in your opponents body, you still lose a life.
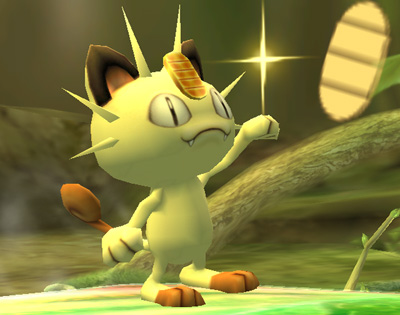
Meowth
Attack:
Pay Day
Throws gold coins (called Koban, and old Japanese gold coin) in one direction. Similar to razor leaf, only he randomly arcs the coins, providing more upward range but less forward range.
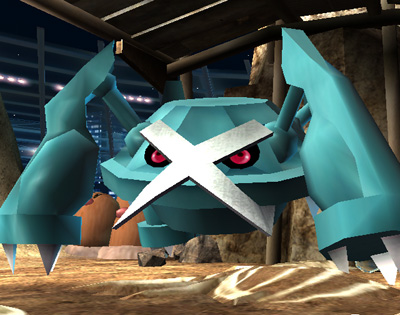
Metagross
Attack:
Earthquake
Stomps the ground, creating earthquakes around it and will pound opponents into the ground if they get to close.

Mew
Attack:
Fly
It doesn’t attack. Rather, it comes down and drops a single CD.
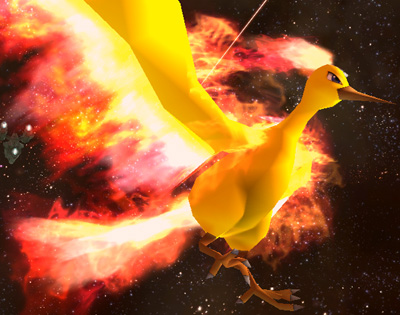
Moltres
Attack:
Fly
Just floats above the stage. It’s body is super hot though and will damage opponent that comes near it.
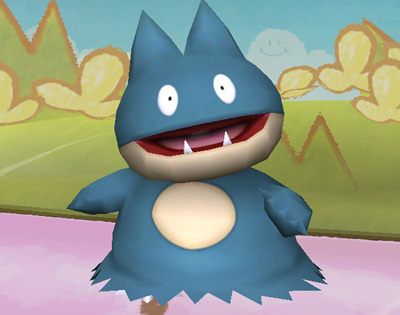
Munchlax
Attack:
Pickup
He doesn’t attack. He just roams the stage for a big eating any item that appears. Pig.
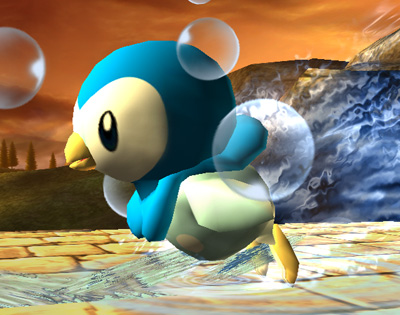
Piplup
Attack:
Surf
Creates a large amount of water underneath it and uses that to surf across the stage in one direction. Anyone that doesn’t jump over it will get washed away over the edge.
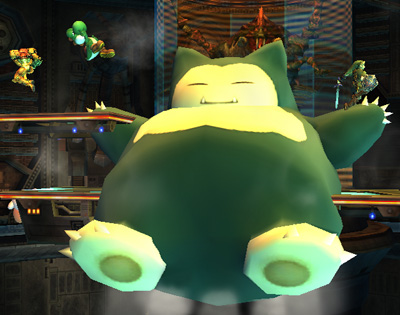
Snorlax
Attack:
Body Slam
Jumps into the air, grows twice his already huge size, then comes back down a second later pretty much killing anyone he sits on.
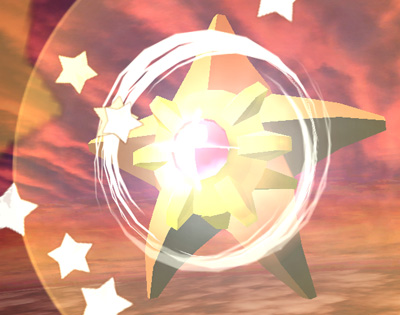
staryu
Attack:
Swift
Locks onto an opponent and follows them for a few seconds, then turns upright and starts blast that person with something similar to the super scope.
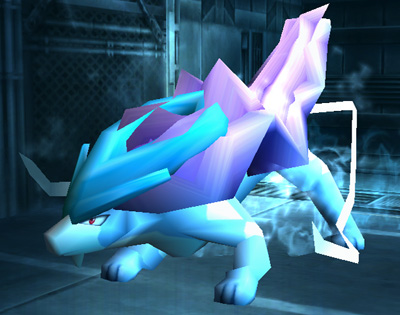
Suicune
Attack:
Aurora Beam
A large freezing wind surrounds the huge Suicune, engulfing opponents. Wont send them flying, but does do a lot of damage.
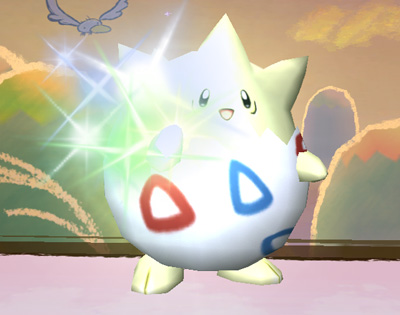
Togepi
Attack:
Metronome
Uses a random attack.
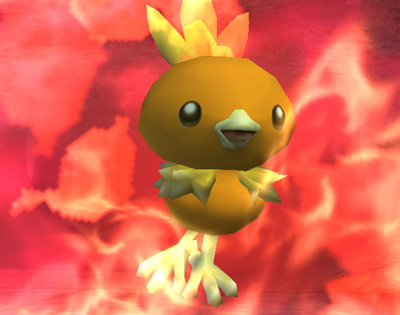
Torchic
Attack:
Fire Spin
Stands in one place as a air around it bursts into flames.
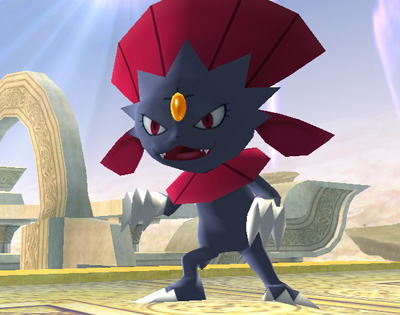
Weavile
Attack:
False Swipe
Rushes back and forth at a high speed, like Fox’s B -> attack. It also dazes opponents when it hits.
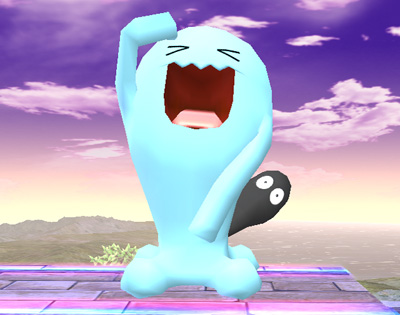
Wobuffet
Attack:
Counter
When hit, he tilts side to side very rapidly. The harder the hit, the faster he swings. If his sporadic swinging hits someone, they take double the damage. Unlike the others, this pokemon doesn’t differentiate between friend and foe.
Assist Trophy
Assist trophies are automatically broken open as soon as you pick them up. Most will target the nearest enemy and start beating on them. None of the trophies will hurt the user, so don’t be afraid to walk right into them.
Andross
Game:
Star Fox
Attacks:
Floats behind the stage and shoots large metal-like panels at people

Barbara
Game:
Daigasso! Band Bros.
Attacks:
Plays her guitar, creating a circle around here that damages opponents that enter.
Custom Robo
Game:
Custom Robo
Attacks:
Flies around randomly shooting missiles and lasers.
Devil
Game:
Devil World
Attacks:
Floats in the air. When he points in a direction, the stage travels that way, but not the camera. This makes that end of the stage unusable till he decides to move it back.
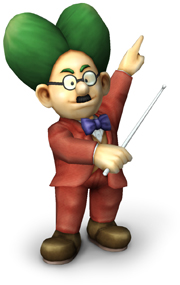
Dr. Wright
Game:
SimCity (SNES)
Attacks:
Makes large buildings appear out of nowhere, launching foes into the air and changing the field’s geography for a bit.

Excite Bike
Game:
Excite Bike
Attacks:
Many bikes appear and race around the stage knocking opponents off their feet and possibly carrying them over the edge.
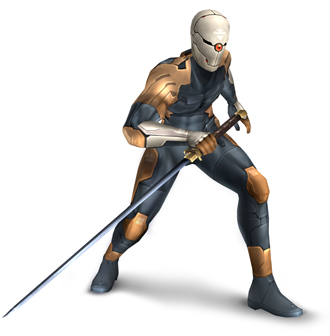
Grey Fox
Game:
Metal Gear
Attacks:
Slashes his sword with a back-handed grip and can reflect projectile attacks back at the shooter.
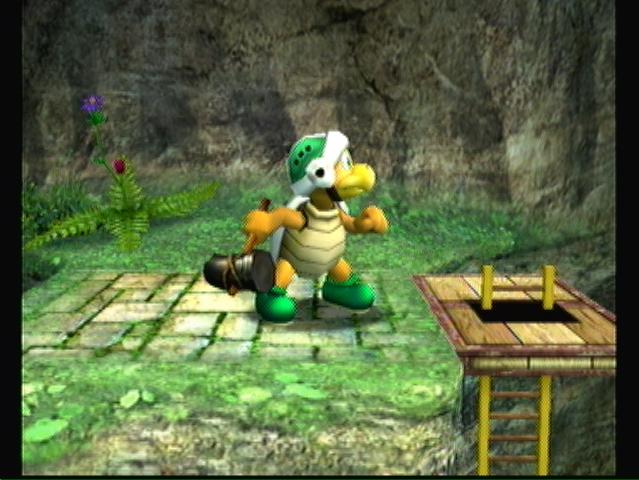
Hammer Bro.
Game:
Super Mario Bros.
Attacks:
Throws hammers in an arc at your enemies. The hammers are easily dodged.
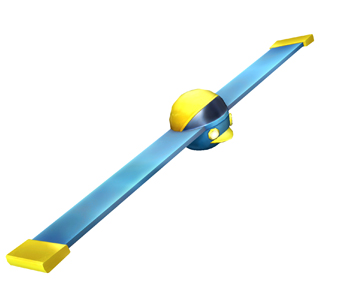
Helirin
Game:
Kururin
Attacks:
Acts like the bumper, kind of. It’s blades slowly rotate and can push people off the stage.
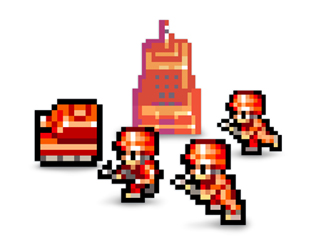
Infantry and Tanks
Game:
Advanced Wars
Attacks:
Slowly move across the stage firing rifles and missiles. Not all that effective or powerful, coolness aside.
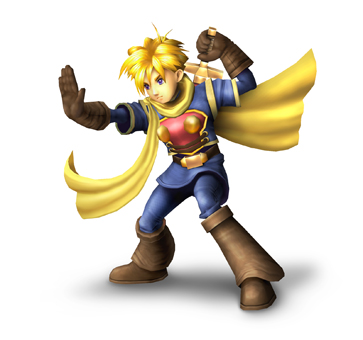
Isaac
Game:
Golden Sun
Attacks:
Move. Uses Psyenergy to create large hands that can push opponents off the stage.

Jeff
Game:
Mother
Attacks:
Shoots a series of 4 small homing rockets at the nearest enemy, finished off with one large rocket.
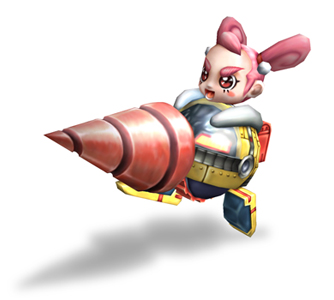
Jill
Game:
Drill Dozer
Attacks:
Moves back and forth across the stage ramming people with her drill. Can do some decent damage.
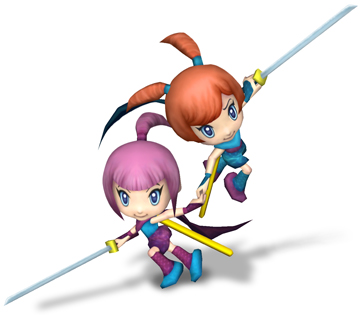
Kat and Ana
Game:
WarioWare
Attacks:
They vanish almost instantly and begin sweeping across the stage diagonally, dive bombing the nearest enemy with their swords.
Knuckle Joe
Game:
Kirby Super Star
Attacks:
Has three main moves.
Vulcan Jab. A series of rapid-fire punches
Smash Punch. A slow but hard and explosive punch
Rising Break. An upper cut with added lightning effect
Lakitu and Spinys
Game:
Super Mario Bros.
Attacks:
Throws spinies down onto the stage. The spinies hurt if you touch them
Little Mac
Game:
Punch Out!
Attacks:
Runs very quickly and attacks with a one-two jab. Sometimes performs powerful upper cuts on people.
Lyn
Game:
Fire Emblem 7
Attacks:
In Brawl, like her attacks from FE7, she Attacks a form of Battojustu, which you may know from the Anime Rurouni Kenshin. She’ll crotch to build power, then dash so quickly she vanishes. Upon reappearing next to an enemy, she draws her sword and attacks in the same swing.
Metroid
Game:
Metroid
Attacks:
Attaches itself to the nearest enemy and begins draining his life energy. After a bit it will seek out a new enemy. It can attack up to three times, doing a fair amount of damage each time, so use this opportunity to get some easy KOs.
Mr. Resetti
Game:
Animal Crossing: Wild World
Attacks:
The goldeen of assist trophies. He does nothing but lecture you.
Nintendog
Game:
Nintendogs
Attacks:
Blocks the screen. More of a back-fire item, especially when fighting the computer.
Saki Amaiya
Game:
Sin and Punishment: Successor to the Earth
Attacks:
Wields a gun-sword called the DOLPHIN. As such, he fights using both energy-based projectiles and something similar to the beam sword. He is really the most character-like assist trophy.

Samurai Goroh
Game:
F-Zero
Attacks:
Runs around the stage constantly slashing his sword.
Shadow the Hedgehog
Game:
Sonic
Attacks:
Same as the timer. Will slow down all enemies, making them easier to hit.

Stafy
Game:
Densetsu no Stafy (“Legend of Stafy” or “Legendary Stafy”)
Attacks:
Spin attack of sorts, goes around the stage spinning doing mild damage to anyone he hits. He is one of the few assist trophies that can be killed.
Tingle
Game:
Zelda: Majora’s Mask
Attacks:
Will drop random items sometimes, and others he will just harmlessly float up into the sky.
Waluigi
Game:
Mario Tennis
Attacks:
Stomps foes into the ground with his feet, then finishes them off with his tennis racket.
Here is your guide to everything that can be unlock in Super Smash Bros Brawl. There is loads so we have broken it down into sections... details below... Or see links on the left.
- The blue squares are squares we know nothing about.
- The red squares tells you how to unlock said square. A square turns red when the square to the left or right of it is unlocked.
- Open squares and unlocked items.
- The square with the green outline is the one I’m highlighting.
- The golden hammers near the bottom indicate how may hammers I have left. The hammers can be used to instantly open any square, but you only have five of them so make them count.
- The numbers and letters around the grid is my doing. Those numbers will be referred to below to mark what square an item is in. For example, the green outline is around square A:1.
Now on with the items! They are split into sections:
Characters
Game Modes, Events, and Target Smash Levels
Stages
Stage Builder Parts
Masterpieces
Stickers and Assist Trophies
Trophies
Music
In that order. Within their own section, they are alphabetized. Note that some things in this section are not listed in Challenges Mode, and therefore have now square.
To use this section to it’s fullest, do a search for either the name, requirement, or square number to find it (square number will be the most reliable).
NOTE: When there are multiple requirements listed, you can choose one, you don’t have to do them all.
This is the list of all the unlockable characters in Super Smash Bros Brawl. Where there are more than one requirement listed, you only actually have to achieve one of them to unlock that character.
Captain Falcon
Requirements:
1) Clear Classic Mode on Normal difficulty in 12 minutes
2) Play 70 Versus mode matches
3) Complete SSE Level 20: Outside the Ancient Ruins
Falco
Requirements:
1) Clear 100-Man Brawl
2) Play 50 Versus mode matches
3) Complete SSE Level 18: The Swamp
Ganondorf
Requirements:
1) Clear Classic Mode on Hard difficulty as Link or Zelda
2) Play 200 versus mode matches
3) Get the Link and Zelda trophies SSE Level 30: Subspace (2)
Jigglypuff
Requirements:
1) After clearing SSE, clear Event Matches 1-20
2) Play 350 Versus Mode matches
3) Clear SSE, then play The Swamp to find a hidden door
Lucario
Requirements:
1) Complete all 5 Target Tests with any character
2) Play 100 Versus Mode matches
3) Clear SSE Level 21: The Glacial Peak
Luigi
Requirements:
1) Complete Classic Mode on Easy without continues
2) Play 22 Versus Mode matches
3) Clear SSE Level 29: Subspace
Marth
Requirements:
1) Play 10 Versus Mode matches
2) Clear Classic Mode
3) Clear SSE Level 8: Battlefield Fortress
Mr Game & Watch
Requirements:
1) Clear any level of Target Test with 30 characters
2) Play 250 Versus Mode matches
3) Clear SSE Level 25: Battleship Halberd Bridge
Ness
Requirements:
1) Play 5 Versus Mode matches
2) Reflect 10 projectiles
3) Clear SSE Level 29: Subspace
R.O.B
Requirements:
1) Get 250 different trophies
2) Play 160 Verses Mode matches
3) Clear SSE Level 27: The Subspace Bomb Factory (2)
Snake
Requirements:
1) Play 15 Versus Mode matches on Shadow Mosses Island
2) Play 130 Versus Mode matches total
3) Clear SSE Level 23: The Battleship Halberd Interior
Sonic
Requirements:
1) Complete Classic Mode with all other characters
2) Play 300 Versus Mode matches
3) Clear SSE Level 31: The Great Maze
Toon Link
Requirements:
1) Play 400 Versus Mode matches
2) After clearing SSE, go back to The Forest to find a secret door
3) After clearing SSE, clear Classic Mode with any character
Wolf
Requirements:
1) Clear Boss Mode with Fox or Falco
2) Play 450 Versus Mode matches
3) After clearing SSE, go back to The Ruins to find a secret door
All-Star Mode
Requirements:
1) Unlock all characters.
Boss Battles Mode
Requirements:
1) Clear Adventure Mode and Classic Mode.
Co-op Events #9-13
Requirements:
1) Complete the Sub-space stage in the Sub-space Emissary.
Co-op Events #14-20
Requirements:
1) Clear 10 Co-op Events and unlock all characters.
Co-op Event #21
Requirements:
1) Clear Co-op Events #1-20.
Events #11-20
Requirements:
1) Complete seven Events.
Events #21-28
Requirements:
1) Complete the Sub-space stage in the Sub-space Emissary.
Events #29-40
Requirements:
1) Unlock all characters.
Event #41
Requirements:
1) Clear Events #1-40
Target Smash Level 2
Requirements:
1) Complete Classic Mode on Normal.
Target Smash Level 3
Requirements:
1) Complete Classic Mode on Hard.
Target Smash Level 4
Requirements:
1) Complete Classic Mode on Very Hard.
Target Smash Level 5
Requirements:
1) Complete Classic Mode on Intense.
75m
Square: D:4
Requirements:
1) Use Donkey Kong 20 times in Versus Mode.
Big Blue (Melee)
Square: A:5
Requirements:
1) Use Captain Falcon 10 times in Versus Mode.
Flat Zone 2
Square: D:13
Requirements:
1) Unlock Mr. Game & Watch.
Green Greens (Melee)
Square: C:12
Requirements:
1) Use Kirby 20 times in Versus Mode.
Green Hill Zone
Square: C:26
Requirements:
1) Unlock Sonic
Hanenbow (Electroplankton)
Square: A:20
Requirements:
1) Clear Event Match #28.
Jungle Japes (Melee)
Square: B:18
Requirements:
1) Play 10 matches on other Melee stages.
Luigi's Mansion
Square: B:3
Requirements:
1) Use Luigi 3 times in Versus Mode.
Mario Bros.
Square: A:11
Requirements:
1) Clear Event Match #19.
Pirate Ship
Square: A:9
Requirements:
1) Unlock Toon Link.
Pokemon Stadium (Melee)
Square: B:13
Requirements:
1) Play 10 Versus Mode matches on Pokemon Stadium 2.
Spear Pillar
Square: C:30
Requirements:
1) Clear Even Match #25.
Edit Parts A
Square: B:6
Requirements:
1) Play 10 matches custom stages
Edit Parts B
Square: D:28
Requirements:
1) Create 5 stages in the Stage Builder
Edit Parts C
Square: C:3
Requirements:
1) Create 15 stages in the Stage Builder
Donkey Kong
Square: D:21
Requirements:
1) Play Brawl for 10 hours or more total.
F-Zero
Square: B:30
Requirements:
1) Unlock Captain Falcon
1.1) Clear Classic Mode on Normal difficulty in 12 minutes.
1.2) Play 70 Versus mode matches
1.3) Have Captain Falcon join you in the Sub-space Emissary
Super Mario Bros. 2
Square: B:21
Requirements:
1) Get 5 standard Versus Mode wins with Peach.
Super Mario World
Square: D:5
Requirements:
1) Play Versus Mode on Yoshi’s Island (Melee) 5 times.
Zelda: Ocarina of Time
Square: A:14
Requirements:
1) Play as Toon Link in 10 Versus Mode matches.
NOTE: Stickers and assist trophies appear at random on the stage, that much is still true. The ones listed below WON'T appear randomly until you unlock them. Once you do, its anyone’s guess when they will appear in game, just like normal.
Barbara
Square:
Requirements:
1) Unlock 25 songs.
Custom Robo
Square:
Requirements:
1) Play 100 Versus Mode matches.
Gray Fox
Square:
Requirements:
1) Unlock Snake.
1.1) Play 15 Versus Mode matches on Shadow Moses Island.
1.2) Play 130 Versus Mode matches.
1.3) Have Snake join you in the Sub-space Emissary.
Infantry and Tanks
Square:
Requirements:
1) Play 300 Versus Mode matches
Isaac
Square:
Requirements:
1) Play in 200 Versus Mode matches
Shadow the Hedgehog
Square:
Requirements:
1) Unlock Sonic
1.1) Play 300 Versus Mode matches.
1.2) Have Sonic join you in the Sub-space Emissary.
Boo (Mario Tennis)
Square: B:4
Requirements:
1) Hit Sandbag a combined total of 900 feet in the Homerun
contest.
Liquid Snake (Metal Gear Solid: the Twin Snakes)
Square: D:16
Requirements:
1) Defeat 10 enemies in Cruel Brawl.
Phyllis (Animal Crossing: Wild World)
Square: B:17
Requirements:
1) Clear All-Star on Normal.
Running Chibi-Robo
Square: B:11
Requirements:
1) Clear Classic Mode on Easy.
Ryuta Ippongi (Ous! Takae! Ouendan 2)
Square: A:6
Requirements:
1) Clear 100-Man Brawl in under 3 minutes, 30 seconds.
Note: this is BY FAR not all the trophies in the game. These are just ones that have special requirements to unlock.
All others must be obtained by either:
1) beating classic/adventure/all-star mode as a character ... or
2) using a trophy stand on them in the Sub-space Emissary ... or
3) winning their trophy in the coin launcher.
Ancient Minister
Square: C:17
Requirements:
1) Clear the Sub-space Emissary.
Apples
Square: B:20
Requirements:
1) Clear Target Smash Level 1 with any character.
Ashley Robbins
Square: D:10
Requirements:
1) Play over 100 hours of Versus Mode matches
Ashnard
Square: C:15
Requirements:
1) Clear Target Smash Level 3 with 10 characters.
Baby Peach
Square: B:32
Requirements:
1) Get 500 different trophies.
Ballyhoo & Big Top
Square: B:1
Requirements:
1) Unlock 75 hidden songs.
Banana Peel
Square: 28
Requirements:
1) Get 10 max combos in Training.
Birdo
Square: D:24
Requirements:
1) Clear All-Star on Hard.
Blast Box
Square: C:11
Requirements:
1) Clear Target Smash Level 2 with all characters.
Blue Alloy
Square: C:2
Requirements:
1) Clear 100-Man Brawl with all characters.
Bumper
Square: D:19
Requirements:
1) Hit Sandbag a combined total of 15,000 feet in Homerun Contest.
Cardboard Box
Square: A:3
Requirements:
1) Clear Target Smash Level 4 in under 32 seconds.
Combo Cannon
Square: D:8
Requirements:
1) Clear Target Smash Level 5 in under 30 seconds.
Cracker Launcher
Square: C:7
Requirements:
1) Get 1,000 or more total KO’s.
Crazy Hand
Square: D:2
Requirements:
1) Clear Classic Mode on Intense.
Creeping Chrysanthemum
Square: A:26
Requirements:
1) Collect trophies for all characters.
Dark Cannon
Square: D:6
Requirements:
1) Clear Boss Battles on Hard.
Dr. Eggman
Square: C:14
Requirements:
1) Get 500 different stickers.
Dyna Blade
Square: A:16
Requirements:
1) Clear All-Star Mode on Very Hard.
Excitebikes
Square: A:24
Requirements:
1) Collect all Masterpieces.
Franklin Badge
Square: B:14
Requirements:
1) Unlock Ness.
1.1) Play 5 Versus Mode matches
1.2) Reflect 10 projectiles and get Ness to join you in the
Sub-space Emissary.
Galleom (Tank form)
Square: A:1
Requirements:
1) Clear Boss Battles on Intense.
Gekko
Square: A:7
Requirements:
1) Clear All-Star Mode with 10 characters on any difficulty.
Golden Hammer
Square: A:32
Requirements:
1) Hit Sandbag a combined total of 45,000 feet in the Homerun
Contest.
Grey Fox
Square: D:25
Requirements:
1) Clear Target Smash Level 5 with all characters.
Green Alloy
Square: A:22
Requirements:
1) Clear 15-minute Brawl.
Gulliver
Square: C:1
Requirements:
1) Get 2,000 or more total KO’s.
Halberd
Square: C:29
Requirements:
1) Clear Event #3
Home-Run Bat
Square: B:27
Requirements:
1) Hit Sandbag a combined total of 1,500 in the Homerun Contest.
Jyk
Square: B:16
Requirements:
1) Clear Boss Battles with 20 characters.
K.K. Slider
Square: C:32
Requirements:
1) Collect all Songs
Kapp'n
Square: C:8
Requirements:
1) Swim a combined total of 300 feet or more.
King K. Rool
Square: D:17
Requirements:
1) Clear Target Smash Level 4 with all characters.
Kyle Hyde
Square: D:7
Requirements:
1) Clear All-Star Mode with all characters on any difficulty.
Master Hand
Square: A:31
Requirements:
1) Clear Classic Mode with 20 characters.
Mewtwo
Square: C:25
Requirements:
1) Clear All-Star Mode on Intense.
Musketeer Daltania
Square: A:15
Requirements:
1) Clear Target Smash Level 4 with 10 characters.
Ouendan
Square: B:9
Requirements:
1) Get 400 combined max combo in Training Mode.
Strategy: go to Hyrule Temple (Melee) and choose Kirby for
yourself. Set the computer to Control and turn on Help.
Jump over to beside the pillar where he his and push him
up against it. Get up close and use his standard A
attack. Keep it up till you reach your goal. This can
also be done with Meta Knight and Fox, though they are
harder.
Outset Island Link
Square: B:8
Requirements:
1) Clear Target Smash Level 5 with 10 characters.
Palutena
Square: D:12
Requirements:
1) Clear Event match #4.
Palutena's Bow
Square: A:2
Requirements:
1) Clear Target Smash Level 1 in under 15 seconds.
Paper Mario
Square: B:2
Requirements:
1) Clear Classic Mode with all characters.
Party Ball
Square: C:31
Requirements:
1) Get a total of 500 KO’s.
Peanut Popgun
Square: C:5
Requirements:
1) Clear Target Smash Level 2.
Pellets
Square: C:6
Requirements:
1) Clear Target Smash Level 2 with 10 characters.
Pichu
Square: A:12
Requirements:
1) Clear All-Star Mode with no continues.
Pitfall
Square: C:21
Requirements:
1) Clear 100-Man Brawl.
Plusle & Minun
Square: D:15
Requirements:
1) Collect Final Smash trophies for all characters.
Porky Statue
Square: D:26
Requirements:
1) Clear Boss Battles on Very Hard.
Ray MK III
Square: A:23
Requirements:
1) Clear Target Smash Level 3 in under 20 seconds.
Red Alloy
Square: A:18
Requirements:
1) KO 5 enemies in Cruel Brawl.
Red Pikmin
Square: B:22
Requirements:
1) Clear Event #14
Rocketbarrel Pack
Square: C:27
Requirements:
1) Clear Target Smash Level 4.
Sandbag
Square: C:10
Requirements:
1) Use every character in the Homerun Contest.
Shadow Bugs
Square: C:23
Requirements:
1) Clear boss Battles on Normal.
Shy Guy
Square: D:22
Requirements:
1) Hit Sandbag a combined total of 30,000 feet in the Homerun
Contest.
Silver
Square: B:25
Requirements:
1) Clear Target Smash Level 3 with 10 characters.
Smash Coins
Square: A:19
Requirements:
1) Play 10 or more Coin Matches.
Stafy
Square: C:18
Requirements:
1) Clear Target Smash Level 1 with 10 characters.
Stickers
Square: D:1
Requirements:
1) Collect all stickers.
Striker Mario
Square: C:16
Requirements:
1) Clear Classic Mode on Very Hard.
Sub-space Bomb
Square: A:10
Requirements:
1) Clear Boss Battles on Easy.
Sub-space Gunship
Square: B:26
Requirements:
1) Clear boss Battles with 10 characters.
Super Scope
Square: C:19
Requirements:
1) Clear Target Smash Level 1 with all characters.
Tabuu (winged)
Square: D:32
Requirements:
1) Clear Boss Battles with all characters.
Tails
Square: D:27
Requirements:
1) Get a combined total of 30,000 walking distance.
Timer
Square: D:20
Requirements:
1) Play 30 hours of Versus Mode.
Tom Nook
Square: D:30
Requirements:
1) Collect a total of 1,000 coins in Coin Matches.
Walky
Square: B:23
Requirements:
1) Unlock 50 hidden songs.
Wario Bike
Square: D:9
Requirements:
1) Clear Target Smash Level 3.
Xananab
Square: B:24
Requirements:
1) Hit Sandbag a combined total of 24,000 feet in the Homerun
Contest.
Yellow Alloy
Square: A:30
Requirements:
1) KO 100 enemies in Endless Brawl.
Note: This is just the music that has special requirements to unlock.
All other music is obtained through collecting CDs while playing.
O2 Battle
Square: D:23
Requirements:
1) Collect a total of 5,000 or more coins in Coin Matches.
Ai no Uta (French Version)
Square: D:31
Requirements:
1) Hit Sandbag a combined total of 37,500 feet in the Homerun
contest.
Clu Clu Land
Square: A:4
Requirements:
1) Hit Sandbag a combined total of 1,200 feet in the Homerun
contest.
Credits (Super Smash Bros.)
Square: B:10
Requirements:
1) Clear Classic Mode on Hard.
Dream Chaser
Square: A:29
Requirements:
1) Play 10 Versus Mode matches on Port Town Aero Drive.
Ending (Metroid)
Square: C:13
Requirements:
1) Play 10 Versus Mode matches on Norfair.
Excite Truck
Square: D:3
Requirements:
1) Clear Target Smash Level 2 in under 19 seconds.
Fire Field
Square: C:22
Requirements:
1) Clear Event Match #24.
Frozen Hillside
Square: C:28
Requirements:
1) Play 10 Versus Mode matches on Halberd.
Great Temple/Temple
Square: D:11
Requirements:
1) Clear Event Match #33 on Hard.
Hidden Mountain & Forest
Square: D:18
Requirements:
1) Clear Event Match #18 on Hard.
HIS WORLD (Instrumental)
Square: A:8
Requirements:
1) Play 10 Versus Mode matches on Green Hill Zone.
Icicle Mountain (Melee)
Square:
Requirements:
1) Clear Classic Mode on Normal.
Ike’s Theme
Square: B:15
Requirements:
1) Have Ike join you in the Sub-space Emissary.
King Dedede’s Theme
Square: A:21
Requirements:
1) Clear Event Match #15.
The Legendary Air Ride Machine
Square: B:28
Requirements:
1) Clear Event Match #13.
Mach Rider (Melee)
Square: B:31
Requirements:
1) KO 50 enemies in Endless Brawl.
Main Theme (Super Mario 64)
Square: D:29
Requirements:
1) Play Versus Mode for a combined total of 50 hours.
Menu 2
Square: A:17
Requirements:
1) Unlock all characters.
Multi-Man Melee 1 (Melee)
Square: A:25
Requirements:
1) Clear 100-Man Brawl in under 4 minutes.
Multiplayer (Metriod Prime 2)
Square: B:5
Requirements:
1) Play 10 Versus Mode matches on the Frigate Orpheon.
Pokemon Center
Square: A:13
Requirements:
1) Collect 200 different stickers
Power-Hungry Fool
Square: D:14
Requirements:
1) Play 10 Versus Mode matches on Castle Siege.
Princess Peach’s Castle (Melee)
Square: B:7
Requirements:
1) Unlock all Melee stages.
Road to Viridian City (Pallet Town/Pewter City, GBC versions)
Square: C:4
Requirements:
1) Clear Event Match #8.
Snake Eater (Instrumental)
Square: B:29
Requirements:
1) Play 10 Versus Mode matches on Shadow Moses Island.
Song of Storms
Square: B:18
Requirements:
1) Clear Event Match #37.
Star Wolf (Star Fox Assault)
Square: C:24
Requirements:
1) Clear Event Match #38 on Hard.
Tal Tal Heights
Square: C:9
Requirements:
1) Clear All-Star on Easy.
Title (10 Hot Rally)
Square: A:27
Requirements:
1) Clear Target Smash Level 5.
Underwater Theme (Super Mario Bros.)
Square: C:20
Requirements:
1) Play 10 Versus Mode matches on Mushroomy Kingdom.
Yes, this is the same as the unlockables section, however, this has been usefully re-organized to be in order with the challenges section in game.
Lets start with a picture.
Challenges Screen
The blue squares are squares we know nothing about.
The red squares tells you how to unlock said square. A square turns red when the square to the left or right of it is unlocked.
Open squares and unlocked items.
The square with the green outline is the one I'm highlighting.
The golden hammers near the bottom indicate how may hammers I have left. The hammers can be used to instantly open any square, but you only have five of them so make them count.
The numbers and letters around the grid is my doing. Those numbers will be referred to below to mark what square an item is in. For example, the green outline is around square A:1.
===============
Row A
===============
Galleom (Tank form) (Trophy)
Square: A:1
Requirements:
1) Clear Boss Battles on Intense.
Palutena's Bow (Trophy)
Square: A:2
Requirements:
1) Clear Target Smash Level 1 in under 15 seconds.
Cardboard Box (Trophy)
Square: A:3
Requirements:
1) Clear Target Smash Level 4 in under 32 seconds.
Clu Clu Land (Music)
Square: A:4
Requirements:
1) Hit Sandbag a combined total of 1,200 feet in the Homerun contest.
Big Blue (Melee) (Stage)
Square: A:5
Requirements:
1) Use Captain Falcon 10 times in Versus Mode.
Ryuta Ippongi (Ous! Takae! Ouendan 2) (Sticker)
Square: A:6
Requirements:
1) Clear 100-Man Brawl in under 3 minutes, 30 seconds.
Gekko (Trophy)
Square: A:7
Requirements:
1) Clear All-Star Mode with 10 characters on any difficulty.
HIS WORLD (Instrumental) (Music)
Square: A:8
Requirements:
1) Play 10 Versus Mode matches on Green Hill Zone.
Pirate Ship (Stage)
Square: A:9
Requirements:
1) Unlock Toon Link.
Sub-space Bomb (Trophy)
Square: A:10
Requirements:
1) Clear Boss Battles on Easy.
Mario Bros. (Stage)
Square: A:11
Requirements:
1) Clear Event Match #19.
Pichu (Trophy)
Square: A:12
Requirements:
1) Clear All-Star Mode with no continues.
Pokemon Center (Music)
Square: A:13
Requirements:
1) Collect 200 different stickers
Zelda: Ocarina of Time (Masterpiece)
Square: A:14
Requirements:
1) Play as Toon Link in 10 Versus Mode matches.
Musketeer Daltania (Trophy)
Square: A:15
Requirements:
1) Clear Target Smash Level 4 with 10 characters.
Dyna Blade (Trophy)
Square: A:16
Requirements:
1) Clear All-Star Mode on Very Hard.
Menu 2 (Music)
Square: A:17
Requirements:
1) Unlock all characters.
Red Alloy (Trophy)
Square: A:18
Requirements:
1) KO 5 enemies in Cruel Brawl.
Smash Coins (Trophy)
Square: A:19
Requirements:
1) Play 10 or more Coin Matches.
Hanenbow (Electroplankton) (Stage)
Square: A:20
Requirements:
1) Clear Event Match #28.
King Dedede's Theme (Music)
Square: A:21
Requirements:
1) Clear Event Match #15.
Green Alloy (Trophy)
Square: A:22
Requirements:
1) Clear 15-minute Brawl.
Ray MK III (Trophy)
Square: A:23
Requirements:
1) Clear Target Smash Level 3 in under 20 seconds.
Excitebikes (Trophy)
Square: A:24
Requirements:
1) Collect all Masterpieces.
Multi-Man Melee 1 (Melee)
Square: A:25
Requirements:
1) Clear 100-Man Brawl in under 4 minutes.
Creeping Chrysanthemum (Trophy)
Square: A:26
Requirements:
1) Collect trophies for all characters.
Title (10 Hot Rally) (Music)
Square: A:27
Requirements:
1) Clear Target Smash Level 5.
Banana Peel (Trophy)
Square: A:28
Requirements:
1) Get 10 max combos in Training.
Dream Chaser (Music)
Square: A:29
Requirements:
1) Play 10 Versus Mode matches on Port Town Aero Drive.
Yellow Alloy (Trophy)
Square: A:30
Requirements:
1) KO 100 enemies in Endless Brawl.
Master Hand (Trophy)
Square: A:31
Requirements:
1) Clear Classic Mode with 20 characters.
Golden Hammer (Trophy)
Square: A:32
Requirements:
1) Hit Sandbag a combined total of 45,000 feet in the Homerun
Contest.
===============
Row B
===============
Ballyhoo & Big Top (Trophy)
Square: B:1
Requirements:
1) Unlock 75 hidden songs.
Paper Mario (Trophy)
Square: B:2
Requirements:
1) Clear Classic Mode with all characters.
Luigi's Mansion (Stage)
Square: B:3
Requirements:
1) Use Luigi 3 times in Versus Mode.
Boo (Mario Tennis) (Sticker)
Square: B:4
Requirements:
1) Hit Sandbag a combined total of 900 feet in the Homerun
contest.
Multiplayer (Metriod Prime 2) (Music)
Square: B:5
Requirements:
1) Play 10 Versus Mode matches on the Frigate Orpheon.
Edit Parts A (Stage Builder)
Square: B:6
Requirements:
1) Play 10 matches custom stages
Princess Peach's Castle (Melee) (Music)
Square: B:7
Requirements:
1) Unlock all Melee stages.
Outset Island Link (Trophy)
Square: B:8
Requirements:
1) Clear Target Smash Level 5 with 10 characters.
Ouendan (Trophy)
Square: B:9
Requirements:
1) Get 400 combined max combo in Training Mode.
Strategy: go to Hyrule Temple (Melee) and choose Kirby for
yourself. Set the computer to Control and turn on Help.
Jump over to beside the pillar where he his and push him
up against it. Get up close and use his standard A
attack. Keep it up till you reach your goal. This can
also be done with Meta Knight and Fox, though they are
harder.
Credits (Super Smash Bros.) (Music)
Square: B:10
Requirements:
1) Clear Classic Mode on Hard.
Running Chibi-Robo (Sticker)
Square: B:11
Requirements:
1) Clear Classic Mode on Easy.
Icicle Mountain (Melee) (Music)
Square: B:12
Requirements:
1) Clear Classic Mode on Normal.
Pokemon Stadium (Melee) (Stage)
Square: B:13
Requirements:
1) Play 10 Versus Mode matches on Pokemon Stadium 2.
Franklin Badge (Trophy)
Square: B:14
Requirements:
1) Unlock Ness.
Ike's Theme (Music)
Square: B:15
Requirements:
1) Have Ike join you in the Sub-space Emissary.
Jyk (Trophy)
Square: B:16
Requirements:
1) Clear Boss Battles with 20 characters.
Phyllis (Animal Crossing: Wild World) (Sticker)
Square: B:17
Requirements:
1) Clear All-Star on Normal.
Jungle Japes (Melee) (Stage)
Square: B:18
Requirements:
1) Play 10 matches on other Melee stages.
Song of Storms (Music)
Square: B:19
Requirements:
1) Clear Event Match #37.
Apples (Trophy)
Square: B:20
Requirements:
1) Clear Target Smash Level 1 with any character.
Super Mario Bros. 2 (Masterpiece)
Square: B:21
Requirements:
1) Get 5 standard Versus Mode wins with Peach.
Red Pikmin (Trophy)
Square: B:22
Requirements:
1) Clear Event #14
Walky (Trophy)
Square: B:23
Requirements:
1) Unlock 50 hidden songs.
Xananab (Trophy)
Square: B:24
Requirements:
1) Hit Sandbag a combined total of 24,000 feet in the Homerun
Contest.
Silver (Trophy)
Square: B:25
Requirements:
1) Clear Target Smash Level 3 with 10 characters.
Sub-space Gunship (Trophy)
Square: B:26
Requirements:
1) Clear boss Battles with 10 characters.
Home-Run Bat (Trophy)
Square: B:27
Requirements:
1) Hit Sandbag a combined total of 1,500 in the Homerun Contest.
The Legendary Air Ride Machine (Music)
Square: B:28
Requirements:
1) Clear Event Match #13.
Snake Eater (Instrumental) (Music)
Square: B:29
Requirements:
1) Play 10 Versus Mode matches on Shadow Moses Island.
F-Zero (Masterpiece)
Square: B:30
Requirements:
1) Unlock Captain Falcon
Mach Rider (Melee) (Music)
Square: B:31
Requirements:
1) KO 50 enemies in Endless Brawl.
Baby Peach (Trophy)
Square: B:32
Requirements:
1) Get 500 different trophies.
===============
Row C
===============
Gulliver (Trophy)
Square: C:1
Requirements:
1) Get 2,000 or more total KO's.
Blue Alloy (Trophy)
Square: C:2
Requirements:
1) Clear 100-Man Brawl with all characters.
Edit Parts C (Stage Builder)
Square: C:3
Requirements:
1) Create 15 stages in the Stage Builder
Road to Viridian City (Pallet Town/Pewter City) (Music)
Square: C:4
Requirements:
1) Clear Event Match #8.
Peanut Popgun (Trophy)
Square: C:5
Requirements:
1) Clear Target Smash Level 2.
Pellets (Trophy)
Square: C:6
Requirements:
1) Clear Target Smash Level 2 with 10 characters.
Cracker Launcher (Trophy)
Square: C:7
Requirements:
1) Get 1,000 or more total KO's.
Kapp'n (Trophy)
Square: C:8
Requirements:
1) Swim a combined total of 300 feet or more.
Tal Tal Heights (Music)
Square: C:9
Requirements:
1) Clear All-Star on Easy.
Sandbag (Trophy)
Square: C:10
Requirements:
1) Use every character in the Homerun Contest.
Blast Box (Trophy)
Square: C:11
Requirements:
1) Clear Target Smash Level 2 with all characters.
Green Greens (Melee) (Stage)
Square: C:12
Requirements:
1) Use Kirby 20 times in Versus Mode.
Ending (Metroid) (Music)
Square: C:13
Requirements:
1) Play 10 Versus Mode matches on Norfair.
Dr. Eggman (Trophy)
Square: C:14
Requirements:
1) Get 500 different stickers.
Ashnard (Trophy)
Square: C:15
Requirements:
1) Clear Target Smash Level 3 with 10 characters.
Striker Mario (Trophy)
Square: C:16
Requirements:
1) Clear Classic Mode on Very Hard.
Ancient Minister (Trophy)
Square: C:17
Requirements:
1) Clear the Sub-space Emissary.
Stafy (Trophy)
Square: C:18
Requirements:
1) Clear Target Smash Level 1 with 10 characters.
Super Scope (Trophy)
Square: C:19
Requirements:
1) Clear Target Smash Level 1 with all characters.
Underwater Theme (Super Mario Bros.) (Music)
Square: C:20
Requirements:
1) Play 10 Versus Mode matches on Mushroomy Kingdom.
Pitfall (Trophy)
Square: C:21
Requirements:
1) Clear 100-Man Brawl.
Fire Field (Music)
Square: C:22
Requirements:
1) Clear Event Match #24.
Shadow Bugs (Trophy)
Square: C:23
Requirements:
1) Clear boss Battles on Normal.
Star Wolf (Star Fox Assault) (Music)
Square: C:24
Requirements:
1) Clear Event Match #38 on Hard.
Mewtwo (Trophy)
Square: C:25
Requirements:
1) Clear All-Star Mode on Intense.
Green Hill Zone (Stage)
Square: C:26
Requirements:
1) Unlock Sonic
Rocketbarrel Pack (Trophy)
Square: C:27
Requirements:
1) Clear Target Smash Level 4.
Frozen Hillside (Music)
Square: C:28
Requirements:
1) Play 10 Versus Mode matches on Halberd.
Halberd (Trophy)
Square: C:29
Requirements:
1) Clear Event #3
Spear Pillar (Stage)
Square: C:30
Requirements:
1) Clear Even Match #25.
Party Ball (Trophy)
Square: C:31
Requirements:
1) Get a total of 500 KO's.
K.K. Slider (Trophy)
Square: C:32
Requirements:
1) Collect all Songs
===============
Row D
===============
Stickers (Trophy)
Square: D:1
Requirements:
1) Collect all stickers.
Crazy Hand (Trophy)
Square: D:2
Requirements:
1) Clear Classic Mode on Intense.
Excite Truck (Music)
Square: D:3
Requirements:
1) Clear Target Smash Level 2 in under 19 seconds.
75m (Stage)
Square: D:4
Requirements:
1) Use Donkey Kong 20 times in Versus Mode.
Super Mario World (Masterpiece)
Square: D:5
Requirements:
1) Play Versus Mode on Yoshi's Island (Melee) 5 times.
Dark Cannon (Trophy)
Square: D:6
Requirements:
1) Clear Boss Battles on Hard.
Kyle Hyde (Trophy)
Square: D:7
Requirements:
1) Clear All-Star Mode with all characters on any difficulty.
Combo Cannon (Trophy)
Square: D:8
Requirements:
1) Clear Target Smash Level 5 in under 30 seconds.
Wario Bike (Trophy)
Square: D:9
Requirements:
1) Clear Target Smash Level 3.
Ashley Robbins (Trophy)
Square: D:10
Requirements:
1) Play over 100 hours of Versus Mode matches
Great Temple/Temple (Music)
Square: D:11
Requirements:
1) Clear Event Match #33 on Hard.
Palutena (Trophy)
Square: D:12
Requirements:
1) Clear Event match #4.
Flat Zone 2 (Stage)
Square: D:13
Requirements:
1) Unlock Mr. Game & Watch.
Power-Hungry Fool (Music)
Square: D:14
Requirements:
1) Play 10 Versus Mode matches on Castle Siege.
Plusle & Minun (Trophy)
Square: D:15
Requirements:
1) Collect Final Smash trophies for all characters.
Liquid Snake (Metal Gear Solid: the Twin Snakes) (Sticker)
Square: D:16
Requirements:
1) Defeat 10 enemies in Cruel Brawl.
King K. Rool (Trophy)
Square: D:17
Requirements:
1) Clear Target Smash Level 4 with all characters.
Hidden Mountain & Forest (Music)
Square: D:18
Requirements:
1) Clear Event Match #18 on Hard.
Bumper (Trophy)
Square: D:19
Requirements:
1) Hit Sandbag a combined total of 15,000 feet in Homerun Contest.
Timer (Trophy)
Square: D:20
Requirements:
1) Play 30 hours of Versus Mode.
Donkey Kong (Masterpiece)
Square: D:21
Requirements:
1) Play Brawl for 10 hours or more total.
Shy Guy (Trophy)
Square: D:22
Requirements:
1) Hit Sandbag a combined total of 30,000 feet in the Homerun
Contest.
O2 Battle (Music)
Square: D:23
Requirements:
1) Collect a total of 5,000 or more coins in Coin Matches.
Birdo (Trophy)
Square: D:24
Requirements:
1) Clear All-Star on Hard.
Grey Fox (Trophy)
Square: D:25
Requirements:
1) Clear Target Smash Level 5 with all characters.
Porky Statue (Trophy)
Square: D:26
Requirements:
1) Clear Boss Battles on Very Hard.
Tails (Trophy)
Square: D:27
Requirements:
1) Get a combined total of 30,000 walking distance.
Edit Parts B (Stage Builder)
Square: D:28
Requirements:
1) Create 5 stages in the Stage Builder
Main Theme (Super Mario 64) (Music)
Square: D:29
Requirements:
1) Play Versus Mode for a combined total of 50 hours.
Tom Nook (Trophy)
Square: D:30
Requirements:
1) Collect a total of 1,000 coins in Coin Matches.
Ai no Uta (French Version) (Music)
Square: D:31
Requirements:
1) Hit Sandbag a combined total of 37,500 feet in the Homerun
contest.
Tabuu (winged) (Trophy)
Square: D:32
Requirements:
1) Clear Boss Battles with all characters.
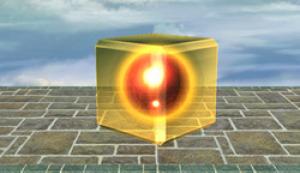
Welcome to the Yellow Box guide!
In The Sub-Space Emissary, there are several things that count toward your over-all completion percent.
1) Completing levels
2) Unlocking new characters
3) Going through EVERY door
4) Collecting loose trophies and stickers
5) Opening Yellow Boxes and collecting what's inside
#1-3 you'll have to see the walkthrough about. However, #5 is the one that is often missed (in collecting the boxes, you're likely to go through ever door, and have unlocked all the stages).
Here, we'll list all the boxes by level. There are 69 total. Note that after you collect a Yellow Box, you can immediately choose the “go back to map” option, and it will still count. Also, you'll know which ones you've missed, as once you collect them, they disappear forever; or at least till you're next play through.
Well, lets get started. They are listed in order by level. Using your browsers search function will help you find the level you're looking for.
Because there are so many, we have split them over three pages arranged by levels for more easy browing.
Level 2: SkyWorld
#1) You'll come to a place where some pillars in the ground move up and down. Wait for the third pillar to lower, revealing a door.
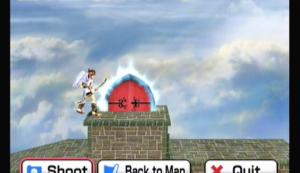
#1
Level 4: The Jungle
#2) Not far into the level is a barrel. Jump in and ride to the second barrel. Use this barrel to propel yourself straight down into the breakable blocks.

#2
#3) You'll come to a free-fall point near the end of the level. Dodge the first set of Jyk and stay to the left, landing on a hidden platform.

#3
Level 5: The Plain
#4) A few feet into the level is a large wall of breakable blocks. Take out the top row, then jump up and take out some hidden blocks that are above the top row. One of them is the item box.

#4
#5) Just after the point where the walls are chasing you, some Primid will drop down from overhead. Use a character that has a high third jump to get to a hidden ledge in that gap.

#5
Level 6: The Lake
#6) After entering your first blue door, jump to the ramp up above it and go left.
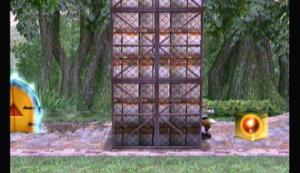
#6
#7) Near the end of the level, you'll be on a raft and forced to fight several waves of enemies. After just a few feet is a door over head. Jump in it quickly.
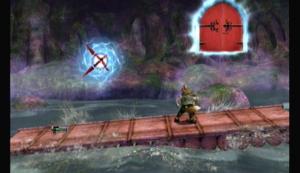
#7
#8) Still on the raft, just as some Giant Goomba come down to take you on, don't let them distract you from the passing Yellow Box overhead.

#8
Level 7: The Ruined Zoo
#9) After you join with Pokemon Trainer, you'll enter a cave past the first part. Inside the cave, you'll fight a wave of Bytan. Just to the right of that is a spring. Use the spring to get to the ledge overhead.

#9
#10) Out of the cave and more to the right. You'll find an anonymous spring on one of the wood platforms. Fall straight to the left of this platform to find a hidden door.
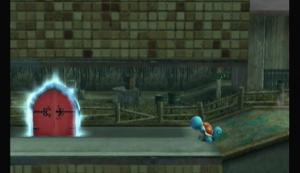
#10
Level 8: The Battlefield Fortress
#11) After the second wave of Armight, climb the ladder and use the key on the locked door to find a hidden door.

#11
#12) After the ride in your first mine cart, there is a door just to the right of where it hit the wall.

#12
Level 9: The Forest
#13) When you find your first tall tree you have to jump over, fall straight down the other side, past the Boom Primid. There is a door hidden on the left.
#13
#14) Once out of the forest, you find some bomb boxes. Use the second set to get your Yellow Box.

#14
Level 10: The Research Facility
#15) Just in, ride the elevator up one level and head right. Just past the ROB is your prize.
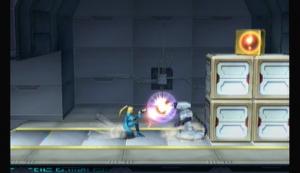
#15
#16) In the main room with the windmill, take the bottom right door. Keep heading up and to the right to find a launcher. Let it shoot you across the gap to find your box.

#16
Level 11: The Lake Shore
#17) Once the camera starts moving on it's own, jump over the pillar of two Jyk, guarded by two Bucculus, over the next gap is the box.
#17
#18) In the cave, past the Shaydas, and to the part where the red-hot pillars move up and down. To the left of that hall, use a triple jump to get up on a hidden ledge on the left.

#18

#18, a closer look
#19) Past the trap area with three locked doors, a Shayda will appear. Kill him to make a door appear.
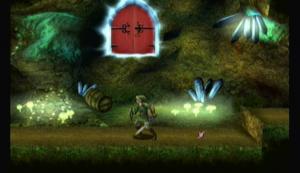
#19
#20) I don't see how you could miss this one. Right in front of the end level door.
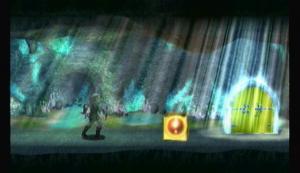
#20
Level 12: The Path to the Ruins
#21) Get to a large gap. Watch the falling blocks and Jyk. Just to the right is your box. Kind of hard to miss.
#21
#22) Past the flaming hallway, fight the Armight without falling off the ledge. Use the ledge to the right to jump up and grab the box.
#22
Level 13: The Cave
#23) In the area with the crushing ceilings and floors, get past the crushing floor and wait for the second crushing ceiling to fall. A path will become visible above it. That's your boxes door.
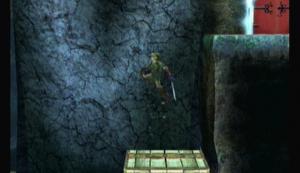
#23
#24) In the same crusher as the above, fall down under it quickly. On the left side on the lowest platform is your box.
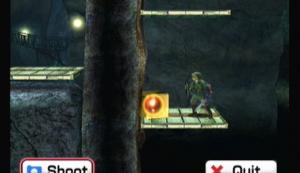
#24
#25) Right at the end of the level, just before the giant Goomba. Hit the switch to the left and a door will appear above the Goomba.
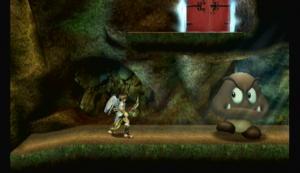
#25
Level 14: The Ruins
#26) When the camera starts moving on it's own, dodge the flames and Mite. Watch for a set of breakable blocks. It is on top. This one is easy to spot, but hard to actually get.

#26
#27) After you get Ivysaur and make it past the door puzzle, you'll come across a Roturret and three switches. Hit the right hand switch to make a door appear in the center.
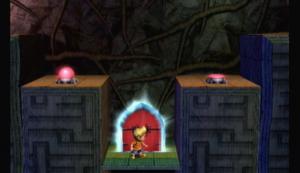
#27
Level 15: The Wilds
#28) Once past the Big Primid, take the hall on the right. At the end, jump to the ledge above the hall and enter the door.
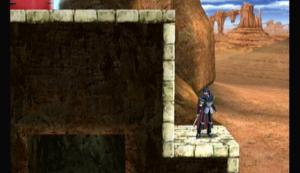
#28
#29) You really cannot miss this one. Seriously, it's blocking your path!
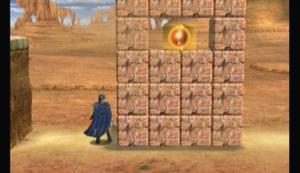
#29
#30) Once you come to the barrel puzzle, take the following barrels:
One above the item box to the middle one
Middle one to the one above it
From here to the one on the right.

#30

#30
Level 17: The Wilds (2)
#31) You'll come to a series of three elevators. Ride the middle one up. When you see the one to the left pass you, drop off and fall into a hole under the middle one.
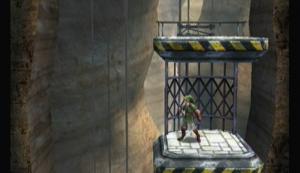
Up
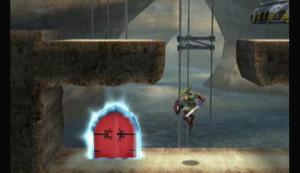
Down

In, #31
#32) Right at the end of the level, head left from the yellow door.
#32
Level 18: The Swamp
#33) A few feet in, jump on the leaf in the center of the gap. Fall down and land on a hidden platform on the right.

#33
#34) Just past the fight with the Floow and Hammer Bros, the camera starts moving on it's own. Take the ladders up and watch for a door on the left.

#34
#35) When you get to the river part, get past the launchers and barrels. Now you should be at the springs part. At the first Paratroopa (red), look for an item box above him.
#35
Level 19: Research Facility (2)
#36) At the end of the darkness puzzle, there is a ladder that leads down to the door. At the top of the ladder is a light switch. Hit the switch and fall down the ladder quickly while the lights are still on to find a hidden door on the left.

#36
#37) After your forced fight with the ROB and Cymul, and the start of the orange platform puzzle, hit the switch and ride the platform down to the first Cymul, then jump to the platform on the left.

#37
#38) If you followed the walkthough, you cant miss this box. If not, At the very start of the puzzle, instead of taking the lower red teleporter, take the upper blue one.
#38
Level 20: Outside the Ancient Ruins
#39-40) After the bridge and Gamyga, when you find a couple of ROB Launchers and breakable blocks, hop up on the blocks to find a hidden door.
#39-40
Level 21: The Glacial Peak
#41) After you fight off the Sword Primid on the moving platform, the camera starts moving on it's own and you have to keep pace by jumping on moving sheets of ice. Watch for the scene below:
#41
#42) After the above, you'll find a lone barrel that shoots you straight up. Go up and veer to the right. Destroy the blocks to find a door.

#42
#43) After the above, on your trek upward, you cant miss the door on the right.
#34
Level 23: Battleship Halberd Interior
#44) A few feet in and you'll have to jump down onto some falling blocks. Make the far left one fall to reveal a switch. Press it to make a door appear.

#44
#45) In the area where you have to find the three switches to gain access to the ladder, take the bottom right path. Across the gap are some breakable blocks. Destroy them and jump though the wall to the door.
#45
#46) Another one you cant miss. After hitting all the switches, fall down the ladder. It's right there.
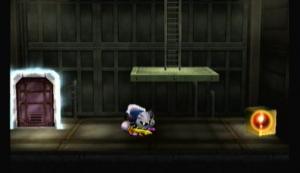
#46
#47) At the end of the level, the area where you have to kill the enemies to open the blue gates. Above the Cymul is the box.

#47
Level 24: Battleship Halberd Exterior
#48) This box is probably the second most overlooked box. I got it by accident. At the part with the mines, go to the right instead of up. At the second mine, you'll notice a crack in the ceiling. The only way to blow it out is to use the mine. The easiest way is to wait for the mine to be right next the ceiling and jump into it.
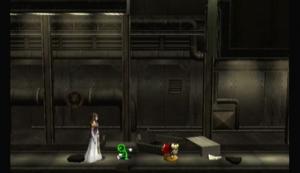
#48
#49) At the end of the level when you're on the outside of the ship again. Just to the right You'll have a split in the path where you can go up or right. Go up to find the box.
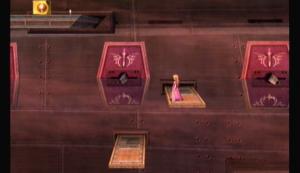
#49
Level 26: The Sub-Space Bomb Factory
#50) Ride the elevator down two levels. On the left is a Jyk and a door. Enter and kill the enemies for your prize.

#50
#51) Ride the second elevator all the way up and kill the ROB on the left to make a door appear.
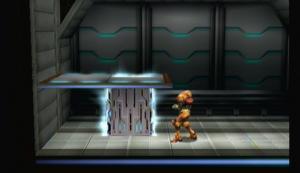
#51
Level 27: The Sub-Space Bomb Factory (2)
#52) After you fight the ROB Launchers and Meta Primid, the camera will start moving on it's own. Just to the right, on the second platform that falls, is a door. That's not the end of it though. Inside, use the spring up top and double jump to a hidden platform way up off screen. Use a down attack to destroy the box.

Door

#52
#53) For this, you need someone who can wall jump (Captain Falcon, Diddy, Fox, and Samus all make good choices). At the blue switch that opens the multi-lock door, jump up the shaft that the Mite fall down out of. Here, wall jump up the blocks and hit the bomb block.
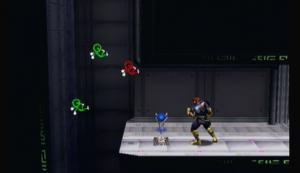
#53
#54) At the jet puzzle, climb the ladder near the end and hit the switch. Destroy the breakable blocks on the left, then jump across, taking out the ROB Launcher. Hit the switch above and jump to the left.
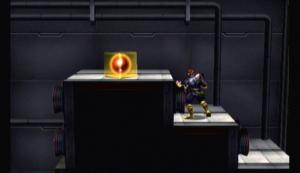
#54
Level 29: Subspace
#55) In through the first door, past the Towtow, then jump up. Enter the door on the right and fall all the way down. It's on the left.
#55
Level 30: Subspace (2)
#56) Below the Meta Knight trophy, before the Sword Primid Spawner but where you fight the Sword Primid. Its under the ledge on the right.

#56
#57) Fall down through the web of Bucculus and bomb blocks, heading right. Use the first launcher, then the second past the rail block. Fall straight back down to the left.
#57
Level 31: The Great Maze
The Yellow Boxes in The Great Maze mostly correspond to where they were in their original world. Now, since The Great Maze is split into four levels, if one of the levels has a green flag on it, the box you're missing is going to be near that warp point.
I made this map below, and put the box number on the appropriate room. When looking up the individual box, look for the number on the map. The text description will assume you are already in the room marked. A couple rooms I will recommend you enter from a certain door.
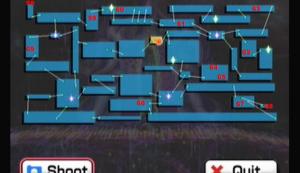
Yellow Box Locations in The Great Maze
Click on the map to enlarge it if needed.
#58) Jump up though the clouds, past the Jyk. It's on a ledge at the top.
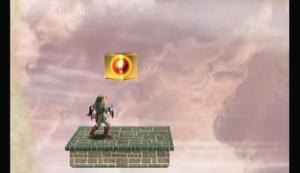
#58
#59) Above the Greap, beside the Glunder. Regardless of which way you enter, it's pretty hard to miss this one.
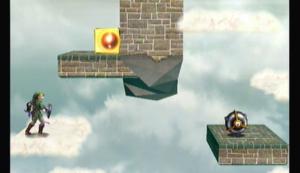
#59
#60) Enter 60s room from the left door. Head right and enter the gold door. Blow up the blocks and go back through the blue door.
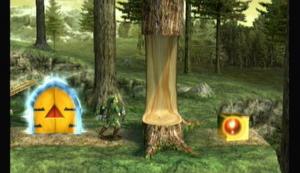
#60
#61) If you enter from the left, you might not see the box before destroying it, from the right, you'll have to jump over the blocks to hit the rail that opens the box. It's beside the Buckot near the right side of the room.

#61
#62) Another one you simply cannot miss. From the top left, fall down and take the ladder down. From the bottom right, enter and It's right there.

#62
#63) Entering from the right is going to be easier. Jump over the large spikes and fall straight down. Swim left to find it.

#63
#64) This is probably the MOST missed one on the game. Take the upper path above the Scope Primid. Stay to the left, past the Borboras, and watch for a ladder with a Red Mite spawner on the right. Opposite that is a conveyor belt with a little shield thing on it. Attack into the shield to break the Yellow Box (you normally cannot see it, but you'll hear the noise and the conveyor belt will bring the item to you).
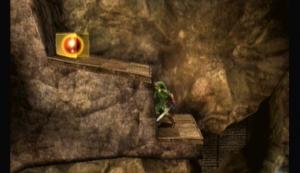
#64
#65) From the above, drop back down and go to the right of the Scope Primid. Cant miss it.

#65
#66) Enter from the upper right. Jump straight up. It's right there on the left.

#66
#67) Enter from the bottom right. Jump up, and use the springs to get over the spikes. The box is to the left of the Cymul.
#67
#68) If you've fought Falco, you've gotten this box. Seriously, after the fight, you're put down right next to it.

#68
#69) Another one you cant miss. Weather going up or down, its on the left about half way through, not on a moving platform.

#69

Welcome to Brawls Adventure Mode! It is FAR deeper then Melees. It actually has a story line and plays out like your average platformer with a Smash Bros. twist. It took me 10 hours to play through this the first time on easy, and there isn't much of a way to speed that up. But, you can save after every level, unlike in Melee.
Sit back, relax, and enjoy the ride.
At the beginning of each chapter, enemies you can expect to encounter, and the number of boxes in the level.
Also, during a boss fight, I will list the enemy's moves and how to spot/dodge them at the START of the fight. The fights strategy will be just below it.
Be sure to read the Sub-Space Emissary Basics section (on the single player modes page) so you know some of the stuff I'm referring to. Also, reading up on the Enemy Bios will help a lot as well.
To get things started, lets look at a complete map of this world:
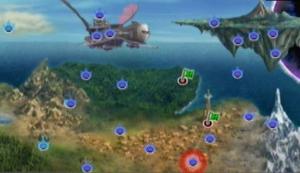
World Map
Note that there isn't any talking in the game, so in some cases you'll see some italicised text (like this) wherein I'll shed some light on what's happening story-wise.
Enemies: Kirby/Mario, Primid, Boom Primid, Spaak, Sword Primid
Boss: Petey Piranha
Boxes: 0
After the cut scene, choose whoever you want. You begin a 1vs1 stock match with the person you DIDN'T choose. You have two lives, but your opponent only one.
What a wonderful day in the neighborhood
Story Note
After the match and the cut scene, you see that Pit was watching the match, and rather enjoying it. Also note that when a person is defeated, they get turned into a trophy, which can be turned back to normal by touching the stand. After, Kirby and Mario shake, signifying that the match was just for fun, a boxing match if you will. At this point the Halberd shows up and releases spores that turn into Pirmids.
Oh noes! Our beautiful day!
Now you get to choose your characters again. Zelda is a good choice for what's up next. After that it doesn't really matter, the odds of you dying are slim.
Here you'll face an army of Primid and Spaaks. Since the order of the enemy emergence is random based on the order you defeat them, and the fact that they are very low-level, I wont list the order of the waves.
Just use regular crowd clearers on the Primid, paying special attention to the Boom Primid, and aerial up moves on the Spaak (Zelda makes that nice explosion).
Story Note
The Ancient Minister makes his first appearance. He carries a strange bomb device on the undercarriage of his pedestal. The R.O.Bs are given the task of arming the bomb with no hope of escape. Bomb timers are set to three minutes. That remains a constant throughout the game, though I'm not sure why three minutes exactly. Mario is also given the boot with a as-of-now unknown projectile (likely from the Halberd.
Time for the fight with Petey Parana. You only have one choice of characters: Kirby. Though Zelda would have been better, IMO, Kirby has a nice, cheap move that will work well for this battle.
--== Petey's attacks ==--
1) Swings a cage horizontally in front of him.
2) Jumps into the air and lands, creating a small tremor.
3) (near the end of his life) jumps a few times in a row.
--== How to predict ==--
1) He'll take the cage and kind of hold it back a bit.
2) Ducks his head down.
3) Ducks his head down longer and roars.
--== How to dodge ==--
1) Jump into the air.
2) Either shield or be in the air above him.
3) Be in the air for the first, then stay in your down B form till
he is finished.
--== Strategy ==--
The goal here is the free both Princesses. Sadly, try as you might, you only get to free one. Choose with one you want and focus on only on that cage. Zelda on the left and Peach on the right. Bear in mind that the one you don't free you wont get to see until much later in the game, and the one you do you'll have to put up with for the next few levels. I'd choose Zelda. She's more well equip, especially with Sheik to help.
Either way, start pounding on the cages. Your best bet (and the cheap move) is to jump up above Petey's head, then use Kirby's down B attack to drop on the cage. It does a fair amount of damage, and will protect you from Petey's attacks.
Story Note
Wario is one of the bad guys (surprise?). He also reveals a strange weapon that is capable of instantly turning anyone into a trophy. The person you didn't save is turned into a trophy and carried off by Wario, who seems to be collecting them for some reason. Kirby starts to give chase, when he sees the timer is almost gone on the bomb, so he calls in a Warp Star to get him and the person he saved out.
In the end you see the colossal power of the sub-space bomb. But why is it creating a dimensional orb around the area? Whats the point?
End of level!
Enemies: Primid, Spaak, Boom Primid, Glunder.
Boss: Roturret.
Boxes: 6
Story Note
Palutena gives Pit her bow, and her blessing to go help.
Wheeee~
You have one stock as Pit, make the most of it. Nothing to worry about on the way down. When you hit ground, there is an item box (1) under you, and one just to your left (2). Go down till you hit solid cloud. Down the road and jump to the ledge. Open the item box to advance. Go through the door.
Story Note
Pit sees the Halberd, and the Halberd sees him, greeting Pit with a fresh batch of Primid (just like Grandma used to make).
Fight a small wave of Primid to open a platform on the right. Advance to find a Spaak. Just above the second Spaak is a box (3). One final Spaak and a Primid await in this area. Keep it up right and trample a Boom Primid.
Two more Primid along the path. A Cycmle guards an item box. Carefully fly under it and grab the box (4). Keep going till you find your first Greap. Greaps are easier then they may seem. Just attack them from one side, then just as they turn to face you, dodge to the other side. A door appears after the fight.

Not good...
Story Note
Pit finds Mario, turns him back to normal, and relays all that’s happened since he was knocked out.
Choose your character. Pit has an advantage, being his home turf, but it really doesn’t matter. You now have three lives.
Six glunders patrol this area, so keep a sharp eye out. Drop down till you’re on the purple platform.
Here you’ll find you first Jyk. Since you cant kill them, you’ll just have to go over. Cross the moving platforms. There is a Spaak, Boom Primid, and Glunder on the top platform. More to the right, there is a Jyk blocking the upper path, as well as three Spaaks. A Boom Primid, Primid, and Glunder on the lower path.
Payback.
Across the gap sits a Boom Primid on a platform, and a Spaak on the other side. Take them out with one motion. There are some pillars that will raise and lower in this section. Keep an eye on the third one and wait for it to lower. This gives you access to a secret area.

Secret, Yellow Box #1
In here, grab the first item box (5), then move up with the camera for your second (6). Drop back and exit.
They set up quite the trap ahead. A Spaak in the air, two Glunders on the platform, and a Boom Primid on the other side. Looks like they didn’t anticipate you having a projectile attack. Use it to take out Glunders. The other two fall quickly.
You’ll get caught in a battle with some Primids, Boom Primids, and a Spaak. After they are gone, you’re first Roturret appears. Constantly attack the Roturret to keep it from firing.
Ha ha.
Just up ahead is your first launch pad. Get in the habit of dodging these, as later they only bring trouble (launching you into spikes, pits, back the way you came, ect.). You can use this one to quickly reach the door, however.
End of Level!
Time:
Enemies: Boom Primid, Primid, Glunder, Spaak, Feyesh, Yellow Mite, Towtow, Poppant.
Boss: Greap
Boxes: 5
Story Note
Fox appears to be chasing after the Halberd. The Halberd catches up to Kirby at this point.
Choose your character and move forward.
Wow, that was easy.
Story Note
Fox gets injured and blows Kirby off the deck of the Halberd. We now know that Fox is, at the very least, not in league with the Ancient Minister.
Choose another character.
On your way right, you’ll find a Boom Primid and a Primid.
When you reach the dead-end, attack the blocks to destroy them. A Primid waits on the other side, as well as four glunder that randomly patrol this area. Follow the path down and take out the Boom Primid. Just below him, look to the right past some wreckage for an item box (1) with a spare life.
Rock and a hard place
Yay!
Continue left. You’ll find your first Poppant. I wouldn’t really bother with them. In the clearing, you get attacked by two Feyesh. Use upward attacks to dispatch. Little more and you’ll find a towtow. He should still be sleeping, in which case charge up a heavy attack to do as much damage as possible, at which point one more shot should do it.
Another Feyesh descends from the blocks. Don’t destroy the blocks, rather climb up on them. You should see a small opening in the wall above a couple of them.
Secret
Enter the door for another secret. Two (2)(3) item boxes, one of which contains hearts. Back out and back down. All of the enemies will have re-spawned (joy). I’d just avoid them and head left.
A Primid attack on when you reach solid ground. Destroy the blocks to continue. A Poppant on the left path and a Boom Primd on the right. It really doesn’t matter, as you end up at the same place on the right. Destroy the blocks on the right path to get a random item.
Item
MY CANDY!
Go to the left of the fan and drop down to the bricks below. Walk right. Three Feyesh attack. Enter the door.
Three Spaaks and a Poppant to the right. Drop down to find your first spawner, as well as the Yellow Mites. Don’t worry about the Mites so much and focus on the purple orb spawning them. Once that’s destroyed, take out the Mites and go back to the ledge where the spawner was. Jump up to the ledge above and fall down the other side. CAREFULLY destroy this item box (4). Too much force will destroy the blocks it sits on. Grab your prize and go back left.
You cant see me...
Watch for falling boulders along this path. Zelda’s ability to warp short distances will come in handy. Spam it if you have it. At the end of the path is a platform guarded by a Glunder. Destroy it and take it’s platform.
I have a terrible head cold...
Use a projectile attack to take out the next Glunder, and the next one. Now to the final platform and the item box (5) therein. Take your star and fall into the pit below where the Glunders were.
Star time!
There is a yellow Mite spawner and several Glunders. Focus on the spawner while keeping an eye on the Glunders.
More boulders fall down this path, only this time they hit and roll. Jump over them if they get too close, and watch for the Feyesh. Once over the pit a ways down, you’re safe.
For the last time, I’m NOT Indiana Jones!
Another Greap appears. Use the same dodging strategy and end the level.
End of Level!
Time:
Enemies: Goomba, Koopa, Parakoopa, Jyk.
Boss: Giant Goomba
Boxes: 9
Story Note
Bowser’s minions steal DK’s bananas (idiots). Diddy Kong appears and saves DK from some bullet Bills.
Choose a character. I like DK, personally.
One Goomba, followed by another with an item box (1) over it. Grab the item and drop down. Aim for the Koopa and be sure to slap it AWAY from you, hopefully taking out a couple Goombas with it. Parakoopa hovers above the next platform. Two more platforms with Koopas on them, and some Goombas on the ground. Up the hill are a couple of Parakoops. Across the gap and jump in the barrel.

Another day in Nintendo’s world
Item box (2) at the top with a couple of Goombas. Use the second cannon to propel yourself straight down through the blocks. Here is another box (3), and a button. Hit the button to get back out.
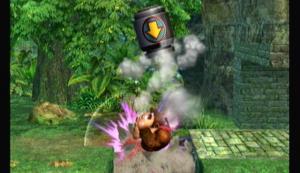
Yellow Box #2
A few Goombas in the tunnel. Jump in the barrel at the end. Carefully aim your shots to get back on the ground. You should take out the Goombas before you even stop spinning. Enter the door.
These rail things will become vital later on. Hit them to propel them forward, wreaking havoc in their wake. Use these to take out the Goombas. Use the loop-de-loop one to take out the Parakoopas, then the one in the center to break an item box (4).
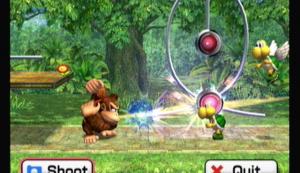
Foolish fools!
You’ll see an item box under ground, but you cant reach it yet. Instead, use the next rail thing to kill the Goomba and Koopa on the platform ahead. Jump up to the top and activate the rail on the left. This will open your item box (5) drop down and claim your prize.
Get up here and hit the rail
Smash the next rail to get a trophy, then the rail under the platform to destroy the two Koopas overhead. Climb up. Climb up the next set of ladders and hit the rail thing to destroy the blocks. Enter the door.
Secret
Another secret. Take out the two Goombas and Koopa to get to your two boxes (6) (7). Exit. Drop back down to the right. Hit the corkscrew one to press a button. Jump on the platform that appears. You’ll be attacked by several Goomba and a Koopa. Use the rail thing to take them out or DK’s Down B. Jump off and use the rail to destroy the blocks.
Many Hammer Bros and Goombas will appear. Keep taking them out while avoiding the Bullet Bill. The rail is kind of inconsequential here. Your reward is another life. Continue to the right and in the cannon. Enter the door.
The platform raises as Hammer Bros, Goomba, and Bullet Bill appear out of nowhere. Take out the Goomba first, as they pose more of a threat then the over-shooting Hammer Bros. The Bullet Bill will never come while you’re fighting, so don’t really worry about them. A few feet up and a ledge will appear to the right with a trophy on it. Jump off and grab it real quick. When you see the moving door, jump up and enter as fast as you can. The platform will keep moving right up out of bounds.
Trophy time
Another launcher thing that does nothing. Watch out for the Jyk on your way down, and keep to the left (dodge the first set of Jyk by staying on the right, then double-jump to the left after they go by). You’ll land on a platform with a door. Enter.
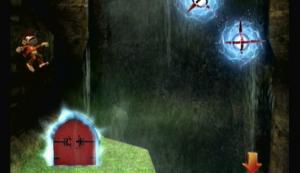
Secret, Yellow Box #3
Grab your prizes, boxes (8) and (9). Exit and fall back down.
A couple Giant Goomba appear, along with several Goomba. Take them all out (like you need a strategy) to finish the level.
End of Level!
Enemies: Borboras, Primid, Boom Primid, Spaak, Glunder, Feyesh.
Boss: None.
Boxes: 3
Story Note
The Kongs finally get their bananas, but find them bitter-sweet. Bowser is waiting with a trophy-fing ray. DK winds up and sends Diddy flying out of they way, saving him but sacrificing himself. So now we know that Bowser is one of the Ministers henchmen.
Choose between Mario or Pit. Choose Pit. Not just because I like him, but for an item box.
Move right. Your first Borboras. Take it out. More to the right is a Pirmid and another Borboras. Drop down the ledge to be attacked by three Primid and two Boom Primid. Just to the right is a Borboras guarded by a Feyesh. Down the ledge and three Feyesh attack as a Boom Primid drops behind you. As you get close to the wall, three Ticken appear. Beat them with rapid swings.
Break through the top row of blocks first. Just above the highest block in the second to last column is a box (1). Drop down and kill the Borboras on the other side.
Yellow Box #4
A Ticken comes shooting out of the tunnel, you've been warned. In the tunnel, a wall will appear behind you and chase after you. Keep moving in front of it, avoiding the Poppant and Jyk. Just at the end is an item box (2) if you miss it, you can use a projectile attack to break it, and the next wall will carry it to you.
AHAH! That's not right or possible!
Drop down behind the Boom Primid and Borboras. Break the blocks (again, nothing in them) and take out the Primid and Boom Primid under them. At one point, you'll find a Boom Primid. Just before that there is a hole in the ceiling that Primid fall out of. Use Pit to jump up the shaft. You should just be able to make it. Beware the Feyesh at the top.
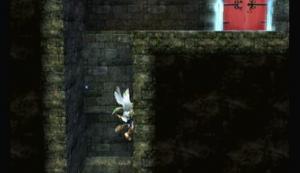
Secret, Yellow Box #5
Secret room. Take out the blocks above you and work right to the heart, being carful not to let it fall. Drop down and grab your box (3). Exit. Drop down to be greeted by your Primid friends. Run right and take out the Borboras to enter the door.
The platform will begin moving. On it you'll have to fight a slew of Primid, Boom Primid, and Spaaks. After the first wave comes the Fire Primid. Don't get right in front of them or they'll burn you. Attack quickly from above. Next is a random mix of Boom Primid, Primid, Fire Primid, Glunders, and Borboras.
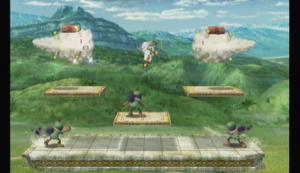
You guys again?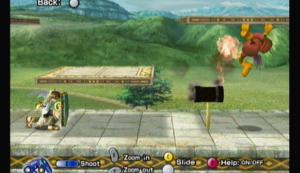
Have a taste of your own medicine!
Just as you reach land comes another random mix. This time with Spaaks added in. Take them out and walk into the light.
End of Level!
Time:
Enemies: Goomba, Giant Goomba, Koopa, Parakoopa, Borboras, Auroros, Bucculus, Towtow, Jyk, Hammer Bro, Paratroopa.
Boss: Rayquaza, Dark Bowser
Boxes: 8
Story Note
Diddy is rushing back to help DK when he is assaulted by Rayquaza, who appears to have been awakened by Fox. Fox jumps out of the flaming Arwing wreckage to save Diddy.
Doesn’t matter who you choose, as you’ll probably end up using both Fox and Diddy for this next fight, the first real boss fight since the first level.
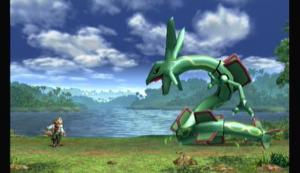
Hello.
--== Rayquaza’s attacks ==--
1) Shoots a large ball of energy
2) Ground explodes
3) Whips his tail in the circle around him
4) Attacks from underground
5) Corkscrews in from the side
6) Drops lightning on you
7) Dives to the other side
--== How to predict ==--
1) He’ll tilt his head back and his mouth will start to glow.
2) His eyes will glare red.
3) Rears his tail back and kind of spins first.
4) Dives underground. The ground will bulge as he comes up.
5) Flies off screen. Keep your eye to the opposite side he was on.
6) Jumps up and forms a ring. Starts to spin.
7) Growls and tilts his head down.
--== How to dodge ==--
1) Foxes reflector works nice, otherwise just use your shield.
2) This one happens so fast, you better just hope to be in the air.
3) Jump, or just be out of the line of fire, which is just a small
circle around him.
4) When the ground bulges, dodge to the side.
5) Shield.
6) Normally too much for your shield, but nothing else does anything.
7) Jump.
--== Strategy ==--
Best thing here is to get up close and personal with Fox. Nothing special. Hitting him from a distance with ranged weapons will garner less damage, but is very time consuming and drags out the later part of the fight, wherein he gets more fierce and uses attacks in sequence.
Story Note
Diddy tries to talk to Fox, but Fox brushes him off and tries to go his own way. Diddy then kidnaps (foxnaps?) Fox and forces him to come.
Choose your character again. Doesn’t matter. I like Fox.
Enter the door. Destroy the blocks. Take out the many Goomba and one Parakoopa on the ramp. Drop down and enter the door under the ramp, watching out for the Hammer Bro.
Jump up on top of the ramp again. Watch out for the Auroros and Goombas as you work your way left to the item box (1). Back to the right and fall down the second pit. On your way down, watch out for the Paratroopa. Kill the Goomba and Hammer Bro at the bottom and enter the door.

Yellow Box #6
You’ll get a flash of light, and the room goes dark. Jump straight up and up aerial attack. The room should explode. Jump up to the platform on the left to get your next item (2), and continue up using the other platforms. Fire Fox works really well on the Hammer Bros beside the ladder.

Is dark.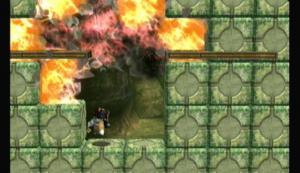
Not for long.
He he.
Once at the top, to the right are a couple of Auroros and a Giant Goomba. To the left is a Bororas, Auroros, and a Giant Goomba. Take the left and enter the door.
Straight ahead is a Towtow. Charge up and take it out, along with the second one and the Auroros above it. Destroy the blocks and the third Towtow, and enter the door.
To the right are some Green Mites and a couple Bucculus. Avoid the Bucculus unless you are sure you can take them out before they retreat back underground. Go up the tunnel to get another item box (3) and with it another life. Head back down and enter the door with the arrow on it.
Sorry, Grandma called dibs on my cheeks.
Head to the right to fight and army of Goomba and a Giant Goomba. Hit the block that appears. Now head back through the arrow door. Go up to the right to find a hole in the ceiling. Go up and hit the switch. Now go to the door above the arrow door.
Who puts a vital switch inside a cave wall?
Fall down and enter the door. Take out the Towtow and enter the door that appears.
This definitely hurts you more then it hurts me.
You are now on a raft. Here you will fight waves of Goombas, Paratroopas, and some Hammer Bros. After a few feet, jump up and grab the item box (4). Take out the Hammer Bros and pass under the Jyk. Jump up and enter the door.

Yellow Box #7
Hit the rail to destroy the blocks and the item box for a life (5).
Hit the next rail to destroy the blocks, jump up and get a trophy (6).
Back through the door.
Some Bullet bills will come by. If you’re using Fox, hold down his Reflector. If not, good luck! After, two Giant Goomba will come down. Destroy them, but don’t miss the item box (7) overhead.
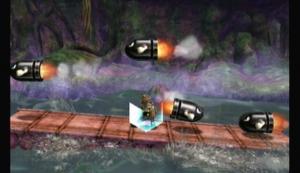
Right back at ya!
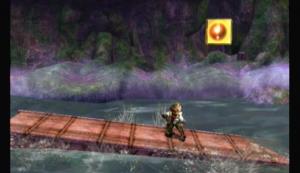
Yellow Box #8
Solid ground again. Take out the Koopa, and use it to destroy the Goomba. Now jump across the gap, taking out the Hammer Bro. At this point, several types of Koopa should be coming from the right. Take them down with an area attack and move on.
Drop down in the hole after the platform for an item (8). Jump in the barrel.
Chivalry counts for nothing.
He’s the same as regular Bowser, so I wont bother with attacks. Stay fast on your feet, as that’s your main advantage over him. Keep him in the air and watch for his Bowser Bomb.
End of Level!
Story Note
With Primid Bowser defeated, you find it was only a decoy. The real Bowser tries in vain to turn Diddy and Fox into trophies, but they escape. You now know that the Primid can take the shape and characteristics of anyone.
Mario and Pit catch up to the Minister, but fail to actually catch him.
Time:
Enemies: Primid, Boom Primid, Fire Primid, Ticken, Floow.
Boss: Porky
Boxes: 5
Story Note
RUUUNNN!!!!!
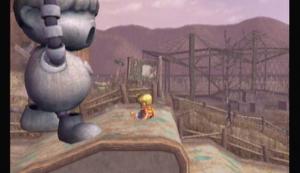
AHAHAHAHAH!!
Just... run. If an enemy gets in your way, jump over them, or better yet, knock them into the statue. Also, this is the first level were you cant move at your own pace. You have to move in time with the camera. Move to fast and you’ll fall off the screen, move to slow and fall off the screen (well, here you’ll just run into the statue, but normally...).
After Ness comes in and pwns the statue (he is so much cooler the Lucas could ever be), it’s time to fight its maker. Ness and Lucas are pretty much the same, so it really doesn’t matter who you choose.
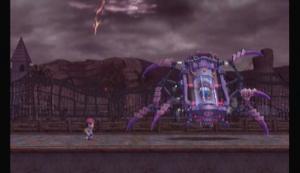
Sorry, but the giant statue was way cooler.
--== Porky’s attacks ==--
1) Fires a laser sideways
2) Fires a laser from the sky
3) Rapidly strikes with one of its claws
4) Sends out Porky drones
5) Jumps into the air and lands on you
6) Rushes across the stage
--== How to predict ==--
1) Creates an energy ball above its head
2) Flies up and turns on a search light
3) None, really
4) Stops moving, red light above his head
5) Crouches a bit first
6) Starts acting hyper
--== How to dodge ==--
1) Jump.
2) Stay in the light just long enough for him to charge up, then dodge
3) Hope you’re not nearby.
4) Jump up, then land carefully and jump again.
5) Dodge to the side as he jumps
6) Jump over him
--== Strategy ==--
Stay light and use ranged PK attacks. PK Fire and Thunder work well.
Story Note
Wario tries to trophy-fy Ness, but realizing Ness is far to awesome to be caught, he tries for the easier Lucas. Ness sacrifices himself to save Lucas. Wario proceeds to collect the trophy. In escaping, Lucas runs into Pokemon Trainer, who also saves Lucas from a Primid army.
(Lucas is pretty useless like that).
Note before you make your character choice, Pokemon Trainer only has Squirtle. Either one of them can do this level alone though.
Take out the few Primid here, followed by the Boom Primid. Carefully jump over the spikes and avoid the Auroros and Primid. Just keep heading right, not worrying about anything. Your main goal is surviving, and there are too many Auroros in this area to make it easy.
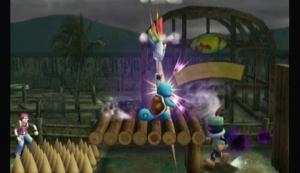
I have a splitting headache all the sudden.
After the water, you find a new enemy. The Floow. Floow cant attack until their health reaches max. It will slow regenerage just floating there, and if you hit it, it will regenerate even faster. Take it out BEFORE its health reaches full. Continue right to fight three more Floow.

Get away from me!
Carefully jump over the two sets of spikes. Upon landing, you’ll be attacked by a wave of Primid and Boom Primid, followed by a wave of Floow. Jump over the spikes and continue until you reach a building with a hole in it. The hole acts as a door.

Door.
Jump up and hit the switch. On the center platform you face an army of Bytan. Well, its only four to start, but since they replicate themselves, it very quickly turns into an army. Use crowd clearers to take the majority of them down, while slowly sweeping from one side to the other.
Once that’s over, use the floating platform to jump to the higher ledge. Watch out for the Glunder. Grab your item (1) and continue down the ramp. Once at the bottom, I wouldn’t bother with the Glunder spawner. Just jump up and enter the door.
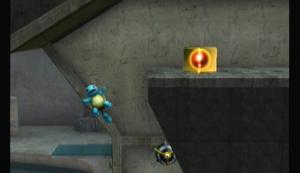
Yellow Box #9
Watch for the Boom Primid. Use the spring to reach the high ledge.
Take out the three Ticken and Boom Primid and move on. Fall straight down and to the left. enter the door.

Yellow Box #10
Secret time. Two boxes (2) (3), gotta catch’em all. Exit. You’ll want to keep on the high ground to avoid most of the Fire Primid, but the Floow will still get in the way. There’s also and item box (4) that you cant miss. After, use the spring to get over the spikes.
A hoard of Ticken, Boom Primid, and Fire Primid attack. After the fight, fall straight down and to the left for another item (5). Use the springs to get over the spikes and kill the Ticken. Walk into the light.
Box.
End of Level!
Story Note
Pokemon Trainer waves goodbye, and intends to follow his own path. Lucas makes up his resolve to become stronger and save Ness. To do this, he decides to follow Pokemon Trainer. Will this pay off in the end?
Time:
Enemies: Primid, Sword Primid, Armight, Borboras, Scope Primid, Buckot, Roader, Spaak, Autolance, Feyesh, Greap, Jyk.
Boss: Nagagog
Boxes:
Story Note
A subspace bomb is set on a seemingly baron section of land, probably to draw the attention a local hero. As the Primid army invades, he rushes to protect his land....
Head right. Four Primid attack in the open, and two Sword Primid wait inside. Down the ramp are two more Sword Primid, two regular Primid, and two more Sword Primid, in that order.
Dash attacks are very effective.
After falling off the ledge, you face your first Armight, probably the most annoying enemy in the game. Two of them attack in tandem. Keep low and use wide reaching moves. Don't drop your guard or try to gain distance, as they can throw their swords. Blocking your path is a Borboras.
Bwhahah? You're not Don Kanoji.
Next room has two more Armight. Climb the ladder and grab the key. Throw the key at the door across from the ladder. Watch out for the Jyk and enter the door.
That takes some aim to unlock a door like that.
Secret, Yellow Box #11
Secret time. Navigate the Jyk and grab your two boxes (1) (2). Exit back out.
Fall down and continue left. Take the lower path, dodging the first Jyk and shielding past the second to hit the switch. Continue left to get your prize, another life (3). Watch for the Armight. (the upper path just has some Sword Primid). Continue left. Lunge through the Sword Primid and enter the door.
Duck!
This can be tricky. Use Marths Side-B attack to hit the switch on the other side of the gate.
If his sword can swing though the gate, why not just break the gate?
Watch the Roader (jump onto the platform above it). Three more Roaders attack just over the mound. Use aerial attack to take them out and hit the switch. Some Primid and a Borboras appear. Dispatch them and continue. Go under the platform and wait for one of the enemies (two Roaders and a Spaak) to show themselves. Take out the first one quickly, and move the next as fast as possible. Down the road is another Spaak and Roader combo. Enter the door.
Story Note
Meta Knight (whom we think is a bad guy, being the pilot of the Halberd) attacks Marth. Marth retaliates until they are BOTH ambushed by Primid. At that point they both realize that they have the same enemy, and are therefore on the same side.
We can now draw that Meta Knight is not on the Ministers side, and that he somehow had his ship stolen, and is probably trying to get it back. Meta Knight attacked Marth thinking that he was with the Primid.
Meta Knight or Marth, your choice.
Now you have to fight an army of Primid, Sword Primid, Scope Primid, and Buckot. The Scope Primid aren't that much of a threat, and the Buckot are very annoying. Take out the Buckot first, then the Sword, followed by the regular and Scope. In the end you'll have to fight a Greap.
Back to platforming. You actually run quite a ways before getting attacked by a swarm of Primid and Sword Primid, and one Scope Primid. Just to the left, you get hit by your first Autolance. Knock the head off to attack the yellow light underneath. Your reward for winning is an extra life. Little more left is the first box of this area (4).
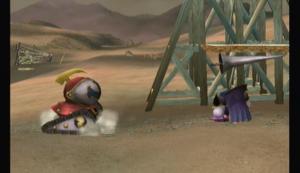
Sometimes, it pays to be short.
Now for an annoyance. The camera will start moving on its own. Keep pace and don't outrun it. During this time you get attacked by a Primid, two Sword Primid, a Scope Primid, and an Autolance. The camera moves to fast to take out the Autolance, so just jump over it. Before jumping over the mound ahead, grab the trophy under it.
Or CD
Another Primid and a Poppant. This Poppant is trapped and easy pray for a Trophy Stand if you have one. Once the camera stops, you'll be attacked by three Sword Primid and a Greap. Take out the Sword Primid while staying just out of the Greaps range, that way you can take on the Greap by itself later.
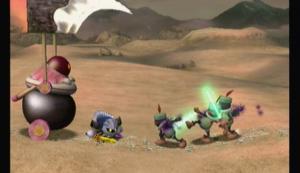
This would be, NOT out of the Greaps range.
Now you are master of the camera again! However, just across the gap lay a Scope Primid, three Sword Primid, two Primid, two Autolances, ... and partridge in a pear tree. Some of them appear on the wrong side of the gap, and commit suicide trying to get over.
Jump up on the wood strutures ahead to get attacked by six Feyesh, five Sword Primid, two Armights, and two Autolances. Glad that's over with. At least there weren't twelve drummers drumming. Enter the door.
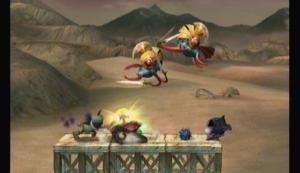
Sadly, the enemy cant hurt each other.
Fall down and take a ride in the mine cart. You don't have to jump out before hitting the spikes, they don't do any damage. Enter the door below. Hop in the cart and grab your boxes at the end (5) (6). Run back through.
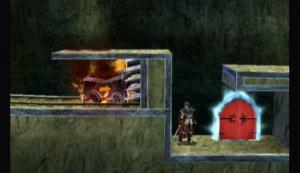
Yellow Box #12
Hop up and go right. You'll be attacked by a wave of Sword Primid and Buckots. Take out the Buckots first, using the high ground as an advantage over the Sword Primid. A box will appear after (7).
Now go get in the next mine cart.
Jump out when you see the flashing sign. Jump into the next cart and do the same.
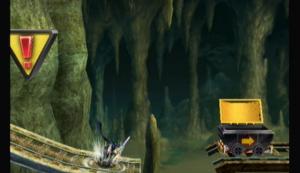
Who built these rails?
Third cart. This one's different. Don't jump out when you see the sign. Rather, fall with the cart till you see the door appear in the bottom right corner. Jump out and aim for the platform. Enter the door and head left to finish.
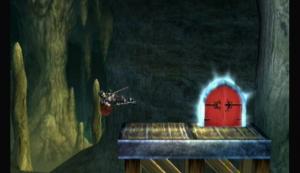
Here.
Story Note
Marth and Meta Knight catch up to the Minister, only to get shot down (literally). At this time, Ike ambushes the Minister with his final smash, disarming the Minister. Now the swordsmen are together, unified, all be it for their own reasons, against the Minister.
There are several Primid ahead, along with a Roader and two Buckots.
Just after you get attacked by many waves of enemies, including Primid, Sword Primid, Feyesh, Buckot, and a Nagagog. When the Nagagog appears, focus killing it before it grows larger. After, two more will appear with even more Primid.
No fair!
Well I WAS picking on someone my size...
Story Note
The Minister gets away.... for now.
Luigi shows his, er, “courage” against the Waddle Dee, only to get ambushed by King Dedede, who is also collecting trophies. Dedede uses the Luigi trophy as bait for Wario, who appears in his hover cart with several other trophies. Dedede springs his ambush of an army of Waddle Dee, steals the cart, and leaves Wario in the dust.
This proves that A) Luigi is as scardy as ever, and more importantly, B) the Ministers lieutenants aren't unified or organized, acting more as free lancers looking for more power.
Too easy...
End of Level!
You just unlocked Marth!
Time:
Enemies: Primid, Boom Primid, Puppit, Fire Primid, Sword Primid, Feyesh, Auroros, Ticken, Trowlon, Bucculus, Jyk.
Boss: Shellpod
Boxes: 10
Story Note
Link takes hold of the Master Sword and walks past the obviously harmless sleeping Yoshi, when they are both attacked by the Primid.
Choose either, but know this: Links dash attack can KO most types of Primid in one swing.
Start on your way by crushing several Primid and Boom Primid. You get attacked by a wave of Sword and regular Primid by the moving platform. By the next platform you see your first Puppit. Links aerial up attack can take it out in one shot. Watch out for the Bucculus on the next ledge. Over the tree and grab the item box (1) on your way down. Take out the Boom Primid and head left through the tree.
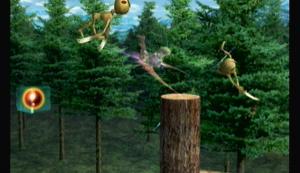
Secret, Yellow Box #13
First secret. Mind the Jyk and grab the boxes (2) (3) back out and up the trees to the right.
Watch the Puppits and don’t fall down here, theres just some Bucculus at the bottom. Jump to the next tree and fall straight down for an item box (4).

Who’s controlling these things anyway?
Across the first gap is an ambush. Take out the Boom Primid with projectiles quickly so you can focus on the Puppits. Enter the door.
Across the gap are a couple Trowlon. Don’t attack them head on, and don’t let them get under you. After, watch for the Auroros and the Primid riding the Trowlon.
Bad.
[level9-4thumb=.jpg title=Worse.]
Use the springs by the cliff to get up the side. Mind the Auroros at the top. On top, use the spring to get to the item box (5). You can fall straight down, avoiding the Trowlon and Ticken, all the while grabbing the item box at the bottom (6).
Weee~
Any you thought you were dead.
Across the next gap you have to fight a wave of Puppits and Ticken. Since they both require the same move to kill, take them on at once. More to the right, hit the bomb to destroy the blocks and grab the item box (7). Hit the next bomb and grab that box (8).
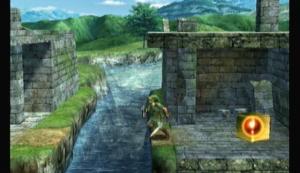
Yellow Box #14
Jump up to the higher ledge. Watch for the Puppits and Primid. Drop and destroy the final set of blocks. Enter the door.
A Feyesh attacks. Use the rails on the following Feyesh and Fire Primid. Use the spring to hit the rail and destroy the blocks. Down below is an extra life (9).
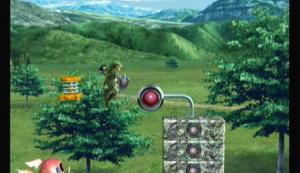
What’s the second spring for?
More to the right, hit the main rail to activate the other rails, destroying anything in that pit. Hit the next rail with caution, as it will destroy the block under you as well as the box on the other side (10). Just past it is a Shellpod. Hit it a few times to destroy the shell, then kill the creature underneath.
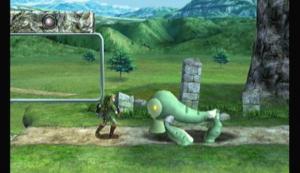
Hard on the outside, creamy on the inside.
In the tunnel are two more Shellpods. Hit the switch to make platforms appear so you can reach the ladder. At the top, hit the rail to go higher.
As soon as you exit go right. You’ll be attacked by two Feyesh and a Fire Primid. Destroy them while hitting the rail.
Ranged attacks come in handy.
Use the spring to get up the cliff. A couple waves of Shellpod, Feyesh, and Fire Primid attack. Hop down and go into the light.
Story Note
The Halberd gets away again.
A “mysterious” box appears in an unknown location.
End of Level
Enemies: ROB Sentry, ROB Blaster, Roturret, Glunder, Bytan, Metal Primid, ROB Launcher.
Boss: None.
Boxes: 5
Story Note
Well, that was a rather wrong picture of Samus breaking into an unknown research lab.
The boxes don’t contain anything, so continue though. Take the elevator down and destroy the ROB sentries. Now go back up and go left. Destroy that ROB Sentry. Go up one more level. Destroy the ROB Sentries and ROB Blaster to get to the item box (1). Back across and go up again.
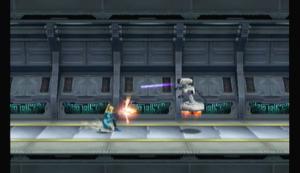
Yellow Box #16
Head right. Watch the ROB blaster and enter the door.
Story Note
Looks like they are using Pikachu to power a misc. machine. Samus saves the poor mouse, who now joins the fray.
Pick your character and prepare to fight four ROB Sentries and two ROB Blasters. Enter the door.

I see your laser, and raise you my own.
This room is big, and you’ll come back to it several times. For now, just go straight across, take out the ROB Sentries and ROB Blaster to go down the ladder and through the door.
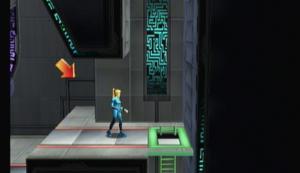
Heed the arrow.
Go right till you’re on a larger platform. Two Roturrets and ROB Sentries will appear. In killing the Roturrets, you’ll probably KO the ROBs as well. Continue along and take out the ROB Sentry and Blaster up the ramp. Ignore the upper path and keep right. Take out the two ROB Sentries and the Buckot. Grab the key and go back and take the upper path.
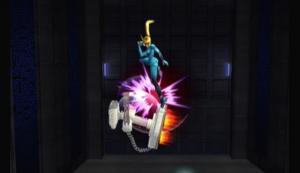
My key!
Ignore the upper-upper path again and stay left. Destroy the Roturret and two ROB Sentries. Now head back and take the upper-upper path. The left is locked, so take the right path. Watch the Roturret. Grab the key. Go back left and use it on the locked door. Destroy the ROB Blaster and hit the switch. Go back right to where the second key and Roturret was. Step on the Launcher and let it propel you across the gap to an item box (2).
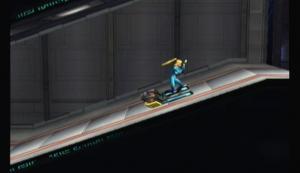
Yellow Box #16
Fall down and head left. Follow the arrows back to the door.
Back here again! You want the door directly above you. To get there, climb the ladder and ride the windmill platforms.
Here.
Platform look familiar? It should. Ride it across while watching out for the Jyks. At the end, some Glunder will come down. Destroy them to activate a switch. Hit it and run back.
Sorry, just need to get the switch.
This time, ride the windmill to the green ladder directly overhead. Climb up and destroy the boxes on the right, and the ones across the gap to get an extra life (3). Now head back to the ladder. This time go left and enter the door.
ZSS’s blaster doesn’t destroy blocks, sadly
Don’t mind the Bytan. There’s literally infinite of them. Keep climbing till you reach a moving platform. There are ROB Launchers on either side, so carefully take them out on your way up. To the left of the door is another item (4). Enter the door.
If I had my armor, I’d so retaliate...
Go right till you see a gap in the ceiling. There is your next item. Just triple jump to get it (5).
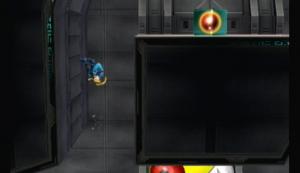
Don’t be fooled, the box is on top.
Fall down and defeat the three giant Bytan. Jump up the next ledge. STOP! I know you’ve never seen these before, but they are mines. Rather big, annoying ones that that. Keep your distance and detonate them with projectile fire.
Don’t get too close!
This next part is impossible to explain without getting yourself killed, so I’ll say this: RUN! Use double jumps and jump over everything. The ROB Launcher will probably get you, but oh well. Keep moving till you get in a fight with a bunch of Metal Primid. KO here is hard, so you’ll have to do it the old fashioned way of beating them to a pulp. As with all slow things, use your speed.
Continue right. Jump over the gap and use the movable platform to get over the next ledge. Stay light on your feet and jump from the ledge to the next purple platform. Quickly jump from the platform to the ROB Launcher and use an aerial down attack on it and jump back to the purple platform. One more time should do it. Now jump to the next ledge. And enter the door.
Story Note
Samus spies her trademark Power Suit in this control center, meaning it’s somewhere on the facility. Like all good Metroid games, the goal of this mission was to upgrade Samus’s suit.
End of Level!
Enemies: Ticken, Bombed, Greap, Bucculus, Shaydas, Feyesh.
Boss: None.
Boxes: 6
Story Note
Kirby runs off for an unknown reason (it doesn’t appear that he sensed danger) leaving the other character (Zelda or Peach) behind to get turned into a statue. Her then gets taken over by the Primid. That Primid (Zelda or Peach) tries to trophy-fy Link and Yoshi, but Pit and Mario save them. Pit and Mario now know that Link and Yoshi aren’t with the Primid. The same cant be said for Link and Yoshi....
Choose a character to face off with either Peach or Zelda.
So cheap.
Story Note
Link mistakes the situation. Now two teams must face off, each fighting for the same cause.
Pit works good, as you can just sit back and lob arrows.
Story Note
Dedede takes advantage of the situation and runs in to scarf Yoshi and Links trophies. But it turns out Kirby didn’t go as far as we had thought. Kirby turns them back to normal and Link proceeds to disable Dedede’s hover cart. Now that they all know they are on the same team, the unify to take on Dedede together.
Yoshi and Kirby are poor choices. But whatever works.
Heading right, look out for the Bombed. Dodge their attack and just run past them. Red Mites also come to annoy you. Jump the gap and get the drop on the next Bombed as a couple Ticken get the drop on you. Grab the item (1) and be on your way.
Don’t have much aerial range.
The next stone platform will move up. You’ll have to fight waves of Bombed. Use your shield or aerial abilities to dodge their first attack, then they’ll normally jump off the side on their own. After the Bombed come two Spaak and a Greap. Equally annoying. Focus on the Greap first, this being a small area. Finally, some Bullet Bill will come flying by. They don’t really pose a threat after what you went though. When the platform ends, head right, dodging the two Bombed. Enter the door.
Link forgot to wear deodorant today.
The camera moves on its own again. Watch the Bucculus right off, and the Jyk later. Now the pillars should start moving up and down. Under one is a Bucculus and above the next is a Jyk, so time your steps carefully. Over the gap. There are platforms that come out of the ceiling that may hinder your jump, so time it right.
Jump over the Jyk and Bucculus. DON’T jump on the launch thing. Get across the moving platforms and dodge the Red Mite within reason. One final set of falling platforms, across the gap and over the Bucculus.
If only they had the budget for one more Jyk...
Across the gap (you don’t really have time to time it, just pray you make it) and don’t miss your item box! (1). Keep moving till the camera stops and enter the cave.

Bow before the power of Yellow Box #17
Story Note
Dedede’s cart is parked outside (no, he’s not smart enough to hide it), so he is definitely in there. Now they just have to smoke him out.
Drop down to fight your first Shaydas. These are extremely hard to kill and do a ton of damage, so you should avoid them at all costs, though you cant here.
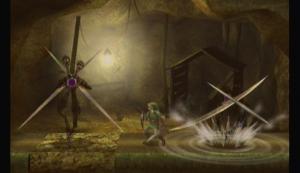
No fair! You have bigger swords!
Once they are gone, a hole in the floor appears. Drop down to the mine cart below. Jump out on the warning sign. There’s an item box (2) above the tunnel you just came out of, and a Feyesh in this tunnel. Keep moving up. At the top, triple jump to the left to reach a hidden platform. Ignore the Shaydas and destroy the blocks to enter a door.
Secret, Yellow Box #18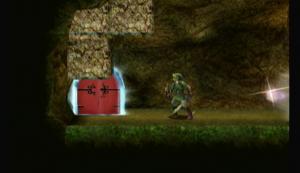
A closer look.
Everyones favorite: secret time! Jump across the water to get your boxes (3) (4)
Move quickly through the red hot pillars in this tunnel. But be careful, contact of any kind will damage you. Grab the key at the end and use it on the top door (the other two are just traps).
Traps 1 and 2.
Down the hall and kill the Shaydas. A door will appear.

Secret, Yellow Box #19
Secret again. One directly across from you and one in the top right.
(5) (6).
Ignore the Shaydas this time and move right, blowing up the blocks as you go. Drop down and destroy the next set. One last time, only now move quickly so as to not fall on the spikes.
Now you are pressed into combat with some Feyesh and Ticken. In the end three Shaydas appear. Attack them hard and fast at the same time. Don’t let them separate, as they will attack you from multiple angles at once. Enter the door. Grab your boxes (5) (6) and finish the level.

Yellow Box #20
End of Level!
Enemies: Shellpod, Primid, Puppit, Boom Primid, Borboras, Gamyga, Fire Primid, Armight, Glire.
Boss: Wario.
Boxes: 5
Story Note
We see Kirby watching the Halberd hover over Bowser’s Castle. Ganondorf appears in a control room and, not really “orders” so much as “informs” Bowser on where to find is long lost Princess. Ganondorf obviously knows more of whats going on at this point, as evident by his smirk.
Pokemon Trainer enters the scene again. We now know his motives for all of this: to capture more Pokemon.
I still like Pokemon Trainer.
Onward! A Shellpod greets you into the level, followed by a Boom Primid. Carefully jump over the Jyk, and the spikes. Now you’ll be forced to battle a Shellpod and some Puppits. Take out the Puppits first. As long as you stay on the upper platform, the Shellpod wont attack.
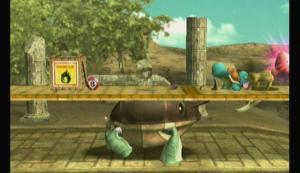
Na na!
Fall down to fight three Primid. Blast your way though the stones to find the first item box (1). Continue up the elevator. On either side is a Gamyga. Focus on one, attacking the head (attacking the base does nothing by lower it.) You really only have to kill the one on the right to continue.
Secret.
It’s that time again: Secret time! Blast away at the blocks, working from the top down. You should find three trophies hidden amongst the blocks. None of them are actually IN a block, just resting in little nooks. Go back out and up.
Over the next pit to the right. Now you’ll want to touch off the falling blocks and land on the platform with the item box (2). Grab it and carefully jump across the rest of the blocks.

Yellow Box #21
Ooo, lava. Navigate the lake, watching out for fireballs. On the other side is a Fire Primid. Take him out and wait for the flames to go down. Quickly get across and kill the next fire Primid. Hit the button overhead to lower the flames for a few seconds. Use that time to get to the block before the next switch overhead.
This one is hard with Squirtle, but easy as Lucas as you can use his PK Thunder. In one motion, jump over the flames and hit the switch. If you miss, you’ll hit the flames and become invincible for a second. Use that time to hit the switch and continue, ignoring the Fire Primid.
Surf works well also.
Do the same thing at the gap. This time you should be able to make it past the next switch before the fire comes back on. Wait for the flames on the stairs to recede and jump up both of them. Two Armights attack. Don’t let them push you off either side!! Your goal is to jump across the gap and upwards to get an item (3).

Yellow Box #22.. I hit it with Surf on accident.
Now fall down like the arrow says. Jump over the spikes on the left to fight a Puppit and get a spare life (4). Now right. You’ll be attacked by several Glire, Primid, and Sword Primid. Use area attacks and continue.
Now you’re attacked by three Nagagog. The rails work best for destroying them. Across the gap and another fight. Scope Primid on the right, Fire on the left, and Glire all around. Enjoy.
Behold the destructive power of a Rail!
Go down the ramp. At the bottom, jump on one of the raised platforms. The entire thing will lift into the air, and no, you cant just jump over it to avoid it. A fight with Glire and Armight ensues. Squirtles Up A attack works well.
I do this EVERY time...
Continue to the right and take the elevator up. Item box (5) on the left, door on the right.
Story Note
Wario appears. Lucas strengthens his resolve to fight.
Choose a character and fight. It’s just Wario. The walls make it hard to send him to the side, so focus on juggling him.
He never did like to take baths...
Story Note
Since Wario got his cart stolen earlier, it’s no surprise to us that Ness’s trophy isn’t with him. Lucas takes it hard though. An ominous growl his heard from the cave in the background...
End of Level!
Enemies: Paratroopa, Parakoopa, Goomba, Koopa, Shellpod, Glire, Bucculus.
Boss: None.
Boxes: 4
Story Note
For clarity, this is not the cave Pokemon Trainer was outside of. Dedede places strange medals on his new trophies. Bowser crashes the party though, caving the ceiling in on Dedede with his army. Bowser only spots the Peach trophy, and is the only one he makes off with. As dull as ever.
Mario’s group enters the ruined thrown room, still not noticing the other trophies, and gives chase through a crack in the wall that Dedede used to escape.
Choose your characters.
Watch out for the falling boulder. It will chase you. Across the gap, the ceiling starts to come down. Get off the platform and take out the Goombas on the other side. Climb the ladder and jump up to be assaulted by a literal army of Paratroopa, Goomba, and Hammer Bros.
he’s not Indiana Jones either!
Mario needs a sword powerup.
Fall down the other side, watching for the Koopa at the bottom.
Jump out onto the platform and fall as quickly as possible. The ceiling will be in hot pursuit. In the next area, the floor raises up, so jump as quickly as possible. Jump up to the next ledge and take out the Koopa.
This time, jump out to the platform, then quickly jump back to the tunnel. The ceiling will start to come down over the platform. Wait for it to go all the way down, the cross over top of it. Enter the door.

Secret, Yellow Box #23
Everyone know what time it is? That’s right, its Tool.. er, secret time! The walls will cave in here. Grab one box (1), then exit and re-enter to grab the other (2). Exit the last time.
Wait for it to go down again and cross. Now wait for it to come back up, and jump down. This time, stay to the left to grab an item box (3), but be careful as there is no floor. Jump across before the ceiling meets up with you.
Why don’t improve your marksmanship while you wait?
Yellow Box #24
Up the ladder. This is a very interesting puzzle. You have to jump over the gaps in the space provided within the stone pieces, and still grab your item box in the center. Not much I can really do to help you here. Good luck. On the other side are a couple of Goombas and Hammer Bros.
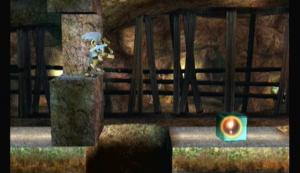
Over
Under
Through
Alright, grab the key. Wait for the spikes across the gap to fall. Jump across just as they start to rise (minding the flames) to pass under them. Jump straight into the locked door open it. Enter the door.
Right. Hit the switch to dissipate the fog. Get across and take out the Parakoopa. Get up the tunnel quickly, as the platforms fall the longer you stay on them. Grab the ladder and climb up. Across the gap to pick a fight with two Shellpods, some Paratroopa, and a few Glire. Across the next gap.

I think Wario set up this trap...
Watch for the Glire that come rolling down. At the end, jump up the platforms. On your way up, destroy the Paratroopas. Just before the purple fog, there should be a switch on the left. Hit it and climb up quickly.
Some Bullet Bill will come across at the top. Head right. There is a switch on the lower path guarded by a Glire and two Bucculus. Let the Glire come to you and jump over the Bucculus. Hit the switch and take the upper path. Hit the next switch and continue quickly as the ceiling starts coming down.

Upper. Lower.
The final switch you’ll have to hit with a projectile. This also calls down some Giant Goomba, who you’ll have to kill before the fog comes back. Over the Glire and on to the platform. Watch the Parakoopa and get on the windmill platforms. You want to make it to the top to get to another moving platform that will take you right.
Couple Hammer Bros in the next hall. There will also be boulders coming at you. At the end, be sure to hit the switch. Jump up and enter the door (not the yellow one).

Secret, Yellow Box #25
Two secrets in one level. Get across by either path (they both collapse) and get your boxes (3) (4). Exit and go right, through the yellow door.
Story Note
Mario tries to get Bowser, but Bowser uses Peach as a shield. Pit attack while Bowser is offguard, but it’s no use. Bowser escapes. In the process, the strange medal falls off Peach. Kirby spots it and, though they don’t show it, eats it.
We rejoin the minister at Bowsers castle. He sets a Subspace bomb and engulfs it, unbeknownst to Bowser.
Master hand appears on the computer before Ganondorf, signaling that he wants Ganondorf to be his minion. Ganondorf agrees with the same smile he gave the King of Hyrule in Ocarina of Time. Think we know how that turned out.
End of Level!
Enemies: Borboras, Glire, Floow, Toturret, Matal Primid, Bytan, Armight, Shaydas, Autolance, Towtow.
Boss: None.
Boxes: 9
Back to Pokemon Trainer and Lucas.
Down the elevator and into the mine cart. Free fall all the way down. Head right. Take out the Borboras and quickly make it under the wall.
There are randomly shaped raising platforms in this section, so watch out. Ignore the Mite. Right to the right and above the Jyk is a trophy. Wait for the platform to lower from the ceiling, grab it and move on.

Squirtle looks so cute when he’s falling.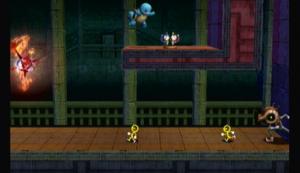
Mine all mine!
Well now that that’s over with, jump to the platform with the Glire. Don’t jump too high or you’ll hit the spikes. In the next hall watch the spikes that fall from the ceiling. Get close and wait for them to fall, then wait for them to go back up. Go across as they go up. Take out the Borboras a the end, and do the same with the next set of spikes on the stairs.
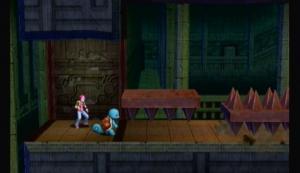
That was a close one...
Make it under the wall and grab your prize, another life (1). Jump onto the moving platforms. Take out the Floow as you go around, but don’t worry about the Roturret. Get the item box (2) at the apex and continue right when the hall comes around.
Destroy the Floow before falling down. Once down, the switch you want is the far right one. Hit it and jump off quickly. Carefully fall and enter the door.
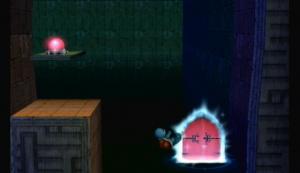
Right hand switch
The camera will now move on its own again. Get around the flames and watch for the Mite. At the second set of blocks, get ahead of the game to get your item box at the top (3). Don’t ride the mine cart! Walk along the path yourself. At the end, get on the platform. It will begin moving down.
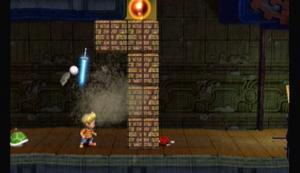
Yellow Box #26
Avoid the crystals on your way down. It will be very hard. After the first set, you have to jump off to some side platforms and fall though those to get around. Next, some Metal Primid will attack as the platform rocks back and forth into crystals. Another Metal Primid will appear just before a door on the left. Ignore the Primid and enter the door.
This is why we dodge the crystals.
Secret.
Man this level has some rushed secrets. Jump across and grab your boxes (4) (5) and exit.
You’ll fall down a ways, and at the bottom be forced to fight two giant Bytan and a Glire. Watch for the Glire in the next hall.
Story Note
Pokeball go! Ivysaur is caught in the Pokeball!
Right we go. If you’re using Pokemon Trainer, you can switch between Ivysaur and Squirtle using his Down B. On this platform, you’ll fight two Autolances and way too many Armights. Next is a wave of Armnight and Borboras. Finally, your worst nightmare, Armight and Shaydas, with random flame pillars coming from all round. And you’re done. Grab the item box (6) and continue.
Eat spore!
Hit the switch to open the gate. And again. And again, this time with a Borboras in your way. Now you have to hit two switches and move quickly though both sets of doors. If you don’t make it, drop though the platform and try again. Hit the next switch to open a gate above you. This last one is the hardest. First take out the Bytan, then hit the first switch. Run over to the next switch. Use a dash attack and keep moving past the first door, drop, and move down to the left. Grab the box behind the gate (7) and jump back up. Now to try again, only this time move right at the bottom.
Destroy the Roturret using aerial attacks. Hit the Right switch, and not ANY of the other ones. Enter the door that appears.

Yellow Box #27
Much easier then it looks. Hit the switch and work your way counterclockwise. Grab your boxes (8) (9) and leave.
Move to the end of the hall to kill the Towtow, trying to ignore the Shaydas. Enter the door.
Now you fight Charizard. It’s the same as fighting Pokemon Trainer, only with him just using Charazard. If you keep him in the air, he wont be able to attack.
Its Super Effective!
Story Note
Pokemon Trainer is now at full power. He and Lucas enter a large empty room. It wont stay that way for long....
End of Level!
Enemies: Scope Primid, Trowlon, Primid, Gamyga, Buckot, Bytan, Armtank, Auroros.
Boss: Galleom.
Boxes: 8
Story Note
A giant airship rushes through the desert. Ike, being his usual self, rushes off without thinking. Meta Knight and Marth hesitantly follow.
Choose your character.
A Scope Primid will attack right off, so jump as soon as the stage starts. A Primid will also run after you. After one more Primid, another Scope primid, and a Buckot, you come to the second platform. A Gamyga guards the other side. Attack it’s head to continue.
The camera starts moving on its own again (tell me I’m not the only one that hates these parts...). Fall down, but not too fast. Watch for Buckot, Scope Primid (on the left) and Trowlon. You don’t have time to fight any of them, so show some agility. At the bottom you find a hoard of Bytan. At least the camera stopped moving.
Continue right. Take the Scope Primid and move though the tunnel. Watch out for the Roader a few feet in, and the second one soon after. Grab the item box. Jump to the ledge above the tunnel, then the ledge above that. Enter the door.

Secret, Yellow Box #28
Secret. Grab your boxes (2) (3) and leave.
Watch for Buckot along this path, oh, and the Scope Primid when there is a pillar coming out of the sky.
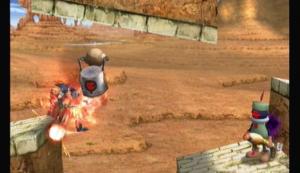
Tell me, its not just me, this is really cheap, right?
Break the blocks and grab the item (4).

Yellow Box #29
Continue. Since none of the characters have ranged moves, you’ll have to carefully go though the mines. At the end, kill the Scope Primid and go up. Don’t get grabbed by the Trowlon.
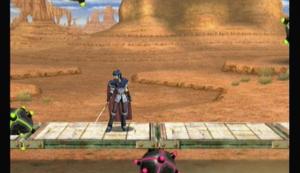
For some reason, I don’t feel safe.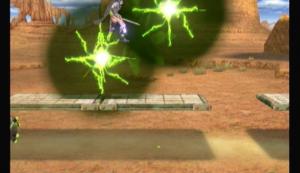
Oh, right. I remember now.
Here you fight an Armtank. These aren’t as annoying as they may sound, but are more annoying then they look. The only vulnerable part is the green blob inside. To get to it, you have to use jumping attacks. Further, the armor completely protects it. To get past the armor, you have to attack the flaming arm that comes out the top.
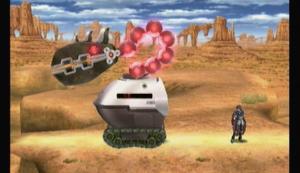
Looks menacing...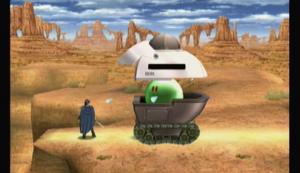
...till you see the pilot is a Jello prototype.
Fall all the way down and move off the falling platforms quickly. Enter the door.
Watch for the Auroros ahead, as well as the Mite and Towtow. Use the Auroros to take them out if you can. After the first set of moving platforms is a Towtow. The second set sees a flock of Auroros pass overhead.
NO! the camera started moving on its own again! Well, make your way down. Watch the falling boulders. At the bottom are a couple of Big Primid. There no more a threat then regular Primid, just easier to hit. Once they are gone, the tunnel contains a ton of Bombed. Use your shield and dodge your way though. Jump in the barrel.
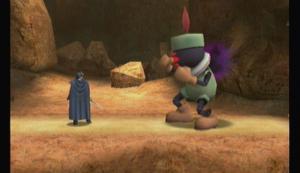
Just what have they been feeding you?
Time your firing. First barrel to the second, second to the bottom right bottom, right to the item box (4), item box back to the, one above it to the middle one, middle one to the one above that, one above that to the one on the right. Enter the door. Grab your boxes (5) (6) (7) and exit.
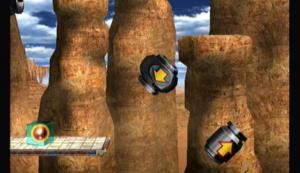
Green box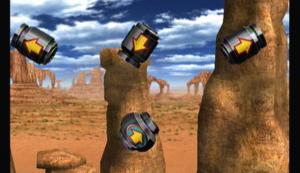
One more...
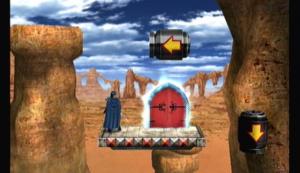
Secret, Yellow Box #30
One above the item box to bottom right, bottom right to the only barrel it point too, from there to the center, center to the right, from there to the right again, and finally into the tunnel. Phew. Enter the door. Grab your item (8) and continue.
That’s no airship, it’s a boss!
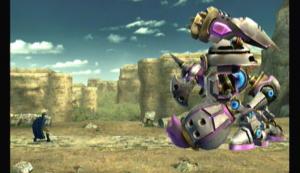
Where’s Obi Wan when you need him?
--== Galleom’s attacks ==--
1) Stomps the ground
2) Rushes across the stage
3) Stomps his way across the stage
4) Fires a shockwave across the stage
5) Punches wide
6) Creates a tornado
7) Body slams the stage
8) Launches missiles at you
--== How to predict ==--
1) Raises his leg up
2) Folds up into an airship
3) Turns his back to the screen
4) Raises his hands and spins
5) Rears back
6) Faces the screen and winds up
7) Stands up straight
8) Stands up and his shoulders glow
--== How to dodge ==--
1) Don’t be near him or dodge to the side.
2) Jump over him.
3) Dodge when he is about to fall on you.
4) Jump or shield
5) Be out of range or shield.
6) Be out of range. It will suck you in if you’re close.
7) Jump up and aerial dodge when he falls.
8) Shield, or be in really close to him.
--== Strategy ==--
Stay airborne to dodge most of hit attacks. It also gives you a better shot of his face, which sticks out farther then the rest of his body.
Overall, he is slow. Meta Knight makes a good choice with a standard B attack.
Story Note
Galleom jumps off the cliff, only to land on unstable ground. Hmm... this place look familiar.
End of Level!
Enemies: None.
Boss: Galleom
Boxes: 0
Story Note
Thought that looked familiar.
This fight is exactly the same as last time, just with a different background.
Man, Obi Wan isn’t down here either...
--== Galleom’s attacks ==--
1) Stomps the ground
2) Rushes across the stage
3) Stomps his way across the stage
4) Fires a shockwave across the stage
5) Punches wide
6) Creates a tornado
7) Body slams the stage
8) Launches missiles at you
--== How to predict ==--
1) Raises his leg up
2) Folds up into an airship
3) Turns his back to the screen
4) Raises his hands and spins
5) Rears back
6) Faces the screen and winds up
7) Stands up straight
8) Stands up and his shoulders glow
--== How to dodge ==--
1) Don’t be near him or dodge to the side.
2) Jump over him.
3) Dodge when he is about to fall on you.
4) Jump or shield
5) Be out of range or shield.
6) Be out of range. It will suck you in if you’re close.
7) Jump up and aerial dodge when he falls.
8) Shield, or be in really close to him.
--== Strategy ==--
Stay airborne to dodge most of hit attacks. It also gives you a better shot of his face, which sticks out farther then the rest of his body.
Overall, he is slow. Lucas’s PK attacks are very effective.
Story Note
Turns out that he was a walking bomb. In a last ditch effort, Galleom grabs Lucas and Pokemon Trainer and rockets into the air. Lucas finally snaps out of his cowardness and uses PK Thunder, just like Ness, to save himself and Pokemon Trainer. Meta Knight, seeing them defeat Galleom and therefore proving that they are not with the Minister, swoops in to save them. Pokemon Trainer and Lucas shake, saying that they are even.
Enemies: Shellpods, Feyesh, Bucculus, Armight, Puppit, Trowlon, Scope Primid, Nagagog, Primid, Greap, Spaak, Ticken, Bytan.
Boss: None.
Boxes: 4
Story Note
The Minister reflects, looking almost sorry for what he’s done till now. Not so much as for the destruction, but more for the R.O.Bs. Pit tries to get a cheap shot in, but the Minister is still too quick.
Choose your destiny, er, party.
Use the rail to get past the blocks. Two Shellpods and some Feyesh attack next. The camera will start moving on its own again (ugh) so keep pace. Hit the next rail, avoiding the Bucculus, to continue. Jump over the gap and take out the Borboras. Try to ignore the Mites and hit the rail when it is inline with the lower blocks.
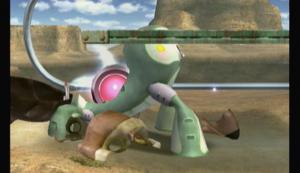
Ooo, that’s gotta hurt.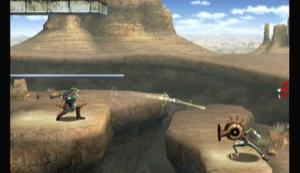
Projectiles come in handy.
Hit the next rail down quickly. Drop onto the ledge below for your first box (1) that should have been shattered by the rail.
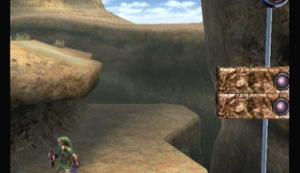
Stickers!
Continue to the right. On the moving platform, a bunch of Feyesh will come from the right, followed by an Armight in the center.
You now have control of the camera again! Yay! Shellpod up ahead. This can be tricky. Ride up the first elevator, but jump out. You’ll fall onto the second. Go back left and fall off under the first elevator. Once on the ground, look for a gap where the second elevator used to be. Fall down before getting squished and enter the door.

Up.
Down.
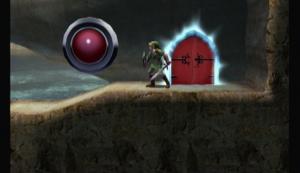
In. Yellow Box #31
It’s that time again. Hit the MASSIVE rail to get your boxes (2) (3). Exit. You’ll need to use the bomb on the right to get out.
Right the first elevator all the way up this time. Kill the Feyesh and jump across. Watch the Puppit and Ticken. Use the next giant rail to take out a bunch of Puppit and jump across. Kill the Ticken and Shellpod to gain access to the door.
The metal platform will start moving once you’re on it. Ride it down and attack the Nagagog and Primid at the bottom. A Trowlon will try to carry you away. Get around and jump the gap, avoiding the Scope Primid. The spikes will fall from the ceiling here. Get right up on the edge of one to make it fall, then go under it while it goes back up.
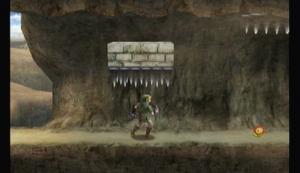
Mom! I’m going to need a bandaid!
Here you’ll face off with a ton of Primid, Sword Primid, Scope Primid, and a Greap. There’s really no easy way to do this.
Jump over the gaps, avoiding the Trowlon and the spikes at the other side. Jump to the medal platform to start moving again. From that one to the next, and finally get off as the walls close in. A Nagagog and a Bytan spwaner are up top. In taking out the Bytan spawner, you’re likely to kill the nagagog as well. Continue up past the blocks.
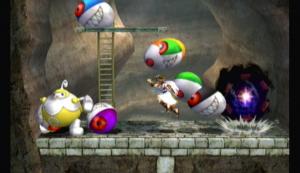
Don’t know what’s worse, getting crushed to death or this.
A couple Spaaks will come. Go left to get another item (4). And back right. Get past the Roaders and end the level.

Yellow Box #32
Story Note
The Minister tries to fend off Link and Mario. An army of R.O.Bs come to his aid. As he turns to look, another R.O.B jumps up and detaches the subspace bomb from the Ministers platform. Without second thought, the R.O.B activate the bomb to allow the Minister to escape. The Minister seems surprised, meaning the R.O.B aren’t acting on his orders. As he flies away, a R.O.B waves goodbye, the Minister looking quite sorrowful over the incident.
Our heroes just barely manage to escape, but so does the Minister.
At this point, everyone except Samus’s and Diddy’s party has joined up. So, just what ARE they up to? And what was with that box?
End of Level!
Enemies: Goomba, Koopa, Parakoopa, Paratroopa, Puppits, Floow, Borboras.
Boss: Primid Diddy
Boxes: 9
Jumps straight to the level. Watch the Goomba by the gap. If you're lucky, you can jump the gap and land on the Koopa, sending him down range to take out the Goomba. Over the next gap, avoiding the Koopa and Parakoopa. Up the ladder.
This is very interesting here. The updraft provides more lift, allowing you to jump higher and get more airtime. Jump on the leaf and ride it down. When it stops, look to the right for a secret passage. Jump in for an item box (1).
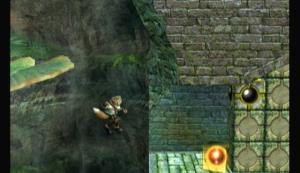
Yellow Box #33
Blow up the box and continue out. Destroy the Hammer Bro and the Goomba. Keep right and climb up the ladder. Watch the Hammer Bro at the top and the Parakoopa to the right. Jump on the swing and ride it to the next swing. Use the second one to get to dry land.
If you're using Fox, use a triple jump to get across this gap without landing, as there is a bunch of Puppits here and they are annoying to fight. Enter the door.
Fox is awesome.
Move carefully over the gap. Some Bullet Bill will pass overhead. Don't worry about the Parakoopa and just take out the Hammer Bro. The next gap has a downdraft, meaning your jumps are shortened. Play it safe and use the platform to get across. Over there you'll find a Poppant, as well as Bullet Bill. Hop from one ladder to the next to reach the next ledge. Under the ledge you'll note an item box. Get there by falling off the edge and jumping back in (2). Blow up the blocks to get back up.
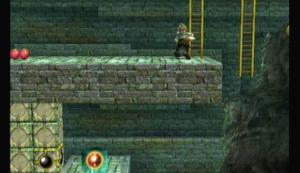
Green box
Use the ladders to reach the moving platform. This gap has another downdraft, so don't try to jump it. Mind the Parakoopa and jump up. Don't touch the launcher thing while fighting the Floow, Hammer Bro, and Puppit that appear. After, grab your life and use the platform to get up.
The camera is moving on its own again -_-
Jump up and grab the ladder. Wait for the ladder to get around the spikes, then wait for then wait for the next ladder. There's a door on the left, take it.
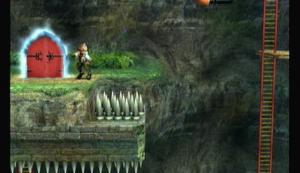
Secret, Yellow Box #34
Something tells me you should never do this with Peach or Zelda...
Everybody loves Secrets! You have to use the updraft to get to the second box (3) (4). Exit.
Grab on to the ladder again and move up, dodging the Bullet Bills. Once on the top, jump to the left to blow up the blocks. Jump over and keep moving with the camera. A Koopa is in here somewhere. Detonating the next set of blocks will drop down a Hammer Bro. Enter the door at the top.
Story Note
Diddy gets turned into a trophy by Bowser. The Primid then copy Diddy, and forces fox to fight both Diddy and Bowser. But Falco shows up to save the day by very coolly disarming Bowser and forcing him to retreat, but not before leaving a parting gift. He orders more Primid onto Diddy, to make it Giant Diddy. Falco turns the real Diddy back to normal.
Fox and Falco are almost identical, so it comes down between them or Diddy, and in the end it doesn't matter. This Diddy likes to camp items, which turn giant when he holds them. Beware.
You should go on a low-banana diet.
Story Note
A rather hilarious cut scene. So now Falco has joined Diddy's party.
Take a ride in the cart. Jump out before hitting the water. Watch the two Parakoopa and continue right. Use the launcher thing to get put into a huge line of cool launcher things, eventually ending in a battle with some Hammer Bros. Into the Barrel!

While Fox doesn't look it, he's having the time of his life.
If you miss, who cares?
Don't hit the Jyk. Next couple of barrels are boring. Ok, when you get to the barrel that goes up and down, aim for the upper barrel, you'll land by an item box (5). Jump up into the barrel overhead. When you get to the one with the bricks in front of it, you're suppose to launch yourself into the bomb. While that works, you can also miss, fall into the water, then jump out an hit the bomb. One more time and enter the door.
Wheee~! Springs! After a few sets, you'll reach one with a Paratroopa overhead (the red on) above him is an item box (6).

Yellow Box #35
Above the Borboras is also an item box with another life (7). Continue right. Use the springs to get over the first set of spikes, then go under the next set by breaking the blocks (watch out for the Parakoopa). Fall straight down. You'll see some springs and a door. Enter the door.
Secret.
Another secret! Break the first box (8), jump over the boxes to get a heart, then target the bomb box (just under the first item box) to blow away the blocks and reveal another item box (9). Exit.
Use the springs to get to the moving platform, and use that to jump over the first set of spikes. Land on the springs to get over the second. Take out the Boom Primid, Bororas, and Feyesh here, and move on to the next set of springs. Use the series of springs with a triple jump to get over the tall spikes. Enter the door.
Moving platform time. Dodge the Bullet Bill while avoiding the weeds that pop out of the sea. Heres a battle. Goomba, Paratroopa, and Bullet Bill. Fun.

Beware, some Goomba will attempt to camouflage themselves as blocks...
The camera will move on its own after the battle to another platform. While the platform doesn't move, you sure should! That weed is back and tearing apart this platform as you go. Watch for Goombas. Ride the final small platform up and to the yellow door... and a Giant Goomba.
It's like a B-rate, ScFi Jaws rip-off.
Story Note
DK has been officially captured. Diddy's team doesn't make it there in time, but they do call in Peppy and the Great Fox for a lift.
End of Level!
Congrats on unlocking Falco!
Enemies: ROB Sentry, ROB Launcher, ROB Blaster, Big Primid, Sword Primid, Glice, Buckot, Cymul, Autolance.
Boss: Ridley.
Boxes: 6
Right into the level again. This time it's dark.

It's dark.
Just to the right are some ROBs and a Glice. Be carful. You can hit the switch to turn the lights back on for a minute, but I can see just fine without it.
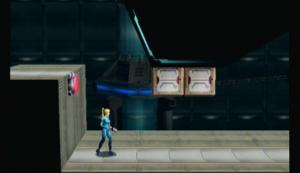
and now it's not.
Anyway, break the blocks to continue. A stairway full of ROB blasters. Watch the Glice by the next switch. Drop down through the red part of the platform. Over the gap, and if you've turned the lights on, there will be a red wall blocking your path. Wait for the lights to go out for it to clear.
DON'T HIT THE NEXT SWITCH! It locks the doors and forces you into combat with a couple of Big Primid.
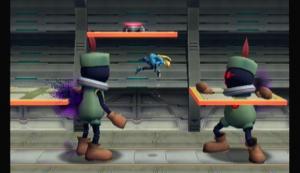
Yeah...
Jump onto the blue block and hit the switch. Go to the next blue block and wait for the lights to go off. Jump to the orange platform.
The second orange platform as land under it. There's a switch to the right if you need, but there's a couple of Sword Primid, a Glice, and a Roader guarding it. After that, hit the light switch and take the ladder down. If you get down in time, there should be a door on the left. Enter.
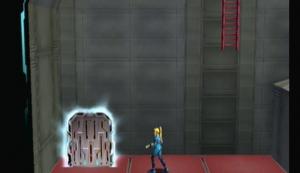
Secret, Yellow Box #36
Secret time already? Five more minutes.... grab your boxes (1) (2) and go. Enter the other door.
Watch for the Buckot, two ROB Sentries and ROB Blasters. Enter the next door.
Story Note
Samus finds her suit, which has apparently been copied by the Primid.
This is actually kind of sad, as the suit the Primid are wearing is actually the Gravity Suit from Metroid Prime, which looks stupid and is a PAIN to get.
Choose a character and fight. It's just like fighting two Samus's, only they like to use close-combat instead of relying on their weapons. Don't let them surround you, try to keep them on one side. If they do try to fire something, your pistol fires faster and can cancel it out.
Story Note
See a ton of ROBs get obliterated by Samus's suit.
Pick a character.
Blast your way through a sizable hoard of ROBs until you get to a stack of boxes completely blocking your path. Use a down attack to clear them. The bottom left column holds trophy. Don't blast too fast or you'll drop it into the gap.

Trophy
Use the button on the platform to stop it from moving, providing safe passage for a short time. Do the same for the next one. Beware the ROB Launcher on the other side. This time, don't bother with stopping the platforms. Just jump across them. Take out the ROB Launcher and Blasters. Enter the door.
Hit the button to call down platform. Hop on and enjoy the ride. Jump off at the first ledge to the right.
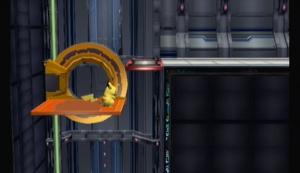
Your stop.
Watch the Cymul. Jump to the next platform and climb the ladder. Hit the button and ride the platform right above you. Jump off on the first platform you come to. You have to fight a Cymul, ROB Blaster, ROB Launcher, ROB Sentry, and Autolance on this small platform, all at once. You cant really focus on anything, just slash away and collect your life.
Alright. Hit the button to make a platform appear. Hop on and keep an eye on the left. Jump off when you see the Cymul and a small ledge. Blow up the blocks and enter the door.
Your third stop.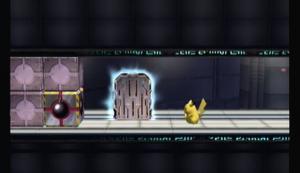
Secret, Yellow Box #37
Secrets. Use the buttons to stop the platforms and get across to your two boxes (3) (4). Exit and climb the ladder back up.
Hit the button again and ride the platform. Listen carefully. Jump to the platform on the right, then the one below that, then the one to the left of that up high, then to the left of that. Finally jump to the door.
Right
Below
Left
Left
Up
Use the blue teleporter. Fight off the Primid and Roturret, then use the right teleporter. Take out the ROB and use the three sets of springs to get to the highest ledge and the the teleporter therein.
Ride the platform across, jumping over one teleporter, to get to the last one. Hit the button and go back. This time, use the teleporter you jumped over. Watch the Glice and grab the box (5). Use the teleporter. Whee! Back where we started. Enter the door.

Yellow Box #38
Grab your item (6) and continue through.
Story Note
Samus gets caught totally dumbfounded. Pikachu saves her from Ridley. The fight is on now.
Pick a character. Samus is the classic for this fight, but Pikachu has some cheap moves.
I'm in ur base, killin' ur Riley.
--== Ridley's attacks ==--
1) Drags his claw across the stage
2) Flies up and comes in from behind
3) Drags his tail a few feet
4) Roars, creating a wind
5) Slams down onto the stage
6) Flies across the stage
--== How to predict ==--
1) Rears back a bit
2) Roars, lands on the stage, crouches, flies off
3) Growls a bit rears back, and bobs up, swinging his tail around.
4) Flaps forward a bit, inhales
5) Lands on the stage and stands up straight, jumps up
6) Flies off screen sideways
--== How to dodge ==--
1) Be in the air.
2) Jump up at the last second and aerial dodge.
3) Shield or be out of range.
4) Doesn't do any damage. Besides, unless you are right next to him,
you cant dodge it.
5) Dodge to the side.
6) Jump up after he leaves. He'll lock onto you in the air, and by the
time he passes you'll be on the ground.
--== Strategy ==--
Pikachu is the easiest, since he is the lightest and can easily dodge all of his attacks. Also, his B Down (Thunder) move works every time. Just get underneath him. If you're using Samus, either get at a distance and use rockets and power shots, or get under him and use screw attacks. The problem with Samus is she's not as agile, and the way you have to attack makes her vulnerable to start with.
Story Note
You see Ridley go off in a ball of flames, but not necessarily die.
Samus and Pikachu make it out just in time to see a couple R.O.B pull a Subspace bomb out of another facility.
Of course, I never would have guessed that the bad guy would have his main manufacturing facility on the ominous, secluded floating island in the sky. Never. >_>
End of Level!
Enemies: ROB Sentry, ROB Launcher, ROB Blaster, Shellpod, Auroros, Gamyga.
Boss: None.
Boxes: 3
Story Note
Pikmin are attacking a Giant R.O.B, which we never see again. He shakes them off, killing a good portion of the Pikmin, and Olimar starts to loose his nerve. Just then, Captain Falcon shows up and takes down the R.O.B with one hit. His choice of landing locations is.... less then perfect however.
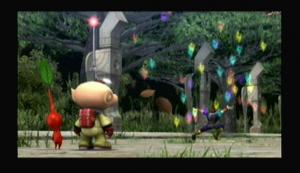
Best entrance ever. XD
This level is really short, so go with whoever.
Couple of ROB Sentries followed by a ROB Launcher on the stairs. Jump up and continue. Drop down under the bridge to find a door.
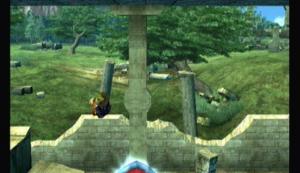
Secret.
It’s that time again. This one his HARD. You have to grab the trophy on your way down, without falling into the hole yourself. If you miss, exit and try again.
When you’re done, hop up the stairs on the left. Fend off a couple ROB sentries and continue right. Grab the item box (1) and take out the ROB Blaster. Over the gap and destroy the Gamyga. Watch for the Auroros and Roader at the end. Climb the ladder.
Two Shellpods, two ROB Launchers and Blasters, a ROB Sentry and two Auroros attack. Nothing you cant handle in a few shots. Continue right and take out the ROB Sentry and Blaster. Next kill the ROB Launchers carefully, don’t destroy the breakable blocks. Use the breakable blocks to reach a door.

Secret, Yellow Boxes #39-40
Anther secret already? Two item boxes (2) (3) and a trophy just sitting there. Careful not to drop the ground under the box. Exit.
Take out the Gamyga on the right. Enter the door.
Story Note
Diddy and Falco team up to rescue DK in a very cool manner. Captain Falcon and Olimar see the fighting. Captain Falcon wants a piece of the action, but Olimar isn’t so sure, though Captain Falcon doesn’t give him much of a choice. By the time they land, DK is free. They signal they are friendly and team up to fight the Primid.
DK is an excellent choice here, as his has that super cheap B Down attack that will KO everything in one hit. Pretty much every enemy, barring bosses, that you’ve fought till now comes out to play, so prepare yourself.
Story Note
Congrats all around as Diddy’s new party enters the heart of the enemy base.
End of Level!
Captain Falcon has just been unlocked!
Enemies: Primid, Shellpod, Boom Primid, Bucculus, Poppant, Ticken, Floow, Metal Primid, Glice, Shayda, Towtow.
Boss: Lucario.
Boxes: 7
Story Note
The Great Fox has started combat with the Halberd. Meta Knight plans to use the mountain in front of him as a stepping stone to his ship. He passes the Ice Climber on his way up, who, being just kids, cant be part of the Ministers army. The Ice Climbers don't like the fact that they've been outdone, and races Meta Knight to the top.
Pick your character. Ice Climbers are an acquired taste, so you might want to stay clear of them unless you've used them a lot before.
A few Primid will drop down. A Shellpod is just above them, along with a Boom Primid. Keep going, dodge the Boom Primid at the top and take the ladder. A Primid, Boom Primid, and Shellpod wait on the ramp. Keep going up. Note that the camera is moving on it's own, but you can move it quicker if you want.
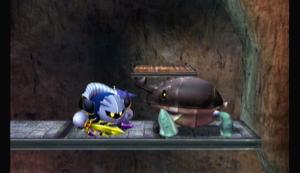
Something is not right here...
Partway up the ladder is a small alcove to the right. Jump in for an item box (1), and get out quickly before either the camera or the spike wall catches you.
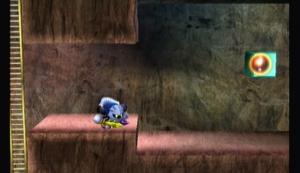
Green box
A the top are some Primid and Boom Primid, and a Bucculus. Keep up. Jump over the spikes, landing right on top of the Boom Primid, and jmump to the right, landing before the spikes and jumping over. A Poppant is just above. Take out the Ticken first, jump up to entice the Floow and take them out as you go up. Timing the platforms while fighting can be tricky, so don't be afraid to fall.
Once at the top, time your barrel jumps carefully, but you only have one path to choose from, so it's not hard.
Even if you miss, you have wings.
At the top you're greeted by a couple Ticken. Continue up. A couple platforms more and some Floow attack. Take them out as you go. Enter the door.
The platform will start moving up. Avoid the ice crystals while fending off the Sword Primid and Floow.
Again, this is why we avoid sharp things.
At the top, the camera will start moving on its own. Jump to the right platform and wait for long sheets of ice to come out the other side. Use them as stairs. The next set you have to wait to recede before continuing up. Wait for the sheet to come out of the right before grabbing the item box (2). Use the next sheet on the right to jump up to the next platform. Use the next sheets as stairs again. This time, quickly jump over the wall on the right. Wait for the ice to go by under you and grab the item box (3). Very quickly jump out before the other ice blocks you in.

Yellow Box #41
Now you have the ice AND camera chasing you. Stay in the upper left keep going up until you get over the ice.
”Ice Climber” does not mean I literally climb sheets of ice.
Fight off the Metal Primid and enter the door before the camera passes. Hop in the barrel and veer right. Destroy the blocks and enter the door.

Secret, Yellow Box #42
Wheee~ secret! Take out the Boom Primid and Primid. Grab the two boxes (4) (5) (the switch turns the lights on). Exit.
Use the barrel again and this time veer left. Grab onto the ladder and climb up. You have to avoid the Glice while climbing up. Don't worry, there's nothing in this area worth collecting. Two Jyk guard the platform at the top. Use the ladder they guard to go up. Jump up to the next platform. You're forced to fight five Shaydas; after, some Glice appear. They'll pass by harmlessly if you're on an upper platform.
Jump up to the next area. Here you'll actually have to fight the Shayda. Watch the Glice on the platform, and the cross breeze that blows you into them. A Spaak will appear, followed by another Shayda. Enter the door on the right.

Secret, Yellow Box #43
Time for another secret! Grab the box (6) above you. Now use the metal box and jump off to the right, straight into the water to get under the stalactite. Grab the ladder on the other side and climb up. Grab an item on the left, then take the next ladder to your next box (7). Blow up the blocks on the left to drop down. Exit.
Continue up and to the next platform. Mind the Towtow and Spaak on your way up. Enter the door at the top.
Story Note
Lucaio is waiting at the top.
Pick your character and fight.
KANNONBALL! Lucario could so be Don Kanoji.
Story Note
The winner turns the looser back to normal.
Lucario has the special ability to see peoples “auras” or basically see into their hearts. So he can discern between friend and foe and peoples intentions. He probably knew from the start what Meta Knight was going to do, and acted accordingly.
Through fighting, they now know that they are friends. The Halberd appears and has captured the Great Fox, but it appears to the misjudged the wait and needed lift, slamming straight into the side of the mountain. This allows Lucario and Meta Knight to board. Poor Ice Climbers...
End of Level!
Lucario is now unlocked!
Enemies: Primid, Boom Primid, Feyesh, Armight, Big Primid, Roturret, Puppit.
Boss: None.
Boxes: 0
Story Note
Ice Climbers fall to earth, only to be met with our heroes fighting an oncoming army of Primid. Mario’s party makes it just in time to save the day, rushing to the aid of everyone else.
Pick your favorite character, and prepare for a fight. No platforming this time, just a brawl. Here you’ll face a litteral army of Primid, Boom Primid, Feyesh, Armight. After the first wave comes two Big Primid. The second wave consists of Glire, Fire Primid, Puppit, and Armights. Next wave is six Big Primid and a Roturret. Stay in the bottom left or right corner and make them come to you.
Yes, they are as clumsy as ever.
End of Level
Enemies: Primid, Scope Primid, Sword Primid, Bytan, Armight, Floow, Glire, Cymul, Nagagog, Shaydas, Autolance, Towtow, Buckot,
Boss: None.
Boxes: 9
Story Note
Meta Knight and Lucario free the Great Fox. Snake appears from the mysterious box (who didn’t see that coming?) and starts tearing the Haleberd apart from the inside out.
Take a minute to get used to Snakes moves. He is a tad different. Enter the door.
Take out the Primid in the hall with the Scope Primid at the end. Jump up and fall down. Fall through the second set of blocks as well. Make the far left block fall to reveal a switch. Press it and enter the door.
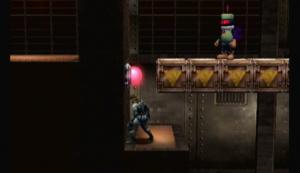
Switch
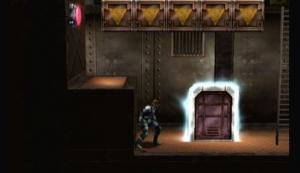
Yellow Box #44
A secret? So soon? Don’t mind the Jyk and grab your prizes (1) (2). Exit.
Climb the ladder and get past the variety of Primid that attack. Dash past the next set of blocks and take out the Scope Primid at the end. Enter the door.
Story Note
Snake hides in his box as Lucario and Meta Knight attack. Lucario senses Snake and uses his aura ability to tell that he is on their side.
Pick a character and move on.
You’ll fall down and fight a wave of Primid. Continue right, straight across the gap and past Scope Primid. Take out the Bytan spawner, as well as the Armight to make a switch appear. Activate the switch and head back to the gap. Go down and to the left.
Switch 1
Down the ladder. This time a Mite spawner and a bunch of Primid with a Scope Primid. Take them down and hit the switch at the top. Go to the left and down the ladder. Watch the Scope Primid and grab the item (3). Back up both ladders. Head due right and fall down.
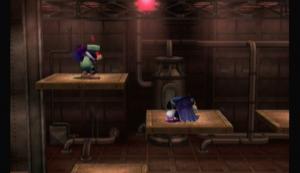
Switch 2
Fall down again and destroy the Floow spawner. Some Primid may get in the way, so take them down as well. You can kill the Cymul if you want, but in any case hit the switch at the top of the room.
Switch 3
Go to the right of the room at the top and destroy the blocks. Jump though the black wall and enter the door.

Secret, Yellow Box #45
Another secret. This level is going by fast. Watch the Fire Primid at the end of the hall, and you’ll want to destroy the Glire spawner at the top. Grab your boxes (4) (5) and exit.
Use the springs to get up to the top. Head left till you see a ladder in the floor. Take it down. Grab the item on the right (6) and enter the door.

Yellow Box #46
Now you’ll have to fight a wave of Sword Primid, followed by a wave of Shaydas, and finally and Autolance. Enter the door that appears.
Another darkness puzzle. Head right and fall into the first hole before the Scope Primid to activate the lights if you want. Take out the Scope Primid and Buckot and jump over the spikes. There’s another switch after the spikes before the gap, and one just across the gap. Watch for the Buckot.
Watch the gap.
Grab the item box (7) when you come to it and take out the Scope Primid below. A series of Roaders with a Fire Primid at the end of the hall. Enter the door.
Take out the Bombed on the right (gate 1). Climb the ladder and take out the Primid (gate 2). Keep heading right. Drop down and grab the item box (8) and kill the Nagagog (gate 3). Keep right, over the spikes and up the ladder. Kill the Metal Primid at the top (gate 4). Now head back to where the item box was.
Jump up and use the springs to get to an item box (9) on the right.
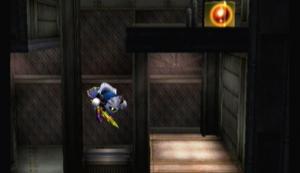
Yellow Box #47
Fall back down and take out the Cymul on your way (gate 5). Now jump left and climb the ladder. Take out the Towtow (gate 6). Fall back down and to the left, going down the ladder. You’ll note the blue walls are gone. Enter the door on the right.
Story Note
We find Peach and Zelda captured. The Primid take their form.
Don’t let them get on either side of you, keep them in front. Peach loves to use item, so don’t let her get anything dangerous.
Story Note
The real Zelda and Peach are freed. As Meta Knights party leaves, Snake tells the girls to stay put.
End of Level!
Snake is now unlocked!
Enemies: Primid, Scope Primid, Puppit, Greap, Feyesh, Puckot, Mites, Mines.
Boss: None.
Boxes: 10
Story Note
Peach and Zelda, not being ones to listen, escape anyway.
Zelda is better suited for this level, as Peaches umbrella doesn't work to well in high winds.
First thing I'd do is transform into Zelda. Jump right. If you cant see your next platform, try jumping up or down. Enter the door at the end.
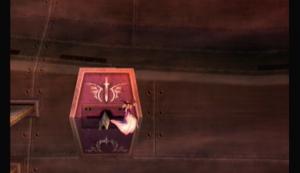
Hope an Arwing doesn't come flying by right now...
Walk right and use Dins Fire to take out the mines. When you reach a gap in the ceiling, go up. Use the switch to take out the mines. Jump up to the platform with the Mites. Use Dins Fire again and work your way up on the right. Get all three boxes (1) (2) (3) and drop back down to the real floor.
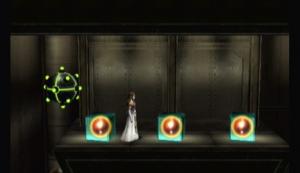
Green boxes
Head right again, taking out the Primid and mines. The second mine, wait till it's right next to the ceiling, then jump into it. If you do it right, the ceiling should blow out, revealing an item box (4).

Yellow Box #48
Note the item box above you at the ledge. Use Dins fire to clear all the mines in your way, then a triple jump to reach the box (5). Fall back down to the far right. You'll find another item box (6) with a Scope Primid on the ledge above it. Grab the box and take out the Primid. Hit the switch overhead and jump across the gap. Enter the door.
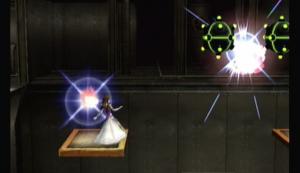
Dins Fire is quite effective.
This is very interesting. Its like a hall of Primid, one of which (on the bottom) you've never seen before and will never see again (it's called Mizzo. It's trophy can be randomly gotten.) Enter the next door.
Here you have to fight a wave of Primid and Scope Primid, followed by a wave of Puppit and a Greap. Head right and take out the Feyesh. There will be an item box overhead. Grab that (7) and continue to the next item box on the right (8). Hop over the gaps. The Greap is to persistent to ignore, so kill it. Jump over and grab the next item box (9). Watch for the Buckot and Mite.
Those weird things on the floor are jets. Don't stand on them or you'll get burned. Wait for them to turn off and jump over, watching for Buckot. Jump over the gap. Don't get crushed and enter the door in the center.
Ok, here jump two platforms right, then start going up. You should see an item box at the top left (10). Grab it an continue right.

Yellow Box #49
Story Note
Sheik and Peach reach the Halberds main deck. Fox begins a bombing run and locks on target. He sees Peach at the last second, but it's too late. The Arwing fires at the turret, narrowly missing Peach. Sheik jumps onto the Arwing to defend Peach and rips Fox out of his cockpit. Landing on the deck, they begin to exchange blows, but Peach has another, more civilized idea to settle this.
End of Level
Enemies: None.
Boss: Duon.
Boxes: 0
Story Note
Snake infiltrates the Halberds bridge, finding it to be controlled by Primid Game and Watch. He sends them flying out of the bridge, only to have the Primid reform as a giant two headed android. His team jumps out to join with Fox, Peach, and Zelda. Falco also sees the trouble. He cant make a firing run, due to everyone being in the way, so instead ejects to join the fight.
Fox, Falco, Lucario, and Shiek make a good team, as they have good ranged attack and defense.
He... They... It is here.
--== Duon’s Attacks ==--
1) Blue smashes his head into the ground
2) Blue swings his sword arms horizontal
3) Spins rapidly
4) White shoots his lasers in an arc across the '
5) Dashes across the '
6) White fires massive blue lasers out of his head
7) Blue attacks you with a flurry of swings
8) Jumps up and lands on you
9) White fires missiles
10) Blue fires homing mines
--== How to predict ==--
1) Blue is out and raises his head
2) Growls and forms his arms in an X shape
3) Both bots lower their heads slightly and go limp
4) White points on of his guns at the ground
5) Current head will spread its arms out and begin burning its tires
6) His head will begin to glow
7) Growls really long, begins to move toward you
8) Crouches down and builds energy
9) You’ll see the missiles coming out
10) He’ll growl and start to launch them
--== How to dodge ==--
1) Shield.
2) Be either far away or up close.
3) Don’t be near them. It will suck you in.
4) Get some distance and activate your shield. Preferably a reflector.
5) Double jump and dodge as he goes by.
6) Be close to him or use a reflector.
7) Get within range, then jump away as he starts to swing.
8) Dodge to the side as he lands.
9) Get inside the missiles arc.
10) Move away.
--== Strategy ==--
You can either keep your distance and use ranged attacks, making his attacks easy to dodge but prolonging it, or go on the offensive and use close combat. The later is likely to get you killed a few times, but it’s not that bad. Fox and Falco have their reflector (Down B) to guard against ranged attacks, Lucario has a long counter (Down B), and Zelda has Nayru’s Love (B).
Story Note
Duon turns back into the Game & Watch trophy that formed him. Fox treats him as a hostile, but Peach sees the good in him and turns him back to normal. Give him her umbrella, Game & Watch seems happy. Meta Knight takes the helm. Poor Meta Knight....
End of Level!
Game & Watch is now playable! Yay!
Enemies: Glunder, Shayda, ROB Sentry, ROB Blaster, ROB Launcher, Borboras, Roturret, Bombed, Big Primid, Sword Primid, Nagagog.
Boss: None.
Boxes: 7
Story Note
The base appears to be aware of Samus’s presence. Just a hunch.
First floor: Head right and take out the two ROB Sentries. Ride the elevator down one level.
B1: On the right is an item box (1) guarded by two ROB Sentries and a ROB Blaster. The left nothing. Down one more level.
B2: Left is a trap with a bunch of Glunder and a Shayda. Down again.
B3: Left is an item box (2) and a door. Inside, you are forced to fight two ROB Launchers and a bunch of Sword Primid. Your prize is items (3) (4). Exit. Right is a trap with a Borboras and a Jyk. Down again.
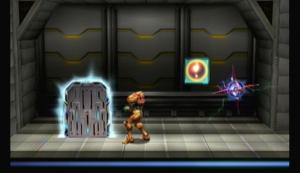
Yellow Box #50
B4: Left is a trap with a Borboras and a Roturret. Right is a Bombed and an elevator. If you go past the elevator, there’s a trap with two Big Primid. Ride the new elevator up.
B3: don’t take this one just yet, as it will exit the area. Ride up.
B2: Right is a trap with a Roturret and a Jyk. Left is a set of boxes around a switch that activates a secret door. Enter. You have to fight an Armtank for a trophy, then climb the ladder and exit.
B1: Right is an item box (5) with a Borboras and Jyk guarding it.
First floor: Right is a trap with some Nagagog. Left has some ROB sentries and Blaster guarding a door. Enter. Grab the box on the left (6) and wall jump up the right to the next box (7).

Yellow Box #51
Exit and ride the elevator back to B3.
B3: Enter the door to exit the area. Beware the two ROB Launchers and walk into the light. A ton of ROB Sentries and Blaster will attack you. Finish them off to exit the level.
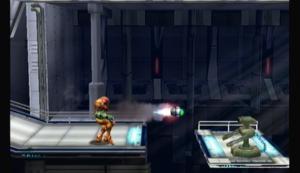
Finally!
Story Note
Samus and Pikachu barge in on the Minister, ready for a fight. However, the Minister looks remorseful, ready to call it quits and give up for the sake of his ROB followers.
End of Level!
Enemies: ROB Sentry, ROB Blaster, ROB Missile, Cymul, Autolance, Metal Primid, Primid, Sword Primid, Scope Primid, Armight, Floow, Buckot, Bytan, Ticken, Auroros.
Boss: Meta Ridley
Boxes: 8
We rejoin DK's team. Head right, taking out the ROB Sentries, ROB Blaster, Cymul, Autolance, and ROB Launcher on your way. Jump over the boxes and hit the Cymul, and take out the Autolance before you land. There's nothing in the boxes, so proceed to kill the ROB Launcher. Again, nothing in either set of boxes. Watch the Jyk and jump across. The second and third platforms have ROB Launchers on them. On the third platform, drop through and detonate the bomb block, the quickly jump back up.
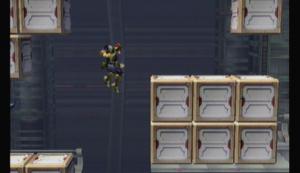
Should look a little like that.
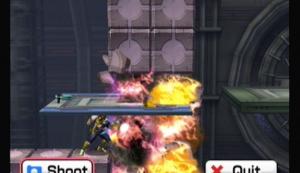
Uh oh.
Jump onto the next stationary platform. You are attacked by several ROB Launchers. Use your shields. Then some Metal primid and an Autolance appear. Continue right.
One of the platform in the next windmill has a door on it. Wait for it and jump through.
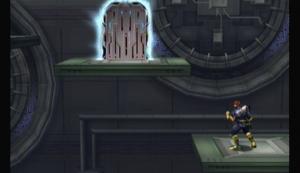
Secret, Yellow Box #52
Secret! Grab your item boxes (1) (2). Now use the spring at the top of the windmill. Let it propel you up, then double jump at the apex to land on an invisible platform. Use a down attack to break it (3). Exit.
It's up here.
Continue right with the camera. Watch the Cymul and the platforms with spikes. Enter the door.
Over the spikes and onto the conveyor belts. Take out the Buckot as you go. Don't get squished by the blue spikes. The other side is a ROB Sentry. Take it out and go up. Destroy the blocks overhead to get by. Take out ALL the Mite and as many blocks as you can.
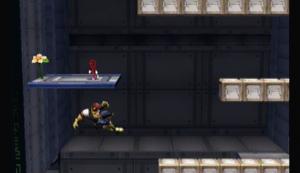
Like so
Hit the red switch. The ceiling will start to come down. Jump down as fast as you can till you're beside a door. Take the ladder down.
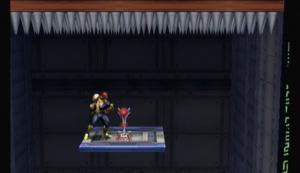
Red Switch
Head left. Take on the Floow and Armight to continue. Hit the switch. Wait for the Mite to pass on the left, then jump up to find a door. Only Diddy and Captain Falcon can get up there for now (later, Fox and several others can as well).

Blue Switch, Secret, Yellow Box #53
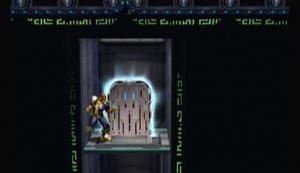
Secret, Yellow Box #53 door
Secret number 2: You have to use someone who can wall jump, Diddy or Captain Falcon. Jump up and hit the bomb block to claim your prize (4) (5). Exit.
Go back right and past the ladder. Watch for the Buckot and don't fall into a hole. Get all the way right and hit the green switch.
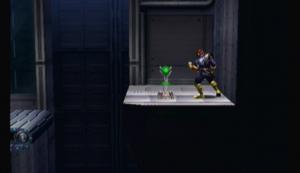
Green Switch
Now back over to the ladder and climb up. Enter the flashing door.
Take out the ROBs in the area while avoiding the flames. Head right to find a switch. Press it to kill the ROB Launcher. Continue till you find a ladder past the blocks. Climb up and press the button.
Go through the block on the left and destroy the ROB Launcher on the platform. Hit the switch above the platform.
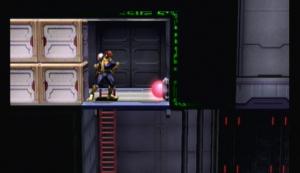
Switch 2

Yellow Box #54
Jump left to get an item (6). Fall left to get another item (7). Press the switch and fall all the way down.
Back over to the ladder on the right. Jump up on the boxes that fell and kill the Bytan. Down the ladder. Don't jump on the launcher thing. Instead, jump up and his the switch, then go back down and ride the launcher thing.
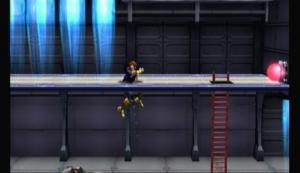
Something like that.
Take out the Bytan as quickly as possible. A few feet up, it will stop and some Fire Primid will attack. Get on the upper platform, as the walls cave in and that is the only safe place. Wait for them to reside before jumping up to the moving platform above, then to the ladder.
Yeah, only one safe spot. No room for Primid.
Head left. Destroy the boxes to find a key and a giant Bytan. Kill it and grab the key. Head right, though the locked door. Walk over to the crack to end this part of the level.
It's the Orange Beast of Aaargh!
Story Note
You unite with Samu's party by the Minister. Ganondorf appears in a hologram and orders the R.O.B to activate the Subspace bombs in the room. The Minister tells them to stop, but Ganondorf activates a control chip that forces them to listen to only Ganondorf. Minister tries to stop the attack, saving not only himself, but his R.O.B followers. Ganondorf orders the R.O.B to attack their own master.
Our heroes join in at this point, trying to stop the R.O.B. Ganondorf calls in an Auroros squad and, thinking he's won, turns off the hologram. However, the Minister isn't finished yet. His capes burn off revealing that he is R.O.B! Now united with our heroes, they must find a way out.
The Minister was able to control the R.O.B because he was the lord of this world until Tabuu came and took over, forcing his R.O.B brethren to fight for him.
Now, I really like R.O.B as a character, and this is a good time to get used to him, as all you have to do is fight off some other R.O.B. and a few Primid. But it's up to you. DK still has his really cheap Down B attack.
Wave after wave of all different types of R.O.B and Primid appear, with some Auroros and Ticken. Ending with two Armtanks. Get on one side of the tanks, don't let them surround you.
Story Note
In the end, they are not able to stop the Subspace bombs. R.O.B feels sorry for his comrades, but there's nothing he can do. Captain Falcon calls in the Blue Falcon for evac. Can they make it in time?
Now for the daring escape. Don't worry about any enemy, just clear the boxes and move! The camera moves fast here, but I'll tolerate it in place of a countdown clock. When you get to the moving platform, don't get hit by or stuck on top of the spikes. When it stops and opens up, move down the platform. Watch the Cymul. The platforms will rise as you land on them, so keep moving. Enter the door at the bottom center.
Out of my way!
There are mines here. A lot of them. I don't even think it's possible to do this without getting hit. Keep moving down, trying to dodge as many as possible.
Ah man!
The camera starts moving again. Ignore the enemies and keep on moving. Under the ladder is a heart on the left. To the right of the Mite spawner is a trophy. Move down and enter the door. Grab the box (8) and move down.
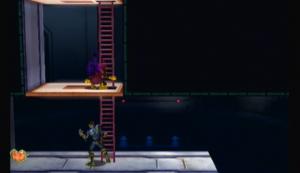
Heart.
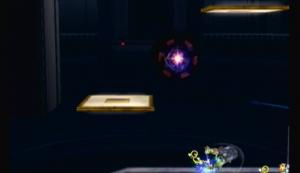
Trophy.
Story Note
Blue Falcon picks you up just in time. It also picks something else up, however.
Pickachu, Samus, Olimar, and Captain Falcon all have good moves that can strike in the air.
Im in ur base, killin' your Ridleys... again.
--== Meta Ridley's attacks ==--
1) Lands on the ship, sinking it temporarily
2) Grabs on to the left side of the ship, slowly dragging it down
3) Strafes with fireballs
4) Drags his tail along the ship
--== How to predict ==--
1) Flies off screen
2) Flies off screen
3) Flies off screen
4) Growls and flies off screen
--== How to dodge ==--
1) Jump as he lands.
2) Jump over and get him off by beating on him!
3) Dodge.
4) Jump.
--== Strategy ==--
You're on a hard time limit. Don't worry so much about his attack as you do yours. Don't let up, you have plenty of character. Attack continuously. Samus's aerial up and side moves work excellently.
Story Note
The entire island is engulfed into Subspace. Our heroes barley escape to join up with Mario's party on the ground.
End of Level!
R.O.B is now playable!
Enemies: Boom Primid, Floow, Borboras, Fire Primid, Armtank, Big Primid.
Boss: None.
Boxes: 0
Story Note
Bowser and Ganondorf emerge from Subspace with a giant cannon that can create Subspace from nothing. The Halberd attacks, only to get shot down. However, our heroes have more agile ships: the Blue Falcon, Arwing, Gunship, and the Hocotate. Kirby comes from the left with a surprise attack on Dragoon, taking out the cannon. Ganondorf and Bowser retreat into Subspace. Our heroes give chase.
Select your favorites. Level is really short.
Head left and jump over the gaps. You will be forced to fight a couple of Boom Primid and Floow. The camera starts moving on its own (Grr!). Keep pace.
Take out the Primid spawner and Borboras. There is a trophy on the other side of the small ledge, as well as a Primid spawner in the air.
Trophy
At the end, you'll have to fight a Primid spawner, Fire Primid spawner, and a Borboras spawner.
Hop up the stairs. With a long walk right, you'll have to fight an Armtank. After that, a Greap with four Big Primid. Focus on the Greap in that round. More right is an Armtank and another four Big Primid.
They pull and Indiana Jones here (Leap of Faith). The path appears to end after a ways, but it really doesn't. Keep walking and enter the door.
Darn it! Again? I thought we covered this! It's like Steven Spielberg made this game!
Story Note
Ganondorf betrays Bowser so that he can become the new king. Master Hand appears, but he is just being controlled by Tabuu. Ganondorf is angry that Tabuu simply used him. He attacks, only to be turned into a trophy while freeing Master Hand. Master Hand tries in vain to attack Tabuu, but also fails.
Our heroes join the fight, only to get instantly turned to trophies. Tabuu now surrounds himself with the parts of the world that have already been consumed by Subspace.
End of Level!
Enemies: Glice, Towtow, Mite, Roader, Trowlon, Feyesh, Puppit, Bombed.
Boss: Bowser.
Boxes: 1
Story Note
Those weird medals that Dedede used appear to have the power to turn people back to normal automatically. For some reason, they don't activate until a person is inside Subspace. These three awake, they resolve to find out what's happened.
Glice on the platforms and Bombed down below. I'd stay on the platforms. Grab the Samus trophy above the door.
Samus Trophy
Enter. Take out the Towtow on the right and head up. Enter the door on the right.
Grab the Pit trophy on the right and Falco trophy in the top left. there's also an item in the bottom left (1).
Pit
Falco
Yellow Box #55
Exit. Head up with the arrow. Watch for Trowlons and grab the Lucas trophy to the right of the door. Enter.
Lucas
A Big Primid attack with a couple Feyesh. Take them out and jump on the yellow platform to make stairs appear. Hurry up them before they disappear. Grab the DK trophy.
DK
Head to the upper left. Jump up on the springs to destroy the blocks. Enter the door. Grab the Pokemon Trainer trophy, the hit the bomb block and quickly grab the Pikachu trophy. Exit.
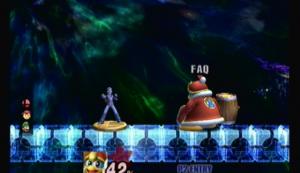
Pokemon Trainer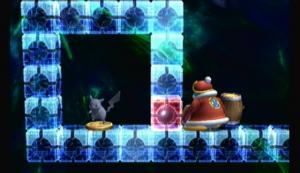
Pikachu
Now we're going to the bottom left. Grab the Ike trophy and go back up.
Ike
Now to the top right. Watch the Feyesh and Roaders. Drop down at the end of the ramp and grab the Marth trophy.

Marth
Enter the door, ignoring the Mite. Use a projectile to take out the mines, then grab the Olimar and Fox trophies. Exit and go to the top right. Enter the door.
Olimar, Fox
Run across the blocks till you get to a solid piece of ground. Use this to take out the Puppits. Jump over and destroy the blocks. Use this new platform to take out the new Puppits.
Like so.
Make your way to the door. To get the Game & Watch trophy on the right, knock down the one block and hit the bomb on your way down. Jump up quickly to the left, then jump over and claim the trophy. Enter the door.
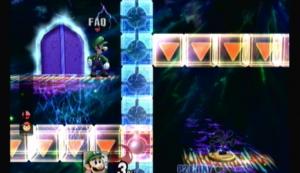
Mr. Game & Watch
The camera moves in circles here. Don't worry about the Mite, as annoying as they mite (lol, pun) be. Grab the Diddy Kong trophy overhead and the Captain Falcon trophy to the right when you get a chance. Drop down and enter the door.
Diddy Kong
Captain Falcon
Grab the Mario trophy and climb the stairs. Enter the door.

Bro! It's like Luigi's Mansion!
Story Note
Just FYI, every trophy you picked up along the way was freed. Dedede frees Bowser. Bowser mistakes the situation and attacks.
Fight Bowser.
Story Note
Dedede frees Bowser again, and shows him the situation. Bowser agrees to come along.
End of Level!
Luigi and Ness are unlocked! And in one short level as well.
Enemies: Bombed, Feyesh, Sword Primid, Bucculus, Fire Primid, Autolance, Armight, Ticken, Auroros, Gamyga.
Boss: None.
Boxes: 3
Story Note
Remember when Kirby ate that medal? Yeah.
Jump up and grab the Peach trophy. Watch the Bombed.

Peach
Take the upper most path and use Kirby's Up B move to clear the mines. Grab the Zelda trophy and jump the gap, opening the item box (1).
Zelda
Watch the Feyesh and jump though the mines on the right. There's no easy way past the next set of mines. On the other side, jump to the higher ledge Some mines wait below guarding the Meta Knight trophy. You can either just jump though the mines or try to fight the Sword Primid below in hopes that one of them will fly into it.
Meta Knight
Fall down and fight the Sword Primid for the item box (2) on the right under the ledge.

Yellow Box #56
Jump up to the ledge and focus your attack on the Sword Primid spawner. Over the Scope Primid and through the door. Blow up the boxes on either side to get to the Link trophy.

Link
Fall down and blow up the box on the far left for a Yoshi trophy.
Yoshi
Fall down. Watch the Bucculus in the ground and blow up the block on the right. Grab Lucario and jump back out, over the Bucculus, and blow up the next box. Fall all the way down.
Lucario
Here you have to fight some Fire Primid, Spaak, and an Armight. Get your extra life and move on, keeping pace with the camera. At the end you'll have to fight some Primid and Scope Primid, and two Autolances. Kirbys Down B works well with the Autolances. Move right and grab the R.O.B trophy. Enter the door.

R.O.B
Head right without falling. Use the launcher thing to get across. Hit the rail and grab the Ice Climbers trophy.
Ice Climbers
Jump to the upper platform ahead and use the launcher to get across. Fall straight back down on the left and grab the box (3) then get back up by going back left and jumping onto the launcher again.

Yellow Box #57
Watch the Auroros and use the rail to kill the Ticken and free Snake. Grab him and move on.
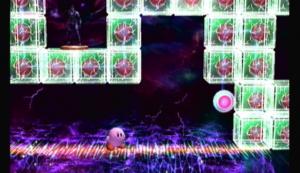
Snake
Ignore the enemies and continue up the glowing platforms. At the top, take out the Ticken first, then use Kirby's Up B to take out the Gamyga. Grab Wario and exit.

Wario
Story Note
Bowser comes out of nowhere and attacks the Ganondorf trophy. Dedede is er, very happy to see Kirby. Link and Zelda find Ganondorf, and force him to swallow his pride and help. Wario is as clueless as ever, but in not letting anyone outdo him, he still comes along.
End of Level!
Ganondorf has joined your roster!
NOTE: The Great Maze level is special. It plays as one level, but when you complete it and look at it on the map, it shows up as four levels, the four levels being the different purple teleportes, which I'll explain later.
If you exit back to the map while in the Great Maze (not quit, using a warp point to exit out) you can re-enter through any of the four warp points that you've already been to.
Enemies: All.
Boss: All.
Boxes: 17
Story Note
All that is about to happen (refighting old bosses, playing through snippets of old levels, ect) is possible because of the Subspace bombs. When the bomb went off, it doesn't destroy the area, rather it puts it in a time-space bubble, preserving it exactly how it is, and sometimes even turning back the clock.
That is how Wario was saved in the above story. He didn't die in the blast, rather he got pulled into another dimension.
Why you're here now is because Tabuu has surrounded himself with these bubbles, linking them together in Subspace. When you look at your map (described below) you see it as a flat surface, but really it is curved in an orb around Tabuu, with only one entrance to the center. You must fight through the bubbles to break the link and get to Tabuu.
You get to choose from all of your characters. You can change what characters you are using at some points in this level, so don't worry.
In the Great Maze, you must trek through condensed version of areas you've already been, as well as fight all of the boss fights again, and shadow versions of your characters.
Alright, lets get some of the basics here out of the way. Press start. See the little blinking dot? That's you, and this is a map. Areas in this map will only show up when once you enter the area. Here is a complete map:
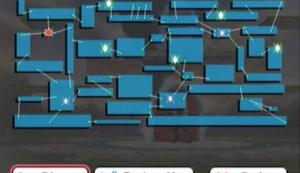
The Great Maze
Little white dots represent doors.
Lines represent where the door will take you.
Green crystals will show save points.
Purple crystals are warp points/save points.
When you're in a warp point, you can pull up your map and select another warp point to warp to. There are four points total.
Ok, exit out of there. This door isn't a standard door. See the darkness around it? That represents a boss fight. Some doors have a gold orb in the center. That represents a save point.
See the smash icon? That is a save point. Here you can save your game, as well as switch characters. In switching characters, even if you switch to the same ones your using, or a character that has been KOed, they will be fully healed.
Time to get started.
Ok, time to start the level. Enter the door to fight Petey again.
What? You again?
--== Petey's attacks ==--
1) Swings a cage horizontally in front of him.
2) Jumps into the air and lands, creating a small tremor.
3) (near the end of his life) jumps a few times in a row.
--== How to predict ==--
1) He'll take the cage and kind of hold it back a bit.
2) Ducks his head down.
3) Ducks his head down longer and roars.
--== How to dodge ==--
1) Jump into the air.
2) Either shield or be in the air above him.
3) Be in the air for the first, then stay in your down B form till
he is finished.
--====--
If you need to be healed, go back though the door with the yellow orb. If not, continue through the other door. We are going to go left, past the Goomba, Koopa, and Primid. Enter the door to fight Pit.
Pit
In here, work your way up, grabbing the first item box (1). The next one is past the Jyk, under a Glunder (2).

Yellow Box #58
Exit. Go right. Stop at the door and go back to heal if you need. If not, continue right.
Get past the Trowlon and Scope Primid. Under the Glunder and past the Giant Goomba. Enter the door.
You are here.
Drop down and fight the Greap. Continue right, through the door. Here you'll fight Kirby.
Kirby
This time, you can ignore the Greap. Just work your way back to the door and then up. Watch for the Glunder. Just above the door is an item box (3).

Yellow Box #59
Continue up. Ride the purple platform, staying to the left, and enter the door. Now you fight Link.
Link
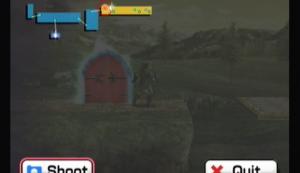
You are here.
Take out the Puppit and Shellpod. Enter the save door. Save your game and heal. Exit and continue right. Enter the gold door. Blow up the bomb and go back through the blue door to get your item box (4).

Yellow Box #60
Now back though and over the gap. Watch the Auroros and Primid. Over to solid ground and enter the door in the air. Defeat the Gagagog and exit. Continue right.
Take out the Boom Primid and through the blue door. Kill the Armight, being careful to only destroy the blocks on the right, not beneath. Go back though and enter the gap you've made. Blow up the bomb and go back to the blue door. This time, go right and blow up the far right set of blocks. Don't destroy the last two that hold you up, however.
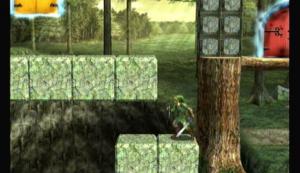
Like this. The dark door leads to Yoshi.
Go though the yellow door above. Use the way you cleared to blow up the blocks above, after dealing with the Shellpod. Go back though the blue door. Jump across and enter the dark door to fight Yoshi.
Head back though the gold door. Head right and enter the normal door.
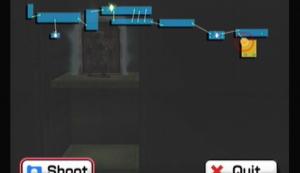
You are here.
Look out for the Roader, and take out the Buckot with the rail. Use the spring to hit the rail above the Gamyga till it dies. Now use it to jump right and grab the item box. Use the system of rails ahead to kill the Borboras. Use the next rail to pass across the gap. Grab your item box (5). Watch the Buckot overhead and enter the dark door. You now must fight Diddy.
Yellow Box #61
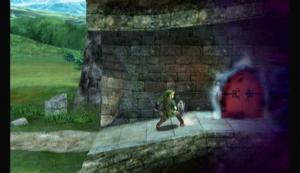
Diddy Kong
You are here.
Alright, major crossroads here. Enter the middle door with the yellow orb for a warp point. Prepare for a fight with Duon. Heal and exit. Enter the door on the top right (you have to use the springs to get there).
At least we get him out of the way early
--== Duon's Attacks ==--
1) Blue smashes his head into the ground
2) Blue swings his sword arms horizontal
3) Spins rapidly
4) White shoots his lasers in an arc across the field
5) Dashes across the field
6) White fires massive blue lasers out of his head
7) Blue attacks you with a flurry of swings
8) Jumps up and lands on you
9) White fires missiles
10) Blue fires homing mines
--== How to predict ==--
1) Blue is out and raises his head
2) Growls and forms his arms in an X shape
3) Both bots lower their heads slightly and go limp
4) White points on of his guns at the ground
5) Current head will spread its arms out and begin burning its tires
6) His head will begin to glow
7) Growls really long, begins to move toward you
8) Crouches down and builds energy
9) You'll see the missiles coming out
10) He'll growl and start to launch them
--== How to dodge ==--
1) Shield.
2) Be either far away or up close.
3) Don't be near them. It will suck you in.
4) Get some distance and activate your shield. Preferably a reflector.
5) Double jump and dodge as he goes by.
6) Be close to him or use a reflector.
7) Get within range, then jump away as he starts to swing.
8) Dodge to the side as he lands.
9) Get inside the missiles arc.
10) Move away.
--====--
You'll most likely need to go back and heal before continuing. Anyway, drop down and enter the door under you.

You are here.
Get past the Primid and Buckot. Drop down, but not down the ladder, and head left. Don't fall in here to get over the Bytan and Primid. Go all the way left and fall down the ladder. Enter the door to fight Snake.
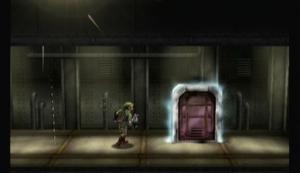
Snake
(Don't worry about healing) Back out, take out the Scope Primid and climb the ladder. Try to avoid these enemies and go down the ladder you pasted earlier. Grab the item box (6) and enter the door.
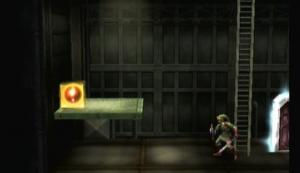
Yellow Box #62
Go all the way right and enter the save point. Save and heal.
Exit and take the elevator you passed. Take it all the way down and kill all the Primid. Now ride it up one level and take on the Fire Primid. Fall down on the right and grab the key as you fall. Finish falling and use the elevator to go back up one floor and open the locked door. Blow up the boxes so you can fall. Blow up the other set as well. Now enter the door to fight Mr. Game & Watch.
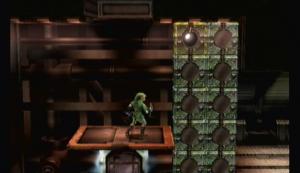
Mr. Game & Watch

He actually looks pretty cool...
Ride the elevator back up, save, and exit back out to the Halberds exterior (door on the left, climb, door on the left over head).
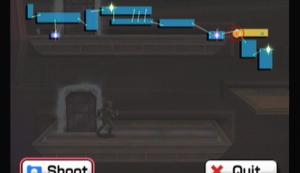
You are here... again.
Work your way across right. No enemies, no traps. Enter the door and say hi to Meta Knight.
Watch for the Buckot and work your way left. Use the springs to get over the spikes, then fall and swim to your next item box (7).
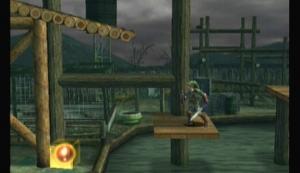
Yellow Box #63
Jump up and take out the Ticken and Fire Primid. A Roturret at the end, take it out without falling. Fall down. More Buckot in this area. When you reach a spring, use it to jump to the ledge on the left. Continue left and enter the door past the Buckot and Primid. Here you fight Ness.
Ness
Back out. Past the Buckot and Primid, use the springs to get back up and to the other side of the platform. This time, fall down and enter the door on the left. There's a save point just ahead.
You are here.
Fall down and get past the Scope Primid and Feyesh. The next solid ground has a Metal Primid and some Bytan. Kill the Metal Primid under the spikes and continue to the edge of the platform. Get rid of the Feyesh and jump to the ledge above you, hitting the switch to get to the save point. Prepare to fight Proky. Heal up and exit.
Press the button the right and fall down. Get past all the enemies again. Go past the boxes and enter the door. Nothing really exciting in this area, so you can just jump past everything, including the Towtow and Gamyga. At the end is a dark door containing Porky.
Porky
The statue is STILL cooler...
--== Porky's attacks ==--
1) Fires a laser sideways
2) Fires a laser from the sky
3) Rapidly strikes with one of its claws
4) Sends out Porky drones
5) Jumps into the air and lands on you
6) Rushes across the stage
--== How to predict ==--
1) Creates an energy ball above its head
2) Flies up and turns on a search light
3) None, really
4) Stops moving, red light above his head
5) Crouches a bit first
6) Starts acting hyper
--== How to dodge ==--
1) Jump.
2) Stay in the light just long enough for him to charge up, then dodge
3) Hope you're not nearby.
4) Jump up, then land carefully and jump again.
5) Dodge to the side as he jumps
6) Jump over him
--====--
Here we are again. Go right again, using the same strategy, and reach the warp point. Save and heal. Head right and take the bottom right door. Fall down, avoiding the mines, which is pretty hard. Enter the door to fight Captain Falcon.
Captain Falcon
Head right. Use a projectile to take out the mines on the bridge. Take out the Shellpod and continue. Watch the Aruroros and Gamyga on the other side. Enter the door to fight Olimar.
Olimar
Back out the way we came, all the way back to the warp point. The trick with the mines going this way is to grab onto the ladders. Heal and save. We're taking the last door on the bottom left.
You are here.
With the updraft, you should be able to get past the Cymul-infested gap in one jump. Get past the Hammer Bro and use the swings to get past the next gap. Once on the other side, don't drop down. Take out the Hammer Bro and jump to the swing. From the swing, take the upper path and enter the dark door to fight DK.
DK

All the fights yet to come.
See all the people in the background? Those are all the things that block your path to the door behind them. Cool huh? Exit out though the door. Head right and drop down to the lower path and head left though the door to fight Samus. A save point is near, don't worry.
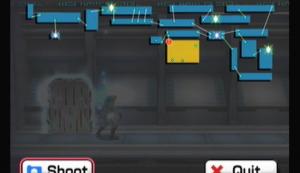
You are here.
Head right. Get past the Primid and down the ramp. Destroy the blocks to get to the other side. Run across and grab the key. If you're feeling up to it, drop down and enter the door to fight Pikachu. If not, use the key to unlock the door on the left. Ride the elevator down and use the save point on the left to heal, then go back to the platform under the key and fight Pikachu.
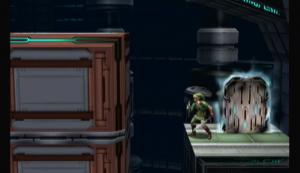
Pikachu
Opposite the save point is a door. In here, hit the switch in front of you.
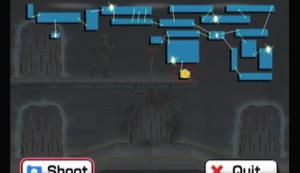
You are here.
Take the right door first. Watch the Buckot and Mite spawner. Work your way to the Scope Primid. Climb up above him to the left. When you reach a conveyer belt opposite a red Mite spawner, swing in the nook there for an item box (8).
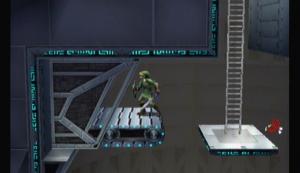
Yellow Box #64
Continue up. Hit the green switch and enter the door to fight R.O.B.
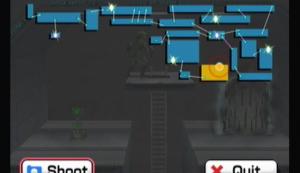
R.O.B
Drop back down and to the right of the Scope Primid for an item box (9), just over the Mite spawner.
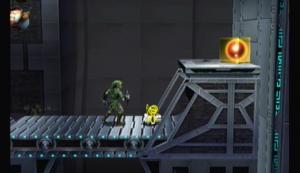
Yellow Box #65
Go back left and exit. Take the left door. This room is easy by comparison. Head left and take out the Scope Primid, then the Bytan. Grab the key at the end and go back to the locked door above the Bytan. Grab the item (10) and hit the switch. Back out to the right and enter the dark door. This is a fight with Ridley, so go out the top left if you feel you need to save.
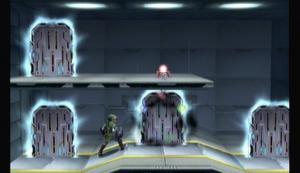
Door.
Havent I killed you, like, twice already?
--== Ridley's attacks ==--
1) Drags his claw across the stage
2) Flies up and comes in from behind
3) Drags his tail a few feet
4) Roars, creating a wind
5) Slams down onto the stage
6) Flies across the stage
--== How to predict ==--
1) Rears back a bit
2) Roars, lands on the stage, crouches, flies off
3) Growls a bit rears back, and bobs up, swinging his tail around.
4) Flaps forward a bit, inhales
5) Lands on the stage and stands up straight, jumps up
6) Flies off screen sideways
--== How to dodge ==--
1) Be in the air.
2) Jump up at the last second and aerial dodge.
3) Shield or be out of range.
4) Doesn't do any damage. Besides, unless you are right next to him,
you cant dodge it.
5) Dodge to the side.
6) Jump up after he leaves. He'll lock onto you in the air, and by the
time he passes you'll be on the ground.
--====--
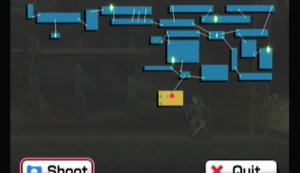
You are here.
Warp point just on the left. Heal up and exit. Hit the switch to the left and fall down. Enter the door. Jump up to the left and grab the item box (11), minding the Glire.

Yellow Box #66
Drop back down and work your way left, using the switches to turn off the fire as you go. I normally just bumble though, not even using the switches. At the end, watch the fireballs from the lava and enter the door to fight Bowser.
Bowser
Now you need to go back right to the door you came from, only this time drop under it. Watch the Goomba and enter the door at the bottom.
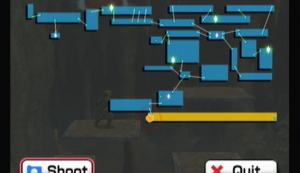
You are here.
Ride the mine carts. At the first one, jump out at the yellow symble. The second one don't jump out till you see the door. Enter and fight Dedede.
Dedede
Work your way up past the Puppit and Feyesh. On the ledge, take out the Shellpod and use the springs to go left. Jump over the Cymul and use the springs to get an item box (12) on the left. Fall down and take the dark door below it. Become the champ over Falco.

Yellow Box #67. Falco is right below.
Grab the item box (13) on the right and the hearts on the left. Blow up the blocks using the bomb that's underwater to get another item box (14). Back through the door.
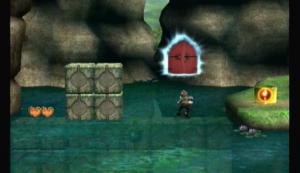
Yellow Box #68
A Feyesh attacks. Continue left. Use the spring to reach the door to the left. Here we're going right. It doesn't matter what barrels you use, you end up at the same place. Enter and fight Fox.
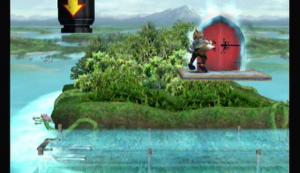
Fox
Use the barrel on the right to rocket back to start. Now we're going left. Noting of particular interest, and you cant really die because of the water. Just watch for the Buckot and dash past everything else. Enter the door for your last fight before the next save: Meta Ridley!
There's no time limit this time around, so take as long as you need.
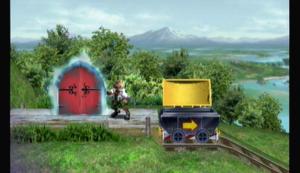
Meta Ridley
Dude, seriously, stay dead!
--== Meta Ridley's attacks ==--
1) Lands on the ship, sinking it temporarily
2) Grabs on to the left side of the ship, slowly dragging it down
3) Strafes with fireballs
4) Drags his tail along the ship
--== How to predict ==--
1) Flies off screen
2) Flies off screen
3) Flies off screen
4) Growls and flies off screen
--== How to dodge ==--
1) Jump as he lands.
2) Jump over and get him off by beating on him!
3) Dodge.
4) Jump.
--====--

You are here.
Phew. Don't know about you, but I only had two characters left after all that. Go to left and use the warp point to save. Exit and enter the door across the gap on the left. Fight Mario.
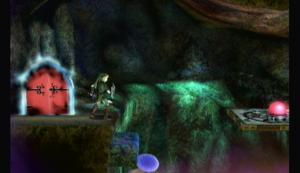
Mario
Ignore the Big Primid, but take out the Buckot as soon as possible. Dodge the boulders on the way up. You can tell where they are going to fall by the dust coming down. Once at the top, dodge the Auroros and kill the Gamyga to continue though the door.
With the wind blowing at you, it's hard to fight here. Just use your jumps and dodge everything, make it straight though to the tunnel after the Gagagog. Watch the spikes and enter the door.
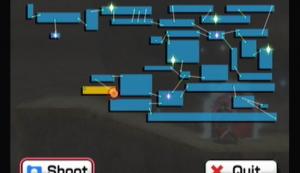
You are here.
Take out the Floow and continue. An Armight appears. You can usually kill them with the rail across the gap. Hit the next rail into the blocks over your head, then use the rail that uncovers to get across the gap (you have to hit the third rail with the second one). Watch the Bucculus and continue. Enter the dark door to fight Galleom.
Another enemy that needs to stay dead.
--== Galleom's attacks ==--
1) Stomps the ground
2) Rushes across the stage
3) Stomps his way across the stage
4) Fires a shockwave across the stage
5) Punches wide
6) Creates a tornado
7) Body slams the stage
8) Launches missiles at you
--== How to predict ==--
1) Raises his leg up
2) Folds up into an airship
3) Turns his back to the screen
4) Raises his hands and spins
5) Rears back
6) Faces the screen and winds up
7) Stands up straight
8) Stands up and his shoulders glow
--== How to dodge ==--
1) Don't be near him or dodge to the side.
2) Jump over him.
3) Dodge when he is about to fall on you.
4) Jump or shield
5) Be out of range or shield.
6) Be out of range. It will suck you in if you're close.
7) Jump up and aerial dodge when he falls.
8) Shield, or be in really close to him.
--====--
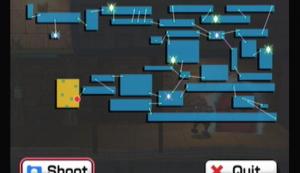
You are here.
Another warp point just ahead, thank goodness. Heal up and exit. Take the elevator up one level. Ignore the Floow and enter the door. Mind the flames and take out the Scope Primid. A couple Shaydas and a Roader block your path, but you can get around one way or another. Enter the door at the end to fight Pokemon Trainer. Now, I've never seen him use anyone other then Charizard, but that's not to say he doesn't.
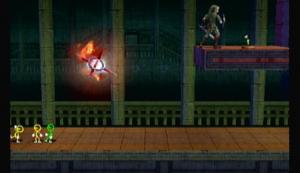
Pokemon Trainer
Go down. Go though the closing door on the right, though the Borboras. You should remember this section. The wall above and to the right of the Jyk still has a trophy on it. Watch the Mite and continue though.

Trophy
Don't go through the door unless you need to heal. Instead, keep going right. Watch the spikes and continue up the stairs. Jump onto the moving platforms and take out the Floow as you go. Grab the two item boxes (15) (16) and continue to the next ledge. Enter the door to fight Zelda.
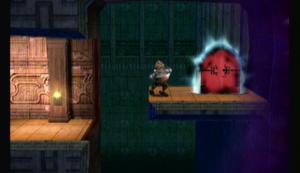
Zelda
Head right. Don't get pushed into a Jyk. Jump the gap and take out the Armtank. Don't use the launch thing and enter the door to fight Peach.
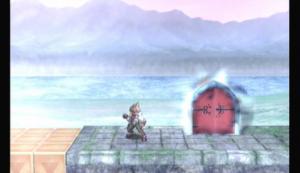
Peach
With that out of the way, make your wall all they back left and enter the door (Peach always does make people go way out of their way to see her).
Back in here, make your way to the door we passed earlier. Take the elevator up one level to save and heal. Exit, and go back up another two levels to the top. At the top, take out the Floow and Primid, then take the ladder up. Head left and blow up the blocks. Enter the door to fight Wario.
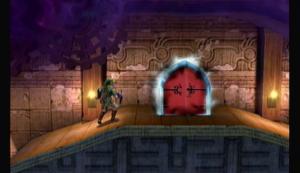
Wario
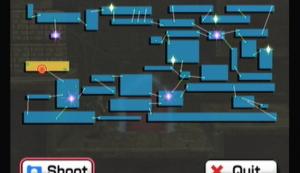
You are here.
For those of you keeping track, that's the fiftieth image in this level.
Go right. Take the elevator up. At the top, head right, ignoring the Roturrets. Dodge the Puppits and fall down the third gap (the one with the Borboras after it). Enter the door for a fight with Luigi, and the awesome Luigi's Mansion theme song.
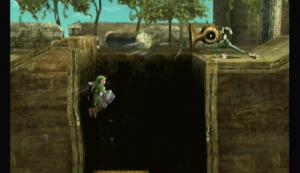
Luigi
Go back up, past the Puppits and Roturrets, down the elevator and past the door through the blocks. Fight the Puppits, and at the top jump past the Mite. Enter the door. Fight past the Primid on your way up. Just past the first set of Sword Primid above the platform is an item box (17).
Yellow Box #69
The final Yellow Box!
Keep going till you reach the top, blocked with, well, blocks. Hit the bomb to blow them up. One more time and enter the door to fight Rayquaza.
Rayquaza
--== Rayquaza's attacks ==--
1) Shoots a large ball of energy
2) Ground explodes
3) Whips his tail in the circle around him
4) Attacks from underground
5) Corkscrews in from the side
6) Drops lightning on you
7) Dives to the other side
--== How to predict ==--
1) He'll tilt his head back and his mouth will start to glow.
2) His eyes will glare red.
3) Rears his tail back and kind of spins first.
4) Dives underground. The ground will bulge as he comes up.
5) Flies off screen. Keep your eye to the opposite side he was on.
6) Jumps up and forms a ring. Starts to spin.
7) Growls and tilts his head down.
--== How to dodge ==--
1) Foxes reflector works nice, otherwise just use your shield.
2) This one happens so fast, you better just hope to be in the air.
3) Jump, or just be out of the line of fire, which is just a small
circle around him.
4) When the ground bulges, dodge to the side.
5) Shield.
6) Normally too much for your shield, but nothing else does anything.
7) Jump.
--====--
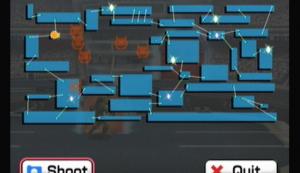
You are here.
Well, that was one big, crazy circle, no? Well, we're not done yet. See the blinking demon heads? They are all the bosses we have yet to fight. Save and heal, then jump into the bottom left teleporter. Press up to teleport. Exit. Now take the elevator on the left back up two levels. Exit off to the right and run past the Shaydas. Enter the door to fight Lucas.
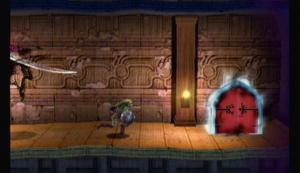
Lucas
Hop in the barrel. This time, there is nothing on the right, so veer left and climb the ladder. Take out the ticken, mind the Glice, dodge the Jyk, and keep climbing till your on stable ground. Kill the Feyesh and continue up. A little more up, past the next Glice, is a door leading to Ice Climbers. Fight them.
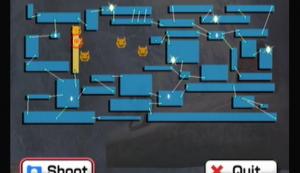
You are here. Ice Climbers are as well.
After the fight, go straight back though the door. Keep going up, dodging Glice and Spaak. At the top, fight Lucario. Here we are again. Save, then go back though the bottom right door and drop down to the area you fought Ice Climbers. Enter.
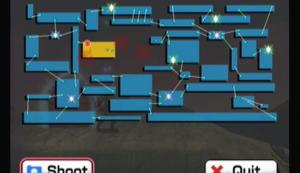
You are here. Ice Climbers are not.
Don't take the launcher and dodge the Mite. Save if you want to again, then continue to the left and down. After the Autolance, don't get caught in the launcher or barrel. At the second barrel, take out the Fire Primid and jump in the barrel. Have it send you straight up to hit the rail and destroy the blocks. Enter to fight Ike.
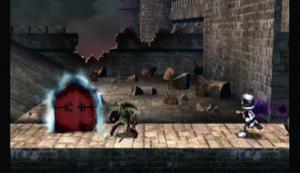
Ike
Go back right till you reach the save point again. Heal, then exit and go right. Enter the door quickly (if you don't make it, there is a switch to the left). Kill the Big Primid and Armight, then jump to the ledge on the left. Go up past the Armight and Borboras (ignore the key). Keep going past the Glice and Metal Primid. Once past the Armight, enter the door to fight Marth.

Marth
Head right. Hop in the new barrel to be magically shot back to the launcher. Get on and let it take you to the key. Grab the key and go down one more flight of stairs. Jump across the gap and go though the locked door. Enter the dark door to fight Ganondorf.
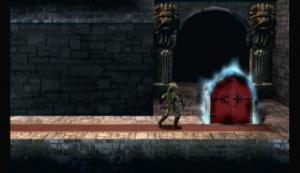
Ganondorf
And here we are again, only with no trophies blocking our way. Stand in front of the large door in the background and go in.
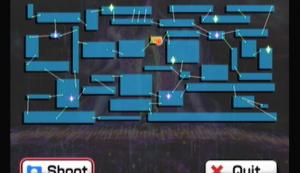
You are here. Tabuu is waiting.
Story Note
Tabuu was forming his wings when Sonic comes out of nowhere (literally, we haven't seen him this entire game) and snips them off.
Choose any six characters. They should have good aerial attacks and high jumps, but you definitely need to be familiar with them above all else.
Tabuu, winged form

Tabuu
--== Tabuu's attacks ==--
1) Teleports around the field
2) Forms some energy around his hand and swoops across the field
3) Thrashes at you
4) Fires a giant laser across the field
5) Fires giant energy fields from the back that are instant kills
6) Creates a picture frame and captures you in it, slamming you into
the ground
7) Fires rapid energy across the stage, ending in an explosion
8) Fires eye beams across the stage
9) Uses a tether to grab you and slam you down
10) Fires off a ton of copies of himself in all directions
--== How to predict ==--
1) Cant really. He'll just teleport four times in a row.
2) Teleports high in the air to one side and gathers energy in his
arm
3) Teleports right in front of you
4) Teleports to one side and puffs out his chest, a giant dragon
head will appear.
5) Teleports and appears behind the stage with wings
6) Turns the background black
7) Teleports to the edge of the stage facing down
8) Turns huge, his head appears beside the stage
9) Almost none.
10) Teleports over the center of the stage and makes weird motions
--== How to dodge ==--
1) Try to guess where he'll end up and start attacking.
2) Jump.
3) Dodge though him when he appears.
4) Jump a second after the head appears.
5) Dodge three times consecutively.
6) Dodge the frame.
7) Don't be near him, especially for the explosion.
8) Jump.
9) By the time you see the tether, it's too late.
10) Dodge if a stream is headed for you.
--== Strategy ==--
Dodge as best you can. Focus on offence only when he is in the air above the platform. You'll notice a pattern (though it's different every time you face him) as to where he appears above the stage. Figure it out and wail on him using aerial attacks.
End of Level!
Story Note
Tabuu defeated, the areas engulfed by Subspace return. Everything goes back to normal.
Sonic is now playable!
Now you can go back at any time and play ANY of the levels.
You cant watch the ending video again in your data files, so here it is. It's also a complete translation of the theme song, which is in Latin.
SPOILER ::: ENDING VIDEO BELOW
SPOILER ::: ENDING VIDEO BELOW
SPOILER ::: ENDING VIDEO BELOW
SPOILER ::: ENDING VIDEO BELOW
SPOILER ::: ENDING VIDEO BELOW
Launch in external player
End of Game!
This can only be done AFTER you beat SSE.
There is a few things you need to do before getting 100% and finishing SSE. These are located in The Forest, The Swamp, and The Ruins levels.
You must WIN the fights against these characters. If you lose, the stage still ends and you have to go back through and fight them again. Also, you will fight time one-on-one in a one-stock battle with whatever character you enter the door with, not your party leader. You will be fully healed, however.
Level: The Forest
A few feet into the level, after the first battle, there should be a door in mid-air. Kind of hard to miss. Just to the left of the first Puppit that drops down. Enter, and you’ll have to fight Toon Link on his ship.
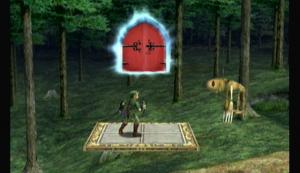
Toon Link
After the fight, you’ll clear the stage.
Level: The Swamp
Three doors in, and you have to fight Primid Diddy. Hop in the cart and continue right, past the fight with the Hammer Bros. Jump in the barrel and shoot to the next barrel. In here, you should see a door right in front of you. Aim for the next barrel above the Jyk, and have that barrel propel you to the platform. Enter the door to fight and unlock Jigglypuff.
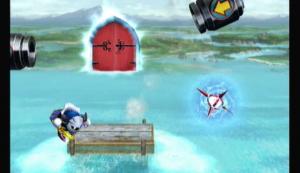
Jigglypuff
After, the stage ends and Jigglypuff is unlocked.
Level: The Ruins
Get to the part where the platform moves down on its own and you have to dodge the crystals coming out of the wall. Part way down, two Metal Primid will fall on you. You have to kill both of them. A little more, and just before the secret door, another Metal Primid appears. You have to kill him as well, before entering the first door that appears on the left. Now you can grab the boxes or immediately exit.
You’ll fall a ways down. At the bottom, there should now be a door floating above the ground. Enter to fight Wolf.
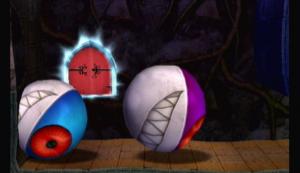
Wolf
The stage ends, and Wolf is now unlocked.

 How to add Videos and Music to Xbox Video and Xbox Music on Windows 8, 8.1 or RT 8.1
 Street Fighter IV Guide
 Destiny: Which Multiplayer PvP Mode Gives the Best XP?
 Watch Dogs Guide to Understand and Fix Windowed mode settings for Windows 7 or Windows 8
 Fifty Shades of Grey: Sia recorded new theme for the anticipated film