Welcome to SuperCheats.com unofficial Super Smash Bros Brawl Character Guide. If you are looking for the game guide, please click here.
Like our game guide, this low down on all the characters in SSBB has been written exclusively for SuperCheats.com by SPV999. This guide covers all of the characters in the game, that include all the unlocable ones. As well as moves for each character there is also information about how to unlock them plus some tips and strategies.
There is also commentary from the members of our forums, to kind of give you a second opinion for things like gameplay strategies for each character.
OK, our SSBB Character guide lists the characters in alphabetical order, there are some details below about how the info is laid out... So, read on, and please enjoy!
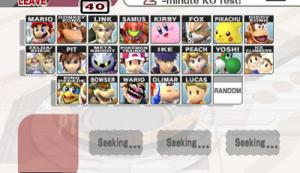
Starting Roster
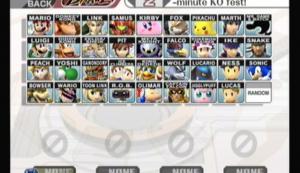
Final Roster
Let me give you a brief rundown of how this section is laid out:
(character name)
[picture of character]
First appeared in: (game the character first appeared in)
Veteran fighter: (if this character has been in a previous Smash game)
Class type: (light, middle weight, heavy. Effects speed and power)
Fighting type: (ranged, mid-ranged, close combat, all-round)
Clone: (if this character has a clone. Clones are character that share
an almost identical move set with only slight modifications
[speed, power, looks])
How to unlock:
1) (most characters have 2 different ways to unlock them)
2) (you can choose any of the ways listed meaning you don't have
3) to do ALL the things listed)
Moveset: (attacks the character has)
A set: (Standard attacks)
A charged set: (smash attacks)
B set: (special attacks)
Grab set: (grab moves)
Aerial set: (attacks made in air)
Final Smash: (yeah)
Strategy:
(Basic strategy of how to use this character effectively)
Defense Strategy:
(How to fight this character)
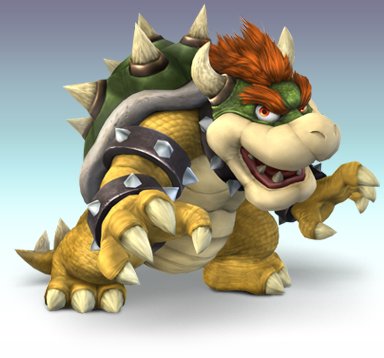
Bowser
First appeared in: Super Mario Bros.
Veteran fighter: Yes. SSB & SSBM
Class type: Heavy
Fighting type: Close Combat
Clone: No
How to unlock:
Starting Character
Moveset:
A set:
A:
Damage: 5-10
Side-A:
Damage: 11
Up-A:
Damage: 12
Down-A:
Damage: 14-25
A charged set:
Side-A:
Damage: 33-46
Up-A:
Damage: 15-28
Down-A:
Damage: 9-29
B set:
B: Fire Breath. The longer you hold the button, the shorter it gets.
Damage: 1-infinite.
Side-B: Flying Slam. Grabs your opponent then jumps into the air
only to land on them.
Damage: 18
Up-B: Whirling Fortress. Ducks in his sell and spins at high speeds.
Damage: 16 for initial hit, 2 for each consecutive hit.
Down-B: Bowser Bomb. Jump up and lands on an opponent.
Damage: 4 for the rise, 20 for the fall.
Grab set:
A:
Damage: 3
Side:
Damage: 10
Up:
Damage: 10
Down:
Damage: 12
Aerial set:
A:
Damage: 13
Side-A:
Damage: 12
Up-A:
Damage: 12
Down-A:
Damage: 1-12
Final Smash - Giga Bowser:
You may remember Giga Bowser from Melee. He is basically a giant form of Bowser, with elements added to his attack (including Fire, Dark, and Freeze). The effect lasts 15 seconds, so make the most of it!
Strategy:
Bowser is big, slow, and heavy. Use that to your advantage. Don’t try anything fancy, you’ll only be predicted and countered. Use him like a tank, move slowly, time your attack, and let loose. Bowser isn’t a hunter, let them come to you. Most of his attacks have a fair range, longer then some of the smaller characters, so keep that in mind. Bowser is also fiercely powerful and not easily stunned, so if he hits someone they are liable to go flying and if hitting someone means taking a hit, don’t be afraid to.
Defense Strategy:
Hit him fast and from a distance to rack up damage. You cant do anything till he get at least to 60%, so don’t even try. Dash attacks also work well, as by the time he strikes you’ll have already passed. Once his damage builds, use aerial attack to finish him.
Here are some extra comments from the members of our forums for Bowser...
The King of Koopas and the Mushroom Kingdom's biggest threat, Bowser has kidnapped Peach countless amounts of times, intending to lure his nemesis Mario in to traps. He is the biggest and heaviest fighter in the game, using his size, power and fire breath to destroy his opponents.
Special Attacks
Standard: Fire Breath. Bowser breaths fire down on nearby opponents. By holding the button, he wil continuously breath fire, although the fire will shrink until it is barely noticable and useless.
Side: Flying Slam. Bowser slashes at foes, grabbing if they're close enough and spinning them in ti the air before slamming them in to the ground. If Bowser is near the edge when he does this, he can drag him and his opponent off the stage, KO'ing the foe first. If the opponent has taken minimal damage - or Bowser has taken a large amount of damage - then it is possible for the opponent to turn Bowser arouns so he falls first.
Up: Whirling Fortress. Bowser retreats in to his shell and spins rapidly, injuring those caught up in the spin. The move allows Bowser to return to the arena if he is knocked off of it.
Down: Bowser Bomb. Bowser jumps in to the air before crashing down in a ground pound style. If he is in the air, he will go straight in to the move without jumping.
Final Smash: Giga Bowser Transformation. Transforms in to Giga Bowser - Melee's proper final boss - for a little while. While in this form, he is seemingly invincible, so the only option for opponents is to run.
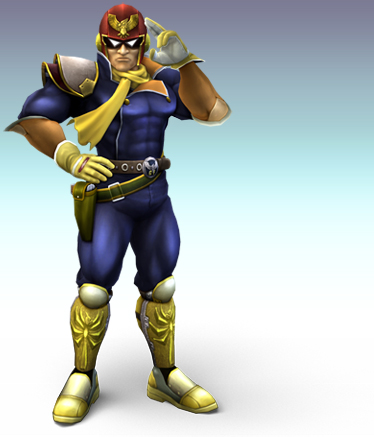
Captain Falcon
First appeared in: F-Zero
Veteran fighter: Yes. SSB & SSBM
Class type: Mid-weight
Fighting type: Mid-ranged
Clone: Yes. Ganondorf.
How to unlock:
1) Clear Classic Mode on Normal difficulty in 12 minutes
2) Play 70 Versus mode matches
3) Complete SSE Level 20: Outside the Ancient Ruins
Moveset:
A set:
A:
Damage: 3-23
Side-A:
Damage: 10
Up-A:
Damage: 13
Down-A:
Damage: 10
A charged set:
Side-A:
Damage: 19-26
Up-A:
Damage: 20-29
Down-A:
Damage: 18-25
B set:
B: Falcon Punch! A very fierce flaming punch.
Damage: 27
Side-B: Raptor Boost. Dashes sideways. If he hits an opponent, he
performs a flaming uppercut.
Damage: 7
Up-B: Falcon Dive. Grabs an opponent, sets them ablaze, then kick-
jumps off of them.
Damage: 17
Down-B: Falcon kick. Dashes across the field with a flaming kick.
Damage: 13
Grab set:
A:
Damage: 2
Side:
Damage: 9
Up:
Damage: 7
Down:
Damage: 7
Aerial set:
A:
Damage: 4-8
Side-A:
Damage: 19
Up-A:
Damage: 13
Down-A:
Damage: 14
Final Smash - Blue Falcon:
Uses his F-Zero to smash into an opponent, knocking them to Port Aero Smith, where he proceeds to splatter them. Damage is 40, but overall it’s a guaranteed KO. You need to be standing as close as possible to an opponent for it to work, as you need to hit them with the initial strike. If you hit multiple opponents, you will splatter all of them, but the KO potential goes down.
Strategy:
C.Falcon is fast, but only when dashing. His attacks are fairly short range, but this is offset by most of his B moves. Use the Raptor Boost and Falcon Kick from a distance to build up damage, then go in for the kill with either a well-timed Falcon Punch (if you’re facing multiple enemies and they are distracted) or a couple charged attacks. Don’t let your opponent get too much distance, as he is pretty defenseless past the range of his kick.
Defense Strategy:
Keep your distance. Aerials work good for the kill. Don’t underestimate his speed though, in the hands of a good player he can run circles around most other characters. Whenever you see a body part start to flash orange, shield or get away, as something big is coming. Use as many projectiles as you can as he approaches, then try to stay behind him.
Here are some extra comments from the members of our forums for Captain Falcon...
A bounty hunter and star of the F-Zero Grand Prix, Captain Falcon returns to show opponents his moves. One of the fastest characters in the game - only dwarfed by Sonic - the Captain utilises a blend of swift moves such as his rapid punch combo and powerful blasts such as the famous Falcon Punch. A good balance of both is key to mastering Captain Falcon.
How to unlock: Play 70 Brawls, then challenge him; complete Classic on normal or harder in under 12 minutes, then challenge him; get him to join your team in the Subspace Emissary.
Special moves
Standard: Falcon Punch. Captain Falcon charges up before unleashing a powerful punch that gives the shape of a falcon in flames. If the opposite direction is pressed when he is charging, he will turn around and punch the other way. This is more powerful than the standard Falcon Punch.
Side: Raptor Boost. Captain Falcon dashes forward with his fist, giving an uppercut to those he hits. It can be used in the air for recovery purposes.
Up: Falcon Dive. Captain Falcon Dives upwards, grabbing anyone who gets in his way and blasting them back in an explosion. If he grabs someone with this, he is able to perform the move again.
Down: Falcon Kick. Catain Falcon charges forward with his foot covered in flames. If used in the air, he will charge downwards at an angle with his foot.
Final Smash: Blue Falcon. Captain Falcon summons his F-Zero ship - the Blue Falcon - to dash in front of him. If it hits anyone, he will jump in as they are knocked on to an F-Zero track, where he drives straight in to them to knock them back on to the stage. This is the only cinematic Final Smash in the game.
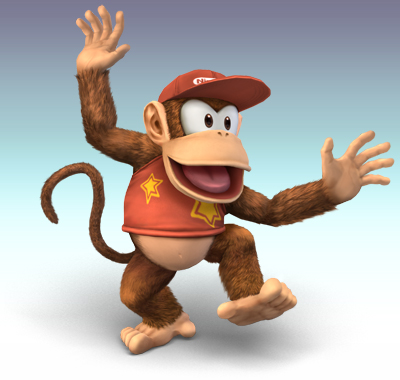
Diddy Kong
First appeared in: Donkey Kong Country
Veteran fighter: No
Class type: Middleweight
Fighting type: Ranged
Clone: No.
How to unlock:
Starting Character
Moveset:
A set:
A:
Damage: 3-19
Side-A:
Damage: 11
Up-A:
Damage: 7
Down-A:
Damage: 7
A charged set:
Side-A:
Damage: 18-25
Up-A: Damage: 15-22
Down-A:
Damage: 16-22
B set:
B: Peanut Popgun. Fires a round from his peanut gun. Can be charged.
Damage: 5-18
Side-B: Monkey Flip. Jumps and barrel rolls forward, latching on to
an opponent’s face. Then press the A or B button to attack.
Damage: 5-15
Up-B: Rocketbarrel Boost. Uses his jetback to fly into the air. Can
be charged.
Damage: 10
Down-B: Banana Peel. Toss a banana peel onto the stage. Acts just
like the item. Remember to throw it to activate it.
Damage: None.
Grab set:
A:
Damage: 2
Side:
Damage: 11
Up:
Damage: 9
Down:
Damage: 9
Aerial set:
A:
Damage: 6
Side-A:
Damage: 14
Up-A:
Damage: 11
Down-A:
Damage: 12
Final Smash - Rocketbarrel Barrage:
Puts on his jetback and pulls out his peanut guns. Use the control stick to fly him around and angle his attacks. It takes some getting use to. A button to fire his guns. Lasts for 12 seconds, so make sure you’re over dry land by then.
Strategy:
Keep your distance and use the pop gun and banana peels to build damage. He isn’t a heavy hitter, so it will be a ways into the fight before he can kill someone easily. He is very agile, however, so if someone does get in close use his speed and high aerials to get away. Once they are damaged enough, a smash attack should work ok.
Defense Strategy:
Watch for the banana peels and pop gun to get in close. He’s pretty good from a distance, but if you get in close he cant do much at that point. Match his movements to prevent escape (watch for the jetpack) and keep the pressure on. He is a lightweight, so it shouldn’t take much.
Here are some extra comments from the members of our forums for Diddy Kong...
Donkey Kong's best mate and most comon ally finally makes his Smash Bros. debut. His movements have been described as 'whimshacal' while he also comes armed with his peanut pop guns and rocketbarrels.
Final Smash: Rocketbarrel Barrage - Diddy Kong takes out his rocketbarrels and his Peanut Popguns and blasts about the arena. The Peanuts he shoots cause explosions all over the stage. After a while, the Rocketbarrels explode, causing damage to all nearby opponents. The Peanuts from the Popguns can be eaten if found on the ground.
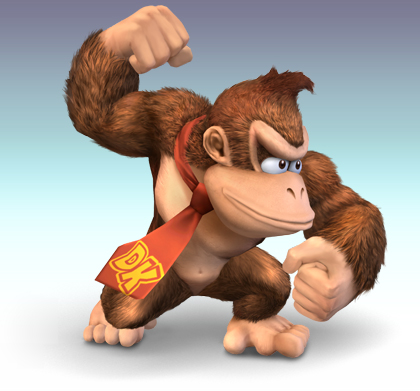
First appeared in: Donkey Kong
Veteran fighter: Yes. SSB & SSBM
Class type: Heavy
Fighting type: Close Combat
Clone: No
How to unlock:
Starting Character
Moveset:
A set:
A:
Damage: 3-10
Side-A:
Damage: 10
Up-A:
Damage: 6
Down-A:
Damage: 8
A charged set:
Side-A:
Damage: 20-29
Up-A:
Damage: 18-25
Down-A:
Damage: 17-23
B set:
B: Giant Punch. Winds his fist up to build power. Press B again to
unleash, or move to the side to store and release later.
Damage: 10-28
Side-B: Head butts an opponent and smashes them into the ground.
Damage: 10 immobilizes them
Up-B: Spinning Kong. Spins around with his arms out.
Damage: 4-18
Down-B: Hand Slap. Slaps the ground, creating a shockwave.
Damage: 14
Grab set:
A:
Damage: 3
Side (facing):
Damage: 6
Side (away):
Damage: 11
Up:
Damage: 9
Down:
Damage: 7
Aerial set:
A:
Damage: 8-11
Side-A:
Damage: 16
Up-A:
Damage: 14
Down-A:
Damage: 16
Final Smash - Konga Beat:
This attack isn’t that fancy. He just pulls out a set of drums and starts playing, sending soundwaves our around him. Very simple, and doesn’t stand much of a chance of getting a KO. Damage is 3-70.
Strategy:
DK is slow, but his attacks back a punch and extend a ways. When in close, don’t try for your slow smash attacks, us regular attacks or your ground slap to build damage and a bit of distance. Always keep a giant punched charged up when you can, as it is fairly fast and can easily KO.
Defense Strategy:
While his is big, he’s not very heavy, so you can send him flying easier then the other big guys. You still need to build damage, but it’s easier to get in close and use quick low-damaging attacks then projectiles.
Here are some extra comments from the members of our forums for Donkey Kong...
The original Nintendo character, back for the Smash Bros. hat-trick. Donkey Kong, or D.K. for short, is one of the games more powerful characters, though compared to felow powerhouse Bowser, has some exceptional speed. His fist-based specials can cause all sorts of headaches for his opponents.
Special Attacks
Standard: Giant Punch. By pressing the special attack button, Donkey Kong charges up a powerful punch. Pressing B again after it is fully - or partially - charged will throw the punch. If he is hit during the charge, the charge will be cancelled. Py pressing any other button, the charge will be cancelled and he will store what is currently charged.
Side: Headbutt. Donkey Kong slams his head down in front of him, powerful enough to drive anyone in front of him in to the ground, allowing anyone o attack them without knockback. It has powerful knockback if done in the air.
Up: Spinning Kong. Donkey Kong spins around rapidly to move along air. The move gains more horizontal distance than vertical. On ground, it can be manovered side to side.
Down: Hand Slap. Donkey Kong slams the ground with his hands, causing the ground to tremor around him. This move can be used repeatedly for an easy way to take care of large crowds.
Final Smash: Konga Beat. Takes out the DK Bongos and beats away at them, the shockwaves from the music damaging nearby enemies. By pressing buttons to the beat, the damage can be increased.
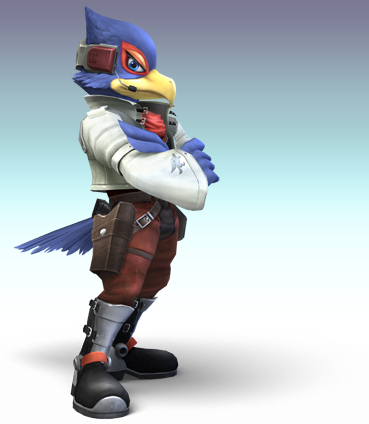
Falco
First appeared in: Star Fox 64
Veteran fighter: Yes. SSBM.
Class type: Light
Fighting type: All-round
Clone: Yes. Fox, Wolf.
How to unlock:
1) Clear 100-Man Brawl
2) Play 50 Versus mode matches
3) Complete SSE Level 18: The Swamp
Moveset:
A set:
A:
Damage: 4-40
Side-A:
Damage: 9
Up-A:
Damage: 9
Down-A:
Damage: 12
A charged set:
Side-A:
Damage: 15-33
Up-A:
Damage: 14-19
Down-A:
Damage: 15-21
B set:
B: Blaster. Fires semi-auto rounds that can stun opponents.
Damage: 3
Side-B: Falco Phantasm. Dashes very quickly across the stage.
Damage: 7
Up-B: Fire Bird. Creates flames around him, then thrusts up into the
air like a flaming bullet. Outer flames can damage people. Can
also control the direction of the shot by initiating the
attack then pressing a direction on the control stick.
Damage: 4-20
Down-B: Reflector. Falco kicks a shield out. If close enough, it
can damage people when first activated. Its main effect is
to reflect projectiles.
Damage: 6
Grab set:
A:
Damage: 2
Side:
Damage: 8
Up:
Damage: 8
Down:
Damage: 9
Aerial set:
A:
Damage: 3-12
Side-A:
Damage: 3-6
Up-A:
Damage: 11
Down-A:
Damage: 4-12
Final Smash - Landmaster:
He calls in a Landmaster Tank. When in the Landmaster Tank, Press A to fire energy rounds, use the control stick to move, and hold X or Y to activate your thrusters and hover. Shots do 16, running into someone does 15. Press down to roll and shake people off. KO potential is moderate, depending on your enemy's damage. Whole thing lasts 15 seconds.
Strategy:
Falco is an all-round type, opening your options quite a bit. He is mid-weight, so don't worry about being sent flying too much, and most of his attacks pack a punch. At a distance, you can use your blaster to build damage, your blaster will also stun them, unlike Fox's so use that to your advantage at close range. Falco Phantasm is great for escapes and recoveries. Over all, us your speed to get in close and wail on them, mixing in a few specials to keep them off balance. Don't be afraid to use your reflector either, as he kicks it away it makes a great projectile attack.
Defense Strategy:
Falco is a tough one. You cant use projectiles as they will all be reflected, you also cant get in close because of his speed. Hitting him in a air is bad, as a lot of his aerial attacks can send you flying in one shot. Getting in close is going to be your best bet. Sure, he can still hit you, but they wont be the powerful attacks he'll be able to hit you with from a mild distance.
Here are some extra comments from the members of our forums for Falco...
The cocky expert pilot of the StarFox team returns to the fight with a slightly altered moveset. From his free-spirited, loner personality, Falco is a speedy character, with the best first jump of the game. His specials are similar to Melee, however, his standard moves are changed considerably, including a double slash with his forward smash and a rapid slap for his combo.
How to unlock: Play 50 Brawls, then challenge him; Complete 100 man Brawl, then challenge him; get him to join your team in the Subspace Emissary.
Special moves
Standard: Blaster. Falco takes rapid shots forward with his blaster. His blaster is a lot slower than Fox's, but the shots are slightly more powerful and cause those that are shot to flinch.
Side: Falco Phantasm. Falco dashes forwards incredibly fast, attacking his opponents with his illusion. The move is very similar to the Fox Illusion, however, the move acts as a meteor smash to those hit by it in the air.
Up: Fire Bird. Falco surrounds himself in flames, charging up before launching himself in the direction of the player's choice. The move is very similar to Fox's Fire Fox recovery move.
Down: Reflector. Falco activates his reflector, then kicks it forward, looping back like a boomerang. The reflector can knock back incoming projectiles as well as injure those that touch it.
Final Smash - Landmaster. Falco jumps in to a Landmaster to take down opponents. Since he is more accustomed to life in an Arwing, his control over it isn't too good, nor is its power compared to Fox's Landmaster. However, its hover ability far surpasses Fox's, allowing him to hover high enough to lift opponents off the stage for a K.O. off the top of the screen.
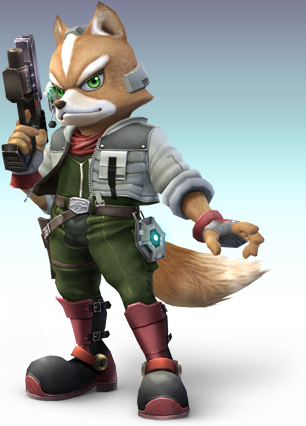
Fox
First appeared in: Star Fox
Veteran fighter: Yes. SSB & SSBM
Class type: Light
Fighting type: All-round
Clone: Yes. Falco, Wolf
How to unlock:
Starting Character
Moveset:
A set:
A:
Damage: 2-14
Side-A:
Damage: 6
Up-A:
Damage: 8
Down-A:
Damage: 8
A charged set:
Side-A:
Damage: 15-21
Up-A:
Damage: 17-23
Down-A:
Damage: 14-19
B set:
B: Blaster. Can be rapid fired.
Damage: 3 per shot.
Side-B: Fox Illusion. Dashes very quickly across the stage.
Damage: 4
Up-B: Fire Fox. Creates flames around him, then thrusts up into the
air like a flaming bullet. Outer flames can damage people. Can
also control the direction of the shot by initiating the
attack then pressing a direction on the control stick.
Damage: 1-28
Down-B: Reflector. A shield comes up around Fox. If close enough, it
can damage people when first activated. Its main effect is
to reflect projectiles.
Damage: 5 or the projectiles power.
Grab set:
A:
Damage: 1
Side:
Damage: 8
Up:
Damage: 8
Down:
Damage: 9
Aerial set:
A:
Damage: 6
Side-A:
Damage: 5-20
Up-A:
Damage: 16
Down-A:
Damage: 1-10
Final Smash - Landmaster:
He calls in a Landmaster Tank. When in the Landmaster Tank, Press A to fire energy rounds, use the control stick to move, and hold X or Y to activate your thrusters and hover. Shots do 16, running into someone does 15. Press down to roll and shake people off. KO potential is moderate, depending on your enemy's damage. Whole thing lasts 15 seconds.
Strategy:
Fox is an all-round type, opening your options quite a bit. He is lightweight however, and not horridly powerful. Rely on his speed for quick attacks. Use the reflector when possible, and don't forget about your blaster, its not much but every bit helps. Your standard and smash attacks are good, but getting in that close means exposing yourself. When you do get in close, attack quickly, use Fox Illusion to get some distance, then go back for more.
Defense Strategy:
Fox is easier then Falco do to his lightweight class. Rush him and get in close. He'll be fast, but his close range attacks wont do much damage. Focus more on getting in one or two hard hits compared to 5 or 6 light hits.
Here are some extra comments from the members of our forums for Fox...
While normally seen piloting an arwing, Fox returns to Smash Bros. with his incredible agility and formidable melee combat. Unlike before, Fox keeps his blaster out at all times instead of taking it out when needed, which could possibly alter his moveset. He now sports a look that seems loosely based off his StarFox Assault appearence.
Special Attacks
Standard: Blaster. Fox fires his blaster at opponents. While having no knockback and only doing small damage, it has rapid fire capabilities, allowing easy K.O. steals.
Side: Fox Illusion. Fox dashes forward, attacking opponents with an illusion of himself. This can be used for recovery purposes.
Up: Fire Fox. After a brief charge, Fox wil - while surrounded by fire - charge in the direction of the control stick. This can be used for recovery.
Down: Reflector. Fox puts up a shield that reflects projectiles. The move can injure opponents the instant it is activated, but cannot reflect physical hits or injure afterwards.
Final Smash: Landmaster. Fox summons and jumps in to his Landmaster - scaled much bigger than before - and attacks from within it. Opponents can stand upon the tank, although by pressing down, Fox can perform a barrel roll to knock off and damage opponents. The jump button allows the vehicle to hover, while the attack button fires the canon, causing large amounts of damage. Because of the Landmaster's size, it is slow to turn.
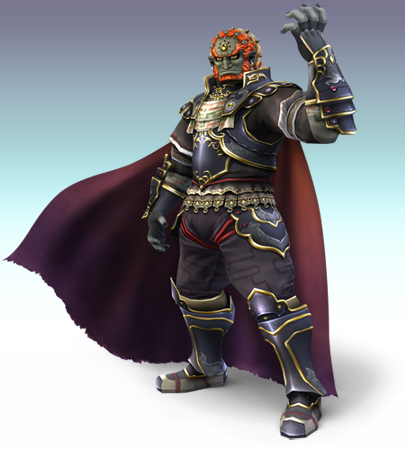
Ganondorf
First appeared in: The Legend of Zelda
Veteran fighter: Yes. SSBM.
Class type: Heavy
Fighting type: Mid-ranged
Clone:
How to unlock:
1) Clear Classic Mode on Hard difficulty as Link or Zelda
2) Play 200 versus mode matches
3) Get the Link and Zelda trophies SSE Level 30: Subspace (2)
Moveset:
A set:
A:
Damage: 7
Side-A:
Damage: 15
Up-A:
Damage: 27
Down-A:
Damage: 12
A charged set:
Side-A:
Damage: 24-33
Up-A:
Damage: 19-26
Down-A:
Damage: 19-26
B set:
B: Warlock Punch. A very fierce magic punch.
Damage: 32
Side-B: Flame Choke. Thrust forward and grabs an enemy. Chokes them
then blows them up.
Damage: 9
Up-B: Dark Dive. Grabs an opponent, sets them ablaze, then kick-
jumps off of them.
Damage: 11
Down-B: Wizard's Foot. Dashes across the field with a flaming kick.
Damage: 12
Grab set:
A:
Damage: 2
Side: 13
Damage:
Up: 7
Damage:
Down:
Damage: 7
Aerial set:
A:
Damage: 11
Side-A:
Damage: 15
Up-A:
Damage: 12
Down-A:
Damage: 22
Final Smash - Beast Ganon:
Transforms into his massive Twilight Princess beast form and rams forward real quick. Damage around 65% to anyone near you, and a high chance of a KO for anyone right in front of you.
Strategy:
Unlike C.Falcon, Ganondorf is all-round slow, meaning you'll have to rely on his heavier weight to take some blows while setting up your foes. Use the Wizards Foot to keep them off balance and go in for the kill with any of his other attacks once some damage is built up.
Defense Strategy:
Ganondorf is fairly easy to take down with a fast character. Use rapid shots and ranged attacks to build damage. At that point, even your slowest attack should be able to charge up before he can get on off, so rush in and hit him.
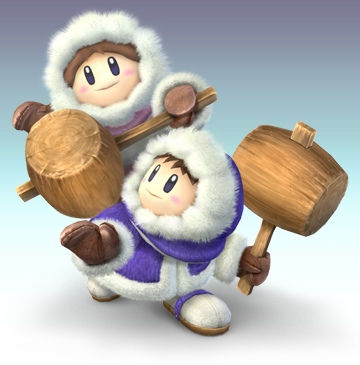
Ice Climbers
First appeared in: Ice Climbers
Veteran fighter: Yes. SSBM.
Class type: Light
Fighting type: Close Combat
Clone: No
How to unlock:
Starting Character
Moveset:
A set:
A:
Damage: 5-11
Side-A:
Damage: 16
Up-A:
Damage: 4-16
Down-A:
Damage: 10
A charged set:
Side-A:
Damage: 21-29
Up-A:
Damage: 19-28
Down-A:
Damage: 20-42
B set:
B: Ice Shot. Tosses mini glaciers that slide across the field.
Damage: 6
Side-B: Squall Hammer. Spins in a circle, swinging their hammers.
Damage: 4-14
Up-B: Belay. Only works with both Popo and Nana.
Damage: 16
Down-B: Blizzard. Sends a cloud of freezing ice out in both
directions. Has a chance to freeze your opponent.
Damage: 16-18
Grab set:
A:
Damage: 3
Side:
Damage: 8
Up:
Damage: 6
Down:
Damage: 8
Aerial set:
A:
Damage: 6-12
Side-A:
Damage: 12-19
Up-A:
Damage: 15
Down-A:
Damage: 13
Final Smash - Iceberg:
Causes a giant iceberg to appear in the center of the stage. Causes freezing damage to anyone near it, and can do up to 200 damage. Can also freeze solid and send flying anyone that actually touches it. Lasts for 25 seconds.
Strategy:
Ice Climbers take FOEVER to get used to, and are not recommended for anyone other then experts. Controlling two characters at once is nearly impossible, but the payout is huge if you can get it down. Use your two stage attack to catch opponents off guard. Don't forget about your Ice Shot, as it can catch people off guard, as can Blizzard.
Defense Strategy:
Don't be fooled, there are two of them, and many of their attacks use both of them in a delayed fashion. Wait until their full combo is over before moving in or de-shielding. Their range isn't that great, so keep a distance. They are also very light, so if you can get in and land a blow, they wont last long. Try to keep them in the air as much as possible and juggle them.
Here are some extra comments from the members of our forums for Ice Climbers...
Popo in blue, Nana in pink, the tag team duo of the Ice Climbers return. Players are in control of Popo, while Nana follows behind computer controlled, usually copying Popo. They can attack seperately, although when together their abilities are increased, such as being able to perform their 'Beley' recovery.
Final Smash - Iceberg:
Nana and Popo high-five each other to form a huge iceberg that pierces through and covers most of the stage. It serves as an obstruction on the stage as well as damaging and possibly freezing enemies. The Ice Climbers are completely unaffected by it and are able to walk on it normally.
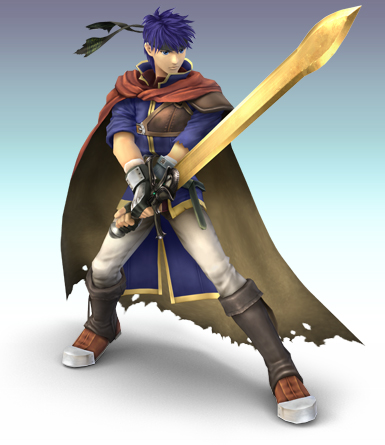
Ike
First appeared in: Fire Emblem: Path of Radiance
Veteran fighter: No
Class type: Heavy
Fighting type: Close-combat
Clone: No.
How to unlock:
Starting Character
Moveset:
A set:
A:
Damage: 4-16
Side-A:
Damage: 15
Up-A:
Damage: 12
Down-A:
Damage: 14
A charged set:
Side-A:
Damage: 22
Up-A:
Damage: 17-23
Down-A:
Damage: 16-18
B set:
B: Eruption. Holds his sword up and slams it, tip first, into the
ground, creating a pillar of fire and a shockwave. The longer you
charge it, the larger the shockwave. If charged for too long, it
will be a huge attack, but will also give you 10 damage.
Damage: 10-37
Side-B: Quick Draw. Holds his up beside his head, then dashes
forward with one great swing. Can be held infinitely, but
reaches max power when you hear the chime.
Damage: 9-16
Up-B: Aether. Throws his sword up spinning into the air, then jumps
up, catches it, and slams it into the ground.
Damage: 2-18
Down-B: Counter.
Damage: Double the enemy attack.
Grab set:
A:
Damage: 3
Side:
Damage: 6
Up:
Damage: 6
Down:
Damage: 6
Aerial set:
A:
Damage: 9
Side-A:
Damage: 13
Up-A:
Damage: 14
Down-A:
Damage: 16
Final Smash - Great Aether:
Pretty much the same as his standard Aether, only longer, more powerful, and much, much cooler. You need to be pretty close to them to hit with the initial swing, but after that you'll do around 70 points of damage followed by a hard slam into the ground that can easily send them flying if they have around 100 damage.
Strategy:
Ike is very slow. When not used with another character, try to use his quick draw as much as possible, and stick to standard attacks. When the damage begins to mound, it wont take much for even Ikes standard moves to KO someone. Aether is also very good for building damage, and one of his few quick attacks. Get in close and try to get an opportunity to counter something, as that will knock everyone off guard, at which point you should be able to get in a good strong blow.
Defense Strategy:
Use quick attacks and dodging to build damage. Watch for his quick draw, as that can hit at quite the distance. Ranged attacks also work well, though he will be prone to countering them. Don't use strong attacks till you know he is off guard, or else he can counter for double the damage, and that can hurt.
Here are some extra comments from the members of our forums for Ike...
A member of the Greil mercenaries from the continent of Tellius. Ike is the newest Fire Emblem character to the Smash Bros series. His weilds the Ragnell sword and has his aether ability to cause havoc upon the battlefields.
Final Smash - Great Aether:
Ike throws his sword up, Aether style, to catch an enemy (or enemies) before jumping up and slashing at the opponent rapidly - each hit setting them alight - before charging up a finisher and slamming them to the ground in an explosion.
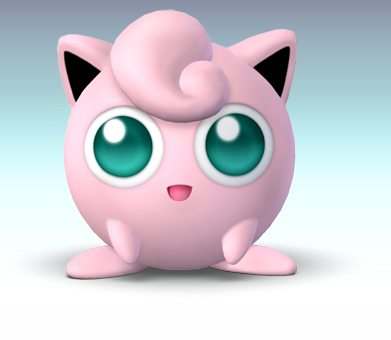
Jigglypuff
First appeared in: Pokemon Red/Blue/Green
Veteran fighter: Yes. SSB & SSBM
Class type: Light
Fighting type: Close Combat
Clone: No
How to unlock:
1) After clearing SSE, clear Event Matches 1-20
2) Play 350 Versus Mode matches
3) Clear SSE, then play The Swamp to find a hidden door
Moveset:
A set:
A:
Damage: 3-12
Side-A:
Damage: 10
Up-A:
Damage: 9
Down-A:
Damage: 10
A charged set:
Side-A:
Damage: 16-22
Up-A:
Damage: 13-18
Down-A:
Damage: 12-16
B set:
B: Rollout. Rolls across the stage doing impact damage. Can be charged. Can be controlled with the control stick.
Damage: 0-18
Side-B: Pound. Punches forward.
Damage: 11
Up-B: Sing. Puts enemies in the surrounding area to sleep.
Damage: None. Puts enemies to sleep.
Down-B: Rest. If close to an enemy, launches them up and puts a flower on their head.
Damage: 12-43
Grab set:
A:
Damage: 3
Side:
Damage: 10
Up:
Damage: 10
Down:
Damage: 10
Aerial set:
A:
Damage: 6
Side-A:
Damage: 12
Up-A:
Damage: 9
Down-A:
Damage: 4-12
Final Smash - Puff Up:
Expands to a huge size, taking up most of the stage on small stages. This can push people off the edge, but more importantly if someone is to touch Jiggly just as it gets to full size, they take massive damage and are sent flying. Not all that great on large stages.
Strategy:
Jigglypuff has been severely toned down since last time around. Her rest attack is fairly weak, thought still the strongest of her attacks. Using a Sing Rest combo is about your only chance, so make the most of it. Her Rollout is also severely weaker, being able to be knocked out of it with a weak attack from another enemy.
Defense Strategy:
Just rush in and attack. Now, even if she does manage to hit you with Rest, it wont do that much. Being a lightweight, it doesn't take much to send her flying, so a couple dash attacks ending in an aerial smash should do it.
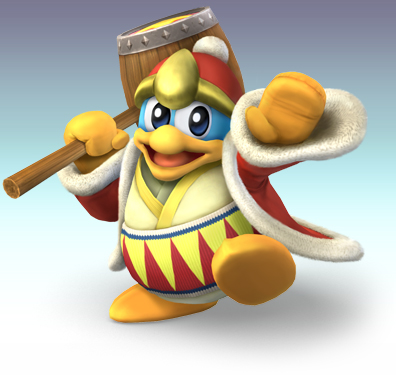
King Dedede
First appeared in: Kirby's Dream Land
Veteran fighter: No
Class type: Heavy
Fighting type: Mid ranged
Clone: No.
How to unlock:
Starting Character
Moveset:
A set:
A:
Damage: 6-20
Side-A:
Damage: 6
Up-A:
Damage: 14
Down-A:
Damage: 10
A charged set:
Side-A:
Damage: 23-33
Up-A:
Damage: 14-19
Down-A:
Damage: 15-22
B set:
B: Inhale. Sucks up his enemies. Press again to spit out. If he heats an item, he will swallow it and absorb its effect.
Damage: 10
Side-B: Waddle Dee Toss. Throws a random Kirby enemy or item (mostly waddle Dees, but sometimes other enemies and even Capsules)
Damage: 5-20
Up-B: Super Dedede Jump. Jumps high into the air and comes crashing back down.
Damage: 11-15
Down-B: Jet Hammer. Charges up a horizontal swing using a jet engine. Can be charged. After a few seconds of charging, Dedede starts to take damage.
Damage: 11-30
Grab set:
A:
Damage: 3
Side:
Damage: 11
Up:
Damage: 9
Down:
Damage: 8
Aerial set:
A:
Damage: 12
Side-A:
Damage: 15
Up-A:
Damage: 2-10
Down-A:
Damage: 2-6
Final Smash - Waddle Dee Army:
Calls in a massive hoard of Waddle Dees (and sometimes other enemies) to assault your foes at once. Not great for KOs, but you can expect around 70 damage out of it.
Strategy:
Dedede is the most powerful character in Brawl, he is also one of the slowest. Use the Waddle Dee Throw to keep enemies at a distance, then charge up your Jut Hammer in close (just tap it for a quick swing). Use his High Jump to get out of sticky situations. He is slow and heavy, so don't be afraid to take a hit. Don't stay stationary though, his moves are too easy to predict. Keep moving and keep your opponents guessing. Land a heavy blow to send them flying once they are off guard.
Defense Strategy:
Stay just out of range of an attack, and wait for your recovery long recovery time to kick in to get in close and start tearing him apart. Keep your distance for the most part though, and build up some damage before moving in. whenever you see that hammer start to move and you're within range, get out of there! Getting behind him also works well, as not to many of his attacks cover his rear.
Here are some extra comments from the members of our forums for King Dedede...
Kirby's primary villan and self-proclaimed King of Dream Land enters the fray looking for revenge. Dedede comes in as another heavyweight to go with Bowser and DK, although little else is known apart from he has a newly mechanised mallet that can deleiver earth shaking blows.
Final Smash - Waddle Dee Army:
King Dedede Summons his army of Waddle Dees, who run about the stage at high speed to try and sweep opponents away with them. Gordo's occasionally appear with the Waddle Dee's causing large damage to whoever touches them.
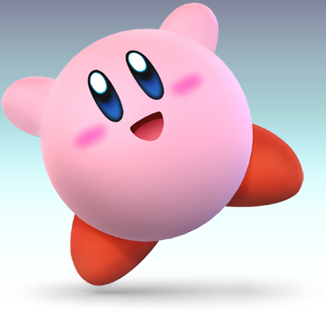
Kirby
First appeared in: Kirby's Dream Land
Veteran fighter: Yes. SSB & SSBM.
Class type: Light
Fighting type: Mid-Range (can change depending on hat)
Clone: No.
How to unlock:
Starting Character
Moveset:
A set:
A:
Damage: 1-infinite
Side-A:
Damage: 8
Up-A:
Damage: 5
Down-A:
Damage: 5
A charged set:
Side-A:
Damage: 15-22
Up-A:
Damage: 15-21
Down-A:
Damage: 14-19
B set:
B: Inhale. Sucks in an enemy. Press again to copy said enemies B move. When wearing a hat, will use that hats B move.
Damage: 6
Side-B: Hammer. Horizontal hammer swing.
Damage: 29
Up-B: Final Cutter. Pulls out a Scimitar and jumps into the air swinging the sword. At the apex, he comes straight down and slams the ground, sending out a projectile blade of air for a short distance.
Damage: 8-15
Down-B: Stone. Turns into some kind of stone. This makes you temporarily invincible, though you cant move. Mainly used for coming down hard on opponents.
Damage: 14-18
Grab set:
A:
Damage: 1
Side:
Damage: 8-11
Up:
Damage: 10
Down:
Damage: 12
Aerial set:
A:
Damage: 8-15
Side-A:
Damage: 5-15
Up-A:
Damage: 10
Down-A:
Damage: 1-10
Final Smash - Cook Kirby:
Puts on a chiefs hat and throws your opponent into a giant pot.
This does around 35 damage, and has a good KO potential if your opponent has more then 70 damage to start. The draw back is you have to be pretty close to your opponent for it to work. But in the end you do get some random items. The more enemies you put in, the more and better items you'll get (I never would have guessed that Super Mushrooms were made out of Marios...)
Strategy:
Kirby is light and fast, but his attacks slow him down. None of them can really be used on the fly, so you'll need some luck to connect with a good one. Eat your opponents whenever they get in close, just to get them off guard. Your Final Cutter also works well as a projectile, so don't hesitate to use it as such.
Defensive Strategy:
He is short and light, so use low attacks or dash attacks to get him in the air. Watch for the Stone ability, however. It's easy to dodge but easier to forget about. His Final Cutter is also easy to see coming, and a simple jump will leave you unharmed and in a perfect position for a counter attack. Take advantage of his short range by getting in just out of his range, but just within yours.
Here are some extra comments from the members of our forums for Kirby...
The pink blob returns to the fray once again. Despite being one of the least popular Nintendo franchises, Kirby is made unique due to his swallow move which allows him to copy a move from another character. His small size does mean he can be knocked off-stage easily, but his ability to perform 5 additional jumps after the first makes it hard to keep him out.
Special Moves
Standard: Swallow. Kirby inhales, sucking in a nearby opponent. He can walk about with them in their mouth or either press the attack button to spit out or the special button to copy their standard special. The opponent can break out of Kirby before he spits/copies. The copy is cancelled after either a taunt, a KO or a certain amount of consecutive hits is done on Kirby.
Side: Hammer. Kirby swings his hammer sideways at opponents while on the ground. While in the air, he spins it around.
Up: Final Cutter. Kirby pulls out a sword, jumps up, spins and drops down to the ground. The sword launches shockwaves upon hitting the ground. This can be used for slight recovery if he touches the side of the platform, but it will result in KOing himself if he doesn't.
Final Smash: Cook Kirby. Kirby uses his cook ability to boil opponents in a cauldron. After stirring them in the boiling pot, they are spat out, along with several items. Since he puts on a chef's hat for this, he may lose copied abilities by performing this.
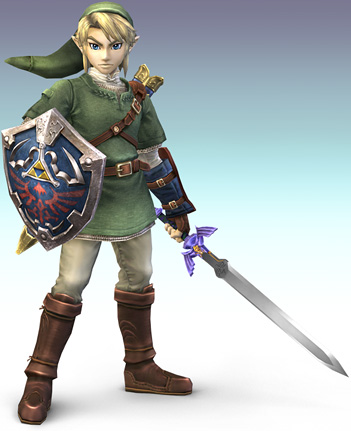
Link
First appeared in: The Legend of Zelda
Veteran fighter: Yes. SSB & SSBM
Class type: Mid-weight
Fighting type: All-round
Clone: Yes. Toon Link
How to unlock:
Starting Character
Moveset:
A set:
A:
Damage: 4-12
Side-A:
Damage: 13
Up-A:
Damage: 9
Down-A:
Damage: 12
A charged set:
Side-A:
Damage: 15-44
Up-A:
Damage: 4-23
Down-A:
Damage: 14-19
B set:
B: Hero's Bow. Press and hold to charge the bow.
Damage: 4-12
Side-B: Gale Boomerang. Throws a boomerang that uses wind to extend
its reach vertically.
Damage: 5-12
Up-B: Spin Attack. Uses magic to create a hurricane like spin with
his sword. This attack can be charged.
Damage: 12-19
Down-B: Bomb. Pulls out a bomb. Press A to throw. The bombs can hurt
you and will automatically detonate after 7 seconds.
Damage: 8
Grab set:
Link's a little different, in that he uses his Clawshot to grab opponents, giving him greater grab reach.
A:
Damage: 2
Side:
Damage: 7
Up:
Damage: 7
Down:
Damage: 7
Aerial set:
A:
Damage: 10
Side-A:
Damage: 12-21
Up-A:
Damage: 15
Down-A:
Damage: 18
Final Smash - Triforce Slash:
A beam will shoot out of links eye. If this hits an opponent, Link will then proceed to unleash a devastating series of slashes on them. 75 damage easy, with an almost guaranteed KO.
Strategy:
Keep some distance and hail them with your various projectile attacks. When they get in close, use a well-timed double side smash attack to send them flying. Link is a fairly balanced character, but if you can master him he jumps in rank. Don't forget to come down hard by using his powerful down aerial attack.
Defense strategy:
Don't let Link control the pace of the battle. Get in close and try to catch him off guard. When he swings, dodge to the other side, as his swings leave him open for just a second, especially his smashes. Don't let him use too many projectiles, unless you are confident in your ability to dodge and counter from a distance.
Here are some extra comments from the members of our forums for Link...
The legendary green-cladded hero has starred in some of the greatest games off all time and has returned for his third Smash Bros. game. Taking the look from his Twilight Princess incarnation isntead of the Ocarina of Time one from the previous beat-em-ups, he is now stronger then before with weapons taken from his most recent adventure. His swordplay and long ranged items makes him a formiddable force, but the equipment also acts against him to make him slightly sluggish.
Special Moves
Standard:Hero's Bow. Link pulls out his bow and an arrow, then fires. Holding the button for a bit allows the arrow to fire further, faster and cause more damage.
Side: Gale Boomerang. Link throws a boomerang granted wind control by the Gods. It injures on the way out and draws opponents towards Link on the way back in.
Up: Sword Spin. Link spins his sword round at a rapid pace, creating upwards movement that he can use for recovery. He can now charge the attack to cause more damage.
Down: Bombs. Pressing the button once pulls out a bomb. The bomb acts like an item, so it is thown with the normal attack button. Link can't pull out bombs while holding another item.
Final Smash: Triforce Slash. Traps an opponent inside the triforce and attacks furiously with the Master Sword.
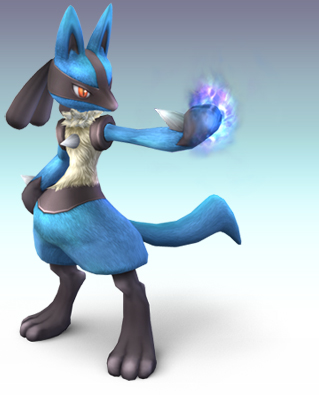
Lucario
First appeared in: Pokemon Diamond/Pearl
Veteran fighter: No
Class type: Heavy
Fighting type: Mid-ranged
Clone: No.
How to unlock:
1) Complete all 5 Target Tests with any character
2) Play 100 Versus Mode matches
3) Clear SSE Level 21: The Glacial Peak
Moveset:
A set:
A:
Damage: 2-7
Side-A:
Damage: 9
Up-A:
Damage: 4
Down-A:
Damage: 5
A charged set:
Side-A:
Damage: 9-13
Up-A:
Damage: 9-12
Down-A:
Damage: 9-13
B set:
B: Aura Sphere. Charges up a large sphere of Aura. Can hold the
charge by moving. Press again to fire.
Damage: 5-13
Side-B: Force Palm. Grabs a nearby enemy and punches them with Aura.
Damage: 6-9
Up-B: Extreme Speed. Dashes very quickly in the direction you press.
Damage: None.
Down-B: Double Team.
Damage: Counters.
Grab set:
A:
Damage: 1
Side:
Damage: 4
Up:
Damage: 8
Down:
Damage: 10
Aerial set:
A:
Damage: 9
Side-A:
Damage: 4
Up-A:
Damage: 8
Down-A:
Damage: 13
Final Smash - Aura Storm:
Kind of like Hyper Beam. Flies up into the air and unleashes a massive beam of energy straight down. You can aim the beam with the control stick. The beam will also pierce right through the ground. Only lasts a few seconds, but can cause around 40% damage with a full hit. Odds of sending someone flying is remote, but possible.
Strategy:
Keep an Aura Sphere charged up at all times. Your regular smashes are powerful, but they leave you wide open and take a bit to use in the first place. When in close, your grabs will be your fastest and best defense. Otherwise, try to keep you opponents at a moderate distance.
Defense Strategy:
Get in close and use quick attacks. Watch for grabs and his Double Team attack. Don't let him use his Aura Sphere either. Remember, he has to charge it to be effective, so keep him under pressure.
Here are some extra comments from the members of our forums for Lucario...
The aura Pokémon appears in Brawl to represent the newest generation of Pokémon. Lucario is unique in that he becomes more powerful as he takes damage, his power level peaking at 200%. He also uses the aura to attack his opponents at a further distance than he is able to reach, making him a formiddable opponent at any range.
How to unlock: Play 100 Brawls, then challenge him; complete 'Break the Targets' with 10 characters, then challenge him; get him to join your team in the Subspace Emissary.
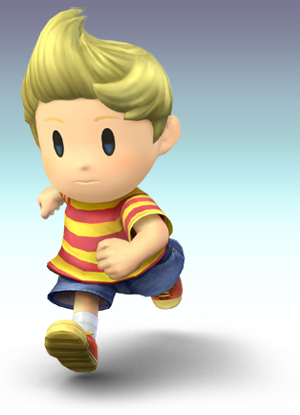
lucas
First appeared in: Mother 3
Veteran fighter: No.
Class type: Mid-weight
Fighting type: Mid-ranged
Clone: Yes. Ness.
How to unlock:
Starting Character
Moveset:
A set:
A:
Damage: 3-10
Side-A:
Damage: 11
Up-A:
Damage: 11
Down-A:
Damage: 11
A charged set:
Side-A:
Damage: 15-21
Up-A:
Damage: 21-29
Down-A:
Damage: 17-23
B set:
B: PK Freeze. A large orb of freezing PK energy comes flies up from Lucas. By holding the B button, you can increase the duration and power of the energy. You can also control its direction with the control stick.
Damage: 10-19, high possibility of freezing.
Side-B: PK Fire. Shoots a large lightning shaped burst of PK energy that burst into flames on impact.
Damage: 8
Up-B: PK Thunder. Fires a burst of PK energy. If anyone is near you at the time of the firing, they will take 16 damage. In addition, the orb can be controlled with the control stick. The orb will cause 11 damage on impact, and can pass through multiple opponents. Finally, if you hit yourself with this attack, you will fire off like a missile in the opposite direction, causing 10-30 damage to anyone you hit.
Damage: 10-57
Down-B: PSI Magnet. Absorbs projectile attacks and heals Lucas by half the power of the attack. Can also damage enemies that are touching the shield when you stop using it.
Damage: 9, absorbs projectiles, heals
Grab set:
Lucas is has a special grab: he uses a snake. This increases his grab range.
A:
Damage: 3
Side:
Damage: 10
Up:
Damage: 10
Down:
Damage: 7
Aerial set:
A:
Damage: 2-8
Side-A:
Damage: 12
Up-A:
Damage: 13
Down-A:
Damage: 2-10
Final Smash - PK Storm:
Causes a large meteor storm. Since the entire field isn't covered at once, it's rather easy to dodge. Further, each meteor only does around 14 damage, and isn't very likely to KO anyone. Could be useful if you are playing against 3 people on a small stage and they aren't paying attention, I guess. Other then that, this is pretty useless, however pretty.
Strategy:
Use PK Freeze and PK Fire from a moderate distance to build up mass amounts of damage. Also remember that all of his attacks are powered up with PSI, and have slightly increased range. His stick has the toned-down attributes of a baseball bat when fully charged, so it makes a great finisher.
Defense Strategy:
Lucas doesn't have many fast attacks, so get in close, preferably behind him, and unleash with anything you have. You could also distance yourself outside the range of his PK Fire and use projectiles, just don't use anything laser-based or he'll just absorb it.
Here are some extra comments from the members of our forums for Lucas...
A shy boy with psychic powers, making his Smash Debut after getting the chop from Melee. He is the spiritual successor to Ness, and is likely to have many of Ness' abilities, with some possible alterations. It is said that he could possibly surpass Ness.
Special Attacks
Standard: PK Freeze. Lucas fires a snowflake shaped attack in to the air. By holding the button, he will charge it until maximum power, at which the snowflake explodes, freezing anyone nearby. If the button is released early, he will attack, though with not as much power or range. If he is hit during charge, the attack is cancelled.
Side: PK Fire. Lucas fires a spark forwards, exploading in to a tower of flames when on contact with the ground, an opponent or an item. It now fires straight when on both ground and in the air.
Up: PK Thunder. Lucas fires a bolt of electricity, then controls it mentally. Controlling with the control stick, it moves about for a while until it hits something, damaging them. If it hits Lucas, it will launch him in the same direction of the thunder, allowing for possible recovery. Lucas is incontrollable during this attack.
Down: PSI Magnet. Lucas creates a ball of psychic energy around his finger, which absorbs energy attacks. If any non-solid projectile (e.g. Charizard's Flamethrower) hits the PSI Magnet, Lucas will recover the equivelent of double the damage the attack would have caused.
Final Smash: PK Starstorm. Lucas unleashes a rapid barrage of PK based energy meteors downwards upon the stage, the intensity of the attack becoming greater as it continues. It is advised to use this more on smaller stages to have the biggest effect.
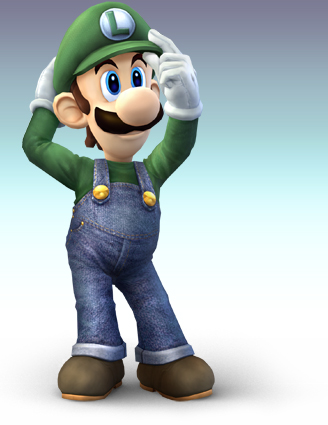
Luigi
First appeared in: Mario Bros.
Veteran fighter: Yes. SSB & SSBM.
Class type: Mid-weight
Fighting type: Mid-range
Clone: No.
How to unlock:
1) Complete Classic Mode on Easy without continues
2) Play 22 Versus Mode matches
3) Clear SSE Level 29: Subspace
Moveset:
A set:
A:
Damage: 3-10
Side-A:
Damage: 10
Up-A:
Damage: 9
Down-A:
Damage: 9
A charged set:
Side-A:
Damage: 14-19
Up-A:
Damage: 15-19
Down-A:
Damage: 16-22
B set:
B: Fireball. These go in a straight line.
Damage: 6
Side-B: Green Missile. Charges up energy, then lunges head first.
Can be charged. Sometimes mis-fires and you'll go shooting
off at random.
Damage: 5-25
Up-B: Super Jump Punch. Massive uppercut.
Damage: 25, meteor.
Down-B: Luigi Cyclone. Spins rapidly with his arms held out.
Damage: 4-12
Grab set:
A:
Damage: 3
Side:
Damage: 7-21
Up:
Damage: 8
Down:
Damage: 6
Aerial set:
A:
Damage: 14
Side-A:
Damage: 10
Up-A:
Damage: 13
Down-A:
Damage: 11
Final Smash - Negative Zone:
Creates a large negative bubble around Luigi that encompasses the field (more or less). Any opponents caught therein will suffer various status effects, including flowers on their heads, sleep, and loss of control. They will constantly suffer damage while within the bubble. After Luigi finishes his dance, quickly run over and do Super Jump Punch on each enemy before the bubble disappears. If you can pull this off, it's pretty much guaranteed KOs.
Strategy:
Luigi has a variety of strange moves that can keep your opponents guessing. The Green Missile is prone to misfires, so don't use that near the edge. Otherwise, use the cyclone and his rather fast smash attacks to build damage, and finish them with a Super Jump Punch.
Defense strategy:
On defense, watch for his fireballs and dodge when he gets in close to get behind him. His attacks don't leave him very open, and he can turn quickly, his Super Jump Punch also has him covered from the air. Overall, hail him with projectiles and use attacks that have a moderate range when you approach him.
Here are some extra comments from the members of our forums for Luigi...
Mario's taller, thinner, cowardly brother once again returns for a fight. While Luigi initially seems similar to older brother Mario, their differances are actually bigger than first thought. Luigi is a faster character who has his own signature move called the Green Missile. His somewhat cowardly fighting style makes him unique and a bit of a comical character.
How to unlock: Play 22 brawls, then challenge him; complete classic without using any continues, then challenge him; get him to join your team in the Subspace Emissary.
Special moves
Final Smash: Negative Zone. Luigi dances around, creating a giant bubble known as the Negative Zone. Inside this colour-reversed bubble, all opponents are struck with many status effects at once, including decreased attack, speed, traction and weight, dizzyness, sleep, flowers growing on their heads, constant health drain and uncontrollable taunting. All this makes opponents essentially an easy target for Luigi.
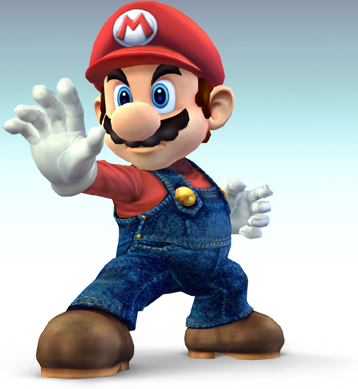
Mario
First appeared in: Mario Bros.
Veteran fighter: Yes. SSB & SSBM.
Class type: Mid-weight
Fighting type: Mid-range
Clone: No.
How to unlock:
Starting Character
Moveset:
A set:
A:
Damage: 3-9
Side-A:
Damage: 8
Up-A:
Damage: 7
Down-A:
Damage: 5
A charged set:
Side-A:
Damage: 14-19
Up-A: Head butt.
Damage: 14-19
Down-A:
Damage: 15-21
B set:
B: Fireball. This does not travel in a straight line and will fall
off platforms.
Damage: 5
Side-B: Cape. Swings a cape at your opponent. Turns them around and
can deflect projectiles.
Damage: 8
Up-B: Super Jump Punch. Jumps up at an angle, draining coins from
your enemies as if they were ? blocks.
Damage: 1-12
Down-B: F.L.U.D.D. Press once to charge FLUDD, and again to use him.
Doesn't do any damage, but it can push them off the stage.
Damage: None.
Grab set:
A:
Damage: 3
Side:
Damage: 11-18
Up:
Damage: 8
Down:
Damage: 6
Aerial set:
A:
Damage: 10
Side-A:
Damage: 13
Up-A:
Damage: 11.
Down-A:
Damage: 2-10
Final Smash - Mario Finale:
Fires a huge cluster of giant fireballs. Very easily dodged, as it travels slow and doesn't cover the entire field. Best used from the edge of a mid-height platform. Only does around 25 damage, but can push people off the edge pretty easily.
Strategy:
His specials don't help much, though his cape reflects projectiles. Get in close and use his powerful smash attacks to both deal damage and KO. His Super Jump Punch also isn't as powerful as Luigis, so keep that in mind.
Defense strategy:
Keep him at a distance and bombard him with projectiles. He wont be able to block all of them with his cape. In close, he's not that much of a powerhouse, so don't worry. Just watch your damage and don't let it get too high and you should be fine.
Here are some extra comments from the members of our forums for Mario...
Nintendo's main man has been the lead in well over a hundred games, including the first two Smash Bros. games. Mario is generally considered an all-rounder, so has no obvious weaknesses and is generally a solid choice for beginners and experts alike.
Special Moves
Standard: Fireball. Mario throws a small fireball as if he's obtained the Fire Flower power-up from Super Mario Bros. It bounces along the ground before disappearing if it hits no one.
Side: Cape. Mario swings his cape from Super Mario World, spinning enemies around and deflecting projectiles. It also allows for some slight horizontal distance and slower descent, giving it useful recovery capabilities.
Up: Super Jump Punch. Mario's third jump is an uppercut-style jump very similar to his standard jump from Super Mario Bros., complete with the sound. If it hits anyone, coins spew out of them.
Down: F.L.U.D.D. Mario pulls out the F.L.U.D.D. from Super Mario Sunshine and charges up water, then spraying it. The water doesnt damage and is solely for knockback purposes. It can be charged while shielding.
Final Smash: Mario Finale. Creates a giant fire blast and launches it across the screen. The flame gets larger as it moves.
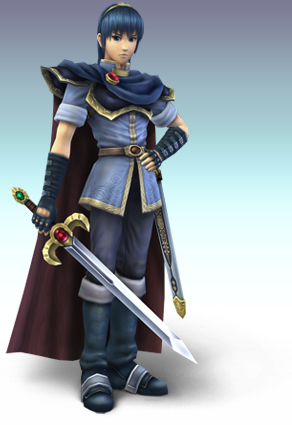
Marth
First appeared in: Fire Emblem
Veteran fighter: Yes. SSBM.
Class type: Mid-weight
Fighting type: Close Combat
Clone: No.
How to unlock:
1) Play 10 Versus Mode matches
2) Clear Classic Mode
3) Clear SSE Level 8: Battlefield Fortress
Moveset:
A set:
A:
Damage: 4-8
Side-A:
Damage: 10
Up-A:
Damage: 10
Down-A:
Damage: 9
A charged set:
Side-A:
Damage: 14-19
Up-A:
Damage: 21-25
Down-A:
Damage: 14-19
B set:
B: Shield Breaker. Thrusts his blade forward. Hold B to charge.
Damage: 8-20
Side-B: Dancing Blade. Press B several times while holding to the
side for up to a four hit combo.
Damage: 3-18
Up-B: Dolphin Slash. Lunges upward.
Damage: 13
Down-B: Counter.
Damage: Counters.
Grab set:
A:
Damage: 2
Side:
Damage: 4
Up:
Damage: 4
Down:
Damage: 5
Aerial set:
A:
Damage: 10
Side-A:
Damage: 10
Up-A:
Damage: 13
Down-A:
Damage: 12
Final Smash - Critical Hit:
Dashes across the field. If he connects with someone, it WILL instantly kill them. Problem is, it is linear. Using it in the air causes him to dash to the side, usually killing himself. It also has a bit of warm-up before he dashes, and a fast opponent can use this chance to jump up or dodge behind you. But, if you do connect...
Strategy:
Marth is fast. Really fast. Use this speed to your advantage to perform aerials and get behind them quickly. Most of his moves don't pack much of a punch, however, and he can be sent flying fairly easily. Still, get in close and hit them with the tip of Marths sword (where he has the most power). Dancing Blade works well for inflicting combo damage, and has a fair range. His counter will counter projectiles, but the explosion will still hurt him.
Defense Strategy:
Best thing you can do is keep him at a distance. If you do have to get in close, fear his Dancing Blade and Counter. A skilled Marth user can constantly get you off guard, so watch out.
Here are some extra comments from the members of our forums for Marth...
The original star of Fire Emblem and the royal prince of Akenia, Marth returns to Smash Bros. after introducing the world to the Fire Emblem franchise. Marth is - unlike other swordsmen such as Ike and Link - swift on his feet and more powerful with the tip of his sword. He attacks quickly with combo specials and can charge up his sword to instantly break the shields of his opponents.
How to unlock: Play 10 Brawls, then challenge him; complete classic mode on any difficulty, then challenge him; get him to join your team in the Subspace Emissary.
Final Smash: Critical Hit. Marth raises his sword upwards before charging towards the nearest opponent in front of him, delivering an incredibly powerful strike. The attack does about 60% damage and is an almost guarenteed K.O. On stages with no edges - such as the Bridge of Eldin - missing with this will result in a self-destruct.
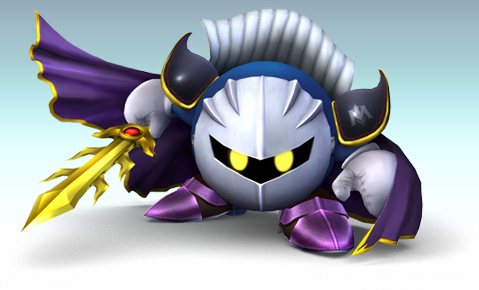
Meta Knight
First appeared in: Kirby's Dream Land
Veteran fighter: No.
Class type: Light
Fighting type: Mid-range
Clone: No.
How to unlock:
Starting Character
Moveset:
A set:
A:
Damage: 2-20
Side-A:
Damage: 4-12
Up-A:
Damage: 6
Down-A:
Damage: 4
A charged set:
Side-A:
Damage: 14-19
Up-A:
Damage: 9-12
Down-A:
Damage: 11-15
B set:
B: Mach Tornado. Creates a literal tornado. Rapidly pressing the B button will extend the duration. Can mildly control direction with the control stick.
Damage: 2-15
Side-B: Drill Rush. Lunges forward, head and sword first, while spinning. Can mildly control by tilting the control stick.
Damage: 1-7
Up-B: Shuttle Loop. Lunges up, then pulls a loop, and glides back down. Can effect glide by tilting the control stick.
Damage: 9
Down-B: Dimensional Cape. Disappears, then reappears and slashes his sword. You can control where he reappears by tilting the control stick. To perform the slash at the end, you must hold down the B button until he reappears.
Damage: 14
Grab set:
A:
Damage: 3
Side:
Damage: 10
Up:
Damage: 12
Down:
Damage: 11
Aerial set:
A:
Damage: 12
Side-A:
Damage: 3-10
Up-A:
Damage: 6
Down-A:
Damage: 9
Final Smash - Galaxia Darkness:
Swings his cape out. If the cape hits an opponent, the screen will turn back for a second, then everything will reappear and giant slash will be drawn diagonally from where you opponent was. 40 set damage and a high probability of a KO. Can hit multiple opponents if they are in the same area.
Strategy:
Meta Knight has to rely on shear damage to get by, as his attacks don't pack a punch at all. Try to master his Dimensional Cape, as it's easy to get people off guard with. You can also spam his Mach Tornado for high damage, but beware it's weak point: at an angle coming in from the top. If you get a chance, his standard moveset and smash attacks are extremely fast, so use them at close range.
Defense Strategy:
Meta Knight can be really annoying, but not really deadly. There's not much you can do about most of his attacks, but you can hit him from a distance. Most of his regular moves wont stun you for long either, giving you a slight chance. His smash attacks also leave him open from the rear.
Here are some extra comments from the members of our forums for Meta Knight...
Kirby's rvial and an honourable warrior. Meta Knight is skilled with his sword, which he can use at incredibly fast speeds. His wings allow him to glide back to the arena if knocked off and are conceiled behind a cape, which he can use to shield behind and blend in to the environment. His battleship, the Halberd, is his most prised asset.
Final Smash: Galaxia Darkness. Meta Knight swings his cape forward. If an opponent is caught in it, the screen goes black and stops for a few seconds before Meta Knight delivers a devastating blow that does huge damage and knockback. The Smash Ball is wasted if the cape doesn't connect with anyone.
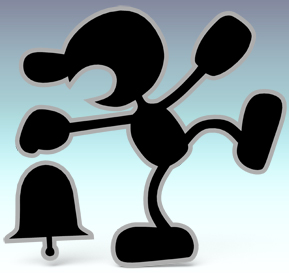
Mr. Game and Watch
First appeared in: Game and Watch
Veteran fighter: Yes. SSBM.
Class type: Light
Fighting type: Close Combat
Clone: No.
How to unlock:
1) Clear any level of Target Test with 30 characters
2) Play 250 Versus Mode matches
3) Clear SSE Level 25: Battleship Halberd Bridge
Moveset:
A set:
A:
Damage: 3-infinite
Side-A:
Damage: 10
Up-A:
Damage: 8
Down-A:
Damage: 6
A charged set:
Side-A:
Damage: 18-25
Up-A:
Damage: 18-25
Down-A:
Damage: 13-18
B set:
B: Chef. Takes out a frying pan and flips misc. hot food out.
Damage: 4 for the item, 5 for the pan.
Side-B: Judge.
Damage: See description.
Up-B: Fire. Use the aid of two other G&W to propel himself into the
air. Takes out a parachute which can be controlled with the
control stick.
Damage: 6
Down-B: Oil Panic. Mush absorb three projectile attacks. On the
third attack, it unleashes a large gush of water doing twice
the damage of all three attacks combined.
Damage: Counters.
Grab set:
A:
Damage: 3
Side:
Damage: 8
Up:
Damage: 8
Down:
Damage: 6
Aerial set:
A:
Damage: 5-17
Side-A:
Damage: 16
Up-A:
Damage: 8-16
Down-A:
Damage: 14-20
Final Smash - Octopus:
Transforms into and octopus for some reason. He is big, but still easy to dodge. Anyone that touches him takes around 10% damage, and his tentacles extend with A for 20% with a clean hit. You can move around, but controlling him vertically is hard, and he drops fast if you wonder off stage. Whole thing lasts around 15 seconds. 15 seconds for 80% damage isn't bad though.
Strategy:
First, lets go over the Judge abilities:
1) Inflicts 1% damage and hurts G&W
2) Minimal damage
3) Attacks the same as the Fan
4) Attacks the same as the Beam Sword
5) Electrical damage and a chance at stunning
6) Fire damage
7) Moderate damage and drops a random food item
8) Attacks the same as a Mr. Freezie
9) Attacks the same as a Homerun Bat
With that, know that the Judge is your most powerful attack, use it to its fullest. Chef isn't very useful though. Your side smash is your second most powerful attack however, and between that, Judge, and a bit of luck, you can rule at close range. Don't forget to use your Oil panic on projectiles. G&W also has a bunch of random attacks that can catch most people by surprise. He is fast, but also light, so don't get in too deep.
Defense strategy:
Get in close and unleash. Theres not much you can do about his Judge attack, so you'll have to rely on luck. Getting behind him works well, but not for long. Come at him head on and use a powerful attack to send him flying easily. .
Here are some extra comments from the members of our forums for Mr Game and Watch...
The original video game character, imortalised in Smash Bros. again as a 2D sprite. Mr. Game & Watch is unlike the other characters in that he moves about as he did in his LCD portable games, and utilises moves from the games, such as Fire! and Oil Panic!
How to unlock: Play 250 Brawls, then challenge him; Play 30 'Break the Targets' matches with 30 characters on any difficulty, then challenge him; get him to join your team in the Subspace Emissary.
Ness
First appeared in: Mother (Earthbound)
Veteran fighter: Yes. SSB & SSBM
Class type: Mid-weight
Fighting type: Mid-ranged
Clone: Yes. Lucas.
How to unlock:
1) Play 5 Versus Mode matches
2) Reflect 10 projectiles
3) Clear SSE Level 29: Subspace
Moveset:
A set:
A:
Damage: 3-9
Side-A:
Damage: 11
Up-A:
Damage: 7
Down-A:
Damage: 4
A charged set:
Side-A:
Damage: 18-25
Up-A:
Damage: 4-17
Down-A:
Damage: 13
B set:
B: PK Flash. A large orb of PK energy comes flies up from Ness. By holding the B button, you can increase the duration and
power of the energy. You can also control its direction with the control stick.
Damage: 9-40
Side-B: PK Fire. Shoots a large lightning shaped burst of PK energy that burst into flames on impact.
Damage: 6-22
Up-B: PK Thunder. Fires a burst of PK energy. If anyone is near you at the time of the firing, they will take 16 damage. In addition, the orb can be controlled with the control stick. The orb will cause 11 damage on impact, and can pass through multiple opponents. Finally, if you hit yourself with this attack, you will fire off like a missile in the opposite direction, causing 10-30 damage to anyone you hit.
Damage: 8-21
Down-B: PSI Magnet. Absorbs projectile attacks and heals Ness by half the power of the attack. Can also damage enemies that are touching the shield when you stop using it.
Damage: None. Absorbs projectiles.
Grab set:
A:
Damage: 1
Side:
Damage: 11
Up:
Damage: 10
Down:
Damage: 9
Aerial set:
A:
Damage: 11
Side-A:
Damage: 4-11
Up-A:
Damage: 13
Down-A:
Damage: 12
Final Smash - PK Starstorm:
Causes a large meteor storm. Since the entire field isn't covered at once, it's rather easy to dodge. Further, each meteor only does around 20 damage, and isn't very likely to KO anyone. Could be useful if you are playing against 3 people on a small stage and they aren't paying attention, I guess. Other then that, this is pretty useless, however pretty.
Strategy:
Use PK Flash and PK Fire from a moderate distance to build up mass amounts of damage. His bat has the toned-down attributes of a baseball bat when fully charged, so it makes a great finisher.
Defense Strategy:
Ness doesn't have many fast attacks, so get in close, preferably behind him, and unleash with anything you have. You could also distance yourself outside the range of his PK Fire and use projectiles, just don't use anything laser-based or he'll just absorb it.
Here are some extra comments from the members of our forums for Ness...
Despite worries made from Lucas' debut, Ness returns for a third brawl. His moves are somewhat similar to newcomer Lucas, but also have some differances between them, from attack properties to the moves themselves, like his yo-yo smashes.
How to unlock: Play 5 Brawls, then challenge him; reflect 10 items, then challenge him; get him to join your team in the Subspace Emissary
Final Smash: PK Starstorm.
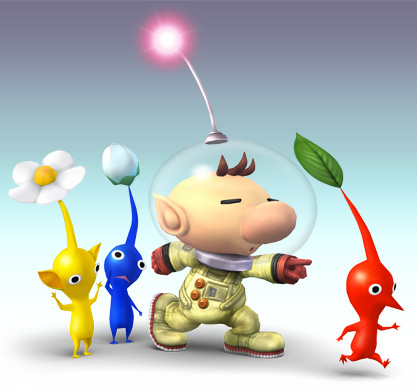
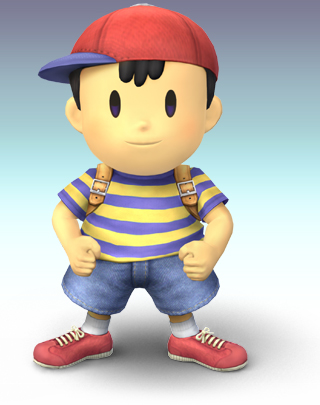
Olimar and Pikmin
First appeared in: Pikmin
Veteran fighter: No
Class type: Light
Fighting type: Mid-ranged
Clone: No.
How to unlock:
Starting Character
Moveset:
A set:
A:
Damage: 5-15
Side-A:
Damage: 6
Up-A:
Damage: 2-11
Down-A:
Damage: 4-8
A charged set:
Side-A:
Damage: 6-25, can also burn, poison, stun, or electrify
Up-A:
Damage: 6-25, can also burn, poison, stun, or electrify
Down-A:
Damage: 6-25, can also burn, poison, stun, or electrify
B set:
B: Pikmin Pluck. Pulls new Pikmin out. Can have 6 at once.
Damage: None.
Side-B: Pikmin Throw. Throws Pikmin onto opponents.
Damage: 1-infinite, can also burn, poison, stun, or electrify
Up-B: Pikmin Chain. Uses Pikmin like a grappling hook.
Damage: 6, can also latch onto the edges of a stage.
Down-B: Pikmin Order. Recalls all your Pikmin. Also changes the
order you'll throw the Pikmin in.
Damage: None.
Grab set:
Olimar uses his Pikmin to grab enemies. The range of his grab, and the attributes of his attacks, depend on the type of Pikmin being used.
A:
Damage: 2
Side:
Damage: 7, can also burn, poison, stun, or electrify
Up:
Damage: 9-12, can also burn, poison, stun, or electrify
Down:
Damage: 6-18, can also burn, poison, stun, or electrify
Aerial set:
A:
Damage: 2-8
Side-A:
Damage: 6-18, can also burn, poison, stun, or electrify
Up-A:
Damage: 10-23, can also burn, poison, stun, or electrify
Down-A:
Damage: 10-18, can also burn, poison, stun, or electrify
Final Smash - End of Day:
Olimar and his Pikmin get in their spaceships and leave the field as the day turns to night. As everyone knows, this is a dangerous planet at night. All of the carnivorous creatures come out and munch on those who were left behind. 40 damage to start, then another 20 or so when your spaceship crashes on top of them. Is pretty easy to get a KO with, and if not then you've at least caused a lot of damage to everyone on the field.
Strategy:
Olimar takes a lot of practice to use. His Pikmin Throw can inflict a ton of damage, and his smash attacks have quite the range. The attributes of the attacks changed based on the Pikmin he throws. Yellow has the longest range while Purple are the strongest. A master can re-order his Pikmin perfectly, so that he knows what every attack will bring.
Defense Strategy:
Most of his attacks leave him open afterward. Charge in and use whatever attack you want. Don't give them a chance to re-order or switch out their Pikmin. Olimar is pretty defenseless in the hands of someone that cant use him, so you don't have to worry 90% of the time. The other 10%, you're just dead.
Here are some extra comments from the members of our forums for Olimar and Pikmin...
The interstellar freight delivery man Captain Olimar takes the battle field with an army of Pikmin in tow. The Pikmin of all five species - Red, Yellow, Blue, Purple and White - are essential to Olimar's fighting to the point he can't even do smash attacks without them, so they need to be plucked when possible. The Pikmin may scatter after a while and can possibly be killed if attacked enough.
Pikmin abilities
Red: Has more attack power than others, along with having fire enpowered attacks. They are completely resistant to fire attacks.
Yellow: Fly further and with an arc when thrown. Their attacks are enpowered with electricity.
Blue: They are powerful upon impact with enemies and last longer than any other colour.
Purple: Slow and heavy, so can't be thrown far. Their attack power is very high and slam the ground when thrown.
White: The fastest and lightest. They can poison opponents upon impact
Special moves
Standard: Pikmin Pluck. Olimar will pull Pikmin out of the ground to help him in battle, the colour of the Pikmin is random - though infulenced by the stage - and can only have a maximum of 6 Pikmin out at once.
Side: Pikmin Throw. Olimar throws the next Pikmin in his group at enemies. If the hit an opponent, the Pikmin will latch on to them and repeatedly attack them, although the Purple Pikmin will instead slam the ground next to them.
Up: Pikmin Chain. Used for tether recoveries, the Pikmin and Olimar will make a chain and grab the edge of the stage. The length depends on the number of Pikmin present, so can be really long or fairly useless.
Down: Pikmin Order. Olimar uses his whistle to call back any nearby Pikmin that have split up from the group. It can also be used to change the order of the Pikmin.
Final Smash: End of Day. Captain Olimar boards his ship and flies up in to the sky. As he does this, the stage turns to night and a colony of Bulborbs come on screen and rapidly attack the remaining fighters. As the day comes back, Olimar's ship crash lands back on to the stage, possibly injuring opponents in the explosion.
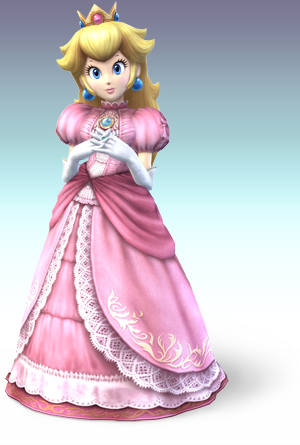
Peach
First appeared in: Super Mario Bros.
Veteran fighter: Yes. SSBM.
Class type: Light
Fighting type: Close Combat
Clone: No.
How to unlock:
Starting Character
Moveset:
A set:
A:
Damage: 3-6
Side-A:
Damage: 13
Up-A:
Damage: 13
Down-A:
Damage: 10
A charged set:
Side-A: Frying pan is the strongest but the shortest range, Golf Club as the longest range, Tennis Racket is the weakest.
Damage: 12-25
Up-A:
Damage: 8-21
Down-A:
Damage: 5-15
B set:
B: Toad. Uses Toad as a counter.
Damage: Double the damage of the attack.
Side-B: Peach Bomber. Dives to the side and hits people with her hip
Damage: 15
Up-B: Peach Parasol. Jumps up with her parasol and opens it at the apex to slowly float down. Control her decent with the control stick.
Damage: 2-15
Down-B: Vegetable. Pulls a turnip out of the ground. Press A to throw. The meaner the turnip looks, the more damage it does. The girl turnip is the weakest at 6, and the zombie is the strongest at 34.
Damage: 6-34
Grab set:
A:
Damage: 2
Side:
Damage: 10
Up:
Damage: 8
Down:
Damage: 7
Aerial set:
A:
Damage: 13
Side-A:
Damage: 15
Up-A:
Damage: 12
Down-A:
Damage: 4-14
Final Smash - Peach Blossom:
Puts all players to sleep. The closer they are, the longer they sleep. Further, a plethora of peaches fall to the ground. So you must choose: a relatively easy KO, or to heal yourself. Bear in mind that anyone can eat the peaches, and that they heal around 30 damage per peach.
Strategy:
Her Bomber attack is her most fierce, so use it as much as you can. Vegetable works well as a projectile, though it's rather slow. Don't forget to use Toad if you get in a bind. Her side smash is random, but can easily KO. She works best at a moderate distance, and is slow up close.
Defense Strategy:
Theres not much she can do to you up close, so rush in. you could also hail her from a distance, but given her light weight it's not necessary. When she uses Toad, dodge behind her and attack.
Here are some extra comments from the members of our forums for Peach...
The Royal Princess of the Mushroom Kingdom and Bowser's biggest target, Mario's often Damsel-in-distress is back for a second round of Smash. Although lighter and weaker than some characters, Peach's biggest strength is in her ability to recover from huge distances with her parosol. She can also use Toad as a counter technique and pluck and throw vegetables.
Special Attacks
Standard: Toad. Peach pulls out Toad, one of her loyal servents, in front of her. If Toad is hit by an attack, he releases spores that injure the attacker
Side: Peach Bomber. Peach lunges forward, rear first, causing a heart-shaped explosion if she hits someone or something. The move also causes Peach to go up slightly, meaning repeated use against a wall can eventually allow her to recover.
Up: Peach Parasol. Peach jumps up with her parosol, then using it to float slowly downwards. The direction of descent can be altered with the control stick, while pressing down will cancel it. Touching the parosol will injure opponents. If Peach is holding the Parasol item, she will use it instead of her normal parasol.
Down: Vegetable. Peach plucks a turnip out of the ground. The turnip acts like an item, so can't be plucked is she is already holding an item. The face shown on the turnips show how much damage and knockback it does. Peach will occasionally pluck a beam sword, bob-omb or Mr.Saturn instead of a turnip.
Final Smash: Peach Blossom. Peach starts to dance while two cut-outs of her appear on either side of the screen, blowing hearts. All characters on screen are put to sleep by this, the closer they are to Peach, the longer they are asleep for. A shower of peaches comes down with it, each one restoring health.

Pikachu
First appeared in: Pokemon Red/Blue/Green
Veteran fighter: Yes. SSB & SSBM.
Class type: Light
Fighting type: Ranged
Clone: No.
How to unlock:
Starting Character
Moveset:
A set:
A:
Damage: 2-30
Side-A:
Damage: 9
Up-A:
Damage: 7
Down-A:
Damage: 7
A charged set:
Side-A:
Damage: 20-28, can electrify
Up-A:
Damage: 14-19
Down-A:
Damage: 2-21, can electrify
B set:
B: Thunder Jolt. Fires off a small electric orb that hops along the
ground. Will also cling to the underside of platforms.
Damage: 6, can electrify
Side-B: Skull Bash. Builds up energy, then lunges forward head
first. Can be charged. Will fire off automatically after a
few seconds. Can misfire and send you randomly flying.
Damage: 7-25
Up-B: Quick Attack. Jolts in the direction you tilt the control
stick. Can add a second attack onto the end by tilting the
control stick in another direction.
Damage: 3, can electrify
Down-B: Thunder. Calls down a lightning bolt. Cannot pass through
platforms.
Damage: 20
Grab set:
A:
Damage: 2
Side:
Damage: 10
Up:
Damage: 10
Down:
Damage: 10
Aerial set:
A:
Damage: 12
Side-A:
Damage: 5, can electrify
Up-A:
Damage: 5
Down-A:
Damage: 12, can electrify
Final Smash - Volt Tackle:
Pikachu transforms into a ball of energy. Control the ball with the control stick. It can pass through platforms. Each time you hit an opponent, it does around 20 damage. Hard to KO with, but you can amass a large amount of damage; 100 easily. Lasts for 12 seconds.
Strategy:
Keep your opponents at a distance, preferably above you. Remember that Thunder wont go though platforms. Besides that, your side smash is your most valuable asset. Skull Bash is prone to misfiring, so don't use it toward and edge. You an also keep some distance by using Thunder Jolt.
Defense Strategy:
Always stay under cover to guard from his Thunder. Jump over and Jolts and get in close. He is totally defenseless up close, so you can do what you want. Watch his speed though, and don't let him lure you into the open.
Here are some extra comments from the members of our forums for Pikachu...
The electric mouse if considered the most famous of all pokémon. His small size may make him seem weak, but his agility and powerful electric moves proves this wrong. With new moves coming from the GBA and DS pokémon games, Pikachu's moveset may alter from past Smash Bros. games to bring some newer moves.
Special Attacks
Standard: Thunder Jolt. Pikachu shoots off a small jolt of electricity that hugs on to the platforms that it touches. Whoever it touches is shocked and injured.
Down: Thunder. Pikachu summons a thundercloud that releases a bolt of lightning straight down towards the pokémon. If anything obstructs the bolt - like platforms - it will stop there. If it hits Pikachu, an additional explosion will occur around him, causing extra damage.
Final Smash: Volt Tackle. Transforms Pikachu in to a ball of electrical light and - under control of the player - zooms about the stage attacking opponents. A risky move as it can cause Pikachu to KO itself if it stops off-stage.
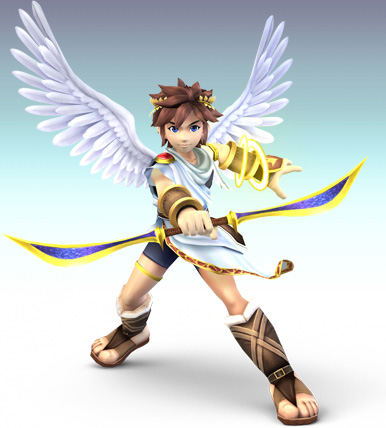
Pit
First appeared in: Kid Icarus
Veteran fighter: No.
Class type: Mid-weight
Fighting type: All-round
Clone: No.
How to unlock:
Starting Character
Moveset:
A set:
A:
Damage: 3-20
Side-A:
Damage: 12
Up-A:
Damage: 10-13
Down-A:
Damage: 11
A charged set:
Side-A:
Damage: 19-23
Up-A:
Damage: 13-18
Down-A:
Damage: 13-18
B set:
B: Palutena's Arrrow. Fires an arrow. Can be charged. Can also
control slightly by press up or down just after firing.
Damage: 5-11
Side-B: Angel Ring. Dashes forward spinning his sword.
Damage: 2-14
Up-B: Wings of Icarus. Allows him to fly. Can control direction with
the control stick. Lasts for 2 seconds.
Damage: None.
Down-B: Mirror Shield. Deflects projectiles.
Damage: The same as the attack.
Grab set:
A:.
Damage: 2
Side:
Damage: 10
Up:
Damage: 11
Down:
Damage: 6
Aerial set:
A:
Damage: 2-10
Side-A:
Damage: 14
Up-A:
Damage: 2-14
Down-A:
Damage: 12
Final Smash:
Palutena's Army
Calls in Palutena, who calls in her minions to sweep down and ram your opponents. Each does about 16 damage. The only problem here is that they are easy to block or dodge. However, if and opponent is hit with one and is near the edge or his high (lets say 80 ) damage, they could fall or shoot off.
Strategy:
Hail them with arrows. It is his specialty after all. When in close, use smash attacks to push them back. Angel Ring also works great for gaining some distance and inflicting damage. Your Mirror Shield works to defend against other projectile users.
Defense Strategy:
Don't let him pelt you with arrows. Stay above or below him and close in. He is fast up close, but his attacks loose their edge. Watch for the Angel Ring, dodge behind him, and hit him from behind where he is open.
Here are some extra comments from the members of our forums for Pit...
After almost 16 years from being absent, Pit finally returns as a playable character. As in his games, Pit's main weapon is his bow and light arrows, making him an expert at long range attacks, but he can now split the bow in to two blades, giving him good close-combat abilities too. His light weight is helped by his wings, which allow him to perform multiple jumps.
Final Smash: Pauletta's Army. Calls upon Pauletta, who sends down an army of centeurs that dive domb opponents at speeds hard to dodge. They scatter upon attack and can be attacked by players while they scatter.
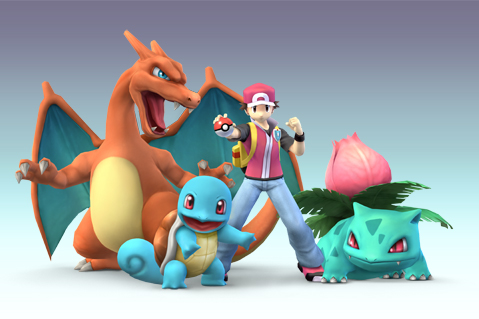
Pokemon Trainer
First appeared in: Pokemon Red/Blue/Green
Veteran fighter: No.
Class type:
Squirtle: Mid-weight
Ivysaur: Light
Charizard: Heavy
Fighting type: Mid-ranged
Clone: No.
How to unlock:
Starting Character
Moveset: Charizard
A set:
A:
Damage: 3-10
Side-A: Tail whip.
Damage: 7
Up-A:
Damage: 5
Down-A:
Damage: 5
A charged set:
Side-A:
Damage: 15-21
Up-A:
Damage: 11-15
Down-A:
Damage: 11-15
B set:
B: Flamethrower. Spits flames. The longer you hold it, the shorter
it gets.
Damage: 1-20
Side-B: Rock Smash. Pull out a boulder and smashes it.
Damage: 12
Up-B: Fly. Lunges into the air, spinning.
Damage: 11
Down-B: Pokemon Change. Charazard -> Squirtle -> Ivysaur
Damage: None.
Grab set:
A:
Damage: 1
Side:
Damage: 7
Up:
Damage: 7
Down:
Damage: 4
Aerial set:
A:
Damage: 6
Side-A:
Damage: 6
Up-A:
Damage: 7
Down-A:
Damage: 9
Moveset: Squirtle.
A set:
A:
Damage: 3-9
Side-A:
Damage: 6
Up-A:
Damage: 6
Down-A:
Damage: 8
A charged set:
Side-A:
Damage: 11-15
Up-A:
Damage: 11-16
Down-A:
Damage: 7-10
B set:
B: Water Gun. Builds up water that is released by pressing B again.
Does no damage, but can push people over the edge.
Damage: None.
Side-B: Withdraw. Slides around the ground spinning.
Damage: 7
Up-B: Waterfall. Rides upward on a plume of water.
Damage: 2-15
Down-B: Pokemon Change. Charazard -> Squirtle -> Ivysaur
Damage: None.
Grab set:
A:
Damage: 2
Side:
Damage: 10
Up:
Damage: 11
Down:
Damage: 5
Aerial set:
A:
Damage: 7
Side-A:
Damage: 8
Up-A:
Damage: 7
Down-A:
Damage: 2-8
Moveset: Ivysaur
A set:
A:
Damage: 3-20
Side-A:
Damage: 2-10
Up-A:
Damage: 5
Down-A:
Damage: 5
A charged set:
Side-A:
Damage: 11-15
Up-A:
Damage: 11-16
Down-A:
Damage: 5-7
B set:
B: Bullet Seed. Tosses your opponent up, then pummels him with seeds
Damage: 2-50
Side-B: Razor Leave. Launches a leaf across the stage.
Damage: 4-8
Up-B: Vine Whip. Tosses its vines at an angle upward. Can be used
to grab onto the stages edge.
Damage: 4
Down-B: Pokemon Change. Charazard -> Squirtle -> Ivysaur
Damage: None.
Grab set:
A:
Damage: 2
Side:
Damage: 7
Up:
Damage: 7
Down:
Damage: 7
Aerial set:
A:
Damage: 2-6
Side-A:
Damage: 8
Up-A:
Damage: 11
Down-A:
Damage: 5
Final Smash - Triple Finish: It's Super Effective!
This can be activated with any of the pokemon. All three pokemon come onto the field and start blasting their specials. Squirtle strikes low and up at an angle with Hydro Pump, Ivysaur in the middle with Solar Beam, and Charizard up high with Fire Blast. Best used at one edge of the stage, as it will reach across most stages. Expect around 50 damage and a high chance of knocking them off the edge.
Strategy:
Pokemon Trainer takes a LOT of getting used to. But, once you do, his is probably the most well rounded and versatile off all the characters. Between the three pokemon, he has all weight classes and range classes covered. Squirtle is fast and light, great for up close combat. Ivysaur is slow, but heavy and good at a distance. Charizard is slightly faster, but has great recovery and can pack the biggest punch of the three. Beware though, using one Pokemon for too long will wear them out and cut back on the damage they do. Also, switching Pokemon takes time, and leaves your new Pokemon wide open for attack.
Defense strategy:
Match your strategy to the Pokemon you're facing. Squirtle you'll want to use heavy attacks to take advantage of his lightness. Ivysaur, keep your distance and use ranged attacks to weaken it before moving in. Charizard is faster and lighter then he looks. Get behind him for maximum effect.
Here are some extra comments from the members of our forums for Pokemon Trainer...
For the first time in the series, a trainer from the world of pokémon steps in to the battlefields of Smash. He does not attack directly, instead using his three pokémon - Squirtle, Ivysaur and Charizard. They can be swapped out at any time, though they share the same percentage meter. They also have what is described as a stamina meter - meaning if a pokémon is out too long or they are switched about too quickly, it will tire them out.
Final Smash: Triple Finish. Once any three of the Pokémon Trainer's Pokémon grab a Smash Ball, all three are sent out. After a brief charge, they will all unleash an attack at the same time: Hydro Pump from Squirtle, Solarbeam from Ivysaur and Fire Blast from Charizard. It is more powerful the closer you are to the opponent. During this, a dialogue box appears at the bottom of the screen saying "Take That! Triple Finish!" as the Pokémon charge and "It's Super Effective!" after they launch the attack.
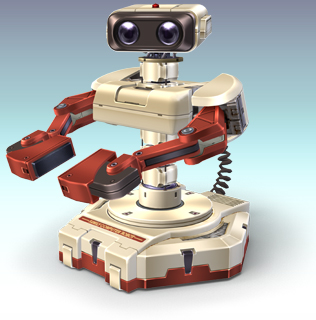
R.O.B.
First appeared in: NES peripheral
Veteran fighter: No.
Class type: Heavy
Fighting type: All-round
Clone: No.
How to unlock:
1) Get 250 different trophies
2) Play 160 Verses Mode matches
2) Clear SSE Level 27: The Subspace Bomb Factory (2)
Moveset:
A set:
A:
Damage: 3-6
Side-A:
Damage: 6
Up-A:
Damage: 3
Down-A:
Damage: 4
A charged set:
Side-A:
Damage: 14-19
Up-A:
Damage: 12-19
Down-A:
Damage: 3-18
B set:
B: Robo Beam. Fires a large laser. Laser power decreases the more
you use it. Recharges when not using.
Damage: 5-35
Side-B: Arm Rotor. Spins forward like a helicopter. Can be prolonged
by repeatedly pressing B.
Damage: 2-20
Up-B: Robo Blaster. Activates his jets.
Damage: None.
Down-B: Gyro. Charges up a gyro. Press again to launch. Charges can
be held by moving.
Damage: 5-18
Grab set:
A:
Damage: 2
Side:
Damage: 10
Up:
Damage: 10
Down:
Damage: 10
Aerial set:
A:
Damage: 10
Side-A:
Damage: 10
Up-A:
Damage: 7-19
Down-A:
Damage: 21
Final Smash - Diffusion Beam:
Shoots spiraling beams out of his eyes. These beams can trap opponents and rack up huge amounts of damage (over 30 per round), and ever two seconds or so he shoots a large laser which easily sends people flying. The large laser gets more powerful every time he fires it, so try to hit with the final one. The whole things lasts 15 seconds. A KO is pretty easy to get off of this, especially since you can still use regular attacks during the final smash.
Strategy:
The longer you go without using a laser-based attack, the stronger they get. Us your Arm Rotor at moderate range and Gyro for long range attacks. Remember that you can only have 2 Gyros on the field at once. Keep your foes at mid-range, but don't worry if they get in close, he's a ton a metal after all.
Defense Strategy:
Watch for his laser attacks and pound on him from a distance. He cant do much past mid-range, so build up damage with ranged attacks. When in close, use either fast attacks or large slow attacks with heavy characters.
Here are some extra comments from the members of our forums for R.O.B. ...
The infamous NES peripheral appears as the first robotic Smash Bros. fighter. R.O.B.'s moves about using jets underneath its base, which it also utilises to attack opponents and to make huge recoveries. He is also able to attack with lasers through his eyes, his trusty gyros and spin his arms at a rapid pace.
How to unlock: Play 160 Brawls, then challenge him; Obtain 250 trophies, then defeat him; get him to join your team in the Subspace Emissary.
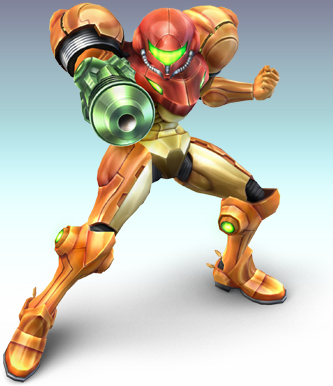
Samus
First appeared in: Metroid
Veteran fighter: Yes. SSB & SSBM
Class type: Heavy/Mid-weight
Fighting type: Ranged
Clone: No.
How to unlock:
Starting Character
Moveset:
A set:
A:
Damage: 3-10
Side-A:
Damage: 8
Up-A:
Damage: 13
Down-A:
Damage: 14
A charged set:
Side-A:
Damage: 13-18
Up-A:
Damage: 23-32
Down-A:
Damage: 15-21
B set:
B: Charged Shot. Charges up her arm cannon. Press again to fire. Can
hold the charge by moving to the side.
Damage: 3-25
Side-B: Missile. There are two types of missiles. If you press over
and B at the same time, a Super Missile will launch. These
go in a straight line and inflict more damage. If you are
already holding over when you press B, a seeker missile will
launch. They don't do as much damage.
Damage: 5-10
Up-B: Screw Attack. Spins violently while emitting electrical
discharge.
Damage: 2-10
Down-B: Bomb. Lays a Morph Ball Bomb. If you are caught in the
explosion, Samus turns back into a ball and jump up.
Damage: 5
Grab set:
Samus uses her Grappling Beam to grab opponents. This gives here increased range.
A:
Damage: 1
Side:
Damage: 7
Up:
Damage: 9
Down:
Damage: 6
Aerial set:
A:
Damage: 9
Side-A:
Damage: 5-14
Up-A:
Damage: 2-10
Down-A:
Damage: 15
Final Smash - Zero Laser:
Fires a massive beam across the field. Can easily engulf the entire field. The only problem is it travels slow and is very easy to dodge on large fields. Expect 40 damage and an easy KO if someone actually gets caught in the beam. After the attack, she will lose her armor and turn into Zero Suit Samaus.
Strategy:
Samus is purely ranged. She is slow in close and not horridly effective. Keep a charged shot up at all times and pound them with missiles. Her bombs work great for escapes.
Defense Strategy:
Get in close and use your speed get around her melee attacks. She's pretty helpless up close, but if she does land an attack it will hurt, so beware.
Here are some extra comments from the members of our forums for Samus...
Recently making a comeback to the gaming industry, Samus proves that she's still got it. Renowned for being a long range master with missiles and the charge beam, she is also one of the few characters to have a wall jump ability to get back in to the arena.
Special Attacks
Standard: Charge Beam. Samus charges up a powerful shot, then releasing with an extra press of the button. If she is attacked while charging, the shot will be cancelled, though she can stop and store what is charged by tilting the control stick left or right to roll. If it is pressed is mid-air, she will fire off either a small shot or whatever she has charged up.
Side: Missile. Samus fires a missile at opponents. Depending on how the control stick is tilted, it will be one of two missiles; a homing missile the flie slower and is less powerful, or a super missile that is faster and more powerful, but flies completely straight.
Up: Screw Attack. Samus jumps upwards, spinning rapidly while surrounded by electrical energy. Anyone she touches is attacked rapidly by the spin and the energy.
Final Smash: Zero Laser. As a last ditch attempt, Samus charges up and fires a screen filling laser, causing severe damage to all opponents hit by it. The Laser is so powerful, it destroys Samus' Varia Suit, changing her in to Zero Suit Samus. Her suit pieces can be thrown about afterwards.
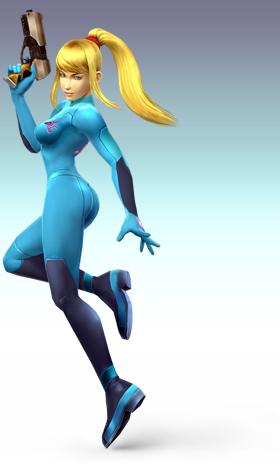
Zero Suit Samus
First appeared in: Metroid
Veteran fighter: No.
Class type: Light
Fighting type: Mid-ranged
Clone: No.
How to unlock:
1) Use Samus's Final Smash
2) When playing as Samus, hold down the shield button before a match
starts
3) Rapidly press up and down on the D-pad during a match
Moveset:
A set:
A:
Damage: 3-7
Side-A:
Damage: 6
Up-A:
Damage: 11
Down-A:
Damage: 12
A charged set:
Side-A:
Damage: 10-14
Up-A:
Damage: 12-16
Down-A:
Damage: 11-15, also stuns
B set:
B: Paralyzer. Fires a paralyzer shot. Can be charged.
Damage: 4-6
Side-B: Plasma Whip. Throws the plasma whip straight out.
Damage: 19, also burns
Up-B: Plasma Wire. Throws the plasma whip straight up. Can be used
to latch onto the side of the stage.
Damage: 15
Down-B: Flip Jump. Flips forward. Press again in air to kick.
Damage: 12
Grab set:
Zero Suit Samus uses the Plasma Whip to grab opponents, increasing her grab range.
A:
Damage: 2
Side:
Damage: 9
Up:
Damage: 10
Down:
Damage: 7
Aerial set:
A:
Damage: 10
Side-A:
Damage: 8-17
Up-A:
Damage: 10
Down-A:
Damage: 9
Final Smash - Power Suit Samus:
She puts her Power Suit back on. Not fancy, but the electrical surge can draw some near by opponents in a shock them for 25 damage.
Strategy:
ZSS switches her strategy completely. Get in close and use her acrobatics and speed to get around your opponents defenses. Her Flip Jump works excellent as a sneak attack. Her attacks aren't very powerful, however. Also remember that her Paralyzer does just that, it will stun an enemy plenty long for you to charge up a heavy combo.
Defense Strategy:
Don't let her moves distract you. Always stay facing her. Don't let her hit you with any of whip or shot attacks, or you'll be in for a hurting in the aftermath. Keep her at a distance. If she tries to jump over you, let her, and head in the opposite direction under her.
Here are some extra comments from the members of our forums for Zero Suit Samus...
Appearing only after Samus loses her armour from her Final Smash. Samus loses some of her power and weight when she takes off her power suit, but she more than makes up for it in speed. Her gun has been upgraded so that it can change in to an energy whip that can be used for tether recoveries.
Final Smash: Power Suit Samus. Restores her Vaira Suit while giving out a surge of energy, sucking up nearby opponents and items before sending them flying.
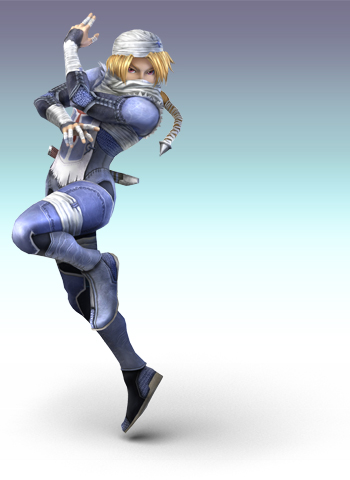
Sheik
First appeared in: The Legend of Zelda: Ocarina of Time
Veteran fighter: Yes. SSBM.
Class type: Light
Fighting type: Close Combat
Clone: No.
How to unlock:
Starting Character (transforms from Zelda)
Moveset: Sheik
A set:
A:
Damage: 3-infinite
Side-A:
Damage: 5
Up-A:
Damage: 5-13
Down-A:
Damage: 8
A charged set:
Side-A:
Damage: 5-19
Up-A:
Damage: 12-16
Down-A:
Damage: 13-23
B set:
B: Needle Storm. Gathers needles. Press B to throw between 1 and 6
needles. Can be held by moving to the side while charging.
Damage: 3-18
Side-B: Chain. Throws out an electric chain. Hold down B and tilt
the control stick to move the chain around.
Damage: 5
Up-B: Vanish. Disappears and reappears. Can control where she
reappears with the control stick.
Damage: 15
Down-B: Transforms into Zelda.
Damage: None.
Grab set:
A:
Damage: 3
Side:
Damage: 7
Up:
Damage: 5
Down:
Damage: 6
Aerial set:
A:
Damage: 13
Side-A:
Damage: 6
Up-A:
Damage: 11
Down-A:
Damage: 10
Final Smash - Light Arrow:
Fires a light arrow straight across the stage. Can hit multiple opponents if they are lined up. Does 48 damage and sends them straight across the stage. Zelda's is different in that it sends them up at an angle. In either case, this attack is almost a guaranteed KO.
Strategy:
Zelda is great for ranged combat with Dins Fire and Nayrus Love. Use Sheik to get up close and personal, or if an enemy gets to close to you. Both of their B ups work as great escape plans. Don't forget to charge up needles if you're using Sheik. With Zelda, focus on her specials. For Sheik, work her standards and some smashes.
Defense Strategy:
When fighting Zelda, stay close and dodge behind her. Sheik is the opposite, keep your distance and hail her. Sheik is easier to send flying, so wait for the transform if you don't feel like racking up the damage.
Here are some extra comments from the members of our forums for Sheik...
The alter-ego of Princess Zelda, Sheik returns as Zelda's down special transformation. In contrast to Zelda's slow but powerful stance, Sheik is nimble and can cause quick, rapid strikes to ememies. She also has a few ninja like weaponry with her, such as sharp needles. She can change back to Zelda with her down special.
Final Smash: Light Arrow. Sheik summons a huge bow and a single light arrow for it. Anyone hit by the arrow will be sent a huge distance, however, Sheik only gets the one shot and it goes completely straight. The Final Smash can also be used by Zelda, with slightly differant properties to the attack.
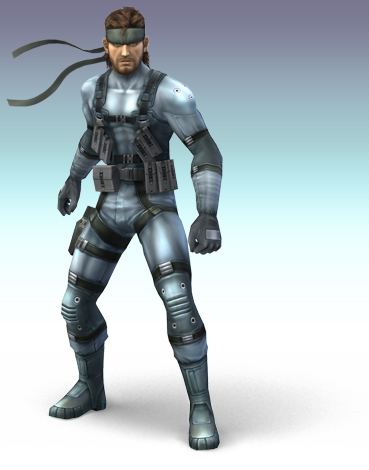
Snake
First appeared in: Metal Gear
Veteran fighter: No.
Class type: Heavy
Fighting type: All-round
Clone: No.
How to unlock:
1) Play 15 Versus Mode matches on Shadow Mosses Island
2) Play 130 Versus Mode matches total
3) Clear SSE Level 23: The Battleship Halberd Interior
Moveset:
A set:
A:
Damage: 4
Side-A:
Damage: 8
Up-A:
Damage: 13
Down-A:
Damage: 10
A charged set:
Side-A:
Damage: 22-24
Up-A:
Damage: 4-14
Down-A:
Damage: 14-19
B set:
B: Grenade. Tosses a grenade. Explodes in 5 seconds. Can bake the
grenade by holding B.
Damage: 13
Side-B: Remote Controlled Missile. Control the missile with the
control stick. Missile explodes after 5 seconds if no target
is hit.
Damage: 14
Up-B: Cypher. Calls in his surveillance bot to lift him up.
Damage: None.
Down-B: C4. Plants C4 on the ground. Press again to detonate.
Damage: 17
Grab set:
A:
Damage: 2
Side:
Damage: 9
Up:
Damage: 10
Down:
Damage: 12
Aerial set:
A:
Damage: 11-15
Side-A:
Damage: 14
Up-A:
Damage: 14
Down-A:
Damage: 6
Final Smash - Grenade Launcher:
Grenade launcher is an interesting Final Smash. It's a lot like Dragoon. Snake calls in a helicopter, to which he hangs from a ladder of and flies in front of the screen with a grenade launcher. Cross hairs appear, and you use the control stick to aim. Each grenade does about 18% damage, and can send an opponent pretty high. You don't have infinite grenades, however, only 12. And you only have about 20 seconds in which to use them.
Strategy:
Snake is an odd one. Most of his attacks use weapons, not melee. His grenades take some getting used to, but can be really effective. The C4 can not only stick to ground, but can also be stuck right on opponents. With the Remote Controlled Missile, you lose control of Snake, so if an opponent gets near, press the shield button to cancel the missile and regain control of Snake. You'll want to keep your opponents at mid-range and use your traps to catch them off guard.
Defense Strategy:
Watch out for anything blinking, ticking, or leaving a smoke trail. Snake is pretty defenseless at hand to hand or at longer distances. Choose one and fire at will.
Here are some extra comments from the members of our forums for Snake...
The first non-Nintendo character to appear in Smash Bros. Snake uses a variety of explosives, such as a rocket propelled granade launcher, as well as hand-to-hand combat. The infamous cardboard box is also used, most likely for shield purposes.
How to unlock: Play 10 Brawls on Shadow Moses Island, then challenge him; get him to join your team in the Subspace Emissary
Special moves
Standard: Granade. Snake pulls out a granade, which an be thrown with a second press of the button. He can either throw hard by pressing forward and the button, throw normally with just the button, or throw softly by pressing back and the button. The granade can be picked up by other characters.
Side: Remote Missile. Snake fires a Nikita - a remote control missile - at opponents. The missile is controlled manually, but you have ncontrol of Snake while doing this. The missie can be cancelled with the shield button.
Up: Cypher. Snake takes out his flying reconnaissance camera - Cypher - and uses it to float upwards. It is unkown if it can damage or not.
Down: C4. Snake lays down the C4 plastic explosive on the ground. Pressing down and the special button again will detonate the C4. The explosive can also be placed on opponents with the same functions.
Final Smash: Granade Launcher. Snake calls in a helicopter before jumping upwards off stage. He re-appears in the foreground from the rope ladder of the helicopter and fires his granade launcher at opponents. Snake has 12 shots for the laucher - 2 clips of 6 - and will finish and return to the stage either when all shots are used or when a certain amount of time has elapsed.
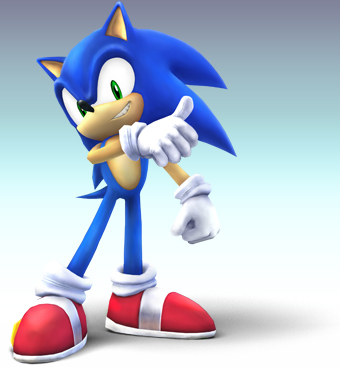
Sonic
First appeared in: Sonic the Hedgehog
Veteran fighter: No.
Class type: Mid-weight
Fighting type: close combat
Clone: No.
How to unlock:
1) Complete Classic Mode with all other characters
2) Play 300 Versus Mode matches
3) Clear SSE Level 31: The Great Maze
Moveset:
A set:
A:
Damage: 2-7
Side-A:
Damage: 11
Up-A:
Damage: 7-14
Down-A:
Damage: 6
A charged set:
Side-A:
Damage: 14-19
Up-A:
Damage: 10-19
Down-A:
Damage: 12-16
B set:
B: Homing Attack. Charges up and jumps into the air. Will hone in on
any nearby enemies, within reason.
Damage: 8
Side-B: Spin Dash. Curls up and rolls across the stage causing
impact damage. Can be charged. Can be controlled with the
control stick.
Damage: 5
Up-B: Spring Jump. Calls in a large spring beneath him. If on the
ground, spring can be used multiple times.
Damage: None.
Down-B: Spin Charge. Curls into a ball and dashes to the side
causing impact damage. Not as powerful as the Spin Dash, but
faster.
Damage: 6
Grab set:
A:
Damage: 3
Side:
Damage: 9
Up:
Damage: 12
Down:
Damage: 8
Aerial set:
A:
Damage: 11
Side-A:
Damage: 13
Up-A:
Damage: 9
Down-A:
Damage: 8
Final Smash - Super Sonic:
Sonic turns into Super Sonic (basically turns sparkly yellow). You can move him about with the control stick, though he is extremely fast and can be hard to control. You damage enemies by ramming them. Whole thing lasts 13 seconds, and does 18 damage per contact.
Strategy:
Sonic is the fastest character in the game. Use that to your advantage. His disadvantage is that all of his attacks are basically the same. Keep your foes close, but not too close and use his special attacks to mow through them.
Defense Strategy:
Don't let him gain speed. Stay in as close as you can and constantly pummel him. While he is fast, his attacks aren't that fast. Don't let him gain distance.
Here are some extra comments from the members of our forums for Sonic...
The high-speed blue hedgehog makes his well-anticipated Smash Bros. debut. Being known for his speed, Sonic is clearly the fastest character in the game. He also appears to have attacks - such as his classic spin dash - that can plough through multiple characters at a time.
How to unlock: Complete the Subspace Emissary
Special moves
Standard: Homing Attack. Sonic jumps in to the air and - homing on to the nearest opponent - slams in to them. If he is in the air, he will automatically go in to homing attack without jumping.
Side: Spin Dash. Sonic dashes forward while curled up in a ball. By holding it, you can briefly charge to send Sonic faster. You can jump during the dash to perform extra hits, allowing for Sonic to combo opponents easily.
Up: Spring Jump. Sonic summons a spring to jump high in to the air. If this move is performed on the ground, the spring will stay, allowing other characters to use it after him.
Down: Spin Charge. Sonic curls up in to a ball and - by holding the button - charges up a spin, then releases when the button is released. It can be charged indefinately and doesn't have any jump capabilities.
Final Smash: Super Sonic Transformation. Sonic summons the 7 Chaos Emeralds and tempoarily transforms in to Super Sonic. While like this, Sonic flies about the screen, damaging and sending anyone he touches soaring. If it runs out while he is off the stage, he will fall and self-destruct.
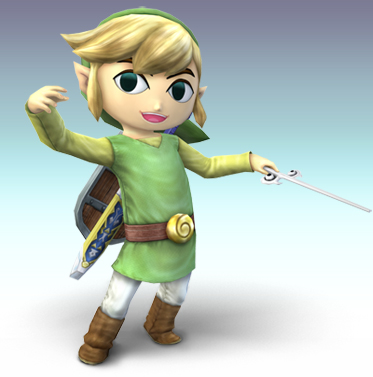
Toon Link
First appeared in: The Legend of Zelda: The Wind Waker
Veteran fighter: No.
Class type: Mid-weight
Fighting type: All-round
Clone: Yes. Link.
How to unlock:
1) Play 400 Versus Mode matches
2) After clearing SSE, go back to The Forest to find a secret door
3) After clearing SSE, clear Classic Mode with any character
Moveset:
A set:
A:
Damage: 3-10
Side-A:
Damage: 9
Up-A:
Damage: 9
Down-A:
Damage: 9
A charged set:
Side-A:
Damage: 10-32
Up-A:
Damage: 21-15
Down-A:
Damage: 7-15
B set:
B: Hero's Bow. Press and hold to charge the bow.
Damage: 4-12
Side-B: Boomerang. Throws a boomerang.
Damage: 5
Up-B: Spin Attack. Uses magic to create a hurricane like spin with
his sword. This attack can be charged.
Damage: 10-19
Down-B: Bomb. Pulls out a bomb. Press A to throw. The bombs can hurt
you and will automatically detonate after 7 seconds.
Damage: 6
Grab set:
A:
Damage: 2
Side:
Damage: 7
Up:
Damage: 7
Down:
Damage: 7
Aerial set:
A:
Damage: 10
Side-A:
Damage: 13
Up-A:
Damage: 14
Down-A:
Damage: 16
Final Smash - Triforce Slash:
A beam will shoot out of Links eye. If this hits an opponent, Link will then proceed to unleash a devastating series of slashes on them. 75 damage easy, with an almost guaranteed KO.
Strategy:
Toon Link doesn't have the range or power of Link, but he is faster. Use his speed to get in close and make aerials out of his bombs. He still shares all the same attacks, but he is lighter so you'll need to dodge more.
Defense Strategy:
Get in close, really close. His sword attacks don't hurt near as much as Links. Pound on him with hard attacks.
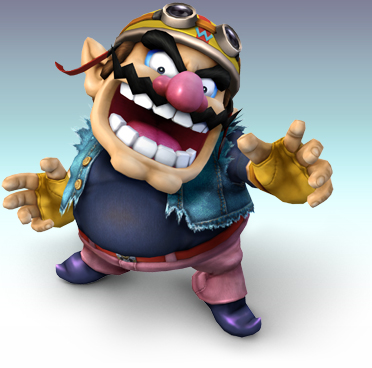
Wario
First appeared in: Super Mario Land 2
Veteran fighter: No.
Class type: Heavy
Fighting type: Close combat
Clone: No.
How to unlock:
Starting Character
Moveset:
A set:
A:
Damage: 6-12
Side-A:
Damage: 13
Up-A:
Damage: 10
Down-A:
Damage: 8
A charged set:
Side-A:
Damage: 19-26
Up-A:
Damage: 10-21
Down-A:
Damage: 13-18
B set:
B: Chomp. Opens his mouth. Release to close. Eats anything nearby.
Damage: 2-11
Side-B: Wario Bike. Hops on his motorcycle. Control his direction with the control stick. The faster he is going when he hits an opponent, the more damage it does. Has a high chance of wiping out. If it does, you can eat it with B, pick it up and throw it with A, or get back on it with Side-B. If you lose your bike, it will be a few seconds before you can use it again.
Damage: 9-15
Up-B: Corkscrew. Jumps into the air, spinning.
Damage: 1-20
Down-B: Wario Waft. The longer you wait before using it, the more powerful it is (not chargeable). Two minutes to fully charge
Damage: 0-40
Grab set:
A:
Damage: 2
Side:
Damage: 11
Up:
Damage: 10
Down:
Damage: 7
Aerial set:
A:
Damage: 9
Side-A:
Damage: 7
Up-A:
Damage: 17
Down-A:
Damage: 10
Final Smash Wario-Man:
Turns into Wario-Man. Basically just gets faster and way more powerful. His bike is now almost impossible to control, so I wouldn't use that. Lasts 20 seconds.
Strategy:
Get in close and use Chomp and his down smashes. If an opponent attempts to flee or gain distance, use the Wario Bike to close in. At close range, most of his attacks can be lethal.
Defense Strategy:
Spam projectile attacks. He has little defense against them and if hit enough even his Wario Bike will wipe out before reaching you. If you don't have any good projectile attacks, get in close and use aerials to avoid most of his attacks.
Here are some extra comments from the members of our forums for Wario...
The alter-ego of Princess Zelda, Sheik returns as Zelda's down special transformation. In contrast to Zelda's slow but powerful stance, Sheik is nimble and can cause quick, rapid strikes to ememies. She also has a few ninja like weaponry with her, such as sharp needles. She can change back to Zelda with her down special.
Final Smash: Light Arrow. Sheik summons a huge bow and a single light arrow for it. Anyone hit by the arrow will be sent a huge distance, however, Sheik only gets the one shot and it goes completely straight. The Final Smash can also be used by Zelda, with slightly differant properties to the attack.

Wolf
First appeared in: Star Fox
Veteran fighter: No.
Class type: Light
Fighting type: All-round
Clone: Yes. Fox and Falco.
How to unlock:
1) Clear Boss Mode with Fox or Falco
2) Play 450 Versus Mode matches
3) After clearing SSE, go back to The Ruins to find a secret door
Moveset:
A set:
A:
Damage: 3-8
Side-A:
Damage: 11
Up-A:
Damage: 8
Down-A:
Damage: 6
A charged set:
Side-A:
Damage: 15-21
Up-A:
Damage: 18-25
Down-A:
Damage: 19-14
B set:
B: Blaster. Fires semi-auto rounds. Can stun opponents.
Damage: 6
Side-B: Wolf Flash. Dashes very quickly at an angle upward.
Damage: 3
Up-B: Fire Wolf. Thrusts up into the Air. Can control the direction
of the shot by initiating the attack then pressing a direction
on the control stick.
Damage: 7
Down-B: Reflector. A shield comes up around Wolf. If close enough,
it can damage people when first activated. Its main effect
is to reflect projectiles.
Damage: 3
Grab set:
A:
Damage: 1
Side:
Damage: 7
Up:
Damage: 7
Down:
Damage: 12
Aerial set:
A:
Damage: 8
Side-A:
Damage: 11
Up-A:
Damage: 12
Down-A:
Damage: 15
Final Smash - Landmaster:
He calls in a Landmaster Tank. When in the Landmaster Tank, Press A to fire energy rounds, use the control stick to move, and hold X or Y to activate your thrusters and hover. Shots do 16, running into someone does 15. Press down to roll and shake people off. KO potential is moderate, depending on your enemy's damage. Whole thing lasts 15 seconds.
Strategy:
He is lightweight, believe it or not, and not horridly powerful. Rely on his speed for quick attacks. Use the reflector when possible, and don't forget about your blaster, its not much but every bit helps. Your standard and smash attacks are good, but getting in that close means exposing yourself. Wolf Flash is a bit harder to use, due to its curving up at an angle.
Defense Strategy:
Wolf isn't as much of a threat as you would think. Rush him and get in close. He'll be fast, but his close range attacks wont do much damage. Focus more on getting in one or two hard hits compared to 5 or 6 light hits.
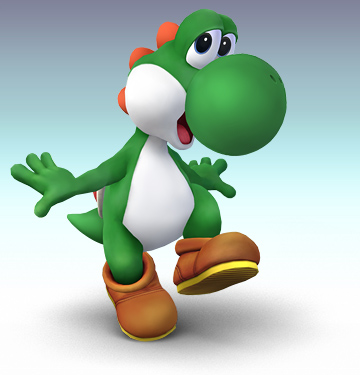
Yoshi
First appeared in: Super Mario World
Veteran fighter: Yes. SSB & SSBM
Class type: Mid-weight
Fighting type: Mid-range
Clone: No.
How to unlock:
Starting Character
Moveset:
A set:
A:
Damage: 3-9
Side-A:
Damage: 9
Up-A:
Damage: 11
Down-A:
Damage: 10
A charged set:
Side-A:
Damage: 16-22
Up-A:
Damage: 16-22
Down-A:
Damage: 13-19
B set:
B: Egg Lay. Eats an opponent and turns them into a helpless egg.
Damage: 7
Side-B: Egg Roll. Mmm, egg rolls... Anyway, turns into an egg and
rolls across the stage, damaging on impact. Control his
direction with the control stick. Snap out of it with B.
Damage: 4-16
Up-B: Egg Throw. Throws an egg in an arc. You can control the arc
with the control stick. Hold B for longer range.
Damage: 6
Down-B: Yoshi Bomb. Jumps into the air and pounds the ground.
Damage: 15
Grab set:
Yoshi uses his tongue to grab, giving him increased range.
A:
Damage: 2
Side:
Damage: 7
Up:
Damage: 5
Down:
Damage: 4
Aerial set:
A:
Damage: 12
Side-A:
Damage: 16
Up-A:
Damage: 13
Down-A:
Damage: 2-10
Final Smash - Super Dragon:
Gains wings and flies around the stage. Can also use A to shoot fireballs. He can be hard to control at times, so sometimes it's better to stay in one place and shoot straight across. If you don't shoot any fireballs, you will begin to randomly breath fire. If you are close to someone when this happens, the fire can cause mass amounts of damage, easily 200 over the duration, though it wont send them flying. You can easily inflict 100 damage to one opponent, and can KO someone with one shot if they have over 70 damage to start with. Lasts for 20 seconds.
Strategy:
Egg throw and Egg roll work great on close combat enemies. Equally, his standard smash attacks will work wonders for enemies that like to keep their distance. Pretty well rounded.
Defense Strategy:
He does have rounded attacks, but most of them don't do much damage and leave him open. Dodge a couple and watch the pattern, then strike when you get a chance.
Here are some extra comments from the members of our forums for Yoshi...
A dinosaur with the ability to turn what it eats in to eggs. Back for the third time in the series, he uses his egg abilities to attack and stun opponents. His second jump is one of the largest in the game, allowing large recoveries back to the stage. His egg throw is now capable of increasing the distance of his jump.
Special Attacks
Standard: Egg Lay. Yoshi sticks his tounge out and eats anyone that gets stuck to it. The character is layed as an egg, stunning them and leaving them open to attack until they break out.
Side: Egg Roll. Yoshi goes in to an egg and rolls about the stage, slamming in to opponents. The egg is controlled by the control stick and pressing the special button again cancels the attack.
Up: Egg Toss. Yoshi throws an egg upwards, exploading upon impact with opponents. It's direction can be altered depending on the control stick and how long the special attack button is pressed. The move can now be used for recovery purposes.
Down: Yoshi Bomb. Yoshi jumps up and does a ground pound. Not only does it injure those Yoshi lands on, the stars that come out from Yoshi can also injure. If Yoshi is in the air, he will go straight in to Yoshi Bomb without jumping.
Final Smash: Super Dragon. Yoshi sprouts wings and fliea about the stage, spewing out fire. By pressing a button, he can also spit out fireballs. It wears out after a while, possibly causing Yoshi to self-destruct if he's off the stage when it runs out.
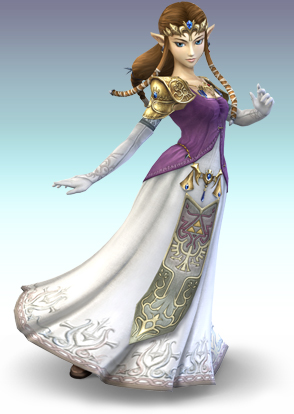
Zelda
First appeared in: The Legend of Zelda
Veteran fighter: Yes. SSBM.
Class type: Light
Fighting type: Ranged/Mid-ranged
Clone: No.
How to unlock:
Starting Character
Moveset: Zelda
A set:
A:
Damage: 6
Side-A:
Damage: 13
Up-A:
Damage: 11
Down-A:
Damage: 7
A charged set:
Side-A:
Damage: 17-23
Up-A:
Damage: 15-20
Down-A:
Damage: 12-16
B set:
B: Nayru's Love. Creates a large crystal shield around her as she spins. Can deflect projectiles.
Damage: 3-9
Side-B: Din's Fire. Launches an orb of fire magic. The longer you hold B, the longer it travels. Can be controlled with the control stick.
Damage: 9-14
Up-B: Farore's Wind. Disappears and reappears. Can control where she reappears with the control stick.
Damage: 6
Down-B: Transform into Sheik.
Damage: None.
Grab set:
A:
Damage: 3
Side:
Damage: 12
Up:
Damage: 11
Down:
Damage: 10
Aerial set:
A:
Damage: 5
Side-A:
Damage: 20
Up-A:
Damage: 15
Down-A:
Damage: 5
Final Smash - Light Arrow:
Fires a light arrow straight across the stage. Can hit multiple opponents if they are lined up. Does 42 damage and sends them up at an angle. Sheiks is different in that it sends them straight to the side. In either case, this attack is almost a guaranteed KO.