Unofficial Fable III Guide by vhayste for
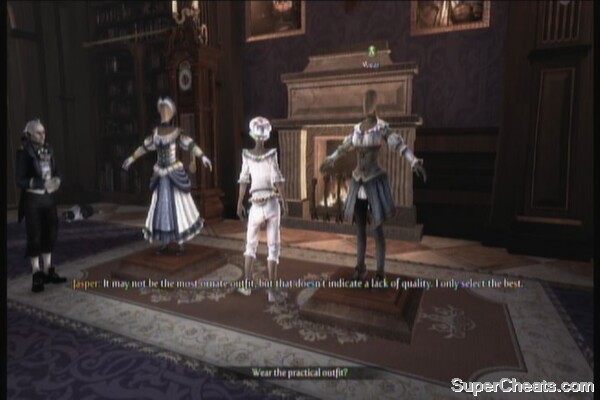
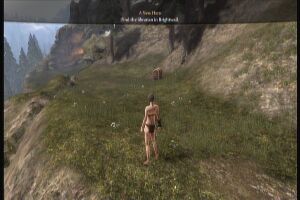
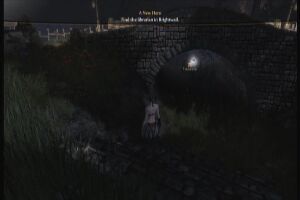
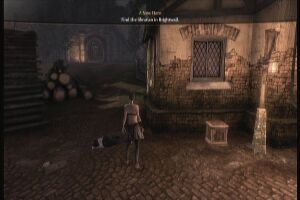
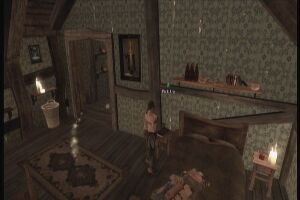
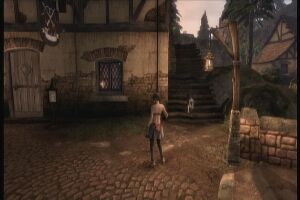
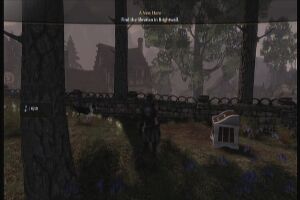
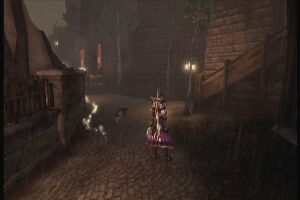
Welcome to our super guide to Fable 3. We've got everything covered with over 130 videos and 350 images! There is a straight walkthrough of the game, as well as sections on completing all the side quests, help withachievements, finding all the Demon Doors all the Flowers, Silver Keys, Gold keys, Rare Books and blasting all the Gnomes - We've got your back on this one! Before you delve into the guide, we suggest you take a look at the general gameplay page to get an overview of things and perhaps pick up a few helpful hints and tips. Its been 50 years since the previous Hero saved the land of Albion. The kingdom is now under the control of a tyrant and nefarious king named Logan - your older brother. As the prince or princess, you carry the blood of your father, the last hero that once saved Albion. As the land entered an industrial evolution with the bleak vision of prosperity, the people has fallen into despair and poverty under the iron rule of your brother. After a major incident in the castle, you’ll be forced to leave its premises, along with your trusted teacher and butler. This is the start of your journey as you follow the steps of your father. The land needs a hero... the land needs a revolution! Gameplay The game doesn’t utilize huds and bars to track the player’s health, magic or experience points. The player can cast magic infinitely without getting tired. As for the player’s health, the hero has a natural healing ability that will allow him/her to fully recuperate in a few seconds, so long as he/she is not receiving damage. During combat, the health potion will become available if the hero’s HP is considerably low; otherwise, it won’t be available for use. The game doesn’t have an experience system but it is completely replaced by Guild Seals. You can use Guild Seals to purchase upgrades for your character, as well as various expression packs and other in-game bonuses. (See the guild seal section below for details) Defeated enemies will drop red orbs that will fill up the guild seal icon on the top left corner of the player’s screen. After filling up the icon completely, it will become 1 guild seal. Guild Seals Interaction Before your relationship with an NPC improves to the next level, you must do certain tasks for them, like delivering an item to another NPC on another village or finding a hidden item in a region (via digging). For romantic levels, you need to woo your lover with gifts or take them out for a date. You can then hold a wedding ceremony to officiate your marriage, if you want to. You can marry as many times as you want. You may divorce an NPC should you want to return to the wild - but take note that this will severe your relationship with that NPC permanently. Real Estate Later on, you’ll be able to get the Entrepreneur pack. This will allow you to purchase shops, stalls and other business establishments. These properties are usually expensive but you may want to prioritize getting them as they’re virtually maintenance-free (they don’t deteriorate). You can start buying small stalls and businesses then once you have enough, purchase larger establishments like pubs and pawnbrokers. You can enjoy massive discounts by buying stuff from the stalls and shops you own. Combat Your character can only use for types of items during combat: Slow Time Potion, Summon Creatures Potion, Health Potion and a food item. Summon Creatures potion can save you when you’re completly surrounded and you’re unable to roll out of danger. The summoned creatures will depend on your character’s magic level. For starters, you’ll only be able to summon lowly bees while high-end characters can call forth a squad of deadly, shadowy balverines. Summoned creatures also take the heat off from you instantly, allowing you to get out of the mob and heal. Slow Time Potion will obviously, make everything go slower, except the hero. Use this to buy enough time to summon a full-charged AoE attack or just buy some time to heal or get out of your dangerous predicament. Flourishes are charged attacks with your melee or firearm that will inflict great damage and will also change the camera view in really cool angles/ cinematics. Use these whenever you have the chance to maximize your damage potential. Weapons There are two types of firearms and melee weapons. You can choose to carry a sword or a hammer. The sword will allow you to land swift and accurate slashes while the hammer will enable you to deliver slow but solid attacks. The best property of the hammer is that you can hit multiple enemies with it. Rifles has longer range and higher damage but its firing rate and bullets are low. Pistols have more bullets, high firing rate but limited range and average damage. Each weapon have their own set of tasks and challenges that will unlock bonus stats and effect once completed. These tasks are unique to every weapon. You may want to check if the weapon you’re trying to level up fits your fighting style or morality standing. A weapon that can only grow by forcing you to commit murder won’t be of much use to a character with saintly morals. Morality Positive Morality Negative Morality Start by selecting your character – either a prince or princess. There are no advantages or disadvantages for either genders so you can pick whatever you want. Hold the button of the character of your choice then wait until you gain control of your character after the scene. After getting out of the bed, its time to select the outfit of your choice. Again, there's no differences status-wise on what you wear; only your sense of style. Choose one that fits your tastes, then exit your room. Just follow the trail as it will lead you to your objective. You can shake hands with 20 different people along the way to unlock the achievement Touched by a Hero. You can unlock this achievement even before reaching your objective. There is also a chest past the fountain to the right of your objective point that requires silver keys. You can't open it for now obviously, so just take note of it. You can find your first Silver Key by checking the back of the statue left of the Catacombs entrance.

General Gameplay
As a hero, you need to gather followers and resources to build and strengthen your own army for the revolution to succeed. In that aspect, you’ll need to visit various locations, interact with NPCs, complete quests and even become a landlord to pool your manpower and wealth. You can explore lands and find treasures that may help you in your journey.
As mentioned above, these are used to purchase upgrades and new skills for your character. You can obtain guild seals by doing the following:
Along with the course of the game, you’ll also come across moral decisions that will directly affect people’s opinion of you in the long run. How you treat individuals will affect how they warmly accept you or fear/despise you. When interacting with NPCs, you have the option to make friendly or offensive gestures. These gestures will increase or decrease their affinity to you, further allowing more options. Befriending shop owners for example will allow you to enjoy all-time discounts or even higher discounts when they’re having a sale. Further improving your relationships might even allow you to obtain lover(s) and even settle down, marry and have children.
After obtaining the Landlord pack from Road to Rule, you’ll be able to buy residential properties and rent them out to earn money. All rented properties earn a set amount of gold every five minutes. You can adjust the rent and demand higher or lower fees – which will also affect your moral standing. Take note that each of these properties have a percentage of its condition or status. While being rented, residential properties will deteriorate over time. Once their condition fall down to zero, you won’t be able to earn money from them until they’re repaired. You can also increase the value of these properties buy buying furniture and remodel the interiors. These properties are not only for earning gold. You can also choose a home out of them where you can leave your family, should you decide to have one.
Your Hero can utilize spells, guns and swords to aid in his/her adventure. Though it is completely possible to master all of them later in the game, you should prioritize upgrading one of them as it fits your fighting style. Most players will surely go with upgrading their magic level as you can cast unlimited magical attacks and it’s the only attack that has an AoE (Area of Effect) attack. This is the best method of softening up multiple enemies and make them easy pickings for your gun and sword.
There are only six types of gauntlets in the game, all of them must be purchased by spending guild seals in Road to Rule. As for guns and melee weapons, some of the common ones can be bought from shops while more rarer and uncommon ones can be acquired randomly from silver or golden chests. Later in the game, you’ll be able to purchase the Spellweaver upgrade which will allow you to equip two magic gauntlets. Now you can combine different spells to create devastating magical attacks.
The game is full of choices and decisions. They range from resolving minor conflicts to major ones that will affect an entire locale and its populace. Your own actions will also affect your overall moral standing in the long run. See the chart below for a quick run down of actions that will affect your good or evil moral standing:
Giving money to beggars
Eating carrots and celery
Catching and apprehending criminals
Noble or good major decisions
Threaten a citizen
Crime (Murder, Assault, Vandalism, etc)
Eating crunchy chicks (yes, these are being sold)
“Selling” a citizen to the factory for labor
Evil major decisions
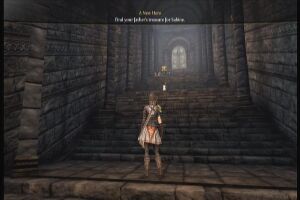
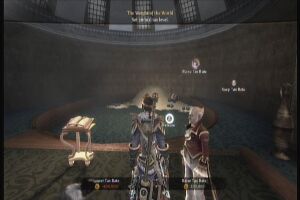
Life in the Castle

Silver Key
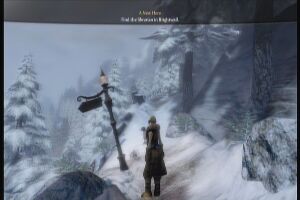
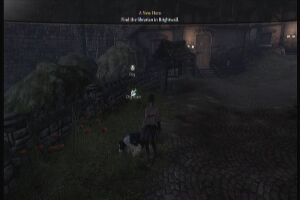
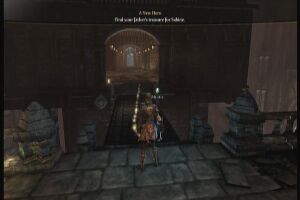
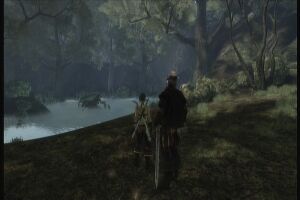
Just head to the objective point to find your friend. Press A or X to interact, then press RT when prompted. Take your friend's hand by pressing LT then just lead the way and follow the trail. Just follow the onscreen button prompts.
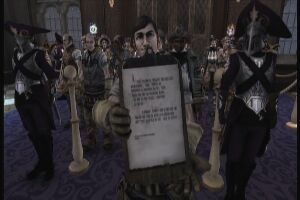
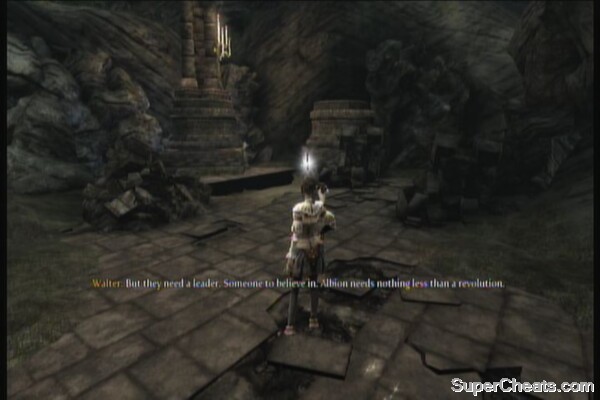
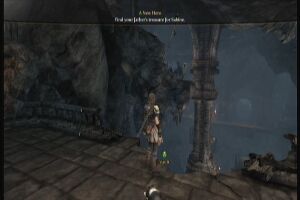
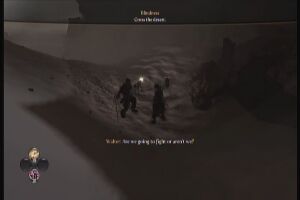
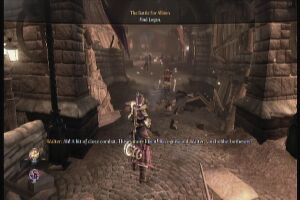
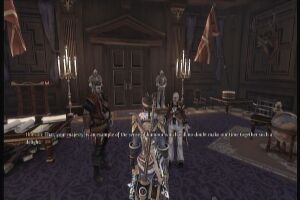
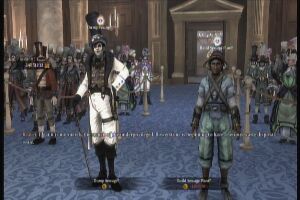
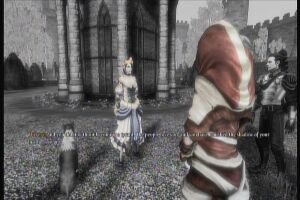
You will need to address your subjects by encouraging them or shouting at them. The decision is yours. Next, follow Walter. You'll need to choose whether you'll want to sign the petition or insult the subject.
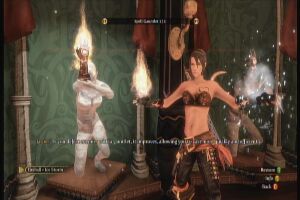
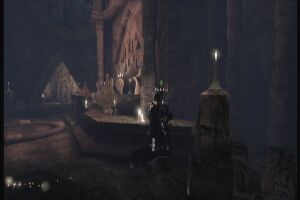
Head to the combat room with Walter, then approach the weapon rack. Grab the sword to start your training. Learn how to swing your sword, block attacks and finally use a charge attack called Flourish. After using it on Walter, the lesson will be over. Head towards your next objective.

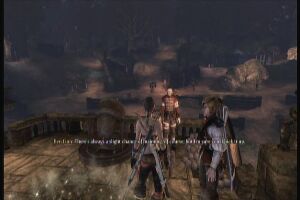
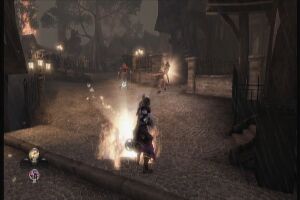
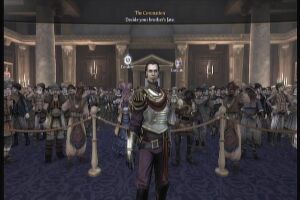
Watch the following scenes. You'll need to choose whether you'll have your friend or the mob leaders to be executed. The decision is again, up to you.

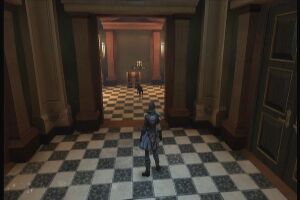
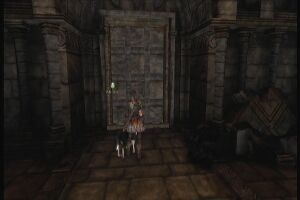
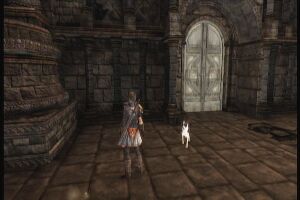
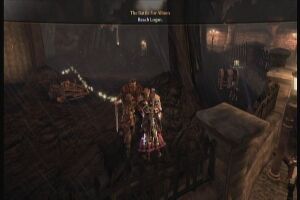
Once in control, you'll need to leave the castle this time. Follow Walter and head to your next objective. Press A to open the doors to the catacombs.
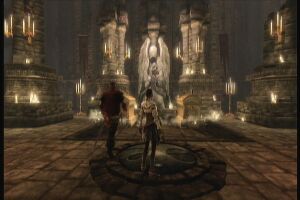
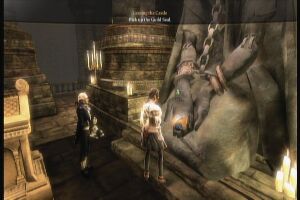
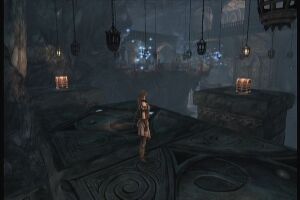
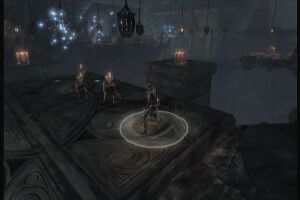
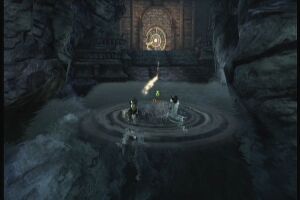
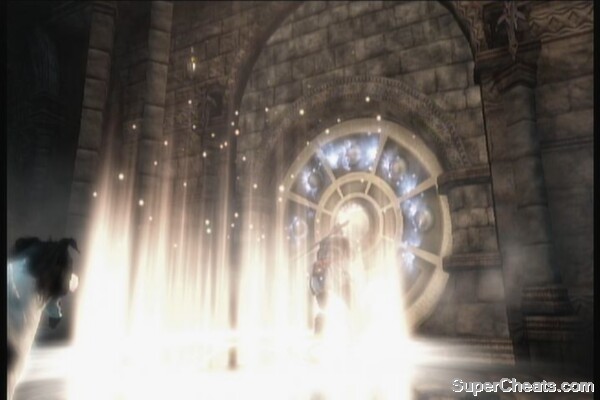
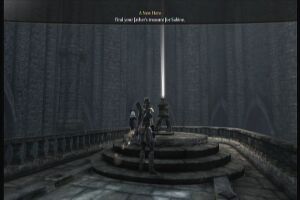
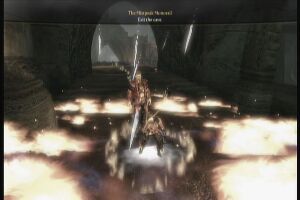
Head to the shrine and wait until the next scene triggers. Grab the Guild Seal then watch the next scenes.
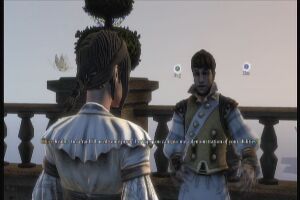
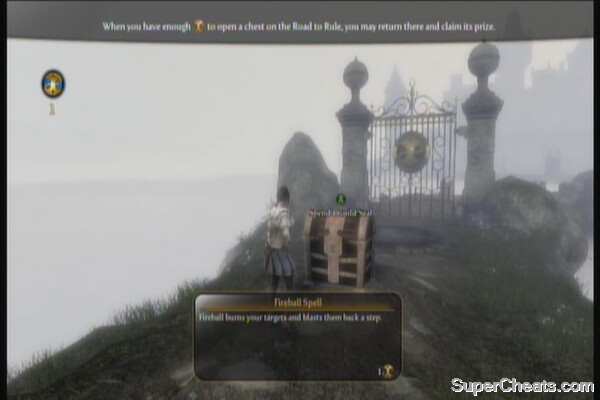
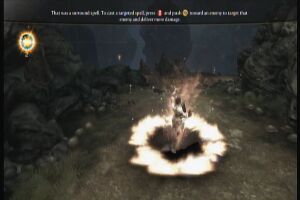
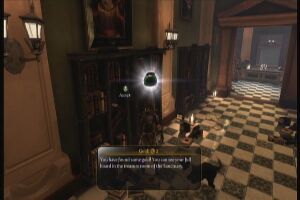
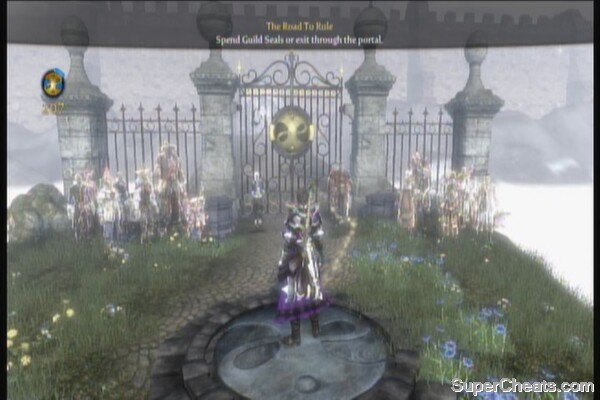
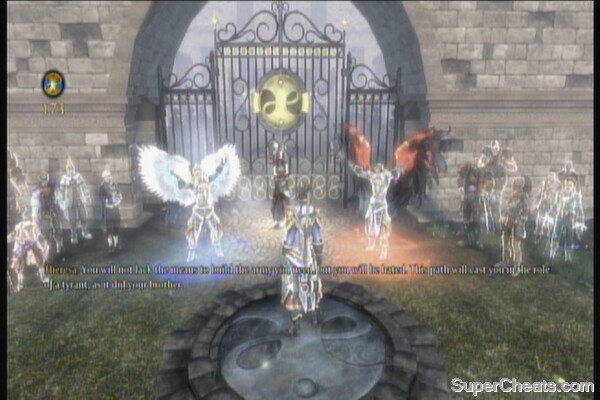
You'll find yourself in the Road to Rule. Theresa, the spire will talk to your about the destiny that awaits you. The road consists of several gates, which can be opened as you complete quests and gain more followers. Behind each gate lie treasure chests that contain weapons, skills and other items beneficial to your journey. You'll need to spend more seals to open gates later on but for this time, you'll only need to spend one. Use the guild seal on the gate then grab the Fireball spell from the chest. Accept the gauntlet then leave the Road to Rule through the portal.
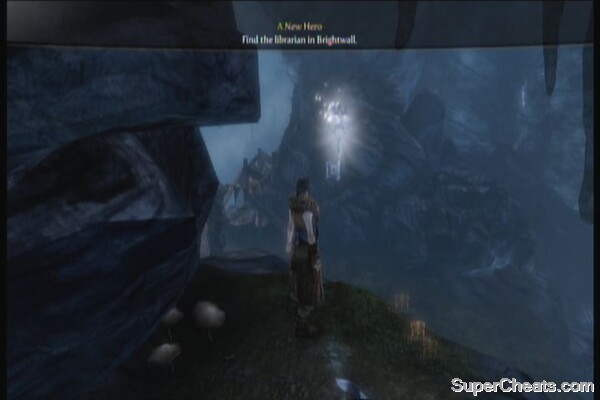
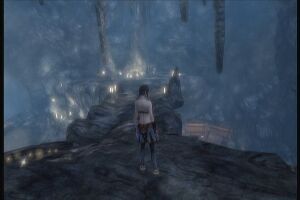
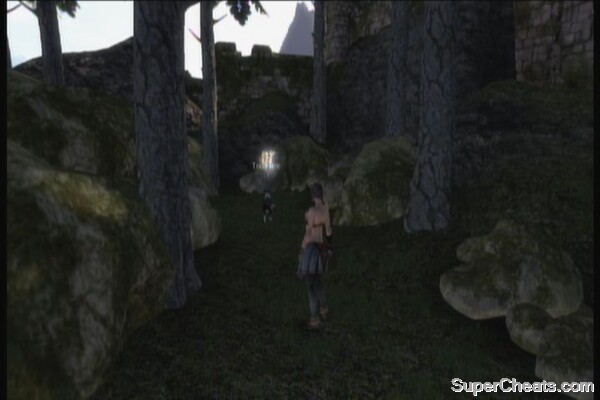
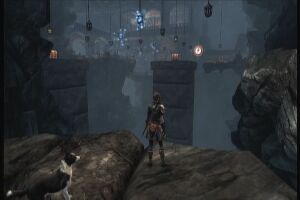
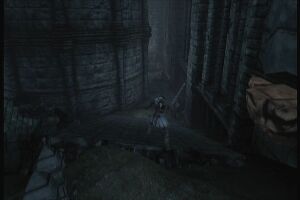
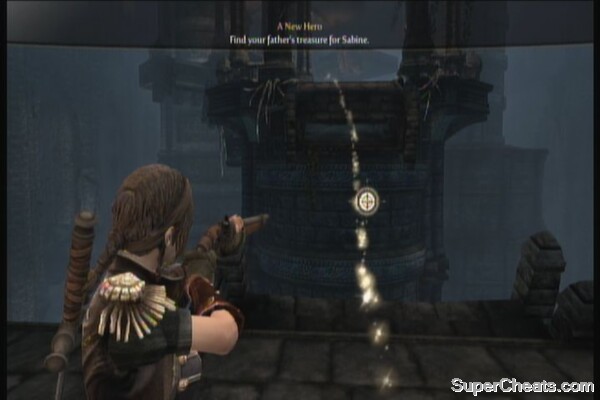
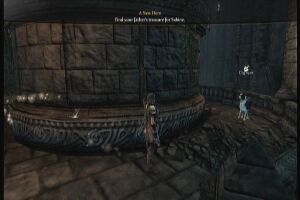
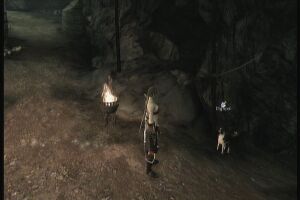
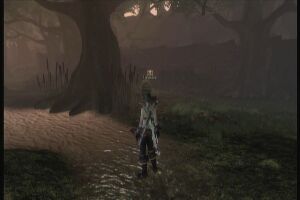
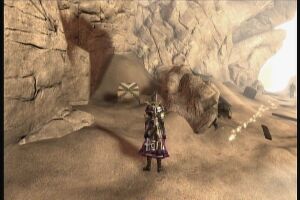
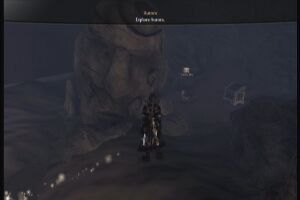
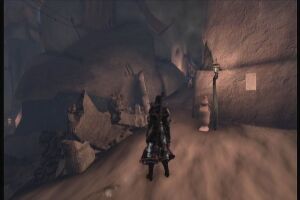
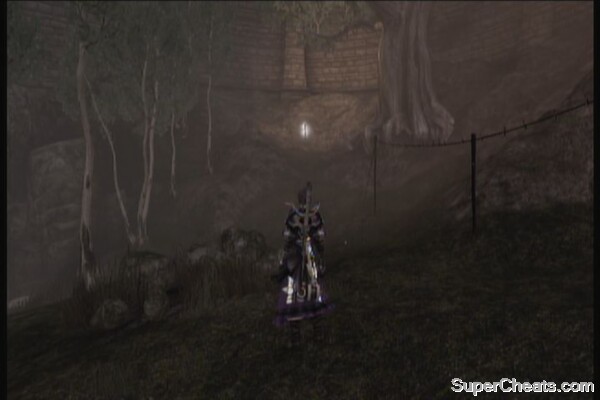
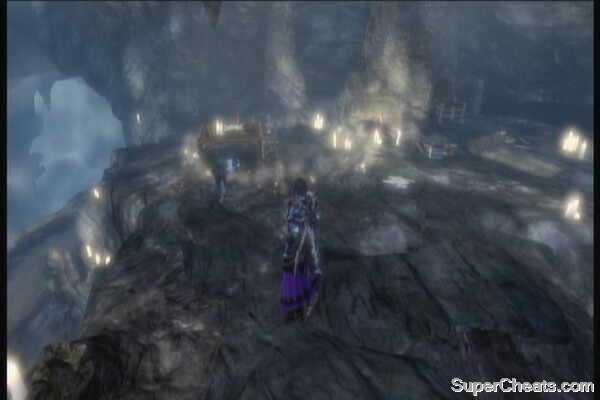
Once back in the catacombs, press B on where you're standing to use the spell and to open the hidden path. Follow the trail. Once you've reached the large part of the cavern, head left but don't cross the bridge ahead. Instead, continue west until you find a floating shiny thing by the ruins. This is a collectible called a Silver Key which can be used to open Silver Chests scattered throughout the land. Some chests require several silver keys to be opened so its imperative to gather these whenever you can. Silver Keys are not consumed when opening the silver chests so when you find one as long as you meet or surpass the required number of keys, you can loot the contents without problems.
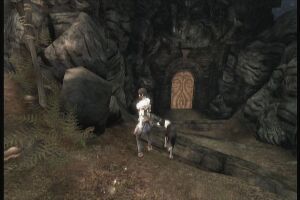
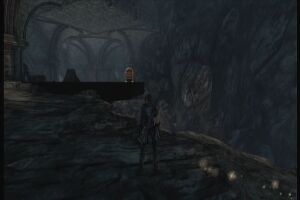
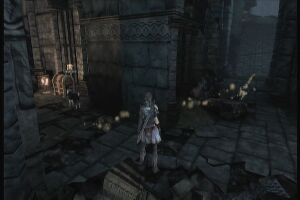
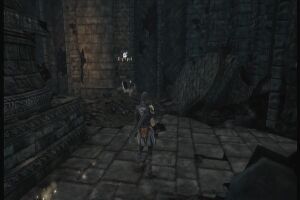
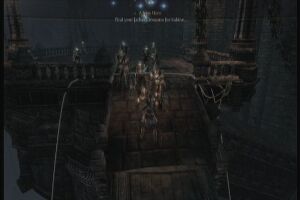
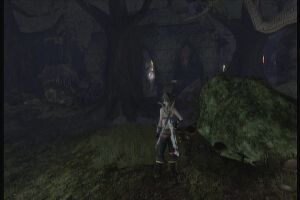
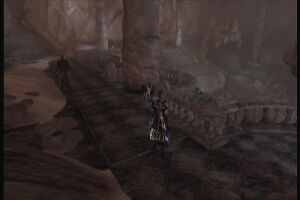
After grabbing the key, cross the bridge and blast the bats that will attack you. Continue following the path. There is also a golden door here which you can't open for now.
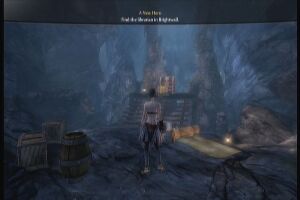
Just follow the trail until you reach the sewers. Destroy the bats that will attack you along the way. There's nothing much to do here so just head to where the trail leads you then press B to activate the cullis gate and reach the Sanctuary.
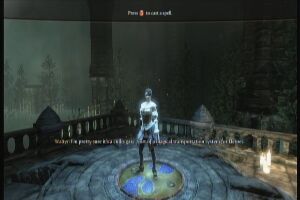
Read through the conversations and you should be able to use the table to fast travel to various locations. For now, press A to examine the table then fast travel to the Dweller Camp in Mistpeak.
Dweller's Camp
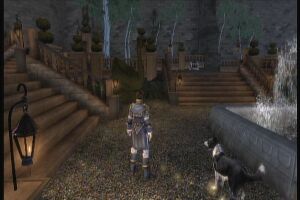
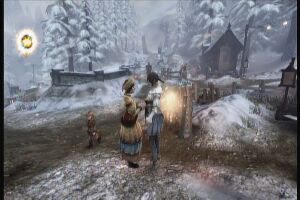
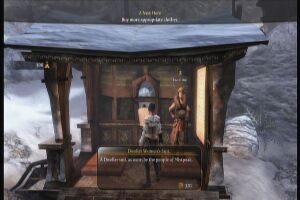
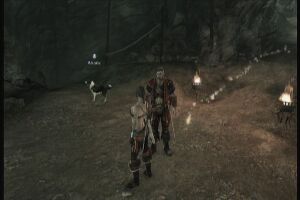
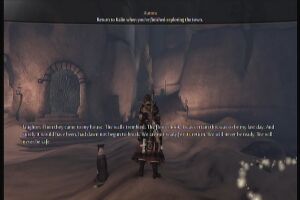
If you've been following righteous decisions and interactions till now, you have the option to gain support from the dwellers by pressing and holding A to activate more pleasant gestures. Later in the game, you'll have more gestures that will enable you to collect more guild seals. Interact with all the people here if you want; otherwise, follow Walter to the gate. He'll give you 500G to buy more clothes. Follow the trail as it leads you to the only shop in town. Buy the Dweller Women's Suit from there.
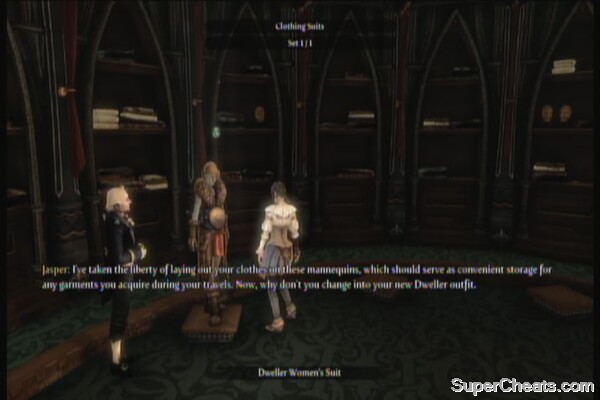
After purchasing the suit, you should be able to access the Sanctuary now. Head to the dressing room and change there. From here on, all the new outfits you obtained can be accessed here. Play around the rooms if you want then just return to the camp once ready.
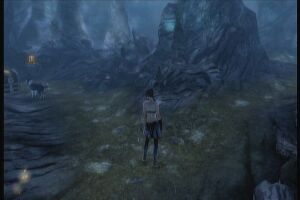
Head to Walter and watch the following scenes. Once in control, you can head to the next objective. There is a small off-shoot path south of Sabine's gate that leads to a silver chest. Just remember its location for now. To the right of that silver chest is another treasure chest behind the wagon.

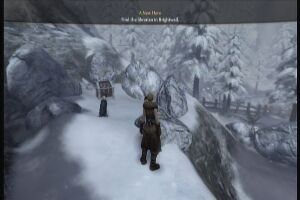
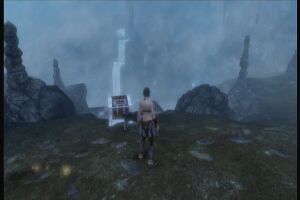
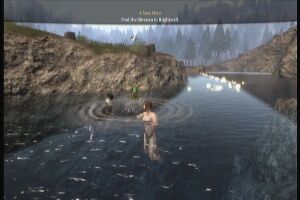
Head to the town gate. There is a path uphill to the left that will lead you to a lone, cozy property you can buy later on and beside that is a pond. Dive there to obtain the Wedding Ring. You can sell it for some gold or just keep it so you can give it later on if you'll get married to somebody.
Wedding Ring
Now follow the trail out of the village to reach the next location.
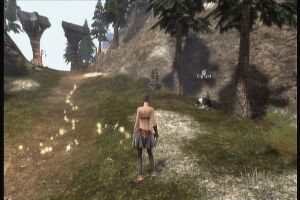
Mistspeak Valley
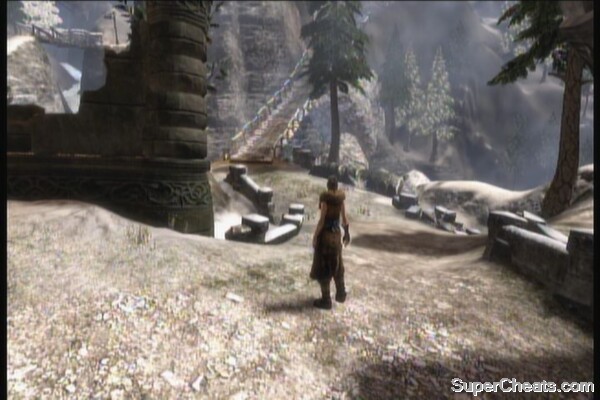
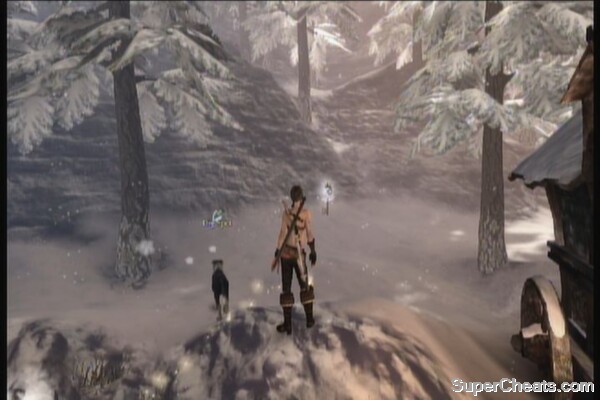
Follow the path until you find the signpost. Take the path to the right then follow it until you reach a silver chest before the hanging bridge. To the left of it is a dig spot where you can obtain a random treasure. You'll know if there's one nearby if your dog barks and immediately takes off to find it. Be very keen on finding them as it never hurts to have free stuff to help you in your journey. Cross the bridge to find a lone chest by the ruins containing a random treasure.
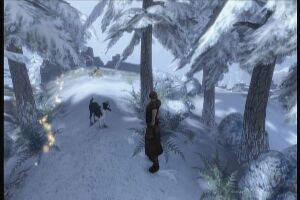
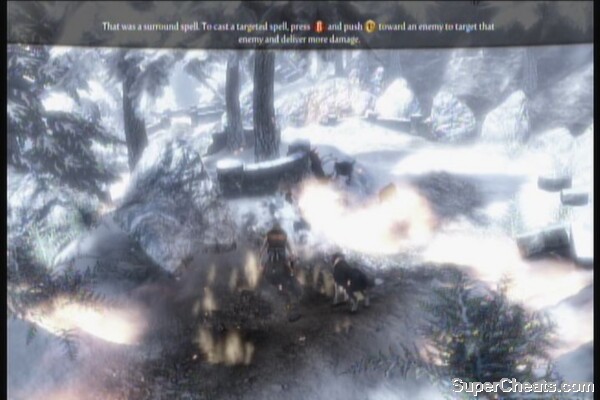
After collecting the items, backtrack to the signpost then follow the golden trail. After crossing the bridge, wolves will attack you. You can have them come to your position while you charge for an AoE (area-of-effect) fire attack or just release a volley of fireballs toward them.
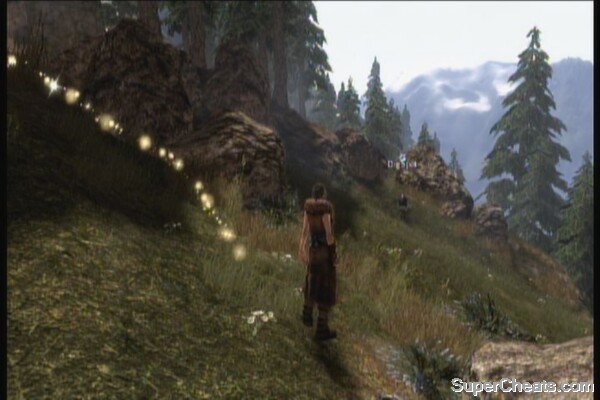
Follow the path then before crossing the second bridge, take the uphill path to the right. It leads to a dig spot.
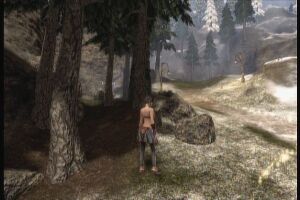
Follow the trail again then kill the pack of wolves that will appear after crossing the second bridge. (The following steps will take you off the track to obtain various items and gold. You may skip this if you like.)
Follow the path. The trail will lead you to an uphill path. Before going there, check out the chest behind the ruined wall to the left. To the northeast of it is another dig spot that has Jewellery. Go downhill first.
Take the bridge to the left then continue uphill to find a treasure chest. Continue to the left then enter the cave.
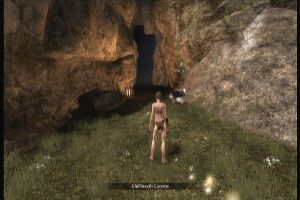
Chillbreath Caverns
Follow the path, there's a dig spot right around the corner. Continue along the path, there's another treasure chest behind the large rock by the curve. At the end of the path is a Silver Key but you don't have means of getting it for now so just leave it there for the meantime. Exit the cave back to Mistpeak Valley


Mistpeak Valley
Backtrack to the main path. Before following the golden trail, go downhill to the left until the path becomes warm and green. Cross another bridge there. This will lead to the second entrance of Chillbreath Caverns. Before entering, checkout the small patch of grassland to the right as it has a dig spot as well.
Chillbreath Caverns
Follow the path and it will lead you to the Silver Key you saw earlier. Grab it then exit the cavern from where you entered.
Mistpeak Valley
Vault off from any of the edges there to quickly reach lower ground then follow the narrow path. A dig spot should be detected by your dog before the path narrows down.
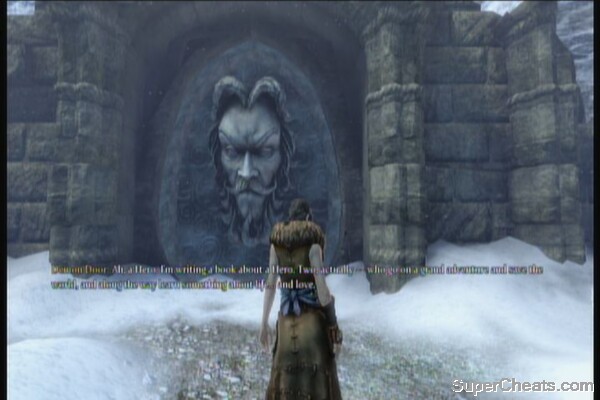
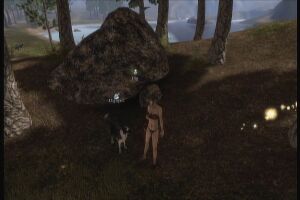
Follow it and you'll reach a Demon's Door. You can't complete this for now so just return to the main path. Just take note of its location for now.
Head to the left past the signpost that read “Brightwall Village” to find a chest. Continue past that and you'll find the third entrance of Chillbreath Caverns.
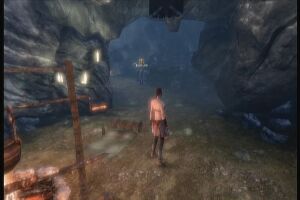
Chillbreath Caverns
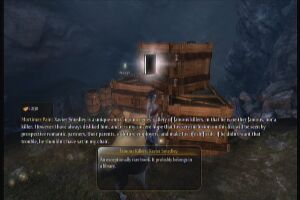
Follow the path and the dog will point you to the first dig spot in this area. Continue down and you should find a frozen waterfall. Go around it to find a chest. Beside that is a rare book (Famous Killers: Xavier Smedley)

Return to the main path then continue down. The dog should detect another nearby dig spot. Go down the path in front of it to find another chest by the frozen waterfall. Continue following this path to find another chest along the way. Continue along the path to find a small camp. There's another chest there. Continue upstairs to find another chest by the sleeping rag.
Backtrack again to the main path, take the uphill path then cross the rock bridge. Follow this long path until you reach the chest at the end of the path. I got 750 gold from this chest.

Return to the rock bridge then take the other path this time. You'll come across a silver chest here. Ignore it for now then continue following the path until you reach a fork. There's a chest to the left.
If you continue following this path, this will lead you back to the other side of Mistspeak Valley. Exit there to find a great surprise awaiting for you.
Mistpeak Valley
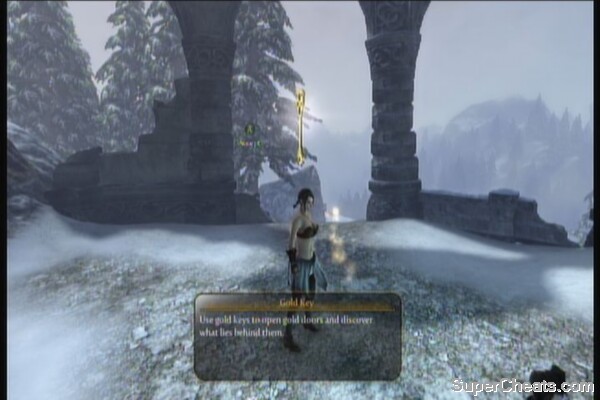
Follow the path and you'll find a Gold Key. Jump down and it should bring you back to the intersection.
Now follow the path downhill to reach the lake. There is another dig spot behind the rocks near the signpost by the lake. Continue heading to the camp. You should spot stacked logs to your left. There's a dig spot nearby. There is also a Silver Key behind those piled logs.
Continue downhill and head to the village gates. There is another dig spot beside the water. Swim straight ahead from the dig spot and you should find a dive spot this time. Dive down for another free item.
You can't enter the village for now so just swim to the island in the middle of the lake. The diving spot should be visible from there. Swim to the other side of the lake to find another dig spot by the shore.
Continue uphill and your dog should lead you to another dig spot. Another dig spot is located beside the road leading to the Monorail Station, behind the large rock.

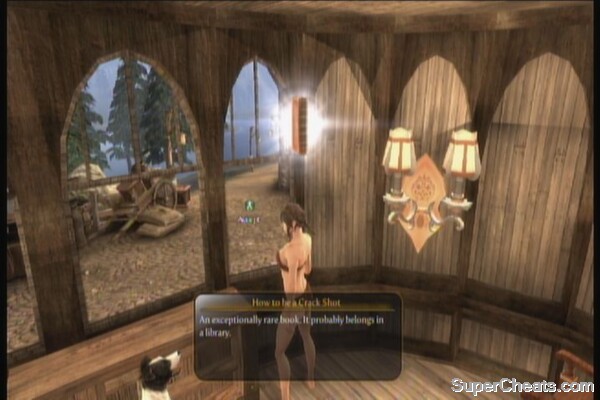
Enter the small booth by the Monorail Station entrance to find a Rare Book (How to be a Crackshot).
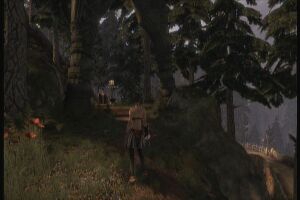
From the Monorail Station, there is another dirt road leading uphill. Follow it and you should find another Silver Key.
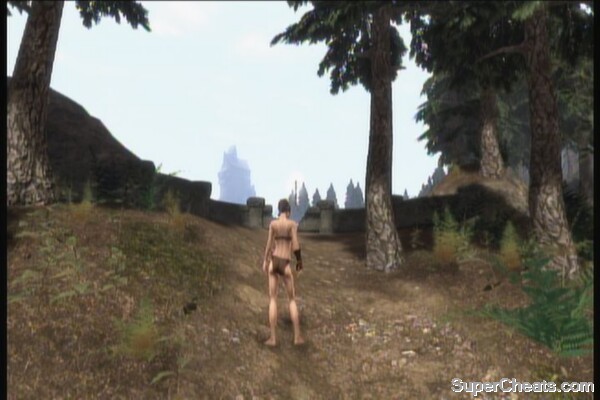
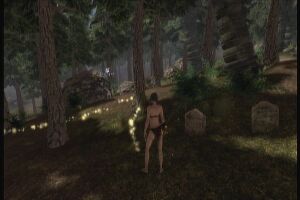
After getting the silver key, check the ruins further to its southeast and you should find a chest hidden behind. In front of that ruins is a small graveyard. There is a dig spot nearby.
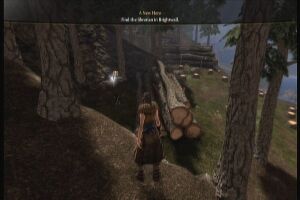
That should be the last spot here so backtrack to the main intersection then continue uphill to reach the next village.
... Continues on the next page of the guide.
... Continued from Part 1
Brightwall Village
Before crossing the bridge leading to the village, continue along the main road and take the small off-road path leading to a chest. Get back to the main path and head towards the buyable house (you can't afford it for now) then search for a Silver Key under the bridge.
Upon entering the village, its time to interact with the people and also hunt for items. You can also sell some stuff to the pawnbroker near the gate. Behind the pawnbroker is a Demon Wall and a chest beside the canal. Enter the free bedroom in the second floor of the pub. Pick up the rare book: (Famous Kings of History: Markus Ivy) from the stand beside the bed.
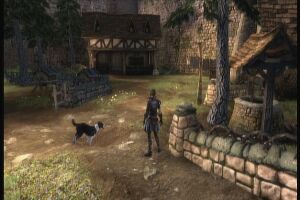
Climb the stairs of the house before the bridge to find a chest on the second floor. Cross the bridge and your dog should find a dig spot near the well.
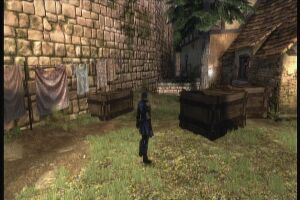
From there, go uphill until you reach the chicken pens. Check the crates behind the shed for a chest, then look for a Silver Key behind a tree and some crates, just outside the shed.
Continue exploring the village. Go to the second floor of the furniture shop to find a chest behind some crates. Behind the shop is a path that leads to a deadend with another chest. Take the stairs by the stalls near the furniture shop then turn to the left to find silver chest. Take note of its location for now.
Note: This chest only requires 10 silver keys which you can collect sooner or later. Prioritize opening this chest first as it contains 50,000 gold. This amount should be enough for you to afford all the available properties/houses in Brightwall and Dweller's Camp. Properties are perfect investments as they automatically and continuously earn money every few minutes or so. It is a sure way of earning gold in the game (the honest way) without spending too much time doing odd jobs like Pie Making, Lute playing or Blacksmithing.
Tip: If you don't want to work your ass off to become a millionaire in the game, don't fret. Use this guide's Easy Money Trick (video and instructions provided) to earn tens of millions of gold in just a few minutes!
To the left side of the library lies another Silver Key, behind the boulders. Now that's all done, you can now enter the Academy.
Brightwall Academy
Don't talk to the Librarian yet. Examine the shelves near the entrance to get a handful of gold each. Check out one of the rooms behind the librarian to find a chest.
After that, talk to librarian and show the guild seal. Follow him to the Reliquary's entrance then place the Guild Seal to open it.
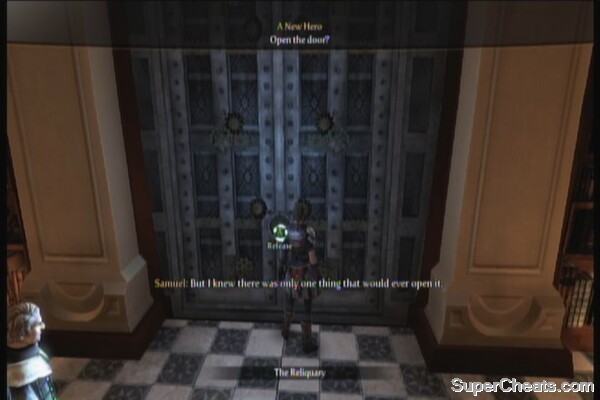
The Reliquary
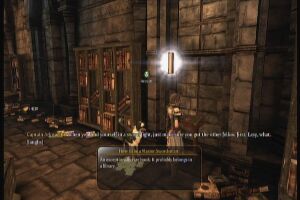
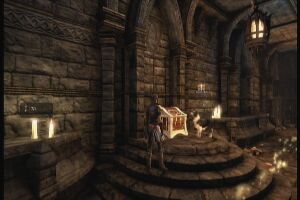
From the entrance, check the room to your right. Examine the bookshelves to gather a few coins. There's a rare book here called How to be a Master Swordsman on the lone stand in the middle of the room. There's also a dig spot in the far end of the room.

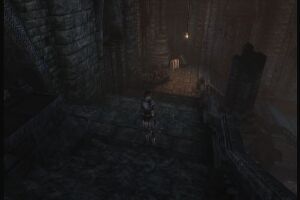
Check out the opposite room to find a silver chest that only requires one Silver Key so make sure to grab what's inside. It contains a book called Dog Training Combat 2. To use it, whistle to the dog and press UP in your DPAD to permanently add its bonuses to the dog. Follow the trail to the next chamber. Check the path to the left first, opposite to the trail's direction to find a chest.
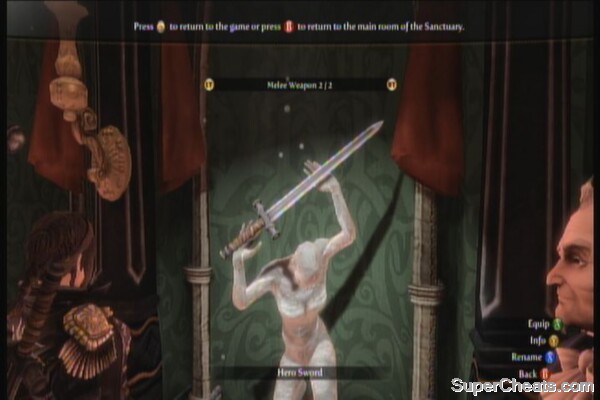
Follow the trail and as you go near the flit switch, Jasper will inform you about the newly opened Armory in the Sanctuary. From here, you can either choose whether you want to carry the Hero Hammer or Hero Sword. Just choose what fits your fighting style then return back to the Reliquary.
Hit the switch with your melee weapon then cross the bridge. Ignore the locked door behind you since it requires an ordinary key that you can acquire from Sidequests.
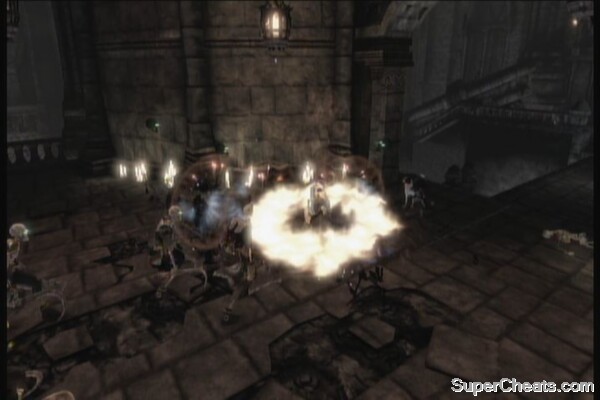
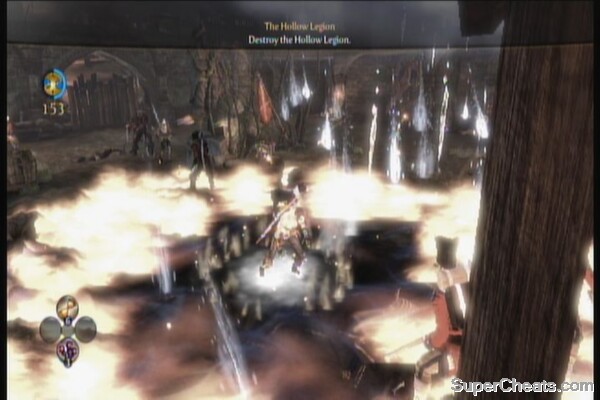
Cross the bridge and a new enemy will appear. Defeat it easily with your melee weapon. More of these Hollow Men will appear and will start to overpower you. You may want to roll away to get distance then use your AoE fire attack. Just charge your magic then wait for the white circle to appear. If timed correctly, you should be able to take out most of the enemies in one blow.
Cross the other bridge and your dog will find another dig spot downstairs. Continue downstairs and open the door. Find another chest along the flight of stairs. There is another (ordinary) locked door at the end of the stairs so just ignore it for now.
Backtrack to the main path and follow it until you reach the objective point. Use your fireball to shoot the switch and to raise a set of stairs. Step on the blue arrow to create a platform. Get off the platform by taking the path to the right, which leads to a lone chest by the ledge.
Stepping on the blue arrows will raise the platform on that direction. You need to defeat Hollow Men that will appear to feed energy to those blue arrows.
Continue making your way to the other chests; just raise the platforms necessary to reach them. After grabbing all the chests, just continue raising platforms until you reach the next floor. Don't mind the other areas for now since you don't have any of accessing them just of yet. Vault to reach the floor below. Jump off the ledge and dive. Follow the trail then dive on the diving spot along the way.
Step on the platform then press and hold B to charge your fireball. Now use your analog stick to point yourself to the door then release the charged fireball there to unlock the door.
Go through the door then defeat the Hollow Men that will appear. Don't continue ahead yet; instead, go down the ramp to your right to find a chest inside the caved in room to the right.
Continue along the path and you'll fight a second wave of Hollow Men. Get rid of them then follow the path again. As it turns to the right, check out the dig spot nearby by going straight north then turn left to find a mound. Now follow the path and you'll encounter a skeleton a short walk after the stairs.
Right after the skeleton are several braziers. All you need to do is to light them all up using your fireball spell to open the door. A Silver Key lies behind it.
Silver Key Reliquary
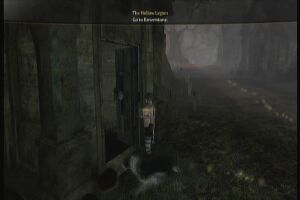
Follow the path again until you exit to the large cavern. Continue running along the path and defeat Hollow Men along the way. There is also a dig spot along the way so just wait for your dog to sniff it out. Continue fighting your way through. You should reach the other end of the path which brings you back to the previous area you're in. As soon as you enter there, your pet should immediate detect a treasure. Just check the path behind the debris and you should find the chest there.
Go past this chest and continue following the stone path until you reach the same floor where you dealt with the raising platforms earlier. Pull the lever in the middle of the large platform and defeat all Hollow Men that will appear. After doing so, a set of stairs will appear northwest of the platforms you've raised a while ago. Take those stairs and it will lead you to a Silver Key.
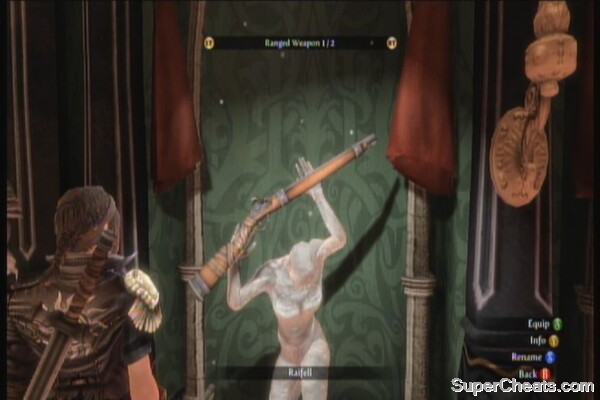
Vault from where you obtained the silver key, then follow the golden path. This will lead you to a yellow switch. Jasper will inform you about the need to use firearms to activate the new switch. Head back to the Sanctuary's Armory. You can select a pistol or a rifle. Like the melee weapons, these evolve over time, as you use them. Make your selection then go back to the field.
To use your firearm, just press Y to fire. It will auto-lock on the nearest target making it more convenient for you to chain attacks as needed. While a fire-arm is equipped, you can zoom its sights to make more accurate shots. Use this to destroy the flit switch. Destroy the additional enemies that will appear.
Follow the path and go up the ramps while clearing the Hollow Men that will appear along the way. When you reach the platform that has a chest on it, a large group of Hollow Men will appear. Fall back to the ramp to create a bottleneck, then let them eat your fireballs and bullets. Grab the 3 Slow Time Potions from the chest then continue up the ramp. Follow the path to find a dig spot behind the platform with the round pillar. Continue up and destroy another large group of hollow men. Destroying all of them will raise the ramp leading to the doorway.
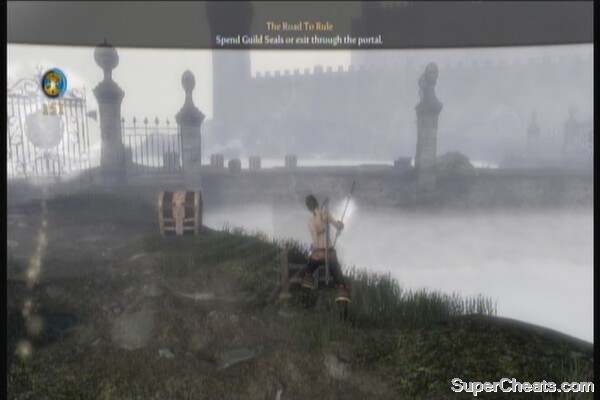
Enter it and you should find the treasure you're looking for. Go behind it first then dig the mound behind it. Grab the treasure afterward and to open the portal leading to the Road to Rule.
You can now spend your collected Guild Seals to purchase upgrades and additional packs. Landlord and Friend Expression Packs are quite cheap so grab them both. The Landlord pack will allow you to buy, sell and decorate houses. Renting out houses is a good way to earn steady income over time. The Expression packs add more options for you when interacting with people. As for the offensive packs, I suggest stick with Fireball for now since there's really no need for you to buy Shock yet. It is recommended to upgrade your magic and ranged levels as you'll be using them often, especially in crowd control. Melee can wait since you probably won't use it often until you get more powerful weapons later on, unless you generally prefer close-quarter combat.
Take note that these skill levels STACK. Which means if you happen to purchase a higher level version of the upgrade, you'll also get the lower versions of it (buying LV3 will also give you LV1 and LV2) so it's up to you what you should prioritize. Once done, exit through the portal.
You'll be back in the Academy afterward. Before leaving, grab some G's from the shelves. If you're too lazy to walk, you can just Fast Travel to Brightwall Village to return to the entrance. If you bought the Landlord Pack earlier, then you should start buying a property or two in Dweller's Camp then fully repair them. The properties there are cheap so you can start your real-estate business early.
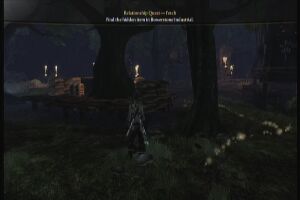
Also, if you have purchased the Expression Pack, then you can have more options to interact with people and further enhance your relationship with them. At this point, you can do Relationship Quests. Just max out the current bar by pressing and holding A while interacting with people (character with good morality) and an NPC will offer you a quest either to deliver something or find something via digging. You can only do this to NPCs with relationship bars. Completing this will make you their friend. I suggest being friends with shop owners as they'll offer you exclusive discounts.
When ready to continue with the story, talk to Walter. Follow him upstairs and grab the mercenary outfit from the drunk merc. You still need to purchase facial hair and a tattoo which costs a total of 1000G and is available from the town stylist. His house is just across the bridge from the town square. You should have more than enough if you followed this guide up to this point. (I have initiated a Mistspeak Valley-wide treasure hunt earlier) If not, there are a few jobs you can do: Lute Hero and Pie Maker.
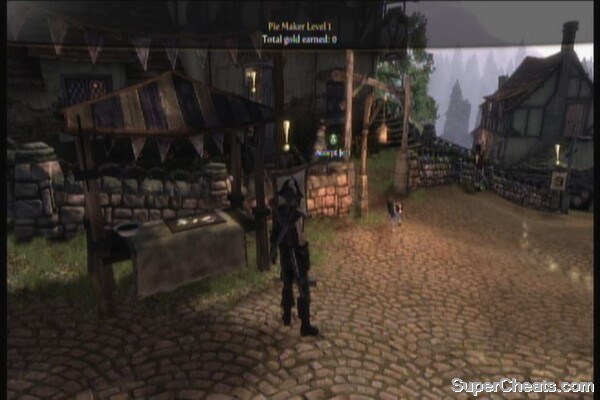
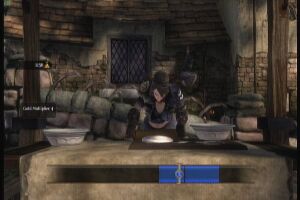
To start these jobs, you need to examine any of the signboards in the middle of the town. Both of these jobs require you to press corresponding buttons (blue for X and green for A) in the correct order as they're shown in the screen. For every perfect combination, the gold multiplier is increased up to 10. The speed also increases as well. Pie Maker is a lot easier since you only need to complete 3 buttons per sequence. Though you can make 60 gold (x10 multiplier) per round compared to Lute Hero's 80, you won't need to do the tedious button combinations Lute Hero requires.

Once you're ready, equip the mercenary garb, tattoo and beard then head to their camp Mistpeak Valley.
Mistpeak Valley
Head to the mercenary camp. With the full disguise on, you should be able to get inside.
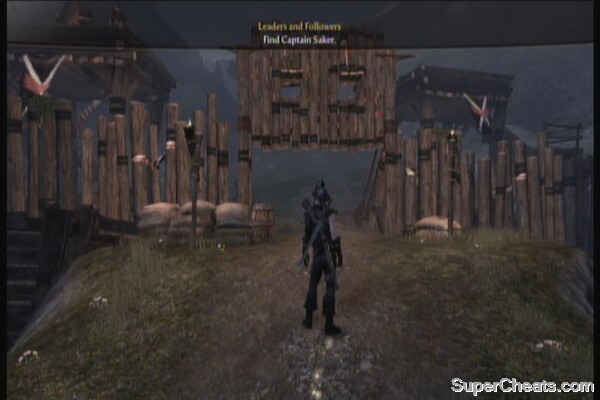
Mercenary Camp
After entering, your dog should be able to find a dig spot nearby. This spot contains Dog Exploration 2. Use it on your pet immediately. This will further enhance your dog's tracking ability. There is also a chest under the watchtower.
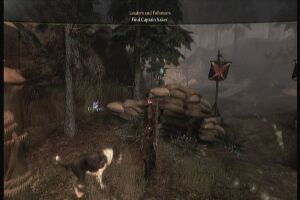
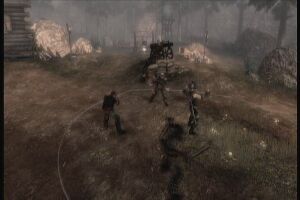
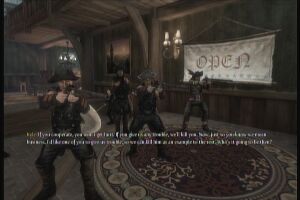
Head to the two guards calling you over then interact with the newbie, Stilts. Even if you're a moral character, you can't blow your cover so choose to fart on the bastard. Take note that these are enemies so you can attack them to get boosts to your Guild Seal. Since they don't suspect you at all, you can just use Flourish attacks behind them or AoE charged fire attack to catch them off guard. Past the two guards are some stairs leading to a path with a dig spot and a treasure chest. Return to the main path and follow the trail.
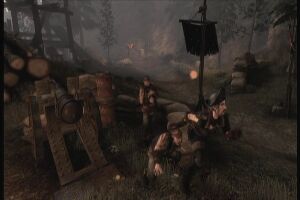
Head past the second gate then check out the back of the cabin to find a chest past the tombstones. Approach the gates and your cover will be blown. The mercenaries will start attacking you so defend yourself and get rid of them. Use your charged magic or just lure them to the gates to create a bottleneck. Remember that you can also use the explosive barrels to get rid of them quickly.
Clear the area past the second gate and climb up the watchtower ahead to find a chest on top of it. Follow the trail and you'll also come across a dig spot by the cannon. Fight more enemies along the way to find another dig spot behind the sandbags.

Continue along the path to the next watchtower. There should another dig spot by the cages. Grab the Silver Key under ramps of the watchtower. The mercs will also release their guard dogs so be careful. Go downstairs and find a chest beside the cabin.
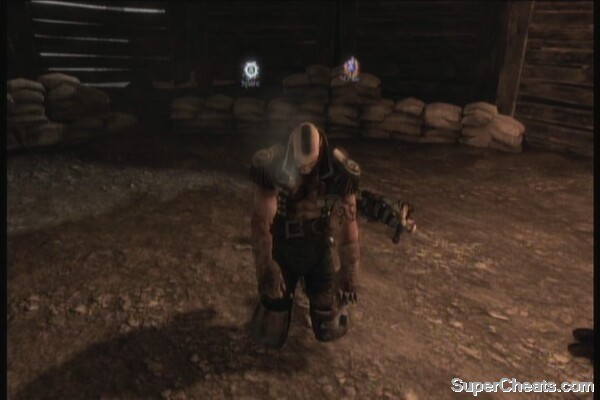
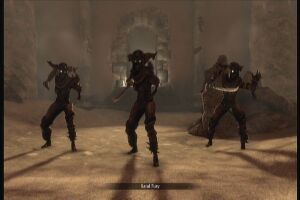
Continue ahead, grab the chest behind the sandbags and dig the spot in front of it. The trail will lead to the arena where you'll fight the boss so save your game before that. 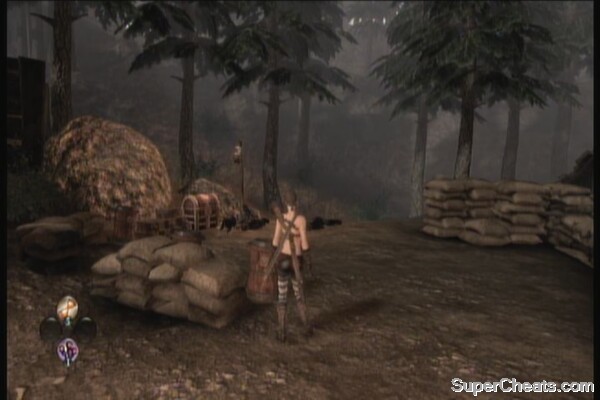
The battle should be pretty manageable; just remember to use your stocked Slow Time potions to charge your fireblast attack then keep firing fireballs or guns to the boss while he's alone. Check out the video to know how to deal with this boss effectively.
Saker
After defeating the boss, you'll have to choose whether to spare him or kill him. If you're playing as the good character, then the obvious choice is to spare him. The Road to Rule will appear afterwards.
Road to Rule
Its time to buy some more upgrades. The Lovers Expression pack should be available now, but since the Family pack also unlocks the former, you may consider getting this instead. As for the offensive upgrades, you may consider sticking with the upgrade of your gun and magic. Once done, exit through the portal
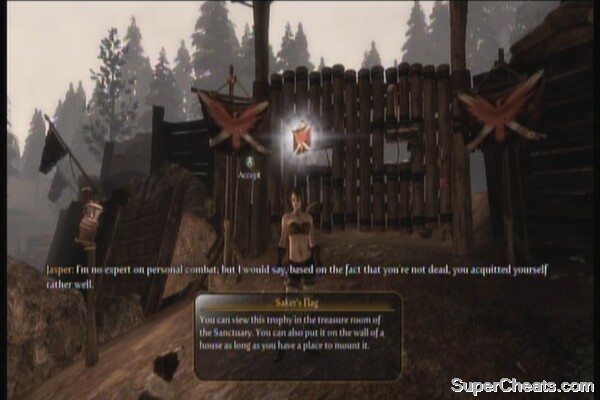
You'll also obtain Saker's Flag which can be viewed from your trophy room and can be hung on the walls of your house. Also, by freeing this area, you should be able to purchase properties here for additional investments. Return to Brightwall.
Brightwall Village
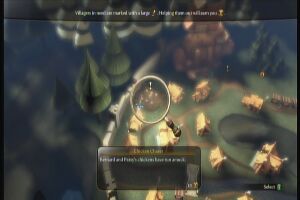
You can do your business here as usual like making best friends out of some villagers. If you're ready, head to the second floor and talk to Walter and Samuel. Go back to the Sanctum when you're ready. Check the map. You should be able to see the villagers in need. Help them to gain followers. Check out the Sidequests Section of this guide for details on how to complete these quests.
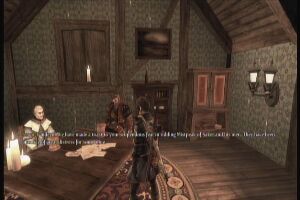
After collecting enough followers, you can immediately talk to Samuel to start the story mission or just continue doing the sidequests. After signing your contract, the next story event takes place in Mistpeak Dwellers Camp. After the scene, you'll be taken to the Road to Rule.
Road to Rule
There is a new spell available for purchase, as well as some packs and other upgrades. If you're saving your Guild Seals, you should have a lot by now so you may want to purchase additional expression packs and the Ice Storm spell as well. The Pie Maker and Lute upgrades can be left for now since you won't possibly be making a living out of them. Exit the portal when you're done.
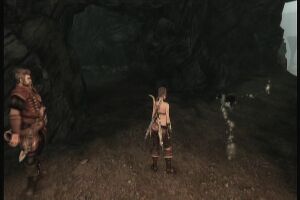
Dweller's Camp
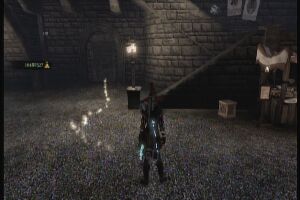
After signing the contract with Sabine and the dwellers, his compound's gate will be open. Go inside to grab the Silver Key as well as finding a dig spot. Head to the next objective when ready.
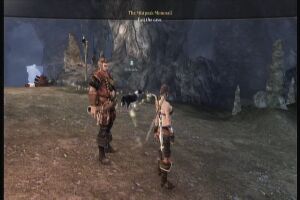
Monorail Station
Interact with the people here if you want some free guild seals then approach Sir Walter. After the scene, wait for him to open the gates then head to the lift and activate it.
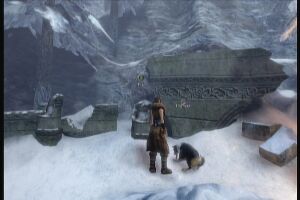
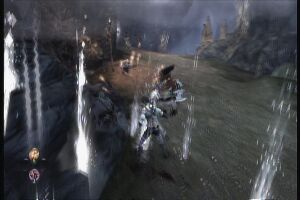
The Hole
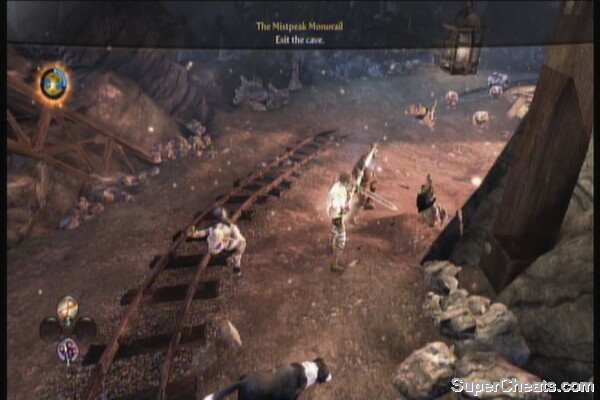
Once down, continue walking until you get introduced to new enemies – the hobbes. If you have purchased and equipped Ice Storm, you'll find it most effective against these fiery enemies.
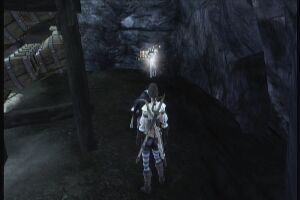
After disposing the enemies, go down the wreckage and you can hear that familiar annoying voice again. Check the metal beam behind the wreck to find a gnome there.
Gnome

Follow the path and watch out for a small path leading to a shallow spring. There's a diving point there. Return to the main path and follow the course until you find a large cavern. Surprisingly, several hobbes are taking up positions. It's a stupid decision for them though, to line up explosive barrels beside them. Target these with your gun and clear the area easily with some fireworks.
Continue following the path until you come across a small hobbe garrison. There'll be a lot of them so make sure to take advantage of the explosive barrels conveniently lined up along the path. Continue past the first gate and you'll encounter a small group of hobbes falling back. Apparently, they're just joining up with their main group that has a few larger brute hobbes. Keep your distance if possible and avoid getting sandwiched between them. Continue along the path and you should find a chest under the sniping platforms you took out earlier. A short walk past that chest is a dig spot.
Continue following the path until you encounter a hobbe summoner and some escorts blocking the wall with a magic barrier. Follow the trail as it turns to the right and lead you to an underground stream. Swim there and dive on the diving spots. Once you've reached dry land, kill the bastards.
After Walter joins you, don't follow the trail yet; instead, take the small path to the right that leads to a chest. Return to the main path and the dog should discover a dig spot to your left, inside the small cavern. Continue to the next area afterward.
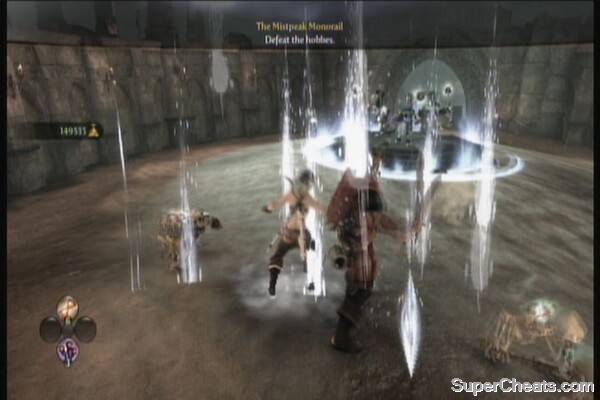
Approach the arena. You should find a dig spot before entering it. The annoying insults of a gnome should be clearly audible as well. Save your game because you'll be in the arena to fight off a hobbe horde. Keep spamming your Ice Storm, use charged attacks when possible. Try to take out the summoners first as they'll keep summoning additional enemies. They will also release projectiles to protect themselves. You may use a Slow Time potion or two to successfully use charge attacks in the middle of the mob. The Road to Rule portal will open after this battle.
Road to Rule
For the available upgrades, the ones you should get would be the Entrepreneur pack, which will allow you to haggle in shops or purchase your own (further enhancing your constant income)and the Spell Weaving upgrade that will allow you to combine spells by wearing two gauntlets. Buying shops and business establishments are a good thing since they don't detoriate, thus, no repair costs. There's also another spell here which is entirely optional unless you have lots of GS to spare. After buying Spell Weaving, return to your Armory and check out how to use it.
The Hole
Once done, you're good to shoot the annoying gnome in the arena.
Gnome
Exit the arena and go downhill to the right to find a dig spot. Cross the bridge to find another dig spot. Across that dig spot is a hidden path leading to a chest with the Technician's Key. This will allow you to access the locked door you came across earlier.
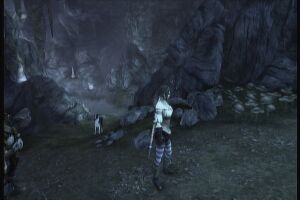
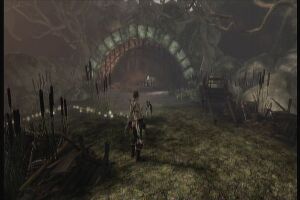
Continue following the path and it should lead you out of the cave and to Mourningwood.
Mourningwood
Follow the path until you find a pond to the right. There's a chest on the shore. Continue following the path, past the bridge and you'll find a fork in the road. The golden trail will turn left. As for you, continue ahead and find a treasure chest behind the rocks. There's also a dig spot in the small area in front of the chest.
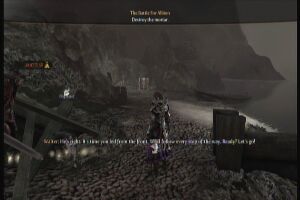
Resume on following the path, and you'll find another chest along the way that contains a new pistol. (Bonesmasher) Continue to the fortification. There's nothing much to do here so just follow Finn upstairs and head to the mortar to practice using it.
Shortly after, you'll need to use that mortar to fend off a hollow men invasion. It has infinite ammo so the only thing you should worry about is the 2.5 second reload time. Keep destroying as many hollow men as you can and this sequence will end automatically.
Mortar
Jump down and head to the rear gate. Take out the enemies that will break through there. Enemies will also start flooding the area so this is the best time to abuse the power of your Spell Weaving to defeat multiple enemies at the shortest span of time.
After repelling the massive wave of hollow men, a dark power will resurrect one of the dead soldiers. You need to take it out. This will serve as a mini-boss. Use the central barricades to your advantage. Run around in circles while using charged attacks. Spell Weaving does wonders here. Just keep running around and avoid getting hit by the boss as it deals considerable damage.
Hollow Boss Fight
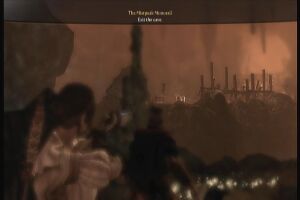
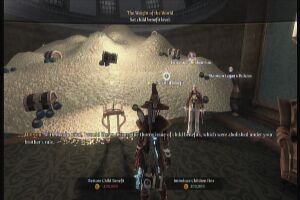
After defeating the boss, promise Major Swift to make him the leader of the Royal Guard. The Road to Rule portal will open once again. You'll also obtain Simmon's Head as your trophy after your business with the Road to Rule.
Road to Rule
As for the upgrades, there are additional expression packs here but they won't do you good if you're building a good character. For now, you can purchase upgrades to your Magic and Ranged primarily. As for Melee, it's up to you if you'll get it now or just later. Exit through the portal after completing your business here.
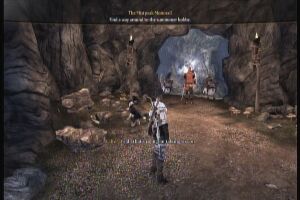
Mourningwood
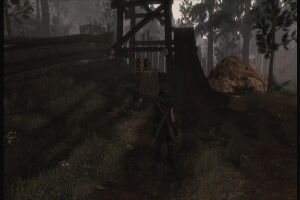
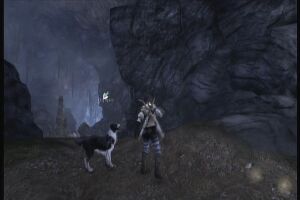
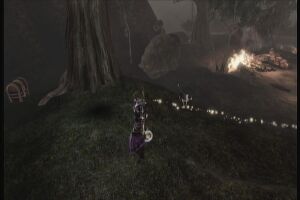
Your next destination is Bowerstone. Before heading there, you should explore the area. Watch the video below to grab the Silver Key and to find another Gnome near the fort. There should be a dig spot near near the gnome, beside the dirt path.
Silver Key and Gnome
There's also a chest hidden in one of the uphill edifices left of the fort. Continue to the graveyard and follow the road. There's another edifice her that you can open. Behind it is a treasure chest. Continue along the path and your dog should be able to sniff another dig spot by the road.
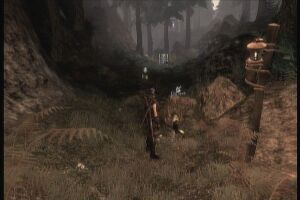
Continue following the path and you'll eventually reach an abandoned war trench. There's a dig spot by the mound near the trench's entrance. Instead of following the golden trail and heading straight there, approach the gate. There's another dig spot that can be spotted nearby.
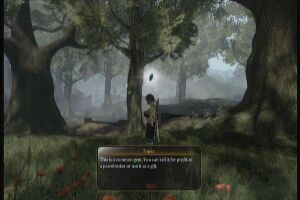
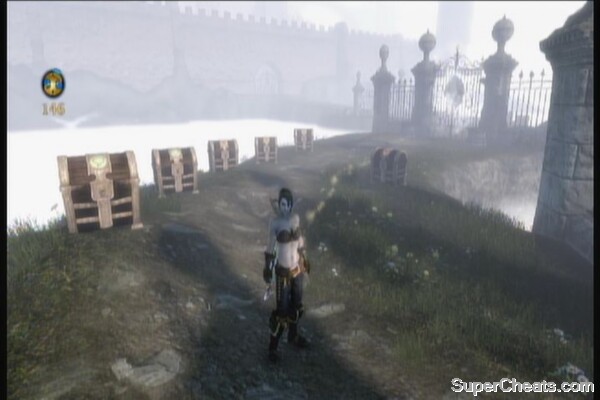
Passing the gate will allow you to unlock the Sunset House location. It is a bonus area that has a couple of Silver Keys, a demon door, a golden door, a gnome and a sidequest. You can visit this area later on if you want; however, I would strongly suggest that you clear this as you'll find some goodies you can keep as early as now. Refer to the Sidequests section for the dedicated walkthrough in Solving the house's mystery.
Mourningwood
Note: You can fast travel to the village already but if you don't mind a short hike, it will be good to explore the area a bit.
From the Sunset House gates, enter the trenches then turn to the right to find a treasure chest. Take the middle path then take the uphill path to the right to find a dig spot.
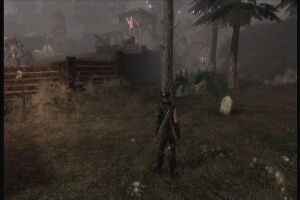
Follow the trail out of the trench. Your dog should detect another dig spot behind the trees and another one behind the boulders. Continue following the trail and you should find a chest behind a tree along the way. Walk a bit from that tree then look out for a Silver Key behind the ruin walls.
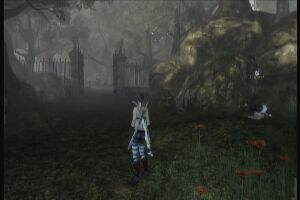
Hug the path to the right and you'll find a dirt road leading to the Demon Door. There's a dig spot there. On the main path past the Demon Door is a chest that should be immediately visible.
Upon reaching the village, check out the large tree with sandbags around it western side of the village. There's a chest in there. Check out the blocked tunnel entrance beside the one leading to Bowstone Industrial to find a chest there.
After getting the chest, there should be a familiar annoying voice resonating nearby. The gnome you're looking for is lying on the rocks.
Gnome
That's it for now so just head to Bowstone Industrial. Just follow the golden trail and it will lead you to Walter. Follow him.
Bowstone Industrial
Note: The houses here deteriorate really fast so they won't be good investments for now as you'll probably be spending more repairing them. Wait until you finish the sidequest called “Kidnapped” to stop this rapid deterioration. Refer to the sidequests section of this guide for the complete walkthrough of that quest.
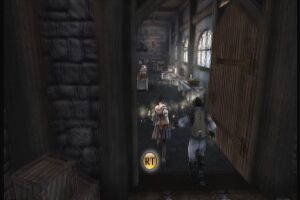
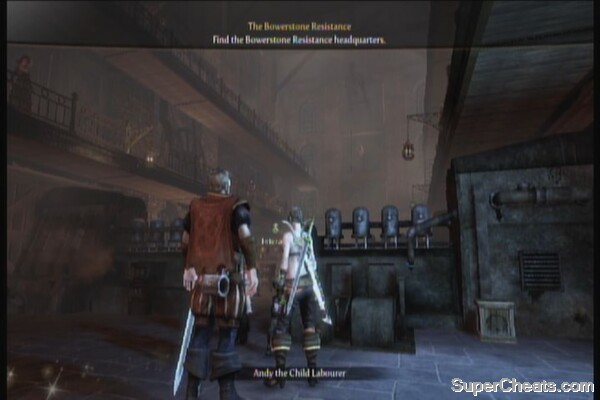
Continue following Walter until you reach the bridge. To the left is a factory with lots of child laborers. There is a Silver Key on the second level of this factory. Steams are blocking the path and you need to activate the levers to remove the steam and access the key. Ignore the taunting of the gnome for now since you can't pull out your weapon yet. Just follow William to trigger the scene.
Gnome
After the scene, you'll can't go anywhere yet without completing the current quest. The factory where the scene took place has a silver chest on the third level but that only contains 5 Slow Time Potions (which you can just buy if you really want them). Just follow the path and you should hear another gnome nearby. Check the video below to know its location. Just shoot the bastard later once you're free.
Gnome
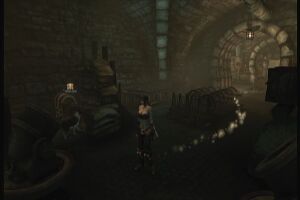
Just follow the trail for now and it will lead you to a door to the Sewers. Enter it to continue with the story.
Sewers (Bowerstone Industrial)
You should immediately see the Silver key to your immediate left but there's no way of accessing it for now since you'll need to use another entrance to reach it. For now, follow the trail to the next chamber. After the scene, check out the door to the right. It is the armory and there's a chest in it.
Just follow the trail to Page's chamber. You can explore the area for some random goodies from shelves if you want. After the conversation, you'll enter the Road to Rule.
Road to Rule
The next set of chests will introduce you to more expressions, a new spell called Force Push and upgrades for your Blacksmith, Pie Making and Lute playing skills. Grab the new expressions if you want. There's really no need to get the new spell, unless you want to complete the whole set of gauntlets and if you're after the Archmage achievement. Exit through the portal after your business.
Return to the Sanctuary to find more quests waiting for you. You should be able to do your normal stuff now. Check out the Sidequests section of this guide for the walkthroughs for the individual sidequests.
Mourningwood
Peace, Love and Homicide (15GS)
Bored to Death (10GS)
>>Gone but Not Forgotten (30GS)
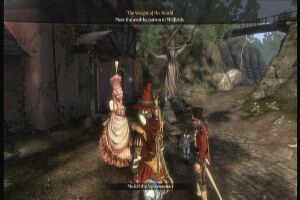
Millfields
Restoration (5GS)
The Final Insult (5GS)
Brightwall
The Pen is Mightier (10GS)
A Marriage of Inconvenience (20GS)
Bowerstone Industrial
Kidnapped (30GS)
Bowerstone Market
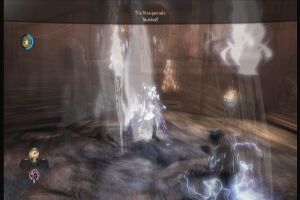
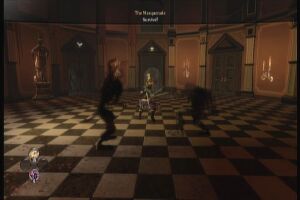
The Game (40GS)
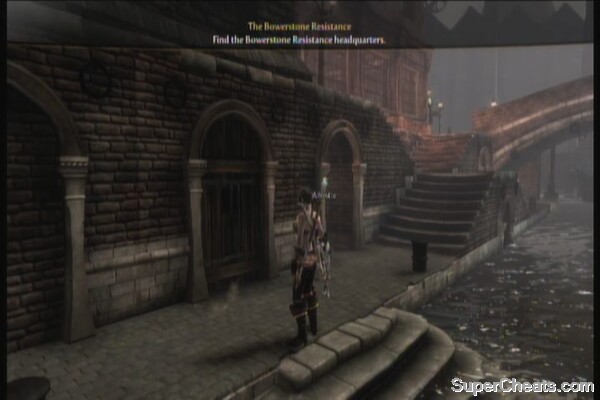
Once you've gathered enough followers by completing a few or all the other available quests, return to the resistance camp and meet up with Page.
Bowerstone Industrial
Meet up with Page and wait until you receive a new dress to use for your disguise. Equip it then check the map. Zoom in Millfields. Reaver's manor is your next destination so fast travel there.
Millfields
Follow the golden trail and head to the manor. Enter it. Keep heading to the next room and watch the scenes. You'll need to play a little game of his by entering the opened chambers and clearing it off enemies. Continue to the first chamber; don't forget to grab the Health Potion from the chest there.
After clearing the hobbe chamber, return to the main chamber and wait for the next chamber to open. Enter the hollow men chamber next. Grab the slow time potion on your way there. Like the other chamber, survive this battle to open the gates. The next chamber will pit you against mercenaries. Take out the gunners first. Be careful of the large mercs that look like Saker since they can deal a lot of damage if you're not careful. As for the next chamber, you'll be fighting Sand Furies. These are fast enemies that can close the distance between you in an instant. Equipping crowd control spells like Shock or Vortex should help in keeping them from surrounding or cornering you.
Remember that you can return to the Sanctuary anytime to change weapons or gauntlets. The last wave will require you to fight more agile enemies. These guys are dangerous up close so you may want to slow down time and use AoE spells then switch to melee when dealing with them up close. Don't hesitate to use health potions whenever you need them. Keep killing the beasts until the scene triggers.
After the battle, promise page and sign the note. You'll get your bonus guild seals for completing the quest and the portal to Road to Rule will now be open.
Road to Rule
You should have enough to purchase LV4 upgrades for your magic, ranged and weapon stats. There's also an Scary Expression Pack here that you can purchase as well but it will work well with an evil character. Grab the upgrades then exit the portal.
There will be more quests available at this time. You may proceed with the main story or just take care of the minor quests first. The choice is up to you.
Mourningwood
In Mourning (5GS)
Bowerstone Industrial
One Ring to Find (5GS)
Bowerstone Market
Reaver's Unmentionables (5GS)
The Man Who Knew Just Enough (5GS)
The Debt (5GS)
Millfields
Animal Liberation (5GS)
Bowerstone Old Quarters
Framed for Murder (5GS)
Bowerstone Industrial
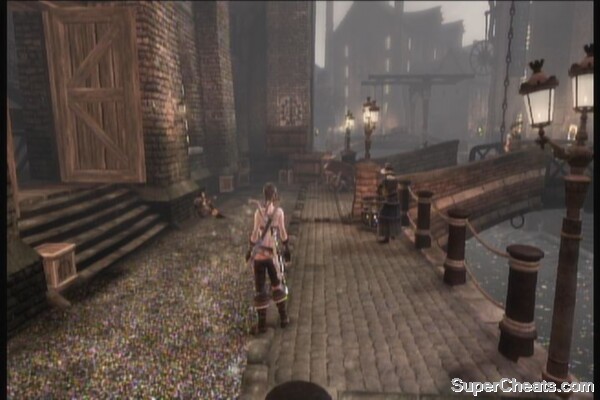
When you're ready, select the marker for the main quest in the castle and watch the scene. Meet up with the resistance fighters next. Head to the headquarters and learn about your next plan. You'll be taking a long trip to the distant land of Aurora next so if you still need to do some stuff here, this is the best time to do so. I suggest stocking up with as many health, summon creatures and slow time potions you can afford. Once you're ready to make your trip, just follow Ben deeper in the sewers.
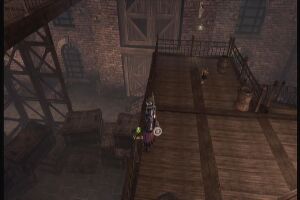
Fight through the docks. There are barrels scattered about so use them to your advantage. Once inside the building, fight your way up the ramps and take out the guards there as well. Grab the chest then vault down.
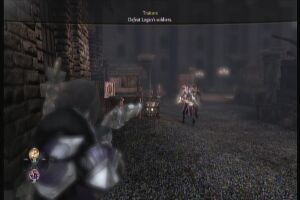
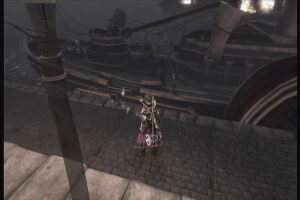
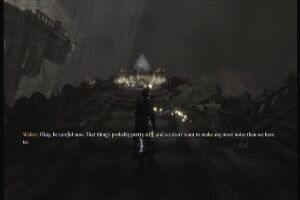
Exit the building and follow the path. After witnessing the fireworks, continue ahead and take out Logan's soldiers. After defeating them, Walter will appear. Board the ship to proceed with the story. Watch the following scenes.
Once you're in control, check the path behind you to find a chest. Then, follow the trail to the cave. Keep following the trail until you reach a large ruins inside.
Keep hugging the wall to the left and you'll find an offshoot path leading to a chest. Continue downstairs then search one of the bodies there for clues. After Walter opens the path, continue to the spiral staircase going down.
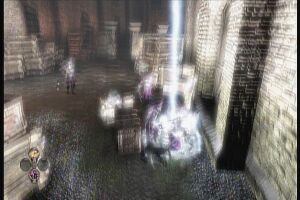
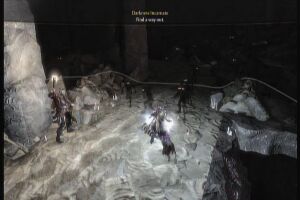
Upon reaching the next area, just stick with Walter as he lights up the way. Jump off the ledge where he leads you then pull the lever on the other side. Follow Walter as he opens the magic barrier. Follow him to the large room where you'll get attacked by shadow creatures. If you also check the Sanctuary now, some of its functions are unusable and its becoming more filthy. Just ignore it for now and continue following Walter.
You'll run into another ambush. These guys should be easy to take down, especially if you have purchased the offensive upgrades when you have the chance before. After clearing the enemies, continue following the path until you reach the large cavern. Vault down and watch the scenes. Walter will be taken away and you need to find him. Fight off the approaching enemies.
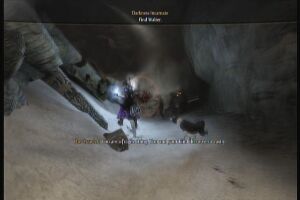
Continue following the path until you reach yet another chamber. Vault down twice. You'll find Walter and you'll need to fight off the Crawler. Check the video below for the actual combat.
Crawler Boss Fight
After defeating the enemies, take Walter's hand and lead him out to the light. Just follow the trail and you'll be out of the damned forsaken place.
Shifting Sands
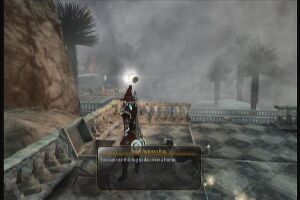
Lead Walter until you reach the platform. You'll have the option to leave him or continue assisting him until you trigger the next scene. Vault from the platform then follow the trail. Keep following it, ignore the other apparitions of Walter until you're forced to hit him. Continue running and watch the following scenes. You'll find yourself in the City of Aurora.

Aurora
After getting back on your feet, check the left side of the altar to find a rare book The Amazing Exploits of Baron Barnaby Beadle. Next, approach the door to open. Follow Kalin and take a tour of the city. Your Sanctuary will return to normal as well. Don't forget to check the silver chest behind the boulder to the right.
Approach Salen, the only NPC you'll find outside at the moment. You can check out the notes left behind by people. There are two chests that you can find here; from the central statue, look for a small alley to the right. There's a chest in front of a note. Just near it is another path leading to a ruined house where a chest can looted inside.
Return to Kalin to continue with the story. Follow her then promise to complete this quest. This will open the portal to Road to Rule.
Road to Rule
The final gate can be opened now. The only chest available is another spell called Blades Spell. Purchase it then exit the portal.
Aurora
Watch the following scene after exiting the Road to Rule. Board the ship for now and watch more scenes.
Bowerstone Old Quarter
Once in control, check the chest and dig spot from behind. There will be heavy mortar fire here so make sure you keep on your toes. Fight your way along the road. After reaching the first curve to the left, check the chest behind the tree.
From that position, keep heading straight to find a Silver Key uphill, near the walls.
After breaching the wall, continue ahead and fight your way through several enemy positions. Continue until you meet up with Sabine. Go through the rubble and continue your advance.
Another gate will be blocking your path; take the alternate route by following the golden trail. Vault down and snipe the enemy soldiers below to assist Page's men. Continue following the path then kill the next bunch of enemy soldiers. Push through, then go through the burning house to meet up with Page herself. There are two chests that can be found here; one is above the stairs and the other one is behind the burning house beside the one where you came from. Just follow the trail for now and it will lead you to the castle gates.
Bowerstone Castle
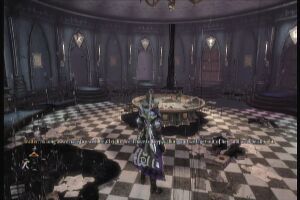
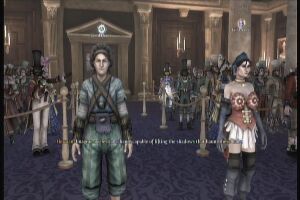
Watch the following scenes. You'll be crowned as the ruler of Albion. Once in control, you'll have to accept your agenda for the day. You can't do anything for now so follow the trail to the throne room. As for your first task, you need to decide Logan's fate. After this, you'll learn more about the impending threat against the kingdom. You'll also be taken to the Road to Rule and speak with Theresa.
Road to Rule
You can open the last three chests here if you have the chance. You'll also have the choice to become a benevolent leader or a tyrant by keeping the promises you made or to break them. The choice is up to you. Exit when ready.
Bowerstone Castle
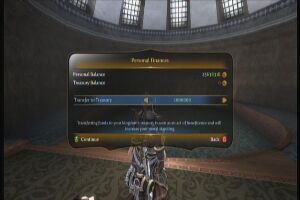
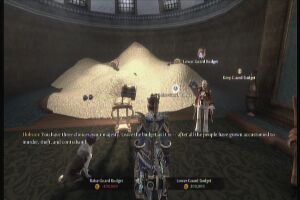
Follow Hobson to the treasury. You'll learn that you need to set the tax rate. You'll be given three choices; set the tax rate lower, higher or retain it. You can also donate your own cash. If you have used this guide's Infinite Money trick, then donating as much gold the kingdom needs should be easy. Take note that the treasury needs 6.5 Million gold to ensure the lowest civilian casualties and to unlock the “Tough Love” achievement. The “good” decisions will leave you short in finances but will greatly have a positive effect on your subjects. Evil decisions will raise considerable amount of gold in your coffers but will adversely affect your people's opinion of you.
Bowerstone Industrial
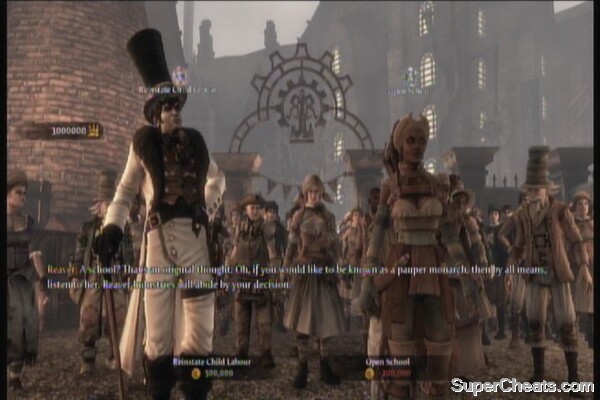
Meet up with Reaver and decide whether to keep your promise or not. The choice will depend heavily on your character's moral standing. Return to the castle once done.
Bowerstone Castle
Head to the throne and decide whether you'll have Old Quarter rebuilt or not. After landing on your decision, you'll be taken back the treasury. Here, you'll need to decide the budget for the guards. You'll also be given your new agenda for today. Head to the throne room next.
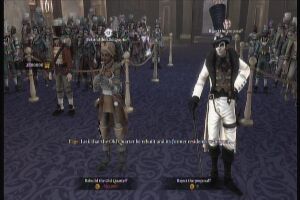
You'll need to decide on the castle's interior design. Next, you'll need to decide on your rule on Aurora.
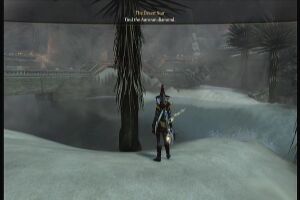
After all that stuff, you'll finally have the time of your own to go on a journey. You may use this time to find the other collectibles in the game. When ready, set the Desert Star as your active quest then fast travel to Aurora.
Aurora
Exit the city and follow the trail to Sandfall Palace, which is a short walk east from the city gates. If you're visiting there for the first time, you'll find two gnomes along the way and a Yellow Auroran Bloom. (See the guide's Gnome collectible section for the exact spots to find the gnomes if you're having problems finding them)
Sandfall Palace
A short walk from the entrance and you'll come across a locked door with a flit switch. If you look up, there's a Ranged orb that you need to shoot three times to activate the switch. Take note that the orb itself has a timer that will return the orb to its starting position if not hit within the set time. Behind the locked door are a chest and a Silver Key.
Silver Key
Continue following the path until you reach the stairs leading to the main area. There is a Red Auroran Bloom on the side of the stairs. 
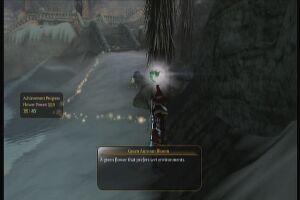
Keep following the path until you reach long walkway across the oasis. Take the stairs left to find a couple of dig spots near the shore and on the small island, as well as a dive spot near it and across the walkway. There is also a Green Auroran Bloom in the corner by the shore.
Cross the walkway and before entering the large door, turn to the right to find a rare book (Dangerous Things: Ladders)
Rare Book
Continue upstairs to the next oasis area. There's a dig spot nearby and the gnome should be visible overhead. You can take the stairs and see the gnome as well. There's a Blue Auroran Bloom as well behind the stairs, by the statue.
Gnome
Flower
Don't take the stairs yet; instead, check the area to the left where a dig spot, a Green Auroran Bloom and a chest are located.
Flower
Take the stairs then follow the walkways until you reach the chamber that contains the diamond itself. To the left of the diamond is another Silver Key.
Silver Key
Grab the Desert Star diamond and fend off the incoming attacks by desert furies. Follow the path to the side of the room then grab flower in the corner. Loot the treasure chest downstairs next. Continue following to the path and you'll be back to the first oasis. There's a chest at the end of the walkway as well.
Dive down and head to the exit.
Bowerstone Castle
Fast travel to Bowerstone Castle then you'll be given a choice to deposit the reward money to your account or to the treasury. The decision you make will depend and affect your moral standing.

After completing the quest, you'll be asked to set the Child Benefits. Again, the decision will depend on your moral standing (and cost). Your next set of appointments will be displayed. Head to the throne room and decide whether you'll be renovating the shelter or turn it into a brothel. The next proposal is the disposal of the city's wastes.
Your next appointment is to meet up with Page. This is a free time to collect other collectibles, especially in the Auroran region. When ready, head to the rebel headquarters in Bowerstone Industrial.
Bowerstone Industrial
Talk to Page to accept the quest. Fast travel to Bowerstone Market next.
Bowerstone Market
Enter the pub and kill the thugs inside. Then you'll get the key to the Hideout. Exit the tavern the cross the bridge. Enter the hideout from the metal door beside the stairs.
Bowerstone Market - Hideout
Kill the enemies in the mess hall, then go downstairs to the open door. Follow the path until you reach the prison cells. Instead of following the golden trail that leads to the objective. Open the door to the right then go downstairs. It will lead you to the Silver Key inside a prison cell.
Silver Key
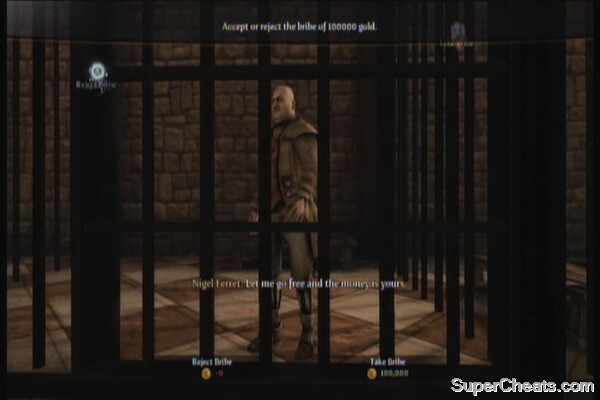
Backtrack up and follow the trail again until you reach the door. You'll need to fight two more thugs. After defeating them, Ferret will attempt to bribe you. Choose whatever you like to complete the quest.
Bowerstone Castle
You'll be asked to decide whether to abolish the alcohol limit or not. Choose what you think is best, and you'll be given your agenda for the day. Head to the throne room and hear the next couple of proposals. When you get your last task for the day, you can head there directly or head to Aurora to deal with the new sidequest available. (Temple's Treasure)
Millfields
Accept the quest from the noblewoman. Follow the trail as it leads you to Silverpines. Read the note on the tree to get more closes.
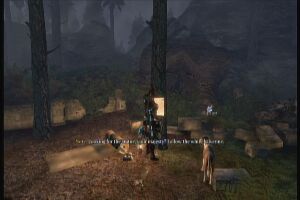
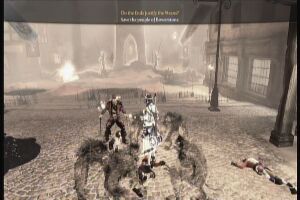
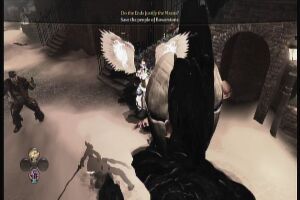
Head to the village to witness a scene. Follow the trail afterward until you reach an altar where you'll meet Connor. He'll try to conspire you whether to destroy the village by destroying the silver nitrate lamps or defend it.
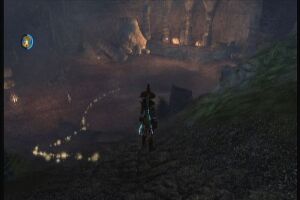
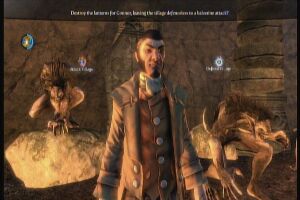
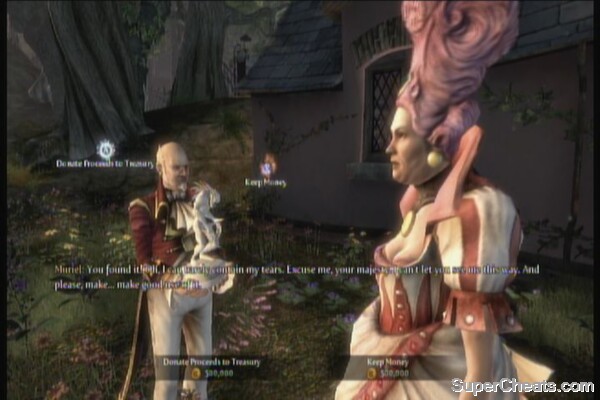
Should you decide to defend it (which is the most reasonable choice after all), defeat the enemies that will attack you then rush to the village and destroy the balverines that are attacking the village. Take out the initial wave and Connor will arrive. He'll transform into a balverine himself and will call out a couple of reinforcements. Deal with them and you'll get the statuette back. Deliver it to the noblewoman in Millfields to complete the quest. You'll then have the option to keep the donate or keep the reward money.
Bowerstone Castle
You'll now start the next set of activities and decision making. The days will go by and you'll be celebrating your kingdom's first anniversary. While Hobson is busy planning for the celebration, the portal to Road to Rule will appear. Enter it to reveal your “true” form. Exit when ready.
This is basically the last battle; you just need to fight your way through several waves of enemies until you reach the entrance of Bowerstone Market where the final battle will take place. The enemies shouldn't be hard to dispose, especially if you have maxed out your offensive stats and even acquired more powerful weapons. The last boss, the Darkness himself is a pushover, especially if you didn't have problems disposing his minions.
Last Battle
Watch the ending scenes and you'll be free to explore the world and collect all the other stuff you wanted to collect. There are also new quests available. Just refer to the Sidequests section for more details on each of them.
Is your treasury almost empty? Are you broke most of the time? Do you want to have more than enough funds to keep your promises to the people and prepare for the climactic final battle at the same time? You don't need to do odd jobs or sell junk to earn money. Just follow the trick below to become the richest monarch in Albion's history – in a few minutes!
This can be done as soon as you have access to Sanctuary. Using this trick will immediately make income mechanics of the game obsolete and may take out the fun/ challenge for some so use this at your own discretion. You need the following:
• Another controller
• A dummy/ secondary locally saved profile
• Internet connection IS NOT necessary. This trick can be done offline, making it more convenient.
• Second player is NOT necessary. It's easier to execute this trick alone.
Easy Money Trick
Steps:
1. While playing as your main hero (P1), turn on the second controller and sign in to your secondary profile (which we'll refer as P2).
2. Once signed in, have P2 press START to join. P1 should get close and press LB to give gifts to P2.
3. Give all your money or items to P2; take note that you can only send 100,000 gold at a time.
4. After sending the gifts, P2 will return to Sanctuary and examine the gifts. He MUST REJECT all of them.
5. After rejecting all the gifts, P2 must SIGN OUT and reload his profile
6. P1 will return to the main game while P2 presses START again to join. Repeat the process as needed.
7. When done, P1 will return to Sanctuary and WITHDRAW the gifts that P2 rejected. Depending on how many times P2 reloaded and rejected them, that's the same amount that will be withdrawn by P1.
Tip: After getting more money, have P1 send A LOT more gifts to P2 so he can reject an even higher amount.
Tip: P2 can immediately sign in after signing out.
Most of the achievements are self explanatory and unlocked automatically as part of the story progress so I will just discuss the ones that need further detail.
The Guild Seal (10 points)
Unleash your heroic potential.
And So It Begins (20 points)
Win the support of the Dwellers.
Swift Justice (20 points)
Win the support of the Swift Brigade.
The Resistance (50 points)
Win the support of Bowerstone.
Distant Friends (20 points)
Win the support of Aurora.
The Ruler of Albion (80 points)
Become the ruler of Albion.
For Albion! (80 points)
This is where you *spoiler* the great, big *spoiler* and then it all *spoiler*.
Save The Princess! (10 points)
Rescue the princess from the evil Baron.
Complete the sidequest entitled “The Game”. Check the Sidequests section for more details.
Ghost Brothers (10 points)
Make sure Max and Sam get home in time for tea.
Complete the sidequest entitled “Gone but Not Forgotten”. Check the Sidequests section for more details.
Tragical-Comical-Historical (10 points)
Help the celebrated thespians Lambert and Pinch put on the world's greatest play.
Complete the sidequest entitled “Missing Play”. Check the Sidequests section for more details.
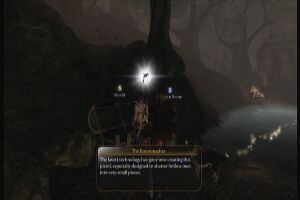
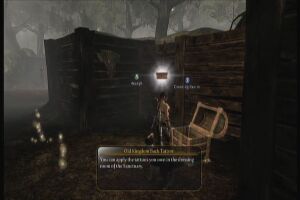
The Dark Sanctum (10 points)
Reinstate an ancient, evil temple.
Complete the sidequest entitled “Leverage”. Check the Sidequests section for more details.
Island Paradise (10 points)
Establish the island of Driftwood.
You need to complete three sidequests (Pest Control, Gift Wood for Driftwood and Island Getaway) which will become available sequentially. If it doesn’t unlock just wait for a few minutes or do something else until Driftwood becomes an attractive, established locale. Check the Sidequests section for more details.
Knight Jumps Chesty (10 points)
Defeat Chesty at his own game.
Solve the mystery of the Sunset House and defeat Chesty. You don’t need to defeat him in the actual game of chest but you just need to survive the waves of live chest pieces he’ll throw at you. Check the Sidequests section for more details.
Coronation Chicken (10 points)
Perform a royal judgement while dressed as a chicken.
Simply wear the costume suit before making a royal judgement. These are available only after you become the ruler of Albion (obviously)
Spellweaver (5 points)
Combine two gauntlets to cast a "woven" spell.
Purchase the Spellweaver upgrade from Road to Rule then equip two kinds of spell gauntlets. The achievement will unlock automatically as soon as you use your spells.
Archmage (20 points)
Cast all 15 possible spell combinations.
There are 6 different gauntlets and you just need to try out all combinations.
Total Warrior (10 points)
Kill enemies with melee, ranged and spell attacks.
Can be acquired as soon as you unlock your ranged weapon as part of the story. Just kill enemies using those three.
Pull! (10 points)
Send an enemy flying into the air and kill him while he's airborne.
Can be easily done by spamming spells and gunshots as long as the enemy gets killed while it’s in mid-air. Hobbes seems to be good target practice for this achievement.
Gunning For Glory (20 points)
Kill 500 enemies using firearms.
If It Bleeds, We Can Kill It (20 points)
Kill 500 enemies using melee weapons.
Wizard's Revenge (20 points)
Kill 500 enemies using magic.
Super Hero (50 points)
Fully upgrade your Melee, Ranged, and Magic abilities on the Road to Rule.
You Can't Bring Me Down (50 points)
Complete Fable III without being knocked out in combat.
Just don’t hesitate to use health potions as there aren’t any enemy capable of performing one-shot kills to your character.
My Weapon's Better Than Yours (25 points)
Complete 3 unique upgrades on one of the legendary weapons found around Albion.
Check the weapon’s requirements and try to unlock those upgrades by performing those tasks. It will be a good idea to do this on a weapon that suits your moral standing and style.
I Am The Keymaster (30 points)
Collect all 50 Silver Keys and 4 Gold Keys.
See the Collectibles section of the guide for the individual location of all 50 keys.
Flower Power (30 points)
Collect all 30 Auroran flowers.
See the Collectibles section of the guide for the individual location of all 30 flowers.
Gnome Invasion (30 points)
Destroy all 50 gnomes.
See the Collectibles section of the guide for the individual location of all 50 gnomes.
Brightwall Book Club (30 points)
Collect all 30 rare books for the Brightwall Academy.
See the Collectibles section of the guide for the individual location of all 30 books.
Digger (15 points)
Dig up 50 items.
We Need Guns, Lots Of Guns (20 points)
Collect all 50 legendary weapons. They won’t all appear in your world, so trade with other Heroes!
This is probably the most time-consuming achievement to unlock in the game. There are only a fixed number of chests that spawn legendary weapons so you’ll really need to trade with other players to get the whole set. As it’s impossible for me to take note of EVERY legendary weapon, you may check this very helpful link for the complete list of legendary weapons and chest locations.
Fashion Victim (20 points)
Collect every item of clothing.
Kindly refer to this link for the complete list of Clothing in the game. You need to have all these outfits in one character to unlock this achievement.
He's a Woman. She's a Man (5 points)
Wear a full set of clothing intended for the opposite sex.
Dye Hippie, Dye (5 points)
Dye each part of an outfit you're wearing a different colour and have long hair.
Hand in Hand (5 points)
Hold hands with someone.
Long Distance Relationship (10 points)
Get married to another Xbox LIVE player.
Cross-Dimensional Conception (10 points)
Have a child with another Xbox LIVE player.
Online Merger (10 points)
Enter into a business partnership with another Xbox LIVE player.
Barrel of Laughs (10 points)
Kill 30 enemies with explosive barrels.
The Hole, Mercenary Camp and Bowerstone Old Quarter (during the revolt) have strategically placed explosive barrels that you can detonate to instantly kill enemy(ies) within its range.
We Can Be Heroes (10 points)
Earn 1,000 gold in henchman wages in another Hero's world.
Kaboom! (10 points)
Score 2000 on the Mourningwood Fort mortar game.
You need to buy the fort first then activate the mortar mini-game by fast traveling there and examining the signboard by the mortar.
Lute Hero Tour (10 points)
Play in each town as a 5 star lute player.
Buy the LV5 Lute upgrade in Road to Rule then visit the towns and play your lute there.
Touched By A Hero (10 points)
Use touch expressions to interact with 20 different people.
Popularity Contest (15 points)
Make 20 Friends.
Remodelling (10 points)
Remodel 5 different houses by changing the furniture.
Magnate Personality (50 points)
Build a property empire worth 2,000,000 gold.
This will build over time; just purchase as much property and businesses as you can.
Crime Spree (10 points)
Get a 15,000 gold bounty placed on your head.
Perfect task for a murderous evil character; just go on a killing spree, do other crimes and resist arrest until you garnered enough bounty.
Henry VIII (10 points)
As ruler of Albion, get married 6 times and kill 2 of your spouses.
Chest Grandmaster (40 points)
Unlock all of the chests on the Road To Rule.
Remember that unlocking higher level chests will also unlock unopened lower level chests of the same upgrade. Basically, unlocking a LV5 Piemaker upgrade will also unlock levels 1 to 4.
Tough Love (10 points)
Save the maximum amount of Albion citizens.
Just meet or exceed the 6.5 million gold requirement in the treasury before the final battle with the Crawler.
Adopt Or Die (5 points)
Adopt a child.
Bowerstone Industrial has the only orphanage in the kingdom and it will open later in the game.
Use our rare books guide to locate all the rare books in the game.
The Amazing Exploits of Baron Barnaby Beadle
It's located inside the temple. Look for it in the right side of the altar. 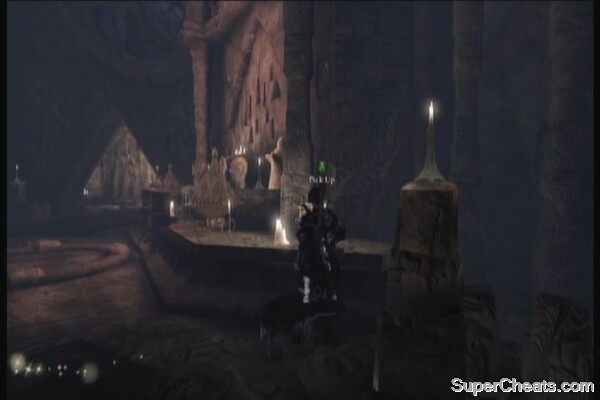
The Very Unsafe Book for Boys, Vol 1: Hang Gliders
The Very Unsafe Book for Boys, Vol 1: Hang Gliders
Alchemy and Immortality
Alchemy and Immortality
Famous Killers: Terence Posture
Famous Killers: Terence Posture
Dangerous Things: Gunpowder
Best done during the sidequest Kidnapped. After gaining access to Cesspools, kill the thugs in the dining hall then grab the rare book on one of the tables there. 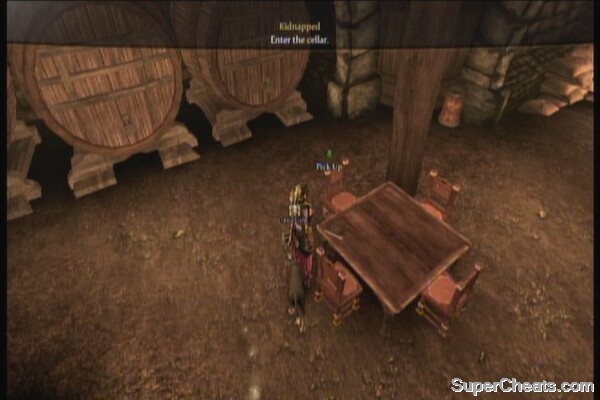
The Grasping Avarice of Kings and their Lackeys
Just purchase the property called The Dollhouse then head to the second floor.
The Grasping Avarice of Kings and their Lackeys
Tyranny of Tyrants
Tyranny of Tyrants
Dangerous Things: Industrial Machinery
Dangerous Things: Industrial Machinery
Invocation of the Watcher Quest
Samuel will ask you to find this book once you donated 10 books. This is a pretty straightforward fetch quest like the first one. Check the Sidequest section of the guide for more details.
Famous Kings of History: Markus Ivy
Second floor of the pub, pick up the rare book from the stand beside the bed.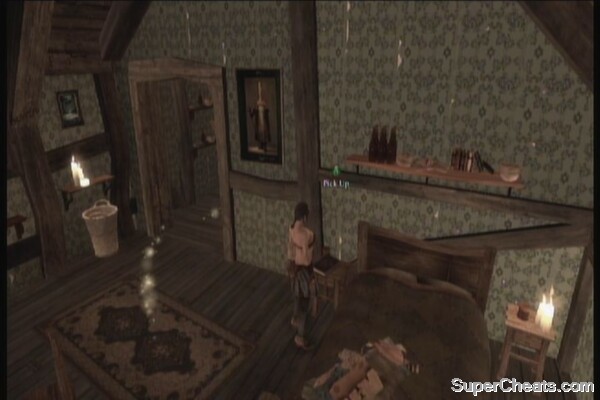
The Very Unsafe Book for Boys, Vol. 2: Ovens
Buy the property called Two-Knock House then go upstairs on its side. The book will be in the balcony.
The Very Unsafe Book for Boys, Vol. 2: Ovens
Attack of the Killer Puffins
Attack of the Killer Puffins
How to be a Master Swordsman
From the entrance, check the room to your right. Examine the bookshelves to gather a few coins. The rare book here called on the lone stand in the middle of the room.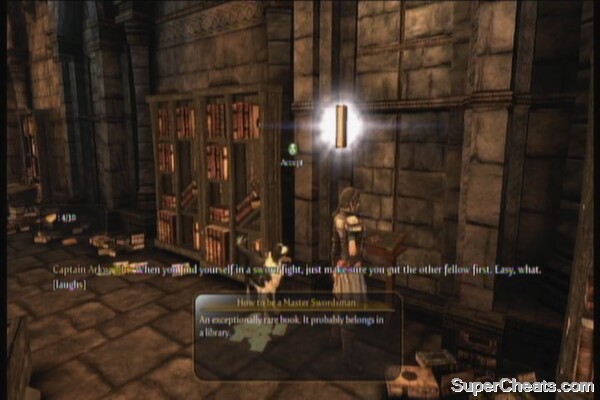
Famous Killer: Carl Tendency
Can be found during the course of the sidequest “Ancient Key”. Refer to the sidequests section of this guide to know the details. It's located in one of the stands inside the secret library. 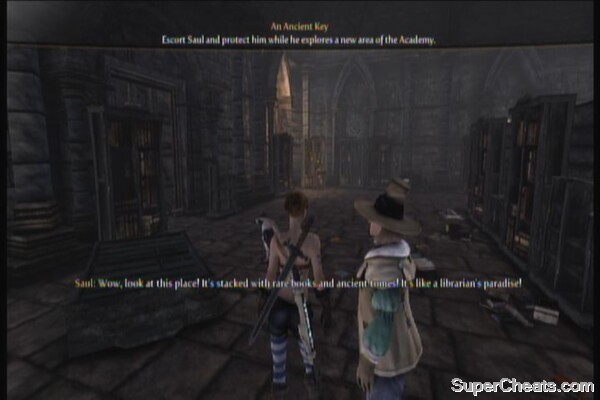
Book of Doom
This is the last book that you need to acquire and Samuel will only ask you to get it after collecting the other 29 books. See the Sidequests section for the complete walkthrough on how to get it.
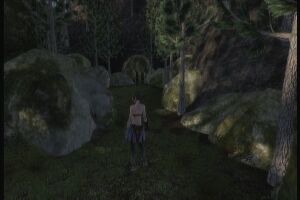
Famous Killers: Xavier Smedley
Find the entrance using this video:
Chillbreath Caverns
However, instead of following the path left that will take you downhill to a larger, frozen waterfall the one with the broken bridge in it continue straight to the right, by the first fork in the path. Based on the screenshot below, you should see a frozen waterfall behind some boulders. Go around it to find the book.

Book of Mysteries quest
After donating 5 books to the Academy, Samuel will send you off to find this rare book. It's located in the same entrance of Chillbreath Cavern see video above. Just continue past where you get the gnome and you should come across a small camp. The trail should lead you where the book is.
Liver of Darkness
Liver of Darkness
Dangerous Things: Stargazing in Remote Areas
Driftwood must be fully developed before you can access this book. Complete the sidequest Giftwood for Driftwood then wait until the mine entrance appears in your map. From the main island, head left until you come across the mine. The book is sitting on top of the crate nearest to the entrance.
Dangerous Things: Stargazing in Remote Areas
Famous Kings of History: King Cedric
Famous Kings of History: King Cedric
Dangerous Things: Lightning
Can be easily acquired during the main quest where you and Page crash Reaver's part, during the sidequest “Reaver's Unmentionables” or just after the story events mentioned. From the entrance, go to the room to the left and look for the book on top of the table near the windows. 
How to be a Crackshot
It's inside the only Monorail station in the area. If you don't know where to locate it, you'll come across it during the story mission where you'll meet Walter early in the game.
AdventureQuest: A Select of Your Own Endeavor
After defeating the wave of hollow men during the sidequest “Bored to Death”, check the opened crypt and search for the book inside.
Pangs of Sunset Quest
Samuel will ask you to find this book once you donated 15 books. This is a pretty straightforward fetch quest like the previous ones. Check the Sidequest section of the guide for more details.
The Mibbs-Spagno Theory of Gluttony
The Mibbs-Spagno Theory of Gluttony
Famous Kings of History: Old King Oswald
Famous Kings of History: Old King Oswald
Dangerous Things: Ladders
Dangerous Things: Ladders
Reaver on Reaver
Samuel will ask you to find this book once you donated 20 books. This is a pretty straightforward fetch quest like the previous ones. Check the Sidequest section of the guide for more details.
The Very Unsafe Book for Boys, Vol. 3: Boxing
The Very Unsafe Book for Boys, Vol. 3: Boxing
The Extraordinary Homunculus of Baron Von Orfen
The Extraordinary Homunculus of Baron Von Orfen
Demon doors are already shown in the map of the area they're in so you can just fast travel to their locations should you want to complete their tasks.
Requirement: Use expressions on another hero.
Reward: Legendary Weapon
You can do this with a friend through Live or do this offline with another character stored locally, preferably on another profile. You need to use all the available (and unique) expressions until the door acknowledges the task completion.
Mistpeak Valley Demon Door
Requirement: Be Albion's ruler
Reward: 1,000,000 Gold
After your coronation, just talk to the door and grab the loot behind it.
Sunset House Demon Door
Requirement: Bring an innocent child with you (biological or adopted)
Reward: 25 GS, 3 Summon Creature Potion
You need to bring a child with you, either adopted or biological. Take note that the child's status must be at least 'Fine'. If he/she's unhappy, you need to improve your relationship by using positive gestures and giving him/her the gift that he/she wanted. The door will automatically recognize the child once you met to fulfillment.
If you want to get the reward from this door immediately, you can just get it on with the opposite sex and create your own little horror. Otherwise, if you prefer adopted kids, you may want to wait until later in the game until the orphanage in Bowerstone Industrial opens.
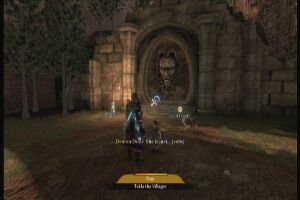

Just bring the kid to the door and watch it get emotional. Wait for it to finish the drama until the door opens. Once inside the other side of the door, just ignore the main tavern where there are several merry skeletons prancing around. Take the stairs on the side of the tavern and find the chest in the room in the second second floor.
Requirements: Wear ugly clothes (pyjamas), have full weight gauge (check Hero Stat in the Sanctuary)
Reward: 40 GS
First appear to the door using pyjamas. If the door doesn't seem to approve of it, get hold of the pyjama set of the opposite sex. The door will then tell you to 'eat like a pig' and gain weight. You need to have a full weight bar in your Hero Status screen before the door recognizes you. To increase weight, you need to hog down all high-fat foods you can find. It seems consuming large amounts of liquor, fish and pies will rapidly increase your weight. Once the conditions are met, talk to the door once more to gain access to the reward behind it.
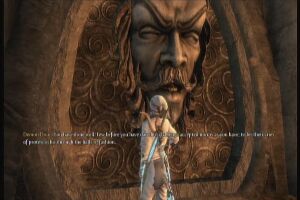
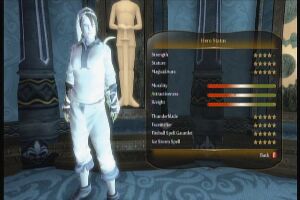
Should you wish to lose the weight you gained for the sake of this quest, consume a large amount of low fat foods such as fruits and vegetables.
Requirement: Full Good or Bad Moral Gauge.
Reward: Legendary Weapon
You need to either be pure good or pure evil. (Your morality meter is either in the farthest left or farthest right. The door will open automatically if you met any of these requirements. The reward will still be the same regardless of your moral standing.
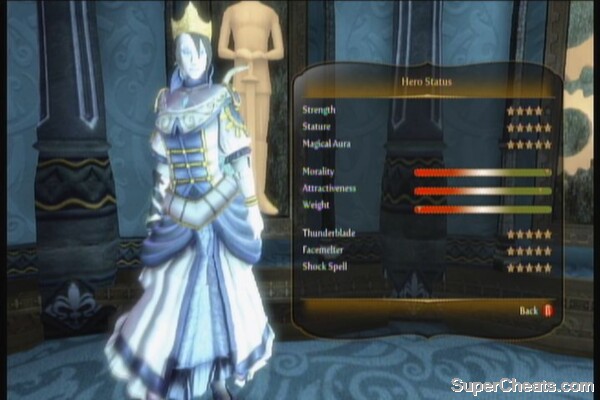
Requirement: Fully maxed out weapon
Reward: Military garment set, Summon Creatures Potion
Check your weapons and use the one that will fit your fighting style and moral standing. That way, you can easily meet its requirements. Fully upgrade it then show it to the door to open it.
Mourningwood Demon Door
Chest Contents: Legendary Weapon
After entering the manor grounds (past the demon door), check the woods to the right to find a path leading to the golden door.
Chest Contents: Legendary Weapon
Follow the downhill path until you find an offshoot path to the left. 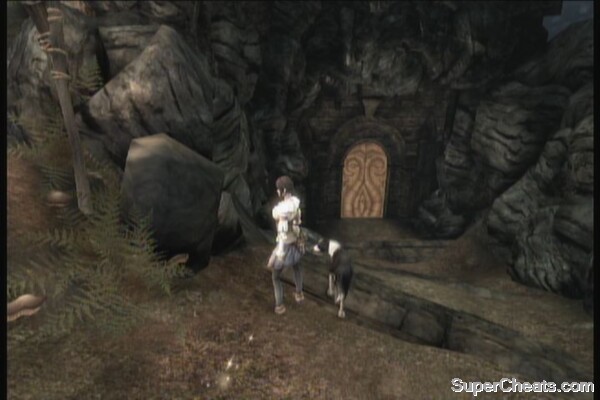
Chest Contents: Guild Seals
Should be immediately visible by going upstairs. It's along the main path. 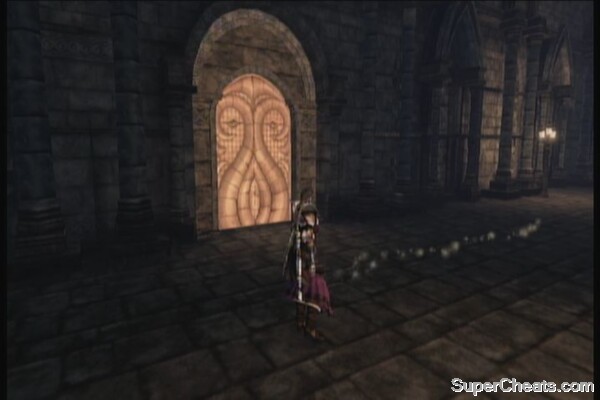
Chest Contents: Highwayman set
Unlike the other doors that you can easily find and loot, the golden door in the reliquary will require you to do some tasks. Be warned though as I'll easily spoil it for you. The reward(s) are just plain Highwayman clothes that you can easily buy from shops. If you have a Gold Key at hand, you may want to use it on the other gold doors that offer better rewards. If you're a completionist and would like to open every golden door there is (there's the same number of gold keys and gold doors in Albion), check video and short guide below.
You need to head to the secret library after completing the An Evil Presence quest. You should see a flit switch there. Shoot it three times, then chase it to the newly opened door before finally hitting it with a melee strike. Vault down, hit it again and defeat all enemies so a new platform will appear. Keep stepping on the blue light on each platform to construct a path to the gold door.
Reliquary Gold Door
Once inside, just take any teleporter as you'll be forced to visit each area to grab all chests. Enjoy the highwayman costume you'll acquire. Was this worth doing? In my opinion, not at all. But then again, we have this strong urge to discover as much stuff as possible, aint it?
Aurora (2)
Aurora Silver Key #1
Aurora Silver Key #2
Bowerstone Castle (2)
Bowerstone Castle Silver Key
(Bowerstone Castle – Catacombs)
In case you missed it the first time around, the Catacombs can be accessed once again once you've become ruler of the land. Just enter the catacombs using the same entrance you've used before during your escape. The Silver Key can be easily acquired when you first escaped the castle. Once you've reached the large part of the cavern, head left but don't cross the bridge ahead. Instead, continue west until you the key by the ruins.
Bowerstone Industrial (4)
By the first bridge nearest to sea (southernmost bridge if you checked the map), there's a factory to the west employing child laborers. The key is located on the second floor which you can access by taking the nearby ramp. You need to control the steam by pulling the levers.
(This key is available only after you become ruler of Albion)
Bowerstone Industrial Silver Key
(Bowerstone Industrail – Cesspools)
Entrance to this sub-area is available after accepting the sidequest, Kidnapped.
Bowerstone Industrial Cesspools Silver Key
(Bowerstone Industrail – Sewers)
There are two entrances to the sewers; one is used by the resistance group and the other one is right under the large crane in front of the factory where you first met Reaver. It's near the orphanage. After entering it, just head to the right to find the silver key by the metal grates.
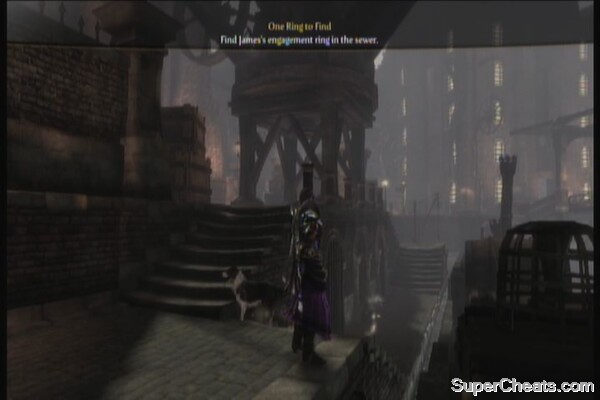
Bowerstone Market (3)
Bowerstone Market Silver Key #1
Bowerstone Market Silver Key #2
Bowerstone Market Silver Key #2 (Hideout)
You need to wait for the sidequest Crime and Punishment to become available so if you can't access the door for now, just let it be.
Bowerstone Old Quarter (2)
This is easily and best acquired during the mission where you and your allies storm the capital and mortar fire is raining down on you. The key is located by the walls uphill, beside the large tree near the gates.
Bowerstone Old Quarter Silver Key
Brightwall Village (5)
There's a lone cottage outside the village. The Key can be found underneath the small bridge leading to it.
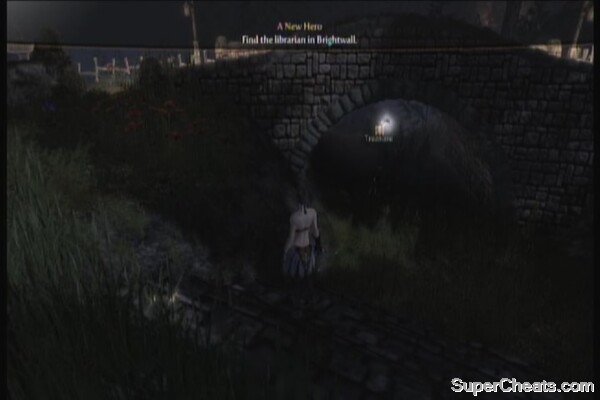
Head to the library and check the boulders to the left. The key should be hiding behind it.
Head to the northern part of the village where the chicken pens are located. Find the key behind the house by the wall, beside a tree and some large crates.
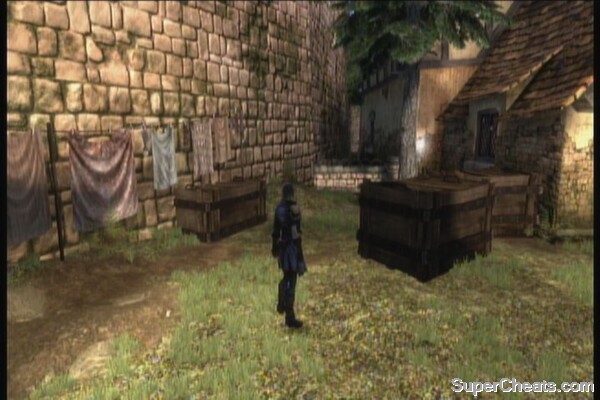
(Brightwall Village - Reliquary)
Brightwall Village - Reliquary Silver Key
After getting the key above, you should come across a large cavern which path circles back to the to the previous area you're in. As soon as you enter there, your pet should immediate detect a treasure. Just check the path behind the debris and you should find the chest there.
Go past this chest and continue following the stone path until you reach the same floor where you dealt with the raising platforms earlier. Pull the lever in the middle of the large platform and defeat all Hollow Men that will appear. After doing so, a set of stairs will appear northwest of the platforms you've raised a while ago. Take those stairs and it will lead you to a Silver Key.
Driftwood (2)
Driftwood Silver Key #1
As for the second silver key, you need to complete the quests Pest Control and Gift Wood for Giftwood (see the sidequests section for the walkthrough) so that the inhabitants of driftwood settles to the offshore islands and the carpenter fixes the bridges. Check the video below to easily locate this key.
Driftwood Silver Key #1
Dweller Camp (1)
After accepting Sabine's promise and gaining the support of his people, the gates to his compound will be open. The key is located there.
Mourningwood (4)
After defending the fort against the hollow men attack using the mortar, you'll be free to explore the area. Check the video below to find the silver key.
Mourningwood Silver and Gold Key
Check the ruins behind the village. The key should be behind one of the wall archs there.
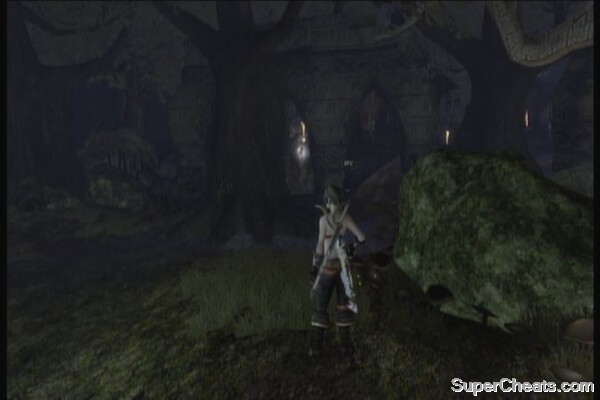
(Mourningwood – The Ossuary)
The door leading to Ossuary becomes available during the quest Gone But Not Forgotten. From the entrance, look to right to find an open crypt. Grab the Silver Key inside. Check the video below to find the second Silver Key in the area as well.
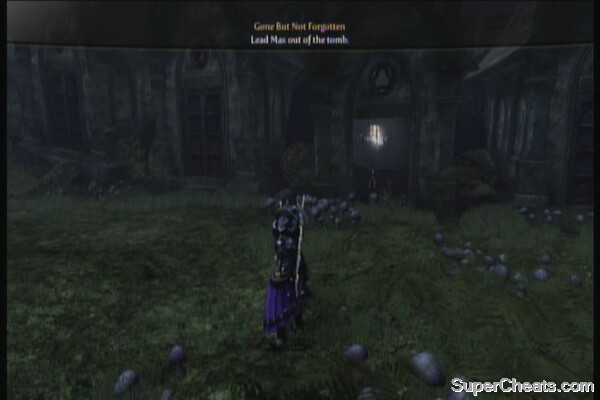
Mourningwood – The Ossuary Silver Key
Millfields (7)
Millfields Silver Key #1
Millfields Silver Key #2
Millfields Silver Key #3
(Millfields – Dankwater Cavern)
The path leading deeper in the cavern is blocked until you finish the quest “Hobnobbing for Hobbes” which will appear later in the game, after completing the main storyline. However, you can't access the deeper parts of the cavern immediately. Exit the cavern and come back later to check if the barricade is gone.
How to find cavern
Millfields – Dankwater Cavern Silver Key #1
Millfields – Dankwater Cavern Silver Key #1
(Millfields – Reaver's House) (1)
Reaver's manor can be freely accessed after you crashed his party along with Page in the main story. It is also best done alongside the sidequest “Reaver's Unmentionables”. Head to Reaver's bedroom and examine the bookshelf in the corner to reveal a hidden passageway leading to Reaver's personal creep chamber. The key is right behind the bed.
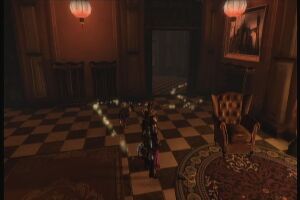
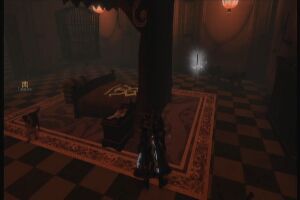
(Millfields – Pepperpot Cave) (1)
How to Find Pepperpot Cave
Just keep following the path and fight off some hobbes. You'll see the key in the end, across the water.
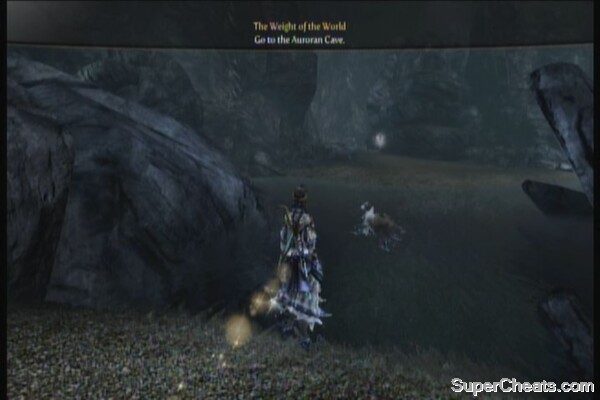
Mistpeak Valley (6)
Head to the lake and check out the stack of logs in one side, along the path leading to the mercenary camp.
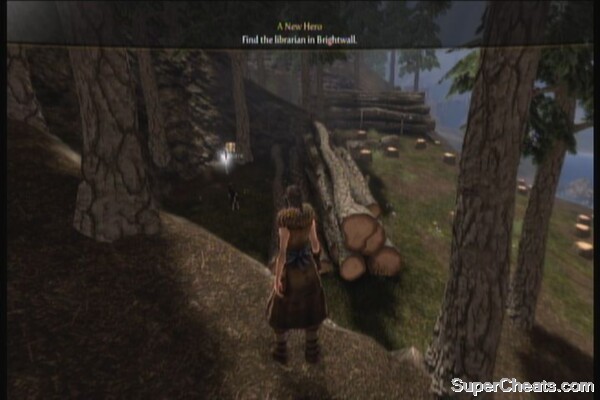
From the Monorail Station, there is another dirt road leading uphill. Follow it and you should find another Silver Key.
Mistpeak Valley - Chillbreath Cavern
Check the video below to find the second entrance of Chillbreath Cavern. Head inside and just follow the straightforward path and you'll find the key at the end.
Mistpeak Valley - Chillbreath Cavern
Mistpeak Valley - The Hole
During your first visit to the hole for the first time, follow the path until you reach a room with several barrels. The silver key is right behind the rack.
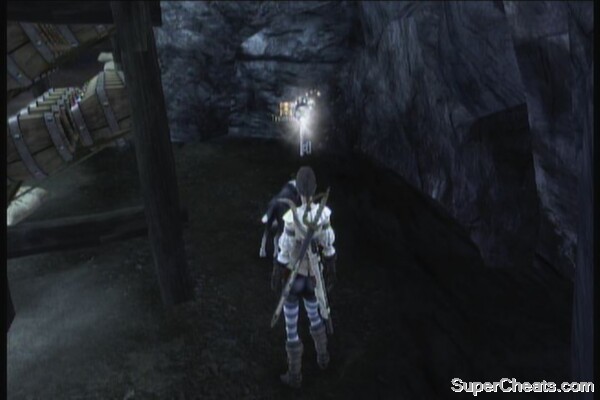
Enter the monorail station in Mistpeak then take the elevator down the hole. Follow the path until you reach the area with several barrels. Unlock the door there using the Technician's Key. Continue following the straightforward path until it leads you to the cliff overlooking the arena where you fought off the army of hobbes earlier. The key is there.
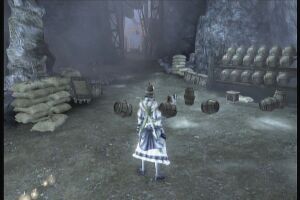
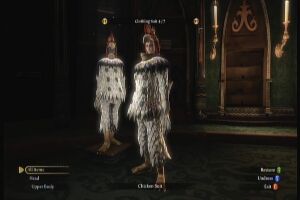
Fast travel to Millfields then enter the monorail station there. Head to the main office, near the monorail tracks and you should find the key beside it.
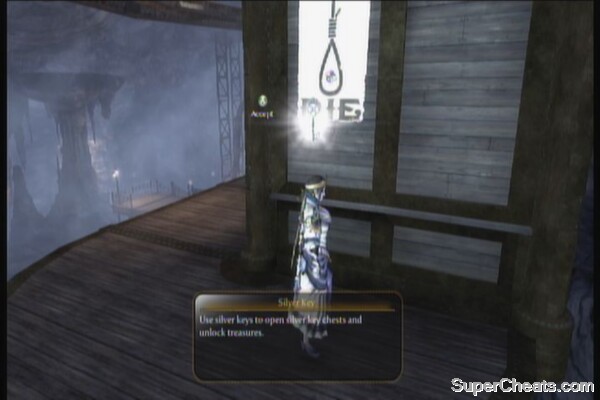
Mercenary Camp (1)
It is found at the base of the watchtower uphill, on the way to Saker's arena. The watchtower has several cages near it as well so its practically hard to miss.
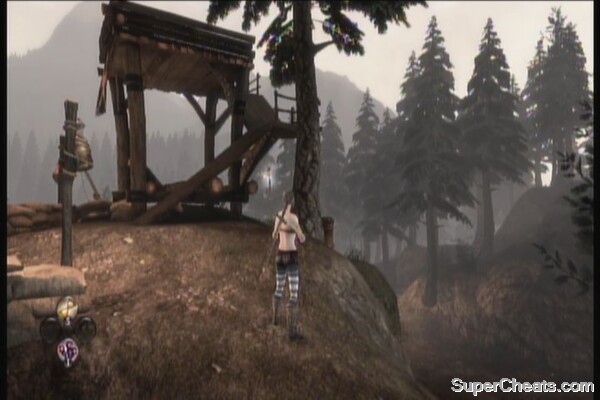
Shifting Sands (5)
Shifting Sands Silver Key #1
Shifting Sands Silver Key #2
Shifting Sands Silver Key #3
Shifting Sands – Sandfall Palace
Shifting Sands – Sandfall Palace Silver Key #1
Shifting Sands – Sandfall Palace Silver Key #2
Silverpines (2)
Silverpines Silver Key
The second key is located inside the mine.
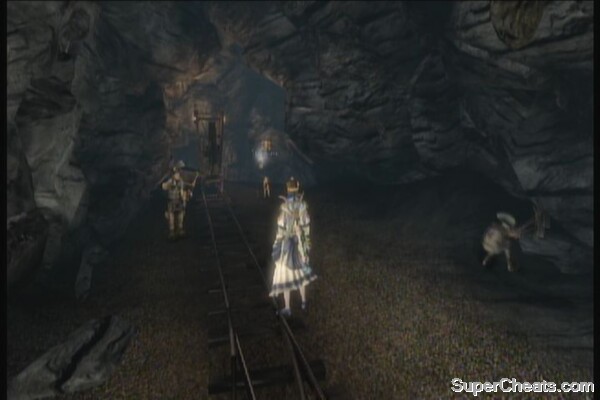
Veiled Path (2)
Veiled Path Silver Key
(Veiled Path – Enigma)
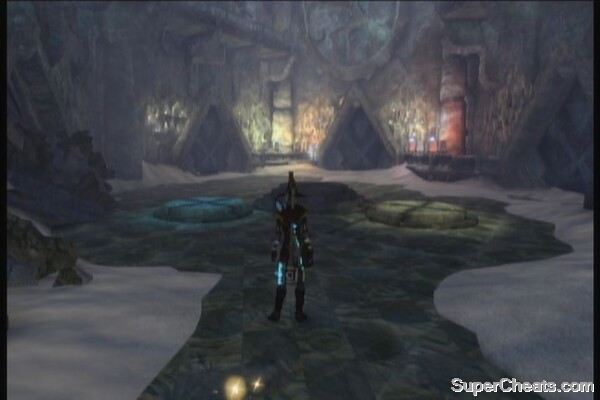
Silver Chest Locations
[Chest Location] (Required keys)
The Reliquary (1)
Dweller Camp (5)
Mistpeak Valley (5)
Bowerstone Industrial (5)
Brightwall Village (10)
Mourningwood (10)
Bowerstone Industrial (10)
Shifting Sands (10)
Chillbreath Cavern (15)
Bowerstone Market (15)
Millfields (20)
Aurora (20)
Bowerstone Castle (50)
You need to complete the following quests to get the Island Paradise achievement and enable you to hunt this gold key:
Pest Control
Gift Wood for Giftwood
Island Getaway
Head to the main settlement and track down the flit switch. You need to hit with several attacks as indicated by its symbol. See the video below for a complete rundown on where to find the orb (flit switch) and the golden key.
Driftwood Gold Key
Enter the 3rd entrance of Chillbreath Caverns by checking this video:
Chillbreath Caverns
Instead of taking the frozen waterfall path, continue taking the rocky path as it leads in the upper part of the cavern. Continue following the path and it will lead you to the exit. The Gold Key is located there.
Enter the Veiled Path by fast traveling to the Shifting Sands then continue to the left. The path is just a straightforward one just continue walking until you reach the long flight of stairs. The Enigma's door is the only one accessible here so its very hard to miss it.
Check the walkthrough below if you're accessing it the first time:
The Enigma (Veiled Path)
Grab the chest near the entrance. There's a ranged flit switch on top of the door so hit it to open the path. To open the individual rooms, you need to light up the unlit braziers so equip your Fireball gauntlet. Head to the next room and grab the Green Aurora Bloom in the middle, then open the room to your immediate left to find a chest inside.
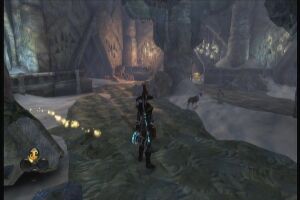
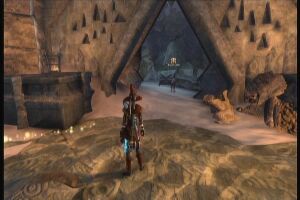
In the next room, clear out the enemies and the doors will open automatically. Grab the Red Aurora in the middle of the room. The gnome is located in the middle door. Exit to the other door that leads to the third room where the Silver Key is located and some colored platforms.
Veiled Path Enigma
Resolve the puzzle by stepping on the following colored platforms:
yellow, blue, yellow, red, blue, red, blue, red
Enigma Platform Solution
Dispose of the two enemies that will appear then follow the long walkway until you reach the Gold Key. That's all there is in this area, so use that key in one of the four golden doors to receive your reward.
You need to purchase the ancient key from the sidequest “The Key to a Greater Key”, which will only become available after you beat the game (defeating the darkness).
Crossroads of Passing
From the stone arch in the Shifting Sands (there will be an outpost underneath if you accepted Kalin's proposal before) continue heading northwest until you find a small path leading to the locked door.
Once inside, you need to step on the lighted portions of the platforms to either raise the next platform or to spawn enemies. Your objective is to reach the two rooms on both sides of the chamber so you can step on the foot switches. These will light up the two braziers on the main door ahead. Behind that door is a Gold Key, the last one if you've been collecting them before you finish the game.
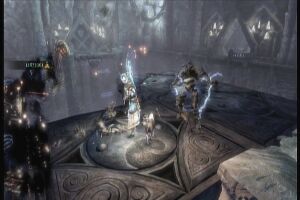
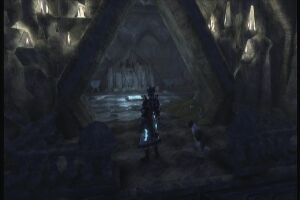

This page contains all the locations of the Gnomes in the game, we've used for most, and for others there are images and/or text descriptions.
Aurora (2)
Gnome - Aurora #1
Gnome - Aurora #2
Bowerstone Castle (3)
Gnome - Bower Castle #1
Gnome - Bower Castle #2
Bowerstone Castle - Catacombs
Gnome - Bower Castle #3
Bowerstone Industrial (5)
Gnome - Bowerstone Industrial #1
Gnome - Bowerstone Industrial #2
Gnome - Bowerstone Industrial #3
Bowerstone Industrial – Sewers
Gnome - Bowerstone Industrial #4 (Sewers)
Bowerstone Industrial – Cesspool
The trapdoor leading to this area can be unlocked during the sidequest “Kidnapped”
Gnome - Bowerstone Industrial #5 (Cesspool)
Bowerstone Market (3)
Gnome - Bowerstone Market #1
Gnome - Bowerstone Market #2
Gnome - Bowerstone Market #3
Bowerstone Old Quarter (2)
Gnome - Bowerstone Old Quarter #1
Gnome - Bowerstone Old Quarter #2
Brightwall Village (5)
After starting the quest Gnomes are Evil, the game will lead you to the first one, inside Brian’s house.
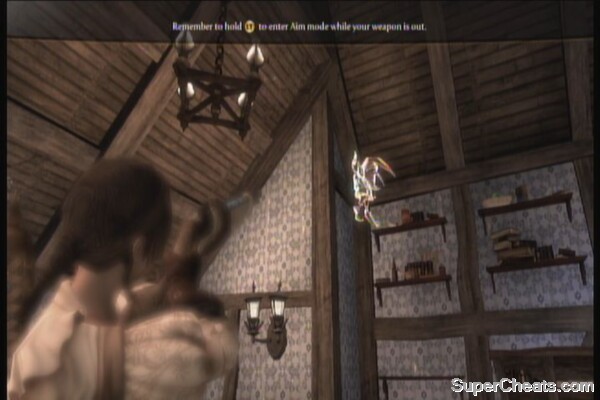
Gnome - Brightwall Village #2
Gnome - Brightwall Village #3
(Brightwall Village - Reliquary)
Gnome - Brightwall Village #4 (Reliquary)
Gnome - Brightwall Village #5 (Reliquary)
Driftwood (2)
How to find Driftwood
Gnome - Driftwood #1
Gnome - Driftwood #2
Dweller's Camp (1)
Gnome - Dweller's Camp
Mercenary Camp (1)
Gnome - Mercenary Camp
Millfields (5)
Gnome - Millfields #1
Gnome - Millfields #2
Gnome - Millfields #3
(Millfields – Dankwater Cavern)
The path leading deeper in the cavern is blocked until you finish the quest “Hobnobbing for Hobbes” which will appear later in the game, after completing the main storyline.
How to find cavern
Gnome - Millfields #4 (Dankwater Cavern)
Gnome - Millfields #5 (Dankwater Cavern)
Mistpeak Valley (7)
Near the Demon Door. Set it as your target then fast travel there.
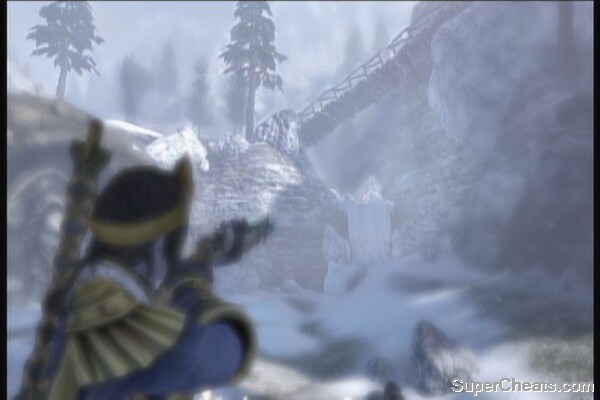
Gnome - Mistpeak Valley #2
Gnome - Mistpeak Valley #3
(Mistpeak - Chillbreath Cavern)
Gnome - Mistpeak Valley #4 (Chillbreath Cavern)
Gnome - Mistpeak Valley #5 (Chillbreath Cavern)
Mistpeak Valley – The Hole
Gnome - Mistpeak Valley #6 (The Hole)
Gnome - Mistpeak Valley #7 (The Hole)
Mourningwood (3)
Gnome - Mourningwood #1
Gnome - Mourningwood #2
Mourningwood – Ossuary
Accessible only during the sidequest 'Gone But Not Forgotten'. See the sidequests section for details.
Gnome - Mourningwood #3 (Ossuary)
Shifting Sands (4)
Gnome - Shifting Sands #1
Gnome - Shifting Sands #2
Gnome - Shifting Sands #3
Shifting Sands - Sandfall Palace
Gnome - Shifting Sands #4 (Sandfall Palace)
Silverpines (2)
He's hanging by the Silverpine Mine entrance. It's really hard to miss.
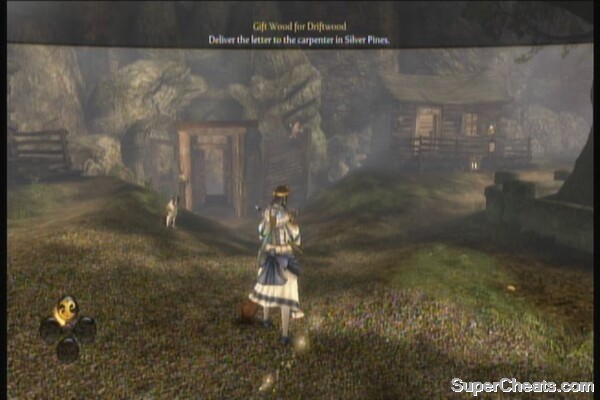
Gnome - Silverpines #1
Gnome - Silverpines #2
Sunset House (1)
Gnome - Sunset House
Veiled Path (4)
To access this area, fast travel to Shifting Sands then run to the left. As soon as you enter the area, you’ll hear the gnome. Just look to your right, he's up the wall.

Gnome - Veiled Path #1
Gnome - Veiled Path #2
Gnome - Veiled Path #3
(Veiled Path – The Enigma)
Gnome - Veiled Path #4 (The Enigma)
This section is recorded to guide players how to find individual flowers, just in case they're missing a few. The videos will mostly feature a recognizable landmark of the area as a starting point so players can easily track and locate the flowers.
These flowers are needed for the sidequest 'Temple's Treasure' though you don't need to have the quest active to be able to collect them. Finding all flowers will unlock the Flower Power achievement.
Green Auroran Bloom 5/5
(Sandfall Palace)
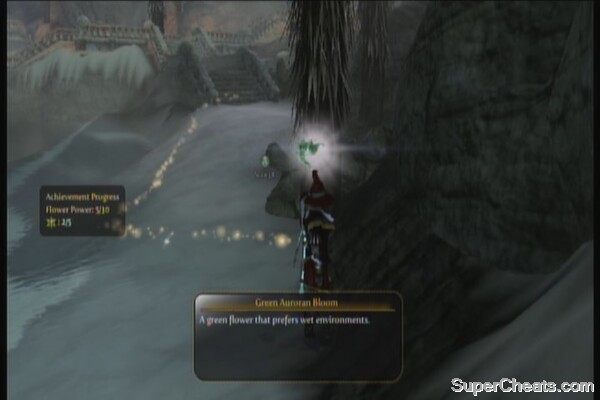
Flowers - Green Auroran Bloom #1
Before crossing the long, straight walkway in the first oasis room, take the stairs to the left. The flower is blooming near the shore.
Flowers - Green Auroran Bloom #3
Flowers - Green Auroran Bloom #4
(Veiled Path - Enigma)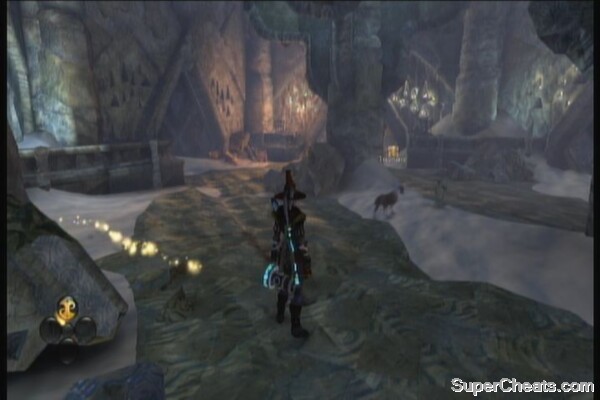
Flowers - Green Auroran Bloom #5
Immediately visible as it is sprouted in the middle of the room.
Red Auroran Bloom 5/5
(Sandfall Palace)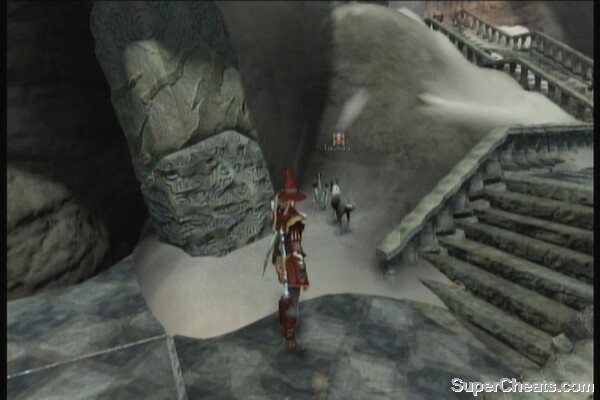
Flowers - Red Auroran Bloom #1
Found near the stairs of the first oasis room, the set of stairs near the palace’s entrance
(Sandfall Palace)

Flowers - Red Auroran Bloom #2
After getting the Desert Star diamond, check the corner of the next hallway that will lead you to the exit.
Flowers - Red Auroran Bloom #3 (Veiled Path)
Flowers - Red Auroran Bloom #4 (Veiled Path)
(Veiled Path - Enigma)
Flowers - Red Auroran Bloom #5]
Immediately visible as it is sprouted in the middle of the room.
Yellow Auroran Bloom 5/5
Flowers - Yellow Auroran Bloom #1
Flowers - Yellow Auroran Bloom #2
Flowers - Yellow Auroran Bloom #3 (Veiled Path)
Flowers - Yellow Auroran Bloom #4 (Veiled Path)
Flowers - Yellow Auroran Bloom #5 (Aurora City)
Blue Auroran Bloom 5/5
(Aurora City – Docks)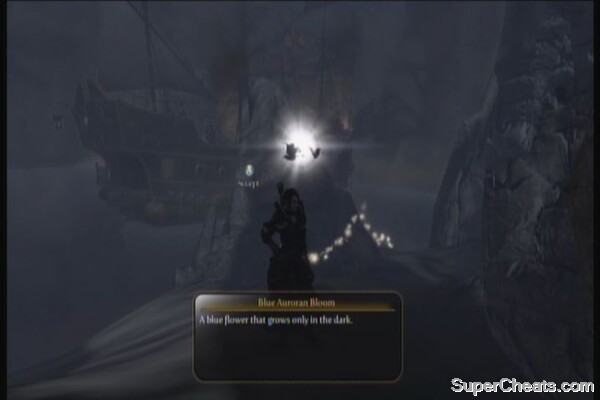
Flowers - Blue Auroran Bloom #1
Head to the docks then swim to the other shore, to the left of the ship.
Flowers - Blue Auroran Bloom #2 (Sandfall)
(Veiled Path - Entrance)
Flowers - Blue Auroran Bloom #3 (Veiled Path - Entrance)
Immediately visible after near the entrance of the Veiled path
Flowers - Blue Auroran Bloom #4 (Veiled Path)
Flowers - Blue Auroran Bloom #5 (Shifting Sands)
Purple Auroran Bloom 5/5
Purple Auroran Bloom #1 (Shifting Sands)
Purple Auroran Bloom #2 (Shifting Sands)
Purple Auroran Bloom #3 (Veiled Path)
Purple Auroran Bloom #4 (Veiled Path)
Purple Auroran Bloom #5 (Aurora City)
Orange Auroran Bloom 5/5
Orange Auroran Bloom #1 (Veiled Path)
Orange Auroran Bloom #2 (Veiled Path)
Orange Auroran Bloom #3 (Aurora City)
Orange Auroran Bloom #4 (Shifting Sands)
Orange Auroran Bloom #5 (Shifting Sands)
(Brightwall Village)
Equip the Chicken Suit and find the chickens. There are three groups of chickens. Check out the video below to find them and to learn how to lure them back to their pens.
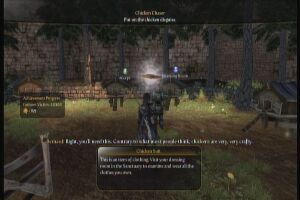
Chicken Chaser
Guild Seals: 10
Trophy: Chicken Trophy
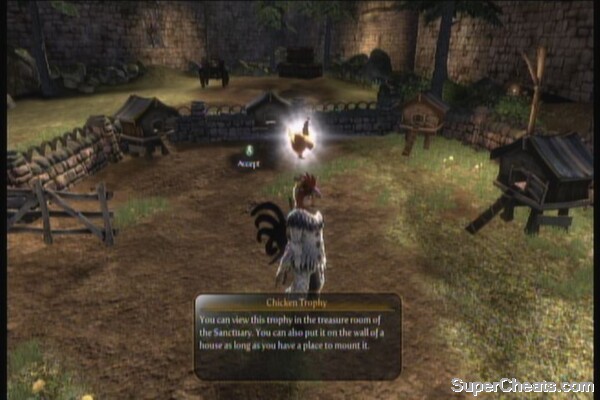
(Brightwall Village)
Check the map to find the quest giver on the other side of the bridge. Talk to her fast travel to Mistpeak Valley. Make the quest active and follow the trail to Chillbreath Cavern. You should find the kid at the end of the cave near the platform with stuff toys. Just hold the kid's hand then escort her out of the cavern. More wolves will attack you along the way; just repel them and continue escorting the kid back to her mom to complete the quest.
Missing Child

Guild Seals: 5
(Brightwall Village)
Accept the quest from the guys in front of the academy. Enter it and continue following the golden trail. Read the book and you'll be transported in the world inside it.
You'll find Ransom Locke inside and to escape, you need to act out the scenes in the book. Start off by donning the costume in the middle.
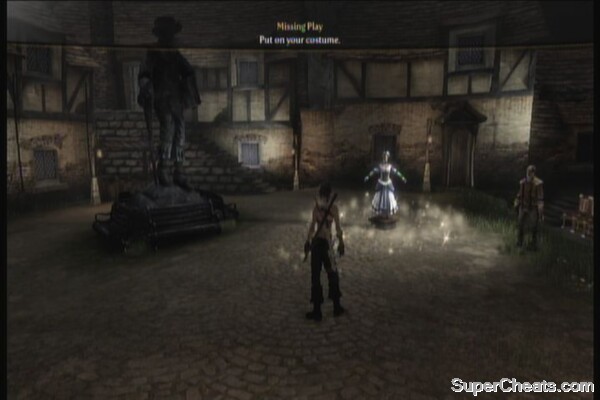
For this scene, choose to Declare Love. For the next scene, don the Chicken Costume and choose to Tickle. For the final scene, equip Titus' costume then deal with the ghostly enemies. Use your Fireball spell to destroy two waves of ghostly mercenaries. After defeating them all, you'll receive the Ham Sandwich and you'll be returned to reality.
Missing Play
Hand over the Missing Play to the quest givers to complete the quest.
Guild Seals: 20
Trophy: The complete works of Philip Morley
Achievement: Tragical-Comical-Historical
(Dweller Camp)
Talk to Ms. Biggins in Dweller's Camp to get the package. Return to Brightwall Academy and deliver it to Saul.
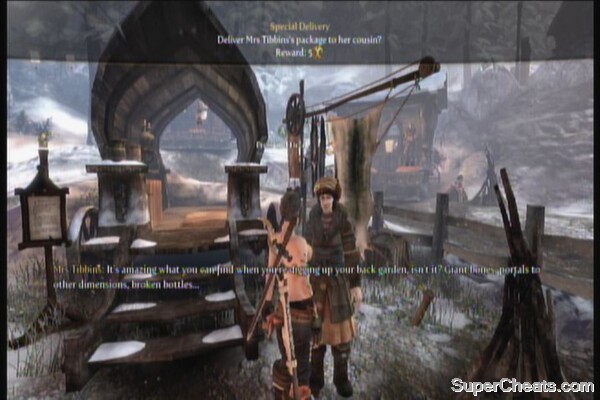
Guild Seals: 5
(Mistpeak Valley)
Talk to Billy standing near the monorail station. Escort him to Brightwall Village. You need to take him by hand or else the oaf won't follow. Several bandits will ambush you along the way; just dispose of them as necessary. Bring him to Brightwall Village's square to complete the quest.
Guild Seals: 5
(Brightwall Village)
Use the map to accept this quest and fast travel to Brian's location. He should be in the gnome shrine of some sort down the stairs to the side of the library. Fast travel to Mistpeak Valley and follow the trail as it leads to the package. You'll find bandits looting the coach. Dispose of them then grab the gargoyle statue. Deliver it back to Brian to complete the quest.
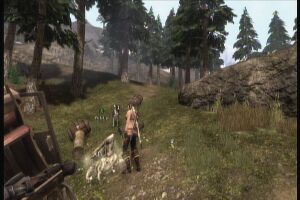
Guild Seals: 10
(Brightwall Village)
Available after completing Special Delivery
Talk to Saul inside the Academy. Escort him inside the Reliquary. Get the key from him and enter it. Like other escort missions, you need to take him by hand and release it when dealing with enemies. Continue following the trail until you reach the previously locked room. The mission is completed after successfully bringing him there.
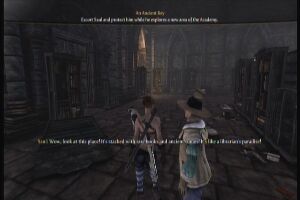
Check out the rare book on a lone stand in the corner of the room. There is also another locked chest here so just take note of its location for now.
Guild Seals: 5
Rare Book: Famous Killer: Carl Tendency
(Brightwall Village)
Available after completing Ancient Key
Talk to Saul inside the Academy. This time you have to go to the Reliquary alone. Just head to the secret library section you have opened earlier then open the locked door there using the key Saul provided. This task is simple; just follow the trail and destroy all enemies. Don't forget to examine all the bookshelves as they may contain random loot, as well as a handful of gold each. The only chest in the area has a Rare Emerald.
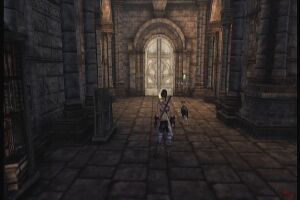
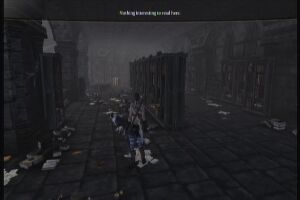
Guild Seals: 5
(Brightwall Village)
Available after completing Gnomes are Great
Speak to Brian in his gnome shrine and learn that his gnomes just ran away. You have to find all 50 of them since they'll be part of the game's collectibles but for now, you need to find one. Follow the trail as it leads you to Brian's house. Bring out your gun and zoom in. When you're hunting for the other gnomes, just listen to their annoying voices and verbal abuses. Shoot him down then open the chest. Return to Brian. You won't be able to get 40 GS that was promised until you find all the gnomes. You won't be able to gather all gnomes at this point of the game; just refer to this guide's collectible section to find the all.
After finding them all (And getting the Gnome Invasion achievement) travel back to Brightwall and talk to Brian. Follow him to his shrine then shoot the gargoyle when you're prompted to.
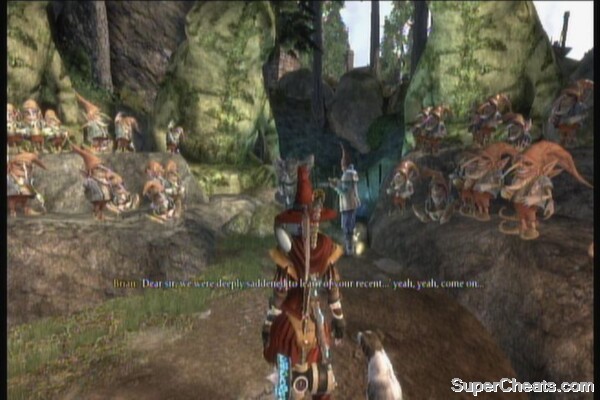
Guild Seals: 40
Reward: Various items and Gnomewrecker pistol.
From the manor's entrance, head to the right until you find a dirt path. Follow this and you'll find a golden door. Go uphill; there's a Silver Key behind the tree a bit north of the golden door. Further north of the Silver Key you'll find a pond. The area's only gnome is on the rocks.
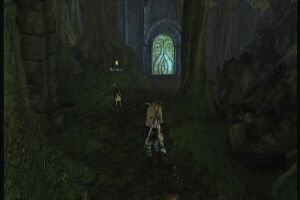
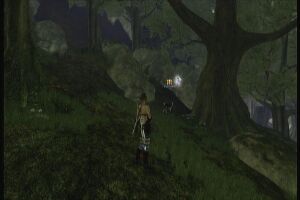
Sunset House
At night the destroyed house is fixed again. Head to the pavilion and discover that gazebo is glowing blue. You can now interact with the statues there. You need to press A on each statue until they resemble their solid poses during the day. To make it easier, you need to change their poses 4 times. If done correctly the phantom house will materialize so you can enter it.
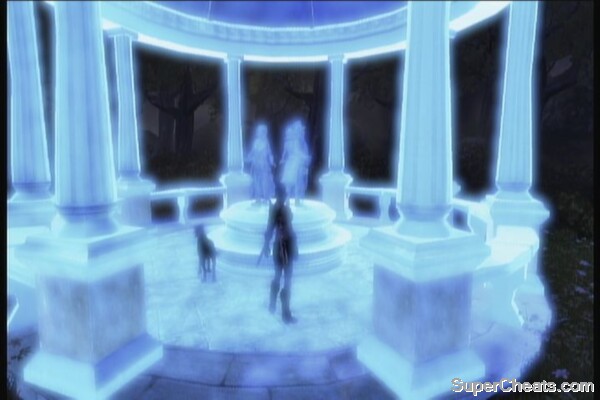
Sunset House Statue Puzzle
Warning: You won't be able to leave this house until you complete the quest.
Enter the house. You'll find a hanging skeleton there. Examine the note beside it to learn more about the curse. Ignore the warning and follow the trail. Sleep on the bed and you'll be taken in another dimension with a large chessboard on it. Talk to the chest in the middle of the board named Chesty. Start a game of chest with him.
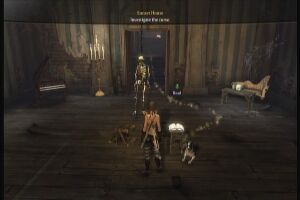
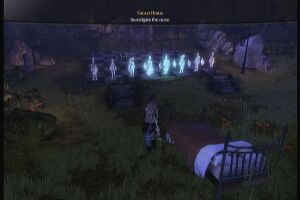
Just play chess as you normally would. After a few turns he'll get bored and will have the chest pieces attack you instead. Speak to Chesty after defeating each wave. After getting rid of the last pieces, talk to him again to complete the quest.
Guild Seals: 20
Sunset House
(Mourningwood)
You can find these two ghosts in the cemetery. You need to find the book which is in Millfields. Head there, then follow the trail as it leads you to a small graveyard. Follow the trail and have your dog sniff out the spot. Dig the book up and accept it.
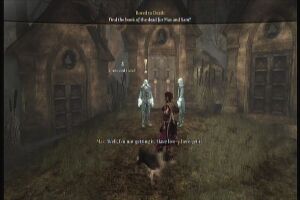
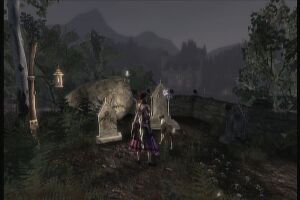
More enemies will afterwards so deal with them. After destroying three waves of hollow men, a mini-boss will appear. Use the obstacles here to keep distance from the boss as it has the same attacks as the one you faced in Mourningwood Fort but a bit weaker of course.
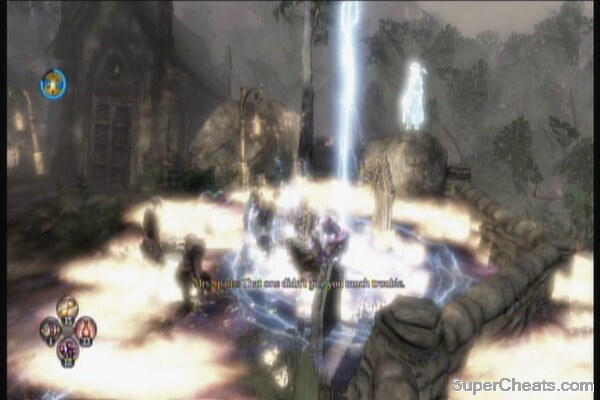
Bored to Death
After defeating the last wave, check out the small edifice the mini-boss bursted out from then pick up the rare book: (AdventureQuest: A Select of Your Own Endeavor book) Teleport back to Mourningwood.
Guild Seals: 10
AdventureQuest: A Select of Your Own Endeavor rare book
(Mourningwood)
This is available after completing the quest Bored to Death. Talk to Sam then follow him and he will open a new area called the Ossuary.

The Ossuary
There are two Silver Keys, a golden door and a gnome that can be found here. Start off by dragging Max to the exit. He'll turn into a wisp and escape you. Before pursuing him, look to right to find an open crypt. Grab the Silver Key inside. Check the video below to find the second Silver Key in the area as well.
Continue upstairs and approach Max. He'll run away, leaving a small group of hollow men behind. Take them all out. You should see the golden door along the way as well. Keep following him until you run into a chest.
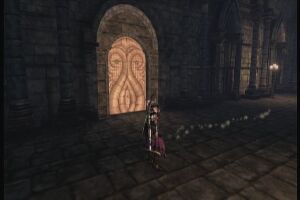
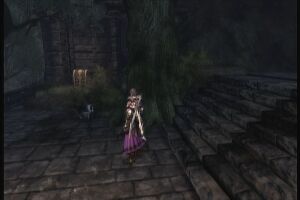
Follow Max as he leads you to a line of crypts. He'll unleash a wave of ghosts to take you down. Defeat them then follow him again. Before leaving the central area with the large tree, check the video below to reach the gnome and a chest.
Follow the golden trail as it leads you to a wide area downstairs. You'll need to defeat another wave of angry ghosts so throw whatever you got at them. After defeating the ghosts, Max will lead you further inside the mausoleum. Follow him there and you'll be caught in a trap where a massive spiked ceiling will start to descend. Don't panic though as Sam will come in and stop the trap just in time. Follow him deeper in the mausoleum.
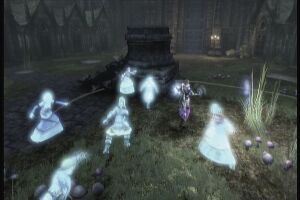
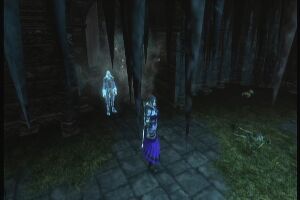
You'll find a courtyard with several spotlights. Standing in the spotlight will trigger the alarm and several hollow men will appear to fight you. If you're after for some extra orbs, then you may as well trigger them deliberately. Don't forget to loot the two chests in the area as well.
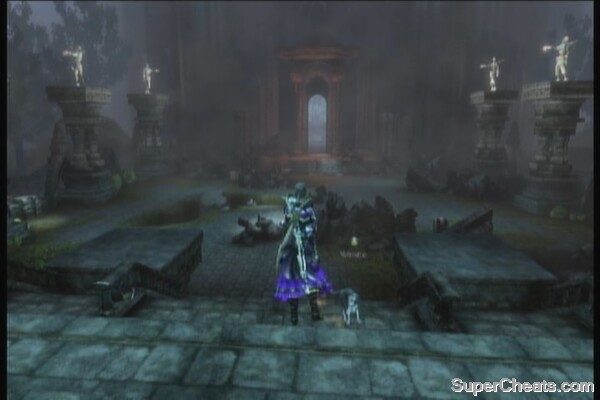
Enter the building and you'll be pitted against another horde of angry ghosts. There are also a couple of spotlights here so if you're having problems with crowd control, then it may be best to avoid it by staying in the middle. Later on, Sam will join his brother and the two of them will keep throwing wisps at you and summon more enemies. Well rejoice; that just means more orbs to collect and more guild seals to obtain. After they release their last wave, kill off some enemies, especially the gunners then grab the book to end the battle. Watch a few scenes and the quest will be completed.

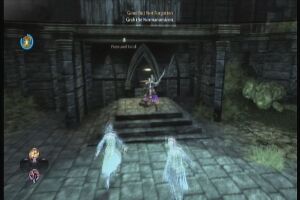
Guild Seals: 30
Achievement: Ghost Brothers
(Mourningwood)
This quest is best done by a character with low moral standing. Activate the quest then fast travel to Mourningwood to find Rhys. Approach him then draw your weapon. Press down on your D-pad as instructed then hit him. Once he's killed, return to Lesley to complete the quest.
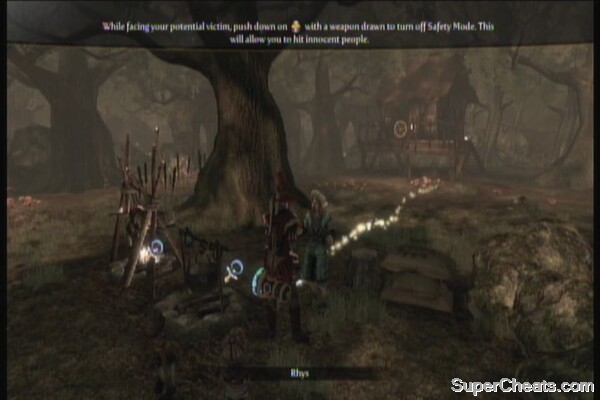
Guild Seals: 15
(Millfields)
Set this as your active quest then fast travel to reach the location immediately. Talk to Griffith Smith and hand over 750 to complete the quest.
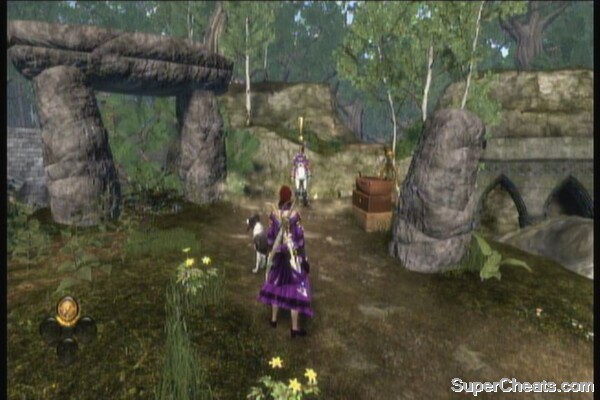
Guild Seals: 5
(Millfields)
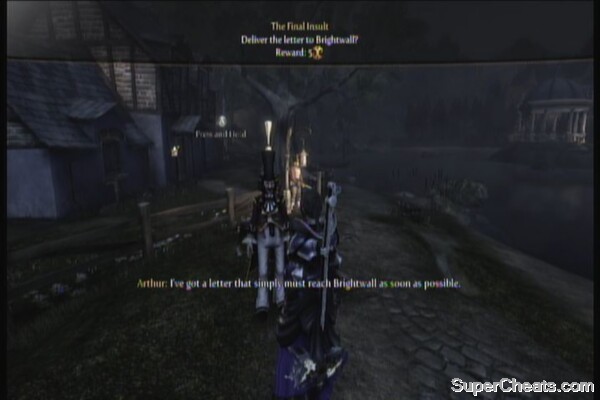
Talk to the quest giver by the lakeside. After getting the letter, fast travel to Brightwall Village, then follow the golden trail to find Zachary. Deliver the letter to him to complete this easy quest.
Guild Seals: 5
(Bowerstone Industrial)
Fast travel to Bowerstone Industrial and follow the golden trail. Accept the quest from Linda. Follow her as she leads you to the thugs. Enter the house and find the trapdoor leading to the Cesspools.
Once there, follow Linda until the negotiation turns ugly. Kill all the thugs then grab the rare book (Dangerous Things: Gunpowder) from one of the tables there.
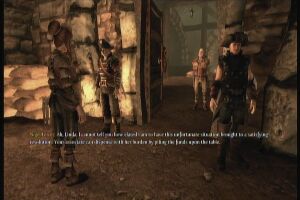
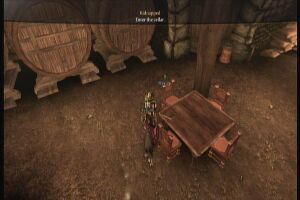
Go to the next room and learn that you'll still need to find Linda's fiancé in the sewers. Jump off from the ledge to land on the sewers below. You'll find the fiancée there and you'll need to lead him out of the sewers. You can find a gnome and a Silver Key in this area:
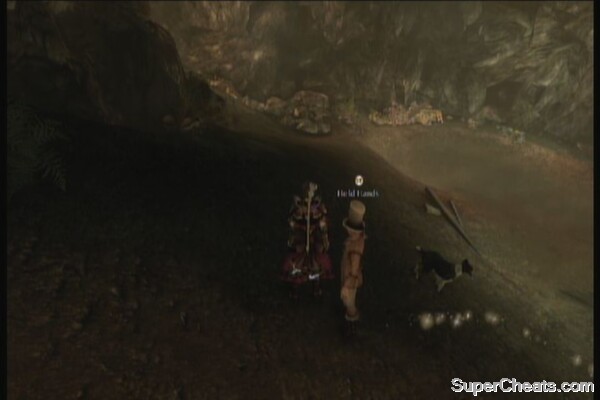
Continue following the path and as it turns to the right, continue ahead to find the gnome there. There's also a dig spot there.
Continue following the path and you should find some Hobbe grunts and summoner. Kill them all then check the dig spot and the chest in one corner of the camp. Continue following the path, kill more hobbes and follow the rock bridge. Another chest should be immediately visible.
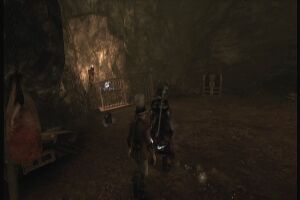
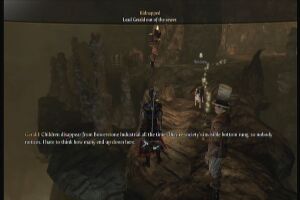
Grab the item then continue following the path until you reach the exit. Gerald will ask your opinion whether he'll stick with Linda or not. Choose what you feel is best for your character's moral standing then exit the area. Reunite the lovers to complete this quest.
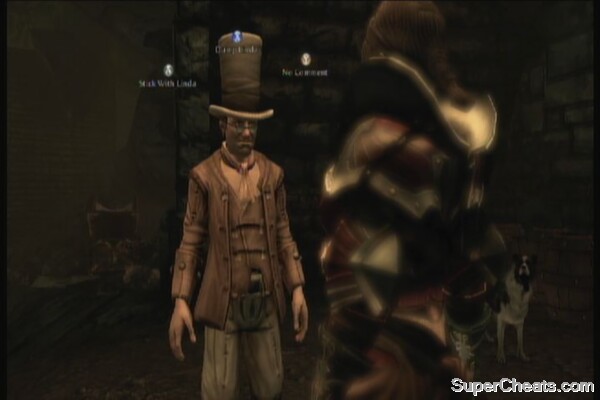
(Bowerstone Market)
Fast travel to the quest givers' location then accept the quest. You'll be taken into the realm of the role-playing geeks. Open the gate and enter the village. You just need to talk to the NPC by the gate. If you want to, you can also bother talking to the other NPC cards. Follow the path until you reach the tower on the hill. Wolves will be attacking you so get rid of them. Enter the Baron's Tower afterward.
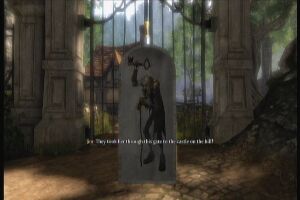

After meeting the Old Baron, examine the chest to your left to get the Scimitar of Baron Slaying 3. Go through the hallway then pull the lever to get caught in the obviously set trap. Hollow Men will be summoned so defeat them all.
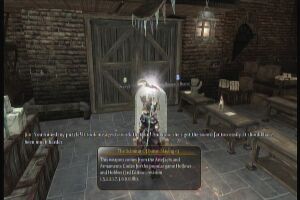

After getting rid of the Hollow Men, continue following the path. Cross the bridge and pick up the Legendary Condom of the Gods 5. Head up the hill and fight some fire-breathing, demonic chickens. They can be taken care of with one shot but they can be pretty annoying with their fireballs raining on you.
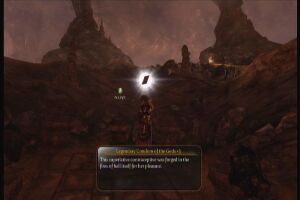
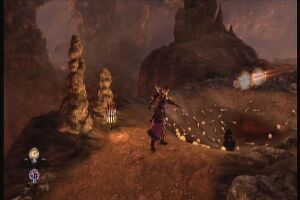
Kill them all then continue outside. This time, you'll have to fight some hobbe grunts. Get rid of them all as well then continue along the path. Vault down to the space below then get rid of the next hobbe group. Finally, follow the trail and defeat the baron himself by hitting him with the sword you got earlier. Finally, kiss or threaten the princess to end the game.
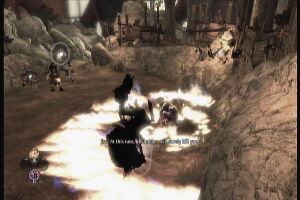
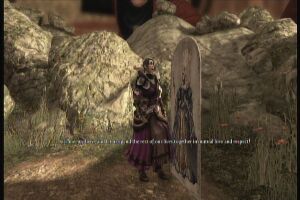
Guild Seals: 40
Orb of Magicka
Save the Princess! Achievement
Megafun Mansion available for purchase
Don't forget to exit through the house's backdoor and find a chest on its right side.
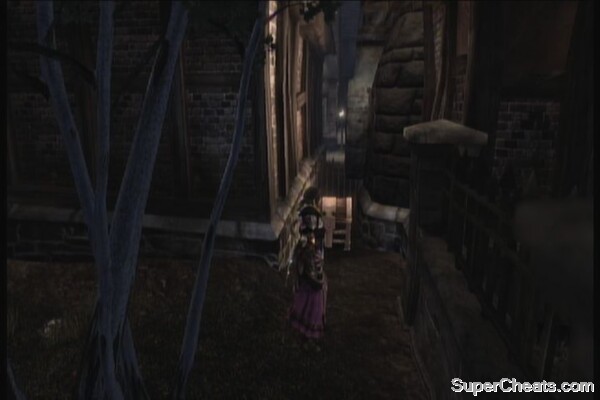
(Brightwall)
(Note: I was asked to seduce the husband so I am assuming this is true if your character is female. I haven't tested it yet with a male character so it is safe to say that you'll be seducing the wife if you're playing as one)
Head to the house of the couple. Start by initiating a positive action to get Vincent's attention. Once you raised the bar to full, you need to give him a ruby next. You should have one if you kept the precious stones you found. Otherwise, head to the Brightwall Bling stall and purchase one.

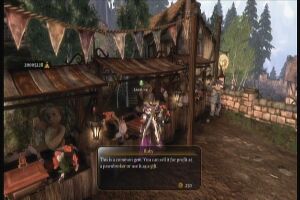
Return to Vincent and give him the ruby. This will increase your relationship as friends. Continue seducing him until you raise the bar. After making him fall in love, take his hand and lead him to Brightwall Bridge. Finally, kiss him then propose a marriage. Return to Wilma and watch the conversation. Now you have the option to kill Wilma or just leave the house. The decision is up to you. Leaving the house will complete the quest.
(Brightwall)
This is another collectible quest that will stretch until the end of the game. There are 30 rare books scattered throughout the land, some of which are already in your possession if you're following the main walkthrough. Check the Collectibles Section later on to know the location of the books. It doesn't matter which you find first and it is not required for you to deliver each book as soon as you find them. You can hold on to them then just drop them off at the same time whenever you want to.
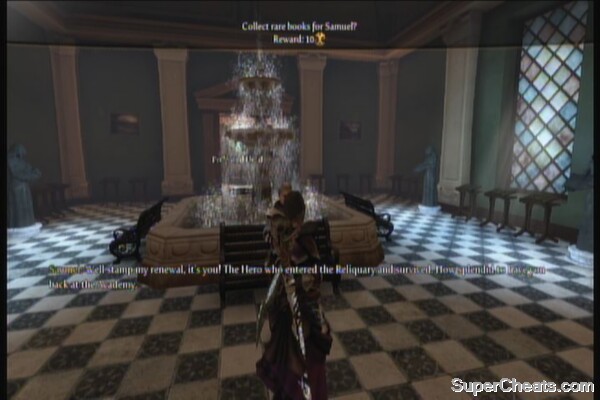
He will also ask you to find the Book of Mysteries after you donate 5 books. Just fast travel to Mistpeak Valley and enter the third entrance to Chillbreath Caverns. Just follow the golden trail and it will lead you there. If you can't still find it yourself, just watch the video below as it also leads you the gnome as well. It is easier by starting in Brightwall's entrance.
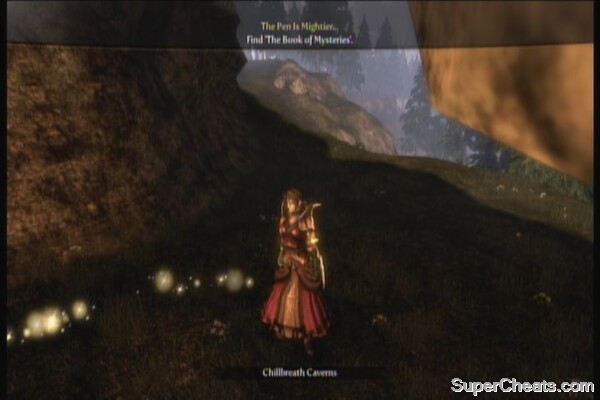
Once inside the cave, keep on following the trail and take out the bandits you'll encounter along the way. Grab the rare book: The Book of Mysteries. Return it to the Academy and receive guild seals as your reward. Refer to the Collectibles section to find more details about the locations of the other books.
After returning a total of 10 books, Walter will then ask you to find the book called Invocation of Watchers. Accept the quest then fast travel to Bowerstone Old Quarter. Follow the trail as it leads you to a trap door with a chest nearby.
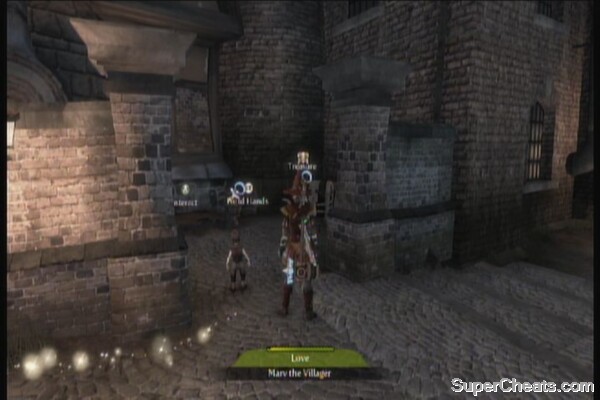
Go downstairs then kill the enemies in the main room. Once dealt with, shoot the flit switch in the corner and keep attacking it until it opens a bookcase with the Invocation of Watchers inside. Deliver this to Samuel to get your bonus GS.
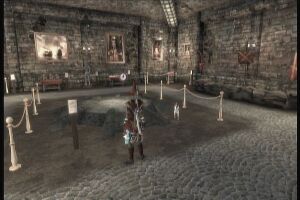

After donating 15 books, Samuel will then ask you to find yet another rare volume called Pangs of Sunset. Start off by fast traveling to the fort in Mourningwood. Follow the trail then dig up the book.
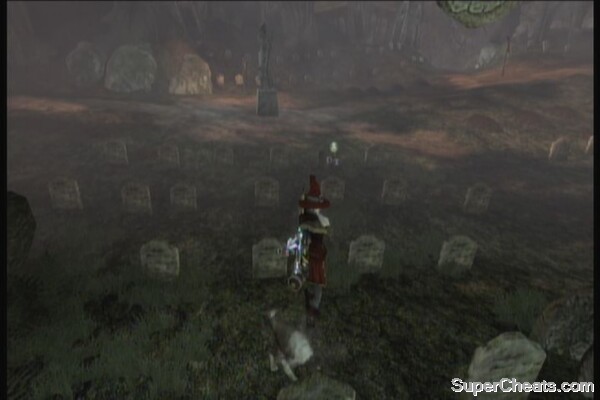
Collecting 20 books will prompt Samuel to give you another tip to find another book entitled Reaver on Reaver. Fast travel to the Shifting Sands and follow the trail. You'll find a digging spot with scatted books so just let the dog do its job and dig up the book. Return it to Samuel to complete this task.
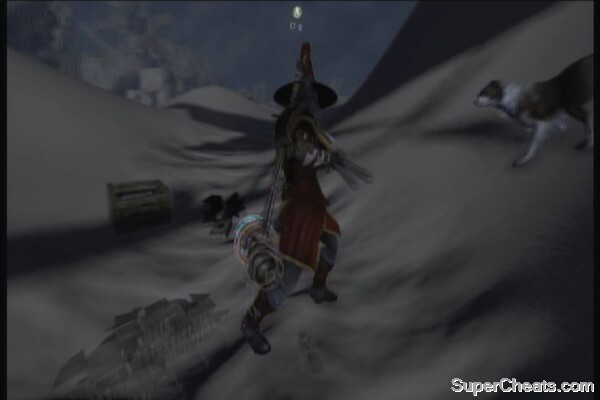
After donating 29 books (including the four special books), you'll be asked to find the last book called the Book of Doom. Accept the quest and obtain the key. Head to the Reliquary. Follow the trail deep inside then open the previously locked door using the key you obtained from Samuel. This is pretty straightforward so just keep following the path until you reach the book itself.
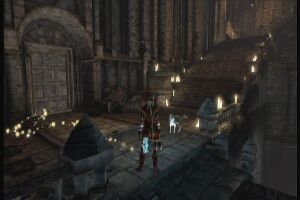
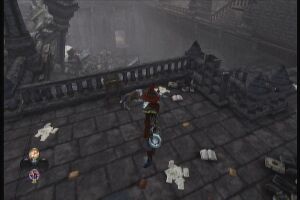
Grab the book to get the achievement Brightwall Book Club then run all the way back to the Academy and deposit on the last free stand to fully complete this quest.

Guild Seal: 10
Achievement: Brightwall Book Club
(Bonus 10GS for donating each of the five special books)
(Millfields)
Zoom in Millfields then fast travel to the quest giver's location. You'll get the factory key. There's a Silver Key from the path ahead and the area's demon door so take note of their locations for the meantime. Next, fast travel to Bowerstone Industrial and follow the trail as it leads you to the previously locked gate.
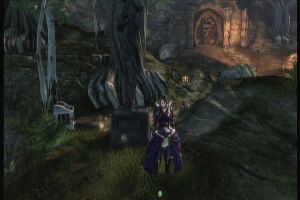
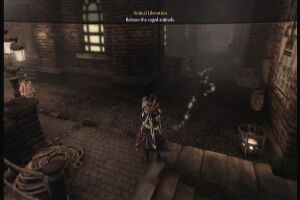
Kill the guards and before going upstairs, grab the treasure nearby. You'll also hear a gnome nearby so check the video below to know its location. Head upstairs then pull the lever to open the factory door. Jump down and defeat the enemies below. The gnome should be under the ledge where you jumped down; inside an open cage.
Check the opened door beside the central lever to find a treasure chest. Next, pull the lever to open the gate and the cages. Zoom in to Millfields using your map then fast travel to Katie. Approach her to complete the quest.
Guild Seal: 5
(Mourningwood)
The quest giver needs an escort to visit her late husband's grave. Take her by hand then follow the golden trail until you reach the grave. There will be enemies along the way so dispose of them as you see fit. The hollow men will have a leader that will summon more reinforcements so make sure to priorities taking it out first. The quest will be completed after you reach Sarah's husband's grave.
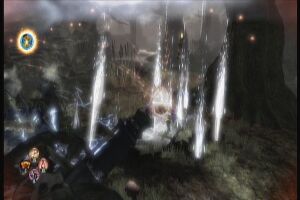
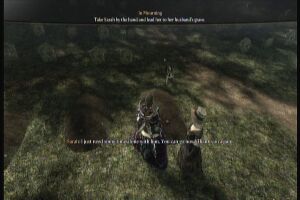
(Bowerstone Industrial)
Fast travel to Bowerstone Industrial and it should take you near the orphanage. James, the quest giver should be immediately visible so accept the quest for him. Follow the trail and it will lead you to the alternate entrance to the sewers.
As soon as you enter, turn right. You should find the Silver Key there. Continue straight ahead and fight off some hobbes. You should find a gnome behind the broken wall in the middle. Check the video below for more details.
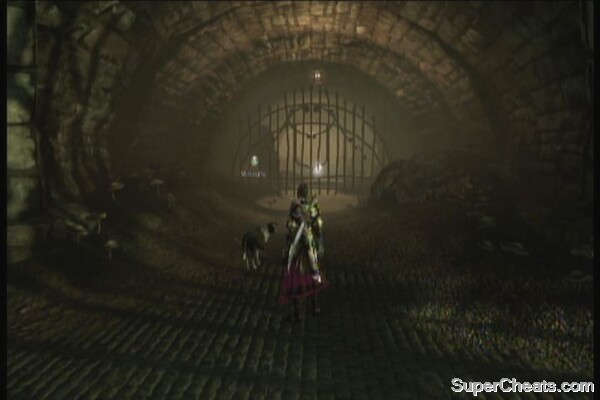
After shooting the gnome, there should be a dig spot in the small alcove near the entrance. There is also a chest in the deadend left of the central room. Continue following the golden trail and dispose all enemies you encounter. The trail will lead you to another dead-end where you can finally dig James' engagement ring.
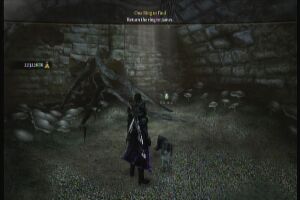
Return to the surface and deliver the ring to complete the quest.
Guild Seals: 5
(Bowerstone Market)
Fast travel to the quest giver to accept the quest. You can find Reaver's underpants in his manor in Millfields. Head there and explore the area.
Reaver's Manor
After entering the manor, enter the room to the left (the one with the statue) and pick up the rare book Dangerous Things: Lightning. Continue follow the path as it leads you to his bedroom. Check out the cabinets there to grab random goodies. Examine the bookshelf in one corner to reveal a hidden passage.
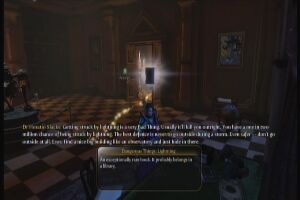
Follow the passage and it will lead you to Reaver's secret room. There's a chest inside and a Silver Key as well. Check out the drawers and closets to obtain more goodies. Pick up the creep's underpants on the drawer beside the bed. Deliver it to his fangirl to complete the quest.

(Bowerstone Market)
Accept the quest then fast travel to Bowerstone Industrial. Find the target inside the tavern. Shoot or maul him in broad daylight then return to Cedric to complete the quest and obtain your reward.
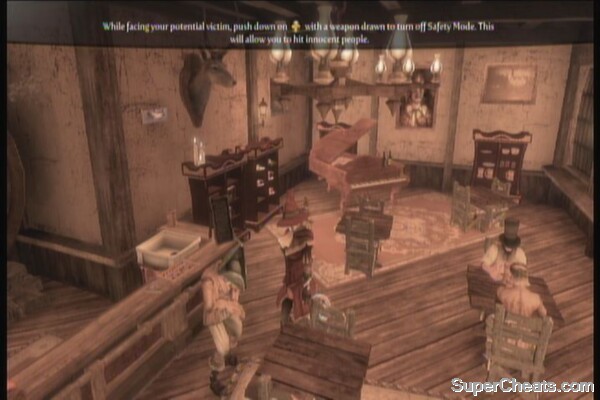
Guild Seals: 5
(Bowerstone Market)
Eliminate Leonard. This is the same as the other assassination jobs you've acquired earlier. Just locate the target (which is easily tagged by your golden trail) then kill him. This quest will disappear later on so if you want to do this, don't wait until you're too far in the game.
Guild Seals: 5
(Bowerstone Old Quarter)
Eliminate the artist Thomas Kaidkin. Accept the quest then travel to Brightwall Village. The artist is located in the town plaza so you have no choice but to kill him right there. Report to Russell to complete the quest.
Guild Seals: 5
(Driftwood)
This is available as soon as you enter Driftwood. Accept the quest then follow the golden trail. Swim to the island where the hobbes are located. Kill them all then follow the trail again to find the other hobbe settlements.
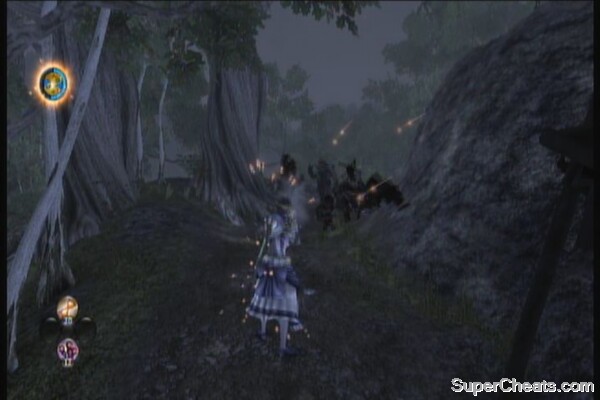
(Driftwood)
Available after finishing 'Pest Control'. This is not immediately available as soon as you finish the aforementioned quest so spend some time doing other stuff until this becomes available. Accept the letter, then head to Silverpines. If this is your first time to get there, just fast travel to Millfields (via Reaver's Manor) then take the path left past the gate.
Silver Key
Keep following the trail until you reach the lone house where the carpenter resides. Deliver the letter to him to complete the quest.
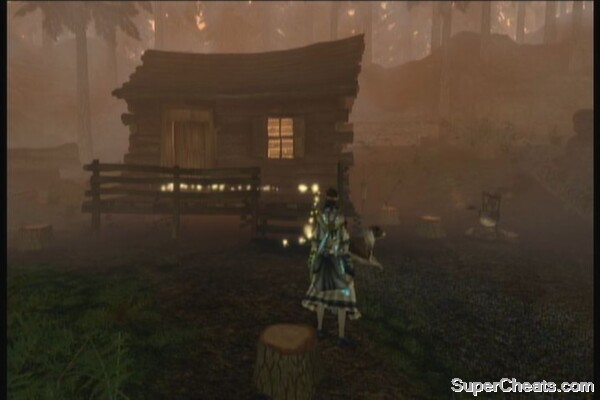
(Bowerstone Market)
Find Rusty in one of the rooms in the second floor of the tavern. Take him by hand and escort him out of Bowerstone Market to Millfields.
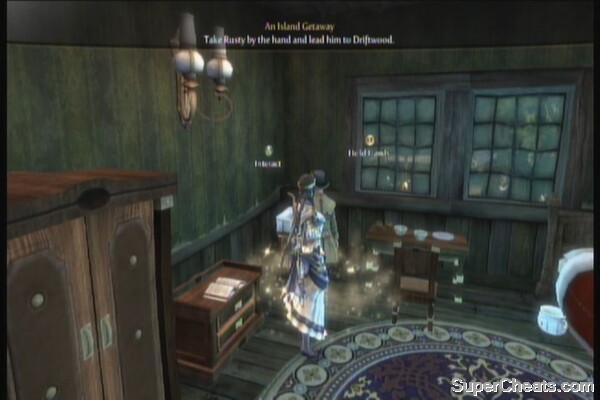
Once you've reached Millfields, follow the trail as it will lead you to the road leading to Driftwood. You'll be attacked by armed bandits along the way so be prepared. Just continue escorting him until you reach the objective point.
(Millfields)
After defeating the Crawler and after draining Bower Lake to become a mine area, head there and follow the trail to the miner's cottage that will give you the quest. Enter the sub-area called Millfields Mine then fight your way through waves of hobbes until you find the brother. Just take him by hand and lead him freely to the surface.
(Aurora)
Fast travel to Aurora and head to the temple. Talk to Priestess Mara to learn that you need to collect several flowers scattered throughout the desert. Check the Auroran Blooms collectibles section to learn more of the flowers' individual location. There are a total of 30 flowers you need to collect, 5 for each color. You don't need to collect them all as this is considered to be a long collectible quest, like the gnomes and rare books.
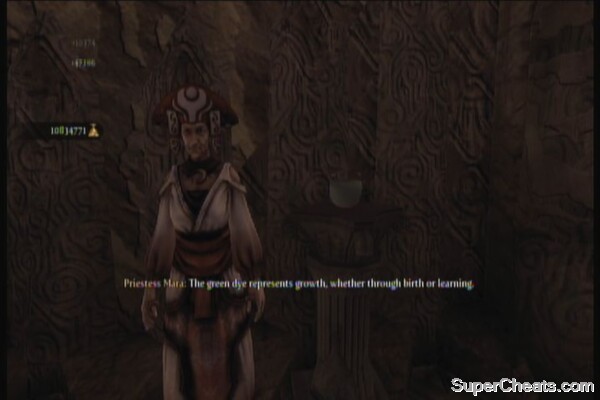
Guild Seals: 10 per color, 10 completing the quest. (Total of 70GS)
Flower Power Achievement
(Millfields)
Escort Dan to the Hobbe Cave. Like other escort missions, you need to take him by hand. Take note that this oaf can't swim or vault so you need to follow the trail and lead him to the cave using the normal road.

Dankwater Cavern (Millfields)
Dankwater Cavern Entrance
Start by following the path; you should encounter the first gnome in this area.
A short walk from there will lead you to a larger cavern with some enemies. Dispose of them and you'll hear yet a nearby gnome's insults. Find it behind the rocks.
Follow the path and grab the chest along the way. Continue fighting off the enemies until you reach the vantage point. The quest completes afterward.
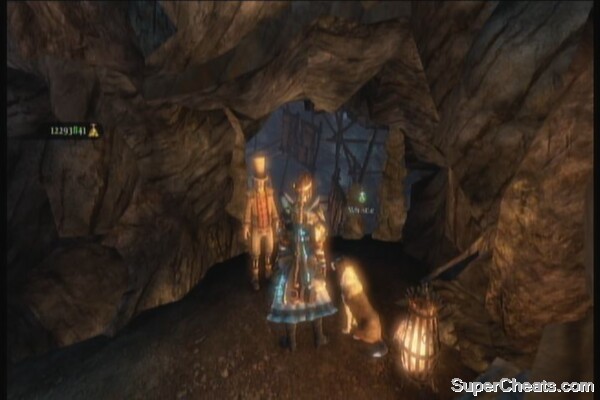
Guild Seal: 5
(Aurora City)
Talk to the quest giver to receive the package. Head to the Veiled Path and fight your way to the end to find the hermit. Just deliver the brain and wait to finish the conversation to finish the quest.
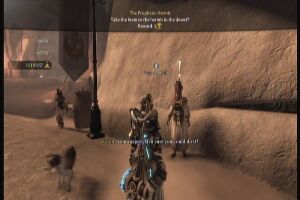
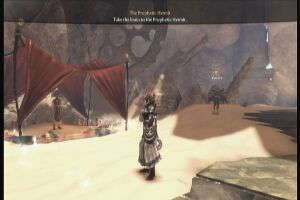
Guild Seal: 5
(Aurora City)
Find the quest giver in the city and hand over 8,000 gold to fund the expedition. Wait a while then visit Driftwood. Swim to the back of the islands to find a shipwreck there with scattered ship logs and several chests containing a total amount of 20,000 gold. I assume you already know what happened here. Enjoy the loot!
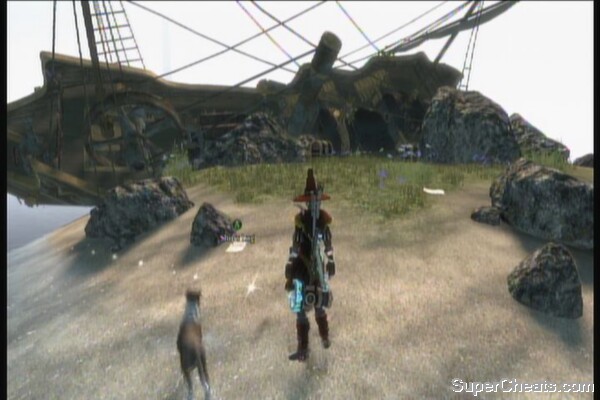
Guild Seal: 5
(Aurora City)
Accept the quest then head out to the Shifting Sands. The statue must be dug out from a dig spot near Shadelight. Just follow the golden trail and wait for your dog to detect it. After you found the statuette, return to the city and deliver it to the quest giver.
Guild Seal: 5
(Aurora City)
Talk to the man and buy the Ancient Key for 4000G to complete the quest. This will allow you to access the optional dungeon holding the last golden key.
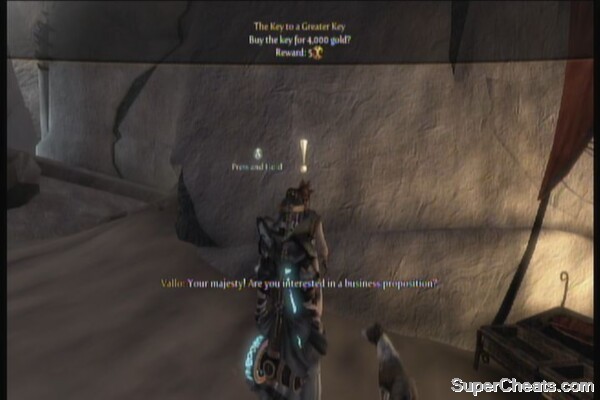
Guild Seal: 5
Ancient Key
(Bowerstone Industrial)
This quest is only available after you defeat the Crawler and convert the orphanage into a brothel. Head to the location and speak with Deirdre. She'll ask you to head to Bowerstone Market and kill the prostitute named Lucy. Just follow the trail and it will lead you to her location, in the backalley behind the pawnshop.
Guild Seal:5
750G
(Mourningwood)
Available after completing “Peace, Love and Homicide”. Fast travel to the quest giver's location on the map then hand over 5,000 gold to him to complete the quest.
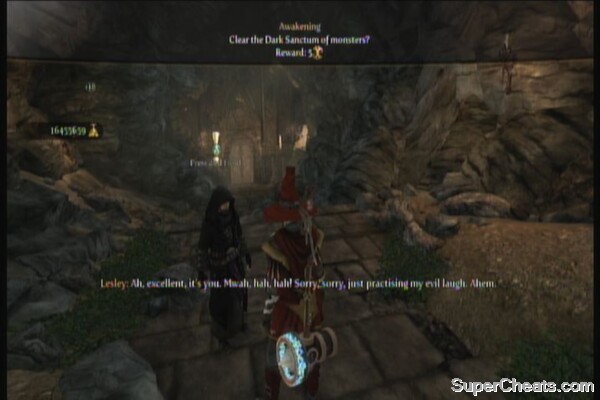
Guild Seals: 5
(Mourningwood)
Available after completing the pre-requisite quest Excavation. Head deep in the Dark Sanctum and clear the area of monsters. Go downstairs and just destroy the hollow men that will appear. After clearing the area, just return to Lesley to complete the quest.
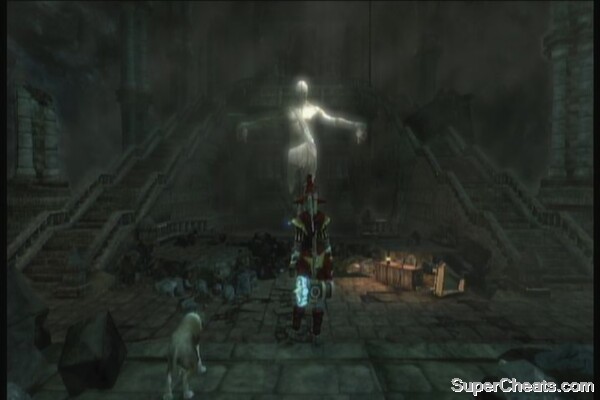
Guild Seals: 5
(Mourningwood)
Head to the Sanctum and talk to Lesley. Obtain the key from him then follow the trail to the next objective. You'll eventually come across a large chamber where you need to raise platforms to reach the other parts of the room. Stepping on the wrong direction will summon hollow men which you can easily destroy.
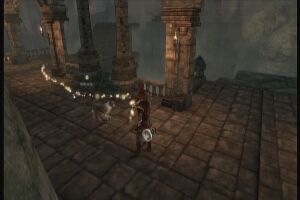
Step on the platforms and make your way to the left hallway first. Destroy all the enemies there and the stairs on the other end will rise. Continue following the only path and fight off the enemies. Continue stepping on the switches to create pathways that will lead you to the other door.
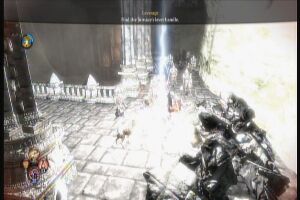
Continue following the path until you reach a sarcophagus. Open it to get the ancient lever. Several enemies will start appearing so take them out. There's also a flit switch here that you can't interact for now. If you want to solve this puzzle, you may need to come back later.
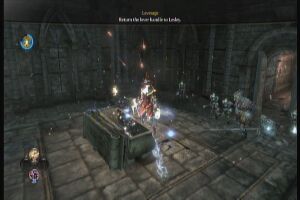
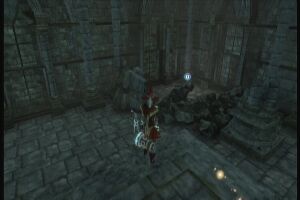
Just walk all the way back to Lesley and hand over the lever. Completing this task will unlock the “Dark Sanctum” achievement as well. You'll also have the option to burn the peasant or not.
Guild Seals: 10
Achievement: Dark Sanctum
(Brightwall Village)
Available after completing Chicken Chaser sidequest
This is just an ordinary gambling game where you bet for the chicken that you think will win.
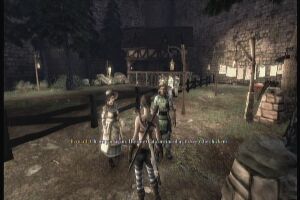
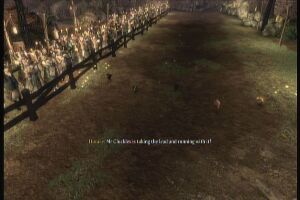
This quest is repeatable.
(Major towns)
These quests are given by local guards where you need to chase down escaped convicts by following the golden trail. These convicts will try to run away from you so you can either chase them down until they give up or if you want them to surrender the easy way, hurt them bad. Tagged convicts are immortals and won't die even if you use a flourish attack with a LV5 weapon / gun. Drag them back to the guard that gave you the quest to complete the quest. The harder to bring in the criminal, (those who break your grip and attempt to run away) the higher the reward money.
Reward: 1000 to 6000 gold
Morality: 10
This quest is repeatable
(Bowerstone Industrial)
All you need to do is find any volunteer then drag them to the factory owner. This might be a good way to clean the streets off beggars but do take note that you can earn higher amount of gold by dragging someone with higher social status.
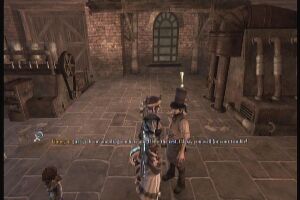
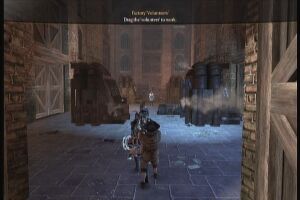
Reward: 1000 to 6000 gold
Morality: -10
This quest is repeatable.
You'll find the Demon Door to the left. It should be easily spotted since there's some braziers lighting it up. You need to be the Queen or King of Albion to meet its condition. Look to the left past the ruined arch and pillar to find a Silver Key as well.
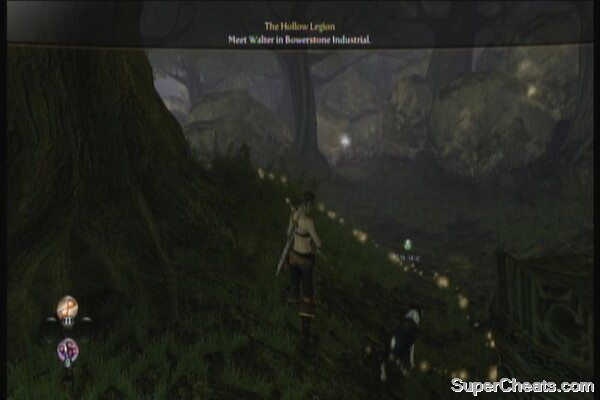
From the manor's entrance, head to the right until you find a dirt path. Follow this and you'll find a golden door. Go uphill; there's a Silver Key behind the tree a bit north of the golden door. Further north of the Silver Key you'll find a pond. The area's only gnome is on the rocks.
At night the destroyed house is fixed again. Head to the pavilion and discover that gazebo is glowing blue. You can now interact with the statues there. You need to press A on each statue until they resemble their solid poses during the day. To make it easier, you need to change their poses 4 times. If done correctly the phantom house will materialize so you can enter it.
Warning: You won't be able to leave this house until you complete the quest.
Enter the house. You'll find a hanging skeleton there. Examine the note beside it to learn more about the curse. Ignore the warning and follow the trail. Sleep on the bed and you'll be taken in another dimension with a large chessboard on it. Talk to the chest in the middle of the board named Chesty. Start a game of chest with him.
Just play chess as you normally would. After a few turns he'll get bored and will have the chest pieces attack you instead. Speak to Chesty after defeating each wave. After getting rid of the last pieces, talk to him again to complete the quest. Your reward is 20 Guild Seals and the house itself. You'll be taken back to reality afterward.
Don't leave yet; there's still some stuff to do here. Take the new corridor as it leads you to another room with a mirror. If you look at the mirror, you won't see your whole reflection. Instead, you'll find a floating head which is your head. Look closely at the mirror and change your camera angle to find a glowing seal on the wall. You need to guide the glowing head on that seal. Watch the video below for more information.
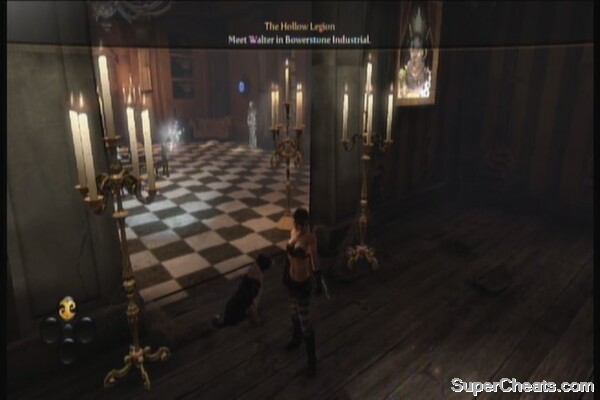
Sunset House Mirror vault
Doing this three times will allow you to vault over through the mirror to the house's alternate side. Head to the entrance and shoot the green ball on the table to unlock the other door.
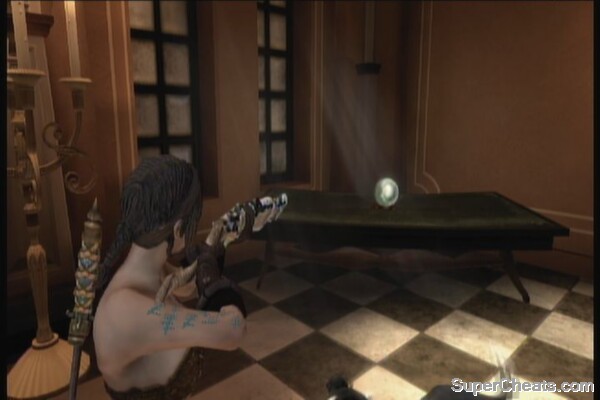
This will lead to a chest with a legendary weapon (I found a Thunderblade sword). You can also check the master bedroom to find a chest with health potion. Check out the shelves for some random goodies as well. Return to reality then shoot the green orb behind the hanged skeleton. This will also open the locked door, leading to a chest with possibly random loot. (I got 6 Guild Seals and a Slow Time Potion from this chest)
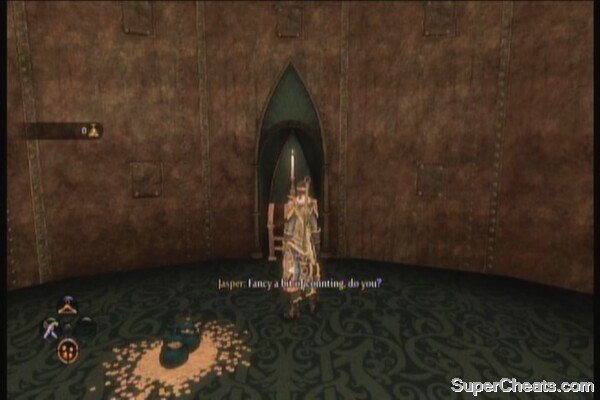
You can come back later to discover that there are evil nobles gathering in the Sanctum and some unfortunate peasant victims as well. The flit switch from the burial chamber a while ago should be accessible now so you can head there and start hitting it. Check the video below for more details. There should be four orbs and I'm missing one on the video. The last one is found along the corridor, just backtrack and you should see it along the way. Activating the four orbs will open the previously locked door.
You need to solve another simple puzzle in the chamber behind the hidden door. You need to light up all the hanging braziers by the chest by hitting the braziers with blue wisps floating around. After hitting all four, the stairs leading to the chest will appear .This chest contains a Legendary Weapon.

(Aurora Mine)
This sub-area is Aurora will only become available by breaking your promise to them and making them work. Inside the mine, you need to find all 8 hidden flit switches to reveal the treasure chest.
1. As soon as you climb the first set of stairs, look to the left; you'll find the first flit switch there.
2. Follow the path clockwise until you reach the stairs in the far corner. The switch is beside the stairs on the left.
3. Go down the ramp in the far lefthand corner and look at the central platform. You'll find the switch by the platform's pillar.
4. Look for the next flit switch under the wooden walkways. Go down the rocky ledge then follow the path west until you see it.
5. One flit switch is located across the right side of the central platform
6. On the right-hand path, keep following the path as far as you can go. You should spot a pillar facing away from the statue. The flit switch is embedded there.
7. When you extend the bridge that leads to the central platform, step on it and look around to find the switch under some wooden walkways to the left.
8. In the right-hand part of the cave are four pillars; scan the ceiling to find the switch near it.
Once the switches gather in one place, use a wide-area magic attack to activate them all. Grab the Legendary weapon from the chest.
Check the castle's library to find a locked door inside. You need to examine the four statues in the room in order to unlock it.
Castle Library
Check the treasure room and you should see a golden key by the ceiling. The only way to reach it is by earning at least 5,000,000 gold. (See this guide's money trick to know more how to earn millions in minutes!) Once you have a mountain-pile of gold, grab the key, then get rid of those gold either by temporarily donating it to another player or transferring to the kingdom treasury (the latter requires you to become the ruler of Albion first). Once the treasure room is cleared out, you'll find a chest by the wall. Open it to get a Legendary weapon!


 Bleach: Soul Resurreccion Mission Mode Walkthrough
 FIFA 15 Hidden Gems in Career Mode
 Until Dawn Bonus Chapter Guide: How To Download, Install and Play It
 Torchlight 2 Walkthrough
 How to Steal like Pro without getting caught in Fallout 4