Torchlight 2 Walkthrough
Get more Torchlight 2 cheats and game guides like this on the Game Front video game walkthrough app where the latest easter eggs and extras are uploaded daily.
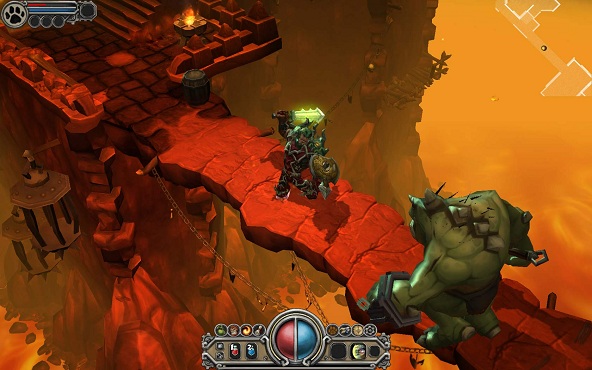
Welcome to Game Front’s Torchlight 2 walkthrough. It’s a good time to be a loot-hunter. Expanding in every way over the original, you’ll now have four customizable classes to choose from as you adventure through four acts outside of the limited dungeons of the original.
Never dungeon-crawl alone, as this small-scale action RPG lets you join with your friends. It may come at a reduced price, but this simplification and refinement of the classic Diablo clicky formula has big ideas. If your lizard brain needs to constantly kill enemies and collect randomly generated treasure with an overhead view, you’ve found another fix.
Find the rest of our Torchlight 2 information on the cheats page, where you might just find actual codes.
Warn The Estherians
This first mission is essentially your tutorial for the game. You have to get from the military camp to the Estherian Enclave.
Talk to the peasant to begin your adventures and accept the quest.
Dispose of the little creatures with your basic attacks. You won’t run into anything too bad here, but use a potion if it’s completely necessary.
The Bearmen here come in groups. Use area attacks to take them out efficiently.
If you run into any locked chests, one of the enemies in the area probably has the key. I would recommend spending a good amount of time in this level seeking out all the enemies and chests. This way, you’ll get a good amount of experience to start the game off and begin beefing up your inventory.
You can also beef up your stats and skills as you begin to level up.
Find and talk to the Grand Regent once you reach the Estherians to complete this quest.
Protect The Guardian
Before you depart from the Enclave, you can talk to one of the denizens to have them reset your skills and stats for the last 3 levels.
Your next destination will be the Wellspring Temple. Along the way, you will mostly have to deal with puny undead enemies. To maximize on your killing efficiency, take out all of the archers and long range attacking enemies first. After that, deal with all the melee foes. You will take less damage this way.
Again, if you run into locked chests, backtrack and check groups of enemies to find the key.
Examine the Waypoint to activate it when you pass it.
Shortly after the Waypoint, you will start encountering bombs and bear traps. You can avoid some of them by moving around carefully, but for most of them you will not be able to tell. Turn your volume up- you will have a split second to outrun the bear traps before they close on you.
Talk to the Enchanter in the Steppes to make upgrades to your equipment.
Once you see all the corpses outside the temple, you will know you’re in the right place. Once you get through the second level, you will have your first boss fight.
General Grell doesn’t hit too hard. The key to this battle is to take out the boss’s little minions before dealing damage to him. He will keep summoning more. Stay disciplined and take out the minions as soon as they’re summoned. If you take this precaution, you will keep your health up and win easily.
Scour the area for some minor treasures and then open the main chest to talk to the Guardian and complete the quest. Make your escape by taking the portal.
Regroup At The Enclave
Well, er, this is probably the easiest quest you’ve done in a while. All you have to do to complete this quest is walk through the portal after the General Grell fight. I’m going to go out on a whim here and say they probably didn’t have to make this a separate quest. Alright, freebe’s over. Moving on.
Trail Of The Grand Regent
Your next task will be to track down the Grand Regent. He is on his way to Watchwaeld Temple, so you will have to follow him through Crow’s Pass.
Spiders make up a good bulk of enemies here. They can poison you, so equip to protect against poison if you have something fitting.
When you see the groups of small spiders, do what you did in the previous quests and use your concentrated area attacks to take them out.
Once you get to the end of the path, speak to the person that has been traveling with the Grand Regent. Doing so will initiate the next part of the quest. Seems the doors have been sealed behind the Regent after he went into the temple. Word has it that there is a mysterious illness going around as well…
The Ember Keys
To access the next teleporter, you will need to acquire Passkey Ember from the Slavers’ Stockade, and the Watchweald Ember, which you can locate in the Emberscratch Mines. To get to both, you will have to trek the Frosted Hills.
The Mikra Frostbinders are tougher than the enemies you’ve encountered thus far. They are enchanters and can manifest traps. If you see a blue pentagram type of design star to appear around you.. RUN.
Once you reach the Slavers’ Camp, you will have to face many bandits. As you can imagine, there’s plenty of loot to be had lying around here.
Before entering the stockade, make sure you are prepared for this next fight. You will have to take out some fairly tough bandits to get to the Ember. The space in which you will be fighting is narrow and you will take a decent amount of damage. Honestly, potions will probably save you this battle. Don’t be afraid to use a lot.
After retrieving the first Ember, backtrack to the Frosted Hills. Your next place of interest is the Mines.
The enemies certainly don’t get any easier in here. The annoying as all hell goblins will throw explosives at you, and if you’re not careful, they will take all your health in a heartbeat. When fighting groups of enemies, they should always be the first priority.
Wearing equipment that protects against fire will give you an advantage in these mines.
King Pogg is a bit tougher than the first boss but still not a huge challenge. Be conscious of Pogg’s long reach and try to get all the TNT barrels destroyed before the fight begins so that you have room to move around.
Upon finishing this battle, you will receive the second Ember necessary. And we’re off back to the portal!
Mission Of Mercy
Inside the Watchweald Temple, you will run into a number of larger enemies. They have a lot of power to their attacks, but telegraph their strikes with pretty obvious wind ups. These attacks are fairly easy to dodge, but don’t let down your guard or you will take lots of damage.
Be prepared for a battle before entering the Regent’s room. For the first phase of the fight, you will see tentacles protruding from the hole in the center of the room. Stay away from that hole or you will be smashed.
Once the Regent actually emerges and descends to the ground, you can attack him.
As with the first few battles, make sure to dispose of the Regent’s minions when they are summoned to keep the floor clear for you. Otherwise, this boss battle isn’t much more challenging than the previous two.
Upon victory, speak to the Guardian to open the portal and to complete this main quest.
Return To The Enclave
Another horrendously easy quest. Probably the easiest quest since.. Regroup At The Enclave earlier in the game. After you step through the portal following the Grand Regent’s defeat, talk to Commander Vale. Do you guys feel as accomplished as I do!? Anyway, on to the next REAL quest :]/
Onward To Zeryphesh
Talk to the transportation agent located in an upper corner of the Enclave to board the railway.
Enjoy the nice cutscene which will constitute a good portion of this quest. Talk to the Guardian inside the entrance of Zeryphesh in order to complete the second short quest in a row.
The Eve Of War
This is the first quest of the Second Act. Talk to the Guardian to start.
You will have to cross the desert to reach the Sphinx. Be aware that the enemies have gotten tougher and will now ambush you. There will also be chests and other traps to lure you into some tough situations. Keep on your toes.
Reach the Sphinx (pull up your mini map if you get lost) and approach the Manticore Lair entrance to finish out this quest.
Lair Of The Manticore
The enemies in this lair use a lot of poison based attacks, so equip accordingly to avoid having your HP being constantly drained.
Once you reach the Manticore, make sure you and your pet are in good shape to fight. This includes your level as well. The Manticore is tough and has a whirlwind attack that is tough to avoid.
A little bit into the battle, a second Manticore appears. They are both equally as strong. Keep focusing your attacks on the first one to take them out as quickly as possible. If you divide up your attacks, you’ll be taking twice the damage all battle.
There will be plenty of gold lying around after the fight. Collect it all and open up the main chest before backtracking to the Sphinx and finishing off this quest.
Artifice of Evil
Inside the Artificer’s palace, your enemies will attack you with guns. You won’t be able to do anything to avoid being damaged except closing the distance as quickly as possible.
You will have to watch for several traps, including blades that snap beneath our feet which you can run around, columns which raise from the floor and slam you with lightning which you can destroy the second they pop up, vents which dispense self destructing robots which you can kill with strong area attacks, and statues that shoot energy lasers at you from their eyes. You can easily avoid these statues though since their timing stays the same.
When fighting the Artificer, try to give yourself as much space as possible. The more cramped it is, the less of a chance you will have of avoiding his attacks. Return to Zeryphesh once you defeat him to complete the chest. Don’t forget to grab that main boss chest though!
Meet the Djinni
Take the northwest exit out of town. You will have to cross yet another desert- this time, to seek out the Djinni.
This time around, you’ll have to deal with even more powerful enemies. In fact, they will now be spawning infinitely. The traps get more difficult too here. Cages of bones will attempt to ensnare you. Break these as quickly as possible- you will be sniped while trying to free yourself.
The Djinni is located in the Salt Barrens proper.
The Djinni’s first task is basically a seek and destroy type of quest (I will include all 4 quests related to the Djinni in this section for efficiency’s sake. They are short and don’t warrant separate sections). Your first task is to take out Aruk the Cruel. Once you reach his lair, you can either go straight for him or take out the guards around him to make life easier first. Once you defeat him, you will have completed The Djinni’s First Task .
To complete The Djinni’s Next Task , you will be sent to another dimension. You will have to stay inside the circle of light the Djinni places you in. There will be plenty of foes and things getting in your way trying to push you outside of the circle. It will get difficult- don’t hesitate to ingest a whole bunch of potions. Especially when the blades start coming down. Yikes. The second survival part of this task is easy. You will have to take out the Manticore again.. who is surprisingly easy the second time around.
The Djinni’s Final Task entails you taking out his foe Ezrek. Once teleported to his lair, take out the enemies. They are actually pretty easy here. However, the boss fight is tough. Ezrek will summon waves of minions and eventually split into three. Keep attacking the original Ezrek. Towards the end of the fight, he will summon more of these clones and fly around trying to confuse you out of desperation. Upon the end of the fight, the Djinni will come congratulate you and give you your reward. Time to go back to Zephyresh for the conclusion of Act 2.
Breaking the Siege
After returning Zephyresh, head to the Salt Barrens and continue on to the Witherways.
The enemies here are electric based, so protect yourself accordingly. When being attacked by the towers or the turrets, try to close the distance as quickly as you can to minimize the damage you’re taking.
The Siege Guardian battle will really test your endurance. Keep pummeling away. Ignore the turrets if you can. I know this fight is tedious, but stick to the game plan and keep your health up.
After the battle, go talk to the Air Guardian in Zephyresh. Next, talk to the guy at the rail station and you will finish act 2, and pick up the small transition quest On to Grunnheim while you’re at it.
Some Assembly Required
Talk to the man at the Imperial Camp to add the “Alchemist’s Rage” transition quest to your catalogue and begin the Some Assembly Required quest.
Head down the Rotted Path and equip yourself with armor that protects against poison. You will have to keep on the move- your hero can get poisoned from the fumes here just by standing in one place too long.
Talk to the next soldier along your path, and once completing the Cave In, use the dynamite you obtained to continue on.
Grab the Automaton Power source and you’re good to go back to the Imperial Camp.
The Sundered Battlefield
This quest is basically a trek through Ravenskull Gorge. The foes here are all armored, so use those armor break abilities of yours. You will also be ambushed from all angles, but the enemies here are not all that tough.
You will have to retrieve the Crown from the Forgotten Halls. Technically, this part of the mission will go down as the Enter the Emberworks quest. Make your way through the wave of enemies and take out the stage boss, an undead dragon called Thiss, to complete the quest. He will summon minions and has a pretty absurd amount of durability and health. Once you get the crown, return to the Emberworks.
Once you are back on the path, you will have to deal with some pretty brutal battle turrets. Don’t try to take on more than one at a time or you will probably meet a premature end to your quest.
You can’t take out the steam jets. When you run into these things, the only way to get through them is to find the nearby valve that will disable them.
The “War Titan” boss is a pushover. He’s got a lot of health, but it goes down quickly. Watch for the appearance of the Shield Turret though- it will make the War Titan invincible while its in active mode.
Take the recharge back to the Imperial Camp to complete The Power Source quest.
Into the Dark
After completing the freebie Pass Through the Gate quest, you’re ready for your final confrontation with the Alchemist.
You will have to get to the fourth floor of the Mines to reach the last boss. The enemies here attack you with fire, so once again, equip accordingly to minimize damage.
If you get lost in here, use Portal Scrolls to bring yourself back to the surface.
The Alchemist battle will consist of three parts. Before confronting him, make sure you are stacked with potions and prepared.
The first stage of the fight will require for you to destroy the shards of flame that are summoned by the Alchemist. Afterwards, close in and attack!
The second stage will test your maneuvering. Basically, the Alchemist will be shooting a harsh heat beam at you. This beam is very streamlined. Stay disciplined and do NOT approach the boss at a straight angle. Move slowly but go from side to side often. You have to get around these lasers to have a chance. Patience is key.
The third phase is essentially an extension of the second one, except a lot more intense. At this point, unload completely. Give it all you’ve got until you take the boss’s health all the way down.
The Heart of the World
Your last descent through the mines isn’t too harsh. You’ll have to fight a lot of Netherling enemies, but they’re chumps. Watch out for the turrets and, as always, make sure you destroy them systematically before they get you.
The last boss fight of Torchlight 2 is against the Netherlord. You will fight him in 2 stages- the first will see him throwing ice based attacks at you. Equip for elemental defense. The second part of the fight will have the Netherlord switching to sword based physical attacks. This battle isn’t too much harder than the one against the Alchemist. Feel free to exhaust all your potions and let your equipment carry you. Congratulations on completing the main quests of Torchlight 2!


