
Fable 2 is Peter Molyneux and Lionhead's flagship game. After the original won many fans, but missed out on a few key promises, the sequel has been designed to be everything the first game should have been and with a next-gen sheen.
The overriding principal behind it is that all your actions have consequences and never has a feature been more-true in a game. Something as obscure as going outside with no shirt on, or buying your weapons from one town rather than another can have a marked effect on the rest of your gameplay experience. Fortunately the game makes it clear when you have positively or negatively influenced someone, as icons appear above the characters' heads.
Read on for a complete guide to Fable 2, that's a walkthrough and acheivements... You'll also find a heap of screeenshots and videos which to go with the guide which will outline some of the more trickier parts of the game... Onwards!


There are four areas you need to consider. Love, Renown, Hate and Humour. People like you when you perform positive or funny expressions, they appreciate your fame if you show off your trophies, but many expressions can be interpreted in different ways depending on how successfully hey are performed.
For example, the scary roar, if successful causes the target to fear you. If it fails (you can visually see the consequences of messing it up) they will merely find it funny – be aware though, it's not a particularly honourable thing for your would-be enemies to think you're a walking joke. Expressions are also extendable. This means that if you hold down the appropriate button on the D-Pad, a meter comes up. Keeping the button held until the bar turns green and then releasing it in the centre gets you the successful outcome and the best possible reaction from the expression. Releasing in yellow or red is still successful, but missing the bar altogether results in embarrassing failure. It's a risk to get the best results, but is often worth it.
Fable 2 Guide - Combat

Combat is brilliantly simple in Fable 2. For a start, you cannot die – something which will instantly cause some gamers to raise their eyebrows at the difficulty factor. While it makes the game impossible to fail at, repeatedly dying is not fun for anyone and you also receive a scar for each time your health metre hits zero. You are then knocked down and have to wait a few seconds before jumping up again and sending a brief shockwave at your enemies. You can purchase and find various potions with which to regain your health, as well as items of food which either make you fatter or thinner, depending on the item (though the non-fatty ones are not as effective at restoring your health bar).
Combat is all performed with X, Y and B. X initiates melee attacks and Y ranged ones. B allows for Will (magic) attacks. Holding each button down does different types of attacks. Though at the start of the game you will only be able to perform basic moves, with each successful blow on an enemy experience orbs are released. Holding RT sucks these in and allows you to unlock different combos, flourishes and attack styles. In terms of Will attacks it is recommended that you focus on getting Inferno as high as possible at the start of the game. This deals with many of the trickier enemies early on, though any high-level (3 or higher) Will attack should be pretty effective. Others worth investing in early include Raise Dead, which brings a horde of friendly spirits to take all the fire away from you; Time Control slows the speed of the game down while allowing you to pummel enemies at full speed too. Later on you can aim to boost all the spells.

Fable 2 has many, many options for making friends, enemies, and permanent relationships that will last you over the entirety of the game.
The game features an expression wheel which allows you to effectively convey your feelings to any character in the game. With the main expressions assigned to the D-Pad, and more available using RB, you can purchase various books to unlock extra expressions, and others unlock after certain facets of your personality develop enough, such as your fear factor.

Your dog is your faithful friend and you will end up loving and failing to do without him by the game's end. His appearance alters with you, and while the dog may live an improbably long time, you should learn to take care of it and get the most from what the canine has to offer.
The dog can perform a number of incredibly useful tasks.
Throughout the game you will find various treasures and secret items buried beneath the earth. Your dog will bark and lead you to where the item is, before beginning to dig into the ground. When the spade icon appears in the appropriate slot, simply press D-Pad down while standing next to your dog and you will dig up whatever it has found.
You can purchase and find books appropriately named Treasure Hunting, allowing your dog to discover more lucrative items throughout the game, those buried deeper underground by people wishing to keep them from lightfingered heroes!
The dog will also let you know if there are any chests nearby.

There are various books, volumes one to five entitled Dogs of War. You can buy these from the book shop in Bowerstone throughout the course of the game, or find them around Albion. Each one offers your dog more powerful and aggressive attacks, though bear in mind that he can only attack once an enemy has been knocked to the ground. It is still incredibly useful to have him as frequently enemies can get knocked down more than once and are very hard for you personally to hit while down.
Your dog can also get hurt while fighting. Press the appropriate D-Pad button while next to him if you see him limping to use an elixir and restore him to full health. He also gets scared, particularly in caves, tombs and crypts, and you can comfort him, again using the context-sensitive D-Pad.
You can find and purchase many books teaching your dog new tricks throughout Albion. These are combined with your own expressions to add to the points you get from performing them. Highlights include the paw over the eyes and targeted urination for the more antagonistic members of society.

Fable II features many, many secret items to find. While your first visit to the shops in the game may leave you feeling disheartened, there are a wealth of items to find and acquire by other means. You should check the shops regularly too. Events in the game world will affect what they sell: if you spend a lot of money in one shop, they can buy in new and more exotic items.
There are basic dig spots, which your dog must find, dive spots, which are shown by a small whirlpool in a body of water, and chests, all containing items. None of these will contain anything really lucrative in the general game world, and many of the items within are randomised. Certain chests require a set number of silver keys to unlock them however. We've listed the basic locations of the silver keys at the back of this guide. These chests contain more expensive items.
There are also Gargoyles to find, again listed at the back of this guide, along with details on the side-quest associated with it. Demon Doors are scattered across Albion too. These contain great treasures including a number of legendary weapons.

The game, as with the real world, revolves around money. You earn gold for completing quests, but you can also find it buried, in chests and acquire it by other means. Taking part in the Crucible (see the quest guides) earns you a pretty good sum, and you can also buy property in the game. You can actually purchase any building you see in Albion, from shacks to mansions, stalls to huge shops, all earning rent or profit from sales. Buy enough and you become King of Albion! Money from property comes in to you regularly while playing, and if you leave the game for a few days a healthy stash builds up! There are a number of jobs on offer, including Blacksmith, Bartender and Woodcutter, with Bartender the easiest and most profitable. You get promoted after a certain amount of gold and then can earn more with each passing second. You can also bet on pub games either in the taverns or from travelling game masters.
There are many ways to earn money in Fable 2, both on the good side of the moral coin and the bad side. Below are some tips for getting a pile of money flooding in every time you boot up your console.
There are many jobs you can take on, with the primary three being bartender, blacksmith and woodcutter. Following that order, the bartender is by far the best. It is worth getting your promotions are early as possible as you can get great chains going earning 75 gold for each beer poured with a little patience. This is the easiest way to earn money, though they take the most time.
You are also able to bet on the various pub games in the inns and available from the travelling game masters in Fable II. These include Fortune's Tower, Keystone and Spinnerbox. Additional jobs include work as a bounty hunter, seeking out criminals from the guards in Bowerstone Market. You can fast travel to the area and these quests are unlimited, meaning you can repeat them as much as you like. The Assassination Society gives out warrants which can pay gold into the thousands throughout the game too, but your morality will take a serious knock. Similarly, Civilian Displacement requires you to lead civilians out into the wilderness to slave camps, again paying a lot of gold but costing morality points. Work with the archaeologist is available very early on and is also very lucrative. You can fast travel to any of the locations you are sent on a job, so they don't even take that long to complete.
Buy stalls and shops as soon as you can afford them. Ensure you take on specific quests in order to get access to the more lucrative properties such as the Rookridge Inn after completing the Something Rotten quest for just 2,500 gold!
Make use of the economic climate by stealing in an area to reduce house prices, intimidating or flirting with shop owners to get better prices for buying and selling goods, and of course remember to sell anything you find while on quests – you can always buy them back again later! While quests don't frequently reward you with cash, you can sell any trophy you receive as a reward for gold well into the low thousands if you're not especially sentimental about them. The Thag's Head trophy is worth 1,000 gold, with values then ranging from there up to The Crucible trophy and the Shard Shard at 5,000 each – generally the value is based on the difficulty of the quest.
Any house, building or stall in the game can be purchased. Simply walk up to the note pinned next to the door and you can get information on the price to buy the property. You can then either live in it, or rent it out, earning you money for every five real-minutes. You even earn the money with your console off, though at a reduced rate. Set prices higher to get more cash, but you suffer a corruption hit as a result. Particularly good places to buy early on include The Silk Moon in Bowestone Market for just 3600 gold, the weapon stall in the Old Town, Luminous Cottage in Oakfield for 4,800 gold, any of the caravans in the game,
Before heading to the Spire try to buy as many properties as you can. These will then give you considerable rent on your return.
You can alter the clock on your Xbox 360 by as much as a month (this is the maximum amount of gold you can earn at once) to get a nice payload when you turn it back on. Do this repeatedly for heaps of cash. You must be offline to do this as Xbox Live will alter the clock otherwise.
Buy the weapon stall in the Old Town of Bowerstone. This allows you to get a significant discount, so you can now buy weapons from here, then sell them to the blacksmith's shop in Bowerstone Market for a profit. Similarly, sell the weapons on to the travelling traders in Fairfax Garden where you will get even bigger profits. Both these options increase the value of your stall in the Old Town too! This technique also works with jewellers, particularly when selling on the items to general traders.
Equip augments such as Gold Burden (though this reduces your attack and defence – try using it with another augment to counteract these effects!), or the better Golden Touch, or preferably both, to earn cash while fighting. Equipping these and then taking on the Crucible is a sure way to improve your bank balance.
OK, that's the basics covered, now onto the walkthrough...
The Crucible is by far the best way to earn experience in Fable II. Once you pick up a legendary weapon you can continue to play through it as many times as you want to get more and more experience.
Clearly quests are the best way to get experience, most of which is collected when an enemy is killed. Therefore, jobs such as Slave Rescue, which need you to free a group of slaves from various camps around the map, are very good if you can get the work (usually generated randomly throughout the game). Similarly, Bounty Hunter work earns experience, and just exploring through areas such as Wraithmarsh keep your XP coming in regularly.
There are various potions you can find while questing, or, buy them from the various potion outlets throughout Albion. Many give you experience, with the most lucrative, being the more expensive, whereby drinking them instantly gives you XP points into the thousands. Be sure to use them as soon as you find or buy them, it is often easy to overlook them in favour of health potions. Certain augments, most notably the Cursed Warrior and Discipline, earns you XP as you fight (though the former also depletes your health while it is being used.
You can spend this experience on a variety of moves and abilities. It is recommended that you make a special effort to upgrade the likes of Inferno, great for defeating Hollow Men, and Raise Dead, which can deflect enemy attention away from you and is particularly handy while at the Crucible. Of course, while you cannot actually die it is worth upgrading your health repeatedly using the Strength category, as this gives you a better chance in the Crucible and will reduce scarring!
Sleep in as many beds as possible! Many have good properties that can give you experience boosts from using them.
When donating to the Temple of Light you earn experience for each donation of 1,000 or 5,000 gold. You can do this repeatedly as long as you have enough gold.
You can set up a co-op game with a second controller, which then makes a carbon-copy of your character for a friend to play as. Discard all of the co-op character's abilities, then quit the co-op for the second player, gifting all the XP to your main character!
At the start of the game you are presented with a choice. Either pick to be a male hero, or a female one. Both selections will give you the nickname Sparrow, the only real change to gameplay is that if you are a female character you have to become pregnant and give birth (which happens pretty much instantaneously after sex and doesn't affect your fighting ability!). Both male and female heroes can have sex with male and female NPCs as they see fit.
The game starts in Bowerstone Old Town, a location that you will become very much accustomed to over the next few hours. Here you are introduced to the Left Trigger zoom, which allows you to scope in on specific elements during cut scenes, entirely optionally, such as Fairfax Castle in this case.
- Buy the music box from the trader for five gold coins
Upon hearing a commotion in the town square your sister, Rose (guardian over you as orphans), leads the way to investigate. This is an overarching story-quest that stretches over the whole of the childhood phase of the game. The ultimate goal is to buy the music box from the stall seller who is causing the crowd to gather.
Unfortunately money is scarce and the price for the box is 5 gold coins. A character who will become all the more familiar as the game progresses, Theresa, makes it clear that it is an essential purchase for turning the orphans' fortunes around so you must do some minor questing to gather the asking price.
- Locate the five missing warrants
Head directly to the right hand side of the stall towards the guard with the yellow exclamation mark above his head. Let him explain the conundrum he is in and accept the quest with A.

To collect the gold coin reward for this task we must locate all of the warrant papers that have been scattered around the town. Double-back on yourself and head behind the magic stall to visit the photographer and activate another quest.
This just requires you to climb up on stage and strike a pose, introducing you to the game's expressions system. Emotions are mapped to the D-pad demonstrated in the bottom left corner, so pick either the thumbs-up, heroic pose, thumbs-down or fart and hold the D-pad button down, releasing it in the centre when the moving bar turns green for full effect. You lose or gain no evil or good points regardless of the expression, so have some fun.
Achievement complete – The Show-Off (if you held the expression successfully) 5g
This earns the first gold piece. Head down the alley to the right of Barnum's stage to where the warrants blew. You come upon a nasty piece of work terrorising a dog in the centre of the street. When prompted, push X repeatedly to get out your sword and teach him a lesson – your first good deed, earning four positive points.
Follow the path past the crowd and down the hill. The first warrant (for arson) is on the way – along the line of the golden track and just past the lamppost on the right.

Listen out for Rose's comments as you go – she will often let you know if you've walked right past one without noticing!
At the end of the alley collect the second warrant by the vent on the floor next to the stairs at the far wall. Then head up said stairs to the marked character. He has a problem with bugs in his warehouse and needs your help to eliminate them.
This quest is your first opportunity to earn some evil points, if you desire. Once you have accepted, you are beamed into the warehouse, and Arfur, the villain of this early piece introduces himself (look at him with LT when prompted), saying he will give you a gold coin instead if you destroy the warehouse owner's stock. If you want to do this, earning 1 evil point, then remain downstairs and use your sword to destroy the stock. The completion metre in the bottom right hand corner will tell you how you are progressing. Otherwise, to earn 2 good points, continue upstairs and use your toy gun to exterminate the pests with Y. The game should lock you on to the majority of the five automatically, though they are in the open anyway so shouldn't be too hard to miss.
Take out those Beetles!
This earns the second gold coin. Follow the trail down the stairs and to the right to the two adults arguing outside underneath the lamppost. Pete, the drunk, has had his bottle stolen by a nearby tramp, and will give one gold coin if we get it back.
Sneak up to the tramp down the alleyway next to the warehouse steps and retrieve the bottle. Move slowly so as not to disturb him! Then return to the couple. You can now either give the bottle to Pete for 3 evil points, or to the woman, for 3 good points. Both result in getting a gold coin, so make your choice! You are also given the third warrant (for guntoting) as part of the reward.

The fourth warrant (for sneakiness) can be found by the crates down the other end of the street with the warehouse and arguing couple on. The fifth warrant (for burglary) is by the lamppost to the left of the second, near the steps leading down.
Head back towards the main square to see the guard and evil Arfur will approach you in the alleyway en route. Here you can choose to give him the warrants for a gold coin (remember that the guard has promised you one, so it's a like-for-like trade) and 5 evil points or continue past him and back to the guard to return them to him for 5 good points. This has far bigger effect that that alone however. Giving the warrants to Arfur will allow you to steal and commit whatever crimes you like in the Old Town when you are older, as crime has taken over the district and law is not longer enforced. If you don't give them to him it will be far more prosperous with shops, money, and overall more beneficial for you (though not necessarily more fun!).
With the fourth coin in hand, walk over to the pictured pauper attempting to woo his romantic desire in the balcony above.

The man promises to give you the last coin if you knock on the door of the house and give his love letter to the girl. Go over to the door opposite the man of the tale and knock using A. The mother answers. To earn 1 evil point give the letter to her. To ear 1 good point push past her and head up the stairs to give it to the girl instead. Both options result in receiving the final gold coin for delivery of the postage.
Achievement complete – Whippersnapper – 25g
With the last gold coin in hand, head back to the magicians stall and buy the music box and complete The Music Box quest.
Head back to your house up the street to the left of the stall. Walk up to the plush box overlooking Fairfax Castle and hold A to place the music box down and use it. This triggers a cutscene and suddenly it disappears – it appears as though the magic isn't real as Rose wishes for you to live in the castle. Follow her back to the house and to bed where your new friend is also waiting. Secret item: You can pick up Rose's diary in your shack at the start with no morality punishment.
Lo and behold, you are woken in the middle of the night and told to report to Fairfax Castle. Walk out of your shack to the right to meet the guards and hold A to accept their request to visit the castle. Once there follow the butler to meet Lord Lucien and complete the Childhood phase of the game.
You awake with Theresa in the gypsy camp at Bower Lake. She has been nursing you back to health for ten years and your hero is now a young adult.
Read on for a walkthrough and some videos of all the chapters in this section of the game.
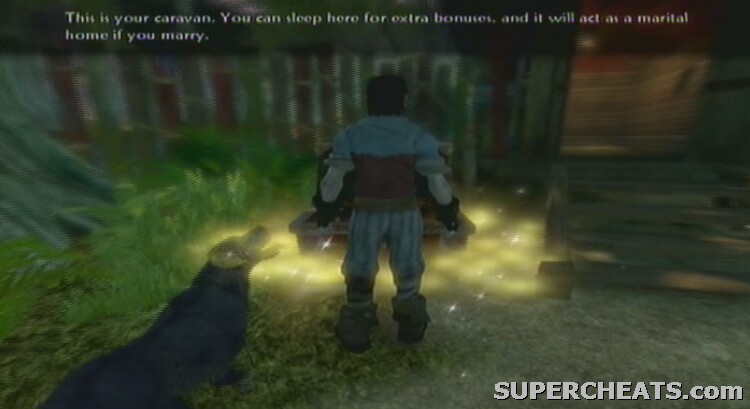
Theresa has stored some items for you in a chest which you'll find useful. Head down the hill through the centre of the gypsy camp and out the other side to your caravan.
You can sleep here to regain health and certain benefits related to the area, but for now, open the chest with A to receive a spade, dog elixir, placebo health potion, light splintered crossbow, rusty longsword and collar of holding. Best of all, you now have the dog from your childhood (it lives a very long time indeed!) as your companion for the rest of the game. Using the inventory in the pause menu, equip the collar of holding to name your dog.
With this done, return up the hill to Theresa by the gate under the bridge you began on. Follow her out of the camp and she'll give you the Bower Lake Tomb Seal. You need to use this to access the first tomb of the game, the Guild Cave. Sprint down the hill towards the lake, stopping to dig up any items your dog finds.
Achievement: The Archaeologist (for digging up an item) – 5g
Run into the water and swim across to the island. Press A by the door to insert the seal and unlock the door. We need to go deep into the tomb to locate the chamber of fate. The secondary goal however is to gain strength, and while the enemies in this area are weak, you can still pick up valuable experience points to unlock new moves and abilities.
Head down the corridor and press A over the hole in the floor to dive spectacularly into the pool of water below. Climb out of the water and move through the archway, pushing A to vault off the rock and onto the level below in the next room. Run diagonally across the centre towards the opening at the other end. About half-way through the room some Giant Beetles emerge. These are best despatched using your crossbow from distance, but even up close they shouldn't prove too taxing. Hold RT once you have defeated them to draw in the experience orbs and move on. Follow the corridor, fighting off any beetles en route until you come to a larger room. Shoot the glowing blue orb in the centre of the room with crossbow bolts until it locks into the notch above the locked door and opens the entrance.

Turn left through the entrance to locate some treasure. Back on the main corridor, keep going through the beetle swarms until you enter the water at the far end. Swim into the centre of the cavern; you can collect two diary entries from separate explorers on the islands on either side, then continue on through the water-filled tunnel. Follow the path as it emerges back into the cavern and across the bridge. Proceed down the corridor. You will eventually come into a high cave with rickety bridges and many beetles. Take each set out from the previous platform using your crossbow and you should avoid taking any damage. Move through the corridors ahead. Step into the golden circle of the farthest room and shoot the glowing orb, then slash at it with your sword when it comes close and turns blue, before shooting it once again to send it up, and unlocking the door.
This quest is designed to give you a gentle introduction to the game's concepts
Continue through the caverns and over the bridge, then step into the circle of light to boost your strength enormously. Now you can assign strength, skill and will points to various aspects of your hero to boost their stats. See the RPG section of this guide for full details on that element of the game. Having spent as many of the points in each section as possible, use your new Will attack (activated by holding and releasing B) on the glowing pink switch in the corner of the room. Walk up to it and hold A to leave the tomb and appear back on top of the hill overlooking Bower Lake.
You appear amongst hordes of beetles, so try and cast a surround spell using your new Will ability to deal large amounts of damage to multiple enemies. Finish off the rest with X.

Now follow the yellow trail in the direction of Bowerstone where we need to meet Theresa. Unfortunately once you get to Bowerstone Road you will see that it is in fact blocked as bandits are terrorising travellers on their way to the big city. We need to travel to the bandit camp of notorious nasty Thag and defeat him and his cronies.
Head back down the path following the trail left and over the hill until you come to a pair of mysterious banners. Here is a good opportunity to revive your health or equip any weapons you want to use in the battle ahead. With that done, continue on into the bandit camp. Move up to the shack at the far end to start the confrontation. These relatively weak enemies, first coming at you in a pair, can be easily despatched using Will spells and light sword-work, or simply crossbow them at range.
Many more will come upon you now, but they rarely attack together so you should be able to deal with them. With that mass defeated, Thag will come out of his shack and try to finish you off. Use ranged attacks to keep away from his sword. If you do find yourself up close, block his attacks and counter as he staggers back until he is knocked down for good.
This nabs you your first trophy, Thag's Head, as well as a not-too-shabby 100 Renown points.
To earn some extra points go into Thag's shack and open the chest to take the cage key needed to free the slaves (you can also find the Grubby Journal on his bed). On your way out you will encounter the owner of the slaves, who bought them from Thag. Now you can either give him the cage key for 100 gold and 30 evil points, or walk up to the cage and unlock it yourself with A for 30 good points and you will have to fight the bandit, though it's an easy contest. Finish him off to get the 100 gold he promised you anyway!
Achievement: The New Hero 50g
Now follow the trail out of the camp and back to the spot on Bowerstone Road where the blockade was previously in place (about halfway along there is a treasure chest by some ruins on the right.) Move through after listening to the acclaim of the guard if you want to and you will be transported to the luxurious city of Bowerstone.

The Bard introduces himself as you enter, someone you should learn to exploit to boost your renown later in the game. He will be your guide for the day. As you cross Bowerstone Bridge follow your dog down the steps and to the treasure underneath (behind the crates at the bottom of the stairs) before returning up top and moving into the circle in the centre of the town square. You need to amuse yourself for five real minutes before Theresa arrives. Head to the tavern and sleep in the beds upstairs (for free), get used to the pub games or explore the town, shops and jobs on offer. At this stage the Blacksmith job is the only one open, and it's also the least rewarding.
With five minutes up, wander back to the centre and meet Theresa. When she asks whether you 'feel the weight of responsibility' for slaying Thag and his men, use either the thumbs up or thumbs down expression mapped to the up and down buttons of the d-pad respectively to convey your view. There is no punishment for either selection, just a different response from Theresa. Follow her through the town and down to the gypsy caravan where she gives you a talk on the history and background to the game, as well as some Fate Cards to pore over.

To find the location of the first hero, we must initially pay a visit to the abbot at Oakfield, which also gives a perfect opportunity to explore the second of the game's four towns.
Take some more time to generate some cash from the items you've already acquired on your travels and to stock up on potions and equipment if you feel the need. You can always do this once you get to Oakfield however. To get there, follow the trail, turning left before the bridge out of Bowerstone and heading to the Old Town Road. The Old Town looks different depending on what you did while as a child, but head down to the warehouse from long ago and left down the steps, through the arch and out of the town.
Travel through Roookridge Road, the small area full of dig-spots and onto Rookridge itself. This area is crawling with bandits, and as you follow the track you will be introduced to a hijacker who has attacked a carriage. You can pillage the remains of the vehicle and its owners for 10 corruption points, or leave it alone for 10 purity points. Incidentally the items on offer include 50 gold, apple pie, and milk chocolate, so not worth writing home about.

Continue on past the horse statue and uphill. As it turns downwards follow the trail until you come to a varied area featuring high cliffs and a flat expanse beneath them. All around, perched on top of said peaks are bandits, and the only way to Oakfield is to fight through them. They are armed with pistols and rifles, which you may well not have encountered yet. Your crossbow (or equivalent ranged weapon) can do just as good a job, though you may want to spend any spare skill points you have currently on upgrading your Accuracy.
Use a ranged weapon to pick off the bandits up high. Doing this will enrage the others, who will doubtless come streaming down the cliffside to engage you close-quarters. Use your sword and Will attacks to see the lower enemies off before moving up the precipice and taking on the musketeers up high. They will number around ten, so don't be afraid to use potions if necessary. With them vanquished, move on cautiously – the area is still littered with bandits – as you proceed up the winding hill-path.
You will often have very similar fights to this while traveling through Rookridge
You'll know you're going the right way when you go under a ruined aqueduct, complete with treasure chest underneath one of the arches – plus you should have met more bandits by now. At the bottom of this hill is another bandit camp. Generally though they're ability is pretty limited and once you take them on up close you should just be able to treat this as a XP gathering exercise. After moving past the camp you should come to a ruined bridge with bandits guarding it. Despite their cajoling, the only way forwards is to dive into the swollen river below and swim to the bank.
You will come across a man whose little boy has been carried off by Hobbes into the depths of a nearby cave – helping him provides some much needed XP and good points. Going through this cave is the only way to proceed, but killing Hobbes is fun, even for the good and pure hero, so it's not too bad. The boy's father is a bit of a coward, but nonetheless he wants to follow you in, and will regale you with stories of Hobbes eating little boys and how they all once were lovely, naïve children. Lead him into the cave and the truth will out.
Once inside, swim out in the pool to the dive spot to collect the booty beneath, before leading the father along the path and deeper into the cave. You'll be introduced to the Hobbes before they attack you, so don't feel the need to rush or be too cautious in exploring the early section. Once you emerge into the mining section of the cave, complete with tracks and carts, the first Hobbes will attack. These early versions really provide little resistance, so use whichever weaponry you wish, though they can take a lot of punishment.

Head up the winding wooden path going high into the roof of the mine. There are numerous side rooms sporting treasure and items and you can see where these locations are in the latter section of this guide. Soon the father will, sensibly, run off into unknown territory and rooms full of Hobbes. Don't feel the need to keep up with him, but once you get there you need to follow your dog to find a way past the blocked path. After which you will see father and son reunited, but not in a particularly happy-ending sort of way. Get out of the cave at this point, following the route to the other exit emerging behind those taunting bandits from earlier. It's a hectic path, with dozens of Hobbes, but it should be a XP gathering exercise rather than a particular threat to your health.
See the bandits off to the right when you surface. Then double back and head up the middle path going uphill along the trail to Oakfield. Get the treasure by the mine at the top of the hill (in between the two large crates to the left of the shaft) and continue on. Take the right hand fork underneath the arch and you'll arrive in pleasant Oakfield.
To proceed we must find the Temple of Light and the abbot within. Explore the town, but follow the main path past the farm and woodcutter job, turning right into the next field and off the beaten track. Head right again once you emerge from the other side of the field, following this route over the bridge and past the pub, keeping it on your left hand side. Staying on this path (don't take any grassy routes leading off it) you will eventually come to a pool and waterfall. Keep on and you will move up a hill to the Temple.
Talking to the abbot will start the questline. Here we must gain the necessary renown points (another 400) to get the respect of the abbot and allow us to escort his daughter into the sacred cave to get some sacred water needed to plant the golden acorn.
We therefore need to take on some of the side-quests in Oakfield and the surrounding area.
This is the first sub-quest to embark on and as it is not directly related to the main questline you need to select it as the active mission in the Quests/Maps section of the main menu so the golden trail directs you to the right place! The location for this is the Oakfield pub (The Sandgoose), where good old Barnum from our childhood needs a hand.
He has bought the bridge we were at earlier, the one the bandits had captured and destroyed. We need to go in and clear the area so he can set about repairing it, allowing us to return to Bowerstone eventually too. The bandits are using the abandoned inn at Rookridge as their base of operations, so head out of Oakfield and all the way back to the mineshaft with the treasure chest, heading left at the bottom of that hill, past the water pool. You can see Rookridge Inn from afar, atop the large hill, but there won't be any enemies until you enter.
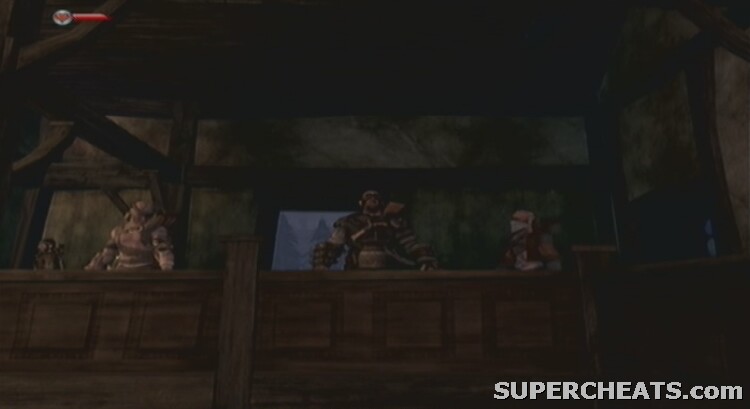
Try to do as much damage as possible from range, though the bandits' height makes that tough from the ground floor. Head up the stairs and some will undoubtedly come to meet you. Take them out at close quarters and head up to the ranged bandits before they have time to inflict any damage on you. Collect the treasure in the side room (left at the top of the stairs) and then head out onto the balcony. Follow it round and you'll see Dash, the bandit leader taunting you from a distance. He's very fast but isn't going anywhere in the end, so pursue him at a reasonable pace, but be aware that there are more of his cronies in the area to keep you busy.
Chase down Dash!
Follow the trail along the tracks and up into the mountains through hordes of enemies and you'll find Dash cornered by your dog. Finish him off with your ranged weapon and collect the treasure behind the monument, then return to Barnum (you can fast travel now as you've been there before, just select the quest again in the Quest/Maps window and press A) to finish the quest and receive a healthy 250 renown points as well as a pair of Barnum's Goggles and Barnum's Thesaurus.
This should leave you with three quests left as possibilities to increase your renown, Till Death do us Part, The Sculptor, and The Archaeologist. For the purposes of this walkthrough, we'll go for the Till Death do us Part quests, as that is certainly the most interesting quest and rewarding quests.
Select it in the menu and follow the route out through Rookridge to the statue that overlooks the value below on its own little extension of the cliffs. You may have been past it before, where the inscription reads 'Beware the ghost'.

Walk into the circle of light and get talking with the spirit nearby. Its partner-to-be ditched it near-enough at the altar and so it killed itself – now it wants revenge. The task is to go to Bowerstone, woo the man or woman (depending on which gender you are, though the name is the same) and then break their heart with a cruelly worded letter from the ghost to enact sweet revenge. Their name is Alex and you can find them either at Bowerstone by the main bridge leading to the market or in the pub just nearby. Use your seduction skills (see the seduction section for more tips!), particularly taking her to the romantic spot beneath the clock tower in the centre of the town square.
Once they are ready to marry you, either give them a ring or the rejection note. Your decision here may be conditioned by whether you want your wife or husband to be of your own choosing or not, though bear in mind that as well as the 100 renown points either way, there is also a 10 evil points haul if you break their heart, or 10 purity points if not. You need to sort out a marital home (see the romance section for more) if you became engaged, otherwise give her the note and return to the spirit to complete the quest.
You may well still need to complete one more quest before you have enough renown to take on the abbot's request.
This quest starts in Oakfield, so select it in the menu and then head to the Sculptor's house along the river trail. To perform the quest simply climb onto the platform and pull an expression of your choosing – you'll get more renown for the best poses. Hold the D-Pad down until she tells you to stop, then try and release it in the green bar, which will now be pretty small. For this first one you should get 100 renown points and the statue erected in Oakfield.
If Theresa doesn't come over the speakers telling you that you have enough renown (you can also see how much you need under The Ritual quest in the menu, commission more statues from the Sculptor if you have any spots available (see the extras section of this guide), pay a visit to the Bard and commission some songs, or try another open quest.
Select this in the menu and head to Bowerstone and Fairfax Gardens. The female archaeologist is working in the grass to the right as you enter from the town centre. She has a collection of artifacts that need finding spread across Albion. If you're just playing the main story as much as possible, you should only need to take on one of her requests.
The first artifact couldn't be easier. In case you didn't work it out from the note she gives you, head to Bowerstone Old Town and follow your dog to the artifact. This is the basic formula for every quest she gives you – fast travelling to where you think/know it is also works. Follow your dog to the dig spot to collect the first note, then return to the archaeologist and give it to her for a healthy 75 renown.
Finding the first artifact
The second artifact is located in Rookridge for 100 renown and the third at Bowerstone Cemetary for 125 renown. Another six open up later on in the game (after returning from your 'journey'), and the final four when the game is completed. You are then given access to a tomb with the prize The Archon's Dream gem, which fetches a large price. You can kill Belle for the evil alternative, earning 50 evil points and 30 corruption. Giving her the artifact nets 50 purity points. Overall you can get a heap of good points for each artifact found too.
With the renown in the bag, we can now return to the abbot at the Temple of Light in Oakfield as we resume The Ritual quest.
After talking with him you will be told to meet his burly daughter at the entrance to the cave where the ritual takes place. As she is a monk and a pacifist you have to escort her through the cave on her dangerous mission. Wellspring Cave is right down the hill from the temple – follow the golden trail and listen out for the monk (Hannah's) voice.

Head inside the cave with Hannah, moving down the path to the central chamber. There are no enemies yet despite the eerie atmosphere so feel free to admire the spirits in the sky and listen to what Hannah has to say. Once in the central chamber wait for her to step on the appropriate switch and a new gate will open. Escort her (again, through no enemies) to the first fountain. Stand on the switch next to Hannah once you embark onto the central island and the water begins to pour into the jug. When you get back into the main cavern, before the central chamber the previously-beautiful spirits will reveal themselves.
The cave is full of a new enemy, Hollow Men. They are incredibly susceptible to fire (Inferno) attacks being highly flammable corpses and also attack in large groups. A good tactic is to draw them in close and then cast a surrounding Inferno spell before finishing them off with melee and ranged attacks, or other Will spells.
Back in the central chamber with the path cleared Hannah will stand on the next switch, in turn opening the next door. As with last time, lead the way through to the next room, this time ascending the steps to stand on your switch up high. Be prepared for Hollow Men to attack this time as Hannah fills the jug and get your inferno targeted attack and any other ranged spells and attacks ready as they will all attack from below – you are required to stay on the switch to keep the water flowing (you can leave it and clear the room before returning to it if it all gets a bit hectic!
Help Hannah fill up the water jug
Battle off the waves for about two full minutes and you are safe to return to the main room with the jug filled a little more. After the last gate opens fully head along the path to the third room – battling through Hollow Men en route this time. There are literally dozens of the zombies, followed by a Headless Hollow Man as a sort of boss to the scene. To defeat him, attack from range as he is a slow mover. Up close his blind slashes can inflict some serious damage and his electric attacks also need to be avoided. When his eyes glow blue it means he is charging, so start diving around the room to avoid the inevitable attack.
Continue on to the final room with the undead defeated and climb on the switch to complete the ritual. This time however there is an interruption of another sort with terrible news about the abbot, Hannah's father. Follow her back to the Temple of Light and once there you'll see her renounce her pacifism in the face of true evil. This, unfortunately, is what was needed to awaken her violent side and make her a useful hero. Changing her name to Hammer, she is now the true Hero of Strength. You will be automatically transported to the funeral, where Hammer is convinced to join forces with you beside the golden oak, and the next hero, of Will, is identified. You receive a leaf from this plant as your trophy reward as well as a whopping 1000 renown.

Achievement: The Hero of Strength – 100 points
Taking part in and completing The Ritual unlocked the Donating to the Light distraction.
You can now pay a visit to the Temple of the Light regularly to make donations in return for positive points. The most sensible course of action is to donate 1,000 gold at a time, giving you 25 good and 25 purity points each time. Donate 500 gold in total and then one more upon the monks' request between midday and 1 pm to earn the title of Harvest Benefactor and attaining the weapon The Rising Sun. You need to donate over 10,000 gold in the one go for this, so one for the future perhaps.
With that in mind, travel to the Chamber of Fate via fast travel or using the Cullis Gate on top of Bower Lake Hill as the first step on the next mammoth quest, The Hero of Will.
Theresa explains that this hero is residing in Brightwood Tower, though Lucien's Spire soldiers are also on the hunt, so things may not be quite so simple as just paying him a friendly visit. Head back through the Cullis Gate and follow the trail through Bower Lake and on the road to Brightwood.
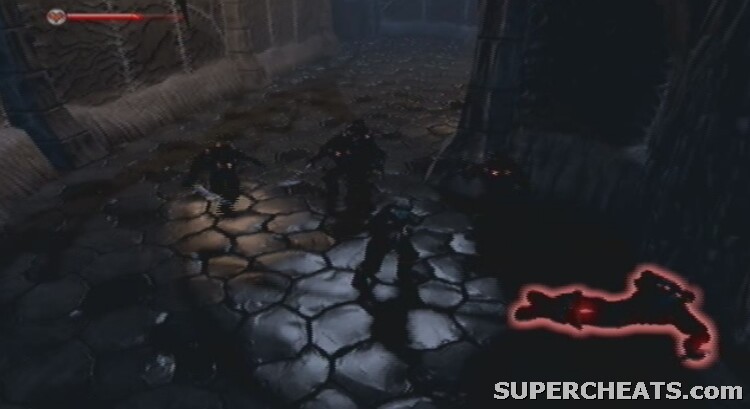
Once in the area of Brightwood, follow the path up to the closed gate and push A to open it. Stay prepared for meddlesome Hobbes to come and pester you on the way. You should pass through a second previously-sealed gate before your attention is drawn to a miniature spire – a lethal and tough enemy we could do with avoiding! Continue along the path towards the tower in the distance and the spire will deploy some Spire Guards. These are essentially the next level up from bandits, but the same sort of rules apply for defeating them. They are much better at blocking and have plenty more health, so it's a good idea to attack from range or wait for them to attack and then dodge or parry before flourishing a sword attack on them.
Despatch this initial group before moving on towards the tower. As you move up the sets of stairs towards the front door you'll also encounter many more Spire Guards. Kill them all and move into the tower, taking the treasure from the chest on the bottom floor and climb the staircase. Once you reach the top floor of this initial section defeat the guards and move along the walkway towards the taller structure. Climb the set of stairs in the next building, dealing with any Spire Guards, and peer through the flames on the top floor to discover the fate of the Hero of Will.
Head back to the Chamber of Fate (you can fast travel) to meet Theresa and devise a plan for locating and rescuing the missing Hero. We need to find Lucien's diary and learn what he is planning and perhaps where he is likely to have taken the Hero of Will. The idea is that Lucien's butler, creatively named Jeeves, will know where it is. We can find him in the pub in Bowerstone Market so head there and meet him in one of the rooms upstairs. The golden trail should lead you there if you get stuck.
He wants 1,000 gold in exchange for a map to the juicy diary that he has buried. Go and earn the money if necessary then pay him for the location. You can always kill him and get your money back if you're doing things the evil way, just bear in mind that you are in a public place!
Use the map to locate the dig-spot, at Bower Lake. Of course, things are never as easy as all that and there is a humungous Troll guarding the location. Use rolls and dodges to avoid its tunnelling attacks and hit its weak spots (glowing red) with your ranged gun or ranged spells. You may have to sprint round behind it to be able to hit the more difficult ones, and sometimes they disappear until it has attacked. Dig underneath it once defeated to get Lucien's Diary. Return to Theresa to get your next main quest.
Defeat the troll to get Lucien's Diary
From Lucien's diary it has become clear that he has a policy of recruiting guards from Westcliffe – the winners of a prestigious and challenging arena known as The Crucible, sharing its name with the quest.
We must win it to gain access to Lucien's army and so also to the spire, where Garth, the Hero of Will was presumably taken after being captured.
Head through Brightwood along the golden trail to meet Hammer under the bridge over Westcliff Road. The next area is even more bandit-ridden than the last, so it's fortunate that the invincible Hammer is by your side. Head under the bridge and onto the Bandit Coast. Bandits have numerous bases along this coastline so be aware that you will have to fight off a fair number. You may also meet Thag-like bandit leaders before reaching their main base.
Eventually, after about an in-game day of fighting scores of enemies you'll reach their main base – blocking the route to Westcliff. Hammer will hammer the door down, at which point you need to defeat yet more bandits and highwaymen. Highwaymen are more evil-looking and sport guns as well as swords and incredible agility meaning the usual close-up bandit-killing melee attacks can be countered in groups with Highwaymen by their ranged attacks. Stay quick, dodge regularly and try to take out the Highwaymen first. If surrounded by bandits perform surround Will spells to knock them down and run to take on the Highwaymen.

There is a fair amount of treasure in the camp as well as a bed to sleep on and regenerate your health in the shack near where you entered. You'll need it, as the next area is even tougher. Head down the path through a few more bandits and to the right of the building and aqueduct to exit the Bandit Coast and join Westcliff.
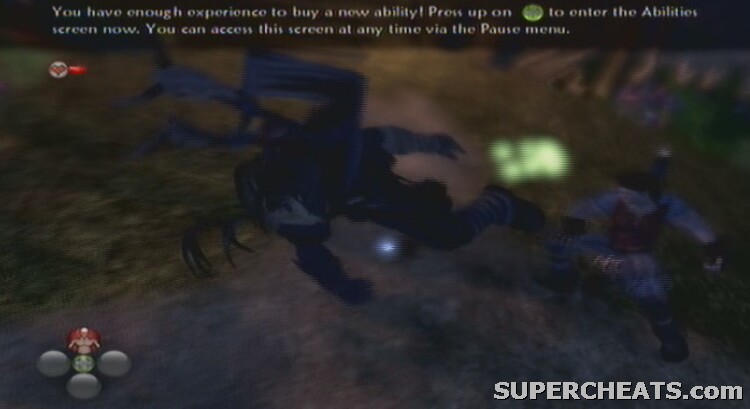
Not far into this area you are introduced to the next new enemy in the game and certainly one of the hardest to defend against, the Balverine. They jump in an incredibly agile manner and can deal massive damage with unblockable flurry attacks. Quick melee combos are effective, as is Inferno magic. Slowing time also helps if you do it once they jump into mid-air, giving you more time to dodge and counter. Force them into jumping with fast melee combat, then dodge and attack as their swiping attack misses. Beware not to attack after they have jumped unless you dodge and their attack misses first, as it's unblockable and they can do it as you are attacking, forcing you back and unavoidably taking off a large slice of health.
Along the trail you'll meet a woman whose family has been attacked by Balverines. Her son has been carried off, she believes to the Howling Halls, a building located nearby. Head across the bridge, through the camp, past more Balverines that must be defeated, and into the lowland swamp area. Climb the hill on the other side, then fight across the bridge until your attention is drawn to Balverines guarding the edge of the building. Push on inside the walls and down into the halls through the crypt-like door. The Balverines don't actually attack you at the moment, it's all for suspense!

Hammer and the woman will lead you through the tunnels into the main hall where the first enemies actually fight you. The treacherous woman appears to find her son then jumps into the air, turning into a stronger-than-your-average Balverine before hordes of the things attack. There is no option but to fight off the masses until Hammer finds a way out.
After fighting an already impressive number of them, Hammer needs protection while she works on knocking over a pillar to create a bridge over the Balverine's spike pits to manufacture a way out. Use potion after potion and spell after spell, particularly Raise Undead and Inferno to divert attention from yourself and singe your enemies' fur. Defeat the giant Balverine and its accomplices and escape over Hammer's bridge, following the path out of the Howling Halls and back to what now seems like relative-safety, in Westcliff.
Fortunately there shouldn't be any more enemies until you enter the village of Westcliff. Just head up the path and through the main gate. Stock up on food, potions and equipment, then head up the main steps of the mammoth building that is the Crucible and talk to mad-dog to enter. You may need more renown if you haven't done every side-quest mentioned so far or made use of the sculptor and bard regularly. Below are few more side-quests that have recently been unlocked – do them all to get up to date.

This is the first you should try so select it in the quest menu and then go to meet the two mischievous brothers and learn what a quandary they have managed to get themselves into. They have accidentally unleashed 100 Hollow Men in Bowerstone Graveyard using a book of the dead. Head there and clear them out. The golden trail will lead you to each horde of the beasties, at which point they may well number well into double figures. There are five locations to visit in the graveyard before the 100 undead will be returned to the ground. You must then enter the crypt and get the book back to ensure this never happens again! Return it to the brothers in the Old Town to receive a healthy 250 renown and a Hollow Man Trophy.
Next you have a choice. Either embark on the Cold Comfort Farmer or the Red Harvest quest. Cold Comfort Farmer boasts 750 renown and either 30 good or 20 corruption points. Red Harvest is a purely evil quest however, for the same 750 renown and 50 evil points.
First we'll look at the good option.
Set it as your current quest and head to Brightwood, following the golden trail to locate the shack which the farmer in this quest is meeting you at. He wants you to hunt down a notorious bandit that killed his wife, but rather than kill him in vengeance, you are to capture him and bring him to the farmer. Head off to the marked spot in the wilderness at Ripper's camp and take down the bandits. With them all defeated (not an easy feat, so use ranged attacks primarily) Ripper will unleash his fury on you. Pick whichever attacks you like, because as a lone enemy he's not too tough, and choose to either spare or kill him to get 30 good points or 20 corruption points.
This mission is the truly evil alternative – only one of these two quests can be taken on. For this one, meet the nasty Arfur from your childhood (the Old Town so-and-so) down by the docks underneath the bridge as you come into Bowerstone Market (set it as the active quest and follow the trail). He's friends with Ripper and informs you that he needs a job doing. Head out into Brightwood to the camp there and whistle three times using the expression wheel. Ripper explains that he needs you to go to the same farm and kill the farmer and steal his key. With that in mind, head to the farm and defeat his protecting bodyguards.
They fire on sight, so stay distant and do the same – bear in mind that these kills count as murders and so you get evil points for them as a result. With them all defeated, the farmer emerges, so kill him and loot the Cellar Key from his grave (your dog must find the dig spot by the tombstone near his house, it will have to have at least Level 3 Treasure Hunting ability). If you use the key to get into the cellar you will have to fight Ripper, but can then enter the dungeon below and find a dig spot at the end containing the legendary blunderbuss, The Enforcer. You can also get the enforcer by completing the Cold Comfort Farmer and Blind Date quests, then buying the farm (Giles moves out with his son) and finding the Cellar Key upstairs and using it in the same way as described above.
You should now be up to date with all your quests and are free to enter the Crucible with plenty of renown. Unlike arenas in many other games, the Crucible features room after room of enemies, getting harder and harder over eight separate areas. Stock up, augment your weapons (see the equipment section of this guide) and head inside.
Upon completion of the Crucible successfully, as well as a ticket into Lucien's army, you get the Crucible Trophy, 10,000 gold and, if you beat the set time for each room you get a special weapon.

Round 1 is pleasantly simple. Everyone's favourite enemy the Giant Beetles come in three distinct waves – if you are going for the target tme of 1:45 then bear in mind that you have to squash every last one in each wave before the next one spawns. They are also quite hard to spot sometimes so watch for any sneaking off. Use Inferno and crossbow bolts or gunfire to despatch them. Fire attacks get the crowd happiest, increasing the amount of gold they throw down onto the arena in pouches.
Round 2 is against Hobbes. Use your previous strategies from the Hobbe cave to see them off, but try to lure them onto the spikes as you hit the switch on the floor for maximum commentary and crowd acclaim. With only 1:50 on the clock and three rounds to battle through though, if you're going for a perfect run and aim to beat each time, don't waste it messing with the environmental traps.
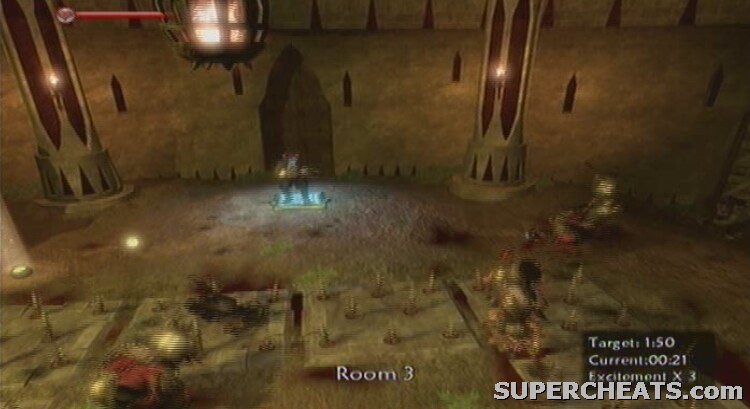
Round 3 contains Hobbes too, but with 2:25 to do it in. Use the pit in the centre of the arena to push the Hobbes into either with the push Will spell or general combat. Target the explosive barrels dotted around to inflict heavy damage on these tougher Hobbes who can also attack from range (watch out for suicidal ones too!) as well.
You now get the chance to buy some items off a trader in between the rounds, though he doesn't have a lot on offer. It's still worth getting as much as possible however, as there is a sharp rise in difficulty now.
Round 4 is Hollow Men. With these three waves, just use your usualy Hollow Man tactics i.e. Inferno and melee combat. The timer is at 2:30 for those going for a quick run, and the crowd here have a penchant for flourishes and seeing the undead burn!

Round 5 is the Bandit round, with an interesting arena layout. Some will spawn onto the central bridge, which also features explosive containers allowing easy and crowd-pleasing kills. Many will also come down lower to attack you on the ground, but try to take out as many as possible using Accuracy to zoom in close. To trigger the next wave you may well have to climb up onto the bridge and finish some off. It is worth staying up there from then on and dealing with them head on if you are going for time (2:10 on this one), otherwise remember that health is at a premium and don't be afraid to attack from as far away as possible!
Round 6 is the Bandit's closest ally, Highwaymen. The same sort of idea would usually apply, except they'll want to attack from range as much as you will. Lines of ranged Highwaymen will circle the edge of the arena, but pleasingly there are a number of switches to activate fire walls to burn them off the ledge and into the central pit. With that done, move in close to take out the rest using the explosive barrels provided and close up melee and Will attacks. Return to the switches for the next wave and repeat the process. The time for this one is 2:00 and again, the crowd appreciate using the scenery as much as possible, so send them into the central pit and use the barrels and switches if you want the most gold from the crowd.
Round 6 is tremendous fun, unless you're going for a perfect round!
Another visit to the merchant (he can't get much business off Hollow Men and Hobbes, so feel free to keep him going) is on the cards here, so make use of it.
Round 7, the penultimate arena is against those tenacious Balverines in the hardest room of the Crucible. As such you have a seemingly-generous 2:35 to do it in for a perfect round, but they pack a punch and have plenty of health. They do catch fire as we learnt on the way to Westcliff however, so make Inferno Will spells your top priority.
Round 8 is a paltry 1:50 but features the largest enemy in the Crucible. A Rock Troll, similar to the one we fought to get Lucien's Diary, is standing in the way this time, but of potential glory and the Spire rather than a single item. Use targetted spells on its weak spots such as Blades and your ranged weapon, while avoiding its attacks and dealing with the Hobbes it calls in as quickly and ruthlessly as possible. Dodge its attacks and then unleash your ranged weaponry to burst its bulging warts, slowly moving round the back so as to get them all.

When he falls the ordeal is over, and you are free to leave the Crucible as champion. With this you earn the Crucible trophy, 10,000 gold, admission to Lucien's army and the Lionheart title on request. Theresa will inform you that you are now able to join Lucien's ranks and depart for the Spire. It is made clear that you will not be back for some time, and she is right, so sort out your family (there's no need to stock up on weapons though, or equipment as you won't need them in the epic quest that awaits) and ensure you've completed the two choice quests of Cold Comfort Farmer or Red Harvest (depending on which you want to do, as outlined above) and Defender of the Light or The Oakfield Massacre which will be outlined below now. The rest should keep for later, though you also will want to invest some money in Barnum and Westcliff Development, which we'll come to shortly.
First is the good option, Defender of the Light.
Ensure you take part in this quest if you want to keep the Temple of Light active when you return from the Spire, though completionists should note that you will want to take part in The Temple of Shadows before this, as there are hidden items in the temple that are only accessible via this quest (see below). The monks will inform you, upon returning to the Temple to initiate the quest that the water supply is being poisoned, the one used in the crucial ritual we took part in with Hammer. Head back to Wellspring Cave in a deja-vu moment and systematically clear out all the enemies within.
There will be a body of Shadow Worshippers and a Monk in each of the three fountain rooms we were in with Hammer, so clear them all out to bring the head of the Shadow Worshippers Cornelius Grim out of the woodwork along with his army of Hollow Men. Take him out to keep the temple in good order and receive the Temple of Light Seal and 750 renown.
For the bad option, The Oakfield Massacre, you first must have made sacrifices to the Temple of Shadows, so we'll go over the quest involved with that first.
The Temple of Shadows, the diametric opposite to the Temple of Light, is stationed in Rookridge on its own island, reachable via a lengthy bridge up to the impressive structure. Once at the front gate you'll meet one of their members, a Shadow Worshipper. They have a rather tame entry test, though that is just to get inside the gate and not to join them. Simply crunch and swallow the chicks using the expression that appears on the D-Pad to impress and astonish him, and grant you entry to this foreboding place. You should note that this will give you 25 evil points and is unavoidable. This completes the Temple of Shadows quest. Those looking for the secret items can now venture inside and get them, then do the Temple of Light quest with only a minor morality hit.
To participate in the Oakfield Massacre however you still need to make your first sacrifice to the temple in Sacrificing to the Shadows.
You get points from the Shadow Worshippers depending on the quality of the sacrifices (monks from the Temple of Light get most) and if they take place at night. To convince people to be sacrificed isn't easy, so you need to get them to follow you to the mystery location instead. After you accumulate 2000 points you get a special prize. To do this, head to the Temple of Light and impress the monks there suitably to get them to follow you (you should be able to get four at once at least) and then head to the Temple of Shadows (fast travel works for followers too). Lead them onto the bloody platform in front of the sacrificial wheel and let it do its work to get a healthy batch of points. Repeat this process until you hit 2000. Remember, more points are given if the sacrifice s made at night. You should suffer around 50 evil points and 30 corruption points for each successful sacrifice.
After this you can get a legendary weapon by making a particularly gruesome sacrifice in the hour after midnight. Use fast travel to get there at the right time and if your sacrifice was gruesome enough (try as many monks as possible, even your husband or wife to really show your dedication!).
With all that evil out of the way, get ready for a heck of a lot more! The Oakfield Massacre is by far the most gruesome quest in the game, so get your most bloody sword sharpened and ready.
By contrast to The Defender of the Light, this quest gets you the Temple of the Shadows seal and 750 renown. You also get around 30 evil points for each kill, in total well over 500 evil points in this one quest!

In case you hadn't worked it out yet, the idea of this quest is to head to Oakfield and execute every single person there. To accept the quest, visit the Temple of Shadows and then move on to Oakfield and speak to their representative there as instructed. The golden trail will point you towards each villager and soldier, but for the most part you'll find them in the common places: the pub, Temple of Light, the main bridge and along the main paths and roads. Use your ranged weapon to take the majority out in a single, satisfyingly devilish shot. Clearly this quest has serious consequences for the future of Oakfield.
With this done, it's time to head back to Bowerstone and stock up on items, see the family and then head to Westcliff docks to meet Hammer and set sail for the Spire.
Once back in Westcliff however you should invest 5,000 gold in Barnum's redevelopment project, in the Westcliff Development quest.
This not only gives you heaps of renown (1500 renown to be precise) when you get back, but also makes Westcliff a much more profitable place in the future. Speak to him on the hill overlooking central Westcliff, hand over the cash and then head to the docks by bearing left on the road to the Crucible to make ready to leave.

This is one of the defining moments in Fable 2 and should be very much enjoyed. Don't worry about leaving your equipment and faithful friend with Hammer, you won't need them where you're going – as a guard in Lucien's army all your needs will be provided for.
Bear in mind that you will want to finish any half-completed quests, and take part in the two choice quests Cold Comfort Farmer or Red Harvest and Defender of the Light or The Oakfield Massacre as these will be permanently lost once you enter the Spire – events move along while you're gone even without your Heroic presence.
Once you board the boat, The Spire quest begins as we search for the Hero of Will.

Day One in the Spire is an introduction to just what those in Lucien's army let themselves in for. Follow the rest of the recruits as the guards hurry you along to see Lucien giving an indoctrinatory speech, and the darkness of the Spire instantly feels all the closer with his mad words.
Week One gives you a chance to get to know the place, as you become one of an army of character-less drones. There are two chests, one near where you begin and the other in the room above which you can get to via the door on the left off the golden trail once you leave the initial room. You have been summoned to meet the Commandant, though you can deviate from the route to explore (there's not a lot to see), so follow the trail to his quarters.
Along the way you'll meet Bob, who takes you the rest of the way. Be sure to stop at the last cell in the row of rooms housing the prisoners to see the Hero of Will, Garth, and get some much needed advice. Head up the stairs to the Commandant's room once Garth has finished his inspirational musings.
He introduces you to the collar you are wearing, which punishes you for disobedience, and is apparently impossible to remove. As he tests your loyalty make a choice via the D-Pad whether to make a positive, appreciative reaction, a negative, insulting middle-finger, or just ignore him. Note that every time he shocks you with the collar you lose experience and on this occasion you don't actually gain anything from ignoring him (though it may make you feel like a big man to insult him). You lose much experience if you decide to ignore him or insult him each of the three times he asks. Him asking you to beg may be more than you can take however.

Week 38 inside the Spire presents your first chance to earn some good or evil points, with 90 good points and many evil points on offer. Head down to the Detention Centre to begin your shift, having been instructed to relieve a guard who needs a break. This is your first taste of responsibility under the Commandant, but you can still abuse it if you wish. Despite instructions to let the prisoners starve, you can disobey orders and release food into their cells using the levers just outside the shield doors. Each time you do this will lead to 30 good points but will lose heaps of experience through the shocks from the collar you are wearing. Ignoring the prisoners forces you to sit through as the timer counts down each time and listen to their pleas for food, but you bag incrementing evil points the longer you let them starve in the three minute window and keep all your precious experience. The choice is yours. You can only feed three cells before the collar's punishment knocks you out.
Week 137, almost three years inside the Spire, and the ultimate test of your loyalty now presents itself. Your only friend for the last 137 weeks, Bob, has been called to the Commandant to be punished. You are the one to put him out of his misery, so follow the now-familiar route through the spire to the Commandant's chamber. After receiving the sword from the Commandant, either attack and kill Bob, giving you 50 evil points but costing no experience; do nothing, costing a measly 10 evil points, not a whole lot of experience and not having the guilt of killing Bob; or attack the Commandant, using all your bottled up rage, giving you 90 good points in total but costing loads of experience each time. You get 10 for the first act of disobedience, then 30 for hitting him the second time, and 50 for the third, before passing out.
10 years have now passed in the Spire, as your Hero proves his loyalty to the Commandant to get more important quests that can possibly be used to free Garth and escape the Spire. You are now in the later stages of life in the game, entering the Late Adulthood stage.
The usual report to the Commandant objective will pop up, so head through the ever-expanding Spire to get your orders. Apparently a guard has gone missing. You need to locate him as we're back on the The Hero of Will quest line.
Follow the golden trail through the less polished parts of the Spire to find a body on the floor – the guard. Search the corpse to find a sword, pistol and health potion, providing you with the chance to escape. You then find yourself getting shocked in the collar again, but this time not by the Commandant, but by the Hero of Will, Garth. He removes your collar and vows to assist you in taking down the Commandant – guarding the only way out of the Spire.
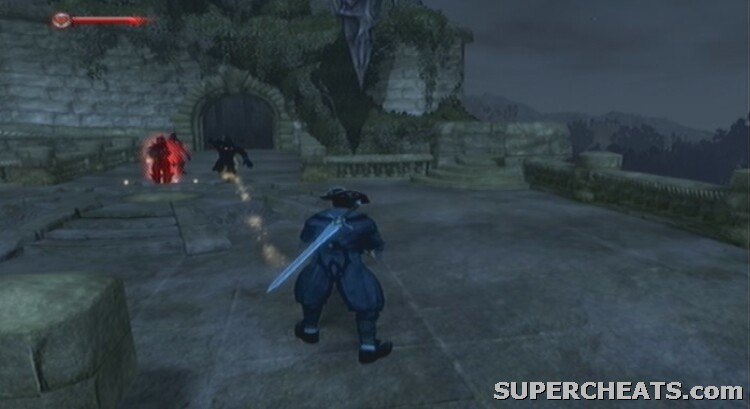
On the way you will face many Spire guards, with Garth unable to assist having used all of his Will and Strength in removing your collar and taking out the first guard. Use powerful melee and Will attacks to battle through the throngs of guards and into the Commandant's chamber for the last time. The chamber appears empty as you see new ships full of Crucible-hardened recruits arrriving. The Commandant transports in behind you at this point, and the opportunity you've been waiting for to destroy the man keeping you imprisoned for all these years has arrived.
Stay out of the electrified border at the edge of the room and use Blades and Inferno spells to deal damage on the magic-wielding Commandant. He raises spikes from the ground if you stay still for too long, as well as boasting a behemothic sword if you come too close. Use bullets from your new pistol, spells and fast melee attacks to expose his weaknesses, all the while watching to make sure his army of Spire guards don't get too close. Spire guards will continue to spawn in until you defeat their leader, so keep them at bay while using ranged attacks to hit the Commandant – crucially though, stay on the move. The Spire guards are cumbersome and slow, and dodging regularly will keep you safe fro the Commandant's spike attack. You can use the elecrtric field for your advantage too – use Force Push on the guards and melee attacks on the Commandant to push them into it and deal massive damage – the final blow brings you that much closer to ending the ordeal on the Spire.
Unleash your revenge.
All the floating experience from this mammoth fight goes to replenishing Garth's Will, making the fight down to the boats all the more easy. He activates the Cullis Gates in the room using his magic, so head through the marked one and down to the Spire docks. You'll see Garth destroy the majority of the docked boats, so descend the steps and help him fight a way through to the boats. Ignore the majority and just get to the marked boat. Use surrounding Will attacks to keep the guards at bay, but concentrate on getting to the boat in one piece. Once aboard, a cutscene ensues as this phase of the game ends.
Achievement: The Hero of Will – 100g
Back onto Oakfield shore and things have changed in the world of Albion in the ten years you've been gone, but before you go off exploring, get reacquainted with your best friend, and perhaps see how your family are doing, if you have one. There are many new quests, people and items to explore and find however, so don't take too long before you get cracking. Meanwhile, Theresa needs you to go and find Hammer at Rookridge; she's been doing some digging of her own to find the last hero, the Hero of Skill as part of The Cullis Gate quest. Incidentally, you net a hearty 5000 renown for your exploits at the Spire, quite rightly, as well as the Broken Spire Collar Trophy.

Head out of Oakfield and to the pub at Rookridge (remember the one we liberated from the bandits all those years ago? Well it's now successfully back in business!) and meet Hammer, she's missed you! With the news that Garth has been brought back to dry land and is with Theresa, a gathering of all the current heroes in order, so Hammer heads for the guild. After a short delay (a fast-travel to Bowerstone should do it) Theresa calls you to the grand meeting at the guild, so head to the Chamber of fate, either via fast travel or the Cullis Gate itself.
Hammer has learnt the location of the Hero of Skill, in a cut-off and remote part of Albion known as Bloodstone, so not the most attractive place in the world. You have to travel through a dangerous wild-land to get there, known as Wraithmarsh, but to make it easier Garth and Hammer will accompany using Garth's own Cullis Gate in his tower from before in Brightwood – your next destination.

Make the short trip to Brightwood where Garth and Hammer will be waiting for you. You will see some bandits en route to the tower, but with two allies in tow it shouldn't be too troublesome. Follow Garth and he will lead you up a rise in the ground by a statue. Look over the edge to see Spire Guards protecting the main bridge to the tower. Use Accuracy to zoom in and pick off as many as possible before the main body of the guards come up to your position. Follow Garth again and take out those guards who have moved in. He is attempting to lead you in via the back entrance, but clearly the Spire Guards are wise to it.
After more encounters you'll have to dispose of a Shard, a miniature Spire capable of deploying solders and devastating lightning attacks. Throw everything you've got at the energy ball when it opens up, making itself vulnerable. As soon as you come into contact with it it should open up once, so attack with bullets, crossbow bolts and using Blades to target that ball! If it closes before you can destroy it then keep on your toes and stay away from it as it tries to melee you, but you can still damage it with pot shots at the core. Wait for your chance patiently, then try again.
The shard is a big surprise and unlike anything seen before when you first encounter it
With that done, continue along the route to the tower. Climb up the stairs and get ready for battle. Things may look nice and serene when you first emerge, but Garth needs to activate the Cullis Gate using his Will, evidently not easy to do as it ends up taking well over five minutes! As you would expect in any half-decent action game, you need to protect him for the duration. Scores of Spire Guards and their Commandants will rain down on you as Garth works his slow-magic. Use our previous techniques for both the respective enemy types, staying clear of the Commandants spike attack. Use Time Control and your Will attack of choice to allow you to get in powerfully charged surround attacks and deal damage on all those involved. Hammer provides some assistance, but you need to keep a good eye on Garth and make sure the Spire Guards don't slow him down too much.
Once the timer in the bottom right hand corner of the screen reaches 100% you are free to enter the Cullis Gate. Ignore the remaining guards and get in there!
Unfortunately, despite Garth's protracted efforts, the Gate didn't work as expected and you, displaying all the luck a hero of Albion needs, were the only one to be transported to the hellish wasteland of Wraithmarsh, starting the Stranded quest.
Luckily your dog made it through though, a pretty crucial fact as he helps you escape from your captivity. A local farmer locked your unconscious body up in a cage, but the mysterious fog in the marsh dealt with him and your dog got the key from his corpse. Use it to escape from the cage and proceed through the misty marsh.
Head directly into the watery swamp, then towards the deserted settlement along the suggested route. Soon you'll be led into the submerged courtyard of The Drowned Farm and meet a Banshee for the first time.
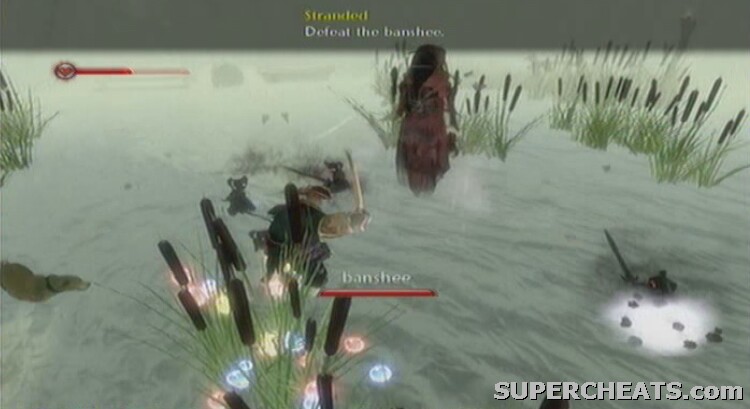
Banshees are a lot weaker than they look. They send little underlings using spirits to pester you and prevent you from putting your whole attention on them, but once you knock these weak pests out of the way and the Banshee cowers, with its hands over its face, unleash either repeated and quick ranged attacks or targeted spells. You can use quick sword attacks, especially as the Banshee won't attack while cowering, and disappears before its next spell, but well aimed ranged attacks are probably more effective. It also uses the Vortex Will attack, but it shouldn't bother you too much. No more than two rounds of cretins and cowering should be required to put it out of its misery.
Head out of this area onto dry land and continue up the hill as suggested by the golden trail and cross the wooden bridge in pursuit of the Hollow Men which you may catch one or two glimpses of on the way. Deal with them as before, as well as any Balverines which happen to have joined the party. Bear in mind that Banshees, Hollow Men, Hobbes, Balverines and Bandits should all attack each other as much as you, so feel free to sit back on occasion and just finish them off when weaker.
You'll then have to cross a stone bridge and fight off more Hollow Men, with more spawning alongside you as you move through the marshes. After fighting your way through a less-decrepit but still abandoned settlement you should meet the Elder Hollow Man, similar to his friends but capable of a surround Will attack of his own. Despite this, he still shouldn't prove too troublesome if Inferno attacks are used for the majority.
Upon entry to another suspicious-looking swamp you will need to fight off another Banshee and then in the next suspicious-looking swamp almost straight afterwards, a Troll. This one is stronger than any before, with particularly hardy-warts this time. Use ranged attacks rather than Will as it is resistant to most. The bridge nearby makes it so the troll cannot get you with any of its attacks. You can often still get shots on its back from here, though you may need to move (use Time Control to buy yourself some extra speed) to finish it off. Watch out for Hollow Men during this period too. Inferno spells from your bridge should stop them from pestering you too much.

Phew. You'd think that was just about all the developers could throw at you in one area. And you'd be right. Continue along the short remainder of the route, fighting off the last few Hollow Men and enter the relative haven of Bloodstone to end the Stranded quest and resume the Hero of Skill one.
The hero, a man named Reaver and basically the lord of Bloodstone needs to be located and convinced to join our cause. You can go and talk to him in his mansion straightaway, but you may well need to increase your renown before he'll listen to what you have to say. Talking to him now however will give you a definite number of renown needed (if you're going for a speedy-play through, or you can just do all the outstanding side quests which will be outlined shortly. His mansion is at the highest point of the town, tough to miss once you've squirmed through the rows of buildings and shops.
Bloodstone boasts a couple of very enjoyable quests, but we'll start at the top.
First up, set the T.O.B.Y. quest as your active task in the main menu and navigate your way to the middle of the hill on which most of the shops and houses in Bloodstone are. You'll find the man himself, Toby that is, on the top floor of his house, otherwise known as Temple of Benevolent Yokels. If things sound a bit fishy then that's because they are, but we still need to play through to get the mega 4000 renown and 10 good or 30 evil points. For the good of the temple you need to gather some sacred items so that he can perform a ritual to get rid of all the prostitutes, beggars and general lowlifes from Bloodstone. It sounds like a noble idea if it were to work.
Unfortunately, as you may gather from the first two items (the Mutton of Eternal Hope and the Wine of Forgiveness, located inside the searchable furniture upstairs in the marked houses nearby), he's having you on, using you simply to steal from his neighbours! Once you bring him the Sacred Pie of Kindness this time on the ground floor of the marked building, things take a turn for the worse – bringing him a prostitute is the next task – apparently to use in the ritual.
After he asks you to leave him alone, head down the street and speak to the local fellow who knows the truth. Return to the house and bang on the door until Toby answers. Scare him using your most devilish expressions to earn the renown and 10 good points or kill him, having made a mockery of you with his conniving ways to get the usual 30 evil points for a murder.
If you're having trouble stealing the items, wait until about midday as the houses are more likely to be empty. If you do get caught in the act, use the apology expression (marked with the white flag) to smooth things over.
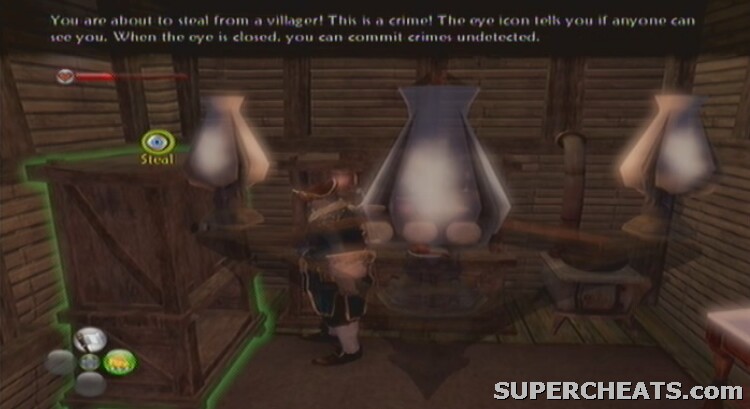
Next is the involving Treasure Island of Doom quest. Set it up as usual and then go and speak to the drunk in Bloodstone tavern. He's sure he's seen a ghost in the cave by the waterfront yet no one believes him, mainly because he hangs out in the dingiest pub in Albion presumably. This is quite a long-winded quest, so be sure you have about half an hour to see it through, then head out of the tavern to the cave he has pointed out. Dive off the ledge in front of you as you enter, then climb out of the water and up the wooden ramp past the galleon docked in the cave.
You won't meet any enemies until you come to the out-of-place door. It leads to a mess-hall full of pirates, eager to protect their captain and their booty. They may be ghosts but they can be easily despatched using similar techniques to Bandits. Inferno and flourishes work well, and using Raise Dead to draw attention away from yourself isn't a bad idea either. In the next room you need to uncover the switch to unlock the door (clever people these pirate-ghosts) which is in the top left-hand corner as you enter the room. This gives you passage into the captain's personal quarters after a spiral staircase, where you can find the key to his chest in the drawers by his bed. Unlock the chest to get a lever, which you can then use all the way back in the main cave (turn right as soon as you exit the building) to raise the water level and make the ship sea-worthy. Vault across the gap and onto the ship and the captain and his motley crew will appear. Focus on his foot-soldiers as the captain is supervising for the moment. With them out of the way you can feel free to focus on the man himself.
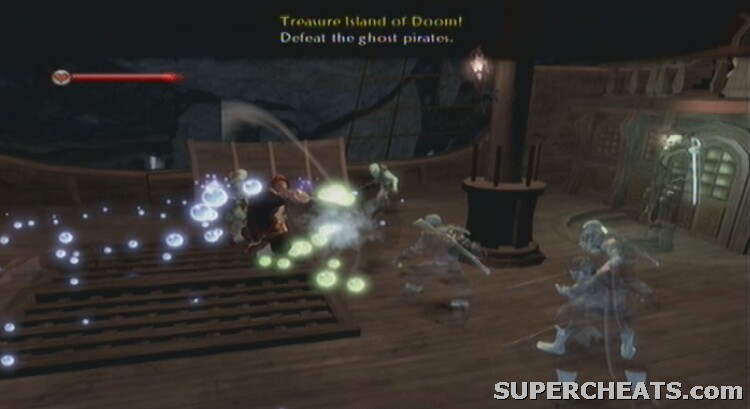
Will attacks are weak against him, so ranged and accurate fire is the way to go. Try to avoid his melee attacks if possible, and once defeated you will get his treasure map, giving you access to a secret area of Albion and a plethora of treasure up for grabs.
Head up to the helm and press A by the wheel to become at one with the ship and see it steer out of the harbour and to the location on the map. Pretty sweet.
Once back on dry-land you are given the task of finding 10 treasures on Lion's Head Isle. Why this information wasn't marked on the map is anyone's guess. The first can be found in the ship wreckage ahead and to the left of where you start. Explore underneath the wreck's overhang to find it. The next can be found by following the path across the beach and into the grassy area uphill. Jump down on your left to land on top of the same shipwreck where you can also find a chest, containing 1500 gold, just like the other 9, allowing a total of 13500 gold from this one quest.

Next, head back up to the same path and walk up the point where you are prompted to dive into the water off the tall jump. Instead of that, jump off the left hand side onto a platform underneath for the third chest. You can find the next stash in a chest on the central isle of this canyon, and the fifth in a dive-spot nearby. Walk around in circles on the central isle for a short while and your dog should find a dig-spot with the sixth. Seventh can be found underneath one of the waterfalls to the left of where you land from the jump into the water. Climb out of the watery canyon and head into the cave to find chest number eight in an opening on the left. Drop down onto the ledge below after exiting this cave to get chest nine. Continue back to the beach then follow the spit of land to the far left by swimming then turning round the end of it to find the final chest. Head back to the ship with all ten in the bag, activate the wheel as before and the drunken pirate will meet you as you disembark back into Bloodstone.
You should now have enough renown to take on the rest of the Hero of Skill quest, but the rest of the quests from this part of your life in the game are now detailed below.
Head back to Oakfield and set the Hobbe Squatters quest. Assuming you didn't decimate the Temple of Light, you'll meet a rather odd character whose cave has been infested with Hobbes. Called Echo Mine, after accepting you need to fight your way through Hobbes outside and then down into the belly of the darkness. Battle the crowds of Hobbes inside and defeat their leader using ranged attacks and targeted Inferno. You may also be able to knock him off the bridge with powered up melee attacks. You get a Hobbe Leg trophy and 3500 renown for your troubles, but unfortunately for the man who sent you in it has emerged that he was trying to kill you, the now infamous hero of Albion. Give him what he deserves (no morality points gained or lost here) and get the hell out of there.
You should now be able to pick up the 1500 renown and 15000 gold for your initial investment in Barnum's Westcliff Development, so pay a visit to him in the newly improved Westcliff and collect your reward.
In Brightwood meanwhile, you can take on the Blind Date quest. This again is not available if you decimated the farmer and his household in the Red Harvest quest, as it's hard to accept a quest from a dead man. Still, head to his farm in Brightwood as before and he'll tell you he needs you to perform a matchmaking exercise for his son as it's high time he was married. His son doesn't want the same sort of partner however, preferring the company of men, and so your task is to hook him up with an eligible man by showing possible candidates his photo. After talking to his son in the barn, make you way to Bowerstone and locate a suitable character to show the photo to. If they accept, travel back to the farm and break the good news to the lad.
Incidentally, you can show it to a woman and set up the blind date with her, though this will get you 10 evil points rather than the 10 good points you get otherwise. The most positive outcome of this quest however, as well as the 3500 renown is the option to buy the farm as the boy and his father wish to move to Bowerstone.
Next is a nice quest to reminisce about your past, being located in the gypsy enclave at Bower Lake.
Named Rescuing Charlie, you need to speak to the woman wailing about her child (set the quest as active and you'll be lead to her). He is a mischievous sort who enjoys adventuring, but has got himself in a spot of bother. After taking the note off her to prove who you are, go to the entrance of the tomb he is in down in the dip marked also in Bower Lake. Head inside and into the main room and chat to Charlie who is by the coffin at the head of the room. Keep him protected from the horde of Hollow Men as he tries to open the coffin, bear in mind that he can die unlike your fellow heroes, so use Time Control, Raise Dead and surround spells to keep the enemy attention off him.
With the loot already taken, trudge back out with Charlie through the crowd of enemies and back into the sunlight. You do have a few choices in terms of your morality on this quest. You get a hearty 5000 renown and the Gold Burden Augment from Charlie's grandma if you deliver him safely, as well as 30 good points. You can kill him in the cave and get 50 evil points, you can then also pretend to be him by wearing his characterful hat, tricking his grandma into thinking he's still alive (you wouldn't want to disappoint her) and receiving the augment as a result, but also 20 corruption points.
Head to Rookridge for the Something Rotten quest. Another water-pollution epic, you need to accept it from the man behind the bar at the now-familiar Rookridge Inn and then head to Wellspring Cave to see what's causing the pollution. In fact, as you'll see once you enter the cave, there is a Troll having a nap in the cool water of the cave.
Use the usual techniques to attack the Troll's weak spots, but unlike in the Wraithmarsh you have to attack it from ground level. With it vanquished head back to the barman and collect your 3500 renown and as a nice bonus also receiving the Troll's Eyeball trophy. As if that wasn't enough, you can also buy the Rookridge Inn with its colourful history for a outstanding 2500 gold – it's well worth buying for the income it gives and for that price you can't go wrong!
Back in Bowestone set up the Love Hurts quest. This involves you going to see the gravekeeper in Bowerstone Cemetery to go on a longwinded hunt for some missing body parts which he is collecting.

Without asking too many questions, you'll be sent first to the well-travelled Hobbe Cave in Rookridge to get the initial piece of the puzzle. Fight your way through the cave to wherever your dog locates the quest-crucial dig spot as being. Digging here will unearth the lower part of the body. Get back to Bowerstone and deliver the partial corpse to him. It emerges that he is collecting the body parts of Lady Grey, but for what end it's unclear at the moment. The second piece is in a new tomb in Wraithmarsh. Unfortunately every time you travel there you tend to have to fight at least one Banshee or group of Hollow Men, but you can fast travel pretty close if you use Bloodstone Road as the route. Hold A to enter. This tomb is a bit of a puzzler, but the first room you get into is pretty simple. Defeat the Hollow Men and then destroy the creepers to climb up the stairs and then stand on the switch underneath the next set of tangled plants and shoot the glowing orb, then slash at it, then shoot it again to open the main door out from the lower level.
Once you get to the corridor with the spikes in and full of Hollow Men, head to the end and stand on the switch to send an orb through and to the other side of the spikes.

Move back to the centre where the spikes are and shoot the orb as usual. That opens the door, so continue on. The next main room is waterlogged and again inhabited by Hollow Men. Defeat any that there are then stand on the switch underneath the odd looking statue. After it repositions itself, do the Chicken expression to activate another orb. If you follow the golden trail now to stand on the switch in the next room nothing will happen, but double back and head up the stairs to the left of the statue, rather than following the golden trail's path. At the top of the stairs stand on the switch (you may have to move on and off it repeatedly until the orb changes colour and moves closer) shoot the orb and then drop down to stand on the platform in the room below. You can then proceed through the door. The next large room will see plenty of Hollow Men to defeat, but more importantly an orb which moves from statue to statue each time you hit it. Keep pummelling it until it makes its way to the opposite door to the one marked with the golden trail. Make your way past the flame-throwing statues and stand on the switch right at the end to open the correct door. Head through and in the final room open the coffin/chest to get Lady Grey's upper body. Get out of Wraithmarsh and back to the graveyard (fast-travel if you wish) and get the details of the third piece.
Fortunately for all concerned this one is nice and short. Go to Fairfax Gardens and into the tomb of Lady Grey herself. Once you descend the stairs and initiate the drop into the main tomb it all looks a bit scary amongst the dark sand.

All the same, head straight forward to the coffin and open in to retrieve her head (it's a shame the coffin in the Rescuing Charlie quest wasn't this easy to open!). You can leave via the stairs at the end of the room through the larger-than-average beetles, or simply fast travel out back to Bowerstone Cemetery.
Finally the quest is nearing its end, and this time you can find the gravekeeper in his basement. It emerges that he has invented a device to resuscitate the dead, planning to use this on Lady Grey convinced that she'll fall in love with the first person she sets eyes on. As events unfold you can either choose to keep Lady Grey as your girl (she does look and sound unique, which is a plus) despite all the gravekeeper's hard, yet disturbing work, and collect 10 evil points. Otherwise, just leave the mansion before events pan out at the gravekeeper's request and you get 10 good points. The Rod of Life trophy and 8500 renown also greet you upon completion of this quest.
Following this the Cemetery Mansion quest opens up. To activate it however you have to return to the mansion and buy it for a whopping 100,000 gold. Presumably the gravekeeper has decided to move out and pursue a more family orientated career, or, if you made him suffer, to rethink his life. Upon buying it you receive a key and note allowing you to access Shelley Crypt located in the graveyard. The main attraction of the crypt is one of the most powerful augments in the game, The Stone of Myr'Bregothil, but after you pick it up strike the cracked wall and kill the enemies inside and hit the orb to gain access to the next chamber.
Here you have to hit more of the orbs to produce a bridge as you cross the expanse beneath until the Hollow Man Leader, much larger than any before, will confront you. He wants the augment back. If you give it to him you get 30 good points, but you can deny him that, despite it being the meaning of his undead-life to protect it (he's quite a likeable character actually!), for 30 evil points but a fairly tough fight with him too. As with all Hollow Men, use Inferno as the staple of your attacks and stay away from melee combat unless absolutely necessary. Exit the tomb with 3500 renown in pocket.
The final quest to get us up to date is the Evil in Wraithmarsh quest. Yes, unfortunately it means another trip to Wraithmarsh, but first, head to Bowerstone to initiate the quest in the pub upstairs. The woman tells you that her sons Sam and Max (the two brothers from The Summoners quest earlier in the game) have got themselves into trouble yet again, this time in the far more dangerous Wraithmarsh. Travel there and your dog sniffs them out to a well so hold A to climb down inside. There's only one main room and that's where the brothers are, accompanied by the obligatory Hollow Men horde. Take them out and protect the brothers. But that's not the end of it! They have also summoned a Banshee using the same methods as in The Summoners quest, and this time to a public place in Bloodstone Docks. Travel there and kill the Banshee, a task made trickier by the fact that you only have the pier to stand on, limiting your dodging ability and making melee attacks impossible. Use Accuracy to target the Banshee's head to deal most damage, while fighting off her minions until she cowers as usual.
Hopefully the brothers have learnt their lesson after this encounter…
>Head back to Bowerstone and reunite the family for 4000 renown and the Banshee Rags trophy.
You are now up to date with your questing, and can now travel back to Bloodstone to meet with the Hero of Will safe in the knowledge that you won't be missing out as you embark on this last part of the story. With plenty of renown in the bag the Hero of Will, Reaver, still wants to send you on a mission before he will join up with you. After getting the seal from him, head to the ever-formidable Wraithmarsh, specifically to the Drowned Farm and head into the large structure of the Shadow Court to begin the Returning the Dark Seal quest.
Fight through the Hobbes through the corridors, keeping an eye out for the cracked walls and boarded corridors hiding treasure chests within until you come to a spike floor. Use Time Control to cross the floor without getting jabbed by waiting in each alternate area for the next set of spikes to fall back into the ground. Hit the switch at the end and collect the treasure before continuing on up the stairs.
In the main hall when you try to get through the locked door shadows will appear intent on getting you out of their court. Wave after wave will spawn in. The always welcome Inferno keeps them at bay, but concentrate on the Balverines and use the usual techniques that you would perform against their real counterparts to proceed. Head through the now unlocked gate and jump down the hole, moving through the corridors to the main court of the shadows.

After listening to the head shadows' conversation you'll learn that it is a heinous crime for anyone else to be in possession of the Dark Seal. The woman also in the court who was trapped in there is also blamed, and the shadows need someone to punish with irreversible premature aging. If you volunteer you receive 50 good points, but let the girl take the wrinkles, and it's 50 evil points for you.
Return to Reaver in Bloodstone, but ensure you have completed the T.O.B.Y., Love Hurts, The Cemetery Mansion and Evil in Wraithmarsh before continuing with the Hero of Skill quest, or else you may never get another chance!
Back with Reaver in Bloodstone then on the Hero of Skill quest. Reaver, doing some digging and realising that you are in fact the infamous hero who escaped from the Spire and who is wanted across Albion by Lucien himself, has turned you in. While his treachery could have cost you another decade in the Spire, Lucien wants Reaver captured too, and his soldiers have begun invading Bloodstone as you are talking in Reaver's mansion.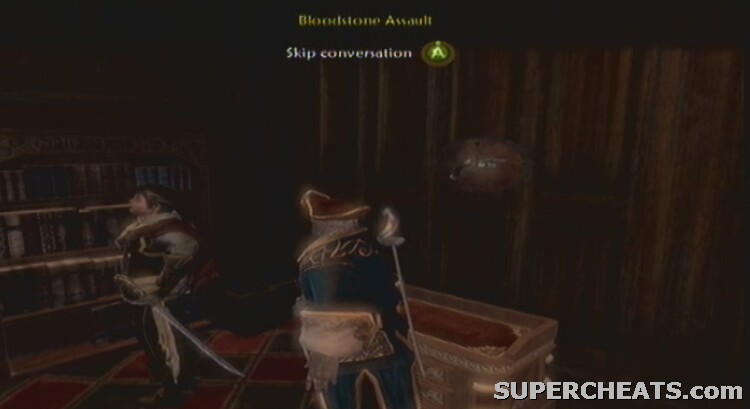
Fortunately he has a back-way out of the building, so follow him through the bookcase as the Bloodstone Assault quest begins. As you enter the first cavern use your Accuracy to take out as many Spire guards as possible before they get too close. Explosive barrels can assist you in taking them out. Use Time Control as the second wave rushes you to get plenty of ranged attacks in on them before they arrive.
Follow your dog to the treasure up the ramp you were firing upon a short while ago and another wave of guards will storm in opposite you. Continue the ranged attacks and head down across the centre of the room and move along the bridge just below where the guards were. Take out the guards in the next room and the accompanying Commandant and into the next large area. Use the explosive barrels to aid in your destruction of the guards on the main bridge across the top of the cave, using Time Control to buy yourself some respite from those beneath it who will inevitably rush you.
Carry on following Reaver and you will emerge up high in the cavern you were just in. Use the barrels on the ground to defeat and damage as many of the Spire guards as possible, also shooting the spikes on the ceiling to send them hurtling down onto the enemies below. Time Control gives you more of a chance of taking them all out, but it's likely they'll run underneath the bridge and up through the caves to come out behind you before you can despatch them all.
Escape with Reaver
Fight the few guards running towards you after you cross the bridge and drop down to the level below. Glancing at the ship Reaver has earmarked for escape, continue into the gloomy cavern and take out the last set of guards blocking your route out before exiting through the winding cave out onto Smuggler's Beach.
Being reunited with Hammer and Garth, all the heroes are now together in one place, and it's just as well because the Great Shard, a giant version of the miniature ones that are hard enough to defeat has come to rain on your parade. It will begin by unleashing an army of Spire Guards onto the ground. The same principle applies with this giant shard as with the smaller ones – the target is the glowing orb in the centre. This one however only exposes itself after taking enough damage, preferably with Shock attacks on its shell. The Spire Guards are a mere annoyance by contrast, and you should allow Garth and Hammer to deal with them while you and Reaver use the raised sections to hit the Great Shard until it opens. Use ranged weaponry and Shock to attack it once open. Repeat this, switching sides if the Spire Guards come up to you until the Great Shard, the most heavily armoured enemy in the game, is finally defeated.

Achievement: Hero of Skill – 100g
With the Hero of Skill quest now complete, you collect 10,000 renown and the amusingly-titled Shard Shard trophy as The Weapon quest begins.
You will want to watch the scene as the heroes meet with Theresa yourself so as the story is not ruined.
Suffice to say, Lucien arrives and you are knocked out, waking up as a child with your dear sister alongside you at a picturesque farm in an unknown location. Spend the day there, doing whatever Rose advises until nightfall when it's time for bed. Shoot beetles in the crop field, take out the bottles Rose has kindly placed around the farm for your target practice, and kick the chickens back into their pen. Once asleep, the music box wakes you with its noise and you must leave the farm and rose, heading out down the road ignoring Rose's ever-more desperate pleas to remain. Press A at the end of the path to pick up the music box. Head up the steps when you return to adulthood and walk into the light.
Watch the scene play out while walking towards the centre to trigger the remainder. When prompted, hold A to use the music box to suck out all of Lucien's power. Once his protective shield is down, finish him with a single shot from your ranged weapon, though feel free to listen to what he has to say first. Take Theresa by the hand when offered by holding A, and she will give you a choice.
There is a pure and good option, a neutral, personal one, and then an evil and corrupt one.
The first, Sacrifice, gives you the option of sacrificing both your family, killed by Lucien, and your dog, which valiantly tried to disarm him in the final scene, to bring back all those who lost their lives in the Spire. Remember, you need your dog to locate buried treasure, so think carefully about this if you want to be a true completionist. What you do get is a statue, a letter from the people of Albion and your impure marks on your character's appearance will be reversed. You get 300 good points and 500 purity points for this choice.
The second, Love, allows you to resurrect your dog and family, but everyone on the Spire will stay in the ground, and you will have to live with that guilt. You do however get a letter from Rose which gives at least a little closure (see the end of the guide for it if you chose another option but simply have to read it). This is the basic choice which most gamers will want to pick.
The third is the wealth option. This ignores your family, dog and all those in the Spire. You get heaps of cash though, 1,000,000 gold to be precise. Though this can be earned relatively easily at this stage of the game with a bit of time spent after following one of the other two options. However it will also give you 300 evil points and 500 corruption points.
Congratulations, you've competed Fable II!
There is still plenty to do however, so here is a walkthrough for the remaining quests in the game.
Brightwood Tower, that familiar place where you first try to meet Garth can now be purchased, though at 250,000 gold it isn't cheap. You need to fight a horde of Spire Guards to get to the property information board by the entrance, but once purchased this quest unlocks through a letter that Garth leaves for you.
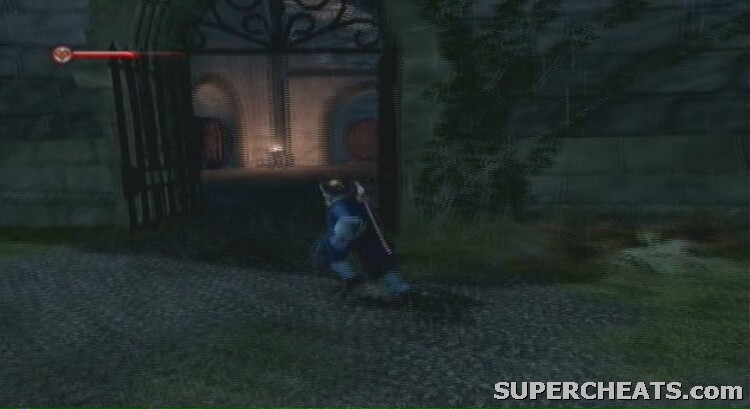
Sleeping in the tower causes you to be transported to another childhood experience, this time though not in the picturesque farm but in Nightmare Hollow. This is a very bizarre quest, but once you head through the area and walk up to the chest in the centre it reveals that it likes to play tricks on its friends, of which you have now become one. It sends enemies at you as part of these, all familiar and Crucible-esque in nature. Take them all out using previous tactics to get access to the chest itself: 100,000 gold and the Diamond of Sorrow worth as much again if sold! You also get 3,000 renown and the Son of Chesty trophy. Use the bed where the chest ends up to return to your tower.
A tough quest to unlock, likely to be activated merely by playing the game a lot after completing it is The Hit. This is only available after collecting all four sketch fragments which you receive after successfully defeating bandits that have been paid to ambush you on your travels. Roaming the various wilderness locations should give you the chance to get all four, at which point the location of the Assassins' Guild is made apparent, located in the Forsaken Fortress in Brightwood. Clear away the bandits and highwaymen inside before attacking and defeating their leader. This will earn you 7500 renown and stop the persistent attacks from assassins.
If you thought the 100,000 gold from the Brightwood Tower quest was handy, you need 1,000,000 to be able to take part in the Castle Fairfax quest.

Invest the money in shops and real estate so you are generating as much money as possible, then work on getting five-star acclaim in all the jobs in the game, particularly serving drinks behind the various bars in the game. The money is to purchase the massive Castle Fairfax, which holds the last few secret items in the game, but to actually trigger the specific quest, sleep in Lucien's bed, if you can bear it. You will be awoken by bandits attacking from a tomb underneath the castle, so take out those in your room and nearby, before proceeding down into the tomb to finish them off.
While your luck with enemy-infested houses thus far hasn't been great, you need to defeat these enemies to get the rewards on offer. Head through the enemies after activating the lever when you enter the tomb and then through the left-most door. You will eventually come to a room with another orb in, so use whatever colour button it recommends to whack it around the room until it allows you into the next room. Open the chests and pick up the Sex-change Potion on the table. This allows you, as the name suggests, to permanently change your gender for the rest of the game. You have to make the decision right now, in this tomb, or the opportunity is gone. Happily though your castle is now bandit-free, and as owner of the prestigious property you receive 10,000 renown.
The next quest also requires some formalities to be filled before it is activated, namely living a double life with two spouses!
The Blackmail quest opens after living with two marriages simultaneously with neither partner finding out. You will learn of a blackmail letter from a man in Bowerstone who wants to meet you underneath the main bridge to discuss terms. The good option is to ignore his request and come clean to your partners. You may lose them, but honesty is always the best way to go in relationships. This nets you 1000 renown (though presumably not of a good type!) and 10 purity points. If you disagree, then either pay off the gentleman with a meagre 2000 gold or kill him to get 20 corruption points or 30 evil points respectively.
Finally, depending on the fertility of your many marriages, you should probably have a child by now. This will trigger a quest known as The Rescue, where your child, presumably imitating your heroic deeds, has wandered off into a cave not long after being born (they age quickly!).
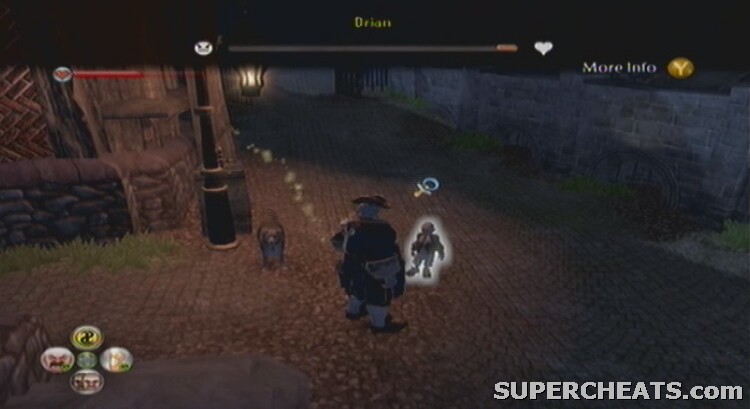
Your partner will tell you where they have gone, to the legendary Hobbe Cave in Rookridge which you would hope would be empty of Hobbes by now (alas, it is not). It is unfortunately bursting at the seams with Hobbes, but you'll have to fight your way through to the cages at the end. Kill the main Hobbe in here to get the key to the cage and then lead your child out, past more enemies (make sure they don't get eaten!) and out of danger, out of the cave. This not only gives you your child back, which would surely be enough for any parent, but 1500 renown, 30 good points and the Hobbe Staff Head trophy.
If you didn't choose the family option at the end of the game, you won't have got Rose's letter. If you really want to know what it says, but don't want to have to play through again, here it is in full:
"Dear Sparrow
I woke up today in such a peculiar place. It's like a great big forest, with lots and lots of trees that go on forever. I was scared at first because I couldn't find you, but there's someone here who says he knows us, knows our family. He told me his name, but I keep forgetting it. Weird. I think he's a king or something. He's thin and wears a hood and looks scary, but he's nice and I feel safe with him here. I hope your okay, Little Sparrow. Somehow I know that it's all going to be alright and we'll be together again one day. He promised me.
Love
Rose"
The general consensus is that the figure Rose talks about is either Scythe, the hero from the first game, or Jack of Blades, a character in the original, but who died in the game. We await the next Fable, or downloadable content with anticipation!
Archon's Knot: 1
Bandit Coast: 6
Bloodstone: 9
Bower Lake: 8
Bowerstone Cemetary: 7
Bowerstone Market: 15
Bowerstone Old Town: 13
Brightwood: 12
Echo Mine: 3
Fairfax Gardens: 8
Fairfax Tomb: 5
Farm Cellar: 1
Forsaken Fortress: 6
Guild Cave: 5
Hobbe Cave: 5
Lion's Head Isle: 1
Oakfield: 6
Reaver's Rear Passage: 1
Rookridge: 4
Shelley Crypt: 1
The Temple of Shadows: 1
The Wellspring: 4
Wraithmarsh: 8
Archon's Knot: 1
Bloodstone: 3
Bloodstone: 2
Bower Lake: 4
Bowerstone Market: 4
Brightwood: 4
Fairfax Tomb: 1
Guild Cave: 1
Hobbe Cave: 1
Lion's Head Isle: 1
Oakfield: 1
Westcliff: 3
Archon's Knot: 1
Bandit Coast: 8
Bloodstone: 11
Bower Lake: 17
Bowerstone Cemetary: 5
Bowerstone Market: 13
Bowerstone Old Town: 7
Brightwood: 12
Echo Mine: 1
Fairfax Gardens: 3
Fairfax Tomb: 9
Farm Cellar: 1
Forsaken Fortress: 5
Gargoyles Tomb: 6
Gemstone Grotto: 1
Guild Cave: 5
Hall of the Dead: 2
Hobbe Cave: 5
Howling Halls: 2
Lady Grey's Tomb: 2
Lion's Head Isle: 8
Nightmare Hollow: 2
Oakfield: 8
Old Tin Mine: 1
Reaver's Rear Passage: 4
Rookridge: 11
Shadow Court: 4
Shelley Crypt: 3
Sinkhole: 1
The Tattered Spire: 2
The Temple of Shadows: 2
Tomb of Heroes: 3
Twinblade's Tomb: 1
The Well: 2
The Wellspring: 2
Westcliff: 17
Wraithmarsh: 9
These are the lowest denominator of collectibles in Fable 2. Used to unlock special chests, you must collect a certain amount to be able to unlock each one. There are 50 in the game, but the reward for getting all 50 is a relatively meagre 50,000 gold (find it in the throne room of Fairfax Castle).
Archon's Knot: 1
Bandit Coast: 1
Bloodstone: 1
Bower Lake: 3
Bowerstone Cemetary: 3
Bowerstone Market: 2
Bowerstone Old Town: 3
Brightwood: 3
Echo Mine: 1
Fairfax Gardens: 1
Farm Cellar: 1
Gemstone Grotto: 1
Guild Cave: 1
Howling Halls: 1
Lady Grey's Tomb: 1
Lion's Head Isle: 1
Oakfield: 4
Rookridge: 3
Shadow Court: 1
Shelley Crypt: 1
Sinkhole: 1
The Temple of Shadows: 1
Tomb of Heroes: 1
Twinblade's Tomb: 1
Wellspring Cave: 1
Westcliff: 3
Wraithmarsh: 4
The Calavera
This is mace-like melee weapon of the 'blunt' type. It boasts the flame augment, allowing you to deal splash damage with fire while swinging it at enemies. As a helpful tip, try to get this weapon before embarking on The Crucible quest. The Demon Door which houses it is easy to open early on and despite the relatively low value of the weapon compared to some other legendary items, it should not be ignored before going on the tough route through the Crucible.
Location: Inside the Demon Door at Westcliffe (see the Demon Door section of this guide for how to get in there).
Augments: Flame.
Damage: 67
Value: 4385 gold
The Chopper
This battle-axe of the 'cutting' type has an impressive damage rating of 86. The augments Stoneskin and Discipline prevent scarring your unblemished face with the former, and gives more experience from each fight with the latter. The story behind this one is that the previous legend of the Crucible promised to hand over his fabled weapon to anyone who would beat his Crucible record – a perfect score from all 8 rounds.
Location: Westcliff – complete the Crucible with a perfect score in each of the 8 rounds.
Augments: Discipline and Stoneskin.
Damage: 86
Value: 16,200 gold
The Daichi
This is a Katana, a thin blade of the 'cutting' weapon type. It has a massive value of 59,400 gold, three augments and a huge damage score of 96. With it you can increase damage, add electronic splash damage, and boost your attractiveness. By far one of the best legendary weapons in Fable II.
Location: Inside the Archon's Knot tomb. To access it, escape the spire, then go to the level of Garth's Brightwood Tower you used to get to Wraithmarsh and press A to jump over the gap in the edge and into the well below. Explore the tomb to find a chest towards the exit.
Augments: Bewitching, Devastation and Killerwatt.
Damage: 96
Value: 59,400 gold
Hal's Sword (Limited Edition DLC)
This is only available to those who bought the Limited Edition version of Fable 2. Enter your code that came with the game in the Marketplace to unlock it. It is, quite clearly, a sword, and of the 'cutting' type. It has a low value and damage rating, three augment slots, but none filled by default. It's based on the Covenant Energy Sword in Halo 2 and 3, though clearly not as powerful!
Location: In the Guild Cave's Chamber of Fate – there is a chest at the far end.
Augments: None
Damage: 22
Value: 3375 gold
The Hammerthyst
As the name suggests, this is a hammer, so a 'blunt' weapon. It has good damage, a low value, but the Barkskin augment, which increases your defence, but makes scarring more common.
Location: Inside the Oakfield Demon Door
Augments: Barkskin
Damage: 78
Value: 4725 gold
The Maelstrom
This is a fairly average sword, but the augment increases damage on guards and civilians; anyone who isn't clearly evil.
Location: The Temple of Shadows – sacrifice as many people as possible and your spouse, as outlined in the Sacrificing to the Shadows quest in the hour after midnight, to unlock and receive this weapon.
Augment: Scourge
Damage: 58
Value: 3375 gold
The Rising Sun
In contrast to the Maelstrom, this weapon does the most value to evil people, like ghouls and shadow creatures.
Location: Simply donate a bundle of cash to the Temple of Light between midday and 1:00pm this time, over 10,000 gold in one go is needed.
Augment: Righteous Violence.
Damage: 61
Value: 4050 gold
The Wreckager (Limited Edition DLC)
Another fantastic weapon, probably second only to the Daichi. It has high damage of 65, but most importantly three great augments, reducing scarring, giving you gold for each kill an creating fear amongst those around you.
Location: Inside the Halls of the Dead, an exclusive area for those with the Limited Edition version of Fable II. You access it after downloading the content with your code in the Xbox Live Marketplace, through a new dive spot in the water by middle of the pier at Bloodstone town. It's a tough tomb to get through, and you must follow the orb sequences to get through – one of which makes you use a dive spot within the tomb to follow it into the next area. At the end of the orb path you will find a chest with the Wreckager in.
Augments: Fear Itself, Golden Touch and Stoneskin.
Damage: 65
Value: 54,000 gold
The Enforcer
The first of the ranged legendary weapons, The Enforcer is a pistol boasting a whopping 177 damage which also increases your defence and attack but makes you more likely to scar. The value matches the damage, at 17,550 gold, complete with Barkskin and Lucky Charm augments. The downside is that it is a pistol, so needs reloading regularly.
Location: Buy Giles's farm in Brightwood after completing the Cold Comfort Farmer and Blind Date quests and take the cellar key from upstairs and go into the cave within where you will find a dig spot with the Enforcer in. You can also complete Red Harvest and loot the key from his grave using your dog to sniff it out.
Augments: Barkskin and Lucky Charm
Damage: 177
Range: 20
Ammo Capacity: 1
Value: 17, 550
The Perforator
Similarly fantastic when compared to the Enforcer, this is a rifle with a far higher range, 60, and an ammo capacity of 6. The augments within create fear when you are around, increase your experience, but also makes you more prone to scarring. It has a huge value of 59,400 gold.
Location: In the Wraithmarsh Demon Door
Augments: Barkskin, Discipline and Fear Itself
Damage: 81
Range: 60
Ammo Capacity: 6
Value: 59,400 gold
The Rammer
This powerful and expensive crossbow has huge damage of 119, a quicker reload time than the Enforcer, but the same ammo capacity of 1. It does however allow splash damage of fire on your enemies thanks to the augments within, as well as draining health from enemies and improving your attractiveness. This is the compromise between the Enforcer and the Perforator.
Location: Take out all 50 gargoyles. The chest is in Gargoyle's Trove as explained under the Gargoyles section of this guide.
Augments: Bewitching, Flame and Ghoul.
Damage: 119
Range: 45
Ammo Capacity: 1
Value: 54,000
The Red Dragon
This pistol has an unusual ammo capacity for this type of weapon of 6. The augments increase damage further and increase your defence similarly.
Location: Win the Westcliff Shooting Range to receive it.
Augments: Devastation and Lucky Charm
Damage: 41
Range: 35
Ammo Capacity: 6
Here is a list of all the augments in Fable II and the effects that they have. You can find them while questing or buy them from the stone-cutters in the towns and villages of the game. Try using complimentary augments that either take off the negative side effect that may come with one of them, or increase the positive effect to a great degree. Every weapon can boast up to 4 augment slots, but this varies depending on the version of each one found. They can equally come with no augment slots. Legendary weapons come pre-packed with augments, except the Limited Edition downloadable-content Hal's Sword, which has 3 slots by default that you can customise with your own augments.
Bewitching
Effect: Increases your attractive power to other citizens
Cost: 900
Cursed Warrior
Effect: Increased experience in combat, but gradually reducing your health while the augment is equipped. Note that this will never actually kill you, just knock your health to seriously low levels.
Cost: 2680
Devastation
Effect: Increases damage.
Cost: 4690
Discipline
Effect: Increased experience in combat.
Cost: 4690
Fear Itself
Effect: Creates fear amongst those around you.
Cost: 875
Flame
Effect: Adds fire splash damage to your attacks.
Cost: 2680
Ghoul
Effect: Drains health from your opponent and gives it to you when attacking.
Cost: 4690
Gnarly
Effect: Increased defence, but also the chance of scarring increases.
Cost: 1530
Gold Burden
Effect: Receive gold for each enemy killed, but defence and attack are both reduced.
Cost: 2680
Golden Touch
Effect: Gold received for every enemy killed.
Cost: 8200
Killerwatt
Effect: Electrical splash damage when attacking.
Cost: 2680
Life Sucks
Effect: Drains the health from enemies, though your defence and attack are both reduced.
Cost: 2680
Lucky Charm
Effect: Attack and defence increased.
Cost: 4690
Piercing Agony
Effect: High attack boost, but your health decreases constantly. Note that this will never actually kill you, just knock your health to seriously low levels.
Cost: 2680
Slash and Burn
Effect: Fire damage replaces regular damage, but you are more likely to scar in battle.
Cost: 1530
Stoneskin
Effect: Resistance to scarring.
Cost: 3060
Storm Scar
Effect: Electrical damage when equipped, but you are more prone to scarring.
Cost: 1530
There are 50 gargoyles to find. Once you have found one you receive a map and can access a dive spot in underneath the bridge to Bowerstone Market, leading to a cave known as Gargoyle's Trove. Here there are six chests, each one opening after you find multiples of 10 gargoyles. The last chest is opened when all the switches in front of the others are pressed and a bridge appears (it actually contains a Rotten Apple, but break the wall directly behind it to access the real booty), and of course once you have unlocked those ones as well. 10 Gargoyle's gets you the growl expression book for your dog, 20 a Potion of Life, 30 is three emeralds, 40 is 10,000 gold, 50 is the Ghoul Augment and the sixth chest holds the legendary crossbow the Rammer.
Archon's Knot: 1
This is a secret area. To access it, escape the spire, then go to the level of Garth's Brightwood Tower you used to get to Wraithmarsh and press A to jump over the gap in the edge and into the well below
Location: Turn round in the water to see it on the wall.
Bandit Coast: 2
Location: 1: Amongst the cliffs on the trail forking off the main track before the camp. It's in the cave. 2: On a pillar at the top of the tower in the fortress.
Bloodstone: 3
Location: 1: When looking out over the harbour directly out to see, swim to the right and onto the beach to see it on the rocks. 2: On the crane on the left hand side of the docks as you look out to sea. 3: Look up the hill while standing on the docks in front of the middle boat to see it.
Bower Lake: 4
Location: 1: Beyond the waterfall to the south of Bower Lake (follow the river leading off it) – you will have to zoom in with a ranged weapon to see it. 2:On the ruins on the beach as part of the lake itself. 3: To the north-east of the gypsy camp where the arched wall is, the gargoyle is on top. 4: On the side of the same wall.
Bowerstone Cemetary: 4
Location: 1: By the building containing the legendary book to raise the dead. 2: Head left when coming from this building up the hill to see it on the next temple you come to. 3: Follow this path uphill into the gardens. 4: On the wall going round the graveyard to the north-west.
Bowerstone Market: 4
Location: 1: In the furniture shop's top floor. 2: On the northern side of the main bridge. 3: On the city wall, in a tower. 4: Inside the recess with the carriage in.
Bowerstone Old Town: 2
Location: 1: By the warehouse from childhood. 2: On the stairs of The Felling Residence in the centre of the area.
Brightwood: 3
Location: 1: On the aqueduct near the Demon Door. 2: On the back of the tomb on the island in Brightwood river. 3: In the window at the top of Brightwood Tower.
Fairfax Gardens: 2
Location: 1: In the window as you look high up at Castle Fairfax. 2: In the library inside Castle Fairfax – only accessible if you buy it.
Forsaken Fortress: 1
Find this ruin near Brightwood Tower.
Location: 1: To the southeast of the main castle.
Guild Cave: 1
Location: 1: On the left of the first main room you come into.
Hobbe Cave: 1
Location: 1: In the spiral walkway.
Howling Halls: 1
Location: 1: In the corner of the main room over the spike pit.
Lady Grey's Tomb: 1
Location: 1: In the corridor before dropping into the sand of the main tomb.
Lion's Head Isle: 1
Location: 1: Outside the cave that you come to after coming out of the water-filled lagoon with the island in the middle and heading up the hill.
Oakfield: 3
Location: 1: On the bridge at the hub of the village. 2: Behind the sculptor's house. 3: Up the shore in the lack below the Temple of Light, there is a path heading behind the temple.
Rookridge: 3
Location: 1: Outside the entrance to Hobbe Cave. 2: In Late Adulthood you can go past the previously blocked rail track if you follow the track from Rookridge Inn all the ay along to the mining equipment. 3: On the wall of the Temple of Shadows main courtyard.
Shadow Court: 1
Location: 1: Behind you once you cross the spikes.
Shelley Crypt: 1
Location: 1: Once you navigate the bridges and orbs in the main room follow the ledge to the right.
The Temple of Shadows: 1
Location: 1: To the left of the wheel in the sacrifice chamber.
Tomb of Heroes: 1
Location: 1: On the other side of the door on the way to the sarcophagus room.
Twinblade's Tomb: 1
Location: 1: Above the door you come into the final room through.
Westcliff: 4
Location: 1: On the path on the way to the Howling Halls, after the second large bend near some stone ruins. 2: Turn right at the fork and the next gargoyle is near the tower at the end of the path. 3: On the wall of the Howling Halls just before you go inside. 4: On the cliffside on the beach you come back from the Spire on.
Wraithmarsh: 4
Location: 1: In the building near your cage at the start of the area. 2: On your way to the Drowned Farm from your cage it's outside the house before you enter the circle of the village. 3: After crossing the bridge from Oakvale it’s on the right after a short distance. 4: To the west of the circle of tombs, on the left of the path as you head downhill.
There are nine Demon Doors in total.
1: Bloodstone – Winter Lodge:
On the path from Bloodstone towards Wraithmarsh to the north of the area. You need to play a tune on the lute (you can buy it in most general shops) to the door and hold the expression and finally finish it correctly when prompted by the door to enter.
Reward: Master Longsword (weapon)
2: Bower Lake – The Arid Sea:
In the woods to the far south-west of the lake, past the pond. Perform expressions to match what the door reads in this order throughout the play.
Bloodlust Roar
Fart
Middle Finger
Worship – Purchase Bower Market's bookshop and the Book of Worship you need for this expression appears in the bookcase upstairs.
Blow Kiss
Growl
Point and Laugh
Dance
Laugh
Vulgar Thrust
Reward: Lucky Charm Augment
3: Bowerstone Cemetary – Forgotten Keep:
Near the entrance to the cemetery. Kick the nearby chickens at the door to enter.
Reward: Balverine Strength Potion, Practiced Skill Potion and Infused Will Potion.
4: Brightwood – The Sepulchre:
In the woods near Giles's farm. You need to visit it many times. First, bring it cheese. Second, get a haircut to include a mullet, handlebar moustache, dreadlocks or mutton chops. Third, items of cross-dress clothing to include Bandit Bandana, Tart Skirt, Yokel Hat, Noble Trousers, Noble Gent's Shirt or Corset. You can buy all the items in advance but don't wear them until the door asks you to, as it will ask for something else if you turn up with the stuff already. You can then equip them and it should work.
Reward: Not great! Merchant's Cap, Knotted Shirt, Harlequin Trousers (clothing).
5: Fairfax Gardens – Forest Sanctum:
In the basement of Castle Fairfax, accessible from the outside. This must be the last Demon Door opened to allow you access.
Reward: 50,000 gold and Marcus's Poems (book).
6: Oakfield – Homestead:
On the alternate path to the Temple of Light, the one on the side of the main village and the sculptor's house. You need to get married in front of the door to enter.
Reward: Serenity Farm (property worth 32,000 gold) and Hammerthyst (legendary weapon) – found in the chest in the outbuilding of the farm.
7: Rookridge – Memory Lane:
On the way to Rookridge head up the hill towards the rail track bridge rather than crossing beneath the inn. Perform 5 different dog tricks to enter (using your own expressions).
Reward: Potion of Life
8: Westcliff – The Vault:
On the way to the Howling Halls, on the main path. You need to be at least 50% corrupt for the door to welcome you in.
Reward: The Calavera (legendary weapon)
9: Wraithmarsh – Terry Cotter's Army:
As you leave your cage cross the river over the bridge and turn right up the path to find the door. You need to bring a crowd of rich people to see the door, so use Bowestone town square to lure the middle class to the door. You may need almost a dozen followers, so be sure to only attempt this when your renown is pretty high.
Reward: The Perforator (legendary weapon)
The Pooch Pamperer
Reward: 5 Points
Objective: Play fetch with your dog, or see another Hero's dog play.
The Archaeologist
Reward: 5 Points
Objective: Dig up something the dog has discovered, or see another Hero do so.
The Dog Trainer
Reward: 5 Points
Objective: Teach your dog a trick, or see another Hero's dog learn one.
The Persuader
Reward: 5 Points
Objective: Convince a villager to give you a present, or see another Hero do so.
The Show-off
Reward: 5 Points
Objective: Impress a villager with a perfect expression, or see another Hero do so.
The Romantic
Reward: 10 Points
Objective: Take a villager on a perfect date, or tag along to one. Location and expressions are all-important.
The Spouse
Reward: 10 Points
Objective: Marry a villager, or attend the wedding of another Hero.
The Parent
Reward: 10 Points
Objective: Have a child, or be there for the birth of another Hero's child.
The Hunter
Reward: 5 Points
Objective: Kill a sweet, innocent, fluffy bunny rabbit (remember, safety's off!)
The Gargoyle
Reward: 25 Points
Objective: Find the gargoyles' legendary treasure.
The Chicken Kicker
Reward: 5 Points
Objective: Kick a chicken a good distance, or see one getting kicked.
The Cliff Diver
Reward: 5 Points
Objective: Cliff dive 500 feet, or see another Hero do so.
The Workhorse
Reward: 10 Points
Objective: A Hero must achieve a high-enough chain while performing a job.
The Hero of Many Names
Reward: 5 Points
Objective: Change your Hero's title, or see another Hero change theirs.
The Teaser
Reward: 5 Points
Objective: Make bandits respond to expressions with fear, anger, mirth, and confusion... during combat!
The Property Magnate
Reward: 10 Points
Objective: A property must be sold for twice the price it was bought for.
The Rogue
Reward: 5 Points
Objective: Steal something undetected from a building while there are people nearby, or see another Hero do so.
The Illustrated Hero
Reward: 5 Points
Objective: Tattoo every part of your Hero's body, or see another Hero do so.
The Executioner
Reward: 10 Points
Objective: Sacrifice ten people in the Temple of Shadows, or see another Hero do so.
The Gambler
Reward: 10 Points
Objective: A Hero must win 500 gold at a pub game in one sitting, having tried each game type at least once.
The Bigamist
Reward: 10 Points
Objective: Get married a second time, whilst already married, or attend the second wedding of another Hero.
The Swinger
Reward: 5 Points
Objective: Take part in a debauched bedroom party with several participants.
The Pied Piper
Reward: 10 Points
Objective: Start a party where at least five villagers are dancing, or see another Hero do so.
The Party Animal
Reward: 10 Points
Objective: Get five villagers drunk in under three minutes, or see another Hero do so.
The Menace To Society
Reward: 5 Points
Objective: Commit an act of public indecency, or see another Hero commit one.
The Black Knight
Reward: 10 Points
Objective: Shoot the weapons from a hollow man's hands, blow off his head and then kill him for good!
The Duellist
Reward: 10 Points
Objective: String together a full-speed chain attack, or see another Hero do so.
The Sharpshooter
Reward: 10 Points
Objective: Hit three enemies with one shot, or see another Hero do so.
The Archmage
Reward: 10 Points
Objective: A Hero must kill five human enemies with one spell.
The Ruler of Albion
Reward: 100 Points
Objective: Amass a 2.5 million gold real estate empire, or be there when another Hero does.
The Hoarder
Reward: 25 Points
Objective: Collect every silver key, or see another Hero do so.
The Goth
Reward: 5 Points
Objective: A Hero must dye their hair black, and wear a black outfit and black makeup.
The Completionist
Reward: 50 Points
Objective: Get all expressions, pet tricks and abilities, or see another Hero do so.
The Paragon
Reward: 15 Points
Objective: Reach 100% good or evil, or see another Hero do so.
The Extremist
Reward: 15 Points
Objective: Reach 100% purity or corruption, or see another Hero do so.
The Celebrity
Reward: 50 Points
Objective: Reach 50,000 renown, or see another Hero do so.
The Artisan
Reward: 10 Points
Objective: Succeed at one job to Level 5, or see another Hero do so.
The Dollcatcher
Reward: 10 Points
Objective: Collect all the Hero dolls, or see another Hero collect them.
The Muse
Reward: 5 Points
Objective: Inspire the Bard to compose songs celebrating your great deeds.
The Philanthropist
Reward: 10 Points
Objective: Send a gift to an Xbox LIVE friend, or watch another Hero send one.
The Whippersnapper
Reward: 25 Points
Objective: A child Hero must collect five gold pieces.
The New Hero
Reward: 50 Points
Objective: The terror of Bower Lake must be defeated.
The Hero of Strength
Reward: 100 Points
Objective: Complete The Hero of Strength.
The Hero of Will
Reward: 100 Points
Objective: Complete The Hero of Will.
The Hero of Skill
Reward: 100 Points
Objective: Complete The Hero of Skill.
The Sacrifice
Reward: 25 Points
Objective: A Hero must choose 'The Needs of the Many'.
The Family
Reward: 25 Points
Objective: A Hero must choose 'The Needs of The Few'.
The Egomaniac
Reward: 25 Points
Objective: A Hero must choose 'The Needs of the One'.
The Companions
Reward: 10 Points
Objective: Perform a perfect co-op expression. (Multiplayer only)
The Double Threat
Reward: 10 Points
Objective: Get a co-op combat bonus. (Multiplayer only)
Lionhead made a choice to expand on the game world of Fable 2, and what they have produced is a brand new area, only accessible by submarine from the main hub of the original land, Bowerstone Market. It adds a number of substantial things to the game, some more crucial for certain people than others, as well as three short quests, all linked by the island.
As an add-on to the main game which is supposed to build on the experience of those who have completed it (as well as those who haven't, of course), a guide for this downloadable content contains certain spoilers, in particular a major one about the end of the campaign. While many people will have been unable to avoid hearing about the ending, we will endeavour to flag up any sections that may ruin it for you.
Background
The people of Knothole Island were intrepid explorers, seeking out an idyllic utopia to settle on which was rumoured to afford them control over the elements and weather. After exhaustive travelling, they finally discovered Knothole Island. While when they landed it was a beautiful and tranquil environment, they soon realised that the weather just would not change. Their island was stuck in an eternal drought.
Contents of the Downloadable Pack:
What does the downloadable content give you? This may help you decide whether it is worth the 800 Microsoft Points asking price (£6.80).
Knothole Island added to the game world
3 New Quests: Knothole Island's Big Freeze, Knothole Island's Huge Heat, and Knothole Island is Drowning.
149 New Items, including six new legendary weapons, a suit of armour (as well as more outfits)
A fat burning potion to decrease weight, as well as potions to increase and decrease your height.
The ability to reverse your actions at the end of the main Fable II campaign (see below).
3 New Achievements totalling 100 points.
Notes:
This guide outlines the quests, points of interests and extras on Knothole Island. Items in bold are the Knothole Island Book Volumes, which, if you collect all 10, unlock an achievement worth 25 points, as well as the Knothole Knight clothes, a rather smart outfit that can only be completed by finding the items in the shrines that make up the islands quests. For media depicting exactly where the Knothole Island Book Volumes are, see the section further on in this guide.
Spoiler:
SCROLL DOWN
You can also revive your dog from the end of the main game if you chose either the greed or renown options. How to do this is explained later in this guide.
So you have downloaded the Knothole Island downloadable content from the Xbox Live Marketplace, under Fable 2? Then we can begin.
To get to Knothole Island, fast-travel to Bowerstone Market, to the town square, and walk from the square to the docks.
Locating the submarine to get to Knothole
Head down the steps on the side nearest the clock tower and square and you will see a quaint new object in the harbour. It's a submarine. Walk up to the man next to it (Gordon) and he will explain where he's from and what he wants from you, the infamous hero of Albion. Knothole Island is in dire need of your help. Apart from having a lazy yet tyrannical chieftain, the town and its surrounding are gripped in the swathes of a heavy winter, but one that never goes away. Constant snow in the summer causes obvious problems when it comes to growing food, and so you must travel to the island, talk to the chief, and rescue the citizens. Easy. Accept the quest and you will receive a pile of gifts to whet your appetite that can only be found on the island.

Accept the quest and receive your gifts
These include:
One Burned Calorie Potion (fat-reduction) - Potion
Solar Shielding Spectacles – Clothing (headgear)
Knothole Island Vol. I – Book
Assassin's Gloves – Clothing (hands)
Knothole Knight Boots – Clothing (feet)
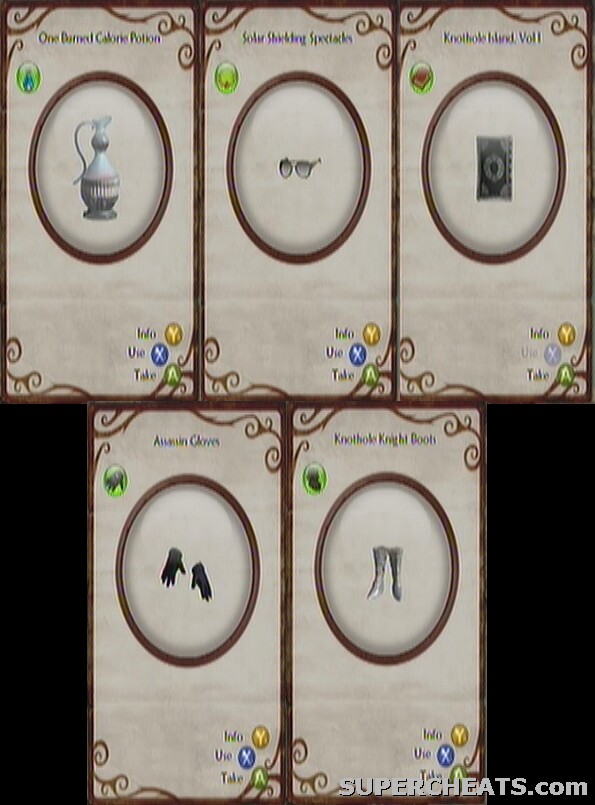
Not bad for doing nothing!
These are all exclusive Knothole items, and the complete set, or more items along the same theme, are available from the quests and shops on the island. Once you have examined the last item, you will be transported to Knothole.
Upon your arrival, you will notice that Knothole is unlike anywhere else in Fable II. The driving snow gives it a Christmassy feel, but also an overpowering shine due to the sheer weight of snow compared to the usual Albion environments. You begin at the docks, the only way in and out of the island. Head up the pier and climb the snowy-slope. In the alcove on the right, there is a dig spot. Continue towards the centre of Knothole Village. You can of course walk on the ice!

It's a beautiful place!
Head into the first building on your left, which is the Chieftain's house. He explains the situation: basically the ancestors of these people hid some weather totems which they used to control the weather, in various caves full of trials. This was to stop their villagers from becoming fat and weak, forcing them to stay strong so they could reclaim the totems each year with the seasons. Their warriors have now died out regardless however, so they are stuck in a frozen state. You must find the Ice Key to open the Ice Shrine and get the Ice Totem.
Head out of his house and down onto the ice. Turn left, following the golden trail under the wooden walkway, past the tower and up the snowy-slope. About half-way up you will have to fight some Hobbes. They shouldn't prove too troublesome, so dispatch them from range and move on. Further up you will be accosted by a Banshee and some Shadow Creatures. Take out the Shadows first, as they pose the main threat (the Banshee doesn't really do much damage). To kill the Banshee, you must kill the wave of her small minions and then either melee or shoot her when she cowers following this. Repeat a couple of times and she won't survive. Shooting her in the head, if you are accurate enough, is the quickest way to do it.

Deal with the Banshee and her allies
Continue up the hill until you get to the top where it levels out. Deal with the beetles and walk across the ice and up the bank on the other side onto the glowing patch. Wait for your dog to start digging and press D-pad down to unearth the Ice Key when the spade icon appears.
Head back down the hill the way you came until you get back to the frozen lake by the village. Once you pass under the first walkway, turn right up the hill-path by the rowing-boat wreck.

Head up this path towards the Sun Shrine
Follow this path all the way up as it soars high up into the sky. Approach the door of the shrine and hold A to insert the seal and open the door.
Move down the path a little way once inside and you will be greeted by an army of Hobbes. Take them all out, focusing on the magical one as it can summon more to the fight. Proceed into the Hobbe village ahead, where they have clearly been enjoying the snowy surroundings. Head straight through the middle of their village and destroy the icicles that are blocking the way forward.
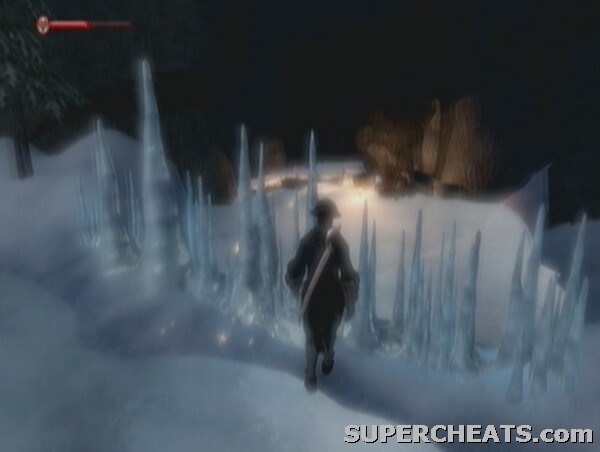
Attack these icicles to create a path through
Press A to vault down the hole ahead once you are through. As you splash down into the pool of water below, swim around to the left of the island to find a dive spot and a Fat Burner Potion. Climb up the steps onto the island and pull the switch to melt the ice blocking the door ahead. Move through and once in the large, square area, head to the right hand door. Once you get near it will slam shut and a horde of Shadow Creatures will begin their attack, around five in total.
You should have few problems dealing with them, before all the doors will open again. Cross the room and descend the slope through the door directly opposite the one we just approached. You will come into a room with a flit-switch orb and a fairly challenging puzzle-section.
It is crucial in this room to be quick on your feet and know what is coming. If the orb is red, you need to use a magic attack (B). If it is blue, you need to melee attack (X) and if it is yellow, you need a skill or ranged attack (Y). Follow the sequence below to learn where the orb will appear next.

You must stay on your toes for this one
1. To begin, melee the switch in its starting position.
2. It will then move across the barrier and to the right. Shoot it with a skill-based attack (Y).
3. Next it will appear in the middle, needing a magic attack (B). Point in the direction of the orb and just tap B, you don't need to charge it.
4. In the middle on the left next, and it needs a melee attack, so make sure you're nearby as it comes over.
5. Next it's at the front on the left, needing a magic attack.
6. Then it will appear at the back on the right, with a skill-ranged attack required.
7. Next is a melee attack at the back on the left.
8. Nearly there now, at the front with a magic attack.
9. At the back with a ranged attack, to the left.
10. Only one after this, which is at the back and needing a melee attack, to the right.
11. Lastly, at the very front to the right – you need to be quick with a melee attack!
This will send the orb over the electric wall to destroy the pedestal on the other side, deactivating the electricity and exposing a switch.
Beat this tricky puzzle
Head over to it and push A. This melts the block of ice back in the main room. Return to the main room and deal with the crowd of shadow creatures that appear when you get there. Now you want the door opposite where we just came out of again. It will lead you to a large cave with plenty of flit switches and electronic gates. If you destroy the icicles to the right of the main bridge and drop down, activating the switch along the way, before following the path and climbing the ladder, you will find Knothole Island Vol. II through the icicle barrier at the end.
Locating Volume 2 in the Ice Shrine
Vault down off the platform to land back in the flit-switch cave. Hit each melee switch until the electronic barriers have all been deactivated and then run across the bridge and pull the switch at the end. This will melt another block of ice in the main room. Head back there to find more Shadow Creatures, including a Balverine. With them defeated, the ice will melt in the middle of the room, on the platform, revealing another switch. Guess what this one does? Yes, melts more ice. Use Left Trigger to see where you need to go, and head along the narrow path, opening the two chests on the way, and through the door. These chests should carry Bandit Gloves and Knothole Knight Trousers.

Get through the hot area as the Sun Totem gets near
Take the path until you come to the canyon, and vault down into the suspiciously open area below. Shadow Creatures will appear, again including a Balverine that must be defeated before you can carry on. Continue on and vault down a level, before collecting and activating the Sun Totem at the end of the path by holding A. You will then be warped back to the main area of Knothole Island, with a sun-drenched and impressively different scene to the one we left.
Move forward and jump down into the dry riverbed – yes, the same river that was previously frozen over!
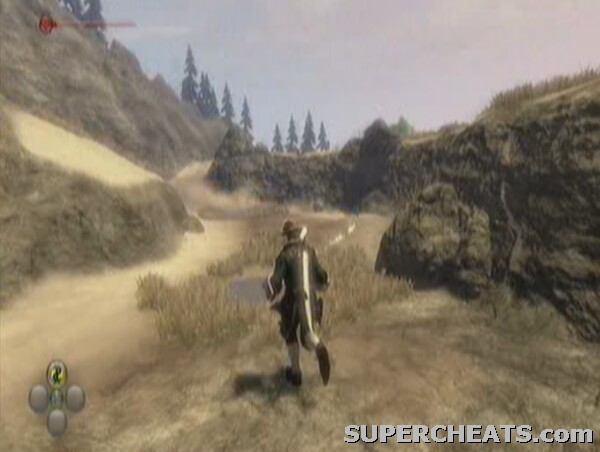
Get through the hot area as the Sun Totem gets near
Head down the riverbed, dealing with the bugs that attack after a short distance. When the riverbed merges into a path, going up hill, go right and along the raised path to find a treasure chest. To get to the chief, head left. Follow this path downhill and back past the odd temple/tower in the valley. Around the side of this tower is Knothole Island Vol. VII (the right hand side as you come down the hill, the left from the village). Before continuing on into the riverbed, through the water and back into the centre of the village, turn left up the narrow path to find a chest which should contain a Knothole exclusive Iron Axe complete with augment slots.
Locating Volume VII by the temple tower
Now you can feel free to head into the dry-river and towards the village. Once you see the red house and pass underneath the high walkway, turn left up the slope, and then double back on yourself to collect Knothole Island Vol. VI underneath the pier. Just next to it you will find a chest too, containing a Heavy Yew Crossbow exclusive to the island with more augment slots than the mainland equivalent.
Get back into the riverbed following this and continue on until the walkway above stops, taking the sandy slope up to the right into the chief's house. He'll thank you, while assuming all the credit for himself, and you'll be rewarded with 150 renown points and the Ice Key trophy.
To recap, you should, at this point, have the Knothole Island Volumes listed below. Many of them only appear under certain weather conditions, so to find them you will have to wait until all three Knothole Island quests are competed, and then there may well be some backtracking through dungeons and fiddling with the weather involved if you didn't collect them during this quest. It is advisable to collect them as you complete the quests to do it as easily as possible and to get the respective achievement on offer.
Knothole Island Vol. I
Knothole Island Vol. II
Knothole Island Vol. VI
Knothole Island Vol. VII
To activate this quest you need to leave Knothole Island. As soon as you set foot back on the mainland, the next quest will pop up and you will be able to fast-travel back to Knothole and accept the task from the chief. Return to the location of your choosing and then fast travel back to Knothole. Head back up from the docks, though take the first path on the right briefly to find a chest. Continue on into the village and into the end-terrace chief's house once again.
He will explain that now the people of Knothole have too little water! They are experiencing a drought and desperately need you to find the Sun Key and enter the Sun Shrine to get the Storm Totem and solve their problem. Phew.

Accept the chief's quest, again.
Head out of the chief's office and turn left, following the wooden walkway along until the steps lead you down onto the sand. Head straight on up the hill. Jump down into the canyon using A once you reach the drop, then head left along the bottom. Take the path off to the right into the grassy-wooded area. Take out the Hobbes that will bother you along the way. Bear right into the grass and trees and hug the cliffside. Move along it and you will find Knothole Island Vol. V as well as a dig spot nearby.
Locating Volume V in the wilderness
Rejoin the path and follow it along a little way, possibly past some more Hobbes, until you come to a ruin. Lead your dog to the golden circle and unearth the Sun Key by digging when prompted.

Unearth the key.
With the key in hand, continue on the path to the dead end with the graveyard below. Jump down and head amongst the graves. Head past the small mausoleum to find Knothole Island Vol. VIII behind the farthest grave from the village. Get back down into the dry-lake in the village and take the river-bed out in the direction of the Ice Shrine we were in last time. You will come to the now-familiar tower, which is actually the location of the Sun Shrine. Put the key in the door and hold A to activate.
Locating Volume VIII in the graveyard
Descend the spiral staircase once inside. Open the chest on the left once you get to the hallway, then proceed into the main room. You should see a flit switch straight ahead, and a chest nearby on the right. Open the chest first, and then shoot the orb with a ranged skill attack. It will fly around the room a few times before stopping. Melee attack it once it lands near the door on the right (from where we came in). It will fly some more and then open the left hand door. Go through and activate the expression statue, which needs you to perform the Chicken expression. Use RB to select it under the Rude expressions, then hold it down and release it in the green zone on the slider.

Perform the Chicken expression to get the reward from the statue.
It will then release an orb which, once you shoot it with Y, will land in front of the door we came in at. Melee attack it to send it to open the left hand door. Another expression statue is in there, needing you to perform the Laugh expression in the Fun category. Hit it in the green zone once again and another orb will be released. This time, perform a magic attack once it lands with B. It will move back to where the other expression statue is. Shoot it, and it will open the final door.
Head through it and down the steps, then through the corridor, stopping to open the chest on the right before the floor turns sandy further on. Climb up the massive hill once you are in the large room and fight off the plague of beetles.

Vanquish the bugs.
Once they have all been defeated the door across the hill will open. Head through the corridors with the stream running through, opening the treasure chest on the right just before the large room. Edge slowly into this larger room as spikes will smash up through the water right by your feet, activating the orb in the centre of the area. It will fly over your head and back the way you came, into a corner of the corridor. Shoot it and it will re-enter the spike room. Head back to that room and shoot the orb across the far side to send it flying nearer you, then hit it again with a ranged attack to deactivate the spikes.
Head across the water and onto the sand, then up the wooden slope at the back of the cave. Shoot the orb/flit switch that is over the other side of the room once you are up on the wooden deck. Use a magic attack when it flies over you and rests on the slope. Now walk up the left hand fork of the decking and use a melee attack on it. Notice the chest behind the orb if you want to open it. The orb will now have opened the door on the right hand fork of the deck, directly opposite the chest. Go through it and down the corridors to fight an army of Hobbes in the large room at the other end. There are a lot of them, but as they are only Hobbes it shouldn’t cause too many problems.

Defeat the Hobbes.
Locating Volume 3 in the Sun Shrine
Having defeated them, head up the slope on the left with the tall wooden fence. In the Hobbe camp within there is a chest by the cave which holds the Knothole Knight Shirt. Next to it is a switch which should be activated with A. Head back down the slope and through the door that just opened, past the small shack at the end of the area.
The next room contains a few Hobbes which must be taken out. Once the area is clear, smash the crates near the entrance to expose a switch on the ground. Stand on it to open the door on the other side of the room. Just next to the crates is a destructible wall, shown by the large crack in it. Break it down with an attack and collect Knothole Island Vol. III inside.

The switch and destructible wall nearby.
Proceed through the recently-opened door and along the rocky-cliff path and open the chest in the middle of the sandy track on the right before the steps down. Walk down the steps and through the door at the end into the watery room. Dive in, collecting the loot from the dive-spot in the far right corner before climbing out and moving on. Open the chest along the corridor on the right, then head on up the stairs.
You must be careful in this room as it's full of flames that turn on and off in a certain pattern. The first, which fires down over the switch in front of the door, deactivates for a good period of time – plenty long enough for you to stand on it and unlock the gate to the left. Get off the switch as soon as it opens and head in to pull the lever inside, opening a gate further down the corridor. Your presence will send an orb/flit switch flying out and into the alcove opposite. Shoot it and it will go down the corridor, beyond the flames. Wait for the gap in the flames and then run down, waiting at the last one if you don't have time to get through in one sprint, towards the end of the corridor.
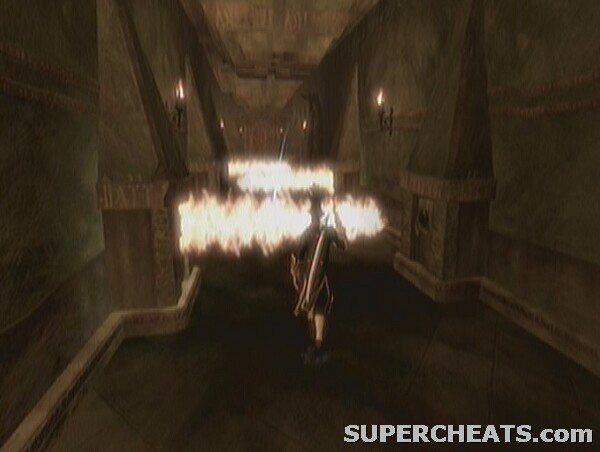
The dangerous flame-filled corridor.
Near the end you will see that the door is shut, so head into the open gate on the right. Pull the lever to turn off all the flames, leaving you free to stand on the switch at the end and open the door. Crack open the chest on the left, just before heading through, to get the Knothole Knight Gauntlets. Move into the final room and fight the two waves of Hollow Men that appear on the scene. With them destroyed, the Storm Totem will appear in the centre of the room. Collect it to be warped back outside the dungeon.
Back outside you will be greeted by a rain-storm: a welcome site for the inhabitants of the island. Take the only route available, along the path and under the tall pair of columns that form an arch. Shortly, following the first right hand bend in the track after the arch, you will see a large piece of ruinous rubble at the left hand edge of the track. Behind this is Knothole Island Vol. IX. Continue along the path and dive into the lake, filled with water following our activation of the Storm Totem (it clearly rained very hard very quickly! Use the dive spot to the immediate right, and then swim to the beach far away to the left. Climb the steps and meet the chief again.

Swim across the lake to the chief's house
Locating Volume IX in the wilderness
Once again, he is hardly gracious in his praise of you. Still, you get 750 renown points and the Sun Key as a trophy. Here is a list of the Knothole Island Volumes that you should have collected by this stage:
Knothole Island Vol. I
Knothole Island Vol. II
Knothole Island Vol. VI
Knothole Island Vol. VII
Knothole Island Vol. III
Knothole Island Vol. V
Knothole Island Vol. VIII
Knothole Island Vol. IX
We now need to repeat the steps at the end of the last quest: fast travel out of Knothole Island, accept the next quest: Knothole Island Drowning, and then fast travel back again. Repeat the familiar route to the chief once back on the isle. Head up the path from the docks and turn left just before it turns into decking past the lake and head into the house to see the chief.
As you may have predicted, the wealth of water that we bestowed upon the island has now also refused to stop, though why they can't use the Sun Totem we nearly died getting for them is unclear. Still, we must travel to the Storm Shrine and retrieve the Ice Totem, which would obviously stop the water and return Knothole to the icy state it was in when we got there.

Head in the direction of the Storm Key
We obviously need to dig up the key before we can enter the shrine, so head along the wooden promenade and turn left up the hill when it breaks to sand. Dive into the canyon similarly to how we did on the last quest, but this time head to the right. Note that there is a dive spot in the right hand corner of this little inlet, so make use of it and then climb up onto the beach. Open the chest on the right, and walk up the incline. At the top you will find the ring of light, and your dog will find a dig spot.

Locate the ring of light and your dog will let you know exactly where to dig.
Stick your spade in there to dig up the Storm Key.
From the dig-spot location, dive into the lake and swim through the canyon gap, before climbing onto the beach and moving up the path on the right. A short way along you will be attacked by a group of troublesome Balverines (hopefully just a pair). Use Time Control or Raise Dead to give yourself a larger attack window or to give them multiple targets. Move along the path further once you have dealt with them and vault down when you get to the dead end.
Head along the familiar wooden-walkway past the chief's house, but this time, rather than heading left and up the hill, join up with the other walkway. Jump off it as it crosses the water and swim away from the village across the lake.

Jump into the lake in pursuit of the Storm Shrine
Swim past the temple tower and defeat the Hobbe army at the top of the windy path which comes off it. Get in the water at the top, locating the dive spot to the left of the shrine entrance if you want it, before getting out at the other side and placing the key in the door.
Upon entering the shrine, move into the room with the low layer of mist on the floor. To the right, between a few of the pillars of rock, you will find Knothole Island Vol. IV. Head straight on and up the steps into an odd outdoor section. This is quite a tough section with a lot of enemies. After you are prompted to look at the large building in the distance, you should notice a group of Shadow Creatures at the end of your walkway. Pick off most of them with a ranged weapon and they shouldn't be able to get to you before they are all dead. Once in the open area, strike the blue flit-switch to see it fly off to the right.
Locating Volume 4 in the Storm Shrine
Follow it down the steps and turn left. More shadow creatures are waiting for you, of which at least one is a Balverine. Head inside the oval building and strike the flit-switch again. It will move to the next one, just across the way. Again, there will be a Balverine guarding it – try to shoot it repeatedly from distance before it spots you if you can. He will also have some Shadow Creatures with him, so take them out and hit the flit switch, which is in the same place as the last room. Open the chest before you depart in pursuit to find the Knothole Knight Armour.

Defeat the shadow monsters
Turn immediately left as you come out of the front of the building and follow the walkway, up the steps and along the concrete wall. Hit the switch yet again and it will move into the distance and turn yellow. Use accurate targeting to aim at it and make the shot. It will move into another of the circular buildings. Jump down and turn left up the steps into the initial area by the building we're trying to get into. Take the left hand corridor, back down the way we came into the area, but turn right in the opening about half way along. Destroy the pair of Shadow Creatures within, open the chest, and strike the blue flit-switch.
Head back to the main area, though be aware that there will be a group of Shadow Creatures populating it once again. At least three Balverines will be amongst them. Use surrounding spells to damage as many of the myriad enemies at once as possible. With the group defeated, head up the steps at the end of the area, hit the flit-switch once again, and enter the door. Press A to vault down the hole into the depths of the shrine.
Turn around once inside and swim under the plant-covered door to find a dive spot. Head back the other way and swim under the waterfall this time. Climb the steps to enter a grassy room. There is a damaged wall panel to the right which contains a chest. From this secret room, head straight across to the door in front. It will slam shut and you will be forced to fight off some Hollow Men.

Defeat the Hollow Men
Head through the door and turn right, ignoring the sealed door and head up the stairs. You should find yourself in an overwhelming room full of platforms and cogs. Turn left immediately when inside to find a chest. Otherwise, move through the centre of the room and press A to climb the ladder at the other end. Hit the flit-switch on the first platform and jump across to the next one. Hit it again, and repeat this all the way across the platforms until you reach the last one and send the switch through the pipe in the ceiling. Jump back down to the lower floor to locate it. Hit it once you are there and shoot it as it turns yellow. It will then go out of the room, down the stairs and open the locked door mentioned earlier, back in the passage between the grassy main room and the machinery-filled one we are currently in. Follow the path up the stairs until you see a ladder. In the dark area just before it you will find a chest on the right. Head up the ladder after this.
Turn right 90 degrees and walk forward as you emerge in this room to find a secret, if bemusing room through the solid-looking wall. Back in the main room, head along the central platform and defeat the Hollow Men that meet you in the middle. Deal with them and continue straight across and up the steps. You will come to a challenging little room with a flit-switch puzzle that needs to be solved. Position yourself so you think you can use both ranged skill and magic attacks to reach the pipes in the centre of the room and then shoot the flit-switch in its first position. It will then reappear in the second pipe, but red, so project a magic attack at it (push the control stick in the direction and press but don't hold B). The next two pipes both require skill attacks, and the final one a magic attack. So the order is Skill, Magic, Skill, Skill, Magic. If you don't do one in time the orb will move back down the pipes in the same order, so you may have time to rescue it in the later stages. For the magic attacks, Raise Dead works best as a quick projectile based move.
The door will then open and a lever made available for you to use to open a new area.
Beat this tricky little room
With the level pulled, head back to the main room where we met the Hollow Men. Turn left at the central platform and head up the stairs into another flit-switch room. This one's nice and easy. Simply use whatever attack is indicated by the colour of each orb passing up the central pipe to destroy them. Once every orb has been destroyed, the door will open. Enter and pull the switch at the end of the corridor. Head back to the Hollow Men room to find a Banshee waiting for you. Take it out.

Get past the Banshee
The final door will then open across the platform. Enter it and climb the steps to find a chest halfway up, containing the Knothole Knight Helmet, and a blocked door at the top. Use ranged magic or skill attacks to destroy the explosives in front of the door and clear a path through. Once beyond the door you will have to fight a Troll. You should have come across these before, but basically the trick is to dodge and roll around it, avoiding the rocks it enjoys throwing at you, and then either use skill attacks or Blades to hit the glowing warts on its body. Once they are all popped, it will be destroyed.
Go through the exit and corridor into the snowy cavern. Follow the path and you will end up at the Ice Totem. Press A to activate it.
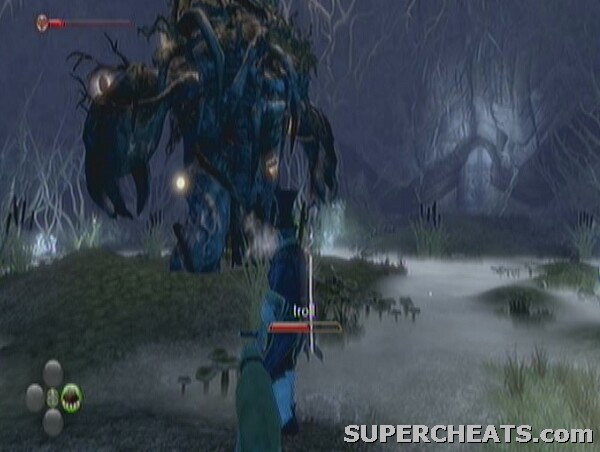
Walk up and activate the Totem
Back in snowy Knothole, we must get back to the chief for the final time to deliver our good news (if he hasn't realized that the weather has changed already). You will have to fight a Banshee as soon as you exit the shrine, but with that done, proceed down the path. Do not jump down yet however, as there is Knothole Island Vol. X to get. From the exit of the shrine it is behind the large rock off the path to the right. This should be the last one and thus should also activate the Bibliophile achievement in the process.
With that, vault down to the frozen lake and return to the village past the temple tower. The villagers have gathered around the chief in the centre of the lake. He is trying to extort money from the villagers for 'maintaining' the newly recaptured weather system. The villagers are unwilling to pay this, but can't stand up to the chief without your help. To side with the chief and gain his pretty meagre 10,000 gold reward, walk up to him and hold A. To side with Jessica and the villagers, do the same of them. You get 100 good morality points for the latter choice, and 100 evil for the former. There is also 3000 renown in it for you.
With that done, you should unlock the Meteorologist achievement and can then access the Weather Chamber using the pedestal in the centre of the lake. To locate any Knothole Island Volumes that you do not already have, replicate the weather conditions of the appropriate quest to enter the shrine (the name of the shrine indicates the weather conditions you need to open it) or any otherwise inaccessible areas (many places in Knothole Island can only be reached in certain weather conditions) and locate them using the instructions and movies in this guide.

Your new Weather Chamber!
You should now have all the volumes of the Knothole Island book and have completed the bulk of this downloadable content.
For more detailed locations, follow the guide through the shrines and environments in the quest section of this guide, or use the provided walkthrough videos where available.
Volume I:
Location: You receive this in Bowerstone Market as incentive to accept the quest and travel to Knothole from Gordon, the submarine captain.
Volume II:
Location: In the Ice Shrine, preferably during the Knothole Island's Big Freeze quest.
Locating Volume 2 in the Ice Shrine
Volume III:
Location: In the Sun Shrine, preferably during the Knothole Island's Huge Heat quest.
Locating Volume 3 in the Sun Shrine
Volume IV:
Location: In the Storm Shrine, preferably during the Knothole Island is Drowning quest.
Locating Volume 4 in the Storm Shrine
Volume V:
Location: On the way to locate the Sun Key, preferably during the Knothole Island's Huge Heat quest.
Locating Volume V in the wilderness
Volume VI:
Location: Under the pier on the way back to the village to see the chief after activating the Sun Totem, preferably at the end the Knothole Island's Big Freeze quest.
Volume VII:
Location: On the way back to the chief around the side of the temple tower having activated the Sun Totem at the end of the Knothole Island's Big Freeze quest.
Locating Volume VII by the temple tower
Volume VIII:
Location: On the way to the Sun Shrine having located the Sun Key, preferably during the Knothole Island's Huge Heat quest, the book is amongst the gravestones.
Locating Volume VIII in the graveyard
Volume IX:
Location: On the way back to the chief at the end of the Knothole Island's Huge Heat quest, having activated the Storm Totem.
Locating Volume IX in the wilderness
Volume X:
Location: On the way back to the chief at the end of the Knothole Island is Drowning quest, having activated the Ice Totem. It's behind the rock on the right before you drop down back to the main lake. (Note: The images below were taken after unlocking the Weather Chamber and having re-entered the Storm Shrine with the Storm Totem active – preferably get the book before this stage following the Knothole Island is Drowning quest as outlined above).

Behind this rock on the right

Locate the final book
Thoughtfully, Lionhead bundled with the Knothole Island expansion some new achievements, totaling 100 points. They are outlined below:
The Collector
Reward: 25 Points
Objective: Acquire all the mystery items in The Box of Secrets shop, or see another Hero do so. (See the Box of Secrets section)
The Meteorologist
Reward: 50 Points
Objective: Bring all of Knothole Island’s weather problems under control, or help another Hero to do so.
The Bibliophile
Reward: 25 Points
Objective: Find all the books detailing the history of Knothole Island, or help another Hero to do so.
The Box of Secrets is a general store in Knothole Island, but with a twist. To buy the items it sells, you must collect the designated items and exchange them. These items, which may be common or rare on the mainland, are all unusual on the island, so are sought after by the shopkeeper. The catch is that you don't know what you're buying until you hand over the goods; just a vague description is given (unless you use this guide of course!). Below are the items revealed for you, as well as information on what you have to trade to get them, so some people may view these nuggets of information as spoilers.
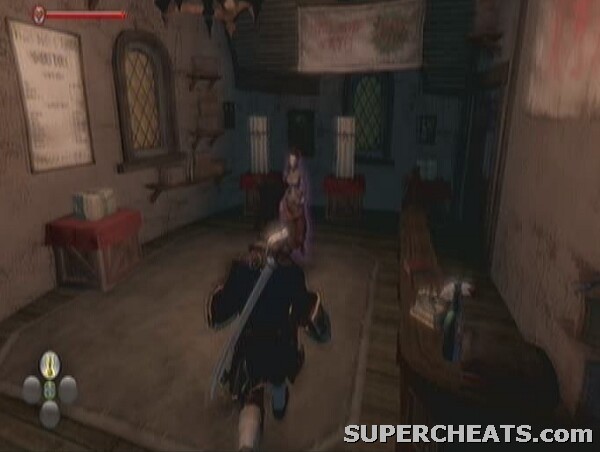
The Box of Secrets is your ticket to Knothole's secret items
Description: 'Sexy Garment'
Product: Knothole Skirt
(This is a black skirt which would look very good on your wife, though perhaps not so much on your husband).
Trade Item: Marriage and How to Survive It (Book)
Location of Trade Item: Bowerstone Market's Book Shop
Description: 'Rebellious Costume'
Product: Black Wheel-Gang Outfit
(This is a motorbike gang outfit).
Trade Item: Pretty Necklace
Location of Trade Item: Gift Stalls or Jewellers
Description: 'A Stylish Accessory'
Product: Greaser Wig
(This is a wig to go with the Black Wheel-Gang outfit).
Trade Item: Eternal Love Ring
Location of Trade Item: Bowestone Market's Jewellery Store
Description: 'Murderous Attire'
Product: Assassin Outfit
(This is the complete outfit for a stealthy assassin, all in black)
Trade Item: Puny Carrot x2
Location of Trade Item: Any Produce Seller
Description: 'A Lovely Hairdo'
Product: Cascading Hair
(A new hairstyle doing what it says on the tin)
Trade Item: Table Wine x2
Location of Trade Item: Any Inn/Pub
Description: 'Barbaric Garments'
Product: Brodican Warrior Queen Outfit
(A new hairstyle outfit, emphasising the top half of the female figure and basically looking like Xena's costume)
Trade Item: Murgo's Big Book of Trading x2
Location of Trade Item: Bowerstone Market's Book Shop
Description: 'Vile Attire'
Product: Chasm Outfit
(A new outfit with a cool-looking helmet)
Trade Item: Crucible Peanuts x2
Location of Trade Item: The Crucible's Food Seller
Description: 'An Evil Weapon'
Product: Wretcher's Blade
(A very powerful legendary weapon which does more damage to guards and villagers)
Trade Item: Crunchy Chicks x3
Location of Trade Item: Bloodstone or Westcliff's Food Sellers
Description: 'A Saintly Weapon'
Product: Judge's Steel
(A new legendary weapon which does greater damage to evil enemies)
Trade Item: Monk's Robes
Location of Trade Item: Oakfield's Clothing Stall
Description: 'A Strong Willed Weapon'
Product: Staff of Wrath
(A new legendary weapon which reduces the chance of scarring and increases defence)
Trade Item: Diamond
Location of Trade Item: Bowerstone Market's Jewellery Store
Description: 'Rare Ranged Weapon'
Product: Hal's Rifle
(A new legendary weapon based on the redesigned assault rifle in Halo 3)
Trade Item: Pure Experience Extract
Location of Trade Item: Bowerstone Market/Fairfax Gardens' Potion Trader
Description: 'Weapon of Note'
Product: Axe of Disharmony
(A new legendary axe shaped like a flying V guitar)
Trade Item: Lute x2
Location of Trade Item: General Stores
Description: 'Barbaric Weapon'
Product: Brodican Mace
(A new legendary mace)
Trade Item: Regal Purple Dye
Location of Trade Item: Fairfax Gardens' Clothing Trader or Travelling Dye Trader
As well as all the items mentioned above during the quests, there are other items that are exclusive and new to Fable II with Knothole Island, below is a list of the most important:
Appearance changers:
Taller potions – increases your height
Shrinking potions – decreases your height
Thinner potions – reduce the weight and girth of your character
You can find these in dig-spots, dive-spots, chests throughout the island and buy them from the Knothole Potion shop.
Augment remover:
This allows you to remove augments from a weapon to which they have been added i.e. you cannot do it to a weapon that came with them built in.
You can buy this in Knothole Island's Stonecutter shop, next to the Box of Secrets.
SCROLL DOWN...
Now onto how to get your beloved dog back if you chose the greed or renown options at the end of the main game.
Firstly, this mini-quest is only open to those of you who have lost your dog; it simply cannot be activated otherwise. To begin, head to the crypt in the graveyard where we found Volume VIII of the Knothole Island book. It is located between the chief's house in the village and the docks where you enter the island. Read the message on the door (which will only appear if you have actually lost your dog) which informs you that a mage named Cheet-Ur (a dig at those of you wanting your dog back of course) would like to help.
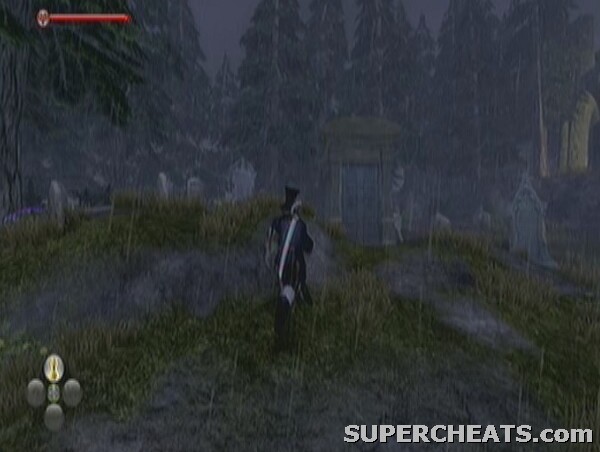
Cheet-Ur's crypt
To get Cheet-Ur's help you must take a life, in order to get one back. To do this, simply get a villager or your spouse to follow you (you may have to increase your renown amongst those on the island if you haven't already saved their lives with the quests) and lead them to the entrance to the crypt. When the doors open, get them inside and then activate the switch outside (i.e. disengage the follow command once inside yourself) to lock them in and condemn them to death.
Your dog will then come bounding out at you. It's a nice feeling.


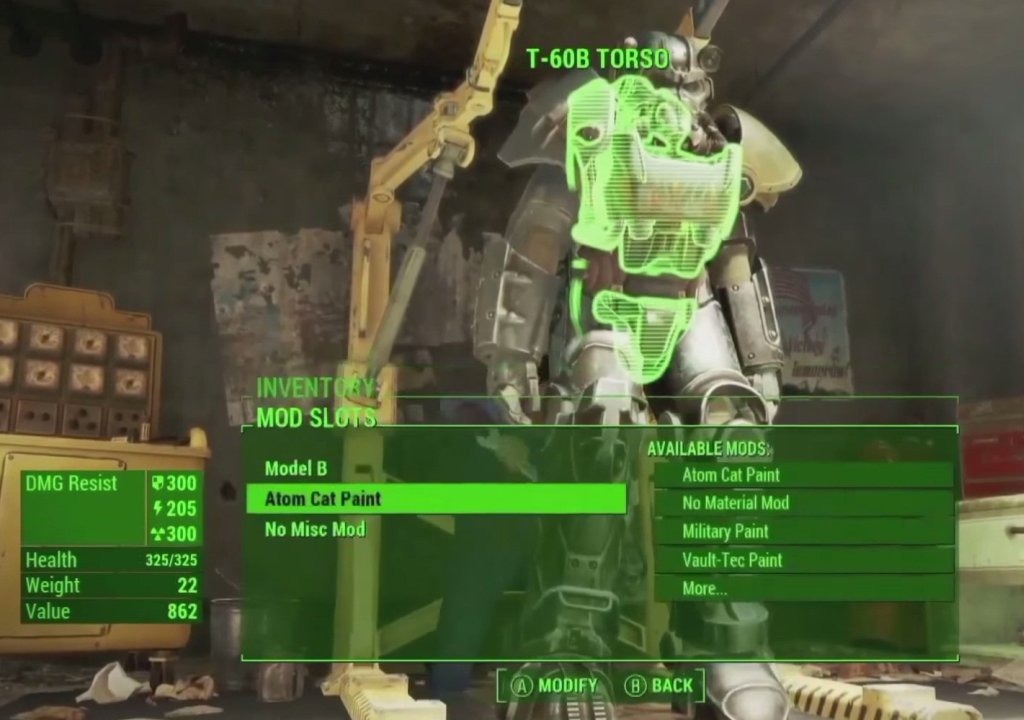
 What to do After Level 20 in Destiny
 Hands-On With MechWarrior Tactics
 How to get The Flintstones: Bring Back Bedrock Infinite Gold, Complete Tasks, Mission and Organise Houses, Tips and Tricks Guide
 Quantum Conundrum: The Desmond Debacle Walkthrough
 Prototype 2 (PC) Fix Radeon graphics cards issues