Assassin's Creed II picks up right where the first Assassin's Creed left off -- with test subject Desmond Miles trying to make sense of the strange messages and symbols he has discovered on the wall of his room in the Abstergo Industries research facility, where he is being held prisoner. Desmond must once again use the Animus to relive the genetic memories of one of his ancestors. This time it's the memories of Ezio Auditore da Firenze, a young noble living in the time of the Italian Renaissance.
Every one of Ezio's memories is covered in this guide, as well as every optional event, feather location, and Monteriggioni statue location. You'll also find solutions to all 20 Glyph puzzles and video walkthroughs for each Assassins Tomb.
Note: Now updated to include Sequence 12 and 13 DLCs.
Note: This guide was written based on the Xbox 360 version of the game. Nevertheless, this guide can still be used in conjunction with the PlayStation 3 or PC version, as the only major difference between the three versions is the control scheme.
Assassin's Creed II Guide
Left Bumper - Contextual Camera
Left Trigger - Target Lock
Right Bumper - Weapon Wheel
Right Trigger (Hold) - High Profile
Left Stick - Move
Right Stick - Look
Y Button - Head
B Button - Empty Hand
A Button - Legs
X Button - Weapon Hand
D-pad UP - Select Hidden Blade
D-pad DOWN - Select Fists
D-pad LEFT - Use Medicine
D-pad RIGHT - Select Long Sword
Back Button - Map
Start Button - Pause menu
L1 Button - Contextual Camera
L2 Button - Target Lock
R1 Button - Weapon Wheel
R2 Button (Hold) - High Profile
Left Stick - Move
Right Stick - Look
Triangle Button - Head
Circle Button - Empty Hand
X Button - Legs
Square Button - Weapon Hand
D-pad UP - Select Hidden Blade
D-pad DOWN - Fists
D-pad LEFT - Use Medicine
D-pad RIGHT - Select Long Sword
Select Button - Map
Start Button - Pause menu
Assassin's Creed II Guide
Assassin's Creed II features a total of 50 different achievements. Each achievement unlocked contributes a certain amount of points to your overall Gamerscore. You can acquire a grand total of 1000 gamer points by playing Assassin's Creed II.
 1. The Birth of an Assassin
 2. Arrivederci Abstergo
 3. Welcome to the Animus 2.0
 4. The Pain of Betrayal
 5. Vengeance
6. Exit the Son
5. Vengeance
6. Exit the Son 7. Bloody Sunday
 8. Undertaker
 9. The Conspirators
 10. An Unexpected Journey
 11. Bleeding Effect
 12. The Merchant of Venice
 13. The Impenetrable Palazzo
 14. Masquerade
 15. Bianca's Man
 16. The Prophet
 17. The Vault
 18. An Old Friend Returns
 19. Myth Maker
 20. Vitruvian Man
 21. Street Cleaner
 22. Fly Swatter
 23. Messer Sandman
 24. Doctor
 25. No-hitter
 26. Kleptomaniac
 27. Lightning Strike
 28. Sweeper
 29. Venetian Gladiator
 30. I can see your house from here!
 31. Hallowed be thy name
 32. Prison Escape
 33. Choir Boy
 34. Assassin For Hire
 35. Macho Man
 36. Steal Home
 37. Show your Colors
 38. Handy Man
 39. I like the view
 40. High Dive
 41. Mailman
 42. Tip of the Iceberg
 43. A Piece of the Puzzle
 44. Art Connoisseur
 45. Podestà of Monteriggioni
 46. Perfect Harmony
 47. In Memory of Petruccio
 48. Red Light Addict
 49. Man of the People
 50. Victory lies in preparation
Assassin's Creed II Guide
Assassin's Creed II features a total of 51 unlockable trophies. There are 34 Bronze trophies, 15 Silver trophies, one Gold trophy, and a Platinum trophy unlocked by earning every other trophy available in Assassin's Creed II.
1. The Birth of an Assassin
Be reborn as Ezio Auditore Da Firenze.
Bronze
2. Arrivederci Abstergo
Break out of Abstergo.
Bronze
3. Welcome to the Animus 2.0
Enter the Animus 2.0.
Silver
4. The Pain of Betrayal
Complete Sequence 1.
Silver
5. Vengeance
Complete Sequence 2.
Silver
6. Exit the Son
Complete Sequence 3.
Silver
7. Bloody Sunday
Complete Sequence 4.
Silver
8. Undertaker
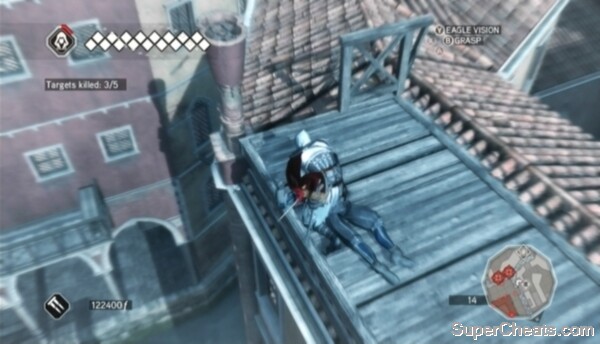
Discover the Assassin's Tomb inside the catacombs under Santa Maria Novella.
Silver
9. The Conspirators
Complete Sequence 5.
Silver
10. An Unexpected Journey
Complete Sequence 6.
Silver
11. Bleeding Effect
Complete training and reenter the Animus.
Silver
12. The Merchant of Venice
Complete Sequence 7.
Silver
13. The Impenetrable Palazzo
Complete Sequence 8.
Silver
14. Masquerade
Complete Sequence 9.
Silver
15. Bianca's Man
Complete Sequence 10.
Silver
16. The Prophet
Complete Sequence 11.
Silver
17. The Vault
Complete Sequence 14.
Silver
18. An Old Friend Returns
Escape the hideout.
Gold
19. Myth Maker
Find the 8 statuettes in Monteriggioni.
Bronze
20. Vitruvian Man
Unlock all 20 pieces of Subject 16's video.
Bronze
21. Street Cleaner
Hide 5 dead bodies in a Bale of Hay.
Bronze
22. Fly Swatter
Kick a Guard while using the Flying Machine.
Bronze
23. Messer Sandman
Stun 4 guards at once by throwing sand in their face.
Bronze
24. Doctor
Perform an Air Assassination on a Poisoned NPC.
Bronze
25. No-hitter
Kill 10 enemies while remaining in conflict without being hit.
Bronze
26. Kleptomaniac
Pickpocket 1000 Florins.
Bronze
27. Lightning Strike
Sprint for 100 meters.
Bronze
28. Sweeper
Sweep 5 guards at once by using a Long Weapon.
Bronze
29. Venetian Gladiator
Discover the Assassin's Tomb inside Santa Maria della Visitazione.
Bronze
30. I can see your house from here!
Discover the Assassin's Tomb inside the Torre Grossa.
Bronze
31. Hallowed be thy name
Discover the Assassin's Tomb inside the Basilica di San Marco.
Bronze
32. Prison Escape
Discover the Assassin's Tomb inside the Rocca di Ravaldino fortress.
Bronze
33. Choir Boy
Discover the Assassin's Tomb inside Santa Maria del Fiore (The Duomo).
Bronze
34. Assassin For Hire
Complete your first assassination mission for Lorenzo Il Magnifico.
Bronze
35. Macho Man
Defend a woman's honor.
Bronze
36. Steal Home
Win a race against thieves!
Bronze
37. Show your Colors
Wear the Auditore cape in each city.
Bronze
38. Handy Man
Upgrade a building in the Stronghold.
Bronze
39. I like the view
Synchronize 10 View Points.
Bronze
40. High Dive
Perform a Leap of Faith from the Top of Florence's Giotto's Campanile.
Bronze
41. Mailman
Intercept a Borgia Courier.
Bronze
42. Tip of the Iceberg
Use your Eagle Vision to scan a Glyph in the environment.
Bronze
43. A Piece of the Puzzle
Unlock a piece of Subject 16's video.
Bronze
44. Art Connoisseur
Buy a Painting from Florence and Venice.
Bronze
45. Podestà of Monteriggioni
Reach 80% of your stronghold's total value.
Bronze
46. Perfect Harmony
Tint your clothes with those colors: Wetland Ebony and Wetland Ivory.
Bronze
47. In Memory of Petruccio
Collect all the Feathers.
Bronze
48. Red Light Addict
Spend 5000 florins on Courtesans.
Bronze
49. Man of the People
Toss more than 300 florins on the ground.
Bronze
50. Victory lies in preparation
Get all Hidden Blades, Item Pouches and Armor upgrades for Ezio.
Bronze
51. Master Assassin
Unlock all trophies.
Platinum
Assassin's Creed II Guide - Walkthrough
Assassin's Creed II picks up right where the first Assassin's Creed left off -- with test subject Desmond Miles trying to make sense of the strange messages and symbols he has discovered on the wall of his room in the Abstergo Industries research facility, where he is being held prisoner.
When Lucy Stillman appears, follow her over to the Animus table. After the cutscene, press any button to get on the Animus. Press the buttons shown on screen during the ensuing cutscene.
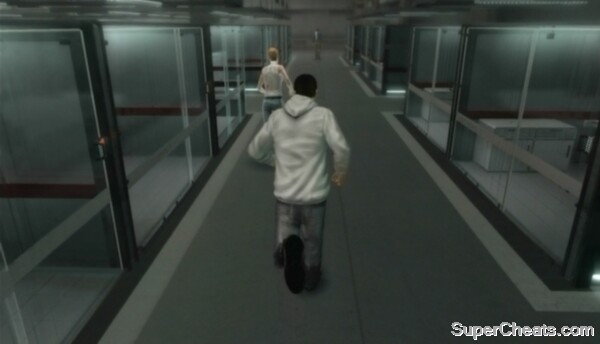
Once you have regained control over Desmond, follow Lucy out into the hall. Note that Desmond can now Sprint (hold RT on the Xbox 360 or R2 on the PS3). Continue following Lucy through the halls and to into an elevator. When the elevator stops, you must make it through to the other side of the large room while avoiding the patrolling guards. Just follow closely behind Lucy; if a guard spots you, keep running.
Escape Abstergo Industries!
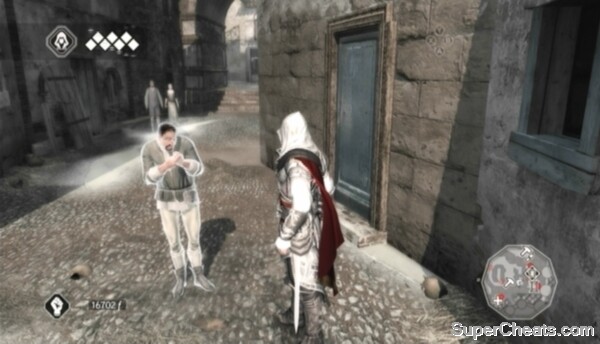
When you reach the elevator keypad at the other end of the room, hold Y or Triangle to have Desmond figure out the passcode. A group of guards will confront you in the parking garage. Not one of the guards is armed, so they can be easily dealt with. Press LT/L2 to lock on to a guard and then use the X/Square button to punch. Hold RT/R2 to Deflect; press A/X while holding RT/R2 at the right time to dodge an enemy's swing.
After the fight, follow Lucy to the getaway vehicle to trigger a cutscene. When you regain control over Desmond, follow Lucy up to the hideout. Watch the cutscene and then chat with Lucy twice. Talk to Shaun Hastings and Rebecca Crane as well. Then, stand by the side of the Animus opposite of Rebecca and press any button to get started on the first memory sequence.
Assassin's Creed II Guide - Walkthrough
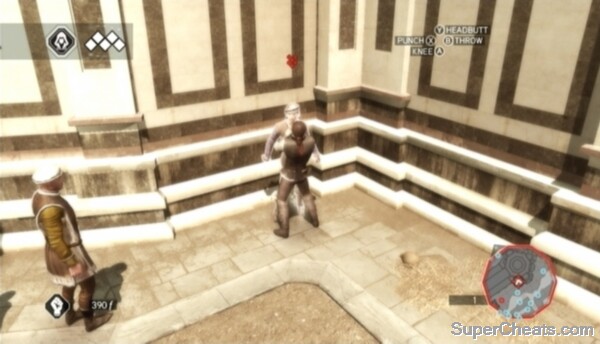
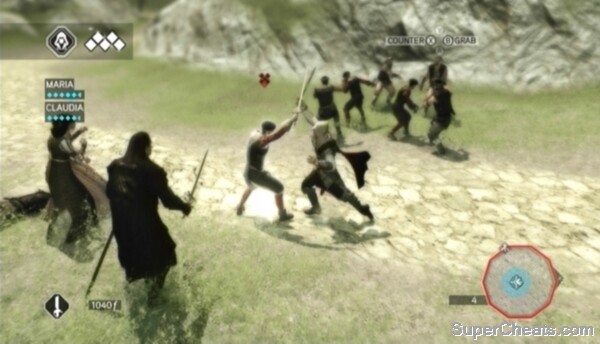
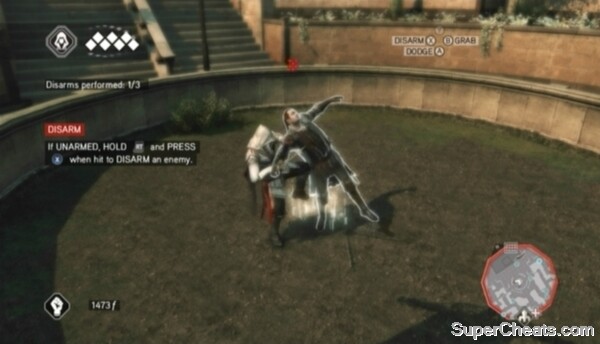
When you gain control over Ezio, press LT/L2 to lock on to an enemy and then use the X/Square button to punch. Hold RT/R2 to Deflect; press A/X while holding RT/R2 at the right time to dodge an enemy's swing. You can also grab hold of an enemy by pressing the B/Circle button and follow up with a Punch (X/Square), Knee (A/X), Headbutt (Y/Triangle), or Throw (B/Circle). Be careful though, as getting hit while holding an enemy will cause Ezio to release him.
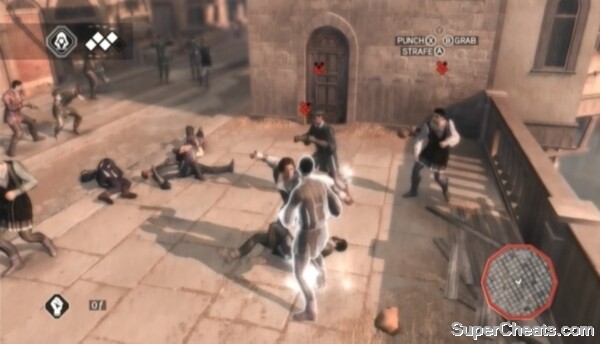
Defeat your rivals!
Beat the first batch of enemies to trigger a cutscene. Afterwards, another group of enemies will appear. You can't lose the fight at this point, so just take out as many of them as you can. When your rivals retreat, move on to looting the downed enemies. To Loot, stand over a downed enemy and hold the B/Circle button until the icon fills to collect some florins. Collect a total of 200 florins this way to complete the memory.
Speak to Federico to begin this memory. You just need to follow him to a doctor. Hold RT/R2 and A/X and Sprint and Free-Run after Federico to reach the nearby doctor. Approach the doctor to trigger a brief cutscene.
You must beat Federico in a race to the marker on top of the church. During the countdown, turn to face the stack of crates behind Federico; as soon as the race has started, hold RT/R2 and A/X and Free-Run up to crate at the top of the stack. Hop across the beams and onto the curved roof at the other end. Once on the roof, jump and climb up onto the roof above. Free-Run toward the suspended, wooden platform between the two buildings, then jump to the other side and leap down to the mid-section of the church. Jump to grab hold of the upper roof and hit the marker before Federico does to win the race.
Winning the race against Federico
After the cutscene, follow Federico as he scales the tower. Reach the top of the tower to trigger a cutscene and complete the memory.
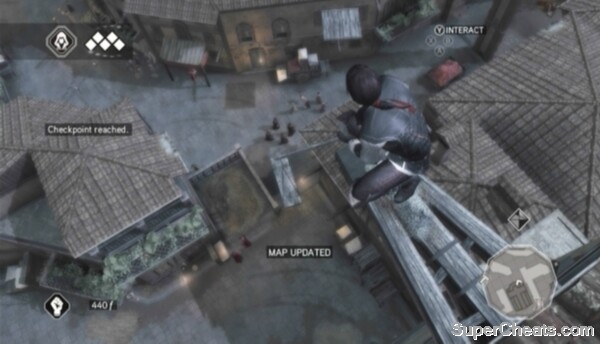
Move onto the highlighted plank attached to the top of the tower and press the Y/Triangle button to Synchronize the Viewpoint. Synchronizing a Viewpoint uncovers a portion of the map, as well as one or more additional Viewpoints. You can then travel to, scale, and Synchronize these Viewpoints to uncover even more of the map, revealing the location of additional Viewpoints in the process.
Note that currently you only have access to one of Florence's districts. An additional district will be unlocked at the start of each Sequence.
After Synchronizing the Viewpoint, while still on the edge of the plank, hold RT/R2 and the A/X button and push the Left Stick forward to perform a Leaf of Faith. You'll land safely in a pile of hay below. Pigeons and scattered feed on rooftops indicate where a Leap of Faith can be performed, so keep an eye out for pigeons if you're ever trying to lose an enemy or a group of enemies in the future.
You must visit Cristina Vespucci at her home to complete this memory. You must be Anonymous to see Cristina, which means you must not be spotted by enemies on your way to the target, otherwise you'll have to lose them to become Anonymous again. Red blips on the Mini-Map denote enemies; there are relatively few enemies en route to the Vespucci residence, but it would probably be best to travel along the rooftops to avoid any trouble.
Synchronize Viewpoints to uncover more of the map.
Stand in the marker below Cristina's bedroom window while Anonymous to trigger a brief cutscene. Then, hold RT/R2 and Free-Run toward the two windows below Cristina's bedroom window and continue holding the Left Stick to climb up into her bedroom.
After the cutscene, lose the guards by travelling outside of the yellow circle marked on the Mini-Map and remaining there for a short while, or by hiding in a pile of hay or roof garden or on a bench between two people once the guards have lost sight of you (the edges of the Mini-Map outlined in yellow). Hiding spots appear as light-blue blips on the Mini-Map.
Escape the guards to complete the memory. Completing this memory will unlock a Race, which is one of the types of optional events you can participate in. While completing the events is not essential, they can be a good way to earn some florins.
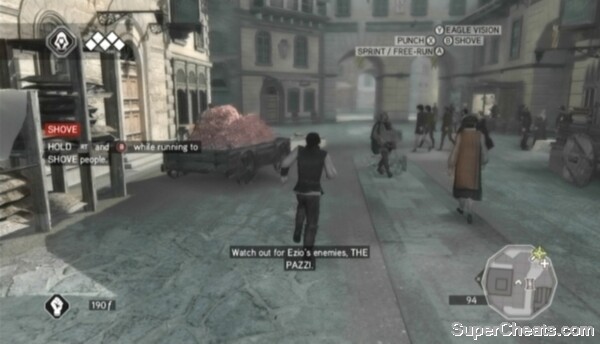
Speak to Giovanni in front of Palazzo Auditore to begin this memory. You just have to deliver a letter to Lorenzo de' Medici, whose home is in the southeast corner of the district. The Pazzi are still on the lookout for Ezio, so steer clear of red blips as you make your way to Lorenzo's home. Pazzi are blocking the way to the house, so you'll have to scale the building and drop down into the area to avoid being spotted. Follow the green marker on your radar to reach Lorenzo's palazzo. Speak to the servant standing outside to deliver the letter.
Deliver Giovanni's letter.
After delivering the letter, climb back up to the rooftops and make your way back to Palazzo Auditore. Speak to Federico outside and then approach the highlighted door and press the B/Circle button to trigger a cutscene. Completing this memory unlocks a Courier event in Florence.
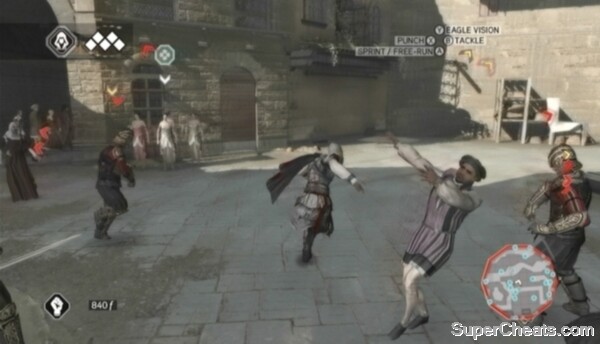
Speak to Claudia Auditore in the Palazzo Auditore courtyard to begin this memory. You must to find and punish Duccio -- with your fists. Make your way to the green marker on the Mini-Map to confront Duccio. Be ready to press the X/Square button when the prompt appears during the cutscene. Lock on to Duccio after the cutscene and start pounding him with the X/Square button. Grab hold of him with the B/Circle button, throw him to the ground with B/Circle and use the X/Square button to kick him while he's down. Deplete Duccio's health to complete the memory and unlock a Beat Up event in Florence.
Beat the tar out of Duccio to teach him a lesson.
Talk to Petruccio outside of Palazzo Auditore to begin this memory. You must collect three feathers within two minutes and 30 seconds and then deliver them to Petruccio at Palazzo Auditore. The three feathers are marked on your Mini-Map, so follow the markers and collect all three before time runs out. You have plenty of time to grab the feathers, and the timer stops as soon as you collect the last one, so this memory is quick and simple.
Once you have all three feathers, return to Palazzo Auditore, approach the highlighted door and press B/Circle to trigger a cutscene and complete the memory.
Completing this memory unlocks Feather Locations. There are 100 Feathers in the world; check out the “Feather Locations” section of this guide for maps and screenshots of each location. If you want start collecting the feathers now, be sure to mark which ones you have so you can continue using the maps once all 100 Feather Locations have been unlocked.
Collecting the feathers for Petruccio
Speak to Maria at Palazzo Auditore to begin this memory. She wants you to accompany her on an errand. Follow her to Leonardo da Vinci's home to trigger a cutscene. After the cutscene, hit the B/Circle button to pick up the box and then start toward the green marker on the Mini-Map -- Maria and Leonardo will follow you. You can Sprint while carrying the box, but bumping into another person while sprinting will cause Ezio to drop it. If this happens, just pick it back up and be more careful.
Make your way back to Palazzo Auditore, stand in the marker there, and drop the box to complete the memory.
Knock on the front door of Palazzo Auditore to see Giovanni. He wants you to deliver two letters and retrieve a third from a pigeon coop. Travel to the green markers on the mini-map to deliver the letters and collect the letter from the pigeon coop. Complete all three tasks to complete the memory.
Collect Giovanni's letter from the pigeon coop.
Giovanni is being held in the Palazzo della Signoria, which is located at the east end of the district. You need to scale the tower to reach Giovanni's cell window. The guards are on the lookout for Ezio, so avoid the streets and take to the rooftops instead. Follow the green marker on the Mini-Map to reach the Palazzo della Signoria.
Walk around to the east side of the building, ensure no guards are watching, and then start climbing. There is a single guard patrolling the first level; you can wait until he has his back turned before pulling yourself up and running to the next climbing point, or you can simply beat him with your fists. Once you're past the first guard, climb up to the next level. The tower with Giovanni's cell is on this level. There are two guards patrolling the area. Again, you can either try to sneak past them or just knock them out.
Climb up the tower and onto the visible marker to trigger a cutscene, completing the memory.
Winning the race against FedericoClimbing to Giovanni's cell in the Palazzo della Signoria
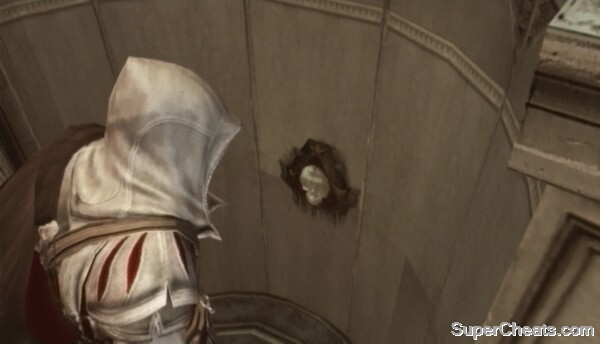
Enter Palazzo Auditore to trigger this memory. Inside, activate Eagle Vision by holding the Y/Triangle button. Look at the northern wall to discover entrance into the secret room. Approach the wall and press the B/Circle button to lower it. Approach the highlighted chest and press the B/Circle button to open it.
After the cutscene, head back outside and you'll be confronted by two guards. These guards are agile and can Free-Run, so it's best to just kill them as they can be quite difficult to lose. Equip the Long Sword by pressing the right D-pad button. Lock on to one of the targets and press the X/Square button to swing the sword. You can counter an enemy's attack by holding RT/R2 and pressing X/Square at the right time, which is just before the strike is about to connect.
Use Eagle Vision to reveal the hidden room inside of Palazzo Auditore.
Once the guards have been dealt with, start following the blue marker on the Mini-Map. The guards in Florence are still on high alert, so it's best to travel along the rooftops. You must be Anonymous to speak to Uberto Alberti, so kill any guards following you and then approach the highlighted door and press the B/Circle button to trigger a cutscene.
Follow the green marker on the Mini-Map to trigger a cutscene. You must escape the guards. You've lost your sword, so fleeing is definitely the better option here. Sprint out of the square and try to climb up to the rooftops. Hide in a roof garden once the guards have lost sight of you (the Mini-Map is outlined in yellow) and remain there until they give up.
Note that some guards may inspect hiding spots in an effort to find you; as such, you may want to flee out of the yellow circle on the Mini-Map (which denotes the Last Known Position, where guards will actively search for you) instead.
Escape from the guards!
Lose the guards to complete both the memory and Sequence 1.
Assassin's Creed II Guide - Walkthrough
Make your way to La Rosa Colta and interact with the highlighted door there to get started. During this memory, you'll learn how to blend in with crowds. To Blend, simply get close to a group of civilians. Ezio and the group of civilians will turn grey, and a pattern will appear on the ground below them to signify that you're invisible to guards. Try blending with one of the group of Courtesans in the courtyard.

Blend to become invisible to guards.
Begin following Paola when you're ready. Ezio's Notoriety level is currently maxed, meaning guards will swiftly detect you. You will be desynchronized if you are detected by any guards during this memory, so you must use the Blend skill well. Follow close behind Paola and try to nudge your way into a group of moving civilians whenever you can.
Blending is especially important when passing by a group of guards. Guards won't detect you immediately, but once the arrow above their head becomes entirely yellow, they'll begin to inspect the situation. If the arrow is not completely yellow, you can sit on a bench between two people to empty the arrow so the guard won't come looking for you. Guards that have a full yellow arrow above their head will easily detect you if you try this, though.
Learning to Blend.
Once you've followed Paola back to La Rosa Colta without being detected by any guards, she will then teach you how to steal. To Steal, simply bump into a civilian while holding the A/X button. Don't stick around for too long after though, as the civilian may realize what has happened and call for the guards. Steal from five different civilians to complete the memory.
Speak to Paola in the La Rosa Colta courtyard to begin this memory. You must visit Leonardo da Vinci to see if he can repair Giovanni's Hidden Blade. The guards are still on high-alert, so it's best to travel along the rooftops. Follow the green marker on the Mini-Map to Leonardo's place in the San Giovanni district.
At last, you now have a weapon in the Hidden Blade. Now to try it out; after the cutscene, walk up behind the corrupt guard and press the X/Square button to assassinate him. With that, pick up the body by tapping the B/Circle button while standing over it. Carry the corpse into Leonardo's workshop and drop it in the marker to complete the memory.
Use the Hidden Blade to rescue Leonardo.
Bring philosophical Codex pages to Leonardo's workshop to increase Ezio's health; four Codex pages yield one block of health. Synchronizing Viewpoints will reveal Codex pages on the in-game map.
Return to La Rosa Colta and interact with the highlighted door there to get started. You must find and kill Uberti Alberti. Follow the green marker on the Mini-Map to Santa Crose. Climb up to the marker on the roof to trigger a cutscene.
After the cutscene, perform a Leap of Faith, hop out of the pile of hay, then quickly find a group of civilians and Blend. You must follow Uberti without alerting him to your presence. There should be several groups of moving civilians around Santa Crose, so walk along with them to get closer to Uberti.
Your target will soon move through a doorway that is blocked by two Brutes. To get past the Brutes, you must hire a group of Courtesans and use them as a distraction. There just happens to be a group of Courtesans around the south side of the building; lock on to one of the Courtesans and press the Y/Triangle button to hire them for 150 florins. Blend with the Courtesans as you approach the two Brutes. Lock on to one of the Brutes and press the Y/Triangle button to order the Courtesans to distract them. When the Brutes move from the doorway, stroll through and Blend with one of the crowds of civilians gathered in the courtyard.
Wait until Uberti has his back turned before confronting him. He will spot you, but just continue walking toward him. Press the X/Square button while standing in front of Uberti to kill him. You then must flee the area to complete the memory. Free-Run up the crates along the north side of the courtyard and climb up onto the roof. Make your way back down to street level and run out of the yellow circle on the Mini-Map to complete the memory.
Assassinating Uberti Alberti.
Visit Paola at La Rosa Costa to begin this memory. In this memory you must reduce Ezio's Notoriety by removing posters, bribing a herald or killing a corrupt official. Ripping down a poster reduces Notoriety by 25 percent, bribing a herald with 500 florins reduces Notoriety by 50 percent and killing a corrupt official Notoriety by 75 percent.
Posters, heralds, and corrupt officials appear on the Mini-Map while Ezio has notoriety. Posters are plentiful, so reducing Notoriety is not much of an issue. If you happen upon a corrupt official or a herald, it's best to pursue them instead, as they yield a greater reduction. Corrupt officials will bolt as soon as they detect you; just enter High Profile, Sprint after them with your Hidden Blade equipped and press the X/Square button to perform a High Profile assassination when close enough.
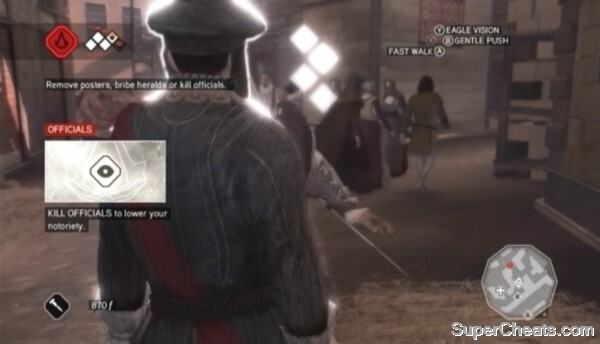
Tear down wanted posters, bribe heralds, or kill marked officials to reduce Ezio's Notoriety.
Return Ezio's Notoriety level to Incognito (0%) to complete the memory. Note that from now on, killing guards, civilians, or being seen committing other crimes will increase Ezio's Notoriety level. Posters, heralds, and corrupt officials will be marked on the Mini-Map while Ezio is notorious, so seek them out to become Incognito again.
Reunite with Claudia and Maria at La Rosa Costa and start following the green marker on the Mini-Map. Guards will not bother you as long as Ezio's Notoriety level is Incognito and you remain in Low Profile. Resist the urge to punch the minstrels who pester you along the way and instead hold RB/R1, select money from the weapon wheel and throw some coins down to clear the way.
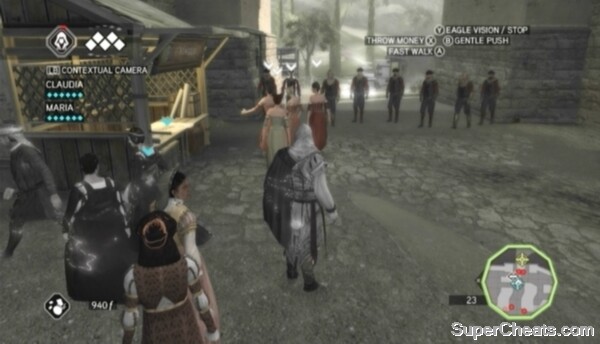
Hire a group of Courtesans and use them to distract the guards blocking the way out of Florence.
Continue following the markers on the Mini-Map until you reach the west gate. The gate is blocked by a group of guards. Lock on to one of the groups of Courtesans nearby and press the Y/Triangle button to hire them. Then, lock on to one of the guards standing in front of the gate and press the Y/Triangle button to order the Courtesans to distract them. While the guards are distracted, walk through the gate and over to the marker outside. You can enter High Profile and Sprint once out of Florence.
Continue following the markers on the Mini-Map to complete the memory and the sequence.
Assassin's Creed II Guide - Walkthrough
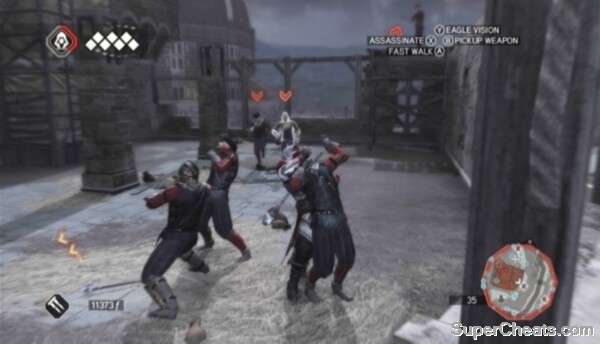
Start down the trail and you will soon be stopped by the Pazzi. Vieri de' Pazzi will send two men after you. Equip the Hidden Blade if it isn't already by pressing up on the D-pad and immediately walk up to one of the enemies and press the X/Square button to ice him. The second enemy will likely go for Claudia and Maria; walk up behind him and use the Hidden Blade to kill him.
Defend Claudia and Maria from the Pazzi.
When the two goons are dead, a cutscene will ensue. Ezio's uncle Mario appears with his men, throwing Ezio a sword. When you regain control over Ezio, select the Long Sword by pressing right on the D-pad. Mario brought some allies with him, so with any luck most of the enemies will be preoccupied fighting them.
Walk up behind enemies who are busy fighting and hit the X/Square button to effortlessly kill them. If an enemy happens to turn to you, hit the X/Square button repeatedly to deplete his health, or perform a Counter Kill by holding RT/R2 and pressing the X/Square button just as his strike is about to connect
Help Mario and his men kill all of Vieri's goons to complete the memory.
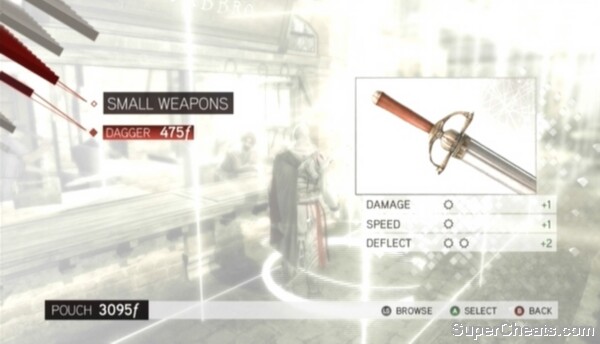
Enter Monteriggioni and speak to Mario to begin this memory. Follow Mario up to Villa Auditore at the north end of Monteriggioni. After a short chat, Mario will give you some florins. You must visit the Blacksmith in Monteriggioni and purchase a Dagger and Greaves. Follow the green marker on the Mini-Map to reach the Blacksmith. Buy the Leather Greaves under the Armor category for 1140 florins, and the Dagger under the Small Weapons category for 475 florins. Equip the Dagger by holding RB/R1 and selecting it with the Left Stick.
Purchase Leather Greaves and a Dagger from the Blacksmith in Monteriggioni.
Once you have the Greaves and Dagger, visit the Doctor a few steps from the Blacksmith and fill your Medicine Pouch with five Medicine. To speed the process up, press the X/Square button after selecting the Medicine and then the A/X button to purchase the maximum amount. Press the left D-pad button to use the Medicine and complete the memory.
Enter Villa Auditore, speak to Claudia and then to Mario to get started. You're going to practice a few basic combat skills in the practice field in front of the villa. Follow the instructions onscreen to complete the Quickstep, Counter Kill, and Taunt training. You then must defeat Mario, which is ridiculously easy.
After defeating Mario, follow the marker on the Mini-Map to the Codex Wall room in the Villa to complete the memory.
Head upstairs to Maria's room to speak to Claudia. Collected Feathers can be delivered to the Feather chest in Maria's room. Deliver 50 Feathers to unlock the Condottiero War Hammer, and all 100 to unlock the Auditore Cape.
After seeing Maria, get on the horse at the stables outside of Monteriggioni and follow the marker on the Mini-Map to travel to Tuscany. Meet Mario and his men at the marker outside of San Gimignano to begin the memory.
Activate the lever to raise the portcullis.
Run up the hill with Mario to the south wall of San Gimignano. At the wall, Free-Run up the stack of crates to climb up. Equip the Throwing Knives you've been given by holding RB/R1 and selecting them from the weapon wheel with the Left Stick. While standing in the marker on the wall, lock on to the archer on the rooftop across the street and hit the X/Square button to throw a knife his way. It only takes one throwing knife to kill these guys.
There are three more archers by the gate; two of them are on rooftops, and the other is in the tower above the portcullis. Make your way over to these archers and use Throwing Knives to kill them. After killing the archer in the tower, drop done to the turnwheel next to the gate and press the B/Circle button to interact with it
Storm San Gimignano in search of Vieri de' Pazzi.
When the gate is open, help Mario and his men finish off the guards outside the walls, and then follow them as they enter the city. Mario will give you command over a few of his men, who you can use to occupy the nearby guards. Lock on to one of the guards and press the Y/Triangle button to command the Mercenaries to attack. Help the Mercenaries kill 10 of the guards and then start toward the green marker on the Mini-Map. Speak to the wounded mercenary by the well and then head up the steps to aid Mario.
Equip your Long Sword if it isn't already (press right on the D-pad). Target preoccupied guards and effortlessly kill them by pressing the X/Square button from behind. Continue killing guards until another green marker appears on the Mini-Map, at which point start heading toward it. Hit the marker on the roof to trigger a cutscene.
Entering San Gimignano
After the cutscene, Vieri will appear on the tower next to the gate. Climb up the scaffolding west of the gate and walk along the wall to the tower. Jump and grab hold of the one of the protruding stones along the side of the tower and climb up to the ledge. Vieri will automatically detect you when you pull yourself up, so be ready with your Long Sword or Hidden Blade to Counter Kill him.
Assassinating Vieri de' Pazzi
Speak to Mario outside of Villa Auditore to get started. Follow him into the villa, into the Codex Wall room, and speak to him again there. There are four philosophical Codex pages in Monteriggioni -- you must collect all four to complete this memory.
Synchronizing the Viewpoint on top of the villa will mark the location of all four Codex pages on the in-game map. Head over to the northwest side of the building, climb up to the roof and then up onto the Viewpoint. Synchronize the Viewpoint before performing a Leap of Faith.
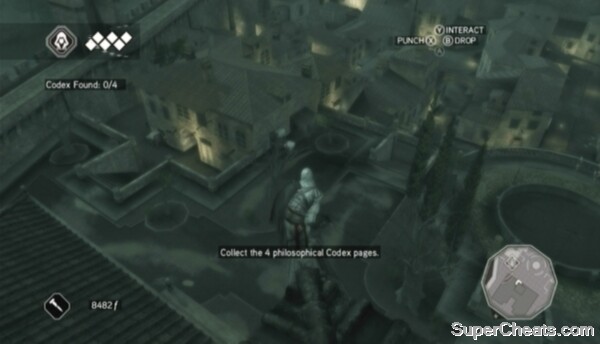
Synchronize the Villa Auditore Viewpoint to reveal the locations of the four philosophical Codex pages in Monteriggioni.
Three of the Codex pages are within the commune walls, and the last is by the house at the east end of the map. Make your way to each container and hold the B/Circle button to retrieve the Codex page inside. Collect all four Codex pages to complete the memory and Sequence 3.
Assassin's Creed II Guide - Walkthrough
Follow the memory start point marker on the Mini-Map to Claudia in Villa Auditore. Speak to her to learn about upgrading Monteriggioni. Upgrading the town and buying weapons, armor, and paintings all improve the value of Monteriggioni. An amount of florins based on the total value of Monteriggioni will be added to the income chest in Villa Auditore every 20 minutes. Check the Summary section of the Record Book to find this amount.
Speak to the architect in Villa Auditore about upgrading the town. He is standing by the model of Monteriggioni in the Villa Chest Room. It's a good idea to dump as much money as you can into upgrading Monteriggioni, as you can easily make that money back and more through the income chest. As the old adage goes: “It takes money to make money.”
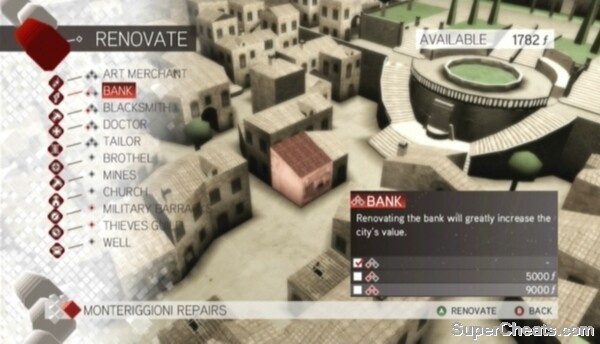
Renovate Monteriggioni to increase the city's value -- and with it, the capacity of the Villa's income chest.
Upgrading merchants gives you discounts when buying from them, and also improves the city's value. Make as many renovations as you can with the money you have to increase the capacity of the income chest. A pop-up will appear onscreen every 20 minutes, notifying you of how much money has been added to the chest at the villa. If the chest reaches its capacity, any additional money will be lost until you visit Villa Auditore and empty it.
Once you've spent some money upgrading Monteriggioni, head to the Codex Wall room and speak to Mario there. Follow Mario into the hidden Sanctuary to learn about Altair's armor and the seals. Collect all six seals and plug them into the indentation on the base of each corresponding statue to obtain the Armor of Altair, which is the strongest armour in the game and never needs to be repaired. Seals are hidden in Assassin Tombs, which you will come across as you progress through the story.
Collect the six seals to obtain the Armor of Altair.
When you're ready to depart, leave Monteriggioni, get on a horse and follow the marker on the Mini-Map to travel to Florence. Follow the marker on the Mini-Map and interact with the highlighted door to speak to Leonardo. The Codex pages you collected in Monteriggioni contain the design of a second Hidden Blade, which will allow you to pull off double kills.
But first, you must practice a couple of new assassination techniques while Leonardo works on completing the design. There are three abilities to be practiced; the starting point of each practice session is marked by a red target on the Mini-Map. Approach the highlighted pile of hay and hop in. Press the X/Square button to stab the nearby practice dummy and hide it in the hay.
Next, Free-Run up the crates and barrels and grab hold of the window below the balcony. Climb up to the balcony ledge and press the X/Square button to stab the practice dummy there and throw it to the ground. To practice the final ability, get up to the marker on the platform, lock on to the dummy below and press the X/Square button to perform an Air Assassination.
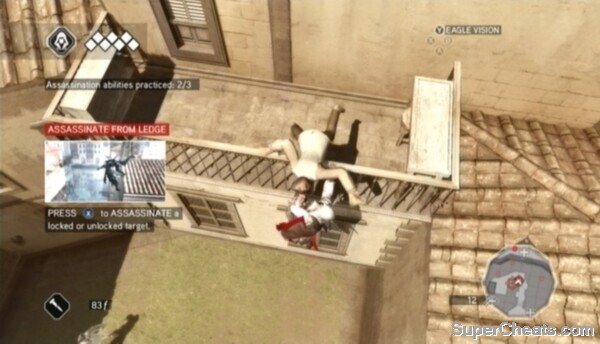
Practice the assassination abilities while Leonardo works on the second Hidden Blade.
With that, return to Leonardo's workshop and interact with the door to trigger a cutscene.
Make your way to memory start point outside of the Mercato Vecchio. Accept the memory and then hold the Y/Triangle button to activate Eagle Vision. Your target is marked in gold, so walk search the area until you find him. A thief will steal your money just after you identify the target. You must chase after and catch the thief to complete the memory.
Press LT/L2 to lock on to the thief, hold RT/R2 and the A/X button and Sprint after him. Press the B/Circle button to tackle him when you're close enough. The thief can climb, but he isn't as fast as Ezio, so it should be a short chase.
Meet La Volpe by the docks at the south end of the Santa Maria Novella district and speak to him to begin this memory. Follow La Volpe onto the platform and hit the marker there. Get to the marker outside of the Santa Maria Novella within one minute to complete the memory.
Make it to the Santa Maria Novella within one minute.
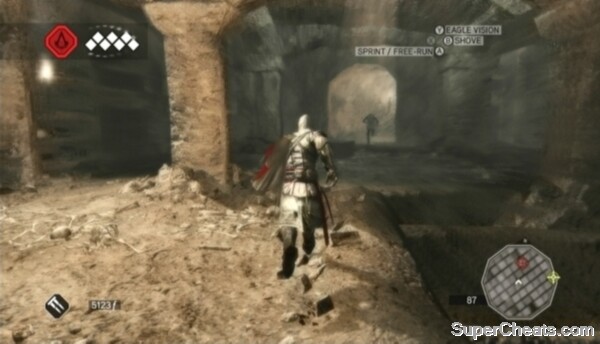
A Templar meeting is taking place deep in the catacombs below the Santa Maria Novella. You're tasked with infiltrating the Templar stronghold within the catacombs to eavesdrop on this meeting.
Also in the catacombs below the Santa Maria Novella is an Assassin Tomb, and so it contains one of the six seals needed to unlock the Armor of Altair in the Villa Auditore Sanctuary. The other tombs are not part of the main story, but will appear on the map from now on when they become available. Check out the “Assassin Tombs” section of this guide for videos showing how to solve the puzzles in each of the tomb.
La Volpe has revealed how to gain access to the catacombs. It involves interacting with the skull switch at the northeast end of the building. There are guards blocking the way to the access point, so you can either drop down from above or hire a group of Courtesans and use them as a distraction.
Interact with the skull switch to enter the catacombs.
Interact with the skull switch to enter the catacombs. Once inside, go down the steps ahead and activate the switch along the wall to your left. Climb up to the gate that the switch opened and head through. Move through the next room to reach a collapsed stairwell; your task is to somehow get to the bottom.
Start by walking to the edge of the stairs. Enter High Profile and jump to the beam hanging just ahead. Ezio will swing from the beam and land onto another. Jump to the platform and use the next set of beams to reach a lever. Interact with the lever to raise the gate across from you. Run and jump to the tunnel and then to the platform on the other side. Look north for another set of beams and jump across. Pull the lever on the platform. After the cutscene, perform a Leap of Faith from the platform to reach the bottom.
Getting to the bottom of the broken stairwell
Hop out of the hay after the cutscene and approach the rubble west of the pool of water. Free-Run up the rubble to grab hold of the bricks protruding from the wall. Climb to the left to reach the platform there. Remain hanging from the ledge, press up on the D-pad to equip the Hidden Blades if you haven't already, and wait for the guard to stop by the ledge. Assassinate the guard while he's standing above you before pulling yourself up.
There's another guard up the steps around the corner, so sneak your way over to him and assassinate him as well. Continue to the other end of the walkway and jump across the beams to reach the first lever. Pull the lever and then cross the narrow wall to the south. Walk onto the planks of wood and look to the east for a narrow ledge with some bricks above it. Free-Run up the wall to grab hold of one of the bricks and then climb to the wooden platform. On the wooden platform, face north and jump to the stone platform there. Jump onto the hanging coffin to the west, then turn south and jump to swing from the hanging beam there, landing on another wooden platform. The second lever is up here -- use it to open the door to the great hall.
Opening the door to the Great Hall
After the cutscene, look west and jump to grab hold of the hanging beam there. Release your grip and then perform a Leap of Faith from the ledge behind you. Wait until the guard wearing the gold helmet walks by your hiding spot, at which point jump out and quickly assassinate him. Kill the two remaining guards and then approach the door at the north end of the area.
The Agile guard will take off running to warn the others. Try your best to assassinate him before he can do so. It's not a big deal if you fail to catch him, as you'll just have to fight a few additional guards to proceed. As you're chasing after the runner, he'll attempt to slow you down by creating obstacles as he runs through the catacombs. There is always another way around, though, so these obstacles aren't much of an issue.
Start after the guard and hop across the stone platforms. A portion of the ledge ahead will crumble, but you can still grab hold of a lower part of the wall and pull yourself up. Continue chasing after the guard and he will eventually close a gate behind him. Turn right at the gate, Free-Run up the steps and to the hanging disc there to swing through an opening in the wall beyond the gate. Then, Free-Run up the boxes along the wall to the right and grab hold of the beam hanging above. Climb on top of the beam and jump again to swing from another beam to reach the other side of the gap.
Catch the runner before he can warn the others.
Continue sprinting after the runner. When he closes a second gate behind him, turn right and jump from the railing to the two beams along the wall to the left. Jump across the beams and to the hanging disc to swing through the opening in the wall. Keep after the runner and he will soon close another gate behind him. Hop up the stone steps to the left of the gate and chase the runner to the other end of the room.
Now's your chance to catch him. Follow him up the stone steps and then Free-Run onto the stone platforms to the left. When you're up the first three steps, begin mashing the X/Square button while continuing to Free-Run. With any luck, Ezio will pounce, killing the fleeing Templar with an Air Assassination.
If you don't manage to catch the guard he will go on to warn his friends in the Great Hall and the door will close behind him. If this is your situation, all hope is not lost. Climb up onto the wooden platform to the right of the door to reach an opening in the wall, and then drop down into the hall to fight the guards.
Catching the runner
Climb up to the skull switch at the north end of the hall and activate it to open the door. After the cutscene, continue down the corridor to reach the Assassin Tomb. Open the sarcophagus to obtain one of the seals, and then open the chests to collect some florins before exiting via the highlighted wall.
Make your way to the memory start point on the Mini-Map. After accepting the memory, hold the Y/Triangle button to activate Eagle Vision. You're looking for Lorenzo de' Medici, who is marked in gold. A cutscene will begin as soon as you spot him.
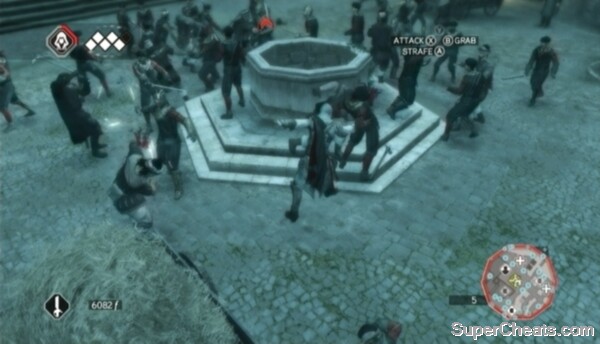
After the cutscene, press right on the D-pad to equip your Long Sword and start attacking the guards surrounding Lorenzo. Ignore Francesco for now and concentrate on clearing away the guards. You must kill the 12 guards and weaken Francesco before Lorenzo is killed. You'll be getting attacked from every direction, so be ready to perform Counter Kills by holding RT/R2 and tapping the X/Square button just as an opponent's swing is about to connect.
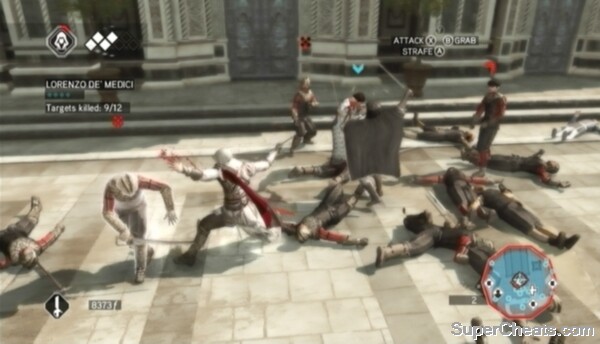
Defend Lorenzo de' Medici.
When Francesco is the only enemy remaining, you then must deplete his health to force him to retreat. Francesco is quite adept at dodging, so you'll have to deal most of the damage through counter attacks. You may also be able get a hit in by dodging one of his swings with a Strafe and immediately attacking after that.
Once Francesco has gone, you then must lead Lorenzo to safety. Lorenzo can't climb, so remain on street level. Enter High Profile and follow the marker on the Mini-Map. Ignore the fights taking place as you head towards safety. If any guards confront you, equip your Hidden Blade and quickly take them out.
Speak to the guard marked on the Mini-Map to begin this memory. Francesco de' Pazzi is planning something at the Palazzo della Signoria. You must find and assassinate him.
Combat is rife in the streets of Florence, but ignore it and head for the Palazzo della Signoria. Stick to the rooftops if you can, otherwise just Sprint through the streets and past all of the fighting. Follow the green target on the Mini-Map and hit the marker there to trigger a cutscene.
After the cutscene, drop down to street level and run around to the east side of the Palazzo della Signoria. Climb up the ladder there and then climb up the wall to the outpost. Try to use your Hidden Blade to assassinate a couple of the guards here, and then equip your Long Sword and finish the rest of the guards off with combos and Counter Kills. There is an archer on the wooden tower in the northeast corner, so you may want to hit him with a throwing knife to avoid having any of your attacks interrupted.
Climb the Palazzo della Signoria to reach Francesco de' Pazzi.
When the area is clear, climb up the wooden tower and then the ladder to reach Francesco on the tower above. Ignore the four guards stationed there and approach Francesco to trigger a cutscene. Immediately after the cutscene, enter High Profile, Sprint to the wall and perform a Leap of Faith into the pile of hay below. Immediately hop out of the hay and start after Francesco.
Francesco is quite fast and can Free-Run as well, so taking him down might be a bit of a challenge. You just need to get close enough to him to perform a High Profile assassination with your Hidden Blade. Just keep after him, because he's sure to screw up eventually; he is an AI, after all.
Assassinate Francesco de' Pazzi to complete the memory and Sequence 4.
Assassinating Francesco de' Pazzi
Assassin's Creed II Guide - Walkthrough
Speak to Francesco de' Medici to trigger a cutscene. This memory is just the cutscene. Completing this memory unlocks Assassination Contracts and Beat Up and Courier events.
Visit Leonardo at his workshop in Florence to begin this memory. The Codex page contains a design for a poison blade, which you can use to deliver poison to your targets. Poison can now be purchased from Doctors.
You must now return to Monteriggioni. Make your way to Florence's east gate and use the Fast Travel Station nearby to travel to Monteriggioni -- it's only 100 florins. Once back at the Villa, speak to Mario in the Codex Wall room to get started.
Learn the Dodge and Disarm abilities in the practice field.
You're going to learn a couple of new tricks out in the practice field. First, the Dodge ability; hold RT/R2 and press the A/X button just as your opponent is attacking to dodge his attack. Successfully Dodge three of Mario's attacks to move on to the next ability. Next is the Disarm ability, which is particularly useful for dispatching Brutes. While unarmed, hold RT/R2 and press A/X just before your opponent's strike connects -- the same way you would to perform a Counter Kill. Disarm Mario three times to complete the memory.
Leave Monteriggioni, get on a horse and ride to the marker on the Mini-Map to travel to Tuscany. Speak to the mercenary near the Santa Maria Assunta in San Gimignano to begin this memory.
Your assassination target is one Antonio Maffei. He is up on the tower just northeast of the Santa Maria Assunta. Follow the green target on the Mini-Map to make your way there. There may be some archers on the rooftops surrounding the tower, so consider stopping by a Blacksmith and stocking up on Throwing Knives on your way there.
When you reach the base of the tower, find a climbing point and begin your ascent. Three archers are stationed on the wooden platform near the top of the tower. Remain hanging from the platform until the archers are stationary. Then, with your Hidden Blades ready, pull yourself up, Free-Run at the wall and climb onto the tower to meet Antonio Maffei. Eliminate the target with your Hidden Blade and then kill the three archers to complete the memory.
Assassinating Antonio Maffei
Bernardo Barconcelli is your target. He's somewhere within the green circle on the map. Follow the green target on the Mini-Map to make your way there. The area is surrounded by guards, so you'll have to climb up to the rooftops and drop down. Use Eagle Vision to locate the target marked in gold.
Bernardo will bolt as soon as he detects you; he's slow, but the number of guards who immediately start after you may make your pursuit difficult. Try your best to avoid the guards and go for Bernardo with your Hidden Blade out. Kill Bernardo and then escape from the guards to complete the memory.
Assassinating Bernardo Barconcelli
Speak to the mercenary at the northeast end of the map to start this memory. Francesco Salviati is your target. You've been given command over a band of Mercenaries, who will aid you in infiltrating Villa Salviati. The villa is surrounded by guards, so you'll need the help.
Start up the hill toward the keep. You will likely encounter a group of three guards along the way; equip your Hidden Blade and use it to quickly dispatch them. Make your way to the front gate, lock on to one of the guards stationed there and order the Mercenaries to attack. While the guards have their hands full, use the bricks protruding around the gate to climb up to the top of the wall. Assassinate the two archers stationed on both sides of the gate and then drop down into the courtyard.
There's no need to be stealthy here, since Francesco will immediately come out to fight, axe in hand. There are quite a few guards on his side, so interact with the highlighted lever next to the gate to raise it, allowing your mercenary allies to enter. Equip your Long Sword and concentrate on Francesco. He isn't wearing any armour, but he can deflect your attacks. With any luck, one of your allies will attack Francesco as well, allowing you to get behind him and quickly finish him off.
After the cutscene, kill the remaining guards or flee from the villa to complete the memory.
Assassinating Francesco Salviati
Speak to the mercenary at the southeast end of the map to get started. You must assassinate Stefano de Bagnone. He is hiding among monks in the nearby abbey. A number of guards are also posing as monks in order to protect Stefano. Use Eagle Vision to identify guards (marked in red) among the monks. The target is in the courtyard; he'll flee when he spots you, so get the job done quickly. Start by walking toward him, and once you're close enough, Sprint the rest of the way and strike with your Hidden Blade.
After the cutscene, hold RB/R1 and use the Left Stick to select the Smoke Bombs given to you by the mercenary. Throw one down while surrounded by guards and then rush out of the courtyard. Flee from the abbey and become Anonymous to complete the memory.
Assassinating Stefano de Bagnone
You can now purchase Smoke Bombs from Blacksmiths (check under the Ammunition section).
Hit the marker on the roof of the building across from the Santa Maria Assunta to begin. Jacopo de' Pazzi is headed to a Templar meeting; you must locate him, follow him to the meeting, and then assassinate him.
At the start, activate Eagle Vision by holding the Y/Triangle button. Jacopo is among the crowd of people gathered below, marked in gold. Once you've identified him, turn off Eagle Vision and climb down to street level. A blue arrow now appears above Jacopo's head, allowing you to easily track him. Keep your distance, though, as getting too close may make him suspicious.
The meeting is set to take place in the ruins of the Antico Teatro Romano outside San Gimignano. Jacopo moves at a slow pace, so you're in for quite a long trip. The ruins are a restricted area during this memory, meaning guards will quickly identify you when you're within the red circle on the Mini-Map. When Jacopo reaches the ruins, Free-Run and hop across the stone walls to make it past the guards.
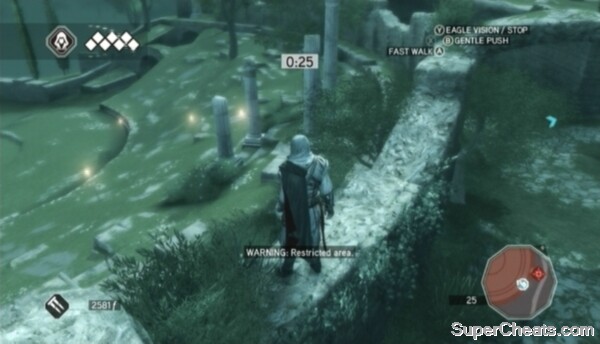
Follow Jacopo de' Pazzi to the ruins of Antico Teatro Romano.
Enter the ruins without being detected to trigger a cutscene. Be ready to press the X/Square button when prompted during the cutscene. After the cutscene, Sprint past the group of guards coming toward you and use your Hidden Blade to put Jacopo out of his misery. Then, kill the guards surrounding you to complete the memory and the sequence.
Assassin's Creed II Guide - Walkthrough
Speak to Lorenzo de' Medici at the Palazzo Medici in Florence. You'll receive the Medici Cape after the cutscene. With this cape equipped, you will remain Incognito while in Florence and Tuscany, but guards will still react to crimes.
Wear the Medici Cape and your notoriety will not increase while in Florence or Tuscany.
Next, head to Leonardo's workshop and interact with the door to trigger a cutscene.
Leave Florence, get on a horse and make your way to the marker on the Mini-Map to travel to the Mountains. Once there, dismount and hit the marker to begin this memory. Borgia's men attack Ezio and Leonardo on their way to Romagna. It's your job to get the carriage to Romagna in one piece.
Use the Left Stick to steer the carriage to avoid obstacles along the way. Hitting obstacles damages the carriage, though it does has a fair bit of health (indicated below Ezio's health and social status. Enemies will jump from horseback, grab hold of the back of the carriage and attempt to climb up. You must shake them off before they manage to get to the front of the carriage where Ezio is seated. You can also smash hanging enemies into roadside obstacles to dislodge them.
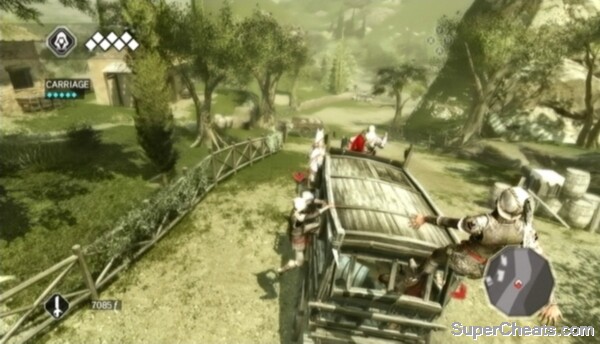
Veer to the side to shake off enemies that manage to climb on top of the carriage.
If an enemy manages climbs on top of the carriage, you must sharply veer from side to side to throw them off. This is best done while the enemy is actually standing on the roof of the carriage. Be careful when veering, though: go too far you'll flip the carriage. If an enemy manages to reach Ezio, mash the B/Circle button to throw him off.
When you pass the burning bridge, enemies will begin to pelt the path with flaming arrows. You'll have to steer the carriage around the flames along the road to avoid damage to the carriage. Keep this up until a cutscene is triggered.
The trip to Romagna
After the cutscene, take out the group of soldiers that approaches to complete the memory. Completing this memory unlocks Assassination Contracts, Beat Up, Race, and Courier events.
Speak to Leonardo at the docks at the north end of Romagna. After the cutscene, dive into the water and swim out to the boat marked on the Mini-Map. Climb onto the boat, approach the oar, and press the B/Circle button to grab hold of it. Press the B/Circle button to stroke and use the Left Stick to steer the boat. Make your way to the green target on the Mini-Map and hit the marker there to rescue the stranded woman. Row back to the marker at the dock to complete the memory.
When you're ready to depart, step into the marker on the boat to set out to Venice.
Assassin's Creed II Guide - Walkthrough
Meet Lucy in the complex downstairs to test your skills. You just have to hit the four sensors to complete the training. Two of the sensors are on the ground floor, and the other two are on the catwalks above. Run to either side of the warehouse, press the buttons there, and then climb the stack of boxes to reach the catwalk. Activate the sensors on both catwalks and then return to Lucy.
Exit the complex to trigger a memory sequence. Sprint forward to spot a woman; start after her when she takes off. Just keep up with her as she moves through the city. Activate Eagle Vision if you lose track of her. When she enters the tower, jump onto the railing and grab hold of the ridge along the base of the tower. Climb up to the balcony railing and then jump up and grab hold of the wooden post. Continue climbing up to the top of the tower and hit the marker there to trigger a cutscene.
Back in Acre?
After the cutscene, approach the Animus and press any button when you're ready to continue.
Assassin's Creed II Guide - Walkthrough
Note that if you plan to synchronize the Viewpoints before starting the first memory of Sequence 7, you won't be able to reach the Viewpoint on the Santa Maria Gloriosa Dei Frari (the building more or less in the middle of the district) just yet. You'll need to complete the “Monkey See, Monkey Do” memory first, as the climb leap technique learned during this memory is needed to reach that Viewpoint.
Speak to Leonardo at the docks to begin this memory. Follow Alvise da Vilandino through the streets of Venice. You'll eventually reach Leonardo's new workshop.
You must help Rosa get to safety. She's still quite fast despite being wounded, so try to keep up. She'll stop to fight guards along the way. You'll want to take them out quickly. Use your Long Sword in these fights; get behind enemies while they are preoccupied fighting Rosa and hit the X/Square button to effortlessly kill them.
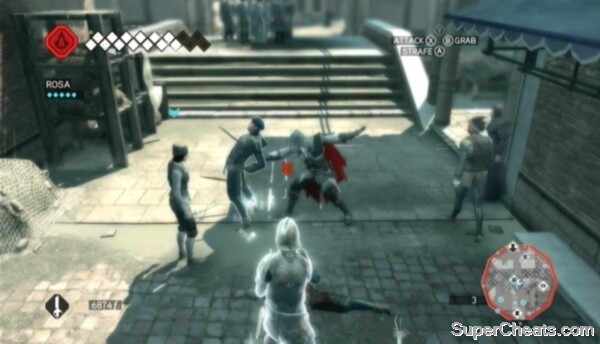
Help Rosa get to safety.
Continue following Rosa until her wounds get the better of her and she can't go on. At this point, approach her and press the B/Circle button to pick her up. Hold RT/R2 and the A/X button to move faster. Ignore any guards that pursue you and carry Rosa over to the marker.
Once you've delivered Rosa to her ally, you then must kill the archers along the canal to protect the gondola. Start by free-running across the posts sticking out of the water to the south to reach the wooden walkway. Use your Hidden Blade to kill the archer there, then head west and kill the archer by the columns past the bridge.
Don't move too quickly. The gondola will stop moving if you're too far ahead, and moving even further away at this point will desynchronize the memory. Wait for the gondola to catch up by the crate at the east end of the walkway after killing the second archer. Free-Run onto the wooden balcony and then onto the wooden platform across from the third archer. Equip Throwing Knives, lock on to the archer and hit him with two knives to kill him. While the camera angle while locked on to the archer may make it difficult to see what you're doing, the knives will still hit as long as you are locked on to the target.
Kill the archers along the canal to protect the gondola.
Cross the wooden beams to the platform across the canal, jump to the post and then to the crates. Equip your Hidden Blade and perform an Air Assassination on the first archer along this side of the canal, and then move in and kill the second archer further up. Kill the archer on the bridge and then wait for the gondola to catch up.
Free-Run toward the crate and post to reach the wooden walkway north of the bridge. Kill the archer there and continue down the walkway to reach another one. After killing the second archer on the walkway, look for some barrels covered by white cloth and Free-Run up to begin a Free-Run sequence. Make your way over to the archer on the wooden platform around the side of the building and ice him with your Hidden Blade. Move to the end of the platform and climb back down to street level.
Kill the two archers on either side of the Fast Travel Station and then follow the gondola west by free-running across the posts and wooden platforms along the buildings there. When the gondola comes to a stop, get down to street level to trigger a cutscene. After the cutscene, pick up Rosa and carry her to the table once her allies have cleared it off. Press the B/Circle button to place her on the table, triggering a cutscene and completing the memory.
Protecting the gondola
Interact with the door marked on the map and watch the cutscene that ensues. Three memory start points will then be marked on the map. They can be completed in any order you wish, but it would be best to complete “Monkey See, Monkey Do” first, which can be started by speaking to Rosa just outside.
Memory 4: Monkey See, Monkey Do
After speaking to Rosa, approach the scaffolding to the south and Free-Run up to grab hold of the first grip point. Then hold RT/R2, push up on the Left Stick and press the A/X button to leap upwards. Press the B/Circle button at the height of your jump to Grab the grip point that would normally be too high to reach. Use the climb leap technique to reach the marker on the wooden platform to complete the memory.
This memory is unlocked following “Monkey See, Monkey Do.” Make your way to the Santa Maria Gloriosa Dei Frari and speak to Rosa there to get started. The building can be scaled with ease using the climb leap technique learned in the previous memory. You have five minutes to make it to the top of the tower, which is more than enough time.
Climb up to the top of the tower, using the climb leap technique when necessary, and hit the marker on the Viewpoint. Synchronize the Viewpoint if you haven't already and then perform a Leap of Faith to land in the pile of hay below. Speak to Rosa to complete the memory.
Using the climb leap technique to scale the Frari
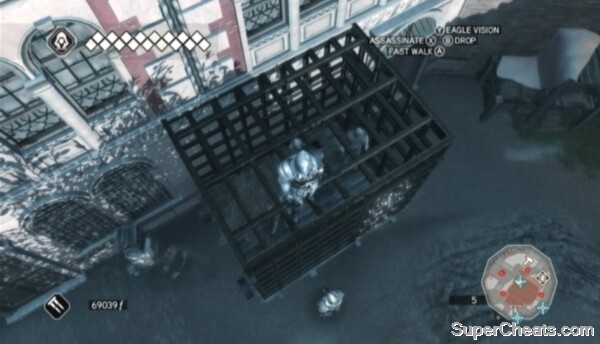
Meet Ugo on the rooftop in the middle of the San Polo district and speak to him to start this memory. You must free three groups of captive thieves. The thieves are being held in cages around the district. Each cage is in the middle of a restricted area, meaning the guards there are on high-alert and will swiftly identify you.
Follow any of the blue targets on the Mini-Map to reach one of the cages. You'll want to approach from the rooftops, since there are guards blocking the street level access points. Use Throwing Knives or the Hidden Blade to kill the archers along the rooftops. Position yourself on the rooftop above the cage, and then climb down to the top of the cage. One to three guards will be standing directly in front of the cage. Take them out with an Air Assassination from the top of the cage. Interact with the cage door to free the thieves once the area is clear
Free the three groups of captive thieves and escort at least one from each cage back to Ugo.
There are four thieves in each cage, but you need only get one back to Ugo. As with AI in most other games, the thieves' aren't the brightest, so while you should stick to the rooftops, keep it simple to avoid losing any of them along the way. Luckily there's some leeway here, since you only need to get one of the thieves back to Ugo.
Make your way to the green target on the Mini-Map and stand on the marker there. Wait for at least one of the thieves to reach the marker before starting toward the next cage. Open all three cages and get at least one thief from each cage back to Ugo to complete the memory.
Speak to the thief by the docks at the west end of the San Polo district to begin this memory. You need to collect some guards' armour and deliver them to Ugo. There are three chests marked by blue targets on the map. Each chest is guarded. You could stroll up to the guards in front of each chest and duke it out, but there is a trick to looting each chest without getting your hands dirty.
Start for the blue target nearest to you; jump across the posts east of your current location to move down the canal. Keep an eye on your left and you'll soon find yourself behind the row of guards blocking the way to the first armour chest. Hop from the post over to the chest, loot it, then jump back to the post and climb up to the rooftops.
Use thieves to lure guards in front of armour chests.
A second chest can be found in front of the Santa Maria Gloriosa Dei Frari. Four guards are blocking it. Look for a group of thieves just around the corner north of the chest and hire them for 150 florins. Then, approach the guards standing in front of the chest, lock on and press the Y/Triangle button to order the thieves to lure them away. When the guards start after the thieves, move in, loot the chest, and start toward the last one.
There's another group of thieves just south of the final chest. Hire them and use them to lure away the guards standing in front of the chest. Loot the chest and then climb up onto the rooftops, being careful not to step into the restricted area marked by the red circle on the Mini-Map just yet.
Approach the blue target on the Mini-Map and dive into the water. Swim to the boat, climb on, grab hold of the oar and start rowing toward the green target on the Mini-Map. Ignore the archers firing at you and continue rowing until you reach Ugo at the nearby dock. Row the boat into the marker and hop out to complete the memory.
Looting the armour chests
See Antonio at his home to get started. You're after three treacherous thieves. You'll need to travel to each green target and use Eagle Vision to identify them. The thieves are somewhere within the green circles on the Mini-Map, but their locations appear to be fixed.
Make your way to the first green target just north of your current location. The thief should be on the boat north of the Fast Travel Station, but use Eagle Vision just to make sure. Jump across the posts leading up to the boat and grab hold of the side of the. Climb onboard and quickly kill the traitor with your Hidden Blade. There's no need to stick around and face the guards; just dive into the water and swim back to the docks.
The thief at the south-most zone should be alone on a rooftop. Use Eagle Vision to locate him, walk behind him and use your Hidden Blade to take him out. The treacherous thief at the final zone seems to move around a bit, but he should be walking along the water at the north end. Use Eagle Vision to identify him and assassinate him with your Hidden Blade to complete the memory.
Killing the three treacherous thieves
It's time to take down Emilio Barbarigo. Visit Antonio at his place to learn the plan. You first must kill the five archers along the rooftops south of the building so Antonio's men can take position. Make your way onto the rooftops and walk along them, taking out the marked archers with Throwing Knives or your Hidden Blade.
After the cutscene, climb back onto the rooftops and move closer to the palace. Just south of the palace, get down to street level and hire the group of thieves standing just before the archway leading to blocked passage. Order the thieves to lure the guards away. Wait for the guards to chase after the thieves and then move through. Approach the southeast corner of the building and start climbing, starting with the window there. You'll need to use the climb leap technique to reach the next window up.
Kill the marked archers along the rooftops south of the palace.
There's an archer on the balcony, so pull yourself up onto the ledge, equip your Hidden Blade and take him out with an Air Assassination. With that, climb up the windows to reach the roof. Emilio is inside the palace; you just need to get yourself in a good position to take him out swiftly. There are some archers along the rooftop, so make your way north and dispatch them with your Hidden Blade. Start east when you reach the north end of the palace roof.
At the east end of the roof just before the turret, drop down to the grab hold of the window sill where an archer is and use your Hidden Blade to assassinate him from the ledge. Once inside the palace, you just need to get close to Emilio. Jump to grip the balcony along the east wall, and then over to the walkway at the south end. Emilio should be right in the hallway here; quickly Sprint after him and perform a High Profile assassination with your Hidden Blade.
The remaining enemies will be taken care of by your allies after the cutscene. Follow Rosa to the gate to trigger another cutscene, completing the memory and the sequence.
Assassinating Emilio Barbarigo
Assassin's Creed II Guide - Walkthrough
Make your way to the memory start point in the San Marco district and stand in the marker to begin. You must follow the two Templars to eavesdrop on their conversation. Don't follow too closely, though, as doing so will make them suspicious. If the arrow above either of the targets' heads begins to fill with yellow, back up immediately to avoid being detected.
Tail the Templars to eavesdrop on their conversation.
At one point you'll come to a short bridge blocked by guards. The Templars are able to pass through without any trouble, but the guards certainly won't let you pass. Hire the nearby group of Courtesans and use them to distract the guards while you slip past. Continue following the Templars and you will eventually come to an archway blocked by guards. Hire one of the groups of Thieves nearby and order them to lure the guards away so you can continue following the targets.
Follow the Templars until they reach the Ponte Di Rialto, at which point a cutscene will close the memory.
Speak to Rosa at the Palazzo Della Seta to start this memory. Make your way to the green target on the Mini-Map with Antonio. You must find some way into the Palazzo Ducale Di Venezia. Scout the area with Antonio by heading to the markers that appear on the Mini-Map. Wait for Antonio to stand in each marker to trigger a cutscene. Straying too far from Antonio will desynchronize the memory, so stop and wait for him to catch up if necessary.
After the third marker, follow the scaffolding up to the roof of the basilica, using the barrels covered by white cloth as a starting point.
Visit Leonardo at his workshop in Venice to begin this memory. It's a short one; just crash the flying machine on any rooftop to complete the memory.
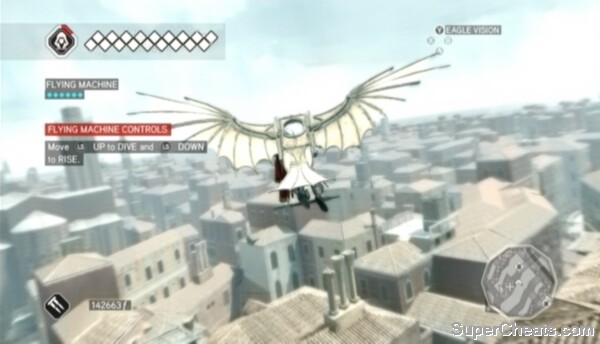
Crash the flying machine to complete the memory.
You must clear the guards in the four areas marked by red targets on the map. Simply travel to each red target and kill all of the marked guards in the area. There are two Brutes at two of the four areas; they're close enough to each other for Ezio to perform a double assassination with the Hidden Blades.
Clear the four areas of guards to complete the memory.
Make your way to the mission start point on the rooftops and stand in the marker there to start the memory. You need to get on top of Palazzo Ducale using the flying machine and then assassinate Carlo Grimaldi.
Da Vinci's flying machine is quite easy to control: push the Left Stick up to dive, and the Left Stick down to rise. The tricky part comes with the need to keep the craft in the air using the fires Antonio's men have strategically set around the city.
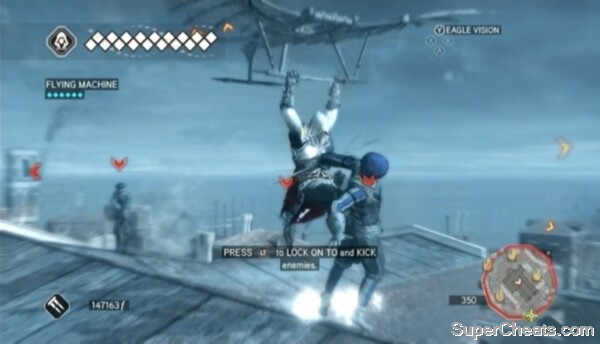
Kick a guard while using the flying machine to unlock the “Fly Swatter” achievement or trophy.
You'll also want to unlock the “Fly Swatter” achievement or trophy during this memory by kicking an archer while using the flying machine. At the time of writing, you won't be able to replay this memory unless you start a new game, so this is your only chance to earn this achievement/trophy on your current playthrough.
You can nab this achievement/trophy early on in the flight. Start by flying over to the first two fires, but ignore the third in line and instead continue east to the four archers on the rooftop of the building there. To kick an archer you have to be flying low enough and locked on to a target using the LT/L2 button. If you're locked on to an archer and Ezio is flying low enough, he will automatically kick the archer when he reaches him. Once you have the achievement, pull up immediately by pushing the Left Stick down to avoid crashing. Even if you do crash, at least you'll have the achievement/trophy and won't have to go for it again during the next flight.
Continue following the fires northeast. Dive down as you reach the next fire and after flying over it, rise up by pushing down on the Left Stick to gain more height. Archers will fire at you from the rooftops, but their arrows are easy enough to avoid and the flying machine can take a decent amount of damage (the condition of the craft is indicated below Ezio's health and social status in the top-left corner of the screen).
Follow the fires until you're near Palazzo Ducale, at which point direct the craft toward the marker on the rooftop.
Using da Vinci's flying machine to land on top of Palazzo Ducale
Once on top of the palazzo, you must make it to the marker by the stairs at the north end without being detected. Stand on top of the wall by the fence and leap toward the awning next to the marker, pressing the B/Circle button to Grab hold of it as you're falling. There's a guard patrolling along the stairs, but he shouldn't have enough time to detect you if you hit the maker immediately after landing.
After the cutscene, equip your Hidden Blade, climb through the window at the south end of the room, hop onto the stairs railing and pounce on Carlo Grimaldi. All that's left to do is escape. Sprint right through the front door at the south end of the courtyard and lose the guards to complete the memory and Sequence 8.
Assassinating Carlo Grimaldi
Assassin's Creed II Guide - Walkthrough
Visit Leonardo at his workshop in Venice to begin this memory. The Codex page contains the design of a pistol modification for the Hidden Blade. Time to test it out; make your way to the green target on the Mini-Map to reach the practice range. There, lock on to one of the target dummies with LT/L2, then hold X/Square until the pointer is extended completely to the dummy. Hold X/Square until this point while aiming the pistol to reach maximum accuracy.
Once you've hit all three practice dummies, return to Leonardo's workshop to trigger a cutscene and complete the memory. Leonardo gives you the Carnevale Mask; while wearing it, Ezio will remain incognito for the duration of Carnevale.
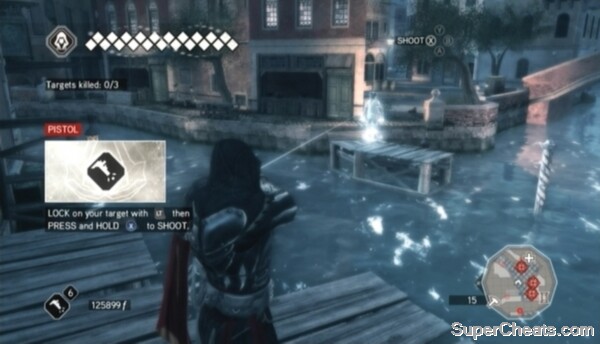
Practice using the Hidden Blade's pistol modification.
Make your way to the memory start point and interact with the highlighted door there to begin. After the cutscene, head outside and start toward the red target on the map. The murderer is holding another girl hostage -- if you get too close, he'll kill her, so you must use the Pistol to take him out from afar. As you near the red target, inch forward so you are just close enough to lock on to the killer. Then, equip the Pistol, hold the X/Square button and ensure that no civilians are in the way before releasing it to kill the murderer and complete the memory.
Return to the brothel to begin this memory. Follow Antonio and Teodora to the square. You must compete in and win four different games to claim the prize. The prize happens to be a golden mask -- just what you're after!
The three memories that follow can be completed in any order.
Speak to the man at the memory start point in the northeast corner of the square to begin this memory. All you must do is obtain 25 ribbons within four minutes to complete the memory. This is a very simple game, and you're given more than enough time to beat out the competition.
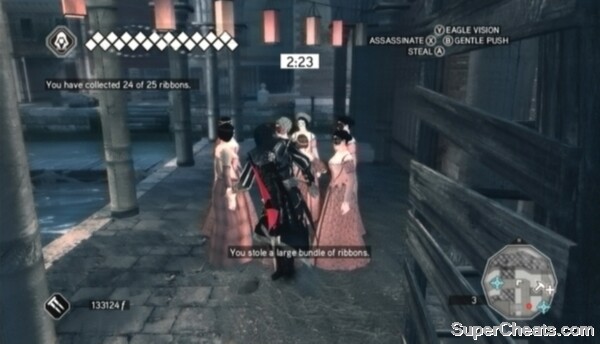
Pickpocket the groups of women marked on the map to collect ribbons.
To obtain ribbons, you must essentially pickpocket the groups of women marked on the Mini-Map (hold the A/X button while next to them). Do so, and you'll receive a small, medium, or large bundle of ribbons. Each group of women is marked on the Mini-Map by a blue target. Groups with more women will yield a larger bundle of ribbons. The larger groups are mobile and further out from the square.
Make your way to the memory start point northwest of the square and speak to the man there to participate in this game. You must beat a single opponent at capture the flag. You and your opponent begin on opposite rooftops, and the flag sits in the middle of the square between each starting point. There's just one flag, and whoever gets to it first must bring it back to his starting point, while his opponent must tackle him (hold RT/R2, A/X, and press the B/Circle button when close enough) to steal it. The first to capture the flag three times wins.
The opponent starts off slowly, giving you plenty of time to make it to the flag first and an easy time escaping with it. Each time you score he becomes faster, to the point where making it to the flag first requires a near death-dive from the rooftops. At this point in the game you should have Ezio equipped with a decent set of armour to attain a sizeable health bar and deciphered at least a portion of the Codex pages, so surviving this jump shouldn't be an issue as long as you go at it with full health. Before starting this memory, make sure you're carrying some Medicine and that your armour is completely repaired.
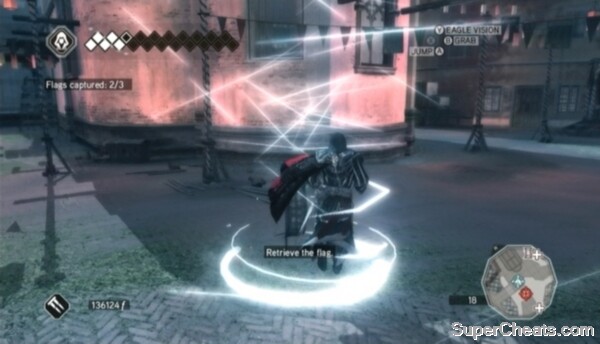
Get to the flag before you opponent does.
Take your time for the first round, just to get a feel for where the flag is and what you need to do to get to it. Sprint across the rooftops and climb down to the square, grab the flag, then quickly climb back up and start back towards home. You're pretty much home free as soon as you're on the rooftops, as the AI doesn't seem to want to or be able to pursue you -- this doesn't appear to change in subsequent rounds, either.
The second round isn't much different than the first, but you'll have to be a bit quicker. At the least, just make sure you're there to tackle the AI if he happens to get to the flag moments before you do. This might require not being as careful as you usually are and taking some fall damage.
Immediately use Medicine (by pressing the left D-pad button) at the start of round three to ensure that you have enough health to survive the jump. Then, run to the other end of the rooftop and leap down to the square, hopefully landing on or right next to the flag. If your opponent happens to get to it just moments before you do, at least you'll be close enough to have some hope of catching him.
Once you have the flag, make a mad dash for home to win the game.
Winning Capture the Flag
Travel to the memory start point southeast of the square and speak to the man there to begin this game. This memory is just like a Race event. In this one, you have two minutes to clear 16 checkpoints.
The first four checkpoints are on street level, so start by sprinting north and clear each one. The fifth checkpoint is on a stack of boxes, which is the start of a Free-Run sequence. Run up the boxes to grab hold of the sign. Continue across the awning and wooden platform and then to the sixth checkpoint. Immediately after hitting the sixth checkpoint, jump over to the platform on the building across the street. From here, jump onto the post and over to the seventh checkpoint on the wooden platform.
From the seventh checkpoint, turn south and jump to swing around to the other side of the building using the hanging plant there. Run across the posts to hit the eighth checkpoint, and continue over to the ninth on the rooftop. Run across the rope bridges between the rooftops to reach the tenth and eleventh checkpoints. Continue to the twelfth checkpoint at the far end of the rooftop and then jump from the post and dive into the canal below.
Climb out of the water and Sprint east to clear the next three checkpoints. The final checkpoint is on the boat up ahead, so jump from the railing over to the boat to complete the race and win the game.
Beating the speed record
Complete the three previous memories to unlock this, the final challenge. Beat this, and the golden mask is yours. You must beat your opponents with your fists to win this one. Accomplishing this won't be a problem; just mash the X/Square button to pummel your opponents, and Ezio will perform a devastating finisher when their health is low.
After beating the first three combatants, Dante Moro will enter the ring. Again, just mash the X/Square button and he won't even be able to get a hit in. Was that supposed to be a challenge?
Next, four guards armed with swords will enter the ring. Hardly seems fair. Nothing is stopping you from taking out your own sword here, but it would be best to wait to disarm one of your opponents when they strike, since you're facing four Agile guards and they are difficult to hit. To Disarm an opponent, hold RT/R2 and, while unarmed, press the X/Square button just as an enemy's strike is about to connect to stop the attack and snatch his weapon, allowing you to then effortlessly kill him. Be ready to perform Counter Kills to finish the remaining guards, or you can just slash away and they will eventually tire.
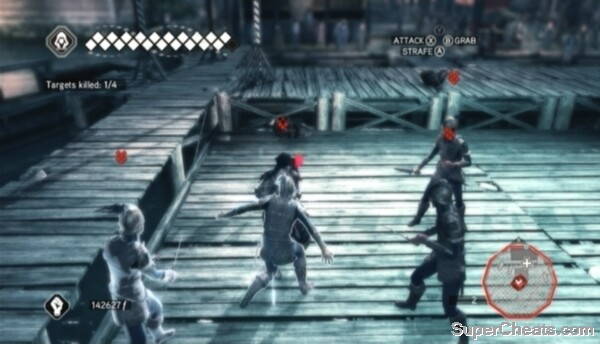
Use the guards' own weapons against them.
Kill the rest of the guards to complete the memory.
Return to Teodora and Antonio to begin. Dante Moro is on his way to the doge's party; you must steal the golden mask he carries before he gets there. Start by making your way to the green area marked on the Mini-Map; Dante is somewhere within this area. You'll need to hire a group of Courtesans in order to steal the mask without being caught. There are several groups of Courtesans in the area, so hire one and head to the small bridge at the north end. Be ready to throw some florins down to fend off the minstrel in the area.
Dante will step out from the yard west of the bridge; a couple of the Courtesans with you will automatically begin to distract him. Walk past Dante while holding the A/X button to nab a few florins -- and, more importantly, the mask. Once you have the mask, you can then head for the doge's party. Only start sprinting once you're out of Dante's sight to avoid detection.
Stealing the golden mask from Dante
When you reach the entrance to the party, proceed through and listen to what Teodora has to say. Move to the middle of the party to trigger a cutscene. Dante shows up, and he's looking for you. You must remain Anonymous for one minute. Look for a group of civilians to blend with and remain there for as long as possible. Guards will eventually break up the group you are blending with in search of you, so leave the group when you see guards approaching and look for another. Also, avoid walking close to guards at any point, as they'll be able to easily identify you if you do so. Even if a guard catches sight of you and begins following you for a closer look, continue walking forward in search of another group of civilians to blend with. The guard will back off as soon as you're blending with another group.
After one minute has passed, your target, Marco Barbarigo, will appear on the boat to the northeast. You must use the Pistol to kill him. Be careful, though, as the guards on the boat alongside him will become suspicious if you are too close. Inch forward, just close enough to lock on to Marco, and then, with your Pistol equipped, hold X/Square to line up the shot. Release the X/Square button while the path is clear to end him.
Assassinating Marco Barbarigo
Once Marco is dead, you must escape the party and return to the brothel to complete the memory. Just jump onto the boat, dive into the water and swim away to escape. The guards remain on high-alert, so try to lose your notoriety by tearing down posters, bribing heralds, or killing corrupt officials on your way to the brothel.
Assassin's Creed II Guide - Walkthrough
Hit the marker in the Palazzo Dela Seta to begin this memory. It's just the cutscene.
Speak to the wounded man at the memory start point to begin. You must free Bartolomeo D'Alviano from his cage. The area surrounding Bartolomeo's cage is restricted, and the surrounding rooftops are dotted with archers, so be ready with some Throwing Knives or your Hidden Blades to clear the way.
Start north across the rooftops to reach the area where Bartolomeo is being held. The cage is at the north end of the yellow area on the map. There is a group of Thieves in the yard just south of the cage. Hire the thieves and order them to lure away the four guards in front of the cage. Alternatively, you can simply run at the guards and take them all on at once, since you are more than capable of handling them at this point.
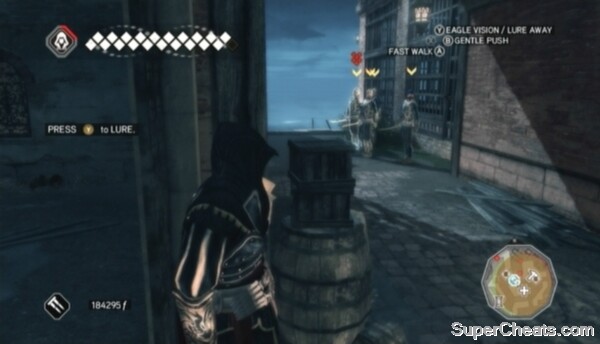
Use Thieves to lure the guards away from Bartolomeo's cage.
Once the cage is clear, interact with the door to free Bartolomeo. After the cutscene, switch to your Hidden Blade and take out as many of the guards as you can. Help Bartolomeo kill whoever's left, and then start toward the green marker on the Mini-Map. You must make it to the green marker with Bartolomeo, so don't get too far ahead or you risk desynchronizing the memory. Also, despite Bartolomeo's apparent battle-hardiness, he is barely able to take on a single enemy, so if you notice his health dropping, backtrack and help him out.
When you reach the marker with Bartolomeo, two guards will approach. Kill both targets and open the gate to the headquarters to complete the memory.
Rescuing Bartolomeo
Bartolomeo wants you to free some mercenaries who are being held prisoner in cages around the Castello District. There are three groups of Mercenaries total. Each group is being held in a cage similar to the one Bartolomeo was locked in. As with the previous memory, the areas surrounding the cages are restricted, so the guards in the area are on high-alert.
There are two, three, or four guards posted in front of each cage. The easiest way to eliminate them is to climb atop the cage and perform a Double Air Assassination with the Hidden Blades, and then quickly take out the remaining guards before they realize what's happening.
When the first group of guards has been dealt with, open the cage to free the Mercenaries. The Mercenaries will join you. If you plan to go stealthy again, it's best to order the Mercenaries to wait by pressing the Y/Triangle button, otherwise they'll just get in the way. You can clear away the guards in front of the second cage in very much the same fashion as the first -- with a Double Air Assassination from atop the cage, followed by one or two quick kills with the Hidden Blade. Free the Mercenaries in the second cage and they will join you as well.
The Mercenaries will come in handy for the third rescue, as it is quite difficult to pull of the same moves as with the previous two due to the positioning of the guards. You should have a sizeable group of Mercenaries with you, so order them to fight the guards. Help the Mercenaries out and then free the third group to complete the memory.
Freeing the captive Mercenaries
Visit Bartolomeo at his home to get started. You must lead Bartolomeo's men to each point marked on the map and clear the guards there so they can take position. The Mercenaries can't Free-Run, so it's best to remain on street level and Sprint to each location.
You'll face four guards at the first strategic point, three at the second, and two at the third. You can easily take them all out yourself with a Double Assassination from atop the wall or a nearby rooftop followed by some quick Hidden Blade work before the remaining guards can react
Clear the three areas so the Mercenaries can gather there to complete the memory.
Return to Bartolomeo's house to begin. Your targets are Dante Moro and Silvio Barbarigo. First, you must scale the Viewpoint marked on the map to signal to Bartolomeo's men to attack. Follow the green target on the Mini-Map to reach the tower. Climb to the top and hit the marker on the cross to signal to the mercenaries.
After the cutscene, perform a Leap of Faith into the pile of hay northwest of the tower and then cross the canal to help Bartolomeo fight Dante. Dante flees, and two Brutes show up. The Brutes shouldn't be after you just yet since you've just entered the scene, giving you a chance to quickly eliminate them with your Hidden Blades.
Help Bartolomeo defeat Dante.
Start after Dante once the Brutes have been taken care of. Once you've caught up, help the Mercenaries kill the guards before turning your attention to Dante. Equip your Long Sword, lock on to Dante and continuously mash the X/Square button to slowly deplete his health. He'll run off again once his health has been completely depleted.
You have about five minutes to assassinate both Dante and Silvio, but you can finish the job in about thirty seconds. Start after Dante and Silvio immediately following the cutscene and keep an eye on your right. When you pass the docked boat, Free-Run up the barrels alongside the cage and follow the posts and wooden platform to get on top of the higher wooden platform at the other end of the building. Dante and Silvio should pause below, allowing you to assassinate the both of them with a devastating Double Air Assassination from above to complete the memory and Sequence 10.
Assassinating Dante Moro and Silvio Barbarigo
Assassin's Creed II Guide - Walkthrough
The Apple of Eden is in Venice and it's on its way to the Spaniard. You must tail the courier and take his place without being detected. The route is quite a long one, but the courier you're followings moves quite a bit faster than the targets you've had to track in other memories. As with any other, don't get too close to him, as doing so will likely cause him to detect you, which would desynchronize the memory. If the arrow above the courier's head begins to fill with yellow, duck out of sight until the arrow reverts back to blue and the courier continues on his way.
You also don't want to fall behind, because the memory will desynchronize if the target gets too far ahead of you. He spends some of the time walking, but tends to Sprint in spurts, so keep up. You can follow him from above on the rooftops, or just remain on street level. On the rooftops you'd have to deal with archers, and the target's destination is quite a distance, so it might be best to stick to the streets.
Follow the courier through the streets of Venice.
Once the courier reaches his destination, you then must assassinate him and take his place without being detected. There are four guards blocking the way to the courier. While there's a group of Courtesans and a group of Thieves nearby, using them isn't the best option here, because the courier is in a restricted area and entering at street level is a sure-fire way to get spotted. Instead, climb the wall to the left of the guards (make sure you're out of sight) to reach the rooftops.
On the rooftops, walk behind the nearby archer, assassinate him with the Hidden Blade, and then move south along the rooftop to the chimney there. There's another archer beyond the chimney, but he won't spot you if you take cover behind the chimney and wait for him to turn his back. Climb down to the ledge above the courier and drop down. Grab one of the windows below while you drop to avoid sustaining fall damage and alerting the courier. Once you've made it to the courier's location, ice him with your Hidden Blade to don his armour and complete the memory.
Taking the courier's place
Approach the box that holds the Apple and press the B/Circle button to pick it up. You must follow the marked guard without drawing attention to yourself. This essentially means not bumping into any other guards, or causing a civilian to drop the crate he is carrying. Right at the start, three or four civilians carrying boxes will be headed your way. Carefully move around them or wait for them to pass to avoid bumping into them. Even if these civilians bump into you and the collision is clearly their fault, the guards will turn on you, so you must be careful.
Continue following the marked guard until he reaches the green target. Be ready to press the X/Square button when prompted during the cutscene. After the cutscene, you must take on Rodrigo Borgia and deplete his health. He's easy enough to beat one-on-one; just equip your Long Sword, mash the X/Square button and be ready to hit him with a counter attack if he manages to take a swing.
Defeat Rodrigo Borgia.
After the fight, four guards will show up to aid Borgia. Ignore Borgia at this point and concentrate on attacking the guards. Be ready to pull off a Counter Kill when one of the enemies strikes. Kill the four guards to trigger a cutscene. Four of your allies appear, and so too does a large group of guards. Leave Borgia to one of your allies and start eliminating the guards with your Long Sword.
When all of the guards have been taken care of, you and your allies are free to gang up on Borgia and beat the tar out of him. Deplete Borgia's health to trigger a cutscene to close Sequence 11.
The Venetian Cape is added to your inventory. Wear it to remain Incognito while in Venice.
Battle of Forli is one of the two corrupt memory sequences in the standalone game (along with Sequence 13: Bonfire of the Vanities). At the time of writing, Sequence 12 can be purchased and downloaded from the Xbox Live Marketplace or PlayStation Network for $4.00 USD (or 320 Microsoft Points).
To play Sequence 12, if you’ve already finished Assassin’s Creed II, simply load your save file to begin. If you have yet to pass Sequence 11 and have the content downloaded, Sequence 12 will follow Sequence 11.
Sequence 12 takes place in Romagna. Approach the white memory start marker on the Mini-Map there to get started.
Start following Machiavelli and Caterina Sforza. A crowd of peasants running in the opposite direction of the city will soon appear. Forli is under attack!
Sprint after Machiavelli and Caterina after the cutscene. As you near the group of enemy soldiers up ahead, have your Hidden Blades equipped and try to score a Double Assassination as you meet them. Then, equip your Long Sword and target enemies occupied with your allies. Simply stroll up behind these enemies and press the X/Square button to effortlessly kill them.
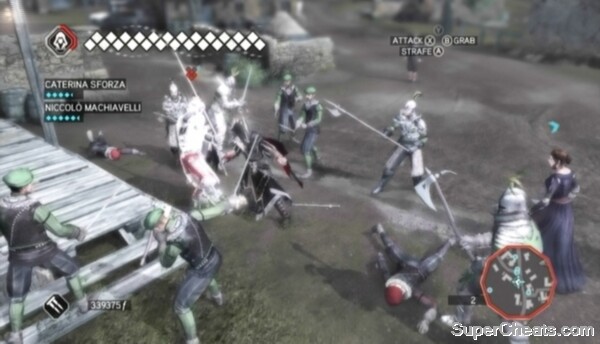
Fight your way to the city gate!
If you don’t have a weapon in the Long Sword slot, you can pick up a fallen enemy’s weapon by standing on it and tapping the B/Circle button. Ezio will carry this weapon with him, so you can make use of it in later memories.
Once the first batch of enemies has been dealt with, continue following Machiavelli and Caterina to the city gate. The gate is closed, so you must find another way in. Follow the marker on the Mini-Map west to some vacant gondolas. Hop on one of the gondolas, grab hold of the oar and start rowing toward the gate beyond the dock. At the gate, hop out of the gondola and into the water. Hold the A/X button to dive under. Swim past the gate while underwater to enter the city.
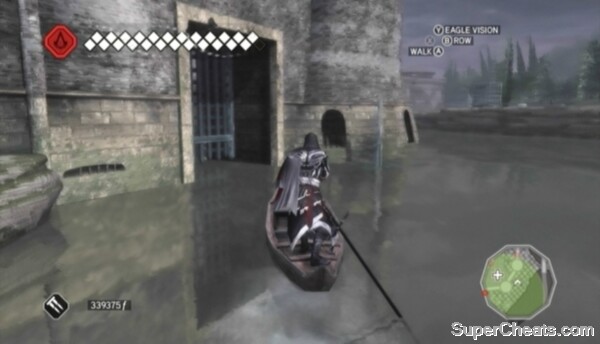
Swim under the gate to enter the city.
You must get to the turnwheel atop the gatehouse and use it to open the gates. You can make your way there while avoiding combat if you move swiftly. Once you’re in the streets of Forli, start sprinting east to the blue marker on the Mini-Map. Head up the steps and run past the group of battling guards. Continue moving forward and you will soon reach the top of some steps. To avoid being detected by the group of enemies heading up these steps, stray to the right and leap from the platform next to the steps to the street below and continue on your way.
There are some crates covered by a white cloth against the building across from the stairs. Free-Run up these crates and onto the building, and then climb up to the top of the adjacent building to reach a rope bridge attached to the city wall. Cross the bridge and assassinate the patrolling guard with your Hidden Blade. When the way is clear, climb onto the tower at the north end of the wall. Move to the middle of the rope bridge between the two towers and hit the pair of guards below with a Double Air Assassination.
Interact with the turnwheel to complete the mission.
Opening the gates of Forli
You must protect Caterina and Machiavelli as the group heads for the Rocca di Ravaldino at the south end of the city. There’s a large number of enemies en route to the citadel, making it quite easy for your two AI allies to become overwhelmed. Keep an eye on your allies’ health meters while in combat and help them out if you notice they’re taking damage. Both characters’ health meters appear below Ezio’s health and notoriety meters in the top-left corner of the screen
If you spot an ally engaged in combat with an enemy, attack the enemy from behind with your Long Sword to effortlessly kill him. If for some reason you don’t have a weapon in the Long Sword slot, you can pick up a fallen enemy’s weapon by standing on it and tapping the B/Circle button. Ezio will carry this weapon with him, so you can make use of it in later memories.
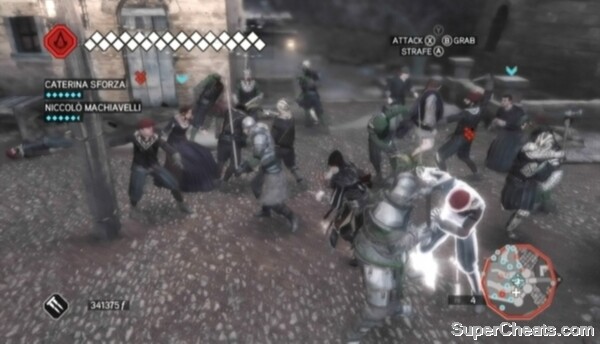
Sequence 12 is chockfull of large-scale battles.
Once the first group of enemies has been dispatched, follow Caterina and Machiavelli and you’ll soon reach another. Continue following your allies once the way is clear. The last big battle takes place in the square outside the citadel. Just concentrate on backstabbing occupied enemies to quickly thin their ranks.
Another group of enemy soldiers will appear from the north once the square is clear. Equip your Hidden Blades and try to score a Double Assassination if you can. These enemies are unarmoured, so eliminating this group shouldn’t take long.
When the remaining enemies have been dealt with, head for the marker in front of the citadel to trigger a cutscene and complete the memory.
Enemies are invading the citadel; you must kill each and every one of the invaders to complete this memory, all while looking after Machiavelli and Caterina. Again, they’re nearly incapable of defeating a single enemy themselves, and are thus extremely vulnerable without your help. As such, you’ll want to stick by your allies to avoid losing one and desynchronizing the memory.
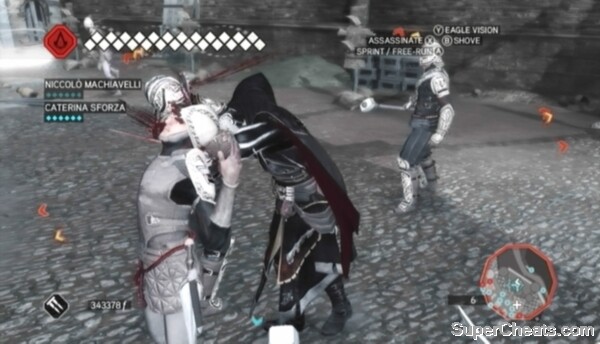
Ouch.
A group of enemies drop into the courtyard at the start, but don’t let them occupy you for too long. Try to score a kill or two with your Hidden Blades, but then immediately look around for Machiavelli and Caterina and take to attacking the enemies they are occupied with.
Make use of your throwing knives and the Pistol here, because you can step in any of the white markers in the courtyard to refill your ammo.
When the first batch of enemies has been dealt with, your allies will likely climb up to the rooftops or citadel walls. Follow them up and begin attacking the remaining enemies there. If your allies are apart and you notice one is taking damage, go to their aid immediately to avoid having them die.
Defending the citadel
Speak to Caterina on top of the citadel to begin this memory. The Orsi brothers have kidnapped two of Caterina’s children, and you have to rescue the both of them. You have 10 minutes, which is plenty of time.
Leap from the top of the tower into the pile of hay below and start toward the green marker on the Mini-Map. The guards in Forli are on high-alert, so steer clear of them to avoid trouble. Take to the rooftops if you must. There are archers on the rooftops, but they can be killed with a single throwing knife. So have Throwing Knives equipped and make your way to the city walls.
From the walls, dive into the water outside the gate. The first captive child is within the green circle on the Mini-Map. She’s surrounded by guards by the house between the two bridges. You can get to her without alerting the guards if you’re stealthy enough. Approach the house from the south and climb up onto it. Have your Throwing Knives equipped and throw one at the archer on the adjacent rooftop. Then, look for two guards below and take them out with a Double Air Assassination. Drop down and interact with the girl to rescue her.
Rescuing the first captive child
When the girl is free, start heading south to the lighthouse where the second child is being held. You must also kill Ludovico Orsi.
Try your best to avoid stirring any guards along the way by moving around buildings rather than running straight down the road. The area surrounding the lighthouse is restricted, but the guards posted there are quite spread out, making it easy enough to simply Sprint through to the lighthouse. Just don’t run too close to any guards, as that’ll give them an easier time identifying you.
Free-Run up the barrels along the west side of the lighthouse and assassinate the two guards on the bridge. From here, climb up onto the wooden post above the door and continue ascending until you reach the top of the tower. There are two archers patrolling the area, so wait until the coast is clear before climbing up to the top of the lighthouse. If one of the archers spots you, assassinate him quickly before Ludovico is alerted.
Wait until Ludovico has his back turned before pulling yourself up onto the ledge and hitting him with an Air Assassination.
Assassinating Ludovico Orsi
Return to Forli and step in the marker outside the citadel to begin this memory.
Checco Orsi is your target.
Checco is just outside the city, somewhere within the restricted area on the Mini-Map. He’s standing in front of the Fast Travel Station; he’s the guy with the blue arrow above his head. Climb on top of the house across from the station and end Checco with an Air Assassination before he can run off.
Assassinating Checco Orsi
Step in the memory start marker outside of Forli to get started. You’re looking for the black-robed monk who snatched up the Piece of Eden. Your search starts at the abbey up the hill. The area is restricted, but there are only a few guards in the area. The guards you’re concerned with are on the east side of the abbey, in the small yard with the one monk. Kill the two guards to rescue the monk, and he’ll point you to the abbey in Forli.
Enter Forli and follow the green marker on the Mini-Map to the abbey. The monks inside will flee when you arrive. Immediately activate Eagle Vision and look for the monk marked in gold. Use LT/L2 to lock on to him. You must Tackle him to get the information you need. Hold RT/R2 to Sprint and hit the B/Circle button when you’re close enough to Tackle him.
Tackle the fleeing monk to complete the memory and the sequence.
Tackling the abbot in Forli
Downloading Sequence 12 adds a Special Memory in Romagna, which allows access to da Vinci’s flying machine. The start point is on top of the lighthouse at the north end of Romagna. Climb to the top of the lighthouse and hit the marker there to trigger the memory.
With this Special Memory you can unlock the Fly Swatter achievement or trophy if you missed it during Sequence 8 without having to beat the game again. Enjoy!
Da Vinci’s flying machine in Romagna
Bonfire of the Vanities is one of the two corrupt memory sequences in the standalone game (along with Sequence 12: Battle of Forli). At the time of writing, Sequence 13 can be purchased and downloaded from the Xbox Live Marketplace or PlayStation Network for $4.00 USD (or 320 Microsoft Points).
Alternatively, the Sequence 13: Bonfire of the Vanities & Secret Locations DLC, priced at $7.00 USD (or 560 Microsoft Points), contains Sequence 13 and the three Templar Lair locations that were bundled with the collector’s editions of the game: Palazzo Medici, Santa Maria Dei Frari, and the Arsenal Shipyard.
To play Sequence 13, if you’ve already finished Assassin’s Creed II, simply load your save file. If you have yet to pass Sequence 11 and have the content downloaded, Sequence 13 will follow Sequence 11. If you have purchased both downloadable memory sequences, Sequence 13 will follow Sequence 12.
Sequence 13 takes place in Florence. Hit the white memory start marker outside the city to get started.
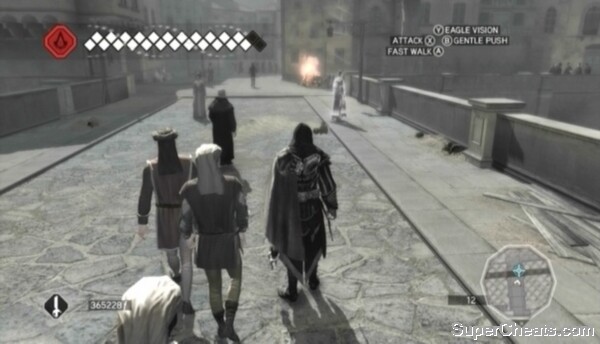
Meet Machiavelli on the bridge to the Oltrarno District.
The Bonfire of the Vanities DLC opens up the Oltrarno District at the south-end of Florence. You must meet Machiavelli there. The guards are on high-alert, so take to the rooftops and steer clear of archers to avoid alerting them. Make your way to the blue marker on the Mini-Map to meet Machiavelli. Talk to him to trigger a cutscene and then follow him into the Oltrarno District. When the green marker appears on the Mini-Map, escort Machiavelli to the Palazzo Pitti deeper into the district to complete the memory.
Sequence 13 consists of killing Savonarola’s nine lieutenants. All nine of the corresponding memories are marked on your map. You can complete the following nine memories in any order you wish. It’s worth taking the time to synchronize the Viewpoints in the Oltrarno District before getting started.
Sprint north to the edge of the rooftop and hit the two guards below with a Double Air Assassination. You must perform a Sprint Jump to reach the platform on the building to the east. To do so, simply Sprint to the end of the springboard at the east end of the roof.
After using the springboard, Free-Run across the platforms along the wall. Quickly assassinate the archer when you reach him to avoid being spotted. Then, look below for your target and end him with an Air Assassination when he’s close enough.
Assassinating The Artist
Flee from the area after the cutscene and become Anonymous to complete the memory.
This far into the game you are more than capable of surviving the waves of enemies the target sends your way. There’s no need to even fight these guys. You can simply climb up to the target and take him out. Your assent may be made difficult by the archers’ arrows, but your health bar should be sizeable enough for you to reach the target alive if you persist.
When you’ve reached the target, equip your Long Sword and start swinging. He’s unarmoured, so he will fall quickly.
Assassinating The Guard Captain
Flee the area after the cutscene to complete the memory.
This guy is a runner, but he can be killed very quickly. Turn right immediately after the cutscene and Sprint up the crates there to reach the rooftops. Climb onto the upper roof and Sprint to the target as he pulls himself up. Assassinate him as soon as he’s on your level.
Assassinating The Nobleman
Return to anonymity after the cutscene to complete the memory.
Your target is high up on the cathedral at the north end of the district. You must assassinate him without being detected. Reaching his perch won’t be easy and is made even more difficult by the guards patrolling the area below.
Start your ascent at the southwest corner of the cathedral. Assassinate the patrolling guard from the ledge before pulling yourself up. Climb onto the platform along the west side of the cathedral and hit the patrolling guard below with an Air Assassination while his back is turned. You then need to kill the archer on the lower walkway. Hop back down onto the lower roof while his back is turned and hang over the outer ledge. Assassinate the archer from the ledge when he walks by then climb to the upper roof ledge. Wait until the patrolling guard is close enough to assassinate from the ledge before pulling yourself up.
With those guards out of the way, begin climbing toward the priest’s perch. There are guards circling around the target, so remain hanging on the ledge and move yourself around to the target. Once you’re hanging near him, pull yourself up and finish the job with an Air Assassination.
Assassinating The Entranced Priest
This one is a bit tricky. Your target is on a boat, surrounded by guards. You must eliminate the target without alerting these guards, as alerting them will desynchronize the memory. You are given a bit of leeway, though: the guards can spot you, but they need to be full-on alerted to end the memory.
Start east across the rooftop and dive into the water below when you reach the first smokestack.
Swim over to the dock, pull yourself up onto it and get behind the boat. Jump from the dock to the back of the boat and inch your way over so you’re hanging before the set of steps on the south side. Wait until the patrolling guard has walked down the stairs before pulling yourself up. Leap across to the target between the two sets of steps and quickly end him.
Assassinating The Merchant
When the target is dead, dive into the water and swim away to lose the guards and complete the memory.
You must assassinate this target without being seen. Though he is surrounded by guards, the doctor can be easily killed with the Pistol. Walk over to the red area on the Mini-Map and stand on the steps just outside of the restricted area. Make sure you’re far enough away from the target to avoid alerting the guards. Once you’re in place, take aim and release to kill the doctor.
Assassinating The Doctor
You could also Blend with the group of walking monks and then ice the target with your Hidden Blade when close enough, but the Pistol method works just as well
After the cutscene, flee the scene and return to anonymity to complete the memory.
You must kill your target without being detected. Start north across the rooftop and climb down to street level. Steer clear of guards to avoid alerting them. Equip the Pistol, stand by the fence just outside the red area marked on the Mini-Map, and wait until the target is close enough to lock on to. Once locked on, hold the X/Square button to take aim and then release to finish the job.
Assassinating The Farmer
Shake the guards after the cutscene to complete the memory.
The guards in the city are on high-alert, and unfortunately you can’t equip the Medici Cape during this memory. To make matters worse, your target is posted on a rooftop, surrounded by guards. There’s no penalty if you want to just fight your way to him, however you can finish the job without alerting him to your presence if you’re swift enough.
At the start, turn left and drop down to street level. Head west and turn right into the alley just before the archway. Through the alley, turn right and sprint to the window straight ahead. Climb up the windows above to reach the roof. Ignore the archer posted on the nearby balcony; he won’t be able to identify you if you move quickly.
Before pulling yourself onto the roof, wait for the patrolling archer to face away. Then, hop across the two smokestacks and assassinate the archer posted on the platform on the other side. After killing the archer, perch on the railing at the other end of the platform, locate the target below and hit him with an Air Assassination. You must do this quickly, as the guards you skipped past will likely be pursuing you.
Assassinating The Condottiero
After the cutscene, dive into the water and lose the guards to complete the memory.
Start north across the rooftop. Equip your Throwing Knives and use them to kill the archers posted on the church across the street. Once the archers have been dealt with, jump across to the church roof and walk onto the wooden platform. Assassinate the archer on this platform and then locate the target below. Finish the job with an Air Assassination once you’ve spotted him.
Assassinating The Preacher
You must now escape the guards. After the cutscene, Sprint up the crate covered by a white cloth south of the church to start a Free-Run sequence. Return to anonymity to complete the memory.
Once all nine of Savonarola’s lieutenants are dead, make your way to the white memory start marker in the Oltrarno District. Be ready to hit the X/Square button during the cutscene.
Savonarola drops the Apple while being carried away and an Agile Guard makes off with it. As soon as you regain control over Ezio, Sprint over to the railing, climb up onto the walkway, and jump over to the window through the archways. Climb up onto the roof and Sprint after the runner. He’s fast, but just keep at it. You’ll catch him eventually.
Retrieving the Apple
Hit the white marker on the Mini-Map to get started. When you gain control over Ezio, move through the crowd to Savonarola’s stake to kill him before he burns.
Assassin's Creed II Guide - Walkthrough
Sequence 12 and Sequence 13 are corrupt, according to Rebecca Crane. Ten years have passed since the end of Sequence 11, but apparently nothing overly important happened during the two missing sequences. That is, save for two things: Ezio grew a beard, and Rodrigo Borgia became pope, and is thus now the most powerful man in Italy.
Before you can get started, you must collect all 30 Codex pages if you haven't already done so and plaster them on the Codex Wall. The location of every Codex page has been marked on all of the in-game maps, regardless of Viewpoint synchronization. So before you can start Memory 1 of Sequence 14, you must travel to Florence, San Gimignano, Forli, and Venice and collect all of the Codex pages you missed in those cities. A counter below Ezio's health and social status in the top-left corner of the screen notes how many Codex pages have been collected.
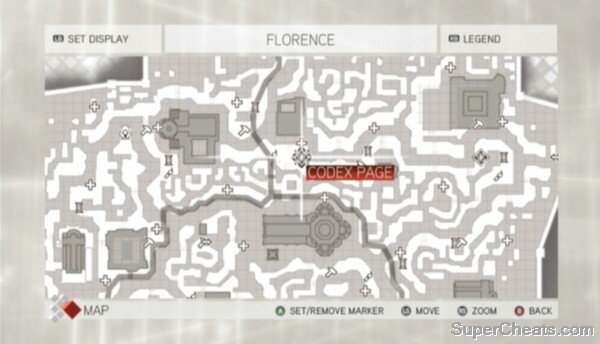
Every Codex page now appears on the maps.
Refer to the in-game map by pressing the Back/Select button while in one of the cities to pinpoint the locations of any uncollected Codex pages. It might help to set a custom waypoint by moving the cursor over the nearest Codex page icon and pressing the A/X button. This way, the page will remain on the Mini-Map and you won't have to keep opening the map to make sure you're headed in the right direction.
Most of the Codex pages are watched over by a group of guards. This far into the game you should be more than familiar with how to go about getting past them. Hire a group of Thieves, Courtesans, or Mercenaries and order them to lure, distract, or fight the guards blocking the door into the room with Codex page container. Or, you can take them out with some quick Hidden Blade work.
There are five Codex pages in Florence, two in San Gimignano, three in Forli, and six in Venice. Return to Monteriggioni once you have all 30 codex pages. Leonardo can be found in the Villa Chest Room; speak to him to have the Codex pages deciphered.
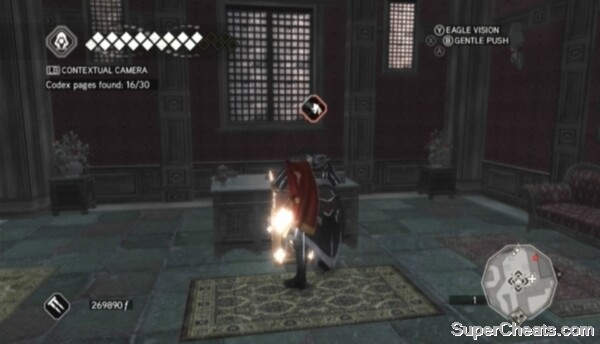
Collect all 30 Codex pages to unlock Sequence 14.
Once the Codex pages have been deciphered, approach the Codex Wall and press the B/Circle button to add the Codex pages. Speak to Mario to begin the first memory.
Approach the highlighted pedestal in front of the Codex Wall and press the B/Circle button to set the Apple of Eden upon it. Then, stand in the marker in front of the wall to begin rotating the Codex pages.
Start by pressing the Y/Triangle button to activate Eagle Vision and reveal the markings on each Codex page. The Codex pages plastered on the wall will depict a map of the world when rotated appropriately. The map will reveal the location of the vault.
Use the RT/R2 and LT/L2 buttons to rotate each Codex page. Start by forming the edges and corners of the map using the outer Codex pages. Then, rotate the Codex pages inside the borders to form each continent.
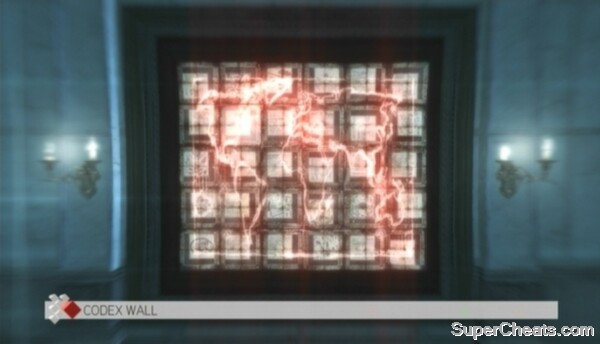
Rotate the Codex pages to form a map of the world.
Speak to Mario in the Codex Wall room once you're ready to begin. Note that you will still be able to free-roam once you have completed the Sequence 14, so there's no need to complete everything before seeing the ending of the game.
Rodrigo Borgia, now the pope, is your target. Borgia is inside the Sistine Chapel; you must enter the Vatican, find a way in to the Sistine Chapel and kill him.
Start by climbing onto the stack of crates nearby. From atop the crates, jump to grab hold of the wooden post above. Jump over to the second wooden post and then onto the suspended wooden platform. From the wooden platform, jump to the horizontal protrusion on the wall and climb up to the long, wooden post. Jump to the side from the top-most grip point to grab hold of the wooden post. Pull yourself up onto the post and from there jump up to grab hold of the trim along the wall. Move as far to the left as you can using the grip points there. Perform a climb leap from the last, horizontal grip point to reach the grip point above, and then climb up to the top of the tower.
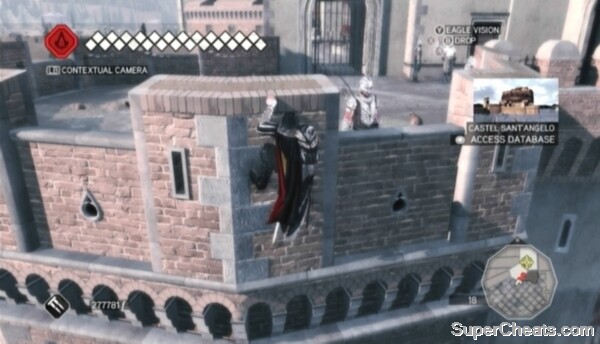
Scale the castle wall ready for a fight.
There are four guards patrolling on top of the tower. Two of the guards are standing close enough to the sides of the tower to be assassinated from the ledge. The other two guards are walking back and forth in front of the gate. Assassinate the two closest guards from the ledge with your Hidden Blade, then climb up onto the tower and take out the two remaining guards with a Double Assassination. Flip the lever next to the gate to open it.
Two more guards patrol this area. You can take them both out with your Hidden Blades if you're quick enough. Once the two guards have been dealt with, Free-Run up the crates and wooden posts along the east side of the area to reach the balcony. Kill the guard on the balcony and then interact with the switch to open the gate below.
Five guards patrol this next area. It's best to just run in there and take out as many of them as you can with your Hidden Blades before they can react. Finish any remaining guards with Counter Kills or combos and then climb up to the top of the tower at the west end of the area and hit the marker there.
On the way to the Vatican
During the cutscene, Ezio drops from the top of the tower onto the back of the horse that is conveniently present below. During this bit, it's best to move quickly while avoiding the guards along the wall as much as possible. Though it may be tempting, avoid running them down, as they can chop at the horse's legs to knock Ezio off. You need to gain a good amount of speed to cross the gap coming up, so swerve around any guards in your path, jumping over crates in an effort to avoid them.
Tap the A/X button to gallop while moving along the wall. When you reach the sizeable gap beyond the first gate house, keep going forward; if you have enough speed, the horse will easily clear it. On the next section of wall, continue avoiding guards, jumping over any barrels and crates along the way, and head straight for the lowering gate. You'll have to abandon your horse if the gate closes before you can pass through. If this happens, kill the guards, then Free-Run up the crates to the left of the gate and climb up to the top of the tower. You'll have to continue the rest of the way on foot.
Once past the second gatehouse, speed to the next one. The third gatehouse is closed, so you have no choice but to abandon your horse in order to continue. Kill all of the guards along this portion of wall first before attempting to climb to the top of the gatehouse, otherwise they'll give you a hard time by continuously pelting you with rocks. You can take them out quickly if you have a Smoke Bomb; just throw the Smoke Bomb down and then go to town with your Hidden Blades.
Getting to the other end of the wall on horseback
On top of the gatehouse, assassinate the guard at the other end and then perform a Leap of Faith into the pile of hay along the wall below. Assassinate the patrolling guard when he walks in front of your hiding place, then hop out and make a beeline for the two guards who are walking side by side further ahead. Take them both out with a Double Assassination, then quickly turn to the Seeker and kill him with your Hidden Blade before he can react.
Free-Run up the crates and barrels to the left of the gate and climb up to the top of the tower. Assassinate the archer there from the ledge and then pull yourself up. Hit the two guards at the other end with a Double Assassination, and then the guard walking along the wall below with an Air Assassination.
Climb up onto the next tower and assassinate the guard there. There are just short of a dozen guards in the area below. It's best to just take them all on, because you won't be able to activate the switch above the gate unless you are Anonymous. Again, throw down a Smoke Bomb if you have one so you can take them out with ease.
Entering the Vatican
Once the guards have been dealt with, climb up the scaffolding at the south end of the area and flip the switch on the balcony to open the gate below. You get into the Sistine Chapel without being detected. There are several guards patrolling the halls beyond the gate; you'll have to Blend with the groups of monks to avoid being seen.
Fast Walk to the first group of monks down the hall. The other group of monks in this hall continuously circles the central divider. Wait with the first group of monks until the strolling group of monks is in view and approaching the north end of the divider, then Fast Walk to the strolling monks and Blend with them. Stray from the group when they reach the gate and use your Hidden Blade to stealthily assassinate the guard standing there. Flip the lever and continue into the next section of hallway.
There is another group of monks standing just beyond the archway. Move forward and Blend with them. A guard continuously circles the east-most divider in this hallway. Wait with the first group of monks until the guard passes by and is behind the divider before joining the second group of monks further down the hall. Move on to the third group when the guard passes by a second time. A second guard circles the west-most divider in the hallway; wait until he passes by, at which point break from the group and assassinate him with your Hidden blade while he's behind the divider. Be quick about it, otherwise the first patrolling guard might spot you.
When the patrolling guard has been taken care of, walk around the divider to the two guards standing nearest to the lever and hit them with a Double Assassination. Pull the lever to enter the chapel.
Borgia is preaching at the other end of the chapel. You must get close enough to him to perform an Air Assassination. Walk across the boards and onto the second wooden platform, then jump over to the third platform and start across the rope bridge. Jump onto the hanging wooden platform, walk to the edge and perform an Air Assassination on Borgia below.
Assassinating Rodrigo Borgia
It's not over yet! Borgia still has some fight left in him -- and he wields a Piece of Eden! Ezio is able to spawn four clones to fight alongside him, though they are almost completely useless. Borgia is able to effectively block most of your sword swings, while Ezio's clones seem content to stand idly by while you continue to whale on him.
This is going to be a lengthy fight regardless, but the quickest way to deplete his health is while unarmed. Borgia can't be grabbed while you're wielding a weapon, but can while Ezio is unarmed. Press down on the D-pad to select Fists and press the B/Square button to Grab hold of Borgia. You can Punch, Headbutt him, or Throw him to the ground and kick him while he's down. The quickest way is to Throw him to the ground, then equip your Long Sword and get a few slashes in before he gets back up. Rinse and repeat.
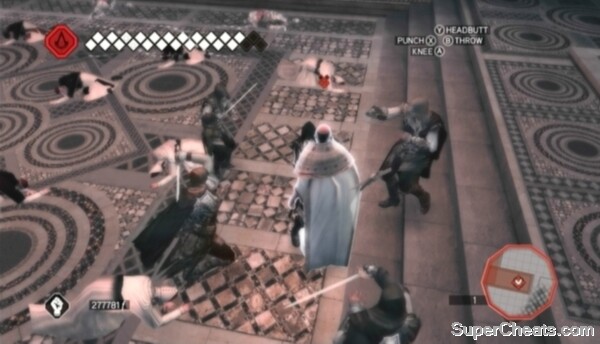
The Ezios take on Borgia.
Once Borgia's health has been completely depleted, a cutscene will ensue. After the cutscene, approach the pulpit and activate Eagle Vision to reveal the two switches that will open the way to the vault. Interact with each switch and then climb down the steps and continue to the vault entrance.
You must defeat Borgia in a fistfight to proceed. As one would expect, this is an exceedingly easy task. Just Grab him, Throw him to the ground and kick him while he's down. Keep this up and the fight will be over in no time.
With Borgia out of the way, enter the vault and hit the marker inside to trigger the endgame cutscene.
Sit back and enjoy the ending. Be sure to stick around for the credits -- the action's not over yet!
Assassin's Creed II Guide - Optional Events
Florentine Sprint
Unlocked After: Sequence 1 - Memory 4: Nightcap
Florentine Sprint
San Marco Scuttle
Unlocked After: Sequence 4 - Memory 1: Practice What You Preach
San Marco Scuttle
Casanova
Unlocked After: Sequence 1 - Memory 5: Paperboy
You have four minutes to deliver letters to two recipients. Both recipients are “guarded,” and you must get the letters to them without being detected. Go for the north-most recipient first; she's only guarded by a single person, so you can simply climb up onto the roof of the building and drop down to her.
The other recipient is at the south end of the district, and she is standing on a balcony surrounded by several guards. Make your way to the building and grab hold of the ledge below the balcony. There is one guard standing on the platform next to the balcony. To avoid being detected, shift yourself over to the balcony while hanging from the ledge. When the guard on the platform turns away, climb up onto the balcony and hand the lady her letter.
video to follow (v5) Casanova
A Woman Scorned
Unlocked After: Sequence 1 - Memory 6: Beat a Cheat
Travel to the green circle on the Mini-Map and climb onto the roof of one of the buildings in the area. You must use Eagle Vision to locate the cheating husband. Hold the Y/Triangle button to activate Eagle Vision and search around for the target marked in gold.
Once you've spotted the target, switch off Eagle Vision, drop down to street level, immediately lock on to him and begin whaling away with your fists. Grab hold of him with the B/Circle button, press B/Circle again to Throw him to the ground and use the X/Square button to kick him while he's down. Deplete his health to complete the event.
Day at the Market
Unlocked After: Sequence 5 - Memory 1: Four to the Floor
Your target is a merchant, who can be found wandering around the market district. He isn't marked on the Mini-Map, though; you'll have to use Eagle Vision to find him first. He'll be somewhere within the green circle on the Mini-Map. Search the area with Eagle Vision active -- deactivating it periodically to ensure that you're still within the circle -- until you spot the target marked in gold. Once you've located the target, switch off Eagle Vision and take to killing him.
Fallen Archers
Unlocked After: Sequence 5 - Memory 1: Four to the Floor
You're tasked with assassinating three archers, all of whom have been marked on the Mini-Map. They're all patrolling along the river at the southeast end of the city. Follow the red targets on the Mini-Map and assassinate each of the three archers with your Hidden Blade.
Political Suicide
Unlocked After: Sequence 5 - Memory 1: Four to the Floor
The target is somewhere near the Church of San Lorenzo. Follow the green target on the Mini-Map to reach the area. He's easy enough to spot -- he's the guy surrounded by a boatload of guards. Activate Eagle Vision and look in the tunnel that has a red blip at either end to identify the target.
Getting at the target is easy enough. First, look for a group of Courtesans to hire. Then, lock on to one of the guards on either side of the tunnel and order the Courtesans to distract him. The guards gathered on this side of the target will move away to socialize with the Courtesans -- now's your chance! Move in there and use your Hidden Blade to assassinate the target.
Political Suicide
Caveat Emptor
Unlocked After: Sequence 5 - Memory 1: Four to the Floor
The target is somewhere near the Santa Maria Novella. He should be standing with some guards just southeast of the building. Use Eagle Vision to identify the target. You must not be detected before making the killing; if you are, the memory will be desynchronized. As long as you the guards aren't already after you, you can simply walk up to the target and end him with the Hidden Blade. Be careful not to arouse the suspicion of nearby guards by bumping into civilians.
Meeting Adjourned
Unlocked After: Sequence 5 - Memory 1: Four to the Floor
The five targets you're tasked with killing are having a meeting. First, you must locate a corrupt official, then follow him to the meeting place and kill everyone involved. Follow the green target on the Mini-Map to reach the area where the corrupt official can be found. Activate Eagle Vision and search around for the target marked in gold. Once you've spotted him, switch off Eagle Vision and begin following him. Don't follow too close, as doing so is likely to make him suspicious.
When your lead reaches the meeting place, equip your Hidden Blades and perform a double kill on the two guards blocking the entrance. Then just slaughter everyone in the yard to complete the memory. You're facing armed targets as well as unarmed targets, so you may want to switch to your Long Sword.
Meeting Adjourned
Needle in a Haystack
Unlocked After: Sequence 5 - Memory 1: Four to the Floor
You're hunting a single target, located somewhere near the Santa Maria Novella. Follow the target marker on the Mini-Map to reach the building. The green circle on the Mini-Map denotes the area where the target can be found, so you must activate Eagle Vision and continue searching the area until you spot him marked in gold.
Since you're searching quite a large area, it might help to take to the rooftops and look down at the streets below. You must assassinate the target without being spotted, so keeping to the rooftops might help you remain undetected as well. Once you've found the target, try to get in a position to Air Assassinate him if you're on a rooftop, otherwise drop down to the street, sneak up behind him, and use your Hidden Blade to finish the job.
Peacekeeper
Unlocked After: Sequence 5 - Memory 1: Four to the Floor
Kill 10 Brutes within one minute -- it's easier than it sounds. Make your way to the bridge that the Brutes are stationed on and equip your Hidden Blades by pressing up on the D-pad. The first set of Brutes should be facing the north, and the second set further up should be facing south. If they are walking around, wait until both groups have their backs turned to each other. Walk past the first set of Brutes and use your Hidden Blades to score double kills on the second group of Brutes while their backs are turned. With any luck, you should be able to wipe them all out without being detected.
Take to killing the second group once the first has been dealt with. Attempt to do the same by approaching the group from behind and going for double kills. If one or two Brutes are on to you, you should still have enough time to dispatch of them some other way. You can easily kill a single Brute if you happen to have the Disarm skill: unequip your weapon by pressing down on the D-pad, then hold RT/R2 and tap X/Square just as the Brute attacks -- the same as you would to perform a Counter Kill. Then you can use his own weapon to quickly end him.
Peacekeeper
Leader of the Pack
Unlocked After: Sequence 5 - Memory 1: Four to the Floor
Your target is the leader of a garrison at the north end of Florence. First, you must locate a lead and tail him to the garrison. Follow the green target on the Mini-Map to reach the area where the lead can be found. Activate Eagle Vision and search the zone for the guard marked in gold. Once you've located the lead, keep your distance and begin to follow. If you get too close, the guard will become suspicious; if he turns to you and the arrow above his head begins to fill with yellow, back off immediately and wait for him to forget about you and continue on his way.
Continue following the guard until you reach the garrison. Hire the Courtesans outside and use them to distract the guards blocking the entrance. When the guards move to socialize with the Courtesans, slip past them and enter the garrison. The troops are gathered inside, and your target is among them. Grab hold of the wall and use Eagle Vision to identify your target. Then, climb up onto the wall, lock on to the leader and press the X/Square button to perform an Air Assassination. If that fails, just slash him to death and then get the heck out of there.
Leader of the Pack
Assassin's Creed II Guide - Optional Events
San Gimignano Dash
Unlocked After: Sequence 3 - Memory 3: Practice Makes Perfect
San Gimignano Dash
Wedding Bells are Ringing
Unlocked After: Sequence 3 - Memory 3: Practice Makes Perfect
You have two minutes to get the letter to the recipient at the church in the northeast corner of San Gimignano. Two minutes is plenty of time to accomplish this, but keep in mind that you must be Anonymous to hand the recipient the letter. As such, you'll want to leave yourself enough time to lose the guards once you reach the target if necessary.
At the start, climb the ladder on the buildings across from the event giver. Just travel along the rooftops toward the green marker on the Mini-Map, trying your best to avoid alerting any of the archers stationed en route to the recipient. You'll most likely be moving at a quick enough pace that any guards who do detect you won't be able to keep up.
Drop down to the streets once you reach the church. The recipient will be standing right out front. If guards are after you, quickly dash behind the church to break the line of sight and hide in the pile of hay. Hand the man his letter to complete the event.
Wedding Bells are Ringing
Speedy Delivery
Unlocked After: Sequence 5 - Memory 1: Four to the Floor
You have two minutes and 30 seconds to deliver three letters to three different locations. If you take a look at your map, you'll notice that the three targets are quite far apart. If you get a horse, though, this distance can be traversed within the allotted time with ease. There is a horse by each of the city's exits; the starting point of this event is closest to the south exit, so turn south once you regain control over Ezio and start running down the street to the exit.
Be ready to Shove people out of the way by holding the B/Circle button while Free-Running. Don't keep the B/Circle button held done the entire time, though, as Ezio moves at a slower pace while doing so. Turn left to spot a horse as soon as you're through the gate. Get on the horse and make a beeline for the first location -- the one furthest south. When you reach the spot, dismount, hand the recipient his letter and then get back on your horse and start toward the northeast marker. You should be able to get the letters to each recipient with time to spare.
Speedy Delivery
Spear of Infidelity
Unlocked After: Sequence 5 - Memory 1: Four to the Floor
Travel to the green circle on the Mini-Map, activate Eagle Vision and begin searching for the cheating husband marked in gold. Check along the city walls, though his location may be random. The cheating husband happens to be a city guard, and so he is wearing a suit of armour. Even so, you must use your fists to teach him a lesson.
Lock on to the husband, make sure you have no weapon equipped (tap down on the D-pad) and start thrashing him. Just don't let up and he shouldn't even be able to fight back. Deplete his health and he will cower before you, promising to be a good husband henceforth.
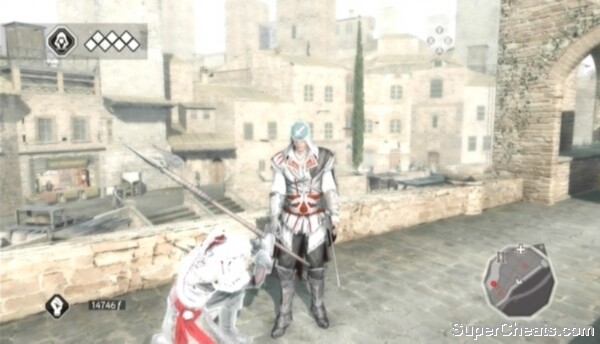
Beat the cheating husband with your fists to teach him a lesson.
Reap What You Sow
Unlocked After: Sequence 5 - Memory 1: Four to the Floor
The target can be found at a farm east of the city walls. Be sure to stock up on Throwing Knives before setting out.
Leave San Gimignano and make a beeline for the area marked on the Mini-Map. When you reach the spot, hide behind the building there and activate Eagle Vision to locate the target marked in gold. The target will run if he spots you, so you'll want to take him out quickly to avoid having to give chase.
Once you've spotted him, hold RB/R1 and use the Left Stick to select Throwing Knives from the Weapon Wheel, then lock on to the target and throw two knives at him to quickly finish the job.
Reap What You Sow
Don't Get Your Hands Dirty
Unlocked After: Sequence 5 - Memory 1: Four to the Floor
You're tasked with killing four archers -- all without the use of weapons. Instead you must use the Grab ability to throw the archers off of towers or into a collapsible structure. Two of the guards are on top of Viewpoints, one is on top of a roof and the other is standing near a collapsible structure. Follow the red targets on the Mini-Map to locate each guard.
When you're close to one of the targets, sneak up behind him, hold RT/R2 and press B/Circle to Grab. Then, throw him from the tower or, if he's on street level, into a collapsible structure to kill him. Kill all four marked guards to complete the contract.
Don't Get Your Hands Dirty
Supply In Demand
Unlocked After: Sequence 5 - Memory 1: Four to the Floor
Your target is a guild leader. To find him, you must first locate a guild member and then tail him as he goes to meet the leader. Purchase some Throwing Knives before getting started if your stock is low.
Travel to the green circle on the Mini-Map and activate Eagle Vision by holding Y/Triangle. Search the area for the guild member marked in gold. Once you've spotted him, switch off Eagle Vision and begin following him. Don't follow too closely, however, as doing so is likely to make him suspicious. If he turns to you and the arrow above his head begins to fill with yellow, back off immediately and wait until he forgets about you and continues on his way.
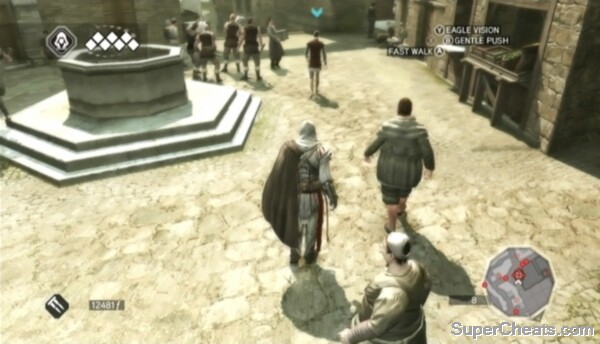
Follow the guild member to the assassination target.
Continue following the guild member until he reaches the target. Equip Throwing Knives by holding RB/R1 and using the Left Stick to select them from the wheel. Then, lock on to the guild leader and throw two knives to kill him.
Flee Market
Unlocked After: Sequence 5 - Memory 1: Four to the Floor
You're after two conspirators. Both are at the Santa Maria Assunta, in a restricted area surrounded by a bunch of guards. The way into the restricted area is blocked by four guards, but there is a group of Courtesans just east of them. Hire the Courtesans and order them to distract the guards. Walk past the distracted guards and activate Eagle Vision. The targets are together in the courtyard, and as you can see there are quite a few guards with them.
The conspirators will bolt as soon as they detect you. To make matters worse, both targets can Free-Run. Catching both of them with a boatload of guards after you is no easy task, so your best bet is to run in there and take them out swiftly. They're standing close enough to each other that you can score a nice double kill with the Hidden Blades if you're quick enough. If you only manage to get one of the targets and the other takes off, just keep after him. The memory will be desynchronized if either of the targets gets far enough away from you.
Flee Market
Vertical Slice
Unlocked After: Sequence 5 - Memory 1: Four to the Floor
There are five targets -- all are guards. You must kill them without being detected, or else the memory will be desynchronized. Two of the targets are on street level and three are on rooftops. For the two guards on street level, just get behind them and assassinate them with your Hidden Blade. You have to be careful when dealing with the guards above street level, as they'll become suspicious just because you're up on the rooftop. Use the Assassinate From Ledge ability to kill them without being detected.
The five targets are fairly close together, so make sure you're out of view of the other targets before performing an assassination.
No Camping
Unlocked After: Sequence 5 - Memory 1: Four to the Floor
Your task is to travel to three different camps and kill the three camp leaders within five minutes. The three camps are quite far apart, so you'll need a horse. Right at the start, press Back/Select to view the map and look for the closest way out of the city. Fast Travel Stations are always found near city gates, so note the cardinal direction of the station closest to your current location and quickly make your way there.
Once through the gate, look around for a horse and hop on. Refer to your map, note which camp is closest to you and then make a beeline for it. Each of the three camps is a restricted area, meaning the guards there will attack on sight.
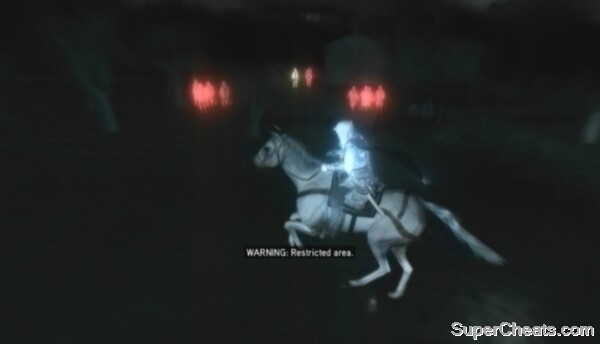
Use Eagle Vision to identify the camp leaders.
There are quite a few guards at each camp, so it's best to get in there, kill the target, and get out. As you near one of the camps, hold Y/Triangle to activate Eagle Vision and look around for the leader marked in gold. When you've identified him, dismount your horse just short of the boundary of the restricted area, equip your Hidden Blades and make a mad dash for the target. If you are unable to assassinate him, equip your Long Sword and whale on him to deplete his health. Just be ready to perform a Counter Kill when one of the guards surrounding you strikes.
As soon as the camp leader has been dealt with, hop back on your horse and make for the next target. Kill the remaining two leaders before time runs out to complete the contract.
No Camping
Showtime
Unlocked After: Sequence 5 - Memory 1: Four to the Floor
The target is somewhere in the ruins of the Antico Teatro Romano. The theatre is a restricted area during this memory, and dotted with archers. The target is also being guarded by two Brutes. He'll make a run for it if he detects you, so it's in your best interest to take him out quickly.
Try running around to the east side of the ruins. You can kill a couple of the archers posted there, and then use Eagle Vision from a high point to locate the target marked in gold. Once you've spotted the target it's just about getting close enough to assassinate him with your Hidden Blade. He can't run very fast, so just jump, land somewhere and make a beeline for him.
Assassin's Creed II Guide - Optional Events
Romagna Hustle
Unlocked After: Sequence 6 - Memory 2: Romagna Holiday
Romagna Hustle
Horseplay
Unlocked After: Sequence 6 - Memory 2: Romagna Holiday
Horseplay
The Messenger's Burden
Unlocked After: Sequence 6 - Memory 2: Romagna Holiday
You have one minute to get the quest-giver's letter to a farmer outside of Forli. The farmer is just on the other side of the east wall of the city. At the start, run east and look for some wooden stairs leading up to a wall and wooden beam. Free-Run up the crates and across the beam to land on the wooden platform along the building on the other side of the street. Climb up onto the roof of the building and begin heading north. Look for a rope bridge connected to the city wall along the east side of the rooftops and cross it. Hop over to the wooden beam on the other side of the wall and perform a Leap of Faith to land in the pile of hay below.
Follow the green marker on the Mini-Map to reach the recipient. It seems the recipient is not on good terms with the author of the letter, and the farmer wants to punish you for it. You can either fight or flee from the farmers to complete the memory. There's no glory in slaughtering a group of unarmed farmers, so it's best to just get out of there.
Courier
Wanton Hubby
Unlocked After: Sequence 6 - Memory 2: Romagna Holiday
The unfaithful husband is somewhere within the large, green circle on the Mini-Map. Travel to this location, activate Eagle Vision and begin your search. Unless his location is completely random, he'll be by one of the houses near the bridge at the west end of the circle. You must beat him with your fists. He has two buddies with him, both unarmed. They will attempt to help the target while you deliver the beat-down. Be ready to Counter their attacks by holding RT/R2 and pressing the X/Square button when the attack is about to connect.
Use your fists to teach the unfaithful husband some respect.
Promiscuity Knocks
Unlocked After: Sequence 6 - Memory 2: Romagna Holiday
The promiscuous husband is somewhere within the green circle on the map. Follow the green target on the Mini-Map to reach this location. Unless his location is completely random, the husband should be standing by the well near the drawbridge. Use Eagle Vision to identify him. If he isn't there, get on top of a building, activate Eagle Vision and scan the area for him. Once you've identified him, walk up to him and start beating him with your fists. Just keep mashing the X/Square button and he won't be able to fight back. Deplete his health to complete the memory.
Thin the Ranks
Unlocked After: Sequence 6 - Memory 2: Romagna Holiday
Assassinate the six guards marked on the Mini-Map. The assassinations can be as high or as low profile as you like. Easy.
Beginnings of a Conspiracy
Unlocked After: Sequence 6 - Memory 2: Romagna Holiday
You're after three guards. You must kill all three without being detected. The only problem is that each of the three targets is with company. So, you'll want to purchase some Poison for this. You can deliver poison to a target to effectively kill him without being detected. The guard closest to the Abbazia Di San Mercuriale is patrolling with three other guards -- just use Eagle Vision to identify him. Throw some coins down to get the other guards out of the way, and then hit the target with poison and make for the next one.
The other two targets are also with guards, but you should be able to poison them right in front of the others without being implicated. Poison both guards and wait for them to keel over to complete the memory.
Beginnings of a Conspiracy
Arch Enemies
Unlocked After: Sequence 6 - Memory 2: Romagna Holiday
You have two minutes to kill 10 archers. The countdown starts as soon as you kill your first archer. Purchase as many Throwing Knives as you can carry before starting this one. If you haven't already, visit a Tailor and see if they have a Throwing Knife Belt Upgrade in stock.
Once you're all suited up, head to the north end of the rooftops where the archers are all lined up, equip your Throwing Knives and climb up. Lock on to the first archer and hit him with a throwing knife to get started. A group of guards will likely start after you, but do your best to ignore them. Just continue running south across the rooftops, hitting the marked archers with Throwing Knives until you've killed all 10.
Arch Enemies
Wet Work
Unlocked After: Sequence 6 - Memory 2: Romagna Holiday
Your target is the captain aboard the boat in the waters east of Forli. The boat is a restricted area, so the guards onboard are on high-alert and will attack on sight. Swim out to the boat and over to one of the sides. Climb up onto the side of the boat and shift over to the back. Climb up and hang just below the railing. Use Eagle Vision to identify the target. Wait until the captain is standing at the back of the boat with his back to you, at which point pull yourself up onto the railing and perform an Air Assassination with your Hidden Blade to complete the memory.
The guards onboard will immediately take to attacking you. Dive into the water, hop on the gondola and row back to shore to escape.
Wet Work
Dead On Arrival
Unlocked After: Sequence 6 - Memory 2: Romagna Holiday
The target is somewhere within the green circle on the map. Unless his location is completely random, he should be on the rooftops somewhere. Climb onto a building and use Eagle Vision to locate the agent. He's a runner, so try to take him out swiftly. Maybe hit him with a couple of Throwing Knives. If he does manage to take off, he's not very fast, so you shouldn't have much difficulty catching up and ending him with your Hidden Blade.
Go Towards the Light
Unlocked After: Sequence 6 - Memory 2: Romagna Holiday
Your target is atop the lighthouse along the north coast of Romagna. Exit Forli and make your way to the red target on the map. The lighthouse is a restricted area, so the guards are on high-alert and will attack on sight. To avoid getting into a fight, run around to the north side of the warehouse and climb up onto the broken archway. Assassinate the archer from the ledge using the Hidden Blade and then take out the Brute there.
Get on top of the wooden posts left of the door and then begin climbing the lighthouse. Climb all the way up to the top of the lighthouse to reach the target. Get onto the ledge and perform an Air Assassination with your Hidden Blade to kill the target and complete the memory.
Go Towards the Light
Mark and Execute
Unlocked After: Sequence 6 - Memory 2: Romagna Holiday
You must kill the target without being detected. He's in a small courtyard by the docks at the north end of Romagna. The best way to assassinate him without being detected is to perform an Air Assassination with the Hidden Blade. There are three archers posted around the courtyard, so you'll want to dispatch them first.
Start by climbing up the south side of the building below the restricted area on the Mini-Map. Sneak up behind the archer on the wooden platform and ice him with your Hidden Blade. Then, drop down to the lower walls and kill the two archers patrolling along there. Use Throwing Knives or your Hidden Blade -- just make sure the target doesn't see you.
Once the archers have been taken care of, walk along the roof, taking care not to be spotted by the target, and wait for opportunity to strike. When the target has his back turned and is below you, lock on to him, move to the edge of the roof and hit the X/Square button when the “Assassinate” option appears in the top-right corner of the screen. Be careful not to accidently kill the woman in front of the two guards
Mark and Execute
Assassin's Creed II Guide - Optional Events
Thicker Than Water
Unlocked After: Sequence 7 - Memory 1: Benvenuto
To get to your target you must first tail a gondolier, who is marked by a blue target on the map. Make your way to the gondolier and look east for an unoccupied gondola by the dock across the water. Swim out to it, hop in, grab hold of the oar and start following the gondolier
Follow the marked gondolier out to a boat. Your target is on this boat; use Eagle Vision to identify him. The water surrounding the boat and the boat itself is a restricted area during this memory, meaning the guards are on high-alert and will attack on sight. Row the gondola to the east side of the boat, just outside of the red circle on the Mini-Map, and dive into the water. Hold the A/X button to dive underwater to avoid being spotted and swim up to the side of the boat. Assassinate the patrolling guard while he's near the ledge, then climb on board and use the Hidden Blade to assassinate the target.
Thicker Than Water
Zero Tolerance
Unlocked After: Sequence 7 - Memory 1: Benvenuto
You must kill this target without being detected by the woman he's chasing. This is simple with some Poison. Buy Poison from a Doctor if need be, and then make your way to the target marker on the map. The target is somewhere within the green circle on the Mini-Map. Drop down to street level and search around for him.
Once you've spotted the target, equip the Poison, approach the target and stab him. Now just stand back and watch as he flips out and eventually dies.
Blade in the Crowd
Unlocked After: Sequence 8 - Memory 1: Birds of a Feather
Find and kill the three targets within three minutes without being detected. The three targets are somewhere within the green circles on the map. Their locations seem to be fixed, and they're all quite close to each other, so this is an easy one. Start by heading east along the rooftops, past the group of Thieves, and look down from the south end of the rooftops with Eagle Vision active to spot one of the targets marked in gold walking below. Once you see him, climb down, walk up behind him and use your Hidden Blade to end him.
Make your way to the small bridge east of the first target's location. The second target should be walking on this bridge. Ice him with the Hidden Blade and then continue east to the next green circle. The third and final target should be by the archway at the other end of this area.
Blade in the Crowd
Honorable Thief
Unlocked After: Sequence 8 - Memory 1: Birds of a Feather
You're after a single target, but you first must meet a thief who will lead you to him. Make your way over to the blue target on the map and stand in the marker there to meet with the thief. Follow him along the rooftops, helping him kill any guards who attack him, until you reach the target. Eliminate the target any way you see fit to complete the memory.
No Laughing Matter
Unlocked After: Sequence 9 - Memory 1: Knowledge is Power
There are three targets, all marked by red targets on the map. The targets are dressed as jesters and will bolt as soon as they detect you, so start after them right away. There's no need to use Eagle Vision to identify them, because in all cases they'll reveal themselves by reacting to your presence. The targets aren't particularly fast and they can't Free-Run, so catching up and assassinating them with your Hidden Blade won't be a problem.
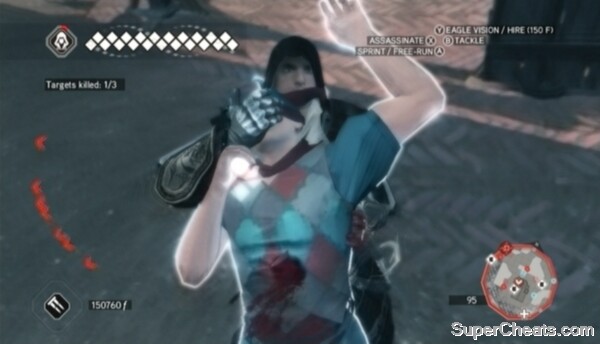
Find and kill the three targets.
Crash a Party
Unlocked After: Sequence 9 - Memory 1: Knowledge is Power
Your target is hosting a party. You need to identify one of the guests, follow her to the party, and then kill the host. The guest is somewhere within the green circle on the map. Run across the rooftops, following the green target on the Mini-Map, until you reach the green circle. Then, activate Eagle Vision and look down; the guest, marked in gold, should be in the middle of the square.
Make your way down to street level and start following her. Don't follow too closely, as doing so will make her suspicious. A minstrel will pester you at some point, so be ready to throw some florins. As you near the party (the restricted/red area on the map), hire the nearby group of Courtesans. Continue following the guest to the archways and order the Courtesans to distract the guards blocking the way.
Using the Courtesans as a distraction should allow you to move through the archways unhindered, but since the area the party is taking is a restricted area, the guards will identify you quickly once you've been spotted. As such, you'll want to find and kill the host as quickly as possible. He'll appear by the archways at the west end of the area, so make a beeline for him and perform a High Profile assassination with your Hidden Blade.
Crash a Party
False Legacy
Unlocked After: Sequence 9 - Memory 1: Knowledge is Power
You're after just one target -- a Brute. The target is somewhere within the green circle on the map. Follow the green target marker on the Mini-Map to reach the location. The target is walking around by the pillars along the southeast end of the area, surrounded by about a dozen guards. The target is easy to identify -- he's the lone Brute. Use Eagle Vision to mark him on the map.
Hire the group of Mercenaries south of the target's location and order them to fight the guards. Stand back and wait for the target to get involved in the fight. Equip your Hidden Blade and assassinate the Brute amongst the confusion to complete the memory.
False Legacy
Hunting the Hunter
Unlocked After: Sequence 10 - Memory 1: An Unpleasant Turn of Events
Someone's after Ezio. You must find and kill this bounty hunter. The first marked target holds the information you need; you must kill him and loot his corpse to mark the location of the hunter on the map. Make your way to the green circle on the map. The Agile guard standing by the San Pietro Castello is your man. He's quick, and he'll bolt as soon as he detects you, so make a beeline for him as soon as you spot him and perform a High Profile assassination with your Hidden Blade. If he manages to get away, you'll have to give chase.
Once Lorenzo's marked target is dead, loot the corpse to mark the location of the bounty hunter on the map. He's somewhere within the green circle by the Rialto Bridge. Make your way there and look for him below the archway across from the docked gondola along the canal. But it's not him -- it's a trap! Immediately equip your Long Sword and prepare to face the real bounty hunter, who will soon appear with a few friends. There are four of them, but you should be more than able to take them all on at once this far into the game. Just whale away at one of the targets by mashing the X/Square button and be ready to pull off a Counter Kill when one of the other hunters strikes.
Kill the bounty hunters to complete the contract.
Venetian Rush
Unlocked After: Sequence 10 - Memory 1: An Unpleasant Turn of Events
False Legacy
The Perfect Marriage
Unlocked After: Sequence 11 - Memory 1: All Things Come to He Who Waits
This Courier event is a bit different than the others: you first must kill the thief who stole the letter, loot his corpse, and then return the letter to the event-giver. You have five minutes to do so, which is more than enough time. The thief is an Agile guard, so he is fast and can Free-Run; purchase some Throwing Knives beforehand to make this job a quick one.
The thief is somewhere within the green circle on the map. He's up on the building at the west end of the area. Climb up to the top of this building with your Throwing Knives ready. As soon as you're up on the roof, lock on to the thief and hit him with two Throwing Knives to kill him. Loot the corpse to obtain the letter. Follow the green marker on the Mini-Map and hand the man his letter to complete the event.
Courier
Philanderer on the Roof
Unlocked After: Sequence 11 - Memory 1: All Things Come to He Who Waits
The unfaithful husband is somewhere within the green circle on the map. Follow the green target marker on the Mini-Map to reach this area. The husband is behind the roof garden at the north end of the area.
Once you've located him, make sure you are unarmed, then lock on and start beating him with your fists. Deplete his health completely and he will apologize profusely for his wrongdoings. Be careful not to knock him off the roof -- you're not trying to kill him! (Though killing him this way doesn't appear to desynchronize the memory.)
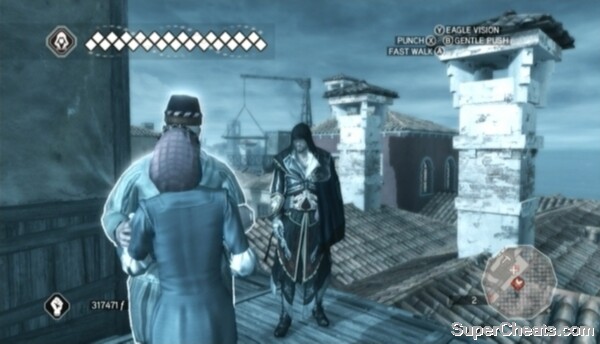
Teach the adulterous husband a lesson.
Assassin's Creed II Guide
To unlock the “Armor of Altair” set in the Sanctuary inside the Villa Auditore in Monteriggioni, you must collect six seals from the tombs of assassins long past.
There are six such tombs in Assassin's Creed II. The first tomb you will visit is under the Santa Maria Novella during Sequence 4 as part of the main story. The other five tombs are optional, but will appear on the map (denoted by an assassin's symbol icon) when they become available.
The tombs are hidden deep within each location, and require the completion of a number of “climbing puzzles” to uncover.
Collect all six seals and plug them into the indentations on the base of each statue in the Sanctuary to obtain the Armor of Altair, which is the strongest armour in the game and never needs to be repaired.
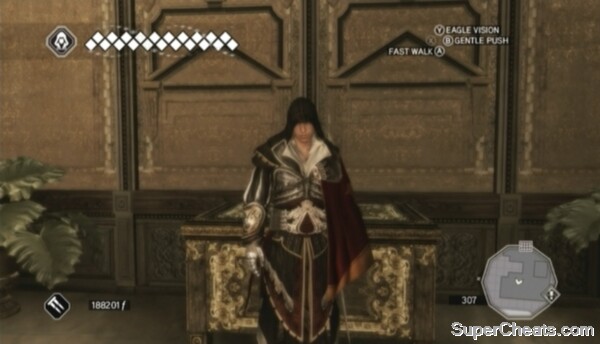
The “Armor of Altair” Set
In this section you will find a video walkthrough of each tomb, since written instructions would just be hard to follow (and to write).
Location: Basilica Santa Maria del Fiore in Florence
Unlocked: After Sequence 4 - Memory 4: Novella's Secret
Treasure: Seal of Iltani
Finding Iltani's Tomb
Location: Torre Grossa in Tuscany/San Gimignano
Unlocked: Sequence 5
Treasure: Seal of Wei Yu
Finding Wei Yu's Tomb
Location: Rocca Di Ravaldino in Romagna/Forli
Unlocked: After Sequence 6 - Memory 2: Romagna Holiday
Treasure: Seal of Qulan Gal
Finding Qulan Gal's Tomb
Location: Basilica Di San Marco in Venice
Unlocked: Sequence 8
Treasure: Seal of Amunet
Entering the basilica
North Trial
West Trial
South Trial
East Trial and finding Amunet's Tomb
Note: The four trials can be completed in any order.
Location: Santa Maria Della Visitazione in Venice
Unlocked: Sequence 9
Treasure: Seal of Leonius
Finding Leonius's Tomb
This memory is not available from the get-go. You first must create a Uplay account and link it to your Xbox Live or PlayStation Network tag. Then, you can redeem points earned by unlocking certain achievements/trophies in the game. You can access Uplay through Assassin's Creed II by pressing Y/Triangle while on the main menu.
The Auditore Family Crypt (“Uplay Exclusive Bonus Map”) costs 40 Uplay points to unlock.
Location: Auditore Family Crypt in Monteriggioni
Unlocked: Sequence 5 (if redeemed via Uplay)
Treasure: 5000 florins
Use Uplay points to purchase the Auditore Family Crypt. Paying Respects “Uplay Exclusive Map”
Finding the burial chamber
Assassin's Creed II Guide
Templar Lairs are much like Assassins Tombs in that they require the solving “climbing puzzles” to uncover treasure -- florins, in this case.
These three maps are not part of the main game (well, they are on the disc, but you need a code to unlock them). Those who either pre-ordered Assassin’s Creed II or purchased one of the special editions of the game may have one or more of these maps. For those who didn’t, the “Sequence 13: Bonfire of the Vanities & Secret Locations DLC,” priced at $7.00 USD (or 560 Microsoft Points), contains Sequence 13 and the three Templar Lair locations bundled with the collector’s editions of the game.
Location: Palazzo Medici in Florence
Unlocked: Sequence 5
Reward: 5250 florins
Rescuing Lorenzo de' Medici from the Templar
A code for the Palazzo Medici bonus map was given out as a GameStop preorder bonus, and also comes packaged with the Master Assassin Edition (NA) and the Black Edition (EU).
Location: Santa Maria Gloriosa Dei Frari in Venice
Unlocked: Sequence 7
Reward: 4000 florins
Finding the treasure room
A code for the Santa Maria Dei Frari bonus map comes packaged with the Master Assassin Edition (NA), the White Edition, and the Black Edition (EU).
Location: Arsenale Drydocks in Venice
Unlocked: Sequence 10
Reward: 4000 florins
Finding the Templar strong box
A code for the Arsenal Shipyard bonus map comes packaged with the Black Edition (EU).
Assassin's Creed II Guide
There are 100 Feathers to collect in Assassin's Creed II. Twenty-seven of the Feathers are in Florence, four are in Monteriggioni, 11 are in Tuscany, 12 are in Romagna, and 46 are in Venice.
You'll have to progress through the story to collect all of a city's Feathers, since not every district is available from the get-go. The earliest you can collect all 100 Feathers is Sequence 11.
Deliver collected Feathers to the chest in Maria's room on the second floor of Villa Auditore in Monteriggioni. Collect and deliver 50 Feathers to unlock the Condottiero War Hammer, which will then be available for purchase at the Blacksmith in Monteriggioni.
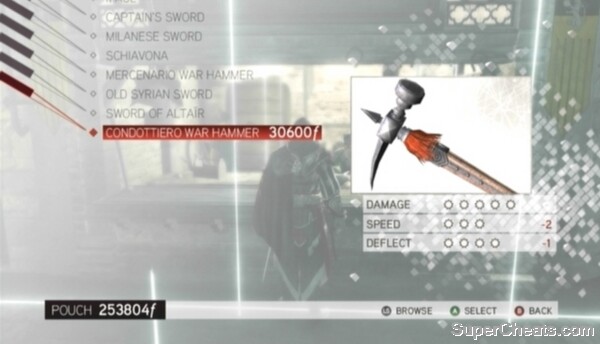
Collect 50 Feathers to unlock the Condottiero War Hammer for purchase.
Collect and deliver all 100 Feathers to unlock the Auditore Cape. Ezio's Notoriety will remains at 100% in every city but Monteriggioni while the Auditore Cape is worn. Posters, Heralds, and corrupt officials will not appear.
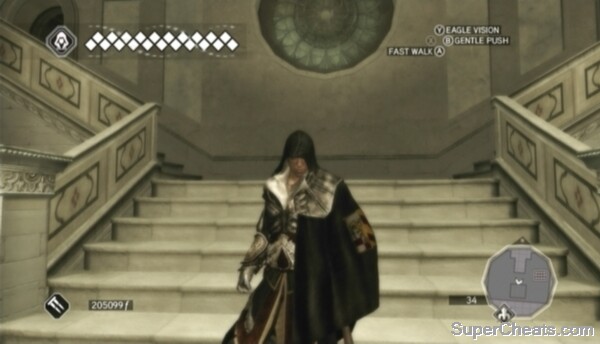
Collect all 100 Feathers to unlock the Auditore Cape.
Collecting all 100 Feathers also unlocks the “In Memory of Petruccio” Xbox 360 achievement or PlayStation 3 trophy.
Refer to the maps in the following sections for the locations of every feather. If you're having difficulty finding a particular one, match the number next to the marker on the map with the corresponding image to pinpoint the location.
With that said, the markers are numbered based on when each district becomes available. If you were to collect the Feathers district by district, it would be efficient to collect them in the order the markers are numbered. If you're collecting the Feathers at the end of the game when all of the cities and districts are available, it would probably quicker to not follow the order the markers are numbered, though this might make it harder to keep track.
Assassin's Creed II Guide - Feather Locations
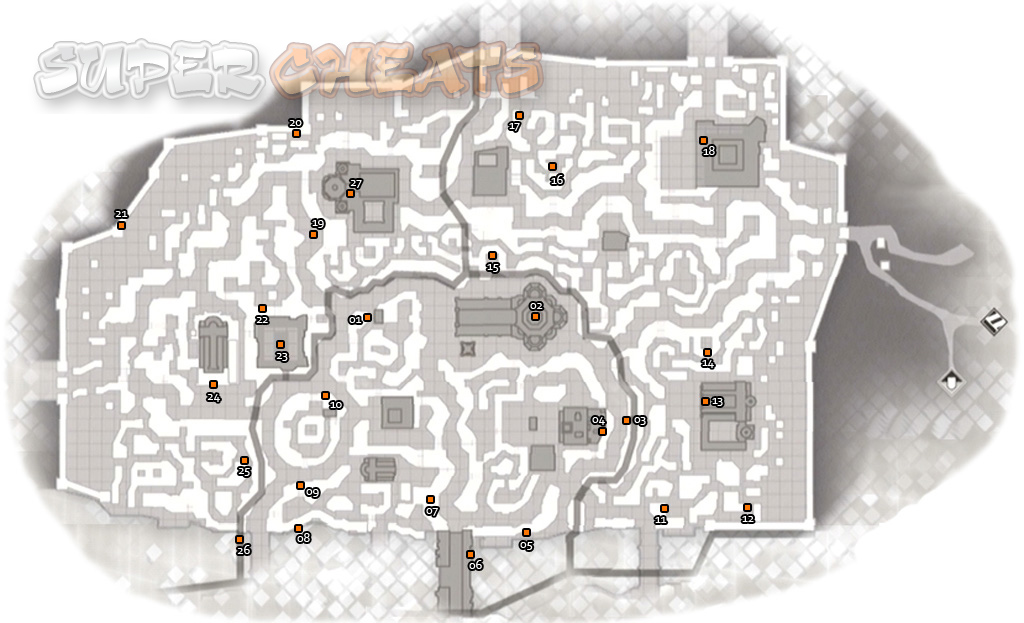
Click Map to Enlarge
Feather Locations 1-10
Unlocked: After Sequence 1 - Memory 7: Petruccio's Secret
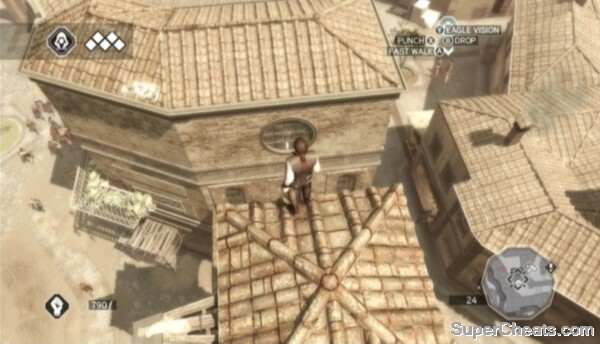
Feather Location (1/27)
Feather Location (2/27)
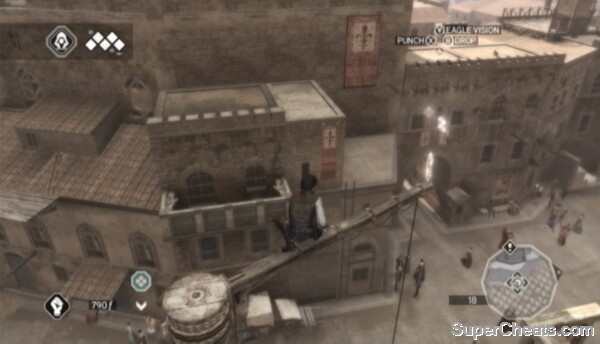
Feather Location (3/27)
Feather Location (4/27)
Feather Location (5/27)
Feather Location (6/27)
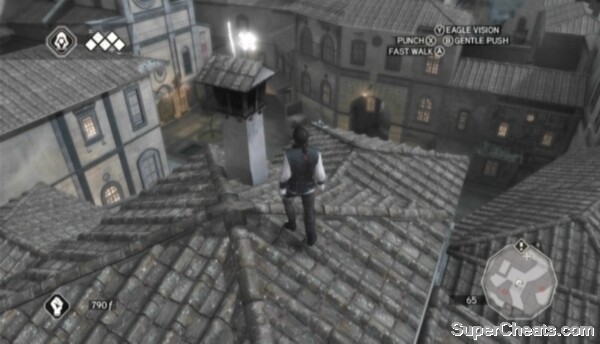
Feather Location (7/27)
Feather Location (8/27)
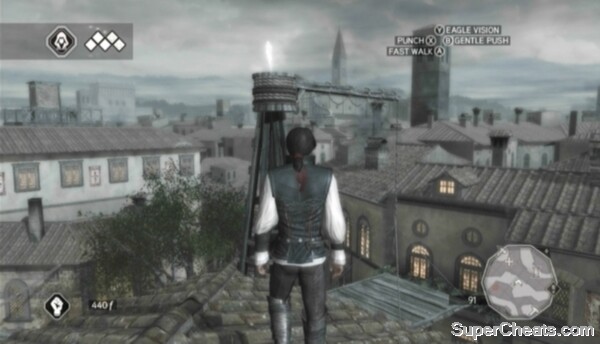
Feather Location (9/27)
Feather Location (10/27)
Feather Locations 11-18
Unlocked: Sequence 2
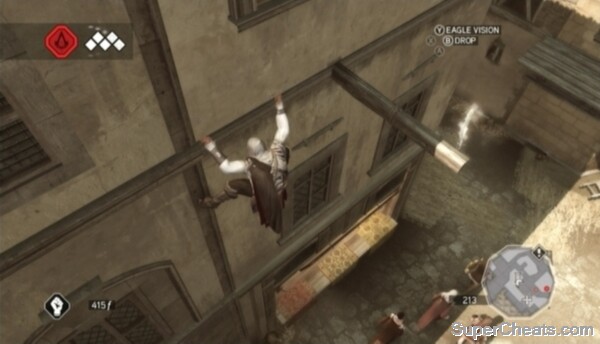
Feather Location (11/27)
Feather Location (12/27)
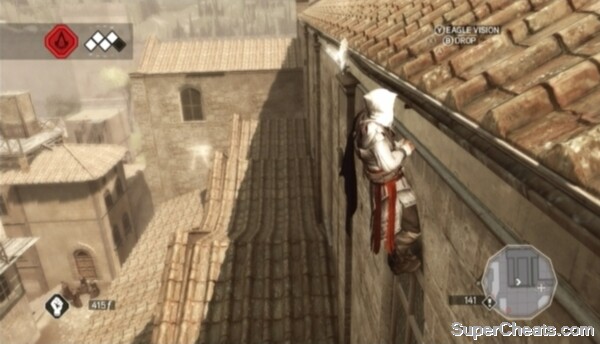
Feather Location (13/27)
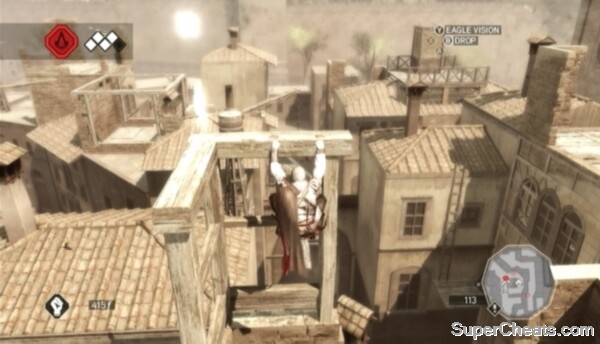
Feather Location (14/27)
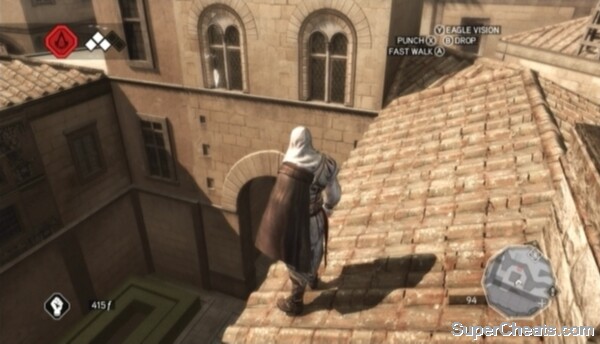
Feather Location (15/27)
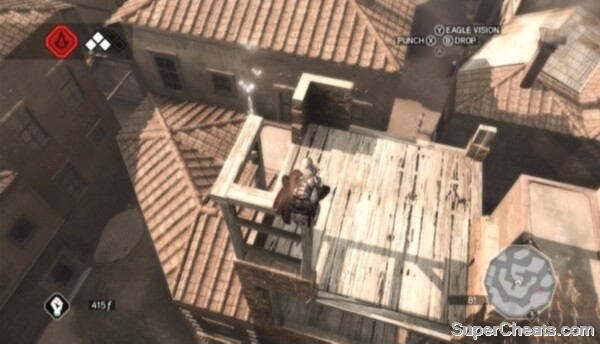
Feather Location (16/27)
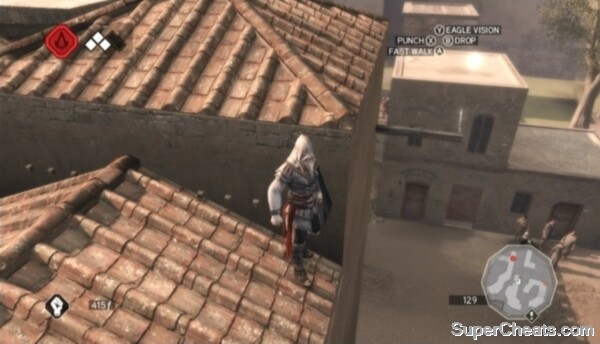
Feather Location (17/27)
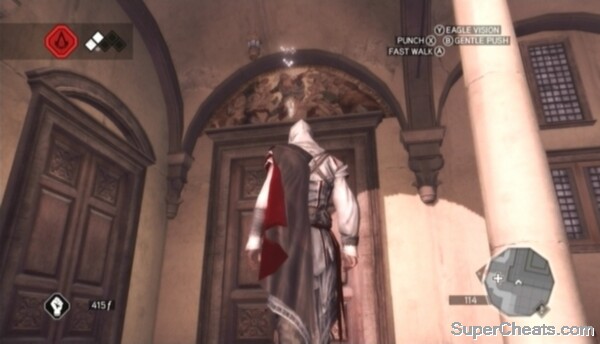
Feather Location (18/27)
Feather Locations 19-27
Unlocked: Sequence 4
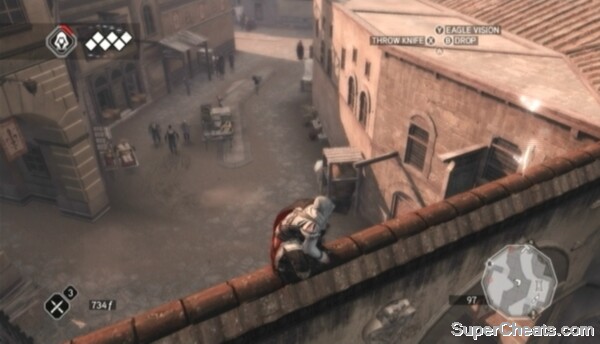
Feather Location (19/27)
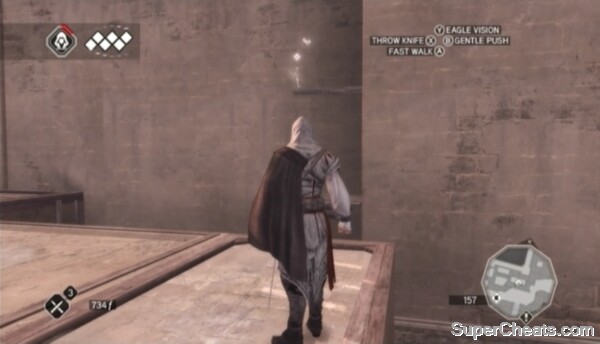
Feather Location (20/27)
Feather Location (21/27)
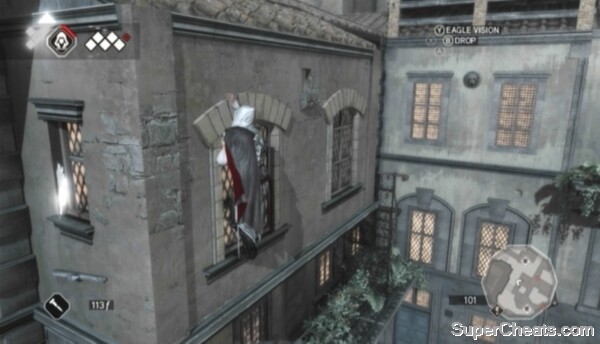
Feather Location (22/27)
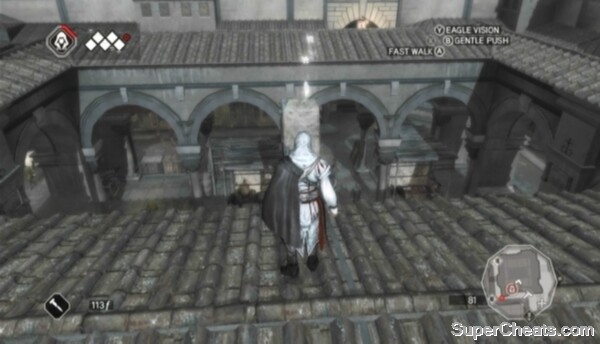
Feather Location (23/27)
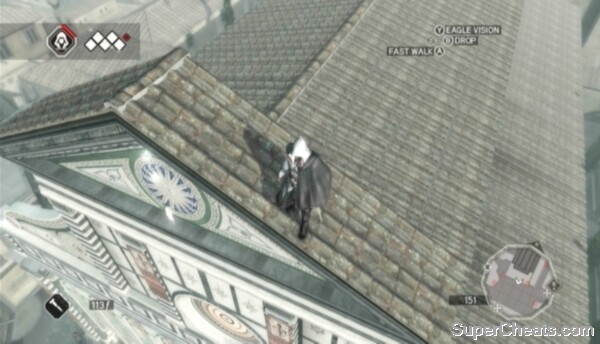
Feather Location (24/27)
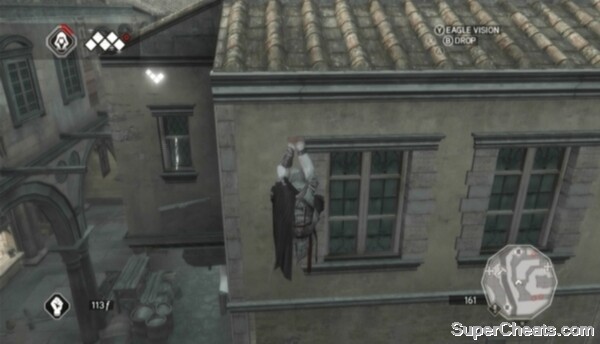
Feather Location (25/27)
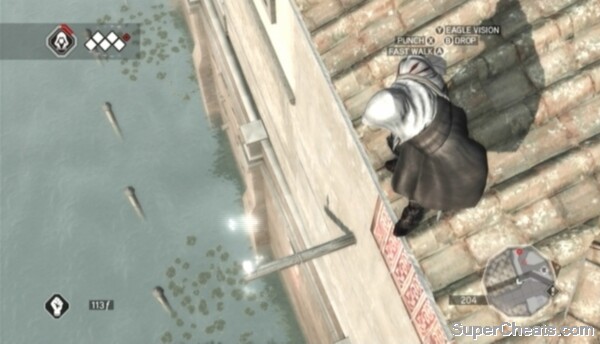
Feather Location (26/27)
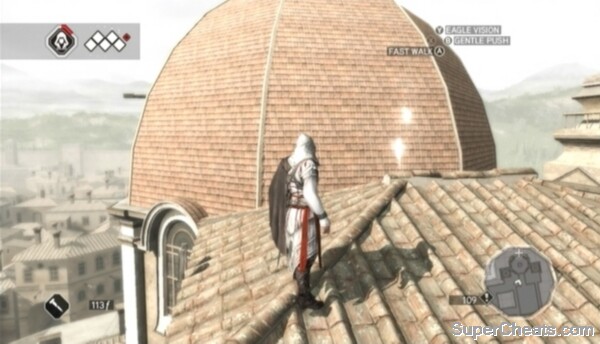
Feather Location (27/27)
Assassin's Creed II Guide - Feather Locations
Monteriggioni Feather Locations
Feathers Locations 1-4
Unlocked: Sequence 3
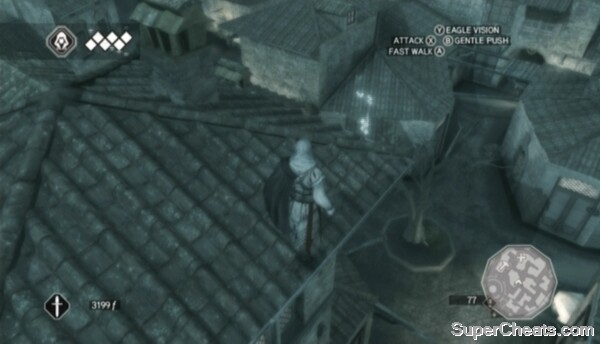
Feather Location (01/04)
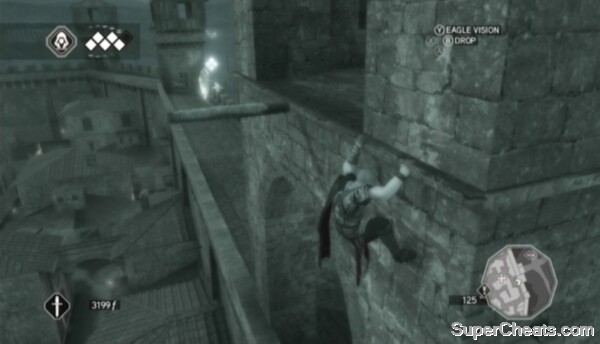
Feather Location (02/04)
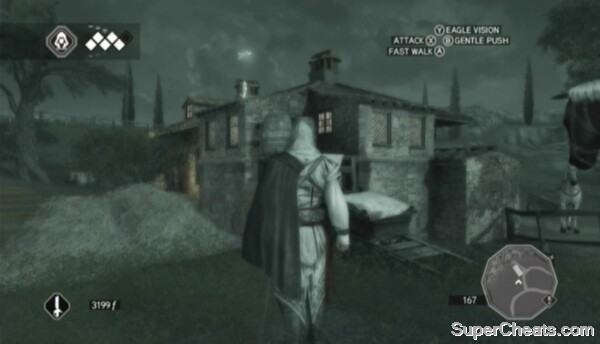
Feather Location (03/04)
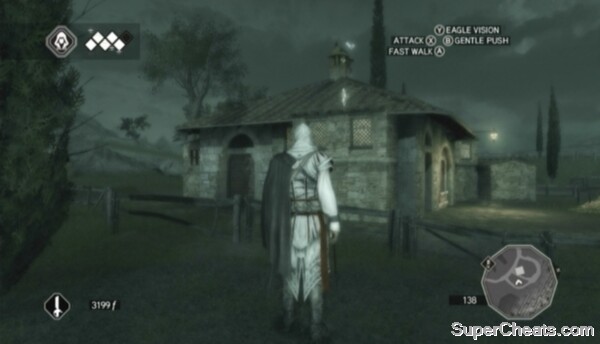
Feather Location (04/04)
Assassin's Creed II Guide - Feather Locations
Tuscany/San Gimignano Feather Locations
Feather Locations 1-11
Unlocked: After Sequence 3 - Memory 3: Practice Makes Perfect
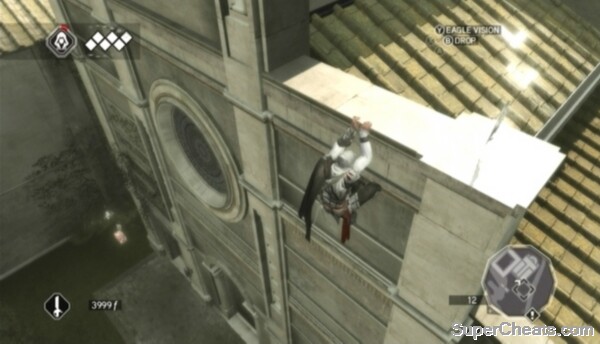
Feather Location (01/11)
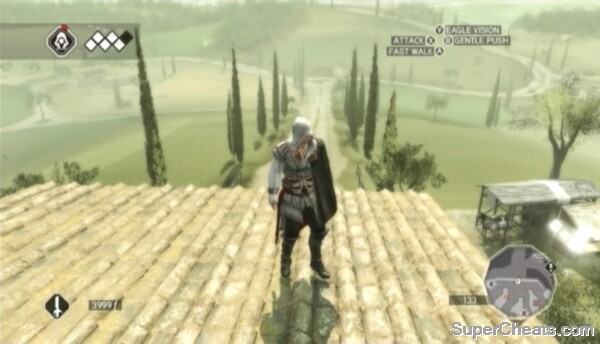
Feather Location (02/11)
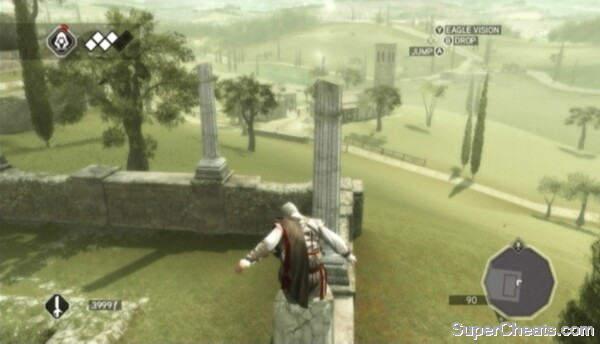
Feather Location (03/11)
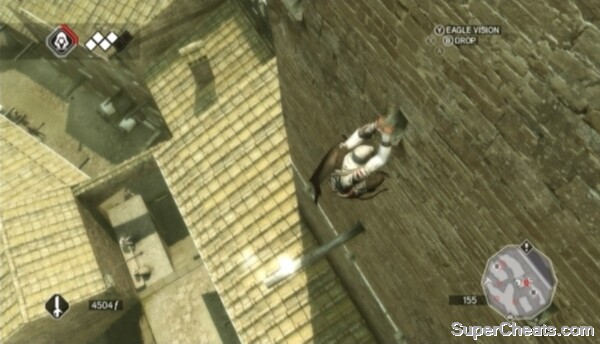
Feather Location (04/11)
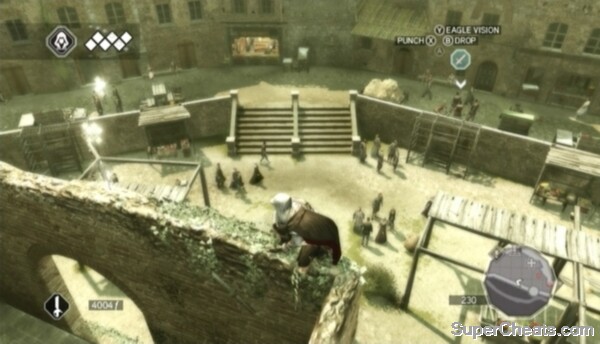
Feather Location (05/11)
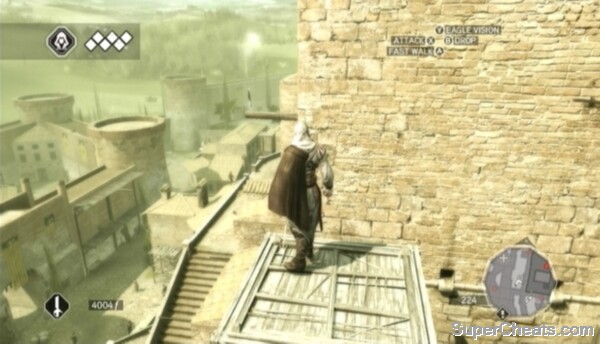
Feather Location (06/11)
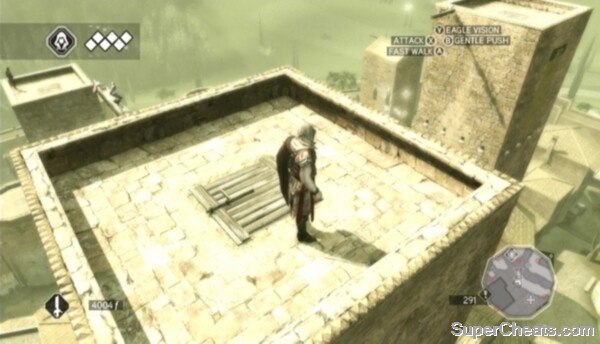
Feather Location (07/11)
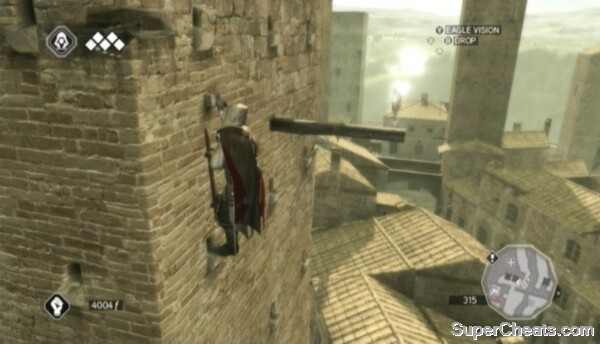
Feather Location (08/11)
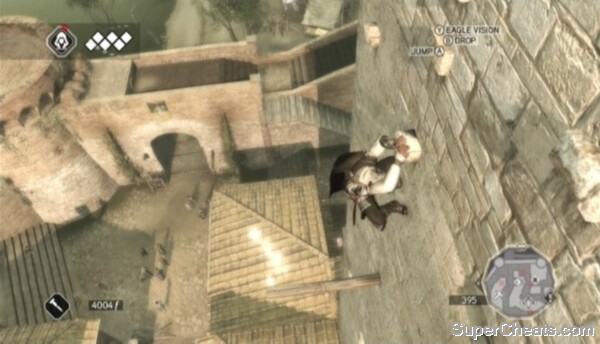
Feather Location (09/11)
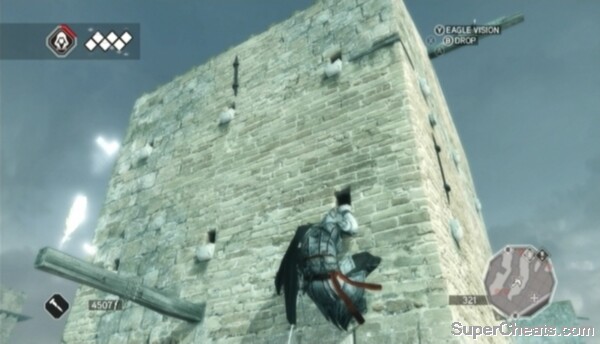
Feather Location (10/11)
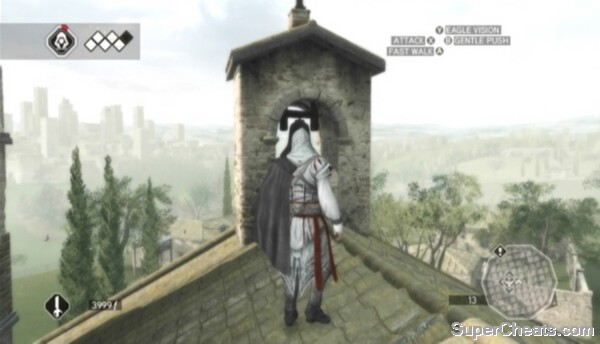
Feather Location (11/11)
Assassin's Creed II Guide - Feather Locations
Romagna/Forli Feather Locations
Feather Locations 1-12
Unlocked: After Sequence 6 - Memory 2: Romagna Holiday
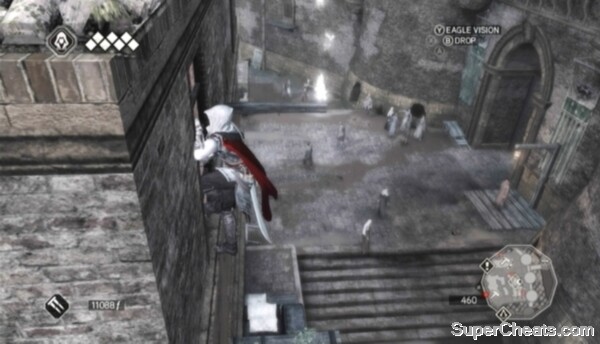
Feather Location (01/12)
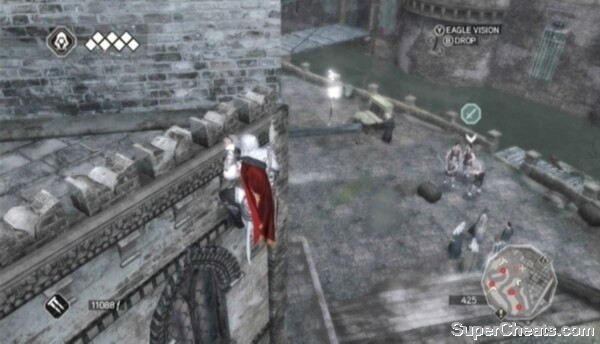
Feather Location (02/12)
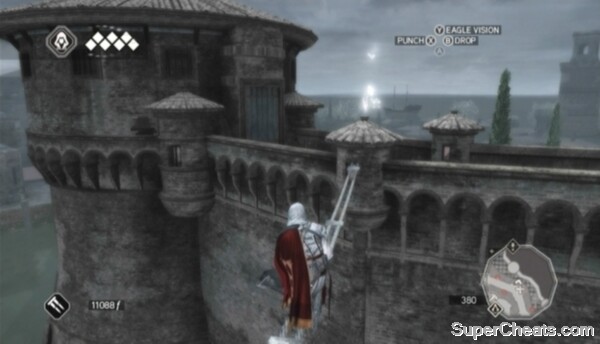
Feather Location (03/12)
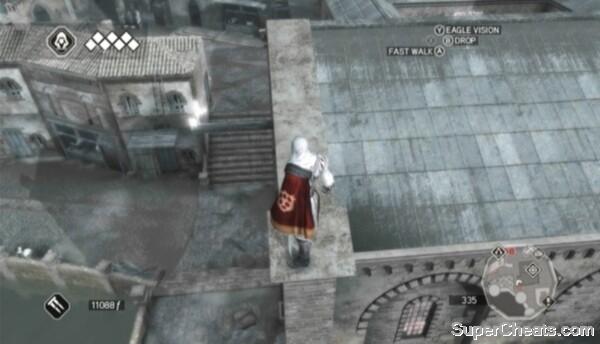
Feather Location (04/12)

Feather Location (05/12)
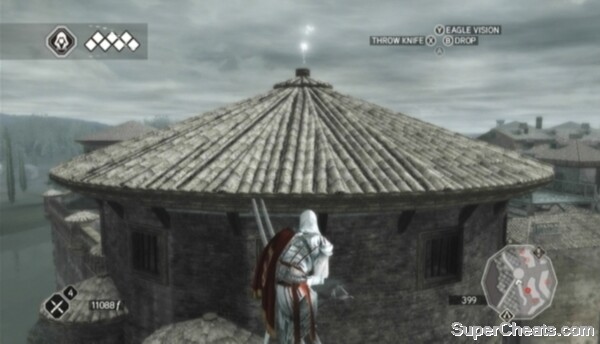
Feather Location (06/12)
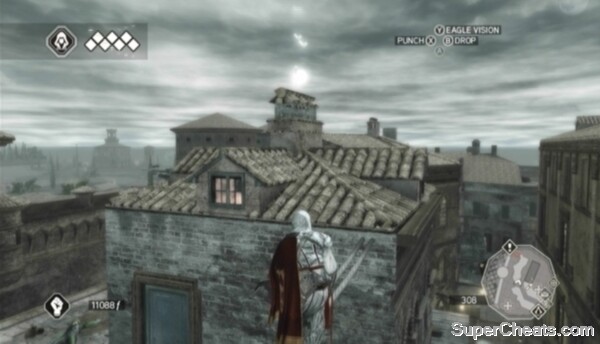
Feather Location (07/12)
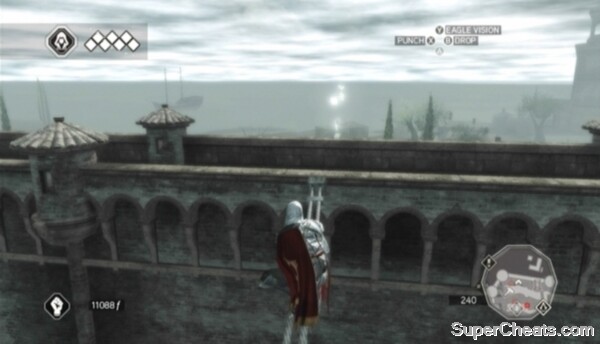
Feather Location (08/12)

Feather Location (09/12)
Feather Location (10/12)
Feather Location (11/12)
Feather Location (12/12)
Assassin's Creed II Guide - Feather Locations
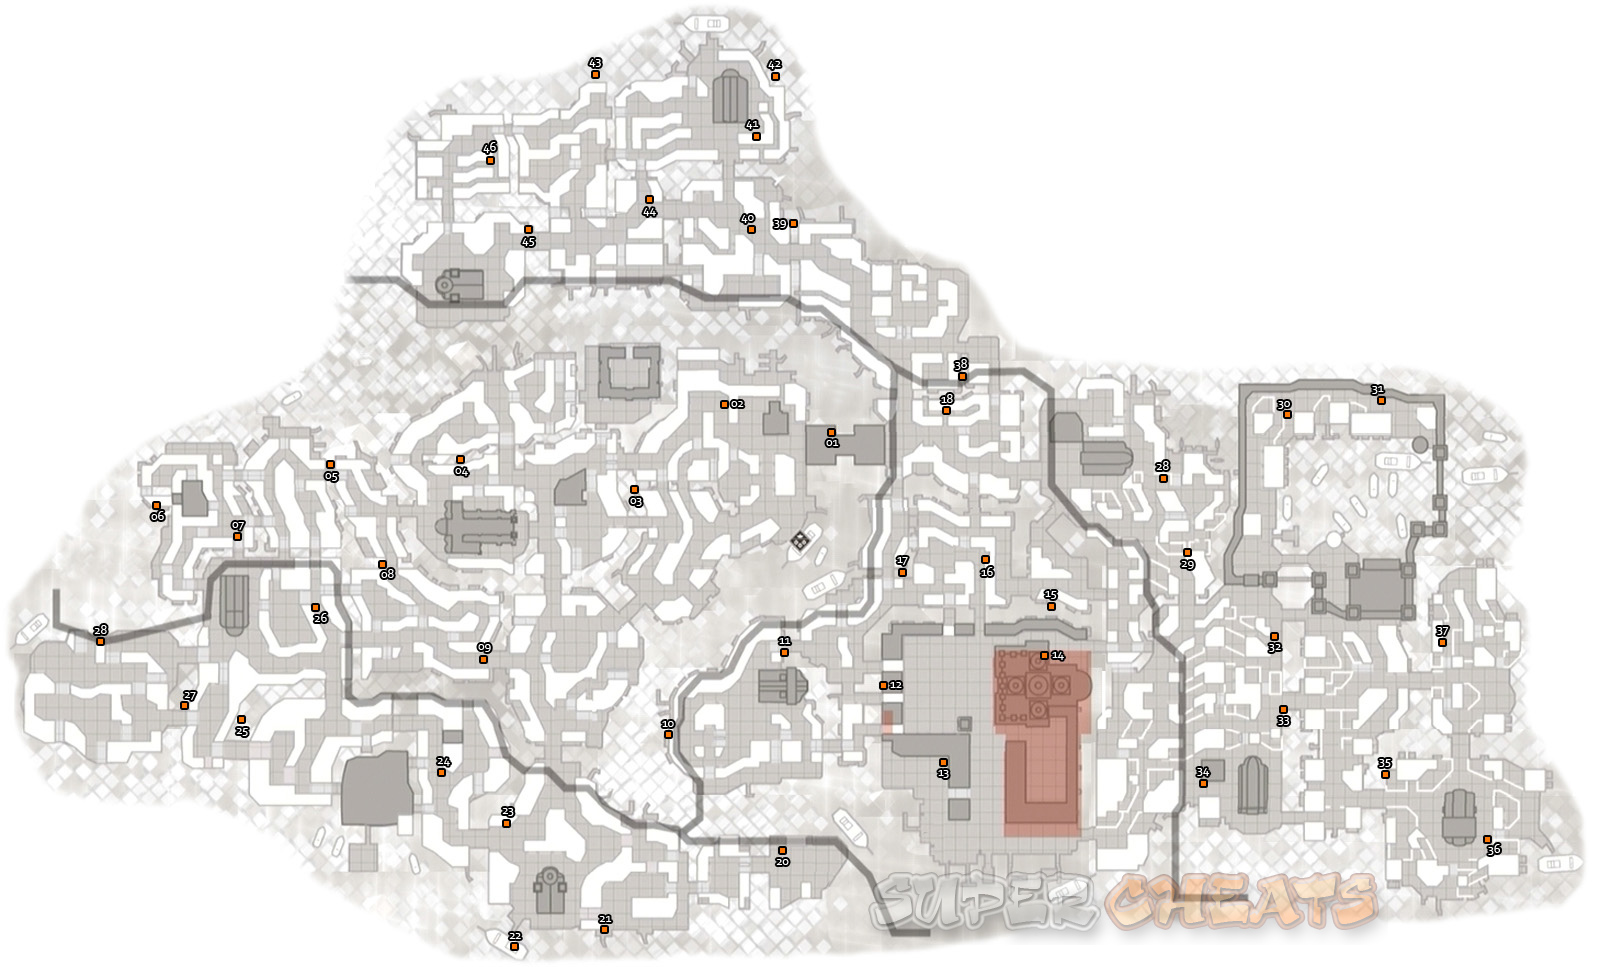
Click to Enlarge
Feather Locations 1-10
Unlocked: Sequence 7
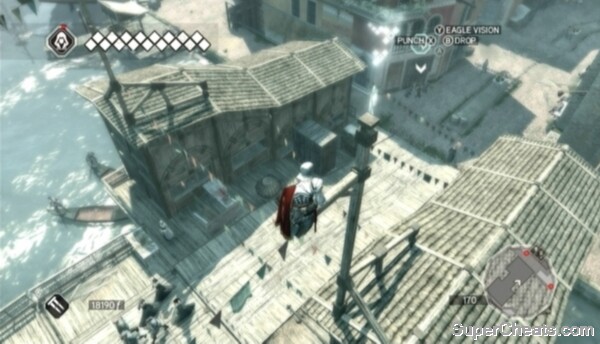
Feather Location (01/46)

Feather Location (02/46)
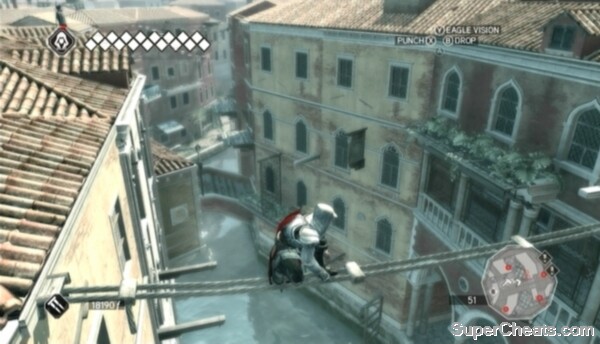
Feather Location (03/46)
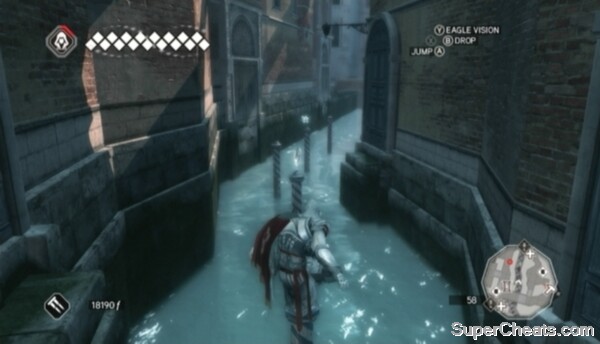
Feather Location (04/46)
Feather Location (05/46)
Feather Location (06/46)
Feather Location (07/46)
Feather Location (08/46)

Feather Location (09/46)
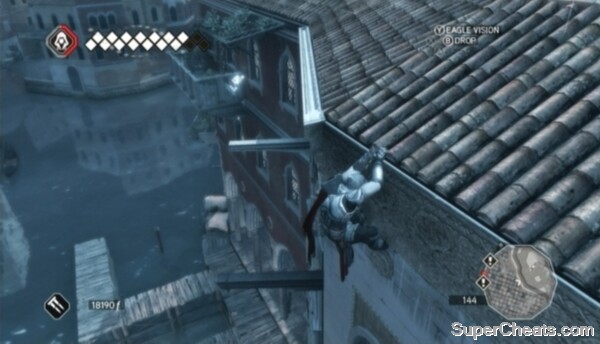
Feather Location (10/46)
Feather Locations 11-18
Unlocked: Sequence 8
Feather Location (11/46)
Feather Location (12/46)
Feather Location (13/46)
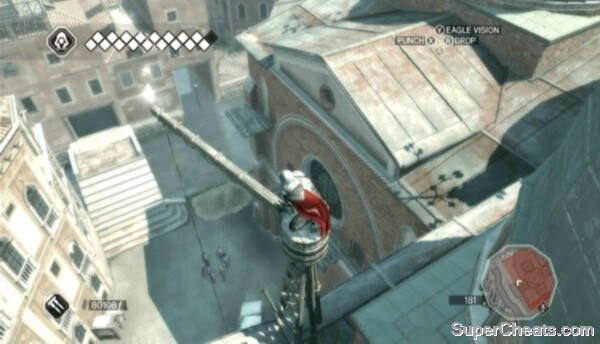
Feather Location (14/46)
Feather Location (15/46)
Feather Location (16/46)
Feather Location (17/46)
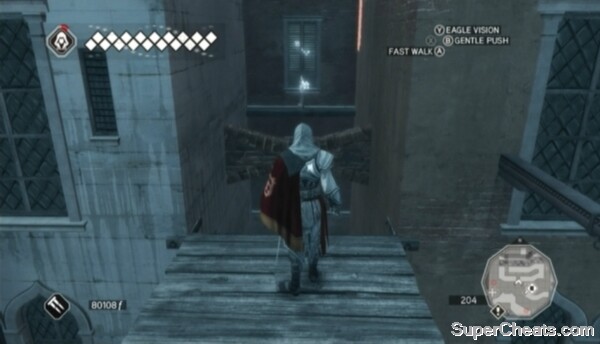
Feather Location (18/46)
Feather Locations 19-27
Unlocked: Sequence 9
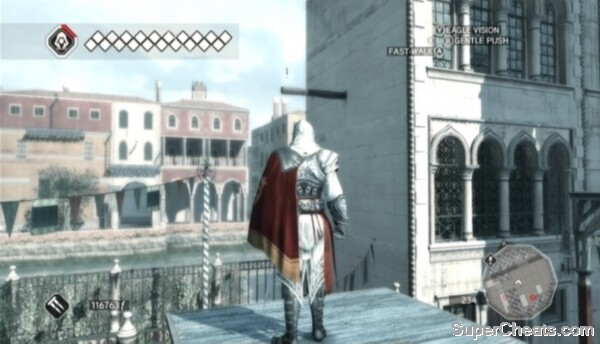
Feather Location (19/46)
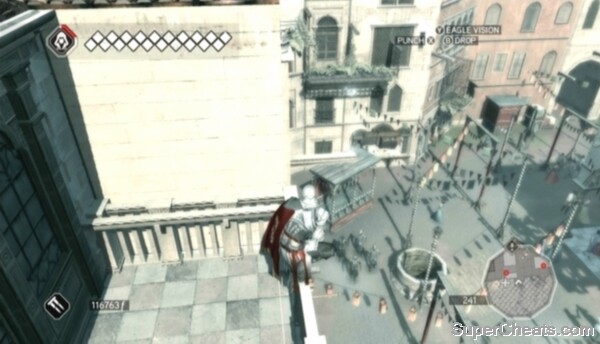
Feather Location (20/46)
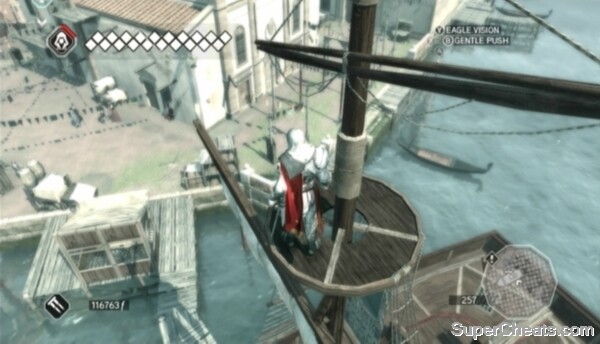
Feather Location (21/46)
Feather Location (22/46)
Feather Location (23/46)
Feather Location (24/46)
Feather Location (25/46)
Feather Location (26/46)
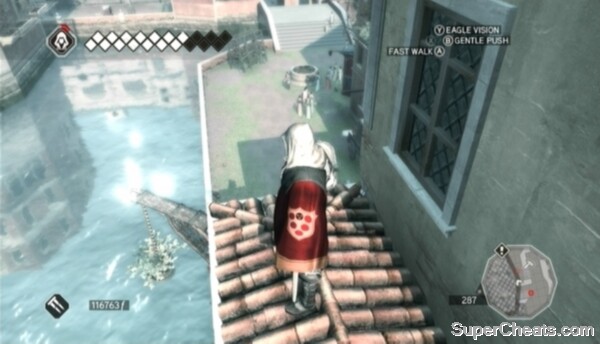
Feather Location (27/46)

Feather Location (28/46)
Feather Locations 28-37
Unlocked: Sequence 10
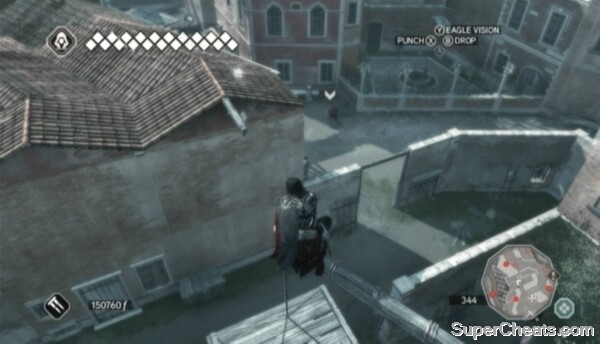
Feather Location (29/46)
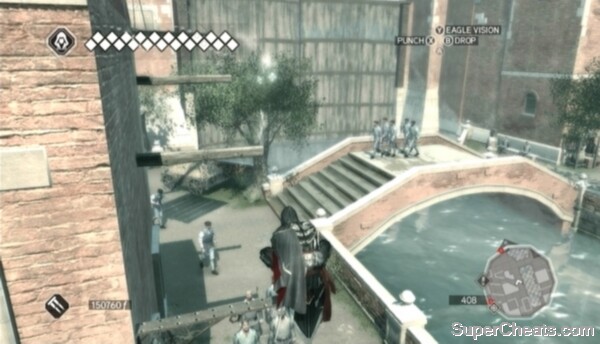
Feather Location (30/46)
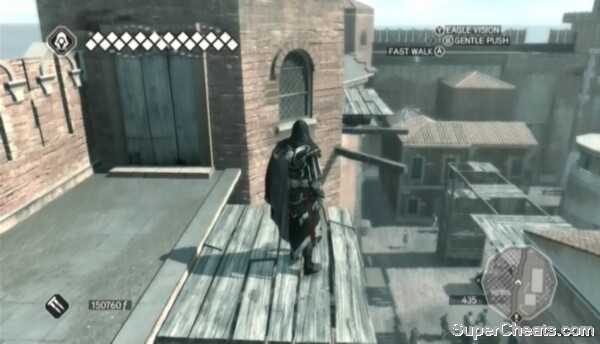
Feather Location (31/46)
Feather Location (32/46)
Feather Location (33/46)

Feather Location (34/46)
Feather Location (35/46)
Feather Location (36/46)
Feather Location (37/46)
Feather Locations 38-46
Unlocked: Sequence 11
Feather Location (38/46)
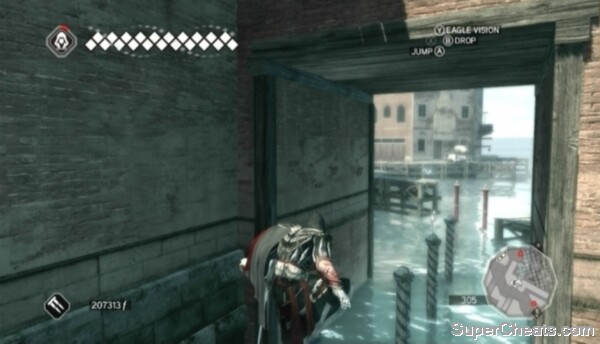
Feather Location (39/46)
Feather Location (40/46)
Feather Location (41/46)
Feather Location (42/46)
Feather Location (43/46)
Feather Location (44/46)
Feather Location (45/46)
Feather Location (46/46)
Assassin's Creed II Guide - Statue Locations
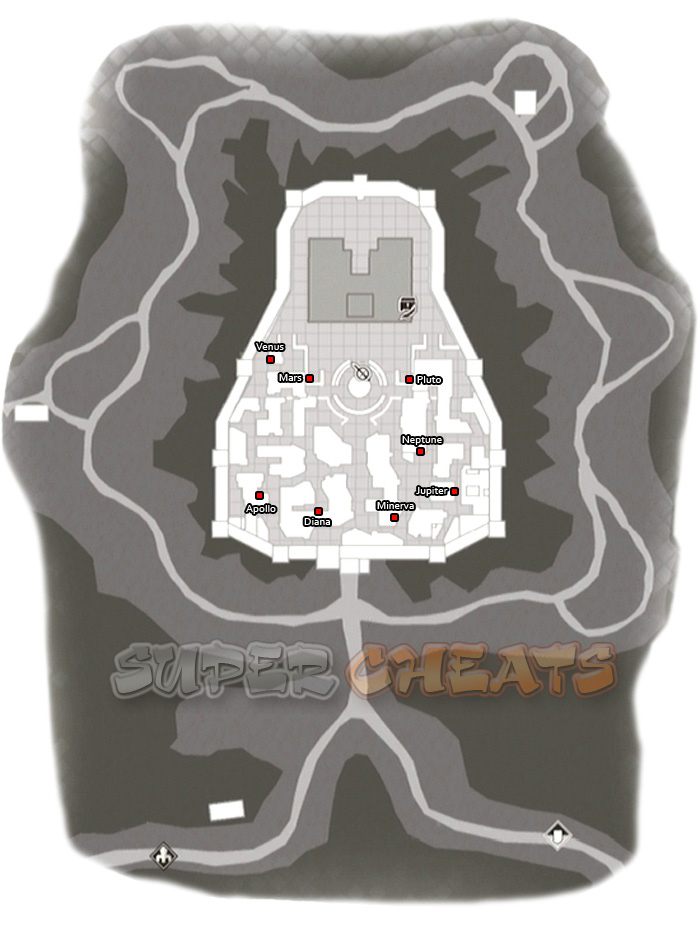
Monteriggioni Statue Locations
There are eight statues hidden in Monteriggioni. The statues can be placed on the four pedestals surrounding the Villa Auditore. Place two of the statues on one of the pedestals to uncover 2000 florins. Place all eight statues on the four pedestals to earn 8000 florins total.
Collecting all eight statues also unlocks the “Myth Maker” Xbox 360 achievement or PlayStation 3 trophy.
If you're having trouble locating a particular one, match up the text next to the marker with corresponding image below to pinpoint the location of that statue.
Venus
Mars
Pluto
Neptune
Jupiter
Minerva
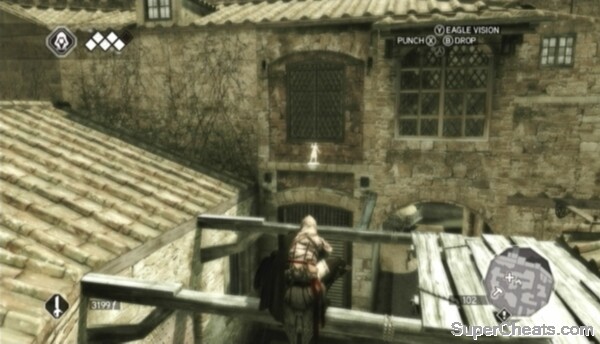
Diana
Apollo
Assassin's Creed II Guide
Twenty Glyphs have been hidden by Subject 16 in the Animus' recreation of late 15th century Italy. The Glyphs are the key to unlocking “The Truth” video. Glyphs appear on landmarks in the world. When you come across a Glyph, activate Eagle Vision while near it to load a Glyph puzzle.
There are five Glyphs in Florence, one in Monteriggioni, five in Tuscany, two in Romagna, and seven in Venice.
Use Eagle Vision to decipher Glyphs found on landmarks and then solve the puzzle to unlock a piece of Subject 16's video.
There are 20 Glyphs, and thus 20 Glyph puzzles. The puzzles aren't tied to particular Glyphs -- they follow a set sequence, regardless of the order you discover the Glyphs.
Unlock all 20 pieces of Subject 16's video to earn the “Vitruvian Man” Xbox 360 achievement or PlayStation 3 trophy.
Refer to the following sections for Glyph location maps for each city.
Assassin's Creed II Guide - Glyph Locations

Click to Enlarge
Ospedale Degli Innocenti
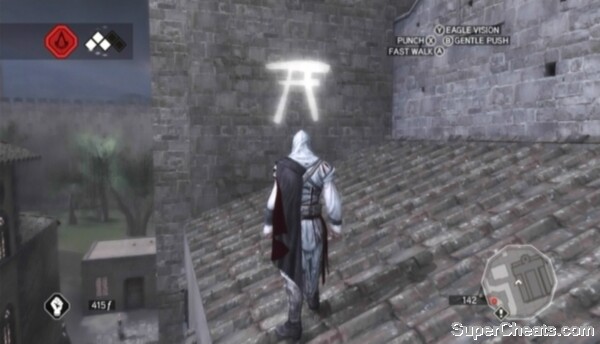
Santa Croce
La Rosa Colta
Sam Lorenzo
Mercato Vecchio
Assassin's Creed II Guide - Glyph Locations
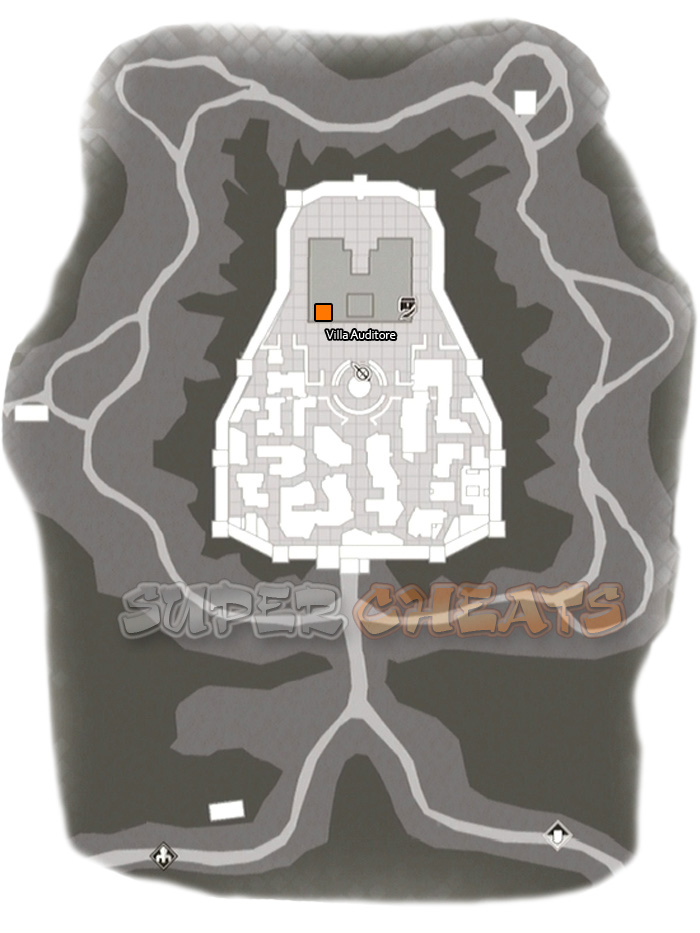
Monteriggioni Glyph Locations
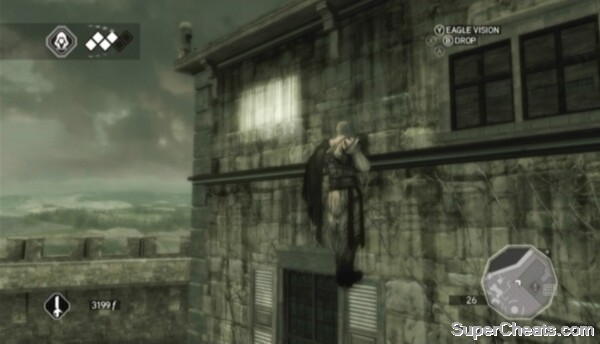
Villa Auditore
Assassin's Creed II Guide - Glyph Locations
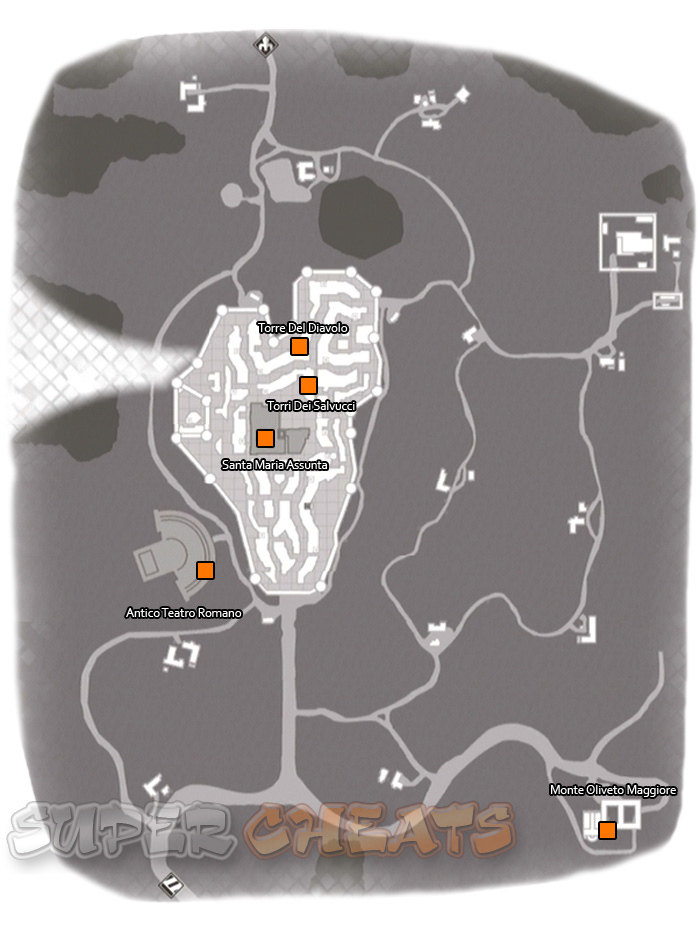
Tuscany/San Gimignano Glyph Locations
Torre Del Diavolo
Santa Maria Assunta
Torri Dei Slavucci
Monte Oliveto Maggiore
Antico Teatro Romano
Assassin's Creed II Guide - Glyph Locations
Romagna/Forli Glyph Locations
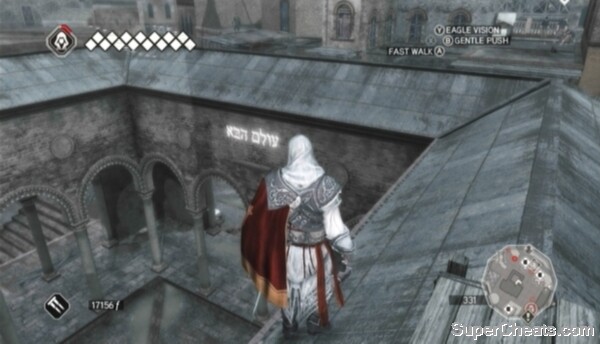
Abbazia Di San Mercuriale
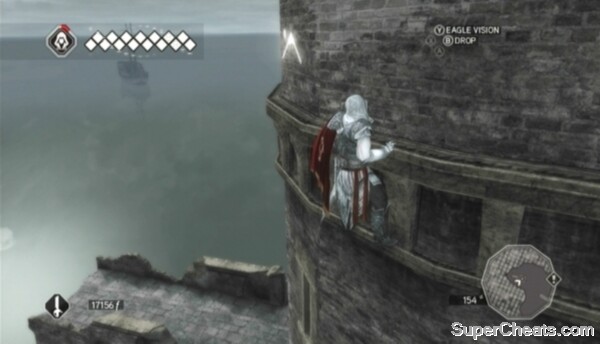
Avamposto Veneziano
Assassin's Creed II Guide - Glyph Locations
Click to Enlarge
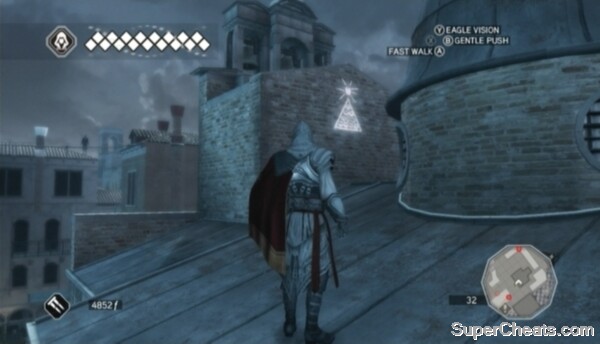
San Giacom Di Rialto
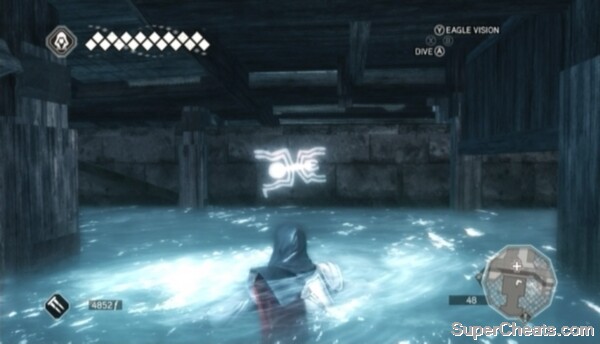
Ponte Di Rialto
Gilda Dei Ladri Di Venezia
Torre Dell'Orologio
Campanile Di San Marco
Scoula Grande Di San Marco
San Pietro Castello
Assassin's Creed II Guide
There are 20 Glyphs, and thus 20 Glyph puzzles. Completing the Glyph puzzles is the key to unlocking “The Truth” video.
The puzzles aren't tied to particular Glyphs -- they follow a set sequence, regardless of the order you discover the Glyphs.
Unlock all 20 pieces of Subject 16's video to earn the “Vitruvian Man” Xbox 360 achievement or PlayStation 3 trophy.
This section offers a pictorial guide to solving each Glyph puzzle.
In the Beginning
Select these paintings.
Sixty-Four Squares

Complete the picture.
Complete the picture.

Complete the picture.
Descendants
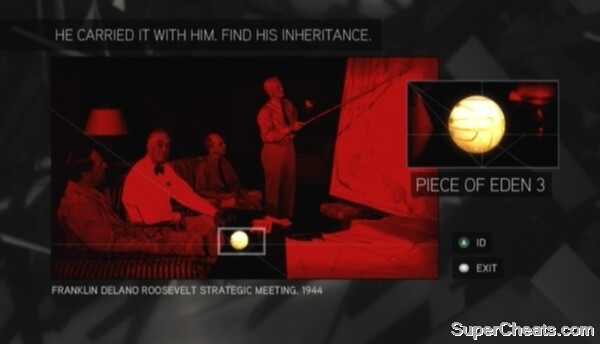
Find the Piece of Eden.
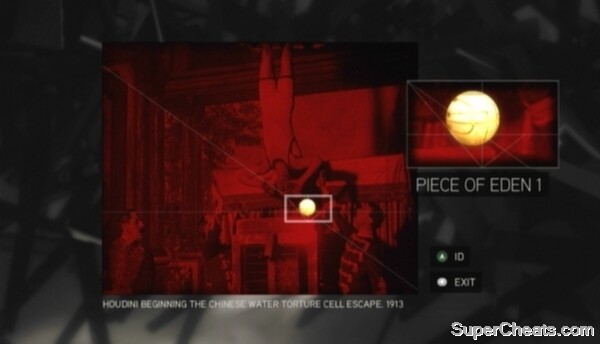
Find the Piece of Eden.
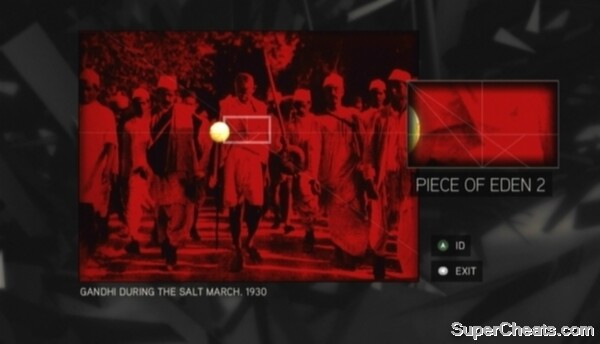
Find the Piece of Eden.
Infinite Knowledge

ID the bazooka.
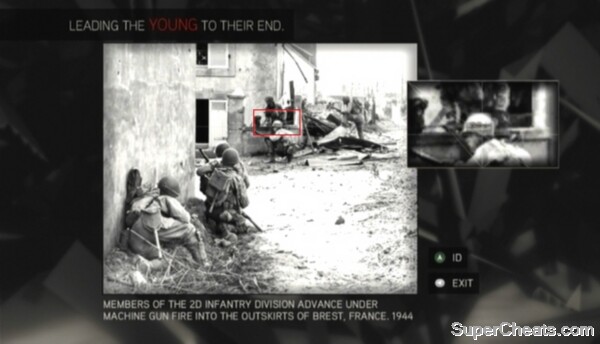
ID the young soldier.
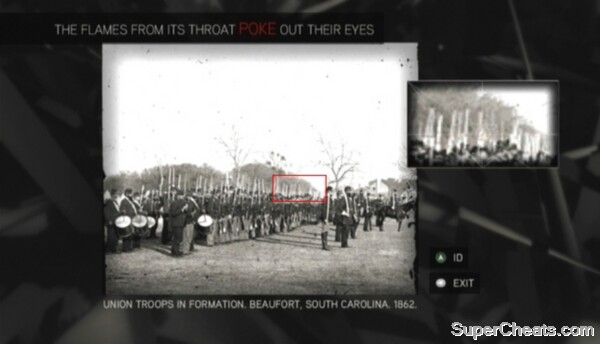
ID the guns.
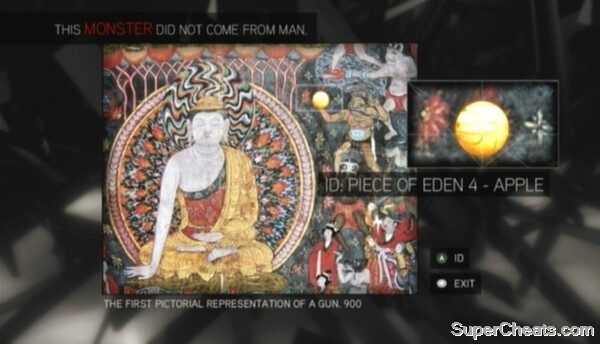
Find the Piece of Eden.
Instruments of Power
Select these paintings.
Select these paintings.
Brothers
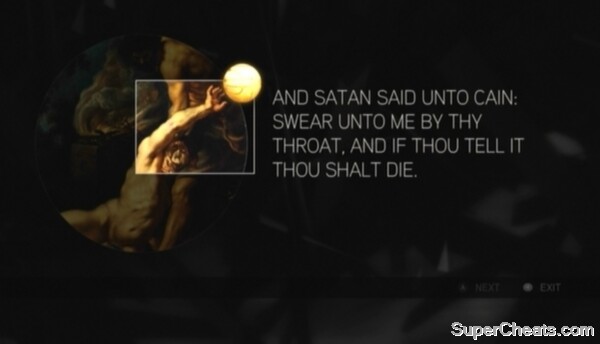
Complete the picture.
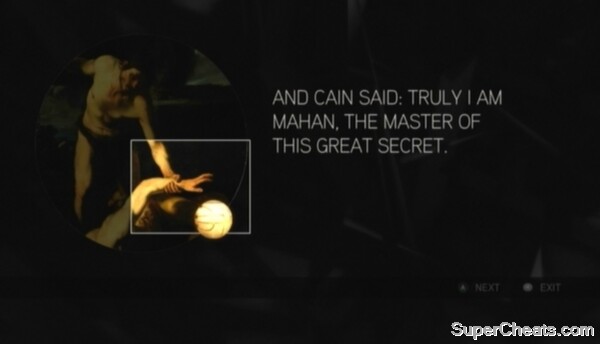
Complete the picture.
Complete the picture.
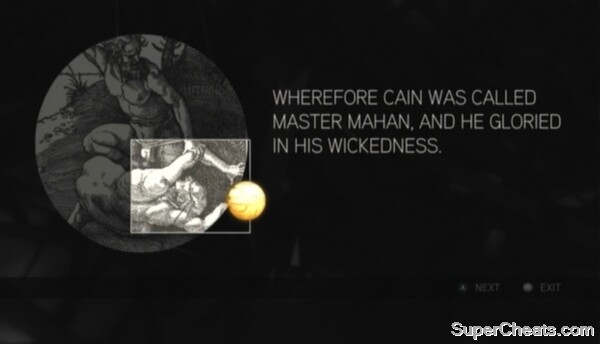
Complete the picture.
“Keep on Seeking, and You Will Find”
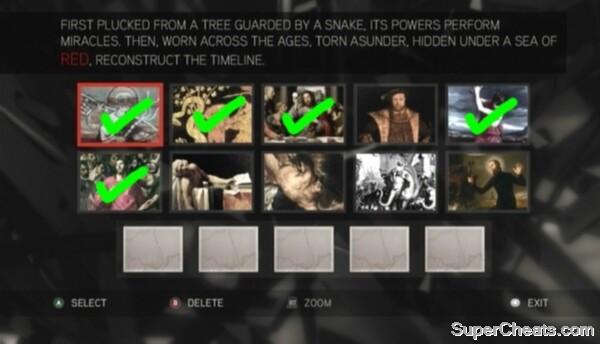
Select these paintings.
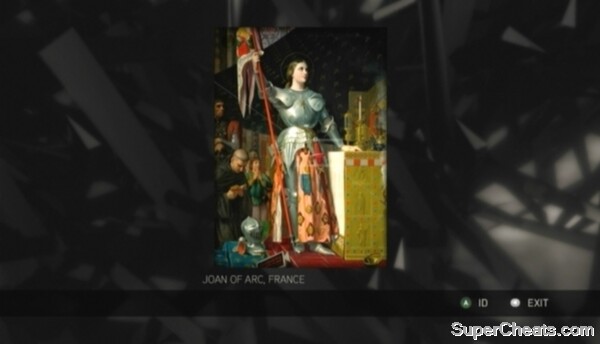
ID the Shroud.
Martyrs
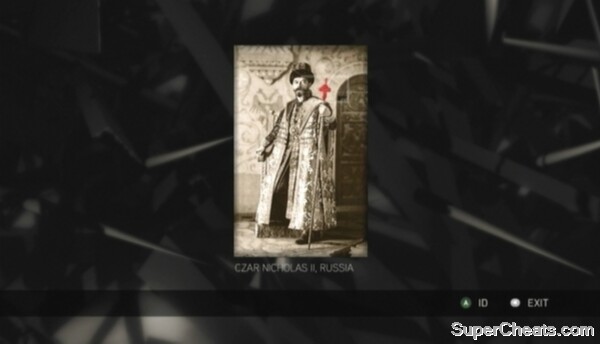
ID the staff.
ID the hilt of the sword.
Move the fire to Joan of Arc.
Move the photo of Rasputin to the photo of Czar Nicholas II.
Hat-Trick
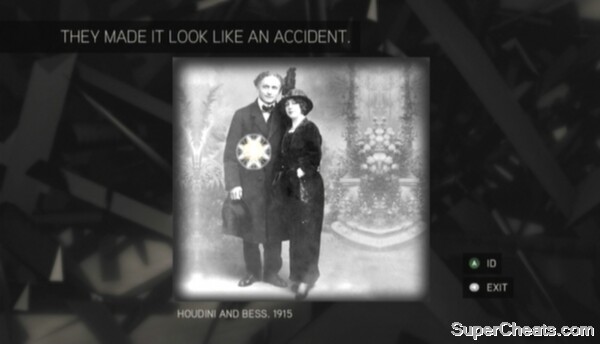
ID the Piece of Eden.

ID the Piece of Eden.
Enter password 312.
Apollo

ID the craft.

Complete the symbol. Tip: Make sure the inner-most moveable disc remains lined up with the white, unmoveable center.
ID the Piece of Eden.
The Inventor

Move the cursor over each light bulb.
ID the windows above the entrance.
ID the Piece of Eden.
Titans of Industry
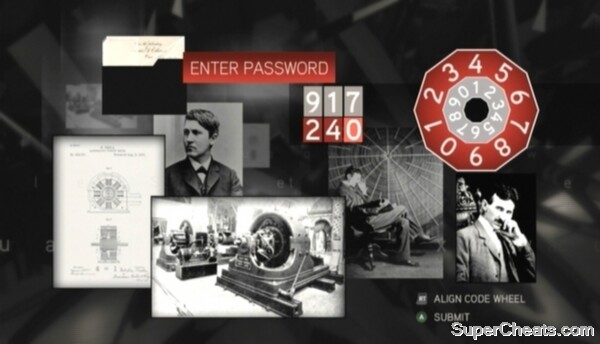
Enter password 240.

Move the cursor over each light bulb.
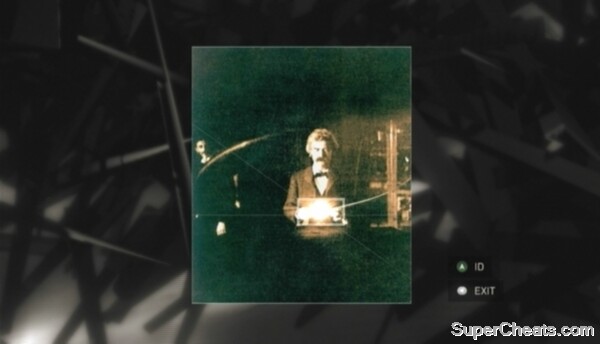
ID the Piece of Eden.
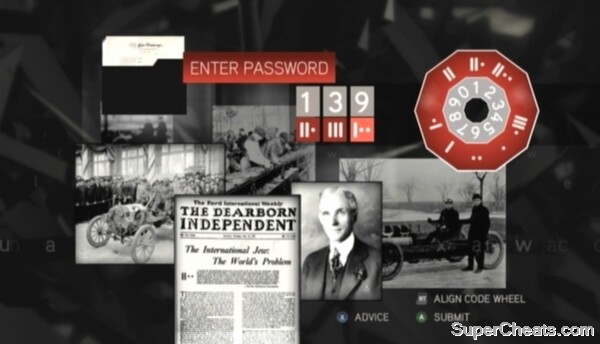
Enter the above password.
“I Am Become Death, The Destroyer of Worlds”
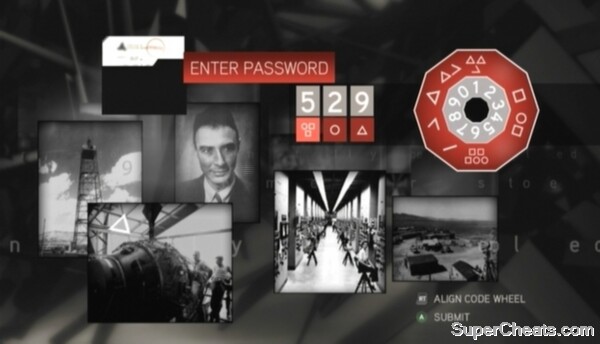
Enter the above password.

Move the cursor over the button.
ID the passcode.
Bloodlines
Select these paintings.
Guardians
Complete the picture.

Move the cursor over each target.
The Cavalry
Move the cursor to Tunguska.
Move the cursor over to the staff.
Move the staff over to the photo.
The Bunker
Enter the above password.
ID the Assassin symbol.
Synapses
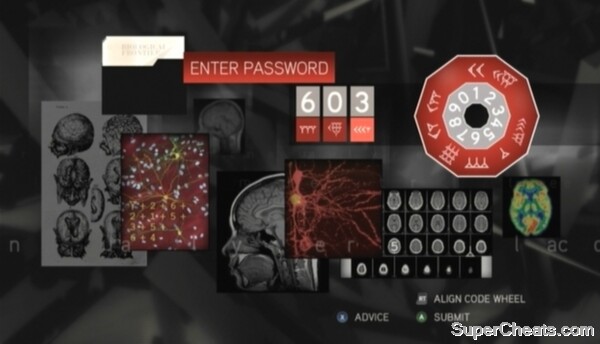
Enter the above password.
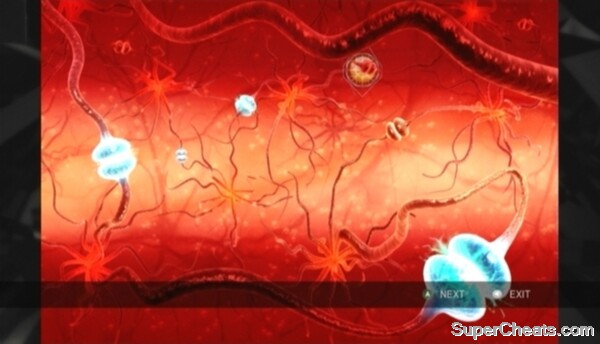
Move the Piece of Eden over each synapse.
The Fourth Day
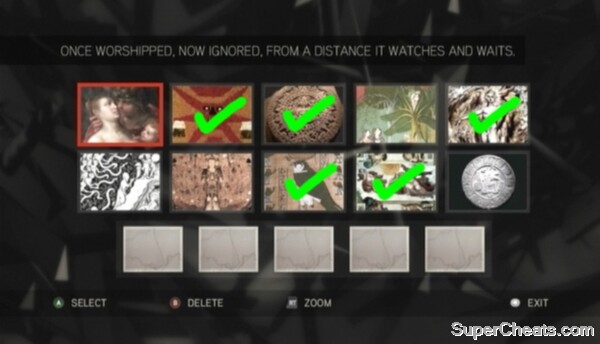
Select these paintings.

ID Earth.
The Origin of the Species
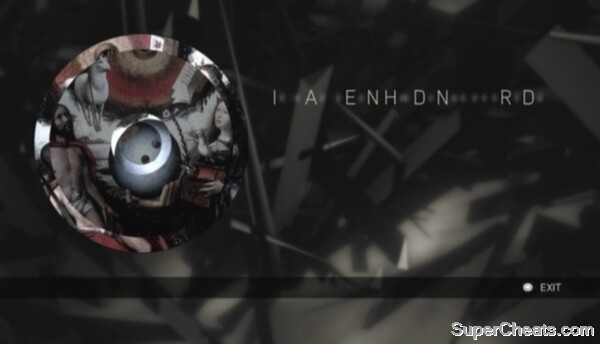
Complete the picture.
Enter any password.
Move the Piece of Eden onto each part of the monkey skeleton.


 Destiny: The Taken King - How to use and charge the Agonarch Rune
 How to fix The Game of Thrones PC Key Re-Mapping Issue, Graphic Issues, FPS Issue and more
 How to farm Souls in Dark Souls 2
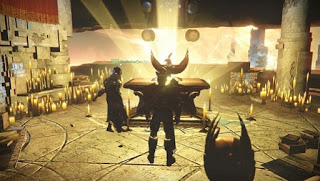 Destiny: how to Get Etheric Light to improve weapons and armor
 We Cant Call It Journalism, Previews Are Marketing (Re: Destiny)