Unoffical guide by Chris Boots-Faubert for
Army of Two is a third-person shooter with a focus upon teamwork, and was designed to be played by two human players, though it can be played solo, with the A.I. controlling the second character. Army of Two: 40th Day is the sequel to the original game, Army of Two, and takes place after the events of the first game. Before you jump into the game, if you review the Achievement/Trophy list you will notice that there is one for creating and wearing a custom mask in the game. To earn this one you have to do a few things outside of the game first - register with EA (if you have not already done so) and link your Gamertag or PSN ID to your AO2:FD account. You start by picking the mode - Solo Campaign - and your character - I chose Tyson. Next you decide the difficulty level you will play - Casual, Normal, and Contractor. I went with Normal for the first play-through - if you plan to get most of the Achievements / Trophies you will be making two complete play-throughs of this game. The game begins with you and your partner standing on Nanjing Road in Shanghai dressed in casual clothes - very casual, as in you do not have your gear with you. This is a bit of a tutorial in which you will learn how to change the camera side, move, and all of the other commands that are good to know if you want to play the game.
As you proceed down the street look to the left for a butcher shop - on a table outside is the first radio message (Radio 1 of 14) you need to collect - it looks like a radio and is pretty obvious. You can listen to the logs you pick up from the pause menu - and you should since they fill you in on events in the city. As you move further up the street you will run into your Contact - JB - the bloke you are supposed to meet - and he will lead you along a route that includes more commands for you to learn like jumping, crouching, and taking cover. Your contact takes out a patrol, and then you learn that he is a past SSC Operative. He delivers your gear to you, with apologies, and you kit up. If you did the custom face mask do not panic when it doesn't appear in the CS - that is canned video, and once you get control of your character back you will be wearing the correct mask.
Your first task is to place beacons - so turn on your GPS unit and follow the path on the ground to the nearby breakout boxes - you and your partner attach the beacons together there. As you continue along the street JB does the gate opening duties for you - and when you reach the second gate he wants you to take out the pair of alarm boxes on the other side of the area. Basically this is your aiming tut, so go ahead and do that, and then use your A-button to sprint - and you have now learned most of the basic commands! On the elevator you will be informed that mobile weapons drop can now be called in as needed - if you played the first Army of Two game you already know about that - if not, you will learn about it soon. The next thing that happens is you are instructed on how to do weapon customization - hold the Y-button and select Weapon Customization to do that - but it takes money to do this, and some of the weapons are not unlocked yet, so your options are pretty limited right now. Your contact Alice lets you know that a new objective has been added but not precisely what it is - explaining that she needs to check on it and get back to you. JB gives you a mini-tut on your mask tech, and you are instructed on how to tie an enemy up. JB warns you that there will be enemies ahead, and mentions that the rest of the beacons need to be placed above. Hit the stairs and sneak around the corner above and either take-out or tie-up the two cops here. I chose to tie them up, since I am working on the Achievement for that, but you can do what you like. Remember that there are other Achievements and game path options that depend on the moral decisions that you make, so you may want to consider that.
As you approach the second beacon spot look over the rail and to the right on top of the raised roof in the corner - see that white and gray cat (Neko Cat 1 of 12) waving at you? Right! That is the first cat you need to shoot - so shoot it! After you place your second set of beacons you go outside and have your first firefight - this is more of the tut basically and the aggro system is explained to you. You can play with your sniper rifle here and your other weapons just to get used to them, but once you pull enough aggro your partner will go down below and mop-up the resistance rather quickly. Move down and across this area to the elevator grate and assist your partner in opening it, and once you pass through and along the hallway here, the Co-Op Choices system is explained to you - and then you exit the building and JB asks you to cover his back while he completes the assignment - and Alice contacts you with some additional information. The extra task for this contract is to eliminate JB - and you have to decide if you are going to do that or not. If you choose to kill him, you get a CS in which you do that, and the Achievement/Trophy Pessimist. If you choose not to kill him, you get a CS and the Achievement/Trophy Optimist. If you want to earn both of these, pick the one you do not want attached to your play-through and get it, and then re-load your last checkpoint and do the one you want attached to your play-through. As the mission ends you get treated to a graphic-novel like set of images for the transition that tells the story of what happened after this point - if you chose not to kill JB you see the last few weeks of his life... And his death at the hands of an assassin. Bummer. Next you get a CS in which you learn what those beacons were for. Man, I was not expecting that!
You need to get off of this roof and out of this building - but the incoming attack and the damage to the building are the least of your problems at the moment - as you head through the damaged wall to the exit door grab the radio on the table (Radio 2 of 14) - look for its glowing dial. Now help your partner open the grate and you see in the CS that there is an entire squad of masked mercenaries and you are their assignment! God I love this game! When you take out the bad guys do not forget to pickup anything that they drop - like money and kit - and keep your situational awareness hiked - staying frosty means not taking a round, and that is always a good idea. After you take out the leader you get prompted about Supply Crates - and look! There is one ahead! May as well resupply now, as we have to hook up with Murray at the South African Consulate. Now that you have resupplied, head over to the wall and do your first boost in the game, scope out the level above and then help your partner up. A few steps later and the world explodes into conflict as you deal with another squad of merc's. As you move through the area you will have a few opportunities to feign death, and do some creative kills - hey this is black op's, so have some fun with it! Remember that building we were in a little while ago? Bet you are glad you are not in it now! Working your way through this area without getting hurt takes some patience and good form, so try to take the bad guys out strategically - don't just spray-and-pray and remember that you have grenades now. When you reach the next set of stairs there is a bloke below in an armored gun emplacement - a head-shot is the best way to take him out. I used the pistol :)
Now before you go any further, look up above the area where the mounted gun is and on top of an HVAC duct is the second cat (Neko Cat 2 of 12) - go ahead and shoot that now, right? Mounted Guns: These are a good way to take control of aggro and maintain it so that your partner can flank. They are also a good way to kill the bad guys if they cooperate but as they usually do not, not so much. Bear in mind that you need to keep an eye on the heat level for the weapon. As you fight your way to the next level down you will encounter another squad and a second mounted gun - this one is not positioned for an easy take-out so you may want to use your sniper rifle to kill the guy using it. Once you have done that, taking out the rest of the squad is actually pretty easy, so do that and then head for the next door you need to open co-op style. As you arrive at the door you will get another update from Alice - the consulate is being raided, and she would really like it if you two hurried up!
In the next area you are confronted with your first Civilian/Hostage rescue situation, and the game gives you some advice on how to deal with this. Taking the commanding officer hostage really is the best way to handle this situation - but you need to be stealthy as you do it. If you screw up go ahead and load the last checkpoint to try it again if you like - that will put you back to the stairs just before the CS with the civilians. Sneak down and hit LB to take the leader hostage - he is the guy closest to your position on the stairs with the higher chevron rank. Once you have him in a neck-hold you will order his minions to their knees and they will comply. After that it is just a matter of tying up the bad guys and getting praise from the civilians - they will probably want to invite you to come home for a scratch-made diner of local delicacies but alas, you just do not have the time! Actually, that is probably what they would do... I spent a month in Shanghai when I was working for a company that engineers and installs satellite uplink/downlink stations, and getting invited to a home-cooked meal was pretty common as a way to indicate appreciation. The food is amazing there and the people are also pretty special - though they pull out all the stops when it comes to food, so bring your appetite and remember, in a situation like this even if you are a vegetarian you are NOT one for that meal, because saying no to food they went to a lot of trouble to make is an insult in that culture. Once you have secured the bad guys, walk over to each of the civilians and hit A to "save them" and collect your reward - which in this case is cash. When you rescue people in the game their ID cards are added to that section in the pause menu, so you can see who they are, how old they are, and where they are from. Mind the area below your level, as additional PMC's will pop out there and start shooting, so you should kill them quickly. As you exit you get a brief CS with more missiles hitting buildings - including the building that Murray is in - and the floor that you need to reach is highlighted. There are some shields that can be picked up to use as team cover here. When you reach the fence boost your partner over so he can open the gate - the controls for it are on the other side - and then follow him into that area.
In the shack through the gate is a barrel with the next radio log (Radio 3 of 14) on it so be sure to grab that after you kill the bad guys. When you reach the stairs nearby you get a lengthy CS in which a heavily armored shotgun toting enemy is the focus - and then you engage him and his minions. Aiming for head-shots on this guy is the quickest way to bring him down, and then you can grab his shogun if you like. As you arrive at the elevator you reach the end of the chapter - so hit the B-button to finish this up and grab your first story-based Achievement/Trophy. The end of the chapter also gets you the stats for your play, including the number of cats you collected (shot), your best time for the chapter, kill count, and reputation at the end. A note on the cats - these are one of the collection items in the game - if you missed them it is no big deal, you will be playing this a second time, and can pick up any that you missed at that point. You begin this level in the elevator - you get a CS showing the enemy nearby, and then you get to kill them! A nice explosion gives this floor the feeling of an open-air atrium, and you get to fight your way through the desk farm to the other side, where at one point a body comes raining down. There are plenty of enemy to kill in close quarters, and eventually you work your way to a set of stairs that lead down to a metal grate you have to co-op lift. On the other side you go around a corner and get the Mock Surrender tut - go ahead and follow the instructions here.
When you do this you get a bullet-time effect and the pleasure of some nice slo-mo head-shots! Once they are dead, note the Radio (Radio 4 of 14) on the left desk - go ahead and grab that now! Move through the door down the hall and around the corner for a checkpoint save, and then head up the ramp here for a CS and tut on issuing orders to your A.I. Partner. You are then treated to another CS of two buildings coming down and some choppers in the air before control of your toon is returned. At this point you and your partner will split up - you are about to take on a large number of enemies who are all over the place so just use the cover and carefully take out the enemy you encounter, giving priority to the RPG merc's as they can actually kill you pretty quickly.
As you work your way down the shattered roof past the lit Chinese neon sign and then down further you approach where you re-enter the building. Before you enter stop and look up to the right to spot the next Cat (Neko Cat 3 of 12) for you to shoot. After you enter the building you go down a flight of stairs and get a CS in which you do a bit of bragging and then you jump across a gap in the stairs. Head down to the next level and you'll see a soda machine that somehow still has power - nice cold drink budeee! Down the hall is a door, and when you kick it open an enemy tries to grab you as a meat shield but your partner takes him out with a clean head-shot and you are back in business. Through this room is a drop-down and another pair of soda machines - and some more bodies. At the end of this room you spot two PMC's about to execute some more hostages across the large gap in the buildings. This is where you get the tagging tut, so go ahead and use GPS and tag the guy on the right, then use your sniper rifle to take-out the guy on the left. Nicely done! There is a boost-point next to you but after your partner boosts you up the floor collapses beneath him! You are going to have to hook up later it seems... Fight through the cubical farm and pass another soda machine and head down the ramp here, loop around and take-out the bad guys, and then down another ramp and another group of bad guys. Down the next ramp you confront a mounted gun and some shield toting merc's - go to the desks to the right and lob a grenade in to take out all of them in one go! As you move past the mounted gun you reach a gap where you push down a section of wall to make a bridge - as you cross make a sharp left turn and head through the hole in the wall as your partner joins you.
Just inside here is another boost point, and once you are both up, head into the room on the left and take out the bad guys, and collect another Radio (Radio 5 of 14) sitting on the desk here. There is a supply crate here and you get an update on Alice. Exit this room through the door and drop down to a flight of stairs, climb those and you will enter another part of the building and into the security office where you get a CS and find the armory here. A Security Guard shows up and points his weapon at you - this is another moral choice point - take his weapon or shoot him.
There really is no graceful end to this encounter - and after it resolves wither way you get a graphic CS and then you hear someone nearby begging for their life. Down a short hall and at a door you hear a merc explain to the hostage that he is about to execute that the man's name is on the list - not a good sign really - but hey, you gotta rescue him, right? With that done, a squad appears at the other end of the room for you to engage and kill - which you do - and then you move into an open area with more enemy units. At this point your partner picks up a shield - you can choose to do the shield thing or branch out on your own and selectively prune this crop of merc's - that is what I did. Follow your partner through the nearby door and up the stairs - you should be approaching the level with Murray now. At the end of the hall is a security gate you co-op lift, and inside a short CS shows you her location. Move in and take down the three merc's that are a direct threat to her, and rescue her. At this point there is a little dialogue but nothing important is said - and then another squad of merc's attacks. You will be a little busy taking them out - hopefully quickly - and then you move back towards that large atrium like room. A lot of things happen at once now - Murray tells you that she will use the crane to lower you to the ground level, but as you enter the open room an enemy helicopter appears outside, and is hit by an RPG. The pilot loses control and crashes it into your building, and Murray yells to you that the helo cleared the way and you should make for it. There is a pair of heavy armor merc's on the stairs on the way down so go easy there. Once you reach the floor below, move across the room towards where the helo crashed, taking out the bad guys as you progress, then enter the room there and drop through the floor, and then pause for a moment while Murray tells you what she knows. Once she is done filling you in, move through the last two rooms to the crane platform and Murray will lower you down. Her plan is to find someplace to bunker down and wait out the attack while you do what you do best.
Basically what this is is a modified bullet-time section - the entire time that you are being lowered on the crane time is slowed - but it is not as slow as full bullet time. The object is to take out the large number of mercenaries on almost every floor on the way down - but this is made easier by the fact that your weapon ammo is now in infinite mode and there are lots of red explosive tanks for you to shoot to take out more than one enemy at a time. Have some fun with this - it is literally a moving shooting gallery! You should probably give some priority to the RPG mercenaries, but other than that, go for the Hollywood style effects right? Once you get to the lower levels, you actually end up being lowered through the building, and at the bottom an explosion opens an exit for you. You exit out onto a section of elevated highway - and there are enemy here to be killed. As you move along the highway here you will notice that the enemy here seem to cluster together a lot. This is a good opportunity for you to pick up the Pumpkin Patch Achievement / Trophy for shooting two enemy in the head with the same bullet. Basically you get several chances to do this if you flank the enemy positions behind the Jersey barriers.
You will reach an ambulance that is blocking your way here - and you co-op push it down the ramp and engage the enemy below. This is a good time to pull out your sniper rifle and use it to good effect. As you reach the road below you will notice a green highway sign with a cat face on it - immediately to the left of the cat face is another one of the Cats (Neko Cat 4 of 12) that we need to shoot! Now clear out the rest of the mercenaries here, and proceed down the road.
You will now get a brief CS that shows you a boss mob - a heavily armored mercenary wielding a Vulcan Chaingun. Nasty! Concentrate your fire on the tank on its back until it explodes, killing him, then run up and grab his gun for a little chaingun action of your own! Granted you only get to use it on a pair of regular mercenaries but still, sweet! Ahead and to the right is the door that marks the exit for this chapter - head on over there and hit your B-key to exit and get your stats. You should have saved 3 out of 3 civilians, and shot the 2 cats for this chapter as well as the two radios. We begin this Episode outside and as you round the corner you get a CS in which a transport helicopter hauling an APC goes down in flames, the APC doing some serious damage to a nearby building. Up ahead is a squad of mercenaries who you engage - they are mostly coming from the road on the right ahead and hiding behind the barricade in the street ahead of your position. After you take them out, head into the road on the right and co-op open the gate at the end; as you move into this road you will get a brief CS and your next hostage rescue scene. Like before use your GPS to determine who is the higher ranking merc and then take them hostage, forcing the others to their knees. If you are bored and curious, try taking a lower ranking merc hostage to see what happens - but don't do that if you are seriously trying to rescue the hostages, okay?
Once you have them dead or tied up - whichever you choose - remember to rescue the hostages for the extra cash, and then look in the alcove nearby and grab the Radio (Radio 6 of 14) on the counter in the corner. Follow the main street up and turn left to reach a gate - there is a boost point on the right, and this is your next hostage rescue point. You are going to be tempted to take a direct approach to this - have your partner boost you up so you can snipe the two mercenaries from above - but unless you are really fast and really lucky that is not going to work here! The best way to pull this off is to boost your partner up, and then move to the gate and hit LB to order him to climb down the ladder on the other side and open the gate. Then you can stealth in and capture the merc on the left, forcing the one on the right to his knees, and either kill or tie up the pair and save the two hostages. The path continues to the right where you get ambushed by some mercenaries - kill them and then head around the corner to the left and co-op open the gate here - and you enter a loading dock area. Now this is where the real ambush happens! You try to talk the door open but wave after wave of mercenaries pour over the wall - and your only job is to survive!
Once you take out the mercenaries - including the ones sniping and throwing grenades from on top of the far wall - the loading gate opens on the building behind you. As you enter the bloke you were trying to get to open the door spins you a bit of his personal philosophy. Now before you do anything else, once you are inside, run around the racks past the soda machines and grab the Radio (Radio 7 of 14) by the far wall. As you enter the zoo you see an explosion to the right and then a 747 Jumbo Jet flies low overhead and crashes in the distance - follow the GPS path to the left past the dead elephant, along that path and up the stairs ahead. The ride controls are ahead of you on the left - engage them to open the door on the left and head through it. Go into the ride and take the door on the left going down the stairs here. You have to listen to the unseen bloke from before as he addresses you over the PA - more philosophy - and as soon as he finishes speaking you can kick open the green door down here. There is a squad of mercenaries below and across from you - after you take them out follow the path around to the left and drop down into the Hippo Habitat - move along the wall here into the doorway and up the stairs for your next confrontation. There are a large number of incoming troops - the easiest way to deal with this is thin them out a bit and then drop over the edge down into the habitat and take them on in a sweeping movement. Once you have all of the ones in the lower area dead, move up the ramp and take out the three up top by what is left of the crashed jet liner. Now head over the bridge here, and take cover behind the railing here.
Across from you is a bunch of mercenaries and once you take them out, look to the top and center of the building you are facing - see that Cat? (Neko Cat 5 of 12). Right, shoot it! Inside the garage ahead is a set of ride controls - when you activate them you will get a brief CS showing you the path to the now open door and the enemies that are waiting for you there - including a heavy armored shotgunner! Head in that direction now and engage them. As you enter the cable car run you get another lengthy chat from the hidden bloke, and then he opens the door at the end and you get a CS of the enemy you are facing. After you take out the handful of mercenaries move to the downed chopper and turn off the beacon there that the hidden bloke was telling you about - doing this triggers a short CS in which another heavy armor merc is revealed - this one with a grenade launcher!
The easiest way to deal with this guy is to take cover in the downed chopper and grab the aggro by firing short bursts at him and order your partner to take him out. You will burn though a lot of ammo doing this, but once your partner gets into position behind him, the guy is as good as dead, and so are the two minions that appear once you have hurt him a bit. Once you have taken them out, move into the open door to the tiger pens - you have a moral decision to make here - kill the tigers or do not kill them... There is a special gun (weapon part) inside the cage - if you kill the tiger you can get it - if not, not. Either way, once you make your decision your hidden host opens the gate for you - and you exit into another area of the zoo.
Your next hostage rescue opportunity has arrived - you need to save the park worker in the cage on the other side of the area from being killed by the mercenaries. Sneak up, target the leader, and take him hostage, then tie him up. If you picked the right guy, you tied up the others - if you picked the wrong guy, you had to shoot them. Co-op open the gate to release the hostage, and as soon as it is safe - meaning you have killed the mercenaries that are now rushing the cage - move to the side of the opposite cage and use the ladder to get to the roof. On the roof here is a weapon part - go ahead and grab that now. Note about Weapons and Parts: A lot of the weapons and parts are collected as a consequence of the moral choices that you make, collected from the supply boxes you encounter, or are in really obvious places on the route that you will normally take anyway. Because of that I only include the ones that you would otherwise miss if you did not know that they were there and the ones - like this one - that are in places you would not normally go. There are two reasons for collecting the parts and weapons - first there is an Achievement/Trophy associated with collecting them, and Second, having the full arsenal gives you more options when playing the game. Believe it or not, each weapon is unique and has its own characteristics as far as performance and use in the game, and finding the "right" one for you is not only a good idea, it will make your game play that much more enjoyable! Right, so you should have eliminated the immediate threats prior to grabbing the weapon part - now several squads will be rushing your location from the temporary rally point that the enemy has set up at the far end of the plaza - and at this point things get rather hot as you have to fight your way back across the area to the aforementioned gate - the one that the hostage can open. To do that you have to kill several squads of mercenaries! You should make good use of the available cover and pick off the bad guys when they show their heads. In games like this is it almost second nature to pick up any ammo boxes that you see on the ground - but here I want you to NOT do that! Your sniper rifle only has a small capacity of loaded and stored ammo, and when you collect the ammo boxes and it is already at capacity, you simply do not receive any rounds for it. Instead of picking them up, go from cover to cover using the sniper rifle to pick off the bad guys, and when you have emptied your clip, pick up the next ammo box. Once you get to the gate you get a checkpoint save, but be ready when the other side opens as there is a squad waiting for you with another hostage. Kill them, rescue him, and bonus! Note: If you have been following this guide, by now you should have close to $200K saved up... Now would be a good time to upgrade your weapons or even buy some new ones. Better ammo mag capacity, and extra grenade slot, maybe a silencer for your sniper rifle so you can discretely kill? It is all good! Once you kill all of the first wave of mercenaries you get a brief CS with another heavy armored grenade launcher mini-boss mob. He has a pair of minions with him so you should take them out quickly, and then flank the mini-boss and draw his fire so your partner can take him out from behind. You should be well versed at this by now, this is the third or fourth mini-boss we have faced, right? After you take out the mini-boss you do a wall boost over the wall where they came into the area, and you get a brief CS that shows a few transport choppers flying in - presumably dropping off more troops for you to kill! The dialogue here is a little sick but in a funny way, and you are not ready to continue on with the chapter! The firefight in this area is rather wide - though most of the enemy are originating at the far end of the area - so you should work your way in that direction using team tactics. Advance and cover, wait for your partner to do the same, and leap-frog to the edge of the area, where you will encounter a mounted gun and some more troops. Eventually you will take them all out and a pair of heavily-armored shotgun merc's will spawn. Taking them out requires head shots, so use the available cover to your advantage, and take them out as quick as you can! Now work your way over the nearby bridge and take out the remnants of the merc force and you get another message from the hidden bloke.
Before you do anything else look at the archway ahead of you - in the center midway up is the next Cat (Neko Cat 6 of 12) for you to shoot! That is it for this chapter as far as collection items go - so just head through the broken gate to the boost point where you get the Episode End indicator! For this chapter you should have saved 7 hostages, found 2 Radios and 2 Cats, and had a lot of fun! The chapter begins with you on a street outside on the other side of the zoo. You get a head's up from Murray on what the next objective is - we are looking for a communications relay - actually those are more common than you might think, so I hope that we know which one we need to find... Proceed ahead and turn the left corner but be easy on your weapon - there are civilians here and we are not supposed to shoot them - no permit you know. After the three civilians run down the street some merc's appear - kill them as quick as you can and mind that one of them is in a mounted gun on that APC at the far end of the road. Now proceed up the road past the APC and turn right, and then right again and co-op open the gate here. Your next hostage rescue is here - you get the normal CS, and you should make it a point to spot the officer here! Now there is an easy way and a hard way to do this. The hard way is to target the merc near the hostages and take him out, then the next closest, then the closest. I do not recommend this unless you are a really good shot. The easy way is to attach the silencer to your pistol and put a round through the head of the closest merc - who is NOT the officer. Now stealth up the road a little and put another silenced round into the guy on the upper level to the right, then grab the next closest guy on the street and use him as a meat shield! He is not the officer so the other mercenaries will only keep their hands raised for a few seconds - so go ahead and start killing them immediately. Once you have them all dead, walk over to the two hostages and save them - cha-ching! Easy money! Now backtrack to the stairs by the open fire plug and go up them (they are on the left side of the street as you were coming down, right side of the street if you already moved past them) go up the stairs. At the top you will see a ladder on the wall here - climb that and move forward to the railing. You spot the antenna and you engage a large force of mercenaries. Kill them now.
Once you have eliminated the threat, pull out your sniper rifle and aim a little up and straight ahead to the right of the door on the second floor of the building at the end of the street to target the next Cat (Neko Cat 7 of 12). Excellent shot! Move along the left side here and your partner will move to the right side of the street - and take out the new mercenary squad that arrives ahead and above you. Work your way along the path and you will hook back up with your partner at the stairs. Head up and then into the building entering at the Communications Room. There is a switch on the left side for you to throw, but you report to Murray that there is nothing else here - so move to the door in the back of the room and kick it open, dropping down into the next area. As you cross the metal walkway ahead it triggers a CS in which your partner makes a joke about the solid Shanghai construction and then the platform collapses, causing him to fall a good ways and get hurt. The CS shifts to a new scene - your partner is laying on a gurney and it is now 24 hours later. There is a TV playing in the background so you get some news - and you learn that you are in a hospital. The doctor tells you what he wants from you - to get the generator running, and protect the hospital while he evacuates the patients. The Doc does not think much of you - in fact he does not like you at all - but he still wants your help. Your next hostage rescue is ahead and this one is going to be complicated. Make sure that you have your silencer affixed to your pistol and move carefully forward - take out the guy outside of the OR with a head-shot, and then move to the door and hold down the A-button to open it quietly. Now ease around the corner and shoot the officer, then the other merc in the room. If you do this smoothly and quickly you will save the doctor here! Note that using the silencer slows down their reaction time. As you exit the OR keep your weapon in aimed mode and target down the hall - another mercenary will emerge from the door on the left with a hostage and put him on his knees - he is getting ready to execute the guy, so go ahead and take him out with a head-shot and save the hostage. Another easy $10k cha-ching!
The door that they came from leads to the stairs down - go ahead and hit that now, and proceed down to the grate that you co-op open with your partner. This is the Generator Room - and inside here is both the switch you need to throw and the next Radio (Radio 8 of 14) for you to collect! The radio is on the left of the stairs so grab it and then move to the generator and turn it on. You talk to the Doc only to learn that the mercenaries are now shelling the building! Head back upstairs and as you exit the stairwell the door across from you opens and you encounter a shotgun mini-boss. Take him out with a few well-placed head-shots, and then take out the six guys who were supporting him.
There is a second squad ahead including a shield merc - the easiest way to take him out is to target his feet until he drops the shield, and then take him out! As you proceed down the hall here you encounter another shotgun merc and a few more behind shields - but you know how to quickly take them out now, so do that! There is a mounted weapon ahead on the right - it would be an idea to take that guy out quickly - and then you can deal with the last shield merc - but before you hit the end of the hall, step onto the room on the left and open the door to the storeroom here and pick up the weapon part on the floor. As you enter the last room a kid emerges from the door in a brief CS, and waves for you to follow him into the storeroom. Inside he tells you that he can help - that he knows the fastest way to get where you need to go - and then without waiting for you to say okay, he hits that ladder like a monkey! When you get to the hallway above, he is crouched next to the soda machine with his hand jammed in, and your partner tells him to grab a soda for him as well. Actually what the kid is doing really can be done - when I was a kid I grew up in Byron Bay, New South Wales - it was what you would call a Resort Community these days, and one of my best mates Alex used to do that! He could reach into almost any soda machine and start pulling out sodas - I was the large one of the group so my job was getting the noshies out of the vending machines... You know the ones with the corkscrew like devices in them? All you had to do was slam it really hard against the wall it was next to and the snackies would rain down in all their salty goodness!
He asks for a boost up - you do that and then you do a boost and climb up - and just a little way up this hallway is the second Radio (Radio 9 of 14). It is also the last one for this chapter as well, so after you grab it listen to the broadcast - you have been listening to these, right? As you move along the hall here and approach the door you get your next hostage rescue challenge - and this one is a beauty! There are a lot of mercenaries in this area, and the hostages are in the center of what appears to be a lecture hall - this must be a teaching hospital... The easy way to handle this is to sneak to the left and down the stairs and then grab the officer standing at the bottom of them slightly to the left. Once his men surrender, tie them all up and save the hostages. At this point you get attacked from the other side of the large crater that was the rest of this floor - and in the CS the kid spots a sniper rifle and asks you if he should grab it and help you. I told him no - to stay hidden - but letting him help is how you unlock the Barrett Rifle, so if you are not doing the positive play-through, go ahead and let him help to unlock that weapon - but be aware that you are sentencing him to death. If you tell him to stay hidden you get a cash reward from the doc once you deliver the kid, so it is win-win either way. Several snipers appear at this point, and if you are using your sniper rifle this is also where you should pick up the next Achievement we are due, Co-Op Sniper. You should also have picked up the Achievement Meat Bag for using 15 enemies as human shields when you grabbed the officer.
Eventually once you eliminate the guys across the gap, a squad busts in above and behind you to flank you - take them out and then before you do anything else, arm your sniper rifle and look across the gap in the middle and you will spot the last Cat (Neko Cat 8 of 12) on in this chapter. Shoot it, and then head through the door that they came in by. You get a brief CS showing the rest of the squad, and then you move along the hall and kill them - easy peasy! There are two more to kill around the corner, and then you head into the supply room and use the ladder there to go down several levels. As you open the next door you get a brief CS in which you see a flamethrower mini-boss burning some bodies - you know what you have to do here, right? The problem with this particular fight is that your partner makes it nearly impossible to complete it gracefully! He makes certain that he stands in your way to keep you from making the shots you need to make to take out the tanks if you play conservatively - you cannot just let the flamethrower trap you in this room - and you cannot rely on your partner to be smart about taking it down despite the fact that he yells out to target the tanks on the guys back!
The easiest way to do this is to quickly switch to your sniper rifle and very quickly put five rounds into the tanks - causing them to explode. If you do this without moving he will not block you and that lets you take out the first heavy flamethrower guy. Did you see that I said "the first heavy flamethrower guy" there? Yes, there is another one - and taking him down means getting out of this room before he enters it! Note that this battle is as close as this game has come to adding grief code, which is actually pretty stellar for this sort of game! So after you take out the first flamethrower immediately exit the room and go straight ahead - there are some tables and crates in the middle of this area you can circle around - just let your partner engage the second flamethrower and you put some well-placed shots into his tanks at the same time, and voila! Dead flamethrower! Now co-op open the gate in the back wall here and exit the area - take out the last few mercenaries and then enter the elevator shaft for a nice CS in which you deliver the kid and get your reward. The enemy is now storming the hospital and you get a graphic novel CS that shows some of the future. The mercenaries blow the front doors and begin streaming in in waves - so go ahead and kill them in waves, right? The next wave is even more intense, but you should be able to handle it. Something I did not cover before - there are Achievements in the game that are based on the number of enemy that you kill with a given weapon - same as in the first Army of Two - and when you get large waves of enemy like here, it is an idea to switch to a weapon you have not been using much - your pistol for example - and rack up a few kills with it. If you do that often enough, you will be unlocking those Achievements in no time! Now that you have saved the hospital, take a moment to collect any money and ammo dropped by the enemy and then it is time to do another co-op opening move to get the revolving door working - and exit the hospital.
As you exit though the door to the street you find yourself in yet another intense firefight - same drill here, take cover and begin picking them off. Once you take out the last of this wave, you get a brief CS and a chain gun mini-boss enters the fray - oh joy! You need to get seriously fast on flanking this guy and taking him out because your partner will run right into him and get killed - thereby ending the mission. Do not delay in deploying your flanking maneuver here. Once you take him down go ahead and grab his mini-gun and ammo - sweet! The mini-gun makes really short work of the last few mercenaries and then you reach the Episode Exit point, so go ahead and hit the B-Button to end another thrilling chapter in the game! You begin this chapter in the street - and once you move forward a bit go ahead and take cover as you watch an APC and some mercenaries move past at the end of the street. The path divides ahead - you can ether go to the left or straight... Option 1: If you go left you will spot an enemy facing away from you further down the street - take him out with a silenced head-shot and move forward. The lane here divides again - you can go to the right or straight but this split basically takes you to the same situation. You will see several mercenaries in the street - and kill them - and your partner will spot a heavy with a flamethrower. Option 2: If you go straight you will spot a mercenaries at the end of the lane facing away from you - take him out with a silenced head-shot, and move ahead, turning left as you reach the street. There is another patrolling enemy ahead - take him out and then a burning pole will fall into the street. Continue along and you will see a split to the right that leads to the same small alcove as referenced in Option 1 - ignore that and approach the rear of the APC ahead. Head-shot the gunner in the APC and move to cover behind it and your partner will call out a heavy with a flamethrower - thus bringing both options to the same state. Back On Track: First order of business is to take out the Flamethrower - you have done this before but if you forgot, we do it by targeting the fuel tanks on his back until they explode! Once he is down, mop up the rest of his minions in the area, and then another with a shotgun shows up - take him down by firing into his face! As you work your way along the street mind the two or three mercenaries in the windows of the second story on the right - they wait until the guy on the mounted gun on the barricade at the other end of the street starts firing and then hit you in a cross-fire. Once you have taken them out, and worked your way to the barrier, taking out the defenders there, swing around to the other side and be sure that you pick up the ammo and money that is dropped where they fell.
The path continues on to the right, through the narrow alley, where you find a co-op gate - open that and then you get a call from Murray but the signal is not strong so you do not get her full message. As you round the next corner you are ambushed by two mercenaries - after you kill them look to the left - there is the first of the two Radios (Radio 10 of 14) for this level - so go ahead and pick it up. Ahead of you in this same area is a supply crate - go ahead and empty that now. After you kick open the gate and pass through you will be attacked by a pair of squads - one in the windows on the second floor of the building at the end of the street that includes a pair of RPG merc's and another squad in the street. This is a good opportunity to pull out your sniper rifle and take out the upstairs squad - giving priority to the RPG dudes of course, before hading up the street to take out the rest of the vermin with your assault rifle. As you reach the opening of this alley you will discover a larger than usual squad is deployed on the right - including more RPG merc's - and they are quite a threat if you just waltz into the street so try not to do that, right? Just take cover, stay frosty, and maintain your situational awareness so that you can concentrate priority on the biggest threat - the RPG's. Note: There is a fence to the right as you progress up this alley - you may be tempted to boost your partner over it so that you can flank them - that may not work out like you think it will unless you are playing with a human partner - if you are not than do not do it since your A.I. partner will likely end up incapacitated and screaming for help you cannot give them! As you work your way out of the alley and into the street to the left, following the path laid out by your GPS, the wall in the back of the small court will explode and a heavy machinegunner will emerge with several minions. The way to take him out is to target the backpack he is wearing - and you can do that even if he is in front of you, because it sticks out over his shoulder like a hump. The trick to dealing with an enemy like this one in so confined a space is to use cover to your advantage, and fire short and well-aimed bursts. Once he is down, and you have eliminated his minions, move toward the hole in the wall that he came from but stop as you enter that courtyard - you see the door on the corner building on the right on the street? Go inside to the second room and pick up the pile of cash there - an easy $25,000!
Now head through the blown-open wall and into the alley there - and co-op open the gate at the end of the alley - as you enter this area you get another garbled transmission from Alice. Ahead of you and on the left you will see the second and last Radio (Radio 10 of 14) for this chapter - go ahead and snag that now! As you work your way along the street you will engage a couple of mercenaries and then as you turn the corner you will get a checkpoint save. As you approach the end of this street you see a yellow crane and as you approach that you get a CS of your next hostage rescue mission. There are several mercenaries within shooting distance of the hostage and you are a level above them at the moment. The best way to handle this particular hostage situation is to GPS mark the bad guys and then take out the guy on the right as your partner takes out the one on the left, and then quickly shift your aim to the third guy and one-shot him. If you do it smoothly the hostage is standing there unharmed and waiting for you to rescue them! Once you save the hostage head to the rear (left) of the crane and you will see a set of concrete stairs ahead - move to them and stay in cover, and use your sniper rifle to begin picking off the mercenaries in the construction yard and the building windows across the way. After you clear the yard area of enemies you will move past the mounted gun and the second APC, and just as you pass that APC on your right you will see a concrete slab that has fallen to make a ramp - take that up and then the next one too so you are on the second floor, and head to the back of that area and crouch by the damaged window frame. There are three mercenaries on the ground level below to kill, and another few and once they are dead, arm your sniper rifle and aim at the building across from you.
There are three dark squares that represent rooms or hallways that go deeper into the building - focus on the second one up in its right corner and you will see the first of the two Cats (Neko Cat 9 of 12) for this chapter. Go ahead and shoot it now! Head back down to the street and bang a u-turn onto the wooden walkway and towards the area we were just targeting - you should have already killed the mercenaries in this area, so there should be no threats until you reach the point where you partner tells you that you need to cross the ditch and get into the mall. On the other side are some barricades and enemy who will start shooting at you now. Take cover and start picking them off, and once you have cleared them away, head into the ditch and over to the other side. Note that there is a mounted gun ahead - your partner will be sure to tell you that - and did you notice the orange barrels on the other side? They are indeed explosive and you can use them, strategically speaking, to take out a few enemy at a time. As you head down into the ditch you get a CS of the front loader that you ostensibly started yourself rolling across - and knocking down the bridge you need to cross over. There may be one or two enemy that you could not engage before now shooting at you - just take your time and take them out, and then cross over to the mall side.
As you approach the stairs on the other side you get a bullet-time fight with infinity ammo - and a lot of mercenaries coming at you including a mini-boss. You are supposed to go back-to-back and shoot your way out of this jam! If you do not die at lease once on this one you are really good at this! IF you do die - you need to backtrack and shoot the Cat again before you continue on! Do not forget to do that so you do not lose track of which you have and which you do not! Note: If you are playing the game solo on the regular difficulty you are going to have trouble with this fight. The A.I. partner is simply not smart enough to properly support you - he does not concentrate on a set area, and the enemy target you mostly, not him, so you will die - a lot. You might be thinking that this is grief code - and maybe in a way it is - but not really. The thing you need to remember here is that this game is called Army of Two for a reason - it is meant to be played by two people. If you are on Normal or Hard difficulty (Contractor) you really should not attempt this unless you have a human partner. If you are on Normal (not Contractor) and you do not have a human partner, you can exit to the main menu, reload back in, and set the difficulty at Easy for this fight without there being any negative impact as far as the Achievements / Trophies are concerned. That is not true for Contractor however - as changing the difficulty will cost you the one for completing the game on Contractor... The solution to this fight is actually pretty simple - your human partner covers the left side, you cover the right - and you arm the highest damage weapon you can. This is infinity ammo and no reload, so really you can just spray and pray for the most part. Aiming on the higher levels will get you dead - shoot from the hip here! The enemy will pop like this - three on the right including a heavy shotgun merc, then two or three on the left, followed by two on the right, and then two who track behind you to the right. Two will pop up and flank you from behind, and there will be two above and to the left, followed by another group on the right sort of behind you. At this point an RPG merc will pop up to the left and above, and let loose a round that lands pretty much at your feet, knocking you both out. When you wake up you are being captured - you get knocked out again.
You wake up to hear that you are to be interrogated - and again get knocked out. Finally you wake up in a cell - and you see some mercenaries pass by it. The guard is standing too close to the bars, so all you need to do is reach through and kill him, then unlock and open your cell door and grab the pistol he dropped. You get on your com link and contact your partner, who is elsewhere in the building - and then you head off in search of him. There really is only one way you can go - across the hall and into the larger area, where you hop over the barricade and take out the guard here. Move into the next long hall and you will engage a squad in a gun fight - and win of course! Past the next barricade and you fight another squad, and then you move into the next area and the gates slam shut. On the other side is a control panel - use that to open the gates on the other side and continue along the path, take out another squad and get a checkpoint save, and then use another set of controls to open the gates here. Fight your way down to the escalator - your partner and a Russian agent that is helping him join you - and you go through another gate. Next you get a CS in which the Russian sort of fills you in, and then you recover your gear and the Russian expands on your mission and the plot by telling you about some explosives and what you can do with them. Now you head back out of the gate and you get a CS of their control center - and the Russian briefs you on where to place the explosives.
Follow the Russian and have your partner pick up the bomb, then escort him to the X on the right side and he will place it. Now regroup on the Russian and go to the room behind him and grab the second bomb, and escort him to place it. Now rinse and repeat the third bomb, but before you escort him pull out your sniper rifle and target the target the last Cat (Neko Cat 10 of 12) for this level. Now regroup on the Russian and watch the fireworks! Now follow the GPS trail down one level and engage the squad and the heavy grenade merc - to kill him target the bags on his hips. Once you have eliminated all of them, continue on the path and the Russian will open a gate for you - follow him over the crates, and then you have an extended firefight with mercenaries below you. Once you clear enough away, drop down to their level on the boxes below the opening and begin sweeping through the area, killing as you go. When you get to the back of the area you get a CS in which the Russian opens a door and you have a sort of confrontation with him - a woman is inside and you have to make a choice - take his bribe or stop him. I chose to stop him - and the woman ended up delivering the killing shot in the graphic novel-style transition - but it turns out that she was not the innocent that I thought she was - she is an agent tasked with killing defectors, and their families. Fortunately the Russian was not actually killed and he catches up to her before she can kill his baby in the hospital. Makes me wish I had taken the bribe now... but that is it for us as the chapter ends.
You start this chapter inside the Bund - directly ahead of you is the next Radio (Radio 12 of 14) to collect, and then you run up the stairs and co-op open the revolving door here. Basically you will be fighting your way through the area ahead and below - and there are a fair number of enemy to kill here! The good news is that there is lots of cover - the bad news is there are some heavies here. Eventually you will work your way to the rear of the area and co-op open another revolving door.
Inside here is a resupply crate - get to it before it closes - and the second Radio (Radio 13 of 14) for this chapter. After you grab the Radio head towards the left side of the area - and your partner will boost you over. Head through the pen area kicking open the three gates to let your partner in, and then turn around and follow the path - to another co-op revolving door! As you enter this area Murray tells you about the challenge ahead - including the AA gun on the boat. You have to clear the area and take out the AA! Work your way along the pier near the boat (left side) and plant the C4 on the crane, then pull back and watch the boat go boom! Mind the RPG mercenaries on the boat as you retreat - you will need to snipe them on your way to safety. After you blow the boat you are told that there is a second AA gun somewhere and you will need to take it out prior to the extraction chopper being sent in!
A shotgun heavy puts in an appearance as you follow the path - take him out quickly and then continue on through the gate behind the crane and stop - look above on the containers for this chapters only Cat (Neko Cat 11 of 12) and shoot it, then head through the gate and up the stairs. Resistance is pretty stiff here so take you rime and clear out the bad guys, then head to the left and co-op open yet another revolving door!
After you enter your partner boosts you over the fencing and you take out two mercenaries and use the controls to open the gates, and then you co-op open another revolving door and end up smack in the middle of another massive firefight. Take your time, clear out the enemy, and make good use of the cover you have available. There is a mounted gun ahead you should clear quickly, and then start picking off the guys to the right and ahead hiding behind the boxes. Work your way forward and then have your partner boost you over the fence down the stairs and clear that path to flank the other mercenaries above. Meet your partner above and take out the mercenaries by the controls - then hop the barrier and activate the controls to take out the other AA gun! Excellent! Your ride comes in to land and - oh man! It gets his by an RPG and crashes! Take out any remaining mercenaries and then head into the door and down the stairs. You get a CS in which you complain a lot, and then your partner spots a newspaper photo of the person responsible for this mess - and you have a new goal - kill him! The chapter ends at this point. Yes it was sort of short, but there was plenty of killing here! In fact this may be the chapter you want to use to buff up your kill count if you are going for that Achievement / Trophy, right? We call this a target-rich environment mate! We begin this chapter right outside of the temple complex - ahead of you are some mercenaries - including a heavy with a shotgun! You can boost your partner over the wall here and he can work on clearing some of the mercenaries out of the inside - as you work your way to the back of the area and head in. On the left is a room and inside on a barrel is a weapon part - be sure to grab that! At the end of this area is a boost point, and after you and your partner get over, there are more than a few bad guys to kill! You will probably be getting the notices that you failed to save enough civilians and will have to fight alone - what that means is that at some point you did not save a civilian or you ended up killing one. As far as I know you cannot simply reload and continue once that happens - you have to save them all in one play-through in order to both have some fight with you at the end and earn the Achievement / Trophy. Needless to say that is not one I will be actively trying to get any time soon...
If you look ahead at the temple building on the very center of its roof you will see the very last Cat (Neko Cat 12 of 12) so go ahead and shoot that now, and then take out the rest of the mercenaries here, and follow the path forward. Once you take out the heavy shotgunner and the other mercenaries in this area the gate will open in the back - and you should follow that through. Work your way up the stairs and clear the area - spawning the heavy chain gunner - and after you kill him head to the right corner and a mercenary will exit a door in the corner - go inside and co-op open the gate here.
Inside here and on the right very close to you is the final Radio (Radio 14 of 14) so go ahead and collect that and ding the Achievement / Trophy - good on ya mate! Move forward and have your partner open the door ahead, and your partner will offer to boost you to the window on the left. Go ahead and do that and start taking out the mercenaries inside - works better with a silencer on your assault rifle but that is your call. Once you are happy with the killing, drop down and kick in the door and begin clearing the area - there are actually two ways you can go inside - both are boost points. Either way your partner will fight his way to the door and let you in - and then man the mounted gun and mow down the opposition. There is very stiff resistance here but eventually a pair of gunners will open the door on the left and after you kill them, slip in and clear that area out next. and head through the door here, then co-op open another gate while the big man tells you how inconsequential you are. Nice to know, eh? As you push through the temple here you open a door and encounter serious resistance from gunners and shield mercenaries - you have to clear them out though, but hey, your business is killing, and business is good! Once you reach the level just below the top and take out enough mercenaries you trigger the boss fight for this chapter - two heavy shotgunners and a heavy grenadier - the shotgunners are easy compared to the grenadier - just take them out and then use cover and try to flank the last heavy so you can blow the bags of grenades he is wearing! Once you have done this, all that is left is to wrap up the mercenaries on the top level of the stairs - mind the mounted gun when you do this - it would really such to die now!
At this point you are about to enter the last area of the chapter - before you do that, if you have not already been building either discord or friendship, now would be the time to do that - considering that you are about to end the game! Just stand next to your partner and hit A or B depending on which you are looking to build, and when you have them maxed, go through the door! For positive you want it to read Ambiguous, and for negative you want it to read Hateful... Once you blow the door you get a CS in which you must make another moral decision - kill your partner, or kill that maniac and sacrifice 7.5 million people in the city. What do you do? I know what I did - and I am not saying... After the final CS you get the credits - you can press down on the D-Pad to get through them fast. Once they end the game unlocks playable costumes and cheats - be aware though that cheats do effect Achievements / Trophies. (01) A decent animal - Complete Episode 3, any difficulty. (35) Bound for life - Versus: Survive an entire public Extraction match with no team deaths. (45) Hardcore - Complete the game on Contractor difficulty. (47) Better than gold - Earn all other trophies. (01) A decent animal (15 GP) - Complete Episode 3, any difficulty. (02) A steep descent (10 GP) - Complete Episode 2, any difficulty. (03) Attention grabber (10 GP) - Allow your partner to snipe 5 enemy while you mock surrender. (04) Chaaaarge! (15 GP) - Charge through 20 enemies. (05) Co-Op Sniper (10 GP) - Co-Op snipe 5 enemies. (06) Emergency Room (20 GP) - Complete Episode 4, any difficulty. (07) Full arsenal (30 GP) - Collect all weapon parts and weapons. (08) Future vision (30 GP) - Unlock all potential futures. (09) Gone Shopping (25 GP) - Complete Episode 5, any difficulty. (10) Grenadier (10 GP) - Kill 3 or more enemies with one grenade. (11) Hardcore (100 GP) - Complete the game on Contractor difficulty. (12) Hate monger (10 GP) - Customize your weapon to high aggro. (13) Healer (10 GP) - Heal your partner 10 times. (14) Heartless (20 GP) - Make only negative choices. (15) Humanist (30 GP) - Save every hostage. (16) In Sync (10 GP) - Kill two enemies together in Co-Op mock surrender. (17) Loot and pillage (20 GP) - Collect $1 million (do not need all at once) (18) Meat Bag (15 GP) - Use 15 enemies as human shields. (19) Not so bad after all (10 GP) - Tie up 15 enemies. (20) Not what I thought it was (5 GP) - Complete Episode 1, any difficulty. (21) Old Faithful (20 GP) - Kill 400 enemies with assault rifle. (22) One Shot, One Kill (20 GP) - Kill 100 enemies with Sniper Rifle. (23) Open hand slap (15 GP) - Kill 50 enemies by melee or bayonet. (24) Pistoleers (20 GP) - Kill 150 Enemy with pistols. (25) Pumpkin Patch (10 GP) - Shoot two enemies in the head with one bullet. (26) Purist (20 GP) - Make only positive choices. (27) Quick Draw (15 GP) - Kill 25 enemies with Quick Draw from mock surrender. (28) Rock, Paper, Scissors (5 GP) - Beat your partner three times in a row. (29) Scavenger (15 GP) - Build a gun using 3 home brew parts. - Kitchen Knife Simply upgrade a weapon using any three of these parts - one from each category. (30) Softcore (50 GP) - Complete half of the game on Contractor Difficulty. (31) Survivor? (30 GP) - Complete the game, any difficulty. (32) The Beast (50 GP) - Kill 6,666 enemy. (33) The optimist (5 GP) - Make a positive Co-Op morality choice. (34) The pessimist (5 GP) - Make a negative Co-Op morality choice. (35) The truth is right here (20 GP) - Listen to all radio broadcasts. (36) Total Fist-bump destruction (10 GP) - Finish game as best friends. (37) Total Fist-bump deflation (10 GP) - Finish the game hating each other. (38) Touch not a cat but a glove (50 GP) - shoot all Maneki Neko cats. (39) Unbreakable (25 GP) - Survive an entire chapter without being revived on normal or above difficulty. (40) All guns blazing (30 GP) - Versus: In a public match kill a player with every weapon. The Full Arsenal Achievement requires you to obtain all of the weapons in the game. There are a total of 20 weapon parts and 7 weapons to collect - and of course the weapons you need to purchase. You accomplish this by doing ALL of the following: (1) Play through the entire campaign making only positive morality choices. Note that you are going to need roughly 2.5 million dollars to make all of these purchases. Note that there are two weapons that can only be unlocked if you have a save file on your system from the original Army of Two game... The good news is that the achievement Full Arsenal does not actually require those two weapons - but it is nice to have them anyway. If you are curious, the two weapons you get in this fashion are the AS-KRI and the S8-Z. Also note that there is a known bug in the game that effects the two bonus weapons - no information is available on why this happens, but on some XBox 360 consoles when the game detects the save from the original Army of Two game, it unlocks the two bonus weapons, but when you quit the game and return to it, they are locked again and cannot be purchased. It is presumed that there will be a fix for this in the upcoming patch but there has been no official announcement to that effect. Episode Two Episode Three Episode Four Episode Five Episode One Episode Two Episode Three Episode Four Episode Five Episode Six Episode Seven 
The original Army of Two took place between 1994 and 2009, in Somalia, Afghanistan, Iraq, China, and Florida, and featured the main characters, SSC Operatives Tyson Rios, Elliot Salem, and their SSC control contact, Alice Murray. Rios is an ex-Army Ranger from Brooklyn New York, and Salem is also an ex-Army Ranger and gang-banger from Yonkers, New York. Murray serves as the control contact at at the new company that the trio established - T.W.O. - after the disaster that was SSC in the last game.
Interfacing with the pair via radio and satellite communications, Murray is the off-site over-watch for the team, providing intelligence information, situation reports, and updating their assignments from their clients. Although you do not get to see much of her, Alice is present for nearly the entire game as the voice in your ear.
In 40th Day, Rios and Salem find themselves trapped in Shanghai when a hot-war erupts that may be connected to the assignment that they are presently working on. After the events of the first game, the trio broke away from SSC and formed their own private military contracting agency, Trans World Operations (T.W.O.) and accepted the contract to place beacons in Shanghai - though they have no idea why the beacons are being placed.
Now trapped in Shanghai, they must fight their way through squads from two different PMC's to rescue Murray, who is trapped in the South African Consulate, before the PMC's capture or kill her, and then fight their way out of the city and then country.
While the game follows the basic genre of the original, significant improvements have been made in the graphics and A.I., including a morality system that slightly alters the end-game, weapon customization, and increased focus on team play, and a more robust multi-player mode. Although there are some minor bugs in the game - in particular sound stutters and Achievement/Trophy bugs, the game is surprisingly solid and reliable out of the box!
If you did not pre-order the game from a participating store, part of the multi-player content is not available to you until after 15 February 2010. Players that pre-ordered the game received a code that enabled the Extraction Maps for the online PvP mode, but players who did not pre-order, or who rent the game, have to wait a month before they will be able to play that part of the game.
Custom Masks
So first head over to http://www.armyoftwo.com and check to see if you have an EA account already - if you have played other games from EA with online content chances are that you do - so find out by doing the log-in thing. If you do, skip to the next part of this section - if you do not, go ahead and register with EA now, and create your account.
Next Part of this Section
I know, I am so funny I make me laugh too... Right, so you now have linked your game account to the EA account, so you are ready to run the Mask and Armor creator! Using it is pretty basic and there are good instructions and a tutorial on the site to help you.
I quickly made my own mask - called the Chucky Mask - and uploaded it to both the server and my game - and I made it publicly available if you want it. It is a yellow mask with a green four-leaf clover and the phrase - Tiocfaidh Ar La - on it. That is Irish, and it is pronounced Chucky-Arr-Laa and it means "Our Day Will Come."
Once you have uploaded your mask to the server and your game, you can use it by selecting it in the Custom Mask Menu. Once you have done that you are pretty much done with this part of the process. When you collect your gear in the game, your new mask will be in it, and you will be wearing it!
To earn the actual Achievement / Trophy there is an additional few steps you have to take - so do the following:
1 - Once you have uploaded the mask to the server and your game and verified this by selecting the mask as your custom mask;
2 - Enter Verses Mode from the Main Menu and select Options;
3 - Equip the mask on both factions;
4 - Play a Versus Match and it should then unlock!
Note: You may find that you can only equip the graphic on the mask of the first faction and the pad of the second - that is fine - once you enter the Quick Versus game this will unlock.
1-1: Shanghai Streets
First radio collection
First beacons placed
1-2: What Could Go Wrong?
The first Neko Cat collectible and second beacon
Collect second radio
1-3: Get to Ground
Collect the second Neko Cat
First hostage rescue
1-4: Hold Position
Collect the 3rd Radio
2-1: In Case of Fire
Collect 4th Radio
2-2: Descent
Collect the Third Neko Cat
2-3: Vertigo
Collect the Fifth Radio
2-4: Murray
The Security Room
2-5: The Fastest Way Down
Exiting from the Consulate
2-6: Highway
Collect the fourth cat
Taking down a Chaingun Boss
3-1: Solid Ground
Collect the sixth Radio
Collect the seventh Radio
3-2: Field Trip
3-3: Dead Hippos for Cover
Collect the fifth Cat
3-4: Crash Site
Taking down a Grenadier Boss
3-5: Cages
Rescue Zoo Worker and grab Weapon Part
3-6: Entrance
Collect the sixth Cat
4-1: Higher Ground
Collect the seventh Cat
4-2: Don't Die in a Hospital
Collect the eighth Radio
4-3: A Brief Loss of Power
Collect the weapon part in the hospital
Collect the ninth Radio
4-4: A Room with a View
Collect the eighth Cat
4-5: Laundry Day
Taking out a Heavy Flamethrower Boss
4-6: A Poor Reception
4-7: Hospital Streets
Taking down the Chaingun Heavy]
5-1: It's Raining Crazy
5-2: A Shattered City
Collect the tenth Radio
Collect the eleventh Radio
5-3: A Trip to the Mall
Collect the ninth Cat
Epic Battle
5-4: Trapped
This jail isn't big enough to hold me
5-5: Just Blow it all to Hell
Collect the tenth Cat
6-1: The Bund
Collect the twelfth Radio
6-2: Sink It
Collect the thirteenth Radio
Collect the eleventh Cat
6-3: Get to the Chopper
Catching the Dustoff
7-1: No Way Home
7-2: Tourist Trap
Collect the last Cat
7-3: In the Belly of the Beast
Collect the last Radio
7-4: Revenge
Obtaining the Fist-Bump Achievement
PS3 Trophies
PS3 Bronze Trophy List
(02) A steep descent - Complete Episode 2, any difficulty.
(03) All guns blazing - Versus: In a public match kill a player with every weapon.
(04) Attention grabber - Allow your partner to snipe 5 enemy while you mock surrender.
(05) Big game hunting - Versus: Kill both members of a partnership in the same public match.
(06) Chaaaarge! - Charge through 20 enemies.
(07) Co-Op Sniper - Co-Op snipe 5 enemies.
(08) Death Dealer - Versus: kill 10 players with head-shots in a single public map match.
(09) DIY PMC - Versus: Create a custom face mask on www,armyoftwo.com.
(10) Emergency Room - Complete Episode 4, any difficulty.
(11) Fancy meeting you here - Versus: Invite a friend to a public match before entering lobby.
(12) Fresh Meat - Versus: Revive your partner and do a partner reload in same public match.
(13) Gone Shopping - Complete Episode 5, any difficulty.
(14) Grenadier - Kill 3 or more enemies with one grenade.
(15) Hate monger - Customize your primary weapon to high aggro.
(16) Healer - Heal your partner 10 times.
(17) In Sync - Kill two enemies together in Co-Op mock surrender.
(18) Job Seeker - Kill a player either the primary or secondary weapon in all kits in a public match.
(19) Loot and pillage - Collect $1 million (do not need all at once)
(20) Meat Bag - Use 15 enemies as human shields.
(21) Not so bad after all - Tie up 15 enemies.
(22) Not what I thought it was - Complete Episode 1, any difficulty.
(23) Old Faithful - Kill 400 enemies with assault rifle.
(24) One Shot, One Kill - Kill 100 enemies with Sniper Rifle.
(25) Open hand slap - Kill 50 enemies by melee or bayonet.
(26) Pistoleers - Kill 150 Enemy with pistols.
(27) Power Couple - Versus: Earn the higher partnership score in a public match.
(28) Pumpkin Patch - Shoot two enemies in the head with one bullet.
(29) Quick Draw - Kill 25 enemies with Quick Draw from mock surrender.
(30) The optimist - Make a positive Co-Op morality choice.
(31) The pessimist - Make a negative Co-Op morality choice.
(32) The truth is right here - Listen to all radio broadcasts.
(33) Total Fist-bump destruction - Finish game as best friends.
(34) Total Fist-bump deflation - Finish the game hating each other.PS3 Silver Trophy List
(36) Full arsenal - Collect all wepaon parts and weapons.
(37) Future vision - Unlock all potential futures.
(38) Humanist - Save every hostage.
(39) King of the hill - Versus: Win a public match on all maps.
(40) Softcore - Complete half of the game on Contractor Difficulty.
(41) Survival of the fittest - Complete all 16 rounds of a public Extraction match.
(42) Survivor? - Complete the game, any difficulty.
(43) Touch not a cat but a glove - shoot all Maneki Neko cats.
(44) Unbreakable - Survive an entire chapter without being revived on normal or above difficulty.PS3 Gold Trophy List
(46) The Beast - Kill 6,666 enemy.PS3 Platinum Trophy List
XBox 360 Achievements
As long as you are doing the mock surrenders when they are available this will come naturally as you play the game.
Simply hold down the A-Button and run into an enemy - you will automatically toss them aside.
This will come naturally as you play the game - there is no need to farm this Achievement.
See Appendix B to learn where these collection items are located.
This requires two complete play-through sessions to unlock all of the optional choices, and then reload the last section and choose the opposite character in order to unlock this.
The easy way to unlock this Achievement is to wait until after you have accessed the first supply chest in Episode One and obtained grenades - and then at the next hostage mission where there are three enemy simply tie them up and then drop a grenade in the middle of them.
Note that if you play this difficulty the lower level difficulty Achievements will unlock. If you play this in split-screen or multi-player, all players must be set to Contractor difficulty.
The easiest way to unlock this Achievement is to purchase the RPG and customize it with the "Pimp" appearance. It will unlock after you exit the upgrade screen.
If you are playing the game solo, this is rather hard to get since you are the one that usually gets incap'd and needs to be healed. The fast way to get this is to use a second controller, load up the Hospital Lobby section, and position both characters behind the counter there. Have your main crouch, and your partner stand - the enemy will oblige you by incap'ing your partner quite quickly.
Whenever you come to a moral choice in the game make only negative choices - if you mess up and the moral indicator is a plus, quickly reload the last checkpoint before the CS completes to make the correct choice.
To unlock this Achievement you must save every hostage in a single play-through.
This one does not come naturally - you will need to have a human partner to do this with.
This can be accomplished on your first play-through if you make sure that you get all of the cash stashes and rescue all of the hostages.
You do not have to actively try for this - if you are rescuing the hostages this Achievement will unlock naturally.
You do not have to actively try for this - if you are rescuing the hostages this Achievement will unlock naturally.
This will unlock naturally as you play the game.
If you do not usually use the Sniper Rifle you may need to farm this one. The chapter section at the Zoo and the Hospital Lobby are two good areas to farm this.
The street and alley just after the Hospital Lobby section is a good place to farm this.
If you do not usually use the pistol you may need to farm this one. The chapter section at the Zoo and the Hospital Lobby are two good areas to farm this.
You do not need to try to get this actively - either on the highway mission or on the Zoo mission as you are flanking and killing the enemy this will happen. Just be sure that you are doing head-shots more often than center mass shots.
Whenever you come to a moral choice in the game make only positive choices - if you mess up and the moral indicator is a negative, quickly reload the last checkpoint before the CS completes to make the correct choice.
The section just after the plane crash at the Zoo is a good place to do this if you want to farm it, otherwise simply take advantage of any Surrender options you encounter.
To unlock this Achievement use a second controller and play the game - stand next to your partner when not in combat and hit the Y-Button, and then make your selection with the D-Pad.
The following weapon parts count as "home brew" parts:
- Metal Plate
- Pipe Bomb Launcher
- Rusty Stock
- Screwdriver
- Soda Can Silencer
Note that if you are playing split-screen or multi-player all of the players must be on Contractor difficulty for this to unlock.
These completion Achievements stack - so if you complete the game on Normal or Contractor this will also unlock.
After your second play-through, you should have between 2K and 3K kills. You will need to farm the rest of the kills for this in Campaign Mode - simply pick a chapter section such as the Zoo or the hospital lobby and kill the enemy there, then reload the checkpoint, rinse and repeat. You do not have to hit a checkpoint to save in between loads but you do have to advance to a checkpoint save at the end to have the kill totals saved to your stats.
Shortly after you start the game you will be asked to make your first moral decision - simply choose the "good" decision to unlock this.
Shortly after you start the game you will be asked to make your first moral decision - simply choose the "bad" decision to unlock this.
Listen to all 14 Radio broadcasts.
Wait until you are outside the door at the top of the steps in the last chapter, after you have taken out the three heavies and the rest of the mercenaries. Stand next to your partner and hit the A-Button to get the positive gesture about 14 times - check the stats menu and when your relationship reads "Ambiguous" you are good to go.
Wait until you are outside the door at the top of the steps in the last chapter, after you have taken out the three heavies and the rest of the mercenaries. Stand next to your partner and hit the A-Button to get the positive gesture about 14 times - check the stats menu and when your relationship reads "Hateful" you are good to go.
The location for each of the cats is listed in the campaign walkthrough. Simply shoot all of the cats to unlock this Achievement.
This is probably the hardest Achievement to get in the game - you cannot get incap'd and you cannot reload the last checkpoint if you DO get incap'd. Basically you have to do the entire level with no reloads without getting incap'd! Good luck with this - it goes easier if you do it as a Co-Op farm, and let your partner lead the way and take the heat.XBox 360 Online Achievements
(41) Big game hunting (5 GP) - Versus: Kill both members of a partnership in the same public match.
(42) Bound for life (30 GP) - Versus: Survive an entire public Extraction match with no team deaths.
(43) Death Dealer (10 GP) - Versus: kill 10 players with head-shots in a single public map match.
(44) DIY PMC (10 GP) - Versus: Create a custom face mask on www,armyoftwo.com.
(45) Fancy meeting you here (5 GP) - Versus: Invite a friend to a public match before entering lobby.
(46) Fresh Meat (5 GP) - Versus: Revive your partner and do a partner reload in same public match.
(47) Job Seeker (10 GP) - Kill a player either the primary or secondary weapon in all kits in a public match.
(48) King of the hill (30 GP) - Versus: Win a public match on all maps.
(49) Power Couple (15 GP) - Versus: Earn the higher partnership score in a public match.
(50) Survival of the fittest (50 GP) - Complete all 16 rounds of a public Extraction match.
Full Arsenal Notes
(2) Play through the entire campaign making only negative morality choices.
(3) Save all of the hostages.
(4) Find all 17 weapon parts.
(5) Purchase all of the weapons.
(6) Purchase all of the weapon attachments (not including styles).
Weapon Locations
(1) Weapon Cache in the Consulate - HM Shotgun
(2) Weapon Cache in the Consulate - M416
(3) First group of hostages - P90
(4) Rescue second batch of hostages - DE .44 Mag. Handgun
(5) Allow child to get weapon - .50 Cal Barrett Anti-Vehicle Rifle
(6) Hospital Weapon Cache if you make positive moral choices - G18
(7) Construction Yard hostage - Grenade Launcher
Weapon Part Locations
(01) Episode One Supply Crate - G14 Thunderstrike
(02) Catwalk above the first mounted gun turret near the second Neko Cat - Slanted G5 Grip
(03) Near the gate control and Radio 3 - Custom Shield
(04) On yellow seat after first hole in Descent Section - Soda Can Silencer
(05) Third level down in the corner after the skyscraper fight - EZ Muzzle
(06) On desk in the room with the 2nd PMC Supply Crate - Z1 Muzzle Flash Reducer
(07) Kill the Tiger - FR Elite Model 3 Sniper But Stock
(08) Kill the Tiger - V17 Bayonet
(09) Tram Control Room - Red Star Sniper Rifle Barrel
(10) Chopper crash site strongbox - PCG Delta EX 6x Sniper Scope
(11) On top of cage near zoo-worker hostage - Pipe Bomb Launcher Attachment
(12) On a table just past the first hostages in the apartment - 7337 Defender Shotgun Barrel
(13) First hostage - M636 2x Rifle Scope
(14) Hallway just before you meet child - HL Reflex Core Stock
(15) Saving lecture hall hostages - D56 Supressor
(16) In hallway after two Flamethrower Heavies - TG-400 Shield Part
(17) Trash bin near blue truck in first area - Trueshot MK-1 Barrel
(18) From bomb room enter shop to the right on counter - Kitchen Knife
(19) Tunnel hall under plaza - Red Dot 3x Sight
(20) In small room on left after first gate - J37 MK4 Defender Stock
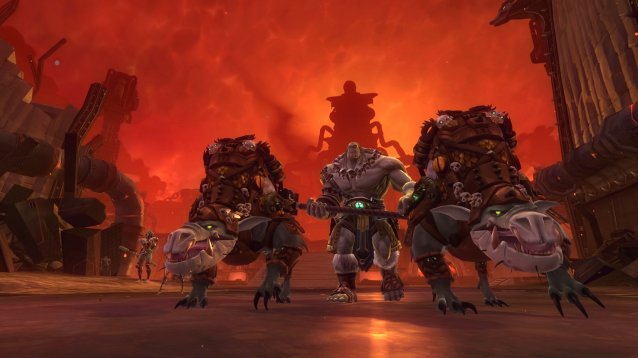
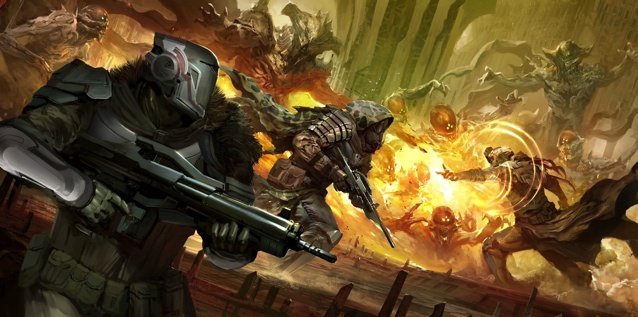

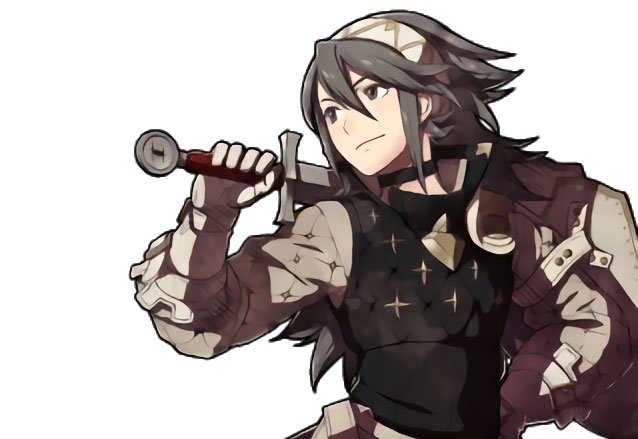 Manufactured Controversy: Whats Fire Emblem Have to do with Gay Conversion Therapy?
 Alan Wake’s American Nightmare Walkthrough
 How to unlock Demon Snake and Demon Points in MGS V: The Phantom Pain
 The Last of Us Wiki .
 Call of Juarez: Gunslinger Review: Techland Redeems Itself