The biggest and baddest 3DS game to come out of Capcom is finally arriving with a big, wet, bloody splat in the form of Resident Evil: Revelations. Join Jill Valentine as she searches a derelict cruise liner, with the plot periodically switching back and forth between other members of a special military unit specifically commissioned to fight the threat of bio-weapons. Prepare for twists and turns as you experience Resident Evil 4′s gameplay style on a smaller screen, and with even more scares.
Can’t get enough revelations right here with our text walkthrough? Try the cheats page, where we dig in to discover the secrets behind Resident Evil.
Resident Evil: Revelations Walkthrough
PROLOGUE
Climb the stairs to your right and make your way along the shipping crates to experience waves rocking the ship, then continue around the next corner and approach the orange door ahead.
Use your pistol to shoot the chain off the door and enter the next room, then take a left at the far wall and use another door to reach the new area.
Move forward to the back of the room and open the next door down the hallway on your right to spot someone moving in the shadows ahead, then make your way around the shelf to enter a new area.
Make your way down the stairs in the back left corner of the room to spot something crawling through the ductwork above, then examine the scene to the right when you reach the bottom of the steps.
Continue follow the ductwork above on your left to keep track of the creature, then follow it over to a locker and collect the green herb within.
Enter the room to the left of the locker and make your way over towards the soda machines on the far wall, then follow the path cut between the obstructions to reach the next door in the corner that leads to the kitchen.
Approach the floor grate at the center of the room and inspect the glowing object within to activate a cut scene in which you discover a handgun, then aim your pistol at the monster that rises behind you and pop off a few headshots.
Back away from the enemy and continue firing upon it with the help of your teammate until it falls over dead to complete the prologue.
Return to the Main Walkthrough Page
Resident Evil: Revelations Walkthrough
Jill’s Story – Part One
THE BEACH
Move forward to drop down onto the beach below and approach the corpse at the feet of your teammate, then use the Genesis device to scan the two bodies ahead and inspect the one with metal inside of it to activate a cut scene in which you discover a mysterious vial.
Pick up the ammo on the rocks in front of you and scan the body part on the pike above to your left, then turn around and move forward to scan another hunk of corpse beneath a blue sign in the rubble.
Continue to the left and grab more ammo off the row boat, then scan the sample in the rubble above and turn left to find another hunk of corpse stuck to the front of the boat run ashore.
Approach the mine shaft to your right and scan the sample outside the entrance to bring it to life, then back away from the slug creature while firing upon it repeatedly with your pistol until its dead.
Enter the tunnel ahead and continue forward through it, then scan the sample on the left and exit the shaft.
Scan the corpse ahead to watch it explode from gas and continue around the trail to analyze the last sample in the rubble to the right, then make your way back through the previous mine shaft and eliminate the creature the bursts through the structure on the other side.
Continue forward across the beach ahead and approach O’Brien in the distance to activate a cut scene in which you flash forward back to the scene out on the abandoned ship.
THE ABANDONED SHIP
Use the Genesis device to scan the corpse in the room and collect ammo off the surrounding surfaces.
Exit the kitchen and make your way through the hall to descend a set of steps, then interact with the rusty door at the bottom to activate a cut scene in which you locate Chris, then turn around and make the next left down another corridor.
Enter the stairwell through the blue door and move down the steps to collect the green herb, then move back up to the top of the staircase and open a white door to reach the next area.
Climb the steps ahead and make a left, then enter the bunk-bed area beside you and move forward through it into the bathroom ahead.
Eliminate the creature that emerges from the stall and scan it’s corpse afterwards, then search for supplies with the Genesis device and exit the area through the locker room in the back right corner.
Make left down the hall and follow it around to open a gray door at the end, then make your way down the steps to witness a bloody scene at the bottom.
Move left and exit through the next green-lit door on the right, then eliminate the creatures in the lab to scan their bodies with the Genesis device and search the room for supplies.
Scan the pool of blood in front of the woman’s body to locate the key and exit the room, then return to the rusted door where you discovered Chris earlier, killing and scanning monsters along the way.
Use the key to open any rusted door you encounter and collect supplies or eliminate monsters within these rooms before return to the task at hand.
Reach the rusted door and open it with the key you found earlier to complete the first episode.
Return to the Main Walkthrough Page
Resident Evil: Revelations Walkthrough
Chris’ Story – Part One
THE MOUNTAIN MINE
Move forward through the snow storm and along the rocky trail ahead until a cut scene activates in which you witness a plane crash, then continue following the path to locate the wreckage.
Drop down beside the plane crash and use your Genesis device to scan the area for supplies, then open the container marked with a biohazard symbol to analyze the virus.
Open the door that leads to the cockpit to scan the body that falls out and the control panel, then pick up the Flight Plan and exit to your left to discover the mine.
Break the crates to collect supplies before entering the mine shaft, then inspect the barred door to call Jessica over and lift the iron gate.
Move forward through the cave tunnel and drop down the ledges ahead, then enter the open cavern and eliminate the infected wolves within it.
Exit the cavern through another shaft ahead and follow it around the reach a wooden bridge, then eliminate the infect wolf nearby and cross the chasms ahead using the bridges.
Collect the B.O.W. supplies and drop over the tall ledge ahead to reach the open cavern below, then eliminate another wave of wolves and pick up the decoys you find in this area.
Exit this area using the next trail ahead and follow it around to drop down another ridge, then exit the cave completely and make a left along the ledge you’re on at the moment.
Attempt to jump across the space in the ledge ahead and activate a cut scene in which you fall into the chasm, then aim your pistol at the wolves that appear and eliminate them before they swarm around your injured body.
Hold off the wolves until Jessica can arrive by scoring head shots, tossing smoke grenades and efficiently utilizing the green herbs you’ve been collecting, then finish off the remaining creatures in the area to return to your feet again and climb up a nearby ladder.
Make your way up the inclined trail and use Jessica’s help again to lift the iron gate, then move to the outside ledge and activate a cut scene to complete the level.
Return to the Main Walkthrough Page
Resident Evil: Revelations Walkthrough
Jill’s Story – Part Two
THE SHIP
Communicate with Parker, then approach the door that’s been blocked off by a dresser and push the obstruction aside, then enter the bathroom and investigate the contents of the tub to pick up a screwdriver.
Exit the bathroom and eliminate the enemy that emerges from the wardrobe by dodging its attack so that it ends up headfirst through the TV, then approach the other door in the room and use your screwdriver on the wall panel beside it.
Use the touch screen to unscrew the front of the panel and unlock the door, then exit the room and dodge the enemy directly to your right.
Move through the door past the enemy to reach a second story landing and make your way around the right corner ahead, then enter the next bathroom and collect the green herb.
Exit the bathroom and enter the hallway in the opposite corner, then make your way through it and open the next doorway on your right.
Head through the next hallway and enter the room ahead, then eliminate the enemy and push the dresser away from the exit.
Make a right in the next area and approach the balcony that overlooks a warmly-lit dining room, then make your way downstairs to the floor below and head left to meet up with Parker.
After your conversation with him, follow Parker down the hall to collect the B.O.W and enter the next room beside you.
Move forward through the room and eliminate the next enemy, then exit ahead and clear this area of creatures as well.
Navigate around the bookcases to reach the other side of the room and exit into the next hallway, then collect the various supplies around the hall before helping Parker kick down the metal door.
Enter the supply room and collect your Stolen Equipment from the crate ahead, then exit the area and make a right through the door down the hall.
Eliminate the enemies to make your way safely through the library rooms and back into the warmly-lit dining room, then clear this eating area of creatures as well and return to the second floor via the staircase.
Exit back into the display case room and clear out the enemies within, then continue into the hallway beyond that and return to the hallway decorated with various paintings.
Enter the second story landing lit with chandeliers and clear out the awaiting enemies with the help of Parker, then make your way back to the red hallway at the beginning of this level and break open the chained door.
Enter the next hallway and make a right, then press the elevator button and enter the car when the doors open.
Choose the “Bridge” to ascend in the elevator and exit when the doors of the car open at the top, then enter the next room at the end of the walkway ahead and find the door with a green light over it.
Move through the next hallway to reach the bridge, then scan the room for supplies, handgun upgrades and handprints.
Afterwards, investigate the smoking section of consoles on the left for sabotage to activate a cut scene and complete this level.
Return to the Main Walkthrough Page
Resident Evil: Revelations Walkthrough
Parker’s Story – Part One
Approach the man working by the board to the left of the giant screen and listen to what he has to say, then collect supplies from around the room and watch the other conversation take place at the front.
Afterwards, exit through the double doors at the back of the room and use the staircase to reach the floor below, then, while facing the front entrance, aim your automatic weapon at the steps on the right side of you to eliminate the waves of enemies that descend.
Search the area for ammo and other supplies, then move back and forth across the lobby to continue clearing out the enemies while protecting your teammate.
After you’ve cleared the area, return to the second floor via the right-side staircase and exit the room through an open doorway.
Press the elevator button at the top of the next staircase and eliminate the enemy when the doors open, then enter the car to ascend to the floor above and wait for it to come to a stop.
Exit the elevator and make your way down the hallway to the left, then enter the next room at the end and eliminate the enemy that bursts through the windows on your right.
Move through the door on your left and eliminate the enemy in the hall, then vault over the orange sign and collect the supplies at the end of the corridor.
Vault back over the sign and enter the conference room on the right, then take out the enemy within and exit through the next door ahead.
Move left through the corridor and enter the room to the right for additional supplies, then return to the previous hall and make your way towards the opposite end to pick up the shotgun.
Continue along the corridor and enter the wooden door at the end ahead, then exit the locker room , after searching it, and vault over the orange sign to your right.
Take out the enemies in the corridor ahead and enter the stairwell on the right, then climb the steps to reach the sixth floor above and open the double wooden doors beside you.
Move forward through the cubicles and vault over the orange sign, then eliminate the enemy and collect ammo from the locker in the corner.
Turn left and fight your way across the cubicle area, then check the other lockers and exit through the door in the corner.
Move to the right down the hall and approach the metal shutter to get Jessica’s help in lifting it, then move left when you’re on the other side and follow the hallway around to reach a room decorated with numerous glowing monitors.
Collect the grenade from the corner and move into the next room, then vault over the orange signs to your left and pick up the ammo.
Press the elevator button at the back of the room and continue collecting supplies from the area before the creatures show up, then fight off the zombies with your machine gun and grenades.
Your best bet is to stand in the entrance to the elevator room and fight off the enemies as they come with explosives, the machine gun or the shotgun.
Enter the elevator after the doors open and press the button to ride to the next floor, then exit the car to follow the hallway to the helipad on the roof and approach the chopper to complete this level.
Return to the Main Walkthrough Page
Resident Evil: Revelations Walkthrough
Jill’s Story – Part Three
Follow Parker downstairs and exit through the door at the bottom, then make a right and eliminate the enemy around the corner ahead.
Enter the door on your right to reach a conference room and collect the Helm Key from the window sill, then exit the area and make your way back across the hall.
Use the key to enter the Helm and search the initial area for supplies, then move into the back room and turn the chair around to discover the corpse and scan it with the Genesis device for additional items.
Pick up the Crest on the nearby bookshelf and return to the first area of the Helm, then examine the picture hanging on the wall to the left to acquire the Upper Interior Map.
Exit the Helm and make two rights through the hall to collect more supplies, then return to the bridge above and cross to the opposite side of the area.
Make a left up the steps and exit the bridge through the door at the top, then eliminate the enemy within and leave the room through the back entrance.
Press the button on the wall and enter the elevator, then choose the “Upper Cabins” and exit the car when you reach the floor above.
Move around the corner ahead and open the door to the left, then make your way to the end of the hall and enter the upper landing with a chandelier hanging from the ceiling above.
Make your way to the opposite side of the landing and eliminate the enemy, then enter the door in the leftmost corner to reach the hallway that’s decorated with antique paintings.
Make your first left to enter a blue lit room and insert your crest in the podium to acquire the Shotgun Windham, then eliminate the enemy that appears in the room and exit back into the hallway.
Enter the door across the hall from you and follow the next corridor around to reach the display case area, then eliminate the enemy within and exit the room.
Head down the stairs to reach the dining area and eliminate the enemies that are waiting for you, then search the room for supplies and use the Helm Key to unlock the gated door.
Unlock the next door ahead and wait for the locking mechanism to rotate itself open, then enter the warmly-lit room and move left around its outer walls.
Read the note on the wall beside the gated door and head down the nearby stairs, then exit the area through the two doors locked with ship wheel mechanisms and make your way down the next set of steps ahead.
Smash open the crate to collect ammo and climb back up the steps, then enter the door to the right and collect the rifle laying on the ground ahead.
Finish collecting supplies in this area before exiting into the Promenade room beside you, then fire at the enemy on the bridge across from you to kill it and continue forward.
Make a right through the next area and follow the walkway to eliminate another enemy, then lift the metal shutter to your left and continue forward into the room ahead to collect supplies.
Exit the room and make a right, then make another right and approach the last window ahead to look in on the previous area.
Shoot the lock off the chained door and equip one of your shotguns, then open fire on the creature that emerges until its exits the room as well.
Turn towards the red fuel tank to the right and wait for the creature to round the corner, then shoot the container to hit the enemy with a fiery explosion.
Fight off the other creatures that emerge and jump through the nearby window if you must, then search the room you just unchained for supplies and exit back out through the window.
Use your rifle to take out the enemies below and continue fighting the larger creature by jumping back and forth through the windows while firing upon it with the shotgun.
Wear down the larger enemy with grenades and rifle shots until it falls over dead, then pick up the Lifebuoy Key and drop to the checkered floor below.
Search the area for ammo and supplies, then use the Lifebuoy Key to open the ornate metal door and make your way through the rooms ahead to reach a new staircase.
Climb the steps and make a left at the top, then move into the room to the right and continue following the hallways forward to return to the large doors that are locked with ship’s wheel mechanisms.
Open the two sets of double wooden doors to reach the grandfather clock area and climb the steps in front of you, then use the Lifebuoy Key to unlock the doors at the top and complete this level.
Return to the Main Walkthrough Page
Resident Evil: Revelations Walkthrough
Jill’s Story – Part Four
Search the area for supplies and exit the room, then take the Iron Anchor Key from O’Brien and converse for a few moments.
Move right and head down stairs, then move behind them and open the door you find with the Iron Anchor Key.
Continue through the next set of doors ahead and move down the stairs, then climb the next staircase and examine he painting of the lady.
Turn to the generator on your right and pull on the lever to restore power, then move back down the stairs and press the button attached to the small pool of water.
Eliminate the mutant fish the jump out of the water and pick up the Coin that drops from one of them, then use the coin on the lit up slot machine to your left and continue playing until you win a Bundle of Coins.
Return to the painting of the lady on the floor above and put your bundle of coins on the scale, then enter the room that op and search it for supplies.
Climb down the ladder in the floor of the room and continue into the ventilation tunnel below, then climb the next ladder ahead and move forward through the pipeline at the top.
Drop into the next room ahead and follow Parker over to the control area to realize that the key is missing, then exit back onto the walkway and make a right to leave through a set of large metal doors.
Follow the hallway around and approach the control panel beside the elevator to your left, then unscrew the front cover to hotwire the doors open and enter the car.
Push the button to reach the next floor and exit the car when you reach your stop, then make a right and follow the corridor around past an enemy crawling on the ground.
Enter the next room on the left in front of the locker and move around the rubble to exit into the kitchen, then leave the kitchen through the door in the back and continue forward to move down a set of steps.
Make a right at the bottom of the steps and enter the stairwell, then climb to the floor above and open the white door at the top.
Move through the next corridor and eliminate the enemies you encounter, then re-enter the bunk area from before and continue taking out the creatures that drop down around you.
Exit through the next bunk area past the bathroom and make a left down the hall, then use the Iron Anchor Key to open the first door to your left and collect supplies off the beds.
Enter the next room ahead and pick up the Machine Gun by changing weapons, then exit back into the hallway and continue left.
Open the door at the end of the hall and make your way down the steps, then take a left and open the next door on the right to reach a bloody lab area.
Read the diary on the floor to activate a cut scene in which you encounter a zombified Rachel, then exit the lab chase after her down the hall she just used.
Equip the machine gun and begin ascending the steps to call her down after you, then open fire while running backwards and chase after Rachel when she retreats.
Continue shooting at Rachel until she escapes into the ducts, then open the door to your right and follow the hall around to take down another enemy.
Move back through the bunk area to return to the bathroom and wait for Rachel to drop from the ceiling, then continue firing upon her with the inclusion of grenades until she retreats back into the vents.
Exit into the hallway through the next bunk area and wait for Rachel to emerge from the vents around the corner to the right, then open fire on her again until she retreats back into the ducts.
Move through the next door ahead and make your way down the stairs, then enter the hall to the left and take on Rachel in another exchange.
After the zombie retreats into the next vent, make your way back through the kitchen to return to the checkered floor cafeteria and finish off Rachel with the help of Parker.
Pick up the Lift Key from Rachel’s corpse and clear out any remaining enemies, then scan her remains with the Genesis device and make your way back to the previous elevator.
Press the button to descend in the car and exit the elevator to move to your right, then enter the lift area and use the Lift Key in the control area to complete this level.
Return to the Main Walkthrough Page
Resident Evil: Revelations Walkthrough
Grinder’s Story – Part One
Use the Genesis device to scan the are for supplies and make your way down the steps ahead, then enter the storage area to chastise your teammate for making too much noise and scan the fallen contents to acquire a Screwdriver.
Open the nearby yellow door and collect supplies, then exit through the back and head down the steps.
Unscrew the panel on your left to open the door beside it and enter the control room, then examine the consoles to unlock the other door in the previous hallway and watch the video feed.
Enter the room that was just unlocked across from you, then search the area for supplies with your Genesis device and pick up the Security Token to complete this level.
Return to the Main Walkthrough Page
Resident Evil: Revelations Walkthrough
Jill’s Story – Part Five
Exit the left and enter the room to your left, then climb down the ladder to drop into the sewer and make your way through the corridor to reach the next door.
Continue forward through the water-filled corridor and climb the steps to enter the control room, then examine the lever and approach the exit to activate a cut scene.
Exit the room and smash the crates on your right, then turn around and make your way forward through the corridor to descend back into the water.
Make your way through the flooded corridor and fight off the enemy you encounter, then enter the next room filling with water and leave through the entrance in the corner ahead.
Navigate through the flooded room and exit using the door in the corner, then turn right to eliminate the enemy and pick up the ammo by the industrial fan.
Turn around and open the gate to your right, then climb the steps and open another door at the top to reach the Engine Room.
Examine the jammed console and pull the lever to your right, then continue down the catwalk to pick up the health and examine the note pinned to the wall.
Exit the room to return to the flooded corridor and open the gate at the bottom of the steps, then make a right and pass through the next gate you come to ahead.
Enter the room in front of you and make a right, then grab the Custom Parts and pick up the map on the other side of the area.
Exit through the door beside you and climb the ladder, then move across the bridge the Large Mechanical Wheel at the top and make a right down the steps to reach the flooded section of the area below.
Fight off the enemies that emerge and make your to the opposite side of the room, then make a left up the steps and open the door at the top to return to the engine room.
Turn right and pull the next lever ahead to turn off the steam, then approach the console across from you and examine it to learn about the other key you need.
Make your way to the opposite side of the room and pull the first lever you utilized in this area to learn about the steam situation, then exit through the door behind Parker and head down the steps to return to the flooded ground below.
Open the gate in front of you and head right, then exit through the door to your left and use the back entrance to reach the next area ahead.
Move towards the back left corner of the room and enter the nook to pick up the Cog you find within, then turn the red valve wheel to set the gauge to “Off” and return to the Large Mechanical Wheel by fighting off the enemies along the way.
Insert the Cog into the large mechanical wheel and and press the button beside it to acquire the Restart Key, then return to the engine room and activate the console across from Parker to complete the level.
Return to the Main Walkthrough Page
Resident Evil: Revelations Walkthrough
Grinder’s Story – Part Two
Move forward along the mountain pathway and take out the wolves, then continue down the trail until you reach the crash site and watch Quint get thrown to the ground.
Use your Genesis device to scan the area ahead to encounter the Hunters, then eliminate these invisible creatures one by one with the help of your partner and continue forward along the trail.
Scan the area as you go to find additional supplies until you reach the opening fuselage near the crashed plane’s cockpit, then push away the debris blocking your entrance and continue forward into the aircraft.
Use the Security Token to activate the console on the left and complete this level.
Return to the Main Walkthrough Page
Resident Evil: Revelations Walkthrough
Chris’ Story – Part Two
Move forward across the steps to reach the windowed wall, then make a left and enter the next room to your right.
Search the area for supplies and enter the elevator by pressing the button on the wall beside it, then ride the car to the next floor and exit the hallway through the double set of metal ornate doors.
Make your way across the checkered floor and eliminate the enemies in your path, then exit through the last metal door on the right and navigate through the rooms to reach the next staircase.
Climb the steps and cross the bridge around the corner, then make a left through the rooms to open the next wooden door ahead and take a right.
Enter the next room at the end of the hall and open the two wheel mechanisms on the doors to your left, then move through entryway behind the staircase in front of you to reach the casino and head down the steps.
Make a right at the bottom of the steps and approach the door to unleash a pair of large creature into the room, then eliminate them by backing away while opening with your machine and use your partner’s help to make the job easier.
Collect the Trident Key from the enemy corpses and use the entryway that was just knocked open, then exit through the metal ornate door and drop through the opening in the floor ahead.
Move forward through the darkened corridor and fire at a distance on the enemy ahead to make it explode in a bloody splatter, then enter the next door in front of you and navigate between the shelves to eliminate another wave of creatures with your shotgun.
Climb the ladder on the other side of the room and move forward along the corridor to eliminate another enemy, then drop through the opening in the floor to reach the lift area and activate the control lever to activate a cut scene.
Afterwards, exit the lift through the door in the red-lit corner and climb down the ladder in front of you.
Exit the hallway through the door around the corner and climb the steps, then enter the control room at the top and approach the window that looks out on the enemies through the glass.
Leave this room to encounter the enemies on the other side and eliminate them with grenades, then make your way around the next corner and head down the steps.
Navigate yourself forward along the walkway and eliminate the enemies in your path, then enter the room with a barred window and take out the creatures within using more grenades.
Enter the room with the barred window to collect supplies and exit through the door in the back corner, then eliminate the enemies wait for you and approach the back right corner of the area.
Exit this area and quickly open the gate to your left to retreat from nearby enemies, then enter the Engine Room in front of you to complete this level.
Return to the Main Walkthrough Page
Resident Evil: Revelations Walkthrough
Jill’s Story – Part Six
Dive beneath the water and descend to the floor of the Engine Room, then search the perimeter of the area to acquire the Pipe and swim back up towards the yellow-glowing grate above.
Use the pipe to begin opening the grate, then swim over to the control console in the corner and pick up another Pipe across from the door.
Use this pipe to continue forcing open the previous grate and exit the flooded Engine Room, then move forward through the sewer tunnel and pick up the Shotgun Ammo Case.
Drop into the next room below and search for supplies, then exit through the next door in the wall and approach the opposite corner of this area.
Exit the room, without taking damage from the fish creature, and make your way forward through the next corridor, then climb the steps at the end and smash open the supply crates in the dry area you find at the top.
Enter the next room to activate a cut scene in which you discover that the ship’s antenna is damaged, then exit through the back door and head down the steps into another flooded corridor.
Make your way past the enemies ahead and climb the ladder, then enter the lift area at the top and use the control lever to activate a cut scene.
Exit the lift area using the ladder against the wall and move forward through the sewer pipe, then drop through the opening in the floor and approach the next industrial fan ahead.
Climb two ladders to reach the hidden gambling room and exit into the main casino area, then head down the steps and climb the escalators on the other side.
Open the two doors locked with ship’s wheel mechanisms and make a left in the next room, then open the golden elevator doors on the right and enter the car to ascend.
After the elevator breaks down, aim your weapon out the front window that’s been broken and open fire on the creature that occasionally hangs down from the roof of the car.
Turn left after repelling the creature for the first time and continue firing upon it when it hangs down again, then fight off the enemy until the elevator starts moving again and exit the car when you reach the floor above.
Collect the nearby supplies and make a right behind the various kiosks beside you, then fire upon the enemy that emerges with one of your more powerful weapons by aiming for the fleshy vulnerable spot beneath its missing arm, constantly staying on the move when the creature charges and shooting the red container in close vicinity to its body.
After the enemy is defeated, search the room for supplies and climb the ladder against the wall to pick up the Veltro Key Card.
Open the next door ahead to reach the outside balcony and make your way around it to move up the staircase, then climb the the ladder and examine the antenna’s console at the top to complete this level.
Return to the Main Walkthrough Page
Resident Evil: Revelations Walkthrough
Jill’s Story – Part Seven
After your conversation with O’Brien, drop back down the ladder and use the stairs to reach the next level below.
Move around the balcony to re-enter the ship and drop down another ladder, then use the elevator on your right to reach the next floor below.
Climb out of the car and move left around the upper landing, then take your next right and enter the next wooden door ahead on the right.
Open the two doors locked by ship’s wheel mechanisms and search the lockers to your right for supplies, then enter the next room and use your Genesis device to scan the fleshy parts of the mutated blob.
Unscrew the panel beside the green-lit door to open it and move into the next room, then approach the control panel to your right and press the button to purify the water outside.
Exit the room to assess the situation, then make your way back into the locker area and open the doors locked with ship’s wheel mechanisms.
Return to the warmly-lit upper landing and move forward around the balcony, then make a left through the next open doorway and head down the stairs.
Open the door at the bottom of the steps and make a right around the balcony to use the staircase in front of the grandfather clock, then approach the man in front of you and unlock the ship’s wheel mechanism nearby.
Move through the two doors locked with ship’s wheel mechanisms and enter the room to your right, then move forward through the hall and open the green-lit door to the left.
Approach the break in the railing to your right and drop to the ground below, then move through the door in the back left corner to reach a bed of red flowers and take a left.
Move through the double doors at the opposite end of the room with the Lifebuoy Key and fight off the Hunters that drop down, then unscrew the panel beside the elevator to open it and enter the car to choose the “Deck” as your next destination.
Exit the car when it reaches the floor above and move left to collect supplies in the various rooms, then make your way into the opposite corner of the area and use the Veltro Key to grab the Custom Parts from the wall panel.
Turn around and open the door across from you to reach the outside, then eliminate the enemies that appear with your shotgun and make your way to the left.
Cross down the bridge of steps to your right and continue eliminating the enemies, then collect supplies around the helipad and clear this area of creatures before opening the nearby shipping container to activate a cut scene.
Move back across the bridge of steps to leave the helipad and make a right along the walkway, then re-enter the ship through the next door on your left to activate a cut scene.
Afterwards, approach the doorway ahead of you and take out the wave of enemies ahead with your rifle before continuing forward across the deck.
As time is of the essence, run past the remaining enemies on the deck as fast as you can without stopping and shoot the red containers to help clear the path.
Move through the white door at the end of the deck and approach the elevator in the next hall while the enemies with, then ride the car to the floor below and make a left after exiting to activate a cut scene.
Run past Rachel when she appears to cross the bridge in front of you and drop over the edge to your right, then continue climbing down the crates to reach the floor below and make your way over to the nearby set of steps.
Continue fighting off the other surrounding enemies to pick up the Rocket Launcher at the top of the steps, then exit this area through the door on this small raised platform and head down the stairs in front of you.
Run through the hall to push past the enemies and Rachel, then open the door at the end to enter the next room and activate the radio to complete this level.
Return to the Main Walkthrough Page
Resident Evil: Revelations Walkthrough
Jill’ Story – Part Eight
Wait a few moments for a wave of water to knock down the door in front of you and completely flood the room, then swim out through the exit and navigate the next hallway ahead.
Open the door at the end of the hall and swim forward around the obstacles to cross the room, then pause for a moment to avoid the falling debris and make a left into the next part of the area.
Climb the ladder against the wall in front of you and make a left around the walkway to collect the Custom Parts, then drop over the edge beside you to re-enter the water and dive down towards the next door below.
Enter the next area and swim through the corridor ahead, then make your way through the door at the end of the hall and ascend to the water’s surface.
Climb the ladder to attempt opening the Trident door, then jump back into the water to dive down all the way to the bottom floor and exit the room.
Swim forward through the corridor and move through the door at the end, then navigate through the debris and up the stairs to surface through an opening in the ceiling above the next entrance.
Catch your breath and dive back below the water, then swim to the left of the door and make your way down the next set of steps ahead.
Enter the next room around the corner and swim forward towards the bridge in the middle of the area, then enter the hallway at the right end of the bridge and open the door below.
Surface through the opening in the ceiling above and climb into the sewer tunnel, then move forward and drop into the next pool of water ahead.
Dive down into the room below and open the door at the bottom, then swim over the staircase and enter the next room across from you.
Swim through the obstruction to collect the Custom Parts and open the door to your right, then navigate through the next corridor and enter the broken window above.
Enter the door to your left and surface through the hole in the ceiling to catch your breath, then dive back down and exit the room through the next door below.
Continue swimming the rooms to make your way up the ladder at the end and move forward through the door in front of you, then ascend to the surface above and climb onto the walkway surrounding the area.
Make your way around the walkway and climb up the ladder in the corner, then head forward through the pipe and drop into the next pool of water below.
Swim towards the industrial fan and up the ladder ahead to climb out of the water, then move up another ladder in the next room and exit to complete this level.
Return to the Main Walkthrough Page
Resident Evil: Revelations Walkthrough
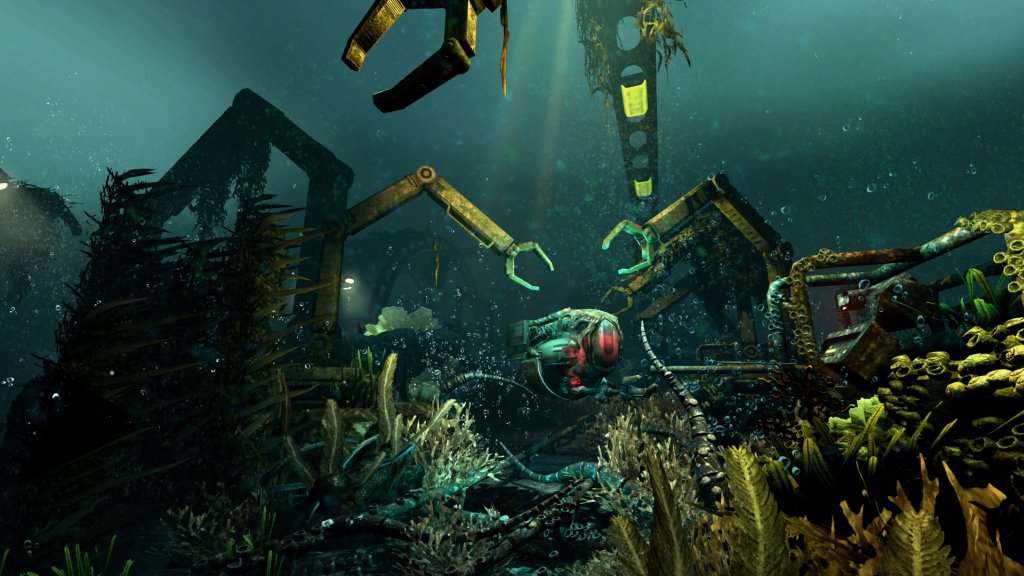
Chris’ Story – Part Three
Keep your gun aimed at the creature’s tentacles and fire in short bursts to avoid overheating on a regular basis.
Watch for the tentacles to emerge on your left beside the boat and continue firing upon it to avoid it’s swinging attacks.
When the underwater monster tosses three smaller creatures in your direction, aim for the center of the cluster and open fire to take them all out at once.
Continue protecting your vessel from the underwater creature until you reach the large ship in the distance to complete this level.
Return to the Main Walkthrough Page
Resident Evil: Revelations Walkthrough
Jill’s Story – Part Nine
Drop down the ladder in the corner of the room and re-enter the pool of water beside you, then dive down and swim forward towards the industrial fan.
Swim up the next ladder to surface and climb into the sewer tunnel above, then drop into the room ahead and make a right around the walkway.
Drop over the next break in the rail to return to the water and dive straight down to the upper left corner, then exit the area through the door and navigate the hallways ahead to reach the room flooding from its ceiling.
Climb up onto the walkway and make a left, then drop back into the water via the break in the railing ahead and dive down to exit this room through the next door below.
Swim through the hallway to reach the next room and surface the climb the next ladder nearby, then use the Trident Key that Chris gives you to open the door and enter the laboratory hallways.
Pass by the automatic door on your left to vault through the broken window around the next corner, then examine the fingerprint scanner in the back corner of the room and follow the on-screen instructions to complete registration.
Search this area for supplies before jumping back out the previous window, then use your fingerprint to open the automatic door and enter the left corridor to activate sterilization.
Equip your shotgun and move to the opposite side of the hallway you’re trapped in, then wait for the creature to burst through the wall and unload as many rounds as possible into the enemy before it can attack you.
Use grenades and melee attacks to keep the creature at bay as well until the door open behind you, then use Chris’ help to finish the monster off for good and head down the nearby set of stairs.
Search the lower floor for supplies to pick up the Magnum in the corner by the glowing monitor and enter the elevator car, then press the button to descend to the floor below and open the next large door at the end of the corridor to complete this level.
Return to the Main Walkthrough Page
Resident Evil: Revelations Walkthrough
Grinder’s Story – Part Three
Follow Jackass until he stops in one of the hallways below and eliminate the enemy ahead, then continue forward through the corridor and enter the projector room.
Search the area for supplies and enter the elevator in the corner to descend to the next floor, then exit the car after the doors open and continue picking up items around this new room while Jackass types at the computer. You can climb on top of the shipping container beside Jackass to find the Magnum.
After listening to Jackass’ complaints regarding a lack of power, pull both levers protruding from the two generators in opposite corners of this room and wait for the enemies to start appearing.
Back yourself up to the elevator doors you used previously and keep your gun aimed in the general direction of Jackass, then equip one of your more power weapons and eliminate the creatures that drop down.
Equip the shotgun after Jackass announces his progress at 50 percent, then run up to the enemies one at a time to dodge their swipes and knock them down with close-range blasts.
Stay near the container lined with weapons beside the elevator doors and switch them out repeatedly whenever you are running low on ammo. Use grenades to reveal the creatures cloaked in invisibility
Continue fighting off the enemies until Jackass has completed hacking the computer, then clear the room of the remaining creatures and approach your teammate to complete this level.
Return to the Main Walkthrough Page
Resident Evil: Revelations Walkthrough
Jill’s Story – Part Ten
Move left to open the door ahead with your fingerprint and enter the room, then search it for supplies and head down the steps to exit.
Enter the morgue and search the area for supplies, then exit into the main laboratory area and wait for Parker to crack the code on the elevator door so that it opens for you.
Ride the elevator down and exit the car when you reach the next floor below, then use your Genesis device to navigate the maze of laser beams and press the button on the opposite wall.
Exit the maze and move through the other entrance between the beams that you just created by pushing the button, then drop down over the next available ledge to encounter the underwater monster behind the windows.
Use the door in the corner to exit this room and fight your way forward through a wave of enemies to climb onto the raised platform beside you, then climb the next ladder at the back of the area and collect the additional supplies at the top.
Exit this area by using your fingerprint to open the nearby door and continue into the larger room lined with monitors, then pick up the Laboratory map and press the button in the corner to disable to red lasers.
Return to the maze of laser beams and examine the corpse to acquire the Vaccine, then make your way back into the room of monitors and insert the vaccine into the console located to the left of the wall screens.
Move to the large wall monitor right beside you and examine the console to begin downloading data, then wait for it to finish to pick up the Passcode and approach the exit.
After the room is flooded with infected red water, swim back into the laser maze room and exit through the last window on the right.
Swim upwards to surface and climb the nearby ladder to re-team with Chris, then use the Passcode on the computer in front of you to encounter a wave of enemies that drops from the ceiling.
Use your pistol for as long as possible to clear out the initial hoard, then switch over to the shotgun to eliminate the larger enemies at close range or climb up onto the shipping containers and take out the creatures with your scoped-rifle at a safe distance.
Make the area safe by clearing the room of all enemies to complete this level.
Return to the Main Walkthrough Page
Resident Evil: Revelations Walkthrough
Parker’s Story – Part Two
Move around to the other side of the staircase and open the two doors locked with shipping wheel mechanisms across from it, then enter the hall to your right and make your way through it to reach the upper balcony area on the left.
Drop through the break in the railing to your right and move through the next doorway in the corner to reach the bed of red plants, then head left across the checkered floor and exit via the double doors.
Fight your way past the creatures to reach the elevator and ascend to the Bridge, then exit the car and open the metal door across from you to complete this level.
Return to the Main Walkthrough Page
Resident Evil: Revelations Walkthrough
Jill’s Story – Part Eleven
Exit through the door that unlocks across from you and follow Chris through the series of rooms to re-enter the water, then swim down the corridor and make a left when the debris fall down in front of you.
Climb up the ladder and continue following your teammate to drop into a semi-flooded corridor, then push your way past the various explosions in the hall to reach Chris and witness the ceiling cave-in between you.
Move through the door to your right and navigate the hallway ahead to reach Parker, then continue forward after helping him to his feet and navigate the flooded corridor until a blast of hot steam blocks your path.
Return to the previous area and press the button behind the explosive tank across the room, then eliminate the enemy that appears by shooting the red container and fight your way back down the corridor that was previously blocked by steam to re-team with Chris.
Follow Chris through the flooded halls and take out the enemies by shooting the red containers floating in the water, then climb the next set of steps and cross the bridge in the next room to activate a cut scene.
Head up the steps in front of you to enter the next room and drop over the ledge to your right, then shoot the red container to eliminate the creature ahead and turn the valve around the corner to shut off the steam.
Continue forward along the walkway and climb the next ladder to the left, then draw the creatures on the bridge across from you over to your side and shoot the red containers to eliminate them.
Move around the walkway to climb the ladder on the other side of the room and head forward through the ventilation tunnel, then drop into the next room below and follow Chris up another ladder.
Move through the hallway at the top to follow Chris into the outside area and watch as the ship begins its final descent into the ocean, then run uphill towards the rear of the vessel and sidestep the debris that rolls your way to complete this level.
Return to the Main Walkthrough Page
Resident Evil: Revelations Walkthrough
Jill’s Story – Part Twelve
Move to the opposite side of the deck to collect the health, then aim your machine gun or rifle up at the monster and open fire on the slimy blue head of the snake-like parasite protruding from its side.
Pick up the Rocket Launcher inside the crate that the helicopter drops off for you and wait until you have a clear shot before firing it at the parasite.
Stay on the move to avoid the parasite’s slamming or projectile attacks and continue firing until you cause visible damage, then repeat this assault on the other parasites that emerge.
Continue attacking the parasites, with the help of the Rocket Launcher, until the entire monster slumps over dead to activate a cut scene, then use helicopter’s chain gun and grenades to continue the assault.
Target the parasites emerging from the monster’s corpse and kill off as many as possible while the helicopter circles around it.
Be sure to shoot in short bursts to avoid overheating the gun and keep the crosshairs always trained on the nearest parasite to fend off any lunging attacks.
Remove the remaining parasites from the monster’s body so its head starts erupting blood and additional creatures emerge from the corpse’s mouth, then continue the attack until you pick up the rocket launcher from the floor.
Fire a missile into the white sac within the monster’s mouth to eliminate all enemies and complete this level.
Return to the Main Walkthrough Page
Resident Evil: Revelations Walkthrough
Parker’s Story – Part Three
Make your way up the adjacent set of steps and eliminate the enemy at the top, then enter the elevator and press the button to reach the next floor.
Exit the car and take your next right to join up with Raymond, then eliminate the enemies in the hall and help your fallen teammate to his feet.
Walk forward down the corridor with Raymond hanging and enter the next room on the right, then exit through the door in the corner and continue in the next hall ahead.
Eliminate the enemy you encounter and continue forward along the corridor, then enter the wooden door to your right to reach a conference room and exit via the back entrance.
Make a right and prop Raymond against the wooden door across from you, then turn around and vault over the yellow sign ahead to collect supplies.
Return to the previous conference room and exit into the hall ahead, then make a left and enter the next room to the right for the purpose of collecting supplies.
Return to the previous hall and make a left, then continue around the corridor and enter the door at the end to reach the locker room.
Exit through the backdoor and vault the orange sign to your right, then continue around the hall to reach a metal door at the end that leads to a stairwell.
Climb the stairs to fight off the creatures and open the door to the fourth floor, then enter the cubicle area and continue eliminating enemies.
Make your way to the opposite corner of the cubicle area and search the debris lining the wall to pick up the tourniquet, then fight your way back to the hallway where you left Raymond and help him fend off the invading creatures.
Apply the tourniquet to Raymond to activate a cut scene, then open the door in front of you and make your way around to the other side of the room to exit.
Continue through the corridor and enter the elevator to press the button, then exit the car when it reaches the next floor and head down the steps.
Enter the lobby area and continue eliminating the enemies that approach, then make your way down the steps to the ground floor and clear out the remaining the threats.
Climb the center staircase at the back of the room to reach the double wooden doors and clear out the Hunters that appear, then enter the Command Room to complete this level.
Return to the Main Walkthrough Page
Resident Evil: Revelations Walkthrough
Jill’s Story – Part Thirteen
Turn the wheel to open the door and enter the wreckage, then search the room for supplies and use the on-screen instructions to cut a hole in the back entrance.
Swim through the corridor ahead to find the blobs from the beach, then cut into the next room across from you and collect the additional supplies.
Exit the supply room in the previous blob area and cut open the other door in the corner, then examine the corpse and continue swimming to your left to spot a creature in the distance.
Enter the next room on the left to collect additional supplies, then exit the area and make your last available right down another hall.
Cut into the next room in front of you and examine the electronic door in the corner, then exit the area through the other door in the area and swim forward through the corridor.
Wait for the large creatures in the room beside you to move on, then exit the area through the opening above on the right.
Float within the opening until the monster swims past you to the right, then make your way around the next corner ahead and quickly pass through another opening in the wall to the left.
Exit the room and swim through the next opening in the wall above after the creature glides past, then follow the underwater monster along the hall below and enter the next area in front of you.
Activate the console to open the door, then return to Chris’ location without being seen by the underwater monsters and enter the next room you unlocked.
Swim up the ladder to activate a cut scene, then pick up the Voice Recorder in the corpse’s hand and wait in the room while you listen to the tape’s message.
Exit the room through the wooden door beside and make your way through the hallway to reach the Dining Room, then make a right past the table and exit through the doorway in the corner to activate a cut scene.
Afterwards, search the room for supplies and exit through the the doors locked with a ship’s wheel mechanism.
Make your way down the carpeted stairs and open the door at the bottom, then enter the room in front of you and approach the man sitting the throne to activate a cut scene.
Pick up the evidence that was dropped during the cut scene and make your way back towards the previous doorway to complete this level.
Return to the Main Walkthrough Page
Resident Evil: Revelations Walkthrough
Final Boss
Open fire with the machine gun as the boss walks towards you and back away slowly, then wait for him to teleport right against you and aim upwards to fight him off the creature with a stream of shots to the exposed heart.
Repeat the attack above once more, then wait for the boss to teleport again and spin around to fend off his assault from behind your back.
Repeat the previous attack, then wait for the boss to teleport and spit himself in two so that you can open fire on the creature with purple smoke seeping from his face.
Repeat the previous step, then wait for the boss to teleport and shoot the one spewing purple smoke before either of them can execute their pounding attack.
Repeat the attack from before, then wait for the boss to teleport and dodge the one that swipes at you to then fire upon the creature emitting purple smoke.
Continue shooting the boss’ exposed heart until he drops to his knees, then use your shotgun for close range hits before the creature is back on its feet.
Evade the enemy’s various teleport attacks by sidestepping him or shooting the exposed heart if he appears in your face, then equip your rocket launcher and finish off the enemy with a solid hit on its heart to complete the game.


 Top 10 Exotic weapons in Destiny and how to use them part 2
 Hellraid Wiki: Everything you need to know about the game .
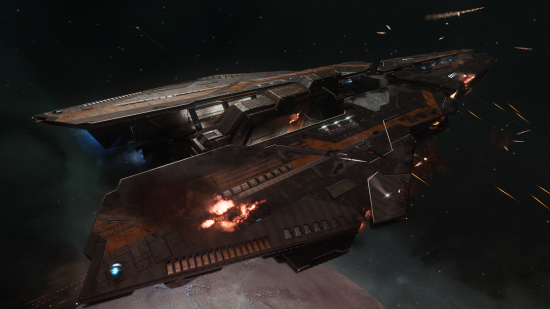 Elite: Dangerous Guide - How to be Successful When Bounty Hunting
 Thief 4 Serendi Stone Circles Locations
 Persona 5 Wiki – Everything you need to know about the game .