There are 7 Serendi Stone Circles in Thief 4, each of which is found in a specific mission. Read on to discover their locations...
Chapter 1: Lockdown – Amethyst Circle Location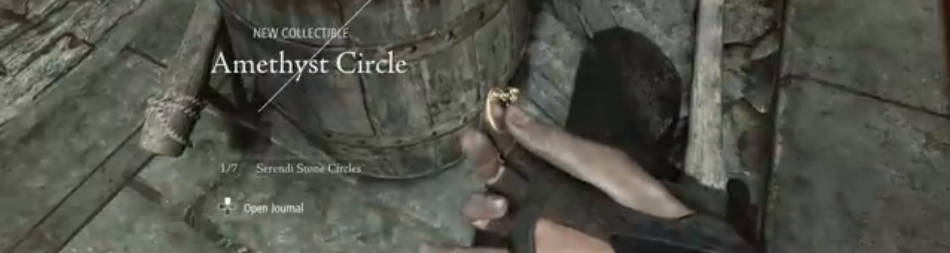
This one is found as you’re heading towards the clock tower. At the beginning of the mission, if you take the downwards path to the right of the tree, you will see a ladder on the right-hand wall of the building that you have to jump to reach. Climb the ladder and you should see a second one straight ahead, which you should also climb up. At the top of the second ladder, the camera zooms to focus on a building across the way. After this happens, head to the left corner of the roof you’re on and you should see a walkway with a beam conveniently spanning across towards your target building. Hop onto the walkway and as you step onto the beam, look left down onto the street and locate a cart on the left of the street. Jump down and locate the Amethyst Circle on the far side of the cart next to the barrel.
Chapter 2: Dust to Dust – Diamond Circle Location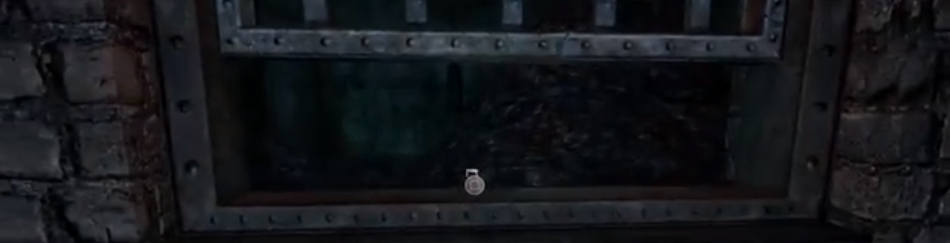
This one is located in Furnace Hall, which incidentally is the room with the large automated furnace. As you enter the room, take the passage that leads off to the left. The hallway you enter will wind round to the right and then left again, after which you should spot a window directly ahead that is open just a little. Perched on the middle of the windowsill you will spot the Diamond Circle.
Chapter 3: Dirt Secrets – Emerald Circle Location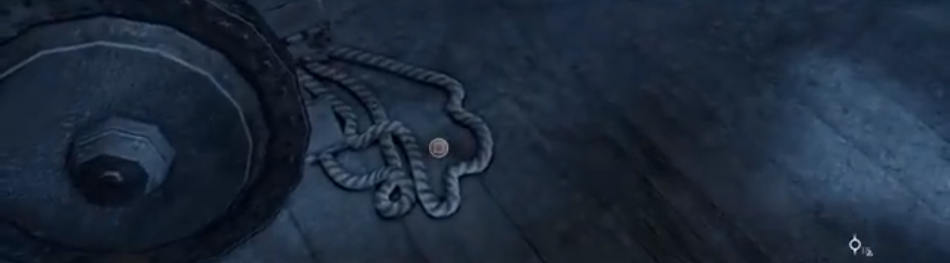
In the lower level of The House of Blossoms, move forwards through the first area and take the left hand staircase. After the second flight of stairs, directly ahead is a hooking point that you can use to climb up to an abandoned room. As you pull yourself up into the room, look on the floor slightly to the right. There will be a bundle of rope and the Emerald Circle sitting inconspicuously on the floor.
Chapter 4: A Friend In Need – Lapis Lazuli Circle Location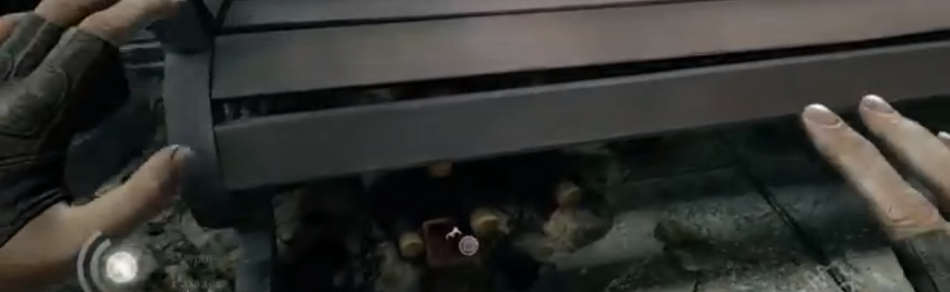
After seeing the building on fire in the distance, jump down on to the walkway and look to your left to locate a wooden beam sticking out of the brickwork that you can use your rope arrow on. Drop down and turn left at the bottom, going down the alley to the right of the steps. At the end of this alley you will see two benches: look underneath the one on the right to locate the Lapis Lazuli Circle.
Chapter 5: The Forsaken – Ivory Circle Location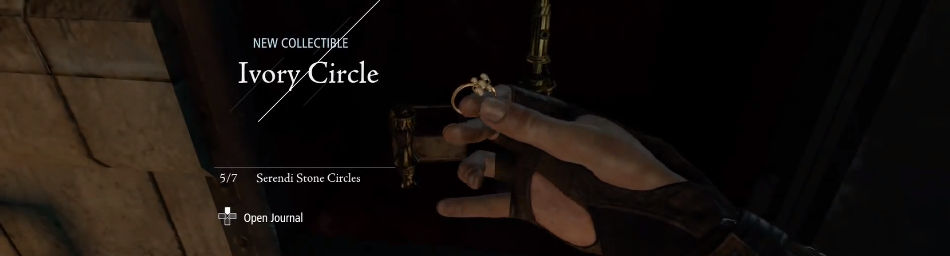
On the third floor of the Treatment Center, you come to a point where a man is beating up another man ahead in the hallway. To your right there is a room with a safe in it. Open this safe with the combination 731 and the Ivory Circle is inside.
Chapter 6: A Man Apart – Sapphire Circle Location
This one is on the first floor of Northcrest Manor. Go into the room on the right that has an armchair and a couch with a chess board set up between them. Along the back wall on the far left, you will see a safe. Open it by using the combination 889, and the Sapphire Circle will be inside.
Chapter 7: The Hidden City – Amber Circle Location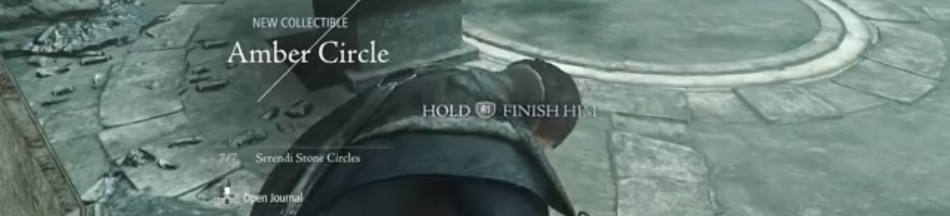
The final Serendi Circle is obtained during the boss battle in The Rotunda. You can either stun him during battle and pickpocket him, or simply kill him and pry it from his cold, dead hands.
Congratulations! If you've followed this guide then you've now obtained all of the Serendi Stone Circles in Thief 4! Stay tuned for more Thief 4 guides or see our existing ones below...
If you liked this, here are a few more that you may also enjoy...


 25 Best Video Game Inspired Desserts
 Magic: The Gathering and Counterfeits - An Old Issue Spawns a New Head
 A Sum of Parts: Use Your Words
 How To Re-Spec Your Character In The Witcher 3: Wild Hunt and Return All Ability Points
 Jessie J performs Masterpiece on Graham Norton Show