Completing the tombs in Tomb Raider will reward you with XP and possible gear upgrades, making them well worth doing. Using this guide you'll want to have as many fast travel camps as possible, allowing you to navigate more easily and also much quicker. So first things first, where do you find them? Well, look no further; here are all the tomb locations in Tomb Raider!
Coastal Forest – Tomb of the Lost Adventurer
To find this tomb, start at the Forest Ruins fast travel camp. From where Lara stands up, exit the area through the gap ahead of you and go down the stairs. From here take a right through the bushes, you should see a bridge in front of you (or to the left if you took a hard right through the bushes. Walk underneath the bridge to the back and take a right when you hit the wall. Jump up towards the crate with wooden planks on it and ahead of you will be the entrance to the first tomb location.
Mountain Village – Tomb of the Unworthy
 The first tomb in the Mountain Village is located about halfway up the cliff. To get there, begin by fast travelling to the Village Plateau camp. Walk past the plane’s wreckage where you’ll find a statue sitting in an open hut (part of the Illumination challenge, one of many you’ll find in Tomb Raider). To the right of the statue there will be a wall you can scale with your axe. Follow the wall’s path until you get to the top and jump onto the plane wing. Go right across the wing and you’ll find 2 more wall paths for you to climb, one small and one larger with a gap in between. After you’ve jumped the gap and climbed the ledge, go forward where you’ll see white painted signs next to the bridge. Instead of going across it, drop down to the right where the painted symbols are and to your right again will be the entrance.
Mountain Village – Hall of Ascension
Repeat the steps to get to the first tomb location in this area. This time however, cross the bridge to the other side of the first tomb's entrance and scale the wall. Once this has been climbed jump across to the next climbable wall situated in the middle of the waterfall. You may find some enemies patrolling this area with a couple of shacks. If applicable, take them out and jump to the island in the middle of the river. Another climbable wall will be to your right. Climb that and follow its path. You'll find a little ramp to indicate where to climb yet another wall in front of you. Once you're up, turn right around and you'll see two statues in front of an archway, jump over and enter. Follow the path through (illuminating the statue if you haven't already for part of a challenge) and on the left you'll see a wooden pillar for you to attach a rope arrow to. Continue forward across the gap and follow the path until you find another wooden pillar. Ignore this however and simply look to the left for the second tomb's location.
Shantytown – Well of Tears
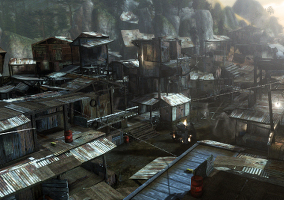 From the helicopter hill base camp follow the path to the right. Keep going until you see a small ramp. Ignore the ramp and drop down a level and turn left. There will be a wooden railing in front of you, and to the right of that a set of stairs. Either go down the stairs or simply jump down to the floor below. Just behind the somewhat disturbing deer carcass stuck in branches and a tyre is a wall that you can wall scramble (A/X to jump on it, A/X again to scramble up mid jump). Turn right and continue forward until you see a set of stairs leading to an old chapel, which is also the entrance to this tomb. Once inside there will be a few small white arrows painted in a certain direction. Look in that direction and rope pull the debris off to reveal the tomb location.
Shantytown – Chamber of Judgment
The second Shantytown tomb location will be incredibly simple if you have unlocked the Windmill base camp. It's literally right next to it littered with tied up corpses. If you haven't found it yet, start from the Ancient Gate Day Camp (pretty much right in the middle of Shantytown). From here walk down the stairs and keep left. Ignore the entrance that you'll come to and instead use the wall scramble to climb to the left of you. Continue forwards up the wooden stairs and keep right. Once you're past the wall scramble spot you'll see the Windmill base camp and the second tomb's location and entrance.
Summit Forest – Stormguard Sanctum Tomb

Use the fast travel option to get to Summit Forest's only Base Camp - Hunting Lodge. From where Lara stands up, do a 180-degree turn and simply walk forwards. You should see a small cavern formed in the wall before you. Simple and quick; another tomb location found.
Shipwreck Beach – Temple of the Handmaidens
Using Shipwreck Beach's only fast travel point will make this a breeze. Fast travel to the Survivor's Camp Base Camp and turn left from where Lara spawns. Ignore the main pathway leading uphill and continue forwards to the big rock ahead. Once you get to the rock simply turn right and you'll see a bunker leading underground which doubles as the Tomb's entrance.
Shipwreck Beach – The Flooded Vault
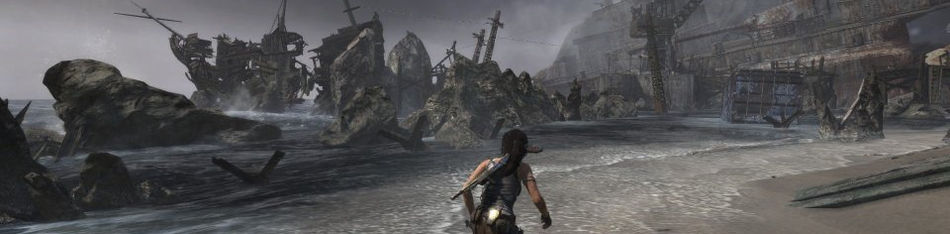
Start from the Survivor's Camp Base Camp again. Turn left like before and go forward until you walk to a lower level. Turn right here and go forward underneath the makeshift archway. Continue forwards on the path past the set of stone stairs that lead to thin air. At the end of this pier is a wooden pole that you can use to set a rope arrow to. Fire the rope arrow into the climbable wall opposite and proceed across. Wall scramble up the scrap metal and go right, jumping to the white drainpipe at the end. Jump up and climb here then jump forwards using the metal pole to swing Lara forwards onto the next platform. Jump again to the hanging crate and wall scramble the wood in front to reach the rusty damaged ship. In front of you will be a rope leading up to a ledge ahead of you. Pull Lara up the rope (or hold X if you have the rope ascender) and you'll come to a small island. Turn left and jump up to the higher ground. The tomb's location will be here right in front of you in an abandoned bunker.
Did this article help you find what you were looking for? Let us know in the comments section below!
If you enjoyed this, here are a few more pages that you may also like:


 Top 10 Best Free FPS Games
 Xbox 360 Slim System Error and Power Button Red light Fix
 The Hard Way: A Lesson for Hepler
 Project CARS (2015) will have 74 Vehicles, full Car List
 Sayonara Shadow the hedgehog