Like our videos? Subscribe to Game Front Video Walkthroughs on YouTube!
Find Game Front’s extensive video library of cheats and guides on our free mobile apps.
GameFront Video Walkthroughs app for iOS
GameFront Video Walkthroughs app for Android
Welcome to the walkthrough to the indie mind-bender Antichamber, where we’ll break down the bizarre environments and show you how to complete every puzzle. The designers want to break down expectations by putting players in unfamiliar puzzling situations. Don’t get lost in the non-euclidean corridors of Antichamber, let us guide you out of this experimental indie FPS with your brain intact.
Check out more indie guides on Game Front like our Slender Tips & Tricks, Strike Suit Zero Text Walkthrough, and The Cave Endings Guide.
Antichamber
Video Walkthrough – New Updates!
Part 1:
Part 2:
Part 3:
Part 4:
Part 5:
Part 6:
Part 7:
Part 8:
Antichamber Walkthrough
Antichamber
Leap of Faith
Before starting the game, please take note of the destination wall in the menu room. From here, you can choose where you want to go. If at any point in a level you get lost, you can travel to a different location by pressing ‘Esc’ and choosing the destination on this wall.
Start off by choosing ‘Leap of Faith’ as your destination. Walk forward to the gap.
Walk towards the gap that tells you to jump, but DO NOT jump. Just walk forward. The ground will appear underneath you, allowing you to make it to the other side.
Once you reach the end of the hall in front of you, turn left. Head towards the next picture on the wall. The ground beneath you will disappear, and you will fall.
When you fall into the pit, take notice of the platform below you. Keep jumping on it like a trampoline. Eventually you will end up in a new room. You can get back to this room later by choosing ‘Impossible Paths’ as your destination.
Antichamber Walkthrough
Antichamber
Impossible Paths
Choose ‘Impossible Paths’ on the map. When you arrive, jump into the ‘WTF’ pit.
Head forward until you reach the sign. Make your way towards the ticking pendulum. At the intersection, move left towards the eye.
Stare at the eye until it disappears. Here, hold down shift to walk. While moving slowly, make your way across the bridge.
Keep going forward until you reach two blue blocks blocking a laser. Walk through to the middle, then take the blocks. Use them to block the next laser. Back up into the first laser to open the door.
Go through the newly opened door and head up the stairs. Take the blue blocks ahead of you and use them on the door to the left. Next, take the green blocks and place them in the remaining slots. The left door will open.
Head through the fake stairs until you reach the next sign. To your left you will find a blue dead end. This wall is actually made up of blue blocks. Take as many blocks as possible and clear a path.
Use the blocks to create a staircase on the wall in front of you. At the top of this there will be another short wall that appears in front of you. Use the blocks to jump over it.
Jump onto the platform ahead of you. Use it as a trampoline and walk forward. When you get low enough, you will walk into a new hallway. Keep going until you find another platform on the ground. Once again trampoline yourself until you reach the bottom.
The room you just entered will be labeled as ‘Butterfly Effect’ on your map. You can travel back here anytime.
Antichamber Walkthrough
Antichamber
Butterfly Effect
Choose ‘The Butterfly Effect’ as your destination. When you get into the room, take the blue block in front of you. Walk forward and push the large cube until it can’t go any further. A platform will lower behind you.
Hold the cube in place with the block. Walk back onto the platform behind you. When you are ready to go up, pick up the block that is holding the wall.
Let the platform slingshot you upwards. Walk forward and jump when the platform reaches the top. You will end up in a maze full of doors. Place your block in the slot to open up the first door.
Walk through to the next door. Use the slots to open up all the doors until you reach the end of the maze. There will be two slots, one of which contains a blue block. Do not close the doors behind you.
Grab the block and head back the way you came in. In the last room, keep the door open using one of the blocks. Keep making your way back to the first room. Be careful not to get yourself trapped. If at any point you become trapped, simply restart. This part may take some practice.
Make your way to the original slot and grab your first block. Head back through the doors, collecting all of your blocks as you go. Block the doors with the blocks to progress without having to use the slots.
Close the doors behind you and keep moving until you reach the final hallway again. Place blocks in the two slots so the door opens. Next, keep the door raised with one of the blocks. Enter the room, and grab your blocks so they don’t get left behind.
Open the door with four slots above it. Keep moving until you reach the next gun. This room will be called ‘Learning to Draw.’
Antichamber Walkthrough
Antichamber
Learning to Draw
Choose ‘Learning to Draw’ on the map. Use your gun to collect the blocks from the wall in front of you. Do this carefully. Try to leave the shape in-tact, or block will disintegrate. Collect as many blocks as possible.
After you collect the blocks, head to the cube in front of you. Inside is another set of blocks for you to collect. Locate the line around the cube.
If at any point during this level you should run out of blocks, simply restart. This level takes a lot of practice. Keep trying until you are able to collect enough blocks to complete this area.
Find the start slot and use your gun to start drawing in cubes on the path. When you completely fill in the line, the cube will open.
Start collecting all of the blocks inside of this cube. Do it carefully, or the blocks will disintegrate. Try to collect them layer-by-layer so they don’t disappear.
Locate the door to the left of the cube. There will be two more lines to fill in with blocks, going around the door. Fill in both lines with your gun. If you run out of blocks, restart the level and try again.
Move through the door and head to the exit. Read the sign, and move along into the next area. This location will be called ‘Strength in Numbers.’
Antichamber Walkthrough
Antichamber
Strength In Numbers
Choose ‘Strength In Numbers’ as your destination. Head straight forward and collect blocks from the fence in front of you.
Cut a line down the fence so it disintegrates. Walk through to the green door ahead.
On the panel to the left, take one of the blocks in the center. Immediately start drawing in blocks around the square. If you do it too slowly, the blocks will reappear.
When the square is filled in, the door will open. Keep moving forward until you reach ‘Managing Resources.’ Here you will find some blocks on a wall, and two doors on each side. Pick up the blocks with your gun.
Using the blocks, draw a square with a missing center. The gun will automatically fill in the center block. Keep drawing empty squares until you have at least 12 blocks. You can then open the door on your right.
Enter the next room. Go to the right and you will reach a cross blocking your path to a door. Look at the center of the cross, and in this order, take the blocks: the block directly to the right of the center, to the left, and the bottom.
If you take the blocks fast enough, the others will disappear in a chain reaction, which is perfectly timed to open the door. Before they reach the end, quickly run forward to the door. If you do not reach it fast enough, it will close. This part may take a lot of practice.
Open the next door by stealing the block in the slot. In the next room, you will find the yellow gun. Pick it up and move towards the exit.
Move forward into the next chamber called ‘I Like to Move it.’
Antichamber Walkthrough
Antichamber
I Like to Move It
Choose ‘I Like to Move It’ as your destination. Use the yellow gun to pull the shape out of your way. You can do this by choosing a block and pulling it with the middle mouse button.
Continue forward to the door straight ahead. On both sides of the wall there will be slots. You cannot directly place blocks in each slot. Instead, place it on the outside and drag it into place using the yellow gun.
Using the above technique, fill in each slot. The door will open up. Head through to the first ‘Climbing the Tower’ room.
In this room, go into the doorway to the right. Take the blue block and the wall will disintegrate. You will be back in the ‘Learning to Draw’ room.
Focus on the door to the left this time. Instead of drawing blocks to open the door, just place one block and drag it into place. Do this for both slots so the door will open. Drag the large yellow wall out of the way.
Advance into the second ‘Climbing the Tower’ room and turn left. Once again, grab the blue block so the wall will disintegrate. Head towards the next door.
There will be eight slots that need to be filled, four on each side of the door. However, you are only given five blocks. Grab the blocks you are given.
Locate the panels to the left and right of the door. Place blocks in the panel, and drag them so they connect to the yellow blocks already placed inside. Connect them to one of the open squares outside of the panel.
When the yellow blocks are connected, you can drag all of them out of the panel using your yellow gun. Do this until you have access to all eight blocks. Open the door by placing them in the slots.
Move through into the third ‘Climbing the Tower’ room.
Antichamber Walkthrough
Antichamber
Pulling Both Ways
From the third ‘Climbing the Tower’ room, move left into ‘Pulling Both Ways.’ Locate the panel near the door.
You will need to get a block in each corner of this cross-shaped panel. While it seems impossible, it is actually very simple. You can do this by splitting the shape into pieces.
Choose a corner to start with and drag the shape into it. Quickly grab the corner block, and drag the shape away. The block you grabbed will reappear, separate from the rest of the shapes. You can do this until each section of the cross has a block in it.
The door will open, giving you access to the fourth ‘Climbing the Tower’ room. Go left and grab the blue block. When the path is open, continue into the next area. There will be a large gap labeled ‘Fly??’
Instead of trying to fly over the gap, grab pieces from the floating word. Use the blocks as a bridge to clear the gap. Draw a bridge using your gun, and cross it to the other side.
Before you try to walk through to the next room, shoot a block at the glass. You will need one block to open the next door.
Use your yellow gun to drag it with you. Drag it around the glass and into the slot to open the door. This will lead you to the fifth tower room.
Antichamber Walkthrough
Antichamber
Four Different Exits
From the fifth ‘Climbing the Tower’ room, head to ‘Four Different Exits.’ We will be taking the exit straight ahead from where you enter.
Grab the yellow block and place it on the side of the large cube on the right. Jump on top of the block, and drag it upwards. Ride the block to the top of the cube.
From the large cube, jump to the exit. You should now be in ‘Just a Little Bit Shy.’ Take note of the panel near the door.
This panel does not have enough blocks, so you will need to make some. Connect all the pieces, then drag them around the perimeter. Drag them around the inside square to create some blocks. Repeat the process one more time.
After you create enough blocks, you can drag the blocks around the outside perimeter of the square. This will completely fill in the panel, causing the door to open. Head into the sixth tower room.
Move right through the door into ‘Impossible Paths.’ Grab some blocks from the floating letters. You will need to make your way to the other side of this gap. Start off by creating more blocks. Draw an empty square to fill in a floor.
Use the floor you created to move to the middle of the glass walls. From here, drag a row of blocks from your floor to the other side of the gap. Be careful not to fall.
From the middle of the two glass walls, you should be able to jump across the gap to the other side. Move into the seventh tower room.
Move through to the next door. There will be a slot on each side, only one of which is filled. Take some blocks from the filled slot.
Place the blocks in the empty slot. Drag the blocks into the panel, and attach them as you go. Keep dragging the blocks until the panel, and slot, is filled. Head through the opened door into ‘Breaking the Arc.’
Antichamber Walkthrough
Antichamber
Breaking the Arc
Go to ‘Breaking the Arc.’ In the red center, take notice of the window at the top. Walk to the launch pad on either side.
Stare up at the window as you are launched across the room. You will be teleported to the last tower room. Look at the window on of the roof, then look down. You will drop into a hole.
Stand on the word ‘Up,’ then drag a block towards the X above you. It will lift you back into the Arc room.
When you reach the top, jump down to the launch pad again. Use the launch pad to reach the yellow blocks that you just raised. This time, the lift will appear below you. Fall down to the bottom, and once again ride the word ‘Up’ to the top.
When you climb to the top of the tower, exit into the room that just appeared. This room will contain the red gun. You will have to solve a puzzle to open the door.
Take notice of the panel next to the door. This part can be very tricky, and requires a lot of trial and error. There are not enough pieces to fill the panel, so you will need to make more.
Connect the pieces, then drag them into a line. Wrap the blocks around the center square to create more blocks. Separate two pieces to place in the outside corners. Use the main piece of blocks to wrap around the center again to create more blocks.
Once you have created enough blocks, move the pieces into place. The door will open to the red gun. If you have trouble with this part, or become stuck, restart and try it again. Practice makes perfect.
Grab the red gun and turn to the red panel in the room. Using the middle and right mouse buttons, collect all of the red blocks. The door will open. For the next panel, place the red blocks by holding down the middle and left mouse buttons.
Head through to the exit
Antichamber Walkthrough
Antichamber
The End
Once you have the red gun, you can head to the end of the game. Travel to ‘Leap of Faith’ and immediately turn around. Stare at the eye on the wall until it disappears.
Grab the two blue blocks in the room ahead. Use your red gun to create new blocks. Once your gun is full of blocks, turn around and head towards the gap. Jump into the gap, but stay near the edge where you jumped off.
Along this edge there will be a stairway. Do not fall to the bottom of the pit, but instead land on this stairway. This part may take practice. If done right, you should reach a barricade in front of a door marked ‘The End.’
Place blocks underneath the barricade. Use them to link all of the blocks in your path. Once the blocks are combined, you can suck them up using your red gun. Continue forward into ‘The End.’ Move through the exit door.
Head up the staircase until you find the floating blob, and chase it. Once you reach a white wall blocking your path, find the spring platform on the floor.
Take notice of the stairs above you. Use the platform to launch yourself onto the stairs, towards where you entered. Move forward to the blue and green windows.
Look through the green window to get into the white room. Here, you will find many multi-colored windows. The correct window to go through is the white window. Use the white window to teleport to the blue room.
When you reach the blue room, turn right into the white hallway. Walk straight forward to the circle on the wall. You will be trapped in a cube-shaped room. Stare at the white circle, then walk backwards to free yourself. Go to the other side of the circle, and walk backwards again.
You will now be on the outside of that room. Move towards the blue hallway, and into the seemingly-pink hallway. The hall will actually lead you into a green room with a launch pad and an eye on the wall.
This part will take some practice. Stare at the eye until it is about to disappear. Before it disappears, launch yourself using the pad. You should fly through into the orange room. Head forward into the pink hallway that you saw before.
Continue into the room full of stairs. Do not run here, use the shift button to walk. Go to the left and drop down to the lower platform. Head up the stairs and keep walking. The invisible floors will appear below you. Keep moving up.
When you reach the upper walkways, a short wall will be blocking your path. To the left of the room, there will be an invisible floor that cannot be destroyed by running. Get onto this platform, then run into the wall. It will disappear, allowing you to move through.
Locate the yellow hallway and walk into it. Continue until you reach a door. When you enter, you should see the floating blob again.
Move left into the open hallway. Enter the door with the laser in front of it. Keep heading through the doors marked with lasers. Eventually, you will end up at a hole in the ground, in front of red blocks. Drop down.
Enter the blue hallway and jump through the square hole in the glass. To the right of this room, head into the green lift. Activate it with the laser.
Once again, move through the doors with lasers in front of them. You will reach a red hallway. Drop down and move straight forward. You will reach the red blocks. Collect them with your gun, and go back the way you came in. Use your blocks to reach high places.
On the blue panel straight ahead of you, place blocks in the slots. Drag the blocks to connect all of the red blocks in the panel. Once the blocks are connected, move them out of their original places. You can suck them up using your gun. This will unlock the door.
Behind this door, there will be another panel. Repeat the process. Move the blocks out of their original places to open the next door. When the doors are open, head into the orange hallway.
Jump onto the spring platform. Use it to lower into the green hallway. In this room, there will be a large blue-framed area. Use the square opening in the glass to place red blocks on the inside of it. Do not lose your blocks.
Head in and retrieve your blocks. Create more blocks using your gun. When you have enough blocks, look at the line on the ground, and fill the slots with your gun. Follow them into the blue hallway. Retrieve your blocks again from the square in the ground.
Keep moving forward until you reach a dead end. Use your blocks to boost yourself up into the original room. Head to the door with multiple slots in it. Place your blocks in the slots, and go around to the other side.
Retrieve your blocks from the slots on the other side. When you get them, multiply them. Head through the sets of doors, opening each one by placing blocks in the slots.
You will reach a blue-framed cube in the center. Trapped inside is the floating black blob you were chasing. Use your gun to capture him through the window. The room will change around you.
Travel through the doorway to the outside. You will no longer be in a chamber. This part is very direct. Locate the black sphere, and follow the pathway towards it. When you reach a split in the path, go either way.
Jump down the hole and hit the platform below. Clear the gap to the next walkway, and keep traveling towards the sphere.
Continue forward until you reach a large gap. Jump straight down to the platform below. Keep moving towards the sphere until you are on the outside perimeter of it. Please note, you can reach anywhere on this map by jumping off of the side and falling on top of it, even the sphere. This part takes a lot of practice.
You will need to reach the inside of the sphere. To do this, jump off the platform and fall down towards it. Hit the inside platform. There sphere will open up.
When the sphere opens, place the blob inside of the floating cube. Watch the end of the game, and enjoy your freedom from the chamber.


 Ghost Recon, or Fighting Terror With Terror
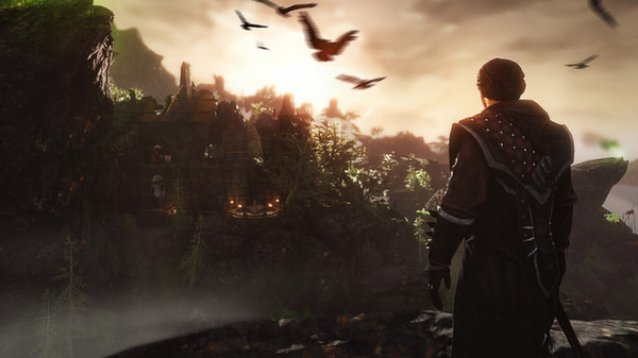 Risen 3: The Titan Lords Review
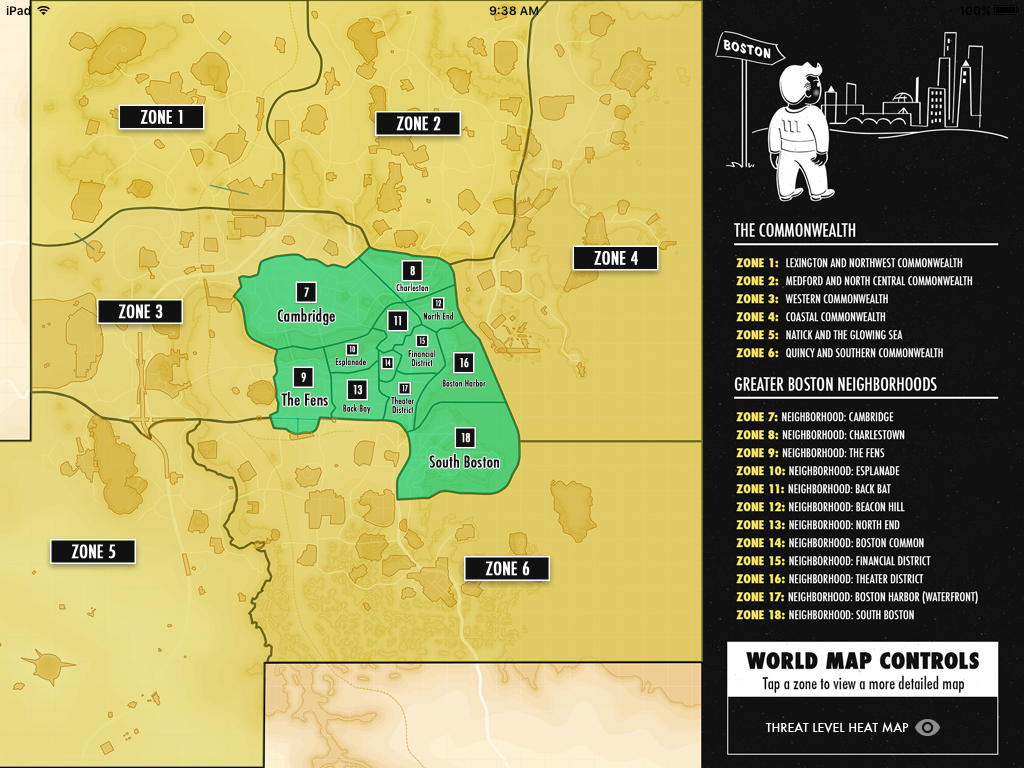 Fallout 4 Guide: All Bobblehead and Magazine Locations With World Map - Spoiler Fee
 Pirates of the Caribbean 5: Kaya Scodelario joins the cast
 Empyrion: Galactic Survival Beginner Crafting Guide