Here’s the full video and written walkthrough for Rayman Origins including
locations and how to’s to release all the Electoons and find Skull Teeth to
give to the Reaper to gain entry to the “Land of the Livid Dead”
-

TABLE OF CONTENTS

The Snoring Tree
Jibberish Jungle
Desert of Dijiridoos
Gourmand Land
Sea of Serendipity
Mystical Pique
Ticklish Temples
Grumbling Grottos
Luscious Lakes
Angsty Abyss
Moody Clouds
Land of the Livid Dead
------------------------------------------------------------------------------

The Snoring Tree

While resting peacefully in thee Glade of Dreams, Rayman and his friends -
Globox and the Teensies along with the Bubble Dreamer make so much noice that
they raise the Livid Dead.

The Livid Dead have now invaded the Glade and loonified the Dreamer, now
Rayman needs to release the Electoons which have been captured by the dead.
Along the way he also needs to gain as many Lums as possible so that at the
end of each level the Magician can trade in Lums for more Electoons.

As you keep collect Electoon, different characters are also unlocked here, you
can change a character by just jumping into their bubble, the four basic are
Rayman, Globox and the Teensies and all others are just colorful variants of
the same guys.

Jibberish Jungle

Electoons - 32
Skull Teeth - 1
Nymph - Betilla the Fairy
Powers - Attack
Final level Boss - Angry Bird in Hi-Ho Moskito

Explaining how to do things word by word in a 2D platformer can be very
tiresome and also, unnecessary and flawed. So, I made the videos of all the
stages so it's better to see the videos for the walkthrough. I showed all the
hidden doors which lead to Electoons and also some hidden Skull Coins and
other stuff in the videos and if I missed anything, they are mentioned with
pictures below so you don't have to worry about missing anything out.

Here's the video -
It's  jungle Out There... 00:41
Geyser Blowout            02:15
Punching Plateaus         05:18
Go With The Flow          08:44
Swinging Caves            11:42
Over The Rainbow          14:22
Can't Catch Me            14:58

After you finish an area, you can replay it and this time, you should see a
clock in the beginning of the area, if you attack the clock you can enter
timed mode, in the timed mode you have to complete an area before the given
times to unlock extra Electoons (needed) and trophies (useless). The time
trials are really very easy so you should not have any problems at all.

The level Can't Catch Me will be available only after you free 25 Electoons,
Betilla opens the passage after that and you can go in. You'll see a magical
chest which holds the first Skull Tooth for the Reaper. You may find chasing
a box to be more challenging that you'd think but you'll get thru after a
couple of tries, just make sure you are jumping at the right places and always
keep sprinting. Go back to the Snoring Tree and near the Reaper to give him
the tooth.

I left out Hi Ho Moskito so that you can play it without any spoilers, there
are no hidden objects, just shoot the things that come infront of you and
you will also face your first boss, not very tough through, just move up and
down to avoid getting sucked in and keep shooting it - you'll see when you
get there.


Desert of Dijiridoos

Electoons - 30
Skull Teeth - 1
Nymph - Holly Luya
Powers - Fly
Final level Boss - None

Crazy Bouncing         00:00
Best Original Score    04:30
Wind or Lose           08:26
Skyward Sonata         12:46
Cacophonic Chase       17:23
To use the Fly power which can be unlocked in Crazy Bouncing after saving
Holly, just jump and while in the air, release and again hold the Jump button
to glide like a bat... the power should have been named Glide instead of fly..

You may need to play Best Original Score a couple of times before you can beat
it in time trial, it's a bit challenging.

I missed a Hidden Door at 09:27 in Wind or Lose, here are the pics which lead
to the door -

-

-

No Turning Back and Shooting Me Softly, the last two areas are basically same
as the last areas in the previous level, nothing is hidden, just collect all
the Lums for greater rewards.

Cacophonic Chase is unlocked after you release 45 Electoons, it's more
challenging than the last Skull Tooth we collected so take a look at the video
for some useful pointers. You will need to play it several times before you
can catch the chest.


Gourmand Land

Electoons - 24
Skull Teeth - 1
Nymph - Edith Up
Powers - Change Size
Final level Boss - Flying Eel
Polar Pursuit            00:00
Dashing thru the Snow    04:07
Piping Hot               07:23
Sink or Swim             12:05
Boss Fight - Eel         12:54

As usual, you will not need any help for Mending The Rift and Aim for the Eel.
Well, you should do Aim for the Eel yourself anyway but I did include the boss
fight at the end of the video, check it out if you have any trouble with the
Eel. This is one of the shorter levels in the game.


Sea of Serendipity

Electoons - 24
Skull Teeth - 1
Nymph - Anetta Fish
Powers - Dive
Final level Boss - None
Port O Panic           00:00
Swimming with Stars    03:56
Freaking Flipper       09:50
Pirates Treasure       14:09
Fire when Wetty        14:53

You should do Port O panic once after you gain the power to Dive so that you
can explore the area better and have a chance at catching all the Lums.

I missed out a Hidden Door in Port O Panic at 02:34, here are the pics showing
how to get to the door -

-

-

I did not show another door in the Freaking Flipper at 12:57, here are the
pics leading to the door -

-

Bad Bubbles and Beyond is the Electoon Bridge, at the end of which you will
see a red spider, go in between it's legs after it lifts them and then hit it
upwards on the jewels (huh!). Fire when Wetty is the Moskito lift level, as
such there is no boss to fight but you'll need to move while avoiding two
flying Eel like things, I added that part at the end of the video to help you
out.


Mystical Pique

Electoons - 24
Skull Teeth - 1
Nymph - Helena Handbasket
Powers - Run On Walls
Final level Boss - Golly G.Golem
Moseying the Mountain      00:00
Mystikal Munkeys           05:56
Trickly Treasure Temple    11:40
Golly G.Golem              12:16

Before you start the Tricky Treasure Temple, make sure you have an extra life
with you just in case. Just play the first area of the first level and make
sure you have the life and then get back to this area and them play it. And
the Electoons Bridge is left out for you.

Moody Clouds

When you go here the five Nymph Sisters appear and Helena Handbasket asks us
to free the Four Kings so that the Dreamer Door can be opened.

If you check now, four new locations have been added, each one has a king we
need to take care of.


Ticklish Temples

Electoons - 30
Skull Teeth - 1
Final level Boss - Corrupted Little Daisy
Outta My Way            00:00
Up and Down             04:06
Hunter Gatherer         07:53
Climb Out               10:03
Still Flowing           14:16
Poor Little Daisy       17:31
Playing in the Shade    19:59

Make sure you have a extra life going in to Poor Little Daisy, you can pick
one up in the area itself but just take one anyway. After the last area, you
free the first king - Little Daisy.

This may be the longest area, and Playing in the Shade needs 140 Electoons so
go back and do some area again for Electoons if you don't have enough. Also,
the trick to complete Playing in the Shade is in the jump. For instance, if
you hold your jump button you are going to take a higher jump whereas if you
just hit and release the button you will make a shorter jump, just use the
appropriate jumps at the right times to catch the box. This may take a few
tries but keep swinging till it hits.


Grumbling Grottos

Electoons - 30
Skull Teeth - 1
King - Corrupted Mocking Bird
Savage Swarms                 00:00
Tricky Winds                  04:00
High Voltage                  08:58
Tuned up Treasure             12:08
Snake Eyes                    12:59
To Bubblize a Mocking Bird    14:52

I caould not show a Hidden Door in Snake Eyes, it can be missed very very
easily, the door is right below the last door that leads to the last Electoon
at the end of this area, here are the pics, you may need to wait for the
snake to go away completely before you jump down here -

I left out Don't Shoot the DJ because it's too simple. When you are fighting
the Mocking Bird, if you are looking to make more Lums to get the prizes in
the end, then after hitting it for the first time, the second time it moves
around with some more birds behind it, do not hit the Mocking Bird, just kill
the other birds and that should fill you up. Also, while fighting it for the
last time, it tries to suck you in, to avoid getting sucked hold the opposite
direction button while floating.


Luscious Lakes

Electoons - 18
Skull Teeth - 1
King - Little Dragon Chef
Dragon Soup               00:00
You're on Fire            04:40
Fickle Fruit              07:18
Ice-Fishing Folly         11:33
My Heartburn's for You    12:14

In Ice-Fishing Folly, you will need to gain momentum at each platform so that
you can make the jump. Make sure you are jumping at the very edge of each
platform so that you gain momentum running a bit.


Angsty Abyss

Electoons - 18
Skull Teeth - 1
King - Corrupted Murray of the Deep
Why so Crabby?           00:00
Risky Ruin               07:11
Beware of Mini-Murray    09:15
Murray of the Deep       13:28

I left out Scuba Shootout since it's a Muskito transport area and you
would'nt need any help. In Risky Ruin, you'll again need to change the jump
pattern, just remember that if you hold the jump button, you'll jump longer
and if you just tap it, you'll just get a little jump, do either of these
when and as necessary, look at the video if you need to know what jump to
do when, just watch carefully when Rayman is jumping - short or long leaps.
When inside water, you'll need to hold the sprint button at all times and
also, keep hitting the attack button when the walls are collapsing near you.


Moody Clouds

Electoons - 18
Skull Teeth - 1

Riding the Storm        00:00
On Top of Old Smokey    02:27
Mecha No Mistake        07:38
Tricky Temple Too       12:23
The Reveal              13:36Tricky Temple Too has the last of the skull teeth, it's also the hardest
tooth chase in the game - as expected. You'll need to hover, small jump and
long jump at proper times and even nose dive (hold down and then attack to
quickly hit below you) at appropriate places to get to the end, this may take
a while and I made that part of the video in slo-mo (1/2 speed) so that you
can look at the chase properly and make sure you have an extra life going
into the chase. After you get the tooth, this should be your tenth and now
you can enter the Land of the Livid Dead via the Snoring Tree by giving all
the teeth to the Grim Reaper at the left most area of the tree.

The Reveal can get really tricky but actually is much much easier than I
though it would be.


Land of the Livid DeadThis area unlocks only if you collect all the ten skull teeth and give it to
the reaper. Go into the portal which the reaper has been guarding to get the
tour of the dead.


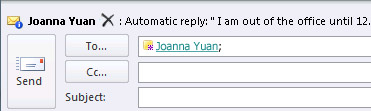 Save Time by Creating Outlook Items Directly from Your Clipboard
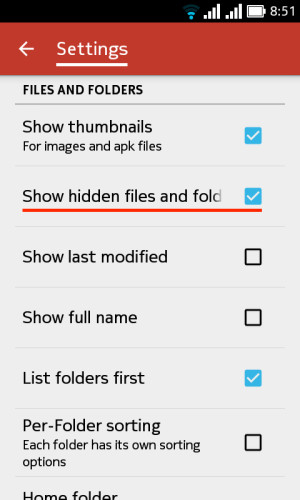 An Easy Way to Hide Files on Android So Nobody Can See
 Easily Turn Your Android Device Into A Retro Gaming Hub
 Rock Band 4: learn to Import / Transfer Old DLC songs
 All Easter Eggs Locations in Just Cause 3