

Head off the transit and turn left, heading up the stairs before you. Pass through the unmarked door on your right and head up the small set of steps, ignoring the elevator on your left and passing through another unmarked door in front of you. Board the nearby elevator to head up to Seegson Synthetics.
Step off the elevator to have your objective update to Climb the Elevator Shaft to Upper Labs. Move behind the desk and access the terminal, browsing to the Personal folder to find the code 8382 in the Smythe Read This area. Use your Cutting Torch on the nearby door and then enter the code to open it. Hop into the vent and move through it until you exit, then shimmy across a ladder, up a second ladder to your left, and then to a third ladder which you must shimmy across. After a short scripted event you’ll end up inside an elevator. Climb through the roof and into another vent, following the shaft until you reach a room.
Make your way through this room in the only possible way and save your game once you spot the terminal on the wall ahead. Pass through the door on your left and follow the hallway as it curves, taking the first door on your left. From here approach the large door with the Apollo Secure Transit sign above it and your objective will update to Find a Way Through the Electrified Door.
In order to pass through this door you’ll need to approach and turn off three different devices scattered throughout the area. The first is a few feet behind the transit door, and the other two are across the hall from this area, in their own separate rooms. To find them easily just look at the ground and follow the wires, which will lead you directly to the devices. Once the third device is down return to the door and power off the final device to head inside.
Follow the corridor as it ramps up and when the door ahead of you closes hop into the nearby vent and observe Samuels in action. Continue to follow the vent until your objective updates to Find Samuels and then exit into a small room. Leave the room by approaching the door and using the button beside it. Now turn right and loot the desk and nearby body for supplies before accessing the Sevastolink Terminal. Browse down to the Personal folder and open the RE: Plans Tonight document to learn there is a lockdown button somewhere near the desk. From the terminal move right to the nearby pillar and find the button sticking out like a sore thumb. Interact with it to unlock the big door at the far end of the room.
At this point the display models of Synthetics in the room will come to life and you’ll need to sprint to the end of the room and through the door as fast as you can. Once through the door make your way to the Sales Agreements desk and use the Access Rewire to set Gas Divert to the active modifier. This will cause a blast of flames across the showroom door that separates you from the coming Androids.
Head straight from the desk and pick up the Molotov V.2 from the dead body near the small stairs and then head into the nearby room to grab any extra loot. Now craft as many Pipe Bombs, Medkits, Molotovs, and EMP Mines as you can. Reload your weapons and save your game before heading back to the Synthetic Showroom door to take on the Joes.
Once the Joes have broken through the door let them walk through the flames before dropping an EMP mine at their feet. Once they are stunner hit them with a Pipe Bomb to quickly de-escalate the situation and loot their bodies once they’re all dead. You should find a Keycard on one of them, and may have to turn off the gas line via the rewire before you can search them all.
Now use your newly acquired keycard to unlock and pass through the Apollo Secure Transit door. This will lead you to another Tower Link Transit sign. Head just up the stairs and on the left you’ll see the booth where Samuels just killed the Synthetic as you watched from the vent. Head inside and Turn off the device to receive an updated objective, Follow Samuels. Exit the room and step on the nearby elevator to head to Android Orientation.
Once you reach your destination follow the only open path and climb up and shimmy across the ledge before you. Once you get across about halfway you’ll need to jump down and pass to the other side, careful of the streams of steam coming from the vents in the walls. Once you reach the end jump to the ladder and climb up, continuing into the tunnel and following it until you reach a narrow room with an audio file and a save game terminal. Listen to the audio file if you want and save your game before passing into the Implant Ward and using the lever to open the door.
You’ll need to be careful as you make your way through the next set of rooms, as there are several sleeping Joes on the tables around here and any noise just might wake one or all of them up. Head through the room, crouching as you go, and watch out for the camera. You can duck inside the first room here if you want and disable the camera, or just hop into the floor vent and follow it to the last room. Either way you’ll need to sneak through the area until you come to a door where you have to use your Access Tuner to get through.
Once you make it through this door you’ll meet up with Samuels and have a nice little chat about his plan to stop Apollo. There’s a door to the right of the glass but you can’t get through it until you’ve restored the power. Instead head left and sprint through the corridor until you enter the center room as Samuels moves into a secondary room and prepares a large MRI like machine for the Grid purge. Once it starts you’ll need to locate several different devices in order to complete an updated objective to Halt the Grid Purge.
Samuels will mostly tell you where to go, giving out color-coded instructions of wires to follow to their respective machines. First you’ll need to disable the machine with the red cable, next moving on to the machine with the blue cable. The third device is plugged into a wall socket next to an upturned gurney. The fourth device is next to an open floor panel and a deactivated android. Once you’ve deactivated the rest the last device is sitting directly in front of the glass through which you can see Samuel.
After a few intense moments you objective will update to Take Private Transit to Apollo Core. Leave the room through the nearest door and make your way back through the Implantation Ward. Once you exit into the main corridor update your save file and backtrack back into the room where you were forced to shimmy across the ledge. This time take the cart in the middle and then head back to the elevator, taking it down to the transit station. Once at the transit station you’ll need to approach Towerlink 01 and call the transit. Once it arrives board it and head towards your destination to finish up this mission and move on to the next.


 Is Your Home Energy Efficient? 7 Things You've Overlooked
 Gameranxs Gamer Gift Guide For The Holidays
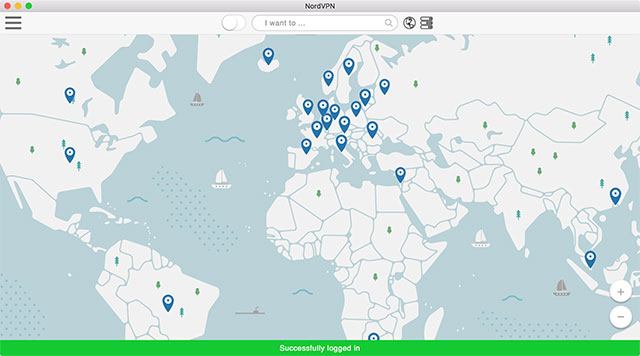 NordVPN for Mac: Easily Manage Privacy and Regions in OS X
 How to add Top Gear Test Track in GTA online
 A Sum of Parts: Dangerous Excesses