Fear for Sale: Endless Voyage Walkthrough, Guide, & Tips
Fear for Sale: Endless Voyage Walkthrough

Welcome to the Fear for Sale: Endless Voyage Walkthrough
In this ghostly continuation of the Fear for Sale series, you’ve discovered a luxury ocean liner bears an eerie resemblance to a ship that vanished years ago.
Whether you use this document as a reference when things get difficult or as a road map to get you from beginning to end, we’re pretty sure you’ll find what you’re looking for here.
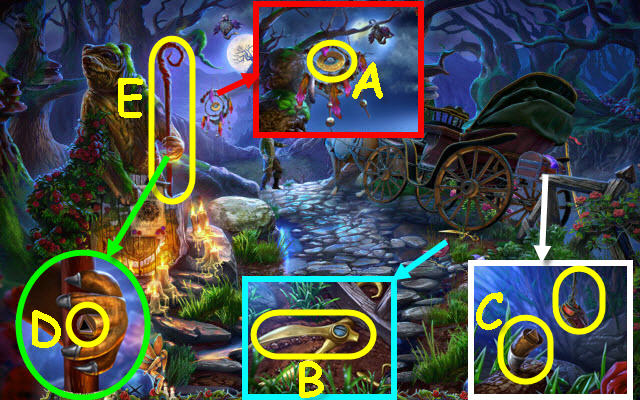
This document contains a complete Fear for Sale: Endless Voyage game walkthrough featuring annotated screenshots from actual gameplay!
We hope you find this information useful as you play your way through the game. Use the walkthrough menu below to quickly jump to whatever stage of the game you need help with.
Remember to visit the Big Fish Games Forums if you find you need more help. Have fun!
This walkthrough was created by Nina de Boo, and is protected under US Copyright laws. Any unauthorized use, including re-publication in whole or in part, without permission, is strictly prohibited.
General Tips
- This is the official guide for Fear for Sale: Endless Voyage.
- This guide will not mention each time you have to zoom into a location; the screenshots will show each zoom scene.
- Hidden-object puzzles are referred to as HOPs. This guide will not show screenshots of the HOPs, but it will mention when a HOP is available and the inventory item you’ll collect from it.
- This guide will give step-by-step solutions for all puzzles that are not random. Please read the instructions in the game for each puzzle.
Chapter 1: S. S. Virginia

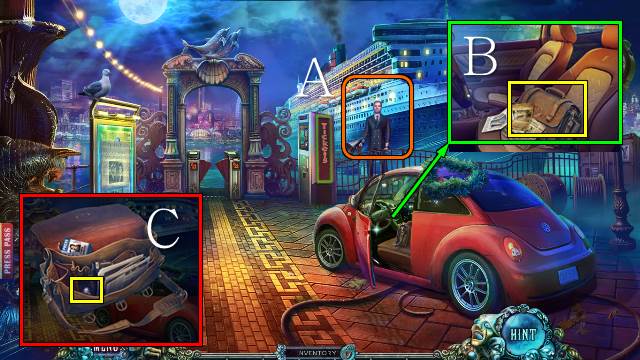
- Talk to the steward (A).
- Read the papers and take the BAG (B).
- Open the bag, move the dictation machine and take the PURPLE DIAMOND RING (C).

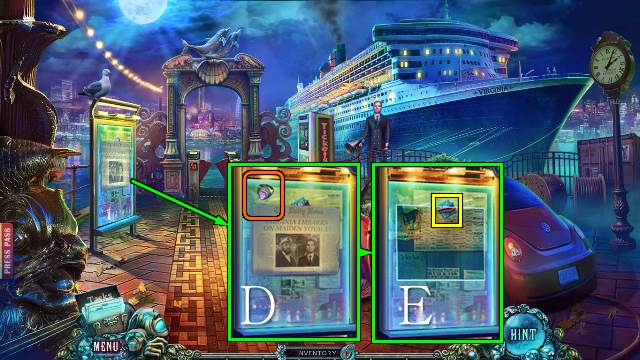
- Use the PURPLE DIAMOND RING (D); read the paper and take the SHIP TILE (E).

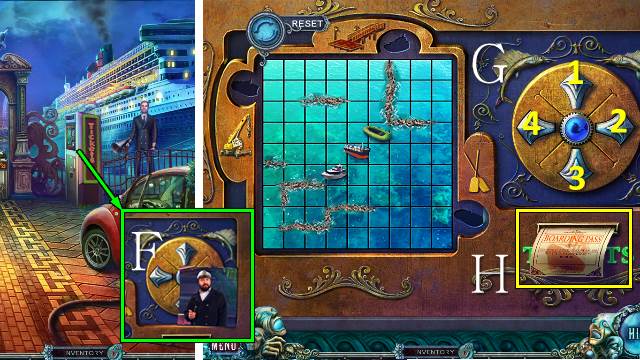
- Take the RIGHT PHOTO HALF (F); place the SHIP TILE for a mini-game (G).
- Solution: 4-1-4; 3-2-3-2; 1-4-1.
- Take the TICKET (H).

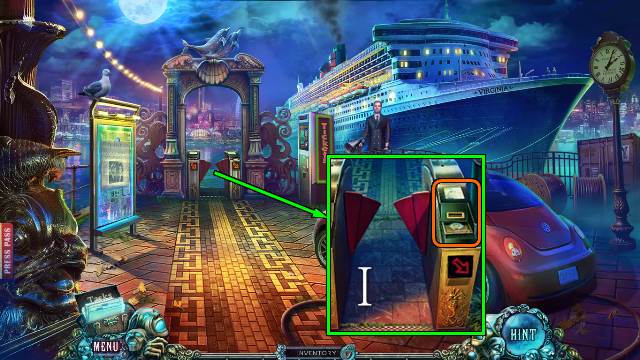
- Place the TICKET (I).
- Go forward.

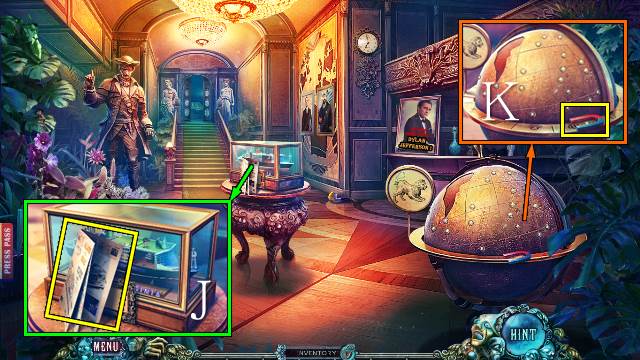
- Take the map (J).
- Take the MAGNET (K).

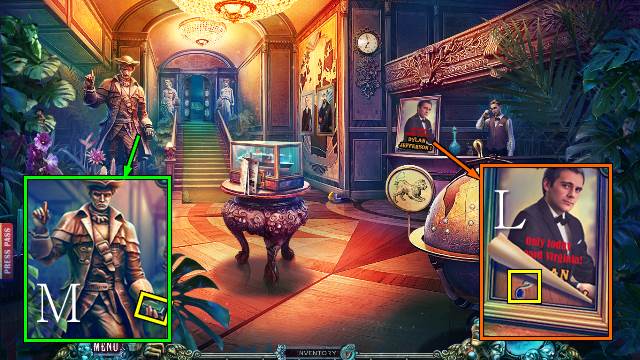
- Move the poster and take the SILVER NOTE (L).
- Take the KNIFE SHARPENER (M).
- Go forward.

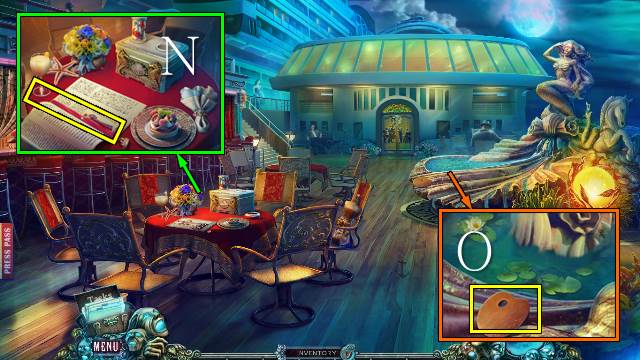
- Open the magazine and take the RIBBON (N).
- Take the PALETTE (O).

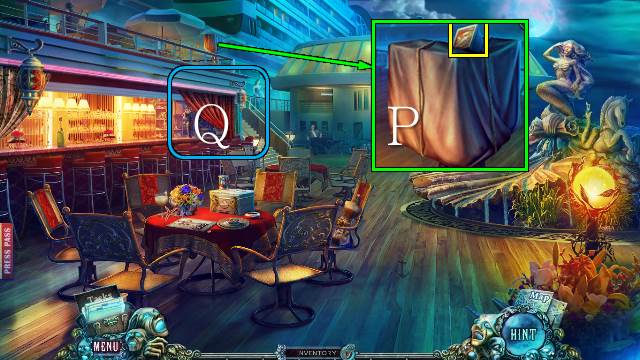
- Take the LIGHT BULB (P).
- Open the curtain and play the HOP (Q).
- You receive the LEFT PHOTO HALF.
- Walk down.

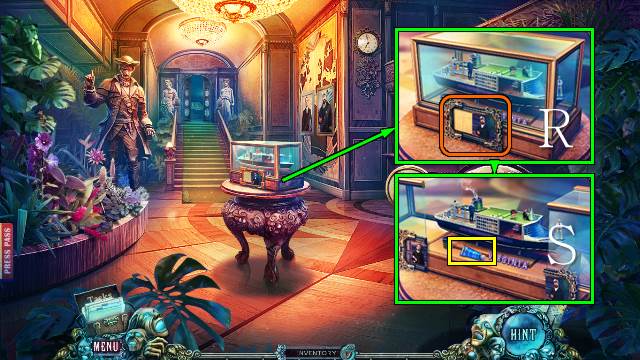
- Place the RIGHT PHOTO HALF and LEFT PHOTO HALF (R); take the BLUE PAINT (S).

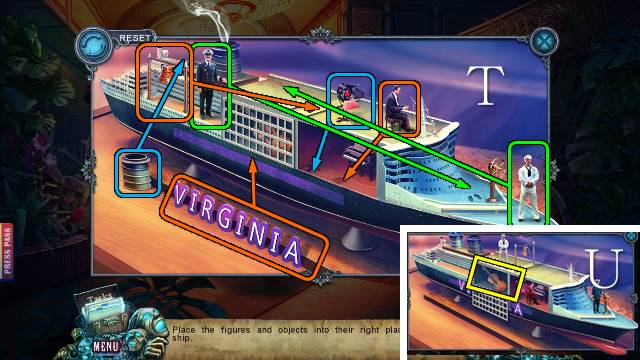
- Play the mini-game (T).
- Take the BASS (U).
- Walk forward.

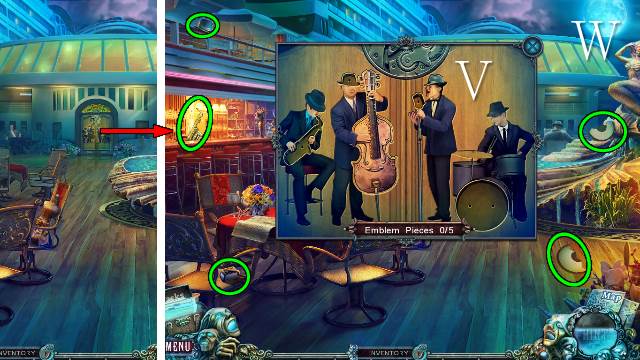
- Place the BASS (V).
- Find the missing pieces (W).
- Walk forward.

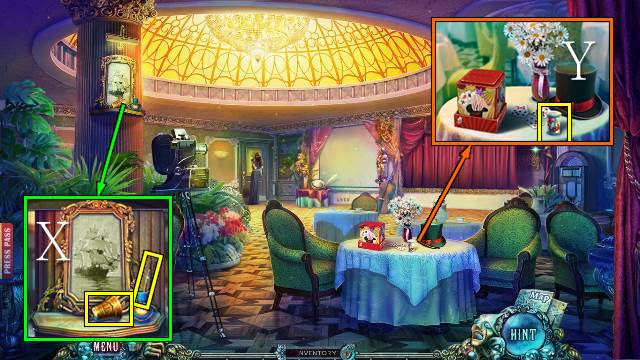
- Take the SHIP’S BELL and BRUSH (X).
- Take the SALT (Y).

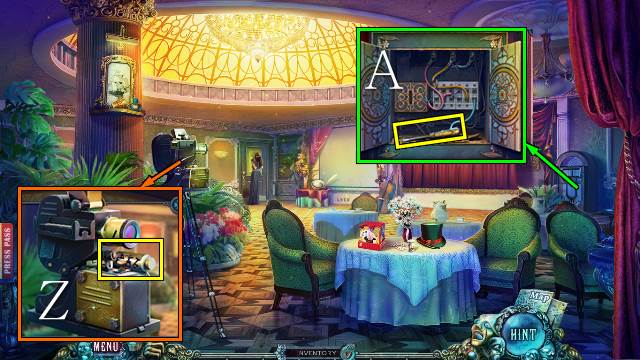
- Take the PART OF PIANO ROLL (Z).
- Open the cabinet and take the SCREWDRIVER (A).
- Walk down.

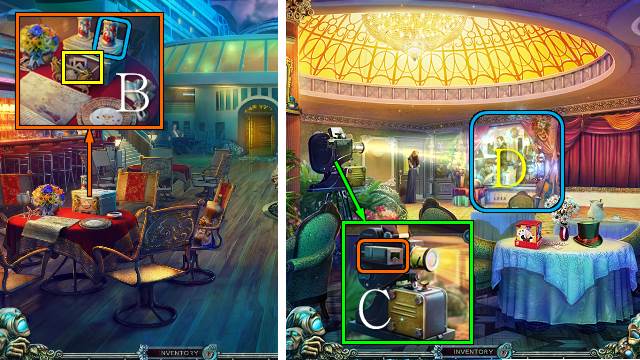
- Place the SALT and take the SLIDES (B).
- Walk forward.
- Place the SLIDES (C).
- Play the HOP (D).
- You receive a LEVER.
- Walk down twice.

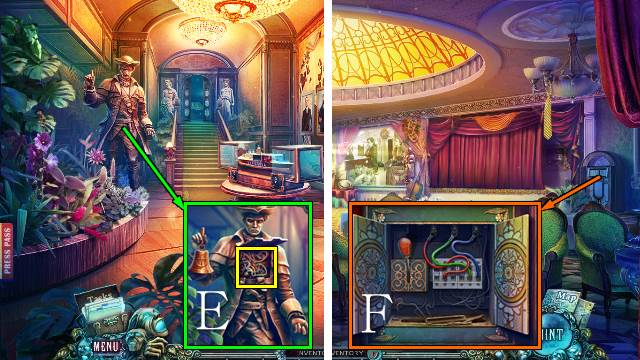
- Place the SHIP’S BELL and take the WIRES (E).
- Go forward twice.
- Remove the wires and place the LEVER and WIRES; pull the lever (F).
- Walk forward.

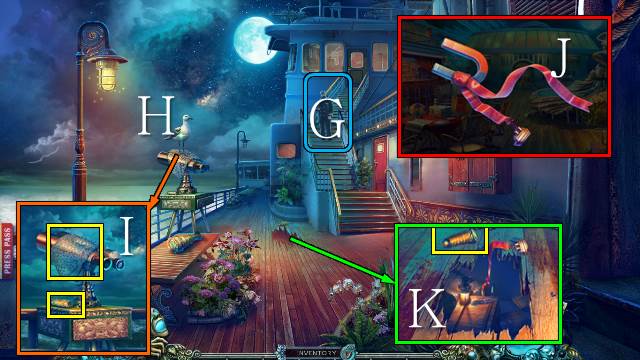
- Talk to the captain (G).
- Move the gull (H).
- Take the BATTERY and NETTING (I).
- Access the MAGNET and attach the RIBBON; you receive the RIBBON WITH MAGNET (J).
- Take the BROWN PAINT; take the UNSHARPENED KNIFE with the RIBBON WITH MAGNET (K).
- Walk down twice.

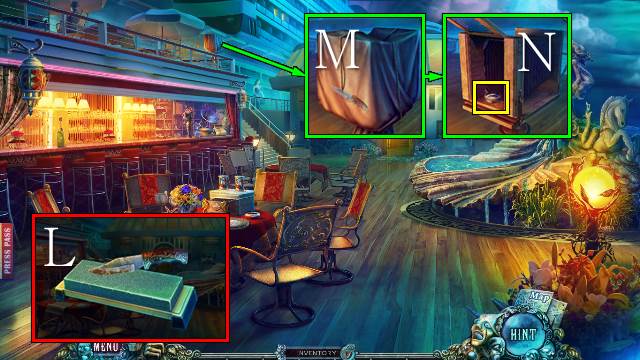
- Access the KNIFE SHARPENER and place the UNSHARPENED KNIFE; you receive the KNIFE (L).
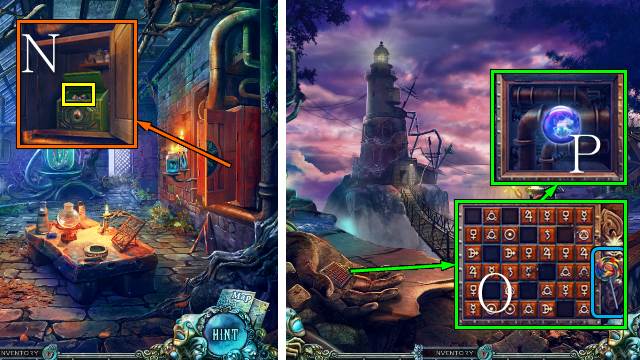
- Use the KNIFE (M); open the hatch and take the LENS (N).
- Walk forward twice.

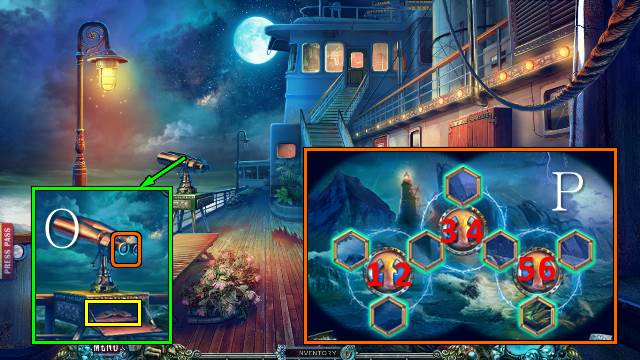
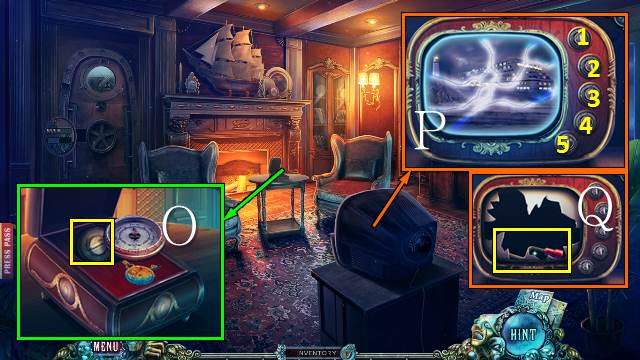
- Place the LENS and look through the telescope for a mini-game (O).
- Solution (P): 4-1-4-5-3.
- Take the CONSTELLATION (O).
- Walk down three times.

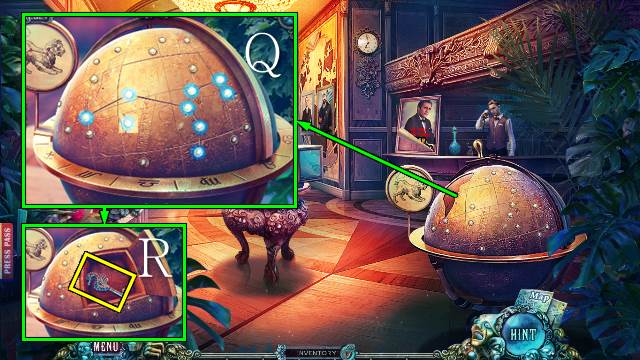
- Place the CONSTELLATION for a mini-game (Q).
- Take the SEAHORSE KEY (R).
- Go forward three times.

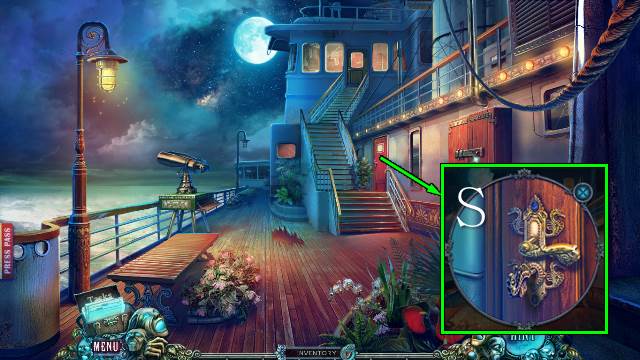
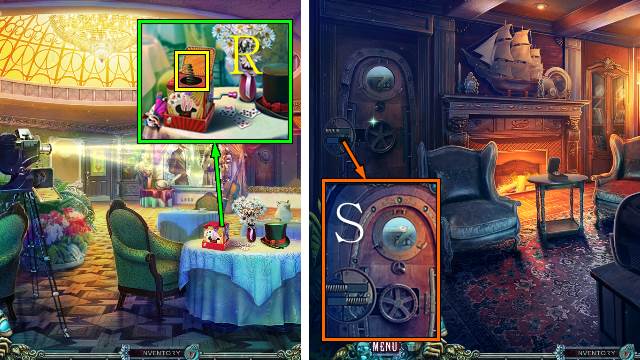
- Open the door with the SEAHORSE KEY (S).
- Go into Dylan’s Cabin.
Chapter 2: Building the Case

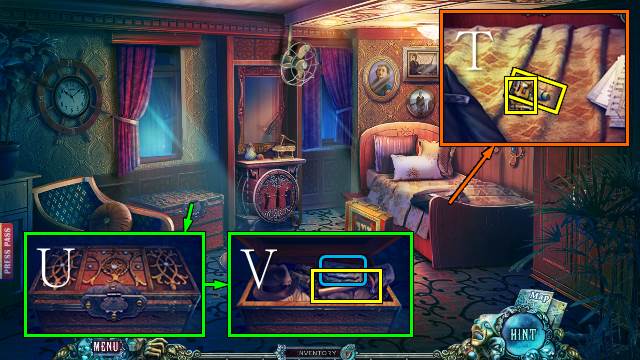
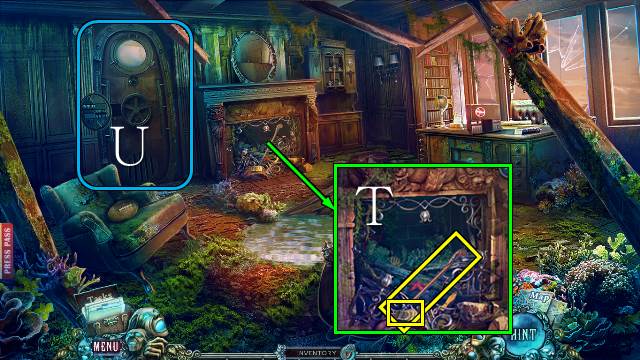
- Move the suit and sheet music; take the PART OF PIANO ROLL and WHITE PAINT (T).
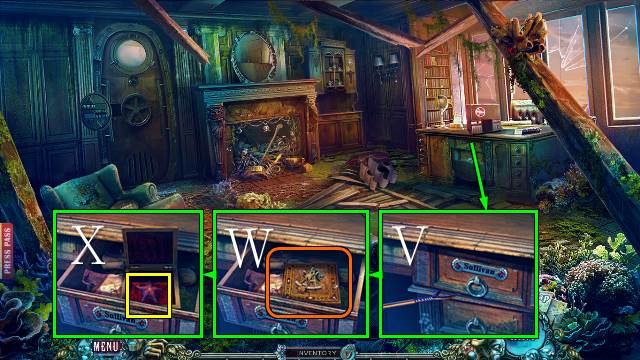
- Use the SCREWDRIVER (U); take the HAMMER and pick up the chest (V).

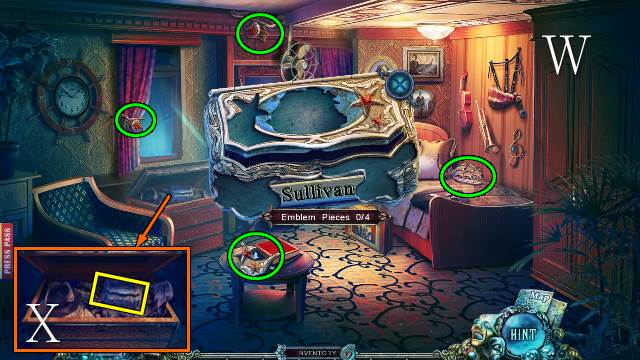
- Find the missing pieces (W); take the CHEST (X).
- Walk down.

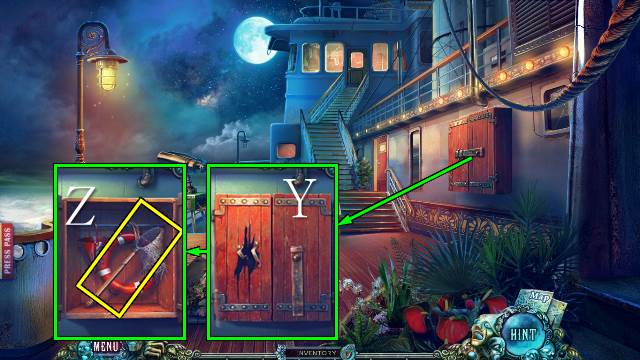
- Use the HAMMER (Y); open the hatch and take the DAMAGED NET (Z).
- Walk down.

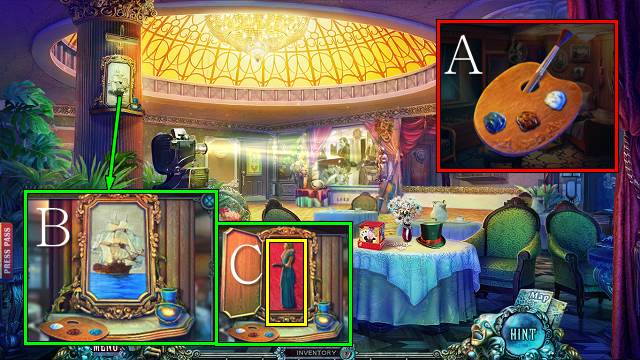
- Access the PALETTE and add the BLUE PAINT, BROWN PAINT, WHITE PAINT and BRUSH; you receive a PAINTER’S SET (A).
- Place the PAINTER’S SET, paint the water blue, the sails white and the ship brown (B); take the GRACE FIGURE (C).
- Walk down.

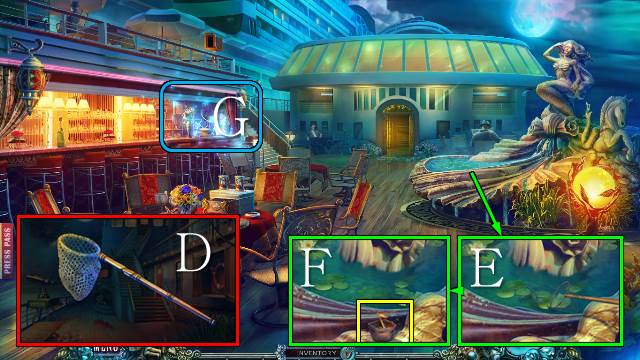
- Access the DAMAGED NET, remove the netting and place the NETTING; you receive a NET (D).
- Use the NET twice (E), open the sack and take the GOLDEN NOTE (F).
- Play the HOP (G).
- You receive a BROKEN FLASHLIGHT.
- Go to Dylan’s Cabin.

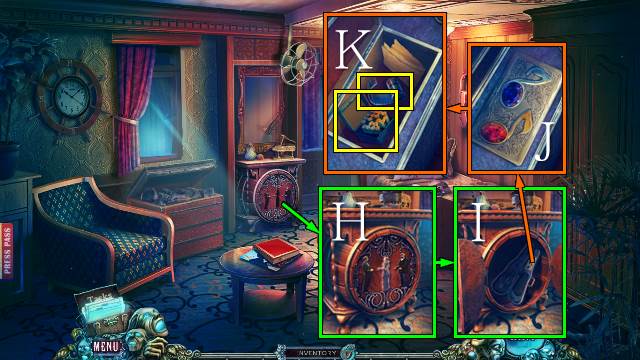
- Place the GRACE FIGURE (H) and open the violin case (I); place the SILVER NOTE and GOLD NOTE (J), take the note, FILM and BOX OF CARTRIDGES (K).

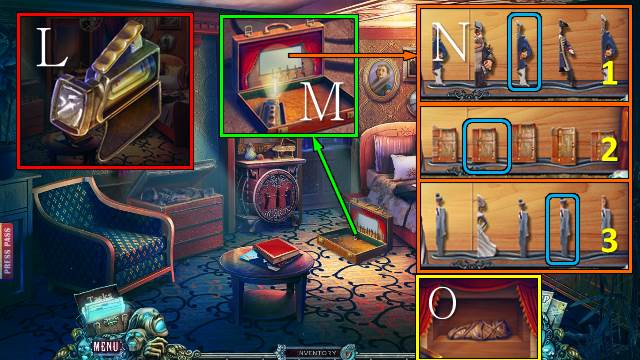
- Access the BROKEN FLASHLIGHT and place the LIGHT BULB and BATTERY; you receive a FLASHLIGHT (L).
- Open the case, place the FLASHLIGHT and switch it on (M); zoom in for a mini-game (N).
- Take the PACKAGE (O).
- Walk down twice.

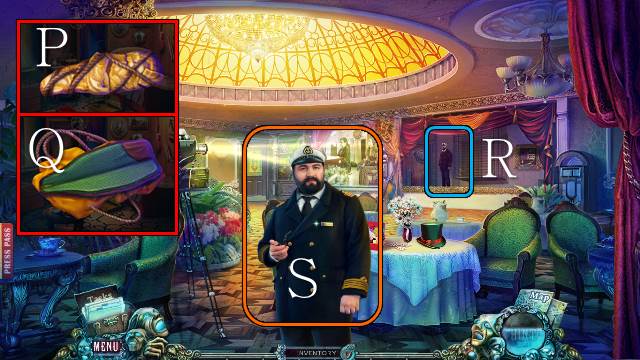
- Access the PACKAGE and open it (P); you receive a GUN CASE (Q).
- Talk to the captain (R).
- Give the GUN CASE to the captain (S).
- Go into the Storage Room.

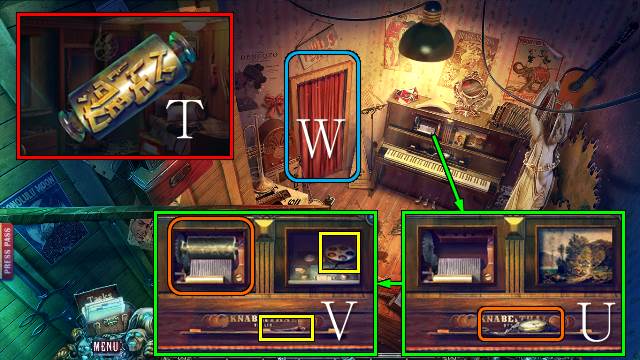
- Access the PART OF PIANO ROLL and place the other PART OF PIANO ROLL; restore the PIANO ROLL (T).
- Try to take the watch (U); take the HAIRPIN, place the PIANO ROLL and take the REEL OF TAPE (V).
- Open the curtain (W).

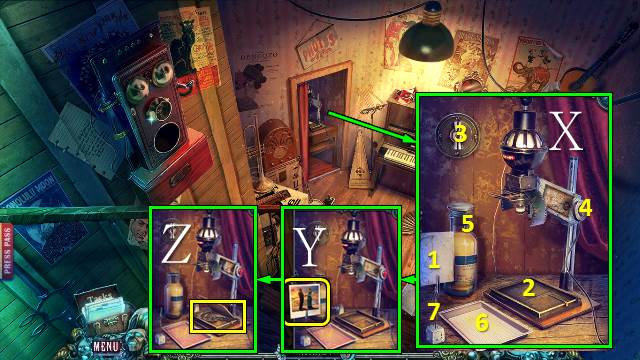
- Place the FILM, put the paper (1) on the tray (2), turn off the light (3), push the button (4), pour the developer (5) in the tray, put the photo paper in the developer (6) and put the photo on the clip (7) (X); take the photo (Y).
- Take the WRENCH (Z).
- Walk down.

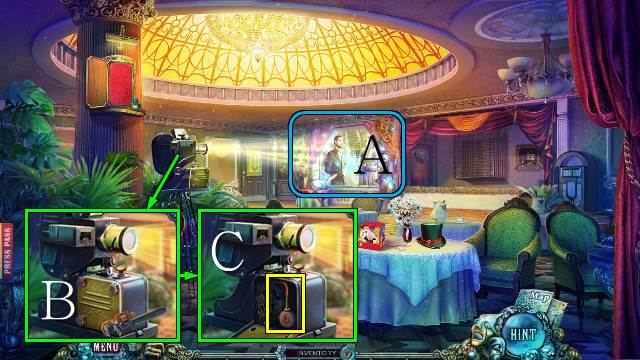
- Play the HOP (A).
- You receive the TWEEZERS.
- Use the WRENCH (B); remove the tube, and cap and take the OIL (C).
- Go into the Storage Room.

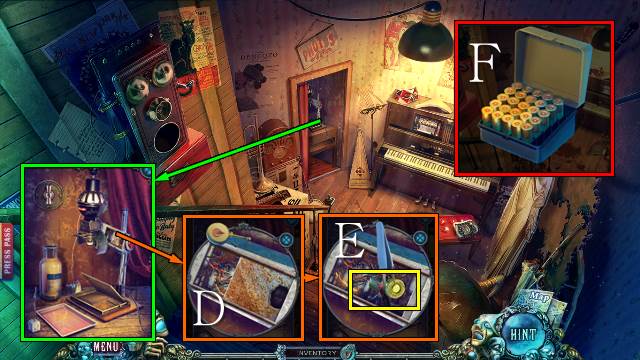
- Use the OIL and TWEEZERS (D); take the CARTRIDGE (E).
- Access the BOX OF CARTRIDGES, put all cartridges in the box and place your CARTRIDGE; you receive PROOF (F).

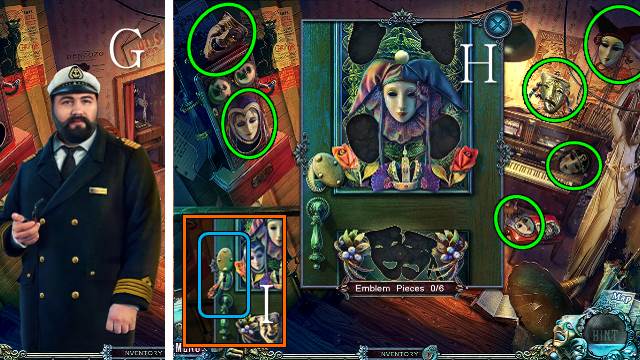
- Talk to the captain and give him the PROOF (G).
- Look down and find the masks (H); use the HAIRPIN (I).
- Walk down.

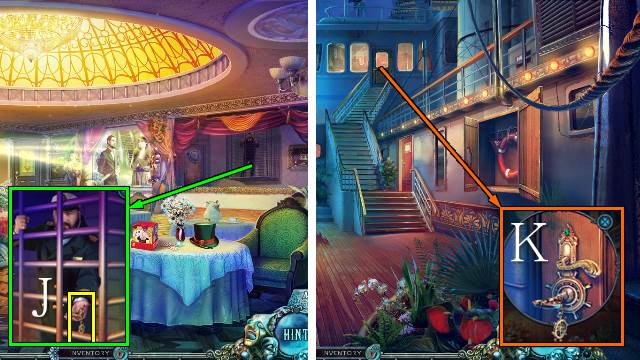
- Talk to the captain; take the CAPTAIN’S KEY (J).
- Go forward.
- Open the door with the CAPTAIN’S KEY (K).
- Go forward.

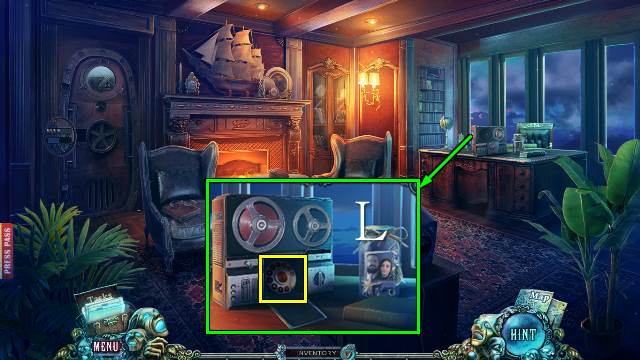
- Place the REEL OF TAPE; take the ROTARY PHONE DIAL (L).
- Go to the Storage Room.

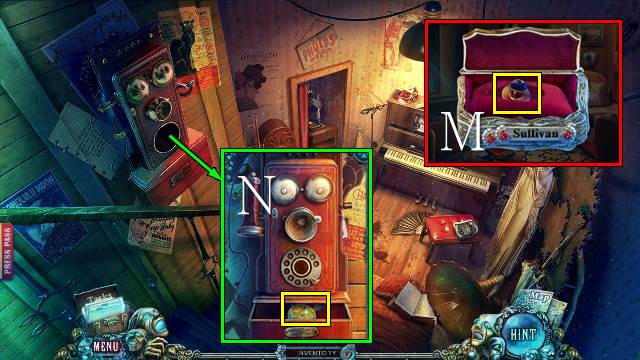
- Access the CHEST, open it and take the PHONE MOUTHPIECE (K).
- Place the PHONE MOUTHPIECE and ROTARY PHONE DIAL and lift the receiver; take the ASTROLABE (N).
- Go to the Captain’s Quarters.

- Open the box and place the ASTROLABE; take the DIAL (O).
- Place the DIAL for a mini-game (P).
- Solution: 1-2-3-4-5-1-4.
- Take the BOX HANDLE (Q).
- Walk down twice.

- Place the BOX HANDLE; take the SPRING (R).
- Go forward twice.
- Place the SPRING (S).
Chapter 3: The Island

- Take the EMPTY LIGHTER and POKER (T).
- Open the door and play the HOP (U).
- You receive a SEXTANT.

- Use the POKER (V) and place the SEXTANT (W); take the STARFISH (X).
- Walk down.

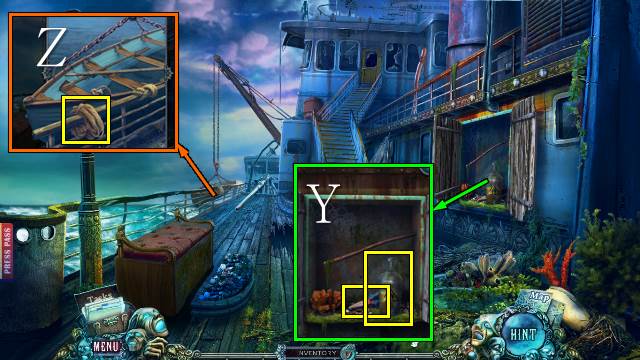
- Take the LIGHTER FLUID and NIPPERS (Y).
- Take the ROPE (Z).
- Go forward.

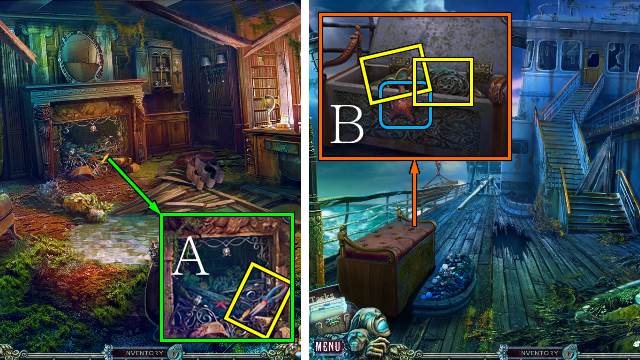
- Use the NIPPERS and take the SCRAPER (A).
- Walk down.
- Use the SCRAPER and place the STARFISH; take the CHAIN and CADUCEUS (B).
- Walk forward.

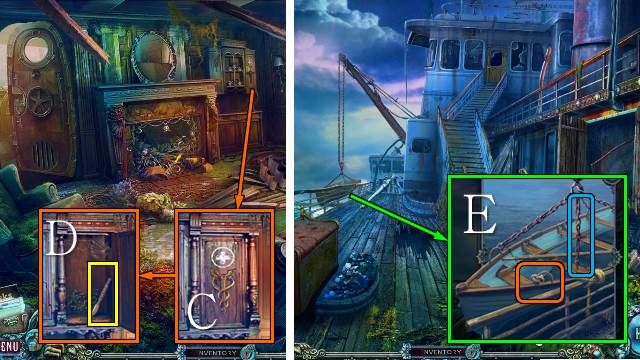
- Place the CADUCEUS (C); take the SCALPEL (D).
- Walk down.
- Use the SCALPEL; place and attach the CHAIN and zoom in for a mini-game (E).

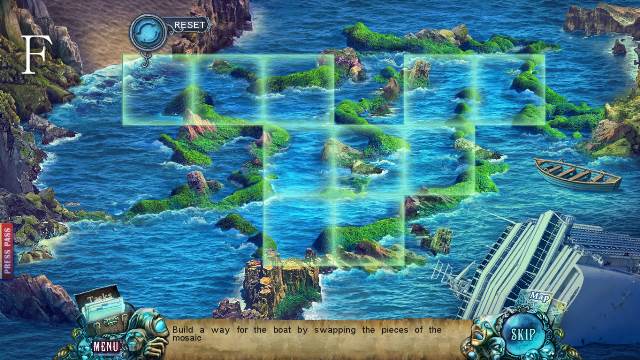

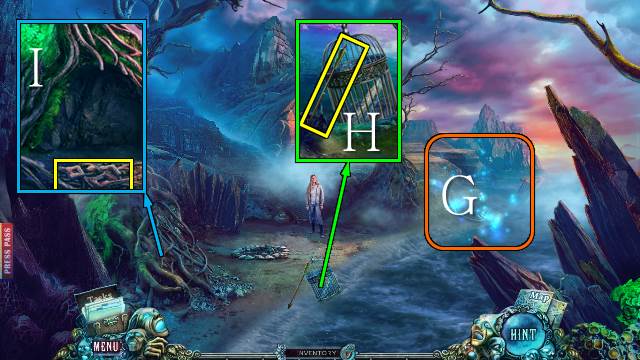
- Play the HOP (G).
- You receive a SAW.
- Take the ARROW (H).
- Use the SAW; take the DRY ROOTS (I).

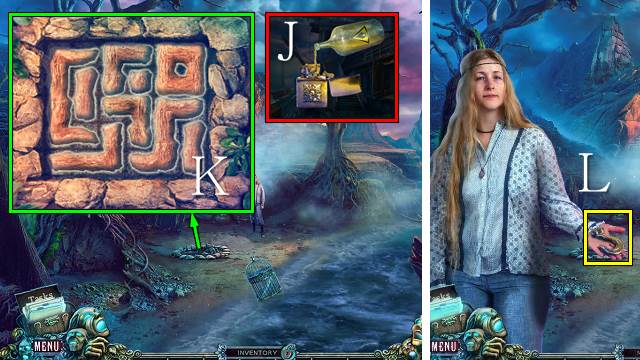
- Access the EMPTY LIGHTER and fill it with the LIGHTER FLUID; take the WORKING LIGHTER (J).
- Place the DRY ROOTS for a mini-game (K); use the WORKING LIGHTER.
- Take the HOOK (L).
- Walk forward.

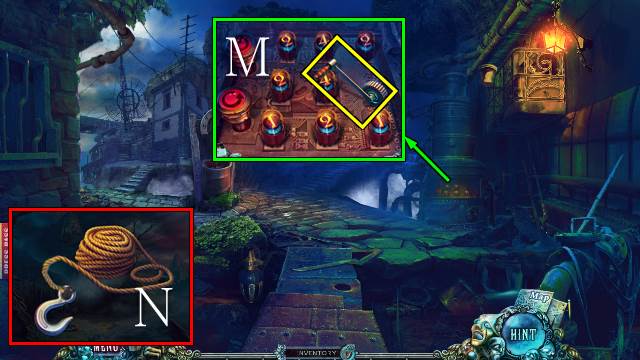
- Take the CRANK (M).
- Access the ROPE and place the HOOK; you receive a ROPE AND HOOK (N).

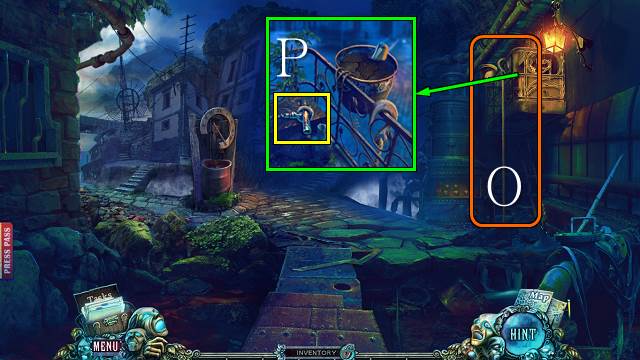
- Use the ROPE AND HOOK (O).
- Take the poster and the CORKSCREW (P).
- Go left.

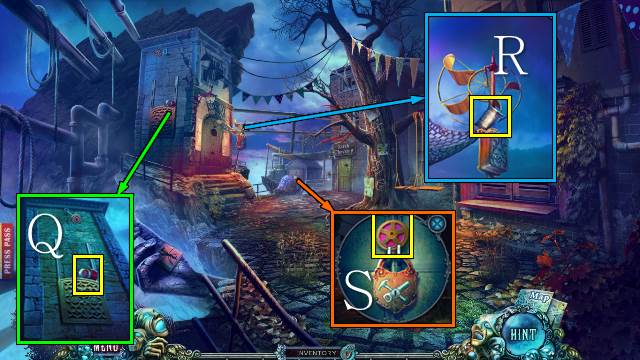
- Take the BULB (Q).
- Take the PIPE PART (R).
- Take the GEAR (S).

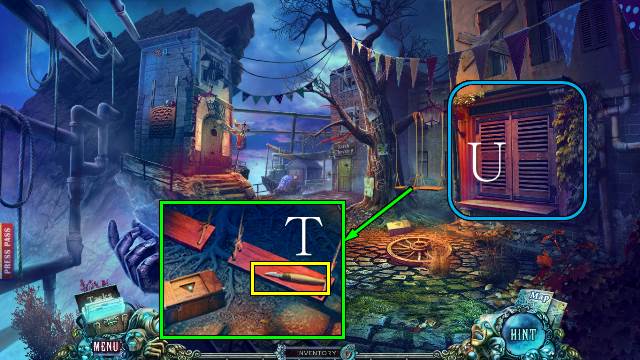
- Take the CARVING KNIFE (T).
- Open the shutters and play the HOP (U).
- You receive the LAVENDER.
- Walk down.

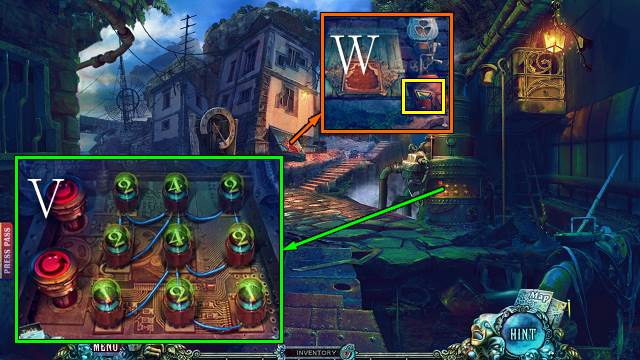
- Place the BULB for a mini-game (V).
- Take the SIGN (W).
- Go forward.

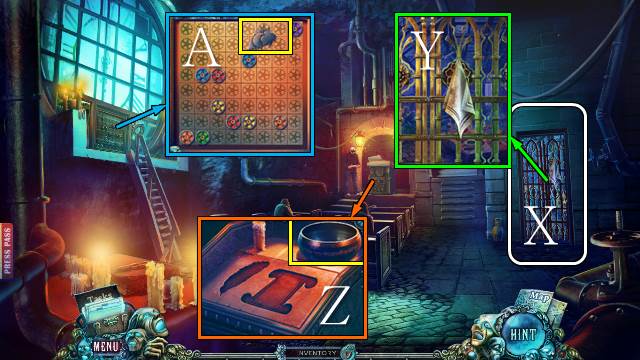
- Interact with the gate (X).
- Take the HANDKERCHIEF (Y).
- Take the BOWL (Z).
- Take the WEATHER VANE (A).
- Walk down twice.

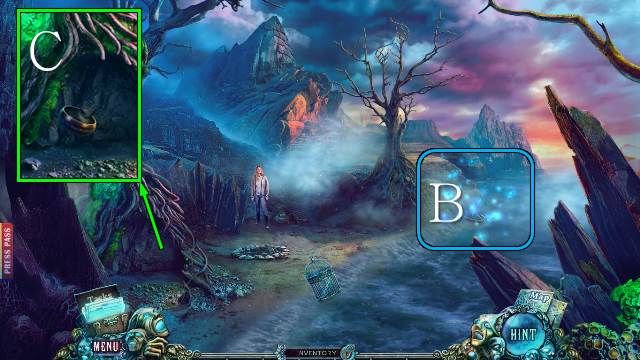
- Play the HOP (B).
- You receive a HOE.
- Take some CLAY with the BOWL (C).
- Walk forward and left.

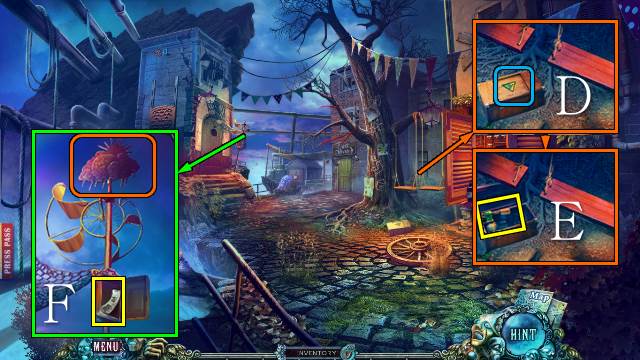
- Place the SIGN (D); take the TORCH (E).
- Place the WEATHER VANE; take the PART OF WATER CLOCK (F).
- Walk down.

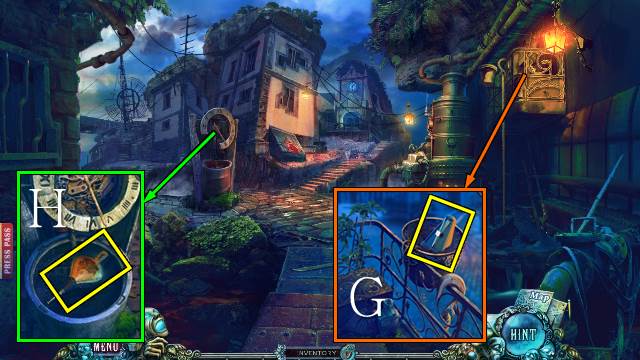
- Use the HOE and take the METRONOME (G).
- Place the PART OF WATER CLOCK; take the BELLOWS (H).
- Walk down.

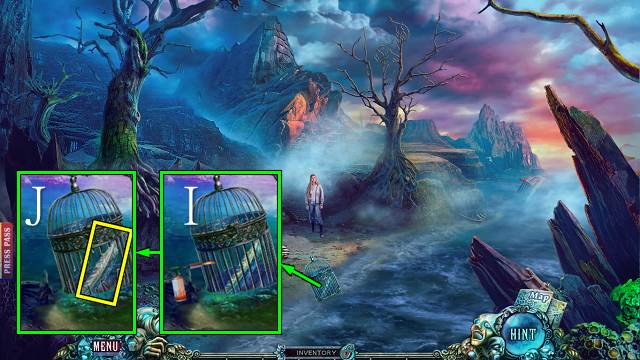
- Use the TORCH (I); take the FEATHER (J).
- Go forward and left.

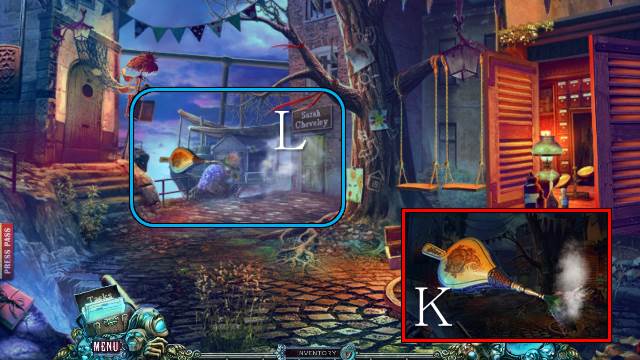
- Access the BELLOWS, place the LAVENDER and use the WORKING LIGHTER; you receive the BURNING LAVENDER (K).
- Use the BURNING LAVENDER (L).
- Open the door.
- Go right.
Chapter 4: The Captain’s Compass

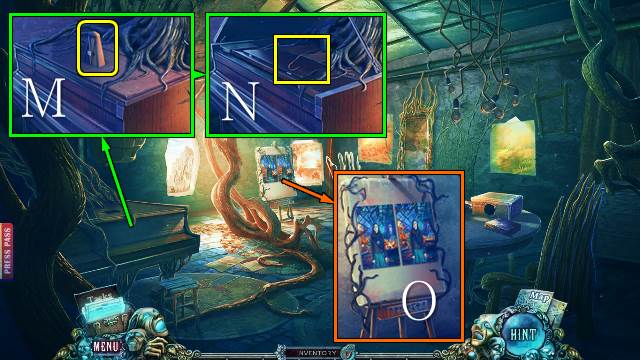
- Place the METRONOME (M); take the WIRE HOOK (N).
- Play the mini-game (O).

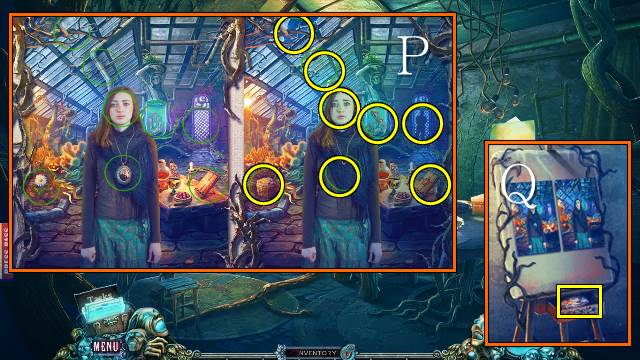
- Solution (P).
- Take the CLOSED COMPASS CASE (Q).
- Walk down.

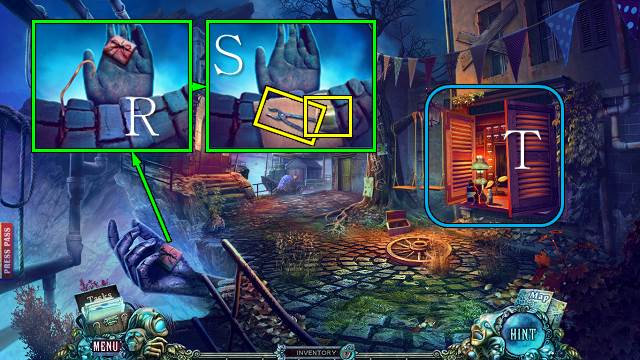
- Use the WIRE HOOK and open the parcel (R); take the PLIERS and LOCK TUMBLER (S).
- Play the HOP (T).
- You receive the WEST symbol.
- Go right.

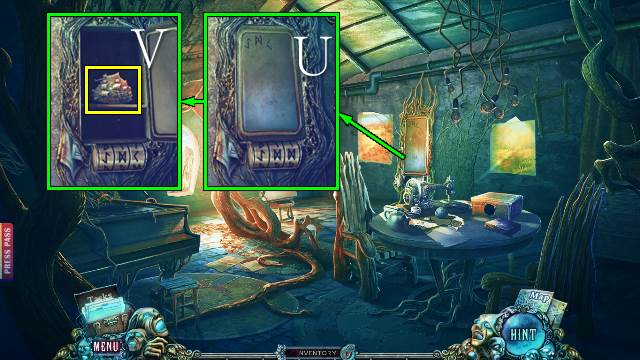
- Place the LOCK TUMBLER and use the HANDKERCHIEF (U); turn the tumblers to the right code and take the OLD SHIP (V).
- Walk down twice.

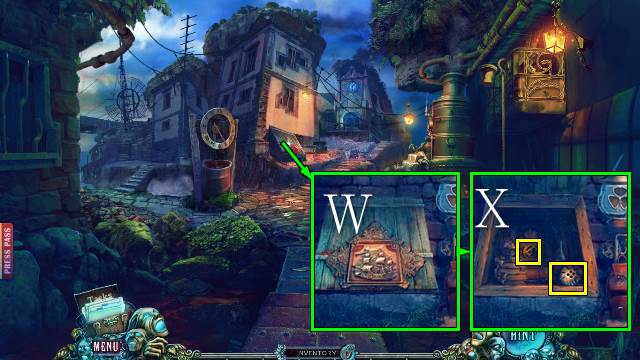
- Place the OLD SHIP (W); take the EAST symbol and BUTTON (X).
- Go left and right.

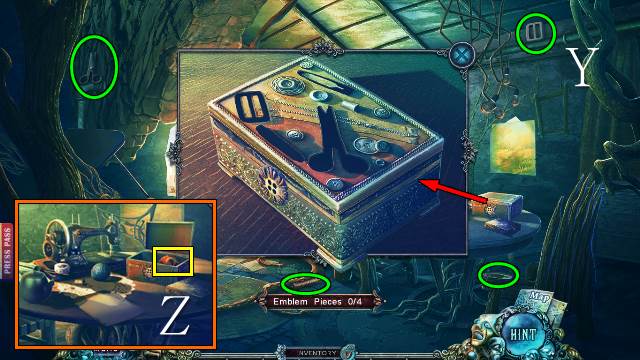
- Place the BUTTON and zoom in to find the pieces (Y); take the SOUTH symbol (Z).
- Go to the Tower.

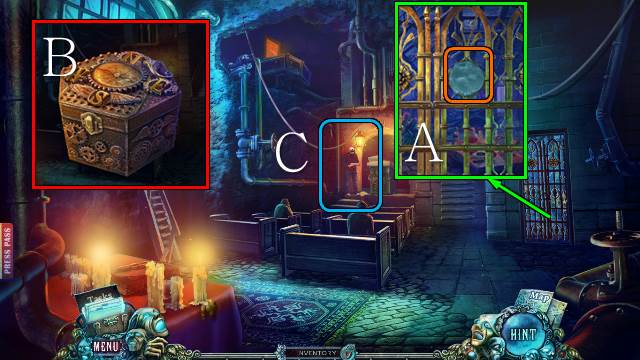
- Use the CLAY; you receive a MOLD (A).
- Access the CLOSED COMPASS CASE and place the WEST, SOUTH and EAST symbols; you receive the OPENED CASE (B).
- Give the OPENED CASE to the captain (C).

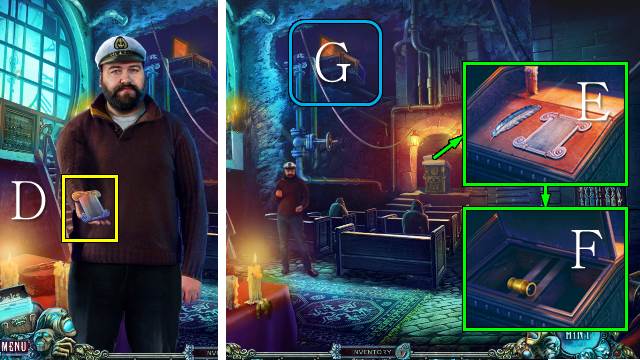
- Take the SCROLL (D).
- Place the SCROLL and FEATHER (E); move the lever (F).
- Play the HOP (G).
- You receive the WORKSHOP KEY.
- Go to the Street.

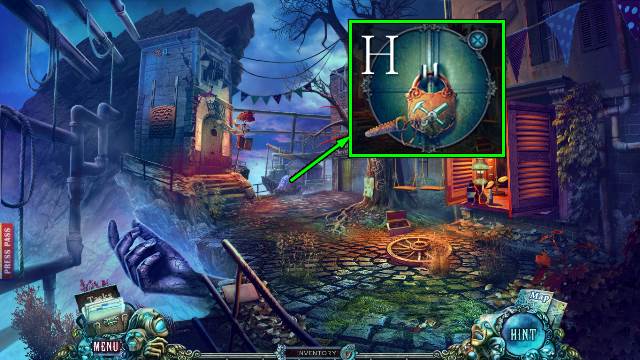
- Use the WORKSHOP KEY (H).
- Go forward.

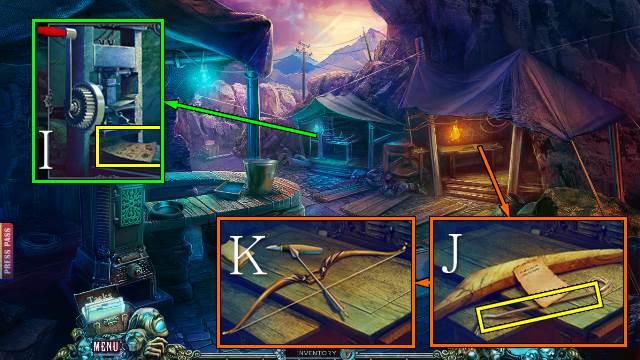
- Read the note, place the CRANK and turn it and take the INSTRUCTION SHEET (I).
- Read the note and take the NAIL PULLER (J); use the CARVING KNIFE, attach the string, place the ARROW and take the BOW AND ARROW (K).
- Walk down.

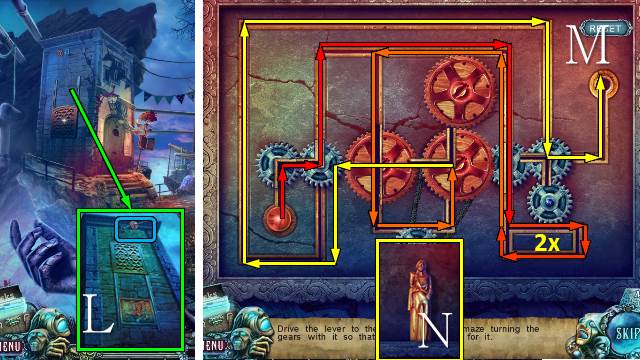
- Use the BOW AND ARROW (L); play the mini-game (M).
- Take the GOLD STATUETTE (N).
- Go forward.

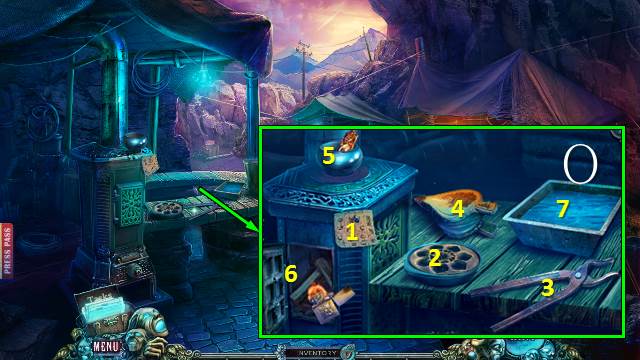
- Place the INSTRUCTION SHEET (1), MOLD (2), PLIERS (3), BELLOWS (4) and GOLD STATUETTE (5), use the WORKING LIGHTER and bellows (6), take the gold with the pliers, put the cast in the water (7) and take the GOLDEN FLOWER (O).
- Go to the Tower.

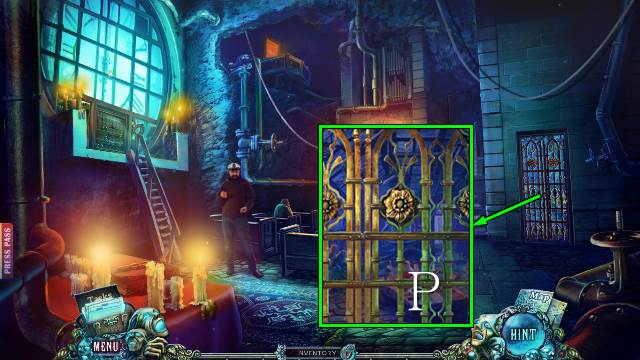
- Place the GOLDEN FLOWER (P).
- Go right.

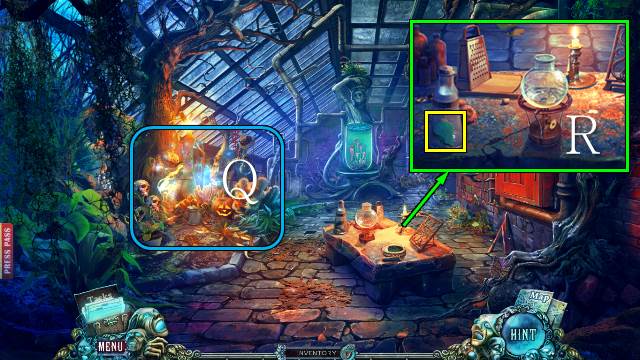
- Play the HOP (Q).
- You receive a CLOVER.
- Use the CORKSCREW; take the STAINED GLASS (R).
- Walk down twice.

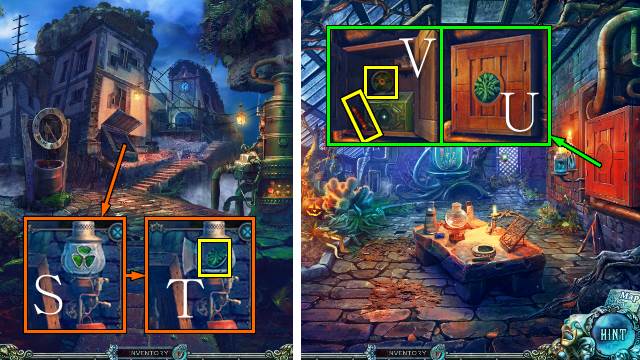
- Place the CLOVER (S); take the TREE (T).
- Go forward and right.
- Place the TREE (U); take the DYNAMITE and GEAR (V).
- Walk down.

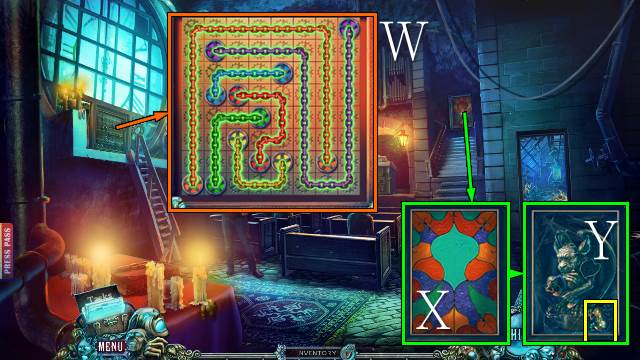
- Place the two GEARS for a mini-game (W).
- Place the STAINED GLASS (X); take the FROG (Y).
- Go right.

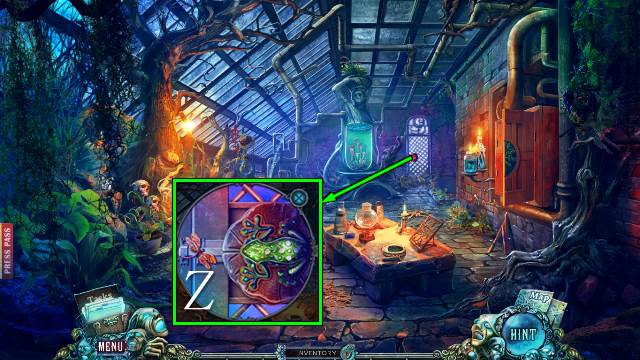
- Place the FROG (Z).
- Go forward.
Chapter 5: The Lighthouse

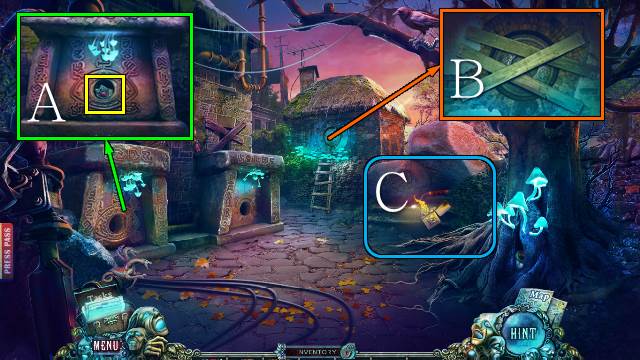
- Take the GARGOYLE DECORATION and SHIP’S STERN (A).
- Use the NAIL PULLER; you receive some BOARDS (B).
- Place the DYNAMITE and use the WORKING LIGHTER (C).
- Go forward.

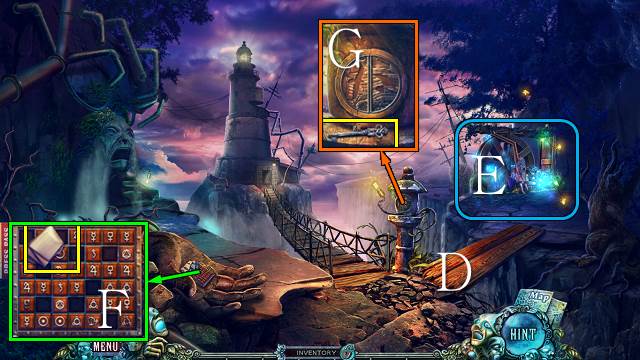
- Place the BOARDS (D).
- Play the HOP (E).
- You receive the LIGHTNING.
- Take the SAILCLOTH (F).
- Take the STORAGE KEY (G).
- Go forward.

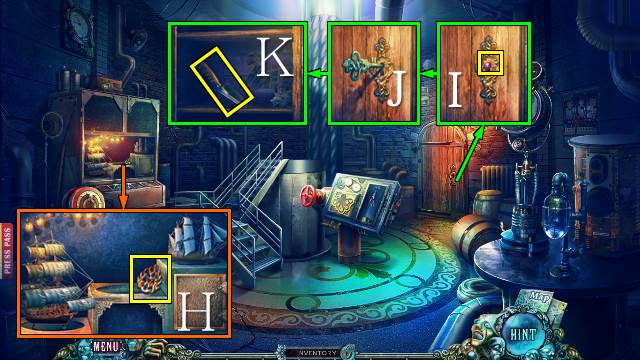
- Take the FIRE (H).
- Take the BALL (I); use the STORAGE KEY (J) and take the TROWEL (K).
- Walk down.

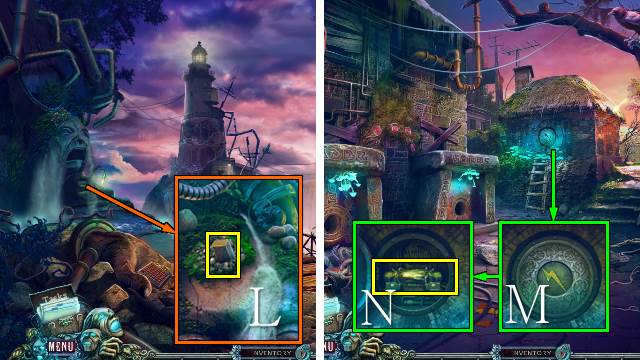
- Use the TROWEL; take the WEDGE (L).
- Walk down.
- Place the LIGHTNING (M); take the BATTERY (N).
- Go forward twice.

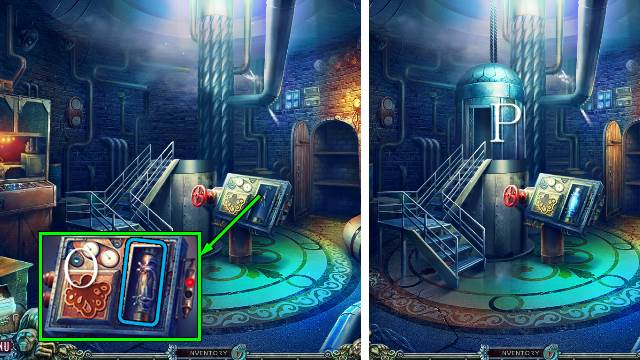
- Place the BATTERY (O).
- Go forward (P).

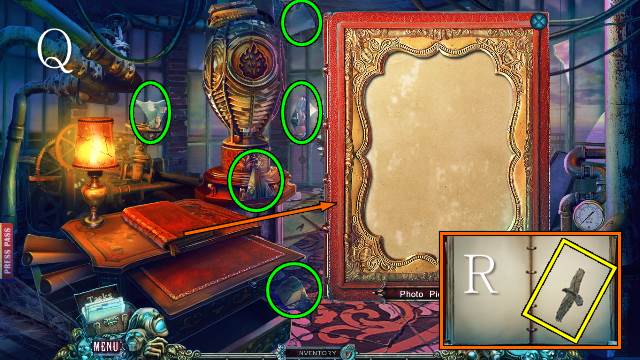
- Find the book pieces (Q); take the note and FLYING RAVEN (R).

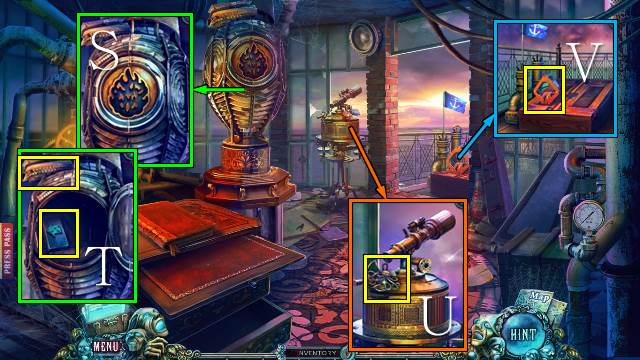
- Place the FIRE (S); take the SHIP’S HULL and ARROW CHIP (T).
- Take the OCTOPUS (U).
- Take the SCISSOR JACK (V).
- Walk down.

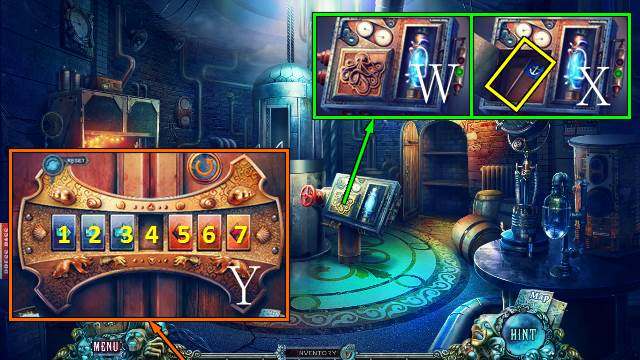
- Place the OCTOPUS (W); take the PENNANT (X).
- Look down; place the ARROW CHIP for a mini-game (Y).
- Solution: 3-5-6-4-2-1-3-5-7-6-4-2-3-5-4.

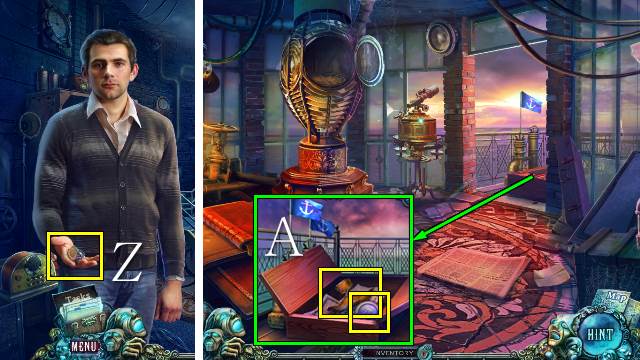
- Take NICHOLAS’ SIGNET RING (Z).
- Go forward.
- Place the PENNANT; take the RUNE and PERCHED RAVEN (A).
- Walk down twice.

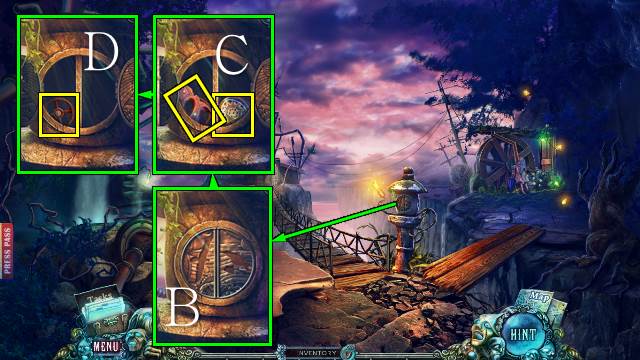
- Place the PERCHED RAVEN and FLYING RAVEN (B); take the SAW HANDLE, TELESCOPE HANDLE (C) and VALVE HANDLE (D).
- Walk down twice.

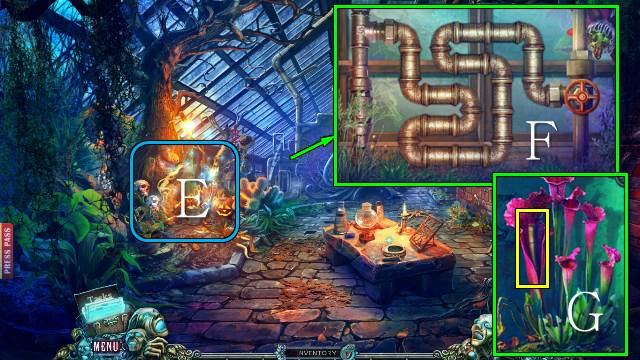
- Play the HOP (E).
- You receive the MAST.
- Place the PIPE PART and VALVE HANDLE for a mini-game (F).
- Take the BAMBOO STICK (G).
- Go forward four times.

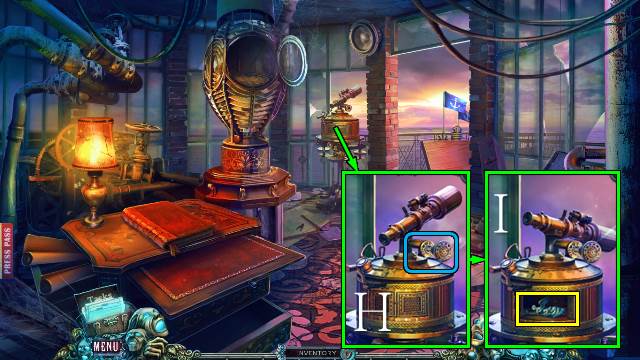
- Place the TELESCOPE HANDLE (H).
- Take the SHIP’S FIGUREHEAD (I).
- Walk down.

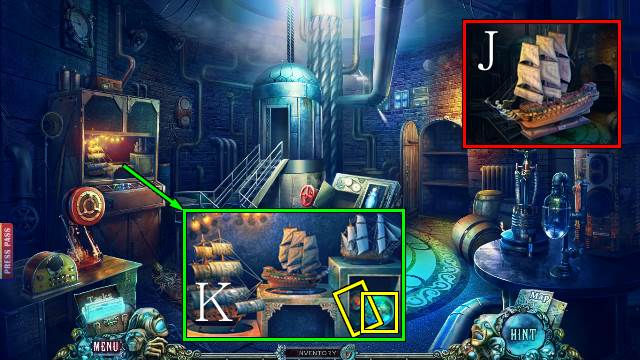
- Access the SHIP’S HULL, place the MAST, SAILCLOTH, SHIP’S STERN and SHIP’S FIGUREHEAD; you receive the SHIP MODEL (J).
- Place the SHIP MODEL; take the LOLLIPOP and EYE (K).
- Walk down.

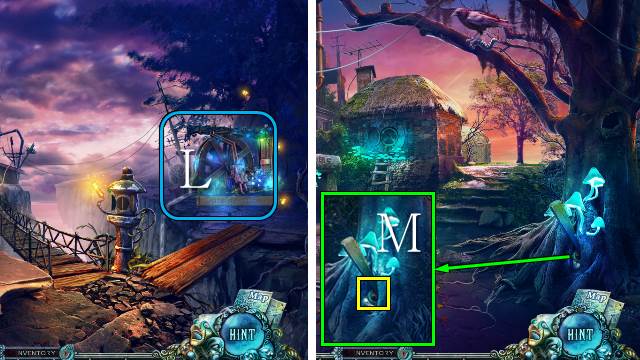
- Play the HOP (L).
- You receive a MALLET.
- Walk down.
- Place the WEDGE and use the MALLET; take the PENDANT (M).
- Walk down.

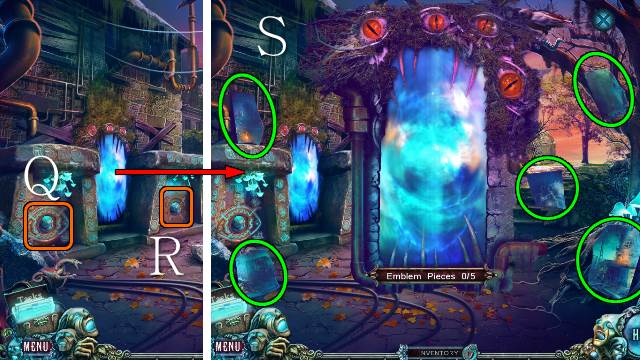
- Place the PENDANT; take the CHIPS (N).
- Go forward twice.
- Place the LOLLIPOP and CHIPS for a mini-game (O).
- Take the SPHERE (P).
- Walk down.

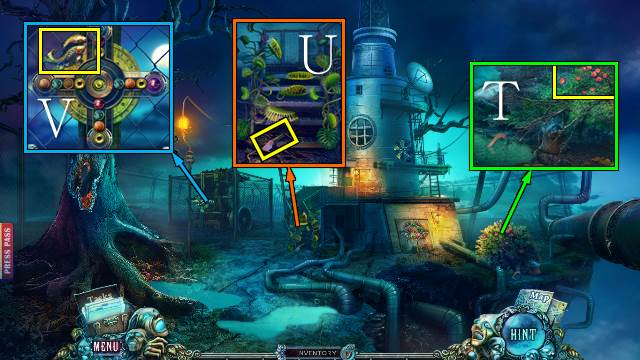
- Place the EYE (Q).
- Place the SPHERE (R).
- Find the emblem pieces (S).
- Go left.
Chapter 6: The Radio Tower

- Take the RED BERRIES (T).
- Take the KNIFE (U).
- Take the FISH (V).
- Walk down.

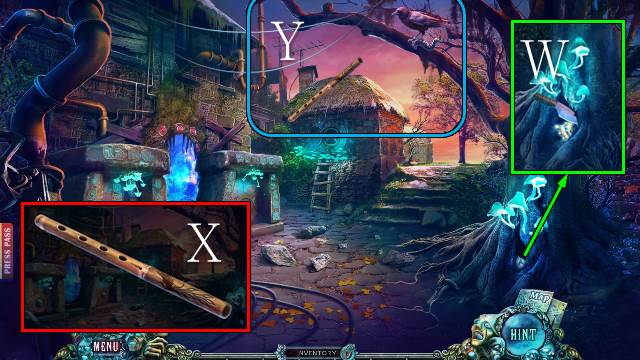
- Take the WHITE ROOT with the KNIFE (W).
- Access the BAMBOO STICK and use the KNIFE; you receive a BAMBOO FLUTE (X).
- Use the BAMBOO FLUTE; you receive a GARGOYLE HORN (Y).
- Walk down twice.

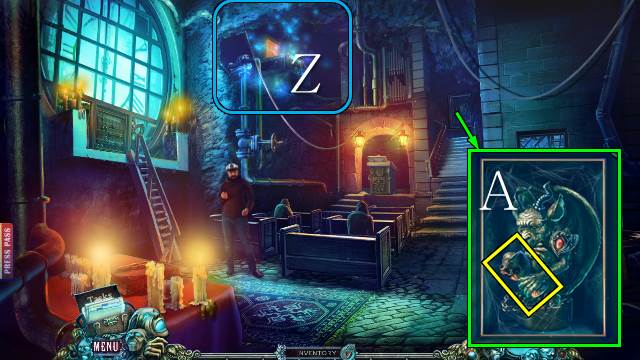
- Play the HOP (Z).
- You receive a GREEN BOOK.
- Place the GARGOYLE DECORATION and GARGOYLE HORN; take the CUP (A).
- Go to the Road to Radio Tower.

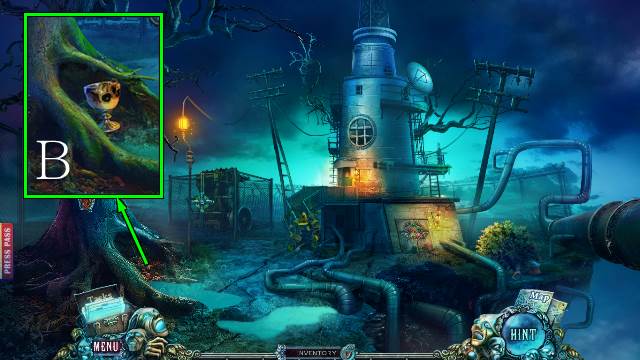
- Take some TREE SAP with the CUP (B).
- Walk down twice.

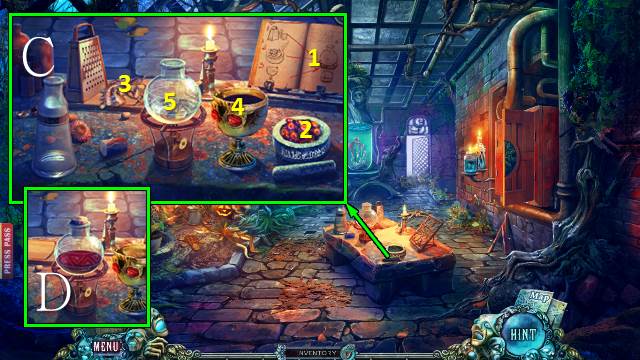
- Place and open the GREEN BOOK (1), place the RED BERRIES (2), WHITE ROOT (3) and TREE SAP (4), grate the root, grind the berries and put root, berries and tree sap into the flask (5) (C); put the cork on the flask and take the WEED KILLER (D).
- Go forward and left.

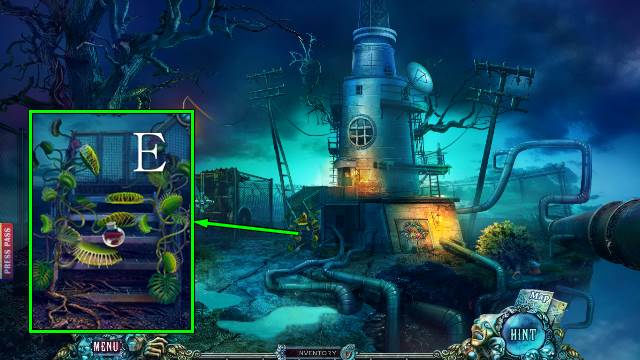
- Use the WEED KILLER (E).
- Go forward.

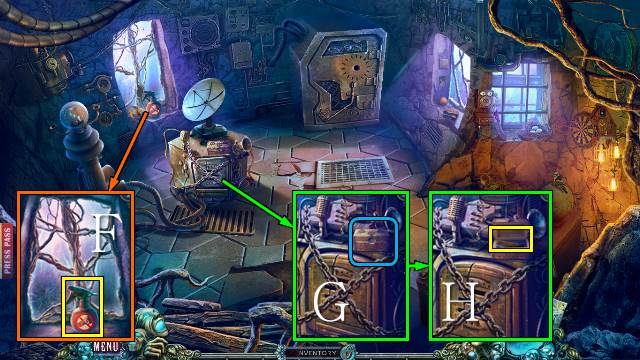
- Take the RUST REMOVER (F).
- Use NICHOLAS’ SIGNET RING (G); take the CHARCOAL (H).

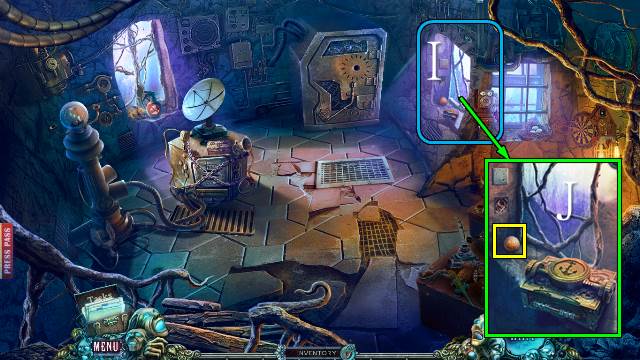
- Look through the window (I).
- Take the BALL (J).
- Walk down.

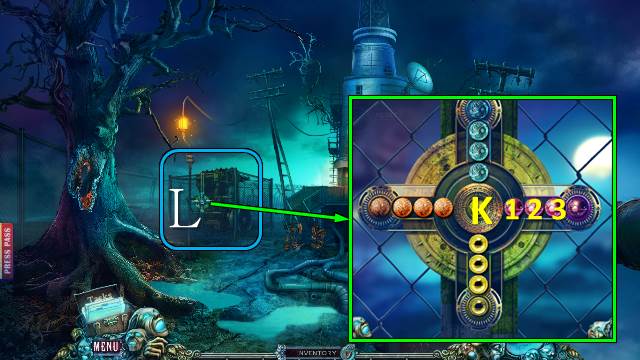
- Place the two BALLS for a mini-game.
- Solution: K, move balls in ring 1 to ring 3, Kx2, ring 1 to ring 2, Kx3.
- Play the HOP (L).
- You receive a WINDOW HANDLE.
- Go forward.

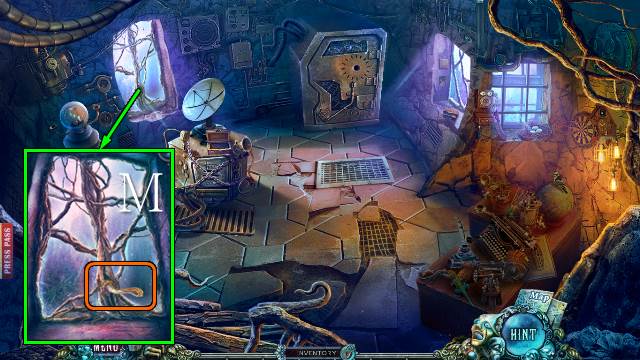
- Place the WINDOW HANDLE (M).
- Go left.

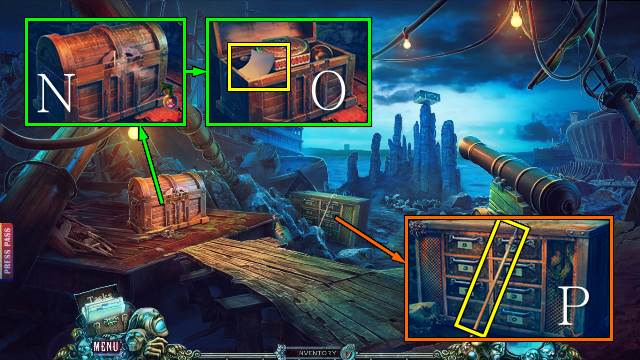
- Use the RUST REMOVER (N); take the PAPER (O).
- Take the STICK (P).
- Walk down twice.

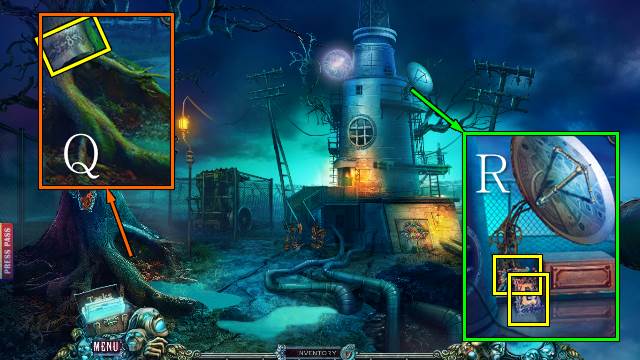
- Place the PAPER and CHARCOAL; take the CODE (Q).
- Use the STICK; take the GRYPHON and SWITCH (R).
- Go forward.

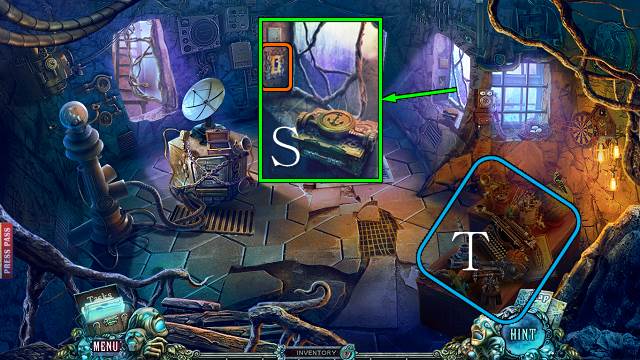
- Place the SWITCH and push it (S).
- Play the HOP (T).
- You receive a DRAWER PULL.
- Go left.

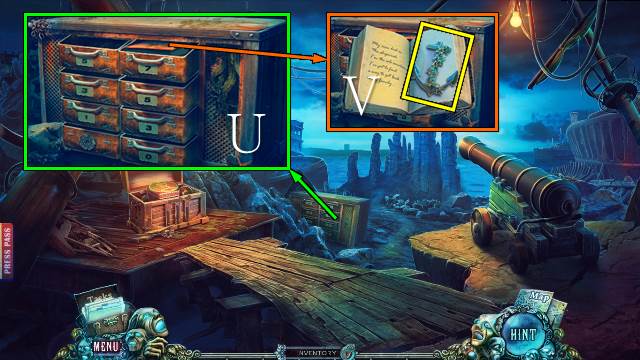
- Place the DRAWER PULL for a mini-game (U).
- Solution: 0-1-flower-3-flower-3-flower-5-flower-5-flower-7.
- Open the book and take the ANCHOR (V).

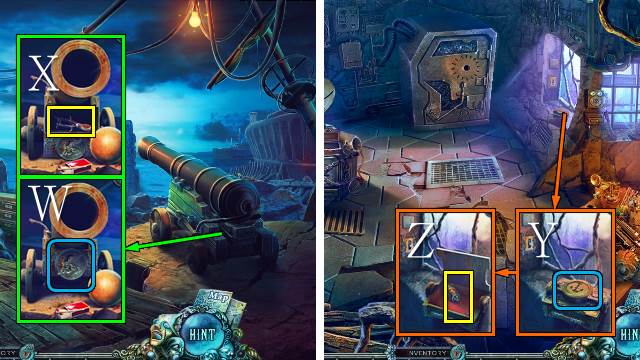
- Place the GRYPHON and push it (W); take the PRUNERS (X).
- Walk down.
- Place the ANCHOR (Y); take the ANTENNA PART (Z).
- Walk down.

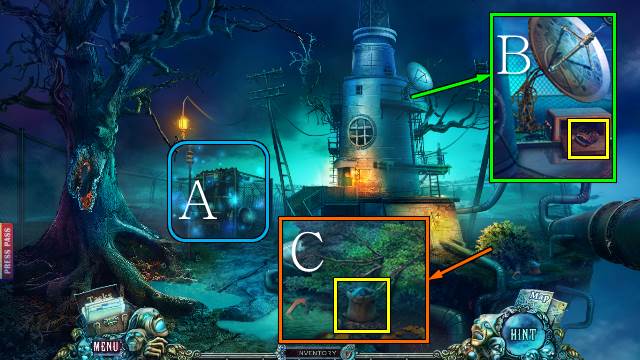
- Play the HOP (A).
- You receive the GUNPOWDER.
- Place the ANTENNA PART; take the CROWN (B).
- Use the PRUNERS and take the SAND (C).
- Go forward and left.

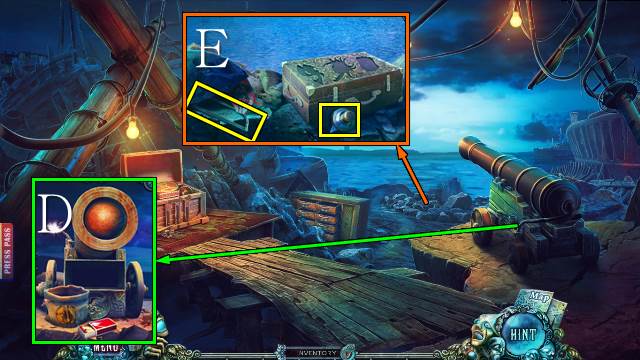
- Place the GUNPOWDER, move the cannon ball and use the matches (D).
- Use the SCISSOR JACK; take the SAFE LOCK and SAW BLADE (E).
- Walk down.

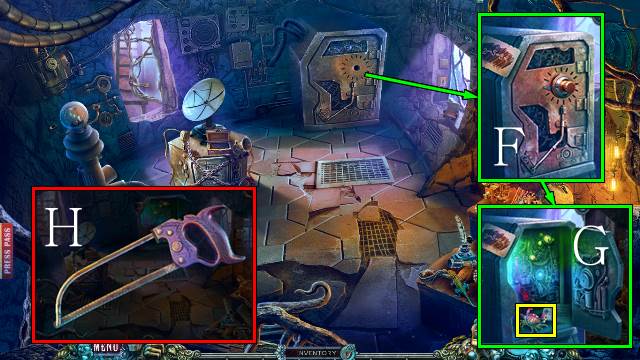
- Place the SAFE LOCK and CODE and touch the lock (F); take the note and CRAB (G).
- Access the SAW HANDLE and attach the SAW BLADE; you receive the SAW (H).

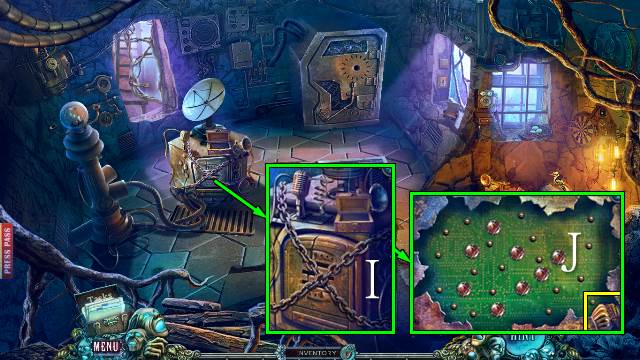
- Use the SAW (I); take the SHELL (J).
- Go left.

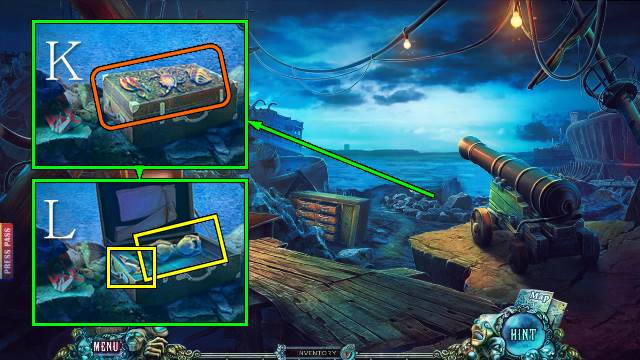
- Place the FISH, CRAB and SHELL (K); take the TERMINAL CLAMPS and EMPTY HOURGLASS (L).
- Walk down.

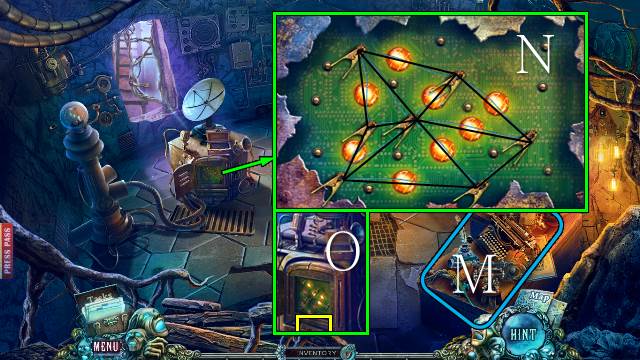
- Play the HOP (M).
- You receive a CHARIOT.
- Place the TERMINAL CLAMPS for a mini-game (N).
- Take the GLUE (O).
- Go left.

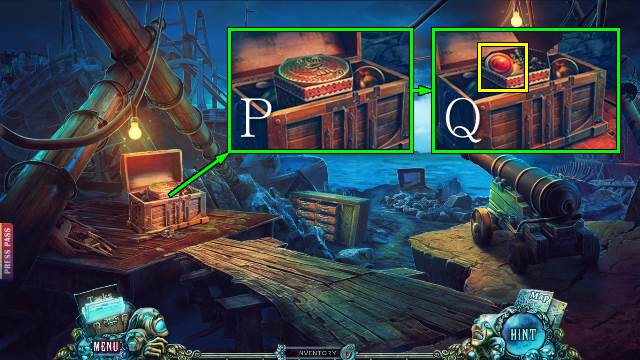
- Use the GLUE and place the CHARIOT and CROWN (P); take the RUNE (Q).
- Walk down twice.

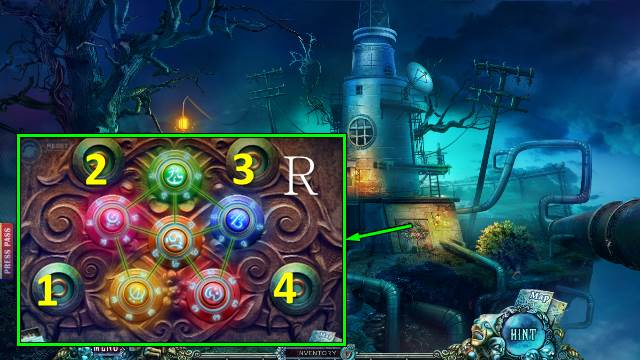
- Place the RUNES for a mini-game (R).
- Solution: 1-2-1-3-4-3.
- Go right.

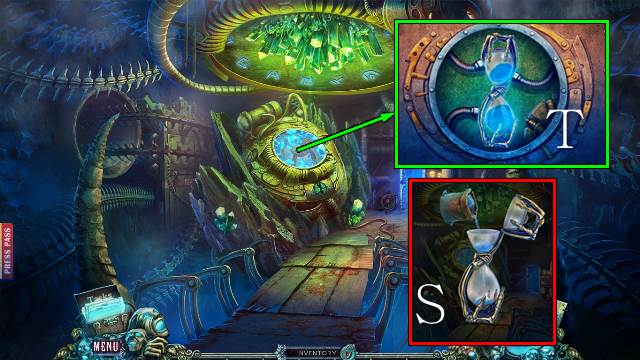
- Access the EMPTY HOURGLASS and fill it with SAND; you receive a GLOWING HOURGLASS (S).
- Place the GLOWING HOURGLASS (T).

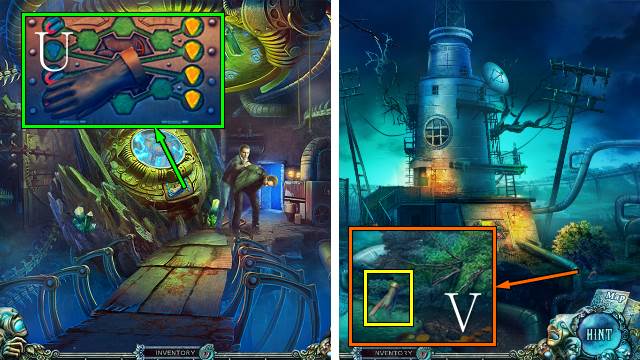
- Take the RUBBER GLOVE (U).
- Walk down.
- Take the MAGNET with the RUBBER GLOVE (V).
- Go right.

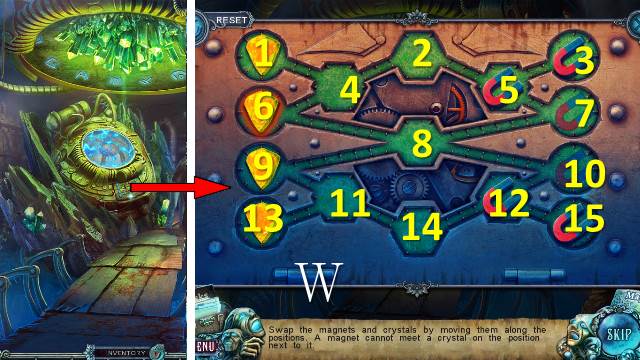
- Place the MAGNET for a mini-game (W).
- Solution: 6-2, 9-11, 10-6, 7-8, 15-10, 11-14, 8-9, 10-7, 14-15, 9-8, 13-12, 8-13, 6-9, 2-4, 7-8, 3-7, 4-2, 8-6, 7-8, 2-3, 8-7, 6-8, 1-2, 8-6, 7-8, 2-5, 6-1, 8-6, 5-7, 12-10.
- Congratulations, you have completed Fear for Sale: Endless Voyage Collector’s Edition.




 Delaware St. John Volume 2: The Town with No Name Walkthrough, Guide, & Tips
 Detective Agency 2: Banker's Wife Walkthrough, Guide, & Tips
 Grim Legends: The Forsaken Bride Walkthrough, Guide, & Tips
 Strange Cases: The Faces of Vengeance Walkthrough, Guide, & Tips
 EcoRescue: Project Rainforest Walkthrough, Guide, & Tips