Spirits of Mystery: Chains of Promise Walkthrough, Guide, & Tips
Spirits of Mystery: Chains of Promise Walkthrough
Welcome to the Spirits of Mystery: Chains of Promise Walkthrough
Isa’s back to his old tricks, and now he’s doing the bidding of an even greater foe.
Whether you use this document as a reference when things get difficult or as a road map to get you from beginning to end, we’re pretty sure you’ll find what you’re looking for here.
This document contains a complete Spirits of Mystery: Chains of Promise game walkthrough featuring annotated screenshots from actual gameplay!
We hope you find this information useful as you play your way through the game. Use the walkthrough menu below to quickly jump to whatever stage of the game you need help with.
Remember to visit the Big Fish Games Forums if you find you need more help. Have fun!
This walkthrough was created by Nina de Boo, and is protected under US Copyright laws. Any unauthorized use, including re-publication in whole or in part, without permission, is strictly prohibited.
General Tips
- This is the official guide for Spirits of Mystery: Chains of Promise.
- This guide will not mention each time you have to zoom into a location; the screenshots will show each zoom scene.
- Hidden-object puzzles are referred to as HOPs. This guide will not show screenshots of the HOPs, but it will mention when a HOP is available and the inventory item you’ll collect from it.
- This guide will give step-by-step solutions for all puzzles that are not random. Please read the instructions in the game for each puzzle.
Chapter 1: A Royal Wedding

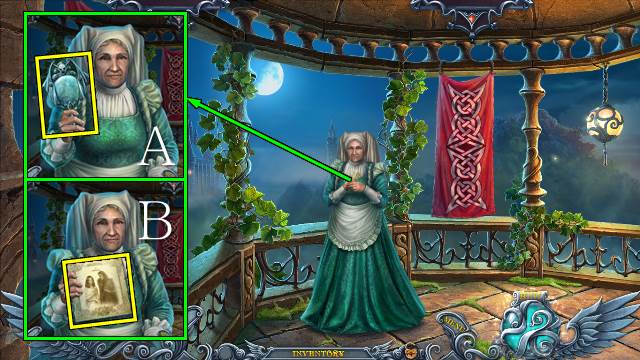

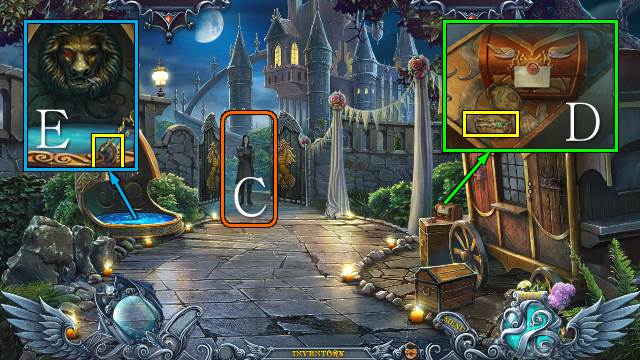
- Talk to Nanny; take the mirror (A) and invitation (B).
- Interact with Isa (C).
- Read the note, open the box and take the TWEEZERS (D).
- Take the STONE SYMBOL with the TWEEZERS (E).

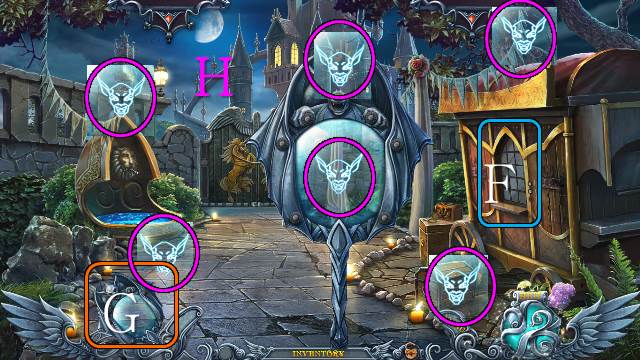
- Zoom into the window (F) and select the mirror (G).
- Find the six gargoyle symbols to charge the mirror (H).

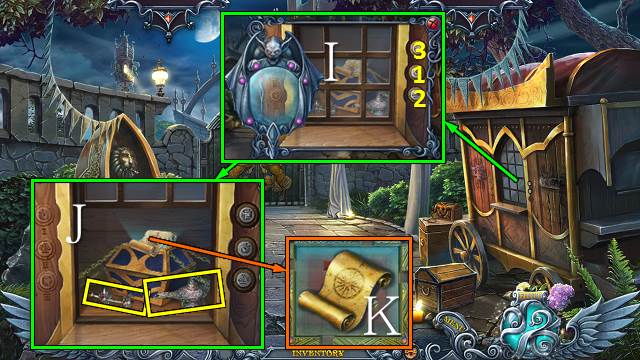
- Use the mirror on the hidden image, place the STONE SYMBOL and push the buttons in order (I); take the BRIDLE, OIL LAMP (J) and map (K).

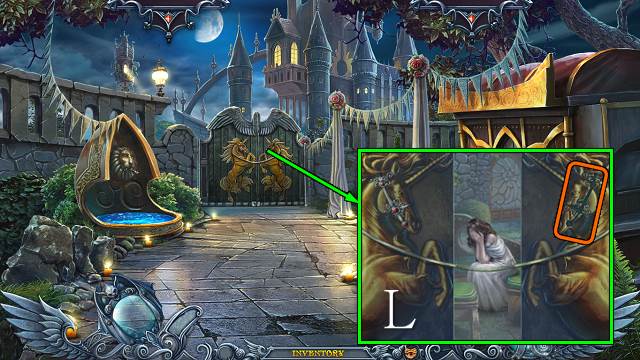
- Interact with the gate; place the BRIDLE (L).
- Open the gate.
- Go forward.

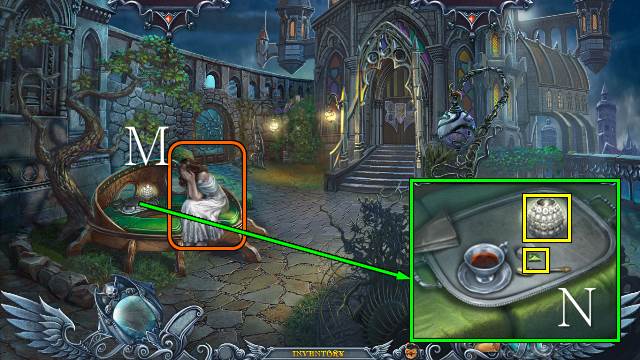
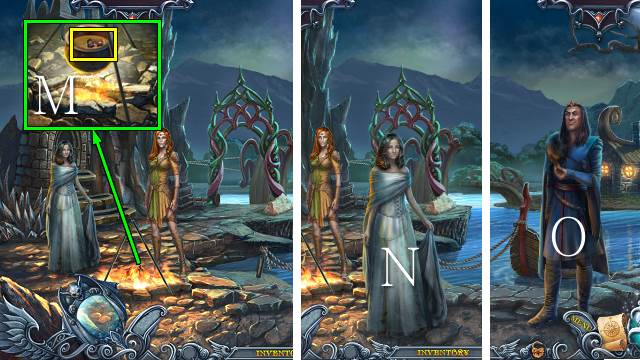
- Talk to Adele (M).
- Take the GREEN GEM and CANDLE (N).

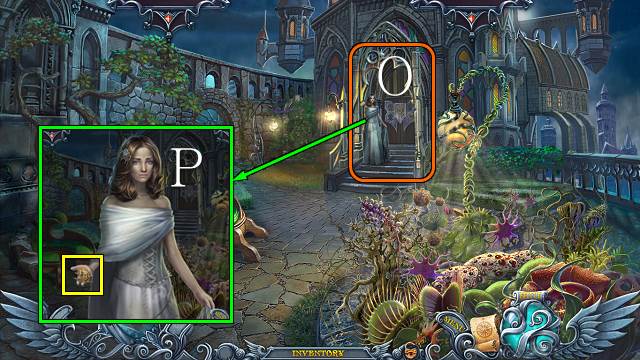
- Interact with the door twice (O).
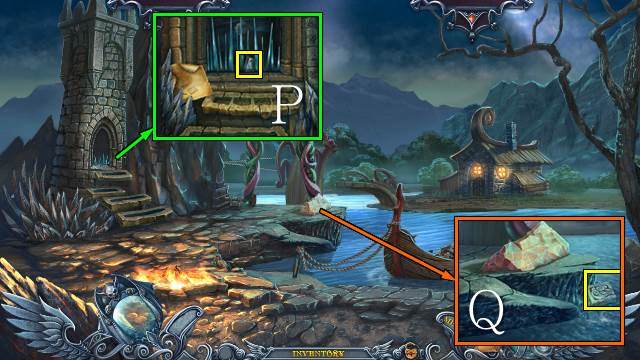
- Talk to Adele; take HERALDIC SYMBOL 1/4 (P).
- Walk down.

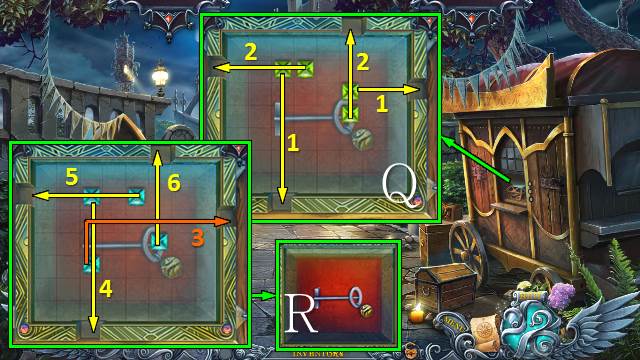
- Place the GREEN GEM for a mini-game (Q).
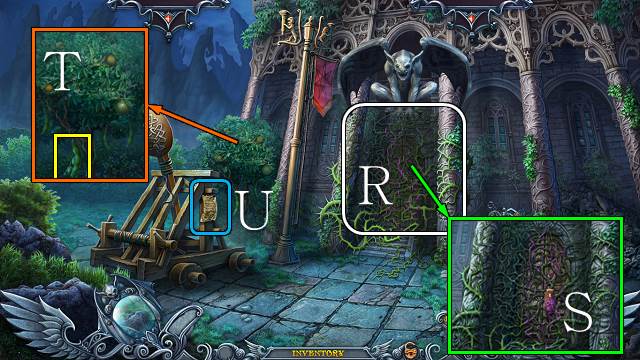
- Take the KEY (R).
- Walk forward.

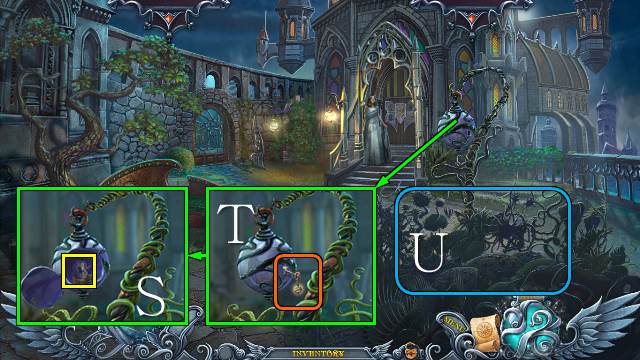
- Use the KEY and open the lamp (S); take HERALDIC SYMBOL 2/4 and place the CANDLE (T).
- Play the HOP (U).
- You receive a LION’S EYE.
- Walk down.

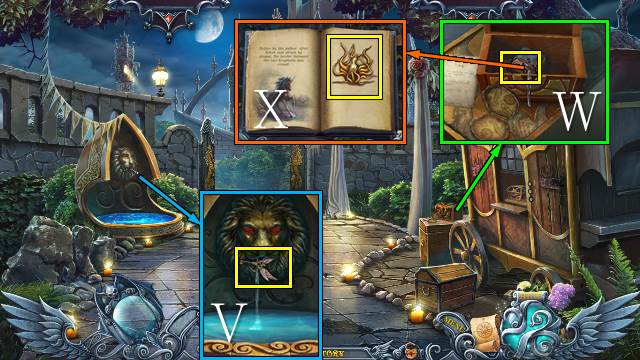
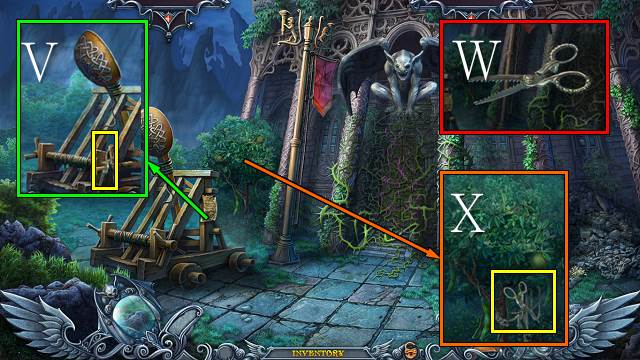
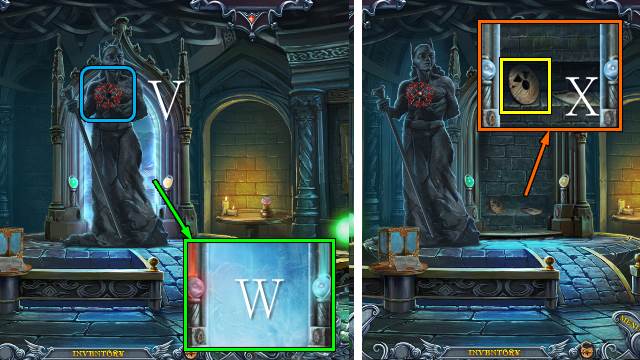
- Place the LION’S EYE; take the CHEST KEY (V).
- Use the CHEST KEY and take HERALDIC SYMBOL 3/4 (W); open the book, turn the pages and take the PHOENIX (X).
- Walk forward.

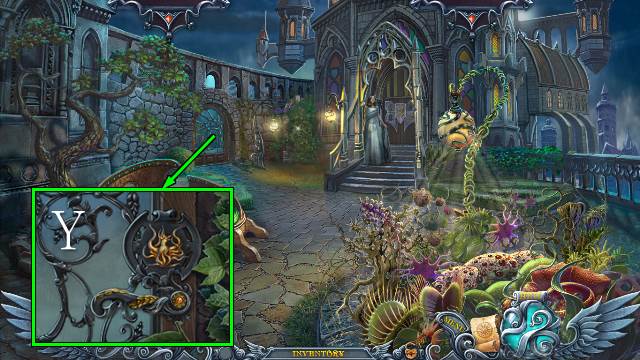
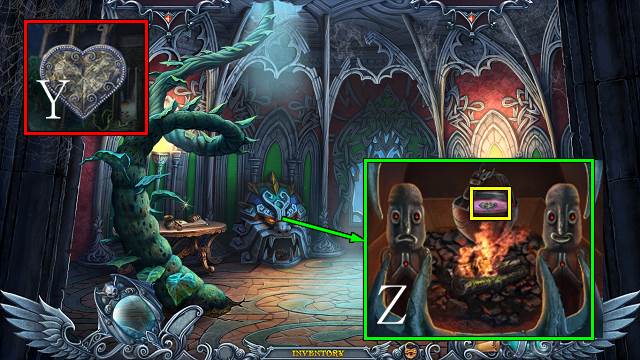
- Remove the vine and place the PHOENIX; turn the handle (Y).
- Go left.

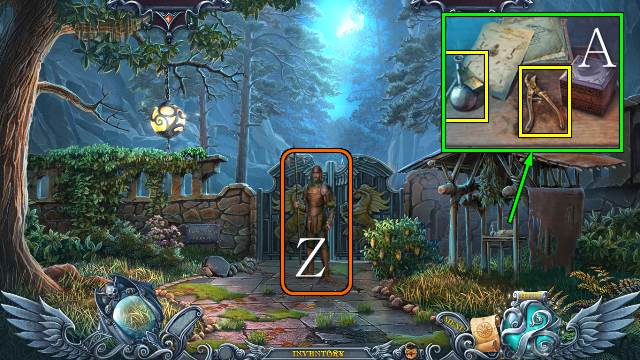
- Talk to the guard (Z).
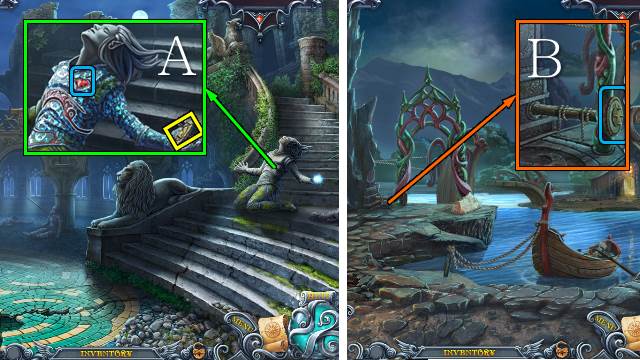
- Take the RUSTY PRUNER and POTION; read the note (A).
- Walk down.

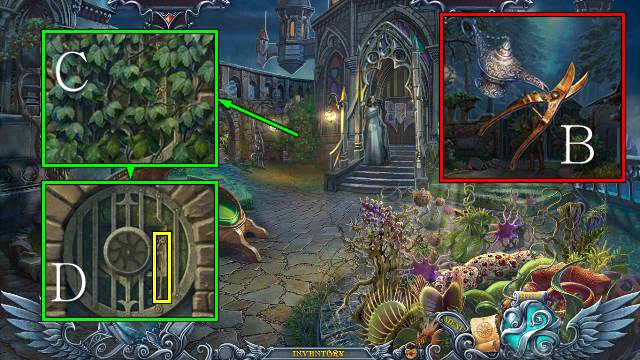
- Access the RUSTY PRUNER and use the OIL LAMP; take the PRUNER (B).
- Use the PRUNER three times (C); take the KNITTING NEEDLE (D).
- Go left.

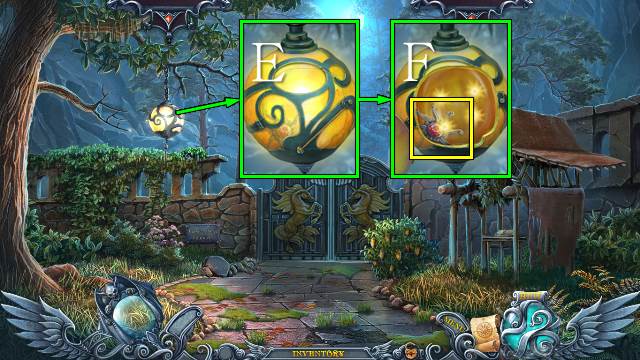
- Use the KNITTING NEEDLE (E); open the lamp and take the SHIELD LOCK (F).

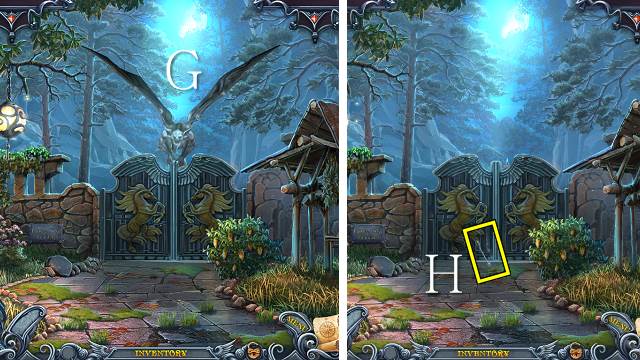
- Interact with the gargoyle (G).
- Take the ARROW (H).
- Walk down.

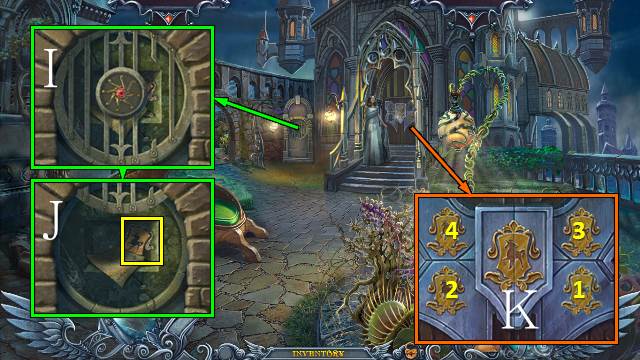
- Use the SHIELD LOCK (I); read the note and take HERALDIC SYMBOL 4/4 (J).
- Place the HERALDIC SYMBOLS and push them in the order in which they light up (K).
- Go forward.

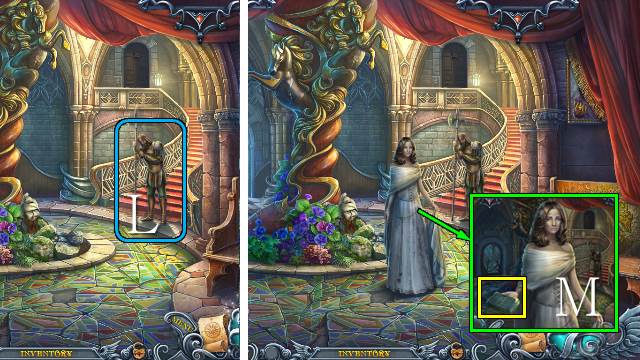
- Interact with the guard (L).
- Talk to Adele; take the ALBUM (M).

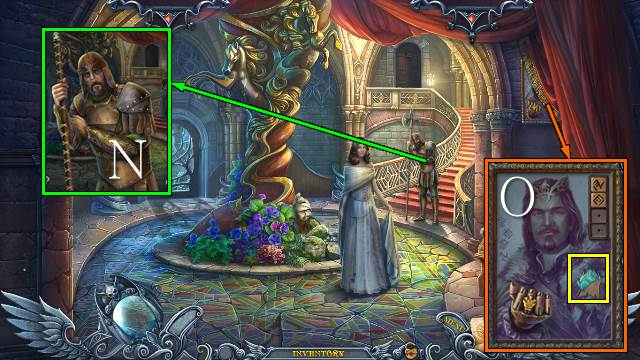
- Give the ALBUM to the guard for a HOP (N).
- You receive a DRAGON SYMBOL.
- Move the drape, tear the painting and take the CAGE KEY (O).
- Go down and left.

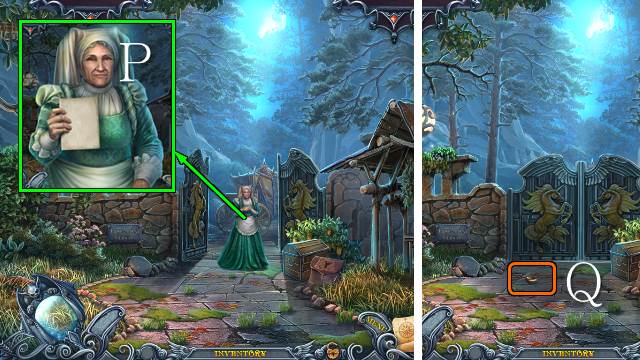
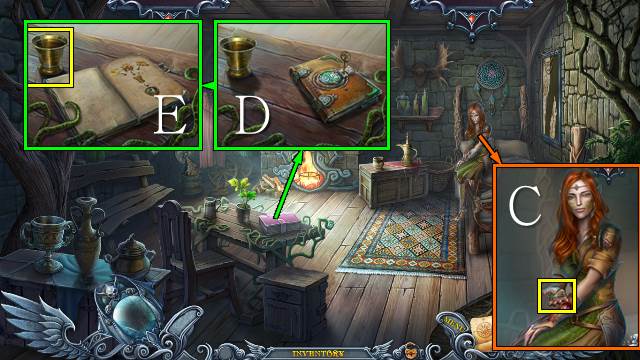
- Talk to Nanny; take and open the note (P).
- Try to take the ring twice (Q).

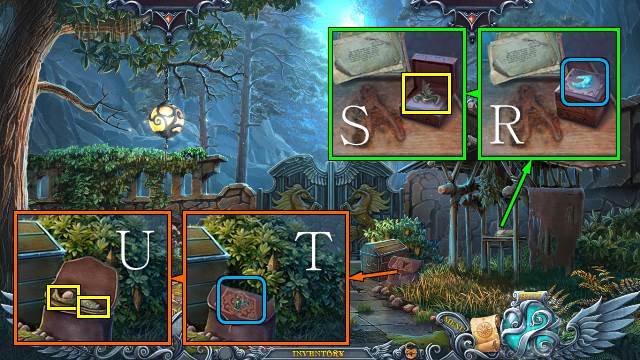
- Place the DRAGON SYMBOL (R), open the box and take the FIGURINE (S).
- Place the FIGURINE and open the bag (T); open the sack and take the COIN and BROKEN MEDALLION (U).

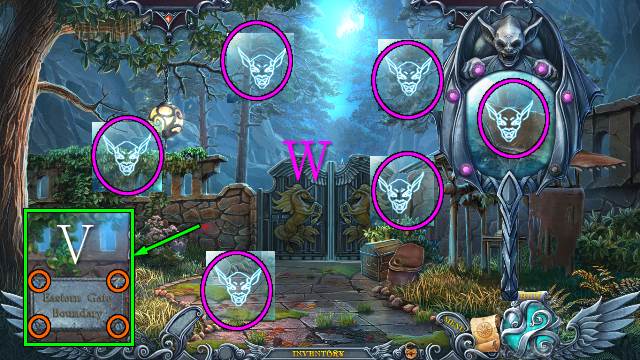
- Use the COIN four times (V); select your mirror and find the six gargoyle symbols (W).

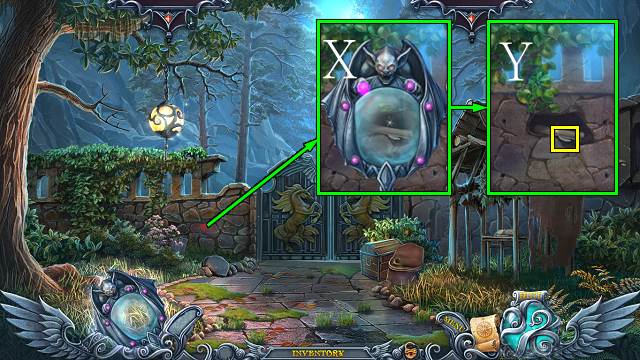
- Use the charged mirror (X); read the note and take the MEDALLION PIECE (Y).
- Walk down.

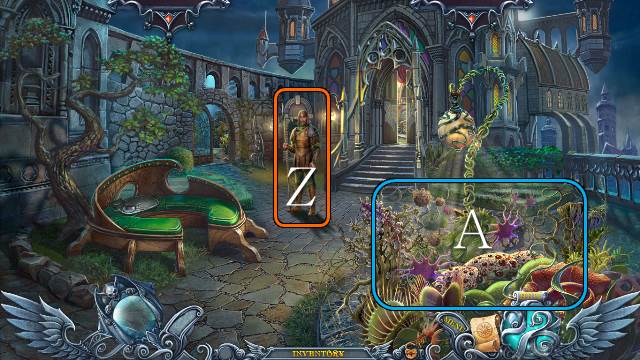
- Talk to the guard (Z).
- Play the HOP (A).
- You receive a MEDALLION PIECE.
- Walk forward.

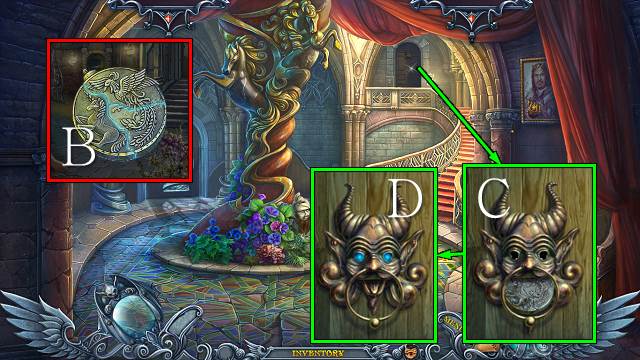
- Access the BROKEN MEDALLION and place the two MEDALLION PIECES; take the MEDALLION (B).
- Interact with the knocker and place the MEDALLION (C); knock (D).
- Walk forward.

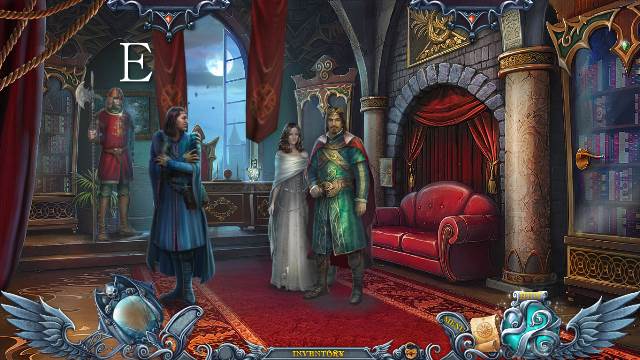
- Interact with the scene (E).

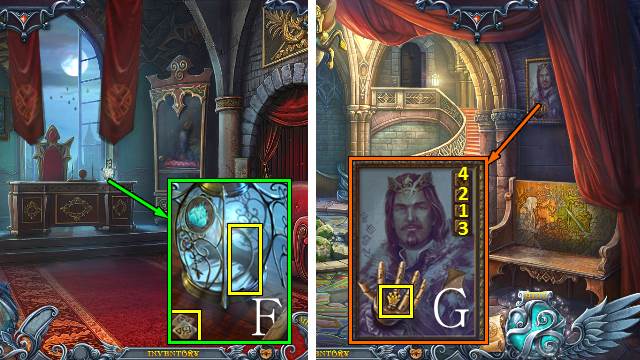
- Take the RUNES; place the CAGE KEY, open the cage and take the FISH LAMP (F).
- Walk down.
- Place the RUNES and select them in the indicated order; take the KING’S RING (G).
- Walk forward.

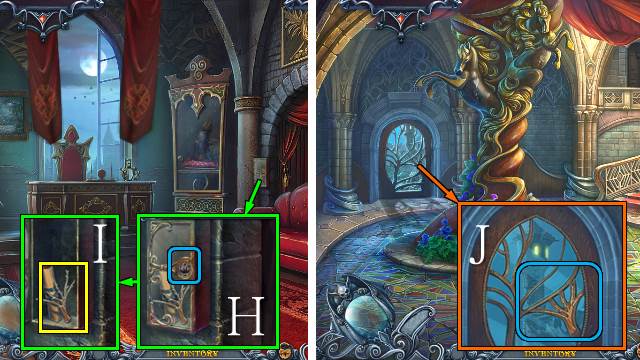
- Use the KING’S RING (H); read the note and take the KEY (I).
- Walk down.
- Move the bars twice, place the KEY and move the branches (J).
- Go left.
Chapter 2: Into the Kingdom of Arken

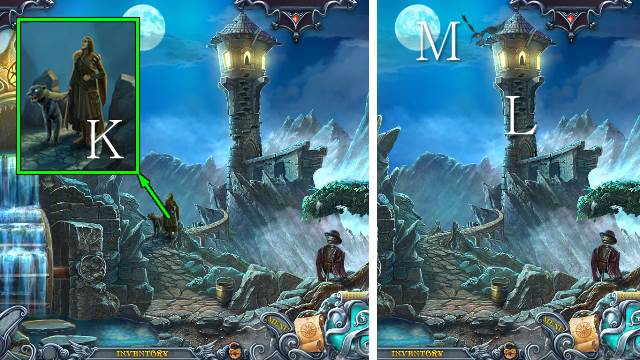
- Interact with Isa (K).
- Interact with the tower (L).
- Interact with the gargoyle (M).

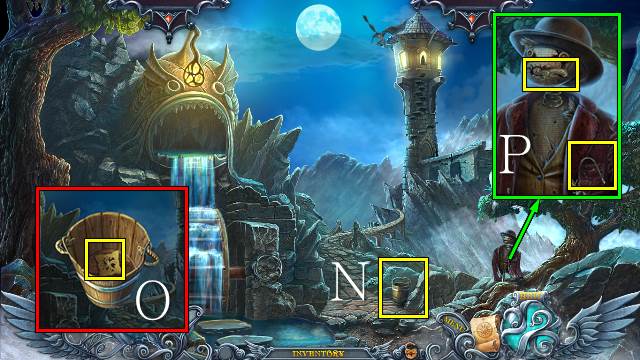
- Take the BUCKET (N).
- Access the BUCKET and take GEAR 1/2 and the BUCKET (O).
- Open the mouth and take the HANDLE and HOOK (P).

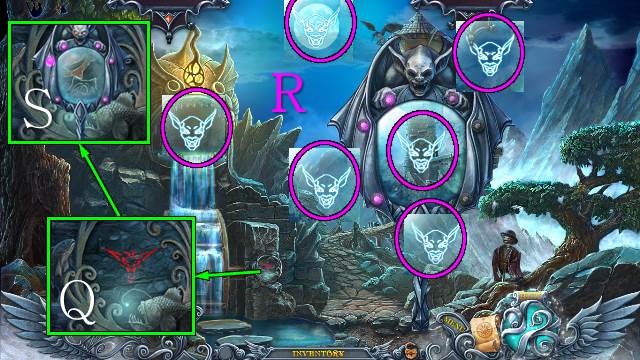
- Place the FISH LAMP (Q); select the mirror and find the six gargoyle symbols (R).
- Use the charged mirror (S).
- Walk down.

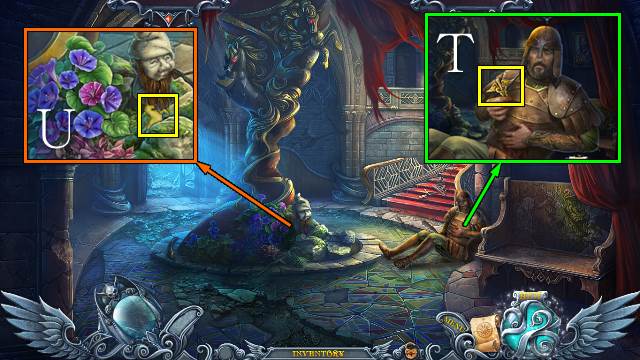
- Talk to the guard; take the CADUCEUS (T).
- Take the UNICORN FIGURINE with the HOOK (U).
- Go upstairs.

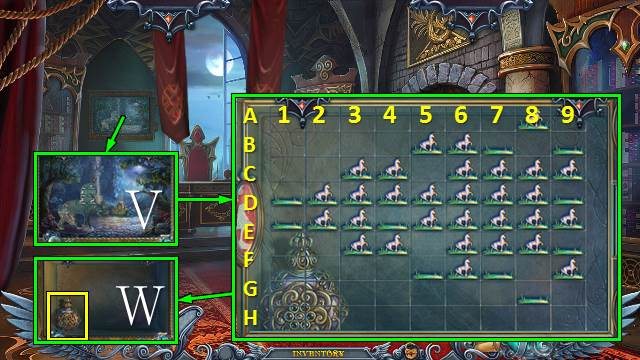
- Place the UNICORN FIGURINE for a mini-game (V).
- Solution: D5-B7, A8-C6, B5-B7, B7-D9, D9-B9, E6-C8, B9-D7, E7-C9, G9-E7.
- C6-C8, C9-C7, E8-E6, C7-E7, E6-E8, E9-E7, F7-D7, G6-E6, D7-D5, E6-E4.
- D3-D1, F3-D3, D1-F3, C3-E3, D5-D3, F4-D4, D4-D2, F3-D3, D2-D4, C4-E4.
- Take the VIAL (W).

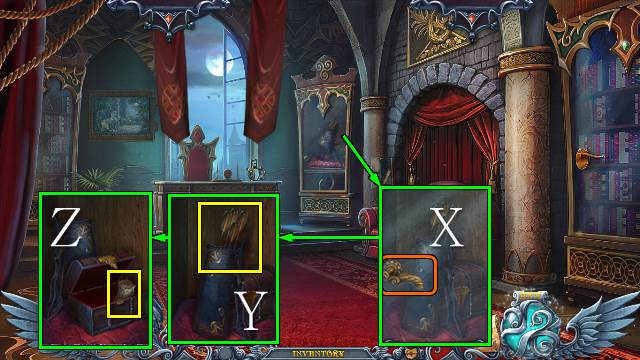
- Place the HANDLE (X), open the cabinet and take the ARROWS (Y); place the CADUCEUS and take the BANDAGE (Z).
- Walk down.

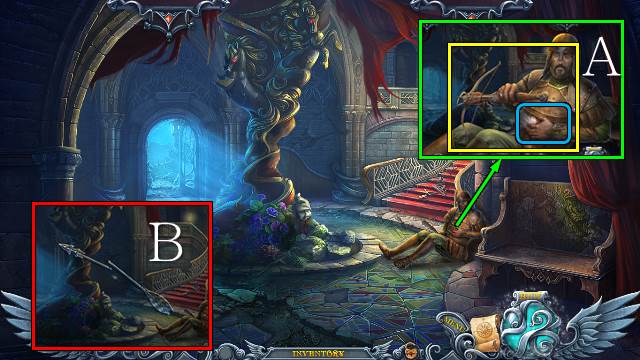
- Use the BANDAGE; take the CROSSBOW (A).
- Access the ARROW, break it and take the BROKEN ARROW (B).

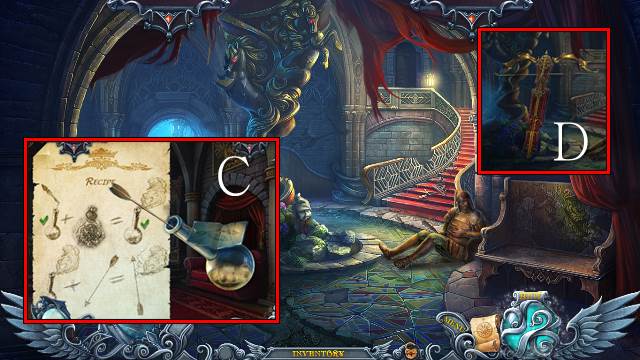
- Access the POTION and use the BROKEN ARROW, VIAL and ARROWS; take the POISONED ARROWS (C).
- Access the CROSSBOW and place the POISONED ARROWS; take the CROSSBOW (D).
- Go left.

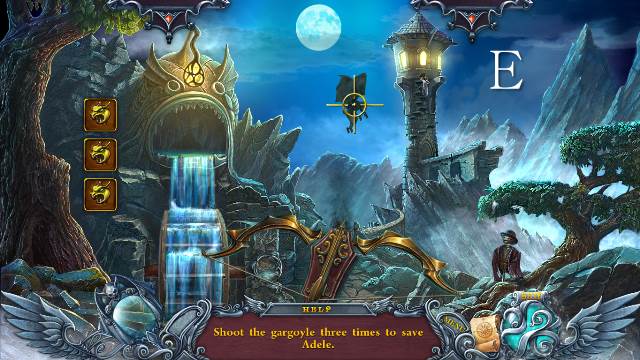
- Use the CROSSBOW for a mini-game (E).

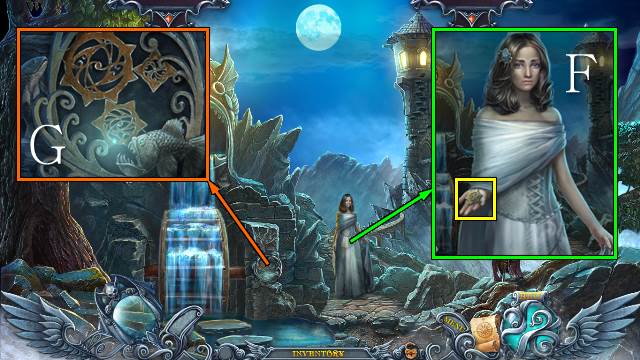
- Talk to Adele; take GEAR 2/2 (F).
- Place the GEARS (G).
- Go forward.

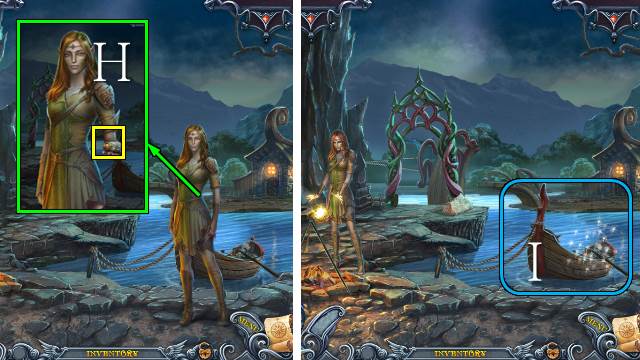
- Talk to Lilian; take the BOTTLE (H).
- Play the HOP (I).
- You receive a POTION.

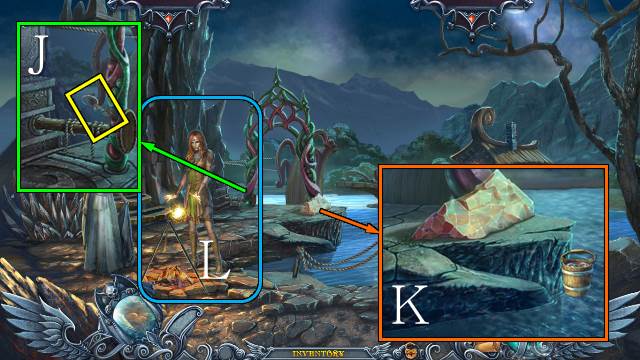
- Take the PARTIAL SHEERS (J).
- Get WATER with the BUCKET (K).
- Interact with Lilian (L).

- Place the POTION and add the WATER; take the POTION with the BOTTLE (M).
- Talk to Adele and give her the POTION; you receive LILIAN’S CUP (N).
- Talk to Isa (O).

- Read the note and take the BRICK WAVE (P).
- Put the BRICK WAVE in the water to get ACTIVATED PLATE 1/4 (Q).
- Go left.

- Try to open the door (R).
- Use LILIAN’S CUP to get a CUP OF POISON (S).
- Open the pod and take the BEAN (T).
- Read the note (U).

- Take the TONG PART (V).
- Access the SHEARS PART and attach the TONG PART; take the PARTIAL SHEARS (W).
- Use the SHEARS PART and take the ROPE (X).
- Walk down.

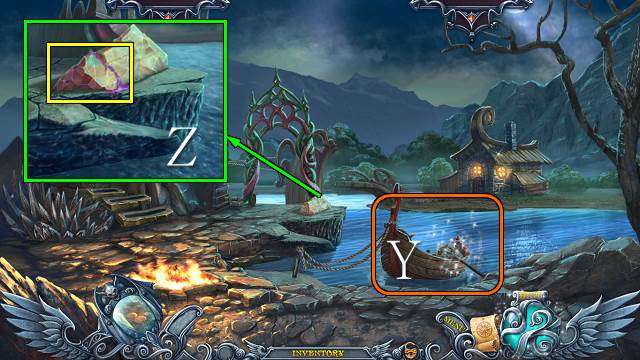
- Play the HOP (Y).
- You receive ACTIVATED PLATE 2/4.
- Use the CUP OF POISON and take the BOULDER (Z).
- Go left.

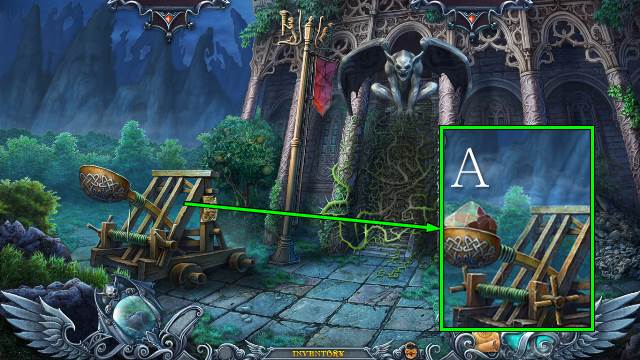
- Remove the old rope, place the ROPE and turn the handle; place the BOULDER and release the handle (A).
- Go forward.
Chapter 3: The Elvish Tower

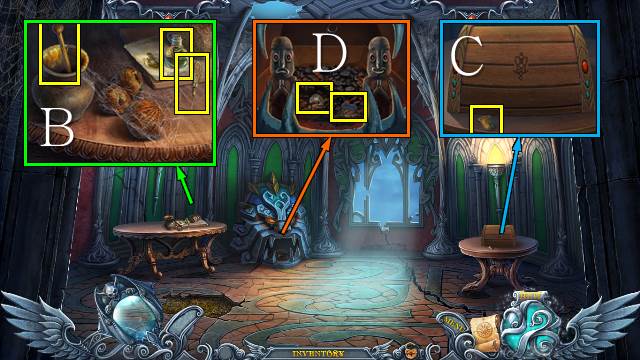
- Take the AWL, GREEN FIRE and HONEY and read the note (B).
- Take the SHIELD (C).
- Take the HEART and MEDALLION PART 1/5 (D).
- Walk down.

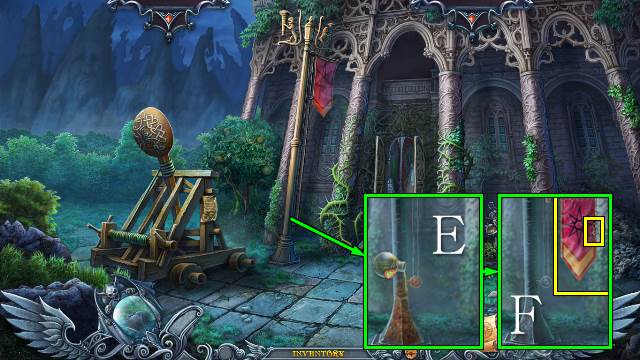
- Use the GREEN FIRE and pull the rope (E); take the STAR and BANNER (F).
- Walk forward.

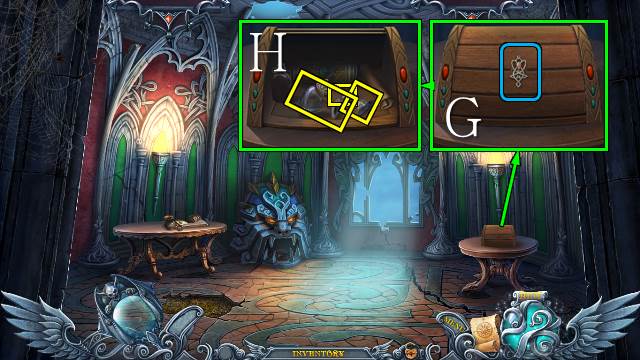
- Use the STAR and open the cabinet (G); take the POTION and MEDALLION PARTS 2/5 and 3/5 and read the note (H).
- Walk down.

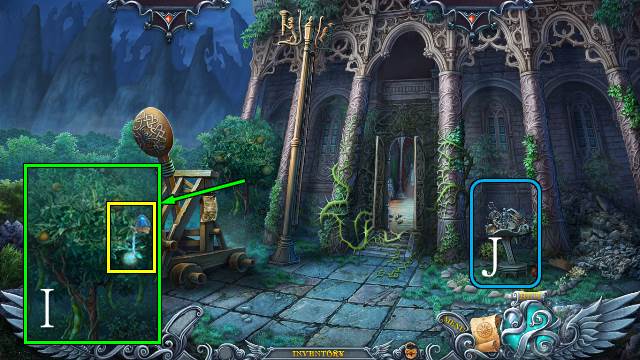
- Use the POTION and take the ORANGE (I).
- Play the HOP (J).
- You receive a DAGGER.
- Walk forward.

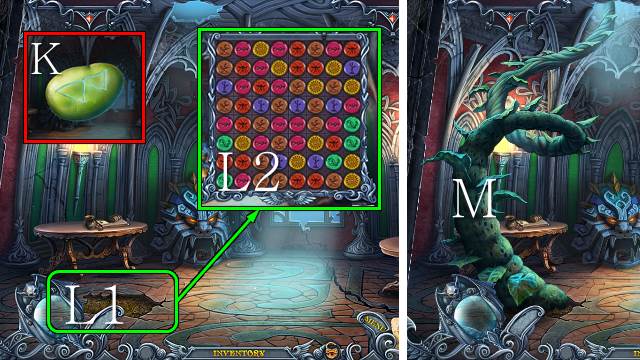
- Access the BEAN and use the DAGGER; take the BEAN RUNE (K).
- Plant the BEAN RUNE (L1) for a mini-game (L2).
- Go up (M).

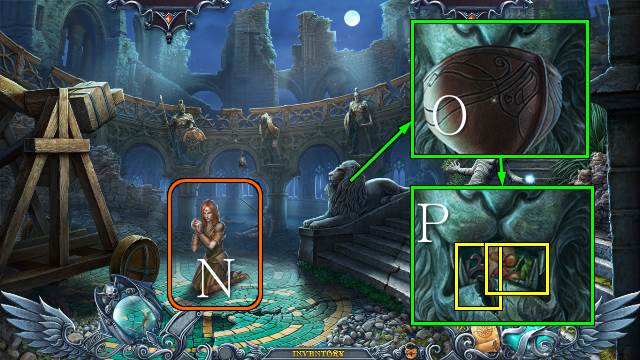
- Talk to Lilian (N).
- Take the HELMET (O); read the note and take the BRIAR (P).

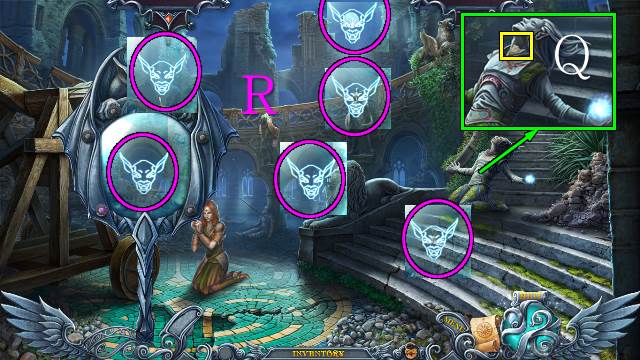
- Take MEDALLION PART 4/5 (Q); access your mirror and find the six gargoyles (R).

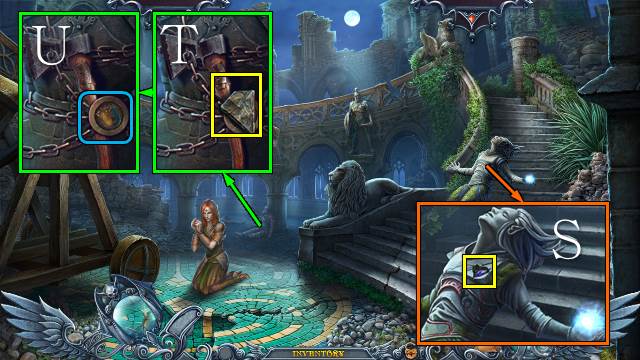
- Use the charged mirror; take the LANTERN STONE (S).
- Take MEDALLION PART 5/5 and place the SHIELD (T); take the AXE (U).
- Walk down twice.

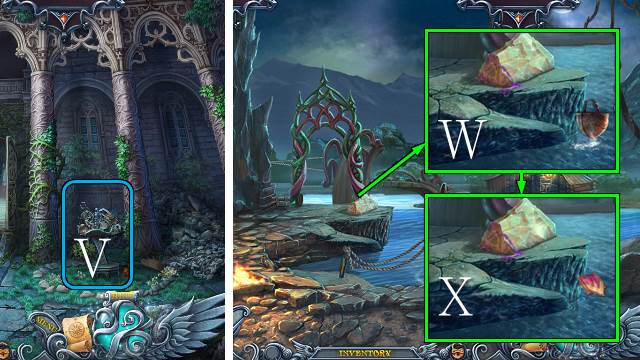
- Play the HOP (V).
- You receive a KEY.
- Walk down.
- Use the HELMET to get a HELMET WITH WATER (W); place the BANNER to get a WET BANNER (X).

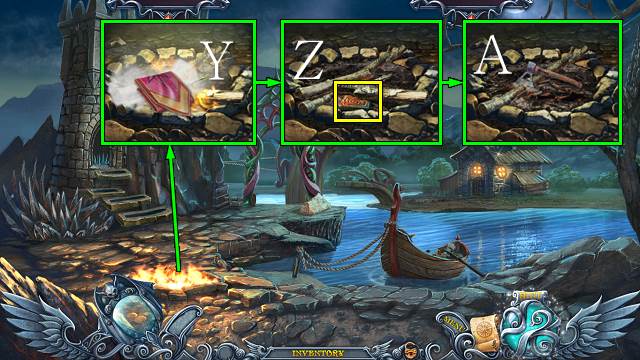
- Use the WET BANNER (Y), move the sticks and take ACTIVATED PLATE 3/4 (Z); use the AXE and take the WOOD (A).
- Go left, forward and up.

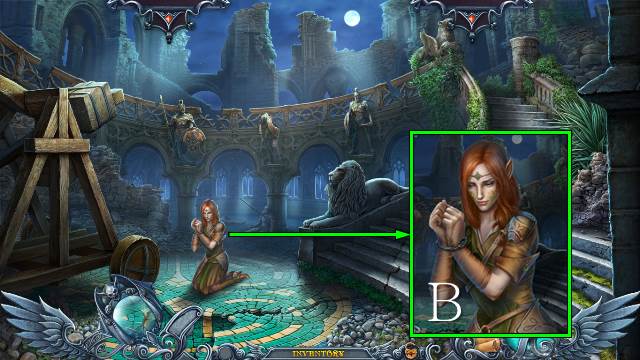
- Talk to Lilian and use the KEY; take ACTIVATED PLATE 4/4 (B).
- Walk down three times.

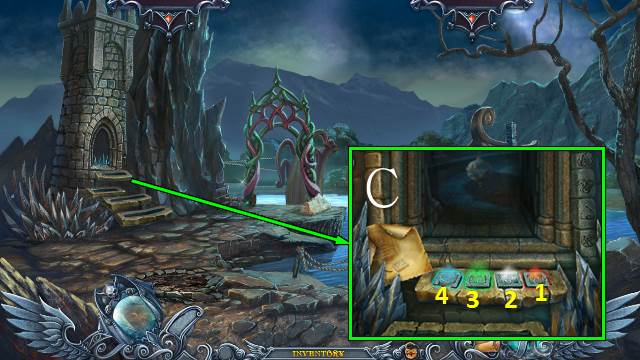
- Place the ACTIVATED PLATES and push them in order (C).
- Go into the tower.

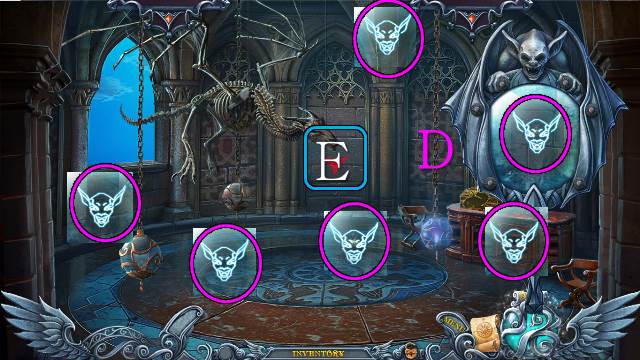
- Interact with the scene.
- Select your mirror and find the six gargoyles (D).
- Use the charged mirror (E).

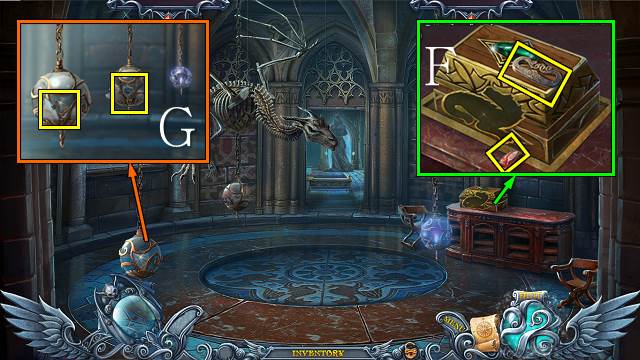
- Take the LANTERN STONE and FLINT (F).
- Open the first two lanterns and take the CORKSCREW and UNICORN FIGURE; place the two LANTERN STONES (G).

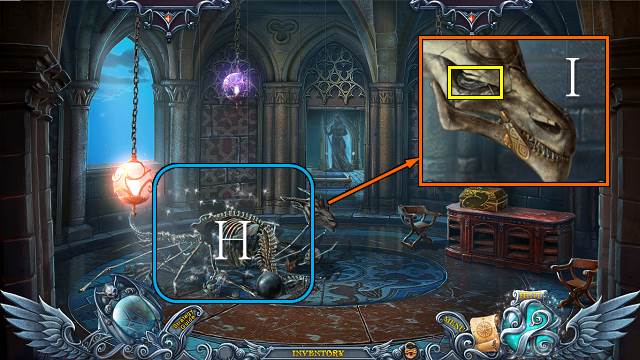
- Play the HOP (H).
- You receive an ISA FIGURE.
- Use the AWL and take the COLORLESS RUNE (I).
- Go forward.

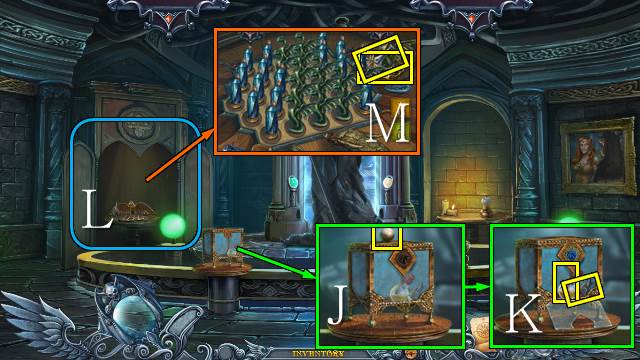
- Take the BALL and place the UNICORN FIGURE (J); take the FIRESTONE and SEALED BOTTLE (K).
- Open the cupboard (L).
- Place the ISA FIGURE for a mini-game; the solution is random.
- Take the RED DYE and BONE CROWN (M).

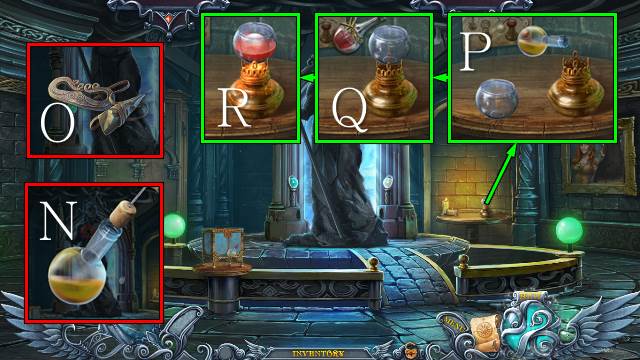
- Access the SEALED BOTTLE, remove the wax and use the CORKSCREW; take the BOTTLE OF OIL (N).
- Access the FLINT and place the FIRESTONE; take the FLINT AND FIRESTONE (O).
- Remove the glass, use the BOTTLE OF OIL and replace the glass (P), use the RED DYE and FLINT AND FIRESTONE (Q); place the COLORLESS RUNE to get a RED RUNE and place the BALL to get a RED BALL (R).
- Walk down.

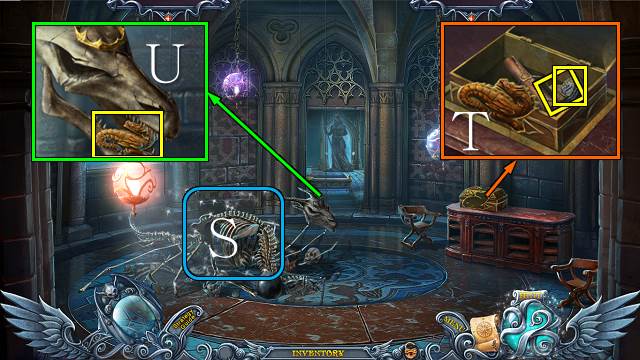
- Play the HOP (S).
- You receive DRAGON FIGURE 1/2.
- Place the BONE CROWN and take DRAGON FIGURE 2/2 (T).
- Place the DRAGON FIGURE, open the box, read the note and take the BLUE RUNE and MAP PIECE 1/2 (U).
- Walk forward.

- Place the RED BALL (V).
- Place the BLUE RUNE and RED RUNE and interact with the doorway (W).
- Read the note and take the BRIDGE PART (X).
- Walk down twice and go left and forward.

- Access the HEART and place the MEDALLION PARTS; reassemble the STONE HEART and take it (Y).
- Place the WOOD, HELMET WITH WATER, ORANGE, BRIAR, HONEY, FLINT AND FIRESTONE and STONE HEART; move the statuettes and take the HEART (Z).
- Go up.

- Place the HEART and take the BRIDGE HANDLE (A).
- Walk down three times.
- Place the BRIDGE PART and BRIDGE HANDLE and turn the handle (B).
- Go right.
Chapter 4: The Library

- Talk to Lilian; take the BOOK KEY (C).
- Use the BOOK KEY (D); open the book, read the recipe and take the MORTAR (E).

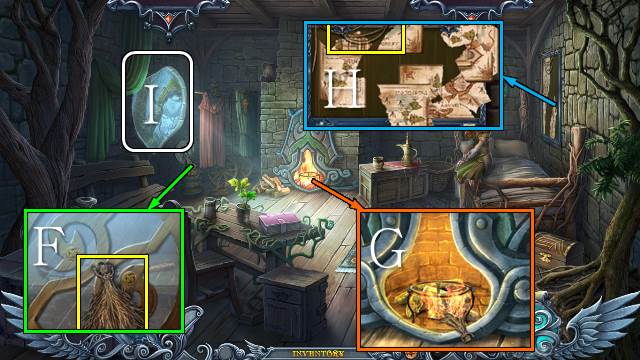
- Take the BROOM (F).
- Light the BROOM to get a SMOKING BROOM (G).
- Take the ROPE (H).
- Open the window (I).
- Go left.

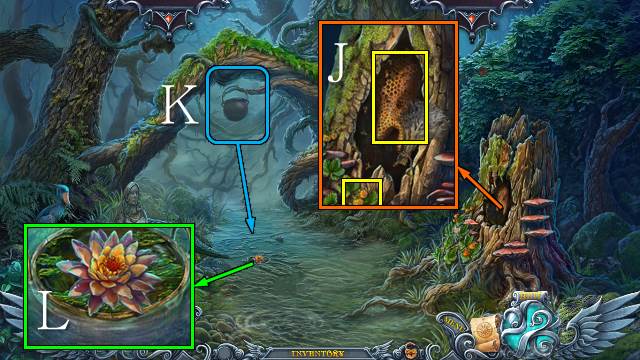
- Use the SMOKING BROOM and take the HONEYCOMB and CLOUDBERRY (J).
- Move the kettle (K).
- Take the LILY and KETTLE (L).

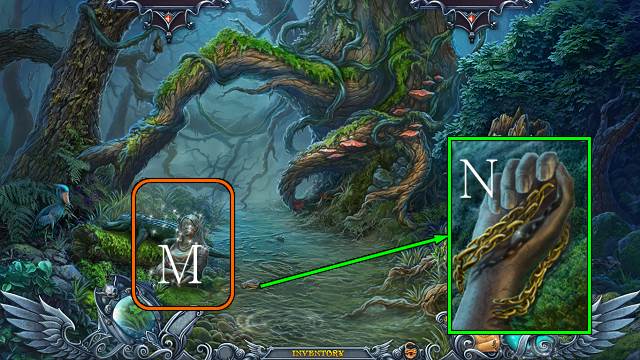
- Use the ROPE on the statue and move it; play the HOP (M).
- You receive a PESTLE.
- Take the GOLD CHAIN (N).
- Walk down twice.

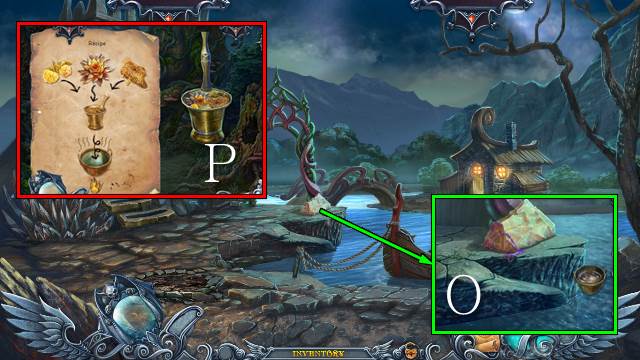
- Use the KETTLE to get a KETTLE WITH WATER (O).
- Access the MORTAR and place the LILY, HONEYCOMB, CLOUDBERRY and PESTLE; take the MEDICAL MIXTURE (P).
- Go right.

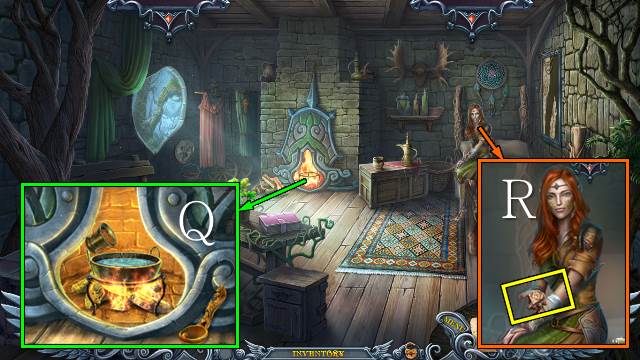
- Place the KETTLE WITH WATER and add the MEDICAL MIXTURE; you receive a FILLED SILVER CUP (Q).
- Give the FILLED SILVER CUP to Lilian; take MAP PIECE 2/2 (R).

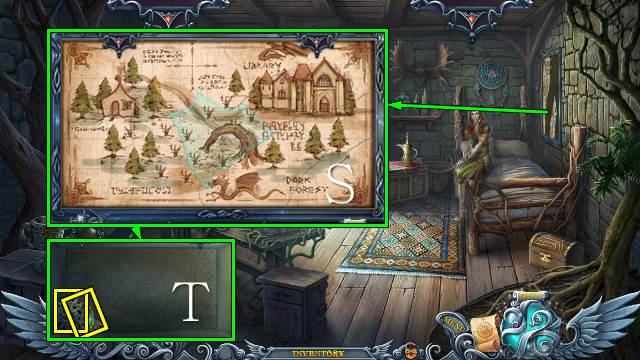
- Place the PIECE OF MAP for a mini-game (S).
- Take ORNAMENT 1/2 and the GEAR PART (T).
- Go left.

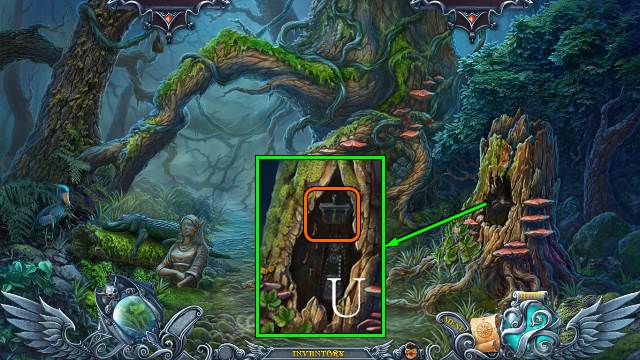
- Place the GEAR PART and move the lever (U).
- Go forward.

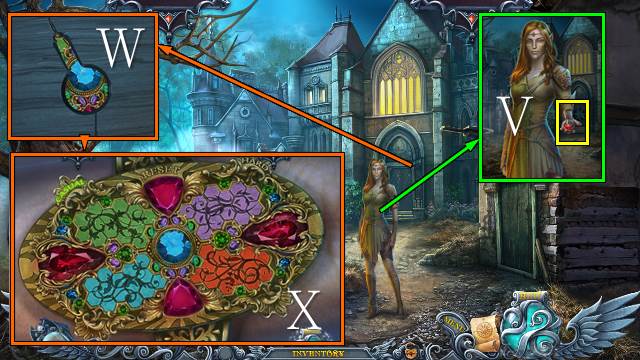
- Talk to Lilian; take the VIAL OF BLOOD (V).
- Place the VIAL OF BLOOD (W) for a mini-game (X).
- Open the door.
- Go forward.

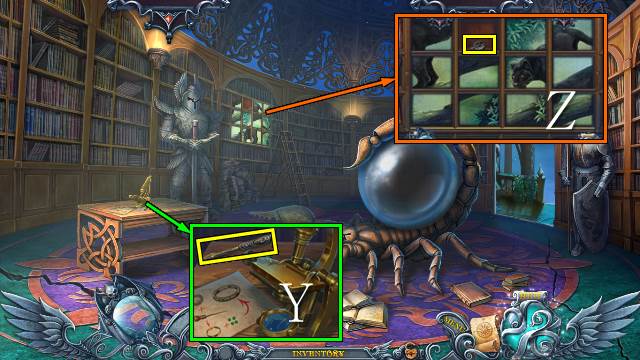
- Take the SCREWDRIVER (Y).
- Take the FALCON (Z).

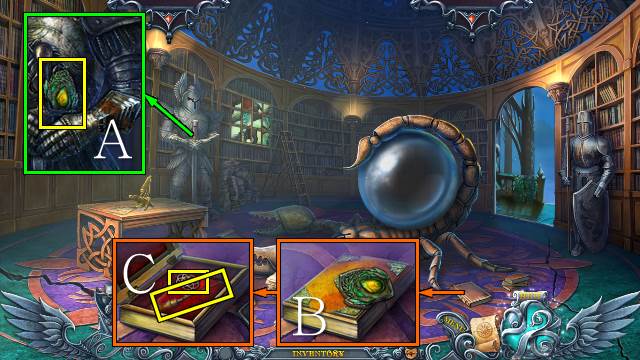
- Take the MEDALLION (A).
- Place the MEDALLION (B), open the book and take the CHISEL and ELF SIGN (C).
- Go forward.

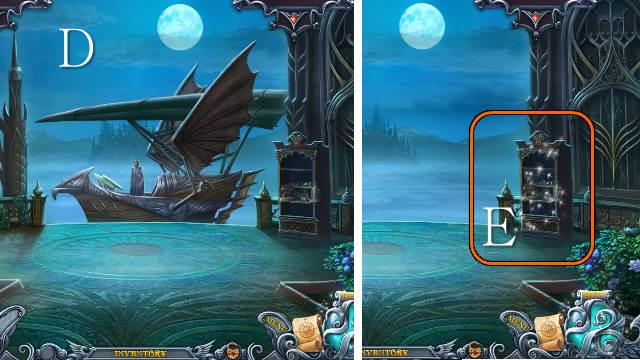
- Try to walk forward (D).
- Play the HOP (E).
- You receive an OILER.
- Walk down.

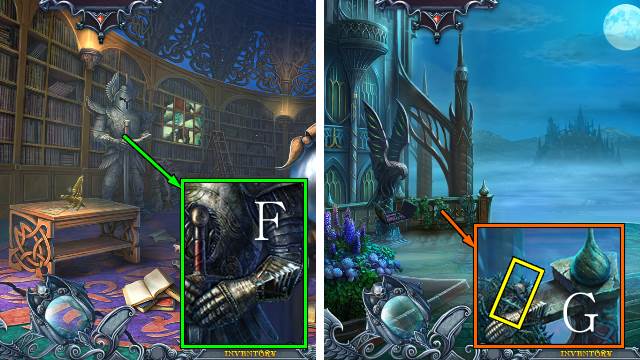
- Use the OILER and SCREWDRIVER and take the ARMOR GLOVE (F).
- Go forward.
- Use the ARMOR GLOVE and take the LATCHKEY (G).
- Walk down three times.

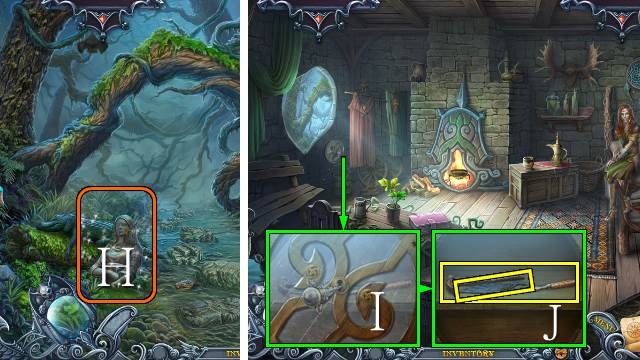
- Play the HOP (H).
- You receive a FIN.
- Walk down.
- Use the LATCHKEY and open the cabinet (I); take the HAMMER AND CHISEL and WING (J).
- Go left and forward.

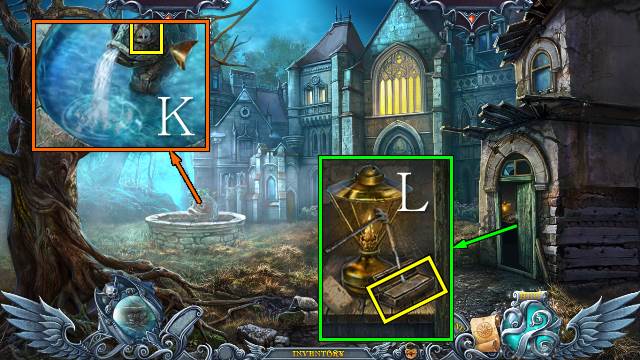
- Place the FIN; take the MEDALLION (K).
- Open the door, use the HAMMER AND CHISEL and GOLD CHAIN, close the box and take the FORM WITH MATERIAL (L).
- Go forward twice.

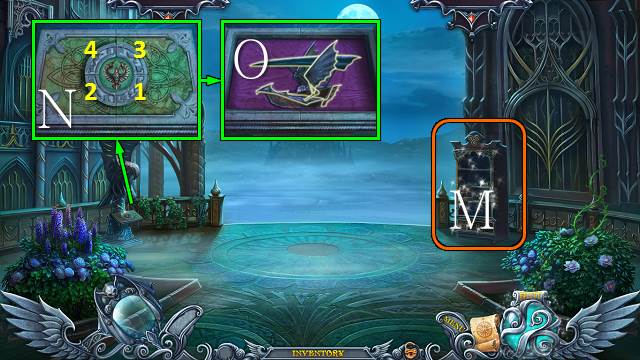
- Play the HOP (M).
- You receive the CRUCIBLE TONGS.
- Place the FALCON and push the segments in the indicated order (N); place the WING (O).

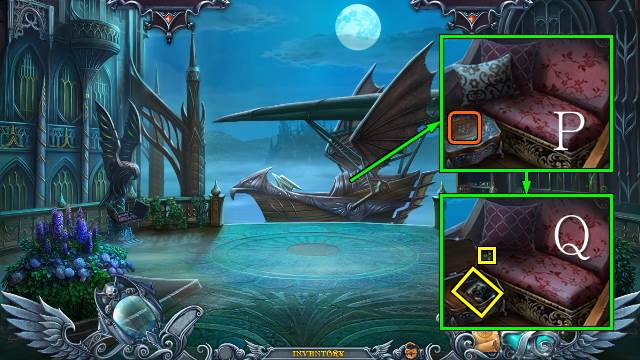
- Place the ELF SIGN, open the box and move the cushion (P); take the JEWELS, open the compartment and take the PUZZLE PIECE (Q).
- Walk down.

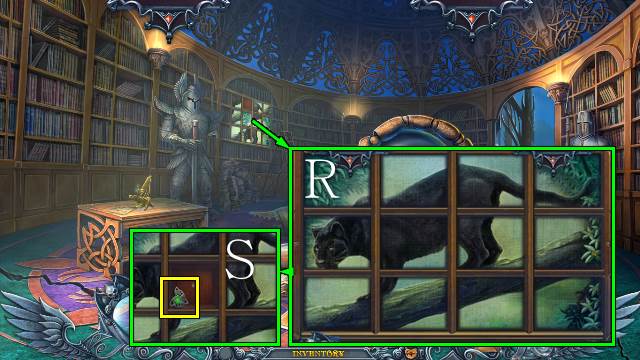
- Place the PUZZLE PIECE for a mini-game (R).
- Take ORNAMENT 2/2 (S).
- Walk down three times.

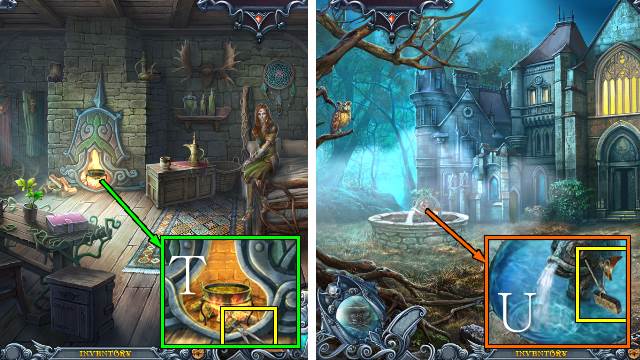
- Place the FORM WITH MATERIAL and take the FORM IN TONGS with the CRUCIBLE TONGS (T).
- Go left and forward.
- Place the FORM IN TONGS to receive the RING BILLET (U).
- Go forward.

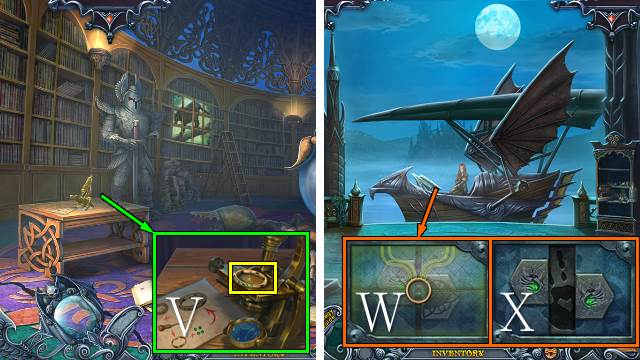
- Place the RING BILLET, use the CHISEL and place the JEWELS; take the HANDMADE RING (V).
- Go forward.
- Place the HANDMADE RING (W) and ORNAMENT (X).
- Go forward.
Chapter 5: The Arrow of Light

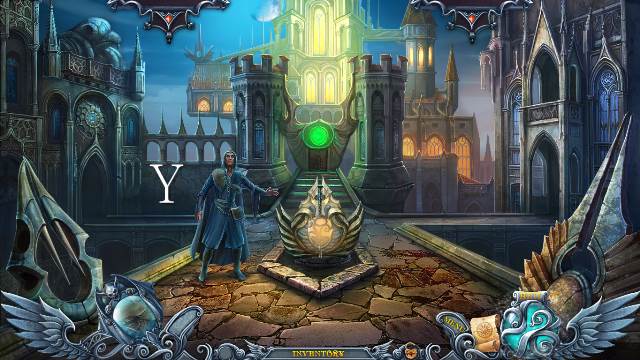

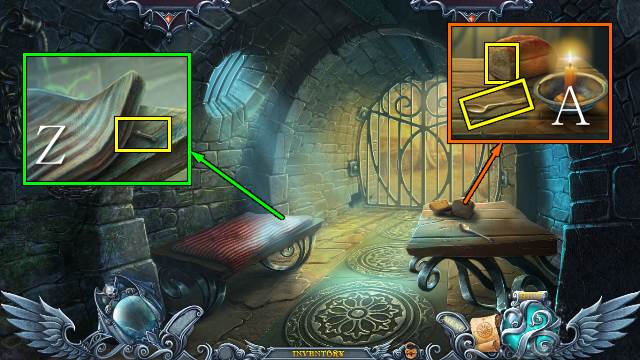
- Lift the mattress and take the LOCKPICK (Z).
- Take the BREAD and SPOON (A).

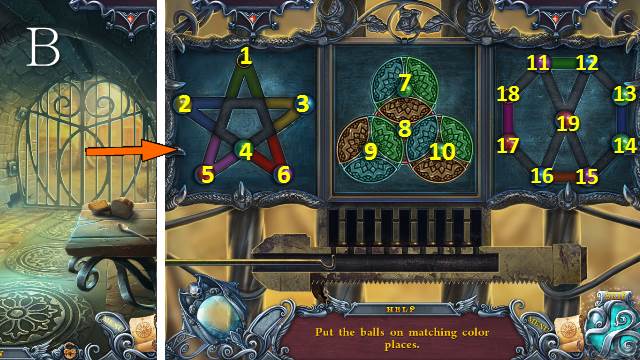
- Place the LOCKPICK for a mini-game (B).
- Solution 1: 5-4-6-1-5-4-3-2-4.
- Solution 2: 8-7-7-10-10-9-8-8.
- Solution 3: 11-19-12-13-14-15-19-11-12-13-14-15-16-19-12-13-14-15-16-17-18-11-19-12-13-14-15-16-19-11-18-17-16-15-14-13-12-19.
- Go forward.

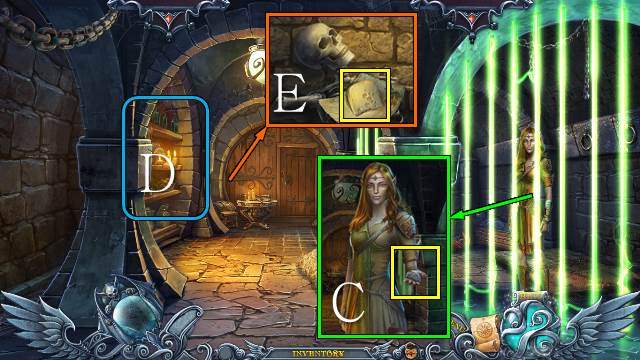
- Talk to Lilian; take GARDEN KEY 1/2 (C).
- Play the HOP (D).
- You receive the HANDCUFFS.
- Take the CHEESE and read the note; remove the skull (E).

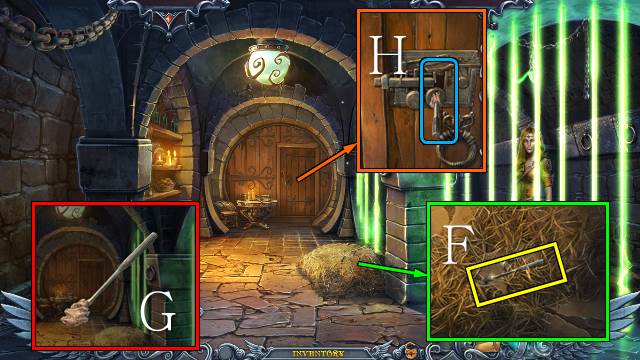
- Remove the hay and take the RASP (F).
- Access the RASP and use the BREAD; take the KEY BLANK (G).
- Use the KEY BLANK and take the CAST KEY (H).
- Walk down.

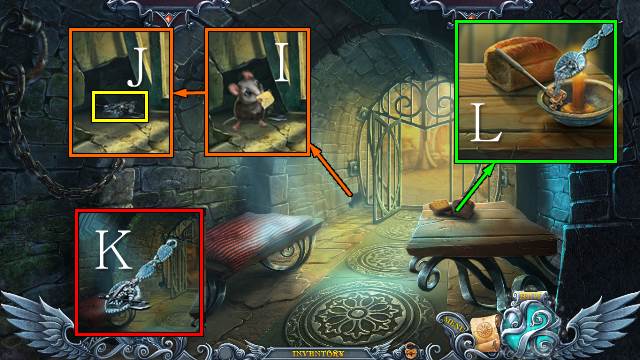
- Use the CHEESE (I); take the SOLDIER EMBLEM (J).
- Access the SPOON and place the SOLDIER EMBLEM (K).
- Place the SPOON and CAST KEY; take the KEY (L).
- Walk forward.

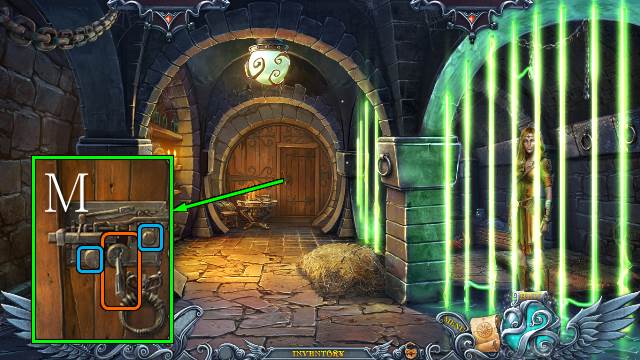
- Use the KEY, move the two buttons on the latch and open the door (M).
- Go forward.

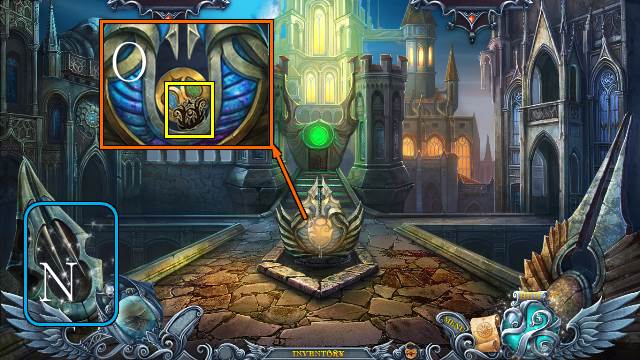
- Play the HOP (N).
- You receive a CODE.
- Take the SYMBOL (O).
- Go left.

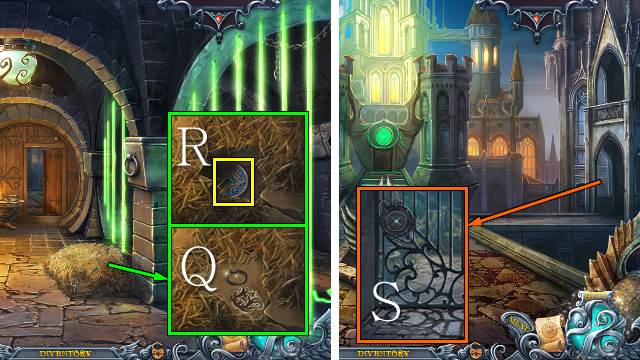
- Place the SYMBOL (Q), pull the handle and take GARDEN KEY 2/2 (R).
- Go forward.
- Place the GARDEN KEY and open the gate (S).
- Go right.

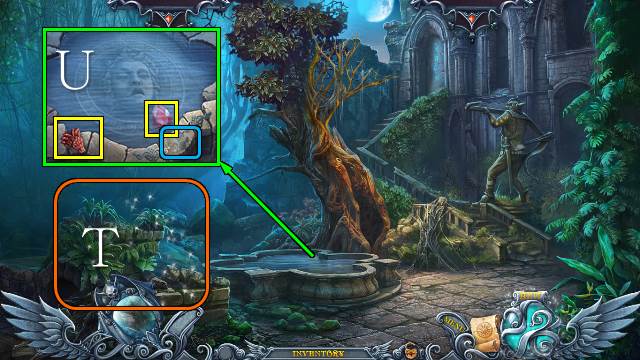
- Play the HOP (T).
- You receive an ARROW SHAFT.
- Place the MEDALLION and take the ELF TEAR and DRAGON HEAD (U).

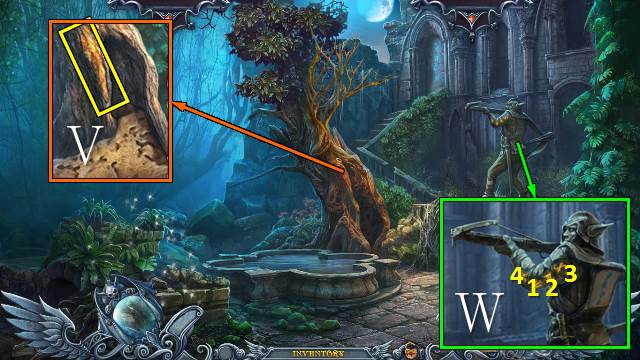
- Take the GOLDEN BARK (V).
- Place the CODE and push the symbols (W).
- Go forward.

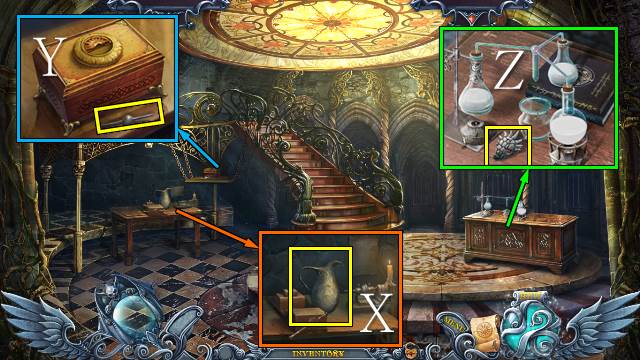
- Take the PITCHER and place the ARROW SHAFT (X).
- Take the GLASS STICK (Y).
- Take the DRAGON HEAD (Z).
- Walk down.

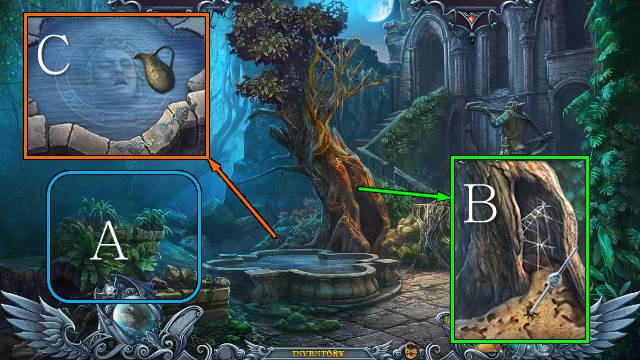
- Play the HOP (A).
- You receive some FEATHERS.
- Take some FORMIC ACID with the GLASS STICK (B).
- Use the PITCHER and take the PITCHER OF WATER (C).
- Walk down.

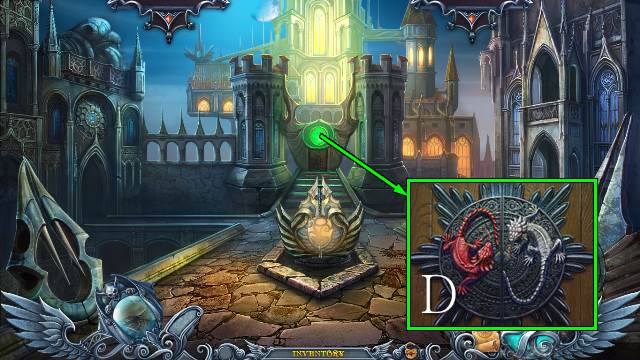
- Place the two DRAGON HEADS (D).
- Go forward.

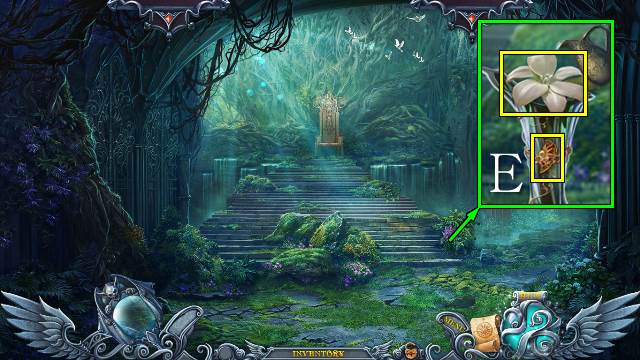
- Use the PITCHER OF WATER and take the ROYAL LILY and CASKET PART (E).
- Go down, right and forward.

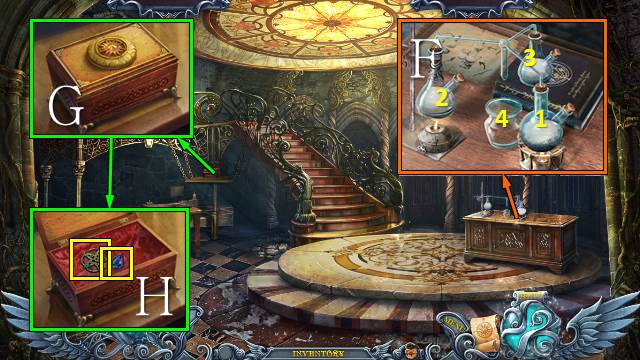
- Place the FORMIC ACID (1), ROYAL LILY (2) and GOLDEN BARK (3), then place the ELF TEAR (4) and take the POTION (F).
- Place the CASKET PART (G); open the casket and take the STONE and STAR (H).
- Walk down twice and go left.

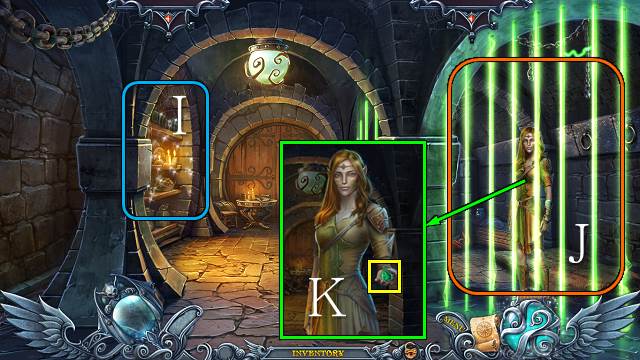
- Play the HOP (I).
- You receive a CROWN.
- Use the POTION (J).
- Take the STONE (K).

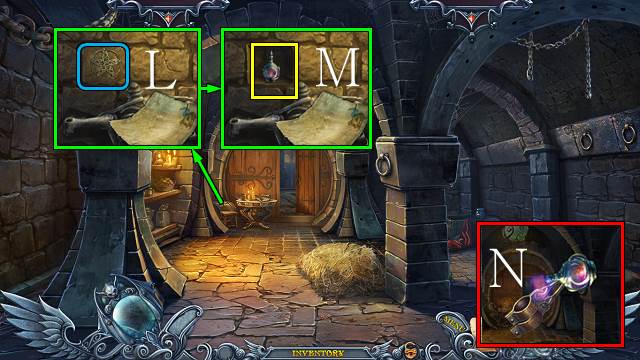
- Place the STAR (L); move the stone, read the note and take the MAGIC (M).
- Access the HANDCUFFS and use the MAGIC; take the HANDCUFFS (N).
- Go forward.

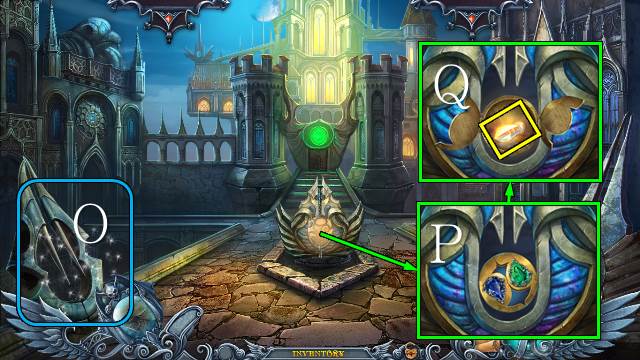
- Play the HOP (O).
- You receive a SCEPTER.
- Place the two STONES (P); take the STONE (Q).
- Go forward.

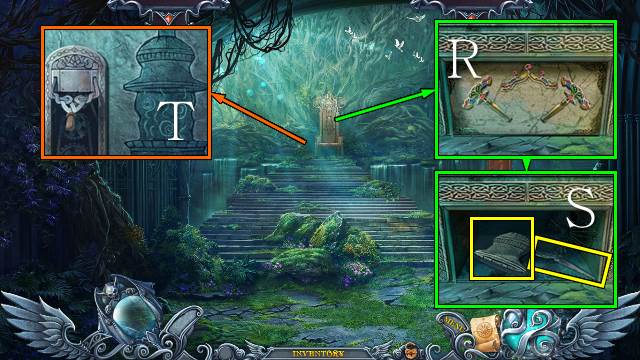
- Place the SCEPTER and CROWN (R); take the BASRELIEF PART and DIAMOND SAW (S).
- Place the BASRELIEF PART and pull the lever (T).
- Go down and right.

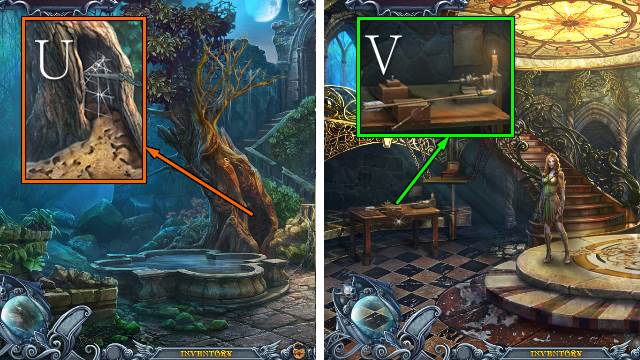
- Use the DIAMOND SAW and take the WEB (U).
- Go forward.
- Place the FEATHERS, STONE and WEB; take the ARROW OF LIGHT (V).
- Walk down.

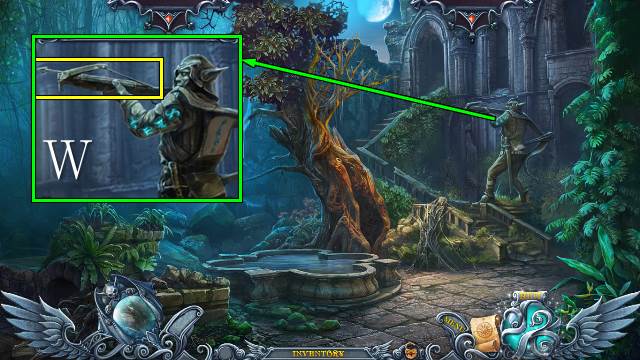
- Place the GLOVE and ARROW OF LIGHT; take the CROSSBOW (W).
- Go down and twice forward.

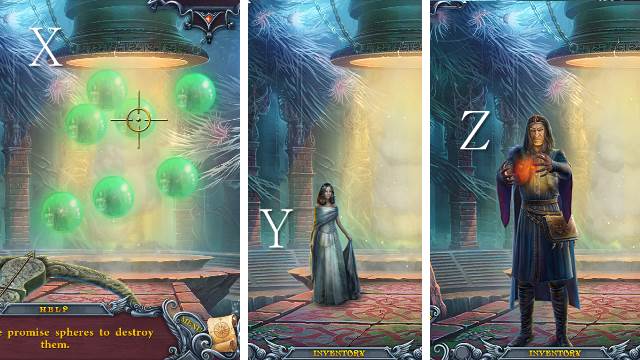
- Place the CROSSBOW and shoot the bubbles (X).
- Talk to Adele (Y).
- Use the HANDCUFFS (Z).
- Congratulations, you have completed Spirits of Mystery: Chains of Promise.




 Nancy Drew: Warnings at Waverly Academy Walkthrough, Guide, & Tips
 Ghosts of the Past: Bones of Meadows Town Walkthrough, Guide, & Tips
 The Cross Formula Walkthrough, Guide, & Tips
 Spirits of Mystery: The Dark Minotaur Walkthrough, Guide, & Tips
 Surface: Alone in the Mist Walkthrough, Guide, & Tips