Ghosts of the Past: Bones of Meadows Town Walkthrough, Guide, & Tips
Ghosts of the Past: Bones of Meadows Town Walkthrough

Welcome to the Ghosts of the Past: Bones of Meadows Town Walkthrough
There’s a new sheriff in Meadows Town – and it’s you! Can you stop a vengeful Viking spirit before she strikes again?
Whether you use this document as a reference when things get difficult or as a road map to get you from beginning to end, we’re pretty sure you’ll find what you’re looking for here.
This document contains a complete Ghosts of the Past: Bones of Meadows Town game walkthrough featuring annotated screenshots from actual gameplay!
We hope you find this information useful as you play your way through the game. Use the walkthrough menu below to quickly jump to whatever stage of the game you need help with.
Remember to visit the Big Fish Games Forums if you find you need more help. Have fun!
This walkthrough was created by SeverineSnape, and is protected under US Copyright laws. Any unauthorized use, including re-publication in whole or in part, without permission, is strictly prohibited.
General Tips
- This is the official guide for Ghosts of the Past: Bones of Meadows Town.
- This guide will not mention each time you have to zoom into a location; the screenshots will show each zoom scene.
- Hidden-object puzzles are referred to as HOPs. This guide will not show screenshots of the HOPs, but it will mention when a HOP is available and the inventory item you’ll collect from it.
- This guide will give step-by-step solutions for all puzzles that are not random. Please read the instructions in the game for each puzzle.
Chapter 1: A Mystery in Meadows Town

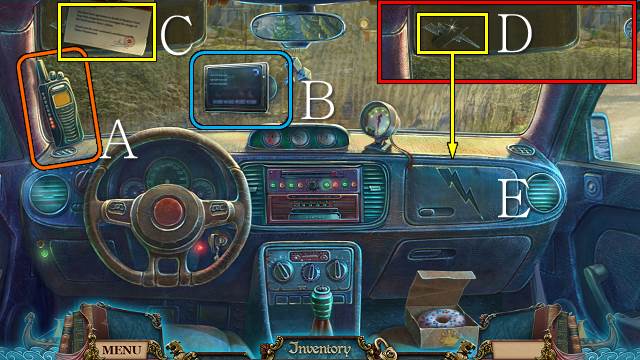
- Take the walkie-talkie (A).
- Take the GPS (B); select the screen to get your map.
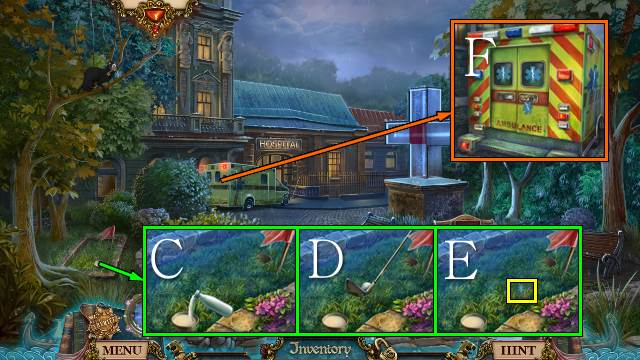
- Take the paper (C).
- Take the LIGHTNING SYMBOL (D).
- Open the glove compartment with the LIGHTNING SYMBOL (E).

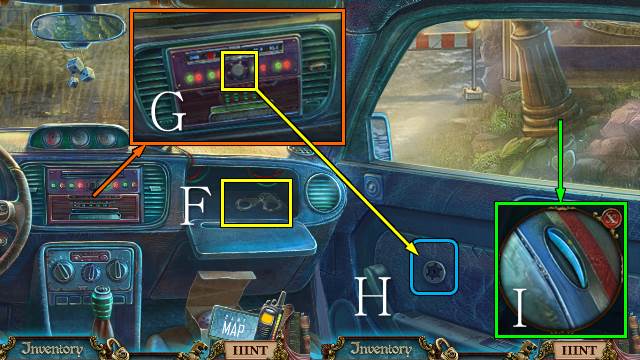
- Take the HANDCUFFS (F).
- Turn the knob three times; take the KNOB (G).
- Pan right.
- Place the KNOB and turn it (H).
- Pull the handle (I).
- Go right.

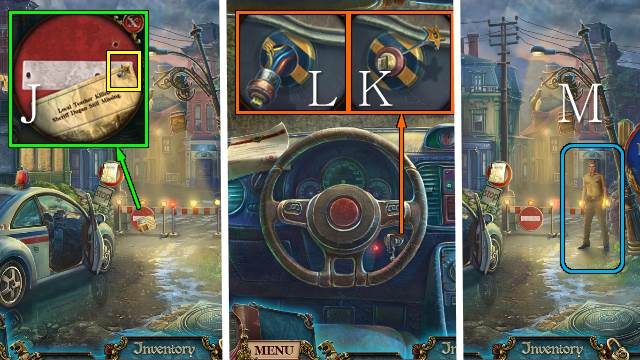
- Take the NAIL (J).
- Go into the car.
- Break the key, use the NAIL (K) and connect the wires (L).
- Go right.
- Talk to Jones (M).
- Walk forward twice.

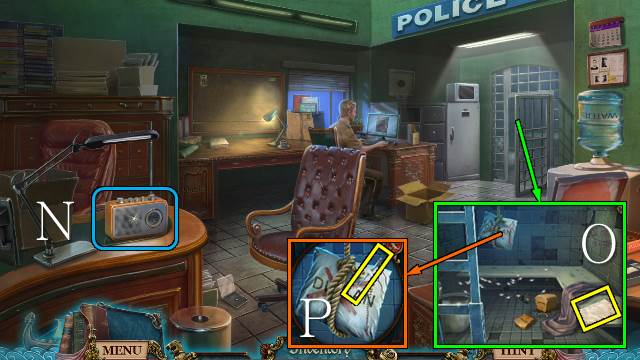
- Play the radio (N).
- Take the paper (O); take the NEEDLE (P).

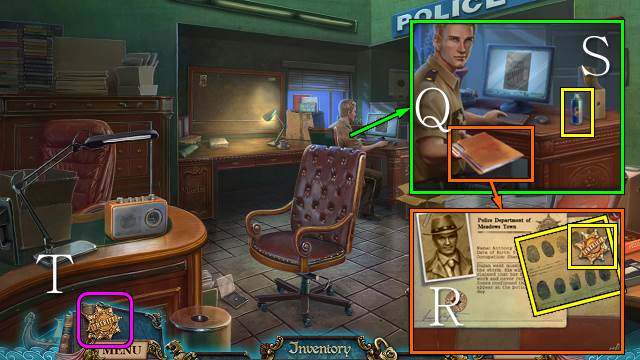
- Talk to Jones and take the case file (Q); open it and take your badge and the FINGERPRINTS (R).
- Take the SPIDER REPELLENT (S).
- Select your Badge (T) to go to the Evidence Board.

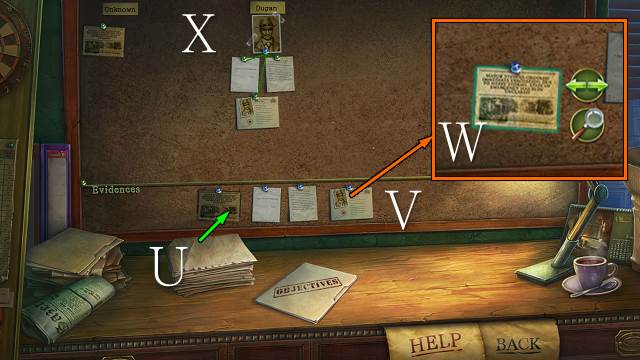
- Take all evidence from the pile (U) and pin it to the board (V).
- Select a piece of evidence and then select the magnifying glass to have a closer look at it; select the green arrows to move the evidence (W).
- To place evidence, move it to the corresponding label at the top of the board; correctly placed items will get a green line.
- Move the two notes and case report to Dugan’s picture (X).
- Walk down and down again.

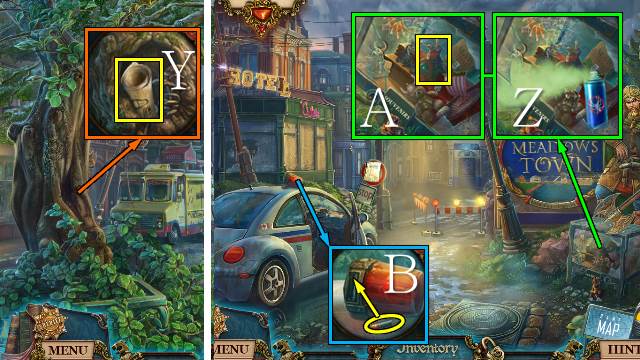
- Take the paper (Y).
- Walk down.
- Use the SPIDER REPELLENT (Z); take the VIKING FIGURINE (A).
- Put the battery in the light; take the POLICE SIREN (B).
- Walk forward.

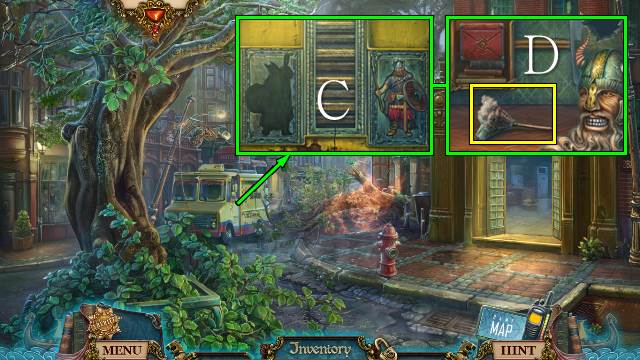
- Place the VIKING FIGURINE (C); take the DUSTER (D).
- Go forward.

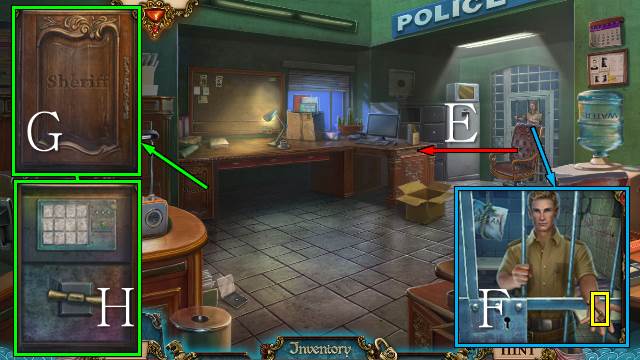
- Move the chair (E).
- Talk to Jones; take the CABINET KEY (F).
- Use the CABINET KEY (G), open the cabinet and zoom in (H).

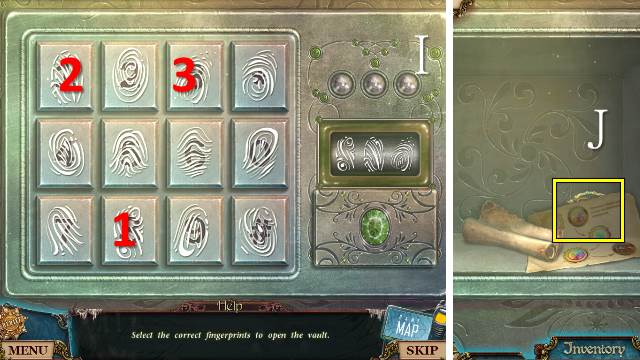
- Place the FINGERPRINTS and use the DUSTER for a mini-game.
- Solution: select the buttons with the same prints as in the example (I).
- Take the notes and Spirit Detector (J).

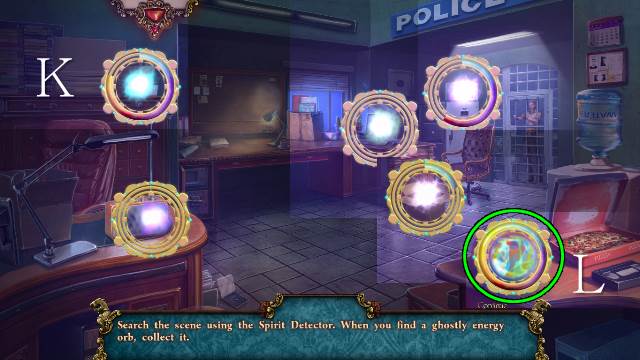
- Move the Spirit Detector across the scene to find glowing items (K).
- When fully charged, move the Detector to the blocked object, indicated by colored swirls (L).

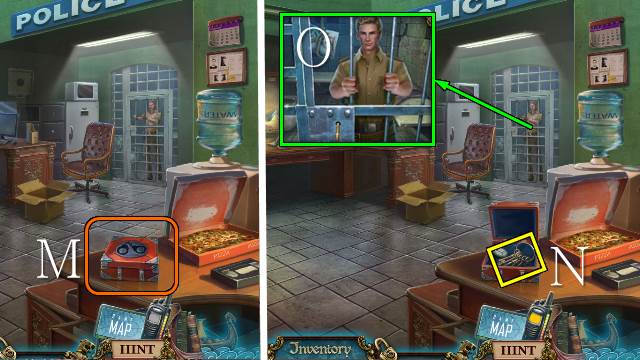
- Use the HANDCUFFS (M).
- Take the CELL KEYS (N).
- Use the CELL KEYS and release Jones (O).
- Walk down.

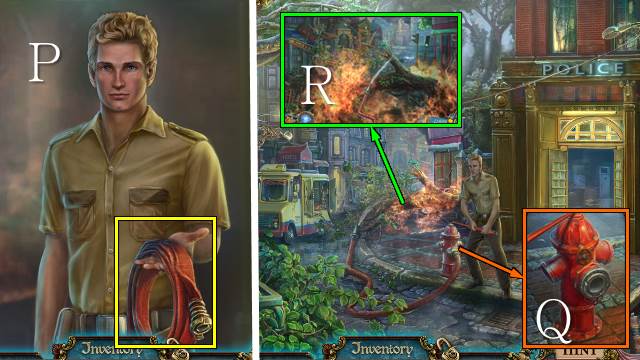
- Talk to Jones; take the FIRE HOSE (P).
- Connect the FIRE HOSE (Q).
- Move the hose over the fire (R).
- Walk forward.
Chapter 2: Murder at the Mortuary

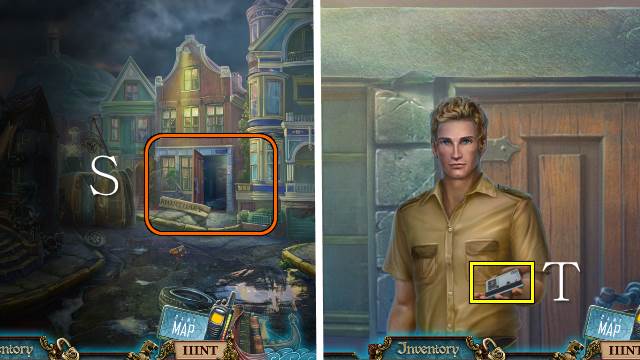
- Inspect the Mortuary (S).
- Take the ACCESS CARD (T).

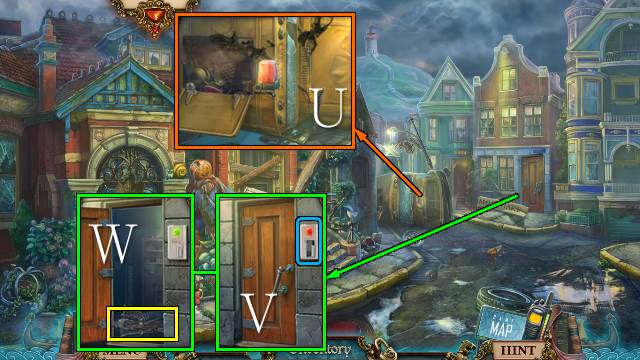
- Use the POLICE SIREN; play the HOP to receive a HAIR DRYER (U).
- Use the ACCESS CARD (V); destroy the skeleton and take the BONE (W).
- Go into the Mortuary.

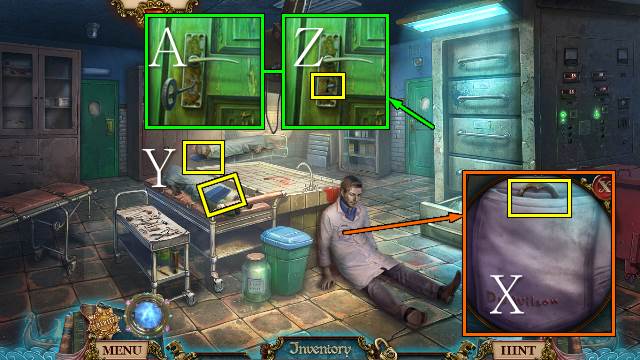
- Talk to Jones.
- Take the OFFICE KEY (X).
- Take the two case files (Y).
- Take blue PENCIL 1/3 (Z); use the OFFICE KEY and turn the handle (A).
- Go right.

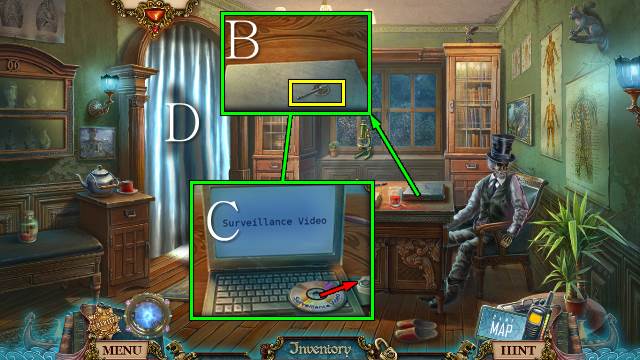
- Take the AXE (B) and open the laptop; put the CD in the drawer (C).
- Open the curtain (D).

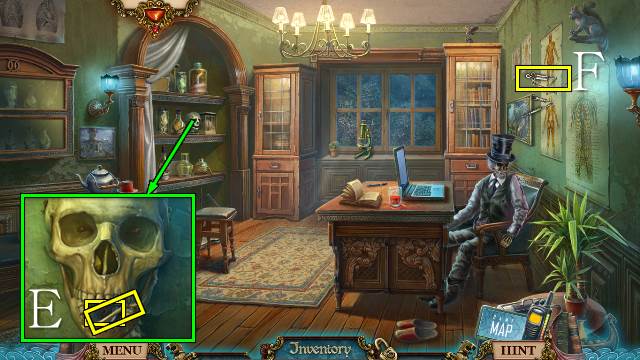
- Use the BONE and take the DRAWER WHEEL and BONE (E).
- Take the ACID (F).
- Walk down.

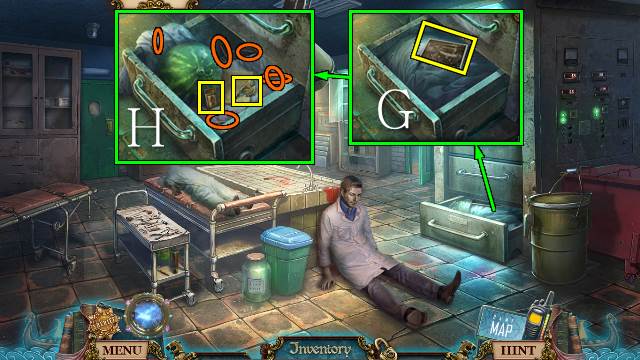
- Place the DRAWER WHEEL, open the drawer and take the Evidence (G); remove the plastic, put the matches in the box and take the DRAGON PART and MATCHES (H).
- Walk down.

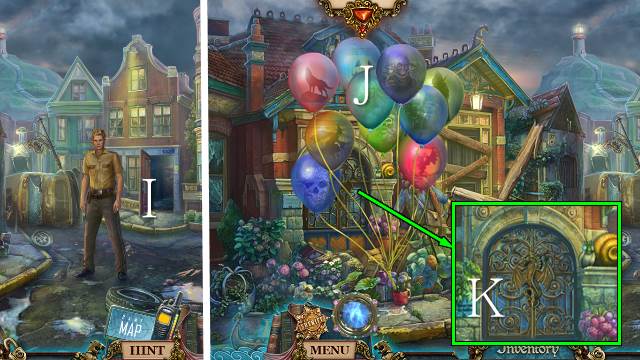
- Talk to Jones (I).
- Burst all balloons with the NEEDLE (J).
- You receive a BUTTON.
- Place the DRAGON PART and open the window; go in (K).

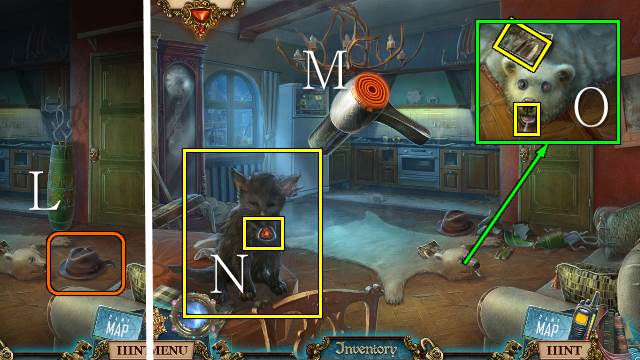
- Inspect the hat (L).
- Use the HAIR DRYER (M).
- Take the GEM and CAT (N).
- Place the BUTTON and use the NEEDLE; take the Evidence and LOLLIPOP (O).

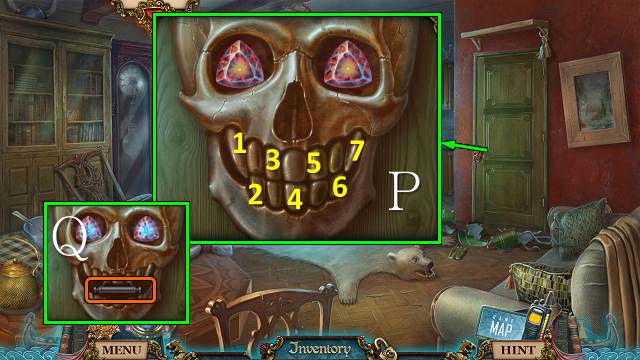
- Place the GEM for a mini-game (P).
- Push the teeth until the mouth is open.
- Pull the handle twice (Q).
- Go right.

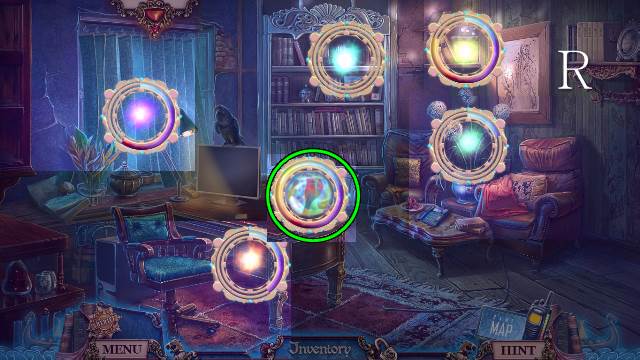
- Use the Spirit Detector as before (R).

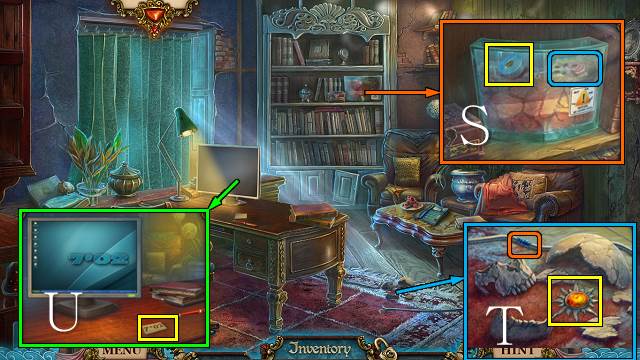
- Use the LOLLIPOP; take the INSULATION TAPE (S).
- Use the INSULATION TAPE; take the SUN SYMBOL (T).
- Browse the computer, write down the code and take the PHONE CODE (U).

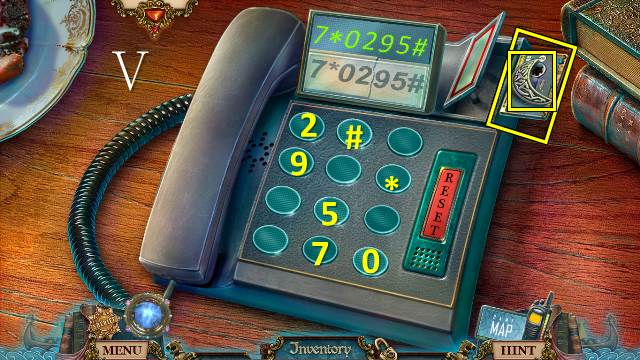
- Place the PHONE CODE for a mini-game (V).
- Inspect all buttons and remember where the correct symbols are; enter the code.
- Take the MOON SYMBOL and Evidence.
- Walk down.

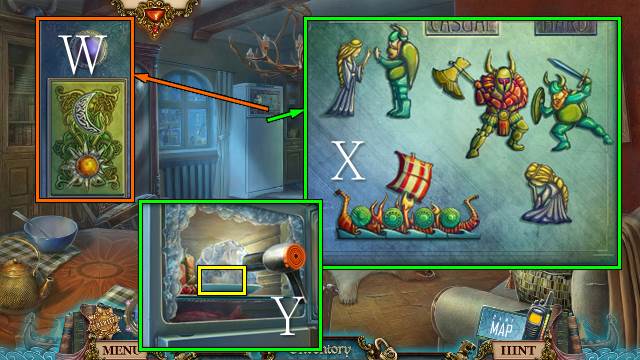
- Take the note; place the SUN SYMBOL and MOON SYMBOL for a mini-game (W).
- Restore the magnets; to rotate a piece, place it on the arrow button (X).
- Pull the handle.
- Use the HAIR DRYER; take the FILM NEGATIVE (Y).
- Go to the Mortuary Main Office.

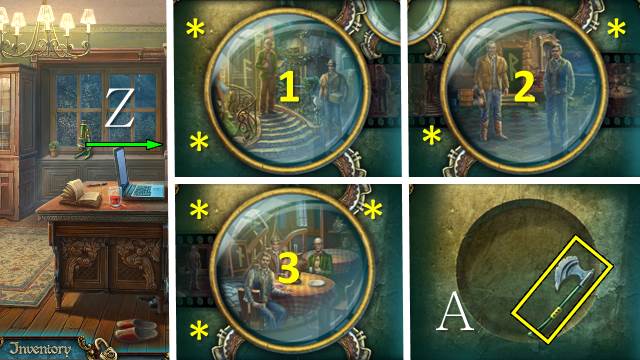
- Place the FILM NEGATIVE and zoom in for a mini-game (Z).
- Find the right combination of lenses for each part of the film.
- Take the AXE (A).

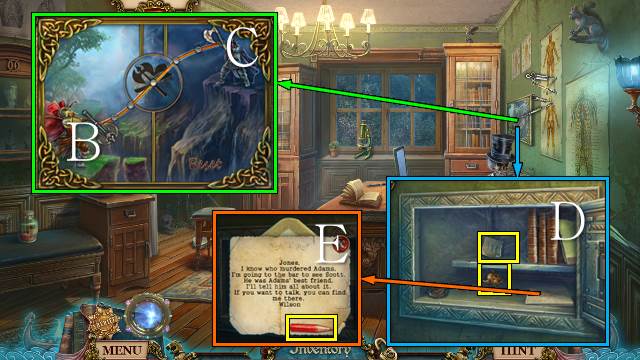
- Place the two AXES on the painting for a mini-game.
- Throw the axes to the center; the movements of one axe affect the movements of the other.
- Solution: Bx3-C-B-C-B-C-B.
- Take the RUNIC CODE and COMEDY MASK (D); open the envelope and take red PENCIL 2/3 and the Evidence (E).
- Walk down.

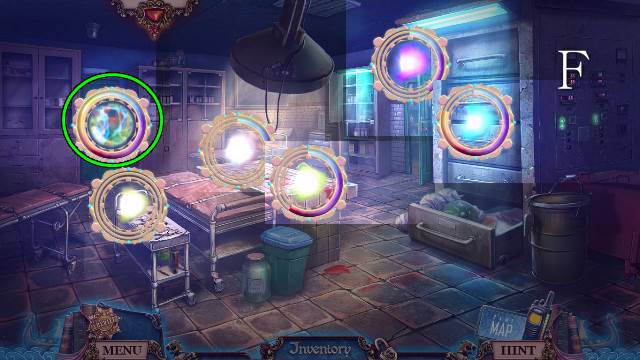
- Use the Spirit Detector (F).

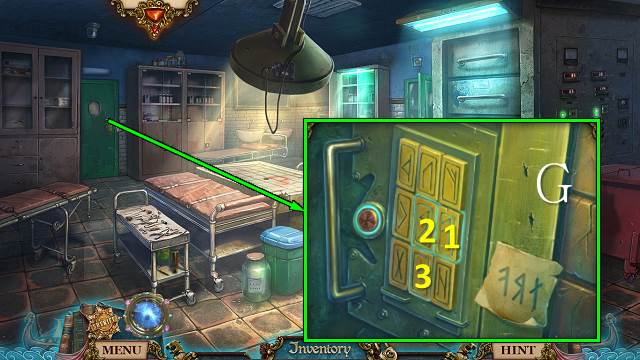
- Place the RUNIC CODE and push the correct buttons (G).
- Go left.
Chapter 3: A Third Victim

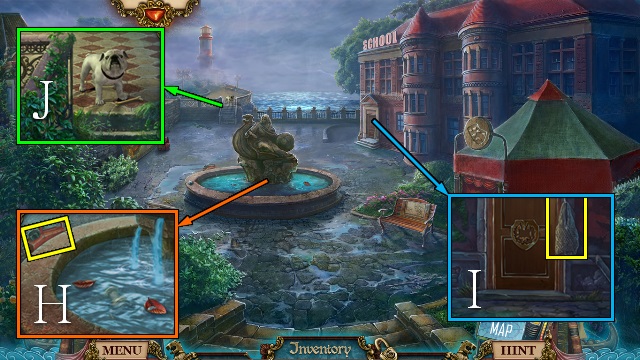
- Take the GAS CAN (H).
- Take the NET STRING (I).
- Throw the BONE to the dog (J).
- Go forward.

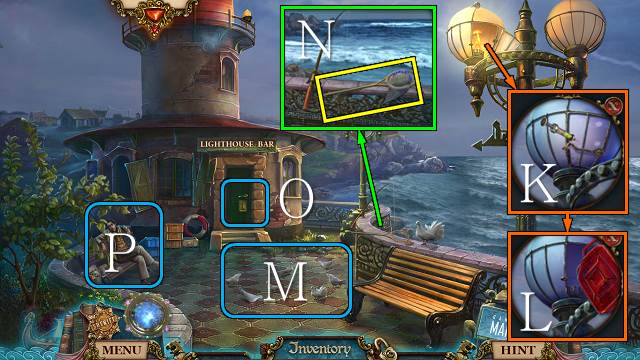
- Use the ACID (K); use the GAS CAN and MATCHES (L).
- Release the CAT (M).
- Use the NET STRING and INSULATION TAPE; take the NET (N).
- Look through the keyhole (O).
- Play the reverse HOP; take pink PENCIL 3/3 (P).
- Walk down.

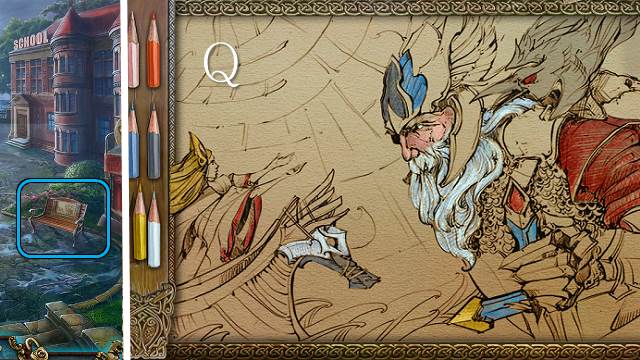
- Place the PENCILS for a mini-game (Q).
- Color the picture according to the examples.
- Take the PAINTING and LIGHTHOUSE.

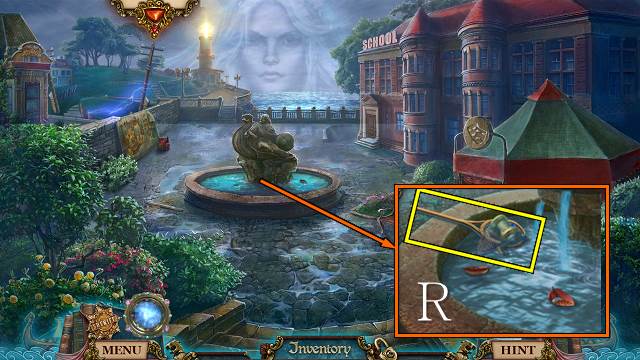
- Use the NET; take the FISHING REEL (R).
- Walk forward.

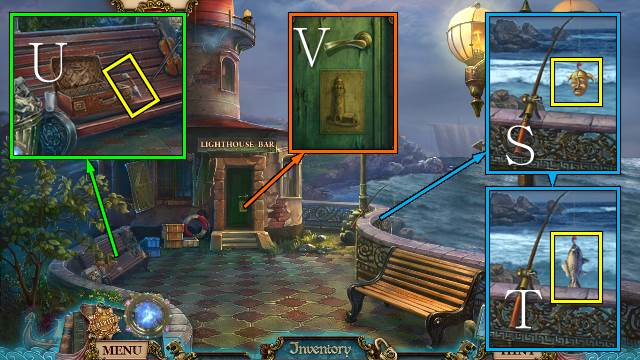
- Place the FISHING REEL; reel in and take the TRAGEDY MASK (S), then reel in and take the FISH (T).
- Take the KNIFE (U).
- Place the LIGHTHOUSE and turn the handle (V).
- Go forward.

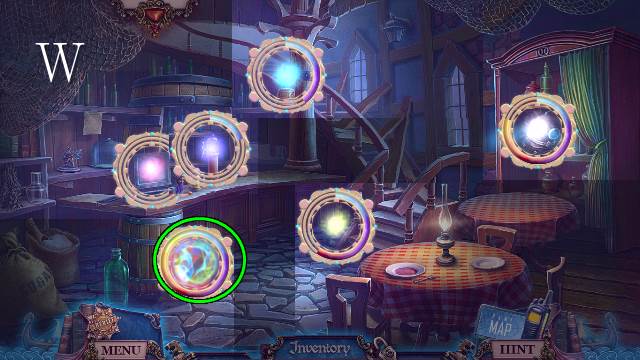
- Use the Spirit Detector (W).

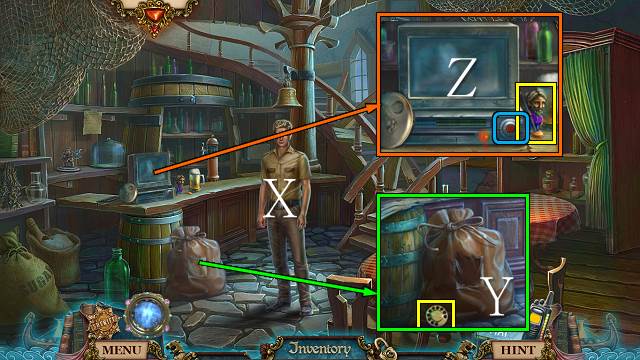
- Talk to Jones and receive more Evidence (X).
- Use the KNIFE; take the TELEPHONE DIAL (Y).
- Take the VIKING FIGURINE (Z).
- Push the button for a mini-game.

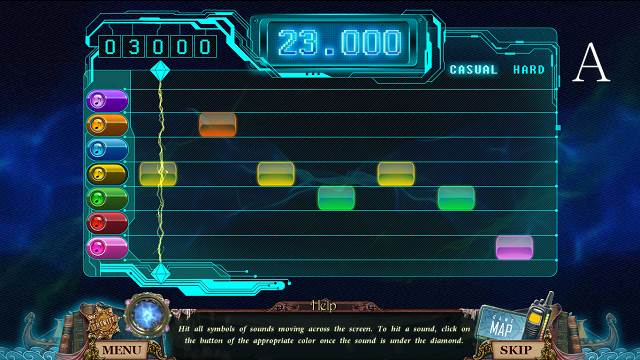
- Whenever a colored block is under the diamond, hit the button of the same color (A).

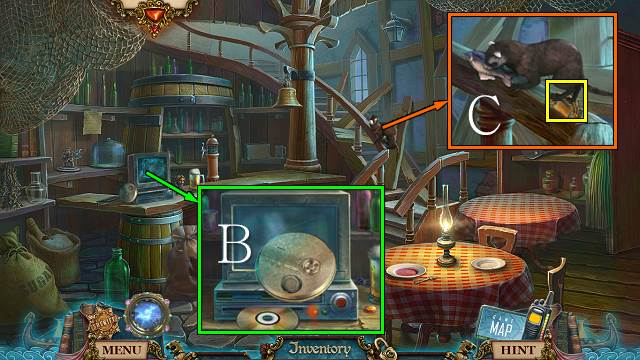
- Access the CD player, place the CD and take the VOICE RECORDING (B).
- Give the FISH to the otter; take the EMBLEM HALF (C).
- Walk down twice.

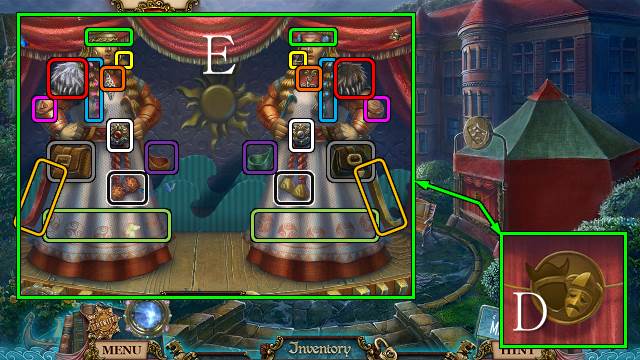
- Place the COMEDY MASK and TRAGEDY MASK for a mini-game (D).
- Find the differences; you have to select the items on both sides (E).
- You receive a BELL ROPE.
- Walk forward twice.

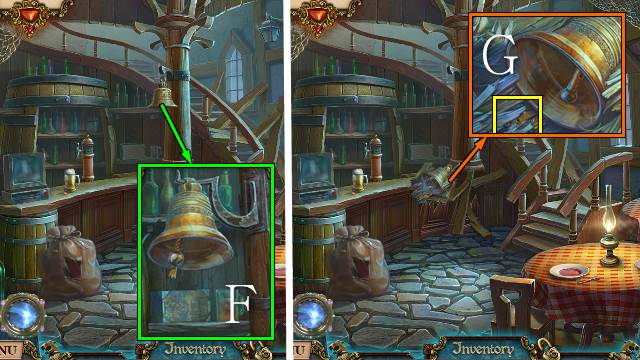
- Place the BELL ROPE (F).
- Take the EMBLEM HALF (G).
- Walk down twice.

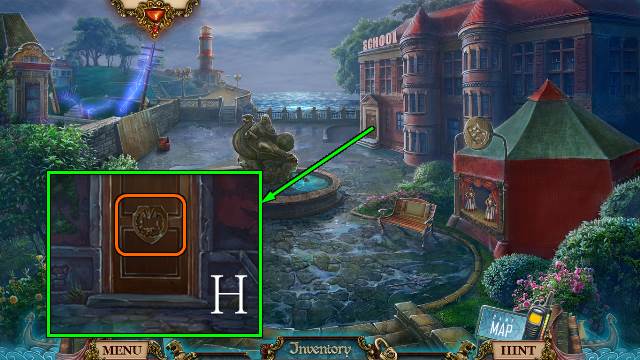
- Place the two EMBLEM HALVES (H).
- Go right.

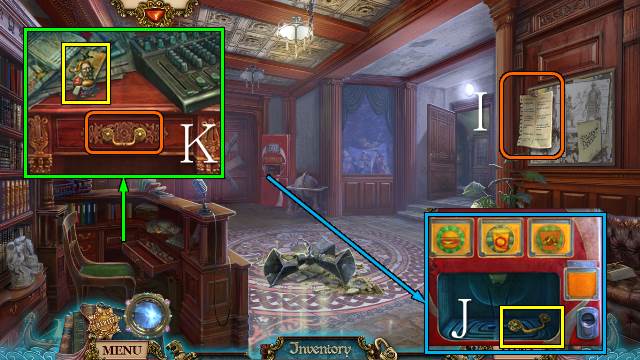
- Inspect the scene.
- Take the Evidence (I).
- Take the HANDLE (J).
- Take the VIKING FIGURINE; place the HANDLE and open the drawer for a mini-game (K).

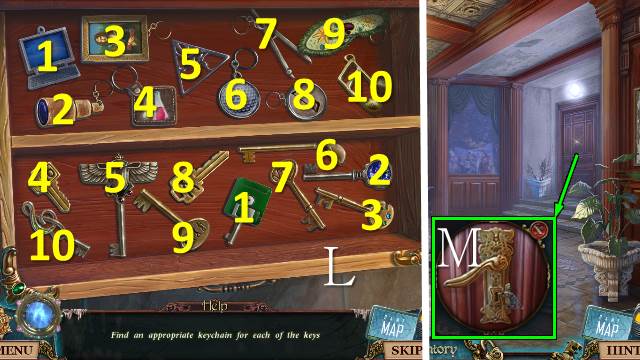
- Match all keys with their key chains (L).
- You receive the CLASSROOM KEY.
- Open the door with the CLASSROOM KEY (M).
- Go right.

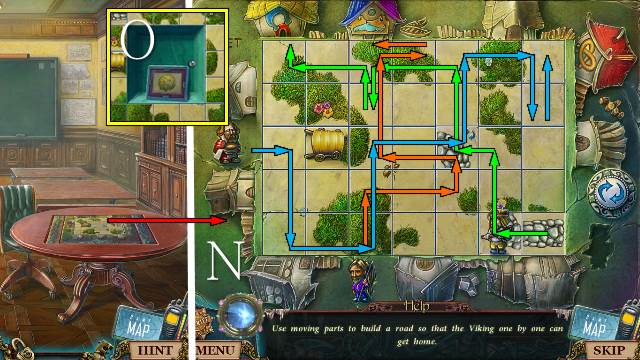
- Place the two VIKING FIGURINES for a mini-game (N).
- Use the three tiles with road to create a path for the Vikings to go home; the two movable tiles can be turned by placing them on the arrow button.
- Take the SLIDE (O).

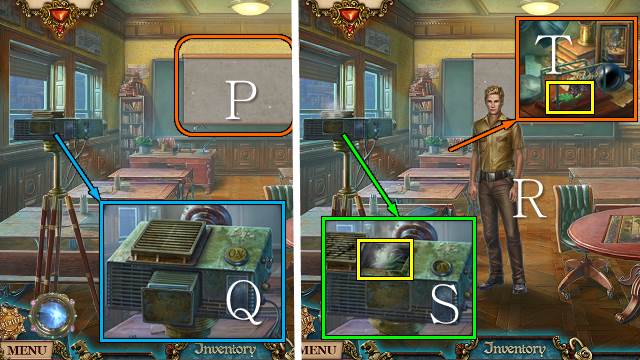
- Pull down the screen (P).
- Open the drawer, remove the empty slide, place the SLIDE and push the button (Q).
- Talk to Jones (R).
- Remove the cover and take DOVE 1/2 (S).
- Take DOVE 2/2 (T).
- Walk down twice.

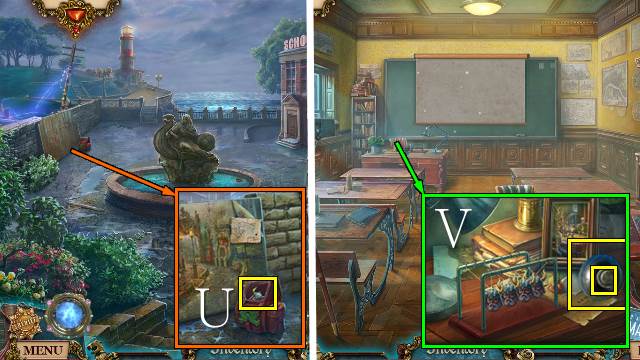
- Place the two DOVES, open the bag and take the VIKING HEAD (U).
- Go to the History Classroom.
- Place the VIKING HEAD, move the heads and take the BOTTLE LID and BOMB (V).
- Walk down twice.

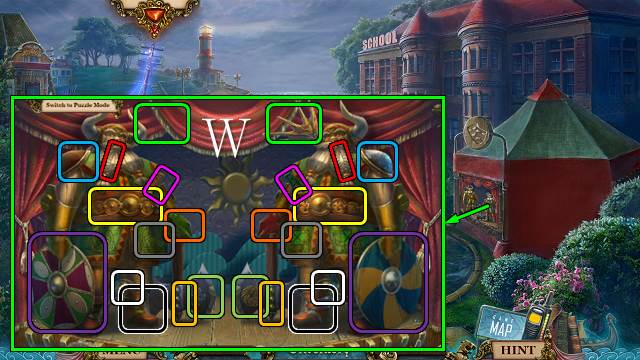
- Play the mini-game (W).
- Find the differences; you need to select the differing items on both sides.
- You receive an ANTLER.

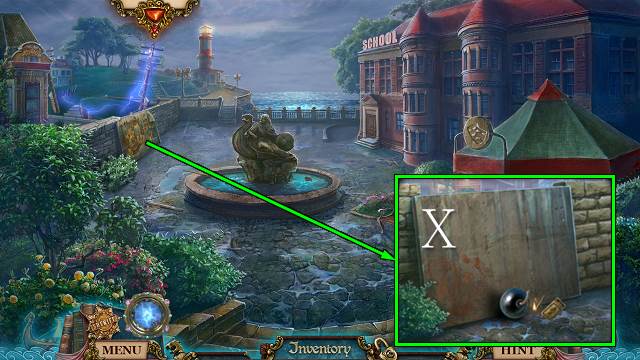
- Take the Evidence and remove the poster; place the BOMB and light it with the MATCHES (X).
- Go forward.
Chapter 4: Sheriff Dugan’s House

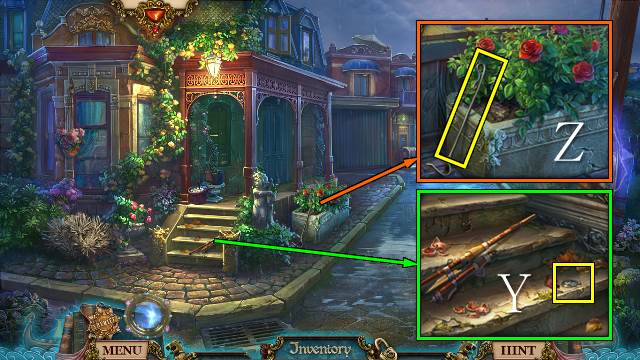
- Take the 25 CENTS (Y).
- Take the FIRE IRON (Z).
- Go to the School.

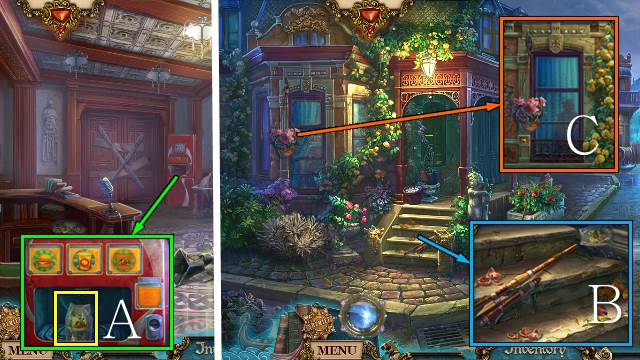
- Push the right button and put the 25 CENTS into the slot; take the PEANUTS (A).
- Go down and left.
- Put the PEANUTS in the PEASHOOTER and take it (B).
- Shoot the PEASHOOTER twice (C).
- Go into the house.

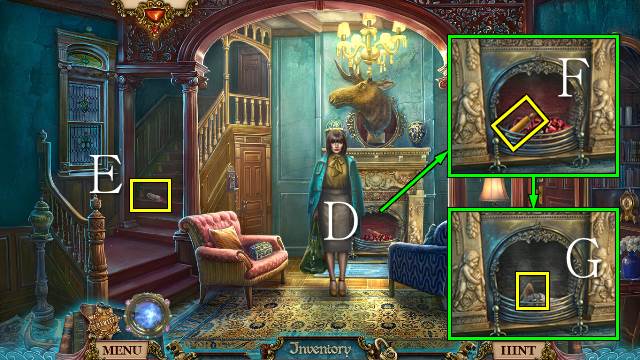
- Talk to Maggie (D).
- Take the STILETTO HEEL (E).
- Use the FIRE IRON to receive the ROLLING PIN (F); use the FIRE IRON again to receive PLATE 1/2 (G).

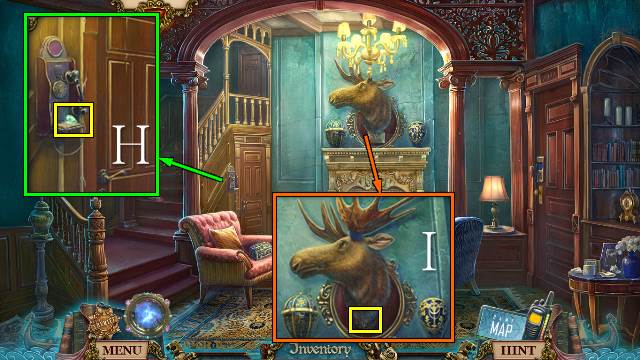
- Place the TELEPHONE DIAL, lift the receiver and take JEWEL 1/3 (H).
- Place the ANTLER and use the INSULATION TAPE; take the Evidence and TOY BAT (I).
- Open the door and go right.

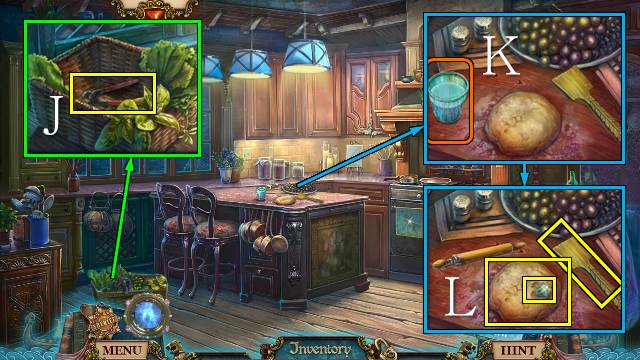
- Move the herbs and take the NIPPERS (J).
- Pour the water on the dough (K), use the ROLLING PIN and take JEWEL 2/3; use the rolling pin again and take the DOUGH and SPATULA (L).

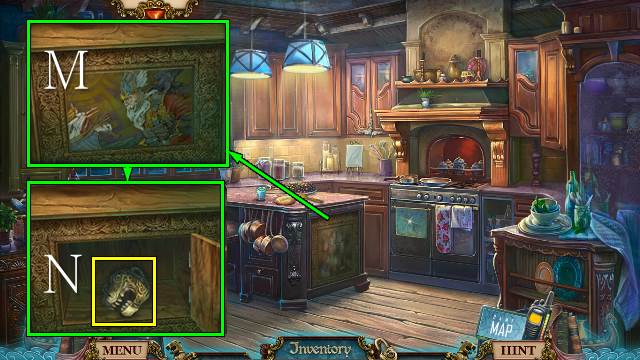
- Use the SPATULA and place the PAINTING (M); take the STONE HEAD (N).
- Walk down twice.

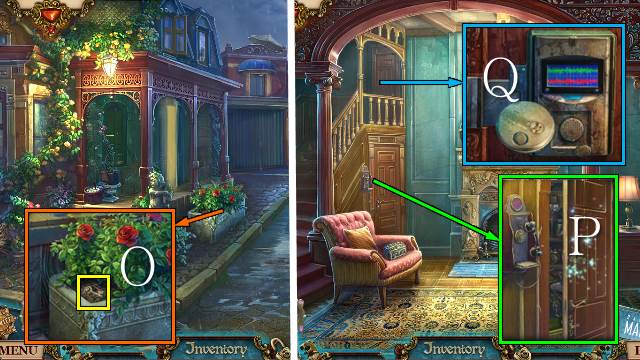
- Use the SPATULA and take the CLOSET KEY (O).
- Go into the house.
- Open the door with the CLOSET KEY; play the HOP to receive the VOLTAGE SIGN (P).
- Play the VOICE RECORDING (Q).
- Go up the stairs.

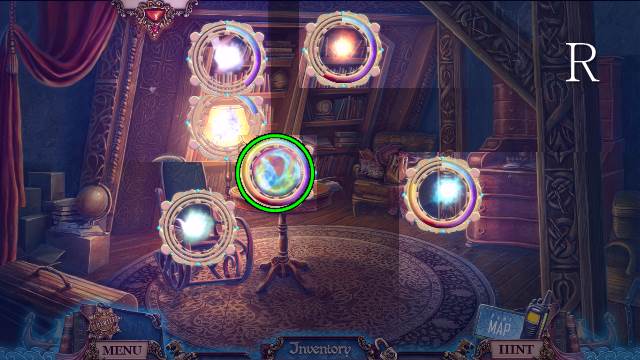
- Use the Spirit Detector (R).

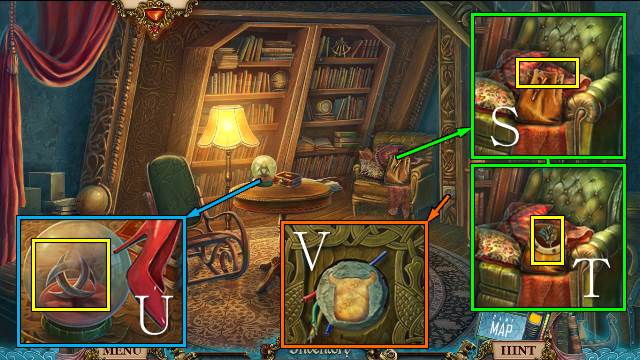
- Take the LEATHER BELT (S) and FEATHER DUSTER (T).
- Use the STILETTO HEEL; take the TRINITY BLADE (U).
- Use the SPATULA and the DOUGH; take the DOUGH HEAD (V).
- Go to the Kitchen.

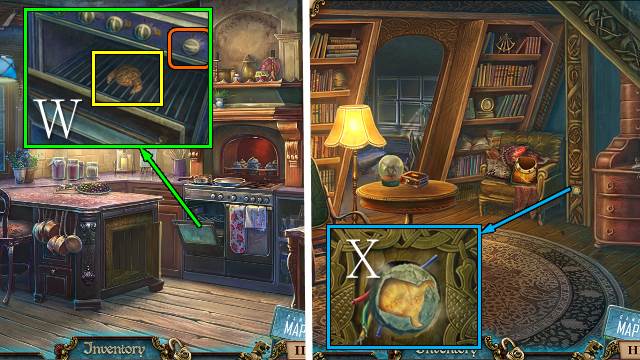
- Put the DOUGH HEAD in the oven, close the door and turn the knob three times; open the door and take the VIKING COOKIE (W).
- Go to the Attic.
- Place the VIKING COOKIE (X).
- Go forward.

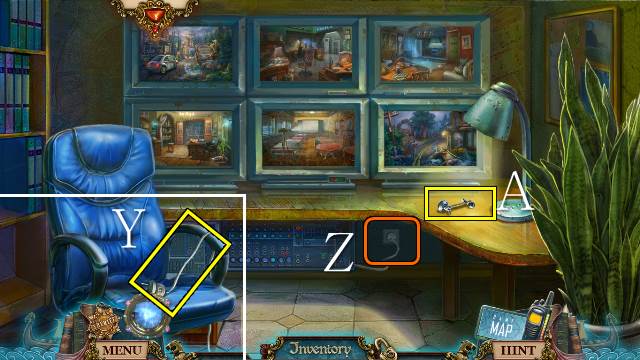
- Take the PLUG (Y).
- Plug in the PLUG (Z).
- Switch on all screens.
- Take the GLASS CUTTER (A).
- Walk down three times.

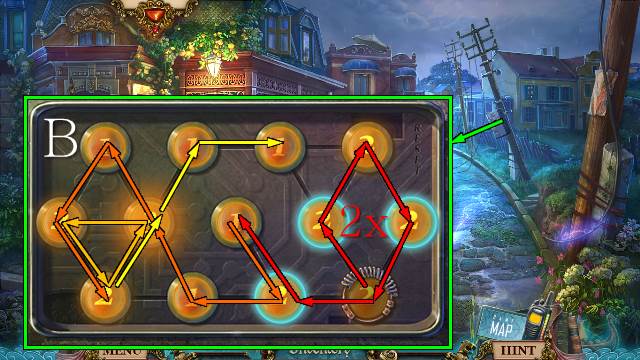
- Place the VOLTAGE SIGN for a mini-game (B).
- Turn off the power by moving the ring around the fuses.
- Each time the ring passes a fuse the voltage goes down by 1; the ring can’t pass fuses with no power.
- Go forward.
Chapter 5: The Perpetrator Unmasked?

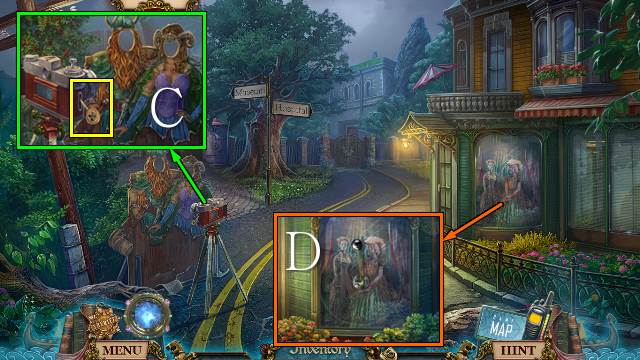
- Take the JEWELRY KEY (C).
- Use the GLASS CUTTER; go in (D).

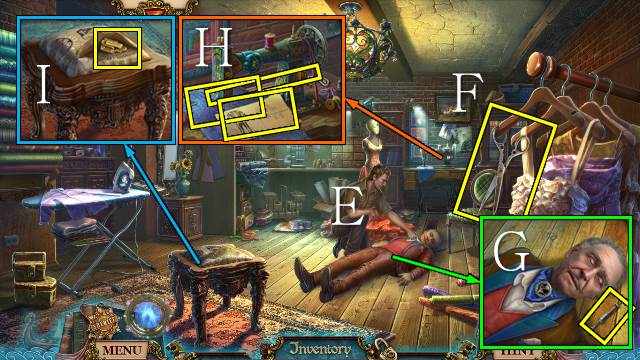
- Talk to Jones (E).
- Take the SCISSORS (F).
- Take the POISON (G).
- Take the Evidence; place the LEATHER BELT. Take the SHEET and GOLF CLUB (H).
- Use the SCISSORS and take the LATCH (I).
- Walk down.

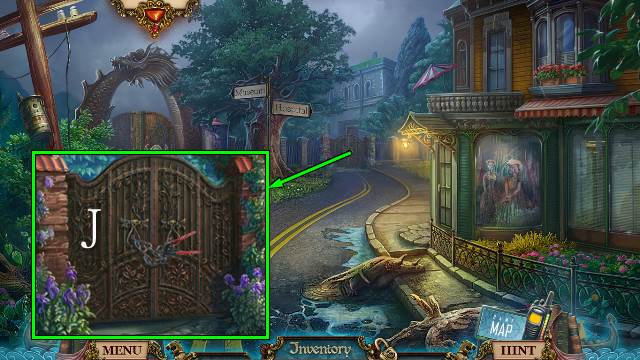
- Use the NIPPERS (J).
- Go forward.

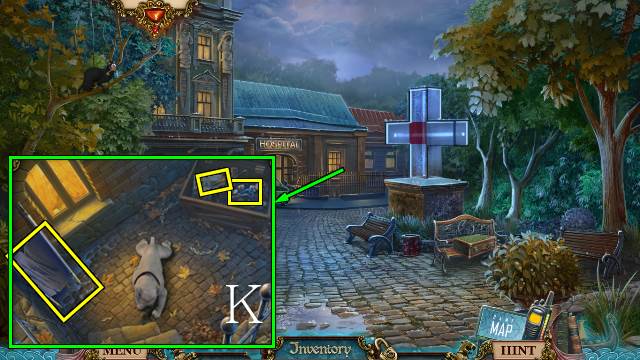
- Give the TOY BAT to the dog, use the NIPPERS, open the crate and take the SCREWDRIVER and CARDIOGRAPH WIRES; remove the cloth, place the SHEET and take the STRETCHER (K).
- Go forward.

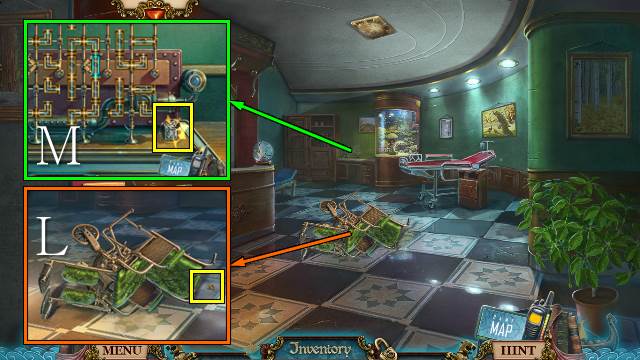
- Take PLATE 2/2 (L).
- Take the LIGHTER (M).
- Go to the Kitchen.

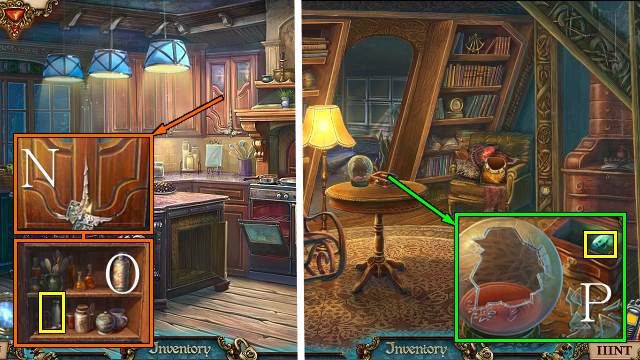
- Use the LIGHTER (N), open the cabinet, place the BOTTLE LID and take the MILK (O).
- Go to the Attic.
- Open the box with the JEWELRY KEY; take the Evidence and JEWEL 3/3 (P).
- Walk down.

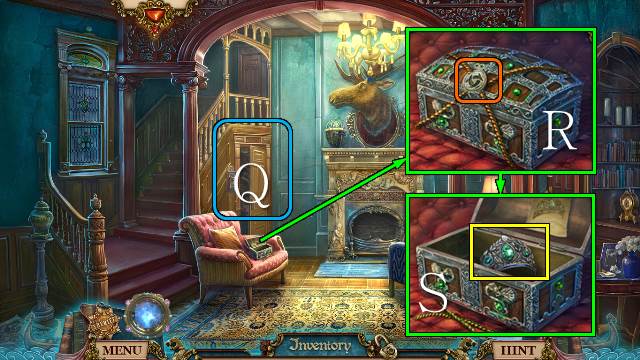
- Play the HOP to receive a REMOTE (Q).
- Use the TRINITY BLADE (R); place the JEWELS and take the DIADEM (S).
- Walk down.

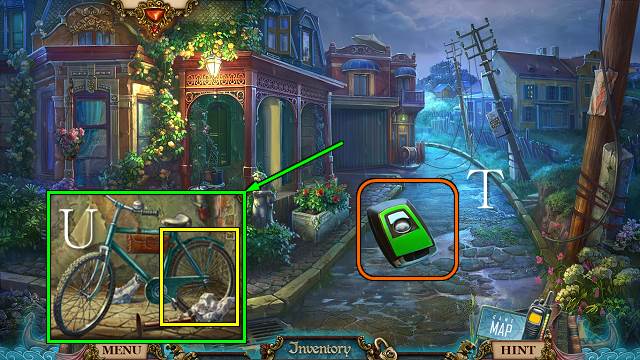
- Use the REMOTE (T).
- Take the BICYCLE WHEEL with the SCREWDRIVER (U).
- Go forward and right.

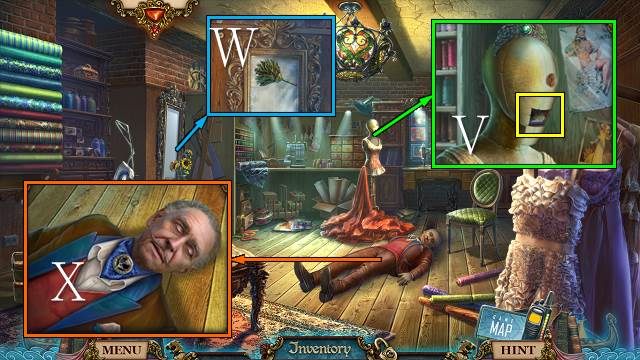
- Place the DIADEM; take the VIKING SYMBOL (V).
- Use the FEATHER DUSTER (W).
- Put Norny on the STRETCHER (X).

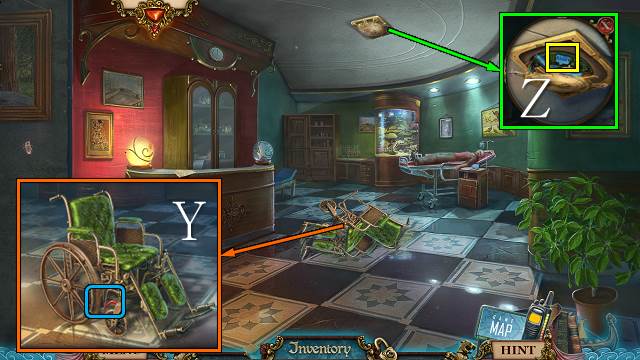
- Place the WHEEL, put the chair upright and put the break on (Y).
- Use the GOLF CLUB and take the ELECTRONIC CHIP (Z).

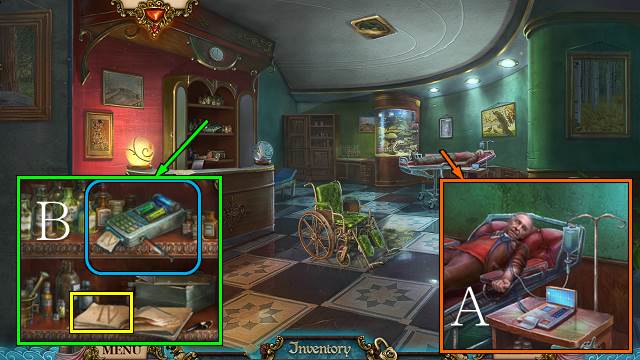
- Put the drip in Norny’s arm, place the CARDIOGRAPH WIRES (A).
- Put the POISON in the chemical analyzer; turn the book to IV and take the RECIPE (B).
- Walk down.

- Put the MILK in the bowl (C), use the GOLF CLUB (D) and take the AMBULANCE KEY (E).
- Use the AMBULANCE KEY; play the HOP to receive the FLASKS (F).
- Walk forward.

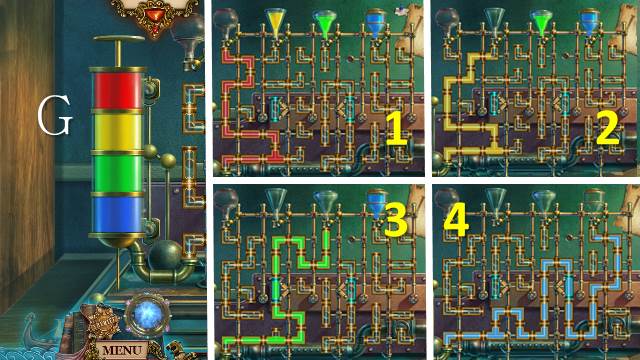
- Place the RECIPE and FLASKS for a mini-game.
- Turn the tubes to allow the liquids to move to the syringe; start with the top color.
- Take the ANTIDOTE INJECTOR (G).

- Use the ANTIDOTE INJECTOR on the i.v. bag; take the SAFE CODE (H).
- Go to the Basement.
- Place the SAFE CODE (I); turn the dial to 3, 5, and 5; take all the evidence and the TOKEN, MAP PART 1/3 and TWO DOLLARS (J).
- Walk down.


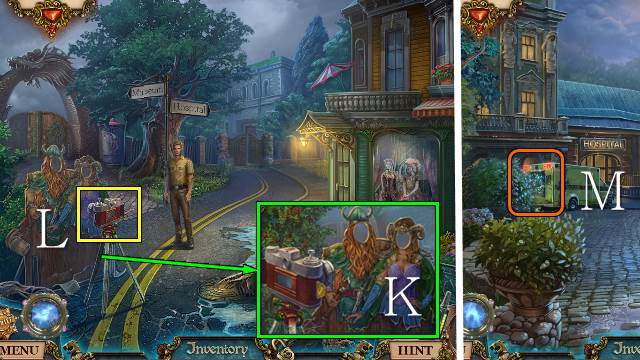
- Use the TOKEN to receive the VIKING PHOTO (K).
- Take the CAMERA (L).
- Go forward.
- Play the HOP to receive a BANDAGE (M).
- Walk down.

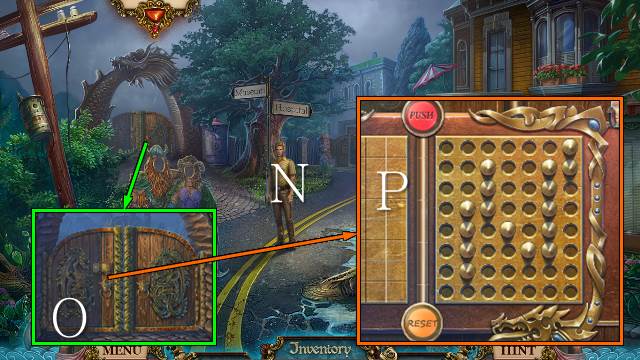
- Give the BANDAGE to Jones and receive a TICKET (N).
- Place the TICKET for a mini-game (O).
- Check the pattern and place the pins in mirror image on the right panel; select ‘Push’ (P).

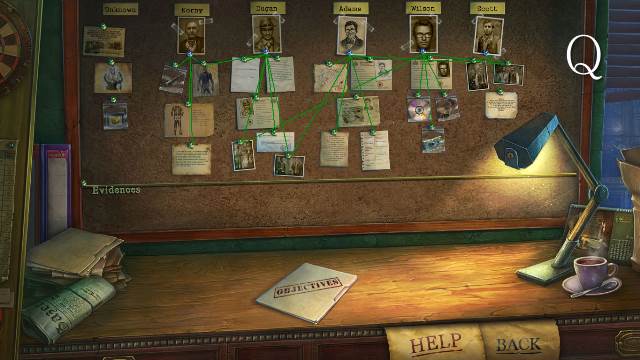
- Before you go through the gate, put all Evidence on the board (Q).
- Go through the gate.
Chapter 6: A Chase Through the Museum

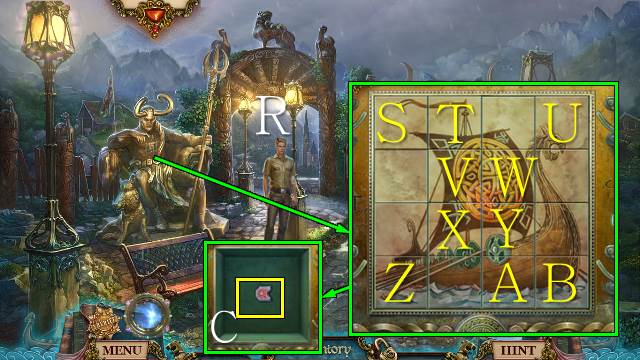
- Talk to Jones.
- Place the PLATES for a mini-game.
- Casual solution: Wx3, Xx3, Sx3, Ux3, Zx3, Ax3.
- Hard solution: Vx3, Wx3, Xx3, Yx3, Tx2, S, Ux3, Ax2, Zx3, Bx3.
- Take VIKING SYMBOL 2/3 (C).

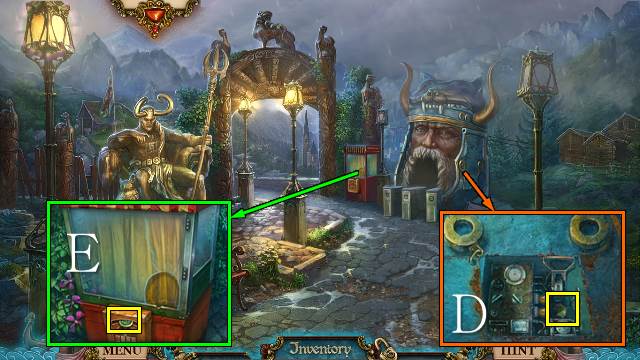
- Use the SCREWDRIVER, take VIKING SYMBOL 3/3 and place the ELECTRONIC CHIP (D).
- Take the BUTTON (E).
- Walk down and right.

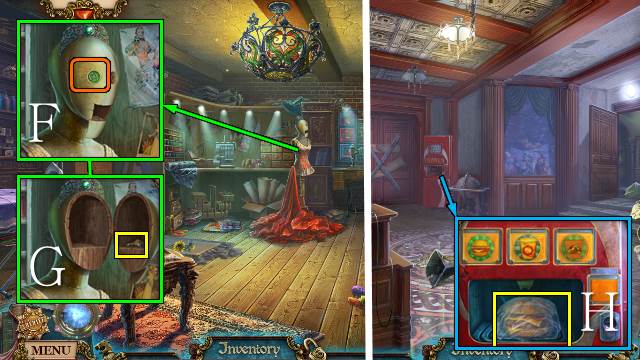
- Remove the button and place the BUTTON (F); take the IGNITION KEY (G).
- Go to the School.
- Select the burger, use the TWO DOLLARS and take the CHEESEBURGER (H).
- Go to the Museum Entrance.

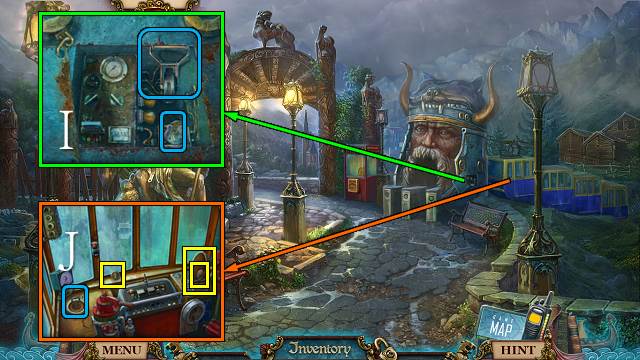
- Place the IGNITION KEY and pull the lever (I).
- Turn the helmet and take the FORTUNE TOKEN, TRINKET and OLD HELMET; turn the key (J).
- Go right.

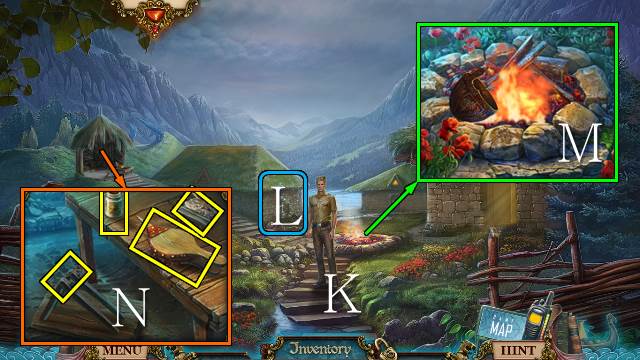
- Talk to Jones (K).
- Play the HOP to receive a HEAVY AXE (L).
- Use the OLD HELMET to receive a HELMET WITH EMBERS (M).
- Take the ARROW, BELLOWS, SULFUR and NET CARTRIDGE (N).
- Walk down and forward.

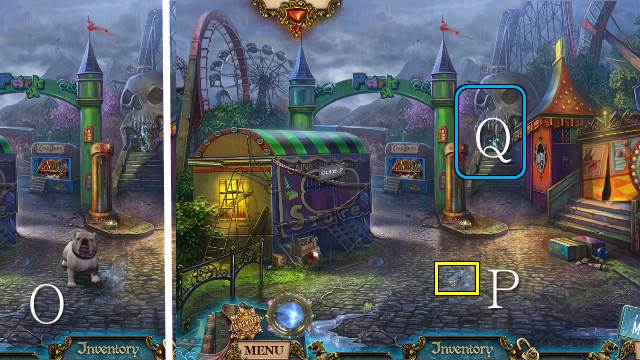
- Give the CHEESEBURGER to the dog (O).
- Take the DECK KEY (P).
- Play the HOP to receive a TORCH (Q).

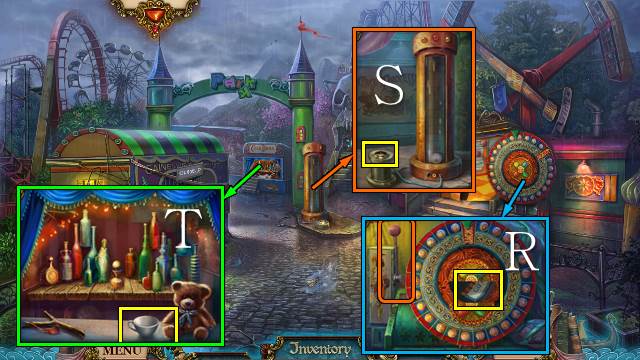
- Use the FORTUNE TOKEN and pull the lever three times; take the GIFT CERTIFICATE (R).
- Take the ONE DOLLAR (S).
- Take the CUP (T).
- Walk down.

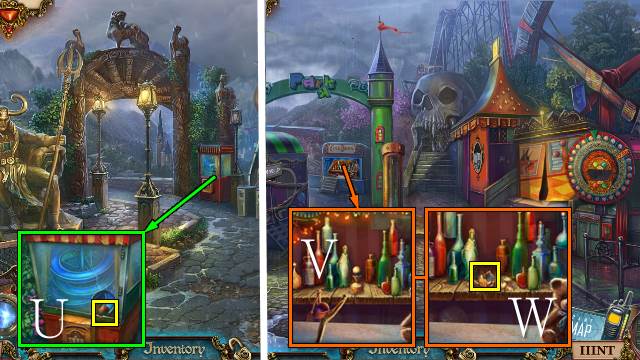
- Open the curtains and use the GIFT CERTIFICATE to get the GOLDEN DEER; take the BALL (U).
- Walk forward.
- Use the BALL (V) and take MAP PART 2/3 (W).
- Go to the School.

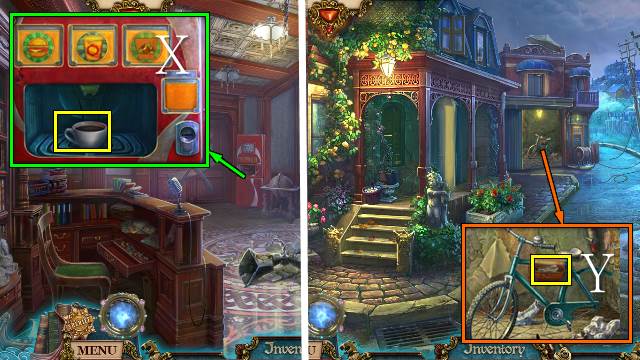
- Select the coffee, place the CUP and use the ONE DOLLAR; take the STEAMING COFFEE (X).
- Go down and left.
- Place the TRINKET and take the REVOLVER (Y).
- Go to the Hospital Yard.

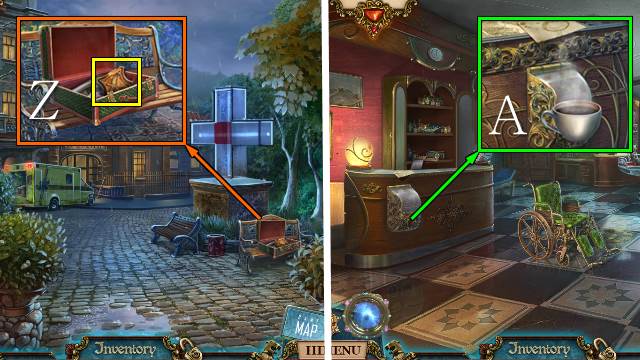
- Place the LATCH, open the suitcase and place the ARROW; take the BOW EMBLEM (Z).
- Go forward.
- Use the STEAMING COFFEE and the napkin; use the CAMERA and receive a PHOTO CODE (A).
- Go to the Viking Museum.

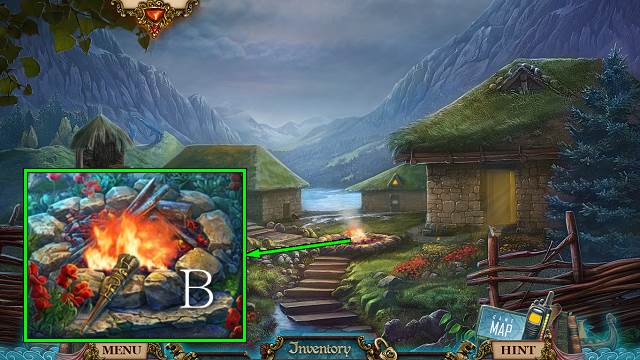
- Light the TORCH to get a BURNING TORCH (B).
- Go right.

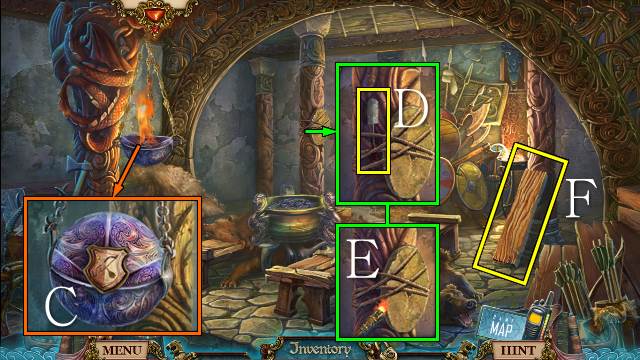
- Place the BOW EMBLEM, open the sphere and use the HELMET WITH EMBERS and SULFUR (C).
- Take the GUN BRUSH (D); use the BURNING TORCH to receive a GRINDSTONE (E).
- Take PLANK 1/3 (F).
- Walk down.

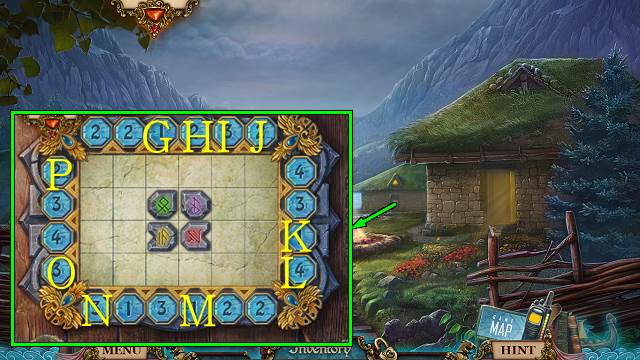
- Place the VIKING SYMBOLS for a mini-game.
- Use the numbered buttons to slide the symbols across the board; the numbers indicate how far from the button the tile will slide.
- Solution: P-N-P-H-J-K-I-L-N-P-H-G-L-N-P-G-O-M.
- Go forward.

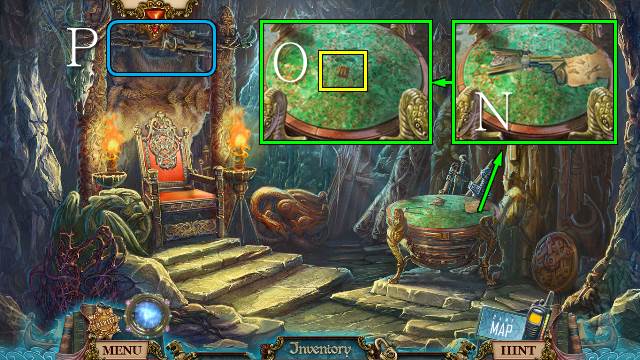
- Place the NET CARTRIDGE, GUN and GUN BRUSH to receive a LOADED NET GUN (N); take MAP PART 3/3 (O).
- Place the STONE HEAD (P).

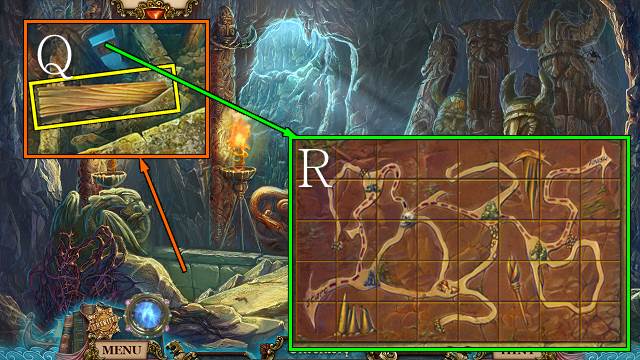
- Take PLANK 2/3 and use the HEAVY AXE (Q).
- Place the MAP PARTS for a mini-game.
- Swap the tiles to restore the labyrinth (R).
- Go forward.
Chapter 7: The Real Story Revealed

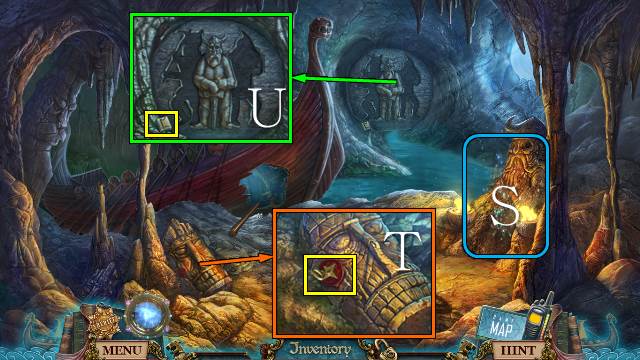
- Play the HOP to receive a STONE VIKING (S).
- Take the PADLOCK KEY (T).
- Take RUNE 1/2 (U).
- Walk down twice.

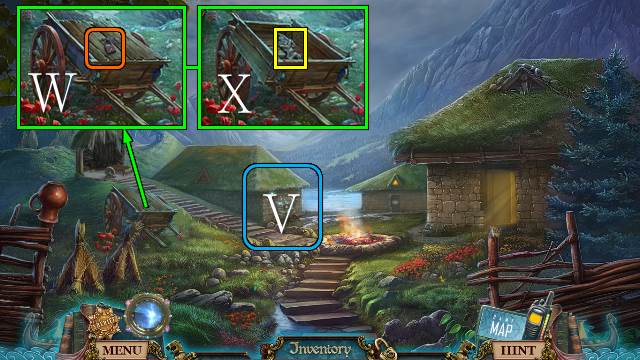
- Play the HOP to receive a SWORD (V).
- Use the PADLOCK KEY (W), open the cart and take the STONE VIKING (X).
- Go right.

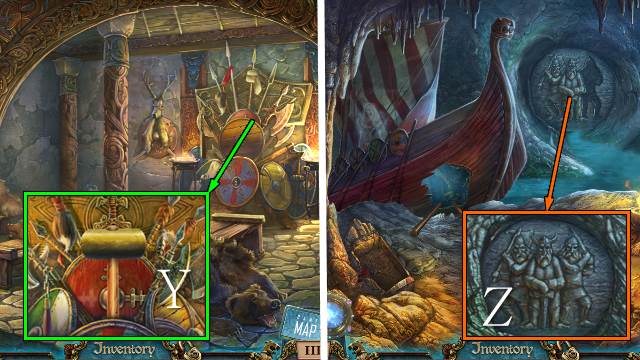
- Place the SWORD and take the WOODEN HAMMER (Y).
- Go to the Grotto.
- Place the two STONE VIKINGS (Z).
- Go forward.

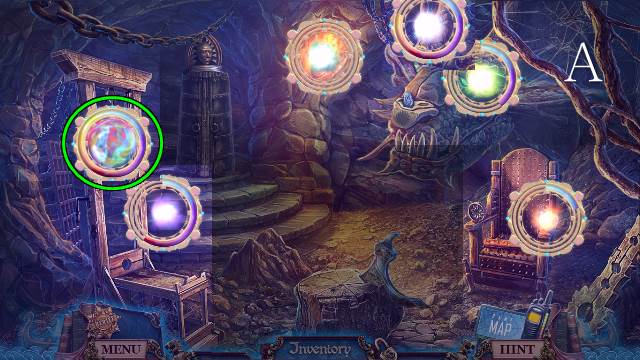
- Use the Spirit Detector (A).

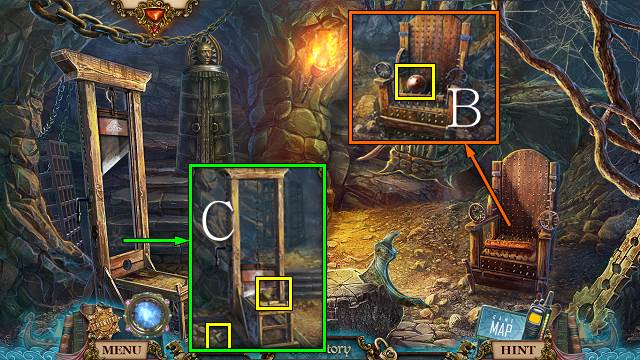
- Take the BOWLING BALL (B).
- Place the BOWLING BALL; take RUNE 2/2 and the GOLD MEDALLION (C).
- Walk down twice.

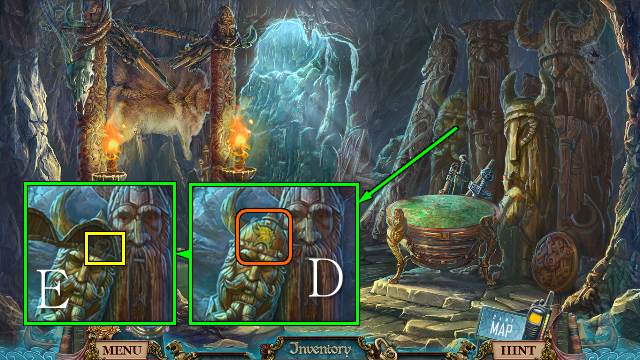
- Remove the cover and place the GOLD MEDALLION (D); take the BADGE (E).
- Go to the Attractions.

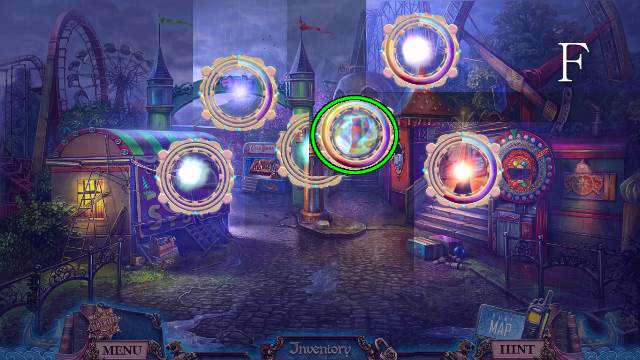
- Use the Spirit Detector (F).

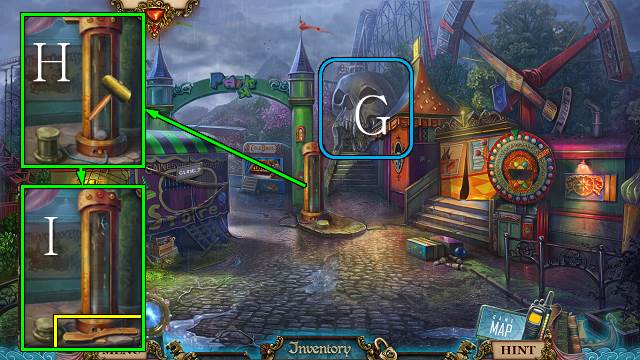
- Play the HOP to receive a MOLD (G).
- Use the WOODEN HAMMER (H); take the AXE HANDLE (I).
- Go to the Torture Chamber.

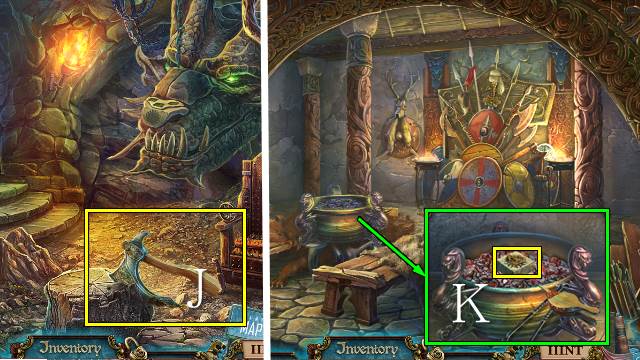
- Place the AXE HANDLE and take the BLUNT AXE (J).
- Go to the Hall.
- Place the MOLD and GOLDEN DEER; use the BELLOWS and take the SUN RUNE with the tongs (K).
- Walk down.

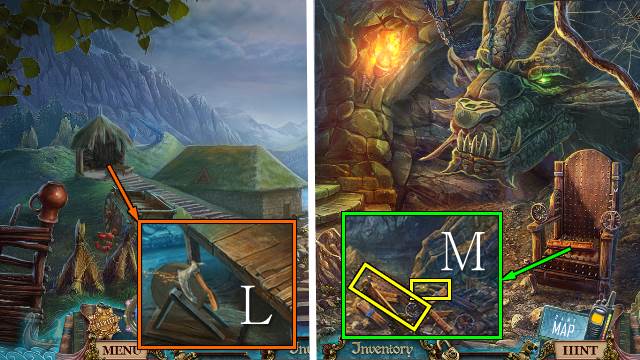
- Place the GRINDSTONE and sharpen the BLUNT AXE; you receive a SHARP AXE (L).
- Go to the Torture Chamber.
- Use the SHARP AXE; take PLANK 3/3 and the NAIL PULLER (M).

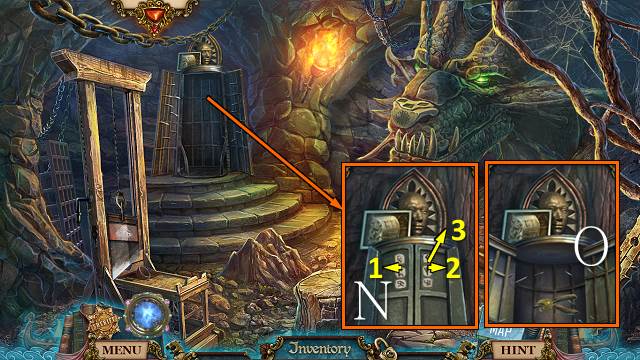
- Place the RUNES and PHOTO CODE and push the runes (N); use the NAIL PULLER 8 times to get the NAILS (O).
- Walk down.

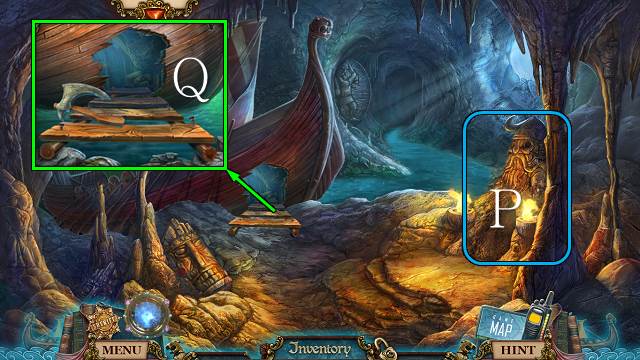
- Play the HOP to receive the LOKI STATUE (P).
- Place the PLANKS and NAILS and use the SHARP AXE (Q).
- Go into the ship.

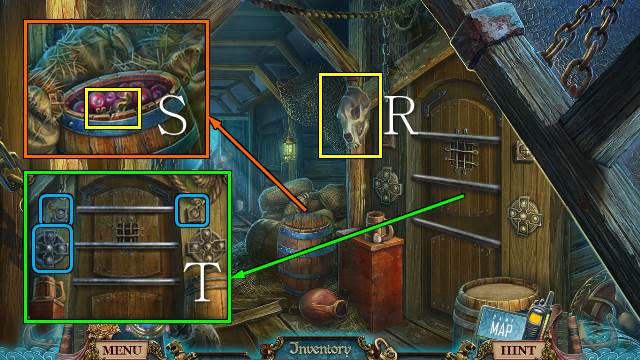
- Take the SKULL MASK (R).
- Use the SHARP AXE and take the DECK KEY (S).
- Place the two DECK KEYS, turn them and turn the left cross (T).
- Go right.

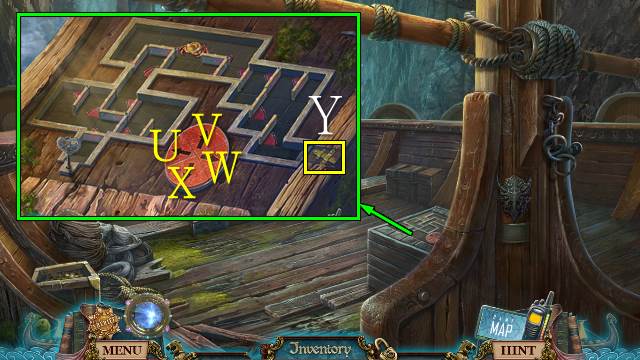
- Place the BADGE for a mini-game.
- Guide the crab trough the maze, to the decoration and to the key.
- To decoration: Wx2-X-U-V-X-U-V-Wx2-X-V-Ux2-X-Wx3-X-Wx2-Xx2-Wx2.
- Take the DECORATION (Y).
- Back to start: U-Vx2-Ux2-V-Ux3.
- To key: Ux2-V-Wx2-X-U-W-V-Ux2-X-W-Xx2-Ux2-X-Wx3-V-Ux3-X-Wx2-Ux2-V-Wx3-X-U-Xx2.

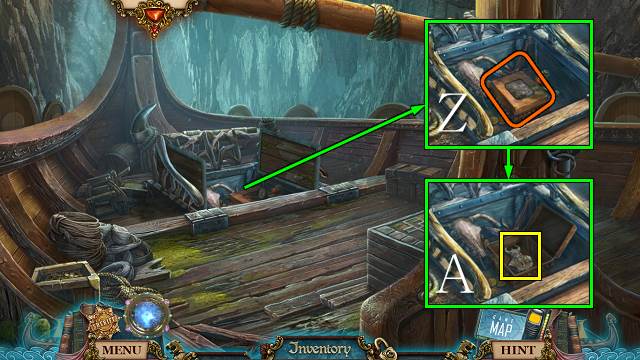
- Place the PHOTO (Z); take the ODIN STATUE (A).
- Walk down three times.

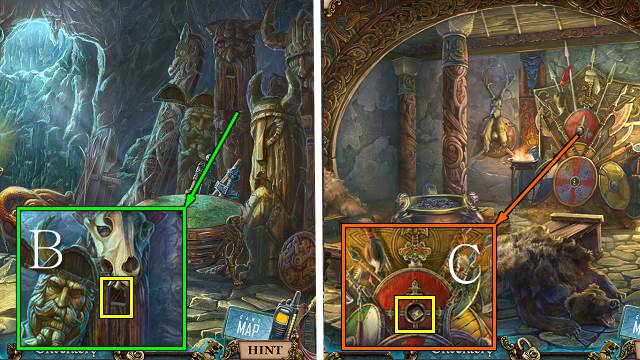
- Place the SKULL MASK and take the HOOK (B).
- Go down and right.
- Place the DECORATION and turn it three times; take the BADGE (C).
- Go to the Grotto.

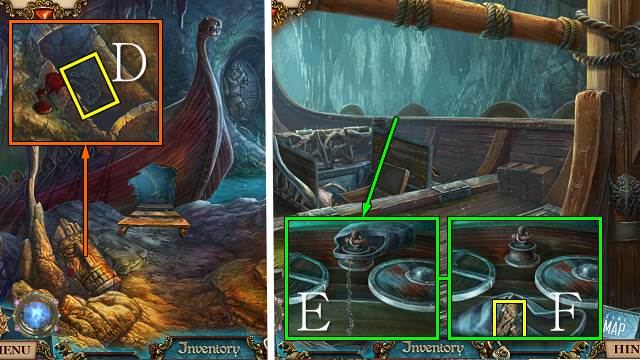
- Use the BURNING TORCH, open the box and place the HOOK to get a CHAIN WITH HOOK (D).
- Go to the Deck.
- Retrieve the bag with the CHAIN WITH HOOK (E); place the BADGE and take the THOR STATUE (F).
- Go to the Torture Chamber.

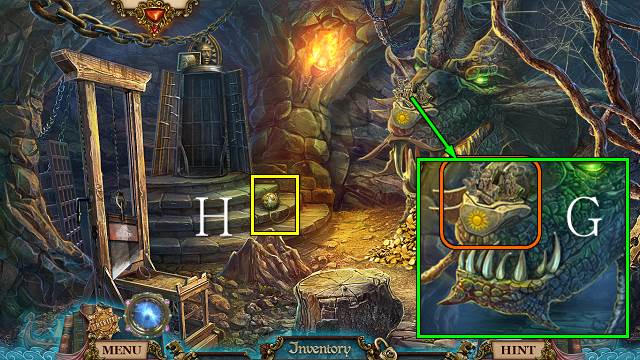
- Place the SUN RUNE, the LOKI STATUE, THOR STATUE and ODIN STATUE (G).
- Take the amulet (H).

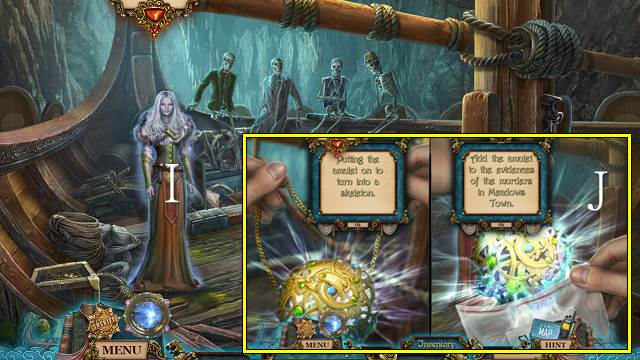
- Talk to Valkiris (I).
- Select an ending (J).
- Congratulations, you’ve completed Ghosts of the Past: Bones of Meadows Town.






 Ghost Town Mysteries: Bodie Walkthrough, Guide, & Tips
 Secrets of the Vatican: The Holy Lance Walkthrough, Guide, & Tips
 Nightfall Mysteries: Asylum Conspiracy Walkthrough, Guide, & Tips
 Danse Macabre: Deadly Deception Walkthrough, Guide, & Tips
 Love Chronicles: A Winter's Spell Walkthrough, Guide, & Tips