After battling through the beginning stages of the castle and passing by the moving wall, you will be most of the way through Pandora’s deceptive labyrinth. There are still plenty of tricks ahead, though, so be careful, as this ending section will quite possibly be the most difficult part of the entire level, and one of the most challenging sections of the game that you will have faced so far.
Run around the path, following the arrows on the ground, and proceed up the ramp towards the door above you. Open up the door and run through to reach the next area, and prepare for combat. One of the floating eyeball enemies will be staring right at you as you cross through the door. Blast it quickly out of the sky. Turn to the left to find another enemy guarding a treasure chest and a jump pad. Blast him and sprint over to loot the contents of the chest and spring yourself forward off of the jump pad, over the gap to the next area. Run through the opening in the wall to the left and drop down to find an odd looking mechanical pincer thing.
As Lady Palutena will explain to you, this odd piece of machinery is actually a motorcycle-esque vehicle. Sprint towards the vehicle and hit the action button to hop inside. The vehicle will control very similarly to Pit when he is on the ground, meaning that you can move around by using the analoge nub, shoot by hitting L, and aim with the touch screen. Take a moment to get used to the vehicle’s controls in this fairly large arena filled with ramps and floating platforms. Medusa will chime in and claim that she uses this arena to practice her driving skills. Who knew? Anyways, use the vehicle to run over or shoot all of the enemies in this room before disembarking and heading over to the jump pad.
The door behind the jump pad will lead to a kaleidoscopic room, the circular walls and ceilings of which will be rotating around in a large circle. You will have to time your approaches carefully so that you don’t fall through the gaps in the floor. There will be some gaps that you simply will not be able to cross by walking, though. In order to cross these, just sprint at the gaps and, if you are close enough to the rotating piece, Pit will jump automatically. You will have to gauge the distance very carefully, though, as Pit’s jumping can be a bit finicky. Along the way, you will have to watch out for the hovering octopus enemies who spew rings of poisonous gasses. They will rotate along with the level’s floors. If it comes down to either taking a hit of the poison or falling through one of the gaps in the floor, choose to take the poison head on. Falling through the floor will result in a larger chunk of your health peeling off than simply being poisoned for a few seconds.
A jump pad will await you on the other side. Take it up and run through the large door ahead. This will take you to a room, the short length of which is actually an optical illusion. As you sprint towards the door, it will appear to grow farther and farther away. Just keep at it, though, and you will soon reach the small door on the opposite side. Run through it and shoot the enemy hovering above the platform ahead. Jump up to the platform, and sprint forward to jump up to the next one. Four enemies will await you here; the group will be made up of three eyeball enemies and one of the large nose creatures. Take out the weaker eyeball creatures first before using dash shots on the nose. When all of the enemies have been dealt with, sprint up to the blue outline of the area to propel yourself onto the hovering platform ahead.
You will find a large armored enemy here. Dash around to its sides or wait until its armor opens and hit it with melee attacks to damage it. As you do, watch out for its charges. If you can dodge to the side just as the enemy charges, you will be able to get in a few good free hits. Collect the hearts and then drop down and proceed up to the left. Blast down the eyeball creatures here, and then bounce up to the next platform, where you will find another of the nose monsters. Kill it, too, and head up to the platform on the left. One of the dancing enemies will appear. Waste this enemy and bounce up to the circular platform with the central column piercing through it, ahead of you. This entire platform will be made from the rubbery, bouncy material that has been springing you around the level this whole time. A small gap in the center of the platform, where the column is, is just wide enough for you to fall through, as is the gap between this platform and the door ahead, so be careful of both. Finally, one of the book enemies will make the rounds on the platform. Take care to avoid him as you bounce around.
Hop over to the door embedded in the wall and walk through to reach the next area. Drop down to encounter another vehicle section. Ride the weird motorcycle to the left, following the arrows on the walls. This will take you for a lap around Medusa’s practice course. A few enemies will block your path, but it’s nothing you can’t handle with the vehicle’s built-in guns. Make a lap and a ramp will appear. Take this ramp to reach the next area, and then leave your motorcycles and take the jump pad up to the next door.
Don’t get too far ahead of yourself, though, because this next room has invisible walkways that you must navigate across in order to reach the other side. If you sprint out recklessly, you will probably fall into a pit. You will have to shoot the invisible floors to reveal them; otherwise, they will remain invisible. Carefully proceed across the series of invisible walkways, shooting the floor pretty much constantly as you go to ensure that you do not take any wrong steps. The first path curves around to the left. Watch out for the enemy in the ground. Continue past him to get a hamburger, and then head to the left to reach the next two platforms. Watch out for the enemy in the ground in this next platform as well. Head to the left to reach the next platform, where you will find another enemy. Hug the wall to the left to reach the second to last platform, where you will have to contend with an armored enemy. You will be able to see the door ahead of you, but don’t sprint for it. Instead, shoot the ground carefully, as the hidden path curves around towards the right side of the room. Follow it, hugging the right-hand wall before crossing the gap, and proceed through the door ahead. You will now be entering into a boss battle against Pandora, so be ready for an intense fight.
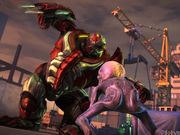
Boss Battle: Pandora
After the brief introductory cutscene in which Pit vows to exterminate Pandora’s evil, you will be in the heat of battle. Pandora has several attacks that you should watch out for, most of which will come in quick succession. First thing in the battle, she will launch a series of bouncy balls at you. Running into one will deal a decent amount of damage, as it will explode, potentially triggering the other balls in the area to erupt along with it. After this, you should watch out for her poisonous cloud-spewing attack. Similar to the balls, this attack has a decent spread and you will have to be careful when avoiding it, as dashing too far to one side can result in you accidentally hitting another of the projectiles.
Pandora can also submerge herself under the ground of the stage. From here, she will come at you like a submerged shark, only popping up for the kill when she is directly below you. When you see the boss initiating this attack, engage a sprint and dash away from her until she tires of the chase and leaves the safety of the ground of her own volition.
You can damage Pandora by simply shooting her as she flies around, but this is perhaps not the most damaging way to initiate combat. Instead, try melee attacking the explosive balls that she launches at you so that they fling back at her and explode on her. A combination of shooting and countering the ball attack will lead to a damaging slow motion attack, just like the ones that come at the end of most boss battles. Don’t be fooled by this, though. Like many of Pandora’s tactics, this is a trick and the battle is not actually over yet. She will retreat back towards the podium in the back and gloat a bit before attacking again, this time using a mirror. In a cutscene, Pit will shatter the mirror, only to make a dastardly mirror image of himself called Dark Pit. Although Dark Pit will certainly not be the most agreeable fellow, his love of chaos and disorder will lead him to join the battle against Pandora on your side, for now.
Having Dark Pit along for the ride will make battling Pandora significantly easier. Keep doing what you were doing before, repelling the explosive balls back at the boss and shooting her with arrows (or whatever projectile you have equipped at the moment) to damage her during the downtime. During this round of the battle, though, Pandora will focus much of her efforts on Dark Pit. Pit’s disorderly alter ego will favor getting in close with melee attacks, so he and Pandora will be practically glued together for the duration of the fight. Use this to your advantage by staying at a distance and taking potshots at the boss. It won’t be long now until you have defeated Pandora.
Dark Pit will surprise you right after the battle with a kick to the chest before escaping with Pandora’s powers. Now he will be able to fly, and you will still be limited to your five minute stints. Palutena will encourage you to follow Dark Pit in an attempt to get Pandora’s powers for yourself, and the elvel will end.


 Battlefield 2142 Tweak Guide
 How to Get the Mechanical Falcon on Sims Medieval (PC)
 . Plays Feb 2, 2013
 Farmville: How to Expand Your Farm
 Resident Evil Revelations 2 Guide: Upgrade Location Guide