


This walkthrough contains the guide through the campaign as well as hints about the fights (not necessarily only those with the bosses). In each chapter you can find the localizations of all notes, letters and recordings which allow you to immerse in the world and get the achievements. Additionally at the end of the guide you have the chapter with all the journals. Their order is the same as in the game's menu which should help to find the missing ones.
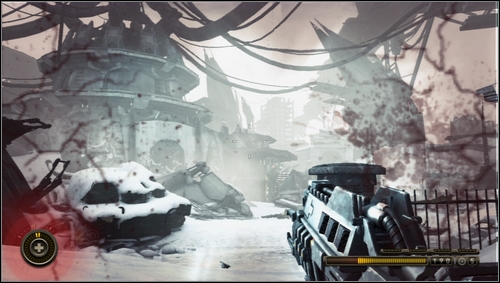
Health. Resistance 3 presents an old school way of replenishing health - you need to find aid-kits which look like a container with a green substance. It's not very annoying but it changes the way of fighting. Finding a peaceful place when the screen is all in red stains is very difficult. In emergency you need to find the aid-kit as fast as possible or use any dirty tricks that allow you to kill all the opponents without risking. You will collect an impressive arsenal to achieve it.
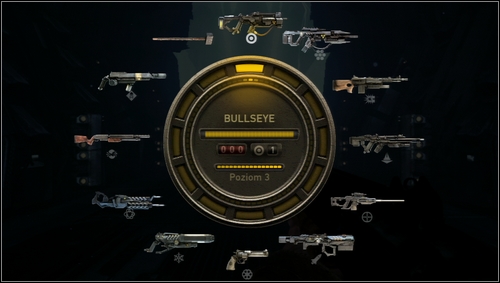
Life savers. During the game your weapon collection will gradually become bigger and bigger. Almost each weapon you can obtain has an alternative mode which make the weapon even more effective. Usually the more you use them, the better your "toys" become.
Description of used marks:
[1], [2] - Numbers in the brackets indicate the screens above the text. One means the left picture, two means the right one.
Green indicates all notes, letters, journals' pieces and recordings.
Brown means enemy.
Robert Frac ()
The game starts with a short introduction describing the past events. [1]. When you wake up go to the firing range to get the gun and take part in a short tutorial.
When you leave your "bedroom" come to the table against which Susan is leaning. Pick up the Feral vs. Military note and take the left tunnel [1] You'll see a small compass's icon which show the way to your task [2].
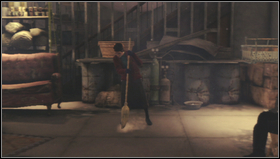
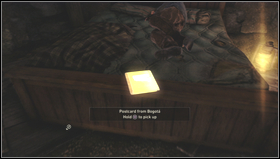
Pass some rooms connected with the tunnels. When you see a woman sweeping the floor [1] look at the niche on the right and pick up the Postcard from Bogota note [2].
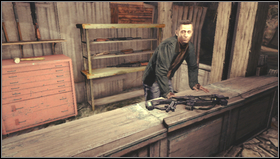
![The next tunnel will lead you to the firing range where you'll get the Bullseye rifle [1] - Chapter 1 - Walkthrough - Resistance 3 - Game Guide and Walkthrough](https://game.lhg100.com/Article/UploadFiles/201512/2015121619284158.jpg)
The next tunnel will lead you to the firing range where you'll get the Bullseye rifle [1].When you pick up the first weapon go to the free stand and start your training [2].
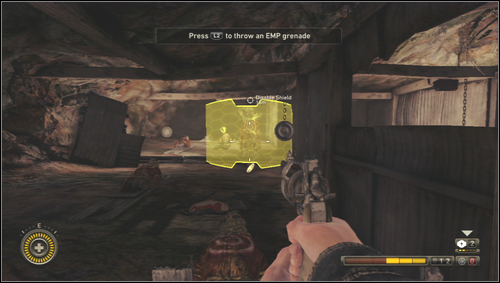
Learn about the controls, EMP grenades and the secondary mode of the revolver and rifle. The EMP grenades deactivate the opponents' shield [1] so eliminating them is far more easier.
![The secondary Bullseyes bullets mark the target so you can shoot in various direction and hit (unless there is an obstacle) [1] - Chapter 1 - Walkthrough - Resistance 3 - Game Guide and Walkthrough](https://game.lhg100.com/Article/UploadFiles/201512/2015121619284245.jpg)
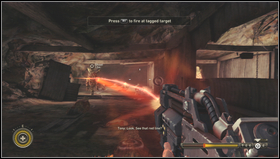
The secondary Bullseye's bullets mark the target so you can shoot in various direction and hit (unless there is an obstacle) [1]. Use it to shoot at the covered enemies. The other revolver's function is to detonate the bullets once fired. When you use the aiming [2] your shots are more precise.
When you finish the tutorial the light will diminish and you need to prepare to the attack. Follow the compass to the briefing room [1]. After the scouts' report, meet the group of fighters. Follow your companion, sneak through the restaurant and go back underground [2].
![Pass few resistance fighters and get to the ladder [1] - Chapter 1 - Walkthrough - Resistance 3 - Game Guide and Walkthrough](https://game.lhg100.com/Article/UploadFiles/201512/2015121619284394.jpg)
Pass few resistance fighters and get to the ladder [1]. Climb up to get to the building where you meet Nat and few other allies [2].
![After a short cut-scene you will fight with the Hybrids' group [1] - Chapter 1 - Walkthrough - Resistance 3 - Game Guide and Walkthrough](https://game.lhg100.com/Article/UploadFiles/201512/2015121619284350.jpg)
After a short cut-scene you will fight with the Hybrids' group [1]. A small chasm will separate you from them so you need a long distance weapon to eliminate them. Use covers like cars and pick up the green containers to regenerate the health.
![When you eliminate everyone a mech called the Stalker will attack you [1] - Chapter 1 - Walkthrough - Resistance 3 - Game Guide and Walkthrough](https://game.lhg100.com/Article/UploadFiles/201512/2015121619284359.jpg)
When you eliminate everyone a mech called the Stalker will attack you [1]. It has a rocket launcher. The red laser directs the rockets. It also has the laser guns. It's hard to destroy because of the shield which can be removed by the EMP grenades.
![There is an ice-cream shop at the battlefield [1] - Chapter 1 - Walkthrough - Resistance 3 - Game Guide and Walkthrough](https://game.lhg100.com/Article/UploadFiles/201512/2015121619284408.jpg)
There is an ice-cream shop at the battlefield [1]. Climb up the ladder behind the building [2]. On the roof you'll find many EMP grenades, rifle ammo and some aid-kits. There are no covers so it's not the best place to fight, but stay there as long as you don't damage the Stalker enough.
![When you hit the mech really hard [1] it will send rockets towards you - Chapter 1 - Walkthrough - Resistance 3 - Game Guide and Walkthrough](https://game.lhg100.com/Article/UploadFiles/201512/2015121619284466.jpg)
When you hit the mech really hard [1] it will send rockets towards you. You don't have any cover and you can't avoid the missiles. Replenish ammo and jump down. Running around the ice-cream shop and hiding should give you enough cover. When you blow up the mech watch the cut-scene and you'll be moved to the base.
Your first task is to find Dean who doesn't respond after the attack. After passing the tunnel go left to the medic room. Find the Bite Protocol note [1] near the patient with the drip.

After passing the room with the sick people you'll enter the room with few chairs standing in front of the board with the Chimera's illustration. On the right there is the Note to John Harper [1]. Follow the compass to leave the underground [2].
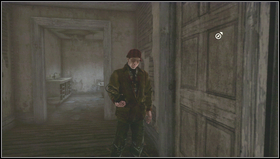
![Passing the ruined building climb the second floor and get the Shrapnel Grenades [1] - Chapter 2 - Walkthrough - Resistance 3 - Game Guide and Walkthrough](https://game.lhg100.com/Article/UploadFiles/201512/2015121619284517.jpg)
Passing the ruined building climb the second floor and get the Shrapnel Grenades [1]. After passing the door you'll see enemies approaching [2]. Eliminate them staying in the building. Then jump through the destroyed wall at the street and pick up the ammo and the aid-kits.
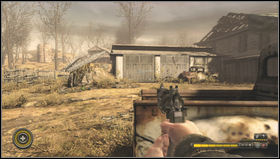
![Follow the compass and get to the garage's gate [1] - Chapter 2 - Walkthrough - Resistance 3 - Game Guide and Walkthrough](https://game.lhg100.com/Article/UploadFiles/201512/2015121619284649.jpg)
Follow the compass and get to the garage's gate [1]. Enter the building where you'll find Dean [2].
![Go upstairs, find the recording Leaper Bite lying on the bed [1] - Chapter 2 - Walkthrough - Resistance 3 - Game Guide and Walkthrough](https://game.lhg100.com/Article/UploadFiles/201512/2015121619284694.jpg)
Go upstairs, find the recording Leaper Bite lying on the bed [1]. Listen to it, go downstairs and follow Dean.
![When you leave the building you'll see the enemy infantry squads along the cornfield [1] - Chapter 2 - Walkthrough - Resistance 3 - Game Guide and Walkthrough](https://game.lhg100.com/Article/UploadFiles/201512/2015121619284663.jpg)
When you leave the building you'll see the enemy infantry squads along the cornfield [1]. Find cover quickly before they'll spot you. If you get seriously wounded go back to the building and look for the aid-kits and ammo.
![When you win follow your companion up the hill where you will see the harbinger of trouble [1] - Chapter 2 - Walkthrough - Resistance 3 - Game Guide and Walkthrough](https://game.lhg100.com/Article/UploadFiles/201512/2015121619284702.jpg)
When you win follow your companion up the hill where you will see the harbinger of trouble [1].
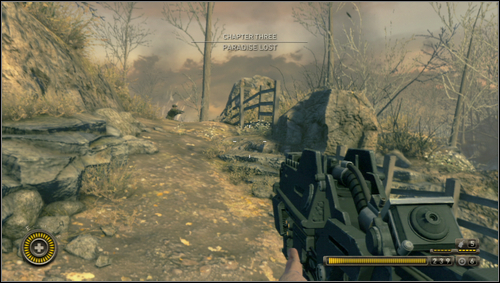
When the cut-scene finishes, a fight will start. Run after Dean avoiding the fight. Follow him up to the small hill [1]. There you'll notice enemy troops marching towards your city.
![When you go down you'll see the Stalker and the Goliath [1] (a gigantic version of the Stalker ) - Chapter 3 - Walkthrough - Resistance 3 - Game Guide and Walkthrough](https://game.lhg100.com/Article/UploadFiles/201512/2015121619284782.jpg)
When you go down you'll see the Stalker and the Goliath [1] (a gigantic version of the Stalker ). Run as fast as you can and don't shoot. Take cover to hide from the Stalker.
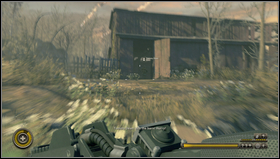
![When you pass the enemies you'll get to the wooden shed [1] where you can look for the aid-kit - Chapter 3 - Walkthrough - Resistance 3 - Game Guide and Walkthrough](https://game.lhg100.com/Article/UploadFiles/201512/2015121619284877.jpg)
When you pass the enemies you'll get to the wooden shed [1] where you can look for the aid-kit. Replenish health and leave the building. You'll see the Goliath but fortunately it won't be interested in you. You can run between its legs to get to the building on the other side of the road [2].
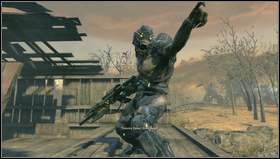
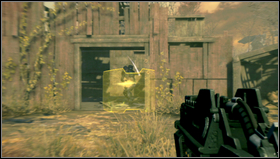
Climb the fallen roof to enter the crumbling house. You'll get an order to go back to the base and you'll find a dead woman. After passing few rooms leave the house using the backdoor. Fight the new type of enemies, the Steelheads [1]. They carry the Auger rifle which bullets can get through the walls. Alternatively this weapon can set the protective shield [2] against bullets (except those from Auger). Like with the Stalker the best way to get rid of the shield is to use the EMP grenade.
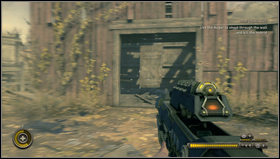
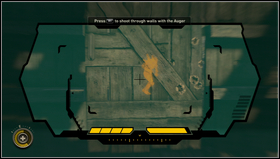
When you eliminate the enemies pick their weapon and try it. Dean will stay in the shed [1] and will ask to eliminate the opponents behind the wall. Use Auger. To see the targets use the aiming mode [2].
![When you leave the shed get to the small ravine [1] You'll be attacked by the Chimeras - Chapter 3 - Walkthrough - Resistance 3 - Game Guide and Walkthrough](https://game.lhg100.com/Article/UploadFiles/201512/2015121619285066.jpg)
When you leave the shed get to the small ravine [1] You'll be attacked by the Chimeras. Because of the high rocks use the Auger to eliminate them. Move towards the bridge [2] and pass under it.
![Enter the open space where you need to run because of the air strikes [1] - Chapter 3 - Walkthrough - Resistance 3 - Game Guide and Walkthrough](https://game.lhg100.com/Article/UploadFiles/201512/2015121619285082.jpg)
Enter the open space where you need to run because of the air strikes [1]. Follow Dean and get to the building [2], where you'll find the cover. You'll find there mines as well.
![Pass the door to get to the factory [1] full of enemies - Chapter 3 - Walkthrough - Resistance 3 - Game Guide and Walkthrough](https://game.lhg100.com/Article/UploadFiles/201512/2015121619285028.jpg)
Pass the door to get to the factory [1] full of enemies. You'll fight here for a longer time so watch for your health level and take cover. Use the grenades and the Auger rifle. Beware of the Steelheads and the air strikes. Luckily there are many places where you can make stealth attacks.
![When you clear the area follow Dean and climb the stairs [1] - Chapter 3 - Walkthrough - Resistance 3 - Game Guide and Walkthrough](https://game.lhg100.com/Article/UploadFiles/201512/2015121619285184.jpg)
When you clear the area follow Dean and climb the stairs [1]. Another but small group of the opponents will attack you. To leave the next building move the metal door next to Dean who is waiting for you [2].
![Outside eliminate another group and after collecting the ammo move towards the bridge [1] - Chapter 3 - Walkthrough - Resistance 3 - Game Guide and Walkthrough](https://game.lhg100.com/Article/UploadFiles/201512/2015121619285102.jpg)
Outside eliminate another group and after collecting the ammo move towards the bridge [1].
![Because of Chimeras' attack [1] the town's evacuation will start - Chapter 4 - Walkthrough - Resistance 3 - Game Guide and Walkthrough](https://game.lhg100.com/Article/UploadFiles/201512/2015121619285260.jpg)
Because of Chimeras' attack [1] the town's evacuation will start. Your task is to get to the scrap heap and slow down the enemies.
![Follow Lester, meet the allies and get the Marksman rifle [1] - Chapter 4 - Walkthrough - Resistance 3 - Game Guide and Walkthrough](https://game.lhg100.com/Article/UploadFiles/201512/2015121619285261.jpg)
Follow Lester, meet the allies and get the Marksman rifle [1]. It has high accuracy rate and shots with the short series. Its alternative mode can set small turrets.
![After passing the door you'll be attacked by the enemy troops dropped by the dropship [1] - Chapter 4 - Walkthrough - Resistance 3 - Game Guide and Walkthrough](https://game.lhg100.com/Article/UploadFiles/201512/2015121619285219.jpg)
After passing the door you'll be attacked by the enemy troops dropped by the dropship [1]. The battlefield is full of covers but unfortunately Chimeras use them as well. The enemies will try to surround you. The important part of the square are the buildings on the right from the entrance [2]. Get there and shoot from the windows at the first floor.
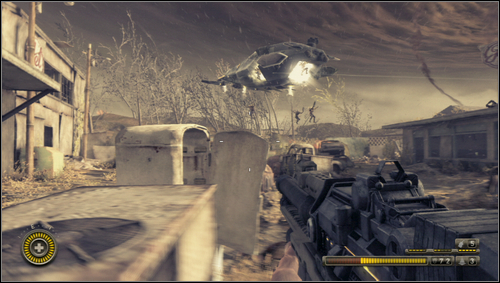
When you eliminate the first wave of the enemies you will have a short moment for picking up the ammo and the aid-kits left by the Chimeras. You'll need them for the next wave also dropped by the dropships [1].
![When you eliminate this group you'll face the Longlegs [1] - Chapter 4 - Walkthrough - Resistance 3 - Game Guide and Walkthrough](https://game.lhg100.com/Article/UploadFiles/201512/2015121619285371.jpg)
When you eliminate this group you'll face the Longlegs [1]. These are very brisk Chimeras which change their position jumping from roof to roof. The best way to kill them is to use the Marksman rifle or the Bullseye's homing missiles.
Elimination of the Longlegs will be interrupted by the withdraw call. Passing the narrow alley eliminate all the enemies shooting at you from the roofs [1]. Follow the compass and get to the street [2] leading to the church. Coming dropships will bring new Chimeras' troops to attack you. The roof of a small shed in the middle of the square is well equipped with weapon but has no covers.
![After eliminating few waves of the enemies you'll by attacked by the Brawler [1] - Chapter 4 - Walkthrough - Resistance 3 - Game Guide and Walkthrough](https://game.lhg100.com/Article/UploadFiles/201512/2015121619285468.jpg)
After eliminating few waves of the enemies you'll by attacked by the Brawler [1]. It's very strong. Its basic attacks are the hits with fists and charge towards the distant enemies.
![The Brawler may also throw the cars standing at the street [1] and jumps at the lower buildings - Chapter 4 - Walkthrough - Resistance 3 - Game Guide and Walkthrough](https://game.lhg100.com/Article/UploadFiles/201512/2015121619285472.jpg)
The Brawler may also throw the cars standing at the street [1] and jumps at the lower buildings.
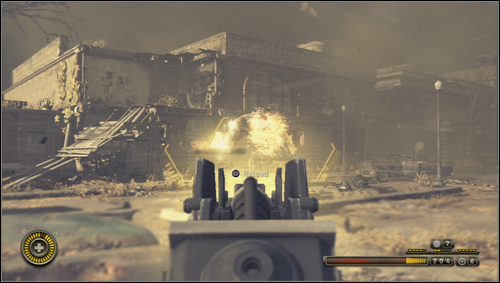
To eliminate this beast shoot at its cooling system which looks like an armor. The damaged elements start to glow [1] Shoot more and it will explode. Your goal is to destroy all armor's elements starting with the brassards through boots finishing on the two plates on the torso. The most important is to avoid its attacks by hiding in or behind the buildings. If you stop shooting at the Brawler there is a slight chance that it will focus on one of your allies. That's the best moment to replenish ammo and health or shooting at the its sensitive points.
![When you defeat the Brawler go towards the church [1], where the chapter ends and you go to New York - Chapter 4 - Walkthrough - Resistance 3 - Game Guide and Walkthrough](https://game.lhg100.com/Article/UploadFiles/201512/2015121619285489.jpg)
When you defeat the Brawler go towards the church [1], where the chapter ends and you go to New York.
![You are at the barge controlled by Dr Malikov [1] - Chapter 5 - p. 1 - Walkthrough - Resistance 3 - Game Guide and Walkthrough](https://game.lhg100.com/Article/UploadFiles/201512/2015121619285582.jpg)
You are at the barge controlled by Dr Malikov [1]. No one will bother you so take a look around.
![At the barge's prow [1] near the tires you will find the Change in Strategy note - Chapter 5 - p. 1 - Walkthrough - Resistance 3 - Game Guide and Walkthrough](https://game.lhg100.com/Article/UploadFiles/201512/2015121619285521.jpg)
At the barge's prow [1] near the tires you will find the Change in Strategy note.
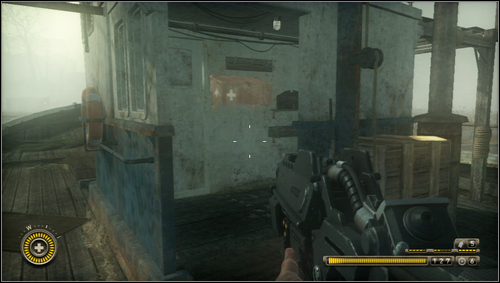
![In front of the cabin find a yellow casket with the ammo supply [1] - Chapter 5 - p. 1 - Walkthrough - Resistance 3 - Game Guide and Walkthrough](https://game.lhg100.com/Article/UploadFiles/201512/2015121619285559.jpg)
In front of the cabin find a yellow casket with the ammo supply [1]. Behind the cabin there is the Ice Blocks note [2].
![In the cabin's threshold there is a red casket [1] full of the aid-kits - Chapter 5 - p. 1 - Walkthrough - Resistance 3 - Game Guide and Walkthrough](https://game.lhg100.com/Article/UploadFiles/201512/2015121619285547.jpg)
In the cabin's threshold there is a red casket [1] full of the aid-kits.
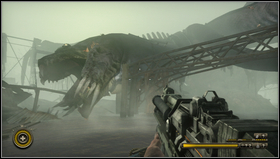
![In the fog you'll notice the Kraken's remains [1] where the Leapers live - Chapter 5 - p. 1 - Walkthrough - Resistance 3 - Game Guide and Walkthrough](https://game.lhg100.com/Article/UploadFiles/201512/2015121619285699.jpg)
In the fog you'll notice the Kraken's remains [1] where the Leapers live. If don't listen to the Malikov's advice and interrupt their meal, they will jump at the deck and attack you [2].
![When you pass the remains, Malikov will give you a shotgun [1] - Chapter 5 - p. 1 - Walkthrough - Resistance 3 - Game Guide and Walkthrough](https://game.lhg100.com/Article/UploadFiles/201512/2015121619285656.jpg)
When you pass the remains, Malikov will give you a shotgun [1]. Try it at the orbs exploding nearby [2]. When you destroy them, move on.
![Pass the Goliath [1] and go under the icy bridge [2] - Chapter 5 - p. 1 - Walkthrough - Resistance 3 - Game Guide and Walkthrough](https://game.lhg100.com/Article/UploadFiles/201512/2015121619285651.jpg)
Pass the Goliath [1] and go under the icy bridge [2]. The icicles will stop you. To move on you have to shoot them down.
![Soon you'll notice flooded buildings [1] - Chapter 5 - p. 2 - Walkthrough - Resistance 3 - Game Guide and Walkthrough](https://game.lhg100.com/Article/UploadFiles/201512/2015121619285768.jpg)
Soon you'll notice flooded buildings [1]. Humanoid beasts called the Grims coming from the buildings on the left will attack you [2]. They aren't dangerous at the distance (they throw stones) so it's good to shoot them before they get to your barge. If they come closer use the shotgun which is extremely effective at short range.
![When you'll be busy your barge will stuck between the icicles [1] - Chapter 5 - p. 2 - Walkthrough - Resistance 3 - Game Guide and Walkthrough](https://game.lhg100.com/Article/UploadFiles/201512/2015121619285767.jpg)
When you'll be busy your barge will stuck between the icicles [1]. To move on you need to break the ice by shooting at it. Beware of the attacks.
When you free yourself it will be calm for a moment. You'll see the Shock Drones fighting the Leapers. It won't be long when those first ones notice you and attack you with their electric lances [1]. The cabin's threshold is a quite good cover. There's also the aid-kit. You can shoot at the Shock Drones while standing here and replenish health.
![Eventually you'll see the Goliath [1] - Chapter 5 - p. 2 - Walkthrough - Resistance 3 - Game Guide and Walkthrough](https://game.lhg100.com/Article/UploadFiles/201512/2015121619285887.jpg)
Eventually you'll see the Goliath [1]. The trick with hiding under the bridge won't work so you need to escape.
![The nearby buildings are the targets of the dropships full with the Longlegs [1] - Chapter 5 - p. 2 - Walkthrough - Resistance 3 - Game Guide and Walkthrough](https://game.lhg100.com/Article/UploadFiles/201512/2015121619285840.jpg)
The nearby buildings are the targets of the dropships full with the Longlegs [1]. Shoot at the exploding orbs to eliminate a part of them. Remember that they can jump at you deck anytime [2] so keep the shotgun somewhere close.
![Again you will stuck between the icicles [1] - Chapter 5 - p. 2 - Walkthrough - Resistance 3 - Game Guide and Walkthrough](https://game.lhg100.com/Article/UploadFiles/201512/2015121619285832.jpg)
Again you will stuck between the icicles [1]. Destroy them as fast as possible. Fight back the Longlegs and the Shock Drones.
![When you think you've made it you will find yourself between two Goliaths which will destroy your barge definitely [1] - Chapter 5 - p. 2 - Walkthrough - Resistance 3 - Game Guide and Walkthrough](https://game.lhg100.com/Article/UploadFiles/201512/2015121619285932.jpg)
When you think you've made it you will find yourself between two Goliaths which will destroy your barge definitely [1].
![When you get to the shore notice the building on high pales with turned on light [1] - Chapter 6 - p. 1 - Walkthrough - Resistance 3 - Game Guide and Walkthrough](https://game.lhg100.com/Article/UploadFiles/201512/2015121619285929.jpg)
When you get to the shore notice the building on high pales with turned on light [1].
![Follow the wounded doctor till you get to the ramp [1] which you can lower from the other side - Chapter 6 - p. 1 - Walkthrough - Resistance 3 - Game Guide and Walkthrough](https://game.lhg100.com/Article/UploadFiles/201512/2015121619290013.jpg)
Follow the wounded doctor till you get to the ramp [1] which you can lower from the other side. To get to the switch go through the labyrinth made of tracks. Follow the yellow arrows painted on the wagons [2].
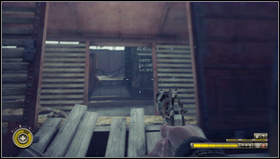
![When you get through the wagon [1] turn left towards the pylons [2] - Chapter 6 - p. 1 - Walkthrough - Resistance 3 - Game Guide and Walkthrough](https://game.lhg100.com/Article/UploadFiles/201512/2015121619290090.jpg)
When you get through the wagon [1] turn left towards the pylons [2]. Be careful because the Leapers may attack.
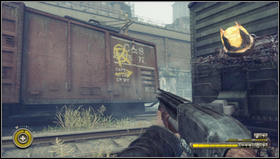
![Pass the pylon and go left following the signs [1] or go right getting through the wagon [2] - Chapter 6 - p. 1 - Walkthrough - Resistance 3 - Game Guide and Walkthrough](https://game.lhg100.com/Article/UploadFiles/201512/2015121619290058.jpg)
Pass the pylon and go left following the signs [1] or go right getting through the wagon [2].
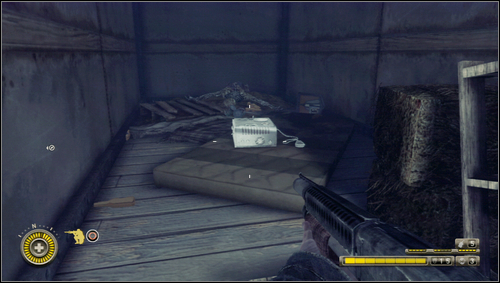
Before you pick the route get on the concrete platform and move forward. On the right near the fence there's an open wagon where you can find the tape recorder with the Staying Warm [1] record.
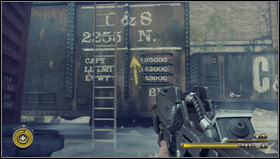
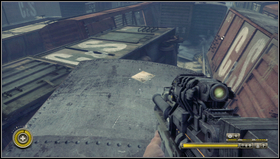
I recommend the left path. When you go left you'll find a marked ladder [1] which you can use to climb up on the trains' roofs. Look left and notice that on one of the derailed wagons lies the A Tragic Paradox [2] note.
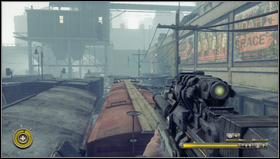
![Go back to the wagon with the ladder and go towards the platform [1] - Chapter 6 - p. 1 - Walkthrough - Resistance 3 - Game Guide and Walkthrough](https://game.lhg100.com/Article/UploadFiles/201512/2015121619290247.jpg)
Go back to the wagon with the ladder and go towards the platform [1]. When you are on the last wagon pass the footbridge leading to the train standing against the high wall [2] and turn left to jump down near the platform. When you march on the wagons' roof you'll deal with the Leapers easily. But you can also go between the trains. That way you'll be an easy target but you'll find ammo in the wagons.
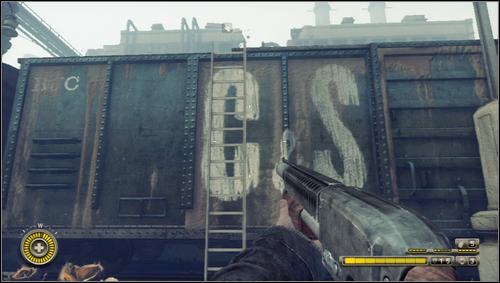
The right path. Go right and get through the wagon and go right. On the last wagon on the right there's a ladder [1]. Climb up on the tracks.
![Use the footbridges and jump over small cracks towards the high wall [1] - Chapter 6 - p. 1 - Walkthrough - Resistance 3 - Game Guide and Walkthrough](https://game.lhg100.com/Article/UploadFiles/201512/2015121619290375.jpg)
Use the footbridges and jump over small cracks towards the high wall [1]. Kill the Leapers from the distance before they'll attack you.
![When you get to the wall turn left and at the end of the wagon jump down near the platform [1] - Chapter 6 - p. 1 - Walkthrough - Resistance 3 - Game Guide and Walkthrough](https://game.lhg100.com/Article/UploadFiles/201512/2015121619290373.jpg)
When you get to the wall turn left and at the end of the wagon jump down near the platform [1]. Open it to have your way to Malikov.
![Leave the platform and follow the doctor to the elevator [1] - Chapter 6 - p. 2 - Walkthrough - Resistance 3 - Game Guide and Walkthrough](https://game.lhg100.com/Article/UploadFiles/201512/2015121619290454.jpg)
Leave the platform and follow the doctor to the elevator [1]. Watch the arrival of the Widowmaker [2].
![When you leave the elevator follow Malikov on the right and up the ladder [1] - Chapter 6 - p. 2 - Walkthrough - Resistance 3 - Game Guide and Walkthrough](https://game.lhg100.com/Article/UploadFiles/201512/2015121619290551.jpg)
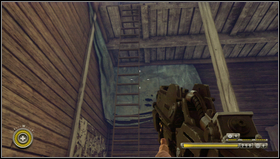
When you leave the elevator follow Malikov on the right and up the ladder [1]. You can look around and pick up the ammo. Go upstairs and look at the plane falling down [2].
![Look around the room and find the mattress with the VTOL Manual [1] note - Chapter 6 - p. 2 - Walkthrough - Resistance 3 - Game Guide and Walkthrough](https://game.lhg100.com/Article/UploadFiles/201512/2015121619290561.jpg)
Look around the room and find the mattress with the VTOL Manual [1] note.
![On the desk on the right from the window you can find a snap hook [1] - Chapter 6 - p. 2 - Walkthrough - Resistance 3 - Game Guide and Walkthrough](https://game.lhg100.com/Article/UploadFiles/201512/2015121619290510.jpg)
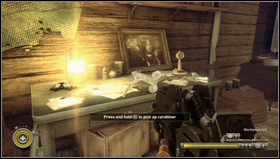
On the desk on the right from the window you can find a snap hook [1]. Pick it up and return to the window. You'll notice the rope attached [2] to the building. Use it to get down and look for the VTOL.
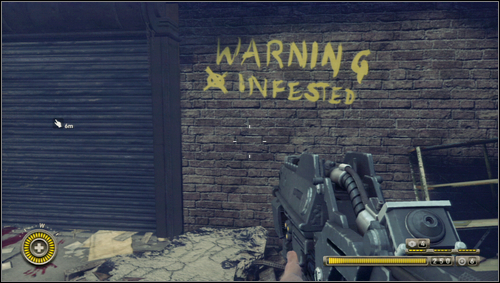
When you land on the balcony move on and jump to the hole in the floor. On the right from the yellow caption "WARNING INFESTED" [1] there's a shelf with the Gotta Get Out note and the exit door on the left.
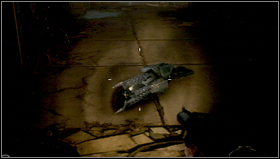
When you pass the door you'll get to the dark boiler room. Go straight then right and find the Atomizer [1]. This weapon shoots with short electric beam which lock itself at the targets. Its alternative version creates the gravity well which drags and kills the enemies. After few steps more when you see the corpse [2] turn left.
![When you reach the wall turn twice right and enter the corridor where you'll find a glowing object [1] - Chapter 6 - p. 2 - Walkthrough - Resistance 3 - Game Guide and Walkthrough](https://game.lhg100.com/Article/UploadFiles/201512/2015121619290711.jpg)
When you reach the wall turn twice right and enter the corridor where you'll find a glowing object [1]. You'll be attacked by the Grims. Test your new toy on them. Climb the stairs at the end of the corridor [2].
![You'll enter the big factory's hall full with the Grims [1] - Chapter 6 - p. 2 - Walkthrough - Resistance 3 - Game Guide and Walkthrough](https://game.lhg100.com/Article/UploadFiles/201512/2015121619290853.jpg)
You'll enter the big factory's hall full with the Grims [1]. Your new toy if highly effective against them. If there's a bigger group use the alternative shot of the Atomizer [2]. After three waves that floor will be clear and you can look around for the aid-kits and ammo.
![Climb the stairs at the end of the hall [1] - Chapter 6 - p. 2 - Walkthrough - Resistance 3 - Game Guide and Walkthrough](https://game.lhg100.com/Article/UploadFiles/201512/2015121619290857.jpg)
Climb the stairs at the end of the hall [1]. Eliminate the enemies and go right using the narrow passage [2].
![Going towards a small construction you'll notice the hole in the floor [1] - Chapter 6 - p. 2 - Walkthrough - Resistance 3 - Game Guide and Walkthrough](https://game.lhg100.com/Article/UploadFiles/201512/2015121619290861.jpg)
Going towards a small construction you'll notice the hole in the floor [1]. Jump into it and you'll see two more rooms. There is a lever to lower the bridge [2] in the first room.
![In the other room there's plenty of ammo and the tape recorder with the Quarantine [1] recording - Chapter 6 - p. 2 - Walkthrough - Resistance 3 - Game Guide and Walkthrough](https://game.lhg100.com/Article/UploadFiles/201512/2015121619290994.jpg)
In the other room there's plenty of ammo and the tape recorder with the Quarantine [1] recording. Beware of the windows. The Grims will enter through them [2].
![When you take everything and switch the lever, leave through the blocked door (smash the planks) [1] and climb the stairs - Chapter 6 - p. 2 - Walkthrough - Resistance 3 - Game Guide and Walkthrough](https://game.lhg100.com/Article/UploadFiles/201512/2015121619290963.jpg)
When you take everything and switch the lever, leave through the blocked door (smash the planks) [1] and climb the stairs. Take the narrow passage to get to the left part of the hall and go right to the abandoned platform [2].
![When you pass the footbridge take the stairs to get to the attic [1] - Chapter 6 - p. 3 - Walkthrough - Resistance 3 - Game Guide and Walkthrough](https://game.lhg100.com/Article/UploadFiles/201512/2015121619291058.jpg)
When you pass the footbridge take the stairs to get to the attic [1].
Your goal is to kill all the enemies and get to the other side of the building. Start with the elimination of the Grims which will attack you as soon as you enter the attic. Take a look around, pick up the ammo and get to the other wall. There's the hatchery so take a range weapon (mines, grenades, shotgun, Atomizer) [1]. When you clear the room you'll notice the exit from the building [2].
![Before you use it, pay attention to the enemies throwing the burning fragments at you [1] - Chapter 6 - p. 3 - Walkthrough - Resistance 3 - Game Guide and Walkthrough](https://game.lhg100.com/Article/UploadFiles/201512/2015121619291193.jpg)
Before you use it, pay attention to the enemies throwing the burning fragments at you [1]. When you eliminate them find the broken platform [2] leading to your opponents.
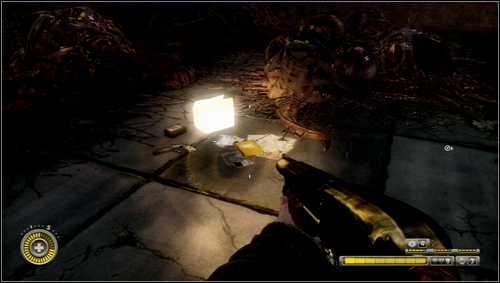
The hole in the platform is small enough to jump over it, but it is safer to take the metal beam near the bridge. On the other side you'll find the ammo and the Safety Violation [1] note.
![Leave the factory using the concrete tunnel [1] which ends with a crack leading to the small room - Chapter 6 - p. 3 - Walkthrough - Resistance 3 - Game Guide and Walkthrough](https://game.lhg100.com/Article/UploadFiles/201512/2015121619291201.jpg)
Leave the factory using the concrete tunnel [1] which ends with a crack leading to the small room. Use the hidden exit door [2].
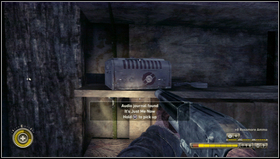
Now you're in the corridor in the ruined building. At its end go left to get the tape recorder with the It's Just Me Now [1] recording or go right to the room with the hole in the ceiling [2].
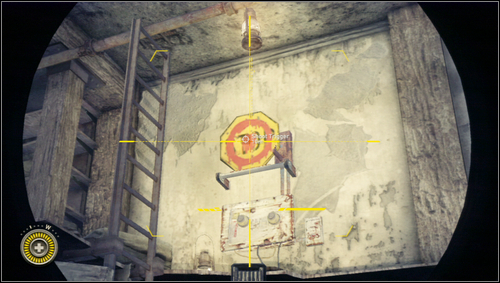
On the right there's a ladder. In a small room there's a hole in the ceiling through which you can see the target [1]. Shoot at it to lower the ladder.
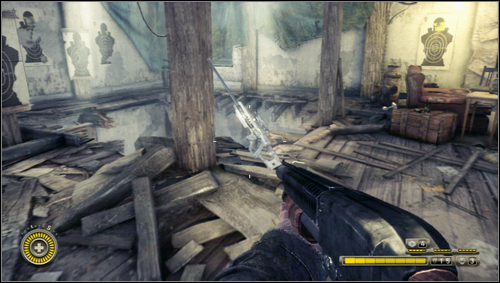
When you climb you'll be in a makeshift firing range. Against one of the wooden pillars stands the Deadeye sniper rifle [1]. It's a long distance weapon with a very high accuracy rate that shoots with single shots. Its alternative mode shoots with the extremely powerful bullet.
![On the right from the window there's the tape recorder with the Girls Best Friend [1] record - Chapter 6 - p. 4 - Walkthrough - Resistance 3 - Game Guide and Walkthrough](https://game.lhg100.com/Article/UploadFiles/201512/2015121619291437.jpg)
On the right from the window there's the tape recorder with the Girl's Best Friend [1] record. Look through the window and notice some Grims. You can practice shooting. After the short play move on through the hole in the floor beneath the targets [2].
Jump down and jump over the lying table. Go right. Through the hole in the wall you can see the yellow and red target [1] Shoot at it to lower the platform leading to the other building.
![Move ahead [1] and turn left by the door - Chapter 6 - p. 4 - Walkthrough - Resistance 3 - Game Guide and Walkthrough](https://game.lhg100.com/Article/UploadFiles/201512/2015121619291504.jpg)
Move ahead [1] and turn left by the door. Jump over the pile of rubbish and climb [2] two floors. Numerous Leapers will attack you. Atomizer should help.
Go through the corridor and enter the open room on the left. Pick up the Letter to Santa [1] note. Continue deep into the corridor at which end you'll find the metal door [2]. Get through it and jump one floor down.
![In the distance you'll notice some rebels defending the VTOL from the Chimeras' attack [1] - Chapter 7 - p. 1 - Walkthrough - Resistance 3 - Game Guide and Walkthrough](https://game.lhg100.com/Article/UploadFiles/201512/2015121619291607.jpg)
In the distance you'll notice some rebels defending the VTOL from the Chimeras' attack [1].
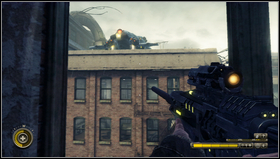
![You have a very good shooting position, therefore eliminate the enemies from the other building [1] - Chapter 7 - p. 1 - Walkthrough - Resistance 3 - Game Guide and Walkthrough](https://game.lhg100.com/Article/UploadFiles/201512/2015121619291660.jpg)
You have a very good shooting position, therefore eliminate the enemies from the other building [1]. The biggest threat are the Longlegs which can jump towards you and start shooting at you [2]. Eliminate them as the first ones.
![The next target are the Steelheads with the Augers [1] - Chapter 7 - p. 1 - Walkthrough - Resistance 3 - Game Guide and Walkthrough](https://game.lhg100.com/Article/UploadFiles/201512/2015121619291743.jpg)
The next target are the Steelheads with the Augers [1]. When you fight them eliminate also other enemies shooting at you. When you eliminate most of them you'll be able to use the rope [2] to get on the other building. But before that eliminate the second wave of the Chimeras brought by the dropship.
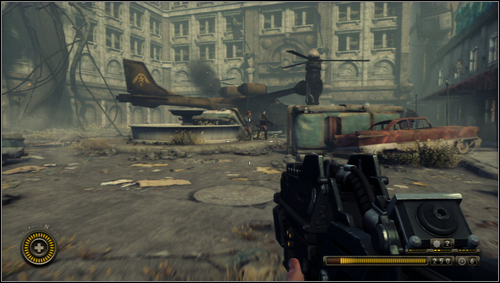
When only few enemies are alive, use the rope and finish them. After the fight search the building and corpses to replenish the health and ammo. When you're ready, go to the VTOL's defenders [1].
![After the short talk the Chimeras' group led by the Ravager carrying the Atomizer will land between the buildings [1] - Chapter 7 - p. 1 - Walkthrough - Resistance 3 - Game Guide and Walkthrough](https://game.lhg100.com/Article/UploadFiles/201512/2015121619291799.jpg)
After the short talk the Chimeras' group led by the Ravager carrying the Atomizer will land between the buildings [1]. It's very dangerous at the short range so you need to eliminate it from the distance. Its shield may be an obstacle but remove it using the EMP grenades or the Auger.
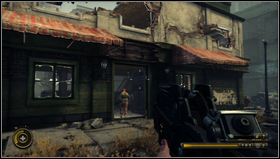
![When you kill the main opponent, eliminate the rest and follow your companions to the bar [1] - Chapter 7 - p. 2 - Walkthrough - Resistance 3 - Game Guide and Walkthrough](https://game.lhg100.com/Article/UploadFiles/201512/2015121619291873.jpg)
When you kill the main opponent, eliminate the rest and follow your companions to the bar [1]. It's a two-floor building where you can find some ammo and aid-kits. Take whatever you need and go upstairs. Soon Chimeras will attack your position. The first wave will strike from the front side [2]. Stand between your allies and eliminate the enemies before they reach the building.
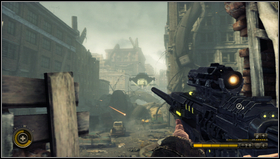

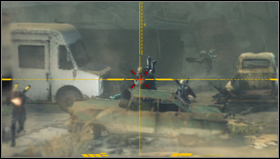
There's the Ravager in the attacking group. Make sure to eliminate it as the first one. Its fast, stubborn and wants to get inside [1]. If that happens it will smash the door therefore you have to go downstairs and lose your advantage. When you eliminate the enemies, replenish ammo and prepare for the new attack from the right side of the building [2].
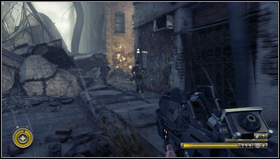
This time apart from the Hybrids two Ravages will attack you. Focus on them when they show up and eliminate at least one before it reaches the building [1]. Otherwise you'll be in big trouble. After the fight once again replenish ammo and leave the building to meet your companions and follow them to the hideout [2].
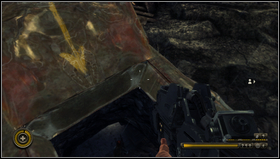
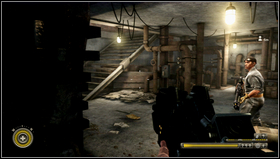
During your escape another dropship will show up. Ignore it and run after your companions to the passage hidden under the hood [1]. In the tunnels follow your new friends and pick up ammo and the aid-kits. Before you enter the first bigger room with lights turned on [2], move back few steps and enter the corridor on the left.
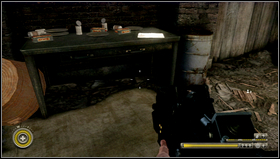
![At its end there is a small room and the Tunguska [1] note lying on the table - Chapter 7 - p. 2 - Walkthrough - Resistance 3 - Game Guide and Walkthrough](https://game.lhg100.com/Article/UploadFiles/201512/2015121619291907.jpg)
At its end there is a small room and the Tunguska [1] note lying on the table. When you take it go back to the previous room and go upstairs [2].
![Pass few rooms and you'll get to the two-floor room where the Brawler [1] will show up [1] altogether with the](https://game.lhg100.com/Article/UploadFiles/201512/2015121619292077.jpg)
Pass few rooms and you'll get to the two-floor room where the Brawler [1] will show up [1] altogether with the "bodyguards".
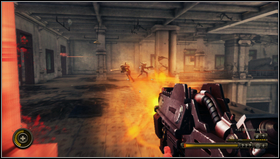
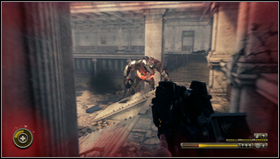
Your main task is to keep the Brawler at the distance so you have to often run away. During your sprints try to eliminate some Hybrids standing on your way [1]. If you're far enough, turn around and shoot at the Brawler's vital points [2] eliminating the armor on its shoulders, wrists and torso. This particular Brawler has a special attack. It hits the floor which results in the spreading ring of fire. Before that attack the Brawler stops and raises its shoulders. Move as far away as possible when you see it. To keep the distance change the floors often and run through the rooms on the upper floors.
![When you kill it jump into the elevator's shaft [1] - Chapter 7 - p. 2 - Walkthrough - Resistance 3 - Game Guide and Walkthrough](https://game.lhg100.com/Article/UploadFiles/201512/2015121619292100.jpg)
When you kill it jump into the elevator's shaft [1]. Follow your companions and you'll get to the ladder [2]. Climb to the resistance's headquarters.
![Altogether with the resistance members prepare to the ambush [1] - Chapter 8 - Walkthrough - Resistance 3 - Game Guide and Walkthrough](https://game.lhg100.com/Article/UploadFiles/201512/2015121619292118.jpg)
Altogether with the resistance members prepare to the ambush [1]. The plan is to attack the dropship to get the generator that will power the VTOL.
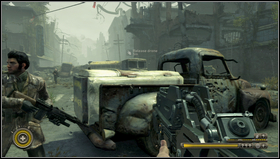
![When you hear the plan, release the Shield Drone [1] from the trunk - Chapter 8 - Walkthrough - Resistance 3 - Game Guide and Walkthrough](https://game.lhg100.com/Article/UploadFiles/201512/2015121619292161.jpg)
When you hear the plan, release the Shield Drone [1] from the trunk. The Drone will call for backup. Before you do it take a look around. When the released Drone flies around for a moment shoot it down and wait [2].
![The first dropship that show up will be destroyed [1] - Chapter 8 - Walkthrough - Resistance 3 - Game Guide and Walkthrough](https://game.lhg100.com/Article/UploadFiles/201512/2015121619292212.jpg)
The first dropship that show up will be destroyed [1]. Some burning Hybrids will get out of it. Unfortunately it's not the only dropship with the enemies.
![The second wave contains of the Hybrids with some Shield Drones which install the personal shield [1] - Chapter 8 - Walkthrough - Resistance 3 - Game Guide and Walkthrough](https://game.lhg100.com/Article/UploadFiles/201512/2015121619292276.jpg)
The second wave contains of the Hybrids with some Shield Drones which install the personal shield [1]. Therefore you should attack the Drones at the first place. Then defeating Hybrids will be a piece of cake.
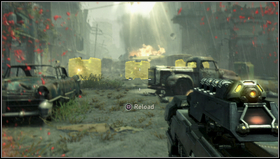
![The third wave contains a huge group of the Steelheads [1] - Chapter 8 - Walkthrough - Resistance 3 - Game Guide and Walkthrough](https://game.lhg100.com/Article/UploadFiles/201512/2015121619292317.jpg)
The third wave contains a huge group of the Steelheads [1]. It's hard to hide from them so use the grenades and the Auger to eliminate them as fast as possible. The last wave contains of the Longlegs [2]. Hide under the roof and shoot at the single ones.
During the last attack you will hear the order to withdraw and take the generator with you. It's in the door where the evacuation path starts [1].
![Take the generator and follow Charlie [1] - Chapter 8 - Walkthrough - Resistance 3 - Game Guide and Walkthrough](https://game.lhg100.com/Article/UploadFiles/201512/2015121619292322.jpg)
Take the generator and follow Charlie [1]. You can't defend yourself so stick to him. You'll see the Chimeras fighting the Widowmaker [2]. Run under the beast's legs and get to the building where you'll rest for a moment.
After the break continue the run. You must stick to Charlie by any means. He'll cover you. You don't have to hide from the opponents, rather beware of not getting lost. You'll get to the small yard between the buildings where the Widowmaker will attack you [1]. Poisonous clouds will appear and you have to run through them down as fast as possible and jump into the building where our companion awaits you.
![As you pass the door your hands will be free again [1] - Chapter 8 - Walkthrough - Resistance 3 - Game Guide and Walkthrough](https://game.lhg100.com/Article/UploadFiles/201512/2015121619292474.jpg)
As you pass the door your hands will be free again [1]. There are beds in front of the billiard table. The [2] Hale Vaccine note is near one of them.
After the short talk Charlie will bring the generator and this time it's your turn to cover him. Before you leave look for the ammo and the aid-kits in the yellow chest next to your companion [1]. When you get through the door you'll be at the staircase and find the Molotov cocktails. Take the stairs and get to the top of the building and pass the door leading to the roof.
![When you get to the roof Charlie will hide in the room with a small roof [1] - Chapter 9 - p. 1 - Walkthrough - Resistance 3 - Game Guide and Walkthrough](https://game.lhg100.com/Article/UploadFiles/201512/2015121619292545.jpg)
When you get to the roof Charlie will hide in the room with a small roof [1]. You have to cover him from the attacks of the Shock Drones and the Longlegs. The former ones will come towards you so hide near your companion and eliminate them.
![Next eliminate the Longlegs from the nearby roofs [1] - Chapter 9 - p. 1 - Walkthrough - Resistance 3 - Game Guide and Walkthrough](https://game.lhg100.com/Article/UploadFiles/201512/2015121619292656.jpg)
Next eliminate the Longlegs from the nearby roofs [1]. When Charlie feels safe he will move to the platform lowered thanks to the shield [2].
![When you pass the platform kill few Longlegs [1] - Chapter 9 - p. 1 - Walkthrough - Resistance 3 - Game Guide and Walkthrough](https://game.lhg100.com/Article/UploadFiles/201512/2015121619292640.jpg)
When you pass the platform kill few Longlegs [1]. Before you move after Charlie, search the building. There are stairs on the right [2]. At their top you'll find the Mass Exodus note.
![When you pick it up go downstairs and take the other stairs [1] to get to Charlie - Chapter 9 - p. 1 - Walkthrough - Resistance 3 - Game Guide and Walkthrough](https://game.lhg100.com/Article/UploadFiles/201512/2015121619292603.jpg)
When you pick it up go downstairs and take the other stairs [1] to get to Charlie. Some Shock Drones and Longlegs will attack you. When you eliminate them your companion will move forward and you should follow him eliminating few other opponents.
Eventually you'll get to the roof. Your ally will hide [1] and you have to eliminate the Chimeras. Then move up using the makeshift platform [2] and wait for Charlie.
![Soon you'll enter the building using the stairs [1] - Chapter 9 - p. 1 - Walkthrough - Resistance 3 - Game Guide and Walkthrough](https://game.lhg100.com/Article/UploadFiles/201512/2015121619292753.jpg)
Soon you'll enter the building using the stairs [1]. At the upper floors there is a group of the Longlegs. You can kill them easily using the Auger's smashing walls bullets. When you do so run after Charlie to the container [2] hanging on the line.
![The Widowmaker will interrupt your ride [1] - Chapter 9 - p. 2 - Walkthrough - Resistance 3 - Game Guide and Walkthrough](https://game.lhg100.com/Article/UploadFiles/201512/2015121619292775.jpg)
The Widowmaker will interrupt your ride [1]. You have to fight it to get the energetic cell back.
![The beast has three basic type of attacks: charge, hitting with the legs and spitting the poisonous substance [1] - Chapter 9 - p. 2 - Walkthrough - Resistance 3 - Game Guide and Walkthrough](https://game.lhg100.com/Article/UploadFiles/201512/2015121619292732.jpg)
The beast has three basic type of attacks: charge, hitting with the legs and spitting the poisonous substance [1]. You'll avoid all of them by running on the buildings that surround the square where the beast is. Remember that the Widowmaker can get through the thin walls easily.
While running on the building you'll find the Leapers' nests; especially in the places which are beyond the range of the main opponent. That means the basements and the staircase leading to the highest roof. These are good points to shoot at the Widowmaker using the Auger [1].
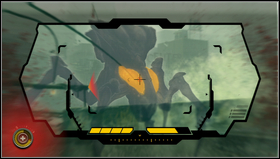
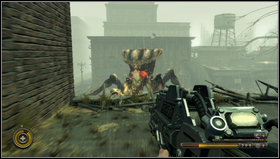
The whole fight is divided into three phases and the goal is to destroy the vital points of the Widowmaker. During the first phase destroy the red glands near the head [1] The easiest way is to shoot at it from the roof [2] which is on the other side of the square where you jumped in.
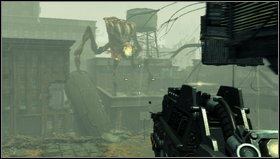
![When you destroy the glands the beast will jump on the roof [1] next to the energetic cell and will spit with the poisonous substance - Chapter 9 - p. 2 - Walkthrough - Resistance 3 - Game Guide and Walkthrough](https://game.lhg100.com/Article/UploadFiles/201512/2015121619292998.jpg)
When you destroy the glands the beast will jump on the roof [1] next to the energetic cell and will spit with the poisonous substance. When the monster jumps down you need to shoot at the glands placed on the abdomen [2].
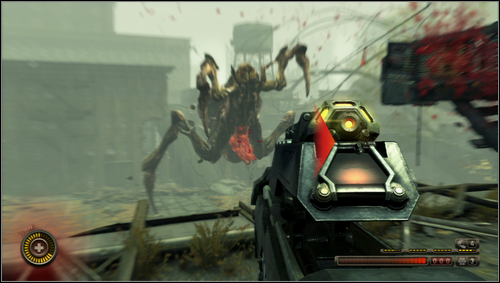
You can destroy those glands standing on this very roof. When the beast again gets furious its guts will appear [1]. That's your last target.
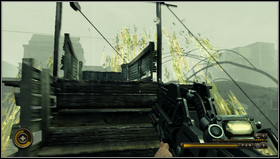
![On this roof there's a platform with the rope [1] - Chapter 9 - p. 2 - Walkthrough - Resistance 3 - Game Guide and Walkthrough](https://game.lhg100.com/Article/UploadFiles/201512/2015121619292968.jpg)
On this roof there's a platform with the rope [1]. You can use the rope to get lower near the place where you jumped down from the container. From that place (don't fall down) get through the narrow passage leading to the basement [2].
![Apart from the Leapers nests you'll find the Auger as well as the ideal position to shoot at the beast's guts [1] - Chapter 9 - p. 2 - Walkthrough - Resistance 3 - Game Guide and Walkthrough](https://game.lhg100.com/Article/UploadFiles/201512/2015121619292906.jpg)
Apart from the Leapers' nests you'll find the Auger as well as the ideal position to shoot at the beast's guts [1].
![When you do it the beast will die [1] and you'll be able to use the VTOL - Chapter 9 - p. 2 - Walkthrough - Resistance 3 - Game Guide and Walkthrough](https://game.lhg100.com/Article/UploadFiles/201512/2015121619293072.jpg)
When you do it the beast will die [1] and you'll be able to use the VTOL.
![After falling down from the VTOL you'll be in the dark forest [1] - Chapter 10 - p. 1 - Walkthrough - Resistance 3 - Game Guide and Walkthrough](https://game.lhg100.com/Article/UploadFiles/201512/2015121619293033.jpg)
After falling down from the VTOL you'll be in the dark forest [1]. Your task is to join Malikov.
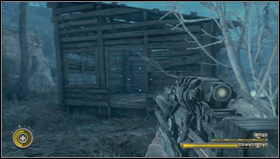
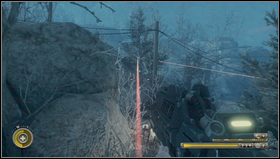
Go up the spring. Keep the left side. In the first hut [1] you'll find some ammo and you'll start going away from the spring. Malikov will soon contact you and the Snipers will appear in the forest. You'll notice them when you see the laser's beams [2].
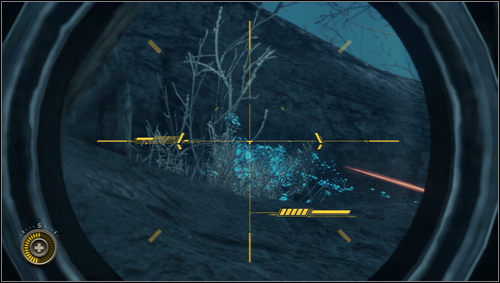
Use the sniper rifle Deadeye to eliminate the enemies or the Marksman rifle. Though your enemies wear masks [1] it's easy to find them because of the lasers.
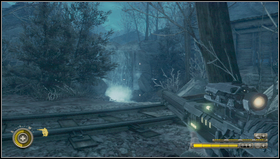
![Moving forward slowly eliminate three Snipers and pass the railway tracks near the waterfall [1] - Chapter 10 - p. 1 - Walkthrough - Resistance 3 - Game Guide and Walkthrough](https://game.lhg100.com/Article/UploadFiles/201512/2015121619293177.jpg)
Moving forward slowly eliminate three Snipers and pass the railway tracks near the waterfall [1]. When you reach the wooden hut up the hill you'll see next Snipers and a dropship on the patrol [2]. If it notices you it will shoot at you. You need to hide in one of the huts and wait till it stops being interested in you.
![Sneaking from one hut to the other, eliminating the Snipers and avoiding the dropships you'll get to the mine [1] - Chapter 10 - p. 1 - Walkthrough - Resistance 3 - Game Guide and Walkthrough](https://game.lhg100.com/Article/UploadFiles/201512/2015121619293227.jpg)
Sneaking from one hut to the other, eliminating the Snipers and avoiding the dropships you'll get to the mine [1]. After few more steps you'll jump down at the tracks from the small slope.
![There's a ladder in front of you [1] leading to the small structure where you'll find the tape recorder with the Just a Little Nap [2] recording - Chapter 10 - p. 1 - Walkthrough - Resistance 3 - Game Guide and Walkthrough](https://game.lhg100.com/Article/UploadFiles/201512/2015121619293220.jpg)
There's a ladder in front of you [1] leading to the small structure where you'll find the tape recorder with the Just a Little Nap [2] recording.
![When you go back at the tracks you should check the open shed with the ammo and then move along through the metal door [1] - Chapter 10 - p. 1 - Walkthrough - Resistance 3 - Game Guide and Walkthrough](https://game.lhg100.com/Article/UploadFiles/201512/2015121619293357.jpg)
When you go back at the tracks you should check the open shed with the ammo and then move along through the metal door [1].
![There are three tunnels patrolled by the Hybrids and the Shield Drones [1] - Chapter 10 - p. 1 - Walkthrough - Resistance 3 - Game Guide and Walkthrough](https://game.lhg100.com/Article/UploadFiles/201512/2015121619293399.jpg)
There are three tunnels patrolled by the Hybrids and the Shield Drones [1]. Eliminate the enemies and take the tunnel on the right. Near the right wall you'll find the Cooling Towers [2] note.
![Move on till you notice that few tunnels change into one [1] - Chapter 10 - p. 2 - Walkthrough - Resistance 3 - Game Guide and Walkthrough](https://game.lhg100.com/Article/UploadFiles/201512/2015121619293436.jpg)
Move on till you notice that few tunnels change into one [1]. There is the Journey to Hanover note [2] nearby. You can go back now and check the other tunnels before you move to the exit.
![When you get out [1] you'll meet the Hybrids' squad supported by the Snipers and the dropships - Chapter 10 - p. 2 - Walkthrough - Resistance 3 - Game Guide and Walkthrough](https://game.lhg100.com/Article/UploadFiles/201512/2015121619293432.jpg)
When you get out [1] you'll meet the Hybrids' squad supported by the Snipers and the dropships. Keep the right side till you get to the tracks [2]. You can take either the left side along the tracks or the right one next to the rocks. If you go left you'll find more ammo, but the right path gives you better shooting position.
![Doesn't matter which path you take you'll get to the other mine [1] - Chapter 10 - p. 2 - Walkthrough - Resistance 3 - Game Guide and Walkthrough](https://game.lhg100.com/Article/UploadFiles/201512/2015121619293493.jpg)
Doesn't matter which path you take you'll get to the other mine [1].
When you jump down from the small slope you'll get to the wide tunnel leading outside. Our search will be interrupted by the dropship [1] that will release the group of the Shield Drones into the mine [2]. Sooner or later you'll have to deal with them but that will attract the group of the Hybrids leading by the Ravager.
![When you eliminate the enemies leave the mine [1] and move to the bridge killing opponents by the way - Chapter 10 - p. 2 - Walkthrough - Resistance 3 - Game Guide and Walkthrough](https://game.lhg100.com/Article/UploadFiles/201512/2015121619293552.jpg)
When you eliminate the enemies leave the mine [1] and move to the bridge killing opponents by the way. There are many aid-kits in the wagons. Before you get through the bridge on the left side you'll find the God's Will note [2].
![When you enter the bridge the dropship [1] will bomb the bridge - Chapter 10 - p. 2 - Walkthrough - Resistance 3 - Game Guide and Walkthrough](https://game.lhg100.com/Article/UploadFiles/201512/2015121619293653.jpg)
When you enter the bridge the dropship [1] will bomb the bridge. To have any chances you need to pass the ruined part of the bridge and pick up the homing rocket launcher Wildfire. Its alternative mode shoots a missile which bomb the whole area after detonation. But to shoot down the vehicle the basic mode is enough.
Take cover from the attacks. The lower level of the bridge will be fine [1]. Then find good enough cover when you'll be locking the target. To shoot the homing missile you need to aim as long as the target is locked (red cross) [2].
After each hit the dropship will bomb the bridge, so it's better to fight from the lower level. Additionally small groups of Hybrids will attack you (they will come from the direction you came). That will happen when you hit the dropship few times. When you destroy it Malikov will open the wagon that blocks the way [1].
![At the meeting with the locals [1] they'll ask you to save their pastor who will help you to continue your journey - Chapter 11 - p. 1 - Walkthrough - Resistance 3 - Game Guide and Walkthrough](https://game.lhg100.com/Article/UploadFiles/201512/2015121619293711.jpg)
At the meeting with the locals [1] they'll ask you to save their pastor who will help you to continue your journey. Follow his wife to the exit door.
![Outside turn right and climb the ladder [1] - Chapter 11 - p. 1 - Walkthrough - Resistance 3 - Game Guide and Walkthrough](https://game.lhg100.com/Article/UploadFiles/201512/2015121619293766.jpg)
Outside turn right and climb the ladder [1]. You'll see new enemies called the Leeches [2]. These are similar to the Grims. After few shots they turn into the gas mines.
![Jump down from the fortifications and turn right near the first barricade [1] - Chapter 11 - p. 1 - Walkthrough - Resistance 3 - Game Guide and Walkthrough](https://game.lhg100.com/Article/UploadFiles/201512/2015121619293846.jpg)
Jump down from the fortifications and turn right near the first barricade [1]. You'll be attacked by the Grims, Leapers and Leeches almost all the time. When you kill the Leeches keep the distance because of the poisonous gas. On the narrow street you'll notice an open hut on the right [2]. You'll find some ammo there guarded by the enemies.
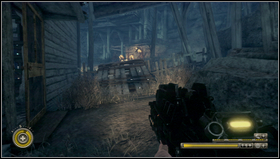
![Move forward and you'll get to the wooden platform [1] where you'll see the horde of the Grims eating - Chapter 11 - p. 1 - Walkthrough - Resistance 3 - Game Guide and Walkthrough](https://game.lhg100.com/Article/UploadFiles/201512/2015121619293866.jpg)
Move forward and you'll get to the wooden platform [1] where you'll see the horde of the Grims eating. When you jump down you'll be attacked. Eliminate the enemies and keeping the right side go to the building [2] near the barricade.
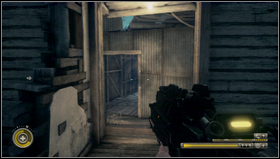
![When you enter the hut eliminate the enemies and go through the door on the left to enter the building [1] - Chapter 11 - p. 1 - Walkthrough - Resistance 3 - Game Guide and Walkthrough](https://game.lhg100.com/Article/UploadFiles/201512/2015121619293826.jpg)
When you enter the hut eliminate the enemies and go through the door on the left to enter the building [1]. You'll be in a bar. The horde of the Grims will attack you. The fight will be easier if you hide behind the bar [2].
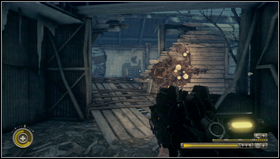
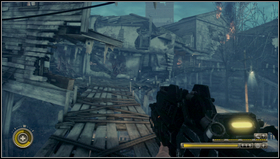
Take the stairs and go up eliminating more enemies. Take the wooden footbridge [1] to get to the hut. Turn right and take the next wooden footbridges to pass through the crumbling buildings [2].
![You'll get to the slightly burning building with the stairs [1] and footbridges leading to the buildings on the right - Chapter 11 - p. 1 - Walkthrough - Resistance 3 - Game Guide and Walkthrough](https://game.lhg100.com/Article/UploadFiles/201512/2015121619293923.jpg)
You'll get to the slightly burning building with the stairs [1] and footbridges leading to the buildings on the right. If you go right you'll pass few buildings and discover the alternative route leading to that place but it isn't necessary.
![When you enter the stairs jump down through the hole in the floor [1] - Chapter 11 - p. 1 - Walkthrough - Resistance 3 - Game Guide and Walkthrough](https://game.lhg100.com/Article/UploadFiles/201512/2015121619293909.jpg)
When you enter the stairs jump down through the hole in the floor [1]. You can find here plenty of ammo and aid-kits. In the next room on the left there's a ladder [2] to climb up.
![On the right on the table there's a Satan [1] note - Chapter 11 - p. 1 - Walkthrough - Resistance 3 - Game Guide and Walkthrough](https://game.lhg100.com/Article/UploadFiles/201512/2015121619294087.jpg)
On the right on the table there's a Satan [1] note. Against the ladder there's the metal door [2] through which you can get to the other part of town.
![Get to the street against the church [1] keeping the left side - Chapter 11 - p. 1 - Walkthrough - Resistance 3 - Game Guide and Walkthrough](https://game.lhg100.com/Article/UploadFiles/201512/2015121619294078.jpg)
Get to the street against the church [1] keeping the left side. Take the wooden platform to get inside.
When you enter the church pick up the ammo and weapon. Getting through the enemies get to the main room. You'll see a strange monster for the first time [1]. Then take the ladder lying near the door to get at the attic [2].
At the attic you'll be attacked by the Leapers. Eliminate them and move on but be careful of the holes in the floor. Before the hole in the wall [1] on the right there's the Pure Chimera note.
![When you leave the attic jump down to the other room where beside the ammo you'll find a hidden door [1] - Chapter 11 - p. 2 - Walkthrough - Resistance 3 - Game Guide and Walkthrough](https://game.lhg100.com/Article/UploadFiles/201512/2015121619294120.jpg)
When you leave the attic jump down to the other room where beside the ammo you'll find a hidden door [1].
![When you come back to the streets of the town move on and then turn left and continue towards the big inscription [1] - Chapter 11 - p. 2 - Walkthrough - Resistance 3 - Game Guide and Walkthrough](https://game.lhg100.com/Article/UploadFiles/201512/2015121619294225.jpg)
When you come back to the streets of the town move on and then turn left and continue towards the big inscription [1]. At the main street a group of the Grims and Leeches will run towards you on the roofs. When you eliminate them move on. You can enter the building on the left to replenish the ammo but remember you'll have fight to get it.
Just before the sign turn right. The street is blocked you need to choose one of the two backstreets. The first begins with the ladder [1] the second starts in the building on the right [2]. In both cases you need to get through the building full with enemies to get around the barricade on the road.
![Doesn't matter what you've chosen you'll be in front of the factory [1] where you need to eliminate the group of the Leapers - Chapter 11 - p. 2 - Walkthrough - Resistance 3 - Game Guide and Walkthrough](https://game.lhg100.com/Article/UploadFiles/201512/2015121619294321.jpg)
Doesn't matter what you've chosen you'll be in front of the factory [1] where you need to eliminate the group of the Leapers. Go left and get inside taking the stairs [2].
![In the factory go towards the end of the corridor and through the destroyed door [1] enter the locker room - Chapter 11 - p. 2 - Walkthrough - Resistance 3 - Game Guide and Walkthrough](https://game.lhg100.com/Article/UploadFiles/201512/2015121619294387.jpg)
In the factory go towards the end of the corridor and through the destroyed door [1] enter the locker room. Turn left and in the last room go through the door on the right [2].
The room will be full of enemies so look for the exit. Go towards the end of the corridor, turn left, move forward and turn right near the stairs. You'll find numerous hatcheries here [1]. Pass the right partition and turn right. There's a wooden door in front of you behind the wooden pillars. This door leads to another room.
![Get through the open door [1] at the staircase and climb up - Chapter 11 - p. 3 - Walkthrough - Resistance 3 - Game Guide and Walkthrough](https://game.lhg100.com/Article/UploadFiles/201512/2015121619294420.jpg)
Get through the open door [1] at the staircase and climb up. Pass the office to get to the corridor with the wooden door at its end [2]. Before you move through it, search the room on the left where you find some aid-kits and ammo.
![When you leave the factory take the stairs on the right [1] and pick up a new type of weapon - Chapter 11 - p. 3 - Walkthrough - Resistance 3 - Game Guide and Walkthrough](https://game.lhg100.com/Article/UploadFiles/201512/2015121619294568.jpg)
When you leave the factory take the stairs on the right [1] and pick up a new type of weapon. The nitro rifle freezes the enemies making them vulnerable to the attacks. Its alternative mode sends a wave that move the enemies back or crashes those frozen ones. At the top of the stairs you'll see the pastor fighting the Chimeras. To help him freeze part of them [2] and smash them.
![Jump down from the wooden platform and join Jonathan [1] - Chapter 11 - p. 3 - Walkthrough - Resistance 3 - Game Guide and Walkthrough](https://game.lhg100.com/Article/UploadFiles/201512/2015121619294579.jpg)
Jump down from the wooden platform and join Jonathan [1]. Follow him and get through the building. Your companion will stop near the wooden door, open it and follow him [2].
![You'll get to the elevator [1] going down the mine - Chapter 11 - p. 3 - Walkthrough - Resistance 3 - Game Guide and Walkthrough](https://game.lhg100.com/Article/UploadFiles/201512/2015121619294586.jpg)
You'll get to the elevator [1] going down the mine. Unfortunately it's broken and you need to cover the pastor when he'll be repairing it.
You need two fuses. Follow the pastor at the first floor to find the first one. While he'll repair the machine [1] you need to kill the Grims. When you hear his cry for help you need to check whether he's ok. If anything attacks him, kill it. After few waves Jonathan will find the fuse and move to the other machine [2] on the ground floor. Like before it will take some time and you need to eliminate the Chimeras. Besides the Grims there'll be also few Leeches.
![After rescuing your companion follow him to the elevator [1] and go down to the mine - Chapter 11 - p. 3 - Walkthrough - Resistance 3 - Game Guide and Walkthrough](https://game.lhg100.com/Article/UploadFiles/201512/2015121619294607.jpg)
After rescuing your companion follow him to the elevator [1] and go down to the mine.
![When you leave the elevator you'll be in a big cave [1] - Chapter 12 - p. 1 - Walkthrough - Resistance 3 - Game Guide and Walkthrough](https://game.lhg100.com/Article/UploadFiles/201512/2015121619294624.jpg)
When you leave the elevator you'll be in a big cave [1].
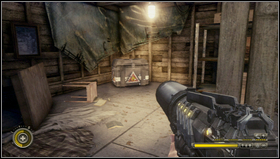
On the right there's closed door leading deep into the mine. On the left behind the metal door [1] there's a small warehouse. First go to the warehouse for the explosives. In the corner you'll find a chest [2] with the gas bottles. Take one of them and go to the blocked passage.
![You need to put the gas bottle near the door [1] and detonate it with the shot - Chapter 12 - p. 1 - Walkthrough - Resistance 3 - Game Guide and Walkthrough](https://game.lhg100.com/Article/UploadFiles/201512/2015121619294729.jpg)
You need to put the gas bottle near the door [1] and detonate it with the shot. When the passage opens move on. When you pass the short tunnel you'll enter the big cave with a blocked exit.
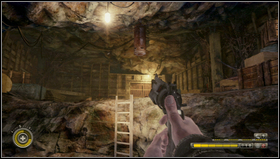
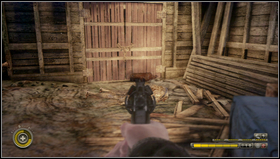
Go to the room on the right and take the gas bottle. Unfortunately the door you need to blow up is a bit higher. Put the gas bottle there [1] then climb the ladder. You need to pick up the gas bottle again and put it against the door [2]. After the detonation move on the narrow tunnel.
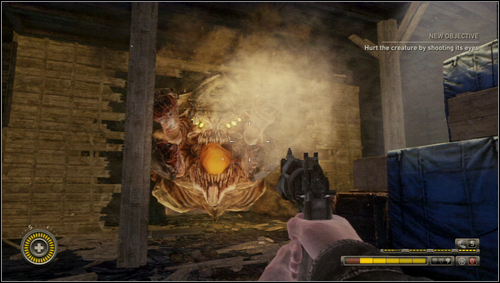
You'll get to the big room with the door on the left. When you try to open it a big monster called the Satan will attack you [1]. You need to scary it by shooting at its eyes and avoiding the beasts' pincers.
After few shots the beast will withdrawn and you can get after it. After jumping down from a small slope take the tunnel on the right [1]. Few beams will stop you [2]. You need to lift them to move forward.
![When you pass them, the Satan will attack you from the left side [1] - Chapter 12 - p. 1 - Walkthrough - Resistance 3 - Game Guide and Walkthrough](https://game.lhg100.com/Article/UploadFiles/201512/2015121619294936.jpg)
When you pass them, the Satan will attack you from the left side [1]. You need to run to the narrower tunnels. Follow the pastor, go right and turn into the narrow cave on the left [2].
![Run until you get on the wooden platform [1] - Chapter 12 - p. 1 - Walkthrough - Resistance 3 - Game Guide and Walkthrough](https://game.lhg100.com/Article/UploadFiles/201512/2015121619294926.jpg)
Run until you get on the wooden platform [1]. The beast will see you and throw you down on the ground. You need to stand up as fast as possible and start running. You'll be safe when you jump down from the bigger slope [2].
![Move forward, lift few beams and again you'll face the Satan [1] - Chapter 12 - p. 1 - Walkthrough - Resistance 3 - Game Guide and Walkthrough](https://game.lhg100.com/Article/UploadFiles/201512/2015121619294985.jpg)
Move forward, lift few beams and again you'll face the Satan [1]. Run towards it and turn left into the narrow tunnel.
When you open the metal door you'll enter a safe room. There's a narrow tunnel under the stairs [1] which leads to the remains of the small monster and the Desperation note [2].
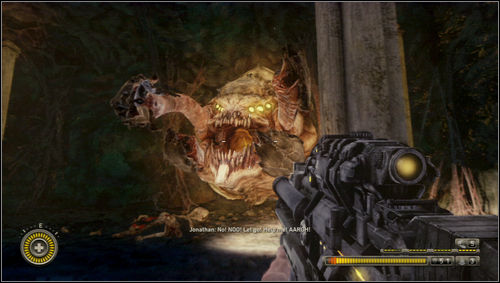
Leave the tunnel and take the stairs leading to the bigger cave. The monster will attack you once more. This time it will catch and hurt the pastor [1].
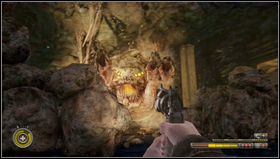
The cave's ceiling is supported by two wooden pillars. If you hide behind them the beast will destroy them and they will be replaced by the useful covers made of stones [1]. Behind them you'll be safe enough to shoot at the beast's eyes. When you shoot at them enough they will become red [2]. The beast will stop attack with its limbs and use them as the cover. Then it will start spitting the poisonous substance.
![Run towards the chest with the explosives [1] which is in the corner on the left - Chapter 12 - p. 2 - Walkthrough - Resistance 3 - Game Guide and Walkthrough](https://game.lhg100.com/Article/UploadFiles/201512/2015121619295174.jpg)
Run towards the chest with the explosives [1] which is in the corner on the left. Take the gas bottle and throw it at the beast's mouth [2]. Now shoot at it and detonate it. That will scare the monster. The pastor can't accompany you anymore so you need to chase the beast alone.
![When you jump down at the tracks go left and enter the flooded tunnel [1] - Chapter 12 - p. 2 - Walkthrough - Resistance 3 - Game Guide and Walkthrough](https://game.lhg100.com/Article/UploadFiles/201512/2015121619295259.jpg)
When you jump down at the tracks go left and enter the flooded tunnel [1]. Pass the room full with water and eliminate few Grims. Pass the crumbling tunnel and climb the steep slope. At the top jump to the wide tunnel [2] and go left.
![At the end of the path you'll find the tape recorder with the Whos Boss message [1] - Chapter 12 - p. 2 - Walkthrough - Resistance 3 - Game Guide and Walkthrough](https://game.lhg100.com/Article/UploadFiles/201512/2015121619295249.jpg)
At the end of the path you'll find the tape recorder with the Who's Boss message [1].
![When you go back the beast will attack you [1] - Chapter 12 - p. 2 - Walkthrough - Resistance 3 - Game Guide and Walkthrough](https://game.lhg100.com/Article/UploadFiles/201512/2015121619295350.jpg)
When you go back the beast will attack you [1]. Get to the narrow tunnel on the left quickly. The beast will attack the entrance you've just used. Go to the other one and run through the main tunnel to the next narrow one on the right [2].
Remember that the beast is busy so you can run through the tracks to the next cave. When you leave it run along the tunnel. You'll enter the staircase [1]. You need to get at its top before the beast will destroy the stairs. Then run towards the wagons [2] and jump into one of them.
![Keep shooting at the Satan's eyes [1] to slow it down and save yourself - Chapter 12 - p. 3 - Walkthrough - Resistance 3 - Game Guide and Walkthrough](https://game.lhg100.com/Article/UploadFiles/201512/2015121619295307.jpg)
Keep shooting at the Satan's eyes [1] to slow it down and save yourself.
![Your ride will end in a spacious room with two piles of chests behind which you can hide [1] - Chapter 12 - p. 3 - Walkthrough - Resistance 3 - Game Guide and Walkthrough](https://game.lhg100.com/Article/UploadFiles/201512/2015121619295446.jpg)
Your ride will end in a spacious room with two piles of chests behind which you can hide [1]. Unfortunately it isn't the best cover as the chests will be destroyed after few attacks. When you lose this cover you need to run from left to the right to avoid the beast's attacks. You need to shoot at its eyes until it starts to cover them [2].
![Get to the chest with the explosives that are on the right side of the beast [1] - Chapter 12 - p. 3 - Walkthrough - Resistance 3 - Game Guide and Walkthrough](https://game.lhg100.com/Article/UploadFiles/201512/2015121619295488.jpg)
Get to the chest with the explosives that are on the right side of the beast [1]. Take the gas bottle [2]. Throw it at the beast's mouth and detonate it with a single shot.
![The furious beast will attack with all its limbs [1] - Chapter 12 - p. 3 - Walkthrough - Resistance 3 - Game Guide and Walkthrough](https://game.lhg100.com/Article/UploadFiles/201512/2015121619295580.jpg)
The furious beast will attack with all its limbs [1]. That means it will soon enter the room.
![Get to the elevator on the right [1] - Chapter 12 - p. 3 - Walkthrough - Resistance 3 - Game Guide and Walkthrough](https://game.lhg100.com/Article/UploadFiles/201512/2015121619295595.jpg)
Get to the elevator on the right [1]. Soon the beast will be behind you [2].
On the left side of the elevator you'll find the chest with the explosives. Take the gas bottle and throw it at the beast's mouth and detonate. The beast's head will explode [1]. And you'll continue your way on the train.
![While traveling on the train [1] you'll witness the brutal murder and soon you'll be the target of the bandits calling themselves the Wardens - Chapter 13 - Walkthrough - Resistance 3 - Game Guide and Walkthrough](https://game.lhg100.com/Article/UploadFiles/201512/2015121619295657.jpg)
While traveling on the train [1] you'll witness the brutal murder and soon you'll be the target of the bandits calling themselves the Wardens.
Your task is to defend the train. Pick up the M5A2 rifle with the grenade launcher. Soon the right side of the train will be attacked by the jeeps [1]. The bandits in the cars will shoot at you using the machine guns. You can kill them or shoot at the vehicles that will explode.
![On the first wagon's wall you'll find the red chest with the aid-kits [1] - Chapter 13 - Walkthrough - Resistance 3 - Game Guide and Walkthrough](https://game.lhg100.com/Article/UploadFiles/201512/2015121619295757.jpg)
On the first wagon's wall you'll find the red chest with the aid-kits [1]. In the third wagon (the last one where you can get) there's the yellow chest [2]. With new supplies you won't have any problems with the defense.
![When you get to the first tunnel [1] you'll have some time to replenish your health and ammo - Chapter 13 - Walkthrough - Resistance 3 - Game Guide and Walkthrough](https://game.lhg100.com/Article/UploadFiles/201512/2015121619295778.jpg)
When you get to the first tunnel [1] you'll have some time to replenish your health and ammo. When you enter the open space another wave of enemies will show up. This time they'll attack the left side if the train [2].
![After dealing with few groups, the right side of the train will be attacked by the armored trucks with the plows [1] - Chapter 13 - Walkthrough - Resistance 3 - Game Guide and Walkthrough](https://game.lhg100.com/Article/UploadFiles/201512/2015121619295717.jpg)
After dealing with few groups, the right side of the train will be attacked by the armored trucks with the plows [1]. When they come closer, they will jump on your train and you need to eliminate them. It won't be difficult but don't underestimate them and replenish health regularly.
Soon the last wagon will derail (the red one) and Malikov will inform you about that. You need to get at the end of the train and unhook that wagon [1]. Then you'll enter the canyon. The bandits will jump on the train [2].
When you eliminate them you need to unhook another wagon. There's the ammo chest so it's good to use it the one last time [1]. After destroying few more vehicles you'll enter another tunnel [2]. At its walls you'll notice the trails of the Chimeras.
![Going between the tunnel you'll see the horde of the Widowmakers [1] - Chapter 13 - Walkthrough - Resistance 3 - Game Guide and Walkthrough](https://game.lhg100.com/Article/UploadFiles/201512/2015121619295819.jpg)
Going between the tunnel you'll see the horde of the Widowmakers [1]. When you pass the next tunnel you'll be attacked by the bandits. They will jump on the train and attack also from the vehicles. The former are the bigger threat so you need to start with them. After the short fight you'll need to unhook another wagon [2].
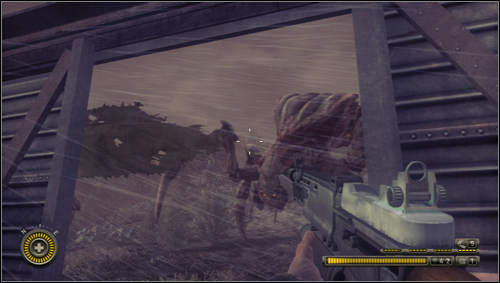
You'll witness how the Widowmakers smash the bandits' vehicles. Unfortunately they will become interested in the train as well [1].
![The bandits will take you away from the train's wrack, hand you the hammer [1] and throw you at the arena - Chapter 14 - Walkthrough - Resistance 3 - Game Guide and Walkthrough](https://game.lhg100.com/Article/UploadFiles/201512/2015121619295989.jpg)
The bandits will take you away from the train's wrack, hand you the hammer [1] and throw you at the arena.
![You'll fight the Grims which will die from one hammer's hit [1] - Chapter 14 - Walkthrough - Resistance 3 - Game Guide and Walkthrough](https://game.lhg100.com/Article/UploadFiles/201512/2015121619295991.jpg)
You'll fight the Grims which will die from one hammer's hit [1]. The strategy is simple. Hit the first one that will run towards you. Then move few steps back to avoid the other Grims. Then hit again and move back. Be careful and don't let them surround you.
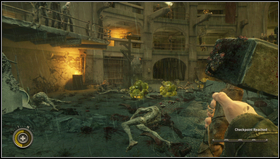
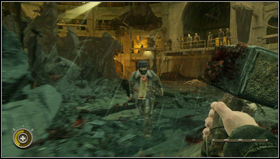
After the short fight the Grims will be supported by the Leeches. Be careful with them. When they are furious run as far as you can and wait till they explode. When that happens continue eliminating the enemies and pay attention to the monsters lying on the floor with the green and yellow blisters [1]. Soon the arena will be full of bandits with the knives [2]. Use the same tactic as with the Grims.
![When they run out of people the bandits' boss will [1] hit you with his gun and you'll be taken to the cell - Chapter 14 - Walkthrough - Resistance 3 - Game Guide and Walkthrough](https://game.lhg100.com/Article/UploadFiles/201512/2015121619300047.jpg)
When they run out of people the bandits' boss will [1] hit you with his gun and you'll be taken to the cell.
![Skinny Herbert will come towards you [1] and he'll propose a help in escaping - Chapter 15 - p. 1 - Walkthrough - Resistance 3 - Game Guide and Walkthrough](https://game.lhg100.com/Article/UploadFiles/201512/2015121619300151.jpg)
Skinny Herbert will come towards you [1] and he'll propose a help in escaping. He will give you the Murator, kind of a biologic weapon that shoots with the substance with the virus. The virus works like the Leech's explosion. If you pull the trigger a bit longer you will shoot a bigger "bullet" so you can save the ammo. The alternative mode is the shot with a toxic cloud, perfect for eliminating bigger groups.
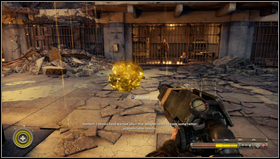
![When you leave the cell kill the bandit [1] in front of you and go left [2] - Chapter 15 - p. 1 - Walkthrough - Resistance 3 - Game Guide and Walkthrough](https://game.lhg100.com/Article/UploadFiles/201512/2015121619300163.jpg)
When you leave the cell kill the bandit [1] in front of you and go left [2]. Take the stairs to get at the higher floor, turn right and go through the open door.
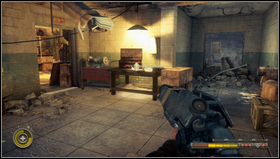
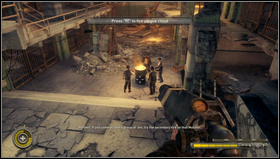
You'll get to the room between the prison's blocks. You'll find ammo for your new toy there. It's on the table [1]. Pick it up and go to the other block. Look at the bandits' group that is lower on the right [2]. That's your test group for the alternative mode.
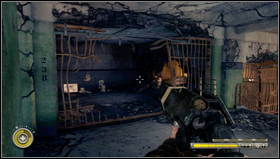
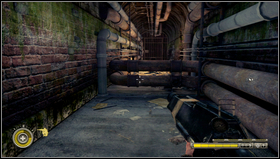
Eliminate two more guards and move to the other part of the room (don't go downstairs). Next to the locked woman enter the dark cell [1] and get to the next one. Use the hole in the wall to get into the tunnel behind the cells, turn right, move under the pipe and jump over two pipes [2].
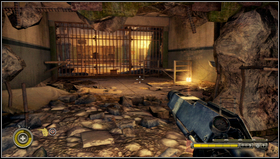
![Turn right to the first lit cell [1] - Chapter 15 - p. 1 - Walkthrough - Resistance 3 - Game Guide and Walkthrough](https://game.lhg100.com/Article/UploadFiles/201512/2015121619300338.jpg)
Turn right to the first lit cell [1]. There's the Letter to Mom #1 note [2] lying on the bunk.
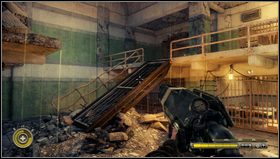
![Go back to the main room, jump down on the ground floor, then take the damaged platform [1] to get to the upper floor - Chapter 15 - p. 1 - Walkthrough - Resistance 3 - Game Guide and Walkthrough](https://game.lhg100.com/Article/UploadFiles/201512/2015121619300320.jpg)
Go back to the main room, jump down on the ground floor, then take the damaged platform [1] to get to the upper floor. The open door will lead you to the first Drone [2] which you must deactivate.
![If you deactivate it the metal door on the lower floor will open [1] - Chapter 15 - p. 1 - Walkthrough - Resistance 3 - Game Guide and Walkthrough](https://game.lhg100.com/Article/UploadFiles/201512/2015121619300397.jpg)
If you deactivate it the metal door on the lower floor will open [1].
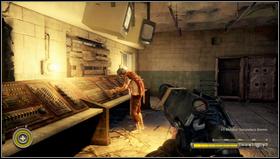
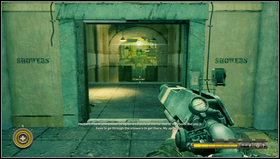
Jump down and go through the door which you've seen while being up. Eliminate the guard standing near the entrance to the room on the right and enter to meet Herbert [1]. He will open the nearby door. Follow him. Listen to the history of this facility and get to the control room where Herbert will open the metal door [2] leading to the next Drone.
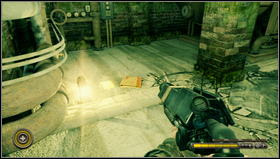
When you enter the bath turn left and stick to the wall. Soon you'll find the corridor leading left [1]. Enter it and look for the niche on the left. You'll find the Letter to Mom #2 note [2].
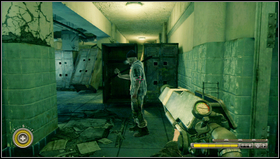
![Go back to the bath and cautiously eliminate the bandits [1] - Chapter 15 - p. 2 - Walkthrough - Resistance 3 - Game Guide and Walkthrough](https://game.lhg100.com/Article/UploadFiles/201512/2015121619300559.jpg)
Go back to the bath and cautiously eliminate the bandits [1]. Some of them will leave the shotguns to enlarge your collection. At the end of the room there's a short corridor leading to the laundry [2]. There are the enemies with rifles and Molotov's cocktails. The opponents have good shooting positions so it won't be easy.
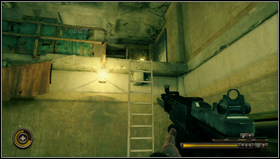
![When you eliminate them find the ladder at the end of the room [1] climb the upper floor - Chapter 15 - p. 2 - Walkthrough - Resistance 3 - Game Guide and Walkthrough](https://game.lhg100.com/Article/UploadFiles/201512/2015121619300699.jpg)
When you eliminate them find the ladder at the end of the room [1] climb the upper floor. More bandits here [2] but this time it will be easier.
![Move towards the place where you've been attacked and find the platform leading to the second Drone [1] - Chapter 15 - p. 2 - Walkthrough - Resistance 3 - Game Guide and Walkthrough](https://game.lhg100.com/Article/UploadFiles/201512/2015121619300661.jpg)
Move towards the place where you've been attacked and find the platform leading to the second Drone [1]. When you deactivate it go to the corridor on the left leading to the prison block B.
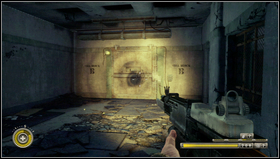
![The light will turn off and you'll have to open the next door [1] manually - Chapter 15 - p. 2 - Walkthrough - Resistance 3 - Game Guide and Walkthrough](https://game.lhg100.com/Article/UploadFiles/201512/2015121619300728.jpg)
The light will turn off and you'll have to open the next door [1] manually. Behind it there's the block guarded by few bandits. Before you start fighting look for the good position. After the fight collect the weapon, go down and go through the open door behind the billiard table [2].
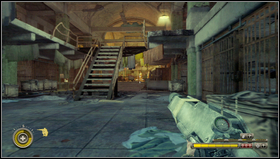
Pass the room and collect the ammo. Get to the next block. Take the stairs [1] to get to the upper floor. Eliminate bandits and search the cells on the left. You'll find the Letter to Mom #3 note [2].
When you pick the note go back to the main room and go to the cells on the right. A passage leads through one of them [1]. Take it to get behind the Sniper that defends the third Drone [2].
![Eliminate the group of the bandits, take the Deadeye sniper rifle and deactivate the Drone [1] - Chapter 15 - p. 3 - Walkthrough - Resistance 3 - Game Guide and Walkthrough](https://game.lhg100.com/Article/UploadFiles/201512/2015121619300899.jpg)
Eliminate the group of the bandits, take the Deadeye sniper rifle and deactivate the Drone [1].
![On the ground floor the door will open [1] - Chapter 15 - p. 3 - Walkthrough - Resistance 3 - Game Guide and Walkthrough](https://game.lhg100.com/Article/UploadFiles/201512/2015121619300844.jpg)
On the ground floor the door will open [1]. Eliminate the sniper and get through the open passage. In the corridor enter the room on the left. You'll find some ammo there and the Letter to Mom #4 note [2].

Take the note, get back to the corridor and pass the door leading to the round block. Its full of the Snipers [1] Take the sniper rifle and eliminate the single opponents that hide behind the covers. Soon our enemies' attention will be caught by the Shield Drones [2]. That's the perfect moment to eliminate the rest of the bandits.
When you clear the area turn left to the cafeteria. You'll meet Herbert, follow him and you'll see the hole in the wall [1] on the right barricaded covered with the planks. Smash the planks and enter the tunnel there you'll find the Letter to Mom #5 note [2].
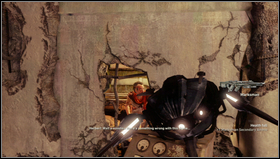
Go back to the main corridor and go towards the door. Herbert will open it and you will enter the cantina [1]. Eliminate the bandits and go at the end of the room where you'll find the fourth Drone [2].
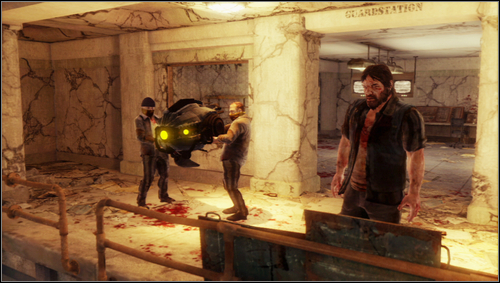
Unfortunately it's fake. The bandits' boss has the real one [1].
Many enemies will attack you. You have to stay there as long as Herbert won't open the door. So better find yourself a cozy place to shoot from. The tunnels at the cantina's sides is quite good choice [1]. Wherever you'll be pay attention not to get surrounded by the enemies. If you have the Marksman rifle you can set the turret. When you kill enough enemies Herbert will call you and you'll be able to escape [2].
![In the corridor you'll find a huge hole in the floor [1] - Chapter 15 - p. 3 - Walkthrough - Resistance 3 - Game Guide and Walkthrough](https://game.lhg100.com/Article/UploadFiles/201512/2015121619301109.jpg)
In the corridor you'll find a huge hole in the floor [1]. Jump into it.
![You're in the sewers in a small room with door blocked by the planks [1] - Chapter 16 - p. 1 - Walkthrough - Resistance 3 - Game Guide and Walkthrough](https://game.lhg100.com/Article/UploadFiles/201512/2015121619301179.jpg)
You're in the sewers in a small room with door blocked by the planks [1]. On the right there's a corpse and a hammer. Pick up the weapon and smash the planks.
Open the door and move on. At the end of the corridor on the right there's a tunnel under the metal pipe [1]. Move on till you enter the wider tunnel. You'll hear two bandits talking and you'll find the ladder [2].
You're in the wide tunnel with many metal pipes. You need to get on the other side of that room. The best way is up using the sewer pipes [1]. If you fall down the Leapers will leave the hatcheries that are in the water. It's not particularly dangerous if you run fast towards the end of the room and leave the water. When you're on the other side jump down to the canal [2].
![Move on and you will get to the boiler room [1] - Chapter 16 - p. 1 - Walkthrough - Resistance 3 - Game Guide and Walkthrough](https://game.lhg100.com/Article/UploadFiles/201512/2015121619301352.jpg)
Move on and you will get to the boiler room [1]. Turn right and enter the tunnel. You'll meet few Grims and you'll enter the boiler room again. Before you leave it take a look on the left close to the entrance to the other tunnels [2]. You'll find ammo and a shotgun which is very effective at the short distance.
![Move on and you'll find the ladder [1] - Chapter 16 - p. 1 - Walkthrough - Resistance 3 - Game Guide and Walkthrough](https://game.lhg100.com/Article/UploadFiles/201512/2015121619301419.jpg)
Move on and you'll find the ladder [1]. When you climb up you'll be in a dry corridor. You'll find there the nitro rifle and the Letter to Mom #6 note [2].
![After few steps jump into the hole in the floor and you'll find a bigger room [1] - Chapter 16 - p. 1 - Walkthrough - Resistance 3 - Game Guide and Walkthrough](https://game.lhg100.com/Article/UploadFiles/201512/2015121619301459.jpg)
After few steps jump into the hole in the floor and you'll find a bigger room [1]. Soon you'll fight the Grims, Leeches and Leapers here.
![The enemies will attack from the left and right side [1] - Chapter 16 - p. 1 - Walkthrough - Resistance 3 - Game Guide and Walkthrough](https://game.lhg100.com/Article/UploadFiles/201512/2015121619301446.jpg)
The enemies will attack from the left and right side [1]. Try to move all the time and use any range weapon. In the middle of the fight the Leapers that spit with the acid will join. Eliminate them at the end, as long as you move they aren't the problem. In the center you'll find some ammo and aid-kits. Use them to replenish life. After the fight go to the metal door [2] smash the planks and move on.
![Just behind the door there's the Can You Hear Them note [1] - Chapter 16 - p. 2 - Walkthrough - Resistance 3 - Game Guide and Walkthrough](https://game.lhg100.com/Article/UploadFiles/201512/2015121619301590.jpg)
Just behind the door there's the Can You Hear Them note [1]. When you pick it up go left. In the corner there are the exploding orbs [2]. Detonate them with a single shot and climb the lying stove. Take the stairs and pass the crumbling floor to get to the hidden door. Open it to move on.
![When to get to the attic you'll see the bandits fighting the dropship [1] - Chapter 16 - p. 2 - Walkthrough - Resistance 3 - Game Guide and Walkthrough](https://game.lhg100.com/Article/UploadFiles/201512/2015121619301597.jpg)
When to get to the attic you'll see the bandits fighting the dropship [1]. Don't wait for the end just shoot at anything. When nothing leaves jump down through the hole in the floor.
Pick the weapon and get to the courtyard. Under the roof [1] on the left there are some rocket launchers. In the building on the right there is ammo and the bandits. The best way to enter it is to use the ladder [2] which stands nearby.
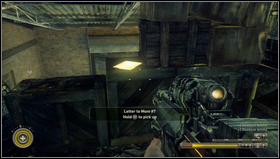
When you pass the mentioned buildings you'll stand in front of two garages. Take the one on the left [1] and keep the left side. Climb the ladder and go towards the second garage. On your way on the right next to the sniper rifle there's the Letter to Mom #7 note [2].
When you collect the items go through the second garage to the courtyard. You'll see the Chimeras fighting the bandits [1]. You need to get to the building at the end of the road [2]. It won't be easy because of the Chimeras and bandits with rocket launchers and sniper rifles. Use the Deadeye or the Marksman to eliminate them.
![When you clear the area, enter the building [1] - Chapter 16 - p. 2 - Walkthrough - Resistance 3 - Game Guide and Walkthrough](https://game.lhg100.com/Article/UploadFiles/201512/2015121619301884.jpg)
When you clear the area, enter the building [1]. In the transversal corridor behind which is the elevator you'll be caught in the crossfire. On your left there will be Chimeras and bandits on the right. You can run fast or eliminate both groups. Whatever you do get into the elevator [2] and go down.
![Exit the elevator, move on and get to the last Drone [1] - Chapter 16 - p. 2 - Walkthrough - Resistance 3 - Game Guide and Walkthrough](https://game.lhg100.com/Article/UploadFiles/201512/2015121619301802.jpg)
Exit the elevator, move on and get to the last Drone [1].
![Unfortunately before you deactivate it the bandits' boss will knock you down and you'll fall on the arena [1] - Chapter 16 - p. 2 - Walkthrough - Resistance 3 - Game Guide and Walkthrough](https://game.lhg100.com/Article/UploadFiles/201512/2015121619301818.jpg)
Unfortunately before you deactivate it the bandits' boss will knock you down and you'll fall on the arena [1]. The enemy will attack you and you need to push the given buttons. You'll gain the revolver and shoot at the boss's head [2]. Detonate the bullet and get rid of that psycho.
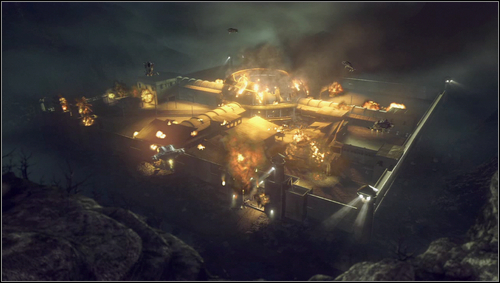
When you unarmed the last Drone you'll meet Herbert and the other prisoners. Leave the prison which will be destroyed by the Chimeras [1].
![You'll get to the icy New York [1] - Chapter 17 - p. 1 - Walkthrough - Resistance 3 - Game Guide and Walkthrough](https://game.lhg100.com/Article/UploadFiles/201512/2015121619301935.jpg)
You'll get to the icy New York [1].
![You're in the building near the Chimeras' tower [1] - Chapter 17 - p. 1 - Walkthrough - Resistance 3 - Game Guide and Walkthrough](https://game.lhg100.com/Article/UploadFiles/201512/2015121619301988.jpg)
You're in the building near the Chimeras' tower [1]. Go outside and jump down to get to the street. After the first jump you'll find the They Are Coming note [2].
![Going lower you'll get to the rope [1] - Chapter 17 - p. 1 - Walkthrough - Resistance 3 - Game Guide and Walkthrough](https://game.lhg100.com/Article/UploadFiles/201512/2015121619302097.jpg)
Going lower you'll get to the rope [1]. Use it to get to the street and start moving towards the lower tower [2].
![Soon you'll reach the metal door [1] - Chapter 17 - p. 1 - Walkthrough - Resistance 3 - Game Guide and Walkthrough](https://game.lhg100.com/Article/UploadFiles/201512/2015121619302066.jpg)
Soon you'll reach the metal door [1]. To open it you need to destroy two yellow fuses that are on the right and left side of the gate.
![When you get through the gate turn right and enter the ruined building [1] - Chapter 17 - p. 1 - Walkthrough - Resistance 3 - Game Guide and Walkthrough](https://game.lhg100.com/Article/UploadFiles/201512/2015121619302138.jpg)
When you get through the gate turn right and enter the ruined building [1]. You'll find there the tape recorder with the Six Bullets record [2].
![You're in front of the guarded Chimeras position which contains of two posts [1] - Chapter 17 - p. 1 - Walkthrough - Resistance 3 - Game Guide and Walkthrough](https://game.lhg100.com/Article/UploadFiles/201512/2015121619302194.jpg)
You're in front of the guarded Chimeras' position which contains of two posts [1].
![You should start with eliminating two Hybrids with the Wildfire launchers [1] - Chapter 17 - p. 1 - Walkthrough - Resistance 3 - Game Guide and Walkthrough](https://game.lhg100.com/Article/UploadFiles/201512/2015121619302109.jpg)
You should start with eliminating two Hybrids with the Wildfire launchers [1]. They stand up the post on the left then attack the place.
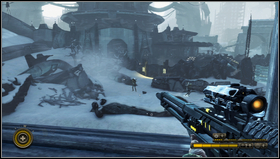
![You should eliminate most of the enemies before you enter the protected area [1] - Chapter 17 - p. 1 - Walkthrough - Resistance 3 - Game Guide and Walkthrough](https://game.lhg100.com/Article/UploadFiles/201512/2015121619302211.jpg)
You should eliminate most of the enemies before you enter the protected area [1]. Use the Deadeye sniper rifle or the Marksman. Thanks to it you won't draw their attention. Besides the Hybrids there will be also the Steelheads with the Augers. Try to eliminate them at the beginning because you may not find the right cover later. When you clear the first post open the metal gate, pick the weapon and climb the stairs [2].
Now it's time to clear the post on the right. Start with the Ravager [1] that stands almost in the middle. Then eliminate Hybrid armed with the rocket launchers that stands above the Ravager and snipers. When you eliminate them get rid of the rest. During the fight you'll hear the alarms and the dropship will appear with the Shock Drones [2]. Eliminate them as fast as possible from the distance. If they come closer move back.
It's not the end. When you eliminate few enemies additional troops will appear. The most important is to clear two posts as fast as possible. Thank to that you'll gain a terrain with plenty of covers. Not to mention loads of guns (including launchers) you'll find there [1]. Next waves will be signalized by the alarm and will be headed from the triumphal arc [2]. To maximize your chances of survival eliminate the most dangerous opponents. These are the Ravagers and Hybrids with the rocket launchers. To avoid their attacks you have to run.
![When you finish fighting search the area and move towards the triumphal arc [1] - Chapter 17 - p. 1 - Walkthrough - Resistance 3 - Game Guide and Walkthrough](https://game.lhg100.com/Article/UploadFiles/201512/2015121619302326.jpg)
When you finish fighting search the area and move towards the triumphal arc [1]. Jump into the hole in the road and open the dark chest connected to the door. Destroy the fuses [2] and enter the dark cave.
![When you reach the metro jump down at the tracks and enter the corridor in front of you [1] - Chapter 17 - p. 2 - Walkthrough - Resistance 3 - Game Guide and Walkthrough](https://game.lhg100.com/Article/UploadFiles/201512/2015121619302447.jpg)
When you reach the metro jump down at the tracks and enter the corridor in front of you [1]. You'll get to the room where you can find some ammo and the tape recorder with the Bad Idea record [2] lying next to the corpses.
Move on till you see the electric traction. Turn right and continue your march [1]. At the station you'll see the Ravagers fighting the Grims [2]. Join whenever you're ready and eliminate everything. Few steps later repeat this scheme.
When you clear the area take a look around. On the right side there's a room in the wall which is protected by the energetic shield [1]. Deactivate it using the controls [2] that are on the right side. Take the ammo.
![If you take the tunnel you'll meet a big group of the Grims, Leapers and Leeches [1] - Chapter 17 - p. 2 - Walkthrough - Resistance 3 - Game Guide and Walkthrough](https://game.lhg100.com/Article/UploadFiles/201512/2015121619302573.jpg)
If you take the tunnel you'll meet a big group of the Grims, Leapers and Leeches [1]. Eliminate the enemies cautiously, get to the end of the tunnel and go through the wagon [2].
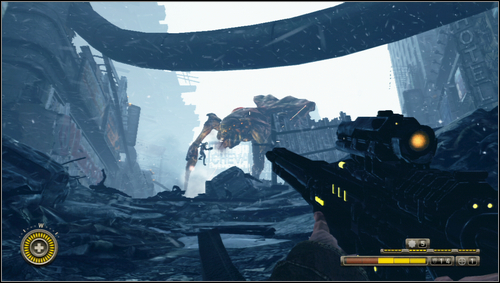
After few steps you'll reach the end of tracks. Turn left into the narrow tunnel that leads to the surface. You'll see the Chimeras fighting the Widowmaker [1].
Eliminate the beast as previously - shoot at the red spots at its body. In the four corners of our arena there are four entrances [1]. You'll spend most of your time here in the underground during the fight. From time to time small group of the Hybrids will attack you. Another threat is the beast's kick that can get through the ceiling.
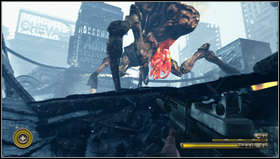
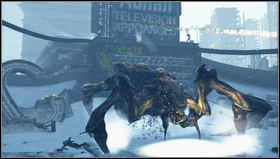
The plan is easy. Lean out from one side and shoot at the beast's vital points [1]. When it will get interested in you go to another entrance. Repeat as long as the beast is alive [2].
![After the fight climb the sign that smashed the beast [1] - Chapter 17 - p. 2 - Walkthrough - Resistance 3 - Game Guide and Walkthrough](https://game.lhg100.com/Article/UploadFiles/201512/2015121619302748.jpg)
After the fight climb the sign that smashed the beast [1]. Jump over the corpse and take the metal platform to enter the building. Leave it using the hidden door.
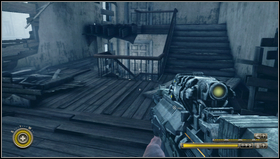
![When you'll leave the room you'll be at the staircase [1] - Chapter 18 - p. 1 - Walkthrough - Resistance 3 - Game Guide and Walkthrough](https://game.lhg100.com/Article/UploadFiles/201512/2015121619302780.jpg)
When you'll leave the room you'll be at the staircase [1]. Go down where you'll find the Particle Smashing note [2] lying next to the dead soldier.
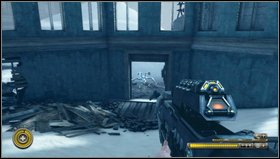
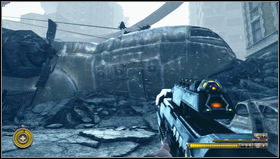
When you go down, move on until you get to the bigger room. The door leading outside [1] will be destroyed and you have to defeat few enemies. When you'll leave the building go right and then through the destroyed plane [2].
![When the loading hatch opens [1] you'll see the group of the Chimeras consisting of the Hybrids and the Longlegs armed with the sniper rifles - Chapter 18 - p. 1 - Walkthrough - Resistance 3 - Game Guide and Walkthrough](https://game.lhg100.com/Article/UploadFiles/201512/2015121619302856.jpg)
When the loading hatch opens [1] you'll see the group of the Chimeras consisting of the Hybrids and the Longlegs armed with the sniper rifles.
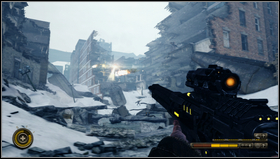
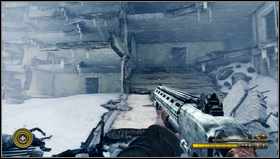
When you eliminate the enemies jump from the plane. The dropship will arrive and there will be plenty of he Chimeras with the rocket launchers standing on the nearby buildings [1]. The enemies have more advantageous position so use your sniper rifle. When you get between the crumbling buildings a new group of the enemies will appear. You can deal with the Snipers like previously but it's better to get to the buildings on the right [2] and shorten the distance. When you're close enough you can use the Auger.
![After the fight replenish the ammo and move on the plane's wing [1] - Chapter 18 - p. 1 - Walkthrough - Resistance 3 - Game Guide and Walkthrough](https://game.lhg100.com/Article/UploadFiles/201512/2015121619302940.jpg)
After the fight replenish the ammo and move on the plane's wing [1].
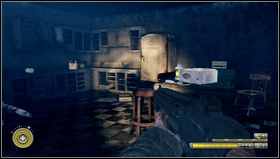
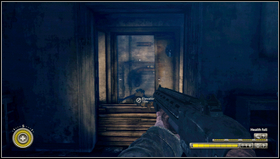
When you enter the building go up and jump down through the hole in the floor. You'll be in the guest room connected with the kitchen. There's the tape recorder with the Bloodbath note [1]. Get to the corridor through the kitchen and to the elevator's shaft [2]. Go one floor down.
![Leave the shaft and go to the next building across the street [1] - Chapter 18 - p. 1 - Walkthrough - Resistance 3 - Game Guide and Walkthrough](https://game.lhg100.com/Article/UploadFiles/201512/2015121619303028.jpg)
Leave the shaft and go to the next building across the street [1]. Take the stairs and go up where you'll find hidden Snipers [2] that watch over the area.
![When you eliminate them get to the square with two bunkers [1] - Chapter 18 - p. 1 - Walkthrough - Resistance 3 - Game Guide and Walkthrough](https://game.lhg100.com/Article/UploadFiles/201512/2015121619303051.jpg)
When you eliminate them get to the square with two bunkers [1].
Start with the one on the right. The metal door will open when you destroy the fuse [1]. Kill the Chimeras inside and destroy three packs of the fuses [2]. The consoles will turn red. When you leave that bunker the Longlegs with sniper rifles will appear. Get back to the bunker and eliminate the enemies from the upper floor.
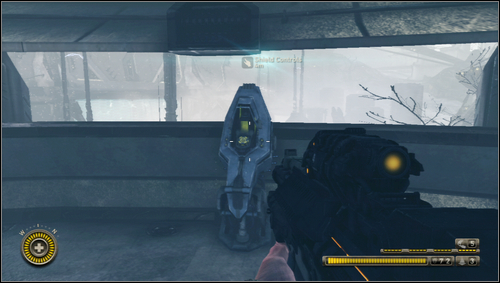
After the fight go to the bunker on the left. Eliminate the enemies inside and go up. Find the console here [1] which can turn the shield down.
When you open your way further the masked Snipers will appear. Eliminate them and attack the entrance [1]. Few missiles from the launcher should neutralized the Chimeras packed in the corridor. When you enter the exit will be closed [2] and you can move only forward.
Through the series of the room you'll get to two Steelheads. Get rid of them and turn left [1]. You'll see the closed door. Open the nearby chest with the fuses [2] and destroy them to open your way.
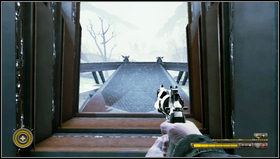
![Take the corridor and stairs to leave outside [1] - Chapter 18 - p. 2 - Walkthrough - Resistance 3 - Game Guide and Walkthrough](https://game.lhg100.com/Article/UploadFiles/201512/2015121619303206.jpg)
Take the corridor and stairs to leave outside [1]. When you jump down you'll be close to the target [2] of your trip.
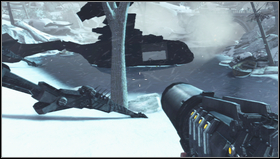
![Before you move on turn left and get to the helicopter lying on the frozen lake [1] - Chapter 18 - p. 2 - Walkthrough - Resistance 3 - Game Guide and Walkthrough](https://game.lhg100.com/Article/UploadFiles/201512/2015121619303338.jpg)
Before you move on turn left and get to the helicopter lying on the frozen lake [1]. Inside there's the Fall Back record [2].
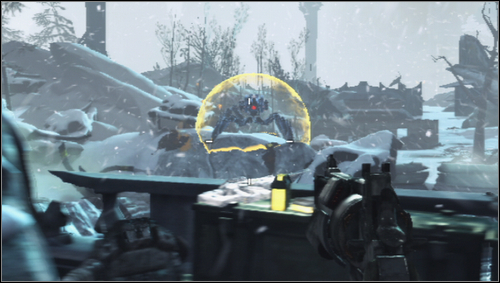
When you leave it get back on the main route and start fighting the Chimeras. The main attraction is the Stalker [1].
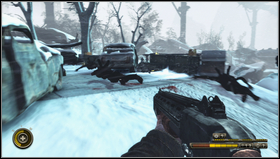
![To destroy it go left to the bridge [1] and take a well covered position - Chapter 18 - p. 2 - Walkthrough - Resistance 3 - Game Guide and Walkthrough](https://game.lhg100.com/Article/UploadFiles/201512/2015121619303450.jpg)
To destroy it go left to the bridge [1] and take a well covered position. Deactivate the Stalker's shield using the EMP grenades. Send it a rocket or two as well [2]. When you damage the robot the waves of Hybrids will attack you. Stop attacking the main opponent just to eliminate the less important ones. Repeat the scheme and the Stalker will explode.
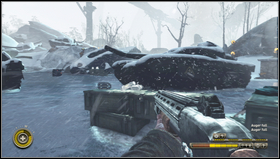
![Leave the bridge and get across the frozen lake [1] - Chapter 18 - p. 2 - Walkthrough - Resistance 3 - Game Guide and Walkthrough](https://game.lhg100.com/Article/UploadFiles/201512/2015121619303492.jpg)
Leave the bridge and get across the frozen lake [1]. On your way you'll meet the squad made of the Steelheads and Hybrids together with the Shield Drones. After the fight leave the lake through the metal platform [2].
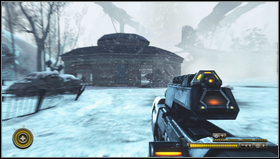
![There's the round building in front of you [1], run towards it as fast as you can and don't be bothered by the enemies - Chapter 18 - p. 2 - Walkthrough - Resistance 3 - Game Guide and Walkthrough](https://game.lhg100.com/Article/UploadFiles/201512/2015121619303522.jpg)
There's the round building in front of you [1], run towards it as fast as you can and don't be bothered by the enemies. Soon the Shock Drones, Stalkers and Goliaths [2] will appear trying to bomb your position.
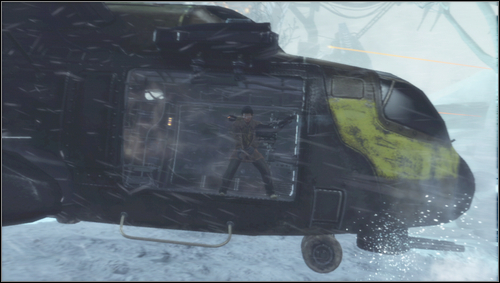
Your task is to hold as long as possible. To achieve that pay attention to the roof's condition. It protects you from the Goliaths' bombing. Try to stick to the places with the roof. Try to stay alive by eliminating the enemies and avoiding the attacks. The resistance group you've met will eventually save you [1].
![When your basic plan turns out to be impossible to introduce together with your companions you'll head to the Chimeras' ship [1] - Chapter 19 - p. 1 - Walkthrough - Resistance 3 - Game Guide and Walkthrough](https://game.lhg100.com/Article/UploadFiles/201512/2015121619303557.jpg)
When your basic plan turns out to be impossible to introduce together with your companions you'll head to the Chimeras' ship [1].
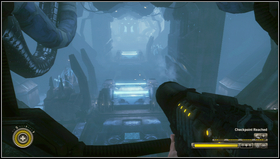
![Through the dark tunnels you'll get to the spacious room [1] - Chapter 19 - p. 1 - Walkthrough - Resistance 3 - Game Guide and Walkthrough](https://game.lhg100.com/Article/UploadFiles/201512/2015121619303657.jpg)
Through the dark tunnels you'll get to the spacious room [1]. Pass the machines, stick to the walls until you reach the device with the stand for the weapon [2]. Turn left then and take the stairs.
You'll fight the Chimeras. Eliminate them and move towards the end of the room where you meet Charlie [1]. Follow him to enter the cold room. To open the door you need to destroy the fuses [2].
![You're in the corridor [1] going around the room full of the Chimeras - Chapter 19 - p. 1 - Walkthrough - Resistance 3 - Game Guide and Walkthrough](https://game.lhg100.com/Article/UploadFiles/201512/2015121619303783.jpg)
You're in the corridor [1] going around the room full of the Chimeras. Eliminate the enemies through the windows and go right. You'll be in the oval room. Take the stairs and wait till Charlie smashes the console [2].
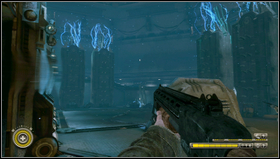
Follow your companion, pass previously cleared room and go through the door. The Chimeras leading by the Ravager will attack from the right [1]. Eliminate them and go through the door they've come. You'll get to the room with the electric pillars [2]. Fight and then take the stairs.
![Up you'll have to fight the Chimeras in the room full of the electric towers [1] - Chapter 19 - p. 1 - Walkthrough - Resistance 3 - Game Guide and Walkthrough](https://game.lhg100.com/Article/UploadFiles/201512/2015121619303854.jpg)
Up you'll have to fight the Chimeras in the room full of the electric towers [1].
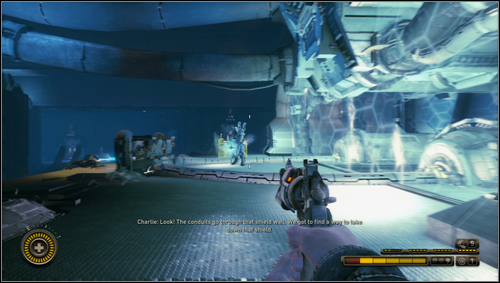
Especially dangerous is the Hybrid with the rocket launcher supported by the Shield Drones. It stands near the shield at the end of the room. When you get closer two Ravagers will attack you [1].
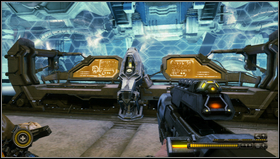
![When you defeat them find the console [1] and deactivate the shield - Chapter 19 - p. 1 - Walkthrough - Resistance 3 - Game Guide and Walkthrough](https://game.lhg100.com/Article/UploadFiles/201512/2015121619303925.jpg)
When you defeat them find the console [1] and deactivate the shield. Unfortunately the wall of blades will block your way [2].
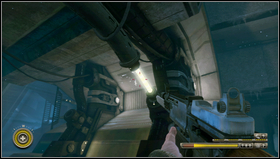
![To turn it down you need to destroy two fuses [1] - Chapter 19 - p. 1 - Walkthrough - Resistance 3 - Game Guide and Walkthrough](https://game.lhg100.com/Article/UploadFiles/201512/2015121619303917.jpg)
To turn it down you need to destroy two fuses [1]. They're where the shield was. When you pass the blades you'll be in the high room [2] where you leave your companion and go alone on the right.
![On the right you'll find the Gray Tech note [1] - Chapter 19 - p. 1 - Walkthrough - Resistance 3 - Game Guide and Walkthrough](https://game.lhg100.com/Article/UploadFiles/201512/2015121619304049.jpg)
On the right you'll find the Gray Tech note [1]. There are petrol cans going up next to it [2]. Jump on one to get higher.
When your "elevator" stops jump on the cables [1] and move on. Soon you'll get to the tunnel through the small hole [2].
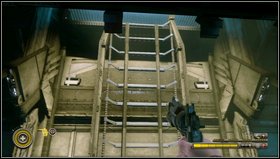
You'll get to the two-part room guarded by the Shield Drones. When they see you they will trigger the alarm and you'll have to fight the Hybrids and Shock Drones. At the end of the fight few Steelheads will appear. When you defeat them go downstairs and get to the room's end. You'll find open panels here [1]. Use them to get to the tunnel where you'll find the ladder [2] leading to the next tunnel.
![Get to the end and jump into the big room [1] full of enemies - Chapter 19 - p. 2 - Walkthrough - Resistance 3 - Game Guide and Walkthrough](https://game.lhg100.com/Article/UploadFiles/201512/2015121619304135.jpg)
Get to the end and jump into the big room [1] full of enemies. The same type of group you've met before, but instead of the Steelheads Snipers will appear. To leave this room take the threshold [2] leading to the very similar room where the Ravagers will wait for you.
After the fight climb the stairs, go up to get to the previous room and run to the opposite wall where you turn left. Kill the Hybrid with the rocket launcher [1] and using the tunnel get to your companion that awaits you near the consoles [2].
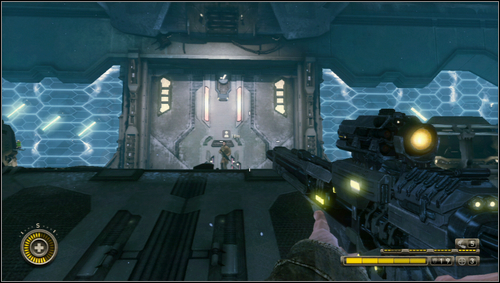
Follow Charlie and eliminate the Snipers. At the end of the room go towards the huge door [1].
![To open it you have to go left [1] and fight the Chimeras to get to the opposite wall - Chapter 19 - p. 2 - Walkthrough - Resistance 3 - Game Guide and Walkthrough](https://game.lhg100.com/Article/UploadFiles/201512/2015121619304269.jpg)
To open it you have to go left [1] and fight the Chimeras to get to the opposite wall. Here's the console [2] which can deactivate the shield near the door. Run next to the door, get to the console and deactivate another shield.
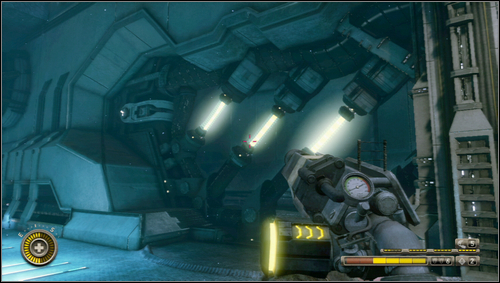
Get back to the door where are the Ravagers' corpses. Destroy the uncovered fuses [1]. When you get through the gate Charlie won't accompany you and you'll be at the top of the ship, next to its core.
![The long road will lead you to the core [1] - Chapter 20 - Walkthrough - Resistance 3 - Game Guide and Walkthrough](https://game.lhg100.com/Article/UploadFiles/201512/2015121619304363.jpg)
The long road will lead you to the core [1]. Remember to pick up ammo and weapon.
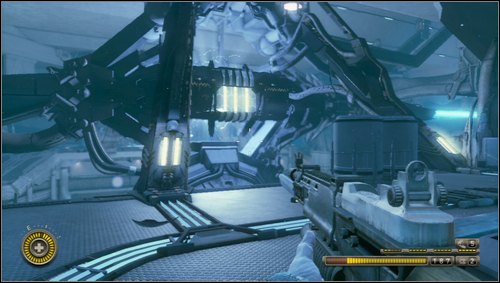
When you get to the door open the chest on the left and destroy the fuses. Enter the big room with the reactor [1]. On the core there are fuses protected by the shield.
To get to them you need to destroy uncovered fuses that you see on both sides of the reactor. On each side there are two pairs of fuses that are on the pillars supporting the reactor [1] and a package of three fuses that are lower under the reactor [2]. Start with the fuses that are at the lowest level as they're protected by the Ravagers. But before you smash anything take a look around when it's still calm. Remember where the aid-kits are.
Hybrids with the Shield Drones will attack you when you destroy the first fuses. Their waves are endless so you need to destroy the rest of the fuses being under fire. The Brawler will appear [1]. It's hard to ignore so take the biggest gun you have, rocket launcher would be the best. When you eliminate it destroy the rest of the fuses and those on the reactor [2].
When the reactor destabilizes you need to start running. At the lowest level near the core there's the wide tunnel [1]. Leave the room with the reactor in a hurry.
![While running the ground will shake and you will catch the edge hanging with the revolver in one hand [1] - Chapter 20 - Walkthrough - Resistance 3 - Game Guide and Walkthrough](https://game.lhg100.com/Article/UploadFiles/201512/2015121619304574.jpg)
While running the ground will shake and you will catch the edge hanging with the revolver in one hand [1]. This is one out of few scenes in which you have to eliminate the enemies shooting at you using only the revolver. The last scene will be with the Brawler [2].
Eventually you will fall down but you'll be saved. You'll see that the Chimeras' tunnel is closing [1]. Now you can reunite with your family.
To ease the search of the missing journals this list show the order presented in the games' menu. Therefore this isn't the order in which you'll find them. If you want to find all the journals during one game (without chapters' repeating) please use the walkthrough. The notes' names are written in green so they're easy to find.
Bite Protocol - Chapter 2
![When the chapter begins enter the medic room where you'll see a man with the drip [1] - Journals Haven, OK - Journals - Resistance 3 - Game Guide and Walkthrough](https://game.lhg100.com/Article/UploadFiles/201512/2015121619304660.jpg)
When the chapter begins enter the medic room where you'll see a man with the drip [1]. The note is on the little table on the right.
Postcard from Bogota - Chapter 1
![When you will be heading to the firing range to get the Bullseye rifle you'll see a woman sweeping the floor [1] - Journals Haven, OK - Journals - Resistance 3 - Game Guide and Walkthrough](https://game.lhg100.com/Article/UploadFiles/201512/2015121619304637.jpg)
When you will be heading to the firing range to get the Bullseye rifle you'll see a woman sweeping the floor [1]. When you approach her turn right to the little niche. The note is one the sleeping man's bed [2].
Note to John Harper - Chapter 2
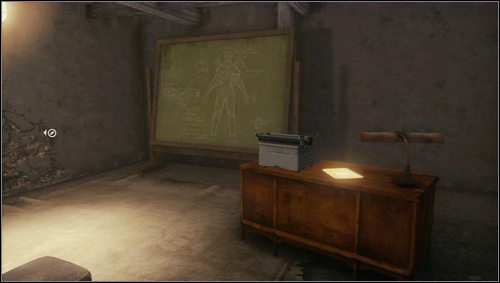
When the chapter begins you'll walk through the resistance's hideout. Eventually you'll get to the room with chairs and green board [1]. The note is one the table on the right from the board.
Ice Blocks Chapter 5
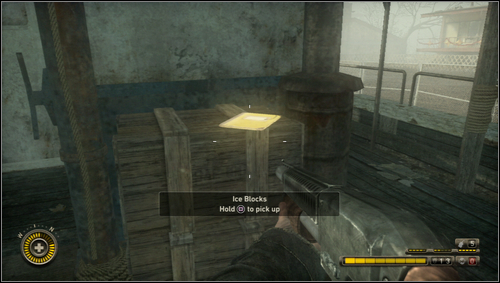
Behind the ship's cabin stands the chest. The note is inside [1].
Feral vs. Military - Chapter 1
![At the beginning of the game when you wake up get to the table upon which Susan is leaning [1] - Journals Haven, OK - Journals - Resistance 3 - Game Guide and Walkthrough](https://game.lhg100.com/Article/UploadFiles/201512/2015121619304757.jpg)
At the beginning of the game when you wake up get to the table upon which Susan is leaning [1]. The note lies there.
Leaper Bite - Chapter 2
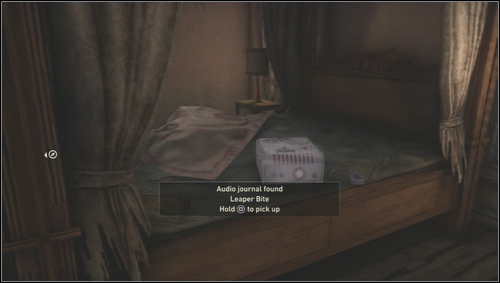
In the building where you meet Dean for the first time go upstairs and search the room. In the bedroom there's the tape recorder lying on the bed [1].
Change in Strategy - Chapter 5
![At the barge's prow [1] near the tires you will find the note - Journals Haven, OK - Journals - Resistance 3 - Game Guide and Walkthrough](https://game.lhg100.com/Article/UploadFiles/201512/2015121619304850.jpg)
At the barge's prow [1] near the tires you will find the note.
VTOL Manual - Chapter 6
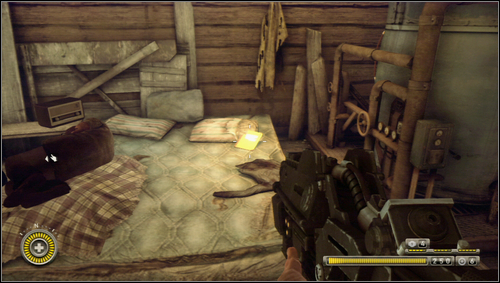
When you pass the labyrinth made of wagons go with Malikov to the building standing on the pillars. Inside on the second floor there's the mattress with the note [1].
Hale Vaccine - Chapter 8
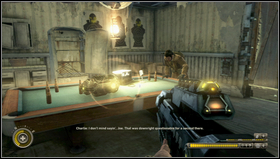
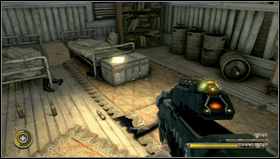
When you run with the energetic link enter the room with the billiard table. Put the link on it [1]. Against the table there are three bunks. The note lies on the chest near one of them [2].
Gotta Get Out - Chapter 6
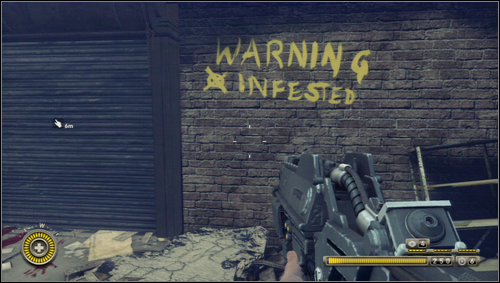
When you leave Malikov in the hut on the pillars, use the rope to get on the building's roof and jump into the hole in the floor. On the wall next to the door there's the yellow "WARNING INFESTED" inscription [1]. The note is on the right on the metal shelf.
Safety Violation - Chapter 6
At the attic of the building full of the Grims you'll find the exit. The damaged bridge is close to it [1]. Move on (jump over the hole) to the other side of the room. Apart from the two Grims you'll find here the note [2] lying among the ammo.
Letter to Santa - Chapter 6
![Close to the chapter's end you'll take the platform that will lower when you shoot at the target [1] - Journals St. Louis, MO - p. 1 - Journals - Resistance 3 - Game Guide and Walkthrough](https://game.lhg100.com/Article/UploadFiles/201512/2015121619305045.jpg)
Close to the chapter's end you'll take the platform that will lower when you shoot at the target [1].
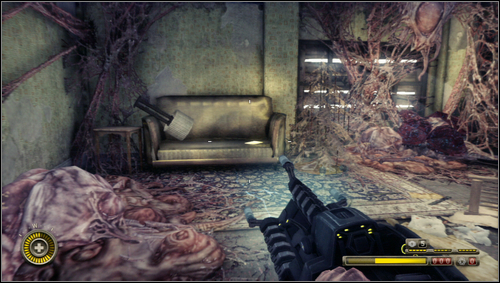
Kill the group of the Leapers and go upstairs where you'll find the corridor. On the left there's the open room with a couch. The note lies there [1].
Staying Warm - Chapter 6
![When the chapter begins, when you get between the wagons go to the pylons [1] - Journals St. Louis, MO - p. 2 - Journals - Resistance 3 - Game Guide and Walkthrough](https://game.lhg100.com/Article/UploadFiles/201512/2015121619305125.jpg)
When the chapter begins, when you get between the wagons go to the pylons [1]. Jump on the concrete platform, come closer to the fence and enter the wagon on the right. There's a record inside [2].
Quarantine - Chapter 6
In the factory full of the Grims go upstairs and jump through the hole in the floor to the one of two rooms. In the first there's a lever that lowers the platform [1] and the tape recorder with the recording in the other one [2].
Girl's Best Friend - Chapter 6
![In the makeshift firing range [1] you'll find the Deadeye sniper rifle (for the first time) - Journals St. Louis, MO - p. 2 - Journals - Resistance 3 - Game Guide and Walkthrough](https://game.lhg100.com/Article/UploadFiles/201512/2015121619305281.jpg)
In the makeshift firing range [1] you'll find the Deadeye sniper rifle (for the first time). Next to the window through which you can see few Grims, there's a shelf with the tape recorder [2].
It's Just Me Now - Chapter 6
![When you leave the factory full of the Grims, go through the hidden door and get to the corridor [1] - Journals St. Louis, MO - p. 2 - Journals - Resistance 3 - Game Guide and Walkthrough](https://game.lhg100.com/Article/UploadFiles/201512/2015121619305342.jpg)
When you leave the factory full of the Grims, go through the hidden door and get to the corridor [1]. At its end turn left to find the tape recorder lying on the shelf [2].
A Tragic Paradox - Chapter 6
![At the beginning of the chapter when you get between the wagons, go towards the pylons [1] - Journals St. Louis, MO - p. 2 - Journals - Resistance 3 - Game Guide and Walkthrough](https://game.lhg100.com/Article/UploadFiles/201512/2015121619305350.jpg)
At the beginning of the chapter when you get between the wagons, go towards the pylons [1].
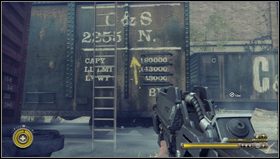
Turn left near the first pillar. There's the marked ladder [1]. Use it to climb up on the trains' roofs. Look left and notice that on one of the derailed wagons lies the note [2].
Tunguska - Chapter 7
When you meet the VTOL's defenders follow them to the underground through the passage hidden under the car's cowl. Follow them till you get to the room with the stairs [1]. Near the entrance there's a corridor turning left. At its end you'll find the note lying on the table [2].
Mass Exodus - Chapter 9
![Follow Charlie who carries the energetic link and get cross the platform that lowers when you use the target [1] - Journals St. Louis, MO - p. 2 - Journals - Resistance 3 - Game Guide and Walkthrough](https://game.lhg100.com/Article/UploadFiles/201512/2015121619305418.jpg)
Follow Charlie who carries the energetic link and get cross the platform that lowers when you use the target [1]. Enter the crumbling building.
![At the first level in the building's corner there are the stairs [1] - Journals St. Louis, MO - p. 2 - Journals - Resistance 3 - Game Guide and Walkthrough](https://game.lhg100.com/Article/UploadFiles/201512/2015121619305541.jpg)
At the first level in the building's corner there are the stairs [1]. At its top you'll find the note lying on the floor [2].
Journey to Hanover - Chapter 10
![In the first mine just behind the metal door there are few tunnels where you'll meet Hybrids with the Shield Drones [1] - Journals Mt. Pleasant, PA - Journals - Resistance 3 - Game Guide and Walkthrough](https://game.lhg100.com/Article/UploadFiles/201512/2015121619305581.jpg)
In the first mine just behind the metal door there are few tunnels where you'll meet Hybrids with the Shield Drones [1]. All those tunnels lead to one passage. A note lies on the pile of the planks close to the passage [2].
Satan - Chapter 11
![When you try to get to the church you'll enter the destroyed building that burns here and there [1] - Journals Mt. Pleasant, PA - Journals - Resistance 3 - Game Guide and Walkthrough](https://game.lhg100.com/Article/UploadFiles/201512/2015121619305615.jpg)
When you try to get to the church you'll enter the destroyed building that burns here and there [1]. Take the stairs, jump into the hole in the floor and climb the ladder.
![Before you go through the hidden door [1] leading to the street near the church you need to take a look around - Journals Mt. Pleasant, PA - Journals - Resistance 3 - Game Guide and Walkthrough](https://game.lhg100.com/Article/UploadFiles/201512/2015121619305667.jpg)
Before you go through the hidden door [1] leading to the street near the church you need to take a look around. In the corner of the room on the table you'll find the note [2].
God's Will - Chapter 10
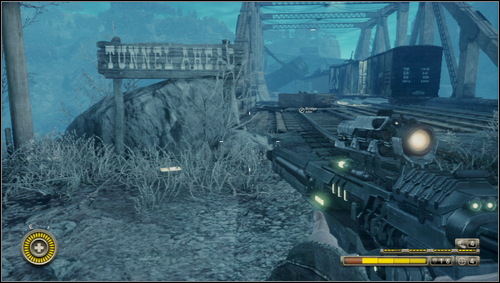
Before you enter the bridge where you'll fight the dropship, look at the wooden sign on the left. The note lies beneath it [1].
Just a Little Nap - Chapter 10
![When get into the first mine get on the tracks and find the ladder leading to a small slope [1] - Journals Mt. Pleasant, PA - Journals - Resistance 3 - Game Guide and Walkthrough](https://game.lhg100.com/Article/UploadFiles/201512/2015121619305844.jpg)
When get into the first mine get on the tracks and find the ladder leading to a small slope [1]. Then move on to a small building where you'll find the tape recorder [2].
Who's Boss - Chapter 12
![When you leave the wounded pastor and move alone chasing the beast through the flooded tunnels jump on the tracks [1] - Journals Mt. Pleasant, PA - Journals - Resistance 3 - Game Guide and Walkthrough](https://game.lhg100.com/Article/UploadFiles/201512/2015121619305836.jpg)
When you leave the wounded pastor and move alone chasing the beast through the flooded tunnels jump on the tracks [1]. Go left to the wall with the rocks. You'll find lying corpse there and the tape recorder [2].
Cooling Towers - Chapter 10
![In the first mine when you go through the metal door you'll get to few tunnels with Hybrids and the Shield Drones [1] - Journals Mt. Pleasant, PA - Journals - Resistance 3 - Game Guide and Walkthrough](https://game.lhg100.com/Article/UploadFiles/201512/2015121619305902.jpg)
In the first mine when you go through the metal door you'll get to few tunnels with Hybrids and the Shield Drones [1]. To find the note [2] you have to pick the right tunnel and stick to the right side.
Pure Chimera - Chapter 11
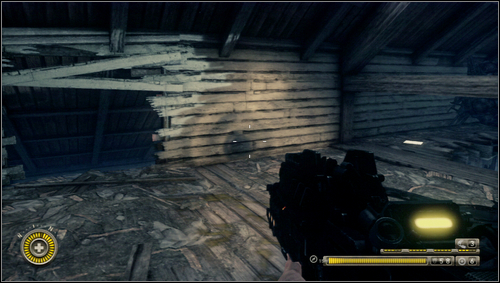
When you get through the church, take the long ladder to climb the attic with plenty of holes in the floor. At the attic's end just before the hole there's the note on the right [1].
Desperation - Chapter 12
![When you see the Satan again [1] in the wide tunnel, hide in the room on the left - Journals Mt. Pleasant, PA - Journals - Resistance 3 - Game Guide and Walkthrough](https://game.lhg100.com/Article/UploadFiles/201512/2015121619305950.jpg)
When you see the Satan again [1] in the wide tunnel, hide in the room on the left.
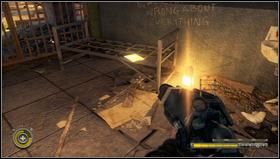
There are stairs leading up. Beneath them there's a cave [1]. If you go at its end you'll find the note that lies on the small beast's skeleton [2].
Letter to Mom #1 - Chapter 15

When you get out of the prison you'll get to another room with cells where you need to fight with the bandits near the burning barrel. Upstairs there's a locked woman. Next to her go through the dark cell [1] to another cell on the right and take the tunnel in the wall. It will lead to the cell where you'll find the note lying on the bed [2].
Letter to Mom #2 - Chapter 15
When you enter the bath turn left and stick to the wall. Soon you'll find the corridor leading left [1]. Enter it and look for the niche on the left. The note lies on the ground next to the lamp [2].
Letter to Mom #3 - Chapter 15
When you deactivate the second Drone go to the prison block B. Kill the bandits and go upstairs, [1] search the cells on the left. The note [2] lies on the ground in one of them.
Letter to Mom #4 - Chapter 15
![When you deactivate the third Drone go through the door and find the corridor (at which ends theres a room full of snipers [1]) - Journals Graterford, PA - Journals - Resistance 3 - Game Guide and Walkthrough](https://game.lhg100.com/Article/UploadFiles/201512/2015121619310103.jpg)
When you deactivate the third Drone go through the door and find the corridor (at which ends there's a room full of snipers [1]). Passing the corridor enter the room on the left where you'll find the note that lies on the table [2].
Letter to Mom #5 - Chapter 15
![When you pass the room where the Snipers fought the Chimeras [1] youll meet Herbert - Journals Graterford, PA - Journals - Resistance 3 - Game Guide and Walkthrough](https://game.lhg100.com/Article/UploadFiles/201512/2015121619310154.jpg)
When you pass the room where the Snipers fought the Chimeras [1] you'll meet Herbert.
Follow him to the cafeteria. On your way in the corridor you'll see a hole covered with planks [1]. Smash the planks, get inside and find the note [2].
Letter to Mom #6 - Chapter 16
![Pass the flooded boiler room, [1] climb the ladder leading to the dry tunnel - Journals Graterford, PA - Journals - Resistance 3 - Game Guide and Walkthrough](https://game.lhg100.com/Article/UploadFiles/201512/2015121619310395.jpg)
Pass the flooded boiler room, [1] climb the ladder leading to the dry tunnel. The note lies on the ground [2].
![Move on until you get to the underground arena [1] where a group of Grims, Leeches and Leapers will attack you - Journals Graterford, PA - Journals - Resistance 3 - Game Guide and Walkthrough](https://game.lhg100.com/Article/UploadFiles/201512/2015121619310323.jpg)
Move on until you get to the underground arena [1] where a group of Grims, Leeches and Leapers will attack you.
Letter to Mom #7 - Chapter 16
![When you get out of the tunnels, youll be at the courtyard where the bandits fight the Chimeras [1] - Journals Graterford, PA - Journals - Resistance 3 - Game Guide and Walkthrough](https://game.lhg100.com/Article/UploadFiles/201512/2015121619310347.jpg)
When you get out of the tunnels, you'll be at the courtyard where the bandits fight the Chimeras [1].
There are two garages at the square's end. Take the one on the left [1] and keep the left side. Climb the ladder and go towards the second garage. On the right near the sniper rifle you'll find the note [2].
There are no audio Journals in Graterford, PA.
Can You Hear Them - Chapter 16
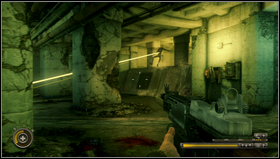
![After the battle with the Grims, Leeches and Leapers on the underground arena [1] pass the metal door blocked with planks and get to the room where youll find the note lying on the ground [2] - Journals Graterford, PA - Journals - Resistance 3 - Game Guide and Walkthrough](https://game.lhg100.com/Article/UploadFiles/201512/2015121619310572.jpg)
After the battle with the Grims, Leeches and Leapers on the underground arena [1] pass the metal door blocked with planks and get to the room where you'll find the note lying on the ground [2].
Particle Smashing - Chapter 18
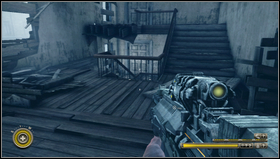
![When the chapter begins youre at the staircase [1] - Journals New York, NY - Journals - Resistance 3 - Game Guide and Walkthrough](https://game.lhg100.com/Article/UploadFiles/201512/2015121619310501.jpg)
When the chapter begins you're at the staircase [1]. Go downstairs and find the corpse. The note lies next to it [2].
Six Bullets - Chapter 17
![When you pass the aliens first metal gate [1] enter the Chimeras two posts in front of the triumphal arc - Journals New York, NY - Journals - Resistance 3 - Game Guide and Walkthrough](https://game.lhg100.com/Article/UploadFiles/201512/2015121619310559.jpg)
When you pass the alien's first metal gate [1] enter the Chimeras' two posts in front of the triumphal arc.
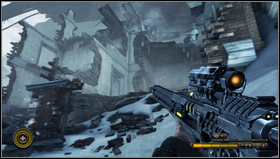
![When you get through the gate turn right and enter the ruined building [1] - Journals New York, NY - Journals - Resistance 3 - Game Guide and Walkthrough](https://game.lhg100.com/Article/UploadFiles/201512/2015121619310676.jpg)
When you get through the gate turn right and enter the ruined building [1]. You'll find there the tape recorder with the record [2].
Bad Idea - Chapter 17
![When you pass the triumphal arc [1], get through the metal door that opens when you destroy the fuses and enter the underground - Journals New York, NY - Journals - Resistance 3 - Game Guide and Walkthrough](https://game.lhg100.com/Article/UploadFiles/201512/2015121619310687.jpg)
When you pass the triumphal arc [1], get through the metal door that opens when you destroy the fuses and enter the underground.
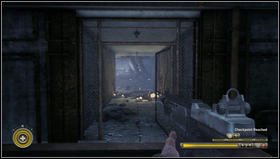
![When you reach the metro jump down at the tracks and enter the corridor in front of you [1] - Journals New York, NY - Journals - Resistance 3 - Game Guide and Walkthrough](https://game.lhg100.com/Article/UploadFiles/201512/2015121619310753.jpg)
When you reach the metro jump down at the tracks and enter the corridor in front of you [1]. You'll get to the room where you can find some ammo and the tape recorder with the record [2] lying next to the corpses.
Bloodbath - Chapter 18
![When you enter the building using the planes wing [1] go up and jump down through the hole in the floor - Journals New York, NY - Journals - Resistance 3 - Game Guide and Walkthrough](https://game.lhg100.com/Article/UploadFiles/201512/2015121619310774.jpg)
When you enter the building using the plane's wing [1] go up and jump down through the hole in the floor.
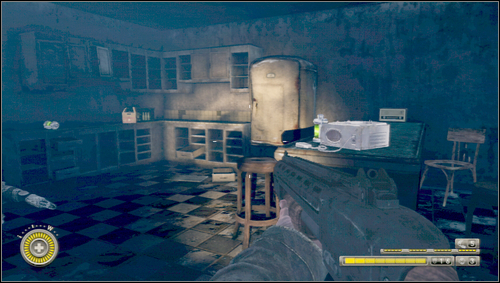
You'll be in the guest room connected with the kitchen. There's the tape recorder with the record [1].
Fall Back - Chapter 18
![When you pass the building guarded by the Chimeras and before the fight with the Stalker, go left to get to the frozen lake, where the destroyed helicopter lies [1] - Journals New York, NY - Journals - Resistance 3 - Game Guide and Walkthrough](https://game.lhg100.com/Article/UploadFiles/201512/2015121619310836.jpg)
When you pass the building guarded by the Chimeras and before the fight with the Stalker, go left to get to the frozen lake, where the destroyed helicopter lies [1]. There's the record inside [2].
They Are Coming - Chapter 17
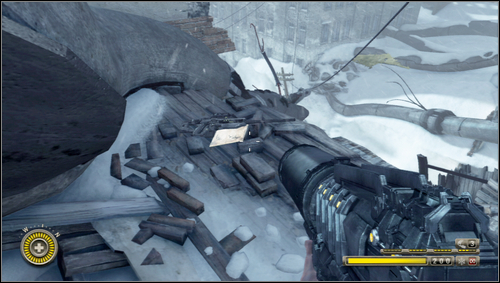
Leave the building and jump down slowly. Before you slide down the rope find the note lying on the ground [1].
Gray Tech - Chapter 19
![When you leave Charlie go right to the boxes going up [1] - Journals New York, NY - Journals - Resistance 3 - Game Guide and Walkthrough](https://game.lhg100.com/Article/UploadFiles/201512/2015121619310962.jpg)
When you leave Charlie go right to the boxes going up [1]. On the right in front of them you'll find the note [2].



 Rocket League Game Guide & Walkthrough
 Risen Game Guide & Walkthrough
 Randals Monday Game Guide & Walkthrough
 Runaway 2: The Dream of the Turtle Game Guide & Walkthrough
 Resistance 3 Game Guide & Walkthrough