

This guide to Might and Magic: Clash of Heroes contains a thorough walkthrough of the game, together with hints regarding the more difficult fights and battles. Additionally a significant part of the text has been dedicated to the various collectibles found throughout the game. In the guide you will find a description of all the available:
- Bounty Hunter quests
- artifacts
- special units
- battle puzzles
- other side quests.
In the battle puzzles chapter, apart from descriptions and illustrations, I have included short movies which accurately present the solutions.
In order to make navigating through the guide easier, I have used fonts of different colours and special symbols.
Legend:
Red - enemies.
Orange - battle units, recruitment points.
Green - battle elements.
Blue - items.
[1], [2] - symbols corresponding with the screens above the text. 1 is for the screen on the left and 2 for the one on the right.
Michal "Kwisc" Chwistek
Translated to English by Jakub "cilgan" Lasota
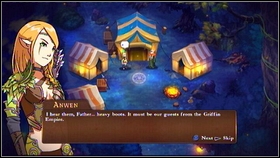
![The game begins in the elven forest of Irollan, where after a short introduction you will take control over a hunter named Anwen [1] - Irollan - p. 1 - Walkthrough - Might & Magic: Clash of Heroes - Game Guide and Walkthrough](https://game.lhg100.com/Article/UploadFiles/201512/2015121618025888.jpg)
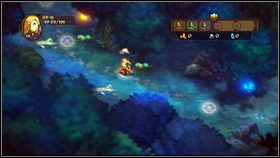
The game begins in the elven forest of Irollan, where after a short introduction you will take control over a hunter named Anwen [1]. You can use both the left analog and d-pad to move [2] and start conversations by pressing X.
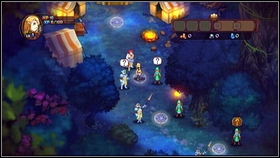
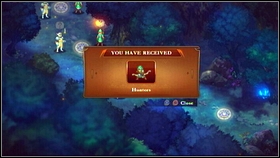
At first head along the only possible path leading south. Talk with all the soldiers you come across [1] and you will receive the first battle unit - Hunter [2].
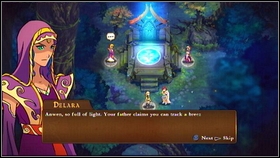
![Keep going straight and you will reach a magic portal where you will meet Lady Delara and her daughter Nadia [1] - Irollan - p. 1 - Walkthrough - Might & Magic: Clash of Heroes - Game Guide and Walkthrough](https://game.lhg100.com/Article/UploadFiles/201512/2015121618025931.jpg)
Keep going straight and you will reach a magic portal where you will meet Lady Delara and her daughter Nadia [1]. Talk with them and your first battle will begin [2].
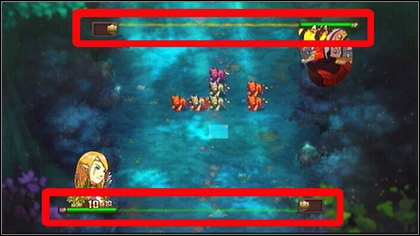
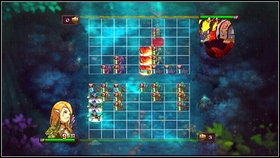
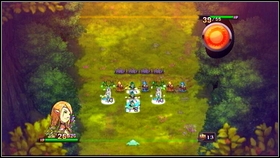
You will learn the basics of fighting. There are horizontal lines in the upper and lower parts of the screen, one for each hero. If a soldier attacks it, he will deal damage to the enemy army's leader. The enemy army is at the top and your units at the bottom of the screen. The battles are turn-based.
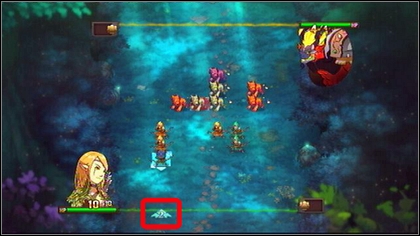
On the arrow below the line you can see how many moves you have left in your turn.
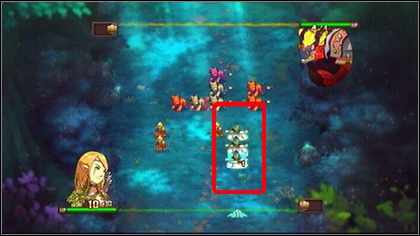
In order to attack the enemy, you have to create the so-called attack formation, that is place three units of the same type and colour in a column. You can move only the units at the very bottom of the column. In order to commence the first attack, select the green Hunter on the left (there's a blue square flashing around him) by pressing X, place him in the place marked by the game and press the same button again. By doing that you will create the first formation, losing one move (the number on the arrow).
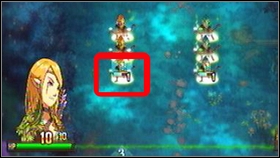
Two digits will appear above one of the units creating the formation. The upper one shows the number of turns left to the next attack (charge time) and the lower represents the unit's health. Time for the second attack. Select the yellow Hunter standing in the middle of the battlefield and move him below the unit column on the left. This way you will create another formation and use up the last move in your turn. The enemy will begin his turn soon afterwards.
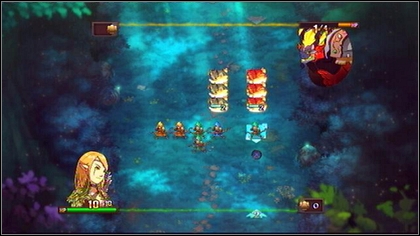
Once the enemy is done, it will be your turn again. The turn will begin with an attack carried out by the previously prepared formation. In total, they will deal 3 damage to the, as one of the attacks was weakened by the creature on the other side. The enemy will be left with one health point. Before you can finish him off, you will first have to call in reinforcements. Do it by pressing either R2 or L2. New units will appear on the battlefield, but you keep in mind that it costs you one move.
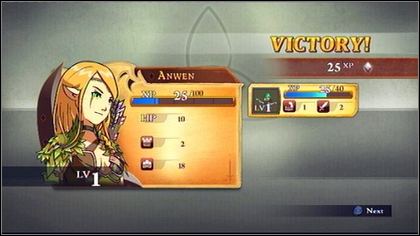
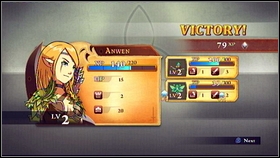
Use the next one to move the green Hunter to the proper column. Unfortunately you can't use your last move in any way, so end your turn by pressing SQUARE. Soon afterwards the battle will end with your victory. In return, your hero and the units participating in the battle will receive experience points. If you collect enough, you will advance to the next level, therefore increasing your stats.
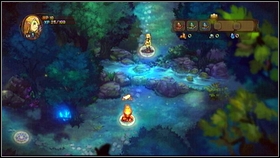
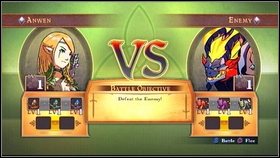
After the fight, head back south. Beside the riverside you will come across another demon. Attack it.
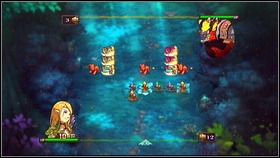
![This time your enemy will begin, creating two attack formations [1] - Irollan - p. 1 - Walkthrough - Might & Magic: Clash of Heroes - Game Guide and Walkthrough](https://game.lhg100.com/Article/UploadFiles/201512/2015121618030155.jpg)
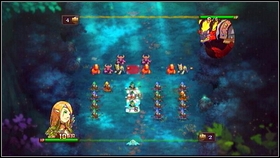
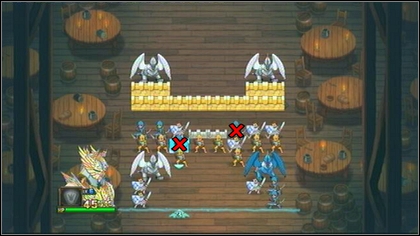
This time your enemy will begin, creating two attack formations [1]. In order to defend, you will have to create a so-called wall. You can do it by placing three units of the same type and colour horizontally [2]. In this case you have to place three yellow Hunters on the left side of the battlefield.
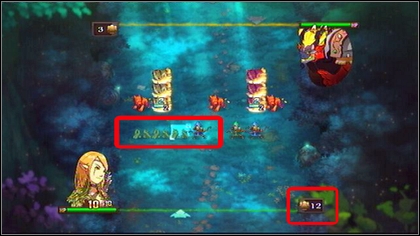
Once you do it, the units will change into a blockade, through which only you can attack. Enemies standing before it will have to hit it, weakening their attack. Additionally this particular wall has a special ability that allows it to regenerate 1 hitpoint each turn. In the lower right corner of the screen there's a number representing the amount of units that you can call in as reinforcement. The number goes up when one of your units leaves the battlefield.
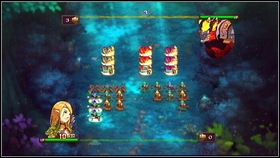
Your army isn't numerous, so quickly call in reinforcements (L2 or R2). Afterwards you will be able to create an attack formation by placing the marked Hunters on the left side of the battlefield. Time for the enemy's turn.
The demon will attack with the previously created formation, though he won't deal too much damage. His attacks will be weakened by the wall and so-called idle units, meaning units that don't create any formations. How much an attack will be blocked depends on the toughness of the blocking army. You can check its level by pressing L1 or R1. Now it's time for your army. The previously created formation will attack the demon for two hitpoints. The rest of the battle is for you to conduct. I'd recommend creating a wall on the right and afterwards quickly attack the unprotected enemy line. One accurate attack will be enough to end the fight.
After the fight, head further to the east. You will come across yet another demon [1]. At the start of the battle you will learn how to remove your own units. In order to do that, you have to select a unit and press CIRCLE [2]. The Hunter will disappear, but it will also cut you one action point. If however a formation will be created as a result of deleting a unit, that point will be restored. That way you will create the so-called chain. Test the new system by eliminating the yellow Hunter in the middle column. Repeat the operation a few times, creating three more formations and end your turn. Soon afterwards the battle will end with you victory. Examine the demolished camp, return to the portal and the next part of the campaign will begin.
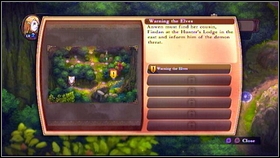
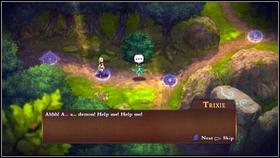
You will receive your first mission at the very beginning. You have to talk with a cousin named Findan. In order to check all current missions, press SQUARE [1]. After going further to the east, you will receive a new type of unit (Pixies) [2].
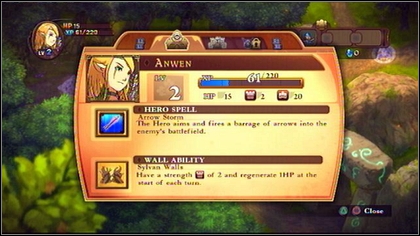
In order to add them to your army, press TRIANGLE. A menu with three bookmarks will appear, you can navigate between them with L1 and R1. The first bookmark presents your hero's level, statistics and available spells.
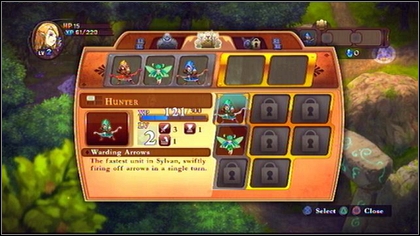
In the second you can see your army. During the battle you can use only three basic ones, the so-called core units, to which you assign adequate colours. For now I'd recommend you stick with Hunters and choose one Pixie to check out how its battle capabilities. The third bookmark will be unlocked later on. For now, keep going west and attack the demon standing on the road (LVL 1).
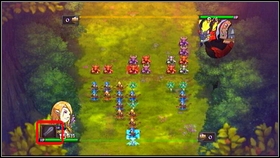
At the start of the battle you will learn of the next element of the battle screen, the spell meter. It can be found in the lower left corner, right next to your character's avatar [1]. When it's full, you will be able to cast a spell (TRIANGLE). You can charge it by collecting MP, received for damaging your enemy, receiving damage yourself, creating links, chains and fusions. You will learn how the spell works during the next fight, for now just kill the demon [2].
![In return you will receive gold and will be able to play a tutorial regarding Links [1] - Irollan - p. 2 - Walkthrough - Might & Magic: Clash of Heroes - Game Guide and Walkthrough](https://game.lhg100.com/Article/UploadFiles/201512/2015121618030379.jpg)
In return you will receive gold and will be able to play a tutorial regarding Links [1]. In order to create a Link, you have to connect two attack formations of the same colour that will attack in the same round. If done so, their attack power will be increased. You can connect any number of formations, increasing their power even further [2].
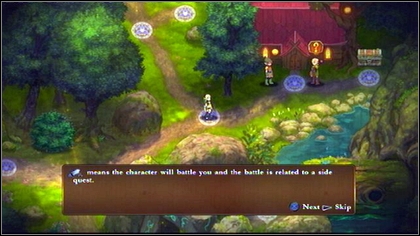
After completing or cancelling the tutorial, keep going east. On the next field you will learn the icons used in the game. A golden question mark means that a given character is connected with a side quest. Brown sword appear above enemies from main quests and silver above those from side ones. The last icon points to bosses, much more demanding enemies.
![Afterwards you will have to talk with the elves standing in front of the nearby building [1] - Irollan - p. 2 - Walkthrough - Might & Magic: Clash of Heroes - Game Guide and Walkthrough](https://game.lhg100.com/Article/UploadFiles/201512/2015121618030340.jpg)
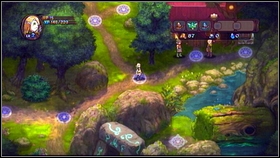
Afterwards you will have to talk with the elves standing in front of the nearby building [1]. One of them is Findan [2].
![Once the conversation is over, Anwen will go to sleep [1] - Irollan - p. 2 - Walkthrough - Might & Magic: Clash of Heroes - Game Guide and Walkthrough](https://game.lhg100.com/Article/UploadFiles/201512/2015121618030336.jpg)
Once the conversation is over, Anwen will go to sleep [1]. After waking up, you will receive the third unit - the Bear [2].
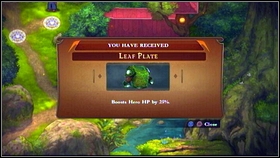
You can now save your game by pressing START and selecting the suitable option in the menu. After doing so, pick up the artifact hidden inside the chest on the right [1]. It will be the Leaf Plate, an armour that increases your hero's health by 25% [2].
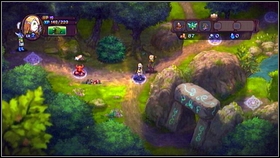
You can find all the obtained artifacts in the third bookmark. Equip the obtained item an go further to the west [1]. Eventually you will come across another demon (LVL 2) [2].
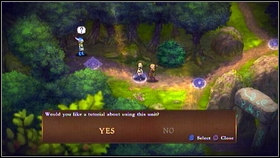
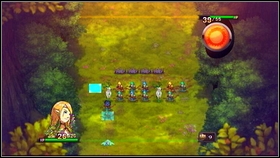
In return for defeating him, you will receive your first elite unit - the Deer. You can turn on the tutorial to learn how to use it [1]. In order for an elite unit to attack the enemy, you have to place two core units of the same colour and type behind it, for example two green Hunters [2].
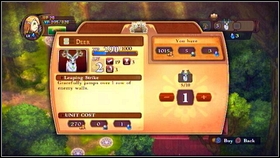
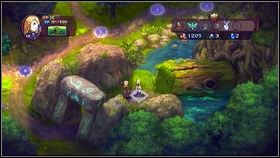
Apart from significant strength, elite units have special skills. The Deer can, for example, jump over an enemy wall. You can find a description of each unit in the proper bookmark of the hero screen [1]. You however have to remember that the amount of elite units is limited. You lose them if they're defeated by the enemy or if you remove them from the battlefield yourself (CIRCLE). In order to replenish, you have to buy them at special buildings, the so-called unit dwellings. Keep in mind that elite units can create links as well. Create such a link in the second round of the tutorial [2]. You can't, unfortunately, build elite walls.
![After the battle ends, head south and go inside the hollowed part of the trunk by pressing X [1] - Irollan - p. 3 - Walkthrough - Might & Magic: Clash of Heroes - Game Guide and Walkthrough](https://game.lhg100.com/Article/UploadFiles/201512/2015121618030509.jpg)
After the battle ends, head south and go inside the hollowed part of the trunk by pressing X [1]. Inside, pick up the rubies on the right. Just like gold and ore, they serve to buy units at unit dwelling. In this case, you will receive 2 blue rubies [2].
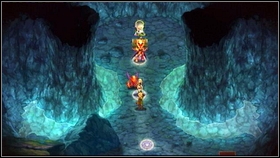
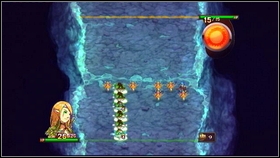
Keep going north until you reach two enemies. After a short talk, you will be attacked by demons (LVL 3) [1]. Kill them and in return you will receive another important element of the game - fusions. In order to perform a fusion, you have to create two attack formations of the same type and colour and in the same line [2]. If you do so, the units will join, inflicting more damage and attacking according to a shorter charge time. You can link any number of units this way and strengthen walls this way.
![Once the tutorial ends, attack the boss in the north - Kullor LVL 4 [1] - Irollan - p. 3 - Walkthrough - Might & Magic: Clash of Heroes - Game Guide and Walkthrough](https://game.lhg100.com/Article/UploadFiles/201512/2015121618030569.jpg)
Once the tutorial ends, attack the boss in the north - Kullor LVL 4 [1]. The key to defeating him is to carry out as much attack as possible into one spot, so they're not blocked by the recovering wall [2]. Remember about creating walls yourself, in order to block the attacks of elite enemy units.
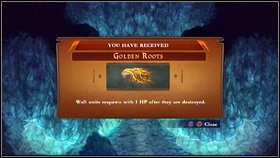
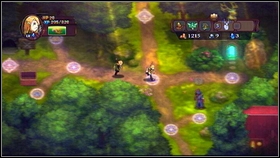
After the fight, open the nearby chest. Inside you will find the Golden Roots [1], an artifact that can restore destroyed walls. Collect it and return to the forest [2].
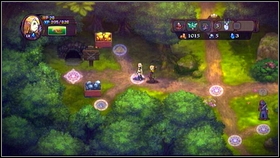
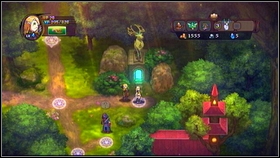
Now you will need to go maximally to the north, to the next location. However before you do it, pick up the gold and ore lying in the north-west [1] and replenish Deer at the unit dwelling in the east [2].
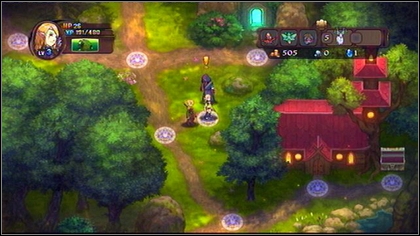
You can also talk with the bounty hunter standing beside the road, who will give you a few additional missions. They're described in the part of the guide dedicated to side missions.
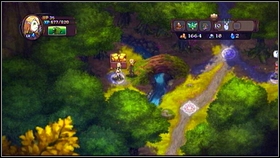
![After reaching the next location, pick up the gold on the left [1], talk with the elf on the right [2] and afterwards head further to the north - Irollan - p. 3 - Walkthrough - Might & Magic: Clash of Heroes - Game Guide and Walkthrough](https://game.lhg100.com/Article/UploadFiles/201512/2015121618030634.jpg)
After reaching the next location, pick up the gold on the left [1], talk with the elf on the right [2] and afterwards head further to the north.
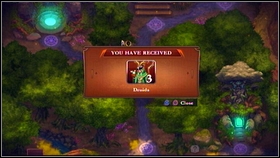
![There you will come across a Druid, who will join your army [1] - Irollan - p. 3 - Walkthrough - Might & Magic: Clash of Heroes - Game Guide and Walkthrough](https://game.lhg100.com/Article/UploadFiles/201512/2015121618030790.jpg)
There you will come across a Druid, who will join your army [1]. This elite unit not only deals damage with every hit, but also increases the enemy's charge time. At start you will only have three Druids, but you can buy more at the unit dwelling on the left [2].
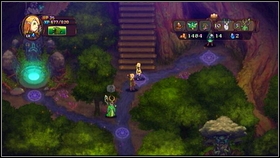
![Once you're ready, head further to the north [1] - Irollan - p. 3 - Walkthrough - Might & Magic: Clash of Heroes - Game Guide and Walkthrough](https://game.lhg100.com/Article/UploadFiles/201512/2015121618030797.jpg)
Once you're ready, head further to the north [1]. In the next location, pick up the rubies in the north and afterwards attack the knight (LVL 3) in the east [2].
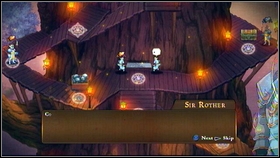
![After the fight you will see more enemies, trying to cut down a mighty tree [1] - Irollan - p. 3 - Walkthrough - Might & Magic: Clash of Heroes - Game Guide and Walkthrough](https://game.lhg100.com/Article/UploadFiles/201512/2015121618030726.jpg)
After the fight you will see more enemies, trying to cut down a mighty tree [1]. Attack them. In this fight there's no particular hero that you need to defeat, your targets are the two soldiers with a saw. You need to attack them, not the horizontal line like in the previous battles [2]. The enemies will be moving from time to time, so try to prepare a formation beside them. Once they're both dead, the battle will end.
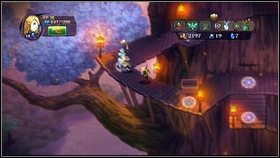
![Afterwards pick up the ore on the left and defeat another knight (LVL 4) [1] - Irollan - p. 3 - Walkthrough - Might & Magic: Clash of Heroes - Game Guide and Walkthrough](https://game.lhg100.com/Article/UploadFiles/201512/2015121618030735.jpg)
Afterwards pick up the ore on the left and defeat another knight (LVL 4) [1]. By going further to the north, you will reach the treetop [2].
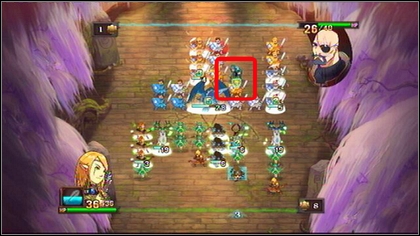
Your target is Sir Strata (LVL 6), standing nearby. During the fight, keep in mind not to hit the Druid in the front. The man will be moving from time to time, so be very careful when attacking.
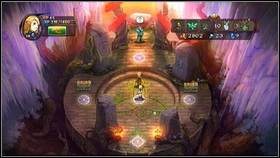
![Once the fight is over, open both chests that appear on the stone square [1] - Irollan - p. 3 - Walkthrough - Might & Magic: Clash of Heroes - Game Guide and Walkthrough](https://game.lhg100.com/Article/UploadFiles/201512/2015121618030838.jpg)
Once the fight is over, open both chests that appear on the stone square [1]. Inside one of them you will find 500 gold and in the second a Doubling Cape [2].
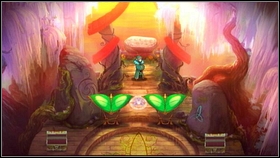
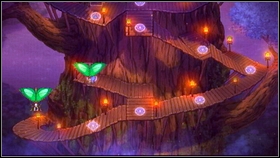
After collecting all the items, head south. The rescued Druid will give you two gliders [1], thanks to which you will quickly return to the very bottom [2].
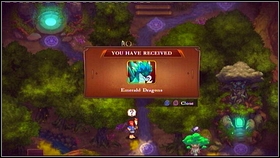
![Talk with the next forest mage on the ground to receive a new unit - the Emerald Dragon [1] - Irollan - p. 4 - Walkthrough - Might & Magic: Clash of Heroes - Game Guide and Walkthrough](https://game.lhg100.com/Article/UploadFiles/201512/2015121618030985.jpg)
Talk with the next forest mage on the ground to receive a new unit - the Emerald Dragon [1]. You will be also able to start a tutorial explaining how to use it [2].
![The Emerald Dragon is a so-called champion unit, which requires four units of the same colour and type standing behind it in order to create a formation [1] - Irollan - p. 4 - Walkthrough - Might & Magic: Clash of Heroes - Game Guide and Walkthrough](https://game.lhg100.com/Article/UploadFiles/201512/2015121618030985.jpg)
The Emerald Dragon is a so-called champion unit, which requires four units of the same colour and type standing behind it in order to create a formation [1]. Otherwise, all its attributes are identical as those of elite units. Each champion has special skills, can create links, cannot create walls, and their number is limited. After completing the tutorial go south and turn right beside the man with a torch [2].
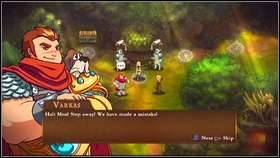
In the next location [M1.7] you will see knight Varkas (LVL8) attacking an elven village in the east [1]. Attack and defeat him [2].
Afterwards go north. Pick up the gold lying on the left [1] and finish off the soldiers trying to destroy the acorn [2].
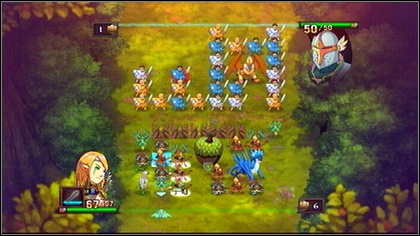
During the fight you will not only have to attack the enemy, but also protect the precious item. Try to place as much walls as possible in front of it or quickly eliminate the enemies.
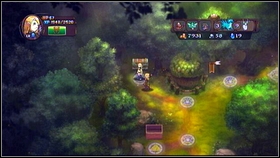
![After the fight is over, open the chest on the left [1] and head east - Irollan - p. 4 - Walkthrough - Might & Magic: Clash of Heroes - Game Guide and Walkthrough](https://game.lhg100.com/Article/UploadFiles/201512/2015121618031060.jpg)
After the fight is over, open the chest on the left [1] and head east. Inside the next location [M1.8] keep going north, until you reach a river [2].
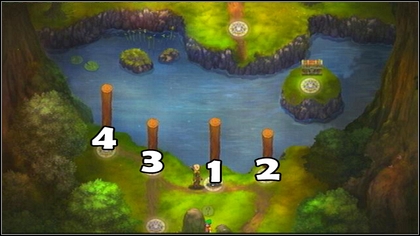
In order to cross it, you will have to knock over the logs in the presented order.
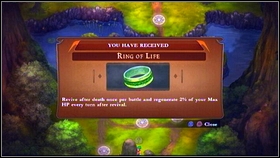
![Once you're one with that, empty the chest on the right for a Ring of Life [1] and get to the other side [2] - Irollan - p. 4 - Walkthrough - Might & Magic: Clash of Heroes - Game Guide and Walkthrough](https://game.lhg100.com/Article/UploadFiles/201512/2015121618031067.jpg)
Once you're one with that, empty the chest on the right for a Ring of Life [1] and get to the other side [2].
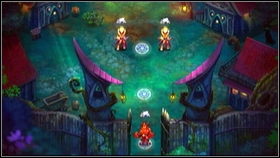
![Keep going north and you will reach a hunter camp overrun by demons [1] - Irollan - p. 4 - Walkthrough - Might & Magic: Clash of Heroes - Game Guide and Walkthrough](https://game.lhg100.com/Article/UploadFiles/201512/2015121618031191.jpg)
Keep going north and you will reach a hunter camp overrun by demons [1]. Defeat all the enemies on your way and you will reach Godric [2].
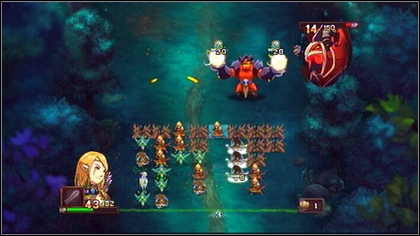
After you save him, Azexes (LVL 10) will show up. The enemy doesn't have any sort of army supporting him, but he can attack very well himself. From time to time he will spread his arms and create a shining spheres with which he will attack in three turns. In that time their power will go up to 30 points, so be sure to place some walls against them or weaken them by attacking yourself.
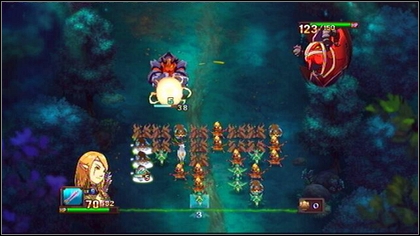
The demon's second attack is even more powerful, but concentrated at one spot, so it's easier to hit/block it. Apart from stopping the enemy's attacks, you also have to attack yourself. Keep aiming at Azexes' body, keeping in mind that the enemy teleports to a random place on the battlefield after attacking. Try to anticipate where he's going to teleport and prepare attack formations in different places. With the enemy's death, the first part of the campaign will end.
![After reaching the capital, you will be accosted by a stranger who will give you the Swordsmen [1] - Holy Griffin Empire - p. 1 - Walkthrough - Might & Magic: Clash of Heroes - Game Guide and Walkthrough](https://game.lhg100.com/Article/UploadFiles/201512/2015121618031189.jpg)
After reaching the capital, you will be accosted by a stranger who will give you the Swordsmen [1]. With the newly gained unit head north, where you will be attacked by guards (LVL 1) [2].
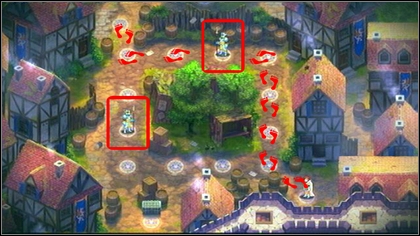
After defeating them, Godric will automatically run to the left. you will now have to reach the other side of the castle while avoiding the knights patrolling the area. The enemies will see you if you're on the side of the square as they are. In order to get through, you have to run north when one of the knights is at the top and the second on the left side. Keep following them slowly until you're able to leave the guarded area.
![Once the patrol is gone, backtrack a bit to the south and open the chest with the Phoenix Feather artifact [1] - Holy Griffin Empire - p. 1 - Walkthrough - Might & Magic: Clash of Heroes - Game Guide and Walkthrough](https://game.lhg100.com/Article/UploadFiles/201512/2015121618031263.jpg)
Once the patrol is gone, backtrack a bit to the south and open the chest with the Phoenix Feather artifact [1]. Equipped with it, you can attack the knight (LVL 2) in the north [2].
![After the battle a new type of unit will join you - the Archer [1] - Holy Griffin Empire - p. 1 - Walkthrough - Might & Magic: Clash of Heroes - Game Guide and Walkthrough](https://game.lhg100.com/Article/UploadFiles/201512/2015121618031253.jpg)
After the battle a new type of unit will join you - the Archer [1]. By going further to the north, you will eventually reach another puzzle with guards [2].
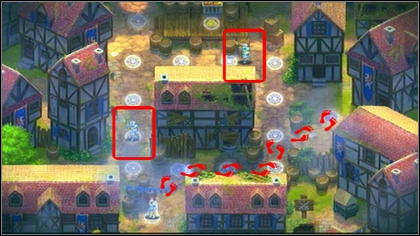
Wait for the knight on the left to go off the lower side and go one field up and one to the right. Stand there for awhile. When only the second knight leaves the right side, hide behind the barrel in the east.
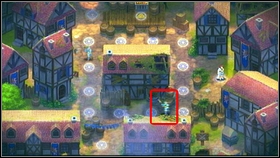
![Wait there until the enemy on the right goes to the lower side [1] - Holy Griffin Empire - p. 1 - Walkthrough - Might & Magic: Clash of Heroes - Game Guide and Walkthrough](https://game.lhg100.com/Article/UploadFiles/201512/2015121618031371.jpg)
Wait there until the enemy on the right goes to the lower side [1]. When he does, you will be able to run north. With the left knight on the southern side, you will be able to leave the square [2].
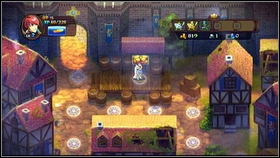
![When the guards disappear, pick up the gold on the right [1] and go to the other side of the wall [2] - Holy Griffin Empire - p. 1 - Walkthrough - Might & Magic: Clash of Heroes - Game Guide and Walkthrough](https://game.lhg100.com/Article/UploadFiles/201512/2015121618031311.jpg)
When the guards disappear, pick up the gold on the right [1] and go to the other side of the wall [2].
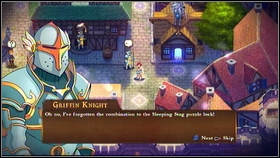
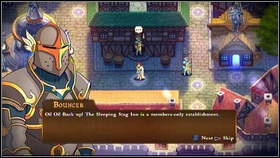
In the new location [M2.4], talk with the nearby soldier [1]and afterwards attack the knight standing by the tavern [2].
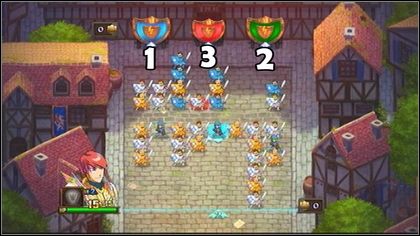
In order to win, you will have to attack the colourful shields in the order given by the previously mentioned soldier. First hit the blue, then the green and lastly the red one. Keep in mind that the charge time of a Swordsman is 3 and of an Archer only 2!
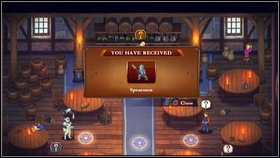
![After going inside you will receive another new unit (Spearmen) [1] and meet an old friend [2] - Holy Griffin Empire - p. 1 - Walkthrough - Might & Magic: Clash of Heroes - Game Guide and Walkthrough](https://game.lhg100.com/Article/UploadFiles/201512/2015121618031416.jpg)
After going inside you will receive another new unit (Spearmen) [1] and meet an old friend [2]. He will tell you about the prisoners that you have to free.
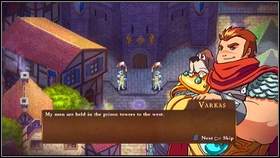
![Leave the tavern and head to the north-west, where you will have to fight with two soldiers (LVL 4) guarding the prisoner [1] - Holy Griffin Empire - p. 1 - Walkthrough - Might & Magic: Clash of Heroes - Game Guide and Walkthrough](https://game.lhg100.com/Article/UploadFiles/201512/2015121618031473.jpg)
Leave the tavern and head to the north-west, where you will have to fight with two soldiers (LVL 4) guarding the prisoner [1]. However before you attack them, buy a few elite units at the unit dwellings to the left and right of the tavern [2].
![In one of the buildings you will find the Knight [1], while in the second the Priestess [2] - Holy Griffin Empire - p. 1 - Walkthrough - Might & Magic: Clash of Heroes - Game Guide and Walkthrough](https://game.lhg100.com/Article/UploadFiles/201512/2015121618031568.jpg)
In one of the buildings you will find the Knight [1], while in the second the Priestess [2].
The battle with the guards isn't your typical fight. Your goal here isn't killing the enemy, but rather hitting the two turnstiles at the same time [1]. Use your units' charge time properly to form a simultaneous attack. In return you will receive six Knights [2].
![Head north and defeat the Knight (LVL 5) blocking the passage [1] - Holy Griffin Empire - p. 2 - Walkthrough - Might & Magic: Clash of Heroes - Game Guide and Walkthrough](https://game.lhg100.com/Article/UploadFiles/201512/2015121618031536.jpg)
Head north and defeat the Knight (LVL 5) blocking the passage [1]. Behind it you will have to fight an Archer (LVL 7) [2].
![In the archer fight, your goal is to kill three enemies hiding behind the stone pillars [1] - Holy Griffin Empire - p. 2 - Walkthrough - Might & Magic: Clash of Heroes - Game Guide and Walkthrough](https://game.lhg100.com/Article/UploadFiles/201512/2015121618031538.jpg)
In the archer fight, your goal is to kill three enemies hiding behind the stone pillars [1]. The enemies will come out from time to time, so place an attack formation in front of each hole in the wall [2]. When an archer appears, he has to sacrifice one turn to aim and fires an arrow during the second. It deals serious damage, so be careful. If only you constantly keep attacking, you should finish the fight quickly.
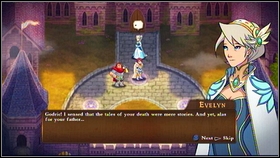
![After the fight, keep going north and talk with Evelyn [1] - Holy Griffin Empire - p. 2 - Walkthrough - Might & Magic: Clash of Heroes - Game Guide and Walkthrough](https://game.lhg100.com/Article/UploadFiles/201512/2015121618031647.jpg)
After the fight, keep going north and talk with Evelyn [1]. She will grant you with 5 Priestesses and a disguise [2], wearing which you can head to the tournament.
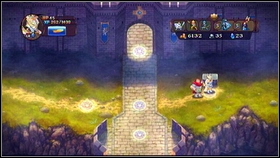
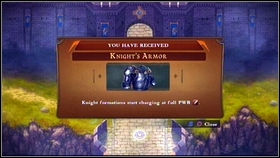
You can reach the arena by going through the main gate, the same beside which you started the game [M2.1] [1]. To the right of the entrance there's a chest with the Knight's Armor artifact inside [2].
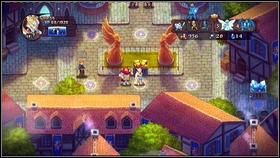
Pick up the item and head to the arena. In order to enter, you will have to talk with the herald and obtain the Griffin unit. The unit dwelling with the flying monsters can be found in the north-east corner of the location [1]. If you lack resource, head to the location in the east [M2.7]. In the middle of the location you will find gold [2] and on the right rubies.
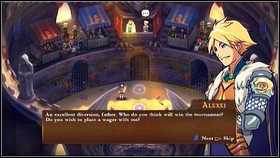
![Properly equipped, talk with the man in front of the arena to get inside [1] - Holy Griffin Empire - p. 2 - Walkthrough - Might & Magic: Clash of Heroes - Game Guide and Walkthrough](https://game.lhg100.com/Article/UploadFiles/201512/2015121618031707.jpg)
Properly equipped, talk with the man in front of the arena to get inside [1]. In the first fight, you will have to face Sir Gerhardt (LVL 6) [2].
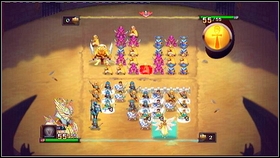
![After defeating him, you will be attacked by Archmage Fayed (LVL 7) [1] and afterwards by Sir Kennerth Drake (LVL 8) [2] - Holy Griffin Empire - p. 2 - Walkthrough - Might & Magic: Clash of Heroes - Game Guide and Walkthrough](https://game.lhg100.com/Article/UploadFiles/201512/2015121618031763.jpg)
After defeating him, you will be attacked by Archmage Fayed (LVL 7) [1] and afterwards by Sir Kennerth Drake (LVL 8) [2]. Win both fights and the tournament will end.
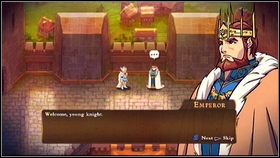
![Head north to the castle, where the emperor awaits you [1] - Holy Griffin Empire - p. 3 - Walkthrough - Might & Magic: Clash of Heroes - Game Guide and Walkthrough](https://game.lhg100.com/Article/UploadFiles/201512/2015121618031792.jpg)
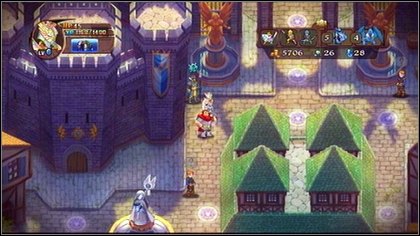
Head north to the castle, where the emperor awaits you [1]. He will give you the King's Crown [2] and ask you to deliver it to count Caryle.
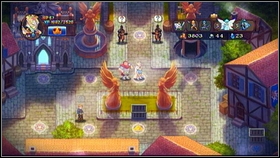
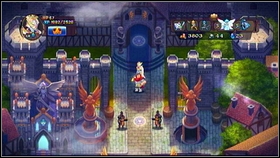
The count's estate can be found inside a location east of the castle [M2.6] [1]. The entrance is in the north [2].
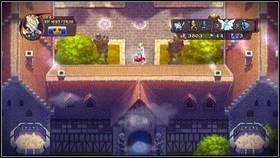
![After talking with the guards and the count, you will be attacked by a demon (LVL 7) [1] - Holy Griffin Empire - p. 3 - Walkthrough - Might & Magic: Clash of Heroes - Game Guide and Walkthrough](https://game.lhg100.com/Article/UploadFiles/201512/2015121618031868.jpg)
After talking with the guards and the count, you will be attacked by a demon (LVL 7) [1]. Defeat it and open the nearby chest. Inside, you will find 5 Angels and the Blessed Wing artifact [2].
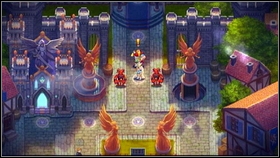
![Having collected it all, head towards the emperor's castle, defeating a few demon (LVL 7/8) squads [1] and knights standing beside the gate on your way there (LVL 9) [2] - Holy Griffin Empire - p. 3 - Walkthrough - Might & Magic: Clash of Heroes - Game Guide and Walkthrough](https://game.lhg100.com/Article/UploadFiles/201512/2015121618031832.jpg)
Having collected it all, head towards the emperor's castle, defeating a few demon (LVL 7/8) squads [1] and knights standing beside the gate on your way there (LVL 9) [2].
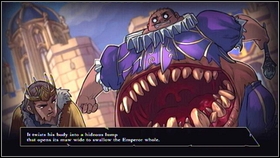
![After reaching the destination, you will have to fight the transformed count (LVL 15) [1] - Holy Griffin Empire - p. 3 - Walkthrough - Might & Magic: Clash of Heroes - Game Guide and Walkthrough](https://game.lhg100.com/Article/UploadFiles/201512/2015121618031973.jpg)
After reaching the destination, you will have to fight the transformed count (LVL 15) [1]. The battle doesn't differ from normal ones in any way. Just like with other bosses, you have to attack the enemy and not the horizontal line behind him. The demon has a few types of attacks at his disposal. At start he summons small green slimes which attack in the third turn [2]. Walls work best against them, as it's hard to kill them in such short time.
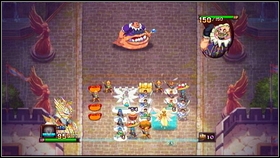
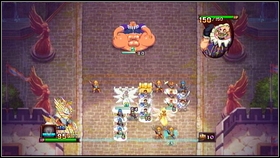
Apart from that, after calling in his minions, the count will take out his wand which will use after 4 turns. By doing so, he will change part of your army into food [1] eat all the dishes in the next round. The strength of his next attack depends on how much he eats [2], so try to remove as many dishes as possible with CIRCLE.
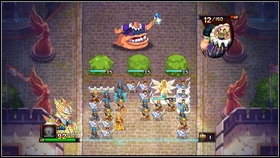
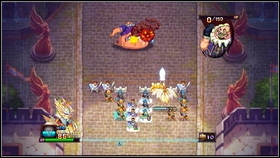
Once the monster is done eating, you have five turns to kill it, otherwise you will receive some very serious damage. It's definitely worth to use the shield spell here. Afterwards the count will repeat the same series of attacks, but this time the slimes will be bigger and attack after only 2 turns [1]. I'd recommend quickly creating an attack formation with an Angel or Griffin, shielding it with a wall and focusing mainly on dealing damage [2]. The shield spell should protect you from more powerful attacks.
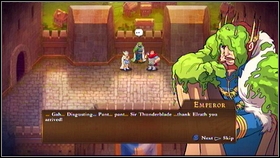
![After you finish the fight [1], the next part of the campaign will begin [2] - Holy Griffin Empire - p. 3 - Walkthrough - Might & Magic: Clash of Heroes - Game Guide and Walkthrough](https://game.lhg100.com/Article/UploadFiles/201512/2015121618032019.jpg)
After you finish the fight [1], the next part of the campaign will begin [2].
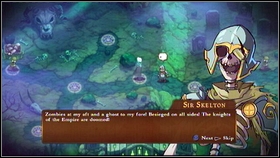
![After the mission start head east, where you will meet Sir Skelton [1] and receive the first unit - Skeletons [2] - Heresh - p. 1 - Walkthrough - Might & Magic: Clash of Heroes - Game Guide and Walkthrough](https://game.lhg100.com/Article/UploadFiles/201512/2015121618032073.jpg)
After the mission start head east, where you will meet Sir Skelton [1] and receive the first unit - Skeletons [2].
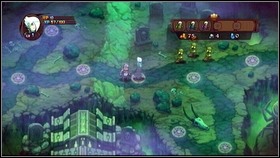
![A bit further you will have to fight a squad of Zombies (LVL 1) [1] - Heresh - p. 1 - Walkthrough - Might & Magic: Clash of Heroes - Game Guide and Walkthrough](https://game.lhg100.com/Article/UploadFiles/201512/2015121618032039.jpg)
A bit further you will have to fight a squad of Zombies (LVL 1) [1]. During the battle, remember about the Blood Ritual spell. It kills all your idle units and deals the more damage, the more units you sacrificed [2].
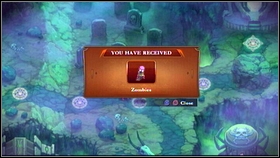
![In return for winning you will gain access to Zombies [1] - Heresh - p. 1 - Walkthrough - Might & Magic: Clash of Heroes - Game Guide and Walkthrough](https://game.lhg100.com/Article/UploadFiles/201512/2015121618032096.jpg)
In return for winning you will gain access to Zombies [1]. Head south and attack the enemies (LVL 2) guarding the necromancer imprisoned in the cage [2].
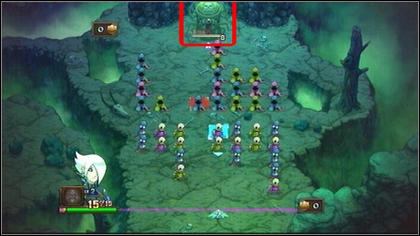
In order to free the man, you have to destroy the cage on the other side of the battlefield. The battle will then end and Fiona will receive a new unit type - the Ebon Guard.
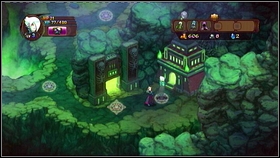
![Your destination are the catacombs in the lower right corner of the location [1] - Heresh - p. 1 - Walkthrough - Might & Magic: Clash of Heroes - Game Guide and Walkthrough](https://game.lhg100.com/Article/UploadFiles/201512/2015121618032142.jpg)
Your destination are the catacombs in the lower right corner of the location [1]. Before you go there however, open the chest in the north and collect the first artifact - the Cursed Shield [2].
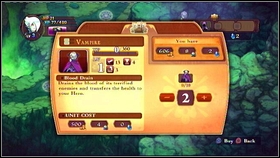
![If you have a sufficient amount of resources, you can also buy some Vampires at the unit dwelling to the right of the underground entrance [1] - Heresh - p. 1 - Walkthrough - Might & Magic: Clash of Heroes - Game Guide and Walkthrough](https://game.lhg100.com/Article/UploadFiles/201512/2015121618032156.jpg)
If you have a sufficient amount of resources, you can also buy some Vampires at the unit dwelling to the right of the underground entrance [1]. Inside the catacombs [M3.2], go maximally east and pick up the rubies from the ground [2].
![You can spend them on Ghosts at the unit dwelling found in the lower right corner of the location [1] - Heresh - p. 1 - Walkthrough - Might & Magic: Clash of Heroes - Game Guide and Walkthrough](https://game.lhg100.com/Article/UploadFiles/201512/2015121618032212.jpg)
You can spend them on Ghosts at the unit dwelling found in the lower right corner of the location [1]. In the upper left corner there's also a chest full of gold [2].
![When you're ready, go north and attack the Ghost found there (LVL 7) [1] - Heresh - p. 1 - Walkthrough - Might & Magic: Clash of Heroes - Game Guide and Walkthrough](https://game.lhg100.com/Article/UploadFiles/201512/2015121618032267.jpg)
When you're ready, go north and attack the Ghost found there (LVL 7) [1]. The first phase of the battle will be different than normally. Your enemy is a powerful skeleton that sucks life out of your units every turn [2] and after 6 turns executes a powerful attack (two rows wide).your task is to block his attack, so try to create as many walls as possible.
![After executing the attack, the giant will disappear and the more standard fight will begin [1] - Heresh - p. 1 - Walkthrough - Might & Magic: Clash of Heroes - Game Guide and Walkthrough](https://game.lhg100.com/Article/UploadFiles/201512/2015121618032236.jpg)
After executing the attack, the giant will disappear and the more standard fight will begin [1]. If the battle will turn out to be too difficult for you, try fighting the randomly encountered monsters in the catacombs. That way you can gain a new level and the fight will become easier. In return for defeating the guardian you will receive resources and the Ghost unit [2].
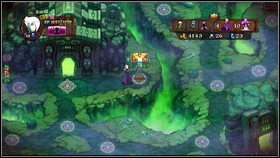
Return to the first location and head into the ancient ruins in the west [M3.4] [1]. Before entering, it's worth to pick up the gold lying on the right [2].
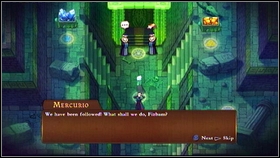
![The mages you're looking for can be found in the northern part of the location [1] - Heresh - p. 1 - Walkthrough - Might & Magic: Clash of Heroes - Game Guide and Walkthrough](https://game.lhg100.com/Article/UploadFiles/201512/2015121618032314.jpg)
The mages you're looking for can be found in the northern part of the location [1]. When you approach them, you will be attacked by a group of demons (LVL 5) [2].
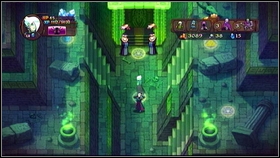
![Kill the enemies and afterwards take care of the mages (LVL 5) [1] - Heresh - p. 1 - Walkthrough - Might & Magic: Clash of Heroes - Game Guide and Walkthrough](https://game.lhg100.com/Article/UploadFiles/201512/2015121618032319.jpg)
Kill the enemies and afterwards take care of the mages (LVL 5) [1]. In order to defeat them, you first have to hit the two switches at the top [2].
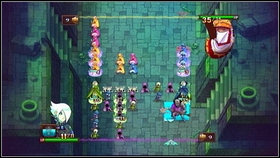
![That way you will deactivate the barrier and will be able to damage [1] - Heresh - p. 1 - Walkthrough - Might & Magic: Clash of Heroes - Game Guide and Walkthrough](https://game.lhg100.com/Article/UploadFiles/201512/2015121618032351.jpg)
That way you will deactivate the barrier and will be able to damage [1]. After the fight you will receive some resources and the Twilight Urn artifact [2].
![Collect the gold and rubies lying on the sides [1] [2] and leave the underground - Heresh - p. 2 - Walkthrough - Might & Magic: Clash of Heroes - Game Guide and Walkthrough](https://game.lhg100.com/Article/UploadFiles/201512/2015121618032430.jpg)
Collect the gold and rubies lying on the sides [1] [2] and leave the underground.
In order to find the magic portal, head to the upper right corner of the location [M3.1]. there you will find a rock that will transform into a Titan (LVL 7) [1]. Defeat it and enter the crypt in the north [2].
Inside [M3.5], pick up the rubies on the right [1] and afterwards attack the demons (LVL 7) that are blocking the stairs [2].
After running away from the fighting monsters, head east [M3.6]. cross the dragon skeleton [1] and you will once again encounter mages (LVL 8) [2].
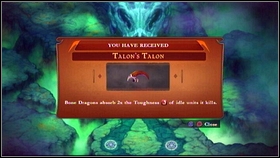
![In return for defeating them the dragon will give you the Talon's Talon [1] - Heresh - p. 2 - Walkthrough - Might & Magic: Clash of Heroes - Game Guide and Walkthrough](https://game.lhg100.com/Article/UploadFiles/201512/2015121618032513.jpg)
In return for defeating them the dragon will give you the Talon's Talon [1]. Take it and head south [2].
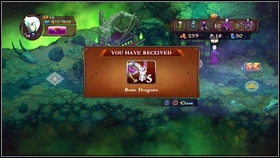
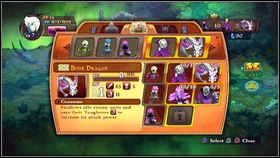
After reaching the new location [M3.7], buy units at the nearby unit dwelling. Bone Dragons are powerful creatures [1] that eat idle units, increasing their attack power [2].
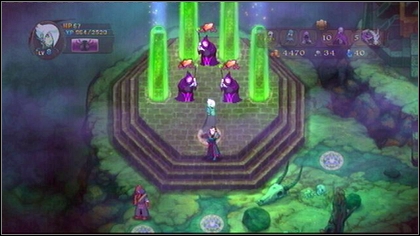
The ritual spot is in the north. Your task is to defeat the mages found there (LVL 9).
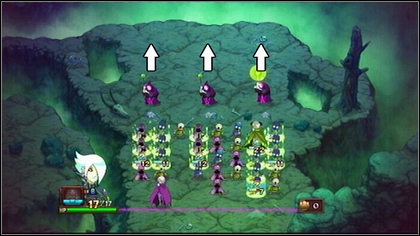
In order to do that, you have to push the enemies into the abyss. Ach attack pushes a mage back a few spaces, depending on the power of the attack. The mages won't however just stand there and do nothing. Every few turns one of them will raise his wand and attack. Apart from that, the enemies will also try to move away from the abyss. Create multiple weaker attack formations and you should win the fight quite fast.
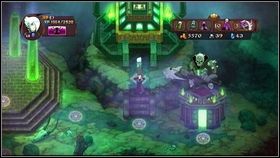
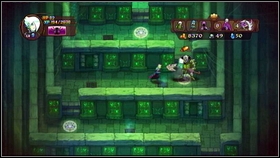
Once the battle is over, head to the Necropolis [M3.9]. the entrance is in the upper right corner of the location [1]. There are three enemies waiting for you inside the corridor. The first one is LVL 8 and the two others LVL 9 [2].
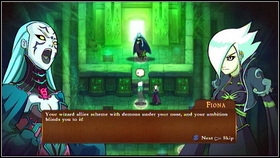
![Eventually, you will have to fight with Ludmilla (LVL 12) [1] - Heresh - p. 2 - Walkthrough - Might & Magic: Clash of Heroes - Game Guide and Walkthrough](https://game.lhg100.com/Article/UploadFiles/201512/2015121618032697.jpg)
Eventually, you will have to fight with Ludmilla (LVL 12) [1]. Throughout this fight, keep attacking the necromancer the whole time. At the beginning, the enemy will also summon two dragons in front of her [2]. Create as many walls in front of them as possible.
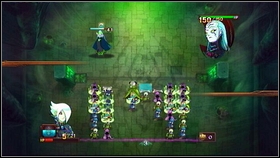
![After you survive the first attack, the boss will move to the left and start preparing a powerful spell [1] - Heresh - p. 2 - Walkthrough - Might & Magic: Clash of Heroes - Game Guide and Walkthrough](https://game.lhg100.com/Article/UploadFiles/201512/2015121618032722.jpg)
After you survive the first attack, the boss will move to the left and start preparing a powerful spell [1]. You can't damage her while she's doing that, so once again create multiple walls or tough attack formations [2].
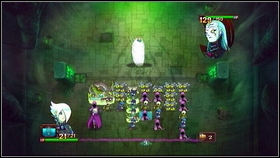
![After casting the spell, Ludmilla will return to the middle and envelop in a cocoon [1] - Heresh - p. 2 - Walkthrough - Might & Magic: Clash of Heroes - Game Guide and Walkthrough](https://game.lhg100.com/Article/UploadFiles/201512/2015121618032738.jpg)
After casting the spell, Ludmilla will return to the middle and envelop in a cocoon [1]. Try to deal as much damage as possible, at the same time creating protection on the whole width of the battlefield. After a few turns the enemy will summon an army of bugs which will attack every column of your army [2].
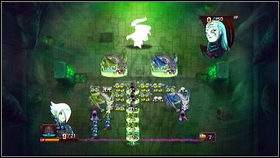
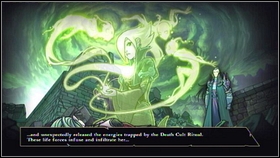
If you won't manage to defeat the enemy by then, she will start over the series of attack, but with subtle changes. Instead of moving left, she will go to the right and she won't summon the dragons right in front of her, but one square to the left and right from the middle [1]. With the enemy dead, the undead campaign will come to an end and Fiona will return to the living [2].
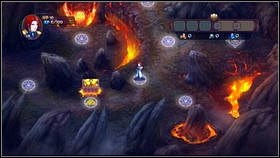
![After the mission begins, collect the gold lying on the left [1] and head to the location in the north-east [M4 - Sheogh - p. 1 - Walkthrough - Might & Magic: Clash of Heroes - Game Guide and Walkthrough](https://game.lhg100.com/Article/UploadFiles/201512/2015121618032825.jpg)
After the mission begins, collect the gold lying on the left [1] and head to the location in the north-east [M4.2] [2].
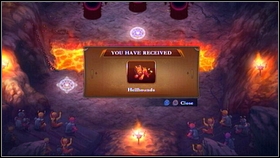
![Once the short cutscene ends, three first units will join your army: the Horned Demon, Imp and Hellhound [1] and the first battle with demons (LVL 5) will begin soon afterwards [M4 - Sheogh - p. 1 - Walkthrough - Might & Magic: Clash of Heroes - Game Guide and Walkthrough](https://game.lhg100.com/Article/UploadFiles/201512/2015121618032878.jpg)
Once the short cutscene ends, three first units will join your army: the Horned Demon, Imp and Hellhound [1] and the first battle with demons (LVL 5) will begin soon afterwards [M4.2] [2].
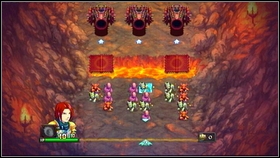
![Your targets are three cannons on the other side of the lava river [1] - Sheogh - p. 1 - Walkthrough - Might & Magic: Clash of Heroes - Game Guide and Walkthrough](https://game.lhg100.com/Article/UploadFiles/201512/2015121618032804.jpg)
Your targets are three cannons on the other side of the lava river [1]. In order to reach them your units have to run across the sideway moving platforms [2]. Try to predict their movements and match them with your units' charge time. One weak hit is enough to destroy the cannon.
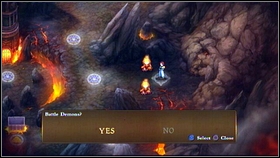
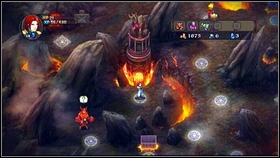
Once the battle is over, Aidan will return to the first location [M4.1], where he will be attacked by more enemies (LVL 3) [1]. Defeat them and head south-west to find the Nightmare unit dwelling [2].
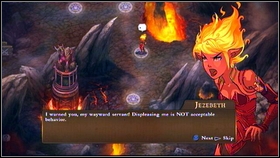
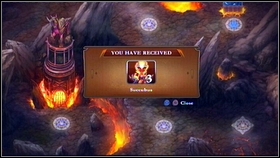
Buy a few of these mighty steeds and head north. There you will meet Jezebeth (LVL 3) [1]. Upon defeat, she will join your team and your army will be aided by a Succubus [2].
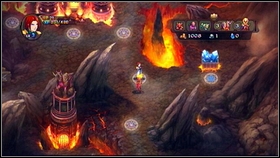
![Collect the rubies lying on the right [1] and attack the demons (LVL 4) guarding the tavern in the north [2] - Sheogh - p. 2 - Walkthrough - Might & Magic: Clash of Heroes - Game Guide and Walkthrough](https://game.lhg100.com/Article/UploadFiles/201512/2015121618032930.jpg)
Collect the rubies lying on the right [1] and attack the demons (LVL 4) guarding the tavern in the north [2].
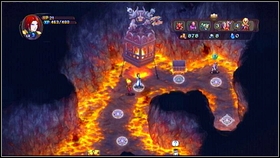
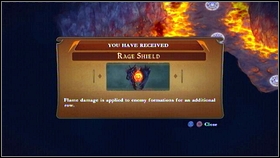
After defeating them, head to the cave in the west [M4.4] [1]. Inside you will find rubies, gold, a unit dwelling of Abyssal Lord and the first artifact - Rage Shield [2].

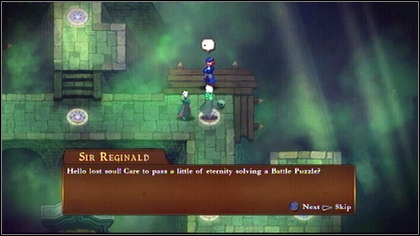
There will be also a man giving battle puzzles. After the first one starts, follow the instructions. Move the grey Hellhounds standing below the red Succubus to the middle, to create a symmetrical rectangle. When you're done with that, remove the Hellhound surrounded by Imps.
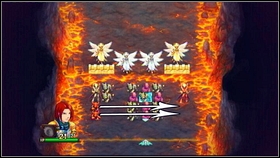
![Use the gained moves to push the red Demons below the red Succubus [1] and create an attack formation from the grey Succubus [2] - Sheogh - p. 2 - Walkthrough - Might & Magic: Clash of Heroes - Game Guide and Walkthrough](https://game.lhg100.com/Article/UploadFiles/201512/2015121618033016.jpg)
Use the gained moves to push the red Demons below the red Succubus [1] and create an attack formation from the grey Succubus [2]. That way you will solve your fist puzzle.

The second one is a bit harder. Start off by eliminating the red Demon on the right. He's standing on the height of the red Nightmare. That way you will obtain many more moves.

Now you need to eliminate another red Demon, this time the one standing before the grey Nightmare. A free space will show up in the column into which you will be able to place a pink Hellhound. With an attack formation created, the army will move.
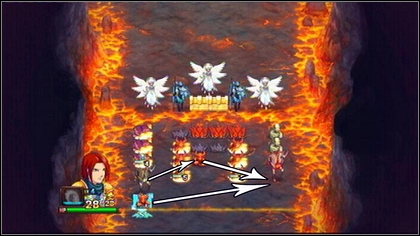
Place the two last red Demons below the red Nightmare and move the grey Nightmare to the middle of the battlefield.
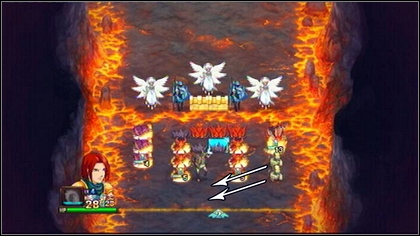
Placing two grey Imps below it will be enough to end the battle.
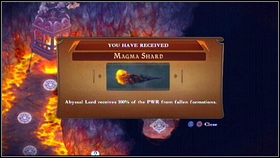
![In return for solving the puzzles, you will receive resources, two artifacts (Thorn Whip and Magma Shard) [1] and precious experience points that will make the battle with the demon waiting in the tavern easier [2] - Sheogh - p. 2 - Walkthrough - Might & Magic: Clash of Heroes - Game Guide and Walkthrough](https://game.lhg100.com/Article/UploadFiles/201512/2015121618033225.jpg)
In return for solving the puzzles, you will receive resources, two artifacts (Thorn Whip and Magma Shard) [1] and precious experience points that will make the battle with the demon waiting in the tavern easier [2]. If you will still have problems with it, you can always complete a few side missions, described in another part of the guide.
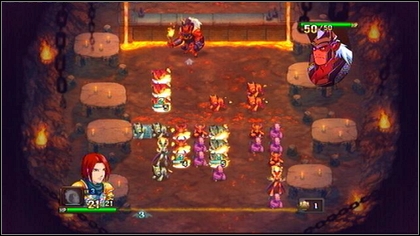
The battle with Lorkish (LVL 5) is not of the easy type. You enemy will keep on moving in random directions throughout the whole fight and throw torches dealing 20 damage on six fields. He is also aided be Hellhounds that will keep on appearing and that you need to block with your own attack formations. Above all try to protect from the hounds, attacking Lorkish as the second priority. Hitting the boss is awfully difficult, but you should eventually manage. You can also sometimes create a couple stronger walls and attack the enemy with spells.
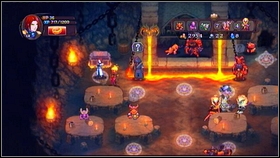
![With the enemy down, open the chest on the left (Burning Horn) [1] and leave the tavern [2] - Sheogh - p. 3 - Walkthrough - Might & Magic: Clash of Heroes - Game Guide and Walkthrough](https://game.lhg100.com/Article/UploadFiles/201512/2015121618033219.jpg)
With the enemy down, open the chest on the left (Burning Horn) [1] and leave the tavern [2].
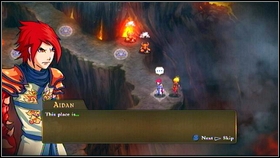
![Head north and you will reach the foot of the mountain [1] - Sheogh - p. 3 - Walkthrough - Might & Magic: Clash of Heroes - Game Guide and Walkthrough](https://game.lhg100.com/Article/UploadFiles/201512/2015121618033242.jpg)
Head north and you will reach the foot of the mountain [1]. A bit further you will have to fight the first demon squad (LVL 5) [2].
![After the fight, visit the unit dwelling in the west [1] - Sheogh - p. 3 - Walkthrough - Might & Magic: Clash of Heroes - Game Guide and Walkthrough](https://game.lhg100.com/Article/UploadFiles/201512/2015121618033331.jpg)
After the fight, visit the unit dwelling in the west [1]. There you will be able to buy the Pit Fiend. A bit further there's also a chest, containing the Pit Master's Tail [2]. Pick up the item and keep climbing up the hill.
![After reaching the next location, there will be a short cutscene [1] - Sheogh - p. 3 - Walkthrough - Might & Magic: Clash of Heroes - Game Guide and Walkthrough](https://game.lhg100.com/Article/UploadFiles/201512/2015121618033344.jpg)
After reaching the next location, there will be a short cutscene [1]. Watch it and go inside the red portal [2].
![Once you're on the other side, attack the mages standing below (LVL 6) [1] and afterwards attack the pair of demons (LVL 6) [2] - Sheogh - p. 3 - Walkthrough - Might & Magic: Clash of Heroes - Game Guide and Walkthrough](https://game.lhg100.com/Article/UploadFiles/201512/2015121618033316.jpg)
Once you're on the other side, attack the mages standing below (LVL 6) [1] and afterwards attack the pair of demons (LVL 6) [2].
![Afterwards you can replenish your army by talking with the Succubus on the left and Nightmare on the right [1] - Sheogh - p. 3 - Walkthrough - Might & Magic: Clash of Heroes - Game Guide and Walkthrough](https://game.lhg100.com/Article/UploadFiles/201512/2015121618033470.jpg)
Afterwards you can replenish your army by talking with the Succubus on the left and Nightmare on the right [1]. There's another battle waiting for you beside the portal [2].
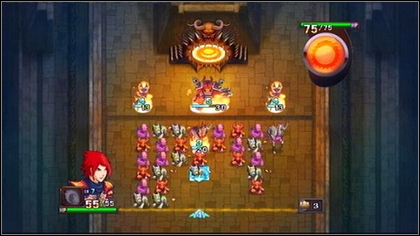
You have to destroy the hellish portal, from which demons will be coming out. In the first wave, a big demon in the middle and two Succubus on the sides will appear. Try to block the attacks of the two lesser enemies, as killing them will strengthen the attack of the monster with the axe.
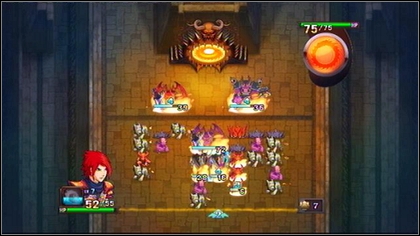
One the three demons are dead, two Nightmare units will appear. Try to weaken their attacks, but mainly focus on attacking the portal. The next enemy wave will be quite powerful, but you should be able to destroy the portal before they can attack.
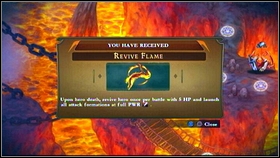
After the volcano eruption, head east [M4.9]. defeat the demon (LVL 7) forces waiting there and afterwards pick up the nearby gold [1]. A bit further you will find a chest with the Revive Flame artifact [2].
![After reaching the northern edge of the location, you will be attacked by a Wizard (LVL 8) [1] and Demon (LVL 8) [2] - Sheogh - p. 3 - Walkthrough - Might & Magic: Clash of Heroes - Game Guide and Walkthrough](https://game.lhg100.com/Article/UploadFiles/201512/2015121618033525.jpg)
After reaching the northern edge of the location, you will be attacked by a Wizard (LVL 8) [1] and Demon (LVL 8) [2].
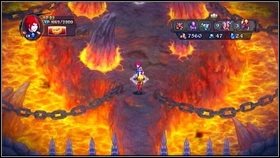
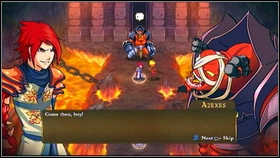
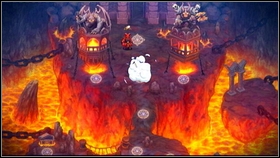
Defeat them and move to the next location [M4.10] [1]. Here you will have to face the last enemy - Azexes (LVL 10) [2].
![In the first phase of the battle your enemy will create two energy balls with a maximum attack of 35 and charge time of 3 turns [1] - Sheogh - p. 3 - Walkthrough - Might & Magic: Clash of Heroes - Game Guide and Walkthrough](https://game.lhg100.com/Article/UploadFiles/201512/2015121618033519.jpg)
In the first phase of the battle your enemy will create two energy balls with a maximum attack of 35 and charge time of 3 turns [1]. Block them with attack formations or walls and afterwards attack the demon [2].
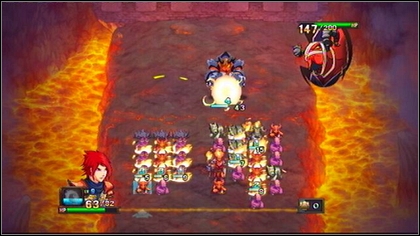
After the first attack, the demon will move right and create one large ball. The charge time this time is 4 and the maximum attack 85.
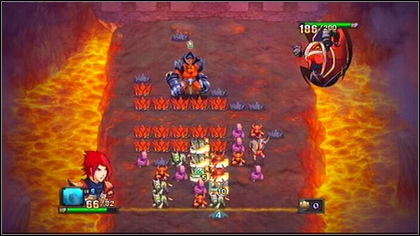
In the last phase, Azexes will teleport left. in the first turn he'll summon walls on the whole width of the battlefield and in the second change them into fireballs. Those three phases will keep on repeating until you defeat him.
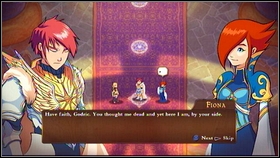
![After beginning the mission and watching the cutscene [1], you will be able to choose the undead units and Fiona's artifacts [2] - Academy - p. 1 - Walkthrough - Might & Magic: Clash of Heroes - Game Guide and Walkthrough](https://game.lhg100.com/Article/UploadFiles/201512/2015121618033670.jpg)
After beginning the mission and watching the cutscene [1], you will be able to choose the undead units and Fiona's artifacts [2].
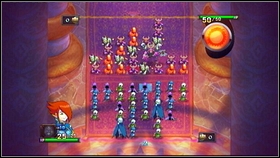
![Afterwards, you will have to battle the demon Jaxler (LVL 6) [1] - Academy - p. 1 - Walkthrough - Might & Magic: Clash of Heroes - Game Guide and Walkthrough](https://game.lhg100.com/Article/UploadFiles/201512/2015121618033738.jpg)
Afterwards, you will have to battle the demon Jaxler (LVL 6) [1]. The fight might seem easy, but unfortunately the reality proves otherwise. Apart from ordinary attack, every two turns the demon summons a wave of fire that destroys nearly all your units. Appropriate preparations are needed in order to defeat him. Id' recommend equipping the Crown of Thorns artifact and not taking any champion units. During the fight, above all try to block the attacks of bigger demons and do everything to charge the spell as fast as possible. You can do it by creating chains, links or fusions, creating formations by removing units or receiving damage. After gaining access to the spell, summon as many idle units as possible and cast the spell. Repeat this until you defeat the enemy [2].
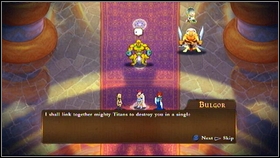
![In the next battle, Anwen will have to face Bulgor (LVL 8) [1] - Academy - p. 1 - Walkthrough - Might & Magic: Clash of Heroes - Game Guide and Walkthrough](https://game.lhg100.com/Article/UploadFiles/201512/2015121618033707.jpg)
In the next battle, Anwen will have to face Bulgor (LVL 8) [1]. You will fight against three Titans, whose powerful attacks you just need to block. The first to attack will be the enemies on the sides and afterwards the foe in the middle. The fight can be made much easier if you use the Ring of Life artifact. It can revive your hero once every battle, giving you the chance to keep on fighting. Using it, you can forget about blocking the two side titans and focus only on the middle enemy. Create the maximum amount of walls or champion units attack formations in front of him [2]. If you can survive his attack, you will win the battle.
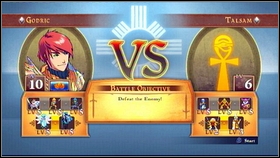
![In the last fight, Godric will be attacked by Talsam (LVL 6) [1] - Academy - p. 1 - Walkthrough - Might & Magic: Clash of Heroes - Game Guide and Walkthrough](https://game.lhg100.com/Article/UploadFiles/201512/2015121618033783.jpg)
In the last fight, Godric will be attacked by Talsam (LVL 6) [1]. It's a very standard fight, with the only difference being that every turn your attack formations will lose a few attack points. However it shouldn't make the battle much more difficult [2]. After these three fights, you will take control over Nadia.
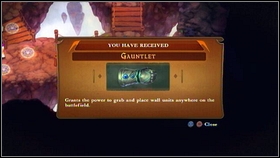
Right at the very beginning your army will be aided by three core units. They will be: Iron Golem, Apprentice and Gremlin [1]. You will also receive the first artifact - Gauntlet [2].
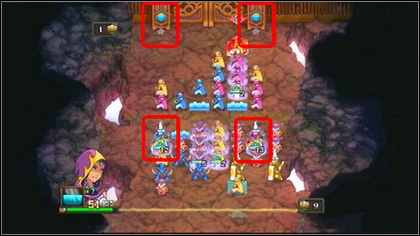
Properly equipped, go west and take a look at the closed gate. You will need a mage's help in order to open it. You can find one in the south. Talk with the man and you will receive the Mage unit. Having it, you can attack the gate guards (LVL5). In order to win, your Mages have to hit two points on both sides of the bars at the same time. Arrange them properly and create two attack formations in the same round.
![After you win, the gate will be opened [1] and your hero will receive the Absorb Circlet artifact [1] - Academy - p. 1 - Walkthrough - Might & Magic: Clash of Heroes - Game Guide and Walkthrough](https://game.lhg100.com/Article/UploadFiles/201512/2015121618033859.jpg)
After you win, the gate will be opened [1] and your hero will receive the Absorb Circlet artifact [1].
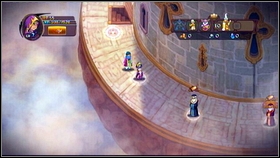
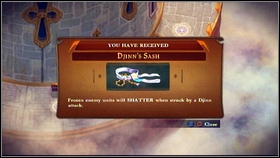
Now your target is reaching the next floor of the tower. Unfortunately the further way is blocked by enemy units [1]. They will be on levels 7, 8 and 9. After defeating the last enemy, you will receive the Djinn and the Djinn' Sash artifact [2].
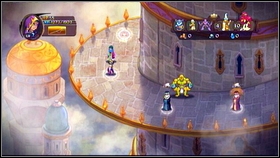
![At the start of the second floor you will have to fight more guards (LVL 7 and 8) [1] - Academy - p. 2 - Walkthrough - Might & Magic: Clash of Heroes - Game Guide and Walkthrough](https://game.lhg100.com/Article/UploadFiles/201512/2015121618033905.jpg)
At the start of the second floor you will have to fight more guards (LVL 7 and 8) [1]. In return for defeating one of the enemies you will receive 5 Titan units. The second to last enemy (LVL 8) on this floor is a bit stronger, but he shouldn't be too difficult for you. In return for winning you will receive the Rakshasas [2].
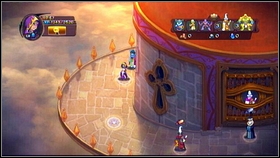
![After reaching the third floor of the tower, you will come across another enemy (LVL 9) [1] - Academy - p. 2 - Walkthrough - Might & Magic: Clash of Heroes - Game Guide and Walkthrough](https://game.lhg100.com/Article/UploadFiles/201512/2015121618033957.jpg)
After reaching the third floor of the tower, you will come across another enemy (LVL 9) [1]. Kill him and go further to the east. Defeat all the enemies and you will reach the fourth floor, where the last battles are waiting for you [2].
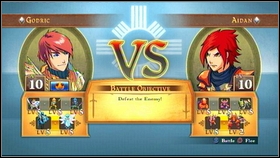
![At first Godric will fight with Aidan (LVL 10) [1] - Academy - p. 2 - Walkthrough - Might & Magic: Clash of Heroes - Game Guide and Walkthrough](https://game.lhg100.com/Article/UploadFiles/201512/2015121618033905.jpg)
At first Godric will fight with Aidan (LVL 10) [1]. The enemy will begin the fight by activating two of his champions, but the later part of the battle will be more standard [2].
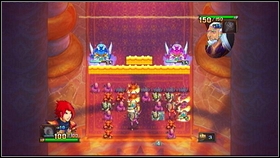
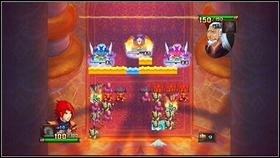
After winning this fight, Aidan will attack Azh Rafir (LVL 15). The enemy in this fight will be cheating a bit as well. He will begin the fight with a wall and two champions [1] and additionally a Phoenix will join them later on [2]. If you can sustain that attack, the rest of the fight shouldn't cause you many more problems.
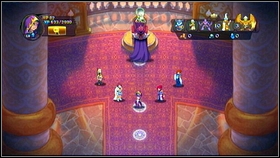
![Your last enemy will be Sir Lordcrown (LVL15) [1] - Academy - p. 2 - Walkthrough - Might & Magic: Clash of Heroes - Game Guide and Walkthrough](https://game.lhg100.com/Article/UploadFiles/201512/2015121618034043.jpg)
Your last enemy will be Sir Lordcrown (LVL15) [1]. The fight against is very demanding, so fight with a few random ones on the lower floor before starting it. Only after your hero and its army are on the maximum level should you attack the powerful mage [2]. I'd recommend give up on any elite units and champions and choose only one type of core unit. It will make controlling the fight much easier.
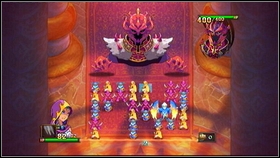
![The enemy's hands move in random directions and after three turns attack on the width of two spaces [1] - Academy - p. 2 - Walkthrough - Might & Magic: Clash of Heroes - Game Guide and Walkthrough](https://game.lhg100.com/Article/UploadFiles/201512/2015121618034015.jpg)
The enemy's hands move in random directions and after three turns attack on the width of two spaces [1]. All damage that they deal are added to the body of Lordcrown that will attack one turn after reaching 100 points [2]. The best way of staying alive and dealing with the enemy is to weaken/destroy the hands as fast as possible, so that they don't strengthen the main body, as well as blocking the main attack. Remember about using the spell, which can considerably weaken the enemy's attack. After a few attempts you should be able to kill the enemy and therefore finish the game.
Name
Prize
Level
Location
Principal I
NONE
NONE
The man is standing a bit to the north of Finwan's house [M1.1].
Principal II
NONE
NONE
He can be found to the right of the elven camp entrance [M1.7].
Gromir
700 gold, 3 ores, 1 ruby
3
Awaits in the south-west part of the woods [M1.1].
Skullbrow
950 gold, 5 ores, 2 rubies
5
He can be found in the north-west part of the forest [M1.1]. He will be standing on the right side of the room [M1.2].
Cuthlion
1200 gold, 6 ores, 2 rubies
8
Hides north-west of the place where you fought with the knight Varkas [M1.7].
Sparky
4 ores, 4 rubies
8
Sparky is a ginger and bearded man with a torch, who can be found below the druid tree to the left of the Trent unit dwelling [M1.4].
Angrod
900 gold, 4 ores, 1 ruby
7
Angrod can be found nearby the Druid treetop [M1.5].
Name
Prize
Level
Location
Principal
NONE
NONE
Can be found in the west part of the tavern [M2.5].
Georgie
700 gold, 3 ores, 1 ruby
4
Georgie is a knight resting in the east part of the tavern [M2.5].
Boydon
4 ores, 4 rubies
6
Boydon can be found west of the tavern. He's standing right beside the Priestess unit dwelling.
Erstam
900 gold, 4 ores, 1 ruby
8
Erstam is standing to the north-west of the arena, nearby the Griffin unit dwelling [M2.1].
Carnax
1200 gold, 6 ores, 2 rubies
12
In order to find the demon, head to the location east of the arena [M2.6]. in the upper right corner there's a knight who you have to defeat. By doing it, you will unlock a passage leading into a secret cave [M2.7].
Valdo
950 gold, 5 ores, 2 rubies
7
This mysterious vampire can be found in the north-west corner of the district patrolled by guards [M2.9].
Name
Prize
Level
Location
Principal I
NONE
NONE
He can be found west of the cage in which Markal was imprisoned [M3.1].
Principal II
NONE
NONE
He's standing right beside the place of the Death Cult Ritual [M3.7].
Bug Eye Magurk
700 gold, 3 ores, 1 ruby
4
Your enemy has hidden inside the cave [M3.3], the entrance to which can be found west of the catacombs [M3.1].
Stumpy the Elf
4 ores, 4 rubies
3
The elf you're looking for is hiding west of the Vampire unit dwelling [M3.1].
Balah the Wizard
900 gold, 4 ores, 1 ruby
4
He can be found in the lower left corner of the catacombs [M3.2].
Bloodthorn the Demon
950 gold, 5 ores, 2 rubies
7
The demon is hiding in the east part of the ancient ruins [M3.4].
Urolox
1200 gold, 6 ores, 2 rubies
9
The demon has hidden inside the cave [M3.8] to which the entrance can be found south-east of the place of the Deadth Cult Ritual [M3.7].
Name
Prize
Level
Location
Principal
NONE
NONE
The only client in this chapter can be found inside the tavern [M4.3].
Glut
700 gold, 3 ores, 1 ruby
4
The demon is hiding in the lower left corner of the location with the tavern [M4.1].
Drak
4 ores, 4 rubies
6
Drak can be found at the bottom of the mountain [M4.6], north of the Pit Fiend unit dwelling.
Ra Stavari
900 gold, 4 ores, 1 ruby
8
The mage is hiding inside a cave [M4.4], the entrance can be found west of the tavern.
Phlecher
3000 gold
9
Phlecher can be found in the location east of the tavern [M4.9]. You will be able to reach it after the volcano eruption.
Bly
950 gold, 5 ores, 2 rubies
8
The demon can be found inside the cave [M4.7] in the middle of the road to the mountain top [M4.6]. In order to get inside, you will have to defeat an Imp (LVL 7).
Bounty Agent
1233 gold, 3 ores, 3 rubies, Chaos Crown
10
He will attack in the tavern [M4.3], when you complete all the missions.
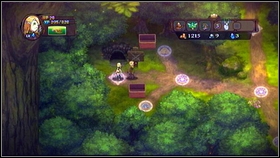
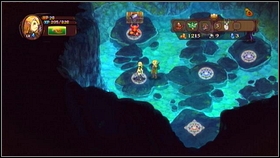
Head to the cave [M1.2] hidden north-west of the first location [M1.1] [1] and defeat the demon (LVL4) on the left [2]. He's protecting an artifact - the Deer Antler.
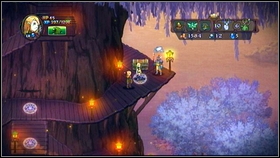
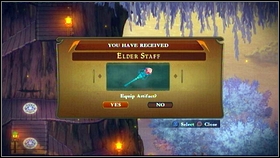
Kill the enemy (LVL 6) standing to the right of the knights cutting down a tree [M1.5] [1]. He's protecting the Elder Staff artifact [2].
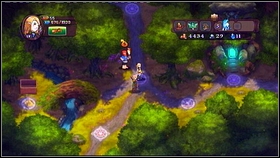
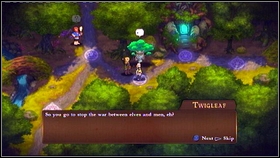
After defeating Sir Strat, go to the very bottom of the tree and go a bit further to the south [M1.4]. On one of crossroads there will be a bearded man with a torch [1]. To the right of it, a Twigleaf (LVL 5) which you have to defeat [2]. Throughout the fight, aim only at the trees. You need to weaken them all the time so they don't deal too much damage during their attack. Try to focus on one enemy and block the other one with walls. When the trees attack, they will be weakened and you will be able to easily finish them off. In return you will receive Treants.
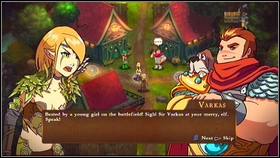
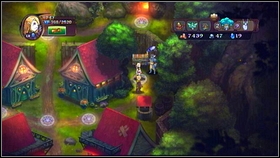
After fighting the knight Varkas [M1.7] [1], turn right. Beside the chest there will be Sir Nathanson (LVL 8) [2]. Defeat him and open the chest. Inside you will find Dragon Scales.
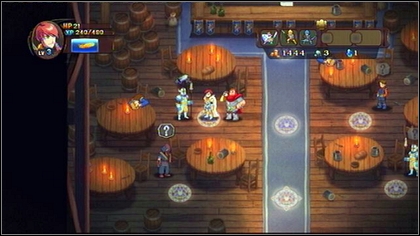
The first side mission is fighting Jarvis (LVL6) in the tavern [M2.5].
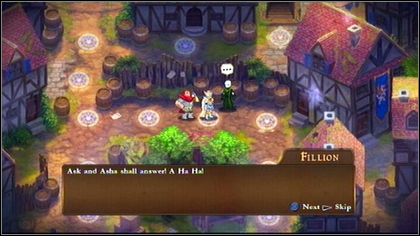
Fillion (LVL 7) will appear after freeing Evelyn. He will be standing where the first guards puzzle took place [M2.2].
Sir Gerhardt (LVL 8) can be found beside the arena [M2.1], right after the tournament ends.
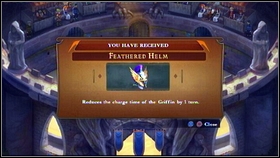
After visiting count Caryle's estate, head to the arena [M2.1] [1]. Talk with the herald to begin the series of battles. In return for defeating the first enemy (LVL 7) you will receive gold, ore, rubies and the Feathered Helm [2].
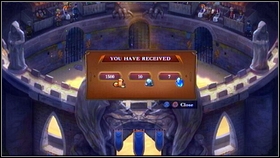
![Winning the second battle (LVL 8) will give you more resources [1] - Holy Griffin Empire - Side missions - Might & Magic: Clash of Heroes - Game Guide and Walkthrough](https://game.lhg100.com/Article/UploadFiles/201512/2015121618034215.jpg)
Winning the second battle (LVL 8) will give you more resources [1]. Defeating the third and last enemy will grant you with gold, ore, ruby and the Crown of Elrath [2].
The first optional enemy is the Zombie squad (LVL 1) standing west of the place where you begin the game [M3.1].
After receiving the Zombie and bid Sir Skelton (LVL 5) goodbye, you can ask them for a sparring [M3.1]. in return you will receive resources and the Spider Cloak.
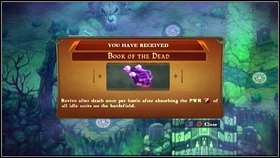
After defeating Skelton, the warrior will tell you of a treasure that has been hidden under a "natural" cross. Head west and press X while standing in the middle crossroads [M3.1] [1]. You will find the Book of The Dead [2].
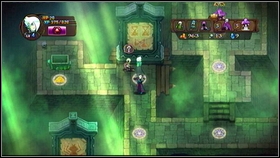
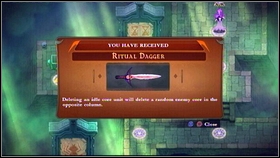
The skeleton standing in the upper left corner of the catacombs [M3.2] will give you a riddle. You have to tell him the number of spider legs, shining coins and broken hourglasses. All of them can be found in the paintings hidden throughout the catacombs [1]. The correct answer is 10. In return you will receive the Ritual Dagger [2].
Farnir (LVL 5) is standing to the left of the ancient ruins [M3.1]. after the fight he will give you the Blood Ring.
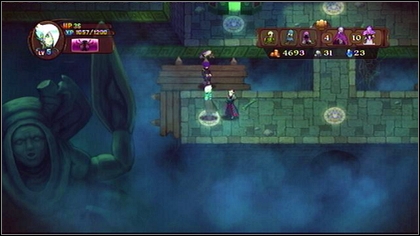
This strange necromancer can be found in the southern part of the ancient ruins [M3.4].
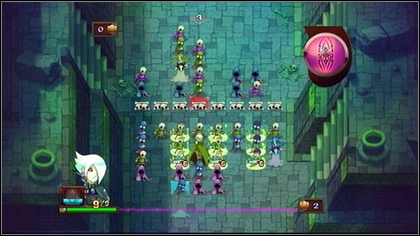
In order to defeat him, you have to hit the enemy three times during one turn. It isn't easy, but if you create enough simultaneous formations, you should make it. In return you will receive the Crown of Thorns.
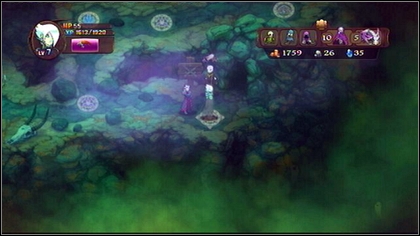
This powerful necromancer (LVL 10) can be found in the lower right corner of the location, where the Death Cult Ritual takes place [M3.7].
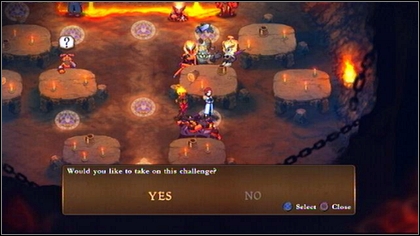
The demon Dirge (LVL 6) is inside the tavern, surrounded by two Succubuses [M4.3].
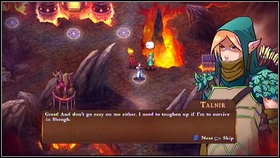
The elf Talnir (LVL 6) can be found south-east of the tavern [M4.1] [1]. After the fight, he will give you the Celerity Ring [2].
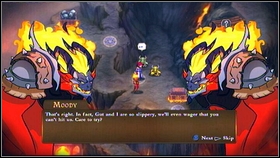

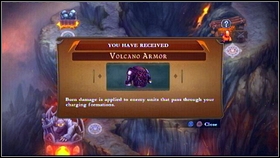
Moody (LVL 7) and his friend Gut can be found in the middle of the mountain climbing in the north [M4.6] [1]. In order to defeat the enemies, you have to kill the yellow and green demon. They will both move towards the middle of the battlefield each turn, so anticipate their movements and match the charge time of your units with it. In return for winning you will receive the Volcano Armor [2].
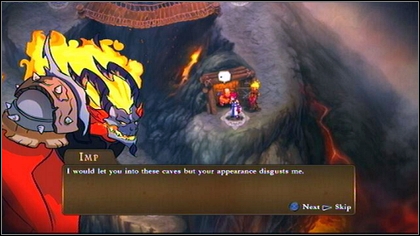
The Imp (LVL 7) is guarding the cave entrance, in the middle of the road to the mountain top [M4.6].
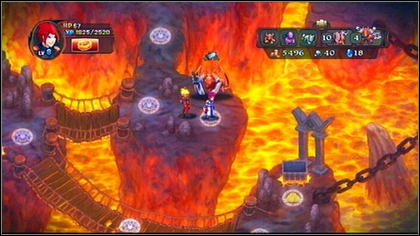
The Pit Fiend (LVL 9) can be found in the location east of the tavern, right beside the chest with at artifact [M4.9].
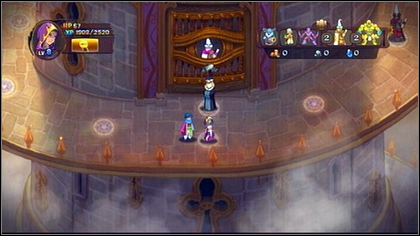
The guard (LVL 10) connected with the side quest can be found on the 3rd level of the tower [M5.4].
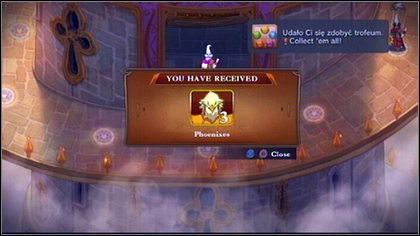
In return for defeating him you will receive the Phoenix and the ability to call in all other units.
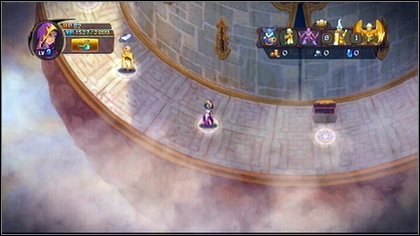
After the first unsuccessful fight with the main boss, retreat to the very bottom of the tower. On each floor you will find one of the Guards (LVL 8, 8 and 9).
![To the east of the Druid unit dwelling there's an Elf (LVL7) [1] - Units list - Special units - Might & Magic: Clash of Heroes - Game Guide and Walkthrough](https://game.lhg100.com/Article/UploadFiles/201512/2015121618034768.jpg)
To the east of the Druid unit dwelling there's an Elf (LVL7) [1]. Attack and defeat it to unlock the cave entrance [2]. Inside you will find rubies, ore and Unicorn unit dwelling [M1.8].
On the square with the Angel unit dwelling [M2.6] you will find Sir Randy (LVL 7), who's guarding one of the statues [1]. Attack and defeat him to unlock the passage into a secret cave [M2.7] [2].
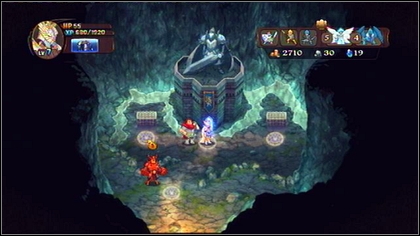
Inside you will find a demon wanted by a bounty hunter, who's guarding two treasure chests (Holy Blade) and the Sword Master unit dwelling.
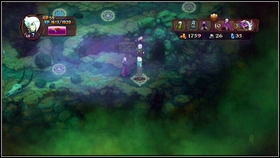
The Wraith unit dwelling can be found inside the cave [M3.8] [1], the entrance to which [2] is south-east of the place of the Death Cult Ritual [M3.7].
The unit dwelling of this unit has been hidden in the cave [M4.7] [1], to which the entrance can be found in the middle of the road to the mountain top [M4.6]. In order to get inside, you have to defeat the Imp (LVL 7) [2].

You will receive it in return for defeating the Guard (LVL 10) on the 3rd floor of the tower [M5.4].
![After defeating Sir Strat and landing at the bottom of the tree, go back north [1] - Irollan - Battle puzzles - Might & Magic: Clash of Heroes - Game Guide and Walkthrough](https://game.lhg100.com/Article/UploadFiles/201512/2015121618034877.jpg)
After defeating Sir Strat and landing at the bottom of the tree, go back north [1]. On one of the floors [M1.5] there will be an elf, you will give you he first puzzle [2]. These battles differ from standard fights. During them you have only one turn consisting of three moves and you have to defeat every enemy on the battlefield. Sometimes three moves aren't enough, so remember about using chains which will increase their number.
Requirements: Druid
Prize: 450 gold, 2 ores, 1 ruby.
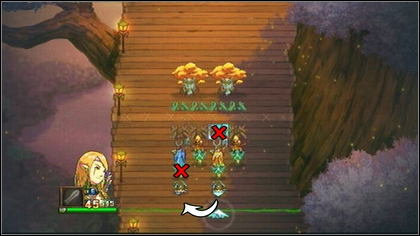
In order to solve the first puzzle, follow these steps. Move Bear on the right, behind the Bear on the left and afterwards remove the Pixie in front of it. The next you have to do is remove the wall in front of the yellow Druid.
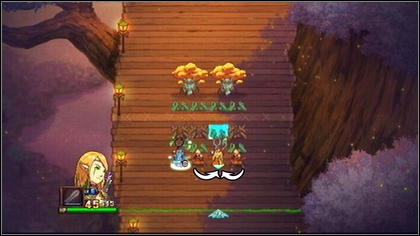
That way you will create another wall and unlock two Hunters. Move them behind the Druid and the puzzle will end.
Requirements: Dear
Prize: 750 gold, 4 ores, 2 rubies, Vine Gloves
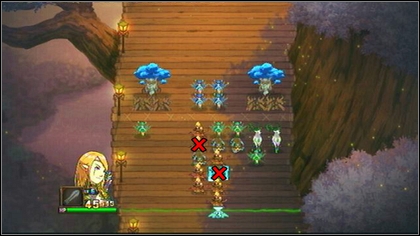
Start off by removing the Hunter standing before the Bear on the left and afterwards eliminate the Bear on the right.
![Move the Pixie from the middle behind the Deer so that they create an attack formation [2] - Irollan - Battle puzzles - Might & Magic: Clash of Heroes - Game Guide and Walkthrough](https://game.lhg100.com/Article/UploadFiles/201512/2015121618034976.jpg)
Move the Pixie from the middle behind the Deer so that they create an attack formation [2]. The last you have to do is move the Deer to face the Trent on the left and in the end place the two remaining Pixie behind it.
The second puzzle elf can be found right beside where you fought the knight Varkas [M1.7].
Requirements: Emerald Dragon, Dear
Prize: 500 gold, 4 ores, 1 ruby
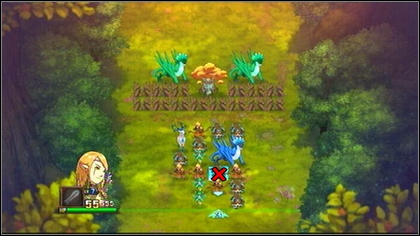
After the battle begins, get rid of the Bear standing between three Hunters.
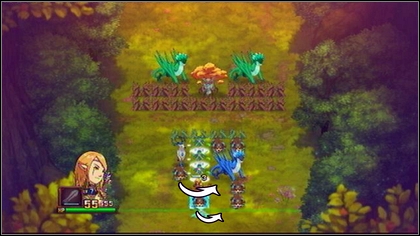
That way you will gain two additional moves. Use it to move two additional Bears behind the blue Emerald Dragon.
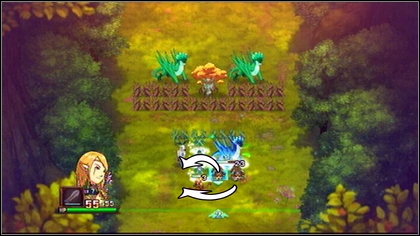
Once the formation is created, move the two last Bears behind the Deer and you will finish the puzzle.
Requirements: Trent
Prize: 750 gold, 5 ores, 2 rubies, Treant Sap
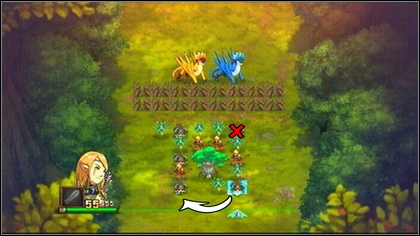
Move the Bear from the right to behind the same unit of the left. Afterward remove the Bear standing in the upper right corner. That way you will gain two additional moves.
![The last you have to do is eliminate the yellow Hunter [1] and move the green Pixie behind the Trent so that you create an attack formation [2] - Irollan - Battle puzzles - Might & Magic: Clash of Heroes - Game Guide and Walkthrough](https://game.lhg100.com/Article/UploadFiles/201512/2015121618035188.jpg)
The last you have to do is eliminate the yellow Hunter [1] and move the green Pixie behind the Trent so that you create an attack formation [2]. The tree's attack will conclude this Battle Puzzle.
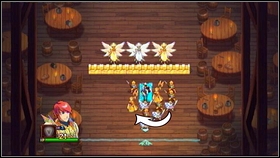
The first person who will give you a puzzle is the bartender [M2.5].
Requirements: Priestess, Knight
Prize: 1000 gold, 5 ores, 3 rubies
![Move the white Swordsmen on the right to behind the Priestess on the left [1] - Holy Griffin Empire - Battle puzzles - Might & Magic: Clash of Heroes - Game Guide and Walkthrough](https://game.lhg100.com/Article/UploadFiles/201512/2015121618035156.jpg)
Move the white Swordsmen on the right to behind the Priestess on the left [1]. Place the unblocked Spearman behind the second Priestess [2].
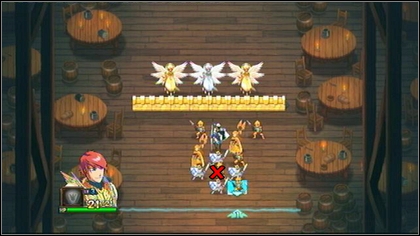
After removing the yellow Spearman standing behind the Knight, you will create a wall and two formations.
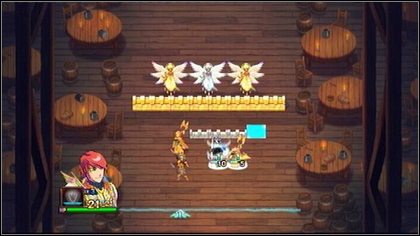
Thanks to the obtained moves, you can create an attack formation from the Priestess and Spearmen in front of the Angel on the left. That way you will solve the puzzle.
Requirements: Griffin
Prize: 500 gold, 4 ores, 2 rubies, Golden Spear
Start with removing the blue Archer surrounded by yellow Spearmen (on the left). Afterwards remove the Archer standing right of the stone wall.
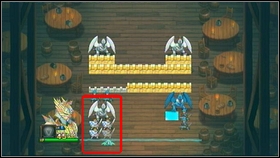
![That way you will obtain enough moves for moving your white Swordsmen behind the Griffin [1] and afterwards doing the same with the blue Archers [2] - Holy Griffin Empire - Battle puzzles - Might & Magic: Clash of Heroes - Game Guide and Walkthrough](https://game.lhg100.com/Article/UploadFiles/201512/2015121618035292.jpg)
That way you will obtain enough moves for moving your white Swordsmen behind the Griffin [1] and afterwards doing the same with the blue Archers [2].
The second puzzle master is the knight standing north-east of the prison [M2.4].
Requirements: Priestess, Griffin
Prize: 500 gold, 2 ores, 1 ruby
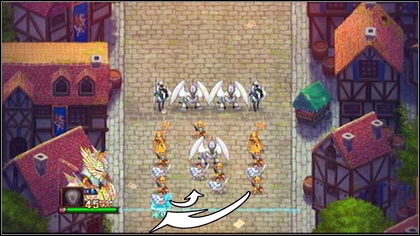
Move the white Swordsman on the left behind the Griffin and in its place move the yellow Spearman from the right.
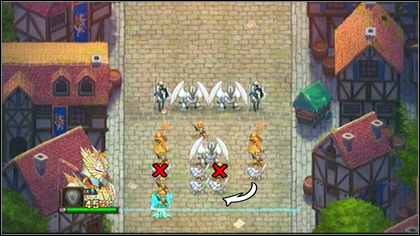
Afterwards eliminate the Swordsman standing behind the Priestess on the left and you will gain two additional moves. Use the first to move the last Swordsman behind the Griffin and the second to remove the Spearman blocking the formation.
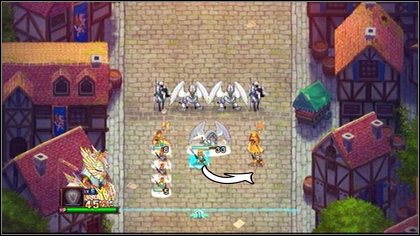
When the Griffin moves forward, he will unblock the Spearman, who you will be able to move behind the Priestess. That way you will create the last attack formation and solve this Battle Puzzle.
Requirements: Angel
Prize: 750 gold, 2 ores, 2 rubies, Staff of Elrath
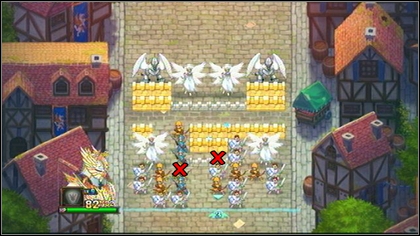
Remove the grey wall in front of the Swordsman and afterwards get rid of the yellow Archer standing between the blue Spearmen.
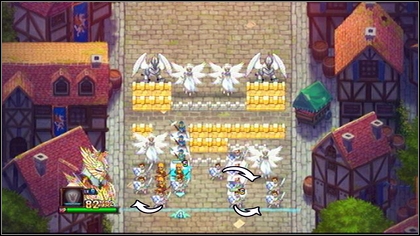
Use two next moves to create an Angel attack formation on the right. The last you have to do is attack with the Swordsmen on the left. that way you will defeat all the enemies and solve the puzzle. In return you will receive the Staff of Elrath.
Can be found in the upper right corner of the catacombs [M3.2].
Requirements: Vampire
Prize: 700 gold, 4 ores, 2 rubies, Blood of The One
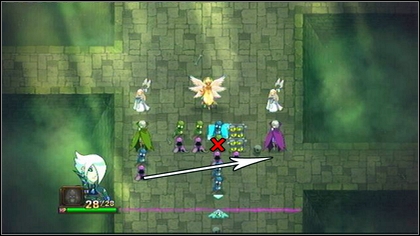
Remove the green Zombie standing beside the bone wall and afterwards move the purple Guard from the left edge of the battlefield to the right.
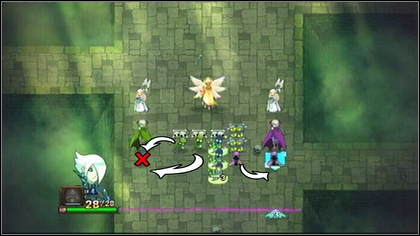
Place the two other green Zombies behind the green Vampire and eliminate the blue monster to create a formation. Use your two last moves to attack the purple Vampire and you will solve the puzzle.
Prize: 1000 gold
Requirements: Bone Dragon
![Remove the blue Zombie surrounded by purple Guards [1] and you will activate the first attack formation [2] - Heresh - Battle puzzles - Might & Magic: Clash of Heroes - Game Guide and Walkthrough](https://game.lhg100.com/Article/UploadFiles/201512/2015121618035527.jpg)
Remove the blue Zombie surrounded by purple Guards [1] and you will activate the first attack formation [2].
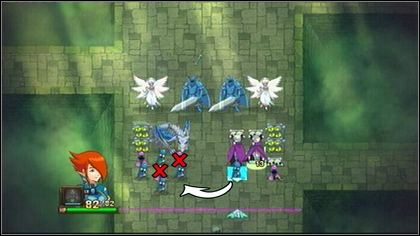
Afterwards move the second Zombie behind the head of the Bone Dragon and remove the Guard standing beside the head. Remove the last Guard from behind the Dragon to create a second attack formation. Use the left moves to attack with the last Vampire [2]. That way you will solve the puzzle.
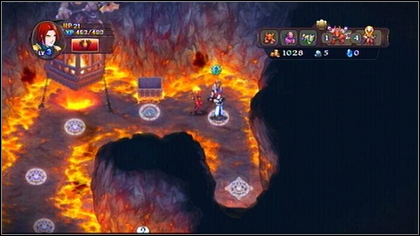
You will find him right beside the entrance to the cave [M4.4] to the left of the tavern [M4.1].
Prize: 700 gold, 4 ores, 2 gold, Thorn Whip
Requirements: Succubus
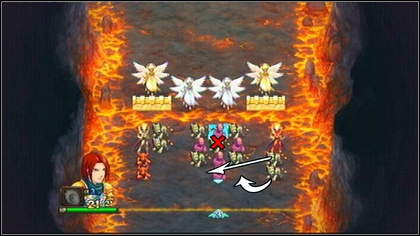
Move the grey Hellhounds from behind the red Succubus to the middle, so that they create a symmetrical rectangle. Once you're done, remove the Hellhound surrounded by Imps.

![Use the gained moves to move the red Demons behind the red Succubus [1] and create an attack formation from the grey Succubus [2] - Sheogh - Battle puzzles - Might & Magic: Clash of Heroes - Game Guide and Walkthrough](https://game.lhg100.com/Article/UploadFiles/201512/2015121618035612.jpg)
Use the gained moves to move the red Demons behind the red Succubus [1] and create an attack formation from the grey Succubus [2]. By doing so, you will solve the puzzle.
Prize: 1200 gold, 4 ores, 4 rubies, Magma Shard
Requirements: Bone Dragon
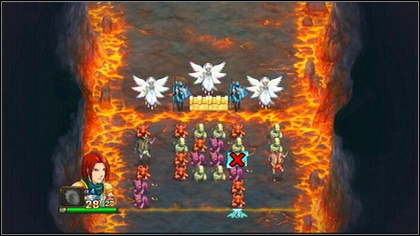
Start by removing the red Demon on the right, standing at the same level as the red Nightmare. That way you will gain multiple additional moves.
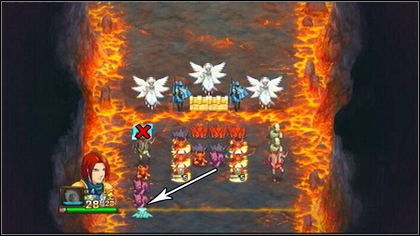
Now you have to remove the next red Demon, this time the one in front of the grey Nightmare. You can use the free space in the column to place a pink Hellhound. After you create the an attack formation, the army will move.

Place the last two red Demons below the red Nightmare and move the grey Nightmare to the middle of the battlefield.

Now all you have to do is place two grey Imps behind it and you will end the battle.
Artifact name
Description
Location
Leaf Plate
Boosts Hero's HP by 25%.
To the right of the place where you met Finwan [M1.1].
Golden Roots
Wall units respawn with 1 HP after they are destroyed.
Inside a chest behind the demon Kullor, found inside a cave behind the hollow trunk [M1.3]. you get there by completing the main mission.
Deer Antler
Deer jump over ALL enemy walls.
Inside a cave [M1.2] hidden in the north-west corner of the first location [M1.1]. protected by the demon standing on the left.
Elder Staff
Increase the Druid ability by 1 for each formation linked with that Druid.
To the right of the knights cutting down the tree [M1.5]. you need to defeat s LVL 6 soldier to get it.
Doubling Cape
Increases Fusion attack Power by 50%
Hidden inside a chest which will appear on the right side of the stone square after you defeat Sir Strat [M1.6].
Vine Gloves
Causes walls to regenerate twice as fast.
You will receive it for solving the two first battle puzzles. The description of puzzles can be found in the dedicated part of the guide.
Treans Sap
Treant roots leech double the amount of HP from the enemy hero every turn.
You will receive it for solving the third and fourth battle puzzle. The description of puzzles can be found in the dedicated part of the guide.
Dragon Scales
The Acid Dragon Goo lasts for an additional turn.
The scales have been hidden in the chest to the right of where you fought the Varkas [M1.7]. In order to get them, you have to defeat Sir Nathanson.
Boost Boots
Attack formations gain PWR bonus for every row traveled across enemy's field.
Hidden in the chest protected by Cuthlion LVL 8 [M1.7]. Found in the north-west part of the location.
Ring of Life
Revive after death once per battle and regenerate 2% of your Max HP every turn after revival.
On an island in the middle of the river [M1.9].
Artifact name
Description
Location
Phoenix Feather
Revive after death once per battle, with 25% HP.
Inside a chest in the southern part of the patrolled square [M2.2].
Lion's Man
Fused attacks receive additional 50% of PWR.
Cave hidden right of the place where you received the Archer unit [M2.3].
Knight's Armor
Knight formations start charging at full PWR.
To the right of the gate by which you began the game. You can open it before the start of the tournament.
Golden Spear
The Spearman's First Strike ability is also applied to wall units.
Received from the bartender in return for solving the second puzzle.
Holy Blade
20% chance of any of your attack formations dealing a critical hit.
Inside a chest hidden in a secret cave [M2.7]. To get there, go to the location east of the arena [M2.6] and defeat the knight protecting the pillar in the upper right corner of the square.
King's Crown
Calling for Reinforcements does not cost a turn.
Received from the Emperor in the castle, after winning the tournament.
Blessed Wing
The Angel heals all charging attack formations back to full PWR instead of incrementally.
Inside a chest in count Caryle's estate [M2.6]. go there after winning the tournament and talking with the Emperor.
Feathered Helm
Reduces the charge time of the Griffin by 1 turn.
In order to get this artifact, head to the arena [M2.1] after visiting count Caryle's estate and defeat the enemy inside.
Staff of Elrath
While charging, the Priestess will hurt the enemy rather than heal the hero.
Received in return for completing the second puzzle received from the knight standing beside the prison [M2.4].
Crown of Elrath
Hero's Spell Meter refills 2x faster.
In order to get this artifact, head to the arena [M2.1] after visiting count Caryle's estate and defeat all the enemies found there.
Artifact name
Description
Location
Cursed Shield
Reduces the strength of enemy walls by 50%.
Hidden inside the chest standing where the cage with Markal is [M3.1].
Blood of the One
Increases the power of the Vampire's Blood Drain attack by 25%.
Received in return for solving the first puzzle [M3.2].
Ritual Dagger
Deleting an idle core unit will delete a random enemy core unit in the opposite column.
A prize for solving the puzzle of the skeleton standing in the upper left corner of the catacombs [M3.2]. you can find the solution in the side quests section.
Spider Cloak
Reduces the Hero's max HP by 75%, but increase power of all attack formations by 75%.
Received for defeating Sir Skelton [M3.1].
Plague Rat
Doubles the effectiveness of the Zombies Plague Bite.
Hidden in the lower right corner of the cave [M3.3], the entrance to which can be found west of the catacombs [M3.1].
Blood Ring
Defeating idle enemy units replenishes the Hero's MP.
Received for defeating Farnir. The elf can be found beside the ancient ruins entrance [M3.1].
Crown of Thorns
Enemy Hero loses 2 HP every turn.
Received for defeating the necromancer Kozmo, found in the lower right corner of the ancient ruins [M3.4].
Twilight Urn
Increases the power of walls created by fallen idle units by 100%.
Received for defeating the mages inside the ancient ruins.
Book of The Dead
Revive after death once per battle after absorbing the power of all idle units on the battlefield.
Received for completing the "X Marks the spot" mission, described in the side missions section of the guide.
Talon's Talon
Bone Dragon's absorb 2x the Toughness of idle units it kills.
Received from Talon's skeleton after defeating the two [M3.6].
Artifact name
Description
Location
Rage Shield
Flame damage is applied to enemy formations for an additional row.
The shield is hidden inside the cave [M4.4] east of the tavern.
Thorn Whip
Nightmares reach their maximum power when they are launched in unison with other nightmares.
Received for solving the first puzzle received from Dillon, found in the cave [M4.4] east of the tavern.
Magma Shard
Abyssal Lord receives 100% of the power from fallen formations.
Received for solving the second puzzle received from Dillon, found in the cave [M4.4] east of the tavern.
Celerity Ring
Adds 1 extra move per turn.
Received from the elf Talnir (LVL 6), south-east of the tavern [M4.1].
Burning Horn
The Succubus receives 25% boost to her attack power.
Hidden inside a chest in the lower left corner of the tavern [M4.3].
Vulcano Armor
Burn Damage is applied to enemy units that pass through your charging formations.
Received for defeating Moody and Gut. Both demons can be found in the middle of the mountain climb [M4.6].
Pit Master's Tail
Reduce the charge time of Pit Fiends by 1 turn.
Found in the chest in the middle of the road to the mountain top [M4.6].
Crippling Flail
Reduces the starting charge power of enemy formations.
Hidden inside a cave [M4.7], the entrance to which is in the middle of the road to the top [M4.6]. you need to defeat the Imp to get inside (LVL 7).
Revive Flame
Upon hero death, revive hero once per battle with 5 HP and launch all attack formations with full power.
Inside a chest in the location east of the tavern [M4.9]. You can go there after the volcano eruption.
Chaos Crown
Receive and HP bonus instead of an MP bonus when chains are created.
Received for defeating the Bounty Hunter (LVL 10). You can fight him at the tavern (M4.3) after completing all the missions.
Artifact name
Description
Location
Gauntlet
Allows you to grab and place walls anywhere on the field.
Received right after beginning the game as Nadia.
Absorb Circlet
Receive Magic from deleting a wall, equal to strength of the wall defense.
Received after opening the prison gate [M5.1].
Mana Shield
Enemy attacks reduce the magic in the spell meter before affecting HP.
Found in the upper right corner of the prison [M5.1]. You can pick it up after opening the gate.
Battle Wand
Begin every battle with full magic.
The artifact is hidden inside a chest on the first level of the tower [M5.2]. Backtrack there right before going to the 3rd level.
Djinn's Sash
Frozen enemy units will shatter when struck by a Djinn attack.
You will receive it after defeating all the enemies on the first floor of the tower [M5.2].
Golden Fist
Titan's shockwave completely destroys enemy walls.
Inside a chest on the second floor of the tower [M5.3].
Scimitar
Rakshasa sword spiral attack is not affected by idle enemy units.
Received for defeating the last enemy on the second level of the tower.
Binding Orb
Increase Link bonus by 50%.
After the first, unsuccessful battle with the last boss, backtrack to the first floor [M5.2] and defeat the knight there to receive this item.
Transform Gem
Mages will fuse with any other Mage formation, regardless of the color of that formation.
After the first, unsuccessful battle with the last boss, backtrack to the third floor [M5.4] and defeat the knight there to receive this item.
Revival Ring
Revive after death once per battle with 5 HP and a full mana bar.
After the first, unsuccessful battle with the last boss, backtrack to the second floor [M5.3] and defeat the knight there to receive this item.
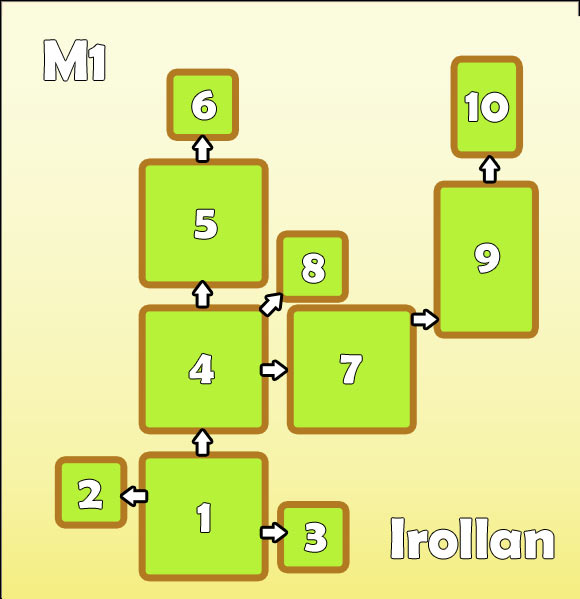
1. Forest I
2. Cave I
3. Cave II
4. Forest II
5. Tree trunk
6. Tree-top
7. Elven camp
8. Cave below the tree
9. River
10. Elven village
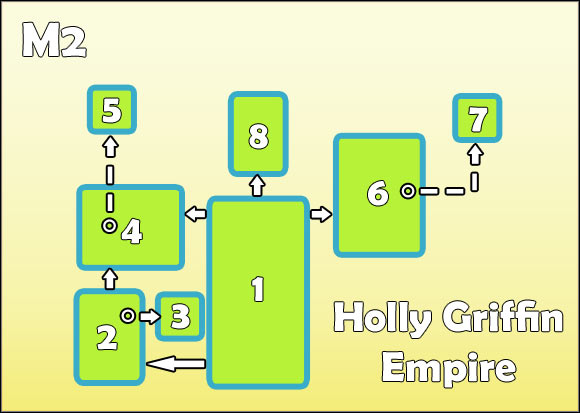
1. Gate/Arena
2. Patrolled streets
3. Cave
4. Square I
5. Tavern
6. Count's estate
7. Secret room
8. Castle
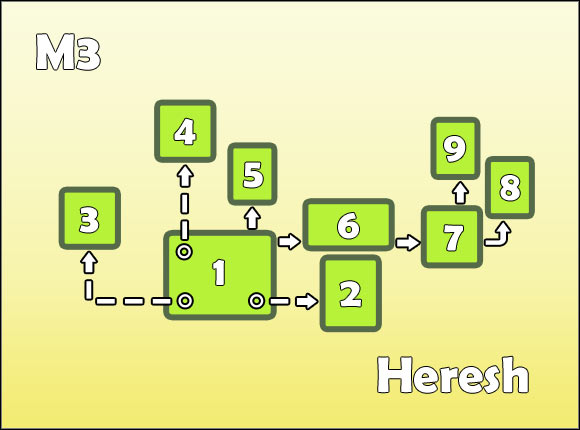
1. Cemetery
2. Catacombs
3. Cave
4. Ruins
5. Temple/Demon portal
6. Talon's skeleton
7. Ritual place
8. Cave
9. Necropolis
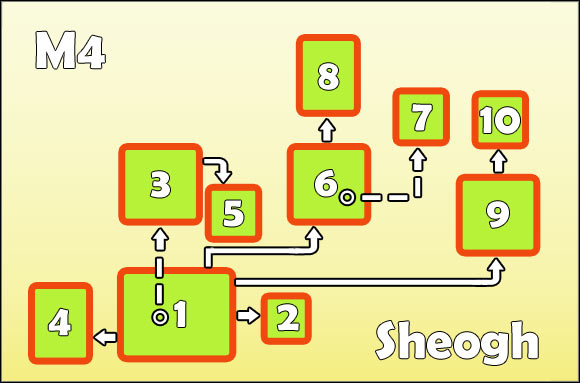
1. Sheogh centre
2. Lava river
3. Tavern
4. Cave I
5. Hidden room
6. Mountain base
7. Cave II
8. Mountain top
9. Volcano I
10. Volcano II
1. Prison
2. 1st floor of the tower
3. 2nd floor of the tower
4. 3rd floor of the tower
5. 4th floor of the tower


 Might & Magic: Heroes VI - Danse Macabre Game Guide & Walkthrough
 Minecraft: Story Mode: A Telltale Games Series Game Guide & Walkthrough
 Might & Magic: Heroes VI Game Guide & Walkthrough
 Mass Effect Game Guide & Walkthrough
 Might & Magic: Clash of Heroes Game Guide & Walkthrough