
This guide contains a description of completing main and side quests available in Might & Magic X: Legacy, along with many screens presenting the gameplay. You can also find here additional advices for completing quests. The guide includes also maps of available dungeons and cities present in the game, as well as tips on fight and overall gameplay. There is also one chapter presenting the list of trainers along with their locations, so you can easier gain higher levels of particular skills. The important element is a description of all quests along with maps, which allow promoting your characters on higher classes and getting mastery in selected areas. Might & Magic X: Legacy is a turn based RPG game by Ubisoft studio, which continues a tradition from first parts of the series. You command a team of adventurers in a magic and dark fantasy word Ashan, which is full of intrigues and political clashes. Even on the easiest difficulty level the game offers a large emphasis on tactics and heroes development, because not each opponent can be defeated in the same, easy way. Players can choose between four playable races and twelve basic and prestige classes. Despite the fact, that classes are race dependent, creating a team has some possibilities.
Might & Magic X: Legacy guide contains:
Marcin "Xanas" Baran ()

Experience in the game can be gained in two ways. First of them is to kill monsters and another one is to complete quests, in which you mostly have to ... kill monsters.
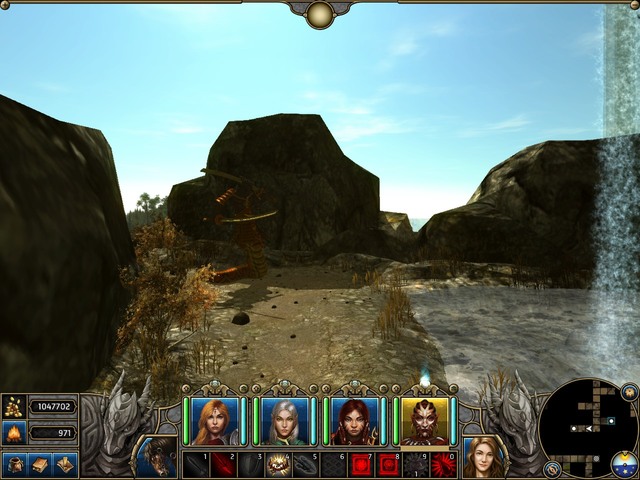
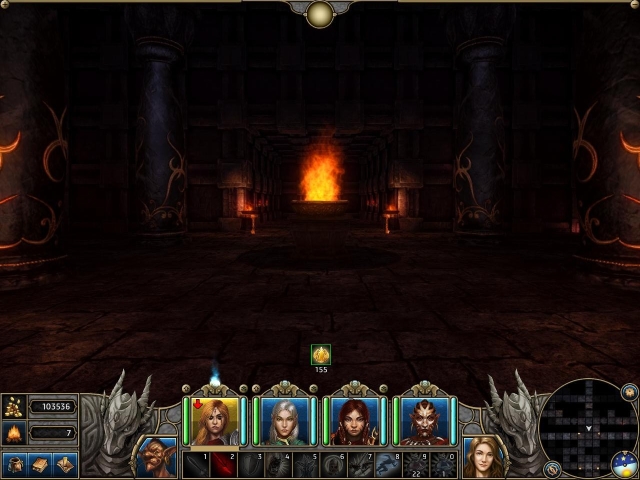
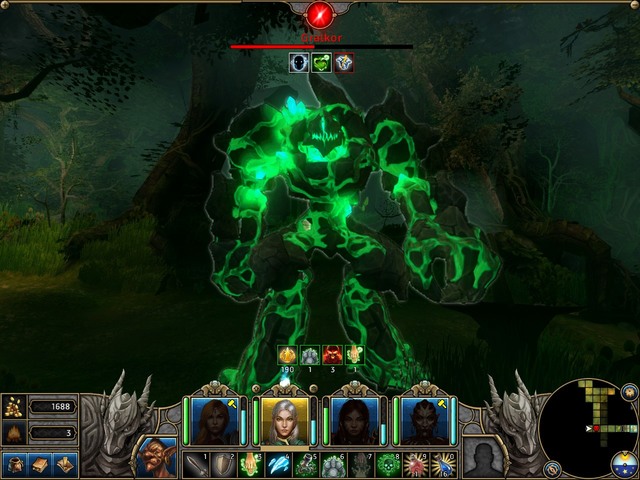
So the most important thing is to survive and in order to do this, you have to know how to fight. Fights in this game are not simply pushing forwards and just pressing one button. You have to remember that this is a turn-based game. So during the fight with Cyclops you'll definitely use the mass healing spells, but on the other hand do not even think about approaching them with characters below 20th experience level.
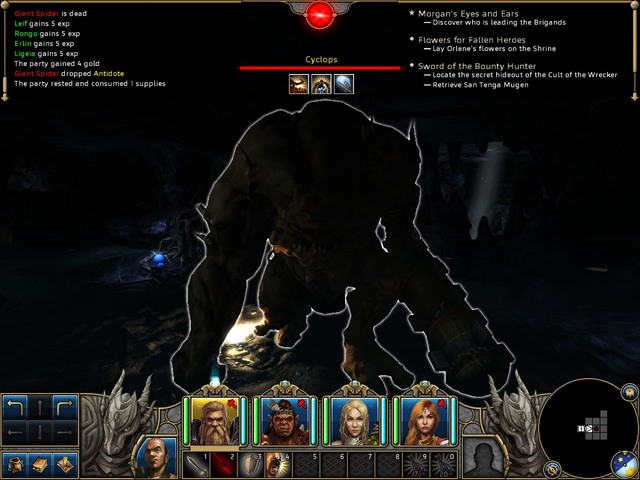
The above screen show a phase of the fight with one of Cyclops, opponents with huge mace, who deal damage with one hit to all of your heroes.
So you should think if there is a sense of using a skill which provokes the enemy to attack your "tank". The answer is "no", because he will attack then all characters and not only one.
Remember that for every enemy there is a different tactics. If the boss fights from a distance, it is best to withdraw behind the corner and wait for him to come to you.
If in opponent's description you read that he fights back every hit in a melee fight, it is best to attack him with magic attack if you have any. The same situation is when the opponent gets an extra hit when blocking - do not attack him and in a melee fight or attack him only if you are pretty sure that he won't block your attack.
These are not only tactics which can be used. Everything here depend on your skills, experience levels of your heroes and first of all - on you, because most of fight can be won if you have a properly balanced team and you do not run onto enemies like for example berserker, keeping pressing the attack button without thinking.

To start the game, you first need to determine if you want to play at the normal difficulty level, or at the high one.
After you have made this choice, the game presents you with another one.
Manual Creation - You can create manually all your four characters.
Random Creation - The game will draw the characters for you.
Default Party - You can select the characters created by the developers.
The two latter points do not need explaining so, let's concentrate on the first one.
Click the appropriate button to bring up the character creation screen. The question marks point to the slot in the party and if there is already a fully-created character there.
Select your first character's slot in the party , by clicking on the appropriate question mark and start the process of creation.
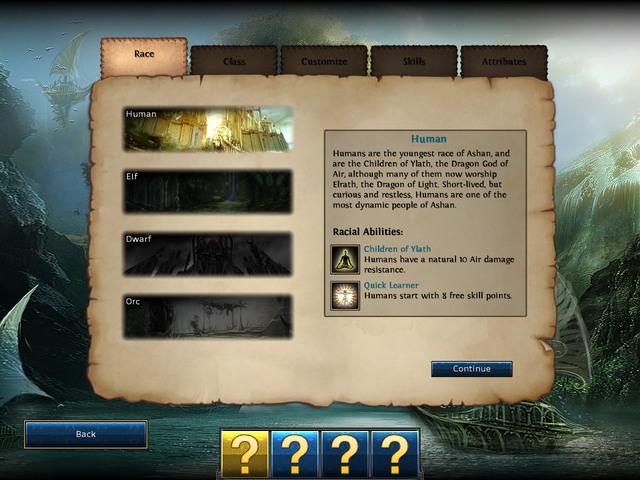 The race and party slot selection screen
The selection of the race is an important step in the character creation process. This is so, because each one of the available races has its limitations, when it comes to class selection, and some bonuses that the character is born with.
The available races and the bonuses that they provide are:
Human:
- Resistance to Air Damage: 10
- 4 free skill points to begin with
Elf:
- Resistance to earth Damage: 10
- + 5 to dodges
Dwarf:
- Resistance to Fire Damage: 10
- They receive 1 additional health points for every point invested in Vitality
Orc:
- Damage to critical attacks increased by 20%
- 20% chances to avoid a negative state
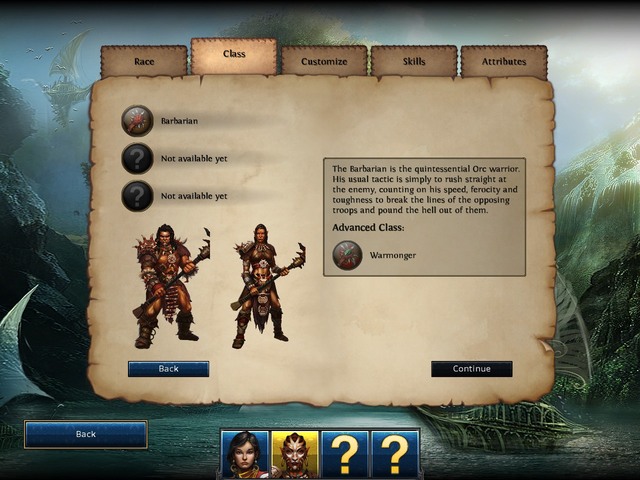 Class selection, in this version of the game, is available only for one character
The class is the next tab, after race selection. You can determine here what kind of weapon you are going to fight. Unfortunately, each class is determined by the race of your character and only these are the available combinations, as for now (more classes will be available in the game's final version).
Human:
Free Mage -> Archmage
Mercanery -> Windsword
Crusader -> Paladin
Elf:
Ranger -> Warden
Blade Dancer -> Blade Master
Druid -> Druid Elder
Dwarf:
Defender -> Shield Guard
Scout -> Pathfinder
Rune Priest-> Rune Lord
Orc:
Barbarian -> Warmonger
Hunter -> Marauder
Shaman -> Blood Caller
 As you can see, the customization options are quite scarce
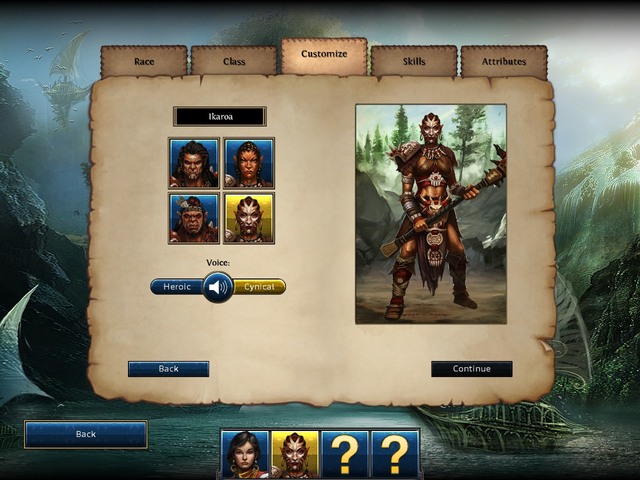
The next tab presents you with the selection of sex, name, voice and the looks of the character that you have created.
There aren't too many options here, unfortunately so, the fans of exact looks determination will be disappointed.
You can set either of two available voices, for each of the sexes, select one of four pictures that present your character and choose a name.
 One of the most important tabs
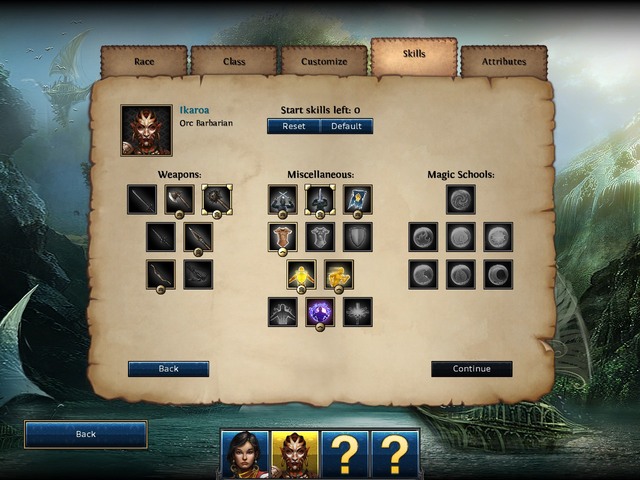
This tab is incredibly important, because it lists all of the skills that you can buy for your characters. After you access this window, you see:
- The base skills of your character, i.e. the ones that you do not need to spend your points on, but they also cannot be removed.
- two character points to spend ( only humans have 8)
- the list of all skills, divided into Weapons, Miscellaneous and Magic Schools.
Depending on the race and the class, some of the skills are unavailable to mix. Additionally, you need to note to what extent you will be able to expand your skill, during the game.
There are three levels of mastery, available for each of the skill: Expert, Champion, or the Grand Master. This selection is imposed on you by the game itself and you cannot gain the Grand Master level with a skill, if you can see that the character can only learn it to the level of the Expert, at most.
Skill list:
Sword
The ability to fight with swords and increase their effectiveness
Mace
The ability to fight with maces and increase their effectiveness
Axe
The ability to fight with axes and increase their effectiveness
Dagger
The ability to fight with daggers and increase their effectiveness
Spear
The ability to fight with spears and increase their effectiveness
Bow
The ability to fight with bows and increase their effectiveness
Crossbow
The ability to fight with crossbows and increase their effectiveness
Two-handed combat
The ability to fight with swords two weapons at a time
Dual-weapon combat
The ability to fight with a two-handed weapon
Art of War
Provides access to the "Challenge", spell, thanks to which you can encourage an enemy to fight
Medium Armor
The ability to wear medium armor
Heavy Armor
The ability to wear heavy armor
Shield
The ability to use shields
Vitality
Increases health points
Dodge
Increases the chances to dodge
Mysticism
Increases the pool of mana
Arcane knowledge
Increases resistance to spells
Magic reinforcement
Increases the potency of spells
Ancient Magic
Gives access to Ancient Magic
Fire Magic
Gives access to Fire Magic
Air Magic
Gives access to Air Magic
Light Magic
Gives access to Light Magic
Water Magic
Gives access to water Magic
Dark Magic
Gives access to Dark Magic
Earth Magic
Gives access to earth Magic
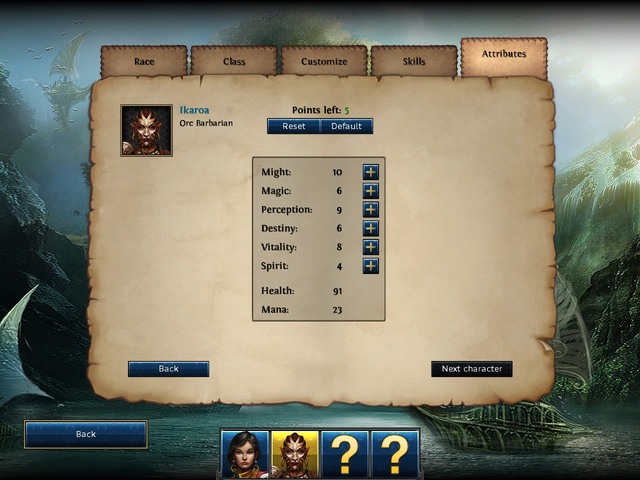 You receive five points to distribute, it is your life that will depend on this
The final step is to determine the attributes of your characters. Of course, each character has to receive different attributes, depending on their race and class.
You receive 5 attribute points, which you can distribute into:
Might
Increases damage that you deal in melee and the maximum health by 1 point
Magic
Increases damage from magic and the maximum of mana by 1 point
Perception
Increases damage that you deal with ranged weapons
Destiny
Increases your chances to score a critical hit and the dodge value
Vitality
Increases maximum health by 7 per point
Spirit
Increases maximum mana by 7 per point
During your journey you'll often come across variety barrels full of colorful liquid or crystals which can be touched. You do not know their effects until you "taste" them, but here you can find information on which color influences which skills or resistances.
 Two resistance crystals
Liquids:
Red - Resistance to Fire Magic
Green - Resistance to Earth Magic
Purple - Resistance to Prime Magic
Black - Resistance to Dark Magic
White - Resistance to Air Magic
Blue - Resistance to Water Magic
Yellow - Resistance to Light Magic
Dark blue - +1 Magic
Dark red - +1 Might
White - +1 Perception
Purple - +1 Destiny
Crystals:
Blue crystal - Resistance to Water Magic
Green crystal - Resistance to Earth Magic
Black crystal - Resistance to Dark Magic
Purple crystal - Resistance to Prime Magic
Red crystal - Resistance to Fire Magic
Yellow crystal - Resistance to Light Magic
White crystal - Resistance to Air Magic
Pink crystal - Resistance to all Magic schools.
In this chapter you'll find locations of trainers for given skills, so you won't have problems to locate a particular master.
 In mountains you can encounter Grand Master who will teach you to fight with two weapons
Expert
Sorpigal Training Center
Master
Portmeyron Castle
Grandmaster
Haart's house in Seahaven
Expert
Town Garrison in Seahaven
Master
Eldgrim's house in Seahaven
Grandmaster
Garrison in Karthal Harbour District
Expert
Sorpigal Training Center
Master
Smith in Karthal Harbour District
Grandmaster
Desolate Wilds - Yumiko
Expert
Inn in Sorpigal
Master
Weapon merchant in The Crag
Grandmaster
Tomb of the Thousand Terrors on lvl 5
Expert
Sorpigal Training Center
Master
The Crag Training Center
Grandmaster
House between Seahaven and Kilburn's Tower
Expert
Sorpigal Training Center
Master
Naga Bank in Seahaven
Grandmaster
Tao house in The Crag
Expert
Sorpigal Training Center
Master
Alchemist in Seahaven
Grandmaster
Vantyr Range - Arnod
Expert
Town Garrison in Seahaven
Master
Armourer in Seahaven
Grandmaster
Karthal sewers under Slums
Expert
Armourer in Sorpigal
Master
Armourer in Karthal
Grandmaster
The Lost City on lvl 4
Expert
Town Garrison in Seahaven
Master
Portmeyron Castle
Grandmaster
Kilburn's tower
Expert
House in Seahaven
Master
Sorpigal Garrison
Grandmaster
South from right entrance to Karthal Harbour District (outside the city)
Expert
House in Seahaven
Master
Armourer in The Crag
Grandmaster
Wyslin Jungle - Wysthal
Expert
Dojo in Seahaven
Master
Lighthouse
Grandmaster
Vantyr Range - Changbo
Expert
Naga Bank in Seahaven
Master
Town Garrison in Seahaven
Grandmaster
Yaksha - Desolate Wilds, east from The Crag
Expert
Smith in Sorpigal
Master
Inn in Karthal Slums
Grandmaster
Sandor - Desolate Wilds
Expert
Merchant between Sorpigal and Castle (in a cart)
Master
Sylad's house in Karthal - Slums
Grandmaster
Swamp east from Kilburn's Tower - House
Expert
Sorpigal Training Center
Master
The Crag Training Center
Grandmaster
Shiva - Wyslin Jungle (in a tent)
Expert
Merchant between Sorpigal and Castle (in a cart)
Master
Healing Lodge in The Crag
Grandmaster
Not far from Kilburn's Tower - Caranthir
Expert
Inn in Seahaven
Master
Library in Karthal Slums
Grandmaster
Halloth Grove - Luna
Expert
Shrine in Sorpigal
Master
Shrine in Seahaven
Grandmaster
Shrine not far from Karthal
Expert
Dojo in Seahaven
Master
Library in Karthal Harbour District
Grandmaster
The Tower of Enigma 3rd floor
Expert
Dojo in Seahaven
Master
Fort in The Crag
Grandmaster
The Crag - Kei
Expert
Dojo in Seahaven
Master
Blackfang Hideout in Karthal Slums
Grandmaster
Big House in The Crag (after completing: "Liberation")
Expert
Alchemist in Sorpigal
Master
Library in Seahaven
Grandmaster
Elemental Forge, hidden room on lvl 2
Expert
Arcana in Sorpigal
Master
House Mojo in The Crag
Grandmaster
Mizuki - Desolate Wilds
 On the fourth level of this dungeon you'll find the most difficult riddle. The answer is: Palimpsest
During the journey you can encounter chests, which can be opened after providing a password. Here is the list of answer to all riddles:
Riddle chest: History is told, forgotten and can be told again. What is put on parchment never remains unchanged. Always truth can be washed away and rewritten, but the spectre of past words seldom completely fades.
Answer: Palimpsest
Riddle chest: While I don't walk, swim or fly. Before I fade I still wander. I shed tears even if I don't cry, But what am I? That I wonder.
Answer: Cloud
Riddle chest: I am so simple, that I can only point, Yet I guide men all over the world.
Answer: Compass
Riddle chest: I am known both young and old, Some cower from me, others I make bold, but I'm not one you mock or taunt, For your every step I hunt.
Answer: Death
Riddle chest: I have a head, I have a tail. But I haven't got a body. What am I?
Answer: Coin
Riddle chest: Strong or weak, they all soon learn, That I dwell within the hearts of men, In darkness I rule but retreat from light. I don't need hands to grasp your tight
Answer: Fear
Riddle chest: What does man love more than life, Hate more than death or mortal strife; That which contented men desire; The pore have, the rich require; The miser spends, the spendthrift saves, and all men carry to their graves?
Answer: Nothing
Riddle chest: What three letters make a man a boy?
Answer: Age
Riddle chest: What is always too late?
Answer: Regret
Riddle chest: What is its name?
Answer: Erebos
Riddle chest: Who has a hat but no head, a foot but no shoe?
Answer: Mushroom
Riddle chest: This engulfing thing is strange indeed. The greater it grows, the less you see.
Answer: Darkness
Riddle chest: Completely round is fairly rare. Bright and shiny when I'm there. When I'm not, they call me new. But I'm old. Older than you.
Answer: Moon
Riddle chest: What runs smoother than any rhyme, Loves to fall but cannot climb?
Answer: Water
Riddle chest: What is not enough for one, Just right for two, Too Much for three?
Answer: Secret
Riddle chest: One shadow. No Honour. No Glory. No Mercy. So many Terrors are buried in this Tomb.
Answer: Thousand
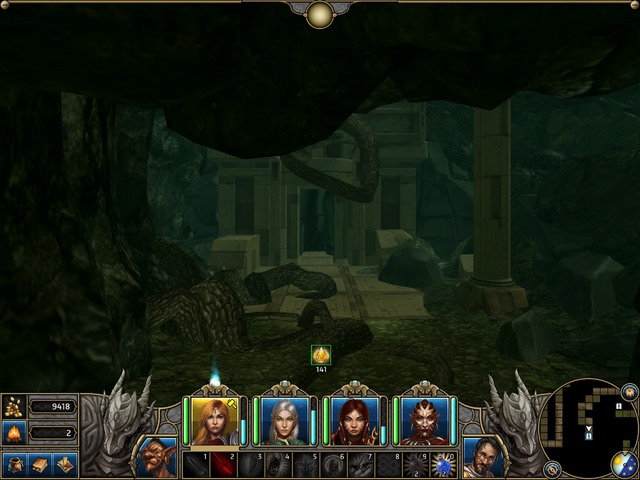
The Druid himself can be found in the jungle. In order to get to him easily it is best to go through the gate in the Crag (1) and look for the first teleport on the east (2). After that you'll find another one near (3). You should then find yourself close to the Elf (4).
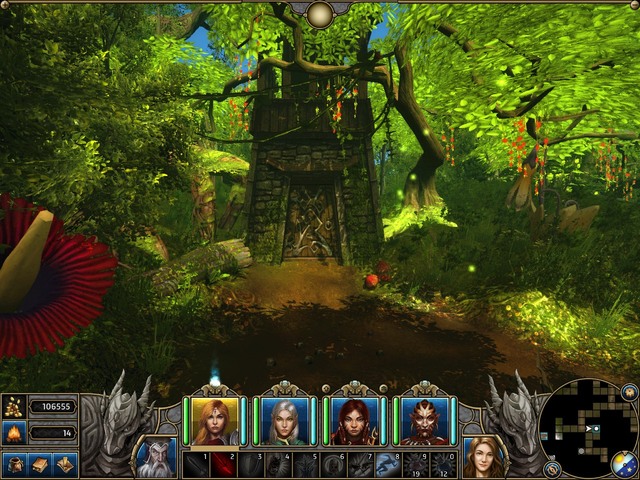 Druid Tieru lives in such lovely cabin
Druid Tieru, who lives in the Jungle, follows a demon named Ergal. He is surprised, how the demon can stay on this plan without Blood Moon Eclipse. He believes that certain book has an answer to his question. But the last copy is in possession of the warlock named Malik. He asks you to find Malik and take the book.
He doesn't tell you where Malik is, but he can be found in Karthal. Only after entering the town with a quest from Act 3 you'll be able to get to him.
Once you are inside the town, go through the harbor district and enter Slums. Look for Malik's house (5) (You can learn from him mastery of Fie Magic until you start talking about the quest).
One you start the conversation, he will flee but leave the book. Now you can return with it to the Druid and he will promote you to Druid Elder.
In order to become a Marauder you have to prove your rights to the tile to Ulagan in the Crag (1). He wants you to go to Mayneri's hut and steal a pendant from the chest. In order to complete this quest you need a blessing of Dragon god of air (Check the quest "Forge of Heroes").
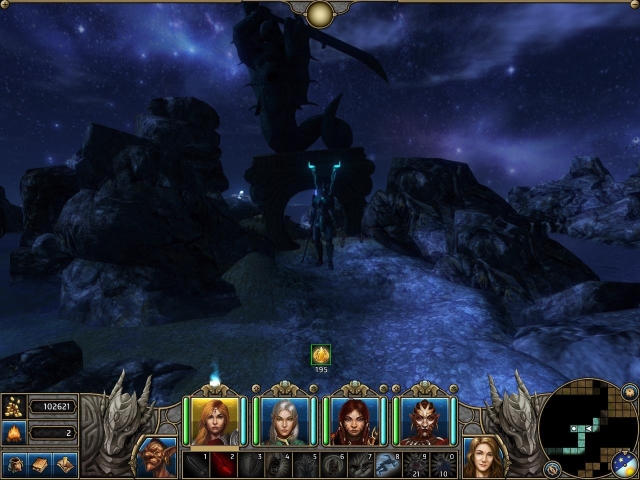
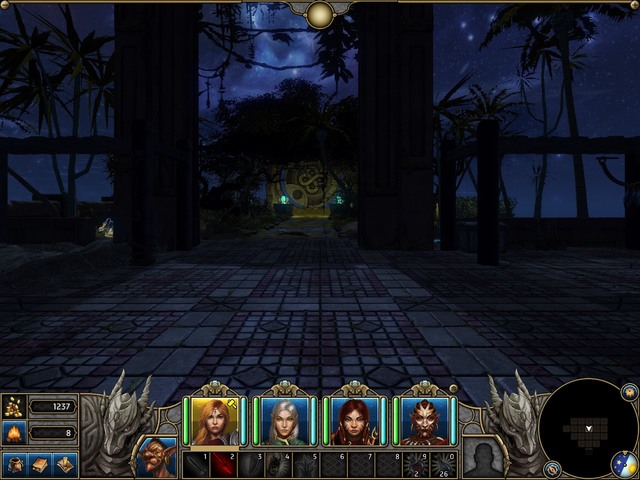
 A stone arch marks the entrance into the household
<br>Once you are blessed, leave the town on the east (2) and find a teleport to a stone ledge. There you'll find a hut with chest and pendant inside. You have to remember that there is a trap there also. Only a character with high perception would be able to disarm it. If you won't manage to do it, prepare to the fight with a shaman himself and his two guards. If you have to fight, it would be good to have a skill blocking the magic of your opponents because then shaman's attacks won't be so painful.
After completing the quest return with the pendant to the Orc and he will promote you to Marauder. Whether you tell him the truth about the shaman noticing you doesn't matter.
Myrands from Seahaven will tell you that in order to become Windsword you have to go to the Temple and swear the oath to the god.
A problem is that the temple is in western mountains, near the Crag. In order to get there you need to go through the forest and get to the Jungle. In addition you will need a blessing of Dragon god of air.
If you've discovered The Crag already, then the temple is located a bit higher on the map. You should head a bit east from the Fortress, use the teleport and then move northwest. If you've completed a quest "Receding Horizons" then you'll find the temple entrance on the same rocky ledge.
Prepare for a mini puzzle inside. First you have to use a portal on the left, then make one step when it teleports you and then use the portal on the left. Now use the straight way over the bridge, where you'll encounter some Elite Harpies and Dreamwalkers. Of course you need a skill which block regeneration of Dreamwalkers or damage which can penetrate their regeneration. Harpies can be dealt with earth and fire spells.
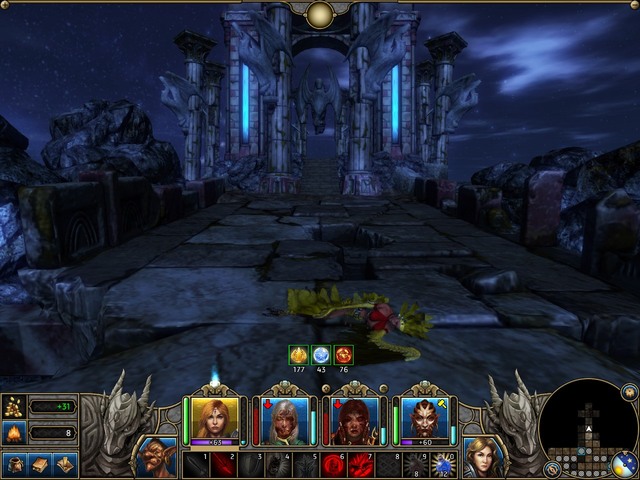 A fight in the bridge - you can already see an altar from here
At the end prepare to fight a boss which is overgrown Harpies Queen. You have to get to her as fast as possible, because she won't fly towards you. Along your way to her she will use area attacks on your characters so it would be best to use Regeneration here to heal yourself. Once you get close to her let your warriors weaken her armor and attack her and mages use Earth and Fire spells. A good spell is Acid Splash, which not only deals damage but also lowers the defense by half.
Once the fight is over, move to the statue and swear the oath by selecting the dialog option with Wind.
You can get this quest in Seahaven, in Eldgrim's house.
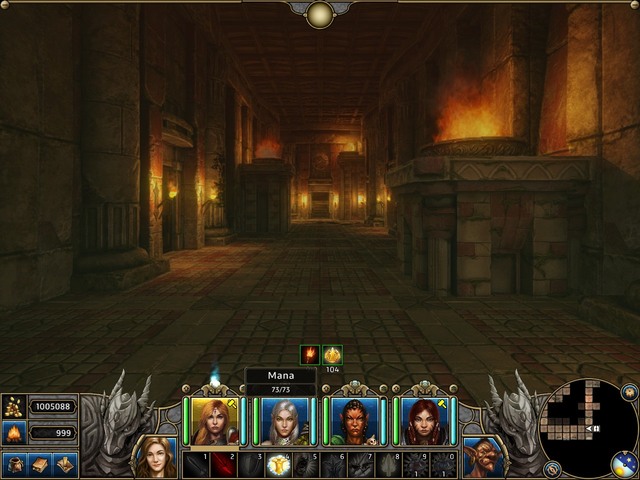
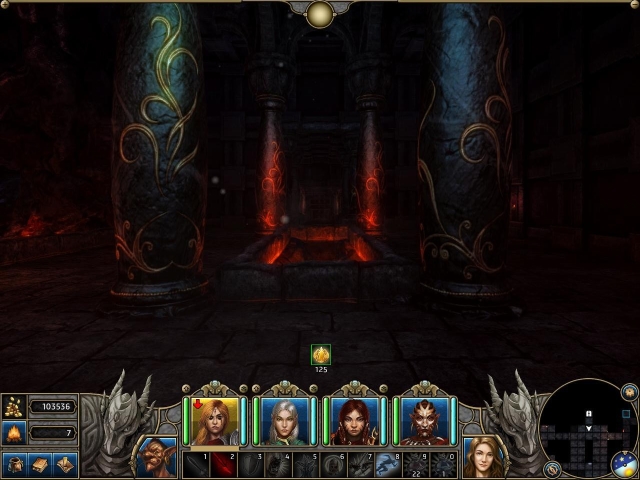 Chambers of the dwarven fortress
In order to become Runelord you have to go to Sudgerd and ignite the fire there. The fortress is located in the mountain, on the right side of the map.
In order to get there you need a blessing of Dragon god of air. First teleport (1) is located behind the Portmeyron castle. The second one (2) can be found on the northeast and third one (3) a bit higher. After that you'll use a straight way to the Sudgerd fortress (4).
While inside (5), you'll have to pull two levers (one is in the room (6) and the other one is in the corridor (7)) and get rid of monsters that will appear there. After defeating enemies you can descend to the next level (8).
It is recommended to have maximum HP more than 150 when completing this quest, as well as regeneration spells, air area scrolls and a druid/priest in your team (you can recruit one in Seahaven). Such strong precautions are caused by fact, that enemies inside are creatures named Shadow Lurkers. These are tough monster, who can deal even 150 damage to a tank with 120 armor points.
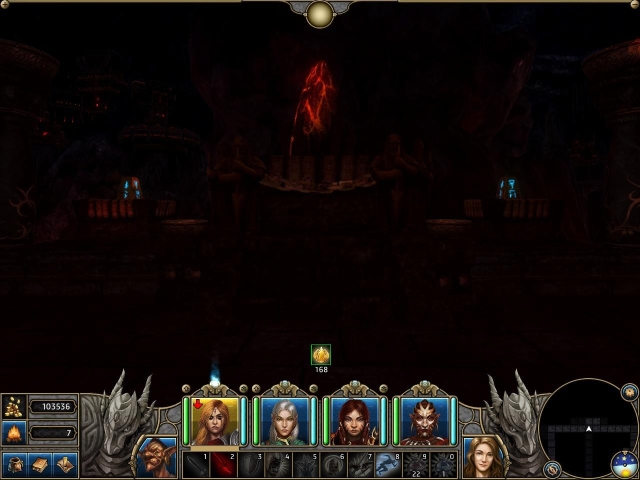
 Stop three steps ahead of this flame. If you move forwards, ten or more opponent will appear.
Once you get to the next floor (9), move forwards through the corridor and cast straightening spells when you get to the entrance to the great Hall (10) with columns. Once you get inside, a barrier will appear behind you and you won't be able to escape. What's more, the Hall will be then full of monsters. There will be about four Shadow Lurkers and you have to deal with them in the first place. It is best to have something which allows you to move even in the melee fight after performing an action (for example Windsword Dash of Windsword class), because in this case they will usually use one turn to get to you.
After dealing with this stage, you have to move forwards. There will be some fire elementals and Lurkers along your way, but not as many as previously and you should have no problems to kill them.
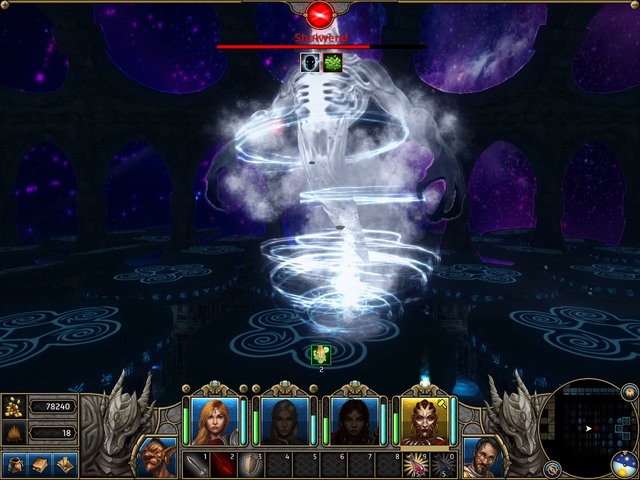
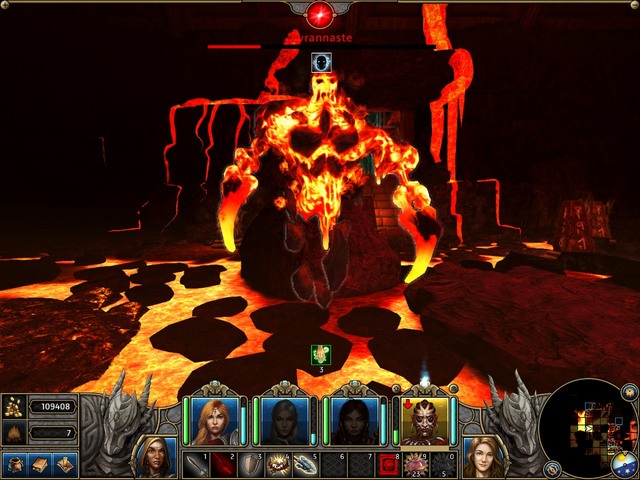
 Set the fire here
Eventually you'll reach the altar (11) where you have to ignite the fire. The problem is that a boss is there. This monster is a bigger version of a Lurker, but the strange thing is that his hits are weaker. You should use here air or light attacks, as well as physical attacks, because the opponent has no good armor.
After defeating the monster you can ignite the fire. Your companion will be then promoted.
This quest is available only completing the main quest "Liberation". It is granted by Falagar's daughter who asks you to go to the Tower of Enigma, which is located north from Karthal.
This quest is available in The Crag, in location "Big house" with coordinates: (31, 17).
She will ask you to find there some hidden scrolls. Go to Karthal and then head north. The Tower (1) is located in front of the Elemental Forge. Get inside.
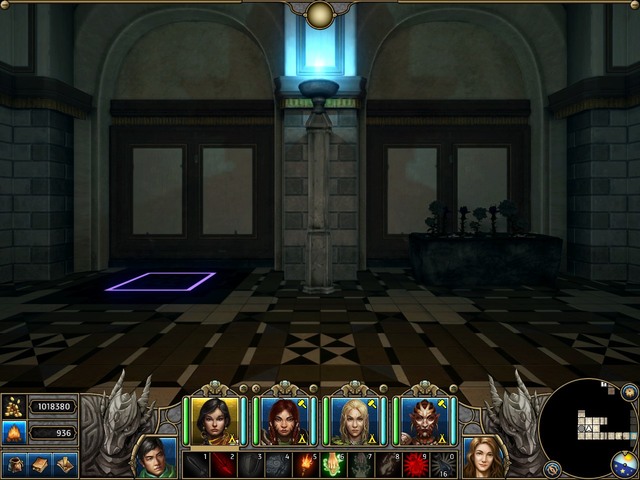 In the last room light first these purple plates
After entering inside (2) go to the middle of the room, where you'll find a barrier. You have to enter proper password to move further (3).
Password: 0451
On the second level (4) you'll have more problems. First, you'll have to step on tiles to light them all (5). The correct combination is:
Up, up, right, left, left, right, back, up, up, right, left, left, right, back, right, back, left, up, back, up, up.
In the next room you'll have to step on correct tiles, so you won't get killed. "Good" tiles are symbolized with blue border on the map (6).
After that you'll get to the third room (7) with escaping teleport. First, go to the both doors and press two purple buttons. After that return to the start and perform:
Up, Right, Up and enter the teleport (also blue border on the map). Teleport will transport you to the entrance to the next floor (8).
On the new floor (9) move ahead and enter the statue password (10):
Password: Fear
Now you can return to The Crag and become Archmage.
In my opinion it is the simplest promotion quest. You have to go to mountains northeast from Seahaven and visit Dwarf Hall (1). You also need a blessing of the Dragon god of water and air from the quest "Heroes forge".
 Dwarf Hall
On the way to the Hall you'll encounter several fire elementals, but there are not many of them. Inside the building the dwarf will tell you that in order to become Pathfinder you have to escort his friend to Seahaven. You only have to watch out on the way back, because the game will place some air elementals and griffins on your way.
In addition the dwarf, whom you have to escort, adds some bonuses after the rest so it would be good to rest during the journey. The way is not long and if you know the way, you can return to Seahaven in five minutes (1).
Gathalel (82, 93) (1), elf which stands north of Lost City surrounded by flying stones, can promote you to Blade Master if you bring him a stone from the Sacred Grove.
This place (2) is located west from the Elemental Forge, prior to the Desolated Wilds.
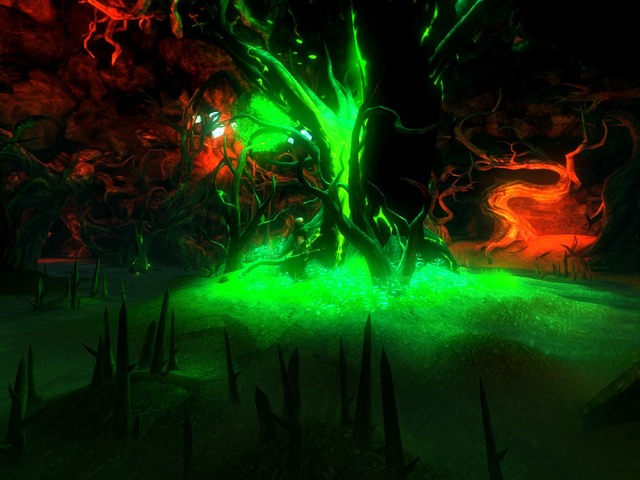 Sacred tree in the Sacred Grove
Once you get inside (3) go to the second level (4), because here you can't take anything. On the next level (5) go to the large tree (6), where you'll encounter a sorcerer. He will jump on you and you'll have to fight. The sorcerer uses paralyze spells so make sure to protect your team at the beginning of the fight.
After defeating him undeads will appear and you'll have to fight your way out.
Once you get outside, go to Gathalel to get the promotion.
Sandor (43, 15), who lives at the Desolated Wilds, can promote you to Warmonger if you enter Pao-Kai Nest and defeat the monster there. In addition you need a blessing of Dragon god of air from the quest "Forge of Heroes".
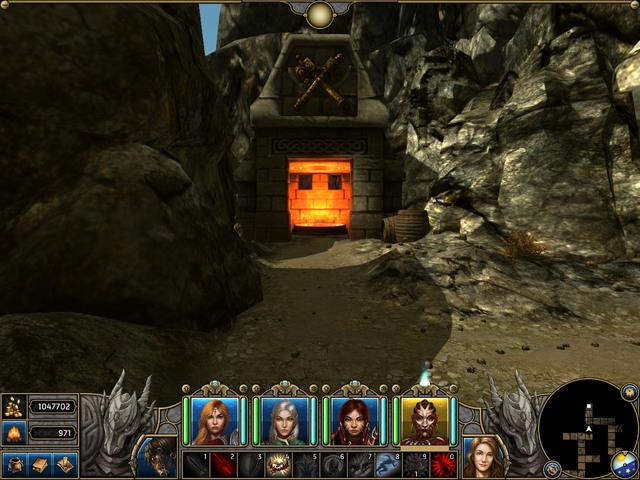
 Who would have thought that Pao Kai is a dragon ...
Move to the Crag (1), because from there you'll have the fastest way to your target. Use the portal (2) east from the gate to teleport into mountains. Now keep going forwards until you find a cave (3).
This is one of most difficult caves, because inside you'll encounter only elite opponents. It would be best to have Fire Blast spell to make your fights easier.
There are no gates inside (4) so start fighting your way through to the entrance to the second level (5).
On the next level (6) you have to talk to Blind Shaman (7) but other Orcs block you an access to him - kill them all. Once you talk to him, the gate to Pao-Kai will open (8). During the fight use regeneration and fire spells, because they are good against him.
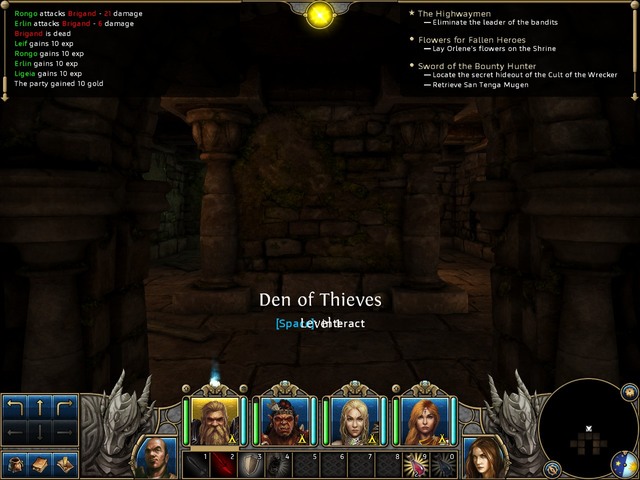
The Paladin promotion quest can be given by Jon Morgan after completing the quest "The Rocky Way to Portmeyron". You have to find all pieces of Shantrii disc and put them onto the altar in ruins. First part is located in Den of the Thieves (1), another one in the second level of the Lost City (2), and the third one can be bought from Blackfang in Karthal Slums (3).
 Cursed ruins - they make a better impression in the dark
Once you get to ruins (4) find a bronze key (5) and use it to open the door at the end of the chamber (6). Take the new key (7) you find inside (a boss will appear) and use it to open the door to the second floor (8).
On the second floor (9) go to talk with a ghost (10) and the quest will be update. You have to find four piece of paper on this floor. You need a high perception or spell which helps finding treasures, because tiles which open rooms on this level are hidden. But it is best to use the spell here, because there are bugs in the game within this location.
First open one passage using the tile (11) and take the first piece of paper (12). Open the second secret in this room (13) and press the tile again. Go to the room in front of it and take the second piece of paper (14).
Now go out to the corridor and take two last pieces of paper (15) (16). The order is important because otherwise the game can be bugged. Once you have all pieces, return to the ghost and he will promote you to Paladin.
Monshan (1) near an inn between Seahaven and Karthal will ask you to find a group of poachers and then he will promote you to Warden.
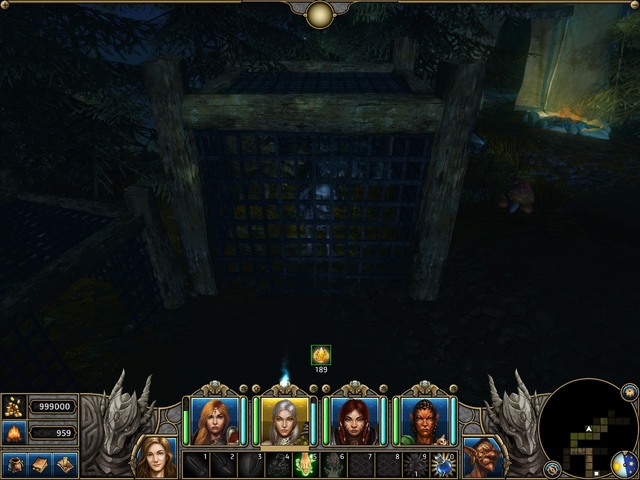
A doggy, which can be taken after defeating poachersYou have to go near Kilburn's Tower and defeat poachers there (2). You can't miss the place because it is full of cages. You can also interact with an animal there.
Afterwards you can take it with you and name it Spike or leave it. It doesn't matter.
Once you are done, return to Monshan to become Warden.
Hedwig (1), sitting in an inn south from Seahaven, will be able to promote you to Shield Guard, if you help her with a small issue. You'll need a blessing of Dragon god of air from a quest "Forge of Heroes".
The female dwarf searches the lost dwarven caravan, which recently went to mountains. She asks you to find it.
 Davros fond of dwarves
You'll find a caravan in the mountains north of Portmeyron castle. Just enter the teleport behind the castle. The caravan is destroyed and there is no sign of dwarves.
Near this place you can find the cave (2) with a Cyclop throwing stones at you. He was just supposed to eat dwarves. Defeat him and dwarves will thank you. Hedwig will promote you after that.
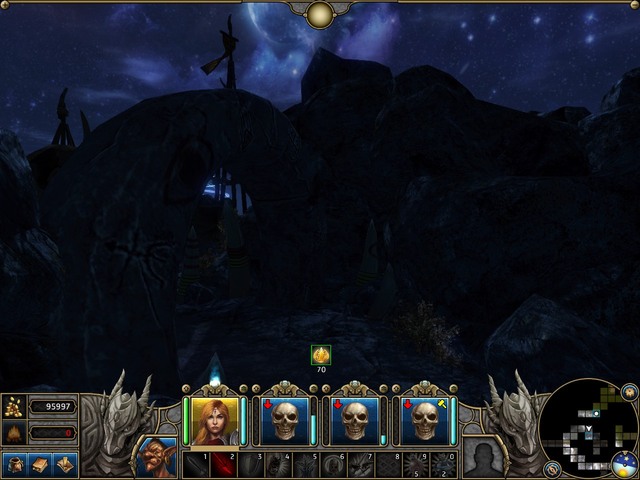
In order to become Blood Caller you first have to go to Healing Lodge in the Crag (1) and the women there will ask you to go to the Owl Cave and spend a night there. You need a blessing of Dragon god of air from quest "Forge of Heroes".
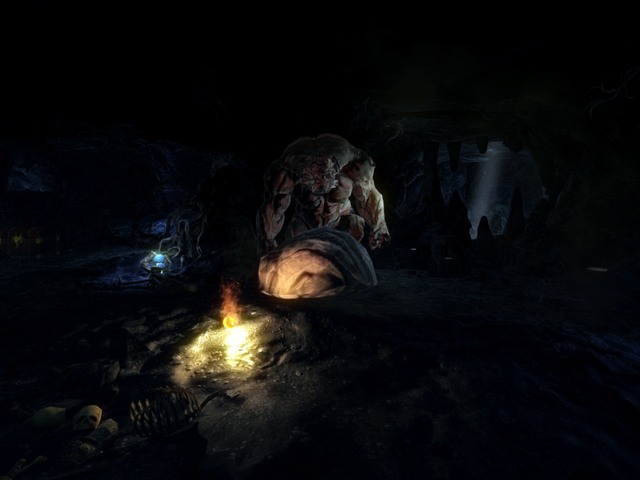
 Terrible demon to be defeated
The Owl Cave is located northeast from the Crag. It is best to use the portal (2) east from the city and the use the nearby portal (3).
The proper entrance (4) is located near the river which transforms in waterfall. Enter inside and interact with fireplace. Now go through the tunnel and you'll encounter a demon which has to be defeated. It would be best to withdraw behind the corner because otherwise he won't get closer and then defeat him with melee attacks.
You start game with this quest in your log. Your heroes have been asked to carry the ashes of some Owen, to the chapel in Karthal.
To get there, you need to complete Act II and complete the "Morgan's Informer" quest. Only after that, will you end up in the city of Karthal and you will be able to carry the ashes to the local temple, which is located in the Northern part of the district.
Evangeline, who you will encounter there, will be glad to take care of the ashes that will be placed in Owen's parents' crypt. Finally, your master has made it home.
Your first quest, right after you start the game, is to find work. This quest is given to you by Dunstan, who accosts you right after you walk off the plank onto the mainland. He also suggests that you go to the Sheriff -Maximus, who has been searching for help, as of recent.
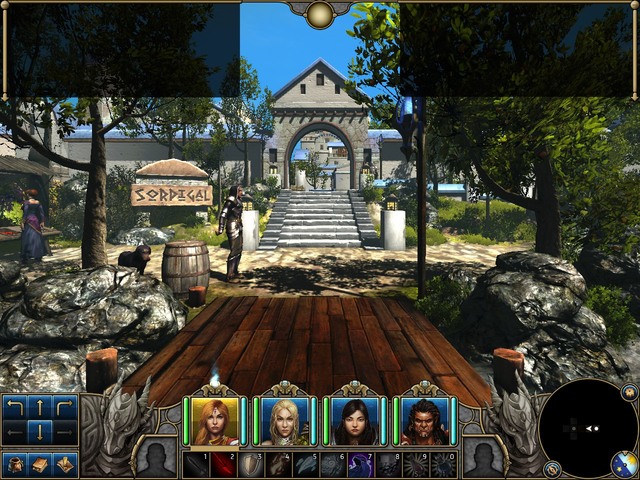 The beginning of the game, Dunstan on the left
Additionally, Dustan says that he can be hired as a guide around the city . It would be better if you agree to that, and your first stop is the Garrison (he will tell you more about it after you approach the site).
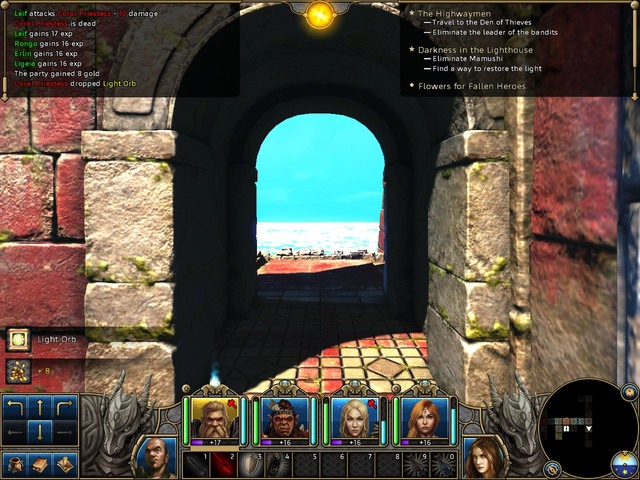
This quest starts inside one of the houses in the town. Orlene wants you to put flowers on her brother's grave, because she cannot do it this year. She will ask your help and you, as a brave hero that you are, agree to help the damsel in distress.
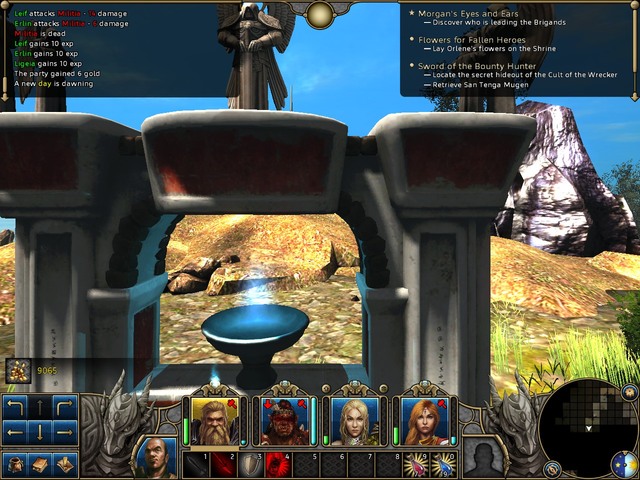
Exit the town and go North. Halfway to the castle, turn left, keep going that way, and deal with the bandits along your way. Keep your eye out for a pedestal shown in the above screenshot. Use it to complete this quest.
To receive this quest, you first need to complete the "Darkness in the Lighthouse" quest. You will receive it from Naga, whom you have liberated in the quest, at the lighthouse's exit.
To complete it, you need to go Westwards of the Seahaven. The name of the land is "Ravaged Lands" and it is a desert area. The location that you are going for is called "Skull Rock" and there is a Kenshi at the entrance.
Zale(1) Will ask you to find his grandfather's treasure, which has been taken by smugglers. To prevent you from working for free, he proposes that you and he share.
 The chest with Zale's treasure in
Once you have agreed, turn around and enter the well (2), which should be nearby. After you go down the well, go ahead (3). To reach the smuggler's bay, follow your map (4) and open the chest on the pier. Your inventory will be updated by the collected item. Return to Zale, who will be happy to see you(1).
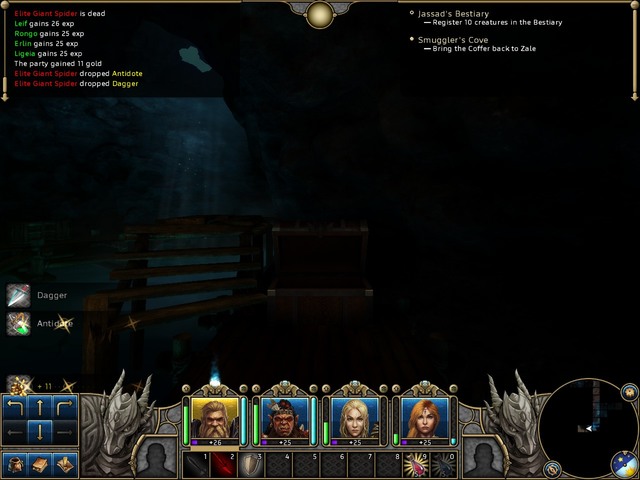
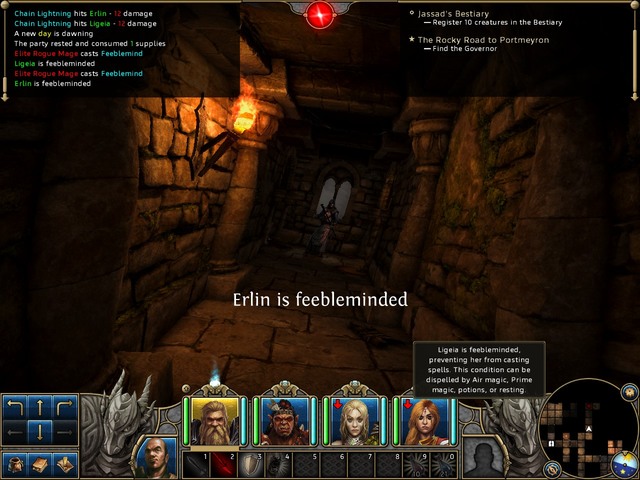
 Killing animals results in adding them to the bestiary
You start this quest in the tavern, by talking to some Jassad, who will ask you to complete his bestiary. He will ask you to enter into it ten various animals that you encounter. To complete this quest, you only need to defeat ten various types of animals that you encounter along your way. Then, return to Jassad to claim your reward.
This is not the end, however. Jassad will ask you to enter another 20 animals and then, 40.
You receive this quest from Naga, whom you have saved from the Lighthouse near Sorpigal. He will then give you a bundle of tea, which he allegedly loves.
You can also buy tea from the traveling merchant, between the town and the castle, to the North, for 200 gold pieces.
In the house on the marshes, you will meet an Elf who will give you some tea.
You can also receive a pack of tea from Tamal, whose tavern is to the South of the Lighthouse.
You can receive the last one of the teas from a woman named Manami, in the harbor district of Karthal.
It turns out that the tea is required by a man named Meleager , who lives in Karthal, in the Harbor district. To visit him, you need to complete the "Morgan's Informer" quest, in Act III.
Eileen asks you o find three people: Luke, Ripley and Kirk.
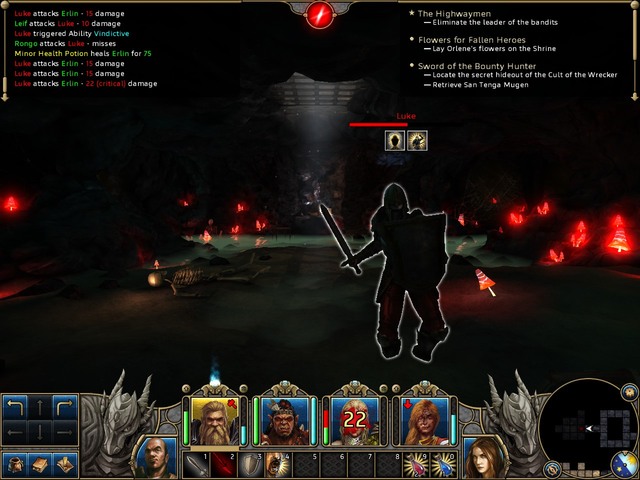
You can meet Luke during the "Bandits" quest. He is the final boss there. If you attack him, make sure that your party is well rested. The regeneration spell, which reinforces the healing process, will be useful here.
Kirk is in the Crag and you can let him go, just like that last time, or attempt to kill him. You need to watch out, because he casts paralysis spells, as well as bundles of lightnings, which attack your entire party. Apart from that, he uses no other spells so, the most important here is the Fiery Determination and some healing spells.
You can find Ripley during the "Morgan's Informer" quest, which informs you that the ambassador that you have been searching for, has been arrested. So, just like in the case of the others, you can either let him walk or fight him. Regardless of what you do, you should go to Eileen to complete this quest.
The quest starts during your conversation with Maximus and it is about killing the spider queen in the nearby well. The entire quest has been described in the chapter entitled "Spiders in the Well".
Rosalie, who you can meet in the temple, will ask you to help her find a book owned by the bandits camping close to the town. The whole quest has been described in the chapter entitled "Bandits".
Maximus is concerned about the situation in the lighthouse, because the light there has recently gone off. He asks you to find out what happened there and report back to him. Also, to the extent it is possible, you are supposed to bring the light back on. The whole quest has been described in the chapter entitled "Darkness in the Lighthouse".
After you have completed some of the previous quests, the garrison commander - Maximus - will ask you to go to the castle to the North. Unfortunately for you, after you get there, the castle will turn out to have been seized by bandits, who you will have to deal with to get to the very top. The whole quest has been described in the chapter entitled "Rocky Road to Portmeyron".
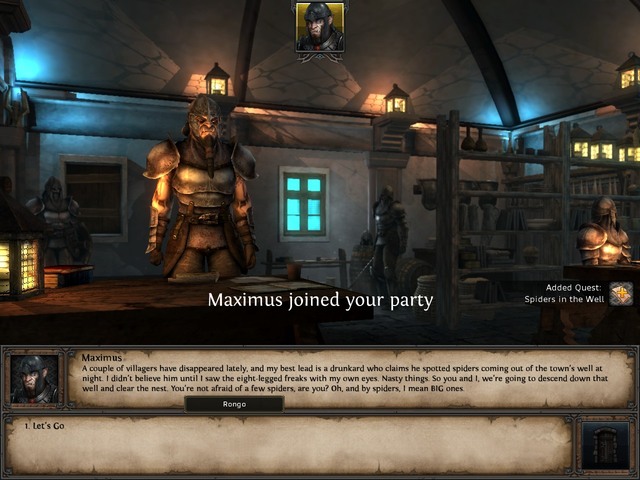 Maximus the sheriff welcomes you to his place
Right after you start the game, go through the gate into the town. Approach the first door on the right and enter (1). Inside, you will meet this town's sheriff, who has been recently having trouble with spiders and wants you to solve it for him.
After you accept the quest, press the key for exiting and go right. Then, turn left as soon as you go past the market stalls. Go past the temple and you will notice a well in front of you (2). Approach it and descend to the well. Before you do that, you can approach Zale - the guardian, and take a quest entitled "Smuggler's Cove" from him (more about it in the quest's description).
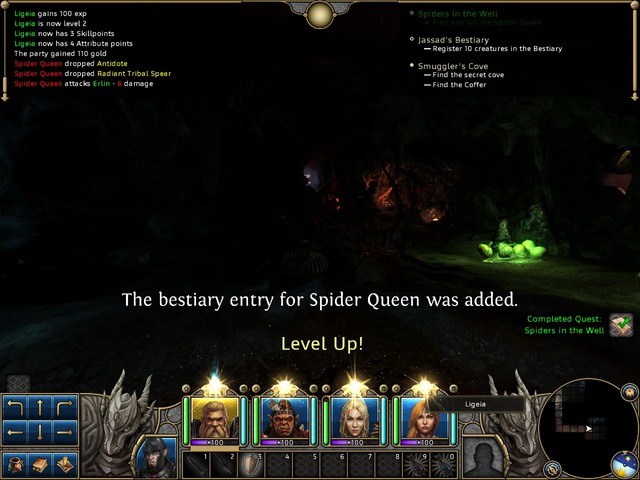 The spider queen's death finishes this quest
Once inside(3) keep following the corridor, kill all the spiders along your way and loot chests.
After some time, you will encounter the spider queen (4). This opponent is stronger, but with the basic party, you will have no problems dealing with them and, if something goes awry, your party is equipped with healing potions. The most important thing, however is to heal the poisoning that your party members from poison injected by the queen. To do that, you need to use the antidotes dropped by the spiders that you killed earlier.
Right after you defeat the queen, return to the town to claim your reward and explore the rest of the complex.
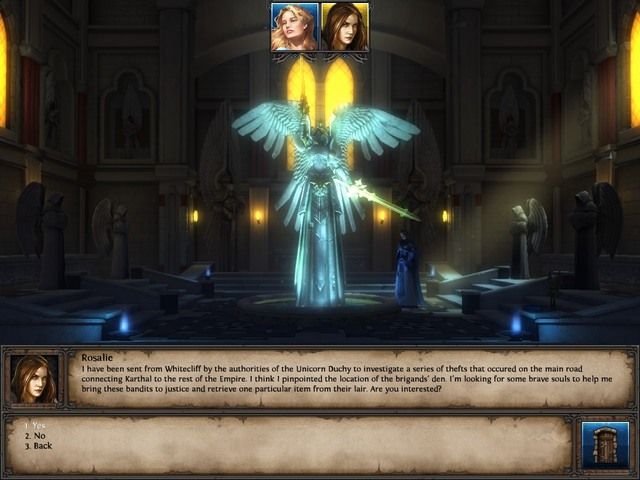 Rosalie the quest-giver
Apart from the healing priestess, in the temple you can encounter another woman named Rosalie (1), who will ask you help. She wants you to help her track down a bandit band and deal with them to retrieve a certain book.
After you agree to help her, go outside of the town (2 and 3).
 At the beginning of the dungeon turn left
Go towards the lighthouse and past it to find a path. Kill all enemies in your path and enter the woods. Before you enter there, you will note a plate with text that you need to read. This way, you will know that you are on the right path. There is not too much exploring here and you will finally reach an inconspicuous house among trees (4). Additionally, the priestess who is accompanying you will start a conversation.
Once you are done, enter the house.
Once inside(5) immediately go to the room on the left(6). There is one opponent there, who is easy to kill. Collect a key from the chest. In the room on the right, there also is a chest with regular loot.
Thanks to the key, you can go further, across the door ahead. After you reach a fork, go left and then right, which will take you to a room with a key that you need. (7).
Return to the first fork and take the other branch. After that, turn left and you will reach a lock, which you can open with the key that you have. Climb onto the next level of the house (8).
After you get upstairs(9) follow the corridor and turn right at the crossroads.. Follow the tunnel under the building.
Cross the bigger chamber and follow another tunnel, up the map. Do not take any turns and you will reach another chest with a key inside (10). Backtrack now and take the first branch that you encounter. Keep going until you finally reach a door that you can open with this key.
 The boss fight is tough, like the most of them
You will encounter the bandit leader here(11). You can either let him go, or kill him, by selecting one of the two available options (this is connected with the "Lost Sheep" quest). If you want to fight, you need to watch out because he is a quite strong opponent. You will definitely need to have your party well rested.
After you kill him, collect the book from the exposed spot and return to the town.
 The view on the lighthouse surrounded by enemies
To unlock this quest, you first need to complete the one with the spiders (it is recommended that you first complete the "Bandits" quest for the next level.) You it by going to the sheriff in the garrison building (1). He will ask you to find out what happened in the lighthouse that has recently gone out. To get there, you need to leave the town through the main gate. (2).
Go outside(3) and go along the seaside. Soon, you will notice your destination (4). Kill the bandits in your way and enter the lighthouse. There, you will need to get through the first floor (5).
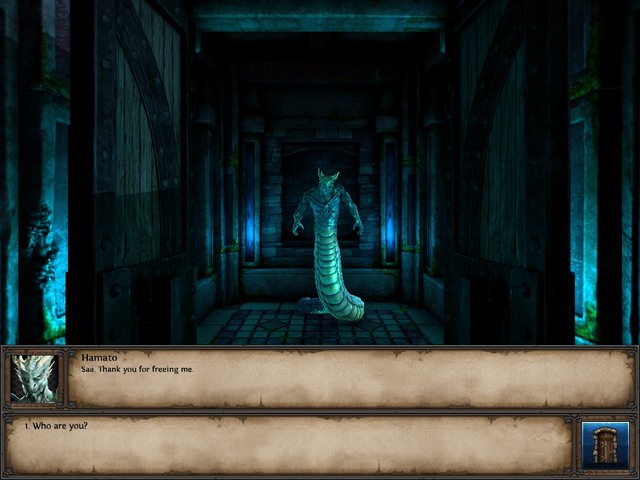 The imprisoned Harmato at the end of the first floor
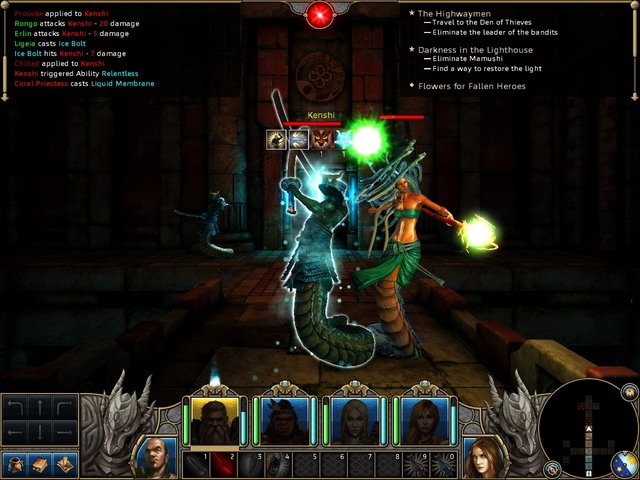
You need to know that your opponents here will be the Coral queen that attack at a distance, and Kenshin, who fight at a distance. You especially need to watch out for the latter, because they can deal damage even five times, in one attack!
The tactic against them is that the mage attacks with the "Gust of Wind" spell, which pushes the enemy away, and its turn finishes after he tries to approach you by moving forward. You can also use the "Challenge" with your tank, who will then take the enemy's attacks onto himself.
To reach the second floor, you need to cross the bridge, turn left at the door ahead of you and follow the corridor. Finally, you will encounter the imprisoned Serpent, who will turn out to have been imprisoned by his tribals. You will also unlock the passage upstairs (6).Additionally, you will notice the hidden passage, which will take you to a chest that you need to open, if any of your party members is capable of opening it.
 On the last platform, activate the switch. Also, there will appear new enemies
Turn around and keep ahead and, next to the door, there will appear another opponent. After you defeat it, go through that door to get higher(7).
Once on the second floor(8) turn left to the balcony and go down the map. After a while, you will reach a portal (9), which you need to cross to proceed.
Keep going ahead(10), and turn right to get to the third floor (11).
There, you will find two paths, to the right and to the left(12). Take the one to the right and, after you go outside, turn right again and reach the end (13). This way, you will activate one of the two plates that activate the teleport above.
After you defeat it, return and take the other path. Do the same, by turning left, this time on the external part (14).
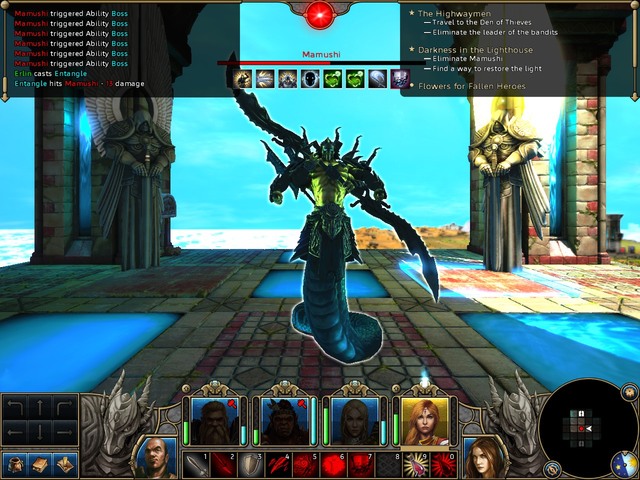 Mamushi, probably the strongest opponent in this version of the game
That is when the portal (15) to the last floor unlocks. There, you will encounter the Mamushi, who is the boss. You need to watch out and make sure that you are not standing next to the edges, or else the Mamushi will push you down. While you are standing in the middle, and he pushes you, use arrows and magic, which will make him waste his turn trying to get to you. Remember however to start this fight with, at least, 10 health potions on you, if you are fighting him on the 2-3 experience level, or you are not going to stand for long.
It is also helpful if you have a druid in your party, with the "Regeneration" spell, because this will help you hold for longer.
After you defeat the boss, you need to restore light in the lighthouse. To do that, use the four buttons. The order in which they are to be pushed, starting from the portal that you took to get here, is: right, ahead, diagonal, ahead.
Once you have done that, return to Maximus.
 A lever - there are plenty of them in the castle
After completing a quest with lighthouse and bandits, Maximus (1) will ask you to go to the castle in the north. Leave the town (2 and 3) and head north when you have such possibility.
One you get to the castle, it turns out that it is attacked and overtaken by bandits. Get inside (4 and 5) and go to the left branch (in order to open the door you have to move the lever in the first room on the right (7)). You have to follow the corridor - at its end you'll find a lever (6) which opens the door on the other side.
Now go back to the entrance and take the right branch this time.
 A bandit mage will make you literally dizzy
Keep going through the corridor until you reach the door, which can't be opened. Move to the nearby door and switch the lever there (8). The door will be open and you'll be able to advance to the next level (9).
Once you are on the second floor (10), turn to the corridor leading left and in the first room with opponents switch the lever (11). Go back and turn right. In one of recesses you'll find a lever (12). Switch it and the nearby door will open. Go through it and then head south, reaching the passage blocked by collapsed junks. Turn right and pull the lever (13).
A door nearby will open, so go there and turn right at the first fork. Enter the chamber with murdered soldier lying on the bed.
Go through the rooms until you get to the warehouse (14). There are three levers there. The order is: left lever - twice, right lever - twice, middle lever - one. After that, the grate will be open. Always start with the left lever.
Keep moving ahead until you reach stairs leading to the third floor (15).
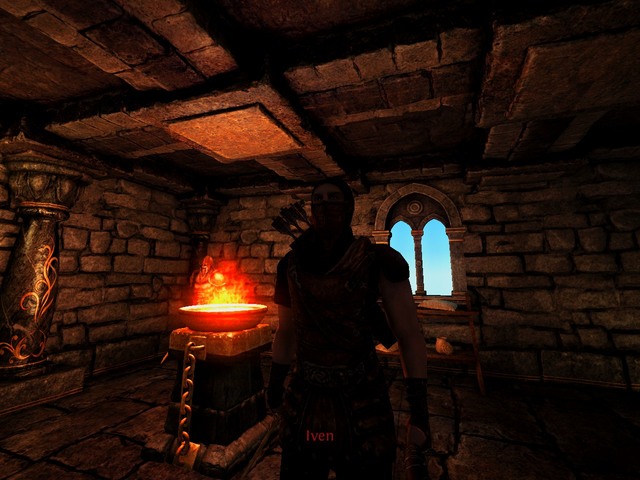
Iven, third floor boss
At the beginning of the level (16), go to the right (on the map) and then get inside the room, which is near. In the chest which is found in the room you'll find one of keys (17). Now go north and in the first room with three opponents get another key (18).
Use the keys to open the door found most southerly and the room which is the right corridor (unavailable in this version).
Now go to the southern room (19) and get inside. You'll find there Iven, who is the boss. He is not too tough and acts like Elite Archers but he has bodyguards, who should be dealt with first.
The boss doesn't leave the room, so you can lure out his bodyguards first and then deal with him.
 Knight in a beautiful, shining armor
After killing him turn right and there you'll find the one, who you had to find (20). The knight will end the quest and you'll be rewarded.
To receive this quest, you first need to complete the "Darkness in the Lighthouse" quest. You will receive it from Naga, whom you have rescued at the lighthouse's exit.
You need to go South a bit, to the sea harbor, over the bridge ( there is a field inn past the bridge, where you can buy 20 supplies) and then, to the West, next to Karthal. Cross the Halloth grove fragment. After a while, you should notice a desert named ravaged Lands. To the South-West of the Sea Harbor. The location that you are going to is called "Skull Rock" (1) and it is close to the location where the meteorite fell in the "Fallen Star" quest. If you are currently in the city of Crag, you simply need to go Southwards a bit. At the entrance, there is a single Kenshi waiting and by that, you will tell that you are finally there.
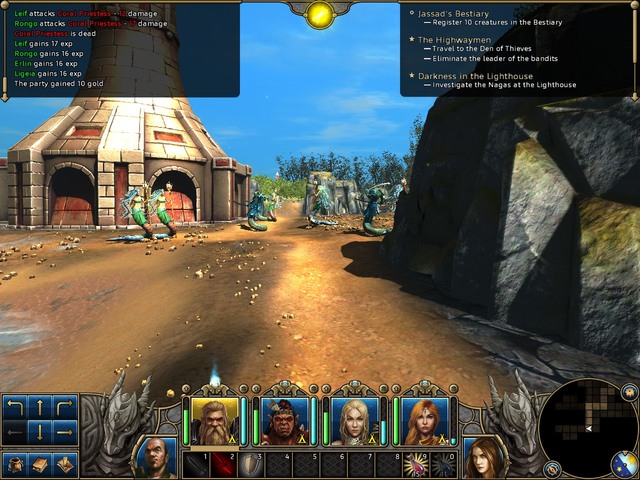
 These water creatures seem to need boats..
Inside(2) you will find a multitude of Priestesses, Commanders and Kenshi. You can go for the passage to the next level immediately (3) or dig up a key for a treasure chest. Watch put, however, because you will respawn eight enemies, as soon as you open the chest at this level and this will be a hard way through. Remember to kill Priestesses in the first place, if it comes to pass, because they cast AoE spells. Kenshi and commanders are not that tough, if they fail to block many of your attacks so, you can leave them for later.
The password to the second level is: Swordfish.
 The boss in the fullest. You do not need to attack her during this quest
Downstairs(4), it is going to be more difficult than it has been so far, because you will be encountering Elite enemies. You can go North first and collect the mysterious box (it pays off) of the Blackfang (necessary for the "Partners in Crime" quest) from the chest. You can also go South (5) to another room, where you find the sword that you are looking for. You can also do both and kill the boss, while you are here, who is in the center (for the "Grand Master of Archery" quest). Just be careful because, as soon as you touch any of the chests at this level, there will appear a multitude of enemies behind your back. You need to remember that these enemies are immune to mind tricks so, attacks like Summon or Head Split are useless.
 Kilburn's tower
This quest becomes available right after you complete the "Rocky Road to Portmeyron" quest. You receive it from Governor Jon Morgan and he asks you to find out who is behind the attack on the castle.
You simply need to find Kilburn, who is hiding in the forest (in the levitating tower), to complete this quest. You can check out the exact location on the map for the "Hunt for Montbart" quest.
Jon Morgan wants to learn the identity of the Highwaymen leader, to be able to destroy them all afterwards. The only one to recognize this style of handwriting is Lord Kilburn.
He is in the forest, to the West of the Seahaven, in the levitating tower. During the conversation, you will also receive a new "Hunt for Montbart" quest.
Jon Morgan quests you with an errand to the Pirate King, whom you need to deliver a truce-propagating letter . The addressee is at the fortress called "the Crag".
To get there, you need to keep going Westwards of the Seahaven, until you reach the ravaged Plains. Around the sea, you will find a fort that Orcs dwell in.
You need to enter the building at the very top and wait for the leader to stop reading. Without major problems, he will agree to truce and you are free to go.
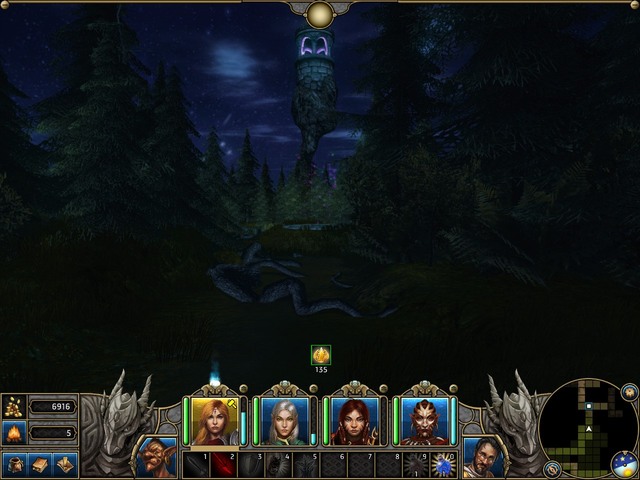 The tower that the Lord is in
Kilburn will ask you to answer several questions, concerning the surrounding areas. The answers are (the letter-case does not matter):
1.Tirya bay
2.Navea
3. The Eye
4. Menthil
5. Irisus
6. Malyn
7.Shadow Woods
8. Wyslin Jungle
Thanks to these answers, you will obtain a relic in the form of a shield.
Irnel from the Silver Blade shop, learned that a meteorite fell nearby, and that it contains the lunar silver. She asks you to bring it to her, so she could forge the perfect sword.
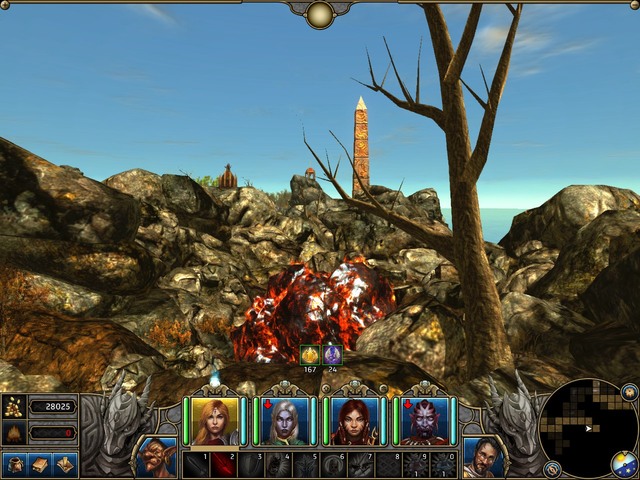 The Meteorite
It turns out that it is not that close, and you need to the Ravaged Lands, which are full of Orcs and Goblins. As you exit the city, go South-Westwards, until the landscape turns to slightly desert-like. To the South of this area is where you should be looking for the meteorite. It is a big red and black orb which can be interacted with. As you can see in the screenshot, there is an obelisk around, you can use it as your landmark.
Once you have obtained the metal, return to the Elf and she will forge an item out of this piece resource. The only thing that you need to do is wait for a week. The quest will be updated automatically, as soon as the moment is right.
Edwin, the astronomer, will ask you to escort him to the old imperial watchtower. He will Take the slot for an accompanying character and off you go.
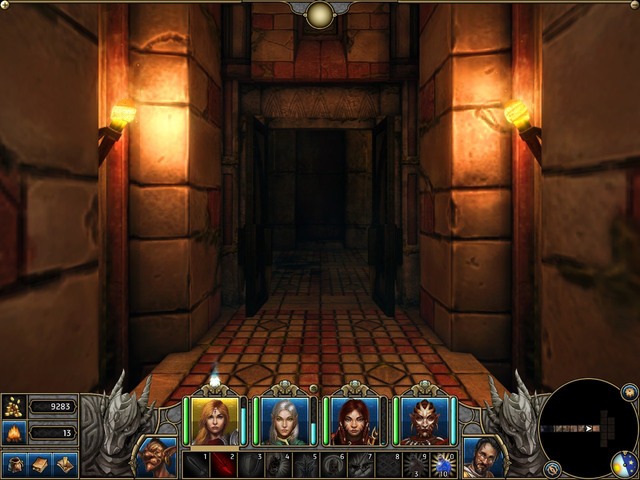
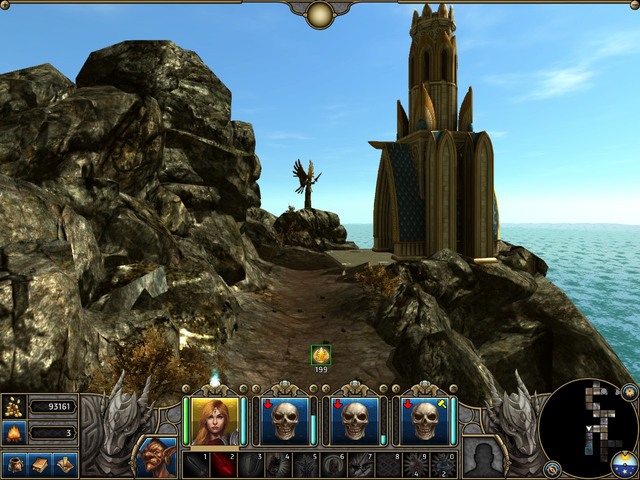 The entrance to the watchtower, paid for with blood.
You need to go far to the North-West. You need to know that you are going to need blessing from the Air god (see: the "Forge of Heroes"). Once you have already obtained it, keep going to the West of the Seahaven. Try to get into the jungle, above the Crag fortress.
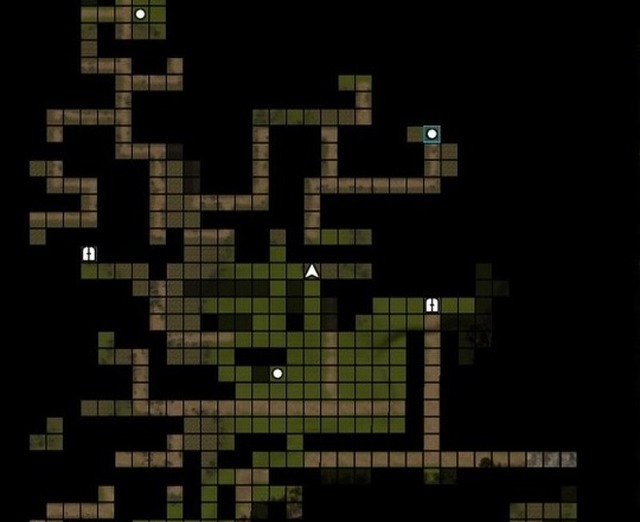
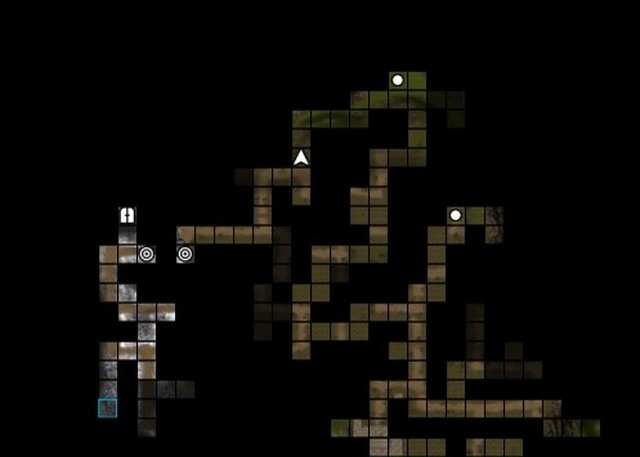 The watchtower is in the Jungle, the blue frame marks its location (above the Crag)
Once you are there, find the teleport. Thanks to this, you will get higher and, at the Southern part of the path, you will find a white tower. Edwin will start a conversation then, after which, he will leave.
Kei, Who is standing in Crag, is willing to teach you the Grand Mastery of water Magic, if only you can walk 100 steps over the surface of water. The easiest way to do that is in Crag itself, because of big stretches of water. It is enough to walk along this water path several times, back and forth, to complete this mission, and you will be able to gain the master the Water Magic.
For that, you need the blessing of the Water God, from the "Forge of Heroes" quest.
Yumiko, a renowned archer, who is standing in the Ravaged Lands asks you to find her bow, and she will be willing to teach you to the Grand Master of Bow.
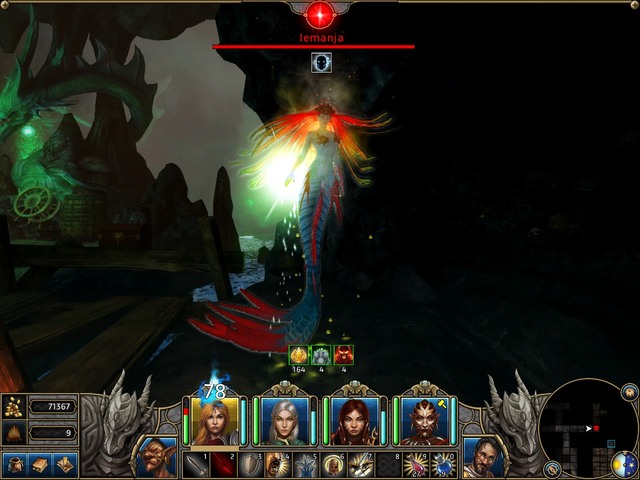
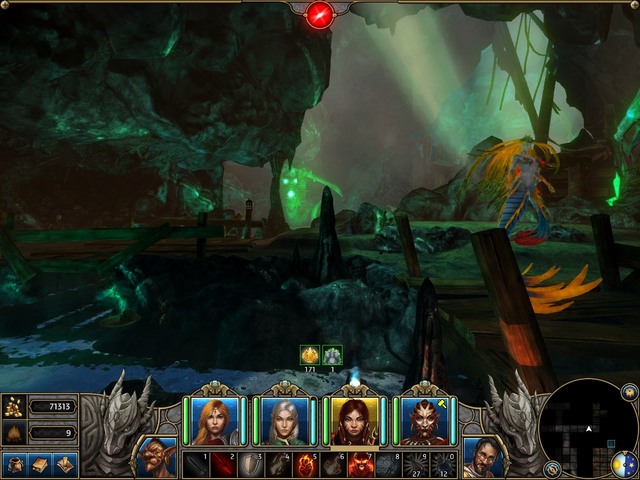
 The siren that stole the bow
It turns out that the bow has been stolen by the Siren Queen and she has retreated to the Skull Rock. The location has been provided in the description of the "Sword of the Bounty Hunter" quest. The siren herself is at the second level of the complex: password Swordfish. The battle with her is an easy one, as long as you have a paralysis protecting spell on you.
Once you defeat here, you will receive the bow that you can return to the owner.
Sandor, who lives in the Dissolated Lands can train you to the level of Grand Mastery of Warfare, as long as you pass a test set by him. The best idea is to cast all of the buffing sp[ell onto self, before starting the conversation.
Once you agree, you will be cast outside and you will be attacked by the first wave of Goblins and Plunderers. At level 20, you should have no problems dealing with them The second wave consists of Dreamwalkers and Jaguar Warriors. These are stronger but, the only thing you need to fear here is the regeneration of the Dreamwalkers. It would be best if you had, on you, something that blocks off this process.
The third wave is the worst one, because you will face two Cyclopes. Of course, you can deal the most damage with the spear, and the best defense is Regeneration. After you have defeated all three waves, return to the tent, where Sandor will be ready to teach you.
 Mizuki, who is meditating at the water
Mizuki, who is staying and meditating at the ravaged Lands can teach you. However, she asks you to wait for one day.
The best idea is to rest several times, next to her, and talk to her again. Once you talk to her again, she will ask you for a week's time.
Return to the Crag and take a week's rest. It is enough that you keep pressing "1" on the keyboard.
When you return to her again, she will have you wait for another month! Now, the choice is yours - you can spend the whole month pressing "1", or wait for it the regular way. Anyways, after you return to her after a month, you will receive experience and she will, finally, agree to teach you to the Grand Master level.
The quest is about finding all the Obelisks scattered all around the world. The quest activates after you find the first one.
Treasure coordinates: 129,53. - you will not wind the treasure, before you find all 7 obelisks.
The entire quest has been described in the "Secret of Obelisks" quest.
In the Crag fort, you will learn that the captain is very sick and only a Necromancer can save him from death. You are asked to go to Karthal and find Kaspar there, who can heal the Pirate King.
It is best to start this quest after you have completed the "Morgan's Informer" quest, because the city gate is open then.
The entire quest has been described in "The Curse" quest.
Jon Morgan is asking you to find out what has happened in the Elemental Forge. Reportedly, elves that have been spotted there, started firing at the scouts. You will be taken there by Lev - a Griffin Rider, who is standing on the castle's rooftop, on the 3rd level.
The entire quest has been described in the "Elemental Forge" quest.
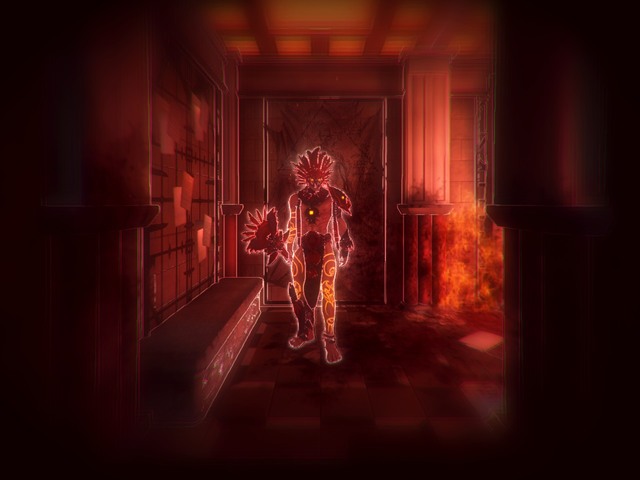
 One of the Forge's bosses
After the fight with the Grand Master of earth, in the Elemental Forge, he explains the meaning of this place to you. It turns out that you can receive here the blessings of various Gods. However, for that to happen, you need to find elemental Shards that fit the barriers. Once you have done that, you are still up for a test.
The entire quest has been described in chapter "Forge of Heroes".
Heame, a knight of the Seahaven, will, tell you that Lord Haart is keeping some dark secret. He himself does not know what this might be and he asks you to follow that man, when he leaves his house at night. You concede to that and go towards Haart's house.
The entire quest has been described in chapter "Haart has his reasons".
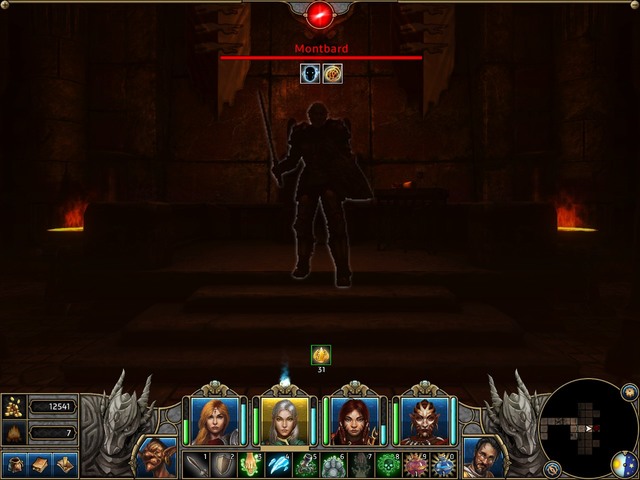
 Montbard, who is not as evil as he seems to be
Lord Kilburn recognized the handwriting sample that you provided him with and states that, undoubtedly, it is Montbard's. After a longer consideration you come up with an idea that he may be hiding in the forest.
Without further delay, you decide to go to search for the Lost City where the Highwaymen leader allegedly is staying.
The entire quest has been described in chapter "Hunt for Montbard".
While visiting Seahaven, pastor Umberto will ask you to find all nine heretical books that the Inquisition wants to burn. These books are scattered all over the world and you can complete all of them only in act 4.
The whole task is described in chapter "Forbidden Saga".
Crag is a city located at the Western side of the peninsula. At the beginning of the game, nobody will want to take you there, because it is a pirate city, full of scum of this soil. Only after you receive the "Pirate Truce" quest from Jon Morgan, you can go there, for the leader of the city to consent to the truce. After you have completed this quest, you will be able to take a ship to this port.
When it comes to the city itself, it is not too big and the number of quests that you can receive there, is small. You can encounter various trainers there, who may even offer you a Grand Master training. The only long quest that you can receive there is "The Curse".
You need to remember that the shaman there, in the Healer's Hut, is not capable of reviving your dead party members.
To start this quest, you need to rescue Morgan in the "Rocky Road to Portmeyron" quest. Talk to Lev (1), who is atop the castle, and he will take you to the forge. You cannot take your horse with you, because it is too heavy.
 This is where you land after the griffin flight
Once you are there(2) there is a portal on your right(3). Enter the portal and it will take you to the forge's third level (4). Inside, you will encounter numerous Dark Elves, but keep pushing ahead and you will discover a portal to level 2 (5). There are not many opportunities for exploration here, but there are quite a lot of enemies.
Do not worry about the fact that you cannot cross the door sealed with various symbols, you will receive a separate quest for that, called "Forge of Heroes".
At the second level, (6) you need to keep going down, and then turn to reach another portal (7). Along your way, you are going to fight familiar enemies.
It is a good idea to have some AOE spell on you and a healing spell, because you will get surrounded many times. What is recommended here is the fireball and regeneration.
You need to kill all the elves, because one of them has an earth fragment that will allow you to clear the chapel later on.
Once at level 1(8), go up the map and take the left turn at the fork. You will encounter a mysterious elf there, who you will have a short chat with. After the conversation, go ahead and, thanks to the earth fragment that you have obtained, you will be able to gain access to the chapel.
 Buffing spells are a must, this guy knows how to hit
You need to watch out, however because, as soon as you interact with the altar(10), there will appear a boss that is the earth lord. You will have to fight him but, it is better not to start the fight at all, without spells like Regeneration, Burning Determination, which will stop the boss from turning the part members into stone, and Stoneskin. With these spells, you should not run into major problems during this fight.
After the battle, you will receive a blessing of the Earth Goddess and you will be able to return to Morgan to report.
You can receive this quest from Gralkor, the Lord of Earth after you complete the "Elemental Forge" quest. He will tell you to gather all the shards of each one of the elements and bring them to him. Only after that, will you become a hero.
The Shards to find are:
- Water
The water shard can be found in the Lost City, close to the Seahaven. The item itself is lying at the 4 level of the dungeon, in a sarcophagus. You need to find a golden key to open this one, which is in one of the chests.
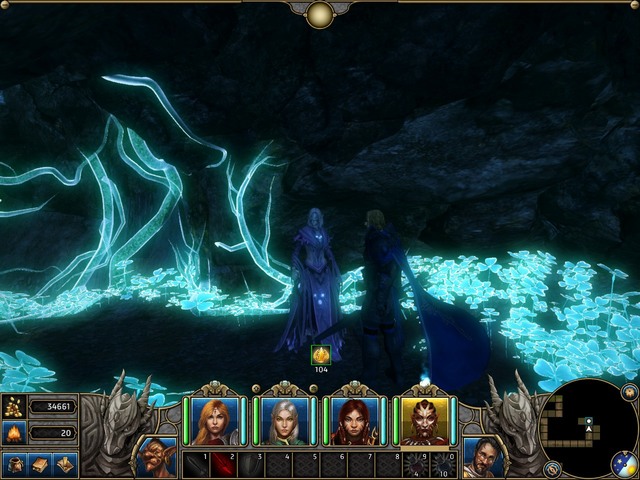
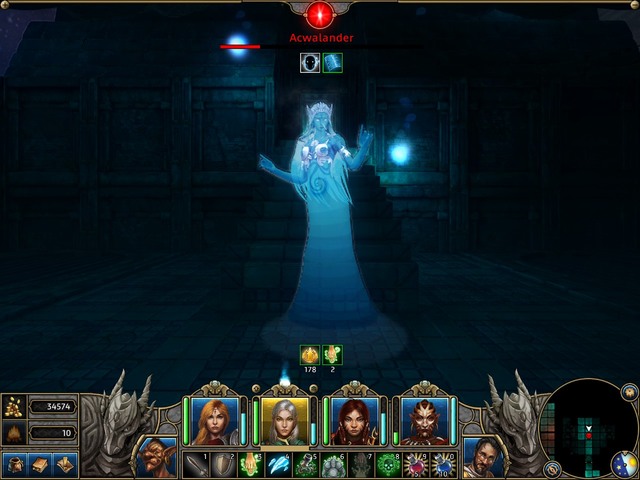 The beautiful and deadly Water Lady
Once you have it, you can go to the elemental forge and open the barrier. Inside, there is a small puzzle for you to solve. You need to align two tunnels so as both of them lead to the fountain, use the switch on the right to change the color of the base, and the ne on the left to make the stream of water as strong as possible. Approach the reservoir than and use it.
Behind you, there will appear the Lord of Water. It is best to cast some buffing spells, before you interact. What makes the battle difficult is that the opponent keeps using AoE spells and deals quite a lot of damage. Air based spells do not work here that well. After you defeat here, she will bestow a blessing on you, thanks to which you can walk on water.
- Air
The Shard of Air can be found at the second level of the Skull Rock. The way to get there has been described in the "Bounty Hunter's Sword" quest. To obtain it, you will have to defeat the boss, who is a siren. It is a very dangerous enemy, because she paralyses your party members. The best way to follow is to have on you a spell on you that makes you immune to this effect, or a spell that lifts paralysis.
 The shard is on this islet
The best thing to do is block the passage in a way that allows you to kill the two smaller sirens in the first place, and take to the queen afterwards. This is another one of the bosses that are best if not approached without the Burning Determination spell, or something that saves your companions from paralysis. She casts paralysis quite often but, if you have this spell on you, you win several turns for an additional attack. A good thing to do is weaken her armor with Acid Splash, and Shatter, after which you attack at short range. If your fighters are good, you can severe he quite a lot.
If you succeed, you will receive Yumiko's Bow from her, which can be returned to the owner. She is on the surface nearby. Behind the corpse, you will also find the Shard of Earth for the "Forge of Heroes" quest.
Once you have this item, you can return to the forge and find the air barrier. In front of it, there are two elite air elementals. The entrance is at level 3. To be able to enter in the first place, you need the gold key that is inside one of the chests. Then, you need to use the key to open the door in the center of the location, and step on two plates inside.
That is when you will be able to open the door to the barrier.
 And another Boss here. Not too much of a challenge, if you stay focused.
While behind the barrier, you need to pave your way with the floating slabs. The correct combination is:
The left one - once
The middle one - 3 times
The right one - twice
Back - 4 times
Once you have used the shard, there will appear another boss - the Air Lord. He behaves in the exactly same way as the elite air elementals, only his attacks are stronger. With a regeneration spell, you should have no problems at all, at level 20. It is a good idea to weaken his armor or poison him. Also, fire spells are effective here.
After you defeat him, you will be able to use the portals scattered all around the map.
- Light
The Shard of Light can be received during the "Motrgan's Informer" quest, because the item itself can be found at level 2 in Faralgan's house, in Karthal.
While at level 2, find a golden sprocket next to one of the statues and use it on the lever that opens the door to the storage. The Shard is up on one of the shelves.
Once you collect it, of course, a multitude of enemies will appear. Still, this is not going to be anything which you have not seen already. After you kill them, return to the forge, and the entrance is opposite the Air Chamber.
Inside, there is another puzzle that you need to solve. A pit with several plates that are already activated. Your task is to deactivate them all.
The pit needs to reset, so that the blue plates are at an angle from right (the bottom) to the left (top). You can reset it with the switch at the entrance.
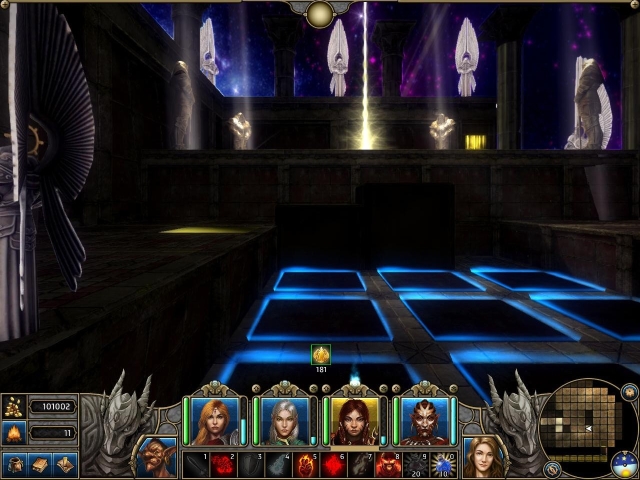 Your starting position during the puzzle
While at the stairs, facing the pit, you need to step in the following order:
Ahead, ahead, back, back, back (onto the stairs), ahead, right, right, ahead, ahead, left, right, back, back, ahead, ahead.
After this combination, everything should be working perfectly and the blocks ahead should form stairs up to the altar. Lay the shard there and wait for the boss to appear. What is interesting, it is a dark-skinned Lady of Light. Of course, she fights like a light elemental, only stronger. The best method is to attack here with Dark Magic, if you do not have such attacks available for you, anything apart from light magic, will do.
- Darkness
The Shard of Darkness can be obtained during the "Morgan's Informer" quest of Act 3. You need to gain access to Falargan's house through the sewers and open the entrance to the second floor, with the key that you have found in the chest (manipulate the two levers).
On the higher floor, there is a multitude of monsters that you have already had the opportunity to fight, but need to get to the room with the statues. Collect the sprocket from one of them and return to the room where there is fire burning in the fireplace. There, on one of the walls, there is an inactive lever that you can fix with the sprocket.
This will open the door to the storage, where there is the shard on one of the shelves. You need to be careful because, as soon as you collect the item, you will be attacked by a hoard of mages and guards.
With the shard in your hand, return to the forge.
 The entrance to the Darkness part.
Inside, you are going to have some fun with portals. First, enter the first one and then, the one to the West. Then the one to the South of the map, to the first from the top, the one to the East, the one to the East, and again East.
This way, you will end up in front of the altar of Darkness. Put the shard there and start the battle. This is not any surprise, but the boss is a buffed Darkness Elemental. There is no point in attacking it with the Dark Magic however, you can harm him with Light Magic. If you do not have such spells, attack with the best ones that you have.
- Fire
The Fire Shard can be found at the third level of the Lost City but, only after you receive "The Curse" quest and you will have to kill the Crystal Spider.
"The Curse" quest quoted:
"After you enter the Chamber at the City's level 3, which can be opened from the bottom of the map, you will have to fight several undead and banshees, at level 20+, you should have no problems dealing with them. In the next room, there is the Crystal Spider waiting for you. This monstrosity fights at a distance and deals damage for 150-200, which is, additionally, and AoE attack. Therefore, you should not save up on your healing and regeneration potions, to be able to push forward. The most important thing here is to shorten the distance. It does not use its AoE attacks then and attacks individual heroes only, although just as strong.
At some point, it will start to teleport and start being active, out of a sudden. The Spider is very tough, but has few health points. Additionally, it will shut you up in cages two times, which you need to smash to be able to continue fighting.
The first moment is the worst, where you need to strive for short range combat",
After you kill the spider, the Shard can be collected in this chamber, on the right side of the entrance.
 The Fire Lord... has nothing that you haven't had experience with already
Take it to the forge to activate another puzzle. After you have defeated the fire elementals, walk back towards the exit, while still facing the chamber, and switch the lever.
Second right
First left
Second left
Then, walk by the wall on the right, and up, and pull the last lever. Then, you will have formed the way to the altar. After you have interacted with it, there will appear a boss that is a big fire elemental. You need to watch out, because its attacks claim as much as 300+ and he often blocks your attacks. The best method is to use water Magic and attacks that he cannot block.
Additionally, you will find the Regeneration spell useful, as well as several rejuvenating spells, just in case. After the battle, you will receive a blessing and the quest ends.
 Haart is in the location marked with the blue frame, to the North of Seahaven
Heame, a knight of Seahaven will tell you that Lord Haart is keeping a dark secret.
His house is a block away. If you enter his house during the day, you will not find him there. If you, however, go there at night, his butler tells you that he is not in.
Then, you need to go to the city gate and talk to the guard there. He will tell you that Haart has been crossing the gate just a few moments ago.
Leave the city, go up and discover the area behind the green trees (close the Cyclops's cave). Go in the direction in which you have the city entrance under your character, and you are sure to find Haart and his dark secret (the quest will be updated if you stand nearby).
 Haart and his wife
Now, you can tell the inquisitor that Haart has been searching for bandits, which will make him approve of Haart's behavior, or tell him the truth, which will antagonize the inquisitor against the Lord. Either way, you will not receive any payment for your efforts.
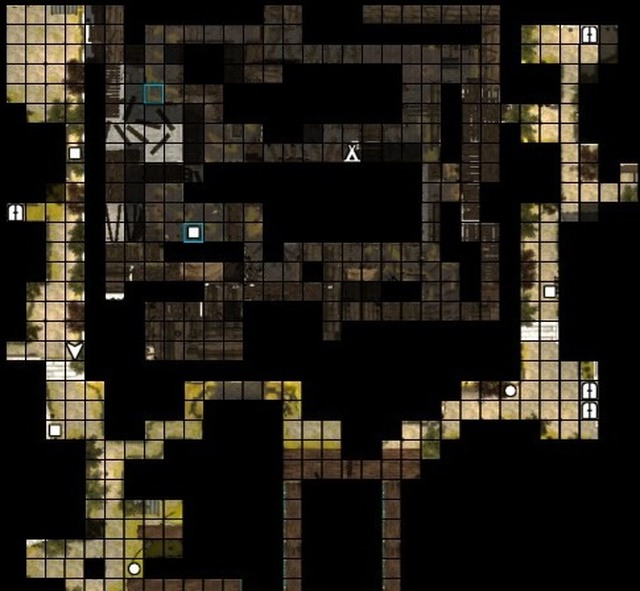
After you have determined who the leader of the Highwaymen, from the "Search for Kilburn" quest(1) is, you decide to set out to find him yourselves. The entrance to the hangout is near (2) the tower itself. You simply need to go Northwards and then to the East. Once you encounter two ghouls, this means that the entrance to the Lost City is close.
 The entrance to the Lost City
As you enter, you need to be very well prepared. A big supply of potions and scrolls is recommended here. It is also imperative that you have , on you, scrolls that protect against paralysis, because there are banshees inside. The minimum suggested party level is 15, but it is difficult then anyways.
 Entrance to the castle part
Once you enter(3) you should quickly locate the bridge to the castle(4). Kill the two guards and open the gate with the key that they drop. Try to go in the direction in which you walked over the bridge, as often as you can, and you will reach a descent (5).
At the next level(6) trifling is over. Here, you can even be attacked by a dozen of enemies, at a time.
 Montbard, is not too tough, but you need to keep your vigil
This is where Montbard is(7). At the first fork, you need to open the door, with the key that you find at this level.
Once you find him, there is no point in descending any further. You can exit through the door that the Southern corridor leads up to, and take a turn at the first fork. This way, you will get to Seahaven.
Then, you only need to return to Morgan in the castle and the quest will be over.
The quest consists in finding all the obelisks scattered around the worlds. This quest activates after you have found the first one.
Treasure coordinates: 129,53. - You cannot find the treasure before you have found all 7 obelisks.
Excerpt from all obelisks:
Your journey starts at the gate of the Seaharbor (Seahaven is what is meant here). Now, take ten steps towards the Sea of Storms. Turn left and take twenty (there is an error in the game, there should be twelve). Turn right and take eleven steps. Turn left and take nineteen steps (requires blessing from the Water God). Turn right and take three steps more. Turn right again and take the final step. Under the rock on the left, there is a buried treasure (a relic).
In the Crag fort, you can learn that the captain is very sick and only a Necromancer, who is proficient at healing curses, is capable of helping him. Ciele asks you to go to Karthal and find Kaspar there, who is capable of helping the Pirate King.
 The white square in the blue frame is Kaspar's whereabouts
To complete this quest, you need to go there (so, you will be able to complete the quest only as late as in the third Act). Once you are inside, go to the Slum and find the Hospice there. Kaspar will join you as your party member.
Return to the Crag with him and he will tell you that, to heal the King, he needs:
- Widowsweep berries(1) - You can find it in the Shadow Woods, to the South-East of Khartal.
- Elven toadstool (2) - You can find them in the Halloth Grove, to the West of the Elemental Forge.
- Sulfur (5) - it can be bought from the alchemist in Seahaven
- Mercury(4) - Can be bought from the shopkeeper in Karthal
- Crystal Spider Heart (3) - 3 level of the Lost City. The door that has, so far, been shut, is open now so, you can get in.
After you enter the Chamber at the City's level 3, which can be opened from the bottom of the map, you will have to fight several undead and banshees, at level 20+, you should have no problems dealing with them. In the next room, there is the Crystal Spider waiting for you. This monstrosity fights at a distance and deals damage for 150-200, which is, additionally, and AoE attack. Therefore, you should not save up on your healing and regeneration potions, to be able to push forward. The most important thing here is to shorten the distance. It does not use its AoE attacks then and attacks individual heroes only, although just as strong.
At some point, it will start to teleport and start being active, out of a sudden. The Spider is very tough, but has few health points. Additionally, it will shut you up in cages two times, which you need to smash to be able to continue fighting.
The first moment is the worst, where you need to strive for short range combat.
After you defeat the spider, you obtain the last item and you can return to the fort.
While visiting Seahaven, pastor Umberto will ask you to find all nine heretical books that the Inquisition wants to burn. These books are scattered all over the world and you can complete all of them only in act 4.
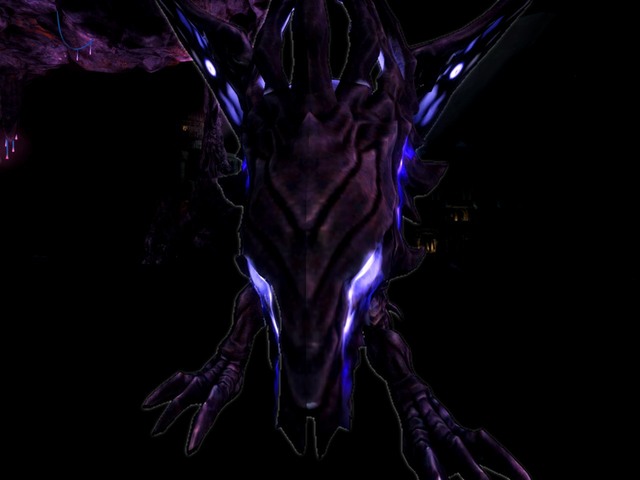 Shadow Dragon guards one of books
(1) - First book can be found near Sorpigal, north in the dangerous cave. There is a Shadow Dragon inside. I recommend having at least level 20 to fight with him.
(2) - The second one is in the first level of Portmeyron castle. You can enter the chamber with the book only through the Lost City.
(3) - Third book is in Cursed Ruins, not far from Portmeyron castle. When you go there, you should invest in spell Burning Determination and have high experience level.
(4) - The fourth book can be found during completing the quest "The Master of Assassins" in the third level of the guardhouse.
(5) - Fifth one is located in Karthal sewers on the second level, after completing the quest "Liberation".
(6) - Sixth book can be found in the Tower of Enigma. The password is: Age.
(7) - Seventh one is found during completing the quest "The Highwaymen" on the first floor of bandits hideout.
(8) - The eighth one is on one of ships wreckages. The one with the book is in north from Seahaven.
(9) - This book is in Black Guard Headquarters, which you enter in the quest "Liberation". You have to find the golden key on the first floor - it lies under the one of beds. After that open the door at the end of the level in order to get to the floor with the book.
Before he dies, Montbard asks you to find his daughter. At the beginning, you need to take his journal from the Southern part of the Chamber.
Now, you only need to go to Church of Elrath in Sorpigal and ask Rosalie to tell you her story. This is when you show her Montbard's journal, which ends this quest.
Jon Morgan tasks you with going to Karthal, to find out what fate befell his informer. To do that, you need to meet up with another agent who is waiting for you in Karthal sewers.
The entire quest has been described in chapter "Morgan's Informer".
Once you get to know, from Dunstan, that Hamza, the rebel leader, can help you free Falagar. You decide to find him, straight away. Since the city gates are open, you can walk around the city without any limitations.
The best way to find Hamza is to listen to gossips. And there is no better place for that than the inn.
The entire quest has been described in chapter "The Great Escape".
For the break into the garrison to be successful, Hamza expects you to steal the key from one of the Black Guards named Theron. Without the key, you can forget all about sneaking your way into the prison. Hamza only knows his name, but he does not know where to find him.
The entire quest has been described in chapter "Sewer Keys".
Apart from the keys, Hamza is also going to require information about the garrison itself. You need to go to the Blackfang's HQ and convince them that you should work together. He does not know, however, what they are going to want in exchange so, you are on your own when it comes to that.
The entire quest has been described in chapter "Partners in Crime".
With all the information that you require, and the key to the sewers, you are ready to break into the local garrison and free Morgan's Informer. Your allies are to divert the soldiers' attention for the time being.
Go to the Slums and start a conversation with the black guard captain there, It does not matter what you tell him, sudden fire will attract their attention.
The entire quest has been described in chapter "Liberation".
After you have completed the quest whose aim is to free Falagar, Morgan asks you to find out, everything that you can, about Dunstan. He is said to be above Marcus, who is currently the sovereign in the city to the South.
You will receive the first hint in Karthal, in the inn located in the harbor district.
The entire quest has been described in chapter "Dunstan".
After you defeat Montard and return to Jon Morgan, you will receive another quest from him. You need to make your way into the city of Karthal and find out has happened to his informer. You are to be awaited by another agent in the sewers.
The problem is that, however, the city gates are shut and nobody is allowed in. This is not a problem, though, because there is a sewer entrance next to the city. (1).
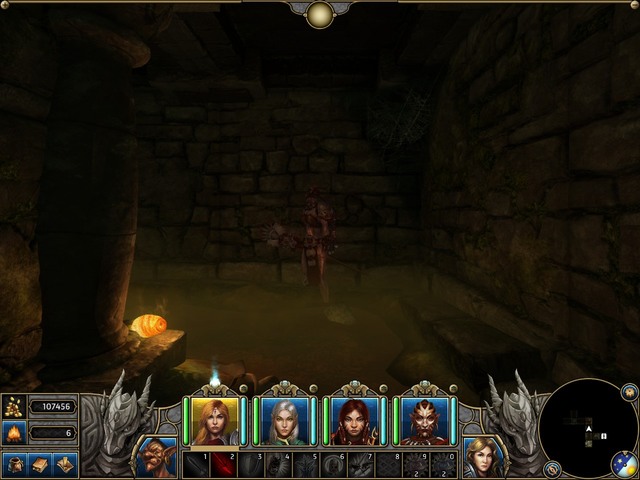 An orc female in the sewers.. what a beautiful sight to behold
Enter the sewers(2), and you will meet there the woman (3), who is supposed to be waiting for you instead. You will learn from her that the sewers lead up straight to her father's, Falagar's, house that is the missing informer. To reach the other end of the sewers, you need to lift the grate first(5) with a lever(4).
From here onwards, it is an easy walk, but there are facehuggers and Giant Elite Spiders waiting for you there. It is a good thing to be accompanied by someone who can heal poisoning with earth Magic, or to have an antidote on you.
After a short walk, you will reach the stairs to the villa (6). Inside, however, there is not that safe either and, almost instantly, you will be attacked by Shadow Mages and Black Guards. Of course, they are quite resistant to Dark Magic, as well as the Air Magic so, it is recommended that you use some other spells and attacks that prevent the mages from casting their spells.
In the vestibule, there is captain Ripley waiting for you(7). His behavior in the fight is the same as in the case of a black guard, but you do not need to fight him. From him, you will learn that Falafar has been arrested. Once you exit the house to the city (8) you will learn from Dunstan that the city gate has been opened and you should look for the man named Hamza, who will help you free the politician from the prison.
Once you learn from Dunstan (1) that Hamza, who is a rebel leader, can help you free Falagar, you go to find him. Since the city gate is open now, you can walk around the city freely.
The best way to find Hamza is to listen to gossips. And there is no better place for that than the inn. Go to the local tavern (2) and talk to the woman residing there, named Haifa. You can only select "Gossip: Hamza", so use this dialogue option to talk to her, and more options will appear. When you tell her that you have been sent by Jon Morgan, she will tell you to search for answers in the Cosmic Circle(3).
 In this light, Hamza looks almost like a demon
The password is: fate cannot be altered, once things are in full swing.
Once you tell the password to the shopkeeper, she will take you to Hamza straight away.
This is when this quest splits up into two quests that you need to complete: "Partners in Crime" and "Sewer Keys".
After you have completed both, return to Hamza.
For the break into the garrison to be successful, Hamza expects you to steal the key from one of the Black Guards named Theron. Without the key, you can forget all about sneaking your way into the prison. Hamza only knows his name, but he does not know where to find him.
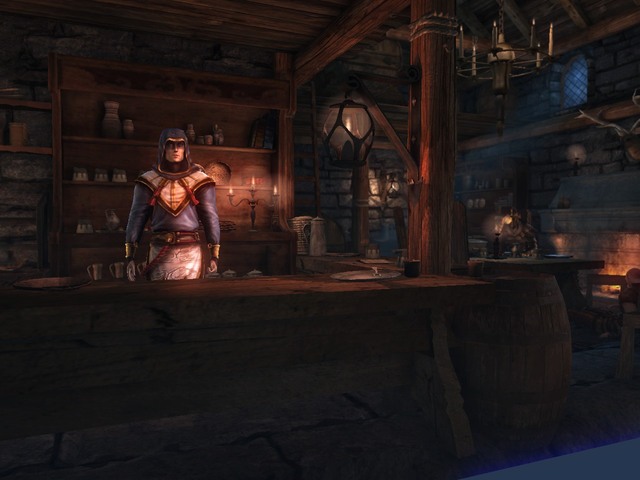 An inn in the Slums run by a... Wizard?
You will find him in the inn(1), which is located in the Slums. You will not even have to fight so, casting protection spells, before you enter, is not necessary.
The only thing that you need to do is to enter and buy the man a drink and he will fall to the ground drunk. Not too strong head, it seems. Run through his pockets and take sewer the key.
Apart from the keys, what Hamza is also going to need is information about the garrison itself. You need to go to Blackfang's HQ and convince them to cooperate with you. He does not know what they will want in exchange so, you need to haggle here.
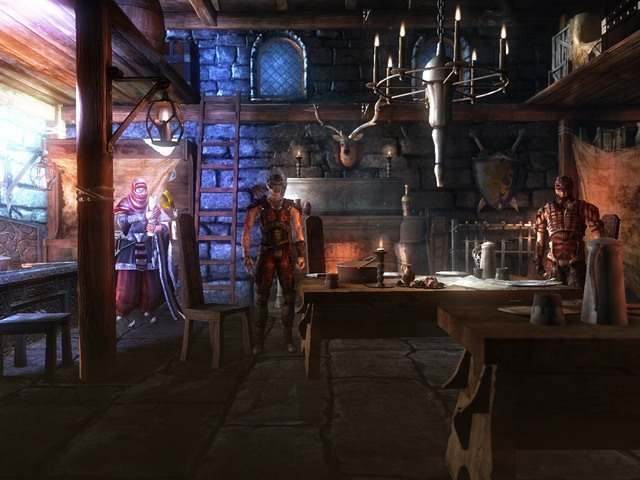 Blackfang HQ
Leave the Harbor District and go to the Slums. You will find there an entrance to the Blackfang HQ (1). It turns out that, in exchange for information, they want the cargo of the ship that carried their belongings, but it sank. If you have followed this guide, while playing the game, you should have collected the chest while completing the "Sword of the Bounty Hunter" quest. It is a good idea to see that chapter beforehand.
In spite of that, you need to go for the chest again because, this is what the game requires.
Take a ship to the Crag (from the Harbor District) and go South. Go past the Skull Rock(2) and continue ahead. Finally, you will encounter the shipwreck (3). Enter and defeat the Nags, who are staying there. The sailor who is there, will tell you that monsters looted the ship and they are hiding now in the Skull Rock.
You now need to return to the Rock (2) and find passage to the second level (4) (the password: Swordfish). If you have not been here before, the chest is in the Northern Chamber (5). Take it back to the owner.
With all the information that you require, and the key to the sewers, you are ready to break into the local garrison and free Morgan's Informer. Your allies are to divert the soldiers' attention for the time being.
 The Commander of the guard in front of the garrison entrance
Go to the Slums and start a conversation with the black guard captain there, It does not matter what you tell him, sudden fire will attract their attention.
Take the main entrance and, while at the beginning of the location(2) go towards the other end of the hall. Open the door on the left, there, and after you kill the mages there, collect the key (3) from the floor, next to the magical anvil. Exit to the hall and you will find out that it is crowded with enemies. The best method is to stand in a corner, or between a wall and a pillar, because you will have them attack from two sides only, instead of three. Remember to deal with mages in the first place, because they are stronger than the regular guards, but also not as tough.
After you have defeated them, enter the room opposite the one the one that you have just left and you will see another door after a while (4). Use the key to open it and you will find a descent to level 1 nearby.
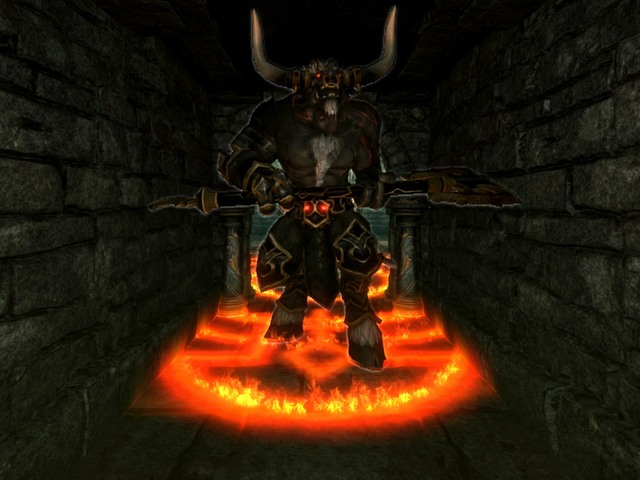 Minotaur guarding the prison
At this level(5) at the first fork, take a turn to the left and pull the lever at the end of the corridor (6). This will open a nearby gate. Additionally, you can open the sewers grate(12), to make the escape easier later on.
Backtrack now and take the right turn, through the opened grate (7). Continue ahead and, when you reach a room with two corridors, take the one on the left. After you open the door, you should encounter a Minotaur Boss(8). The best method is to attack at a distance, because the attacks of the beast are quite strong.
After you defeat the monster, you receive a key that you can use in this room (9), and use the lever next to the grate afterwards(10). Additionally, on the desk, you can find a Shard of Darkness on the desk (useful for the "Forge of Heroes" quest).
After you have passed by all the doors, you still need to make it past the grate, which can be forced open only by a high-powered character. After you have done that, talk to Falagar (11), and he will take the place of your companion. Escape to the sewers (12), where you start another conversation about scams and politics. After that, the only thing left for you to do is report back to Morgan.
After you have completed the quest whose aim is to free Falagar, Morgan asks you to find out, as much as you can, about Dunstan. He is said to be above Marcus, who is now the sovereign in the city to the South.
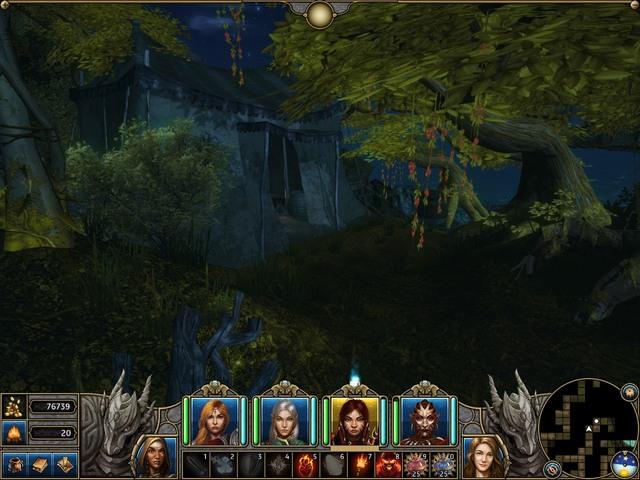 Entrance to Shiva's tent
You receive the first hint in Karthal, in the inn(1), in the harbor district. The innkeeper will tell you that Dunstan used to belong to Shiva's group and that they were adventurers. When he saw him for the last time, Dunstan was going towards the Wyslin Jungle.
It is best to fast travel on the ship to the Crag(2), because the jungle is to the North of that town. Exit the fort and approach the teleport to the East (3), then to the one next to it(4) and you are in the Jungle. Nearby, there is Shiva's tent(5), which is where you are going.
She will tell you that Dunstan changed after their visit to the Tomb of Thousand Terrors. The tomb itself is high in the mountains to the North-East (6) of the Seahaven(5).
While going there, you need to get ready, because this is where Act III ends. Additionally, along your path, you will be fighting three Cyclopes. The preferred level is 25+.
Additionally, before you enter the tomb, you need to buy a lot of potions and get well prepared, because you will not be able to exit, once you enter.
Thousand terrors
A chest: Erebos
You start Act 4 with this quest. After entering the tomb you won't be able to leave through the entrance as you always could. The most important thing is that you enter the tomb completely prepared because it has 5 levels and is full of terrors. You'll also encounter Shadow Dragons.
The whole task is described in chapter "Tomb of a Thousand Terrors".
Jon Morgan decides to go to war with Karthal. You have to tell Crag Hack from The Crag about it. Once he is informed about the kidnapping, he will immediately gather people. He will tell you to go to his ship. Before that make sure that you have 20 units of supplies, half of inventory full of potions, full of spells and resurrections scrolls, because it will be very tough battle and there is no turning back.
The whole task is described in chapter "Battle of Karthal".
 Dunstan
This is the last quest in the campaign. You have to follow Crag Hack and kill Erebos. This will be a challenge but if you have follow advices to save rests, you should make it.
The whole task is described in chapter "The Master of Assassins".
Once you get inside (1) you'll finish Act 3 and the last act will start. The entrance will be locked and you'll get trapped and forced to find the exit.
Move forwards and prepare for fights. Shadow creatures will be your enemies here - remember that they are not very resistant to light magic.
While searching for the exit move west and use the teleport to get to the second floor (2). Before that you can find a statue which will resurrect your companions if they are dead.
On the second floor (3) you'll find more teleports but there is nothing special except a chest to the north - you'll need password for it.
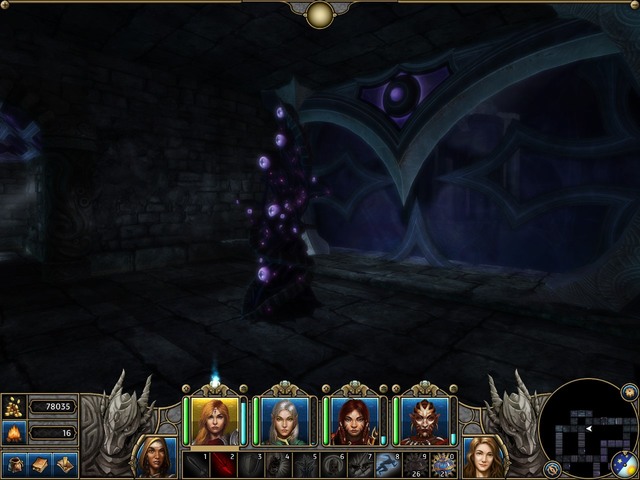 The weirdest level you could ever imagine
Chest password: Erebos
In order to find an exit go through the first portal (4), then enter the second one (5) and at the end enter the third portal (6). Once you do this, keep going east, killing waves of shadow creatures along your way (7).
On the third level (8) prepare for a bit of confusion due to many teleports. Move forward through the first one (9). Then step into second teleport (10) and use the third one (11). Fourth teleport (12) is located on the northern end of the maze. Fifth teleport (13) can be found on the south of the map and the last one (14) is located near the fourth teleport. After that the grate to the next level will be open (15).
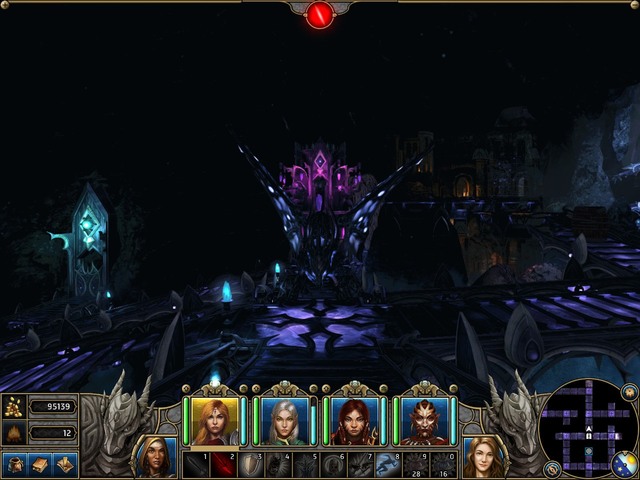 Shadow Dragon - at some point two of them will attack you
The fourth level (16) is a total maze. First move forwards to the teleport in front of you (17). Then enter the next one (18) and press the first tile (19). You have to press five of them. They are marked with some yellow glowing. You have to watch out because on this level you can encounter Shadow Dragons, so it would be good to rest after each fight and often save the game.
Go back now and enter the teleport south (20) from the entrance and then press the second tile (21). Again return to the beginning and move to the portal on the west (22). Now go through two portal (23, 24) and press the third tile (25).
Now use the same path as for the first tile - next to it the fourth tile will be activated (26). Step on it and again return to the level entrance. Now head south east and without using portal descend to the fifth tile (27). There will be a boss there who paralyzes opponents, so use the Burning Determination at the start of the fight, if you have it.
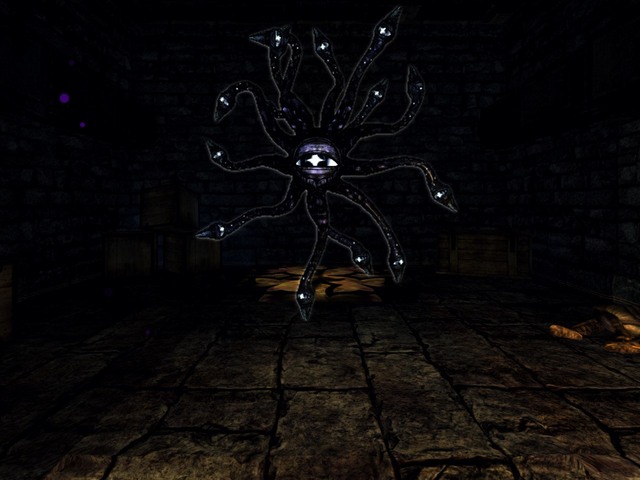 After defeating this boss you'll get the last tile and corpse of Dunstan
After defeating him, stand on the tile - there is a corpse on the right (28). Search the corpse and you'll find the book and Dream Shard. Now you can go to the fifth level (29).
Another game of teleports will start here (30) (yellow markers). Move ahead (1) and then use the one on the east (2), then the one on the north (3) and finally use the eastern teleport again (4).
Turn right on the fork and talk to the dark Elf there (5). She will lead you to the camp and tell you how to leave this place (6). In addition, the characters in the camp can teach you some skills.
Once you get outside, just go to Jon Morgan.
After the visit in the tomb, Morgan will want to start the battle of Karthal and save his own granddaughter. Go to the Crag to ask the Pirates' boss for the help.
Once you get there but everything you need, because you won't be able to return here until the mission ends. You should but Resurrection scrolls. It is also worth to take a druid with you so you can quickly resurrect your team members. You can also spend all gold you have on healing and mana potions, because you'll use them constantly. Buy many supplies and use them wisely until starting the quest "The Master of Assassins".
When Crag heard that it is about his granddaughter, he had immediately mobilized the army. He will await you at the harbor.
Go to the harbor at The Crag and talk to Orc there. Once you step on the ship, the battle begins.
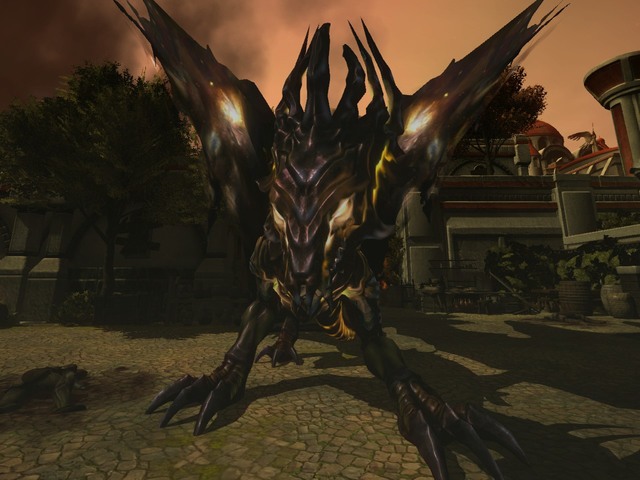 First boss - the dragon
You will appear in Karthal (1) already in the battle and you'll have to face Dark Elves as opponents. They are very vulnerable to light magic, so if you have such spells, you should use them. They will attack you at once. After defeating the first wave, go ahead. Prepare to fight a Great Dragon (2). He hits very hard and also poisons his opponents, to it is good to use regeneration no to waste time for healing each party member.
After defeating him, move ahead until you encounter next enemy soldiers. It is best to get to some corner, so they can attack you only from one or two sides. When you defeat them, you'll talk to an elf (3), which you met once in the Elemental Forge. If you answer with dialog options 1 to 4, he will attack you. But if you choose option 5, then he will commit a suicide. This is unfortunately not possible with the current version of the game (bug), because he still stands there and you can't bypass him. So choose any option from 1 to 4.
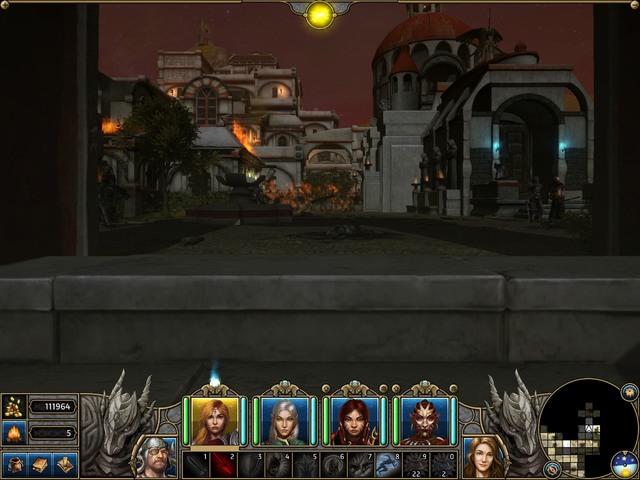 In this fight it is worth to get to the temple door
The fight with him is not a problem. Spells work well against him, but melee hits are not as good. Each successful block adds him additional attack, so it would be good to use attacks, which can't be dodged. After the fight enter the Guardhouse (5).
Inside you'll find the town ruler, Markus Wolf. He will flee immediately and you'll be welcomed by the Black Guards and mages. In order to move forward you have to switch two gears (6 and 7), so you'll be able to pull the levers (8) and open the next door.
In the next room you'll encounter Markus Wolf again. But he will flee once more and call the Guards.
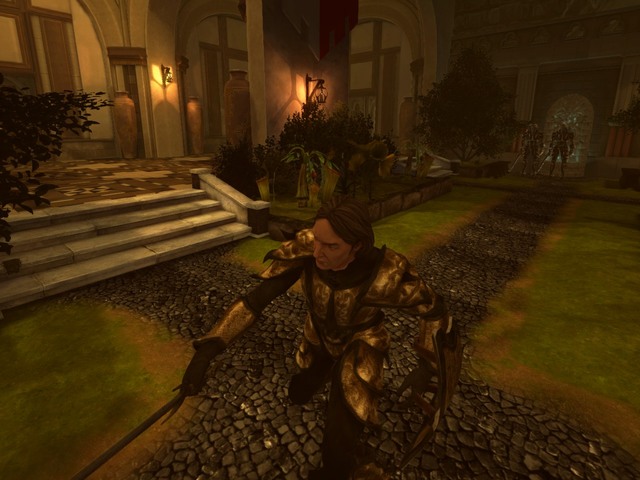 Here is Markus Wolf, who falls after one hit
An army of enemies will attack you. Try to have a wall from at least one side of you, because if they surround you, you'll have a tough time. It is worth to use such spells as Fire Breath, which deals damage to all enemies in one line.
And regeneration is a base to survive.
Once you defeat the army, move south. You can drink fountain water along your way. After walking over the corridor and killing enemy survivors, you'll be able to finally fight Markus Wolf (9). Unfortunately he will fall after the first hit. Now you can decide whether to kill or stun him.
After defeating Markus Wolf (1) a cutscene begins. Now you have to follow captain Crag. Near the body of Markus go back a bit and choose one of ways to the second (2) level of the Guardhouse.
Once you get to the second level (3) go forwards walking on the middle (4), because paths on sides are closed. Elves appear again and this time they are supported by mages. Try to eliminate them first.
After a while you'll get for sure to one (5) of entrances to the third level.
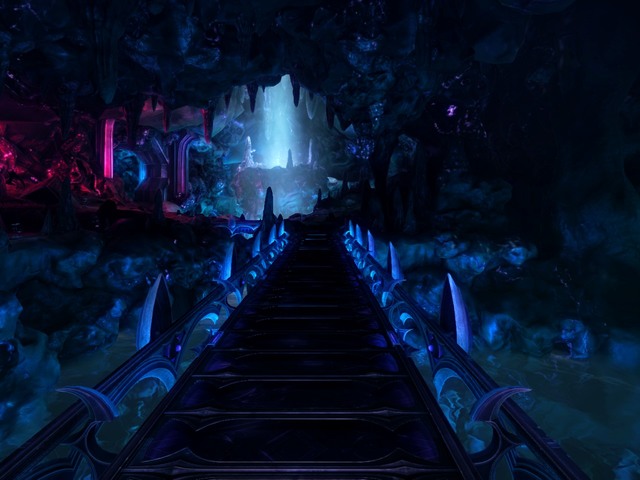 First fight with Faceless - it is not so bad
Here (6) you'll encounter Elves along with Faceless and Shadow Watchers.
In the middle you'll have to face Faceless. Kill him because he is not very tough opponent for the team about 30th level of experience and go by him to the descent (7).
Once you get in Ker-Thal (8) you'll see captain's Crag body. You can go left, but you'll find there only Dark Magic resistance shrine, or go right in order to get to the passage to the second level of Ker-Thal(9).
There are not much forks on the second levelOn the second level (10) there are no riddles. But the corridor you have to go through is very long and you'll be attacked by many monsters there. Each fight looks the same. It is best to use area spells as well as area healing. All strengthening spells will also help you defeating enemies. Do not spare potions but save rests for the third level, because you will need them there. Keep going ahead until you get to the descent to third level (11).
You'll finally encounter Dunstun there (12), who doesn't look nice and inconspicuous as on the game beginning. Go to the right and take one of torn pages (13).
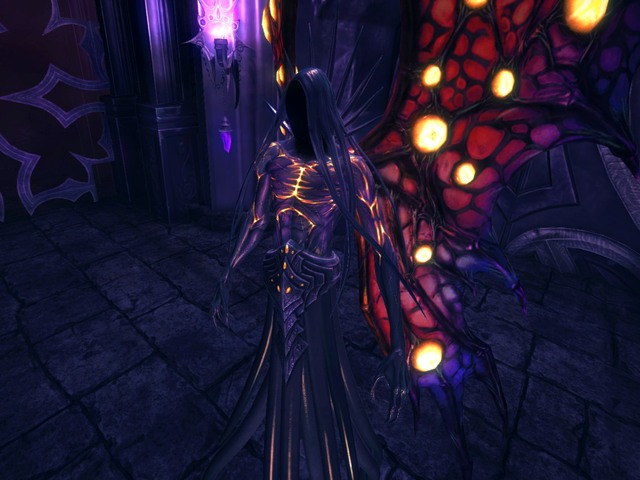 Erebos/Dunstan in the real form
Now you have to watch out, because on the bridge you won't be safe and Erebos will be appearing often near you. Several powerful attacks are enough to get rid of him but he can also deal some damage. Go to the first chamber and defeat Elves there. Take the second page (14) and go to the next room to get the first piece of the sun seal (15).
It is worth mentioning that you are safe only in such rooms and you can heal your wounds there by resting.
Go to the bridge again and move to the room on southeast (16). Now head to the one east from this room (17) and west from it (19). In the last room you can find the third page (18). Remember that in each room around 20 opponents will await you. They have the same power as previously but there are many of them, so prepare for long fights.
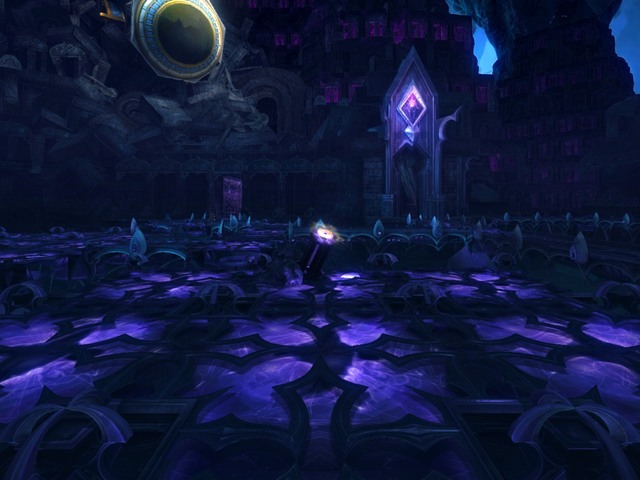 Here you activate the seal
Once you have all pieces, you have to go to the platform in the middle (20) to activate the seal. There are four Faceless ones next to the mechanism, but you'll be able to rest before inserting the seal. When you insert the seal, you'll have to enter the name to activate the system.
This name is: Michael
Congratulations, you just have completed the main story plot. You can continue exploring the world.


 Might & Magic: Clash of Heroes Game Guide & Walkthrough
 Might & Magic: Heroes VI - Shades of Darkness Game Guide & Walkthrough
 Memoria Game Guide & Walkthrough
 Middle-earth: Shadow of Mordor Game Guide & Walkthrough
 Metal Gear Rising: Revengeance Game Guide & Walkthrough