

This guide to the Shades of Darkness, an expansion of the basic version of Might and Magic: Heroes VI contains:
The walkthrough of both campaigns assumes that you're using the default hero. In case of the Dungeon it's Raelag (Might), while for the Necropolis it's Vein (Might). All missions are balanced with those two in mind, therefore playing with a Magic-oriented hero might be much more difficult and require a different approach to the gameplay.
Slawomir "Asmodeusz" Michniewski
Statistics:
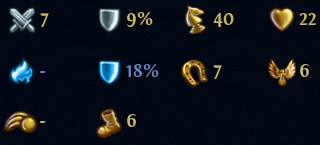
Attributes:
Statistics:

Attributes:
Description:
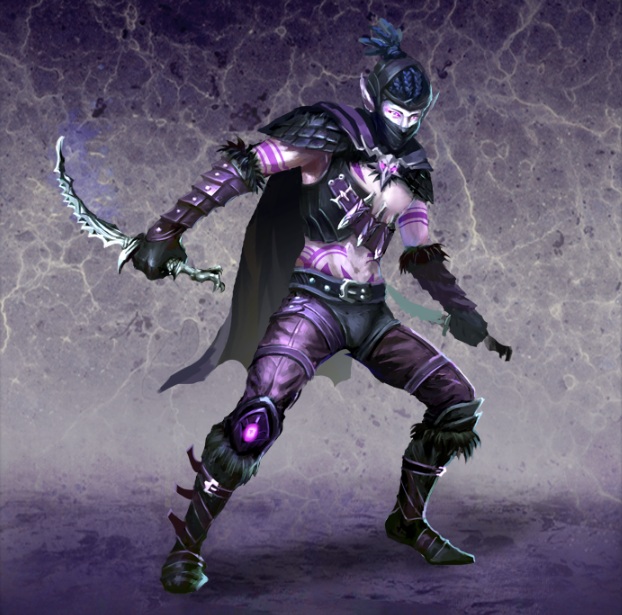
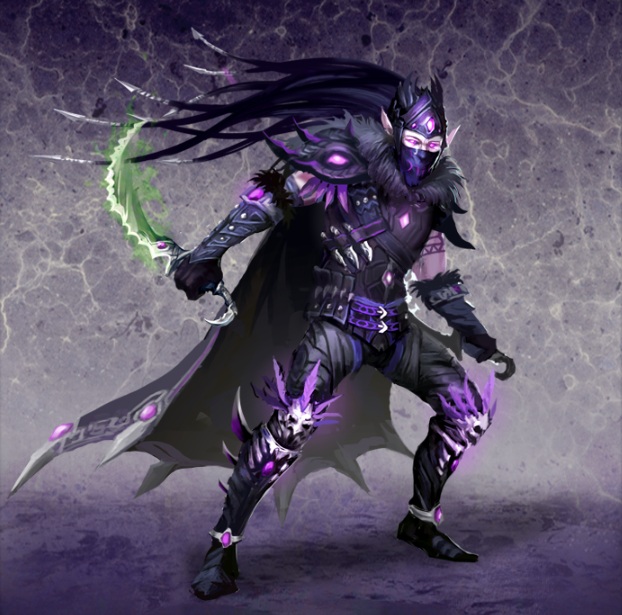
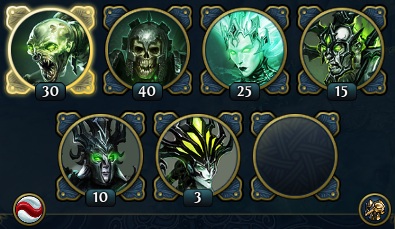
Both Assassins and Shades have two basic roles in your army: reach unnoticed the most vulnerable enemy units and eliminate them with a single fast attack. Backstab linked with Shadow Cloak (and Poisoned Blades of the Shades) lets you move throughout the battlefield freely and deal enormous damage. You however have to look out, as these are basic units which don't have too much health. It's best to Shroud of Malassa right after attacking and move to a different part of the field. A big group of Shades or Assassins can very easily defeat even the strongest creature.

Statistics:

Attributes:

Statistics:

Attributes:
Description:
Stalkers are the first ranged units which you can use. They can deal considerable damage, additionally slowing down the enemy with Curse of Shadow, allowing you to keep him at distance and have more time to attack. Later in the game you will gain access to Chakram Dancers, capable of damaging multiple enemies at the same time with Whirling Death. Unfortunately this attack can as well hurt your own unit, therefore using it requires perfect placement of units on the battlefield. The biggest flaw of Stalkers and Chakram Dancers is their very low health. A couple accurate attacks will deprive you of your main attack forces.
Statistics:

Attributes:
Statistics:

Attributes:
Description:
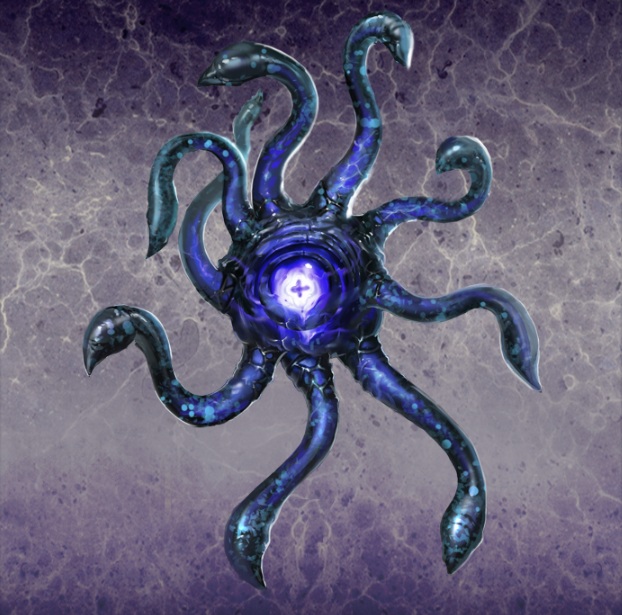
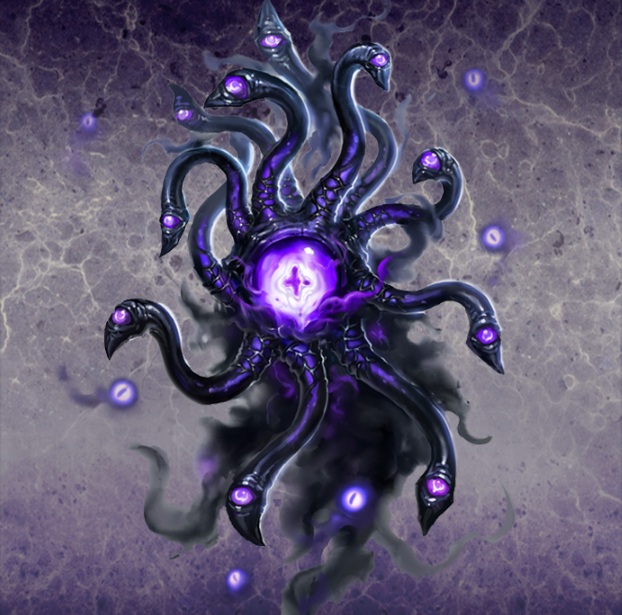
These units might at first seem much weaker than Stalkers. They deal noticeably lower damage and don't slow down the enemy. Despite that they have a few advantages. They are much more resistant than Stalkers thanks to the Spirit Form and can easily change targets - an enemy hit in the previous turn will still receive damage from the Harrowing Vision. The upgraded version of this unit, the Shadow Watcher, may additionally mark one of the enemy units with Mind Probe, thanks to which he will receive 15% more damage till the end of the battle. This skill is priceless when fighting the most powerful enemies.
Statistics:

Attributes:
Statistics:

Attributes:
Description:
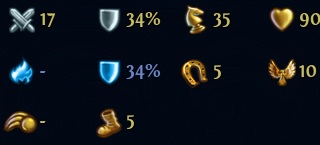
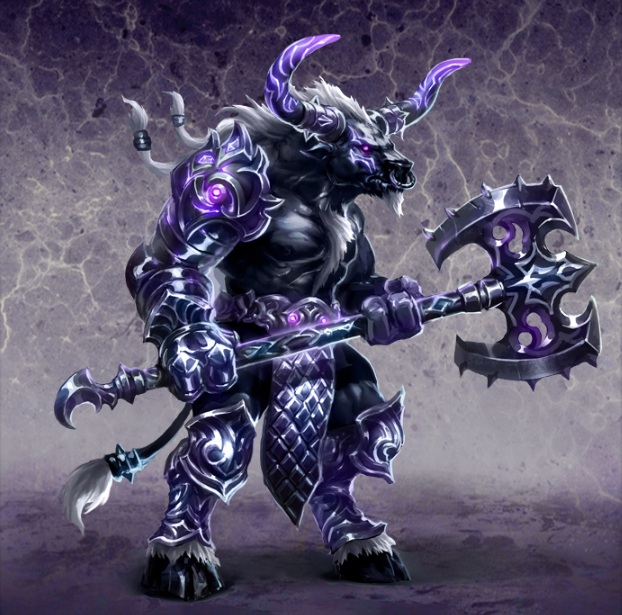
Minotaurs and Minotaur Guards are one of the most resistant units of the Dungeon. They are rather slow and have low initiative, but thanks to their size and Preemptive Strike they are great for blocking narrow paths on the battlefield. Minotaur Guards additionally have to Mighty Slash sill which lets them push back smaller enemy units. It's best used to protect your ranged units from enemy marauders.
Statistics:
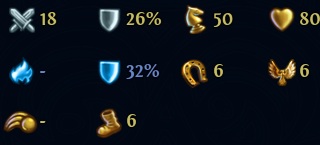
Attributes:

Statistics:
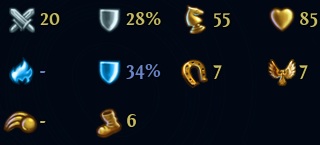
Attributes:
Description:
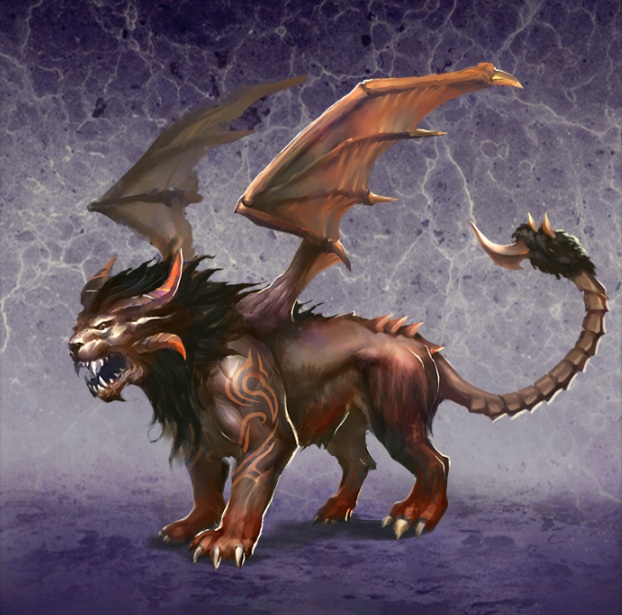
Both Manticores and Scorpicores are great support units in the Dungeon army. They have high initiative and often are the first to make a move. Thanks to their big mobility, enhanced with haste they can get to enemy ranged units as fast as in the first turn. However their role doesn't end just there. The Sting can slow down even the fastest enemy units, while Scorpicores lower enemy initiative by 10 points - that might let your units eliminate him before they can make a move. The Venom of Manticores and Chimeras lowers the enemy defence, additionally increasing the effectiveness of your other units. Attacking with your flying units and afterwards with Assassins or Shades can destroy even the most resistant enemy squad in one turn.
Statistics:
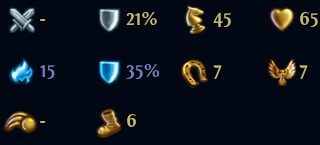
Attributes:
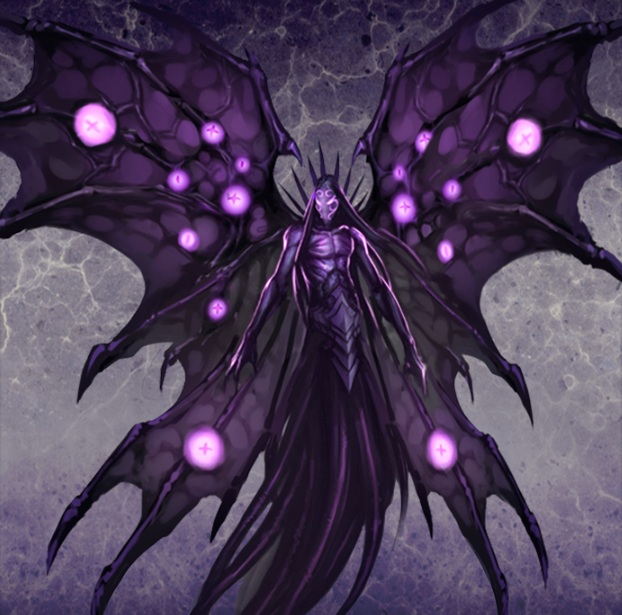
Statistics:
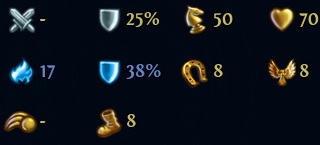
Attributes:
Description:
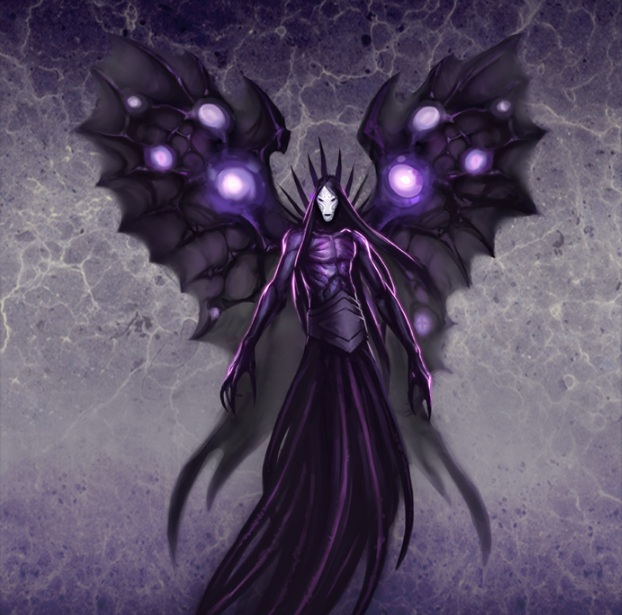
Faceless are a great addition to the Dungeon army. They are fast and not very durable, capable of instantly moving throughout the battlefield. Masters of "hit and run" thanks to the shadow strike will never receive retaliation, while their long range lets them attack enemy from far away. Faceless Puppeteers can also dispel positive effects on a chosen enemy and, what's most important, Mind Leash an enemy group. This skill lets them, e.g. move the enemy forces to the first line of attack or block powerful enemy strike forces.
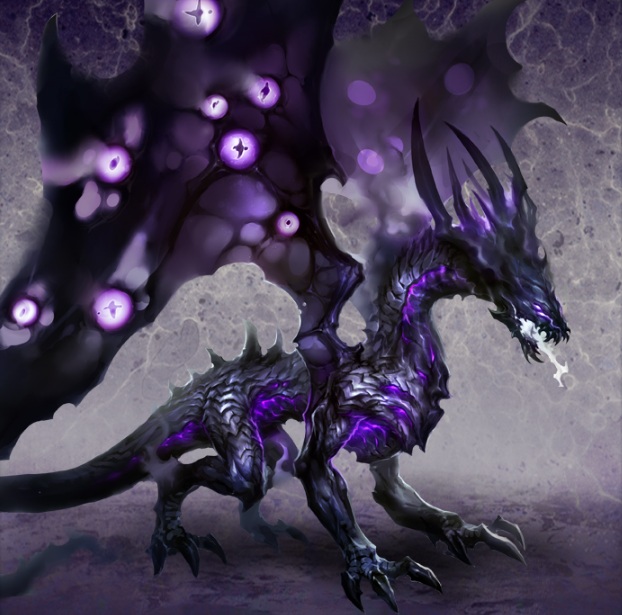
Statistics:
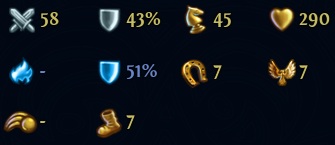
Attributes:
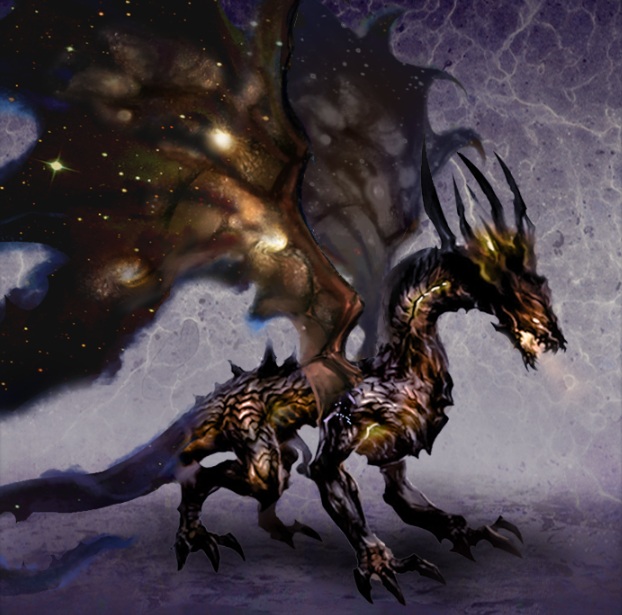
Statistics:
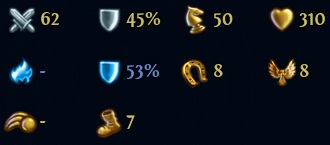
Attributes:
Description:
The strongest Dungeon unit makes a return. The Shadow Dragons and Black Dragons are very powerful airborne units useful for both "guerrilla" and fighting in the first line. Their high resistance is additionally enhanced by Terrifying Presence, capable of blocking enemy movement. The basic attack of the dragons is Withering Breath - the enemy will receive dark magic damage until the end of the battle. Apart from that the presence of dragons increases the effectiveness of all dark skills. If that's not enough, Black Dragons have Immunity to Magic and receive much lower damage from magic.
Objective: Reach the surface
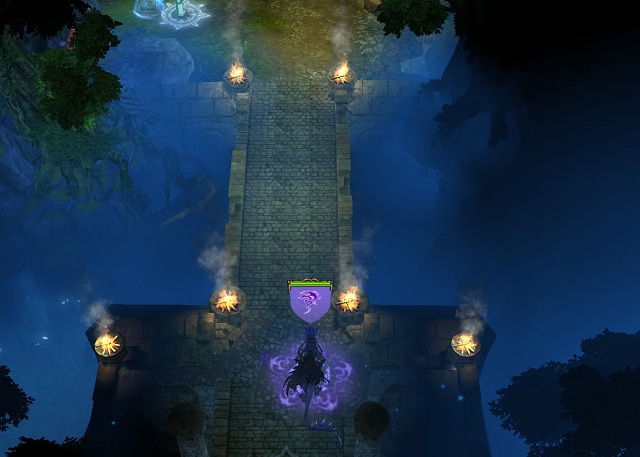
You begin the mission in the southern part of the underground (M1, 1). Head north! After crossing the bridge, you will be able to test your new units in battle, gather the local resources and visit all the locations. In this part you will also have to take care of your army, as you won't be able to regularly restore them!
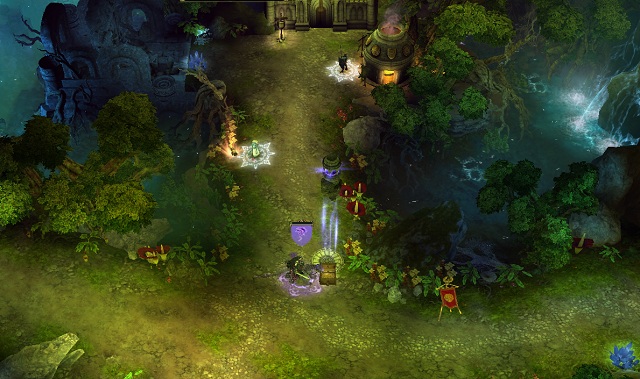
During the battles it's best to wait one turn with the Assassins while shooting at the enemy with ranged units. When the enemy gets within an attack distance from out units, make your move and make them invisible in the next turn (hero skills: Shroud of Malassa) and retreat. Thanks to that you can easily inflict damage without losing units. It's also worth to move your shooters away from the enemy's reach or hide them with the Shroud of Malassa. I'd recommend you practise saving up your units, as each next battle will be harder and the received reinforcement very humble.
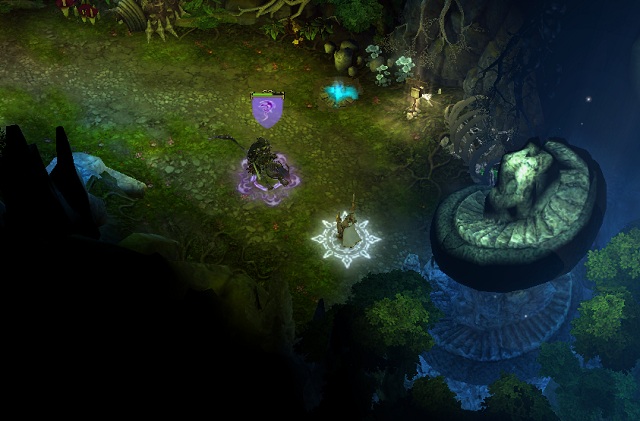
You should definitely visit the Observatory (M1, 2) to unlock one of the side missions: "Eyes of Malassa". While you're moving onwards, you should collect the dragon blood crystals, thanks to which later on you will receive the aid of the Shadow Lurkers. The northern gate (M1, 3) is currently closed, so after visiting the Armoursmith you can head east. There you will come across a group of Pretorians, after defeating which you can get back to the surface (M1, 4) and therefore complete the first part of the mission.
Objective: Find and capture the Angel Erael
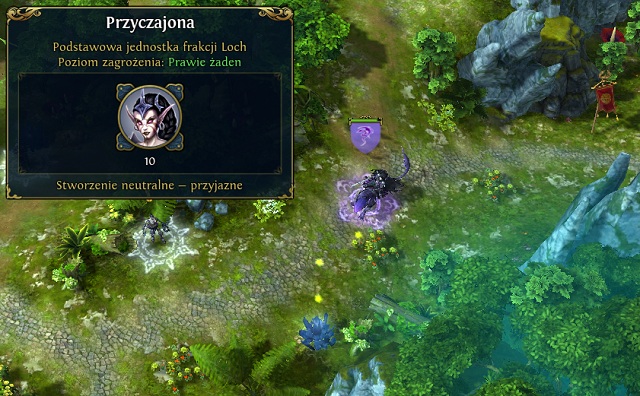
After leaving the underground (M2, 5), head west. On your way you will receive another side mission: "Yrris' finest". I'd recommend completing it as fast as possible as any additional units will not only replenish your loses but also make further battles easier. The first units can be found in the middle of the road (M2, 6) - speak to them and Yrris' Stalkers will join you. At this point you can try your strength at the local Arena (M5, 6); defeating the enemies will let you increase your attack or defence by two points.
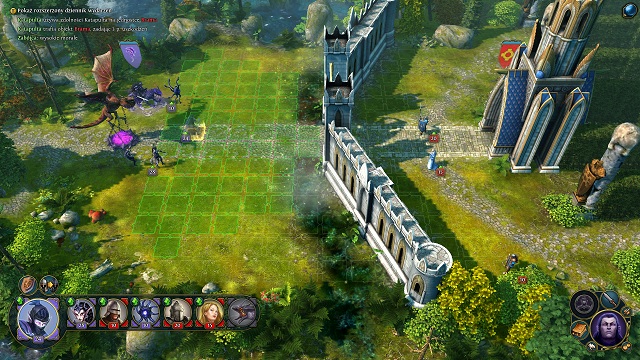
After collecting all the items and visiting every location, you can head north. There you will obtain another group of Stalkers (M2, 7) and will be able to use the Choral of Believers right beside the Fort. Once you're ready, you can attack Eraela and her soldiers (M2, 8). During the battle, firstly take care of the enemy ranged units and afterwards the ones crossing the walls of the stronghold. Defeating the champion will end this part of the main mission.
Objective: Reach the portal to the Reliquary
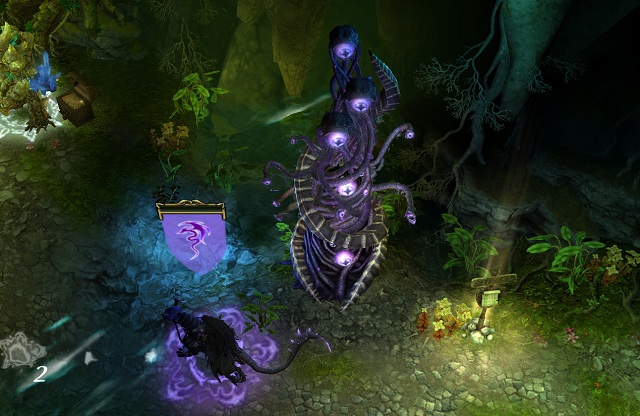
It's time to find the passage to the Reliquary. After examining the area of the Fort, you can head to the underground descent (M2, 9). There will be only path available in the cave - leading west. In the middle of the corridor you will come across the Pillar of Eyes (M1, 10) connected with the previously activated mission "Eyes of Malassa". At this point you should already have 15 dragon blood crystals; after placing them in the pillar you will receive additional reinforcements: 25 Shadow Lurkers. They will come in handy in the upcoming battles; thanks to them you will not only be able to quickly deal with the neutral monster encampment without any loses but also deal with the Haven forces. If you don't have enough crystals, don't worry - you should obtain the missing resources right around the corner.
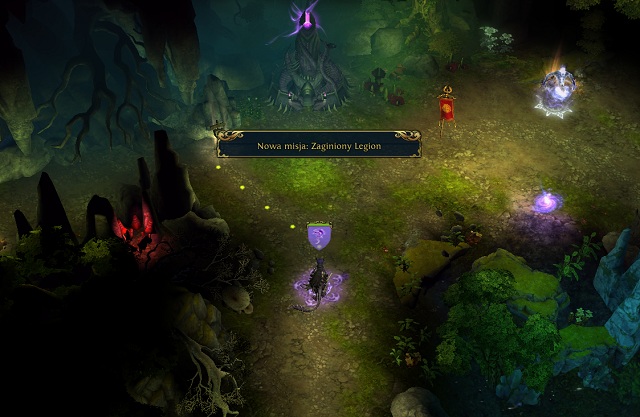
Move north and you will reach a fork in the road (M1, 11). Yrissa will inform you that the remains of the Lost Minotaur Legion ("Find the lost minotaur legion"). If you plan on using them, you should head left towards the exit (M1, 12); the road on the right leads to the Reliquary. I recommend using this chance to strengthen you forces as the additional 15 minotaurs will be very useful when fighting the enemy champions.
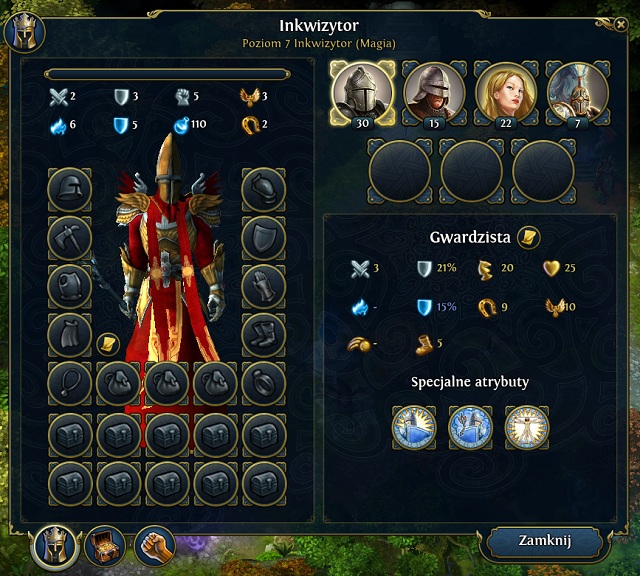
Use the exit (M1, 12) and you will find yourself in the north-west part of the map. Before speaking to Calistar, I'd recommend using the ghost gate (M5, P1), clearing the area and obtaining the last group of Stalkers (M2, 13) thanks to which you will end "Yriss's Finest").Now return to the minotaur (M2, 14) and head north. You will receive 5 new units which you will use during the fight with the inquisitor (M2, 15). Defeating the Haven's hero will end the "Lost Legion" mission - in return you will obtain 10 minotaurs and a dynasty weapon: Edge of Balance! Now just use the nearby ghost gate to return to the underground fork in the road (M1, 11).
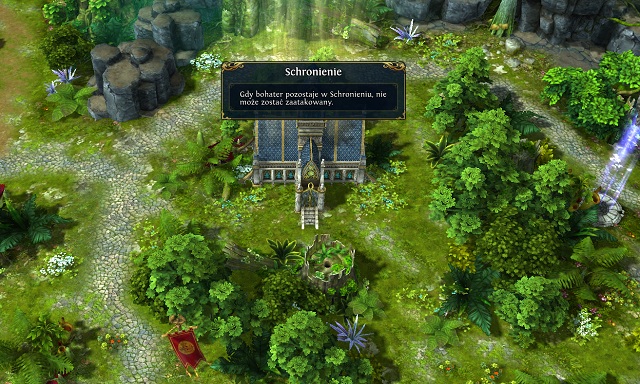
Head right to the next cave exit (M1, 16). On the surface you will come across a Haven patrol in the form of two heroes: Lord Haart and Adelaide. You will also receive two excluding missions: "Infiltration" and "Elimination". If you've been following the tears path from the beginning, you should avoid fighting them. For that, you will have to keep an eye on the enemy and use the shelter in the middle of the map (M2, 17). Heroes following the blood path have an easier time here - just defeat both heroes and the reward for completing the mission will be in your hands. Regardless of the chosen method, you will have to move onwards to the west and eventually reach a closed portal (M2, 18). After the cutscene, you will be able to enter the Reliquary.
Objective: take over the Reliquary to regain Tuidhana's ashes
Reward: 15 000 EXP, Assassin's Gloves
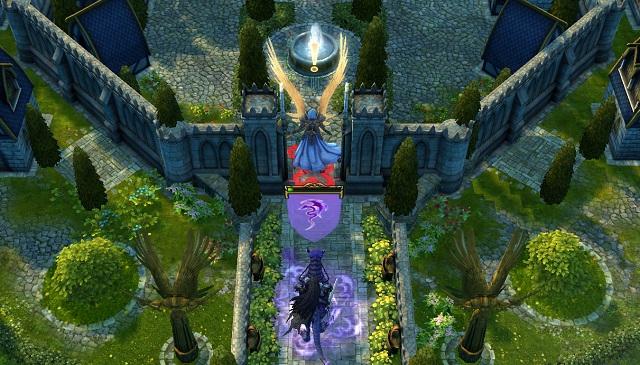
Nothing complicated here - you have to defeat the enemy in front of you. Before the battle, you should use the nearby Choral of Believers (M3, 1) and afterwards charge at the enemy (M3, 2). If you've been saving your units and acquired the Shadow Lurkers ("Eyes of Malassa"), the Stalkers ("Yriss' Finest") and the Minotaurs ("Lost Legion"), this fight should be just a formality. Focus on defending your ranged units and remember about using your hero's skills (Shroud of Malassa) and the ashes should soon be in your possession. It will end the current main objective, but not the mission itself - another challenge awaits for you.
Objective: return to the starting location
Reward: 7650 EXP, +2 defence
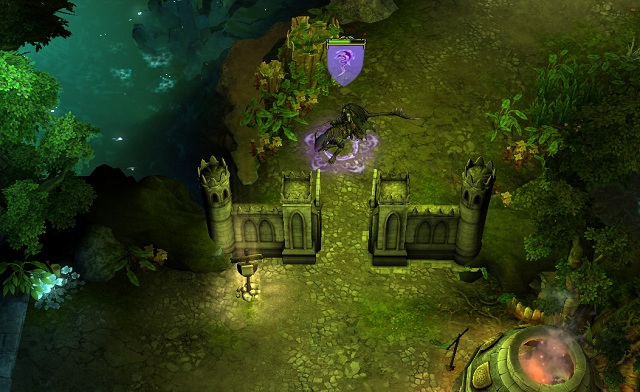
You mission is running from the surface to the starting point of the mission. The gate opposite to the Reliquary will be activated, giving the enemy a convenient path and making chasing you easier. Leave the Reliquary using the portal (M3, P3) and head east to the descent (M5, X4). Once you're in the underground, keep moving to the south. The previously blocked passage (M1, 3) will now be open, shortening your journey. Before heading into the bridge (M1, 1) you should save your game. You will come across an enemy champion, Yeshtar, who's also the last enemy in the mission. The fight can be harder than the previous ones as the enemy has a considerable amount of units and what's worse, also commands a Dungeon army. You should focus on eliminating the Stalkers and Assassins, afterwards the Shadow Lurkers. The Minotaurs should be left for the very end. You don't have to watch out for your units here too much, as the mission will end right after the fight.
Objective: Reach the Blood or Tear class
Reward: +2 Destiny
Just choose any path and keep following it. Unfortunately the first mission doesn't have too many neutral enemies and just a few side missions, so you will need to completely clear the map to finish this quest. You should keep using the chosen skills category from the very start and the mission should end just before the final battle.
Objective: collect 15 dragon blood crystals and place them at the Eyes Pillar
Reward: 3000 EXP, 25 Shadow Lurkers, +1 Magic Power
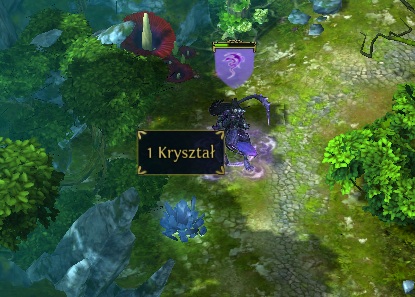
You will receive this mission after discovering the Eyes Pillar (M1, 10) which can be done at the very beginning of the mission by visiting the Observatory (M1, 2). The first part of the mission consists of collecting 15 dragon blood crystals. You should gather just enough on your way to your objective point. If you miss some, you will find more further on. Having collected 15 crystals, you should immediately head back to the Eye Pillar and collect your prize in the form of Shadow Lurkers, who will make the further part of the mission much easier.
Objective: find the 3 Stalker squads
Reward: 5100 EXP, +1 Might Power, Assassin's Mask
Another mission which will be unlocked automatically as you're playing the mission. Right before coming across the first friendly Stalkers squad (M2, 6), Yriss will tell you the locations of all others and tell you to collect them. The first group can be found directly in front of us - just speak to them and let them join your army. The next group can be found right before the fight with Eraela (M2, 7). The last group is in the branch leading to the lost Minotaur Legion on a small beach full of undead (M2, 13). Having collected the third group, the mission will end and you will receive the first element from the Assassin set: Assassin's Mask.
Objective: find the lost Minotaur Legion, recover the stolen Edge of Balance
Reward: 7650 EXP, +1 Might Power, Edge of Balance, 10 Minotaurs
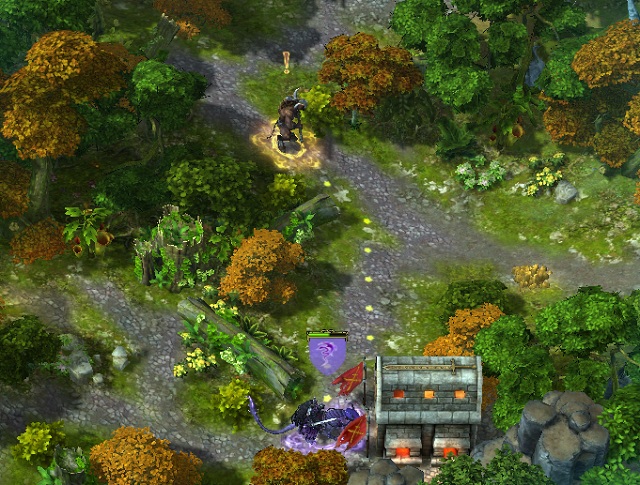
This mission will be unlocked automatically after reaching the underground fork in the road (Mx, x). In order to complete it and get all the rewards, you need to move left towards the cave exit (M1, 12). After reaching the surface, after a short walk north you will find the lost one: Calistar (M2, 14). He will aid you with 5 Minotaurs and tell that the rest will join you after you recover the stolen Edge of Balance. The weapon is now in the hands of a Haven hero who can be found in the northern part of the location. Just defeat him (it shouldn't be very hard) and the mission will come to an end.
Objective: find the Reliquary without engaging the Haven heroes
Reward: 7650 EXP, +1 Magic Defence, +100 Tears reputation
NOTICE! By completing "Infiltration" you will lose the chance of completing "Elimination".
Use the passage (M4, X4) and this mission will be assigned to you automatically. Your task is reaching the portal (M2, 18) without engaging the two Haven heroes who are patrolling the area. For that, you will have to use the shelter in the middle of the glade - if you end your turn inside, the enemy heroes won't be able to attack you. When the enemy is at a proper position, you can head further east until you reach the portal leading to the Reliquary.
Objective: eliminate the Haven heroes (Adelaide and Lord Haart) who are protecting the Reliquary
Reward: 5100 EXP, +1 Magic Power, +100 Blood reputation
NOTICE! By completing " Elimination" you lose the chance of completing " Infiltration".
After using the passage (M4, X4), you will automatically obtain the mission. Contrary to "Infiltration", the mission is rather straightforward - you just need to kill both Haven heroes. Both Adelaide and Lord Haart have just a small army with them, so they should fall rather easily.
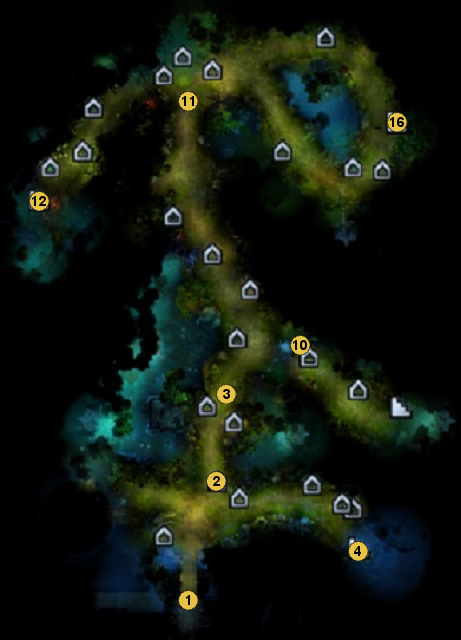
1 - starting/ending location (Storm, steal and escape)
2 - Observatory
3 - gate
4 - underground exit (Ashes of Tuidhana (1/4))
10 - Eye Pillar (Eyes of Malassa)
11 - fork in the road
12 - surface exit (Lost Legion)
16 - surface exit (Ashes of Tuidhana (3/4))
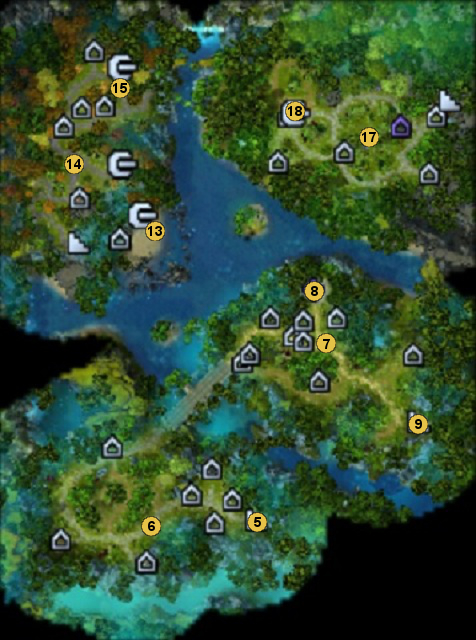
5 - surface exit (Ashes of Tuidhana (1/4))
6 - Stalkers (Yriss' Finest)
7 - Stalkers (Yriss' Finest)
8 - Angel Eraela (Ashes of Tuidhana (2/4))
9 - underground descent (Ashes of Tuidhana (3/4))
13 - Stalkers (Yriss' Finest)
14 - Calistar (Lost Legion)
15 - Edge of Balance (Lost Legion)
17 - shelter (Infiltration) / Haven heroes (Elimination)
18 - portal to the Reliquary (Ashes of Tuidhana (3/4))
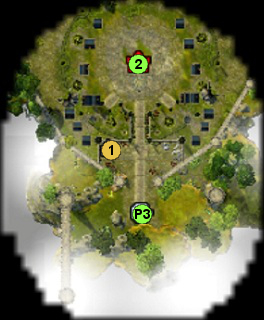
1 - Choral of Believers (+5 bonus to Leadership and Magic Power for the next battle. The hero can use it once per battle)
2 - city (Ashes of Tuidhana (4/4))
P3 - Reliquary exit portal
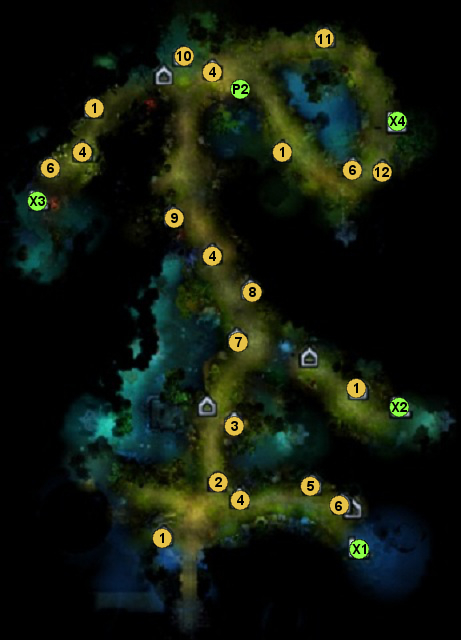
1 - Stone of Enlightment (Gives the hero 2500 EXP. The hero can use it only once)
2 - Observatory (Unveils a big area around the building)
3 - Armoursmith (Gives the hero a permanent +1 defence bonus. The hero can use it only once)
4 - War Ancient (Increases the hero's Leadership and Destiny Increases the hero's Leadership and Destiny by 5 in the next battle, additionally gives 5 movement points. The hero can use it once per battle)
5 - Soul Venom pot (Enemy units start the battle being poisoned. Therefore, they will receive 50 damage each turn and their initiative will be lowered by 5. The effect lasts for 3 turns. The hero can use this object once per week)
6 - Dragon Vein (Regenerates the hero's mana completely. The hero can use this object once per week)
7 - Mother Earth Shrine (Increases the health of all units in the hero's army by 10%. The hero can use this object once per battle)
8 - Arcane Library (Gives the hero a 1-3 bonus to magic power or magic defence. The amount of points depends on the level of the hero [1-10: 1, 11-20: 2, 21-30: 3]. The Hero can use this object only once)
9 - Dragon Nexus (Doubles the hero's mana. The hero can use this object once per week)
10 - Dark Elves post (It's guarded by enemy units - after defeating them, the hero will gain a precious treasure or will be joined by a squad of friendly units)
11 - Stable (Increases the hero's movement points by 5. Can be used once per week)
12 - Dispel Magic Shrine (The hero's army gains magic immunity for the first 3 turns of battle. The hero can use this object once per week)
X1, X2, X3, X4 - underground exits
P2 - one-way portal exit
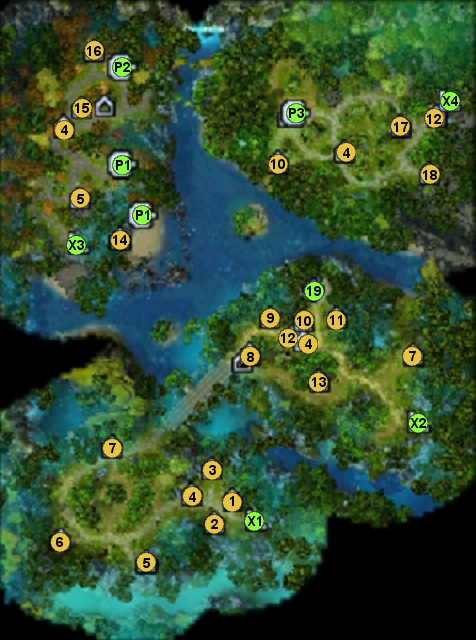
1 - Stone of Enlightment (Gives the hero 2500 EXP. The hero can use it only once)
2 - Blind Maiden (increases the hero's destiny by 5 during the next battle. The hero can use this object once per battle)
3 - Stable (Increases the hero's movement points by 5. Can be used once per week)
4 - War Ancient (Increases the hero's Leadership and Destiny by 5 in the next battle, additionally gives 5 movement points. The hero can use it once per battle)
5 - Weaponsmith (Permanently increases the hero's might power by 1. The Hero can use this object only once)
6 - Arena (After defeating the guards, gives a permanent +2 bonus to might power or might defence. After the fight, the units that the player lost are revived)
7 - Mother Earth Shrine (Increases the health of all units in the hero's army by 10%. The hero can use this object once per battle)
8 - Angels Shrine (Increases the hero's magic power and leadership by 5 till the end of the week. The hero can use this object once per week)
9 - Crystal of Power (Gives a permanent +1 bonus to magic power. The hero can visit this object only once)
10 - Dragon Vein (Regenerates the hero's mana completely. The hero can use this object once per week)
11 - Choral of Believers (Gives a +5 leadership and magic power bonus for the course of the next battle. The hero can use this object once per battle)
12 - Conflux Orb (lets you leave messages for other players)
13 - Armoursmith (Gives the hero a permanent +1 defence bonus. The hero can use it only once)
14 - Artifact Merchant (lets you buy artifacts for your heroes)
15 - Revelation Crystal (Gives the hero a permanent +1 magic defence bonus. The Hero can use this object only once)
16 - Arcane Library (Gives the hero a 1-3 bonus to magic power or magic defence. The amount of points depends on the level of the hero [1-10: 1, 11-20: 2, 21-30: 3]. The Hero can use this object only once)
17 - Observatory (Unveils a big area around the building)
18 - Sigil of Arkath (Gives a +5 defence and magic defence bonus to the end of the week. The hero can use is once per week)
19 - Fort
X1, X2, X3, X4 - underground descent
P1 - two-way portal
P2 - one-way portal entrance
P3 - portal to the Reliquary
Objective: find the path to the Onyx Circle and complete the three trials
Reward: 30000 EXP, Assassin's Shoes
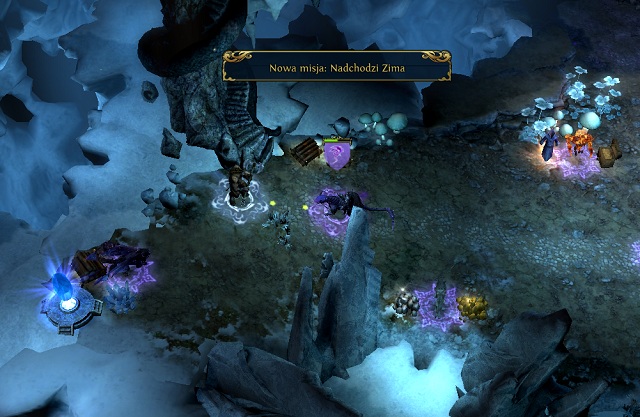
You need to hurry, as the other factions of Dark Elves aren't idly watching. You begin the game with a city (M1, 1) - you need to build as fast as possible the Hall of Heroes and unit-producing buildings. As for now you're missing resources, I'd suggest heading east of the exit (M3, X1) and activating the "Winter is Coming" side quest. After getting to the surface, take the Sawmill (M2, 1) from the enemy's hands, collect the nearby resources and immediately head back underground. If possible, you shouldn't waste time on picking up resources - that will be the task of your second hero who you will buy at the Hall of Heroes.
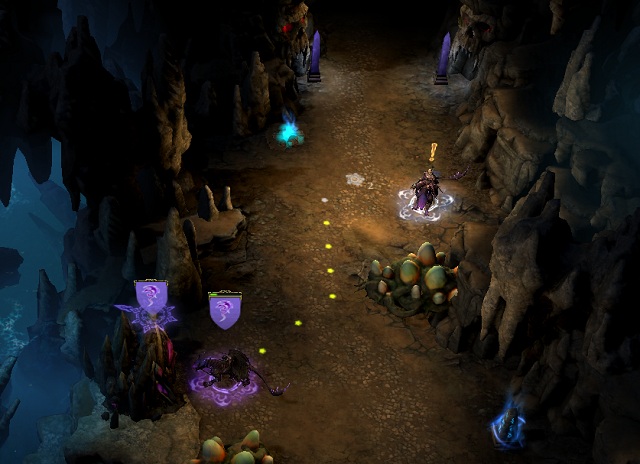
Now you should head towards the Onyx Circle. Go west, take over the Ore Mine (M1, 2) and head further to the north. You can visit the Ominous Chasm (M1, 3) - the units stationed there should join you. On your way you will come across Sorshan, who will confirm that the direction you're following is correct and will mention the three trials that await you. Move further north and you will be able to recruit the Stalkers stationed by the road - be sure to collect every friendly unit on your path, as you won't receive any support in the nearest time. After using the portal (M1, 4) the next part of the main mission will begin.
Objective: collect three Whispers
Reward: 10200 EXP, +5 Magic Power
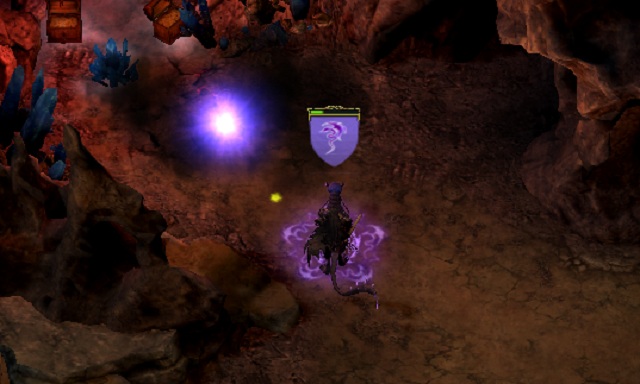
Speaking to the Faceless (M1, 5) will begin the hearing trial. Your task is finding three whispers scattered throughout the area. The first one is right beside you, a bit to the north (M1, 6). It's defended by timber wolves which shouldn't be any threat to you. After defeating the enemies you can collect the whisper and move on. The second whisper (M1, 7) is protected by a group of Minotaurs. The fight should be rather simple as long as you keep them at distance.
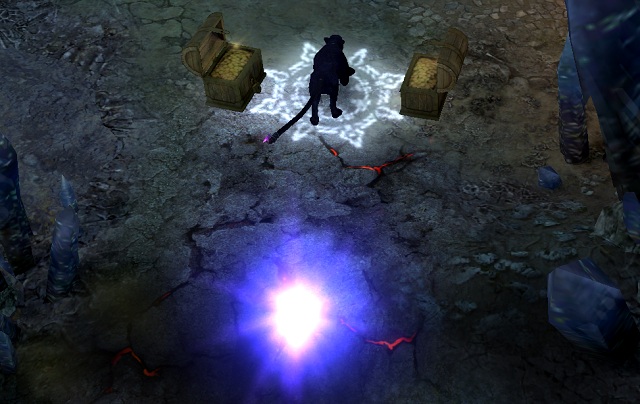
The third whisper can be found directly behind the panthers (M1, 8). I'd recommend saving your game and keep beginning this fight over and over again until your loses are minimal. Unfortunately the panthers begin the fight hidden, so you have to anticipate the path they will follow. You should keep on loading until you come across a single big group of panthers - it's much easier to fight a big pack than searching for multiple smaller ones. Once they're dead, you can pick up the last whisper.
The Faceless will once again appear and ask you to make a choice whether you would support Menan or Sylsai in case of defeat. An additional prize for making the choice is 100 Blood or Tear points. After choosing your answer, the trial will end and you will be able to head further east.
Objective: cross the gate guarded by Shadow Lurkers
Reward: 10000 EXP, +3 destiny
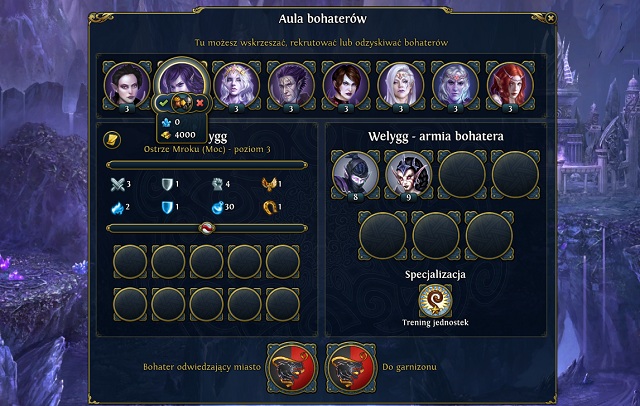
It's time for your second here bought at the Hall of Heroes to collect all the units from the city and head towards your main hero. In the meantime Raelag should keep travelling further to the north-east. Once you reach the Dark Elves outpost (M3, 11) you can attack and take it over. In return you will receive as much as 30 Shades (upgrades Assassins) who will be crucial in the upcoming fights.
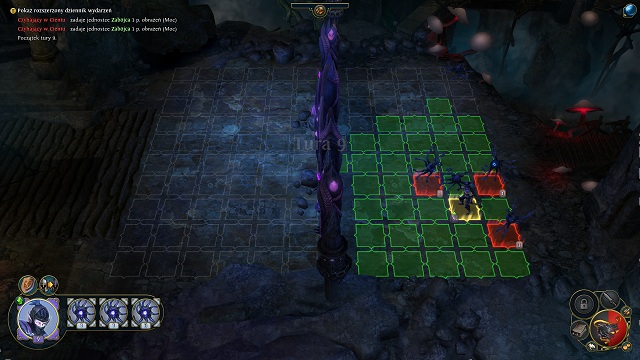
As you approach the gate (M1, 9), the Shadow Lurker will ask you to complete another trial: the trial of sight. It can be initiated by speaking to the assassins beside you. Your task is very simple: during the battle, you will have to pass unnoticed through the gate and defeat all the enemies. Remember that the assassins can only stay hidden for a given amount of turns, so you should rush at the enemy as fast as he's in range. If possible, you should engage two groups of Shadow Lurkers in battle at once. They are very weak in direct fights and your two groups of Assassins can block four units at once. After defeating the creatures, you will be able to move further to the north.
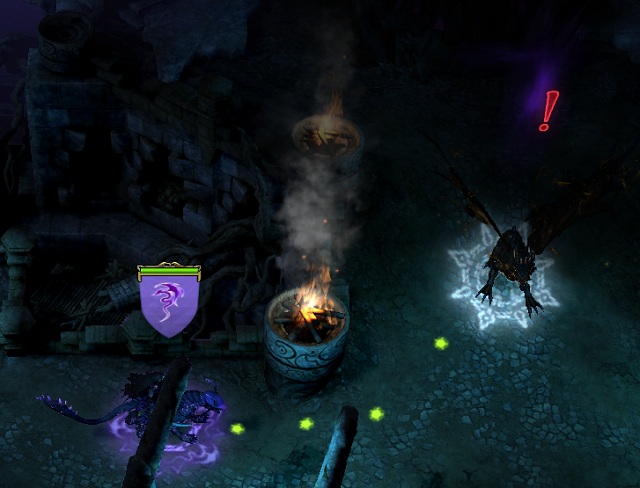
At this point everything depends on whether you were able to reach the Onyx Circle before the other Elven factions. If yes - you can just head north towards the dragon visible on the map (M1, 10). If not, you will have to first defeat an enemy champion. Additional units which you sent from your town will also come in handy.
Objective: defeat the Black Dragons
Reward: 10000 EXP, 3 Black Dragons
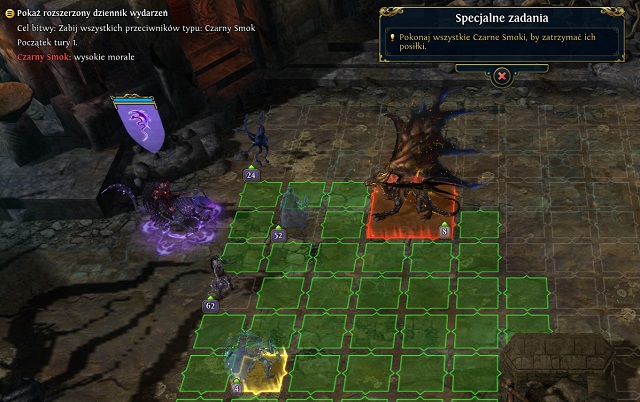
Once you're ready, you can head north towards the dragon (M1, 10). Speaking to it will begin the third and last trial: the Trial of Strength. The task isn't complicated: you have to defeat a group Black Dragons by using the units at your disposal. Unfortunately, these creatures have an ability of summoning additional Shadow Lurkers each turn. As you have to defeat only the dragons, focus all of your attacks on them. Remember about using Shroud of Malassa and your heroes' special skills (e.g. stand your ground / mass stand your ground). After defeating the overgrown lizards, both "Trial of Strength" and "The Call of Malassa" will be completed. It's however not the end of your troubles.
Objective: defeat the Soulscar and Inferno armies
Reward: 40000 EXP, +3 leadership

From now on, you can recruit Shadow Dragons at your city. Additionally the ice barrier blocking access to the surface has disappeared (M2, 2) and all the gates which were separating the Elven groups have opened (M1, 11). These changes let the enemy attack you from multiple directions: you need to act fast and block the enemy from making a move. Additionally, two further side missions will activate in the nearest turns: "Independent Forces" and "Whispers of the Faceless". I'd recommend firstly taking care of the enemies and exploring the map by the end of the mission.
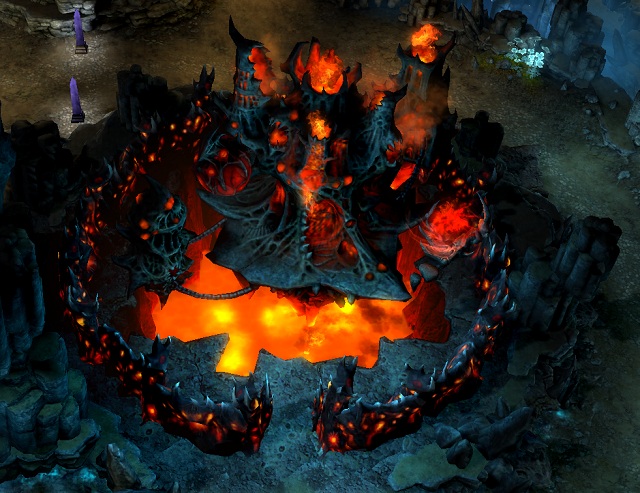
After buying units at the city you should head south while visiting every location on your way. Your first destination is the Inferno fraction city (M1, 12): conquering it will cut the enemy from a big portion of the map. You should place an Improved Town Portal in both the first city as well as in the newly obtained one. It will let Raelag defend both location in case of an attack (just use the Basic Town Portal or Improved Town Portal spells, depending on your hero's location).
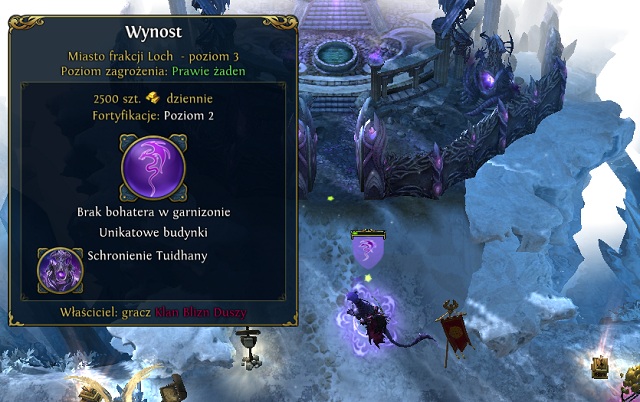
Your next destination is on the surface - the city at (M2, 3). Just like with the Inferno city, place an Improved Town Portal and visit all the observatories in the area (M2, 4) which will let you see an incoming enemy and teleport one of your heroes to lead the defense of the city.
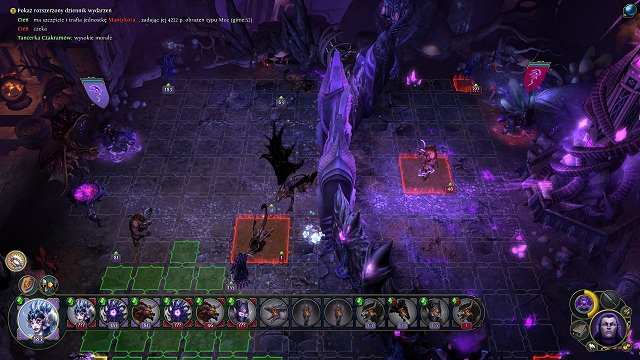
Once you have those areas under your control, you can head to the northern part of the caves and obtain all the mines and the local fort found there (M3, 23). Now you just need to attack the last city of the dark elves (M1, 13). If you haven't yet finished the side missions, you can leave one of your heroes here together with half of your army (just standing one field from the city gates will prevent the enemy from heading out) and take the second one to finish exploring the map.
Objective: free the Sawmill from the hands of the Snow Maidens and Air Elementals
Reward: 15300 EXP, +1 destination
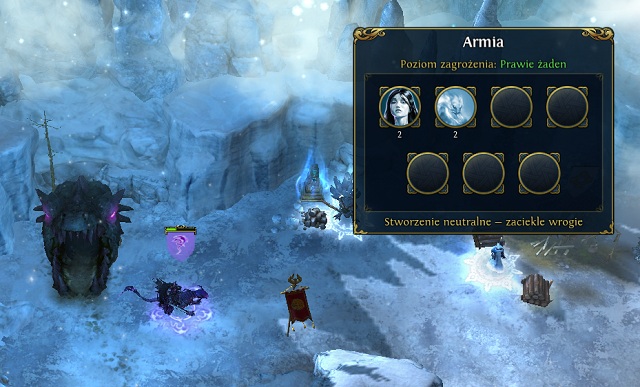
It's the first side mission available in "The Call of Malassa". In order to unlock it, you need to head to the exit (M3, X1) and Calistar will order you to recapture the Sawmill from the enemy hands. Now just head to the surface, go to the marked spot (M2, 1) and defeat a small group of Snow Maidens and Air Elementals.
Objective: eliminate two rebelled squads
Reward: 20000 EXP, Blood Scarf, Poison Phial, +100 Blood reputation
The mission is exceptionally easy: you just need to find the rebels (M1, 14) and defeat them in battle. After destroying the two resistant points you will receive the prize. The mission is best completed before the storm on the last city of the Dark Elves, as you will be able to use the obtained items in the next mission of the campaign.
Objective: find three faceless known as Mukao, Zhengjun and Jingchen
Reward: 30000 EXP
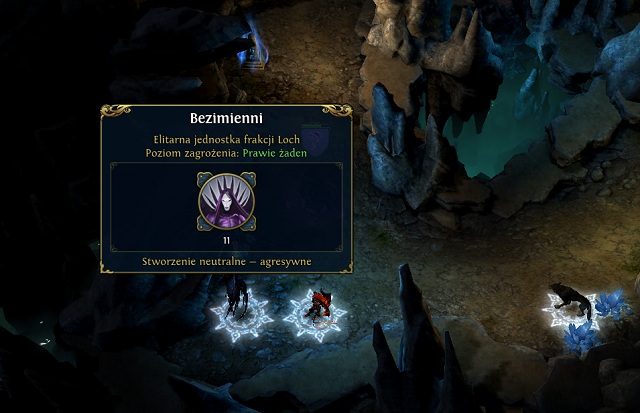
Just like the side mission "Independent Forces", this one should also be completed after you secure the whole map. This time you need to visit three Faceless: Jingchen (M1, 15), Zhengjun (M1, 16) and Mukao (M1, 17). Each one of them will give you a valuable lesson and increase some of you hero's statistics. After the third conversation, the mission will automatically end.
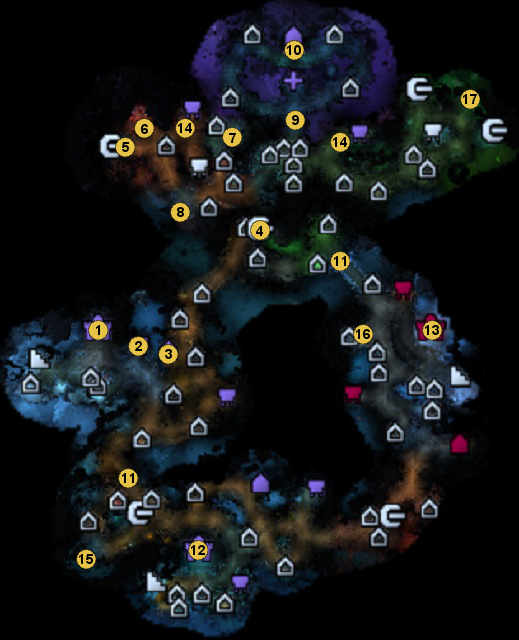
1 - starting location (The Call of Malassa)
2 - Ore Mine
3 - Ominous Chasm
4 - portal leading to the first trial (The Call of Malassa)
5 - Faceless (Trial of Hearing) (The Call of Malassa)
6 - whisper guarded by timber wolves (Trial of Hearing)
7 - whisper guarded by minotaurs (Trial of Hearing)
8 - whisper guarded by panthers (Trial of Hearing)
9 - observer (Trial of Sight) (The Call of Malassa)
10 - Black Dragons (Trial of Strength) (The Call of Malassa)
11 - gates between the dark elves factions (Purge)
12 - Inferno faction city (Purge)
13 - last city of the dark elves (Purge)
14 - rebels (Independent Forces)
15 - Faceless Jingchen (Whispers of the Faceless)
16 - Faceless Zhengjun (Whispers of the Faceless)
17 - Faceless Mukao (Whispers of the Faceless)
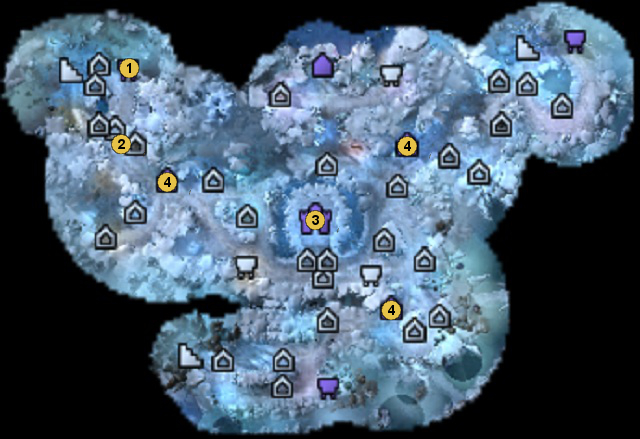
1 - Sawmill (Winter is Coming)
2 - ice barrier (Purge)
3 - dark elves city (Purge)
4 - observatories
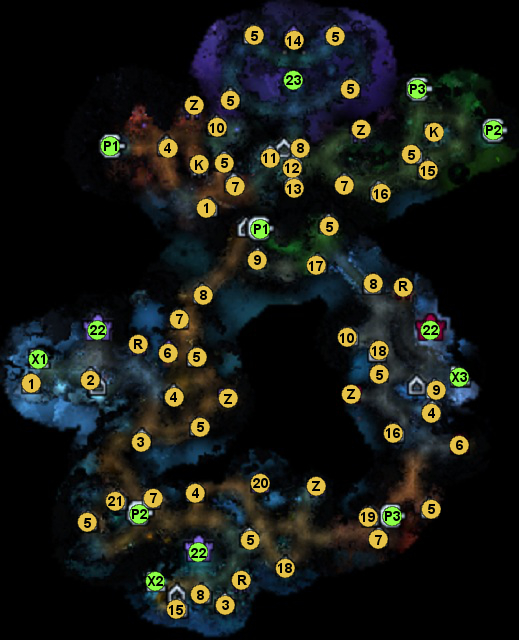
1 - Revelation Crystal (Gives the hero a permanent +1 magic defence bonus. The Hero can use this object only once)
2 - Blind Maiden (increases the hero's destiny by 5 during the next battle. The hero can use this object once per battle)
3 - Armoursmith (Gives the hero a permanent +1 defence bonus. The hero can use it only once)
4 - Stable (Increases the hero's movement points by 5. Can be used once per week)
5 - Stone of Enlightment (Gives the hero 2500 EXP. The hero can use it only once)
6 - Ominous Chasm (Increases the weekly creature growth rate)
7 - Dragon Vein (Regenerates the hero's mana completely. The hero can use this object once per week)
8 - War Ancient (Increases the hero's Leadership and Destiny by 5 in the next battle, additionally gives 5 movement points. The hero can use it once per battle)
9 - Mother Earth Shrine (Increases the health of all units in the hero's army by 10%. The hero can use this object once per battle)
10 - Dispel Magic Shrine (The hero's army gains magic immunity for the first 3 turns of battle. The hero can use this object once per week)
11 - Dark Elves post (It's guarded by enemy units - after defeating them, the hero will gain a precious treasure or will be joined by a squad of friendly units)
12 - Conflux Orb (lets you leave messages for other players)
13 - Arena (After defeating the guards, gives a permanent +2 bonus to might power or might defence. After the fight, the units that the player lost are revived)
14 - Dark Spire (Increases the weekly creature growth rate)
15 - Soul Venom pot (Enemy units start the battle being poisoned. Therefore, they will receive 50 damage each turn and their initiative will be lowered by 5. The effect lasts for 3 turns. The hero can use this object once per week)
16 - Weaponsmith (Permanently increases the hero's might power by 1. The Hero can use this object only once)
17 - Dead Field (All enemy living creatures deal 10% less damage in the next battle and have 10% less life. The hero can use this object once per battle)
18 - Crystal of Power (Gives a permanent +1 bonus to magic power. The hero can visit this object only once)
19 - Chaos Wave (During the next battle, an AI-controlled monster will appear and eat a random enemy units. In order to free it, the enemy will have to kill the creature. The hero can use this place only once)
20 - Lava broad (Increases the weekly creature growth rate)
21 - Altar of Destruction (All enemy creatures will be hit by a meteor at the beginning of the next battle. The hero can use is once per week)
22 - Town
23 - Fort
R - Ore Mine (Gives 2 ores a day)
K - Crystal Mine (Gives 1 crystal a day)
Z - Gold Mine (gives 1000 gold a day)
X1, X2, X3 - surface exit
P1, P2, P3 - two-way portals
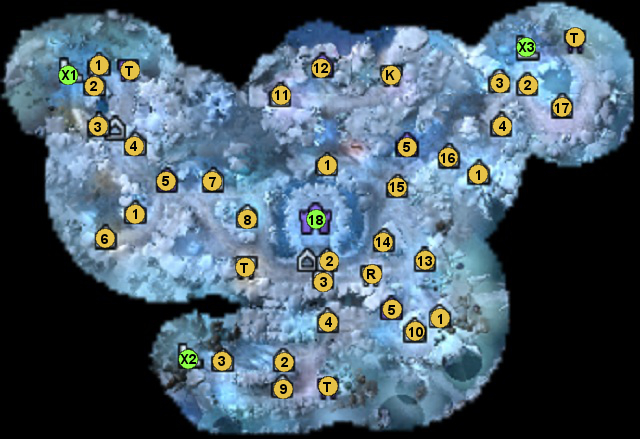
1 - Stone of Enlightment (Gives the hero 2500 EXP. The hero can use it only once)
2 - War Ancient (Increases the hero's Leadership and Destiny by 5 in the next battle, additionally gives 5 movement points. The hero can use it once per battle)
3 - Dragon Vein (Regenerates the hero's mana completely. The hero can use this object once per week)
4 - Stable (Increases the hero's movement points by 5. Can be used once per week)
5 - Observatory (Unveils a big area around the building)
6 - Centaur Monument (Gives the hero a +5 movement bonus and 10% damage bonus for ranged units till the end of the week. The hero can use this object once per week)
7 - Water Elemental Shrine (During the next battle, all friendly creatures will receive the water armor spell when attacked)
8 - Dragon Nexus (Doubles the hero's mana. The hero can use this object once per week)
9 - Mother Earth Shrine (Increases the health of all units in the hero's army by 10%. The hero can use this object once per battle)
10 - Angels Shrine (Increases the hero's magic power and leadership by 5 till the end of the week. The hero can use this object once per week)
11 - Arcane Library (Gives the hero a 1-3 bonus to magic power or magic defence. The amount of points depends on the level of the hero [1-10: 1, 11-20: 2, 21-30: 3]. The Hero can use this object only once)
12 - Dark barrows (Increases the weekly creature growth rate)
13 - Reverie Shrine (Gives a +10 initiative and + 5 might bonus for the course of the next battle. The hero can use this object once per battle)
14 - Sigil of Arkath (Gives a +5 defence and magic defence bonus to the end of the week. The hero can use is once per week)
15 - Choral of Believers (Gives a +5 leadership and magic power bonus for the course of the next battle. The hero can use this object once per battle)
16 - Knight Shrine (+1 unit movement and +5 morale bonus till the end of the week. The hero can use this object once per week)
17 - Blind Maiden (increases the hero's destiny by 5 during the next battle. The hero can use this object once per battle)
18 - Town
T - Sawmill (Gives 2 wood per day)
R - Ore Mine (Gives 2 ores a day)
K - Crystal Mine (Gives 1 crystal a day)
X1, X2, X3 - underground descent
Objective: go deeper underground; take over the Naga town
You begin the mission in a small cave. You target is the underground descent (M1, 2). On your way you can collect resources and visit all the locations. Also be sure to recruit the neutral Scorpicores (M1, 1) - not only will they aid your army, but also let you build their nest in the town, giving you access to them. Once you're done exploring the area, you can head deeper into the cave (M1, 2).
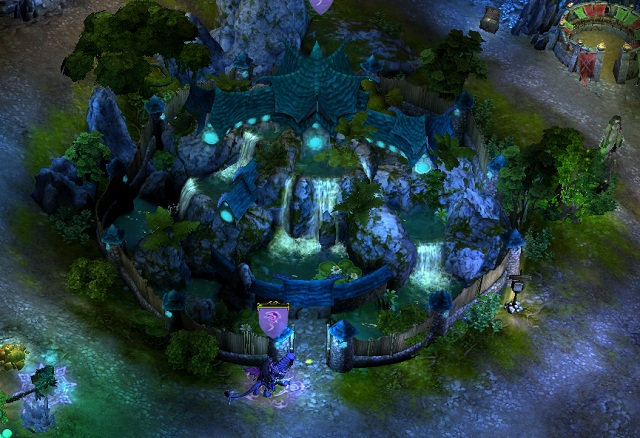
After a short travel you will reach a bigger cave, in the middle of which there's a Sanctuary town: Kakurega (M2, 1). Before you attack it, take over the nearby neutral unit of Shadow Lurkers (M2, 2) which is one of the lost units ("The Nature of Portals"). Now you can attack the castle and take it over. Be sure to build an Improved Town Portal inside, as it will be crucial for swift relocation of your army.
Objective: take over the second Naga town
Reward: 50000 EXP, Crest of Honor
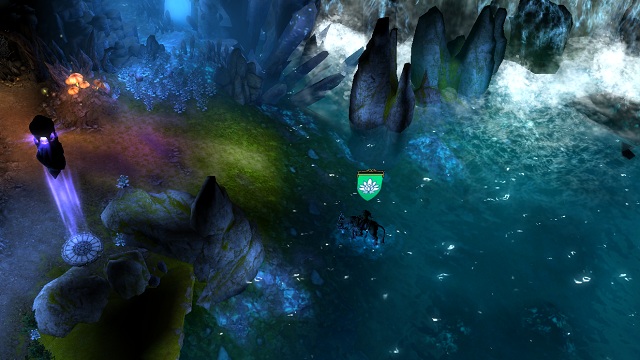
Once you're ready to head out, you can head east. You will encounter a big problem: the enemy heroes can move across the water and therefore can land on the beach (M2, 3) and march on your castle from there. You on the other hand have to move across the land: such a path is not only longer, but also leads beside a Sanctum fort which is protected by enemy forces. The easiest way to solve this problem is using the Improved Town Portal. Whenever the enemy is beside your town, teleport back and take care of the attackers (for example by giving Yriss your items and units for one battle).
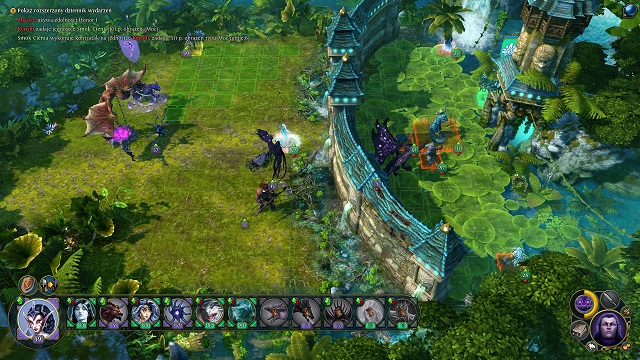
Now quickly move east towards the enemy town (M2, 5), taking over the enemy fort on your way there (M2, 4). After obtaining it, place an Improved Town Portal and eliminate the remaining Sanctuary heroes by teleporting between your cities. Take note of the vortex (M2, 6), as the enemy can use it to attack you from behind.
Objective: Reach the Crystal Lake Crystal Lake and defeat the Guard of Honor
Reward: 40000 EXP, Moonblade
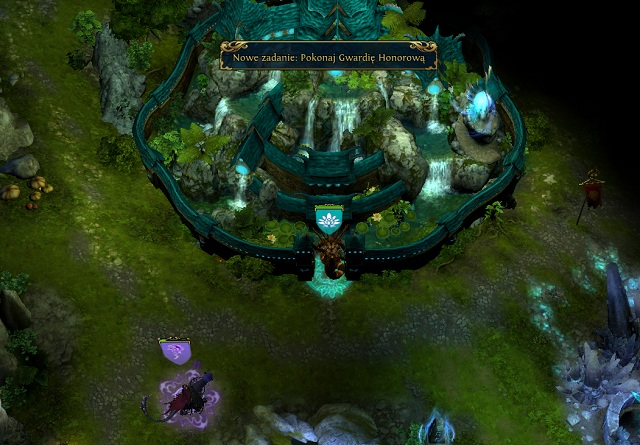
Completing the previous mission ("Raiders of the Lost Tear") will open a gate at (M2, 7) and therefore the Guard of Honor will now constantly keep attack you. To take care of them, you should move the battlefield to the enemy's land. Collect all of your forces at Kakurega (M2, 1) and head north. One firm attack on the Naga city (M2, 8) will put an end to the Guard of Honor's attempts and let you freely explore the map. If you have troubles with defeating the enemy, you can complete the additional missions "The Nature of Portals", "Story of a Ghost" and "Secret of the Shadesteel" beforehand, as they will not only increase your army bit also let you recruit better units.
Objective: reach Oshiro's Sanctuary and defeat Kirin
Reward: 50000 EXP, +5 destination, +5 Magic Power
This is the last task in this mission. Before heading out, you can finish exploring the map and complete all side missions. Once you're ready, head to the sanctuary (M2, 9). The battle with the boss - Kirin - will begin.
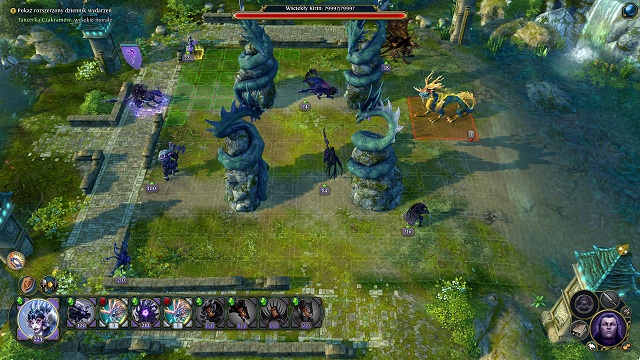
In this battle you have a defined amount of units. Your task is to constantly attack Kirin while also avoiding his attacks. Besides standard attacks, the enemy can also create a vortex under your units (you have to move them to avoid damage), call in a tsunami (it appears on the right side of the screen and moves left - you have to hide your forces behind pillars) and a thunderstorm (an AoE attack which cannot be avoided, so it would be best to keep your forces away from each other).
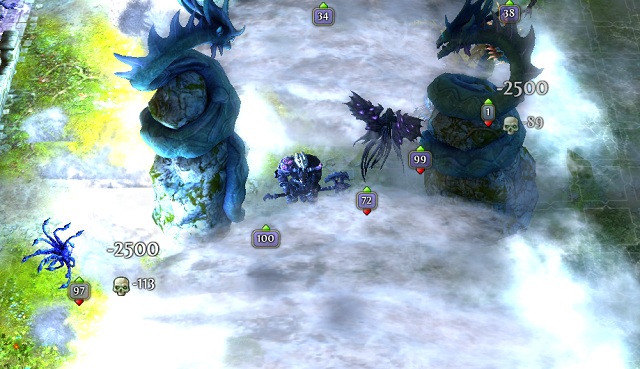
In the first turn you should lower the distance to Kirin and hide your units behind pillars if possible. The dragon is best attacked with the Shroud of Malassa, thanks to which he won't be able to hurt your units. If you want to force him to counter attack, use the Minotaur Guards - they deal the least damage in your army, so losing them won't be a big problem. Remember about constantly using the skills of your champion, the ones increasing your resistance and power alike. After a dozen or so turn Kirin should die and you will therefore end the mission.
Objective: find the two lost squads
Reward: 20000 EXP, Mantle of Resistance
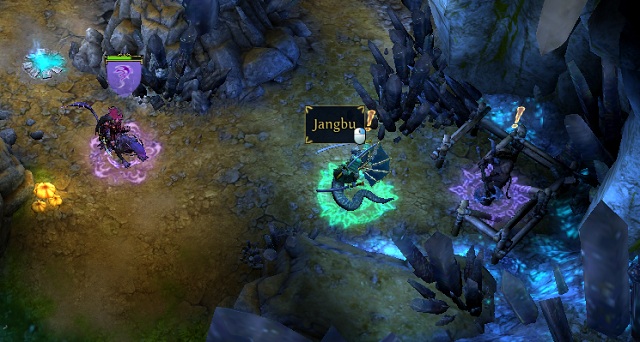
This mission will activate automatically in the first location, but completing it will take some time. The first squad is at (M2, 2) and the second at (M2, 10). In order to retrieve it, you will have to defeat a Naga samurai who's keeping captive a whole group of Minotaurs. The fight is very easy, so you can try doing it before attacking the second Naga city. Completing the mission, apart from giving you the rewards, will also strengthen your army with a few additional units.
Objective: take over three Shrines of Focus
Reward: 30000 EXP, Mesmerizing spaulders, 5 Shadow Dragons
In order to begin this mission, you have to speak with the ghost of Masanori found nearby the first Naga city (M2, 11). You will need to find three Shrines of Focus spread throughout the caves. They can be found in three locations (M2, 12). Afterwards Masanori's ghost will appear once again: his hints will let you recruit Shadow Watchers and Black Dragons.
Objective: find two Shadesteel ores
Reward: 20000 EXP, Faceless Staff, 15 Minotaurs
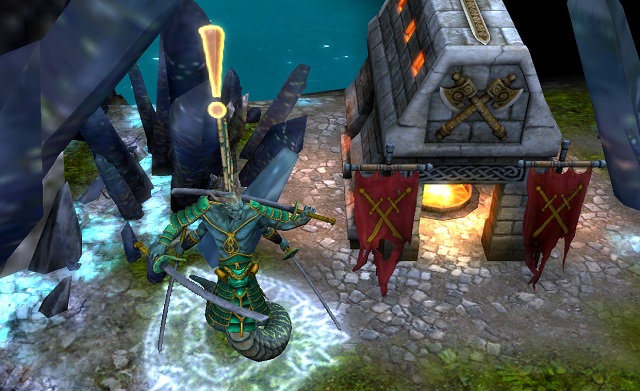
This task begins with visiting the local Naga weaponsmith - Norbu (M2, 13). He will ask you to find two pieces of Shadesteel Ore from which he will be able to produce a dynasty weapon - the Faceless Staff. The metal can be found in two locations (M2, 14). Apart from the standard rewards, you will also be able to recruit Shades, Chakram Dancers and Minotaur Guards.
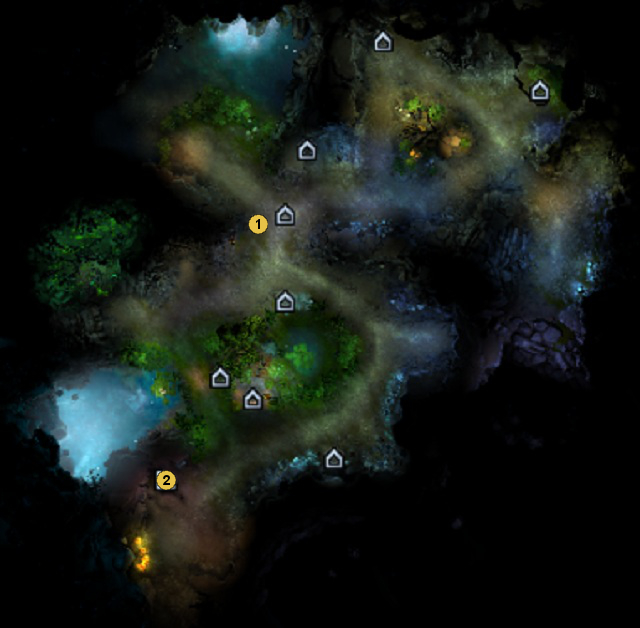
1 - Scorpicores
2 - underground descent (Raiders of the Lost Tear)
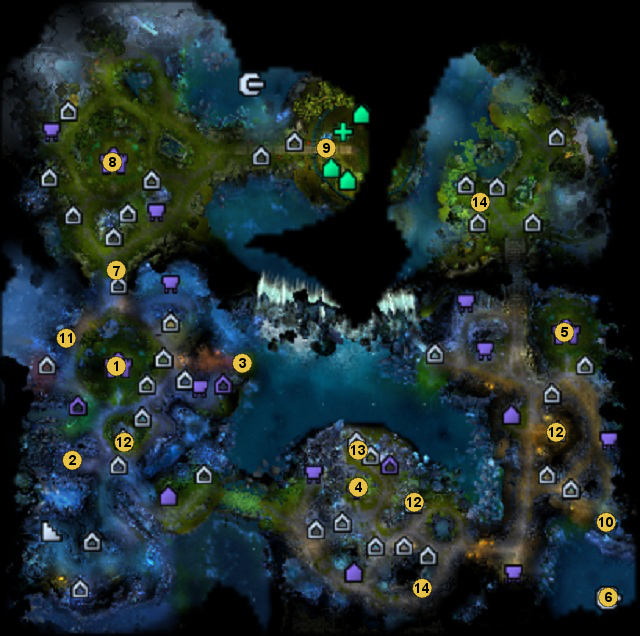
1 - Naga city Kakurega (Raiders of the Lost Tear (1/2))
2 - lost squad (The Nature of Portals)
3 - Sanctuary landing point
4 - Sanctuary fort
5 - second Naga city (Raiders of the Lost Tear (2/2))
6 - vortex (Sanctuary teleport)
7 - gate (For Blood and Honor)
8 - Naga city (For Blood and Honor)
9 - sanctuary (Oshiro's Curse)
10 - the samurai guarding the lost squad (The Nature of Portals)
11 - Masanori's ghost (Story of a Ghost)
12 - Shrines of Focus (Story of a Ghost)
13 - Weaponsmith Norbu (Secret of the Shadesteel)
14 - shadesteel ore (Secret of the Shadesteel)
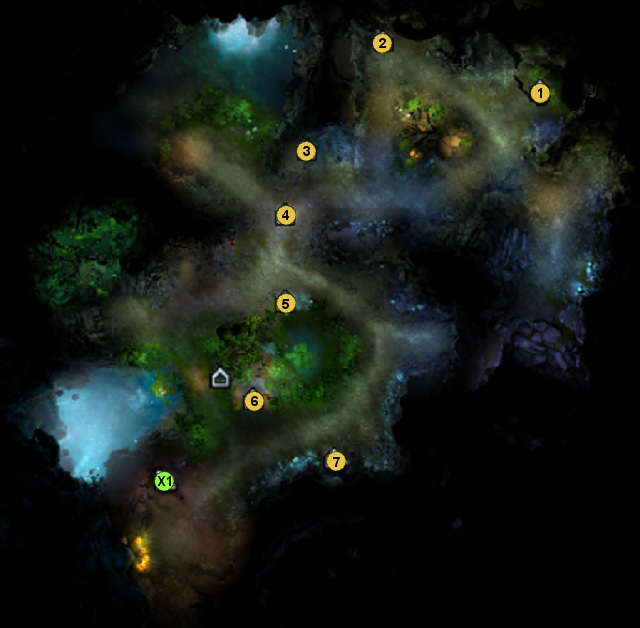
1 - Mother Earth Shrine (Increases the health of all units in the hero's army by 10%. The hero can use this object once per battle)
2 - Stone of Enlightment (Gives the hero 2500 EXP. The hero can use it only once)
3 - Stable (Increases the hero's movement points by 5. Can be used once per week)
4 - War Ancient (Increases the hero's Leadership and Destiny by 5 in the next battle, additionally gives 5 movement points. The hero can use it once per battle)
5 - Dragon Vein (Regenerates the hero's mana completely. The hero can use this object once per week)
6 - Weaponsmith (Permanently increases the hero's might power by 1. The Hero can use this object only once)
7 - Dispel Magic Shrine (The hero's army gains magic immunity for the first 3 turns of battle. The hero can use this object once per week)
T - Sawmill (Gives 2 wood per day)
R - Ore Mine (Gives 2 ores a day)
K - Crystal Mine (Gives 1 crystal a day)
Z - Gold Mine (gives 1000 gold a day)
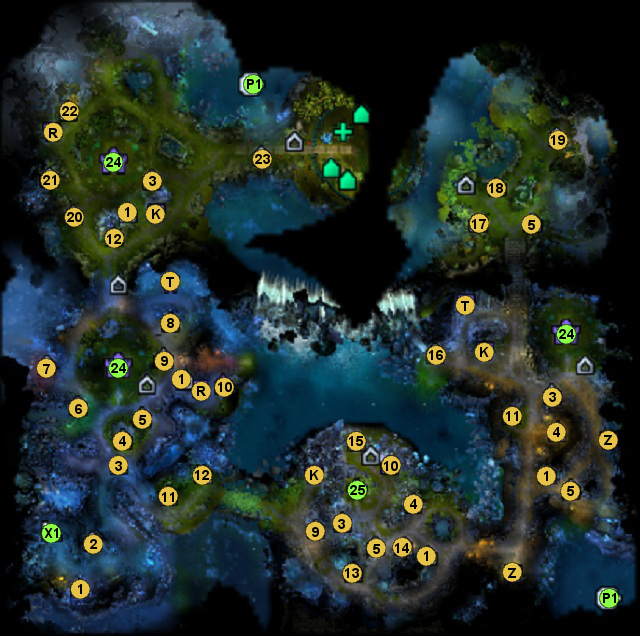
1 - Stone of Enlightment (Gives the hero 2500 EXP. The hero can use it only once)
2 - Ice Pearl Shrine (+10 initiative to the end of the week. The hero can use is once per week)
3 - War Ancient (Increases the hero's Leadership and Destiny by 5 in the next battle, additionally gives 5 movement points. The hero can use it once per battle)
4 - Shrine of Focus (A magic shrine using the power of the lake, connected with a mission)
5 - Dragon Vein (Regenerates the hero's mana completely. The hero can use this object once per week)
6 - Seat of the Invaders (Owner of this building received gold after each battle)
7 - Shrine of the Seventh Dragon (This shrine lets the hero advance to the next level after paying 7 crystals and 11000 gold. The hero can use this object once per game)
8 - Arena (After defeating the guards, gives a permanent +2 bonus to might power or might defence. After the fight, the units that the player lost are revived)
9 - Mother Earth Shrine (Increases the health of all units in the hero's army by 10%. The hero can use this object once per battle)
10 - Observatory (Unveils a big area around the building)
11 - Ominous Chasm (Increases the weekly creature growth rate)
12 - Stable (Increases the hero's movement points by 5. Can be used once per week)
13 - Dark barrows (Increases the weekly creature growth rate)
14 - Armoursmith (Gives the hero a permanent +1 defence bonus. The hero can use it only once)
15 - Weaponsmith (Permanently increases the hero's might power by 1. The Hero can use this object only once)
16 - Crystal of Power (Gives a permanent +1 bonus to magic power. The hero can visit this object only once)
17 - Arcane Library (Gives the hero a 1-3 bonus to magic power or magic defence. The amount of points depends on the level of the hero [1-10: 1, 11-20: 2, 21-30: 3]. The Hero can use this object only once)
18 - Reverie Shrine (Gives a +10 initiative and + 5 might bonus for the course of the next battle. The hero can use this object once per battle)
19 - Artifact Merchant (lets you buy artifacts for your heroes)
20 - Blind Maiden (increases the hero's destiny by 5 during the next battle. The hero can use this object once per battle)
21 - Soul Venom pot (Enemy units start the battle being poisoned. Therefore, they will receive 50 damage each turn and their initiative will be lowered by 5. The effect lasts for 3 turns. The hero can use this object once per week)
22 - Revelation Crystal (Gives the hero a permanent +1 magic defence bonus. The Hero can use this object only once)
23 - Conflux Orb (lets you leave messages for other players)
24 - city
25 - Fort
T - Sawmill (Gives 2 wood per day)
R - Ore Mine (Gives 2 ores a day)
K - Crystal Mine (Gives 1 crystal a day)
Z - Gold Mine (gives 1000 gold a day)
Objective: defeat the Legion of Pain and Legion of Madness
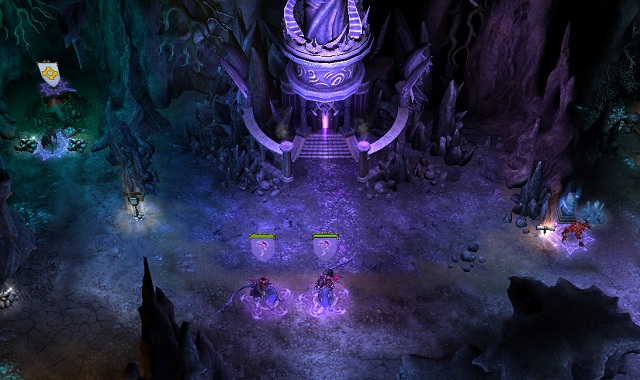
This mission is long and very demanding. Not only do you have to fight two enemies at once, but also fast enough so that they cannot collect too many forces. Apart from that you will also face time challenges multiple times. You begin the mission with a city (M1, 1) - start forming your army from the very start. Stalkers, Assassins and Shadow Lurkers will be the core of your army for quite some time. You should also start recruiting Faceless as fast as possible - they are very effective at fighting demons. You should also try to unlock dragons soon.
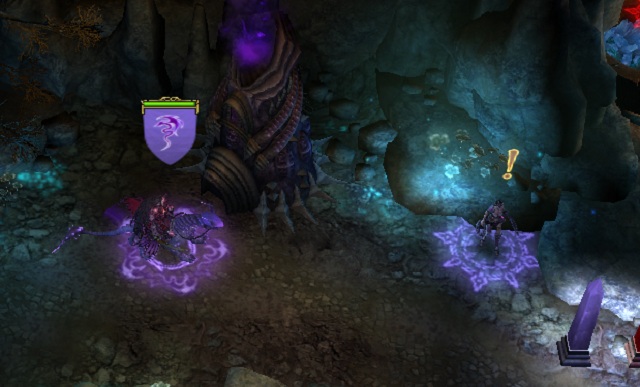
After clearing the area around your city, you can head to the east. You will be joined by a group of Stalkers (M1, 2) but the first time limited mission will also begin: "Demons at the Gate". As there is no better target in the area, you can attack the enemy champion and defeat him in open field (M1, 3). The units you receive in return will soon come in handy. As it turns out, the enemy has activated a second gate in the meantime - it will be one of the biggest obstacles on your way which will hold you back from taking offensive steps against the Inferno legion.
While exploring the area, you will come across a destroyed training camp (M1, 4). It will activate the side mission "Exercise Series" - I'd recommend completing it as fast as possible as the ready building will let you improve your units easily. Also remember about constantly upgrading your city, as additional units will soon be much needed. As the only passage the enemy can use is found at (M1, 5), you can head further to the east - the cave there is isolated from the Inferno forces and the local fort (M1, 7) will increase the weekly creature growth. On your way you should also clear the gates of hell (M1, 6) and take over the Faceless.
Around the middle of the road you will be attacked by a Sanctuary hero of the Elrath faction - it's a forecast of the incoming trouble. After defeating him, clearing the area and visiting every place worth of attention, get ready for one of the most difficult battles.
Objective: defeat the Sanctuary forces
Reward: 35000 EXP, 50 Shades, 50 Chakram Dancers
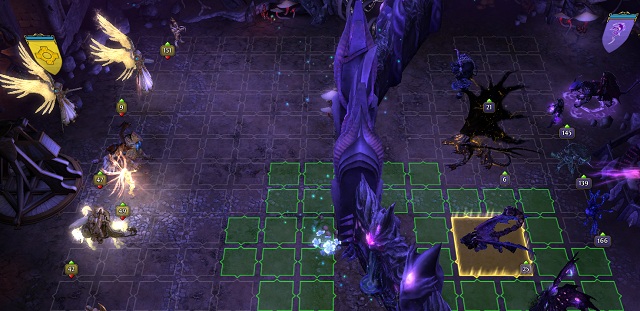
Return to the fork in the road (M1, 5) and head deeper into the library. Your old friend - the angel Eraela - will appear, leading a big Haven army. It's best to retreat to your first town, upgrade the walls, place a Dispel Magic Shrine and be ready to fight off the attack. Eraela's army is very powerful and can deal considerable damage. Firstly you should take care of Blazing Glories, afterwards the Marksman and Celestials. If possible, try staying behind the city walls, heading out only to finish off the leftovers.
Objective: defeat the Legion of Pain and Legion of Madness
Reward: 40000 EXP, 30 Faceless Puppeteers, 5 Black Dragons, Cloak of Darkness
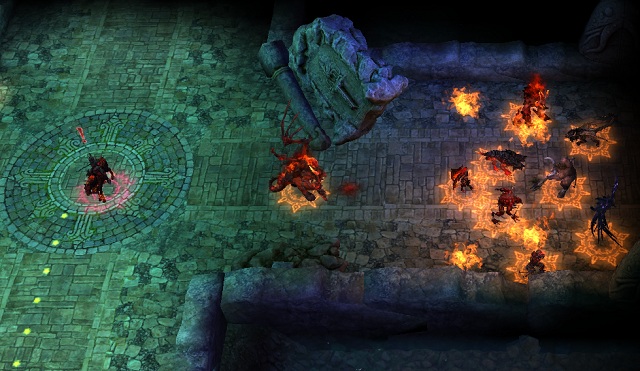
After taking care of Eraela you can return to exploring the Library. You will come across the first enemy at the very first fork in the road (M1, 8). After a short cutscene, you will have to defeat the champion. Afterwards you can head further north and visit the Dark Elves post (M1, 9) to recruit 30 Faceless Puppeteers.
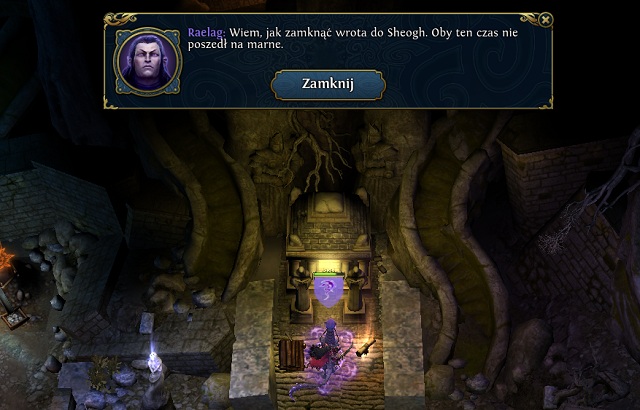
It's time to complete the side mission "Weapons can win battles, knowledge - wars". Finishing it will let you close the portal at (M1, 10). NOTICE! Under no circumstances should you attack an enemy city before closing the portal! Otherwise you will be attacked not only by the two Inferno legions, but also powerful enemy heroes with hundreds of units at their disposal! Right now, in accordance with the mission description, you have to visit three secret libraries (M1, 11) and close the portal afterwards.
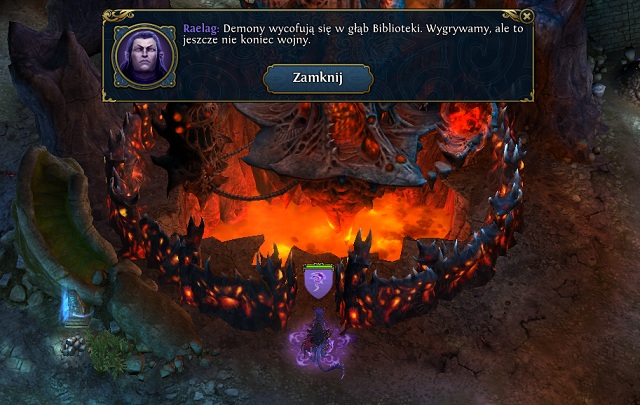
Once you manage to block the enemy movement, you can move to eliminating the individual factions. I'd recommend firstly attacking the Legion of Pain and its city (M1, 12) and the fort at (M1, 13). After building an Improved Town Portal in every city, you will be able to easily move your army across the map. Your next target is the Legion of Madness: the city (M1, 14), fort (M1, 15) and in the end the castle (M1, 16). Taking over the last location will end the mission. Unfortunately now you're for a much more difficult challenge.
Objective: defeat Cyril
Reward: 35000 EXP
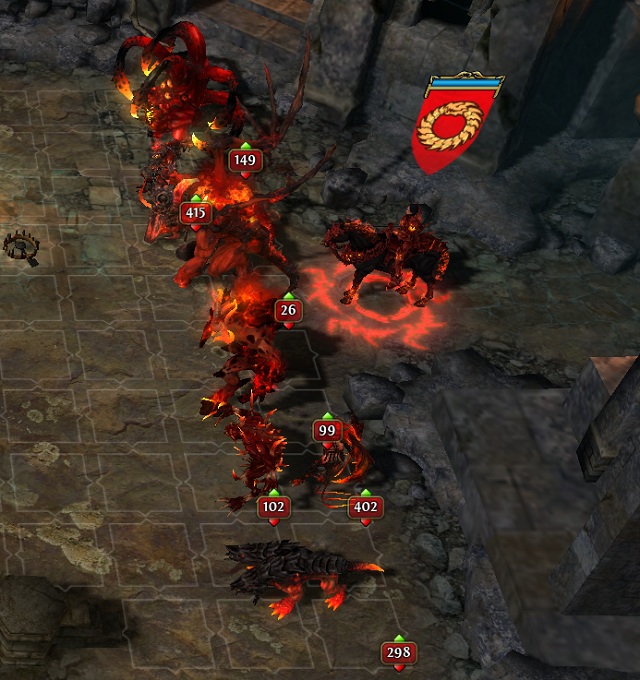
The mission might seem trivial, but at this point the enemy might have at his disposal a few thousand (!) creatures. Attacking his city would be suicide, so you will need a different yet effective method. Move your hero and Yriss to the castle (M1, 14). You also have to transform all cities and forts into Dungeon cities - you will need as much units as possible. From now on you have to focus on increasing your forces, especially Black Dragons.
The enemy will keep regularly sending his champion - Malik at you. Each army he leads will consist of hundreds if not thousands of units, BUT at the same time it will make the forces of Cyril weaker, so the more you defeat Malik, the less units will Cyril have. At the same time, thanks to owning four cities and a few forts your forces will shortly grow.
Battles with Malik are very difficult: I'd recommend saving you game before each one. Before each battle, get your inventory and skills read. You should have the Assassin set (gives resistance to the first couple counterattacks) and the Edge of Balance. Apart from that you should also wear a ring which increases your initiative by 5 or even 10 points which will let you gain advantage in the first turns of the battle. The battle as a whole depends on what units the enemy army consists of. If possible, you should use the skills of Faceless Puppeteers to take over the Anihilators and use them to charge across the enemy army, placing them beside Mother Breeders. Attack Lilims using Chakram Dancers and Shadow Watchers.
You need to constantly keep an eye on the demon gate and what kind of creatures are being summoned. If you see that the enemy is summoning Cerberuses, you should destroy the real unit thanks to which their "clone" will fall apart. If your losses are too big, you will have to load the game and try once again.
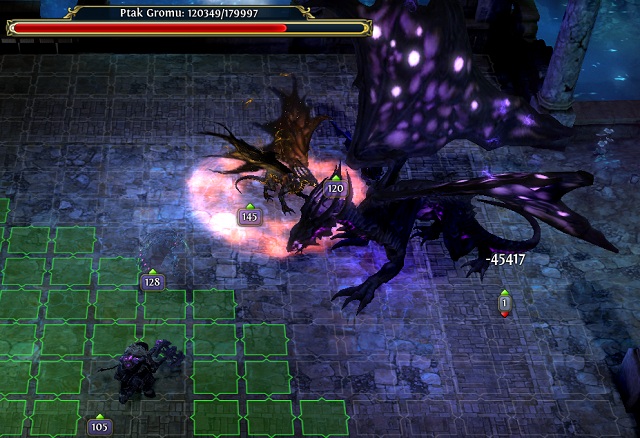
Once Malik is visibly weakened, you can do one more thing: visit the Dragon Utopia (M2, 36). You will once again need an enormous army, especially over a hundred of Black Dragons. As the boss cannot counterattack, the only thing you should care about is dealing as much damage as possible. You can also use the weakness spell on the enemy which will lower your losses. In the battle that I fought, 130 Black Dragons attacking from the maximum range with the heroic charge were able to deal 50000 damage! With such figures, defeating the boss is just a matter of time. A locations' defence renews every month and you can fairly often come across groups of dragons; unfortunately the reward is proportional to the effort - a weaker enemy means worse items.
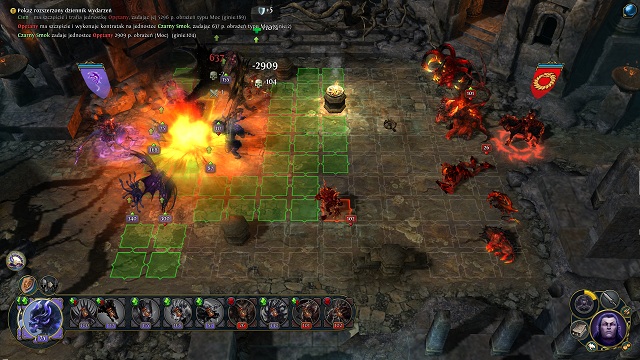
Once you're ready for the final battle, you can attack Cyril who will probably be in the city (M1, 17). Remember that your target is the Inferno hero only. It's also the last battle of the campaign, therefore you don't have to save your army for later. If you were able to kill Malik a couple times, Cyril should be weak enough for your forces to smash him and his hellish forces into pieces. Now just watch the ending cinematic and think about finishing Raelag's history in Heroes V.
Objective: destroy the gate within 10 days
Reward: 20000 EXP, 50 Shadow Lurkers, 20 Manticore
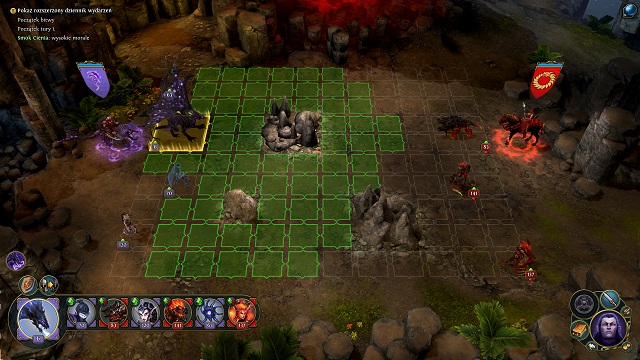
This mission will activate during the conversation with the shadow lurkers (M1, 2). The objective is very easy: defeat the enemy champion (M1, 3) who's busy with opening the gate to Sheogh. You should finish this challenge while exploring the caves as part of "In the Library". During the fight with the champion, you should focus on eliminating his range units (Lilim):lower their effectiveness with the weakness spell and destroy with Shadow Lurkers and Stalkers. The rest of his army shouldn't cause you any problems.
Objective: collect 10 units of wood, 10 units of ore and 5 crystals and take them
Reward: 10000 EXP, +100 Tears reputation
This challenge will be unlocked after discovering the destroyed training camp (M1, 4). As there are lots of minerals in the area, you can use them to rebuild the location. You will not only be rewarded for completing the mission itself, but will also gain the option to pay for upgrading your units.
Objective: visit 3 secret libraries and close the gate to Sheogh
Reward: 30000 EXP, +5 Magic Power, +3 destination
This mission is available right after completing "Demons at the Gate". You need to visit three secret libraries found nearby the enemy cities. The best method of completing this mission is quickly rushing to the library and afterwards using the Improved Town Portal to get away back to your town. If the enemy heroes are afraid of your army and don't chase you, you don't have to use this method and head to the next spot. The libraries can be found at three locations (M1, 11) or (M2, 23). After visiting all three, you have to return to the gate (M1, 10) and close it once and for all.
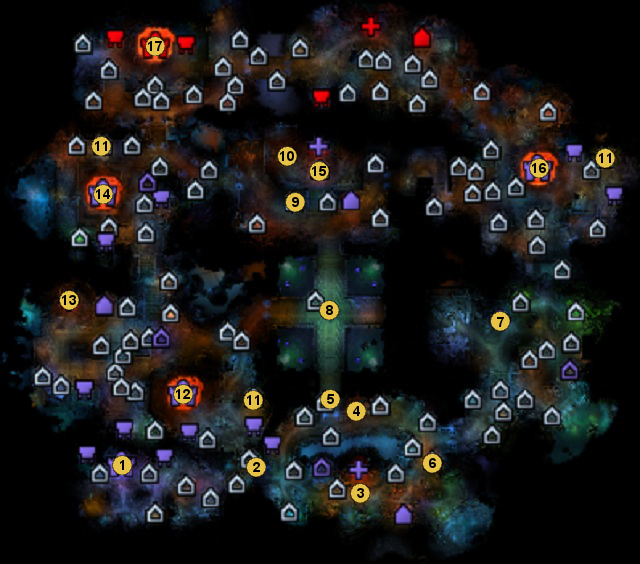
1 - starting location (In the Library (1/2))
2 - Stalkers (Demons at the Gate)
3 - portal and the champion defending it (Demons at the Gate)
4 - training camp (Exercise Series)
5 - passage deeper into the Library (In the Library (1/2)) (Angel of Revenge)
6 - gates of hell
7 - Fort
8 - enemy champion (In the Library (2/2))
9 - Dark Elves post
10 - portal to Sheogh (Weapons can win you battles, knowledge - wars)
11 - secret libraries (Weapons can win you battles, knowledge - wars)
12 - Legion of Pain city (In the Library (2/2))
13 - Legion of Pain fort (In the Library (2/2))
14 - Legion of Madness city (In the Library (2/2))
15 - Legion of Madness fort (In the Library (2/2))
16 - Legion of Madness city (In the Library (2/2))
17 - Cyril's city (Paths of Destiny)
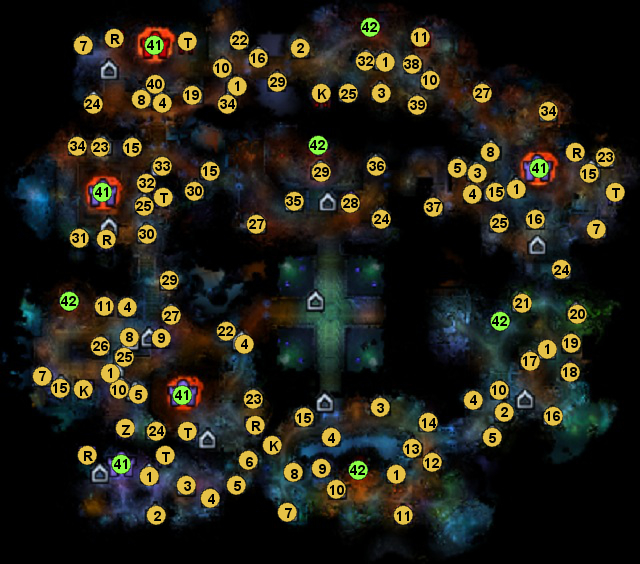
1 - Stone of Enlightment (Gives the hero 2500 EXP. The hero can use it only once)
2 - Armoursmith (Gives the hero a permanent +1 defence bonus. The hero can use it only once)
3 - Weaponsmith (Permanently increases the hero's might power by 1. The Hero can use this object only once)
4 - Dragon Vein (Regenerates the hero's mana completely. The hero can use this object once per week)
5 - Mother Earth Shrine (Increases the health of all units in the hero's army by 10%. The hero can use this object once per battle)
6 - Soul Venom pot (Enemy units start the battle being poisoned. Therefore, they will receive 50 damage each turn and their initiative will be lowered by 5. The effect lasts for 3 turns. The hero can use this object once per week)
7 - Crystal of Power (Gives a permanent +1 bonus to magic power. The hero can visit this object only once)
8 - Stable (Increases the hero's movement points by 5. Can be used once per week)
9 - Observatory (Unveils a big area around the building)
10 - War Ancient (Increases the hero's Leadership and Destiny by 5 in the next battle, additionally gives 5 movement points. The hero can use it once per battle)
11 - Dark barrows (Increases the weekly creature growth rate)
12 - Gates of hell (Guarded by enemy forces - after defeating them, the hero will receive a precious treasure or will be joined by a units of friendly creatures)
13 - Water Elemental Shrine (During the next battle, all friendly creatures will receive the water armor spell when attacked)
14 - Ice Pearl Shrine (+10 initiative to the end of the week. The hero can use is once per week)
15 - Blind Maiden (increases the hero's destiny by 5 during the next battle. The hero can use this object once per battle)
16 - Angels Shrine (Increases the hero's magic power and leadership by 5 till the end of the week. The hero can use this object once per week)
17 - Dispel Magic Shrine (The hero's army gains magic immunity for the first 3 turns of battle. The hero can use this object once per week)
18 - Seat of the Invaders (Owner of this building received gold after each battle)
19 - Centaur Monument (Gives the hero a +5 movement bonus and 10% damage bonus for ranged units till the end of the week. The hero can use this object once per week)
20 - Pyramid (Guarded by enemy forces - after defeating them, the hero will receive a precious treasure or will be joined by a units of friendly creatures)
21 - Well of Souls (Gives a +10 bonus to magic power to the end of the week. The hero can use this object once per week)
22 - Sigil of Arkath (Gives a +5 defence and magic defence bonus to the end of the week. The hero can use is once per week)
23 - Arcane Library (Gives the hero a 1-3 bonus to magic power or magic defence. The amount of points depends on the level of the hero [1-10: 1, 11-20: 2, 21-30: 3]. The Hero can use this object only once)
24 - Shrine of the Seventh Dragon (This shrine lets the hero advance to the next level after paying 7 crystals and 11000 gold. The hero can use this object once per game)
25 - Revelation Crystal (Gives the hero a permanent +1 magic defence bonus. The Hero can use this object only once)
26 - Choral of Believers (Gives a +5 leadership and magic power bonus for the course of the next battle. The hero can use this object once per battle)
27 - Hell Force (Gives a +5 bonus to might power till the end of the week. The hero can use is once per week)
28 - Dark Spire (Increases the weekly creature growth rate)
29 - Demon Shrine (Give a +5 bonus to might power and destiny till the end of the week. The hero can use is once per week)
30 - Dragon Nexus (Doubles the hero's mana. The hero can use this object once per week)
31 - Dead Field (All enemy living creatures deal 10% less damage in the next battle and have 10% less life. The hero can use this object once per battle)
32 - Warmen Guardhouse (After each battle the hero gets a bonus to movement points for each building possessed; +3 for the first one, +2 for the second, +1 for each further)
33 - Wheel of Time (After visiting this place, the hero uses up movement points 20% slower and in the next battle the enemy forces have 10 points less initiative. The hero can use is once per week)
34 - Altar of Destruction (All enemy creatures will be hit by a meteor at the beginning of the next battle. The hero can use is once per week)
35 - Dark Elves post (It's guarded by enemy units - after defeating them, the hero will gain a precious treasure or will be joined by a squad of friendly units)
36 - Dragon Utopia (Protected by Dragons, contains the rarest artefacts in the game)
37 - Chaos Wave (During the next battle, an AI-controlled monster will appear and eat a random enemy units. In order to free it, the enemy will have to kill the creature. The hero can use this place only once)
38 - Gryph Statue (Gives air units a 20% bonus to health. The hero can use this object once per week)
39 - Arena (After defeating the guards, gives a permanent +2 bonus to might power or might defence. After the fight, the units that the player lost are revived)
40 - Conflux Orb (lets you leave messages for other players)
41 - City
42 - Fort
T - Sawmill (Gives 2 wood per day)
R - Ore Mine (Gives 2 ores a day)
K - Crystal Mine (Gives 1 crystal a day)
Z - Gold Mine (gives 1000 gold a day)
Objective: reach Nelsham-Nadin within 7 days
Prize: 6000 XP, +2 defence, +2 magic defence, Helm of Miranda
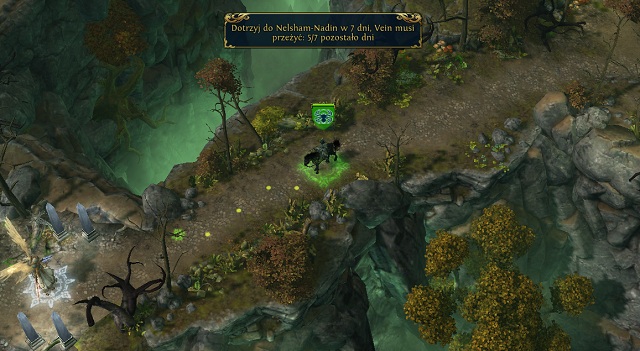
The first mission of the new Necropolis campaign is a constant fight with time. Almost each mission you get will have a time limit set on it - a limit which cannot be exceeded. Because of this limit you will have to constantly save up your army, as a chance to return to the city to replenish forces will be very rare.
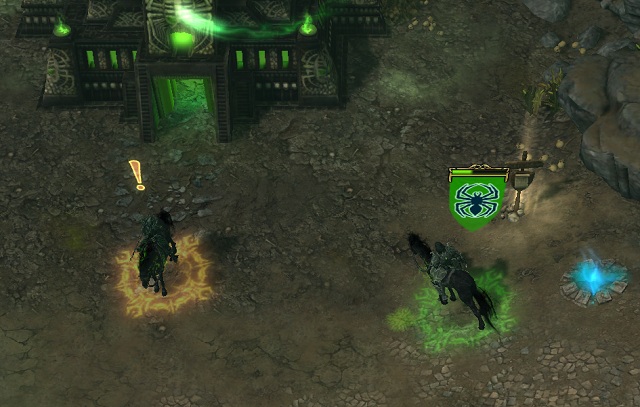
You begin the mission in the eastern part of the map (M1, 1). Your forces have been attacked by a disease and therefore you will lose a few Vampires, Liches and Fate Weavers each day. Head south towards the bridge. On your way you can visit the tomb (M2, 3) which will give you a few additional units. Now cross the bridge. At its end you will come across a Haven hero (M1, 2) - approaching him will start another main mission: "Aggressive Light". Defeat the adversary and head north along the path. On your way you should take over the Sawmill and the ore mine, as a constant inflow of resources will be crucial. Now speak with Ludmilla inside the Fort of Nelsham-Nadin (M1, 3). In the meantime you should also receive a side mission "Undead for the Country" and another main mission connected with "The Siege of Nelsham-Nadin" - "War Machines".
The mission can be completed only after finishing all other main missions: "Aggressive Light", "Aggressive Light - part 2", "War Machines" and "Nelsham Gorge Bridge".
Objective: destroy 3 enemy catapults within 21 days
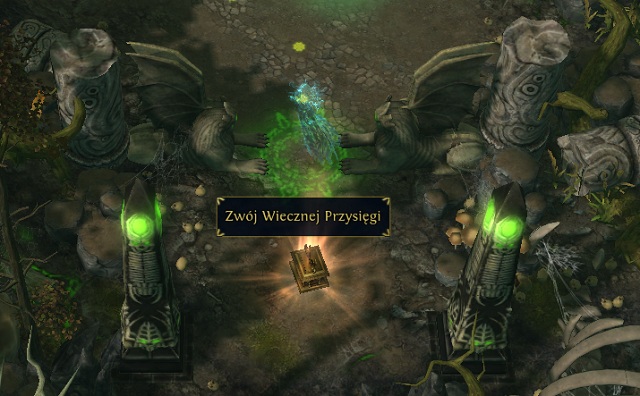
Another time-limited mission. Before heading north, you need to prepare for battle. Build all building required to recruit units and save resources for the Improved Town Portal - it will be necessary to move throughout the map effectively. In the meantime, finish exploring the island. Firstly I would recommend defeating the first Haven hero connected with the "Aggressive Light" mission (M1, 4) and afterwards head south, where you will find the Scroll of Eternal Oath (M1, 5) from the "Undead for the Country" side mission. Thanks to it, each visited tomb (M1, 6) will increase your army.
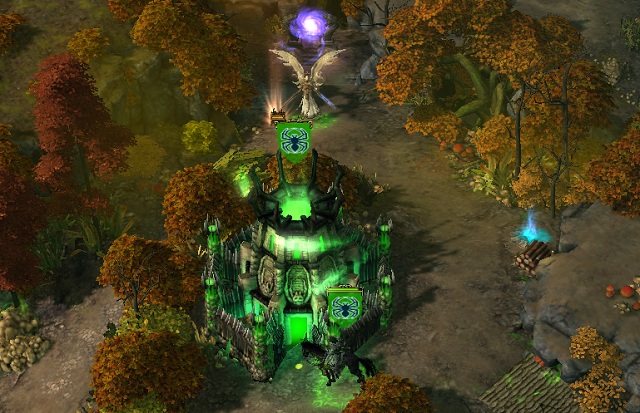
Now you can take over the local Fort (M1, 7). You also have to take note of the beach (M1, 8), as the Haven forces will be constantly sending heroes towards it and they will be able to take over the Forts and cities during your absence. In order to deal with all three catapults, you will need around 10 turns (assuming that you begin your journey at Nelsham-Nadin). If you have enough time, you should collect additional forces and upgrade your ranged units. Now you can head to the portal (M2, P1) defended by the last Haven hero from "Aggressive Light" (M1, 9).
Defeating the enemy will launch the further part of the mission; for the time being you can ignore it - you have to focus on destroying the catapults. As the portal in front of you is one way, you won't be able to return and defend Nelsham-Nadin until you place an Improved Town Portal. Let's move!
Objective: find and conquer 3 Angel outposts
Prize: 2000 XP, +2 magic defence
The mission is very easy - you have to defeat three Haven heroes found in the southern part of the map: (M1, 2), (M1, 4), (M1, 9). As defeating the third hero will begin the second, time-limited part of the mission, you should wait with it until you will have to cross a rift with a portal. Completing this mission has been included in the campaign walkthrough, so there' no need for further descriptions here.
Objective: destroy 3 enemy catapults within 21 days
Prize: 5000 XP, +2 might power
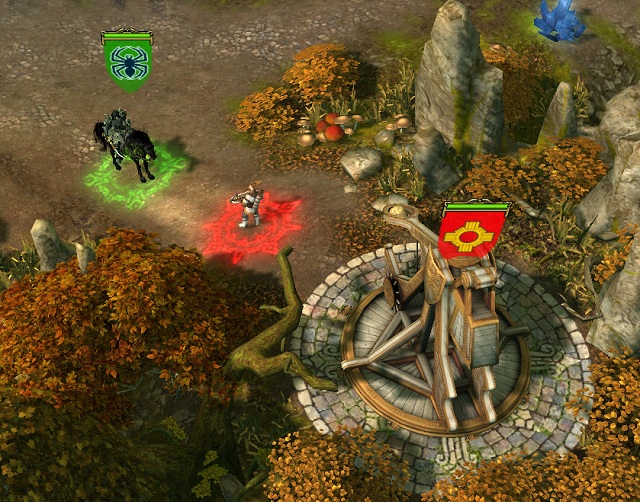
Once you're north, you should ignore all side missions and head directly to the catapults (M1, 10). If you still have a week left when you reach the first machine, you can start collecting crystals on your way (in order to place an Improved Town Portal in Nelsham-Nadin), otherwise just focus on completing the mission. Destroying all three catapults will end this part of the mission.
You should have some freedom now. You can head north to the Haven Fort (M1, 11) and end the "Gold Rush" mission. You should also visit the mass tombs (M1, 6) and increase your army. Sooner or later Haven will land on the beach again (M1, 8) which will force you to use the Improved Town Portal and return onto the island. Soon you should receive the main mission: "Nelsham Gorge Bridge" and a side mission: "Spider Defence".
Objective: defeat the Angel leader within 35 days
Prize: 3000 XP, Ga'arend' Shoes
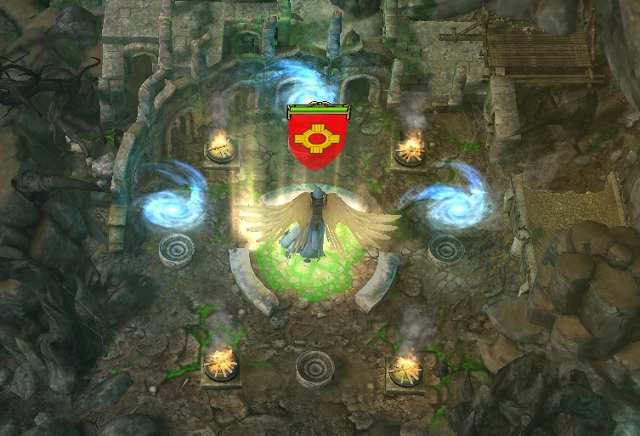
Assuming you've been following the guide up until not, you should have enough time to complete this mission. After taking care of the Haven attack and filling in any losses, you can head east towards the starting location. Your target will be Yashtar's Laboratory (M1, 12), where you can complete "The Return of Yashtar" and the angel leader (M1, 13). On your way you can also visit the crystal mine (they will need them to complete the additional mission "Spider Defence") and collect any items in the area. The army you have, aided by the Lamasu received from Yashtar should be more than enough to deal with the Haven hero.
Objective: destroy 2 Sawmills and defeat the bridge builders within 28 days
Prize: 5000 XP, 10 wood, 10 ore, Four-Leaf Clover
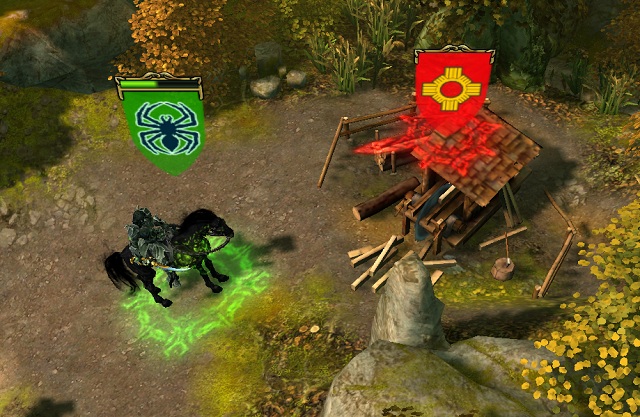
Another time limited mission, requiring you to travel north. Before heading out, I'd suggest completing the additional mission "Spider Defence" and make sure you've visited all the mass graves (M1, 6) in the south. After crossing the portal, be sure to use all the other graves (M1, 6), to finish the mission "Undead for the Country". Now you can head towards the two Sawmills (M1, 14) and the builders (M1, 15). Before beginning the battle, make sure you're done with all the side mission - the end of the quest is near. After defeating the builders and waiting for a turn, "The Siege of Nelsham-Nadin" will automatically come to an end.
Objective: defeat a princess of the Falcon family
Prize: 5500 XP, +1 might power, +1 magic power
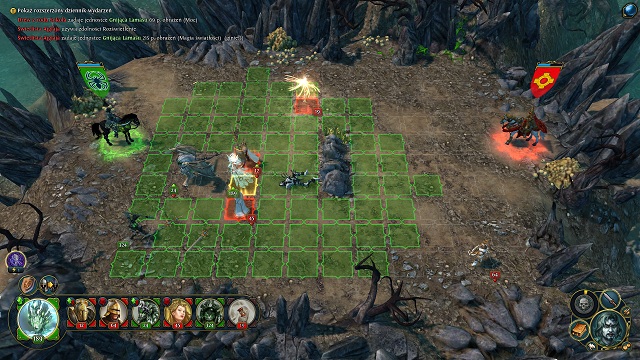
Princess Drew will attack you just like all other Haven heroes - by landing on the beach (M1, 8). Collect your army and head to meet her - it's best to fight outside the city walls. The enemy's army is quite big and includes legendary units, though they shouldn't cause you much trouble. You need to defeat the Celestials and Radiant Glories and also look out for the eventual attack of Vestals (they can very quickly reduce your numbers). The battle itself isn't much different from the others that you fought during the campaign. After defeating Drew and her forces, the mission will end.
Objective: reach the Blood or Tear class
Prize: +2 destiny
Just like in the dark elves campaign, " Choice" is also your first additional missions. Once again, choose a path and follow it at all times. Because of the time limits imposed on the missions and a relatively small amount of battles which you will have, you will constantly need to use your hero's skills to gain Blood or Tear points. You should be able to finish this mission right before the final battle.
Objective: reach level 7 and return to Yashtar's Laboratory
Prize: 2000 XP, 60 Spectres, 30 Lamasu
You will complete the first part of this mission automatically during other missions. Yashtar's Laboratory (M1, 12) is best visited during your march on the angel leader (M1, 13) as part of "Aggressive Light - part 2". The Lamasu you obtain that way will make the upcoming battle easier, while also letting you place a building in Nelsham-Nadin which will let you recruit more creatures.
Objective: obtain the Scroll of Eternal Oath and visit 5 mass graves
Prize: 2000 XP
You will receive this mission automatically upon reaching Nelsham-Nadin. I'd recommend completing it as fast as possible, as the forces you will receive in return will make the upcoming battles much easier. The Scroll of Eternal Oath can be found at (M1, 5), while the five mass graves at (M1, 6): two in the south and three in the north. The best moment for visiting those places has been described in the main mission walkthrough.
Objective: capture the Fort in the north-east edge of the map
Prize: 2000 XP, 10000 gold, Crystal Roses Staff
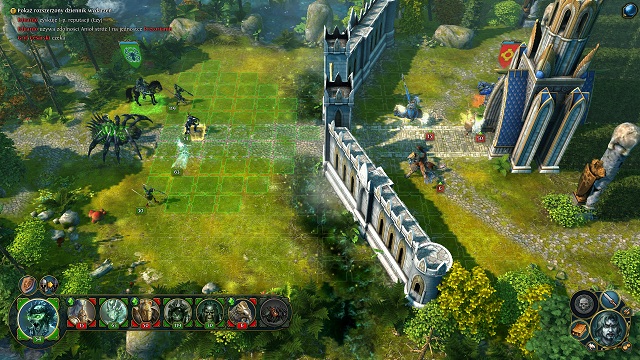
You will unlock this mission automatically after crossing the portal (M2, P1). You need to take over the Fort in the north-east part of the island (M1, 11). The mission is best completed right after finishing "War Machines". The Fort is poorly protected and obtaining it shouldn't cause you any troubles. In return you will receive a dynasty weapon: Crystal Roses Staff. Completing the mission will also let you obtain 100 Blood or Tear points.
Objective: obtain 20 crystals and use the summon point
Prize: 1500 XP, +2 destiny
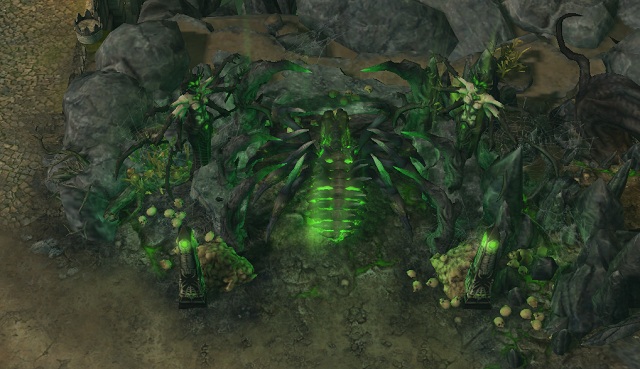
You will receive this mission after destroying the enemy catapults and returning to Nelsham-Nadin. The mission itself is trivial - after collecting 20 crystals you have to go to the summoning circle (M1, 16) and place the gathered resources there. Now just pick a target to receive additional 100 Blood or Tear points.
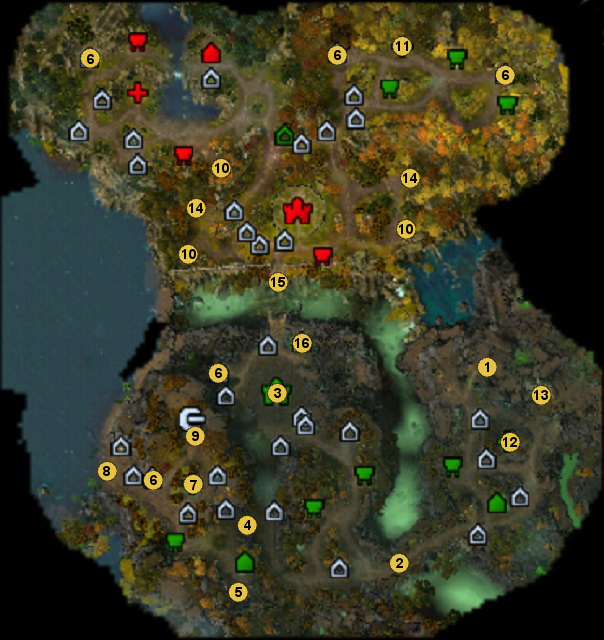
1 - starting location
2 - Haven hero (Aggressive Light)
3 - Nelsham-Nadin (The Siege of Nelsham-Nadin)
4 - Haven hero (Aggressive Light)
5 - Scroll of Eternal Oath (Undead for the Country)
6 - mass graves (Undead for the Country)
7 - Fort
8 - beach (Princess' Pride)
9 - Haven hero (Aggressive Light)
10 - catapults (War Machines)
11 - Haven Fort (Gold Rush)
12 - Yashtar's Laboratory (The Return of Yashtar)
13 - angel leader (Aggressive Light - part 2)
14 - Sawmills (Nelsham Gorge Bridge)
15 - bridge builders (Nelsham Gorge Bridge)
16 - spider summoning circle (Spider Defence)
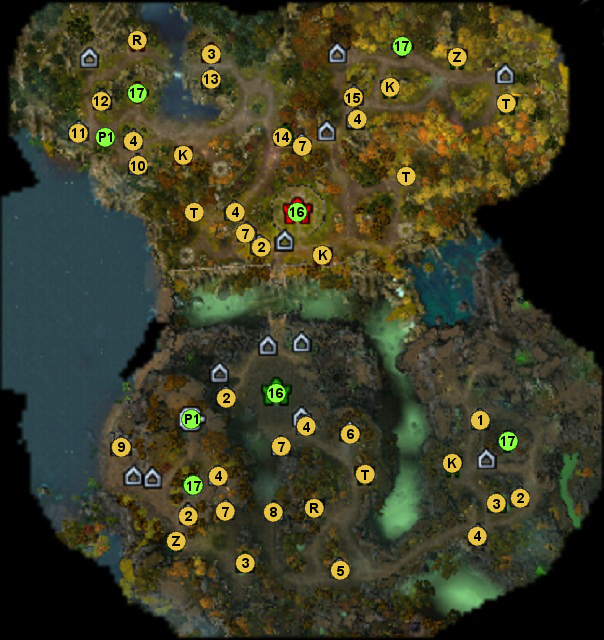
1 - Crystal of Power (Gives a permanent +1 bonus to magic power. The hero can visit this object only once)
2 - Stone of Enlightment (Gives the hero 2500 EXP. The hero can use it only once)
3 - grave /barracks (Increases the weekly creature growth rate)
4 - Dragon Vein (Regenerates the hero's mana completely. The hero can use this object once per week)
5 - Stable (Increases the hero's movement points by 5. Can be used once per week)
6 - Cemetery (lets you recruit Necropolis creatures)
7 - War Ancient (Increases the hero's Leadership and Destiny by 5 in the next battle, additionally gives 5 movement points. The hero can use it once per battle)
8 - Mother Earth Shrine (Increases the health of all units in the hero's army by 10%. The hero can use this object once per battle)
9 - Weaponsmith (Permanently increases the hero's might power by 1. The Hero can use this object only once)
10 - Conflux Orb (lets you leave messages for other players)
11 - Arena (After defeating the guards, gives a permanent +2 bonus to might power or might defence. After the fight, the units that the player lost are revived)
12 - Dispel Magic Shrine (The hero's army gains magic immunity for the first 3 turns of battle. The hero can use this object once per week)
13 - Revelation Crystal (Gives the hero a permanent +1 magic defence bonus. The Hero can use this object only once)
14 - Observatory (Unveils a big area around the building)
15 - Soul Venom pot (Enemy units start the battle being poisoned. Therefore, they will receive 50 damage each turn and their initiative will be lowered by 5. The effect lasts for 3 turns. The hero can use this object once per week)
16 - Town
17 - Fort
P1 - one-way portal with an exit (in the north)
T - Sawmill (Gives 2 wood per day)
R - Ore mine (Gives 2 ores per day)
K - Crystal mine (Gives 1 crystal per day)
Z - Gold mine (Gives 1000 gold per day)
Objective: Reach Belketh's camp
Prize: 7200 XP, +2 destiny, Windsword Brooch
You will slowly lose Vampires and Liches in this mission as well, so I'd advice moving quickly - each saved unit will make battles easier. You begin the game at (M1, 1) - immediately head north. On your way pay a visit to (M1, 2) where you will come across the first enemy champion - Matew. Approach him and the first additional mission will begin: "Revenge of the Beastmen".
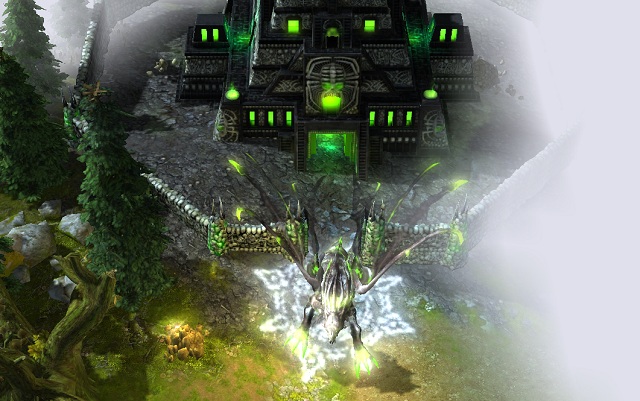
After defeating the opponent and adding the nearby Spectres to your army, head north. You can collect the local resources and visit locations, be sure to take over the sawmill by the road. After reaching Belketh's camp (M1, 3), you will have to speak with the Spectra Dragon by the entrance - that way you will end the current mission.
Objective: find the Dragon Cemetery and bring 10 crystals to command the dragon souls
Prize: 16800 XP, 5 Spectral Dragons
This is the first and last time that you will visit Belketh's camp, so it's best to upgrade it rather slowly. The most important thing here will be buildings which improve you income and let recruit units - you will use the so created army later on in the game.
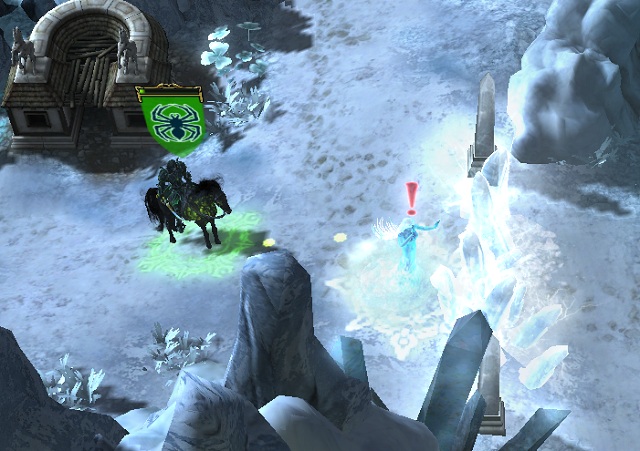
Head south-east. You will come across the first obstacle on your way after passing the stables (M1, 4) - Water Elementals will create an ice barrier, therefore blocking your army. To create a path for yourself, you will have to defeat this enemy. Be ready for consecutive fights with Water Elementals, as they will constantly keep creating more ice barriers.
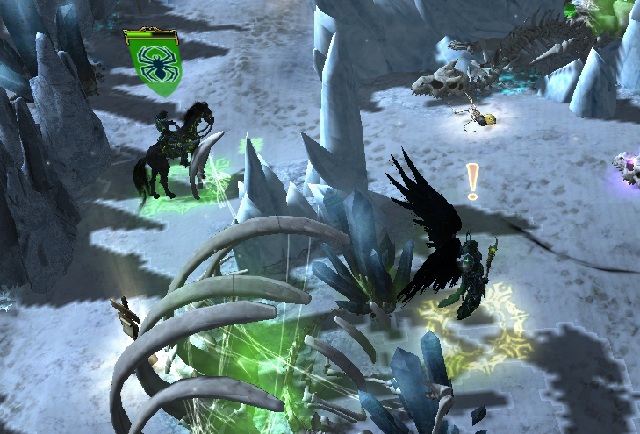
After reaching the Dragon Cemetery, it will turn out that is has fallen victim to the ice as well. Once again you will have to penetrate the whole area and defeat each Water Elemental (M1, 5) that you come across. After eliminating the last group, you will be able to meet with Belketh (M1, 6). The angel will demand 10 crystals - you should have an adequate amount of this resource, hand it over and he will open a path to the spirit world for you. After crossing the portal you will have to defeat a group of Spectral Dragons. As a reward, some of them will join you to protect your remaining Vampires and Liches from the plague. From now on you will also be able to recruit them in your towns - I'd recommend placing a proper building right away.
Objective: find the library entrance and defeat 3 guardians; defeat the dark elves and cross the gate; complete the main mission "Void Breaches"; and defeat Yrris
Prize: 36000 XP, Kieran's Armor
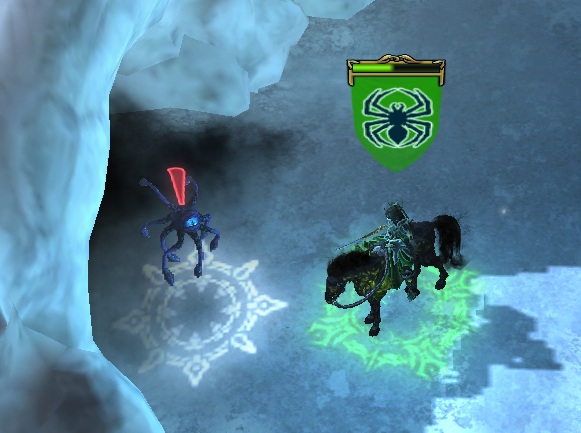
Time to take care of the second main mission. Keep heading north until you meet Belketh (M1, 7). The angel will tell you that the entrance to the library is protected by three guardians. Your mission will be finding the Shadow Watchers (M1, 8) and defeating them. On your way you will also have to face the last group of Water Elementals (M1, 9), defending access to the nearby treasure (M1, 10). After defeating the guards, you will be able to use the descent (M2, X2) leading to the underground.
Begin the exploration of the underground with location (M3, 1). You can head west: by the first fork in the road you'll receive another- "Void Breaches". Speaking with the nearby Faceless (M3, 2) will give you an additional mission: "Fallen Librarians". Your targets are two dark elves cities: the northern (M3, 3) and southern one (M3, 4). As they are weakly protected and the enemy champions inexperienced, the battle should be very one-sided. I'd recommend using the nearby War Ancients to speed up your travel.
After defeating the dark elves you can move to upgrading your towns. I'd recommend placing each possible building used to recruit units and afterwards recruit all the creatures that have been waiting for you for weeks. Having such an army, the further part of the mission should be a piece of cake. Cross the gate (M3, 5).
Objective: find a way to close the Breaches, close 4 Void Breaches, defeat Sandro
Prize: 36000 XP, +1 defence
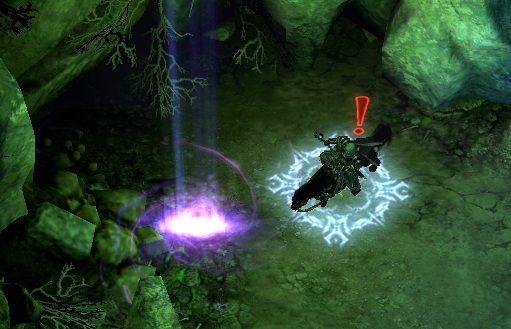
After crossing the gate (M3, 5) you will come across your old friend - Sandro. You will learn that he's behind your recent troubles with and the Void Breaches are his creation. At this point you have two options. You can defeat each copy of Sandro or complete the additional mission "Real Lies" which will let you reduce the number of fights. If you choose the first option, you will have to face a big army of Vampires and Liches in a few locations (M3, 6). The second option assumes defeating three gate guardians - the Shadow Watchers (M3, 7) - and speaking with the void prophet (M3, 8). I'd recommend completing the additional mission, as you will receive 2 destiny points in return. In the meantime you can also defeat the possessed Faceless connected with the "Fallen Librarians" mission at (M3, 9).
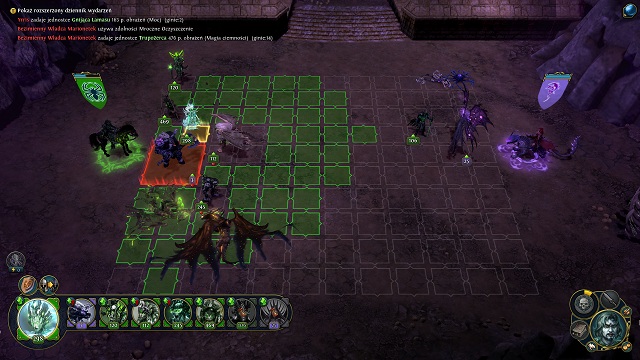
Regardless of the chosen option, sooner or later you will reach the right Sandro (M3, 6). Unfortunately he will once again escape your revenge and you will have to face a dark elf champion - Yrris (M3, 10). It's the last fight in this mission, so you don't have to spare your units. Defeating Yrris will end "Gates of the Library" and therefore the second mission of the Necropolis campaign.
Objective: defeat Matew
Prize: 18000 XP, Gauntlets of the Minotaur

The mission will activate when only you approach the enemy champion (M1, 2). Just defeat his small forces and the reward will be yours.
Objective: defeat 2 groups of possessed Faceless and afterwards the quest giver
Prize: 24000 XP, +2 might power, +2 defence
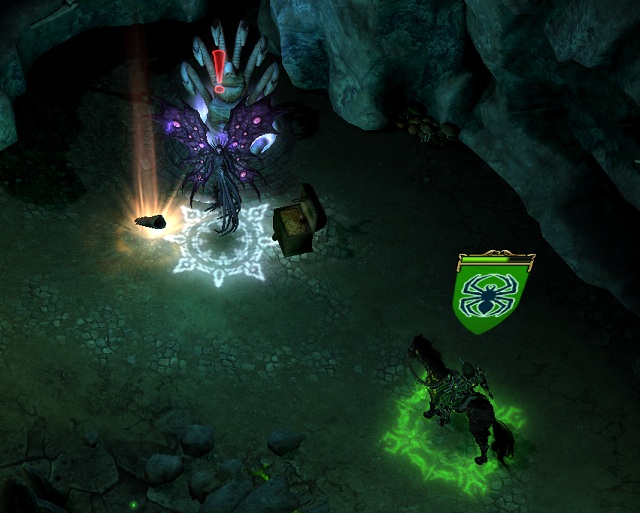
You will receive the mission after speaking with the Faceless at (M3, 2). Your task will be defeating the possessed Faceless found at (M3, 9). After dealing with them, return to the quest giver. NOTICE! Doing so will begin a battle with the strongest Faceless group so far. Defeating them will end the mission.
Objective: visit the Void Prophet
Prize: 48000 XP, +2 destiny
This mission will activate automatically a few turns after you cross the gate (M3, 5). In order to reach the Void Prophet you first need to defeat 3 groups of guards in the form of Silent Watchers (M3, 7). Afterwards you will have to face a group of Shadow Elementals directly in front of the target building. After speaking with the Void Prophet you will receive a prize and eliminate the illusion of Sandro.
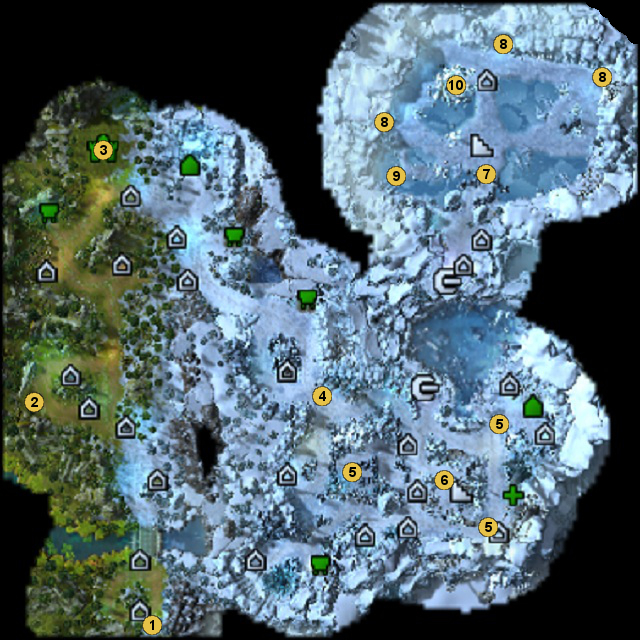
1 - starting location
2 - Matew (Revenge of the Beastmen)
3 - Belketh's camp (Chasing the Angel of Death)
4 - ice barrier
5 - Water Elementals (Bones of Dragons)
6 - Dragon Cemetery (Bones of Dragons)
7 - Belketh (Gates of the Library)
8 - guards (Gates of the Library)
9 - Water Elementals
10 - treasure
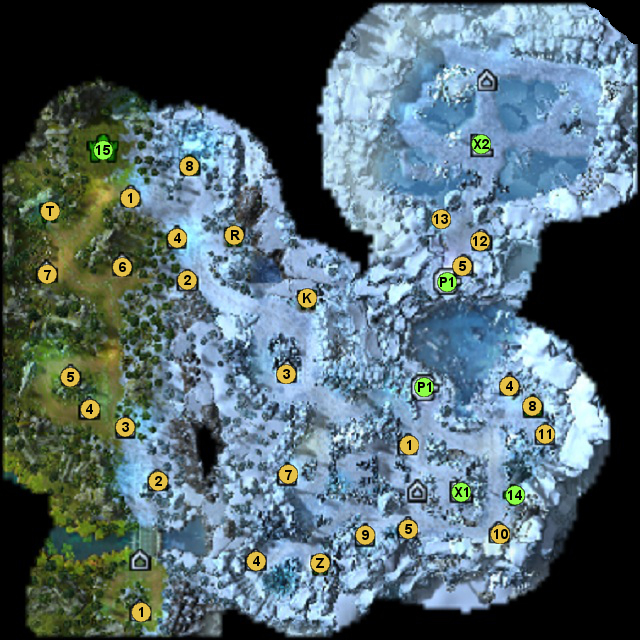
1 - War Ancient (Increases the hero's Leadership and Destiny by 5 in the next battle, additionally gives 5 movement points. The hero can use it once per battle)
2 - Mother Earth Shrine (Increases the health of all units in the hero's army by 10%. The hero can use this object once per battle)
3 - Stable (Increases the hero's movement points by 5. Can be used once per week)
4 - Stone of Enlightment (Gives the hero 2500 EXP. The hero can use it only once)
5 - Dragon Vein (Regenerates the hero's mana completely. The hero can use this object once per week)
6 - Armoursmith (Gives the hero a permanent +1 defence bonus. The hero can use it only once)
7 - Blind Priestess (Give the hero a +5 destiny bonus during the next battle. The hero can use it once per battle)
8 - Grave (Increases the weekly creature growth rate)
9 - Water Elemental Shrine (During the next battle, all friendly creatures will receive the water armor spell when attacked)
10 - Sigil of Arkath (Gives a +5 defence and magic defence bonus to the end of the week. The hero can use is once per week)
11 - Crystal of Power (Gives a permanent +1 bonus to magic power. The hero can visit this object only once)
12 - Elemental Gate (Lets you recruit Elementals)
13 - Training camp (Lets you upgrade units)
14 - Fort
15 - Town
X1 - entrance to the spirit world
X2 - underground descent
P1 - two-way portal
T - Sawmill (Gives 2 wood per day)
R - Ore mine (Gives 2 ores per day)
K - Crystal mine (Gives 1 crystal per day)
Z - Gold mine (Gives 1000 gold per day)
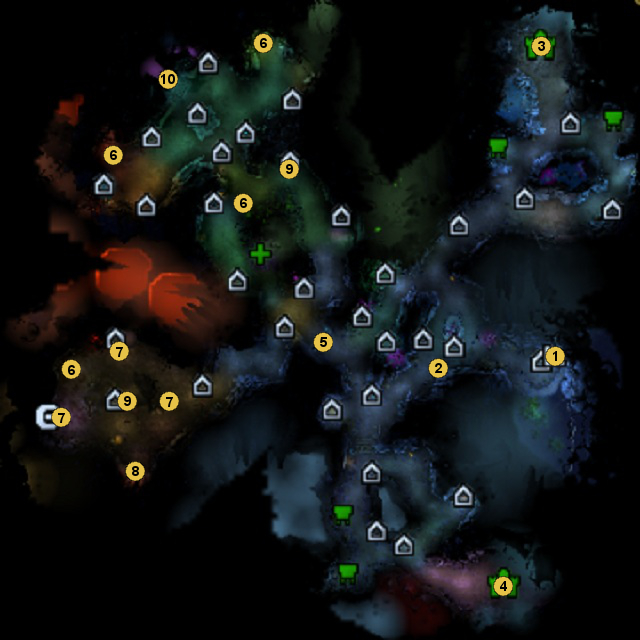
1 - starting location
2 - Faceless (Fallen Librarians)
3 - northern Dark Elves town (Gates of the Library)
4 - southern Dark Elves town (Gates of the Library)
5 - gates (Gates of the Library)
6 - Sandro illusion (Void Breaches)
7 - guards (Real Lies)
8 - Void Prophet (Real Lies)
9 - possessed Faceless (Fallen Librarians)
10 - Yrris (Gates of the Library)
1 - Stone of Enlightment (Gives the hero 2500 EXP. The hero can use it only once)
2 - Dispel Magic Shrine (The hero's army gains magic immunity for the first 3 turns of battle. The hero can use this object once per week)
3 - Dragon Vein (Regenerates the hero's mana completely. The hero can use this object once per week)
4 - Arena (After defeating the guards, gives a permanent +2 bonus to might power or might defence. After the fight, the units that the player lost are revived)
5 - Stable (Increases the hero's movement points by 5. Can be used once per week)
6 - Dark Elves outpost (Guarded by enemy forces - after defeating them, the hero will receive a precious treasure or will be joined by a group of friendly creatures)
7 - War Ancient (Increases the hero's Leadership and Destiny by 5 in the next battle, additionally gives 5 movement points. The hero can use it once per battle)
8 - Blind Priestess (Give the hero a +5 destiny bonus during the next battle. The hero can use it once per battle)
9 - Revelation Crystal (Gives the hero a permanent +1 magic defence bonus. The Hero can use this object only once)
10 - Mother Earth Shrine (Increases the health of all units in the hero's army by 10%. The hero can use this object once per battle)
11 - Weaponsmith (Permanently increases the hero's might power by 1. The Hero can use this object only once)
12 - Conflux Orb (lets you leave messages for other players)
13 - Sigil of Arkath (Gives a +5 defence and magic defence bonus to the end of the week. The hero can use is once per week)
14 - Dragon Utopia (Protected by Dragons, contains the rarest artefacts in the game)
15 - Shrine of the Seventh Dragon (This shrine lets the hero advance to the next level after paying 7 crystals and 11000 gold. The hero can use this object once per game)
16 - Soul Venom pot (Enemy units start the battle being poisoned. Therefore, they will receive 50 damage each turn and their initiative will be lowered by 5. The effect lasts for 3 turns. The hero can use this object once per week)
17 - Arcane Library (Gives the hero a 1-3 bonus to magic power or magic defence. The amount of points depends on the level of the hero [1-10: 1, 11-20: 2, 21-30: 3]. The Hero can use this object only once)
18 - Dragon Nexus (Doubles the hero's mana. The hero can use this object once per week)
X2 - surface entrance
P2 - one-way portal (entrance in the west, exit in the middle map)
T - Sawmill (Gives 2 wood per day)
R - Ore mine (Gives 2 ores per day)
Objective: protect the second ship; protect the middle Fort, protect the Ruins of Jorougumo
Prize: 24000 XP, 2 Spectral Dragons, Dragon Scale Armor

The mission is available from the very beginning of the quest. Your task is protecting the second ship which is transporting Mother Namtaru. If you're careful and eliminate all the enemy champions before they reach the second ship, the mission shouldn't cause you any problems.
In the middle if the mission Mother Namtaru will be transported to a fortress and your mission will be protecting it. Just defeat all the enemy heroes on the sea to end the threat.
You will complete this mission automatically during other main missions.
Objective: conquer 2 Pirate Forts blocking your further path, conquer the middle Fort, conquer two Forts protecting the main gate
Prize: 18000 XP, 50 Spectres, 45 Ravenous Ghouls
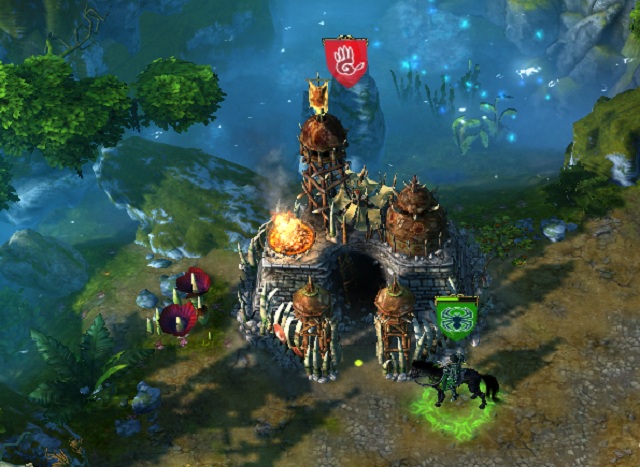
The mission is stretched in time and embraces all of your activities on the current map. As for most of the mission you won't be able to replenish your army, so I'd recommend saving your units and minimizing loses. You begin the mission on sea at (M1, 1). As the gate (M1, 2) has been shut, you will have to conquer the pirate fortress (M1, 3) to unlock it. On your way to the target you will have to visit all locations on the first island and collect the resources. Now you can take over the fortress (M1, 3) and cross the gate (M1, 2).
Unfortunately your path will be blocked by yet another gate (M1, 4). Once again you will have to defeat an enemy hero to protect Mother Namtaru and land on the nearby beach. Your target is another pirate fort (M1, 5) - once again collect all resources and visit every location before beginning the siege. With the gate open, you can cross it (M1, 4) and move onwards.
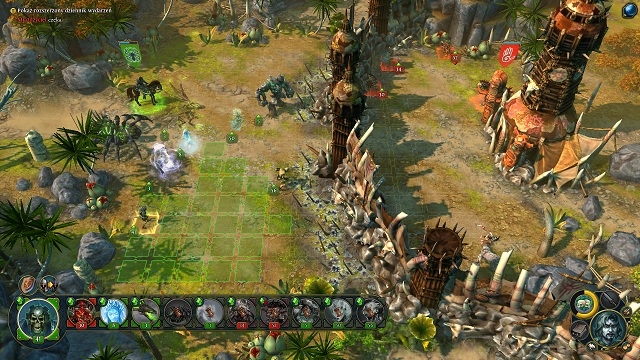
Your next target is the middle Fort (M1, 6). After a short siege the stronghold should fall into your hands. Be sure to visit the nearby Dragon Nexus (M1, 7) to begin at additional mission "Dragon Ships". You will also discover the location of the next gate and two Forts protecting them. This time your journey will be a bit longer.
After sailing into the gulf, you will encounter a pirate hero - Nalani. It's also one of the three heroes who possess the Dragon Skulls (from "Dragon Ships") which you are looking for. The next target is the obelisk in the middle of the gulf (M1, 8) - it will unlock an additional mission "Pirate Gold". Now you can freely use the first vortex portal (M2, P1).
On the other side you will come across another pirate champion - the owner of the second Dragon Skull ("Dragon Ships"). After defeating him you have to move onwards. After reaching the first of the two remaining Forts, I'd recommend penetrating the area. Begin with the north-west piece of land, where in the vey corner of the map you will find a second obelisk (M1, 9)("Pirate Gold"). It's also worth defeating the guard of the local barbarian camp (M2, 19) - in return you will gain additional units. After collecting all items and visit every location, you can go through the nearby portal (M2, P2).
You will find yourself on the middle island. Slowly make way towards the pirate fortress (M1, 10) while collecting items and obtaining bonuses. For now you can ignore the portal (M2, P3) - it leads onto a small island which you will visit later on, one way or another. Once you're ready, strike onto the Fort (M1, 10) - conquering it will mark half of the mission. The attack will unfortunately provoke another enemy to appear. Use the portal (M2, P3), buy a ship at the harbour and defeat the enemy before he can reach Mother Namtaru. Alternatively you can use the portal (M2, P6) and wait for the enemy at the gates of your Fort.
Time to head to the second fortification. Travel east and then south to reach the portal (M2, P4). Use it this time. You will land on the utmost south-east island, where you should visit the third obelisk (M1, 11)("Pirate Gold"). After collecting all items and visiting the Training Camp return through the portal (M2, P4) onto the main island. This time you should head onto the local beach (M1, 12) and buy a ship. You will also have to fight an enemy champion - owner of the last Dragon Skull ("Dragon Ships"). Now you can finish both additional missions: "Dragon Ships" and "Pirate Gold". A more detailed description of both can be found in the further part of the guide.
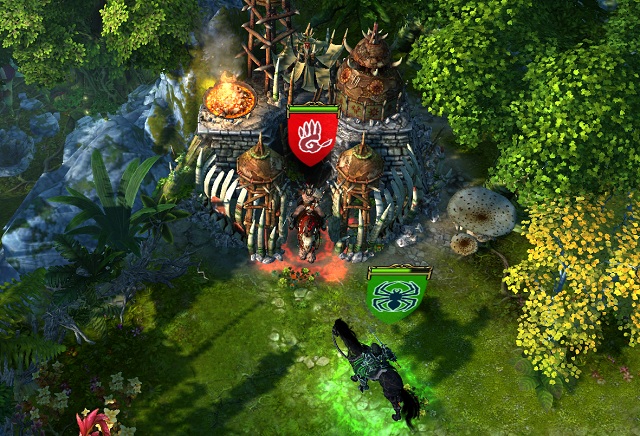
Time to hit the last pirate Fort (M1, 13). After conquering the location, the last pirate hero will appear, ready to attack Mother Namtaru. You can attack him using the ship left at the beach (M1, 12) or use the portal (M2, P7) and defeat him at the gates of the central Fort. Regardless of the chosen option, the main mission will come to an end.
Objective: find the Lost Island, place a foothold on it
Prize: 36000 XP, 30 Archliches
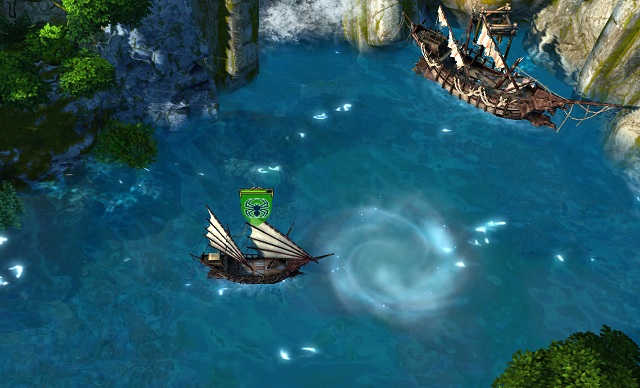
After completing all the additional missions you can move onwards. Sail to the gulf through the open gate (M1, 14) and use the portal (M2, P9).
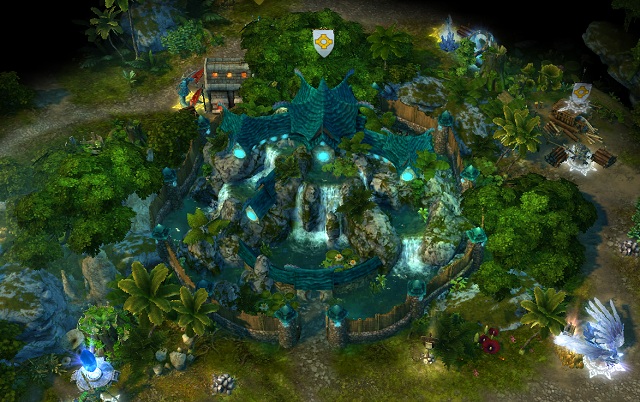
The vortex will take you onto another island (M3, 1). Examine the local island and head further north. Land on the beach and cross the portal (M4, P0). On the other side you should speak to the ghost of Tohunga (M3, 2) - he will give you an additional mission "Panther's Shadow". Now you can take over the nearby town: Ruins of Jorougumo (M3, 3). You should rebuild it quickly and start building basic building. Especially the Improved Town Portal will turn out to be very useful. Conquering the town will end the main mission.
Objective: defeat 2 Sanctuary armies, reach the Cradle of Tears
Prize: 36000 XP, +8 destiny
Obtaining the town will open the gate (M3, 4) - you can head deeper into the island. As you will have to fight with two enemies at the same time, I'd recommend eliminating the first of them as fast as possible. A swift attack on the southern town (M3, 5) end defeating one of the enemy's champions will eliminate the opponent for good. Now you can focus on the northern part of the island. It's best to pre-emptively attack the Nag town (M3, 6) which will give you more freedom. In the meantime you can also visit the temple (M4, X1) and perform the additional mission "Panther's Shadow". After defeating the second enemy, the main mission "Protect the Mother" will automatically end.
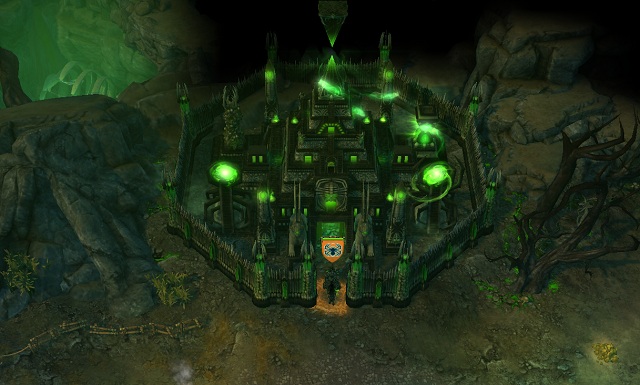
At this point I'd recommend developing all of your towns and collect as many units as possible, as you probably won't be coming back for more units. Obtaining the second Sanctuary town will open the path east (M3, 7). After plundering the area, you have to buy a ship at the local shipyard and sail south. Land on the beach (M3, 8). Now you have to head towards the Cradle of Tears (M3, 10), taking over the enemy Fort on your way (M3, 9). There you will come across the last boss in this mission - Ariana. Head to her town (M3, 10) and defeat the champion.
Objective: collect 3 dragon skulls, visit the Dragon Nexus
Prize: 30000 XP, Sayuri's Journal, 6 Spectral Dragons, +75 Blood reputation
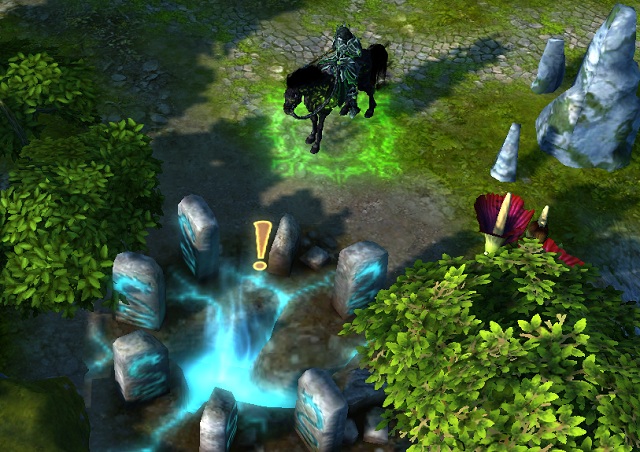
You will receive this mission after visiting the Dragon Nexus (M1, 7) beside the central fort. Your task is defeating 3 pirates on the local waters. Follow the hints in the guide and you should find them without much trouble. Their starting locations are marked as (M1, 15), though they are likely to move elsewhere. After defeating the enemies and collecting 3 Dragon Skulls, you just have to return to the Dragon Nexus (M1, 7) to receive your prize.
Objective: visit 3 obelisks and find Crag Hack's treasure
Prize: 24000 XP, Crag Hack's helmet, Chest of Endless Gold
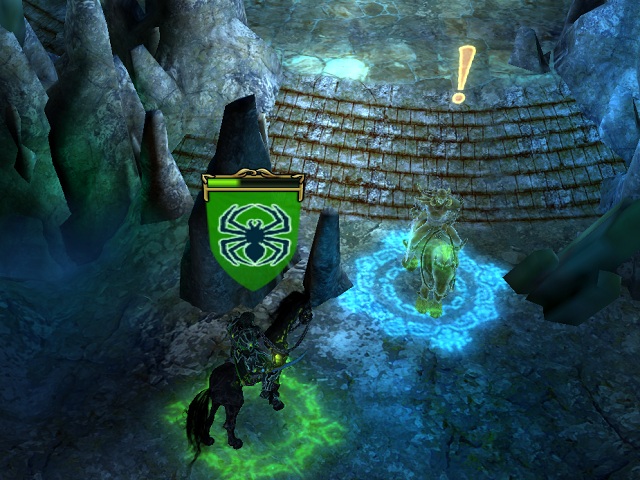
This mission will activate after you visit the first obelisk (M1, 8). You will have to visit the two others, scattered throughout the map (M1, 9)(M1, 11), which will activate the portal (M2, P8) leading to the treasure. In the underground, speak with the ghost of Crag Hack (M5, 1) and defeat the small forces protecting the cave. Defeating them will end the mission and you will be able to penetrate the rest of the cave.
Objective: examine the ruins, defeat the Shadow Panther
Prize: 24000 XP, Amulet of the Jaguar, Shadow Panther Cub
This mission is assigned to you by the ghost of Tohunga (M3, 2). You must head to the temple (M4, X1), defeat the guards and head down to the underground. Follow the tunnel to the exit (M5, X2). Outside, follow the path west and defeat the hero Hunapo (M3, 12) and his Shadow Panthers.
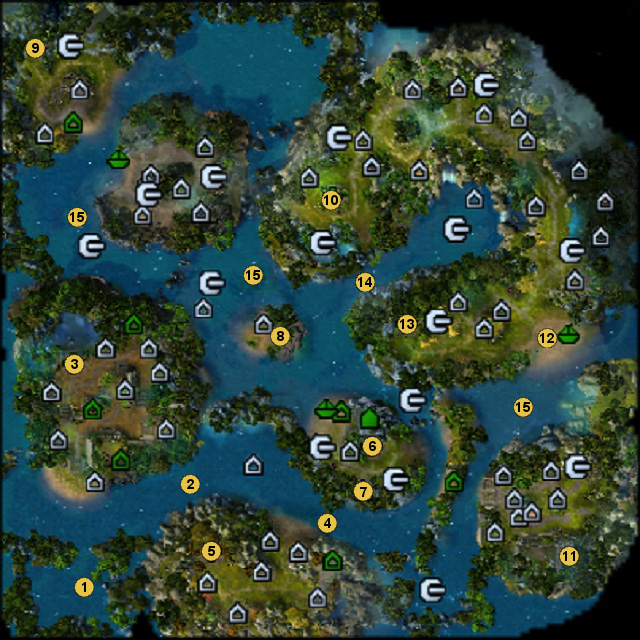
1 - starting location
2 - first gate (Pirate Forts)
3 - first Fort (Pirate Forts)
4 - second gate (Pirate Forts)
5 - second Fort (Pirate Forts)
6 - central Fort (Pirate Forts)(Protect the Mother)
7 - Dragon Nexus (Dragon Ships)
8 - obelisk (Pirate Gold)
9 - obelisk (Pirate Gold)
10 - Fort (Pirate Forts)
11 - obelisk (Pirate Gold)
12 - beach
13 - Fort (Pirate Forts)
14 - main gate (Pirate Forts)
15 - pirate heroes (Dragon Ships)
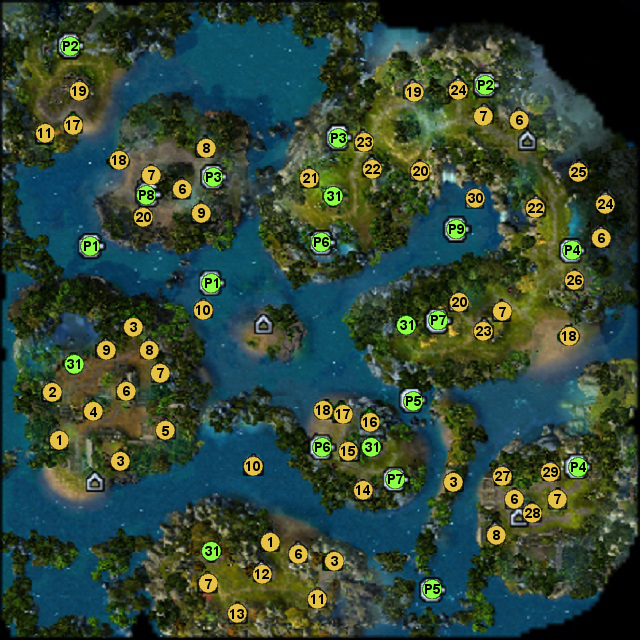
1 - Water Elemental Shrine (During the next battle, all friendly creatures will receive the water armor spell when attacked)
2 - Ice Pearl Shrine (+10 initiative to the end of the week. The hero can use this object once per week)
3 - Observatory (Unveils a big area around the building)
4 - Warmen Guardhouse (After each battle the hero gets a bonus to movement points for each building possessed; +3 for the first one, +2 for the second, +1 for each further)
5 - Arcane Library (Gives the hero a 1-3 bonus to magic power or magic defence. The amount of points depends on the level of the hero [1-10: 1, 11-20: 2, 21-30: 3]. The Hero can use this object only once)
6 - Dragon Vein (Regenerates the hero's mana completely. The hero can use this object once per week)
7 - Stone of Enlightment (Gives the hero 2500 EXP. The hero can use it only once)
8 - Crystal of Power (Gives a permanent +1 bonus to magic power. The hero can visit this object only once)
9 - Mother Earth Shrine (Increases the health of all units in the hero's army by 10%. The hero can use this object once per battle)
10 - Blind Priestess (on sea) (Give the hero a +5 destiny bonus during the next battle. The hero can use it once per battle)
11 - Revelation Crystal (Gives the hero a permanent +1 magic defence bonus. The Hero can use this object only once)
12 - Reverie Shrine (Gives a +10 initiative and + 5 might bonus for the course of the next battle. The hero can use it once per battle)
13 - Elemental Gate (Lets you recruit Elementals)
14 - Dragon Nexus (Doubles the hero's mana. The hero can use this object once per week)
15 - Conflux Orb (lets you leave messages for other players)
16 - Crypt (Increases the weekly creature growth rate)
17 - Lighthouse (Increases the number of movement points on sea)
18 - Shipyard (Lets you build a ship for 10 wood and 2500 gold)
19 - Barbarian Camp (Guarded by enemy forces - after defeating them, the hero will receive a precious treasure or will be joined by a group of friendly creatures)
20 - Armoursmith (Gives the hero a permanent +1 defence bonus. The hero can use it only once)
21 - Dispel Magic Shrine (The hero's army gains magic immunity for the first 3 turns of battle. The hero can use this object once per week)
22 - Stable (Increases the hero's movement points by 5. Can be used once per week)
23 - War Ancient (Increases the hero's Leadership and Destiny by 5 in the next battle, additionally gives 5 movement points. The hero can use it once per battle)
24 - Weaponsmith (Permanently increases the hero's might power by 1. The Hero can use this object only once)
25 - Shrine of the Seventh Dragon (This shrine lets the hero advance to the next level after paying 7 crystals and 11000 gold. The hero can use this object once per game)
26 - Arena (After defeating the guards, gives a permanent +2 bonus to might power or might defence. After the fight, the units that the player lost are revived)
27 - Seat of the Invaders (Owner of this location received gold after each battle)
28 - Hell Forge (Gives a +5 bonus to might and magic power till the end of the week. The hero can use this object once per week)
29 - Dark Elves outpost (Guarded by enemy forces - after defeating them, the hero will receive a precious treasure or will be joined by a group of friendly creatures)
30 - Crashed Galleon (Guarded by enemy forces - after defeating them, the hero will receive a precious treasure or will be joined by a group of friendly creatures)
P1, P2, P3, P4, P5, P6, P7 - two-way portals
P8 - portal to Crag Hack's treasure
P9 - vortex to the next location
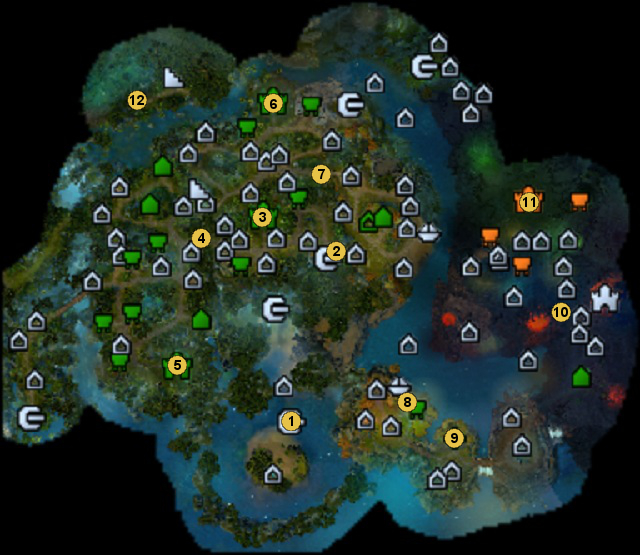
1 - starting location
2 - ghost of Tohunga (Panther's Shadow)
3 - Ruins of Jorougumo (Odyssey)(Protect the Mother)
4 - gate (Odyssey)
5 - first Sanctuary town (Cradle of Tears)
6 - second Sanctuary town (Cradle of Tears)
7 - gate (Cradle of Tears)
8 - beach
9 - Fort
10 - Cradle of Tears (Cradle of Tears)
11 - Ariana (Cradle of Tears)
12 - Hunapo (Panther's Shadow)
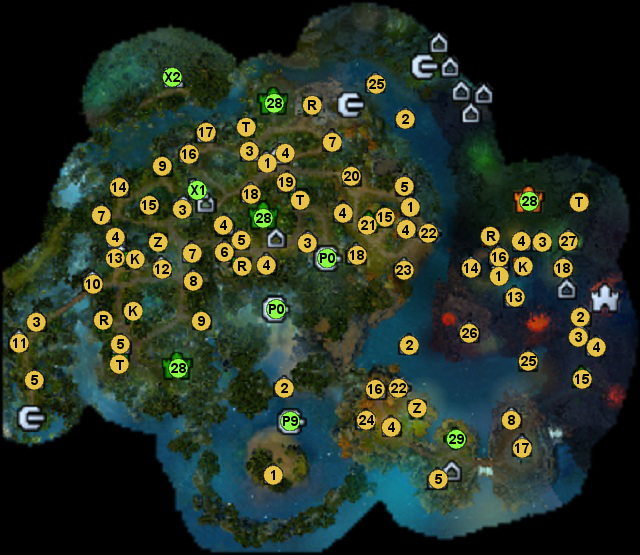
1 - Dragon Vein (Regenerates the hero's mana completely. The hero can use this object once per week)
2 - Blind Priestess (on sea) (Give the hero a +5 destiny bonus during the next battle. The hero can use it once per battle)
3 - War Ancient (Increases the hero's Leadership and Destiny by 5 in the next battle, additionally gives 5 movement points. The hero can use it once per battle)
4 - Stone of Enlightment (Gives the hero 2500 EXP. The hero can use it only once)
5 - Revelation Crystal (Gives the hero a permanent +1 magic defence bonus. The Hero can use this object only once)
6 - Conflux Orb (lets you leave messages for other players)
7 - Mother Earth Shrine (Increases the health of all units in the hero's army by 10%. The hero can use this object once per battle)
8 - Arena (After defeating the guards, gives a permanent +2 bonus to might power or might defence. After the fight, the units that the player lost are revived)
9 - Coral Cave (Increases the weekly creature growth rate)
10 - Blind Priestess (Give the hero a +5 destiny bonus during the next battle. The hero can use it once per battle)
11 - Gryph Statue (Gives air units a 20% bonus to health. The hero can use this object once per week)
12 - Artefact Trader (sells artefacts for your heroes)
13 - Crystal of Power (Gives a permanent +1 bonus to magic power. The hero can visit this object only once)
14 - Armoursmith (Gives the hero a permanent +1 defence bonus. The hero can use it only once)
15 - Coral Altar / Crypt (Increases the weekly creature growth rate)
16 - Soul Venom pot (Enemy units start the battle being poisoned. Therefore, they will receive 50 damage each turn and their initiative will be lowered by 5. The effect lasts for 3 turns. The hero can use this object once per week)
17 - Dragon Nexus (Doubles the hero's mana. The hero can use this object once per week)
18 - Weaponsmith (Permanently increases the hero's might power by 1. The Hero can use this object only once)
19 - Water Elemental Shrine (During the next battle, all friendly creatures will receive the water armor spell when attacked)
20 - Angels Shrine (Increases the hero's magic power and leadership by 5 till the end of the week. The hero can use this object once per week)
21 - Observatory (Unveils a big area around the building)
22 - Shipyard (Lets you build a ship for 10 wood and 2500 gold)
23 - Centaur Monument (Gives the hero a +5 movement bonus and 10% damage bonus for ranged units till the end of the week. The hero can use this object once per week)
24 - Hell Forge (Gives a +5 bonus to might and magic power till the end of the week. The hero can use this object once per week)
25 - Crashed Galleon (Guarded by enemy forces - after defeating them, the hero will receive a precious treasure or will be joined by a group of friendly creatures)
26 - Dragon Utopia (Protected by Dragons, contains the rarest artefacts in the game)
27 - Well of Souls (Gives a +10 bonus to magic power to the end of the week. The hero can use this object once per week)
28 - Town
29 - Fort
P9 - vortex leading to the previous location
P0 - two-way portal
X1, X2 - underground descent
T - Sawmill (Gives 2 wood per day)
R - Ore mine (Gives 2 ores per day)
K - Crystal mine (Gives 1 crystal per day)
Z - Gold mine (Gives 1000 gold per day)
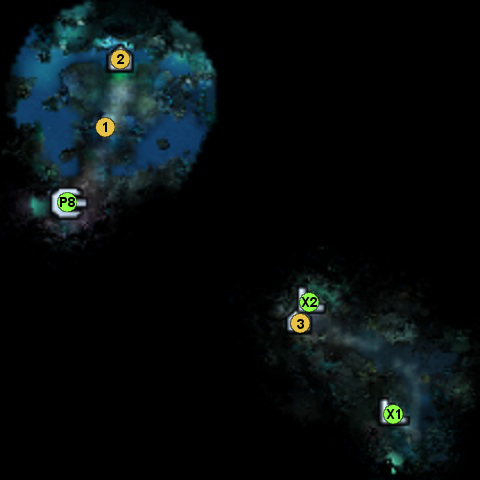
1 - ghost of Crag Hack (Pirate Gold)
2 - Crashed Galleon (Guarded by enemy forces - after defeating them, the hero will receive a precious treasure or will be joined by a group of friendly creatures)
3 - Soul Venom pot (Enemy units start the battle being poisoned. Therefore, they will receive 50 damage each turn and their initiative will be lowered by 5. The effect lasts for 3 turns. The hero can use this object once per week)
P8 - two-way portal
X1, X2 - surface exit
Objective: rebuild the Element Kingdoms: Air, Earth, Fire, Water
Prize: 18000 XP, Vein's Spaulders
You begin the mission at (M1, 1). You have your own town, but you cannot recruit units. From the very beginning you should focus on developing the city to increase your daily gold income. Apart from that you have to build the Improved Town Portal - you will need it to protect the town when needed. You should begin the travel by hiring the friendly Air Elementals - they will be your main strike force for quite some time, so make sure you don't lose even one unit.
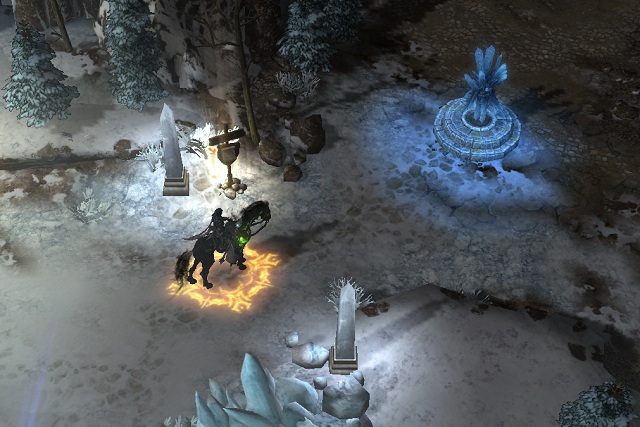
At this point you have a choice of two paths: you can play passively, collecting money to increase your army, afterwards take over some units in the middle of the map or head towards the Elemental Kingdom. I'd suggest heading south, to the area dominated by Water Elementals. Speaking with the Mother (M1, 2) will begin the next mission.
You should know that after some time a portal will open (M2, P2), through which the Inferno castle will be regularly sending its forces. You can eliminate them with Vein's main forces or hand over some of the obtained legendary creatures to a second hero and have him deal with the beginning enemy heroes.
Objective: face the reflection of Vein's past; defeat your own reflection; defeat the dragon Eel
Prize: 10000 XP, +3 magic defence
Right after you enter the area of the Kingdom of Water, you should receive an additional mission: "Divided - we lose", completing which will make the further challenges much easier. Before approaching it however, be sure to plunder the area. After collecting the few resources, you can attack Anastasia (M1, 3). Despite her having larger forces, you should be able to defeat her without any loses. Be sure to have your hero wears equipment which boosts might, so that your attacks quickly drain the enemies' life. Additionally using necromancy effectively should minimise your loses. If you lose the Air Elementals, I'd recommend repeating the fight.
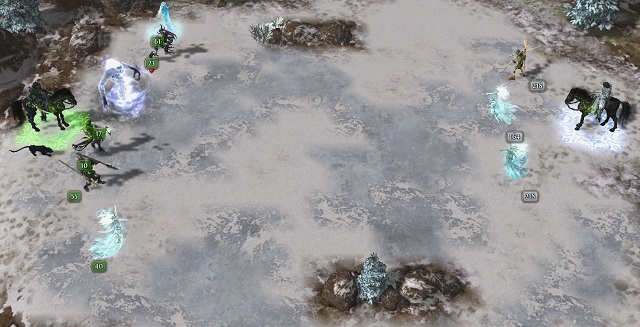
Your next opponent will be Belketh (M1, 4). He's a bit more powerful than Anastasia, but still he shouldn't cause you trouble. Before beginning the fight with Vein's reflection you should boost your army. By collecting resources and eliminating neutral units you should come across a group of Water Elementals which will gladly join you. The next group of Elementals awaits for you at the Crashed Galleon (M2, 13) - just defeat a small group of enemies (you can get there by buying a ship and using the vortex portal). At this moment you should have the beginning group of Air Elementals and around 60 Water Elementals. Such forces are enough to defeat Vein's reflection (M1, 5). In return you will receive additional Air Elementals, thanks to which your forces will be able to deal with pretty much each neutral creatures group!
The next task is defeating the mad dragon Eel. AT this moment your army is too weak to challenge him. I'd recommend visiting the nearby Elemental Gate (M1, 6) (you will unlock the additional mission "Running Stream") and afterwards complete the additional mission "Divided - we lose", the description of which can be found in the further part of the guide.
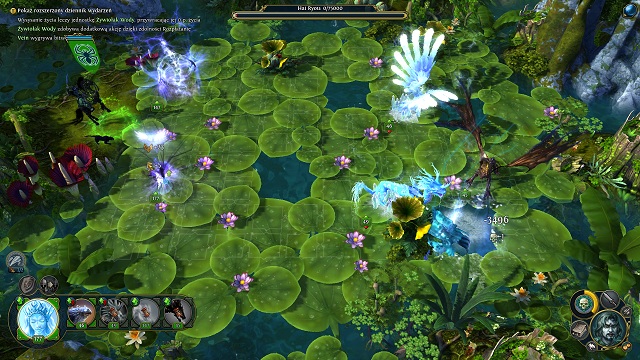
This walkthrough assumes that you have completed all additional missions, have a big group of Air and Water Elementals and at least 3-4 groups of legendary creatures. With such forces, you can attack Dragon Eel (M1, 7) and the fight should be trivial. Just cast weakness on the enemy and mass heroism or heroic charge on your own units and Eel should be down after a couple attacks. In return you will receive the Water Elemental Essence which you can immediately place in the nearby elemental gate (M1, 6) ("Running Stream"). Also be sure to pick up the artefact left by the enemy.
Objective: complete the trial of air; defeat the Thunderbird
Prize: 10000 XP, +3 magic power
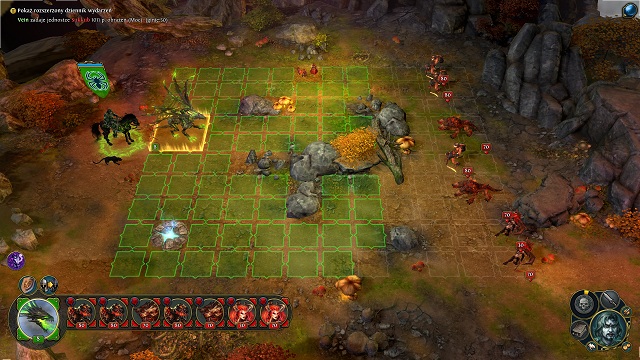
Speak with the Maiden standing by the entrance (M1, 8) to begin the main mission. Your objective is completing the trial of air - winning in a predefined battle with a very small army at your disposal. Approach the Inferno units (M1, 9) to begin the fight. You have just a few Spectral Dragons and quite a lot of demon forces to defeat. Luckily Vein's attacks should be capable of dealing massing damage to the enemy by now. In case you lose some Spectral Dragons, you can return them to their undead life with necromancy.
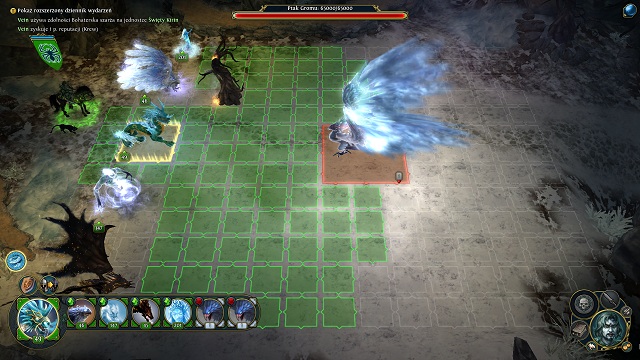
Now explore the area and defeat the Thunderbird (M1, 10). This enemy is slightly more powerful than Dragon Eel, but he still shouldn't cause you much trouble. Your legendary units should take a few or even a dozen thousand life with each attack, so the fight shouldn't last long. Now pick up the artefact left behind by the Thunderbird and take the obtained Air Elemental Essence to the nearby elemental gate (M1, 11).
Objective: reach the heart of the volcano and defeat Uriel
Prize: 10000 XP, +3 might power
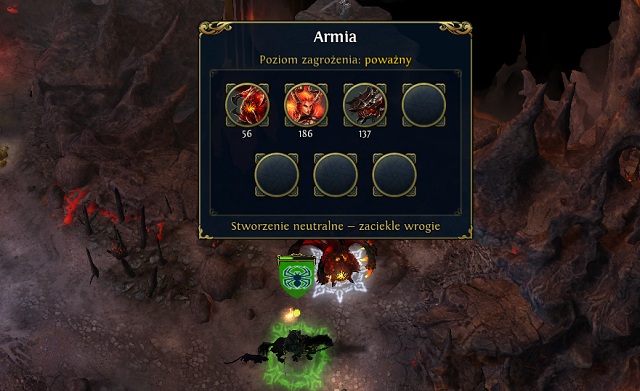
NOTICE! Be sure to save your game! The trial of fire can be started by speaking with the Maiden (M1, 12). Your task is using the received Fire Elementals and reaching the heart of the volcano with them. On your way you will come across a couple Inferno groups, fighting which is inevitable. Fire Elementals are creatures which fight at a distance, but deal considerable retaliation damage. The most important however will be Vein's attacks which should reduce the enemy forces considerably and let the Elementals finish them off.
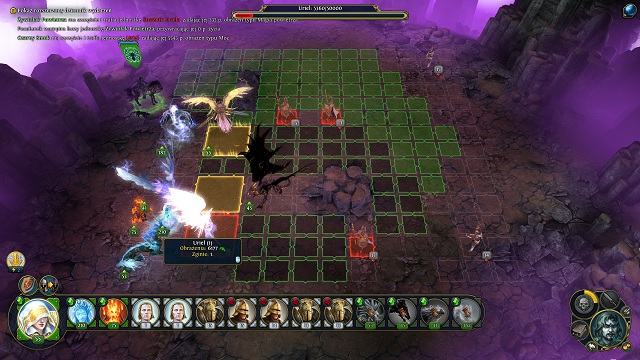
At your destination you will come across Uriel (M1, 13). Just like the other demigod creatures, fighting him will also require the help of legendary creatures. Luckily right before the fight you will get back your favourite units. Uriel will call in a group of Guards - unfortunately you will have to defeat both the angel and his underlings. I'd recommend taking care of the main enemy in the first place and then eliminating the weaker ones. It's worth using life regenerating spells (regeneration or life drain) to reduce losses. Just like with the two previous bosses, you will receive an artefact and the Fire Elemental Essence which you have to take to the elemental gate (M1, 14).
Objective: free the Earth Elementals; take over and keep the Fort, defeat the Abyssal Worm
Prize: 10000 XP, +3 might power
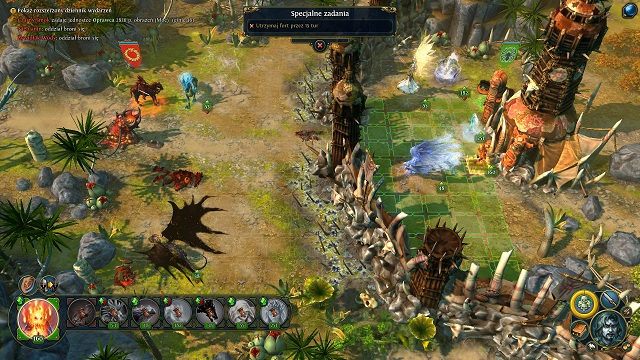
Speak with the Mother once again (M1, 15). This time you will have your main forces at your disposal. You need to free 3 groups of Earth Elementals (M1, 16) by killing the demon forces surrounding them. The next objective will be obtaining and keeping the local Fort (M1, 17). Save your game! After obtaining the Fort, one of the longest fights in the mission will begin: you will have to hold out for 15 turns with the enemy constantly creating new units. If you've been saving you legendary creatures and still have some Air and Water Elementals with you, the mission should be very easy. Just keep on eliminating the consecutive waves of enemy creatures without giving them a chance to retaliate. To speed up the fight, I'd recommend leaving a couple groups of legendary creatures (e.g. Kirins and Celestials) outside the Fortress walls - that way they will destroy the demons before they can make a move.
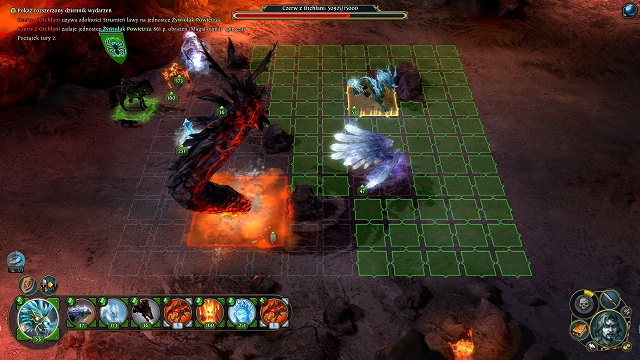
After surviving for 15 turns, you will receive to the world map and receive a new mission - defeat the Abyssal Worm (M1, 18). It's probably the strongest of the demigod creatures. It can eat your creatures and temporarily eliminate them from the battle. Just like with other bosses, strengthen your units with spells and keep attacking the enemy until it dies. In return you will receive another artefact and the last Earth Elemental Essence which you have to take to the elemental gate (M1, 19), therefore completing "Running Stream". At the same time you will also finish the "Master of the Elements" main mission.
Objective: head to the kingdom of light, defeat all the demons, conquer the Inferno town, defeat the demon general Azkaal
Prize: 40000 XP, +3 might power, +3 magic power
You will receive this mission after speaking with the Crone (M1, 20). You have to eliminate all the demons found in the kingdom of light. Eliminate 5 enemy groups to receive the next task.
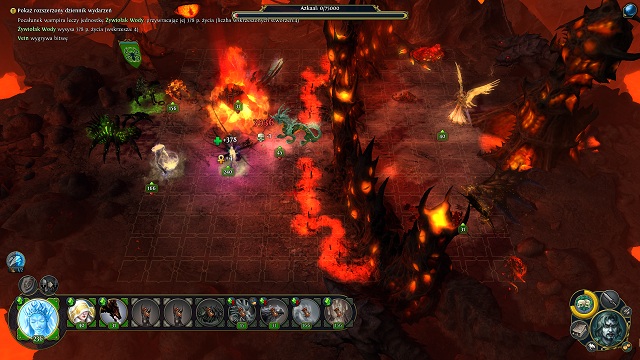
The crusade begins! You have to reach the Inferno castle and defeat the army protecting it, together with the demon general Azkaal (M1, 21). It'll probably be the most difficult fight so far. The enemy town is protected not only by strong walls, but also numerous hellish units and the boss himself. Azkaal can teleport throughout the map which grants him the ability to attack whichever units he wants. I'd recommend killing his underlings as fast as possible using the Air and Water Elementals and afterwards focus all of your attacks on him. Unfortunately this time big losses are inevitable; luckily however, a dozen or so turns should be enough to win. Speak with the Crone and you will find yourself by the gate of the town.
Objective: don't lose the town, defeat the Light forces
Prize: 40000 XP, +3 defence, +3 magic defence
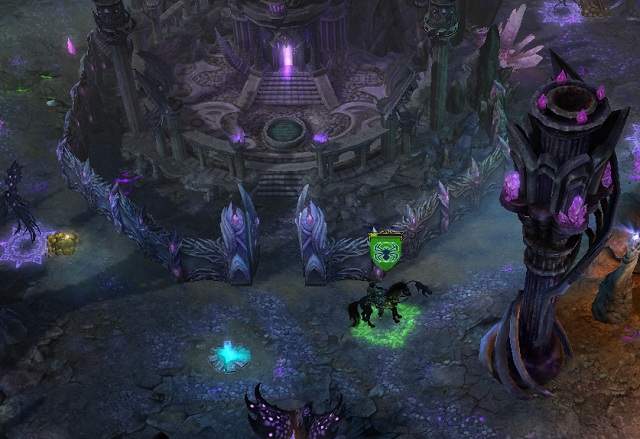
Your task is holding off the town from enemy Light champions. Immediately head north to gather the angels. Leave exploring the area for later, you will have enough time for that. The enemy has three champions: one of them is headed directly to the town, while the second one to your starting position. In order to defend both locations, you will have to defeat the first angel and use the Improved Town Portal to attack the second one. Now just defeat the force of Light in the form of the third and last angel.
Objective: head through the middle ghost gate and destroy the Avatar of the Void

The last mission. Before beginning it, be sure to visit all locations on the map and wear proper equipment: you should mainly focus on increasing your attack power. In case you lack proper artefacts, you can always visit the Dragon Utopia (M2, 18) and hope for some luck. Save your game and enter the portal (M2, P3) - the final battle will begin.
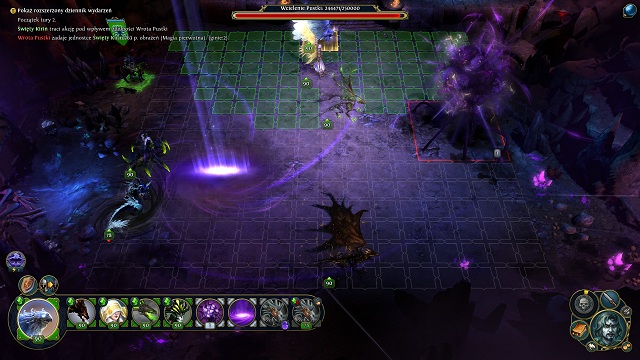
You have a predefined army in this battle. The enemy has lots of health and a few powerful skills which let him damage your enemy and heal himself as well. Additionally he ignores the first attack against him in any given turn. You should begin the fight by casting mass stand your ground and moving your units closer to the Avatar. Keeping in mind that the first attacks won't hurt him, you have a choice of attacking with the hero or Phoenixes - they don't deal too much damage, so you can use them to take off the enemy's barrier. Now you can send the rest of your army and hit the enemy to reduce his health. If possible, try gathering as many units around the enemy so that they can attack while avoiding the force field.
The enemy has a few skills. His basic attack deals damage and pushes back your units - it's not very dangerous. He can create Void Breaches, which remain on the battlefield for a couple turns and damage your units - it's best to move away to avoid damage. The third and last skill is Void Circle: it lowers ranged damage by 10% and heals 8% of health of the Avatar each turn. The best way to fight the boss is using pure brutal strength - you have to deal more damage than the enemy is able to recover. If your hero has a high enough attack ratio and you remember about destroying the barrier with the first attack, you should be fine.
Unfortunately the fight is rather difficult and much depends on how often the enemy will use Void Circle. Your strongest creatures are Black Dragons and Sacred Kirins, so you should cast heroism or mass heroism and heroic charge from time to time (assuming a different unit will take off the barrier). It's also possible that you will have to approach the fight a few times. Good luck!
Objective: recover the Legion's War Horn; blow the horn by the six elemental crystals
Prize: 25000 XP, +3 destiny, +3 magic power
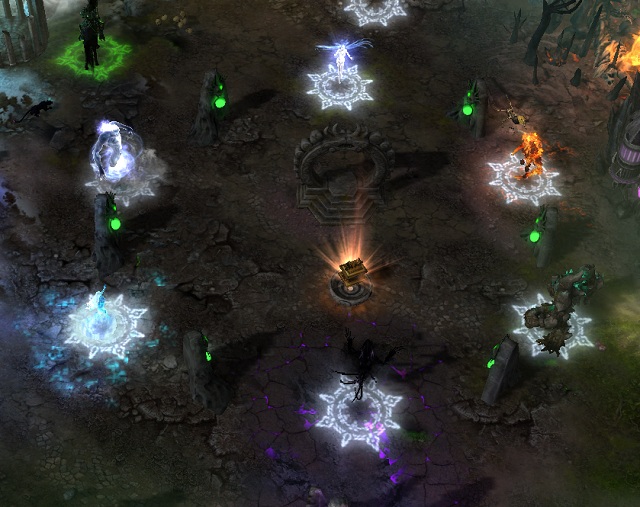
It's one of the most important additional missions which makes the final battle much easier. Apart from prizes for the mission itself you will also receive as many as 300 legendary creatures which will be able to defeat any enemy with ease. You can receive the mission by visiting one of the Elemental Kingdoms and the Elemental Crystal found beside them.
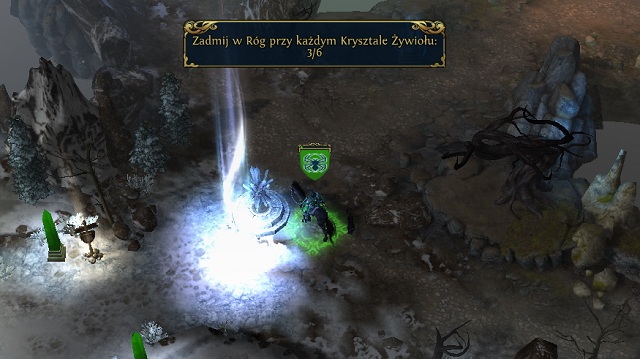
Your first task will be finding the Legion's War Horn. It can be found in the very middle of the map (M1, 22) inside the Elementals circle. In order to obtain it however, you will first have to gain favour of these creatures by recruiting them to your army. If you've been following the guide and defeated Vein' reflection in the Water Kingdom, you should have enough creatures with you. If you miss some, it's a great moment to use the gold you gathered and have some of the creatures which form the central circle join you. Personally I'd recommend Water and Air Elementals, though the Fire ones are also quite good in battle. After collecting the Legion's War Horn you can head towards the Elemental Crystals (M1, 23). By touching each of them will complete a part of the additional mission and summon legendary creatures which will join your army! Depending on the crystal, you will receive various creatures:
After blowing the Horn by each Crystal, you will also receive the main reward.
Objective: gather the essence of four elements, adjust four streams
Prize: 25000 XP, Elemental Ring, Shantiri Moon Disc
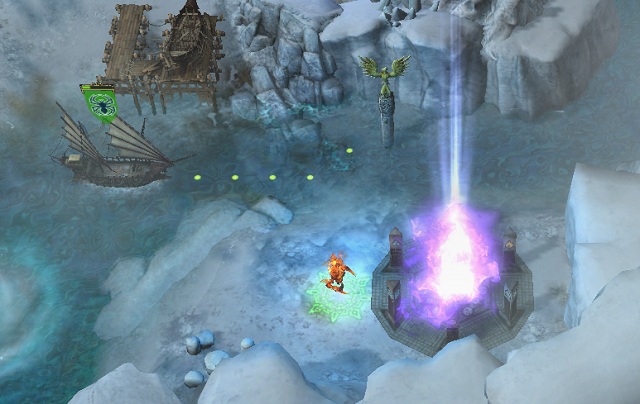
You will receive this mission after visiting the elemental gate found in one of the four Kingdoms: Water (M1, 6), Air (M1, 11), Fire (M1, 14) or Earth (M1, 19). Your mission will require you to defend the demigod creatures dwelling inside (correspondingly: Dragon Eel, Thunderbird, Uriel and Abyssal Worm) and taking the received essences to the nearest elemental gates. Apart from the reward for completing the mission itself, you will also be able to recruit Elementals from respective kingdoms.
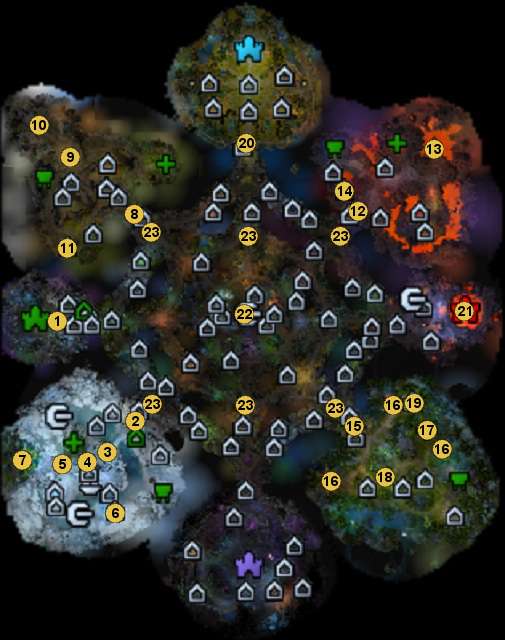
1 - starting location
2 - Mother (Kingdom of Water)
3 - Anastasia (Kingdom of Water)
4 - Belketh (Kingdom of Water)
5 - Vein's reflection (Kingdom of Water)
6 - Elemental Gate (Water) (Running Stream)
7 - Dragon Eel (Kingdom of Water)
8 - Maiden (Kingdom of Air)
9 - trial of air (Kingdom of Air)
10 - Thunderbird (Kingdom of Air)
11 - Elemental Gate (Air) (Running Stream)
12 - Maiden (Kingdom of Fire)
13 - Uriel (Kingdom of Fire)
14 - Elemental Gate (Fire) (Running Stream)
15 - Mother (Kingdom of Earth)
16 - Earth Elemental (Kingdom of Earth)
17 - Fort (Kingdom of Earth)
18 - Abyssal Worm (Kingdom of Earth)
19 - Elemental Gate (Earth) (Running Stream)
20 - Crone (Crusade of Light)
21 - Azkaal (Crusade of Light)
22 - Legion's War Horn (Divided - we lose)
23 - Elemental Crystals (Divided - we lose)
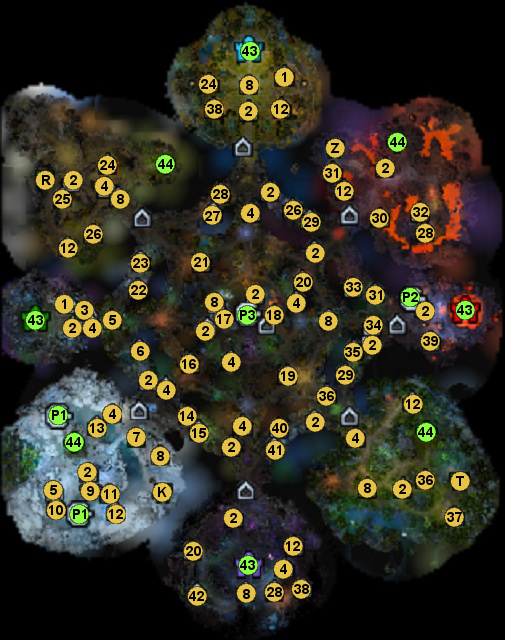
1 - Stable (Increases the hero's movement points by 5. Can be used once per week)
2 - War Ancient (Increases the hero's Leadership and Destiny by 5 in the next battle, additionally gives 5 movement points. The hero can use it once per battle)
3 - Seat of the Invaders (The owner of this location received gold after each battle)
4 - Stone of Enlightment (Gives the hero 2500 EXP. The hero can use it only once)
5 - Crystal of Power (Gives a permanent +1 bonus to magic power. The hero can visit this object only once)
6 - Water Elemental Shrine (During the next battle, all friendly creatures will receive the water armor spell when attacked)
7 - Lighthouse (Increases the number of movement points on sea)
8 - Dragon Vein (Regenerates the hero's mana completely. The hero can use this object once per week)
9 - Shipyard (Lets you build a ship for 10 wood and 2500 gold)
10 - Ice Pearl Shrine (+10 initiative to the end of the week. The hero can use this object once per week)
11 - Lighthouse (Increases morale in the next battle. The hero can use it once per battle)
12 - Elemental Gate (Lets you recruit Elementals)
13 - Crashed Galleon (Guarded by enemy forces - after defeating them, the hero will receive a precious treasure or will be joined by a group of friendly creatures)
14 - Reverie Shrine (Gives a +10 initiative and + 5 might bonus for the course of the next battle. The hero can use it once per battle)
15 - Soul Venom pot (Enemy units start the battle being poisoned. Therefore, they will receive 50 damage each turn and their initiative will be lowered by 5. The effect lasts for 3 turns. The hero can use this object once per week)
16 - Armoursmith (Gives the hero a permanent +1 defence bonus. The hero can use it only once)
17 - Conflux Orb (lets you leave messages for other players)
18 - Dragon Utopia (Protected by Dragons, contains the rarest artefacts in the game)
19 - Artefact Trader (sells artefacts for your heroes)
20 - Weaponsmith (Permanently increases the hero's might power by 1. The Hero can use this object only once)
21 - Magic Menagerie (Lets you recruit magic creatures apart from Elementals)
22 - Sigil of Arkath (Gives a +5 defence and magic defence bonus to the end of the week. The hero can use is once per week)
23 - Dead Field (All enemy living creatures deal 10% less damage in the next battle and have 10% less life. The hero can use this object once per battle)
24 - Arcane Library (Gives the hero a 1-3 bonus to magic power or magic defence. The amount of points depends on the level of the hero [1-10: 1, 11-20: 2, 21-30: 3]. The Hero can use this object only once)
25 - Ruins (Guarded by enemy forces - after defeating them, the hero will receive a precious treasure or will be joined by a units of friendly creatures)
26 - Choral of Believers (Gives a +5 leadership and magic power bonus for the course of the next battle. The hero can use this object once per battle)
27 - Hell Forge (Gives a +5 bonus to might and magic power till the end of the week. The hero can use this object once per week)
28 - Blind Priestess (Give the hero a +5 destiny bonus during the next battle. The hero can use it once per battle)
29 - Mother Earth Shrine (Increases the health of all units in the hero's army by 10%. The hero can use this object once per battle)
30 - Demon Shrine (Give a +5 bonus to might power and destiny till the end of the week. The hero can use is once per week)
31 - Revelation Crystal (Gives the hero a permanent +1 magic defence bonus. The Hero can use this object only once)
32 - Gates of Hell (Guarded by enemy forces - after defeating them, the hero will receive a precious treasure or will be joined by a units of friendly creatures)
33 - Gryph Statue (Gives air units a 20% bonus to health. The hero can use this object once per week)
34 - Altar of Destruction (All enemy creatures will be hit by a meteor at the beginning of the next battle. The hero can use is once per week)
35 - Wheel of Time (After visiting this place, the hero uses up movement points 20% slower and in the next battle the enemy forces have 10 points less initiative. The hero can use is once per week)
36 - Warmen Guardhouse (After each battle the hero gets a bonus to movement points for each building possessed; +3 for the first one, +2 for the second, +1 for each further)
37 - Barbarian Camp (Guarded by enemy forces - after defeating them, the hero will receive a precious treasure or will be joined by a group of friendly creatures)
38 - Shrine of the Seventh Dragon (This shrine lets the hero advance to the next level after paying 7 crystals and 11000 gold. The hero can use this object once per game)
39 - Chaos Wave (During the next battle, an AI-controlled monster will appear and eat a random enemy units. In order to free it, the enemy will have to kill the creature. The hero can use this place only once)
40 - Dragon Nexus (Doubles the hero's mana. The hero can use this object once per week)
41 - Dispel Magic Shrine (The hero's army gains magic immunity for the first 3 turns of battle. The hero can use this object once per week)
42 - Dark Elves outpost (Guarded by enemy forces - after defeating them, the hero will receive a precious treasure or will be joined by a group of friendly creatures)
43 - Town
44 - Fort
P1 - two-way portal
P2 - one-way portal
P3 - portal to the last boss
T - Sawmill (Gives 2 wood per day)
R - Ore mine (Gives 2 ores per day)
K - Crystal mine (Gives 1 crystal per day)
Z - Gold mine (Gives 1000 gold per day)




 Medal of Honor Game Guide & Walkthrough
 Minecraft: Story Mode: A Telltale Games Series Game Guide & Walkthrough
 Metro: Last Light Game Guide & Walkthrough
 Metal Gear Solid V: The Phantom Pain Game Guide & Walkthrough
 Magrunner: Dark Pulse Game Guide & Walkthrough