

This guide for Metal Gear Rising Revengeance is a detailed walkthrough for all the missions in the single player campaign mode, and also the Jetstream Sam and Blade Wolf DLCs. The description of each mission includes hints on the elimination of individual opponents and on completion of each individual mission. Apart from that, this guide also includes a richly illustrated description of the all the collectibles available in the game: Data storages, Left Arms, computers with VR missions, hostages, Endurance Plus and Men in Boxes. The whereabouts of Gekko Mimic can be found in the descriptions of individual missions, which will make it easier to find them. Also, a list of a all achievements, available in the game, alongside with the instructions on how to obtain them, and the information on titles have been included in this guide.
Contents of this guide:
Jakub Bugielski ()
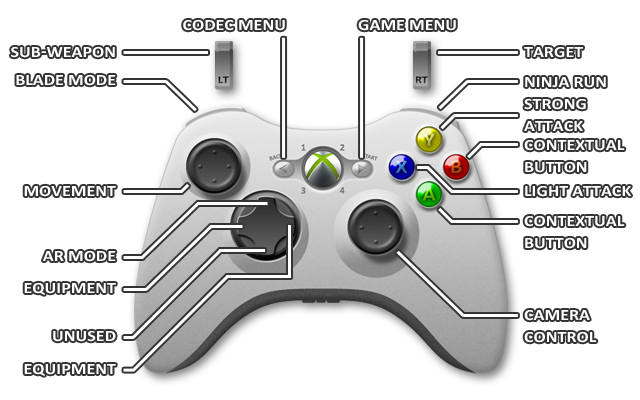

Movement

Unused/contextual button

Camera control

Center camera

Contextual button (used for, e.g. QTE sequences)

Contextual button (used for, e.g. QTE sequences)

Light attack / fire sub-weapon

Strong attack

Blade Mode

Use Sub-weapon

Ninja Run

Target

AR mode

Unused/contextual button

Equipment

Equipment

Codec Menu

Game menu

Camera control

Slash

Zandatsu

Horizontal slash

Vertical slash
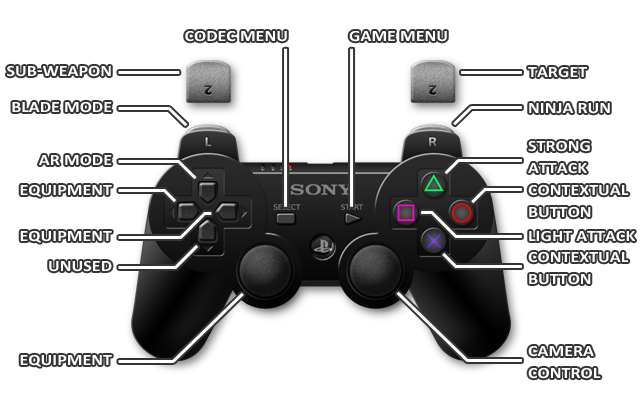

Movement

Unused/contextual button

Camera control

Center camera

Contextual button (used for, e.g. QTE sequences)

Contextual button (used for, e.g. QTE sequences)

Light attack / fire sub-weapon

Strong attack

Blade Mode

Use Sub-weapon

Ninja Run

Target

AR mode

Unused/contextual button

Equipment

Equipment

Codec Menu

Game menu

Camera control

Slash

Zandatsu

Horizontal slash

Vertical slash

Movement

Jump

Use Sub-weapon

Ninja Run

Blade Mode

Light attack / fire sub-weapon

Strong attack

Center camera

Target

Ripper Mode

Zandatsu / silent assassination/ loot / activate

AR mode

Sub-weapon selection

Codec Menu

Use item

Dodge (Defensive Offense)

Execution

Slow movement

Game options
A handful of hints to start with, which will definitely come in handy throughout the game:
In the game, there are several mechanisms at work, whose knowing is a key to success and which will make the game easier for you (especially at the higher difficulty levels). These are the following.
In spite of the fact that you have probably complete the d the tutorial mode (which looks like a VR mission), the first mission is the actual introduction, a kind of a tutorial that will let you try out Raiden's basic moves in practice. This mission is devoid of some of the options available to you, like upgrading and unlocking new tricks - they become available only after you complete this stage.
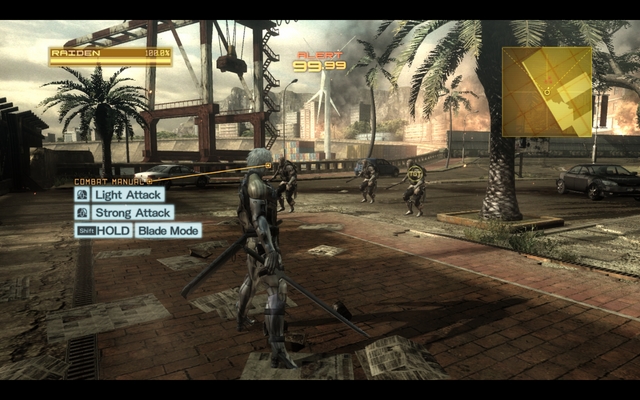 Use the tips displayed on the screen.
The VIP that you were supposed to guard is abducted and your task is to rescue the hostage. First of all, deal with the three opponents - use the help displayed on the screen, to your aid, if you do not remember a thing presented in the tutorial. After you have dealt with the enemies, run towards the marker on the radar - you will reach a wall with a metal gate.
Your task is to get across the gate (shred it with your sword) and to reach the first boss battle. You can also train a bit on the enemies who will be coming from behind the wall - this is a incessant process and you will never kill them all, but you will gain nothing from killing them, they are there so that you can train slashing and parrying. Once you are bored with them, make it across the gate and activate the cutscene.
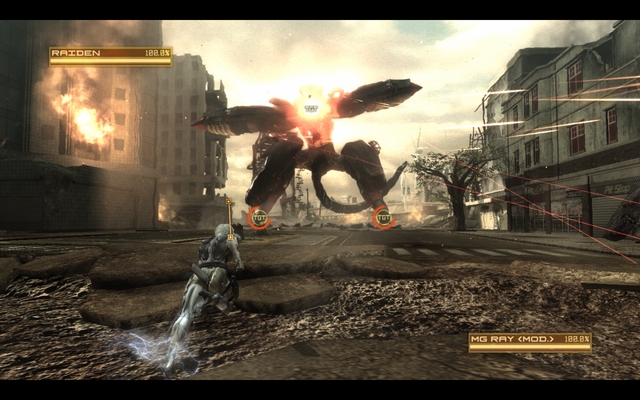 To dodge plasma beams run in angles.
The first boss in the game is not too much of a challenge but, you need to watch out anyways, for some of its attacks (especially if you are playing at the Hard difficult level, or a higher level).
Metal Gear Ray has several attacks which it will use alternatively, depending on your position, during the fight:
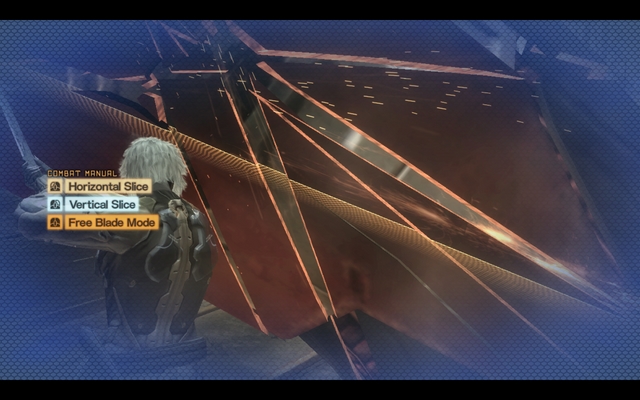 A nice view of slashing into tiny bits
Fighting Metal Gear Ray boils down to attacking its legs - once you have dealt sufficient damage, there will appear an instruction, on the screen, to use the Blade Mode, to slash both the armor and the cannon of the enemy into bits. If you repeat that action for 4 times, the boss will attack you with its blade and another QTE sequence will start. Follow the instructions and press the buttons that appear on the screen, and soon the boss will fall to the ground.
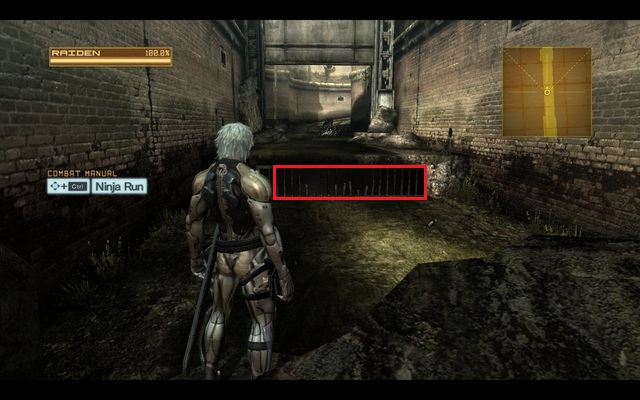 A descent to the sewers, where there is a Data Storage.
After the fight, continue after the abductor, until you reach a descent enclosed with fence. Destroy the fence and slide down. Collect the Data Storage behind your back. Continue after the kidnapper to see a familiar "face" after you climb the stairs...
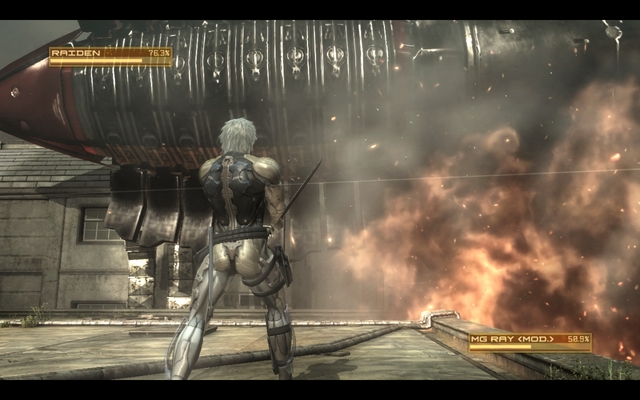 Use Blade Mode, to cut up the rockets.
Yes, it seems that Metal Gear Ray is still kicking and it is time for the second round. This phase is much more difficult, because your options to maneuver are limited and it is more difficult to dodge its attacks. Ray may use one of the following attacks:
Attack Ray's snout to initiate a QTE sequence after a while and cut up the enemy's armor. Repeat the entire sequence several times, and the boss will jump back, when it is your task to chase it with Ninja Run - simply, run in its direction while holding the button and follow the instructions displayed on the screen. After a while, the action will change to the side of a building, over which you need to run down, while avoiding rockets (run to the sides) and the plasma cannon (jump over it) - this will start the final QTE sequence and the boss will fall to the ground, this time for good.
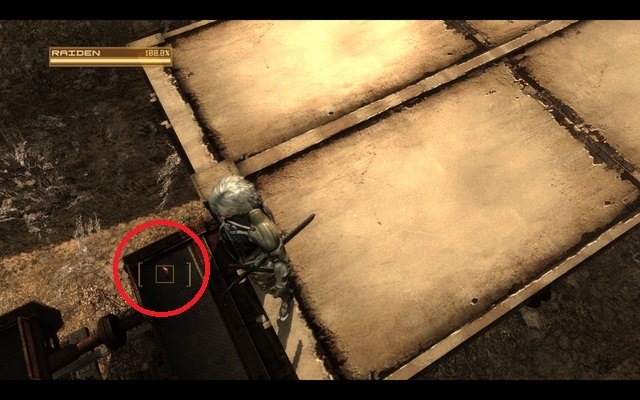
After the fight, you will make it onto a train - jump off the car that you are on and run ahead, until you reach another car, from which you will be able to see the abductor. Do not jump off this car and spin the camera, so that you can see what is behind you (just like in the above screenshot) - you will find another Data Storage. Collect it and go towards the abductors. You are up for a fight here, which you cannot win. After you are defeated, the mission will end.
The first mission in which you will be, finally, able to modify your character and buy various upgrades and additional skills. To access the upgrades menu, bring up the CODEC menu and access Customization Option. Remember that, after you leave the customization menu, you will be transferred to the last saving point and not to the moment at which you decided to buy the upgrades. You will also receive an interesting mechanism called Zandatsu (to learn more, see the chapter devoted to the basic gameplay mechanics).
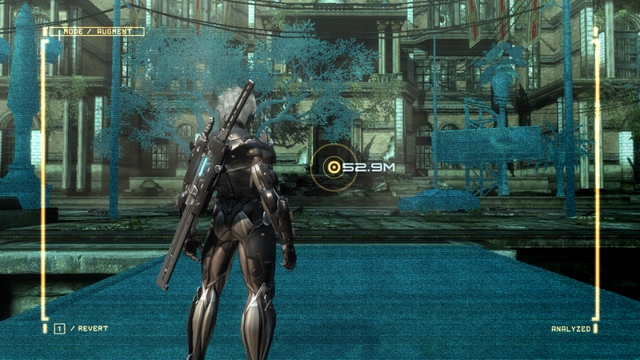 The AR view - a useful thing!
You start at the beach and there is nothing else to do here, but go towards the marker on the radar. Before you enter the building, you will bump into a group of enemies, who will be wearing camo. However, this is not a reason to worry, because they become visible shortly before the attack.
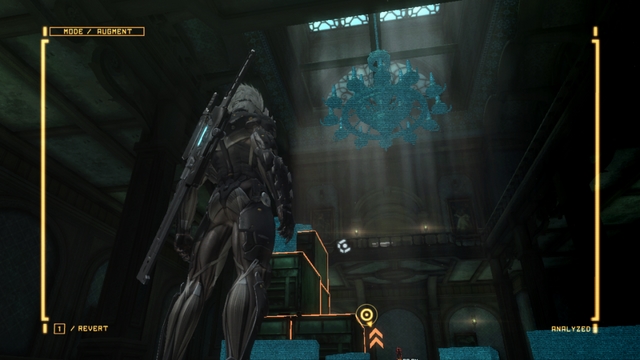 On the chandelier above, there is a Data Storage.
After you have dealt with the cyborgs, enter the building and look behind. You should notice a chandelier under the ceiling. Climb up over the boxes in the location and cut the chandelier down, where there is a Data Storage (1/4). Once the chandelier hits the ground, collect the item and go towards the marker.
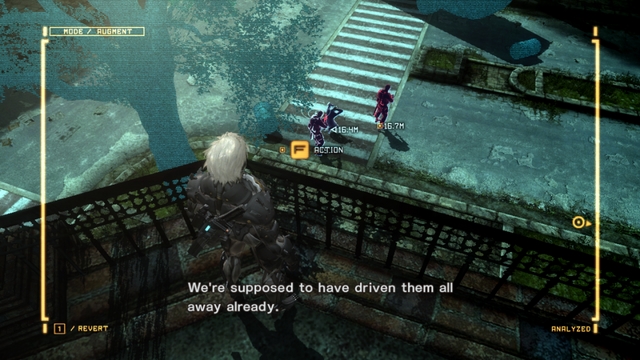 The first one, of the many, hostages.
Eliminate the enemy behind you and walk outside. Out in the street, you will find a hostage (1/2), who you can (and you should, because you will receive a lot of points in return) rescue. Sneak up to the group of enemies guarding him and use the platform on the right to jump down on one of them from, and deal with the other one quickly. Soon, there will be new ones to arrive - deal with them, before any of them manages to kill the hostage. After everything is done, free the man.
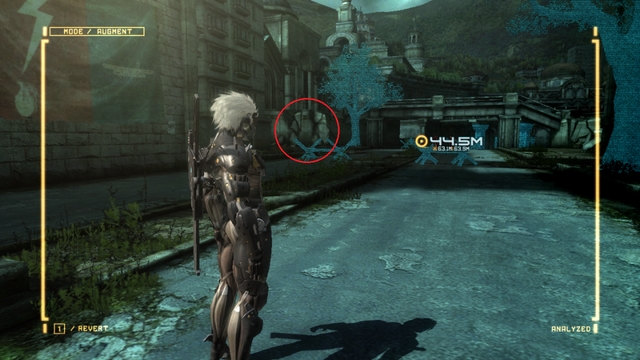 The wall that you need to climb over to reach the Data Storage.
Turn towards the marker and note the wall on the left - there is a Data Storage (2/4) there. Before you climb up there, you will fight a group of enemies and a new opponent - Gekko. A good way to defeat this one is to encircle the robot and slash with light attacks, while avoiding his attacks. After several slashes, the gecko will be driven into the ground, which will give you the opportunity to jump onto its back and deal damage. Repeat this action twice and the robot will be no more.
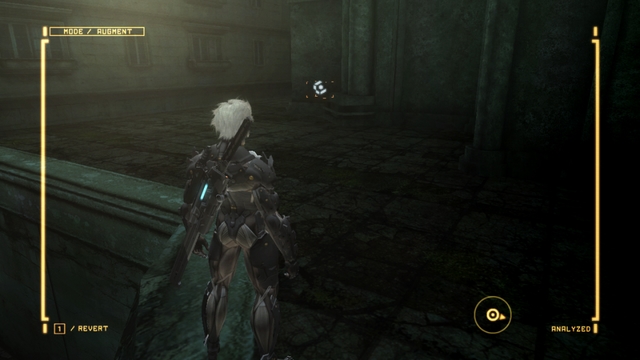 This is where another Data Storage is.
After you have defeated the enemies, climb onto the wall, cut through the lock on the chest (e.g. with the Blade Mode) and collect the Data Storage (3/4).
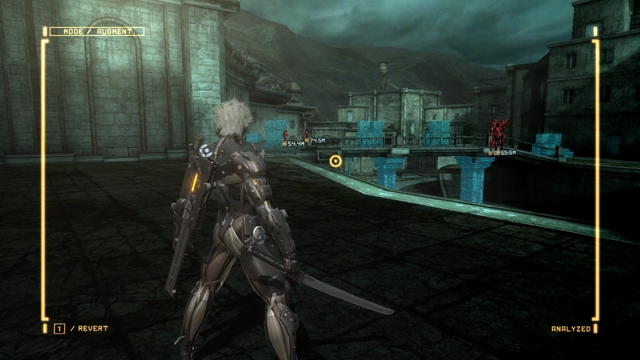 Silent elimination of cyborgs will make it easier for you.
Turn around and take a careful look around - you will have to fight several cyborgs and two Gekko here. You can get into a direct fight, but it is better to try sneaking up to the cyborgs and eliminate them with a silent blow to the back. If you are spotted, there is no other way but fight.
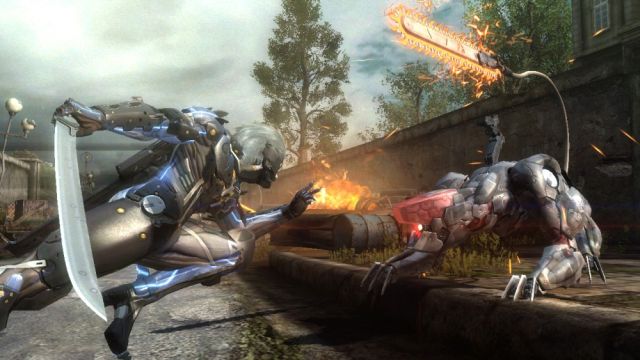 This is a VRM computer - you cannot miss it!
After you have dealt with the enemies, go to the door that the marker points you to and, after you enter, approach the VRM computer (1/4) ahead of you (you cannot miss it, because even Boris mentions it) - once you pick it up, you will unlock a VR mission. Then, go upstairs to face another boss.
 An opponent that will get on your nerves!
The third boss, and probably one of the greatest challenges that you will encounter, while playing Metal Gear Rising Revengeance, mainly due to the fact that few players will have already mastered the game's basic mechanics by this point.
Unlike the fight with the first boss, the Metal Gear Ray, in this one you cannot let yourself run about and swing your sword - you need to start parrying attacks (to learn more see the chapter devoted to the information on gameplay).
Blade Wolf uses several types of attacks, which can mostly by parried:
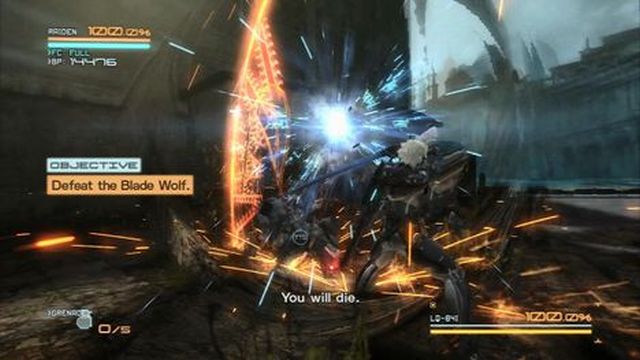 Parrying of attacks is the best method against Blade Wolf.
Every now and then (after Blade Wolf's health drops to a pre-defined value) the boss will escape to the elevation and call for reinforcements - this is a blessing for you, because you can heal yourself, the easy way, by absorbing the enemies' core. The reinforcements, usually, consist of 3 regular cyborgs or one Gekko.
Note the chests and containers all around the place - inside, you can find a lot of useful items like grenades, or the Repair Nanopaste, which you can "wear" if your health drops to zero, to regenerate automatically (the way to equip it can be found in the chapter devoted to the basic gameplay information).
Once you have stopped swinging your sword chaotically, and start to parry attacks effectively, fighting the Blade Wolf will turn out to be much easier.
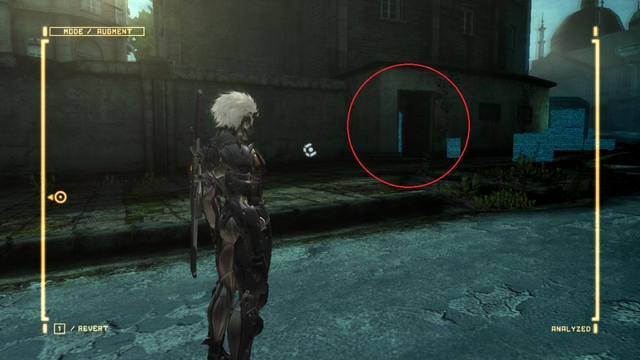 Inside, there is a Data Storage.
After the fight, turn away from the marked on the radar and go to the small area. After you enter, pock up all the items inside, including the Data Storage (4/4) exit and go towards the bridge.
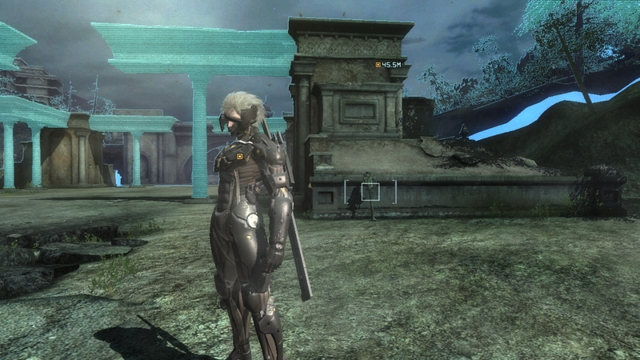 One of the few nearby rocket launchers.
Here you will have to run from Hammerhead helicopter fire - you simply need to run to the right, while holding down the Ninja Run button. After a short run, you will walk out into a some sort of arena where you will have to fight against the chopper. Take a look around and collect all of the guided missile launchers, which will make it much easier to you to fight. Two well-aimed rockets, plus several sword slashes should do the job.
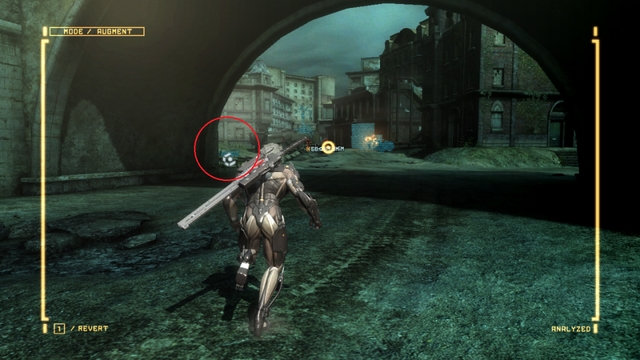 The location of the EM grenade
After you have dealt with Hammerhead, you will make it out into the street, where a group of enemies are guarding another hostage (2/2). On the left, in the chest, you will find an EM grenade. You can use it to make the task easier for you, because it stuns all the enemies within the blast area, temporarily, without wounding the hostage.
First of all, deal with the enemies on the ground and then, eliminate the airborne enemies. To reach them, you can use the rocket launcher, or simply, jump and launch the light attack several times to destroy their wings and bring them to the ground. Rescue the hostage and go towards the big white building.
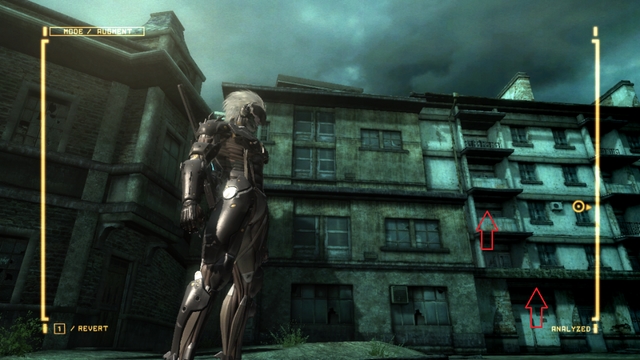
Climb onto the successive levels (the above screenshot) and, after you reach the highest level, go to the right to find another VRM computer (2/4) around the corner. Collect it and continue towards the marker. Soon, you will learn that you need to obtain the enemy's left arm to make it across the gate. Backtrack to where you rescued the hostage. After a while, a group of enemies will arrive.
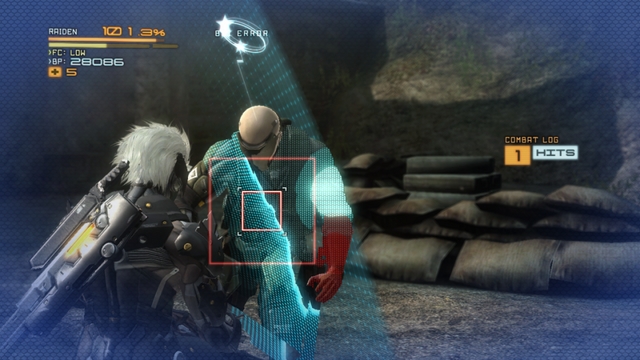 Sometimes, it is difficult to aim well to cut off the arm, instead of the head.
Deal with the three cyborgs that jump out of the vehicle and go ahead, to reach another lonely enemy. Use the Blade Mode to deprive this one of its arm - it is a quite annoying process, because sometimes it is difficult to aim well enough to cut off the arm, and not cut the enemy in half. The process of obtaining the enemy arms is connected with an achievement, which requires you to cut off 30 of them. Further in this guide, you will learn the locations of all the enemies that you need to deprive of their arm. You can also look up the whereabouts, using the AR - the enemy will have his left arm highlighted. From now on, I shall call them leftys.
Once you manage to do that, collect the arm and go towards the gate. If, for any reason, you did not manage to obtain the enemy arm, do not worry - you can destroy the gate with your sword (you need to use the Blade Mode for that). After you crossed the gate, deal with the enemies and go to the building that they exited.
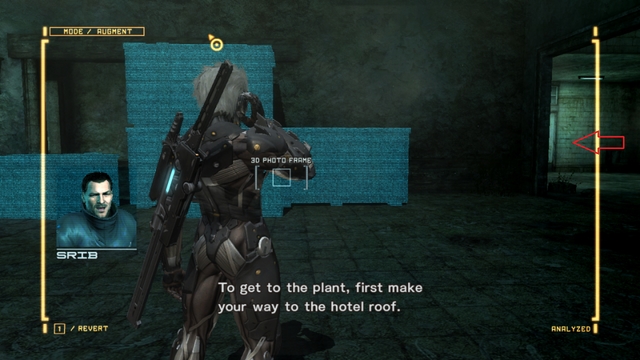 The way to the room with the VRM computer.
Go right to collect a VRM computer (3/4). Then, continue along your path, towards the marker, until you reach the roof. Below, there are two enemies - deal with the first one and cut off the arm of the other one, because he is another lefty (2/4), that you need to obtain this item from. Deal with the rest of the opponents and go out into the open area.
You will have to deal with two Gekko and several opponents here. Around, you should note the Ferris wheel - you can drag a Gekko under it and, after you cut through the legs of the structure, the robot should die under the collapsing structure. After you have dealt with the opponents, go towards the marked to encounter another group of enemies.
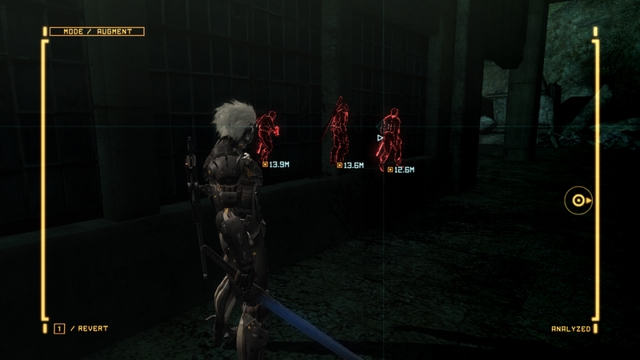 One of the enemies is a lefty.
One of them is a lefty (3/4) again - use the AR to find out which one and cut his arm off. Deal with the rest of the enemies to receive a message from Boris, after a while. At this moment, you should notice two markers - one to the main objective (yellow) and the other to a side mission (green), during which you will have to destroy two Hammerhead choppers. The choice is yours - after al is done, go towards the gate, open it and walk down to the refinery.
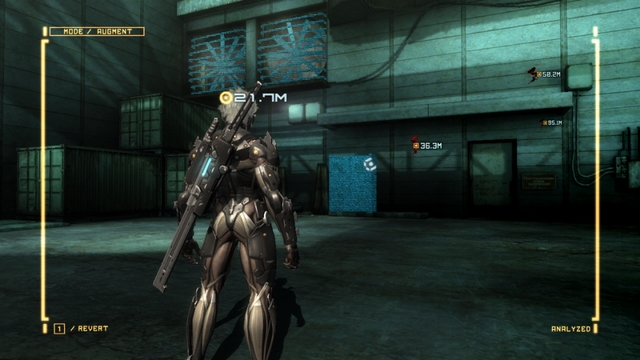 The cameras and the entrance past the fans.
You will encounter a new opponent here - Dwarf Gekko. They are not too dangerous but, in packs, they tend to be very annoying, because they often jump onto your back to immobilize you. After you have dealt with them, enter the building past the fans above. While inside, take a look at the cameras - destroy them all (you will also find several of them a bit further), to receive the No Flash Photography achievement.
To avoid the lasers on the wall, use Ninja Run - Raiden will get past them in the way not triggering the alarm. Continue towards the marker and, in the next room, climb up the stairs. You will find another lefty (4/4) here so, pay attention to who you are slicing and dicing. After you have dealt with the enemies, spend some time exploring this area, because there are quite a few things to collect here.
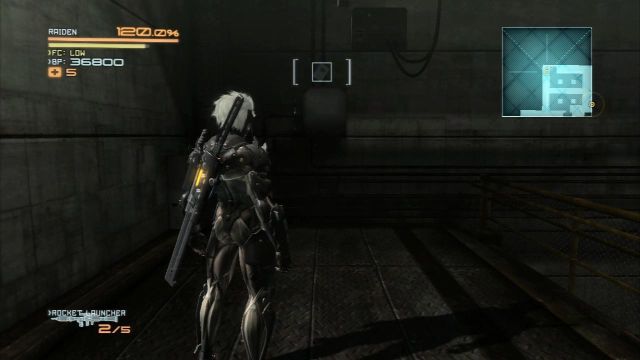 A Data Storage ahead.
On the wall, in the corner of the room, there is a Data Storage (4/4). Then, find fans on one of the walls - smash them and walk out onto the balcony. You will find Endurance Plus there - an item that increases your health bar.
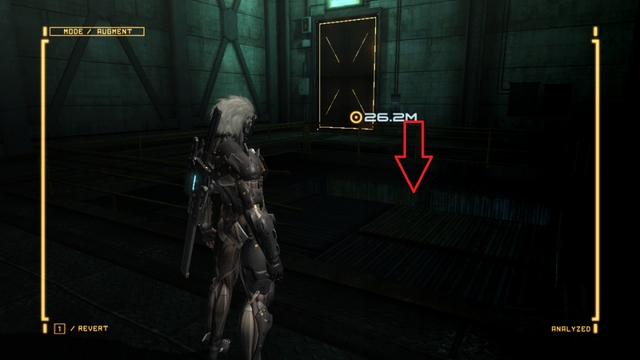 A cyborg in the box below.
Then, go towards the door marked with the marker and jump down. You will find there a couple of items and a cardboard box - cut it open. An enemy will jump out of it. Locating such boxes is connected with another achievement.
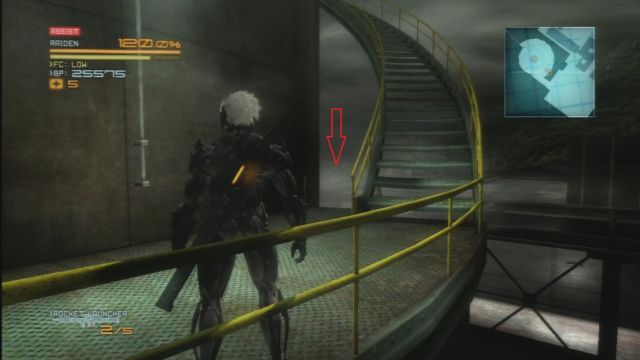
Climb up, go across the door and, before you go up, climb down the stairs (the above screenshot), where you will find a VRM computer (4/4). Activate it and dash to the very top to fight another boss.
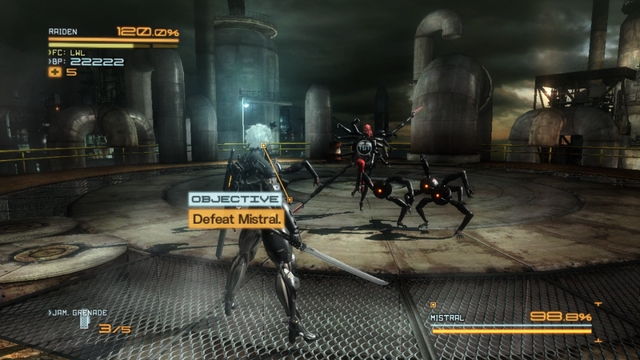 Mistral and a group of her goons.
In comparison with Blade Wolf, Mistral is very easy to defeat. The fight is also a good moment to receive another achievement - Looking Out for the Little Guys, which you receive after you eliminate 30 Dwarf Gekkos - they are plentiful during this fight.
Mistral is an easy opponent and, with successful parrying, you should defeat here without major problems. This is the list of her characteristic attacks:
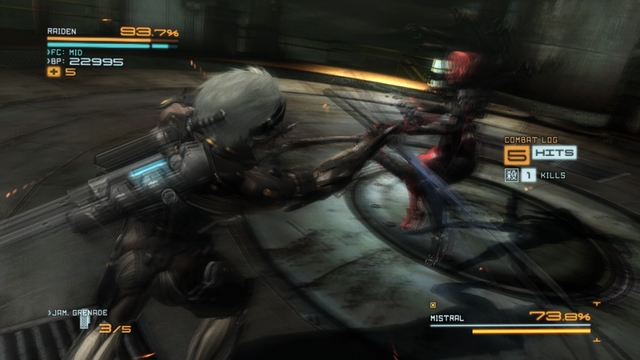 Remember to parry Mistral's attacks.
While parrying Mistral's attacks, you will sometimes manage to stun her - take advantage of that and deal a lot of damage with Blade Mode. During the duel, you will change locations several times but, her attacks should not be too different between arenas. If you are taking damage, smash several Dwarf Gekkos, because they sometimes drop an item that will replenish some of your health. When Mistral's health bar is near to zero, the game will start a cutscene that will end the fight.
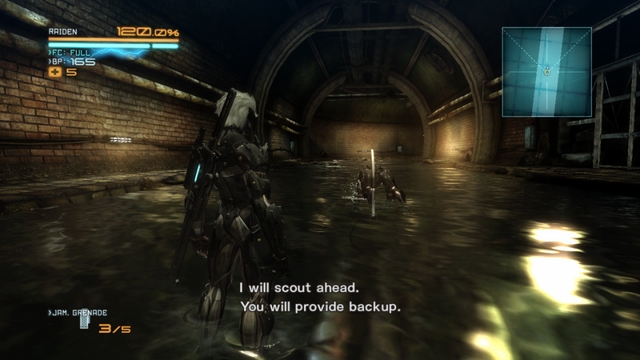 Your new companion ;)
In this mission, you will notice a slight change - you will be accompanied by the restored and enhanced Blade Wolf. This time, instead of fighting you, he will be performing the role of the scout and inform you of the approaching threat. A very handy ally.
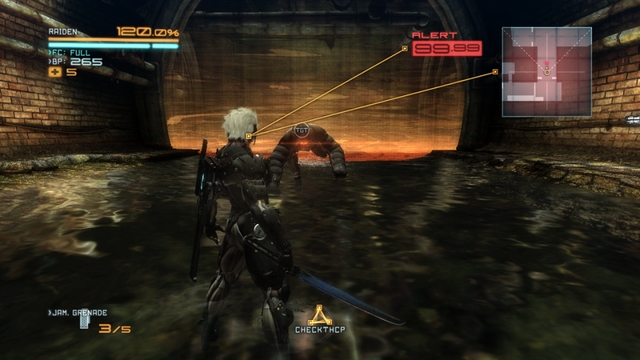 Mastiff - one of the most annoying opponents.
This mission starts in ewers and you have no other option than push ahead. Soon, you will be informed, by Wolf, of an unidentified enemy and soon, you will fall into an ambush set by a new enemy - Mastiff. To defeat him, you need to keep attacking for as long as any of its limbs starts glowing blue - use the Blade Mode then, to cut it off. Repeat this process until the enemy dies. Remember to parry attacks, because this enemy deals quite a lot of damage.
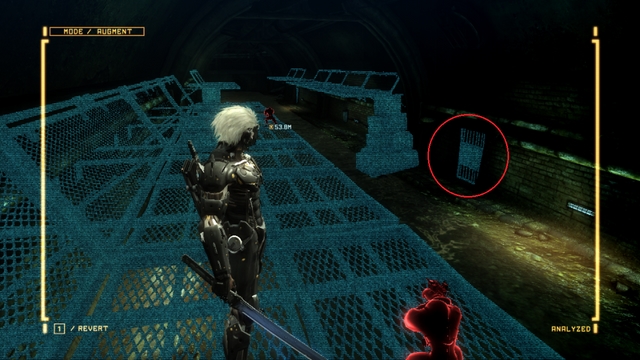 The way to the VRM computer.
Climb up the stairs to the elevation and note the gate on the right. Inside, you will find a VRM computer (1/3). Eliminate both opponents silently (jump onto the head of one of them and sneak up from behind to the second one), to make things easier for yourself - fighting two Mastiffs is not the easiest thing in the World. After you are done, smash the grate and jump down into the tunnel below.
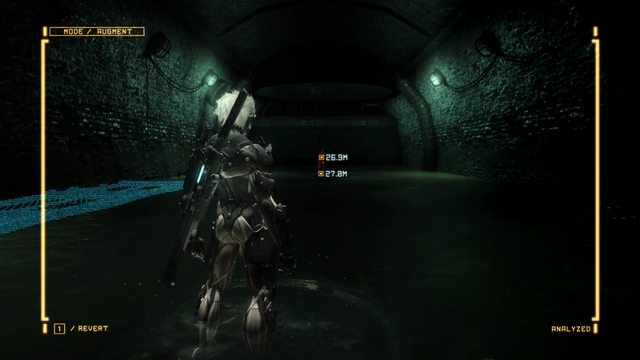 At the beginning of the tunnel, you will find a Gekko Mimic.
Slay all of the Dwarf Gekkos and return to the spot where you landed - there will be a Gekko Mimic there, which you need to destroy. Destroying them is connected with another achievement - Tearing Away the Disguise. Afterwards, reach the end of the tunnel to activate a cutscene.
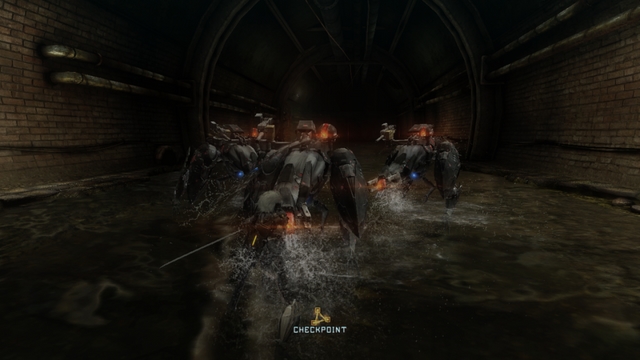 Three against one? Not a problem!
Your task is to rescue George - you need to eliminate all of the opponents. None of the enemies that you encounter here is a threat to you - remember to parry the enemy attacks and continue landing own blows. After you are done, listen to what George has to say, smash the grate and climb down into the generator room.
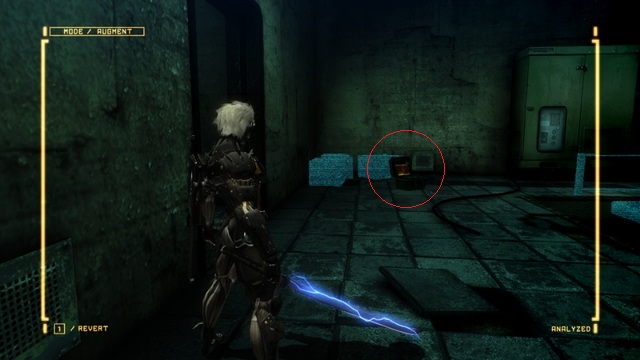 A VRM computer.
On the left of the entrance, there is another VRM computer (2/3) - collect it and go right, pick up the cardboard box and use the AR to notice nearby enemies - 3 Mastiffs. Enter the room with the three enemies and eliminate the one below - do it in a way that will prevent the other two from seeing you.
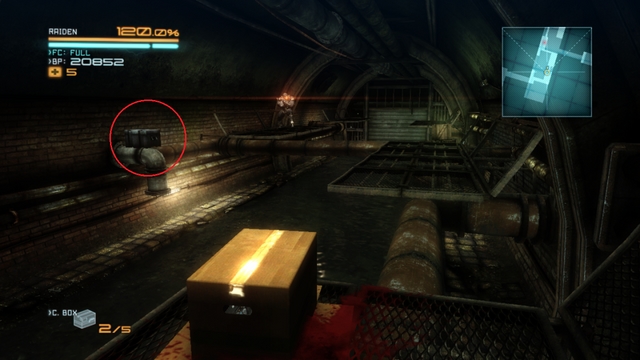 There is a Data Storage on the pipe.
Eliminate the rest of the enemies, by hiding inside the box, and attacking them on the back, whenever they turn away. Remember that you cannot move while inside the box, because the enemy will spot you immediately. If all the Mastiffs spot you, they will tear you t shreds in a matter of several seconds - that is why it is better to eliminate them silently. After you have dealt with them, turn your attention to the chest on the pipes - you will find a Data Storage (1/3) inside.
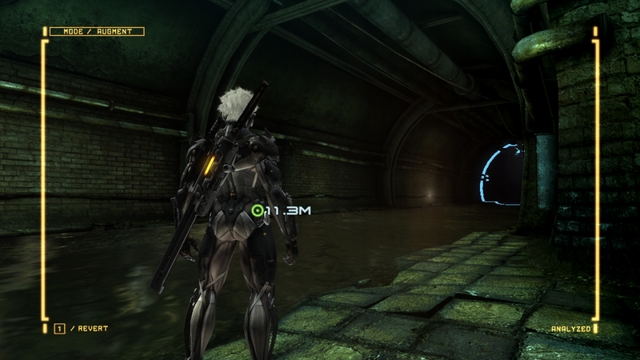 Another side mission.
After a while, there should appear an additional green marker on the map, which leads you to a side mission - if you want to, you can fight several opponents called Vodomjerkas. They usually attack with flame throwers (which can be only avoided by moving out of the line of fire) - if you deal sufficient amount of damage, you will make them to switch to melee. Block the melee attacks and, after a while, there will appear a button that you need to press to eliminate the enemy.
Regardless of your decision, smash the grate (in the tunnel where you have fought the Mastiffs) and walk into the next room. Again, you will have to fight more of these but, you can use a cardboard box to hide and kill the enemy in one backstab.
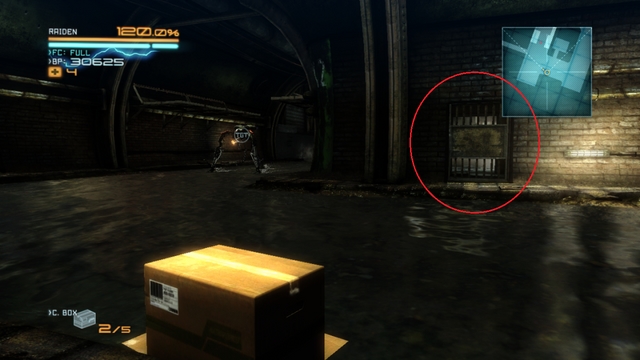 The location of the man in box.
After a while, Wolf will give you coordinates of the lab (you need to smash the door disguised as a wall) - but you should first go to the room behind the metal gate. Collect all the items there and smash one of the cardboard boxes (on the right) - you will find there a Man in the Box for the achievement mentioned in one of the previous chapters. After you are done, go to the place specified by Wolf.
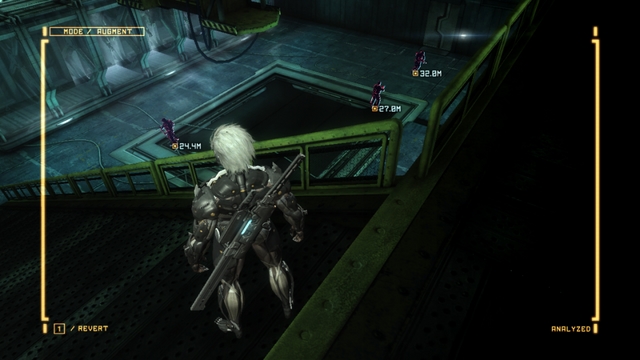 Try to eliminate them silently.
Walk across the lab (smash the cameras that you encounter on your way, or avoid their beams, to avoid starting the alarm) and follow the marker on the radar. Then, eliminate three enemies below. Again, use the cardboard box to sneak up to them silently from behind. If the alarm is be raised, you are up for a difficult fight, which is why it is better to eliminate the enemies here silently.
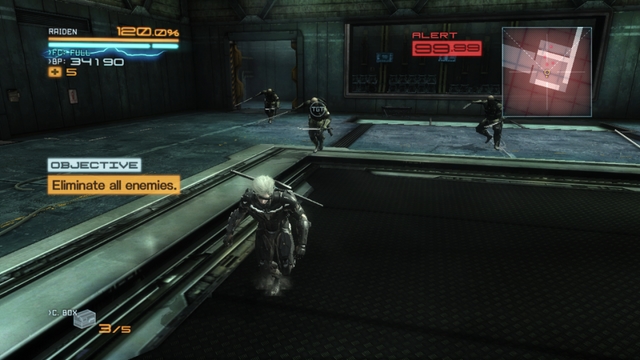 There will soon be a lefty dashing out of the room ahead.
Walk into the next room - automatically, the alarm will be sounded and you will have to deal with a group of enemies. Note the enemy that is dashing out of the room ahead - it is a lefty (1/3), whose arm you need to cut off. Deal with all the enemies and enter the room that the lefty dashed out of and activate the Dwarf Gekko.
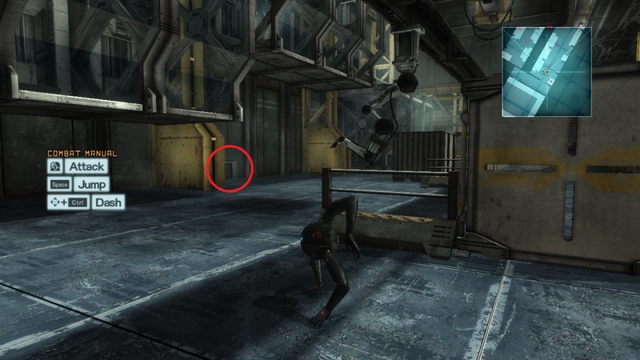 The tunnel with a Data Storage inside.
After you have gained control over it, note the alarm on the left. Roll inside to pick up a Data Storage (2/3). Here (while playing as the Dwarf Gekko) you can obtain two achievements: Dwarf Raiden (for knocking all the cyborgs down) and Love at First Sight (for saying hello to all the Dwarf Gekkos that you find in this room).
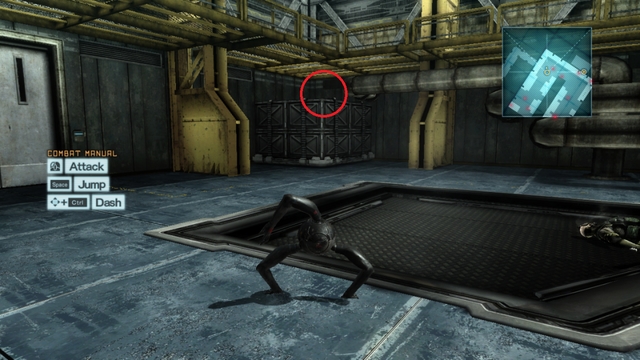 Containers that you will find another Data Storage on.
Once you do that, find the containers in the corner of the map - it is on them that you will find another Data Storage (3/3). All being done, climb upstairs, jump into the neighboring room, through the tunnel and activate the computer.
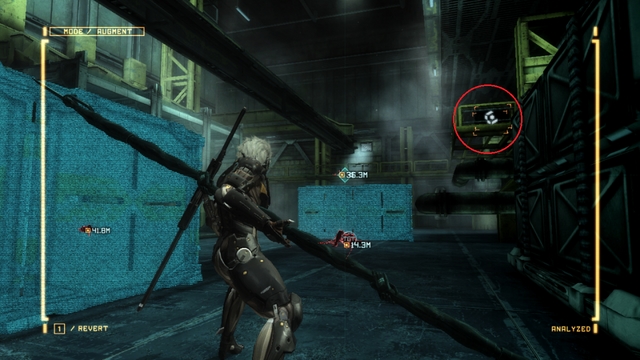 A lefty above and a crate with Endurance Plus to the right.
You will get into the same room, this time dressed as Raiden. Deal with all the Dwarf Gekkos and, if you want tom finish off the incapacitated cyborgs. One of them (lying the closest to the sewers that you have just walked through, with the Dwarf Gekko) is a lefty (2/3) - cut off its arm. Using the AR, locate the crate with Endurance Plus I, which will increase your health. Go to the marker then, to find the boss after a while.
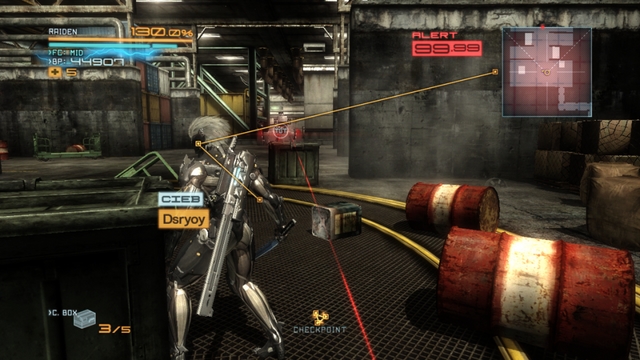 An annoying enemy that is standing in the only passage
Grad is quite easy, but quite annoying an enemy because, until it stays in the form of a tank, you cannot deal any damage to it. You need to make it turn into robot, you need to push it away from the corridor that it is blocking (it reverses each time you hit it with a slide). Use the EM grenades to make things easier for yourself.
Once Grad has taken on the form of the robot, it will do any of the following:
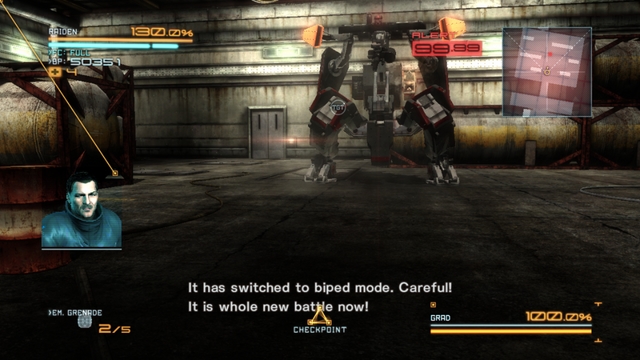 This is the much easier version of the boss.
Try to be close to Grad at all times, pepper it with a hail of blows and parry its attacks, at the same time. Every now and then, the screen will turn into the familiar blue, which will mean that you can use Blade Mode to slice and dice any of the robot's elements. After a while, Grad should be nothing but a piece of junk.
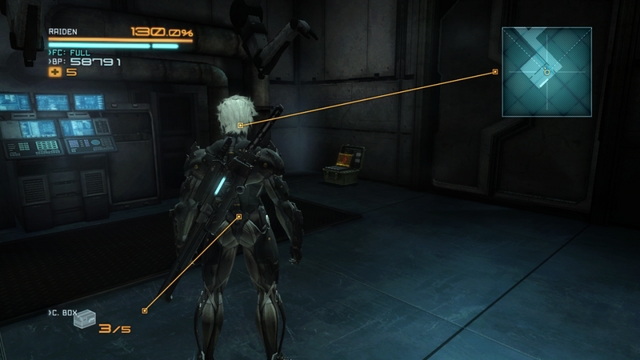 Another VRM computer right before the end of the mission.
After the fight, go towards the marker, until you reach a fork - on the left, there are two cyborgs armed with RPGs. One of them is a lefty (3/3) so, do not forget to claim its arm. In the next room, you need to wait until the Doctor finishes talking and turns away, so you can collect the VRM computer (3/3). Then, go towards the exit to complete this mission.
Probably the longest mission in the game, additionally difficult, due to one of the stages (even more difficult if you want to gain achievements). But, more about this below.
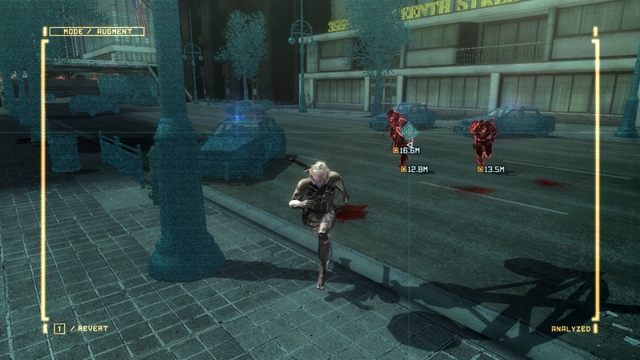 One of the policemen is a lefty.
This mission starts when you are attacked by a group of policemen. One of them is a lefty (1/8) - use the AR, to figure out which one it is and claim his arm. Once you have dealt with the enemy, turn your attention to the poster on one of the buildings - it is an Easter egg, which gained a cult status in the Metal Gear Solid series, although you do not need it for anything.
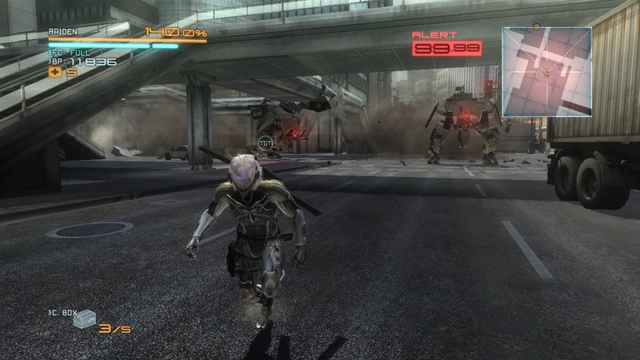 Almost like fighting against two bosses at a time...
Continue along your path, towards the marker on the radar, and you will encounter two GRAD robots. Yes, exactly like the boss that you have just fought against although, they are suitably weaker. The method of fighting these, however, is not the same as in the case of the boss - keep close to them and try to parry their attacks and also use the Blade Mode whenever you receive the appropriate notification on the screen.
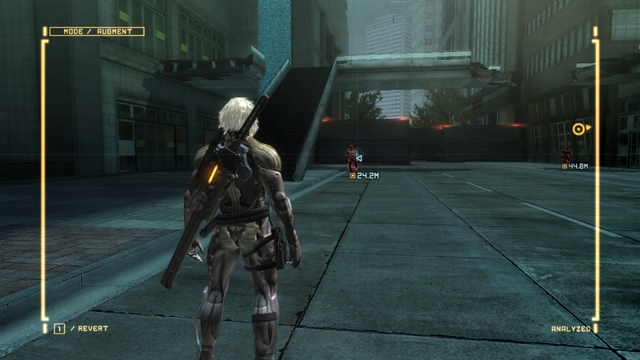 Past the barricade, ahead, there is a VRM computer.
After you have dealt with the robots, go towards the barricade, right next to the stairs. There will be another group of enemies to appear from behind it, where one of them is a lefty (2/8). Then, go past the barricades that the enemies dashed from behind, to find a VRM computer (1/5). Soon after Boris lets you know, of a new side mission (the green marker) - if you want to, go there to fight a quite easy battle.
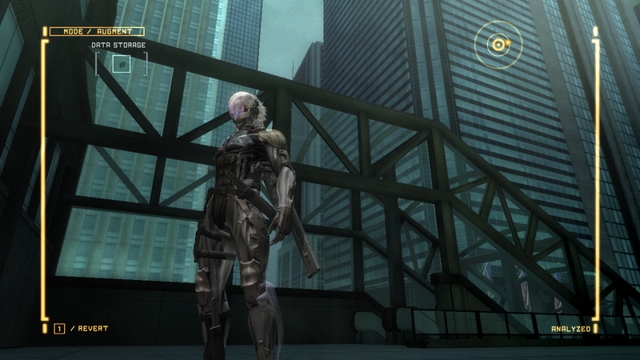 A Data Storage above the escalator.
After you are done, go towards the marker, open the door and after you climb the escalator, look up - above the glass structure, there is a Data Storage (1/4).
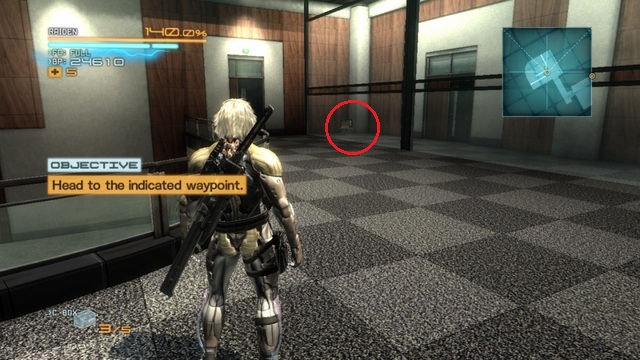 The next VRM computer.
Again, go towards the marker, upstairs, and after Boris is done talking to you, pick up the VRM computer (2/5) behind the glass pane and go to the next room, to the office.
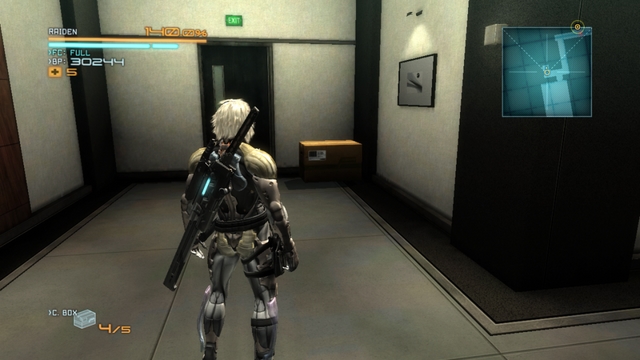 Another Man in the Box!
Clear it and note the fork, as you exit - go left to reach another Man in the Box. Continue past the marker until you reach a corridor, where there is another group of enemies armed with RPGs and shields. One of the soldiers with an RPG is a lefty (3/8).
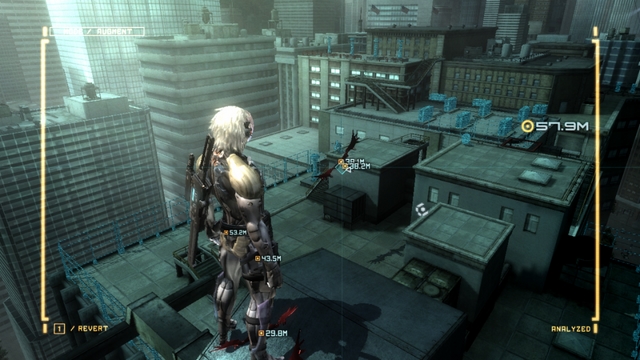 The airborne opponent is another lefty.
After you climb up onto the roof, use the crane to make it over to the next building. Note one of the policemen using the Slider - it is another lefty (4/8). Deal with everybody around and leave the lefty for the end - you can bring him down with several blade attacks, or try to cut off his arm, up in the air, with the Blade Mode.
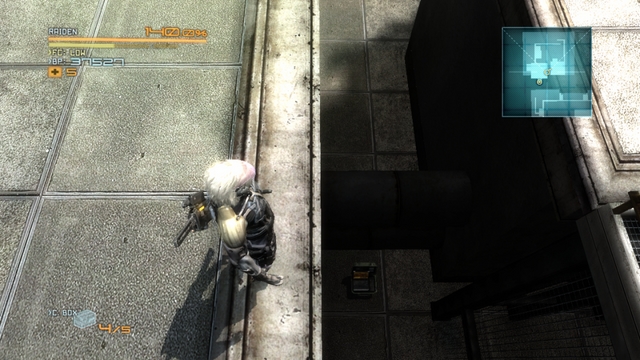
Between two buildings (take a look at the map, in the above screenshot, for orientation) there is another VRM computer (3/5). Collect it and go to the next rooftop. You will encounter a new enemy here - a heavily armored and armed with a sledgehammer, cyborg. Most of its attacks cannot be parried (these are signaled by the enemy's yellow halo), which is why you should use a skip back (Defensive Offense) a moment before the attack reaches you. At the moment at which the enemy misses you, it will be vulnerable to your attacks (it usually parries most of your attacks) - take advantage of this to deal as much damage as possible. Then, cut off its limbs, one after another, in the Blade Mode. Deal with the chopper on the roof and get over to the next building.
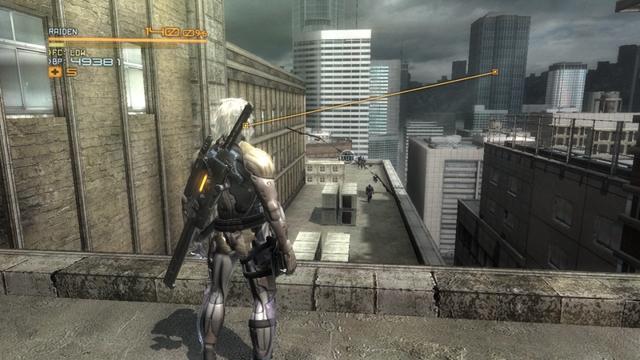 The approaching Slider with a Data Storage, and a dole lefty and the hostage below.
After a while, a Slider, carrying a Data Storage (2/4) will approach - you need to smash it to pick up the collectible. You can use both rockets, regular attacks and the Blade Mode to do that. If you fail, restart the last checkpoint and keep trying until you succeed.
While on the rooftop, you can notice a group of enemies guarding a hostage below. Additionally, one of them is a lefty (5/8). To reach them safely, you need to eliminate the patrolling guard first, and then incapacitate the enemies that guard the hostage, with an EM grenade - this will let you deal with them quickly, without the hostage's dying. After you have rescued the hostage, continue towards the marker, smash the gate and cut through the elevator's ropes to get to the foot of the building.
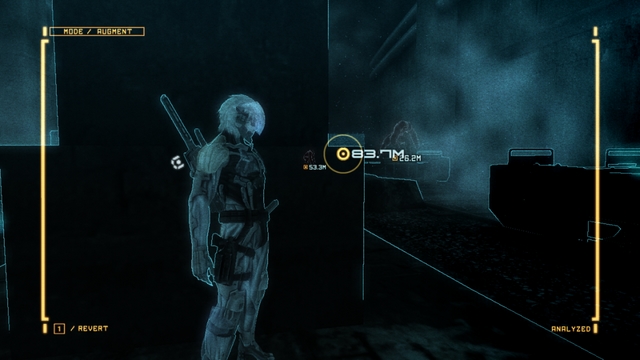 You cannot see here without the AR!
No, do not adjust brightness - this will do nothing. In this location, there is pitch dark and without the AR, it is impossible to move around. Unfortunately, to gain the A Walk in the Dark achievement, you need to cross this location without using the AR. Smash the grate and get down, where you will encounter two Mastiffs patrolling this area.
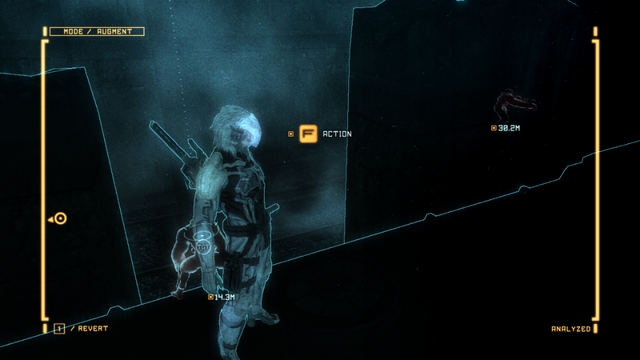 This is a good moment to strike - the enemy on the right is turned with its back at you.
Do not take to the one that is standing closer to you - if you eliminate it, the other one will notice you and you will not be able to make past it without fighting. Instead, go on the left side of the tunnel, climb onto the train and jump down on the enemy, when the other one is turned with its back at you. Afterwards, you can take to the Mastiff that you walked past earlier.
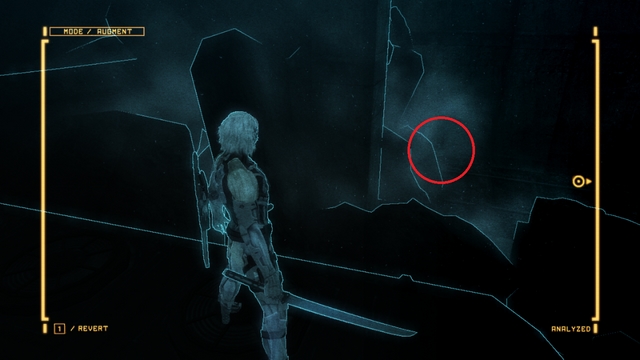
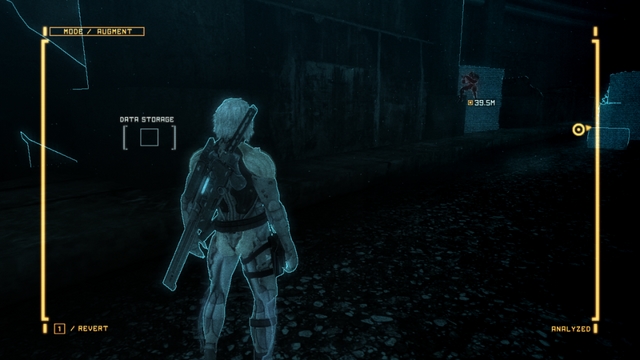 The AR vision - the Data Storage is right behind the wall.
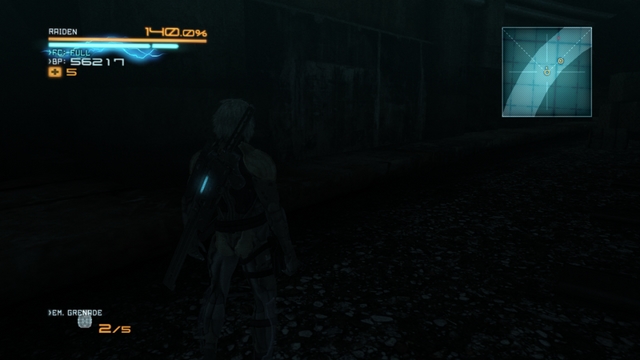 No AR vision, which allows you to take a look at the map.
Go deeper into the tunnel to bump into a Data Storage (3/4) on the left (the two screenshots above present the AR view and the regular one, which shows your position on the map). Eliminate the Mastiff patrolling nearby and find the Data Storage in the heap of rubble.
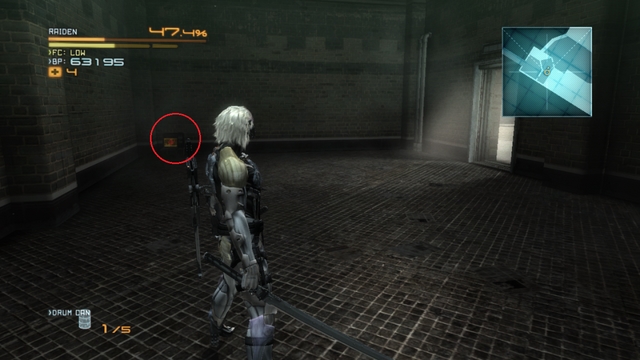
 The VRM computer location.
Continue along the tunnel until you reach a place where there are Dwarf Gekkos under the ceiling. Deal with them and stop at the end of the railway car that the enemies hung above. Then, turn left - you should be looking directly at a VRM computer (4/5) (the above screenshot).
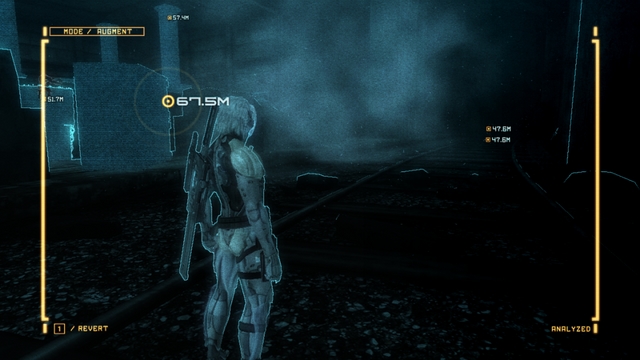 At the end of the tracks, ahead, there is a Gekko Mimic.
Collect it and turn towards the tunnel - at its end (the above screenshot) you will find a Gekko Mimic to blast. Go towards the marker on the radar - you will encounter another Mastiff. If you want to sneak up to it, remember that there are Dwarf Gekkos under the ceiling, which will make this more difficult. After you have dealt with the enemies, approach the switch, open the gate and emerge from the darkness.
 A VRM computer.
After a short conversation with Wolf, collect the VRM computer (5/5) on the left, and exit. You will fight a group of cyborgs and a GRAD here. One of the cyborgs is a lefty (6/8), use the AR to find it. You can bring the GRAD down, by cutting through the columns of the bridge that the robot is standing on.
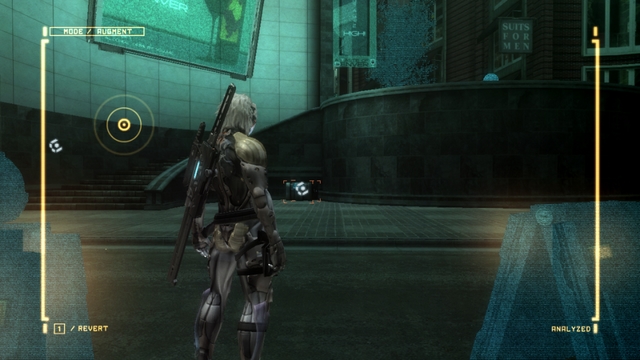 Ahead, there is a crate with Endurance Plus.
A bit ahead, you will find another lefty (7/8). Deal with the rest of the enemies and collect the Endurance Plus, under the stairs on the left, and continue along your path.
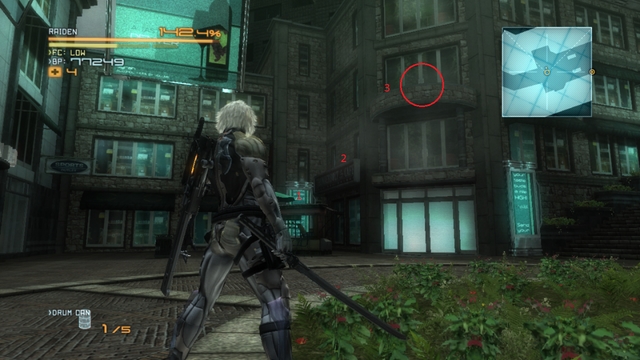
One of the enemies (armed with an RPG) is the last lefty (8/8) in this mission cut his arm off and wipe out everybody, then collect the Data Storage (4/4) on the elevation (the above screenshot). To reach it, jump onto the drinks booth, then onto the caf's sign, and finally perform the Heavy Aerial Attack to reach the item.
After you have reached the square, you will talk to Sam, and afterwards, you will have to fight, after which Raiden will be useless for further combat. Your task is to make it over to the marker, while avoiding the enemies, at the same time. After you cross the gate, you will be unable to avoid detection so, try pushing the enemies away until another cutscene starts, and after that, another boss battle.
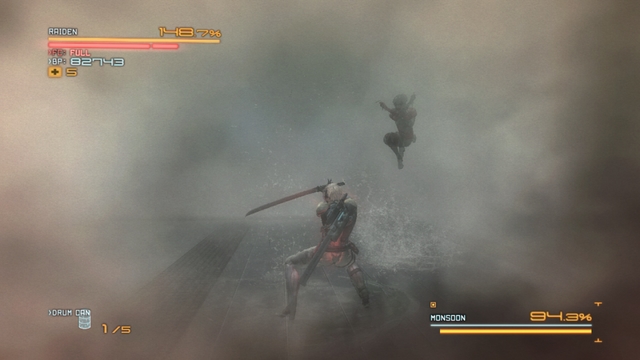 The effect of the phosphorus grenade used by Monsoon.
After a long cutscene, and after Raiden goes online again, you are up for a fight with one of the most dangerous bosses in the game. If you still have not mastered parrying, this is where you get the opportunity to make up for this.
Monsoon does not deal too much damage, but its attacks are incredibly fast. You need to keep your guard at all times, to be ready to parry an attack at any moment. Each time the Monsoon stops its attacks, use this to your advantage and strike.
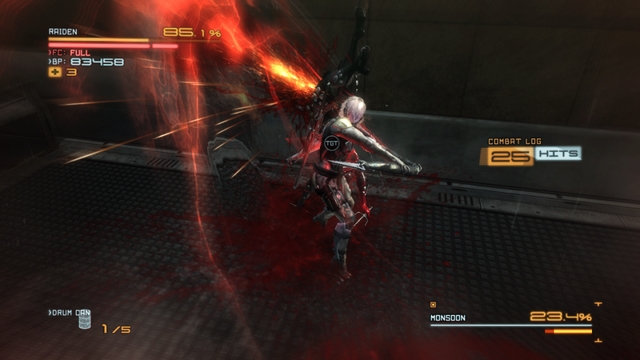 Closer and closer to the end...
Monsoon uses the following attacks in the battle:
The time, during which Raiden can stay in the Blade Mode, is unlimited for this battle, which should let you deal with the scrap that Monsoon throws at you, without any problems. Every now and then, the boss will break up into pieces - locate its head and attack it to deal severe damage to the enemy.
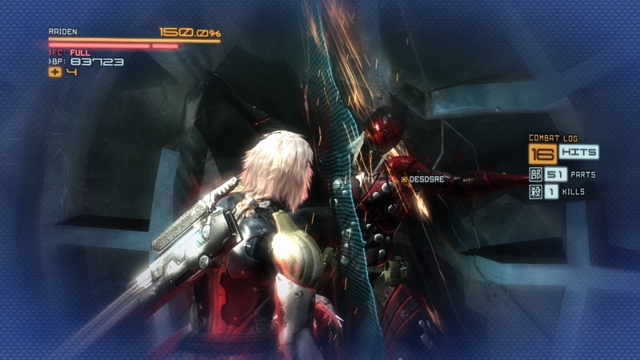 The Grand Finale!
Once the boss's health bar drops below 10%, a QTE will start, in which Raiden will deal with Monsoon, after the correct buttons are pressed.
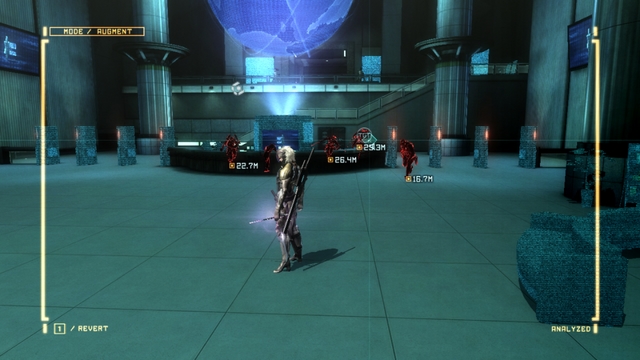 A heartwarming welcome is always in order!
Another long mission, overflowing with collectibles, during which you will square off against three bosses. The mission starts in the office - approach the receptionist robot which will summon reinforcements after a while (ninja cyborgs). One of the cyborgs is a lefty (1/8) - claim its arm and deal with the rest of the enemies.
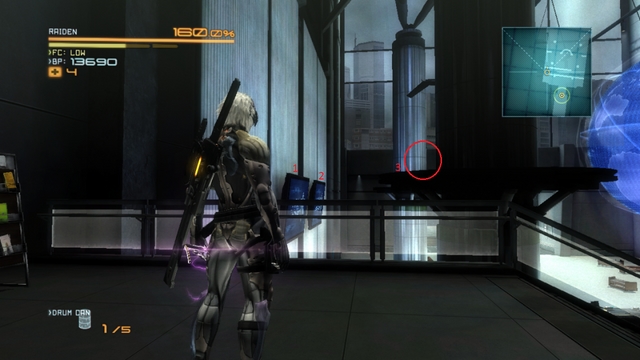 The location of another Data Storage.
After a while, climb up the stairs and go right, towards the screens hanging on the wall. Jump over them to reach the platform on the column, where you will find a Data Storage (1/4).
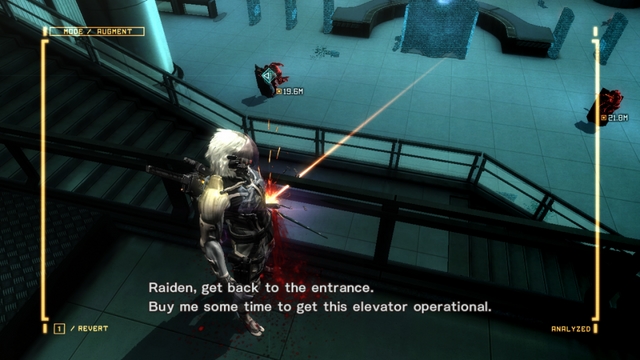 A lefty on the left -a shield-wielder.
Return to the stairs and empty the cabinets -you will find a VRM computer (1/5) in one of them. Collect it and go towards the elevators. It will turn out that the elevators are not working and you need to win some time before the Doctor brings them back online. From the location that you came from, new enemies should start to arrive -one of the enemies with shields is a lefty (2/8). You can use the minigun cannon to eliminate the enemies, before they approach you. After a while, the elevator should come online again - go up then.
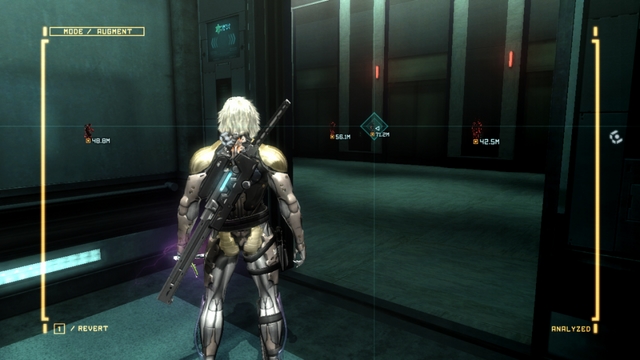 Eliminating enemies silently on this level is necessary.
Right after you exit the elevator, use the AR to locate enemies - one of them is another lefty (3/8). Another cyborg that you can deprive of its arm appears after you destroy 2 -3 control panels without alarming the enemy. So, take to silent elimination of enemies, in the first place.
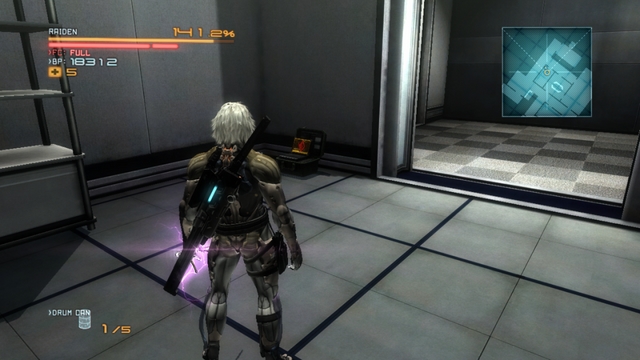 A VRM computer.
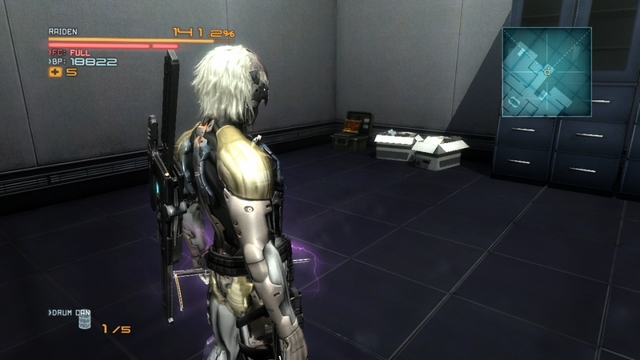 And another one.
Once you have cleared this floor, you will have to find two VRM computers on this floor. Once you have obtained them, run around this floor a bit with the AR on - your task is to find 3 control panels that are invisible in regular vision (they glow orange in the AR).
Once you have destroyed 2 panels, you will receive information that there appeared a new enemy - this is the abovementioned lefty (4/8) so, do not forget to cut its arm off.
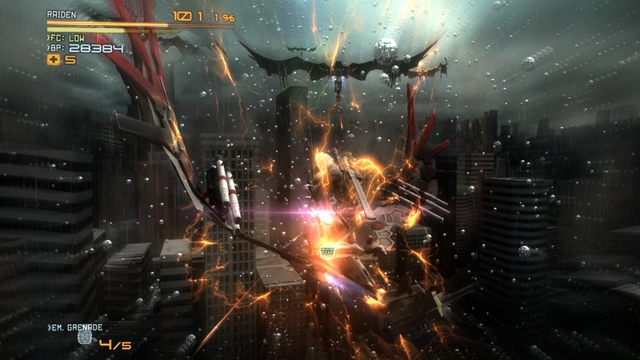 Hey, not all at once!
As soon as you have dealt with it, find the third control panel (near the lefty that you have just killed), destroy it and go to the gate. Now, you will have to Ninja Run and avoid the enemy bullets - you can either spend some time fighting each and every enemy jumping out from behind corners, or simply take it to the heels and run headlong. The choice is yours.
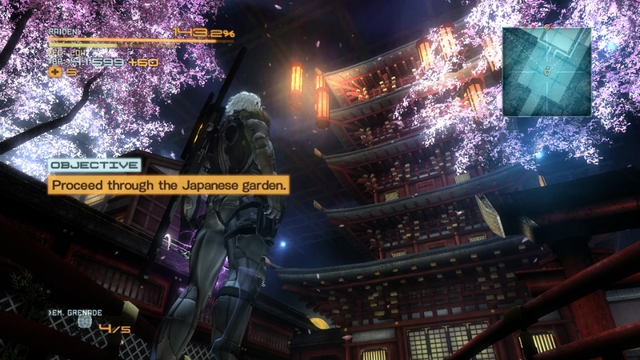 The palace that you need to climb onto.
Eventually, you should make it into a Japanese garden. After a while, you will be welcomed by a group of enemies - eliminate the cyborgs with RPGs and another lefty (5/8) will appear. After you have killed every last of them, smash the wall of the house and kill the cyborg with the RPG inside. Then, leave through the other exit. Look up - above, there is a palace that you can climb onto, by jumping over lamps. On the top, there is a flagpole - cut it down and you will receive the Menace to Society achievement.
Once you are on top, take a look around. Down below, there is another lefty (6/8) waiting but, to get to him, you need to rack your brains a little. The best idea is to reach him undetected by the enemy, because on the rooftops, on both sides of the street, there are Mastiffs - fighting two at a time is a real nightmare. If you do not want to over the possible approaches, and play seek and destroy, you can raise the alarm and lure all of the enemies to yourself - the choice is yours.
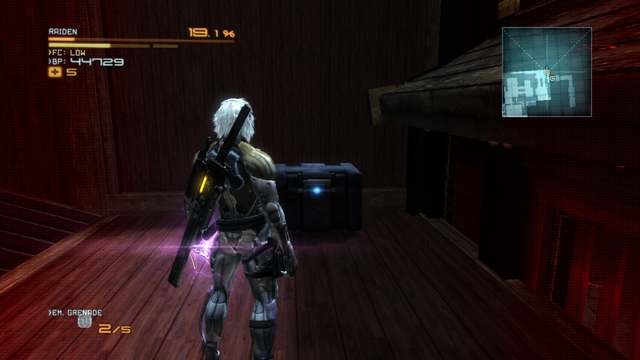 A chest with a Data Storage.
Then, approach the marker on your radar - close to it, on the rooftop, you will find a crate with a Data Storage (2/4) inside. Go towards the marked direction to reach an elevator room. One of the enemies patrolling here is a lefty (6/8).
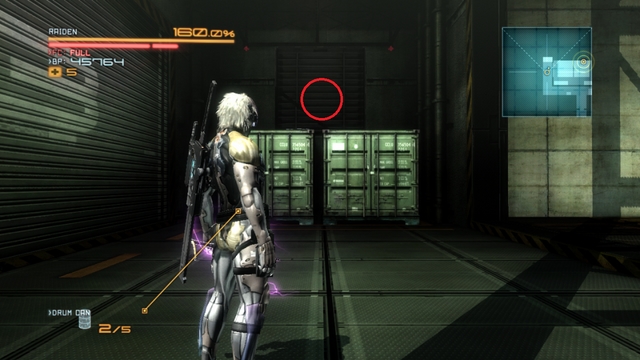 Location of the Endurance Plus.
After you have cleared this area, find two green containers, climb onto them and cut through the metal gate. Inside the containers, there is the Endurance Plus. Eventually, climb onto the elevator to start it.
You are up for a long, and quite exhausting a battle. Defeat all of the enemies to be interrupted by a cutscene, at some moment. In the cinematic, two cyborgs set fire to the elevator you are on. From now on, the Doctor will be reminding you to jump onto the neighboring elevator but, do not do that. Keep eliminating the enemies, until a heavily armored cyborg arrives. After being killed, it drops a Data Storage (3/4). Jump, quickly, onto the neighboring lift, before the one you are on drops down and you will have to repeat from the last checkpoint.
On the other lift, you will have to fight again a cyborg with a sledgehammer that additionally is a lefty (7/8), and a few Sliders. Try not to wipe out all of them (leave, at least, two of them "alive") because they will be replaced with two Mastiffs otherwise, which is not going to end up well for you, in an area that much limited.
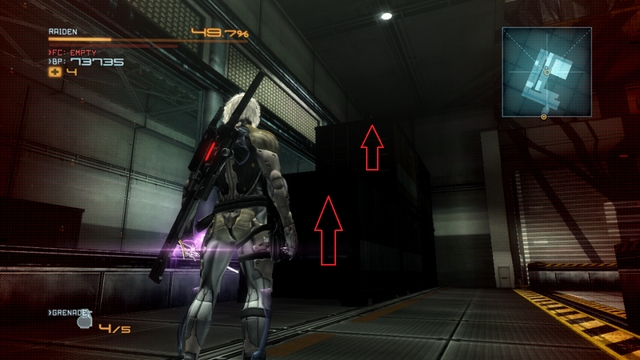 Climb onto the containers to find a Man in the Box.
Once the elevator stops, climb onto the containers opposite and slide through the opening. You will find a Man in the Box.
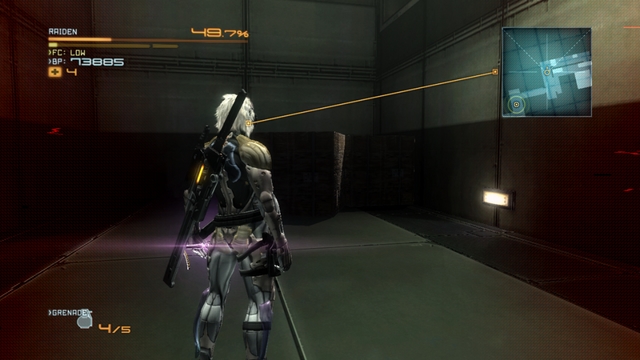 Behind the boxes, there is a VRM computer.
Deal with it and leave that room. Find big red crates. Smash them and you will gain access to a VRM computer (4/5). Then, follow the marker into the server room where you will have to fight.
You are going to fight the bosses that you have already fought - fortunately enough, you do not need to fight them both simultaneously. The fights with the copies of Mistral and Monsoon is identical as in the case of their originals so, there is no point in describing this again - in case of any problems, see the respective chapters devoted to the bosses.
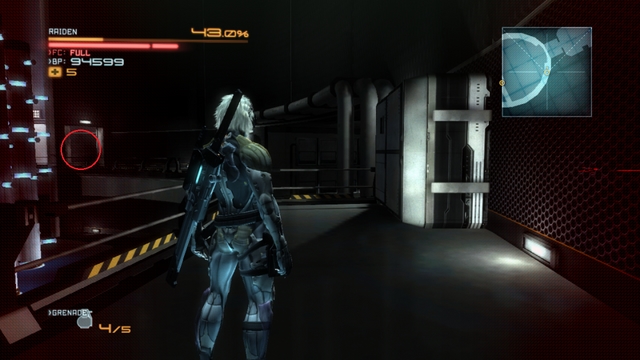
After the fights finish, go to the server room to have a talk with Sundowner. After you regain control over your character, run up the stairs and to the left, then to the right and left again (the above screenshot presents the location in which you should now be - approach the point marked in red). After you run over the pipes, you will reach a Data Storage (4/4).
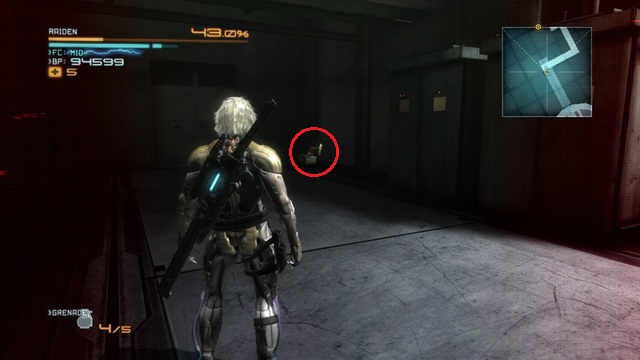 A VRM computer, right before the boss fight.
After you have collected it, return to the stairs and follow the marker. In the middle of the room, there is a VRM computer (5/5). Continue towards the marker until you walk out into the open. Do not run towards the boss yet and turn left - on the balcony opposite, there is a Gekko Mimic, which you can destroy with the rocket launcher. Then, go to the fight with the boss.
Is not too difficult a boss, but it requires to handle the Blade Mode in a flawless, perfect way (i.e. to aim your slashes accurately). If you have problems with that and you usually cut without rhyme or reason, you will have quite a problem with this enemy.
Sundowner has the reactive armor, which means that each your attempt at a frontal attack, with the blade, ends up in receiving severe damage, because the boss's armor explodes. The way to defeat it is to parry its regular attacks to bring about the situation in which you can use the Blade Mode.
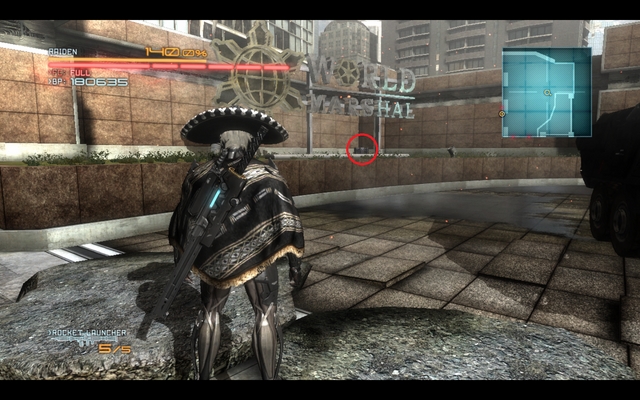 This is how you need to cut through Sundowner's armor - in vertical slashes.
Once you use it, you will see spots, in which the armor can be penetrated, without the risk of explosion, displayed. If you manage to do that, the boss will lose its explosive armor for a dozen of seconds, and you will be able to fight in a regular way. If you fail, the armor will explode and deal quite a considerable damage to you. An additional obstacle is the helicopter that circles around the arena and may interrupt your Blade Mode with rockets - use the rocket launcher to shake the chopper off, for a moment.
Sundowner's typical attacks:
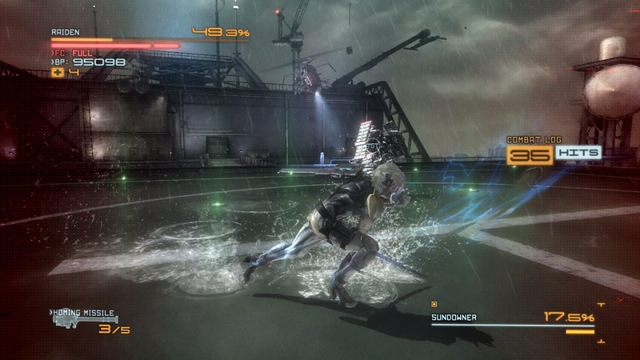 The Hit & Run technique may not be stunning to watch, but it is effective.
If there is no way in which you can defeat Sundowner in the way presented above, there is yet another way, however common. It consists in running up to the enemy constantly, landing a few quick blows with the sword (best into the back) and jump away from Sundowner, before it reacts. Several minutes of such running will handle the boss down. Once its health bar drops to 10%, the usual QTE sequence will start. After that, Raiden will cut up the boss and the mission will be over.
The shortest of the missions, if you consider the size of the map and the most action-packed at the same time, when it comes to the numbers and varieties of enemies. At the end of the map, there also is no usual boss - just a fight with several Mastiffs that you cannot avoid, which will serve you with a dose of frustration to make up.
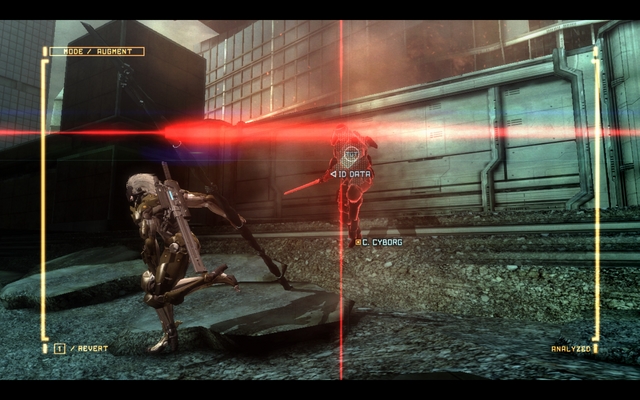 A lefty that you encounter at the beginning of the mission.
Right after the mission starts, note one of the attacking ninja cyborgs, because it is a lefty (1/3) - use the AR, to make sure and locate it.
 Location of the crate with an Endurance Plus.
Claim its arm and deal with the rest of the assailants. Take a look around, then, to find a crate with Endurance Plus. Collect the upgrade and cross the street.
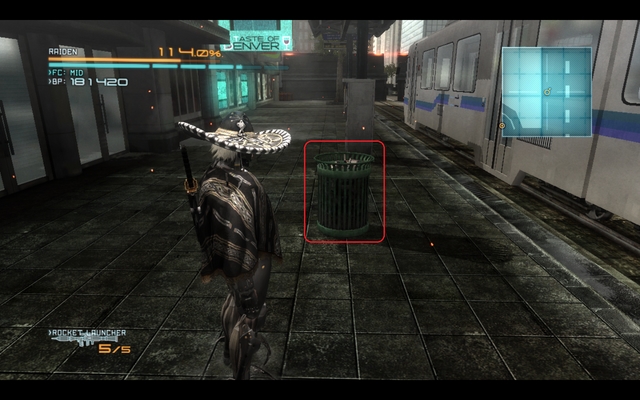 A Data Storage, nicely hidden in a dustbin.
The next enemies (including one robot) can be eliminated quietly (sneak up to them using a cardboard box or a barrel) - if you do not like subtleties deal with them in the regular way, by slashing and dicing everything in your sight. After the fight, take a look around for a green dustbin between the building and the train. Smash it to collect a Data Storage (1/1).
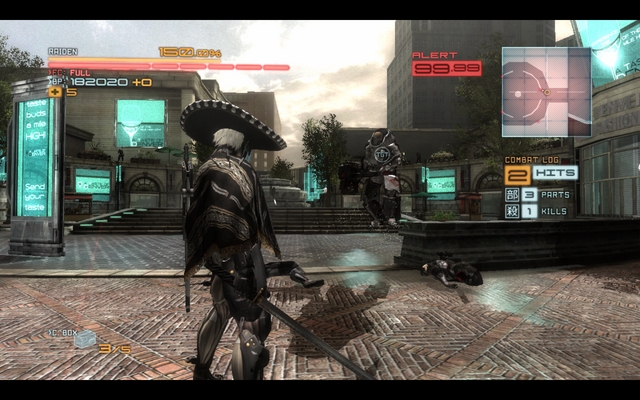 Another lefty, this time more difficult to kill, however.
Go towards the marker and note the heavily armored cyborg with a sledgehammer that is standing near the fountain - this is another lefty (2/3). After you have cleared the location, keep following the marker until you reach a long, narrow street full of Dwarf Gekkos. You can sneak past them using a cardboard box or a barrel.
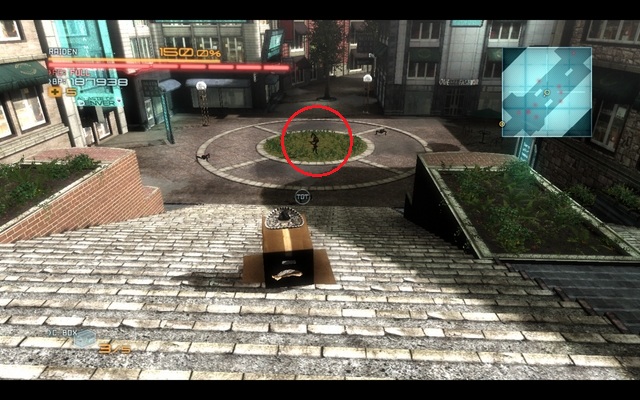 Gekko Mimic, waiting at the foot of the stairs.
At the foot of the stairs, there is a Gekko Mimic standing - cut it up and deal with the wave of enemies that will soon arrive.
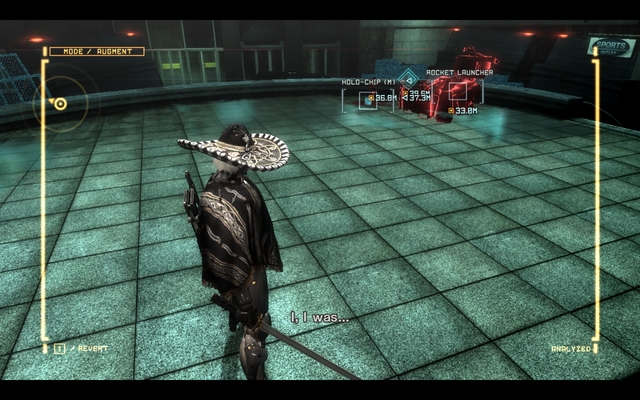 The game's most difficult hostage to rescue and a lefty guarding him.
A bit ahead, you will encounter a group of enemies, with another lefty (3/3) among them. They are guarding the last hostage, who is the most difficult to rescue. In the first place, deal quietly with the cyborg on the cornice, and retreat quickly to prevent being spotted. To reach the hostage, and prevent the hostage from being killed, you need to use EM grenades (a phosphorus grenade may work also). Throw the grenade, while standing on the cornice that you killed the cyborg on, and jump down to eliminate the two cyborgs (remember to cut off an arm of one of them). Then, pull the GRAD away from the hostage, to prevent him from becoming an incidental victim of the robot's attack, and deal with the robot. Eventually, rescue the hostage and go towards the marker.
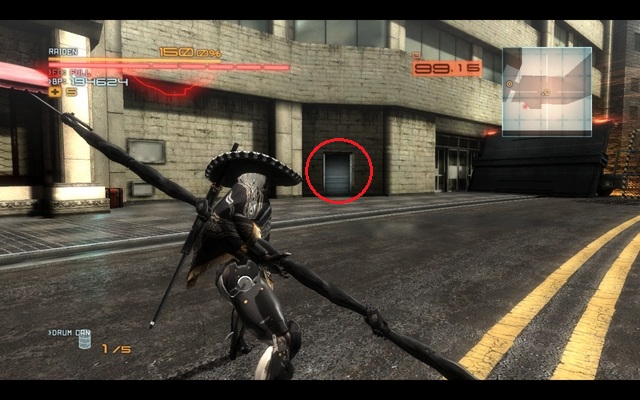 The location of a VRM computer.
You will encounter a Mastiff, patrolling the street, here - at any cost, try sneaking up from behind to it and eliminating it silently. Soon, reinforcements, in the form of several cyborgs, will arrive. After you are done with everything, approach the metal gate on the left of the street.
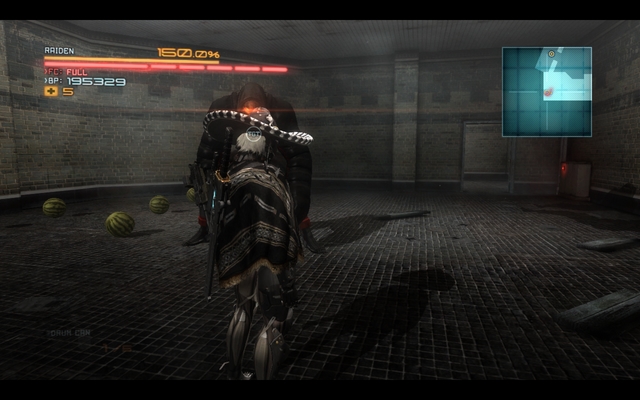 Fighting three Mastiffs at a time is more difficult than fighting one boss!
Once you approach, a cyborg will fly out from inside. Eliminate it, enter and collect a VRM computer (1/1). Get prepared, however, because you will fall into an ambush set by three Mastiffs - if necessary, exit the building, because fighting all three of them at a time is not an easy thing. After you have dealt with them, go towards the marker, walk through the gate and complete the this mission.
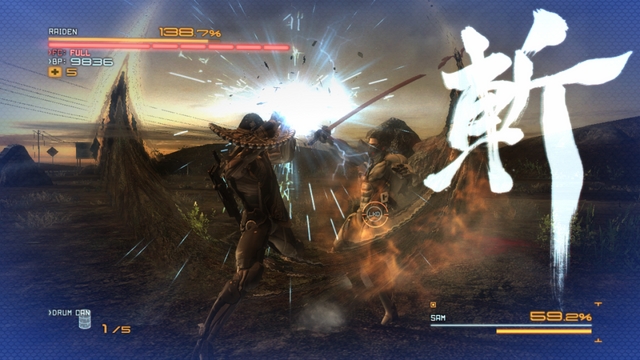 Parrying of attacks is a must for this fight.
The seventh mission is nothing more than a boss battle, your old acquaintance from the beginning of the game - Sam. There are no collectibles here, there is nobody hiding in the box and nobody whose left arm you could cut off.
If you have mastered parrying, the fight with this boss is, probably, going to be the easiest one in the entire game. Sam does not use any attacks that cannot be blocked (more about this later), does not summon reinforcements, does not throw anything at you, nor shoots.
Attacks that may be used by the boss throughout the battle:
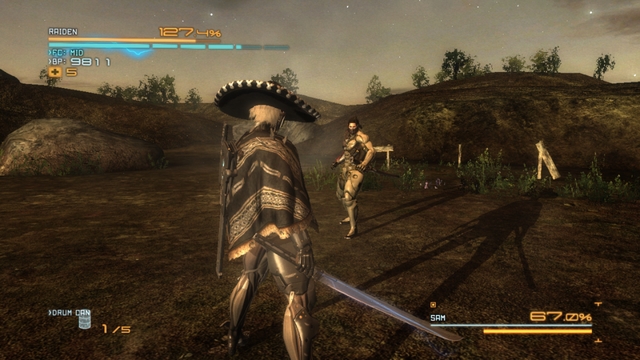 Paradoxically, the fight is more difficult if you disarm Sam!
Focus on parrying and landing blows whenever Sam is not attacking, play more defensively than usually and, as soon as Sam's energy drops below 10%, a QTE sequence will start, which will end the battle.
The final mission which, if you do not count the boss battle, is relatively short. For the most part,, you will be sneaking between enemies and avoid getting into combat - if nobody spots you before you reach the end, you will receive the Surprise Attack! Achievement. If you want to find all collectibles, (the left arms, among others), you need to put up some fight, though. You can, simply, complete the this mission twice, where you avoid detection the second time through.
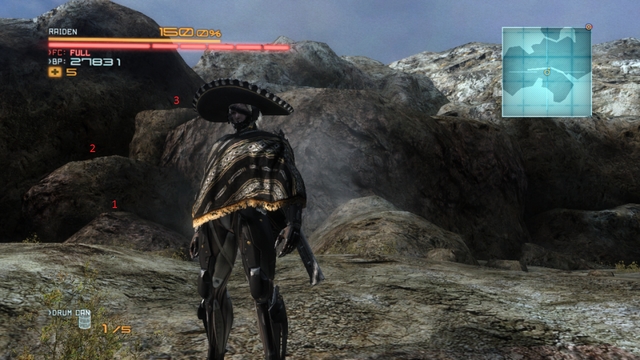 The way to the VRM computer.
Once the mission starts, turn back and Ninja Run onto the rock ahead. You will find a VRM computer (1/2) there. Activate the computer and jump off the rock. Take the road towards the gate.
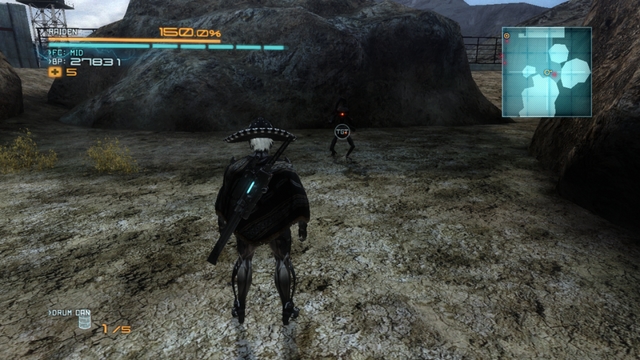 The final Gekko Mimic.
Ignore the marker at the gate and go ahead, to the right of the road, among the rocks. If you have not raised the alarm, there should be a Gekko Mimic waiting for you there. If anybody spotted you, load the checkpoint and go there again - The Gekko Mimic does not appear if the alarm is raised. Then, go towards the gate - one of the cyborgs guarding it is a lefty (1/4).
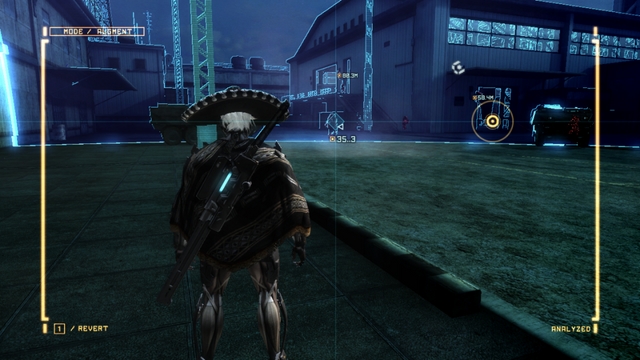 Opposite the gate, there is another lefty.
After you cut off the arm, and deal with all the enemies, cut through the gate and note the patrolling heavy armored cyborg. This is another lefty (2/4).
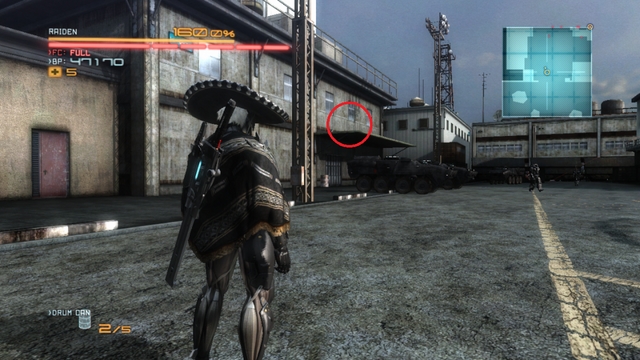 The location of the first, of the two, Data Storages.
Deal with him and (while standing at the HQ's entrance), take a look at the green shelf on the wall. That is where you find the Data Storage (1/2).
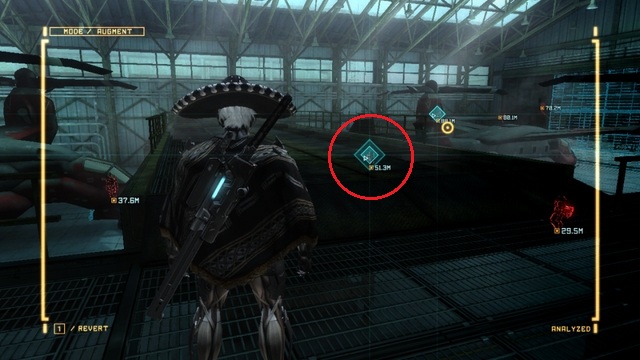 Another lefty has been marked in red, behind him, outside, there is another one.
After you collect the item, go to the hangar on the right. Inside you will have to fight several more cyborgs. Among them, there is another lefty (3/4) - again - a heavily armored cyborg with a sledgehammer. I recommend that you deal with the cyborgs armed with RPGs, in the first place - their attacks may interrupt your Blade Mode, which will make it more difficult to claim the cyborg's arm. You should also watch out for cameras above the hangar's exit gate - they are armed with machine guns and they will fire at you if you get within range.
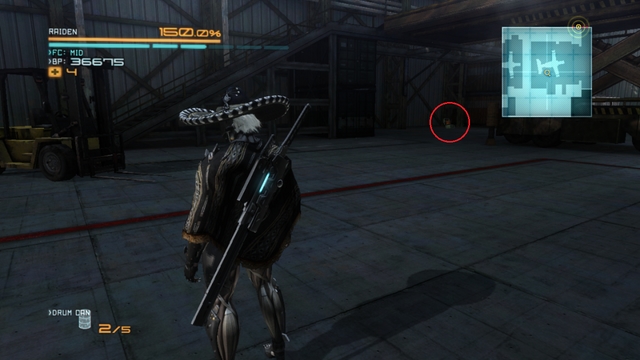 The final VRM computer in the game.
After you have secured the hangar, you can take to collectibles. The first one of them is the VRM computer (2/2) near the forklift, under the stairs to onto the catwalk.
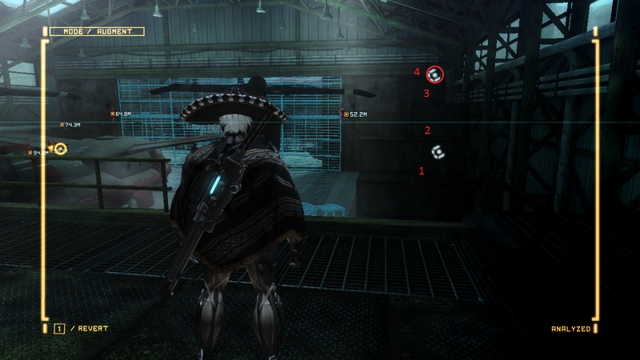 The way to the last Endurance Plus in the game.
Another thing that you can find in the hangar is the Endurance Plus, located on top of the containers, in the corner of the hangar. Ninja Run up the containers and collect the upgrade.
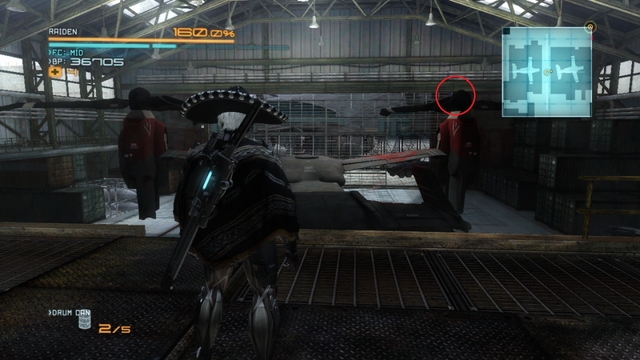 A Data Storage, on one of the rotors of the red helicopter.
The last collectible in the hangar is a Data Storage (2/2), that you can find on one of the rotors of the red chopper. Once you have collected all of them, walk outside through the gate with cameras above it.
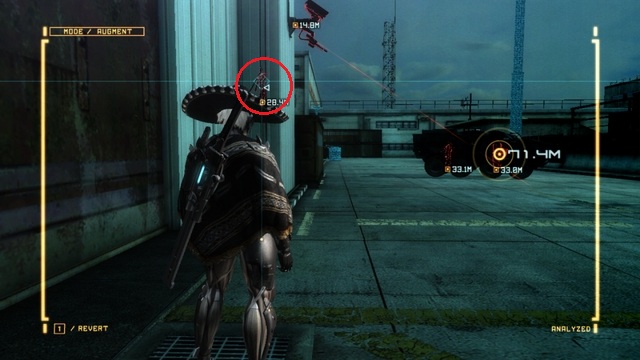 The last lefty in the game.
Initiate the AR and locate the last lefty (4/4) in the game - he is standing on the elevation to the left.
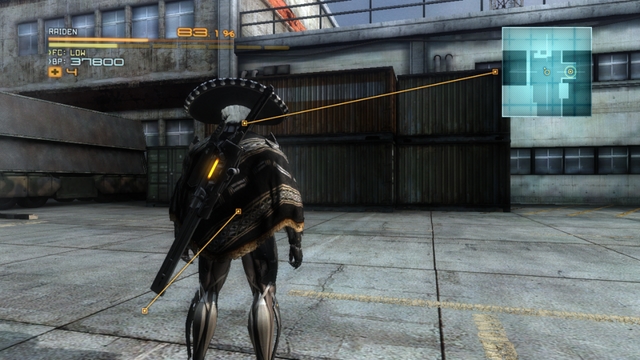 The last Man in the Box is inside this container.
Cut off the hand, deal with the rest of the cyborgs and approach the stack of container, located close to the marker on the map. Inside, among the containers, there is the last Man in the Box. Deal with him and go to the marker to see the cutscene, and start the boss battle.
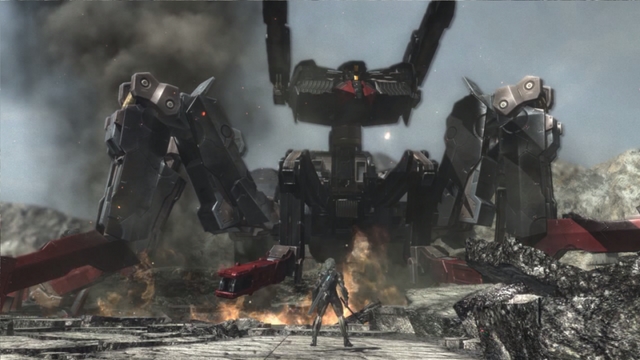 Excelsus is easier than it may seem, at first.
At first look, the fight may seem a bit difficult, because there are several ways in which the boss attacks. Knowing its attacks, knowing which can be blocked, and which you need to escape from, is going to make things much easier for you. The attacks that Excelsus uses are:
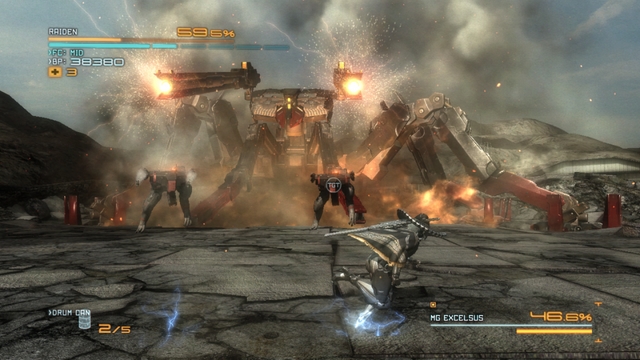 Use the Blade Mode on the Gekko, to regenerate health.
Apart from that, Excelsus will summon several Gekko robots to its aid (when it starts attacking with plasma beams). You can use them to regenerate your health - remember that you can also use the Blade Mode on the Gekkos killed by Excelsus).
Continue fighting, using the Blade Mode until there will appear a piece of information on the screen, and soon after a QTE sequence will start. After this, Metal Gear will end up as a piece of junk.
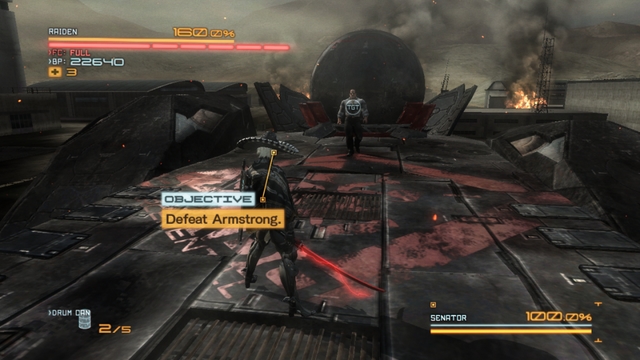 The small battle arena does not make it easier for you.
The first stage of the fight with the final boss. The battle is short, because the boss's health must drop to 90%, after which a cutscene will start. After that, you need to bring the boss's health down to 90% again, to make it to phase 2.
Remember to parry Armstrong's "regular" attacks (when he glows red) and escape when he uses the unblockable ones (he glows in gold) - instead of escaping, you can dodge, but your timing must be right. Once Armstrong's health drops down to 90%, a long cutscene will start, after which the final showdown will start.
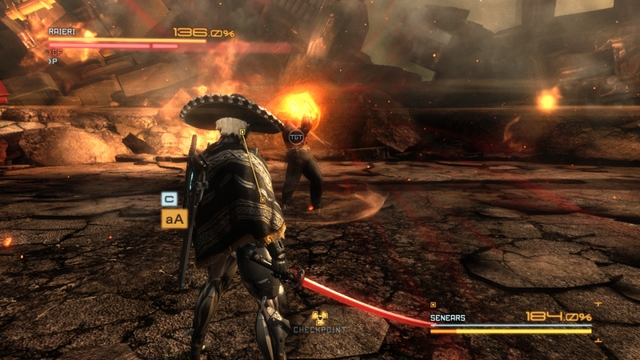 Armstrong is getting ready for his favorite "explosive" attack!
The time for the last, and at the same time, the most frustrating and the most difficult battle in the game, has come. The blows of the upgraded Armstrong deal immense damage (some of them devour , as much as, 100% of your health bar) which is why you need to learn how to parry and dodge them. These are the attacks that Armstrong may use:
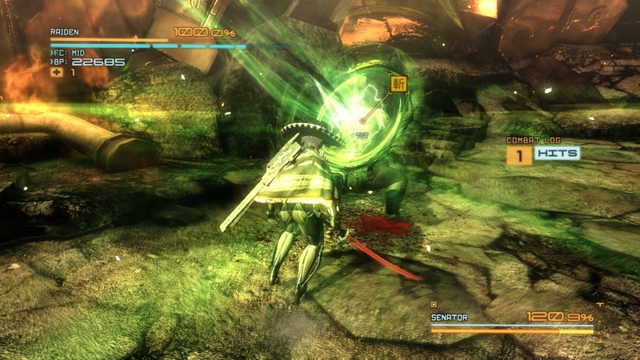 At all costs, do not let him regenerate!
Once Armstrong's health drops to 0.1%, a QTE sequence will start, after which you will have to perform several slashes in the Blade Mode - if you manage to do that, this will end the battle and the game will be over.
A DLC mission pack where you get to control Sam, whom you have had the opportunity to fight against, for several times. This DLC consists of 5 parts but, in this guide, this is going to be treated as on mission.
Playing as Sam is different from playing as Raiden, for several reasons:
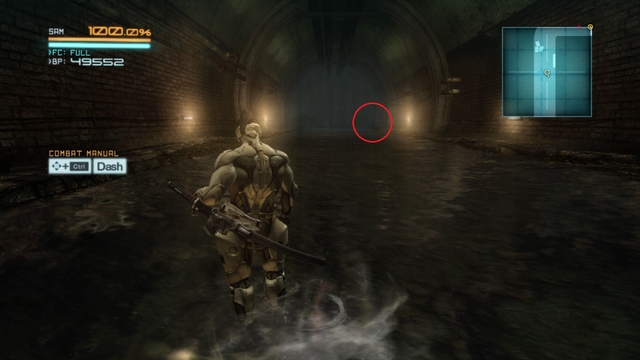 The location of a Fuel Cell.
Right after the mission starts, turn around and reach the end of the corridor, which seems to be a dead end. You will find, here, a rate with an upgrade - Fuel Cell (it increases your health bar). Return where you came from and follow the marker, until you reach a fork. You will have to fight several cyborgs and Vodomjerks here.
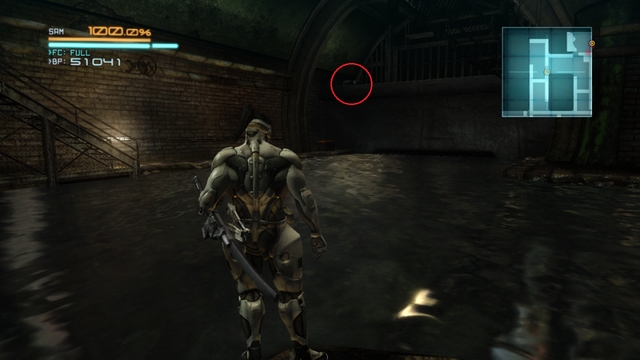 Endurance Plus.
After you have killed every last of them, to the North-West of the sewers. You will find a brown crate here (Electrolyte Pack), and another one above it, which you need to open in the Blade Mode. Inside, you will find Endurance Plus.
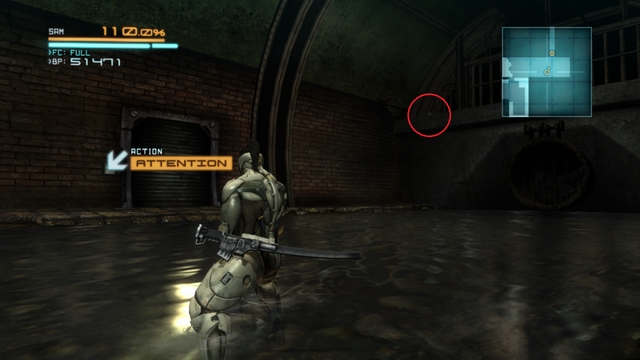 Data Storage.
Collect everything and go towards the gates that the marker points you to but, do not open it yet. Note the ledge on the right. Climb onto it and collect the Data Storage, and then cross the abovementioned gate.
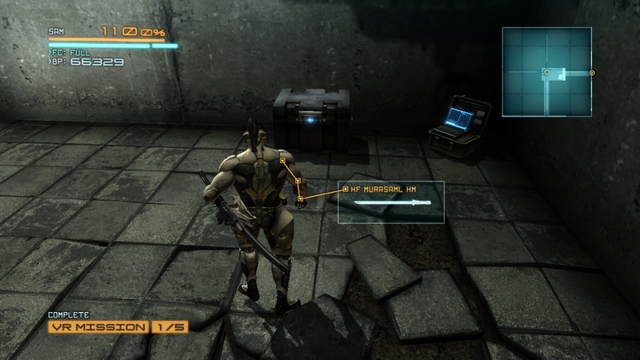 A VRM computer and a reward that will appear after the end of the mission.
At the end of the corridor, before the turn, there is a VRM computer. This one, however, works a bit differently than the ones that you would find as Raiden. Here, you will have to complete the a VR mission right after you find the computer. However, the reward is often some upgrade for Sam. In this mission, you need to deal with 5 enemies - at first you will have to fight 3 cyborgs and, after you kill them, 2 Gekkos will appear. An effective method of eliminating the robots is using the Avalanche attack (a propelled aerial attack). Once you have dealt with the enemies, right next to the VRM computer, there will appear a crate with an upgrade (Endurance Plus). Collect it and go to the marker, where you will fight the boss.
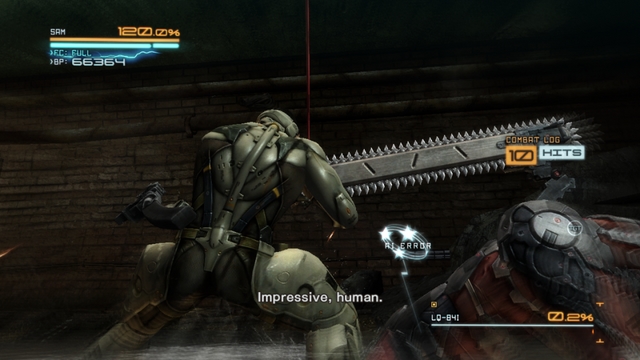 The fight against Blade Wolf is no different than when you fought him as Raiden.
The fight with Blade Wolf s identical so, there is no point in describing it again. In case of any problems, take a look into the chapter devoted to boss battles. After you kill him, Wolf drops an Endurance Plus.
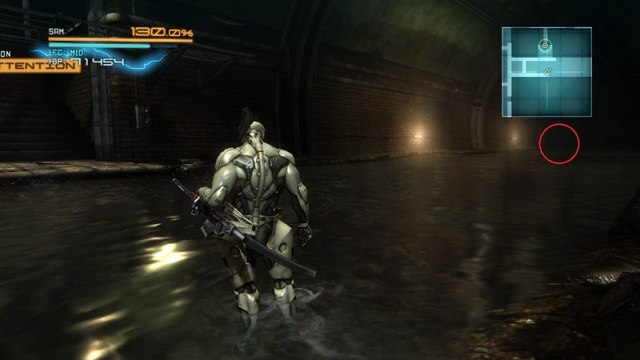 The location of another Fuel Cell.
Once you have reached the gate, do not cross it and go right, until you reach the end of the tunnel, where you will find a crate with a Fuel Cell. Then, walk through the gate, collect the barrel and prepare to fight another Gekko.
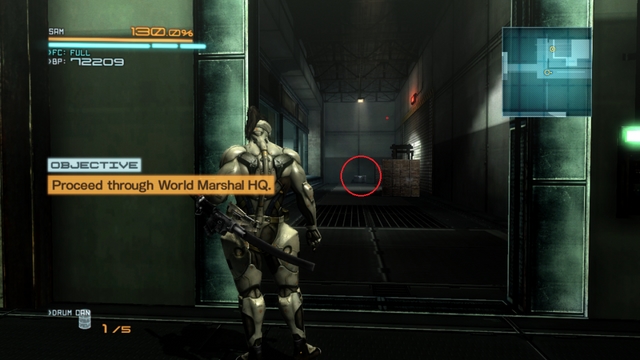 A crate with Endurance Plus.
In the next room, you are up for a fight with 3 cyborgs and a camera armed with a machine gun - not a big deal. Deal with the enemy and run up the stairs. Do not go to the elevator yet and go right - at the end of the tunnel there is a crate with Endurance Plus. At the moment at which you open the crate, you will be ambushed by 2 cyborgs with shields and a slider. Eliminate them and take the elevator.
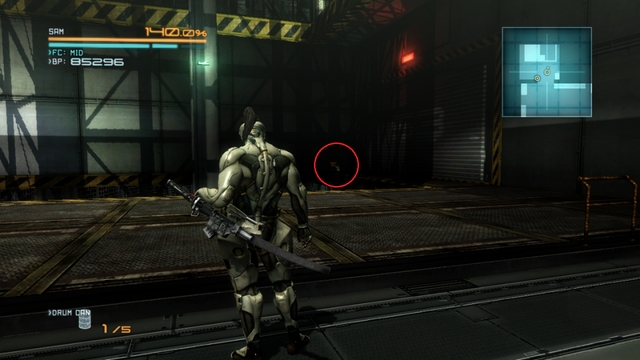
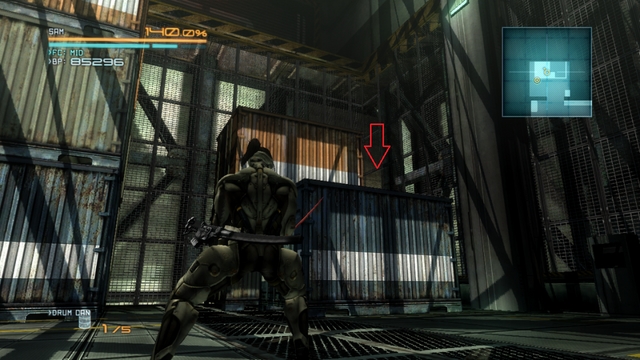 There is a Data Storage behind this container.
You are up for a short, but a heated, fight with a Dwarf Gekko, cyborgs and a Raptor. As soon as the elevator stops, note the containers in the corner. Jump onto them and collect the Data Storage in the corner of the room.
 Another VRM computer - without a reward this time.
Over the container, jump to the very top, towards the marker on the map. Do not open the door, though, and turn around. You will notice another VRM computer there. Completing the mission will not provide you with any bonus, it is required for an achievement though. Regardless of what you decide, go to the gate and get ready for another boss battle.
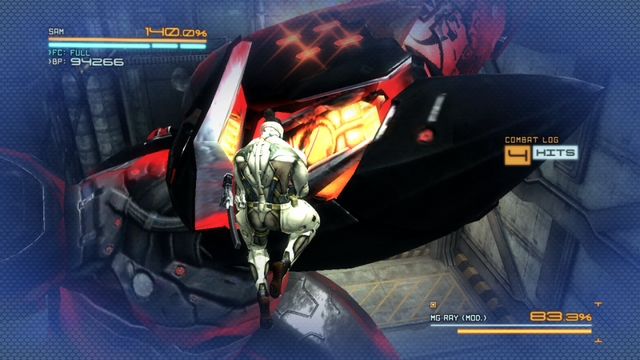 The same boss and the same battle.
Unfortunately, this is another rehashed idea. The fight with Ray is also no different than in the case of the one fought as Raiden. Which is why, describing it all over again makes no sense. Go to the chapter devoted to the game's bosses, in case of any problems.
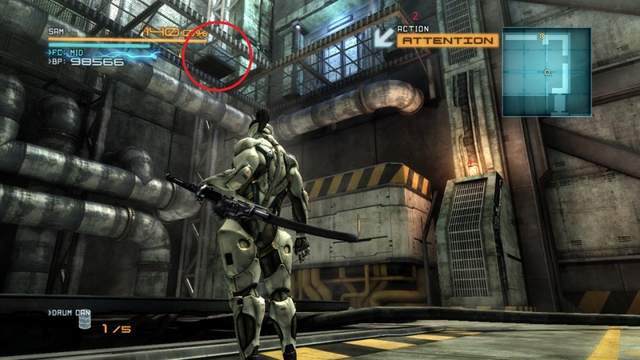 A Fuel Cell is located to the left of the red marker.
After you have dealt with the boss, you need to find the collectibles, which are plenty here. The first one (a Fuel Cell) is in the South-Eastern part of the hangar - look for the plank suspended above the ground and get there with the double-jump.
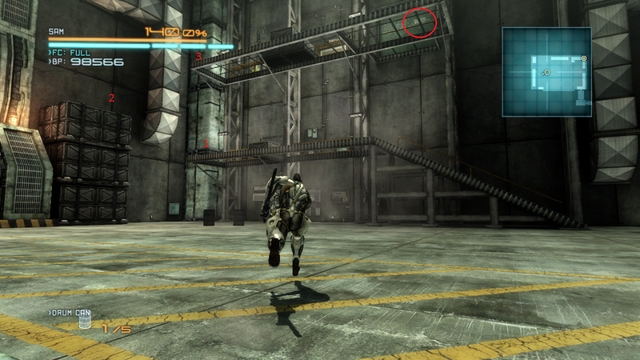 The way to get the VRM computer.
Then, go to the Western part of the hangar and climb onto another plank above the ground. You will find a VRM computer there - for completing its mission, you will receive an Endurance Plus.
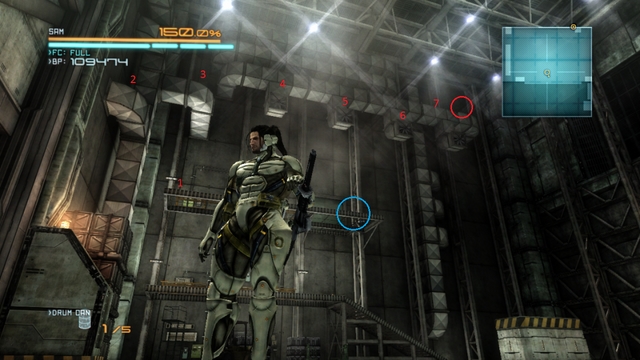 The way to obtain another Data Storage.
Another item (a Data Storage) is located directly above you, on the venting shaft (look at the above screenshot to learn how to get there; your position has been marked in blue). After you have collected everything, go towards the marker - to get to the gate, you will have to cut through the fence with the Blade Mode.
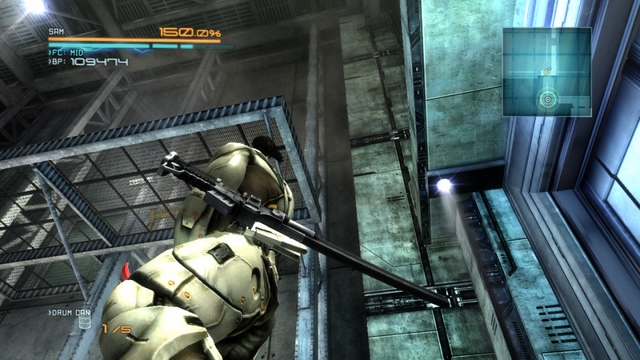 The plank to another Endurance Plus.
When opposite the gates, pan the camera upwards - you should notice another metal plank here. Jump onto it and over onto another one, until you reach a crate with Endurance Plus inside. Collect the item and go to the gate.
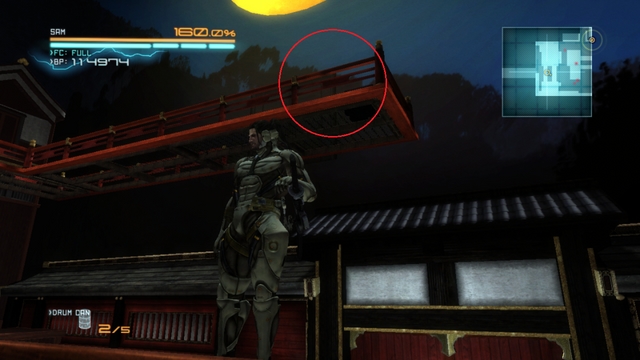 Location of a Fuel Cell.
After a while (and a fight with two heavily-armored cyborgs) you should reach a familiar place - the Japanese garden. Once you cross the gate, look up. Jump onto the rooftop and onto the plank, where there is a crate with the collectible inside (Fuel Cell). Then, go for the palace which you have been recently climbing up.
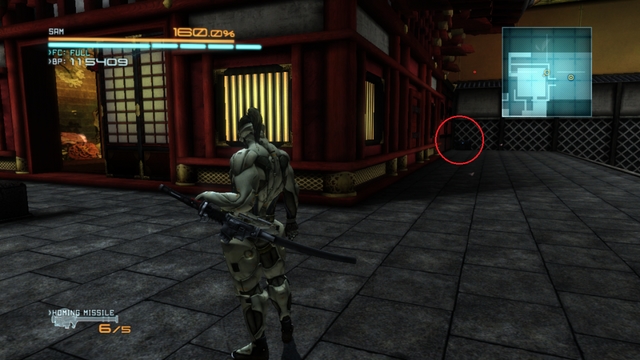 And a crate with an Endurance Plus here.
Deal with all the enemies in your way and walk through the palace to the other side and turn left - you should be looking at a crate with Endurance Plus right now. Collect it and climb onto the top of the palace (use the double-jump for that, to avoid using lamps, which you have been recently jumping over).
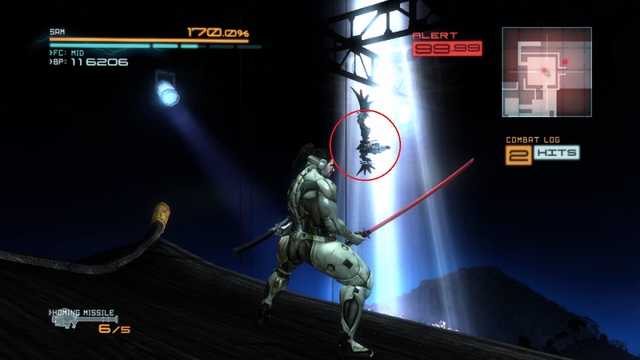 A Slider that drops an Endurance Plus after dying.
You are up for a fight with several cyborgs here. After you have killed one of them, note the airborne slider. Shoot it down with the rocket launcher and it will drop another Endurance Plus. Kill out the rest of them, jump off the palace and go towards the marker, where you will fight cyborgs and Fenrirs.
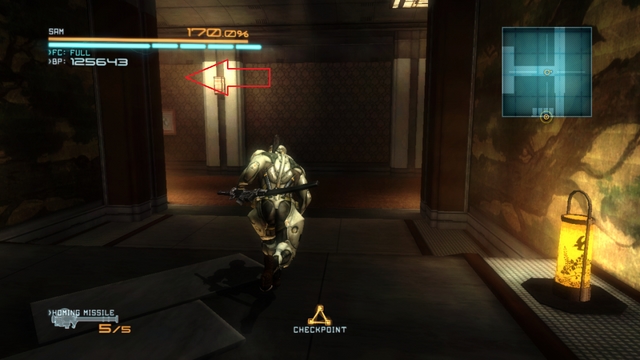 Go left to reach a VRM computer.
After the fight, leave the building and turn left, after you reach the fork. At the end, you will find a VRM computer. The mission that you will have to complete the here is extremely difficult and you will have to fight several opponents (Mastiffs, Fenrirs, Raptors), to fight, eventually, the boss (GRAD). After you complete the this mission, you will not receive any upgrade so, if you are not bent on completing all of the VRs, you can ignore it.
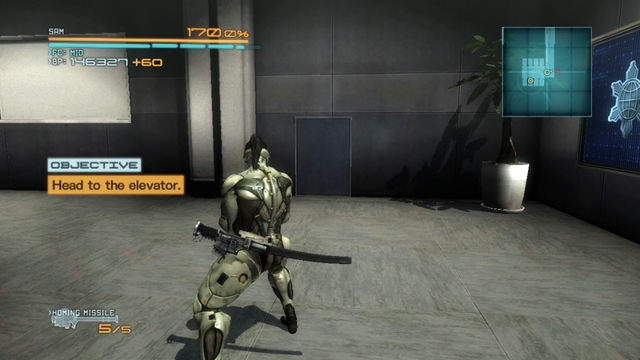 This wall looks suspicious, well...
Regardless of your decision, take the other branch in the fork, towards the marker. You are up for a fight with several Mastiffs, and a lot of cyborgs here. After you have dealt with all of them, look onto the wall opposite the elevators and note the fragment that stands out from the wall's shade. Use the Blade Mode to cut through that point and reach the hidden data Storage. Take the elevator ten and go up.
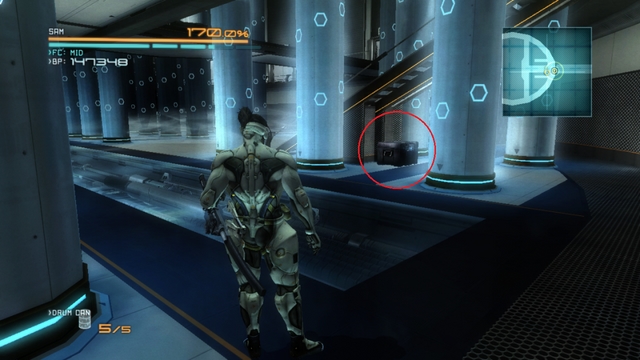 The niftily hidden crate with Endurance Plus, under the stairs.
After you exit the elevator, pick up the box and the repair nanopaste from the brown crate. All of the door, apart from the one marked on your radar, are blocked at this moment, but you will be back in a moment. Eliminate the Gekko along your way and enter the server room. Clear the entire room, so you can move more freely here. After you are done, find a crate (Endurance Plus) hidden under the stairs.
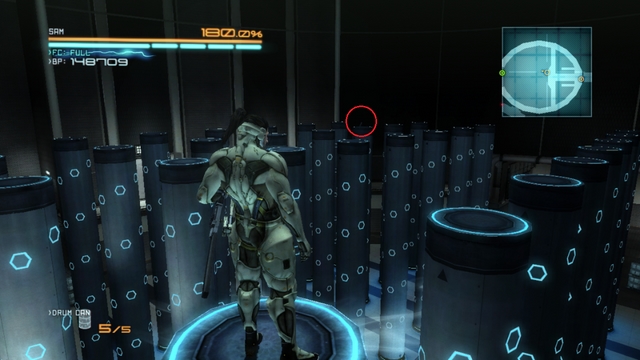 There is a Data Storage on one of the rods/columns.
Collect all of the upgrades and climb up the stairs. Soon, there will appear a green dot on the map (which marks a side mission) - you will fight two GRADS there but, you will not be rewarded for that so, you do not really need to go there. On one of the rods/columns you will find a Data Storage. Double-jump to get onto the rods. After you have collected the item, activate the console at the door. After a while, there will appear enemies in the server room - kill every last of them and collect the access cards that they dropped.
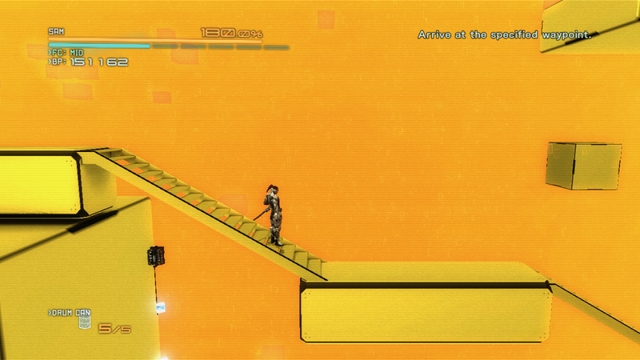 An upgrade that you cannot obtain, yet.
Now you can return to the room that the other green dot is pointing to (this location was inaccessible, at first). Inside, find a crate (Fuel Cell) and the last VRM computer next to it. Once you activate the mission, the view will change to the old-school platform style. Continue along your path, until you reach the Endurance Plus.
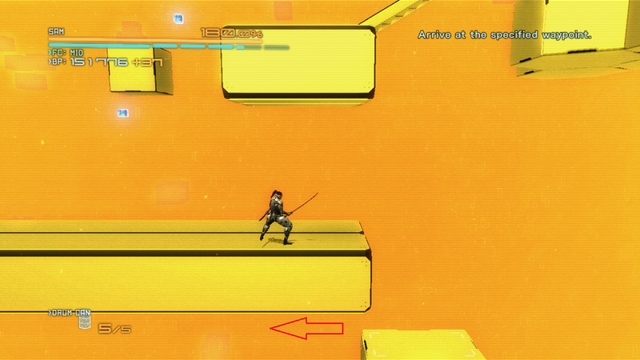 A way to the upgrade.
However, it is under stairs and you need to rack your brains a bit, before you will be able to obtain it. Keep going left, until you reach a place with a platform that moves vertically. Jump down on that platform and go left, until you reach the upgrade. Return now to the place where you jumped down onto that platform and jump up, to complete the VR mission.
Now, The last thing for you to do is go towards the marker, to meet the final boss of this mission pack.
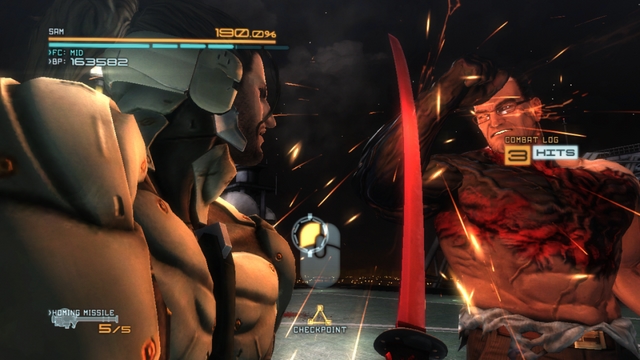 Armstrong, just like the rest of the bosses, is no different from the version that Raiden fought.
And its none other than Armstrong. Just like the previous bosses, his attacks are no different (he received a new, "golden", attack now, where the spire of fire that he launches, follows you automatically). However, his health does not regenerate anymore, and instead of rocks, he now throws helicopters at you, which are way easier to destroy. In case of any problems, see the chapter devoted to the game's bosses.
There are no numerous QTE sequences here, which you had while fighting this boss as Raiden. Therefore, you need to find a way to deal with this one basing on your attacks only. Once Armstrong's health drops to 0.1%, the final QTE sequence will start.
The DLC, in which you get to control Blade Wolf, the mechanical dog with artificial intelligence, which you fought at first, and then he became your ally.
Playing as the Blade Wolf is different from playing as Raiden, or Sam, for several reasons:
Unlike in the case of Same, the Blade Wolf's DLC is not one long mission, but rather a collection of several short stages.
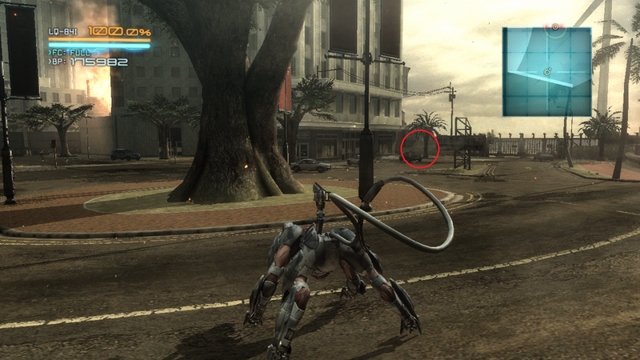
The game starts at the moment, at which you receive your orders from Mistral. Your task is to reach the target and eliminate it. Once the conversation with Mistral ends, go right and move along the wall to reach a Data Storage. Go then towards the gate guarded by 3 cyborgs. You can get into fight, to learn Wolf's fighting system, walk around the targets or eliminate them silently.
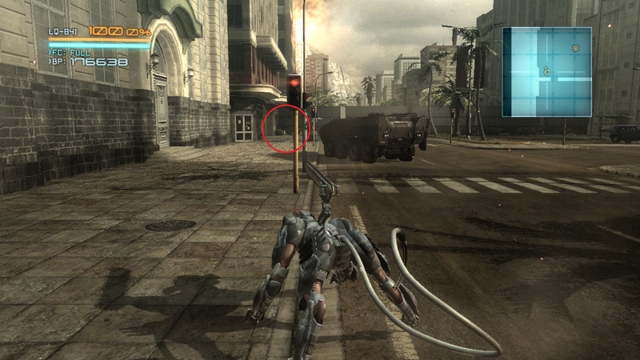 Location of a Fuel Cell.
After you make it across the gate, do not go towards the limo immediately. Instead, follow the wall, until you reach a crate with a Fuel Cell. Collect the item and go towards the limo to neutralize the target and complete the mission.
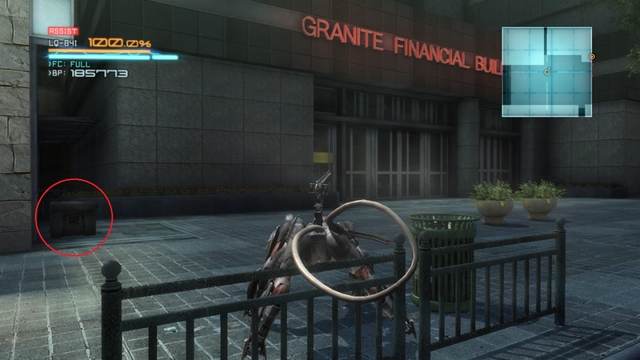 A crate with Endurance Plus.
After you have started the mission, take to securing the area. Try being stealthy, while at it because Blade Wolf does not handle multiple enemies that well. Once you are done, go West. Near the Granite Financial Building, there is a crate with Endurance Plus.
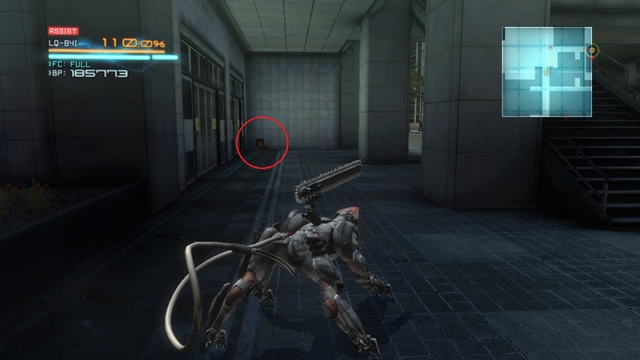 A VRM computer.
Another item (VRM computer) is right under the pass that the cyborg is patrolling, which you had to kill to gain access to the escalator. After the activation, you are to complete the a two-stage mission. In the first one, you need to reach a switch that opens access to the main target. After you have activated it, there will appear enemies on the map. Stage two is about reaching the marked area within the allotted time.
 Wait for the Mastiff to retreat and then eliminate it.
If you still haven't kill the cyborg with the access card to the escalator, and go towards the marked area. The upper floor of the building is being patrolled by two cyborgs (one of them is turned with its back at you, at all times) and a Mastiff. To eliminate the Mastiff without raising the alarm, wait for the patrolling cyborg to climb onto the top of the stairs. Once it turns towards the Mastiff, eliminate it immediately and get back down. The Mastiff will notice something suspicious and will try checking out what it might be. However, it should not be able to spot you. Once it turns back to its initial position, attack it with the surprise attack. Then, eliminate the cyborg with its back at you and complete the mission.
Another short mission, where your primary objective is to eliminate the enemy in the quietest way possible. Right after the mission starts, hide under the stairs - above you, there will appear a Raptor in a moment and, if you stay in your current position, it will raise the alarm. Wait for it to climb down the stairs and eliminate it quietly. After that, take to clearing the building - make sure that nobody spots you.
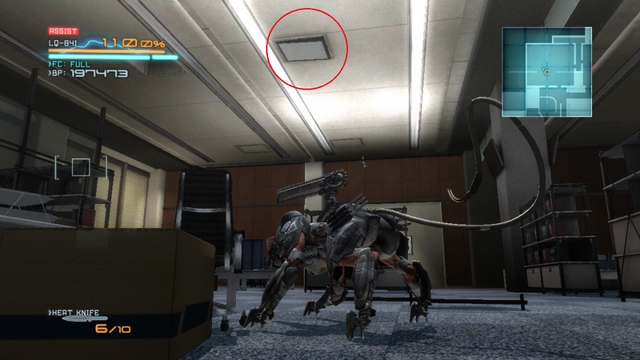 A manhole lid sticking out of the ceiling, covering a Data Storage.
After you have cleared the building, return to the location where there were two cyborgs and the Raptor. Look above and you should notice a manhole lid sticking out. Attack it (by jumping, e.g. off the bookshelf, to reach it) and a Data Storage will fall out. If you have cleared the whole building, Mistral should contact you after a while. She will provide you with further objectives.
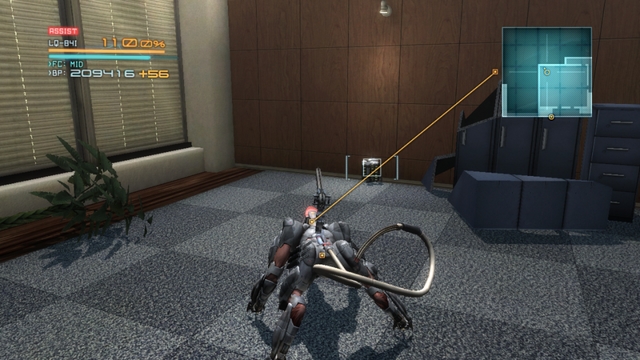 Endurance Plus, dropped by the corpse of your double.
Return to the location where you have found the Data Storage and wait for Mistral to react ("Hurry to the objective"). A moment later, there should appear a marker and an enemy that is your mirror image. Defeat it and it will drop an Endurance Plus. After that, follow the marker that Mistral set for you, to complete the mission.
As the mission's name suggests, you will learn how to move over platforms. The area may not be too crowded by the enemy, but what they lack in numbers, they make up for in quality. The most dangerous of them all are, of course, the Mastiffs and you need to eliminate them quietly at all costs. If you want to explore the area, without any hindrance, and pick the collectibles, you need to clear the map in the first place. This part of the guide assumes that this is what you actually did.
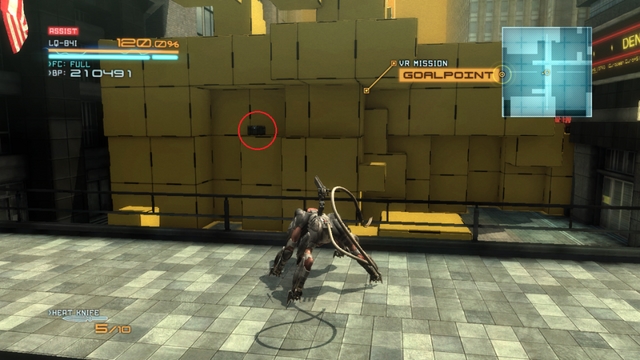 The ledge with a Fuel Cell on.
Climb onto the flyover (in the spot where there is an intersection) and locate a wall of yellow boxes. - inside, on the shelf, there should be a box with a Fuel Cell.
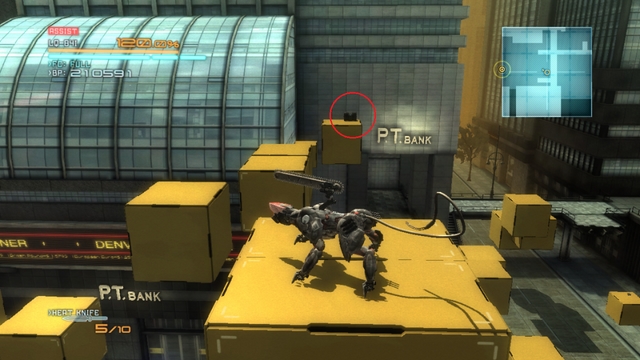 The location of an Endurance Plus.
Return onto the flyover, from which you have spotted the box, and climb over the boxes to the top. Turn towards the P.T. Bank building. From there, you should spot a box with Endurance Plus inside.
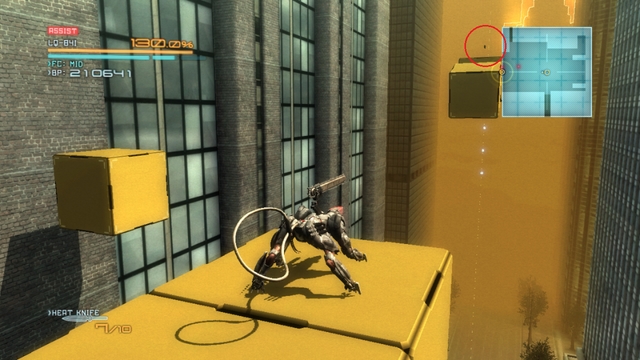 High above the ground, there is another Data Storage.
Climb onto the tall wall of boxes, inside of which you have just found the crate. Locate a box that moves up and down and jump onto it. Find a box moving vertically to get even higher. Once you have made it to the very top, take a look around and try to locate a stationary structure, in the distance, with a Data Storage hanging down from. Carefully, make it over there, make sure that you do not fall off and collect the item.
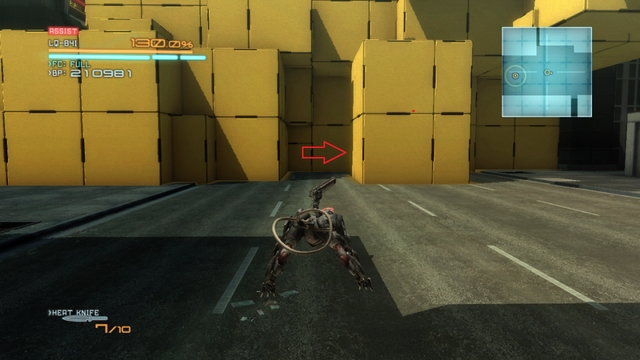 A VRM computer hidden among boxes.
Jump down, to the very foot, and turn away from the marker on the map. In the recess between boxes, you will find a VRM computer - after you complete the mission, you will receive a crate with another Endurance Plus inside. This is the last item that you can find in this mission - go to the location marked on the map to end this mission.
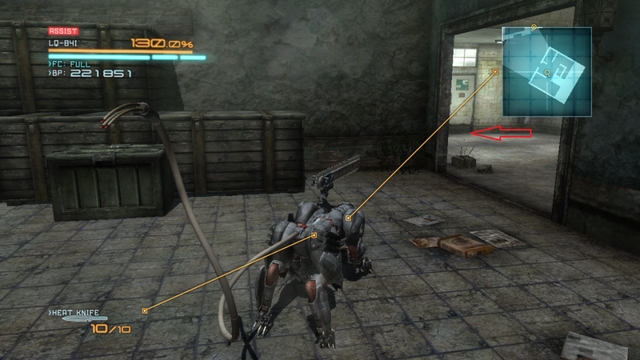 The way to another crate with Endurance Plus inside.
This mission starts with a Mastiff jumping out through a gate. If you do not want it to spot you, try to find a cover, otherwise you are up for an irritating fight. Eliminate the enemy silently and enter the nearby building. From there, walk to the right to locate a crate with Endurance Plus.
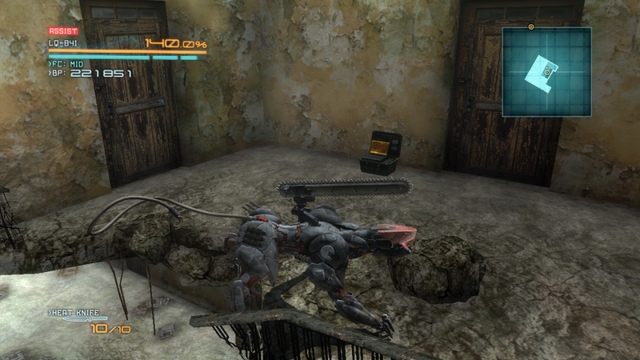 Another VRM computer.
Then, climb onto the building's highest floor to find and activate another VRM computer. Completing this VR mission does not reward you with anything, apart from the possibility to obtain the appropriate achievement. At the bottom of the building , you will get some company - deal with them, leave the building and go towards the marker.
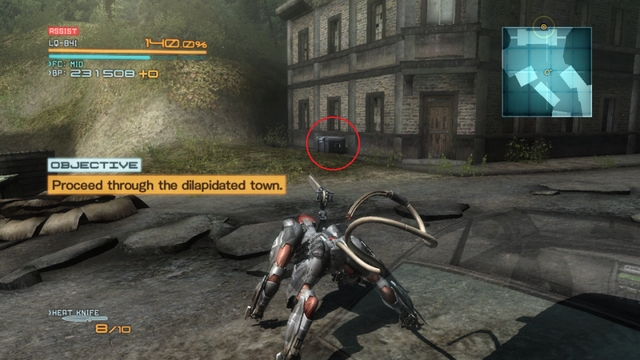 A crate with a Fuel Cell hidden behind the building.
While exploring the city streets, keep your attention to the right side - you will find there a crate with a Fuel Cell. After you have collected the crate's contents, keep going towards the marker, until you bump into a stone structure, which you may remember from mission 2.
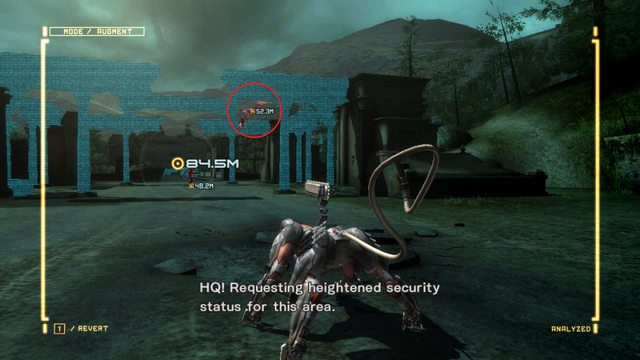 A Slider carrying an Endurance Plus.
After a moment, a slider will fly by, and your mission is to destroy it, because it drops an Endurance Plus after being taken down. Try to sneak near the enemy to prevent driving it away - if it spots you, it will fly away and you will have to load the last checkpoint, if you want to obtain this upgrade.
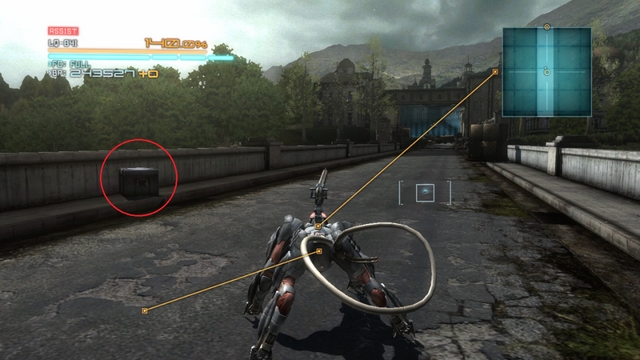 A crate with another Endurance Plus.
Once you reach the bridge, you should be careful, because it is being patrolled by two GRADS and several cyborgs. Try eliminating the enemies silently and take a look along the left edge of the bridge (provided you are facing the marker with the objective). You should find there another chest containing an Endurance Plus.
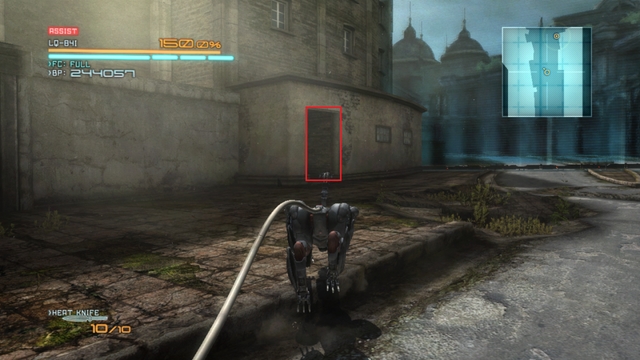 And another Fuel Cell here.
After you walk off the bridge, it will turn out that you need to kill one specific cyborg to obtain a password that unlock passage to the gate in the way. Once you have dealt with the enemy, do not cross the gate, yet, and go into the small building on the left - inside, there is another crate with a Fuel Cell.
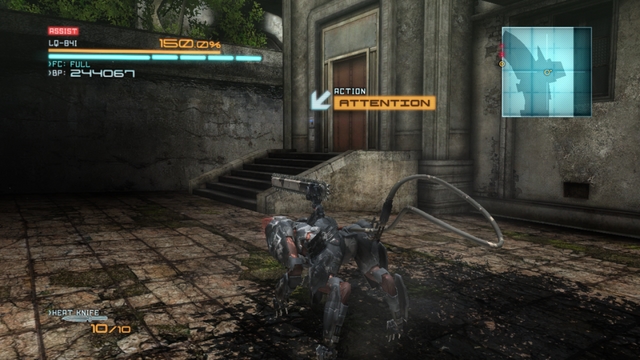 The building with a VRM computer inside.
After you have collected the contents of the crate, activate the control panel, to unlock your way. Do not take the main road, though, turn right and enter the building. Dash up the stairs - at the end of the corridor, at the top floor, there is a VRM computer, with a mission that consists in fighting. For completing it, you will be rewarded with an Endurance Plus.
In spite of the lack of the loading screen, this is a whole new mission. In the closest vicinity, you will find the hostile Gekko and Mastiffs. In both cases, you need to make sure that you are not spotted - the charge of a Mastiff and a Gekko, at the poor Blade Wolf, will not end well for you. Once you have dealt with the enemy, it is time to search for collectibles.
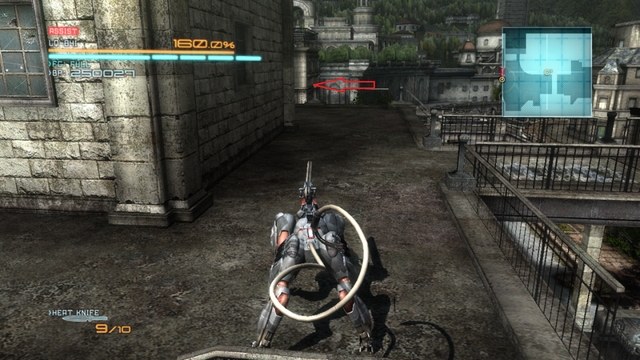 Around the corner, there is another Data Storage.
Locate the bus and jump over it to get to the rooftop. Then, climb over the boxes to reach a stone balcony - now you need to go ahead and turn left, to reach a Data Storage.
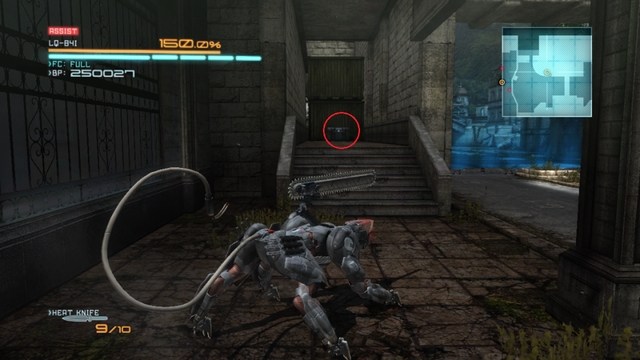 Another Endurance Plus here?!
Return to the bus that you climbed over and turn towards the direction that you came from. You should now be looking directly at the crates with another Endurance Plus. After you are done, deal with two Fenrirs, patrolling the area, and enter the building that the marker on the map points to.
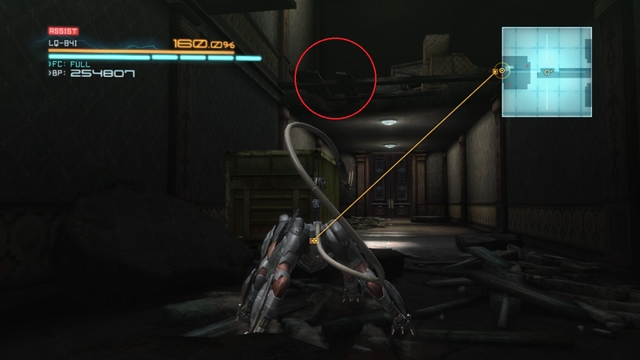 And another VRM computer.
Enter and turn around - on the dilapidating level above, there is the last VRM computer. During the final VR mission, you will get the opportunity to obtain the last upgrade to your health.
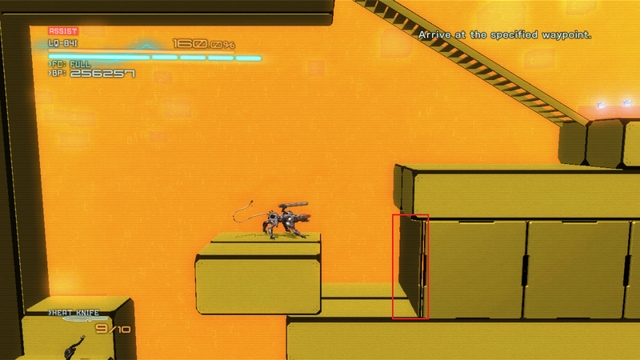 A fake wall to smash.
While completing this mission, you should note the friendly Gekkos waving at you. Right after you go past the second one, take a careful look at the boxes above you (the above screenshot) - the wall in front of you is a fake, which you can destroy, where you will find an Endurance Plus. The only thing left for you to do, after you have performed this action, is to end this mission.
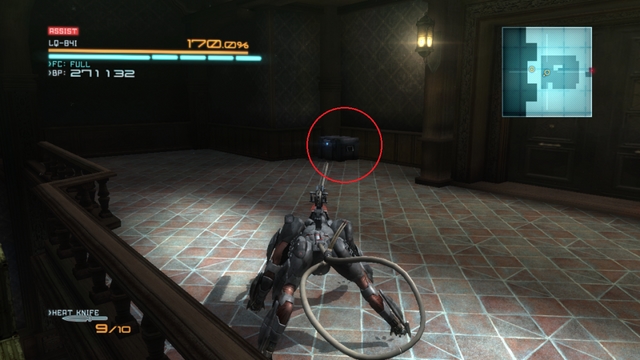 The final Fuel Cell upgrade for Wolf.
Once you return to the building, wipe out all the enemies and get to the top floor. There, you will find the last, fifth, Fuel Cell upgrade.
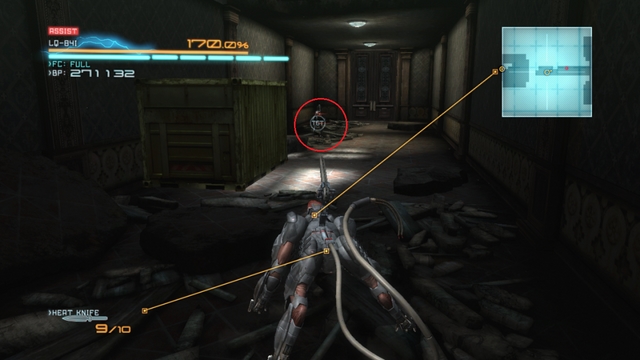 Gekko Mimic at the building's exit.
Once you have cleared the building on enemies, note the red dot that has appeared next to the building's entrance. It is a Gekko Mimic - destroy it to receive the last Data Storage. After you are done, go to the marker to initiate the final fight.
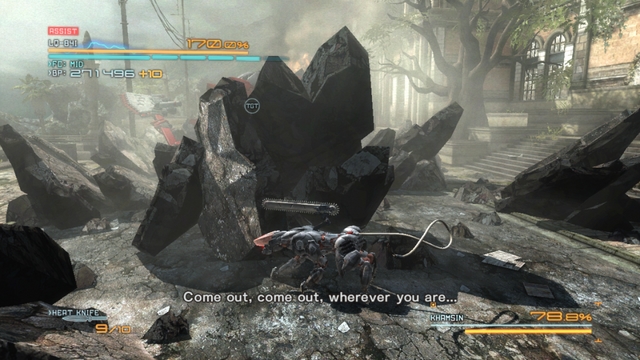 Rocks that can be used to sneak up on the enemy.
Khamsin is one of the easiest bosses in the game. In spite of its size, and its powerful weapon, its attacks do not deal too much damage, they are slow and each one of them is possible to be parried, including the ones where the boss glows gold.
The only noteworthy attack of this enemy is the jumping attack, which can deal a lot of damage, if not parried. If, however, you manage to marry it, the blast will erect small rocks that you can hide behind and attack the boss by surprise, activate a QTE sequence and deal massive damage. Remember, though, that you cannot wait too long, because Khamsin will, otherwise, destroy the rocks.
Try to parry all of its attacks and there is a probability of defeating it without taking damage. Once its health level drops below 10%, a customary QTE sequence will start, after which the battle will end.
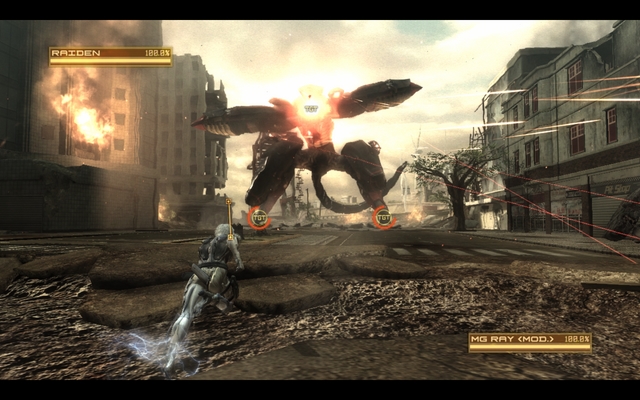 To dodge plasma beams run in angles.
The first boss in the game is not too much of a challenge but, you need to watch out anyways, for some of its attacks (especially if you are playing at the Hard difficult level, or a higher level).
Metal Gear Ray has several attacks which it will use alternatively, depending on your position, during the fight:
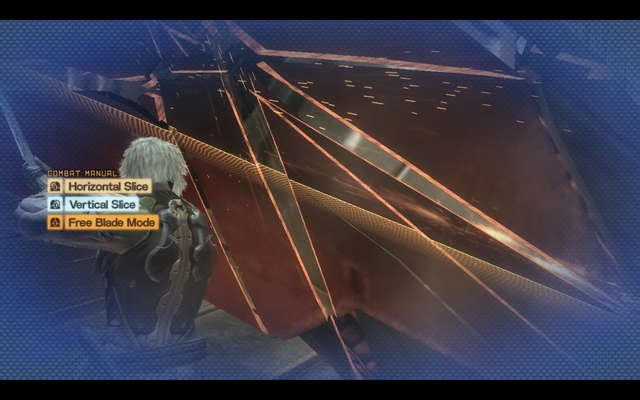 A nice view of slashing into tiny bits!
Fighting Metal Gear Ray boils down to attacking its legs - once you have dealt sufficient damage, there will appear an instruction, on the screen, to use the Blade Mode, to slash both the armor and the cannon of the enemy into bits. If you repeat that action for 4 times, the boss will attack you with its blade and another QTE sequence will start. Follow the instructions and press the buttons that appear on the screen, and soon the boss will fall to the ground.
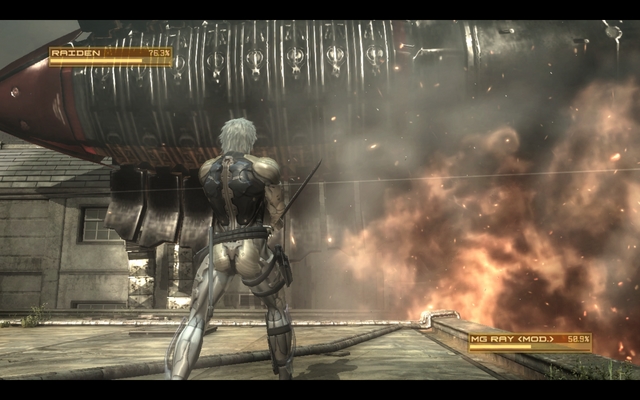 Use Blade Mode, to cut up the rockets.
Yes, it seems that Metal Gear Ray is still kicking and it is time for the second round. This phase is much more difficult, because your options to maneuver are limited and it is more difficult to dodge its attacks. Ray may use one of the following attacks:
Attack Ray's snout to initiate a QTE sequence after a while and cut up the enemy's armor. Repeat the entire sequence several times, and the boss will jump back, when it is your task to chase it with Ninja Run - simply, run in its direction while holding the button and follow the instructions displayed on the screen. After a while, the action will change to the side of a building, over which you need to run down, while avoiding rockets (run to the sides) and the plasma cannon (jump over it) - this will start the final QTE sequence and the boss will fall to the ground, this time for good.
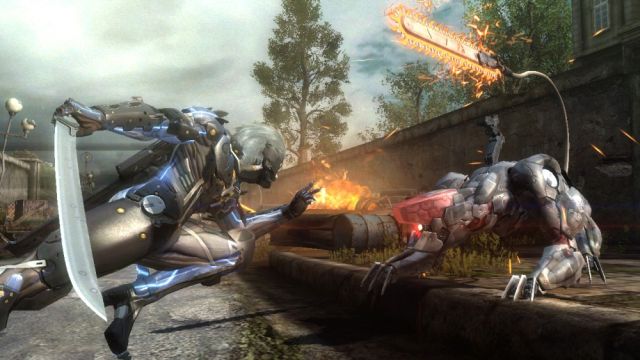 An opponent that will get on your nerves!
The third boss, and probably one of the greatest challenges that you will encounter, while playing Metal Gear Rising Revengeance, mainly due to the fact that few players will have already mastered the game's basic mechanics by this point.
Unlike the fight with the first boss, the Metal Gear Ray, in this one you cannot let yourself run about and swing your sword - you need to start parrying attacks (to learn more see the chapter devoted to the information on gameplay).
Blade Wolf uses several types of attacks, which can mostly by parried:
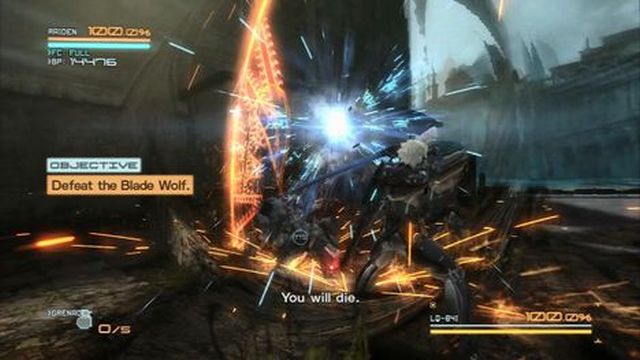 Parrying of attacks is the best method against Blade Wolf.
Every now and then (after Blade Wolf's health drops to a pre-defined value) the boss will escape to the elevation and call for reinforcements - this is a blessing for you, because you can heal yourself, the easy way, by absorbing the enemies' core. The reinforcements, usually, consist of 3 regular cyborgs or one Gekko.
Note the chests and containers all around the place - inside, you can find a lot of useful items like grenades, or the Repair Nanopaste, which you can "wear" if your health drops to zero, to regenerate automatically (the way to equip it can be found in the chapter devoted to the basic gameplay information).
Once you have stopped swinging your sword chaotically, and start to parry attacks effectively, fighting the Blade Wolf will turn out to be much easier.
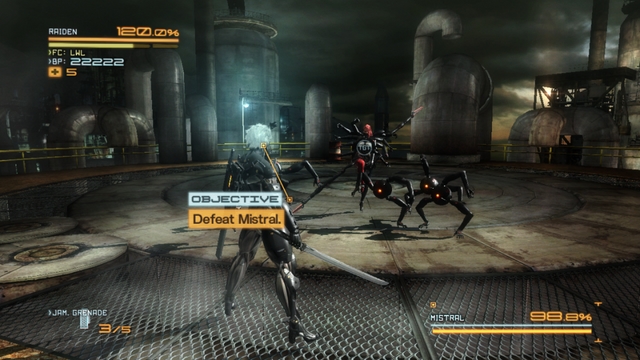 Mistral and a group of her goons.
In comparison with Blade Wolf, Mistral is very easy to defeat. The fight is also a good moment to receive another achievement - Looking Out for the Little Guys, which you receive after you eliminate 30 Dwarf Gekkos - they are plentiful during this fight.
Mistral is an easy opponent and, with successful parrying, you should defeat here without major problems. This is the list of her characteristic attacks:
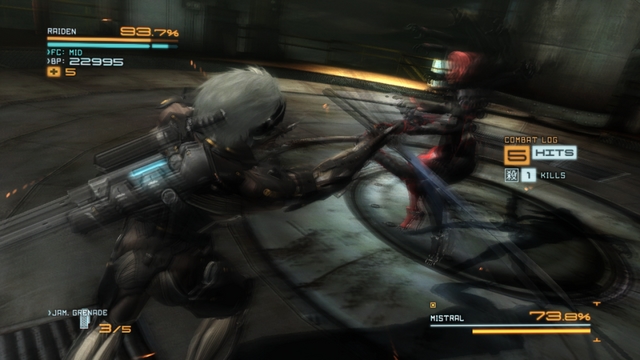 Remember to parry Mistral's attacks.
While parrying Mistral's attacks, you will sometimes manage to stun her - take advantage of that and deal a lot of damage with Blade Mode. During the duel, you will change locations several times but, her attacks should not be too different between arenas. If you are taking damage, smash several Dwarf Gekkos, because they sometimes drop an item that will replenish some of your health. When Mistral's health bar is near to zero, the game will start a cutscene that will end the fight.
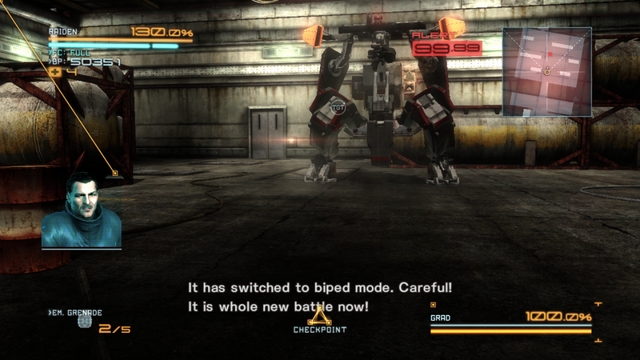 An annoying enemy that is standing in the only passage.
Grad is quite easy, but quite annoying an enemy because, until it stays in the form of a tank, you cannot deal any damage to it. You need to make it turn into robot, you need to push it away from the corridor that it is blocking (it reverses each time you hit it with a slide). Use the EM grenades to make things easier for yourself.
Once Grad has taken on the form of the robot, it will do any of the following:
 This is the much easier version of the boss.
Try to be close to Grad at all times, pepper it with a hail of blows and parry its attacks, at the same time. Every now and then, the screen will turn into the familiar blue, which will mean that you can use Blade Mode to slice and dice any of the robot's elements. After a while, Grad should be nothing but a piece of junk.
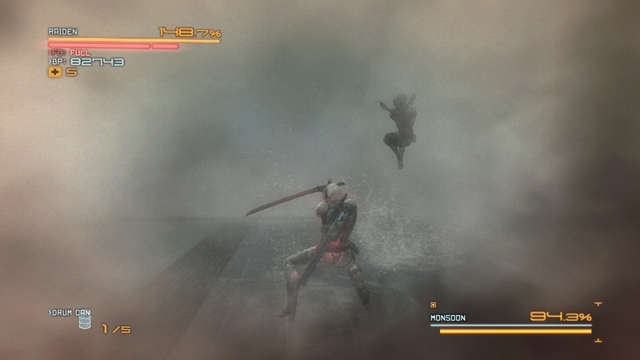 The effect of the phosphorus grenade used by Monsoon.
After a long cutscene, and after Raiden goes online again, you are up for a fight with one of the most dangerous bosses in the game. If you still have not mastered parrying, this is where you get the opportunity to make up for this.
Monsoon does not deal too much damage, but its attacks are incredibly fast. You need to keep your guard at all times, to be ready to parry an attack at any moment. Each time the Monsoon stops its attacks, use this to your advantage and strike.
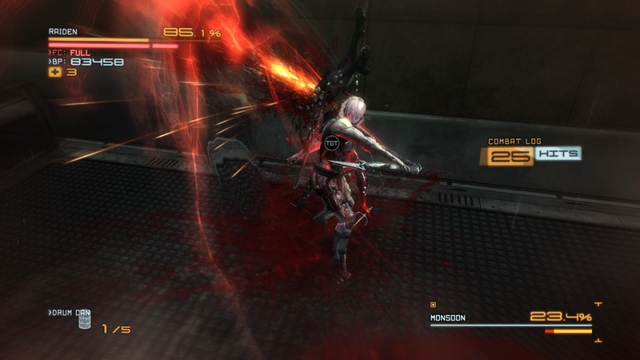 Closer and closer to the end...
Monsoon uses the following attacks in the battle:
The time, during which Raiden can stay in the Blade Mode, is unlimited for this battle, which should let you deal with the scrap that Monsoon throws at you, without any problems. Every now and then, the boss will break up into pieces - locate its head and attack it to deal severe damage to the enemy.
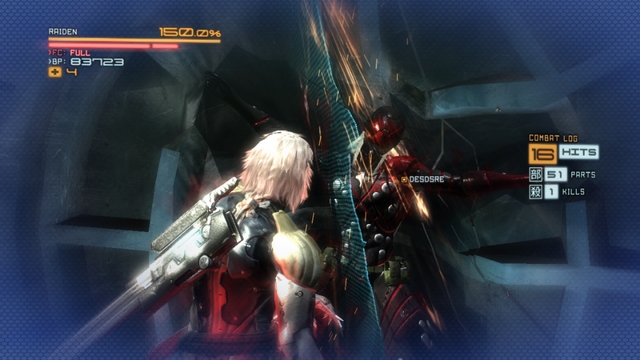 The Grand Finale!
Once the boss's health bar drops below 10%, a QTE will start, in which Raiden will deal with Monsoon, after the correct buttons are pressed.
Is not too difficult a boss, but it requires to handle the Blade Mode in a flawless, perfect way (i.e. to aim your slashes accurately). If you have problems with that and you usually cut without rhyme or reason, you will have quite a problem with this enemy.
Sundowner has the reactive armor, which means that each your attempt at a frontal attack, with the blade, ends up in receiving severe damage, because the boss's armor explodes. The way to defeat it is to parry its regular attacks to bring about the situation in which you can use the Blade Mode.
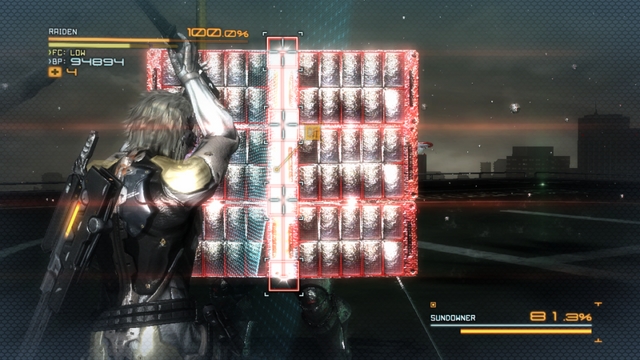 This is how you need to cut through Sundowner's armor - in vertical slashes.
Once you use it, you will see spots, in which the armor can be penetrated, without the risk of explosion, displayed. If you manage to do that, the boss will lose its explosive armor for a dozen of seconds, and you will be able to fight in a regular way. If you fail, the armor will explode and deal quite a considerable damage to you. An additional obstacle is the helicopter that circles around the arena and may interrupt your Blade Mode with rockets - use the rocket launcher to shake the chopper off, for a moment.
Sundowner's typical attacks:
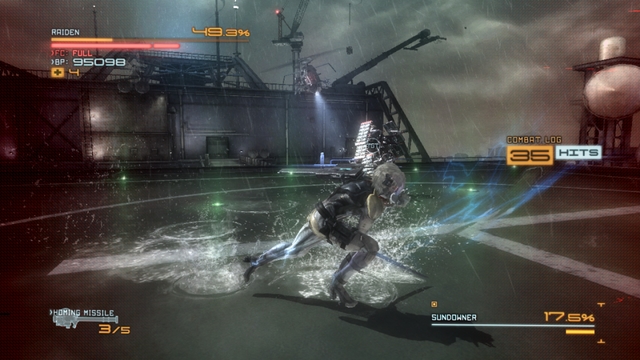 The Hit & Run technique may not be stunning to watch, but it is effective.
If there is no way in which you can defeat Sundowner in the way presented above, there is yet another way, however common. It consists in running up to the enemy constantly, landing a few quick blows with the sword (best into the back) and jump away from Sundowner, before it reacts. Several minutes of such running will handle the boss down. Once its health bar drops to 10%, the usual QTE sequence will start. After that, Raiden will cut up the boss and the mission will be over.
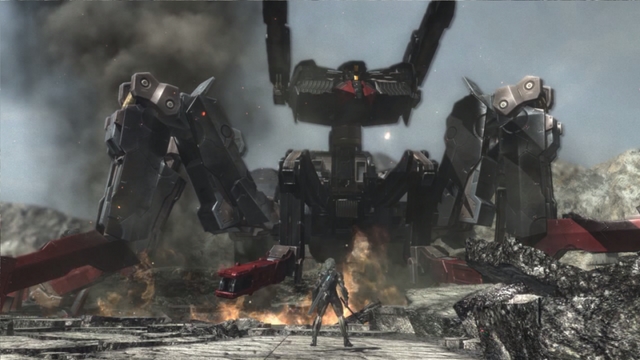 Excelsus is easier than it may seem, at first.
At first look, the fight may seem a bit difficult, because there are several ways in which the boss attacks. Knowing its attacks, knowing which can be blocked, and which you need to escape from, is going to make things much easier for you. The attacks that Excelsus uses are:
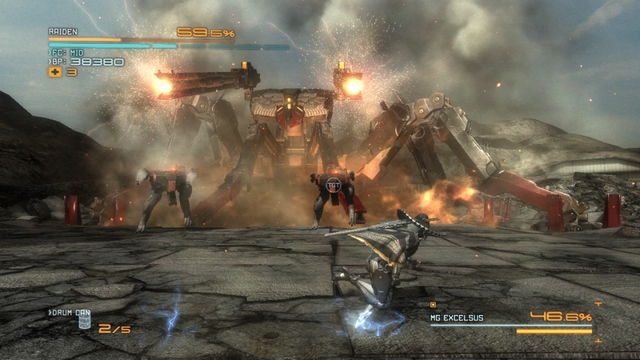 Use the Blade Mode on the Gekko, to regenerate health.
Apart from that, Excelsus will summon several Gekko robots to its aid (when it starts attacking with plasma beams). You can use them to regenerate your health - remember that you can also use the Blade Mode on the Gekkos killed by Excelsus).
Continue fighting, using the Blade Mode until there will appear a piece of information on the screen, and soon after a QTE sequence will start. After this, Metal Gear will end up as a piece of junk.
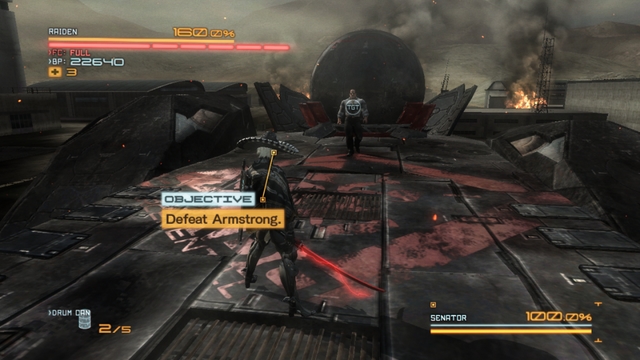 The small battle arena does not make it easier for you.
The first stage of the fight with the final boss. The battle is short, because the boss's health must drop to 90%, after which a cutscene will start. After that, you need to bring the boss's health down to 90% again, to make it to phase 2.
Remember to parry Armstrong's "regular" attacks (when he glows red) and escape when he uses the unblockable ones (he glows in gold) - instead of escaping, you can dodge, but your timing must be right. Once Armstrong's health drops down to 90%, a long cutscene will start, after which the final showdown will start.
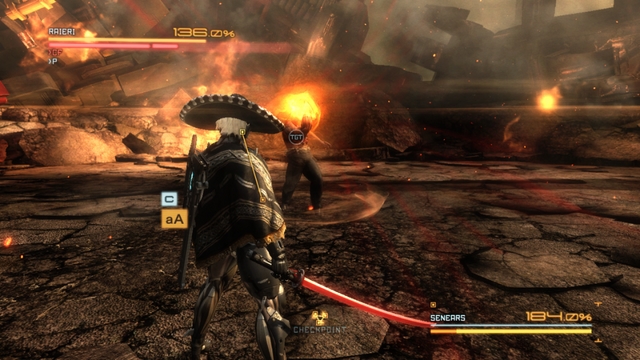 Armstrong is getting ready for his favorite "explosive" attack!
The time for the last, and at the same time, the most frustrating and the most difficult battle in the game, has come. The blows of the upgraded Armstrong deal immense damage (some of them devour , as much as, 100% of your health bar) which is why you need to learn how to parry and dodge them. These are the attacks that Armstrong may use:
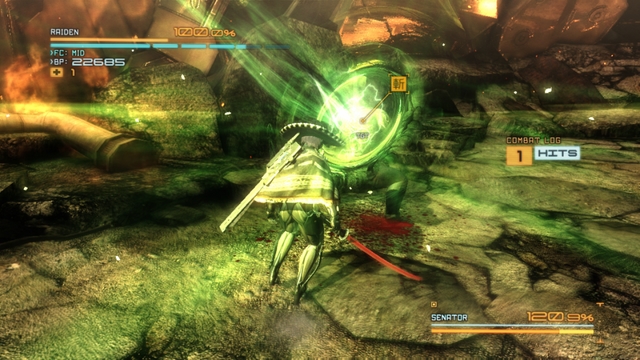 At all costs, do not let him regenerate
Once Armstrong's health drops to 0.1%, a QTE sequence will start, after which you will have to perform several slashes in the Blade Mode - if you manage to do that, this will end the battle and the game will be over.
In total, there are 20 Data Storages in the game, and you will receive the Data Mining achievement, after you collect all of them, as well as an opportunity to buy a new sword (Stun Blade - 20,000 BP).
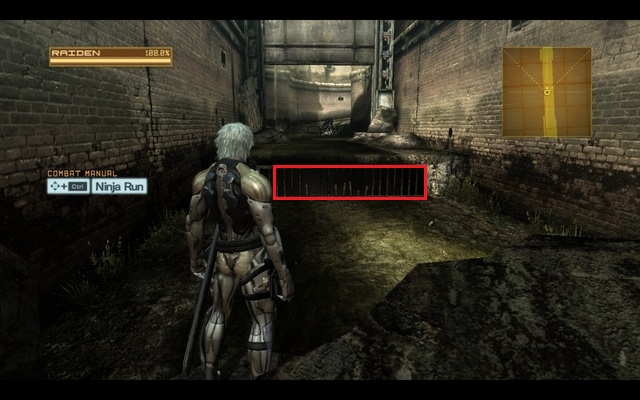 Data Storage #1
The first Data Storage in this mission can be found right after the first fight with Metal Gear Ray (the one in the city street). After you have chased Sundowner, note the drain behind a grate - smash the grate with the sword and slide to get inside. The collectible should be behind your back.
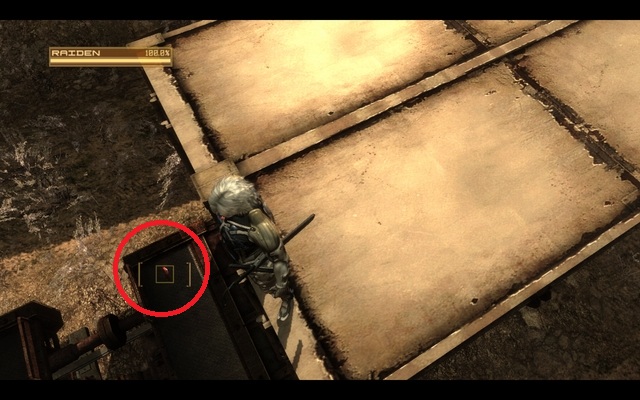 Data Storage #2
The second, and the last Data Storage in this mission can be found after the second battle with Metal Gear Ray, right before the mission ends. Once you reach the last car in the train, from which you will be able to see your target, do not jump off and look down. On the edge of the car, you should notice a Data Storage ready to be picked up.
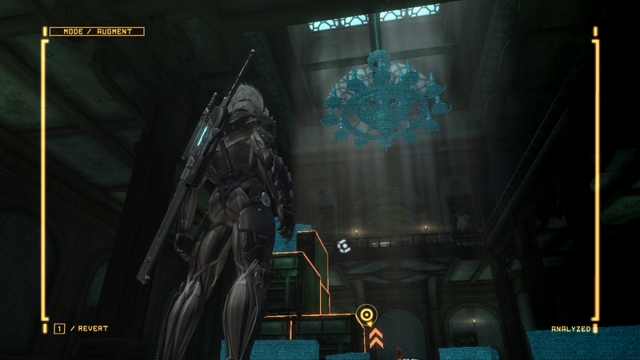 Data Storage #3 - is on the chandelier above.
The first one, of the four Data Storages, available in this mission, can be found at the very beginning of the mission. After you enter the building, look up. You should notice a chandelier hanging down from the ceiling. Climb onto the top of the building, cut the chandelier off and pick up the item.
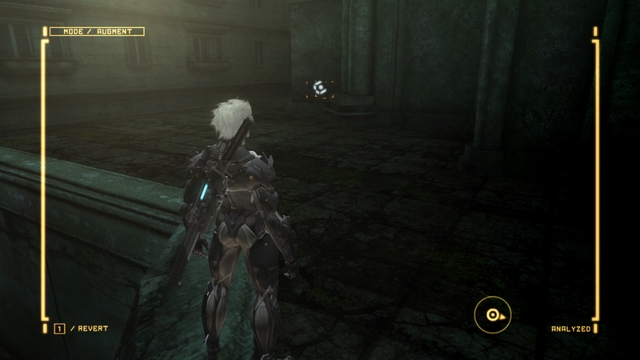 Data Storage #4 - hidden in a small passage between walls.
The second Data Storage can be found where you encounter the Gekko robot for the first time. After the fight, go left, climb over the cracked wall, turn left slightly and pick up the item from the narrow alley.
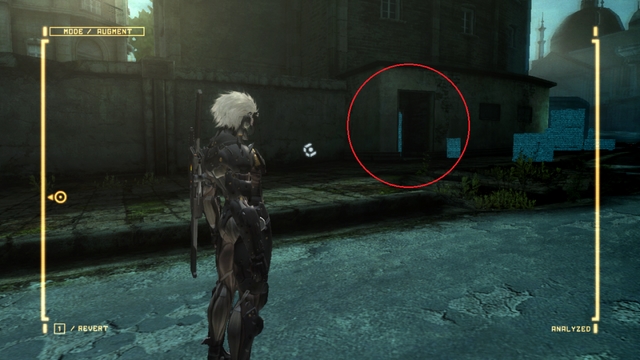 Data Storage #5
The third item can be found after the fight with Blade Wolf. Turn to face the direction opposite to the one shown on the radar and go into the small room, which should be on your left.
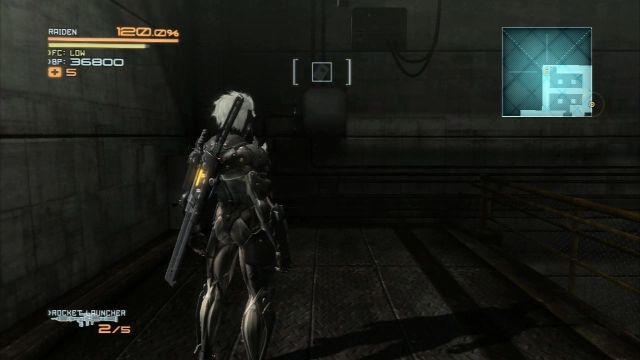 Data Storage #6 - right before the fight with Mistral.
The last Data Storage can be found right before the fight with Mistral, in the hangar where there the laser sensors, at the lower floor. Search through the upper floor thoroughly - you will find the item on one of the walls.
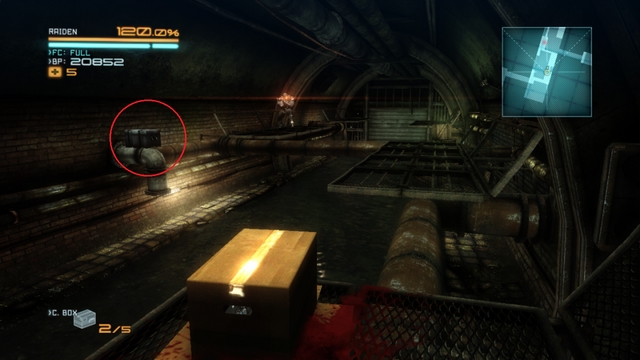 Data Storage #7
The first storage is where you have fought the 3 Mastiffs - search through the crate on the pipe.
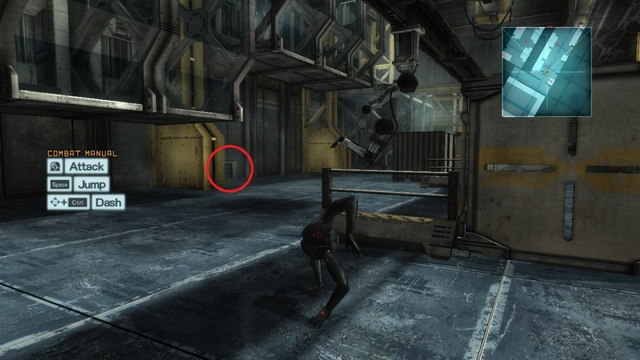 Data Storage #8
You can obtain the second storage only by using the Dwarf Gekko. Once you take control of the robot, locate a small venting shaft right above the floor, to the left of your starting position. Roll inside and collect the storage.
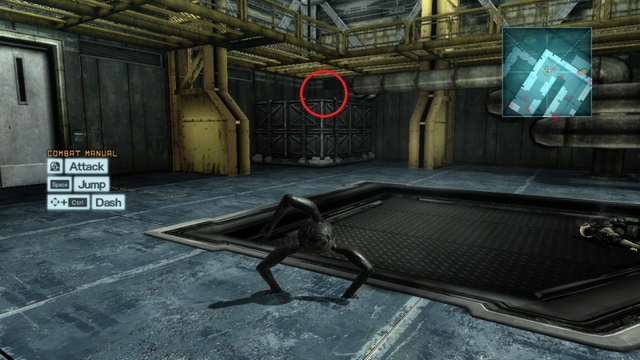 Data Storage #9
The final, third, storage in this mission can, gain, be obtained only with the Dwarf Gekko. Once you have cleared the room, take a careful look around - in one of the corners of the room, at a lower level, there is a container with the item on it.
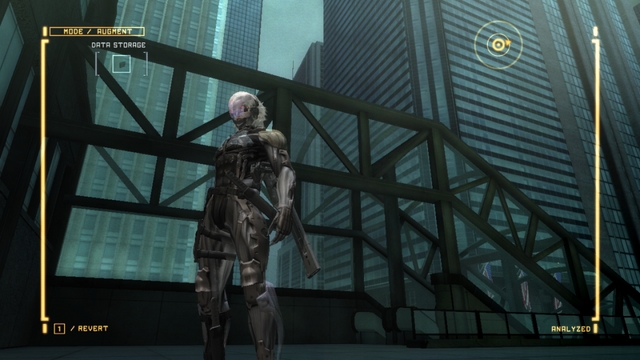 Data Storage #10 - right before the deactivated escalator.
The first one, of the four in this mission, is at the very beginning. Once you enter the building over the inactive escalator, pan the camera up. Right above you, on the glass housing of the stairs, there is the item.
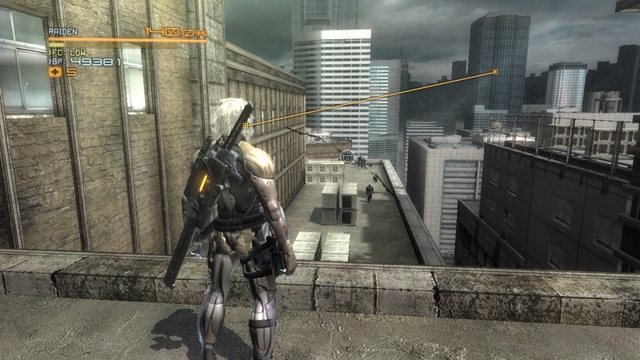 Data Storage #11, carried over by the Slider ahead.
The second storage can be found on one of the rooftops, right before the place where you will have to rescue a hostage. It is carried by a Slider that you need to deal with quickly (either with the sword or the rocket launcher) or it will escape otherwise, and you will have to start over.
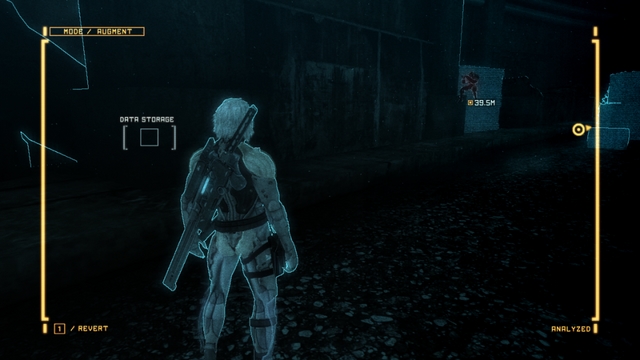 The AR mode, which shows Data Storage #12 behind a wall in the dark tunnel.
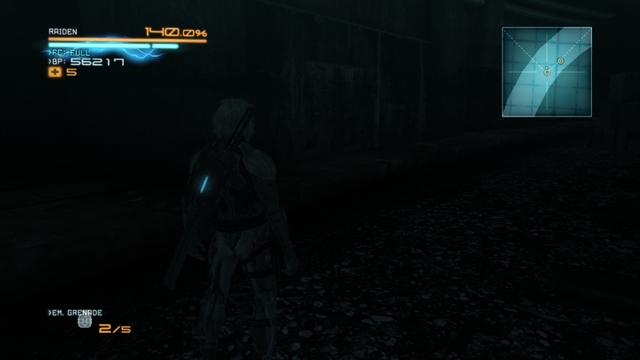 And the regular view, which shows your current position marked on the map.
The third Data Storage is in the dark tunnel, between the two Mastiffs and a lone guard. Use the two screenshots above - they present the AR vision and the regular one, respectively. The other one also marks your position on the map.
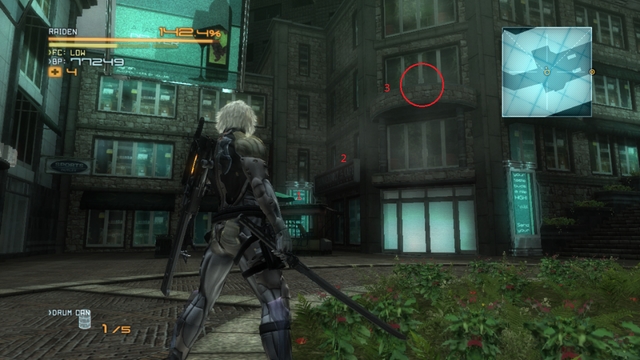 Data Storage #13.
The final, fourth, Data Storage in this mission can be found at the foot of the long staircase, right before you encounter Sam. It is located on the ledge of the building, on the left (as view the stairs from the lower level).
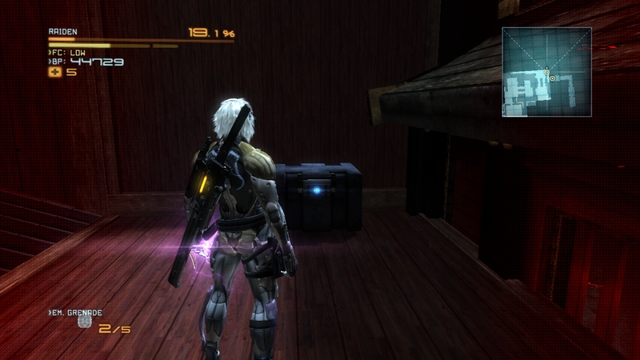 Data Storage #14.
Another storage is at the beginning of the mission. After you have dealt with the ninja cyborgs, dash up the stairs and jump over the TV sets to reach a column, with the item on it.
 Data Storage #15, right before you enter the elevator.
You can find the second storage in the Japanese garden, right before you enter the tunnel to the elevator - the crate with the collectible is very close to the entrance.
The third collectible is in the elevator, which you take to go up. After it catches on fire, do not jump onto the neighboring elevator (in spite of the Doctor's complaining). After a while, there should appear a heavily-armored cyborg. Deal with it and it will drop the sixteenth Data Storage.
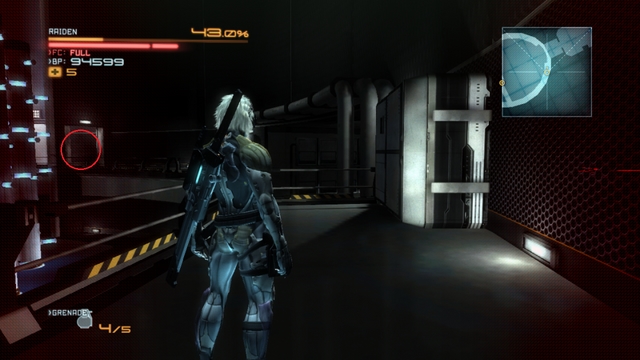 Data Storage #17.
The last, fourth data Storage in this mission can be found in the server room, after the fight with Monsoon and Mistral. After you finish your conversation with Sundowner, run up the stairs and take the path to the left, then turn right and left again. Then, jump over the pipes to reach the neighboring balcony, where the crate with the Data Storage is.
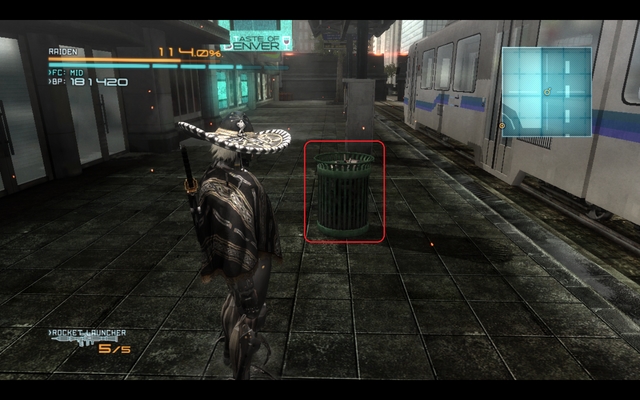 Data Storage #18, hidden in the dustbin.
The only Data Storage in this mission is located shortly after the beginning, in the dustbin between the metro train and the building.
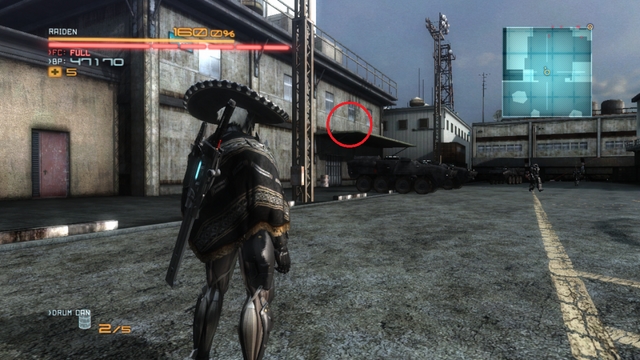 Data Storage #19.
The first storage can be found right after you enter the base - while standing at the gate, locate the green shelf on the wall, on one of the buildings on the left.
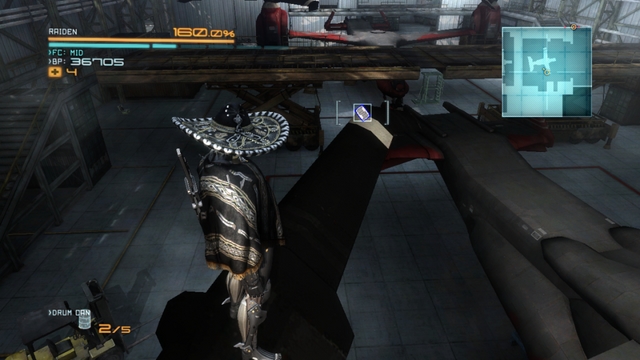 Data Storage #20.
The second item is in the hangar, on one of the rotors of the red helicopter.
For collecting all 30 left arm (i.e. the special IDs) of the cyborgs, you will receive A Big Fan of Leftys achievement: Infinite Wig A, Infinite Wig B and the HF Machete, and Armor Breaker weapons.
The first lefty is where you have rescued a hostage. This is a storyline event (the Doctor will task you with cutting off a left arm, so you can make it past the gate), which cannot be missed.
The second lefty is soon before you reach the open area, where there is the Ferris wheel (where you can jump down on the enemy - the cyborg ahead is a lefty).
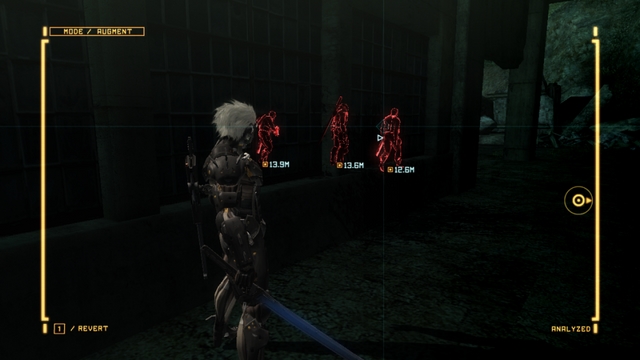 One of them is the lefty #3.
The third lefty is among the group of three cyborgs, a moment before you receive a side mission to deal with Hammerheads.
The final lefty in this mission is located on the upper floor of the hangar, where there are laser sensors, right before the fight with Mistral.
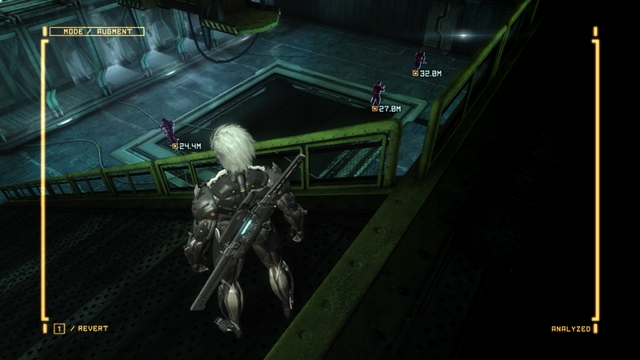 One of them is lefty #5.
The first lefty is in the location where the Doctor asks you to eliminate three cyborgs (one of them is a lefty) silently.
The second lefty is the cyborg that you eliminated with the Dwarf Gekko (it is the one that used to patrol the area closest to the sewers, through which you made it on the robot).
The third lefty is waiting for you right after you fight the boss (GRAD). At the fork, there are two cyborgs with RPGs waiting - one of them is your target.
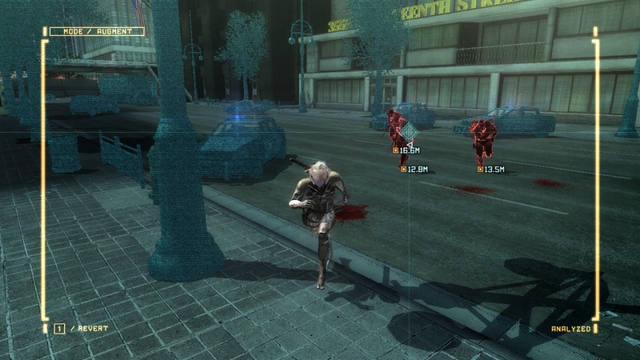 Lefty #8
The first lefty is right at the beginning - he is one of the police officers that attack you.
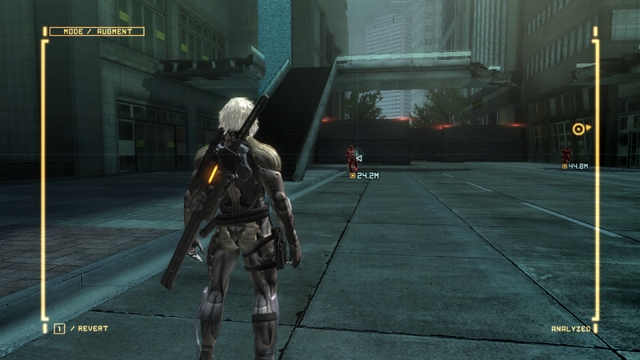 Lefty #9, running out from behind the barricade.
The second lefty appears from behind the barricade, right after you defeat the two GRAD robots.
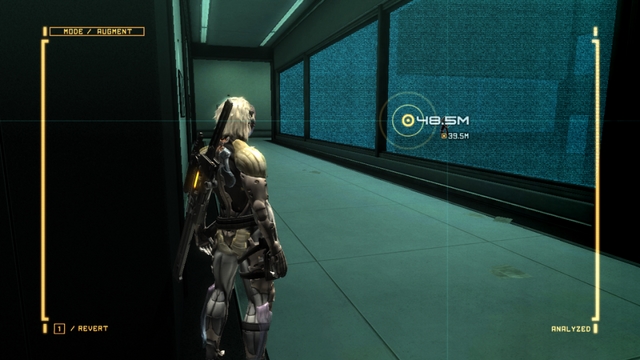 Lefty #10.
The third lefty is one of the cyborgs guarding a narrow passage, with the RPG (you get there right after you deal with the man in the box).
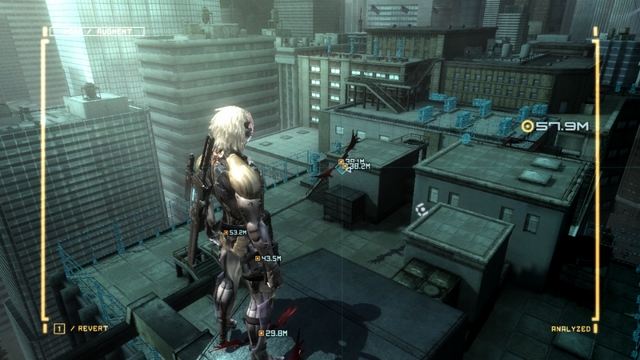 Lefty #11.
You encounter the fourth, airborne lefty, right after you jump off the crane onto the roof.
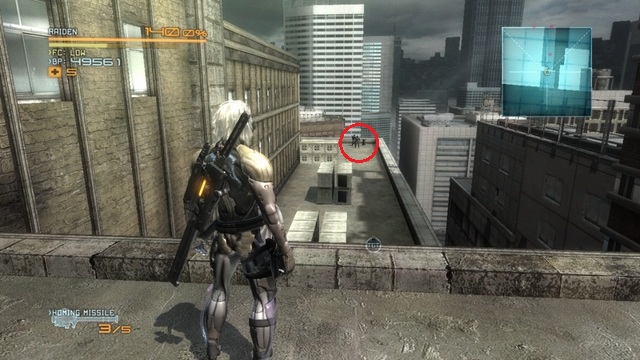 Lefty #12.
The fifth lefty is the cyborg that guards the hostage.
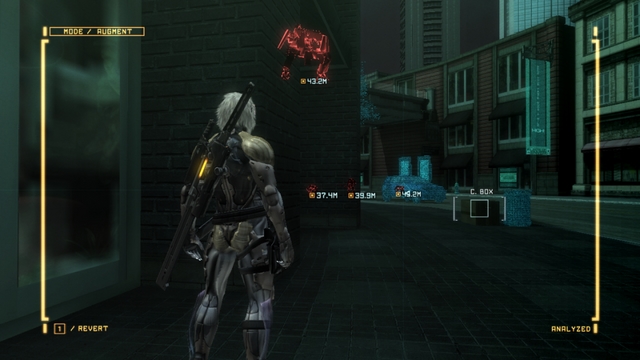 One of the highlighted enemies is lefty #13.
You encounter the sixth lefty after you exit the dark tunnel, accompanied by several cyborgs and a GRAD.
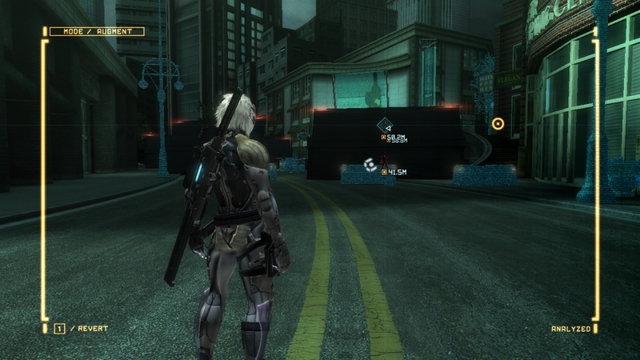 Lefty #14.
The seventh lefty is very close to the previous one - you encounter it after you eliminate the group of enemies, among which there was the previous lefty.
The final in this mission, eighth, lefty is on the same stairs, at which there is a Data Storage. The lefty is armed with an RPG.
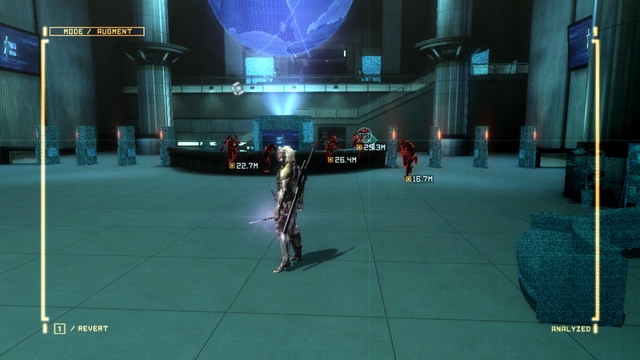 Lefty #16.
The first lefty is among the ninja cyborgs, who attack you at the beginning of the mission.
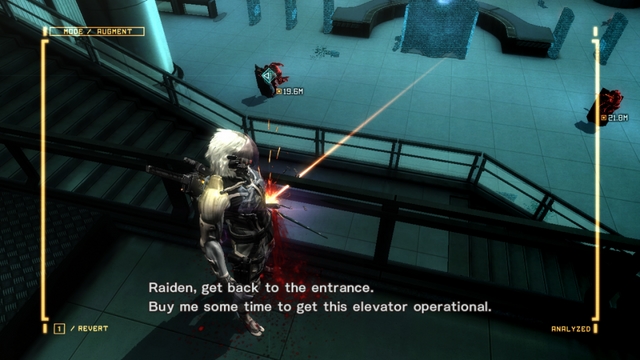 Lefty #17, lefty shieldmaster.
The second lefty is one of the shielded cyborgs, who attack you as you are waiting for the elevator to arrive.
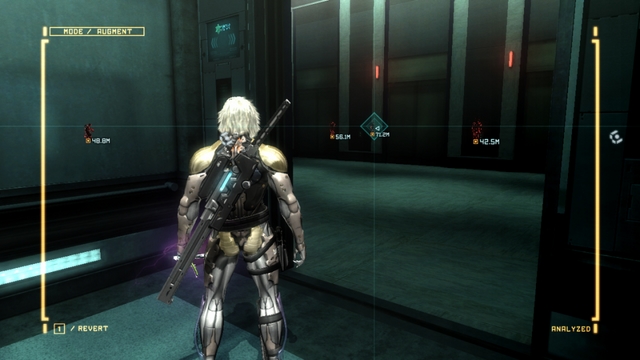 Lefty #18.
Right after you exit the elevator, initiate the AR mode to locate the third lefty.
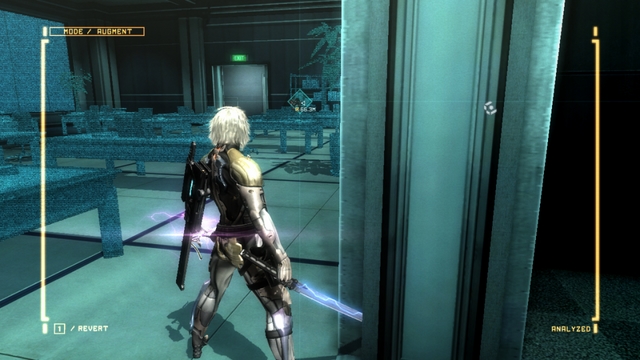 Lefty #19, lefty axe-man.
The fourth lefty (the heavily-armored cyborg with a battleaxe) appears in the office space where you have found the third lefty. You need to destroy two (of the three required) control panels. And the enemy that you are waiting for will appear on the map. Remember that the lefty does not appear if you have raised the alarm beforehand.
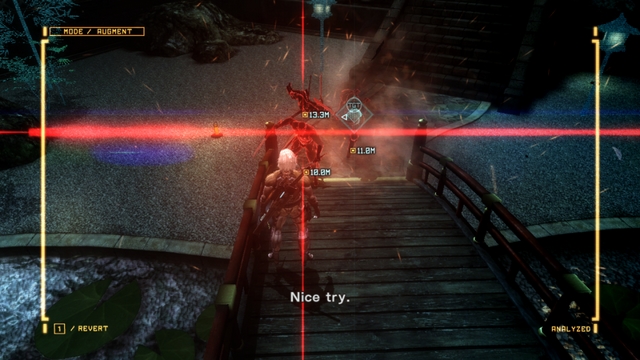 Lefty #20.
The fifth lefty is in the welcoming party that you encounter after you enter the Japanese garden.
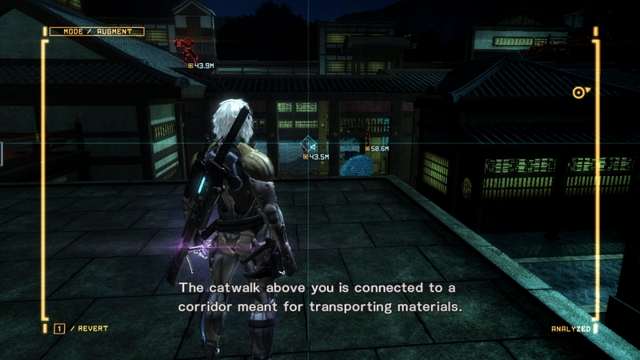 Lefty #21, guarded by the Mastiffs.
The sixth lefty is waiting for you close to the palace (over which you need to climb to receive an achievement) - it is guarded by a group of cyborgs and 2 Mastiffs.
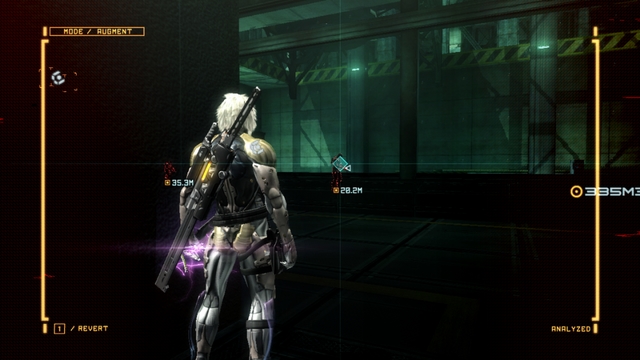 Lefty #22.
The seventh lefty is right before you enter the elevator - the owner of the arm is patrolling the elevator.
The last one, eighth lefty can be found right after you jump over to the neighboring elevator. This is going to be a heavily armored cyborg with a sledgehammer, accompanied by several cyborgs.
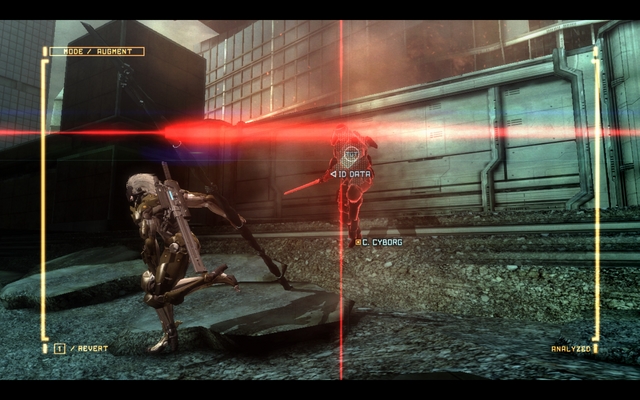 Lefty #24.
One of the cyborgs that attack you at the beginning of this mission is the first lefty in this mission.
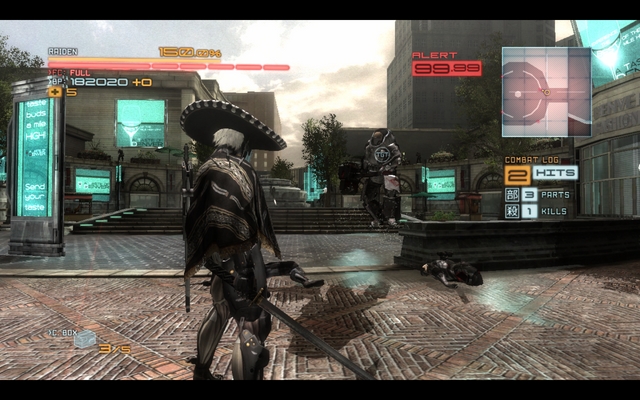 Lefty #25.
The second lefty is waiting at the fountain - again, this is a heavily-armored cyborg with a sledgehammer.
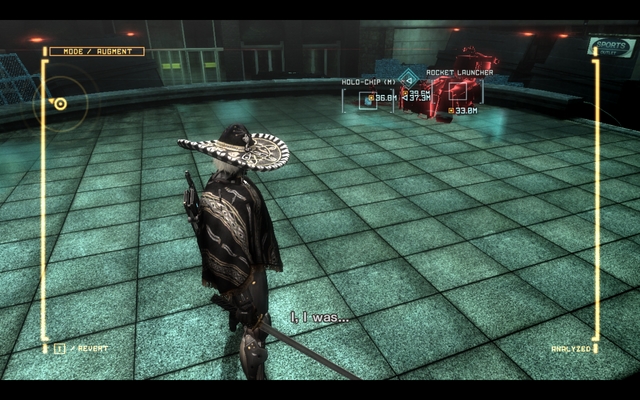 Lefty #26, guarding a hostage.
The last, third lefty of this mission is one of the cyborgs guarding the hostage.
The first lefty is at the beginning of this mission. It is one of the cyborgs that guard the base gates.
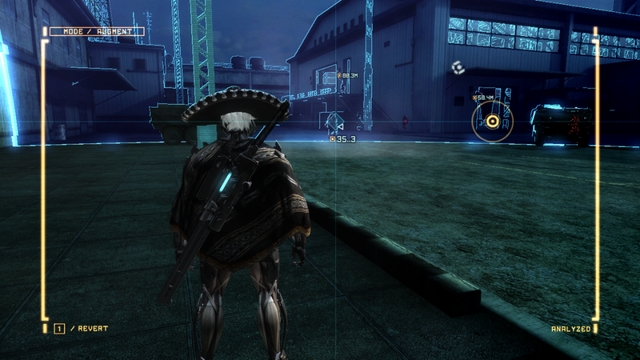 Lefty #28.
The second lefty is a heavily-armored cyborg with a sledgehammer that patrols the base, which you encounter right after you cross the gate.
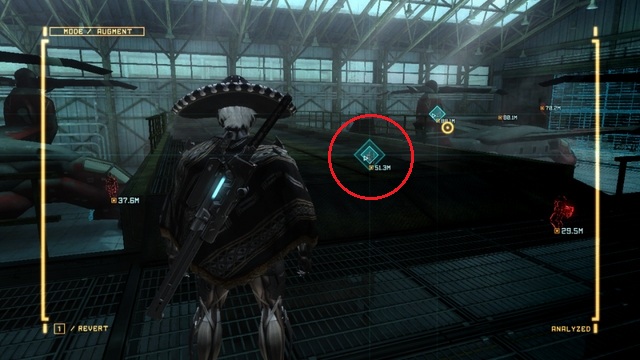 Lefty #29 (marked in red) and lefty #30, outside of the hangar.
The third lefty is in the hangar (the one that you find a Data Storage and a VRM computer in). Again, it is a heavily armored cyborg with a sledgehammer.
You bump into the fourth, last lefty in the game, right after you leave the hangar in which you killed the previous one. It is a cyborg with an RPG standing on a ledge.
For each computer that you find and activate, you receive an additional mission, which you select in the Codec menu.
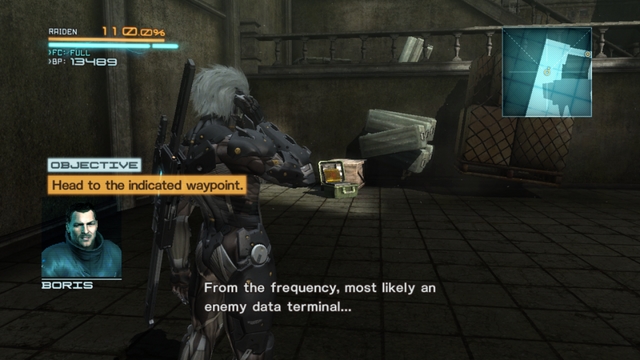 VRM computer #1.
The first VRM computer can be found right after you deal with the Gekko, inside the building. You cannot miss it, because even Boris will mention it.
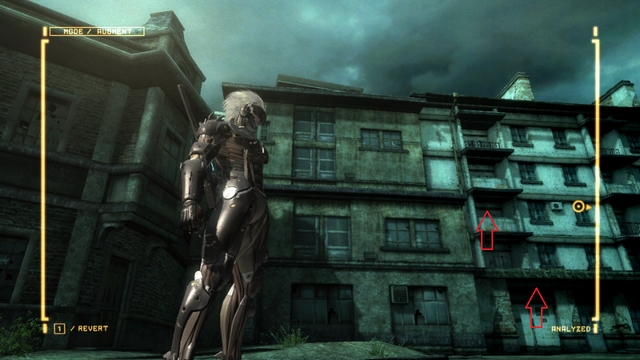
After you have rescued the second hostage, go towards the big white building. Climb up to reach the top level (the above screenshot), and go right to find the second VRM computer around the corner.
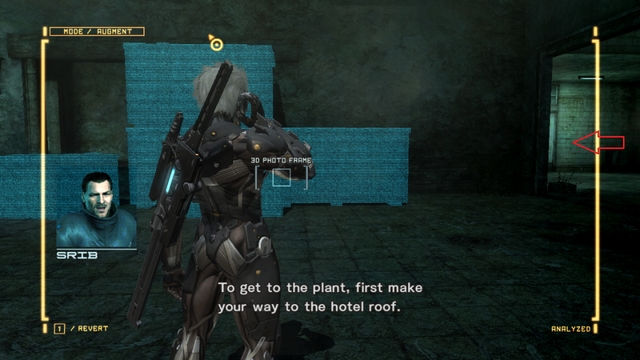 The location of the VRM #3.
The third VRM computer can be found right after you cross the gate, which you required an enemy's arm to open. After you enter the building, go to the small room on the right, where there is the computer.
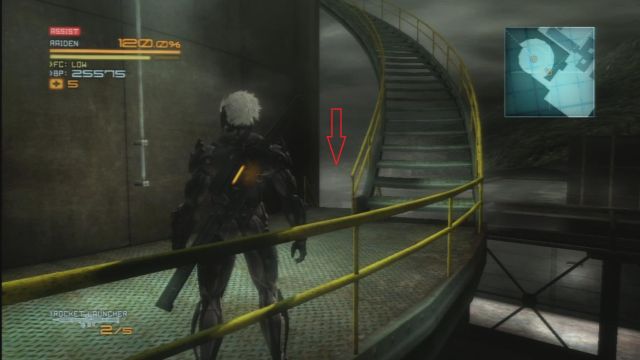 The location of the VRM #4.
The fourth, and the last in this mission, VRM computer can be found right before the fight with Mistral. Instead of going upstairs (to start the boss battle) climb down the stairs to find the computer.
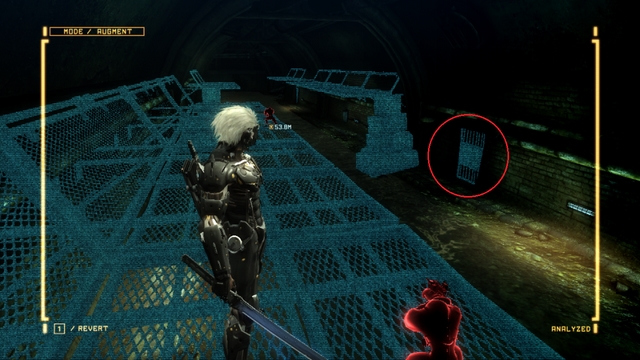 VRM computer #5.
The first VRM computer is in a small room on the right side of the tunnel, where you have fought two Mastiffs.
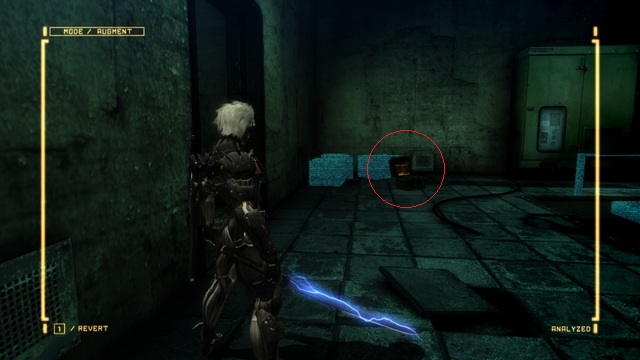 VRM computer #6
The second VRM computer is where you have found the cardboard box, right before the encounter with the group of 3 Mastiffs.
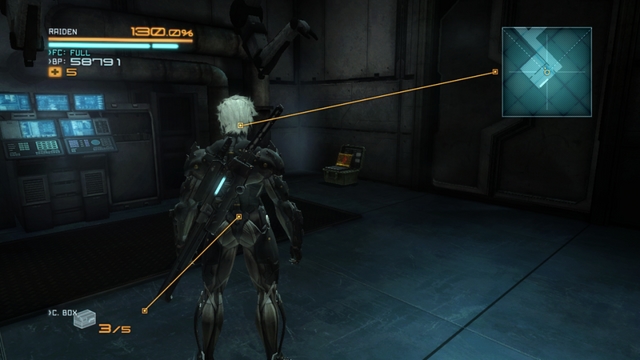 VRM computer #7, right before the end of this mission.
The third VRM computer can be found right after the battle with the boss (GRAD), in a small room (Raiden talks to the Doctor there), right before the mission ends.
The first VRM computer is behind the barricade that a lefty was hiding behind (after the battle with two Grad robots).
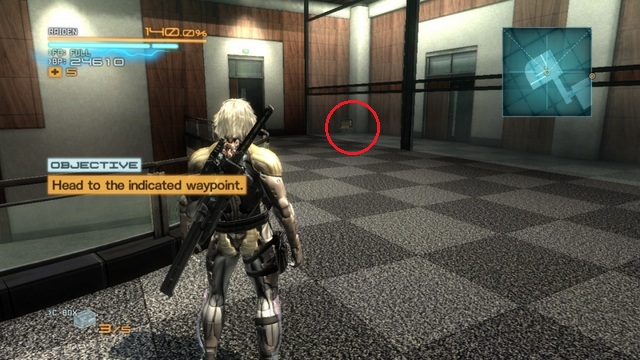 VRM computer #9.
The second VRM computer is in the room that you get to after you climb the escalator - the computer is behind the wall of glass.
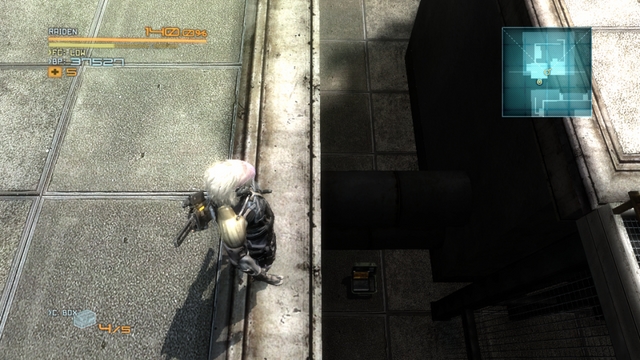 VRM computer #10.
You bump into the third VRM computer, in this mission, after you jump off the crane onto the rooftop. It is between two buildings (look at the map in the above screenshot, for orientation).
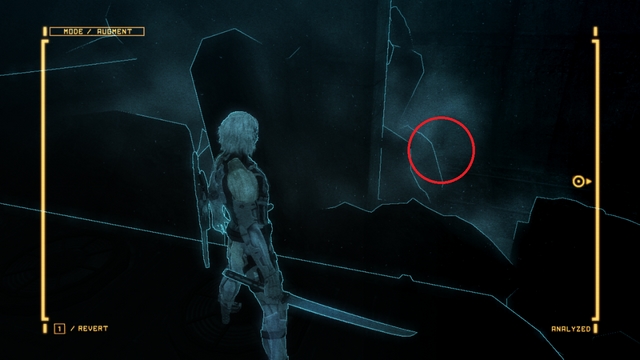 The place where the VRM computer #11 is.
The fourth VRM computer is in the dark tunnel, close to the location where you encounter the Dwarf Gekkos on the ceiling. Deal with them and stop at the end of the railway car, which the enemies hung above, and turn left - you should be looking directly at the spot where the computer is (marked in the above screenshot).
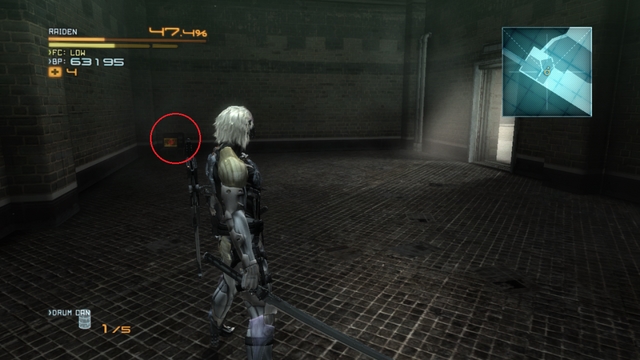 VRM computer #12.
You bump into the fifth VRM computer right after you exit the dark tunnel- it is to the left of the building's exit.
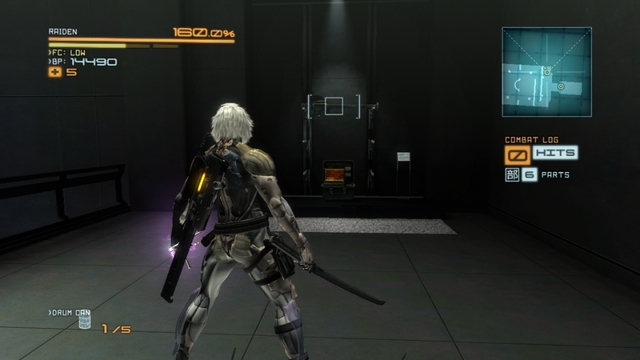 VRM computer #13.
The first VRM computer is inside one of the glass cabinets, at the top of the stairs, right at the beginning of this mission.
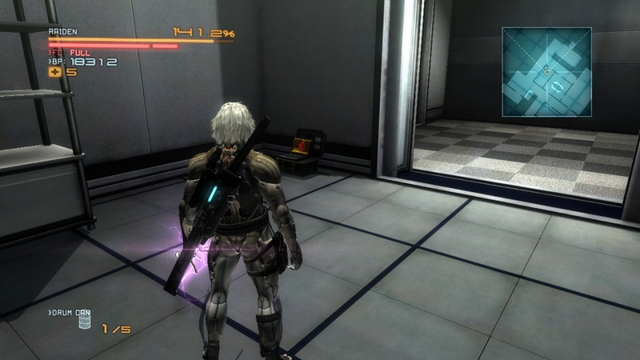 The fourteenth VRM computer.
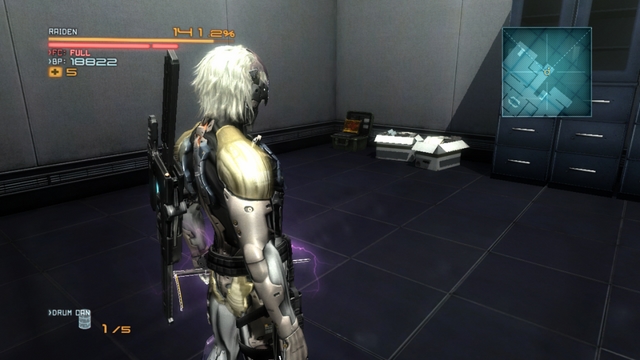 And the fifteenth here..
The next two VRM computers are in the office building that you make it to, after you have taken the elevator - secure the entire floor and ransack all of the rooms here.
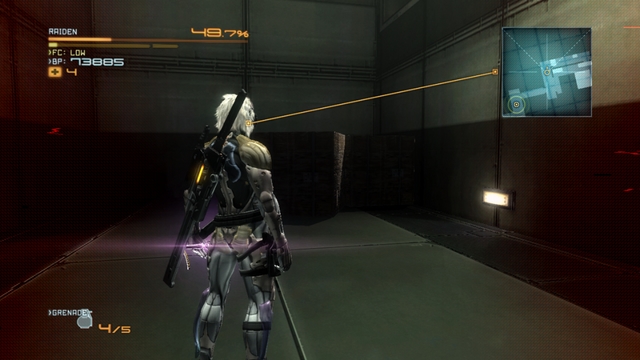 VRM computer #16.
The fourth VRM computer in this mission can be found after you leave the elevator (which you jumped onto, from the blazing elevator). It is hidden behind the big wooden crates that you need to smash.
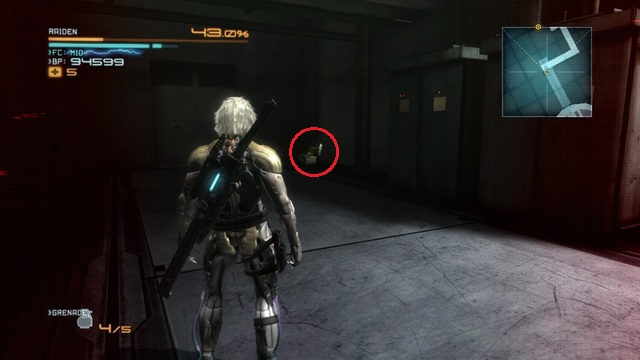 VRM computer #17.
The last VRM computer of this mission is in the narrow tunnel that you take to reach Sundowner, before fighting him.
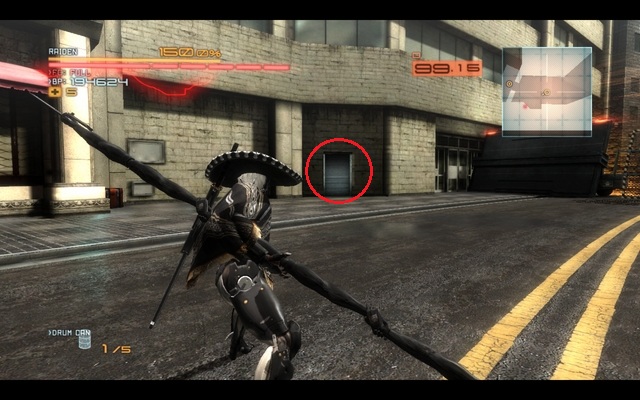 The way to the VRM #18.
The only VRM computer in this mission can be found at the end of the street patrolled by the lone Mastiff - you need to approach the small metal gate, from behind which there will dash a cyborg, which will open a secret passage for you.
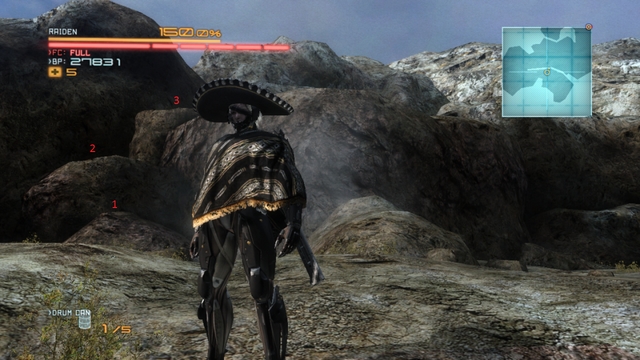 The way to the VRM #19.
The first z of the two VRM computers in this mission, is at the very beginning of this mission - you simply need to turn back and run up the rocks, where there is the collectible.
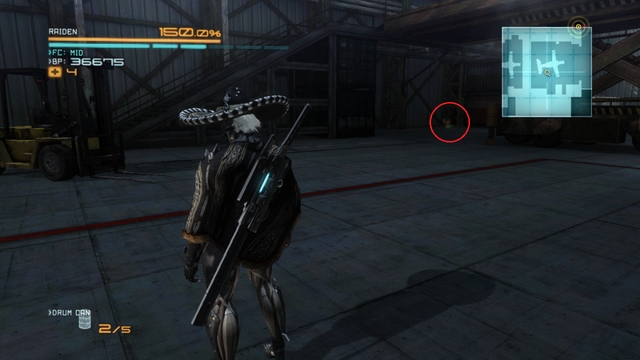 VRM computer #20.
The last, twentieth, VRM computer in the game is in the hangar, where you have found a Data Storage and claimed the arm of an armored cyborg. It is under the stairs, close to the forklift.
For finding hostages, you are rewarded with the Humanitarian Assistance achievement. Apart from that, for rescuing each one of them, you receive quite a number of the BP points.
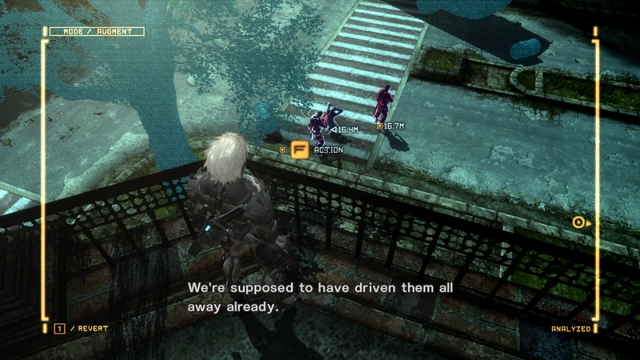 The first hostage in the game.
The first hostage in this mission is on the street, which you get to from the building where you cut the chandelier loose.
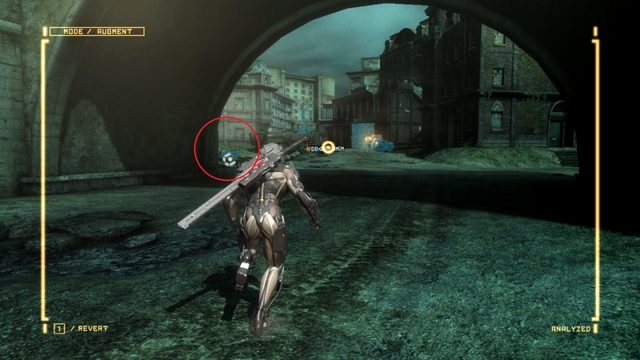 Ahead, the second hostage in this mission.
You bump into the second hostage right after you first fight with the Hammerhead helicopter, in a narrow alley.
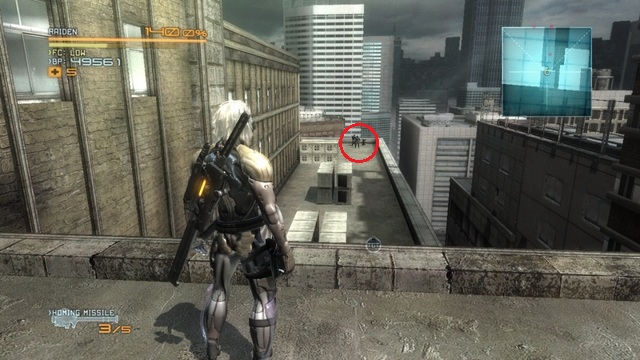 Another hostage.
It is impossible to miss this hostage, because you will be passing by this place. He is in the location where a Slider dropped a Data Storage.
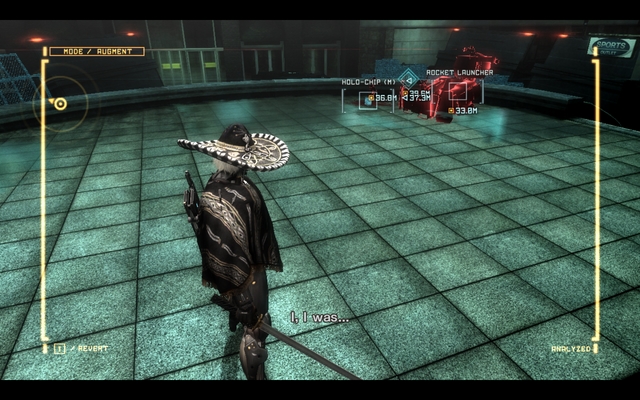 The final, fourth hostage in the game.
You encounter this hostage right after you climb down the long stairs and destroy the Gekko Mimic. He is guarded by two cyborgs and a GRAD robot, so you are going to require the EM grenades to rescue him.
Each time you find an Endurance Plus, your health bar increases by 10% - by finding all 6 and upgrading with 4 more that you buy, you can double your health bar - which is recommended.
Right before you cross the gate and fight against Mistral, you will find fans on one of the walls - smash them and walk onto the balcony at the other side. You will find an Endurance Plus there, which increases your health bar.
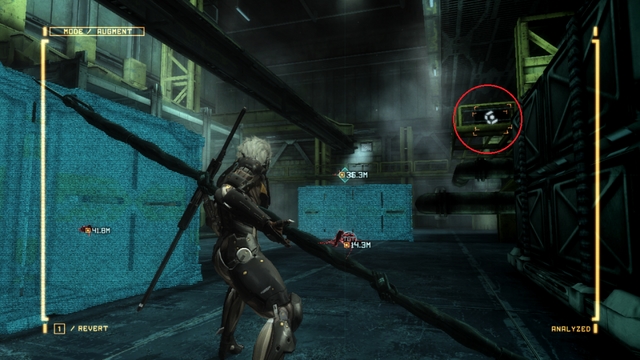 A crate with an Endurance Plus.
Once you walk, as Raiden, into a room that you have just visited as the Dwarf Gekko, initiate the AR vision and take a look around, to find a crate at a higher level (close to the guard whose arm you can cut off). Inside, there is an Endurance Plus.
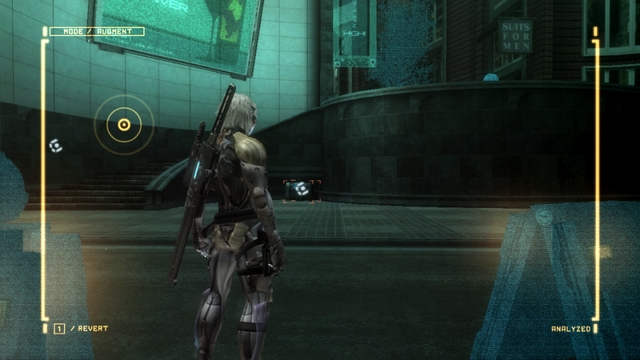
A crate, with an Endurance Plus, in this mission, is next to the short flight of stairs to the courtyard (the above screenshot), where there is the long flight of stairs (where you found a Data Storage).
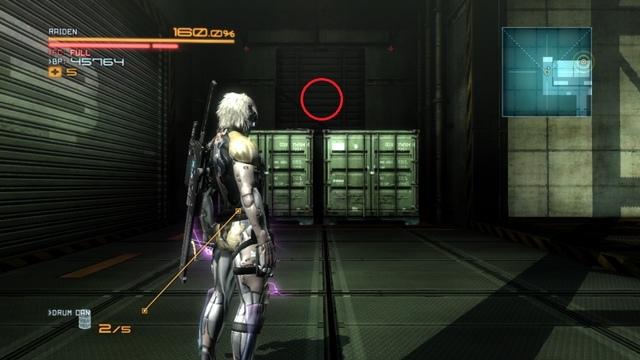 The location of a crate with an Endurance Plus.
Before you reach a big elevator (the one that the enemy will set on fire) find two green containers, climb onto them and cut through the metal gate. Inside, in a crate, you will find an Endurance Plus.
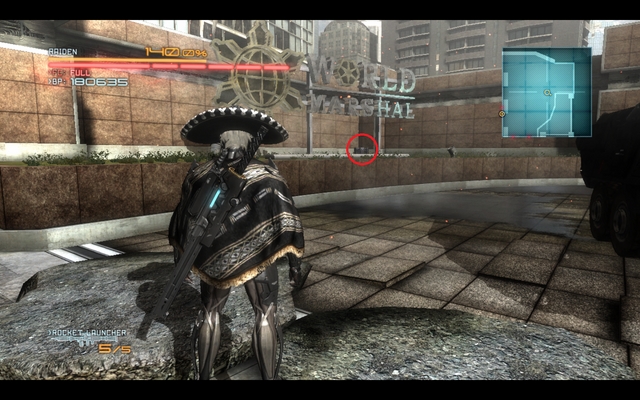 Another crate with an Endurance Plus.
At the beginning of the mission, after you deal with the enemy, take a look around to find a crate with an Endurance Plus. It is in the North-Eastern corner of the map.
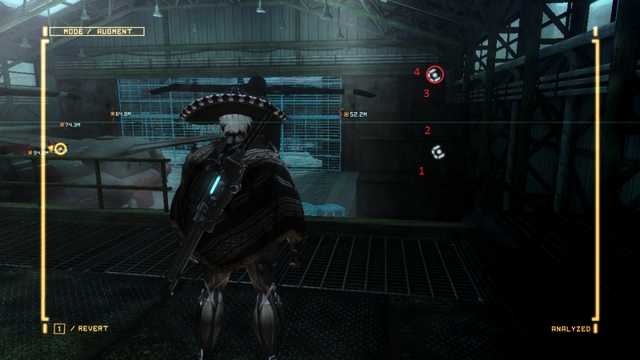 The way to the crate with an Endurance Plus.
While in the hangar, look for a container stack in the corner. On the top of the stack, there is a crate with Endurance Plus.
For finding (and killing) all of the Men in the box, you will be rewarded with the Peekaboo achievement, and you will also receive a Wooden Sword, which you will find useful while trying to obtain another achievement.
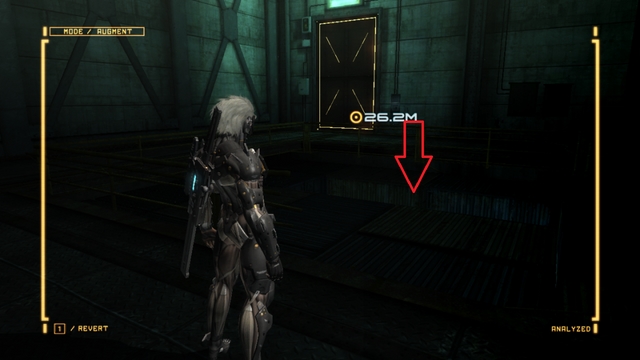 A location of a Man in the Box.
The first Man in the Box is before you fight Mistral - look for the hole between containers, right next to the gate to the boss, and jump down to deal with a cyborg.
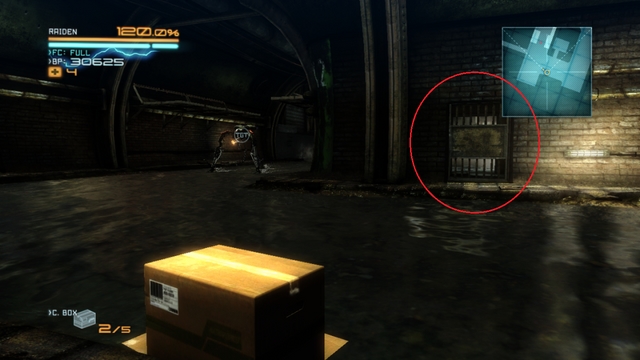 A location of a Man in the Box.
Once you reach the canal tunnel, where Wolf points you to the hidden wall that you need to smash, take a peek behind the gate, more or less in the center of the location. Inside, there is a Man in the Box.
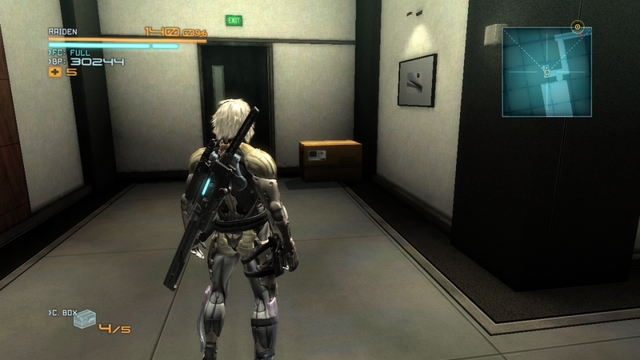 Another enemy hidden in a box!
In this mission, A Man in the Box is inside the building that you enter at the very beginning of the stage. After Boris is done talking (and you start the VRM computer behind the wall of glass), go towards the marker and take the narrow branch. At the door, in the corner, there is the box.
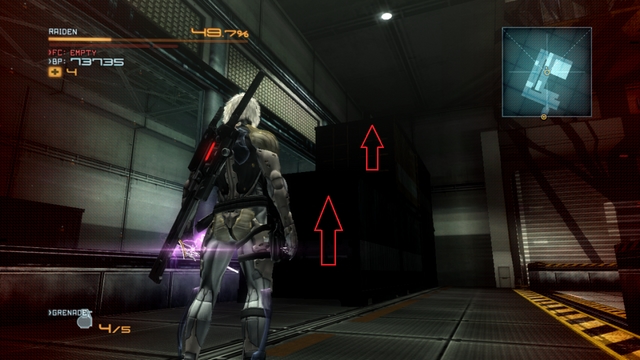 Climb over the containers to find a Man in the Box.
Here, the Man in the Box is close to the location where you get off the big elevator. Once the elevator stops, climb onto the containers in front of you and slide through the opening. Below, you will find the Man in the Box.
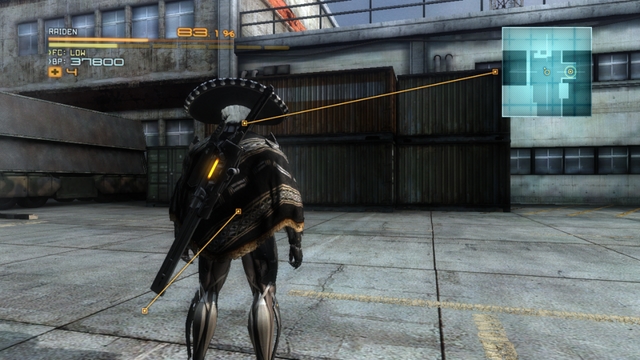 Inside these containers, there is the last Man in the Box.
The last Man in the Box in the game is hidden right before the final battle. Before you go towards the marker, with the wounded Wolf at, climb onto the nearby containers - inside, there is the last Man in the Box.
In the game, you can also unlock several tens of titles. You receive them for performing certain actions, or beating the whole game in a certain way - apart from the satisfaction, (or frustration) they do not provide you with any additional bonuses and do not alter the game in any way.
Title
Condition to meet
Battle Tested
Complete the game at the Normal difficulty level, or higher, and let yourself be spotted, at least, 50 times.
Hard Worker
Receive any grade in each of the battles in the game.
Light Drizzle
Complete the game at the Normal difficulty level within 12 hours.
Passing Rain
Complete the game at the Normal difficulty level, or higher, within 8 hours.
Lighting Speed
Complete the game at any difficulty level, within 2 hours.
Light Breeze
Complete the game at the Easy difficulty level, without dying, within 5 hours.
Complete the game at the Easy difficulty level, without dying, within 5 hours.
Gale Force
Complete the game at the Hard, without dying, within 4 hours.
Cyclone
Complete the game at the Very Hard, without dying, within 3 hours.
Divine Wind
Complete the game at the Revengeance difficulty level, without dying, within 3 hours.
Jack the Ripper
Cut through the enemy, at least, 1000 times, in the Blade Mode.
Lightning Bolt
Receive the general grade B, or higher, at all difficulty levels.
Thunder God
Receive the general grade S, at all difficulty levels.
Lightning Speed
Complete the game at any difficulty level, within 2 hours.
Massive Deterrent
Complete the game at the Normal difficulty level, or higher, without killing any cyborg, armored Cyborg or the Berserker Cyborg.
Mr. One Percent
Obtain 300,000 BP during a single campaign session, at the Normal difficulty level, or higher.
Naked and Unloved
Complete the game at the Hard difficulty level, or higher, without improving Raiden's health or energy.
Ninja
Kill 50 enemies with Ninja Kill (silent assassination).
Precision Machine
Cut off 30 parts of the enemy bodies, without damaging the part that you have cut off, during one campaign session.
Rain Shower
Complete the game within 10 hours, die 10 times, or more, and use 20 or more healing items, when you do not need it.
Samurai
Complete the game at the Normal difficulty level, or higher, using only Raiden's basic sword (the first available one) you can use the secondary and additional weapons.
Sworn To Secrecy
Complete the game at the Normal difficulty level, or higher, and be spotted less than 35 times.
Thunderstorm
Complete the game at the Hard difficulty level, or higher, without being killed once and without using any healing items.
Requirements: collect all left arms (ID) of the enemy officers.
Description: You need to cut off 30 arms of the specific officers in the game. All of the information, necessary to obtain this achievement, has been provided in the descriptions of the individual missions, as well as in the chapter devoted to collectibles.
Requirements: defeat 10 enemies (without killing them).
Description: the best solution to this one is unlock the Wooden Sword (see the description below), which you can easily use to obtain this achievement, by attacking the enemies with it.
Requirements: complete the sewers stage (R-03) without using the AR mode.
Description: Do you remember the fragment of the fourth mission, where it is so dark that you cannot see your character? You need to complete the this one without using the AR mode, which is very easy, once you know the right way to do that. First of all, use the map to navigate, up until the moment you reach the Mastiffs, patrolling the sewers. Let someone spot you, which will trigger the alarm, and the enemies will light the tunnel for you. The only thing that you need to do now is go to the marker on the map (and ignore the enemies chasing you) and leave the metro tunnel.
Requirements: listen to all the conversations through the Codec.
Description: this achievement is easy to obtain, although it is time-consuming. After each event that takes place in the game (new enemy, new boss, new item - everything), start the Codec and talk to EVERY character that you can have a conversation with. Remember, you need to save the game at Courtney's after each such conversation.
Requirements: unlock all the VR missions.
Description: you need to find all computers with VR missions. All of the information, necessary to obtain this achievement, can be found in the walkthroughs of the individual missions, and also in the chapter devoted to collectibles.
Requirements: destroy 100 cyborgs throughout the campaign.
Description: you cannot not obtain this achievement, because you need to complete the majority of the missions, by fighting. Most probably, you will obtain this achievement right at the beginning of the game.
Requirements: Ninja Kill 30 enemies throughout the campaign mode.
Description: eliminate 30 enemies silently and you will obtain this achievement.
Requirements: dismember 3 enemies in the Blade Mode, with a single attack.
Description: in spite of what it may seem, you are not required to kill three enemies in one slash - you can perform 3 attacks, on condition that each one of the attacks kills an enemy (just like in the case of Zandatsu, aim at the square to cut the enemies into halves) and everything happens during one instance of the Blade Mode.
Requirements: complete the campaign at the Revengeance difficulty level, by obtaining S ratings only .
Description: most probably, this one is the most difficult achievement to obtain. You need to complete the entire campaign mode at the Revengeance difficulty level, and receive S ratings only, for each mission - as a matter of fact, you cannot let yourself be hit even once. Good luck.
Requirements: defeat Sam, in R-06, at the Hard difficulty level, or higher without taking damage.
Description: There is nothing to explain in the case of this one.
Requirements: collect all the Data Storages during the campaign mode.
Description: You need to find all the Data Storages. All the information necessary to obtain this achievement, has been provided in the walkthroughs of the individual missions, as well as in the chapter devoted to collectibles.
Requirements: perform Zandatsu for 50 timers, throughout the campaign mode.
Description: there is nothing that needs explaining here also - eliminate 50 enemies with Zandatsu.
Requirements: destroy 100 heavily-armored cyborgs throughout the campaign mode.
Description: another achievement that is easy to obtain. Kill 100 heavily-armored cyborgs, in any way, and the achievement is as good as yours.
Requirements: incapacitate all soldiers, during R-02 with the Dwarf Gekko.
Description: the way to obtain this achievement has been presented in the description of the mission (R-02), in the walkthrough section of this guide.
Requirements: destroy 10 Raptors during the campaign mode.
Description: your task is to destroy 10 Raptors (the bipedal robots) during the campaign mode.
Requirements: complete the File R-00: Guard Duty mission.
Description: complete the first mission, in the campaign mode, at any difficulty level.
Requirements: complete the File R-01: Coup d'Etat mission.
Description: complete the second mission, in the campaign mode, at any difficulty level.
Requirements: complete the File R-02: Research Facility mission.
Description: complete the third mission, in the campaign mode, at any difficulty level.
Requirements: complete the File R-03: Mile High mission.
Description: complete the fourth mission, in the campaign mode, at any difficulty level.
Requirements: complete the File R-04: Hostile Takeover mission.
Description: complete the fifth mission, in the campaign mode, at any difficulty level.
Requirements: complete the File R-05: Escape From Denver mission.
Description: complete the sixth mission, in the campaign mode, at any difficulty level.
Requirements: complete the File R-06: Badlands Showdown mission.
Description: complete the seventh mission, in the campaign mode, at any difficulty level.
Requirements: complete the File R-07: Assassination Attempt mission.
Description: complete the eighth mission, in the campaign mode, at any difficulty level.
Requirements: defeat Monsoon at the Hard difficulty level, or higher without taking damage.
Description: defeat the Monsoon boss without taking damage at the Hard difficulty level, or higher and this achievement is as good as yours.
Requirements: complete the File R-05: Escape From Denver mission within 7 minutes.
Description: to receive this achievement, you need to avoid fighting and sneak effectively. A good idea is to receive this achievement at the Easy difficulty level, after you complete the game and you will already have received all upgrades to the damage that you deal.
Requirements: destroy 10 Gekko robots, during the campaign mode.
Description: your task is to destroy 10 Gekkos (the first kind of robots that you encounter during the second mission), during the campaign mode.
Requirements: rescue all hostages, during the campaign mode.
Description: you need to rescue all the hostages in the campaign mode. All of the information necessary for unlocking this achievement has been provided in the descriptions of the individual missions, as well as in the section devoted to collectibles.
Requirements: unlock all upgrades for your character.
Description: you need to purchase all items, available in the upgrade menu. Remember, that you do not need to upgrade everything (like the swords that you do not use anyways) - you only need to unlock them and be able to use them.
Requirements: destroy 10 Hammerhead helicopters, during the campaign mode.
Description: your task is to destroy 10 Hammerhead helicopters during the campaign mode.
Requirements: destroy 30 Dwarf Gekkos, during the campaign mode.
Description: your task is to destroy 30 Dwarf Gekkos (the small robots resembling an orb with three hands) during the campaign mode. This achievement is easy to receive during the fight with Mistral, because the boss summons them all the time.
Requirements: while controlling the Dwarf Gekko (in mission R-02) find and communicate with the other Dwarf Gekkos.
Description: the way to obtain this achievement has been presented in the walkthrough for mission (R-02), in the section devoted to the walkthrough for the game.
Requirements: cut down the flagpole/ the flag atop the palace, during the campaign mode, in mission (R-04).
Description: the way to obtain this achievement has been presented in the walkthrough for mission (R-05), in the section devoted to the walkthrough for the game.
Requirements: destroy all cameras in mission R-01.
Description: the way to obtain this achievement has been presented in the walkthrough for mission (R-01), in the section devoted to the walkthrough for the game.
Requirements: find all the Men in the Box.
Description: You need to find all the Men in the Box. All of the information, necessary to obtain this achievement, has been provided in the descriptions of the individual missions, as well as in the chapter devoted to collectibles.
Requirements: destroy 5 Vodomjerka robots during the campaign mode
Description: your task is to destroy 5 Vodomjerka robots (the ones that resemble an octopus) during the campaign mode.
Requirements: defeat Mistral at the Hard difficulty level, or higher, without taking damage.
Description: defeat the Mistral boss without taking damage, while playing at the Hard difficulty level, or higher and the achievement is as good as yours.
Requirements: defeat 100 enemies, with slashes, during the campaign mode.
Description: this achievement is impossible to miss. Cut up 100 enemies into pieces, and the achievement is as good as yours.
Requirements: destroy 10 Mastiffs during the campaign mode.
Description: your task is to destroy 10 Mastiffs (the large cyborgs that resemble gorillas) during the campaign mode.
Requirements: destroy 10 Sliders during the campaign mode.
Description: your task is to destroy 10 Sliders (the winged robots that resemble birds) during the campaign mode.
Requirements: cut off Metal Gear Ray's tail, during R-00.
Description: you need to cut off Metal Gear Ray's tail, during the first boss battle (when you run around the city, and not stay in the building). Keep attacking the boss with regular tacks and, when the boss attacks with the tail, parry the attack. After you do that, you will receive a piece of information, concerning the possibility of using Blade Mode - enter this mode, cut the monster up and receive this achievement.
Requirements: reach the destination point in mission R-07 without being detected by the enemy.
Description: reach the boss fight in the eighth mission (R-07) without being detected by any enemy, at any difficulty level. Use a barrel, or a cardboard box to sneak past the enemies - remember not to move while the enemy is looking in your direction.
Requirements: destroy all Gekko Mimic during the campaign mode.
Description: you need to destroy all Gekko Mimic during the campaign mode. In the section concerned with the walkthrough for this game, there has been all the information, necessary to obtain this achievement, provided. You cannot exit the game while trying to obtain this achievement.
Requirements: destroy 100 Custom Cyborgs during the campaign mode
Description: you need to destroy 100 Custom Cyborgs during the campaign mode. This type of cyborgs stands out, because you need to damage them a bit to be able to deal the final blow. Probably, you will receive this achievement while killing enemies.
Requirements: defeat Armstrong (the second phase, where you use Sam's sword to fight) at the Hard difficulty level, or higher, without taking damage.
Description: defeat the final boss (the second phase) without taking damage, at the Hard difficulty level, or higher. It is not the easiest thing to do, to receive this achievement, because it is difficult to avoid taking damage from Armstrong. Parry his regular (red) attacks, dodge from the unblockable ones (when he is glowing gold) and escape from the rocks, once he starts tossing them at you.
Requirements: defeat Sundowner, at the Hard difficulty level, or higher, without taking damage.
Description: defeat Sundowner (the boss with the reactive, explosive, armor) without taking any damage, at the Hard difficulty level, or higher. The best technique to use here is Hit & Run (described in the walkthrough section of this guide), which limits the damage taken from Sundowner.
Requirements: receive the best score in the VR missions.
Description: receive the best score (most frequently, it is the shortest time possible) in all of the VR mission. It is very time-consuming and difficult an achievement, but also a rewarding one, where you receive additional funds (BP), which you can then spend on upgrades for Raiden.
Requirements: during the campaign mode parry 10 attacks in a row, within one minute.
Description: this achievement is easy to obtain, because you only need to find a group of the regular cyborgs and let them attack you, while parrying each attack.
Requirements: destroy 10 Fenrir robots during the campaign mode.
Description: your task is to destroy 10 Fenrirs (robots that look like the Blade Wolf) during the campaign mode.
Requirements: perform 50 executions during the campaign mode.
Description: nothing to explain here. Perform the 50 executions on enemies (appropriate info, and the button to press are displayed) and the achievement is as good as yours.
Requirements: complete all the VR missions added in this DLCs.
Description: complete all the VR missions added after the DLCs are installed.
Requirements: receive the best score in all the VR missions added by the DLCs.
Description: just like in the case of the Virtually a God achievement, you need to receive the best score in all the VR missions added by the DLCs.
Requirements: complete the DL-Story-01: Jetstream mission.
Description: complete the mission added by the DLC - Jetstream Sam, at any difficulty level.
Requirements: defeat 100 enemies during the DLC campaign mode DL-Story-01: Jetstream with Quick Draw.
Description: defeat 100 enemies during the campaign mode, added by the DLC Jetstream Sam with the Quick Draw skill.
Requirements: complete the DL-Story-01: Jetstream mission at the Revengeance difficulty level, within one hour.
Description: everything's clear here.
Requirements: defeat Armstrong, at the Hard difficulty level, without taking any damage.
Description: everything's clear here also.
Requirements: complete the DL-Story-02: Blade Wolf mission.
Description: complete the mission added by the Blade Wolf DLC, at any difficulty level.
Requirements: complete the DL-Story-02: Blade Wolf mission at the Revengeance difficulty level, within one hour.
Description: again everything should be clear here. Complete the mission added by the Blade Wolf DLC, at the highest difficulty level.
Requirements: defeat 30 enemies during the DLC campaign mode DL-Story-02: Blade Wolf, with Hunt Kill.
Description: just as said above, defeat 30 enemies, during the campaign mode added by the Blade Wolf DLC, with the Hunt Kill skill.
Requirements: defeat Khamsin, at the Hard difficulty level, or higher, without taking damage.
Description: also here, nothing needs explaining.
CPU: Intel Core i5-2400 3,1 GHz
RAM: 2 GB
GPU Nvidia GeForce GTS 450
HDD: 25 GB of free space
Sound Card: DirectX compatible
OS: Windows XP, Windows Vista, Windows 7 or 8
Other: requires activation in the Steam service
CPU: Intel Core i7-3770 3,4 GHz
RAM: 4 GB
GPU Nvidia GeForce GTX 650
HDD: 25 GB of free space
Sound Card: DirectX compatible
OS: Windows XP, Windows Vista, Windows 7 or 8
Other: requires activation in the Steam service



 Might & Magic: Duel of Champions Game Guide & Walkthrough
 Men of War: Vietnam Game Guide & Walkthrough
 Mortal Kombat X Game Guide & Walkthrough
 Max Payne 3 Game Guide & Walkthrough
 Memoria Game Guide & Walkthrough