
Welcome to our Metal Gear Solid 4: Guns of the Patriots Guide. It is designed for players, who haven't played any of the previous instalments of the MGS series. It should guide, step by step, any unexperienced play and allows him to finish game on the Solid Normal difficulty setting. The game is very flexible and it is possible to play it in many different ways. Our guide presents you on of them. Advanced gamers, without a doubt, will find plenty of other ways.
Metal Gear Solid 4: Guns of the Patriots is the last one of the Solid Snake's adventures. The game takes place nine years after the events from MGS1 and is a sequel to the Metal Gear Solid 2: Sons of Liberty. That's why we suggest you to familiarize yourself with the previous installments. Otherwise - understanding some of the story elements may be very difficult.
The best way to catch up with the story is visiting Metal Gear Wiki.
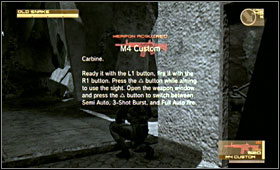
Camera - you can find it under the stairway on the plane deck during the briefing. To get to it, wait till the appropriate onscreen info will appear and switch to Metal Gear, so you can visit Nomad from different point of view.
Cardboard Box - It's useful, when you want to past by the guard undetected. Unfortunately - it's mostly useless.
Cigarettes - integral Metal Gear Solid series item. Smoking allows Snake to recover Psyche. It also reduces his health.
Compress - it boost Psyche for a short period.
Instant Noodles - it helps you regain Health and Psyche, however in lesser degree. In room temperature these regain factors equals 100% for Health and 50% for Psyche. During Alaska mission Psyche regains only by 25%.
iPod - well, it's a product placement. As you probably presume - it allows you to listen to the musing you find during game and podcasts made by the game's makers.
Metal Gear MK.II/MK.III - it's a robot constructed by Otacon. It can stun your enemies, draw their attention by knocking on the wall and it has a stealth camo. It can also be connected to computers panels with a special port.
Military Ration - allows you to regain 75% of Health and 5% of Psyche.
Muna - it's a herb from South America. It raises your Psyche level.
Oil Drum - a friend of a cardboard box, but allows you to ram your enemies.
Pentazemin - drugs for snipers. It stops your hands from shaking.
Regain - it works exactly like Instant Noodles.
Scan Plug -you can buy it in Drebin's shop after about ten hours of gameplay. It shows on map positions of the enemies, which you knocked out using CQC and scanned.
Solid Eye - optical multitool. It is equipped with night vision, binoculars and shows enemy positions on map.
Syringe - it regains 100% Psyche. But watch out - the longer Snake uses it, the faster his mood is getting ruined.
Stealth Camouflage - Drebin demands 5 million points if you want one. If you don't have this amount of money - finish the game without raising the alarm.
CQC - it stands for Close Quarters Combat. It's a martial art with many enemies at once using both knife and a handgun. Firearms allows you to hold off enemies.
Psyche - four short bars below the health meter. It shows Snake's stress. The bigger it is, the faster Snake regains health and the lesser Snake's hands shake during using a sniper rifle.
Goals:
Get out of the territory controlled by Gecko.
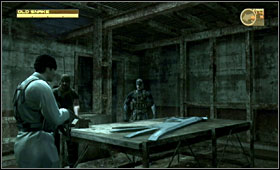
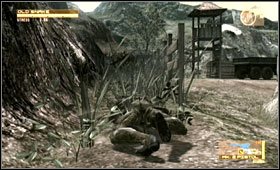
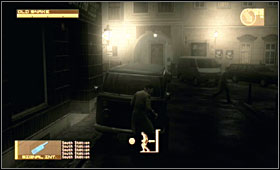
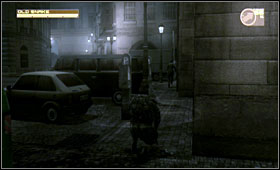
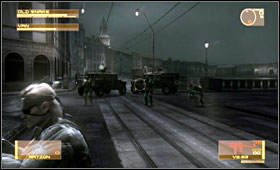
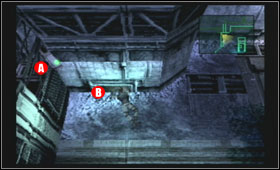
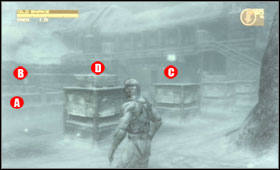
You start nearby two trucks. Crawl beneath the one on the right-hand side [A] and get the Ration. Then go below the second one [B].
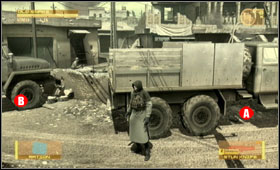
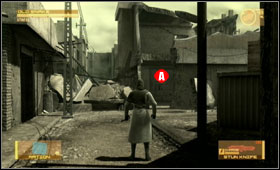
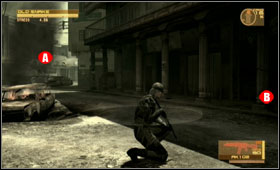
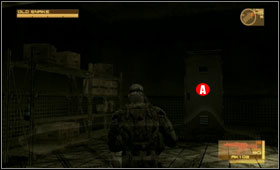
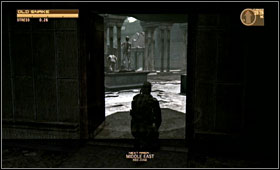
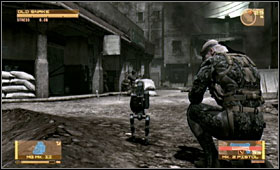
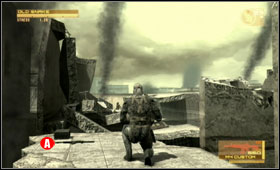
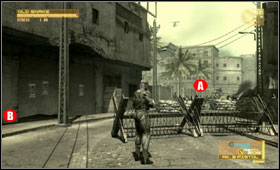
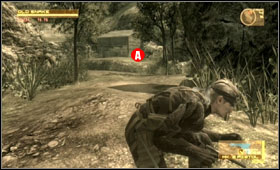
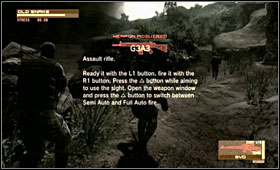
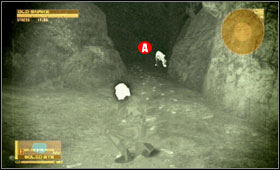
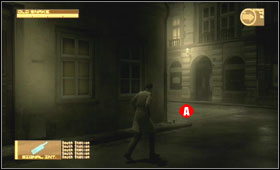
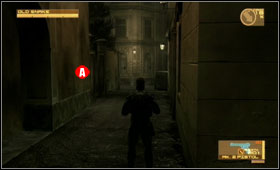
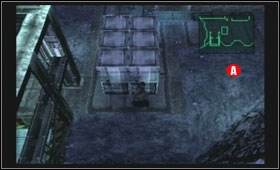
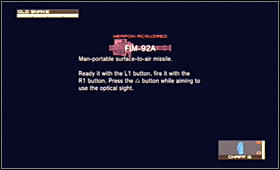
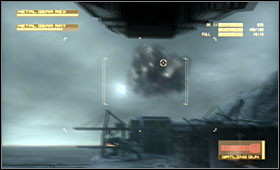
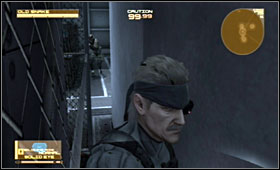
![After a short cutscene raise the gun [A] and go to the right - Prologue - Walkthrough - Metal Gear Solid 4: Guns of the Patriots - Game Guide and Walkthrough](https://game.lhg100.com/Article/UploadFiles/201512/2015121617501412.jpg)
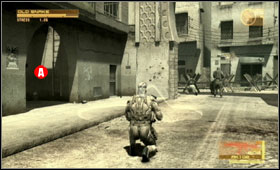
After a short cutscene raise the gun [A] and go to the right.

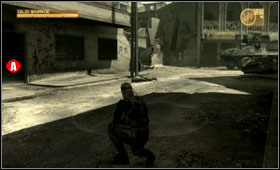
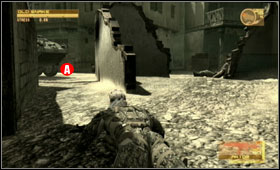
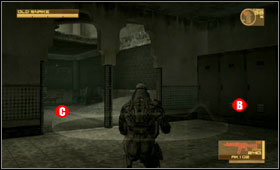
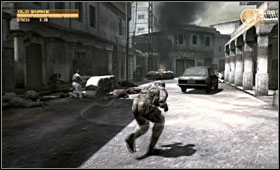
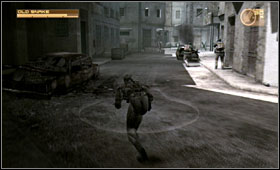
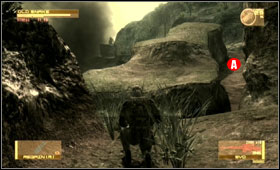
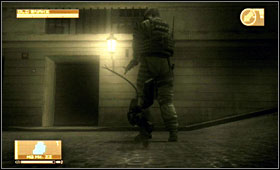
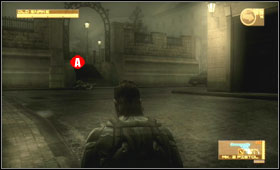
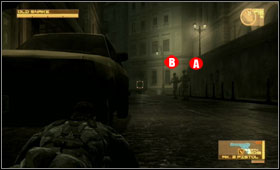
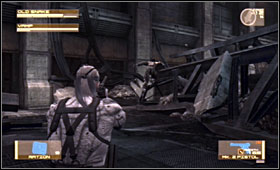
Now you see - Gekkos are extremely dangerous machines and you better keep away from them. There are few of them wandering on the streets. Get back to the place, where you took AK-102. Take the remaining ammo [A] and go down the street [B]. If the Gekkos spot you - try not to allow them to get nearby you, as they are able to kick you extremely hard.
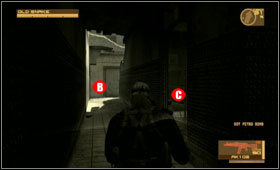
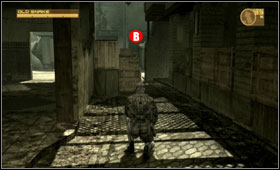
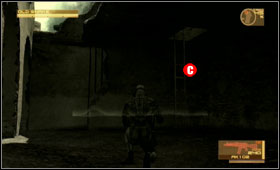
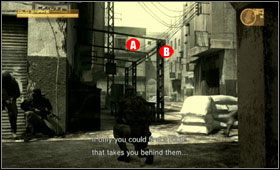
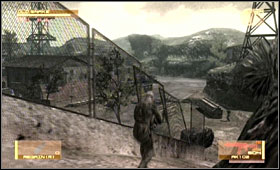
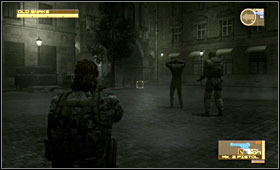
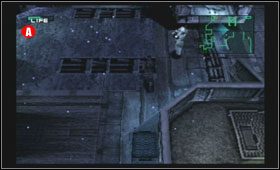
All of the Geckos are on your right-hand side, behind the ruins, now. Flash by into the building [A]. When inside, you can go to the second floor [C]. Wait there till the Gekkos will leave the area.
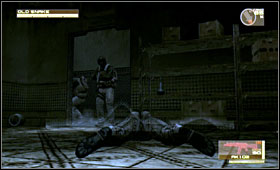
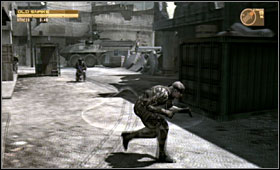
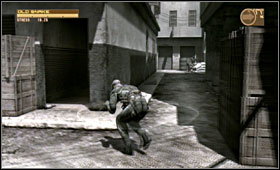
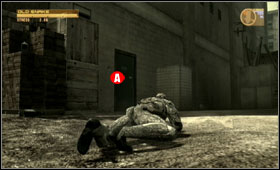
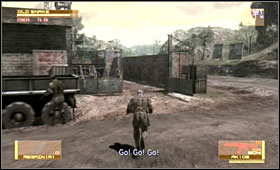
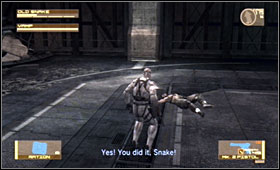
If you have decided to stay on the second floor - immediately crouch behind the wall, because one of the machines would get nearby your location. Wait till it finishes patrolling the area and return to the streets [C on the previous set of the screens]. Then, turn left and run to the next building [A]. Congratulations! You have finished the Prologue.
Goals:
Find Metal Gear MK.II.
Contact Rat Patrol.

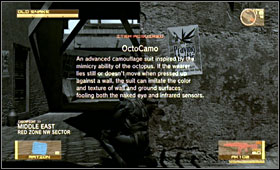
So this is how the first act begins. After the cutscene and a talk with the Otacon you will be able to use OctoCamo. Now you only have to lean on the wall, or lay on the ground, to make your suit imitate it's surface.
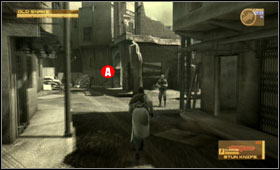
Turn back and look at the alley. On your left-hand side there is a body [A]. Approach it. The icon pointing dragging the body would appear, so press the triangle button on the joypad. As usual - some item should be dropped from the body, ammo or ration for example. Sometimes you can drag body twice and each time you would be rewarded with some bonus. Deeper in the alley you should find rations and ammo. After you take it return you starting position and go on. On the left side of the street you can find a bottle [D] and there is a PMC patrol ahead [E]. When you go to pick up the bottle, an armoured car should block the way in the distance.
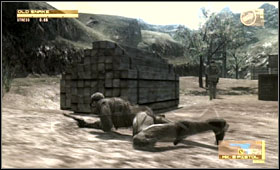
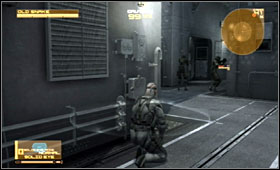
![So - there is and vehicle blocking the way [A] - Ground Zero - First Act - Middle East - Metal Gear Solid 4: Guns of the Patriots - Game Guide and Walkthrough](https://game.lhg100.com/Article/UploadFiles/201512/2015121617501528.jpg)
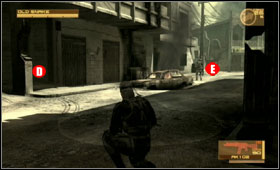
So - there is and vehicle blocking the way [A]. Take the bottle, cross the street and get inside the room [B]. Inside it you should find a ration and a passage, where you can crawl to get into the other room [D]. There is another ration on the other side, but instead going outside - return.
Wait till your way is clear and once again cross the street. Get inside the room [A]. Keep your guard, because there is an enemy patrol wandering nearby. Hide inside a room [C].
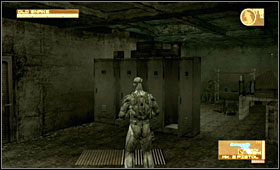
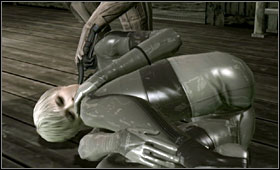
If the patrol get near your location - use OctoCamo. Snake can pretend to be dead, so use it if necessary. In the wardrobe [A] you can find Instant Noodles. Get to the corridor and head towards the opposite direction PMC patrol is going.
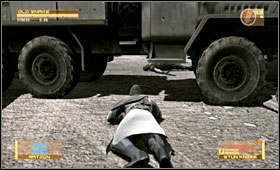
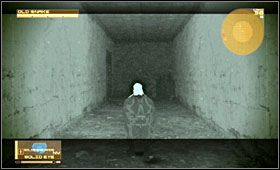
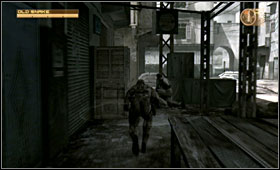
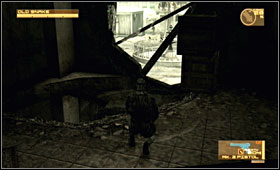
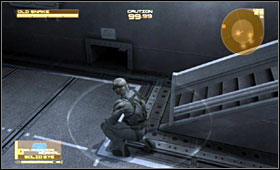
![Wait till your way is clear and crawl nearby the vehicle [A] - Ground Zero - First Act - Middle East - Metal Gear Solid 4: Guns of the Patriots - Game Guide and Walkthrough](https://game.lhg100.com/Article/UploadFiles/201512/2015121617501611.jpg)
Wait till your way is clear and crawl nearby the vehicle [A]. You should notice an entrance to the inside of the destroyed building [B].

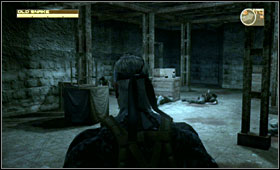
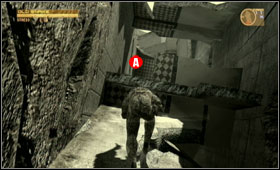
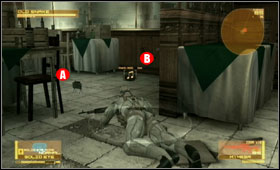
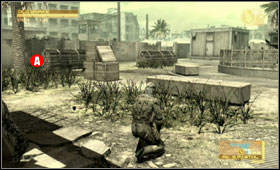
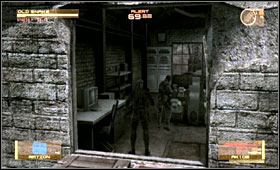
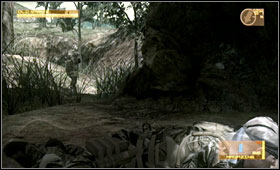
![Cautiously search the room [A] and the bodies you find inside - Ground Zero - First Act - Middle East - Metal Gear Solid 4: Guns of the Patriots - Game Guide and Walkthrough](https://game.lhg100.com/Article/UploadFiles/201512/2015121617501646.jpg)
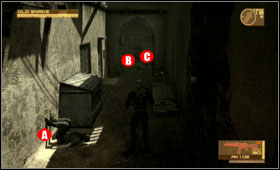
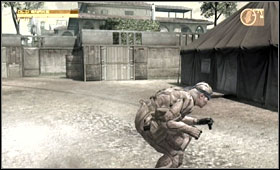
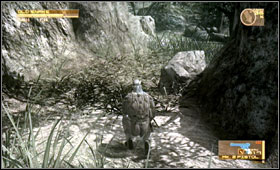
Cautiously search the room [A] and the bodies you find inside. Then start to move slowly below the debris [B]. Wait for the soldiers to pass by [C] and keep moving along.
Search the nearby are, but watch out for the patrolling soldier. Go through the hole to progress [A]. Turn right then - you should notice an exit from the ruins [B].
After you abandon the building run across the street into the next zone.
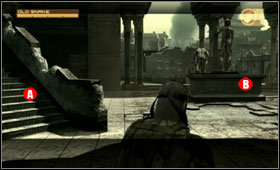
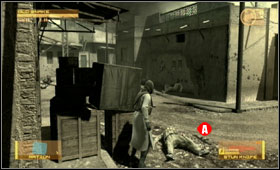
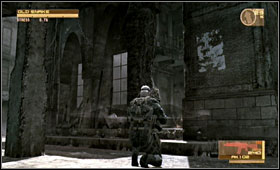
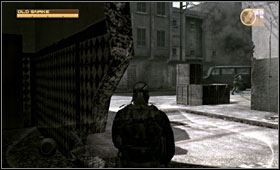
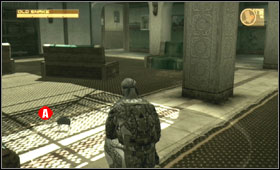
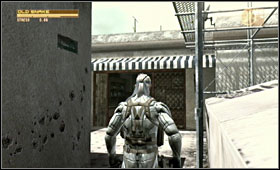
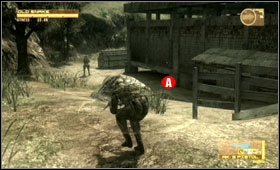
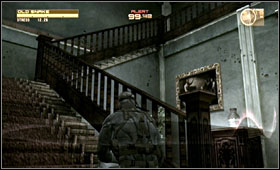
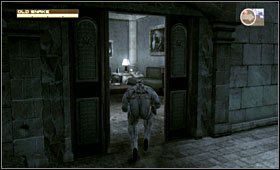
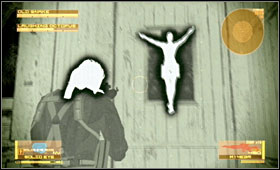
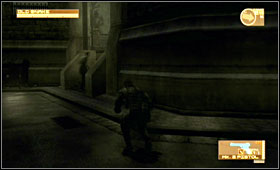
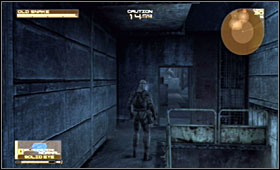
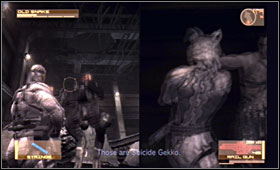
![Under the stairway [A] you can find the cardboard box - Ground Zero - First Act - Middle East - Metal Gear Solid 4: Guns of the Patriots - Game Guide and Walkthrough](https://game.lhg100.com/Article/UploadFiles/201512/2015121617501785.jpg)
Under the stairway [A] you can find the cardboard box. You can also try to get on the sculpture and press the triangle button a few time to watch a funny cutscene.
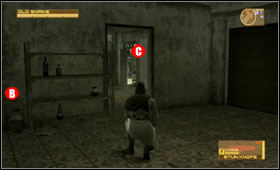
Jump of the sculpture. Go to your right [A]. When you get inside check the cabinets and move along [C]. Don't forget to search all of the nooks..

When you get on the streets again you should spot some ruins to your left. You can try to penetrate it. There is a Playboy magazine, which is useful when you want to drag the guards' attention. Cautiously, watching out for the patrols, get to the [B]. Use the ladder to get to the top side [C].
Avoid the guard walking below you and jump down.
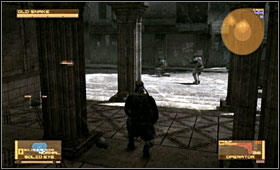
Move along avoiding the enemy patrols. When you get to the church ruins - get inside it. You should contact Otacon and get some fine items: Operator pistol, Mk. 2 tranqualizer gun, the Solid Eye and Metal Geara MG Mk. II.
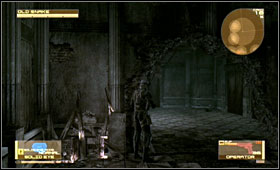
After the cutscene go deeper inside the church and turn left. Wait for the PMC patrol to pass by and take the ammo scattered on the ground. Then - return to the place where you last time talked with Otacon.

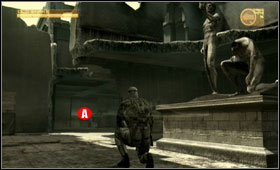
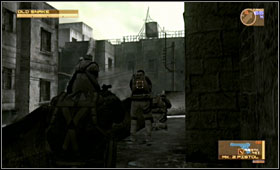
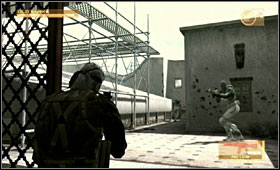
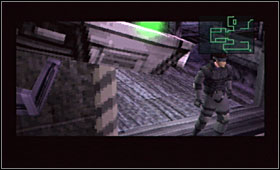
![Go upstairs using the ladder [A] and find a way above the street - Ground Zero - First Act - Middle East - Metal Gear Solid 4: Guns of the Patriots - Game Guide and Walkthrough](https://game.lhg100.com/Article/UploadFiles/201512/2015121617501918.jpg)
Go upstairs using the ladder [A] and find a way above the street. Run on the other side.
Use the Mk. 2 gun and eliminate the guards shooting them in their heads. They will fall asleep immediately. Run around the building and pick up the ammo. Don't forget to search the soldiers. Return to the stone platform and jump down.

Get on the street - there should be lot of shooting. Use the MG and turn it's camo on by pressing the X button. Drive to the three PMC soldiers and press R1 button while holding the L1. You should stun them. Take their weapons and go on, hiding behind the sand bags. There are some rebels, but you don't have to be afraid of them . In the dark are [A] you can find the RPG-7 and you can use it to destroy the armoured vehicle [B].
There is a rebels safehouse in the basement. It's pretty dark in there so try to switch your Solid Eye to the night vision mode. You don't have to hide, after you destroyed the armoured car the people like you. It's important to check all of the rooms - you can find many useful items there.
Ferreting around the basements you would spot plenty of bodies and you will find a clue about new air units using by the PMC.

To get out the basements use the stairway in the north part of the base. It's time for your first time meeting with Drebin, the weapon seller.
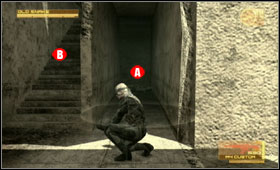
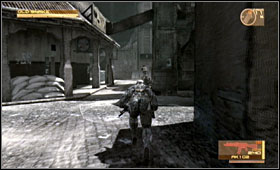
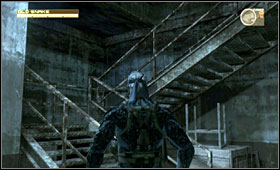
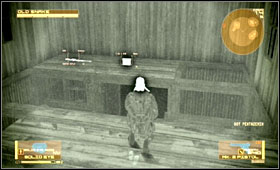
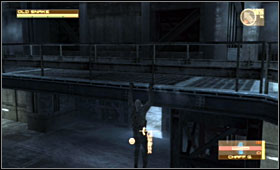
Drebin will give you the M4 rifle. Go to the dark spot [A] and pick up the items. Use the stairs then [B] and get to the top side.
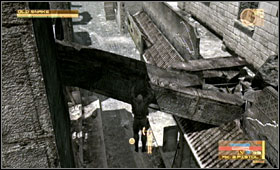
![Take the ammo [A] and drop yourself from the ledge - Urban Ruins - First Act - Middle East - Metal Gear Solid 4: Guns of the Patriots - Game Guide and Walkthrough](https://game.lhg100.com/Article/UploadFiles/201512/2015121617502017.jpg)
Take the ammo [A] and drop yourself from the ledge. Jump down and press the triangle button to take the RPG-7 ammo.
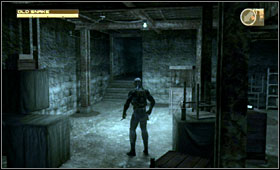
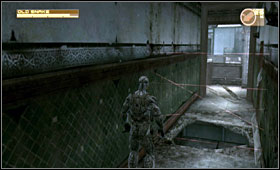
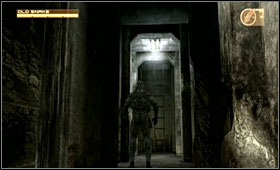
![Get down and enter the ruins [A] - Urban Ruins - First Act - Middle East - Metal Gear Solid 4: Guns of the Patriots - Game Guide and Walkthrough](https://game.lhg100.com/Article/UploadFiles/201512/2015121617502122.jpg)
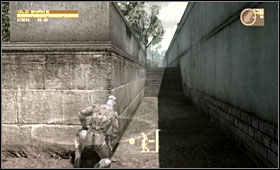
Get down and enter the ruins [A]. When the stairway collapse - turn right.
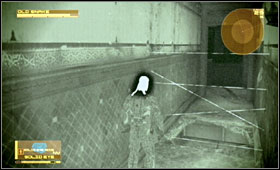
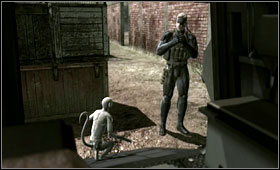
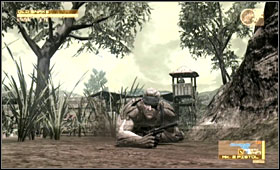
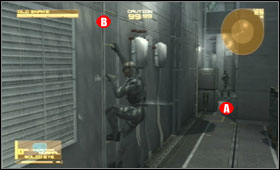
![Get upstairs through debris and stick yourself to the wall [A] - Urban Ruins - First Act - Middle East - Metal Gear Solid 4: Guns of the Patriots - Game Guide and Walkthrough](https://game.lhg100.com/Article/UploadFiles/201512/2015121617502197.jpg)
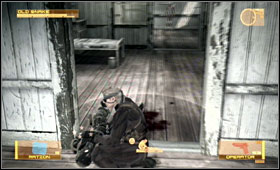
Get upstairs through debris and stick yourself to the wall [A]. Get on the other side of the hole. You will spot a guard trying to relieve himself. After a funny cutscene Snake will take a barrel with him.
There is going to be plenty of tough fights on the streets. Avoid PMC units, which are attacking some places. So - instead of going into their fire, take the side-street.
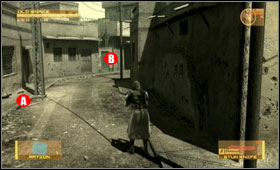
Soon you will get to a spot, covered by two snipers [A] and [B] with some guards hidden behind the sand bags. Carefully move to the next alley. Turn left then.
Thanks to these manoeuvres you should avoid all of the enemies. Get inside the tall building and go upstairs. Watch out on the second floor - there is an enemy soldier running. When everything calms down - take down the first enemy sniper. And take his M14EBR rifle. Look through the window - there is another sniper. Take him down and jump down on the concrete platform below the window.
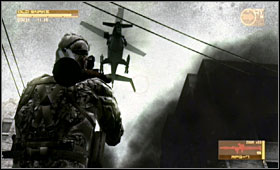
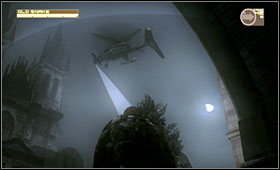
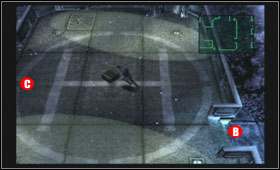
The fight between two enemy forces would escalate. They are hidden among barricades on both sides of the street [A] [B]. Soon the PMC helicopter will show up and start shooting. Calmly crawl through the middle of the street [C] and get inside the building using the doors on the left.
If you want - you can destroy the enemy helicopter. When it's hanging still - shot it down using you RPG-7. To take down enemy snipers use your M14EBR rifle.
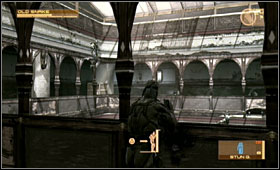
The palace looks deserted, so feel free to look around it. The only things you have to keep your eye on are the gas mines. To neutralize them use MG or just crawl onto them.
![There are also anti-personnel mines [A] - Advent Palace - First Act - Middle East - Metal Gear Solid 4: Guns of the Patriots - Game Guide and Walkthrough](https://game.lhg100.com/Article/UploadFiles/201512/2015121617502382.jpg)
There are also anti-personnel mines [A]. You can shoot them or crawl onto them. Unfortunately, this time MG is useless.
While sightseeing you would spot some fancy laser traps. Stay away from it. For now - you can do nothing and even touching it would kill Snake.
![There is an anti-personnel mine in the kitchen [A] and a tune for your iPod [B] - Advent Palace - First Act - Middle East - Metal Gear Solid 4: Guns of the Patriots - Game Guide and Walkthrough](https://game.lhg100.com/Article/UploadFiles/201512/2015121617502364.jpg)
There is an anti-personnel mine in the kitchen [A] and a tune for your iPod [B]. Before entering the top floor watch out for the last, hidden mine [C].
You would find there the Meryl's team's, Snake Patrol, hideout. And again you will meet Akiba, the guard who was hiding inside the barrel.
After a chat with Meryl Rat Patrol is going to be attacked by trained PMC troops. During the escape try to keep your position inside the group's formation.
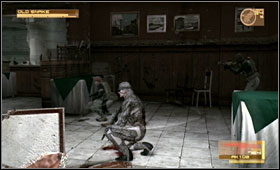
Depending on the way you want to finish the game, you can help Meryl and her boys fighting the attackers or just watch how they eliminate them. They would manage themselves, but it would take much more time.
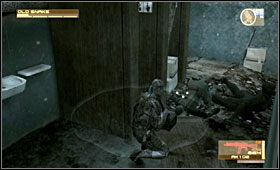
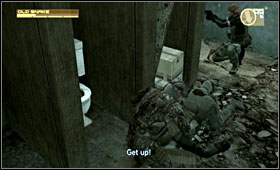
When passing the toilet room Akiba is going to be stunned. You will have to revive him. Stand above him, crouch and press the triangle button. Snake will tap him and with every tap the one star above his head should disappear. Using this method you can also wake stunned enemies.
Remember those fancy laser trap? Akiba would take care of it. After it's turned off - jump through the hole in the ground.
Soon one of the wall is going to be smashed by the bulldozer and another wave of the enemies would appear. Hide behind the counter and try to eliminate them. After the fight go with the rest of the team to the elevator.

After the departure from the Rat Patrol you will begin alone in some dark garage. Take all the items you find there and get outside through the debris. There is a way blocked by the stack of boxes. Approach it and press the triangle button to climb it.
Outside, the rebel's counterattack is going to be supported by the tank. Follow it carefully.

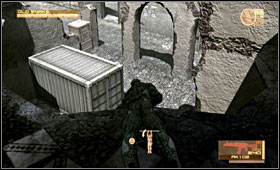
You can also follow the tank using the rooftops. When you get down stay away from the steel box, which can be destroyed any moment.
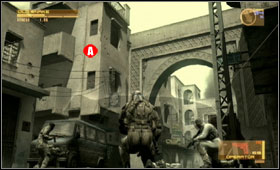
![A few steps away you should spot a high building [A] - Crescent Meridian - First Act - Middle East - Metal Gear Solid 4: Guns of the Patriots - Game Guide and Walkthrough](https://game.lhg100.com/Article/UploadFiles/201512/2015121617502665.jpg)
A few steps away you should spot a high building [A]. Go to the street near it, us the ladder and get to the rooftop. There you can eliminate the enemy sniper.
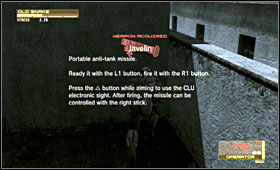
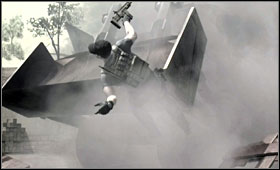
Search the rooftop - there is a Javelin missiles launcher. Get to the street level and move along. When all of the mercenaries are eliminated, just before the wire entaglements, you should find another ladder [A]. Get upstairs.

Move on the other side of the building and jump down. You can now put away the joypad and watch the first encounter with the Beautiful Beasts.
After the massacre pick up the scattered ammo. Carefully move along taking down silently two enemy patrols. When you get to the blockade [A] turn left and get through the hole in the wall. Nearby there is a tune for your iPod. Watch out for the guard on the first floor.
Inside search all of the cabinets. One of them contains the M4 silencer. Jump down through the hole in the floor.
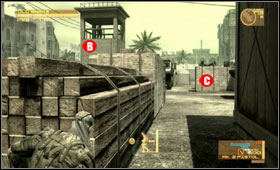
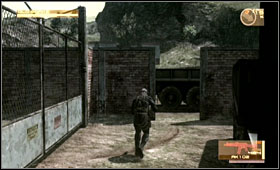
Outside you will find yourself in the front of some large lot. Keep your eye on the patrols. On your left-hand side, behind the wood pile, there is a hole in the wall [A]. Crawl through it. You will get to the other side of the camp. This place is guarded by the soldier in the tower [B]. There are also some soldier walking among the cars and tents.
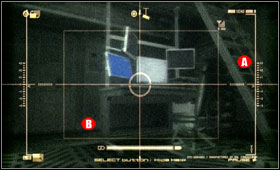
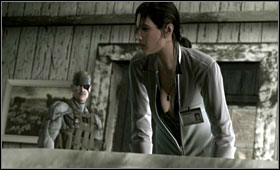
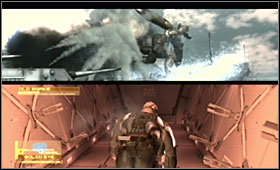
Carefully pass the tents and the watchtower. On the other side find another hole in the wall and through it to watch the cutscene ending the first chapter of the game. During the briefing, when the screen is divided, press the triangle button and then the square button. You will be able to use MG. Find the stairway [A] and drive MG under the desk [B]. Take the camera from there. It would be useful later in the game. There is also an iPod tune in the kitchen.
Goals:
Finding the laboratory and saving Naomi
Follow the kidnapped Naomi
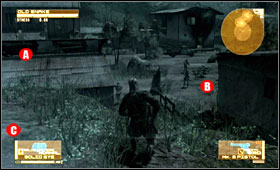
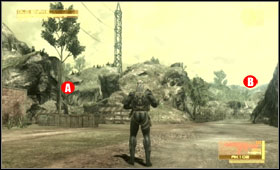
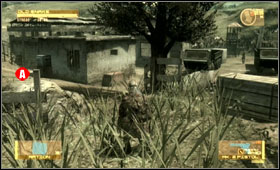
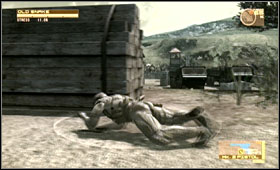
You start you mission on some small hill above the village. There are some buildings [A] you can use to hide yourself during the infiltration. On the right-hand side [B] the PMC soldiers are keeping their eyes on the rebels. From time to time they bring one out to kill him. When it happens you can attempt to set them free, but keep in mind that causing the alert would lead to the killing of the remaining rebels. To the left [C] there is a way out of the village. Move along this way.
Watch out for the guard approaching from the right. Follow him silently and when he would turn right pass him and circle another building.
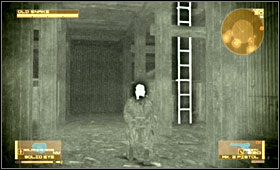
It's a barn. Get inside through the open gates. As usual - there are some items and a ladder. Get upstairs.
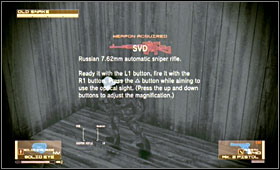
Well, well - there is a SVD sniper rifle. To get it - move to the ledge and jump to the other side.
When you get outside go left to the end of the village. There is a place where sometimes the executions take place, but usually there is only one guard wandering. Pass him, go to the end of the place and turn right. Near the big boulder there is a patch to the left. Leave the village behind you and go to the next area. Slowly, try to avoid the patrols and move upwards.
The rebels are up to attacking the power plant. There is a small group of them. To avoid the PMC patrols stay with them. But when would it came to the gunfight - you can leave them. Soon you should spot some shed. It's guarded by just one soldier.
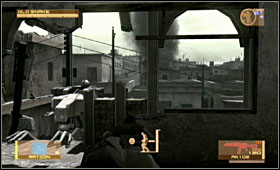
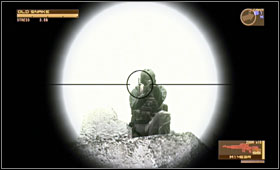
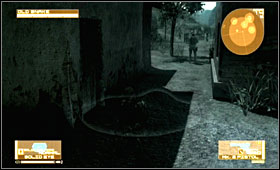
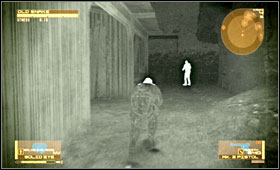
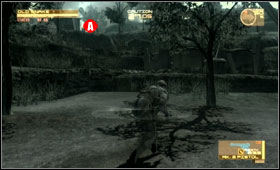
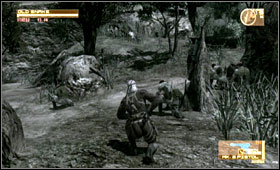
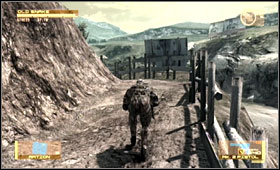
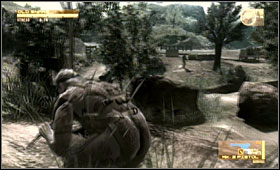
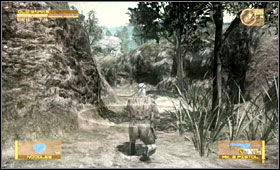
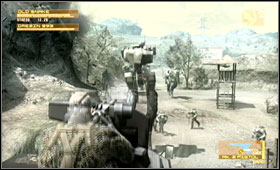
![When you catch sight of the power plant [A] take out the sniper rifle - Power Station - Second act - South America - Metal Gear Solid 4: Guns of the Patriots - Game Guide and Walkthrough](https://game.lhg100.com/Article/UploadFiles/201512/2015121617502981.jpg)
When you catch sight of the power plant [A] take out the sniper rifle. Nearby area is under fire from the spot places on it's right-hand side [B]. You can eliminate soldiers who sit there and help the rebels or just crawl silently through the grass to stay unnoticed .
There is going to be lots of fighting before the power plant entrance. As you are there - grab another weapon to your collection.
On the right-hand side you should spot the path leading to the plateau, which engulfs the power plant. Go there and find the mortar. You can use it to attack the PMC troops.
To the right from the mortar you will find the way down. It will lead you to the power plant's entrance.

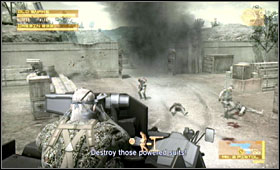
Behind the gate there is an entrance to the first building. Get inside. The rebels should inside right after you, throwing grenades at the machinery. This means that the battle for the power plant is over and all of the PMC are eliminated.
Get to the power plant's back. You can find there Drebin - the firearms dealer.
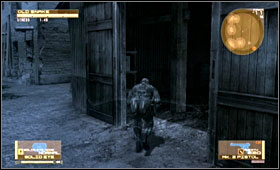
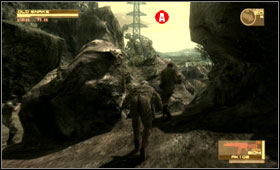
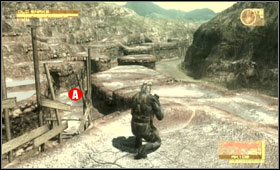
![After Drebin's departure you have two ways to go - [A] and [B] - Power Station - Second act - South America - Metal Gear Solid 4: Guns of the Patriots - Game Guide and Walkthrough](https://game.lhg100.com/Article/UploadFiles/201512/2015121617503167.jpg)
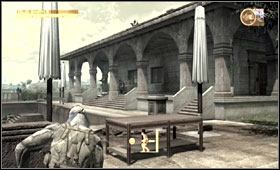
After Drebin's departure you have two ways to go - [A] and [B]. We suggest you to use [A]. During your trip try to pick up all of the items.
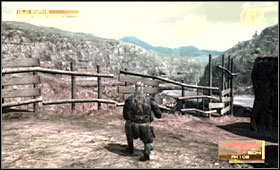
Move along the fence and avoid the road. This are is being patrolled by only a few PMC soldiers, who should present no problem for you. All the time try to keep yourself near the rocky formations in the middle[A].
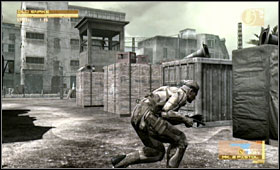
A few steps away there are some guard post. One of them is has a watchtower. There are large packages of wood.
Move slowly behind them to the back of the guard post,. You can get inside the building from it's bottom [A]. Crawl below the floor.
Use the hole to get inside it, but watch out for the soldier. Inside, there is a VSS sniper rifle waiting for you. Get outside and move along.
There is no need to eliminate the soldier in the watchtower. There is always another soldier ready to replace him after some time. Calmly crawl near the tower and move along.
You should get nearby the Vista Mansion. The gate is closed. Move near the fighting soldiers. After a few moments the bulldozer would arrive to make an entrance.
Get inside and turn right. Avoid the fights, circle the mansion and search for the way - staircase leading inside.
Get on top and move along. To the left from the stairway you may encounter some fighting, but ignore it. Move towards the hedge.
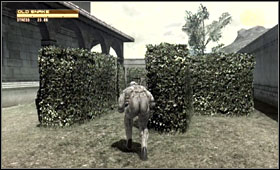
Circle the mansion moving among the hedges. Near the gate you should spot the doors leading inside it. But watch out - from time to time some soldiers run through it.
Inside use the stairway and move to the second floor. Eliminating soldiers you find there you should get another rifle to your collection.
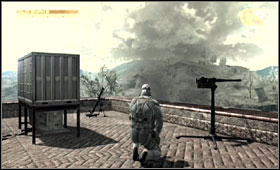

In one of the rooms there is an entrance to the terrace. On the terrace you can find a machine gun and mortar. Don't use them - move to the other side and jump down.
In the basements you would find a ladder. Use it to get to the Naomi's laboratory.

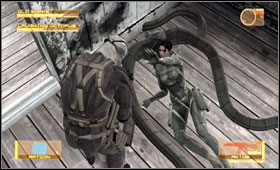
Naomi was kidnapped and Snake locked in the lab. And soon it would be full of enemy soldiers. But don't panic - find some cover and eliminate your enemies. When the last one is dead - Laughing Octopus would appear.
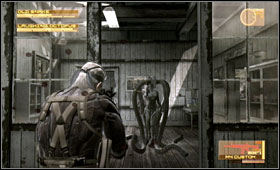
It is not a tough fight, but you have to be patient. Octopus can render herself almost invisible. So you would have to use the Solid Eye.

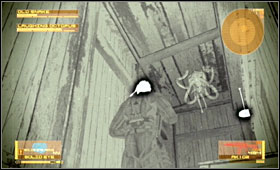
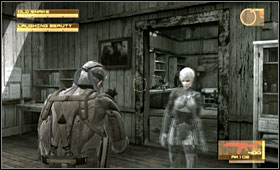
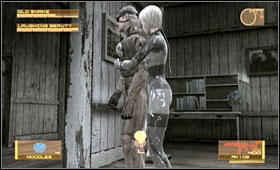
Try not to get nearby the Laughing Octopus - she can stun you with the electric current. She can also imitate mannequin standing in the room and a painting.

Disappearing in the clouds of some black some she may sent three flying spheres towards you. They explode during contact so you have to shoot them down. Octopus can also imitate MK.II. In this form she would call you to follow her. Obviously - don't do this, there are mines waiting for you on the floor. After some fight she will imitate Naomi. Don't let her fool you.
Second phase of the fight looks like a target practice. Use the Mk.2 gun. Notice that your shots wouldn't take the Octopus's health, but her Psyche. It would be enough to defeat her. Still, don't let her get close to you.

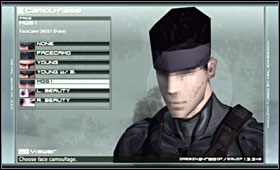
After beating the Octopus you would get the FaceCamo and, if you didn't use the firearms, camo with her face.
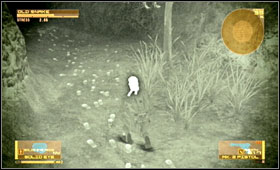
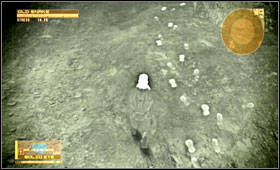
Now you have to follow the kidnapped Naomi. Let's play scout. Switch Snake Eye into night vision mode and you should spot some footsteps on the ground.
Trampled grass means someone was walking there. Move along. At some point the traces would divide, but it doesn't matter now

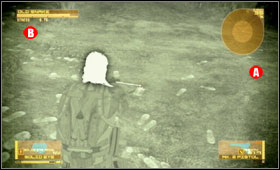
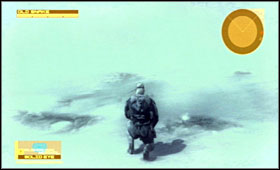
After the bridge watch out for the guard. Nearby the rock you should notice, take soldier have separated from each other [A], [B], [C]. Pay attention to the footprint's shape. Follow the one looking like woman footwear (truangular stilettos).
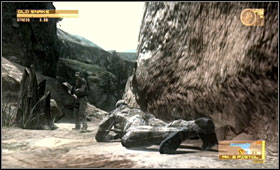
![Later you should find a lost handkerchief [A] and a sniper waiting for you [B] - Mountain Trail - Second act - South America - Metal Gear Solid 4: Guns of the Patriots - Game Guide and Walkthrough](https://game.lhg100.com/Article/UploadFiles/201512/2015121617503774.jpg)
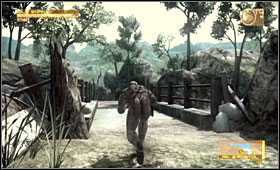
Later you should find a lost handkerchief [A] and a sniper waiting for you [B]. Get rid of him and move along. You should get to the river - cross it.
Pay attention to more distinct footsteps. You can now use the Solid Eye less often, soldier you meet during your trip are pretty good scouts [A] and can even hear it's buzzing. Try to avoid them.

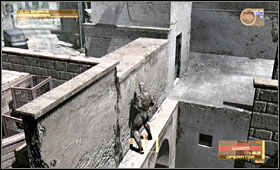
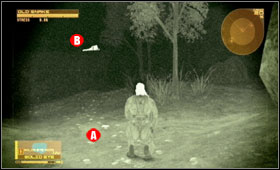
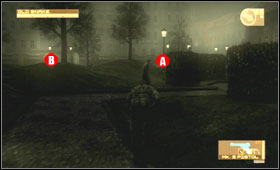
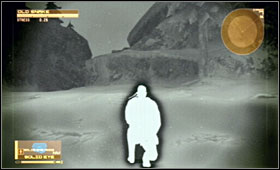
![Once again the team had split up [A], [B] - Mountain Trail Riverside - Second act - South America - Metal Gear Solid 4: Guns of the Patriots - Game Guide and Walkthrough](https://game.lhg100.com/Article/UploadFiles/201512/2015121617503717.jpg)
Once again the team had split up [A], [B]. Move towards [B]. When you get to tall grass move very careful and don't turn on the Solid Eye. There is an ambush prepared by two soldiers. To pass them throw an ammo clip behind them.
When they turn to check the noise - move along. There is also another soldier waiting for you later - just avoid him.
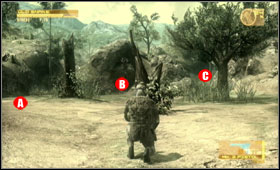
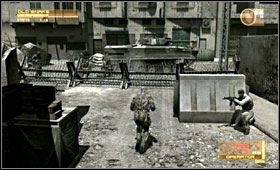
![You can now choose three ways: [A], [B] and [C] - Mountain Trail Riverside - Second act - South America - Metal Gear Solid 4: Guns of the Patriots - Game Guide and Walkthrough](https://game.lhg100.com/Article/UploadFiles/201512/2015121617503822.jpg)
You can now choose three ways: [A], [B] and [C]. Use [C]. Avoiding patrols you should get to lighted road.
It's time for plenty of shooting. Clear your way and wandering soldiers.

But the biggest problem are the Gekkos. You have to shoot them first. At the same time you have to cover your back - soldiers like to climb atop the transporter.
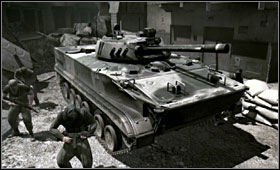
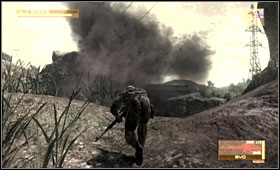
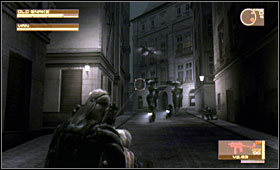
![When you get to the closed gates [A] try to concentrate your fire mostly on them - Stryker Escape - Second act - South America - Metal Gear Solid 4: Guns of the Patriots - Game Guide and Walkthrough](https://game.lhg100.com/Article/UploadFiles/201512/2015121617503947.jpg)
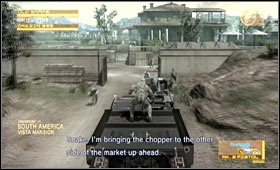
When you get to the closed gates [A] try to concentrate your fire mostly on them. There are just a few Gekkos waiting for you. When you destroy them Drebin's transporter would enter the city streets, where you would meet Raiden.
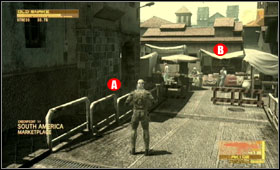
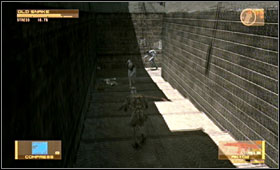
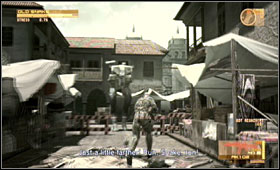
Now you have to act quickly. You are on the street leading to the marketplace. You can see some stands ahead [B].
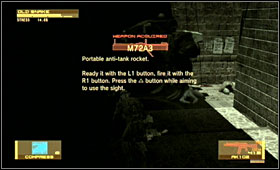
There is a rocket launcher in the alley. As you get it - the Gekko would appear. Immediately run back.
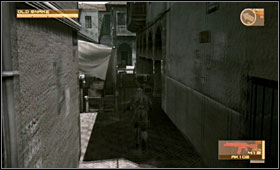
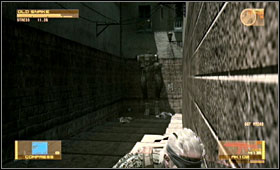
Get into the shadow and get to the other side. Turn left then.
Use the sidestreets to lose the Gekko. But after all you will have to return to the main street. Run. Soon another Gekko would try to block your way. You will have to run nearby it's deadly legs and it may not be a success at the first time. You just have to feel the right moment. If you made it - second act is finished.
Goals:
Find Eva's hideout
Protect the van containing the Big Boss's body

Let's start the third act. First you will get the young Snake's Face Camo, casual clothes and shortwave radio. However - we won't use it. After a few steps you should spot an agent you have to follow.

Hide behind a car and wait till the agent cross the street. You can stick close to him, but in case of trouble you can hide behind the trash cans.
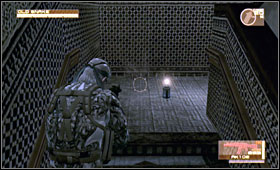
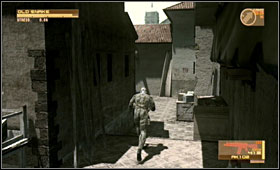
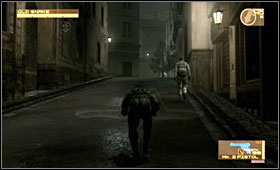
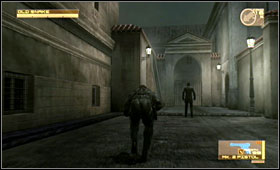
![Passing the first corner watch out for the can [A] - don't knock it - Midtown Sector - Third act - Eastern Europe - Metal Gear Solid 4: Guns of the Patriots - Game Guide and Walkthrough](https://game.lhg100.com/Article/UploadFiles/201512/2015121617504176.jpg)
Passing the first corner watch out for the can [A] - don't knock it. When you get an info from Otacon, pointing that the agent [B] is not going any further, till the soldier [C] is guarding the street - use the MG.
Turn on the camo, drive the MG nearby the soldier and stun him. Wait for the agent to move along and go. There is another soldier near the park [A]. Eliminate him silently - tranquilizer gun should do the trick.
Keep following the agent. He will try to relieve himself buying you time to take down another blockade. Crawl onto the small hill [B].
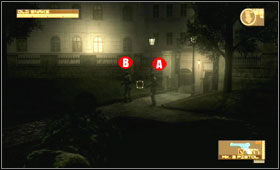
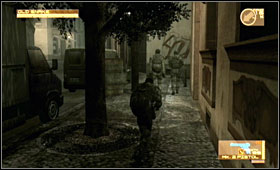
![There two soldier guarding the gate [A] - [B] - Midtown Sector - Third act - Eastern Europe - Metal Gear Solid 4: Guns of the Patriots - Game Guide and Walkthrough](https://game.lhg100.com/Article/UploadFiles/201512/2015121617504102.jpg)
There two soldier guarding the gate [A] - [B]. Take them out silently.
Then you should find a small square with some soldiers and a helicopter. Avoid being detected and follow the agent staying close to the wall on the right.
There are another soldiers trying to catch the agent. You have to eliminate them, first the [A] one, then [B]. But even when the agent is capture - you can set him free.
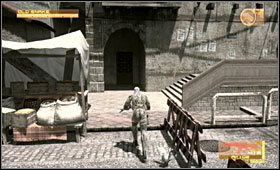
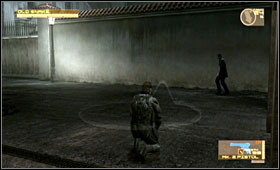
![A few steps away the agent is going to turn into the gate and enter the backyard [A] - Midtown Sector - Third act - Eastern Europe - Metal Gear Solid 4: Guns of the Patriots - Game Guide and Walkthrough](https://game.lhg100.com/Article/UploadFiles/201512/2015121617504280.jpg)
A few steps away the agent is going to turn into the gate and enter the backyard [A]. Wait for him - after a few seconds he would return - dressed like a soldier.
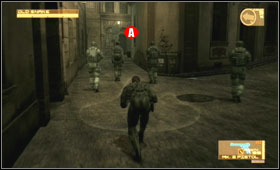
All of this time keep following slowly the agent, who should pass some guard post. At some point three patrolling soldiers would join him [A]. But don't panic - just follow him.

One by one - the soldier would start to departure from the agent. Now it's time to check your barrel-hiding abilities - there is going to be some patrols in cars. As soon as you heard the engine - hide yourself inside the barrel.
At last - the agent has arrived at his destination. Wait till he change his clothes and go with him to meet Eva.
Another chase-scene. You are travelling by bike with Eva and you have to protect the van with the Big Boss's body. Just before start you would get a machine gun with unlimited ammo supply.
Depending on your gamestyle - you can wreak havoc or just only eliminate soldiers using Mk.2, who just landed aboard the van.
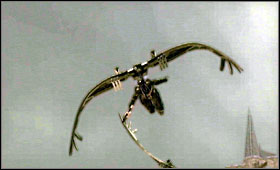
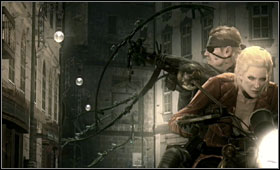
Soon the Raging Raven's team is going to join the party. Shooting them down you get some Drebin's points. But you can also just watch the action and do nothing.
Comparing to previous bosses Raging Raven is a little bit tougher enemy. At the beginning just run upstairs. Before the Raven came out you should find the iPod tune in one of the corners.
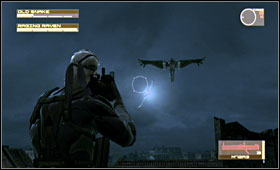
To find Raven use the Solid Eye's radar. The biggest point is pointing the direction, where you have to go. When you spot her hanging motionlessly - shot her as much as you can. But watch out - sometimes she would fire a rocket at you. You can avoid it by rolling to sides. If the Snake is hit and on fire - roll to extinguish the fire.
If the Otacon tells you to run - just do what he said. It means that Raven had placed some explosives. All of the time try to fight her from the top floor. On the lower level the Raven is able to catch Snake - and this may take many of the Snake's health.

When the Raven would lost her armour defeat her the same way you have defeated the Octopus. You should get another rifle as a reward.
Don't be afraid about the graphics - it's just Snake's dream sequence. Go to your right [A]. Approach the helipad [B] and when the spotlights would divide - run to the other side [C] picking up some grenades.
Watch out for the soldiers and cameras. You can see their field of view on the radar.
You will find your way in the left upper side of the entrance. Watch out for the camera [A], crawl through the hole [B] and move along. After this mission you should get Face Camo with Snake's face from first MGS.
Goals:
Find Metal Gear REX
Eliminate Vamp
Get out of the base

The snowstorm is raging. You would have to use the night vision.
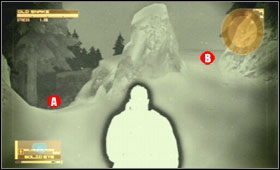
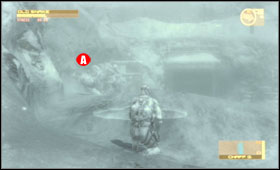
Search the nearby area for the items. When you spot the way to some valley [A] take the upper route [B].
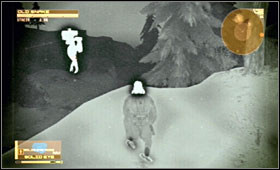
As you can see - the Gekkos are here too. There is a tree nearby. Crawl to it and slide down slope. You should land just right near the underground passage. Crawl through it and when the Gekko is not patrolling - run forward.
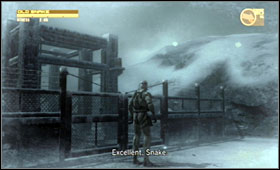
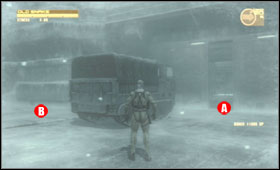
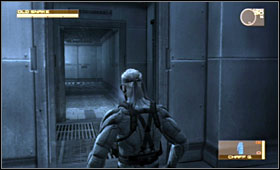
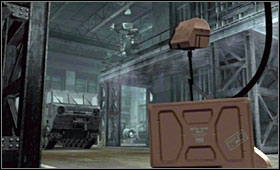
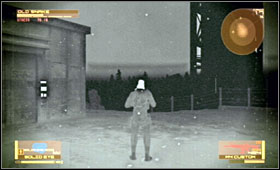
It's time for the most touching Metal Gear Solid's moment. You are at the same helipad you've infiltrated nine years before. But this time the base looks deserted. At the helipad [A] you should find the electrical equipment jamming grenades. In the distance [B] there are abandoned warehouses. To the right [C] there is an entrance to the first hall. Left to it [D] there is a hole in the walls, you used in Snake's dream.
Carefully checking all of your surroundings you can find there lot's of Drebin's points. First go to the main gate and then to the abandoned warehouses. Get inside.
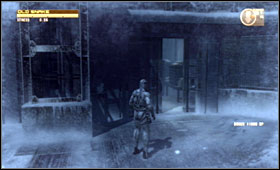
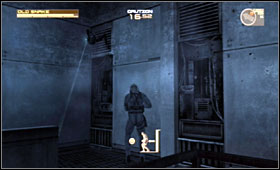
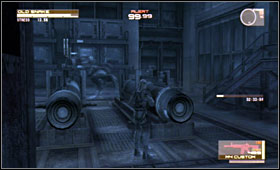
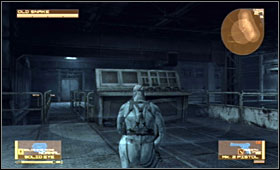
Crawl to the main room and pick up all the items. The go through hall's main entrance [A]. Inside you would find plenty of Dwarf-Gekko machines. So we would have to use the backdoor [B].
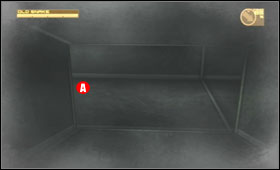
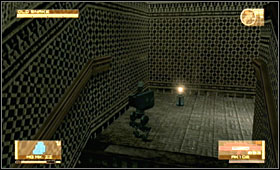
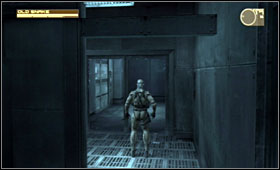
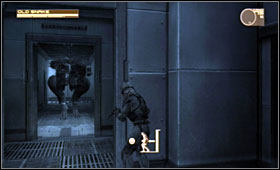
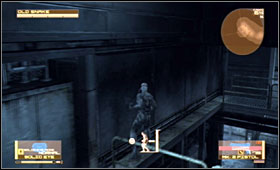
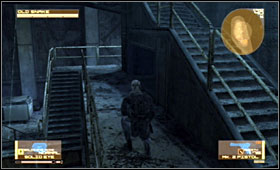
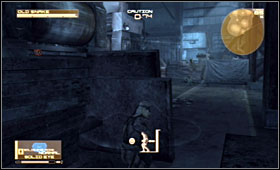
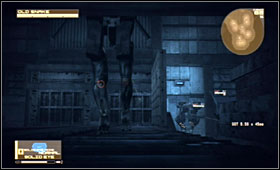
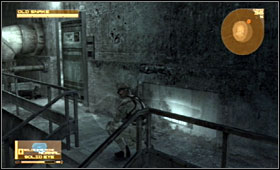
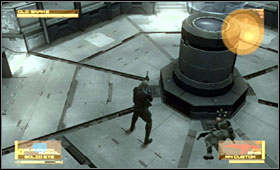
![Inside the ventilation tunnels turn left [A] - Tank Hangar and Canyon - Fourth act - Alaska - Metal Gear Solid 4: Guns of the Patriots - Game Guide and Walkthrough](https://game.lhg100.com/Article/UploadFiles/201512/2015121617504857.jpg)
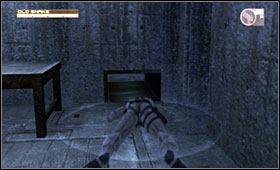
Inside the ventilation tunnels turn left [A]. Crawl to the end picking up the instant noodles.
Near the exit there is a staircase. Use it keeping your eye on the Dwarf-Gekko. For the first time you would spot Gekko, who is used as a surveillance camera. Stick yourself to the wall and avoiding it's search-beam - pass it by.
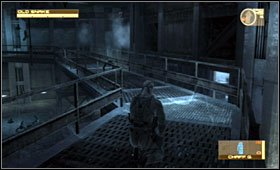
Carefully search the warehouses. Move to the another platform. When the patrolling Gekkos arrive - just jump over the handrail and hang yourself for a while. When the Gekko's are gone - pull yourself up and move along.
The end of the walkway is just above the gates leading to the next part of the complex. Jump down and head towards the exit, avoiding the Gekko-cameras. Watch out outside - there are two idle Gekkos [A].
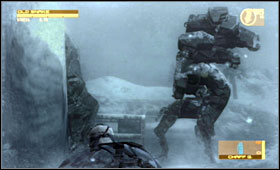
Keep yourself near the left side and move forward near the wall. At some moment the Gekko would wake up and would start going in your direction. Watch out not to be trampled by it. Pick up the scattered items and enter the next area.

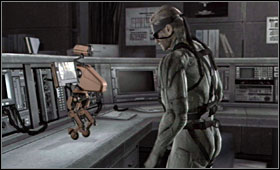
Run down and you will find yourself in the warhead storage room. Get to the gates and try to open it [A], but after the Otacon you should know, that you have to get to the office to do so. He will give you the code - 48273. There is also the truck [B] and the elevator [C] inside the room.
Jump onto the truck and pick up the rocket launcher. Then go upstairs and call the elevator.
When you get down - go forward, to the end of the corridor, and turn left. The cutscene would be triggered. If you input the code Otacon gave you incorrectly - Snake psyche would lower.

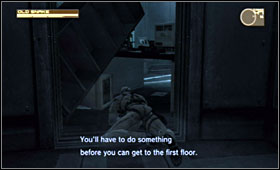
When Otacon finishes his job get back to the elevator. Unfortunately, the way is blocked by the patrolling Gekko. When it goes to the end o the corridor - go to the desk. Crawl underneath it and pick up all the items you find.
Thanks to this you should get to the elevator But you have to still watch out for the Gekko, now to your right.

Call the elevator and get to the top floor. Go to the closed gates. You should see a cutscene showing MG trying to open it.
It's time for some action. The Gekko is not so dumb and is also able to use the elevator. Show yourself to him and start circling around the rockets.
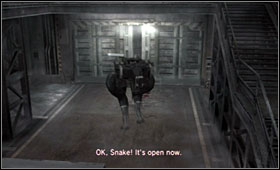
First of all - don't let it get to the MG. Just as soon as the Gekko would stop chasing you - shoot at it. Probably you would have to play a few times a cat and mouse game with it, till the MG would unlock the gates. When the gates are open - pass by the Gekko and get outside.
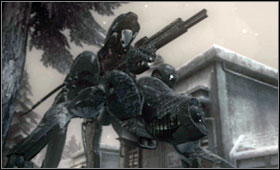
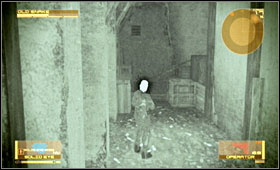
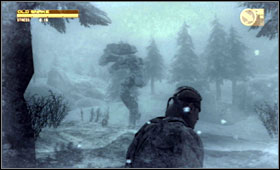
Pick up scattered items and move along. It's time to meet the Crying Wolf.
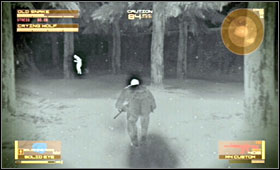
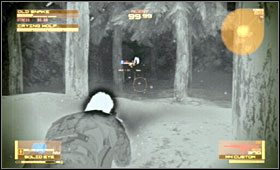
It's hard to spot her during the snowstorm. There is also plenty of wandering enemy soldiers. Search for the distinct trail, it should guide you to the boss.
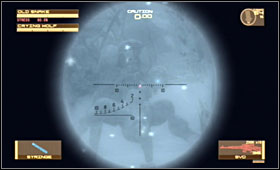
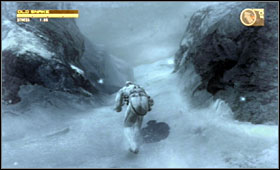
When the snowstorm gets weaker try to spot the Crying Wolf from the distance. it's pretty hard, because her armor is almost invisible in night vision mode. But these are the moments she is peering out of here cabin. Use the sniper rifle and shoot at Crying Wolf as she do so.
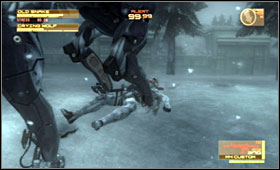
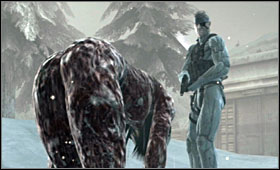
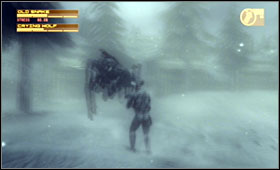
Watch out for her charging. Her charges are very dangerous and takes lots of health. If you would be able to get close to Crying Wolf - use some stronger weapon. Few shots should do the job. The last stage of the fight is practically the same, as in the previous boss duels.

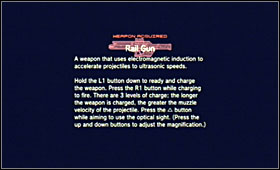
Crying Wolf was using the Rail Gun. It would be very useful in a few minutes.
Get on the other side of the room using the platform. Stick yourself to the wall and use the ledge to get to another one.
Now you have to watch out fore the Dwarf-Gekkos. Wait for the right moment and start walking downstairs. However - don't go to the end of it.

Get to the handrail near the elevator, jump down and call the elevator. In the room patrolled by the Gekko just go on the others side and move along.
There is a narrow way to the second hall. Watch out - there is plenty of the Gekkos. Get inside and hide behind the concrete wall.

When the Dwarf-Gekkos turn back go to the barrels. Then use the conveyor belt and crawl on it to the other side. Wait till the Gekko is not looking and move to the right. There are few Dwarf-Gekkos. Pass them by and move to the next corridor.

Use the ladder and get down. The go down the corridor and go through the hole.
Only two Dwarf-Gekko's here.
Get upstairs and pick up the items. Wait till the way is clear and go through the door controlled by the Gekko-camera.
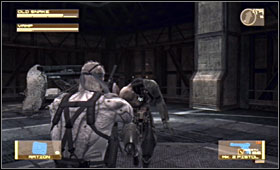
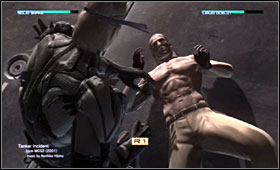
After the cutscene it's time to deal with the Vamp. The fight is pretty easy, but it could be tricky to find the way to defeat him. That's where our guide come in handy. Equip the Mk.2 gun and the syringe you got from Naomi.
Avoiding Vamp's attacks try to shot him with tranqualizer. When his psyche is low, he will fall on the ground and get stunned. It's the right to perform the trick. Hide your weapon and catch the Vamp using the CQC technique. The inject him with the syringe.
Nano-machines in Vamp's body don't work no more and he becomes a mortal. He would fight the Raiden now, while the Otacon would try to start the Metal Geara. Your job is to fight with the deadly Gekkos. The perfect weapon to deal with them is the Crying Wolf's Rail Gun. Aim at the Gekkos' top side.
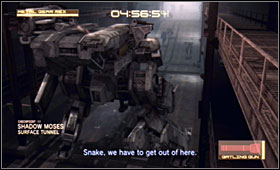
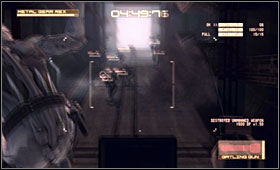
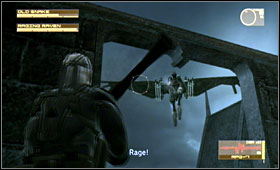
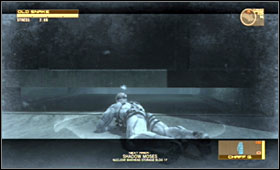
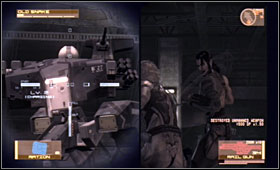
At last! Otacon had started the Metal Geara. Vamp is going to die fighting Raiden. Naomi is going to die too. And you have about five minutes to get to the surface. REX is a powerful weapon - so you should have absolutely no problem fighting the Gekkos. Just go forward and try not to slow down.
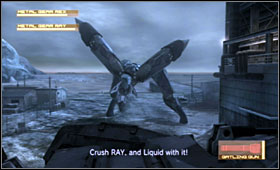
Outside there is the Liquid waiting for you inside RAY. It's another pretty easy fight. You only have to watch out for the RAY's rockets. You have to destroy them before they reach you. Nearby RAY you can try to ram it. Pointing the right direction on the stick press the X button to do so.
Goals:
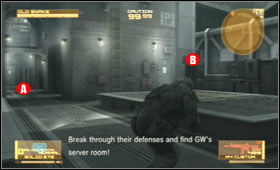
Get to the server room
Defeat the Liquid Snake

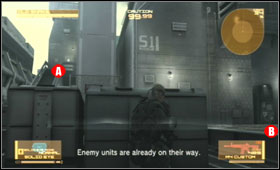
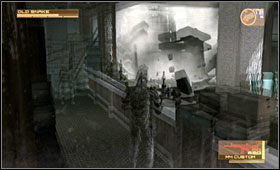
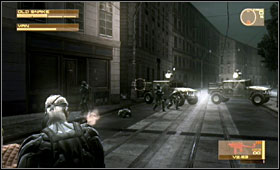
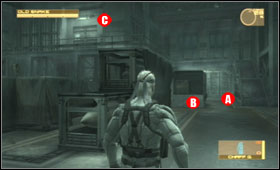
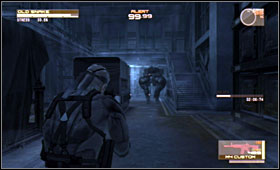
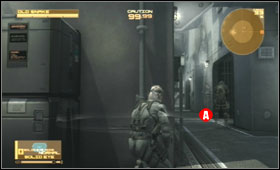
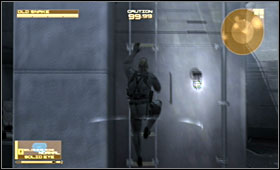
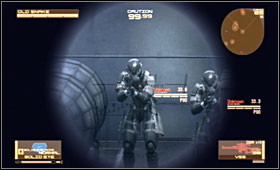
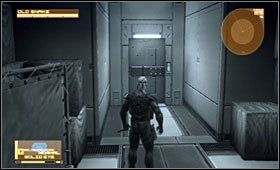
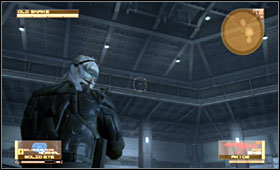
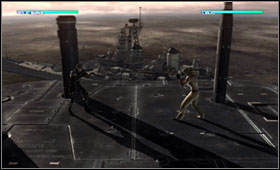
Welcome aboard Liquid's ship! There is going to be plenty of enemy soldiers soon [A], so try to get fast to the right side of the deck [B].
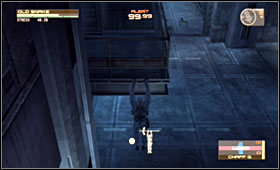
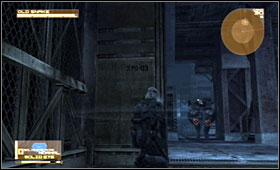
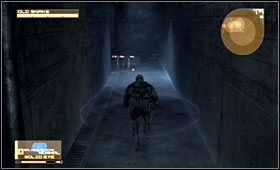
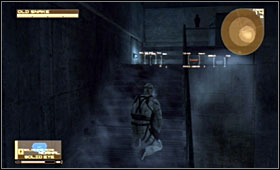
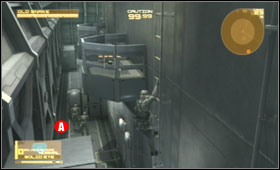
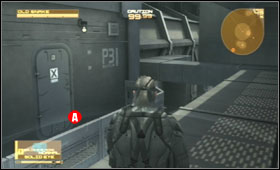
![Patrols would keep on coming [A] - Ship Bow - Fifth Act - Outer Haven - Metal Gear Solid 4: Guns of the Patriots - Game Guide and Walkthrough](https://game.lhg100.com/Article/UploadFiles/201512/2015121617505674.jpg)
Patrols would keep on coming [A]. Keep on moving right [B], towards the narrow passage [C].
Stick yourself to the wall and move between the wall and the fence. In the middle of the passage wait till the patrols are gone, then keep on going.
A few steps away crouch and wait for the another patrol to pass by. Turn right and use the passage nearby the staircase.
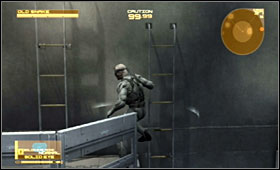
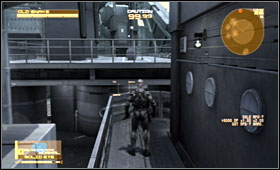
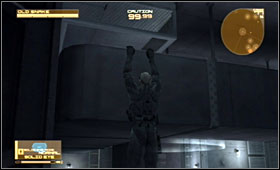
Now you have to act swiftly, because the correct timing is very important. As soon as you get to the other side stay low and move along. As the patrol [A] shows up you have to be already climbing the ladder [B]. Get on top and use another ladder.
Then move the analog stick to the right - Snake would now catch the pipe. Move to the right. Get to the another ladder and when the patrol [A] pass by - get down.
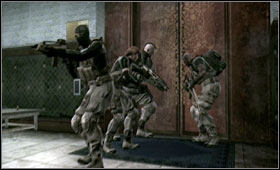
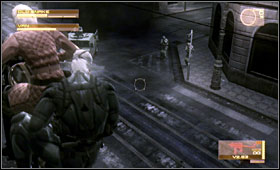
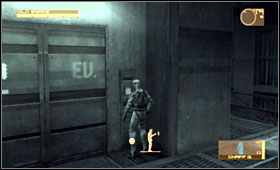
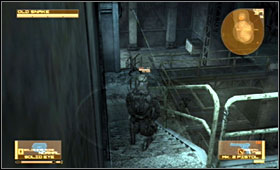
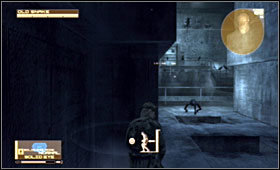
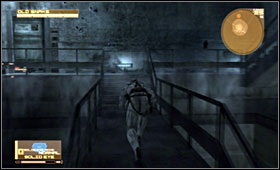
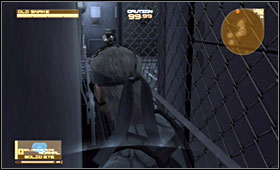
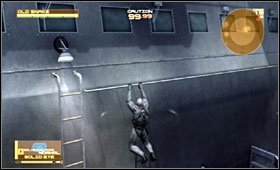
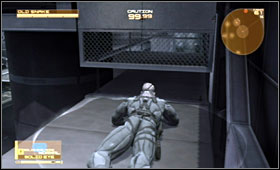
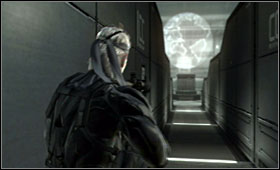
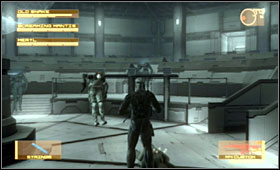
![Wait nearby the ladder for the soldier to jump down [A] - Ship Bow - Fifth Act - Outer Haven - Metal Gear Solid 4: Guns of the Patriots - Game Guide and Walkthrough](https://game.lhg100.com/Article/UploadFiles/201512/2015121617505833.jpg)
Wait nearby the ladder for the soldier to jump down [A]. Pass him behind his back and use another ladder [B].
Use it and get to the platform. Now you have to take a run-up and jump to the next one [A].
After the corner get into the ventilation shaft. Crawl below the fence.
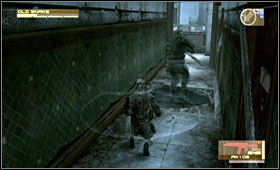
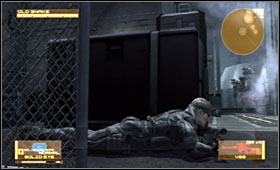
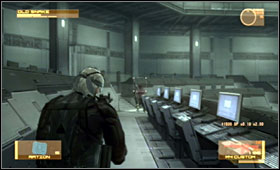
In the bow section of the ship there are about four to five soldier. Lying in the ventilation shaft use the VSS sniper rifle to take them down. Jump down then.
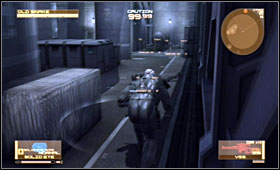

Get to the spot when you have taken down the soldiers with the sniper rifle. Now, very slowly, start to crawl behind the containers [A]. You have to get to the door [B].

Try to avoid two Gekkos patrolling the area. Wait for the right moment and run to the door. You would have to press the triangle a few times button to open it.
You are very close to your destination. Now you have to find Meryl, deal with the last Beautiful Beast and get through the "microwave".
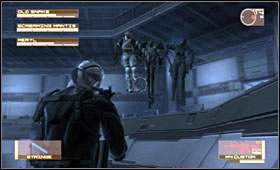
You are in the ship's command center. Meryl is lying there stunned and you have to protect her from the incoming enemy soldiers. Take the Mk.2 gun or other rifle and do your job.

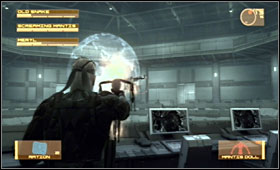
Keep an eye on the guys on the platform above you. When they are gone - it's time for the Screaming Mantis.
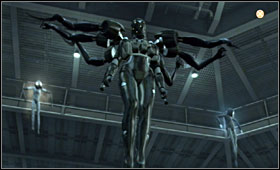
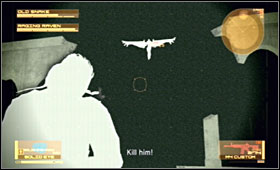
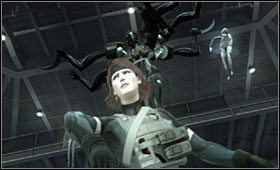
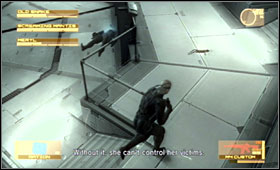
As you probably noticed - there are two dolls levitating near her. They are your target. Don't bother with anything else. Screaming Mantis would try to control Meryl and she will start to shot at you. Just avoid her - killing her means failing the mission.
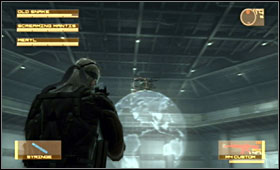
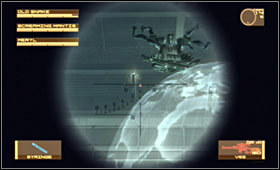
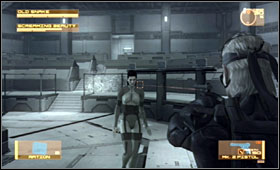
At the beginning the Mantis is hanging above the ceiling. Use the sniper rifles and shoot the doors. She will try to take control over you - so you would be slowed down and aiming could be more difficult. To get out of her power use the syringe.
At some point Mantis would try to hide the dolls behind Meryl and some soldier. Shoot only when you are sure you don't hit Meryl. Concentrate on the soldier and the doll.
When the Mantis would drop the dolls pick them as fast as you can. Use the menu to set one of them as your weapon. Aim at Mantis and try to hit her. When you do hit her you would have to press L1 shake your joypad - the way it is shown onscreen. After a few seconds the Screaming Mantis would lose her armour.

And that's the last phase of the battle - you know what to do. Drebin would contact you to tell you about her past.
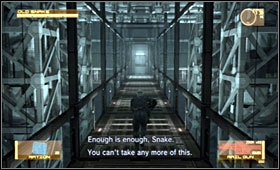
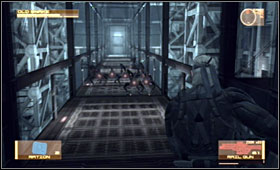
There are some identical rooms crowding with the Dwarf-Gekkos waiting for you. The best way is to ignore the robots, run and jump over them.
There is just a "microwave" corridor between you and the sercer. Keep on tapping the triangle button and Snake should get through it.

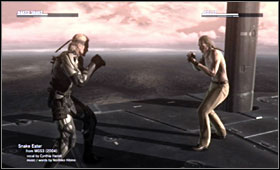
Fighting Liquid Snake is one of the hardest parts of the game. The key to succes is blocking his blows. Press L1 to block and R1 to attack. At the first phase you can just wait till Liquid approaches you and perform a 3-hit combo. Block and counter it - it's 100% efficient. Sometimes, avoiding Liquid's attacks, you would have to press the buttons shown onscreen. if you succeed - Liquid's health level would significantly drop.
The second part of the duel is the toughest. Liquid Ocelot would try attacking you using some big swing punch. Always keep on blocking, try getting of the way of his attack and then counter.
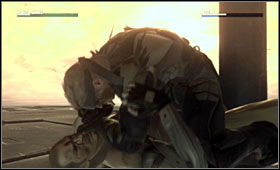

At the end the Ocelot would throw out of him the Liquid's personality and becomes an old, good Revolver. Stay with you previous tactics. There is one head attack you cannot block - but fortunately it doesn't take you much health. Remember - be patient, learn how to block and avoid enemy's attacks. At the end of the fight both guys would start to move slowly and the health bars would disapper. But it doesn't mean the fight is over - you still have to keep on trying hitting the Ocelot. It is going to be much easier now.
Don't turn off the console after you watch the ending movie - it's not the end of the story...


 Mercenaries 2: World in Flames Game Guide & Walkthrough
 Metro 2033 Game Guide & Walkthrough
 Medal of Honor: Airborne Game Guide & Walkthrough
 Mass Effect Game Guide & Walkthrough
 Metro: Last Light Game Guide & Walkthrough