Welcome to the unofficial game guide for the latest addition of the "Medal of Honor" series - "MoH: Airborne". This guide consists mainly of a detailed description of all missions of the singleplayer campaign of the game. You should know that for the most of the time you will be allowed to fulfill given mission objectives in any order, however sometimes you will have to stick with the main plan, following the only route to a current destination. Each mission description contains several important things. First of all, you will have an opportunity to take a look at a global map, so you'll know where to go. I've displayed all objectives and told where they are. You will also find out where to land, however remember that it's always up to you to choose a landing zone. There are at least two different paths leading to each goal area and I've tried my best to show them to you. I've also added a few hints about the best tactical approach. Some of these actions won't be spectacular, but you'll be able to reach your goal much easier or you will have an opportunity to surprise enemy forces.
I would also like to say about a few very important things. Make sure that you've read and understood these hints:
- "Medal of Honor: Airborne" is a much more difficult game than some of its predecessors. As a result, I wouldn't recommend being in a lot of hurry. Otherwise you'll probably end up dead and you'll be returned to the nearest checkpoint area (which is probably going to be an allied plane). Also, make sure that you advance to your target properly. You will have to use nearest objects for much needed cover. Additionally, don't forget about the sprint feature. It's going to be very helpful, especially if the area is not safe and you want to reach a building or a better cover area. You should also consider attacking enemy units from one of the flanks, however make sure that they don't see you coming. It would also be wise to occupy buildings and other higher grounds for a better view of the surroundings.
- Make sure that you're checking your health bar very often. You shouldn't have any major problems finding first aid kits, however I wouldn't recommend losing health bars by taking part in very dangerous actions. Also, it would be wise to wait for the health bar to replenish itself, however this will only include a current slot. If you lost an entire slot, you won't be able to get it back until you've found a med kit.
- It's always very important to land in a strategically important location. Thankfully, you will be allowed to practice parachute jumps by taking part in a short tutorial section of the singleplayer campaign. I'd strongly recommend getting ready for each landing, so it won't be botched. Otherwise you wouldn't be allowed to use your gun right away.
- Don't forget that you can't create any quicksaves during the course of the singleplayer campaign. There are only autosaves and they are being created each time you've reached an important area or fulfilled one of the mission objectives. As a result, I don't recommend taking part in dangerous fights, however you can't stay in one place for too long, because enemy troops will receive reinforcements.
- It would be wise to choose favorite types of weapons at the start of the game. This means you will be using very often and you will be able to upgrade your guns much faster than usual. I prefer sniper rifles to standard machine guns, but the choice is yours.
Have fun playing the game!
Stranger
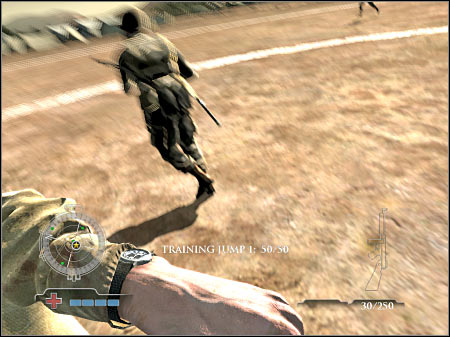
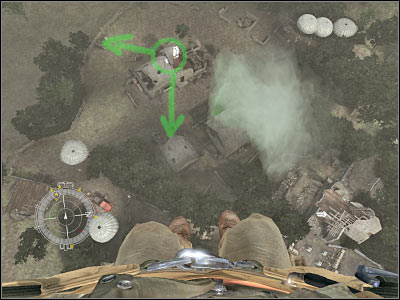
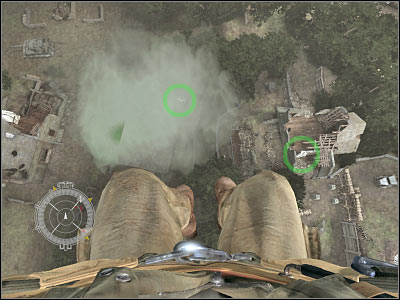
"Medal of Honor: Airborne" contains a very short tutorial mission. You won't be able to skip past it, however it's very short, so it shouldn't be a problem. I will only tell you about a few important things, because you can learn the rest on your own. You will have to take part in three separate jumps. The first jump is going to be the easiest one and it's purpose is to familiarize you with the controls. You will have to use direction keys to steer the parachute (mainly the upper cursor). I guess you won't have any major problems here. Also, don't forget about the possibility of pressing the SPACE key. This will allow you to slow down the approach. It's going to be a very important feature, especially if you plan on landing in a very specific area and not just in some random section of the map. You should be pressing this key each time you're getting closer to the ground, so you won't botch the landing. There's also a possibility of scoring a running landing, but it's extremely difficult to achieve. The first jump will require you to land in a middle of a large circle. It shouldn't be too difficult. The second lesson requires a much more precise landing. Your objective will be to find a small runway which is going to be located near the green smoke. The third tutorial mission will familiarize you with landing on roofs of larger structures. You will be able to choose between two different landing zones here. If you don't make any major mistakes during these lessons, you should be rewarded with golden wings. OK... let's proceed with the game, shall we? :-)
Main mission objectives:
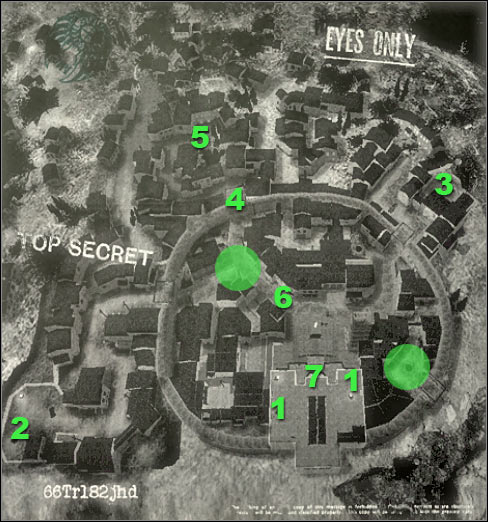
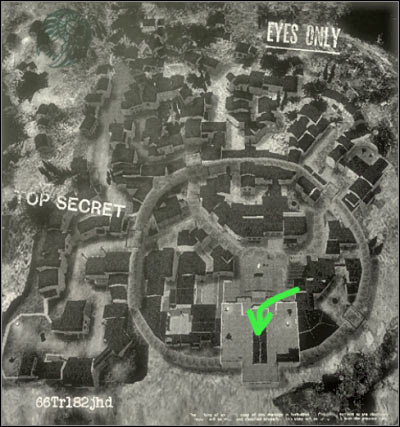
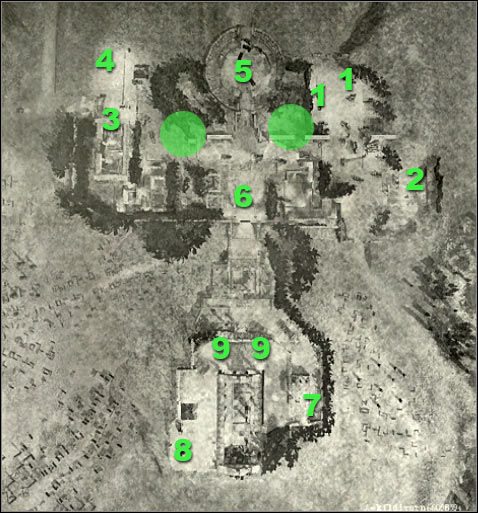
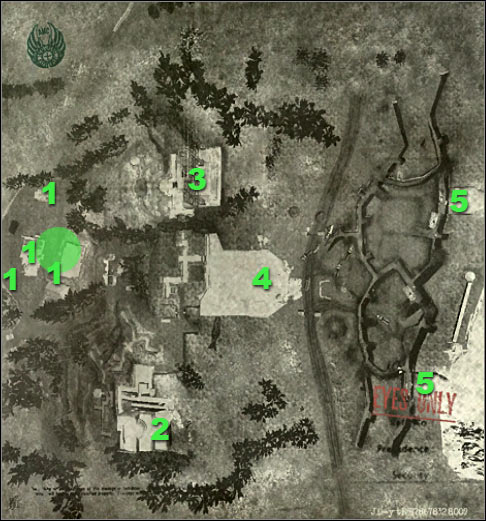
1) Destroy Town Hall AA Guns - 1 on the map.
2) Destroy Hill Houses AA Gun - 2 on the map.
3) Destroy Northeast Gate AA Gun - 3 on the map.
4) Assemble with Airborne at North gate - 4 on the map. You will have to fulfill objectives 1, 2 and 3 in order to unlock this mission goal.
5) Locate Missing Sniper Team - 5 on the map. You will have to fulfill the fourth objective in order to unlock this mission goal.
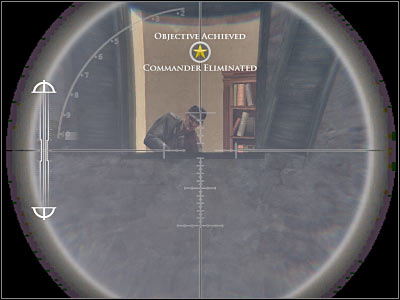
6) Eliminate German Commander - 5 on the map. You will have to fulfill the fifth objective in order to unlock this mission goal.
7) Assemble with Airborne at Town Square - 6 on the map. You will have to fulfill the sixth objective in order to unlock this mission goal.
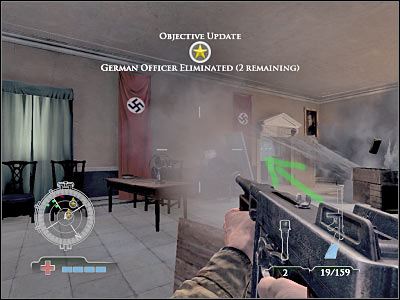
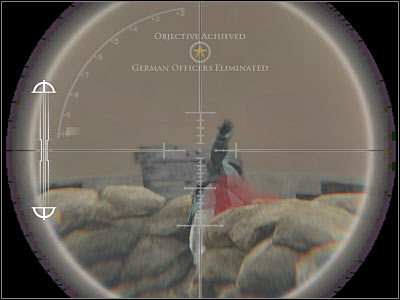
8) Eliminate German officers - 7 on the map. You will have to fulfill the seventh objective in order to unlock this mission goal.
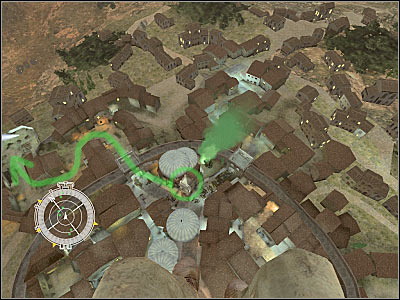
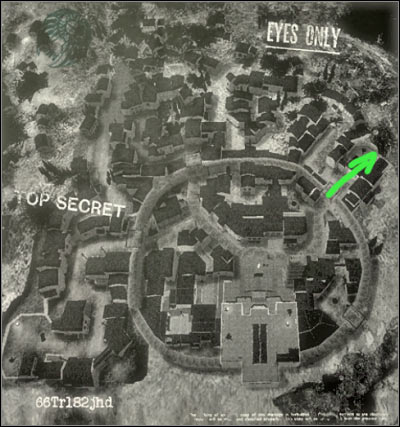
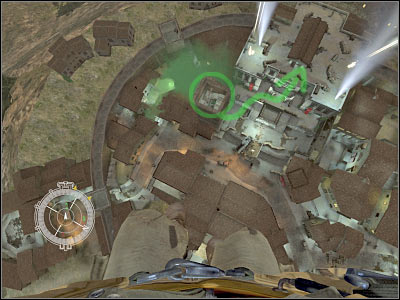
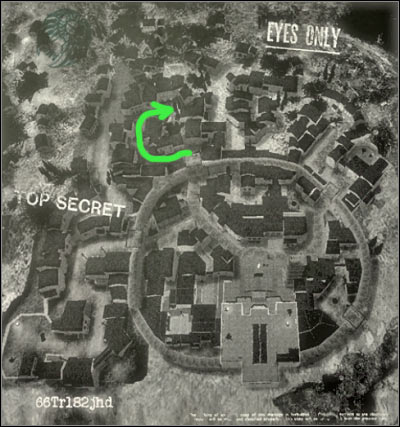
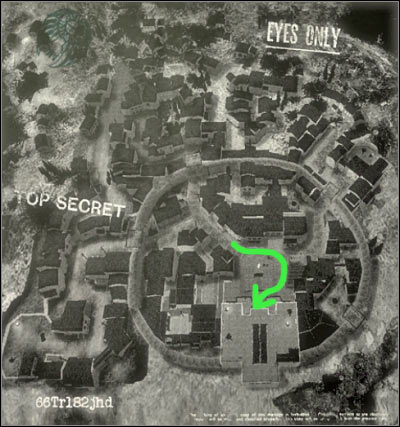
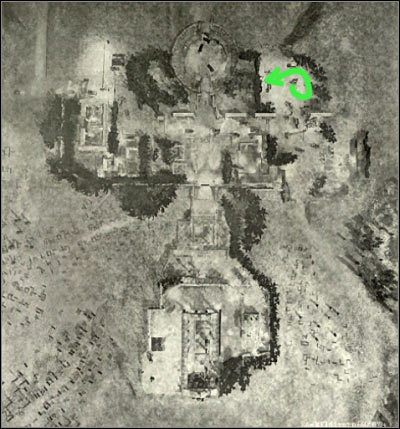
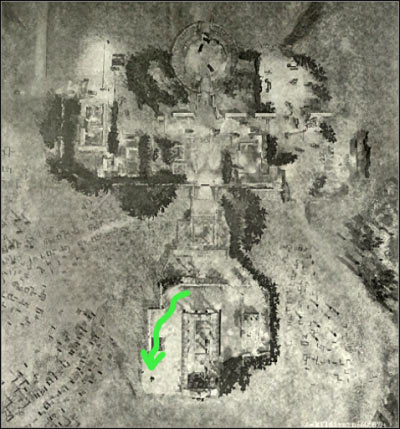
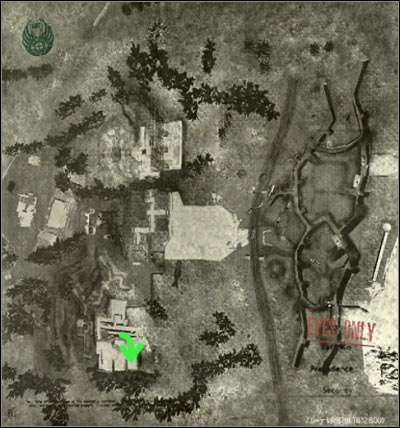
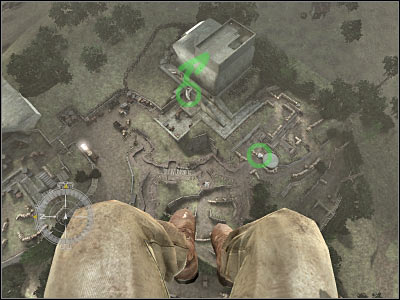
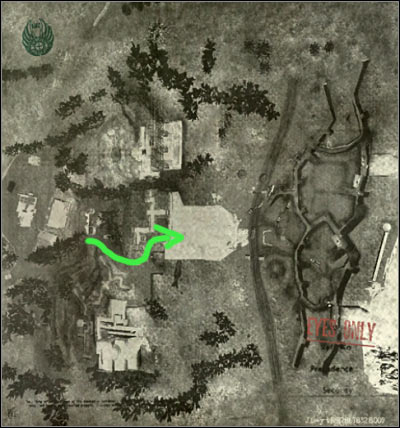
If you take a closer look at the mission map, you will notice numbers. They represent previously displayed mission objectives. Green circles are the safe zones. They will be visible during your approach (green smoke - similiar to the tutorial mission), however you don't have to use them in order to reach goal areas safely. Remember that it's always up to you where to land.
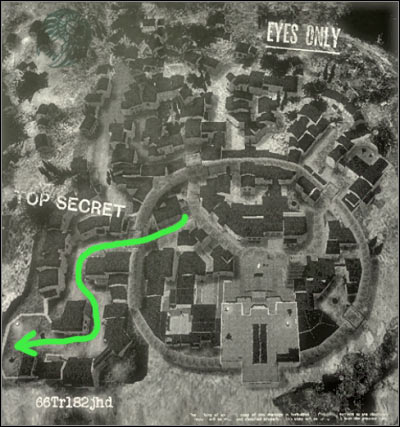
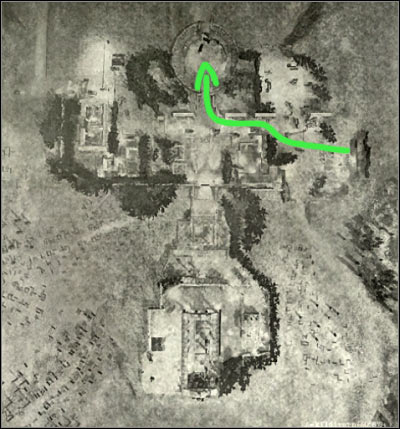
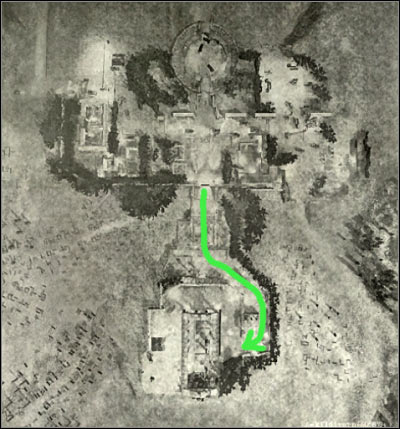
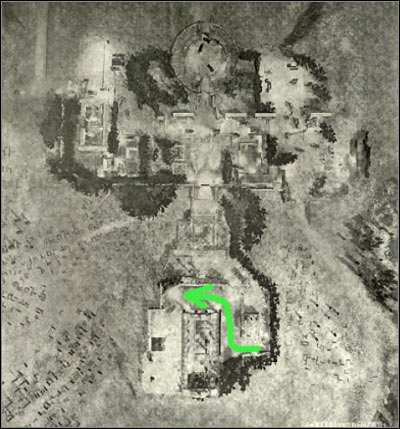
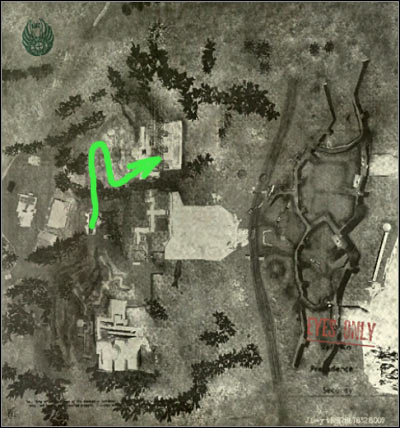
As you've probably noticed by now, this goal is located far away from the center of the town. Remember that you won't have to do what the game tells you, so you may as well skip the briefing section of the mission. It's best to choose the approach on your own. Take a look at the map if you want to find out where to go. Obviously you will be allowed to take detours along the way, especially since there are some open buildings in this area. It will be a good idea to hide inside these structures, however don't forget about enemy troops. Some of the enemy soldiers may be hiding inside the buildings and it's going to be fairly difficult to spot them.
Approach:
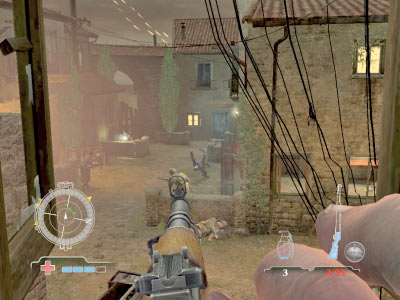
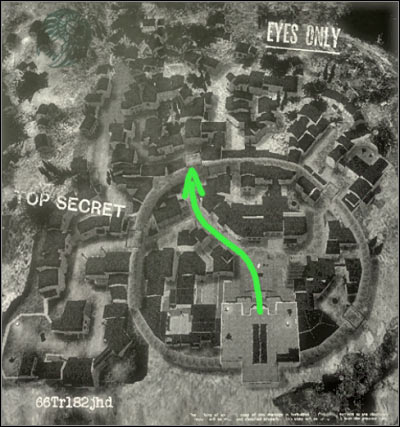
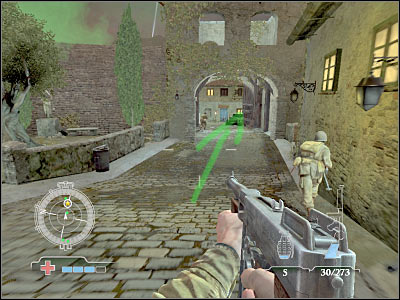
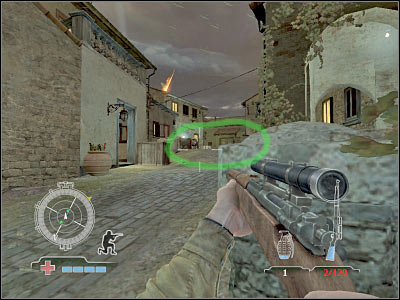
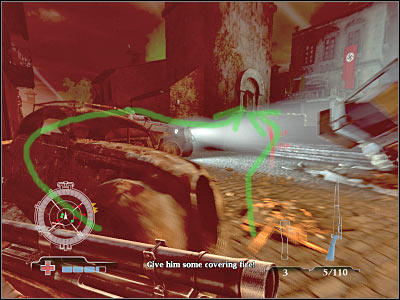
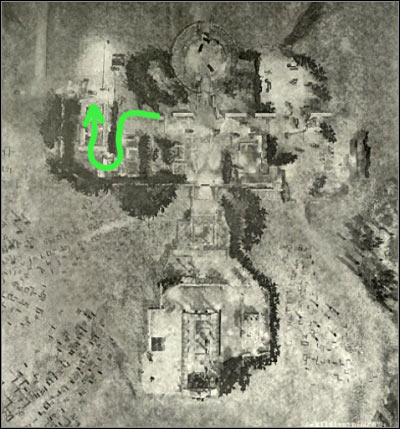
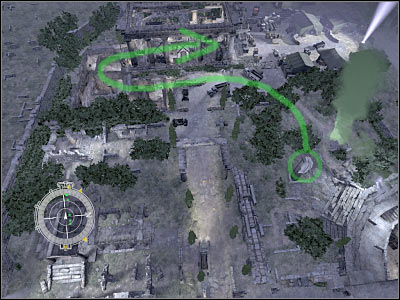
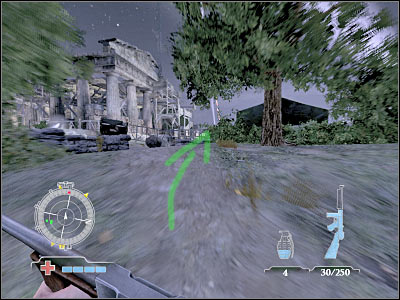
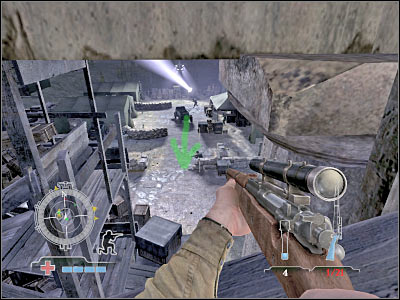
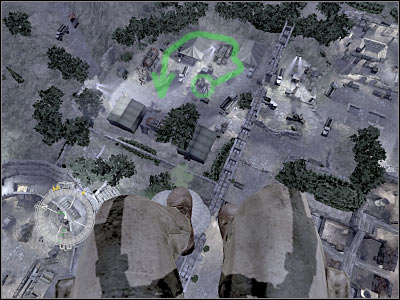
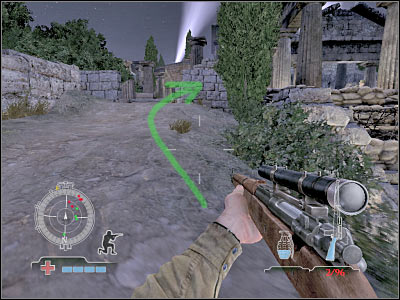
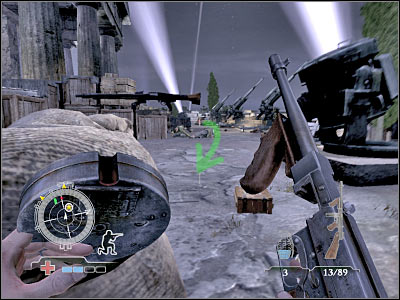
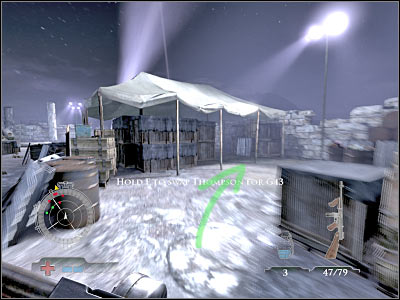
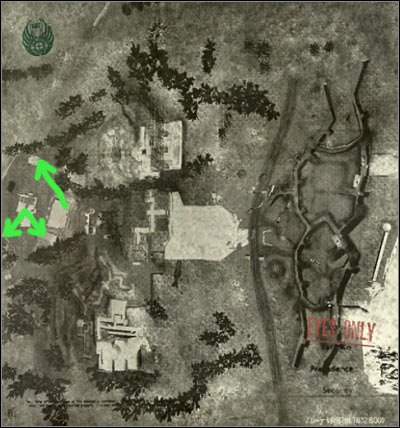
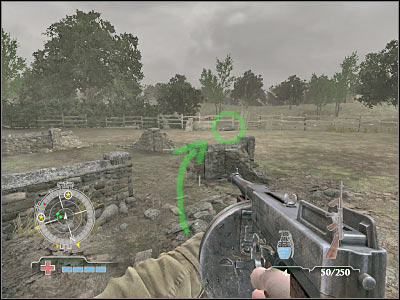
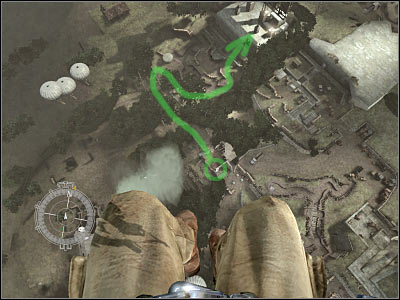
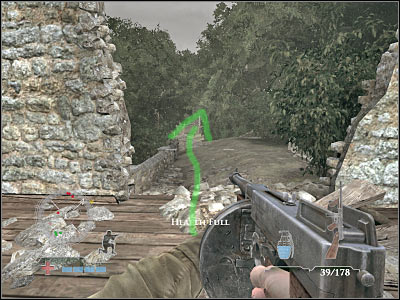
If you don't want any problems, you should consider landing near one of the safe zones. I would recommend choosing a roof of a large tower. First of all, this will allow you to score a bonus for finding a Skill Drop area. You will also have a great look at your surroundings from here, so you'll be able to take out at least a few soldiers without risking anything. Take a look at the screen if you want to find out where you'll have to go. This is going to be the main road leading to your current goal area.
Reaching your target:
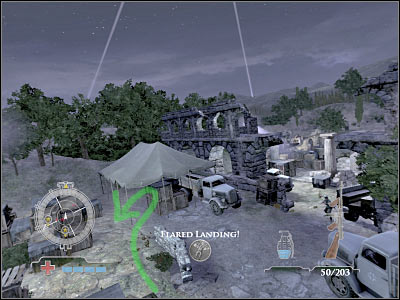
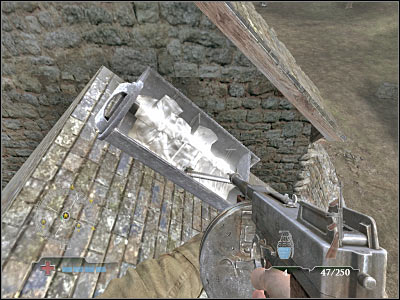
You will have to land safely on top of the tower. It would be a good idea to achieve at least a Flared landing. You should be able to take out at least 3-4 enemies from here, however don't expose yourself too much. You could also try leaning out a lot. Once the soldiers have spotted you, they will start firing. Press the crouch key in order to avoid being hit. Thankfully, you won't have to worry about grenades, so you may continue to attack them. Once they're gone, try moving to your right and landing on roofs of some of the smaller buildings. Don't even think about jumping down directly to the ground, because you would have probably died or you would lose a lot of health points.
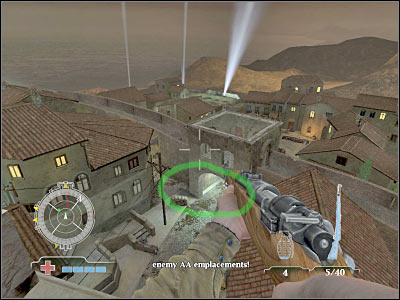
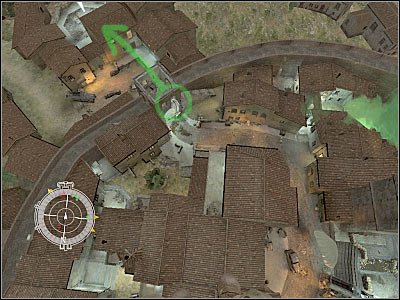
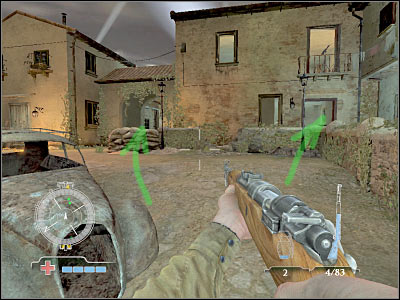
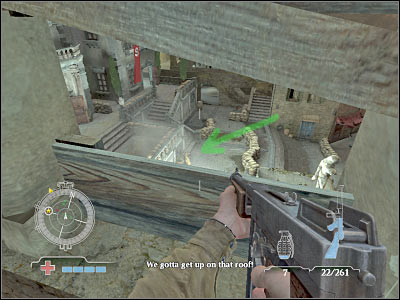
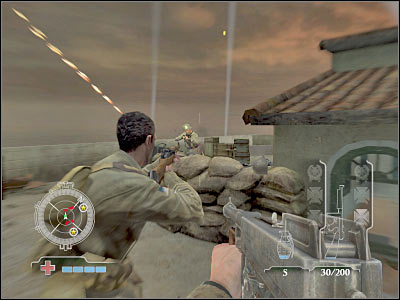
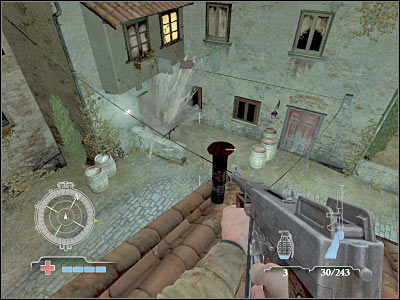
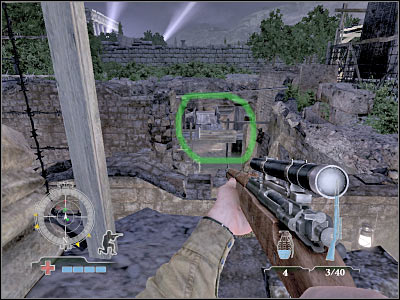
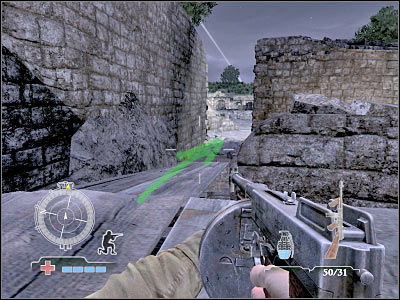
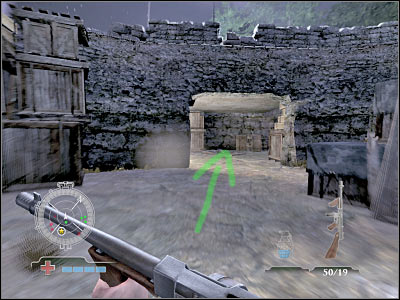
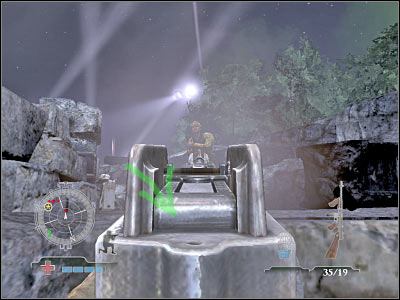
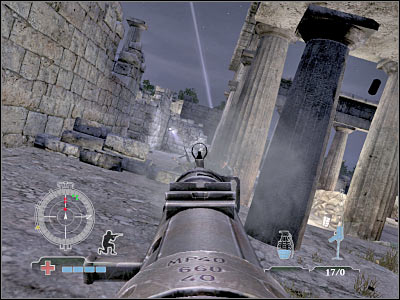
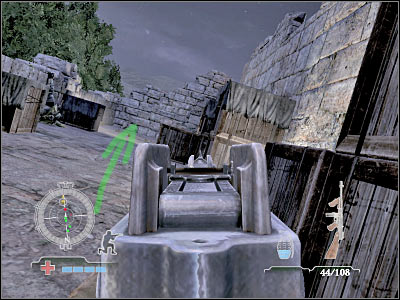
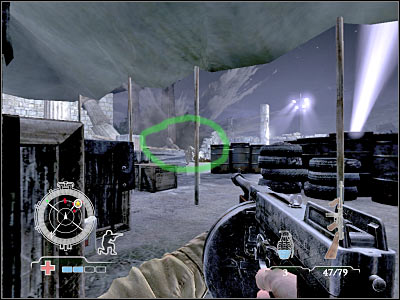
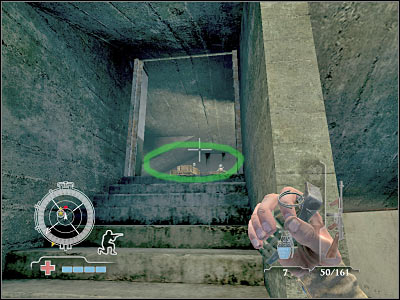
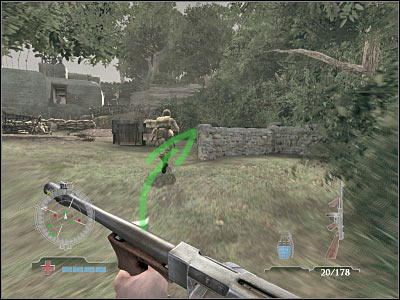
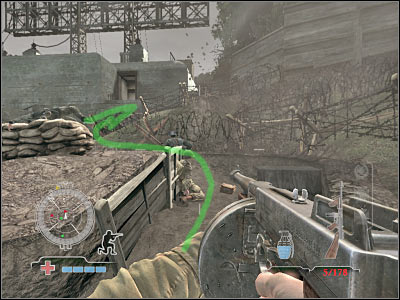
Sooner or later, you will have to decide where to go next. Sadly, you won't be allowed to stay on rooftops for the rest of the mission, because there's a large wall separating you from your current objective. As a result, it would be a good idea to reach the ground. Choose one of the smaller buildings before dropping to the ground, so you won't receive any injuries. Now you will have to help your teammates to secure a small passageway (screen). You could take part in the assault or choose the upper tower for a better view. The choice is yours. I would recommend going with the rest of the soldiers, because you'll only waste your time in the tower.
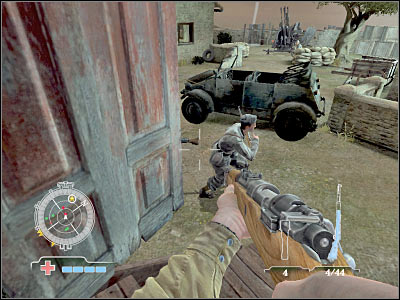
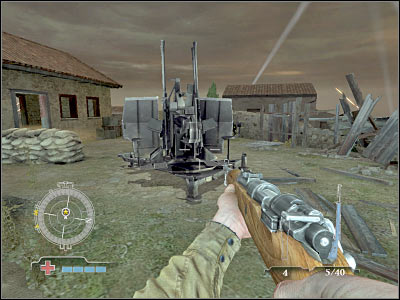
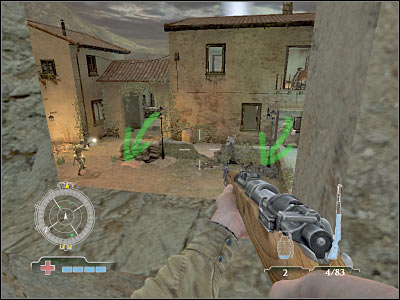
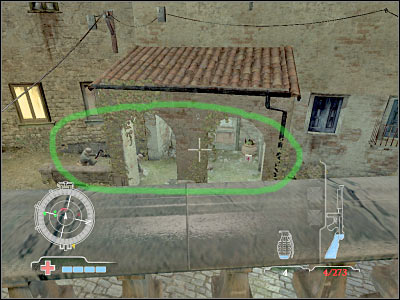
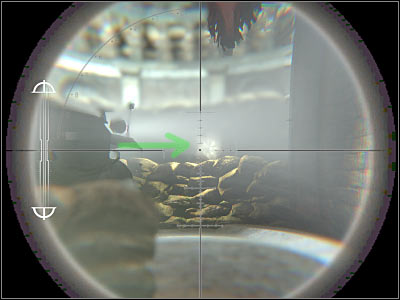
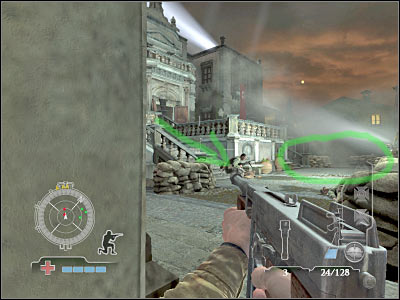
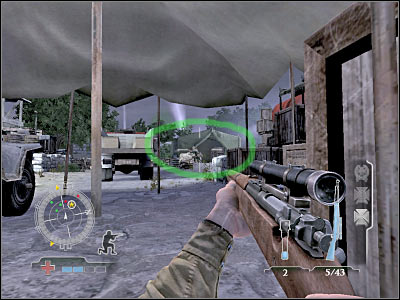
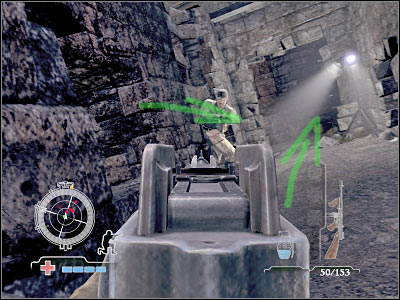
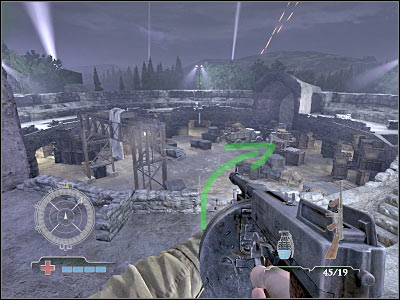
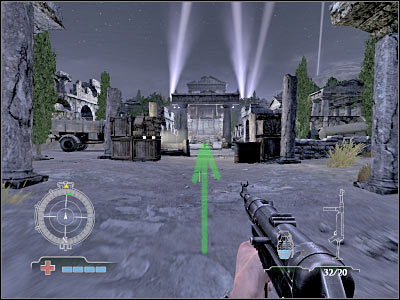
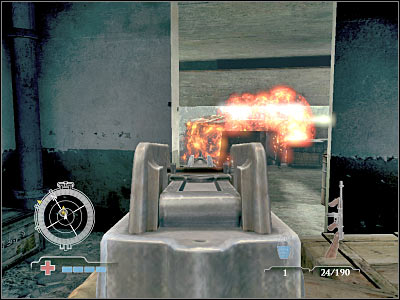
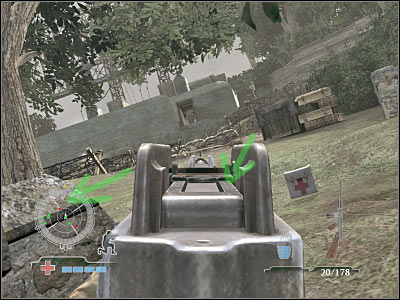
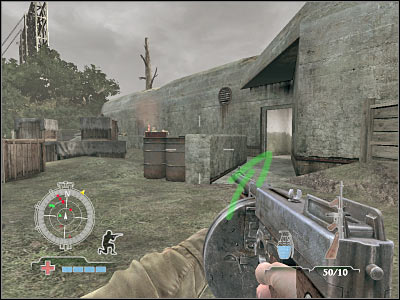
Once you've reached a new location, you'll probably notice that there's a very large group of enemy soldiers in front of you. There's also a MG-42 machine gun post there. Thankfully, you will be able to surprise the soldiers from the right flank. Be careful, though. Some of the enemy units will be coming your way. Move closer to the armored car and neutralize the machine gun post.
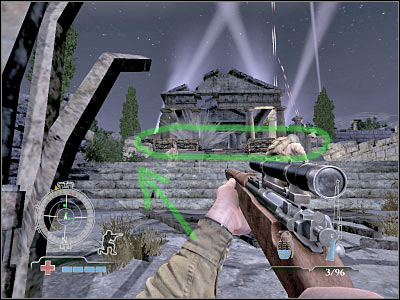
Once you've secured the machine gun post, you will have to prevent it from being used by other enemy soldiers. As a result, you should be standing near an armored vehicle. Kill everyone who decides to head towards your position. The road turns left here. You could stay on the main path, however it would be a better idea to head on to a nearby building. Be careful, though. The entrance to the building may be guarded by someone. Either way, it'll be a lot easier to go through there rather than choosing an open road.

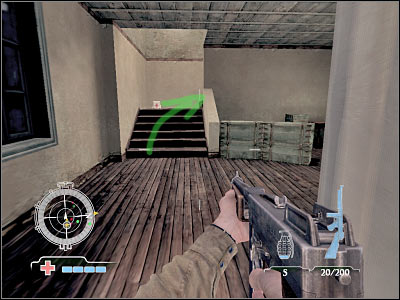
If you've decided to enter the building, you will have a much easier approach. You should consider using windows and a higher balcony in order to spot and kill enemy soldiers. Just make sure that you're not in the open for too long and you should be just fine. Otherwise you would have become an easy target. Also, try aiming at the heads of enemy soldiers, so you'll gain more experience from each shot and you won't have to spend too much ammunition. You should also try and help your teammates advance towards enemy positions.
You will have to kill all visible soldiers. Once they're gone, use the stairs to reach the ground. Start moving forward. I wouldn't recommend staying here for too long, because new soldiers may arrive in the area and you would have to kill them as well. If it's necessary, use nearby objects for cover. You should be using a machine gun here, because you'll be standing close to enemy troops and you won't have much time to start firing at them.
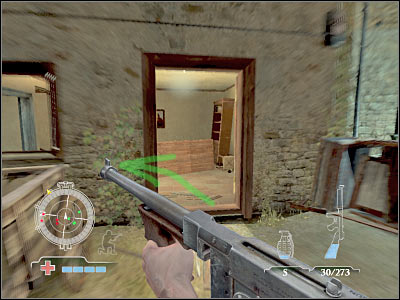
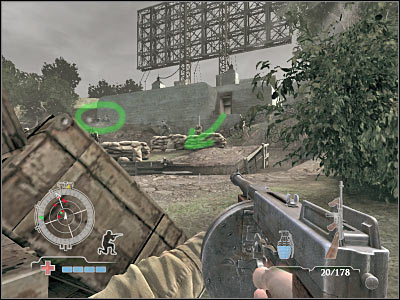
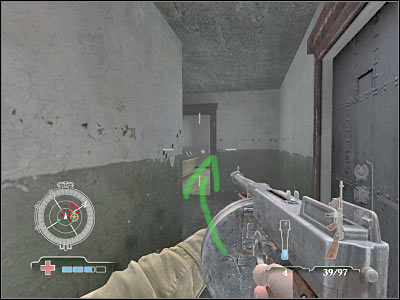
There's going to be a new road just around the corner. It leads straight to your destination which is the first AA gun. Sadly, you won't be able to use it, because there are some machine gun posts in this area. As a result, you should consider entering a nearby building in order to avoid enemy fire. It's going to be located to your right. Try running towards the door, so you won't receive any injuries.
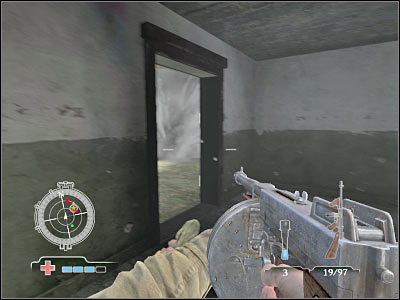
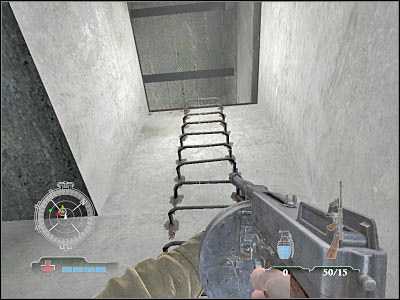
You will have to be extremely careful once you're inside this new building, because it'll probably be guarded by a few enemy soldiers. Kill them and use the stairs to reach the upper floor. Keep heading towards your main goal area. You will come across a door. Try leaning out carefully in order to get rid of some of the nearby soldiers. You will have to secure both heavy machine gun posts. I would also recommend waiting for some of the allied soldiers to arrive. They will provide you with a much needed assistance.
Once you've secured this entire area, you will have to start moving towards the AA gun. Now you must locate a glowing red area. Press and hold the action key. This will allow you to plant an explosive on the AA gun. Move back to a safe distance and wait for the explosion to occur. Congratulations! You've just completed your first mission objective!
This is going to be a slightly easier mission objective, however you will have to land in a very precise spot in order to ensure your victory. I wouldn't recommend choosing the green zone, because you would have to waste a lot of time trying to reach your target. Instead, choose the town wall. As a result, it's only going to take you about two minutes to finish up with this goal.
Approach:
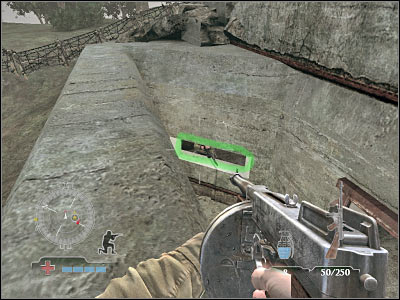
It would be a good idea to choose a small window for your landing location. This is a bonus zone, so you'll be rewarded with yet another Skill Drop. If you don't feel too comfortable or if you're having some problems reaching the window, you could also try and land on the roof of one of the nearby buildings or directly on the brick wall. I wouldn't recommend landing in the safe zone (green smoke).
Reaching your target:
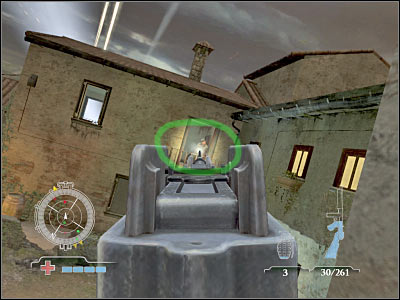
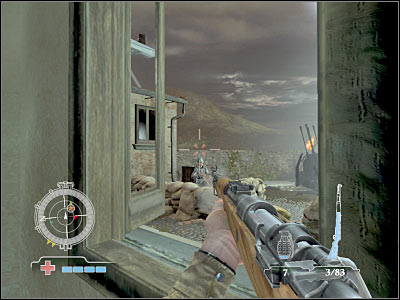
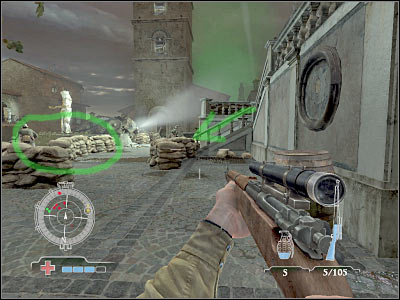
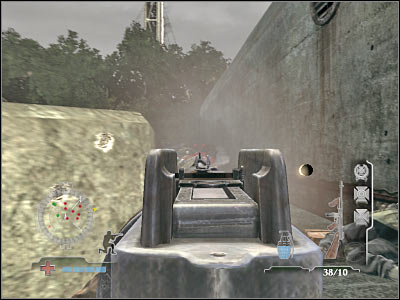
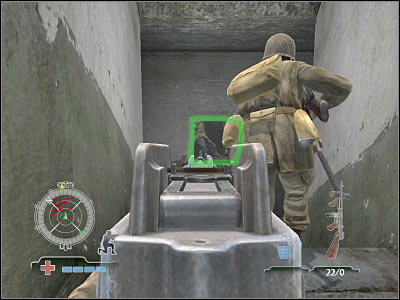
Once you're inside a small room, you should consider hiding behind a wall because there's a heavy machine gun post nearby. Lean out and take it out quickly. Aim at the head of the enemy soldier. You should also know that other enemy units may try using this gun later during the course of the mission. You will have to prevent them from doing that. It's very important that the machine gun post is neutralized, because otherwise your allies wouldn't be able to enter this area without dying almost instantly.
Now you must focus all of your attention on securing the lower square, because that's where enemy units should appear. If you don't stay in the open for too long, you should be able to kill them without receiving any major injuries. You could also consider using grenades to take out larger groups. Also, make sure that you don't hit any of the allied soldiers. Your teammates will advance towards the gun, so it's very easy to make a mistake here. Choose your targets carefully.
Once you've secured the square from the top, use the stairs (or jump through the window - risky if you're playing at Expert) to rejoin with the rest of the squad. The heavy machine gun post has been neutralized, so you won't have to use walls for cover all the time. There are two different passageways leading to your current destination. The main one (between buildings) will probably be heavy defended, so head on to the building on your right. Enter it. It would be wise to have a machine gun here, because you'll be fighting enemy soldiers at a very short distance.
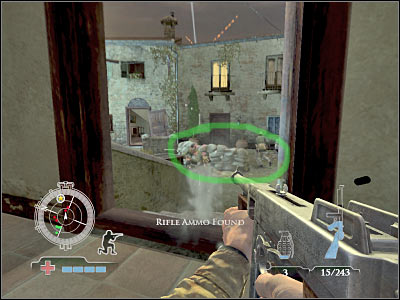
Once you're inside, check the stairs (to your left). Next, hide near one of the windows. You should be able to take out the crew of the AA gun from here. Thankfully, there aren't many soldiers here, so it's going to be an easy fight. Additionally, you will receive help from the rest of the team. Once this is done, secure the right building and approach the AA gun. Place the charge and move back to a safe distance. This will allow you to fulfill this mission objective.
This particular challenge is going to be much more difficult than two of the previously completed tasks. It especially concerns the second part of this mission, because you will have to take part in an assault on a well defended building (town hall). Thankfully, you will be able to clear out the entrance to the town hall, as well as the roof area, from a safe distance.
Approach:
Once again, I'd strongly recommend that you consider starting the game from higher grounds. You should be able to spot a partially destroyed tower. It's going to be located to the north-west of the town hall building. Sadly, the landing is going to be very tricky. The tower has no roof, so you'll have to land inside it. The problem is that the highest platform will be guarded by a single enemy sniper. If you don't want to have any problems with him and you want to score a Skill Drop at the same time, you will have to consider landing on top of him. As a result, you will knock him unconscious. Otherwise you would have some serious problems killing him before he does the same thing. Also, remember that you will receive the bonus only if you land on the platform. You can't land on the brick wall of the tower.
Reaching your target:
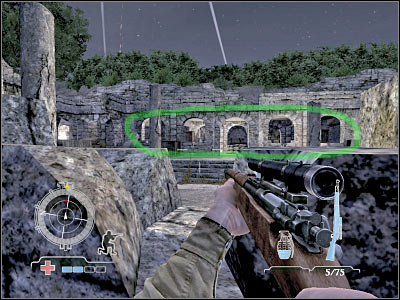
Once you're safely inside the tower, you will have to choose a standard rifle (not the machine gun) from your inventory. There's going to be a small hole to your right. You can see the top of the town hall building from here. Go ahead and kill a few enemy soldiers. They should be helpless against your attacks. You won't have to kill all of them right away. The objective is to make your next fights easier.

Once the soldiers are gone, try going to the lower level of the tower building. You will have to use the stairs. Be careful, though. This staircase may be guarded by a single enemy unit. You will have to kill this soldier right away, so he doesn't surprise you later during the course of this mission. You will find a new hole. Use it to get rid of a few soldiers. They will be guarding the entrance to the town hall, so try being more thorough this time. Just as before, they will be surprised by your attacks and you won't have to worry about their counterattacks.
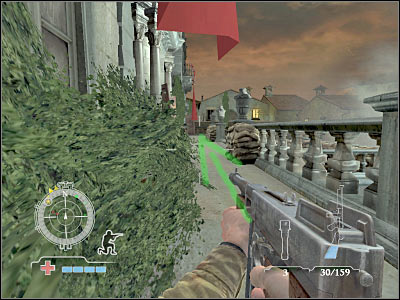
You can exit the tower now. A small group of allied soldiers should be standing in front of the town hall building. You will have to assist them in organizing an assault. I would recommend that you start off by going towards the stairs (located to your left). Head on to an upper balcony. Once you're there, turn right and start shooting at the enemy soldiers. They will be exiting town hall, so you should be able to surprise them. You could also use a grenade against them, however this won't be necessary.
Once you're close enough to the main entrance to the town hall, you will have to choose what to do next. I would recommend that you start off by killing some of the enemy soldiers from here. Most of them will be standing near the stairs, however you will also have to watch out for the upper balcony. You could go to a small room which is located to your right, however make sure that it's been secured by your teammates. Either way, you must take full control over the ground floor of the town hall.
Once you've managed to secure the entire ground floor, you should consider moving closer to the stairs. I guess I don't have to remind you to be extremely careful here, mostly because you will be vulnerable to enemy fire. You should start off by throwing a couple of grenades at the enemy soldiers. Your objective will be to get to the first floor. Now you will have to reach a small room which will be located in the western section of the building. Use the stairs to go to the roof, however it would be wise to wait for a few allied soldiers to join you. Together you stand a better chance at surviving this assault.
Sadly, even if you took out a lot of enemy units from a nearby tower, you still have to kill a lot of soldiers here. It would be a good idea to let your men move forward. Even if they're attacked, you'll know where exactly the enemy soldiers are standing. I had to deal with two soldiers. One of them was standing in front of the exit and the other one to the right. Make sure that you're using your compass (it's in the lower left side of the screen) to find them.
Your final task here will be to destroy TWO anti-aircraft guns. I'm sure that you won't have any major problems finding them, especially since the roof isn't that big. Place explosive charges in designated spots. You will also have to be careful, because you might have missed someone along the way. Once you've destroyed both AA guns, you will have to wait for the game to display a short cut-scene.
This objective won't appear on your main list of mission goals right away. You will have to fulfill three other tasks in the first place (taking out all AA guns). Additionally, you won't begin your game in the air. Instead, you will remain on the ground until the end of this mission. Thankfully, reaching your next goal area will only take about 30-60 seconds.
Reaching your target:
If you've followed my instructions, you will be standing on a roof of the town hall building. Start off by leaving this area. You will have to follow one of your colleagues. Thankfully, you won't encounter any enemy units along the way. You will have to reach the northern gate which is located near one of the safe areas. A new cut-scene is going to be displayed on your screen. It's important, so you should watch it.
This is going to be a much more challenging task, however I'm sure that you'll finish it without having to go back to the checkpoint area. The road is being guarded by a lot of German soldiers (not Italians). There's only one main passageway here, however you will be allowed to enter nearby buildings. This is going to be a very important issue. I urge you to consider this possibility, because you'll be much safer inside buildings and you will be able to surprise some of the enemy soldiers.
Reaching your target:
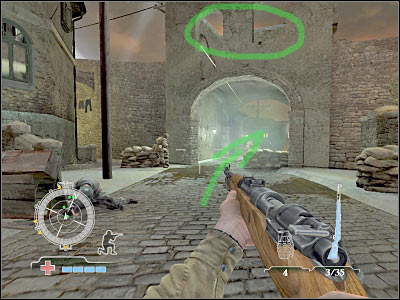
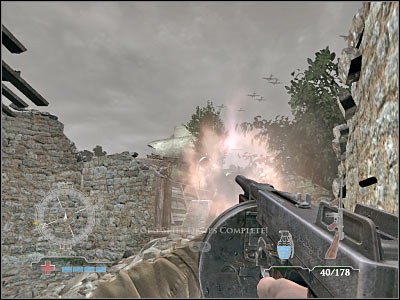
As you've probably noticed by now, you start off in a very bad spot. You're under heavy fire, so you'll have to act quickly. Otherwise enemy soldiers would have arrived here and it would be more difficult to kill them. Start off by RUNNING towards the nearest building. It's going to be located to your right. If you've done this quickly enough, you won't have to worry about enemy units heading your way.
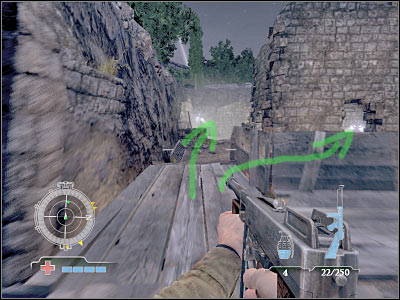
Your first main task here will be to start moving towards current objective. This would allow you to surprise some of the enemy units from the right flank. Once this is done, it would be a good idea to go back and use the stairs. You'll end up on the first floor. Make a few steps forward. Start leaning out carefully. This will allow you to kill new enemy soldiers. You could also throw a couple of grenades at them, however I'm sure that it won't be necessary and you would have to be very precise to kill them with an explosion.
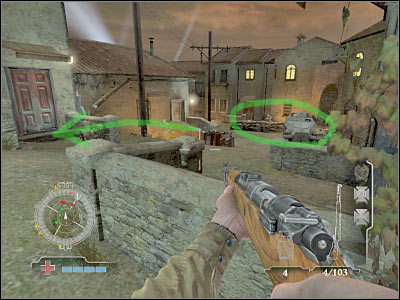
Now you will have to turn right. Make a single jump, so you'll end up standing on a roof of a small building. You can't expose yourself too much, because there's a heavy machine gun post in front of you. Neutralize it. Grenade seems like a good idea here, especially since the enemy soldiers won't be expecting your attack. Once they're gone, return to the ground floor. Keep heading forward. You will also find a lot of ammunition and medkits along the way. Pick them up if you want to.
Start running forward. The rest of the team should automatically join you, so you don't have to worry about their movements. There's a new open building to your right. Enter it, however you will have to be careful here. The building may be guarded by a few soldiers and you would have to kill them. Head on to the second room. You should be crouching here, so you won't lose any health. Try killing at least a few soldiers from here. Some of the enemy units will be hiding to your right. Make sure that they're gone.
Now you should consider taking part in a direct assault. Once you've secured this square (don't worry about the building with the allied snipers), try running towards the sandbags. They are located in front of the exit. Hide there and start shooting at the enemy soldiers. Sadly, you won't be able to stay here for too long, because you are exposed to enemy fire.
You should be able to reach your target building from here, without risking losing any health. Start off by killing all enemy units. Obviously they will be standing near some of the windows, to your left. Once they're gone, use the stairs to reach the upper floor of the building. This is where you'll have to watch a short cut-scene.
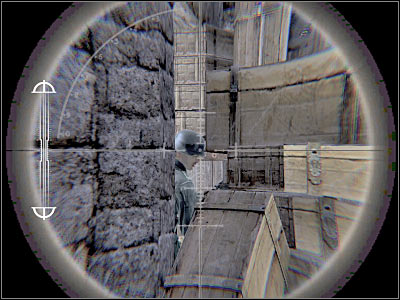
I guess I won't have to add a completely new map here, because you won't leave this area until an enemy sniper has been neutralized. Taking him out will only take a few seconds, however you must be very careful in order to avoid receiving any injuries.
Reaching your target:
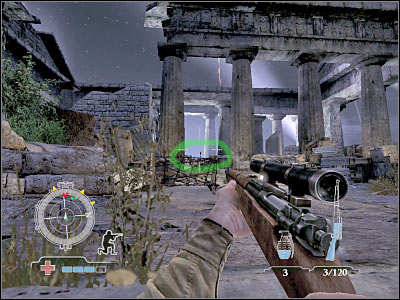
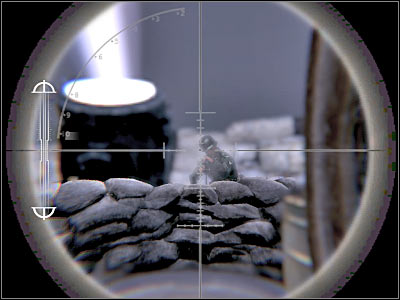
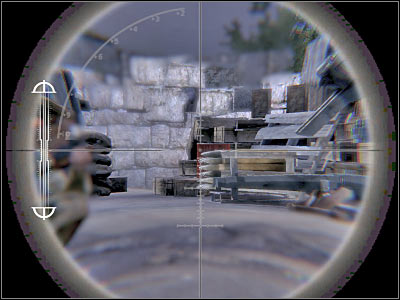
First of all, you should be crouching here, so the enemy sniper won't be able to see you right away. Otherwise he would have started firing at you. There's a sniper rifle to the left, next to the dead soldier. Pick it up (Springfield rifle). It would be wise to drop a standard rifle here, because you'll need the Thompson later during the course of this mission. Head on to the left window. Zoom in the view and lean out carefully. You shouldn't have any major problems finding the commander. Kill him with a single shot. I'd strongly recommend that you take the Springfield with you, because it's one of the most useful weapons of this game.
This next objective is only a short introduction to the final task of this mission. Your goal here will be to return to the town square area, because that's where you'll take part in a second assault. I'm sure that you won't have any major problems finding this spot. The problem is that the road leading to the town square is going to be guarded by a small group of enemy units. As a result, you will have to kill them in order to be able to proceed forward.

Reaching your target:
As I've already mentioned, you will have take out one large group on your way to the main destination. The enemies will appear near the northern gate. That's where you've started your run towards the sniper building. You've got two choices here. You can either choose the sniper rifle from the inventory and take them out from a very large distance or you could use the buildings to your left. This would allow you to get closer to them. Either way, they have to die. The final objective will appear on your list once you're close enough to the town hall.
This objective will be added to your list of main tasks once you've managed to get closer to the town hall building. I'm sure that you still remember where it is. As you've probably suspected, you will have to take full control over this building. It's very important, because all three officers are hidden inside the town hall (respectively on the ground floor, first floor and roof area). You will take part in some very challenging battles here and even choosing alternative approach methods won't help you.
Reaching your target:
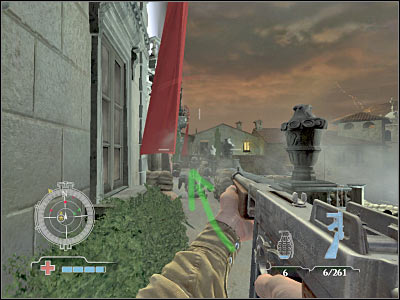
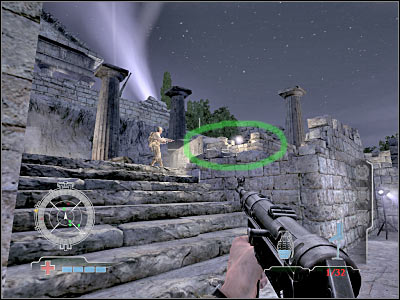
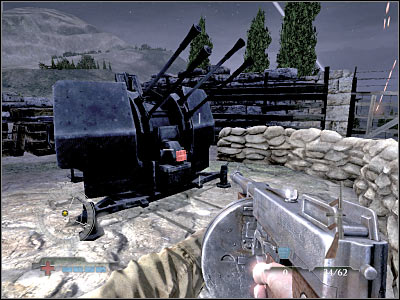
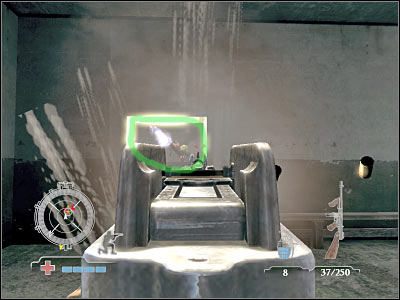
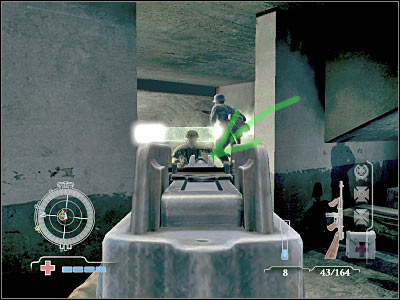
The safer route (at least in my personal opinion) will require you to head on towards the sandbags. They will be located to the north of your starting position. You will have to assist your allies here, because they will try to hide behind some of the nearby objects. This means that you will have to secure at least one heavy machine gun post (screen). Try doing this as soon as possible.
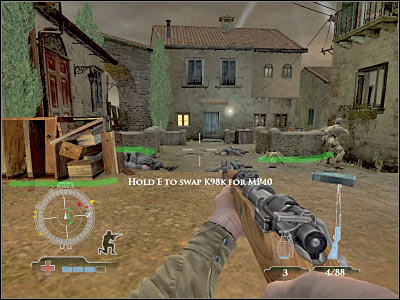
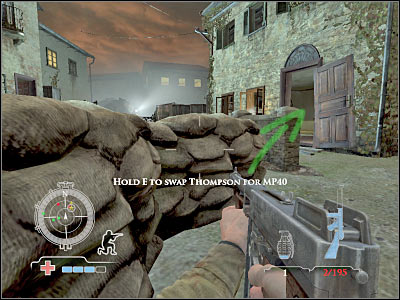
Now you should consider heading towards the well known tower. It's the same building you've used for a drop zone. Obviously you will encounter heavy resistance along the way, however most of the enemy soldiers should already be focused on attacking your allies, so you should be able to surprise them. Either way, you shouldn't be in a lot of hurry, because it's very easy to die here. Use the machine gun to kill enemy soldiers (you can pick up MP-40 from one of the foes).
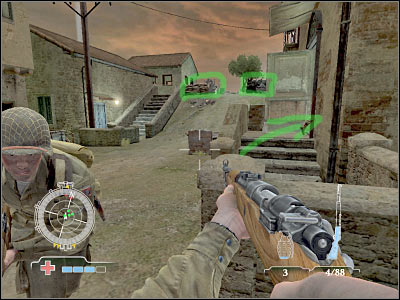
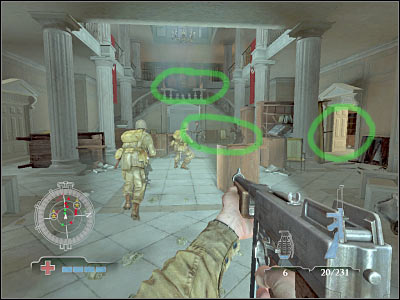
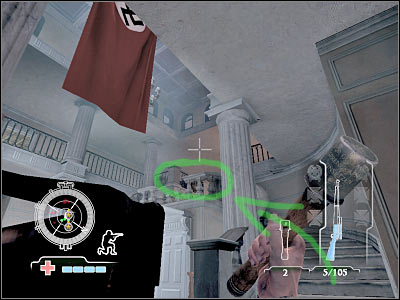
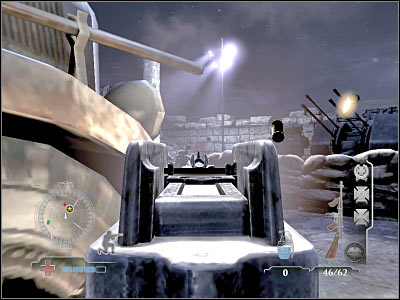
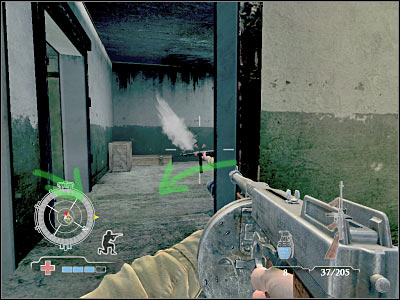
Try entering the tower as soon as possible, because you'll be fully exposed on your way to that object. Thankfully, you won't have to use the staircase, because you'll be able to do a lot of damage from here (screen). You could be standing in front of the exit, however it would be a better idea to hide inside and lean out a lot. Most of the enemy soldiers will use the stairs and that's where they have to die. Make sure to check your compass, so no one manages to get closer to your position.
The alternative route to your final destination would require you to find a small passageway which should be located to the right of the starting area for this mission objective. It won't be guarded by anyone. You would end up near the town hall and you could surprise some of the enemy soldiers from here. Sadly, you would have some serious problems using the stairs, because you would have been fully exposed and you'd take part in a lot of direct fights. As a result, I wouldn't recommend choosing the approach. The 'tower' option is a lot better (safer).
Apart from the previous decision, you must once more reach the upper entrance to the town hall. Start off by securing this entire area. You could use a grenade here, but it's not necessary. It would be a good idea to wait for a few allied soldiers to show up. I wouldn't recommend choosing the main entrance to the town hall. Instead, head on to a small room which should be located to your right. That's where the first officer is currently hiding.
Once you're inside this new room, hide behind a small table. It should be located to your right. You'll also find a medkit there. The officer is hiding somewhere in front of you. Use the machine gun to kill him, however you could also throw a couple of grenades (I would recommend saving them for later, though). Once the officer is dead, wait for a few allied soldiers to show up here. Head on to the left door which leads to the main room of the town hall.
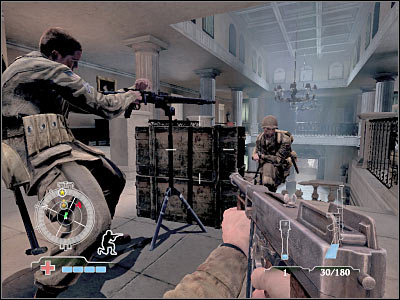
This area may still be guarded by some of the enemy soldiers. Obviously you will have to kill all of them. Don't worry if they're standing at the other side of the room. Once they're gone, use the stairs to get to the upper floor. You could also throw a couple of grenades at the enemy soldiers. This should allow you to secure a nearby heavy machine gun post quite easily.
Before you decide to proceed any further, you should hide somewhere near the heavy machine gun post. One of the allied soldiers will use it. You, on the other hand, should consider leaning out in order to get rid of the enemy soldiers. I'm sure that you won't have any major problems here, especially since no one will get closer to your current position.
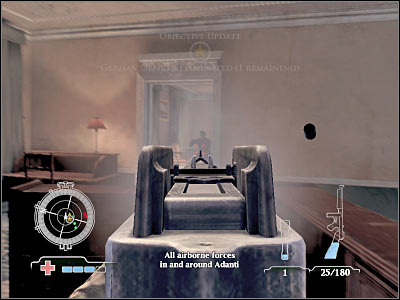
The second German officer is hiding in one of the rooms to your left which is located directly above the room with the first (killed) officer. Just as before, you could use a single grenade to solve this problem quickly, however I would recommend leaning out and shooting at him. He's not wearing any armor, so it's not going to be difficult. Check the surroundings for ammunition and medkits.
Reaching the roof area isn't going to be that simple, mostly because one of the nearby rooms is being guarded by a very large group of enemy soldiers. It would be wise to use all of the remaining grenades here. Once this is done, enter the room and deal with the survivors. Head on to the right room. Once again, you should wait for backup, before going in alone.

Obviously the roof of this building is going to be occupied by new enemy units. I didn't have any major problems defeating them, because they were standing close to each other, so I could use one of the carried grenades. As for the rest of the enemy soldiers, try shooting at them from a larger distance. Use nearby objects for much needed cover. Sadly, your allies won't help you here, so it's all up to you. Once you've killed the third officer, this mission will come to an end. Congratulations! You've just finished your first singleplayer campaign!
Main mission objectives:
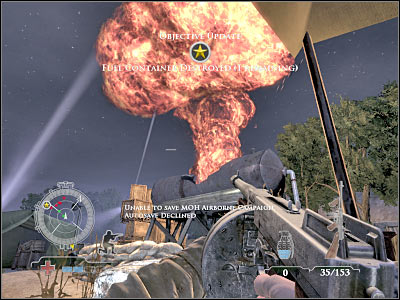
1) Sabotage Fuel Containers - 1 on the map.
2) Destroy Ammo Cache - 2 on the map.
3) Disable Communications Antenna - 3 on the map.
4) Disable Communications Radio - 4 on the map.
5) Assemble with 5th Army Demo Team - 5 on the map. You will have to fulfill objectives 1, 2, 3 and 4 in order to unlock this mission goal.
6) Defeat Enemy Ambush - 5 on the map. You will have to fulfill the fifth objective in order to unlock this mission goal.
7) Assemble with Corporal Kish - 6 on the map. You will have to fulfill the sixth objective in order to unlock this mission goal.
8) Ascend to Hilltop Temple - 7 on the map. You will have to fulfill the seventh objective in order to unlock this mission goal.
9) Destroy AA Gun - 8 on the map. You will have to fulfill the eighth objective in order to unlock this mission goal.
10) Set Signal Fires for P-40 Warhawks - 9 on the map. You will have to fulfill the eighth objective in order to unlock this mission goal.
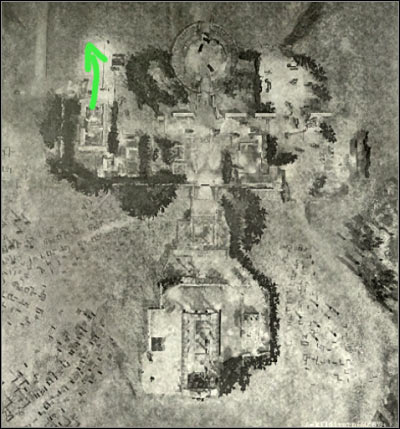
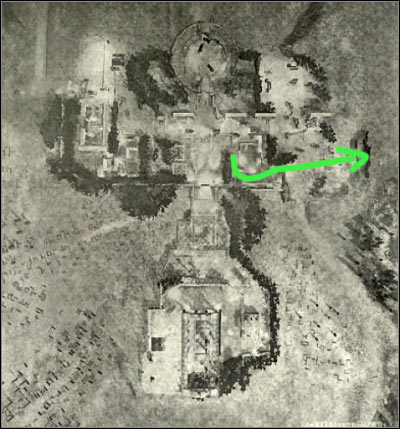
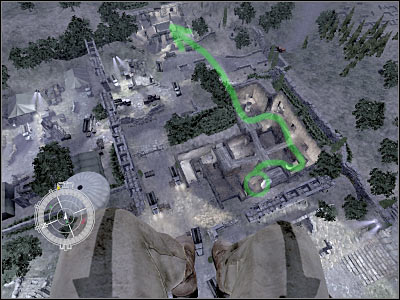
I would recommend taking on this mission objective as the first one. You should also know that you will be able to reach the communications radio at the same time, because it's located close to the antenna. Additionally, both of these goals are located in one of the corners of the map, so you will have to travel the same way to get to them. You'll probably notice that a closed gate will be blocking your way. As a result, you will have to go through the ruins in order to reach your final destination. You will take part in a lot of difficult fights along the way, so you shouldn't be in a lot of hurry, especially since most of the enemy soldiers will be hiding. This means you won't notice them at first glance.
Approach:
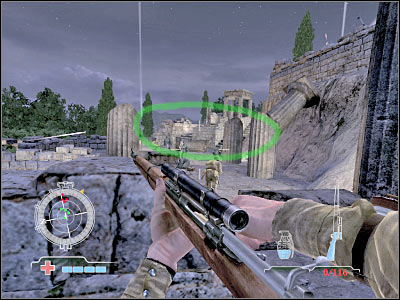
Just as before, you should consider choosing one of the bonus zones. If you decide to land on a small pillar (screen), you will be rewarded with a Skill Drop. Sadly, this isn't going to be a good place to start shooting at the enemy units, so you'll have to get to the ground quickly in order to avoid receiving major injuries. Enemy soldiers will eventually focus their attention on other things, especially since allied soldiers will also land in this area.
Reaching your target:
Like I've already said, you will have to leave this pillar as soon as possible. Keep a crouching stance here, so you won't get hit by any of the nearby enemy soldiers. Try moving closer to your first destination. Make sure that you're not standing in the open for too long. Once you're there, you'll find out that you won't be able to open the gate from this side. As a result, you will have to go to the ruins.
Now you will have to turn left. It would be a good idea to hide behind one of the nearest objects, preferably sandbags. You've probably noticed that there's a heavy machine gun post here. You will have to neutralize it as soon as possible. Thankfully you will be attacking enemy soldiers from one of the flanks, so they won't respond to your actions right away. Kill all enemy soldiers. You will also have to prevent enemy units from using the machine gun post. Try shooting at them from larger distances. I'm sure that you have a sniper rifle at your disposal, so it shouldn't be a problem.

Start moving forward. You should try and secure the heavy machine gun post. This allow some of the allied soldiers to push forward. They will automatically go towards the ruins. There's a small hill to your left. It would be wise to use it. You will have to provide a covering fire while some of your allies try to move on. Be careful, though. One of the enemy soldiers may be standing to your left. It would be wise to get rid of him earlier, so he doesn't injure any of your teammates. Your colleagues wouldn't be able to kill him, so it's all up to you.
Once you've secured this area, head on to the ruins. Choose the exact same passageway, as some of your colleagues did. The area is not safe, though. Once you've reached a small junction, head on to the left room. This will allow you to surprise some of the nearby enemy units. You will have to use small holes in order to find them. You could also use a couple of grenades to kill them. Either way, you must take full control over this entire area.
You may proceed to this new room. You shouldn't encounter any other units at the moment. Start moving upwards. This will allow you to reach a new section of the map. You should be able to reach a new area very soon. You may proceed forward, however it would be a good idea to secure the right room in the first place. It's not a necessary thing to do, but it's better to stay safe. Follow the rest of the team.
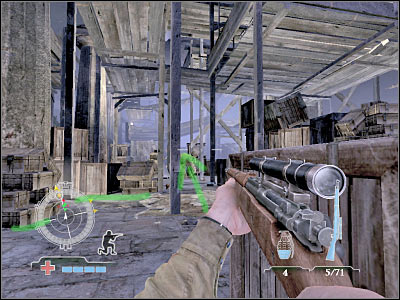
You should be able to reach a much larger scaffolding very soon. I wouldn't recommend performing any risky actions here, because you would have died almost instantly. Instead, allow some of your colleagues to advance forward. Try hiding behind one of the nearby objects. Use the sniper rifle to take down several enemy units. You will also have to watch out for the area above you. Some of the soldiers may be hiding there and you must kill them before they manage to do the same thing.
Once you've secured this area (remember that you can't stay here forever - reinforcements could arrive any minute), start moving forward. You should be able to notice a small platform. This will allow you to reach some of the upper levels of this structure. Once again, I urge you to be extremely careful here, because some of the enemy soldiers will be hiding in this area. The first group is located in front of your current position. You could consider using some of the carried grenades against them, however it would be a better idea to shoot them (or you could wait for them to reveal their positions). Either way, you will have to take control of this part of the construction. You'll also find ammunition and medkits here. Pick them up.
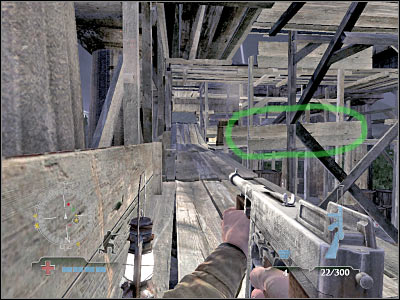
You may proceed to the next section. I'd strongly recommend that you use all available objects for cover, because otherwise you would have been exposed to enemy fire. Take a look at the screen, because that's where one of the enemy soldiers may be hiding. You will have to wait for him to reveal his position. Also, there's a larger platform to the left. Secure it as well, because that's where you'll have to go right now.
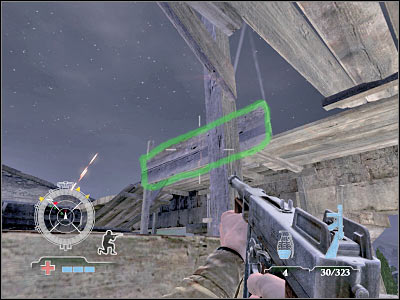
Securing this platform won't be easy, because both enemy soldiers will probably be hiding. You could consider throwing a couple of grenades at them, however you'd have to be very precise in order to kill them. Instead, try doing a frontal assault. It's a little risky, but you should be fine. Just make sure that you're using longer bursts, instead of single shots. There's also a single opponent to your left. He has to die as well.
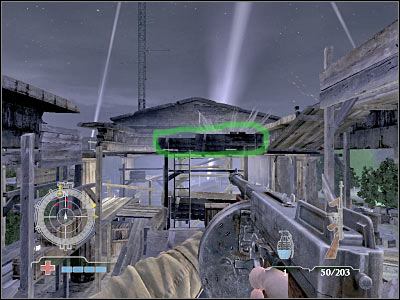
You're getting closer to your current destination. There's a new platform here. If you're standing correctly (screen), you will see the entire camp in front of you. This is an excellent sniper position and you will be quite safe here, especially if you decide to lean out, instead of standing in an open spot the whole time. Try killing as many soldiers as possible. Some of them will try to use a heavy machine gun post. You must prevent them from doing that, especially if you want to help some of your teammates (they will be advancing towards the camp).
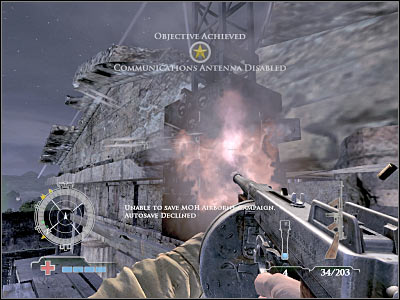
Once you've killed all enemy soldiers, you will be allowed to proceed to the antenna. There are two different paths leading to this destination - you could try and jump to one of the lower platforms or use a small ladder. Either way, you will have to get closer to a glowing object. Use the gun to destroy it... and make sure that the antenna doesn't land on you. :-)
Like I've said before, it would be a good idea to take care of this objective right away (after you successfully destroy the antenna). The tent with the radio station is located nearby and you've already secured most of this area, so you won't have to go through the ruins again.
Reaching your target:
First of all, you will have to go back to the ground floor. It's going to be very easy, however make sure that you don't fall, because you would only lose some health. Thankfully, there's a ladder near the destroyed antenna. Head on to the closed gate. You weren't able to use it before, but now you'll be able to destroy the padlock (by shooting at it). This will also allow some of the allied soldiers to enter this small encampment area.
Now you'll be able to proceed with the main part of this short task. The tent with the radio is going to be located at the other end of the camp. It's probably going to be defended by a small group of enemy soldiers. You may consider killing them, however I'd personally recommend using grenades. Remember that you will only have to destroy the radio to fulfill this objective, so make sure that one of the grenades lands inside the tent. Even if someone has survived your attack, it won't matter, because you've completed this task.

You won't have to spend too much time trying to fulfill this particular mission objective, especially if you decide to land in the middle of the encampment. This is going to be a little risky, but I'm sure that you'll be just fine and you will also receive some assistance from other allied soldiers. Just make sure that you leave the landing zone before enemy units start firing at you. Otherwise you would have to avoid them, as well as several grenades.
Approach:
This time you should consider landing inside the enemy camp. There's a small tower there. I'm sure that you won't have any problems finding it. If you manage to land inside the tower, you will be rewarded with a Skill Drop. I've already said before that the area won't be safe. You would be attacked by most of the enemy soldiers and they would probably use grenades to flush you out. As a result, it should be your top priority to get out of there in time.
Reaching your target:
There are two fuel tanks inside the camp. We'll start with the one to the east. Once you're safely on the ground, start running towards the south-eastern section of the map. Make sure that you find a good cover here, because this will allow you to kill a few soldiers. Thankfully, allied units will appear near the main entrance to the camp, so the enemies won't focus on finding you.
Once you've dealt with the first group of enemy soldiers, try moving to the north. You should be standing close to the eastern side of the camp, because you won't encounter any hostiles there. There are some German units to the left, but you'll be able to surprise them. Use the grenades or the sniper rifle to get rid of the soldiers. You should be quite safe here, but nevertheless I wouldn't recommend standing in the open for too long.
The first fuel tank can be found to the right. Despite what you might think, you won't have to use explosive charges here. Instead, choose a machine gun from the inventory and start shooting at the tank. It will explode after a short while. You will also be rewarded with a possibility of creating an autosave here. Additionally, make sure that no one sees you while you're shooting at the tank.
Now you'll only have to reach the second fuel tank which is located to the west. I would recommend that you stay away from the central area of this encampment, because there are a lot of enemy units there. Instead, try going to the north and to the west. You shouldn't encounter any hostile units along the way, however try avoiding grenades and other larger explosions. Once you've destroyed the tank, you will automatically fulfill this mission objective.
This isn't going to be a very difficult challenge, however you must remain careful, especially while trying to get to the ammo cache. You will be attacked from many different directions, enemy soldiers will be moving in larger groups and they also like throwing grenades, so you will have to avoid a lot of explosions. The final part of this mission will also require you to avoid hitting the ammo cache, but that's rather simple and you will receive some backup from your allies.
Approach:
This time you will have to be very precise while trying to land on the ground. Don't worry that it seems far from your current objective, because once you go past the ruins it's going to be much easier to get there. The landing zone may be occupied by a single enemy soldier. Just as before, you would have to land on his head in order to get rid of him without any major problems. You will have to land inside a small room in order to receive a Skill Drop bonus!
Reaching your target:
Once you've landed and disposed of the soldier, exit this small room. You should consider heading south. Be careful, though. This corridor is probably guarded by a few enemy soldiers. You will have to get rid of them before moving on any further. Once they're gone, go south. You should be able to reach a staircase. Use the stairs to go to the upper level.
You will have to be extremely careful here, because there is a large group of enemy soldiers to the north. I wouldn't recommend attacking them, especially since that's not your main target for the moment. Also, you shouldn't stay in one spot for too long, because German soldiers are using grenades all the time and you wouldn't be able to kick back all of these objects.

Keep heading to the east, because that's where you'll find your goal area. You will encounter a few additional units along the way, however it's nothing you should be worried about. Sadly, you can't rely on your teammates here. Allied soldiers will appear later during this mission. You will have to locate the ruins, because that's where you'll find the entrance to the excavation site.
You should be getting closer to the ruins. The ammo cache is hidden inside, so you won't be able to destroy it from here. Also, you won't encounter any enemy units right away, however you should be using nearby objects for cover (just to be sure nothing happens to you). Don't stay in the open longer than a few seconds. Enemy soldiers are guarding the entrance leading to the excavation site. Try eliminating them from a larger distance. As a result, you should consider using a sniper rifle, but you must be patient, because you won't be able to kill all of them right away. It's best to wait for them to leave their cover areas before attacking them.
Some of the enemy units are going to be well hidden and they won't leave their cover spots. You must be careful while going towards your target. Kill them with your machine gun. Thankfully, there's not going to be many of them. Get closer to the entrance. You should wait for allied soldiers to arrive here, because you'll stand better chances attacking the excavation site as a large group.
Once the allied soldiers have arrived, enter this new area. Thankfully, this excavation site will be guarded by a very small group of enemy soldier. The only bad thing is that you won't be able to see them right away, because they will be hiding. You shouldn't be in a lot of hurry. Take your time and aim for their heads. Keep moving towards the ammo cache. You should also try and memorize this route, because you'll be running towards the exit very soon.
It shouldn't take more than 60-90 seconds for you to reach the ammo cache. Like I've said before, you don't have to be in a lot of hurry, especially since a premature explosion would have killed you and your men. Take out a single opponent. He will be guarding your goal. Once this is done, head on to a designated area and place an explosive charge on the ammo cache. Make sure that you know your way back!
Once you've set the charge, you will have only a few seconds to leave the excavation site. As a result, start running towards the exit. Don't stop and ignore flames, because they won't hurt you. Once you've reached the exit, turn around and wait for a cool explosion. This is it for this particular task. Wait for some new goals to be displayed on your screen.
This is going to be a very simple task. Your only objective here will be to reach a large colosseum area. It's located in the northern section of the map. You shouldn't encounter any enemy units along the way, so you don't have to spend too much time getting there.
Reaching your target:
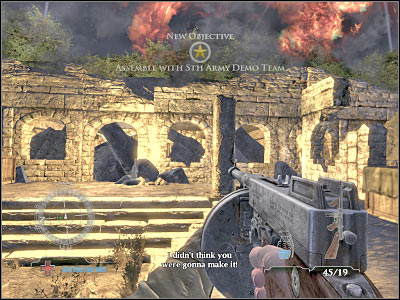
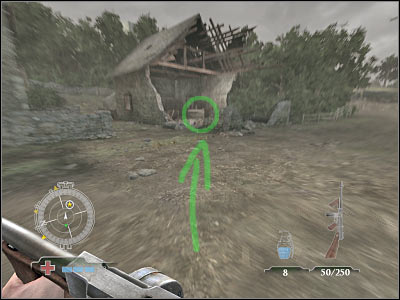
Like I've already said, you shouldn't encounter any unexpected obstacles along the way. If you've followed my previous instructions, you will have to start near a destroyed ammo cache. This means you'll be heading north-west. There are many different passageways here. You're free too choose one of them. Once you're at the colosseum, head on to the ground level. Follow the arrow which is located on your compass. You will have to wait for the game to display a new cut-scene.
As you've probably suspected, you will have to defend yourself against enemy attacks. This is all going to happen at a colosseum area, so I guess that you won't be needing a new map, because you're not going anywhere... at least not until you kill everyone who stands in your way. You will have to act quickly. Thankfully, you shouldn't be worried about your teammates because they will find good cover areas on their own. As for the enemy soldiers, you will have to kill about 10-15 of them. It depends on how many troops are being killed by the allied soldiers.
Reaching your target:
Once you've regained full control over your main character, you will have to leave this central area of the colosseum. You're fully exposed here and even if you would decide to keep a crouching stance, you wouldn't be able to defend against all enemy attacks. It would be a good idea to hide beneath a large wall (screen). This is where you'll plan your next moves.
I wouldn't recommend leaning out here, because you would only waste a lot of time trying to hit someone. Instead, head on to the stairs. This should allow you to distract some of the enemy units. Wait for the German soldiers to get here and start shooting at them. You should be able to kill at least two soldiers. Once the area is clear, choose a sniper rifle from the inventory. We'll be using this brick wall for much needed cover.
You will have to get rid of all enemy units. Thankfully, you'll be able to see them on your compass, so you don't have to look for them on your own. Kill enemy units from larger distances. Obviously you should be using a sniper rifle. If you're wounded, check some of the rooms on the ground floor. You'll find a lot of valuable medkits there. This mission isn't going to end unless you've killed all enemy soldiers. Once this is done, you will have to watch a short cut-scene.

This is also going to be a very short objective and you won't have any problems finishing it. Your only task is to reach a new assembly zone. That's where corporal Kish is standing. If you've suffered some injuries while trying to defend the colosseum, make sure to pick up some medkits along the way.
Reaching your target:
Obviously you won't encounter any resistance while trying to move from colosseum to the southern section of the map. You will have to approach a large temple. You couldn't get there from the air. Once you've arrived near the temple a short cut-scene is going to be displayed on your screen. Listen to what corporal Kish has to say.
This is going to be a rather challenging task, mostly because there's only road leading to the top of this hill, so you won't be able to surprise all enemy units. There are a lot of enemy soldiers in the area. As a result, you must stay focused in order to avoid making major mistakes. Thankfully, other allied soldiers will take part in the assault, so they'll help you out a little bit. Don't be fooled, though. The success of this mission depends solely on your behavior.
Reaching your target:
You will begin near the stairs. You will have to use them to get closer to the top of the hill. Obviously you shouldn't be in a lot of hurry. Before you decide to proceed any further, try taking out several opponents from a larger distance (you must use a sniper rifle). Ignore your colleagues. There's no time meter on the screen, so you can plan your each move very carefully. Once you've secured the area in front of you, start moving forward. Use nearby objects for cover.
I'd strongly recommend that you choose a passageway which should be located to your left. This will allow you to surprise some of the enemy troops. Get closer to them, lean out carefully and start shooting. If you have any grenades with you, it would also be wise to use them here. Aim at larger groups of enemy soldiers. Also, watch out for your teammates. You won't be punished if they die, but it's best to keep them alive as long as possible.
Try going south. You should stay close to the left (eastern) wall. Hide behind one of the large pillars. Start leaning out. This should allow you to take out all of the remaining enemy units. German soldiers will probably be surprised with your attacks, so that's a huge advantage. You will be fighting them at a small distance, so consider using a machine gun, instead of a sniper rifle.
You should be getting closer to your first heavy machine gun post. If you're lucky, one of your teammates will use a grenade here, so you won't have to neutralize it on your own. Otherwise you would have to lean out carefully in order to be able to take out the gunner. Once you've secured this heavy machine gun post, stay here for a little while longer. Choose a sniper rifle from the inventory. One of your allies should approach this structure in the meantime. I wouldn't recommend using the machine gun post on your own.
This is going to be a challenging segment of this mission, however if you have a sniper rifle and a lot of ammunition at your disposal, there's nothing you should be worried about. Otherwise you would have to consider assaulting enemy positions in order to fight them at shorter distances. Enemy soldiers will be coming from the east. Most of them will stop near the stairs, so you shouldn't have any problems finding them. Try to take out at least 10-15 soldiers. Remember that you won't have to reach the top of this hill right away. Take your time and kill as many enemy soldiers as possible, especially if you haven't spent too much ammo for the sniper rifle. You should be quite safe here, especially since one of the allied soldiers will be using a nearby heavy machine gun post. Wait for other allied soldiers to advance towards the stairs. Once you're ready, follow them.
Start moving east, because it's the only passageway to your current destination. You should be able to reach the stairs very soon. Be careful, though. This area may still be guarded by single enemy units. Kill them. Once this is done, head on to the upper level. Start moving south. You should notice a few crates here. Hide behind them. Next, move to the wall, so you won't get shot by anyone. Get ready for some challenging fights.
You will encounter a new group of enemy soldiers just around the corner. This is a small passageway which leads to the south. Be careful. Most of the enemy units will be hiding, so you may not notice them at first glance. You will have to secure this entire area. Once this is done, make a few steps forward. The game will display some new objectives here, however you must be standing close to the stairs.
Ignore the second task (destroying the gun) for the time being, because you'll be able to fulfill this particular mission objective much earlier. Your goal is very simple. You will have to destroy two explosive barrels in order to set signal fires for allied bombers, so they'll know where to drop the bombs. You will also get closer to your next objective while trying to find the barrels, so you won't have to waste a lot of your precious time here.
Reaching your target:
This is going to be one of the most difficult fights for this mission. Sadly, there's only one path leading to your current destination and you will also have to avoid TWO heavy machine gun posts. There are a lot of enemy soldiers in this area as well, however it's going to be quite easy to get rid of them. The first heavy machine gun post can be found in front of the stairs. You will have to go there, so you'll come across it right away. Try standing a little lower. Use the sniper rifle to get rid of the gunner. Stay here for a little while longer, because new enemy soldiers will probably try to use this heavy machine gun. Kill them before they manage to do that.
Second heavy machine gun post can be found to your right. You will have to neutralize it as soon as possible. Otherwise you wouldn't be able to advance towards the barrels. You've got two choices here. You can either use the sniper rifle to kill the gunner or you could throw a couple of grenades at him, however you would have to use a small balcony that's located to the right. I think that the sniper rifle is the best choice here. Either way, you will have to solve this problem before moving on with the mission.
Your next step should be to reach the machine gun post in order to secure it once and for all. You won't have to use the machine gun. Just make sure that all enemy soldiers have been killed. They will appear to your left. Use a good cover before attacking them. Thankfully, there are a lot of large objects here, including the sandbags. You will also receive some help from your allies, so it's not going to be too difficult to take full control over this area.
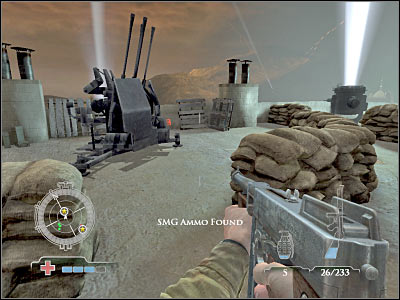
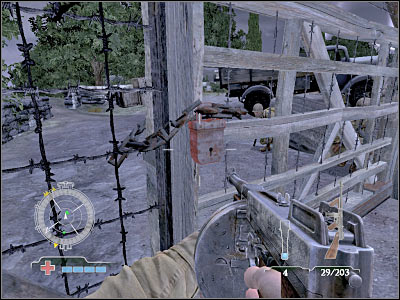
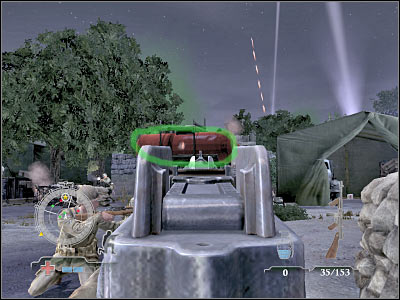
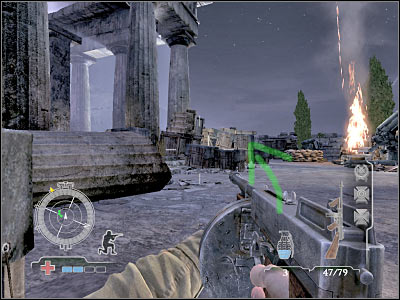
The barrels can be found to your right, near the artillery guns. They are red, so you shouldn't have any major problems finding them. Start off by destroying the closer barrel. One good shot should be more than enough. Once the explosion has occurred, use the sniper rifle to take out the second barrel. This should be done from a larger distance, so you won't have to worry about other enemy units right away. Once this is done, you will be allowed to proceed with the final task of this mission.
You shouldn't have any major problems with this final objective. Obviously you shoudn't be surprised by the fact that it's going to be well defended, so you won't be able to destroy it right away. You've probably collected a couple of grenades along the way. You should try using them, because this is the end of this mission and you won't need them for other fights. You can only try and surprise enemy soldiers. Check the following description for more details on that.
Reaching your target:
If you've destroyed the second barrel from a larger distance, you will have to defeat one more group before moving on to the target area. This is a very important issue, because there are a lot of allied soldiers in the area and I'm sure that you wouldn't want to see them die. Enemy soldiers will be standing to the south-west of your current position. Thankfully, you'll be dealing with small groups, so it shouldn't be a problem to get rid of them.
Now you will have to start moving south. Like I've said before, the main road leading to your target is going to be heavily defended, however you could try and eliminate all enemy soldier. Nevertheless, it would be much safer to turn right (once you've gone past a large entrance). You should be able to find a tent here. Keep a crouching stance at all times, so you'll be able to surprise enemy soldiers. Also, make sure that no one surprises you from the left flank.
I want to say this again - don't attract too much attention and you'll be able to get closer to enemy troops. They will be standing to your left. You could keep moving towards the gun, however I'd recommend using a grenade here. Just make sure that it doesn't touch the roof of the tent while it's still in the air. This should allow you to kill most of enemy units without risking anything.
Keep heading south. You should be standing close to the right wall of the temple. You could try and keep quiet, however this won't be necessary anymore. Make a few steps forward and hide behind a large truck. Lean out carefully. This should allow to kill all of the remaining enemy units. Make sure that you've secured the gun, because that's where most of the enemy soldiers are standing. You should also check your compass to make sure that everyone's been killed. Also, wait for the rest of the squad to advance to this area.
There's only one more thing to do here. You will have to approach the gun. It's not being guarded anymore, so you may as well stand up. Locate a glowing spot and place an explosive charge there. Once this is done, move back to a safe distance and wait for a cool explosion. This will allow you to finish this entire mission. You will also be rewarded with an excellent cut-scene. You'll see the temple being destroyed by allied planes.
Main mission objectives:
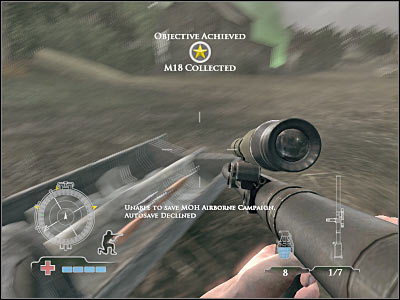
1) Collect M18 Bundle - 1 on the map.
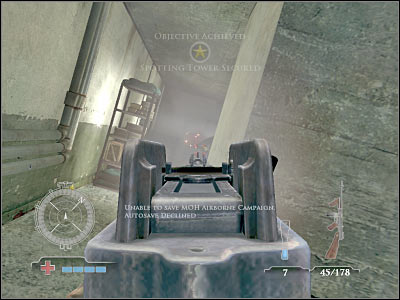
2) Clear and Secure Spotting Tower - 2 on the map.
3) Destroy Radar Antenna Relay - 3 on the map.
4) Knock-out Tiger Tank - 1 on the map. You will have to fulfill the first objective in order to unlock this mission goal.
5) Clear Central Casemate - 4 on the map. You will have to fulfill objectives 1, 2, 3 and 4 in order to unlock this mission goal.
6) Clear and Secure Pillbox - 5 on the map. You will have to fulfill the fifth objective in order to unlock this mission goal.
Your first task for this new mission will require you to assemble a very powerful weapon, so you'll be able to use it against an enemy tank. In order to do this, you will have to collect four different parts. They will be scattered throughout a large area, so it's not going to be easy. This part of the mission will take place near one of the green zones. Your main concern is going to be an enemy tank. It will appear on the map once you've picked up your first part (it doesn't really matter which one it's going to be). Sadly, you won't be able to destroy the tank until you've picked up everything. The good news is that you will be allowed to save your progress once you've collected each part, so even if the tank kills your character, you won't have to start everything from the beginning. I would recommend splitting this objective into two parts. First we'll going to pick up three items and then we'll only go for the final (fourth) object.
Approach:
I've already mentioned before that you should land twice in order to ensure a safe victory. Let's begin with the first landing and I'll explain the second one later during the course of the mission. The best landing zone for this particular goal is a roof area for a small house. I'm sure that you won't have any problems finding it. Not only you will receive a Skill Drop bonus here, but you'll also land near one of the components.
Reaching your target:
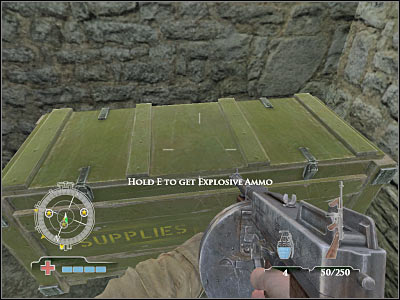
Make sure that you've landed on the roof. Otherwise you won't be rewarded with any bonuses and you would have to spend at least 20-30 seconds finding the ladder. DON'T leave this area just yet, because you will find your first component here. Step up closer and press the action key to pick it up. An autosave will be created here. You will also be presented with a very important cut-scene. As you've noticed by now, an enemy tank has arrived in the area. Sadly, you won't be able to destroy it at the moment, so you'll have to avoid its attacks.
Once you've regained full control over your main character, turn right and IMMEDIATELY leave the roof area. You can't stay here for more than two seconds, because the crew of the tank would have automatically spotted you. Once you're safely on the ground, enter this small building. You should be quite safe here, because the tank won't destroy any of the surrounding walls. Just make sure that you aren't standing close to a door or a window. Check all rooms. You will find medkits an explosive ammunition. Pick it up!
Get ready, because you will perform several risky maneuvers here. You will have to reach two other packages in order to collect much needed parts. Remember that you don't have to be in a lot of hurry. It's often wise to wait for the other tank to move somewhere else. Start running towards the second package. It should be located to the south-west. I'm sure that you won't have any major problems finding it. Pick up this new object and immediately return to the small building.
Now you will have to collect the third package. As a result, you will have to go to the south-west. There's a destroyed building here, however the package can be found on your right. If the tank moves here in the meantime, try hiding inside the house and waiting for it to leave. Once again, you will be allowed to save your progress. Now it would be a good idea to return to the plane, so you'll be able to perform a second landing.
You will have to choose between two interesting drop zones. Both of them are bonus location, so you would be rewarded with Skill Drops. I would recommend choosing a house that's located near the green zone. Be careful, though. The smoke will make your approach a lot more difficult. Slow down, so you will be able to land in a precise location. In order to receive a bonus, you will have to land on the second floor. There's no roof here, so you shouldn't have any problems.
There's some fighting going on in this area, but you may as well ignore it. Use the staircase in order to reach the ground floor. Wait for the right moment (observe the tank) and start running towards the final goal area. It's very important that you don't stop at nothing, because you would have been exposed to enemy fire.
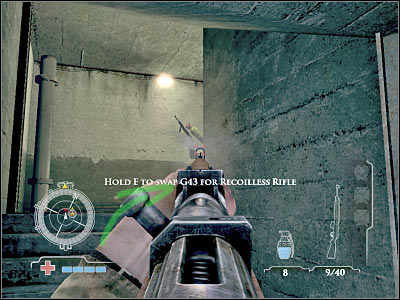
Once you've reached your destination, you will have to make a quick decision. You must exchange one of your carried weapons for the M18 by pressing and holding an action key. I would recommend that you stick with the machine gun and you could always return for the sniper rifle once you've destroyed the tank. Pick up this powerful weapon and you will be rewarded with a new mission objective.
Destroying the tank isn't going to be too difficult, however you must be very careful in order to avoid receiving major injuries (one successful shot may kill you or heavily wound your character). Either way, it's only going to take you about 30-60 seconds to destroy the tank and you'll have plenty of ammunition for the M18.
Reaching your target:
It doesn't really matter whether you've decided to make a new jump or go back to the small building. Try hiding inside this structure. You will have to be very patient here. Allow the tank to patrol this area and wait for a right moment to make a move. Try aiming at the rear, however you may also try hitting it from the side.
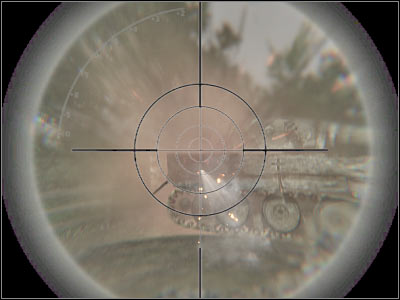
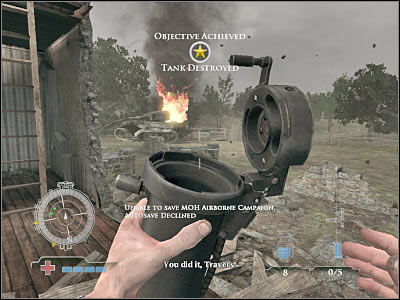
You will probably have to fire at least 3-4 times in order to destroy the tank. It all depends on where it was hit. It shouldn't be too hard. You only have to make sure that you're not seen. Destroying the tank will end this short objective, so you'll be able to proceed with other important tasks.
This is also going to be a very short task, however you will have to deal with only one major passageway leading to your destination. I'd strongly recommend starting with the ground floor. As a result, you will have to land somewhere near the spotting tower. Once you've reached upper levels, you will have to be even more careful, because enemy soldiers will be well hidden and you may not notice them at first glance. Additionally, some of them may actually try and attack you. I'm sure that you won't see it coming, so you'll have to be ready for anything.
Approach:
Once again, you will be able to choose between two different landing sites. Obviously I'm talking about bonus zones (Skill Drops locations). I'd strongly recommend choosing the left zone, because it's closer to the spotting tower. You will have to land on top of a small brick wall. Otherwise you wouldn't receive any bonuses. Thankfully, most of the enemy soldiers won't see you coming and they'll have other important tasks at hand, so you won't have to leave this area immediately after the landing has occurred.
Reaching your target:
The first thing you need to do here is to a eliminate the gunner. The heavy machine gun post is just beneath you, near the entrance. If you're standing in a correct spot (screen), you will be able to neutralize it without receiving any injuries, because the gunner won't see you. Get to the ground, but first make sure that he's dead. Get closer to the entrance.
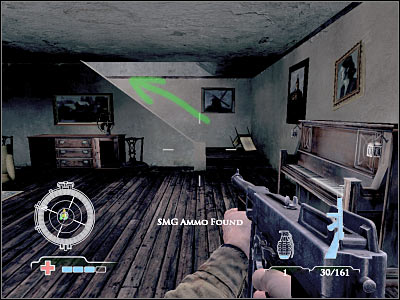
Try entering the nearest room. It shouldn't be guarded by anyone. You will notice a small hole to your left. It would be wise to get there, because you will be able to surprise some of the enemy soldiers. You could try shooting them or tossing a grenade inside. Once this is done, head on to a new door. Lean out in order to get rid of the remaining enemy units.
The next group should be standing to your right. You will have to kill them, because that's the only corridor leading to the upper level. Just as before, you should consider using a grenade, however you could also try leaning out a lot. Either way, you will have to secure this corridor. You could also go back to the heavy machine gun post, because you would find some ammunition and medkits along the way.
You may proceed to a large staircase. Start moving upwards. Be careful, though. This area may be guarded by 1-2 enemy soldiers. You would have to take them out quickly. Use the machine gun (because of a very small distance). Remember that you don't have to be in a lot of hurry. Also, you should consider maintaining a crouching stance for better protection.
Once you're close enough to a new room, you should consider throwing a couple of grenades at enemy soldiers, especially since you'll find a lot of grenades inside the bunker, so you won't have to leave them for tougher fights. Make sure that you've secured this new room. Enter it. Don't leave this area just yet. There are more enemies to your left and you should also turn back, because one of the soldiers may arrive here through the staircase.
Don't enter the next room without checking it in the first place. It would be a good idea to destroy an explosive barrel. This should be more than enough to ensure your safety, however one of the enemy soldiers may still be standing to your left. Kill him quickly.
Now you will have to be ready for an unexpected assault. I've mentioned this before. Enemy soldiers will use the stairs which are located to your light. You must kill them quickly, before they manage to turn around. Once they're gone, enter this new room. Pick up useful stuff. Use the stairs to get to a higher level.
The last group is standing just around this corner. You've got a lot of options here. The easiest way to get rid of them would be to use some of the carried grenades. You wouldn't be risking too much by throwing them. You could also try leaning out, however this can take a lot of time. Also, if you plan to continue your progress without any additional jumps, you should consider heading on to the top of this spotting tower, because you'll be able to kill a lot of enemy soldiers from there. Once you've killed all soldiers, you will automatically fulfill this objective.
This time you will have to blow up a very large antenna. It's going to be located on the roof of a second bunker, so it's going to a very similar task to the previous one (with the spotting tower), mostly because you'll spend a lot of time inside the bunker, trying to reach the roof area. The first part of this task is going to be more difficult, because the entrance to the bunker is well defended. Nevertheless, you shouldn't encounter any major problems here, especially since allied soldiers will try to help you to get inside.
Approach:
You could try and land near the main bunker, however this would be very risky and you would have to deal with a lot of enemy units at the same time. As a result, it would be better to land somewhere else, so you'll be able to plan your next moves more carefully. You've already considered choosing this area while trying to assemble the M18 weapon. Check the screen in order to find out more. Don't worry if it seems like a long trip, because you won't encounter large groups of enemy units right away.
Reaching your target:
Important! You will have to land to the right of the parachute in order to receive a Skill Drop bonus. It shouldn't be much of a problem. Be careful, though. This building is being guarded by one of the enemy soldiers. He will probably show up here very soon, so you should choose a machine gun from the inventory. If he doesn't, head on to the left room and perform a surprise attack.
You may finally proceed to your main target. Start off by going south-west. Next, you will have to turn north. You shouldn't encounter any hostile units here, however I'd still recommend that you keep low and stay away from danger zones. Some of the allied soldiers are fighting nearby, but you don't have to help them. Focus only on your task at hand.
You should be able to reach a much larger area very soon. It's leads directly to the antenna building. You can't stay in the open for obvious reasons. Instead, try hiding behind one of the sandbags. Also, it would be a good idea to kill a few soldiers before moving on. Ignore the heavy machine gun post for the time being. We'll deal with this problem later during the mission. Thankfully, there are a lot of allied soldiers here, so you won't have to worry about being surprised from the back.
I'd strongly recommend that you attack enemy soldiers from the right flank. In order to do that, you will have to start running north-east. You should be able to locate a few large crates. They're very good for cover. Some of the allied soldiers will probably do the same thing. Enemy soldiers are currently occupying mostly the central area of this field, so you won't have to worry about killing them and if you're lucky they won't even attack you here.
Try moving even closer to the designated northern bunker. Remember that it's crucial to stay behind a good cover. Try moving from one object to the other. You will have to focus most of your attention on the main entrance to the bunker. Kill everyone who decides to leave this building. You will also have to neutralize a heavy machine gun post which should be located to your left. Try using grenades during these fights. As for the machine gun post, observe this area. You will have to prevent other enemy soldiers from using it.
Keep pushing forward. It would be a good idea to use the nearby trenches, mostly because you wouldn't have to worry about being shot. Remember to observe the entrance, because a lot of enemy units will appear there. Once you're close enough to the bunker, use the nearby stairs. It would be a good idea to stop here for a while.
BEFORE you decide to enter this building, you will have to eliminate the second gunner. He is hiding to your left. There's a small hole here and he'll be using it to kill everyone who decides to enter the bunker. You must act quickly, so you won't receive any injuries. Try killing him by using a machine gun. Once he's gone, enter the bunker.

There's a small window that's located in front of you. I would recommend ignoring it, because there's only one enemy soldier inside and he wouldn't be able to hurt you later during the mission. Turn left and keep heading forward. You must be very careful here, because this corridor is going to be guarded by new enemy units. Try using some of your carried grenades. You could also kill them from a larger distance. Also, make sure that the heavy machine gun post (it's to your left) has been secured. You'll also find some useful items there.
There's a much larger room to the north-east of your current location. It's going to be occupied by at least 3-4 enemy soldiers. The easiest way to get rid of them would be to use a grenade, however this won't kill all of them at once. You could also wait for some of the allied soldiers and take part in an assault. Make sure you're using your compass to find enemy troops. Some of them will be standing near the stairs. Eliminate them quickly and secure this entire area.
Enter this new room. You won't have to use the stairs to reach your new destination. Instead, you should consider turning right. You will be able to find a new passageway here. Be careful, though. This corridor is going to be guarded by a small group of enemy soldiers. You could use one grenade to get rid of them quickly. Otherwise try leaning out carefully.

You will have to secure this new room. Use your compass in order to find enemy troops. Don't worry by the fact that there aren't any corridors here, because you will have to find a small ladder. You'll use it to reach the roof area. Thankfully, you won't have to act stealthy here, because you won't encounter any hostile units near the ladder.
The roof isn't well defended. You'll only encounter about 2-3 enemy soldiers here and you shouldn't have any problems finding and killing them. Once they're gone, head on to the designated area of the map. Plant a charge on the antenna. Move back and wait for the fireworks to occur. You will receive some new orders in just a few seconds, so take your time and enjoy the destruction of the antenna.

Just as before, you will have to through a large bunker. This time not only it's going to be bigger, but you'll also encounter more enemy troops. Additionally, enemy soldiers are well equipped and it's going to take a lot of efforts to kill them. Remember that you don't have to be in a lot of hurry. Take your time and eliminate every single threat before moving on to a new room. You will also be able to rely on some of the allied soldiers, because they will enter the bunker with you.
Reaching your target:
You'll start the game to the south-west of your main target. There's only one road leading to the bunker area, so you really can't get lost. You'll encounter your first group of enemy soldiers just around the corner. You will have to be very careful here, because enemy units will be expecting your assault. They will probably use a few grenades. Avoid them at all costs. Try killing them from a larger distance.

Keep going straight and in a short while you should be able to get closer to the bunker. It's going to be located on your right. Keep a crouching stance here. Move closer to the entrance. I'm sure that you won't have any major problems finding it. Ignore most of the enemy soldiers for the time being. The most important thing here is that you reach the entrance without being seen by anyone.
Once you're there, turn left and start shooting at the visible enemy soldiers. They will be surprised by your attack, so you shouldn't have any problems killing them. There's also a heavy machine gun post to your right, but you won't have to neutralize it right away. Instead, wait for some of the allied soldiers to arrive.
Enter the bunker. There's a small hole in front of you. Some of the enemy soldiers may be standing there. Get rid of them. We'll return here very soon, because you'll be able to kill a lot more enemies. For now, consider turning right. You will have to go to the heavy machine gun post. Neutralize it and collect items of great value. Now you'll have to go back to the window I was telling you about.
Try eliminating at least 2-3 enemy soldiers from here. They will probably be trying to kill your teammates, so you should be able to surprise them. You could also take part in the assault on this new room (screen), however you would have to deal with a very large group of enemy soldiers. As a result, you shouldn't risk too much, especially since your teammates won't secure this area without your help.

Once you've killed all visible units, head on to a new room. There's a small corridor on your right, but you may as well ignore it. If you hear that someone is there, try using one of the carried grenades. Focus your attention on the left room. You should also wait for your colleagues to show up, because you stand great chances of survival as a team.
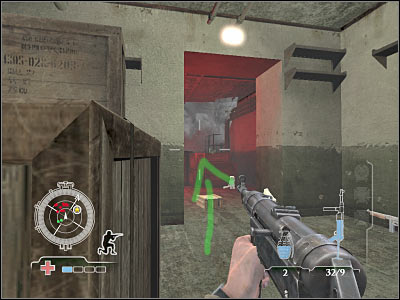
Try entering this room. It's going to be quite dark here, so you will have to be very careful. Some of the enemy soldiers may be hiding to your right. There are some barrels there and they are probably using it for cover. Once they're gone, stand in front of the only exit. More enemy soldiers will arrive here, however I'm sure that you'll kill them without losing too much health, especially since they'll be moving in smaller groups.
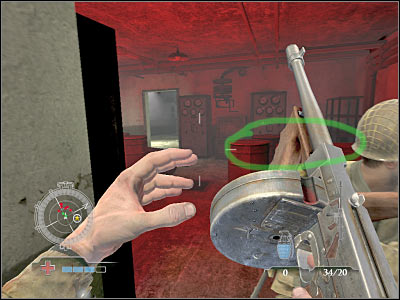
Try getting closer to this entrance, however don't leave the room just yet. The first group should arrive from the right, although you should be more focused on the left door. Check the screen if you want to find out which one it is. Eliminate everyone who decides to show up there. Remember that you can use your compass to find enemy troops.
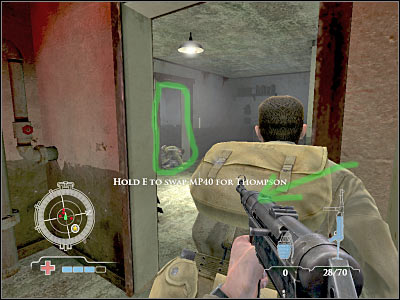
The final group will be hiding to your right. You'll be dealing with single opponents and smaller groups here, so you don't have to waste your grenades on them. Leaning out show do the trick. Once they're gone, go back to some of the previous rooms. Search for ammunition, grenades and medkits. You can also visit a dining hall, however it would be defended by one of the soldiers. Head on to your target. A new cut-scene is going to be displayed on your screen.
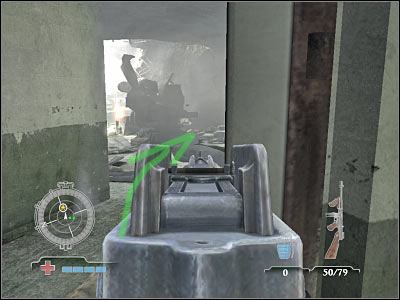
This is going to be the final task for this shorter mission. It won't be too difficult, especially if you're going to take your time to explore the surroundings. You should also know that some of the corridors and passageways may be safe, but if you reload a save, you may encounter enemy soldiers there. As a result, you have to be ready for everything. You will also have to be very careful while securing both pillboxes, because you will encounter large groups there and you will have to be very quick in order to kill them without receiving any injuries.

Reaching your target:
The beach area seems like a large maze, however you shouldn't have any major problems reaching your targets. Look at the screen if you want to find out in which order we'll be securing pillboxes. We'll start with the right one and then we'll head on to the left one. This is a better choice, because you would have to waste a lot of time if you had decided to start with the left bunker.
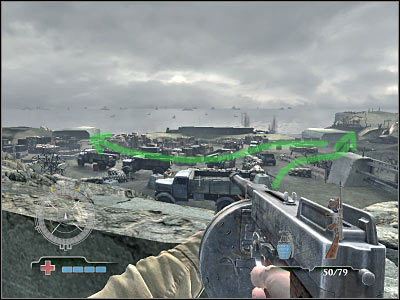
Your teammates will suggest a good thing. You can't stay here, because you would find yourself under heavy and constant fire and you wouldn't be able to do anything about it. As a result, leave this hill and hide behind a large truck. Next, go to your right. Make sure that you're using some sort of a cover.
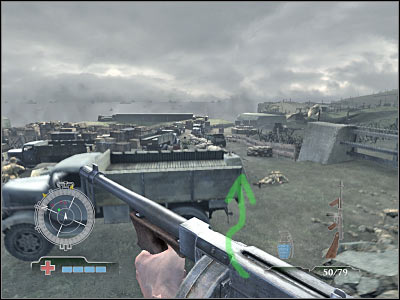
You will have to eliminate a few enemy soldiers from here. Some of them will approach you from the left, so don't be frightened if you see them jumping over sandbags and other obstacles. As for the rest, you should consider using a sniper rifle here. Don't leave this spot until you're sure that this road has been secured.
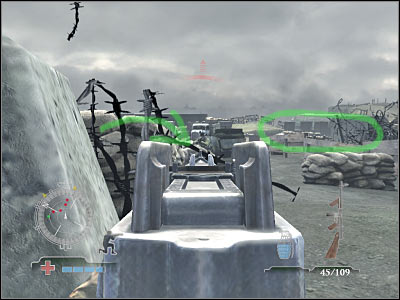
You will have to be heading east, because this is the main path leading to the first bunker. There's going to be a small area in front of you and it may be occupied by a few soldiers. Just as before, try killing them from a safe distance. You could also consider shooting at the explosive barrels, especially since it's very easy to find them.
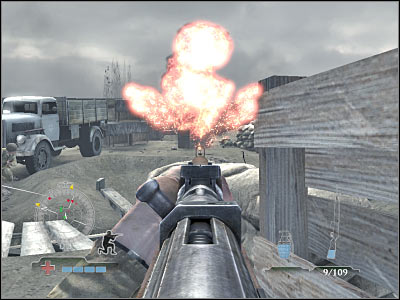
You're getting closer to the trenches. Head on down and start moving forward. You may also encounter some enemy soldiers here. If it actually occurs, you will have to kill them in the first place. Try aiming at their heads, so you won't have to waste too much ammunition. Either way, you will have to go there. Start moving south-east. Don't use any of the side roads.
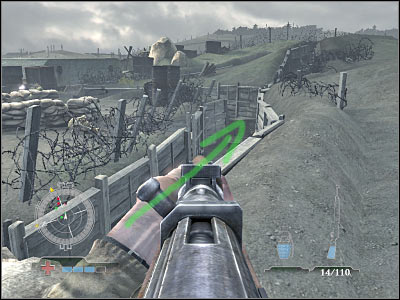
You will have to climb on top of a very small hill in just a few seconds. It shouldn't be a problem and since you're very close to your target, you won't get lots. Head on to the bunker. One of the enemy soldiers will probably be standing by the window. Kill him. Enter the pillbox. You should be able to find a medkit here. Pick it up and reload your weapon. Go right. Get ready, because you will have to kill a lot of German soldier in just a few seconds.
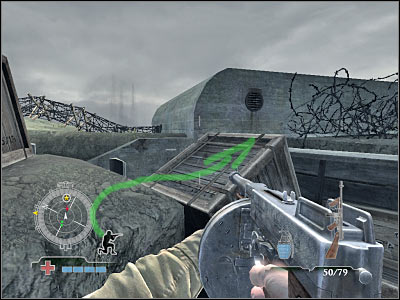
Enemy soldiers are using heavy machine gun posts, but they'll probably hear you coming and they will leave their posts. Use your machine gun to kill them, however you could also go back to the entrance and wait for them to show up. The choice is yours. Once you've secured this area, reload your weapon quickly and turn left.
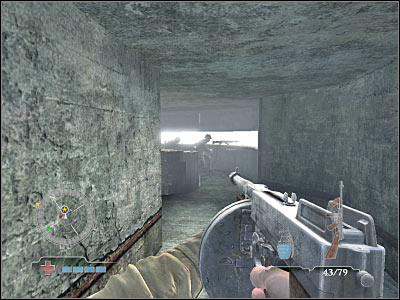
The second large group will appear on your left. Those soldiers were occupying the lower level of the bunker, however they have been distracted by your recent actions. You will have to deal with several soldiers at once, so it would be a good idea to use a machine gun against them. Also, choose longer bursts, instead of more precise shots. Use the stairs to explore the lower floor of the bunker. You will only come across a few opponents here. Once you've secured this bunker, return to the main entrance.
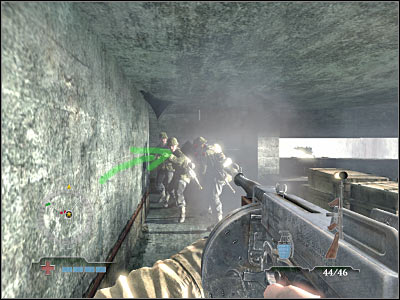
Now you will have to reach the second pillbox. Despite what you might think, it's not going to be easy. Obviously you won't be able to get there in a straight line and you can't use the trenches, because the road is blocked. As a result, you should be on a lookout for a small hill. It's going to be located to your left. Kill all nearby soldiers and hide near the large truck.
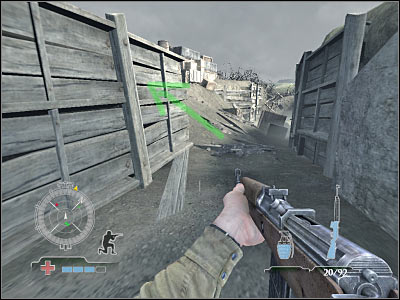
Now you will have to use two sets of white wooden boards to reach your final target. Make sure that you're using your compass, so you aren't surprised by any of the remaining enemy units. Also, some of the German soldiers will be hiding inside the trenches. You won't have to kill them, but it would make your life a lot easier. If you don't want to fight here, try running once you're near them. Remember that you're on an upper platform, so they probably won't follow you.
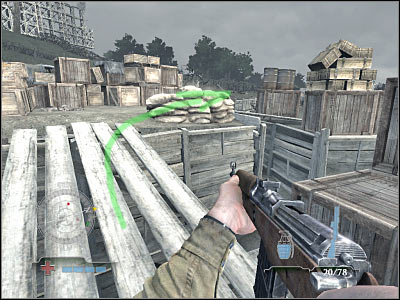
You will have to be moving north-west. Try using nearby crates for much needed cover. Once again, you should know that you won't have to be in a lot of hurry. The second pillbox is going to be guarded by a small number of enemy units, so it's going to be easy to get rid of them. Head on to the trenches, because it's the safest way to the bunker.
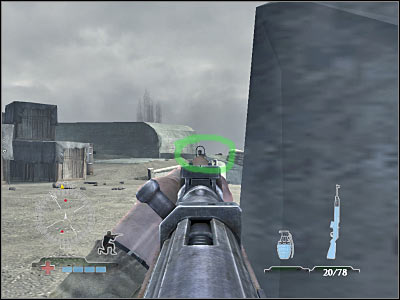
Just as before, you shouldn't be surprised by the fact that the entrance is going to be guarded by a single enemy unit. Kill this guy and take a medkit if you've suffered any injuries. Now you will have to proceed to the first large room. Kill all enemy soldiers. You could also try surprising them or throwing a grenades at them, especially since you won't need these objects anymore.
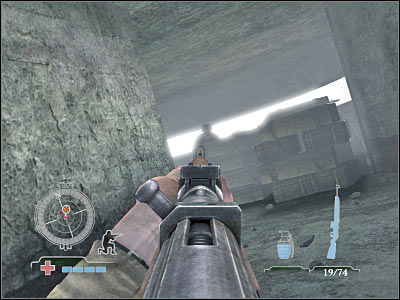
Enter this new room very carefully. Once again, you should also be prepared for a second attack. Enemy soldiers will appear to your left, near the stairs. Head on to the staircase. You will have to get down to a lower level. Be careful, though. You will probably encounter a few soldiers along the way. You will have to secure this pillbox in order to fulfill this objective. You will also end this third mission.
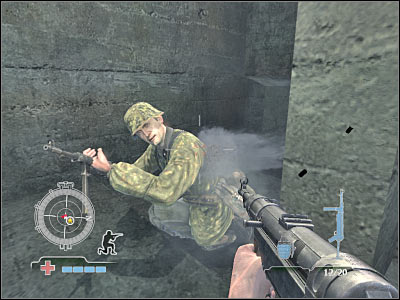
Main mission objectives:
1) Disable Explosives Plunger - 1 on the map.
2) Disable Radio Equipment - 2 on the map.
3) Collect Gammon Grenades - 3 on the map.
4) Clear MG Nests - 4 on the map.
5) Knock-out Roving Tiger Tank - 3 on the map. You will have to fulfill the third objective in order to unlock this mission goal.
6) Clear Resistance and Assemble with Airborne - 5 on the map. You will have to fulfill objectives 1, 2, 3, 4 and 5 in order to unlock this mission goal.
7) Knock-out Tiger Tank - 6 on the map. You will have to fulfill the sixth objective in order to unlock this mission goal.
8) Assemble with Airborne at Bridge Surface - 7 on the map. You will have to fulfill the seventh objective in order to unlock this mission goal.
9) Knock-out Tiger Tank #2 - 8 on the map. You will have to fulfill the eighth objective in order to unlock this mission goal.
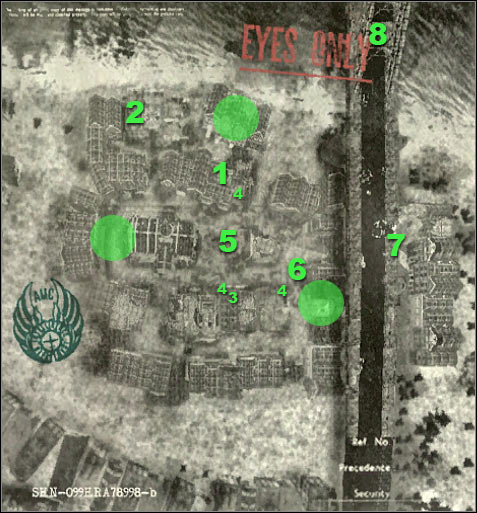
The first task of this mission will require you to land in a very difficult spot. Not only you will have to be very precise, but you're also going to have to eliminate one of the enemy soldiers. This has to be done almost immediately after you've successfully landed. Thankfully, it's not going to take a lot of your time to reach the radio station and you will only be attacked by two larger groups of enemy units. Furthermore, you will receive assistance from some of your colleagues.
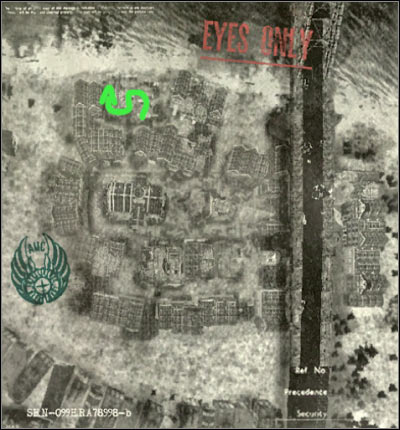
Approach:
The building you'll be trying to get in to is located in the northern section of this map. Take your time and familiarize yourself with the surroundings. It's not as bad as it looks. :-) That's where you'll have to steer your parachute. Like I've said before, you'll land near your first target. Obviously this is going to be a bonus zone (Skill Drop). The landing itself can prove to be quite difficult, especially since you'll have to knock down of the enemy soldiers. If you land a little bit higher, you may also consider attacking him with your gun. Either way, you will have to be very precise here, not only to receive a bonus, but also to survive.
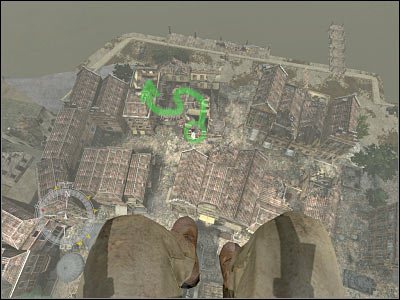
Reaching your target:
First of all, you should near the left wall. Take your time and explore this area. You will also have to check your compass in order to find out exactly how many soldiers you'll be dealing with. Make sure that no one surprises you. Thankfully, you'll be dealing with single soldiers or smaller groups, so it shouldn't be much of a problem.
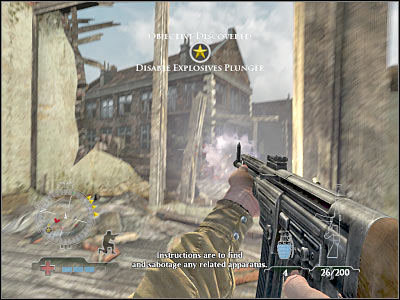
There's a ladder nearby, however I wouldn't recommend using it, because you would find yourself in a very uncomfortable position. Instead, try going north and then turn to north-west. As a result, you should be able to reach a new room (screen). Choose a good machine gun from the inventory, because you'll take part in a few fights.
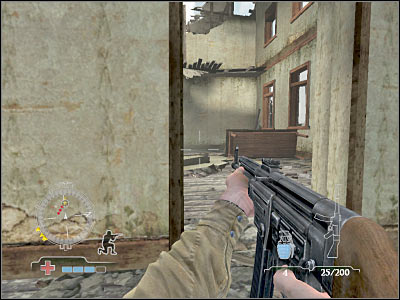
This room is going to be guarded by at least 2-3 enemy soldiers. You won't have to use any of the carried grenades to kill them. Instead, try aiming at their heads. You could also wait for them to leave their cover areas, however don't expect for them to attack your main character. You won't have to worry about other passageways, because it's highly unlikely that someone appears there.
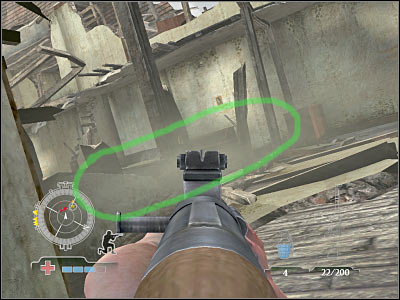
Once you've killed all enemy soldiers, try moving closer to the stairs. Be careful, though. Most of the upper floor will be occupied by new enemy units. Additionally, some of the enemy soldiers may actually try and advance towards you. Attack them while they'll be using the stairs. Consider choosing long bursts, instead of single shots. You will also have to watch out for your back, because other German soldiers may try to perform surprise attacks here.
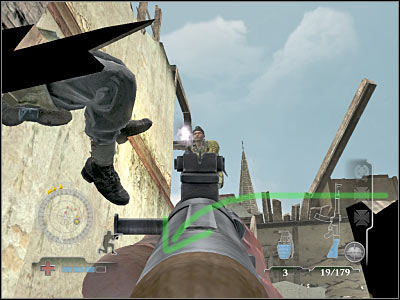
Once you've reached the upper level, hide behind one of the available objects and wait for a few of your colleagues to get here. Once this is done, lean out and start shooting at the enemy soldiers. You should be able to take out at least two of them from here and you won't have to worry about them using grenades against you or your teammates.
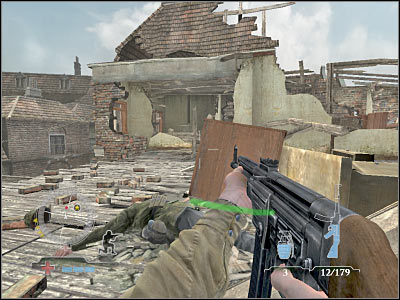
Try getting closer to your main objective. The last group is defending the radio which is located to your right. This time it would be a good idea to use at least one grenade, however you could also try and lean out a lot. As for the radio equipment, one successful shot will take it out, so you won't even have to get closer.
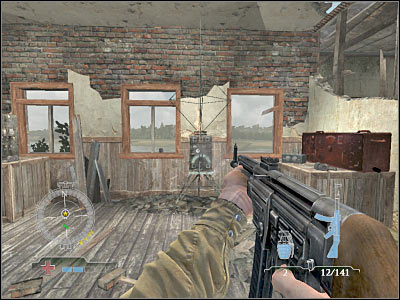
Once again, you won't have to spend too much time trying to reach your goal area, because you'll land nearby. This time you will have to pay more attention to enemy units. There's going to be more of them and they'll be well organized. You will also have to avoid getting too close to the windows, because an enemy tank is patrolling this area.
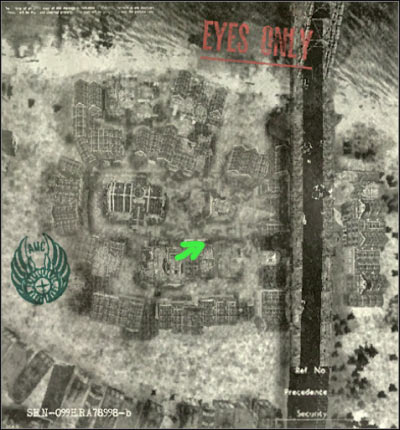
Approach:
I guess you may have some serious problems finding the landing site. Take a closer look at the screen if you want to find out where it is. Obviously we're talking about a bonus zone (Skill Drop). You will have to land on a very small wooden board which connects two buildings. Otherwise you wouldn't receive any bonuses. You will also have to be ready to fire at your opponents almost immediately after the landing. This also means finding a good cover area. You should also consider increasing your speed, so you won't be hit by anyone while you're still in the air.
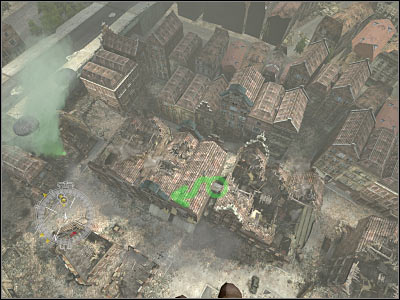
Reaching your target:
Once you've landed, immediately hide behind one of the objects to your right. Don't forget to choose a crouching stance. You can't stay here forever, though. The area is not safe. Kill one of the closest soldiers. Turn around so you'll be facing the landing zone. You will also have to watch out for enemy grenades.
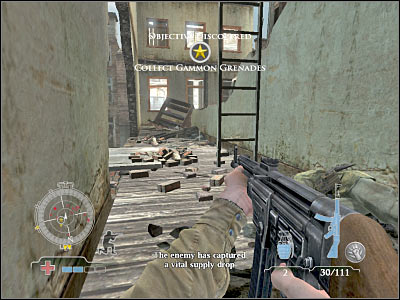
You should consider standing to the left of the wooden plank, so you'll be able to take out some additional enemy units. It shouldn't be too difficult. Be careful, though. One of the enemy soldiers may advance towards your position, so you have to take him out quickly. Once the area has been secured, head on to your target. Hide behind a large chair.
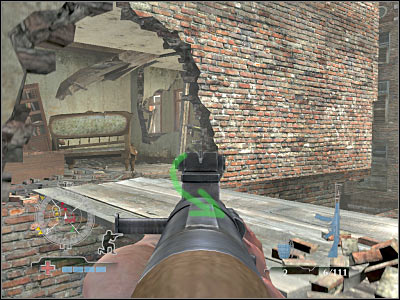
Additional enemy troops are stationed to your right. It would be wise to wait for their move, especially since it's not going to be easy to surprise them. Once they're gone, turn left. You should be able to notice one of three MG nests. This is a different objective, however it would be a good idea to take it out right away, especially since you'll have a tactical advantage over your opponents. Try surprising some of the German soldiers. You could use a sniper rifle for precise shots. If you see a tank in a distance, make sure that you leave its field of view.
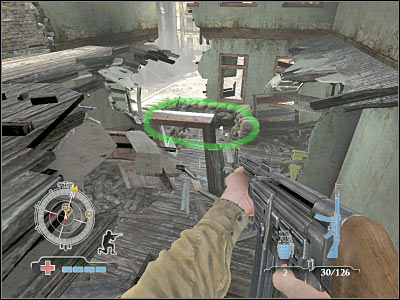
Don't leave this floor of the building just yet. Instead, make a few steps forward and turn right. You will probably notice additional enemy troops. You won't kill everyone from here, but you should be able to take out at least two enemy soldiers. Once they're gone, land on the lower level of the building.

I'd strongly recommend hiding right away. Thankfully, there are a lot of large objects here, so it shouldn't be a problem. You will have to check your compass frequently, because more enemy units may arrive in this area. Try securing your first MG-42 nest, as well as the surrounding area. It shouldn't be a big problem.
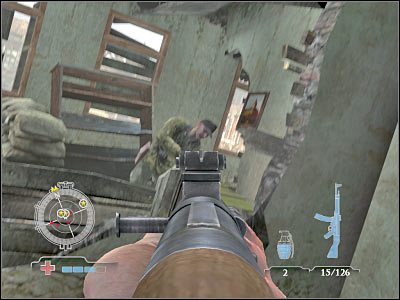
I wouldn't recommend moving towards the second MG site, because we'll deal with this problem later during the mission. Instead, make sure that you have secured this building. Once this is done, locate a large crate. You should be able to find Gammon grenades inside. Pick them up. You will also be allowed to return here in order to pick up more of these grenades. The game should display a new objective on your HUD.
I'd strongly recommend that you try your chances with this objective right away, especially since you'll be able to pick up more Gammon grenades from the crate. You'll also be quite safe inside this building. Your only concern should be to avoid receiving any hits from the tank.
Reaching your target:
Once you've collected the grenades, try hiding near one of the windows. I wouldn't recommend choosing the MG site, because you would have been exposed to enemy fire and the tank is moving that way, so you would probably end up being attacked by its crew. Choose one of the standard windows and wait for the tank (it's patrolling the entire area) to show up.
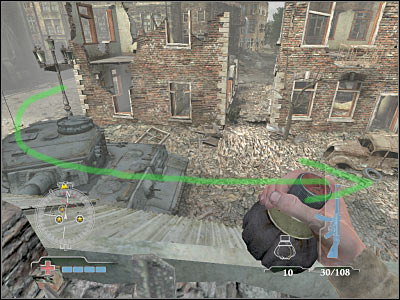
You won't have to be precise here, especially since the tank is near your position. You'll probably have to throw 3-4 at it. This should allow you to destroy the tank. Once this is done, you will automatically fulfill this objective. I would recommend going back to the plane and performing a new jump.
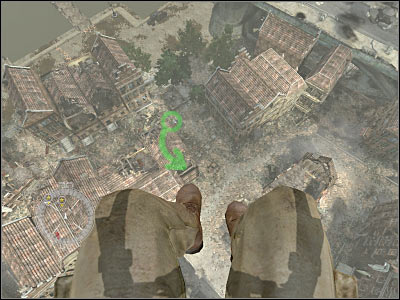
You will have to neutralize three different MG nests in order to fulfill this mission objective. Important! If you have followed my previous instructions then one of the nests is already neutralized (the one near the Gammon grenades). Otherwise you would have to take it out as well. I've focused my attention on two remaining MG sites. We'll start with the southern one, because it's near your previous objectives, so you'll encounter less enemy troops.
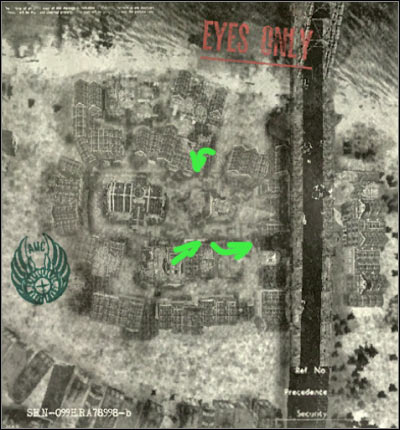
Approach:
Take a closer look at the screen if you want to find out where to land. This is the first landing site. We'll focus on the final one later during the course of this mission. It's not going to be easy to land in a correct spot, however you don't have to be worried about enemy soldiers. You can't land on the top floor. If you want to receive a proper bonus (Skill Drop) you will have to choose a lower floor.

Reaching your target:
If you were fighting here before, you will come across a few enemy soldiers on your way to the MG nest. Otherwise you would have to consider using nearby objects for much needed cover. Once you've secured this floor, use the stairs to reach a lower level, because that's where you'll find the MG-42 nest.
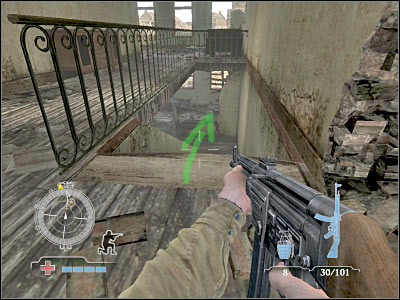
The second heavy machine gun post is going to be located to your right. You'll probably encounter some heavy resistance here, however you'll be against only a few enemy soldiers. Also, they won't have anywhere to hide, so you should take your time and kill them one by one. I'm sure that you won't have any major problems here. Just make sure that you check the right side of the room before going to the nest. Once you've secured this area, it would be a good idea to go back to the plane, because the third nest is located in the northern section of the map.
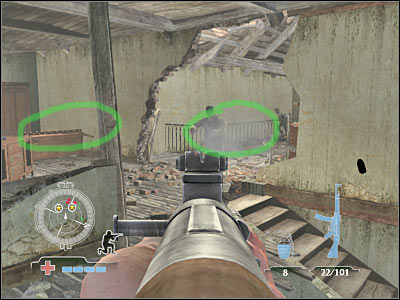
Like I've said before, you will have to land in the northern part of the map, because that's where you'll find this final nest. You will also have an opportunity to take care of a second objective at the same time, because it's going to be located in the exact same building. Nevertheless, neutralizing this MG nest is our top priority here. Try landing on a very small balcony. Check the screen if you want to find out where it is. This is going to be a bonus zone (Skill Drop) and you won't have to worry about someone guarding the balcony. You'll have plenty of time to plan your next moves.
Once you've safely landed on the balcony, turn left and try to enter the building. Most of the enemy soldiers will be standing in front of you, so you won't have to worry about any unexpected attacks. Try securing this entire room. You will also have to kill everyone who decides to move closer to your current position.
The final machine gun post can be found to your left. You could consider throwing a grenade at enemy soldiers, however leaning out is also an interesting possibility. Despite what you have chosen, you can't leave this area just yet, because we'll focus on a second task at the same time and it would be a waste of time to repeat the entire landing procedure.
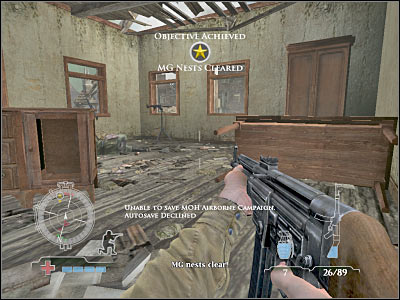
I've already mentioned before that you will have an opportunity to fulfill this task along with the other one. Once you've secured the MG nest, you will be able to proceed with this goal right away, so it's only going to take you 30-60 seconds to win. Nevertheless, you should be very careful here, because the plunger is going to be well defended by German soldiers.
Reaching your target:
I assume that you've started the game near the final heavy machine gun post. As a result, you will only have to turn right and make a few steps towards your new destination. The easiest way to get rid of the plunger would be to blow it up, so you should consider using at least one grenade here. Otherwise you would also have to kill 3-6 enemy soldiers. Either way, destroy the plunger and wait for some new objectives to be displayed on your screen.
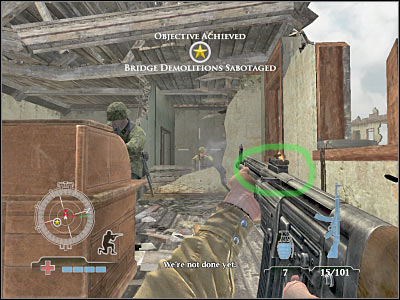
I wouldn't recommend to continue with the mission right away (after you've destroyed the plunger), because you would only have to go through enemy territories and it can be quite difficult to survive. Instead, try loading your last checkpoint and you will automatically begin the game inside a large church. You will have to rejoin with the rest of the squad. Thankfully, you'll only encounter a few hostiles along the way.

Reaching your target:
I've already mentioned that you should consider starting the game inside a large church. I'd also recommend using a sniper rifle here (not the machine gun), because you will have to take out at least three enemy soldiers before leaving church grounds. German units are hiding inside eastern buildings. I'm sure that you won't have any problems spotting them. Just make sure that you're using a good cover. Don't leave this area until you're certain that they have been killed.

Once you've taken care of this small problem, you will have to reach a new green zone. It's going to be located on your left. Don't worry about anything else, because you won't have to protect allied units. Once you've reached your destination, you will have to wait for the game to display a new cut-scene. Get ready, because you'll have to destroy a new tank.
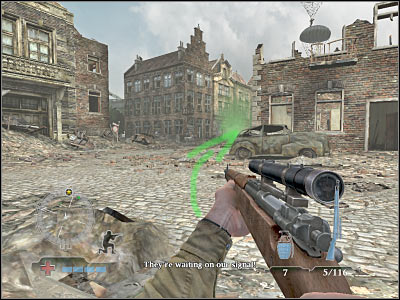
This is going to be a very similar task to one of the previous objectives of this mission. Once again, you will have to use Gammon grenades in order to destroy an enemy tank. You will have to be very careful at the start, because the tank will be able to attack you. Thankfully, you won't have to about your teammates and you will be able to hide inside a building.
Reaching your target:
You'll start the game in a very bad spot. Don't even think about standing up or leaning out, because the tank would immediately attack you and your main character would have probably died. Instead, turn around and hide behind a nearest building. You'll find a crate with Gammon grenades here. I assume that you have used up previously taken grenades, so use the create to pick up more of these objects.
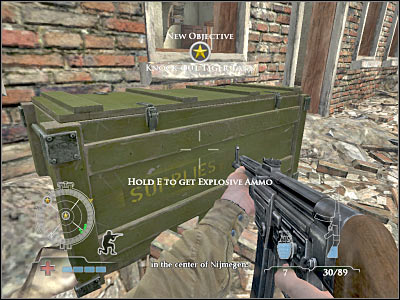
You can attack the tank by choosing one of two different approach methods. If you want to risk your life, you could go back to the starting area. You would have to make sure that the tank is attacking someone else. Next, you would have to lean out and throw a couple of grenades at it. You would also have to be quick about it. You can't let the tank to fire at you.
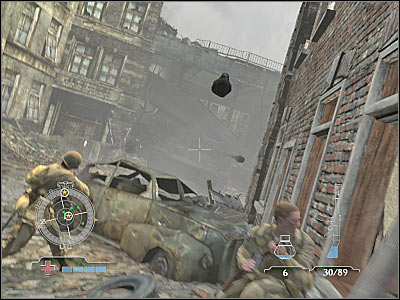
If you don't want to have any serious problems with this mission objective, you will have to enter the building. The entrance is to the right (if you're standing in front of the crate). Look at the screen, because that's where you'll have to be standing. This is very important. Don't move to your right, because you would have been exposed to enemy fire there. Start throwing grenades at the tank. These actions don't have to be too precise. Just make sure that grenades explode somewhere near the tank and you'll destroy it very soon.
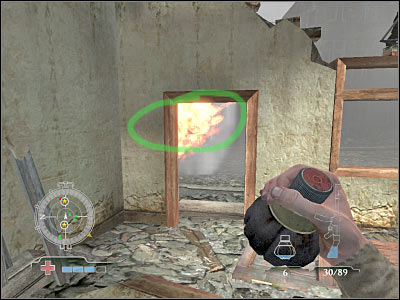
This isn't going to be an easy task. Reaching the bridge will require you to go through a very dangerous zone. You will encounter a lot of enemy soldiers along the way, especially near the destroyed tank. You will also have to perform several risky maneuvers, because some of the enemy units will be well hidden. It's going to get a lot easier when you're close enough to the bridge.
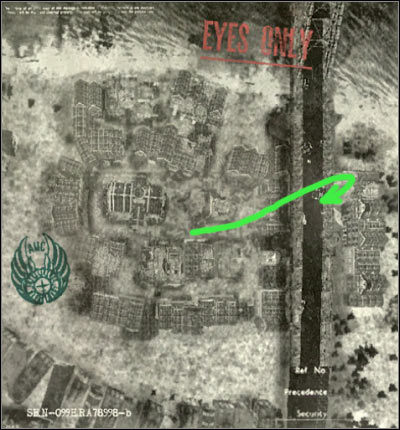
Reaching your target:
Start off by moving east. You should consider visiting a safe zone along the way, because you will have to rearm yourself before proceeding with the final phase of this mission. Once this is done, try hiding near one of the destroyed buildings. Sadly, you won't be able to kill all enemy soldiers from here.
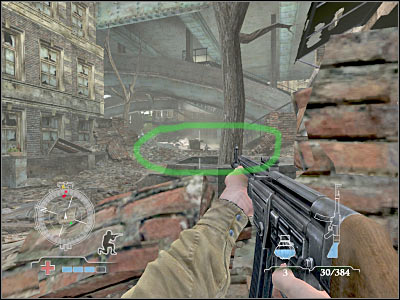
You can't stay here forever, so go ahead and try to move forward. You should be standing close to the buildings on your right. Additionally, make sure that you're using various objects for much needed cover. You will have to avoid one of the MG sites, so it's very important to stay away from the main street.
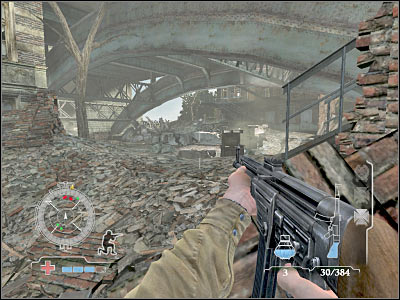
You could throw a couple of grenades if you wanted to. It should allow you to kill at least 2-3 enemy soldiers and they'll be a little distracted for at least a few seconds. Your objective here will be to get closer to the main building (the one with the MG42). I'd strongly recommend approaching it from the right side. You should be able to use some of the nearby objects for cover (screen). Try to get rid of a few soldiers along the way, however you won't have to kill everyone.
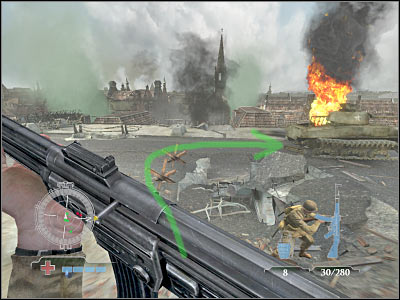
Once you're close enough to the building, you'll be able to hide behind a destroyed car. Lean out carefully. Start shooting at the visible enemy units. Some of the enemy soldiers will decide to leave the building and you will have to kill them in the first place. Focus all of your efforts on securing this area of the map.
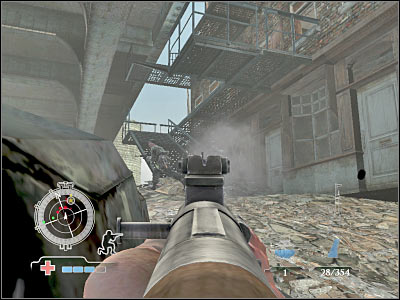
Now it would be wise to take out the gunner. He is currently occupying the first floor of the right building. Take a closer look at the screen if you want to know where to throw the grenade. You shouldn't have any problems here. Once the MG-42 nest has been neutralized, eliminate all of the remaining enemy soldiers. Most of them will appear near the stairs.
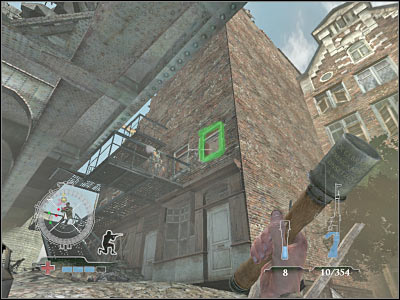
Once you've secured this area, use the stairs to get to the highest floor. You may ignore enemy soldiers on lower floors, however you must be careful, because one of the German soldiers may be standing near a window. You would have to kill him quickly, especially since he'll be facing a staircase, so he'll see you coming.
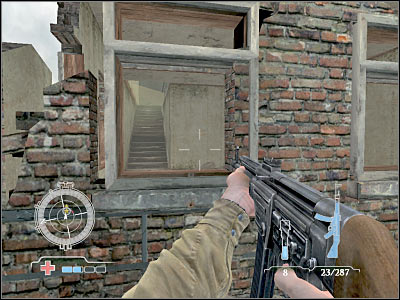
You may enter the building. It should be safe here, however you should consider choosing a machine gun from the inventory (just to be safe). Make sure that you have explored all rooms. You'll find some ammunition and a lot of medkits. Once you're ready, head on to the stairs. You will have to reach the upper level of the building. This is where a new cut scene is going to be displayed. Once it's over, you will receive new orders.
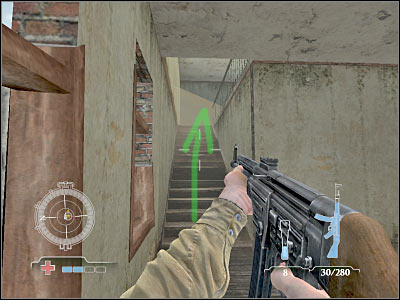
I guess that the title of this objective may surprise you a little bit, because eliminating an enemy tank is going to be the least of your problems. The final phase of this mission is going to be VERY difficult. You will have to be extremely careful, so you won't have to go back to the checkpoint area and repeat everything from the start. The most important thing here is that you avoid being hit by rockets. There are going to be A LOT of enemy soldiers with rocket launchers. A single rocket (in most cases) is more than enough to kill your character, so don't even think about staying the open for too long. You can use other rocket launcher to kill these guys, however I prefer sniper rifles, especially since the rocket launcher is better at aiming at larger targets. Enemy soldiers will also be well hidden, so you must be very thorough while trying to get to the tank. They'll also change their initial positions from time to time. Sadly, you won't be able to observe their movements on your compass.

Reaching your target:
You will start the game in a very uncomfortable spot. You will be fully exposed here, so you can't stay here forever. Otherwise you would have to deal with a lot of enemies and you would probably die as a result of one of the RPG attacks. There's a heavy machine gun post to your right, however I'd strongly recommend avoiding it, because it won't do you any good to use it. Wait for a situation here to calm down a little and start RUNNING forward. Check the screen, because that's where you'll have to hide. It's going to be a destroyed allied here. You'll be safe here, even if one of the missiles hits the tank. Nevertheless, check your compass frequently, so no one manages to surprise you.
You should still be standing behind the tank. Start off by leaning out. A small group should appear to your right. Enemy soldiers will be coming towards you, so you must act quickly. Thankfully, you will be able to locate them with your compass and they won't be carrying any rocket launchers. Nevertheless, it would be wise to surprise them.
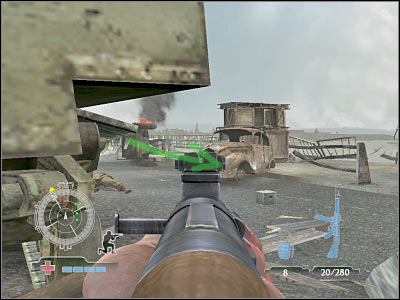
Now you should try and secure left side of the bridge. Once again, you should be standing behind a destroyed tank. You will probably see a small bunker there. Try neutralizing it right away. One of the enemy soldiers will be using a heavy machine gun there and he needs to die. Remember that you should be aiming at his head. Lean out only for a second or two, so he doesn't see you. Also, check if no one else tries to take his place.
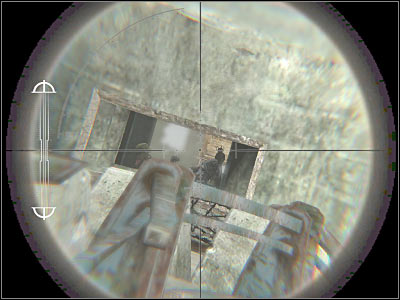
Try moving closer to a previously secured bunker. This is a very important thing, because you won't be able to kill any RPG soldiers from here. Obviously you should choose the left side of the bridge, so you'll be protected by the bunker while trying to get closer to the bridge. You won't have to kill anyone here, however check your compass from time to time, just to be sure.
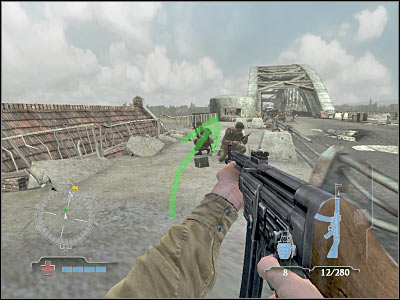
Before you decide to proceed any further, you should take a few seconds to explore the surrounding area. There are a lot of medkits inside the bunker, however I'm sure that you won't need them right away. It's better to leave them for later, especially if one of the missiles would explode near your character. You will also find a rocket launcher here. You can pick it up or remain with your main weapon - sniper rifle. Either way, you will be taking part in very difficult fights from now on.
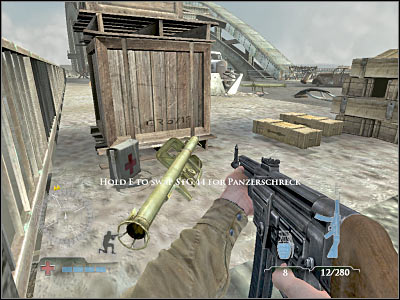
Try hiding behind larger objects. You will have to lean out in order to kill each RPG soldier. Remember that you can't stay in the open, because that would be equal to an instant and painful death. Try eliminating your foes from a very large distance. Start off by checking a small balcony which should be located to your left. Also, you will have to scan the vehicles for more opponents.
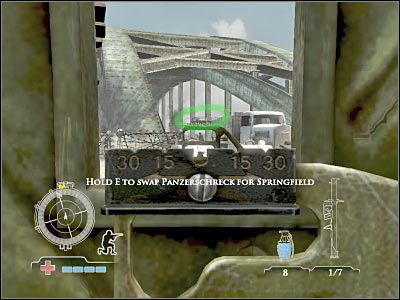
Once you've killed all visible soldiers, try moving closer to this side of the bridge. Check the screen, because that's where you will have to hide. Start LEANING out. This is very important. You can't move to the right too much and you will be protected here by the bridge supports, so you won't have to worry about any missiles hitting your character. Remember that you won't have to risk your life each time you try to kill someone. Also, check the left side of the bridge, because one of the enemy soldiers may be hiding there or he'll even try to advance toward your position.
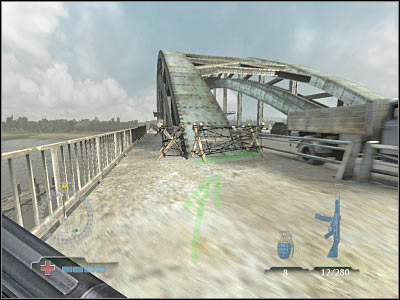
Next, try leaning to your left. Once again, I urge you to be extremely careful, because it's very easy to make a dreadful mistake here. If the area is clear, you may consider moving forward a little, however make sure that you're hiding all the time. There's a balcony here. It may be guarded by one of the RPG soldiers. Take him out as soon as possible.
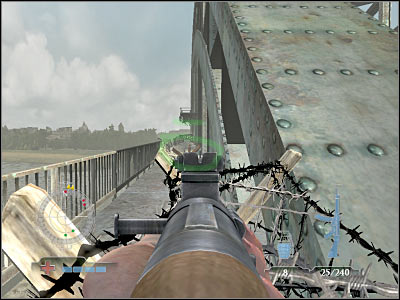
Before you decide to move towards your current target, you will have to make sure that all enemy soldiers have been killed, so you won't have to worry about them attacking you along the way. New German units will appear in the central area of the bridge. Just as before, try killing them from larger distances.
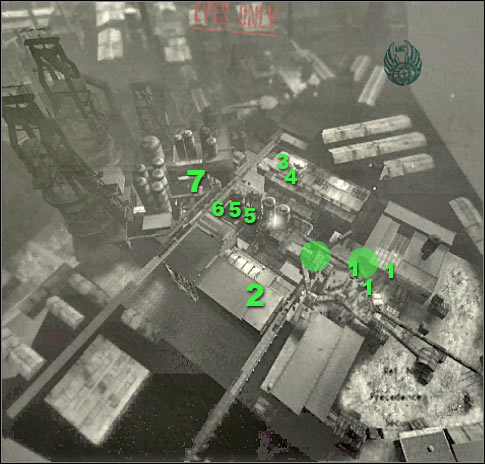
Watch out for the second balcony. It's located to your right (look at the screen). I'm sure that one of the enemy units will be hiding there, so you must kill him quickly. Watch out for the central area. Kill everyone who decides to leave cover. You should also know that a small group of allied soldiers will help you during these fights. This is something new, because they couldn't leave the checkpoint area before.
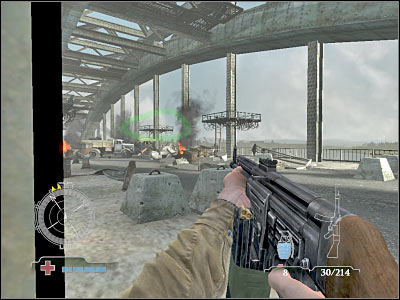
Try hiding behind one of the available pillars. They can be found to your left. Not only you will have to eliminate all of the remaining RPG units, but you also must neutralize a heavy machine gun post. I'd strongly recommend doing this from a larger distance. There's also a new balcony to your left. Secure it as well, especially since it may be guarded by someone. Head on to your target.
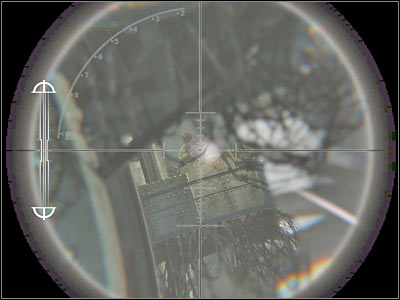
You will have to get closer to a large truck. Take a closer look at the screen if you want to know which vehicle it's going to be. The game should create an autosave here, so even if you die, you won't have to get back to the previous area. Thankfully, the final part of this mission is going to be very simple. Start off by exchanging one of your weapons for the rocket launcher.
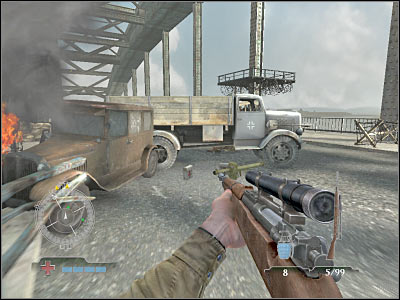
Despite what you might think, destroying the tank is going to be VERY easy. Make a few steps forward. There's going to be a destroyed bus here. You won't have to go left to approach the tank. Instead, turn right. Look at the screen. That's where you'll have to go right now.

If you have any Gammon grenades, you might as well go ahead and use them, especially since you won't need them anymore. If not, choose a rocket launcher from your inventory. Your pattern here is very simple. Make a jump and fire the missile while you're still in the air. Make sure that the missile explodes somewhere near the tank. I know that it sound silly, but the tank will be practically helpless here.
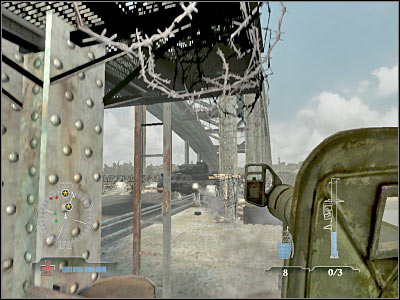
I guess that you will have to perform about 4-5 jumps in order to destroy the tank, however you'll have plenty of rockets to use, so it shouldn't be a problem. Even if you fire more missiles, you can still go back for one of the unused rocket launchers. Once you've destroyed the tank, you'll also end this mission. Get ready for a new assignment!
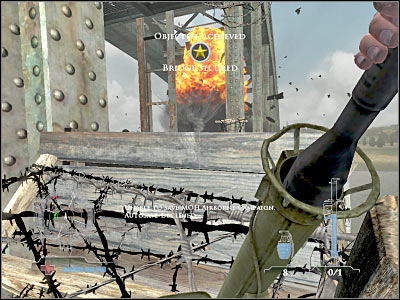
Main mission objectives:
1) Destroy Tanks on Railcars - 1 on the map.
2) Destroy Munitions Stockpile - 2 on the map.
3) Destroy Railgun - 3 on the map.
4) Sabotage Tank Factory Control Room - 4 on the map.
5) Destroy Pressure Valves - 5 on the map.
6) Clear and Secure Entrance to Rail Yard - 6 on the map. You will have to fulfill objectives 1, 2, 3, 4 and 5 in order to unlock this mission goal.
7) Destroy Panzerzug Engine - 7 on the map. You will have to fulfill the sixth objective in order to unlock this mission goal.
8) Destroy Panzerzug Cannon Cars - 7 on the map. You will have to fulfill the sixth objective in order to unlock this mission goal.
I'm sure that you'll have some serious problems finishing this task, especially if you tried more direct assaults in the previous missions of the game. I guess that you won't be surprised by the fact that reaching all three tanks is going to be the least of your problems. Your main concern for this entire mission are enemy snipers. You will have to eliminate all of them in a correct order. Doing this will make your life a lot easier, so you'll be able to take on other important objectives. Also, even if you make a mistake at the start of this mission, you will be able to repeat it from the start, without having to lose too much of your precious time.
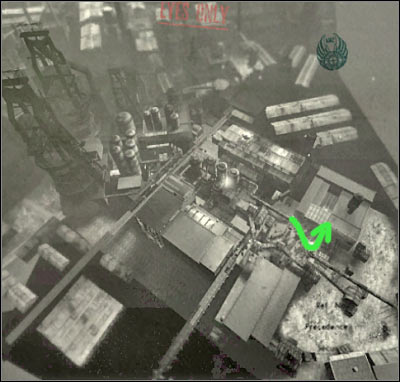
Approach:
You could try and land in a safe spot (green zones are your only choice here), however I think that you should be able to score a Skill Drop AND take out most of the enemy snipers without having to return to the plane. Your landing zone is a very small balcony. I'm sure that you won't have any problems finding it. It's located near all three tanks. Your first concern will be to advance towards the ground. Otherwise the snipers would have attacked you. Also, try scoring at least a flared landing, so you'll be able to use your gun without having to wait too long.
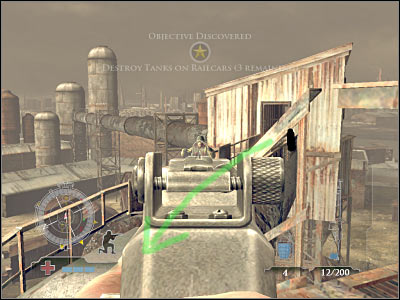
Reaching your target:
Once you've safely landed, IMMEDIATELY choose a crouching stance. You will have to use your default weapon (it should be a machine gun) to kill enemy soldiers. They will appear in front of you. Do this quickly, before they manage to start firing at you. Try and preserve as many health points as possible (at least three). Now you will have to find a good spot to hide from the other sniper. We're going to kill them one by one. Get ready!
The first sniper will be standing inside one of the carriages. He's to the south from your current position. Take a look at the screen if you want to know where to find him. Be careful! A second sniper may also be hiding there, so you should take your time and wait for him to expose his position. Make sure that you're leaning only for a second or two, so you won't suffer any injuries. Otherwise you would probably lose an entire health slot (or more) from a single shot.
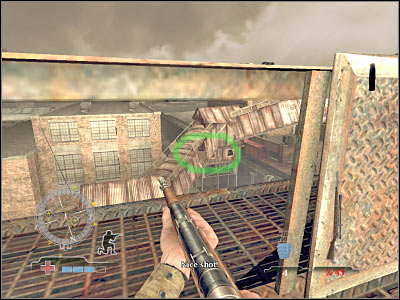
The second sniper is standing on top of one of the northern buildings. Just as before, you will have to lean out quickly in order to take a shot. You can't move to your right, because you would have exposed yourself to another sniper. As for this one, aim for his head.
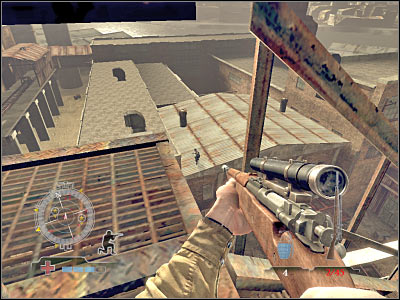
Now you will have to turn left. There are two sniper units there. German soldiers are once again hiding inside one of the carriages. It's to the north-west from your current position. You must be extremely careful here. Lean out for a very short period of time, so the enemy snipers won't be able to kill you. Otherwise you would have lost a large number of health points.
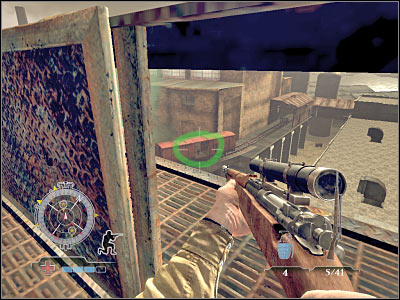
The last sniper is located to the south-east. This is going to be one of the lower carriages. Don't worry if you don't see him at first glance, because he'll be hiding inside the carriage and he'll only expose himself for a short period of time. Once he does that, take your chances. Obviously you will have to shoot him in the head or in the chest.
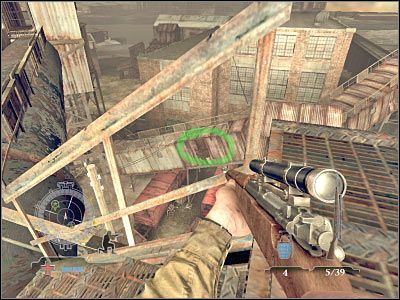
Now you'll finally have a chance to breathe a little, because all nearby snipers have been killed. You may as well stand up. Before we'll proceed any further, you should consider taking care of some other problems. You'll be able to see a lot of the surrounding areas from here and it would be a shame to leave it like that. Start off by trying to locate one of the other snipers. He will be hiding inside one of the lower buildings. Check the screen for his exact location. You would have to wait for him to stand near the window. Don't worry if he doesn't, because we'll take care of him later during the course of this mission.
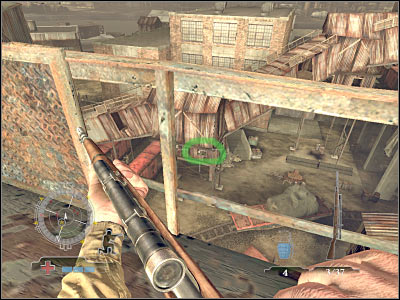
Now you should take a closer look at the area with the tanks. There's a large warehouse there. I'm sure you won't have any problems finding it. As you've probably noticed, enemy soldiers are guarding the entrance and they'll be fighting with some of the allied soldiers. Try taking them out, especially the gunner. The heavy machine gun post is going to be located to your left. I'm sure that you have a lot of bullets in your sniper rifle, so it shouldn't be a problem.
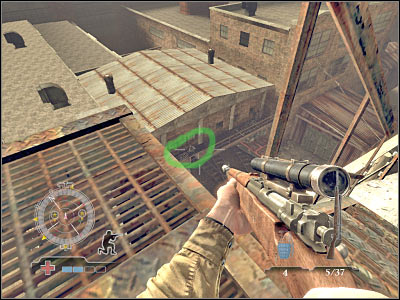
A small group of enemy soldiers will also be hiding inside a second warehouse. Check the screen if you want to know which one it's going to be. Sadly, you won't be able to kill all of them from here, however some of them will probably decide to leave your warehouse and you will have to use this chance to kill them. You could also throw one of the carried grenades there, although it won't be necessary.
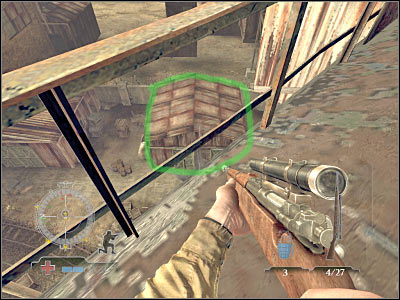
Once you've secured your surroundings, you should finally proceed to a small structure which will be located in front of your current position. That's where you've killed some soldiers before. You will find a ladder here. Use it to reach the ground floor. Be careful here, so you won't fall down, because that would be equal to an instant death.
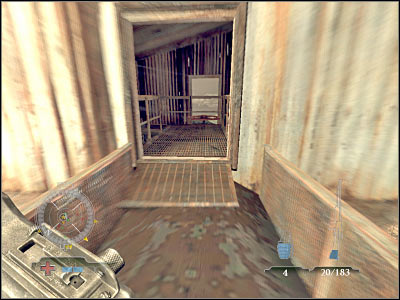
This area is probably guarded by a single sniper. You couldn't kill him before, so you will have to plan your next moves very carefully. I'd strongly recommend going right, so you'll find yourself behind the second warehouse. There are two enemy soldiers here, however it'll be fairly easy to kill them, especially since you'll probably surprise them.
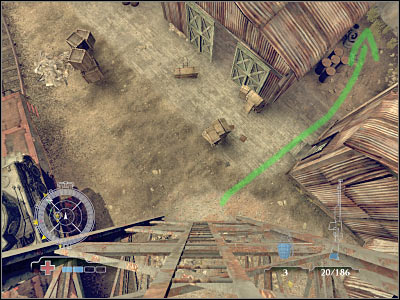
Now you should consider hiding inside the second warehouse. You will probably encounter only a single soldier here. Furthermore, allied soldiers will join you. Now let's take care of the sniper. Take a closer look at the screen, because that's where he should appear. Make sure that you're leaning out and standing behind a good cover. He has to die quickly.
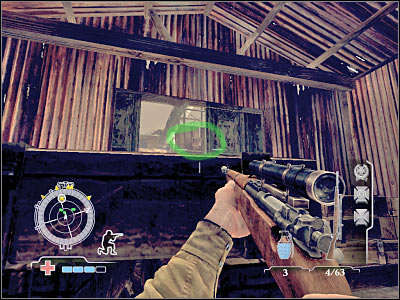
This area should already be secured (only if you have killed all snipers and heavy machine gunners from the upper platform). As a result, you should only be looking at the right building, because that's where you may encounter single enemy units. You may approach your first tank. Use the small ladder. Locate a glowing spot and place an explosive charge there. Go back to the ground floor and wait for the explosion to occur.
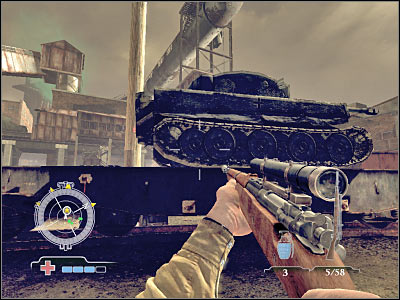
The second tank can be found to your right. It's near the large gate (the one leading to the warehouse). I'm sure that you won't have any major problems finding it. Once again, you will have to use a left ladder to reach it. Place a charge and wait for the second explosion.
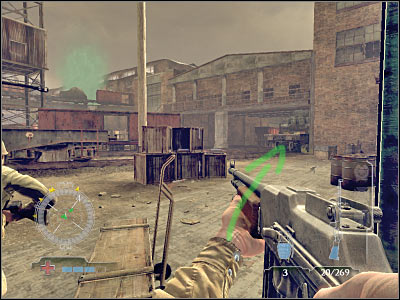
Your final objective can be found to your left. Don't worry, because you shouldn't encounter any hostile units here, including the snipers. Also, your teammates probably took care of all of the remaining enemy soldiers. Use the ladder, place the charge, move back to a safe distance and wait for a cool explosion. This will allow you to finish up with the first main task of this mission.
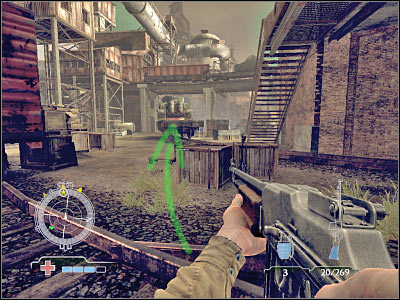
You may have some problems with this particular mission objective. You'll be exploring a large warehouse building for most of the time, so you won't have to worry about encountering any snipers. Instead, you will have to avoid soldiers with better chest armors and heavy machine gun posts. The munitions stockpile will be located in the basement, so you'll have to travel a long way in order to reach it. Thankfully, you will be clear out rooms using various approach methods, so you won't be going in a straight line.
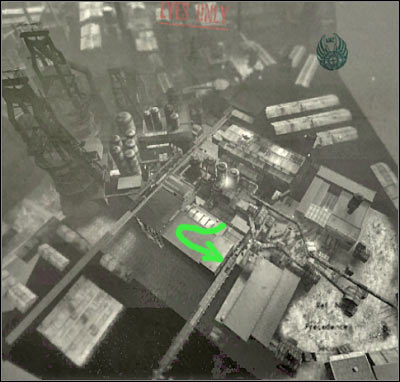
Approach:
The landing site is going to be located in front of this warehouse. Check the screen if you're having some problems finding it. Obviously this is going to be a bonus zone (Skill Drop), however you must land INSIDE the warehouse. As a result, you will have to slow down your approach once you're close enough to the ground. Thankfully, you won't be dealing with any troops at the same time, so you may focus only on receiving a proper bonus.
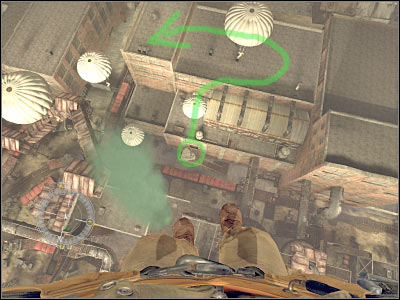
Reaching your target:
Once you've safely landed on the ground, you should consider choosing a machine gun from your inventory. The entrance should already be secured, so you don't have to worry about anyone surprising you from the back. Enter the warehouse and start shooting at the visible enemy units. Make sure that you're not standing in the open, because that would make you an easy target. You will have to kill at least 2-4 German units.
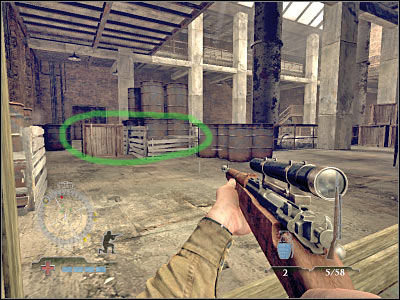
Try securing this section of the warehouse. Once this is done, I suggest that you turn left and explore that area of the warehouse. You'll encounter some additional troops there. Be careful while you're close to the left room, because a small group may be hiding there. It would be a good idea to kill them right away.
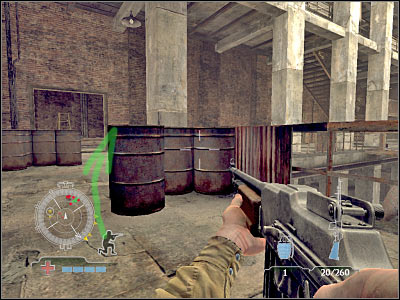
In order to secure this passage, you will have to wait for enemy troops to get here. You could also wait for reinforcements to show up. Make sure that you're using a machine gun during these fights. You can also throw a couple of grenades at enemy soldiers, however I would recommend saving them for later.
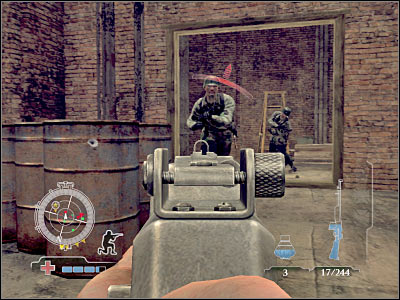
Now you will have to turn right. Hide behind one of the nearby barrels. There's a large staircase in front of you. Don't go there. Instead, try securing it. You will have to kill all of the remaining enemy soldiers. Use the sniper rifle if you're having problems killing them. You should be able to take full control over this floor very soon. Go back to the entrance and turn left. There's a second corridor here. You haven't checked it before. Now's your chance.
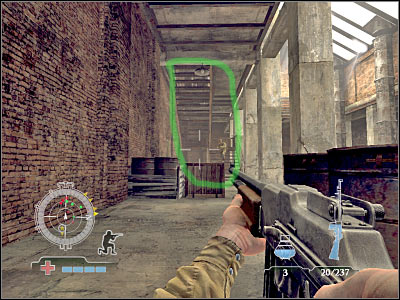
Keep heading forward. There's only one passageway here, so you really can't get lost. You should be able to reach the stairs. The munitions stockpile is in the basement, so you will have to get down to the lower floor. You could also try and neutralize the heavy machine gun post from here, however it won't be necessary.
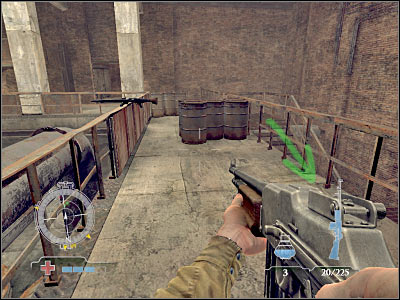
Once you've reached the lower level, you should immediately turn right. Make a few steps forward. Find a good cover. Remember that you can't stay in the open for too long. Thankfully, there are a lot of pillars, barrels and other useful objects here. Start using your compass in order to track down enemy troops. I'd recommend choosing a machine gun from your inventory, however you should consider choosing shorter bursts, mostly because enemy units will be disoriented and you won't have to worry about them attacking you right away.
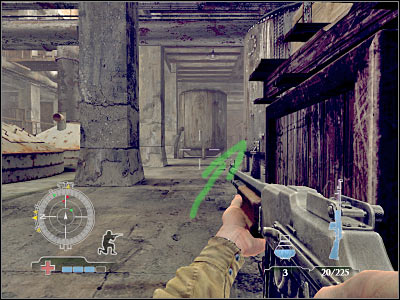
You will have to start moving east, because that's where you'll find a safe route to your current destination. Keep hiding behind pillars. Kill everyone who stands in your way, especially since you'll be playing with a small group of other soldiers and it's good to keep them alive as long as possible. You should also be getting closer to the heavy machine gun post. You can throw a couple of grenades it or lean out in order to take out the gunner. You can also leave it and take care of this problem a little bit later.
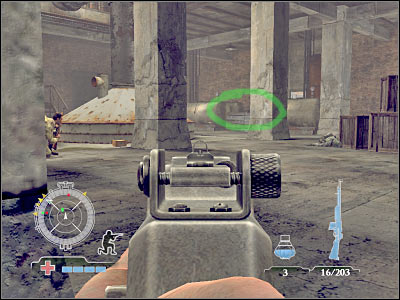
Keep heading towards your goal area. You will have to kill at least 8-10 soldiers in the warehouse. Thankfully, you will find plenty of ammunition along the way. You should be getting closer to a small opening (screen). The heavy machine gun post is to your left. Neutralize it if you haven't done this before. Head on to the elevator shaft. You'll find a ladder here. Use it to reach the lower level of the structure. Don't worry by the fact that you won't be able to return to the surface. We'll find a second exit very soon.
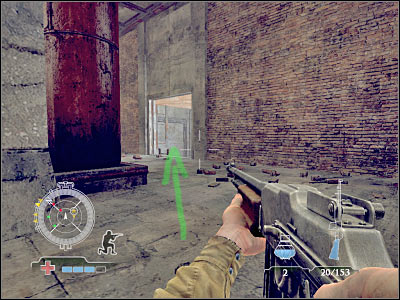
The first group of enemy soldiers is standing just around the corner. Despite what you might think, you won't have to worry about your surroundings and premature explosions. You will also be dealing with smaller groups of enemy soldiers, so you shouldn't have any problems pushing forward.
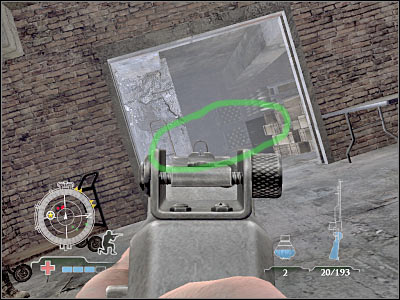
Keep moving towards the stockpile. Remember that you won't have to be in a lot of hurry. Take your time and choose your targets carefully. You should also be using nearby objects for cover. Also, remember that you will be able to see enemy troops on your compass. You will have to secure the entire first room. Now you will have to turn left. You will notice a small entrance here.
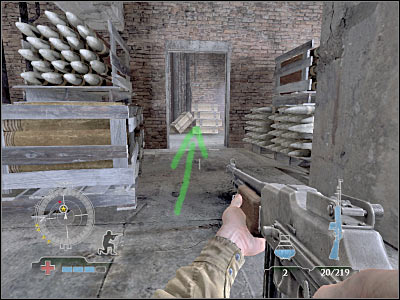
This room is probably guarded by one of the enemy soldiers. You must kill him quickly, before he starts firing at you. Once this is done, step up to a designated area. Place the charge on the munitions stockpile.
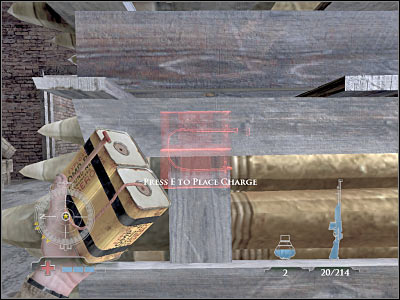
Once you've set the charge, you will have to start running towards the LEFT corridor. Next, use the stairs. You must do this quickly. Don't worry about smaller explosions. Also, the upper door is going to be opened once you're close enough to it. Exit the warehouse and witness a huge explosion. This is it for this particular objective. I'd recommend choosing a new jump.

This objective will require you to land in a very difficult spot (that is, if you want to receive another Skill Drop bonus). As a result, you will have to be very quick in eliminating two snipers. After that, it's going to get a lot easier, especially since you'll be able to take a shortcut to the first pressure valve.
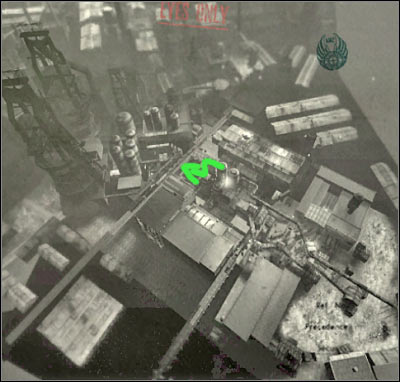
Approach:
I would recommend that you choose the middle tank for your landing zone. Sadly, one of the nearby tanks is going to be occupied by an enemy sniper. As a result, you won't be allowed to slow down your approach. As for the landing, you will have to go at least for the flared one. You could also try landing somewhere else, however you wouldn't receive a Skill Drop bonus. The decision is up to you and even if you land somewhere else, you should consider getting closer to all four tanks.
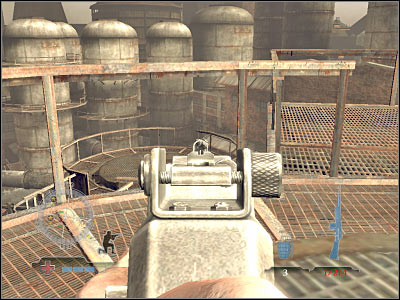
Reaching your target:
Like I've said before, you will have to score a perfect landing here. This is very important, because you'll have to kill an enemy sniper right away. If you can't use your weapon right away, try dodging his attacks. Once he's gone, you'll have some time to cool down, however you should know that the area is not safe.
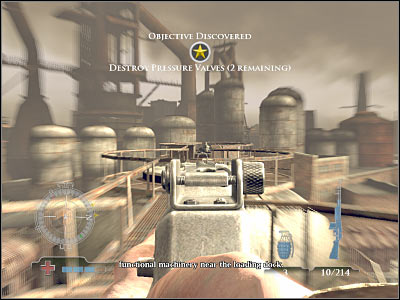
Start off by going towards the nearby tank (the same one that was being guarded by a killed sniper). You shouldn't be standing here. Keep a crouching stance until you've dealt with this new problem. There's a second sniper in this area. He is standing to the west from your current position. You may consider using a machine gun against him, especially since there's going to be a small distance separating you from each other. Once he's gone, check the area for other snipers. They should already be dead, but I'd still recommend that you make sure no one can harm you.
There are many different routes leading to your current destination. I would recommend that you choose a large pipe which should be located on your left. You will have to jump over a small barrier, although it's not a problem. Head on to the first pressure valve. You've got two choices here. You can either throw a grenade inside (there's a small hole in the roof) or try and attack German soldiers with your gun.
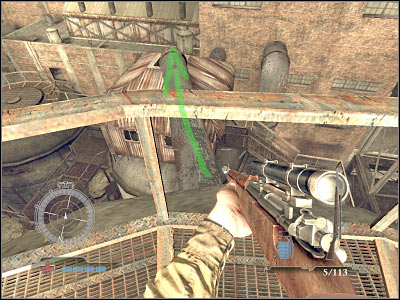
This room will be occupied by two or three soldiers. If you decide to land near them, you would have to kill them almost instantly. Additionally, make sure that no one from the lower platforms starts firing at you. We'll deal with these problems later. Now you will have to make sure that this small room has been secured.
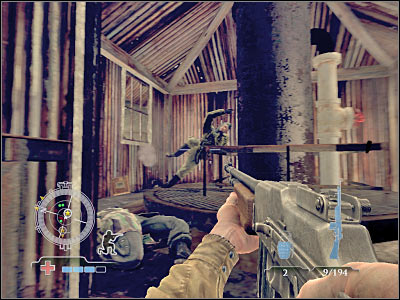
Once you've killed all enemy soldiers, you will have to locate the pressure valve. Place an explosive charge on it. You won't have to exit the room. You may as well be standing in one of the corners, because you won't receive any injuries from the explosion. Now for the hard part - reaching the second pressure valve.
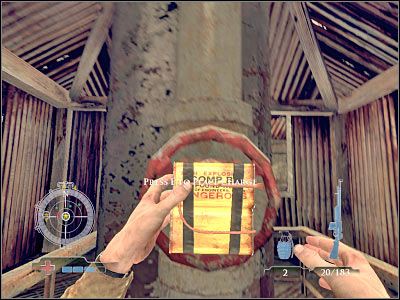
Exit the building and locate a large staircase which leads to the lower level. You will have to kill at least 2-4 enemy soldiers from here. I wouldn't recommend using any grenades, because there's a high probability that it will bounce off and land somewhere else. Once you've killed all German soldiers, start running towards the lower platform. Turn left and hide behind some of the nearby crates. Turn around, so you'll be facing your current target area.
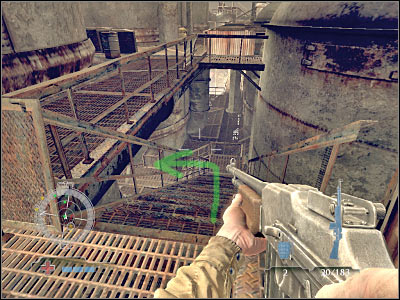
Enemy soldiers will be standing to the south-west from your current position. I wouldn't recommend leaving this cover area just yet. Try eliminating all of them from here. You can use a sniper rifle during these fights, especially since the German soldiers will try to kill your allies instead of your main characters. Watch out for grenades!
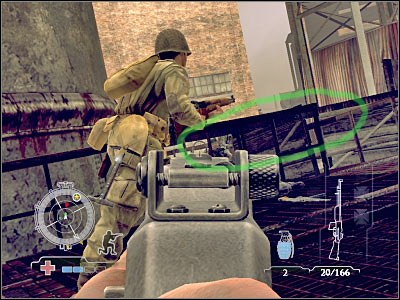
When you're certain that the area has been secured, start moving towards your target. Check the screen if you're having some difficulties finding it. You should also be on a look out for more ammunition. You will have to use a wooden ledge to get to the second pressure valve. Once you're inside, turn around quickly. You will have to deal with reinforcements.
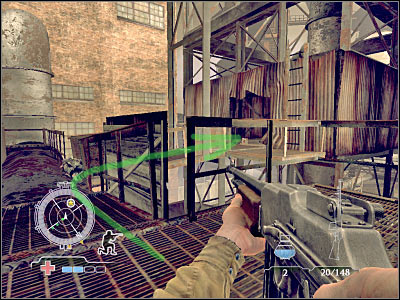
Enemy soldiers will probably appear somewhere near the stairs. You've used them before, so you shouldn't have any major problems finding them. Sadly, you will have to kill most of them in order to be able to proceed with the final part of this task. Eliminate them from a larger distance. Obviously you should be leaning out. Your objective will be to repel few waves of enemy attacks. You could also try and proceed with the mission earlier. You would have to wait for the situation to calm down a little. Nevertheless, I wouldn't recommend going to the valve too early.
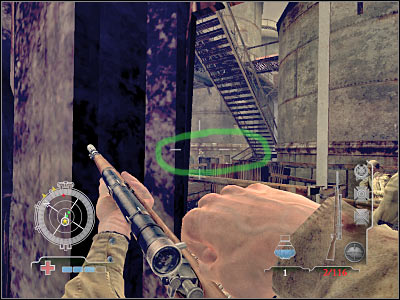
Your final goal here will be to place an explosive charge on the second pressure valve which is located near the entrance. Killing enemy soldiers was very important, because you would have been exposed to enemy fire while trying to set the charge. You won't have to leave this room. Just make sure that you're standing in a corner.
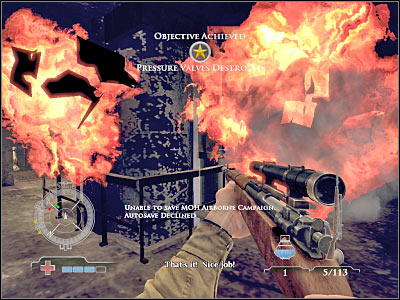
There's nothing you should be worried about here. Reaching the factory is going to be quite simple, especially since you've already killed most of the enemy snipers. Also, you will be starting on one of the upper balconies, so you won't have to worry about encountering any enemy units. As for the factory building, you will receive assistance from allied soldiers. They will be quite useful during these fights, so you shouldn't go in alone.
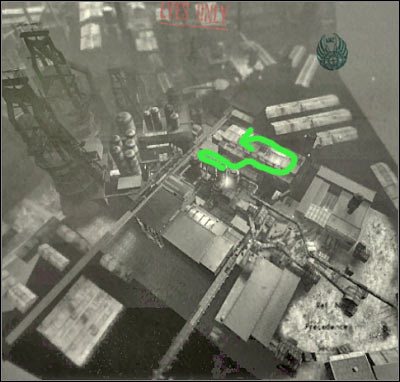
Approach:
I would recommend landing in the exact same spot as before. It's going to be the middle tank. You could also try and land somewhere closer to the factory, however it won't be necessary. Either way, you won't encounter any hostile units in the area, so you may focus only on a good landing.
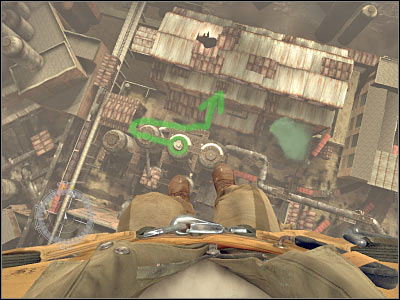
Reaching your target:
Start off by going towards the western fuel tank. It should be located to your left. Now we'll have to perform a very unusual action. Try moving ever further to the west. You should notice several small platforms here. You will have to use the jump button to get to them. It's going to be very easy, however make sure that you don't jump too far. You won't be attacked by anyone here, so you may focus only on performing good jumps.
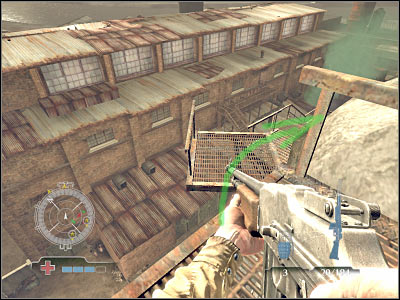
Now you will have to use stairs and other platforms to get closer to the main entrance which leads directly to the factory. Check the screen if you're having some problems finding the entrance. It's going to be extremely easy to get there. Once again, you won't have to worry about enemy troops, so you may speed up a little.

You should end up standing on platform which leads to the factory. You should go there right away, however you could also start shooting at some of the visible enemy soldiers. This isn't going to be necessary, however you would have some serious tactical advantage over your opponents. Nevertheless, it would be wiser to ignore them. The only exceptions are if you want to improve your overall standings or if you plan on upgrading one of your guns. Head on to the main entrance.
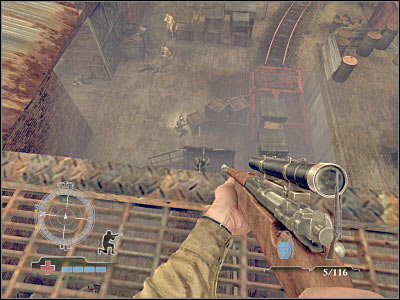
Once you're inside, you should take your time and look around a bit. The control room will be located to your left (screen). That's where you'll have to go. Sadly, you will have to choose a longer path, because the left platform is destroyed and you wouldn't be able to jump there either. Choose a machine gun from your inventory and go right.
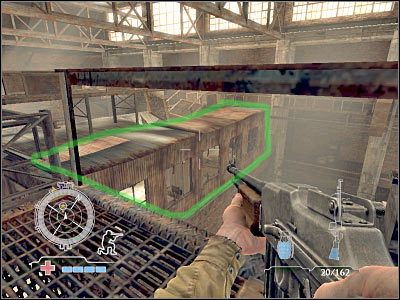
Keep moving forward. There's only one passageway here, so you can't get lost. As you've probably noticed, allied units will join you. Once you're close enough to enemy troops, hide behind a good cover and start shooting at them. Enemy soldiers will appear in front of you, so you won't have to worry about being surprised by someone.
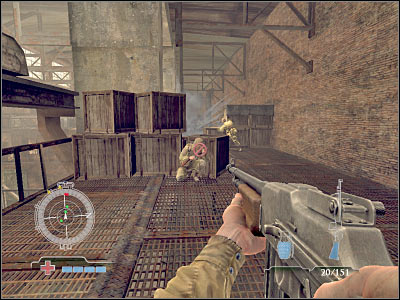
You have to keep moving towards your current target. Eliminate everyone who decides to stand in your way. It shouldn't be too difficult, especially since enemy troops won't use any grenades to kill you. Like I've said before, you should consider using a machine gun, especially since you'll be taking out most of your opponents from a smaller distance.
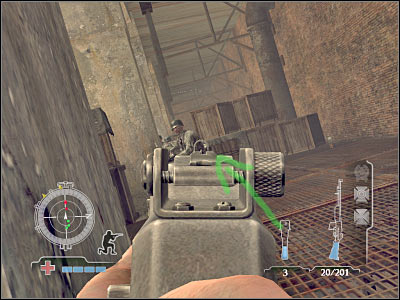
Once you've reached the far side of this platform, you will have to turn left. There's a new platform here (screen). Go there now. You'll be moving towards the control room. The only difference is that you're on the correct side of the platform, so you will be able to proceed with this mission objective.
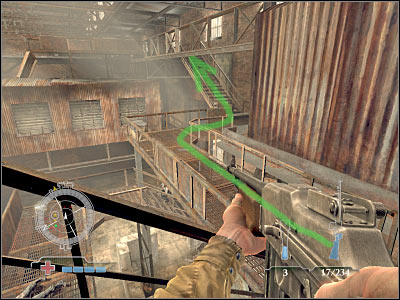
Once you've reached a destroyed section of the platform, turn left (screen). This will allow you to reach the roof area for the control station. There's a large hole where. Get closer to it. You have to be very careful here. You're very close to your target, but you must also remember that it's going to be well defended.
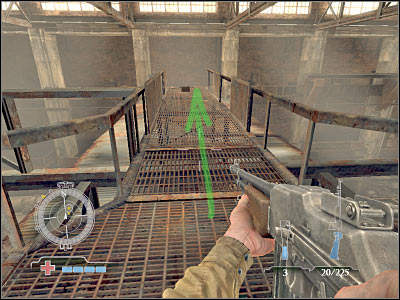
I guess you know what has to be done here. Start off by throwing a couple of grenades inside. You could also try standing near the hole and killing everyone who decides to attack you. Enemy soldiers won't respond to most of your attacks, so it's a good thing. Once they're gone, check the compass to see if the area is clear. Use the hole to enter this new room. Don't go to the control panel just yet. Make sure that no one is heading your way.
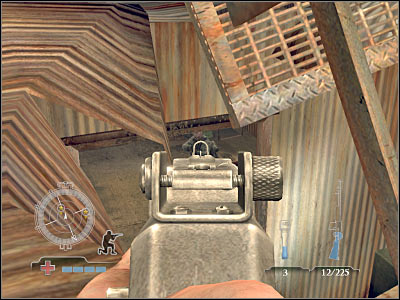
There's a safe here. Unless you want to collect a revolver you might as well ignore it. Head on to the second room. The control panel is on your left. One successful shot is more than enough to destroy it. Don't exit the game just yet, because we'll take care of a new objective at the same time.
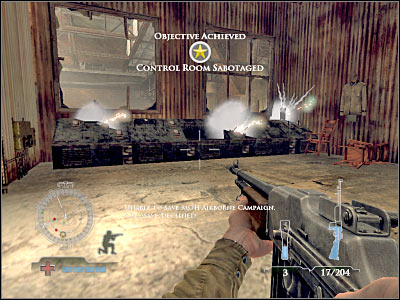
The railgun is inside the same warehouse as the control panel and it's going to take you only a few seconds to reach it, so I think that you don't need a map here. Follow my instructions and you should be just fine.
Reaching your target:
You should be standing inside the control room, near a destroyed panel. Go back to the previous room and head on to the northern exit. The area should already be secured, however you could also try leaning out. Turn left and use the stairs to get down to a lower platform. The railgun is on your left. You could use a second set of stairs, however I would recommend jumping over the barrier.
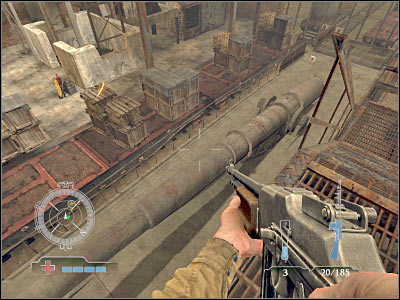
You will have to approach the railgun from the western side, because that's where you'll find a well known glowing icon. Go there now. Press the action key, so you'll be able to place an explosive charge on the railgun. Move back and wait for an explosion to occur.
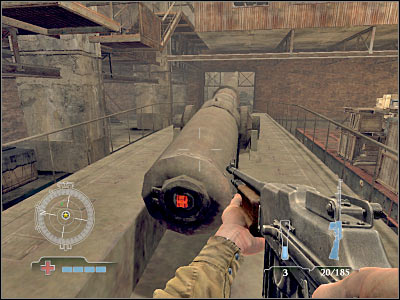
This is going to be a fairly short part of this mission, especially if you won't directly on the ground. You will have a much better view from some of the upper platforms and you will be able to kill most of the enemy soldiers from there. You may only have some minor problems finding all German units, because otherwise you wouldn't be able to enter the rail yard area.
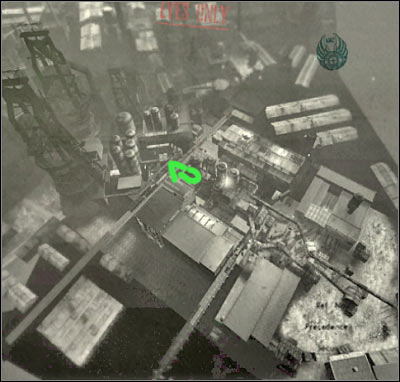
Approach:
I would recommend landing in a neutral zone. Check the screen for a better view of the situation. You should choose this structure, because you'll have a great view at the entrance to the rail yard. You will also be able to kill a lot of soldiers from there, without risking anything, because enemy soldiers won't be able to respond to your attacks.
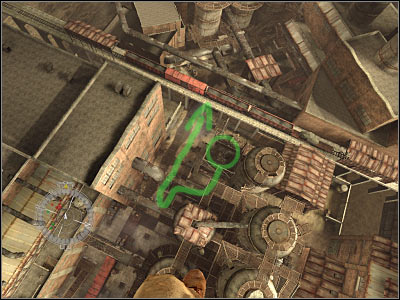
Reaching your target:
Once you've safely landed, head on to the north-east. Try killing at least 3-5 enemy soldiers from here. Start off with the ones guarding the entrance. Like I've said before, you should be safe here, so you may focus all of your attention on choosing targets. Use the sniper rifle to kill German soldiers.
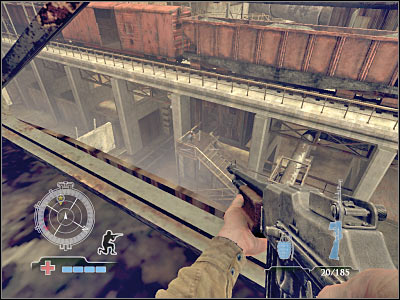
Once you've killed all visible enemy troops, turn left. You will probably see a second group here. The easiest way to get rid of them would be to use one of the carried grenades, however you would have to make sure that it lands exactly where you planned. Once this is done, use a nearby ladder in order to reach one of the lower platforms.
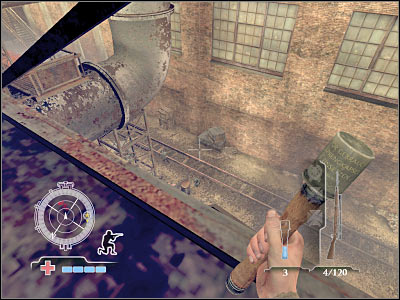
Turn right and start moving towards a large staircase. More enemy units will appear beneath you current position. It would be a good idea to kill them from here. Try leaning out for a better view of the surroundings. Be careful, though. You may be spotted here, so take your time and choose your targets carefully. Also, hide after each shot, so you won't have to worry about any counterattacks.
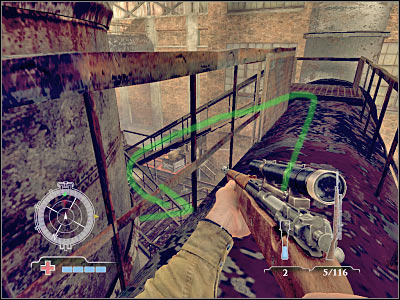
If you had followed my instructions, you should be able to kill all enemy units. Use the stairs to get down to the ground floor. Turn around, so you'll be facing the entrance to the rail yard. You'll probably have to deal with a few additional enemy units. Try exploring an area to your right (screen). Remember that you can use your compass to locate enemy troops. You will have to secure this entire section of the map.
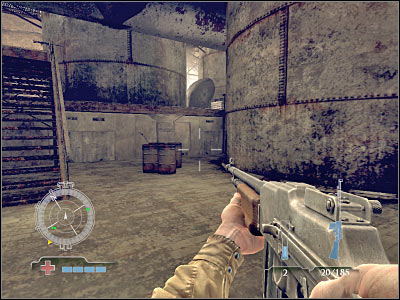
Once you've killed all enemy soldiers, you will have to start moving towards a large gate. The game will let you inside the rail yard only if you had managed to kill all enemy units in this area. Otherwise you would have to hunt them down and kill them. Once you've entered the rail yard, you will have to watch a very interesting cut scene. You'll also receive some new orders.
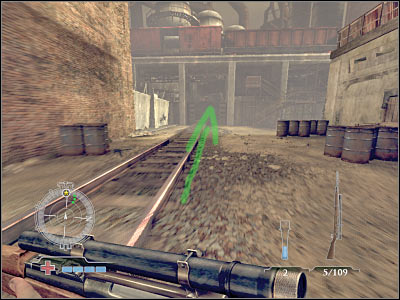
I guess you may have some serious problems here, because fulfilling these two mission objectives won't be easy. You will start the game in a very bad spot. As a result, you will have to deal with a very large number of enemy troops. Additionally, few of the enemy soldiers will be equipped with MG-42 guns (!) and very powerful armors, so it's going to be extremely difficult to kill them. I would recommend that you secure this entire area before proceeding with the main part of this mission. It's going to take you at least 10-15 minutes, but remember that you won't have to be in a lot of hurry.
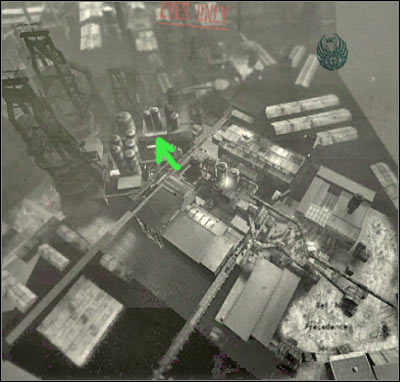
Reaching your target:
Like I've said before, you will begin your game in a very bad spot (and I mean BAD :-)). If you had decided to stay here, not only you would have to deal with one of the armored soldiers, but you would also be attacked from two different sides, so you would have nowhere to hide. As a result, you must leave this area as soon as possible. You can try running to your left or right. I would recommend going right. Start off by hiding behind a large pillar (screen) or even further away from the train.
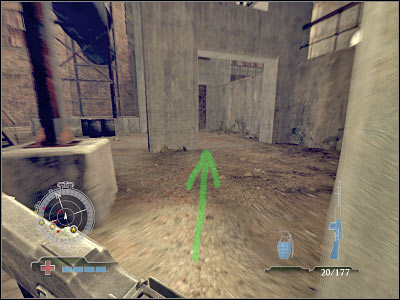
Before a guy with the armor arrives here, try leaning out and killing a few of the standard enemy units. I would recommend choosing longer bursts, instead of single shots. You won't have to worry about ammo supplies. Use your compass frequently, so no one manages to surprise you. Try killing at least 3-4 enemy soldiers from here.
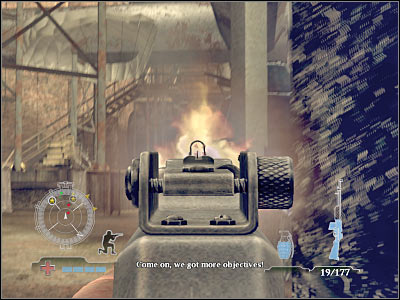
Now you will have to wait for an armored soldier to get here. You can try and start off by throwing a couple of grenades at him. Sadly, it won't do you any good, because he's on a constant move. Instead, try leaning out. Once again, you will have to choose longer bursts, so he won't be able to respond to your attacks. Make sure that you aren't exposed for too long. You will probably have to attack him several times before you'll be able to kill him. I wouldn't recommend using a sniper rifle against him, because it's going to be useless.
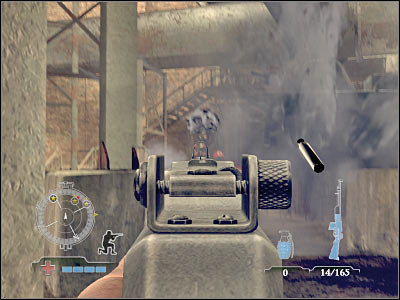
You've got several choices here. The easiest way would be to head on towards the carriages. You will have to stay away from open areas, so you won't become an easy target. If you're low on ammunition, check the crates on your left. They're located near the entrance to the rail yard (screen). You will be able to rearm yourself and you'll also find some medkits there.
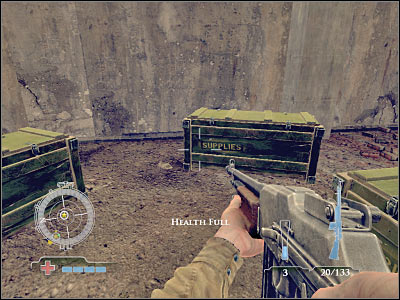
I would recommend that you try and go to a higher ground. You should be able to find a staircase near the first killed armored unit. This isn't necessary, however this area has already been secured, so you won't have any problems reaching the upper platform.
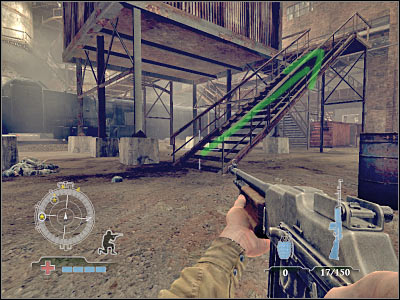
You should be able to reach a very interesting spot here (screen). I would recommend staying here for much longer, because you will be protected from three different sites by wooden boards. Additionally, you will find a MG-42 site here. The only problem is the right staircase. You will have to guard it, because a lot of enemy units will appear there. Try killing them as soon as possible.
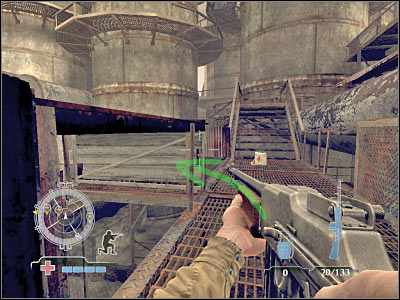
Don't forget about the second armored unit. He will also be guarding this area and your task is to kill him. You shouldn't change anything about your approach. Start off with a few grenades in order to weaken him and then use the machine gun or the MG-42 to kill him. Use the fact that he's very slow, so you can change your covers often.
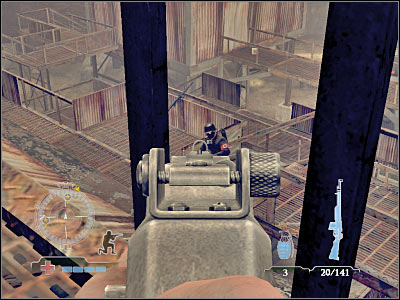
Now you will have to deal with some difficult fights. Go back to the wooden boards. If you position yourself correctly, you should be able to kill some additional enemy troops. They will appear to the west from your current position. Additionally, new enemy troops will arrive on the lower balcony (screen). They won't engage you, but you should engage them.
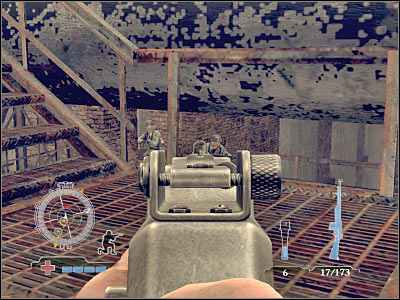
Once you've secured this section of the rail yard, you should proceed to the lower balcony, so you'll have a great view at the northern section of the map. You will also find a lot of good cover areas here. Use them to your advantage. Additionally, make sure that you're using your compass, so no one manages to surprise you.
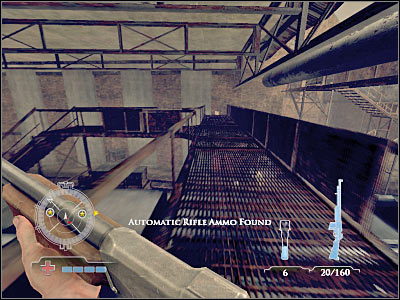
One of the enemy snipers will be hiding to the north-west from your current position. It's very difficult to locate him, so make sure that you've taken a look at the screen. He has to die quickly. Otherwise you wouldn't be able to proceed with your objectives, especially since one of the carriages is located near his position.
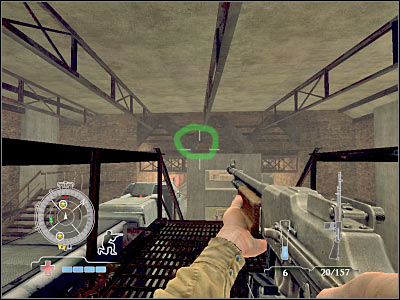
Like I've said before, you will have to kill all enemy soldiers. Thankfully, allied units will provide a much needed help during these fights. They should arrive here automatically, so you won't have to ask them for help or anything. Now let's get down to the business. Jump over a small barricade and start moving towards your first mission objective (screen). You will have to place an explosive charge in a glowing spot. Jump down and move back to a safe distance. Wait for the explosion to occur.
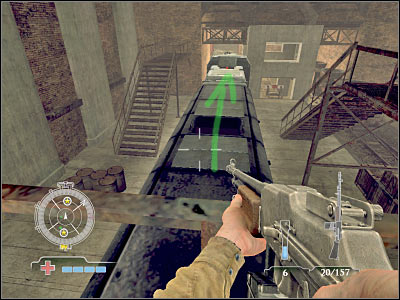
The second carriage can be found near the starting area. That's where you've neutralized one of the armored soldiers. Once again, you should consider jumping over to the train from a higher platform. You will come across a locomotive along the way, however ignore it for the time being. Place an explosive charge and move back, so you won't receive any injuries.

You won't have ANY problems here, especially since this entire area has already been secured.
Reaching your target:
Once again, you should consider using one of the upper balconies in order to reach the locomotive. Ignore of your team members, because you won't have to use any grenades to destroy Panzerzug engine. Instead, place a third explosive charge on the train. Head on to a safe location. Once the explosion has occurred, you will complete this mission.
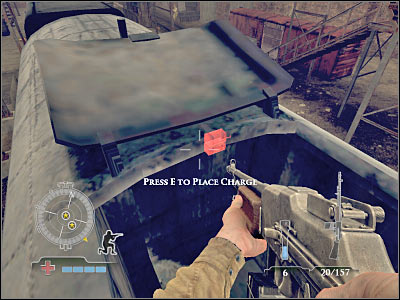
Main mission objectives:
1) Destroy Artillery Guns - 1 on the map.
2) Destroy AA Guns - 2 on the map.
3) Eliminate Enemies on Halftracks - 3 on the map.
4) Disable Ammunition Lift Controls.
5) Disable Ammunition Lift Controls #2.
6) Assemble at Main Control Room. You will have to fulfill objectives 1, 2, 3, 4 and 5 in order to unlock this mission goal.
7) Assemble with Engineers in Ammunition Storage. You will have to fulfill the sixth objective in order to unlock this mission goal.
8) Escape Flak Tower. You will have to fulfill the seventh objective in order to unlock this mission goal.
9) Destroy Flak Tower. You will have to fulfill the eighth objective in order to unlock this mission goal.
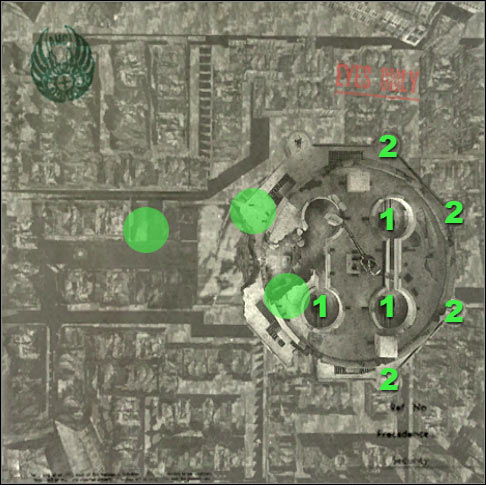
You shouldn't have any major problems with this first objective. Your task here will be to place explosive charges on three different artillery guns. They're located on top of the flak tower, so you won't have to go inside to find them. You will encounter a few soldiers along the way, however they won't be too difficult too kill. Additionally, you won't have to worry about any snipers.
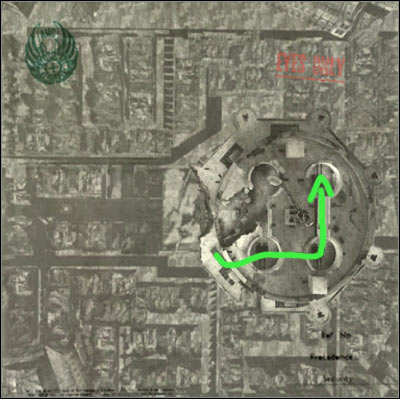
Approach:
You won't be attacked by anyone while you're still in the air, so you will have an opportunity to score a more precise landing. Your objective will be to land inside a very small entrance. Take a closer look at the screen if you're having some problems finding it (it's located near one of the artillery guns). Remember that you will receive a bonus (Skill Drop) only if you land INSIDE the tower. It's going to be tricky, so try slowing down before you touch the ground. Thankfully, this area won't be guarded by anyone.
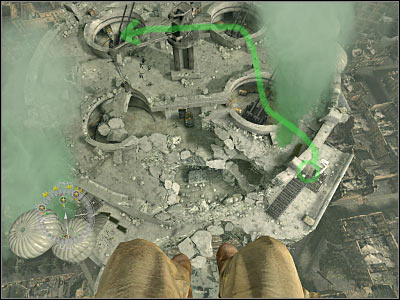
Reaching your target:
As you've probably noticed by now, you're standing very close to your first target. You will be able to find an artillery gun just around the corner. Lean out carefully and start shooting at the enemy soldiers. There's going to be only a few of them here, so there's nothing you should be worried about. They will also play very passively, so you won't encounter any dangerous situations. Use the sniper rifle if you don't want to enter this area right away.
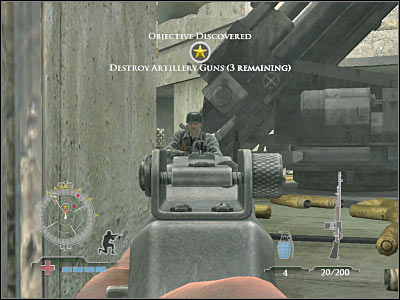
You shouldn't have to spend here more than 40-50 seconds, especially since you'll be able to use your compass to locate enemy troops. Nevertheless, make sure that you leave no one behind. Head on to the artillery gun. Locate a glowing area and place an explosive charge there. Move back and wait for an explosion to occur.
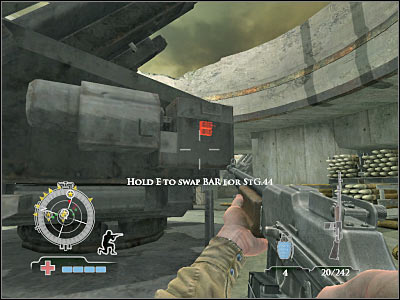
The second artillery gun will be located to the east. You won't have to go back anywhere to reach it, because there's a small corridor leading to it. Hide behind one of the nearby walls. Try and take out at least a few enemy soldiers from here. Once they're gone, move closer and deal with the remaining enemy units. Some of the enemy soldiers may be hiding to your left. Make sure that they don't surprise you.
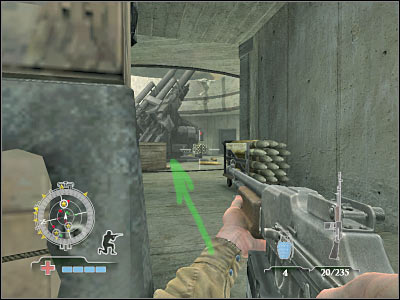
Now you will have to blow up this second gun, but I'm sure that you've figured this out on your own. Once you've set the charge, move back to a safe distance. The final artillery gun can be found to the north. Once again, you will have to choose a small corridor (screen) in order to reach it. Take out all enemy soldiers. You should consider shooting at them from a larger distance. Place the charge and destroy the gun. It will allow you to fulfill this mission objective.
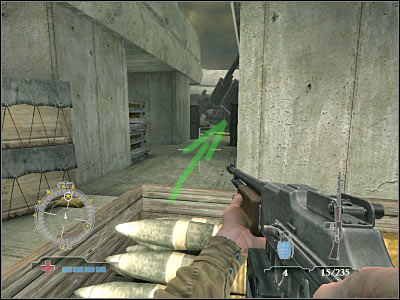
This whole part of the mission will take place inside the flak tower, so I don't think you need a map here, because it wouldn't do you any good. As for the task, you will have to take part in some very difficult fights. You'll encounter a lot of armored soldiers and German officers. You will also have to avoid a soldier equipped with a rocket launcher. He's very hard to spot, so you must be extremely careful in order to survive. Additionally, enemy soldiers will use a lot of grenades to kill you. Avoid them at all costs.
Approach:
You will have to choose between two different landing zones. I've decided to proceed with the safer landing, however you will have to kill a lot of soldiers to reach your target area. Alternatively you could try and land in a very difficult spot, but it would be a lot easier to reach your goal from there. Check the final description for this task if you want to find out more about this second route. As for the landing, you will have to choose a very small ledge (screen). You should consider increasing your speed, because you are going to be attacked by two snipers. You won't have to worry about them, although make sure that you don't receive too many hits.
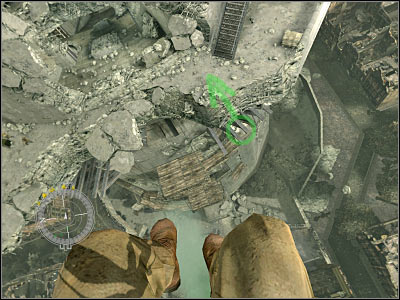
Reaching your target:
Once you've safely landed, you may consider killing both snipers. The first one will be located beneath your current position (screen). If you want to kill the second one as well, you would have to be standing at the other end of this ledge. It's not necessary, though, especially since they will reappear on the map once you've made a next jump. You won't have to use any ladders here. Just make sure that you've returned to the landing site.
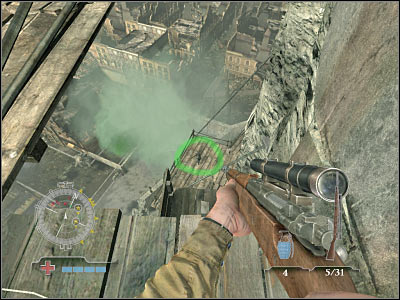
You should be able to locate a large entrance here. Head on to the flak tower. Start off by moving forward. There are some medkits on your left. You will be able to go back for them if you had suffered some injuries later during the course of the game. You will also be able to wait for allied soldiers to show up, however they will assist you only in a small way. The success of this mission depends entirely on your actions.
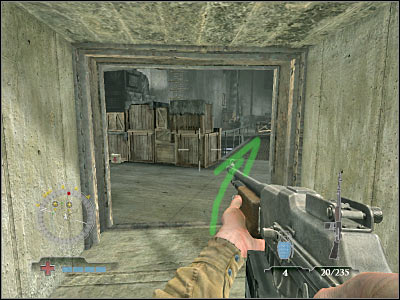
Start off by heading towards the other end of this small bridge. It shouldn't be too difficult, especially since you'll only encounter a few soldiers along the way. You will have to get ready for other fights, though. Make sure that you have good weapons with a lot of ammo.
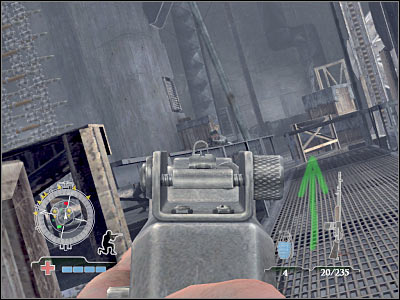
There's a large elevator to your left which is being used to transport ammunition. You will have to go around it. It's not that easy as it sounds. You are going to be attacked by soldiers with better armors and more powerful guns. Make sure that you're using cover to avoid them. You will also have to watch out for grenades, especially since enemy soldiers will be using them all the time.
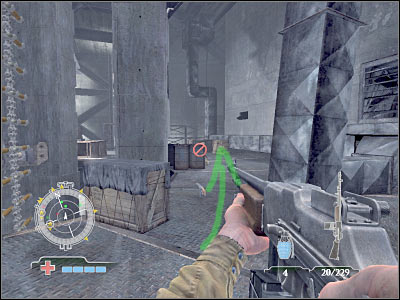
Before you decide to proceed any further, you will have to turn left. Try locating a small balcony. There's a guy with a rocket launcher there and you must kill him as soon as possible. Use the sniper rifle here. I would recommend aiming at his legs or hands. It's very important that he doesn't fight back, because he could have killed you easily. Make sure that he's dead before proceeding to your target.
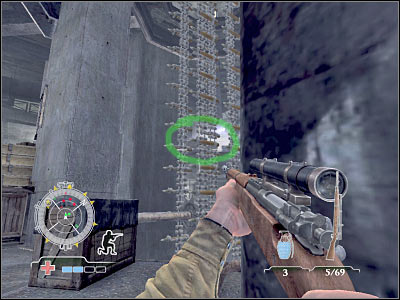
Keep pushing forward. You will have to kill a lot of well equipped soldiers here. They'll also be organized, so make sure to check your compass from time to time. Choose longer bursts, instead of single shots. You should also be using grenades, especially if you have to take out larger groups of enemy units. You will have to get closer to the stairs (screen).
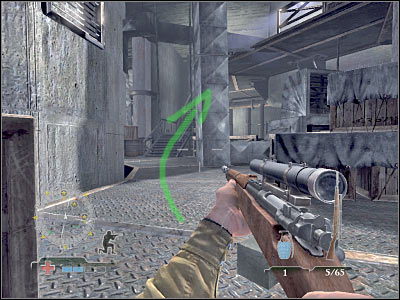
Enemy soldiers are currently occupying the upper floor, however you won't be able to see them from here. I would recommend that you take a risk and use the stairs right away. Start running towards the upper level. Once you're there, hide behind some of the nearby crates (screen). Sadly, you won't be able to stay here forever, because you would have to dodge a lot of grenades and direct assaults.
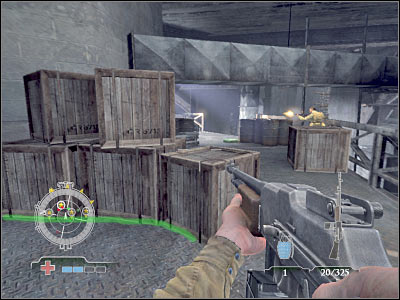
We'll try playing more aggressively here. Start off by eliminating everyone who's heading your way. You won't have to preserve your ammunition, because you will be able to rearm yourself very soon. Don't allow enemy soldiers to throw too many grenades. You will also have to watch out for your teammates, so you won't accidentially kill them.
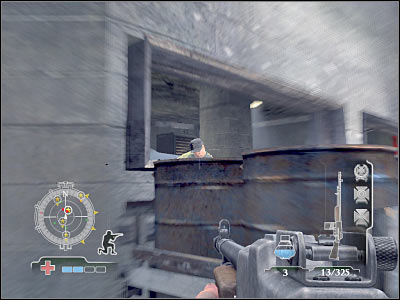
The control room is going to be located to your left. You can't enter it right away, however you should consider throwing a couple of grenades inside. This won't result in killing all of your opponents, but you'll at least have some time to plan your next moves. Start moving forward, because that's the only way to reach your goal area.
You will have to make sure that no one has survived your attacks. Otherwise you would have to lean out a few more times while standing near the entrance. Go ahead and enter this new room. You will have to destroy a control panel (screen) by shooting at it. Don't worry about the electricity, because you'll perfectly safe here.
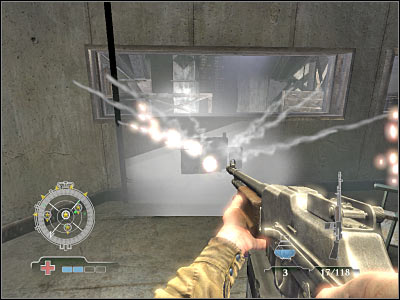
I've also promised that I will you show you an alternative route to the control room. As a result, you will have to reach an extremely difficult landing area. You will have to find yourself looking at the south-western part of the flak tower. There's a very small window here and that's your objective. You will have to fit inside in order to reach a new route. It's very difficult, especially if you haven't practiced precise landings before. Additionally, you are going to be spotted by two enemy snipers (at the same time) and you're going to be helpless against their attacks.
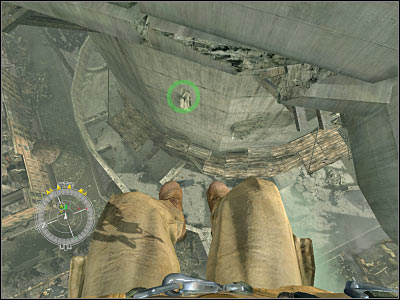
If you manage to land inside the flak tower, you will find yourself far away from all danger zones. You won't encounter any soldiers here, so you won't have to be extremely careful. Once you've reached a junction, choose one of the available corridors. They both lead to the same place, so it doesn't really matter which one it's going to be. You will reach one of the upper balconies. You could and try to kill a few soldiers from here, however I would recommend that you don't attract too much attention.
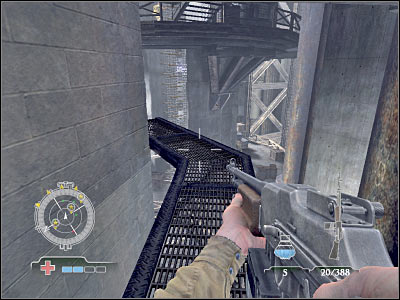
Enter a new room. Once again, you don't have to worry about any guards. You will find A LOT of crates here, containing ammunition and medical supplies. You will also be able to pick up some new weapons, including Recoiless Fire and the M18. If you want to stick with your original choice of guns, proceed to a nearby ladder.
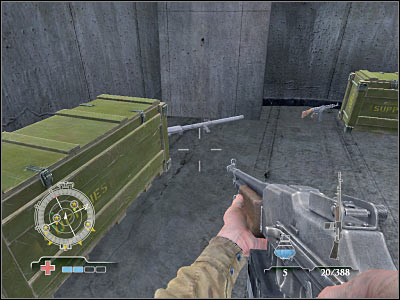
The ladder will allow you to get to the upper level. Once this is done, you will have to go to the second ladder. It leads directly to the control room, so you will have to plan your next moves very carefully. You shouldn't climb up right away. Instead, try throwing a couple of grenades inside. The choice is up to you. If you want to risk your life then make sure that you're carrying a machine gun. You shouldn't have any problems finding the control panel. You will only have to watch out for a guy with a rocket launcher. Now you've got two choices. You can either try and continue with the second part of the mission or prepare for a new jump.
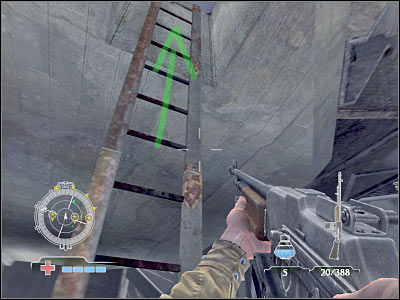
I've already said before that you will have an opportunity to continue your progress without having to make a second jump. If you decide to stay inside the tower, you would have to go to the previously explored landing site. Choosing a new jump would require you to land in the exact same spot as before (near two snipers). As for the objective, you will take part in some difficult fights. You will come across at least two armored soldiers and you will also have to deal with a large number of German officers. Thankfully, you will receive a much needed assistance from the rest of the team.
Reaching your target:
Despite your choice for the approach, you will have to reach a well known staircase (screen). It's near the place where you fought a guy with the rocket launcher. If you decide to make a new jump, you will have to land on a wooden ledge and make a few steps forward. The staircase will be located to your left (near the medkits). Use it to reach the lower level.
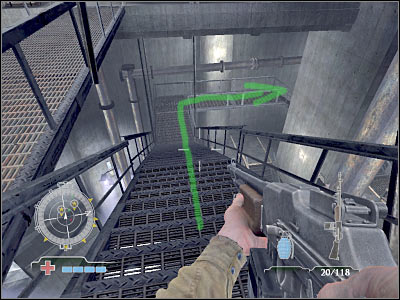
Start heading forward. You shouldn't make any unnecessary stops here, because this area is being patrolled by one of the armored units. You could try fighting with this guy right away, however it would be better to surprise him. Once you've reached this new level, hide behind one of the available covers (screen). Make sure that you don't lose too much health here.
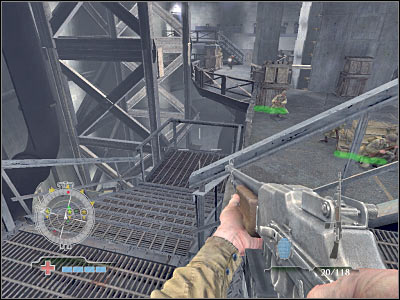
Try focusing your attention only on the standard soldiers. This is very important because they're heading your way and you can't let them get too close. They will appear to your right, so it's going to be to the south-west from your current position. You won't have to preserve your ammo here. As for the grenades, it would be wise to save them for later.
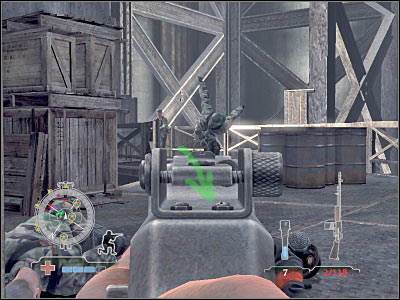
Once you've successfully defended your position against enemy attacks, turn right and start moving forward. This will allow you to surprise the armored soldier. If you'll be standing in a correct spot, he shouldn't see you coming, so it's going to be much easier to get rid of him. Remember to use longer bursts while firing at him. You can also use some of the carried grenades to injure him even more. Once he's gone, try to secure this entire floor.
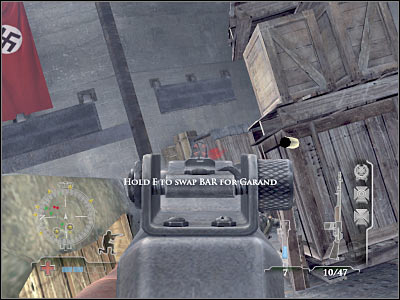
You will have to locate a second staircase. Once again, you must use it in order to reach the lower (second) level of the flak tower. Just as before, you should be running here, so you won't get shot along the way. Once you're on the second floor, hide behind some of the nearby crates, because the area won't be safe. Try killing most of the enemy soldiers from here. Just make sure that you throw back any grenade that lands near your position and you should be fine.
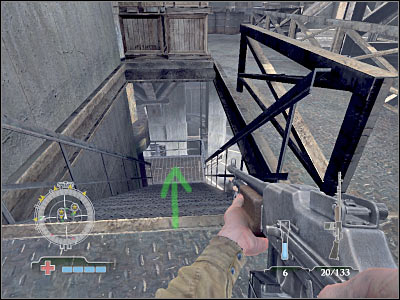
You should be able to get closer to a large structure which looks like a standard bunker (screen). Your main target is located inside. Obviously you won't be able to get there right away. Start off by using some of the carried grenades. You will have to be very precise in order to place a grenade inside the structure. I'm sure that if you had practiced throwing grenades, you won't have any major problems here.
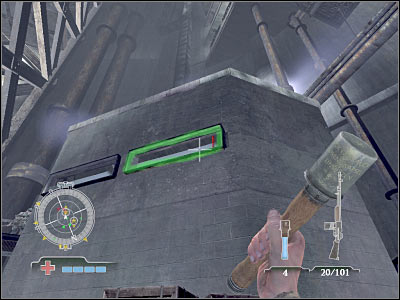
If you decide to use the grenades, you will only kill a few soldiers and you will force them to leave the structure. As a result, you should be standing near the stairs which lead to the bunker. Be careful, though. This structure is also guarded by a single armored soldier. Take him out in the first place. Use the element of surprise. You could also throw a couple of grenades at him or wait for him to use the stairs.
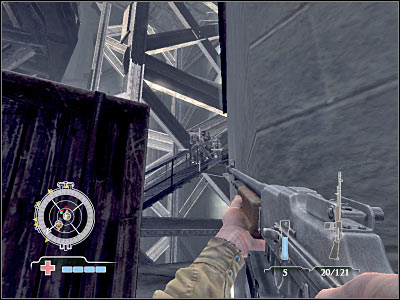
You may start moving towards your target area. There's only one entrance leading to the bunker structure, so you really can't get lost. You must be careful here, because more enemy soldiers may decide to leave this building. Kill them quickly, before they start firing at you. Throw a single grenade inside. Enter the structure and secure it. Use your compass to locate every hostile unit.
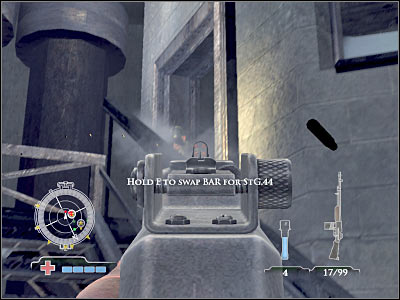
Now you will only have to proceed to the far side of the bunker. This is where you'll find the control panel for the second elevator. Just as before, you will have to waste one bullet on it. This will allow you to fulfill this mission objective.
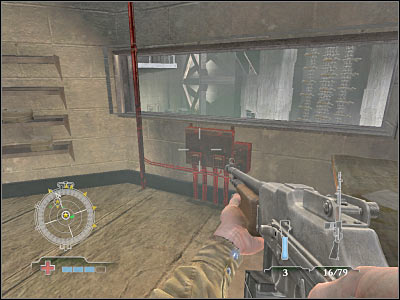
You will have to destroy four AA guns. This means you'll take part in a lot of difficult fights. The only good news is that you won't have to worry about any snipers, because you will land on the upper platform of the flak tower. Instead, you will have to kill 3-4 armored soldiers, as well as 20-30 standard units. You will be dealing mostly with larger groups, however if you decide to use nearby objects to your advantage, you should be just fine. Additionally, you will be able to kill most of the enemy soldiers from larger distances and you will receive help from your teammates.
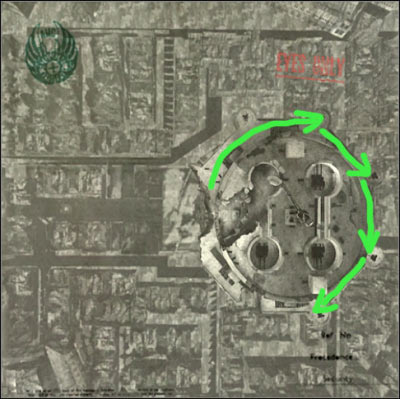
Approach:
This time I'd strongly recommend choosing one of the green zones (screen), mostly because you won't have any problems proceeding to the AA guns. Don't land on the ground, though. Instead, choose an upper balcony, so you'll have a better view at the surroundings.
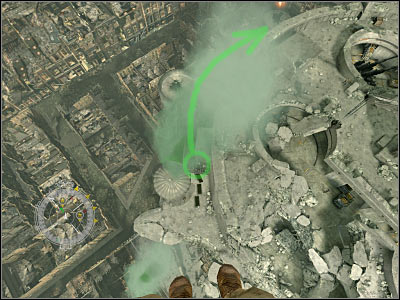
Reaching your target:
If you had decided to land on the small balcony, you will have to move to the north-east. Obviously you should be keeping a crouching stance here. Try eliminating at least 3-4 soldiers. I wouldn't recommend exposing yourself too much. Just make sure that you'll clear your path to the first AA gun. Obviously you should be using a sniper rifle during these fights, especially since you won't have to worry about ammo supplies.
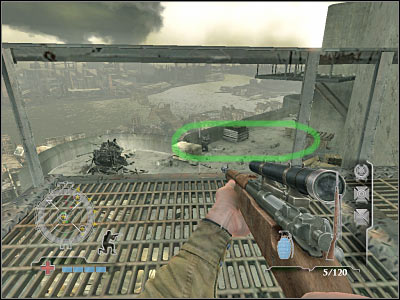
Once you've killed all visible soldiers, turn around and head on to a safe zone. You will have to jump down to a lower platform, however you won't receive any injuries. As you've probably noticed by now, there are a lot of crates here. Open them if you need medkits or ammunition. Start moving towards the first AA gun.
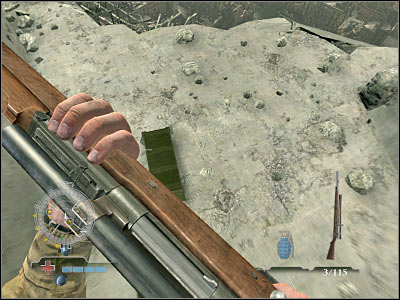
Just as before, you will have to use the sniper rifle to kill all enemy units. Make sure that you're shooting at them from a very large distance. You should also find a good cover before you start attacking them. I would recommend that you secure some of the upper balconies. The closest one shouldn't be guarded by anyone, but it would be wise to make sure that it stays that way.

You will also encounter several entrances to the flak tower along the way (screen). If you're carrying a sniper rifle, you may as well ignore these corridors. You would only need them to get closer to enemy troops with a machine gun. I suspect that you have a sniper rifle in your inventory, so you should stay on the outside.
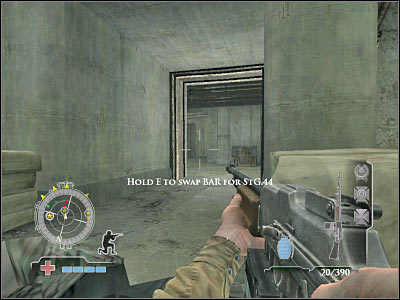
You should be able to reach your first target very soon. The crew of the AA gun has already been killed, so there's nothing you should be worried about here. You will have to approach the AA gun from the north. I'm sure that you won't have any problems finding the glowing spot. Place an explosive charge there and move back to the main area. Wait for the explosion to occur.
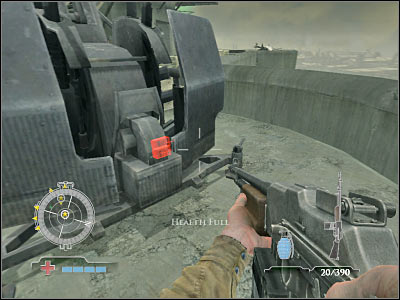
You may proceed towards the second AA gun. I'd strongly recommend that you don't move too quickly, because it's going to be very easy to die here. You are going to be attacked by an armored soldier. Hide behind a good cover. Wait for him to get closer. Lean out and start firing at him. You could also wait for him to attack someone else, so he'll be distracted. Either way, you must get rid of him as soon as possible. Also, secure a large balcony which is located to your right.
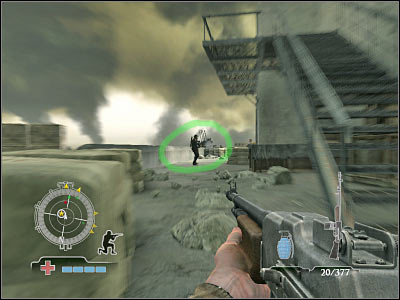
Once again, you will have to choose a sniper rifle from your inventory. The second AA gun is probably guarded by a few enemy soldiers and you should kill them from a larger distance. Try aiming at their heads. This is a fairly simple task, especially since enemy units won't leave that area. Once they're gone, place a charge on the AA gun and wait for it to be destroyed.
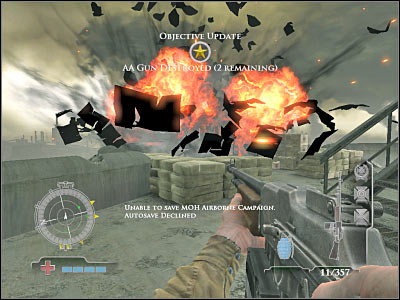
Obviously you will have to start moving towards the third gun. You won't encounter any soldiers right away. They will attack you once you're close enough to the AA gun. You shouldn't change anything in your approach. Use nearby objects for cover and kill them with a sniper rifle. Just make sure that you don't hit any of your team members.
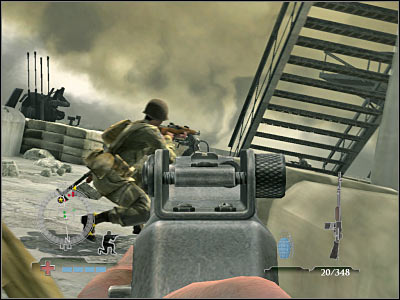
You may proceed towards the third gun, however don't place a charge right away. Instead, try eliminating all of the remaining enemy units. They will appear in front of you, but you should be able to kill them from here. Once they're gone, head on to the third AA gun. I'm sure that you remember what has to be done here.
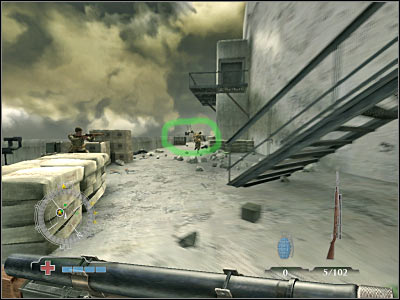
Proceed towards your final target. You must be extremely careful here. Take a look at the screen, because that's where you'll have to defeat a very large group of enemy soldiers. Additionally, two of them are carrying armors, so you should kill them in the first place. Use at least 3-5 grenades. You could also wait for allied soldiers to join you in these fights. Once everyone has been killed, blow up the fourth AA gun. This will allow you to fulfill this mission objective.
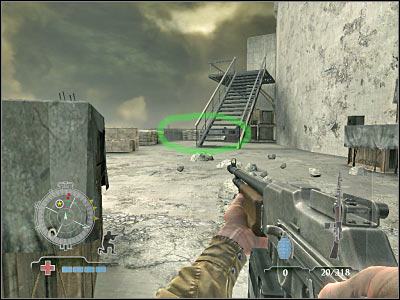
Once again, you won't need a map here, because you'll be exploring the flak tower for the most of the time. If you decide to follow my instructions, you won't have any problems eliminating all three halftracks and you won't risk your life during these fights. Your only concern will be to eliminate one of the enemy snipers.
Approach:
You've got a lot of options here, however if you don't want to have any problems with this particular objective, you should consider following my exact instructions. You will have to land near the northern side of the flak tower. Check the screen, because that's where you'll have to touch the ground. If you increase the velocity of your approach, you shouldn't suffer any injuries while you're still in the air. You should also know that the landing site won't be guarded by anyone.
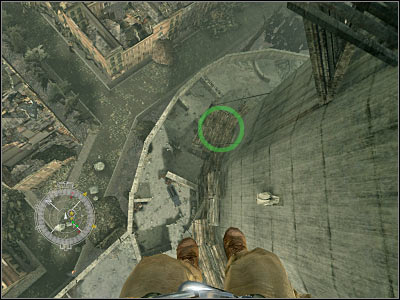
Reaching your target:
You may enter the flak tower. There's a corridor here, so you won't have to leave this area looking for an entrance. If you had already disabled both elevators, you should be safe here, because you won't encounter any soldiers. Your task is going to be very simple. You must locate a cargo elevator in order to use it. There's a small button here. Press it (screen).
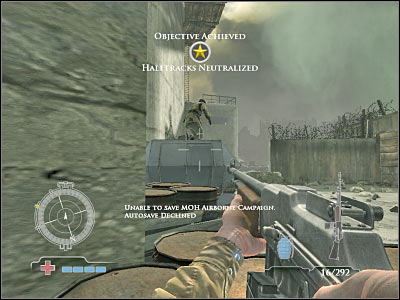
Obviously you will have to wait for the elevator to get here. Enter the elevator and look for a small handle. Pull it. The elevator is going to start. I'd strongly recommend that you hide behind some of the nearby crates. Wait for the elevator to reach its destination. You will probably see a few soldiers here. Don't attack them. Instead, try moving towards new crates (screen). It would be wise to stay out of sight for the time being.
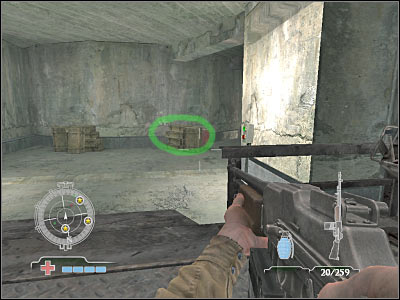
You should be able to see some explosive crates in the distance (they're red). Try shooting at them. Obviously this will cause a huge explosion. Not only will you get rid of all soldiers, but you'll also neutralize the first halftrack, without even getting closer to it. Take a look at the screen if you're having some problems finding it.
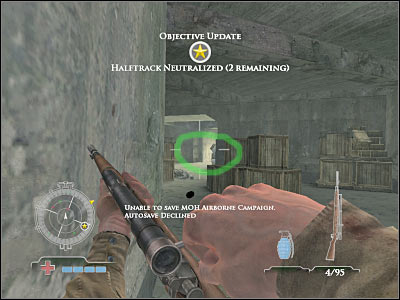
Now you will have to start moving towards the right corridor. It's very easy to find and you won't encounter any soldiers along the way. The second halftrack can be found just around the corner. Check the screen, because that's where you should be standing. Sadly, destroying a barrel won't be enough. You will also have to kill the gunner. Use the machine gun.
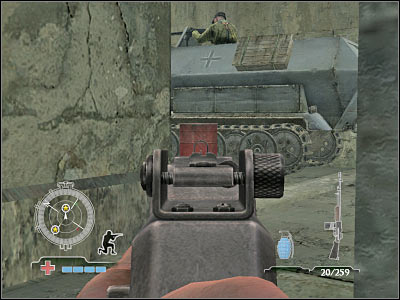
DON'T go back to the tunnels. Instead, head on to a destroyed halftrack. There's a large exit from the flak tower to your left. You must go there now. Be careful, though. You will encounter several enemy soldiers here. Eliminate them quickly, before they manage to use grenades against you. I'm sure that you won't encounter any major problems here. Turn left and start moving towards your final (third) target.
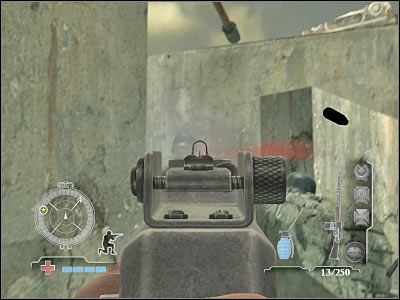
Before we'll deal with the halftrack, you will have to kill a sniper I was telling you about. It's a very important thing, because you would have been exposed to his fire while trying to disable the vehicle. Lean out only for a short period of time, so you will be able to kill him. Thankfully, you won't have to worry about any other snipers.
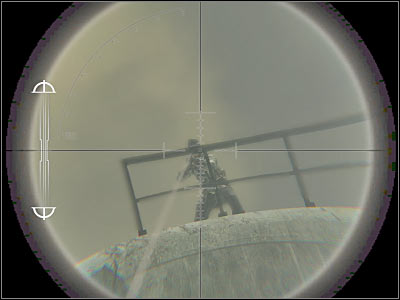
Once the sniper has been killed, you will only have to attack the gunner from the third halftrack. His death is going to be equal to your success. Now you will only have to wait for the game to display a new mission objective.
You will be landing in a well known spot, so you won't need a map here, especially since you won't be leaving the flak tower until the end of this mission. As for the task, you will have to take part in a lot of difficult fights. You'll be going against well trained soldiers, so it would be a good idea to go to one of the green zones for supplies, especially grenades. It's going to take you about 10-15 minutes to reach the main control room of the flak tower.
Reaching your target:
Like I've said before, you should consider using a well known landing zone. It's located near two snipers. That's where you've landed to reach two control panels. Check the screen if you want to know exactly where you should be standing. Obviously you will have to enter the flak tower. Use the stairs (on your left) to get to the lower floor.

Once you've reached a new level of the tower, you should turn left. That's where you'll find your target area (screen). Sadly, you won't be able to get there by going in a straight line, mostly because this area is well defended by enemy troops. As a result, you will have to find some other way to get there.
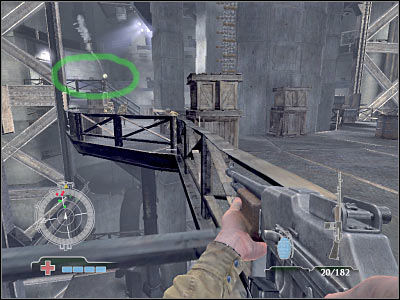
Before you decide to proceed any further, you will have to eliminate a soldier who is equipped with a rocket launcher. I'm sure that you have seen some of his attacks by now. Take him out as soon as possible. Obviously you should use a sniper rifle. Also, make sure that you maintain a safe distance from him. You should also be standing behind a good cover, so you won't have to risk too much.

Now you will have to try and find a new passageway which should be located to your right. Once again, this will allow you to surprise enemy soldiers from one of the side corridors. Once you're there, head on to your right and hide behind large crates (screen). This is going to be an excellent cover area. You will also avoid being hit by enemies standing near some of the upper windows, because you're hiding almost directly beneath them.
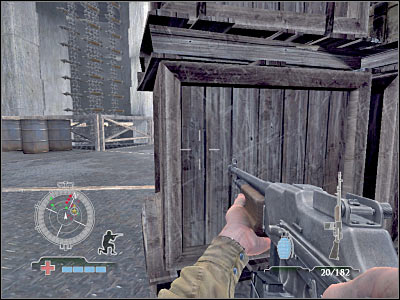
As you've probably suspected, you will have to lean out once every few seconds in order to kill enemy troops. Focus your attacks on one of the upper balconies, because you wouldn't be able to kill these soldiers once you're closer to your goal area and you would also be vulnerable to their attacks.
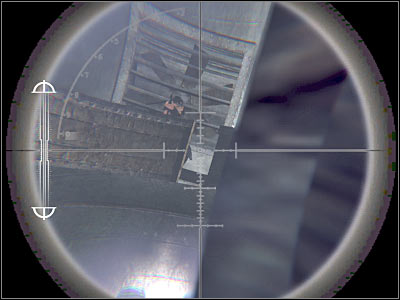
Now you should consider moving forward a little. As you've probably noticed by now, one of the bunker structures is to your right. There are a lot of windows here and they're being occupied by German soldiers. You should consider throwing a couple of grenades inside, mostly because you won't need these for some of the upcoming fights.
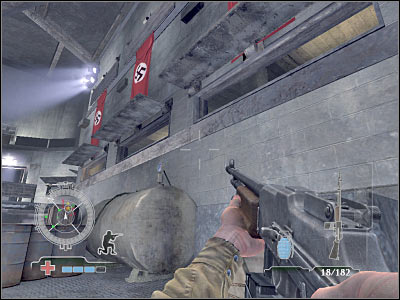
Your second task here will be to get closer to the stairs, because this is the only way to the bunker. Be careful, though. This area may still be guarded by one of the armored units. You would have to consider choosing longer bursts here and it would be a good idea to perform a surprise attack. As a result, you should be hiding under the stairs. You could wait for the armored unit to use the stairs, however this won't be necessary.
You may proceed to the bunker structure. Make sure that you're standing near the door, not in front of the entrance. You could try leaning out, however if you have any grenades with you, they will allow help you to clear out this room. Either way, you will have to kill everyone. Once this is done, enter this structure.
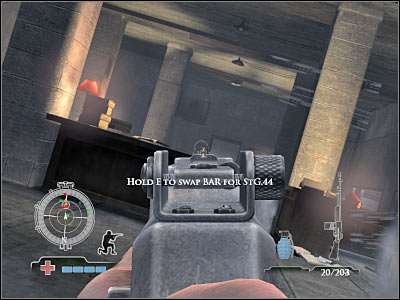
Your objective will be to secure this entire area. You will be able to use many objects for much needed cover, so it shouldn't be too difficult. Make sure that you're collecting medical supplies and ammunition along the way. Your task here will be to locate a small ladder (screen). Use it to get to the upper floor. Thankfully, you won't have to fight anyone right away, so go ahead and climb up to the new level of the flak tower. Reload your machine gun here.
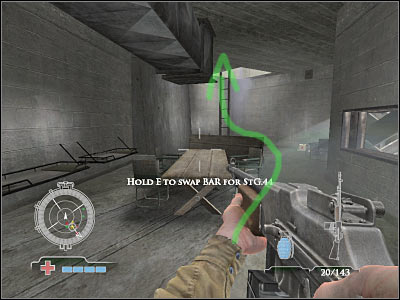
Now you will have to get closer to a new entrance which leads to a new bunker structure. You should be standing near the left wall. Lean out carefully and start shooting at the enemy soldiers. You could also use some of the carried grenades to kill them, however this won't be necessary. Enter this new room and deal with the remaining enemy troops. It will allow you to fulfill this mission objective. Wait for some new orders to be displayed on your screen.
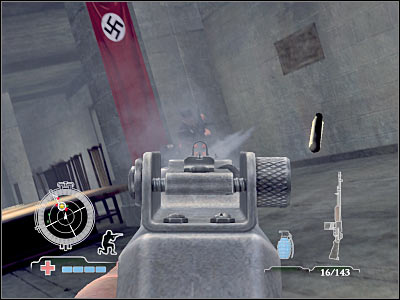
This is going to be an extremely easy task, especially since you won't have to leave this area in order to fulfill this particular objective.
Reaching your target:
Your only task here will be to locate a very small elevator which goes down to the sewers (located beneath the flak tower). If you're having some problems finding it, try reloading the last checkpoint. The elevator can be found to your right (screen).
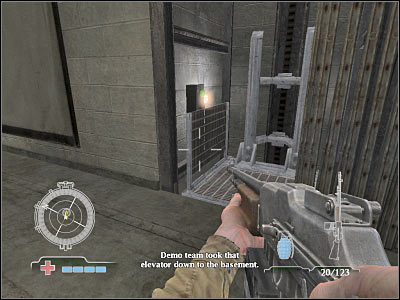
Your only task here will be to press a button, so the elevator will be able to start. Make sure that you're standing inside. Also, don't worry that you have lost control over your character. You will have to wait patiently for the elevator to reach the sewers area. Once this is done, you must also listen to what other allied soldiers have to say to you.

You will have to choose between two different approach methods here. If you're playing a normal difficulty level, you might have some chance running towards the exit. You wouldn't have to engage any soldiers, but you would probably lose at least two health slots. If you're playing on Expert, you must eliminate everyone before proceeding to the safe zone. You will encounter at least 5-6 ARMORED soldiers along the way, so it's not going to be easy to escape the tower. Thankfully, you won't have to worry about any time limits.
Reaching your target:
You'll start in the exact same spot where the last cut-scene took place. Your first task here will be to start running forward. Ignore some of the allied soldiers, because you won't have to be concerned with their safety. There's an armored soldier to your right, but you won't have to fight him. You will also encounter two standard soldiers and you will probably have to kill them. Once they're gone, turn left and head on to a new corridor (screen).
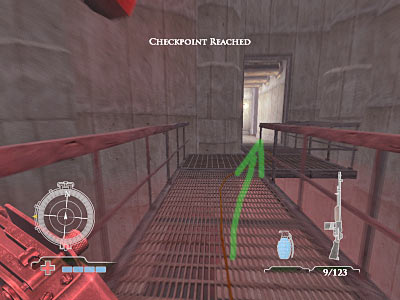
As you've probably noticed, there's a corridor here which leads straight to the basement. You will have to go there now, because this is the only passageway to your current destination. You should be able to find grenades here. Pick them up, because they may come in handy very soon. Head on to the next room. You should be standing close to the left wall.
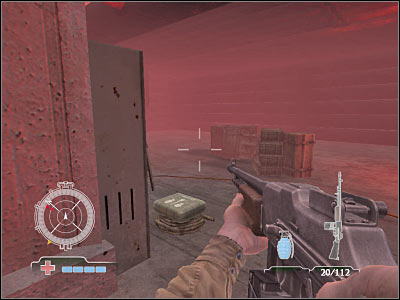
Start off by eliminating one of the standard enemy soldiers. This is where it gets more difficult. There are A LOT of armored soldiers here. You can try several different routes here. Either way, you should use all of your grenades right away. Next, try standing behind a good cover (screen). Make sure that you're using longer bursts to kill them. You might also consider going back to the previous area, so you won't get attacked from many different angles.
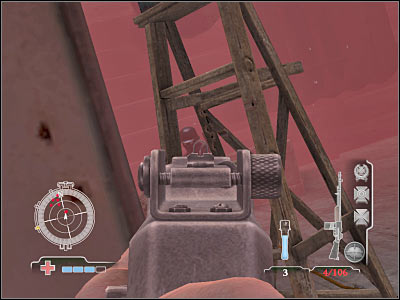
If you're careful, you should be able to kill all hostile units without receiving any major injuries. Now you should take a look at a nearby munition stockpile. You'll find a lot of clips here, as well as several medkits. You can't stay here for too long, because you would be exposed to enemy fire.
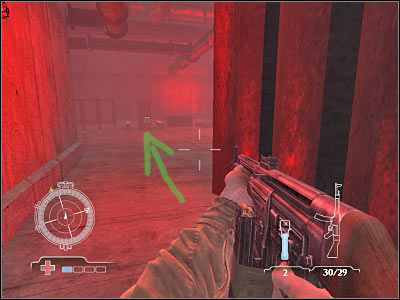
One of the armored soldiers may be hiding to your right (screen). You won't have to kill him, but I'd still recommend neutralizing him, so he won't surprise you in the near future. You'll also find two medkits here.
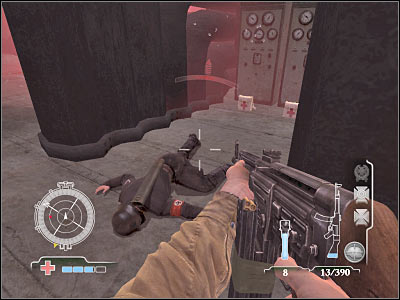
If you don't want to kill all soldiers, you should consider going left. You would encounter a second armored unit here. He will be standing in the corner of this room (screen). Try killing him from a larger distances. You should also use all of your remaining grenades, because you won't encounter any other enemy units.
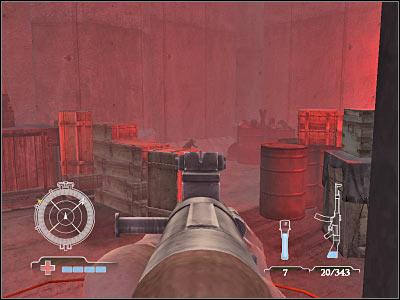
Like I've said before, you'll be safe from now on, so you will only have to focus on finding a correct route to the surface. There's a small corridor to your right. Go there now. You will come across a ladder. Use it and get down to the sewers. Turn left and use a second (smaller) ladder. This is going to be a slightly longer tunnel. It's not guarded by anyone. Keep moving forward. Once you've reached a third ladder, use it to reach the exit.
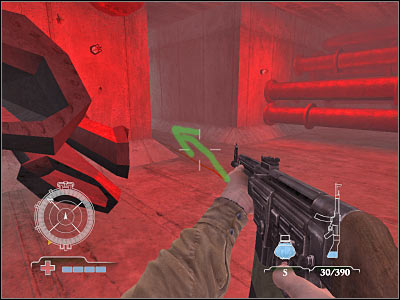
There's absolutely nothing you should be worried about here. You're standing far enough from the flak tower, so you won't get hit by any of the snipers. Your only task here will be to find and use a detonator.
Reaching your target:
Once you've left the sewers, you will have to make a few steps forward. Find a dead soldier. You will a detonator here. Exchange it for one of your weapons (you will have to press and hold the action key).
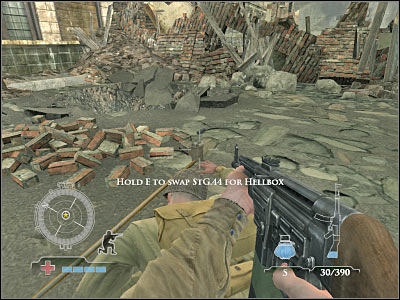
Now you will only have to press the left mouse button, so you'll be able to initialize a huge explosion. Stay here and enjoy the fireworks. :-) Congratulations! You've just finished the final mission of the game!
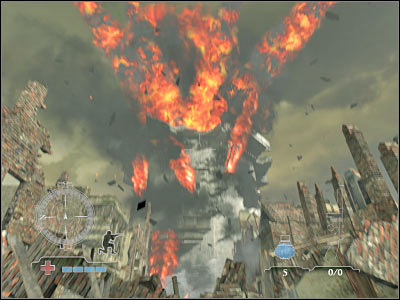
Stranger


 Metal Gear Solid 4: Guns of the Patriots Game Guide & Walkthrough
 Might & Magic: Heroes VI - Shades of Darkness Game Guide & Walkthrough
 Metal Gear Solid V: The Phantom Pain Game Guide & Walkthrough
 Memoria Game Guide & Walkthrough
 Middle-earth: Shadow of Mordor Game Guide & Walkthrough