The guide to Mad Max is a large compendium that contains all important information about the gameplay of the game. In this guide you will find a detailed walkthrough of each main and side mission, including the requirements for unlocking them and hints that will allow you to complete them with no trouble. Detailed maps with all important places in each region marked on them will be very helpful. This will help you find every collectible item (collectibles have been thoroughly described in a separate chapter). In this guide you will also find a description of Max's abilities and of available upgrades, both for Max and for his vehicle called Magnum Opus. You will also find some valuable advices in the chapter focusing on combat, where you will find general information and hints that will let you take care of enemies more effectively. Finally, you will find some chapters focusing on game mechanics, achievements and general advices. Mad Max is a third-person action game, loosely set in the universe known from the classic movies starring Mel Gibson. You will play as Mad Max himself, whose aim is to create a machine as good as the one known from the silver screen and to find the mythical place called Plains of Silence. The game was created by Avalanche Studios, known for its Just Cause sandbox game series.
The guide to Mad Max game contains:
()

Forward

Backward

Left

Right

Map

Jump

Interaction (hold)

Cancel

Enter vehicle

Select different vehicle

Attack/Shoot

Block/Aim (hold)

Sprint

Dodge

Binocular

Call Chum

Flashlight

Canteen

Refueling

Quick shot

Reset camera

Location information

Pause menu

Acceleration

Brake/Reverse

Left

Right

Map

Repair vehicle

Leave the vehicle

Quick shot

Aim (hold)

Handbrake

Boost

Sniper rifle (hold)

Select shotgun

Select harpoon

Select Thunderpoon

Select side burners

Ram

Look back (hold)

Location information (hold)

Activate FPP camera

Pause menu

Move

Camera

Location information

Camera reset

Jump

Aim (hold)

Interaction (hold)

Block/Enter vehicle (hold)

Shoot/Throw

Attack, counter/Strong hit (hold)

Sprint

Dodge

Binocular

Call Chum

Flashlight

Canteen

Map

Pause menu

Move

Camera

Location information

Look back

Brake/reverse

Aim (hold)

Boost

Leave the vehicle

Shoot weapon

Side ram/Grind attack (hold)

Acceleration/Shoot (sniper rifle)

Dodge (sniper mode)

Sniper mode (hold)/camera inside the vehicle (press twice)

Weapon change

Weapon change

Repair vehicle

Map

Pause menu

Move

Camera
Location information

Camera reset

Jump

Aim (hold)

Interaction (hold)

Block/Enter vehicle (hold)

Shoot/Throw

Attack, counter/Strong hit (hold)
Sprint

Dodge

Binocular
Call Chum

Flashlight

Canteen

Map

Pause menu

Move

Camera

Location information

Look back

Brake/reverse

Aim (hold)

Boost

Leave the vehicle

Shoot weapon

Side ram/Grind attack (hold)

Acceleration/Shoot (sniper rifle)

Dodge (sniper mode)

Sniper mode (hold)/camera inside the vehicle (press twice)

Weapon change

Weapon change

Repair vehicle

Map

Pause menu
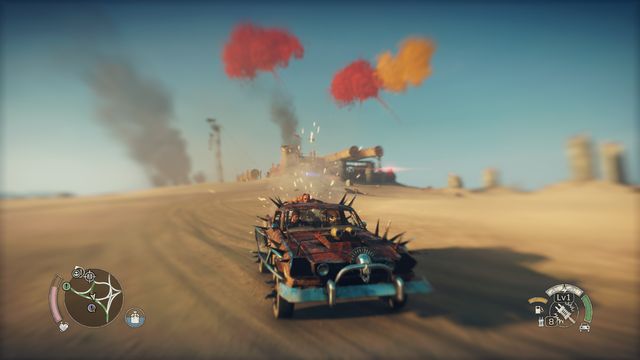
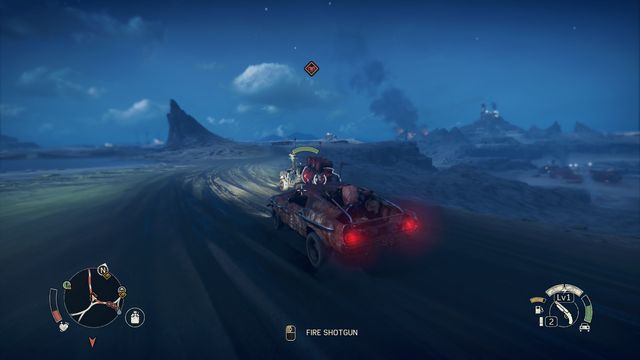
No matter whether you are traveling on foot or in a vehicle, the interface in Mad Max is very simple and clear. In both cases, in the bottom left corner of the screen you will find information about Max's health ([2]) and the canteen with water ([3]). You can increase the size of the bar by buying an upgrade at Griffe. On the other side you will find information about the selected weapon ([4]), ammunition ([5]) and car's durability and fuel (visible only when you're inside the vehicle). During battle you will also fill a fury bar ([7]) which allows you to deal more damage and use stronger hits.
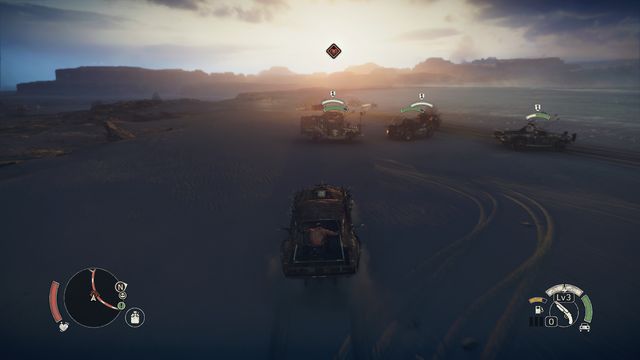
Important information can be usually found in the center of the screen or in its left corner, where the current mission's objectives will appear. When driving the car, above the enemy vehicles you will also see their durability and (optionally) a number that will inform you about their armor level. The minimap ([1]) also remains active the whole time, in the full map screen you can mark destination point, and the route to it will appear on the minimap.
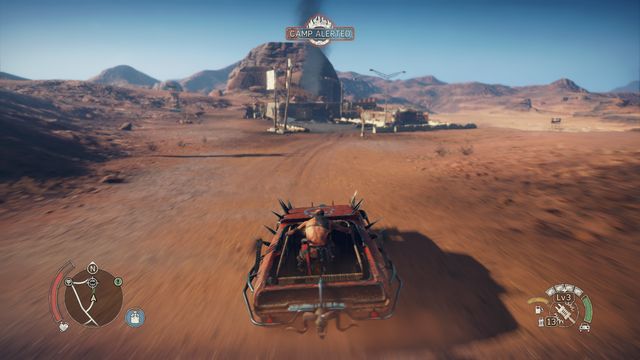
 If you have enough of enemy patrols, reduce the threat level.
Wasteland territories are described with a threat level (from 0 to 5). The threat level impacts the amount of enemy patrols appearing in the region and making your life harder while traveling through it. Reducing the threat level is an optional task; many side missions and unlocking some upgrades are related to it. Each territory has a specific number of Minefields, Scarecrows, Snipers, Camps and Convoys. Destroying, disarming and conquering those territories will gradually reduce the threat level in a region, until it finally reaches zero and enemy patrols will no longer appear in the territory. Such territory will be then marked with green color. Freeing all territories of a specific region will end with reclaiming a whole part of the map from Scrotus' influence.
The threat level for a whole territory (like Jeet's or Pink Eye's) is different than threat level of a single terrain (like Blackmaw's or Colossus) which is part of a larger whole. To reduce the threat level on a whole territory to zero, you must completely free all its single terrains.
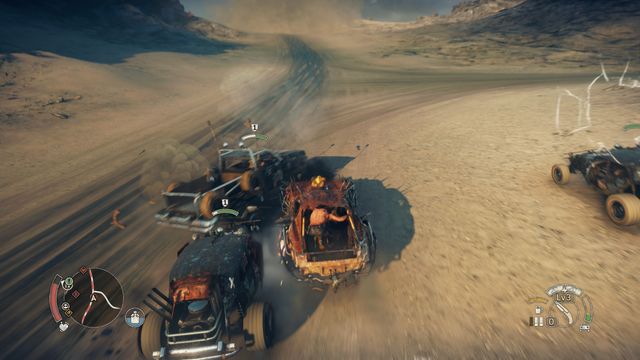
 Vantage outposts are balloons from which you can see all important places in a region.
Many points that you can visit have been scattered across the map. In each of the Scavenging locations, Vantage outposts, Strongholds or Camps you can find various useful items. Most of them will be Scrap parts, project parts (needed for upgrading the strongholds) and collectibles (mostly History relics, but sometimes other things, like cars). To uncover all such places, you must use the Vantage outpost on the specific location. Scavenging locations are different matter.
Those become visible only after you get close enough or after you build a special upgrade for the stronghold (Survey crew). Parts are required for the latter - walk towards the mentioned project and you will be able to locate them on the map. Collecting all of them will allow you to construct the needed upgrade. All Scavenging locations in that territory will be marked on the map once that happens.
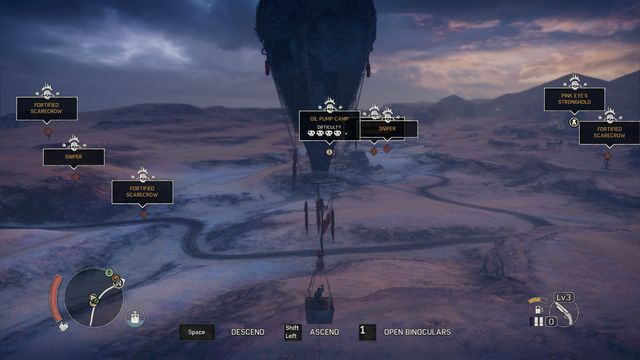
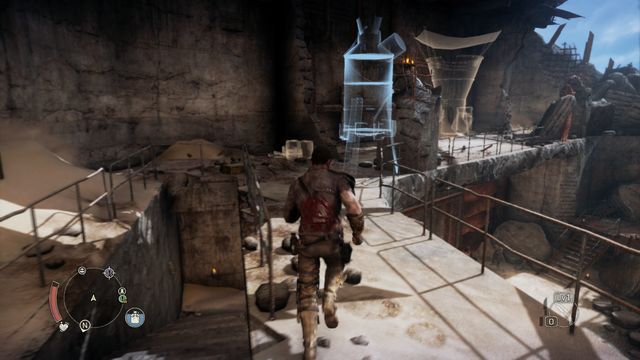
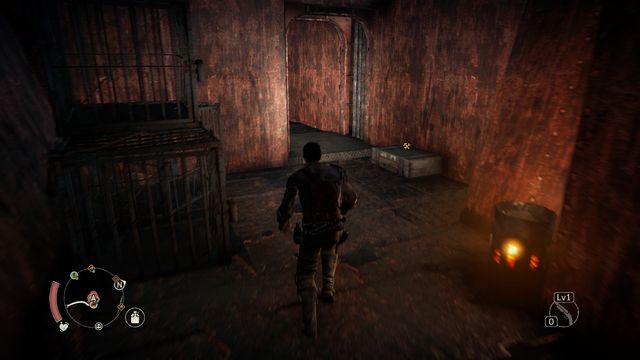
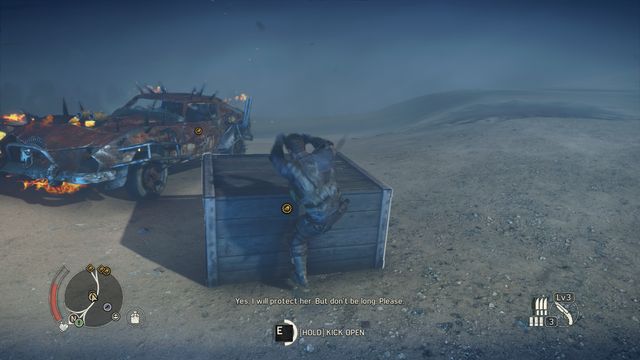
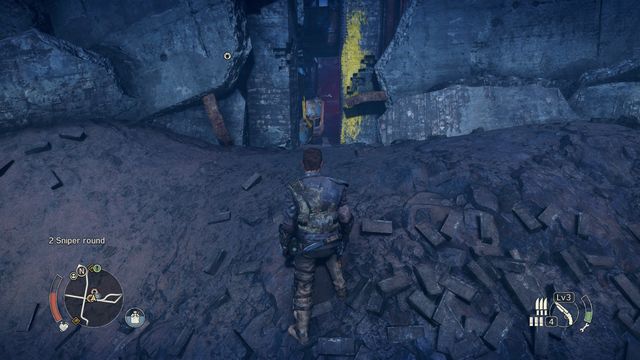 Secret passages will allow you to bypass some enemies and find hidden treasures.
While exploring, keep in mind that not everything is hidden above the ground. Many locations have large underground parts. In each place you can check what you have found and what is left to find there. Thanks to that you should avoid unnecessary roaming. Also, keep attention to the markings on the containers or gates - "X" letter means that you can open them (usually with a harpoon). Look around for places painted with yellow paint - doors, ladders, secret passages, ledges and other places through which you can pass are marked in that way.
Wasteland is quite large and traveling through it in a vehicle takes a lot of time. To speed up that process, you can use the quick travel system. You can travel between strongholds, Vantage outposts or locations of Death runs. The requirement for unlocking a quick travel point is visiting them (in case of Stronghold), finding them (in the Vantage outpost you must use the balloon) or winning the race. Thanks to them, you can travel to a previously unlocked point from almost any place on the map.
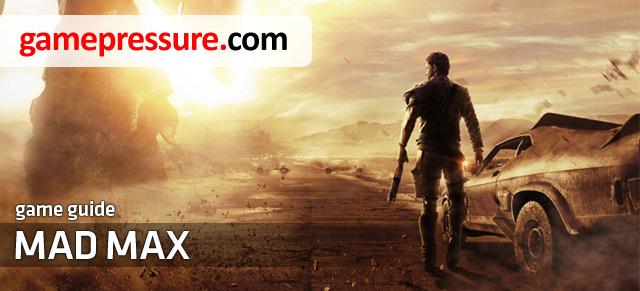
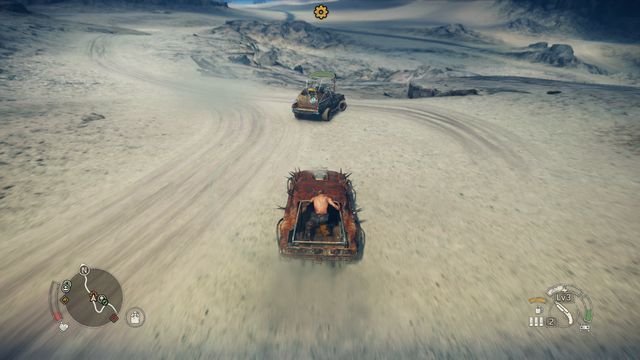 When you notice a vehicle like that, immediately take it over.
Scrap is the currency in the game. It is needed for everything related to upgrading something. Scrap will be needed to upgrade Max's vehicle, the character himself, and each of his strongholds. The more advanced the upgrade, the more scrap will be needed for it, so constant accumulation of scrap is mandatory to develop during the game. Scrap can be obtained in various ways, among other ways by looting the scavenging locations, by freeing camps (they will generate a specific amount of scrap from time to time), by completing quests, by upgrading the stronghold (scrap crew, cleanup crew) or simply by collecting it from the damaged vehicles and fallen enemies. You will collect large amounts of scrap by taking over a Scrapulance or from the chests collected before or after a storm.
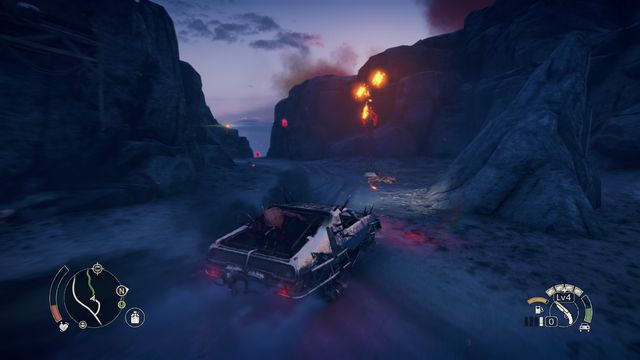
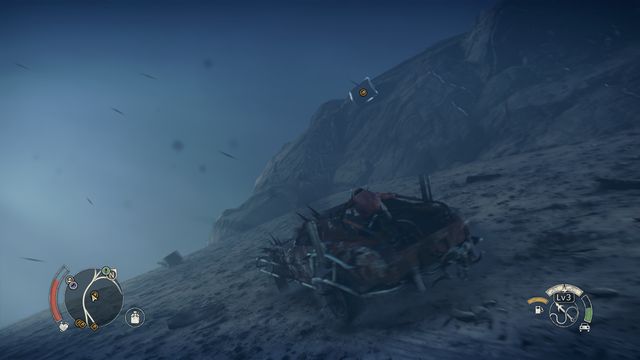 Storm is a dangerous but also profitable time.
When traveling through the Wasteland, you might be surprised by a storm. During storm you have limited visibility and you are vulnerable to constant danger. You can hide from the storm in a freed camp or a stronghold. However, once the storm starts, you must reach a safe spot on your own (quick travel option will be locked). If you remain in the vehicle, you will be constantly hit by flying metal scraps, in worst case you can even be hit by a lightning.
In summary, a storm is dangerous as it can quickly destroy your vehicle (at least early in the game) or kill Max himself. Hide from the storm in a freed camp or in the stronghold.
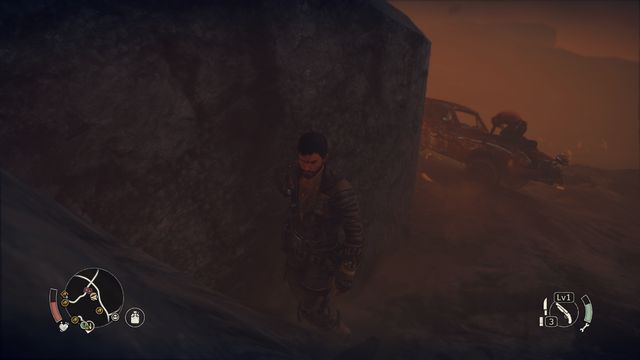
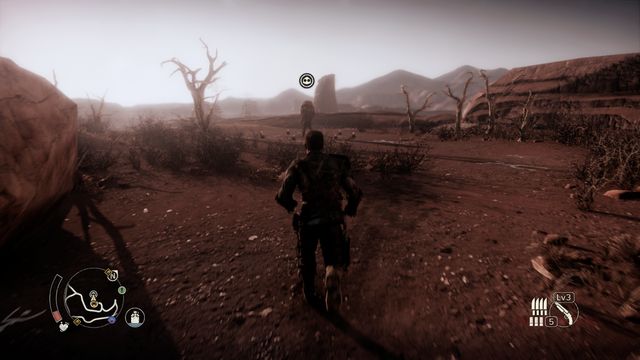
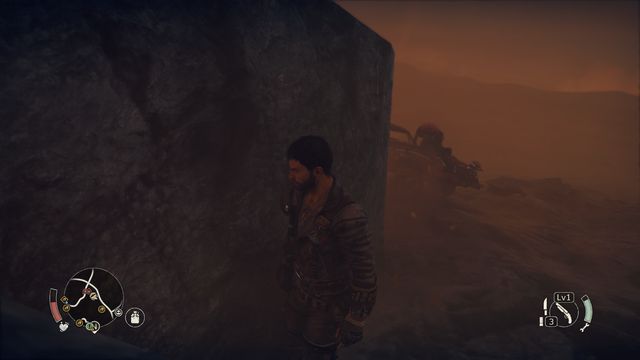 By hiding between large rocks you can safely wait until the storm ends.
One thing makes it profitable to risk the dangers and ride through the storm. During it, large chests appear in various places. If you locate one (they will be marked on the minimap), try to catch it with the harpoon before the wind will drag it away. Such chest can be opened (you risk when you leave the car), it is rewarded with three scrap parts, each gives you 100 pieces of it. It means that a single chest is worth more than 300 pieces of scrap (depending on the bonus coming from the skills). Because of that, sometimes it is worth risking and searching for a precious cargo during the storm.
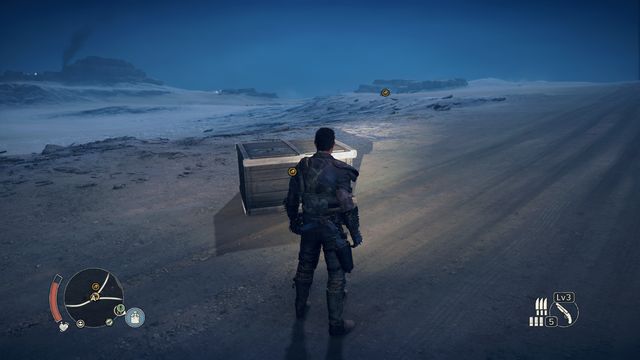 Valuable chests can be also found shortly after the storm.
If during the storm you hid in a safe spot, you still can find precious chest. You still have some time to find chests near your location, this time with no risk. However, you must hurry, as later the chests will disappear.
 In exchange for tokens, Griffa will develop Max's skills.
1. Save your ammunition. At first you will have only small amounts of bullets, so use them only if you really have no other choice (for example, to quickly eliminate the War Crier or an enemy vehicle. Wasting bullets on single enemies is not a good idea.
2. Gather every piece of Scrap you can find. It's the in-game currency, you can buy upgrades for Max and his vehicle with it. During first few missions you can collect enough of it to be able to buy some upgrades immediately after unlocking the possibility of buying improvements.
3. Visit Griffa frequently. You can spend the earned tokens (obtained by reaching new ranks) to buy abilities for Max. The most important one is increasing the number of health points, which allows your character to receive more damage without dying. Remember that when you visit Griffa you must spend all tokens you possess.
4. Complete side missions. Wasteland missions will help you unlock some upgrades that can later be built in strongholds.
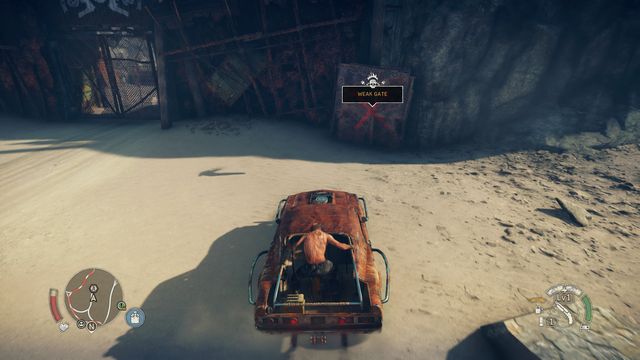 Very often you can enter a camp through a hidden passage.
5. Claim enemy camps. Once you become slightly stronger, it is wise to conquer some of the less protected enemy camps. You will find new project parts and large amounts of Scrap by doing so. Additionally, each camp generates small amounts of Scrap from time to time. The more camps you control, the larger the income.
6. Visit Scavenging locations. In almost each of them you will find some Scrap. Sacrificing time to explore the most valuable ones is definitely profitable.
7. Upgrade the strongholds. The required project parts can be marked on the map. Completing new projects will make the game much easier, providing replenishments of health, ammunition, water or fuel each time you visit a stronghold.
8. Reduce threat level. Thanks to that, you will be attacked by enemy patrols less often. Destroyed Scarecrows drop some Scrap, which means you can combine earning with demolishing.
9. Visit Vantage outposts. This will allow you to quickly unlock large parts of the map and mark the most important places in the region.
10. Use the flashlight. While exploring the Wasteland, very frequently you will visit undergrounds or other dark places. Remember that you can always light up the road with a flashlight.
11. Upgrade Max and his vehicle. Whenever you unlock an upgrade, you should gather the required amount of Scrap and buy it. New attacks used by Max are especially useful - they will allow you to eliminate opponents in melee combats faster and in more brutal way.
12. Replenish the canteen. Use the water tank to replenish the canteen whenever it is possible. Drinking water will regenerate your health.
Each larger location on the map is a part of a territory that belongs to one of the story characters. A stronghold is the center of such territory. This is where you will receive many story missions and side missions related to a specific character. You can also hide from the storm in a stronghold. Finally, this is the place where you can drive cars you found in order to unlock them. You can also switch the vehicle you want to use here (such option becomes active whenever you get close to Magnum Opus vehicle. In short, Strongholds are your bases of operation and your shelters.
 The chests with project parts can be found in Camps and Scavenging locations.
What makes Strongholds a special place is the possibility to build projects and upgrade the fortresses. In each such place you can complete many projects which give you various profits. To construct a project you must fulfill some requirements. Usually the requirements are completing a side mission, gathering enough project parts or bringing enough Scrap.
Places where you can build a project are transparent until you construct the upgrade.To check the requirements, walk towards the transparent place in the Stronghold - it's a place where you can construct a project. Yellow color means that there are still some requirements to meet, blue one means that the project is ready to be built. By walking close you will also check the description of a project. You can also mark the parts needed to create some projects on the map - the location of places where you can find them will be added to the map. Only after finding all of them will you be able to make a project.
After obtaining all project parts, remember to also build it in the Stronghold. Only after that, will it become active. With each visit in the Stronghold where you have build the project, you will receive a reward (ammunition or health replenishment, some amount of Scrap, etc). Additionally, building a project will impact the look of the inside of the Stronghold.
 Visual upgrade of the Stronghold is a "side effect" of constructing projects.
Important: Even if you are not interested in upgrading all the Strongholds, take some time and improve the projects that might interest you in at least one of them. Later you can use the quick travel to return there and replenish supplies.
Water storage - your canteen will be automatically refilled when visiting a Stronghold.
Maggot Farm - Max's health bar will be automatically regenerated when visiting a Stronghold.
Armory - replenishes ammunition whenever visiting a Stronghold (works on shotgun, knives, sniper rifle, Thunderpoon).
Oil well - refills the fuel in Magnum Opus vehicle.
Cleanup crew - the Scrap from each destroyed vehicle (on the territory where Stronghold with this upgrade is located) will be gathered automatically and added to your "account".
Stockpile - further upgrades (3 levels) are increasing the aesthetical look of the Stronghold.
Scrap crew - when you're not playing the game, Scrap is automatically collected and will be given to you once you turn the game on (online mode required).
Survey crew - adds all Scavenging locations to the map of a specific terrain.
Dog and buggy - unlocks Chum's Buggy which is used for finding minefields.
 You will find valuable Scrapulances in camps.
Scrap is the most valuable resource in Mad Max. It allows you to upgrade the Magnum Opus vehicle and to buy upgrades for Max that makes him more resistant and deadly. You can collect Scrap in many places and in various ways. Below you will find few propositions how you can quickly gather large amounts of Scrap.
1. Claim enemy camps. It's one of the best and most efficient ways of earning Scrap. In each camp you will find many chests which makes exploring the territory very profitable. However, the more important thing is that all conquered camps are generating some amounts, usually around 20 pieces, of Scrap automatically. This amount is added to your supplies. One camp doesn't make large difference, but if you obtain more of them, you will regularly receive large amounts of Scrap without having to meet any additional conditions. A camp that you have conquered once will remain controlled by your allies, enemies can't reclaim it.
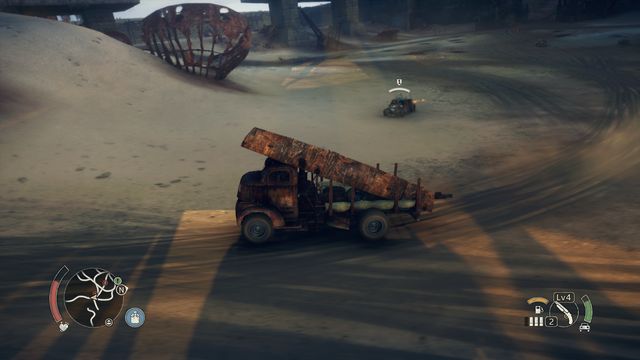
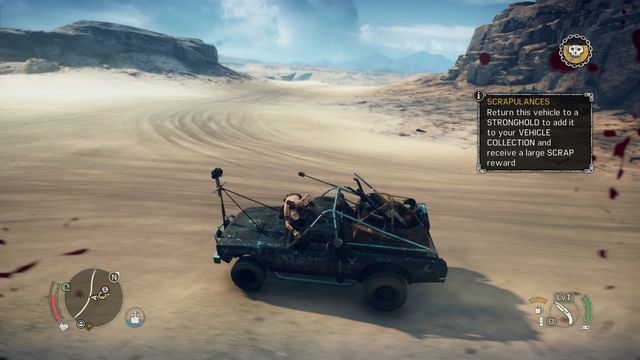
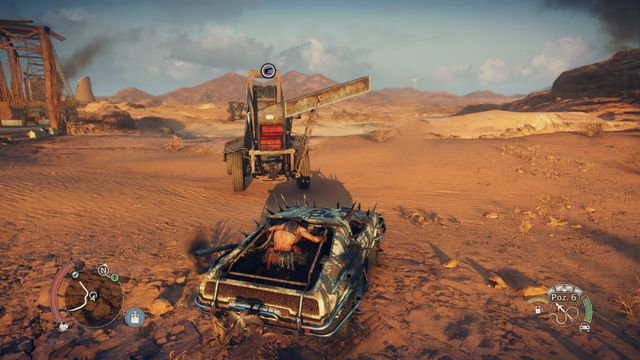
 Looks like a common car, yet it is worth 500 pieces of Scrap.
2. Capture Scrapulances. They are special vehicles which backs are filled with Scrap. Finding such car is hard, it happens rarely. Because of that, whenever you notice a specific icon above a car that is passing by, follow him and shoot the tires or kill the driver without destroying the vehicle itself. If you manage to capture a Scrapulance and deliver it to the closest stronghold in one piece, you will receive around 500 pieces of scrap. You can also find Scrapulances in some camps.
 If a chest is "escaping" from you, catch it with a harpoon, it won't fly any further.
3. Open the chests during a storm. The storms are dangerous and it is easy to die during them, but the chests that are thrown during them are very valuable and worth the risk. If you remain outside friendly camp or a Stronghold during storm, new icons will be added to the map. They will inform you about the location of closest chests. Successful attempt at finding them (watch out, as wind can easily move them from one place to another - use harpoon to hold a chest) and opening them will result in parts of Scrap dropping around. Each of them is worth about 100 pieces of scrap. This can make each storm very profitable as long as you manage to open few chests (you can also find them after a storm. Sadly, they disappear later).
4. Search the Scavenging locations. There are many of them on the map. Additionally, you can discover their location after building the Survey crew in the Stronghold. You won't find large amounts of Scrap in those places, but early in the game visiting few of them will be definitely a good idea. In some scavenging locations you can also find Scrap pallets, collecting them gives you around 50 pieces of Scrap.
5. Invest Griffa tokens in "Volition" ability. Thanks to that, each time you collect Scrap the amount you receive will be increased due to the bonus added by that ability.
6. Construct upgrades in Strongholds. Scrap crew will automatically collect Scrap for you while you're not in the game. Each time you return to the game, additional Scrap will be added to your account. Cleanup crew will gather Scrap from the remains of vehicles that you destroyed near the Stronghold upgraded with that project.
 Some encounters will immediately reward you with some Scrap.
7. Complete Scavenger encounters and Loot encounters. There aren't too many of them on the map, but usually, immediately after going to an encounter location, you will receive around 50 pieces of Scrap.
8. Destroy enemy vehicles and Scarecrows. Each of them will drop some Scrap. You can also loot it from the bodies of killed enemies. The amounts received aren't large, but Scrap is valuable during the whole game, and until you claim large numbers of camps, every amount of scrap counts.
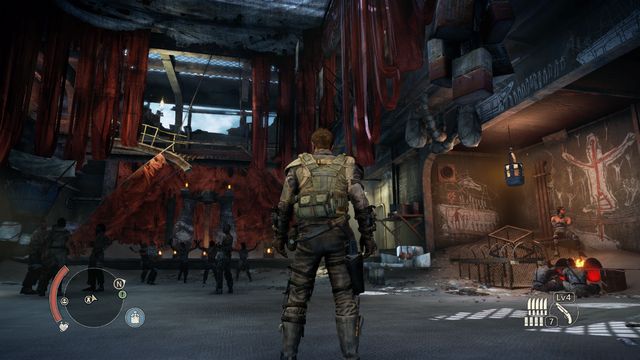
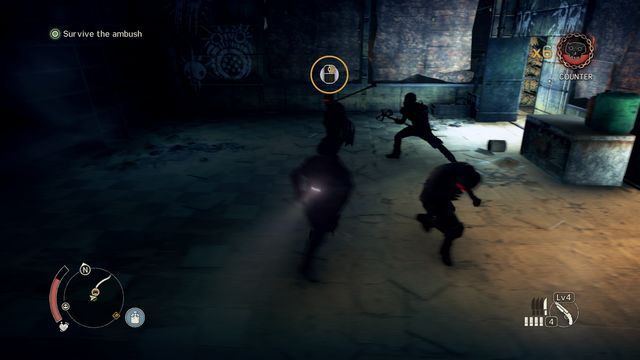
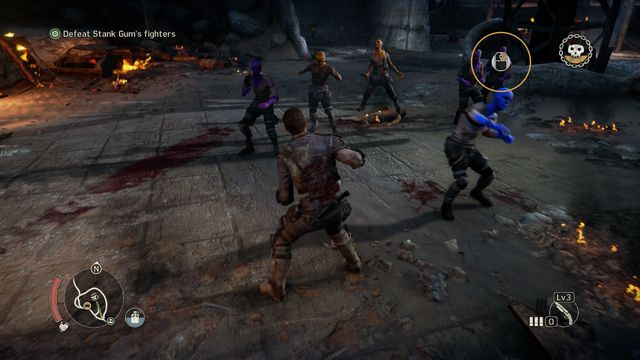
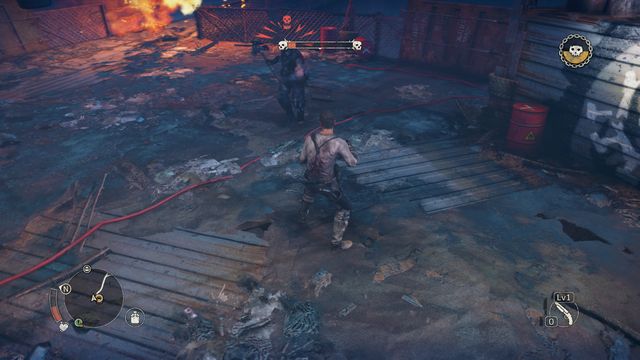
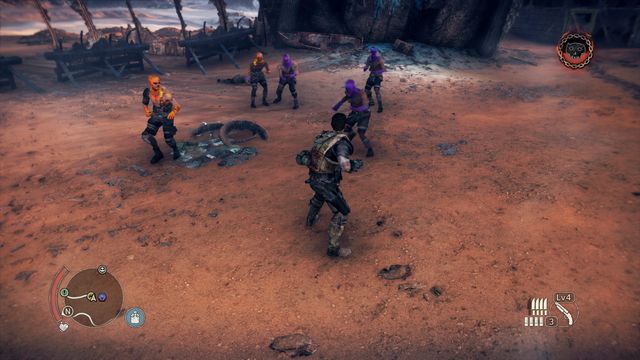
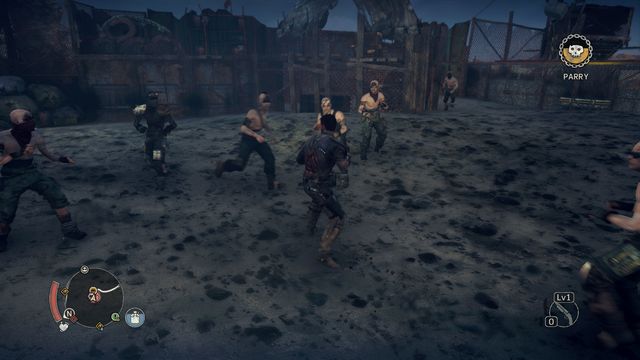 Enemies usually have advantage in numbers.
Combat is an inseparable part of Mad Max. In almost every place of the game world you will meet at least few enemies. Despite the fact that you have weapons, the battle is usually fought with fists, mostly because of the limited amount of ammunition. Max possesses few abilities which you will develop as you progress in the game. The types of enemies are varied as well. However, their attacks are predictable, which makes them easy to learn. Predicting next attacks, successful blocks, dodges and counterattacks are the key to winning each combat with large numbers of enemies.
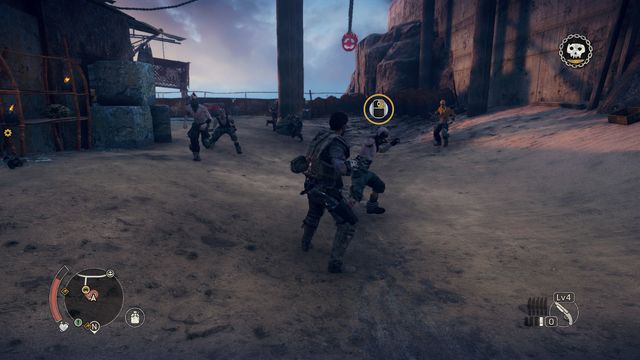
 Don't let enemies surround you.
Almost always Max must face large numbers of enemies. Most of all, all attacks are signalized with an icon informing you whether they can be blocked (yellow icon) or if you must perform a dodge (red icon). Despite the fact that hits are varied, those two rules are important during the whole game. It is worth to learn enemy attacks:
- standard hit - enemy attacks without any weapon, the attack can be easily blocked,
- hit with a weapon - enemy attacks you with a melee weapon. The hit can be blocked after buying an upgrade in Max's menu,
- knife attack - signalized with a red icon. It cannot be blocked, you must perform a dodge,
- charge -enemy with a shield and bosses will usually charge at Max. A successful dodge will allow you to deal some hits at enemy backs.
- Thunderstick throw - special enemy type is able to throw Thundersticks. Those enemies are usually keeping distance from you and throwing explosives. The place where the charge will fall is marked with a red aura, giving you one second to run away.
- back throw - this attack cannot be blocked, it's an ability of few enemies. They catch Max from the back. You must quickly press the interaction button in order to free yourself. There's an ability that allows you to perform execution immediately after being captured by an enemy.
 Attack which you can block is marked with a specific icon.
During the battle you should carefully observe enemy behavior. Each attack performed by them is signalized shortly before, giving you time to perform a dodge or, if it is possible, block the hit and perform a counterattack. Fighting group of enemies should be based on counterattacks and dodges. When there aren't many enemies nearby, you can allow yourself to perform a longer combo. However, if you are surrounded, that would end with receiving a hit at your back. Because of that, focus on proper counterattacks since the beginning of the game - it's the most efficient way which, despite the defensive approach, allows you to quickly weaken enemies and then eliminate them.
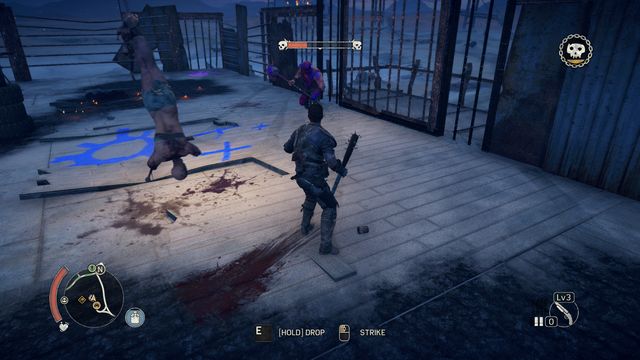
 Using weapon can make a battle much shorter and easier.
Depending on blocks is not the only effective tactic. In many places you will be able to pick up a melee weapon, usually dropped by a defeated enemy. Whenever it is possible, make use of such gifts. Each weapon you pick has limited durability, usually after up to a dozen of hits (depending on ability level) you will be forced to get rid of the tool. Despite that, a melee weapon gives you great advantage, allowing you to hit more than one enemy simultaneously. It also deals much more damage than a regular attack. Max also possesses knives (used for executions) and shotgun which you can use to quickly eliminate even few enemies at once. In some places you will also find stands with Thundersticks - you can use them to throw at enemies or place them inside them (a standard attack which results in an enemy exploding after a while). During the battle you should remember about those possibilities and utilize them in one hundred percent.
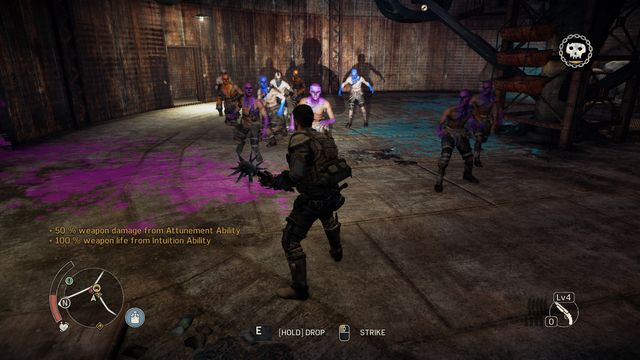
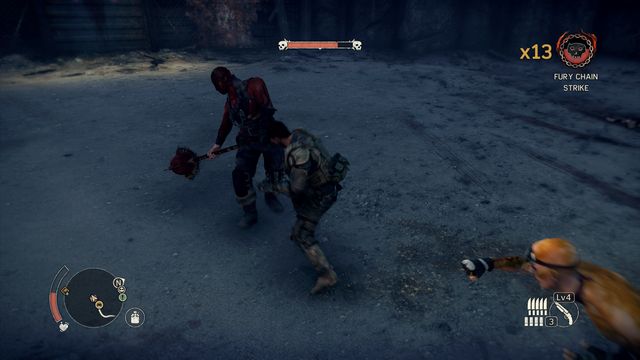
 In fury mode Max's attacks deal more damage and it is easier to stun enemy.
Each successfully landed hit (and each hit received) increases the fury bar. Once it reaches maximum, Max goes into mode in which he deals much larger damage. Regular hits become stronger and a full combo ends with an impressive throw of the enemy. In this mode the battle itself doesn't change too much, you should still depend on blocking enemy attacks. However, it would be a shame not to use the powerful attacks. So, whenever you are not threatened by a back hit, perform powerful combos. Fury lasts for a specific amount of time, it can be increased by buying ability at Griffa.
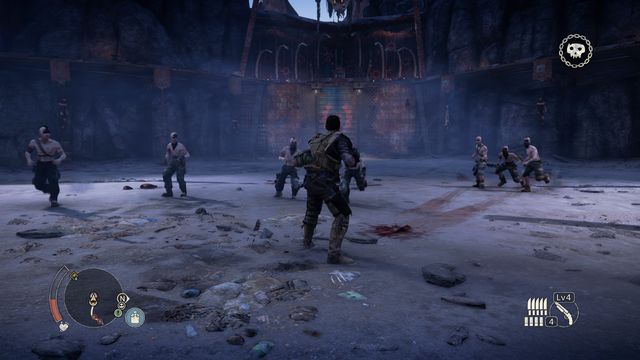
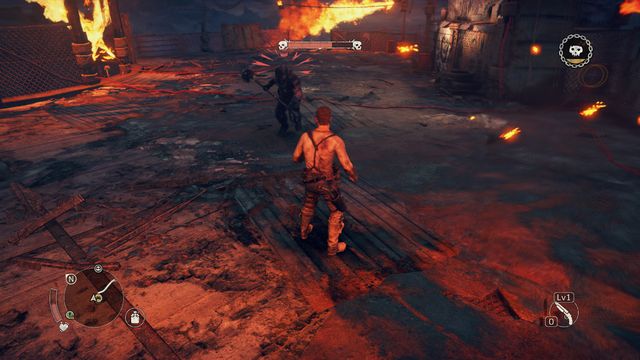 You won't block boss' attacks, you must perform a dodge.
Sometimes you will be forced to fight a special, stronger enemy type. This includes shield bearers and hounds which are mini bosses met in camps. In most cases, you can't block their attacks, which means you must depend mostly on dodges. In case of a 1 vs 1 duel it's not a big problem. However, when enemies are found in larger groups, then you should always focus on eliminating the weaker opponents first, while observing the movements of the shield bearer or the boss. Later in the game you will unlock the ability to destroy enemy shields. As for the bosses, battles with them are similar during the whole game - blocking and back attacking, usually with the use of melee weapons and flames found on the arena (if you position yourself properly, the boss will fall directly into the flame after a charge).
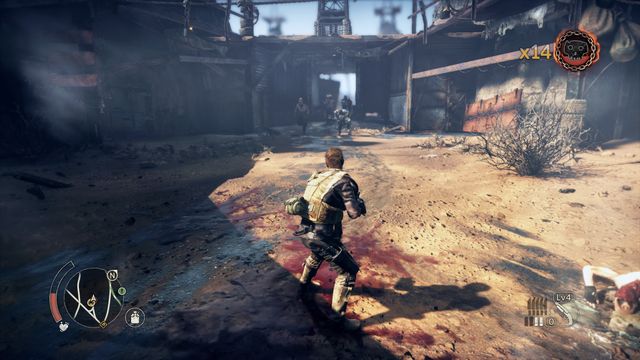
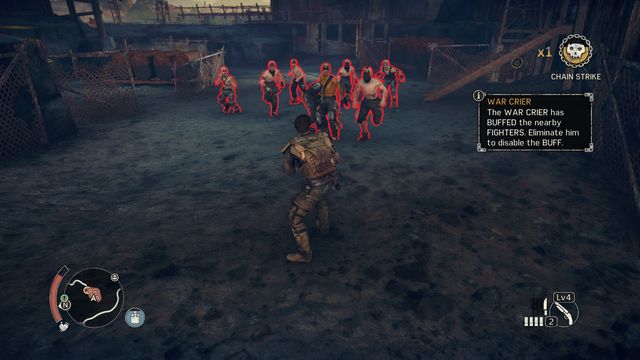
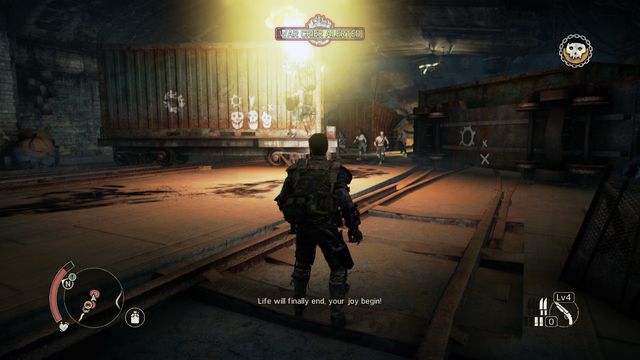
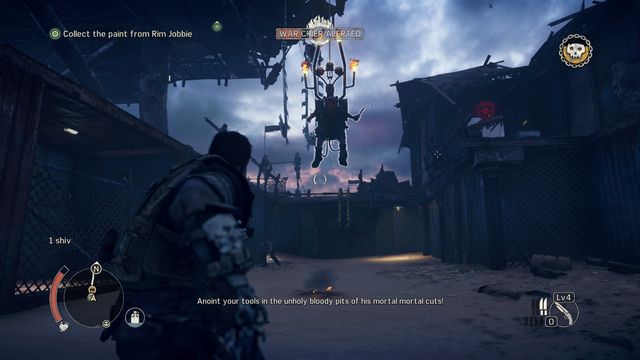 You should always eliminate the War Crier in first order.
When you are conquering enemy camps, you will frequently meet a special enemy type called War Crier. This enemy doesn't fight you directly. Instead, he is hanging above the battlefield and he supports his allies. Entering the arena with a War Crier is immediately signalized with a loading bar. Once the bar reaches its end, enemies will receive a special boost, lasting until you kill the War Crier. The easiest way to eliminate him is shooting him down. If you don't have bullets, you must find a valve located someplace nearby - turning it will drop War Crier to the ground.
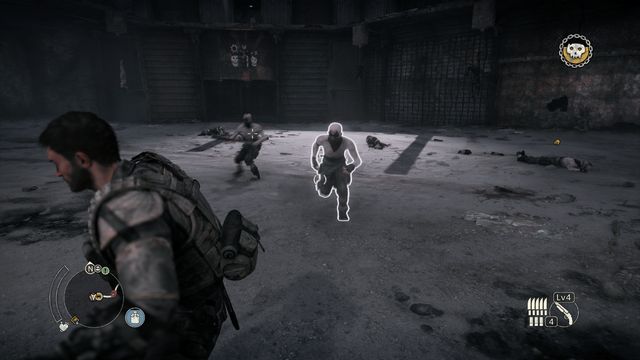 If you heal during battle, watch out for enemies running at you.
Max's health doesn't regenerate during battle, so try to use the canteen and try to find food before attacking enemies. It is hard, but you can use the canteen during the battle as well. Do it only if the health bar is close to minimum, as at that point you become an easy target for your enemies. Also, don't forget about running as far from an enemy group as possible, this should give you few seconds for drinking the water and improving your health.
You will unlock new abilities as you progress in the game. Remember about gradually upgrading other parts of Max's equipment (Jacket, Knuckleduster, Shoulder protection) as well. This will increase the hits resistance and damage dealt by Max.
Combat-related skills:
Chain finisher - after performing few attacks, it is possible to deal a stronger hit. Max does it automatically.
Weapon parry - allows you to block attacks of armed enemies.
Shoulder charge - you can gain speed and hit an enemy with your shoulder. It often stuns him, and while in fury, also makes him lose his weapon.
Gut shot - allows you to shoot enemy below his stomach. To do it, you must be close to enemy and perform a "quick shot" without aiming.
Limb breaking counter - after performing a perfect block, Max deals a powerful hit that stuns the enemy.
Fury ground execution - it becomes possible to eliminate the knocked over enemies while in fury mode. Thanks to that, Max is able to kill each stunned opponent with a single move. This ability is active for a short period of time; if you let enemy regain his senses, the execution won't be possible anymore.
Wall finisher - after a combo, you can finish up weaker opponents with a powerful wall hit. More resistant enemies will be stunned after that.
Reversal - after performing a perfect block, Max is taking enemy's weapon.
Weapon Melee Execution - if you have a weapon in your hands, you can use it to perform an execution.
Wall Shiv Execution - an enemy stunned by the wall can be quickly finished with a knife.
Shiv Grapple Escape - a very useful skill. If you have knives, you can immediately release yourself from an enemy grab. An escape will end with the immediate kill of the opponent.
Shield Shatter - this skill can be used after hitting enemy shield. In that case, Max will hit again few times at enemy cover. In fury mode this should be enough to destroy the cover, otherwise you might need to repeat it.
Master Melee Reversal - it allows you to take enemy weapon even after performing a regular block. You must quickly press the action button, otherwise enemy will push Max back.
Master Shiv Reversal - enemies with knife can be disarmed and immediately killed by Max. Similarly to the ability above, you must perform the execution quickly. When performing this move, you will obtain the enemy's knife (your ammunition will increase).
Shiv Chain Finisher - after a successful combo, you can perform execution immediately, as long as Max has a knife.
Magnum Opus is the vehicle in which you will spend the majority of the game. The car gives you many possibilities to eliminate enemy vehicles, conquer camps or eliminate towers occupied by your opponents. Magnum Opus itself, after buying some upgrades, is a weapon that allows you to ram or push enemy vehicles. In other words, this vehicle, in various configurations, is the most versatile one available in the game (thanks to upgrades and the possibility to take Chumbucket).
 Chumbucket always repair the vehicle when you leave it.
Most of all, Magnum Opus itself is a battle tool. In Mad Max, each vehicle has a certain level of durability. Once it reaches zero, Max won't die (with few exceptions, usually during missions), but the player will receive five seconds to leave the car. Chumbucket, the mechanic, can repair the car (only Magnum Opus, vehicles in which there is no place for Chum can be repaired only with the "Quick repair" option, which costs large amounts of Scrap), but only if it isn't moving. Because of that, repairing during battle is frequently very hard - stopping the car makes it vulnerable to ramming.
 You can push vehicles that are driving next to you.
Upgrading Magnum Opus will be helpful. It will increase its defensive and offensive potential. Most of all, you should take interest in three things and buy them as quickly as they become available:
- ram - allows you to deal more damage during head hits at enemy vehicles. It also secures Magnum Opus from damage received when hitting obstacles.
- armor - mostly protects the sides of the vehicle, allows you to side ram.
- spikes against jumpers - enemies can jump off their vehicles and on Magnum Opus, and then attack Max. The spikes greatly reduce the chance of such attack ending with success.
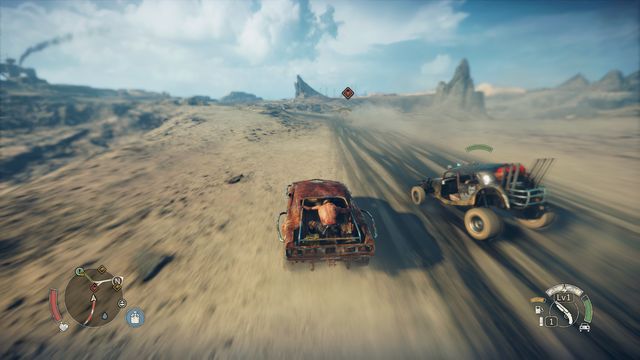
 Hitting the side of a vehicle deals most damage.
The first way to fight from the inside of the vehicle is ramming enemies. It is done by driving into enemies frontally, preferably into their side. Additionally, using the boost before driving into enemy vehicle will increase the damage you deal. This method is best when you are ramming a static opponent which, for example, stopped for a while. Remember that it works both ways. For example, if you stop, enemies can also accelerate and hit the uncovered side of Magnum Opus.
While driving, when enemies are usually driving by your side, ramming in such way might be impossible. In that case side ramming can be helpful (it can be done with the button responsible for it + selecting a direction). Thanks to this attack Max suddenly turns his vehicle in one direction. If, additionally, you bounce from one enemy into another driving on the other side, the damage dealt will be doubled.
In the first phase of the game, when lacking ammunition and better weaponry, the ramming will be most often used as a way of eliminating enemy vehicles. In both cases don't forget about proper speed - the more you accelerate the Magnum Opus, the more damage you will deal when hitting.
 After a successful attaching to enemy, you will consequently reduce the durability of enemy vehicle.
Later in the game you will receive upgraded rims. Thanks to that, you will be able to place spikes on them that will deal damage to the opponents riding next to you. For it to work, you must ride close to another vehicle and "attach" yourself to it. Then keep driving without changing direction, and the enemy vehicle's durability will be consequently lowering. To increase the damage dealt in that way, fast driving is required. Driving slowly isn't effective.
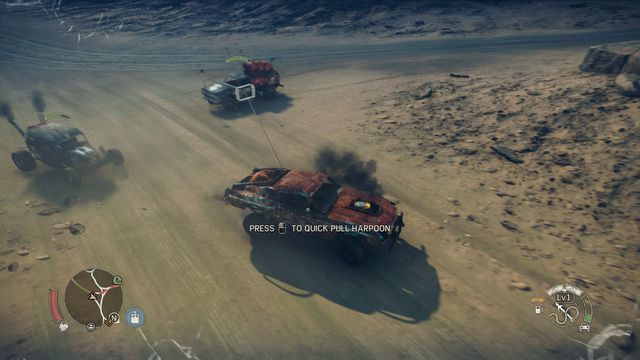 You can use the harpoon to, for example, pull the parts of vehicle's armor.
Ramming and grinding can be considered as ways of fighting with the use of the vehicle itself. However, Magnum Opus has also additional equipment which allows fighting enemies at some distance. The first piece of equipment which you will receive is a harpoon shot by Chumbucket sitting at the back of the vehicle. Harpoon is mostly used for toppling the Scarecrows, gates of enemy camps or towers. After upgrading, it also becomes useful against enemies in vehicles - it will allow you to drag them from the inside of their vehicles and to rip tires from the rest of the car.
 Burners are perfect against enemies driving close to your vehicle.
Another tool that can be used against enemies driving next to Magnum Opus are the side burners. Using them allows you to constantly shoot flames that are on both sides of the controlled vehicle. Enemies that are in the reach of the flames will quickly lose their durability. The weakness of this weapon is the necessity to position yourself properly (enemies can see what weapon you are using and might try to drive to the back) and the quick loss of fuel. Using the side burners for a longer period of time depends on the fuel supplies. In general, this weapon is good, especially after upgrading, and allows you to eliminate enemies that are ramming Magnum Opus from the sides.
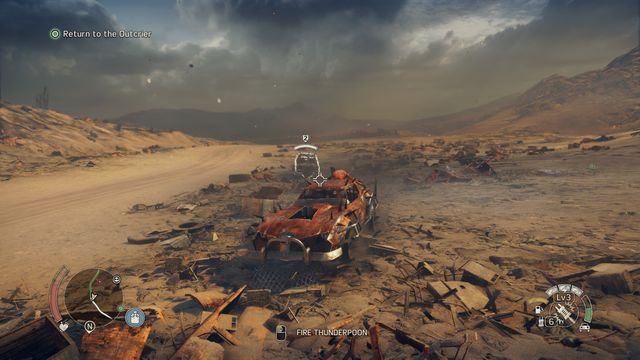
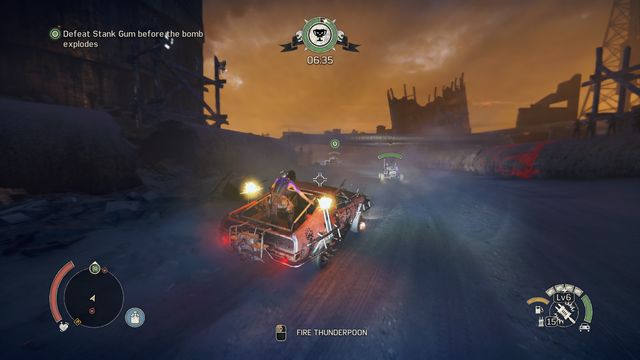 When using Thunderpoon, you can select your target.
The last, but definitely the strongest weapon in Chumbucket's arsenal, is the Thunderpoon. To put it simple, it's a rocket launcher - you mark any target and the mechanic will send a rocket there. It's a very effective weapon against enemy vehicles, it often eliminates them after a single hit. Upgrades will make it even more effective, increasing damage and reducing the time needed for reloading. Thunderpoon bullets should be used against the enemies that are hardest to defeat, for example in order to destroy their armor. Thunderpoon can be used against distant targets, which makes it an effective tool against the enemies that are running away or chasing you. You should definitely utilize the possibilities offered by this weapon.
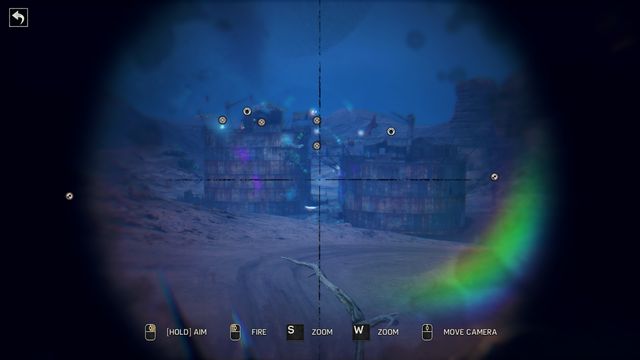
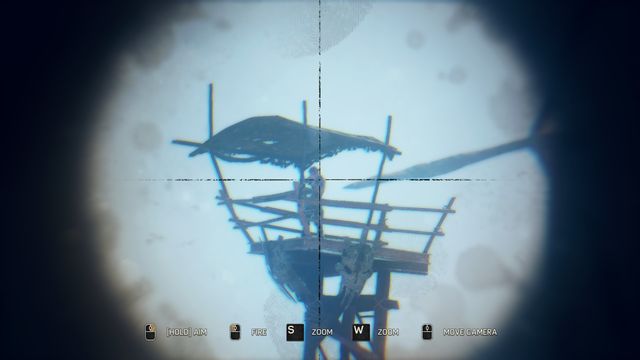 Sniper rifle allows you to eliminate enemy snipers and the first line of camp defenses from a distance.
There is one more weapon available in Magnum Opus. This one isn't too effective in destroying enemy vehicles (but it can be used for that purpose if you want). It's a sniper rifle, which is perfect when it comes to eliminating enemy snipers or blowing up some enemy towers or fuel tanks. To use it, Max must change his seat, so it is wise to do it when there are no enemies nearby. When using sniper rifle, it is possible to move, but Chumbucket is driving very slowly, so it isn't too effective. Sniper rifle is a very good backup when conquering camps - it's perfect for eliminating the first line of defense.
 Always aim at the weak spots, like uncovered fuel tanks.
During battle, you can use all available methods to eliminate enemies. Ramming and grinding will be effective when you are controlling a heavier and better armored vehicle. Using Chumbucket's weapons (especially the Thunderpoon) will always make the battle easier. You should also remember that you can use the shotgun to shoot enemy vehicle's weak points (when aiming, the time is slowing - you can then pick a target: the tire, fuel tank, and sometimes even the driver).
 Ramming will be an advantage of a larger vehicle.
However, vehicle combat is not always done from the inside of the Magnum Opus. In some missions and while driving a different car, you won't have Chumbucket with you. In that case, you're on your own. You will be limited mostly to ramming enemies. If you are controlling a well armored vehicle, such tactic will be good. However, if you have a weak car, then you should consider escaping and reaching the destination as fast as possible. No matter the fighting method, in both cases use shotgun to blow up enemy vehicles or shoot their tires.
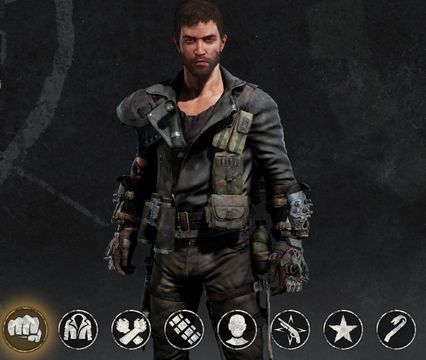
 Buying new skills will be rewarded with, among other things, new attacks used by Max.
In pause menu you can upgrade Max's equipment, his skills and weaponry. New upgrades become available after fulfilling specific requirements, for example completing a mission or obtaining a specific rank. Requirements can be checked in the pause menu, in Max tab. Each new upgrade increases some characteristics of Max, for example his resistance to hits, damage he deals or the number of bullets in the shotgun. Each upgrade costs a certain amount of Scrap.
Knuckledusters - increases damage dealt by Max in melee combat. Each level increases the base damage by 10%.
Jacket - provides better protection from melee attacks and ranged shots. Each level increases the resistance by 10%.
Wrist armor - reduces the damage received after an unsuccessful block. Additionally, increases the damage dealt after successful block, as counterattack.
Ammo belt - first upgrade allows you to wear knives and other types of ammunition, next ones increase the ammunition capacity.
Head- changes the way Max looks, doesn't impact statistics.
Shotgun - increases shotgun capacity (you don't have to reload it after each shot), it also increases the damage dealt with that weapon.
Skills - impacts the attacks available for Max. More detailed information can be found in the Combat - on foot chapter of this guide.
Tools - Max's equipment that cannot be upgraded or deactivated. The only upgrade available to buy in this category is Jimmy bar which you should buy as early as possible.
 Griffa can be found in various places, in various locations.
In addition to upgrades that can be bought in pause menu, Max also has various skills obtained in a different way. In order to develop them, you must have a specific rank that increases the maximum level of ability and a specific amount of Griffa tokens which can be spent on upgrades. Griffa tokens required for upgrading the abilities can be obtained by completing missions, increasing character rank (Legend tab in pause menu) or for obtaining achievements. Griffa can be found in various places of the map. If you have enough tokens, walk to the location where he can be found and talk to him. Remember that each time you visit him you must spend all the tokens you have. Once you upgrade each ability to maximum, you will no longer receive new tokens.
Upgrading abilities is especially important at the beginning of the game. At that point you should visit Griffa whenever you collect some tokens. Thanks to that, Max will be gradually developing and the obtained skills will make it easier to survive (increasing the health bar is especially valuable).
Longevity - increases the number of health points. One of the most important abilities which should be upgraded whenever it is possible.
Metabolism - Max will regain more health points from food and maggots.
Judgement - increases Max's legend level. It doesn't affect any skill, so upgrade this ability only if you have nothing else to improve.
Essence - Max is finding more water in tanks.
Volition - you find more scrap.
Adaptation - you use less fuel when driving a vehicle.
Attunement - an important ability that increases the damage dealt with melee weapons.
Channeling - it allows you to remain in fury mode longer. Together with attunement should be developed as early as possible.
Munition - Max is finding more bullets.
Intuition - melee weapon you pick up is more durable. Together with high attunement level greatly increases Max's combat potential.
 The mechanic and his Thunderpoon make deadly team.
The vehicle used by Max and Chumbucket can be changed, upgraded and modified in various ways. Many upgrades can impact such characteristics of the vehicle like ramming resistance, maximum speed, driving and protection from jumpers. This allows you to personalize your vehicle, creating a large colossus or a fast, but weakly armored car. Upgrades, similarly to Max's upgrades, can be unlocked as you progress in the game, by completing missions, increasing Max's rank or obtaining achievements.
Important: Maximum tires upgrade can be unlocked after finding it in Scavenging location - point 1.7 on the Pink Eye's Territory - The Heights.
 The jumpers will attack you much less frequently if you buy an upgrade.
Ramming Grill - increases the damage dealt by ramming and the resistance to head hits. Further upgrades increase this factor and, at the same time, are making the vehicle heavier, thus reducing its acceleration. If a mission requires you to fight, it is wise to have the best possible ramming grill. If you need your vehicle to be fast, consider not using this part.
Armor - increases overall durability of the vehicle, greatly improves its ramming resistance. Similarly to the upgrade mentioned above, further upgrades are more and more heavy and they have a negative impact on vehicle's acceleration.
Engine - increases acceleration, decreases handling. In general, it is good to always have the best engine available, especially if you also add a heavy armor and grill.
Exhaust - it has positive impact on maximum speed. The stronger the version, the better.
Tires - they increase traction. The newer the version, the better.
Suspension - positive impact on handling, reduces the damage caused by falling from high altitude. Similarly to two previous upgrades - the newer the version, the better.
Boost - increases acceleration and the amount of charges you can use.
Rims - they allow you to deal damage to enemy vehicles by grinding. Next versions improves this effect.
Boarder Spikes - they protect the vehicle from enemies jumping on Magnum Opus.
Sniper Rifle - upgrades impact the damage dealt by sniper rifle, reload time and the amount of bullets available in a clip.
Harpoon - new versions allow you to topple more requiring constructions (Scarecrows, gates, towers) and to tear tires. As you progress in the game, upgrades of the harpoon becomes mandatory.
Thunderpoon - Chumbucket's best weapon. Upgrade it whenever it is possible.
Side Burners - upgrades first allow you to use this weapon, then they increase the damage dealt with it.
Repair Speed - impacts the time Chumbucket needs to perform a repair. When you obtain the possibility to complete As the Wrench Turns mission and to unlock new upgrades, do it. New key will greatly improve the time required for completing a repair.
Car Body - changes the way the vehicle looks. New car bodies can be found in Scavenging locations.
Body Color - changes the car body color. New colors can be obtained by claiming top dog's camps.
Decals - an aesthetical part printed on the vehicle.
Hood Ornament - ornaments obtained by destroying convoys. They give you various bonuses to some statistics.
 You're assaulting a camp and you need a better armor? In Garage menu you will change it in few seconds.
Most of the upgrades are based on the "the further, the better" rule. Those are upgrades that have only positive impact on your vehicle. However, in case of ramming grills or armor, you must decide whether right now you need a fast vehicle or a better armored one (for example, for taking over a convoy). Upgrades can be installed and uninstalled at any time you want from the pause menu. So, if you need a change, it is always a good idea to make it - it takes short time and the result might make it much easier for you to complete the current task.
The starting area. Here you will find Chumbucket's hideout in which you will start few first missions. There's also one Camp on this territory which you will take control of during the main mission, and 3 Scarecrows which you will destroy during the same mission.
Bonecrack (1x History relic, 6x Scrap, 4x Insignia) - a camp that is easy to take control of. Weak enemies, one Sniper, one War Crier. History relic is located in the place where Max is attacking four enemies (not far further there's a pump that must be blown up. Search the green container on the left side, the Insignia is hanging on its wall.
The Edge (1x History relic, 8x Scrap, 4x Insignia, 1x Survey crew) - you can easily take down the War Crier with a sniper rifle from outside the gate. Survey crew is located in the place where Max is attacked by a single enemy with a knife (the second attack in the camp) - you must kick the door in front of the stairs which you used to walk down. From here you can also turn left where, at the end of the corridor (weapon lying on the ground), in the room with "toilet" on the right side, you will find History relic. In this camp you will encounter few more resistant enemies.
 Performing a dodge will give you a moment to attack the unprotected back of the boss.
Gasworks (7x Scrap, 4x Insignia) - before entering the camp you can shoot down the Sniper and the War Crier. Inside you will have to face few waves of enemies, including more resistant ones. In the place where the road is blocked by a flame coming from the piper you must walk near the edge (from the opposite site), above the cliff.
At the top you will have to face a miniboss. You can't block his attacks, so focus on dodging. After you roll under enemy hammer, quickly sprint towards him and attack with a fully loaded hit. Such tactic isn't too sophisticated, but repeated few times will take down the boss. You can also, if you have one of the flames behind you, force the boss to charge straight into the fire - he will receive some additional damage. If you have few bullets, you can make things even easier by blowing up the barrel once enemy gets close to it. Killing the boss will lead to taking over the camp.
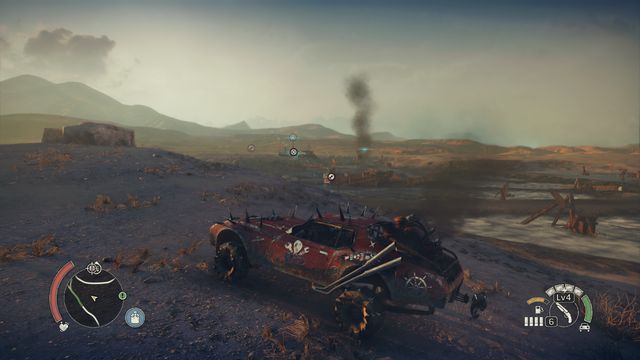
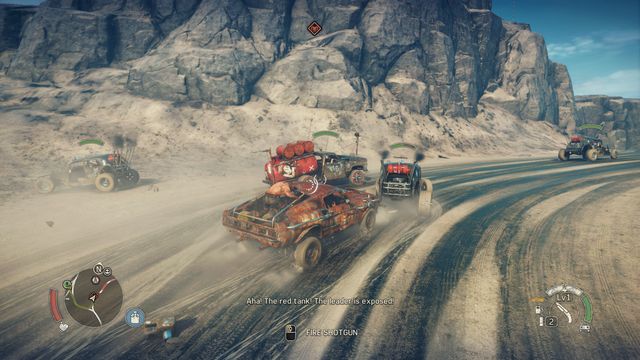 Aim at the fuel tank to quickly blow the car of the convoy leader.
Convoy - on the route marked on the map a convoy consisting of five vehicles is driving. You must eliminate the leader of the convoy by blowing up his vehicle. For that you will receive the chance to pick up the Desert Skull.
Point of encounters - here you will learn about the weak points of enemy camps (Intel encounter) or you will obtain loot (Loot encounter).
Vantage outpost - unravels important places in the region, you will also find 2x Scrap and a History relic here.
 The tanks can be destroyed with gas canisters, shotgun shots or by throwing them off the containers (activating the proper switch).
The Dredges (9x Scrap, 3x Insignia, 1x Oil well) - the camp is divided into two parts between which you will find two towers with enemies shooting fire missiles (ram them with the vehicle or shoot at the exploding barrels). You can enter the camp from the side (the container marked with "X" letter). In order to free the camp you must destroy ten tanks - six of them can be found on the southern side and four other on the northern side (there you will also find one War Crier). The part required for building the Oil well can be found in the southern part, you must walk down there (the passage can be opened with the jimmy bar).
Sand Sifter (11x Scrap, 3x Insignia, 1x Survey crew) - eliminate two shooters and the War Crier before entering the camp (use sniper rifle). At the gate you will face few enemies, few more not far further inside. You must destroy six tanks to free the camp. Part of the Cleanup crew can be found if, after defeating the first enemies, you will go forward, and then left, to the center of the complex. The chest is lying in the main corridor, behind the can with food. After walking back to the surface from the other side, you will be attacked by the last group of enemies. You will also find other tanks to destroy there.
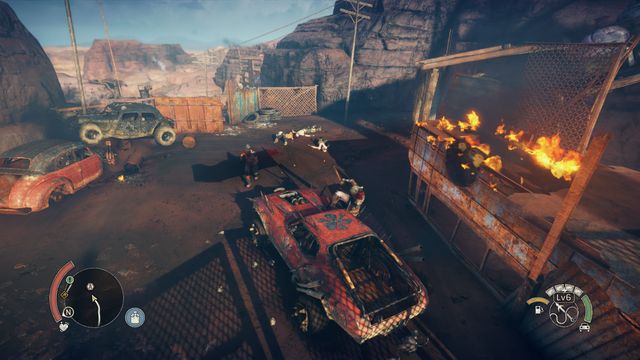
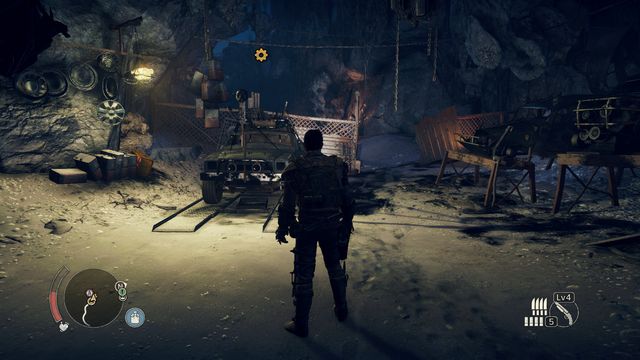
 A successful theft of a vehicle from the Hollow point camp will be rewarded with large amounts of Scrap.
Hollow Point (8x Scrap, 3x Insignia, 1x Oil well) - the camp is protected by a sniper and a gate with flames. After walking inside, steal the car parked nearby, if you manage to deliver it to Jeet's Stronghold, it will be transformed into 500 scraps and unlocked in the Workshop. Oil well can be obtained by walking twice on the ladder in the place where the War Crier hangs and then riding down the rope to the roof below. The pump to destroy can be found at the bottom of the camp.
Vantage outpost - uncovers important places in the region, you will also find 4x Scrap here. To get there, you must slip between the rocks, behind the ship.
Legendary encounter - from this encounter you will learn about ramps on which you can perform legendary jumps (the locations of the jumps will be added to the map).
Jeet's Stronghold - the starting point of few missions, it also allows you to create projects inside and to select the currently driven vehicle. In addition to that, you will find 5 pieces of Scrap here.
Black Sands (6x Scrap, 3x Insignia, 1x History relic) - a sniper and three towers with enemies throwing bullets are the protection around the camp. Additionally, you will find some flames at the gate. Inside there are two groups of enemies and few single ones. History relic is located on the lower deck, in the place where you can replenish water in your canteen (the door on the right side, opened with Jimmy Bar). The pump to destroy can be found above, the door is hidden behind the door that you should open with a kick.
 Three new waves of enemies will attack you in the lower part of the camp.
The Pipes (10x Scrap, 4x Insignia, 1x History relic) - two snipers can be found before the entrance to the camp, and the gate is protected with flames. Inside you will find two groups, in both cases a War Crier is hanging above the arena. Behind the door opened with explosives you will find a bridge, on the other side a single opponent and slightly below a History relic. At the bottom there's a large group of enemies. New enemies will keep coming at you. There are two pumps to destroy there.
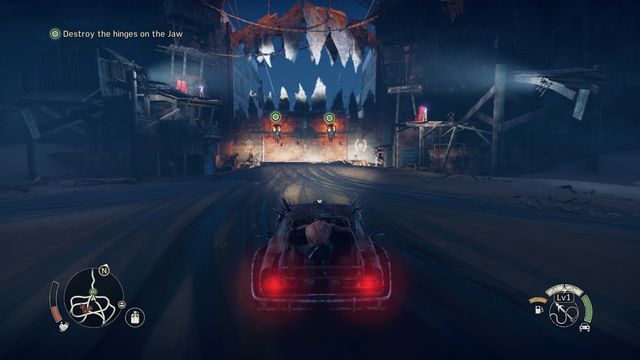 The Jaw is related to a story mission - completing it will unlock the northern part of the map.
The Jaw - the passage to the Dead Barrens. Black Magic story mission is related to it.
Scarecrows - Scarecrows are bit tougher here and require higher harpoon level or the Thunderpoon.
Vantage outpost - Here you will find 2x Scrap and a single sniper. To use the balloon you must shoot 3 hooks that hold the rope.
Convoys - two convoys that can be found here are slightly more protected (4-5 vehicles, light armor, flames). For destroying the vehicles controlled by the leaders you will receive the Dread Ram (west convoy) and Plug Halo (east convoy).
Ironclad (6x Scrap, 4x Insignia, 1x Survey crew) - to take control of this camp you must eliminate all the enemies that can be found there. The first group is supported by a War Crier, second consists only of enemies. The opponents are fast and they can avoid Max's attacks. Because of that, you should often use counter attacks and parries. The part of the Cleanup crew can be found at the top, the ladder behind one of the doors opened with a Jimmy bar.
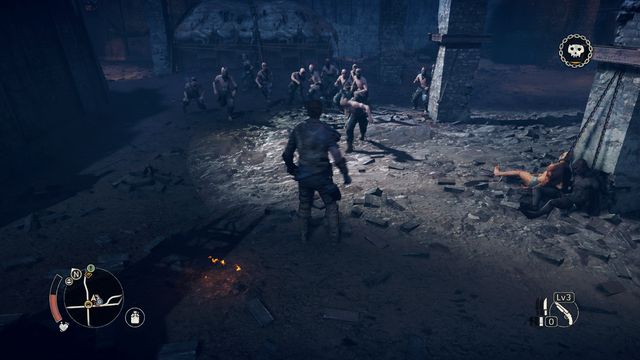
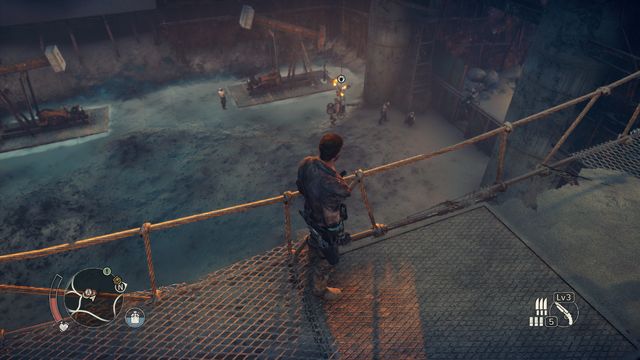
 Instead of jumping down, wait and eliminate the climbing enemies, one after another.
Wreck Hill (7x Scrap, 4x Insignia, 1x History relic) - entrance to the camp is guarded by 3 snipers, a gate reinforced with a flame and a tower with enemy throwing Molotov's cocktails. If you bypass the gate from the right, you can find a gas cylinder which can be turned off, thus getting rid of the flames. The second group of enemies can be eliminated by remaining above - the enemies will try to climb the ladder one after another, it will make eliminating them much easier. To take control of the camp, you must destroy 4 containers. History relic can be found in the last part of the camp (a group of enemies with a War Crier) - find a ladder there (in a container, on the right side) and use it to walk down.
Vantage outpost - few enemies, 3x Scrap and one pallet (around 50 pieces of Scrap).
Convoy - on the route marked on the map a convoy consisting of four vehicles and leader's truck is moving. After destroying it you can collect the Mask of the Pious.
 You can use the weapon dropped by enemies against the boss.
Great Watcher (9x Scrap, 4x Insignia, 1x History relic) - before entering, neutralize three snipers and three towers with throwing enemies. Inside a group of regular enemies will attack you. Once you reach the bridge, you must throw the Thunderstick at the barrels on the other side, thanks to that the bridge will lower and you will be able to pass. Not far further you will have to use the handle to lower the second bridge. Behind it you will find a group of well armed enemies. Further road leads up, to the boss.
When fighting him, in first order you should eliminate few armed opponents. Use the weapon they drop against the boss. He is also vulnerable to fire shooting from time to time in few places of the arena. All you need to do is position yourself properly and perform a dodge, the charging enemy will fall into the fire. Few such dodges and attacks with the bats picked from the ground will quickly kill the opponent and free the camp. Once the battle ends, go through the boss' cage and open the door with a kick. Not much further, near the concrete cliff, you will find the last part of Scrap and a History relic.
Rust Bird (6x Scrap, 2x Insignia, 1x History relic, 1x Maggot Farm) - A single tower with enemy throwing Molotov's cocktails and a single sniper in front of the entrance. To free this camp you must defeat all opponents - first group is at the entrance (supported by a War Crier). Not far further on the left you must kick the door. In the tent behind them you will find a History relic. At the top the last group of 6 enemies will attack you. In the plane wreck you will find a project part.
Loot encounter - A wanderer shows you a place in the nearby cave where you will find a chest with Scrap (4 enemies nearby).
Legendary encounter - A wanderer will task you with destroying few nearby hideouts, they will be marked on the map.
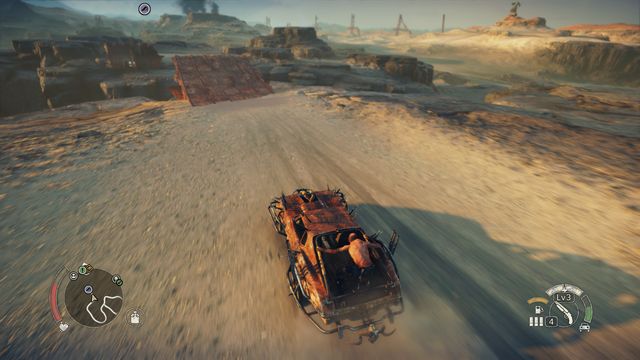 Use the boost before the ramp, it will extend the jump.
Ramps - related to the legendary encounter in Balefire Flatland. Use the nitro before driving on the ramp to complete the jump.
Buzzards' Lair - related to the nearby legendary encounter. Find the hideout, beat the defenders and arm the bomb in the pointed location.
Vantage outpost - you will find 3x Scrap here. To get the balloon down, pull the lever at the yellow panel (floor below the balloon).
Convoy - a convoy is driving through the route marked on the map. It consists of four vehicles and the leader's truck. After destroying it you can pick up the Lawrel.
 Scrapulance can be found near the entrance to the camp.
Gob Stone (6x Scrap, 3x Insignia, 1x History relic, 1x Water storage) - entrance is protected by a sniper and an enemy throwing Molotov's cocktails from a small tower. Before the gate you will also encounter flames. Behind the entrance you will notice a Scrapulance, don't forget to take it later. The first group of enemies is attacking not far ahead. The road leads to another, larger group (War Crier) and to the pump which you must destroy in order to take control of the camp. In the shed on the right side you will find the project part and a History relic.
Black Cove (7x Scrap, 3x Insignia, 1x History relic) - before the entrance, there are snipers and towers filled with throwing enemies positioned along the way. Behind the entrance you will face the first group of enemies (well armed, backed by the War Crier). Deeper, behind the bridge, you will be attacked by a large group, including two enemies with shields. Quickly eliminate the weaker opponents so that you can take care of the shielded ones easier (remember about dodging). Behind the door opened with a kick (on the right side) walk up, leave the bridge and keep going up, in the direction of the previous battle - there you will find some Scrap and a History relic. When going back, use the rope and you will slide down to the pump, which you must destroy.
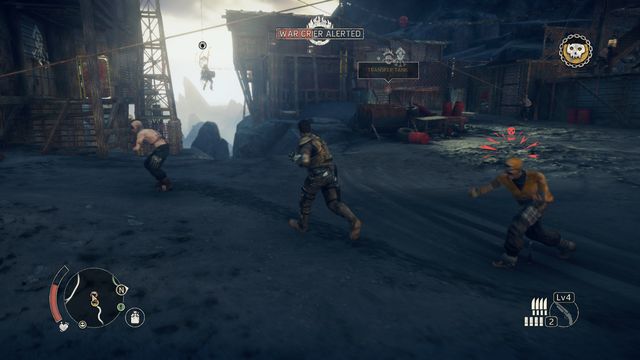
 Enemies that are under War Crier's "buff" are much more dangerous.
Overlook (8x Scrap, 3x Insignia, 1x Oil well) - when driving under the gate, watch out for two snipers. The first group is supported by a War Crier. Further road, behind the door opened with a kick, leads down the camp, there you will face a large group of weak opponents. Excluding one group, enemies in this camp aren't strong, and the camp itself contains many tanks that must be destroyed. Additionally, it is pretty large, so full infiltration will take some time. The project part can be found in the last part of the camp (two opponents, large tent, turn left towards the exit, the chest is lying on the rock ledge). In the part on the surface you will find a Scrapulance - don't forget to drive it to the stronghold.
Buzzards' Lair - three enemies inside
Loot Encounter - the wanderer you meet will step on a mine, collect the loot he left
Vantage Outpost - explosives are needed to blow the door (in the shed on the other side you will find the Thundersticks). 1x Scrap and 1x History relic can be found here (near the stairs, down from the balloon platform).
Convoys - two convoys. You will receive the Sly One (West convoy) and Talon (East convoy, attacked during A piece tougher story mission) for destroying the vehicles of the leaders.
 The legendary encounter will uncover the location of the trucks.
Rook Nest (9x Scrap, 2x Insignia, 1x History relic) - to bypass the protected bridge, you can use the rope and ride directly to the center of the camp. To do it, walk up the path near the Intel encounter. There, between the rocks, you will find a passage. Kill the sniper and use the rope. There are 6 tanks to destroy in the camp. A large group will attack you after entering, first eliminate the War Crier. History relic can be found on the upper level - after opening the door with a kick, go left, to the end. The relic is hidden behind the water tank, under wooden barricades. In the further part of the camp you will again face the War Crier and a large group of well armed opponents, including one with a shield. It is a good idea to pick up any weapon after the fallen enemy as quickly as possible. Destroy the remaining tanks to take control of the camp.
Vantage outpost - it uncovers important places in the region, you will also find 1x Scrap and 1x History relic here. Before using the balloon, refill the generator with fuel, then get the balloon down with a lever. The relic can be found behind the door.
Legendary encounter - In this place you will learn about the trucks that you must destroy (their location will be added to the map).
Gutgash's Stronghold - The starting point of few missions, it allows you to create projects inside and to select the currently used vehicle. In addition to that, four pieces of Scrap and a History relic (on the first floor, near Gutgash) can be found here.
Convoy - on the route marked on the map a convoy is traveling. It consists of six vehicles and leader's truck. After destroying it you can pick up the Rubba Baby.
 You will get to all other parts of the camp from the first one.
Scorched Sand (7x Scrap, 4x Insignia, 1x History relic) - eliminate 2 snipers and 3 towers with enemies before entering the camp. First enemy group will attack you right after you walk through the gate. They will be supported by the War Crier hanging above the field. There are few Thundersticks lying on the ground, it is a good idea to use them. The camp is divided into three parts, you can visit all of them from here. A new group of enemies will wait for you on each field (on the right side from the gate they will be also supported by a War Crier). It is best to leave the part of the camp that's on the left from the gate at the end. You will be attacked by a large group of enemies there (additionally, by an enemy with a shield), use the Thundersticks lying at the entrance. In this place, in a tin shack in front of the passage you walked in, you will also find a History relic and the last water tanks that must be destroyed.
 The road to the camp is protected by few towers and snipers.
Storm Shelter (9x Scrap, 4x Insignia, 1x Maggot Farm) - The road to this camp is well guarded - there are towers and few snipers positioned here. Get under the gate by gradually eliminating the threat. After walking in, you will be attacked by a strong group backed up by a War Crier. In the further part of the camp (door from the left side, opened with a Jimmy bar) you will face another group of enemies. Here you will also find Maggot Farm project part. Further road leads through another pair of doors, also on the left side (after walking through, watch out for the enemy throwing Thundersticks). Destroy two tanks hidden behind a net (a skull is painted above) here and you will claim the camp. If you select the path on the left, you will return to the first part of the camp.
Vantage outpost - in addition to the balloon, you will find 1x Scrap here. The place is guarded by two enemies, before using the balloon you must take it down (the yellow lever).
Convoy - a convoy is riding through the route marked on the map. It consists of five vehicles and the leader's truck. After destroying it you can pick up the Helmeted Beat.
 New waves of enemies will come from both sides at the same time.
Proving Grounds (8x Scrap, 3x Insignia, 1x History relic) - after eliminating the camp's security (sniper, 3 towers, the fire at the gate that can be turned off by walking up, the ladder is on the right side) you will enter an arena. Exploration will have to wait as first you will have many battles to fight. You must survive few waves of incoming enemies. Parry enemy hits and pick the dropped weapons whenever you have a break. Try to save some ammunition and blades, surviving the enemy waves won't be the end of combat.
 Attack the boss immediately after loading the fury.
Once the cutscene ends, you will be attacked by the hound accompanied by few weaker opponents. The boss is vulnerable to attacks dealt during fury. Because of that, you should first load Max's fury by defeating the weaker opponents. After that, a series of hits will deal much larger damage to the boss. You can't block his attacks, remember about dodging and hitting his back. After the battle you can search the camp. History relic can be found in the place from which the boss jumped - you will get up through the gate on the left side of the arena. It can be opened with the yellow valve.
Blood Ridge (9x Scrap, 3x Insignia, 1x Survey crew) - you can safely enter the camp from the road, there are no guards. Inside you will be attacked by a small group of opponents. You will also find a Scrapulance behind the gate, don't forget to take it later. The pump can be found in the next part of the camp, you can reach it by walking outside, through the bridge along the rocks. There you will find a larger group of stronger enemies (including enemy with a shield and a War Crier). After eliminating them you can destroy the pump. On the left side, on a higher platform, you will find the project part.
Vantage outpost - to move the balloon, you must shoot the ropes holding it and refill the fuel. You will also find a single sniper, 1x Scrap and 1x History relic (inside the booth, on the mattresses) here.
Convoy - a convoy consisting of five vehicles and leader's truck move along the route marked on the map. After destroying the truck you can pick the Death Twins.
Jugular Canyon (10x Scrap, 6x Insignia, 1x Survey crew) - when driving under the camp, first eliminate all the towers with enemies, otherwise they might make things difficult for you at the bridge. The container that you must destroy to walk through the bridge is located on the left side (use the sniper rifle). Once you reach the camp, inside you will find many opponents split into few groups (supported by War Criers). The project part can be found in the place where you can walk through two bridges, to the right and to the left. Select the left part of the camp. There you will be attacked by one of the larger groups. Walk to the room above after the battle. There you will find a chest with Survey crew. Defeating all opponents will end in claiming the camp.
 Second group is slightly stronger
Blood Beach (8x Scrap, 2x Insignia, 1x History relic) - entrance to the camp is guarded by two snipers and two towers with enemies throwing burning missiles. First part of the camp is protected by regular opponents supported by a War Crier. After defeating them, walk up (the door on the left side, opened with a kick, next to the water tank). There you will find History relic and slightly further the second and last group of enemies. This one is slightly larger, and there's a shield bearer with it. After eliminating all the opponents, destroy the remaining containers.
 Enemies in this camp are divided into small groups.
Finger Peak (11x Scrap, 4x Insignia, 1x Scrap pallet, 1x History relic, 1x Survey crew). Before entering the camp, secure its first defenses (1 Sniper, 3 towers). Inside you will face few rather small groups of enemies. Immediately after entering, in the ship wreck, you will find a History relic. From there you can go either left or right - no matter which route you pick, you will walk through the whole camp. The project part is lying much further, in a large chimney, together with Scrap pallet (the highest part of the camp). You must defeat 25 enemies to liberate the camp.
Large Blade (9x Scrap, 4x Insignia, 1x History relic). The camp is strongly protected (level 4), so you should have the maximum amount of ammunition and water in the canteen. The outside defense consists of 3 towers from which Molotov's Cocktails are thrown and of 3 snipers. Immediately after entering you will be attacked by two groups of enemies. It is important to start with eliminating the enemies that throw Thundersticks whenever you are far away. Focus your attacks on them, making it impossible for them to use their weapons. The place where a Thunderstick will hit the ground shines in red color on the ground - if needed, perform a dodge immediately. On the right side you will find 2x Scrap, the road ahead leads to the further part of the camp. There you will be attacked by a smaller group of regular opponents - don't forget to eliminate the War Crier. After the battle, walk up through the lowered ladder. Then, pick the road on the left side (in the room on the right you will find, among other things, History relic) and keep going up, behind the bridge which you must lower. After you pass the place with a knife lying in the corner, two opponents will jump out from behind the cover. Slightly further you will find a water tank and a ladder leading to the arena.
 Use the weapon lying on the arena to quickly and easily eliminate the top dog.
The battle with this opponent shouldn't be troublesome. He has similar attacks to other bosses you met, observe his behavior and perform quick dodges. The boss is very vulnerable to knife attacks (if you stun him, you can perform an "execution". There are also weapons lying around, you can use them to deal large amounts of damage). If that will not be enough, stand in such position so that you will have flames behind you - this will make the enemy fall into flames after unsuccessful charge. Combining weapon attacks and deceptive dodges will let you eliminate the opponents quickly. The camp will be liberated and the paint obtained (you must liberate this camp in order to continue the Fumehead's debt story mission).
Vantage outpost - in order to reach the balloon, you must walk around the ladder from the left side, while avoiding the traps lying on the ground. Additionally, you will find 1x Scrap and five enemies here.
Pink Eye's Stronghold - your regional base of operations, you will find 1x History relic here (level above the place where you can meet with Pink Eye).
 Conquering the camp looks almost the same from both sides.
Grave Bridge (8x Scrap, 4x Insignia, 1x History relic) - you can enter the camp from both sides of the bridge. In both cases you will have to face a group few enemies and snipers guarding the entrance. You can partially eliminate the threat from outside the camp, it is a good idea to destroy the containers at the gate and to shoot down the War Criers. History relic can be found in the southern part of the camp, in the half-open container. Conquering the camp looks the same from both sides: a group of enemies with War Crier and a sniper, another group of opponents in the middle, and at the end another group, War Crier and a sniper. Eliminating all Stank Gum's warriors will end with claiming the camp.
 The last group of opponents will open the path to the next part of the camp.
Havoc Point (8x Scrap, 3x Insignia, 1x Survey crew) - the first line of defense consists of two snipers and few towers with enemies equipped with Molotov's cocktails and Thundersticks. You can enter the camp from the right side of the gate, through the hidden passage. After entering, prepare for a slaughter (quickly kill the War Crier). You will be attacked by waves of enemies for few minutes, among them some fast and armed opponents. Watch out especially for the opponents throwing Thundersticks. There are weapons and the Thundersticks mentioned previously (enemies will drop additional ones) lying on the ground. You must use all available methods to eliminate opponents quickly. After few waves of enemies jumping from above, a container leading further will open - the last wave will run from it, including an enemy with a shield. After eliminating the swarm of opponents, you can finally walk to the further part of the camp. There you will find your target - three pumps. All you need to do is shoot the tank in the middle - everything will blow up and the camp will be claimed. All the Scrap, Insignia and project part can be also found there.
Vantage outpost - watch out for the single sniper. In addition to the balloon (destroy the rope attachments), you will also find 1x Scrap here.
Convoy - on the route marked on the map a convoy consisting of five vehicles and leader's truck can be found. After destroying it you can pick up the Demon Doll.
Loot encounter - deliver the message to Pink Eye's Stronghold and you will receive 50 pieces of Scrap.
Scavenger encounter - enter the pointed sewers again and you will find a chest with Scrap.
Stonehold (12x Scrap, 4x Insignia, 1x History relic) - entrance to the camp is protected by a sniper and two towers with enemies. Inside, refill your canteen and walk down. There, watch out, as the first group of enemies consists mostly of fast opponents. Next point is the lower part of the camp where you can ride down with the rope (on your way you should refill the canteen and use food if needed). Once you reach bottom, you will be attacked by two enemies, you should also remember about shooting the War Crier down. On the right side you can climb to the higher level, from where you can reach the final part of the camp. There you will be attacked by the last group of opponents and in the central part you will find the pump. Slightly further few canisters are lying and a History relic can be found above (after walking up the ladder).
 When driving from south, you can bypass the gate and enter the camp directly.
Hell's Gate (11x Scrap, 4x Insignia) - when driving to the camp, it is a good idea to kill the snipers, otherwise they might shoot you inside. Entrance to the camp is open, you don't have to deal with the gate (walk from the other side). Behind the door you will be attacked by few enemies. However, the real threat awaits deeper in the camp. All enemies found there are armed, so watch closely the incoming attacks and try to disarm one of the opponents and take his weapon as quickly as possible. From here you can go under the gate (other opponents) and walk down (walk between the remains of the building from the place where the War Crier was hanging, then left - there you will find few opponents and three containers). The last containers can be found in the part with the bus wrecks, you can get there by, for example, jumping from above or by kicking the door below.
Vantage outpost - you will face two opponents and two snipers at the balloon's location. To be able to examine the neighborhood, you must shoot the ropes holding the balloon and add some fuel to the tank. You will also find 2x Scrap and a History relic lying in the tent here.
 Uncover the tank and then destroy the barrels.
Legendary encounter - after this encounter Stank Gum's Catapults will be marked on the map. You will destroy them by uncovering the fuel tanks (at the back of each vehicle) - this will uncover the exploding barrels.
 Use the Thundersticks to quickly kill few opponents.
Dead End (12x Scrap, 4x Insignia) - a heavily protected camp. When driving under the gate, eliminate few towers and snipers. Watch out not to drive in the hanging bombs at the gate. After walking inside, go ahead where you will face the first larger group of enemies (War Crier, shield bearer) - use the Thundersticks that can be found here to quickly eliminate the threat and to destroy two containers. Next part of the camp can be found on the left from the entrance gate, the passage is between the wagons. There you will find other tanks and another group of enemies. Slightly further you will find the passage to the last part of the camp where you must watch out for the large group of fast opponents.
 Both towers are well guarded.
Twin Sisters (10x Scrap, 2x Insignia, 1x History relic, 1x Survey crew) - the first line of defense consists mostly of snipers and enemies throwing Thundersticks. The camp itself consists of two towers. When you will walk close, you will notice that the entrance to one of them is open. Inside you will be attacked by a large group of enemies, use the weapon lying on the ground to make the battle easier. The road up leads to the roof (after reaching the first platform, move slightly towards the entrance, the History relic is lying there), where you will face another group of enemies, including a War Crier and snipers (if you haven't eliminated them from distance). Blow up the door (Scrotus Insignia next to them) and behind you will find a project part and a rope that leads to the second tower of the camp.
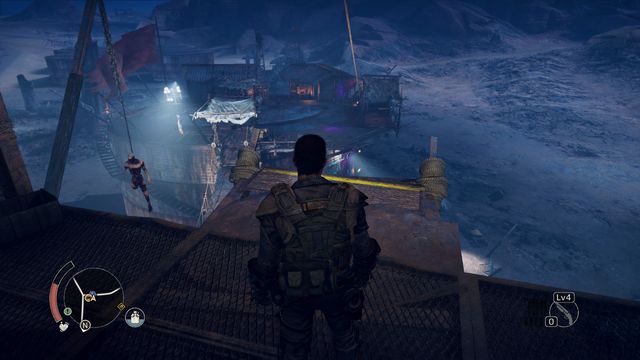 Riding down the rope will allow you to quickly move to the second tower.
This one is similar to the previous tower - you will face two larger enemy groups at the bottom and at the top, halfway you can refill your canteen. Killing all the enemies will liberate the camp.
Tyrant's Lash (12x Scrap, 4x Insignia, 1x History relic) - a camp claimed during Pink Eye's side mission - In Due Time.
Vantage outpost - to lower the bridge, throw the Thunderstick at the explosive barrels on the other side. The balloon requires to be fueled before using. 2x Scrap and a single opponent - that's all you will find in this outpost.
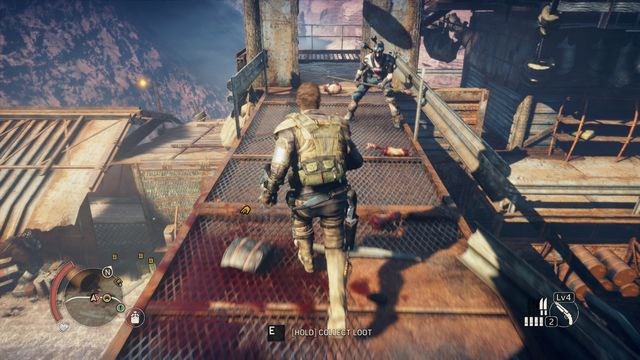 Enemies throwing Thundersticks are located at the bridge, above the battle arena.
The Choke (8x Scrap, 3x Insignia) - you will have a perfect sniping position at the hill near the road. From there you can eliminate 4 camp snipers and two War Criers. After entering the camp you will be attacked by a large group of enemies. However, two opponents standing on the bridge above the arena are a greater threat - they are throwing Thundersticks below. Try to defeat the group below or bypass them temporarily, walk up and kill the two troublemakers. Eliminating the larger group will de facto mean claiming the camp. There are few tanks on the bridge and the last ones are hanging under the bridge (the road below can be found at the sides). Finally, enter the Scrapulance and drive it to the stronghold.
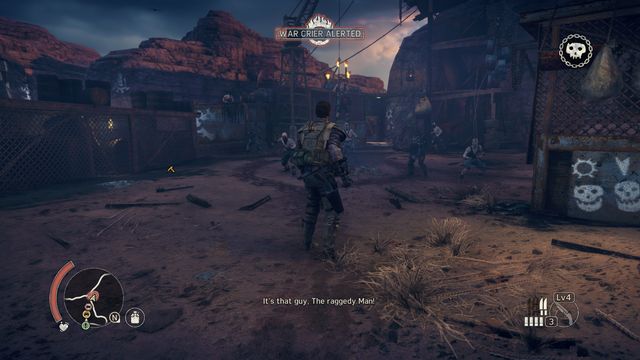 Destroy the towers one after another or quickly bypass them.
The Drop (11x Scrap, 5x Insignia) - eliminate two snipers and the tower with enemy throwing Molotov's cocktails from distance. Drive towards the gate gradually, destroying few towers with enemies throwing Thundersticks on your way. After driving into enemy territory, you will immediately bypass the Scrapulance - don't forget about it when going back. A bit further you will be attacked by first opponents. During the battle you can use the nearby stand with Thundersticks. Behind the door opened with explosives you will find a passage to the next part of the camp (a single opponent on the way), then a ladder leading above, and a passage outside.
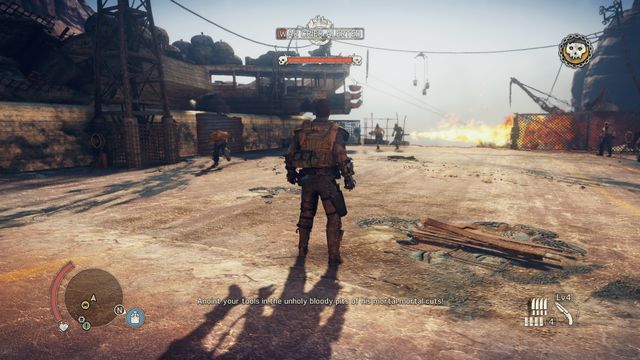 Before fighting the top dog, you must defeat a group of few opponents, including a War Crier.
The top dog is waiting there for you. At first you must eliminate a large group of opponents. Start with the War Crier hanging above the arena. Also, watch out for the shield bearer's charges. The fight with the top dog (he will jump on the arena after defeating most of the enemies) is going according to the usual scenario - dodges, back attacks, and executions whenever it is possible. This boss is vulnerable to shotgun shots, using this weapon at him will deal large damage and stun him, allowing you to perform an execution or combo. Few hits combined with accurate shots will quickly lower enemy health bar. After you defeat him, the camp will be claimed.
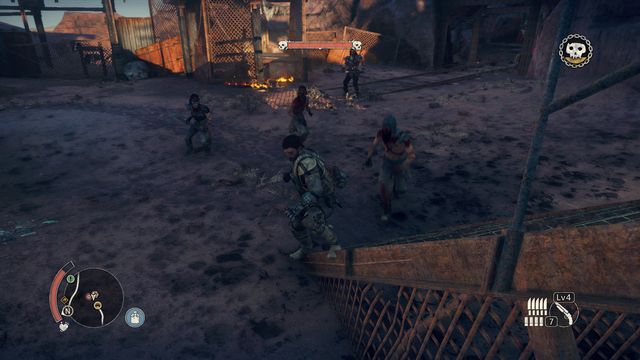 Drag out and eliminate the weaker opponents, leaving the boss for the end.
Old Hole (11x Scrap, 3x Insignia, 1x History relic) - entrance to the camp is open, only two snipers are guarding it. Drive into the first part with your vehicle, this will let you drive over some of the enemies. Then walk down, where another group accompanied by an enemy with a shield will jump on you. Once you eliminate them, destroy the door (Thundersticks nearby) behind which you will participate in a battle with large group of opponents, supported by a miniboss. The key to success is counterattacking and eliminating the weaker opponents in first order. Most of the enemies are well equipped, the weapons they drop can be used against the top dog, which you should leave for the end - it will be much easier to defeat him once he is alone. Until then, watch out for his charges. You will find a pump here as well, it should be blown up in order to finish conquering the camp. In the container next to it you will find the collectible - History relic.
Vantage outpost - in order to activate the balloon, you will have to add fuel and bring it down (the lever in front of the bridge). You will find 2x Scrap and 5 enemies here.
Convoy - on the route marked on the map you can find a convoy consisting of six vehicles and leader's truck. After destroying it you can pick up the Teddy.
 Destroy the pumps without leaving the vehicle.
Wheel Greaser (10x Scrap, 4x Insignia, 1x Oil well) - you can spot part of the defenses of the camp from the nearby hill (Intel encounter location). It is wise to use this opportunity to eliminate four snipers from distance. Before storming the camp, equip large amounts of Thunderpoon ammunition, it will make eliminating the towers around the central part of the camp much easier. Start by moving around the camp and destroying the pumps outside it - it is best to remain in the car and use Thunderpoon or shotgun (blowing up the barrels). Finally, enter the southern part, where you will find an unprotected pump, and to the northern part - there, in addition to a pump, you will find a project part (walk up the ladder on the left side of the gate). In general, to claim this camp all you need to do is take large amounts of Thunderpoon ammunition and destroy the first line of defense. This will allow you to destroy the remaining pumps easily.
War Crier is supporting the group in the central part of the camp.Skull Top (11x Scrap, 4x Insignia, 1x History relic) - entrance to the camp is protected by 3 towers and a sniper positioned at the narrow road. It is possible to completely avoid the defense by entering the camp through the bridge, from another side. After getting through the gate you will be attacked by the first group consisting of few enemies. From there you can walk through the bridge to the next part of the camp - the second group of enemies, which waits for you there, is stronger (more opponents, including a War Crier and enemy with a shield). After defeating them, you can regenerate your health (food), collect some Scrap and ammunition and destroy containers (behind two of them thrown below you will find a room with History relic). The door opened with a kick will lead to another part of this camp (walk through the destroyed plane). There you will find the last group of enemies - watch out especially for the one throwing Thundersticks. Destroy the last containers and the camp will be yours.
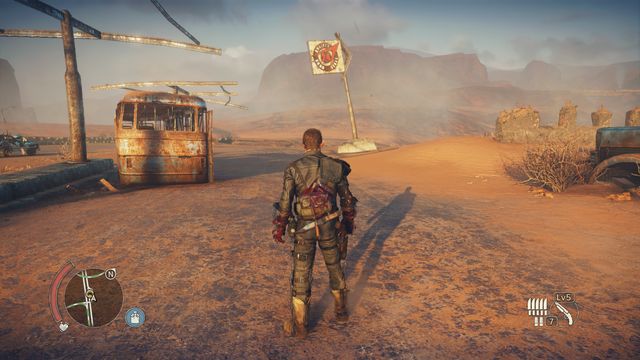
Scavenging location (point 1.7 on the map) - after completing the mission for Pink Eye (In due time mission) you will receive a History relic and a clue related to this place (screen).
 "Collect" the tires and you will unlock the upgrade.
It's an important scavenging location because inside (after walking downstairs near the building) you will find the last tires upgrade. Walk towards the pile lying under the wall.
Legendary encounter - from this place you will learn about the ramps at which you can perform legendary jumps (their location will be added to the map).
Vantage outpost - you will reach the balloon through the underground. In order to use it, you must replenish its fuel. History relic can be found next to the balloon. Additionally, you will find 4 pieces of Scrap and 10 enemies here.
Convoy - the route of the convoy consisting of seven vehicles and leader's truck is marked on the map. After destroying the truck you can pick up the Bike.
This is one of the last areas of operations. You will find many Scavenging locations, Encounters and few Scarecrows and Snipers here. There are no Convoys or enemy Camps here. However, there are many patrols, towers with enemies throwing missiles and large amounts of opponents occupying Scavenging locations.
Deep Friah's Temple - your base in this region. You will also find 1x History relic here, walk from the main room above (from the left, behind the place where you talk with Hope) and then to the next room.
Vantage outpost - you will find 5 enemies, 2 snipers and 2x Scrap here.
Legendary encounter - from this place you will learn about the valves which you must turn off (their location will be added to the map).
The Dunes is a territory where you won't find many opponents. It's a one large desert. The only interesting places you can find here are Scavenging locations. Few missions takes place here, except for that it's a rather empty territory (no threats or enemy camps).
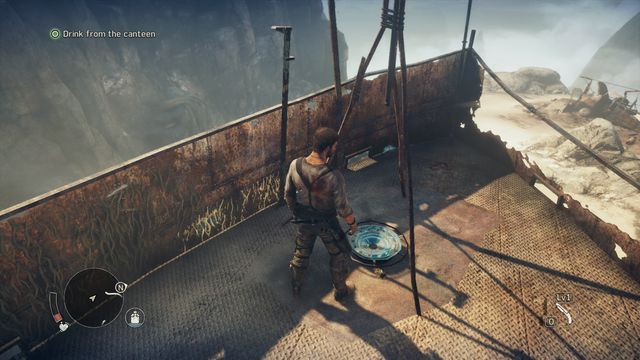 Water supply will allow you to replenish health points.
After starting the game, follow the green marking, forward through the defile. On the open territory, near the ship's hull, you will find a place where you can refill the canteen. After that, use the collected water to replenish some health points.
Then, walk down, where you will meet Chumbucket. Talk to him - he will bind up the dog and send you to get the wires. Before going, use the food lying on the ground, it will fully replenish your health.
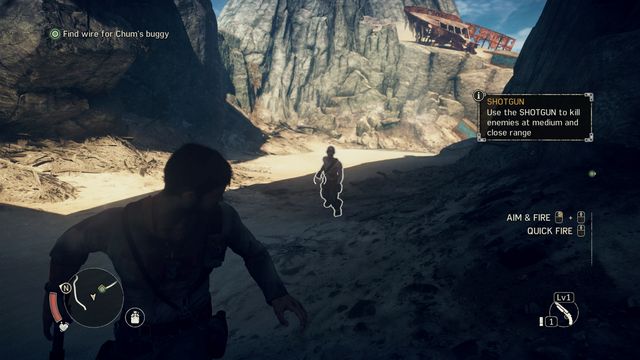 You can quickly eliminate the running enemy with a shotgun.
Go towards the place pointed by the marker. After slipping between the rocks, search the body. Then, once walking on open territory, you will face your first enemy. Aim and shoot soon after to eliminate him quickly.
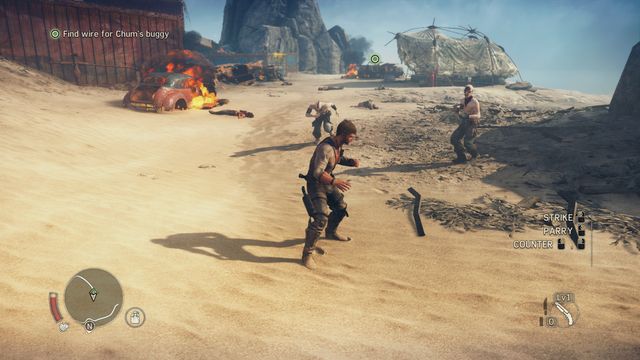 Don't attack blindly - parry cautiously and perform counters at the right moment.
While walking down, you will have three enemies to defeat. You must face them with your bare hands. The rule is very simple - try to avoid enemy attacks, or even better, block them. Attacks are signalized, this will give you some time to block the hit. Proper cancel of enemy hit gives you an opportunity to perform your own attack. If you hold the attack button longer, the hit will load and deal more damage. In summary, block enemy attack and then perform your own quick counterattack (few hits). This will be more than enough for current opponents. A while further you will be attacked by two new opponents.
 Collect the found Scrap - it will be useful when upgrading the vehicle and Max's skills.
After cleaning the territory, collect two chests with Scrap that can be found here. First one can be found in the tent on the right side, in the place where you were attacked by two opponents. The second one can be found in a blue container, this time on the left side (one of the opponents had jumped from there). After collecting the pieces, take the wire that Chumbucket needs from the vehicle wreck and go back to the mechanic.
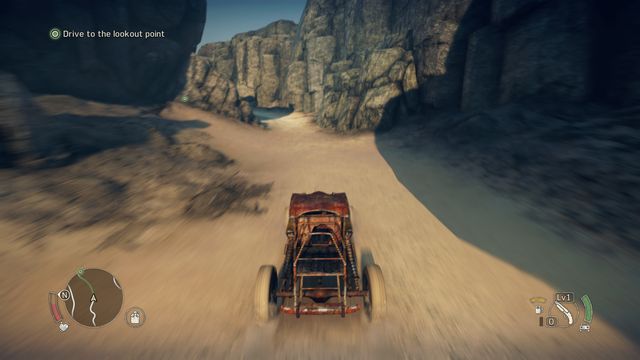 Drive with Chum to the vantage outpost and the mission will end.
Once you reach the destination, put the wounded dog in the car and drive to the vantage outpost, at the same time learning the vehicle controls. Once you arrive, walk to the marked place and the mission will end.
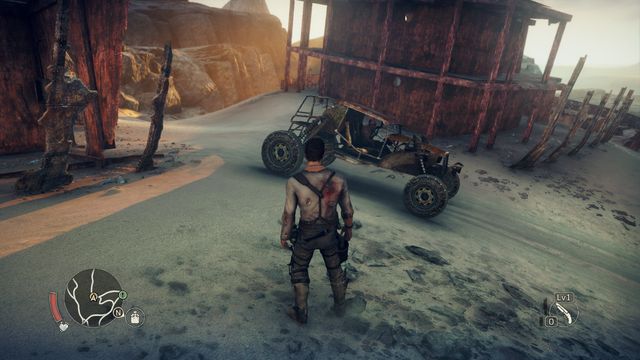 Ride with Chum to his hideout.
You will start the mission by going to Chumbucket's Hideout marked on the map (you can do it immediately after completing the previous mission). While inside, you should fill the canteen with the water from the dispenser found on the left side of the stairs. Walk towards the mechanic and, after a short cutscene, the mission will start.
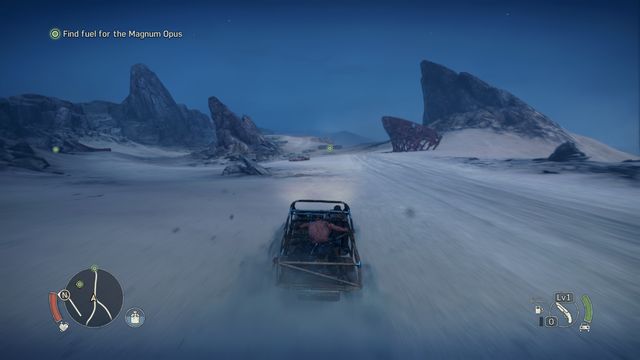 Examine the two camps marked on the map - in the one on the right you will find enemies and the fuel you seek.
Start driving towards the marked place. At some point, you will run out of fuel and two places where you can look for it will become marked on the map.
In the small camp on the left side of the road you will find two packs of Scrap lying inside and next to the tent. The canister will be empty here, so go to the other pointed place. There you will have to defeat three opponents in a brawl - remember about parrying their attacks at the right time (the icon above the head of the enemy that prepares to attack) and counterattacking. By doing so, you will avoid taking damage, and your attacks will quickly knock the opponent down. After taking care of the enemies, search the place (you will find 2x Scrap) and then refuel the vehicle and collect some supplies of the fuel.
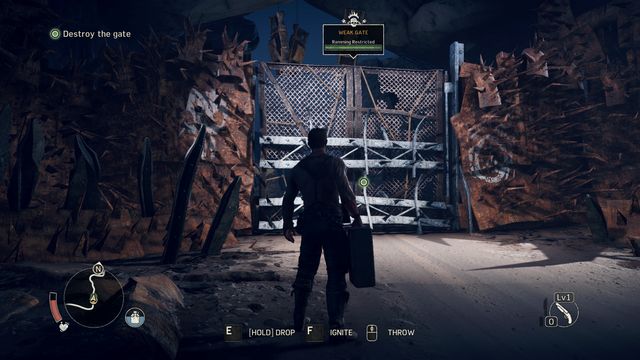 Destroy the gate with the spare canister.
After refueling the gas, drive forward. Once you reach the destination, take the canister from the vehicle, walk close to the gate and set the container on fire - a short cutscene will start (if not, then throw the burning canister at the gate).
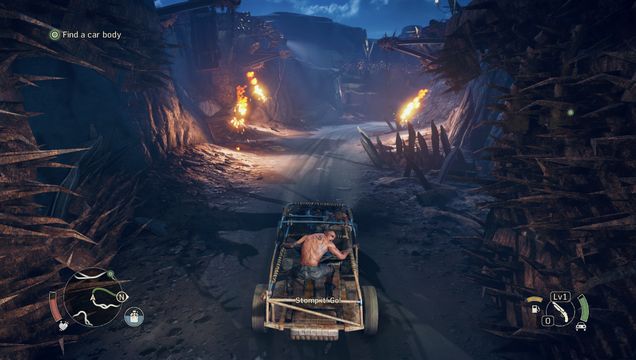 Watch out especially for the hanging bullets that explode after a while.
When driving through the camp, you must watch out for hanging bombs. Some of them will be motionless and will explode only if you drive into them - obviously, don't do that. Be careful at turns, because some of the bombs will swing. These ones explode after a while, it is best to stop, let them explode and drive after that. Once you reach the end of the road, enter the cave.
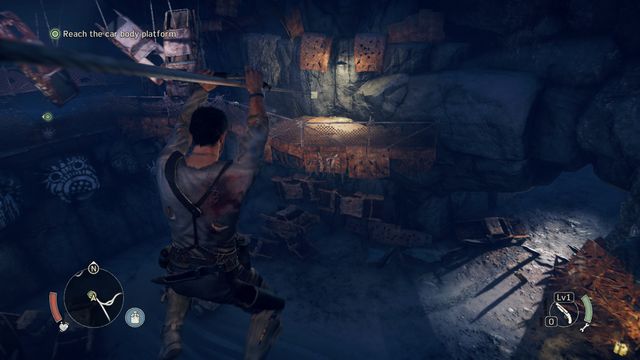 By using the rope you will reach further platforms.
After walking few meters, you will find some Scrap and a rope which you must use to ride down. Pick up the flashlight few steps ahead, you can use it from now. Before using the second rope you can replenish water. Then, ride down the platform with car wrecks.
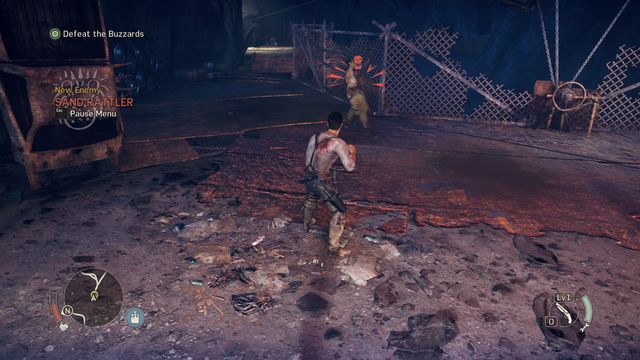 Some attacks cannot be blocked, you will avoid receiving damage by dodging.
On the platform you will find two chests with Scrap. Walk towards the switch and select the "skeleton" you want (it serves only esthetical purposes). After lowering the selected model you will be attacked by an enemy with knife. Watch out for attacks marked with red icon, you can't block them - only moving away or dodging will save you from damage. You can block only the lighter attacks, after that perform a quick counter. After the battle, pick up the dropped blade and prepare for few more enemies.
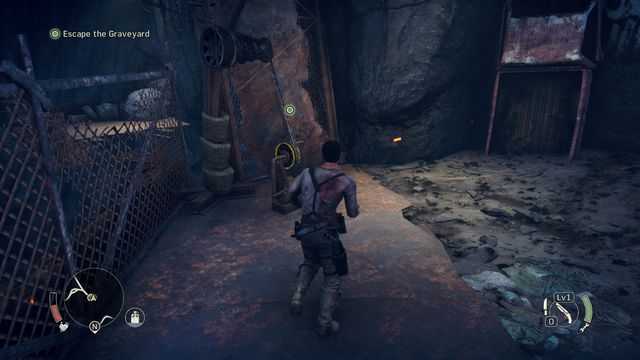 The switch that lowers the bridge that leads to the vehicle.
A large group will surround you. It is important to perform successive blocks and quick counters. Try to eliminate a specific opponent as fast as possible instead of focusing on all of them at once - a successful block and few attacks should be enough for that. Finally, while avoiding bullets, lower the bridge and the ladder, enter the car at the bottom and escape the graveyard.
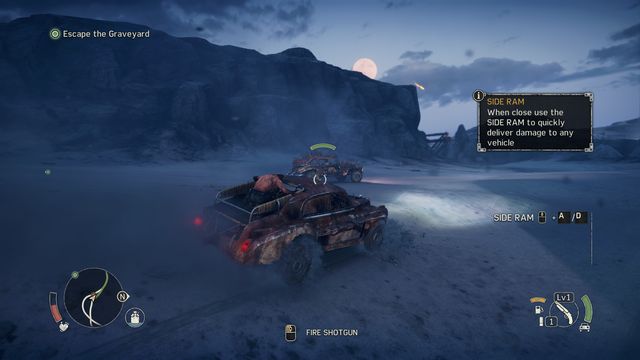 Aim at the wheels or gas tank, a single shot can eliminate enemy vehicle.
During the escape, you will be attacked by few enemy vehicles. Use ramming or (what's easier) shotgun to shoot weak points (tires, gas tanks), this will eliminate your enemies' vehicles. Avoid bullets, destroy the cars and don't stop, you should easily reach the end of the road, where the mission will end.
In order to start the mission, talk with Chum in the hideout. Collect all the junk lying around, then take the end of the harpoon and talk again to the mechanic. Workshop window will open, you can upgrade your vehicle there. Create a harpoon and a ram. Then, leave the hideout.
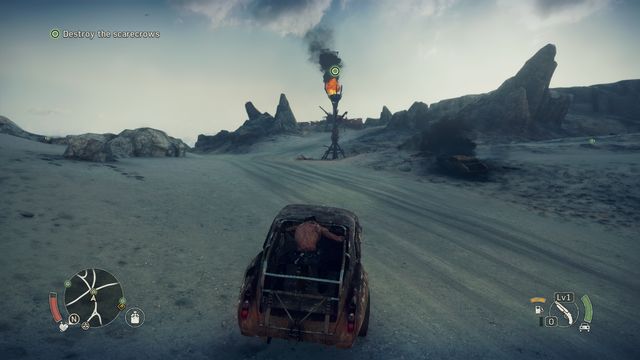 Destroying the Scarecrows reduce threat level in the neighborhood - ride through the posts or break them with the harpoon.
You must destroy three Scarecrows. Two of them you can simply drive over (don't forget about collecting the Scrap that will drop from them), the third can be destroyed with the harpoon - change the active weapon, shoot, and once the harpoon sticks to the Scarecrow, pull back your car. After completing this part of the mission, go to the vantage outpost and infiltrate the camp with binoculars (the gate, Sniper from the Wasteland, a hanging War Crier)
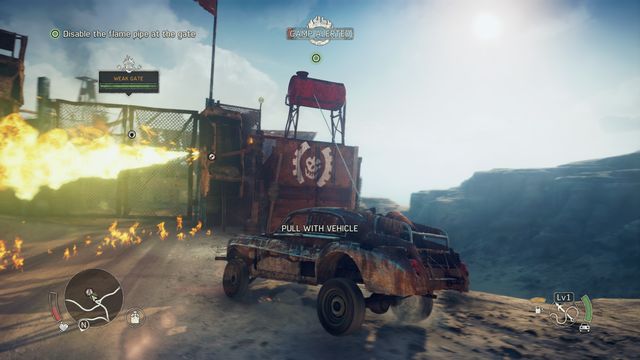 Use the harpoon to topple the tower with a sniper and the fuel container at the gate.
First, take care of the sniper. Drive close, attach the harpoon to the tower and topple it. Do the same with the red fuel container at the gate and finally with the gate itself. Prepare to fight few opponents when you enter the cave.
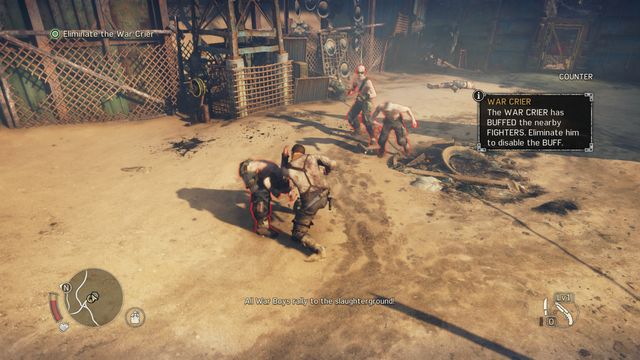 Enemies with a red aura are under the influence of the "war song" and they deal more damage.
Your first target should be the enemy hanging above. If you have shotgun rounds, you can quickly shoot him down. If not, find the handle on the left, destroy it (interaction), and the enemy will fall to the ground. It is important to do it as fast as possible, otherwise he will end his song and inspire the enemies to combat (they will deal more damage). After cleaning the territory, collect Scrap (green container on the right side, behind the entrance), another Scrap (lying under a car) and, from the near container, collectible (History relic). Then, destroy the door and walk to the next part of the camp.
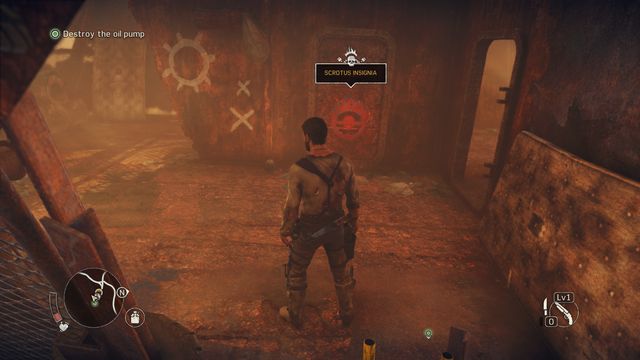 Destroying Insignias is a side objective when taking camps.
After kicking the door, you will be attacked by three opponents. Watch out for the enemy with a knife (perform dodges when he will perform unblockable attacks). At the barrier at the end you will find Scrap. After collecting it, go up the ladder. In front of you there is Insignia, and on the left you can replenish your water canteen. Collect another Scrap (behind the wall) and run through the bridge.
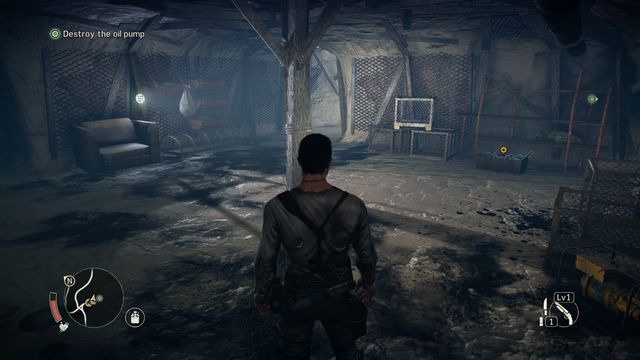
On the other side, enter the room ahead, and then use the ladder to go above - ammunition and Scrap can be found there. Then walk to the very bottom, you will reach a small room shown on the picture. Collect another part of Scrap lying under the wall and choose the left path. Again, walk down the ladder. Collect another Scrap and shotgun round. With the latter you will be able to destroy the Insignia hanging on the wall. Go back and this time select the second ladder that leads above.
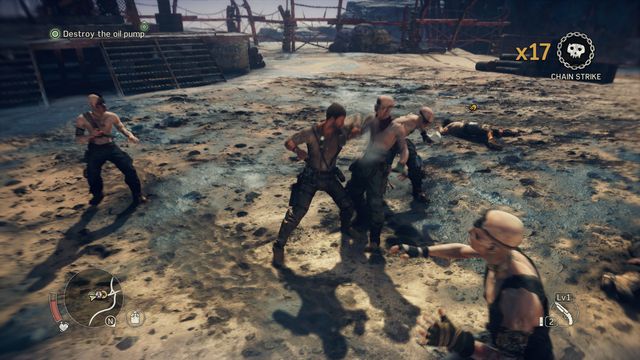 Keeping the fury will allow you to deal stronger hits and to quickly eliminate opponents.
You will be attacked again once you reach the surface. Additionally, the fury will be unlocked. It activates when you deal few successful hits (a combo). Max's attacks will become stronger, this will let you eliminate enemies faster. After cleaning the territory, search the platform (you will find 3 final parts of the Scrap - in the tin shed on the left, behind the pump, in the room on the right, and up the ladder) and destroy the third Insignia (the barrier on the right). Finally, place the lit canister (break the door on the left side of the ramp) under the pump and go back to the vehicle.
Go to the marked place, you will meet Griffa there. He will give you 3 tokens which you can spend on upgrading Abilities (you should invest in Longevity). Once that is done, get up and call Chum in the marked location (shoot the flare). Install boost through the Workshop menu and test it - use it a moment before you reach the marked ramp.
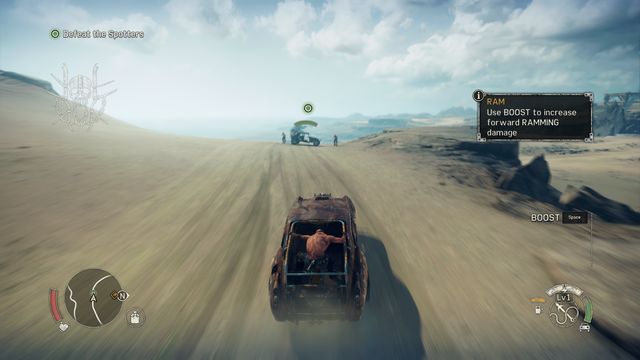 Use the boost before ramming into the vehicle to increase the damage.
Before the mission ends, you must destroy two more vehicles - use the boost to ram into the one turned side towards you. The second one you can ram or use shotgun on it. After destroying the vehicles and killing the enemies, the mission will end - you can still collect some Scrap and fuel. The option to unlock Max's upgrades, such as new combat abilities, will be available from now as well.
After taking control of the vehicle, drive ahead for a while. Then, start following the marked vehicles. Once you reach the destination, a short cutscene will start - once it is over, drive to Jeet.
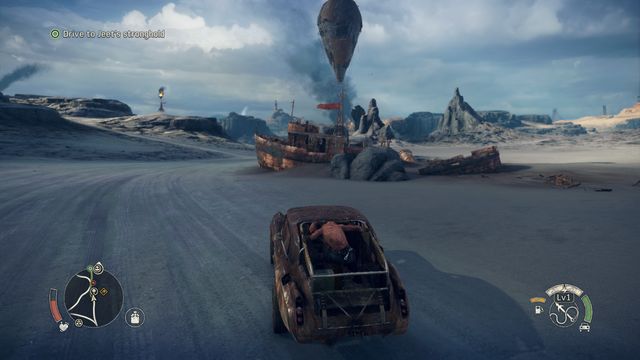 Use the observation balloon on your way.
You will be driving near the Vantage outpost - search it in order to find 2x Scrap and a History relic. You can also use the balloon to uncover part of the territory. Then go straight to Jeet's stronghold (you can be attacked by single enemies on your way).
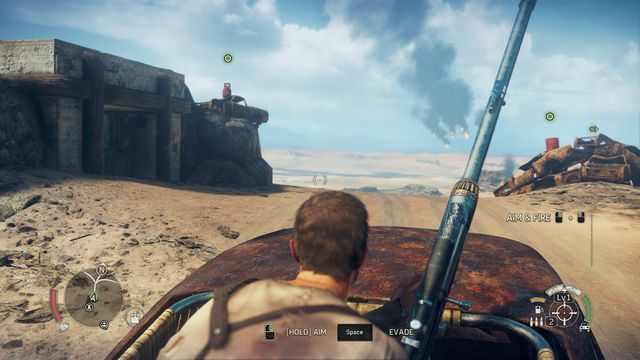 Test the sniper rifle you constructed by destroying the bottle and the barrels.
Once you're in the fortress, talk with Jeet, and then with Chum. Collect the mechanism for the sniper rifle and install it in the vehicle. Test the new weapon outside, destroy three gas bottles with it. Then, switch to driver seat and drive to the marked location.
 Shoot down two snipers from safe distance.
Once you get close, switch seats with Chum and use the sniper rifle to kill two snipers on the lighthouse at the left side of the complex. Then, drive towards the entrance and use the ladder to get above. Go to the end of the path. Walk down the ladder if you want to collect some Scrap. Then turn right, to the main part of the location.
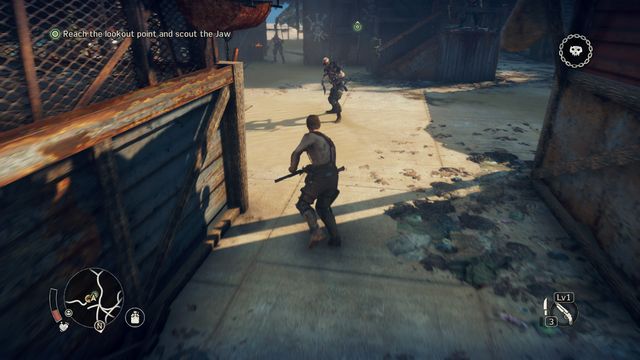 Perform a dodge and then attack the back of the shield bearer.
There you will be attacked by an enemy with a shield. The tactic to deal with him is very simple - dodge before his attack and then quickly hit his back. You can also help yourself with shotgun and destroy his shield. After defeating the opponent, don't forget about picking his weapon up, it will make it much easier to defeat the new enemies. Finally, search the place - you will find some water, 2x Scrap and, in the right corner, a History relic. After you collect the items, go up.
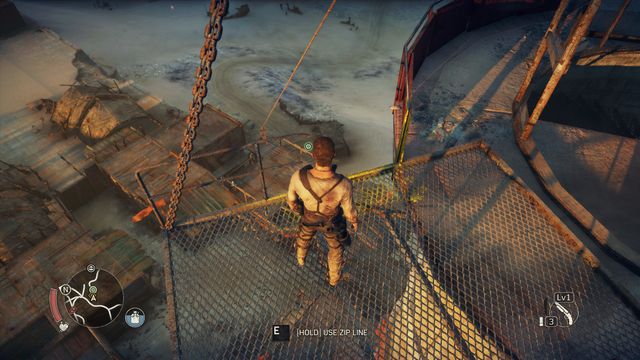 Quick way below.
On the way to the top (collect sniper rifle ammunition) it is a good idea to go to the bottom of the lighthouse where you will find Scrap. The mission will end when you will walk towards the edge at the top of the lighthouse and then return to Chumbucket - use the rope to reach previously unavailable platform, where you can take the last piece of Scrap and kick the ladder down, thus unlocking the passage.
 Destroying the Scarecrows is the easiest way to reduce threat level.
Talk with Chum and learn about the part required for creating an Archangel. Then, talk with Jeet and go search for the required car body.
Important: This part of the mission will become active once you have reduced the threat level in Jeet's Territory at least by one point (from 5 to 4). If you haven't done that yet, take control of some Camp, get rid of Snipers, a Convoy or Scarecrows.
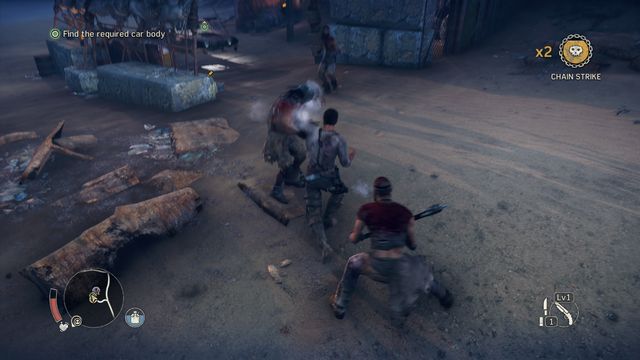 Three enemy fighters are protecting the needed part.
After reaching the marked location, get rid of three opponents. Watch out especially for the guy with a large club, damage dealt by it is dangerous. If you eliminate him in first order, you can pick up his weapon and easily take care of other enemies. Search the place - you will find 2x Scrap, Scrap crew above and your mission objective - the Car body - hanging above.
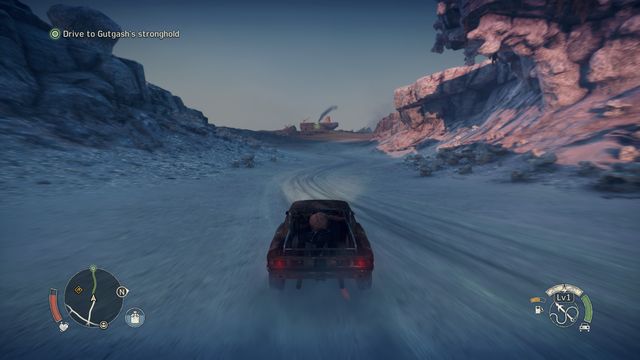 Go to the stronghold where you will find the last needed part.
Then use the Workshop window and install all the available upgrades for "The Jack" Archangel - if you don't have enough Scrap, search for it in Scavenging Locations. When only one part will be left to install, you will receive new objective - travel to Gutgash's Stronghold. Go there. In the stronghold, you will have to bring all required wires to Chum. Finally you will have to collect 100 Scrap and buy the last upgrade. "The Jack" will be constructed and the mission will end.
After obtaining the "Day lizard" rank and liberating any camp on the Gutgash's Territory, drive to his stronghold and talk with him to start this mission. It is a good idea to start it while having full shotgun ammunition clip.
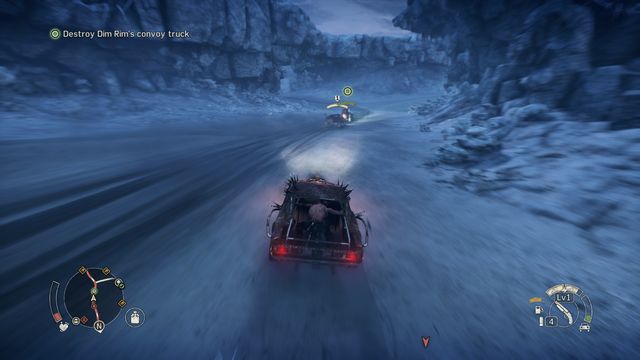 Your first objective is to locate the convoy route and the leader's vehicle.
Go to the place where the convoy is riding. Once you get close enough, its route will be revealed on the map. You must destroy the vehicle of the leader and obtain the Hood ornament. You don't need to rush, you can eliminate one enemy vehicle after another. You can take the cars down with single shots at the tires or gas tanks.
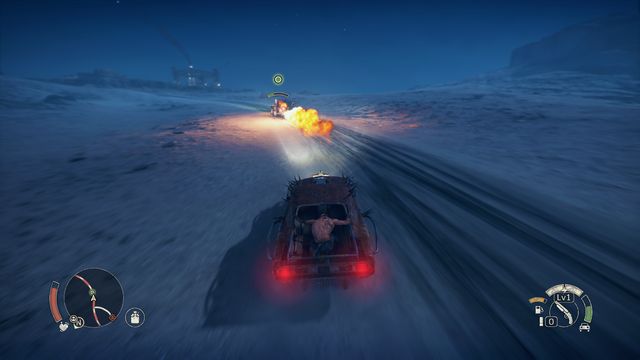 Watch out not to drive through the flames.
Leave the vehicle of the leader for the end. Ram it few times and, if you still have some ammunition, shoot at him. You can also try to immobilize the vehicle by shooting the wheel and destroying it after that. When vehicle's durability will get close to zero, he will activate a flame behind him, it will make it harder to get close. Once that happens, use the boost to get ahead of the machine and then ram it for the last time. Pick up what remains of the enemy vehicle (the Talon) and the mission will end.
During the mission you can lose track of the convoy or even die. If that happens, return to the convoy route and look for it there or wait until it will drive towards you. Look for the dust - if you see a cloud of dust someplace above the route, it means that the cars are driving there.
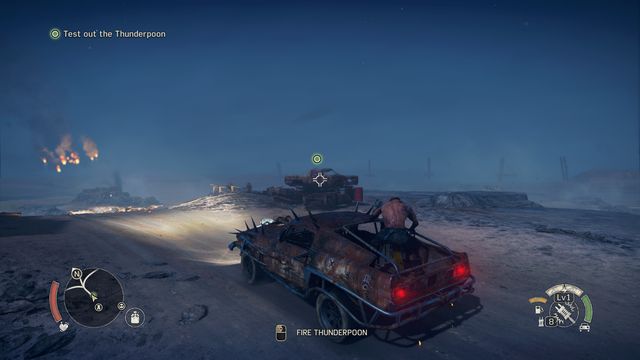 The new weapon will make eliminating enemy vehicles, gates and Scarecrows much easier.
Time to unlock the second part of the map. Talk with Jeet, then with Chum. Install the Thunderpoon in the Workshop menu. Leave the stronghold, test the new weapon and drive to the passage.
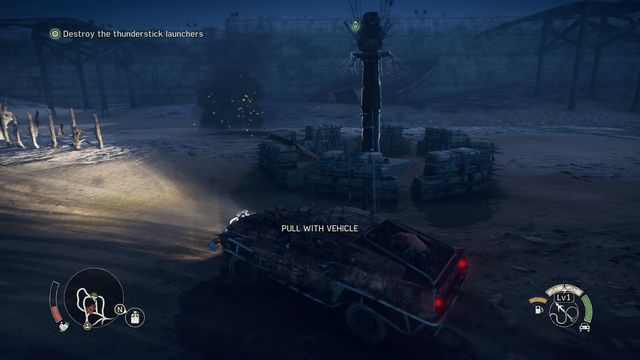 You will destroy the reinforced towers by toppling them with a harpoon.
At the destination, destroy the gate with the new weapon and drive inside. Your first task will be to destroy three towers from which the enemies are attacking you. The place marked on the ground with a red semicircle is a spot where a burning weapon will soon fall. Save the ammunition for Chum's new weapon and use regular harpoon to topple the two towers. You can drive into the third one by accelerating before the ramp. You will be attacked by three enemy vehicles during this phase. Try to eliminate them by shooting them or dragging the enemies out with a harpoon.
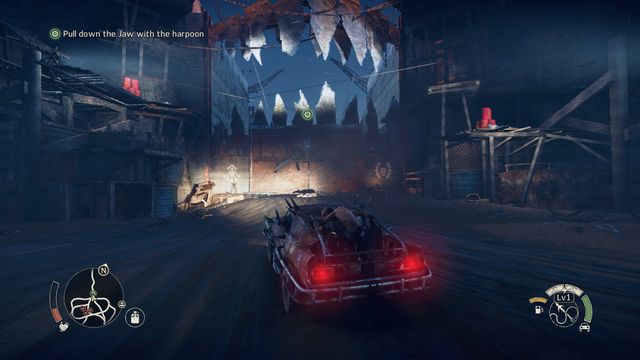 Clear the territory, then destroy the hinges and topple the gate.
Next phase of unlocking the passage is destroying the hinges of the main gate. Before driving close, eliminate the snipers found on both sides and the remaining enemy vehicles. This will make things easier and will allow you to calmly shoot twice with the Thunderpoon. The last phase of the mission is attaching the harpoon to the damaged gate and toppling it.
The mission will end and a passage leading to the northern part of the map will unlock.
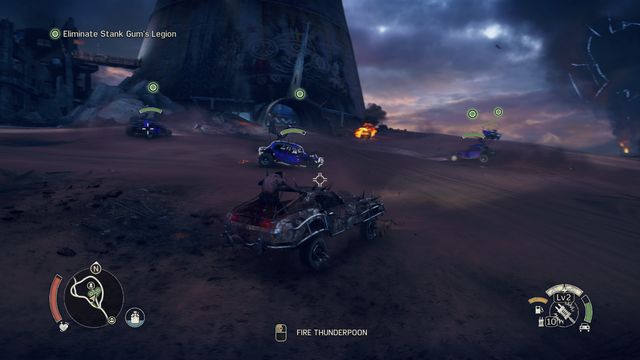 The recently bought weapon will make it easier to destroy enemy vehicles.
After getting close to Pink Eye's Silo, a cutscene will trigger. You will be tasked with destroying four vehicles that belong to Stank Gum's Legion. The fastest way to do it is by using the Thunderpoon.
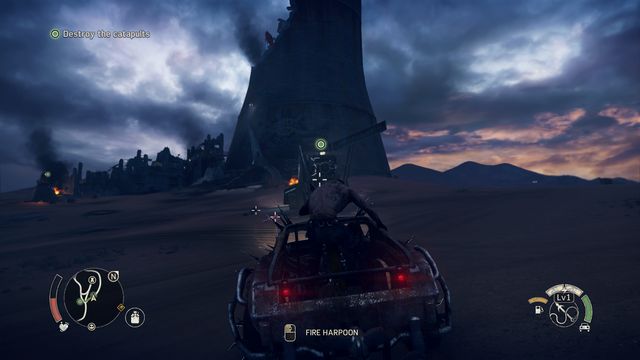 You can attach the harpoon to the back of the catapult.
After taking care of them, you will have to deal with three catapults. Each will be protected by enemies who will jump on your vehicle. It is a good idea to first drive them over, this will let you calmly take care of the catapults. You must open the door at the back of each of them - use harpoon for that. Opening the door will uncover exploding barrels. Shoot them with shotgun and the whole vehicle will be set on fire. Act similarly with two remaining catapults: drive over the enemies, open the door with a harpoon and shoot the barrels with shotgun.
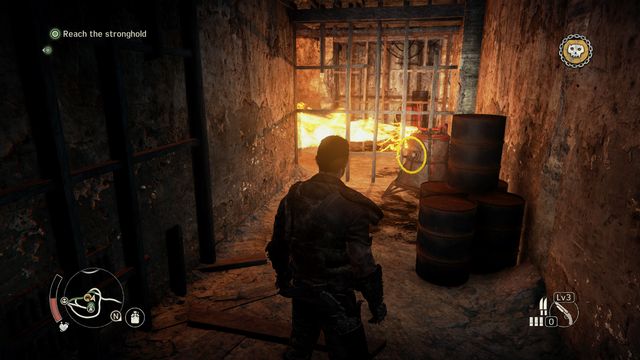 Turn the valve in two places to unlock the passage.
After eliminating the threat, go towards the marker. You will have to kill one enemy there. Walk down, then find two valves that you must turn off in order to deactivate the flame. You will unlock the passage by doing so. Behind it four enemies will attack you. Watch out, as they use fast attacks and can avoid Max's weaker hits. In order to avoid losing health, you should use mostly counterattacks against them.
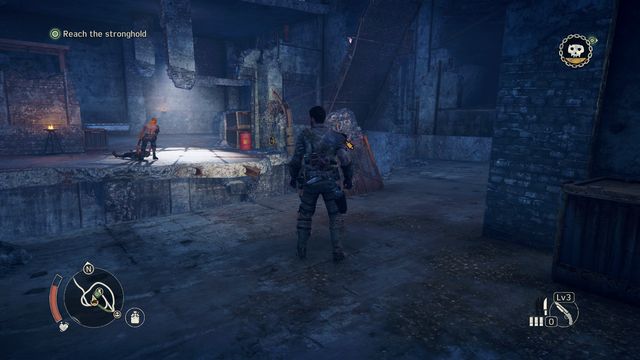
Return to the surface and go forward, through the ruins. Use the ladder, equip the Thunderstick in the place shown on the picture and throw the handle to the other side. This will unlock the bridge. Before entering it, you should use a throwing weapon again, this time against the opponents running towards you. Then you will be attacked by another wave of fast opponents. Similarly to before, use block, dodges and counterattacks to effectively eliminate them.
 The last battle in this mission - remember about parrying and counterattacks.
After defeating all enemies, use the ladder to walk above. Replenish the canteen and enter the stronghold. When you regain control of Max, prepare yourself for the last battle and for quickly blocking the first hit. The tactic that you should use isn't different than before. If you still have some shotgun ammunition or knives, use them as much as you want. Eliminating this group of opponents will end the mission and unlock Pink Eye's silo.
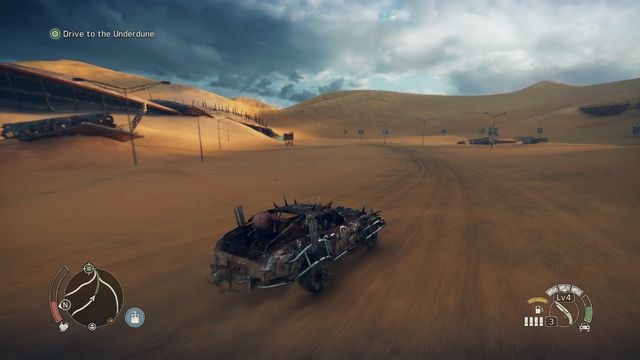 Drive underground in the marked location.
Drive to the Gastown. Once you arrive, talk to Outcrier to activate the mission. Then go to the marked point on the Underdune. Once you reach the target, destroy the gate and continue the journey, this time through the tunnel.
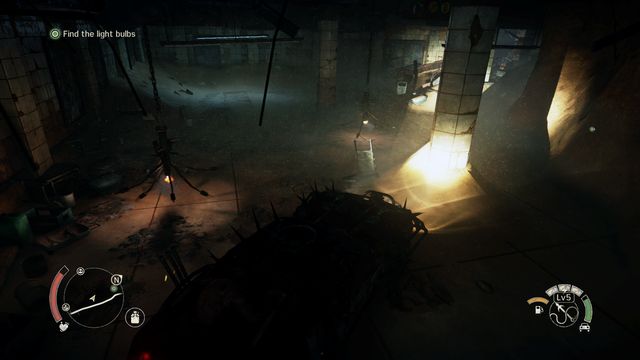 Carefully avoid the bombs hanging in the tunnel.
Drive carefully down the tunnel. For now, the only thing that threatens you is the traps hanging around. Watch out not to drive into such bomb. Keep driving down through various floors. Finally, you will drive down the stairs in front of a bridge that will be raised. Leave the car and walk around the bridge from the right side. There you can lower it. Go back to the car and drive to the next point.
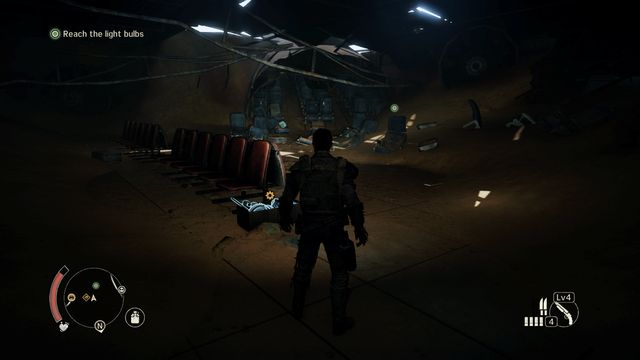 Collect some Scrap on your way for the bulbs.
At the end of the road you will reach a place where you must leave the car. Leave the stairs from the right side of the road and slick between the obstacles. Keep going ahead, while collecting a piece of Scrap on your way. Another piece can be found in the next room, turn left there. When going further, you will find a plane wreck (another Scrap to collect). Walk between the seats. Replenish the canteen on the other side. A while further you will notice an enemy running away. Pick two last pieces of Scrap. Finally, walk through the large corridor and collect the light bulbs.
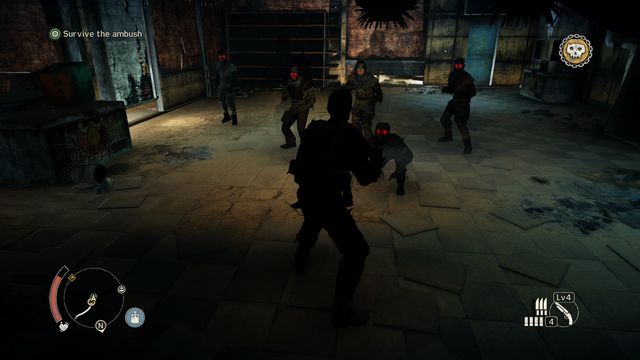 Use counterattacks and executions in order to eliminate the opponents as quickly as possible.
You will be locked in the room and large amounts of opponents will attack you. Use all available methods (counterattacks, shotgun, knives, elimination at the wall) to eliminate the threat as quickly as possible. For a while, new enemies will keep coming and you won't be able to do anything about it - you will have to defeat them all. Finally, an enemy with a shield will enter the room. Remember about dodging his charge and about attacking his back. After killing everyone, leave the room through the open door, ride down the rope and enter the vehicle.
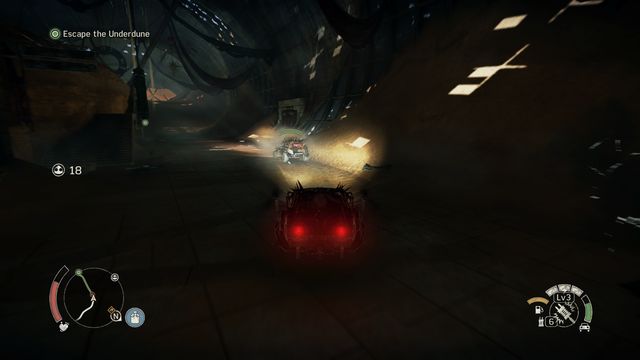 Unarmored vehicles can be destroyed with a single shot at the fuel tank.
The last phase of the mission is escaping from the underground. You will be attacked with bullets on the way. In some places enemy vehicles will attack you as well. The first ones are especially troublesome since while they drive ahead of you, they throw mines behind. The fastest way to destroy such vehicle is using the Thunderpoon. Keep going towards the exit. If you need to repair your vehicle, stop in a safe place (after destroying enemy vehicle, outside the missile's range). Three new vehicles will attack you before the exit from the tunnel. Utilize the fact that they have weak armor and unprotected fuel tanks.
After eliminating them, leave the tunnel and deliver the bulbs to Outcrier. The mission will end.
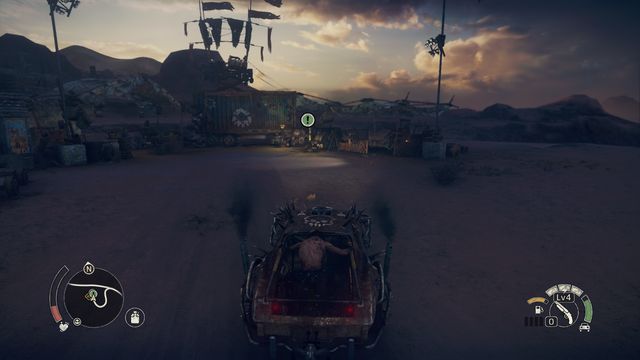 Talk to Crow Dazzle and the mission will begin.
Go to the Death run location and talk with Crow Dazzle. Then, talk to Tenderloin and again with Crow Dazzle. You need a better vehicle to participate in the race - the Speed Demon. In order to build it, you will need some parts.
To continue the mission, it is required to:
- reduce the threat level on Pink Eye's territory to level three
- take over Top Dog's camp, where you can obtain car paint
- visit the Scavenging Location where you can collect the car body
- have enough Scrap to buy the upgrade
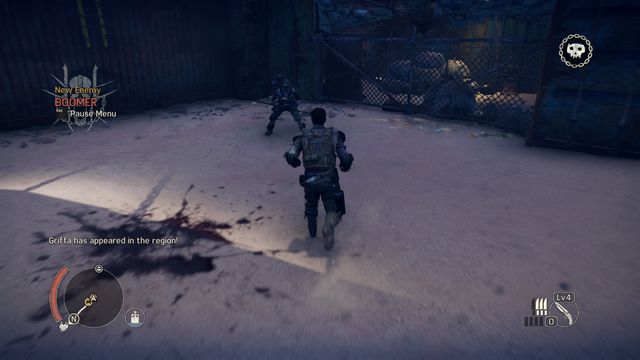 Enemies that throw Thundersticks are the biggest threat - eliminate them in first order.
9x Scrap, 4x Insignia, 1x History relic - this are the items you can find in the camp. It is well guarded (level 4), so supply yourself with the maximum amount of ammunition and water. Outside protection consists of 3 towers from which Molotov's cocktails are thrown and of 3 snipers. Immediately after entering you will be attacked by two enemy groups. It is important to quickly eliminate two enemies that throw Thundersticks whenever you get away from them. Focus your attacks on them so that they won't be able to use their weapon. The place where the Thunderstick will soon fall shines with red light on the ground. If it is needed, immediately perform a dodge. On the right side you will find 2x Scrap, the road ahead leads to the further part of the camp.
 Another group is supported by a War Crier.
There you will be attacked by a smaller group of regular opponents. Don't forget about eliminating the War Crier. After the battle, go up the ladder. Then pick the road to the left (in the room on the right you will find, among other things, a History relic) and keep going up, behind the bridge that you must lower. Two enemies will jump at you after you pass the place with a knife lying in the corner. A while further you will find water container and a ladder that leads to the arena.
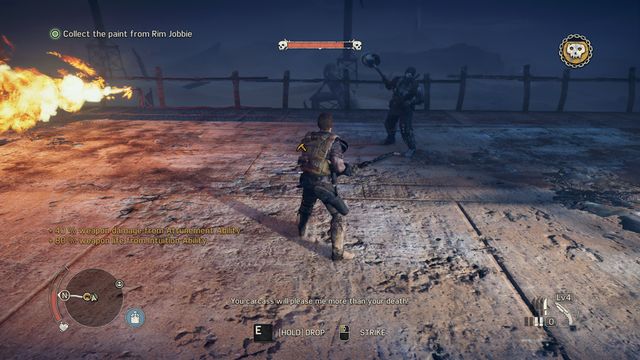 Use the weapon lying on the arena to quickly and easily eliminate the enemy.
Fighting this opponent shouldn't give you any trouble. His attacks are similar to ones used by other bosses. Watch his behavior and perform quick dodges. The boss is highly vulnerable to knife attacks (if you stun him, you can perform an "execution"). There is lot of ammunition lying around, you can use it to deal large amounts of damage. If that is not enough, you can position yourself near the flames and make the enemy fall into the fire after an unsuccessful charge. Combined weapon attacks and deceptive dodges should allow you to eliminate the enemy quickly. The camp will be liberated and you will gain the paint you needed.
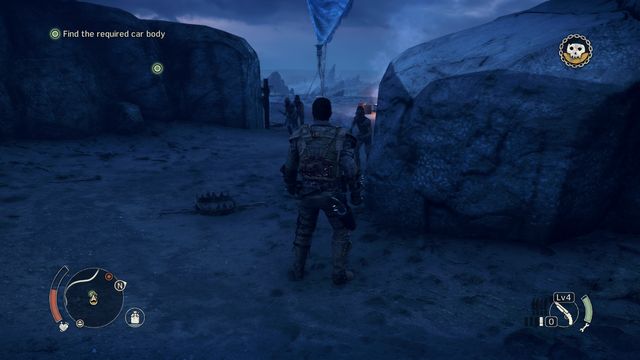 At the entrance, watch out for enemies and traps.
Obtaining the car body will be easier. Go to the Reek Hills, to the Scavenging Location marked on your map. Watch out for two traps and four enemies at the entrance. In addition to the car body, you will also find 1x Cleanup crew and 2x Scrap here.
At this point you should be able to build a new Archangel. If not, then check what requirements you are missing (the fastest way to reduce the threat level on Pink Eye's Territory is to liberate few Camps). Open the Workshop window and create the new vehicle - Speed Demon - with the needed upgrades. Now go to the race location.
 You must ride into the red barrel in each checkpoint.
The race itself isn't very hard. Quickly get ahead of your opponents, this will make the rest of the race calm. Watch the road closely, the race route has been marked with red color. You don't need to strictly stick to the road, but keep attention to the places with burning barrels. To complete the race you must hit at least one of them in each checkpoint. Because of that, it is good to be first since the beginning, it is harder to miss the full set of the barrels. However, if you miss a barrel, turn back immediately - if a barrel is missing, you will fail even if you finish the race first. A safe drive should be enough to win, use boost only on a straight road - falling out of the route will cost you.
After wining, the mission will end and you will be able to recruit Tenderloin.
In order to unlock this mission, you must have Gas Guzzler rank and upgrades bought for knuckledusters, jacket and wrist armor.
Before starting this mission, make sure that your vehicle is durable enough, this will make the mission much easier. Equip your car in the best equipment possible and drive towards the Gastown.
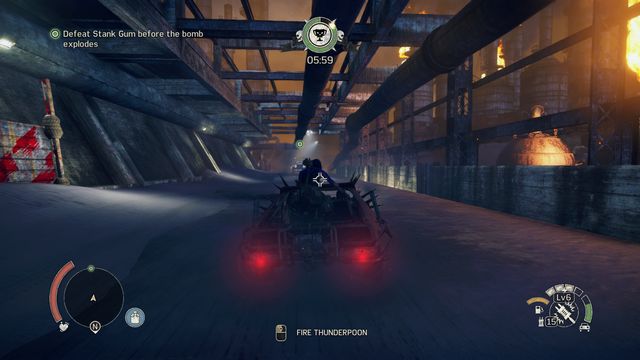 Straight parts of the roads are the best occasion to shoot.
Your first objective is defeating the Stank Gum. It's not easy - a bomb has been planted on your vehicle and you have a limited amount of time to destroy enemy vehicle. However, you will have unlimited amounts of Thunderpoon, so you can shoot as much as you want. Try to shoot Stank Gum's vehicle as many times as possible at the beginning of the race (he has the largest vehicle and starts the race from the first position). Each lap will be harder (more traps on the track), during the race not only the enemies will interrupt you, but various traps, like mines and flames, as well.
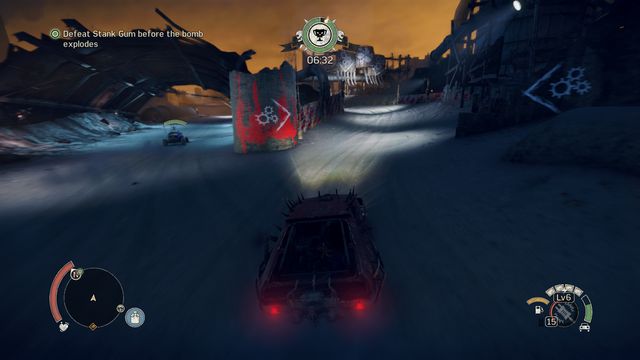 Choose shortcut in order to increase the durability level of the Magnum Opus vehicle.
Driving carefully is the key to success. Destruction of Magnum Opus results in automatic mission failure and forces you to restart the race. Because of that, since the beginning of the race you should be focusing on Stank Gum - the shorter you will drive, the lesser the chance for falling out of the track and damaging the vehicle. Use the boost carefully, hitting a wall will be very expensive. Remember about using two shortcuts (they are marked with red color), the smoke found there regenerates some of vehicle's resistance.
In summary: upgrade your vehicle to the maximum, this will definitely make the mission easier. During the race, drive carefully, use the boost only on safe, straight parts of the road. Quickly focus on Stank Gum and shoot his vehicle whenever it is possible (you don't need to be very close, shooting the Thunderpoon is possible also from distance). Watch out for obstacles, especially for mines, and try to ignore other opponents - shoot them only if Stank Gum is out of your reach.
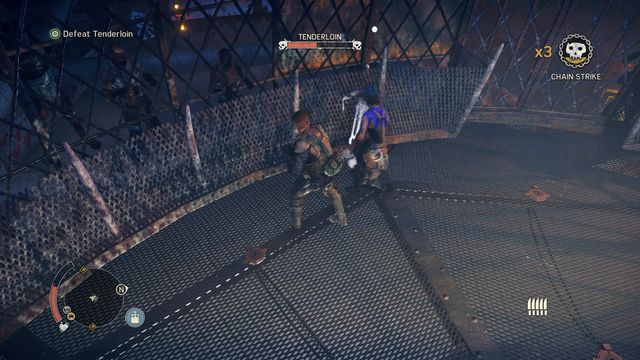 Blocking and countering will allow you to stun Tenderloin temporarily.
After destroying the Stank Gum's vehicle, a cutscene will occur. Once it is over, you will have to fight Tenderloin. Since Tenderloin is very fast and can avoid your attacks with ease, your regular hits won't be effective. The key to success is dodging and attacking whenever she charges - it gives you time to perform at least one hit. Other opportunities will appear after a successful block - some of Tenderloin's attacks can be blocked in the usual way and then counterattacked (few hits), which will stun your opponent. Winning the battle will trigger another cutscene and another duel.
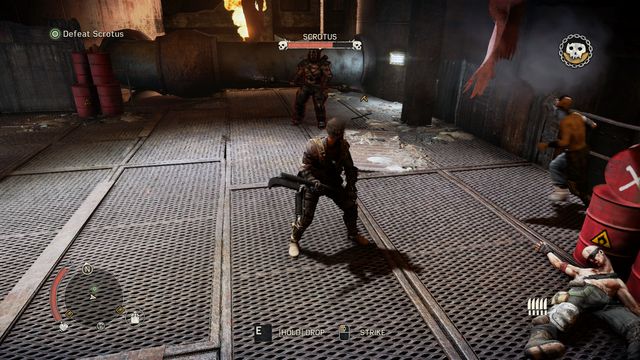 If you want your enemy to fall into barrels and make them explode, position yourself near them.
The duel with Scrotus is similar to the previous one. Most of all, you must remember about dodging, because the boss is very effective in using his weapon. Also, quickly eliminate few weaker enemies in order to fill the fury meter - only after that it is a good idea to attack Scrotus. You will be even more effective when you pick up one of the weapons found on the arena. More or less after half of the battle Scrotus will start charging. It's a moment that you should use quickly - position yourself in front of the red barrels, after you jump away the boss will fall right into the center of the explosion. It is a good tactic, the explosion will deal large amounts of damage to Scrotus. Use the same tactics till the end of the battle: dodges and hits with the weapon will quickly lead to defeating the boss.
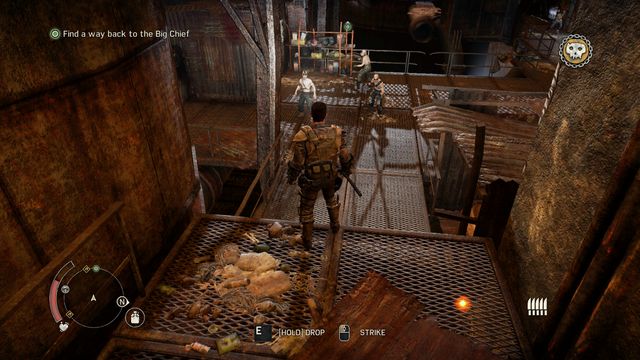 After eliminating opponents, use the food and refill the water.
Once the battle ends, pick up the weapon and go towards the marker, defeating two opponents on your way. After walking below, replenish your health and use the water container. You will be attacked by some new enemies. Then, walk to the last room, where you will be attacked by Scrotus again.
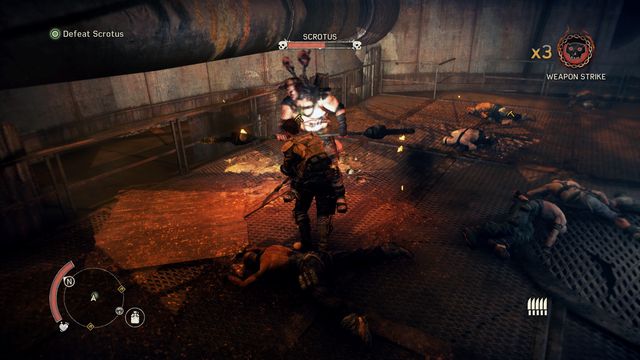 Use the weapon lying on the arena to deal more damage.
The battle is similar to the previous one - use dodges and the weapons lying on the arena. It is wise to attack weaker opponents and load the fury. If you have trouble with their numbers, keep the group between Max and Scrotus, the attacks of the boss will deal damage to his colleagues. This time, a longer cutscene will occur after the battle and the mission will end. Leave the underground and other missions will unlock.
 There are two groups of enemies in the part opened by Hope.
This mission is unlocked after completing three side missions (Wasteland missions) and completing two projects in Deep Friah's Stronghold.
You start the mission in the Underbelly. Talk with Hope and she will open the passage. You can infiltrate one of the previously unavailable parts in the sewers. Turn right at the first crossroads, after a while you will be attacked by a group of regular enemies. From here, when you have the ladder leading to the next "arena" ahead, turn right and go to the end of the corridor. There you will find a History relic. Go back a bit and to the next part of the sewers.
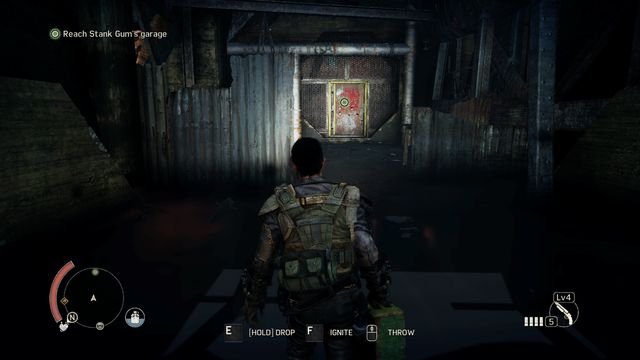 The canister needed for destroying the door can be found at the entrance to the corridor.
The second group is slightly larger, but still possesses no great threat. Watch out for the jump attacks performed by fast opponents - it's easily to miss the time when you should block a hit. Then, pick the canister lying in the corridor and use it to destroy the door leading to a room full of bodies. Walk up, while refilling the canteen on your way.
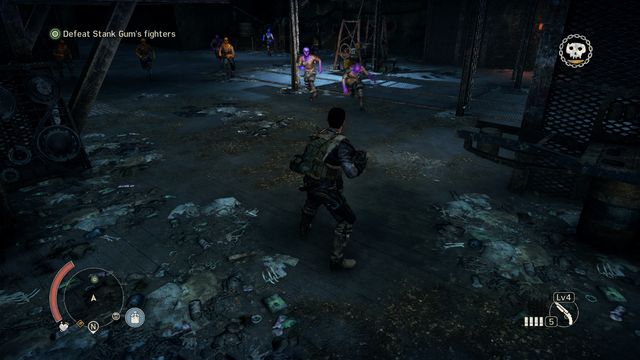 Last opponents guarding the vehicle with V8 engine - fast and agile, be prepared for counterattacking.
You will enter Stank Gum's garage. To get the required engine, first you must defeat few opponents. Watch out, these enemies are capable of dodging most of your hits and perform unblockable attacks. Once you win the battle, walk towards the generator, then to the highest platform and jump below, to where you will find fuel. Fill the generator with it, lower the vehicle and sit behind the steering wheel.
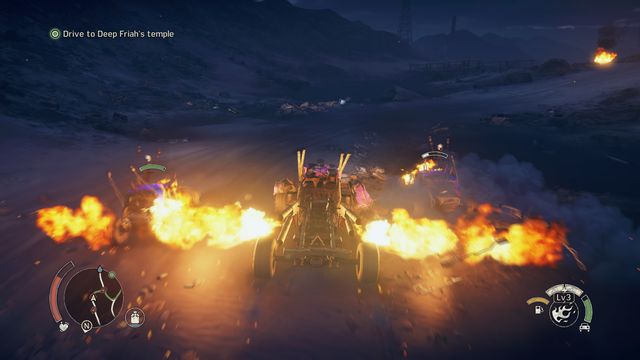 Quickly eliminate enemy vehicles with the side burners.
The final part of the mission is driving to Deep Friah's Temple. Utilize the fact that the vehicle you drive is large and resistant and that you have unlimited amount of fuel. Because of that, you can ram enemies and use the side flamethrowers as much as you want. If you do so, the way will be fast and easy - just ride in the marked direction and use the available weapon. Reaching the stronghold will end this mission and unlock The Big Chief vehicle.
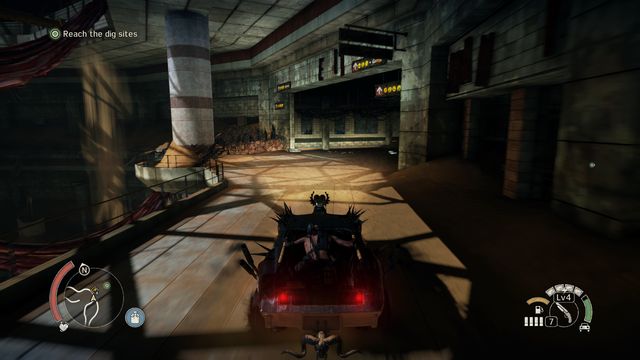 Drive below, then exit the vehicle and jump few more levels below.
After completing the previous mission, walk towards the Magnum Opus vehicle and a cutscene will trigger. Then, you will start the mission by driving towards the place marked on the map (Dunes territory). From there, drive to the next marked location and ram the weak gate there. Once you're inside, go downstairs and then leave the vehicle.
Before entering the elevator shaft, you can refill your canteen. Jump below through the platforms. On the left you will notice a ladder, in the next room you can find some Scrap. Finally, use the next ladder and jump to the very bottom - after reaching it, another cutscene will start.
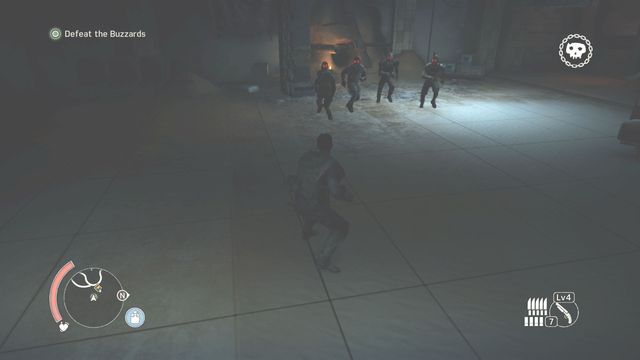 Few easy opponents will attack you on your way.
Continue your journey through successive rooms in which you will find some Scrap. After reaching the stairs, go above (1x Scrap can be found below), where you will be attacked by four enemies. After defeating them, walk towards the hole in which a child was digging. After the cutscene, open the door on the right side with a kick.
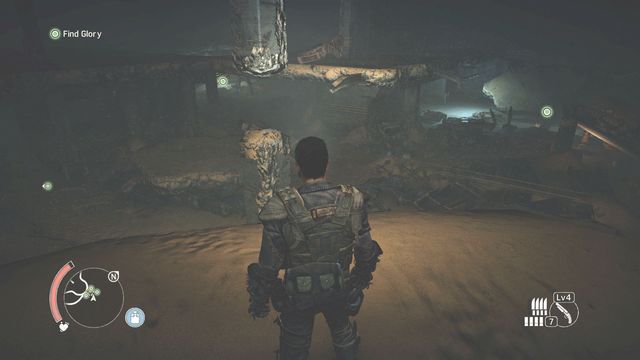
Behind the door you will find the place shown on the picture. You must check the holes in all three places. In first one from the left you will find 2x Scrap, in the middle one and the one on the right you will find 2 pieces of Scrap and few enemies. Once you check two holes, the mission objective will be updated, but if you want to explore this location in one hundred percent, you must also check the third place and go to the new marker only after that.
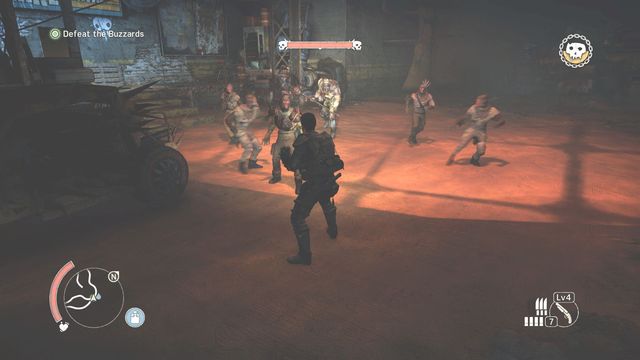 Keep the enemies between Max and the boss - his charges will stun them.
Examine another hole and then slip through the narrow passage on the left side. Walk towards the toppled fridge and you will find Gloria. Go back through the narrow passage with the girl on your hands. You will be attacked by a large group of opponents, including one mini boss. Try to eliminate the weaker opponents in first order. If you keep them between Max and the boss, you will make the larger opponent stun the weaker ones during his charges. You will have to deal with three waves of enemies, during the second one pick up the weapon dropped by one of the opponents - use this gift to deal large amounts of damage to the largest opponent. After eliminating the threat, put Gloria in the car and go to the surface.
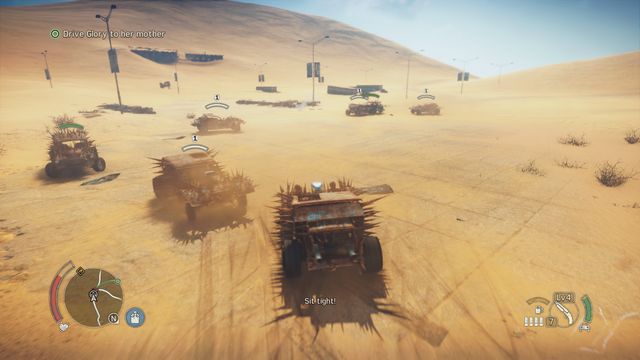 Use the mines and shoot the tires to quickly get rid of the opponents.
Last phase of the mission is reaching Deep Friah's Temple. Quickly after reaching the surface, you will be surrounded by few enemy vehicles. Use the vehicle driven by Max to throw mines, they will quickly reduce enemies' durability. You can also help yourself with shotgun, which you can use to shoot the tires or destroy the fuel tanks. Eliminating the vehicles will allow you to drive safely to your destination. Once you reach it, the mission will end.
You will start this mission by walking towards the place where Magnum Opus should be parked. After a short cutscene, you must drive towards the old Chumbucket's Hideout.
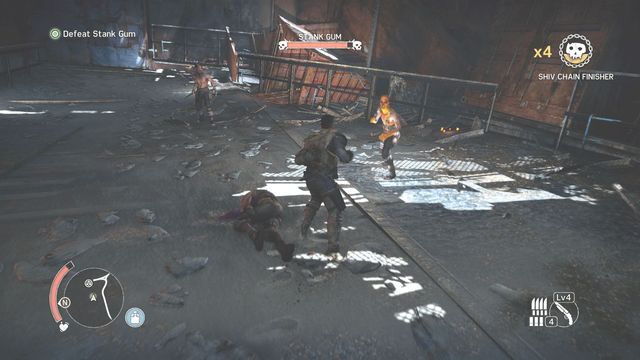 Weaker opponents will join the fight, quickly eliminate them.
Once you get there, a battle with Stank Gum will start. This enemy is very fast and he will easily avoid most of your hits, countering them with very lethal attacks with his blades. The key to defeating the boss is focusing on counterattacking the attacks that can be blocked (watch out, as in case of unsuccessful block his counterattack will occur quickly after - this one cannot be blocked). After performing a perfect block, you will have an opportunity to deal few stronger hits.
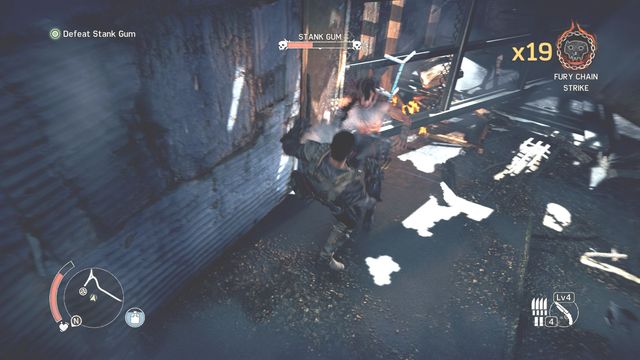 When in fury, keep attacking Stank Gum.
Few other enemies will join the fight. Use them to fill your fury bar, then use that fury against Stank Gum. He won't be able to avoid so strong attacks and it will become possible to perform a powerful combination of attacks. In general, Max's strong attacks can break Stank Gum's defense, so don't waste time on blindly using the fast attacks. Combining the tactic of parrying enemy attacks and performing strong ones, preferably during fury, is the best way to defeat Stank Gum.
Once the battle ends, you must drive to Deep Friah' Stronghold (after a while you can use quick travel to transport near the stronghold). There, a cutscene will occur, after which you can start the last story mission.
Before starting the mission, make sure that Max's vehicle is well developed. Defensive upgrades will be especially useful, just as high harpoon and Thunderpoon levels. Gather large amounts of ammunition and start the mission.
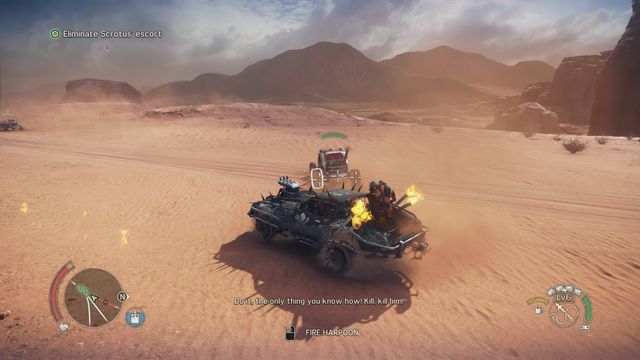 You will save some ammunition by tearing tires from the vehicles with the harpoon.
The main part of the mission will start in the place through which Scrotus' convoy will drive. You start in the vehicle and your first objective is to eliminate enemy's protectors. The cars are driving in a convoy, you should follow them - by moving to the front you will only focus the attention of more of them at once. Use the harpoon for eliminating the unarmored vehicles (the ability to tear the tires), as well as grinding and shotgun. Thunderpoon bullets should be saved for heavier armored vehicles. There are eight vehicles to eliminate. You don't need to make them explode - shooting the tires will be enough.
If you need time to repair the vehicle, you can stop for a moment, but watch out for the convoy to not escape you.
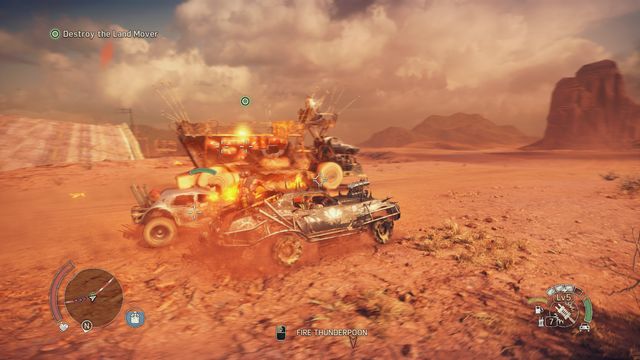 Don't bother about the vehicles driving at you, focus on quickly destroying Scrotus' vehicle.
After eliminating the enemy guards, you must stop the main vehicle controlled by Scrotus. To do it, use the harpoon and uncover the gas tanks on both sides of the machine. When driving closer, keep distance and remain outside the reach of the side burners. Gas tanks are easy targets, attack them with shotgun or Thunderpoon. If in the meantime enemy vehicles will drive close, it is better to ignore them, as destroying both tanks will automatically take you to the next part of the mission.
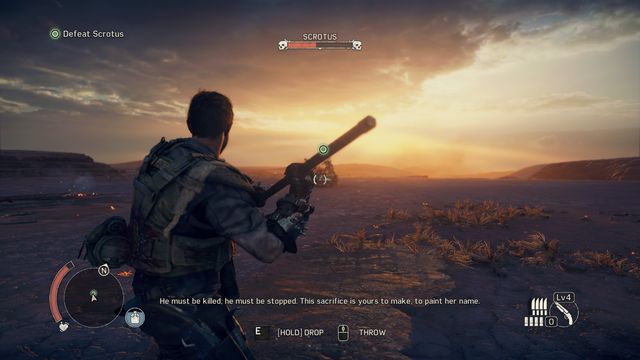 You will have a good position for an accurate throw just before Scrotus will start running at you.
When in vehicle, accelerate and drive into Scrotus' car. Finally, once he drives out in Interceptor from the inside, dodge (just before the incoming car, jump to side) and then pick up the Thunderstick lying on the ground. When Scrotus will position himself directly in front of Max, you will have the best opportunity for an accurate throw. Two hits should be enough to throw Scrotus off the vehicle - this will end the last story mission.
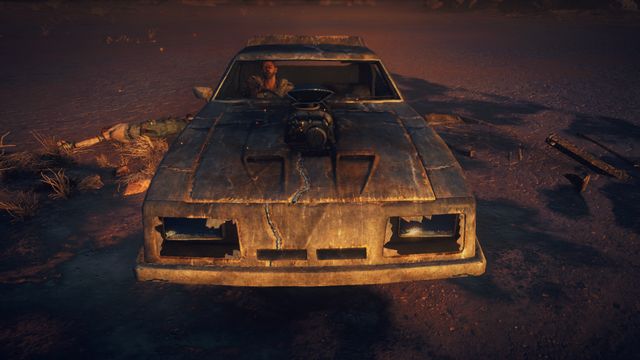 End of the story missions is not the end of the game.
The game allows you to continue playing after the story ends, returning some characters (including Chumbucket).
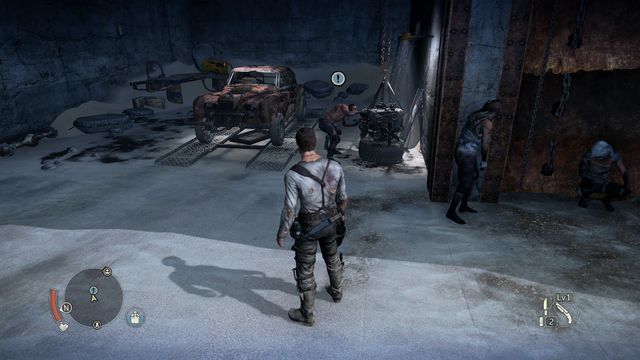 A blue icon informs you that you can start a side mission.
After starting A Wasteland Classic story mission, you can talk with Chum. He will want you to return to the burned hideout and bring the dog and Chum's vehicle back.
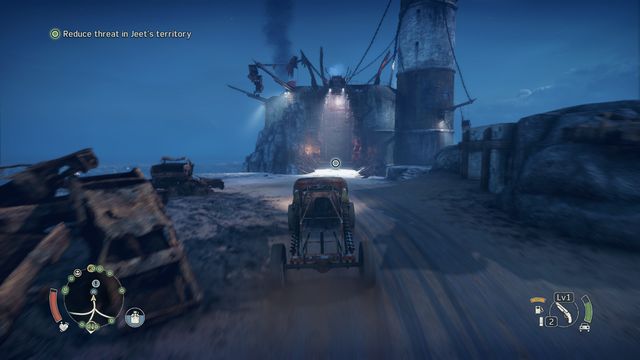 A safe return with the dog will end the mission.
The mission is very simple. Drive to the hideout and get the dog into Chum's buggy. Then drive it to Jeet's Stronghold while watching out for any dangers (depending on threat level). After arriving, create a proper place for the dog - he and Chum's vehicle will be unlocked (when entering the car you will be able to select a different vehicle). The mission will end.
After activating A Wasteland Classic mission, you can talk to Jeet. He will give you a task to deliver a prisoner to the fortress. The reward is very good, so you should quickly complete this mission. Before departure, make sure that Max has Jimmy bar.
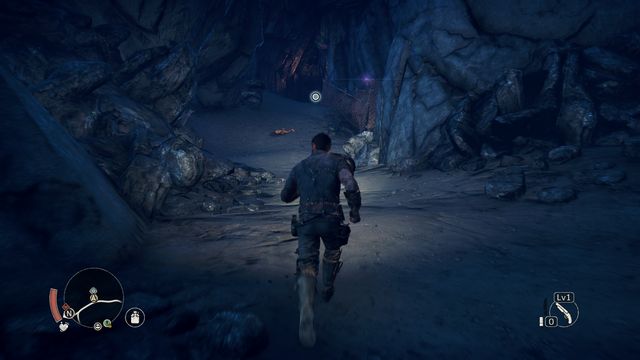 The purple flash isn't an amethyst - it's a sniper.
Once you reach the destination, watch out for the sniper at the entrance to the cave. If you run fast enough, you will avoid his bullets and you will be able to kill him in melee combat. Then, enter inside and take care of three more opponents. After a moment you will reach a small crossroad.
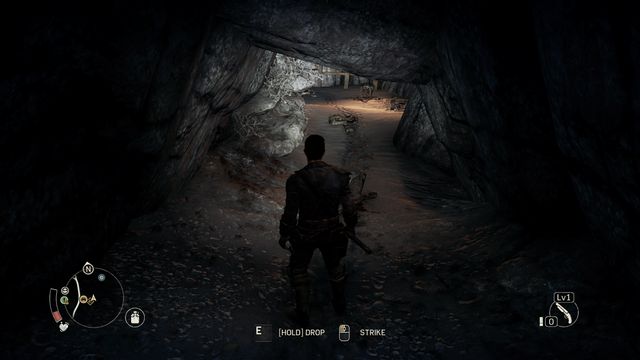 Watch out for the traps on the ground.
Pick the left path. However, be careful, as there are many traps lying on the ground. Use the flashlight to find safe passage and avoid the traps. You will be attacked by three enemies in the next room. You will also find some Scrap there. Slightly above, quickly attack the opponent and throw him off the cliff. Walk near the edge and collect another Scrap.
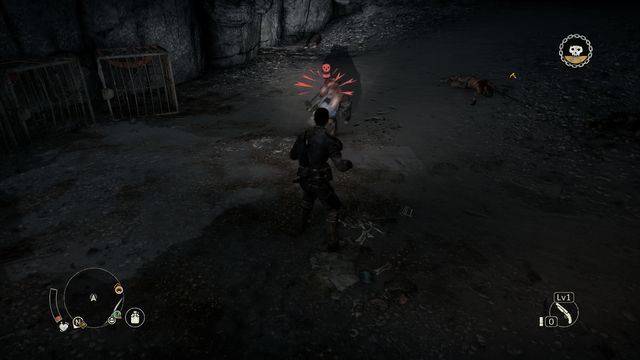 Dodge, and then perform a back attack - that's your only option if you lack weapon or ammunition.
Slightly further you will again reach a small crossroad. The road to the left leads to the prisoner you seek. However, first you will have to deal with 4 enemies, including two with weapons. Watch out especially for the enemy with a shield, you won't be able to parry his attacks. If you defeat the second enemy with the weapon first, you will be able to pick up his tool and use it to destroy the shield. Collect 2x Scrap and replenish the canteen after the battle. Walk towards the cell and talk with the prisoner - opening the cage by using the Jimmy bar will end the mission. When leaving the cave, select the right path and collect the remaining Scrap.
You will be rewarded with the possibility to build an Armory in Jeet's Stronghold. Thanks to that building, your ammunition will be automatically replenished each time Max visits that fortress.
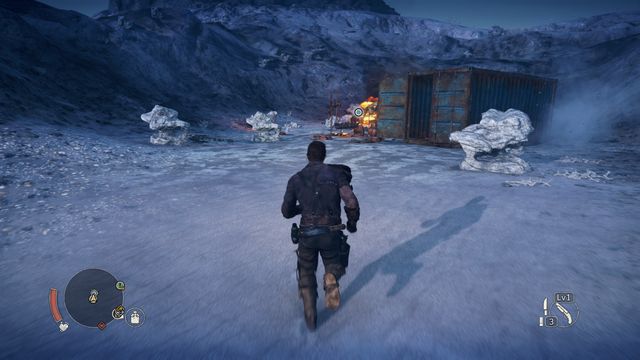 First point has no surprises.
The next mission is received from Jeet. Start with going to the first niter source. You will find few bodies and 2x Scrap there - walk towards the pile of bodies and Max will mark this place by shooting the flare.
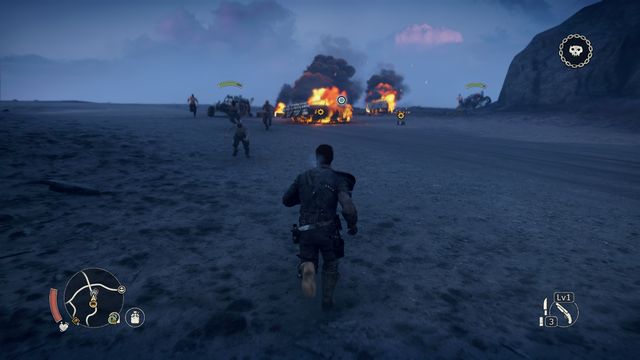 In the next one you will face few enemies.
Then you should go towards the next niter source. There you will face few basic opponents. You shouldn't have trouble dealing with them. After eliminating them, collect some Scrap, mark the second zone and move towards the last point on the map (volcano), located most to the west.
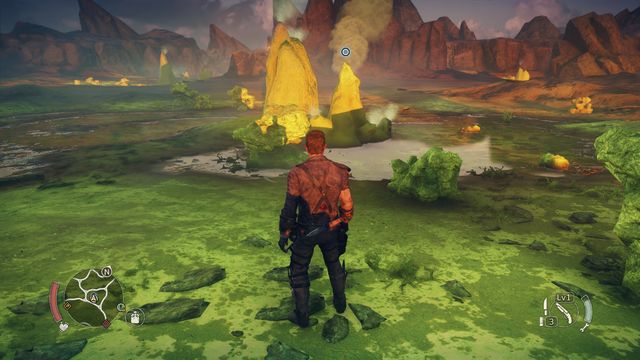 At the last point you must only watch out for the snipers.
Walk towards the rock, while watching out for the snipers (unless you have eliminated them previously). Shoot the last flare and the mission will end. A new project of Armory will become available in Gutgash's Stronghold.
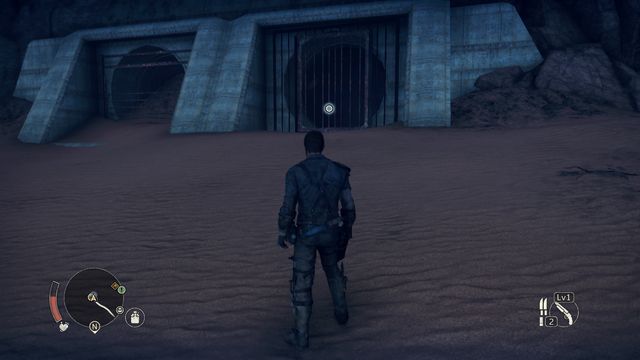 You will find the entrance to the tunnel on the right side, among the rocks.
You can start this mission after completing A piece tougher mission. Gutgash is giving it to you. Go to the marked location. There, slip through the rocks on the right side. Then walk through the corridor and turn towards the bars. You can open them from the inside. Drive the vehicle inside and move forward.
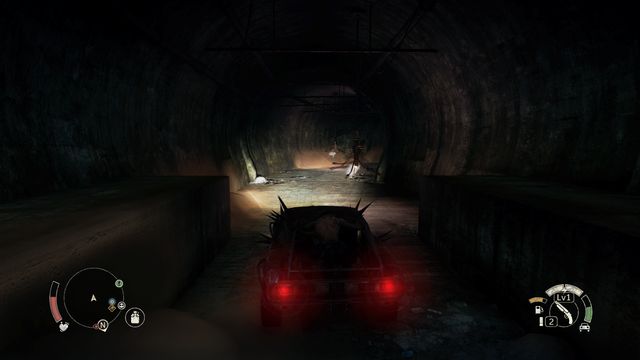 Watch out for the hanging bombs in the narrow corridors - you can also detonate them from safe distance with a shotgun.
You can go only in one direction at the crossroads (watch out for the hanging bombs, they explode if you drive into them). You will reach a barricade which can be easily destroyed with the harpoon. Drive through the destroyed train and enter the subway territory. Slightly further you will reach a closed gate. Few enemies will attack you there. Use the Jimmy bar to open the container blocking the way and prepare to quickly block a hit - enemy is hidden behind the door.
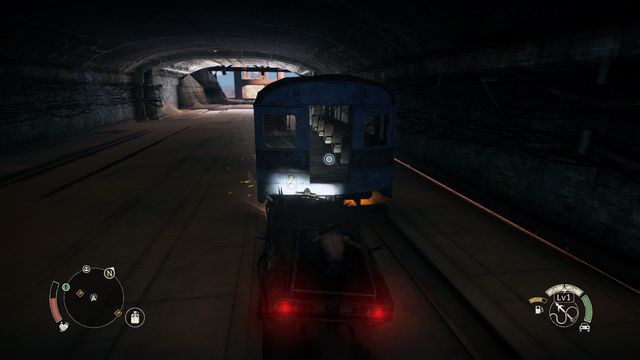 Push the train on the track and destroy the barricades.
Drive forward. Finally, you should find a train. Start pushing it with your car. You will find two more barricades on your way, destroy them with the harpoon (you will be attacked by few enemies at the second one). After a while you will reach the surface. Now throw the train off the cliff, get down to it and shoot the flare. This will end the mission and unlock the "Fracas Frame" armor upgrade in the Workshop menu.
You will receive this mission in Gutgash's Stronghold, after completing A piece tougher story mission. The woman (Hope) in the cell is giving it to you. Completing it becomes possible after unlocking the passage to the Dead Barrens during the Black Magic mission.
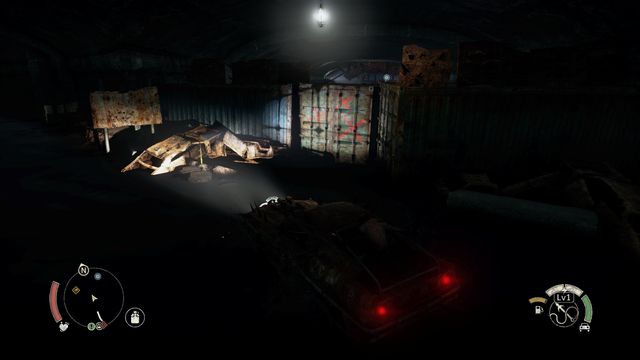 The passage is hidden behind a container.
Go to the territories on the north of the map. There, drive the car into the tunnel. When Max will mention an ambush, find a container marked with "X" letter on your right. Open it with the harpoon.
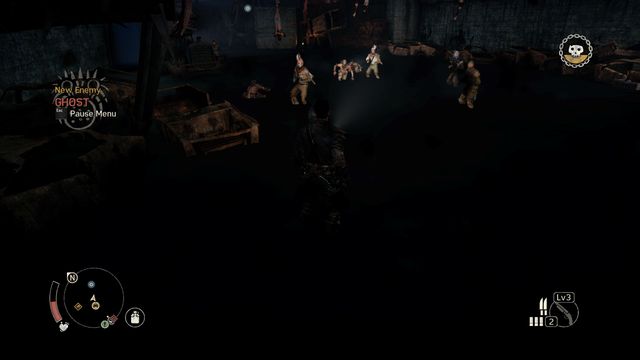 Don't lose the track of the enemies in the dark tunnel.
A group of strong enemies will wait for you on the other side. As opponents' attacks are very powerful, carefully parry enemy attacks and perform counterattacks. Collect some Scrap and go through the container on the left to the next part of the tunnel. Here you will have another round with enemies, this time joined by few quick enemies that are able to perform quick jumps. Similarly to before, you must be very careful and perform quick counters and executions whenever it is possible.
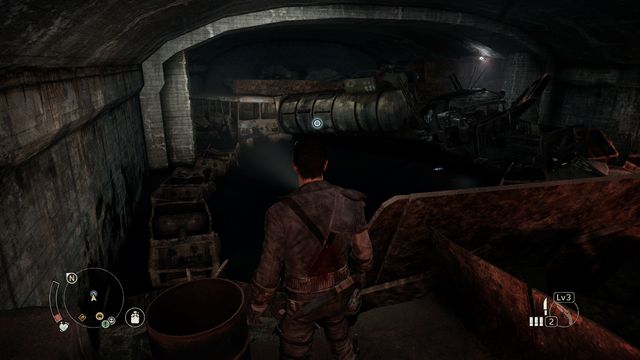 The upgrade can be found at the end.
Finally, use Jimmy bar to open the large container. Behind it you will find your objective. Walk towards it from the other side and you will find an upgrade to the sniper rifle. This will end the mission.
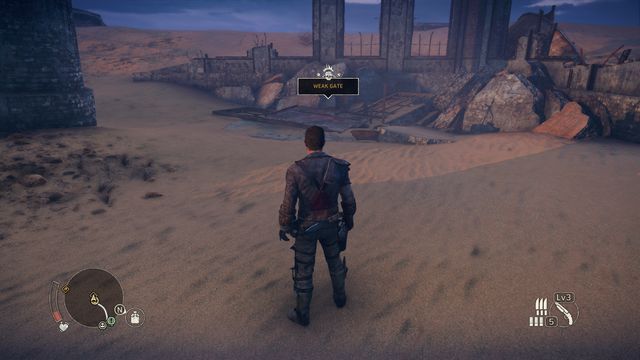 Entrance to the tunnel.
A side mission received from Gutgash, available after completing the Black Magic story mission. Go to the marked location. There you will learn that the entrance to the tunnel can be found on the other side. Drive around and move to the marker from the other side, on the Dead Barrens territory. Find the gate in the ruins, it is located right from your current position. Move it with the harpoon and enter inside.
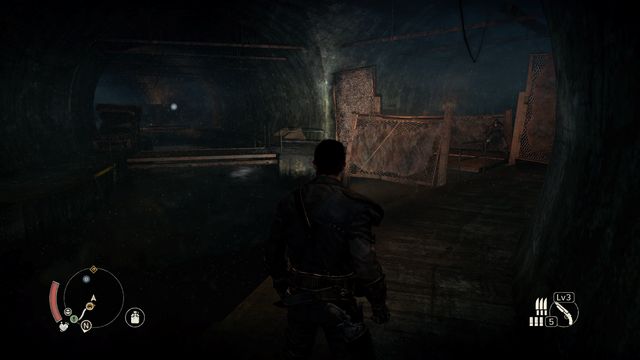 The first crossroad, on the right you will find three opponents and some Scrap.
While below, pick the road right (a single opponent is in the corridor) and you will enter a wide tunnel. Go further and, at the crossroad, pick the road on the right side. You must defeat three opponents here, this will let you collect five pieces of Scrap in the niche at the end (two of them are in the water).
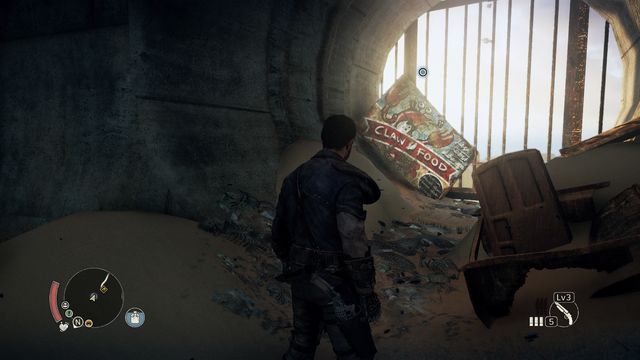 Destroy the gate, then jump down and shoot the flare.
Go back to the main corridor and move towards the marked target. On the way you will be attacked by a single enemy who will jump from the left. You will find 2x Scrap behind him. Walk to the end of the corridor, you will have to defeat two more opponents and you will have an opportunity to refill the canteen. At the end you will find a piece of Scrap and the sign you seek. Destroy the gate, jump down and shoot the flare.
For completing this mission you will receive 200 pieces of Scrap.
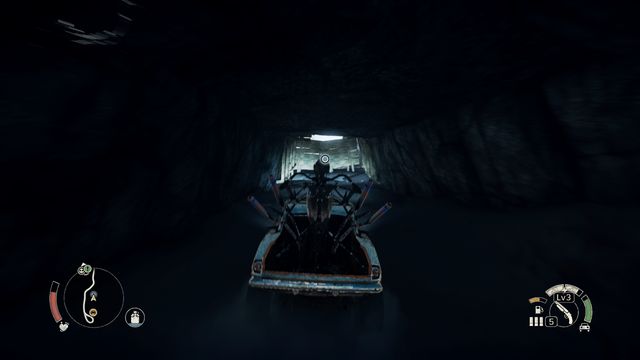 Accelerate before the obstacles to easily destroy them.
Next mission is given to you by Hope in Gutgash's Stronghold after completing the previous task. This time you must reclaim a car buried with its owner. Go to the marked location. There, use the harpoon to destroy the passage.
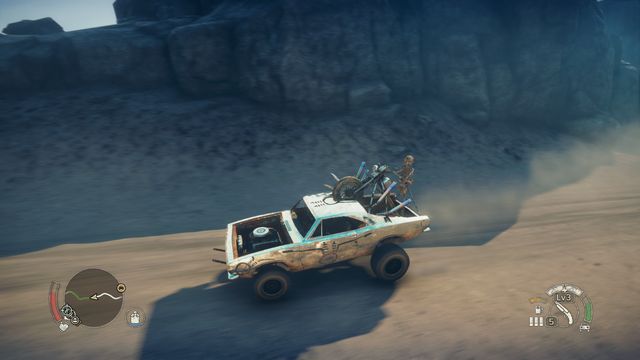 Drive the vehicle to the stronghold and it will be unlocked in your collection.
Inside, after walking down to the crypt, you will find the vehicle. The canisters you need can be found not far further, together with pieces of Scrap. Fill the tank, then leave the tomb. Use boost to destroy all three barricades. Take the car to the fortress. This will end the mission and unlock the Demented Chariot vehicle.
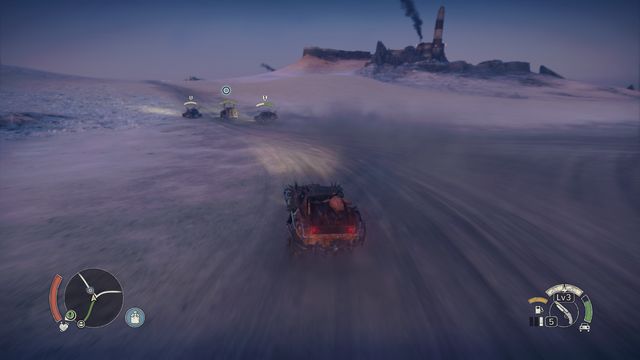 Locate the truck near the marked point.
The mission becomes unlocked after completing the Smoke rises story mission. It is given to you by Jeet in his stronghold. Go to the convoy location. It consists of four vehicles and a truck that you can't destroy.
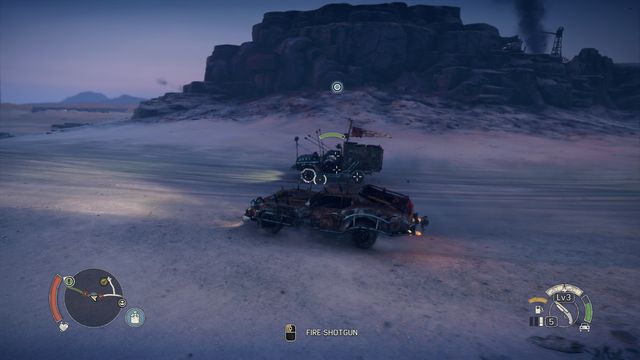 Shooting the driver is the fastest way to stop the vehicle.
There are two tactics for taking over the vehicle. First one takes more time, but is safer. Gradually destroy all vehicles that are securing the truck. With the help of shotgun and Thunderpoon it shouldn't be hard. Then you will be able to take the truck easily. Second tactic is about bypassing the security and quickly driving towards the truck. When you're close, you can kill its driver through the open door. If you succeed, the vehicle will stop. Take it and drive back to Jeet's Stronghold. If you have selected the second option, you will be constantly attacked by the enemies that remained alive.
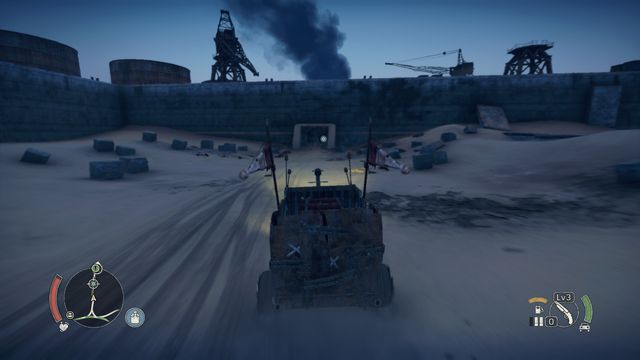 Park in the appointed location and get away from the wall.
Talk with Blas Cap in the stronghold in order to arm the truck. Then drive it towards the wall in the northern part of Jeet's territory. Park the vehicle in the marked location and get away from the wall. An explosion will occur after a moment. The mission will end. Armory project will be unlocked in Pink Eye's Silo and in Deep Friah's Temple, and a new passage to the Dead Barrens will become available.
Talk with Pink Eye (the mission is unlocked after completing the Smoke rises story mission) and go to the marked place. Talk with the person on the bridge in order to learn something about the defenses of the camp that is your target.
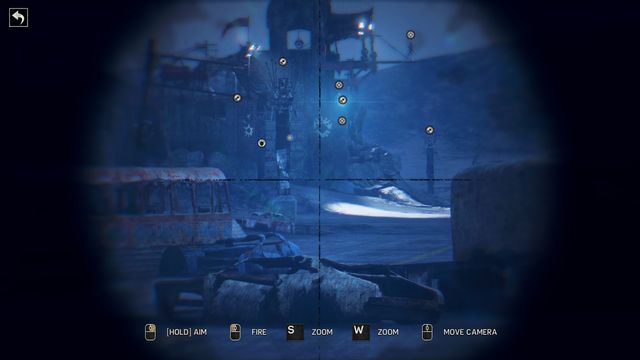 The strong defense of the camp.
The camp is well protected. You will learn about it by looking through the binocular. Eliminate all snipers from distance - there are four of them. After driving close, quickly eliminate the guards with enemies throwing missiles at you. After that, you can destroy the tank that powers the flame protecting the gate. Outside defense ends with that. You can get inside through the main gate or through the secret passage on its right side.
 Instead of destroying the well armored gate, you can use the secret passage on its right side.
Inside you will be attacked by the first group of opponents. After dealing with them, search the territory. You will find some Scrap and a canister which will come in handy when blowing up a door leading to the next part of the camp (two enemies on the way there).
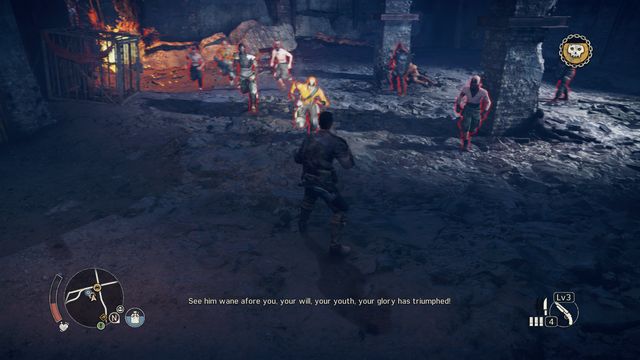 If you won't kill the War Crier fast enough, defeating the other opponents might prove to be almost impossible.
A bit further you will have to participate in a very hard battle. This place is swarming with enemies, some of them have weapons, and two are equipped with shields. Things are more complicated due to the War Crier, you must eliminate him before he strengthens the rest of your enemies.
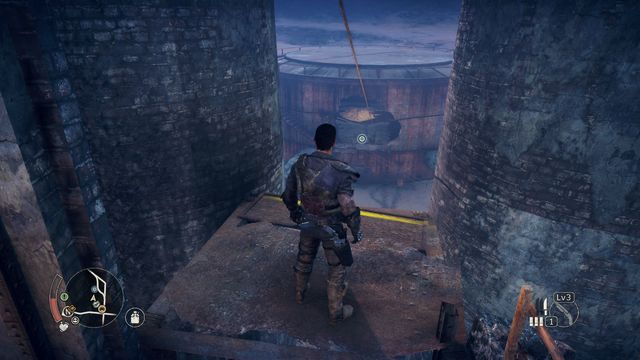 The canister you dragged might help you eliminate a large group of enemies.
To make a good entrance, take the canister from the previous region. Immediately after entering the "arena", lit it and throw at enemies. Then, quickly kill the War Crier with shotgun and... retreat to avoid being surrounded. Once the situation stabilizes, you will be able to slowly eliminate the remaining opponents, one after another. If situation requires that, you can quickly retreat for another canister and surprise the enemies around the previously blown entrance. Leave the shield bearers that are slower than other opponents for the end. In summary: use the canister to eliminate as many opponents as possible, then quickly kill the War Crier, and finally, while slowly retreating, eliminate the rest of opponents.
Once the battle is over, open the door on the left, next to the burning gate, and walk up, where you can refill the canteen and turn the fire off.
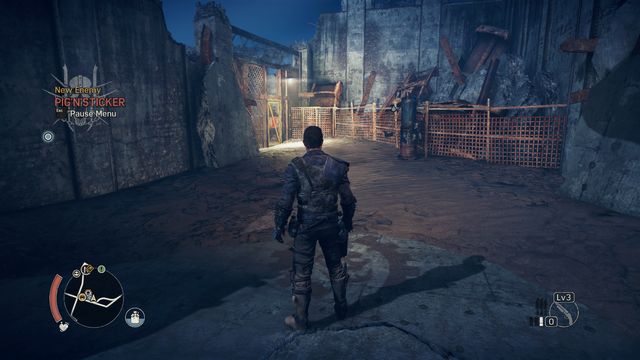 Don't forget about refilling the canteen before the final battle.
In the next part of the camp there is a bridge (History relic next to it) through which you must get to the other side. Collect the Scrap and go underground. Walk through few corridors (in one of them you will be attacked by four fast opponents) and find the door that must be blown up (canister is in the room on the left from the door). The room behind the door leads to surface. Refill the canteen and enter the arena, where you will have to face a boss.
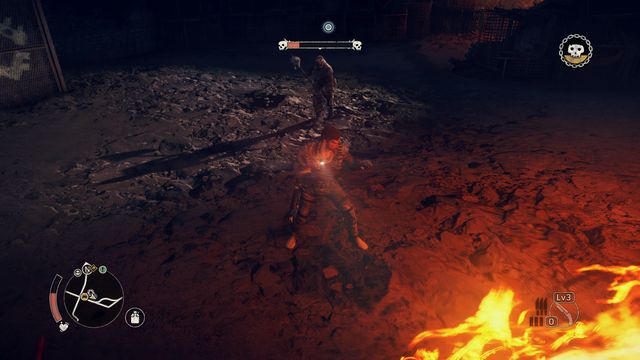 Position yourself in such way that the enemy will get into flames after charging.
Shoot down the War Crier immediately after the battle starts. Then, focus on few smaller enemies supporting the boss. They won't respawn, so the faster you take care of them, the better. Only after that you should focus on the boss. You can't block any of his attacks, so all that remains is to dodge. Utilize the flames found on the arena - position yourself in such way that the enemy will get into flames after charging (dodge when he charges). This will let you quickly reduce his bar. You can also push the boss towards the fire (a specific ability is needed for that). This tactic will be faster than attacking his back with bare hands. The key to success is good timing and luring the enemy into fire. When he gets into the fire, you can attack him with few more hits. After the battle the camp will be conquered and the mission will continue.
Last ride down and last enemies.Walk up, towards the silo. You will reach it by using the rope at the edge. Inside you will have to eliminate the last three opponents. You will be also able to refill the canteen. All that's left is to walk outside at the top, shoot the flare, go back to Pink Eye and collect the reward (History relic).
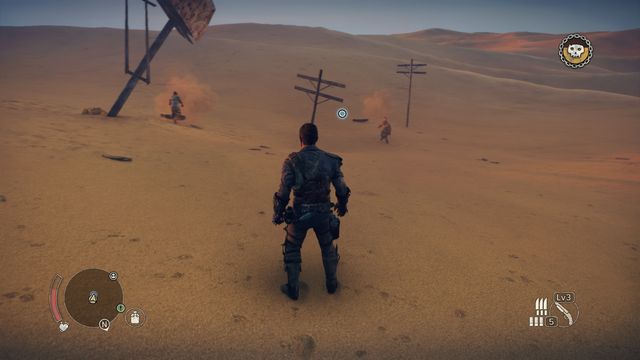 Two easy opponents will appear at the second point.
Another mission received from Pink Eye. Drive to the first point and shoot the flare. Then go towards the second point marked on the map. There you will be attacked by two opponents. Eliminate them quickly and shoot another flare.
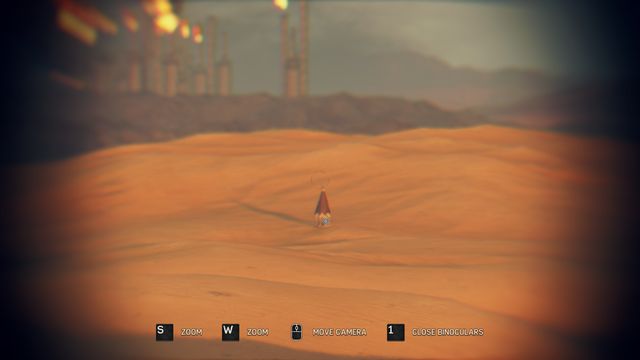 Use the binoculars to find the entrance to the church.
Then move towards the vantage point. Use binoculars there and check the arena between the flares. You must locate the church's tower buried in the ground. Finding it will mark a new location on the map - go there and enter the church.
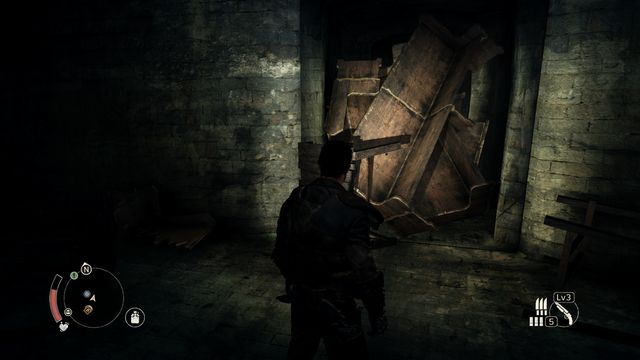 The wooden barricades can be destroyed with nearby canisters.
Walk down and examine the territory. You will find large amounts of Scrap and a History relic lying next to the altar. Go to the right side and select the passage down. You will reach a place where the road is blocked with wooden barricades. In the same room you will find a canister - set it on fire and throw at the barricades. This will unlock the passage. Go to the bottom of the stairs. The flashlight will stop working and reactivate after a moment. Destroy another barricade with a canister lying in the corridor. You will reach a food stock.
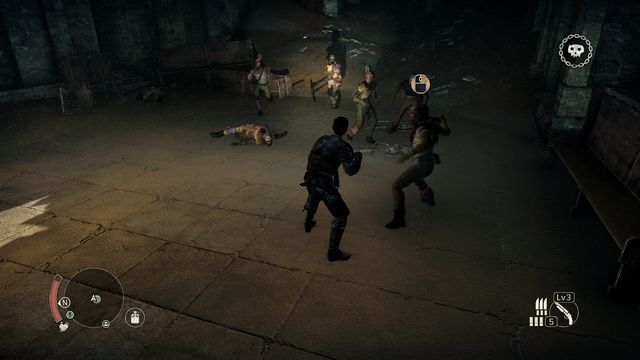 Use counterattacks and dodges during the battle with faster opponents.
After a short cutscene, go back up. There you will be attacked by a group of strong opponents, including one charging with a shield. Your enemies can block and dodge your attacks, so it is wise to use those techniques as well. Once you get rid of the threat, place the charge and shoot the flare. The mission will end and, as a reward, you will be able to build Maggot Farm in Pink Eye's Silo.
The mission will be unlocked (Pink Eye gives it to you) after completing the Dance with dead story mission. Before starting it, check your shotgun level and the amount of ammunition - each bullet will count.
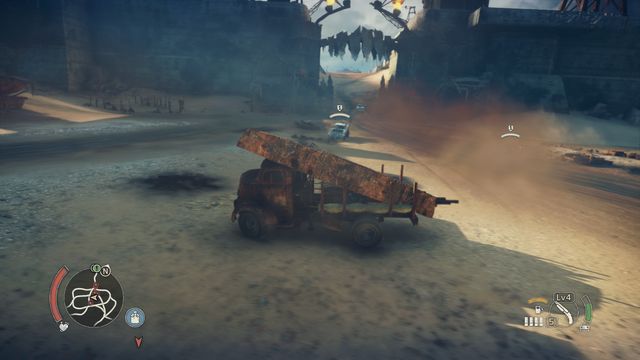 Expect the first larger group of enemies when driving through the Jaws.
Drive the truck towards the marked passage. There you will be attacked by a group of cars. Your objective is to reach the destination in one piece. The enemies will be consequently trying to stop you. The truck isn't as resistant as one could think, so eliminate the threat as quickly as possible - use mostly shotgun for that.
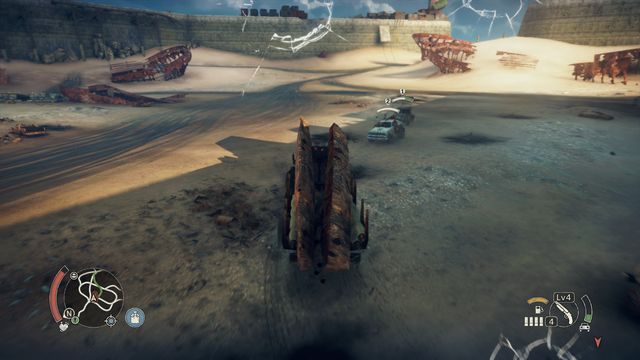 Keep attention to truck's resistance - if the vehicle is destroyed, you will have to repeat the mission from the beginning.
If truck's resistance drops significantly, consider leaving the vehicle. Enemy attacks will focus on you, which will allow you to save the truck. You risk being run over by a car, but usually the enemies are leaving the vehicles after a moment, which allows you to defeat them in hand combat, without the need to destroy their cars. You will be attacked at least twice during the whole track, reaching the destination will end the mission and unlock the Dune Vessel Carrier.
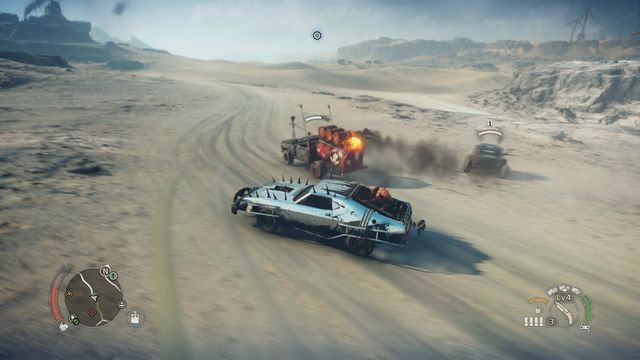 Unarmored trucks are easy target.
Gutgash can give you this mission after completing the Beat to quarters main mission. Prepare large amounts of ammunition before starting it. You will have to destroy two trucks that are driving towards the stronghold.
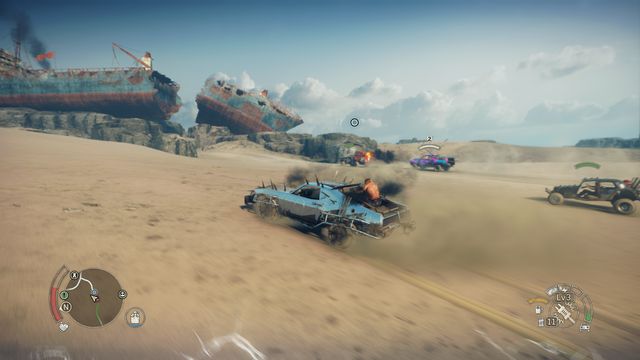 Don't let the convoy reach the stronghold.
Both trucks are moving with small convoys. The key for this mission is being fast and focusing directly on the trucks while ignoring their backup. The trucks must be destroyed before they reach the fortress and when you start the mission, they aren't far away. Luckily, both targets have unarmored fuel tanks. Two shotgun or Thunderpoon shots will be enough to destroy them. Elimination of the trucks will end the mission, you don't need to worry about the rest of the convoys.
The mission is unlocked after completing the Immortal Enemy story mission. Your objective, given to you by Outcrier, is stealing a car. Go to the marked location, but do it during night - otherwise, you won't find anything interesting there.
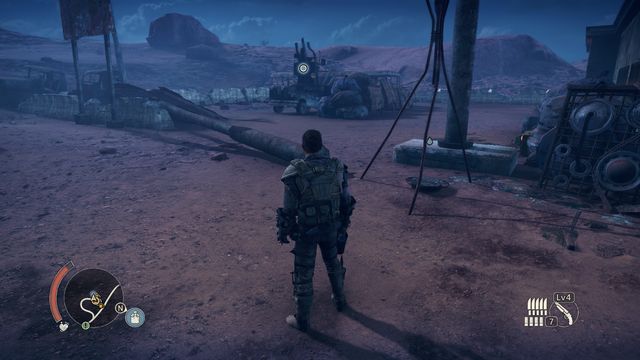 Crow's vehicle can be found only during night.
Once the night falls, at the marked location you will find a vehicle with speakers installed on it. Before entering inside, you will be attacked by two opponents. Enter the vehicle and drive to the Outcrier. Few vehicles will attack you on your way.
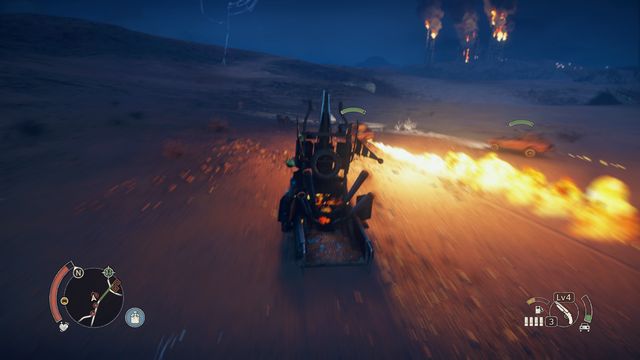 The flames can destroy the vehicle you drive very quickly.
You must watch out especially for the vehicles that are able to spray flames behind them. Remaining in the reach of that fire can greatly reduce the durability of your vehicle. Use shotgun to reduce the numbers of cars chasing you. In harder situations you can also leave the vehicle, once that happens enemies will focus their attacks on Max's character. It is a good tactic that allows you to keep the durability of the vehicle on high level - if it gets destroyed, you will have to repeat the mission. Delivering the car to the destination will end the mission and unlock the Crow Caller.
The mission is unlocked after completing the Immortal Enemy story mission. Hope that gives you this mission can be found in Deep Friah's Temple.
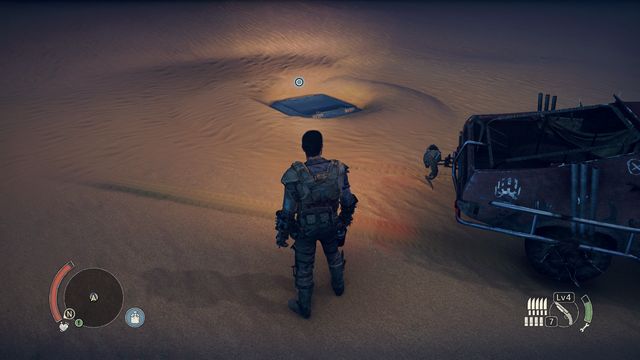 A hatch that leads to the chest.
Go to the marked place located on the Dunes. Open the hatch and walk inside. Go towards the pointed place. Don't worry, nothing can kill you. After leaving the train, examine one of the stocks on the right side. Take the suspension upgrade and the mission will end, at the same time unlocking an upgrade in the Garage.
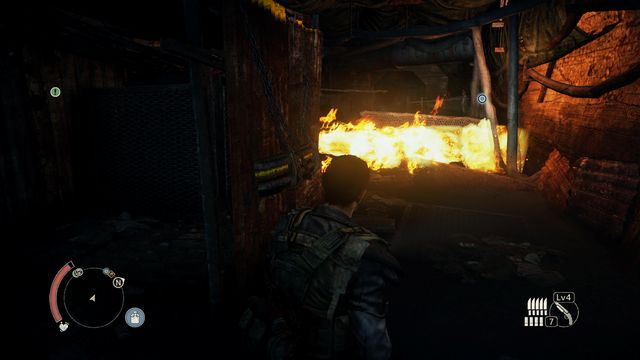 You will unlock the path by turning the valves off.
The mission is unlocked by completing the Immortal Enemy story mission and going to the Deep Friah's Temple. Drive to the Underbelly and explore the lower levels until you reach a wall of fire blocking the passage. Turn the valves twice and thus open the passage to the further part.
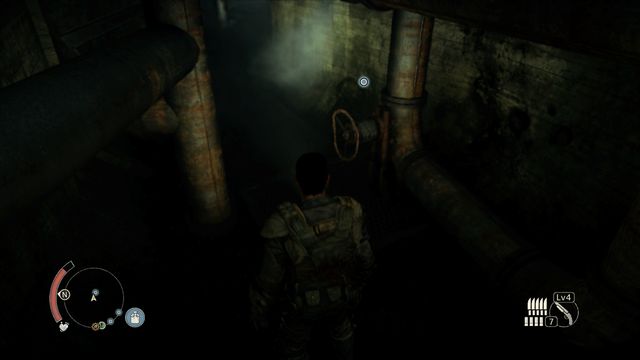 Hurry with turning the valves - the poison gas is reducing your health.
A poison gas is filling the entire Underbelly. This makes the time you have to open all the valves limited, Max's health will be constantly dropping. After opening the path, go quickly down (ahead). Once you're at the bottom, you must find three valves and turn them off. The first one is located in the corridor on the left side, close to the ladder. Second can be found below, turn right when you have the ladder behind you. The last one is located in the corridor to which you will enter if you go from the lowest level one floor above. There you must find the flame coming from a pipe, when you will walk close to it you will notice a corridor on the right side - it leads to the last valve.
Leave the territory, and you will finish the mission and unlock a harpoon upgrade.
You will unlock this mission after completing the Immortal Enemy story mission and going to Deep Friah's Temple.
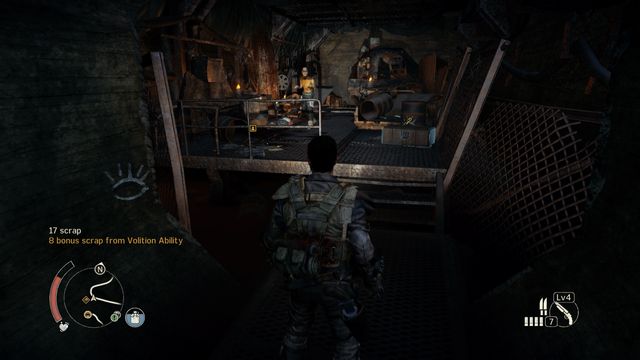 A lone enemy and chest with the upgrade awaits at the end.
Drive to the Scavenging location marked by Chum. Inside you will find 8x Scrap and a History relic. In the next parts of the small underground you will be attacked by few groups consisting of 2-3 enemies. They aren't armed, defeating them will be easy. At the end of the road you will find a single opponent and the main objective of this mission. Collecting the upgrade will unlock the ability to quickly repair the Magnum Opus vehicle.
Another side mission received from Deep Friah, unlocked after completing the previous one (Where There is Smoke).
 When driving under the camp, watch out for the Molotov's Cocktails.
Read the sign and then go to the marked location. Use the binocular there in order to find the burning campfire ahead. This camp is your next destination (watch out for enemies positioned along the road - they will throw burning bottles at you).
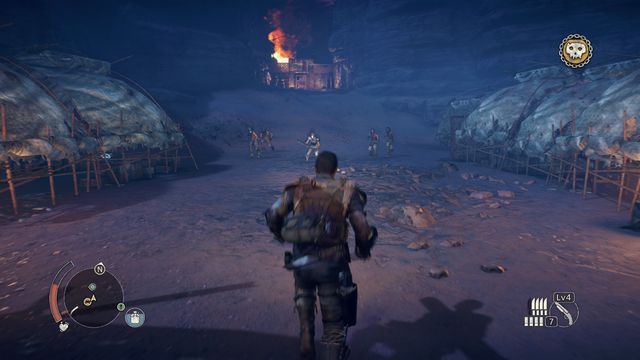 The first group of enemies will attack after you enter the camp territory.
A welcome committee consisting of few enemies is waiting there for you. Watch out, as most of them are armed. After clearing the place, gather the Scrap and go higher, to the next part of the camp.
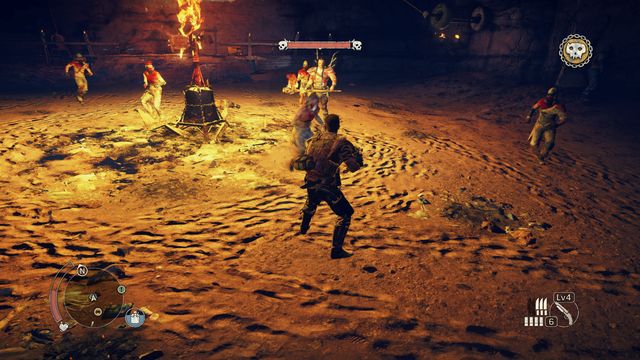 If you keep enemies at distance, you will avoid attacks from all sides at once.
Here you will face much more enemies, including two enemies with shields and one boss. The battle will be hard, try to avoid the center of the arena, as being surrounded by charging enemies will make it much harder to perform dodges and blocks. Try to jump towards single opponents and eliminate them quickly - the lesser the enemies, the easier to perform dodges. Leave the two shield bearers for the end, it will be a good idea to use a weapon dropped by some of the enemies to eliminate them.
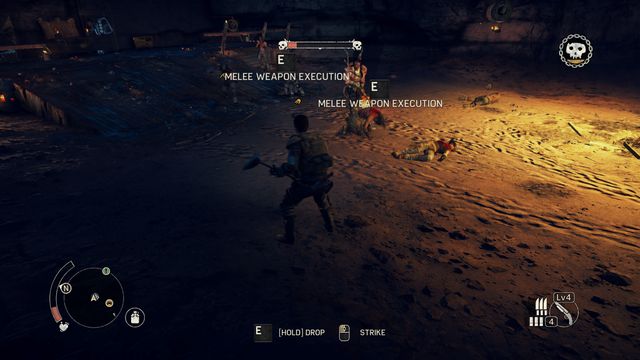 If you keep the enemies between the boss and Max, you can make the boss hurt few smaller opponents while trying to get Max.
Leave the Arkytekt for the end. The fight with him consists of dodging and attacking when jumping away from enemy's charge. Your opponent is resistant, so use all the weapons available on the arena. At the end of the duel, when boss' health bar is close to zero, another group of opponents will join the fight. When that happens, try to quickly finish the boss and then take care of the regular opponents. If it won't succeed, use the previous tactic of eliminating the weaker opponents one after another. After this wave you will be free to finish the Arkytekt and mark the zone by shooting the flare.
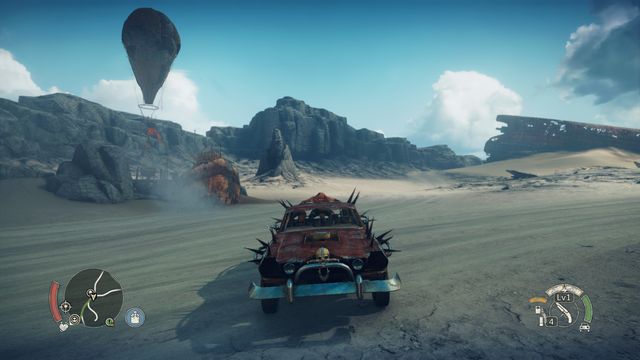 It is always a good idea to use the Vantage outpost whenever you are driving near a balloon.
Excluding the first location (Chumbucket's Territory), each newly visited region has one Vantage outpost. Those places are used for uncovering the map and as a quick travel point. After driving into a new terrain, the location of the outpost is added to the map. When you visit it, the quick travel point becomes active. It is wise to unlock new points quickly, this will let you save time spent on travels and searching for points of interest.
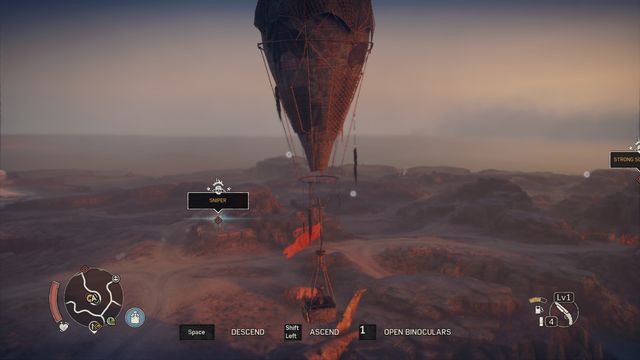 Only the spotted places will be marked on the map (all "circles" are points of interest).
Your objective in each Vantage outpost is reaching the balloon, flying high enough and marking all the visible points (Max will automatically equip the binoculars).
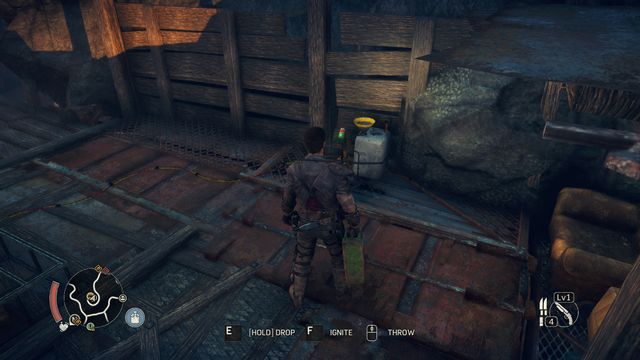 Sometimes you must add fuel, sometimes shoot the lock - nothing hard.
Each vantage outpost is constructed differently. However, they all have some things in common:
- a basket attached to the balloon: sometimes it might lack fuel, in that case you must bring a canister and refill the tank,
- generator: the generator (yellow chest) might lack fuel as well,
- a lever bringing the balloon down: sometimes it might happen that when you visit the outpost, the balloon is in the air. To get it down you must pull the lever on the yellow panel, usually located close to the balloon. If the lever remains inactive, you must first replenish the gas in the generator.
- retaining chains - sometimes it will be impossible to get in the air due to the hitches that hold the ropes. Shoot all three and the balloon will rise.
In almost every outpost you will have to replenish the fuel, get the balloon down or shoot the ropes. Snipers and other enemies protecting the outpost might be an additional difficulty.
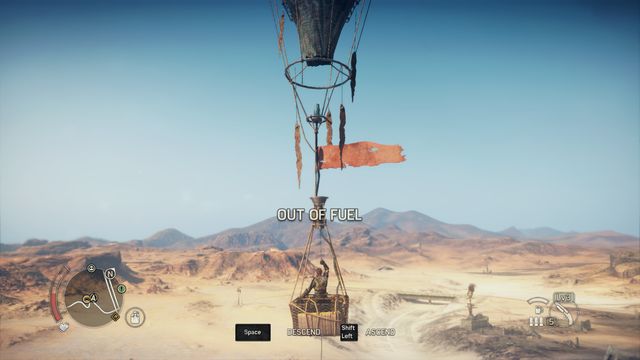 Make sure that the balloon has enough fuel - otherwise it might run out of gas before reaching the required altitude.
While in the air, don't forget to mark all the visible places (turn the binocular in their direction), otherwise they won't be marked on the map. Minefields and Scavenging locations cannot be marked, all other locations can be spotted from the balloon.
Many times while driving through Wasteland, you will spot fearsome Scarecrows or Snipers looking for victims. Eliminating the metal constructions and enemy shooters is optional and can help you in lowering the threat level in a region. It's one of the simplest way to increase safety. Because of that, you should always use it - Scarecrows and Snipers are easy to eliminate.
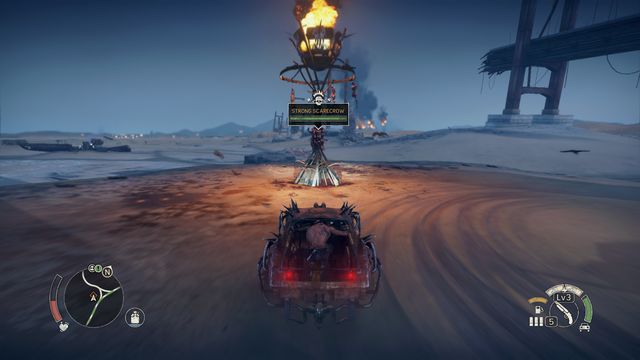 In order to increase the ramming strength, accelerate before driving into the Scarecrow.
Scarecrows are larger or smaller constructions, usually placed near roads. They can be destroyed in few ways, the simplest and most frequently used will be the harpoon (the strongest Scarecrows will require higher harpoon level) and ramming (only if the Scarecrow isn't reinforced with wall - in that case this method will not work. To deal more damage, remember about boosting before driving into a Scarecrow. On the northern territories Scarecrows will be stronger, they might require few hits. At that point you should have the Thunderpoon and upgraded harpoon, they will make it much easier to destroy the Scarecrows.
 It is easier to beat the snipers with their own weapon.
Dealing with Snipers is similar, and even easier. The towers with the shooters don't have to be destroyed. It means that you don't even have to get close to a Sniper. All you need to do is find him from safe distance and kill with your own sniper rifle. He will be eliminated for good, these enemies do not respawn. Driving into a tower will have similar effect.
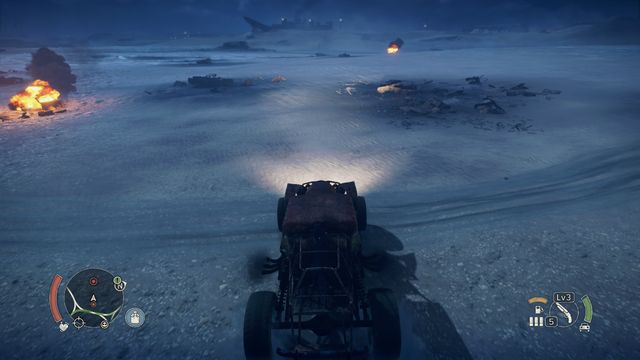 Buggy makes it much easier to find a Minefield.
Minefields are small territories with mines placed on them. They aren't visible on the map until you drive very close to such field. A way to find them from larger distance is to travel using the Chum's Buggy. It becomes available after completing the Dinki-Di side mission - the dog met at the beginning of the game is able to detect mines.
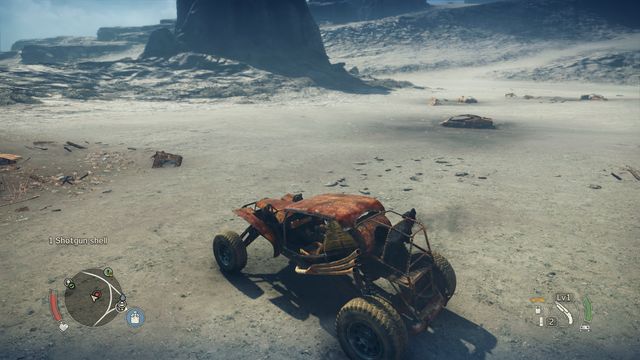 The dog turns his head towards the minefields, and on the minefield - towards a single mines.
When traveling using the Buggy, the dog will start barking from larger distance, pointing you towards a Minefield. You must keep attention to the behavior of the animal. He will be barking whenever he sniffs mines. The direction where the dog is turned is also the direction where you should go. Driving close enough will unlock the Minefield on your map. Uncovering the field is also possible when traveling with a different car, in that case you must get very close to it.
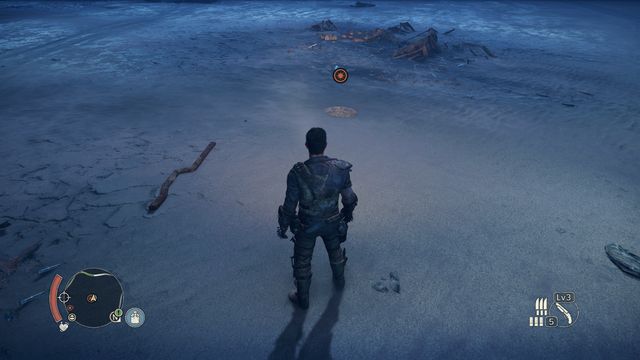 After finding the charge, leave the car and disarm the mine.
Chum's buggy is also needed when disarming the Minefields. The dog will not only find the whole territory, he can also locate single mines. The modus operandi on the Minefield is similar - the dog keeps barking and his head will point the direction where the mine can be found. You should move carefully, as driving into a mine will cause an explosion. When you will be few meters from the mine, your dog will change the way he barks and a mine will be found on the ground. Slowly following the dog is the only way to safely find mines. After finding the explosive, walk close, and Max will disarm it (interaction button). Finding all the mines will clean the Minefield - it will disappear from the map window.
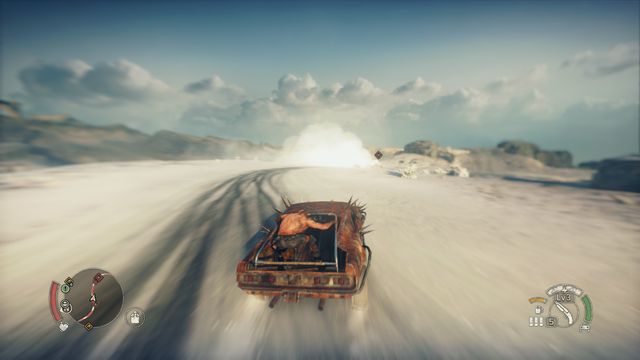 The cloud will point you to the current position of the convoy.
One of the ways to reduce the threat level is eliminating convoys consisting of few vehicles and the leader's truck. Convoys are driving through a specific route, not visible until you drive through a part of it or until you spot the convoy itself. The convoy can be found by observing the horizon line - a moving convoy leaves a cloud of dust behind it. If you notice such cloud from far away, you can be sure that a convoy is there. Once you find the convoy route once, it remains visible on the map, even after you eliminate the enemy leader.
Hood ornaments, one of the collectible items, are related to convoys.
 The guards might have various upgrades which make it harder to reach leader's vehicle.
After finding the route, you must locate the convoy itself. It can be found at any point of the track. Look for a cloud of dust left behind the convoy, this will allow you to find it faster. If the route is going through covered territories, spotting the cloud might be harder or even impossible. In that case you must drive through the uncovered convoy route. At some point you will spot the enemy vehicle group.
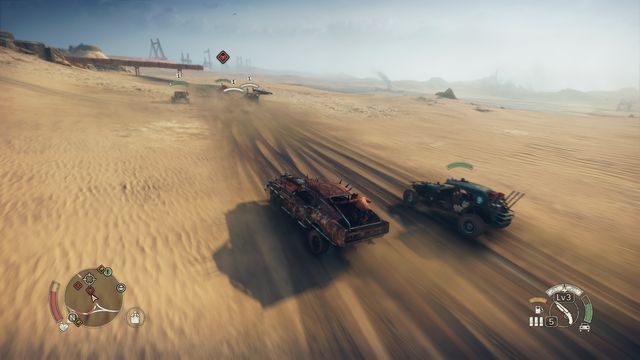 The vehicles protecting the convoy will detach one after another from the group in order to interrupt you.
Each convoy consists of a leader's truck, which is your main target, and the guards. Eliminating the leader automatically eliminates the whole convoy. Because of that, the guards will focus on making it harder for you. The vehicles from the tail of the convoy will detach from the group and attack your car until your or their vehicle is destroyed. Despite the fact that eliminating the guards isn't required for destroying the convoy, sometimes it is wise to do it as it will make eliminating the leader easier.
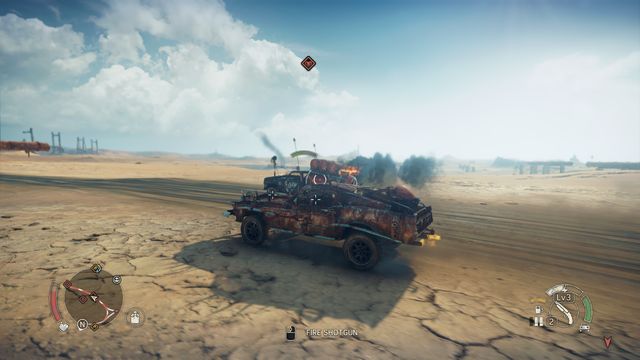 Uncovered gas tanks are perfect targets.
There are many ways to destroy leaders' trucks. At the beginning, shooting the unprotected fuel tank will be enough. However, the more to the north and west of the map, the trucks and the guards will be better armored. Gas tanks will become covered and the tires reinforced. Upgraded harpoon and the Thunderpoon will become useful. One of the upgrades for Max's vehicle's wheels will also allow dealing damage when driving near enemy vehicle. If you have such upgrade, it is wise to drive next to leader's truck and consequently deal damage to it.
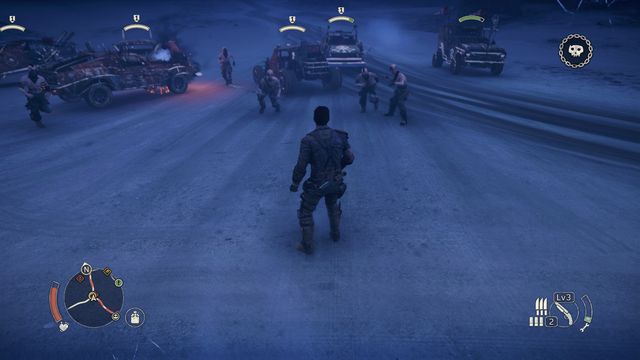 Stopping the convoy and fighting the guards on feet is possible as well - just shoot the tires in leader's vehicle.
Enemy vehicle can be also immobilized by shooting one of the tires (depending on truck's armor, one or few shots will be enough). This will stop the whole convoy. You can take care of the security in melee combat (however, watch out for being run over, enemies won't leave their cars immediately). No matter the method you chosen, destroying the enemy truck will let you collect the Hood Ornament from the ground. Remember that you can install them in your own vehicle - various masks give various bonuses.
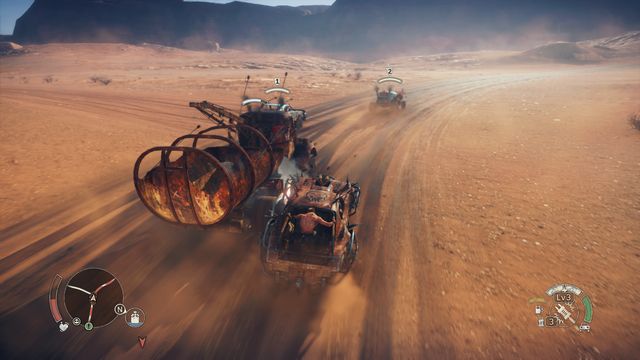 If you have a specific upgrade, you can stick to the truck and reduce its durability.
You can eliminate the convoy gradually. The security that increases in strength and numbers as you progress in the game doesn't need to be destroyed at once. As long as you remain on the route, enemy vehicles will not respawn. Don't worry about your own damage, Chumbucket will always repair you. Eliminating the security methodically will take much more time, but with each time the convoy will be less protected. However, if you die, the vehicles will respawn.
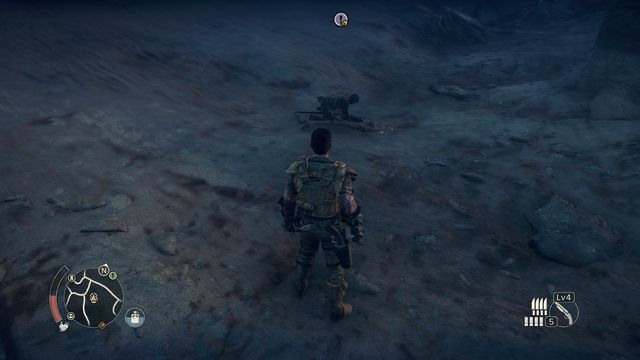 Digging the Scrap together? Not very tiring, but the reward isn't impressive as well.
When traveling through the Wasteland, you can meet inhabitants in various parts of the map. Usually they comment Max's actions in the game or they can help you find Scrap. In some cases they might give you valuable information about the nearby camp (for example, they can inform you where to look for a secret entrance). You might also participate in some Legendary encounters. By talking with the inhabitants in those points you will receive various tasks. Few targets will be added to the map. Completing them shouldn't be trouble and you will receive Griffa tokens for that.
Important: Not all encounters marked on the maps added to this guide are available since the beginning of the game. Some will appear as a form of reaction to your actions (such as reducing threat level) or after completing specific side missions.
Scavenger encounters and Loot encounters - both encounter types are very similar: drive to the marked location where you will have to perform a simple task (for example, kill few enemies) or you will receive some Scrap after the conversation.
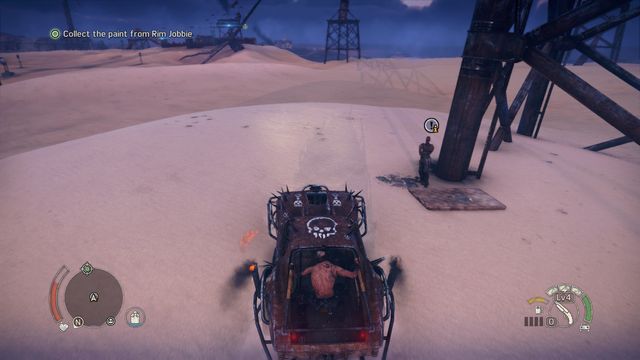 It is a good idea to gather some intel before entering strongly protected camps.
Intel encounters - before assaulting some camps, you can meet with Wasteland inhabitants and gather valuable information from them. Usually they will point you to a chest with parts or to a secret entrance to the camp. Sometimes they will simply comment some events in the game world.
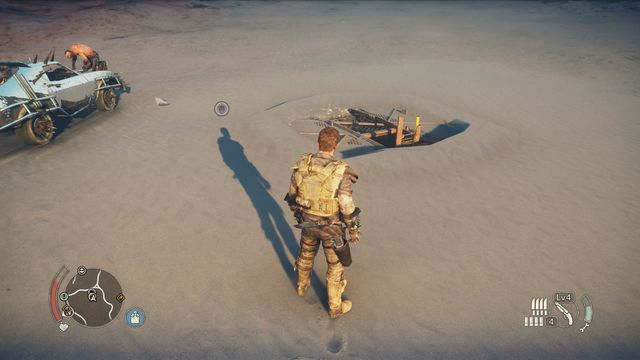 Some places (like Buzzard's hideouts) appear on the map after activating the task.
Legendary encounters - during this encounters you will receive simple tasks. After talking, few points that are your objectives will be added to the map. Completing all of them will be rewarded with Griffa tokens. The objectives might vary. Sometimes you will have to perform a few jumps on the ramps, other times you will be tasked with destroying marked trucks or blowing up enemy hideouts.
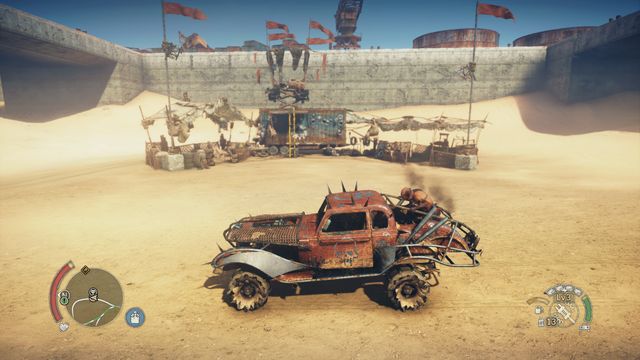 The place where the race begins.
If you want to unlock new vehicles quickly and try your strength in races through the wastelands, Death runs are for you. Scattered through the whole map, they allow you to unlock new vehicles and obtain Griffa Tokens. To start a race, go to the starting point (in each location, it becomes marked on the map after driving near it or after finding it during the visit in the Vantage outpost).
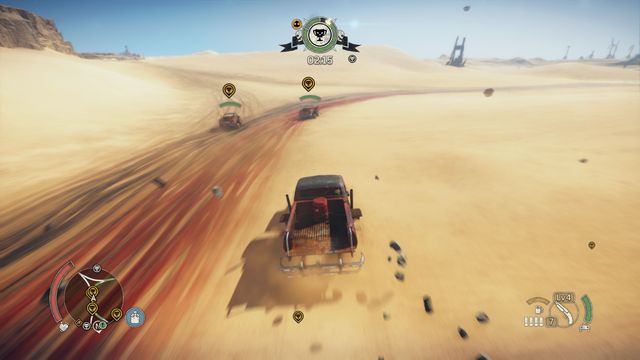 First place and reaching the finish line in time limit - those are your objectives.
The race rules are always similar. Most of all, in order to win you must reach the finish line as the first person. Secondly, you must do it before time limit runs out (it is shown in the center of the screen). It might happen that you finish the race before the time is out, but your opponent will be first - in that case you must repeat the race. Each Death run offers few vehicles to choose from (usually 3), in order to complete the race and unlock a quick travel point you must win once, with any vehicle. Some vehicles from your collection can be unlocked during Death runs, after a successful race the car you were using is added to your garage. Death runs can be repeated as many times as you want, sometimes they allow you to unlock more than one vehicle.
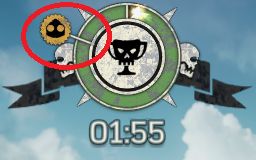
What's important, during the race it is possible to obtain Griffa Token. To get it, you must win the race with better time than the regular one needed for winning the race. A symbol showing the flow of time marks a line which you cannot cross in order to obtain the token (it's usually more than a dozen of seconds before the regular time limit). Getting the "legendary" time is needed only for obtaining the Griffa Token, winning with normal time is enough to complete the race.
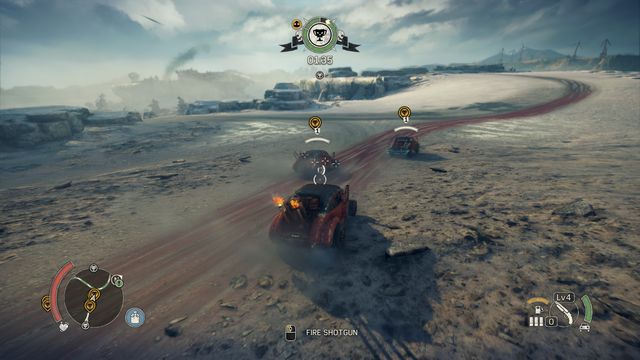 Eliminating enemy vehicles is not only allowed, but recommended as well.
Remember, that you can eliminate other drivers in order to make winning easier. If you want, you can destroy the vehicles of all opponents quickly after beginning the race and drive rest of the race while only worrying about the time limit. There are no penalties for eliminating opponents, sometimes it might be a good way to make your life easier - don't forget about taking shotgun ammunition to the race.
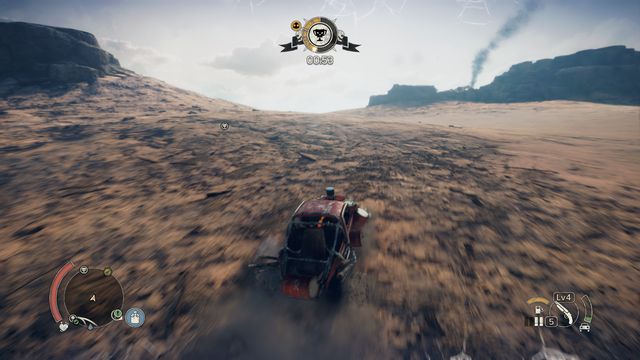 Frequently, driving off the marked track will allow you to obtain a better time
The races themselves are rather typical - you must drive from point A to point B. Only one race type requires you to stick to the track, in two other ones you have more freedom. Use it and don't stick to the path if by going through a shortcut you can reach the finish line faster. The game shows you a suggested route, marking it with a red color - if it's not enough, you can always do it yourself from the map menu. When you do it, the track will appear on the minimap.
Important: destroying or leaving the vehicle will automatically cancel the race.
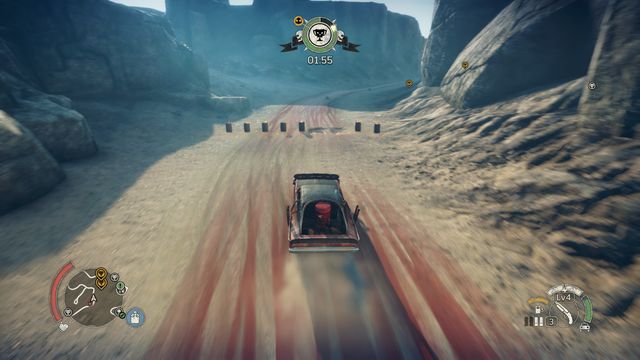 Hitting at least one barrel in each point is required for completing the run.
Scatter Run - your only objective in this race is reaching the finish line as first. You can completely ignore the recommended route and instead create your own. Enemies will probably do the same, driving in different directions.
Time Bomb - in this race type you race only against time. Instead of trying to be faster than you, your enemies will be trying to destroy you. Try to avoid fighting them, only shoot the vehicles that are really getting in your way.
Barrel Bash - there are "checkpoints" located along the route and you cannot miss them. The checkpoints consist of few exploding barrels. You must hit at least one of them in each checkpoint. It means that you must, at least partially, stick to the track (except for the checkpoints, you can drive how you want). Missing or bypassing a barrel in any checkpoint will end in not completing the race, even if you do win it.
 Max is not always welcomed with such energy.
Each terrain contains a specific number of enemy camps which you can conquer in order to reduce the threat level in a region. In most of such camps you will find many interesting things - large amounts of Scrap, collectibles, project parts or a Scrapulance. Successful claim of a camp is also rewarded with Scrap given to you periodically. It's a good way to secure a constant source of "cash".
In addition to that, claiming all camps and doing so in 100% (finding all Scrap pieces and other collectibles placed in a camp) is needed for unlocking the camps in collectibles menu. Sometimes finding the last piece of Scrap is very troublesome - in that case, use the recording mode, which can makes that job much easier (it will allow you to quickly examine at least part of the camp).
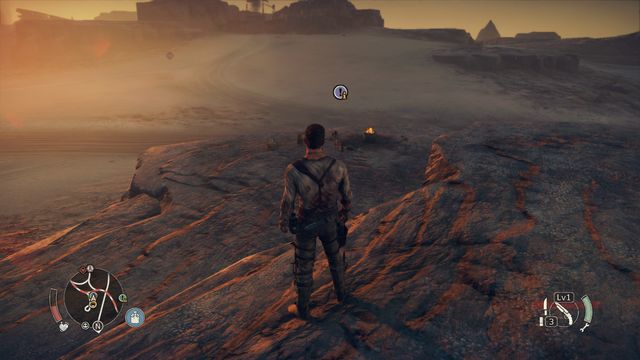 A Wasteland inhabitant observing a camp can give you some valuable information.
Before entering some camps, you can gather knowledge about what can be found inside. To do it, talk with the Wasteland inhabitants in places marked on the map as Intel encounters. Usually they inform you about side entrances or weak points of the top dogs.
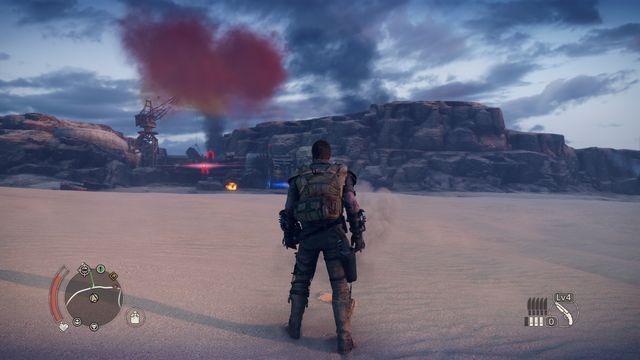 If you toy with the outside defense for too long, it will be reinforced.
Before you start an assault, it is a good idea to check the outside defenses of the camp. It might consist of snipers, gate security and towers with enemies throwing missiles. You can mark these enemies with a binocular. Before attacking the camp, it is a good idea to eliminate such defense. It can be done most quickly with sniper rifle or the Thunderpoon. Early in the game you will have to use shotgun, harpoon or simply ram enemy towers. The fire at the game can be turned off by destroying the fuel tank or, which is not always possible, using a valve. The gate itself can be rammed, toppled with harpoon or blown up with explosives - some gates don't allow you to use all of these options, limiting your choices.
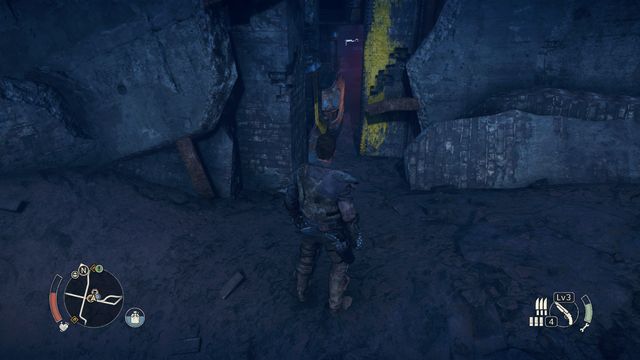 Sometimes it is a good idea to look for hidden entrances.
There might be more than one entrance to the camp. Additionally, sometimes it is wise to look for side entrances. Finding a narrow passage (usually marked with yellow paint) or a container with "X" letter, or even a rope that will allow you to ride directly to the center of the camp, will allow you to bypass the outside defenses and get immediately into the combat. You can also feint the defenders by driving to the camp with a vehicle took from enemy (when entering such vehicle, the game will inform you that a specific fraction will not detect you). However, you must remember, that remaining too long near the enemies or leaving the vehicle will blow your cover. Still, it is a good way to quickly get inside the camp without having to worry about the first line of defense.
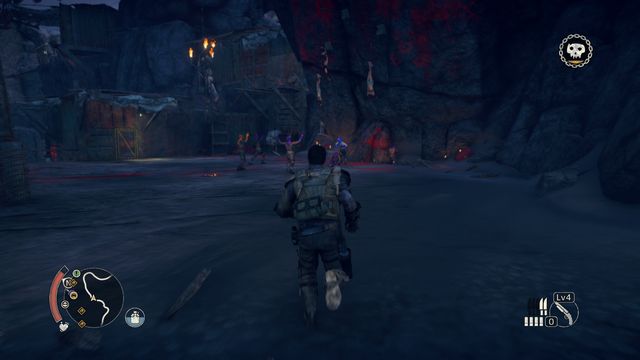 Each camp most of all consists of few groups of various opponents - their numbers and strength depends on the "difficulty" factor which can be checked in the map screen.
Once you get inside, you must be prepared only for combat. Each camp, no matter its type, is a place where large group of opponents can be found. Camp's security depends on its difficulty level - you can check it in the map window, by marking the camp that you're interested in. The more skulls, the more enemies, including stronger and better armored ones, you will have to face.
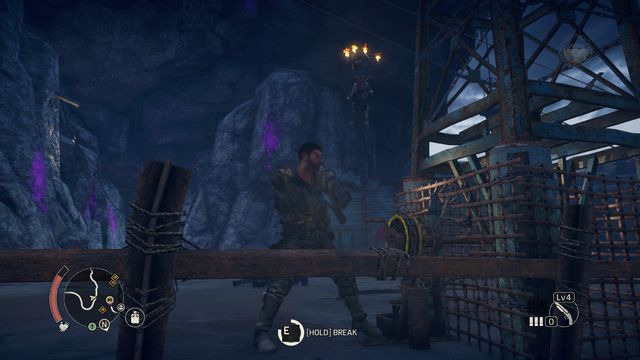 As a last resort, you can always drop the War Crier down.
An interesting enemy type, which you will meet in almost each camp, is War Crier - enemy which isn't fighting, but instead he hangs above the arena. After entering the combat area in which a War Crier can be found, you activate a specific bar. If you will let it fill to maximum, the enemies will become marked in red, their strength will increase and they will attack you more frequently (the same will happen to the outside defenses). Because of that, War Crier should be usually eliminated in first order - sometimes you can shoot him with a sniper rifle even before you enter the camp. If it isn't possible, using the shotgun will be fastest way, and if you lack bullets, you must find a valve that keeps him above (it's usually nearby) and quickly turn it (it's a last resort, as during this action it is easy to be attacked by one of the enemies).
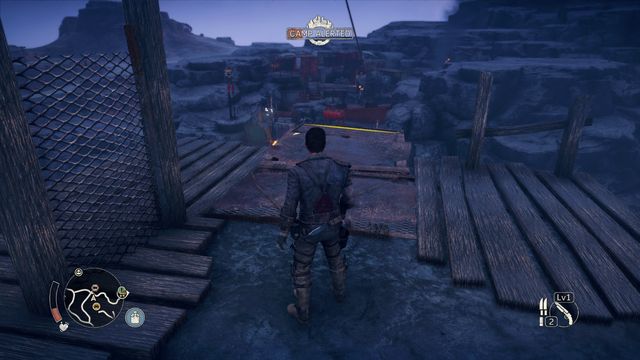 Rope rides, rock ledges and narrow passages might lead to previously missed places.
Each camp looks differently and has many places to discover. However, in most cases only one or two main roads lead inside. If you want to find all the objects (Scrap, Insignia etc.) and thus unlock the camp "in 100%", search for narrow passages, doors opened with Jimmy bar, kicks or explosives, and passages near the edge or places to climb. In other words: explore - most of the places you can enter are marked with yellow paint.
 A charging top dog will fall into the flames if you position yourself properly.
The main difference between the camps is their type. Each camp can be claimed by completing different objectives. Four main camp types are:
- Oil pump camp - Your objective in such camp is finding and blowing up the pump. It is usually located deep in the camp and guarded by the last group of enemies. You will blow it up with a canister filled with fuel, which always can be found nearby.
- Transfer Tank camp - In these camps your objective is to destroy a specific number of tanks. You can do it by blowing them up with explosives (canister, Thunderpoon) or by shooting them with a shotgun. Tanks can be found in the whole camp, they are also marked as targets on the minimap.
- Stank Gum Camp - in this camp type you must defeat a specific number of opponents. Usually, some of them will be able to avoid your attacks (they are fast), so during battles depend mostly on counterattacks.
- Top Dog Camp - the top dog guarding the camp is a miniboss. Usually, you will find him deeper in the camp and before the entrance to the arena with him you should find a water tank. In general, fighting each top dog is similar - these enemies are using attacks which you cannot block, so you must always depend on dodging and attacking them after their charge (hit their backs). Sometimes you can also use the flames on the arena - in that case, position yourself so that you have them behind you. The top dog charging at you, after you dodge his attack, will fall into the flames. Sometimes the top dog isn't fighting alone. In that case, you should use the enemies that accompany him to load your fury. The top dog can also kill your enemies, all you need to do is keep them between Max and the boss. Each top dog is vulnerable to something (fire, fury, a blade), you can usually learn about it by talking with the Wasteland inhabitants (Intel encounter). Such specific attacks deal much more damage.
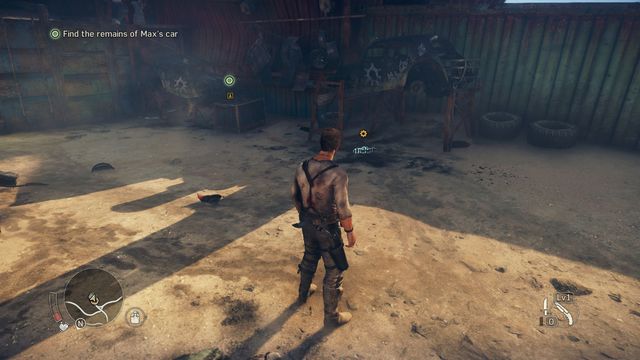
#1 - you will find it during the Righteous Work story mission. When taking over the first camp, examine the container located in the place where you have met the War Crier.
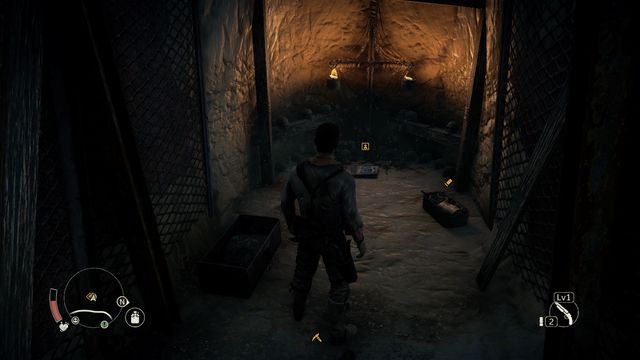
#2 - in one of the Scavenging locations (the one most far away to the west). You will need the harpoon (opening the gate) and the Jimmy bar (opening the door below) to get inside.
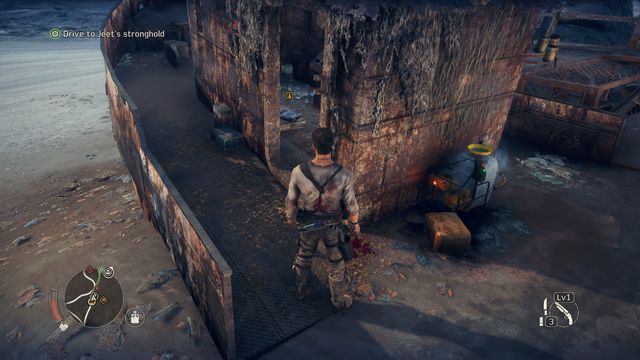
#1 - Vantage Outpost in the Blackmaw's location.
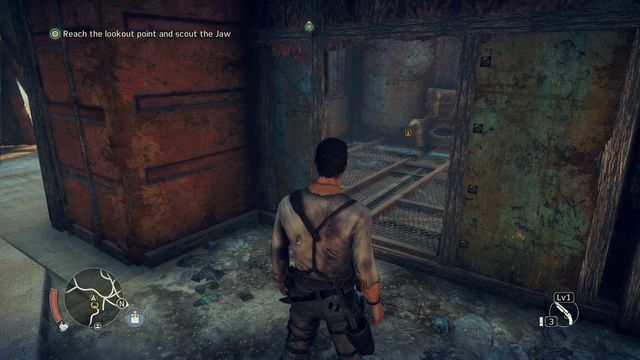
#2 - during the Into Madness story mission, in the place where Max was attacked by an enemy with a shield. Find the container most far to the right side.
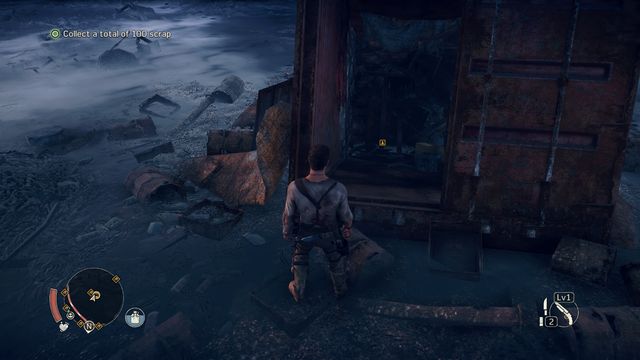
#3 - One of the Scavenging locations (point 1.4 on the Jeet's Territory - Blackmaw's map).
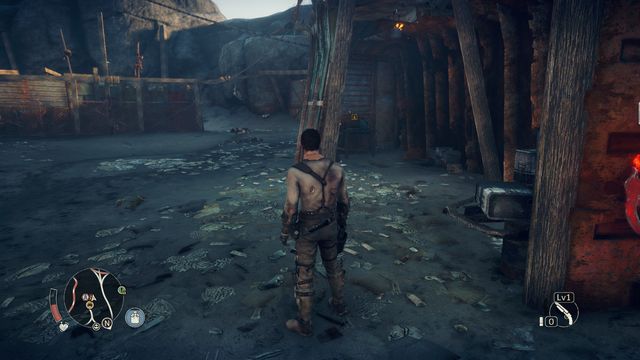
#4 - Bonecrack camp (Blackmaw's). History relic can be found in the place where Max is attacked by 4 enemies (not far further there's a pump that must be blown up).
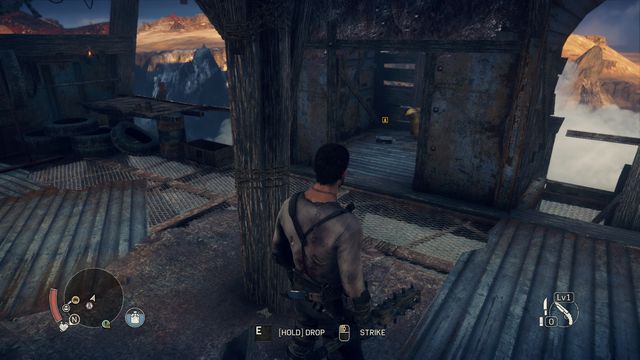
#5 - The Edge camp (Blackmaw's). You can go left from the place where Max is attacked by a single enemy with a knife (the second attack in this camp). At the end of the corridor (weapon on the ground), in the room with the "toilet" on the right side, you will find the History relic.
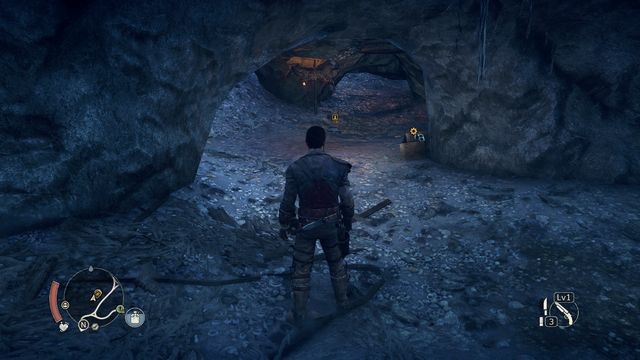
#6 - One of the Scavenging locations (point 1.4 on the Jeet's Territory - Balefire Flatland map). The entrance to the cave can be found between the rocks.
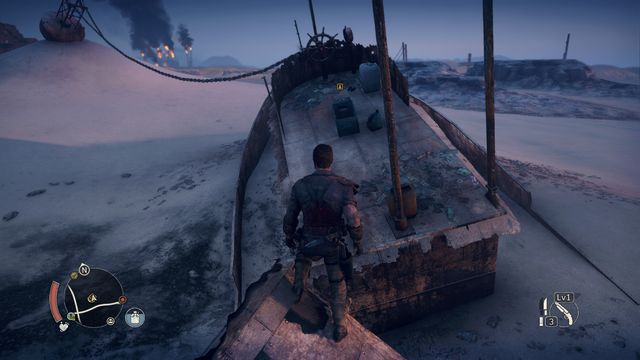
#7 - one of the Scavenging locations (point 1.7 on the Jeet's Territory - Balefire Flatland map). Walk out through the chimney, then use dodge to reach the broken part of the ship.
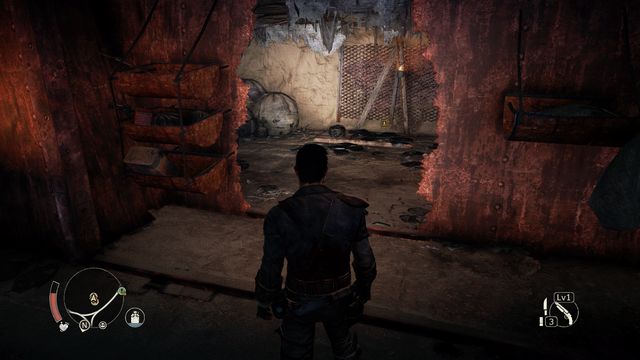
#8 - one of the Scavenging locations (point 1.8 on the Jeet's Territory - Balefire Flatland map). Open the gate marked with "X" letter - the relic can be found on the bed inside.
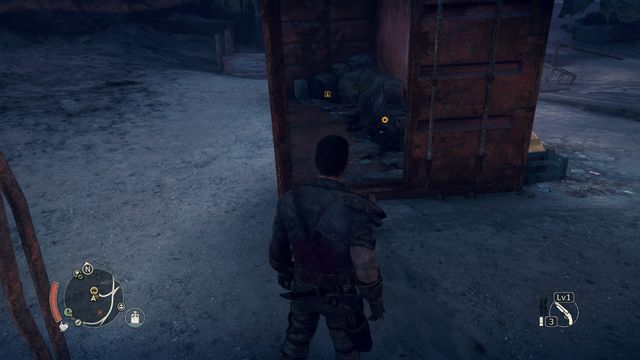
#9 - one of the Scavenging locations (point 1.10 on the Jeet's Territory - Balefire Flatland map). The relic is located in the red container.
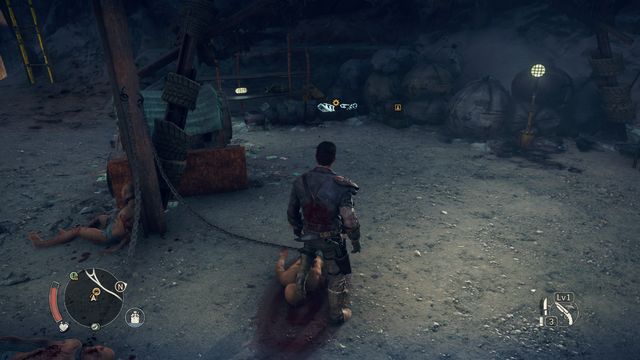
#10 - one of the Scavenging locations (point 1.13 on the Jeet's Territory - Balefire Flatland map). The relic can be found at the very bottom.

#11 - The Black Sands camp (Fuel Veins). History relic is located at the lower deck, in the place where you can refill the canteen (the door on the right side, opened with a Jimmy bar).
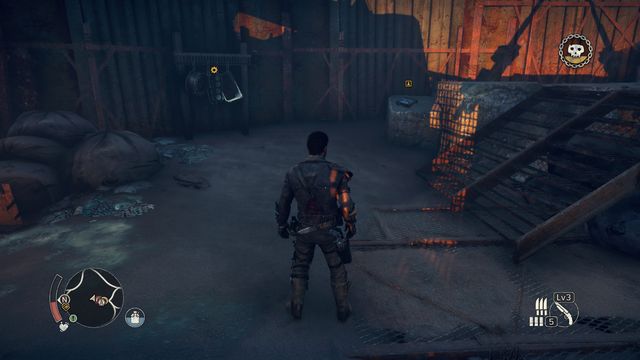
#12 - The Pipes camp (Fuel Veins). Behind the door opened with explosives you will find a bridge. Behind it there's a single opponent, slightly below the History relic.
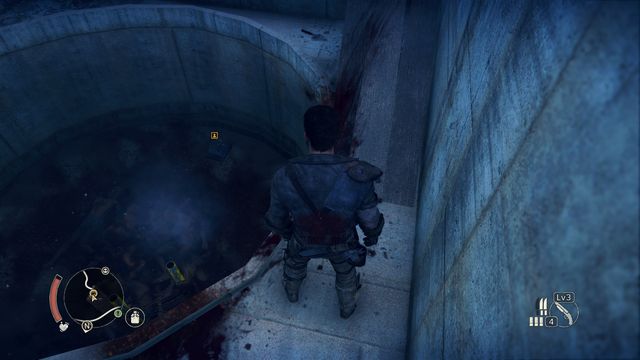
#13 - one of the Scavenging locations (point 1.6 on the Jeet's Territory - Fuel Veins map). The relic is located above, in the round, black hole.
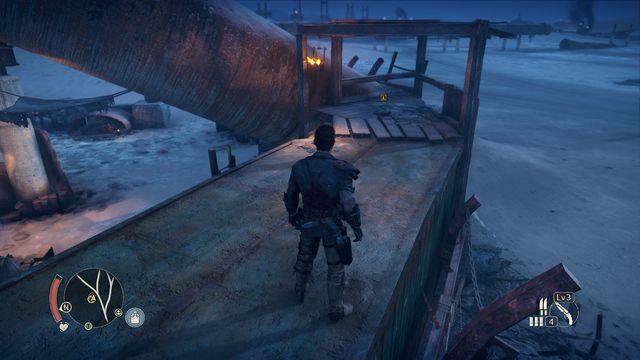
#14 - one of the Scavenging locations (point 1.7 on the Jeet's Territory - Fuel Veins map). On the container, you can get there through the ladder.
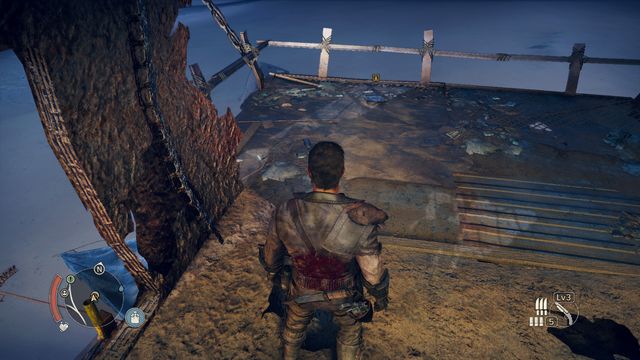
#15 - one of the Scavenging locations (point 1.10 on the Jeet's Territory - Fuel Veins map). At the top of the construction.
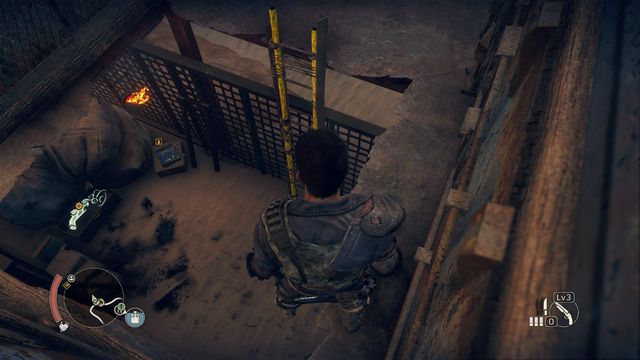
#16 - Wreck Hill camp (Dry Gustie). The History relic can be found in the last part of the camp (group of enemies with a War Crier). Find the ladder (in the container on the right side) and use it to walk down.
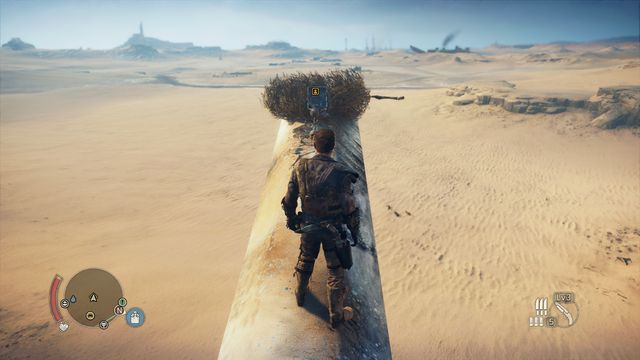
#17 - one of the Scavenging locations (point 1.5 on the Jeet's Territory - Dry Gustie map). Find the end of a long pipe, through which you will reach its other side. There, in a nest, you will find the collectible.
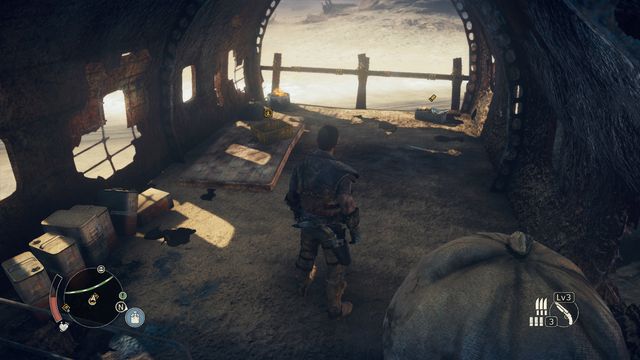
#18 - one of the Scavenging locations (point 16 on the Jeet's Territory - Dry Gustie map). At the top of the construction.
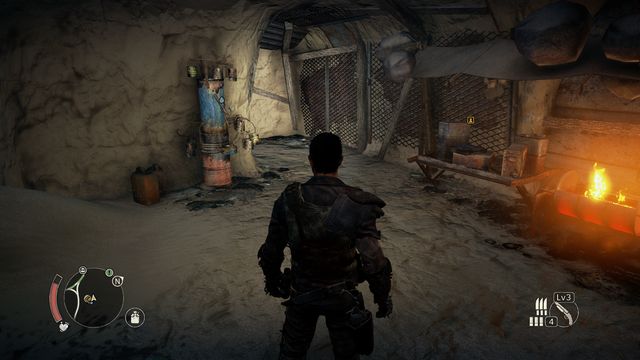
#19 - one of the Scavenging locations (point 1.7 on the Jeet's Territory - Dry Gustie map). In the lower part, in the room with water dispenser.
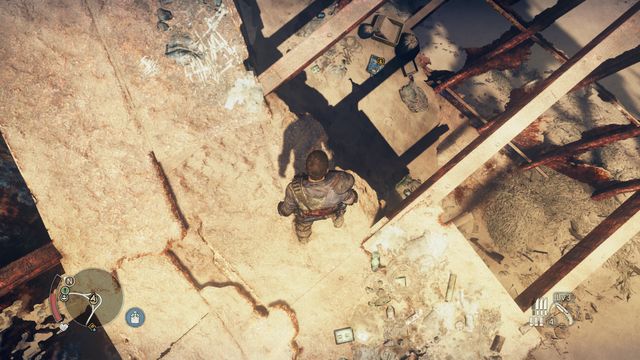
#20 - one of the Scavenging locations (point 1.9 on the Jeet's Territory - Dry Gustie map). Get to the other side from the place where the first piece of Scrap can be found - from there you can jump down and take the collectible.
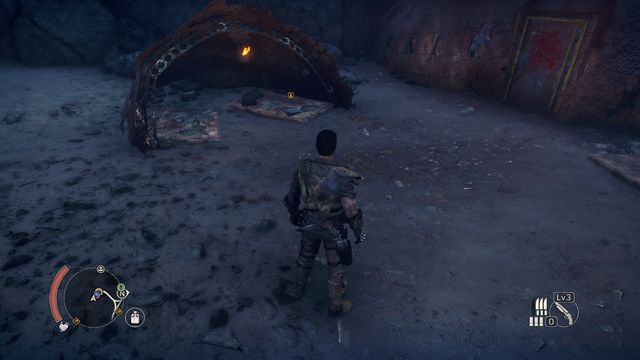
#21 - the Rust Bird camp (Colossus). Not far behind the group with the War Crier, kick the door on the left. In the tent behind it you will find the History relic.
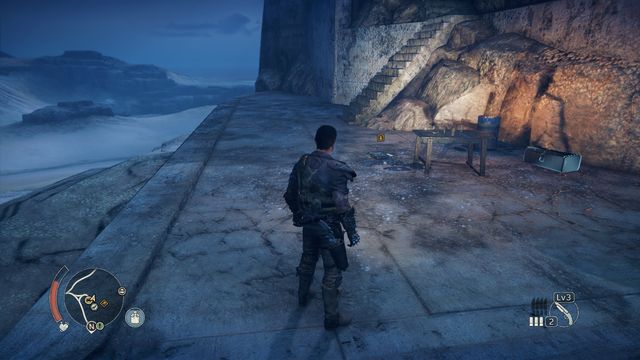
#22 - the Great Watcher camp (Colossus). After the final battle with the boss, go through his cage and open the door with a kick. Slightly further, at the concrete cliff, you will find the History relic.
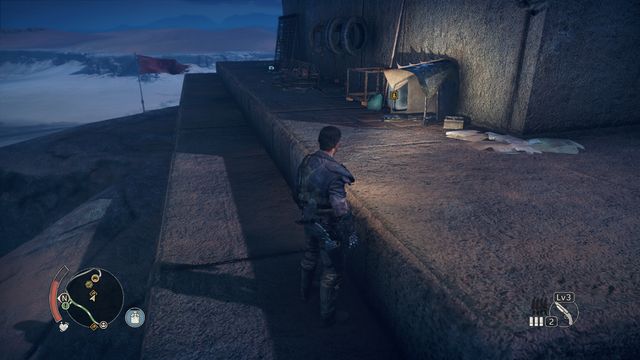
#23 - one of the Scavenging locations (point 1.3 on the Jeet's Territory - Colossus). The relic is located in the corner of the base of the statue. You will get there through the Great Watcher camp.
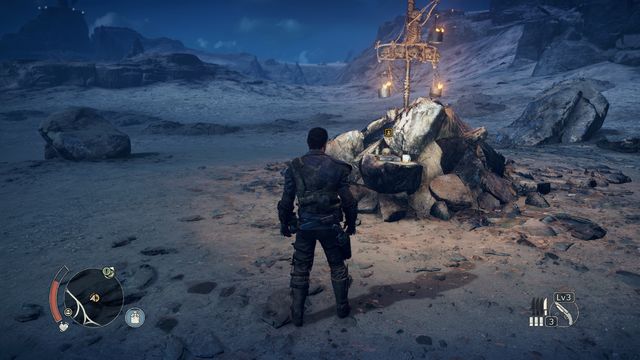
#24 - one of the Scavenging locations (point 1.1 on the Jeet's Territory - Colossus). The relic is on an altar.

#25 - one of the Scavenging locations (point 1.5 on the Jeet's Territory - Colossus map). Turn right before driving into the tunnel to get there. You will find a ladder. The further road leads up (you will bypass point 1.6), to the top, where you will find the collectible.
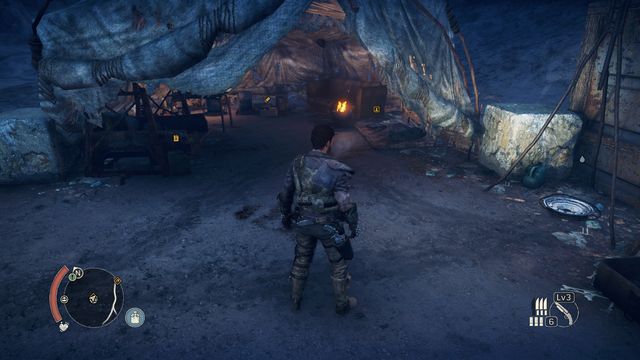
#26 - one of the Scavenging locations (point 1.9 on the Jeet's Territory - Colossus map). In the tent, near the road.
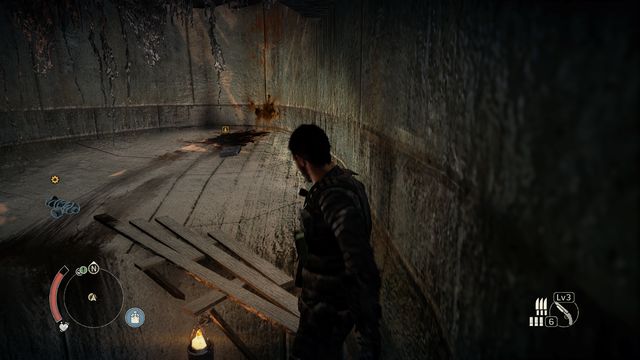
#27 - one of the Scavenging locations (point 1.12 on the Jeet's Territory - Colossus map). You must walk down in the middle circle. Inside you must carefully walk near the wall to the other side.
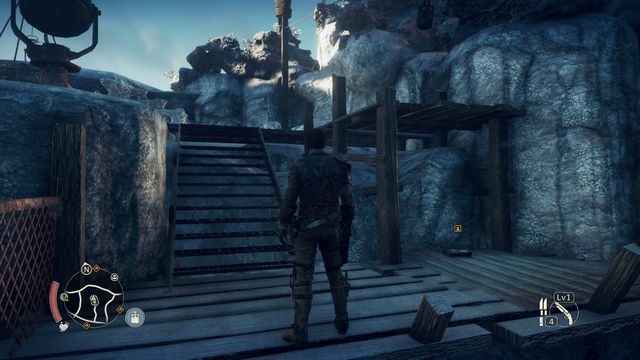
#1 - Vantage Outpost in the Grit Canyons. The relic is located near the stairs, down from the balloon platform.
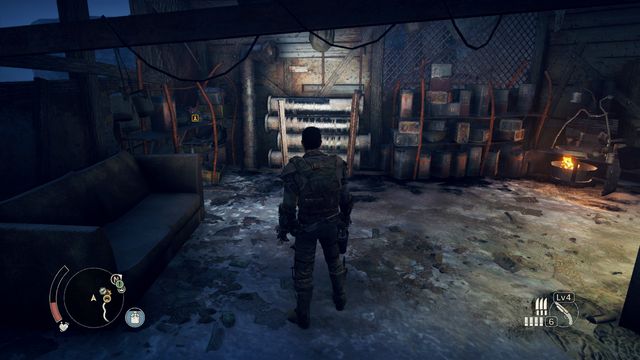
#2 - one of the Scavenging locations (point 1.1 in the Gutgash's Territory - Grit Canyons map). Behind the door opened with explosives.

#3 - one of the Scavenging locations (point 1.3 on the Gutgash's Territory - Grit Canyons map). Next to the totem made of human bodies.
#4 - Gob Stone camp (Grit Canyons). In the shed on the right from the pump you will find a project part and the History relic.
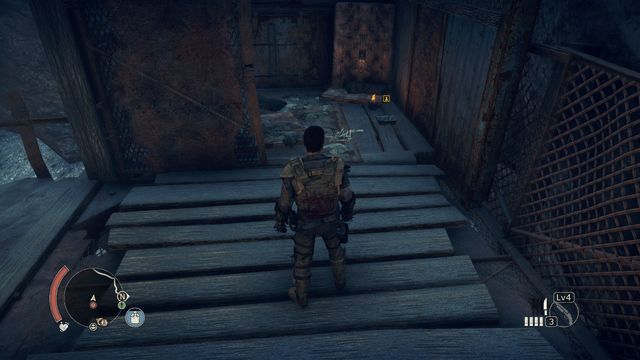
#5 - Black Cove camp (Grit Canyons). Behind the door opened with a kick (right from the place where you were attacked by two shield bearers and other opponents) walk up, lower the bridge, walk again up, to the place where you fought - you will find some Scrap and History relic there.
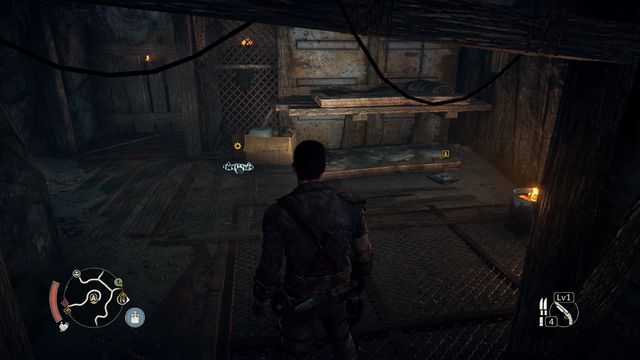
#6 - Vantage Outpost (Parch Moon). The relic is located behind the door.
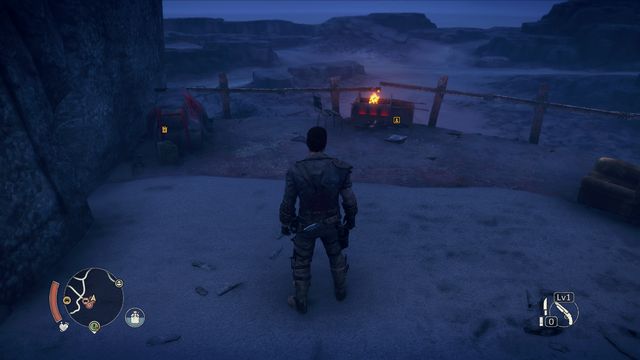
#7 - Rook Nest camp (Parch Moon). The History relic can be found on the upper floor - after opening the door with a kick, go left, and there to the end. The relic is behind a water container, under the wooden barriers.
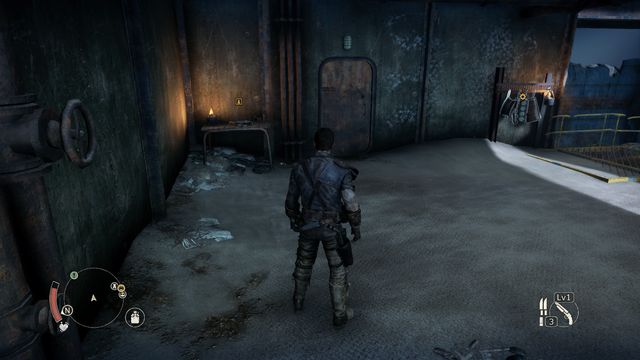
#8 - Gutgash's Stronghold. On the first floor, on the road to Gutgash.
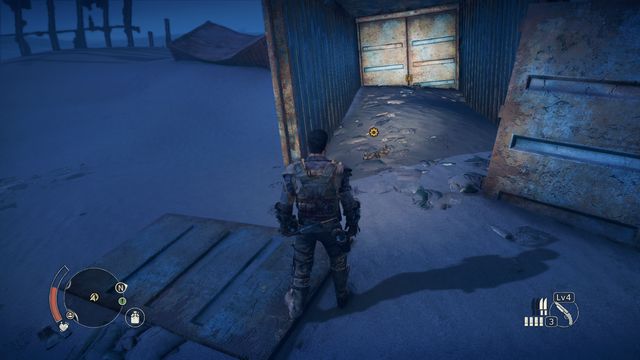
#9 - one of the Scavenging locations (point 1.8 on the Gutgash's Territory - Parch Moon map). The relic is lying in the blue container.
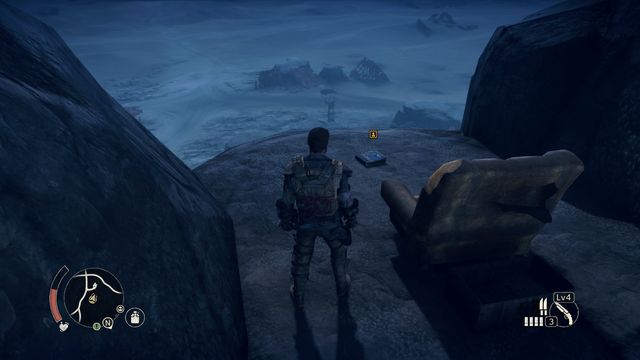
#10 - one of the Scavenging locations (point 1.13 on the Gutgash's Territory - Parch Moon map). At the edge, you will get up by walking among the rocks.
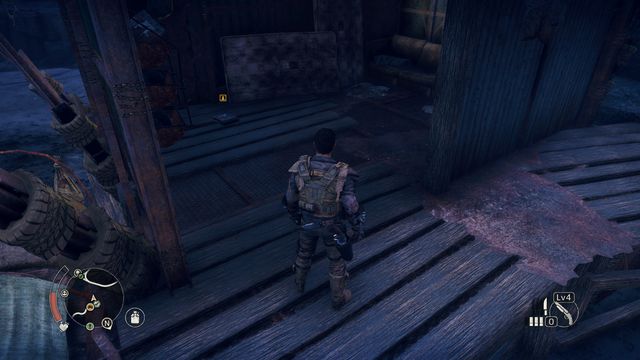
#11 - Scorched Sand camp (Reek Hills). In the last part of the camp, in a metal shed, in front of the entrance through which you walked in.
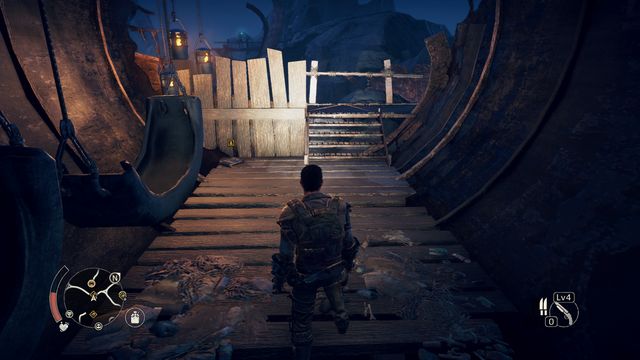
#12 - one of the Scavenging locations (point 1.7 on the Gutgash's Territory - Reek Hills map). The relic can be found in a destroyed part of the boat, in the same place where a Scrap chest is located.
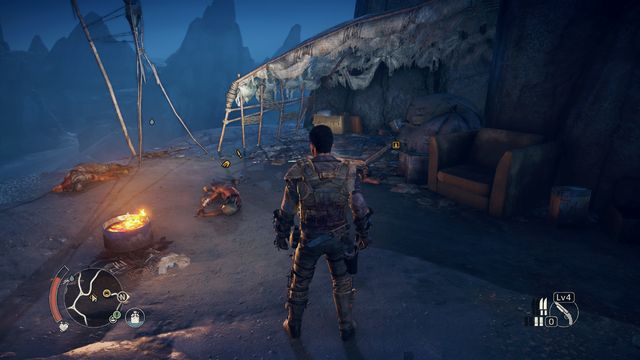
#13 - one of the Scavenging locations (point 1.8 on the Gutgash's Territory - Reek Hills map). You will reach the rock ledge through the cave, entrance can be found at the end of the small road.
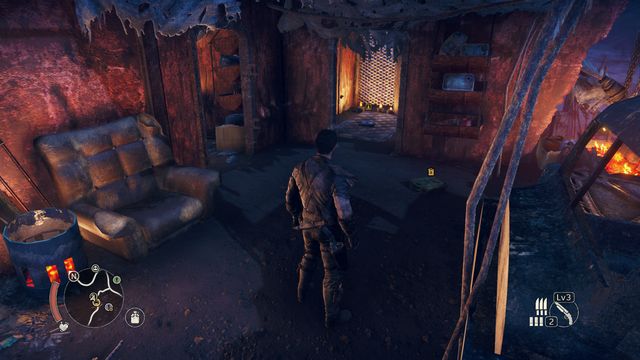
#14 - Vantage outpost (Cadavanaugh). The relic is located on the mattress, inside the shed.
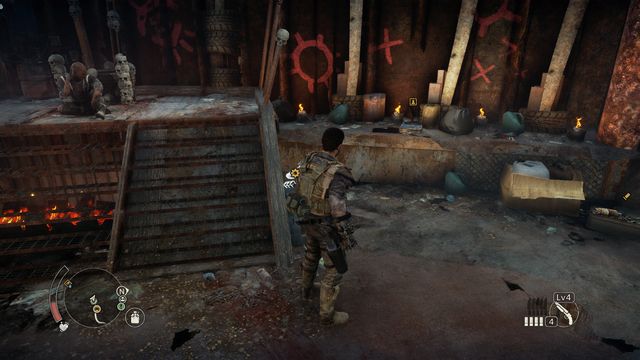
#15 - Proving Grounds camp. The History relic can be found in the place from which the boss jumped - you can get up through the gate on the left side of the arena. You will open the gate by using the yellow valve.
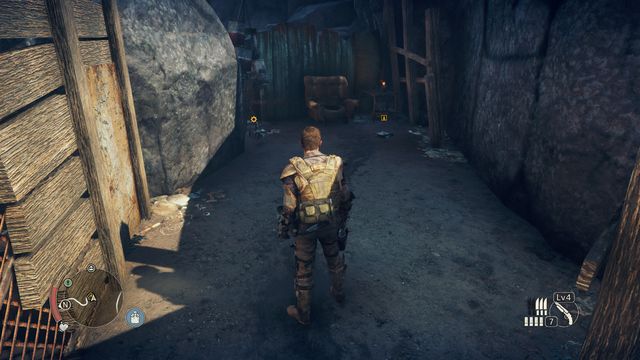
#16 - one of the Scavenging locations (point 1.1 on the Gutgash's Territory - Cadavanaugh map). Once you have the shipwreck at the end of the road on your right side, turn to the small niche on the left, behind one of the tents.
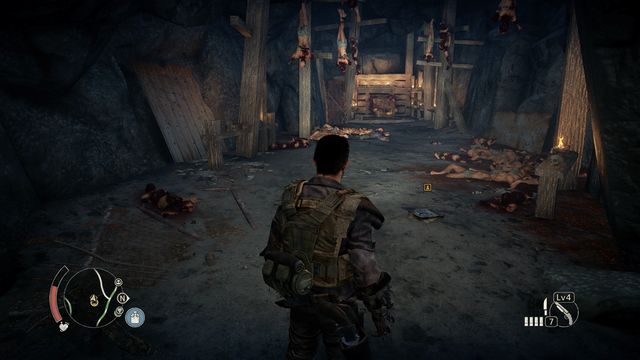
#17 - one of the Scavenging locations (point 1.5 on the Gutgash's Territory - Cadavanaugh map). The relic is lying on the ground, not far behind the entrance to the cave, in the passage between the rocks.
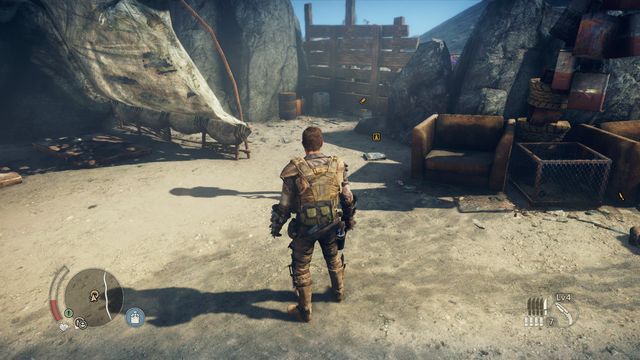
#18 - one of the Scavenging locations (point 1.6 on the Gutgash's Territory - Cadavanaugh map). The relic can be found on the right side of the small camp.
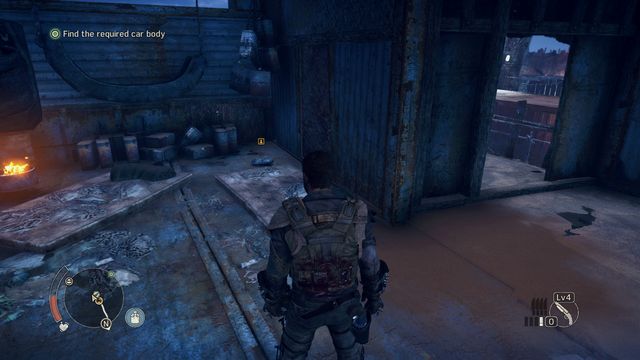
#19 - Large Blade camp (Chalkies). You will visit this place during the Fumehead's debt story mission. After a fight with a group of enemies supported by a War Crier, walk up the ladder and then select the room on the right side.
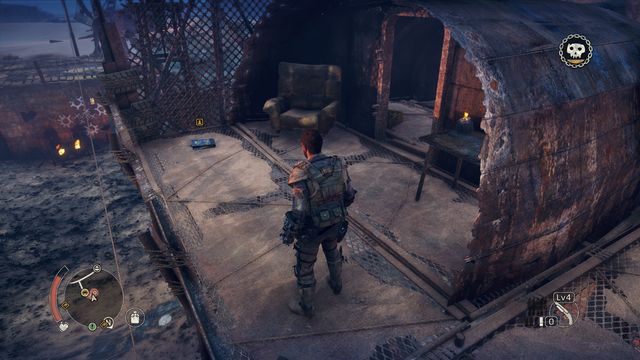
#20 - Blood Beach camp (Chalkies). After defeating the first group of enemies, walk up (door on the left part, opened with a kick; a water dispenser nearby). There you will find the History relic, and slightly further the second and last group of enemies.

#21 - Finger Peak camp (Chalkies). The relic can be found in the shipwreck, immediately after entering the camp from the side of the road.
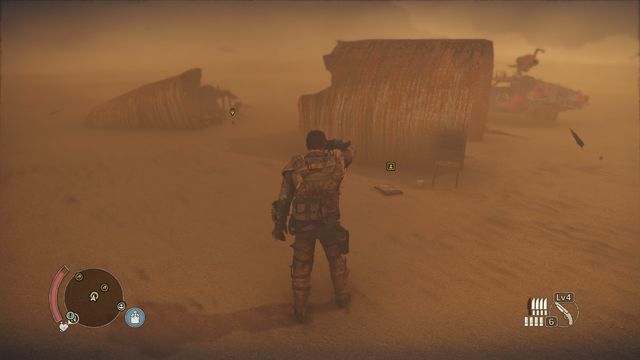
#22 - one of the Scavenging locations (point 1.14 on the Gutgash's Territory - Grit Canyons map), next to the metal pipe.
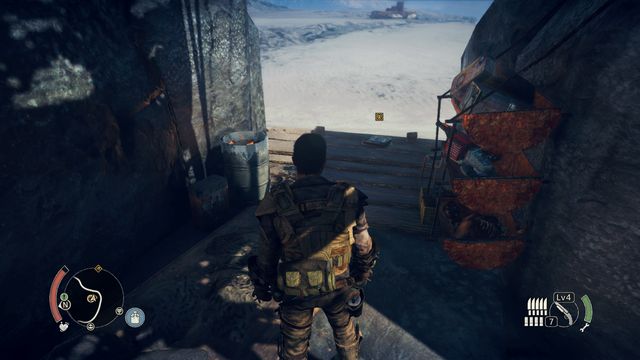
#23 - one of the Scavenging locations (point 1.16 on the Gutgash's Territory - Parch Moon map). You will reach the relic by jumping from the rock above the Scavenging location.
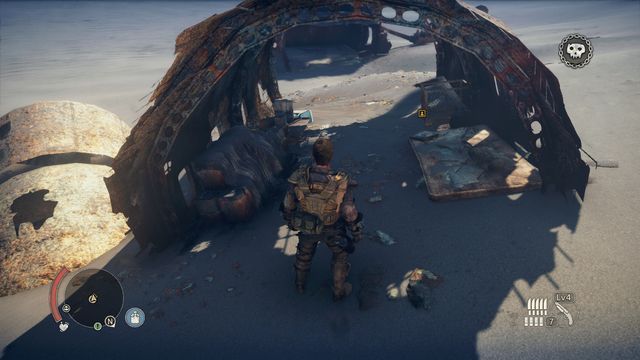
#24 - one of the Scavenging locations (point 1.10 on the Gutgash's Territory - Reek Hills map). The relic is lying on the mattress in one of the iron parts of the wreck.
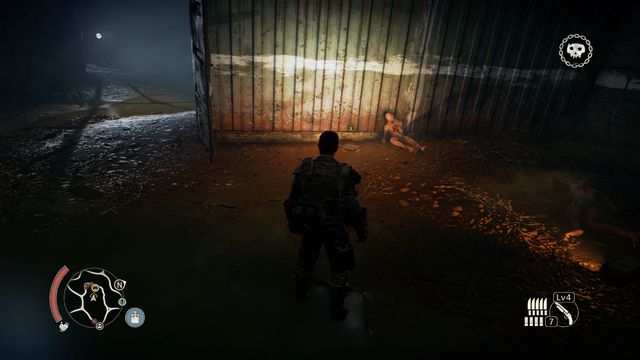
#25 - one of the Scavenging locations (point 1.12 on the Gutgash's Territory - Reek Hills map). The relic is located behind a container, inside the cave.
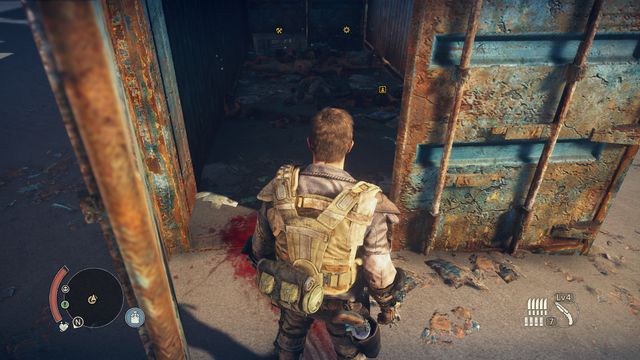
#26 - one of the Scavenging locations (point 1.10 on the Gutgash's Territory - Cadavanaugh map), inside a blue container.
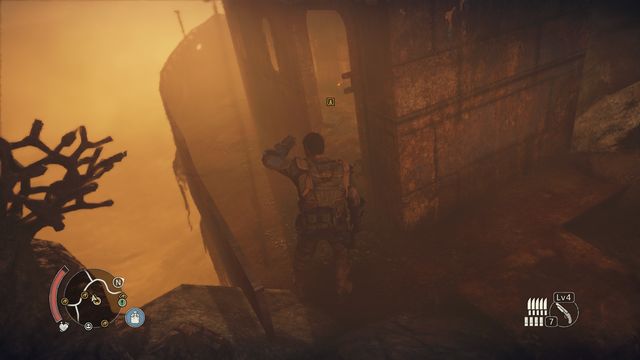
#27 - one of the Scavenging locations (point 1.5 on the Gutgash's Territory - Chalkies map). Above, inside the shipwreck.
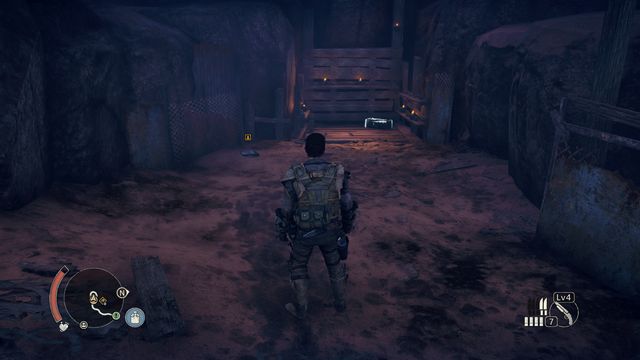
#28 - one of the Scavenging locations (point 1.1 on the Gutgash's Territory - Chalkies map), in front of the entrance.
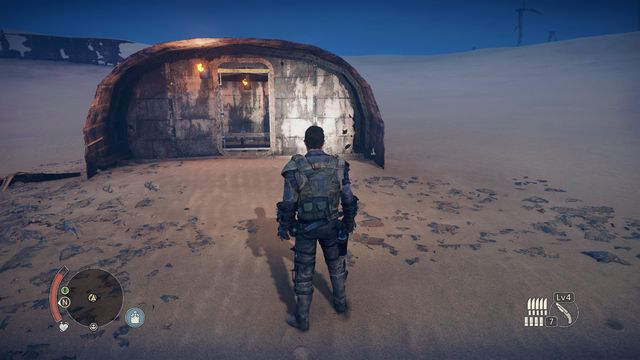
#29 - one of the Scavenging locations (point 1.9 on the Gutgash's Territory - Chalkies map). The relic is located below. You will get there by opening the door with Jimmy bar, at one of the iron parts of the wreck.
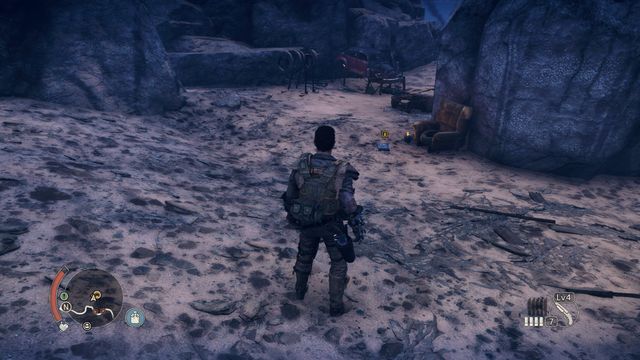
#30 - one of the Scavenging locations (point 1.10 on the Gutgash's Territory - Chalkies map), on the other side of the rock.
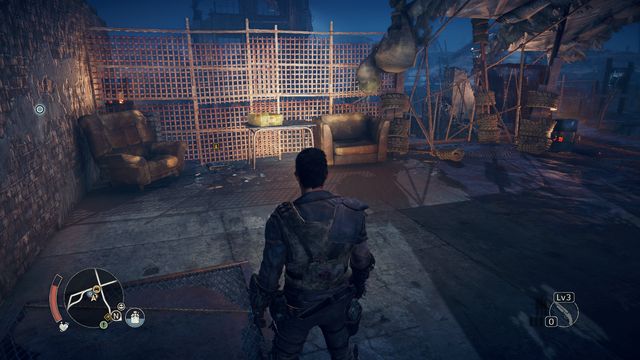
#1 - Tyrant's Lash camp (Rot'n'Rusties). The place is visited during the In Due Time side mission. The relic is located in the center of the camp, near the bridge.
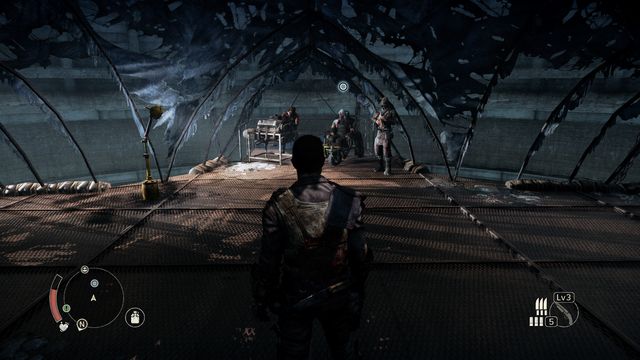
#2 - Pink Eye's Stronghold. You will receive the relic from Pink Eye after completing the In Due Time side mission.
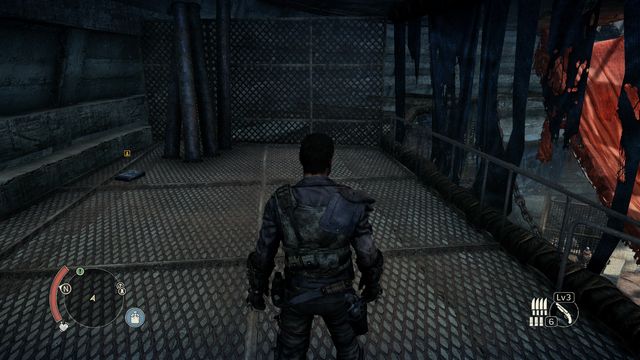
#3 - Pink Eye's Stronghold, on the last level.
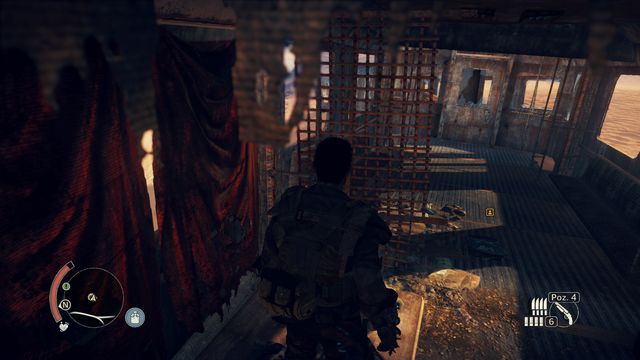
#4 - Vantage outpost (Wailing Wind).
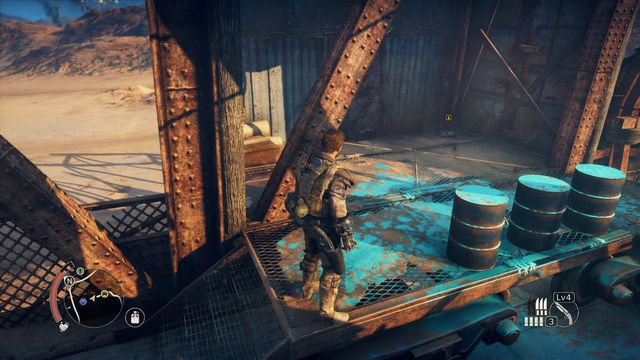
#5 - Grave Bridge camp (Knit Sack). History relic can be found in the southern part of the camp, in the half-open container.

#6 - Stonehold camp (Wailing Wind). The collectible is located in the last part of the camp - slightly further (from the pump) there are few canisters lying, and above there's the History relic (after walking up the ladder).
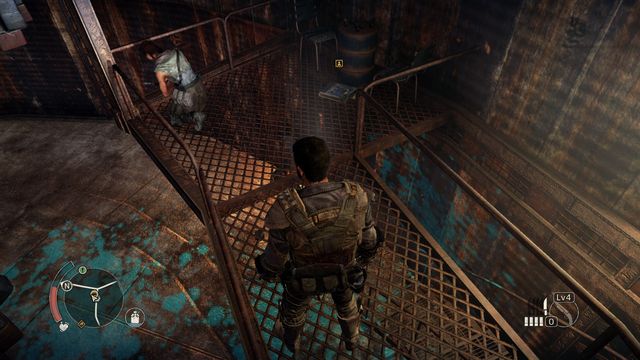
#7 - Twin Sisters camp (Rot'n'rusties). When walking towards the camp, enter the open tower. Go to the roof (after walking on the first platform), move slightly back towards the entrance, and on the ground you will find the History relic.
#8 - one of the Scavenging locations (point "1.10" on the Pink Eye's Territory - Knit Sack map). The relic is located inside the wagon.
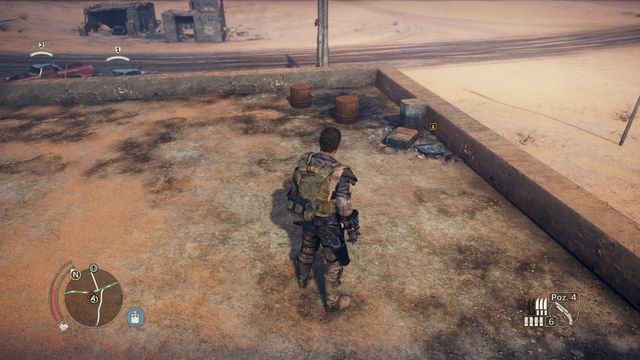
#9 - one of the Scavenging locations (point "1.1" on the Pink Eye's Territory - Knit Sack map). You will get there through the bus wreck, the relic is at the roof.
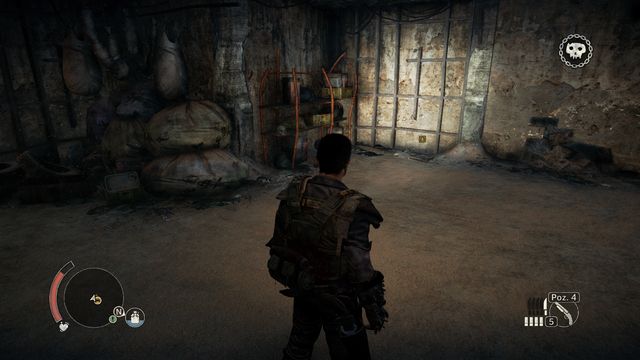
#10 - one of the Scavenging locations (point "1.5" on the Pink Eye's Territory - Knit Sack map). In the lower part of the building on which the sniper can be found.
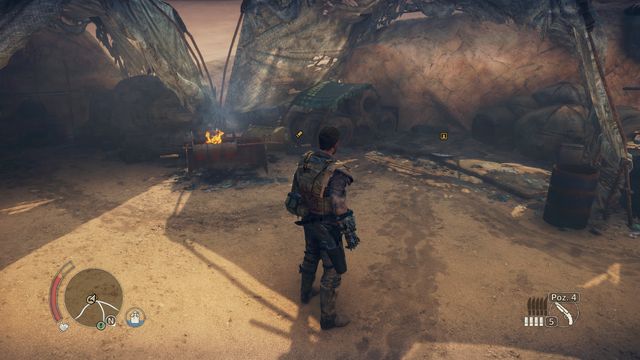
#11 - one of the Scavenging locations (point "1.6" on the Pink Eye's Territory - Knit Sack map). The relic is hidden in the tent.
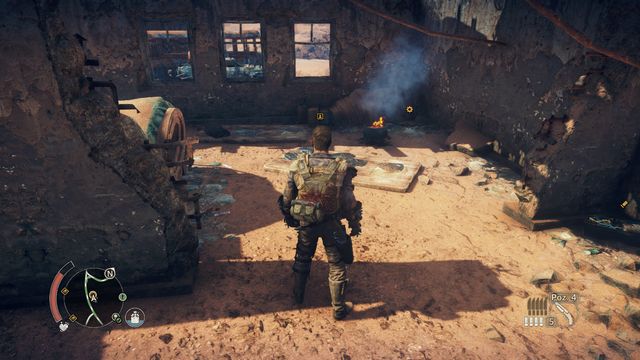
#12 - one of the Scavenging locations (point "1.6" on the Pink Eye's Territory - Wailing Wind map). The relic is inside the building from which the enemies are coming.
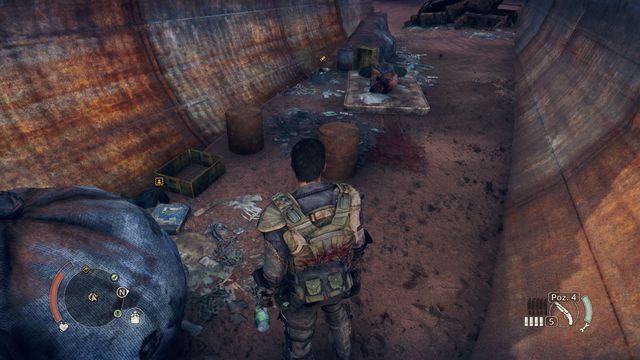
#13 - one of the Scavenging locations (point "1.8" on the Pink Eye's Territory - Wailing Wind map). In one of the tents, next to the Scrap pallet.
#14 - one of the Scavenging locations (point "1.14" on the Pink Eye's Territory - Wailing Wind map). The relic is inside a metal pipe.
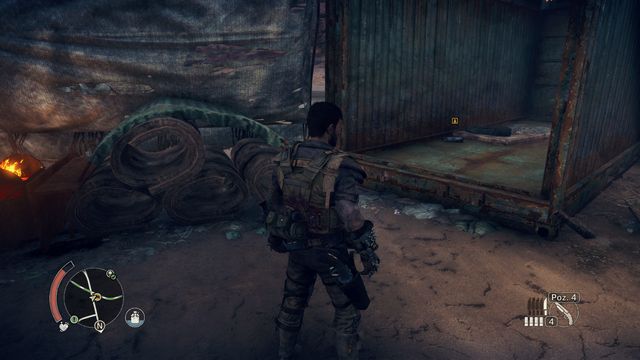
#15 - one of the Scavenging locations (point "1.5" on the Pink Eye's Territory - Wailing Wind map). In the container, below.
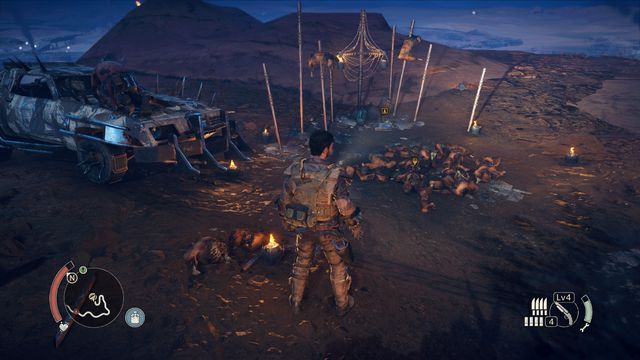
#16 - one of the Scavenging locations (point "1.12" on the Pink Eye's Territory - Rot'n'Rusties map). Next to the pile of bodies.
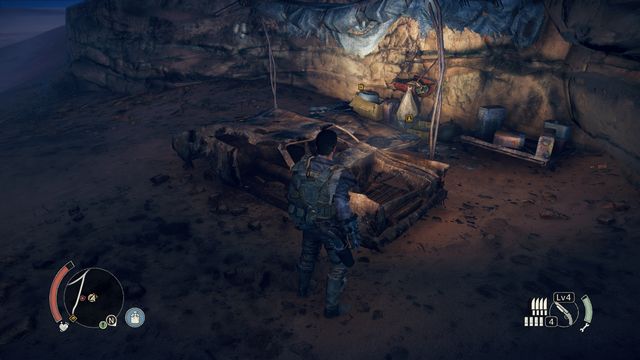
#17 - one of the Scavenging locations (point "1.13" on the Pink Eye's Territory - Rot'n'Rusties map). Next to the plane wreck.
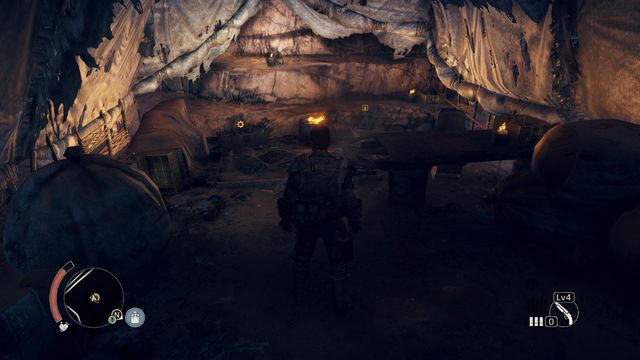
#18 - one of the Scavenging locations (point "1.11" on the Pink Eye's Territory - Rot'n'Rusties map). In the tent.

#19 - one of the Scavenging locations (point "1.7" on the Pink Eye's Territory - Rot'n'Rusties map). In the container on the ruined bridge.
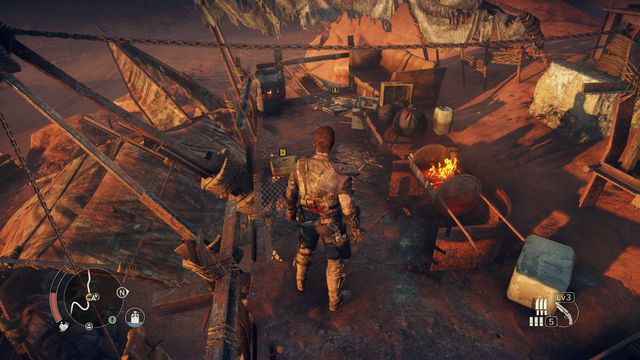
#20 - Vantage outpost (The Heights). The relic is near the balloon.
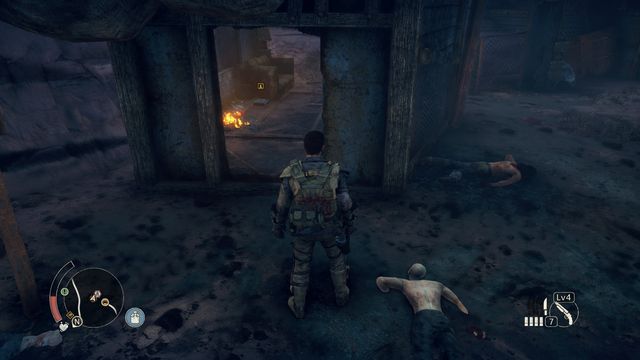
#21 - Old Hole camp (Grandrise). In the last part of the camp you will find a pump which must be blown up in order to claim the camp. Next to it, in a container, the relic is hidden.
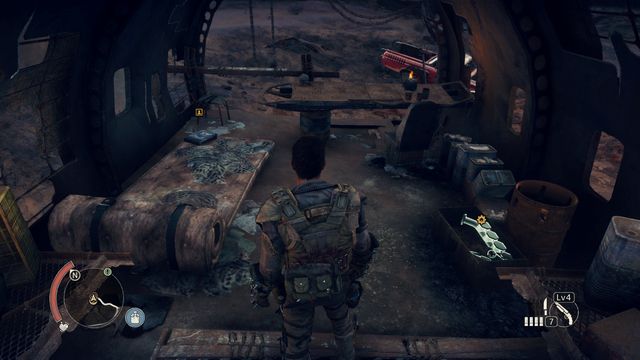
#22 - one of the Scavenging locations (point "1.2" on the Pink Eye's Territory - Grandrise map). Inside the plane wreck.

#23 - one of the Scavenging locations (point "1.4" on the Pink Eye's Territory - Grandrise map). Under the ladder.
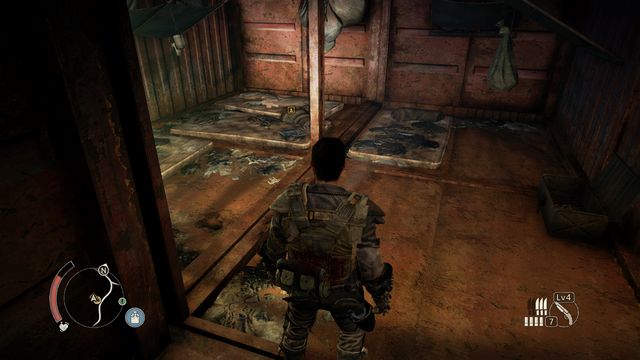
#24 - one of the Scavenging locations (point "1.5" on the Pink Eye's Territory - Grandrise map). In the room underground.
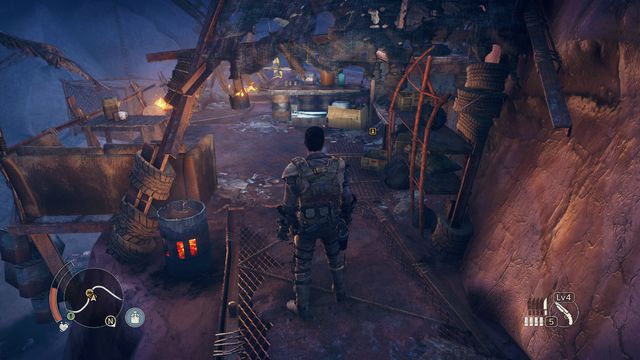
#25 - one of the Scavenging locations (point "1.8" on the Pink Eye's Territory - Grandrise map).The relic is located on the rock ledge. You can get there on foot, through the rocks, starting from the road side.
#26 - Skull Top camp (The Heights). After defeating a group of enemies, behind the two containers thrown below.
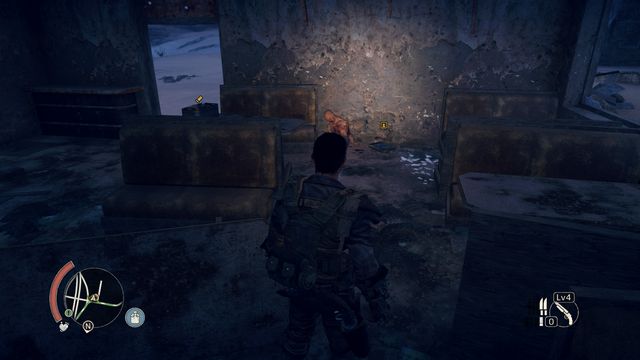
#27 - one of the Scavenging locations (point "1.5" on the Pink Eye's Territory - The Heights map). The relic is inside the building, next to the corpse lying under the wall.
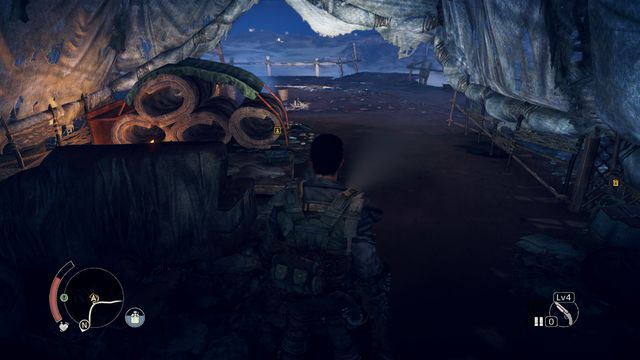
#28 - - one of the Scavenging locations (point "1.9" on the Pink Eye's Territory - The Heights map). Inside the tent.
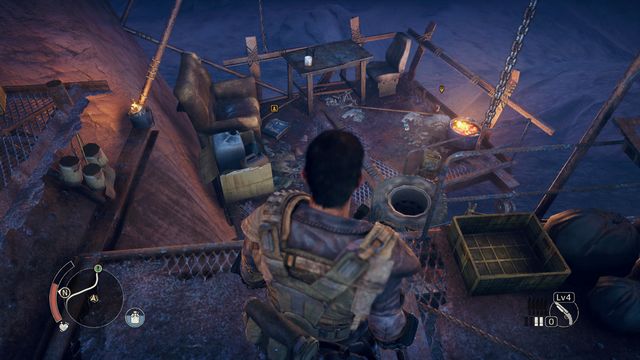
#29 - one of the Scavenging locations (point "1.13" on the Pink Eye's Territory - The Heights map).
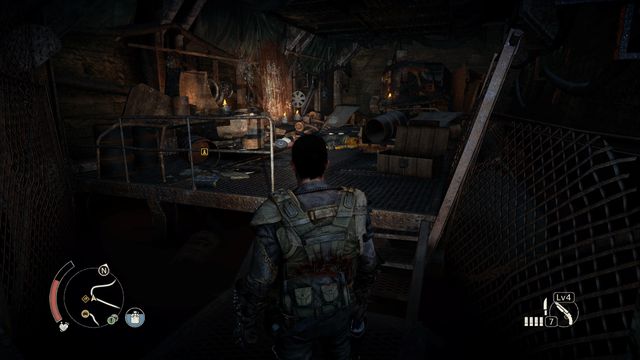
#1 - one of the Scavenging locations (point "1.14" on the Deep Friah's Territory - Dump map). The place is visited during the As The Wrench Turns side mission).
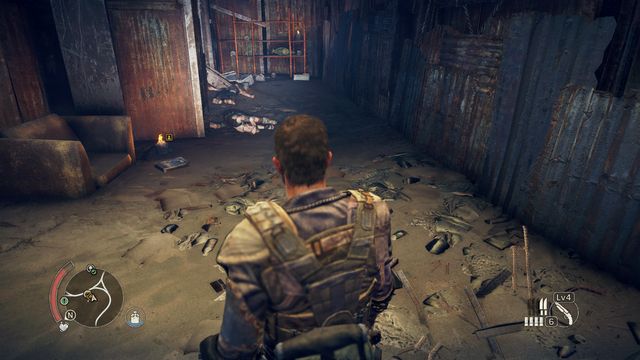
#2 - one of the Scavenging locations (point "1.5" on the Deep Friah's Territory - Dump map). The relic can be found at the entrance to the second part of the camp.
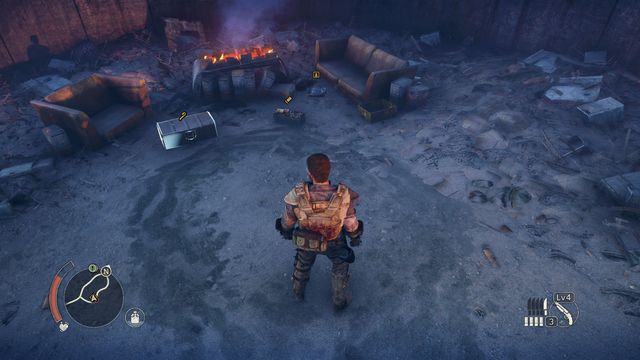
#3 - one of the Scavenging locations (point "1.3" on the Deep Friah's Territory - Dump map).
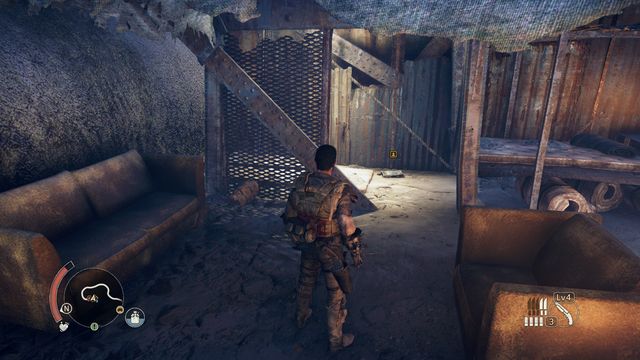
#4 - one of the Scavenging locations (point "1.12" on the Deep Friah's Territory - Dump map), next to the pipe.
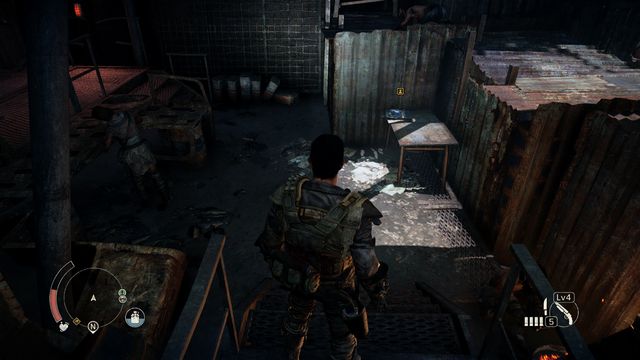
#5 - one of the Scavenging locations (point "1.13" on the Deep Friah's Territory - Dump map). The relic can be found at the very bottom, not far behind the place where conversation with Hope starts a story mission.
#6 - one of the Scavenging locations (point "1.13" on the Deep Friah's Territory - Dump map). The relic is located in the part opened by Hope during The Big Chief mission. Turn to the right in the place where you fight the first group of enemies, the collectible is located at the end of the corridor.
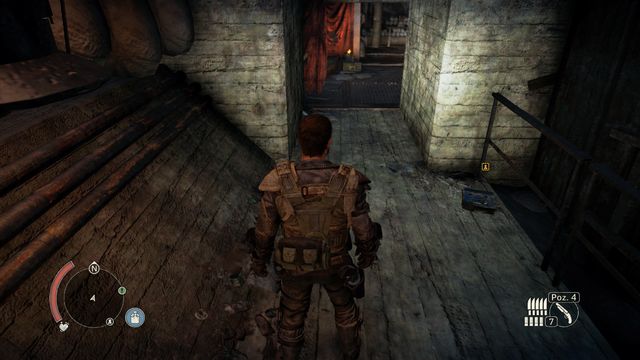
#7 - Deep Friah's Temple (Dump). From the main room, go one level below (from the left side, behind the place where you talk with Hope) and then to the next room.
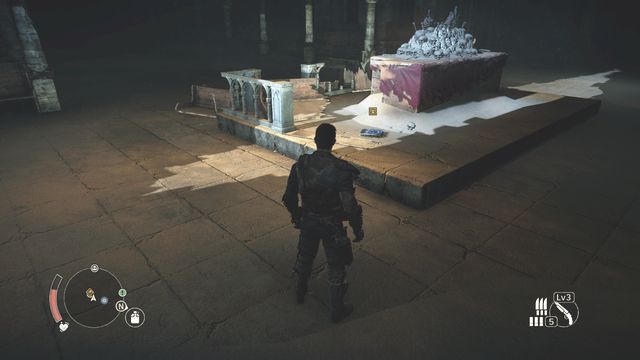
#1 - one of the Scavenging locations (point "1.17" on The Dunes Region - The Dunes map). The relic is located on an altar, in the lower part of the place visited during the Our Daily Bread side mission.
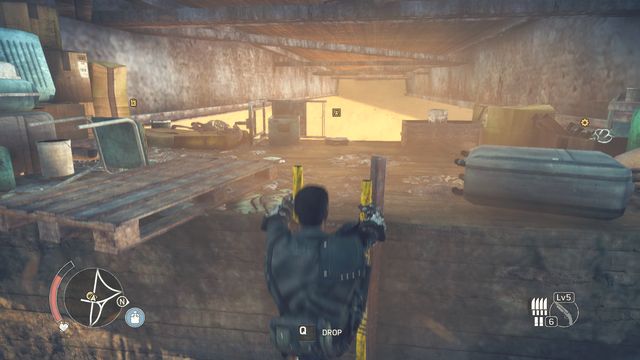
#2 - one of the Scavenging locations (point "1.7" on The Dunes Region - The Dunes map). The collectible is under a bridge, the ladder leading to the part of the bridge can be lowered with a harpoon.
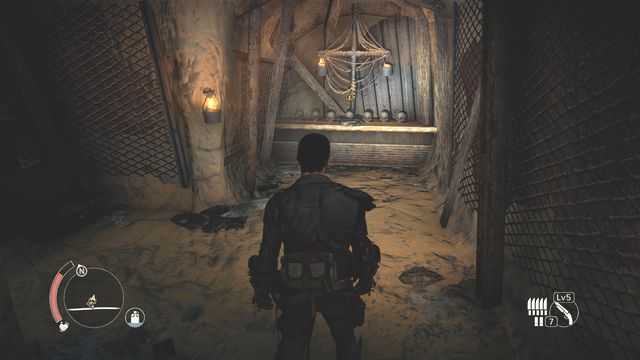
#3 - one of the Scavenging locations (point "1.10" on The Dunes Region - The Dunes map). In one of the buildings you will find a passage below, on the last level you must jump above the cliff - on the other side you will find all the treasures available in this place.
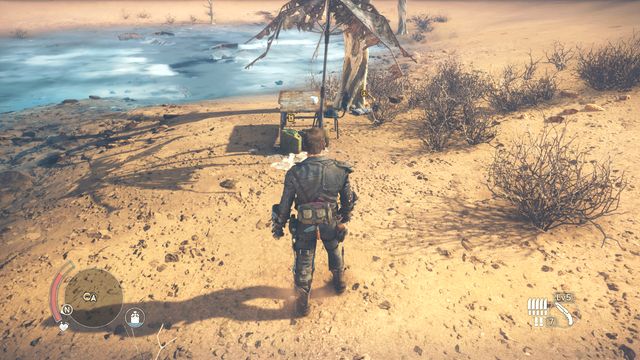
#4 - one of the Scavenging locations (point "1.5" on The Dunes Region - The Dunes map). Under the tree, next to the "lake".
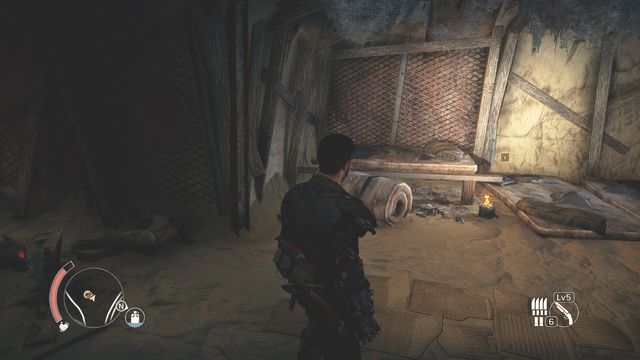
#5 - one of the Scavenging locations (point "1.2" on The Dunes Region - The Dunes map). In the first room, after walking underground - hold the gate with the harpoon.
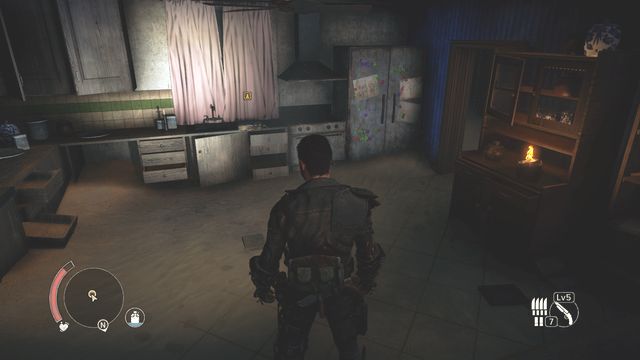
#6 - one of the Scavenging locations (point "1.6" on The Dunes Region - The Dunes map). In the kitchen, at the ground floor of the buried house.
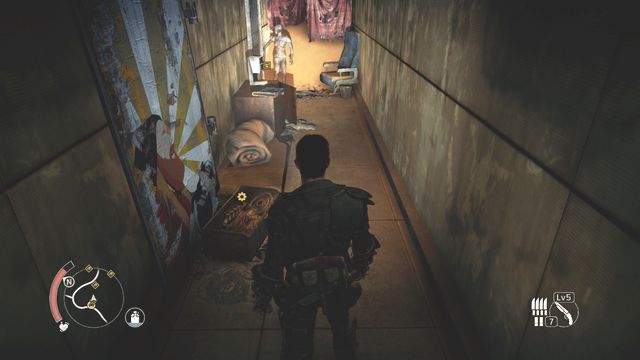
#7 - one of the Scavenging locations (point "1.13" on The Dunes Region - The Dunes map). Inside the plane.
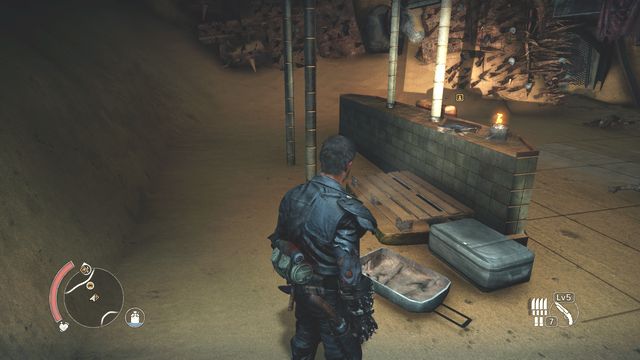
#8 - one of the Scavenging locations (point "1.15" on The Dunes Region - The Dunes map). In the large room below, entrance through one of the pipes.
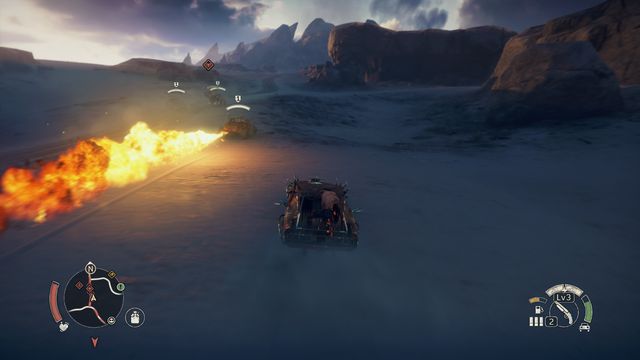 Convoys are protected in various ways.
Hood ornaments are collectible items obtained by destroying convoys, more specifically by eliminating the trucks driven by convoy's leaders. After eliminating such vehicle, an ornament will appear near the wreck. Pick it up in order to add it to your collection. There are 13 convoys available, which means there are 13 Hood ornaments to collect. These items, when installed on the front or the back of the vehicle, give you various bonuses (like increasing the vehicle's durability).
The ornaments have been described in the order "from left to right".
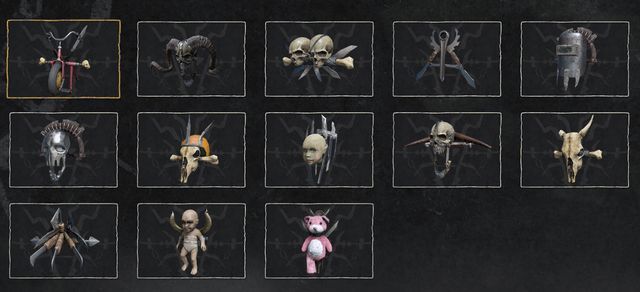 A full set of Hood Ornaments.
Bike - The Heights (Pink Eye's Territory). The convoy consists of 7 vehicles and leader's truck.
Dread Ram - Fuel Veins (Jeet's Territory). The convoy consists of 5 vehicles and leader's truck. The convoy's route goes through the western part of the location.
Death Twins - Cadavanaugh (Gutgash's Territory). The convoy consists of vehicles and leader's truck.
The Lawrel - Colossus (Jeet's Territory). The convoy consists of 4 vehicles and leader's truck.
Mask of the Pious - Dry Gustie (Jeet's Territory). The convoy consists of 6 vehicles and leader's truck.
Plug Halo - Fuel Veins (Jeet's Territory). The convoy consists of 4 vehicles and leader's truck. The convoy's route goes through the eastern part of the location.
Helmeted Beast - Reek Hills (Gutgash's Territory). The convoy consists of 5 vehicles and leader's truck.
Rubba Baby - Parch Moon (Gutgash's Territory). The convoy consists of 6 vehicles and leader's truck.
Desert Skull - Black Maws (Jeet's Territory). The convoy consists of 4 vehicles and leader's truck.
Sly One - Grit Canyons (Gutgash's Territory). The convoy consists of 5 vehicles and leader's truck. The convoy's route goes through the southwestern part of the location.
Talon - Grit Canyons (Gutgash's Territory). The convoy consists of 5 vehicles and leader's truck. Mission objective in A piece tougher story mission.
Demon Doll - Knit Sack (Pink Eye's Territory). The convoy consists of 5 vehicles and leader's truck.
Teddy - Grand Rise (Pink Eye's Territory). The convoy consists of 6 vehicles and leader's truck.
 Not every vehicle can be unlocked immediately.
The vehicles you find while traveling through the Wasteland can be driven by you. If you haven't destroyed the enemy vehicle, leave the Magnum Opus and enter the abandoned car. To add that car to your collection and secure the possibility to choose him whenever you will walk towards the Magnum Opus in the stronghold, you must drive it to any stronghold. Once delivered car becomes unlocked and is available through the whole game.
 Special vehicles can be unlocked during some missions.
Some rare vehicles can be found only in specific locations, others are linked to missions (side and story ones), the rest can be found on the Wasteland roads or won in Death runs - completing the race with a vehicle unlocks it in your collection.
Below you will find a list of all vehicles, with information about where to unlock them.
Metal Grinder - Death run: Neck Snappin', can be found at the road
Skullbutts - Death run: Corner Cut, can be found at the road
Spotter - Death run: Broken pipes, can be found at the road
Armored Spotter - Death run: Craggy Crew, can be found at the road
Heavy Armored Spotter - Death run: Barreling-Barrows, can be found at the road
Flamergamer - Death run: Pothole Ridge, can be found at the road
Carnewagon - Death run: Heat Haze, can be found at the road
Scrapulance - can be found at the road, or in some Camps/Scavenging locations (for example Grit canyons: Gob Stone camp, Grit canyons: Overlook camp, Cadavanaugh: Blood Ridge camp, Grandrise: The Choke camp)
Rammerhead - Death run: Corner Cut, can be found at the road
Sideblender - Death run: Neck Snappin', can be found at the road
Speedsta - Death run: Crazy Racy, can be found at the road
Plate Speedsta - Death run: Craggy Crew, can be found at the road
Toughnut Speedsta - Death run: Mortal Bite, can be found at the road
Fire Raider - Death run: Even RIP, can be found at the road
Kaboom Bug - Death run: Valley of Dust, can be found at the road
Crusher - Death run: Heat Haze, can be found at the road
Armored Crusher - Death run: Summit of the Mighty, can be found at the road
Heavy Armored Crusher - Death run: Tricky Pass, can be found at the road
Charbone - Death run: Pothole Ridge, can be found at the road
Prickles - Death run: Buckle Down, can be found at the road
Mancannon - Death run: Valley of Dust, can be found at the road
Drop Kicker - Death run: Pothole Ridge, can be found at the road
Barbacon - Death run: The Reconvene, can be found at the road
Chum's Buggy - vehicle unlocked after completing the Dinki-Di side mission
Golden Tuska - Scavenging location, point 1.3 on the Jeet's Territory - Dry Gustie map
Hardball - Scavenging location, point 1.15 on the Gutgash's Territory - Parch Moon map
The Twelve - Scavenging location, point 1.1 on the Pink Eye's Territory - Rot'n'rusties map
Demented Chariot - the vehicle is unlocked after completing the Ghosts of the Past side mission
Crow Caller - the vehicle is unlocked after completing the Rustle Dazzle side mission
Big Chief Chariot - the vehicle is unlocked after completing the Big Chief story mission
Interceptor - the vehicle is unlocked after completing the Paint My Name in Blood story mission
Dune Vessel Carrier - the vehicle is unlocked after completing the Exodus side mission
Thirstcutter - the vehicle can be unlocked during the Death Run in the Parch Moon (the place will marked on the map with a yellow star). It's a DLC add-on.
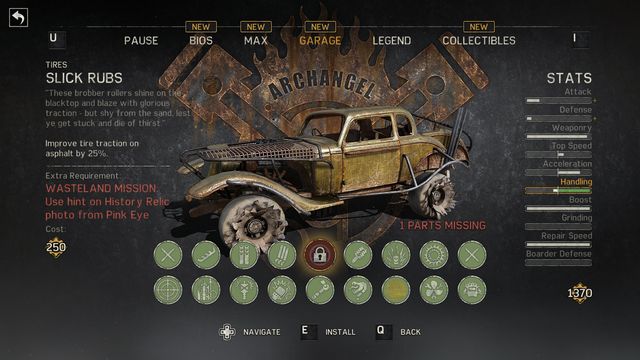 Archangel creation menu shows you the missing parts.
Archangels are predefined vehicles created from parts unlocked in Garage menu. It means that you can build a specific Archangel once you unlock all parts required for constructing it. Most of them can be unlocked during missions, when claiming camps or when searching through Scavenging locations (Car bodies). Once all the parts are unlocked, the Archangel will be automatically added to your collection, without the need to build it manually.
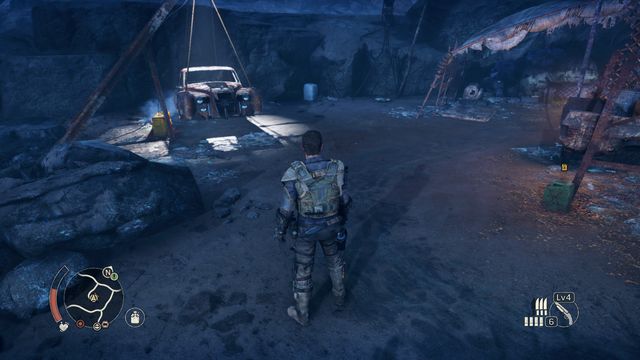 Car bodied can be found in some Scavenging locations.
You can check all the parts required for building an Archangel in the Garage, in the Archangel tab. Unlocking all Archangels equals unlocking all the upgrades available in the game (not counting vehicle's weaponry).
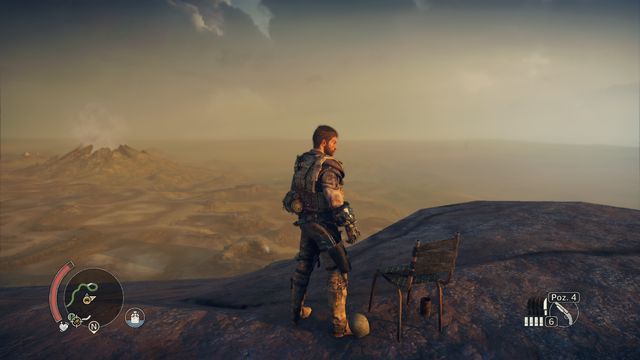
In Mad Max, the player can complete various challenges related to exploration, combat, driving or completing missions and activities. Successful completion of the challenges is rewarded with increased rank level and Griffa tokens. You will complete most of the challenges automatically, during the game. However, some of them requires specific actions taken by you or selecting a proper vehicle.
Below you will find a list of all challenges available in the game. Some of them can be completed more than once, other gradually increase their difficulty (for example, kill 120 enemies, perform 25 gut shots - depending on your progress in the previous challenge, a new one is unlocked as its continuation. Their type doesn't change, only the numbers you must reach increase).
There are more than a hundred of challenges available in the game. You will complete most of them simply during other activities. 144 challenges are unique, which means that you won't find information about how many times they have been completed in their description. Only these challenges are required to be unlocked if you want to complete the game in 100% and unlock the Up to the Task achievement. Repeatable challenges aren't required for that.
Challenges described below are related to gathering Scrap. In order to finish them as quickly as possible, start searching through Camps and Scavenging locations in order to find Scrap crew and Clean-up crew project parts. It is profitable to do it before cleaning the territory, as this will give you bigger chance to encounter enemy vehicles for destroying which you will receive Scrap. The faster you conquer camps, the faster you will receive additional number of Scrap. Make some preparations and these challenges will complete themselves automatically during the game.
Don't Spend it All in One Place - collect 1000 Scrap.
Metal detector - collect 10000 Scrap.
The One Percent - collect 45000 Scrap.
A Penny Saved - collect 500 pieces of Scrap with the help of Scrap crew.
Clean Sweep - Earn 2000 Scrap from Clean-up crew (upgrade available in the stronghold).
Trash Is Treasure - collect 500 Scrap with Scrap crews (an upgrade in the strongholds).
Dyvident - Earn 2000 Scrap from Scrap crew (upgrade available in the stronghold).
Canary in a Coalmine - earn 1000 pieces of Scrap from claimed camps (they generate income from time to time).
Sitting on a Goldmine - gather 10000 Scrap from claimed camps (they generate income from time to time).
Below challenges are related to encounters which are scattered through the whole map. In order to complete them you must talk to wanderers in the marked locations. Some encounters appear on the map after you complete some missions or reduce threat level - they aren't available since the beginning.
A Talkative Man - complete 8 encounters on Jeet's territory.
Chatty Chatty - complete 11 encounters on Gutgash's territory.
Bigmouty - complete 12 encounters on Pink Eye's territory.
Making Friends in Gastown - complete 7 encounters on Deep Friah's territory.
This batch of challenges can be fully achieved by upgrading your strongholds. Large numbers of Scrap are required for building warehouses, the rest can be unlocked by finding project parts and completing side missions.
Lock, Stock and Barrel - complete 3 stockpile projects in Jeet's stronghold.
Full to the Gunwales - complete 3 stockpile projects in Gutgash's stronghold.
Save It for a Rainy Day - complete 3 stockpile projects in Pink Eye's stronghold.
Fuel to the Fire - complete 3 stockpile projects in Deep Friah's stronghold.
Keep Your Powder Dry - complete 5 projects in Jeet's stronghold.
All Hands on Deck - complete 5 projects in Gutgash's stronghold.
The Wheels Are Turning - complete 5 projects in Pink Eye's stronghold.
Irons in the Fire - complete 5 projects in Deep Friah's stronghold.
All Wrapped Up - complete remaining projects in Jeet's stronghold.
Batten down the Hatches - complete remaining projects in Pink Eye's stronghold.
Move that Bus - complete remaining projects in Gutgash's stronghold.
Burning the Midnight Oil - complete remaining projects in Deep Friah's stronghold.
In this category you will find all challenges related to visiting Scavenging locations and Vantage outposts. Final 3 challenges are related to elements of the surrounding. To complete them quickly, do them whenever you have an opportunity to during other activities.
Low Hanging Fruit - Complete 5 scavenging locations.
What's Yours is Mine - visit 13 Scavenging locations.
Picking the Carcass - visit 18 Scavenging locations.
Reaper of the Harvest - visit 191 Scavenging locations.
Paradise Lost - find 3 History relics.
Faded Memories - find 15 History relics.
Clearing the Fog - Reveal 3 regions by using balloons.
Revelations - reveal 13 territories with balloon.
Happy hour - give water to one wanderer (you will meet them when traveling through the Wasteland, a group of wanderers is marked with a water icon floating above them).
Amateur Archaeology - pull a vehicle from the sand with a harpoon (when driving, you can find some wrecks that can be pulled out. When driving next to such vehicle, Chumbucket will tell you about it). The largest number of buried vehicles can be found on Pink Eye's territory.
What Are the Chances - collect 3 chests with scrap from storm. Use harpoon from inside the vehicle, then walk out and as Max open the chest with Jimmy bar.
Below challenges are related to reducing threat level in all territories, to complete them you must keep "cleaning" the map.
Eradicator - Complete the main objectives for 1 camp.
Man is Not Made for Defeat - claim 2 camps.
Rising from the Ashes - claim 12 camps.
A Place to Lay My Hat - claim the remaining 22 camps.
2 Birds with 1 Stone - Complete the main and optional objectives for 3 Scrotus camps.
Make Hay While the Sun Shines - fully claim 10 camps (main and side objectives).
Multi-Task Master - fully claim 15 camps (main and side objectives).
Death on your Doorstep - fully claim remaining 9 camps (main and side objectives).
A Sign of the Times - destroy 8 Scrotus' Insignia (in camps).
Pain and Triumph - destroy 15 Scrotus Insignia (in camps).
A Declaration of War - destroy 30 Scrotus Insignia (in camps).
The Writing's on the Wall - destroy the remaining 77 Scrotus Insignia (in camps).
Shooing the Rooks - destroy 4 scarecrows.
A Cat Amongst the Pigeons - destroy 12 scarecrows.
Scattered Ashes - destroy 15 scarecrows.
From Dust to Dust - destroy 20 scarecrows.
He who watches the watchers - destroy the remaining 28 scarecrows.
Precautionary Measures - disarm 5 mines (you can find the minefields using Chum's Buggy).
Calm like a Bomb - disarm 10 mines.
Cut the Right Wire - disarm 30 mines.
No need to call the Bomb Squad - disarm the remaining 45 mines
Pick of the Day - kill 5 snipers.
I've Got My Eye on You - kill 10 snipers.
Storming the Guard - destroy 5 large guard towers. They can be usually found at the entrances to the camps.
Toppler - destroy 10 large sniper towers.
Calling the Shots - reduce the threat level in one of Jeet's territories to zero (Scarecrows, minefields, convoy, camps and snipers).
Striking Their Colors - reduce the threat level in one of Gutgash's territories to zero (Scarecrows, minefields, convoy, camps and snipers).
What Goes Around - reduce the threat level in one of Pink Eye's territories to zero (Scarecrows, minefields, convoy, camps and snipers).
The Coast is Clear - fully reduce the threat level on Jeet's territory.
Calm Seas - fully reduce the threat level on Gutgash's territory.
The Dust Settles - fully reduce the threat level on Pink Eye's territory.
Challenges listed below are related to combat, usually you can complete them during other activities.
We Die to Each Other Daily - Kill 60 enemies from the Scrotus fraction
A Threat Is a Threat - Kill 60 enemies from the Roadkill faction
Set up Us the Bomb - destroy 50 red, explosive barrels.
Major Blowout - destroy 30 tires of moving vehicles with a shotgun. The easiest way to do it is from inside the vehicle, when fighting unarmored enemy cars.
Tango in a Twister - defeat 3 enemies during storm. The fastest way to complete this is by entering any not visited previously Scavenging location during storm, you will almost always find some enemies there.
2 Are Better than 4 - destroy 5 enemy vehicles while you're on foot. Aim at unarmored tank fuels, they can be easily found on Jeet's territory.
Like a 10 Day Camel - fill the canteen 30 times. Remember that after upgrading the stronghold (Water storage) it is filled automatically - the faster you make the upgrade, the faster the challenge will be completed.
Tentative Tastebuds - regenerate the health by eating maggots.
Flavor of the Month - eat 6 food cans.
Wasteland Gourmet - eat 12 cans of food.
Sticky Fingers - use Jimmy bar to open 5 containers or door (Jimmy bar can be bought in Max's equipment upgrades screen).
Pandora's Box - open 10 containers or doors with the Jimmy bar.
Behold, the Flying Fox! - use zip lines 30 times.
Melee combat challenges are usually completed as you progress in the game. However, it is a good idea to check the active challenges as completing some of them might be much harder after completing all missions or conquering all camps (it will greatly reduce the number of places in which you can find many enemies).
Laying the Smachdown - kill 100 enemies in melee combat.
Swing Batter Batter! - defeat 5 enemies with melee weapon.
Bone Crunching - defeat 10 enemies with a melee weapon.
Peace Pact - disarm 5 enemies.
Rendered Defenseless - disarm 10 enemies (ability required).
Suckerpunched - perform 10 Gut Shots (when close to enemy during combat, perform a "quick hit").
As Vicious as a Bandicoot - defeat 5 enemies by sticking them on a Thunderstick (while having the weapon equipped, walk close to an enemy and perform normal attack).
Slam Dunked! - perform a finisher while in fury mode 15 times.
Challenges related to entering fury mode can be completed easily when fighting large enemy groups. First few levels shouldn't be troublesome, the last challenge might be tricky. Filling the meter is done mostly by performing a long combo of attacks and by executing enemies one after another.
To complete this challenge, try to perform as long combo as possible. After entering fury mode, no matter the time, attack enemies but don't kill them (single hits and jumping away). Thanks to that, after the fury ends, you will be able to quickly activate another one - quickly perform executions, counterattacks and gut shots. This will make going from one fury mode to another much easier. If you have trouble with completing this challenge, pick a place that is full of enemies - like Scavenging location in Gastown or camps: Proving Grounds (Cadavanaugh territory) or Havoc Point (Knit Sack territory).
Slow Burner - fill the fury meter in less than 60 seconds.
Measured Savagery - Fill the Fury meter in 50 seconds or less.
Feeding Frenzy - Fill the Fury meter in 40 seconds or less
Rage against the Meter - Fill the Fury meter in 30 seconds or less
A taste for Violence - Fill the Fury meter in 20 seconds or less
Rattling your Dags - Fill the Fury meter in 10 seconds or less
All counterattacks, shotgun shots and executions count to combo. It is easiest to complete this challenge in a place full of enemies (for example, in a camp). Try to keep them alive as long as possible, by jumping from one to another. If you resign from finishers, you will be able to keep attacking enemies for longer. Only focus on counterattacking at proper time. The weaker the group you attack (for example, unarmed enemies), the easier it will be to complete a proper combo.
Fists of Fury - perform a 15-hit combo.
Found My Rhythm - perform a combo of 20 hits.
Challenges listed below only seems to be hard. The most important thing that you must know is that you don't need to kill the enemies during one battle. It means that you can, for example, defeat few enemies in the camp, then few others in another place. You can also go to few Scavenging locations in which smaller groups of opponents can be found. This will make it easier to avoid receiving damage. Most of all, remember not to kill enemies while you're inside a vehicle and watch out for any damage (damage received while driving also counts) as it could break the combo. If you have trouble with this challenge, search for two-person groups or patrols on Jeet's territory. Enemies found there are the weakest ones, fighting two of them at once won't be hard. Defeating few such groups will lead you to completing the challenge.
Untouchable - Defeat 8 enemies in melee combat in a row without taking any damage.
Unbreakable - kill 12 enemies without receiving any damage
A great handicap, if not a necessity, for completing the last challenge will be buying Channeling upgrade at Griffa. It will allow you to stay in fury mode longer. A large group of opponents will be required as well, they can be found for example at camps mentioned previously (Havoc Point, Proving Grounds). Fill the fury bar by weakening enemies, but don't kill them. Only after entering the fury mode you must quickly finish the weakest enemies and help yourself with the remaining ones with shotgun and executions. In addition to the Channeling skill, upgrades that increase the number of Max's attacks, knives supply and shotgun ammunition will be helpful in completing this challenge as well.
Unstoppable - Kill 8 enemies in melee combat during 1 Fury Mode.
Challenges from this category are mostly related to destroying enemy vehicles. Most of all, they can be divided into challenges focusing on destroying specific number of enemy vehicles belonging to a named faction, and more precise ones, that require a specific vehicle and/or destruction method. For a destruction to count, you must make enemy vehicle explode. Creating the explosion by shooting the gas tank counts as well.
In many cases you must destroy a vehicle of specific faction - Scrotus, Roadkill or Buzzard. Most Scrotus vehicles can be found on each territory before reducing the threat. Convoys are also a good place to attack them - destroy all vehicles except for the leader's truck and they will respawn when you will try again. Many Roadkill vehicles can be found during Death Runs which are also one of the best places for mass destruction. It is harder to find Buzzard vehicles, usually they are moving through the Dunes territory, mostly during night. In some places (like near Scavenging location 1.1 on The Dunes - The Dunes Region map) these vehicles respawn after using quick travel. Locating such place will allow you to quickly destroy the vehicles, few rounds and it will be over.
You can also combine destroying vehicles with other challenges, for example the ones that require you to destroy a specific vehicle or use a specific method. This allow you to combine two missions and complete them at once.
Challenges listed below are the simplest ones, some of them you will complete while exploring and completing main and side missions.
Roadkiller - destroy 10 Roadkill vehicles.
Up the Ante - Defeat 50 Roadkill vehicles by any means
Pup of War - destroy 10 Scrotus vehicles.
Dog of War - Defeat 50 Scrotus vehicles by any means
Expeller - destroy 10 Buzzard vehicles..
Banisher - Destroy 20 Buzzard vehicles
Safe Sex - destroy 6 vehicles by grinding. The best moment for destroying vehicles by grinding is when you attack a convoy - a column of vehicles driving in same direction makes perfect target. Just make sure that you have proper rims installed.
Ridin' Shotgun - kill 10 drivers with shotgun. The best way for this is on Jeet's territory, where they are unarmored. Otherwise you should use harpoon to pull the door cover before shooting.
Pit Stop - pull 5 tires from a moving vehicle with a harpoon (upgrade required).
Bang for the Buck - destroy 15 enemy vehicle's fuel tanks with a shotgun.
Here's the Big Chief - defeat 3 enemies using a vehicle with a V8 engine (you will unlock it during story mission).
Nudge Nudge - destroy 5 vehicles by side ramming them.
Where There's Thunder - destroy 5 vehicles with the Thunderpoon.
Thorn in Your Side - destroy 5 enemies by driving into their side.
In Your Dreams - destroy 3 patrols with Thunderpoon. This challenge is related to vehicles from which opponents are jumping - they can be found mostly on Gutgash's territory.
Morrison Effect - destroy 3 vehicles during storm, while driving the Magnum Opus. The fastest way to do it is by attacking a convoy after the storm starts.
As it was mentioned previously, it is recommended to combine some challenges, especially the harder ones and the ones that require more preparations. Below you will find few challenges which you should complete with the required vehicle in order to complete two challenges at once.
Bullheaded - destroy 12 vehicles with a head-to-head hit and with the use of the booster (don't forget about equipping the heaviest ram possible).
Holy Rolling - destroy 12 vehicles while driving the Radiant Shadow Archangel.
The trouble with destroying anything with a sniper rifle is the speed of enemy vehicles. Usually, they will manage to drive away before Max will sit in the back of the vehicle. The solution to that is by first getting attention of enemy vehicles and then sitting at the back. This will leave Magnum Opus vulnerable to enemy ramming, but it will give you few moments to aim with the sniper rifle and destroy enemy vehicle. Second way is stopping on convoy route and looking for it from far away. Start with positioning yourself in a proper place so that you will have the convoy in front of you. This will allow you to shoot few times before the convoy will get close to your position.
IMPORTANT! The easiest way to complete three challenges is participating in a race in which the rule of war applies. Immediately after the run starts, pull the rifle and start shooting.
Tire Popper - shoot 2 tires of moving vehicles with a sniper rifle.
Point and Shoot - shoot 2 fuel tanks of moving vehicles with a sniper rifle.
Rule the Day - destroy 2 vehicle's fuel tanks with a sniper rifle while driving the Rule of War Archangel.
Ramming becomes possible after unlocking a specific rims type. It is easiest to complete this challenge when facing convoy. Leader truck mostly sticks to the route so attaching to it will allow you to grind for few seconds. Another way is participating in Death Runs and grinding the first vehicle you catch. Then, after destroying it, leave the race and restart it. Repeat this until you complete the challenge.
Strangers on a Train - grind the side of another car for at least 5 seconds.
Keep it Clean - defeat 5 vehicles by grinding them with the Cardinal Grinder Archangel.
The hardest part of these challenges might be finding the proper enemy type. Most of the convoys on Gutgash's territory consist of such vehicles on which you can find few jumpers. The fastest way is to find such convoys and drive close, allowing enemies to jump on your car. Some of them will fall on the spikes, the remaining ones can be simply dropped - this will allow you to complete both challenges at once. Repeating this activity few times will allow you to complete the challenges.
Kill Twitch - shake 10 jumpers from the Magnum Opus without using any weapon (sudden turning, using boost).
Stick It to Ya - kill 15 enemies with the spikes used against jumpers (an upgrade is required).
Below challenges are related to a specific vehicles which you must drive or destroy. There is no need to drive through the map and search for a specific vehicle - there is much faster and more efficient way. Most of all, you can check the vehicles you have in the menu. You unlock them by finding them on the map and driving to any stronghold or by winning a Death Race with a specific vehicle type. This will allow you to select a vehicle whenever you get close to Magnum Opus vehicle while in a stronghold. Then, drive the selected vehicle in front of the fortress and call Chumbucket with Magnum Opus. This will allow you to destroy the required vehicle while sitting in Magnum Opus. Another possibility is to use the Death Run in which required vehicles participate.
Two Can Play That Game - destroy 3 vehicles while driving the Skullbutts.
Sparks Will Fly - while driving a Sideblender or a Metal Grinder, destroy a vehicle of the same type.
My Little Friend - destroy 3 vehicles while driving Chum's Buggy.
Scrotus Kebab - defeat 1 Scrotus vehicle while driving the Prickles.
Bug Eye Crush - destroy 1 Buzzard vehicle while driving the Crusher.
Offshoot - without using a Wasteland Jump, perform a 2 second jump three times while driving a Chum's Buggy (the easiest way to do it is by jumping from a high cliff). You will find a good place for completing this challenge by driving to the west from Pink Eye's Stronghold. By jumping from the large cliff which you will find there you will easily complete all challenges that require a longer flight from you.
Throw Another on the Barbie - while driving the Fire Raider, Flamergamer or Charbone, destroy 5 vehicles using a pipe throwing flames.
Signed and Sealed - While driving the Drop Kicker, destroy 1 vehicle using mines.
Bug Killer - detonate and kill 1 enemy while driving the Kaboom Bug.
Chicken Soup - destroy 5 Rammerheads or Skullbutts by head ramming them with the best ramming grill equipped.
The last batch of challenges is related to using a specific Archangel. Similarly to the previous category, use the vehicles from your own collection or use Death Runs.
Backdraft - Destroy 2 Fire Raiders while driving the Sanguine Guardian Archangel.
Angel without Wings - perform a second jump without using a Wasteland Jump and while driving the Lord Gravel Archangel (as above: it is best to use a high cliff for that). You will find a good place for completing this challenge by driving to the west from Pink Eye's Stronghold. By jumping from the large cliff which you will find there you will easily complete all challenges that require a longer flight from you.
State of Efficiency - destroy 2 enemy vehicles within 5 seconds 5 times while driving Kill Box Archangel. The easiest way to complete this challenge is to destroy two vehicles parked next to each other at once (use Thunderpoon of flames).
Please Drive Faster - keep driving the Righteous Spike Archangel at full speed for 1,9 miles (Dunes territory or a highway will be good for this).
Let's Be Overly Specific - while driving the Aurelian the Ready, destroy 1 vehicle during storm.
Gum Shoe - Defeat 1 vehicle from Stank Gum's battalion while driving the "Soul Sweeper" Archangel. Required vehicles can be found on Deep Friah's territory.
Smite the Heathens - use Jugger of Virtue Archangel to destroy 15 Roadkill vehicles.
Smite the Wicked - use Jugger of Virtue Archangel to destroy 15 Scrotus vehicles.
Smite the Demons - use Jugger of Virtue Archangel to destroy 15 Buzzard vehicles.
Some of the challenges described above require storm taking place to complete them. Sadly, the storm happens rarely. Usually it might occur when you leave the stronghold. You can try to load the game few times, counting on the storm to happen. Another way is using the Outer Graves territory, which is de facto outside the map borders. The best place is the cliff west from Pink Eye's Stronghold. You can perform jumps there and try to destroy required vehicle (drive with it and call Chum). The trick is in pushing the vehicle down. Once you start receiving damage, quickly destroy the vehicle and escape for the challenge to be completed (you can't die during it). You can consider the storm started once you begin receiving damage, so in some cases it is worth trying that way.
Mad Max is a modern game with large, open world. The game offers only singleplayer modes. System requirements are rather high, a good personal computer will be needed for comfortable playing. The guide has been created on a laptop with following specifics: Intel(R) Core(TM) i7-4700HQ CPU @ 2.40 GHz, NVIDIA GeForce GTX 850M, 8.00 GB RAM. This allowed comfortable game with high graphic settings. The game worked with no frame drops.
Singleplayer: Yes
Offline co-op (hot seat/split screen): No
Internet cooperation: No
Multiplayer: No
The guide has been created on a computer with following specification:
OS: Windows 8.1, 64 bits
Processor: Intel(R) Core(TM) i7-4700HQ CPU @ 2.40 GHz
RAM: 8.00 GB
GPU: NVIDIA GeForce GTX 850M, 4 GB GPU memory
Such specification allowed comfortable playing with high graphic settings and resolution. There was no trouble with frame drops.
OS: Windows Vista/7/8
Internet connection during the game: Not required
Internet activation required: Yes
Control inputs: Keyboard + mouse/gamepad
OS: WindowsVista/7/8
Processor: Intel Core i5-650 3.2 GHz/AMD Phenom II X4 965 3.4 GHz
RAM: 6 GB RAM
GPU: 2 GB, GB GeForce GTX 660 Ti/Radeon HD 7870
HDD: 32 GB free disk space
OS: Windows 7(SP1)/8
Processor: Intel Core i7-3770 3.4 GHz/AMD FX-8350 4.0 GHz
RAM: 8 GB RAM
GPU: 3 GB, GeForce GTX 760/Radeon HD 7970
HDD: 3 GB free disk space
 Medal of Honor Game Guide & Walkthrough
 Metal Gear Solid V: Ground Zeroes Game Guide & Walkthrough
 Might & Magic: Heroes VI Game Guide & Walkthrough
 Metal Gear Solid 4: Guns of the Patriots Game Guide & Walkthrough
 Mortal Kombat X Game Guide & Walkthrough