Guide to Medal of Honor: Warfighter contains a detailed walkthrough of the single player campaign on Hard difficulty, as well as a list of all the achievements.
The descriptions are primarily tactical tips on places where best to hide, as well as those where the enemies are hidden. Description has been enhanced illustrations, in the vast majority of cases and showing how to be set or what position to take arms. Phrase (picture above) indicates precisely which of the sentences paragraph specifically refers to the image of the paragraph.
In addition to the description, in the guide you will find a list of all the achievements, divided into three groups - gained automatically, achieved in multiplayer game, as well as others. Valuable tips are included to the latter. In addition, some of them can also be found in the description of each mission, especially if you can get an achievement only in specific missions.
Peter "Ziuziek" Deja
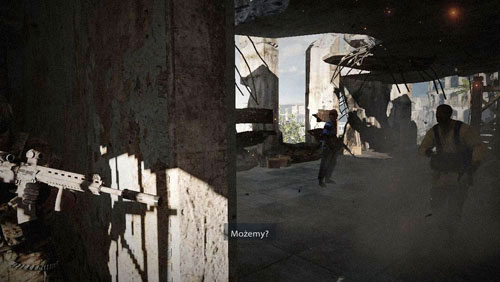
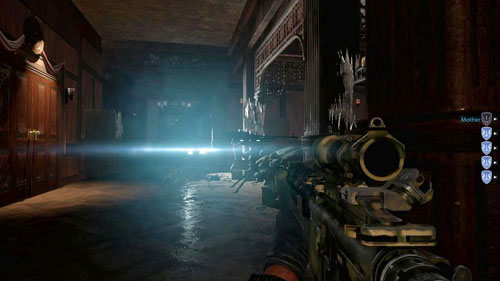
Objective: Locate the target
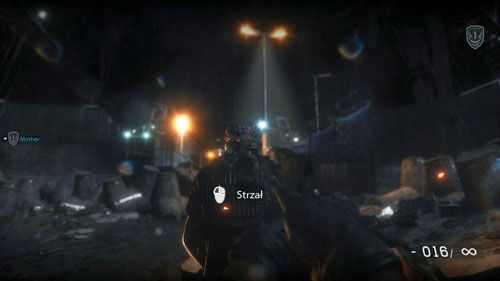
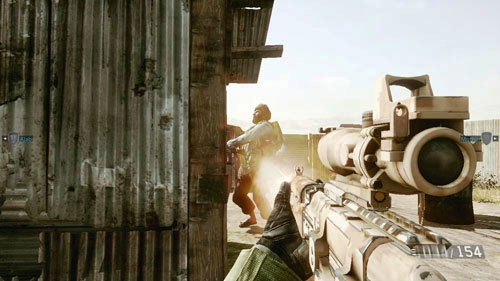
The first thing you do, you will shoot in the head at the guard back to you (see picture above). Once this is done you will get full control over the character.
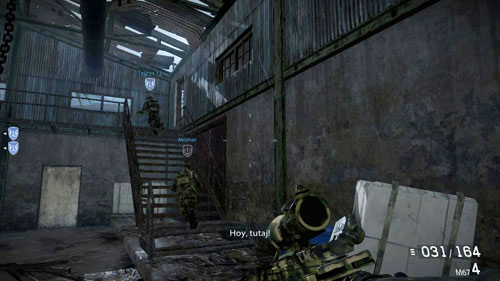
Come to Mother, go up the stairs and go carefully to the next guard. This time, do not shoot, just stand close enough (picture above) and press the button for the melee attack.
Objective: Set the charge
Objective: Eliminate the guard
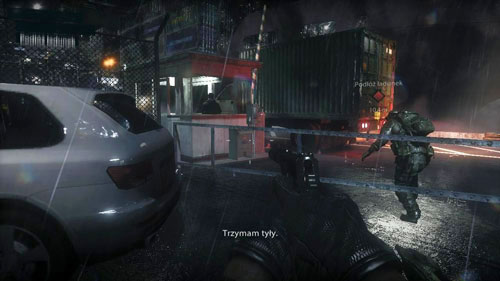
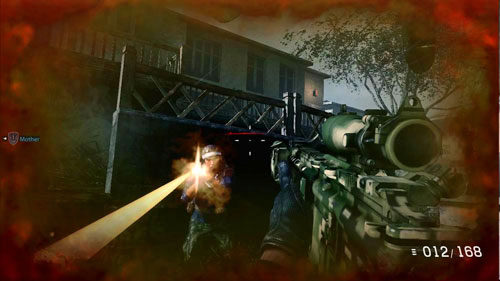
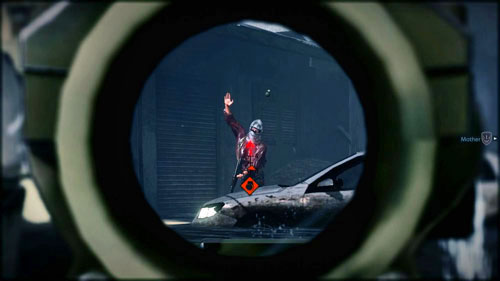
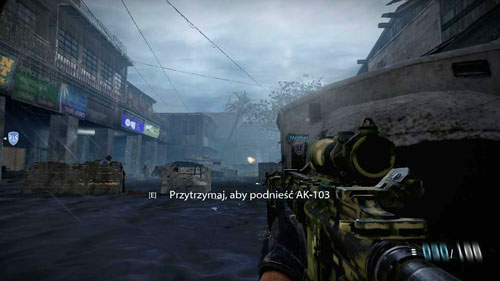
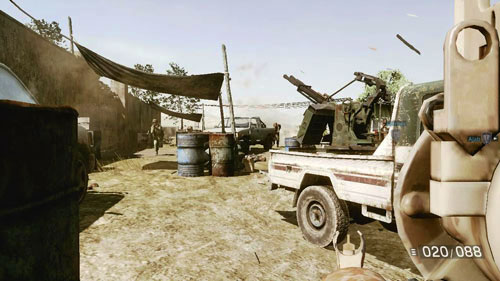
Run forward, jump the fence and go to the marked red diamond at the back of the truck (see picture above). Wait until the truck drives away, then shoot the guard in the head.
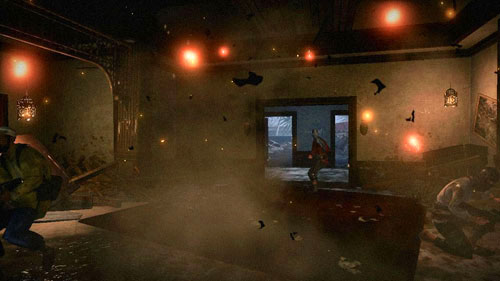
Objective: Detonate the charge
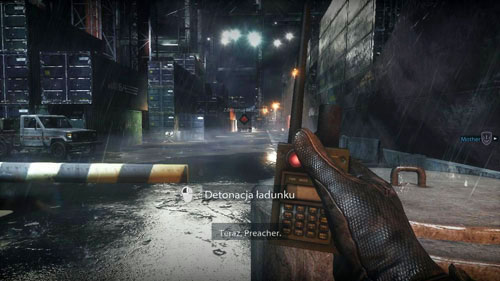
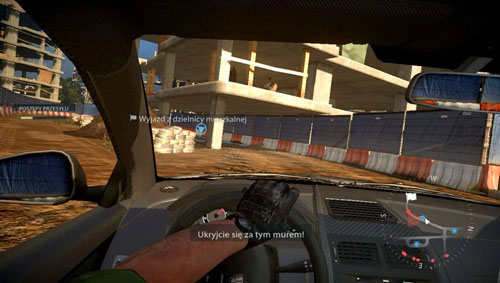
Hide on the right side of the barrier (the place is marked with a gray diamond), and when the screen appears, press the button to blow up the truck (see picture above).
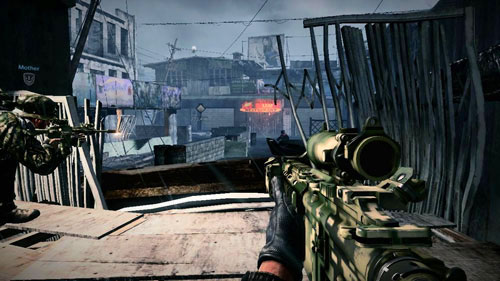
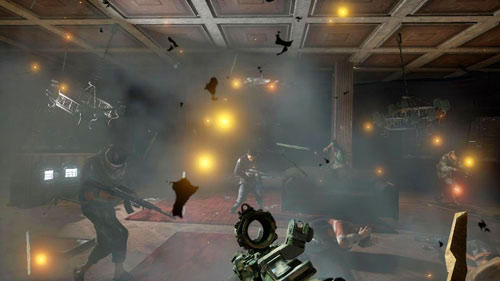
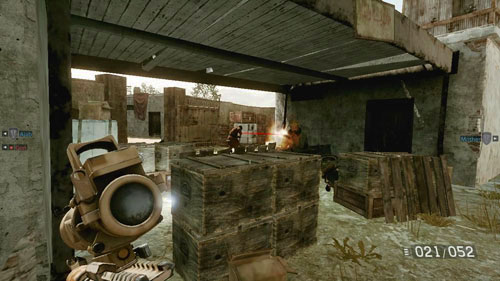
Run forward and prepare for the rapid elimination of the two guards who run from the container on the left (see picture above). Go ahead and watch a short animation.

Continue escape. You can kill enemies with axe. Run away and pay attention to your opponent in a container in front (see picture above).Remove the enemy and run into the container, and then exit the other side, when Mother "opens" it. Run up the containers and then to the left, down.
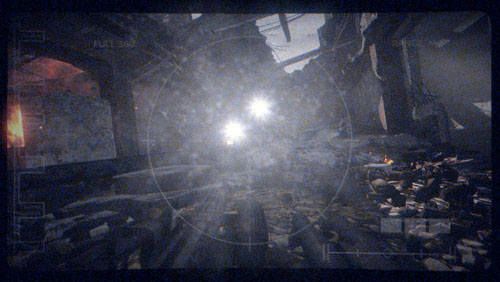
Objective: Destroy an enemy helicopter
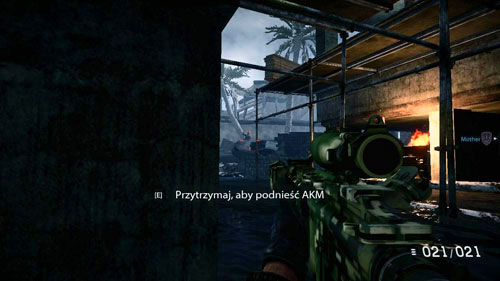
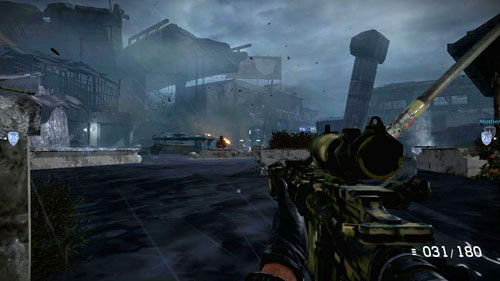
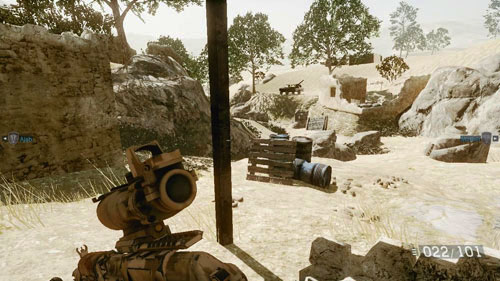
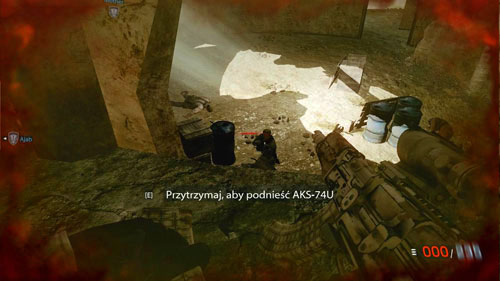
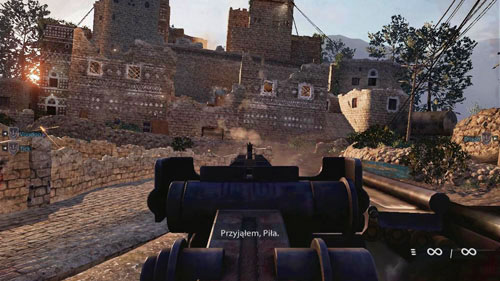
You get to the harbor. Do not worry about the helicopter, just remove the two opponents standing in the harbor (see picture above). Only then run to SMAW rocket launcher and pick it up by holding the use button.
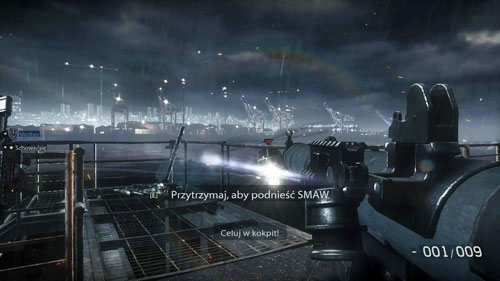
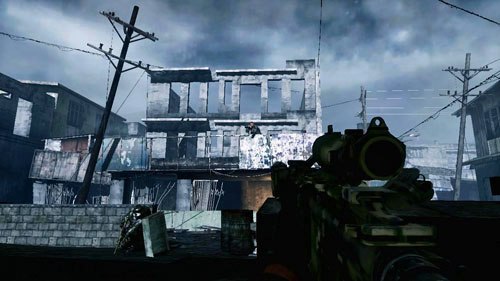
Your final task is to destroy the enemy helicopter. Aim ahead of time - in a place that the helicopter was flying to, and not where it is currently (see picture above). The first mission will end successfully.
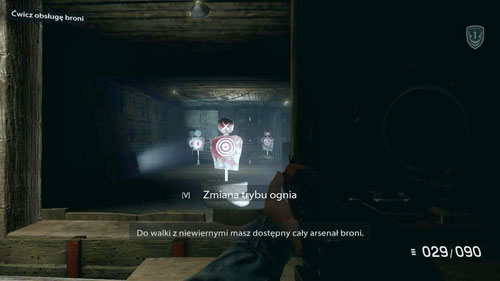
Main objective: Complete the shooting range
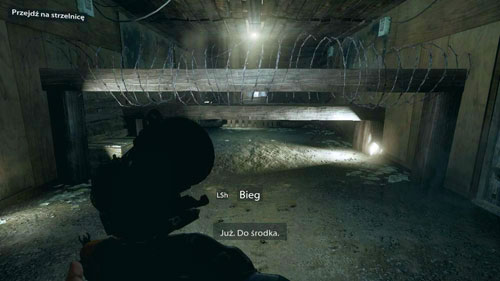
Wait until your boss finished talking, then go through the door next to which he stands. While running hold the crouch button to go under the first beam, then start to crawl, to go into the other (see picture above). Get up and jump over the final hurdle.
Objective: Shoot for training
Objective: Shoot with a telescope
Objective: Throw a grenade in the direction of training objectives
You get to the shooting range (see picture above). At first, you will have to shoot at the middle target. On the right, you have to score a goal away using additional optics (hold button for aiming and hit the one that is responsible for the change of perspective). Throw a grenade at the three objectives on the left.
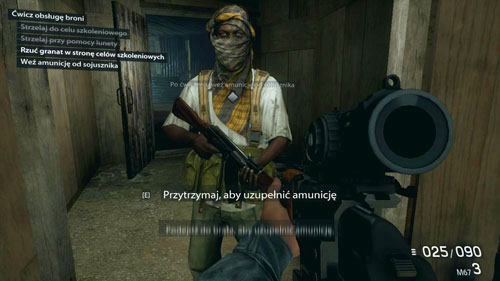
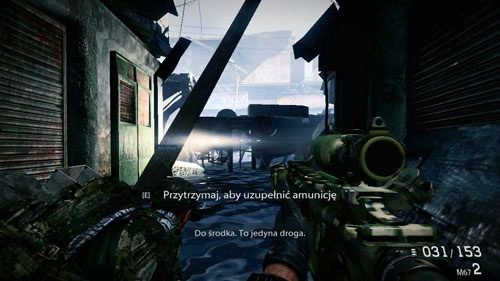
Objective: Take the ammo from allies
Turn to the left, take the ammunition from an ally (picture above), and then wait until removed from the road. Enter the room behind him.
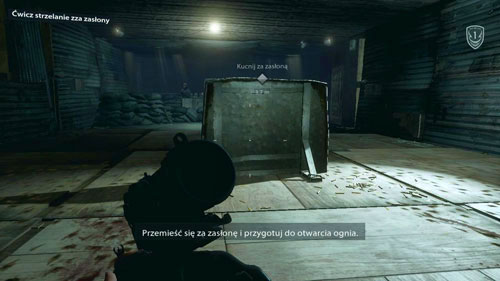
Main objective: Practice shooting from behind the cover
Objective: Crouch behind the cover
Objective: Shoot for training purposes
Hide behind the cover (see picture above). Crouch and lean to the right, remove the target, then go left and pull again. Use additional optics. Repeat the action. Do not underestimate the course, because if you stay too long behind the cover, you're dead.
Run through the right door and follow the only possible way at the beginning of the challenge. Note the timer in the lower right corner of the screen - try to complete the course as quickly as possible. Objectives will be marked with red triangles. Every hit to the head is in the final two seconds of time. Any accidental hit a civilian (blue shields) will trigger a penalty in the form of extra seconds.

On the Clock
Complete training missions Through the Eyes of Evil in less than 18 seconds
Xbox 360: 10 Points
PlayStation 3: Bronze trophy
The method described below will give valuable tips on how to deal with that achievement. First of all, pay attention to the bonus, which give hits to the head. Second, it is more convenient to switch to single-shot mode with a button, and not use additional optics. Finally, in the third place - you must be accurate and not waste ammo, because there will be no time to reload, and the gun is not very accurate.
Note that the guide is not everything - what counts is your skills, accuracy and speed, as well as knowledge of the distribution and conservation purposes. That's why you shouldn't probably count on getting this achievement the first time.
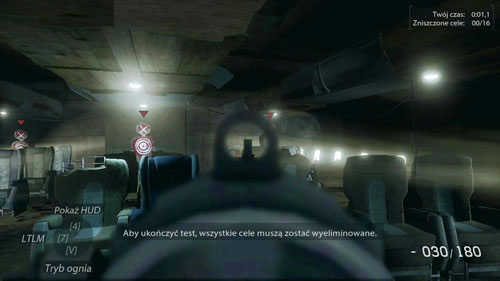
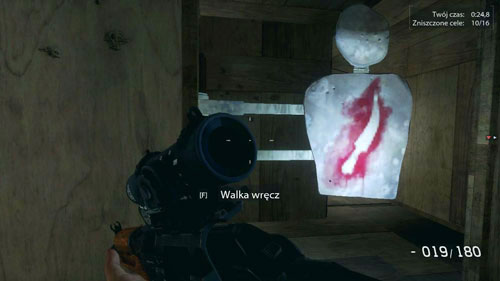
In the first room there are three dummy targets (picture above) - right in the middle and on the left. Shoot from left to right or vice versa, and shoot at the last one on the move, so that you do not lose precious seconds.
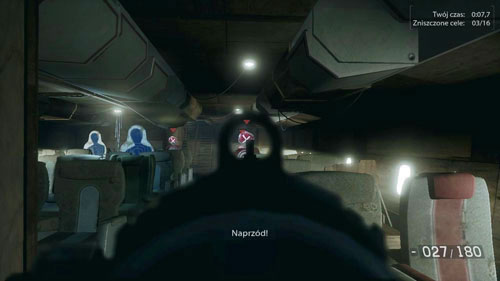
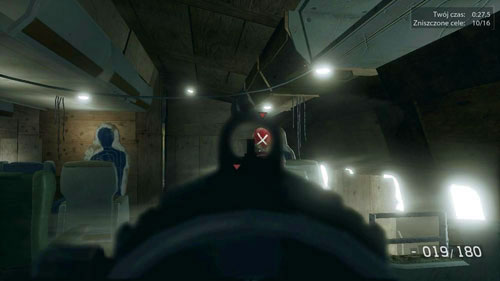
Go to the next part of the "plane" on the right. In this way you will have two objectives in the same line (see picture above). Give two quick shots to the head before they will hide and run straight ahead. The third goal, the one on the left, hide in, but when it is over, you should back up slide - shoot in the head and run up the stairs.
Climb up and turn to the right. In the next two sections of the plane, there are moving targets. Zoom view and be ready to shoot the first, nearest to the wheel, which will go right next to your crosshair (first picture above). Go a little forward, and the next target in this section will be to the left - shoot him in the head, and then immediately look to the left and shoot the next target, which will go through the door on the left. Only now run through to the next section and look sharp right, then shoot the side of the head of the fourth order (second image above).
Run ahead and be ready for immediate pressing of the button responsible for the melee attack, when the blade of the knife image appears in front of you (see picture above).
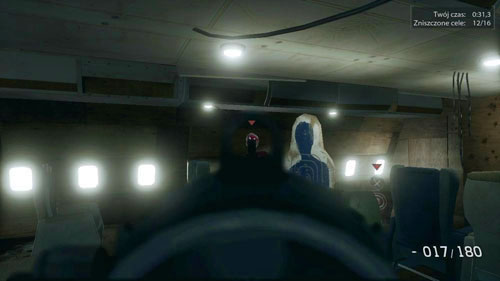
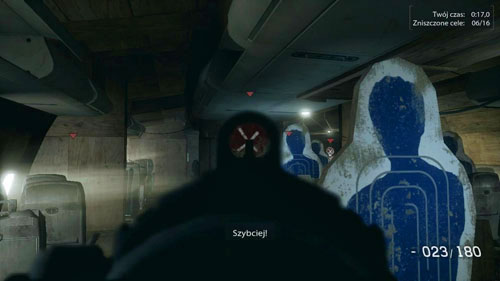
Go to the right. In the next section, there are four targets that are alternately put forward. Shoot the one that is on the right (first picture above). Wait a while until the next pops up behind him - hit it and then look to the left. If you were quick enough to aim more to the left (closer) is very extended (second image above). Immediately after the shooting focus the view on the target to the right - it should appear right in your crosshair.
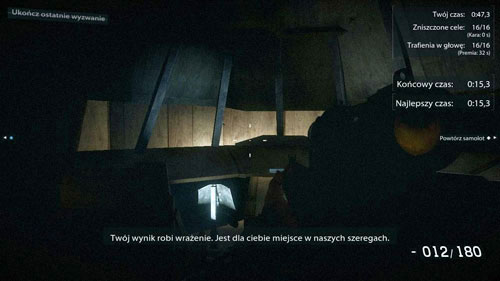
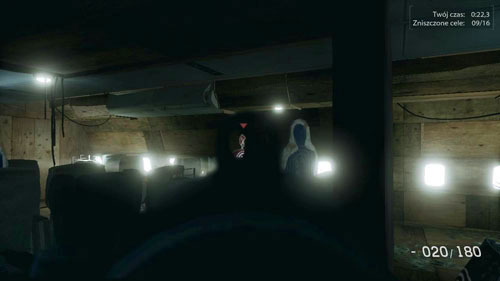
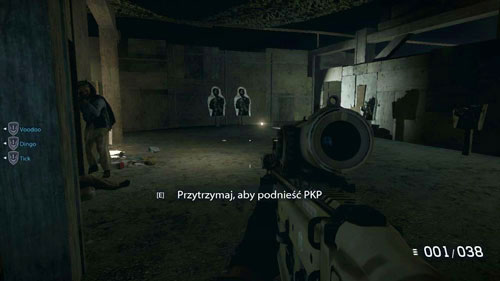
Run as fast as you can to the door. Press the button to use, select the first method of forcing (the fastest). As soon as you shoot to the right, then head left dummies - pilots. Here course is completed (image above).
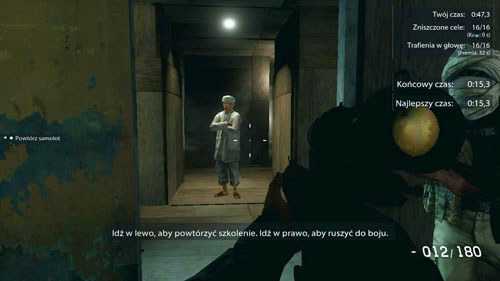
Go to your supervisor (see picture above). If you want to repeat the course, go to the left. If you want to complete the mission, go to the right.
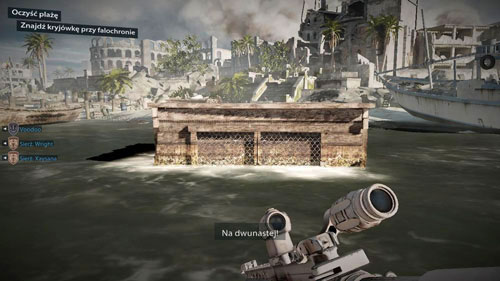
Objective: Find a hiding place at the breakwater
Run towards the beach and hide behind any of the wooden covers (picture above). The companions will inform you of the approaching enemies. The first ones will be hiding behind the following covers: in front of you under the stairs (behind the concrete block), on the right and left. The next wave of enemies will take position at the bottom and at the top. Here also covers are placed in three places - in front (on the stairs), the right and the left. Your companions will help you, but the lion's share of work is up to you. Companions will inform you when you can run up on the beach.
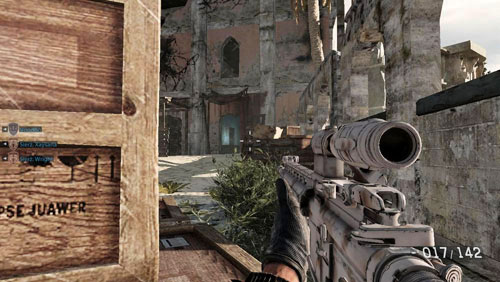
Objective: Get back in the building
Go to the beach, then up the stairs and quickly hide somewhere, e.g. behind a large wooden box on the right (see picture above). Leave the left side of companions. Watch out in particular for the window above the entrance to the building and cases before the entrance. That's where most enemies will be. You must also be careful to not be one of them hid on the right, next to a stack of boxes. It's a short distance, and one can well get hit, if you are not careful. As usual, the companions will inform you about the cleaning of the place. Run into the building.
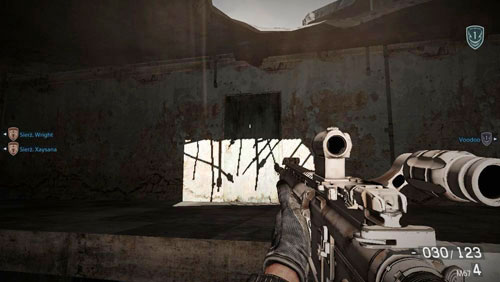
Objective: Breach and clean
Go up the stairs and locate the door on the left (first picture above). You have to remember that headshots do count (they allow to unlock faster new methods of forcing the door), and besides, shooting in the head you get rid of the immediate problem. Just after entering the room (second picture above), look to the left. There will be two enemies. Kill them, then kill the third a little further, who ran out of the door on the right. Fourth rises from behind the curtain, right in front of you (it's pretty close).
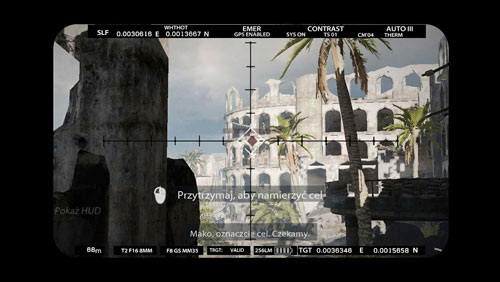
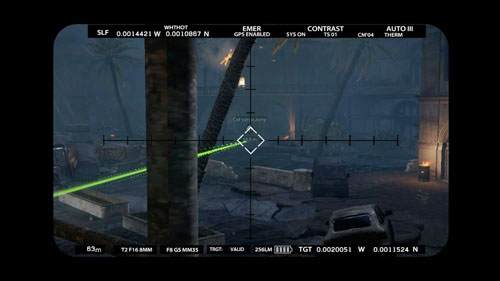
Objective: Use of laser tag
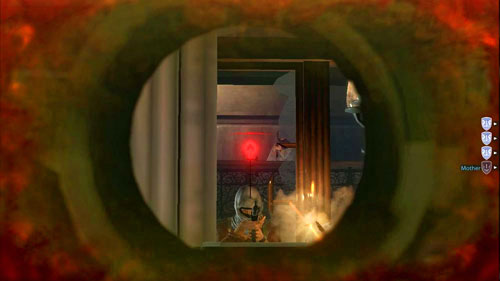
A fairly simple task: just hide anywhere in such a way that you had a view of the building through a hole in the wall. Aim at the red marker and hold the appropriate button (see picture above). After a while, the building will be destroyed with artillery fire.
Move with the companions through the ruins to the building that was destroyed earlier. Until you get to the ruins no one on the way will not attack you, so you can breathe and refill ammunition.
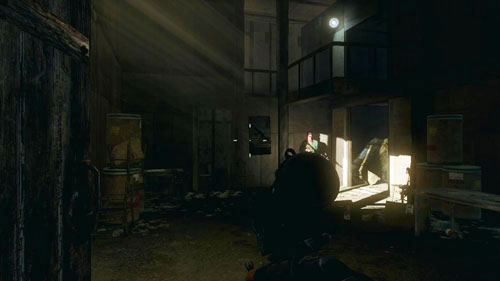
Objective: Find the Marines
At your disposal there will be a fighting robot. It is not as mobile as man, but this does not interfere with the fight. If it is too dark, turn on the flashlight. Go ahead. You can try to shoot your opponent on top. Get out from behind the wall on the right and you will see one or two lights - there are flashlights of the enemies (picture above). Shoot in that direction, and easily get rid of enemies. After a while, go running in successive place. Do not spare the ammunition. You will not follow to the next level, so you have to steer to the right, located slightly below the hole, and then left. When you go to the next room, drive a little into the rubble to the right to avoid an obstacle. This way you get to one opponent who jumps from the top. Kill him and hold fire, as you will meet your allies.
Objective: Give support to Marines
Climb between the Marines and head to the left. Try to kill as much enemies as you manage using simple weapons and a grenade launcher. But sooner or later, the robot will be destroyed (see picture above), and you take control of your hero.
Objective: Breach and clean the room
Go the same way that you drove a robot, but this time go up the rubble in front of the place where the enemies were hiding. Go to the door on the left, then breach another on the left. Four enemies will be waiting for you here, this time will be a little easier, because the room is much brighter (picture above). Two on the left (one is prone) and two on the right.
Objective: Clear buildings
Contrary to what may appear, hiding close to the holes facing the street is not a good idea, because after a while, the wall will be destroyed by enemy RPG. Watch out for explosions, and then hide on the left, while standing upright wooden pallet (see picture above). Therefore, you will have a good view of the street. Enemies will take cover on the first and second floor, and will also come from the roof. Pay special attention to windows and holes in the walls. After a while a few will be on the ground floor - in the windows, curtains for others, and some will also run from left to right down the street.
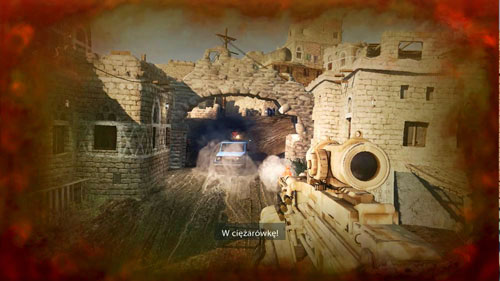
Objective: Clear the street
On the left side of the room where you are, there is a door leading to the staircase. Go through it and go down the stairs. The right side of the street from the swarm of enemies, come to the car with a heavy machine gun. You can kill a few enemies on the first floor on the right, but first of all go to the street and hide behind the van. Refill ammo and make your way to the vicinity of the apparent hole in the picture above (image above). Throw a grenade inside and hide on the side.
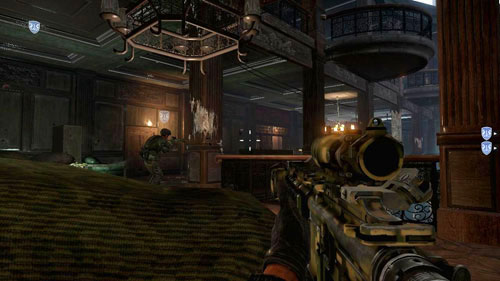
The next task is to get through the building on the right side of the street, so you can flank the car with heavy MG. Along the way kill few enemies. Take cover, lean out and wait for the enemies in the next room to reveal. When you get near the broken stairs, at a glance you will have an opponent supports CKM (picture above). Remove it, and then the other around the car.
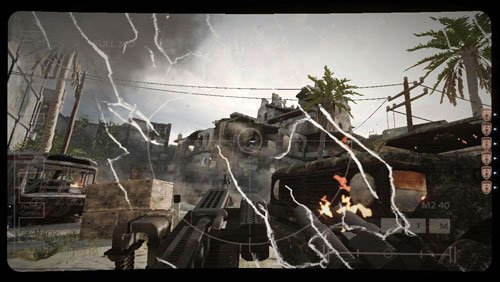
Objective: Grant support to the Marines
Next goal is a building at the end, but this time you can use the heavy MG, which previously was a problem (see picture above). To do this, get in the car by pressing a button to use. With this weapon easily get rid of the enemies on the balcony in front (it will be a lot of them here), and roaming on the left side of the building.
Objective: Get to higher
Follow the road, which indicate your colleagues - or the stairs to the left of the balcony. Then spin and head to the next long stairs on the left. As soon as you reach the top, you immediately jump over the railing to the right and hide behind the car. On the opposite shoot with the heavy MG at another car. Behind the car then run the column on the right, then the next and so forth until you can remove the operator of the heavy rifle (picture above).
Objective: Breach and clean the room
Set at the door of the building where you were hiding behind the columns and breach the door. There are four opponents you should die (see picture above).This time, the two will be in front (one is, you can leave it at the end), one on the left (you have to watch out for him), and the last jump off the top landing right in front of you.
Objective: Get to higher
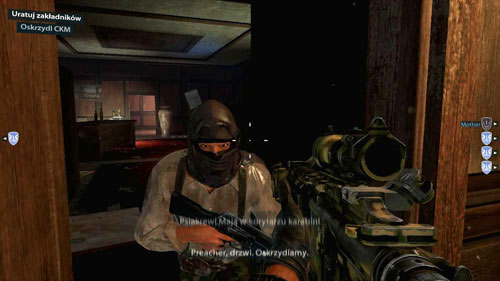
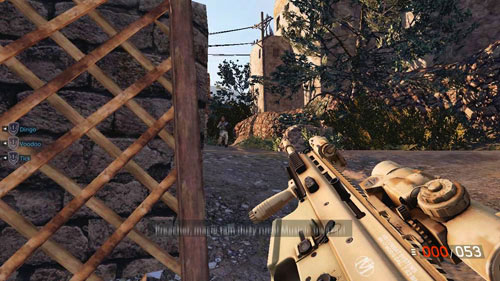
You can breathe, no one will attack you. Run up the stairs in front, then on the roof go through the door to the left and the next steps to the top. Watch the animation, in which the Preacher prepares for sniper task.
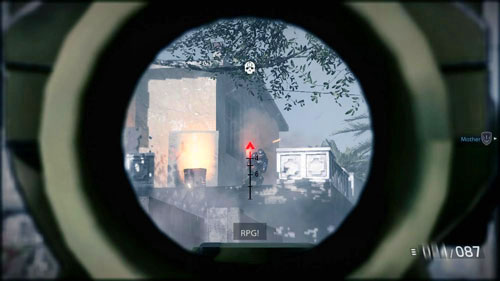
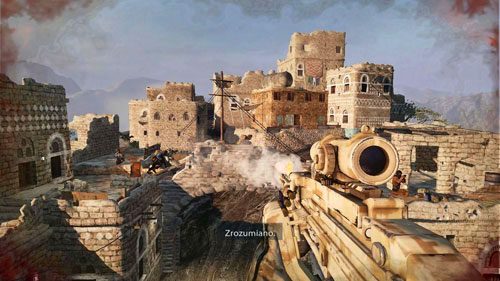
Your friend all the time will give you useful information, and your task will be to eliminate enemies with grenade launchers. They are marked with red triangles. While shooting, take into account the distance, and aim slightly above the opponents, directly in their head. Also, remember to hold your breath just before taking the shot, do not hold the button down all the time.

Leftover lead
Complete the sniper part of the Landing mission without missing a shot
Xbox 360: 15 Points
PlayStation 3: Bronze trophy
Tips: If you want to get this achievement, you have to aim well. If at any point you miss or do not get to achievement after killing the three series of enemies, load last checkpoint.
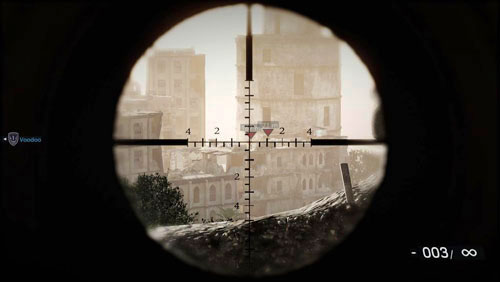
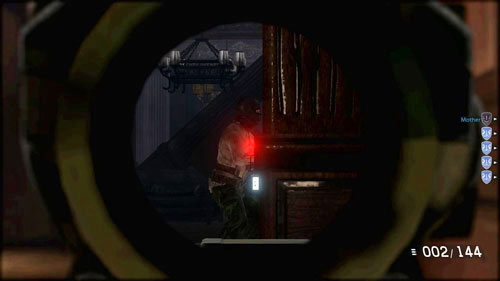
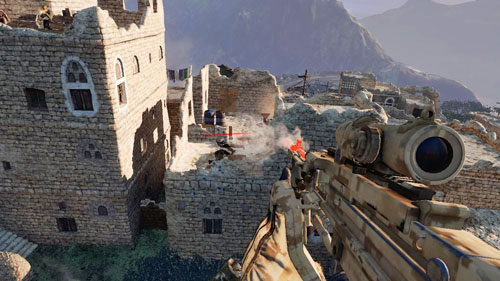
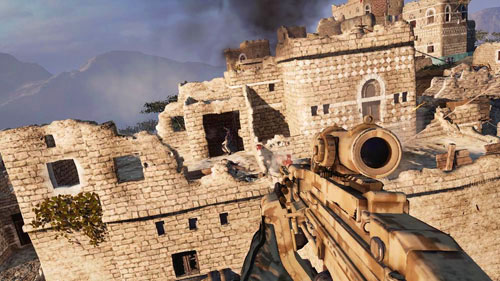
The first enemy with a grenade launcher is on the roof, one is on the left, and the third at the bottom (first picture above). Wait for a while (you can remove this time the opponents of the normal weapon), and then take care of the two enemies in RPG destroyed the roof on the right (second image above). Again, use the time for a simple elimination of enemies, weapons, and then take a look at the top of the tower on the right. The last couple of opponents with grenade launchers will be there (third picture above). You completed the third mission.
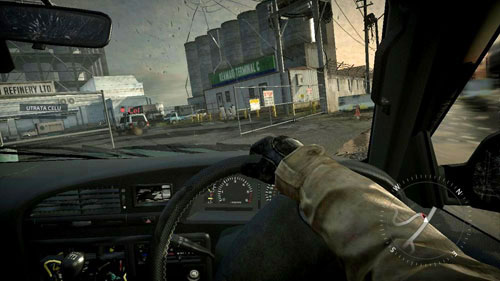
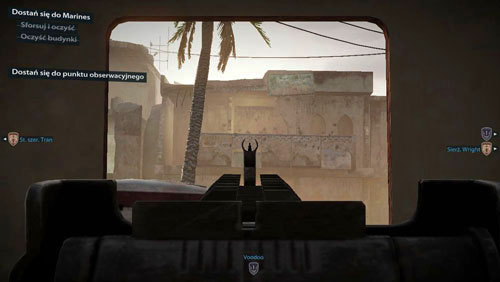
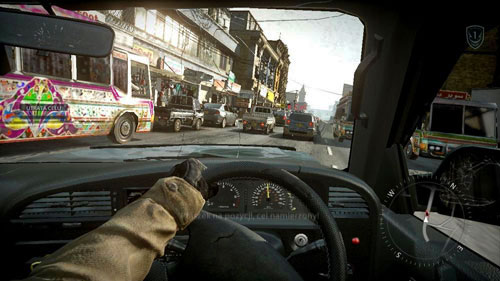
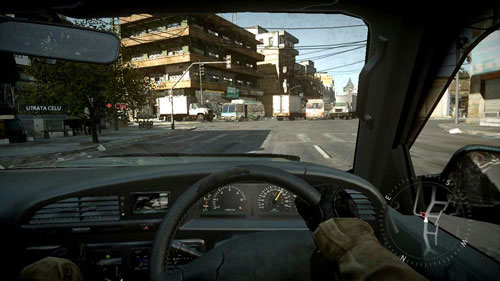
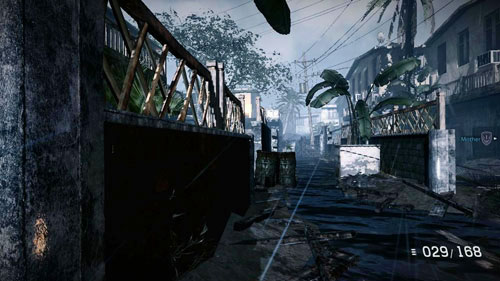
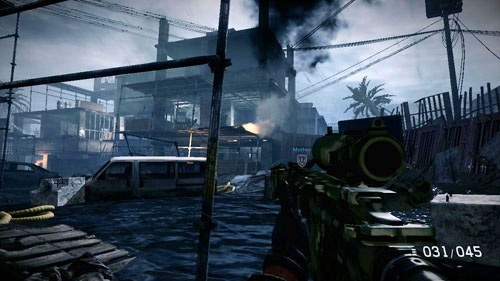
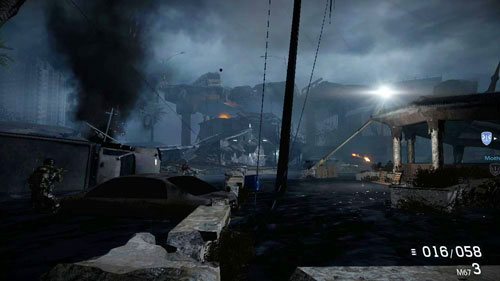
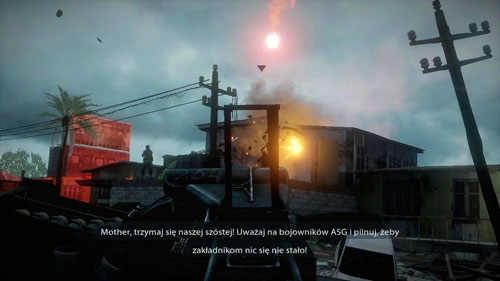
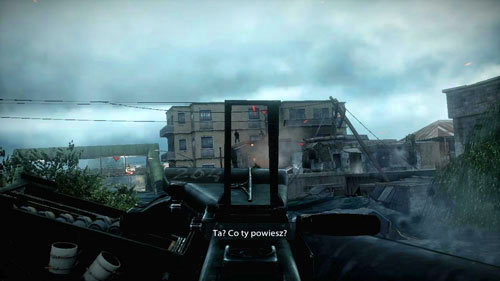
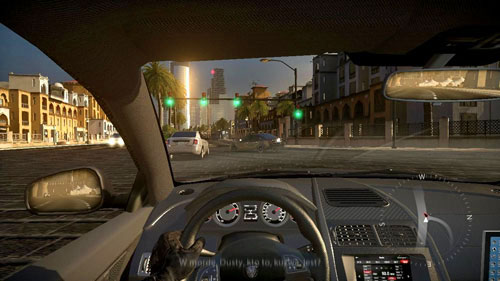
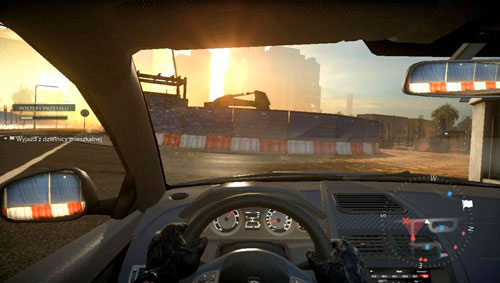
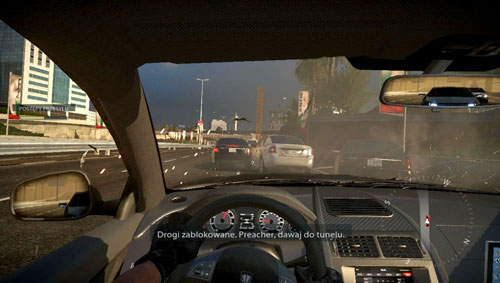
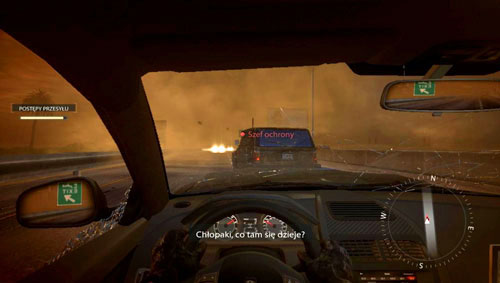
The entire mission will be to prosecute the car, which at the end you have to hit them with the appropriate force. But before that happens, you face a crazy ride through the city. For a good start you have to leave the port. Go ahead (picture above), then to the right (for a truck) and left along the yellow bars. At this point, you should see your goal, you will have to stick with it.
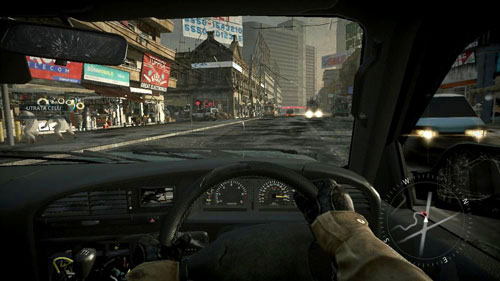
The red indicator on the left side of the screen will inform how close you are to the target. If you stray too far, the mission will finish in failure and will have to continue the game from the last save point. For this it is worth remembering the minimap in the lower right corner of the screen, which appears and you and the target. Look at it, so that you do not turn in the wrong street. You'll also receive messages by radio, but the rapid pace of events to better focus on the road and not on them.

Vender Bender
Destroy 90 market stalls in Hot Pursuit
Xbox 360: 10 Points
PlayStation 3: Bronze trophy
Notes: The stalls are scattered in the streets, and a huge cluster of them is on the market. What's more, you do not have to do it at one time, destroyed the stalls are counted during the following approaches. First of all, take a look to the following description, when you will be able to enter the market.
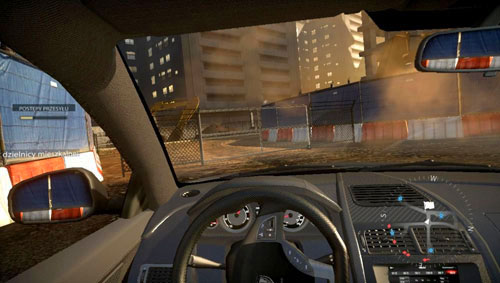
At the beginning, when going out of the port will not be difficult because of the wide roads and no barriers. Drive through the fence and take a long curve to the right. After driving a while along the tank, turn left, then right, to the side, into the drive (previously blocked the road in front of a truck). After driving in a zigzag to the straight path, turn left sharply. Do not be afraid again to ram fences (see picture above).

Take again the winding road among tanks, turn sharply to the right when you are in front of the yellow railing, left and right again. Continue past the tank, go through the double fence to exit the level crossing. While riding to the left of the train looks pretty scary, is not difficult to get around (picture above).
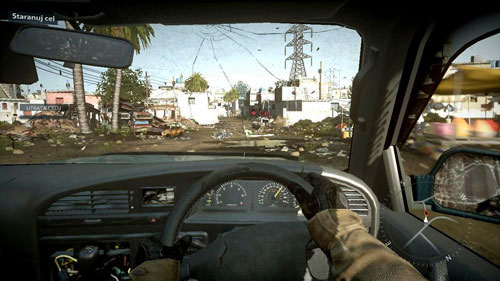
You will enter the slums. Turn right, then left at the first fork to the right and the second it right. Finally, turn left to go into the street. And here's an important tip. You have to keep on the LEFT side, not the right (see picture above). Although the steering wheel on the right side clearly suggests, it is easy to forget it in the middle of action. For the purpose of avoiding the cars go through the intersection, and then turn the narrow alley to the left.
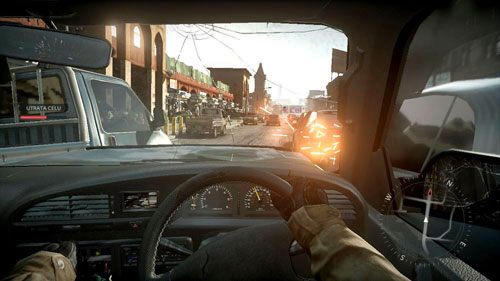
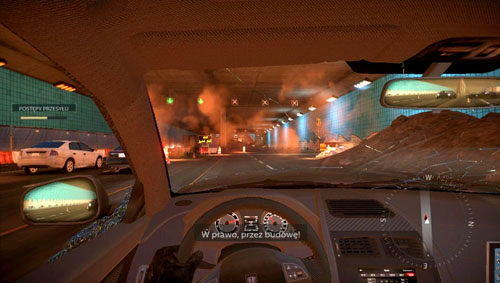
Turn left, then left, right, right and left again. The street will be getting tighter, be careful not to get stuck on any wall Kant. Turn right, the stalls and motorbikes, then the stairs to the street. Then right and right again. Here you will find... a traffic jam (picture above)! Do not worry, it's not only a problem for you, for your target as well. But you must be fast.
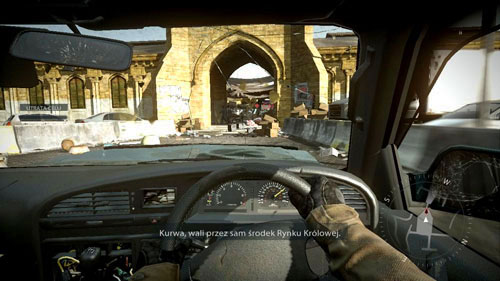
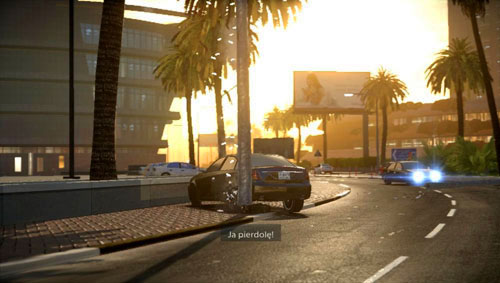
Slow down and just start moving cars by entering between them (see picture above). Pavement on the left is tempting, but pernicious, because there plenty of railings and posts, which cannot be rammed, so going between cars is a more reliable solution. Finally, get through and you'll be able to continue the chase at full throttle. Go straight and turn slightly to the right, watching out for a bus going in the opposite direction. Then go straight ahead, and at the junction of the mosque to the right. Soon after, there is one more intersection, where you should turn into a side street on the left.

Vender Bender
Destroy 90 market stalls in Hot Pursuit
Xbox 360: 10 Points
PlayStation 3: Bronze trophy
Tips: When you go to the market, ram as many market stalls as you can, letting your target escaped. Load last checkpoint (it will be right before twisting the stall) and destroy the stalls ahead.
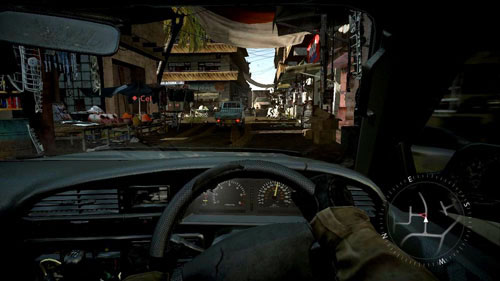
Again, turn left and then right. Follow the only possible path, Turn left until you get to the market on the right. It was there that enters your goal, so do the same. Do not worry, you can ram as many stalls as you like. But you must be careful to "stab" at first, and then the second door and punch the wall (see picture above).When you're behind the other door, you do not have to worry about nothing. Go ahead and slightly to the right, and after a short time, go back to the street.
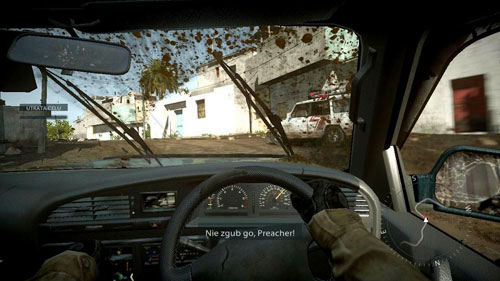
It will be increasingly more difficult. Go straight down the street watching out for civilian vehicles, the barriers, etc. (see picture above). For the next part of the mission you drive through narrow streets. You're should go right, right, left, left and right again. You will get a message that once we get your goal.
Walk through the park with a kind of empty, dusty earth, and then turn slightly to the right to enter the street. Your goal will be for a while he rode the tide, also watch out for cars coming from the opposite direction. Near the mosque turn right going along the fence, then straight ahead, then left the stalls, then left, and the second to the right. Go back to the main street. When after a while you see in front of trucks and buses (picture above), it will be a sign that you need to turn left and then immediately right again.
Go past the market stalls. Turn right and continue to chase down the main street, preparing to turn right. Immediately afterwards, cut immediately to the left and follow the winding street to the smooth curve to the left. Watch out for the bus! Go straight at the intersection to the right (at all times watch out for buses), and then to the left, between the stalls (picture above).
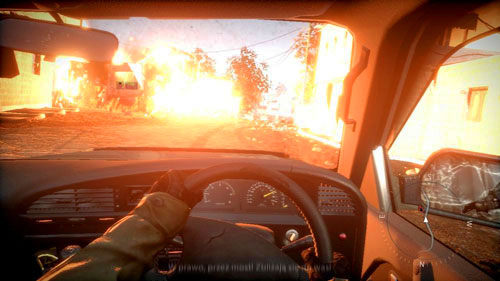
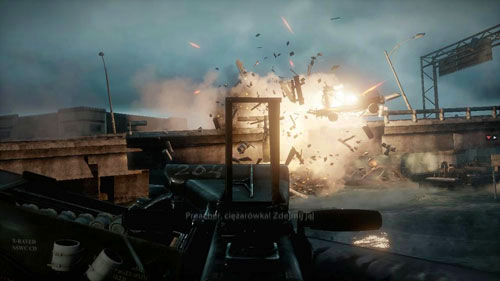
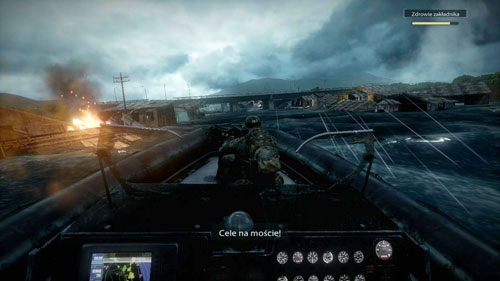
You will enter into slums. Turn left, then right, then left again, turn right and right again. You will hear the message that this is a good time to end the pursuit. Continue driving him winding road, but do not rush too much - yet here we get your order, and it's easy to lose control of the vehicle when the explosion occurs on the left (see picture above). It's a sign that you turned right and drive onto the bridge (your target went to the left, but you do not have that option, so do not worry).
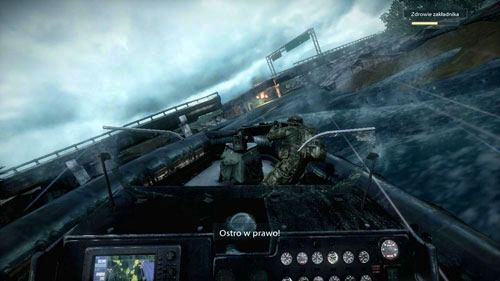
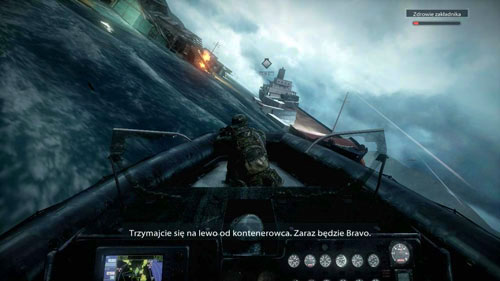
Go ahead, up the left side of your target back on the road. This is the moment where you have to complete the chase, everything is decided to select the appropriate moment. Turn right twice and then left. Briefly a simple way to accelerate the use and aim the car in such a way that went straight into the twisting to the left goal (picture above). Then it will not be such a good way, and after a few seconds the target will run away - it's also your only chance. If you fail, you go back to the checkpoint just before the explosion and twisting of the bridge on the right.
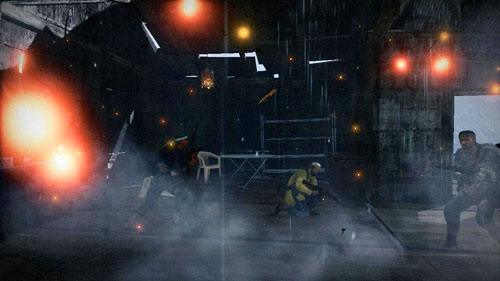
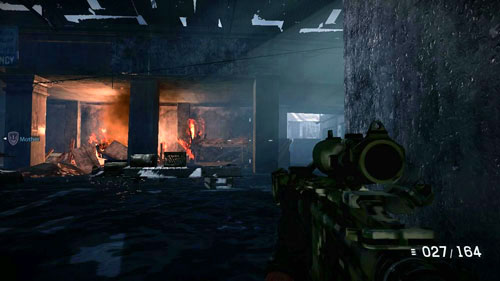
Objective: Eliminate the enemy's resistance
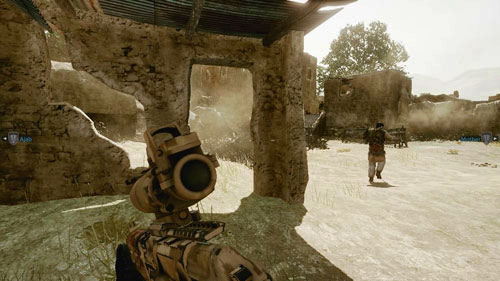
Mission starts quietly. Go right and enter the hut. Here is an enemy soldier with his back, which easily you eliminate without using firearms (see picture above) - just to bring and hold the melee attack button. Go outside. Another enemy is standing next to a burning barrel. Sneak behind him, passing a wooden barrier on the left and kill him quietly.
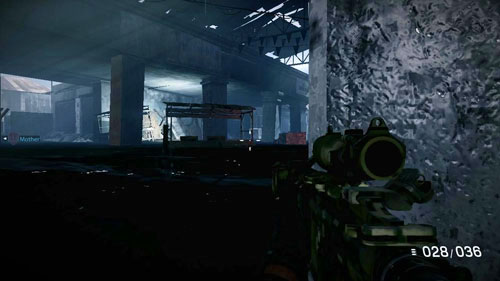
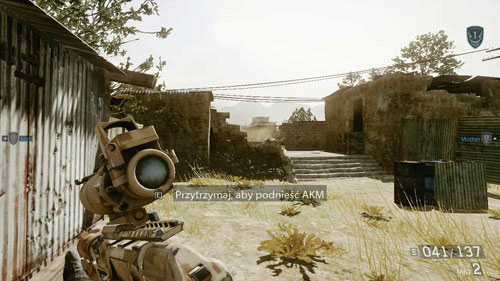
Run towards the next hut (you will see roof collapsing on the right) and get down to the right of the burning barrels to crawl under the hut. Crawl for MOTHER, turn left, then get out of the hut. Reach the enemy soldier and kill him with the ax (picture above). Then go to the cottage, where is a gray diamond (the marker missions) and kill an opponent with a knife in the middle of the fourth.

Double Header
Kill two enemies with one bullet in Changing Tides
Xbox 360: 10 Points
PlayStation 3: Bronze trophy
Tips: Read the paragraph below, there is a detailed explanation of how to do it.
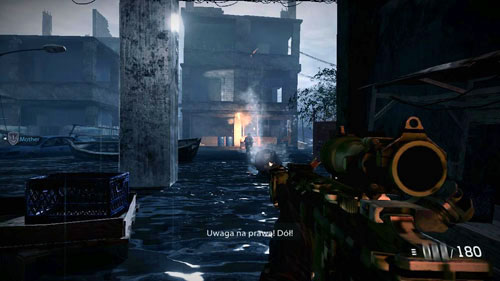
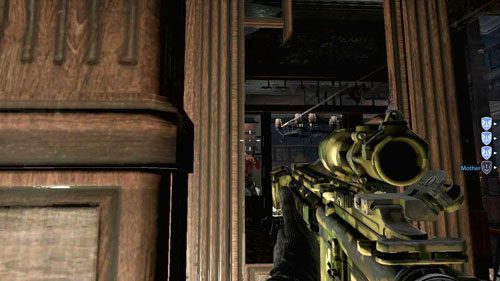
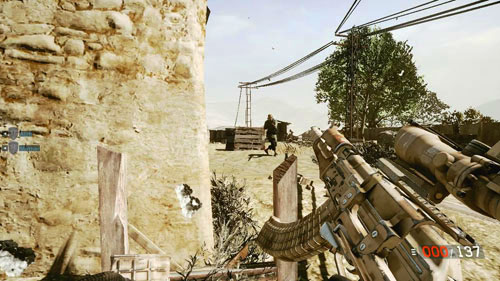
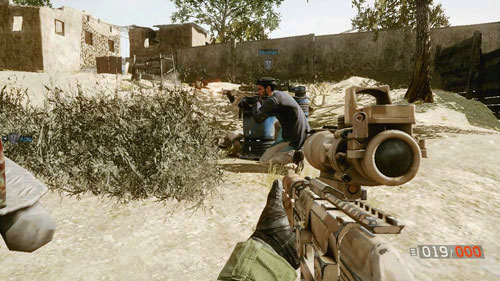
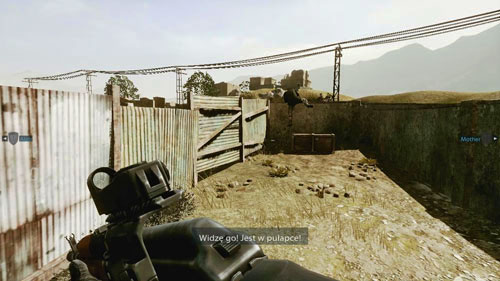
Exit the hut and run along the fence on the right. Lean and look to the right. Before the next hut two enemies are patrolling the area - they go to the right, stop for a while, then left, and so on. There is a significant opportunity to make the fight easier. You have one shot to get two enemies. No need to hide behind the fence, you can be on display, but do not stop, and instead crouch. Change the mode to single shot. Choose the right moment, when the head of one enemy blind second, take a shot (see picture above). Enemies will patrol indefinitely, so you do not have to rush.
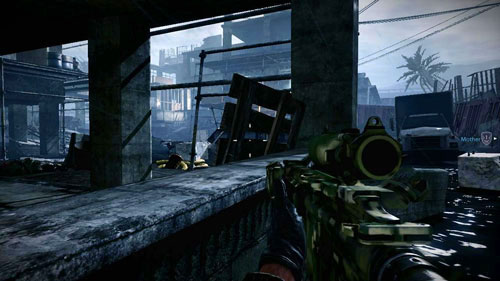
Run up to the hut and leave the exit on the left. If you did not kill the two soldiers with one shot, with the next three will have to deal in an open battle. It will not be difficult, you can count on an ally. If, however, you acted quietly, you can repeat the trick with one shot two soldiers. Exit the cabin door on the left and set the angle. Give me a shot, killing two enemies (picture above), the third cleaning up Mother. Jump over the fence and head to the door on the left.
Objective: Breach and clear
Stand at the door, confirm the breach, select a method, and then enter. There are four enemies, but three visible in the picture above on the right (see picture above), the fourth is raised from the ground. Kill them in the following order starting from the left: third, first, second and fourth. Please note that if you die here, the checkpoint is before the moment in which for the first time had a chance to kill two soldiers with one shot.
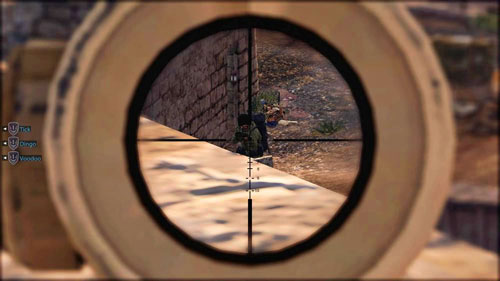
Objective: Clean the field
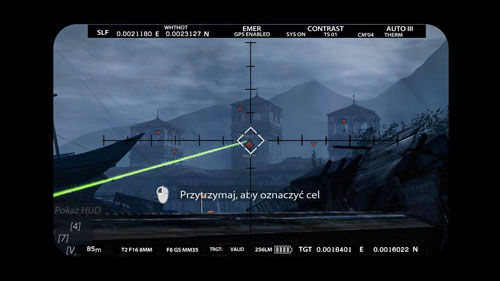
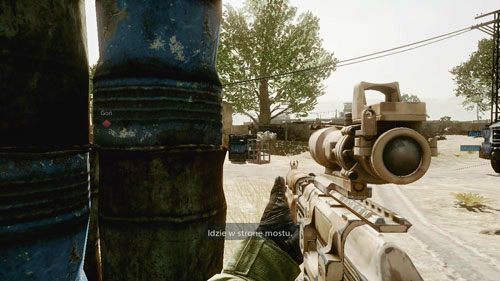
Run out of the hut through the second door and head to the ruins ahead. Stop behind an obstacle when you notice the lone observer on the left. Kill him with a headshot. It turns out that the buildings on the other side are occupied by snipers, thankfully artillery is available. Pull out the laser tag and mark the center tower (picture above). After a series of explosions move on.

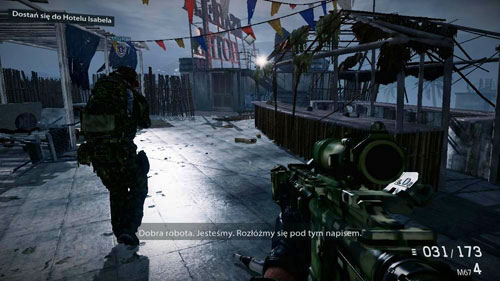
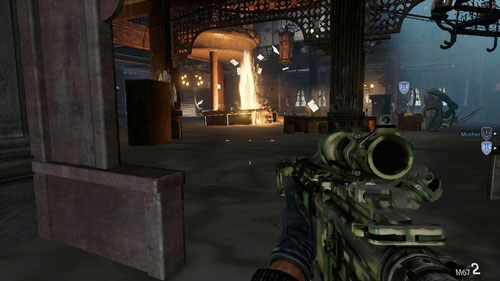
Time for a bit of standard action. Hide behind cover, a good place with wooden boards on the left (see picture above). First you start waiting outside the hotel. Enemies will hide behind a blue car on the left, and in front of low walls. When you can, stand for the said car and continue the fight from there.
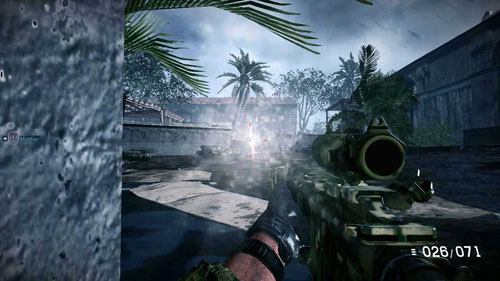
When you can, run ahead, and then hide behind one of the walls (see picture above). Enemies are forward-left. Eliminate them heading to that place. Rather do not place near the wall of the building opposite, because you'll be too easy a target. If you cannot see the enemy, aim simply in the torch - some of them will turn the on. Some enemies will be armed with a shotgun, deadly at short range. Also watch out for grenades. If too much pulls hiding behind low walls while you crouch, just get down on the ground and crawl.
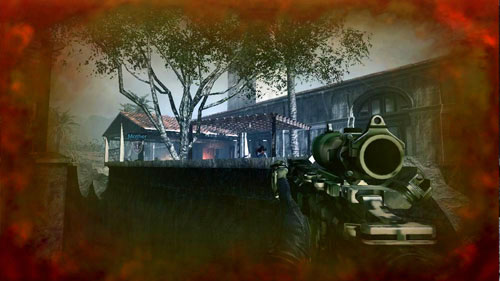
After a while you will get a message that the next enemies are on the left, next to the bell tower (see picture above). Head in that direction, from one curtain to another. Mother will move with you, try to keep up with him. The next enemies will appear under the roof and will be forward-pairs. Eventually you manage to clear the area and run up to the hotel.
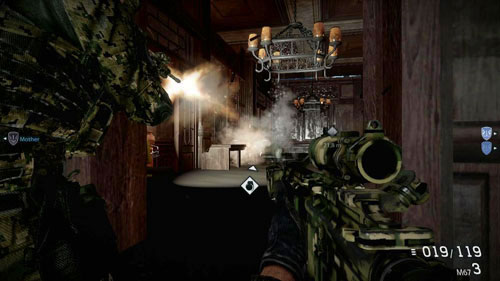
Objective: Breach and clear
Go into the next room and set at the door. You have to breach the door and eliminate four enemies in the middle (see picture above). It will not be difficult, because the room is well lit. First aim at the opponent, which runs out of the hall in front, to the left - right on your sight. Then remove the other close to you on the left and three on the right. Leave at the end of the one noticed at first. With any luck, manage to get up, but do not have time to shoot at you. When you complete all of the action in Mother ammunition.
Objective: Clear the way to the hotel
For a moment no one will be attack. Run straight ahead and then left past the wrecks of vehicles. Stop the wall and lean (picture above).Start to eliminate enemies with two barrels in front of the left. Then hide behind the wall continues to cause another wave of enemies. You can then return to the mother. Opponents will appear on the balcony in front of the left, will also jump and run within the walls. So you need to double-think - to attack from near and far.
Be patient, because the fight will be quite long. In addition, it is easy to deal with enemies on the balcony looking at them through a telescope and not see that the enemy is a few meters away from you (see picture above). Look out for a flashlight, some enemies will use it, which will help you eliminate them.
Move forward to force wave after wave of enemies. Pay attention to the cries of Mother, as he will warn you the enemies are - sometimes these tips may come in handy. After a short time an opponent with a rocket launcher will appear on the balcony (see picture above). This is the last enemy that will be there - with the last wave of enemies will hide among the broken walls of the right and left. Do not pull out too far forward, rather stick to mother, as a guarantee of safety.
Run following Mother to the red gate, which opens at the moment. Wait a wave, and then go to the overturned wreck of a bus (see picture above).
When you are next to the hole, through which you can go out, do not do it yet, just look to the left. The column will hide the enemy - remove it and then move out of the bus. Look in the opposite direction, the car will hide the three enemies. Watch out for grenades? Kill them (picture above) and move on. Go between the buildings, and then to the right.
Jump on the board and hide behind the bent metal grate on the right (see picture above). Mother will take position on the left. Watch out, some enemies with heavy machine guns will join the opponents. The first will appear on the floor of the restaurant opposite, and then also from her. Eliminate them and leave their position only when Mother jumps.
Immediately hide behind a column on the right, as a car wreck more enemies show up with heavy machine guns. Moving on the right side and hide the broken wall (see picture above). Now, in addition to enemies surrounding you in the water, the successive wave will join the fight going to the balcony of the building on the left. Balcony can be destroyed, depriving the enemy of cover. Also look out for a place under the balcony. Some enemies will use flashlights.

Be careful, so that no enemy hides right next to you, for example, on the opposite side of the shield, behind which you hide. Carefully inspect the area, and when it is clean, move the mother. Shoot the survivors, and when Mother shouts that it is clean, move behind him. Do not worry about the outbreak on the left, but pay attention to the three enemies - one from the left, second from right, and at the end of the last front, at the entrance to the mall (picture above). Eliminate them and run into the store.
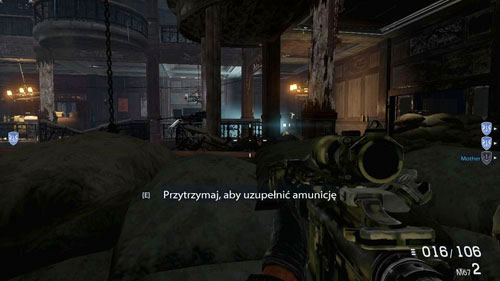
The first serious battle will be waiting for you here. Refill ammunition with Mother. If the next time you die, you start from here again the game. You should see a boat passing by. Hide to the right, behind a concrete pillar (picture above).Your right side will protect kidnapped metal plate. It's a great position. Enemies are forward-right and hide behind the boards in front of where the plastic bins stand. You can destroy them in order to better see the enemy. Watch out for grenades!
Try to gradually lean more and more to the right further eliminating enemies (picture above). They hide behind a concrete pillar on the right of the mentioned boards, stall and a concrete block. As the battle will be long, be sure to complement ammunition in Mother. They will be quieter, the more lean until the mall interior is clean.
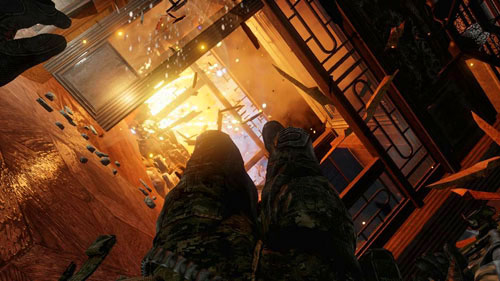
Go to the exit, through which you can see a low building, keeping to the right-hand column. Do not worry about RPG missile that will pass by to the right. Throw a grenade in front of the building on the right and go in its direction, but when you notice two enemies (picture above), who run from the right side, start shooting at them all the time going back. There is no good shields, hiding behind a column, you can pay with life. It is easy for a situation in which you lean to the right, and the opponent to come running to the left. Therefore it is only sensible that former hiding place - with a concrete pole and a metal plate. The enemies will place in the same places as before, so this fight will not be too much different from the previous one.
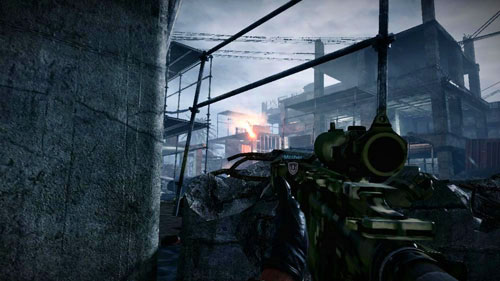
After the end of the fight, the game will autosave. You're in a moment of breath. Complete the ammo and run with Mother, going to the left of the building. Here, the best place to hide in the visible in the picture above (image above) - so that you could at any time crouch. Enemies will appear from left to right. Be especially careful at the beginning, because the two enemies here will drop and there will be quite close to you (one has a gun). Next waves will jump down, and some of which will be on the left side of the scaffold. Those on the ground can also hide behind a wreck in the middle of a white van.
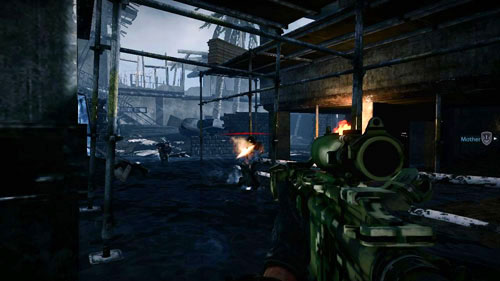
One enemy will be shooting from the middle building (he will hide behind windows with boards) and others will move towards the balcony of the building on the right (see picture above). If you do not keep up with their killing, some can jump, watch out for them in particular. In the meantime, you can move a bit further, with a concrete block next to the building. Look out on the balconies and scaffolding blue and black barrels. Hit them to cause an explosion, which saves you the trouble of enemies.
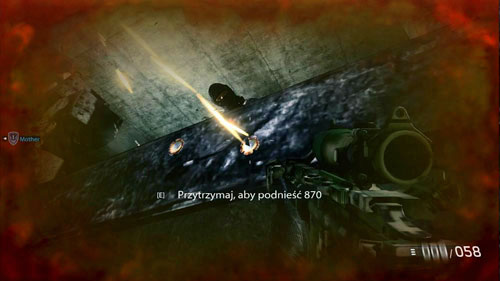
The key moment will be the appearance of a soldier with the RPG on the roof of the middle building (picture above). If you fail to kill him, jump off the floor. Be careful not to get hit in the face rocket. After a while on the balcony of the middle of the building a few more enemies will show up. If you wait too long to kill them, they will run into the building on the right. All the time, be sure to refill ammunition, as this encounter may be extended.
Look out for enemies, and when it will be quiet, get ready for the last fight. If you die, you will be born just at the exit of the store. Mother should move to further position. Join him and then look at the place you look - on the stairs in the distance. Go that way, but when I run their enemies there (picture above), quickly hide. At this point you may be very easily killed, so keep an earlier prepared a grenade to distract enemies. Opponents will hide behind covers, and one will appear at a hole in the building on the left.
If you hide there, watch out for the enemy, who come running right to you - then kill him with a knife. Also watch out for the one that will be right above you, shoot him in the head (see picture above). Instead, you can simply run away in place of the previous shelter, which is next to the corner of the building.
Go up the stairs, and when the palm tree falls, go back to the corner of the building and take position behind it (picture above). Lean and eliminate the enemies of next steps, it will not be difficult, but watch out for grenades. These will be the last enemy in this mission.
Objective: Breach and clear
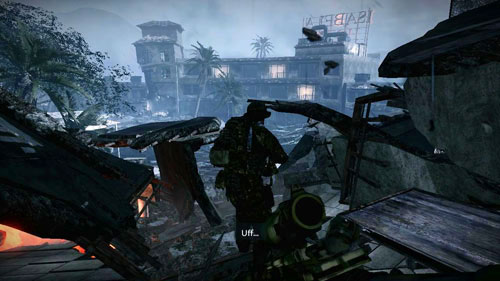
Go up the stairs and breach the door on the right. In the middle there will be "only" an entire floor to collapse, and you will reach the Hotel Isabela (picture above).
Objective: Get on the roof
Next just follow Mother - first into a hole, through which you enter the hotel and then up the stairs. Wait until Mother opens the door to the right, through which you enter on the roof (see picture above). At this point, the mission is complete.
Objective: Clear the street
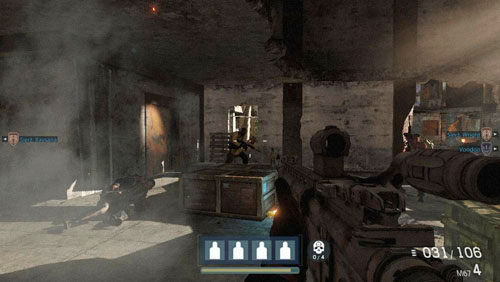
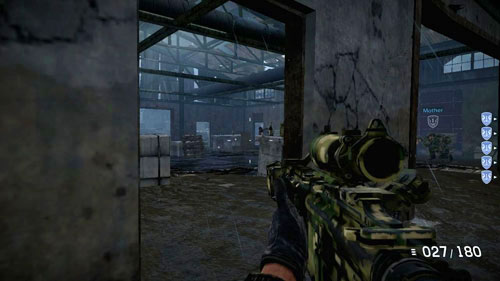
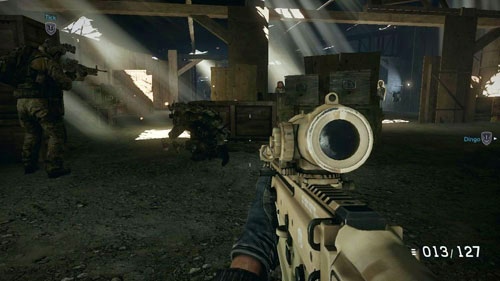
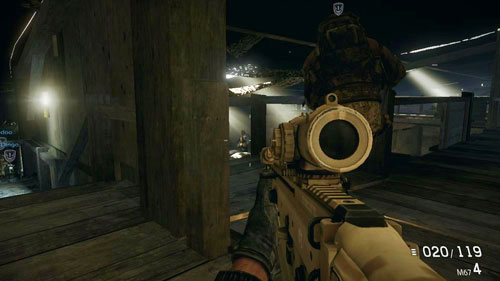
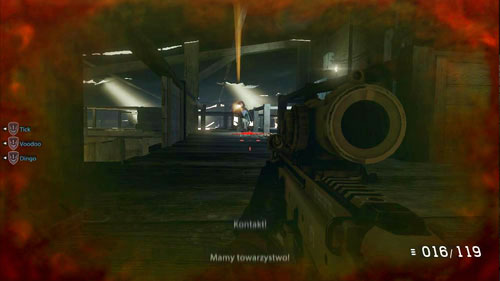
Join the allied team, whose presence will greatly facilitate further clashes. The first one awaits you in a dilapidated warehouse. Set at the entrance on the left (see picture above), lean and remove the running here and there, and opponents hiding behind boxes. Watch out in particular for enemies with guns who are close to you - they just may cause you the most harm. When colleagues come in the warehouse, it will mean the end of the skirmish. Come along with them.
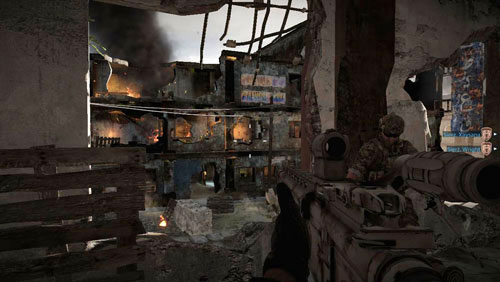
Exit from the warehouse to the other side. Pay attention to the sniper, who will be on the roof of a large, ruined building in front, on the right - remove the enemy. After a while the allied helicopter will come, but it will be shot down. Hide behind a wall and get ready for the next battle standard (see picture above). Shoot the opponents hiding behind walls and rectangular pots. Hold on to colleagues and do not push the barrel into enemies. Also watch out for grenades.
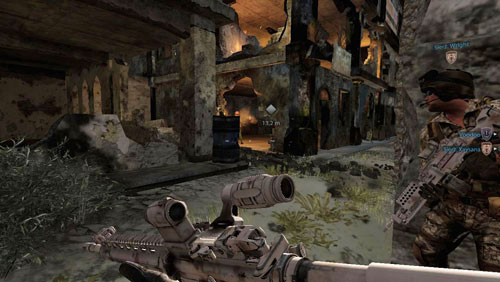
Move slowly to the left along the long wall, which is a good cover. Then hide behind a car wreck on the left. You do not have to worry about any message about the enemy in a specific location (e.g. on the upper level), because your colleagues will not fall asleep. Follow slowly all the time in the direction of the building (or more precisely - the blue minibus), hiding between the low walls (see picture above). Be sure to refill your ammunition!
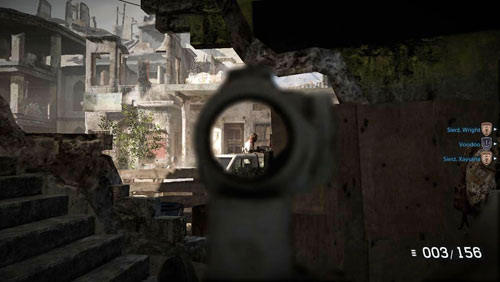
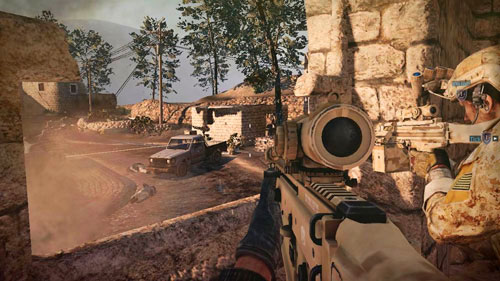
When the area is clean (one of the companions will tell you, and the game will auto-save), hide behind the white truck on the right (see picture above) and start to lean to the left. Rather, do not hide behind the columns of the building on the left, because it was easy to die there. Do not worry about the enemy with the RPG, but pay attention to the operator of a heavy rifle (his shot is shown in the center of the image above). Carefully aim at the head and remove the target, while aiming be careful, of course, about other enemies, and take care of them next. All the time watch out for grenades - move to the right to walk away from the blast.
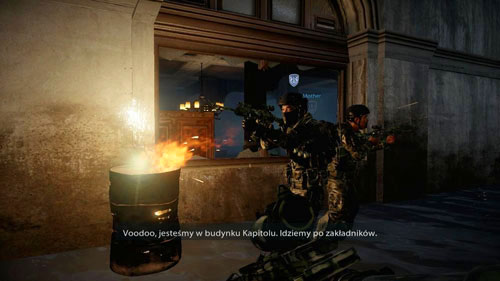
Again, when the allies go ahead, it will mean the end of the skirmish. Run to the door behind which one of them will open. For a moment, you'll have a moment of peace, so you do not have to worry about. Go for the mother to the store, and then go up the stairs on the right to the top (see picture above) and exit to the balcony on the right.
Your will see the Capitol building in all its glory. You do not have to shoot the enemies, who are about to appear. After listening to conversations accompanied with the command of a laser marker and pull the already known way to mark the center of the Capitol building (see picture above). Watch out for the enemies, and when you finish this step, hide in the building.
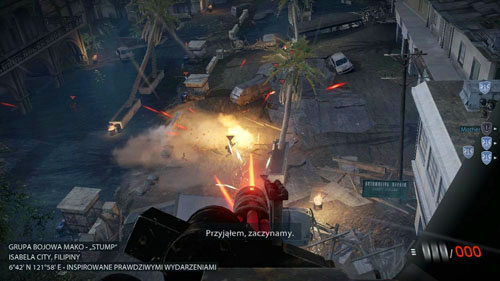
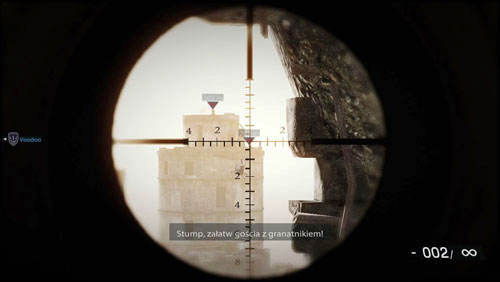
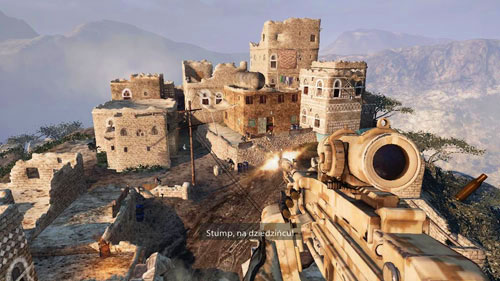
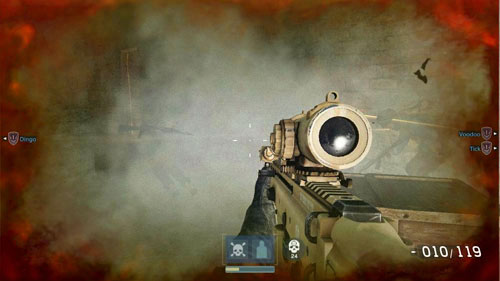
At the moment you leave Preacher's body and play as Stump, who sits on the board of the helicopter. Your task is to destroy the hay with a heavy gun (see picture above).Although it has unlimited ammo, the longer you'll be shooting all the time, especially gun to warm up (the degree of overheating indicates the intensity of the red color of the rifle). If you overheat the rifle, you'll have to wait a few seconds to cool down.

Enemies are marked for ease of red triangles, as you will not have a problem with their location. While targeting, do not exactly try to hit opponents, but rather keep the fire continuously on and around a single enemy, especially in a group of enemies. Secondly, it looks blue - black barrels and cars. The explosions can kill even a few enemies nearby (picture above).In the early knock out several specific objectives, then the enemies will move out in groups from the Capitol.

Objective: Get close to the Capitol building
When you regain control of the Preacher, go down the stairs and then exit the store through the open door. Run toward the entrance to the Capitol building, where two soldiers are standing (see picture above). One of them will try to open the door, followed by an explosion that kills them both. Watch the animation, after which you'll get a new mission objective.
Objective: Go to the U.S. Capitol Building
Follow Mother and two soldiers. Wait until they open the door and destroy the red box on the right, so you'll be able to go inside (see picture above).Do it to get another main objective of the mission.
Go through the door on the left, and then go into the corridor and follow on. When you notice a few enemies, hide behind the seat or closet on the left and eliminate opponents. Run away and set with the mother at the entrance to the room on the right. Do not go inside, eliminate enemies first start in the middle, behind the desks (see picture above).Remember your grenades and watch out for those thrown by the enemy. Do not let the enemies with guns or get too close to you. When Mother hides behind a desk on the left, you do it.
Objective: Breach and clear
After a while, you will hear that the room is clean, then that it's a dead end. But what are the explosives? Set against the wall marked with a gray marker and put the load - this time there is no door at which you choose to take the method of forcing. The wall will be only two opponents - on the left and on the right (see picture above). Kill the two with headshots.
Since then, get ready for some heavy battles, greater caution is advised. The first and essential thing is to find a comfortable position (e.g. left or right out front), and the careful targeting the head of an operator of heavy rifle on the floor (see picture above). If you do not see it, break the glass wall.
Then take care of the standard battle. Stay in a squatting position at the broken window and lean out just to locate enemies and give a few shots (picture above).Take care of the enemies, so that no one rushes to you too closely - those with guns are particularly dangerous. Eliminate enemies to allies come through the door and hide near the next.
Objective: Clear the floor
Absolutely do not go into the atrium. Although there are covers, they will be taken by the enemy. It is extremely easy to overlook any opponent who will come at you. Instead, follow Mother to the left and hide behind the desk (see picture above). Look out for the heads of opponents and shoot. The enemies will hide behind pieces of the roof, as well as destroyed the statue in the middle. When you see an enemy grenade, go back in a squatting position on the desk, and after the grenade blast, go back into position.
When Mother runs out from behind the desk, locate enemies in front (i.e. the left atrium), on the left damaged stairs. Of course, continue to watch for those at the bottom. Hide behind the next desk and fight on. Last enemies will coincide with the right of the stairs. Move to the next curtains (picture above), but only after making sure that there are no enemies. After disposal of the last enemy on the stairs, you will get a new mission objective.
Objective: Clear the first floor
Go up the stairs, but do not go through the door, only lean out. Let them run their former allies and let them focus fire opponents. The next enemy will be on the other side of the atrium, opposite. You can also hide behind the sandbags next to colleagues (see picture above). Lean out and take out the enemies until you hear the messages to move on.
At this point, refill the necessary ammunition, because then you will not have a moment of peace. When you do this, run down the hall, until it explodes, which will reject your character (picture above).When you pick up, the game will autosave, and you get ready for the last hard battle.
As soon as you position yourself on the left pane, right in front of the place where the explosion occurred (first picture above).Thus, you have a straight line shot several enemy positions (you'll see their heads) - on top of the railing and down behind the sofa (second image above).One of the enemies will also be in the front window. Obviously hide if you're hit too much. Eliminate the enemies until you reach the cries of allies to move forward.

Hide behind a column on the corner and lean to the left (see picture above).Hence will notice enemies behind the column on the opposite corner, and behind sandbags on the left. Shoot them, but watch out for the grenades!
Move on only when Mother does, but do not hide with him, just hide in behind the chair on the left (see picture above).It's a pretty safe place and allow you to easily killing enemies forward with sandbags surrounded the entrance to the hall on the left. Pay attention to the wooden door to the left of said entry.
Objective: Flank the heavy machine gun
Wait until the allies occupy the position at the entrance to the hall, surrounded by sandbags, and you'll get a new mission objective. Open the wooden door and be ready to immediately send a series of ax or kill an opponent, which will be right outside the door (see picture above).Then just go through the rooms ahead.
Objective: Kill the heavy machine gun team
Avoid the door on the right and lean right over the front. You'll see the operator of heavy machine gun (first picture above).Steady the aim and kill him with a headshot. Still waiting for you to eliminate the remaining enemies, but because they are lined up side and focus your attention on your companions, you will not have any problem with doing this task. Gradually moves to heavy rifle and lean more and more to the right until you kill all enemies (second picture above).
Objective: Breach and clear
Stand at the door, select a method to force the door, and then enter. Inside will be four enemies (picture above).As usual, they kill headshots. You should not be a big deal. Watch the animation, after which you'll find yourself behind the wheel of a grenade launcher on the boat.

Release the Kraken!
Kill 20 enemies during the boat exfil in Rip Current
Xbox 360: 15 Points
PlayStation 3: Bronze trophy
Notes: The difficulty of getting this achievement depends heavily on the level of difficulty. The lower, the greater the range will have your gun, so the easier you will kill enemies. On Hard difficulty you will have to hit exactly in each of the opponents, so taking into account the continuous and rapid motion of the boat can be extremely difficult - so better to try the easy level. If after all you do not succeed, then before changing position (when you have to control the boat, not to shoot it) load the latest checkpoint.
Objective: Drive to the exfil
Your task is to eliminate the ingress of enemies. You can keep a constant fire, weapons do not overheat or run out of ammo (but its rate of fire leaves much to be desired). Do not worry if you miss some enemies, but of course use the weapons as possible. The first enemies will be in front of the building that bypassing the left side (see picture above).The next on the bridge, which also you bypass on the left (they can kill you, so shoot them in advance).
Another few (alone, not in the group) will be on the left. Immediately afterwards, fire at the jeep, which passes to the left of the bridge, under which a minute will flow (see picture above).When you come out from under the bridge, two flooded buildings will be there, and on them a few enemies. Swim at the next bridge, and after that the enemies will be waiting on the left.
Another bridge, and subsequent challengers - a large group of them will be on the building on the right (see picture above).After a short time of each of the local bridges (which will bypass) will be occupied by at least one enemy. After some time, the way you block the red boat, so you'll have to cross between buildings. You shall have nothing to do until the right will be an explosion.
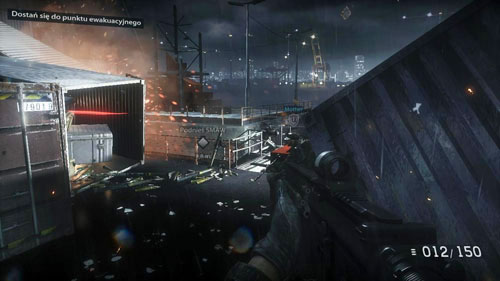
Watch the animation and prepare - now you take the place of Stump and you will be guided boat. Follow this all the time in the direction of the gray markers and stick to measure "path", so that you do not fall into an obstacle. Swim under the bridge (see picture above), swim straight, then slowly turn to the left.
In addition to the markers, a great help will prove the allies messages. Follow their instructions - after warning about the RPG you face a sharp turn to the right (see picture above).Hurry under the bridge and swim under it, along it, and when it set sail from, skip the next part of the bridge turn left. Swim straight for a few seconds, then start gently twist to the right. After a while, pass in the next bridge.
Being careful not to directly affect any of the missiles on the enemies, start twisting slightly to the left. Do it all the time, until you see the wreck of the ship (see picture above).Put out to sea avoiding the wreck on the left side. Swim straight ahead until you see helicopters. At this point, the mission will end.
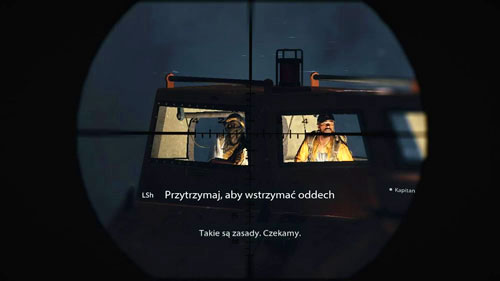
It's a very short mission. At the beginning the only thing you can do is watch (picture above).Do not shoot the target! Wait patiently until you see "18 hours later".
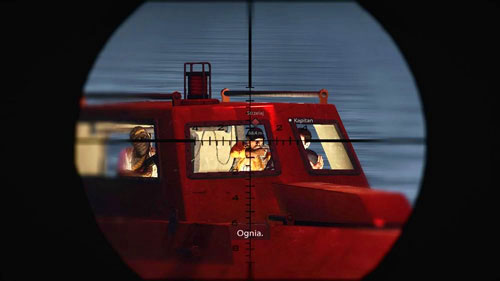
Objective: Take the shot
Keep sight to the right, or the pirate with a beard (picture above).Hold your breath and take a shot. Watch the animation, after which the mission is complete.

Tag, You're It!
Capture Faraz within 15 minutes in Finding Faraz
Xbox 360: 10 Points
PlayStation 3: Bronze trophy
Note: The lower the level, the easier you will include this achievement. Thanks to higher health, you can run through some sections, without worrying about the fire enemies.
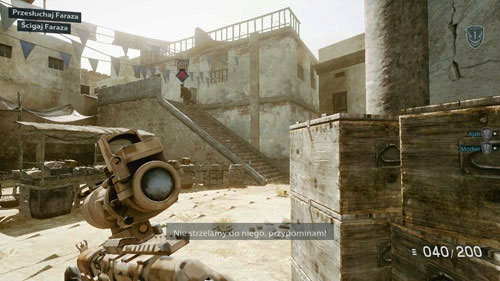
Objective: Chase Faraz
The specificity of this mission enables you to bypass some of the sections, and the lower the level of difficulty, the easier it will be. In other cases, the fight will be the only option. At the start, however, keep your finger on the jump button - handy in the next few seconds. Go to the box and run up the stairs on the right (see picture above).
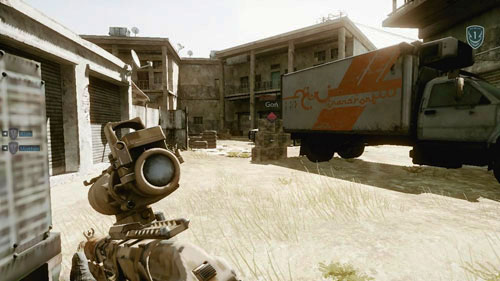
Run straight ahead and after reaching the wall, turn left. Jump to the balcony and follow the only possible path straight and then to the right. After exiting from the balcony jump on board and go through the wooden bridge slightly to the right. Jump over the break, and then a bit further jump from the building to the ground. Run through the gate and run gently turning to the left until you get to the white-and-orange truck (see picture above). Here, the game will autosave, and the idyll ends.
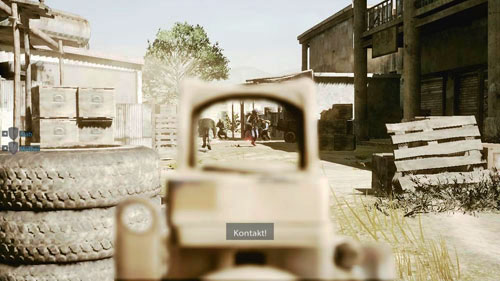
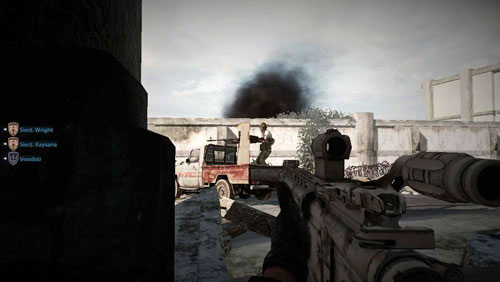
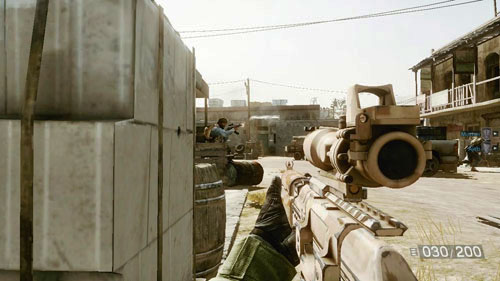
Hide behind the tires and open fire on the three enemies (picture above), who run their exact opposite. You can even throw the grenade. If they scatter, in particular watch out for the one who hides behind a column exactly on your right side. After a while, you will join Mother and Ajab, but move immediately when you kill three enemies mentioned.
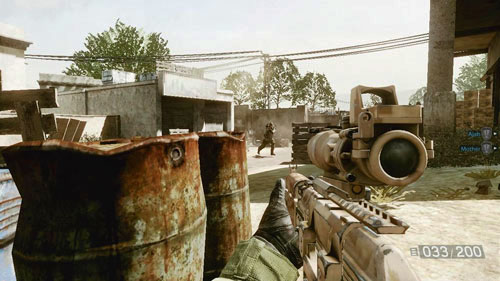
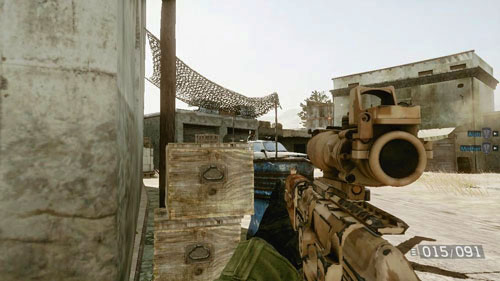
Run as fast forward, as soon as possible and then hide behind piles of tires and a few barrels. Hide behind the metal barrel on the right (see picture above), and lean to the right, eliminating enemies. The enemies will hide behind wooden pallets scattered around the yard, you can destroy, and also near the garage on the left. When Mother and Ajab move forward, move with them in front of the gate.
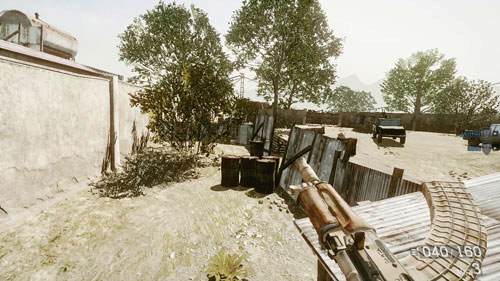
Run through it, hide behind the open door to the right of the car, remove one enemy in front and run away. Then head to the hut with iron plates on the left and jump over the low wall (picture above) to hide behind the barrels on the right. Hence you will eliminate opponents faster.
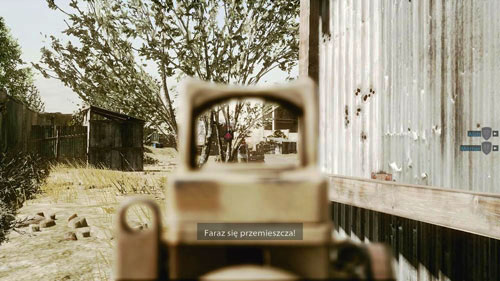
Run behind the companions toward the closed door and hide behind the iron hut standing closest to it. There is a very large area and quite frankly, it makes no sense to fight with everyone. So first go around a hut on the left side and see if any enemy is to the right of the next (picture above).If so, kill it, and then move as fast as the next sticking to the wall on the left, go around a hut and run along the fence with iron plates on the left.
Eliminate only those enemies who stand directly in the way, do not worry about others. It should not be more than the two who hide behind cover with iron plates, and the third, which will be just around the corner (first picture above).If a fall is a great time to use the ax. Eventually you reach the point where you have to jump between the stone houses (second image above).Here, the game will autosave.
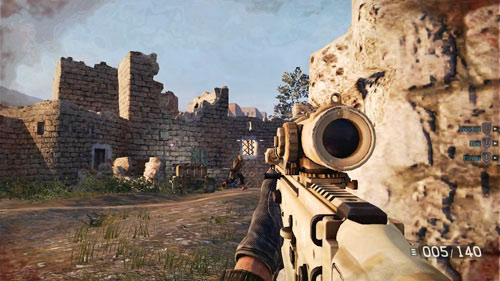
Run forward, and then to the door on the right. The faster you go out and start shooting at enemies running in the distance, the harder it is for them to take cover around you, making it much easier to fight. Stay for a while around the corner house (picture above) and lean all the time. Let the enemies run at you - lean out and a series of surprising bullets from your weapon.
When the area is clear, run as fast as holding back the left wall. Do not worry about the enemies shooting. Jump through the iron fence, hide behind the blue barrels, lean to the right, to the right of the enemy. Clear up at the police station (see picture above), and then run through the gate to the bridge. Run to the other side and head on. When you see another bridge, the game will autosave.

Do not run on it, just go to the left, down, and then climb over and hide behind the wall on the left (see picture above). You'll get hurt, but do not die. It's a great shooting position, as opponents will rather not look at you, but towards Mother and Ajab - simply wait a few seconds to stop the opponents of interest to you. Remember, however, that these enemies are a little better trained than the previous. Also watch out, so that no one suddenly runs to you.
Start to lean from behind the wall and remove the enemy aiming at their heads, of course. Then move to the next barrel. Slowly work your way towards the car (picture above) (easiest to remove are the enemies who lie just between them), but do not be ruthless to go back, if you're in too much danger. Because the event is not willing to go forward, while all non-spiking, use grenades and try to take an active part in the action, rather than leaving everything on the shoulders of comrades.
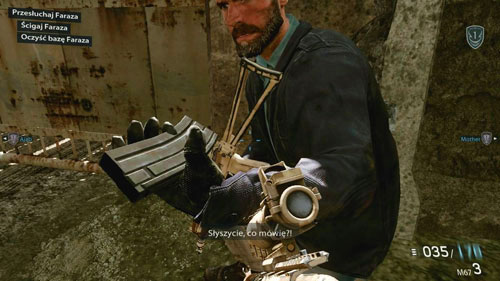
In the end you will hear a message that the base is out clean. One of your teammates will open the door - use this moment to refill ammunition at the other (see picture above).This is very important, because then you do not have time for this. The game will autosave.
Objective: Clear Faraz's compound
Immediately upon entering the base hide behind a pile of white blocks on the left (see picture above) and start to shoot at enemies. Ajab and Mother will take the items to the right. Enemies will hide in front of you (right behind your cover), in the middle of the car, on the roof of the building behind the car, and at the highest wall of the building on the right (behind the iron box) - in particular, be careful as for the latter. Fight pushing for more and more covers and watching out for enemy grenades.
When shooting stops, quickly run to the left, to the middle building. In the alley remove the guy who runs out the boxes, and you hide behind another pile of boxes on the left (which is the entrance to the garage). Lean and carefully remove the bullet in the head operator of a heavy rifle on the car on the left (see picture above). Aim up and kill the guy on the roof of the building behind the car (shoot through the fence).
Wasting no time, go between the back of the car and the building and lean to the left. Among the wooden crates will be a lot of enemies here (picture above).This is a good opportunity to use a grenade. Be careful, because the battle will join the enemies of the heavier weapons. After disposing of them, run through these boxes, and then immediately to the left and down. Run through the trenches as fast, remove the target, which will be a little higher, to the right, and the next moment, which runs out at you from the opposite direction exactly. The game will autosave.
Objective: Chase Faraz
Reach the low wall, through which you can jump - but before you do, stop and aim at the enemy who was hiding behind him. Look to the right, interspersed with rock gorge (picture above).If some enemies run away, use this opportunity to kill them. Be sure to also kill the lone enemy on guard at the top - from the house to the right of the car with a heavy machine gun in the distance.
Running through the gorge watch out for enemies behind the rocks, remove it too, which will be firing at you from across the bridge. After turning to the left hide behind a rock (there are heavy guns), wait for Ajab to treat them with RPG rockets. Head straight through the house with a stone, and then to the right (see picture above).You should notice a few running steps and opponents. Try to kill as much as possible - the more you eliminate, the less will be waiting for you in a moment. Here, the game will autosave.
Run up the stairs and watch out for enemies, if not you haven't killed them already - one is hiding just around the corner house on the left. Run away, jump down and head left. Immediately hide behind the car (picture above).There will be a few enemies, practically every cover (stacks of boxes, etc.). You almost reached Faraz and this is the last skirmish before being caught. Locate enemies, kill them, and when the shooting will stop, as soon as possible run for the stairs on the left side of the yard.
Avoid running zigzag around iron barriers and run up to the top, then turn left and immediately right. You'll notice Faraz trying to go through the wall (picture above).Run as fast, jump on the box at the wall, then sit back comfortably and watch the animation in which your hero catches up with Faraz and interrogates him. But this is not the end!
Objective: Get to the exfil
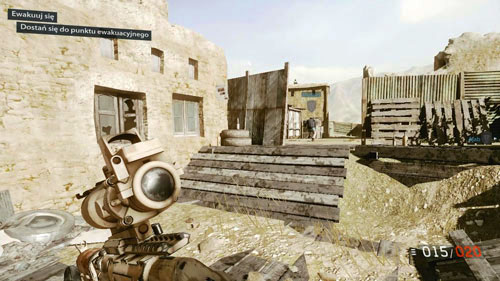
Faraz dies, and you and Mother will have to flee. Just run behind him and do not look back - nothing difficult. Go through the gate (see picture above), then run into between the buildings and immediately to the right, to the stone house and left, and then all the way down. After jumping down, stay with Mother and be sure to refill ammunition at this point. You're in the last challenging skirmish in this mission.
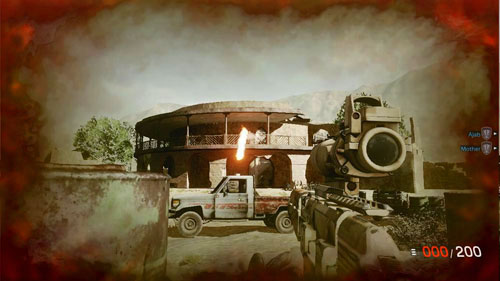
The best cover is the one that took Mother (picture above).Stand behind the barrels and the first note to the balcony of the building across the street. Remove one soldier, then another of the RPG. The first bullet will go in the car, so do not hide behind it. Other opponents are forward-the entrance to the building and hide in between the columns, as well as closer to you - a pile of pallets on the left and the right. Try to focus primarily fire at the entrance, on the forward-looking enemies and those in the middle, so you do not get surrounded.
When you kill enemies in the foreground, run to the left, then the columns and stand at the entrance. You should notice the stairs on the right (first picture above).Run at them and go up, around the corner is the enemy, so be ready to shoot. Lean to the left through the hole to be on view at the bottom of the last enemy (second picture above).Remove them, and follow the jump for the second out with the mother. Breach door - you do not have to shoot the enemies, your character will automatically kill them. At this point, the mission will end.
Objective: Defend ground troops
Objective: Eliminate grenade launchers
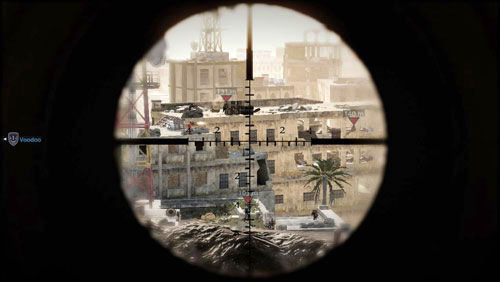
Wait until you reach the enemy base. Remember also that your weapon is overheating - the more red barrel, the closer the gun is to overheating. If this happens, you'll have to wait a few seconds. Try to aim for the blue - black barrel to cause explosions, which will severely hurt enemies. The first enemies will appear to the left of the gate of the bridge (see picture above), and then also on the bridge and on the roof of the building on the right. Those more dangerous (RPGs) are indicated by red triangles, but it's not all - use the telescope to spot the enemy.
After elimination of the first group of enemies you'll go round the building. There will be enemies hiding in the left upper and right lower roof (first picture above).Kill them and wait before you reach the third group enemies. The task does not change - Aim at enemies and barrels while your helicopter is circling the roof (second picture above).After knocking out the enemies on the left, another group will run down the stairs on the right.
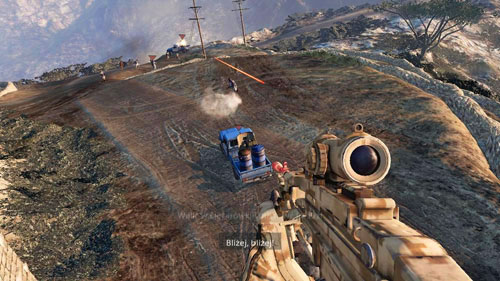
The subsequent opponents will be on the bottom right. Pay particular attention to the jeep with a heavy machine gun (first picture above) - shoot at him until he explodes and causes the bridge to collapse. The subsequent opponents will be scattered in the courtyard of the bridge (the second image above). There are a lot of drums, which will greatly facilitate these explosions task - pay attention to it. From the left another jeep with a gun will come out, so focus your fire on it.
Objective: Chase the convoy
After some time, the allied helicopter will be hit with a rocket, and you will save your friend from falling. Wait until the situation calms down. You will get a new mission objective. Open fire on the fleeing soldiers, then a jeep with barrels (see picture above) - just one shot and it explodes. Helicopters will fly along the road. Fleeing on foot fired at enemies, and then a jeep with a heavy machine gun a bit further. Then wait until you land on the next enemy base. Along the way, you can shoot a small outpost on the right of the road.
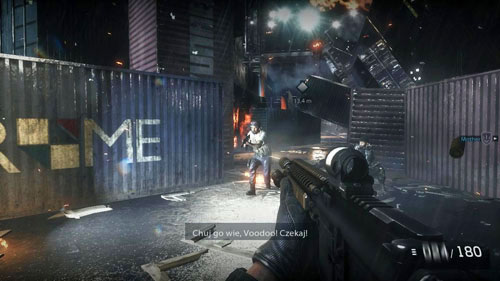
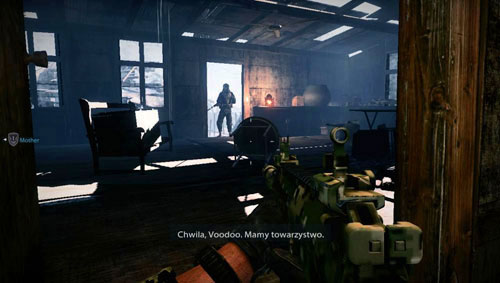
Objective: Clear the village
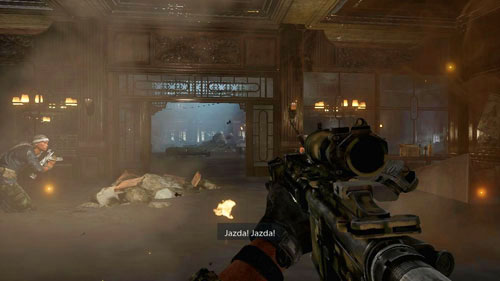
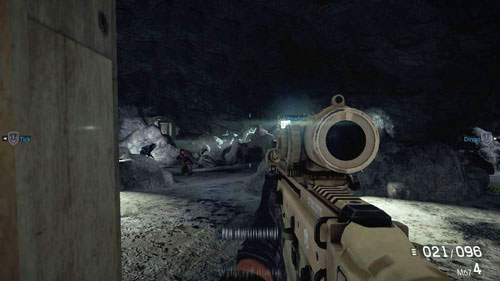
Immediately after landing crouch behind the destroyed wall, behind which hid Voodoo. Get ready for a pretty demanding and long battle. Take a position in such a way to see the left side of the yard (picture above) - from the start. First, kill the heavy machine gun operator - in the roof of the building on the left. Then shoot the enemies hiding in two windows of the same building, as well as in the area of ??the ammunition boxes on the left. Also watch out for enemies who have taken close to your position behind the other dilapidated wall - exactly opposite of where you're hiding behind.
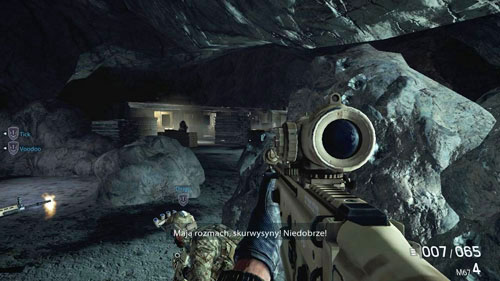
When you get a message about the new goals, you have to start to watch out for grenades. Opponents with shotguns will join the fight, do not let them get close. New enemies will occupy the same position as the previous one (for example, will appear in the window). After a short time, go to the right and lean in that direction (see picture above), start shooting at enemies on the roofs of the buildings on the right, as well as those hiding in nearby buildings.
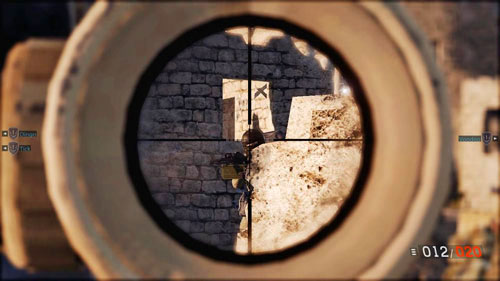
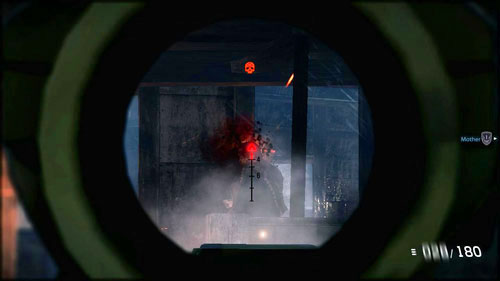
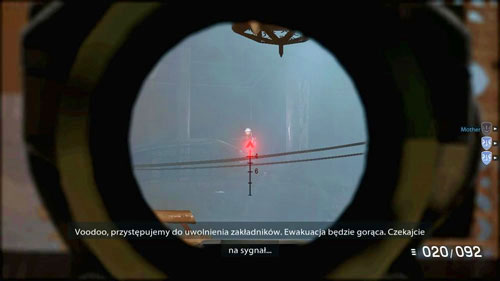
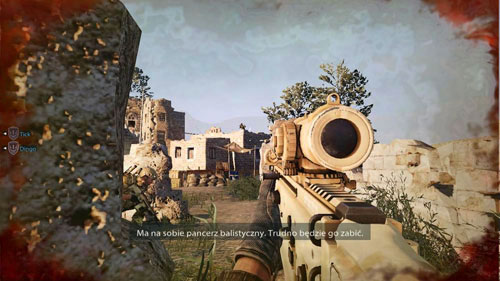
However, your main goal should be to kill the heavy machine gun with ballistic armor. Set in such a way as to see his head through the hole in the next ledges (picture above) and just give to single shots to the head, until the opponent falls (each bullet will reject him for a while, so you'll know if you've hit or not) .His killing is of key importance, but be careful at all times and at other enemies. It is also possible that in the meantime you will have to make ammunition in a team.
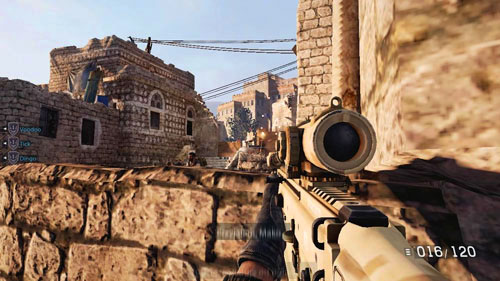
When soldier with armor goes down, the rest of the enemies quickly finish off your companions. Run with them to the place of the next skirmish. Hide behind a wall on the right (see picture above).You simply do not allow this to an opponent get too close. An allied helicopter will take care of jeep with a heavy machine gun and the rest of the enemies.
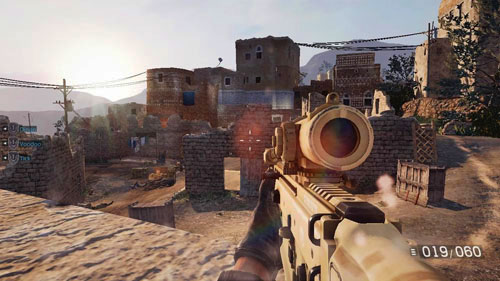
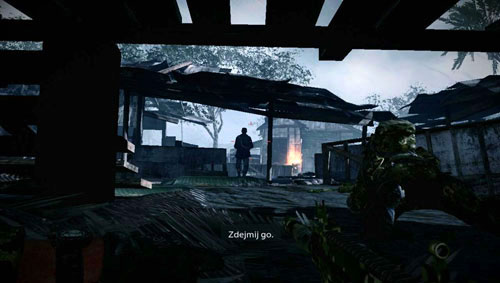
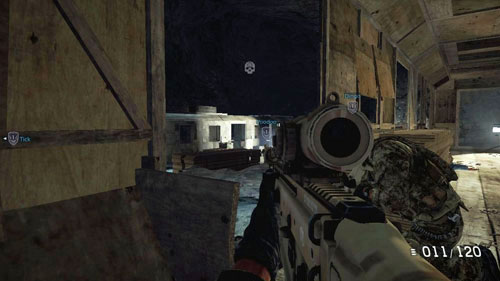
Run forward and watch for the wooden stairs to the right. Run at them and the boards to the roof of the building. Lay there and start watching for enemies, and if you do not see any, move closer to the edge (first picture above).Repeat this step further and eliminate enemies. If you are hit too many times, start to crawl back. Enemies will hide practically anywhere - behind various covers on the bottom, in the windows of the building in ruins closer, as well as the far wall opposite the buildings in the background (there are heavy machine gun operators hidden there).After breaking most of the enemies in the area, move the edge enough to be able to shoot in the head the next heavy machine gunner, next to the wall of the building on the left (second image above).
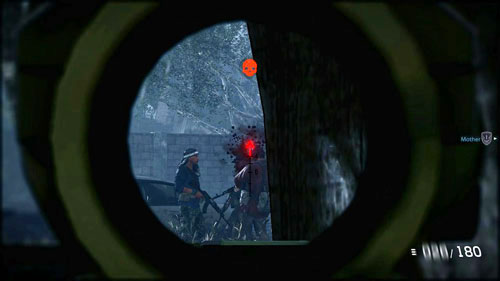
It is possible that due to the lack of enemies you will be tempted to try to flank them (e.g. run the right way up). Do not do this, however, because it is very risky. Instead, for example, just try to move to the left side of the roof and make sure you also do not see any enemies from there. Be careful with the second wave of enemies not thrown a grenade you! Finally, jump off the roof and run to the building across the street. Lean to the right, remove one opponent (picture above), which will run up to you, but do not go his way, just go through the door on the left and hide behind the wall on the right.

From here focus primarily on killing enemies above the ruins of the wall (see picture above).Do not forget to enemies at the bottom of the boxes. You can also join for a while comrades who gradually, slowly approach will be to a high wall. At the end, run up the wall and kill the last enemy. Allies will inform you about the fight ended. Stand with them at the door that you'll have to breach.
Objective: Breach and clear
Behind the door there are only two enemies - one a little to the left, and one on the left - both of them at once take for shooting. In addition, a huge amount of smoke will limit the visibility (picture above). Eliminate them in the order and try to do it quickly - this is one of the most treacherous moments of "breach and clear".
Objective: Clear the village
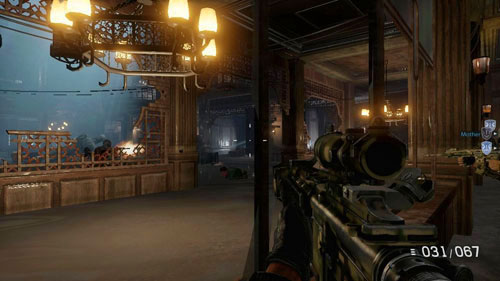
Follow the allies and set on one of the breaks in the wall (see picture above).Lean in and start to shoot enemies - you are higher than them, so it should be easy. First shoot heavy machine gun operator in the head (he will be on the jeep). Then shoot the enemies covering around the car (as well as the wall on the left). If you can not see the enemies, go through the door on the right and hide behind the wall in the next room.
Objective: Defend yourself, waiting for an attack from the air
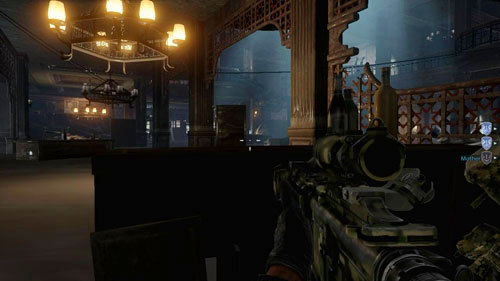
Jump down and quickly run to the jeep with a heavy machine gun. Get behind the wheel of weapons and open fire on enemies in front of the building (see picture above).They were hiding in the windows, and ran on the exposed parts. Some will also hide behind low walls in the courtyard. Shoot up until allied helicopters arrive and shoot at the building. When this happens, shoot the rest of the enemies, and then run into the building and his companions. For a moment, you'll have peace of mind, so it's a good time to replenish ammunition.

Objective: Clear the village
When you leave out, get ready for a pretty easy battle (see picture above).The enemies will hide behind piles of boards that can be destroyed. You will see the head of each of the enemies - even if he crouched behind cover. Moving forward and pushing enemies away. When we all fall down, get closer with our allies to the hidden passage and go inside when one of them opens them. You will get a new mission objective.
Objective: Clear the hidden training camp
Refill ammunition and set on the front door of the training hall (picture above).Let the allies set out further. As usual, start search for opponents of the closet and pick them off. If you can not see any, move a bit further, but do not venture too far. Some opponents even show amazing courage, not shooting from behind the covers, and just standing ... Which will help you do the work.
Watch out for grenades! Take cover behind the boxes on the left or on the right, if the current position you can not see your opponents. The last will be armed with a shotgun, do not let them get close. If for a long time it is quiet, but allies are moving forward, it means that you have to do it alone. Perhaps one of the enemies behind the wall (see picture above).

Target Practice
Shot down the targets in the training camp Connect the Dots
Xbox 360: 20 Points
PlayStation 3: Bronze trophy
Note: When you enter a hidden training camp and kill all the enemies, do not breach the door, only destroy all targets shooting.
Finally, clear the place, replenish ammo and open the door, at which align with your companions. Watch the animation, and then get ready for a quick fight. If you are shot too much, fall to the ground - Crouch is not enough. You have to quickly finish the three enemies - one on the balcony in front, the other on the left and the third on the right (see picture above).When you do this, move on with your companions and go up the stairs on the right to the top.
Do you remember how you lay on the roof of the building and you searched for enemy heads in this mission? Now do the same. Distance is smaller, so you have to be careful (first picture above).For this look from time to time, or by a bridge, where you are, to see if from the opposite direction an opponent is coming (second picture above).Be ready to react and run down, if you land on a grenade.
Objective: Breach and clear
Set at the door marked with a gray marker and select the method to force the them. In the middle is exactly one opponent in front of you, one on the left and two on the right (see picture above).First, kill the opposite, then closer to the right, another to the left and the other on the right (the latter only now he can shoot). Run for the allies to come out of the training center.
Objective: Clear the caves
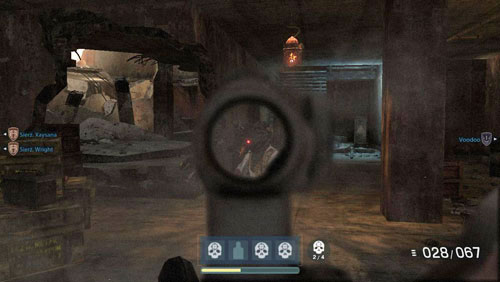
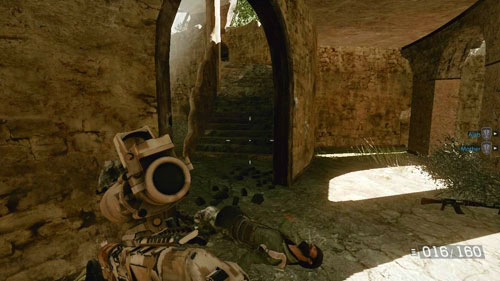
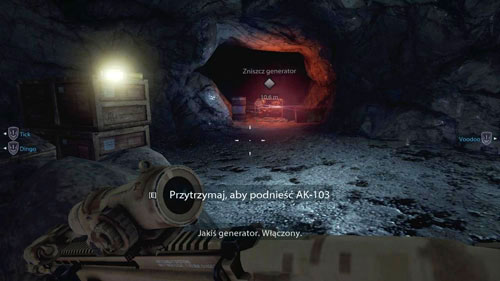
You leave out. After regaining control of the hero go to the only possible way to the entrance to the cave, and then rock corridors. Do not run blindly around the corner waiting for four opponents. Try to surprise them and go to the place where they were. On the left you see a flashing red light generator - hit it to go "off" (see picture above).Darkness will fall, and all the switching on night vision.
Go with the allies. Eliminating four enemies at the bottom, wandering blindly in the dark, it will be child's play - do not return fire. Do it, and then go to the dummy plane and go to the right side. No problem, you kill the first two enemies, but then watch out - successive opponents will have a blinding flashlight (picture above).So let associates go as the first.
Wait until Voodoo opens the door, and when you leave, be prepared for a flashbang and immediately withdraw the door. Therefore, start looking heads enemies who hide among the rocks (see picture above).Come out and hide behind one of them only when nearby there will be no enemies. When you finish off all in the cave, run down to the bottom of his companions.
Get to the underground train station. Hide behind a rock (but not the one in the middle, at the exit - thus can be easily shot at) and continue the fight (see picture above).Watch out for enemies with guns who will try to attack you up close. The next run their right of passage. Wait until companions arrive at the station and hide behind shields.
Then you run into the hallway to the right. Wait a while until the other side will do one of the enemies. If this does not happen, look through the door to the left and kill the enemies behind the piles of planks on the train (picture above).All the time keep an eye on the second entrance to the hall. Move further looking for another door on the left, until you kill all enemies using the train. Then take your companions to the blue door and open it. At this point, the mission is complete.
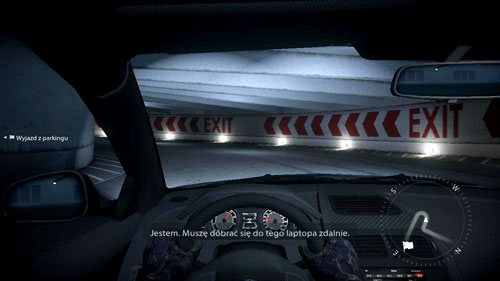
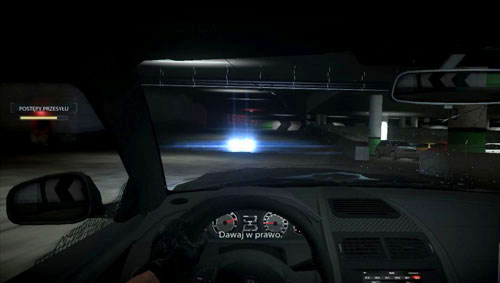
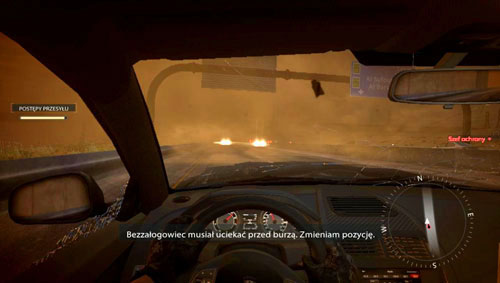
Watch the animation. At the time Preacher turns right, take over control of it. Push gas, and after a while, slow down, turn right, then left. You'll notice trip from the parking lot (see picture above) - head there, and then turn left. As you've probably noticed, you have the steering wheel on the left, so your actual direction is on the right - the opposite of the fourth mission.
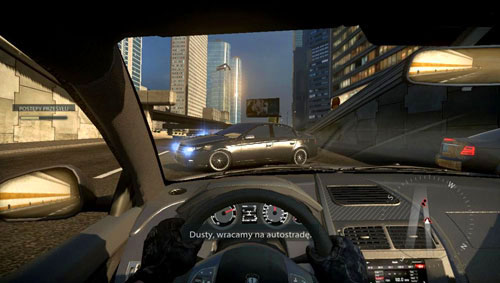
Go ahead, add gas and watch out for civilian cars. After a short time a black car will go aggressively to the right (see picture above) ...It turns out that the men of Hassan you kidnapped want to free him. From now on, if you stand too long in the place of the car (and the next, which soon will join the chase) Hassan and get off people will catch you and Mother. You can not let this happen! If you stop for any reason (e.g. you hit something), just hold the gas all the time. In contrast, the fourth mission, which meant practically glowing screen a failure in this mission much easier to scramble out of a difficult situation.
Another important tip: you can push the enemy cars, and disposal of any of them will reward you with spectacular animation (picture above).But do this only by the way, for example, moving ahead of one of them and hitting in his side. Do not hit the back of Hassan's car, because you will slow down and may lead to defeat.
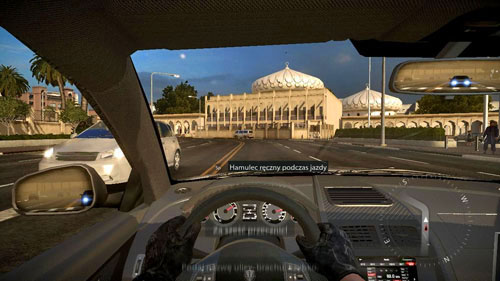
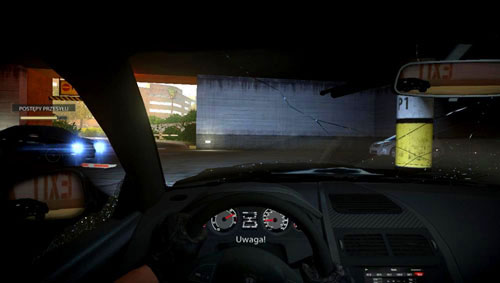
Go ahead. Do not worry about the car that banging on your back. When you see a bright white building with white domes (picture above), you face a sharp turn to the left. Be careful not to get in the van! Then he beat another sharp turn to the right and another, the next episode is a zigzag and the ability to drive head-on collision with civilian cars.

When you pass under the overpass, the road forks into two separate paths, so be prepared for that and stick to the more right. Immediately afterwards, two cars of Hassan's men block your path (picture above) - fortunately will set in such a way that passing between them does not make much of a problem.
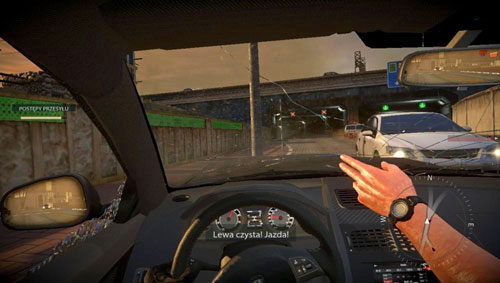
In fact, you do not necessarily should try to outrun cars people Hassan, just go all the time the only possible way and do not stop. Keep right at the fork and wall Take the right path. The street will be more and more civilian cars, so be careful. After a while, the screen displays a message indicating the exit of the highway (see picture above). Bear right at the fork and follow the only possible path. After two turns to the right and one to the left look at the animation, and then get a brand new mission objective.
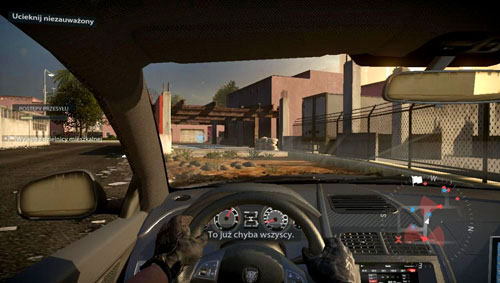
Main objective: Escape unnoticed
Objective: Lose chase
Again regain control of Preacher, when turning right. Your next task will be to hide from the "eyes" of Hassan's men. Their field of view is marked on the minimap on the right and it will be invaluable here. If you are spotted, you will have to run until the hide in one of the points marked with blue circles on the minimap will be possible (though you can also load the last saved game). Immediately after regaining control of Preacher drive slowly in front of him, and then immediately to the right - you'll wind under the stage to hide (first picture above).Wait patiently until the car in front of you will travel Hassan (second picture above).
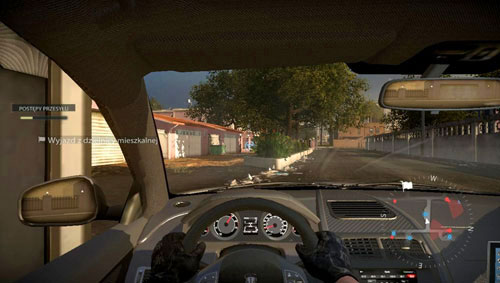
Immediately get out of hidden (to the west), turn right, then left. Do not expand excessive speed for it is easy to hit other cars and cause a delay - and this in turn will cause another car of Hassan's men driving in the opposite direction will notice you. After twisting to the left, locate the next hiding place (under the trees on the left) and take advantage of it (see picture above).
When you pass a Hassan's car, get out of his hiding place and at the junction turn left (south), then right and left again. Along the way, miss two hideouts. When you try to turn right (picture above), on the site flags denoting departure, the minimap will show two Hassan's cars. This road is cut off - as soon as possible back to the nearest shelter, which now will be exactly behind you. Do not delay, because after a while, the right people will arrive next Hassan's car!
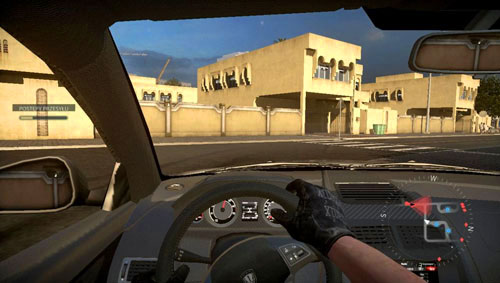
Objective: Escape through the service route
Now you have to wait patiently wait for two Hassan cars that will travel from west to east. When only the second will pass, immediately get out of hiding into the intersection (west) (first image above) and turn right, west, then back to the right, and the last time right when you see white and red markings (the second image above) - this way you get to the hideout. You have to hurry, because the car of Hassan's men will be just behind you.
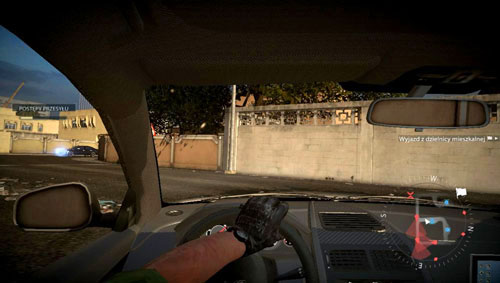
Wait until the car travels through the parallel street, but do not leave. Let the next two, going exactly in the opposite direction you miss. Then get out of a hiding place heading north, and at the next junction turn left, west and go through the fence (see picture above).Turn left and run through more.
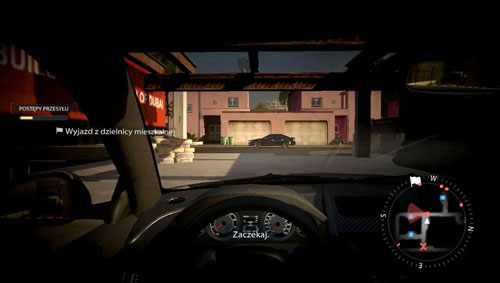
Do not go too fast, because from the exact opposite the last car of Hassan's men will arrive! Quickly turn right and as directed by Dusty hide behind the wall (see picture above).Wait until the car passes by and hit the narrow road to get out of the way of a residential area.
Objective: Lose chase
Take the turn left into the tunnel. Whenever you go, be prepared to face a block of several cars of Hassan's men (picture above). Even if you hit one and stop, push the gas and try to escape. This is not difficult, and besides hitting the enemy car can delete it, and you'll be able to quietly move on.
The next moment is a simple highway, many civilian car, and several cars of people Hassan, who will try to stop you (see picture above). Keep left at the fork and go left path to the tunnel. There will be more and more Hassan's men.
After a little while, lots of civilian cars will arrive. Squeeze through them, watching out for enemy vehicles and keeping right. For a moment, you have a dilemma, whether to go through on the right, which is under construction, but your companions will dispel doubts (picture above). You lose cars of Hassan's men, but you'll have to watch out for the big obstacles in the form of piles of earth and trucks. Avoid the one on the left and another to the right, and head to the exit from the tunnel.
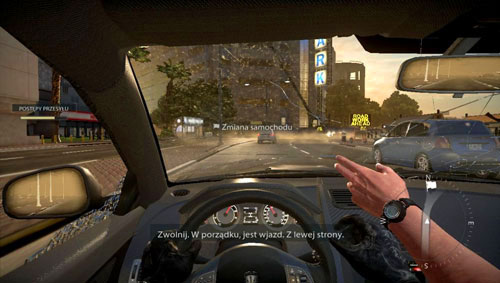
For the next few minutes you do not have to worry about cars of Hassan's men. Just follow the only possible path is not ramming civilian vehicles until you see sign indicating you to change your car. Continue until Mother shows you the exit to the underground car park on the left (see picture above). Go down. Go straight and turn right, then watch the animation.
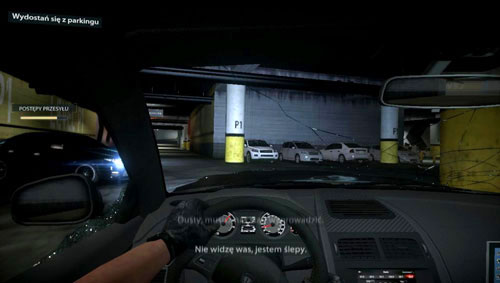
Replacement of the car failed and you need to quickly escape. As soon as Mother enters the car, turn right and then left after a while. The way is blocked by Hassan's men (picture above), but it will stop so that you are able to bypass it on the right. Go straight and turn right, right again and again to the right - a big, black & white arrows will guide you. Another car yard you the way - or skip it and continue the escape.
Turn right, then right, and to the right again, according to the black and white arrows. Then straight towards an oncoming car from the opposite direction of Hassan's men (picture above) - skip it from the right. Turn right and head toward the exit, between civilian cars left and right.
After leaving out turn all the time to the right and then go straight. You'll notice a big sign out and the Exit writing at the top. Hassan's men will appear in front of you, but you manage to get around it and get right to the desired departure (picture above). Ram the gate and turn left, and go into the street.
The next section is quite tight and twisty, so be careful, also for civil cars, which can easily fall. After a while, you'll notice a larger car - Hassan's chief of security personally chose to chase you. Soon after, there is an intersection. You will need to go left - against the direction (picture above).
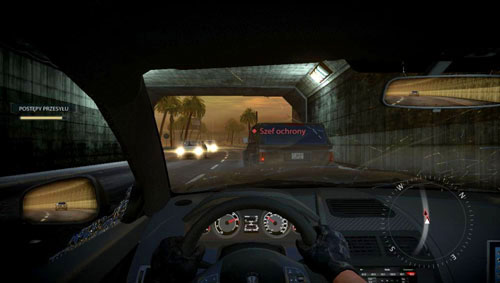
Now you will have to consider not only the head of security in his jeep, not just cars of Hassan's men, but also civilian vehicles traveling in the opposite direction (see picture above). If you even stand in the place of striking something, do not give up - push the gas and drive away. After a short time you leave the tunnel.

Storm Watch
Got through the sandstorm without hitting any vehicles in hallo and Dubai
Xbox 360: 10 Points
PlayStation 3: Bronze trophy
Tips: When you drive the highway in the opposite direction during a sandstorm, you can not collide with any of the vehicle approaching from the opposite direction. If you do not succeed, you just load the last checkpoint and try again.
Sandstorm starts gaining momentum. For now, do not try to overpass the head of security, just follow him (first image above). Try to do it only when there are less civilian cars, then go as fast as possible. Of course, be careful all the time traveling in the opposite civilian cars - thankfully they remember about the lights and you can see them from a distance (the second image above).
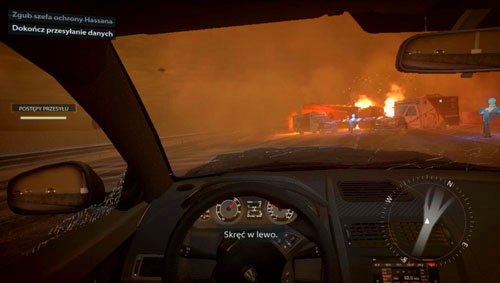
After a while, you will hear that you lost the chief of security. Still go ahead, and when you see the burning truck in front of you, turn left (see picture above). Then, just go the only possible way. When Preacher looks at Mother, it will be a sign that you can breathe. Watch the animation ending mission.
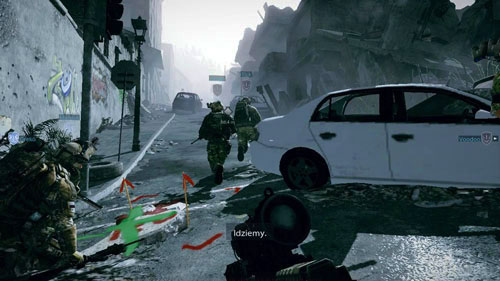
Objective: Support the GROM soldiers
After speaking with Greco regain control of Stump. Run with the GROM soldiers across the street, taking care not to enter the mined area marked with red paint (see picture above).If you're careful, nothing will happen to you. Run of the companions of the building to the right and up the stairs to the right of the blue door at the top.
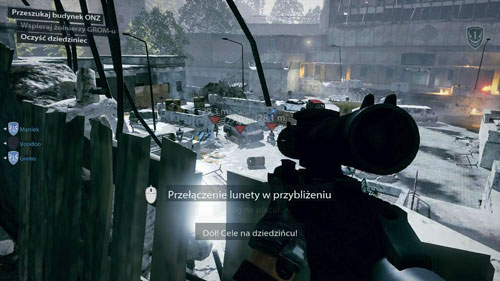
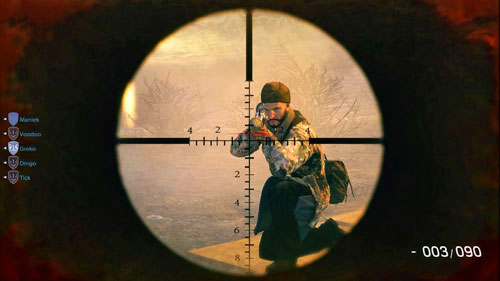
Objective: Clear the courtyard
Stay at the window (first picture above) and use the telescope (second picture above).Remember the additional optics, as well as a button to hold their breath - hold it before taking each shot. If at some point you can not see any enemies, and you can hear the shots, move along the window and take another position. Actually, you have to consider only the enemies of the RPG, but do not worry about grenades because they reach you. You need not necessarily aim for the head - shot with a sniper rifle is so strong that just one bullet to disable an opponent. Crouch if you get hurt and wait until the red disappears.
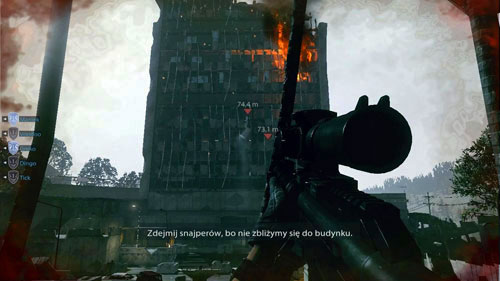
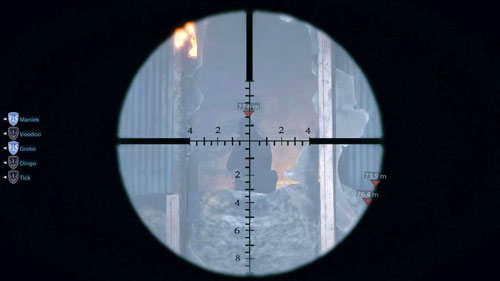
After the initial cleaning, you'll get a new job site - killing snipers in the building. You have a better position arms and sniper rifles, as you have to be more careful and more likely to be hidden. Fortunately, every sniper will be indicated by a red triangle, as you will have no problems finding them (first picture above).Top crouch and begin to eliminate snipers from the upper to the lower floor, gradually moving away from the window (second image above). After completing the task, they go back to their fellows at the bottom.
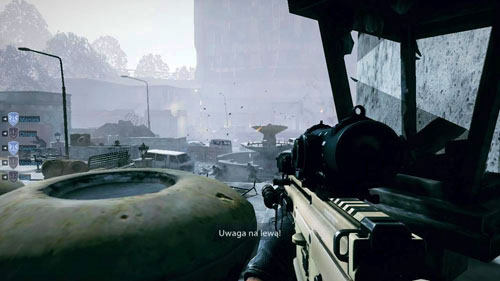
Go outside and hide behind the barrels just before the exit door (see picture above).This is a perfect shooting position, except that there is little chance that some grenades will reach you. By default, search the main enemies and do not shoot. In particular, do not let opponents get close with shotguns and generally choose these goals. In the farthest will be extremely difficult to stab, because the next part of courtyard is covered with dense fog, and even the best telescope a little help here. Therefore, when there will be no enemies nearby, and the rest of the company will move forward and leave their hiding place.
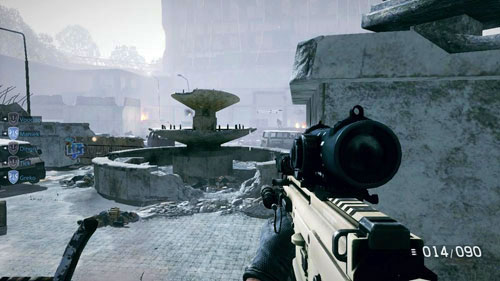
Do not go to the left, as it's hard out there for the position from which you could see better the courtyard. Aim carefully right part of the courtyard. Move to the right is blocked by debris, hide on the stairs leading to the lower part of the yard (see picture above) and kill a few goals. It's a good position - you just have to watch out for enemies who hide behind the destroyed wall with two holes on the left side, the farthest part of the courtyard. You can easily hide for the rest of enemies.
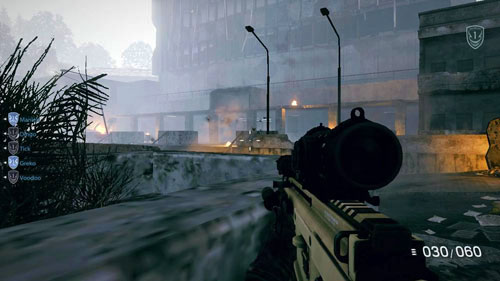
Time to deal with enemies scattered around the building just below the United Nations. Run back down the stairs and then right to the top and walk in a crouching position along an empty, rectangular plant on the left (see picture above).Here to hide and start to eliminate enemies in front, as well as new, forward to the right of the United Nations building. You have to be very careful about grenades, moreover there will be more enemies with shotguns. On the other hand, you will easily observe the movement of enemies and eliminate those who lie in front of the United Nations.

Objective: Breach and clear
After cleaning the courtyard, refill the ammo and set at the door with your companions. Choose a method to force the door, and then get ready for fast elimination of four opponents (two have shotguns) (image above). Do it in the following order (from left): first, third, fourth, second.
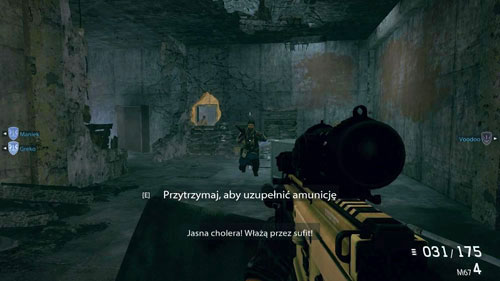
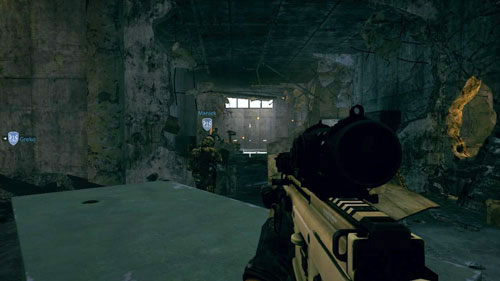
Objective: Clear the UN building
Run to the right and up the stairs. Immediately hide behind the cover on the right. You have to be careful here so that allies - trying to hide behind the same cover - do not put you forward the view of opponents. One enemy will fall from the ceiling, kill him, then kill the one who hides in a hole in the wall, just in front (first picture above).Then hide behind the green table on the right (second picture above) and look to the left. There will be successive opponents - will shoot out of the door on the right and across the street. Kill everyone, and then run for companions. Last opponent in this section will be on the right, in another hole in the wall.
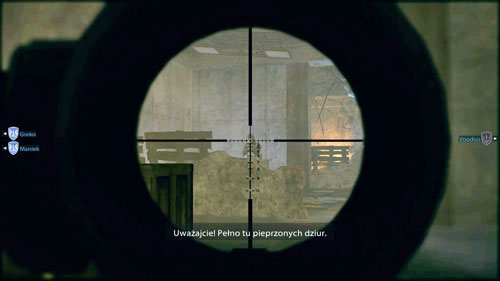
You have a moment of peace, which use to resupply the ammunition. Follow the destroyed room to the right, to the stairs, then up the stairs. Immediately be ready to shoot one enemy with a gun, hidden behind a desk on the left (see picture above). Almost certainly he will throw a grenade at you, so try to kill him before he can do it.
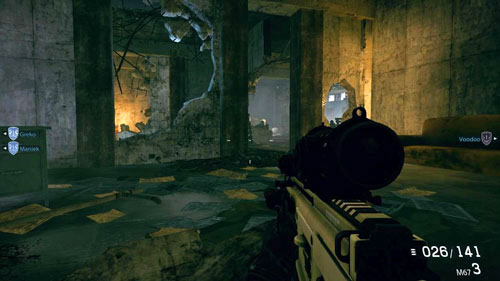
Then hide behind the wall in front of the desk and start to shoot at enemies. This will be so much easy that there are only three places where you will be looking for heads of enemies (picture above) - a hole in the wall on the right, inside the next room in the middle and a double hole on the left (the opponents will be here on a line, one behind the closer to the hole, the other for further).Watch out for grenades, it will be a lot of them, but also to the fact that the allies have not pushed you out of the covers, when they will try to hide behind either. If pulls in a squatting position, just get down. You can also instantly fall in and out to the right, farther and farther, gradually eliminating enemies in the mentioned hideouts from right to left.
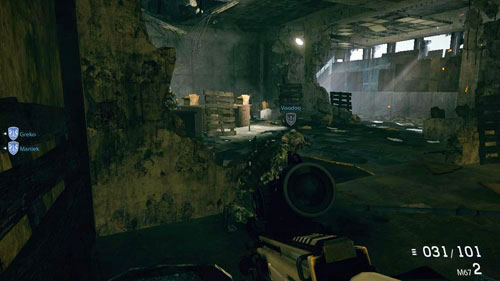
Run to the next room and hide behind the wall, behind Voodoo (picture above).Again, the enemies have a limited number of places to hide. At the door to the right, the left and right side of the damaged column on the left, and behind the desk close to the stacks of boxes on the left. Be careful, enemies will move! After eliminating all hear another question about penthrite. Run to the right avoiding the wall, and then through a long corridor to go outside. There will be no one here, so stay calm.
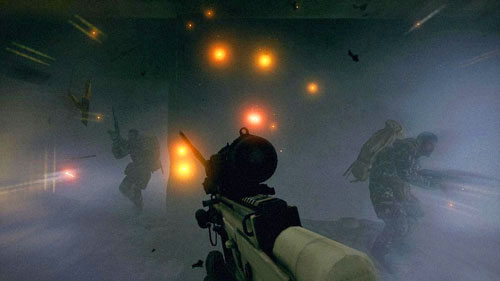
Objective: Breach and clean
Run as companions to the next door, up the stairs, to the left and out. With a little time you get to the stairs, go up and join colleagues. Take a look at the other friendly unit on the streets below. Watch the animation, and then follow them to the left and down to the door that you have to overcome. Select the method and get ready to kill two enemies behind the door (see picture above).Both are almost ready to shoot, so you have little time!
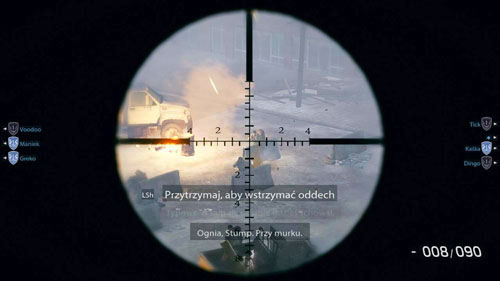
Objective: Protect GROM soldiers
Look out of the hole in the wall to the right and look to the left - on the balcony. At a glance, you'll have an opponent with a sniper rifle. Take it off - right after the white truck at the bottom, as well as the nearby barricade enemies will take cover (see picture above).You have an excellent position, you are well protected, so no problem: shoot all the enemies. More of a problem is finding them than hiding before their fire.
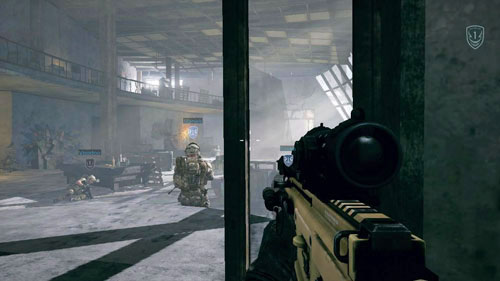
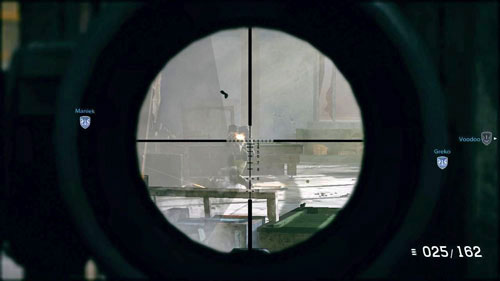
Objective: Clear the hotel
Run behind your colleagues to the hotel, until you get to a big room with a terrace on the left. Get ready for a long battle. However, do not go inside, just stay in front of the entrance, leaning to the left (first image above). It makes no sense to risk, and thus you will see all the items enemies except one - the automaton on a later part of the terrace. Your main consideration should attract the heavy machine gunner with heavy ballistic armor (second picture above).Eliminate enemies shooting at you, and then just go back to shooting at him. Watch out for grenades? After killing the gunner, there will be less enemies at the bottom, but more will appear on the terrace.
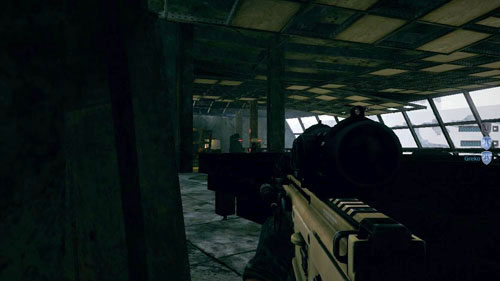
If you are tired of standing before the door, quickly run to the left, to the stairs. If there is a partner, be sure to refill the ammunition. Climb up and stand on the stairs, hidden behind a pillar - do not go on (picture above).Thus, eliminate enemies hidden behind desks and slot machines. Be careful not down on you ran a culprit with a shotgun! After cleaning up help colleagues on the bottom, then go to them. Keep them on the way down the hall and out the exit. No one will attack you. In the end will come to the entrance to the ice rink. Watch the animation, but it's not the end of the mission!
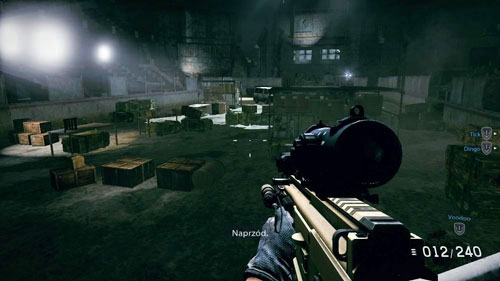
Objective: Get to the ice rink
Run down the hall, then to the left and down the stairs, followed by the next corridor and across a footbridge to the rink filled with boxes of penthrite (picture above).After a while a lot of smoke grenades will land around you, and virtually nothing will be visible. You will get a new mission objective, and your task is simply to survive.
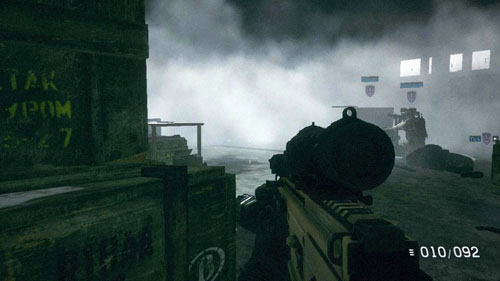
Objective: Survive
The next encounter is a complete chaos, so beware. Quickly hide behind the first, high pile of boxes on the left. Lean to the right and wait for the opponents (see picture above).Opponents will be here with the ordinary weapons, heavy machine guns and rifles. Some will include a flashlight, which will facilitate their location, but it can also blind you. Leave the hideout only when for a while you will not see any incoming opponents.
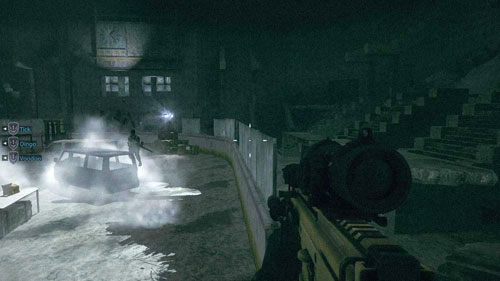
Stick to the left side of the ice rink, there is less smoke and slowly work your way forward - piles of boxes from one to the other. Do not be surprised if you see shooting allies and enemies will hear cries, but not their shots. It will be a moment where you just have to patiently wait. Watch still, because another enemy may appear anywhere (picture above), and in most cases, their showcase will be throwing grenades at your feet. When your allies say that it's clean, head to the location marked with a gray marker and watch the animation.
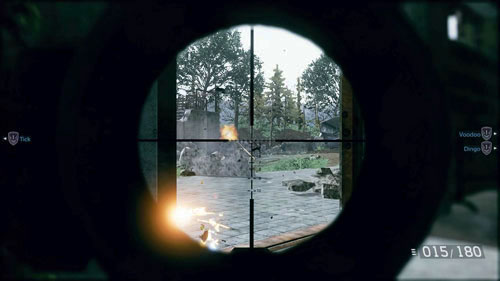
Run down the hall and his companions. You'll notice after a while Bosic, fleeing with his bodyguards. Contrary to appearances, you do not have an awful hurry, so do not take chances and push the barrel into enemies. Set at the exit on the outside, lean and watching out for grenades in turn kill enemies hidden in the walls damaged by side, on the right (see picture above).After their elimination, run right along the wreckage of the bus and on to the forest.
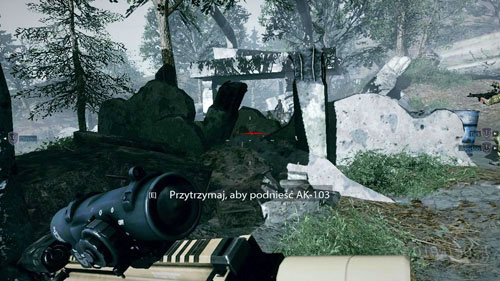
Run straight ahead and slightly to the right (stick to the left side of the forest). Kill one enemy with an iron cage in front, the rest will take care of your colleagues. On the right, you will see an explosion, run that way, take the next enemy, then hide behind the rubble and take care of the rest on the other side (see picture above).
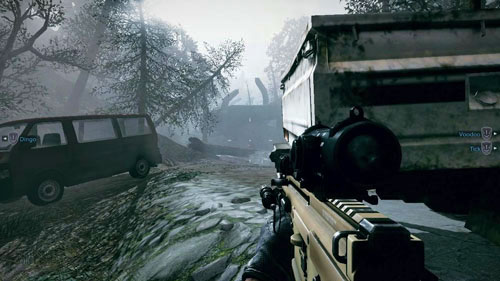
Run to the left. The explosion of the jeep in front will warn you before the next group of several enemies. Hide behind the wreck and lean to the left. Kill enemies in the distance, both before the bridge, under it and over it (see picture above).Fog continues to hinder visibility, but not enough to not see the enemy.
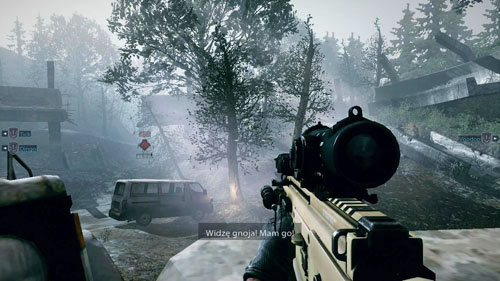
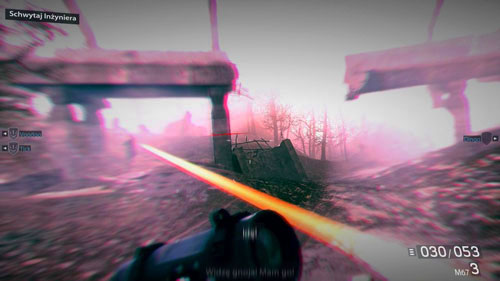
Run under the bridge and head on. Hide behind a wall to the right of a pickup truck and start to remove the objectives (first image above). The enemies are on the bridge, in front of him, and next to the supporting pillars of the bridge intact. Move closer to the bridge on the left, but then immediately back off and hide, because more enemies will arrive here and you can easily die (second picture above). Let them run ahead companions. Run them only when everyone in front of you.
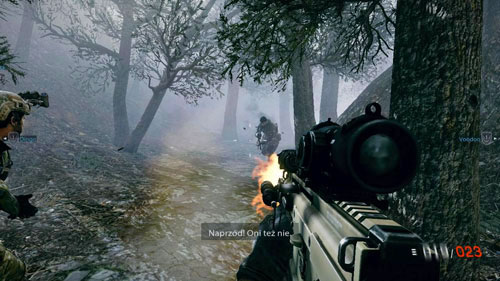
Run with them into the woods on the left of the explosion that is about to happen. Go slowly with the allies and eliminate the incoming enemies (picture above). Do not worry, the fog makes you just as dead, and what your enemies. When you see the fence, stand at the gate and wait for your character to bend the net to the other side, so you can move with your allies.
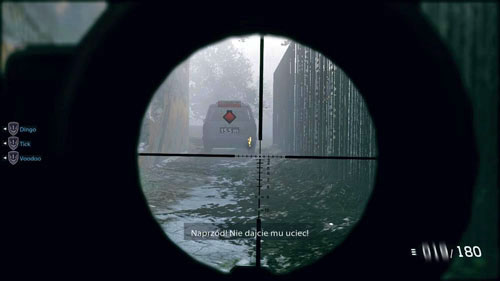
When you go, and on the other side, run to the right and straight ahead. You'll notice a car running away (image above). Shot his tires, then the engine. The engineer stopped the second branch will also not have to worry about the run. Here the mission is complete.
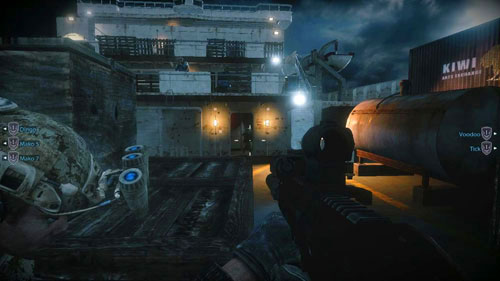
Run behind your companions on the big red hatch, covered with a lot of boxes and hide behind them, at which hide in one of the allies. Be careful at the beginning of easy to get caught in the crossfire of enemies and quickly die. You will hide in several places: the white blocks on the right next to the tank in front of the door, and on the first floor on the left, the middle and on the right (see picture above). Fight until you hear that the area is clear.
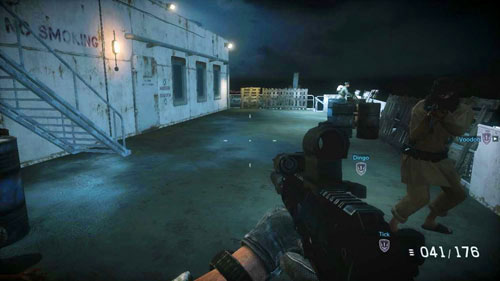
Run through the open door and cautiously up the stairs. Look to the right - the stairs go down there with a shotgun opponent. Surprise him and kill, wait on occasion, and then he carefully climb the stairs. At the top will be two lurking enemies (picture above) - one right by your side, the other on the opposite. Clean up quickly their and then go to the bridge and open the door. Watch the animation.
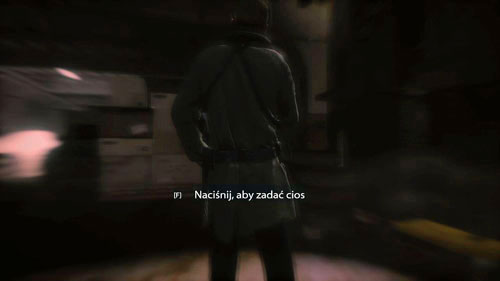
Objective: Find a weapon
You'll find yourself in the body of Preacher. Your first task will be to kill two opponents by twisting their necks. Sneak into each of them and press the button responsible for the melee (picture above).
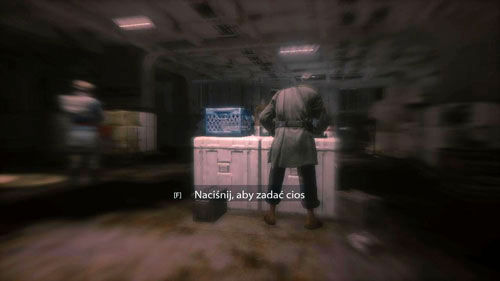
Go ahead, on the right you see a flash of a flashlight. Wait patiently until the light turns off in your web site, which will mean that one of the two opponents turned. Then carefully sneak up to the standing closer to the right, and also responsible for press melee (picture above).Preacher takes the gun and shoot the two enemies.
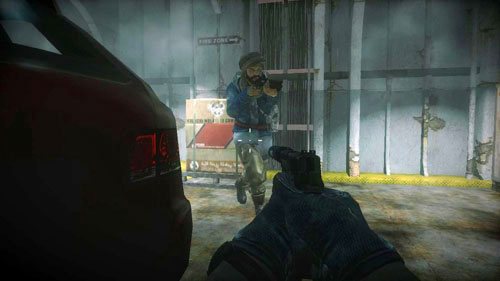
The weapon is always a reason to be happy. Quickly hide behind the boxes on the right. Opponents run out from behind them and hide behind a white car on the left. Quickly make your way to the car, and then start to move to the right. Finally, get up, run to the enemy and start asking blows. Go in the direction from which it came and hide on the left of the entrance to the top. Patiently wait for the fifth opponent, and as soon runs out, kill him (picture above). Be sure to pick up the rifle he was carrying.
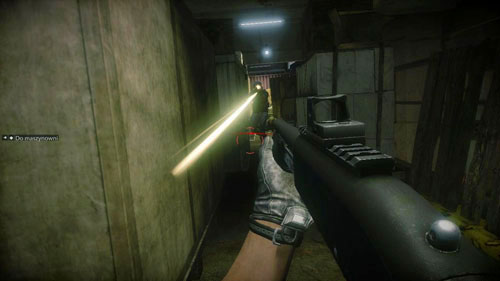
Waiting for the enemies around the corner with a ready ax is a common practice in this mission, but it is safer to use a gun. Climb up and kill the enemy shot that comes out from behind the crates on the left. Continue holding the right side - rails and boxes. In the narrow passage between the boxes you see two enemies (the third time runs out on the left). Go at them shooting from a rifle (picture above).
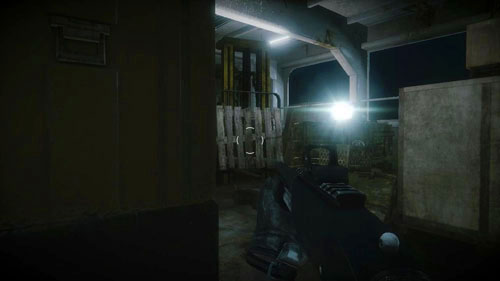
Go left and watch for movement on the left. The enemy is hiding here, who will try to surprise you, so you can surprise them with the ax (two are behind boxes, gray and yellow, where stand blue plastic bins). Hide and stand sideways to the boxes, and wait for the enemies (picture above). If you see one, press the melee button and then quickly hide. Thus kill two enemies.

Quickly go behind the next two, set one on top of the other boxes. Wait for another opponent - you can lure him into showing him the moment and immediately hiding. Then go ahead cautiously keeping to the right side. You get to the alley, where you see on the left the enemy - kill it hit customs, lean and kill the second (image above). Lift the arms of one of them - AKS-74U.

Objective: Get to the engine room
Continue holding the right side, and you get to the ramp leading down. Here a little skirmish awaits you. Stand behind the last metal plate on the left (on the rail ramp) and when you are too much hurt, crouch. Enemies will hide behind a column with the word DECK 1, as well as a white car on the left (see picture above).It is also possible that one will come running to you - then hide and wait for him until he runs into your rifle.
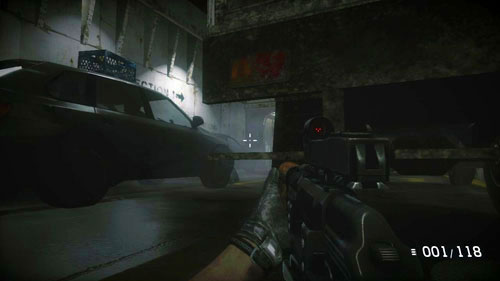
Go down and turn left. Watch out - the black car in the middle (standing to the left of the yellow) lurking foe. Take it off and quickly hide behind a semi-trailer on the right (see picture above).Get down on the ground, lean to the right and open fire on the enemy - they hide behind closer and further away. One of them may hasten to you, too, or in standby mode. The last enemy appears at the top, on the platform.
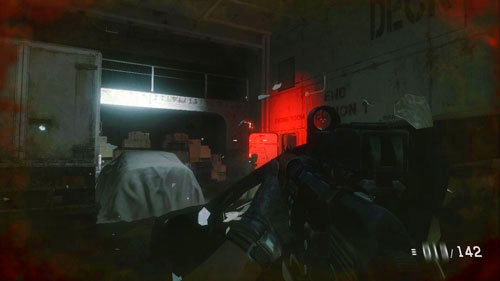
Run forward close to the wall holding the right and hide behind the other trailer. Move to the left, circling the two standing close together cars. Behind them, on the right, close to the red-lit doorway, you'll face an opponent with a shotgun (picture above). Kill him and quickly kill the other, which runs out of these doors. Before you go to them, get the last in this place - is behind the car on the left, with the wooden boxes. Do not let him surprise you!
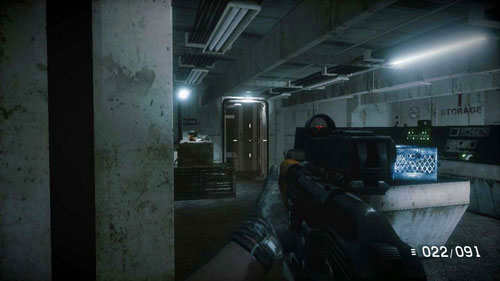
Go down the stairs (the game will auto-save), run along the windows, and you will go to a small room. There are two enemies - one is standing behind the table (Clean up watching him through the door), and the other is hidden behind boxes on the left (see picture above) - you will see it when you enter the kitchen. The second way out of the room will take you to the engine room.
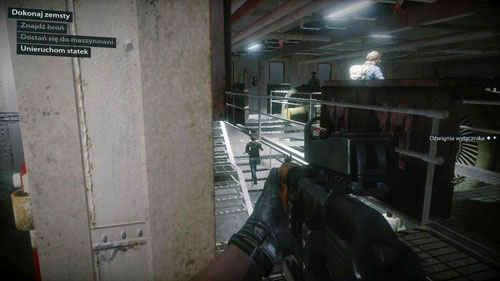
Objective: Stop the ship
Lean to the right. Here you will see three enemies (picture above). One is near you, on the platform, the other also on the platform, but a little further, and the third turns at the bottom and just come up the stairs. For the latter, in particular, be careful. Go down the stairs and go between the two great engines - sure to reload as the culprit behind the left runs out of the shotgun.

At the intersection choose the right side, kill the next enemy and then another one, which will be the engine room. Hide behind the last great engine (see picture above). On the left, closer to and farther, enemies will take cover. Another patrol will appear on the left. Wait patiently, lean out and remove them. Walk around to the left of a large generator and find the enemy, and then back to the right side.
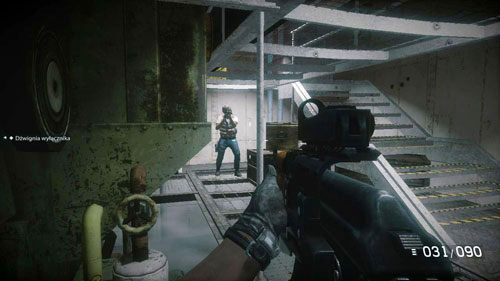
Go ahead and be ready to hide. Behind the big tank on the right, before the stairs, there will be two enemies - on the left and right. Watch out for the grenade! At the top, with the switch to the left (it has a yellow light) is the next opponent. Go between the two last engines. Be prepared to clean up the enemy right above you, on the platform, and then another, which runs out from behind the left engine. At that point, the boxes on the left, there is another (see picture above) and this will be the last opponent in the engine. Watch out for him in particular! Go to the place where he stood, and then turn left. In this way, you get to gray switch - pull up to it and press use.
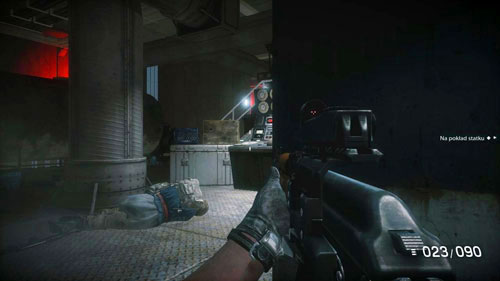
Objective: Get to the top
Go back between the engines and run in the opposite direction, then immediately hide behind the back panel on the right short. Here will come a running opponent. He will not notice you, so kill him quietly. The second will be a bit more trouble (picture above), especially by the fact that there a lot of equipment that reduces visibility. Lean more to the right. The next opponents will hide the panel in front of, on top of the railing. The next two are exactly the panel behind which you're hiding - watch out for them!
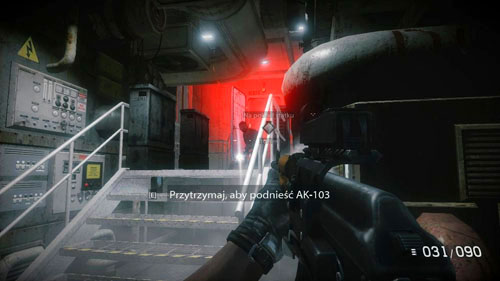
After cleaning the place come out of hiding and turn right. Be ready to kill the enemy that is waiting for you here. Go ahead and look to the right - the stairs, just before leaving, the last opponent in the engine room (picture above). Head to the exit marked with gray marker, then go down the hall. Coincide with the stairs in front of the opponent - kill it and go up. Go the only possible way to the door. The game will autosave and you will find yourself on board.

Objective: Get to the bridge
If you act in accordance with the instructions, you can easily and quickly finish four enemies. Wait until the first comes from the left and the state just before you. Run up to him and ask him to blow. Look carefully to the right and run in that direction. You have to hurry if you want to get to the other before they turn (see picture above). Continue in the direction you go, the right will be another - kill him when he starts to go in the opposite direction. Stand against the wall and look out for the last - run to him when his back is.
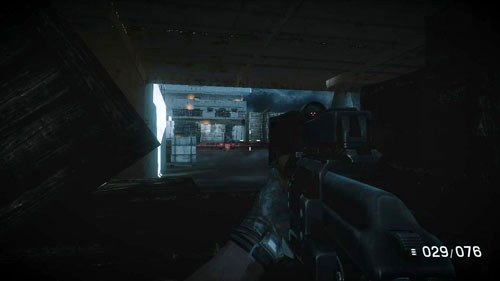
Do not go on this way, just go back to where you killed the other, and then locate the stack of crates and hide behind them (see picture above). This is an excellent point shooting. Not only that you are protected, it's like the hand you will have most of the positions of enemies, hidden among the boxes in front, as well as those on the upper floors of the ship (including the windows on the first floor). It is true that the latter will be hard hit because of the distance, but you have unlimited time to aim.
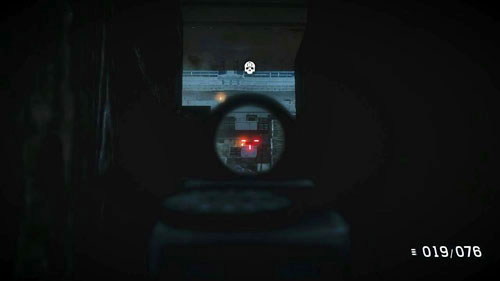
The biggest problem will be to kill the enemy operating the heavy rifle. To get rid of him in a safe manner, move so that you could see it through the crack, which is made ??up of the right side of the box (see picture above). Hitting the enemy in the head may take several tries, but eventually you will succeed. Then take care of all the other prominent opponents. Once you have one you will not see, carefully get out from behind cover. Remove the soldier at the top, on the right-hand side, and then another, who will hide behind the box.
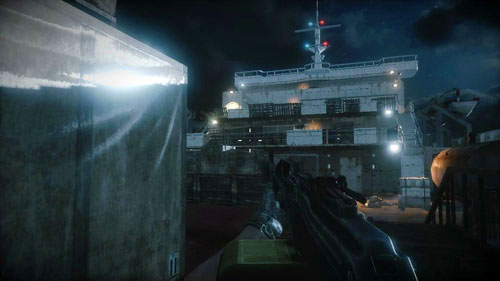
Advance, hiding behind boxes. Be sure to note the position of shooting at the top of the left side - do not let yourself be surprised by any opponent. As you approach the bridge (see picture above) will appear in front of new enemies, thankfully not many of them - one at the box appears on the right (with a big tank, next to the entrance) and the other on the terrace on the left.
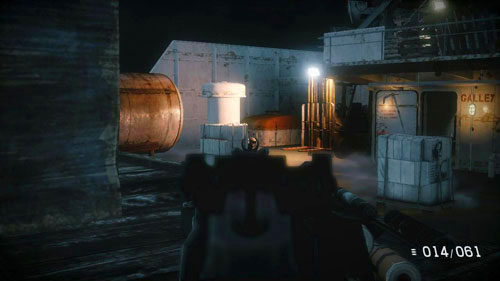
Last one is hiding behind one of the stacks of white packaging, near the entrance to the interior of the ship (next to Galley) (image above). After a while, another enemy will start operating the heavy machine gun, which operator you killed some time ago. Try to close up in such a way to safely dispose of the problem, and then go through the door on the left of the center of the ship. The game will autosave.
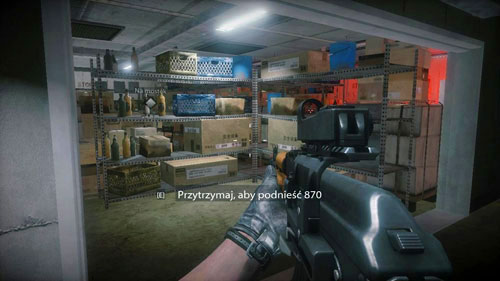
Objective: Find Sa'ad al Din
In the hallway to the door quickly reach the door and kill the enemy, who will open it. Hide at the entrance to the store. There are a lot of items on the shelves, which limit visibility, so be careful (see picture above).The first shelf is the enemy. Kill him trying to hit the protruding parts of the body.
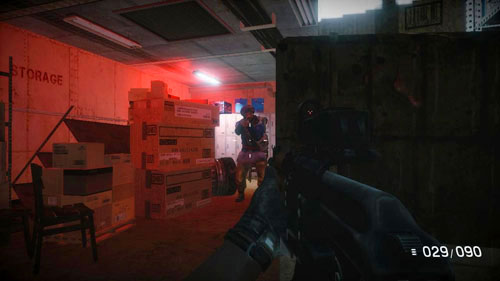
Immediately upon entering the store look to the left, come out from behind the boxes next enemy. Disable it and go ahead, keeping an eye all the time on a white cabinet lying on the left. After a while, a third enemy will appear behind it. Jump over it and immediately hide behind the pile of packages on the left. With the rack in front of the opponent hide. Shoot it and go ahead. Lean to the right and kill the enemies in the last two stock (see picture above).
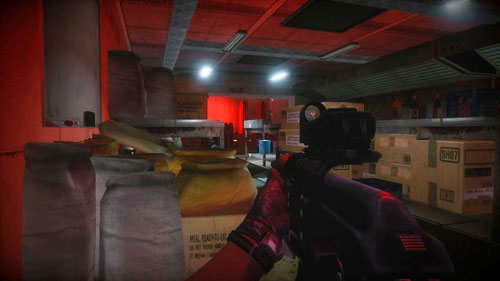
Stand in the doorway on the left and shoot the enemy in the head of the table. Enter with caution, but be ready to go back right away, when two runs out to the left (see picture above) - one will be at the table, and the other on your side, watch out for the latter in particular. After killing them lean to the left and locate the last two - one is still left corner, and the other side, to the left of wall illuminated in red. Watch out for him, is a heavy machine gun, and the distance is not too great!
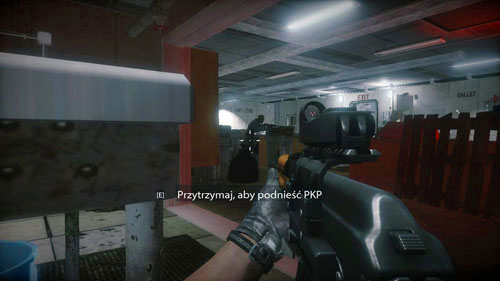
Go along the table and lean to the left. In the room with the exit door you get a few more enemies (picture above).The whole time they remained in a squatting position and be ready for immediate withdrawal and hide if someone starts shooting at you unawares. Then head to the exit to the deck, and then go up the stairs on the right.
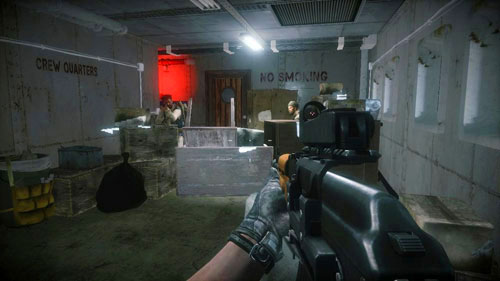
Stand at the front door. On the right there are a few enemies (picture above). Lean slightly until you see the first head of the opponent. Kill him, move on. From the door on the right next two run out. Get them, lean back slightly and kill the fourth shot in the head and then immediately look at the door on your left. There will be an enemy - be ready to welcome him with the ax.
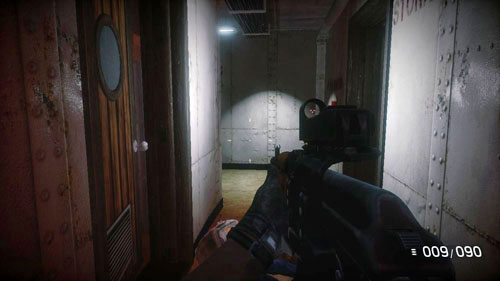
Go to the place where he was and look to the right. The door on the opposite side will open and you will have an opponent in front of the gun (see picture above). Take care of him, and then another one will come, hiding behind an overturned bed in the back of the cabin. Carefully look out into the hallway, at the door to the left (opposite side), where the next enemy will appear. Lure him with arrows and kill.
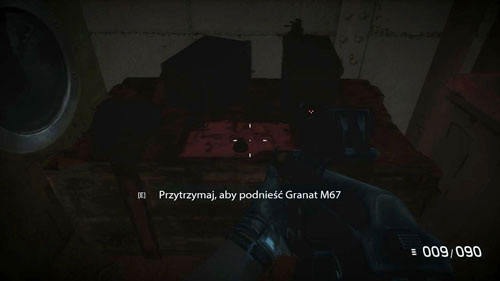

Dirty Laundry
Find the grenades in the laundry room in Bump in the Night
Xbox 360: 15 Points
PlayStation 3: Bronze trophy
Tip: Read the following description.
In the hallway, notice the open door on the left (first picture above) - in front of the word "storage" on the wall to the right. Open them pressing the use button, and then pick up the M67 grenades from the box at the end of the room (second picture above) - by holding the use button. Go back to the corridor and watch - on the left, around the corner, the opponent will be lurking!
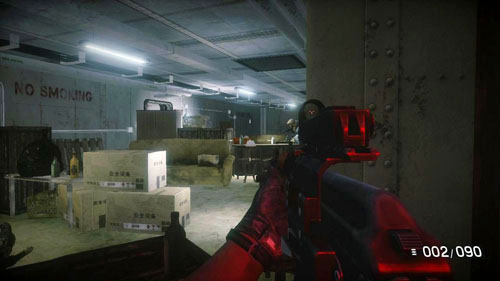
Go down the hall to a big room, but do not go inside. Lean slightly to the right to remove first opponent standing on the right. Lean forward and pick off the next. Lean on, to see the items dealing with enemies (picture above). Have some of you just gained grenades. There will be five enemies together, watch out for one with a shotgun. This is the last enemy at this level.
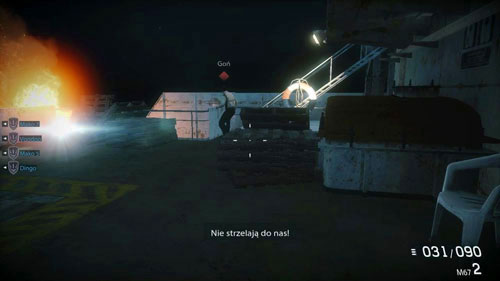
After their elimination, go to the exit door on the left. On the right you see Sa'ad al Din (picture above). Just chase him on some stairs, then another, and then go to the bridge and breach the door. The mission will end in spectacular animation.
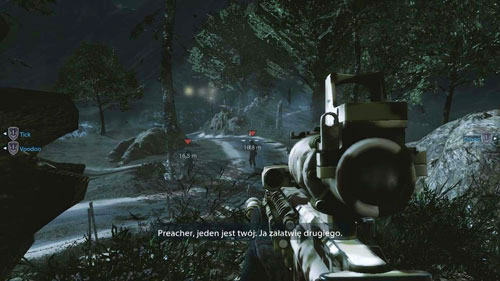
Objective: Avoid detection
As usual, the start of the mission will be very easy. Go with companions to gray marker, and then hide and watch the passing convoy. Two soldiers left behind. Aim, use additional optics and shoot one in the head (see picture above). The second will be killed by one of your colleagues.
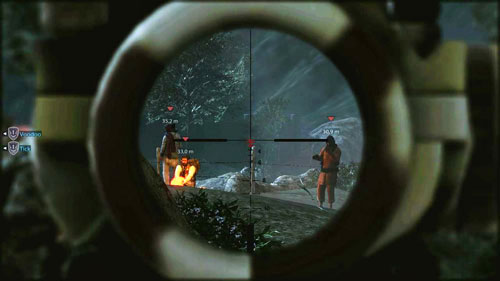
Jump down, run to the right, then straight ahead. After a while you get to the fire. Go on ahead, to have a clear view of the fire and the people around him. When two guards leave, aim and shoot at the head of one of the three who remained (see picture above).
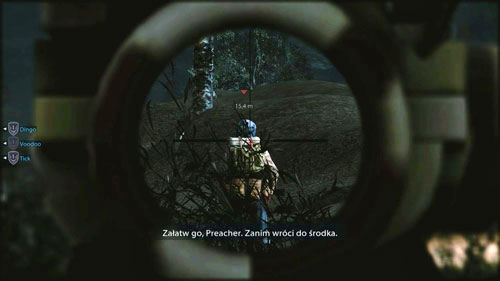
Go right, then jump down to the beach and go across the river to the other side. Stand next to the wall of the property and wait for developments. When the gate is a single guard (see picture above), finish him with a headshot. If you fail, the mission will end in failure! After disposing of the guard, go through the open gate on the right.
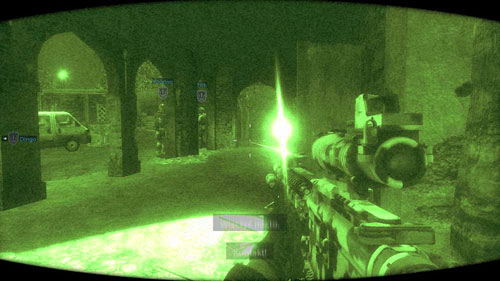
Immediately turn right and run on so as to have a wall on your right. Hold on to it until his companions will come to the side of the building, which will be marked with a red marker fuse box. Shoot it to turn off the power. Set in the front door and wait for the one opponent who runs out in the middle (see picture above). Kill him and enter the building.
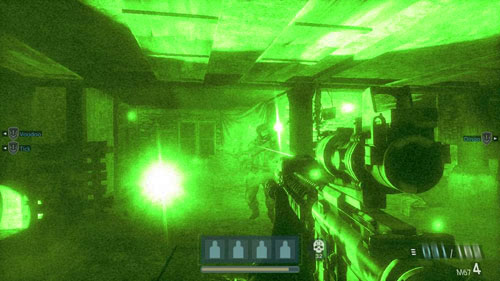
Go into the room on the left, then to the next on the right. You will notice the door that you will have to cross. Stand by them, select the method and get ready for the elimination of the four goals, including three enemies you can see in the picture above (image above). Kill them in the following order (from left) - second, third, first. Do not worry with the flash of the torchlight, after using the ray optics longer dazzle you. Immediately after disposal of the three objectives look to the left and shoot the enemy in the head last. Watch out! From the stairs to the right an enemy will arrive. Shoot at his legs and begin gently to go up.
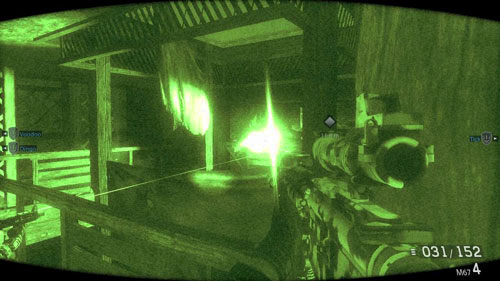
Stand on the stairs and lean to the right (see picture above). Although most enemies have handguns, they cannot be underestimated. The fight can be a bit chaotic due to the low visibility, there aren't also good covers. You can also run and quickly run up to the room on the left, and then from there swing to the left and look for enemies. There are two enemies in front of the room in front and two in the room, including one hidden behind the desk on the left (the other is exposed to the right).
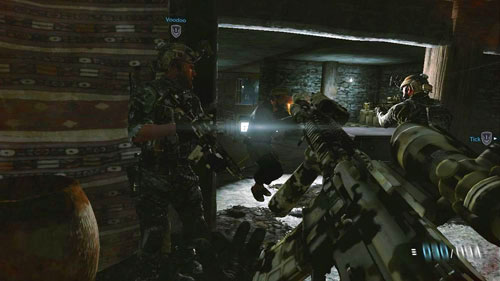
Be prepared to treat the enemy who runs out of the kitchen with some rifle rounds. Go there with your companions. Enter into the larger room, and the light is about to catch fire (see picture above). Here you have to kill two enemies - one will be fired from the gun, and the other after a while, come running to you. After cleaning the room, refill the ammo.
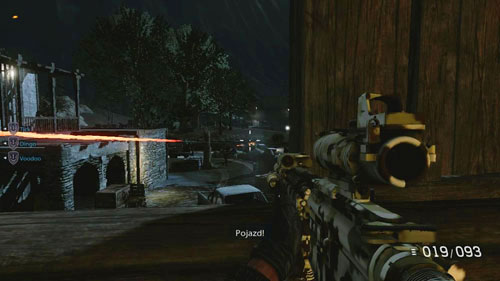
Moving to the window in the distance, you will see a couple of soldiers converging from across the street, then you're on the road below to the left leaving the car with a heavy machine gun and a real shooting starts (see picture above). The best thing to do is to cover at the middle window. Destroy the right shutter to get a better view and hide the left side of the window. Lean to the right more and more by eliminating more goals (not that you can see them all opponents). You do not have to worry about grenades, enemies do not aim so well to get some though the window. Pay particular attention to the operators of heavy guns (perhaps after a while come more vehicles). Fight until you hear the order to go down.
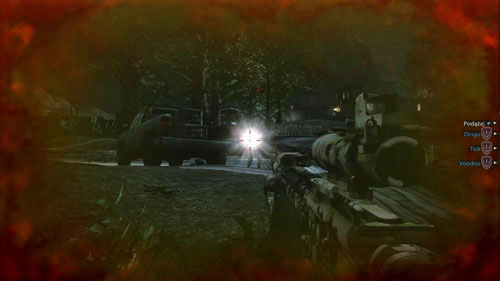
Move to Voodoo, which breaks down the door. Run down to the ground floor and you leave out. There is no point, you shoot enemies and on a remote building opposite - the place will be new deaths come. Instead, run behind Voodoo, who will move from one cover to the other. Hide behind a wood, with Voodoo, and start to shoot at enemies on the road with the wreckage of the jeep on the left (see picture above).
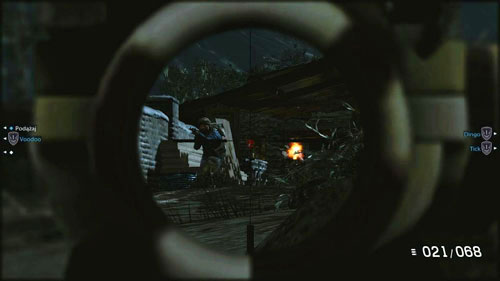
Another cover is a short ledge on the left: the game will autosave here. Hide behind the enemy and remove the trunk to the left, move slightly to the left and go get the next one. After killing them do not leave the curtains, just look toward the marker, which changed the place. You should see two enemies (one is hiding behind the bushes, locate it after the flash of his shots), which will be safely removed from your current position (picture above). Only after this operation, run to Voodoo, who is hidden behind a wall on the left and stand there with him. Lean and remove the enemy who is hiding in the barn, if Voodoo did not.
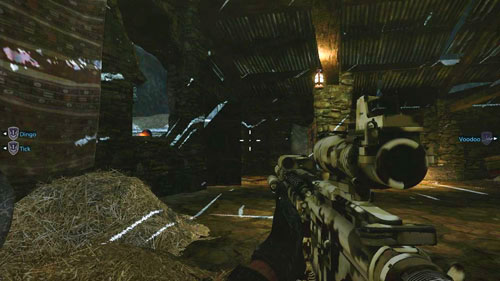
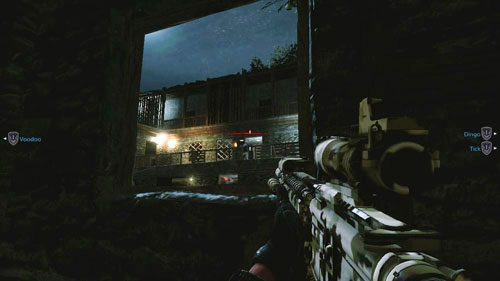
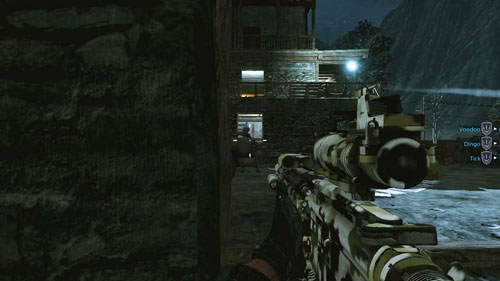
Before you run into the barn, hide somewhere in front of it. You will get an order to kill the shooter in the car. Find him and shoot him in the head (this will be easy, because you are turned sideways). Move to the entrance to the barn and make sure that no one is inside (look for flash torch). When you do, hide under the right window. First, shoot the wooden planks to the window to have a clear vision. Show yourself to the enemy, and then immediately to hide and look in the opposite direction - the entrance to the barn. It is possible that there is one enemy come running (first picture above). When you kill him (see the box on the left), or if that does not happen after a long pause, look out the window. First, set up so that you see only two enemies on the balcony (second image above). Remove them, pick up and locate the other, hidden in the vicinity of the car (third picture above).
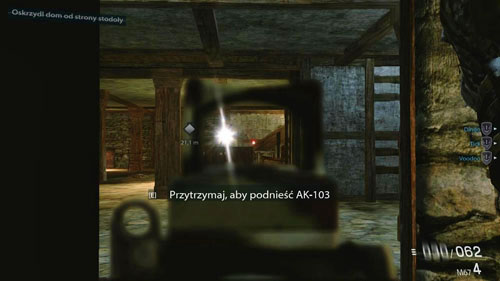
Go to Voodoo, and when he breaks down the door, follow him to the farm. Come on in, and then immediately go and hide at the front door (see picture above). From the first floor few enemies will arrive, including two armed with rifles. Keeping the distance will significantly minimize the risk.
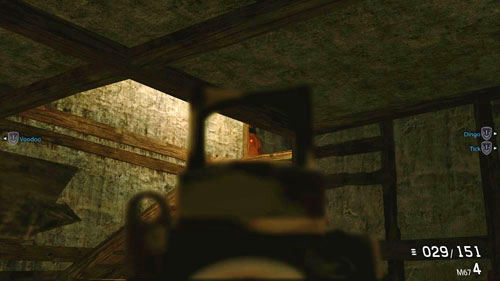
When you are a few feet from the stairs, crouch and you will see dressed in orange outfit opponent (picture above), who lurks at the top left. He is armed with a gun and thinks he will surprise you. Shoot in the protruding part of his body until he falls. Be sure to replenish ammo at this point.
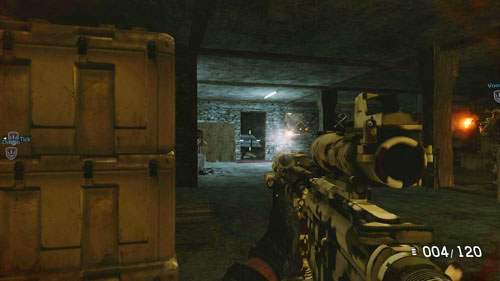
Run up the stairs and immediately hide behind a stack of crates on the left (see picture above).Lean more and more to the right and further eliminate enemies from right to left. Some, armed with shotguns, will try to run up to you - watch out for them. Others will hide the door on the right and the left, on the opposite wall of the room, and in the left corner. Fight, but when you hear that a heavy machine gunner has arrived...
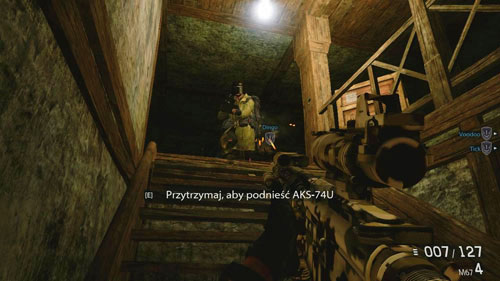
Run away to the ground floor! In close combat you have no chance with him, because as soon as you give in it at least one shot, comes up to you and cover you with bullets. Stand in front of the stairs and be ready to eliminate enemies who may also wish to withdraw. After a while, Dingo and Tick will arrive. Wait for the heavy machine gunner at the bottom of the stairs, and when he appears (picture above), shoot him, while withdrawing all the time.
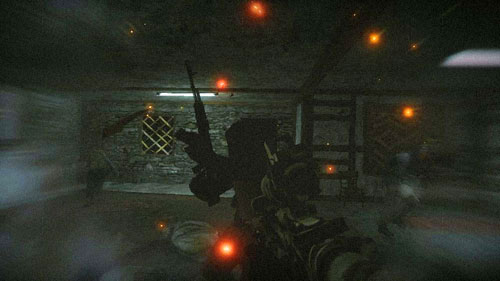
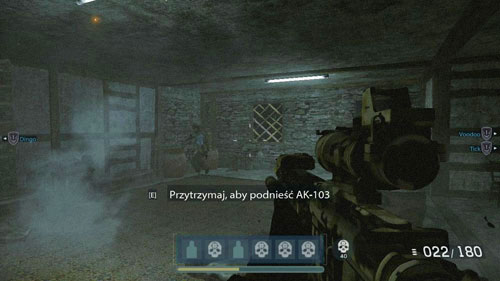
Go back to the top, run into the room on the right, turn left and go to the front of the hall. Refill ammo, reload, stand by the green door and select the method to force the. Note - you here to kill as many as six goals (first picture above)! First shoot in the head of the one, who is exactly in front of you. Look to the right and shoot the head of the two standing next to each other. Look to the left - the fourth one runs into the door, kill him quickly. Clean up the remaining two (second image above) - first the one on the right, then to the left (he is hidden behind a cloud of gray smoke).Now you face a short walk, just run behind Voodoo, and certainly will not get lost.
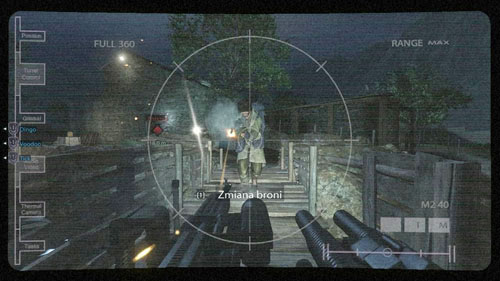
Objective: Clear the path with a robot
For the second time you will be able to "play" with a robot, this time for much longer. Remember that it has two weapons - heavy rifle and grenade launcher. This moment is not difficult and you do not have to hide, etc. - just systematically kill the enemies and go to the places indicated by the allies. At the beginning of the visible fire on enemies (watch for flashlights) and cross the bridge to the other side (see picture above). Shoot all the time, you have unlimited ammo. Kill those who cross the bridge and shoot the boards on the left (marked with a red diamond), then go inside.
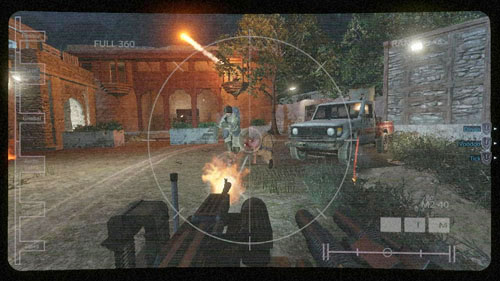
Drive straight through the hut, along the way look out for explosive barrels and visible at all times eliminating enemies. After a while, when you get to the bridge, cross to the other side and look to the right. Finish the operator of heavy rifle on the car, two heavy machine gunners and a guy with RPG in the window or in front (see picture above) - you can switch to the grenade launcher and throw grenades at the enemies, useful in particular to blow up the car with the heavy machine gun. With a little fight, the area will be clean, and you'll see your colleagues rushing to the gate.
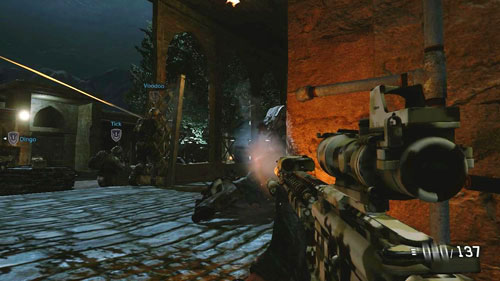
After regaining control of Preacher run across the bridge and join colleagues. Let them open the door, then run behind them. Keep all the time close to Voodoo and stand with him while landing. After a while you hear that there's a vehicle. I still stand behind the wall and wait for the enemies to come running here (picture above).Then crouch and wooden railing huge mess to get a better view. Start shooting the enemies hidden behind the white car and a tree next to it. Watch out for grenades? If you cannot see the enemies, move to colleagues.
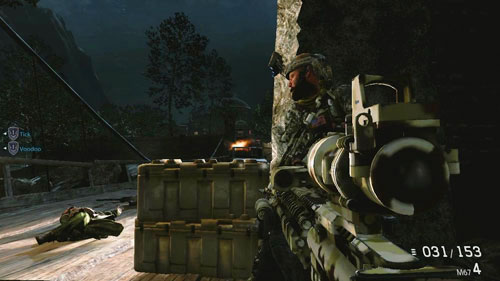
Objective: Use the heavy machine gun to eliminate enemies
After winning the battles, follow Voodoo and hide on the right side of the bridge. Lean in and start to shoot heavy gun operator on the truck (see picture above). However, do not take chances and when you see enemies running, hide and just wait for them. Operator will be hard to shoot at - try to aim for the hole through which the watches.
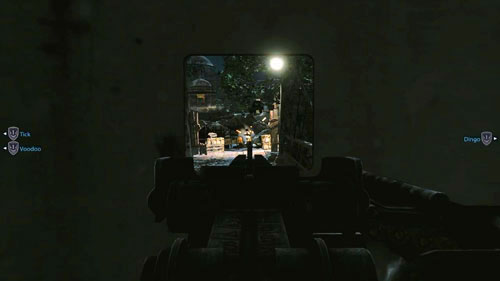
When you kill him, immediately run to the truck and start using heavy machine gun. First destroy the wooden gate, and then just shoot the enemies (picture above). Remember to focus attention primarily on those who are at the gate, and then engage in further. Take care that no one rushed to you! If you miss it, you will have to keep our fingers crossed for their colleagues. In addition to the usual opponents will also face a heavily armored heavy machine gunner.
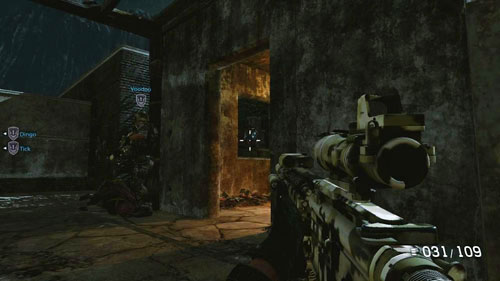
Follow Voodoo in the direction of the palace. After a short time you will notice as it explodes. Move close to your companion, and then run to the left and be prepared to kill three enemies who run their right (see picture above). Two of them will be able to get through the window - one set just below it, the other will be hidden a bit further. Climb the stairs and kill the fourth (to be right).
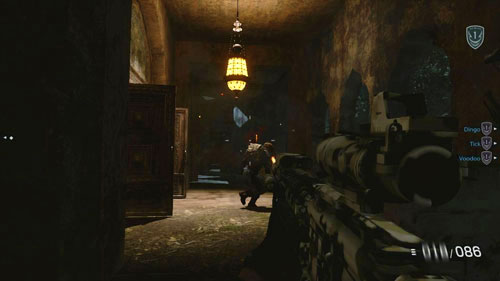
Only then Voodoo will run forward. Run after him, following the gray markers - first up the stairs, and then into the main entrance on the right. When you reach it, an intoxicated enemy will go out (see picture above). Kill him and go inside.
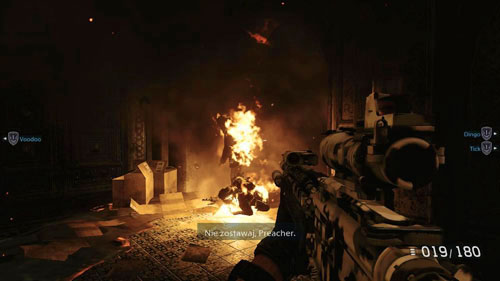
Although there will be a few enemies, you need not worry about them - they are intoxicated and barely holding on their feet. Some even burn (see picture above). If you want, you can even fight against them with the ax. Go right, kill the enemy, then left and right. Look to the right, kill the enemy and continue on the left.
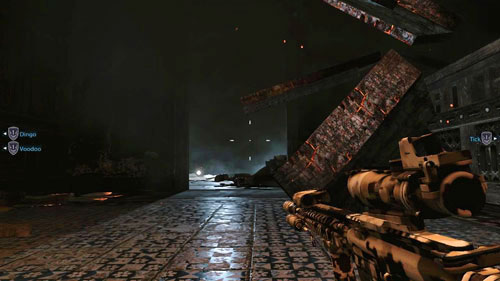
Turn right, your character will fall automatically. For the next section, you will have to crawl. Crawl forward, kill the enemy in front and not worry about falling planks (image above).
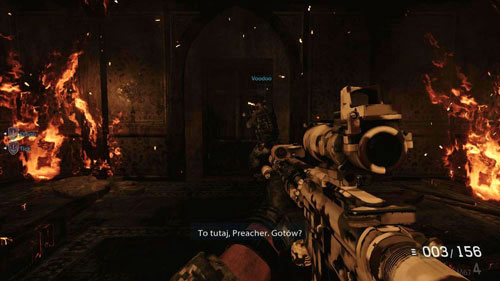
In the room on the right there will be the next enemy. Turn right, kill the enemy in front, and then to the left. Preacher and Voodoo get up. Kill the last enemy in the hallway on the left and run there. At the end of the hallway is a door that you have to breach (picture above).
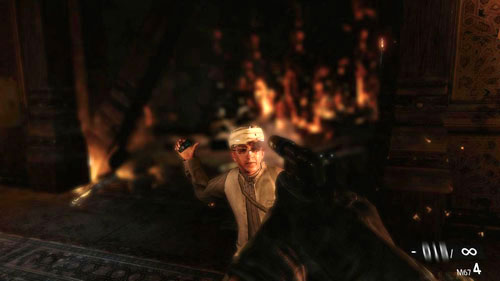
Watch the animation, and then be ready to give an immediate shot in the Cleric's head (picture above). If you do not do it on time, you will lose the mission. After the shot, watch the animation. You've just finished the last mission in the single player campaign.
In this section you will find a complete list of all the achievements that you can earn the Medal of Honor: Warfighter.
Achievements obtained automatically - just go for the single-player campaign to get them all. It should be noted that in order to get all the achievements you need to unlock the next two levels of difficulty - Tier 1 and Hardcore. They are unlocked only after beating the game on Hard difficulty.
Achievements obtained in a multiplayer game - as the name suggests, you get them in multiplayer. As in the previous case, here, you will find only a list of them.
Special achievements - all the other achievements, in which you need to perform a special function one or more times to get the achievement. In addition to the list, here are tips on how to do this.
Just complete the full single-player campaign to get all of the following achievements. They are arranged in chronological order - from the first mission of the game.

Unexpected Cargo
Completed Unintended Consequences
Xbox 360: 15 Points
PlayStation 3: Bronze trophy

Know The Enemy
Completed Through the Eyes of Evil
Xbox 360: 15 Points
PlayStation 3: Bronze trophy

Hit the Beach!
Completed Shore Leave
Xbox 360: 15 Points
PlayStation 3: Bronze trophy

Pit and Pin
Completed Hot Pursuit
Xbox 360: 15 Points
PlayStation 3: Bronze trophy

Rain of Terror
Completed Changing Tides
Xbox 360: 15 Points
PlayStation 3: Bronze trophy

Monsoon Lagoon
Completed Rip Current
Xbox 360: 15 Points
PlayStation 3: Bronze trophy

One shot, Three kills
Completed Hat Trick
Xbox 360: 15 Points
PlayStation 3: Bronze trophy

Non-Official Cover
Completed Finding Faraz
Xbox 360: 15 Points
PlayStation 3: Bronze trophy

Class Dismissed
Completed Connect the Dots
Xbox 360: 20 Points
PlayStation 3: Bronze trophy
Pedal to the Medal
Completed Hello and Dubai
Xbox 360: 20 Points
PlayStation 3: Bronze trophy

Closing Ceremony
Completed Old Friends
Xbox 360: 20 Points
PlayStation 3: Bronze trophy

One Man Mutiny
Completed Bump in the Night
Xbox 360: 20 Points
PlayStation 3: Bronze trophy
Let Him Rot
Completed Shut It Down
Xbox 360: 20 Points
PlayStation 3: Bronze trophy

Stump's No Chump
Finished all the Stump Missions
Xbox 360: 30 Points
PlayStation 3: Silver trophy

Preacher's Path
Finished all the Preacher Missions
Xbox 360: 30 Points
PlayStation 3: Silver trophy

Warfighter
Completed the campaign
Xbox 360: 40 Points
PlayStation 3: Silver trophy
Descriptions of the achievements speak for themselves, so you should not have problems with obtaining them, as long as you spend quite time and patience.

Global Warfighters
Unlocked a soldier from each unit
Xbox 360: 25 Points
PlayStation 3: Silver trophy

Job Done
Complete 3 Combat Mission objectives
Xbox 360: 20 Points
PlayStation 3: Bronze trophy

Back in the Fight
Completed one tour with all classes
Xbox 360: 50 Points
PlayStation 3: Gold trophy

Jack of all Guns
Earned the Marksman Pin for all Weapons
Xbox 360: 20 Points
PlayStation 3: Silver trophy

Warchief
Unlocked all soldiers in multiplayer
Xbox 360: 35 Points
PlayStation 3: Silver trophy
Brothers in Arms
Won a round with a Friend as a Fire Team Buddy
Xbox 360: 20 Points
PlayStation 3: Bronze trophy

There IS an I in Fire Team
Finished a round as part of the top Fire Team
Xbox 360: 15 Points
PlayStation 3: Bronze trophy

All In
Called in Apache support
Xbox 360: 20 Points
PlayStation 3: Silver trophy

MVP
Finished in first place in any online match
Xbox 360: 20 Points
PlayStation 3: Silver trophy

Honey Badger
Used your Fire Team buddy to re-arm or heal
Xbox 360: 10 Points
PlayStation 3: Bronze trophy

Downrange
Played online for 15 minutes
Xbox 360: 20 Points
PlayStation 3: Bronze trophy

Squad Leader
Unlocked a soldier of each class
Xbox 360: 20 Points
PlayStation 3: Bronze trophy
All other achievements are earned in single player campaign, but you have to perform a specific task - once or many times - to get the data to achieve. Because of this at any (or more, if it is linked) is a brief overview explaining how and where to do it.
Each of the following achievements can be earned in one specific mission - the description of the achievement has been written for the mission. Achievements have been arranged chronologically.

On the Clock
Completed the training in Through the Eyes of Evil in under 18 seconds
Xbox 360: 10 Points
PlayStation 3: Bronze trophy

Leftover Lead
Completed the sniping section in Shore Leave without missing a shot
Xbox 360: 15 Points
PlayStation 3: Bronze trophy
Tips: If you miss, just load the last checkpoint - it will be just before the sniper part. While aiming, remember to point the gun slightly higher. But you do not necessarily have to hit the opponent's head.

Vender Bender
Destroyed 90 market stalls in Hot Pursuit
Xbox 360: 10 Points
PlayStation 3: Bronze trophy
Notes: The market stalls are scattered in the streets, and a huge cluster of them is on the main market square. Moreover, you do not have to do it at one time, destroyed the stalls are counted during the following approaches. When you go to the market stalls ram as much as you can, letting your target escaped. Load last checkpoint (it will be right before twisting the stall) and destroy more stalls.

Double Header
Killed two enemies with one bullet in the Changing Tides mission
Xbox 360: 10 Points
PlayStation 3: Bronze trophy
Notes: After you kill three enemies with the ax you get to the fence. Mother informs you about the possibility of killing two enemies with one shot, so take a chance. After a detailed description, see the description of the mission 05: Changing Tides.

Release the Kraken!
Killed 20 enemies during the boat exfil in Rip Current
Xbox 360: 15 Points
PlayStation 3: Bronze trophy
Notes: The difficulty of getting this achievement depends heavily on the level of difficulty. The lower, the greater the range will have your gun, so the easier you will kill enemies. On Hard difficulty you will have to hit exactly in each of the opponents, so taking into account the continuous and rapid motion of the boat can be extremely difficult - so better to try the easy level. If after all you do not succeed, then before changing position (when you'll have to control the boat, not to shoot it), load the latest checkpoint.

Tag, You're It
Caught Faraz within 15 minutes in Finding Faraz
Xbox 360: 15 Points
PlayStation 3: Bronze trophy
Note: The lower the level, the easier you will get this achievement. By far the greater viability of some sections you can simply get around, not worrying about the fire enemies. Assistance may also prove to be the accurate description of the mission 08.

Target Practice
Shot down the targets in the training camp caves in Connect the Dots (Destroy all targets in a shooting at a training camp in Connect the Dots)
Xbox 360: 20 Points
PlayStation 3: Bronze trophy
Note: When you enter a hidden training camp and kill all the enemies, do not breach the door, but destroy all targets shooting. For a more detailed description, look at the description of the mission 09: Connect the Dots.

Storm Watch
Got through the sandstorm without hitting any vehicles in Hello and Dubai
Xbox 360: 10 Points
PlayStation 3: Bronze trophy
Notes: At the end of Mission 10: Hello and Dubai, when you drive the highway in the opposite direction, you cannot collide with any of the vehicle approaching. If you do not succeed, you just load the last checkpoint and try again.

Dirty Laundry
Found the grenades in the laundry room in Bump in the Night
Xbox 360: 15 Points
PlayStation 3: Bronze trophy
Note: When, while playing as Preacher, you see incoming helicopters, run after Faraz. After cleaning the hall and cabins look for the door in the hallway leading to the laundry room. They are on the left, in front of the writing "storage". Open it and take it with grenades inside. More detailed description can be found in the description of the mission 12: Bump in the Night.
These achievements are related to the completion of specific mission or campaign on the top two levels of difficulty - Tier 1 and Hardcore. To unlock them all, you must go campaign on Hard difficulty. The achievement descriptions speak for themselves. It is worth noting that on Hardcore you cannot die once, but of course you can leave the mission and load a checkpoint. In addition, if you go campaign on Hardcore, you will unlock the achievement Tier 1 and Unstoppable (but not vice versa).

Tier 1
Completed the campaign on Tier 1 difficulty
Xbox 360: 50 Points
PlayStation 3: Silver trophy

Unstoppable
Completed Shore Leave on Hardcore difficulty
Xbox 360: 30 Points
PlayStation 3: Silver trophy

Hardcore
Completed the campaign on Hardcore difficulty
Xbox 360: 80 Points
PlayStation 3: Gold trophy
Two achievements that complement each other. Just shoot enemies in the head during parts of the mission of "breach and clean," and for every four shots to the head of the customs unlock another kind of breaching the door. If you look, it's in the middle of the game you will have them all. Also, remember to use every method at least once, and both will achievements will be unlocked.

Room Service
Unlocked all door breach options
Xbox 360: 20 Points
PlayStation 3: Bronze trophy

Master Locksmith
Used each breaching option at least once
Xbox 360: 15 Points
PlayStation 3: Bronze trophy
Below you can find all the other achievements are given, with the related notes.

It's Dangerous to go Alone!
Requested ammo from an Ally in the Campaign
Xbox 360: 5 Points
PlayStation 3: Bronze trophy

Lead Farmer
Requested ammo from an Ally 25 times in Campaign
Xbox 360: 10 Points
PlayStation 3: Bronze trophy
Note: Without it, you will be rather difficult to move the campaign, as it can be said that the two achievements you earn, "by the way".

Peek-a-Boo!
Killed an enemy while using peek and lean in the Campaign
Xbox 360: 15 Points
PlayStation 3: Bronze trophy

Lean With It
Killed 25 enemies while using peek and lean during the Campaign
Xbox 360: 15 Points
PlayStation 3: Bronze trophy
Note: The same as above, without leaning, which you learn in the second mission, it can be difficult, so these are two other achievements earned "by the way".

Tactical Toggler
Killed 25 enemies using Combat Toggle
Xbox 360: 15 Points
PlayStation 3: Bronze trophy
Note: Additional optics, which you learn to use the second mission, is almost a must-have. This is one more achievement earned "by the way".
The Axeman
Killed 25 enemies with melee during the Campaign
Xbox 360: 20 Points
PlayStation 3: Bronze trophy
Note: One enemy you will kill in the mission 01: Unintended Consequences (you can kill those who are burning). Similarly, in the last mission, 13: Shut It Down, after the explosion at the palace, intoxicated and burning enemies will be an easy target. But the greatest number of opportunities you'll have in the mission 12: Bump in the Night. Of course, this is not the only place where you can kill enemies in melee combat. The best way is to practically any place you can hide in the corner and wait for the opponent. When I come running, ask him to blow. The smaller the place where you fight, the better.

Tier 1 Imports
Got 50 while holding enemy weapons
Xbox 360: 15 Points
PlayStation 3: Bronze trophy
Note: You will kill a lot of enemies killed in this way in the mission 12: Bump in the Night. Although weapon retrieved from the enemies is usually not as good as yours, you should somehow deal with it.

Extreme Realism
Recovered from near-death 5 times without dying
Xbox 360: 10 Points
PlayStation 3: Bronze trophy
Note: Critical hit occurs when the edges of the screen cover is red, covering most of the view. The easiest way to get this achievement is on easy difficulty. When you get a critical hit, hide and wait until the red disappears. Repeat step four more times, and the achievement will be yours.


 Mass Effect 3 Game Guide & Walkthrough
 Metal Gear Solid 4: Guns of the Patriots Game Guide & Walkthrough
 Mortal Kombat X Game Guide & Walkthrough
 Mass Effect 3: Leviathan Game Guide & Walkthrough
 Magrunner: Dark Pulse Game Guide & Walkthrough