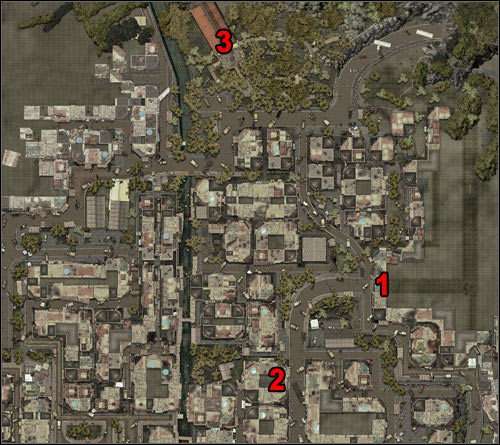
A Dead Island walkthrough contains description of all quests, which you will face during your time in Banoi. In total, you'll find a description of almost 50 main quests and more than 100 sidequests in this guide. Additionally we've included maps of locations, for which there are no in-game maps, such as sewers, police station or prison!
Guide is divided into acts, and these are divided into chapters in order to make a navigation easier.
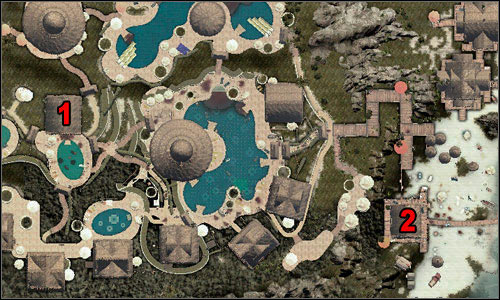
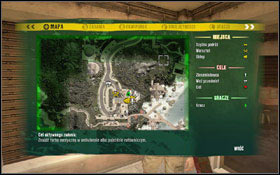
Legend:
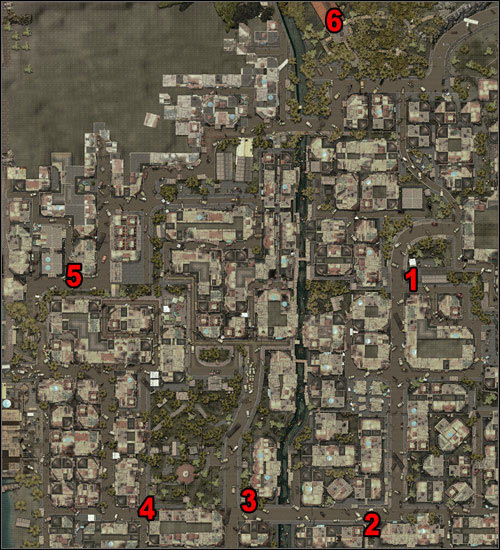
Brown - enemies
Blue - some more important locations
Orange - NPCs, you can talk with them
Green - items
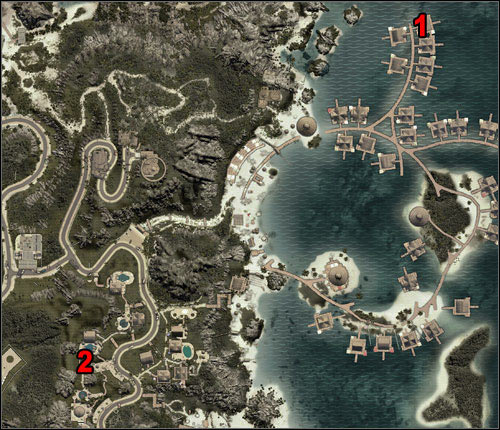
Markings #1, #2 refer to screens above the text, respectively to left one and to right one.
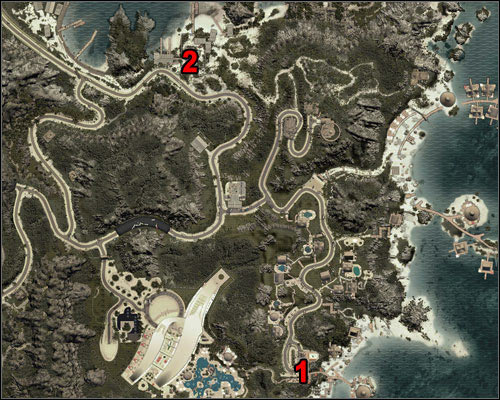
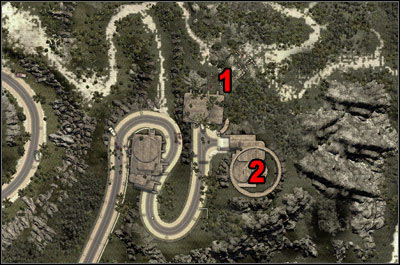
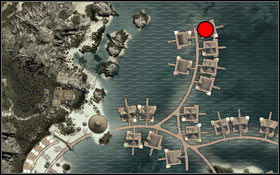
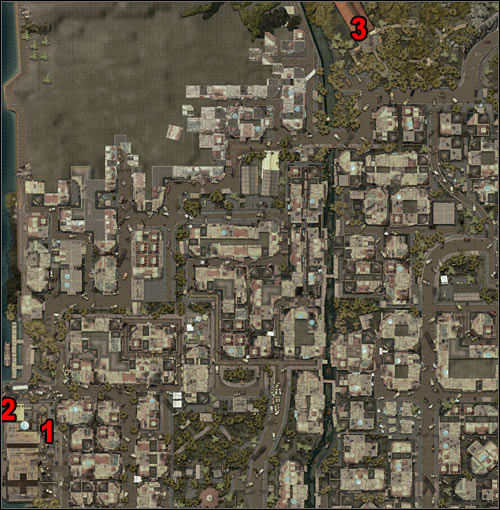
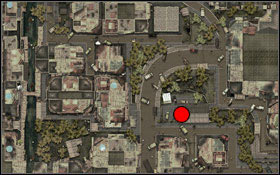
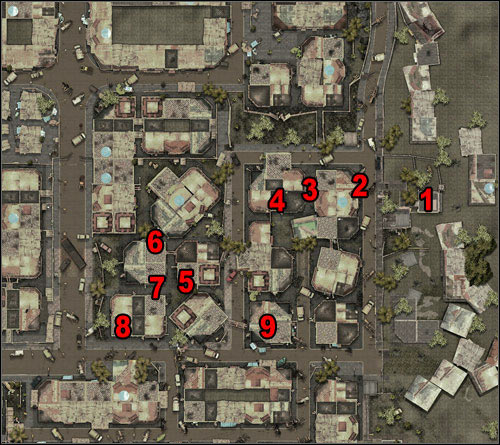
Markings (1), i.e. numbers in parentheses, refer to a point on the map attached at the beginning of the quest.
Artur "Arxel" Justynski

Welcome to Banoi!
Find the emergency staircase
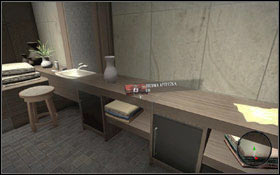
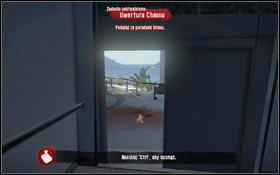
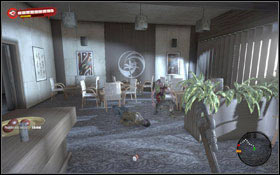
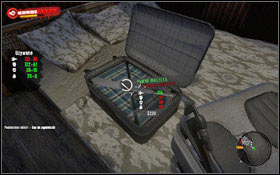
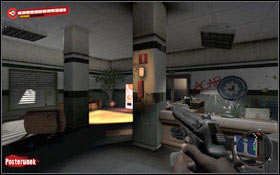
The game starts when you wake up after a hard night (a game intro is in fact good introduction into a main plot) in an empty room. There is a Medium MedKit #1 in a bathroom. Take it - you may need it in future. After you leave the room, you'll find yourself in a corridor. You can turn left and explore adjacent, open room (known to you from a game trailer). When you're ready to go, head the other side of the corridor. Do not forget to loot encountered luggage #2. You'll find money and other items, which can be useful at later stage of the game.
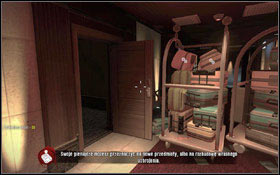

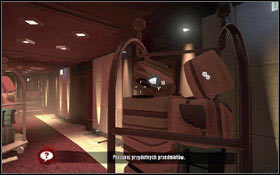
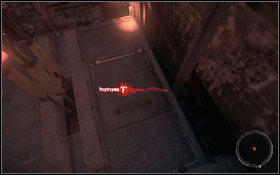
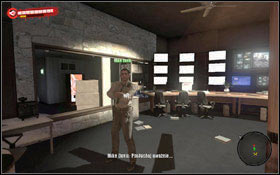
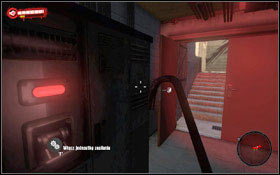
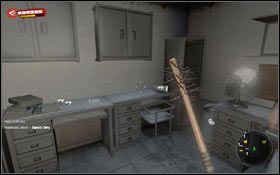
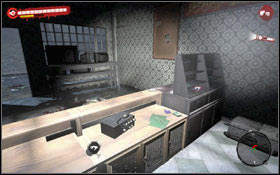
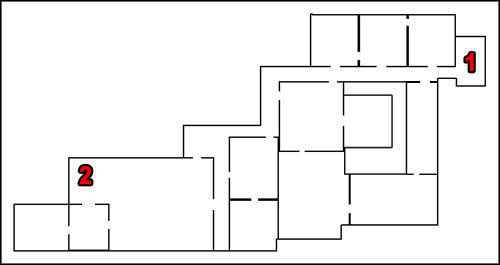
You get to a blocked passage. Note that a room to the left is open and enter it #1. At this point you should use a Flashlight ([T] key), but watch for a running down battery. After preliminary exploration of this room and gathering few dollars, walk to a next door. You must break it yourself #2. First move your mouse (or an analog stick if you play with a pad) down, and wait until a horizontal line gets to the middle, near the red area. Then move your mouse (or an analog stick) up. If you manage to hit perfectly, you'll open the door with first try. If not, you'll have to repeat this procedure several times. Try not to delay with opening, because after longer stillness an indicator disappears.
Find the elevator lobby
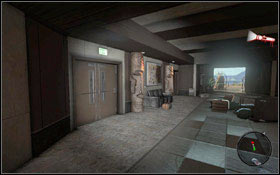

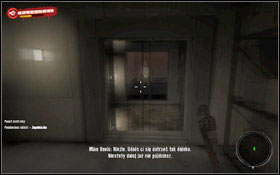
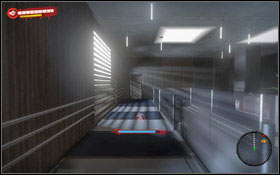
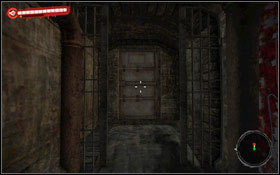
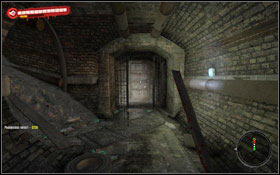
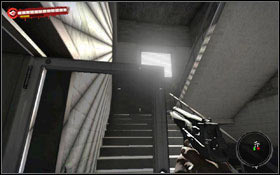
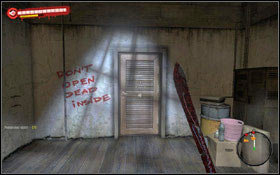
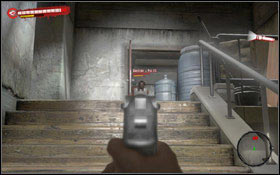
After getting to a next room, go back to the corridor. Turn left, towards an evacuation stairs #1. Unfortunately, the door is closed. Go ahead and after a while the game activates a cut-scene #2.
Go to the elevator shaft; Open the elevator hatch
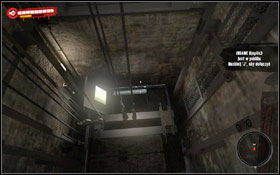
Turn around. The only open elevator shaft is on your left #1. To get inside an elevator you have to open a hatch. In order to do so, hold [F] key for quite a while #2 and then jump inside.
Follow the Voice's instructions
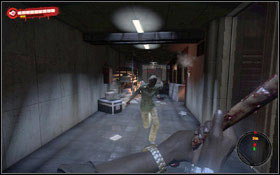
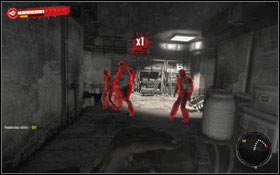
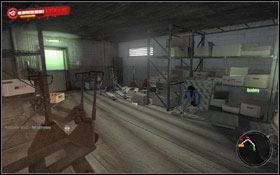
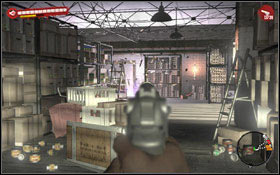
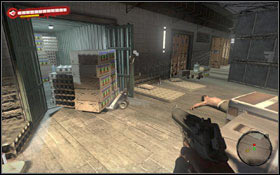
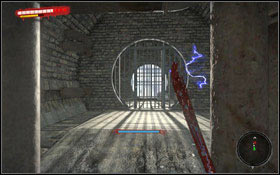
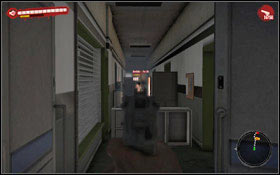
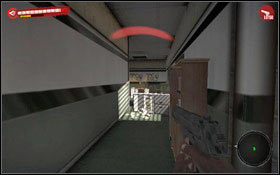
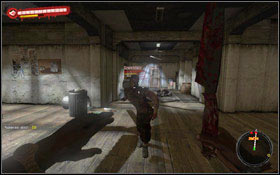
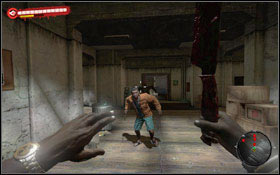
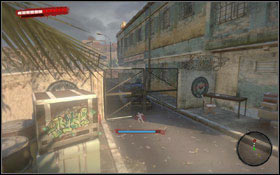
The elevator unfortunately collapses to the bottom. As soon as you get up, you'll hear a mysterious voice from a speaker, which will accompany you to the end of the game. Crouch and exit the elevator. Go towards a corridor, and then turn right, towards tool storage where you'll get weapons. You'll see infected in a distance. To your misfortune, they will also see you #2.
Turn around and run from the infected
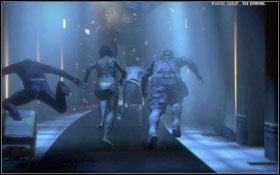
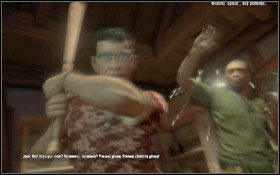
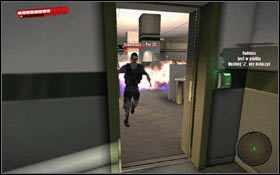
Quickly turn around and run to the other side of the corridor #1. Try not to turn away and it would be good if your stamina bar is fully charged. Another cut-scene starts - unfortunately you're bitten but finally someone saves you #2.
Obtained from: Jeannine
Difficulty level: Easy
Reward: 2000 Exp
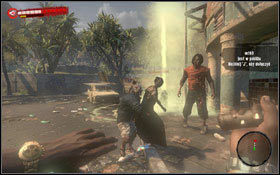
Find a weapon
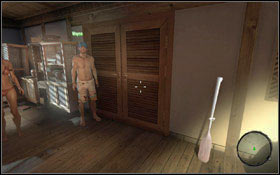
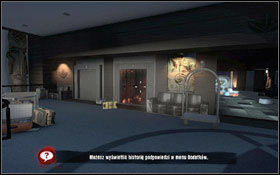
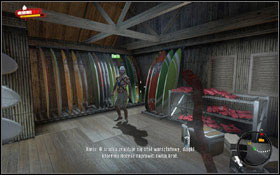
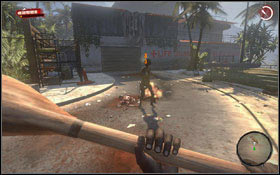
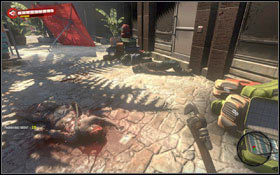
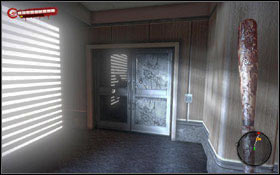
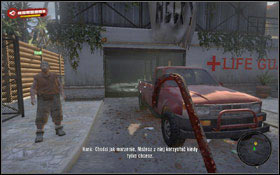
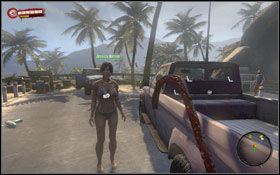
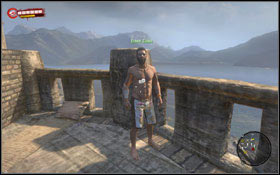
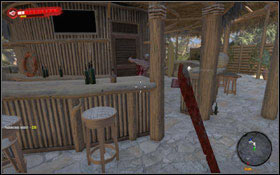
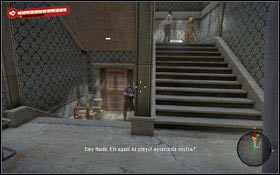
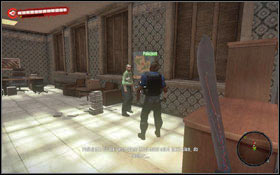
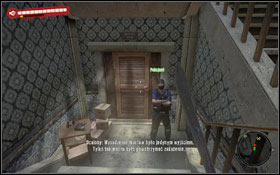
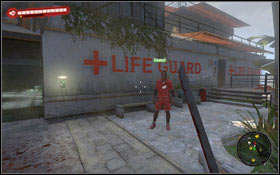
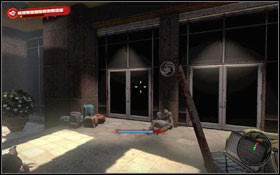
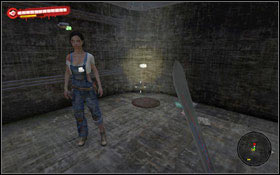
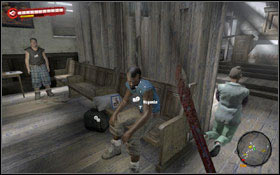
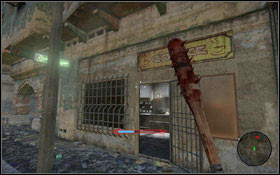
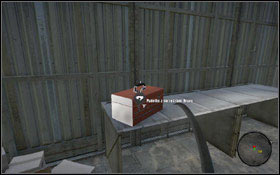
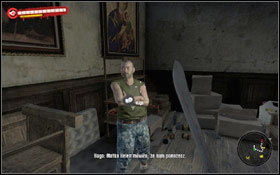
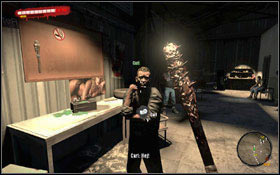
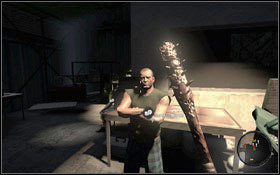
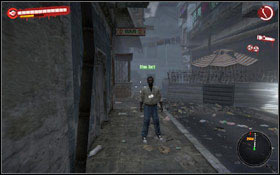
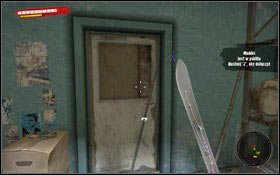
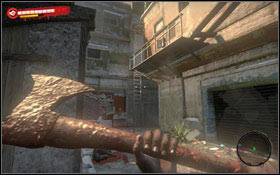
This quest starts when you walk to the main door #1. A woman standing near you will persuade you to help a lifeguard who earlier helped you. But you're not able to go outside until you get some weapon or Wayne lets you out. You do not have to look far - there is a paddle #2 next to the door on the right.

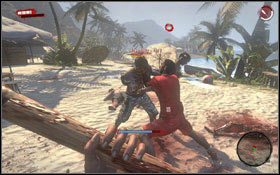
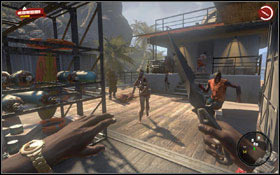
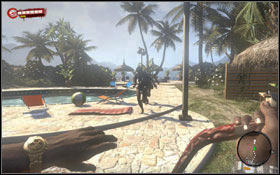
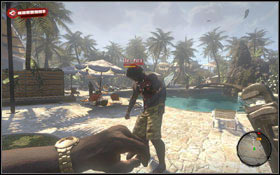
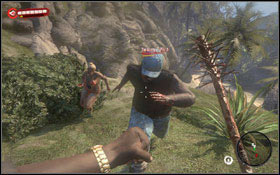
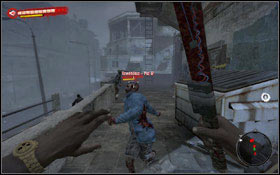
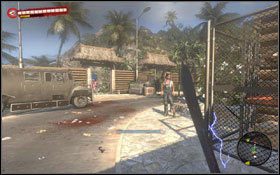
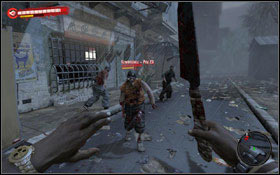
When you're free to go, run outside. You'll face your first zombies in the game - Walkers #1. They are rather slow and attack you by simply walking towards you. If they grab you, they try to bite you. If such situation happens you have to press first left mouse button and then right mouse button in the right moment. Do not wait any second more - get rid of all creatures, thus saving Sinamoi #2.
Obtained from: Sinamoi
Difficulty level: Easy
Reward: 400 Exp, Nail'd Mod
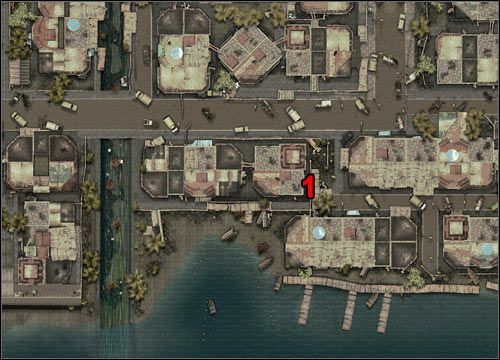
Bring the security keycard to the Lifeguard Tower from bungalow #11
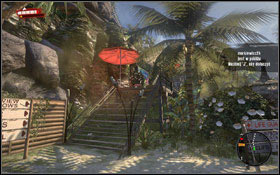
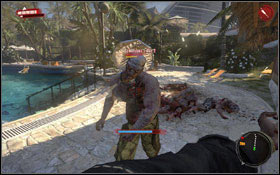
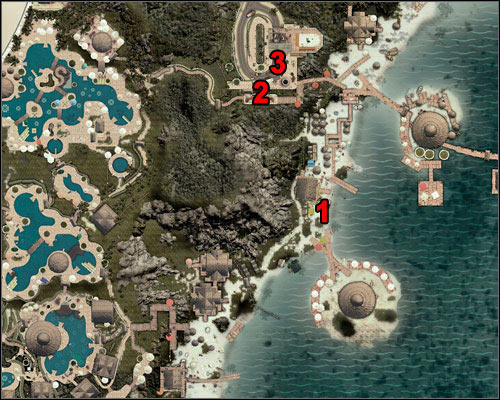
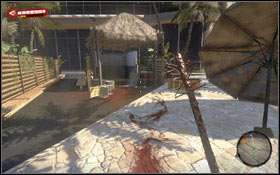
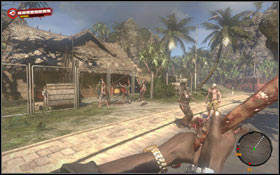
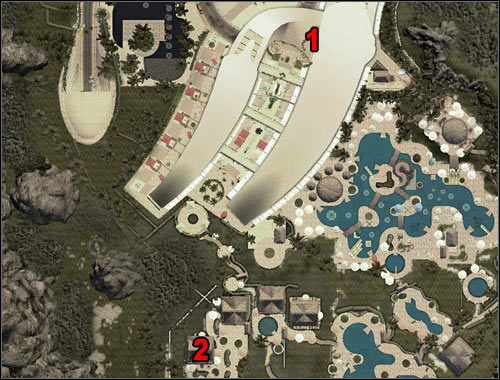
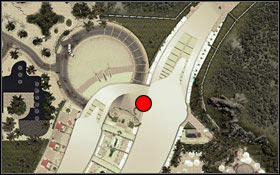
Talk to Sinamoi, you'll find him next to the main door. He will ask you to bring him his security keycard to the Lifeguard Tower, so that everyone can safely go to a new shelter. Go to the stairs #1, and using them reach a sizeable swimming pool. However you must watch out, because there is a large group of zombies around #2. You easily find energy drinks nearby, which will heal you.
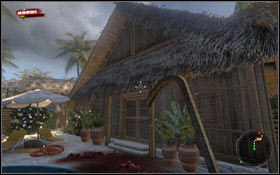
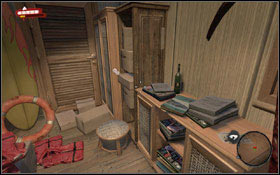
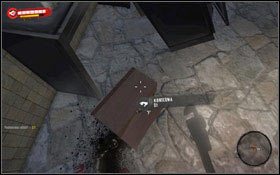
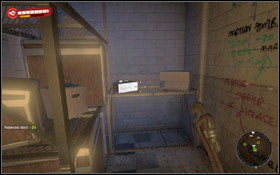
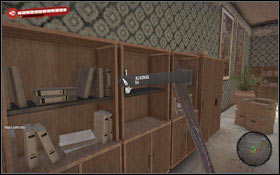
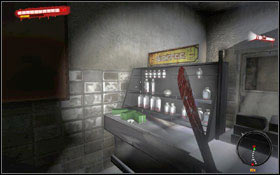
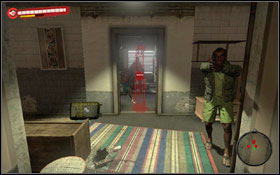
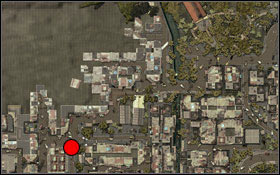
Go further. In e next pool, full of blood, you'll find Ted who mourns the death of his loved ones, whom he killed himself. After reaching a bungalow 11 #1 (1) open a door and kill Walker inside. Be careful when you go to a bathroom - you'll find another Walker there. In a vestibule, on a shelf, you'll find the security keycard to the Lifeguard Tower #2. Take it and go back to Sinamoi (2). A return road is full of zombies so if your weapon is not suitable for fight, just run past them. After return give Sinamoi his keycard and collect your reward.
Obtained from: Sinamoi
Difficulty level: Hard
Reward: 600 Exp, Homemade Cleaver
Go to the Lifeguard Tower and get rid of all the undead in the area

A shortest path leading to the Lifeguard is through the beach. You'll meet many Walkers on your way, so try to exchange your weapons in order to inflict maximum damage. Around a middle of your way (1) you'll be attacked by a larger group of zombies #1. In addition you'll have an opportunity to save your first person, who is trapped in a car. Just kill all undead there. Haris will lead you to a water sport equipment rental, where you can repair your weapon and take whatever you want #2.
Use a card reader to get to Lifeguard Tower
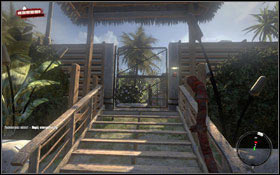
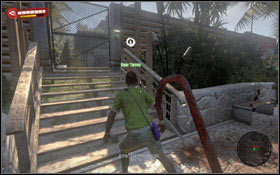
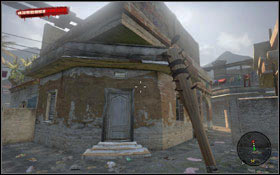
Continue your walk and go up the wooden stairs near the Lifeguard Tower. Use the previously obtained keycard to open the gate (2) #1. First you have to eliminate some Walkers around the Lifeguard Tower. You can use a gas tank and detonate it by throwing at it one of your weapons. It should set undeads on fire #2.
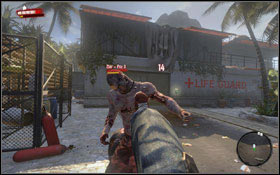
Open the garage - a cut-scene will be activated showing a new type of enemy - Thug. He is incredible tough, can easily knock you down standing still after your punches. So you should dodge after every attack. You can also use a gas tank and set him on fire. It is also a good idea to cut off his hands or break them, depending on what type of weapon you're using. However, you'll still be attacked - with his head. After getting rid of the enemy, clear the whole area inside but watch out for infected #2. They usually run towards you but then they can be easily knocked down with a kick.
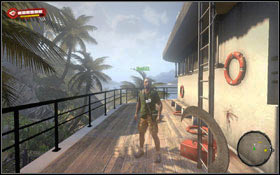
After cleaning the bottom open a hatch #1 leading upstairs. Just before getting to the main deck you'll have to deal with some more zombies #2.
Contact Sinamoi using the radio at the main deck
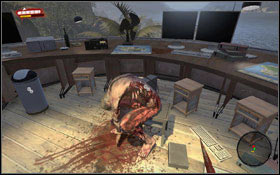
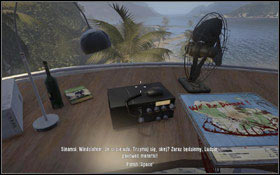
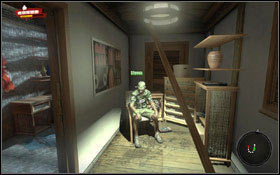
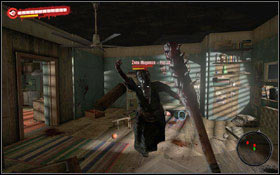
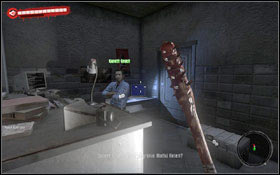
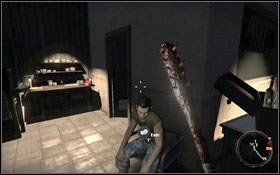
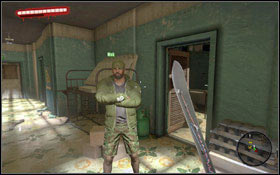
Enter inside the main building but watch out for an undead #1 sitting on a chair. Do not let him surprise you. Finally use a radio #2 to inform Sinamoi, that the Lifeguard Tower is secured. After a while all survivors will appear in the area. Do not forget to collect your reward from Sinamoi.
Obtained from: Sinamoi
Difficulty level: Hard
Reward: Money
 Dominic can be found next the main deck.
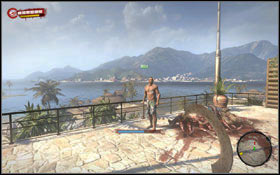 Mike stands right in front of the Lifeguard Tower, next to a pile of zombies.
This quest starts automatically. To continue the story you have to help Mike and Dominic by completing sidequests: On the Air, Ashes to Ashes....
After completing these tasks return to Sinamoi to collect your reward.
Obtained from: Sinamoi
Difficulty level: Easy
Reward: 1500 Exp, Baseball Bat
Search the bars for cans of food. Bring 3 cans of food to Sinamoi
Unfortunately a signal is still too weak to make a contact, possibly because of a monsoon. In a meantime however you need to find some food, because survivors are short on supplies. This quest can be finished very quickly if you have 3 cans of food with you - just give them to Sinamoi. Otherwise you have to search for them. You can check bars near the hotel #1. Without troubles you'll find cans there #2.
Obtained from: Sinamoi
Difficulty level: Hard
Reward: 1800 Exp, Money
Check the two gas stations and bring 2 packs of juice

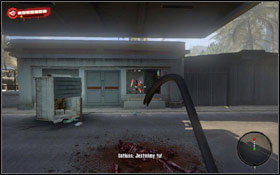
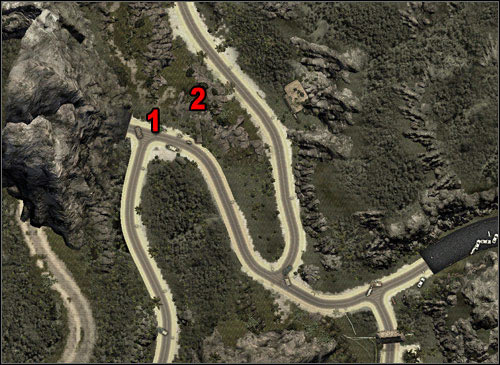
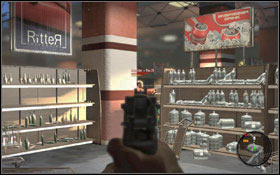
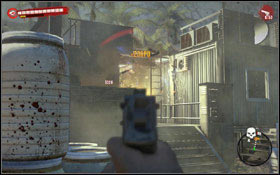
Food acquired in a previous mission is not enough for all to survive so your next task is to search two gas stations in search for packs of juice. You might use a car (can be found with no problems on a station), to fast bring everything in one go. During your second visit at the first station (1) you'll find there only a lot of zombies and even a Thug #1. After clearing the area enter the station. Next to cash registers you'll find a first pack of juice #2.
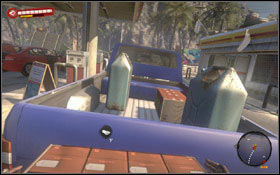
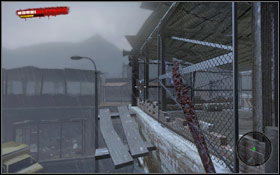
Put a pack on the car trunk #1 and move to another station (2). In order to get to a room where a second pack of juice can be found, you have to complete the Waterdance quest. After you turn off the power, you can climb the ladder #2.
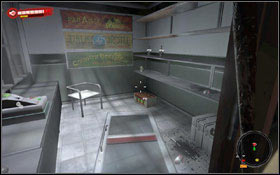
Eliminate Walkers running on the roof and break the window #1, so you'll be able to get inside the building. Next to cash registers you'll find 3 packs of juice #2. Do not forget to open the main door first, so you can leave the building and put packs on the car trunk.
After obtaining two packs of juice return to the Lifeguard Tower, where you can leave packs in a garage #1. Finally talk to Sinamoi #2, who will reward you.
Obtained from: Sinamoi
Difficulty level: Very hard
Reward: 2100 Exp, Diamonds
Recover the Truck from the Hotel's Parking Garage
A signal is still weak and boosting it may take a while. Yet again you're running out of food. So your task is to look for food in a city. But before you go there, you need to get a truck, so you can break through the blocked tunnel. The shortest way to the hotel's parking (1) leads through pools. But you might also use a car and take a longer route. Once you get to a destination place you'll run into two Thugs #1 next to the main door. The fight with these two monsters can be though. If you have a Molotov, do not hesitate to use it. After you knock them down, search their corpses. One of them has a hotel access keycard #2.
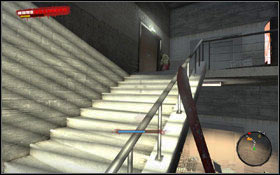
Use the keycard to get inside the hotel. Unfortunately you won't get access to any map of hotel here, but this location is not a maze, so you shouldn't get lost. Stay in a corridor and head in accordance to the target on your mini-map. Both in offices and in smaller rooms (in corridors too) you'll run into Walkers. After getting to the bar #1 go to the only open door on the left. You'll find yourself next to the elevator shaft #2 and on the other side you'll see Mike. The body guard will help you but first you have to find his friend, Ken.
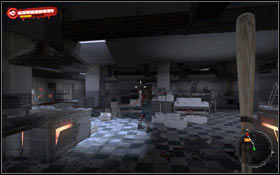
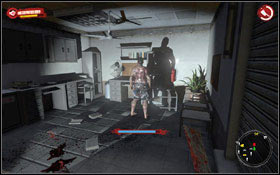
Jump down to the elevator #1 and you'll find yourself on a floor below. In a first corridor there is nothing to fear off, but unfortunately it will get worse and worse later. You have to go through the kitchen, full of Walkers and Thugs #2.
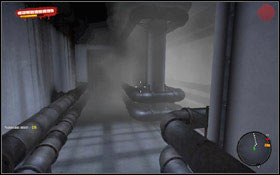
Go left (the door on the right leads to the cold store) but in a next room you'll run into even more zombies. So if you do not want to die and you can't cope with enemies, just run quickly to a next door and close it behind you. Finally you'll get to a narrow passage #1 which leads to a pool. Kill al undead and go to the right where you'll find a door leading to a bath and a dressing room #2.
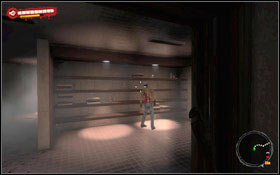
Go ahead through a dressing room. You'll get to a stairs leading to an upper floor #1, where you'll be welcomed by few Walkers. Go to the other side towards a locked door which has to be knocked #2.
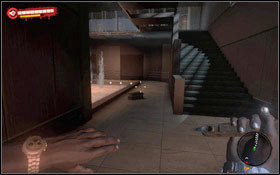
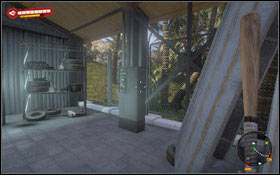
Ken lies in a smaller room with water automate #1. He will ask you to bring him morphine from a doctor's room. Go through the first door then through another, double-door. Being in a corridor with a column in the middle #2 kill zombies and then turn right.
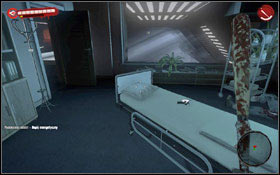
In a doctor's room reception you'll run into a Thug. Kill him and enter another room. You'll find morphine on a bed #1. Return to Ken and give him the medicine. Once again go to the corridor with a column but this time turn left. A double-door #2 is open now.
Go straight down the corridor next to offices, eliminating Walkers along your way. There is only one path, so you shouldn't get lost. You'll have to break one glass door in order to continue your walk. Finally you'll reach a corridor full of zombies. Mike will tell you to clear the passage first #1. After dealing with this threat the door at the end of the corridor will be opened. Go to the security room and talk to Mike #2.
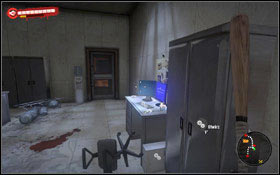
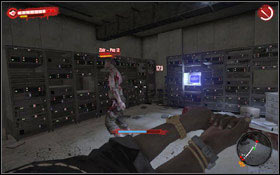
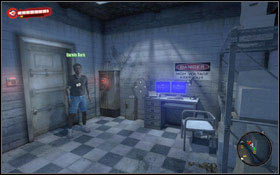
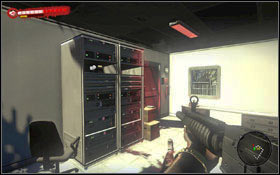
You'll learn that the door to the corridor leading to a parking are blocked, so you have to manually restart the system. Leave this room and go to the server room. In a first room you'll find a first of four computers (you'll recognize it because of a blue screen) #1. Hold down a proper button to restart the computer. Another server room is guarded by a Walker and a Thug #2.
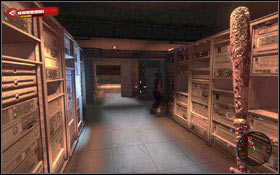
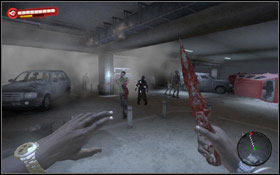
In the main server room #1 more zombies awaits you. Try to eliminate them one by one because if all of them attack you at once, you can be in troubles. In this room you have to find two computers to restart them. Now return to the security room, to Mike. Leave it through the newly opened door and after reaching a stairs, go to the bottom. Finally you've reached a parking lot #2. A tougher fight awaits you but you might as well just run and quickly get to a truck.
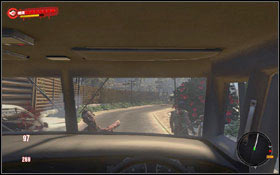
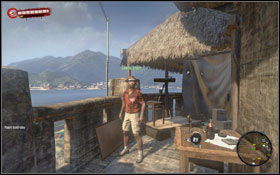
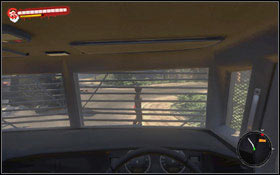
After leaving the parking you'll find yourself next to the truck and few infected will attack you. When you're ready, get behind the wheel #1 and go to the Lifeguard Tower (2). Once you reach the destination place stop at the marked spot #2 and get out of the car. Go to Sinamoi to collect your reward.
Obtained from: Sinamoi
Difficulty level: Medium
Reward: 2400 Exp, Shock Mod
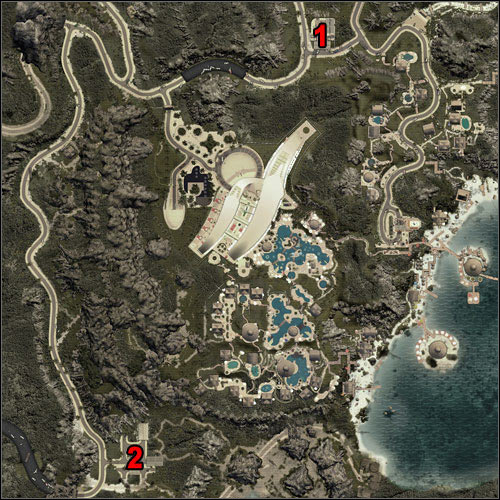
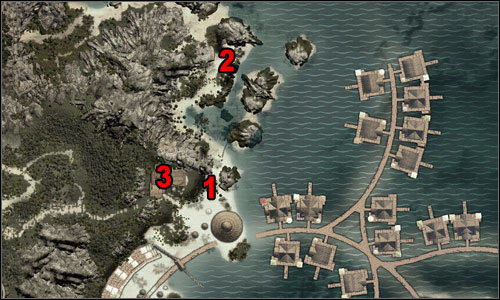
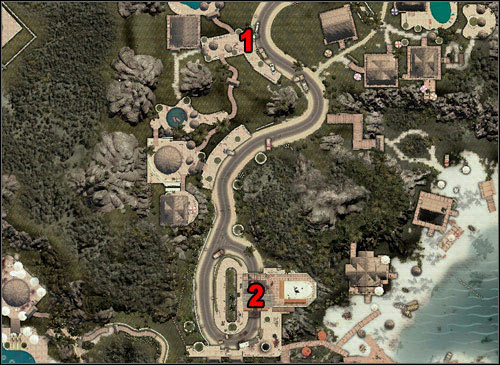
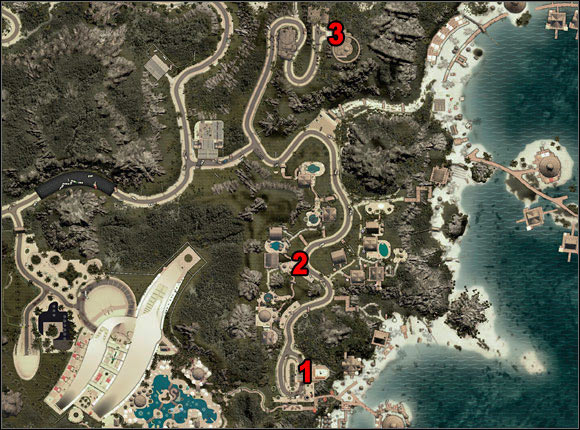
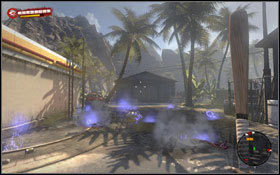
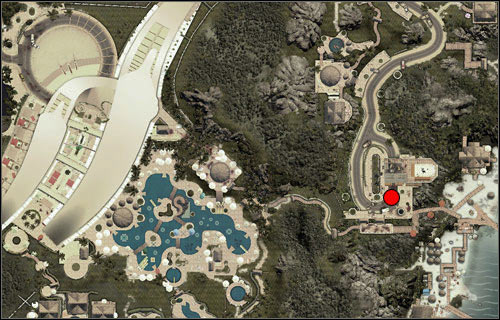
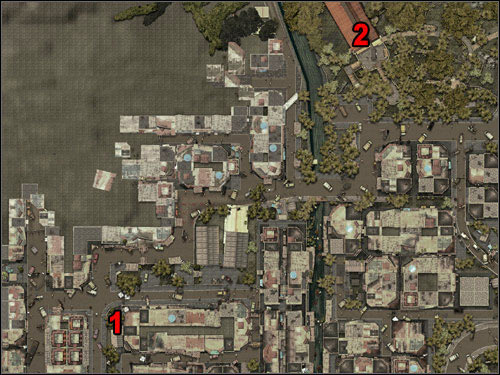
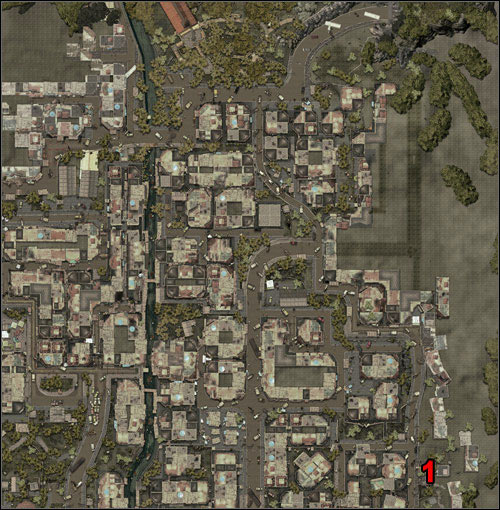
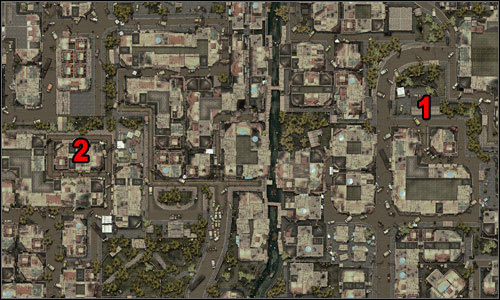
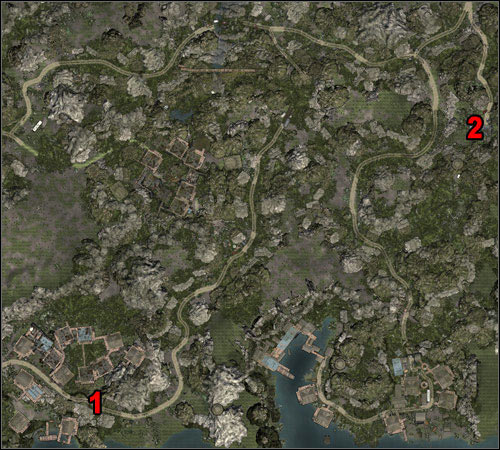
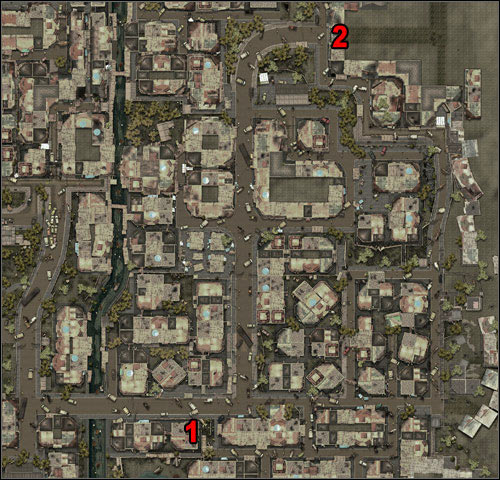
Investigate the helicopter wreckage and bring Sinamoi any supplies you find
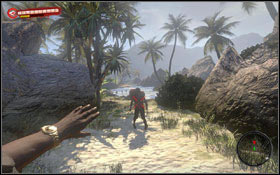
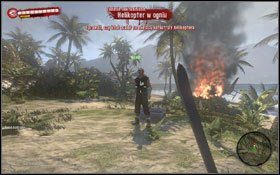
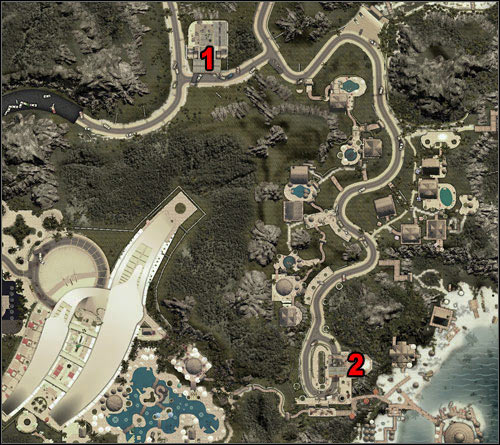
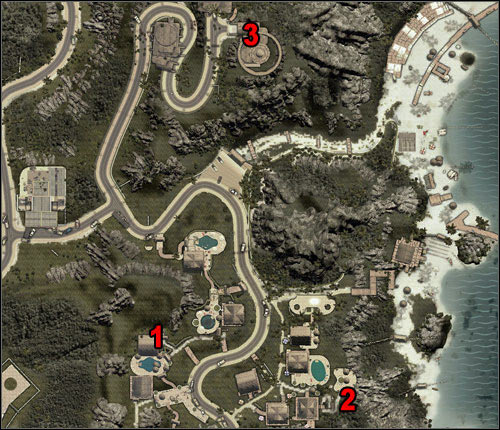
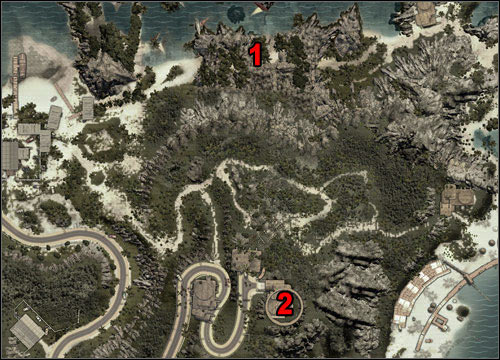
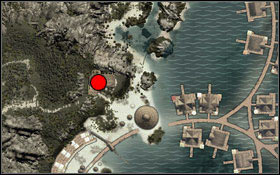
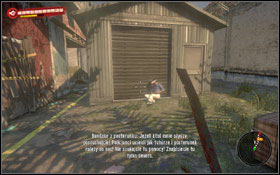
Sinamoi will tell you that he heard on the radio about a helicopter crash somewhere nearby. Head to the Diamond Bungalows district, north of the resort (1). At the marked place a cut-scene will be activated, after which you'll meet a new enemy type - Suicider #1. If you come close enough to him, the monster will explode after few seconds. A good way to eliminate these self-proclaimed bombers is to either throw a weapon at them and detonate them from a distance (later on you'll be able to use firearms) or just come close to them and when you notice that their health bar gets shorter, quickly run away. Go further, towards the crash site. You'll meet Nikolai there #2.


The Russian will ask you to escort him to a nearby bunker (3), where he will be able to take a shelter. Run after him eliminating any threats along your way #1. Remember to monitor your companion health bar - if he dies a mission will fail. Upon reaching the destination place #2, talk to him. He will give you a pretty good weapon. Return to the Lifeguard Tower and talk to Sinamoi, who will also reward you.
Obtained from: Sinamoi
Difficulty level: Medium
Reward: 2700 Exp
Go to a mechanic to reinforce the truck
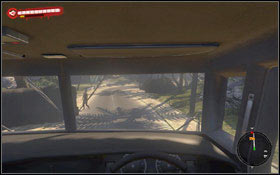
Unfortunately, even though the truck looks solid, it definitely needs extra armor. Your task is very simple. Get down and enter the truck (1) #1. Now you have to get to the north of the resort #2.
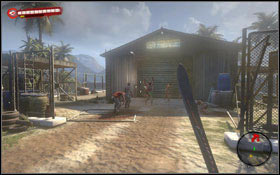
When you get near the car garage (2) leave the truck and take out all infected trying to get inside #1. You can use your car to kill them all. After you clear the area, the car garage door will be opened #2.
Obtained from: Earl
Difficulty level: Hard
Reward: 3400 Exp
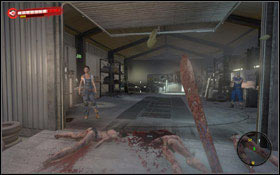
Protect the workshop while the mechanic works
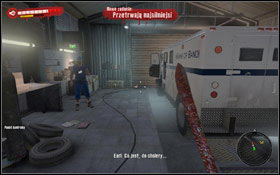
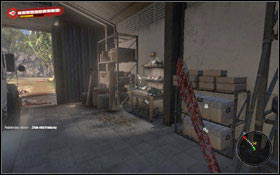
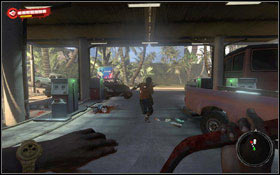
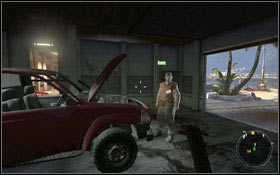
Talk to Earl #1. The mechanic will promise you to turn your car into a "tank", as he will probably turn soon into a zombie, because he was bitten. But before you leave the garage make sure that your health bar is full. Inside a garage you can also find a workshop where you can repair your weapon #2.

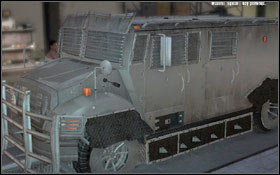
Once you go outside, the garage door will be closed and you task is to exterminate many infected #1 running towards you. There is not too much time between each wave, but if you can pick up gas tanks lying nearby, you might use them to set zombies on fire. After long and tough fight, when the mechanic finishes his work, go inside the garage and talk to Earl. Now you can see your new armored vehicle #2.
Obtained from: Jin
Difficulty level: Very easy
Reward: 5000 Exp
Travel outside the resort to find food, medicine and weapons
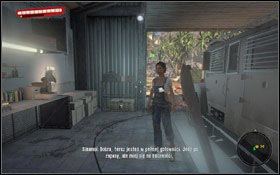
The last mission in Act 1 is very easy. First talk to Jin standing next to the vehicle #1.
Note: You can "use" Jin as item storage. If your equipment is full, you can give her some items, for example weapons which can't be used because of your low experience level.
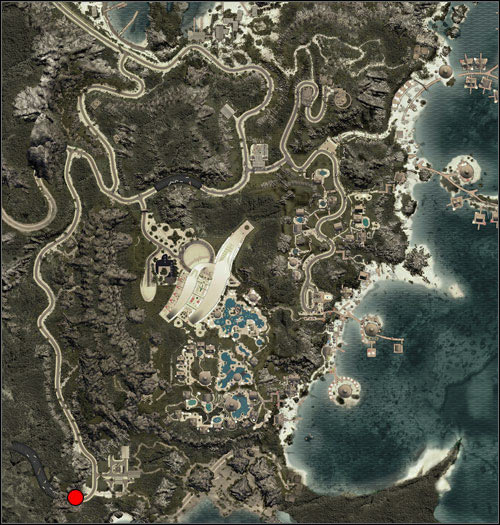
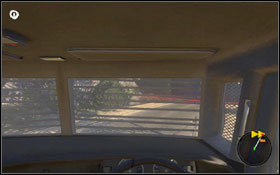
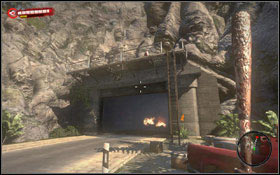
Enter the truck and drive to the southern tunnel marked on a map above. Both, this quest as well as Act I, end in the moment you reach an entrance to the tunnel #2.
Obtained from: Steven
Difficulty level: Easy
Reward: 300 Exp, Money
Find Maggie
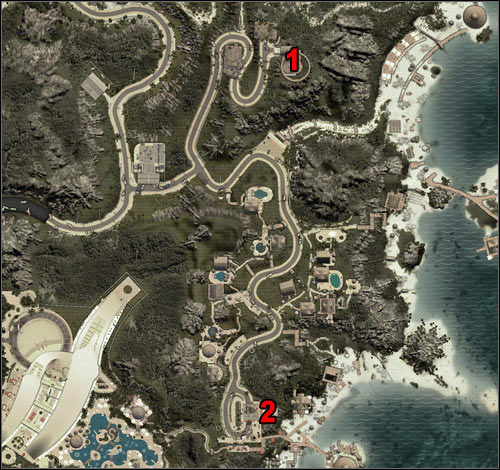
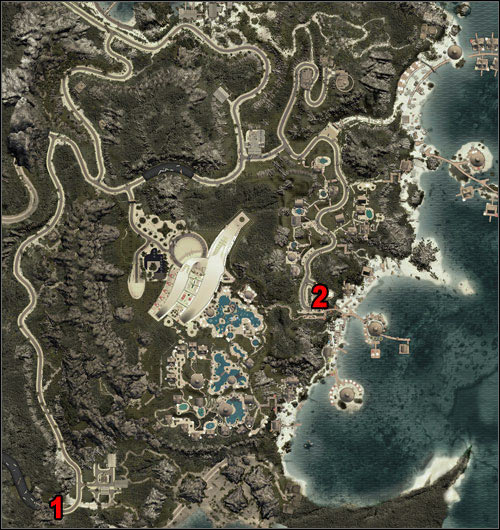
You'll be asked to locate Maggie, and when you do it, you have to tell her and others where Steven is #1. Maggie can be found in the Lighthouse (1), sitting on a mattress in a room corner #2. After short conversation with her you can return to Steven (2) and tell him where Maggie is. You'll get a reward from him.
It is definitely best to complete some quests from a main plot first, so you can get to the Lifeguard Tower and then to the Lighthouse. If you're lucky you can even get a car to move faster and safer between these places. If you do this, Steven can be already found in the Lifeguard Tower and you can use Fast Travel to quickly move there and inform the man about Maggie.

Obtained from: Dominic
Difficulty level: Medium
Reward: 1000 Exp, Money
Go to the lighthouse and bring back a signal amplifier

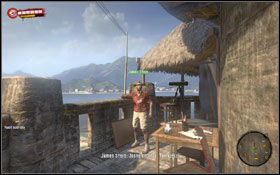
Dominic stands next to the entrance to the main deck #1. He will complain about too weak antenna, which is not able to send signals outside the island. Your task is to get a signal amplifier. It is good to complete the Lazarus Rising quest first, so you can get and access to the car and quickly reach the Lighthouse (1). Go to the top of it (if it is your first visit there you will be escorted by Colin and another quest will start automatically) and talk to James #2.
In order to get an access to the storage you have to complete the Knockin' on Heaven's Door first. After that talk to Darvin #1, who will open the storage door for you. There is a signal amplifier on one of shelves inside #2. Use Fast Travel and return to the Lifeguard Tower. Give Dominic an amplifier and obtain your reward.
Obtained from: Mike
Difficulty level: Very hard
Reward: 900 Exp, Molotov
Bring fuel from the gas station to burn the bodies

Mike stands right in front of the Lifeguard Tower, next to a pile of zombies #1. Your task is to get a gas to burn corpses, so the stench won't attract more zombies here. For this task a car is definitely useful #2, because after you take a canister you won't be able to use any weapon. An easy way to access a car is to complete the Lazarus Rising quest. There is also a car at the gas station - you'll get an access to it during this quest. And one more car can be found on your way to the station, near the entrance to the beach.
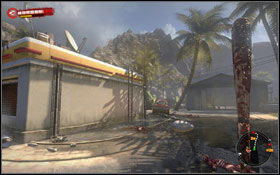
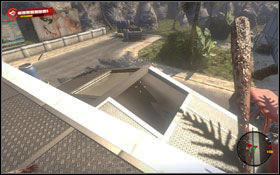
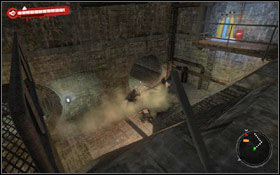
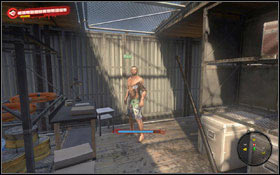
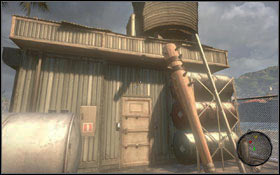
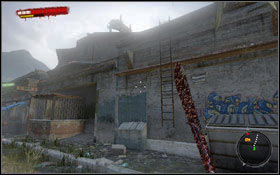
Once you reach the station #1 go over to the window and talk to Sathiss - he will open the door. Being inside, go talk to Don Mark. You'll learn that pumps do not work and a power generator is located in a storage room full of undead. Exit through the back door and find a ladder leading to the roof #2 and go to the top.
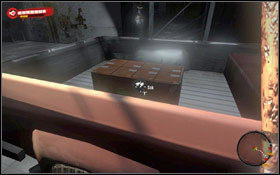
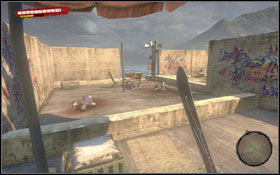
Jump down to the storage room through the open frame in the roof. There is a Thug #1 and few Walkers inside. After clearing the storage room of zombies, activate a generator #2 and then unlock the door taking off a plank.
Take one of empty canisters and put it next to the petrol pump. Watch out, because few waves of infected will attack you now #1. After eliminating the threat refill the canister #2.
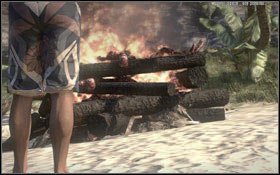
Put the full canister to the car trunk #1 and return to the Lifeguard Tower (1). Once you get to the destination place, grab the canister and bring it to Mike putting it next to the pile of zombies. A cut-scene activates, where zombies are burned. Do not forget to collect your reward - Mike can be now found in the upper part of the Lifeguard Tower.
Obtained from: Hank
Difficulty level: Very easy
Reward: 300 Exp
Find 4 parts from nearby cars
A mechanic will ask you to bring him few car parts from nearby cars. This task is very easy - it is enough to go along a main road from the Lifeguard Tower and examine few cars along your way. Once you get close to a car and there is a part you're looking for, a hand icon will appear on a map #2.

Once you've located proper car move to its front #1 and then hold a key to pull out the car part. After collecting four of them and giving them to Hank, you'll be able to use a car after a while #2. When you use a car and drive it somewhere, it will appear at the garage again after some time.
Obtained from: Jack
Difficulty level: Easy
Reward: 500 Exp, Money
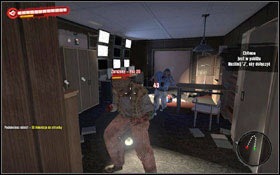
Clear the undead out of the infirmary
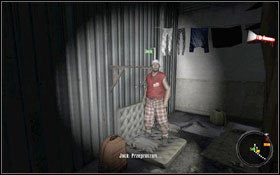
Inside the Lifeguard Tower you'll run into a Jack. Your task is very simple - you have to help him to get inside the ward #1, so he can take medicine for sick Anna. Break the door and deal with two Walkers inside the room #2. Watch out for one of them because he will jump on you from behind the door on the left. After clearing the room, talk to Jack to collect your reward. Do not forget to examine this room and take some useful drugs in case.
Obtained from: Jack
Difficulty level: Medium
Reward: 700 Exp, Sickle
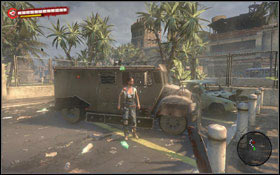
Find a paramedic's bag in an ambulance or lifeguard vehicle
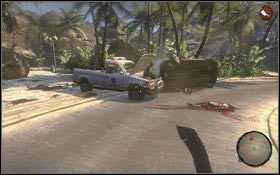
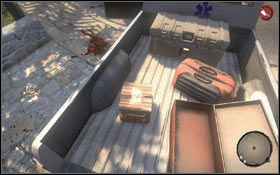
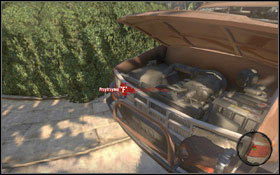
Unfortunately, there are no useful medical help in the room. Jack will ask you to find one of the paramedic vehicles and take a paramedic's bag out of it. The vehicle can be found nearby (2) but watch out for Walkers there. A bag is located at the back of the vehicle #2. Return to Jack to collect your reward.
Obtained from: Max Portman
Difficulty level: Medium
Reward: 700 Exp, Homemade Machete
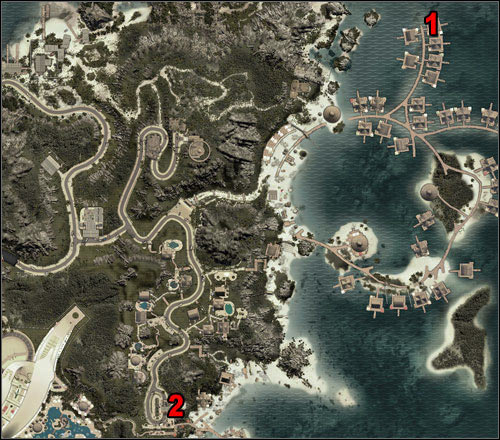
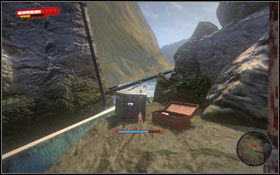
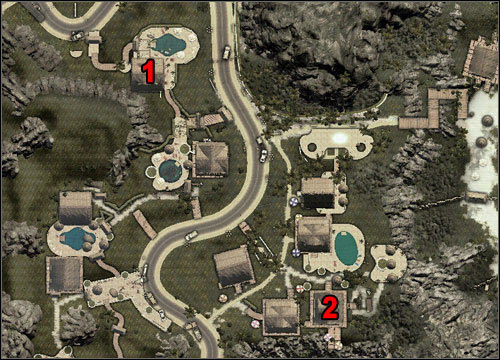
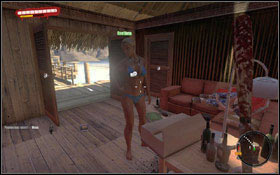
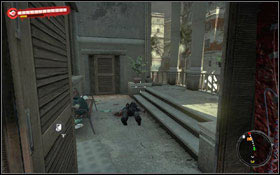
Look for Kelly's husband, a concierge named William at the Diamond Bungalows
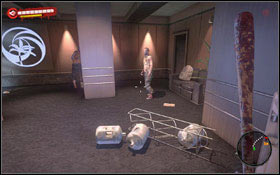
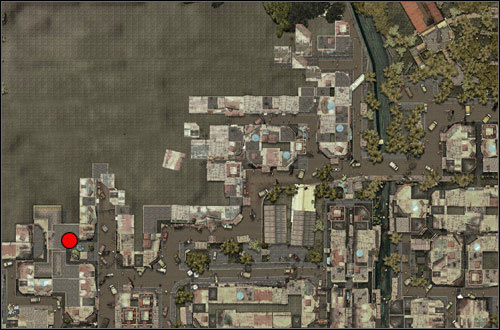
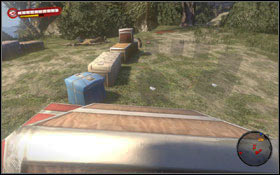
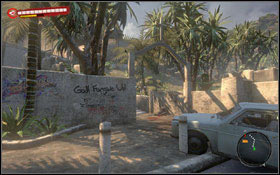
A woman named Kelly #1 sitting on a sofa worries about her husband, Will. Max will ask you to find this man. You'll learn that he has a friend named Doyle, who works in Diamond Bungalows (1) and probably he hides there. A way there is quite long, and you can reach the destination place going by the road at the beginning or entirely by walking on the beach. It is good to complete the Lazarus Rising quest first, and drive most of the way safely in a car. The Diamond Bungalows #2 district is not the safest. Both on the beach as well as near the bungalows you'll encounter many Walkers and several Thugs.

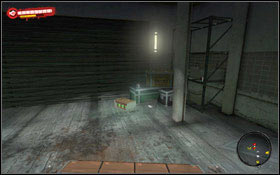
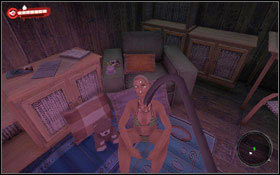
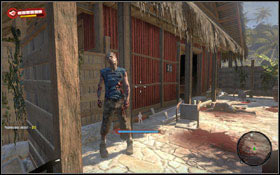
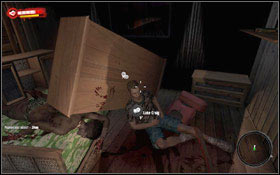
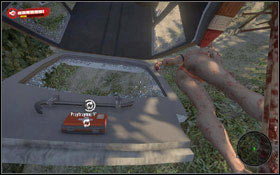
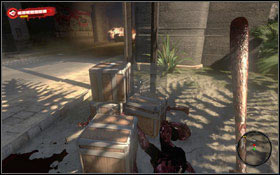
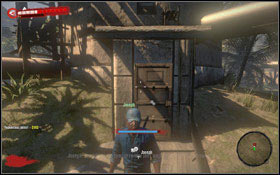
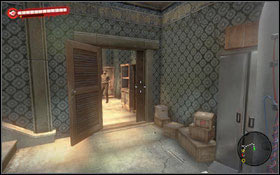
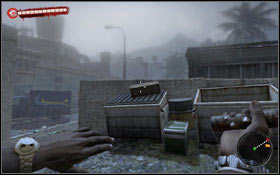
Run safely to the last bungalow (on your way there you have to jump over few obstacles made of suitcases and boxes #1). William can be found in a second room, behind the closed double door #2. He'll ask you to tell Kelly that he is dead, because that would be the best. The guy doesn't want to spend his last moments with his wife. Take the money from him and return to the Lifeguard Tower (2) and tell the news to Max and Kelly.
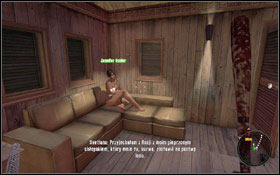
Obtained from: Jeannine
Difficulty level: Easy
Reward: 500 Exp, Slicer
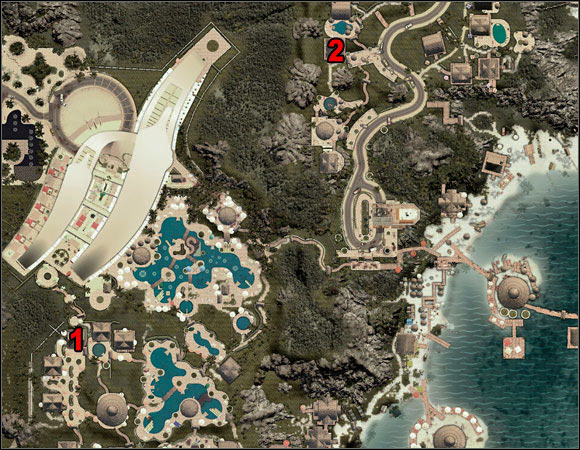
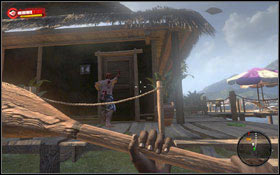
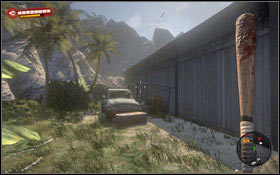
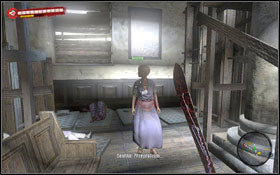
Retrieve Jeannine's necklace from bungalow 6 in the Silver Bungalows District
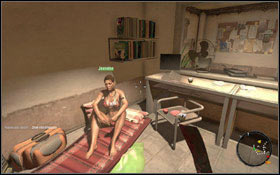

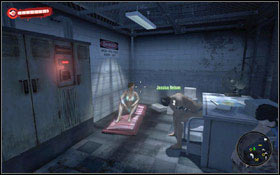
Jeannine sits inside the Lifeguard Tower, in one of rooms #1. She'll ask you to find her necklace, which she left in a bungalow nr 6. Go to the marked bungalow (2). In order to get inside, you have first to drive away with a car, which blocks the entrance #2.
The necklace can be found on one of cabinets. Take it and then return to Jeannine to the Lifeguard Tower (2) to collect your reward.
Obtained from: Anne snider
Difficulty level: Easy
Reward: 500 Exp, Nuts & Bolts Mod
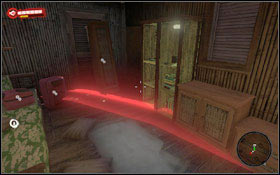
Find Anne's teddy bear

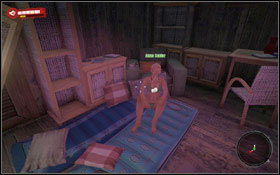
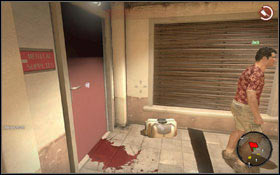
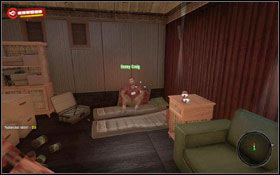
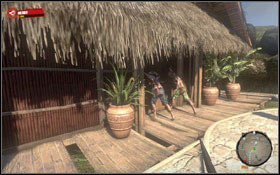
In order to get to Anne first you have to get rid of all zombies trying to get inside the bungalow (1) #1. The woman sits in one of rooms #2. She'll ask you to bring her a teddy bear - she can't sleep without him.
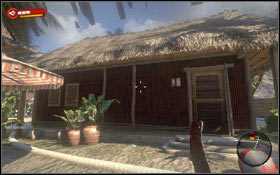
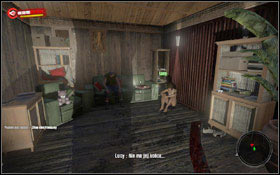
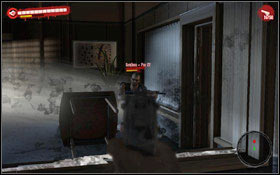
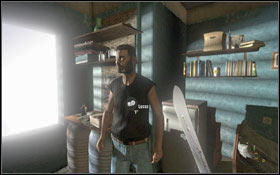
The teddy bear should be in bungalow 15 (2) in the Hotel Bungalows area. This zone is particularly "reach" in undead, so at a critical moment you should simply consider escaping. After reaching the mentioned bungalow #1, break the door and go inside. Go to a room on the left but watch out for Hector Lecter #2 sitting on a sofa, because he will attack you whenever you get close to him.
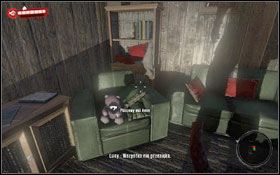
Anne's teddy bear sits quietly on a chair #1. Unfortunately Lucy is so scared that you're not able to talk to her. Return to Anne (1) and give her the teddy bear #2. You'll be rewarded in return.
Obtained from: Roger Nelson
Difficulty level: Easy
Reward: 700 Exp, Homemade Double Blade
Drive Jessica to the Lighthouse
In order to get into a bungalow (1) you first need to drive away a car blocking the entrance #1. Once you get inside talk to Roger who bleeds in a bathroom #2. He will tell you that he killed one zombie but the undead managed to bite him. He'll ask you to drive his wife away as far as possible, so he will not attack her when he turns into a zombie.
Use car #1 - the woman will sit on a passenger seat. Thanks to that you'll reach the lighthouse (2) fast and without any major problems or fights. Get out of the car and talk to Jessica #2 - she'll give you a reward. If you want you can get back to the bungalow (1) to check if Roger turned into a zombie, but it is not necessary.
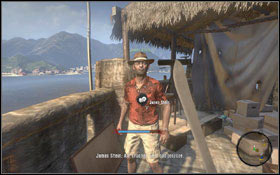
Obtained from: James Stein
Difficulty level: Hard
Reward: 500 Exp, Money

This quest starts automatically during your first visit in the Lighthouse. You'll find Colin #1 next to the entrance, who will take you to James. Use the door to get to the Lighthouse's to #2. In order to complete this quest you have to help people in the Lighthouse by completing the A Ray of Hope quest.
Obtained from: Darvin Bark
Difficulty level: Medium
Reward: 1200 Exp, Wrench
Find Marcus and fix the transformers powering the lighthouse
Darvin can be found in a lower part of the Lighthouse, next to the closed door leading to a storage room #1. You'll learn that one of men went to check two transformers, which power up the Lighthouse, but have not yet returned. Your task is of course to locate and repair transformers if needed. Definitely the fastest way to reach Marcus is to use a car. You can find one near one of transformers (1). The man can't really do any move because of zombies surrounding him #2.

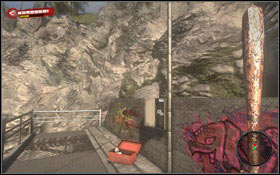
Start the extermination. This shouldn't be too difficult, because initially zombies do not pay any attention at you. After all undead are dead talk to Marcus. He'll ask you to start another transformer, while he fixes this one. A second transformer is not far away (2) but watch out near bungalows and a swimming pool. Go through a damaged fence #1 and get down. Break the door and go inside. It is clear, so you do not have to worry about any attack. You need to turn on five power units #2.
Now it is time to return to Marcus (1). But be careful because right away you'll leave the power units room you'll be attacked by few double groups of infected #1. A location from which they come running from is marked on the map, so do not get surprised. Marcus will give you some money for your help and another reward can be collected from Darvin, who can be found in the Lighthouse (3) #2.
Obtained from: Trevor Cohen
Difficulty level: Hard
Reward: 500 Exp, Nail Hammer
Get 4 flares from the wrecks on the coast
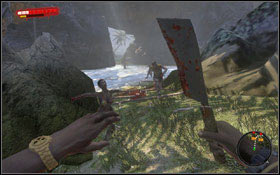
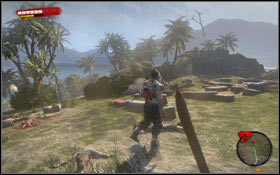
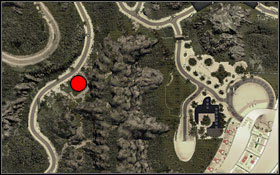
Trevor can be found on the top of the Lighthouse #1. Your task is to find signaling flares in the ship wrecks on the coast. A way to the coast (1) leads through the forest and is full of infected coming running from different directions #2.
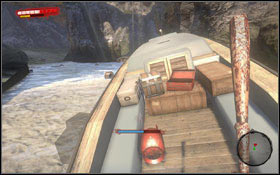
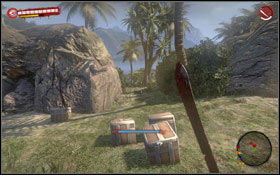
You'll find the first flare in a suitcase next to other bags #1. The second flare you'll find on the motor boat's deck #2.
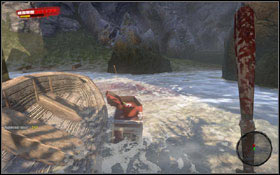
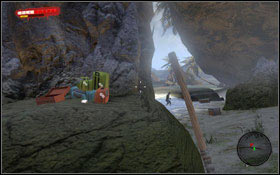
The third flare can be found next to the boat #1. And the fourth, last flare can be found next to a single box on a small hill #2. After collecting all flares return to the Lighthouse (2), give flares to Trevor and collect your reward.
Obtained from: Mick Fler
Difficulty level: Medium
Reward: 500 Exp, Deo-Bomb
Find painkillers and bandages for Linda
Mick stands in the Lighthouse #1. Your task is very easy - you have to bring him painkillers for a woman named Linda. You might probably have some with you. If so, just give them to Mick and collect your reward. Otherwise you have to look for them in few places like the Lifeguard Tower (1) or in a damaged ambulance on the road to bungalows (2). Definitely faster way is to go to the Lifeguard Tower using Fast Travel option. You can find painkillers in the room #2 connected to the Bloody Health Service! quest. After collecting painkillers return to the Lighthouse and give them to Mick (3).
Obtained from: Monica Goldberg
Difficulty level: Hard
Reward: 3500 Exp, Military Machete
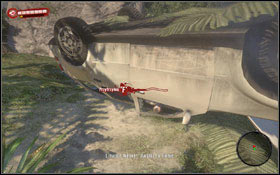
Find the location of the aircraft
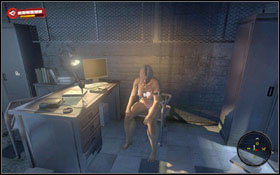
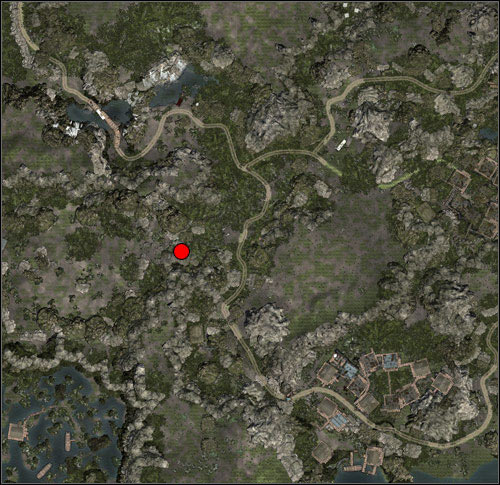
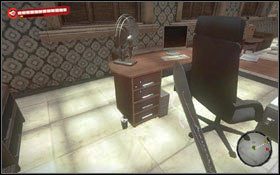
Monica can be found inside the Lighthouse, she sits at a desk. You'll learn that she managed to make a contact with a falling plane, which is likely to emergency land somewhere in the outskirts of the jungle. She'll ask you to find that plane, as it may be a last resort.
In order to continue with this quest you have to complete Act 1 and 2. A plane crash site can be found in Act 3.
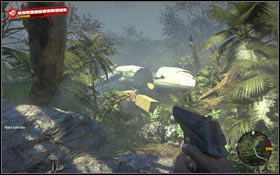
You'll walk next to the mentioned place in first mission of Act 3 during your trip with Jin to the village. It is marked on the map above. You'll see the unfortunately destroyed plane #2 (watch out for a jungle mugger standing next to a car). Return to the Lighthouse and report back to Monica.
Obtained from: Luke Craig
Difficulty level: Easy
Reward: 500 Exp
Get the insulin to Luke's brother, Danny
You'll find Luke in the bungalow 20 (1), but first it is better to kill all zombies trying to get inside #1. Once you get there, you have to break the door leading to one of rooms. The almost dead man lies behind a collapsed wardrobe #2.
He'll ask you to bring insulin to his brother Danny, because he needs it as soon as possible. You'll find him in a bungalow 14 (2), so not far away. Same as with the previous bungalow, here again you must first fight away undead' attacks #1. There are several energy drinks nearby. Watch out on the other side of the bungalow, because there are many zombies near a swimming pool there. Go inside the bungalow and head towards a big room. You'll find there Danny Craig sitting on mattresses #2. Once you give him insulin, the quest is completed. Do not forget to collect your reward from Danny.
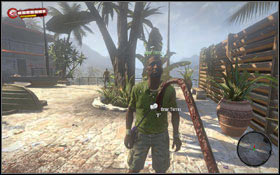
Obtained from: Omar Torres
Difficulty level: Medium
Reward: 600 Exp, Money
Acquire the key from Omar's undead deadbeat
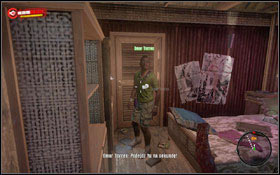
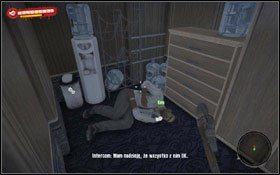
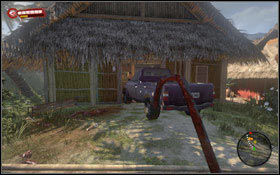
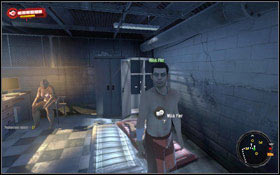
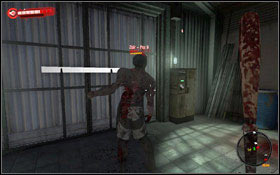
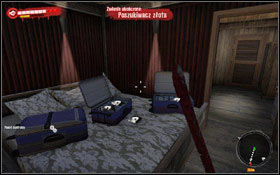
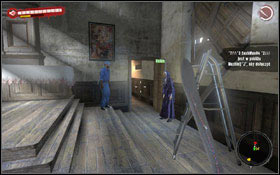
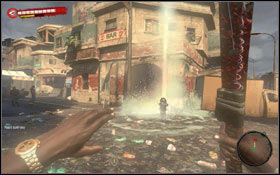
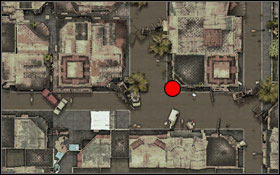
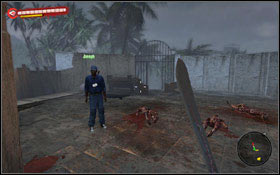
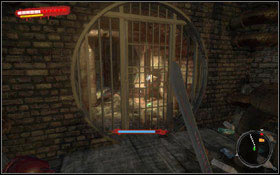
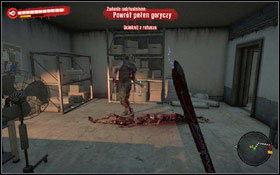
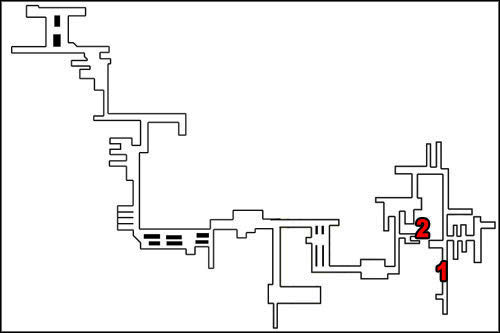
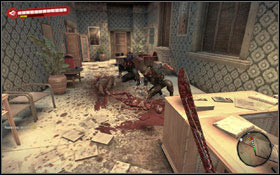
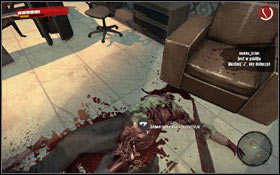
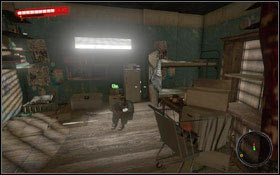
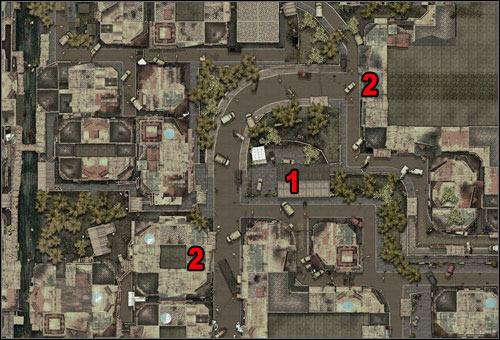
Omar can be found in the bungalow 17 (1) #1. He is not attacked by any zombies, so you do not have to watch out. The guy complains that one hombre owes him money, but since he turned into undead, he is not eager to give it back. However he got a key to his apartment. Omar promises to share the find in the house of the debtor with you, if you can get this key. You'll find the mentioned undead in the bar (2). Watch out though, because you may run into a Thug along your way #2. You can bypass him or try to kill him and get some experience points.
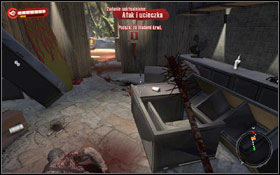
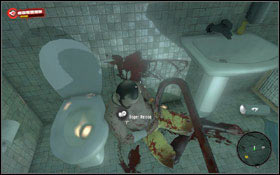
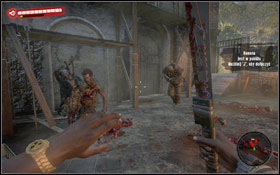
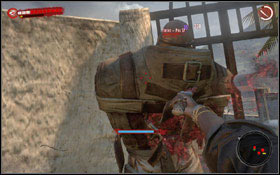
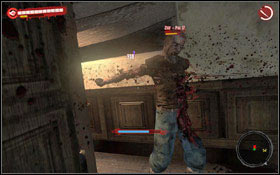
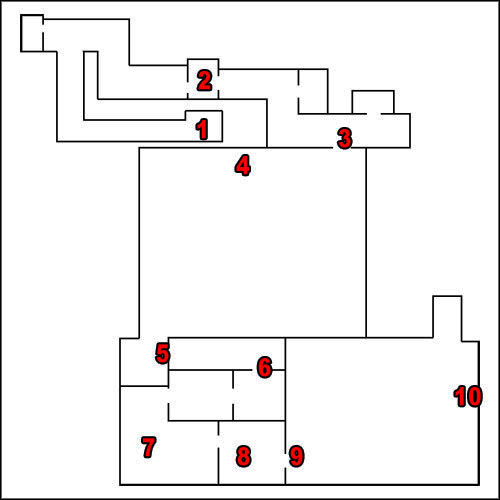
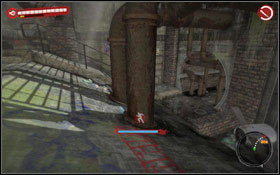
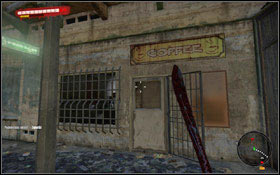
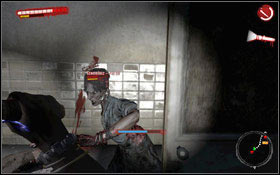
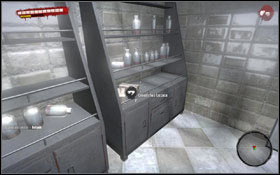
After getting to the bar you'll see that it is unfortunately empty #1. But you can notice blood on the ground. This is your only trail so follow it. Blood traces will lead you to toilets (3) #2.
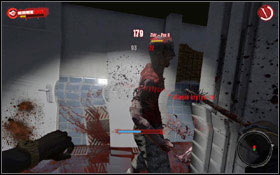
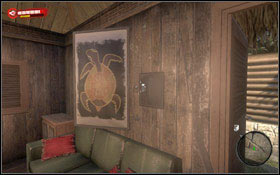
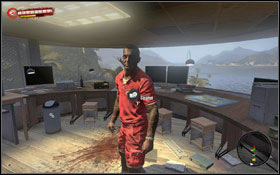
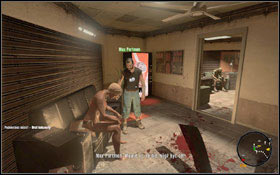
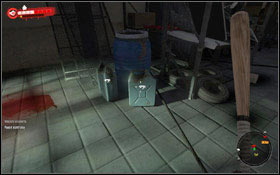
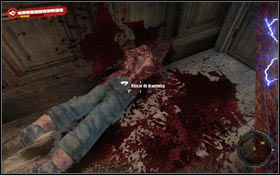
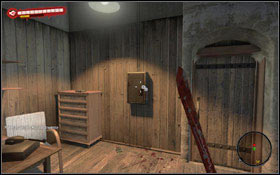
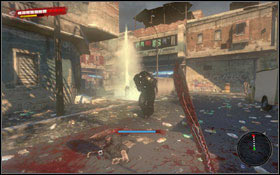
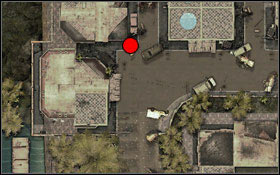
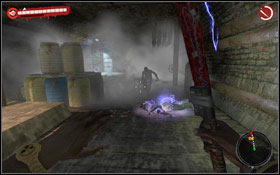
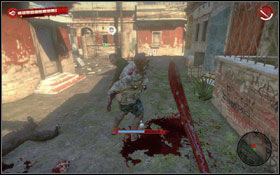
Once you go down, you'll see a terrible sight - the entire bathroom is in blood. You do not have to look for a Thug who is Omar's debtor #1. He'll find you. Due to a small area watch out with attacks. Try to cut off both his arms or at least break them. Remember also about dodging zombie's counterattacks. When he's finally dead, take a safe key from his corpse. Return to Omar (1) and give him the obtained key. Go to the other room and look for a safe. It can be found behind a turtle painting #2. Talk to Omar in order to get your share.
Obtained from: Omar Torres
Difficulty level: Easy
Reward: 600 Exp, Revolver
Help Omar get to the Lifeguard Tower
You can start this mission only after completing the Hit and Run quest.
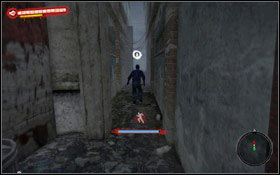
The mission is very easy. You just have to bring Omar to the Lifeguard Tower. Alive - of course. Unfortunately he sets the way you have to follow #1. Do not try to run and bypass zombies, because Omar sometimes just simply walks instead of running. He will not manage with undead himself, so you have to stay close to him and try get rid of zombies attacking him. Current health level of your companion can be seen by holding the key responsible for weapon selection. Once you get to the destination place #2 talk to Omar to collect your reward.
Obtained from: Laurie Weaver
Difficulty level: Easy
Reward: 400 Exp
Get Laurie's husband out of the wrecked car
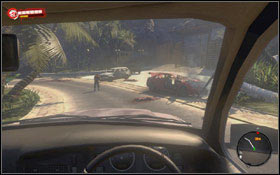
Just along the road in the eastern part of the resort you'll find a woman named Laurie (1) #1 who needs your help. Together with her husband they were driving to the Lifeguard Tower, but when suddenly a zombie jumped out in front of the car, the man lost a control of the wheel and they crashed. Run behind the woman to the accident site (2), where you'll see a wrecked car. Try to open a car in order to get out the man #2 by holding a proper key.
After first try you'll have to fight out two waves of infected attacking you #1. Once you get rid of them, make a second try to open the door. This time it will succeed. The man will go out of the cat and as a reward you can take everything you'll find in the car trunk #2.
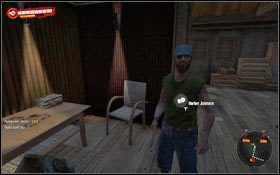
Obtained from: Harlan Johnson
Difficulty level: Very easy
Reward: 500 Exp, Baseball Bat
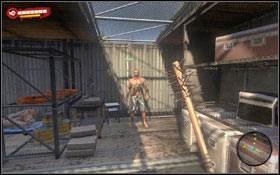
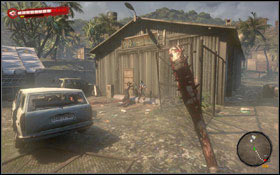
Help Harlan get inside the hut

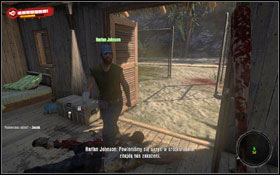
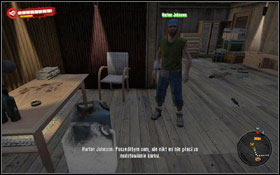
Harnal is located in the west of the resort #1. He is safe but Walkers try to get him #2. Eliminate any threat and then open the gate and talk with the man. He will ask you to help him to get inside a bungalow.

The difficulty is to jump over a fence, which can be done in two ways. First, you can climb the crates and get on top of the fence #1 and then slowly walk over it reaching back of the bungalow. Another option is to jump over the fence being on the hill #2. You can get there by climbing boxes next to the hill.
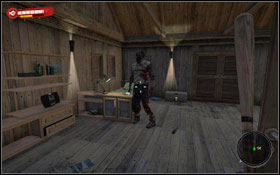
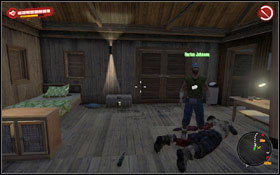
Break the back door and go inside the bungalow. Cross the double door. You'll find a living room there with a Thug inside #1. Deal with the undead (there is a workshop in a previous room so remember about frequent weapon repairs), and open the entrance door #2. Once Harlan gets inside, talk to him in order to collect your reward.
Obtained from: Harlan Johnson
Difficulty level: Medium
Reward: 500 Exp, Money
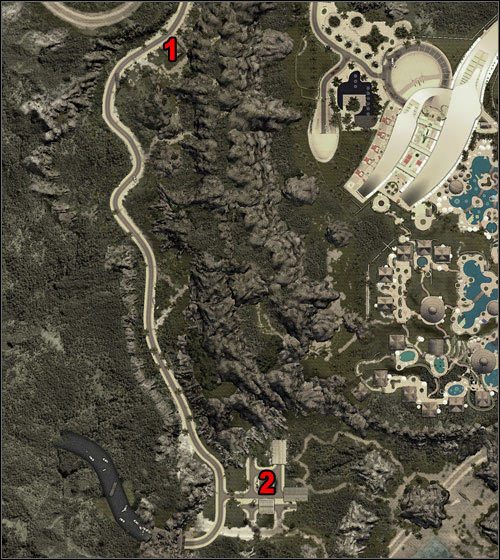
Find 2 gas cans at a gas station and deliver them to Harlan
You can start this mission after completing the Make Yourself at Home quest.
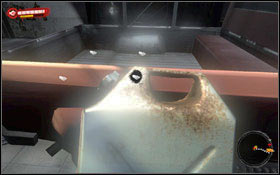
Talk to Harlan, who is inside the bungalow #1. Your task is to bring him two gas cans from a nearby gas station (1). There are many cans on the gas station #2, so you shouldn't have any problems with finding them #2.
Remember to use a car, co you can take two cans at once #1. Return to Harlan (2) and put both cans near him #2. Finally collect your reward from him.
Difficulty level: Medium
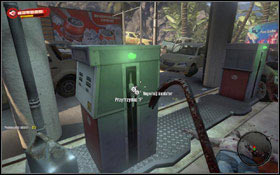
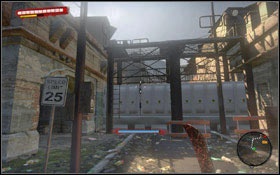
Turn off the electricity in this area
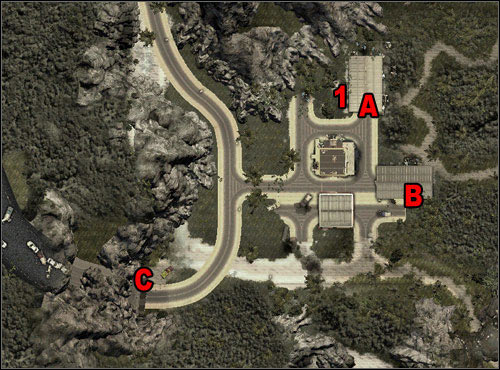
This quest activates automatically during your first visit at the gas station in the southern part of the resort. You have to turn off three switches, so the electricity on the road is off #1. The B switch (B) can be found in an open hangar #2.

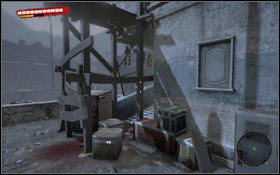
To get inside the hangar with the A switch (A), you'll have to look for a car on its left side. Climb the car and jump over the fence #1. Go to the hangar back door and break it. There are two Thugs and several Walkers inside. The first Thug can be easily dealt with by using a gas tank and exploding it #2.
Eliminate the second Thug and deactivate the A switch #1. Now open the main gate by pulling of a plank blocking it. Finally head towards the C switch (C) #2.
In order to get to the platform, you have to reach the ladder. So gather few crates and put them under the ladder #1 (crates can be found nearby). Watch out for zombies coming running out of the tunnel (usually they are set on fire so try not to make a close contact with them). After climbing to the top, turn off the last switch #2.
Obtained from: Jennifer Snider
Difficulty level: Very easy
Reward: 500 Exp, Heavy Mod
Find Anne, Jennifer's sister
You'll find Jennifer in the Diamond Bungalows district, in last northernmost bungalow (1) #1. She will ask you to find her sister, who may be in a bungalow 15 or in a bungalow 2 in the Golden Bungalows district. In order to get to Anne, you must first get rid of all zombies trying to get inside the bungalow (2) #2.

Anne sits in one of rooms. If you've already completed the Toy story quest, you may return to Jennifer (1) and tell her, that now her sister is safe with her teddy bear. Otherwise you have to complete the Toy story quest first. After that you can collect your reward.

Obtained from: Richard Case
Difficulty level: Very easy
Check out Richard's house
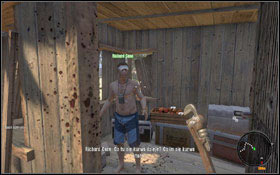

Richard hides in a small storage near the Diamond Bungalows district (1) #1. Kill nearby zombies and open the door. Richard will thank you and give you a key to his bungalow, from which you can take whatever you want. You'll find this bungalow in the eastern part of the district (2) #2. Watch out, because it is guarded by Walkers and a Thug.
Unfortunately, as soon as open the door you'll be attacked by several waves of infected #1. It is not an easy fight due to superior number of opponents. Closing inside the bungalow is not a good idea, because you'll have to go out sooner or later. Explore the bungalow and take all useful items and weapons that you find there #2.

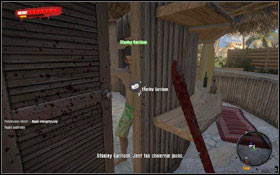
Obtained from: Stanley Garrison
Difficulty level: Easy
Reward: 400 Exp, Money
Get booze for Stanley
This task start automatically as soon as you get close to the attacked bar. First get rid of all Walkers #1 and then move towards the door #2. Stanley will ask you to get him few bottles of whiskey. You can find alcohol mainly near the bar in the hotel pool area. The quest ends when you get him five bottles of alcohol three times. Every time you get more and more money.
Check Hotel Bungalow 14

This task starts only when you pick up the keys to the bungalow 14, lying next to one of the corpses near the Hotel (1) #1, #2.
You'll see two places on the map, which can point to the bungalow 14 - go to one closer to the hotel (2) #1. Open the door and get inside. You'll find lots of wallets #2 full of money. Do not forget to examine the safe behind a painting in the second room.
Obtained from: Nikolai
Difficulty level: Very hard
Reward: 3000 Exp
Get a satellite phone from Sergei at Nikolai's restaurant
This task can be started only after completing the Black Hawk Down quest.
As soon as you take Nikolai to the bunker, you'll be able to talk to him. He will ask you to go to the city and locate a restaurant Cafe Kiev, where you can find Sergei. He will give you a satellite phone.
In order to continue with this quest you have to complete Act 1. You'll find the restaurant in Act 2.
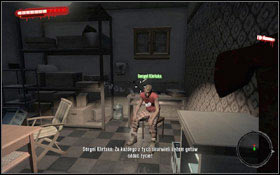
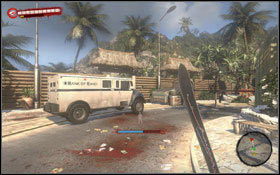
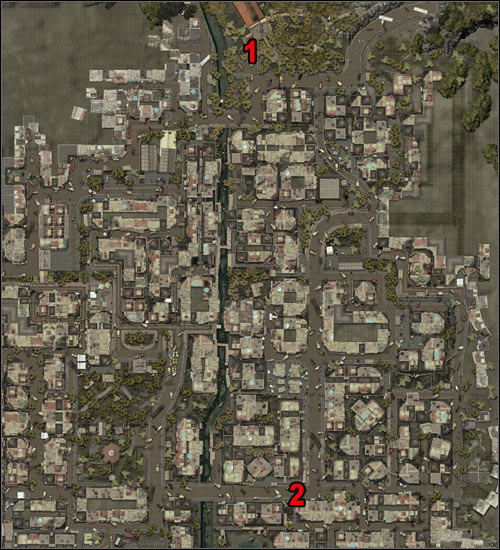
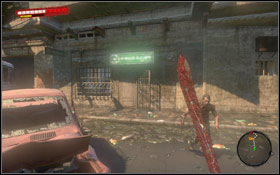
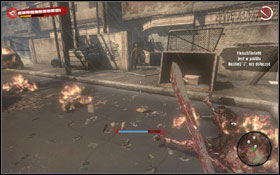
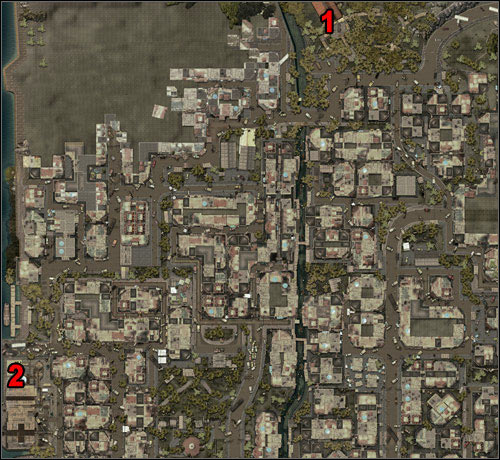
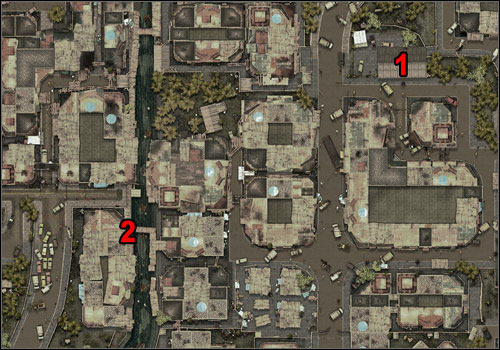
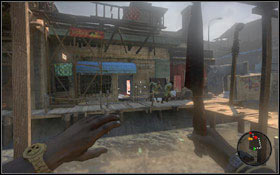
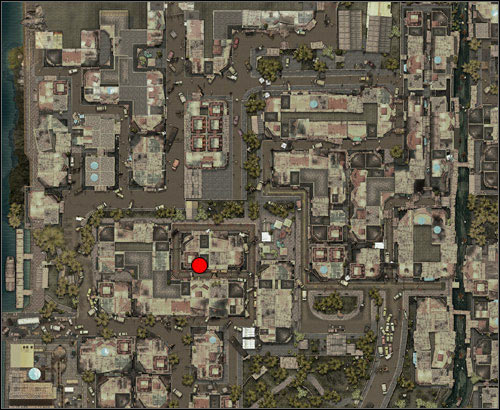
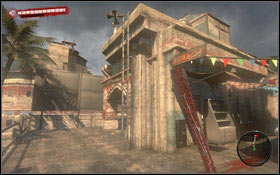
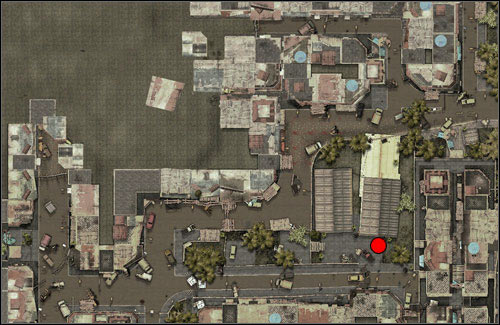
The restaurant can be found near the church. Its location is marked on the map above. Before you get inside you have to get rid of few undead trying to knock in #1. Sergei sits at the back of the restaurant #2. Unfortunately he has no satellite phone with him and the rest of people fled into a jungle.
In order to continue with this quest you have to complete Act 2. You'll find the hideout in Act 3.
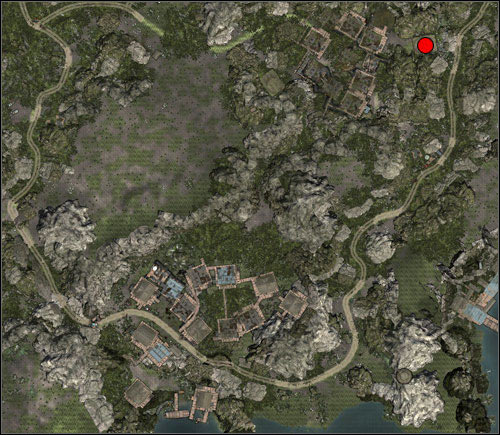
Find the way to the Russian Hideout in the Jungle and get the satellite phone
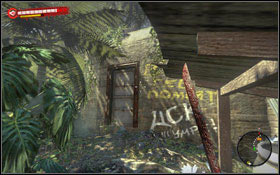
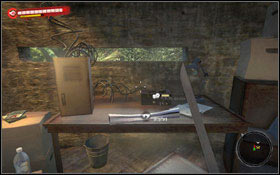
You can reach the bunker #1, where you can find a satellite phone, with the path starting in the village. Get inside the bunker and then use a ladder to get upstairs. Use a phone #2. You'll learn from Nikolai people that they are on their way after him. The quest ends in that moment.
Obtained from: James Stein
Difficulty level: Hard
Reward: 700 Exp, Torch Mod
Finish the HELP sign out in the clearing
You can start this quest only after you complete the Black Hawk Down quest.
You'll find James at the top of the Lighthouse tower #1. Your task is to finish making of huge HELP sign, which people started to make with boxes and suitcases near the Lighthouse. Unfortunately they were attacked by zombies and finishing the sign was not possible. Go there (1) and kill all undead. Prepare for a very tough fight #2, because you'll face infected, Walkers and a Thug.
You'll find few boxes scattered in the area #1. In order to finish the sign (actually only "P" letter is missing) you need to find 6 boxes #2. After completing the task return to James in the Lighthouse and collect your reward.
Obtained from: Kim
Difficulty level: Very easy
Reward: 50 Exp, Money
Acquire water for Kim

To get to Kim first you have to get rid of all zombies trying to get inside the bungalow #1. Inside the bungalow you'll find Kim #2, who will ask you for some water. Water bottles can be found in different places, mainly in bungalows. When you get close to any bottle, your cursor will turn into a hand icon.
Obtained from: Mike
Difficulty level: Very easy
Reward: 50 Exp, Molotov
Acquire 5 bottles of alcohol
This event is available only after completing the Ashes to Ashes... quest.
You'll find Mike in the upper part of the Lifeguard Tower. He'll promise you to make a Molotov if you bring him 5 bottles of whiskey. You can find alcohol in many places, for example inside bungalows or near bars in the hotel area.
Obtained from: Ned
Difficulty level: Very easy
Reward: 50 Exp, Money
Get two food cans for Ned
Ned stands next to the Lighthouse entrance. He will ask you to bring him some food. Your task is to find 2 cans of food and bring them to Ned. Every time you receive experience points and money.
Obtained from: Harlan Johnson
Difficulty level: Very easy
Reward: 50 Exp, Molotov
Bring Harlan 3 bottles of alcohol
This event is available only after completing the Fluid Necessity quest.
Harlan can be found in a bungalow in the western part of the resort. He will promise you to make a Molotov if you bring him 3 bottles of whiskey. You can find alcohol in many places, for example inside bungalows or near bars in the hotel area.
Obtained from: Svetlana
Difficulty level: Medium
Reward: 100 Exp, Diamonds
Find a bottle of Champagne for Svetlana
You'll find Svetlana in the last bungalow in the Diamond Bungalows district #1. The only thing she wants is brand champagne, for which she can pay a lot - with diamonds worth 1500$. Champagne can be found mostly in fridges, it is worth to look for it in a hotel kitchen.
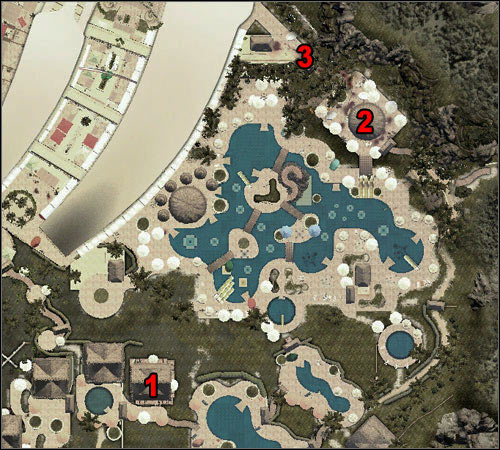
Reward: 2000 Exp
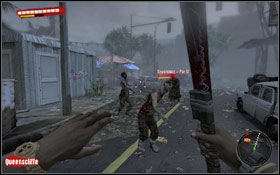
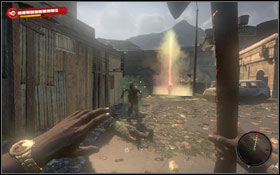
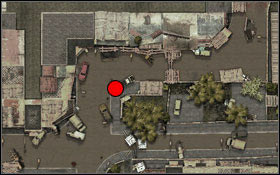
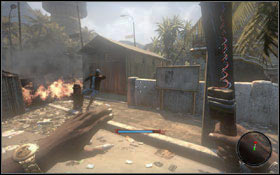
Help the people in the church fend off the attack of the undead
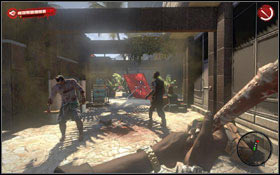
This quest starts automatically after completing Act 1 and reaching the city. You'll also get to know a new enemy type - Ram. Do not wait and run towards the church entrance, where you'll find several Walkers and mentioned Ram #1. It is a huge enemy, who charges at you (if he stays close to you after his charge, he kicks you). The only way to avoid his attacks is to dodge him (you press a direction button, right or left, and then press jump). If this monster stops or runs into an obstacle start attacking him #2. The quest will be over when you kill all undead in front of the church. The door inside will be open then.
Reward: 2000 Exp, Cooler Mace Mod
Silence the bells
Go to Mother Helena #1 who will give you another task. You have to kill one of the infected, who has locked himself inside the church bell. That's why bells keep ringing and may attract more zombies to the church. Inside the room you'll face a Thug #2. Try to cut off his arms or break them in order to get an advantage and then kill him.
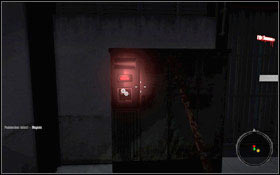
Take the church bell keys #1 and turn off ringing bells by opening a box on the wall #2. Do not forget to talk to Mother Helena in order to collect your reward.
Obtained from: Helena
Difficulty level: Hard
Reward: 4000 Exp, Sticky Bomb Mod
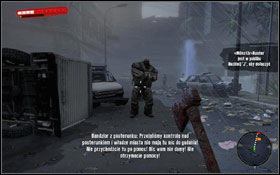
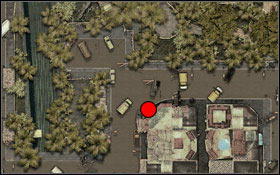
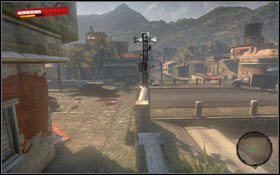
Check what's happened to the pump station
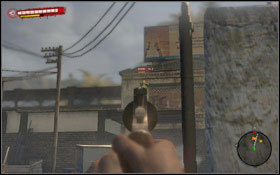
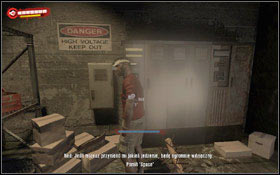
Mother Helena is happy to help you to get food but first you have to help her. Two guys went to the pump station to check it, but they didn't return yet. So you have to go there and see if everything is OK. A way to the pump station is not easy because you'll have to fight lots of Walkers along your way. Generally there is a group of them every few meters #1. Watch out also for burning undead and these with a wisp of poison surrounding them. Once you reach the destination, you'll learn what's wrong - this place was taken by Punks. If you have no firearms, you won't do much #2.
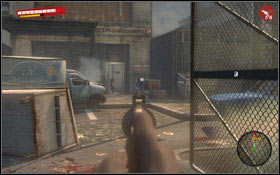
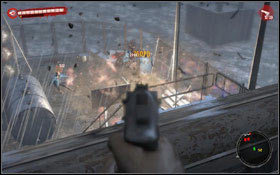
Try to aim at heads. That way Punks will die at once (provided that you hit them perfectly). There are 5 enemies in front of the building to be killed. Two of them are on roofs to the left and to the right, and three of them are in a first room (it can happen that they will run out of the building or start shooting at you from behind the door) #1. Try to pick up ammo left by enemies. Also a good idea is to change your weapon for better one. Inside the facility tougher gunfight awaits you. Try to locate gas tanks and shoot at them creating massive explosions #2.
Do not attack them frontally, because you'll probably die. After clearing the upper part, look around if no one is down there before you continue. Being upstairs you can easier kill your targets #1. Open another door and eliminate three Punks #2.
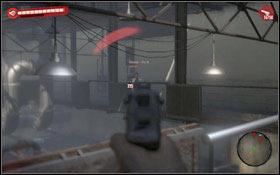
Go to another part of the facility and kill marauding Punks #1. Once you get outside do not go downstairs. Take an advantage of your current position, as well as a cover, and kill several Punks. Remember about shooting at gas tank #2.
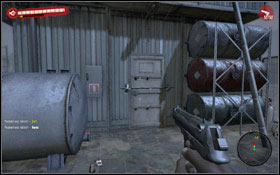
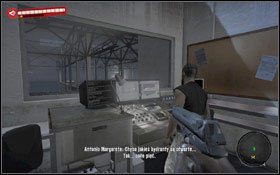
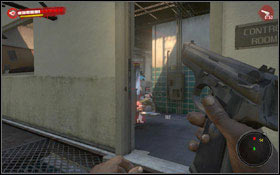
Run downstairs and free Antonio by opening the warehouse #1. Follow two men to a control room. You'll learn that five hydrants are still open so the pressure is too low. At this point the quest ends and you can collect your reward from Antonio #2.
Obtained from: Antonio Margarete
Difficulty level: Hard
Reward: 4500 Exp, Meat Bait
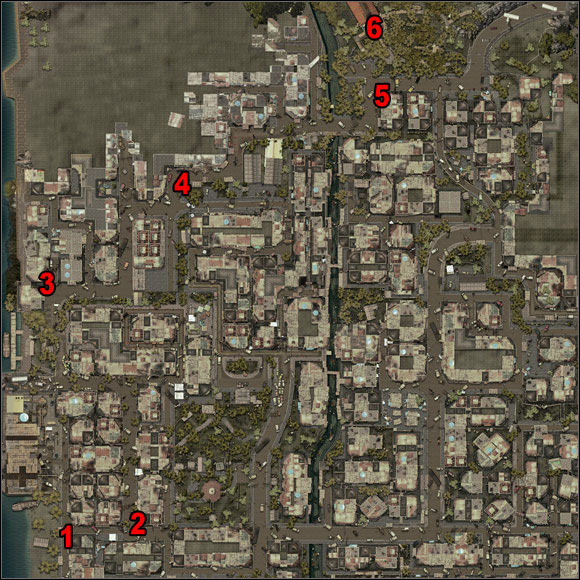
Close 5 hydrants
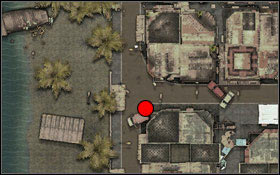
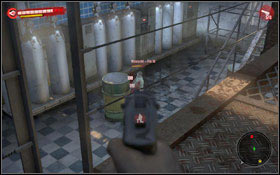
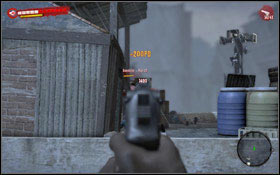
If you want to provide the church with water, you have first to close five hydrants in order to increase water pressure in the pump station. Go to a first hydrant (1) #1, get rid of a Thug guarding it #2 and then close it by holding a proper key.
Second hydrant (2) #1 is guarded by a Ram #2.
At a third hydrant (3) #1 you'll find several poisoned infected #2.
Fourth hydrant (4) #1 is guarded by a Ram with small group of infected #2.
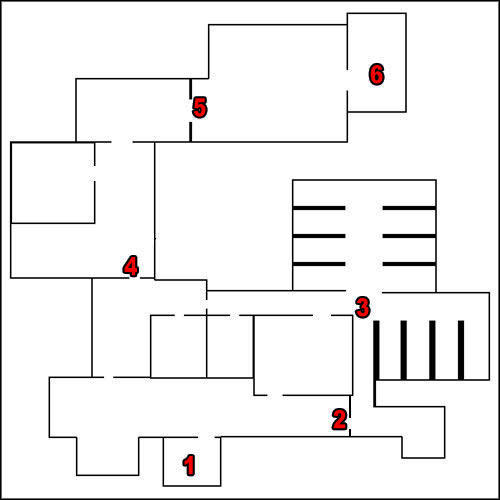
A last hydrant is located near the church (5) #1. It is guarded by a Thug and several Walkers #2. In order to complete this quest and collect a reward, go to Mother Helena (6). A conversation with her starts automatically another quest.
Obtained from: Helen
Difficulty level: Medium
Reward: 4500 Exp, Money
Escort Joseph to the Water Plant
Your last hope to get food is going the wealthy part of town. Unfortunately they walled off and it is hard to get there. But there is one path, which Joseph knows. Meet him next to the church entrance #1. You'll learn that you can get to the wealthy district through sewers but unfortunately they are currently flooded and the sewage level needs to be lowered first. You have to escort Joseph, who will show you the sewers entrance. Your companion will try not to go on main roads in order to avoid lots of zombies on your way #2.
But there will be few places, where you have to fight #1. Try to keep zombies away from Joseph. After long and hard walk you'll reach the sewers entrance #2. Collect a reward from Joseph and enter the door to complete the quest.
Obtained from: Joseph
Difficulty level: Medium
Reward: 5000 Exp
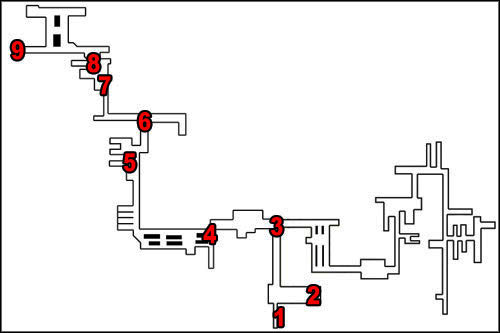
Travel through the sewers to the wealthy district
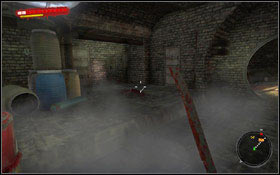
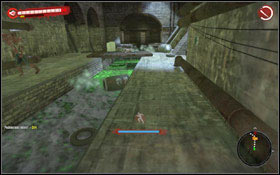
You start in (1). Go forward and when you reach a flooded sewers part, turn right where you can find a ladder #1. Go up. After few steps you'll find a first valve on the right #2. The other is a bit further.
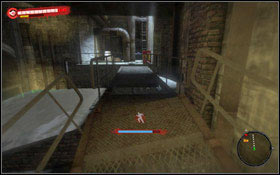
Water level will decrease so you can jump back down and forward to the right. You'll find there another ladder #1. Go up and get rid of Walker there. Now go inside the control room (2) (watch out for a Suicider there). After lifting the gate #2 water level will be completely lowered. Another cut-scene activates and you get to know a new type of enemy - Floater.
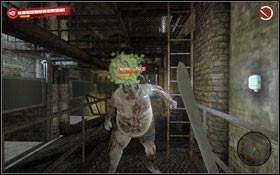
He spits poison at you so the best way to kill him is instant and constant attack, so he won't be able to spit at you #1. Now move to the open tunnel and go ahead. After reaching a junction (3) turn left #2.
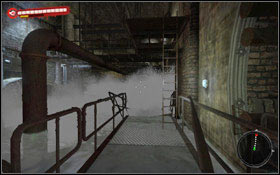
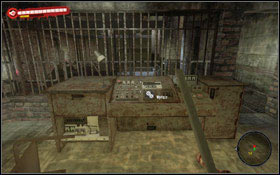
A further way is simple. Keep going ahead eliminating all threats along your way. Once you get to the point when you have three possible paths, stick to the right one (4). You'll reach a small room with steam (5). There is also a workshop in one of the rooms #1. On the next junction #2 (6) turn left again, towards a closed gate.
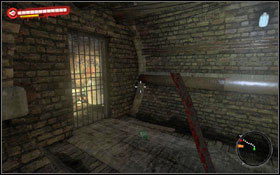
You'll get to another room with steam (7) #1, and this time watch out for steam on the right. You have to bypass it on the left. You'll reach descent (8) #2 - you can throw down a gas tank and shoot at it. This way you'll get rid of the threat before you go down a ladder.
Once you're down, choose a tunnel to your right. Pass through flooded part of sewers #1. Finally you'll reach the door leading to the City Hall (9) #2.
Reward: 1000 Exp
Go to the town hall and investigate the situation
This quest starts automatically after getting the door down in the sewers leading to the City Hall.
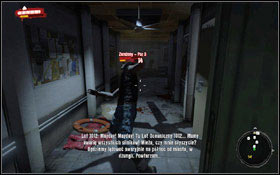
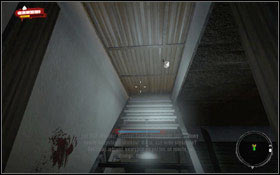
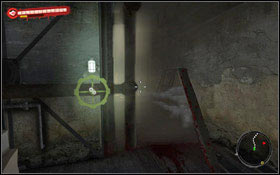
Go straight ahead. Once you're inside the City Hall, go to the first room and turn right. You'll find a stairs there - go up #1. Being on a first floor turn left and go next to Josh #2.
Turn left again and going through the corridor you'll reach mayor Todd Tanis. Unfortunately you won't get any supplies. Quest ends with a cut-scene.
Obtained from: Josh
Difficulty level: Hard
Reward: 5000 Exp
Gather supplies from the supermarket
On your way down the stairs, Josh will call you #1. He'll give you a tip where you can find food and how to get to the supermarket. Go to the bottom where you'll find a policeman standing next to the door #2. As soon as you approach him the Guard on Duty sidequest activates. After completing it you'll be able to open the door in front of you.

Go to the sewers. You start in (1). Pass two doors and watch out for poisonous water in the next room (2) #1. Keep going ahead and then turn left killing a Suicider. You'll find a junction (3) - choose a tunnel to your right, because the left one is blocked on its end #2.
Once you go up choose a tunnel to your left (4) #1. You'll reach a door leading to the supermarket (4) #2.
You'll find yourself in a basement (1). Turn the valve to cut off steam #1 and keep going. Further way in the basement is full of undeads #2.
Keep going until you reach the stairs (2) #1. Go through a double door and move ahead until you get to another double door, leading to the supermarket interior (3) #2.
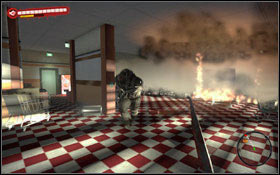
Prepare a weapon because a rough gunfight with several waves of Punks awaits you inside #1. Try to shoot them being covered and aim at heads to kill your opponents with one shot. Remember also about picking up ammo and possible change of weapon for a better one. You can find a shotgun on the right from the entrance (4) #2.
Move towards an exit to the supermarket back (5) #1 and get rid of second wave of Punks. Unfortunately once you get into the corridor, the door at its end will be close in front of you. So you have to go to the kitchen (6). Break the door, move to another room and get rid of two infected #2.
There is a Ram (7) #1 behind the next door. Keep going, passing by some survivors (8) #2 until you get to a second entrance to the warehouse (9).
Once you reach your destination place, the last gunfight awaits you. There are many gas tanks inside the warehouse, so you can use them to create explosions which can kill Punks #1. It is also worth to mention that there are many energy drinks scattered on the floor, so you can heal yourself. After clearing the warehouse prepare supplies to be transported (10) #2.
Obtained from: Jin
Difficulty level: Easy
Reward: 6500 Exp
Return to the church
In order to return to the City Hall you have to complete the Big Daddy, Where Are You? sidequest.
After obtaining a universal key from a mayor, run down the stairs where you enter the sewers. But before it happens, a last confrontation with a Thug #1 in the City Hall awaits you. Use a back door to enter the sewers (1). A way back is very long - in the beginning it is the same as previously until the moment when you reach the junction (2). You have to go straight ahead there. Follow the map and get to one of the exits to slums (3). There are more of them in the eastern part of the sewers but the game points you to the exit marked on the map #2.

You'll exit the sewers near the church #1. Go there #2 and complete your quest.
Obtained from: Helen
Difficulty level: Medium
Reward: 5000 Exp
Find Jin and Joseph near the police station
Mother Helena will tell you that Jin and Joseph drove to the police station to give out food but they are too long there. Your task is to find your companion and bring her back. Joseph lies next to the stairs leading to the church (1) #1. You'll learn that Jin is probably still at the police station. You'll also get a key, so you can reach the police station through the sewers (2) #2.
After entering the sewers you'll find yourself in one of tunnel (1). Turn around and keep going forward. Follow the above map in order to get to the police station entrance (2) #1. You have to watch out though because in the sewers you might find infected, Walkers, a Suicider and Floaters #2.
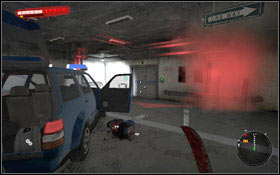
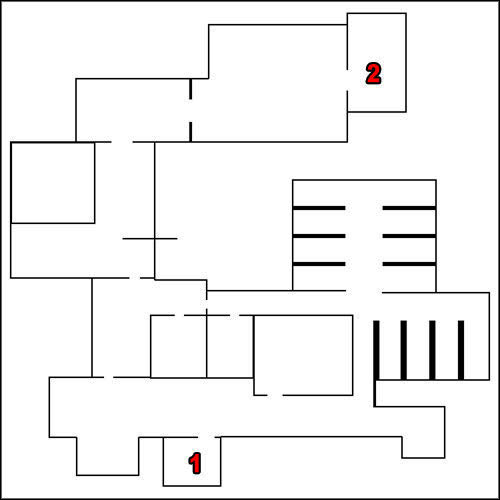
Go ahead past the armored truck. A bit further you'll find an entrance door to the police station #1. Kill a Walker and go upstairs (1). You'll be "welcomed" by two Walkers. Go to the right near a gate (2) but watch out for a Suicider #2.
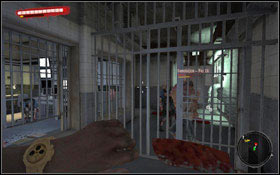
Once you get inside cells (3) turn left. At the end of the corridor you'll find infected and another gate #1. Enter the next room (4) but exchange your weapon for a pistol because you'll have to shoot some Punks #2.
After killing them, go to the next room (5) where you have to kill another Punks. Look for gas tanks to blow them up #1. After clearing the room, go up the stairs (6) #2.
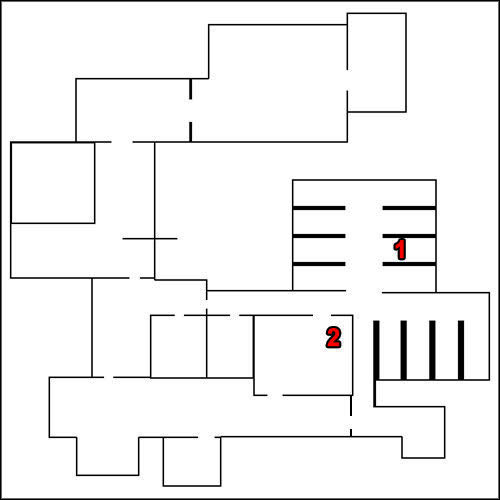
Once you get to the upper floor (1) you'll have to fight Punks again #1. You can use a corridor and move straight ahead or go through rooms to the right. In both cases prepare for a gunfight. Another place where you have to watch out is a further part of the corridor (2) where bandits are hiding behind a wall and a fallen cabinet #2.
A last gunfight awaits you in the last room (3) #1 with many covers. And at the end you'll have to fight Rage Machine #2 (4) sitting in the police chief office. You'll find Jin behind the next door. A cut-scene activates, after which you'll find yourself in front of the church. Talk to Jin to complete the quest.
Reward: Bolo Machete
Share some of the supplies with the people in the church

This quest starts automatically after saving Jin at the police station. Go to the church #1 and talk to Mother Helena #2. She will thank you for bringing supplies and the quest will be over.
Obtained from: Sinamoi
Difficulty level: Easy
Reward: 5500 Exp
Drive the armored truck with food, medicine and weapons to the Lifeguard Tower
You'll obtain this quest on radio from Sinamoi. Situation is worse and worse so he will ask you to bring supplies to the Lifeguard Tower. Leave the church and move to the truck standing in front of the building #1. Once you get inside you'll be automatically moved to the resort (1). A way to the Lifeguard Tower (2) #2 is very long but completely safe. Once you reach the destination place and you exit the truck, the quest is over.
Obtained from: Sinamoi
Difficulty level: Medium
Reward: 6000 Exp
Get to the roof of the hotel
You'll find Sinamoi this time in front of the Lifeguard Tower, next to the garage #1. You'll learn that they still didn't manage to make a contact with the mysterious Voice. Dominic along with several people went to the hotel, but so far there is no contact with them. Your task is to investigate this situation by getting onto the hotel's roof. In fact your mission is only to get to the hotel door #2 (a point marked on the map above). Once you get inside, a cut-scene activates after which the quest is over.
Obtained from: The Voice
Difficulty level: Medium
Get to the Jungle through the old bunkers
Your next task is to return to the Lifeguard Tower, where you have to talk to Mike #1. You'll find him on the upper floor of the tower. Right before going to the jungle you'll some important information, for example whom to look for when you're there. He will give you also a bomb, so you can destroy the entrance door of the bunker leading to the jungle. Leave the tower and talk to Jin #2.
Obtained from: The Voice
Difficulty level: Hard
Reward: 6000 Exp
Drive the truck with Jin to the Jungle Tunnel
After short conversation with Jin, she will point you a way to the jungle. Get into a car and set out on a journey (1) #1. Once you reach the tunnel you have to leave a vehicle and follow Jin, while protecting her from waves of infected repeatedly attacking you #2.
After getting to the bunker (2) walk to its door and set on them the bomb obtained from Mike #1. Get away to a safe distance and wait for the explosion. Now get inside and use sewers in order to get to the jungle #2.
Obtained from: Howard Craigson
Difficulty level: Hard
Reward: 1500 Exp, Impact Mod
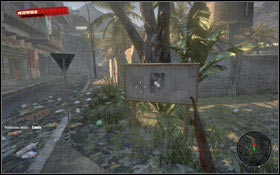
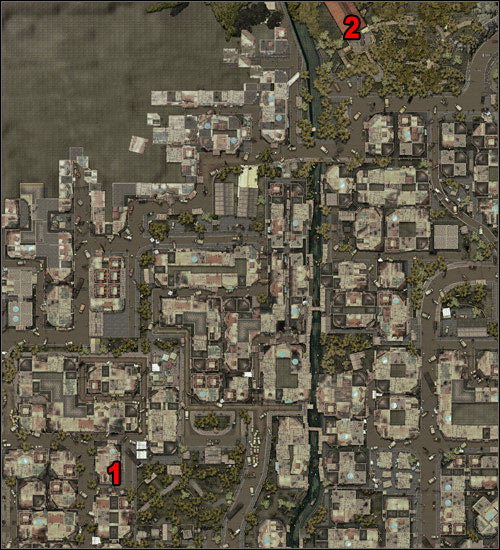
Hang the posters in different spots in the town
You'll find Howard in the church (6) #1. He managed to run away and hide in the church from zombies. Unfortunately his family was less lucky and is lost somewhere. Your task is to hang some posters in different spots in the town, so perhaps one family member can see them and knows where to go. A first place to hang the poster is located next to a hangar (1) #2.

A second poster must be placed near the junction next to the house with survivors (2) #1. Another poster can be placed by the road nearby (3) #2.
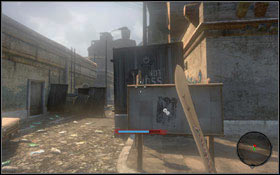
Head further west. You can walk between the building and the wall to avoid fights with undead on the street. At another poster place (4) #1 you'll meet a Suicider. Yet another poster must be hanged on a road leading from the pump station to the church (5) #2. Finally return to Howard and tell him about hanged posters.
Obtained from: Mugambe
Difficulty level: Medium
Reward: 1500 Exp, Heavy Pistol
Put Mugambe's wife and daughter out of their misery

Mugambe sits on a bench inside the church (2) #1. He will ask you to kill his wife and daughter who turned into zombies. You'll have to walk through almost entire city to the old, abandoned house (1) #2.
In the main hall you'll be attacked by infected and two Walkers #1. Your target is the door at the very end with sign on it - do not go inside #2.
Once you enter the flat, Mugambe's wife will attack you. His infected daughter can be found in the kitchen. Both undead are tough enemies so it would be good to use Fury here. After killing both women return to the church and talk to Mugambe. You'll be rewarded for putting his family out of their misery.
Obtained from: Deanna
Difficulty level: Medium
Reward: 1500 Exp, Money
Obtain insulin for Deanny
You'll find Deanna in the church (3) #1. She will ask you to get insulin for her. There is a pharmacy nearby, where you should find this medicine (1) #2.
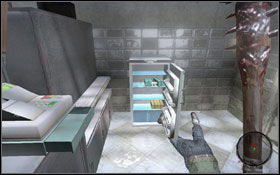
Insulin is inside the fridge #1. One dose is unfortunately mot much, so you have to go to another pharmacy (2) #2. Same as previously, you'll find medicine in the fridge but watch out for a Walker in the building, do not let him surprise you. After collecting three doses of insulin return to Deanna in the church in order to collect your reward.
Obtained from: Terrence Barker
Difficulty level: Easy
Reward: 1500 Exp, Money
Take Terrance's last will and testament to his family
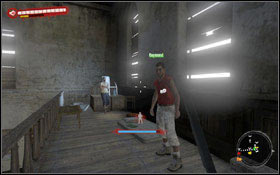
Half-dead Terrence can be found next to one of the garages (1) #1. He is dying and asks you to bring his last will and testament to his family. This mission is very easy and involves returning to the church (2) - you'll find Raymond on the upper floor #2 (use the stairs next to the entrance). The quest is over and you can collect your reward.
Obtained from: Frank
Difficulty level: Easy
Reward: 1500 Exp, Money
Clear the living dead from the area in front of the Pumping Station

This quest is available only after completing the Drowned Hope quest.
You'll find Frank next to the pump station entrance #1. Your task is very easy - right after you leave the facility you'll be attacked by a larger group of zombies #2. You have to get rid of them. A good idea is to throw a Molotov at them until they are close to each other and far from you. After the fight return to Frank and collect your reward.
Obtained from: Bruno
Difficulty level: Medium
Reward: 1500 Exp, Money
Get the tools from Antonio's workshop

This quest is available only after completing the Drop by Drop quest.
Bruno stands inside the church, next to the workshop (1) #1. Your task is to retrieve tools needed to fortify the church. You can find them in the Antonio's workshop next to the pump station (2). You have to walk through entire pump station because the mentioned workshop can be found on the other side of the pump station #2.
Bruno's toolbox can be found on the table inside the workshop. Take it and return to the church (1) in order to give it back to Bruno.
Obtained from: Hugo
Difficulty level: Medium
Reward: 1500 Exp, Money
Bring the recording to Garett
A man named Hugo stands in on one of the corners in the church, right to the entry #1. He'll ask you to bring Garett a special recording, thanks to which they will be able to inform people about the safe place. After reaching the destination (1), in order to get to Garett, you have to jump over the wall because the main gate is closed. On the right you can find a crate and a barrel #2, which can help you to get to the other side.
Go inside the building and give Garett the recording. You'll receive money as a reward.
Obtained from: Theresa
Difficulty level: Medium
Reward: 1500 Exp, Money
Bring 5 bottles of alcohol for Theresa
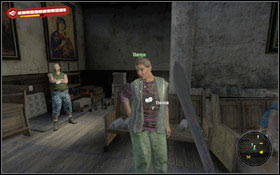
Theresa stands in the church, next to the benches near the entrance #1. You task is to get few bottles of alcohol which is useful for disinfection of wounds. You can find it #2 inside shops and some houses. It is also worth to visit a supermarket (only if you can access it, so you're far enough in the main plot). You can also use a Fast Travel and return to the resort. There you can find alcohol around bars near hotel pools. When you bring Theresa alcohol, you'll obtain money and the quest will end.
Obtained from: Policeman
Difficulty level: Very easy
Reward: 1500 Exp
Find and bring alcohol for the guard

You can start this mission only during your visit in the City Hall in the Supermarket Journey quest. Policeman guarding the door #1 can let you go but only if you do a favor to him. He needs alcohol. Whiskey can be found in mayor's room #2.
Reward: 1500 Exp
Obtain a universal key from the Mayor
You start this quest in the sewers (1) after completing the Supermarket Journey quest. Go ahead until you reach the descending sewers (2) #1. Go to the left tunnel. After getting to the junction turn left and then turn right. You'll reach the sewers with poisoned water (3) #2. Go ahead until you reach the door leading to the City Hall (4).
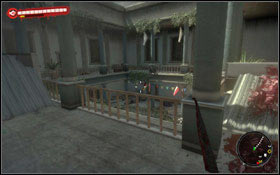
Go up the stairs to the first floor and walk to the terraces #1. Use a plate on the right to jump to the other side. Walk around the terraces and use the only opened door. Go down. You'll reach the main square where a Ram #2 awaits you.
After the fight use the stairs on the other side and go to the first floor. Break down the door leading to a corridor but watch out for a Suicider. Go to its end and walk to the other side of the City Hall #1. In the next corridor get rid of two Walkers #2 and enter the mayor's room.

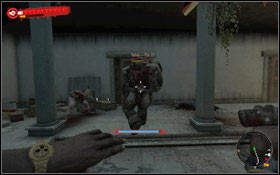
Infected Todd is no different than a normal Thug, he waves his arms so try to cut them off or break them. He should be not a big threat especially there are no other zombies to kill. When you finally kill him take a universal mayor key #2.
Reward: 1500 Exp
Get inside the Warehouse

In this task you have only to clear the area next to the workshop from undead #1, #2. After getting inside, talk to Simon in order to finish the quest.
Obtained from: Carl
Difficulty level: Medium
Reward: 1500 Exp, Big Splitting Axe
Search the electric shop for a transformer and some cable for Carl
Carl, who can be found in the warehouse (1) #1 needs a transformer and a cable to fix CB radio. The electric shop is located in the western part of the city (2). There are few Walkers near the entrance so watch out #2.
Break the door and kill an undead sitting inside #1. A cable and a transformer can be found on a desk #2. Return to Carl (2) and give him your findings. He will reward you for your troubles.
Obtained from: Florencio Morales
Difficulty level: Medium
Reward: 1500 Exp, Molotov
Give 5 bottles of alcohol to Florencio to get cash
Florencio is in the workshop in the eastern part of the town. Your mission is easy and quick. You just have to gather 5 bottles of whiskey to get a Molotov from Florencio. Alcohol can be found in flats or near pubs (you can also return to the resort where alcohol can be found more often.

Obtained from: Kwan
Difficulty level: Hard
Reward: 1500 Exp, Money
Look for Kwan's brother
Kwan sits on a char #1 in the warehouse (1). He will ask you to find his brother, who should still be in their flat, and bring him back to the warehouse. Kwan's brother can be found in one of the abandoned houses (2) south of the city #2, right next to the building with HELP sign on the wall.
There are not too many zombies inside the house, but you'll have to kill several Walkers. Cho can be found in one of rooms (you have to break the door) #1. After very short conversation he will start running towards the warehouse (1). You must protect him #2, because although he also tries to fight zombies he can be easily killed and then the mission will fail. After reaching the hangar collect your reward from Kwan.
Obtained from: Carla
Difficulty level: Medium
Reward: 1500 Exp, Money
Bring Carla an asthma inhaler
You'll find Carla in smaller room at the back of the warehouse (1) #1. She's asthmatic and her inhaler is almost empty. Your task is to search for a new inhaler in one of two pharmacies. So pick one pharmacy (2) and go there #2.
Break the door and eliminate any threat you find inside #1 - do not get surprised. Inhaler can be found on a shelf #2. Return to Carla (1), give her the inhaler and collect your reward.
Obtained from: Jack
Difficulty level: Medium
Reward: 1500 Exp, Paralyzing Strike Mod
Find the picture of Jack's daughter
You'll find Jack in smaller room at the back of the warehouse (1) #1. He will complain that he was attacked and lost his wallet. Your task is to recover his daughter photo, which he held in the mentioned wallet. You should find bandits nearby. Go to the place marked on the map (2). Once you get to a wooden bridge, two Punks will come running from the building on the other side #2.
You can knock them down using melee weapons. But for the last Punk you need a firearm because he also has one #1. A family heirloom can be found under the counter #2. Take it and return to the warehouse. Give Jack a photo of his daughter.
Obtained from: Stan Dart
Difficulty level: Hard
Reward: 1500 Exp, Money
Get rid of the looters in Stan's house
On one of the streets, near the house, you'll find a man crying for help #1. He will ask you to clear his house out of bandits who invaded them. For this mission you need firearm. If you do not have one, taking it from one of bandits can be real challenge. Go inside the abandoned house. At the very beginning you'll be attacked by two bandits with melee weapons #2.
Go up the stairs to the first floor but watch out because behind the door two more bandits #1 are lurking. The last few opponents can be found in a room at the end of a corridor. But be very careful because you have to break the door and in a moment you do this, they will shoot at you #2. Once you kill all bandits go out the building and talk to Stan to collect your reward.
Obtained from: Nick
Difficulty level: Hard
Reward: 1500 Exp, Money
Kill the infected Bob
Nick leads a group of survivors, who are stationed in the south of the city (1) #1. Unfortunately one of them was bitten and locked himself inside the building. Your task is to kill this infected guy and unlock the door so the rest of survivors can hide inside the building. To get there you have first go to the roof. There is a ladder on one of the walls #2.
Go up and get inside the building. An infected guy turns out to be a Thug #1 - he is on a corridor. Try to cut off his arms or break them so he can attack you only with his head. Finally unlock the door pulling out a rod #2, so Nick and others can get inside. Do not forget to collect your reward.
Obtained from: Nick
Difficulty level: Hard
Reward: 1500 Exp, Old Smoky Mod
When you reach the Jungle record a transmission for Nick

You can start this quest only after completing the A New Broom Sweeps Clean quest.
You'll learn that there is a military base on the island, but there are no soldiers inside. Your mission is to find a broadcasting station in the jungle and record the military radio broadcast for Nick.
This mission continues in Act 3.
You might use a car to get to the destination. It can be found next to the exit from the village (1) #2.

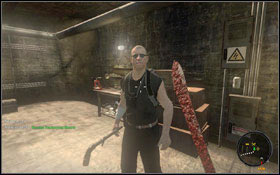
After reaching the place (2) prepare you firearms because you'll have a small shooting. You can shoot at the gas tank near the station building #1, another one is located on the roof. Before you go inside, you might walk to the other side of the building. There is one unsecured window #2 there - you'll be able to take down two soldiers.

Break the door into the broadcasting station and go inside. Vargass hides behind lockers #1 - you can throw a Molotov or a grenade there - he can't escape. There is a radio on one of the lockers #2. Now you can return to the city. Go to the abandoned house (you might use Fast Travel in the village so you'll find yourself directly in the destination) and give Nick whatever you've recorded.
Obtained from: Lucas
Difficulty level: Medium
Reward: 1500 Exp, Big Baseball Bat
Bring the medicine to Lucas
You'll find Lucas inside the house south of the city (1) #1. This mission can be started only after completing the A New Broom Sweeps Clean quest.
This quest is easy and quick. You have to go to the pharmacy (2) and collect a medicine for Lucas (he has written down its name on a paper). Watch out near the pharmacy, there is a Ram waiting for you there. A medicine can be found on a shelf #2. After collecting it return to Lucas (1) and give him a medicine.
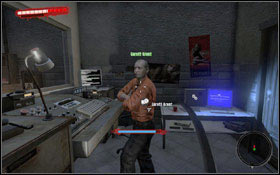
Obtained from: Garett Grant
Difficulty level: Medium
Reward: 1500 Exp, Money
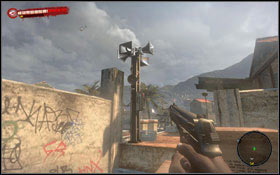
Activate 4 loudspeakers in the Shanty Town
This mission can be started only after completing the Message to the Masses quest.
Garett (1) informs you #1 that despite of his tries to put a recording in the air, no one can hear anything, because loudspeakers are "dead". In order to get to a first one, use a ladder on the building in front of the broadcasting station (2) #2.
Before you use a catwalk (3) to the next building, you have to get rid of bandits located there #1. After clearing the roof you can safely activate loudspeaker (4) #2.
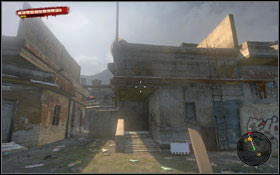
Now go back and use the same ladder to go down to the street. Another loudspeaker can be found nearby. Go up to the first building roof (5) #1, then use a catwalk to go to the adjacent building and use a ladder to go down #2, because a loudspeaker is not on the roof, but on the ground and it is fenced.

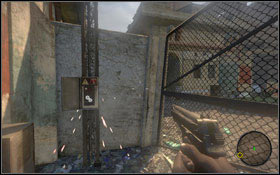
Use ladder again and go to another building walking on roofs (7) #1. This time you'll have to fight few Walkers and a Thug. Once zombies are dead, activate third loudspeaker (8) #2.
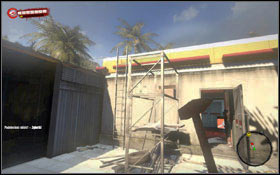
The last loudspeaker can be found a few buildings away (9). To get to the roof you have to use a scaffold there #1. There are two Suiciders there #2 - one stands close to the loudspeaker. After activating fourth loudspeaker return to Garret (1) and tell him about completing the task.
Obtained from: Garett Grant
Difficulty level: Medium
Reward: 1500 Exp, Pistol
Activate 4 loudspeakers in the Eastern Waterfront

This mission can be started only after completing The First Head of Cerberus quest.
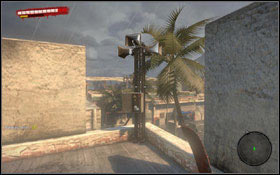
Your next task ordered by Garret (1) #1 is to activate another four loudspeakers. This time they are located in the Eastern Waterfront. In order to reach first loudspeaker you have first to climb an adjacent building (2) #2, surrounded by undead. You can also meet a Ram there.

Climb the building and then walk to its other side. Jump over a scaffold there (3) #1 and finally use a wooden catwalk. There are several Walkers lying near the loudspeaker. Kill them and activate loudspeaker (4) #2.
A ladder leading to the top of the next building can be found at the waterfront side (5) #1. In order to get to the loudspeaker go to the other side of the building and use side catwalks (6) #2.
Third loudspeaker is located on the abandoned house. You do not have to climb it because a loudspeaker can be found on its back (7) #1. First move the boxes so you can crawl under the scaffold. A last loudspeaker is located on the wall (8). There are boxes on its end - use them to jump onto the wall #2. After activating the fourth loudspeaker return to Garett (1) and inform him about completing the task.

Obtained from: Garett Grant
Difficulty level: Medium
Reward: 1500 Exp, Piranha Mod
Activate 4 loudspeakers along Canale Street

This mission can be started only after completing The Second Head of Cerberus quest.
This time Garett (1) #1 orders you a last mission connected to loudspeakers. Your targets now are buildings in the center of the city. Unfortunately they are fenced, but there are few possible ways to get inside. You can find several ladders allowing you to bypass the wall (1) #2.
Being in this part of the city you have to be very careful because you'll be almost constantly attacked! First loudspeaker is on the top of the scaffold. It can be reached with the ladder (2) #1. Another loudspeaker can be found nearby. To get to it, you have to go through the narrow passage between buildings (3) and climb an adjacent building. Before you can use a catwalk, you have to get rid of bandits waiting for you on the roof of the building with a loudspeaker #2.
The last loudspeaker is located on the northernmost building (4). A ladder will lead you directly to the proper roof #1. After activating the fourth loudspeaker return to Garett #2 and inform him about completing the task.
Obtained from: Ojibon
Difficulty level: Easy
Reward: 1500 Exp, Money
Help the man
This quest activates automatically after you get close to the hangar marked on the above map.
This mission is about killing few Walkers #1 only in order, which try to get to the car under which Ojibon hides. He will run to one of the hangars #2. Go there and talk to him to collect your reward.
Obtained from: Reza
Difficulty level: Easy
Reward: 3000 Exp, Police Baton
Open the cells of those in custody

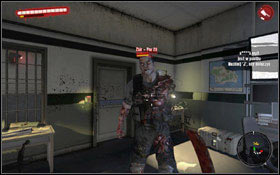
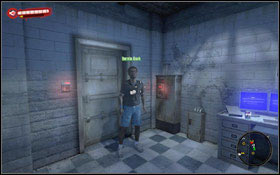
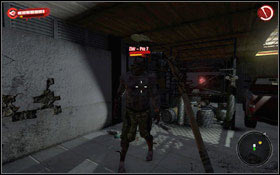
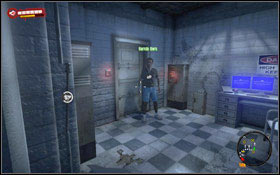
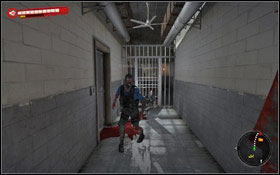
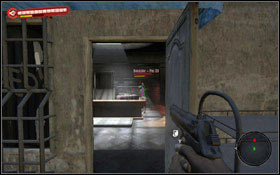
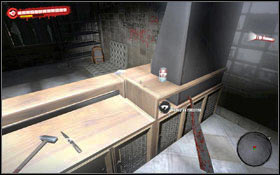
Reza resides in one of the cells (1) #1 on the police station. This building you can visit during the Lady in Trouble quest. This task is very easy - Reza will give you a key which opens all cells in the control room. The only trouble are a Thug and a Walker (watch out - he quietly sits on the chair) occupying the control room (2) #2.

Once you open cell return to Reza and collect your reward. He'll find the exit on his own.
Obtained from: Tim
Difficulty level: Hard
Reward: 1500 Exp, Pride Gun Mod
Bring the document file from the Police Station
This quest is available only after completing the Lady in Trouble quest. You'll find Tim #1 in the church. He will ask you to collect some files from the police station, containing some info on his wife's murder. There is also info about a main suspect inside, whom Tim wants to kill on his own. You'll get to the police station directly from the street #2, so you do not have go through the sewers.
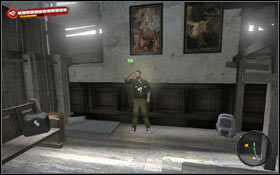
Jump over boxes and barrels on the junction in order to get to the police station entrance #1. You'll find yourself in a garage. Kill all undead and go straight ahead until you reach the door. Go up the stairs (1). Now you have to pass through the entire floor to get to another stairs (2). This time there are undead instead of Punks prowling on the station #2.

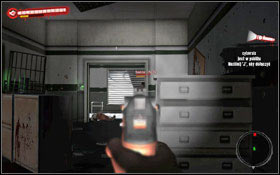
Once you get to the upper floor (1), go through the corridor ahead. You'll reach the last room where you can find files. These are on one of the desks in the corner of the room (2). Leave the station and return to the church (you can use Fast Travel option inside the station in the control room). Give Tim the files and collect your reward.
Obtained from: Helen
Difficulty level: Hard
Reward: 3000 Exp, Gabriel's Sledgehammer
Clear the cemetery of all the walking dead
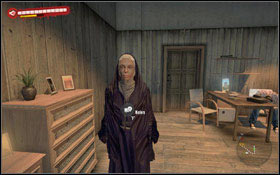
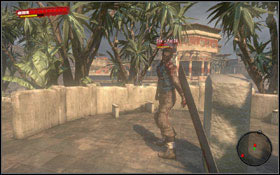
This quest can be started only after completing the Faith Will Move Mountains quest.
You'll find Mother Helena in the church #1. She will ask you to clear the cemetery of undead, because they desecrate the graves. This is quite fast and easy task. There are several groups of Walkers and few Thugs #2 on the cemetery, which have to be eliminated. After the last undead is finally dead, return to Mother Helena to collect your reward.
Obtained from: Owain
Difficulty level: Easy
Reward: 1500 Exp, Brutal Sickle
Find a spade for Owain
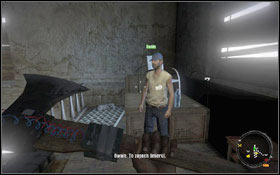
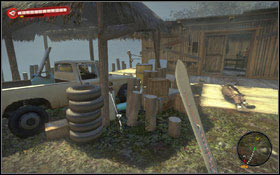
Owain can be found in an upper part of the church #1. He will ask you for a spade so he can burry the dead. On the map you can find a shovel as well as a spade, but you need the second one. A one place where you can find a spade is a village at the river. A spade lies near the entrance #2. You'll get there in Act 3.
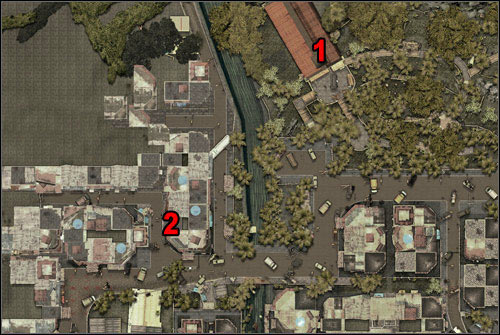
Obtained from: Tim
Difficulty level: Hard
Reward: 1500 Exp, Short-Circuit Mod
Bring the gun from Tim's house
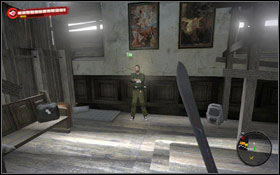
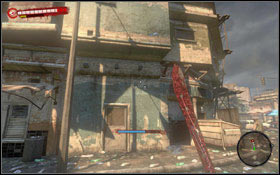
This quest is active after completing the Matter of Justice quest.
To end a life of a rapist and a murderer, Tim needs (1) #1 a gun. There are zombies marauding in the house, so it is you who must deliver the weapon. You have to go to the Tim's neighbor's house, which is located near the church (2) #2.

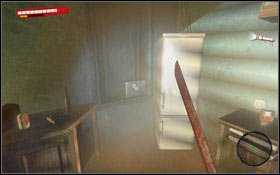
There is a little smoke inside the house - you have to take the opposite door and the turn left to the kitchen. Watch out for a Thug #1 there. Tim's gun is located in the suitcase near the fridge #2. After obtaining the fun, return to the church and give Tim his weapon.
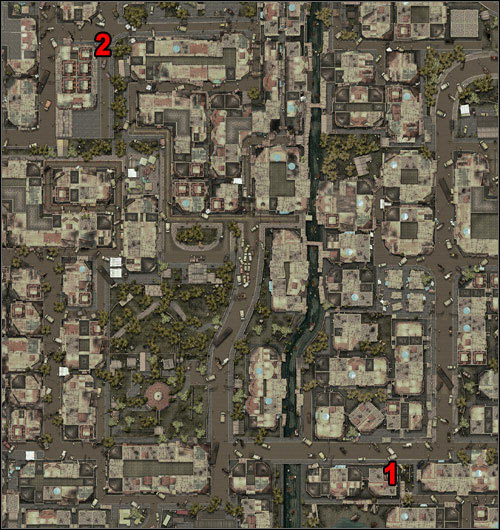
Obtained from: Patrick
Difficulty level: Hard
Reward: 1500 Exp, Money
Find Bill at the Police Station
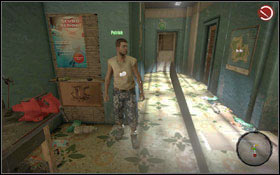
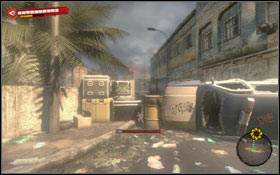
Patrick can be found in the abandoned house on the square #1 (1). He has sent Bill to the police station for some information that might help in leaving the island. Your task is to find the lost man. Go to the police station (2) - jump over the boxes to get inside #2.
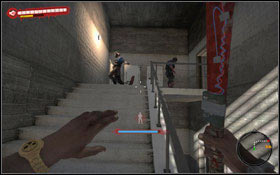

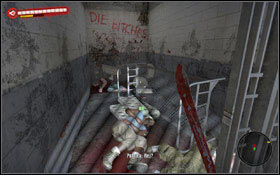
Once you reach the parking kill all zombies #1 and move to the door. Go up the stairs to the first floor (1). Bill lies on one of the cells (2). When you approach it, you'll hear a radio #2. You have to answer the call - tell Patrick that his buddy is dead.
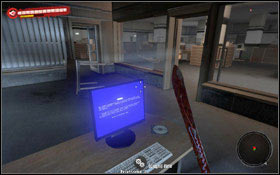
You're still at the police station so you can complete Bill's mission. You have to go to the police chief's office, where you can search the computer in order to find needed data. Go to the upper floor then (3) #1. Once you get there, use a corridor and go ahead until you reach a large room. A police chief's office is located at the very end. Download data from the computer #2 and return to Patrick to collect your reward.
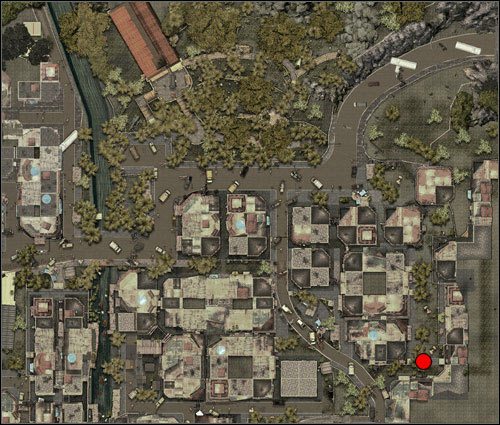
Reward: 1500 Exp
Kill all of the undead in Alicia's house
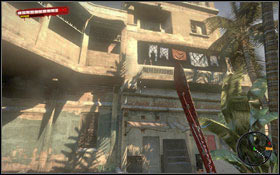
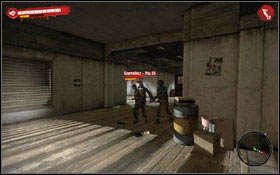
This quest activates automatically when you approach a place marked on the above map. You'll see a woman #1 on one of the balconies, who is crying for help. Get inside the abandoned house and start exterminating of undead #2.
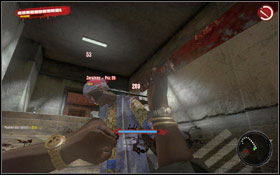

You'll have to fight many infected and Walkers. Once you clear the ground floor, go up the stairs #1. There is a Thug #2 waiting for you in a corridor.
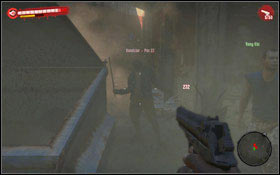
Kill three Walkers trying to get to the woman and then go inside the room. In return for clearing the building you'll get a reward.
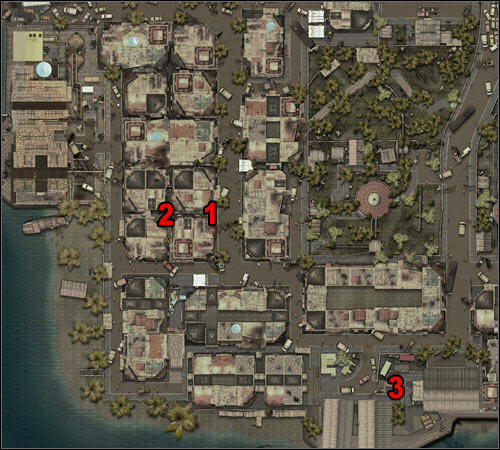
Reward: 3000 Exp, Lightning Mod
Kill all the bandits
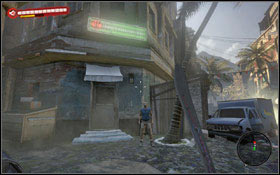
This quest starts automatically when you approach a place marked on the above map (1), near the pump station. You'll meet there a man named Vang Chi #1 who will ask you for a help. When you get closer to him, he will run towards the place where you must help him (2). Unfortunately this is a trap #2. Quickly grab your firearm and kill all Punks who are attacking you.
Rescue Amber from the hands of the bandits
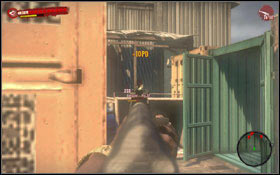
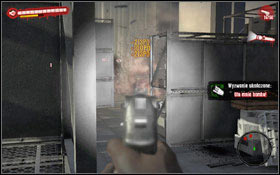
Once you killed them all talk to Vang Chi. You'll learn that bandits keep his daughter and forced him to lure you into the trap. He will ask you to save her. You'll find the girl in a warehouse at the pier (3) #1. But be prepared for more intensive shooting. You have to watch out because bandits can surround you with no problems. There are several gas tanks inside the warehouse, which can be used to create explosions #2.
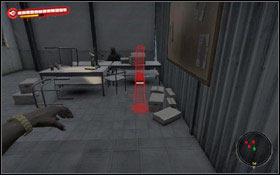
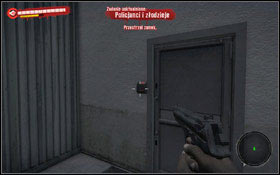
Be careful when breaking the door to the inner room. There is a bandit hiding behind the desk #1 and another one behind the lockers to the left. Shoot the lock #2 in order to open the door and free Amber. After short conversation you'll get your reward.
Obtained from: Rian
Difficulty level: Easy
Reward: 70 Exp, Money
Acquire 5 batteries for Rian
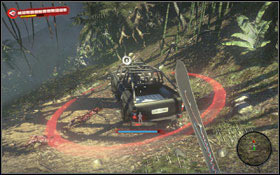
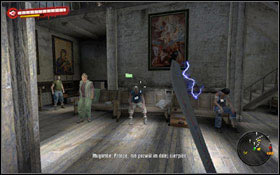
This event is available only after completing the Drop by Drop quest.
Rian sits on the bench next to the entrance inside the church. He will offer you money for every 5 batteries you can find. Basically batteries can be found everywhere - in houses, in cars, in shops. Look for them mainly in electrical devices.
Obtained from: Tavin
Difficulty level: Medium
Reward: 70 Exp, Incendiary Grenade
Bring 5 detergents to Tavin

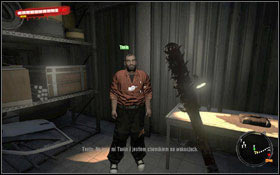
Tavin can be found inside the warehouse #1, #2. This event is available only after completing the Simon Says... quest. Tavin will offer you creating an Incendiary Grenade if you can bring him detergents.
Obtained from: Bruno
Difficulty level: Easy
Reward: 70 Exp, Money
Get the nails for the barricade construction
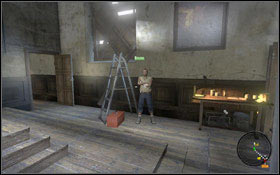
This event is available only after completing the Fortress of God quest.
Bruno will ask you to find some nails, because without them he is not able to barricade doors and windows. Nails can be found almost everywhere, even next to corpses.
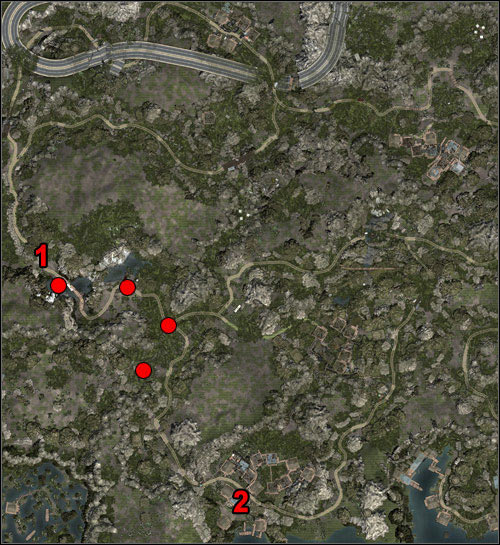
Obtained from: The Voice
Difficulty level: Very hard
Find Mowen in the River Village
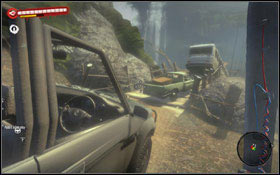
You're entering the jungle. A mysterious Voice informs you that you're here to find a lab, where scientists could create an antidote based on antibodies in your blood. But first you have to find Mowen who will help you get there. Together with Jin get inside a car #1 and drive to the village. Unfortunately you won't get too far because you'll reach the fallen bridge (1) #2.
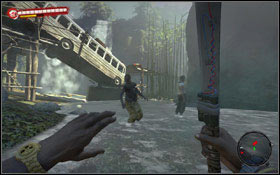
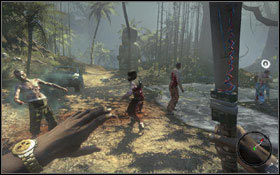
Get out the car and take a very long walk. Go near the waterfall and kill all undead there #1 (watch out for a Floater). Time to run - on the above map with red dots we marked places where you can find large groups of zombies #2.
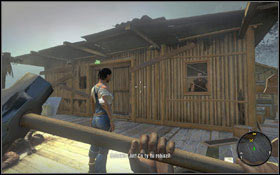
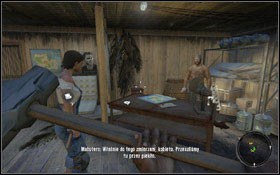
Once you get to the village, Jin will walk you to the hut #1 where you'll find Matutero #2. In order to get to Mowen, first you have to help Matutero with few issues.
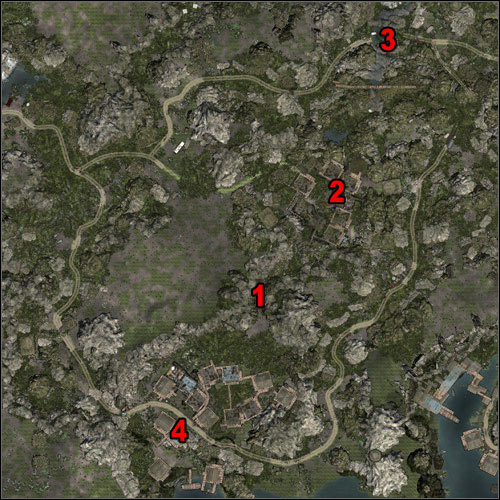
Obtained from: Matutero
Difficulty level: Hard
Reward: 6500 Exp, Auto Rifle
Recover the stolen weapons and ammo and bring them back to Matutero
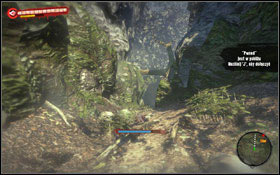
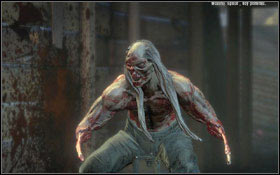
To get help from Matutero you have to recover weapons stolen by Afran. Before you leave the hut, Mohain will tell you to go through the canyon and The Ghost Village (1) #1. Once you get to The Ghost Village (2) you will meet a new enemy type - Butcher #2. This is very dangerous opponent. He got blades made of his own bones instead arms - he attacks you constantly and charges at you. You can deal with him easily if you're inside the car, but in a melee fight you should use Fury option or throwables or firearms. The best solution is to keep this lunatic at the distance.
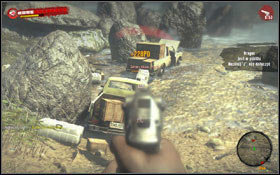
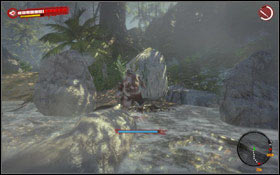
Once you get to the place where Afran's soldiers stuck, a heavy shooting begins #1. Remember to aim at the head, so you can kill your opponent with one shoot. It might happen that undead #2 attack you, then go away and wait until soldiers and zombies fight each other. After that return to the battlefield and kill survivors.

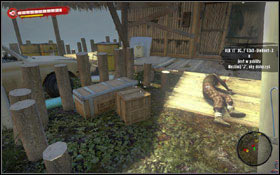
When the area is clear, start loading two crates with weapons #1 to the red car. Do not worry about zombies on your way back, because you're inside the car #2. After getting to the village, get out the car, drop crates in front of the hut #2 and go to talk to Matutero.
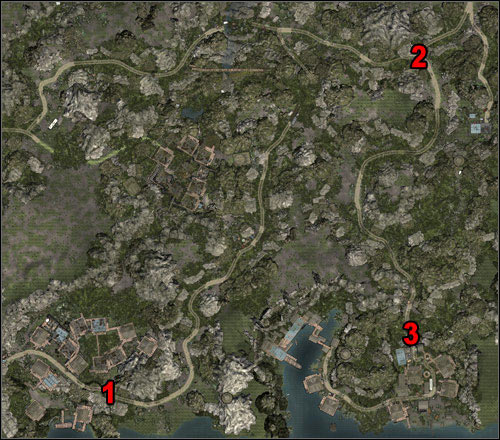
Obtained from: Matutero
Difficulty level: Very hard
Reward: 6500 Exp, Money
Get back to the boat and kill Afran
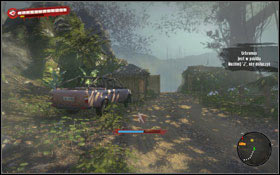
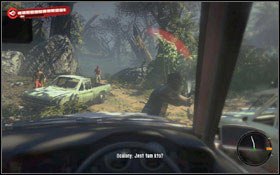
In order to get to Mowen you need a boat. Unfortunately the only one Matutero had, was taken by Afran. Your task is to recover a boat and kill Afran. Next to the exit from the village you'll find a car (1) #1 - you might use it to move faster. Watch out on one of the junctions (2) - there are several Afran's soldiers waiting for you there #2.
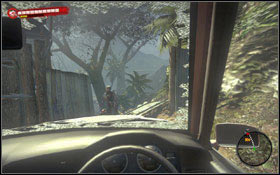
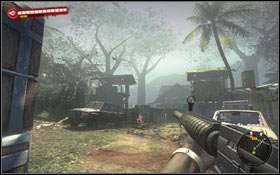
Right before the entrance you'll find few undead (3) #1 - drive them over. After reaching the place where the car becomes useless, get out the vehicle but watch out for two towers #2 where soldiers are stationing.
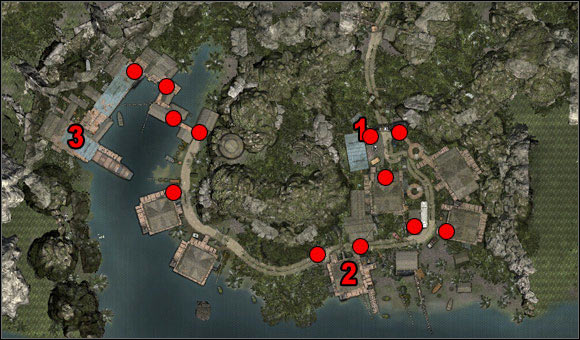
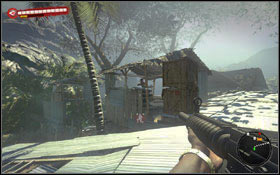
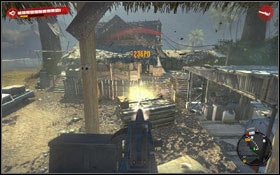
Use a ladder (1) and go up the roof. Now kill soldiers hiding in towers #1. It is worth to go inside one of the tower and use a machine gun #2 to clear the area in front of you. Enemy positions are marked on the above map.

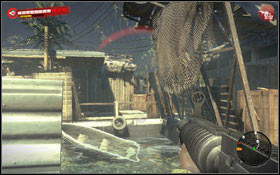
Watch out for soldiers hidden in the bus #1. It is more difficult to shoot them. Go ahead to one of the houses (2) but be careful, because a tough shooting awaits you there #2.
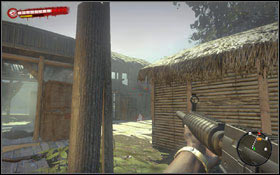
Break the door and kill a soldier waiting for you. Your target is marina (3). But you'll have to fight few more times on your way there #1. Once you approach the marina, a cut-scene starts, after which you'll have to face Afran and few more soldiers. Use some explosive barrels you can find nearby #2 in order to eliminate your opponents.
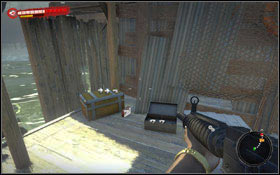
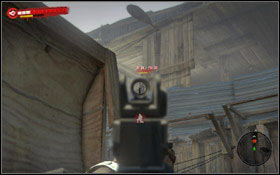
A few steps earlier you might find grenades #1. These are very useful and almost completely deal with Afran. It is also worth to mention that your opponent moves from the right side of the balcony to its left side, stopping there for few second. Try not to waste too much ammo, aiming at his head instead of shooting at his torso #2.
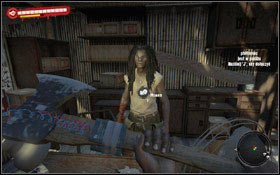
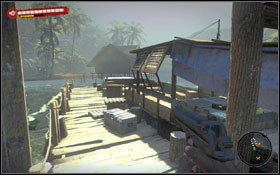
When Afran is dead, break the door leading to the marina and kill one soldier sitting there #1. Then move to the boat and navigate to the marina near the village.
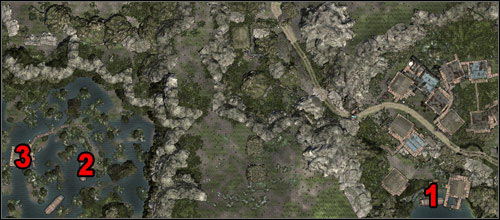
Obtained from: Matutero
Difficulty level: Very easy
Reward: 1000 Exp
Find Mowen on the Swamps

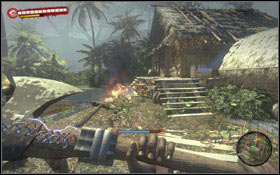
Matutero is waiting for you next to the boat (1) #1. When you're ready to go just start the engine - you'll be automatically moved to the swamps (2). Head towards the hut, where Mowen lives (3) #2 - there will be no zombies on your way so do not worry. The quest is over once you enter the hut.
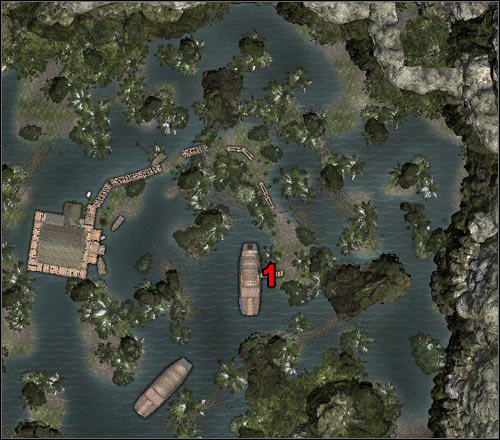
Obtained from: Mowen
Difficulty level: Medium
Reward: 3000 Exp
Check the situation in the laboratory
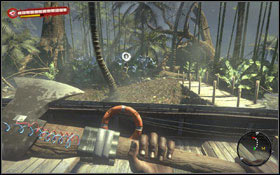
Although Mowen won't take you to the prison, but he can show you where undead come from - he can take you to the lab in the island. But first you need to get to the boat (1) together with Mowen #2.
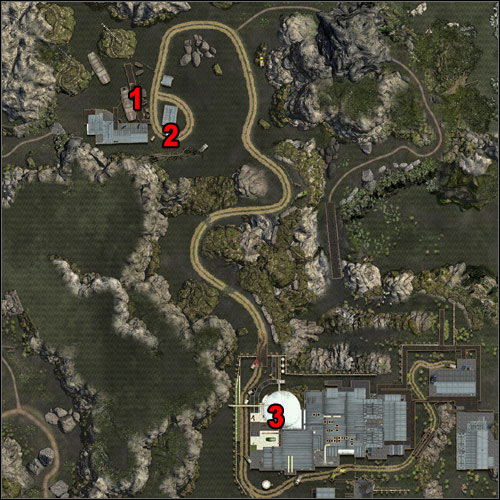
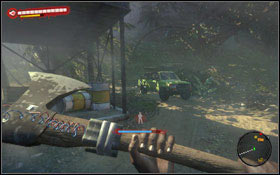
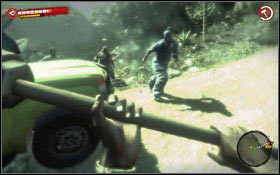
You'll get to the part of the island where the lab is (1). This facility is not far away from here, but it is better to take car (2) #1 so you won't have to bother with zombies along your way #2.

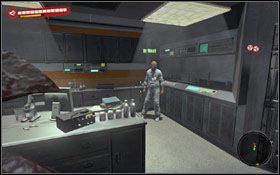
Once you get to the Geo Pharm building you'll hear a voice coming out from the speaker saying that you'll be let in if you can kill all undead in front of the door #1. First you'll meet Willie, who directs you to Dr West #2. Pass the locker room then turn right. Doctor will collect a blood sample from you.
Obtained from: Dr West
Difficulty level: Hard
Help scientists in the lab

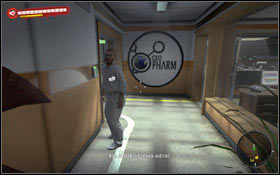
In order to complete this quest you have to help two scientists in the lab: Willie #1 - the Power Slaves quest and Bob #2 - the Rats in the Lab quest. Once you complete both these quests return to the doctor, because he has discovered something interesting.
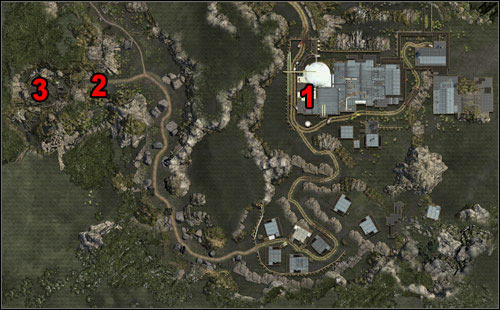
Obtained from: Dr West
Difficulty level: Hard
Reward: 7500 Exp
Find the natives' camping near the lab to take their blood samples
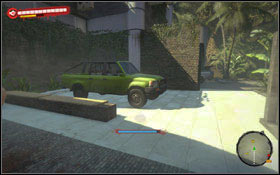
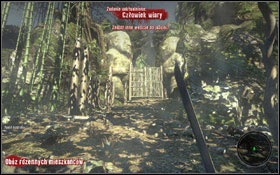
You'll learn about native inhabitants of the island, who may have antibodies in their blood that will help to create an antidote. Unfortunately the doctor was not able to get their blood so you have to convince them somehow to it. You can't use a road from the port - instead of that your way will be more difficult. But it is worth to take a car standing in front of the building (1) #1. After reaching the destination (2) you'll face a gate #2, which cannot be crossed with a car.
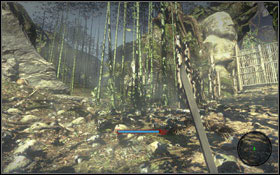
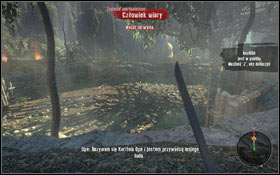
You have to find another way - just to the left you'll see a path #1 which will lead you to the arena (3) #2.
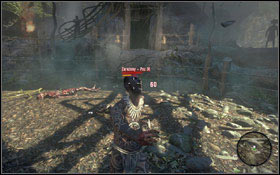
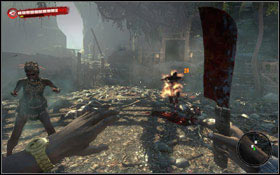
To worm yourself into Ope's favor you have to face best warriors. First you have to fight two waves of infected #1. Then you'll have to get rid of another two double waves of infected and at the end burning infected and poisoned infected attack you #2.
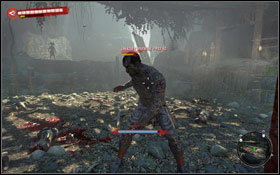
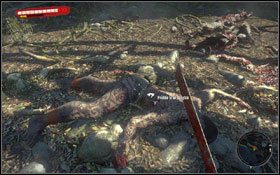
Finally you'll have to face an infected warrior #1. This time you have to be very careful because he constantly run towards you and attacks you. Remember about dodging or using the Fury. Once he is dead collect a blood sample from the native #2 and take it to Dr West in the lab. You can use Fast Travel option - it is located next to the entrance to the village.
Obtained from: Dr West
Difficulty level: Very hard
Help scientists in the lab
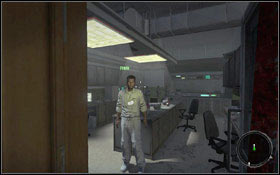

Again you have to wait a little for blood analysis. You have to help two scientists in the lab: Frank #1 - the Substance of Matter quest and Scientist #2 - the Rotting Flesh quest. Once you complete both quest return to the doctor because he discovered something interesting again.
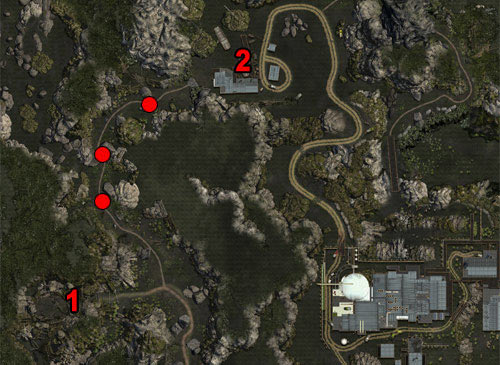
Obtained from: Dr West
Difficulty level: Very hard
Reward: 8500 Exp
Use Ope's help to find a stable strain of the virus
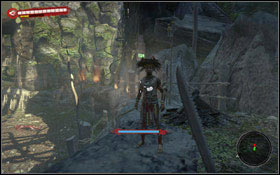
In order to create a vaccine, the scientist needs a stable form of the Kuru, even before the mutation. Leave the lab and go to Ope (1) #1 (use Fast Travel if you do not want to fight undead). You'll learn that basically everyone has eaten flesh of undead so your last hope is in tombs. Take Ope to your boat #2 and you go together to the tombs. Along your way you'll be attacked by three groups of undead.
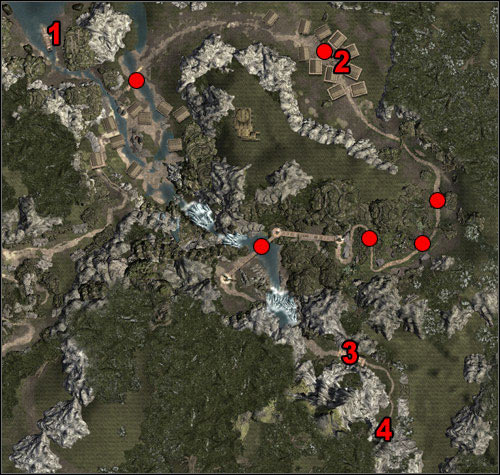
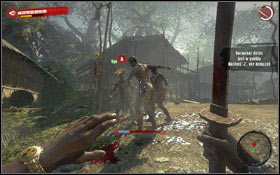
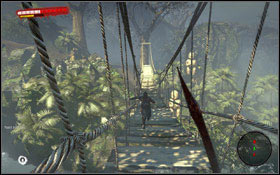
You go further only with Ope, because Mowen stays at the boat (1). The first difficult fight will happen in a small village (2) #1. It can be tough so control Ope health bar. Along your way you'll be attacked few more times but only by single infected. Watch out on the bridge - it is very narrow there and you do not have enough room to maneuver #2.
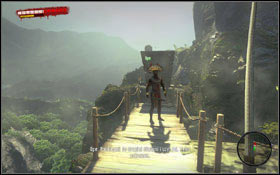
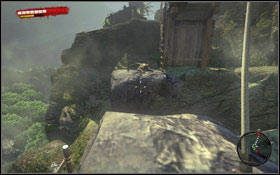
You'll reach raised bridge (3) #1. In order to lower it down you have to use a lever on the other side. Jump down onto the ledge on the left and then take a run-up and jump to the other side #2. If you can't make it just climb the ladder and try again.
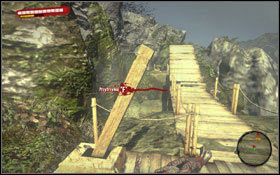
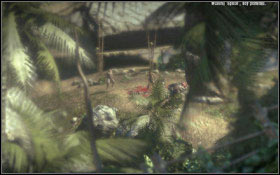
Hold the action button on a lever to lower down the bridge #1 and then follow Ope to the tombs (4) #2. A cut-scene starts showing you finding a woman from the tribe named Yerema.
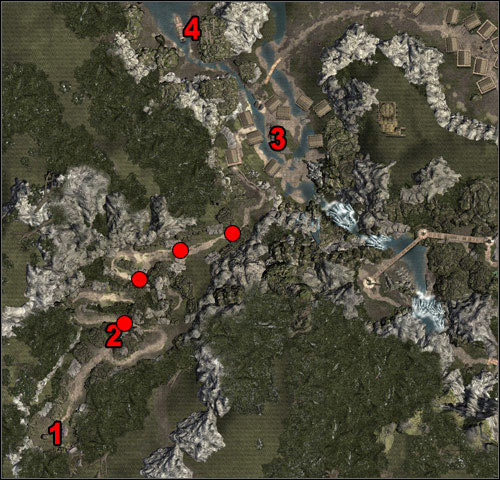
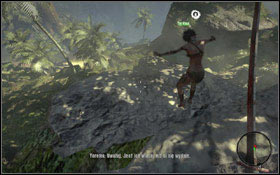
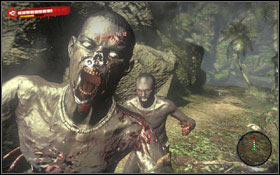
After leaving the tombs (1) she will show you a returning path to the both, far shorter than one you used before. First jump of the rocks (2) #1 and bypass part of the road but once you get to the bottom be very careful because at that moment "a hell is unleashed" #2.
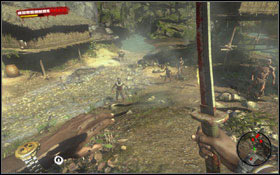
Try to stay close to Yerema. When you reach the cliff you'll notice that Mowen has left the boat and decided to go to the place where sacrifices are made #1. Do not wait any longer and go down to save your companion (3) #2. You'll face a Thug and a Floater and lots of Walkers.
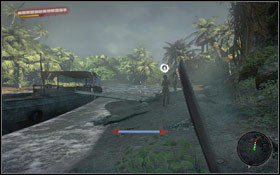
Once all enemies are dead, follow Mowen and Yerema to the boat (4). Return to the lab.
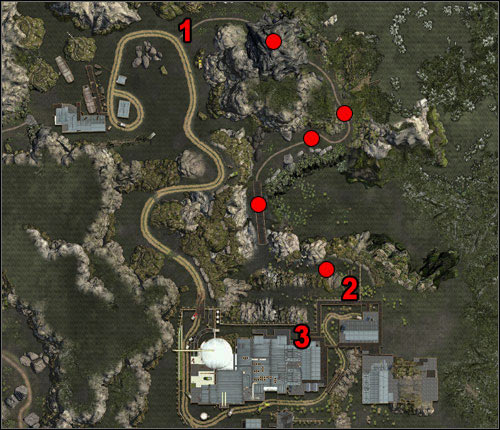
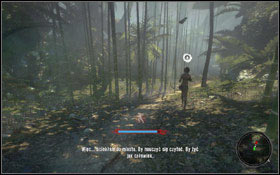
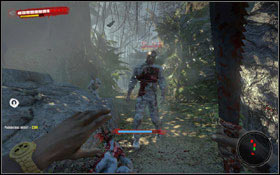
After reaching a part of the island with the lab Yerema will show you the way, which is a little bit longer and does not follow a main road leading to the Geo Pharm building. Once you get to the first junction, you'll leave the main path (1) #1. There are traps along your way - they are marked on the above map. There will be more fights that on the main road #2.

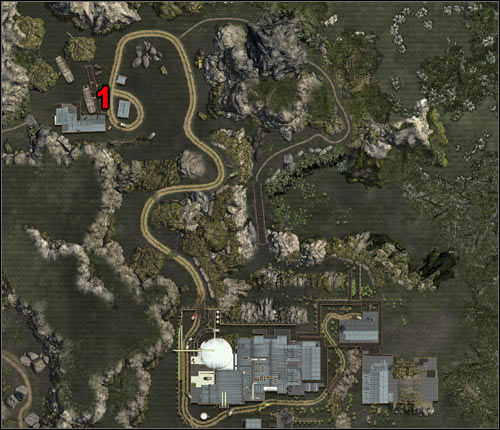
Once you get to the facility (2) open a door leading to the metal passage #1, which you can use to get to the warehouse area (3). It is close to the lab itself so go quickly to Dr West and show him Yerema. Now he can collect blood samples from her #2.
Obtained from: The Voice
Talk to Mowen
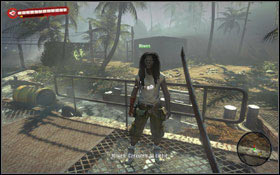
Time is pressing, you can't wait any longer and you're rushed by the mysterious Voice. Quickly leave the lab and go to the marina (1) to talk to Mowen. As you saved his life he will agree to take you to the prison. Before it happens however you have to take some useful items from the city and the resort.
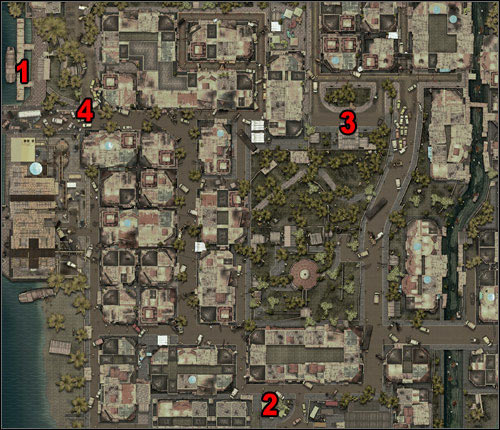
Obtained from: Mowen
Difficulty level: Hard
Reward: 9000 Exp
Bring two fuel canisters from the gas station and a package from Mowen's storage area
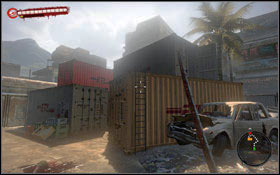
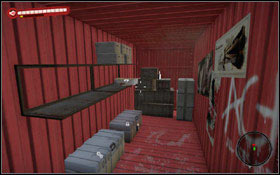
Once you get to the slums (1) you have to deal with two matters. First thing is to get some kind of pass for Titus in the prison. Mowen will give you a key to a container in hangars at the seaside (2). You can get inside the red container by using a ladder and climbing to any of containers #1. Watch out because there are Walkers at the top. Open the stash and take a mysterious package out of it #2.
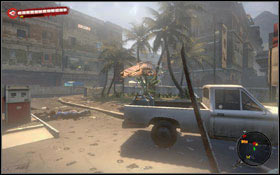
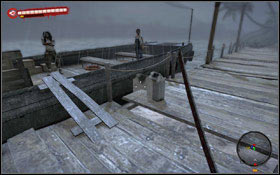
Now the second thing - you have to find a gas for the boat. There is a gas station nearby (3) but it is full of undead. Gas canisters can be found next to the gas pumps - you need two of them. A car can also be found on this station. Take two canisters and put them on the car trunk #1. Drive back to the marina (1). But you won't be able to get close to the marina so you have to stop on the street (4) and move the canisters on your own foot #2.
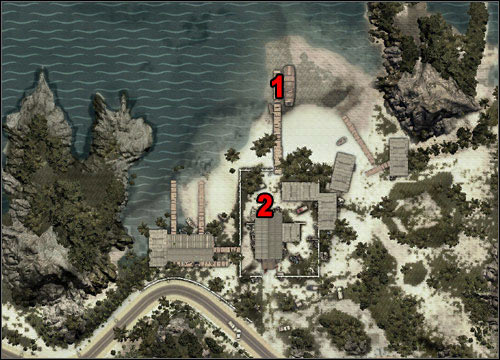
Obtained from: Mowen
Difficulty level: Medium
Take four rods from the workshop of Jin's father
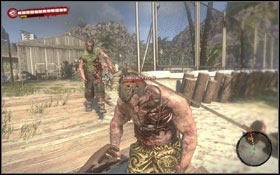
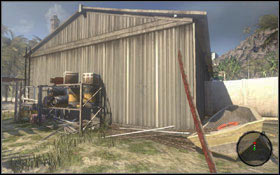
Water is getting restless so there is a risk of accidently falling into a mine. So you have to somehow fortify the boat. Go to the resort (1), near the place where you met Jin. After approaching to the workshop, you'll be welcomed (2) by infected and Walkers #1. Rods can be found near the back wall of the building #2. Take them and return to the boat. Before you go further, talk to Jin, who wants to settle yet one, private matter.

Get to the lab as fast as you can
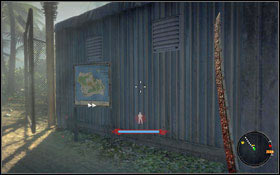
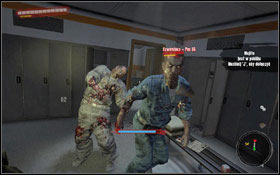
You'll hear a mysterious Voice, which orders you to go to the lab as fast as possible. You'll be moved automatically to the interior of the island. To get to the lab quickly (3) use Fast Travel option (2) #1. Unfortunately something horrible happened and everyone is infected #2.
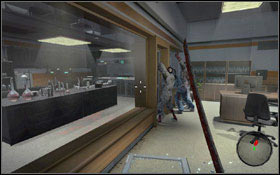
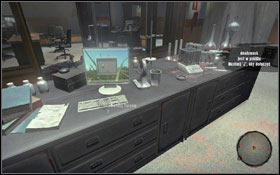
Go to the room where you met Dr West - you'll see several undead trying to get inside #1. Kill them and enter the room. Use a computer #2 to free Yerema locked in a cell.
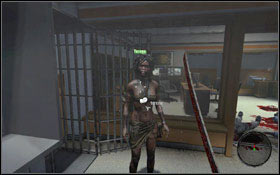
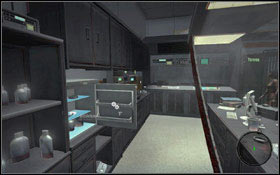
She will tell you what happened in the facility #1. Nervous The Voice will propose you to search for a vaccine - maybe Dr West managed to create it. Antidote can be found in a small fridge in the same room #2.
Act 3 ends at that moment. In order to move to the next Act and go to the prison, answer the CB radio call.
WARNING: After you go to the prison you won't be able to get back, so think twice before you continue with the main plot.

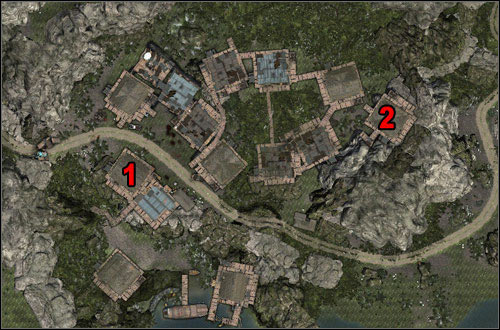
Obtained from: Loren
Difficulty level: Easy
Reward: 1500 Exp, Axe
Bring the bandages to Loren
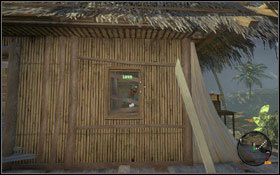
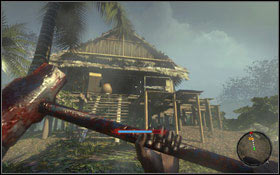
Loren (1) #1, the older woman can be found in one of huts. Unfortunately you can talk to her only through the window because you're unable to get inside. She will ask you to get some bandages for patients. You can find medications in the Robin's hut (2) #2.
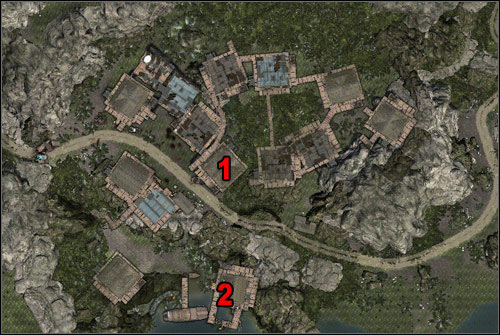
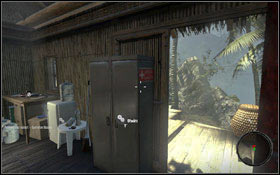
After breaking the door you do not have to worry - there are no undead inside. But you have to look for a key to the medical cabinet. It lies in the bowl, behind the bag on the table in the corner #1. The cabinet with bandages is located next to the door #2. Once you get what you need return to Loren (2) and collect your reward.
Obtained from: Tobias
Difficulty level: Medium
Reward: 1500 Exp, Money
Kill all the undead by the harbor
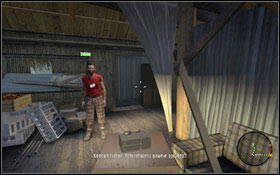
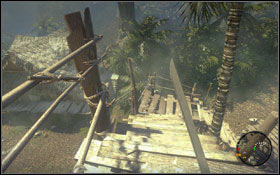
Tobias's (1) #1 task is to repair the gate but all needed tools are in the house in the port. Your mission is to clear that area. A path down to the pier can be found next to the Matutero hut #2.
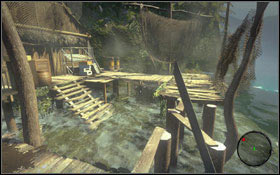
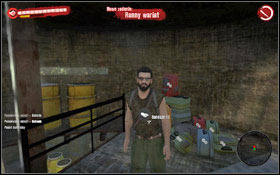
To get inside the hut (2) you might jump into water and use stairs to go up #1. Watch out because planks will collapse the moment you step on them so it is worth to have them as your way back. Inside the house you have to fight three Walkers and one Thug #2, but that shouldn't be a problem. After killing all zombies return to Tobias (1) to collect your reward.
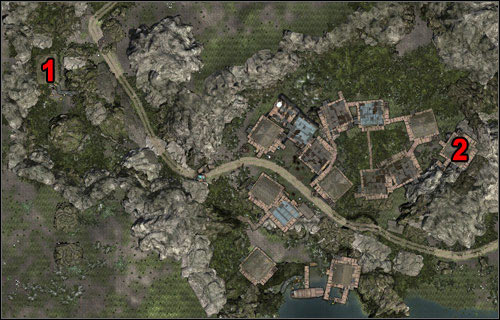
Obtained from: Sam
Difficulty level: Easy
Reward: 500 Exp, Striker Shotgun Mod
Bring Sam a medkit or bandages
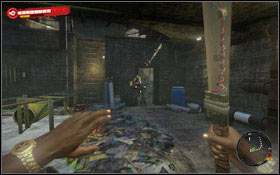
Sam resides inside the bunker (1) #2, right next to the village at the river. To get to him you have first to get rid of a Suicider in the lower part of the bunker. Then walk on a metal catwalk to the ladder. Sam needs a bandage to dress his hand. If you have any with you just give it to him, completing the task. Otherwise, you can search for one in the Robin's hut where you should find some medical supplies (2).
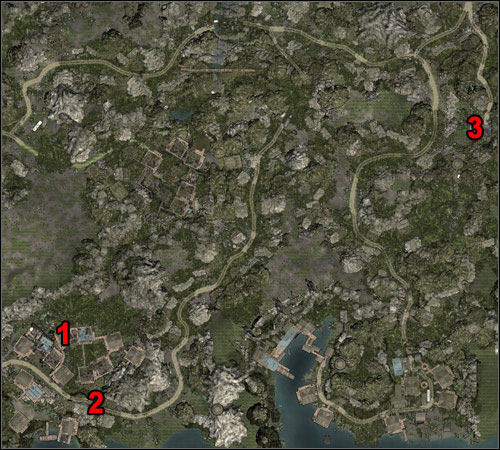
Obtained from: Carter
Difficulty level: Hard
Reward: 3000 Exp, Shark Mod
Kill Vargass
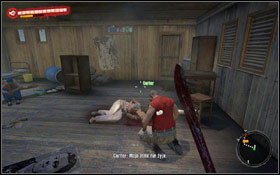

Carter is in one of the huts in the village (1) #1. Once you get inside you'll see him mourning his murdered wife. He will ask you to avenge him by killing Vargass, Afran's gang member. It is the best to take a car to go to the destination - you can find one right outside the village (2) #2.

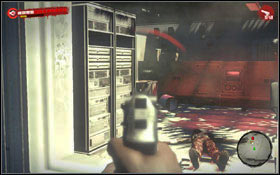
After reaching the place (3) prepare you firearms because you'll have a small shooting. You can shoot at the gas tank near the station building #1, another one is located on the roof. Before you go inside, you might walk to the other side of the building. There is one unsecured window #2 there - you'll be able to take down two soldiers.
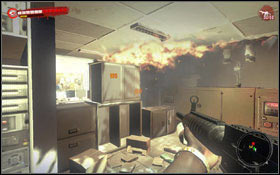

Break the door into the broadcasting station and go inside. Vargass hides behind lockers #1 - you can throw a Molotov or a grenade there - he can't escape. Once he is dead return to Carter (1) #2 and tell him that you killed the murderer.
Obtained from: Bob
Difficulty level: Easy
Reward: 6000 Exp, Money
Rescue Frank from an undead infested part of the laboratory

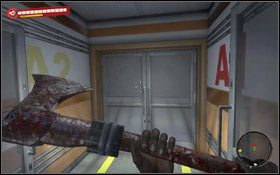
You can start this quest after beginning the House of Science quest, right after you leave the doctor's room. You'll hear a conversation between Bob and Frank #1. You'll learn that Frank is trapped in a part of the lab besieged by undead. Without waiting any longer go through the door leading to the Sector B #2 - you'll be disinfected.
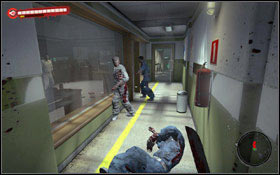
You'll find four Walkers #1 on a corridor. After killing them just return to Bob, report back to him and collect your reward.
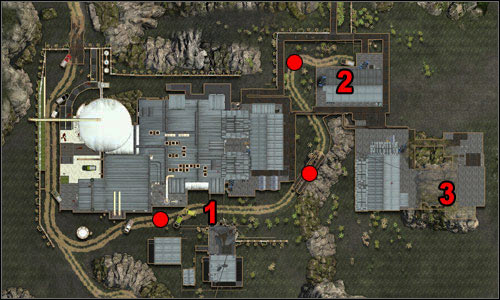
Obtained from: Willie
Difficulty level: Hard
Reward: 6500 Exp, Shock Rifle Mod
Get a new fuse from the warehouse
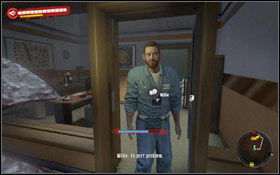
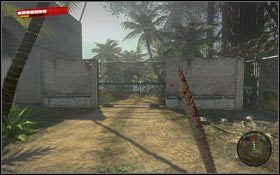
You'll find Frank next to the building exit #1. You'll learn that an emergency generator is out of gas. Your task is to restore power by replacing a fuse in the generator. You have to leave the building and go to its back (1) #2. Watch out because there is a large group of undead next to the gate.
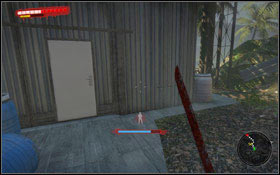
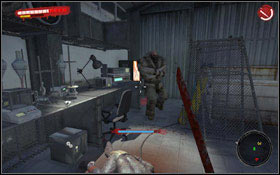
After a while Willie will open a gate for you so you can continue to the warehouse (2) #1. Get rid of Walkers and Thugs in the area and then break the door. Do not get surprised by a Ram #2 once inside.
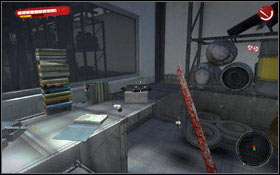
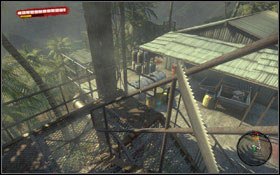
Break another door to the small storage, where you can find a fuse #1. When you go back to the warehouse, three Walkers will arise from the floor. Leave the building and go down the stairs #2 to the bottom, until you reach the Block C.
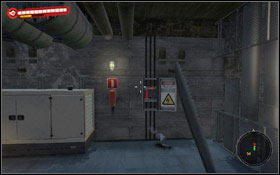
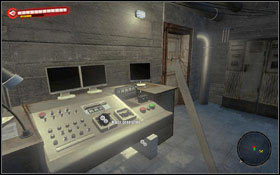
Inside the Block C you'll find a box where you have to put a new fuse in #1 and then activate generators #2. Now it is time to return to Willie in the lab. But you have to be careful because the noise you made attracted infected who will attack you from all directions. After completing the quest you will have an access to the warehouse inside the building.
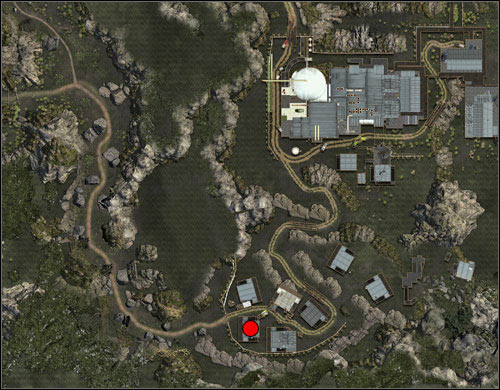
Reward: 3000 Exp, Battle Double Blade
Kill all the undead near the scientist's house
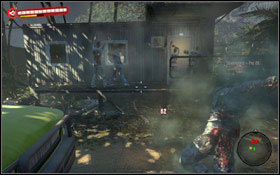
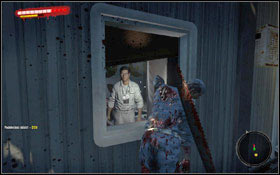
This mission starts automatically when you approach the building marked on the above map. All zombies trying to get to the scientist's house are Walkers #1 but you have to watch out because you might have met a Thug or a Floater. There is also a Butcher on the bridge. Kill all undead and then talk to Sebastian who will give you a reward #2.
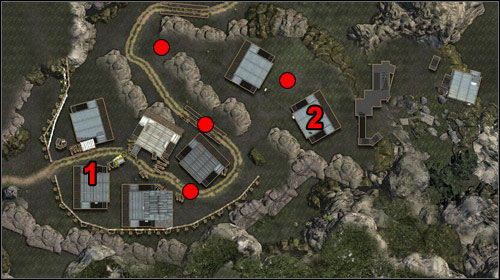
Obtained from: Sebastian
Difficulty level: Medium
Reward: 3000 Exp, Money
Investigate the reason for the breach of contact with the scientist's friend
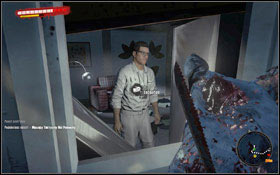
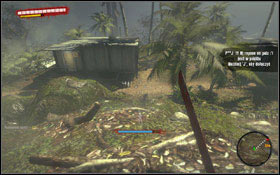
Sebastian (1) #1 will ask you to check what is with his friend because lately they lost a contact with him. You can reach the building marked on the map (2) by the road or on the side to avoid any fights #2.
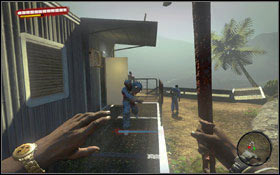
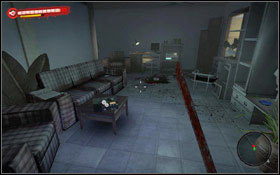
Right in front of the building you'll find several Walkers #1. Go inside and get rid of two more (watch out for one lying on the ground). Check the CB radio laying on the table #2 - you'll notice that it works. Return to Sebastian (1) and tell him a sad news that his friend is dead.
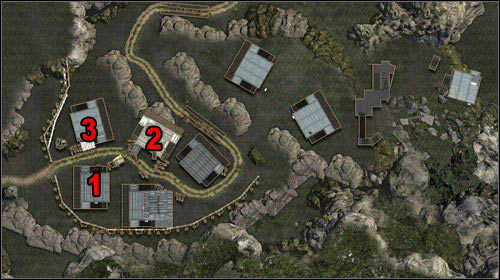
Obtained from: Sebastian
Difficulty level: Medium
Reward: 3000 Exp, Kukri
Search the nearby houses for food supplies
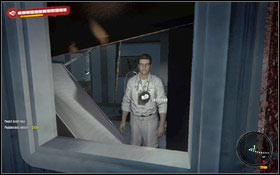
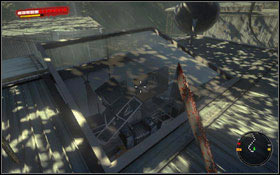
A next task from Sebastian (1) #1 is to find food for him. Inside the first flat (2) you can get only through the roof - you have to break the window #2.
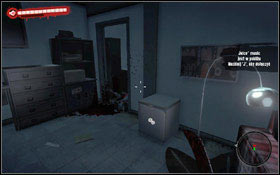
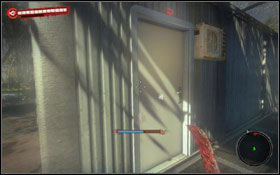
There are two Walkers inside. Food can be found in the fridge #1. Take it and leave the house, this time you can use the door. It is time to explore another house (3). It can be reached through the door which you have to break #2.
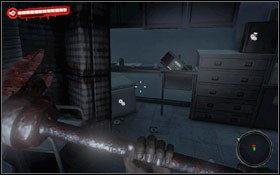
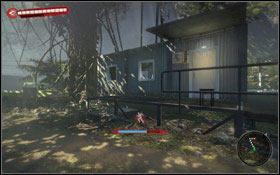
Same as previously, food can be found in the fridge #1. Leave the house, return to Sebastian (1) #2 and give him food.
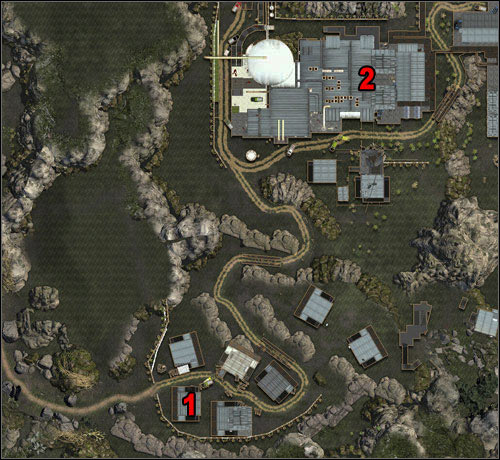
Obtained from: Sebastian
Difficulty level: Medium
Reward: 3000 Exp, Wakizashi
Send message from Sebastian's computer
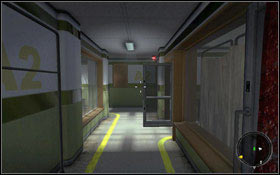
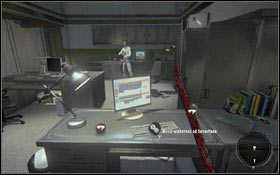
Another task from Sebastian (1) is about his parents. He had birthday lately and his parents wanted to visit him but he said no and now he regrets. He will ask you to send them a message from his computer. The only problem is that his computer is inside the lab (2). Sebastian's desk can be found in the Block A2 #1, in the room where Lechance stays. Move to the computer and send a message to Sebastian's parents #2. Return to the scientist (1) and tell him that the message on his behalf was sent.
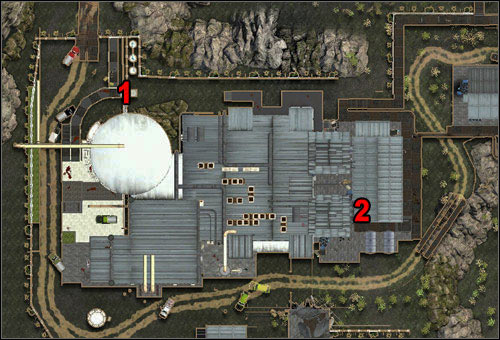
Obtained from: Frank
Difficulty level: Medium
Reward: 8500 Exp, Deathstalker Mod
Bring aluminum potassium from the warehouse to the lab

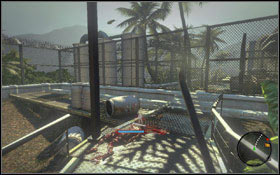
Frank can be found in one of rooms inside the Block A2 #1. He will ask you to bring him a chemical compound, which is necessary for his research. You have to leave the lab building and go to its northern side where you'll find a gate (1) #2.
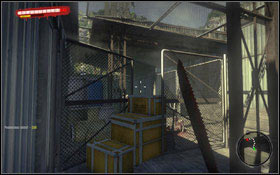
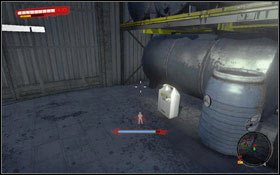
Move forward, killing Walkers along your way. You'll get to the gate, which you can bypass by climbing the yellow boxes #1. Go through the warehouse door (2) - you'll be attacked by three Walkers. Before you get a canister, open the main gate by pulling out the plank blocking it #2.
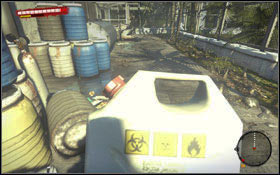
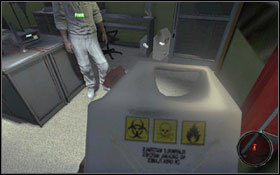
Take fluid #1 and return to Frank #2 - place the canister next to the door. If you come across any zombies along your way you have to throw away the canister and kill them - you're not able to use a weapon while carrying something.
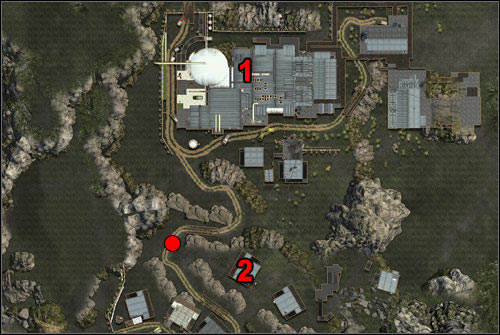
Obtained from: Scientist
Difficulty level: Easy
Reward: 8000 Exp, Magnum
Acquire the samples from infected's muscle tissue and bring them to the lab
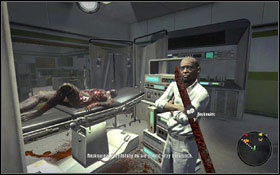
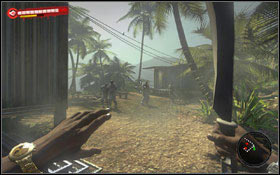
The scientist sits in the Block A2 in the room with the operating table with undead on it (1) #1. Your task is to get samples from muscle tissue of infected locked in the warehouse (2). A new medicine was tested on them. Watch out for lots of undead both in front of the building as well as behind it #2. You can come across a Floater, a Thug and a Butcher.
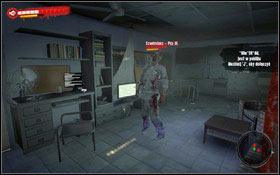
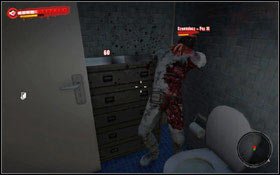
Once you deal with them it is time for an easier part of the job. There are two Walkers inside the house #1 - just kill them. One is in the main room, another is locked in the toilet - you have to break the door to get him #2. Now acquire the samples from tissues of Nick and John and return to the Scientist (1).
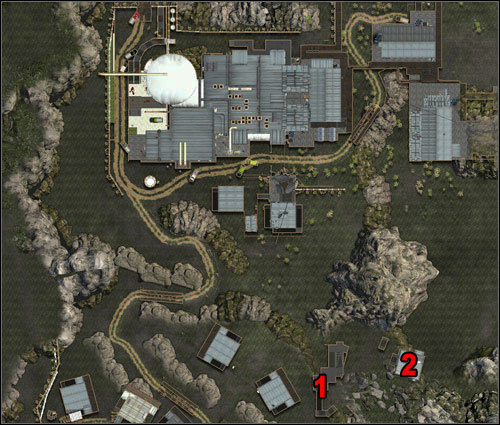
Obtained from: Nguyen
Difficulty level: Hard
Reward: 3000 Exp, Machete
Bring Dr. Nguyen's scientific data from his bungalow
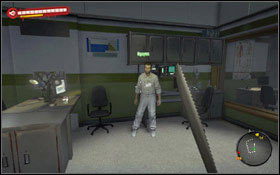
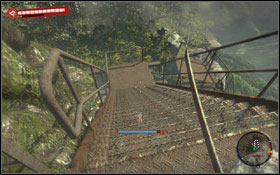
This quest becomes active only after completing the Demonic Science quest.
Nguyen #1 will ask you to get some files from his research, which can be found in his computer in the bungalow 3. Leave the lab and head south. You have to break through the hordes of undead and reach the broken stairs (1) #2.
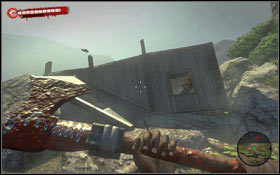
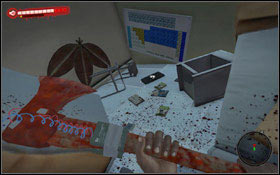
Try not to fall to the ground - some parts of the stairs are really in bad condition. There is a Ram or a Thug (and few Walkers) at the bottom. Go to the building's roof (2) #1 and jump inside through the hole in the roof. In the collapsed room to the right you'll find Nguyen's laptop #2.
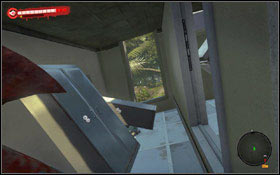
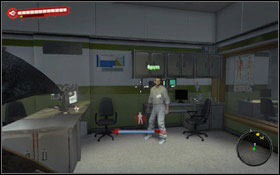
Leave to the corridor and jump outside the bungalow #1 (watch out not to fall into the abyss). Return to Nguyen and give him his laptop #2.
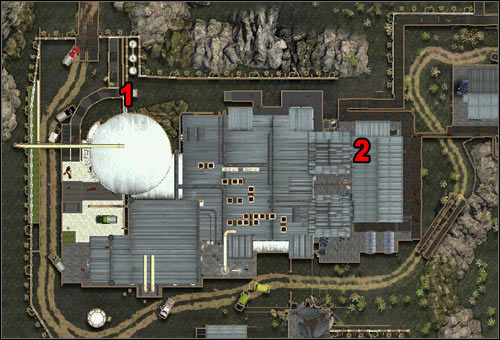
Obtained from: Lachance
Difficulty level: Medium
Reward: 3000 Exp, Detox Gun Mod
Bring Icaridin to Dr. Lachance
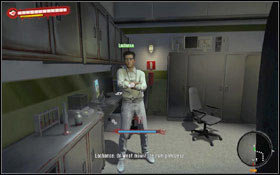
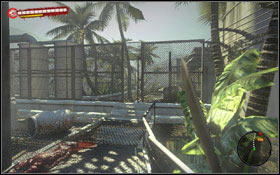
This quest becomes active only after completing the Demonic Science quest.
Lachance can be found in the Block A2 #1. You'll learn that scientists have developed a medication, thank to which zombies think that you're dead. Unfortunately one more ingredient is needed - Icardin. The substance can be found in the chemical warehouse. Leave the lab building and go to its northern side, where you'll find a gate (1) #2.
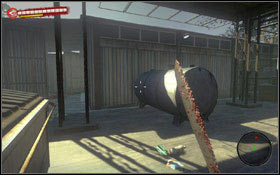
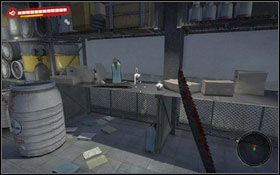
If you already opened gate to the warehouse, just use it without need of climbing the boxes #1. Get rid of a Walker inside the warehouse and take an Icardin from the table #2. Return to the lab and give the substance to Lachance.
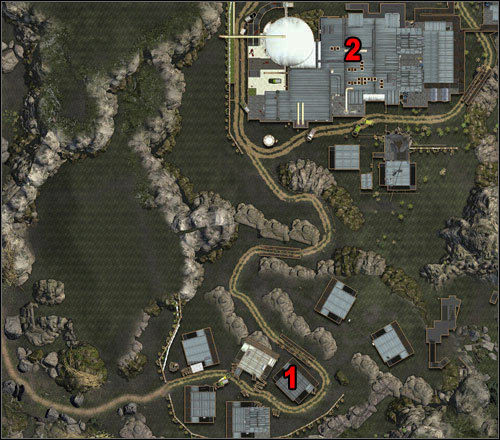
Obtained from: Connor
Difficulty level: Medium
Reward: 3000 Exp, Katana
Take Dr. Connor's notes to Dr. Monroe
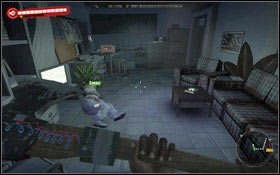
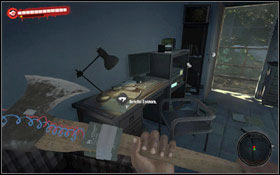
In one of houses to the south (1) you'll find a man lying on the floor #1. He will ask you to take notes lying on the floor #2 and bring it to Monroe.
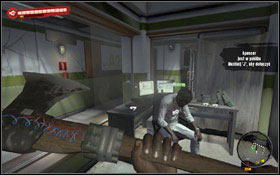
Monroe can be found in the lab (2) in the room with Dr Nguyen in the Block A2. Return to Monroe after some time.
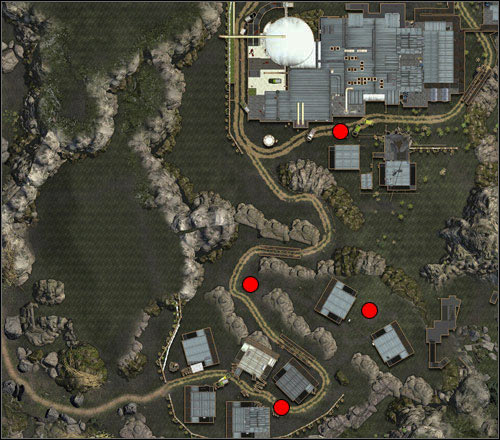
Obtained from: Nguyen
Difficulty level: Hard
Reward: 3000 Exp, Sawn-Off Shotgun
Find Floater tissue

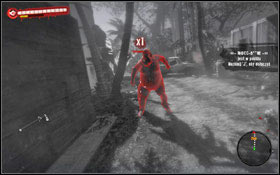
Another task from Dr Nguyen #1 - this time you have to acquire Floater's tissue #2. On the above map we marked places where you can find Floaters.

Obtained from: Monroe
Difficulty level: Medium
Reward: 3000 Exp, Money
Clear and secure the water and food storage
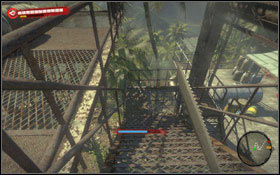
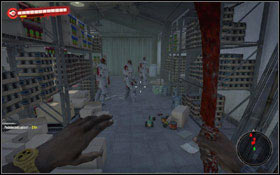
The scientist will ask you to clear the food warehouse. Leave the lab and walk along a road to the stairs leading to the warehouse (1) #1. Since now this warehouse (2) was closed but now you can go inside with no problem #2. There are several Walkers and a Thug inside. Once they all are dead, return to Monroe and tell him about your job results.
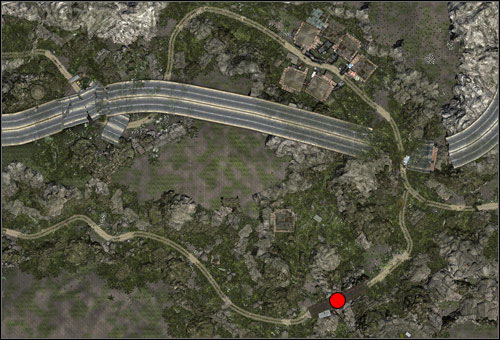
Reward: 1500 Exp, Money
Help the woman survive
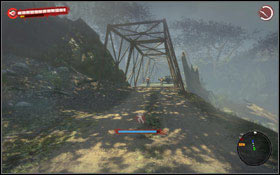
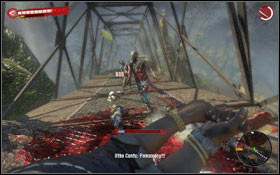
This quest starts automatically when you approach a bridge marked on the above map #1. Your task is to help a woman to get out from under a car where she is hiding. You'll have to face a large number of Walkers #2 - it could be tough when they attack you.
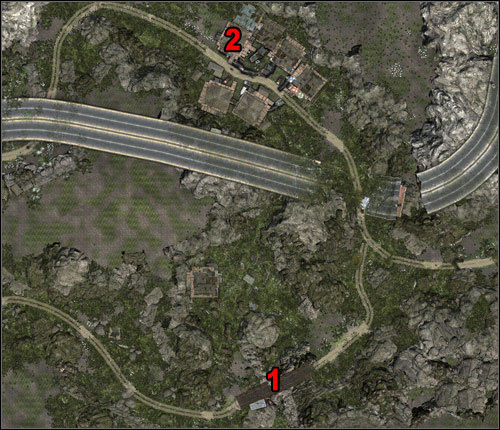
Obtained from: Otha Cantu
Difficulty level: Easy
Reward: 1500 Exp, Saw Disc Axe Mod
Collect all boxes with medicine
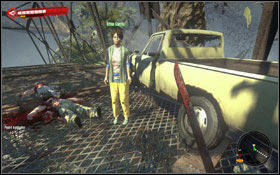
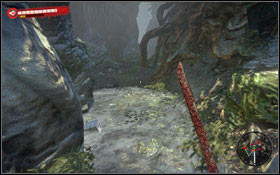
After you save a woman in the Bridge too far (1) #1 quest you can talk to her again. She will ask you to collect boxes with medicine, which she was transporting to the village. You have to collect 5 of them. One can be located directly under the bridge #2.
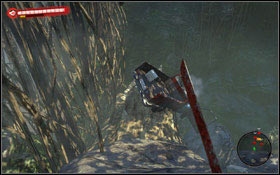
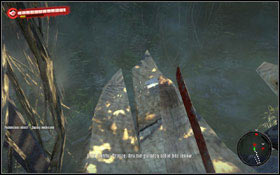
Second one is on the car #1. Another lies few steps further, at the edge of the branch #2.

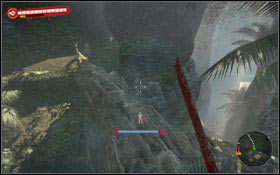
To collect one more you have to jump a little down, next to the car #1. And in order to acquire the last box, walk over the large branch connecting both sides of the abyss #2 but watch out for undead waiting for you there.
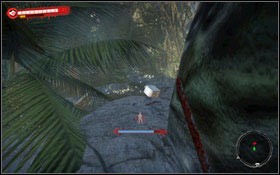
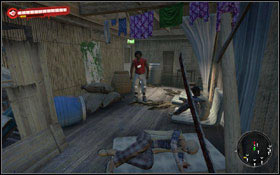
Turn left and follow the rocks down. After a while you should see the box #1. Run to the bottom and go back to the bridge. If you were using a car, get into it and drive to the nearest village (2) where you can give medicine to Paul #2.
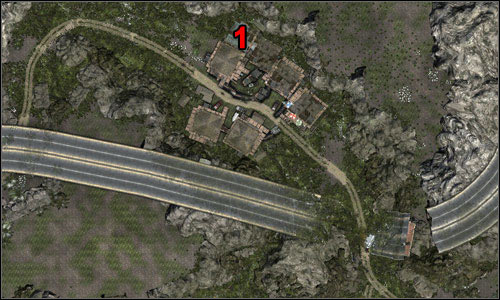
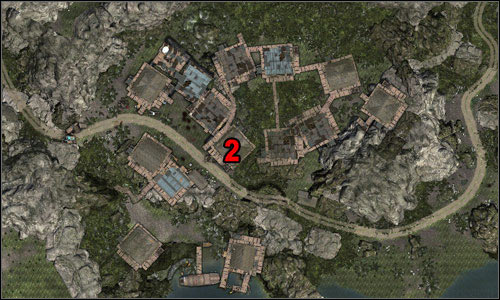
Obtained from: Claire
Difficulty level: Easy
Reward: 3000 Exp, Rifle Ammo
Help Claire find her son
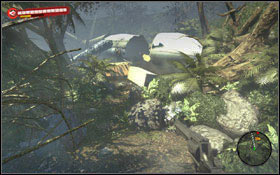
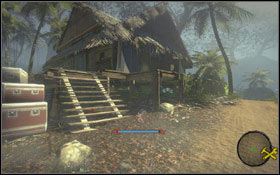
You'll me Claire (1) #1 among natives, who went to the island for the tour. Unfortunately when they were attacked, they all split up and now she is worrying about her son. Your task is to find the boy. This task is easy and fast. Use the Fast Travel option in the village and go to the River Village on the other side of the jungle. Claire's son named David can be found in one of huts (2) #2 sitting on mattresses. You'll learn that he is ok so you can return to Claire (1) using the Fast Travel option and tell her that her son is safe and alive.
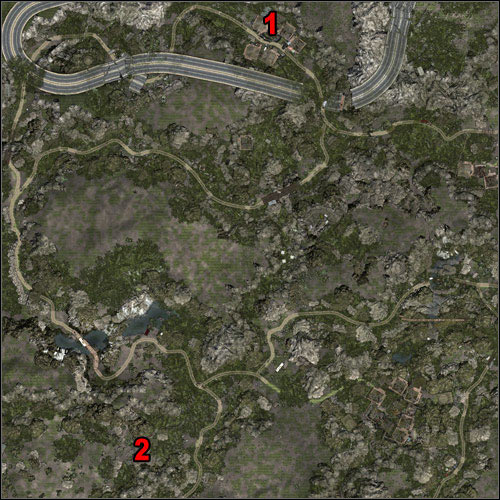
Obtained from: Chris
Difficulty level: Hard
Reward: 3000 Exp, Pick of Destiny
Find the location of the plane crash and retrieve the navigation devices from the plane
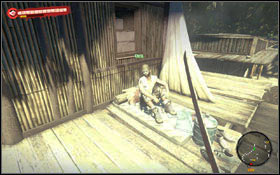
Chris sits next to the entrance to the hut (1) #1. He will tell you that an airplane crashed nearby. Despite the fact, that no one could survive, it might be possible that there some useful items can be found. So your task is to find the location of plane crash and get anything which is useful. The crashed plane can be found in the western part of the jungle #2.
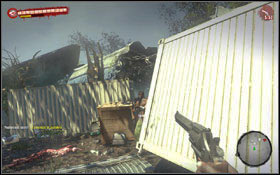
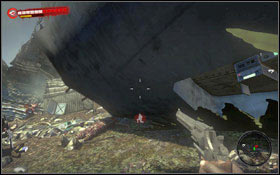
Prepare any firearms, because Jungle Muggers awaits you. They occupy this area #1. Watch out for the center part of the plane, because muggers can hide in its upper part so they can see you better. First electronic part can be found in the front part of the plane #2.
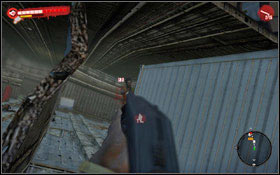
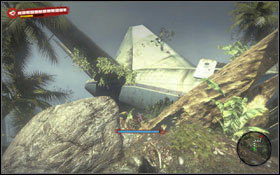
Once you get it move towards the back of the plane but still watch out in its center part because it is very narrowly there. I strongly advise not using the shotgun because of its short range #1. It is true that it works then sensationally but inside the plane you do not have always possibility to get close enough to your enemies without losing your life. Once you clear the area on the back of the plane, climb up the rock inside the plane #2.
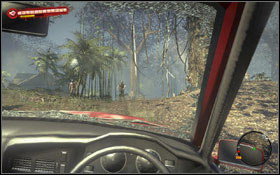

A second electronic part can be found right under the roof #1. Now you can return to the camp (1) and give Chris parts you acquired. Watch out on your way back - muggers will attack you again #2.
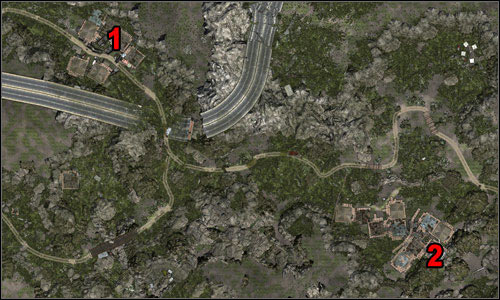
Obtained from: Amanda
Difficulty level: Hard
Reward: 3000 Exp, Detox Rifle Mod
Find the International Geographic video camera
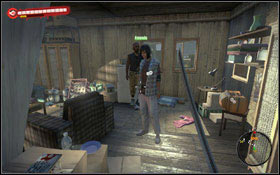
Amanda (1) #1 is a producer working for International Geographic. You'll learn that her crew was during the shooting a documentary film, when suddenly they were attacked by undead. Unfortunately she run out in panic and didn't take a video camera, so you have to find it. She will offer you her car #2 - you can find it next to the bungalows.

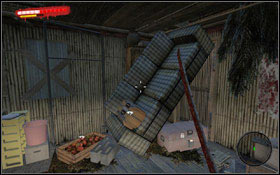
A bungalow with the video camera is closed, but you can get inside through the roof #1. There are several Walkers and a Thug inside. A video camera can be found in the luggage on the sofa #2.
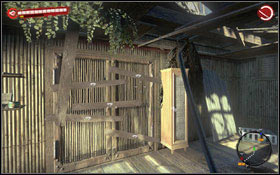
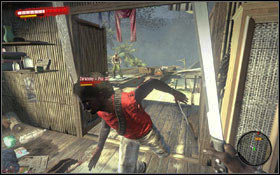
In order to leave the house you have to remove few planks from the exit door #1. Once you go outside, you'll be attacked by few waves of infected. You can stay longer and kill them all or run towards a car and return to the village, where you'll give Amanda her camera.
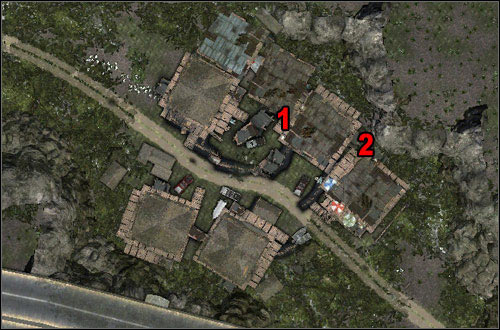
Obtained from: Dwight Turner
Reward: 3000 Exp, Nail Hammer
Obtain the warehouse key from the mechanic
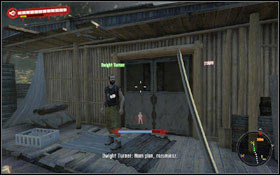
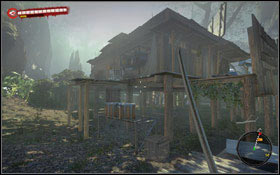
Dwight stands in front of the warehouse door (1) #1. Unfortunately it is closed. A key belongs to a mechanic who is dead but now walks amongst undead. You can find him in the bar. To get there go to the back of the building (2) where you'll find few boxes. Move them that way, so you can jump up over them #2.
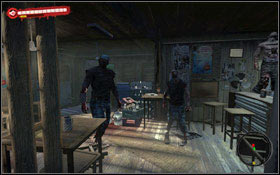
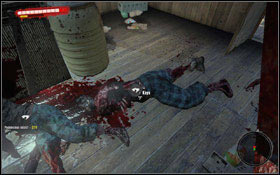
Break the bar's door and get inside. You'll face two Walkers and a Thug #1. There is not much room there so be careful. Once the mechanic is dead, take the key #2 and bring them to Dwight (1). You'll get a reward plus you can take from the warehouse whatever you want.
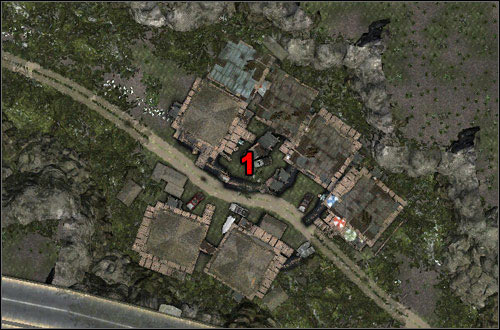
Obtained from: Makimbah
Difficulty level: Medium
Reward: 3000 Exp, Brutal Machete
Rescue Makimbah's bride from the rival village
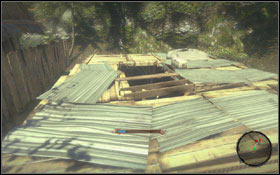
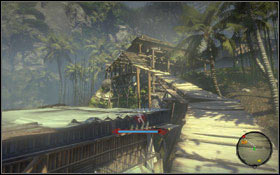
Makimbah sits between huts next to the car (1) #1. He will tell you that his fianc has been kidnapped by hostile tribe and he is to big coward to get her back. Right next to the man you'll find a map for Fast Travel option - use it and move to The River Village. Mahina is kept in one of huts (2). As the door is closed you have to find another way to get inside. Use a wooden catwalk #2 and jump onto the roof.
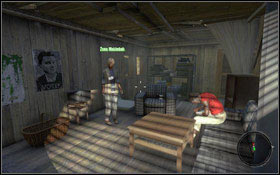
Now get to the roof of the hut where Mahina is kept and jump inside through the hole #1. You'll find Mahimbah's wife there #2. You'll learn from her that her husband was beating her and that's why she escaped. She will ask you to tell her husband that she is dead or turned into a zombie.
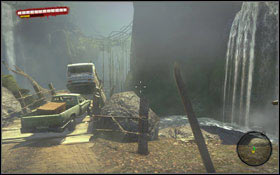
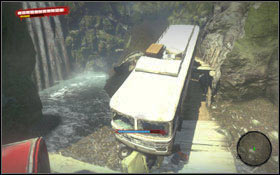
Unfortunately words are not enough so you need some proof. Mahina recently threw out her necklace which she got from her husband. Look for it near Gaia Falls (3) #1. You can't drive shorter way with a car because and exit from the village is blocked. You must walk there or choose a longer way by a car. You can also use Fast Travel to get to the village on the north and then use a car to get to the falls. The necklace can be found in a bus - you have to take a decent running start and jump on the bus from the opposite side #2.
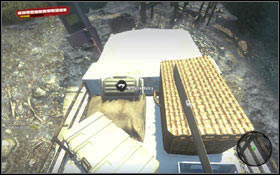
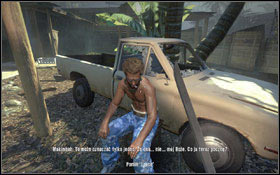
The necklace is in a small bag #1. Take it and return to the village. Tell Makimbah #2 that his wife is dead - he will believe you.
Obtained from: Loren
Difficulty level: Easy
Reward: 100 Exp, Money
Bring 5 Healing Herbs to Loren

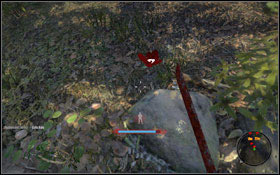
This event is available only after completing the Blood in the Tropics quest.
Loren #1 will ask you to find some local herbs, which can be use to cure patients. Gotu Kola #2 can be found outside the village - there are many of these near the swamps. When you approach to the herb, you'll see it on your mini map as a hand-icon.
Obtained from: Brian
Difficulty level: Easy
Reward: 100 Exp, Small Rifle Ammo
Search through the bunkers and bring the canned food to Brian
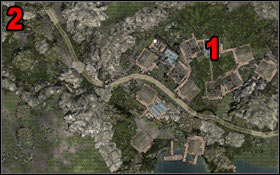
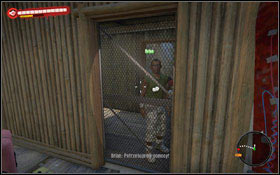
Brian can be found in one of the hut in the village (1) #2. He will ask you to find some cans of food. For every two you'll be rewarded. Cans of food can be found in bunkers - the closest one is in the west from the village (2). There are also few more bunkers in the jungle.
Obtained from: Warrior
Difficulty level: Medium
Reward: 1000 Exp, Money
Get 5 Oleander flowers
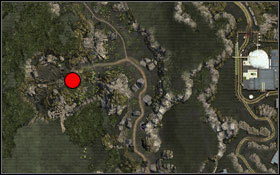
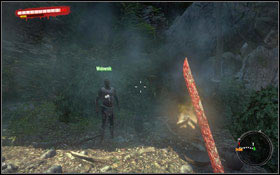
The Warrior is in the inner of the Native Village. You can get an access there in the Man of Faith quest.
Your task is to find 5 oleander flowers. This flower grows in sunny places. Each time you'll get some money and experience points.
Obtained from: Monroe
Difficulty level: Medium
Reward: 1000 Exp
Get five suicider's blood samples
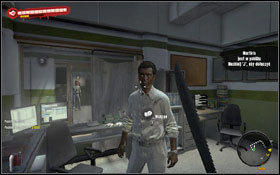
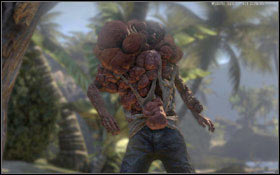
This event is available only after completing quests for Monroe #1 (the last one is the Scran's not for the Dead quest).
The scientist can reward you very well if you can bring him 5 Suicider blood samples. Unfortunately this type of enemy can't be found in the jungle so you have to go to the city or to the resort.
Obtained from: Pono
Difficulty level: Easy
Reward: 100 Exp, Money
Bring 5 cans of food to Pono
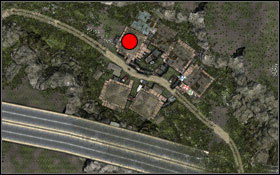
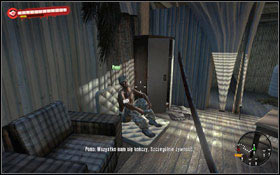
This event is available only after completing the Second Aid quest.
Pono sits in one of the huts in the village to the north of the jungle #1, #2. He will ask you to bring him 5 cans of food. Each time you'll get some money and experience points. Cans can be found in bunkers or in the houses (remember that you can return to the city or to the resort).
Obtained from: Ethan
Difficulty level: Easy
Reward: 100 Exp, Small Pistol Ammo
Acquire 5 batteries for Ethan

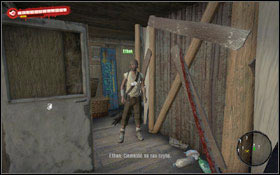
This event is available only after completing the Second Aid quest.
Ethan sits in one of the huts #1, #2. He will offer you a pack of ammo for each 5 batteries you can bring him. Batteries can be found in many places, mainly in electronic devices.
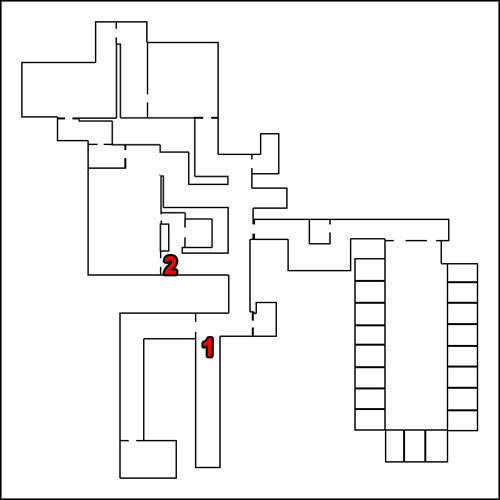
Investigate the situation in prison
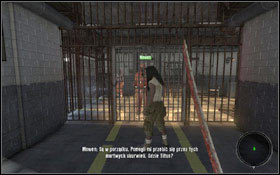
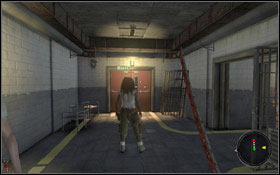
You start Act 4 in the prison. There are no maps in entire facility, but in this guide you'll find hand-drawn maps, which should help you a bit. First mission is very easy - follow Mowen straight to the first bars (1) #1. A prisoner will tell you that both Titus as well as other prisoners sits in the canteen. Follow your companions until you reach double, red door (2) #2 leading to the canteen.
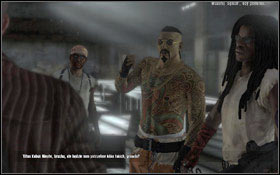
Once you get inside, a cut-scene activates, after which the quest is over.
Obtained from: Titus Kabui
Difficulty level: Hard
Reward: 10000 Exp, Metal Kanabo
Free Titus' friend from his cell
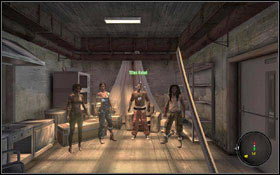

You'll find Titus in the canteen's kitchen (1) #1 - talk to him. Your first mission to get to the Block C is to free and old Titus's friend, who can be found in the Block A. Of course it is full of undead so only you are able to complete this task. Leave the canteen and move to the entrance to the Block A (2) #2.

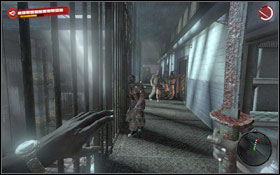
Once you get to the Block A (3) prepare for a tough fight with undead. There are also several "bosses" - watch out for a Ram #1 (4). This room is large enough to dodge his charges. In another part of the Block you'll find also a Thug (5). You have to go up the stairs to the third floor. A proper cell can be found with no problems - it is besieged by undead (6) #2.

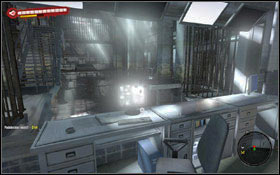
Unfortunately the cell is locked so you have to go down the stairs to another floor #1. Be very careful here. At the very end you'll find the door leading to the control room #2, where you can open Alvaro's cell.
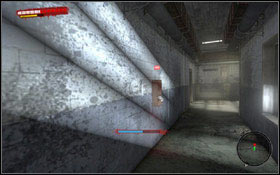

Unfortunately you've triggered the alarm. You have to switch it off as fast as possible because it attracts undead. A switch is located on the second floor #1, but you have to go to the other side, because the door in the control room is blocked. Once again go to the third floor and go with Alvaro to Titus. Once you leave the Block A, a Thug #2 will come out from a small room, which was closed till now. Your companion won't help you with the fight, so you have to defeat the zombie on your own. Now you can go to Titus and collect your reward.
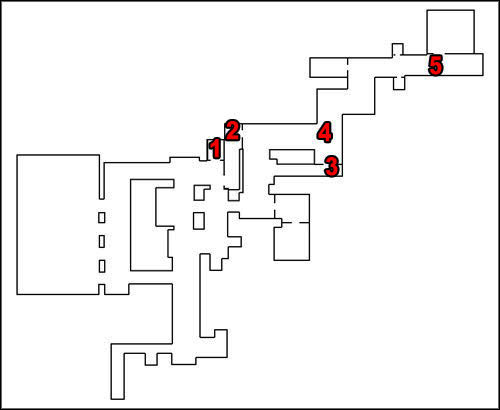
Obtained from: Titus Kabui
Difficulty level: Hard
Reward: 10000 Exp, Sledgehammer
Get weapons and ammo from the armory
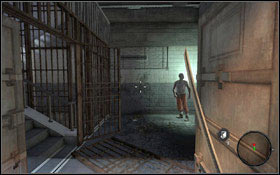
Your next task, which brings you closer to getting to the Block C, is acquiring weapons for prisoners, so can defend themselves against zombies. Go to the stairs #1, #2 leading to the upper floor (the entrance is open now).
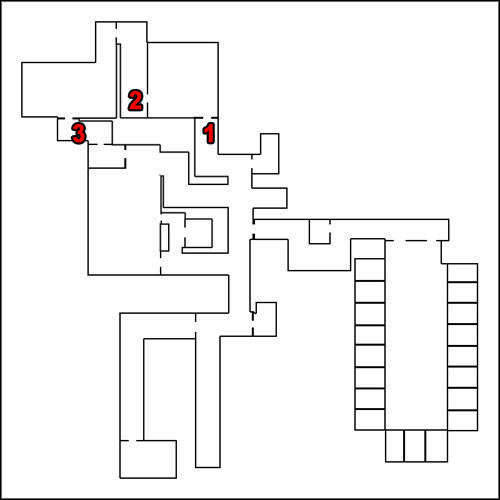
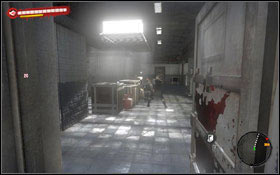
Once you get upstairs (1) go through the door on your left - you'll find yourself in a narrow corridor with a zombie at its end (2). First you have to switch off steam using the valve on the wall #1. Go through the door where zombie was knocking - you'll find yourself in another corridor. In a distance you can see undead and few policemen. Use a corridor on your right (3) where you can quickly and efficiently get rid of policemen (4) #2 (you may use nearby gas tanks).
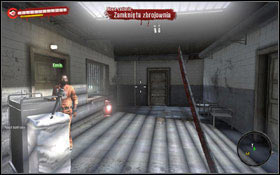
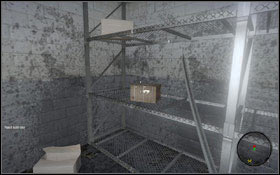
Follow the corridor until you get to the armory, where Kevin awaits you (5) #1. Unfortunately he is not able to open the door. You have to complete the Locked armory quest in order to continue. Once Kevin opens the door, get inside and take an ammo box #2. Return downstairs (1) and talk to Titus.
Obtained from: Titus Kabui
Difficulty level: Medium
Reward: 10000 Exp, Heavy Pistol
Get food from the kitchen
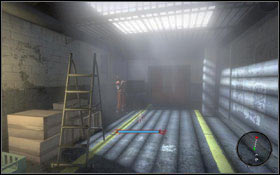
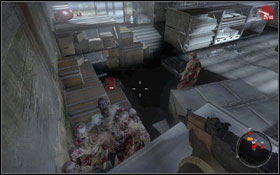
This time you have to get food from the kitchen, which is besieged by undead. Go to the warehouse entrance (1) #1 which is now open. Right next to the entrance you'll find meat bait - it will be useful in few moments. Climb the boxed and lure as many zombies as you can near the gas tank #2 and then shoot it. If not all zombies are dead now, kill the rest and then go to the other door (2).
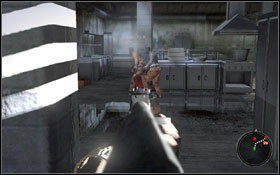
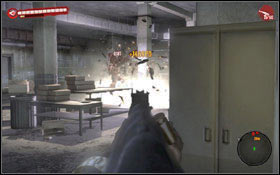
Once you get inside the kitchen, you'll have to fight more zombies. If you still have meat bait, you might throw it near the gas tank to burn few zombies in an explosion #1, #2. After clearing the warehouse and the kitchen, return to Titus (you can go there now directly from the kitchen (3)).
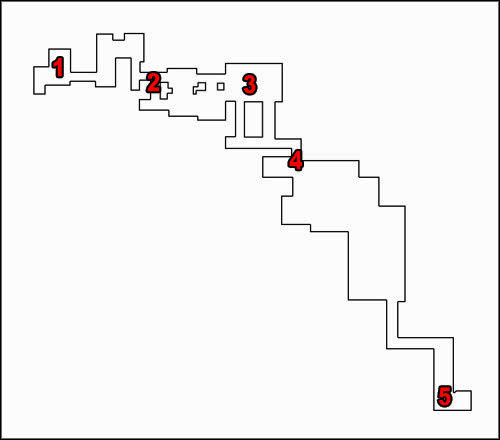
Obtained from: Titus Kabui
Difficulty level: Very hard
Find your way to the armory in cell block B
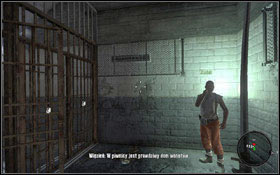
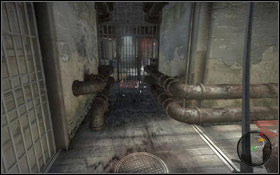
It is time for another try to find weapons. This time you'll go to the Block B, where worst prisoners were locked. In order to get there you have to go to the basement #1 (1). Generally you have to go straight forward there. You'll reach closed gate (2) #2 there, which you have to bypass somehow.
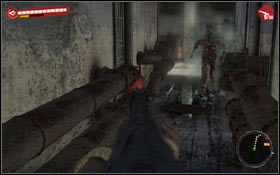
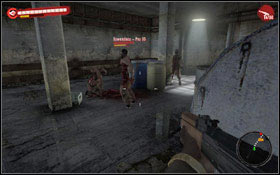
Right next to the larger room (3) you'll find a gas tank #1. Use it to kill zombies which attack you. In another part (behind other tank) you'll come across more Walkers #2. You might again use a gas tank to get rid of them.
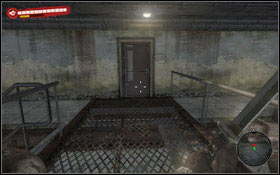
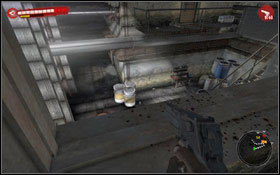
You'll get to a descent (4) #1 but it is better to stay where you are. This will give you an advantage over zombies and policemen in a shooting #2.
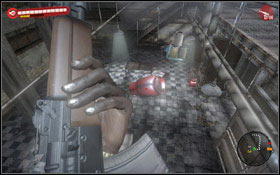
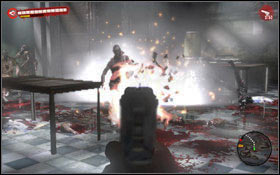
You should still stay on an upper level (for the last time) and take an advantage again. There are few gas tanks in the room, so blow up zombies #1, #2.
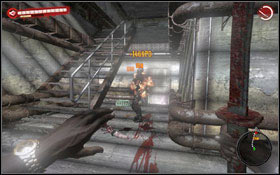
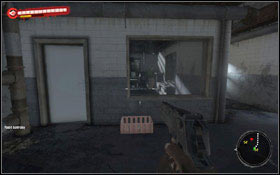
This time you have to use the lower level in order to get to the stairs (5) #1. Watch out, there is a Thug guarding them. Go up the stairs - you'll find yourself in a control room #2, but unfortunately the door leading inside is blocked. You have to cross through the entire prison block.
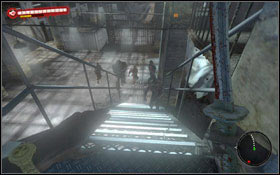
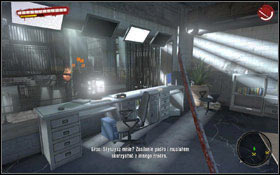
Literally a hell awaits you, because inside the block you'll come across infected, Walkers, Rams, Thugs and a Suicider #1. First go down to use a stairs on the other side of the block. Move forward eliminating threat after threat and going up (note: if you reach the proper floor and you die, there is a chance that you'll respawn in the control room). Finally you get to the control room #2. At this point a Voice contacts you, and tells you to abandon your current plan.
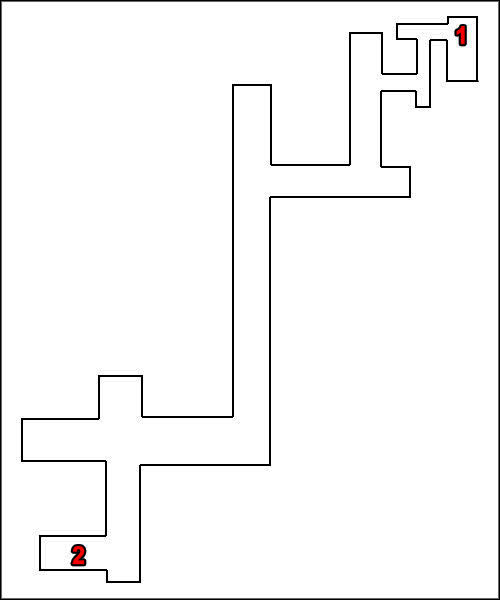
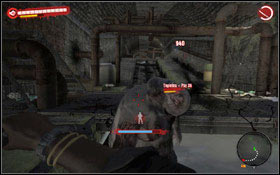
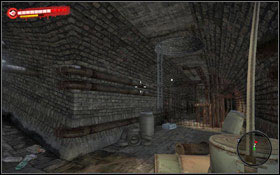
Use the door leading to the stairs and go down the bottom, to the sewers (1). Above you can find map of the sewers - these are not very complicated and you have to reach their second end. Along your way you'll come across few groups of undead (also with a Floater) #1. Your target is a ladder leading to the Block C (2) #2.
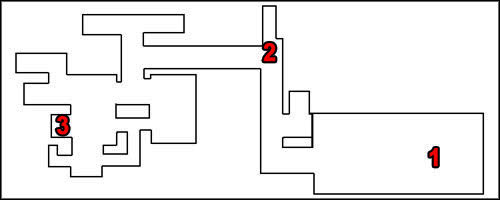
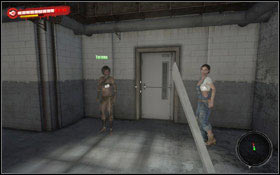
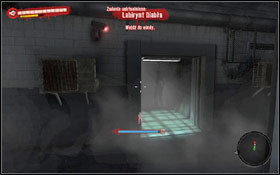
Leave the sewers - you'll find yourself in the bath (1). Leave this room and follow the corridor until you meet Yerema and Jin (2) #1. After few words of explanation what has happened in the canteen, follow both women to the elevator (3) #2.
Find your way to the hospital roof
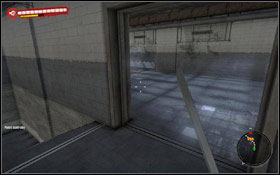
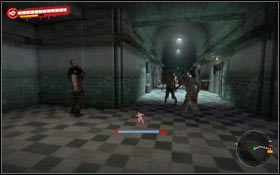
Run through the door and move forward. You'll get to the room with an elevator and a stairs. But do not go down. Instead use a corridor on your right #1. You'll reach another stairs. Again go through the double door and you'll find yourself in the hospital. Now prepare for a fight with huge number of undead #2.
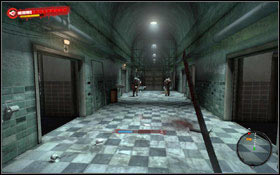
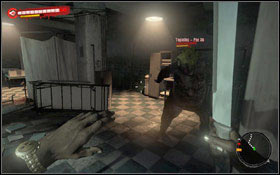
In the next corridor you can follow it #1 or choose side rooms. But in both cases you'll have to fight powerful undead #2.
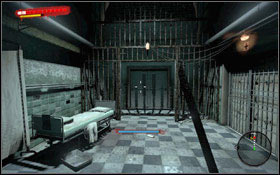
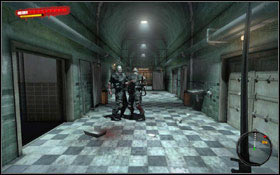
After reaching the corridor's end, turn left. You'll find the door with the stairs leading two floors up #1. This floor is no different from the previous one - again you have to go to the other side of the corridor, killing hordes of undead along your way #2. This time turn right - you'll reach the stairs. Go up the stairs to the roof.
Reward: 25000 Exp
Don't let White escape the island
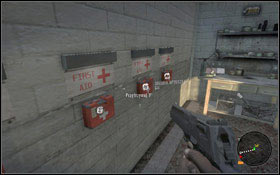
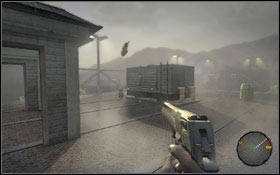
It is time for the last quest and a fight with the last boss. It is worth mentioning, that in the room behind you can find a workshop and medkits #1. There are also many gas tanks on the roof, as well as explosives planted on barrels #2 (you have to hold action key to activate a bomb, when it explodes it creates a wall of fire for few moments, which set fire on zombies crossing it).
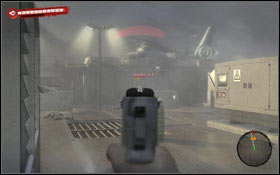
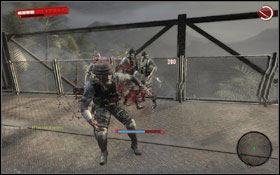
There is also a lot of ammo there. It might be useful because you'll have to face several waves of soldiers first #1. Do not waste your ammo on White, because you're not able to kill him right now. Once you dealt with soldiers, White will order to execute Order 66 and you will be attacked by infected soldiers #2.
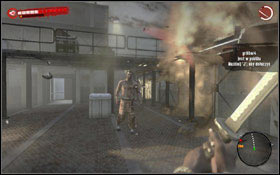
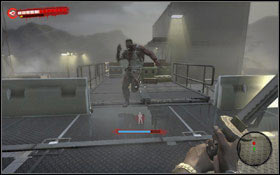
It is not worth fighting with them all the time. Try to move forwards #1, until you reach the stairs leading to the heliport. A cut-scene activates in that moment and you see White being bitten by his infected wife. He is taking an antidote however its effect is contrary to desired effects. Now you have to fight Infected White #2. This struggle is not easy. The monster charges at you all the time so you have to dodge and counterattack him immediately with your melee weapons.
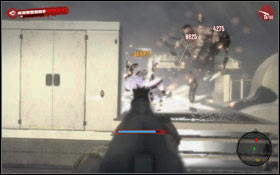
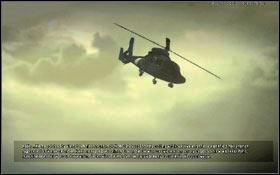
You can try to lure him on the roof, where you can use gas tanks to burn him #1. Once he is dead, the last cut-scene activates ending the game #2.
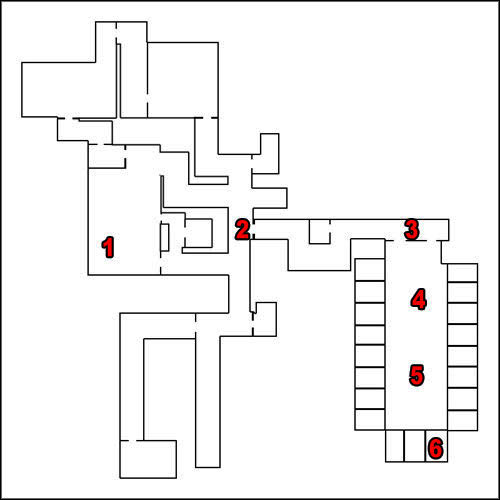
Obtained from: Dreyfus
Difficulty level: Medium
Reward: 3000 Exp, Sawn-Off Shotgun
Take the drugs to Dreyfus
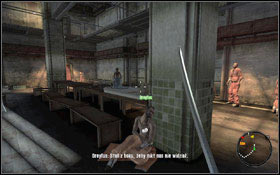
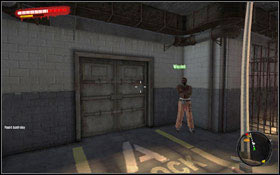
A prisoner named Dreyfus sits next to one of the pillars in the canteen (1) #1. He'll ask you to find some drugs for him. One dealer can be found in his cell. Leave the canteen and go to the entrance to the Block A (2) #2.
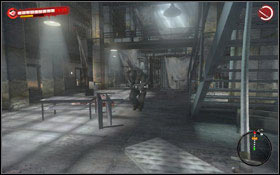
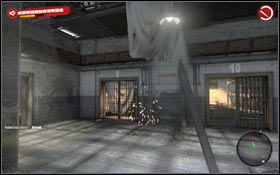
Once you get to the Block A (3) prepare for a tough fight with undead. There are also several "bosses" - watch out for a Ram #1 (4). This room is large enough to dodge his charges. In another part of the Block you'll find also a Thug (5). Cell number 9 can be found at the very end (6) #2.
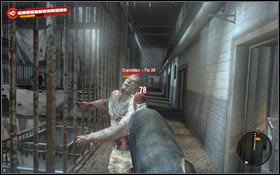
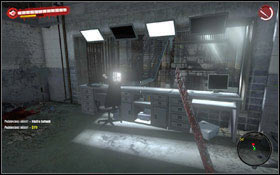
Unfortunately the cell is locked so you have to go up the stairs to another floor #1. Be very careful here. A very narrow passage limits your moves and undead keep attacking you. Go to the other side where you can find stairs leading to the second floor. At the very end you'll find the door leading to the control room #2, where you can open dealer's cell.
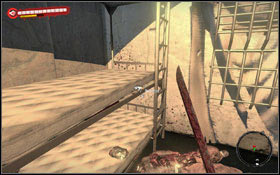
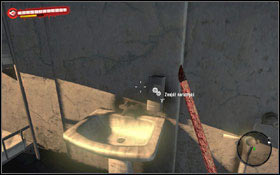
Go down to the bottom but watch out because zombies there might have been respawned. Go to the dealer's cell - watch out for a Walker lying there. Start your search - drugs can be found under the bed #1 and inside the soap box #2.
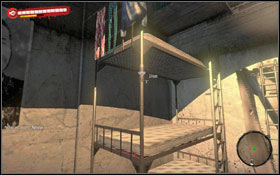

Drugs are also inside the pipe connecting bunks and in the toilet #2. Return to Dreyfus (1) and give him drugs.
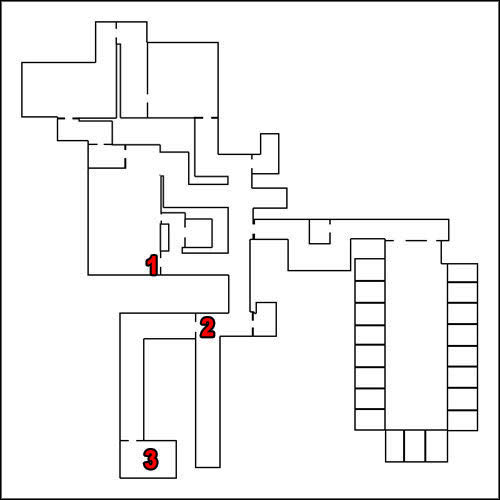
Obtained from: Angel
Difficulty level: Hard
Reward: 3000 Exp, Zed's Demise
Stop the Butcher of Banoi from terrorizing the prison
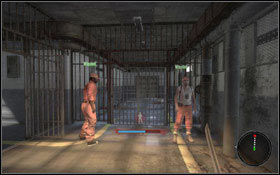
Angel can be found next to the double door to the canteen (1) #1. He will tell you about the Butcher of Banoi, who killed his entire family when he was a kid. If you can defeat this lunatic, you'll earn the respect of many prisoners. Leave the canteen and go to the starting place (2) #2
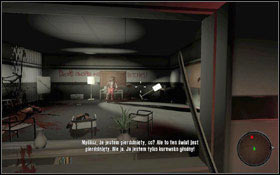
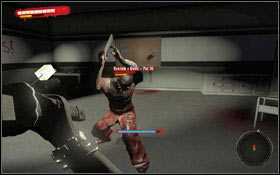
Go through the gate and keep moving towards the place, where the Butcher resides (3). After the initial presentation #1, the door to the room opens. The fight with the Butcher is not the easy one #2. Your opponent charges at you, almost constantly waving his machete. But from time to time he makes a pause - this is a moment which you should use for your counterattack. You might also throw weapons at him or just use the Fury. Do not forget to search the room - you can find very good weapon there! Return to Angel (1), who will be very surprised seeing you. Collect your reward.
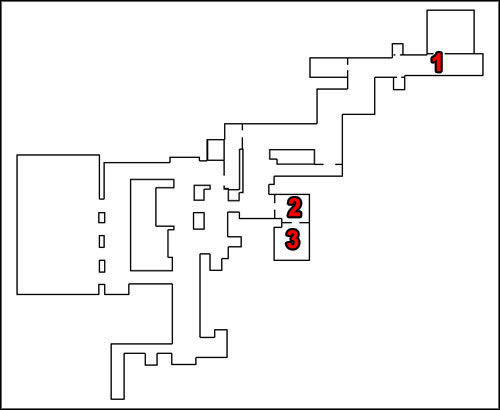
Obtained from: Kevin
Difficulty level: Hard
Grab a Master Key off a senior guard
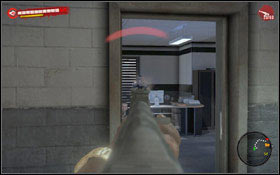
This quest starts automatically during the Full Metal Jacket quest.
The armory door is closed but Kevin (1) #1 who is good with lock picking this time can't help you. So you have to obtain the master key, which can be found by senior guards. Walk through the corridor to one of room, where guards resides (2). Before you open the door, prepare your gun. Inside the first room you have to shoot two policemen #2.
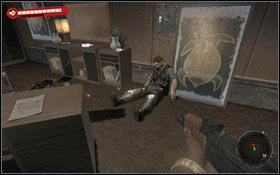
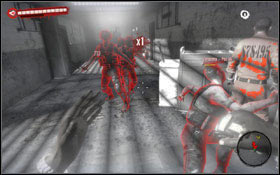
In the next room (3) you'll find only one, last policeman. A master key can be found on a chest of drawers next to a plant #1. Grab it and return to Kevin (1). The prisoner will start opening the door but unfortunately something goes wrong and the double door at the end of a corridor opens. Your task is to protect Kevin during his tries to open the lock #2.
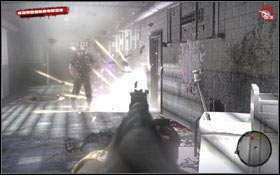
Somewhere in half of corridor you'll find a gas tank. If you didn't use it on a wave of infected then use it on a Thug. The quest is over once you killed all zombies.
Obtained from: Harland
Difficulty level: Medium
Reward: 3000 Exp, Exotic Double Blade
Get some Thorazine from the infirmary
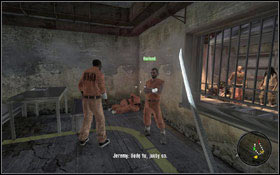
This quest becomes active only after completing the Full Metal Jacket quest.
You'll find Harland in the canteen, in one of the corners #1. One of the prisoners needs a medicine and he is so important that the rest of prisoners won't make without him. Go up the stairs to the upper floor. The doctor room is few steps from the stairs to the right. Thorazine can be found in the locker to the right #2. Return to Harland an collect your reward.


 DayZ - ArmA 2 mod Game Guide & Walkthrough
 Dungeon Siege III Game Guide & Walkthrough
 Deus Ex: Human Revolution Game Guide & Walkthrough
 DayZ Game Guide & Walkthrough
 Dragon Age II Game Guide & Walkthrough