
Welcome to a guide to "Crysis Warhead" PC video game. This guide consists entirely of a very detailed walkthrough of all seven levels of the singleplayer campaign. I've focused my efforts on describing how to fulfill main goals, as well as side challenges which you'll encounter during the course of the game. My guide should prove to be most useful to less experienced players, however I've also pointed out some interesting hints for hardcore gamers. Have fun playing the game and using my guide!
Stranger
The first mission of the game begins with a short tutorial, however you'll soon be dealing with enemy troops and you'll have to explore the surrounding area alone. You shouldn't encounter any major problems during the course of this mission, however it may get difficult near the finish, because you'll have to secure a very large campsite located on the beach.

Main map:
1 - starting area
2 - finish
2 - fourth main objective: campsite
3 - first main objective: safe area
4 - second main objective: scenic location
5 - third main objective: road leading to the campsite
6 - first side objective: additional intel
7 - second side objective: broadcasting station
8 - third side objective: ammo depot
You'll begin your journey by watching two very interesting cut-scenes. The first movie will introduce you to a new main character, called Psycho. You'll have a chance to control him throughout the course of an entire game.

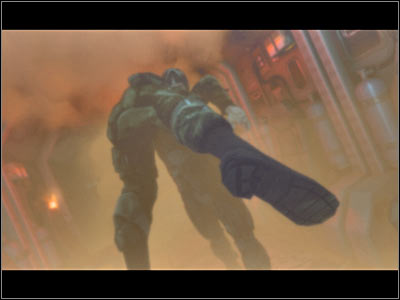
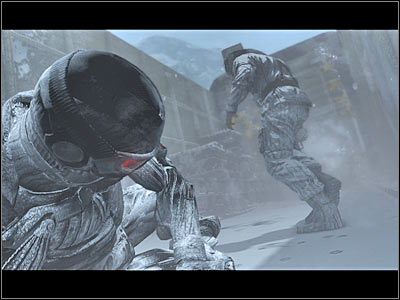
Next up, you will be presented with a second cut-scene. This time you'll find yourself stranded inside a destroyed VTOL (it's a futuristic plane). Psycho will try to rescue one of his colleagues (screen). Get ready to take control over his actions.
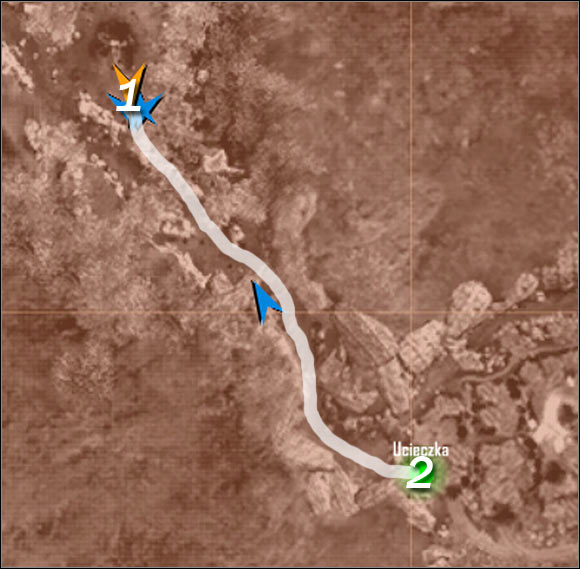
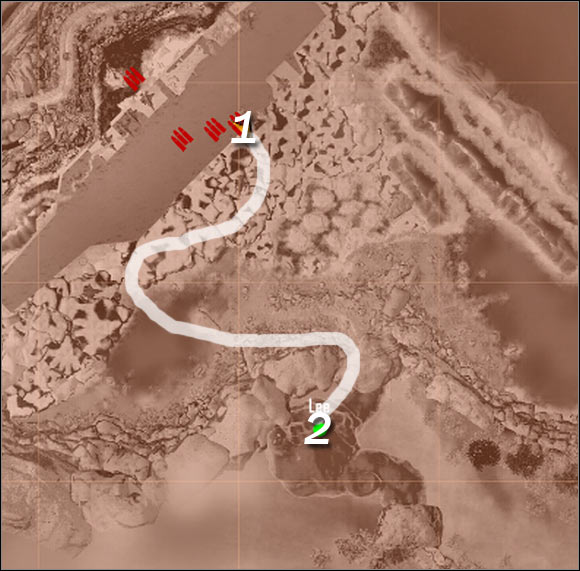
Map legend:
1 - starting area
2 - destination (destroyed village)
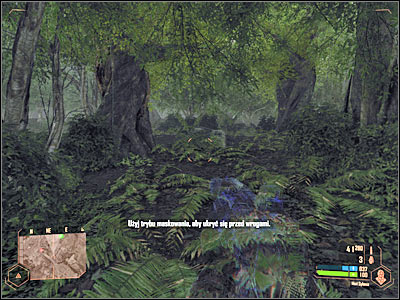
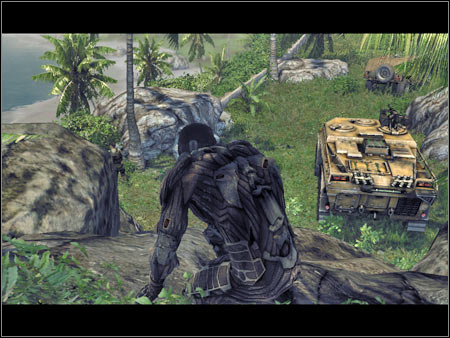
Ignore the fact that large explosions are taking place in the vicinity, because you'll be safe here. You won't have to hide nor use your weapon. Notice that a second VTOL has crash landed in the area (screen). Once you're ready to get moving, start following some of your colleagues. Notice that you'll receive a lot of hints along the way. You'll find out more about how to control your character.
You should be heading north-east. Use my map if you're having some difficulties finding a correct route to your destination. Thankfully, you can't get lost, because there's a large canyon here and you can't leave it. Eventually you'll come across a small opening (screen). You must press and hold CTRL key here to crouch. You could also lay down on the ground by pressing the Z key, but it won't be necessary. Get to the other side.
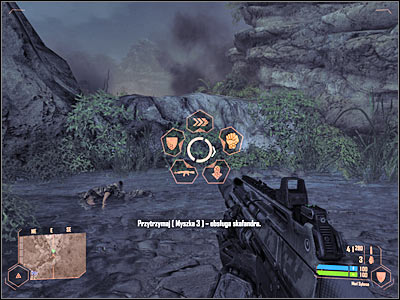
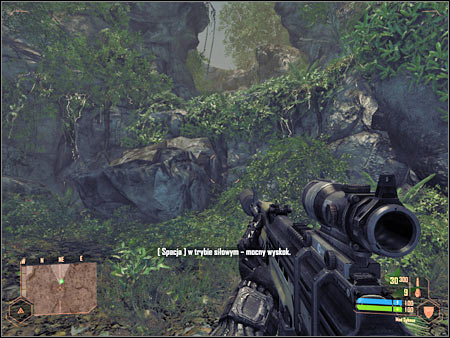
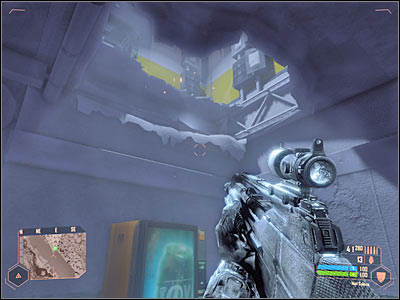
Eventually you'll get to a destroyed VTOL, but you may as well ignore it, because you won't have to rescue anyone. Avoid a new obstacle by pressing the SPACE key. This will allow you to perform a standard jump. Turn east and proceed towards the rocks (screen). You'll have to use your nanosuit for the first time. Activate the menu and choose maximum strength feature. Press the SPACE key and you should end up standing on the upper level. Head on to a destroyed village where you'll presented with a new cut-scene.
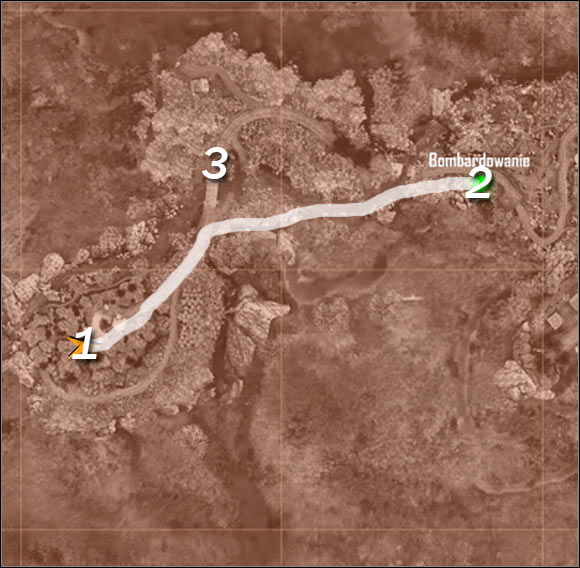
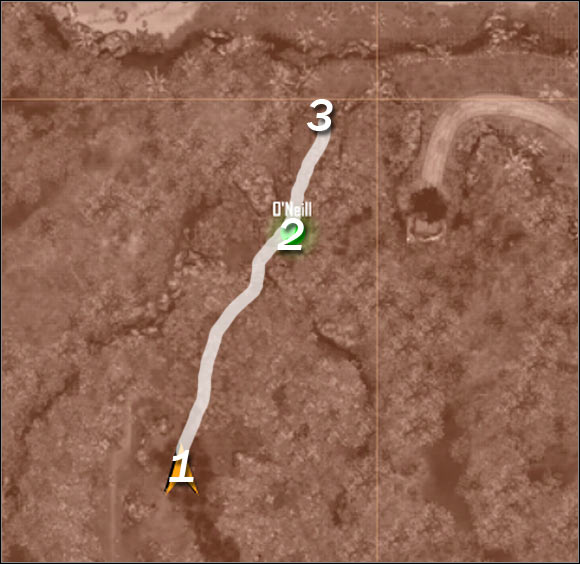
Map legend:
1 - starting area
2 - destination (observation area)
3 - enemy patrol
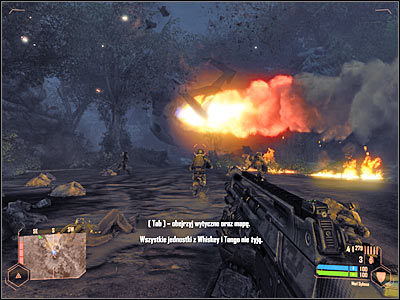
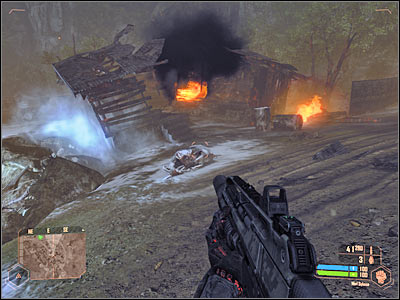
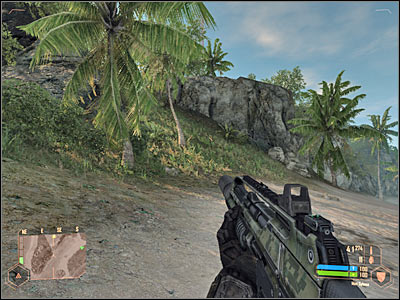
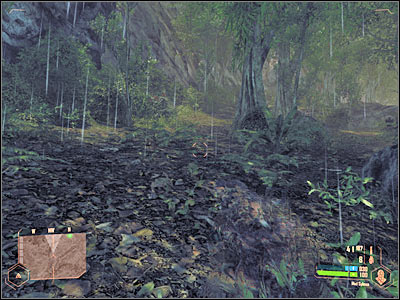
This task will appear on your list a short while after the cut-scene has ended. It would be a good idea to listen to a short radio transmission. Proceed to a lower level and approach the burning buildings. Thankfully, you won't encounter any enemy units here, so you may proceed north-east right away (screen).
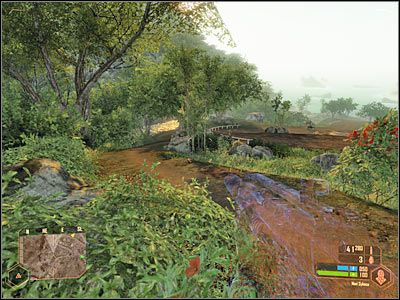
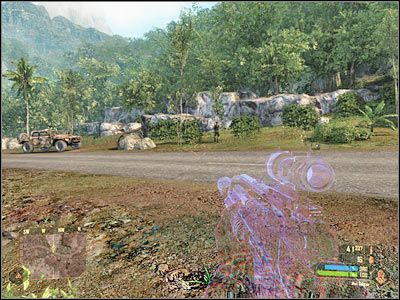
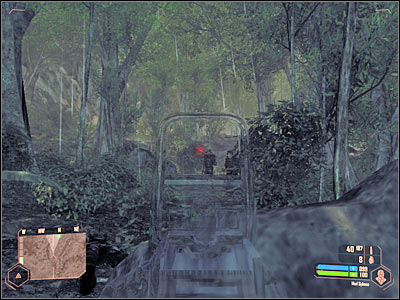
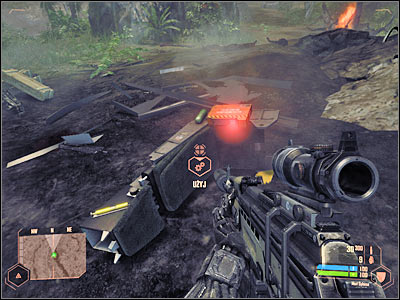
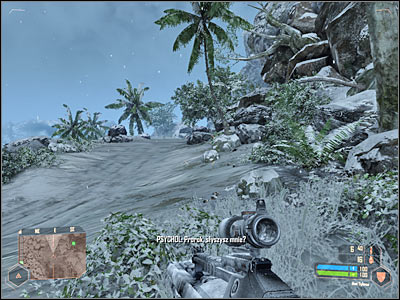
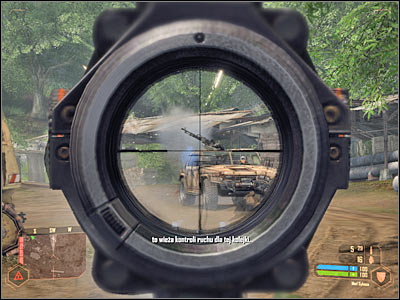
You should be able to get a small bridge in a few seconds. I'd strongly recommend that you stop here. Use your binoculars and you'll notice a small group of enemy units. Korean soldiers will probably blow up an allied humvee (screen). Now you've got to make an important decision. You can decide to fight them or you can try avoiding them and focusing only on getting to your destination. I would recommend choosing the second approach, especially since you're equipped poorly at the moment.

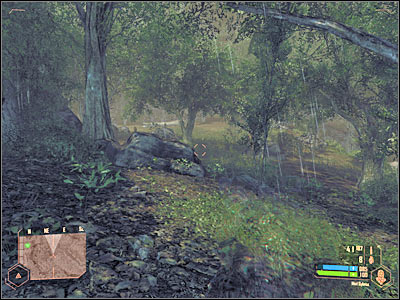
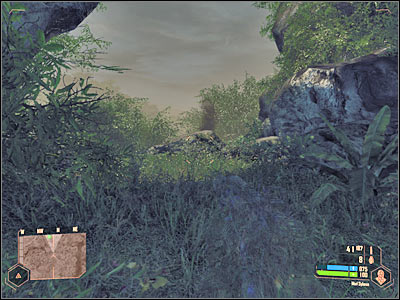
If you do want to fight them, you'd have to lay down on the ground and attack them from a larger distance. Activate cloak function of your suit and proceed east. This will allow you to hide inside the forest (screen). I would recommend that you keep using the cloak. Obviously this will deplete your armor's energy, so each time you must lay down on the ground, disable cloak and wait for it to regenerate.
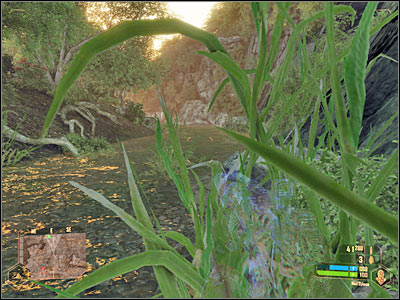
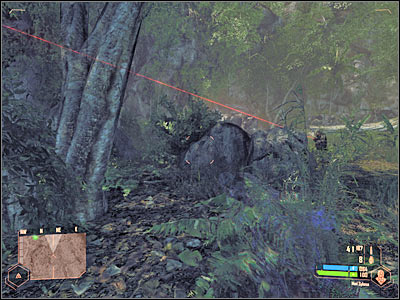
Eventually you'll get to a river (screen). I assume that you're far away from enemy units by now, however you can still keep using cloak just to make sure that you won't get caught. Keep moving east. It would be a good idea to stay near the river at all times, so you won't have to worry about getting lost.
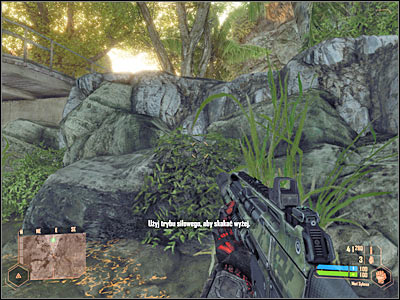
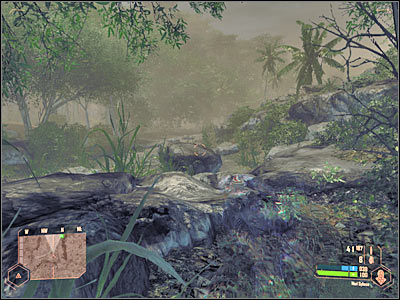
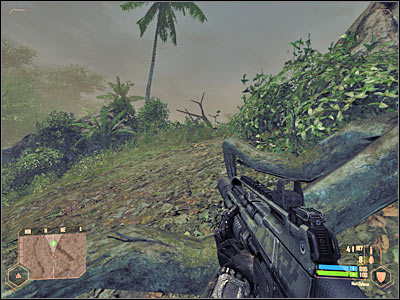
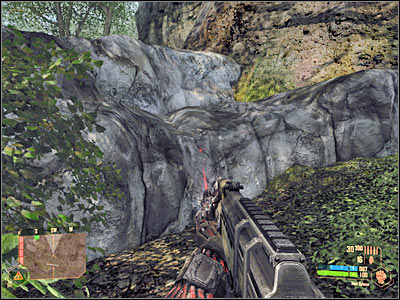
You should be able to get to a second bridge in just a few seconds. You won't encounter any Korean soldiers here, so you won't have to use cloak anymore. Instead, approach the rocks (screen) and use maximum strength option. This will allow you to return to the main path and you'll be allowed to continue with your journey.
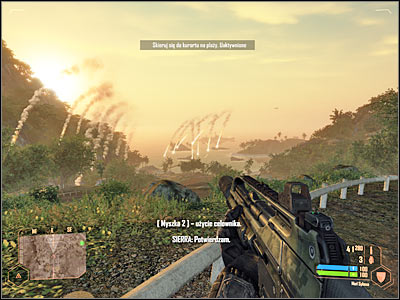
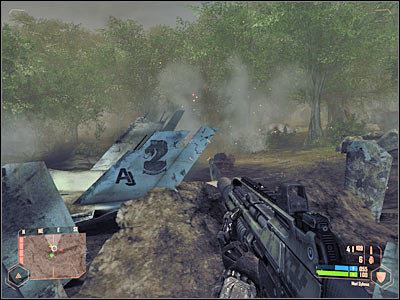
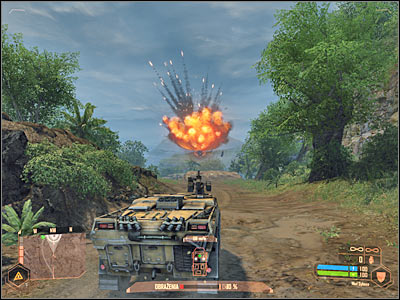
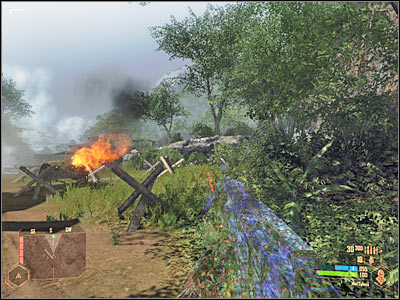
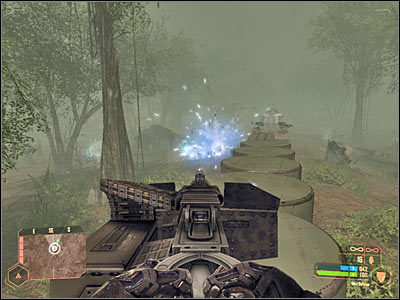
Obviously you'll have to keep moving east until you've reached an observation area. Approach the small barrier and enjoy huge bombardments (screen). You can use your binoculars for a better view of the situation. Sadly, enemy units have arrived in the area. Make sure you're not seen, because you'll want to surprise them later on.
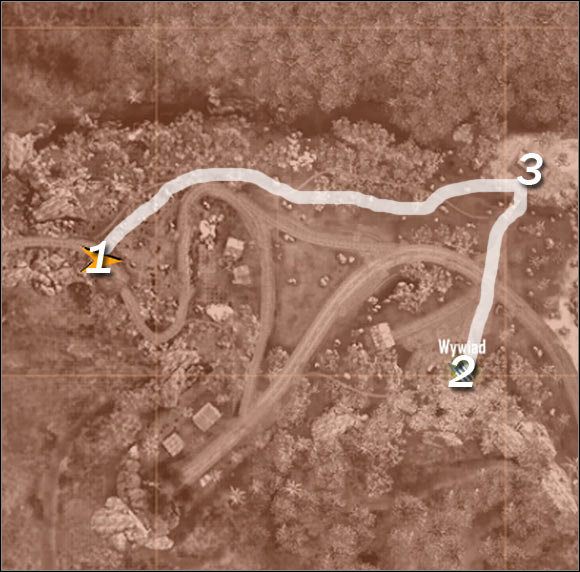
Map legend:
1 - starting area
2 - destination (trailer)
3 - bar (enemy units)
Important! This is a side mission, so it means you won't have to fulfill it. Nevertheless, you shouldn't ignore it, especially since you'll have to explore the area around the trailer anyway.
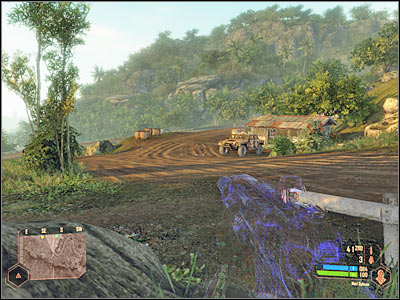
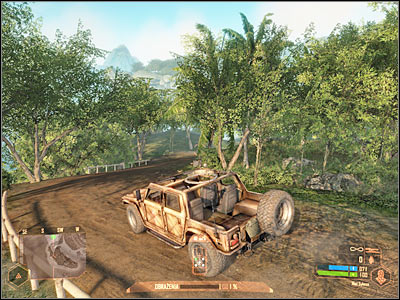
I wouldn't recommend attacking enemy units from the top of the hill. It would be too risky, especially since an enemy humvee is patrolling this area. Instead, activate cloak and proceed to your left (screen). Stay away from the main dirt road and you should be just fine. Don't forget to recharge your armor each time it's been depleted due to usage of cloak.
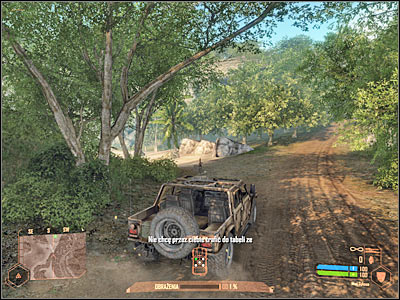
Head south and eventually you should come across a humvee (screen). If you don't have anything against choosing a more direct approach, you may consider using it to attack and eliminate enemy units. I would recommend that you ignore it and keep moving south. Stay off the stream, because you would be exposed to enemy fire there.
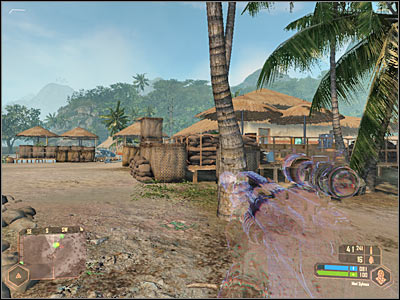
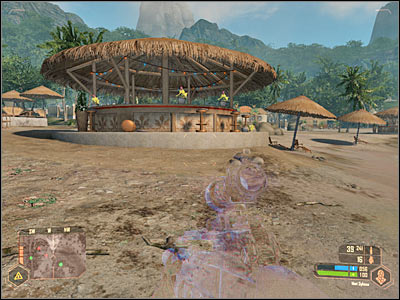
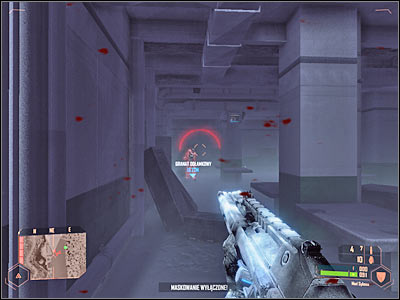
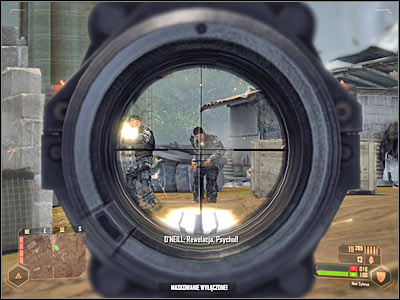
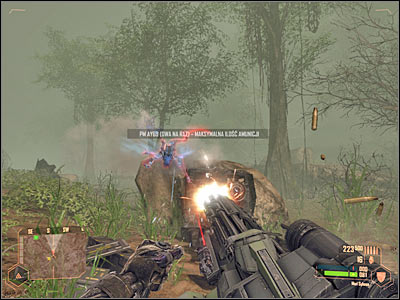
Your next target is a small bar which is located to your left (screen; 3 on the map). There are at least two enemy soldiers here and it would be a good idea to get rid of them as soon as possible. Try avoiding unwanted attention, because one of the soldiers may fire a flare and that would result in enemy reinforcements arriving in this area. You should be fine as long as you're using camouflage properly. It's also a good idea to use your personal map to locate enemy troops. Once you've won, check the area and you should find some interesting pistols, called AY69. They're one of new weapons included in "Warhead". Take two pistols, because the guns are going to be held in separate hands. There are also explosive chargers here, as well as Claymore mines.
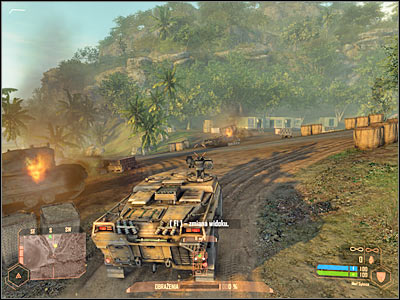
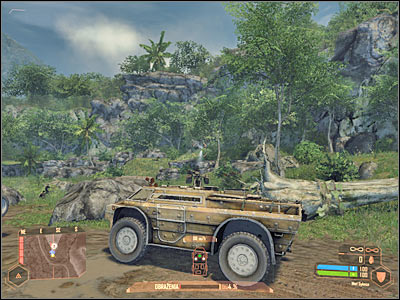
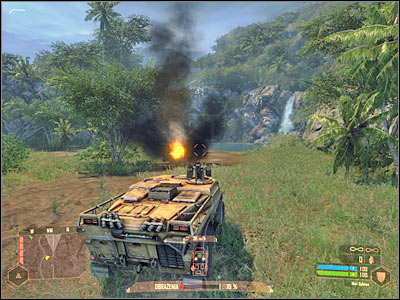
Notice that a large armored vehicle has been parked in front of the bar (screen). You weren't able to use these machines in the previous game, so I guess I should tell you that this vehicle is EXTREMELY useful. Obviously you should enter it as soon as possible. Start using the minigun to eliminate all nearby troops. Some of the Korean soldiers are hiding near the trailer and there's also an enemy humvee to the west of your current position. I would recommend that you maintain a safe distance, so you won't have to worry about enemy units returning fire. Notice that your minigun has an unlimited ammo supplies, but you must prevent it from overheating.
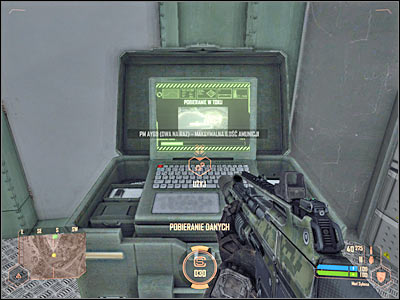
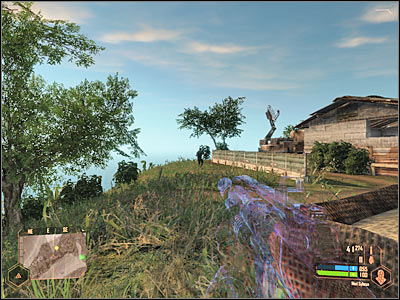
Once you've killed all enemy units, make a stop near the designated trailer. Exit the armored vehicle and enter the trailer. All you have to do is to find the computer (screen) and to press the action key (F by default) in order to acquire necessary data. Go back to the armored vehicle instead of waiting for new goals to be added to your list of assignments.
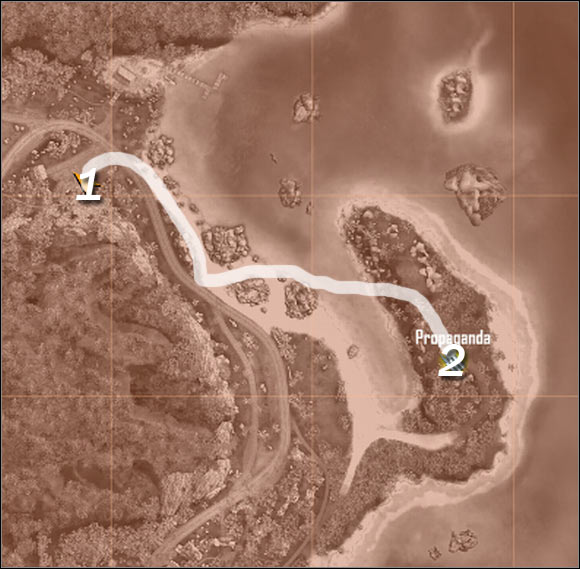
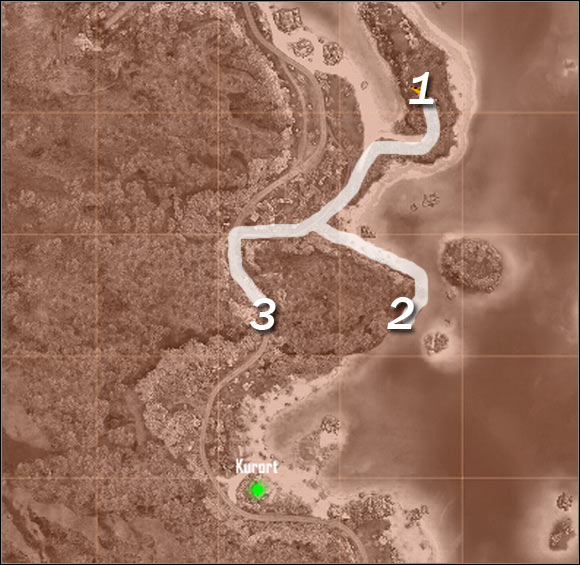
Map legend:
1 - starting area
2 - destination (broadcasting station)
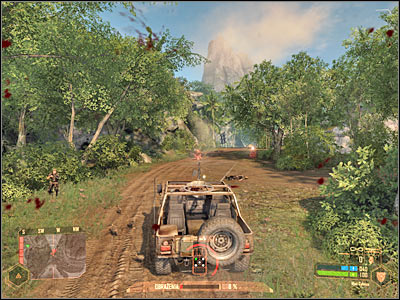
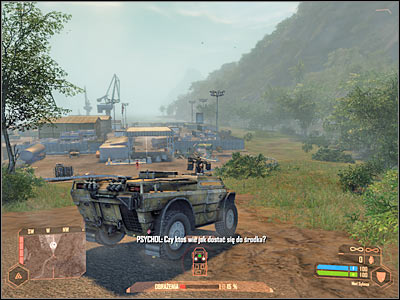
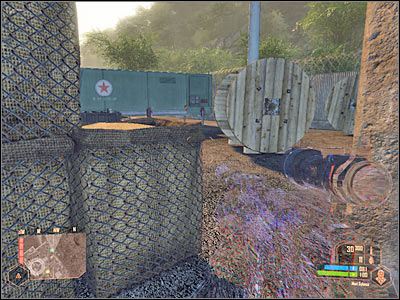
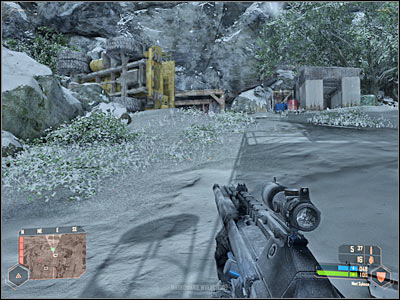
This is also an optional objective. Just as before, I wouldn't recommend ignoring it, because destroying the station is going to be relatively simple and you'll also find a lot of useful equipment near that building. Head on to the asphalt road and start moving south. It's a good idea to drive slowly, so you'll have a lot of time to notice and eliminate enemy troops. Turn left to get to the beach (screen) and destroy an enemy humvee from here.
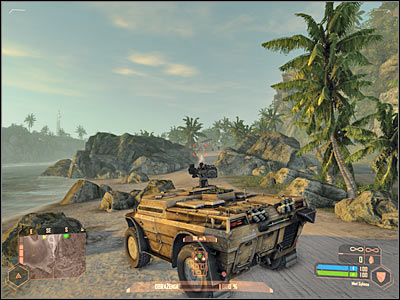
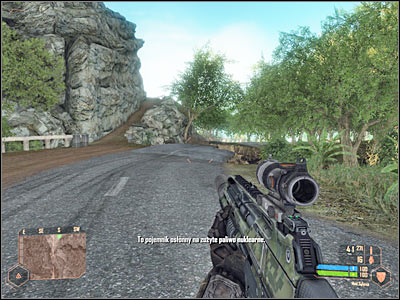
Get to the area where an enemy humvee was stationed. Notice that a second vehicle has appeared to the south of your position (screen). Destroy it as soon as possible. Now you'll have to make a new decision. You can continue moving south, but you would have to destroy an enemy armored vehicle. As a result, it would be better to exit the vehicle and to approach the ocean on foot.
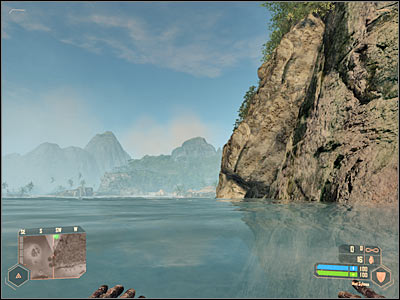
You should currently be standing to the north-west of your target (broadcasting station). Thankfully, the surrounding waters aren't being patrolled by enemy boats, so you may swim to that location without any problems. Once you've reached a shore, try finding a small road which leads to the top of the hill (screen). Activate cloaking device in the meantime, because there are enemy troops in the vicinity.
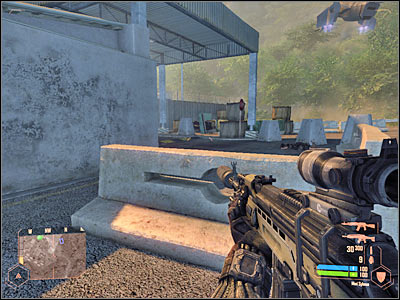
You are getting closer to a large building which is being guarded by at least two Korean soldiers. Thankfully, if you use camouflage wisely, you won't have any problems surprising and eliminating them one by one (screen). Also, even if your position is compromised, you won't have to worry about major reinforcements showing up. Try securing the entire area around the station before proceeding with the current objective.
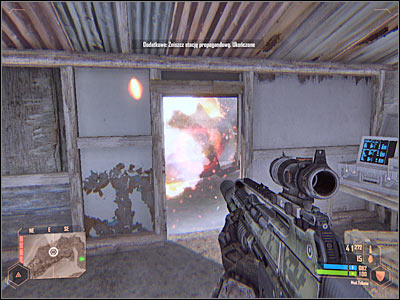
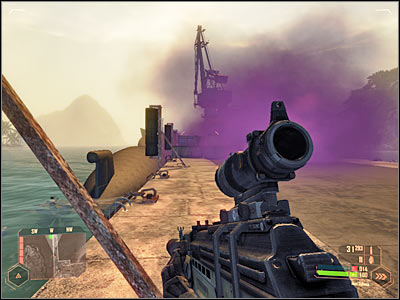
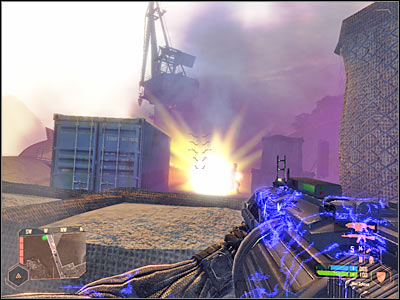
You may finally enter the small building. Notice that a lot of equipment has been stashed here, including an assault scope and FY71 rifles. You should pick up a few grenades as well. Make sure that they're active on your action bar. Use at least one grenade to blow up the transmitter outside the building (screen). The explosion will destroy the station and you'll automatically fulfill this objective.
Map legend:
1 - starting area
2 - first possible destination (ocean)
3 - second possible destination (main road)
The explosion has probably caught the attention of a nearby Korean soldier. As a result, you will have to be ready for him to show up. He will probably approach the station from the south. It's your choice on how to get rid of him. Notice that a humvee has been parked here. Use this vehicle to leave the hill (screen).
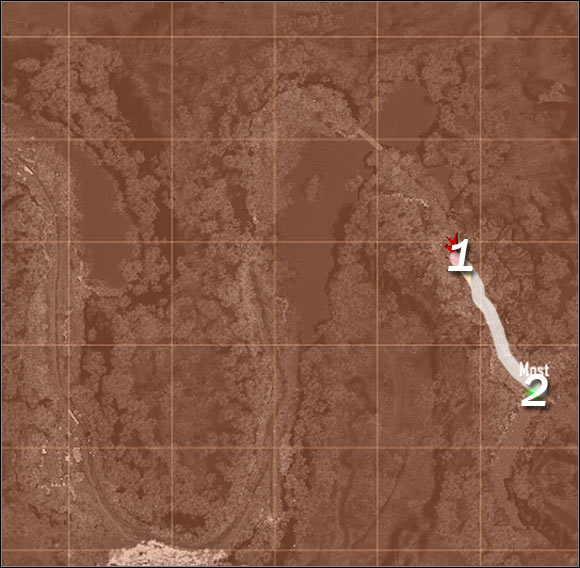
Eventually you should be able to get to the crossroads (screen). You'll have to make an important decision here as well. If you want to get to the campsite from the ocean's side, turn left to get to the beach. Otherwise remain on the dirt road.
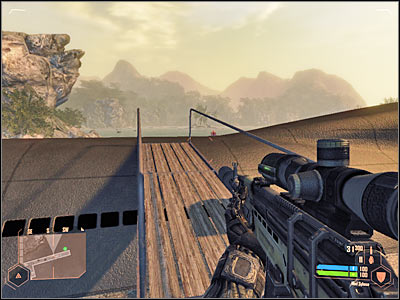
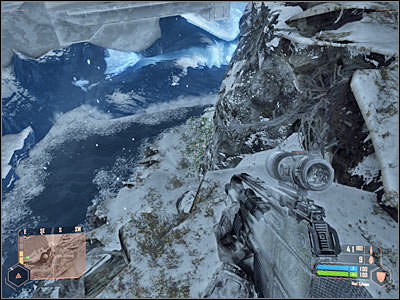
If you've decided to choose the ocean, you won't encounter any additional complications. Just as before, you won't have to worry about encountering any boats. If it all goes according to the plan, you should end up near the cliff (screen) and you'll receive some new orders here (2 on the map). Make sure to familiarize yourself with the next objective. You should also keep moving, before enemy units have a chance to change their positions.
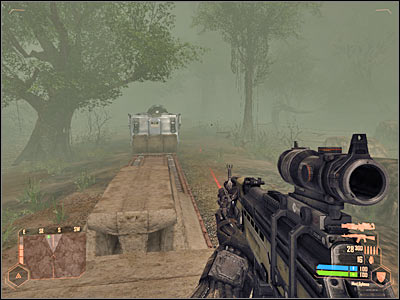
If you decide to stay on the main path, reaching the final area of the map is going to be much more challenging. First of all, you will have to deal with a large group of enemy soldiers along the way (screen). Killing them is not going to be easy, especially since they like to hide near the trees. There are also a few hills here. You could try leaving the car and using your cloaking device, but it would take a lot of your time. Turn left at the crossroads and keep moving until you've reached an impenetrable blockade.
Leave the car once you're close enough to the blockade, because you'll have to continue on foot from now. You would receive the same orders as near the ocean. Notice that you can't stay on the asphalt road. Instead you'd have to turn left and head to the top of a nearby hill. You would find a very interesting observation post there.
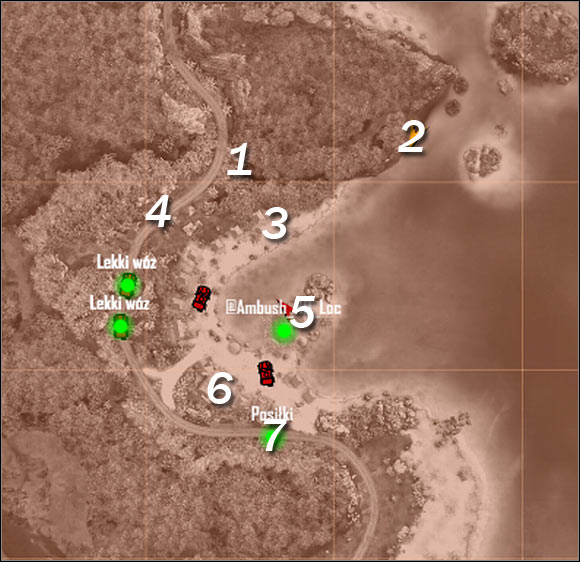
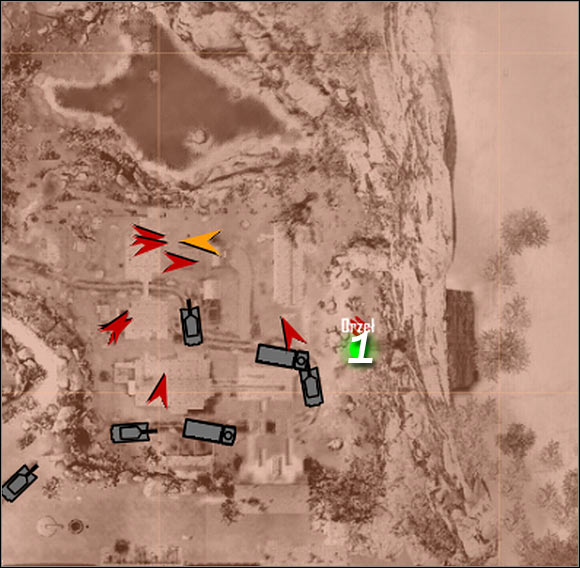
Map legend:
1 - starting area (observation post)
2 - starting area (ocean)
3 - first goal: humvee on the beach
4 - second goal: checkpoint near the main road
5 - third goal: bar
5 - ammo depot (optional objective)
6 - fourth goal: restaurant
7 - fifth goal: armored vehicle (it's constantly moving)
Important! There is no one good way to secure the base and to eliminate all enemy units. I would recommend that you focus on one area at a time and avoid being seen by the Korean soldiers, especially before an enemy gunship has arrived. Check my map to know where to look for enemy troops and read the description to find out how to get rid of them.
1) Humvee on the beach
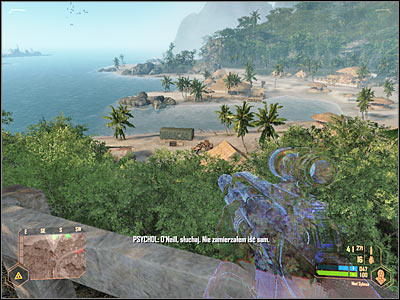
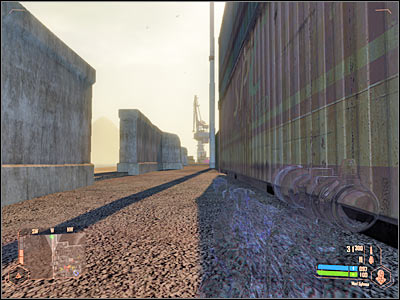
Let's start by focusing on a humvee which has been parked on the beach. It's going to be much more difficult to get to the humvee if you chose approach from the water. The most important thing for you to remember about is to get to the shore as soon as possible. Hide in the woods and start using camouflage. If you're starting near an observation point (screen), you'll have to jump over the railing and slide down carefully. Use maximum strength here to avoid sustaining major injuries.
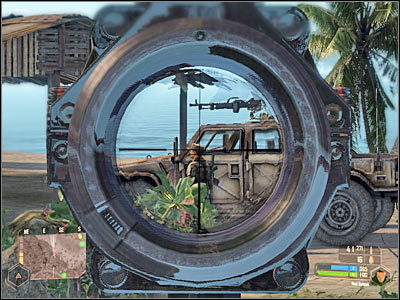
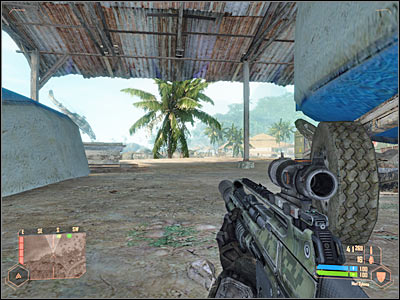
I'd strongly recommend that you approach the humvee from the west, because enemy soldiers are facing other directions (north and east). Surprise them with a little help of your cloaking device (screen). I would recommend killing them from the inside of a nearby hut, so you won't have to worry about being seen by anyone else.
Notice that in the meantime an enemy gunship has appeared over the bar (target number three; screen). DON'T ATTACK THE HELICOPTER, even if you have a rocket launcher at your disposal. It's best that you remain undetected. Thankfully, the gunship will leave this area once it's unloaded a small group of soldiers.
2) Checkpoint near the main road
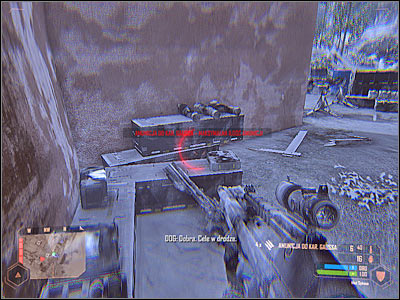
I would recommend that you leave this checkpoint for the end of the mission, because it's going to be very difficult to secure it without raising suspicion in the main camp. There are at least three enemy soldiers here and they're guarding two vehicles (screen). If you can't eliminate them quietly, consider using grenades, especially since they're standing relatively close to each other. It would be a good idea to prevent them from shooting a flare if you're going for a more subtle approach.
3) Bar
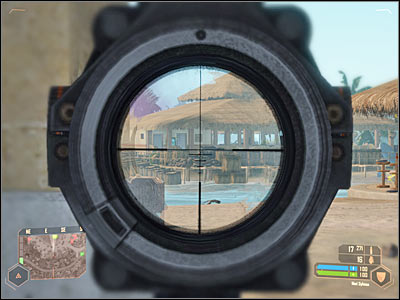
I assume that you'll have a lot of problems securing the bar. First of all, you will have to know that there are several machine gun posts around the bar, especially in the north. If you have a silenced weapon with a scope, try taking out at least one gunner from a larger distance (screen). Otherwise you would have to approach the bar from the west, because this is the weak spot in enemy defences.
It would be a good idea to disable the second northern machine gun post, because it will allow to swim towards the bar (screen). Obviously must approach it from the north. Notice that two enemy trucks have appeared to the south, however you don't have to worry about that at the moment. Instead, focus on securing the surrounding area. Obviously you should be using camouflage to avoid detection.
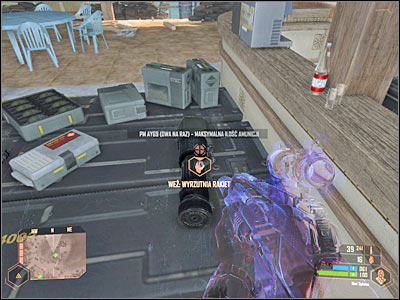
There's a large ammo depot inside the bar and finding it is tied to one of optional objectives of the mission (screen). It's EXTREMELY important that you take a rocket launcher with you, because you're going to need this weapon in a few minutes. Also, take ammunition for your main rifles. Move south and make sure that no one else has appeared near the bar.
4) Restaurant
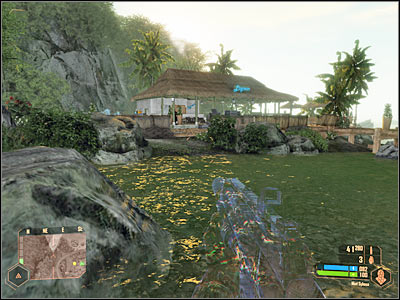
This is where all remaining enemy troops will hide once they've left the trucks. I would recommend that you get to the restaurant without raising any unwanted attention. This means you'll have to activate cloak feature. Also, use some of the nearby objects (screen) to regenerate your armor once it's been depleted.
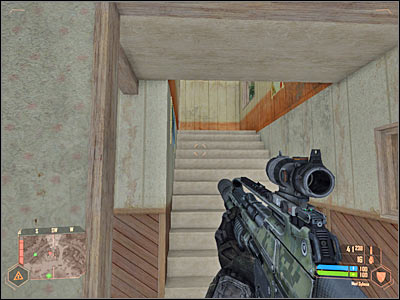
Once you've reached the restaurant, you may as well disable camouflage, because you won't have to stay hidden anymore. Use your guns to get rid of all enemy units. You should be fine as long as you stay away from the northern road. Use your personal map to find enemy troops and make sure to check the first floor of the building (screen).
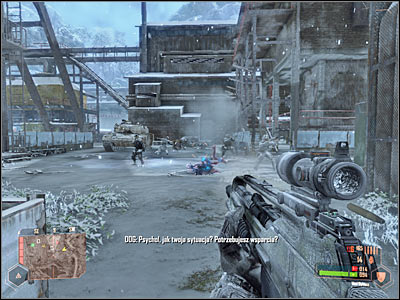
5) Armored vehicle
Notice that an armored truck is to the north and that it's patrolling an asphalt road. Your first objective is to get closer to the road and this means you'll have to activate camouflage. Take cover behind a brick wall (screen) or behind a destroyed bus.
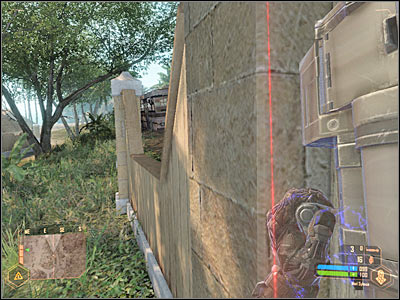
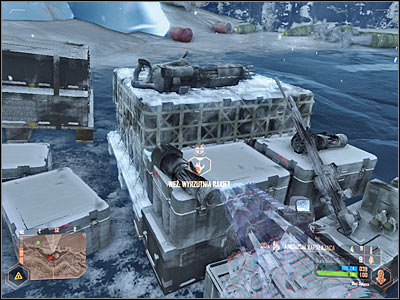
There are several different ways for you to get rid of the vehicle. You can set up a mine on the road, however it would take too much time. Instead, choose a rocket launcher from your inventory and fire at least twice (screen). This should do the trick.

If you've already secured the rest of the base, destroying the vehicle should allow you to end this mission right now. Otherwise you'll have to take some time to explore the area and to get rid of additional enemy troops. Thankfully, you won't have to stay hidden anymore and you can also consider using a humvee for this task. Eventually you'll be rewarded with a new cut-scene (screen). Get ready for the second mission.
The second mission of the game is far more difficult than the first one, especially in the beginning and near the end when you'll have to go in alone against enemy soldiers. The good news is that you'll spend some time inside a safe armored vehicle. You'll also be given an opportunity to make A LOT of damage to the surrounding area.
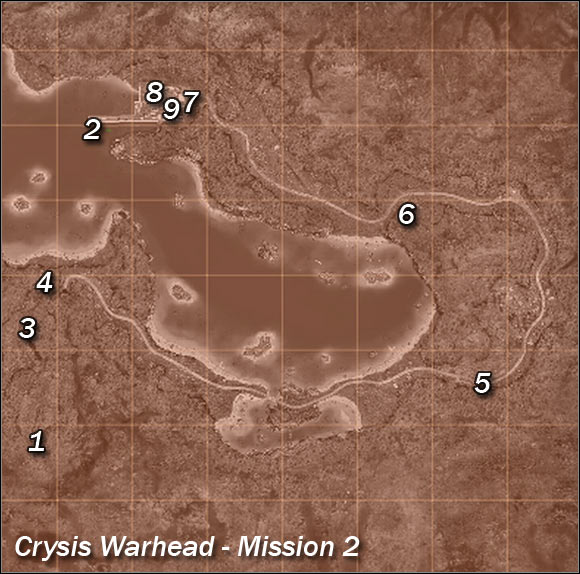
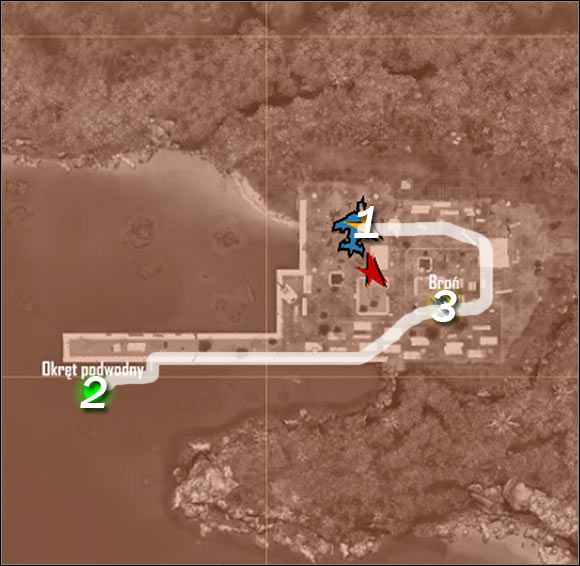
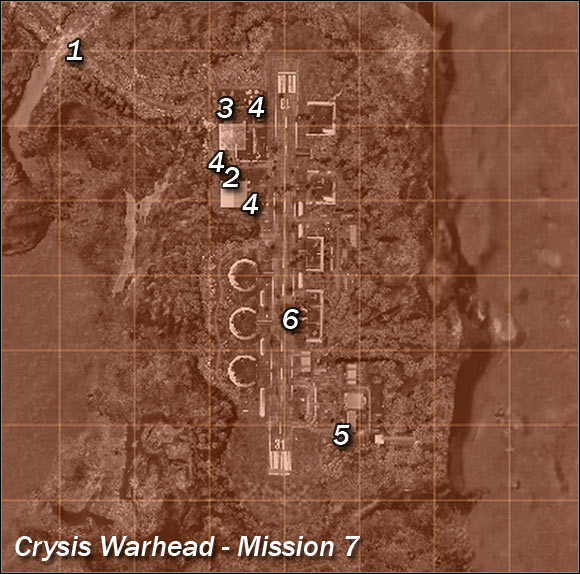
Main map:
1 - starting area
2 - finish
2 - sixth main objective: submarine
3 - first main objective: plane wreck (camera)
4 - second main objective: O'Neill
5 - third main objective: meeting area
6 - first side objective: landing zone
7 - fourth main objective: main gate
8 - fifth main objective: KAL terminal
9 - second side objective: ammo depot
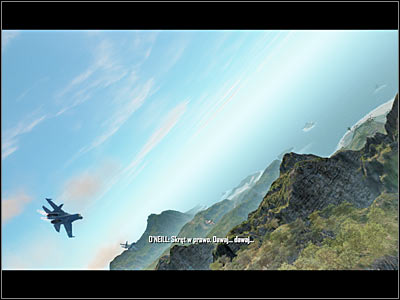
Just as before, this mission will begin with a very interesting cut-scene (screen). Get ready to take control over Psycho.
Map legend:
1 - starting area
2 - destination (camera)
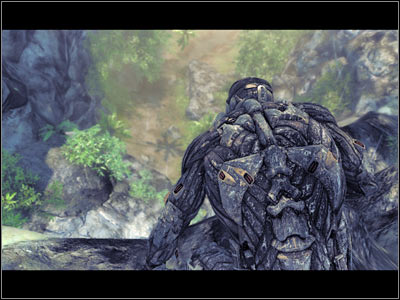
You'll start the game on top of a small cliff, so obviously you'll have to be careful in order to avoid sustaining major injuries. You can use your binoculars to scan the surrounding area, however it won't be necessary. Activate maximum strength feature and proceed to ground level (screen). Once you're there, head on north, but stop your character once you see a large clearing in front of you. It's important to plan your next actions from here.
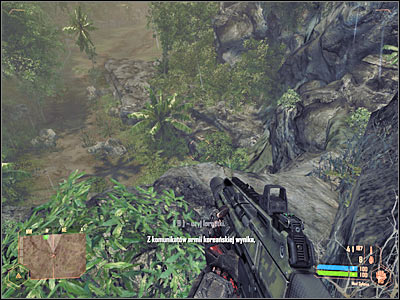
You can't stay on the main path for obvious reasons. There are a lot of enemy troops in front of you and it's important to avoid them. I would recommend hiding in the forest. You can go to your left or to your right. You shouldn't go right, because you wouldn't be able to hide that efficiently. Activate cloaking device and head on to your left (screen). Remember to recharge your armor by laying down on the ground and disabling camouflage for a few seconds. Bushes are always a good idea for a hiding place, because there's a very small possibility of being seen in the meantime.
Sadly, you won't be able to feel safe even when you're travelling in the forest, because at least one enemy group is patrolling this area (screen). You could fight these soldiers, but this would probably alarm the main group. As a result, you should do your best to avoid them. Keep heading towards the northern encampment.
Turn north-east in a short while and eventually you'll get to a much larger encampment (screen). Once again, you'll have to make a very important decision here. If you want to fight Korean soldiers, you will have to acknowledge the fact that you won't be able to take them out one by one. Also, if you make too much noise, you'll probably alarm smaller groups from the south.
You're in a very bad spot, so you should do your best in avoiding detection. Keep heading towards your destination and make sure that you're using camouflage all the time. Use some of the nearby rocks (screen) for cover. Lay down on the ground and recharge your armor there. You should be fine, as long as you stay away from enemy troops.
You should be able to leave the endangered area in a few seconds and eventually you'll come across a small path (screen). Keep heading north and make sure that you're using camouflage all the time. Notice that you're getting closer to your current destination. Once again, you'll have to plan your next moves before going there.
You can approach the crash site from several different angles. I wouldn't recommend choosing the burning passageway which is located to the north-east. The main reason is that you would be exposed to enemy fire. Instead, turn left and drop down with a little help from maximum strength feature. Notice a small river here (screen).
Worst case scenario is that you'll encounter one enemy unit here, so it's very easy to get rid of this threat. Eventually you should be able to find a small path which leads directly to the crash site (screen). It's very important that you save your current progress here. Approach the plane very carefully. Take cover near the rocks and wait for suit to regenerate itself.
Sadly, reaching the camera without killing anyone is next to impossible, especially since the object you're looking for isn't located inside the plane. As a result, you must consider taking out at least a few soldiers. There's also a possibility that your attacks may attract attention of other soldiers from this area. Try killing them one at a time and use your cloaking device properly to avoid detection for as long as possible. If you have nothing against a more direct approach, use more powerful guns and grenades (screen).
Make sure that you've killed all soldiers near the plane. Check the areas to the south and to the west, because there may be additional patrols heading your way. Take your time to collect weapons and ammunition, especially since there is a small stash near the plane. Once you're ready, approach your target (screen) and press the action key. Wait for new orders.
Map legend:
1 - starting area
2 - O'Neill
3 - destination
You don't have to show too much skill to complete this particular mission objective, however you may have to use camouflage if you haven't disposed of all patrols. O'Neill is waiting for you to the north. The only obstacle you'll encounter has been shown on the screen. Obviously you'll have to use maximum strength here twice.
You shouldn't have any other problems reaching O'Neill (2 on the map). This won't be the end, because you'll have to follow him to your next destination. Once you're there, you're going to be rewarded with a new cut-scene. Wait for it to end and familiarize yourself with new orders.
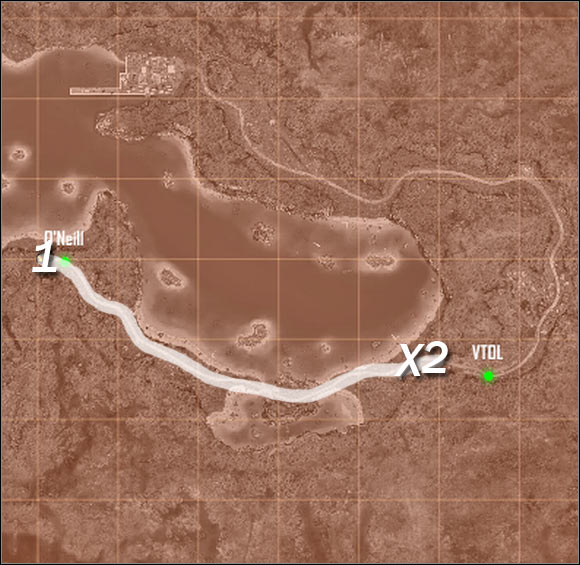
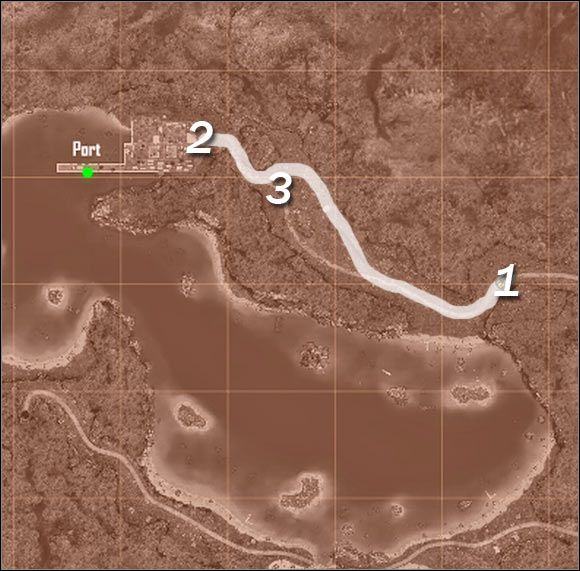
Map legend:
1 - starting area
2 - destination (meeting area)
X - spare armored vehicle
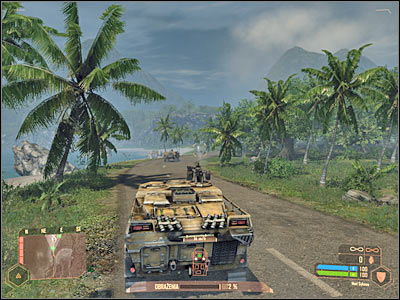
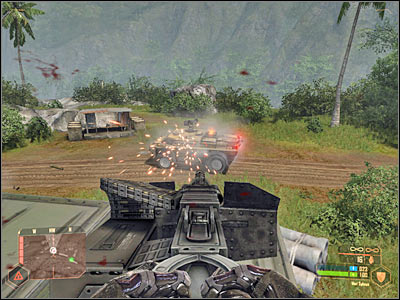
Notice that you've received a second objective at the same time. Theoretically you should protect O'Neill, but you may as well ignore him, because all enemy forces will focus their attacks on your vehicle. Take your time to notice a few important things. First of all, you must maintain low speed, so you won't be surprised by enemy units. It's also important to check your personal map frequently and to take out enemy troops from a very large distance. Your vehicle will take a large number of hits, however you shouldn't expose it to enemy fire without a good reason.
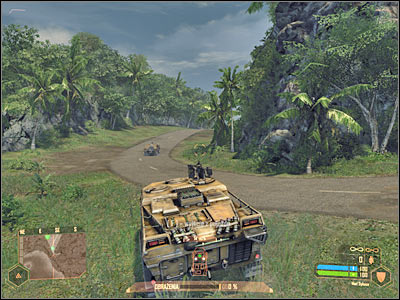
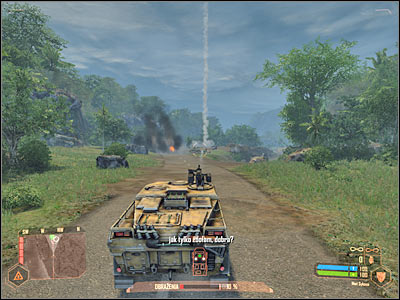
As you've probably noticed by now, your vehicle is equipped with a very powerful cannon and that will make your run a lot easier. You should know that you won't find a similar vehicle on the map, so you shouldn't lose this one. There are some spare vehicles here and there (X's), but they're equipped with less powerful miniguns. Start moving forward and use your primary weapon to get rid of Korean soldiers (screen). Make sure to destroy enemy vehicles in the first place, because they pose a serious threat.
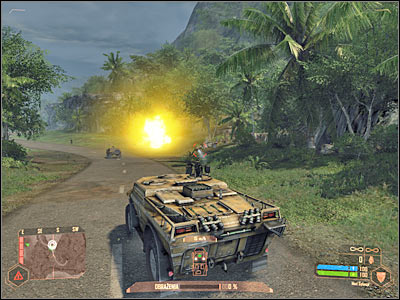
Like I've already said, you don't have to worry about O'Neill. Be on a look out for explosive barrels, because they will allow you to take out surrounding enemy units much faster. There are some snipers on top of a nearby cliff (screen). Take them out as soon as possible. Ignore the fact that they fired a flare, because nothing it's nothing you can't handle.
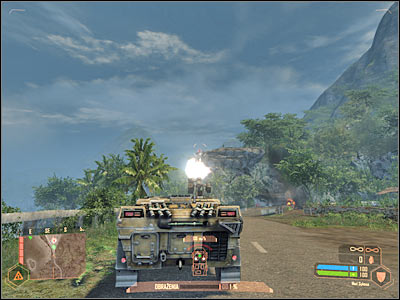
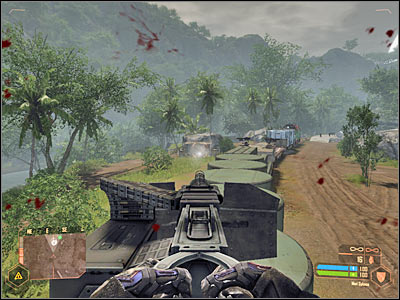
Keep heading towards your current destination. This means you must stay on the asphalt road. Watch out for enemy trucks. Cross a small bridge and stop your vehicle once you've reached a Korean checkpoint (screen). Destroy the checkpoint from a safe distance before continuing with your journey.
You must be careful here, because you'll notice an enemy humvee heading your way. Destroy it before it gets too close. Eventually you'll come across a new armored truck, but don't use it unless your machine has been badly damaged. Continue your journey and eventually you'll reach an area where you'll be given an updated assignment. Ignore the enemy gunship, because destroying it isn't a necessary thing to do.

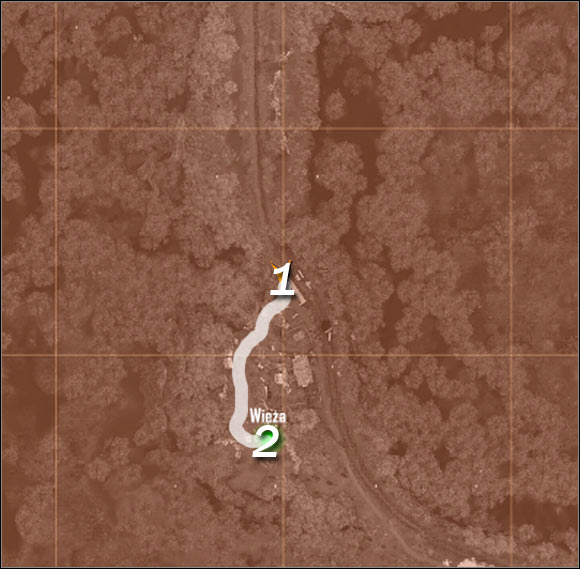
Map legend:
1 - starting area
2 - destination (VTOL)
X - spare armored vehicles
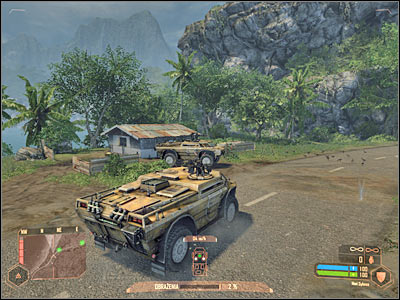
Obviously you must stay on the main path. You should be able to find a second armored vehicle nearby (screen). Just as before, you shouldn't consider switching vehicles unless your machine is nearly destroyed. Watch out for an enemy sniper in front of you. Kill him and destroy his tower while you're at it.

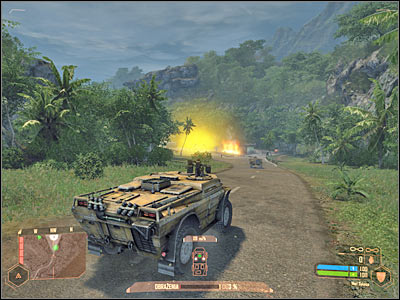
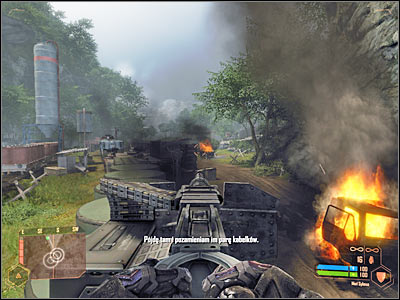
You should also destroy two enemy vehicles. Ignore the roadblock, because you don't have to waste any time trying to ram them. Instead, turn left and leave the asphalt road for a few seconds (screen). Keep shooting at enemy vehicles and prevent them from destroying your vehicle.

Eventually you should get to a large gas station (screen). I think it's fairly obvious that you should aim for explosive objects to do as much damage as possible. Also, notice a cistern to your left. Destroying it will help you in your progress. Approach the station and deal with the remaining enemy soldiers. Keep going to your current destination. There's a third vehicle near your target, but you can also ignore it. Wait for the game to give you a new assignment.
You won't need a map for this particular mission objective, because all the fights will take place near the landing zone. You can stay on the asphalt road for a few more seconds in order to take out an enemy truck. Otherwise proceed directly to the top of the hill. There's a small dirt road leading to it (screen).
Park your armored truck somewhere near an allied plane, but don't exit the vehicle. Instead, use your main cannon to take out enemy troops. You'll probably have to kill 5-10 soldiers. Thankfully, none of them is using a rocket launcher, so it's going to be a piece of cake.
As you've probably noticed, securing the top of the hill hasn't solved the problem. Go back to the asphalt road using the same path you've chosen before. Notice that a new group of enemy units has arrived in this area (screen). If you don't want to damage your vehicle, consider leaving it and fighting them on your own. You could also remain on top of the hill to use a sniper rifle. Either way, you'll have to wait for a new assignment to be added to your list of primary goals.
Map legend:
1 - starting area
2 - destination (main gate)
3 - enemy outpost
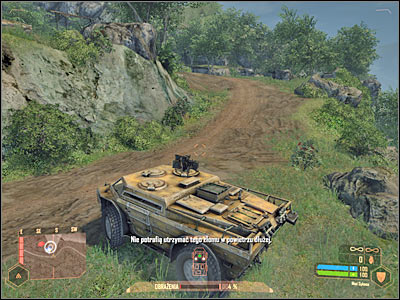
Go back to your armored vehicle and start moving west. Eliminate everything that stands in your way. The good news here is that you're travelling alone, so you won't have to worry about O'Neill anymore. Leave the asphalt road once you've reached a new junction (screen).
Be careful, because you're going to get attacked by an enemy gunship in a short while. Remain inside your vehicle and use the turret to destroy the helicopter (screen). You may continue moving forward. Turn right at the next junction, because you shouldn't go back to the asphalt road just yet.
Eventually you should be able to find a small waterfall (screen). If your vehicle is badly damaged, consider leaving it and heading towards the water. Otherwise turn left and secure an enemy outpost. Start off by eliminating a Korean sniper. Once he's gone, deal with the remaining hostile units. Most of the soldiers are hiding near sandbags and that's where you'll have to look for them.
You may continue moving towards your current destination. This means you can go back to the main road. You should receive a new assignment once you're close enough to the harbour, however remain inside your vehicle for a few more seconds. Take your time to disable machine gun posts. Also, notice that an allied VTOL has appeared in the area and it will help you in distracting enemy soldiers.
Map legend:
1 - starting area
2 - destination (trailer)
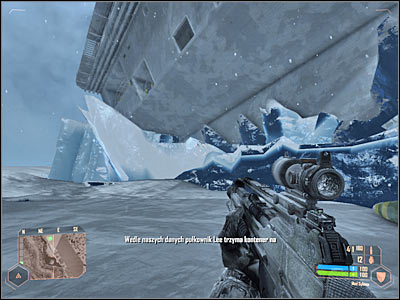
Sadly, you won't be allowed to use your vehicle to enter the harbour area, so you'll have to leave it here and continue on foot. Proceed towards the main gate (screen). You could also consider jumping over the walls (maximum strength), but I'm sure it won't be necessary. I would recommend that you avoid unwanted attention while trying to get to the trailer. As a result, you should be using camouflage and some of the nearby containers for much needed cover.
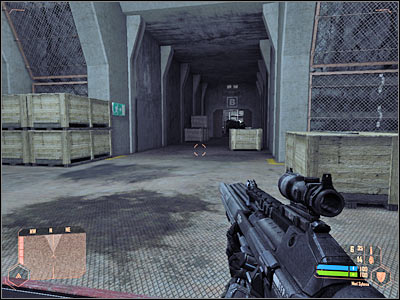
It would be a good idea to stay close to the northern wall of the harbour. Ignore enemy soldiers and prevent them from locating your main character. You should be able to come across a small ammo depot along the way, but ignore it, because you'll find a larger depot in a few minutes. Approach the trailer (screen). You can access it only from the south, so make sure that your armor is fully recharged. Once inside, get to the left computer and press the action key.
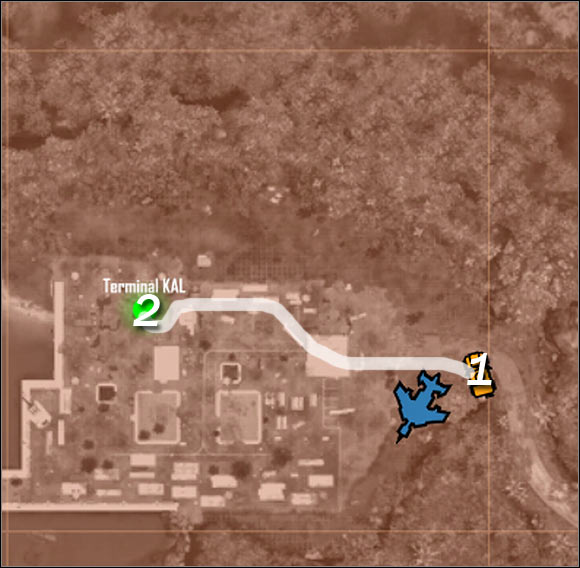
Map legend:
1 - starting area
2 - destination (submarine)
3 - ammo depot
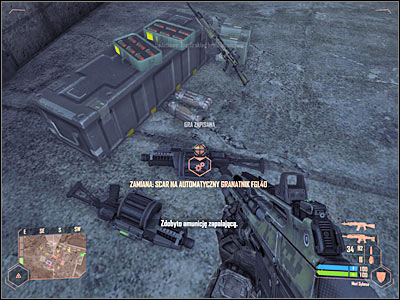
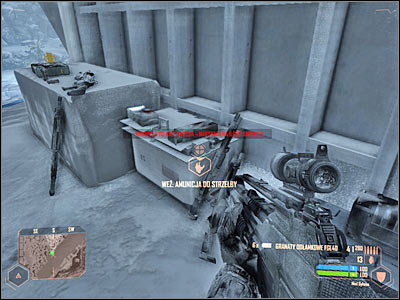
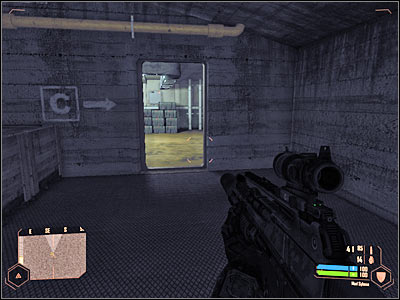
Inspecting the ammo depot isn't a necessary thing to do, however I'd strongly recommend that you go there, because you'll find a grenade launcher for later usage. If you don't want to engage enemy units, go back to the main gate and proceed south. Obviously you will have to jump over a wall here (screen).
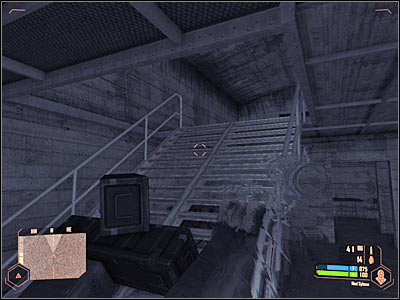
You shouldn't have any major problems finding the correct warehouse. The ammo depot is located on the first floor, so you'll have to use the stairs to get to it. Pick up a FGL40 grenade launcher (screen), as well as machine guns. Don't worry about what you're leaving behind, because you'll lose your equipment very soon. For now you only have to pick up a few important items in order to increase your chances of reaching the submarine safely.
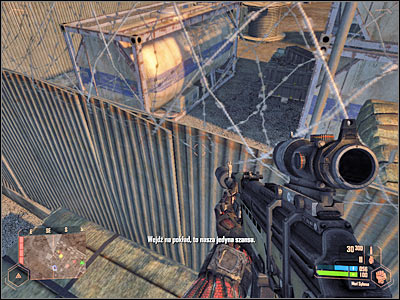
Exit the warehouse and start moving towards the pier, because that's where the submarine is located (screen). Bear in mind that the pier is being defended by a small group of enemy snipers. You can consider finding a good shooting spot in order to eliminate them from a safe distance. Don't get too close, because they'll use smoke grenades and you won't be able to find them anymore.
Make sure that you've eliminated at least one Korean sniper. Get closer to the pier and wait for an enemy gunship to leave this area. Now you must activate maximum speed function. Start running towards the submarine (screen). It's extremely important that you find a good cover as soon as possible. Wait for your armor to regain power.
I would strongly recommend that you use your newly acquired grenade launcher to get rid of enemy troops (screen), especially since Korean soldiers tend to stand close to each other. Don't leave your cover unless you're absolutely sure you've killed all of them.
In order to successfully finish the mission you must perform one more action and that is to get on board of the submarine. Thankfully, it's very simple, because you'll only have to find a small platform (screen). Approach the opened hatch and you'll be rewarded with a very interesting cut-scene. Get ready for the next mission.

This level will familiarize you with the frozen environment. You may remember similar missions from the first game. I guess you might be surprised to hear that you'll have biggest problems not with aliens but with Korean soldiers and that is because some of them will use similar nanosuits to your armor. You'll also have to defeat a powerful boss near the end.

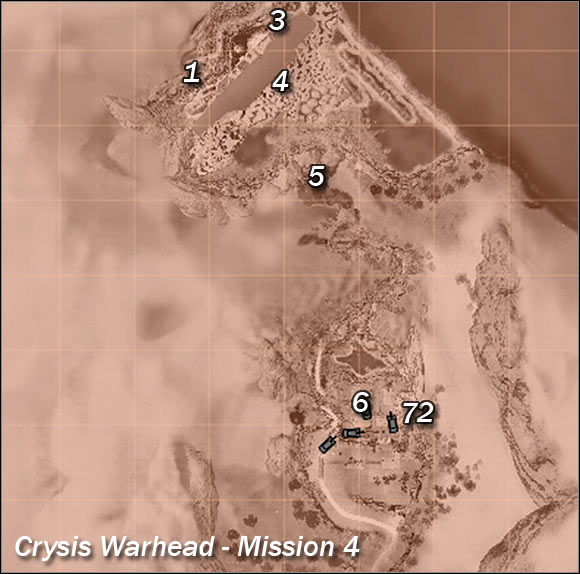
Main map:
1 - starting area
1 - first side objective: hovercraft
2 - finish
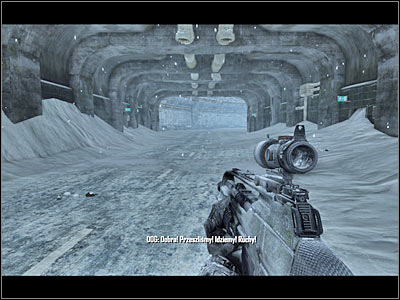
2 - fifth main objective: tunnel
2 - sixth main objective: boss
2 - seventh main objective: passageway
3 - first main objective: colonel Lee's location #1
4 - second main objective: colonel Lee's location #2
5 - third main objective: colonel Lee's location #3
6 - fourth main objective: Eagle squad
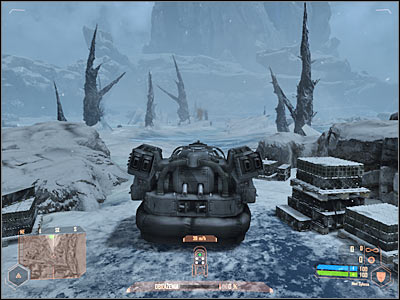
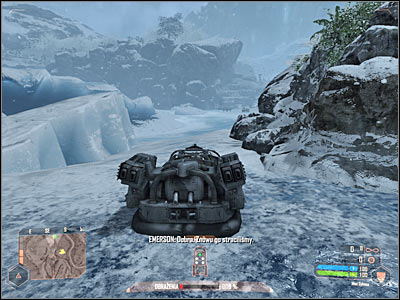
I guess you won't be surprised to hear that this mission will begin with a short cut-scene. Notice that you're in a different environment. There are also frozen Korean soldiers near your position.
Map legend:
1 - starting area
2 - destination (hovercraft)
You've also been given a second objective at the same time, however stealing the hovercraft is far more important at the moment. I wouldn't recommend trying to follow Lee on foot, because you would have to take down some powerful creatures along the way and it would also take a lot of your time. You start the game inside the submarine and you may approach bodies of frozen soldiers to take their pistols if you want to (screen). The same goes with other frozen characters whom you may encounter later on during the course of the game.
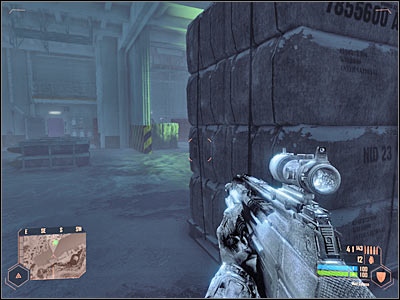
You don't have to take the pistols, because you'll acquire more powerful guns in just a few seconds. Remember what Psycho did during the movie? You'll have to repeat those actions, so activate maximum strength to get on top of the biggest crate (screen). Eventually you'll be able to exit the submarine. Activate your cloaking device, because there are enemy units nearby.

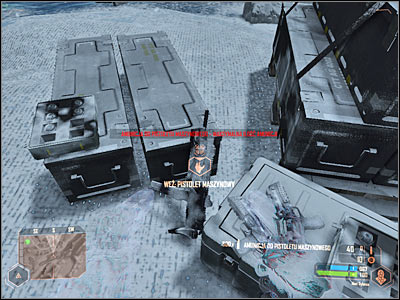
You should notice an ammo stash in front of you. Obviously you should consider taking all weapons, because you have nothing at the moment. Activate cloak and try getting closer to the hovercraft. There's a second stash there and you should take a rocket launcher.
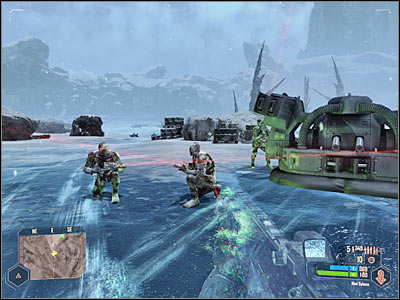
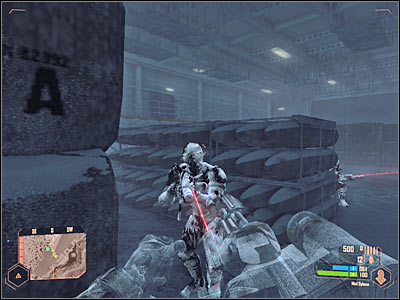
The hovercraft is being guarded by three Korean soldiers in nanosuits (screen). Getting rid of them is not going to be easy, because they can withstand A LOT of damage. You can solve this problem by:
1) disabling a cloak for a second in order to distract them. You'd have to wait for them to split up and take them by surprise.
2) using grenades (it's important not to damage the hovercraft)
3) using a rocket launcher (once again - watch out for the hovercraft)
Either way, you must get rid of all enemy units. Once this is done, approach the hovercraft and enter it. Notice that it's unarmed.
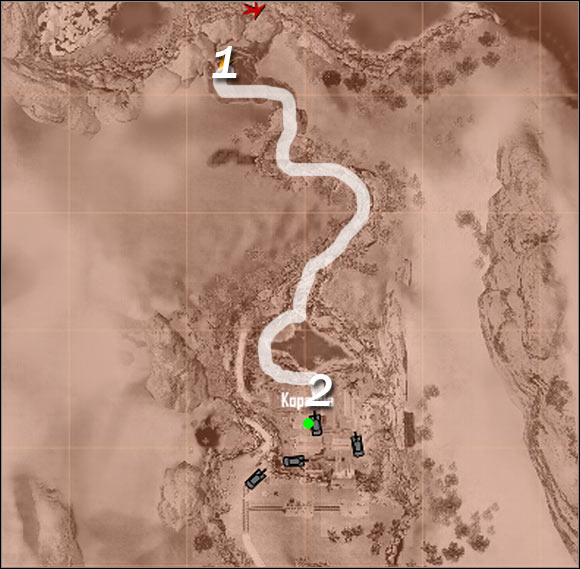
Map legend:
1 - starting area
2 - destination (the game will display the next possible location of colonel Lee)
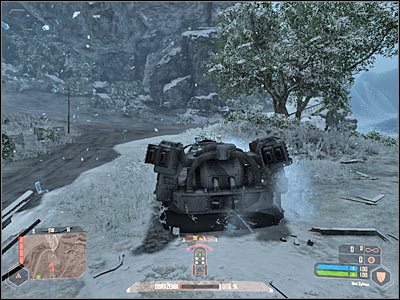
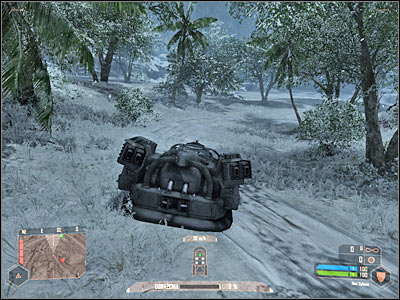
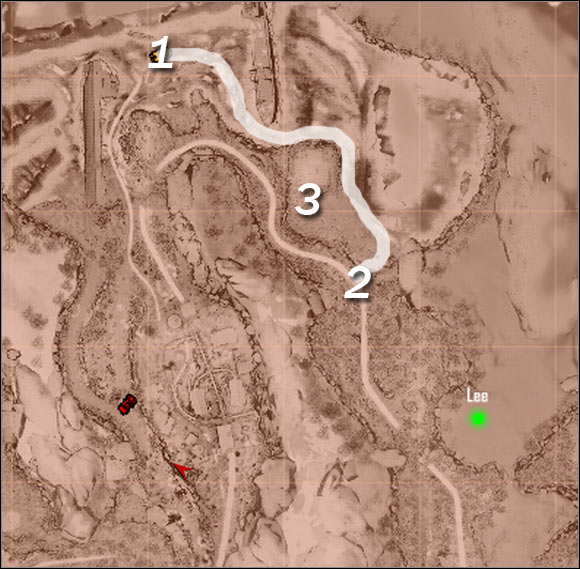
The chase is divided into three segments. Thankfully, you won't have to worry about failing the mission, because the game won't require you to maintain proper distance from Lee. All you have to do is to reach areas where he was last seen. You're going to be attacked by alien creatures along the way and it'll be your main concern to avoid them, because they can kill you within seconds. It's also wise to listen to radio transmission, because you'll receive hints on where to turn and what to avoid. Start off by moving forward (screen).
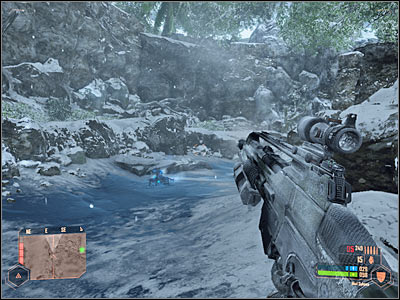
I would recommend that you follow the path from my map, so you won't have any problems reaching your destination. Avoid large spikes coming out of the ground. Thankfully, it shouldn't be too difficult. I assume you'll have more problems with the mines (screen). Obviously you can't touch them. Focus on moving at all costs. Once you've spotted the first alien creature, turn right to get to a frozen lake.

You should be able to leave the ice in a short while. You'll eventually end up driving near the trees. Obviously you can't hit them, but maintaining higher speeds is equally important. Make a sharp right turn (screen) to get to the next area.

Eventually you should be able to get to a small village. Go through the middle of the village and avoid potential obstacles which you may find there. Once you've reached a new junction (screen), turn left and keep heading towards Lee's last known location. You won't receive an updated task right away, but you can keep heading north in the meantime. You'll have to wait for a radio transmission to end.
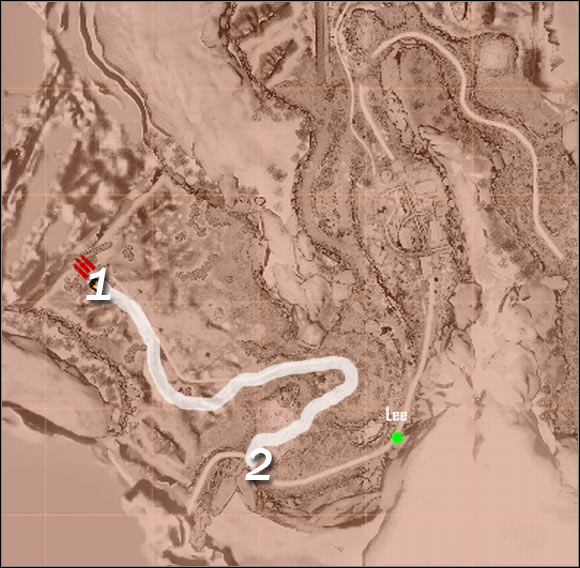
Map legend:
1 - starting area
2 - destination (the game will display the next possible location of colonel Lee)
The chase is divided into three segments. Thankfully, you won't have to worry about failing the mission, because the game won't require you to maintain proper distance from Lee. All you have to do is to reach areas where he was last seen. You're going to be attacked by alien creatures along the way and it'll be your main concern to avoid them, because they can kill you within seconds. It's also wise to listen to radio transmission, because you'll receive hints on where to turn and what to avoid. Start off by moving forward (screen).

I would recommend that you follow the path from my map, so you won't have any problems reaching your destination. Avoid large spikes coming out of the ground. Thankfully, it shouldn't be too difficult. I assume you'll have more problems with the mines (screen). Obviously you can't touch them. Focus on moving at all costs. Once you've spotted the first alien creature, turn right to get to a frozen lake.

You should be able to leave the ice in a short while. You'll eventually end up driving near the trees. Obviously you can't hit them, but maintaining higher speeds is equally important. Make a sharp right turn (screen) to get to the next area.
Eventually you should be able to get to a small village. Go through the middle of the village and avoid potential obstacles which you may find there. Once you've reached a new junction (screen), turn left and keep heading towards Lee's last known location. You won't receive an updated task right away, but you can keep heading north in the meantime. You'll have to wait for a radio transmission to end.

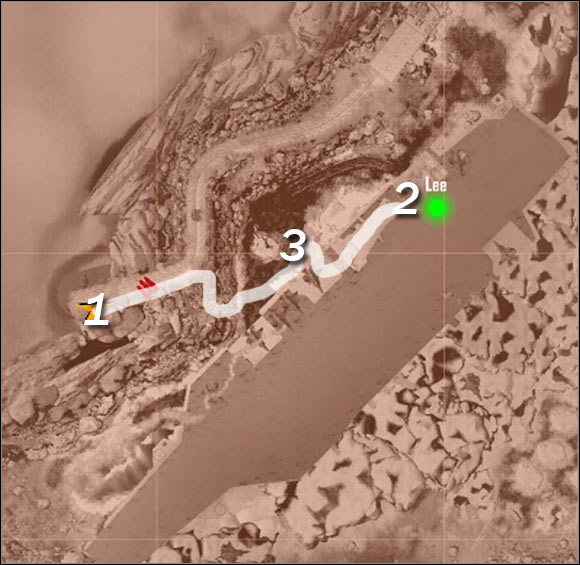
Map legend:
1 - starting area
2 - destination
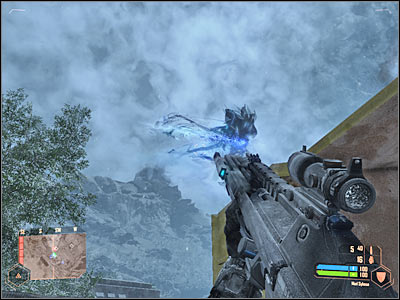
3 - exosuit's appearance (alien boss)
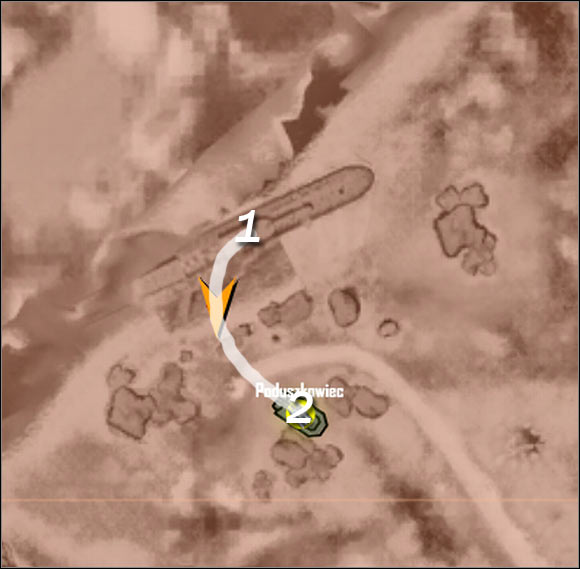
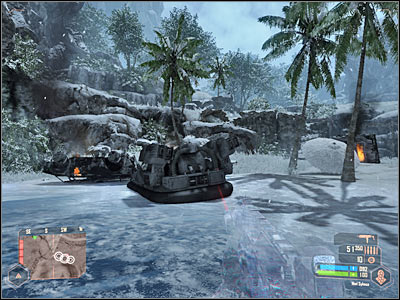
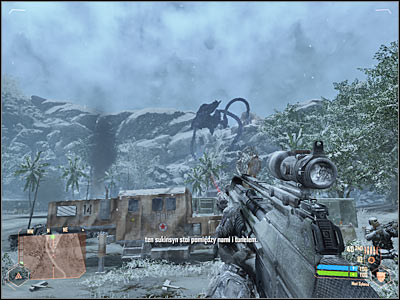
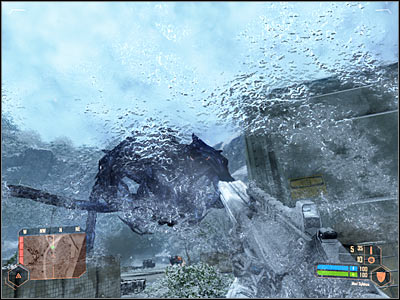
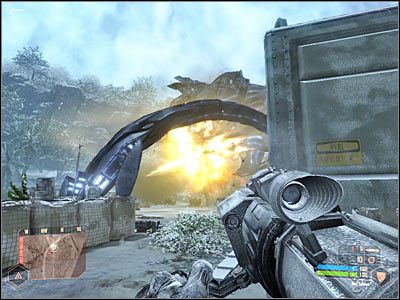
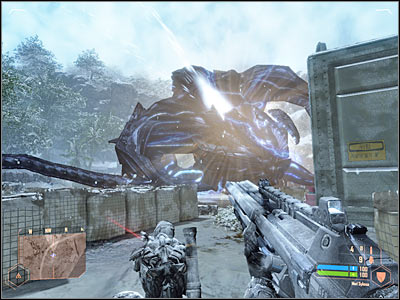
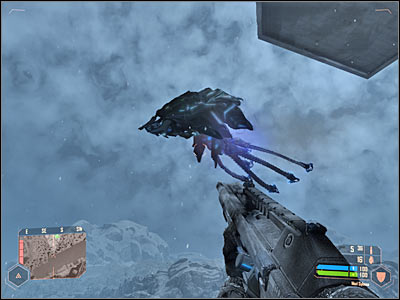
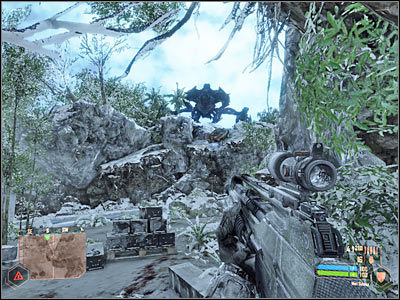
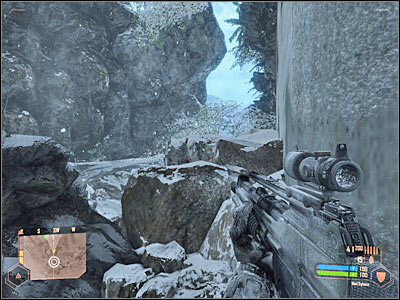
Keep heading east and eventually you'll have to turn south-east. Keep going straight until you've reached a small passageway (screen). Stop the hovercraft for a while and notice that an exosuit has appeared in front of you. Korean soldiers are trying to fight the monster and obviously you shouldn't help them.
I would recommend that you wait for this battle to end, because otherwise you might find yourself being attacked and the hovercraft can't withstand too much damage. Head on south and use the booster to get there quicker. Leave the hovercraft somewhere near enemy vehicles and activate camouflage at the same time (screen).
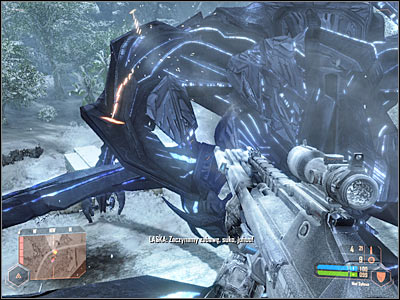
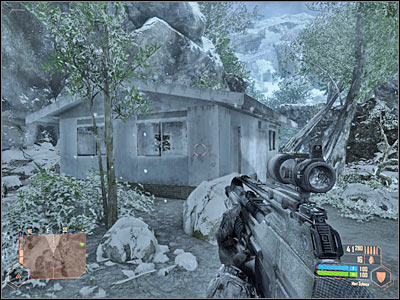
If you look around, you should notice the stairs to your left. Hide in the bushes beneath the wooden balcony and scout the area for enemy troops. There's probably a Korean soldier in a nanosuit nearby. It would be a good idea to kill him (screen). You should also notice that he was carrying a rocket launcher. Take it.
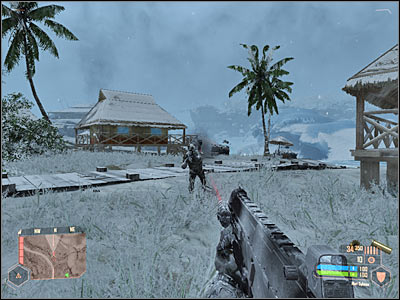
You may finally proceed to the stairs (screen). Be careful, though. A second nanosuit soldier is probably patrolling the area and obviously you'll have to take care of him as well. Once this is done, proceed to your right and continue moving forward until you've been given a new assignment.
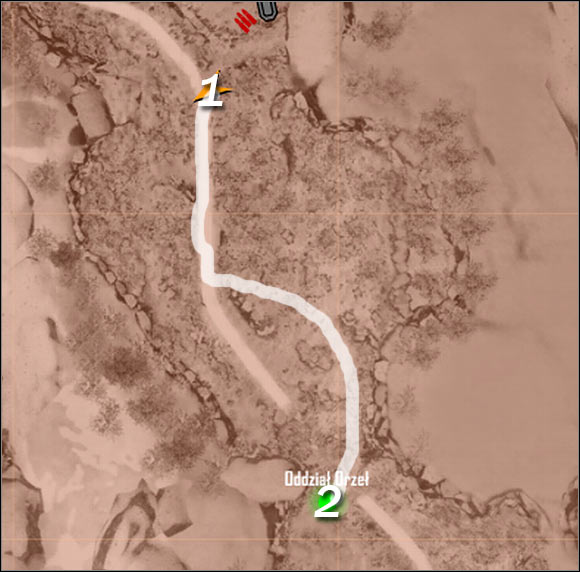
Map legend:
1 - starting area
2 - destination (Eagle squad)
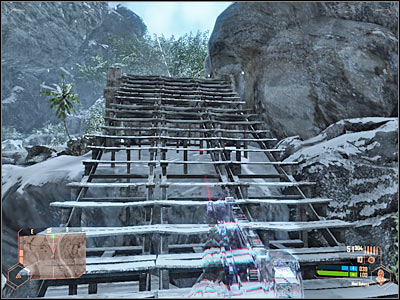
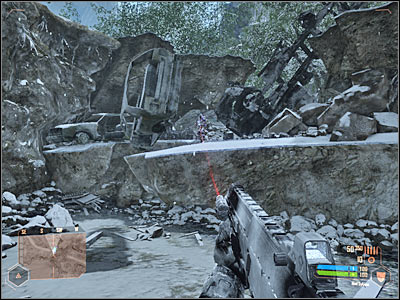
For the next 60-120 seconds you may remain on the main road, because you won't encounter any hostile units. Instead, you will come across a destroyed convoy. It would be a good idea to look around, because there are a lot of supplies here. Eventually you'll find a bridge. Head down carefully and use maximum strength to get to the other side.
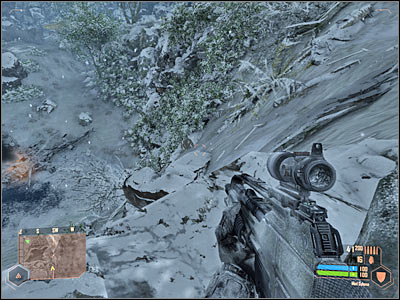
Alien creatures have gathered to the south of your current position. I wouldn't recommend trying to engage them in a battle, because you would only lose a lot of ammunition. Instead, try moving to the south-east (screen). Stay away from the main road and use maximum speed feature to outrun them.
You must get to the designated area of the map in order to complete this particular mission objective. Wait for one of allied soldiers to create an opening by pushing a car (screen). This will allow you to join Eagle squad. Obviously you have to use maximum strength to get to them.
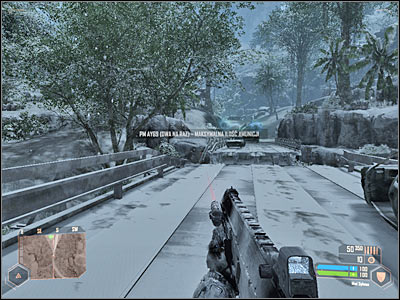
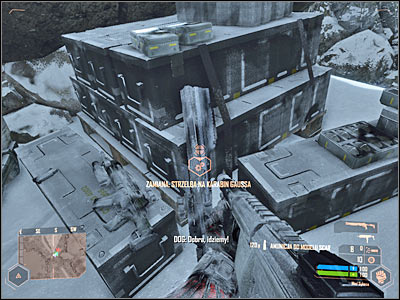
You can wait patiently for new objectives to be added to your list of assignments or you can pick up a nearby Gauss rifle right away (screen). Exchange this weapon for one of weaker rifles. Also, don't forget to collect a rocket launcher, because you're soon going to need it. Follow your colleagues to the south and eventually you'll be given a new task.
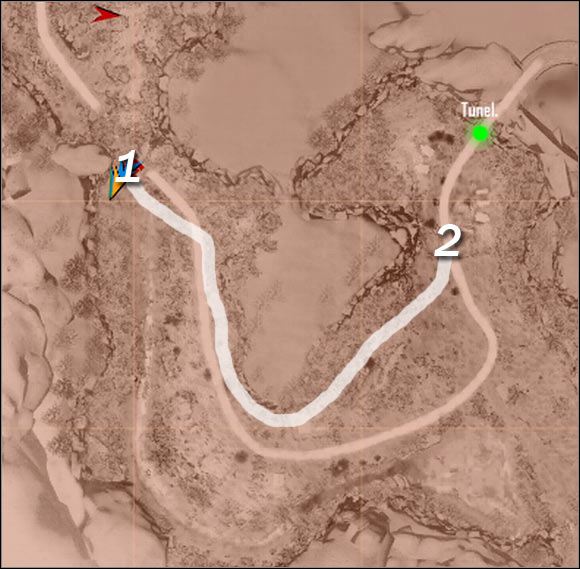
Map legend:
1 - starting area
2 - destination (encampment)
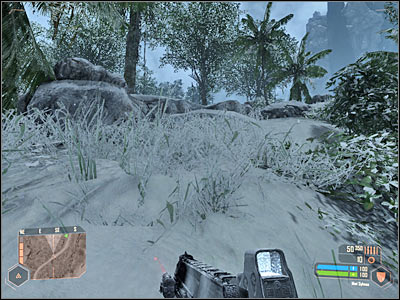
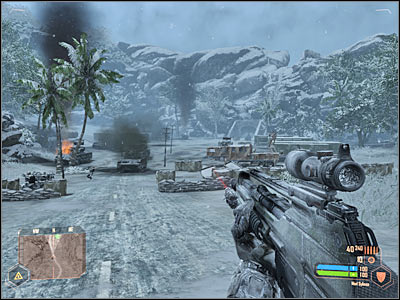
First of all, I guess I should tell you that you will be allowed to ignore your new colleagues. You won't have to provide any backup and you also won't have to worry about them getting killed. It would be a good idea to follow the same tactics as before. As a result, leave the main road and instead head on to the forest. Start moving south.

You should stay close to the cliff which is located to your left (screen). Continue moving south, because you won't find any shortcuts along the way. Ignore the monsters, as well soldiers who are fighting the aliens.

You will soon have to turn south-east. You'll probably notice a couple of allied tanks parked nearby (screen). Sadly, you won't be able to fully utilize these machines, because they're frozen. The only exceptions are the machine guns, but you would be exposed to enemy fire. As a result, ignore the fanks, because they're useless here.

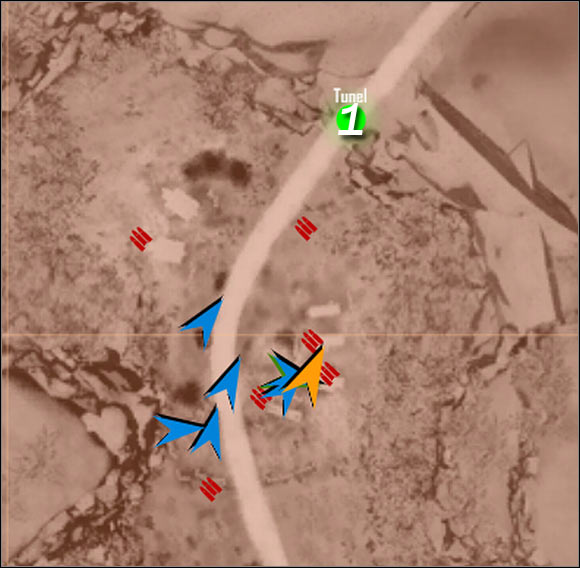
You won't have a chance to get to the tunnel. This particular objective is going to be completed once you're close enough to an allied campsite (screen). Get ready, because you'll be challenged by a boss very soon. Save your current progress and choose a Gauss rifle from your inventory. You can also inspect the area around you for bigger monsters. Kill them if you have the time.
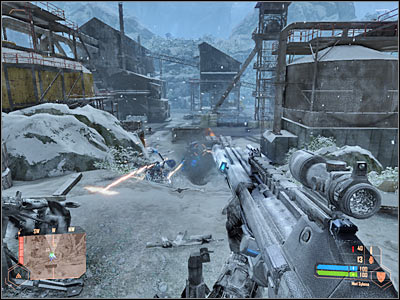
You won't need a map of this area, because this entire battle is going to take place inside the base. You will have to wait for the exosuit to reveal its position (screen) and to get to the campsite. Notice that the creature has blocked the entrance to the tunnel. Get ready to kill it!
First of all, you will have to learn how to avoid primary attacks of the exosuit. Boss will use his freeze ray on you and your colleagues (screen). Thankfully, you can easily survive these attacks, as long as you stay hidden behind the trailers.
I wouldn't recommend getting too close to the alien creature, because you may end up getting caught by one of the tentacles (screen). It's not equal to ending the game, however you will be thrown in the air and there's a high possibility of receiving major injuries as a result of the landing.
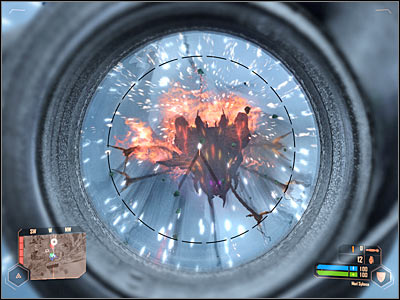
I would recommend using a Gauss rifle to injure the creature, however you can also use your rocket launcher (screen). You would also find a second rocket launcher in the vicinity, however collecting it would be tricky. Aim for the jaw, as well as for the tentacles. Thankfully, your allies will inform you whether your attacks have an effect on the boss or not.
The second phase of the battle won't change anything with the boss, however alien creatures will probably appear near your position. You can ignore smaller monsters (or throw grenades at them), however you will have to take special attention in killing bigger creatures (screen). Prevent them from attacking you with their freeze ray, because it's also quite deadly.
Keep attacking the exosuit until it has been completely destroyed (screen). It's very important that you MOVE BACK, because a large explosion is going to take place here. Look for additional supplies in the meantime.
Map legend:
1 - destination (tunnel)
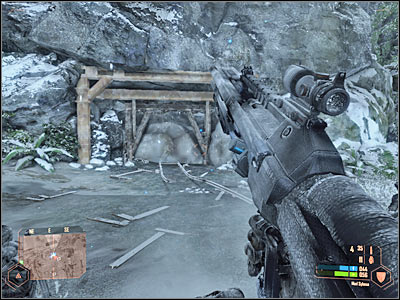
Obviously I didn't add a starting area to the map, because you may be standing practically anywhere at the end of the boss battle. There's not much to be done here. Get to the tunnel entrance. It's closed, but one of your colleagues will place an explosive charge on the gate (screen).
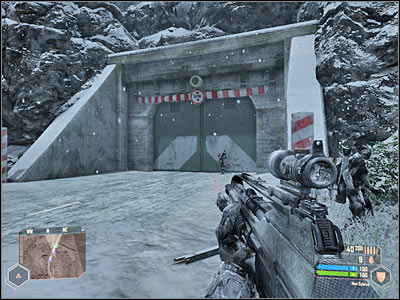
Now you must only wait for the explosion to occur. Before you decide to enter the tunnel (screen), it would be a good idea to rearm yourself. You'll find plenty of ammunition in this area, as well as "big guns". Wait for the game to load the next mission.
This is a second mission in a row played out in a frozen environment. I guess I should tell you that it's going to be even more difficult to stay alive than in the previous level. You will have to deal with a lot of soldiers equipped with nanosuits and the final part of the mission will require to defend yourself against a massive alien attack.
Main map:
1 - starting area
2 - finish
2 - sixth main objective: entrance to the mine
3 - first main objective: colonel Lee's location #1
4 - second main objective: exit from the aircraft carrier
5 - third main objective: colonel Lee's location #2
6 - fourth main objective: mining complex
6 - first side objective: alien creatures
7 - fifth main objective: Eagle squad
Map legend:
1 - starting area
2 - destination (entrance to the aircraft carrier)
3 - ammo depot
You start the game inside the exact same tunnel which you've entered in the previous mission of the campaign. Listen to what your colleagues have to say and follow their lead. Be careful - one of your teammates is going to be hit by a Korean sniper (screen). Find a good cover quickly and take your time to analyze this situation.

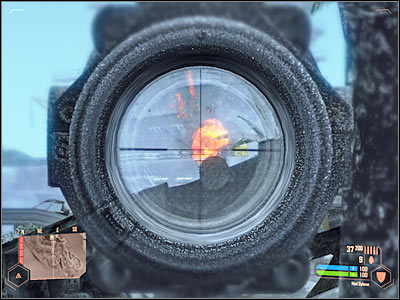
There are two enemy soldiers attacking you and your colleagues. They are both standing on top of the aircraft carrier. You can wait for your teammates to get rid of them or you can use a scope and take them out on your own. If you decide to kill them, make sure to aim for the explosive barrels (screen) and it'll speed up the process.
Once the battle has ended, stand up and exit the tunnel. Notice that you'll have to act alone from now on. Ignore some of the nearby enemy soldiers for the time being. Instead, focus on jumping over a small railing. Go right and use maximum strength feature to get to the surface safely (screen). Plan your each jump here to avoid losing too much energy.
Now you will have to focus your attention on dealing with a few nanosuit soldiers, as well as with a Korean armored car. I would recommend that you start with the vehicle. As a result, proceed to a small ammo depot (3 on the map) and pick up a rocket launcher.
Choose the rocket launcher from your inventory and wait for the right moment to attack the vehicle (screen). One successful shot should be enough to destroy it. Now you can focus on killing the soldiers. Surprising them is a good idea, because they can withstand a lot of damage. Also, avoid staying in the open, because they're equipped with sniper rifles. Once they're gone, go back to the ammo depot and pick up a minigun.

You may proceed towards large ice blocks which can be found to your right (screen). The idea here is simple - you must start using maximum strength feature to reach larger blocks. Notice that you'll be heading north-east. It's important that you've disposed of hostile units by now, because you'll be staying in the open.
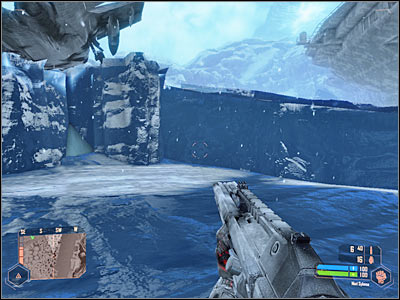
You'll have to make one bigger jump to get to the entrance to the aircraft carrier (screen). You can't make any mistakes here or you'll fall down and probably die. Turn right and proceed to the entrance. You'll be presented with an updated objective here. You should also make sure that you've saved your current progress.
You won't need your personal map here, because there's only one route leading to your destination and you'll be moving inside the carrier. The objective seems to be an obvious one - you must reach an opposite exit. Start off by making a few steps forward and then go to your right (screen).
Ignore frozen soldiers, because they can't attack you and they don't have any good guns with them. Instead, activate your cloaking device. This area is being guarded by four nanosuit soldiers. You should use your newly acquired minigun to get rid of them (screen), especially since you won't be able to attack them by surprise, so you may as well engage them with everything you've got.
I guess you may have some serious problems with one of the soldiers, because he'll be standing on an upper balcony. Deal with him once you've already killed his colleagues. You won't have to inspect the balcony, however you would find guns in one of the smaller rooms (screen).
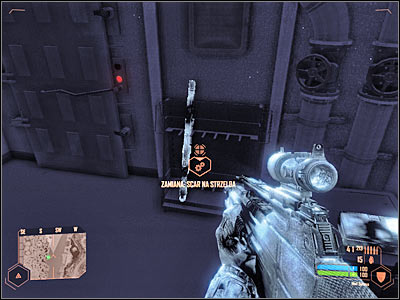
Make sure that the area has been secured and collect much needed ammunition. I assume that you've used up all the supplies for the minigun, so take a Gauss rifle before moving on. You must proceed to a small passageway which can be found to your right (screen).

Now you must go through several corridors. Thankfully, you won't encounter any new Korean soldiers along the way. Ignore the information about the possibility of using nightvision goggles. Turn left and wait for some of the furniture to move. Dispose of the obstacles and approach a large hole in the ground (screen). Save your game before jumping in the hole.

Once you've landed, you should notice that a Korean soldier is standing right in front of you (screen). It would be a good idea to get rid of him with a Gauss rifle. Aim for his head, so you won't have to worry about him surviving your initial attack. Activate camouflage and move somewhere to your left.
I would recommend that you keep using the Gauss rifle, because it's going to be a very effective weapon against other nanosuit soldiers. You could also consider throwing grenades at them (screen), however you must know that a single grenade won't get the job done. Make sure that you've killed all of them and take your time to collect much needed supplies. You can also inspect bodies of frozen crew members for additional equipment.
Find a brighter section of the room and go there. Notice that there's a similar hole to the one you've used before (screen). Activate maximum strength. Get on top of the vending machine. You should be able to get to the upper level from there. Proceed to the next corridor.
Turn right when you have the chance and eventually you'll get to an exit. You should be able to find a much larger stash here (screen). Make sure that you've fully rearmed yourself, especially when it comes to Gauss rifle. Exit the aircraft carrier and wait for new orders.
Map legend:
1 - starting area
2 - destination (ice cavern)
Don't leave this area just yet, because a large alien creature should arrive here in a few seconds (screen). Instead of running away from it you can consider killing it. Obviously you should be using a Gauss rifle. Once the battle has ended, go back to the ammo stash to collect supplies.
There are many paths leading to your current destination. Notice that Korean soldiers are fighting the aliens to the south-east of your current position. You can try getting closer to them, however I would recommend going south-west. This means you'll have to deal with ice blocks by using maximum strength option (screen).
Eventually you should be able to reach an area from where you'll be able to get to the ground level safely (screen). I wouldn't recommend jumping down from higher platforms, because you'll kill yourself. Start moving east and stay close to a nearby cliff if possible.

You should get to a small road in a short while (screen). You may be spotted by enemy units, so it would be a good idea to start using camouflage. Move in the bushes and lie down to recharge your armor whenever necessary.
Eventually you will have to get to an entrance to the cavern (screen). Sadly, there's a high probability that the entrance is being guarded by Korean soldiers or that they're fighting alien creatures. Wait for the situation to calm down and surprising remaining enemy units. I wouldn't recommend trying to run towards the cave, because it's a very long distance. Enter the cave and at about half way through you will be given a new task.

Map legend:
1 - starting area
2 - destination (mining complex)
Your first task here is to leave the ice cavern safely. If you've killed all enemy units before, you won't have to worry about encountering any new creatures while exploring the cavern. You will come across a new exosuit which will appear on top of a nearby hill (screen). Thankfully, you don't have to worry about killing the creature. Instead, avoid being hit by a car which is going to be thrown towards you.
Notice a small hut to your left (screen). This building contains valuable supplies, however it's a trap, because a nanosuit soldier is cloaked nearby. If you try to get closer to the hut, he will use his rocket launcher to blow it up. Get rid of this soldier, preferably with a Gauss rifle, so you won't have to worry about him injuring your character.
At least two other nanosuit soldiers will arrive from the east. You must get rid of them as well and you should do this before they get a chance to surprise you. Take your time to explore the hut, even if it's destroyed. You should be able to find a rocket launcher here (screen) and obviously you must take it. Start moving east.

There's only one passageway leading to your current destination and that's a large canyon (screen). Sadly, you will encounter alien creatures along the way and killing them isn't going to be a simple thing. The main reason is that the monsters are very agile and they can also inflict a lot of damage within a short period of time.
You will soon turn south and it would be a good idea to start climbing here (screen). This will allow you to get a much better view at the surrounding area and you'll be able to kill alien creatures from a larger distance. Keep heading south and eventually you'll get to the mining complex. Wait for two large beings to leave and listen to a radio transmission in the meantime.
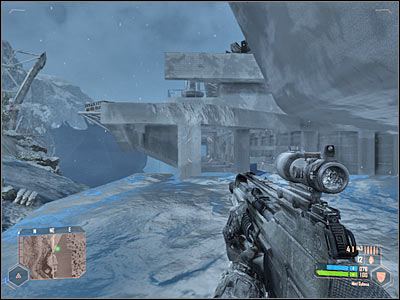
Obviously you must keep moving south to get to the central area of the mining complex. Don't jump down. Instead, look for a safer way (screen). Head on to the concrete wall and find a small opening. Once inside, you'll be presented with two new objectives (primary and optional).
This is a side mission, however you shouldn't ignore it, because you have a unique chance to take a closer look at the surrounding area. Defeating the monsters now will also make your future battles easier. Use your personal map to locate enemy creatures and kill them with your primary assault rifle (screen). You don't have to kill all the monsters to fulfill this objective, but you shouldn't leave anything alive behind.
Map legend:
1 - destination (Eagle squad)
Obviously I won't present you with an information about the starting area, because you may be standing anywhere after finishing up with the side goal. Your objective here is quite simple. All you have to do is to reach a campsite (screen) which can be found on top of a small hill. Get ready for a very challenging battle!
You won't need your personal map here, because you'll have to stay near the campsite until this objective has been completed. Your task will be to defend yourself against alien attacks while one your colleagues tries to place an explosive charge on a nearby gate. Start off by heading towards a small ammo depot (screen). Make sure that you have a rocket launcher in your inventory.
Notice that there are other soldiers around you. Focus mostly on killing larger creatures, especially those who'll show up above you (screen). Some of them will also arrive from the west. Use your rocket launcher to get rid of slower foes, because they won't dodge your attacks and a single rocket should be enough to kill them.
You can also try killing smaller creatures while waiting for larger foes to show up. Remember to use grenades here (screen). They're very efficient, because alien creatures tend to stay close to each other. Prevent them from getting too close to you or your colleagues, because it can get messy.
The second phase of the battle will require you to focus most of your attention on killing larger hive units (screen). Destroying them before they get too close is extremely important. Otherwise they would have dropped new alien units or attacked the campsite. Just as before, use a rocket launcher (or a Gauss rifle) to take them out.
You will have to defend the campsite for about two minutes. You'll then be informed that explosive charges have been set (screen). They won't explode, but an enemy exosuit will fire a huge projectile at you and it'll destroy the entrance to the mine. Thankfully, you won't have to kill the exosuit, especially since it's far away from your position.
Make sure that you've visited the ammo depot, because you'll need a lot of supplies for the next mission. Ignore the fact that your colleagues are still fighting and proceed towards an opened passageway right away (screen). Make a few steps forward and eventually you'll allow the game to begin loading a new mission.
This is going to be a very unique mission. You'll operate underground right until the end. It means you may have some problems with orientation, because you won't be able to use your personal map. Thankfully, you won't encounter any nanosuit soldiers and it'll also be fairly easy to surprise enemy units. The only exception is the final part of the mission where you'll have to go against larger groups of Korean soldiers.
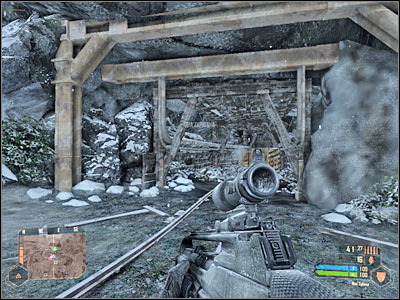
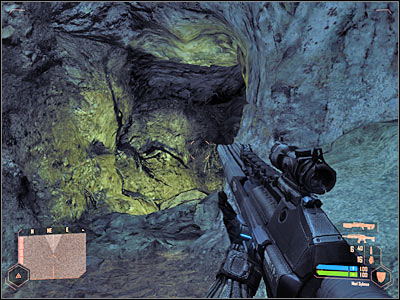
Notice that you're standing inside a small cavern. It would be a good idea to listen to a radio transmission before moving on. Make a few steps forward and notice an equipment on the ground (screen). You probably won't find anything of interest here, but you may look around. Once you're ready, proceed towards a nearby corridor.
Eventually you should be able to reach a very small tunnel, so it means you'll have to crouch here (screen). Activate maximum strength to get rid of the barrels (you must punch them). Proceed to the next section. Ignore any creatures you may encounter, because they won't attack you. Instead, make sure to check bodies of killed soldiers.
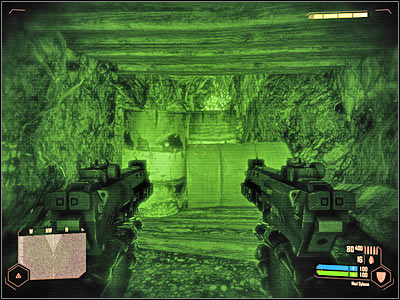
There's only one passageway leading to your current destination, so it's very difficult to get lost. Use nightvision goggles if you're having problems with orientation. Ignore wooden ceiling in one of the corridors. You should be able to reach an area where you'll have to use maximum strength to get to an upper ledge (screen).
Keep heading forward until you've reached a much larger cave. As you've probably noticed, allied soldiers are fighting with alien creatures above you. Wait for one of the vehicles to land inside the cave. Proceed towards the water and swim towards an exit (screen). Keep heading forward and use maximum strength to get to new ledges along the way.
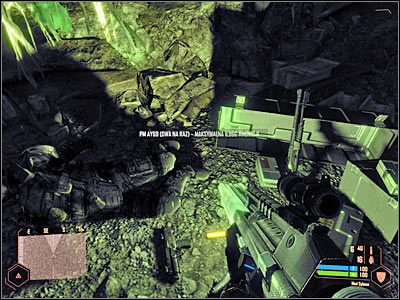
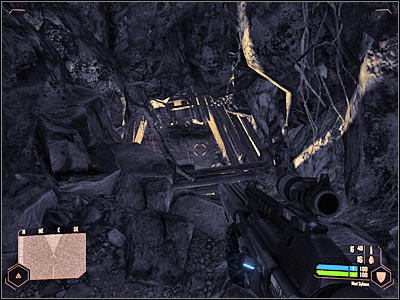
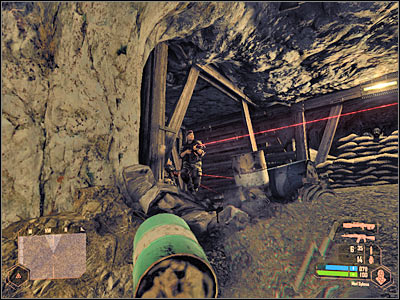
You'll get to a wooden platform in a few seconds. Thankfully, you won't have to worry about the platform collapsing. Eventually you must get to a much larger hole (screen). A few enemy soldiers are standing below you. The easiest way to get rid of them would be to use a grenade. After that, jump down quickly and deal with the survivors. There's also an alien creature nearby. Kill it and wait for an updated assignment.
Notice that one of killed soldiers had a rocket launcher with him. Pick it up and start moving forward. You'll be standing inside a partially flooded corridor. Make a stop once you've reached the crossroads (screen). Activate your cloaking device and proceed to your left. Once again, you should use a grenades to kill enemy units. You could also fire a rocket at them, but it shouldn't be necessary.
The next group of Korean soldiers is standing to your right, just around the corner. The fastest and the easiest way to kill them would be to blow up a nearby explosive barrel (screen). Approach that location and make sure that no one has survived the explosion.

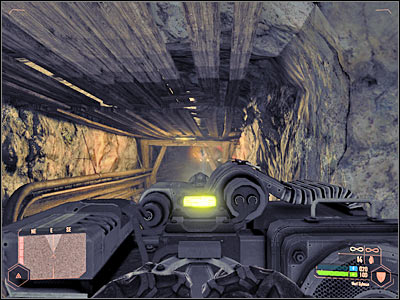
You can use a nearby cannon if you want to. This would allow you to kill some of the nearby alien creatures very easily. You can also avoid them, because they won't pursue you. Start moving upwards, because that's where you'll have to go right now. Make sure that you're using camouflage all the time.
I guess you won't be surprised to find a new outpost in front of you. Thankfully, it's not being guarded by anyone at the moment. Throw a grenade to the left corridor, because two Korean soldiers are patrolling that area (screen). After that, take out the third soldier while tries to get to the cannon. Proceed to your left.
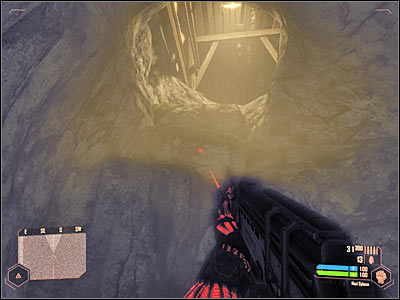
Once again, you will have to perform several tricky jumps. Make sure that you've activated maximum strength feature. Your objective is to get to the upper corridor (screen) and this means you'll have to jump at least twice. Once you're there, make a few steps forward and hide, because more enemy soldiers will appear in front of you. Eliminate them one by one or use some of the carried grenades to dispose of them quickly.
The next group of Korean soldiers is stationed just around the corner, near a buldozer. Just as before, you may choose the approach method. Make sure that you haven't missed a small ammo stash to your right. More enemy soldiers will arrive from the left. Kill them with grenades (screen) and go there now.
It's extremely important that you activate your cloaking device here, because you're probably going to be surprised by three new soldiers. Thankfully, it's very easy to get rid of them, because they won't arrive as a team. Destroy an explosive barrel to get rid of the second group (screen). Use nearby objects for cover, especially if your position has been compromised.
One of the Korean soldiers is hiding just around the corner. It wouldn't be anything important, however he's carrying a Gauss rifle, so you must be careful. Once he's gone, find a new hole and head down (screen). Kill new soldiers there and start MOVING FORWARD. Don't turn around, because the other corridor would lead you back to explored areas. If you don't know whether you're on the right path or not, try going forward until you've reached a checkpoint (autosave).
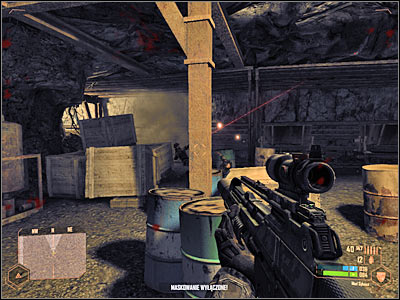
You will find yourself standing inside a much larger room, however you can't feel safe here. The area is being patrolled by several Korean soldiers. If you're careful and patient enough, you should be able to kill them one by one (screen). Also, make sure to eliminate an enemy gunner. Start moving towards the cannon.
Try to memorize where the heavy machine gun post is located, because you will have to go back here in a short while. Turn left and proceed towards a new corridor. Notice a series of explosions (screen). It would be a good idea to save your current progress here.
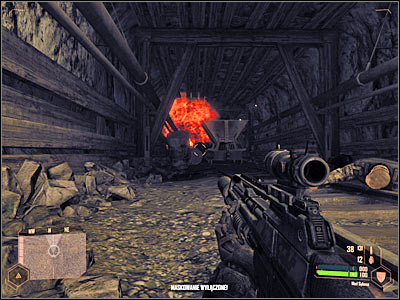
Make a few steps forward and you should notice that an enemy humvee is heading your way (screen). This means you must act quickly. Activate maximum speed and go back to the cannon. Occupy the heavy machine gun post and turn the cannon to your right.
Wait for the humvee to get closer to your position and use the cannon to blow it up from a safe distance (screen). You should remain here for a few more seconds, because you'll have a chance to get rid of Korean soldiers. Prevent them from surprising you and don't worry about the ammunition. Once you've killed all visible enemy units, leave the heavy machine gun post and start moving towards the tunnel.
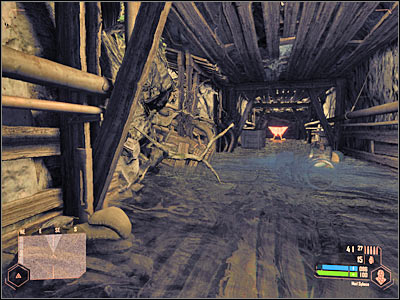
You will probably encounter a few soldiers along the way, however as long as you keep using your cloaking device, you shouldn't have any major problems getting rid of them with a Gauss rifle or a sniper rifle. Eventually you should be able to get to a smaller tunnel (screen). Go through it and enter a warehouse area. Save your progress there.
Be careful, because it's going to be fairly difficult to survive here. The main reason is that the warehouse is being guarded by a single nanosuit soldier and he tends to stay hidden. He can do a lot of damage, even at close distance. Make sure that he's gone, as well as other Korean soldiers. Once this is done, proceed to the stairs (screen).
It would be good idea to secure the entire upper balcony before moving on to the next section. Your target area is a small passageway (screen). Turn on your cloaking device before heading on to the next room, because someone may be hiding there. Proceed towards the elevator and wait for it to take you to another level.
Thankfully, you don't have to worry about being attacked while inside the elevator. Exit the elevator and explore the surrounding rooms. You won't encounter any Korean soldiers here. Instead, you will come across a lot of equipment (screen). Head on to the control room where you'll be given a new assignment.
You won't be able to kill any Korean soldiers from the inside of the control room, so you must go to your right. Eventually you'll end up standing on a metal balcony. Activate your cloaking device, move forward and eliminate two targets (screen).

Start running towards a machine gun post which is located in front of you. Use your cloaking device whenever possible. Obviously you must kill the gunner. Take cover behind the crate and wait for your nanosuit to regain power. Kill anyone who tries to use the cannon.
Wait for your armor to regain maximum power, activate camouflage and proceed towards a small platform (screen) which will lead you directly to the machine gun post. Notice that you must jump to get to that area. Approach the cannon and press the action key to use it.
Obviously you must use the machine gun post to kill all enemy soldiers (screen). Start off by eliminating the closest targets, because they pose a serious threat. Leave more distant targets for later. If you're lucky and skilled enough, you should be able to avoid sustaining major injuries.
Proceed to the right balcony (screen) once you've killed all Korean soldiers. You will come across some new weapons along the way. Keep moving forward and until you'll be able to turn right. Head on to the next room. This is where the mission will end. You'll also be rewarded with a new cut-scene.

This is going to be a fairly challenging mission, mostly because you'll be on the move almost all the time. You will have to occupy one of the carriages and eliminate anything that stands in your way. You won't be allowed to leave the train and the only exception will be when you'll get to a small station.
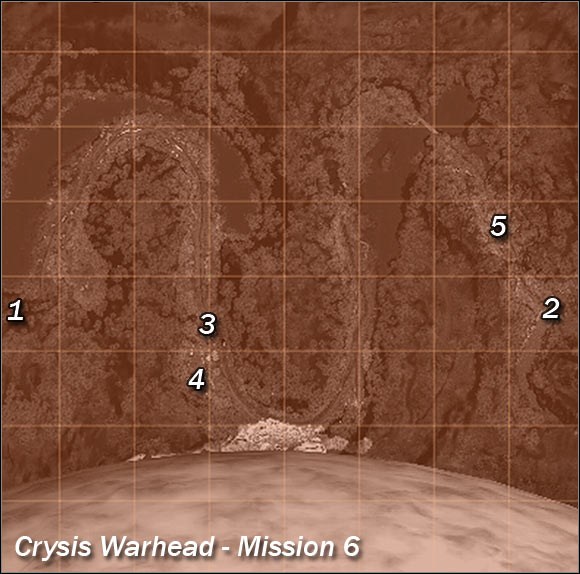
Main map:
1 - starting area
2 - finish
2 - third main objective: the bridge
3 - area where the train will make a stop
4 - first main objective: control tower
5 - second main objective: alien attack
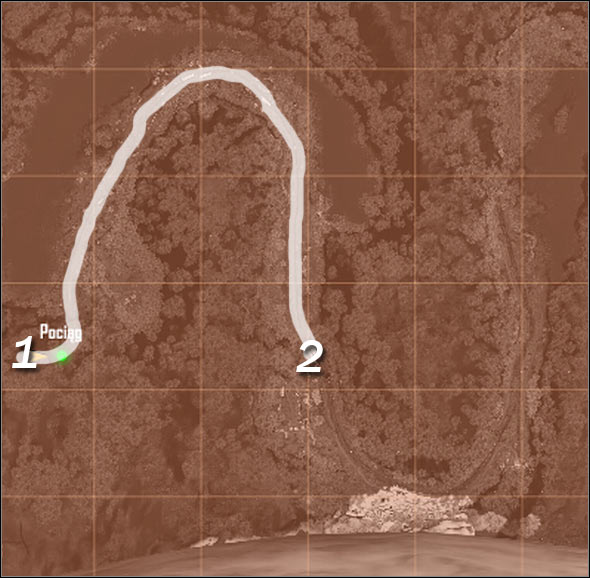
Map legend:
1 - starting area
2 - destination (train station - you'll make a stop here)
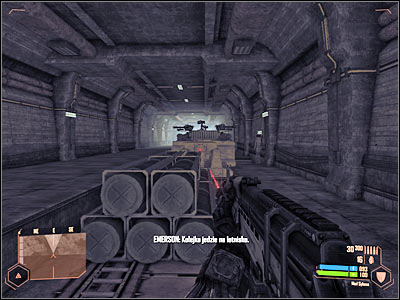
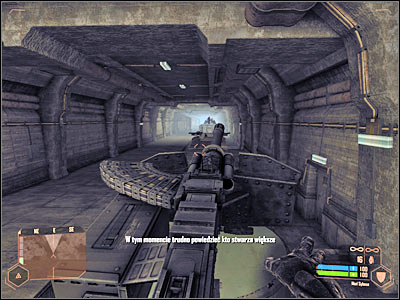
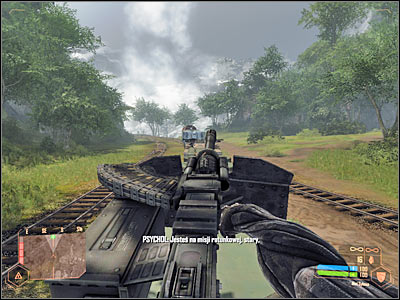
This mission won't begin with an introductory movie, however you will have some time to take grip of the current situation. Notice that you're on a moving train and you're currently inside the tunnel (screen). The most important thing for you to remember about is that you WON'T be allowed to jump off the train, because you'll lose. The only exception will be when you'll reach the train station, but don't ignore this information for now.
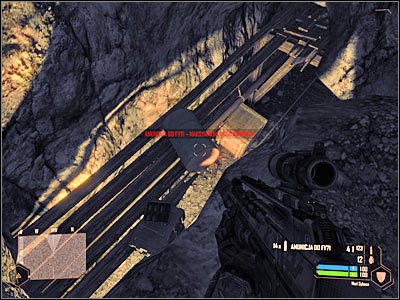
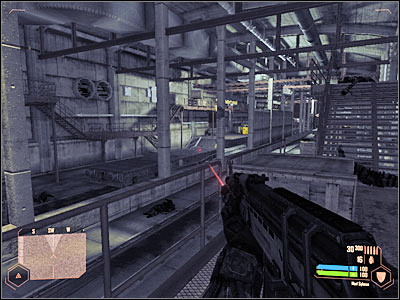
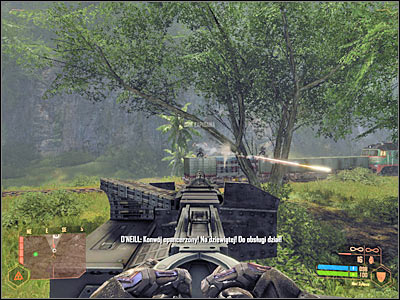
As you've probably noticed, there are some powerful turrets on the train and obviously you will have to use them to your advantage. I would recommend that you use a heavy cannon (screen). It's located far away from the container, but it's extremely powerful. You could also consider using two miniguns, however they have a limited field of view, so you'd have to switch between them often.
You can eliminate your first targets while you're still inside the tunnel. Wait for the train to start turning left and you should be able to spot a few guards on top of other carriages (screen). Wait for the train to leave the tunnel and get ready to engage a lot of Korean soldiers.
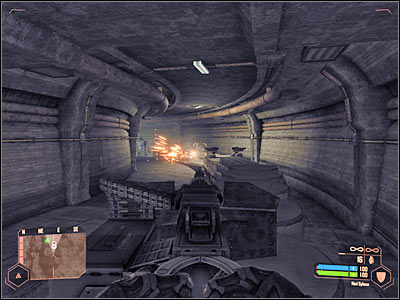
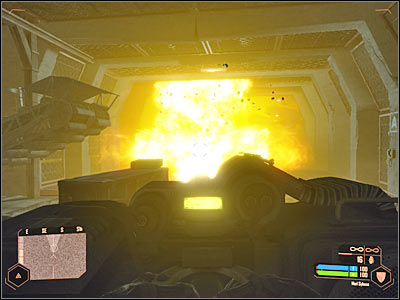
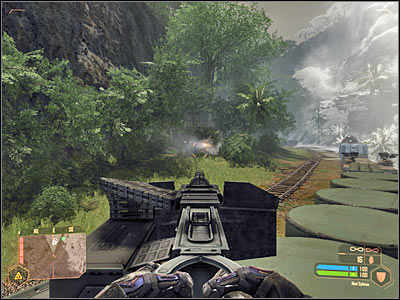
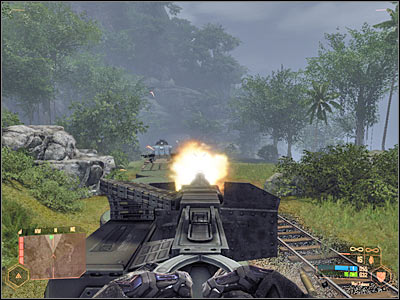
The next phase of this mission is going to be very similar to the chase sequence from the second level of the campaign. The only difference is that you can't stop here, so you'll have to be ready to engage new units at any time. Notice that your cannon has an unlimited supply of ammunition, however you must prevent it from overheating. The first set of buildings is located to your left. Remember to aim for explosive barrels (screen), gas canisters and cisterns.
There's a series of very challenging battles ahead of you and it's going to be important to disable enemy units or soldiers quickly. Focus most of your attention on destroying enemy vehicles. You'll also encounter an enemy gunship (screen). Use the fact that your cannon can turn in all directions to take down the helicopter.
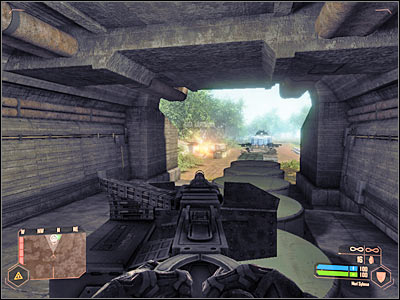
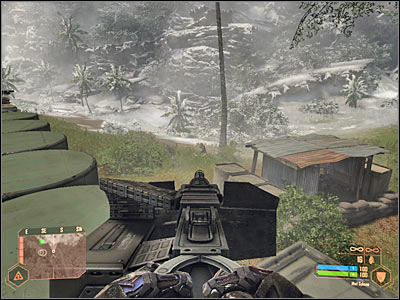
You can't fight the helicopter for too long, because other any enemy units will reveal their positions in the meantime. You should know that you'll also have to take down two other gunships in the near future. Other than that, watch out for Korean armored vehicles (screen). They can injure you quite easily, especially since they usually stay close to the train.
You'll also be dealing with enemy machine gun posts from time to time (screen). They don't pose a serious threat, as long as you destroy them from a safe distance. Keep defending yourself until you've reached a small train station. Start off by listening to a radio transmission. You should also notice that an allied VTOL has appeared in the area. It'll help you in getting rid of enemy soldiers.
Map legend:
1 - starting area
2 - destination (control tower)
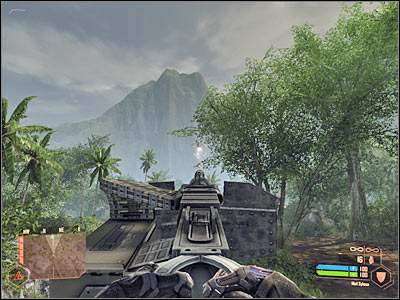
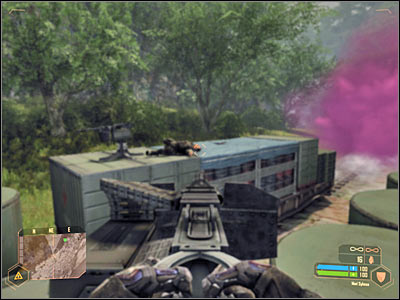
This new assignment won't be added to your list right away. You'll have to make some preparations in the first place. Start off by killing some of the nearby soldiers with your main cannon (screen). Sadly, you can't stay here for too long, because eventually you would have been attacked by a Korean sniper. Jump off the train and activate camouflage at the same time.
Ignore what your colleague in a VTOL is trying to say, because you don't have to be in a lot of hurry. Make sure that you stay hidden all the time and eliminate only those who stand in your way. It's very important that you avoid unwanted attention, especially since the flying machine will take care of most of the problems. Start moving south-west (screen).
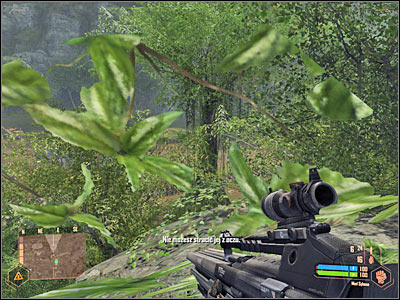
I would recommend that you stay in the forest, near the cliff. This will allow you to get past most of the Korean units safely. You will have to use maximum strength feature from time to time. Start off by jumping towards an upper ledge (screen) and then jump over the brick wall. Hide quickly after reaching a small dirt road.
I guess you shouldn't be surprised to hear that Korean soldiers are guarding this area. You can also expect an enemy humvee to arrive. Destroy it yourself (screen) or wait for the pilot of the VTOL to deal with this problem. Keep heading south. Just as before, stay in the forest and keep using your cloaking device.
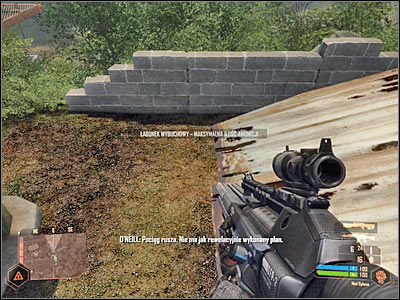
It would be a good idea to get to the main base from the south-west. Notice a new brick wall (screen). There are some Korean soldiers here and it would be a good idea to flank them. Start off by eliminating an enemy machine gun posts and then get rid of the remaining Korean units. I would recommend using grenades here - they're very effective.

You'll probably want to remain undetected for a few more minutes, because additional enemy units may be hiding inside the camp (screen). Make sure that you've killed all Korean soldiers before moving on. It's important, because you'll expose yourself to enemy fire in a short while. Don't forget to collect ammunition!
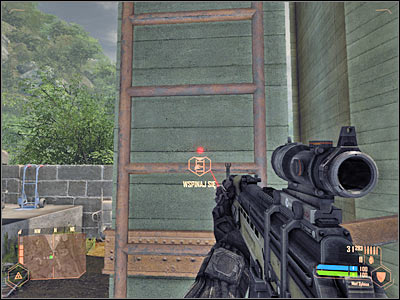
Once you're ready, proceed to the main tower. You shouldn't have any problems finding the ladder (screen). Head on to the middle balcony and save your current progress there. You may continue moving to the top of the tower. Try entering a small control room, but ignore visible equipment entirely.

Map legend:
1 - starting area (control tower)
2 - train tracks (you should get on board the train here)
3 - destination (alien attack)
This objective won't appear on your list right away, however you must act quickly. The second you hear radio transmission starting leave the tower and jump down. It would be a good idea to land on top of a small hut (screen), so you won't sustain any injuries. Obviously you must be using maximum strength all the time.
Start moving east (screen). I wouldn't recommend disabling maximum strength, because you'll still need it as your active ability. You must proceed to the ground level. Try finding an area where the jump won't be too big, however it can't take too long, because the train will eventually leave the station.
Once you've successfully landed for the second time, activate maximum speed and start running towards the train tracks. If you've started early, you should have plenty of time until the train arrives (screen). Activate maximum strength again and jump on top of one of the carriages. Go back to your cannon before the train reaches a new of the map.
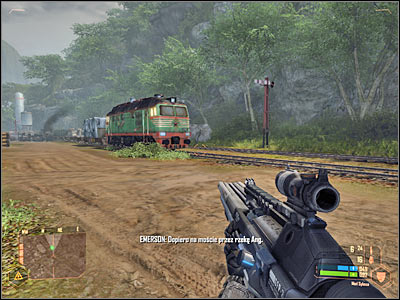
Once again, you'll be dealing with enemy units along the way (screen). I have to warn you - it's going to get more difficult this time. I would recommend that you listen to what your colleague in the VTOL has to say, because he'll tell you where to expect enemy units to show up.
The first armored vehicle will appear to your right. Once it's been destroyed, you'll have to focus on eliminating other any enemy units without any interruptions. Otherwise you'll probably die. Start off by disabling a heavy machine gun post which can be found to your left. Sadly, you can't take it out from a larger distance, because trees are blocking your view.
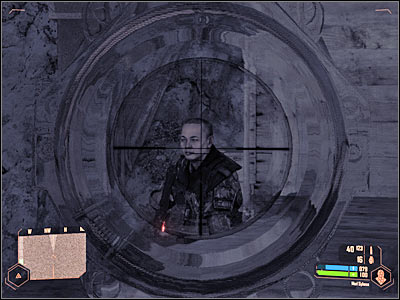
Turn the cannon to your right QUICKLY and dispose of an enemy sniper (screen). It's extremely important that he's killed, because otherwise he wouldn't have any problems inflicting massive injuries to your character. Turn the cannon to your left and kill the gunner from the oncoming train. He must die as soon as possible, preferably before he starts firing at you.
Keep looking at the second train, because a new soldier will be using a similar heavy machine gun post (screen). I guess I don't have to tell you that he must die quickly. Destroy the second heavy machine gun post (not the one on the train), as well as some buildings by shooting at explosive objects.
Watch out for a new armored car which will stop near the train tracks. Also, a new convoy is going to appear to your left. Ignore the trucks for the time being and instead focus on a third train. It'll appear to your right and your job will be to take out a few gunners (screen). Once they're gone, switch back to the convoy and start shooting at the moving vehicles.
You will have to take down a new enemy gunship in a short while. Wait for the helicopter to hover over the tracks and use the cannon to damage it. There are some Korean soldiers to the right of the entrance to the tunnel (screen). It's extremely important that you eliminate them from a larger distance, because they can injure your character. Ignore an ammo depot, because you will find new supplies when you'll need them.
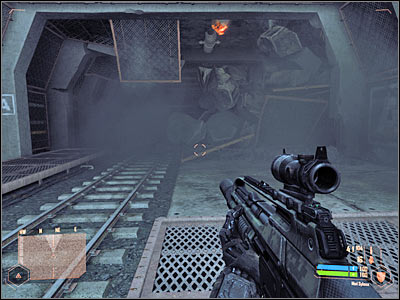
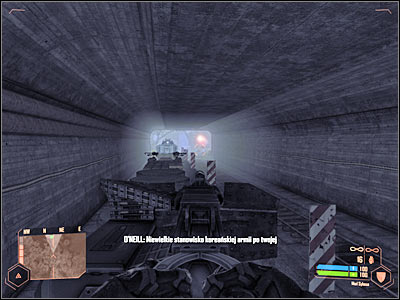
You can feel safe inside the tunnel, however there's a single opponent hidden near the exit (screen). He's carrying a rocket launcher, so it's important to kill him before he fires too many missiles. From now on it should be much safer. You won't be attacked by anyone else, so enjoy the views. Eventually the train will make a second stop and this is when you'll be given a new challenge.
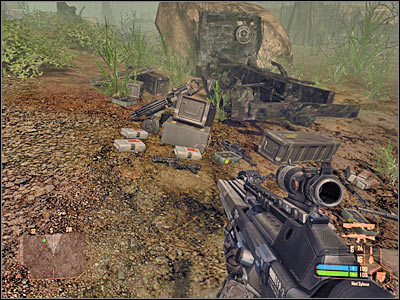
You won't need a map of the area for this assignment, because the entire battle will take place around the container. Obviously you shouldn't wait for the monsters to show up. Instead, use the free time to find a large ammo stash (screen). I would recommend that you choose a good second weapon. You can take a Gauss rifle (better choice) or a minigun.
This battle can be played out differently, depending on the difficulty level. If you think you're skilled enough, you may consider going back to the cannon in order to use it to kill alien creatures (screen). You could also use two miniguns. Sadly, this won't be possible on higher difficulty levels, because you would lose too much health before inflicting any serious wounds to the monsters.
Sooner or later you'll probably going to have to jump off the train to deal with the alien creatures yourself (screen). Focus mostly on killing flying monsters, because they can attack you with their powerful freeze ray. It's also important to return to the ammo stash between waves in order to acquire necessary supplies.
Obviously you will have to avoid sustaining major injuries, especially while being attacked by larger creatures (screen). Notice that this objective may be completed even before you'll deal with all the monsters. As a result, you will have to get rid of the rest quickly and get back on board the train before it leaves this area.

Map legend:
1 - starting area
2 - destination (large bridge)
Once again, you won't have to worry about encountering any hostile units. All you have to do is to wait for the train to reach its destination which is going to be the southern bridge. It doesn't really matter where you'll stand, because you won't have to use any guns.
Wait for the train to get to the bridge and jump off. Thankfully, there aren't any Korean snipers in this area, so you may proceed towards the bridge right away (screen). The game will reward with an excellent cut-scene here. Get ready for the final mission!

This is going to be the final mission of the game. I guess you may be surprised a little that it's going to be reasonably easy to survive in the early parts. Only the last boss bight is going to be a real challenge, especially you will be forced to deal with smaller alien creatures at the same time. Good luck!
Main map:
1 - starting area
2 - finish
2 - second main objective: container
2 - fourth main objective: exosuit (final boss)
2 - fifth main objective: evacuation zone
3 - first main objective: main gate
4 - first group of side objectives: ammo depots
5 - third main objective: control tower
6 - second side objective: experimental weapon
The mission will begin with a longer cut-scene (screen). Don't forget to listen to a radio transmission once you've regained control over Psycho, because you'll learn a few things concerning your current situation.
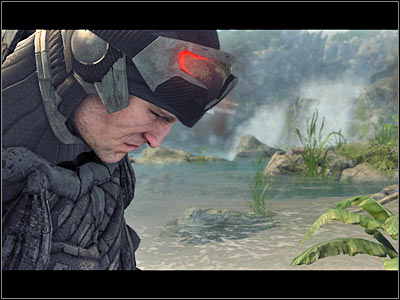
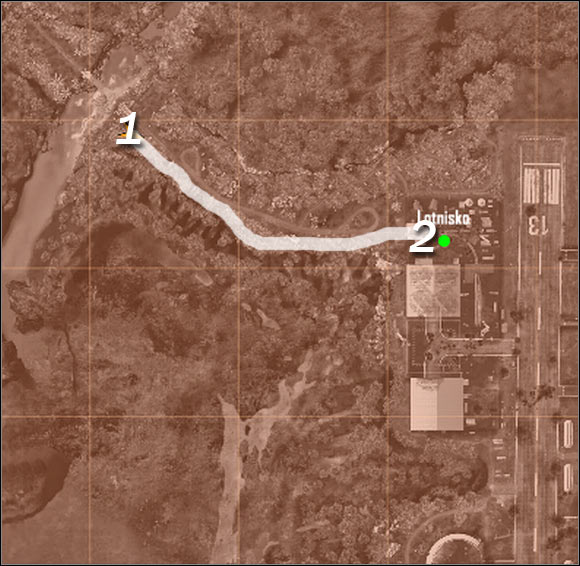
Map legend:
1 - starting area
2 - destination (main gate)
You start the game far away from the airport and you shouldn't be surprised to hear that the main road is being heavily guarded by Korean forces. Just as in previous missions, you should consider staying in the forest area, so you'll be travelling south of the main road (screen). Obviously you should be using camouflage all the time. Don't forget to lay down on the ground from time to time in order to recharge your nanosuit.
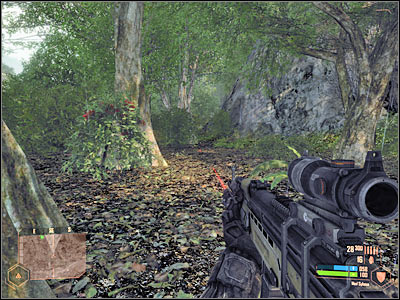
You won't encounter any soldiers right away, however you will eventually get closer to a small hill located near a junction (screen). This area is being defended by 4-6 soldiers and it would be a good idea to avoid them entirely. You could try attacking them (preferably from the east), however this would only be a waste of your precious time.
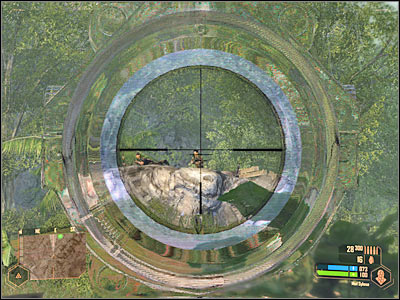
A humvee will appear on the map near your location and this time you should engage it in battle (screen). I would recommend attacking the humvee near a small drop, because it's an area between the hill and the airport. The easiest way to get rid of the humvee would be to use grenades, however you can also focus on killing the gunner with a sniper rifle.
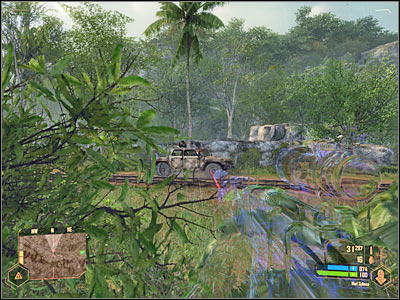
Keep heading east until you see a large wall of the airport in the distance. Use your binoculars and you should notice that the entrance to the airport is being guarded by two heavy machine gun posts. There's also a small minefield to your right. Lay down on the ground between two large boulders and kill an enemy sniper from here (screen). Obviously you should be using a silenced weapon to prevent other Korean soldiers from raising an alarm. It's also important to kill him with only one bullet, so he won't have a chance to dodge your next attacks.
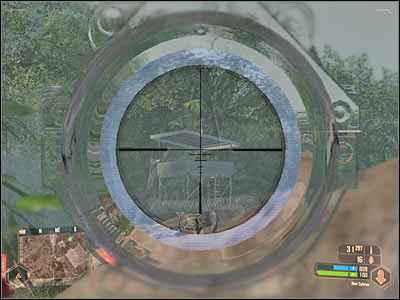
You may finally take care of the heavy machine gun posts and other enemy units who are guarding the entrance. Notice a small opening near the minefield (screen). Head over there to surprise enemy units from the flank. Secure the entire area around the main gate if possible. You won't have to search for supplies, however you would find a lot of mines here. Proceed towards the airport and you'll be rewarded with a new assignment. It would be a good idea to lay down on the ground in the meantime (with camouflage turned on).
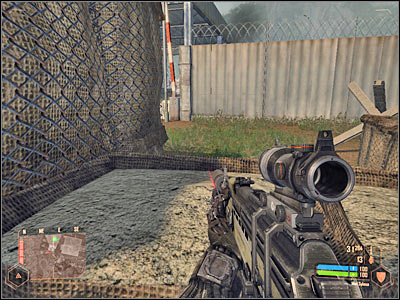
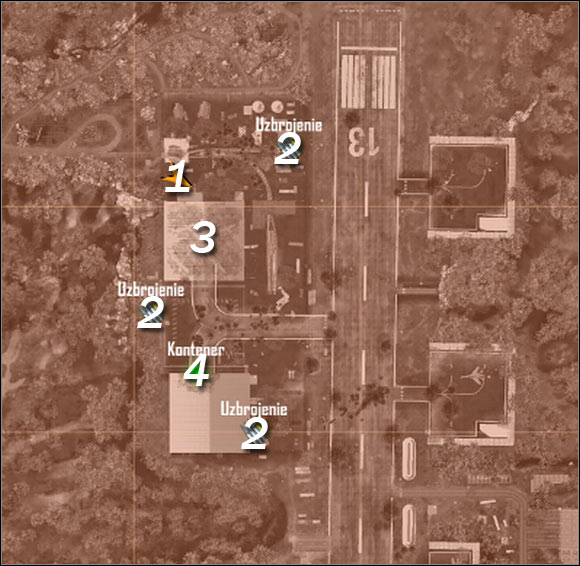
Map legend:
1 - starting area
2 - ammo stashes
3 - main warehouse
4 - destination (container)
I won't tell you exactly where to go, because besides the main objective you will be allowed to visit three large ammo stashes. It's important to rearm yourself, because the container (main objective) is going to be heavily defended. Start off by using your sniper rifle. You must kill a gunner who is standing on top of the largest warehouse (3 on the map).
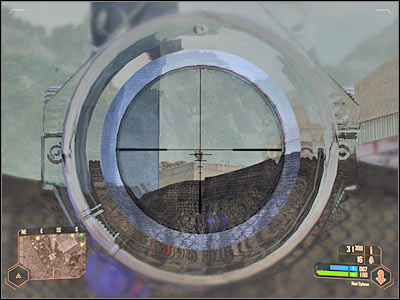
I would recommend that you proceed towards the first ammo stash before focusing on the main goal. The stash in the north is the closest one. Use camouflage along the way, however you could also consider surprising enemy soldiers. The supplies are hidden inside the green container (screen). Take whatever you feel is necessary and save your progress.
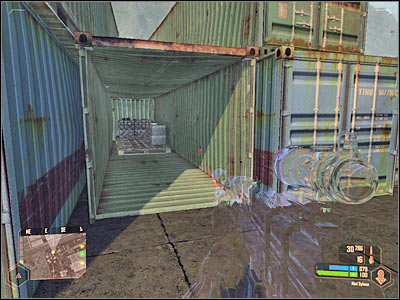
Go back to the main warehouse (that's where you've killed the gunner). Secure this entire area, activate your cloaking device and find a ladder which leads directly to the roof. Go there now, because you'll want to have a better view of your surroundings.
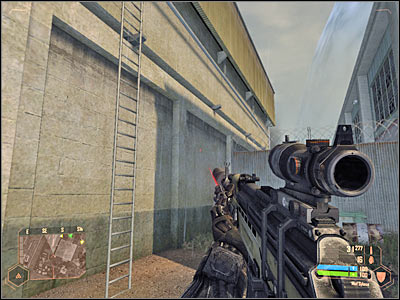
You shouldn't have any problems while using the ladder, as long as you've secured the area around the main gate. Use camouflage again and proceed to the southern area of the roof. You should be able to spot an enemy tank. Use your rocket launcher to get rid of it (screen).
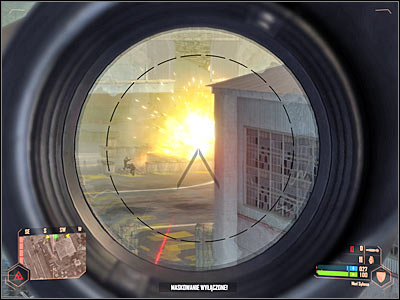
As you've probably noticed, the destruction of the tank has caught attention of Korean soldiers and they've begun patrolling the area. You may consider killing some of them from where you're standing (screen). I would recommend using grenades, because your enemies are travelling in large groups.
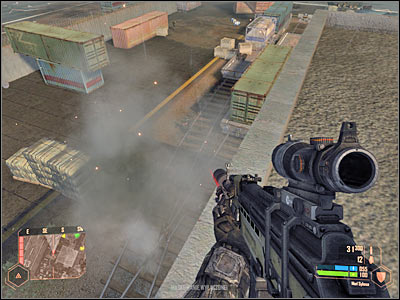
Don't spend too much time trying to kill Korean soldiers, because an enemy gunship is heading your way. Find a new rocket launcher on the roof and use it to destroy the helicopter (screen). Turn on camouflage and use the ladder to go back to the ground floor. Don't even think about jumping down from the roof, because you would probably sustain major injuries. Start moving towards your current destination (white container).
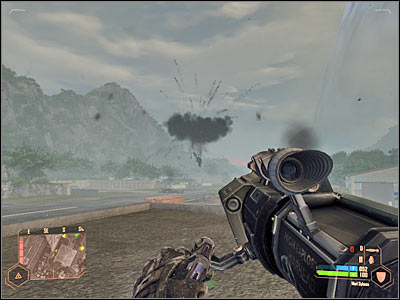
You will encounter a few Korean soldiers along the way and it would be a good idea to kill them. Turn on your cloaking device once you're close enough to your target. Head west and notice that the container is being defended by two heavy machine gun posts. You can attack the gunners from here (screen) or you can surprise them later on.
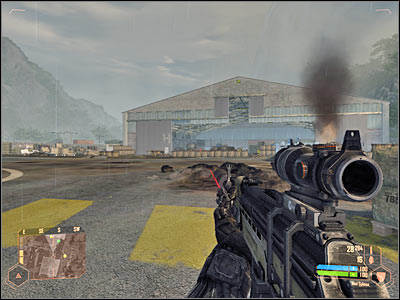
It doesn't really matter how you'll decide to react, as long as you get the job done. It would be a good idea to visit the second ammo stash which is located nearby. Once again, you must be on a look out for a green container (screen). You will find a Gauss rifle inside the container, among other interesting things.
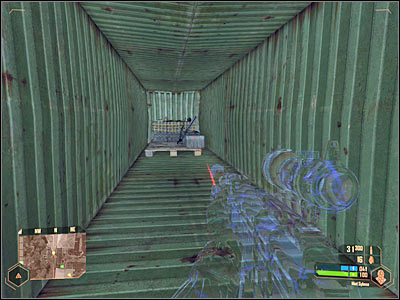
Once you're ready, you may finally proceed towards your current destination. Notice that you won't be able to secure the package until you've dealt with all nearby soldiers. This probably means you'll have to explore the nearby warehouse. You can also visit the third ammo stash, however you'll be going there anyway, so it would be better to leave it for later.
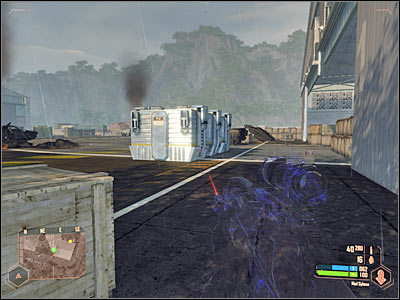
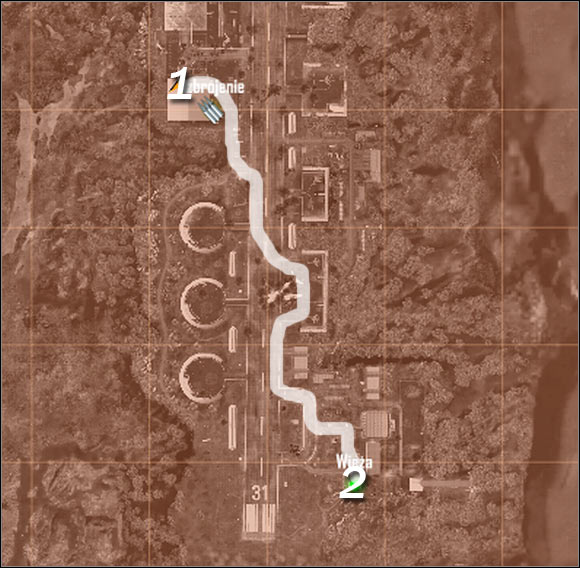
Map legend:
1 - starting area
2 - destination (control tower)
You'll start this objective in the exact same spot where the last one has ended, however enemy vehicles will appear on the map in the meantime. Start moving south. Consider visiting the third ammo stash along the way (screen), but only if you've ignored it before. You'll find a lot of ammunition here, as well as a rocket launcher and grenades.
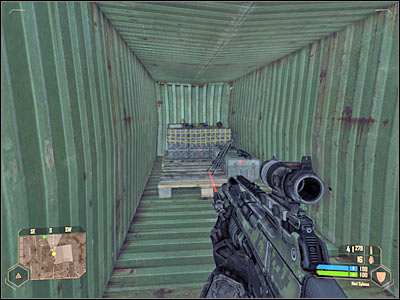
Keep heading south and eventually you should come across an unoccupied armored truck (screen). Save your current game before you decide to use this vehicle. Once you're ready, press the action key to get on board. Turn right and destroy a truck which will appear to your left.
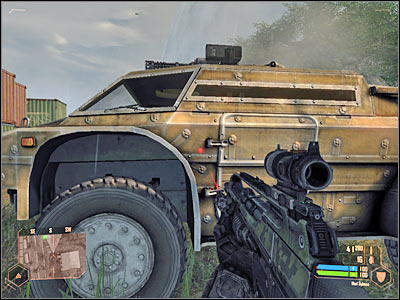
This is going to be a rather challenging sequence. Notice that there are a lot of enemy tanks nearby. You will have to avoid them. Using the thruster here is equally important. Don't worry if you get hit, because your vehicle can sustain a few of these attacks. If you're having some problems driving the truck, consider leaving it and going on foot, however it would take a lot of your time to get to the control tower.
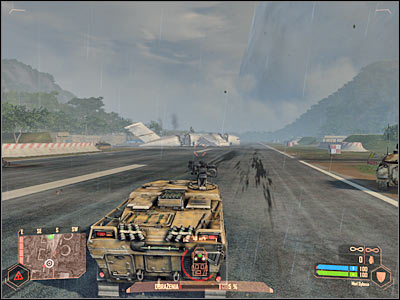
You should be able to get to a wreck of a large airplane in a short while. You won't have to explore the plane at the moment, however remember this place, because you'll return here soon. I would recommend driving left here (screen), because the cockpit of the plane (right side) is being guarded by a Korean tank.
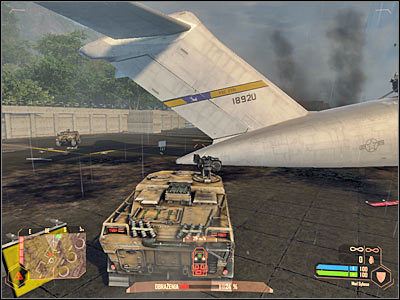
Keep heading towards the southern area of the airfield, because that's where the control tower is located. Once you've arrived, don't use the first gate, because you would have been stopped by large barriers. Instead, head over to the entrance in the middle (screen). Don't worry if your vehicle is badly damaged by now, because you'll leave it soon enough.
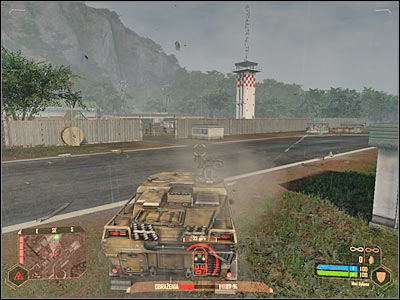
I would strongly recommend slowing down here, especially since you won't have to worry about encountering enemy tanks anymore. Instead, focus on killing enemy soldiers. Take special attention in an enemy sniper (screen) who guards the tower. Don't exit your vehicle until you're absolutely sure that it's safe here.
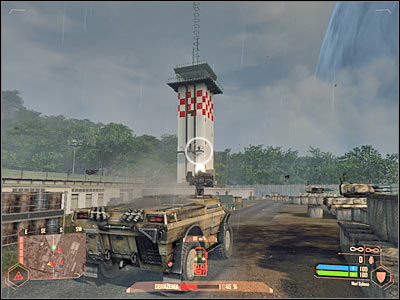
Leave the vehicle after securing the area and start running towards the main building (screen). You can consider using camouflage here, however you'll probably encounter only a few soldiers. Get to the staircase and proceed to the top of the tower. Once you're there, use the console to fulfill this objective. Wait for the game to display an interesting cut-scene.
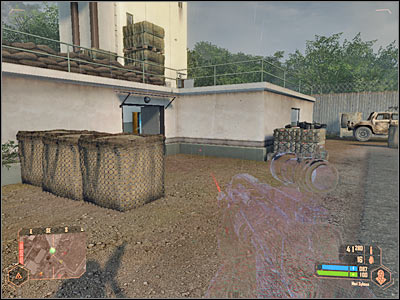
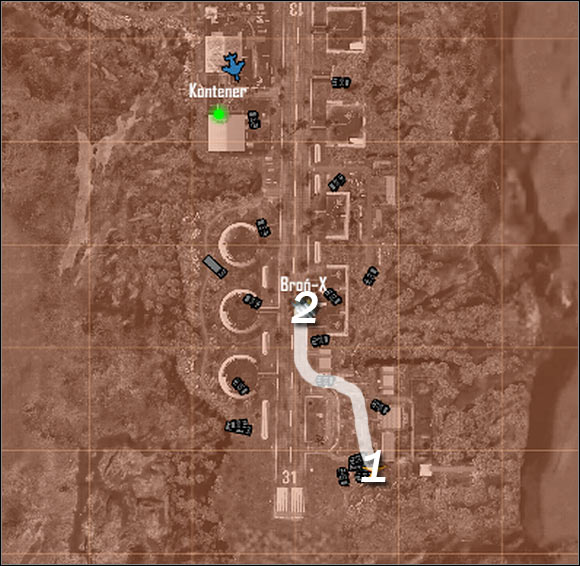
Map legend:
1 - starting area
2 - destination (crate with an experimental weapon)
You don't have to wait for this side objective to be displayed on your list of assignments, especially since flying creatures will appear around the tower and they can injure you if you remain here (screen). Obviously you'll want to exit the building, so you must use the stairs again. Save your progress along the way, especially since it's going to get tougher really soon.
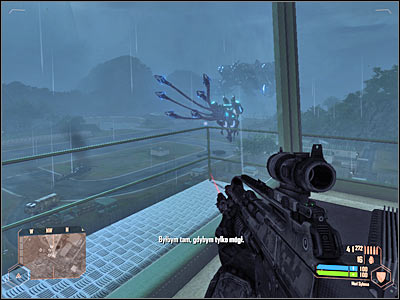
Exit the building via the same route. Your first task here will be to find a new vehicle. There are two large vehicles near the tower, but they're probably damaged by now. As a result, activate maximum speed and start running north. Turn to north-west after reaching a set of buildings (screen) and you should notice an armored truck in the distance.

Approach the truck quickly and take a seat inside the vehicle. If you were quick enough, your new truck should be in good state. Start moving towards the wreck of an airplane. Notice enemy creatures along the way (screen). It would be a good idea to fire at them, especially at bigger monsters. The same goes with creatures guarding the plane.
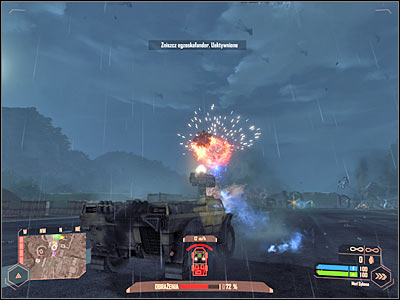
You can keep shooting at the monsters or you can exit the vehicle and proceed towards the wrecked plane. The experimental weapon is hidden inside a large crate (screen). I would recommend exchanging this new gun for your Gauss rifle, because you'll use the machine gun to kill smaller creatures.
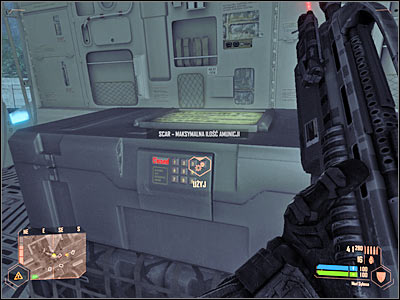
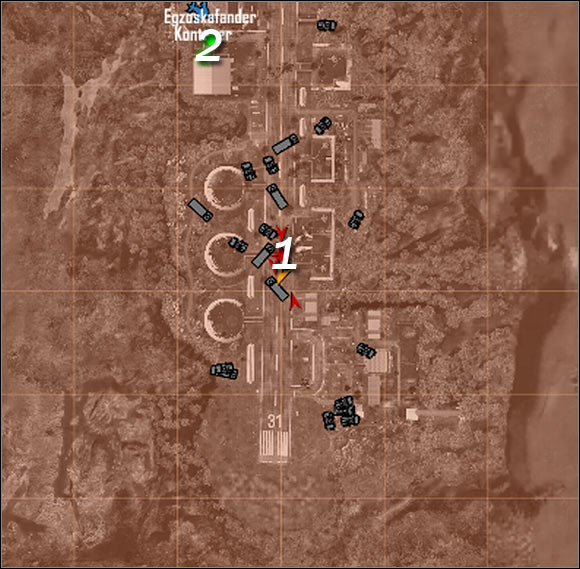
Map legend:
1 - starting area
2 - destination (exosuit)
Obviously I won't show a detailed route to your destination, because the exosuit won't remain in one place, especially when you get near it. Start off by leaving the wrecked plane. Search for a new vehicle. If you can't find any armored cars, you may consider stealing a truck (screen), because you'll only need for a short period of time.
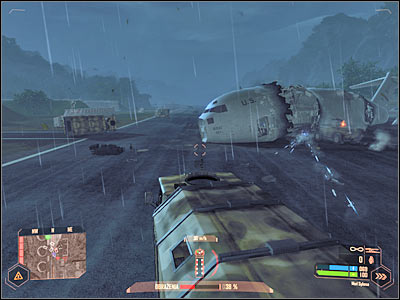
Start moving north, because that's where you'll find the exosuit. I would recommend stopping near the left wall (screen). Make sure that you have a PAX with you and use it to kill a few flying creatures. Once this is done, switch to a machine gun. This weapon will come in handy when it comes to getting rid of smaller aliens. Eliminate as many of them as possible.
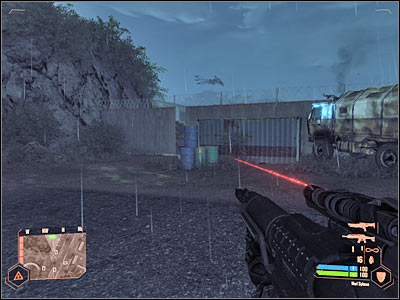
Notice a small opening in the wall (screen). You should be able to fire at the exosuit a few times from here. Notice that missiles have been launched and that they're heading towards you. Don't even think about trying to shoot them down. Instead, remain close to the wall and all the projectiles should hit this object.
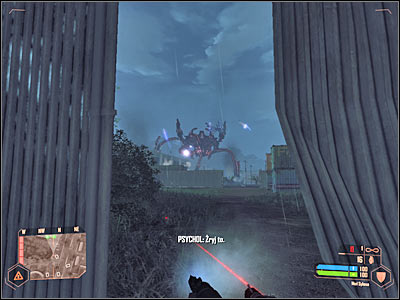
Start moving towards the exosuit, however you must be extremely careful here. Use nearby containers and other large objects for cover. Keep firing until the exosuit has started moving towards you.
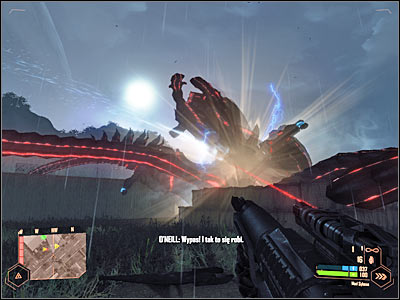
It's going to even more difficult from now on. Not only you'll have avoid being crushed by the legs of the exosuit, but you must also dodge deadly beams being fired at you. Also, you may be caught by one of the tentacles (screen). If this occurs, keep firing at the creature and activate maximum strength to survive the landing.
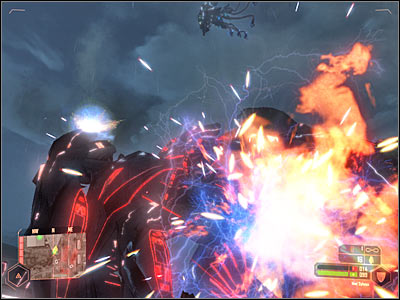
Keep firing at the exosuit until you're able to defeat the monster (screen). You should be fine as long as you avoid most of the attacks. Once the battle has ended, make sure to move back, because the corpse will explode. Kill the remaining nearby monsters while you're at it.
There's only one more thing for you to do here. Start running towards the white container which you've defended before. Notice that an allied VTOL is hovering above the container. Go there and eventually you'll complete this mission.
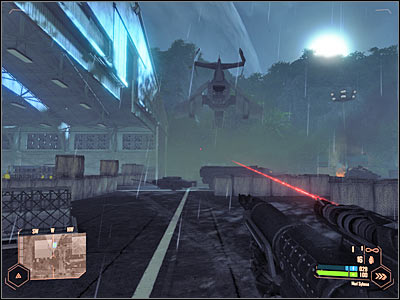
Congratulations! You've just finished the game! Sit back and enjoy the ending. You should also try playing the game on Delta difficulty. Good luck!
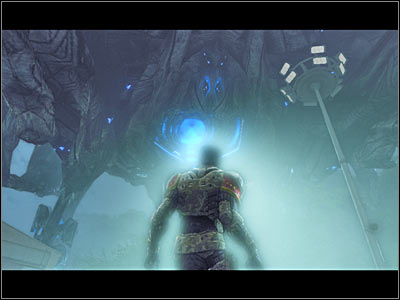


 Crackdown Game Guide & Walkthrough
 Call of Juarez: Bound in Blood Game Guide & Walkthrough
 Company of Heroes 2 Game Guide & WalkthroughCastlevania: Lords of Shadow 2 Game Guide & Walkthrough
 Car Mechanic Simulator 2014 Game Guide & Walkthrough