The unofficial guide to Angry Birds: Epic is a complete walkthrough of the single player mode. The guide contains detailed information about the types of enemies you can encounter in the game, as well as the means to deal with them by using the appropriate units available in the game. The guide thoroughly explains the principles of all branches of crafting system, as well as list the materials used in the process. Additionally, the guide contains a detailed description of all the available birds and their character classes. Furthermore, here you can find the information about the basic mechanisms of the game, such as the ways to draw rewards, as well as a complete specification of all the currencies available in the game. The new installment of the Angry Birds differs significantly from the previous games from Rovio. Angry Birds : Epic is a mix between an Real-Time Strategy and a turn-based RPG game. Traditionally, the game gives us the opportunity to control various Birds in their never-ending struggle against their eternal enemy, Pigs. At the beginning of the game the player has access to a single bird, but he will successively be able to unlock further types. Besides the 5 types of birds, the developers prepared a vast amount of different character classes available to them (which change their abilities), items (to collect and / or craft), as well as various upgrades. In accordance to previous games from the franchise, Angry Birds : Epic is free to play - you don't have to spend a penny to enjoy the game. However, the player can spend a fortune on the game, as it offers micro transactions.
Angry Birds: Epic guide contains:
Jakub Bugielski (www.gry-online.pl)
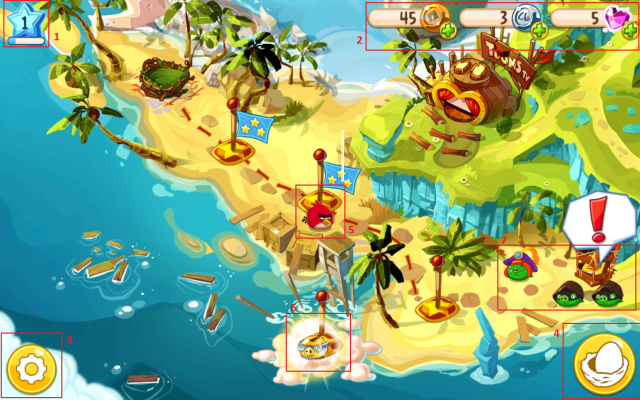
This chapter describes the in-game interface. It looks exactly the same as in numerous turn-based strategy games. Your team is placed on the map, and you can easily issue various commands, sending your troops to specified places, entering combat, and / or get inside buildings serving a given purpose (such as a recipe vendor, a character class dealer, and so on). The interface, despite the colorful graphics, is very clear, neat and does not obscure the view - everything is right where it is supposed to be.
The upper left corner [1] shows the level of experience of your team - each one increases stats of your birds. The upper right corner [2] shows various currencies available in the game - Lucky Coins, Snoutlings, Friendship Essences. Lower left corner [3] allows you to enter the game options menu. The egg in the lower right corner [4] leads to a screen allowing you to set up your party, where you will also find Crafting and Golden Pig Machine. The center of the screen [5] is the location of your team. A little below that point [6] is a random encounter, allowing you to earn various, rare items. Just above the egg, in the lower right corner [7] is your current goal.
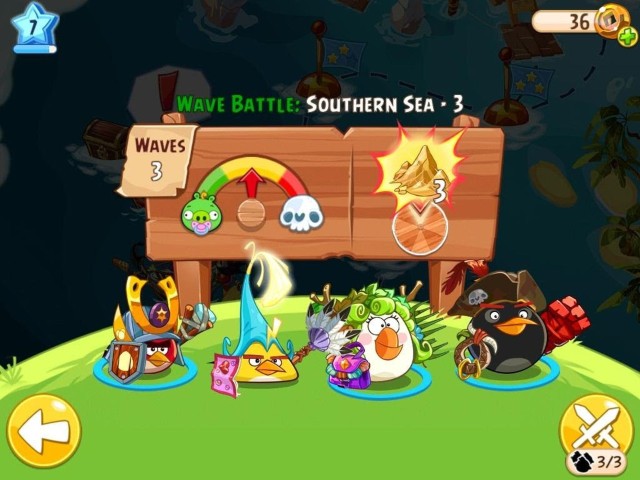 The screen showing information about the upcoming battle.
Combat system differs greatly from the previous installments of the Angry Birds series. Combat in Epic is that of a pure turn-based RPG game - first you get to move your whole team, then it's the enemy's move, after which the action comes back to you.
Before you even enter the battlefield, you can adjust your team accordingly. You can send only 3 birds to battle at once - those, which are currently selected to be used in battle have a little blue circle below them. If you want to choose different birds than those already selected, tap once the one you want to deselect - afterwards, select the one you want to bring to battle. Remember, that the equipment, as well as the class of the birds (being their hats) can only be chosen before the battle, from the menu available from the global map (click the egg icon in the lower right corner of the screen, then click on the desired bird to adjust its equipment).
On the screen directly before the battle, pay attention to some of the details visible there. In the middle of the screen, there's a board showing information about the upcoming stage:
Waves - the number of enemy waves, which you must defeat to complete the given stage. Remember, that you are not healed in between the waves, as well as you can't change the equipment, or the birds.
The difficulty level, represented by the arrow. If the arrow is on the yellow field, you will win the fight without much effort, if it's on green then you will have a very easy time, but you will not get rewarded as much. If, however, the arrow is on the red field, it's almost certain that you will lose the fight, that you will have to use a lot of consumables, or that you will end up with a bad score. In general, it means that you should just avoid entering the red fights.
At the end of the board you have the "main prize" presented - it can be a rare material, or a chest. You have to draw it from the wheel of fortune to get it, obviously.
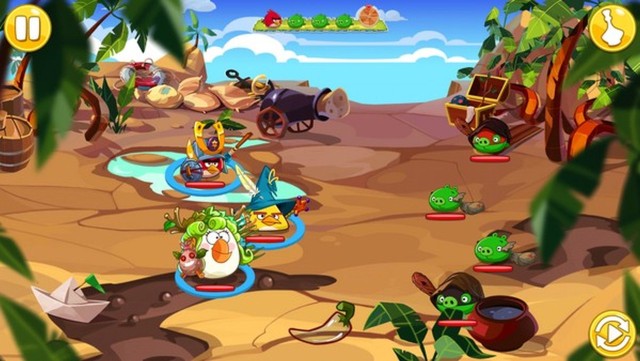 And this is how the actual combat looks like.
The combat itself is fairly simple - you issue your orders, by drawing a line with your finger from a given bird to a specific target. If the target is an enemy, he will be attacked, but if it's an ally bird, you will support him with the additional skill of a bird. You can just tap the bird, which will activate his secondary skill on himself. The combat continues until one of the sides is unable to continue - if it's you, you lost the fight, if it's the enemy you've won.
In the upper right corner of the screen (during combat) you will find a potion-like icon - after clicking it, a menu with consumables will be shown. You can use them to heal your birds, inflict damage onto enemies, or just enhance the experience gain for one battle. Use them wisely, as they can change the tide of the battle, but aren't the cheapest to use, especially at the beginning. The button in the upper left corner of the screen pauses the game, and the one in the lower right issues an auto-pilot like mechanism - the A.I. will continue with the fight.
Here's a bunch of tips that can be of some use to a beginner:
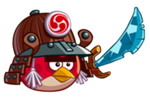
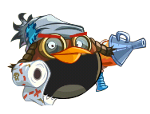
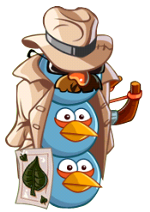
 Prince Porky.
Prince Porky is the first boss you will encounter in the game. He doesn't have any special attack, which you must learn how to counter before you even want to think about defeating him. You can tell that he's just a bigger, stronger version of a regular pig - he hits harder, he has a lot of hit points, as well as a nasty passive ability.
The ability is called Dodge, and it allows Prince Porky to avoid damage above a certain threshold (the amount changes with every boss encounter). It means, that a hit can only deal as much damage, as the threshold allows - if it exceeds it, any damage above it is ignored. It means, that using a Rage Chilli on birds inflicting huge damage with it (like Red or Blues) is simply useless.
Apart from the annoying dodge, the boss has a triple attack pattern (Vicious Backstab) - the boss performs a series of 3 quick attacks, inflicting a set amount of damage (again, the amount of damage done varies in between different encounters with the boss).
Starting from your 3rd encounter with the Prince, he will be able to use a new ability called Tit for Tat, which increases his damage dealt and taken by 25% for 3 turns. With the eight boss encounter, he will be able to use another ability : Holy Hand Grenade. This grenade allows him to inflict enormous damage onto every enemy.
To defeat him, it's good to:
A recommended team would be : Red (with the Avenger / Knight class), Chuck (Mage) and Matilda (with the Bard class, to stun the enemy from time to time, or with the Princess, to heal Red easily)
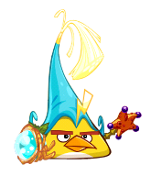
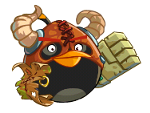
 Wizpig, in his "normal" form.
Wizpig is a rather annoying fellow, especially with the first encounters of the boss. His arsenal of attacks consists of:
Fighting with Wizpig is not really that hard, as it is annoying and time-consuming - the enemy will heal all the time, as well as you will have to fight with dozens of reinforcements. The most important thing is to stop his charged attacks (Black Storm and Black Magic), by using a stun (by using certain types of weapons, or Matilda's class - Bard).
The recommended team for this battle is: Red (with the Paladin class, so that he can heal your party members with his attacks, as well as protect them if it's needed), Matilda (especially with the Bard class, to be able to heal your whole team, as well as stun the enemy), and Blues (with Tricksters class, so that you can easily debuff your enemies / allies).
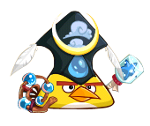
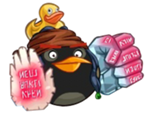
 And here's the fat king of the pigs.
The King Pig itself poses zero threat - the fact that matters is that you will be fighting with him, accompanied by the rest of the bosses, Wizpig and Prince Porky.
The only attack that you must watch out for is Burp - the fat king will attack your bird with it, inflicting minor damage, but blocking the ability to use a Rage Chilli by that bird. Use a bird with a debuff ability to get rid of this pesky effect, because without the Rage Chilli, fighting bosses is way more difficult.
During the actual combat with the King Pig (or rather with every single boss at the same time), focus your attacks on Wizpig, and after that on Prince Porky - you can leave the fat king as a dessert.
The recommended team would be: Red (with a Knight, or Avenger class, so he can force all the enemies to attack him, or eventually a Paladin, so that you will be able to heal some wounds with him), Matilda (with the Bard class, to be able to heal your whole party and stun the enemies), and Blues (with the Tricksters class, so that you can easily debuff yourself or the enemy).
Red is the main bird, with which you start the game (at the very beginning you have him at your disposal). In the world of RPG, you can simple say that he's a warrior - he fights by using a one-handed weapon and a shield, inflicts moderate damage and has the best defensive capabilities of all of the birds available in the game. Great deal of his abilities allow him to divert the enemy attention onto him, decrease the damage inflicted by the pig's attacks, as well as increase the defensive capabilities of your team.
Red can choose from 5 classes (6th is a Japanese-themed Knight) - Knight, Guardian, Samurai, Avenger, Paladin, and the specifically made for the Japanese players Ronin, which is fairly the same as a regular knight. After using a Rage Chilli on Red, he will jump onto the enemy with the highest amount of hit points, hitting him for 500% damage.
Knight
Abilities
How to unlock
Attack - Red jumps to target enemy and deals damage equal to 115% damage. Enemy cannot target anyone other than Red for the next 3 turns.
Protect - Red encloses himself or target ally with a shield. All incoming attacks will deal 55% less damage to the target. The shield remains active for 2 turns.
This class is available from the very beginning.
The class available from the very beginning of the game - starting your playthrough, you have only Red in this class at your disposal. The Knight class is perfectly suited for the role of a tank - he can dish some serious damage, at the same time forcing the enemy to attack him, instead of other birds. Additionally, Red can protect himself or an ally with a shield, which drastically decreases received damage.
The main drawback of using a Knight is the fact, that you will be getting all the enemy attention on Red alone, which, without proper care, can quickly end in the death of the bird - some enemies can inflict gigantic damage, taking as much as half of your bar in one go. The Protect ability, regardless of its insane defensive capabilities, is a single-target spell, so you won't be able to protect everyone.
Usage : this class comes in handy especially when you are fighting tough, small groups of enemies, like Brute, or during your fights with bosses. If you are going to face a huge group of weak enemies, or those who can inflict AoE damage, change the class immediately.
Guardian
Abilities
How to unlock
Overpower - Red jumps to target enemy and deals damage equal to 95% AD. Lowers the target's attack damage by 25% for 2 turns.
Aura of Fortitude - Red shields all allies with aura. The shield takes 25% less damage. The shield remains active for 3 turns.
You can buy it off from a trainer in Cobalt Plateaus, for 100 Snoutlings.
The first class available to buy allows you to change the looks and skills of Red. Just like the previous one, Guardian works especially good in the role of a tank (but a little weaker than the previous one) - the damage he inflicts is a little lower, but each attack debuffs the enemy, weakening his attacks by 25% (unfortunately, the effects won't stack), and the aura allows you to decrease the damage received of all of your birds (not just one).
Unfortunately, the shield isn't as strong as the defensive skill of Knight, which means that your team will still receive a lot of damage. Guardian's attack decrease the damage of the enemy, but the effect is rather short, and, what's the most important - you won't force the enemy to attack Red anymore.
Usage: Guardian will be a good choice in two scenarios - when you are facing a whole lot of enemies, and when you are fighting an enemy (or enemies) using AoE attacks to hurt your whole team.. The aura will decrease that damage to some extent. It's good to have him during fights with more powerful enemies, as he can debuff them, making them weaker, but you must never forget, that the enemy can still hit a vulnerable bird, killing it instantly.
Samurai
Abilities
How to unlock

Dragon Strike - deals 3 x 50% damage.
Defensive Formation - Target bird receives 50% less damage, and all other birds receive 40% less damage. Lasts 1 turn.
You can buy it off from a trainer in Limestone Lagoon, for 115 Snoutlings.
The first strictly offensive class of Red - his attack inflict some serious damage, but they don't carry any special effects. You must also remember, that Red will attack 3 times - each attack has a chance to inflict some negative effect on the enemy (like critical hit, breaking your attack on a nearby enemy, stun, etc.). The samurai has the most powerful defensive skill in the game, allowing him to decrease damage taken by the whole team nearly by half, which will make the enemies attack's less effective.
The advantages of this class are both its drawback - Red's attack, regardless of how powerful it is, doesn't inflict the enemy with any negative status alignment, and the fact, that he attacks 3 times, may bring trouble onto your team (when the enemy is protected by certain spells, for instance). Defensive Formation is useful only when you are certain, that the enemy will attack in the same turn, because the effects last only for 1 turn. It will force you to think about defending your team, or leashing out a powerful attack.
Usage : Samurai is especially good in fights, in which the enemies are using extremely powerful and/or area of effect attacks, especially if they need a few turns to charge them up - all you have to do is to use your Defensive Formation just before their attack, to cut their damage almost in half. Unfortunately, Samurai is fairly weak when fighting with a group of weaker enemies, as his attacks allow him to only attack 1 enemy at the time, not inflicting them with any status, and his shield lasts only 1 turn.
Avenger
Abilities
How to unlock
Revenge - Deals 80% damage. This damage is increased by 2% per 1% lost health.
I Dare You! - Forces all enemies to attack target bird. Target takes 20% less damage. Lasts 2 turns.
You can buy it off from a trainer in Old Nesting Barrows, for 1000 Snoutlings.
The class which can be called a berserker - Red's attacks are stronger with each missing health points of the bird. Additionally, he has an extremely strong defensive ability - it allows him to force all of the enemies into attacking a selected bird (or Red himself). The ability itself, regardless of how risky it is, can save your butt in various situations, not to mention that it will make Red more powerful - when the enemies focus their attacks on him, he will lose a lot of his hit points, meaning that his next attack in the next round will be more powerful (and after the attack you can heal him, so he won't die).
The main drawback of the Avenger is the fact, that his damage is connected with how much health he is missing. It means, that for him to be an effective fighter, you will have to keep him below 50% hit points (without it, other classes available to Red are more powerful), which can end up tragically, if you don't have enough healing at your disposal. His secondary ability, I Dare You!, can wreck havoc in your team, especially when you use it on a wrong target - 20% decrease in taken damage won't really help if you use it on Chuck, who lacks defensive capabilities and has a low pool of health points.
Usage : this class comes in handy, if you have enough healing to sustain the onslaught of enemy troops, because you will have to keep Red on low health for him to be effective. Avenger works wonders if you're not facing any enemies with AoE attacks - the enemy won't be able to attack anyone but the target selected by the I Dare You! skill. This skill can be connected with, for instance, Chuck's electric shield, which will inflict some extra damage on every enemy that attacks the target of Red's ability, or with Matilda's skill, which will allow Red to heal a little health back with each attack.
Paladin
Abilities
How to unlock
Holy Strike - Deals 135% damage. Most hurt bird is healed by 40% of dealt damage.
Devotion- Target receives 35% less damage and the Paladin takes the damage instead of the target bird. Lasts 3 turns.
You can buy it off from a trainer in Old Nesting Star Reef, for 60 Lucky Coins.
This is a strictly support class, but with an enormously powerful attack. Red's attacks, besides inflicting serious damage onto the enemy, heal the most wounded bird (with a proper equipment, upgrades and skills, it can heal gigantic amounts of health back). The secondary skill, Devotion, allows him to protect the target from any harm - instead, all the damage is redirected to Red, decreased by 35% in the process.
The biggest drawback of this class is the fact, that you won't be able to shield your whole team at all times (as the effect lasts 3 turns only), and if you sacrifice your attacks to shield your allies, you won't be able to inflict any damage (and heal).
Usage : the class is effective only when you are not facing an enemy with AoE attacks, because you won't be able to heal everyone, and the effects of Devotion would be less noticeable. Paladin works wonders when fighting numerous foes - in a normal situation, you wouldn't be able to shield your other birds, but thanks to Red's Paladin, your birds (especially Chuck and Blues) won't have to worry about the enemies. If you are facing an enemy with a strong AoE attack, change the class.
Ronin
Abilities
How to unlock
Attack - Deals 125% damage, forces target to attack Red for 3 turns.
Protect - Target receives 55% less damage, last 2 turns.
Available only to the Japanese version of the game. Available from the very beginning.
An exclusive class, available only to the players from Japan - it's a little empowered version of the Knight. The only difference is a slightly stronger version of Attack skill - instead of doing 115% damage, Ronin does 125%.
Usage : this class comes in handy especially when you are fighting tough, small groups of enemies, like Brute, or during your fights with bosses. If you are going to face a huge group of weak enemies, or those who can inflict AoE damage, change the class immediately.
Chuck is the first additional bird to unlock in the game. It can be characterized as a plain mage - he uses spells during combat, has enormous offensive capabilities (especially versus numerous foes), but he's practically the weakest when it comes to defense from all the birds. His attacks allow him to attack all of the enemies at once, while simultaneously inflicting them with negative effects (or purging the positive ones), and his secondary skills allow him to support his allies (what you will read about in the further part of this section). Chuck is both the supporting, and an AoE damage dealer character.
Chuck has an access to 5 classes - Mage, Lightning Bird, Rainbird, Wizard and Thunderbird. After using a Rage Chilli on him, your birds will randomly attack 5 foes (it won't use their move, only Chuck's).
Mage
Abilities
How to unlock
Storm - Chuck deals damage equal to 55% AD to all enemies, regardless of who is targeted.
Shock Shield - Chuck encloses himself or target ally with an electric shield. Enemies who come into contact with the target are dealt 75% of Chuck's AD. The shield remains active for 3 turns.
This class is available to you from the very beginning, as Chuck joins your team.
The first class available to Chuck. As most of his classes, it allows you to attack every foe on the battlefield, regardless of the target you selected. Additionally, regardless of the fact that it doesn't inflict any negative effects to the enemies, it steal does a lot of damage. What's more interesting, is his secondary ability - it allows him to shield a selected bird, and whenever an enemy attacks the bird, it will be hurt by the shield. What's more important, is the fact that the shield kicks in for each enemy attack - if the enemy has a triple attack, he will be hit by the buff the same amount of times!
The drawback of this class, even if he is able to attack every target on the screen, is that Chuck does fairly low single target damage. Additionally, those attacks do not carry any negative effects. Shock Shield, even though that it's extremely fun skill, loses its power the moment another bird joins the party, as you can protect one bird in each turn only, meaning that you will have to sacrifice your attacks to shield your birds all the time.
Usage : this class is especially useful whenever you're fighting a huge group of weaker enemies, as Chuck excels at AoE damage, allowing him to hurt every foe on the screen. His Shock Shield can be connected with other abilities, or bird classes, such as Red's Avenger - after you've used your shield on him, all you have to do is to use I Dare You! of his Avenger class and watch how the enemies charge at him, killing themselves in the process. If you are going to fight with a single, stronger enemy, change the class immediately.
Lightning Bird
Abilities
How to unlock
Energy Drain - 65% chance to immediately remove helpful effects from all enemies. Deals 45% damage.
Lightning Fast - Target bird immediately attacks a random enemy.
You can buy it off from a trainer in Old Nesting Cobalt Plateau, for 115 Snoutlings.
The Lightning Bird class has an access to a powerful attack - it's not dealing enormous amounts of damage (but it's still damage), but allowing you to take out the positive buffs from every hit enemy. 65% chance is more than enough for it to succeed. The secondary ability is not that flashy, but it can be useful if you use it on a proper bird.
Unfortunately, this class has more drawbacks than advantages. The only good ability is the possibility of taking out all of the positive buffs from the enemies, but apart from that, this class has nothing that would warrant taking it into your party. The damage from the attack is tiny (especially when you fight against smaller groups of more powerful enemies), and the secondary skill, given the fact that the targeted bird attacks a random target, is fairly useless, and it can bring more havoc than benefit.
Usage : this class is usable only when you are fighting with a large number of enemies with various buffs, enhancing the capabilities of their allies. Thanks to one attack, Chuck can get rid of all of those buffs, leveling the playing field. If you are facing an enemy who lacks those kinds of abilities, or the group of enemies is rather small, change the class immediately.
Rainbird
Abilities
How to unlock
Acid Rain - Deals 20% damage to all enemies. Targets also take 35% damage per turn for the next 3 turns.
Healing Rain - Removes all harmful effects from target. All birds are healed by 20% (Based on Chuck's HP) health.
You can buy it off from a trainer in Pirate Coast, for 200 Snoutlings.
Rainbird is even more focused on supporting his teammates than his previously described class. His main attack does pretty low damage, but at the same time it sets a Damage over Time effect on every enemy hit (besides pirates, who are resistant to DoT effects), inflicting damage on them each turn. His Healing Rain is even more useful to the team. It allows him to dispel all negative status effects from the whole party, healing them at the same time, making this one of the most powerful healing abilities in the game - it's also the only direct healing ability (you don't have to attack anyone, or let them attack you, or meet any other condition).
The only drawback to this class, is the fact that the Damage over Time effect is not effective on some of the enemies, meaning that Chuck's damage will be severely lowered on them. Besides this, this class is probably the best for the yellow bird.
Usage : probably the best class available to Chuck, if you are looking for someone who can successfully support the rest of the party. His attack, given his DoT nature, allows him to focus more on healing - all you need to do is to attack the enemies every 3 turns, which will allow you to keep the DoT effect on them, while healing your party in between.
Wizard
Abilities
How to unlock
Chain Lightning - Deals 100% damage. Lightning strikes 3 other targets, getting weaker with each jump. (Each jump deals 67%, 45%, 30% damage. Target is selected randomly.)
Energize - Each attack on the target fills the Rage Chili by 5% and has a 20% chance to stun the attacker for 2 turns. Lasts 3 turns.
You can buy it off from a trainer in Snowy Peak, for 500 Snoutlings.
Wizard is Chuck's most powerful class, as far as the offensive capabilities go. His attacks deal surprisingly high damage, and while hitting a maximum of 4 targets at once, they still allow him to get rid of a group of enemies with ease. The most important ability of this class is Energize, allowing him to fill the Rage Chilli bar extremely fast, giving a high chance to stun an enemy at the same time.
The obvious drawback is the fact, that in contrast to the rest of his classes, this one does not allow him to attack all of the enemies at once, and, in unlike most of them, don't impose any negative status effect on pigs. At the same time, Energize ability is pretty useless, if you cast it on an someone who isn't then attacked by anyone.
Usage : this class come in handy when you are dealing with less numerous groups of enemies (when there's from 2 to 4 of them at once), and when you need to fill your Rage Chilli quickly. You can link this class with Red's Avenger - after using I Dare You! the enemies will attack like crazy, and your Rage Chilli bar will be full each turn. Additionally, at least one of the enemies attacking will surely get stunned. This class is extremely useful when dealing with enemies who have Area of Effect attacks - casting energize on all your birds, before they are AoE attacked, will fill your Rage Chili Bar instantly as well, and will guarantee you the stun on the attacking enemy.
Thunderbird
Abilities
How to unlock

Thunder Clap - Deals 45% damage to all enemies. The selected target takes +25% damage for 3 turns.
Rage of Thunder - Enemies attacking any birds receive 35% damage per attack. Lasts 3 turns.
Giant Red Vallet, after crossing the Friendship Gate, for 275 Lucky Coins.
Extremely expensive and problematic class to unlock, at the same time being the best of all available to the yellow bird. His attacks, besides the obvious damage, lay a curse on the whole enemy party, which make them take more damage from succeeding attacks. His second ability, Rage of Thunder, is basically an upgraded version of Shock Shield available to his Mage class - you don't have to select a bird, because all your party will have the shield casted on them, dealing damage to enemies with each hit.
One could say that this class has no flaws - it deals extremely high damage (with regular attacks, as well as with the shield), allowing you to harass the enemy team all the time. If only that price wasn't so high...
Usage : Thunderbird comes in handy in each scenario, both when you are fighting with a few stronger and resilient enemies, as well as when you are dealing with a huge group of weaklings. His Thunder Clap ability allows you to decrease defense of enemies, which is invaluable during boss fights, and the shield will hurt anyone who dares to attack your party. Remember, that the shield hurts the enemy for each attack they make - if you are fighting against a group of enemies who have a 2 or 3-hit attacks, they will practically kill themselves off of your birds.
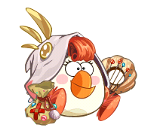
Matilda is the second bird you are able to unlock in the game. According to RPG-like standards, she is basically a healer. She has a whole bunch of supporting abilities - various types of healing (by attacking enemies, when your birds are getting hurt, or by directly targeting a given bird), and she can still pack a decent punch.
Matilda has 5 different classes available to her - Cleric, Druid, Princess, Priest and Bard. After using a Rage Chilli on her, she will heal every living party member by 35% of their maximum health, dispelling any negative effects as well.
Cleric
Abilities
How to unlock
Healing Strike - Deals 100% damage. All birds are healed by 20% of the dealt damage.
Healing Shield - If any bird takes damage, all birds are healed by 15% of the taken damage. Lasts 3 turns.
This class is available to you from the very beginning, as Matilda joins your team.
The basic class available to Matilda, with which she starts when she joins your team. Her basic attack deals quite a lot of damage, healing every bird in your party by 20% of the damage dealt, which is quite a nice thing about this attack. Healing Shield dons a shield on your entire party, which doesn't heal insane amounts of health, but will still come in handy as a support skill.
Her Healing Strike is quite a good ability, but her shield, given quite a low amount of healing it offers (which is even more bothersome when you are getting hit from single, powerful attacks and the shield can't keep up at all). Don't forget tough, that her shield acts like some sort of damage mitigation - if it restores 15% of received damage, it works like it would basically reduce damage taken by 15% (healing the birds which were not hit at all too).
Usage : this class is useful only at the beginning of the game, when you don't have access to any other Matilda's class - and as some of them are extremely strong, you are surely going to switch very soon. Cleric class is effective only when you are facing a group of enemies attacking you with Area of Effect abilities - when all 3 of your birds get hit, all your party will be healed by 45% of damage dealt (for each bird that was attacked - 15% x 3), meaning that AoE attacks become practically useless. Add Red's Guardian class to that, and with his aura and Cleric's shield, the enemy won't be dealing any damage through AoE attacks.
Druid
Abilities
How to unlock
Thorny Vine - Deals 35% damage. Target also takes 100% damage per turn for the next 3 turns.
Regrowth - Heals target by 22% of Matilda's HP and all other birds by 10%.
You can buy it off from a trainer in Limestone Lagoon, for 200 Snoutlings.
The first additional class available to Matilda, offering you a set of more interesting skills, at least in contrast to the previously described Cleric. Her attack, Thorny Vine, at first glance deals quite a low damage, but lays a Damage over Time effect on the enemy, this time hurting the enemy quite a lot. The duration of the skill will allow you to "poison" at least a few of enemies constantly. Her second ability, Regrowth, will heal all of your birds (double healing on the selected bird), which will save your party more than once.
Unfortunately, every rose has thorns. As far as no one can't really have any complaints regarding her basic attack (attacking a single target will deal over 300% damage to it during 3 turns!), her healing from Regrowth is in the best case average. 10% of health restored on every bird can be quite tempting, but it will turn out that every enemy, even the weakest ones, is able to do this amount of damage with a single attack. Basically, it means, that the healing become completely ineffective if the enemy focuses attacks on one of your birds.
Usage : this class is effective only when you have another healing bird in your party (Rainbird Chuck, for instance) besides Matilda, and you are seeking a high amount of damage on a single target at the same time. The druid comes in handy when you are dealing with a group of enemies using Area of Effect abilities - it's easy to heal them. When you are fighting a small group of extremely powerful enemies, you should really consider changing her class.
Princess
Abilities
How to unlock

Royal Order - Deals 125% damage. Forces all enemies to attack the bird with most health for 3 turns.
Royal Aid - Removes all harmful effects from target bird. Target is healed by 30%.
You can buy it off from a trainer in Star Reef, for 250 Snoutlings.
The Princess class is focused more on supporting and crowd control than any other Matilda class. Her attack, aside from dealing damage, forces all the enemies to attack a bird from your party with the highest amount of health (which means that it will be either Red or Bomb to get flooded with attacks). Her additional ability is healed by a high amount, dispelling all negative status effects imposed on the bird as well. A pretty useful ability.
But as with any class in this game, this one is not free of flaws. Her attack, despite that it can look awesome from the description, can have extremely serious consequences - you can be fighting against an enemy with a powerful attack, who will attack the least durable bird from your party (because that one bird will have the highest amount of health at the moment), which will result in his death in one blow. Her healing has one serious drawback as well - it's quite powerful, but it can only affect a single bird, which makes the ability useless when you are dealing with a group of enemies with Area of Effect attacks.
Usage : this class is useful when you are dealing with single, extremely powerful enemies (which doesn't happen very frequently). The single-target healing allows you to regenerate any sustained damage, and her attack will cause the enemy to attack a selected bird from your party (it's easy to control this when you are dealing with a single enemy). If there's more of enemies, and / or they have AoE attacks, change her class.
Priest
Abilities
How to unlock
Angelic Touch - Deals 2 x 55% damage. Birds attacking this target regain 5% of their maximum health. Lasts 3 turns.
Spirit Link - Connect to target bird. All connected birds share received healing (except potions). Lasts 3 turns.
You can buy it off from a trainer in Cobalt Plateaus, for 2000 Snoutlings.
One of the most powerful classes available to Matilda, allowing for a more offensive approach, as well as keeping your party safe and sound. Her attack, while dealing quite a lot of damage, has a very important feature - every bird that attack the target marked by Matilda will be healed for each attack they make. Her Spirit Link is equally interesting - every bird connected with Matilda will be healed by the same amount of healing, whenever any of the connected birds uses a healing ability.
It's hard to talk about drawbacks with this class - the only thing that could have worked better is Spirit Link, if it connected all the birds together with a single usage, but that would be overkill for sure.
Usage : this class comes in handy in practically every scenario, especially when there's a small group of powerful enemies fighting you, and / or when they have access to strong Area of Effect abilities. Whenever Matilda connects with another bird via her Spirit Link, and then attacks an enemy with her Angelic Touch, both birds will be healed by 10% of their maximum health. The possibilities to link those skills are endless.
Bard
Abilities
How to unlock

Heavy Metal - Deals 160% damage. 15% chance to stun the target for 1 turn.
Soothing Song - All birds are healed by 10%. They also heal for 5% health per turn for the next 3 turns.
You can buy it off from a trainer in Northern Sea, for 75 Lucky Coins.
Without a doubt, the most powerful class available to Matilda. Her basic attack, Heavy Metal, aside from dealing huge amounts of damage (one of the strongest attacks in the game), has a chance to stun the enemy, which may turn the tide of any battle, especially with bosses. Her secondary skill allows you to heal the whole party, and lays a Healing over Time effect on your birds for 3 turns, which lets Matilda do what she does equally good - pounding enemies with her attacks.
Just as with the previously described class, this one has no drawbacks. The moment you unlock the Bard class, you won't even want to switch it to anyone else.
Usage : this class comes in handy in every scenario, regardless of the type and amount of enemies you are facing. If you are dealing with a small group of powerful foes, her attacks, which have a chance to stun (you can increase the chance to 20% with a proper equipment) will make your task a lot easier, and when you will be facing a large group of weaklings, you will be easily able to keep your party healthy. They say that there's nothing perfect, however this class certainly is.
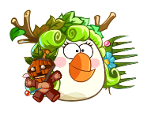
Bomb, the big, black bird is the penultimate one to unlock. He is basically a mix between an offensive and supporting character - a lot of his abilities strengthen his allies, changes the mechanics of their attacks, or weakens the enemies. Some of his abilities are tied with his health pool - if you want to maximize the effects of those attacks, you will have to focus on making his health pool as big as possible.
Bomb, like the rest of your birds, has 5 classes available - Pirate, Cannoneer, Berserk, Cap'N and Sea Dog. After using a Rage Chilli on him, Bomb will deal 150% damage to every enemy on the battlefield.
Pirate
Abilities
How to unlock
Pummel - Deals 100% damage to a single target.
Arrr! - All birds' attack power is increased by 25%. The effect lasts 3 turns.
This class is available to you from the very beginning, as Bomb joins your team.
The first class available to this huge bird, but at the same time unremarkable in any field. His attack does not have any special ability attached to it, besides dealing average damage to a single enemy. His secondary ability appears to be more interesting - 25% bonus to damage dealt is always welcomed.
Unfortunately, in comparison to his other classes (and especially to other birds) this class is very weak. His attack does average (at most) damage to a single target, and lacks any special properties, and the Bomb itself isn't very durable to compensate for his lacks in offensive capabilities with some profits in defense. His aura, which increases the damage of your birds by 1/4 is quite powerful, but it's not enough to take one of three places in your party.
Usage : if you really want to have him in your party, and you don't have any other classes of this bird, you can get him. If you are looking for effectiveness in combat, you shouldn't even consider having him in your party, as this class is useless.
Cannoneer
Abilities
How to unlock
Cover Fire - Deals 3 x 30% damage. Lowers target attack power by 20% for 2 turns.
Counter - Target bird counters enemy attacks with an attack of its own with 40% attack power. Lasts 3 turns.
You can buy it off from a trainer in Great Cliffs, for 250 Snoutlings.
The first additional class available to Bomb, which is way more interesting than his default one. His basic attack does a little lower damage, but aside from inflicting damage, it lowers the effectiveness of the target hit for two turns, which surely come in handy - especially during skirmishes against more powerful foes. The second one, Counter, allows you to enchant one of your birds, allowing it to counter every attack on that bird with his own, dealing average damage in the process.
The only drawback to this class is the fact that counter deals lower damage than Cannoneer's attacks - it's not always worthwhile to sacrifice your turn to enchant an ally (or the Bomb himself), sometimes it's better to just attack the enemy, given the fact that his attacks weaken the enemies.
Usage : this class comes in handy both when you are dealing with stronger enemies (thanks to his damage reducing attack), as well as when you are fighting with a large group of weaker enemies - it increases the chance that the bird enchanted with Counter will be attacked, allowing it to counterattack the enemy. Cannoneer is especially useful when you have Red's Avenger class in your party - after using I Dare You! and Counter on him, every enemy will start pummeling him, and he will be able to counterattack every time, dealing an insane amount of damage to them.
Berserk
Abilities
How to unlock
Enrage - Deals 85% damage. The damage is increased by 1% per 2% filled Rage Chili.
Frenzy - Target bird takes 15% of its maximum health as damage but all enemies receive the same damage.
You can buy it off from a trainer in Snowy Peak, for 500 Snoutlings.
A pretty interesting class of Bomb, which damage depends on a couple of variables. His basic attack, Enrage, does not deal insane amounts of damage, but as your Chilli Bar gets filled, the effectiveness of this ability goes up as well. When Rage Chilli is at the maximum, this ability allows you to deal 130% of damage to a single target. His secondary ability, Frenzy, sacrifices a portion of bird's maximum health, to severely wound all of the enemies.
Unfortunately, this class, despite quite interesting skill set, suffers from at least two reasons. The first one is the necessity to have your Rage Chilli bar filled, so that his attacks have any power at all, which in turn prevents you from using your birds' special abilities - if you use them, Berserker's damage falls down considerably. The second reason is that for Frenzy to be effective, you will need at least one of your birds to have a huge health pool - if that's not the case, the attack becomes ineffective as well.
Usage : given the drawbacks presented above, this class has a very narrow usage potential, which is limited not by the enemies you face like it is with all the classes, but with your playstyle and the amount of health your birds have. If you are able to provide at least one of your birds soldiers with a decent health pool, take Berserker - otherwise think about changing his class.
Cap'N
Abilities
How to unlock
Raid - Immediately removes all helpful effects from target. Deals 90% damage to a single target.
Whip Up! - Target bird takes 10% of its maximum health as damage but its attack power is increased by 60%. Lasts 3 turns.
You can buy it off from a trainer in Northern Sea, for 750 Snoutlings.
Probably the most powerful class available to this bird. His attack, Raid, allows him to, besides the obvious damaging part, dispel all the positive status effects from the target, which is effective when you are fighting with enemies with supportive abilities. Besides that, his secondary ability, Whip Up!, is the most powerful buff available in the game - you will have to sacrifice some of your birds' health, but it can be healed back instantly, and the effects are more than worth it.
This class has practically no flaws - maybe his attack could deal more damage, but with dispelling effect it would pretty much be an overkill.
Usage : if you want to have this big, black bird in your party, you should only do this with his Cap'N class. His abilities are not to be underestimated - the basic attacks will be an effective counter to those pesky enemy enchanters, while his Whip Up!, cast on the appropriate bird, will allow him to literally tear the enemy to shreds, even with a single attack.
Sea Dog
Abilities
How to unlock
Hulk Smash - Deals 125% damage. The damage is decreased by 1% per 1% lost health.
Gang Up - If target bird attacks, Black immediately attacks the same target. Lasts 2 turns.
You can buy it off from a trainer in Cobalt Plateaus, for 275 Lucky Coins.
The last class available to Bomb, while being equally effective to the previously described, there's a little catch to make it work properly. His basic ability, Hulk Smash, does huge damage, but its strength depends on Bomb's health pool. His additional ability, Gang Up, is a lot more interesting, as it allows Bomb to lay a special buff on any of his allied birds - if the targeted bird attacks, Bomb will attack the same target. The ability lasts 2 turns, so it's easy to cast it in between attacks, or just spam it alternately between his two allies - this way, Bomb will be able to attack two times during one turn.
The main drawback and the enemy of this class is, obviously, the loss of health. After his health pool is cut in half, so is his damage output - because of that, if you want him to be effective, you will have to work hard to keep his health at the highest level possible.
Usage : Sea Dog is especially effective, when you are not fighting enemies with a lot of Area of Effect abilities, because that way you will not be able to prevent him from losing health (and decreasing his damage output at the same time), and if you have a healer in your party, as well as a bird who can focus attacks on himself (some of Red's classes, for instance), meaning that Bomb will be able to do full damage. Otherwise, there's no point in keeping Bomb with this class - the risk of suffering damage is too high.
Trio of the blue birds is the last unit which will join your party. The birds are characterized by pretty low health pool, and overall poor defensive capabilities, but they more than make up for it with their offensive prowess. Blue is able to deal one of the highest damages in the game, at the same time having loads of different positive and negative status effects on their abilities.
Blues have access to 5 classes : Tricksters, Rogues, Spies, Marksmen and Skulkers. By using a Rage Chilli on the trio, you will cause a triple effect : one enemy will be severely injured (200% of damage), the second one will be stunned and the third one will have all his positive status effects dispelled.
Tricksters
Abilities
How to unlock

Itching Powder - Immediately removes all helpful effects from target. Deals 100% damage.
Cheer - Removes harmful effects from all birds. All birds' attack power is increased by 15%. Lasts 3 turns.
This class is available to you from the very beginning, as Blues join your team.
The first class available to Blues, at the same time being one of the best available to this group of birds. The basic attacks deals decent amount of damage, but the passive effect, allowing you to dispel all helpful effects from the target, is the main reason this ability is so strong. The second one is probably the best ability in the game - not only does it dispel all negative effects from your birds, but it also increases their effectiveness in combat for a couple of turns. What would you want more?
The only drawback of this class is that the secondary ability does not heal... But to be more serious, this class has no flaws at all. It's perfect.
Usage : it's especially useful when you are fighting with enemies who spam various curses and weaknesses on your birds, and / or enchant their own allies, casting buffs, which prevent or hinder your attempts at damaging them. If you are dealing with "normal" enemies, you should consider changing the class / bird, as this one does not offer a lot in regard to this matter.
Rogues
Abilities
How to unlock
Sticky Goo - Deals 30% damage. Target also takes 90% damage per turn for the next 3 turns.
Cupcake Trap - Forces all enemies to attack target bird and suffer 100% of their dealt damage. Lasts 2 turns.
You can buy it off from a trainer in Pirate Coast, for 200 Snoutlings.
The second class available to Blues, offering quite an interesting set of abilities. The basic attack does not deal a lot of damage, but it poisons the target, dealing Damage over Time for 3 subsequent turns. The additional ability is a lot more interesting - it forces the enemies to attack the selected bird, which can be used in a variety of ways.
This class can prove weak especially when fighting against Pirates - those types of pigs are resistant to negative status effects, that is why the poison won't do much damage to them, making Rogues a little useless. Additionally, reckless usage of Cupcake Trap can even lose you a battle.
Usage : if you are fighting with an enemy squad, which does not have Pirates in it, or enemies using Area of Effect attacks, and you have Red in your team (with Knight or Samurai class, so he can soak damage without any effort), take Blues with the Rogues class without second thought. The poison will deal huge damage in due course of those three turns, and Cupcake Trap will make the enemies kill themselves, provided that the bird you used it on survives the onslaught.
Spies
Abilities
How to unlock
Smoke Bomb - Deals 85% damage. All other enemies receive 35% damage.
Glee - Target bird is healed for 15% of all damage dealt to the enemies. Lasts 3 turns.
You can buy it off from a trainer in Winter Wonderland, for 300 Snoutlings.
The second class available to Blues, Spies, is a little less spectacular than the two previously described. Smoke Bomb allows you to attack the whole enemy team, and Glee can heal insane amounts of health if used properly.
"If" is a key word for this class, because a lot depends on this. The basic attack does pretty low damage (only the main target gets hit quite hard), especially because it does not offer any passive ability, like imposing a negative effect on the enemy. The effectiveness of the secondary ability depends on the amount of damage your birds can dish out. If they are low, you won't be able to effectively heal your birds - it will turn out that "normal" healing abilities are far better.
Usage : this class is useful only when your party is able to do huge amounts of damage to the enemy team, which will allow you to heal effectively. If you are not able to guarantee it, and you are going to fight against a small group of powerful foes, you should consider changing the class - Spies' attacks are weak if there's only a few enemies.
Marksmen
Abilities
How to unlock
Volley - Deals 2 x 35% damage. Target suffers 25% damage per attack. Lasts 3 turns.
Ambush - Target bird takes damage instead of Blues. If target bird is attacked, Blues counter with an attack of their own with 50% damage. Lasts 2 turns.
You can buy it off from a trainer in Banboo Forest, behind a Friendship Gate, for 500 Snoutlings.
Another class, another dose of mixed feelings. As far as the Ambush ability is pretty average (given the chance that neither Blues, nor the marked target are attacked, and the low damage of counterattacks), Volley is one of the strongest skills in the game, if you are able to utilize it properly.
Usage : this class' effectiveness depends on the rest of your party. If you have (besides Blues) Chuck and Red (especially with his Samurai class, allowing him to hit the enemy three times), you can choose this class without second thought. Besides Red, Chuck is of an equal importance to the success of this tactic, especially after you use a Rage Chilli on the yellow bird - it allows your team to land 5 random attacks on random enemies, thus they can deal gigantic amounts of damage (especially if you mark 2 or 3 enemies with the Volley ability, and Chuck will hit them with his lightnings). Otherwise, this class is quite weak.
Skulkers
Abilities
How to unlock
Weak Spot - Deals 90% damage. Target takes +30% damage for 2 turns.
Tricksy Trick - Target bird attacks a random target for 35% damage. Harmful side effects on this attack are applied to all enemies..
You can buy it off from a trainer in Nesting Barrows, for 150 Lucky Coins.
The last class, at the same time being quite uneven. Weak Spot deals moderate damage, but at the same time reduces defense of the target by 30% for a couple of turns, allowing the rest of your birds to deal more damage, which is especially important during skirmishes against more resilient enemies. Tricksy Trick is one of the most original abilities in the game, because it allows you to lay the effects of a given attack to the whole enemy team.
Unfortunately, everything (almost everything) has its flaws - Skulkers have them as well. Weak Spot does not work on Pirates, because they are immune to negative status effects, making this unit useless against them. Tricksy Trick, if it does not impose a negative status effect on an enemy, deals extremely low damage, making the usage of this ability quite risky.
Usage : this class is effective when you have the appropriate birds in your party. The perfect partner for Skulkers is Matilda's Bard class - her basic attack has a 15% chance (20% with the proper gear) to stun an enemy. Basically it means, that you have 20% chance to stun the entire enemy team for 1 turn! All the other abilities which decrease the damage output, defensive capabilities, or in any other way hinder the effectiveness of enemy troops can be spread on the entire enemy team.
 That's how the building you must travel to look like.
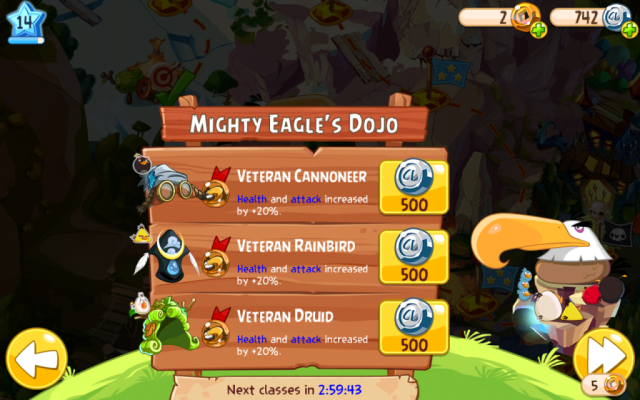
Upgrading your character classes in Angry Birds Epic is fairly simple - all you have to do is to find the right place to do so, have the required amount of given currency, and you should be able to upgrade your desired class. Before you can do that, however, you will have to defeat a single enemy - Sword Spirit. He is located in a place called Mighty Eagle's Dojo, which can be accessed after you've finished Old Nesting Barrows 4.
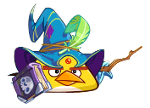
Sword Spirit
Abilities

Angry Bird - the enemy prepares for 3 turns, and then unleashes a powerful attack against one of your birds.
Fortify - decreases damage taken by 55%. Effect lasts for 3 turns.
Duel of Honor - prevents you from using potions.
Sword Spirit is no one else then Red, wearing some stylish clothing. The whole encounter would be a piece of cake, but there's one irritating thing about it - you can fight him with a single bird only (at least you can pick the bird you want). There's really no point to list the birds which are effective against him, because the fight itself isn't really all that hard, and every player has probably developed a liking to specific birds / classes during his / her playthrough.
The enemy starts the encounter by casting Fortify on himself - it severely decreases the damage you can deal to him. Afterwards, he will start preparing his signature attack - Angry Bird. Basically it means, that you will receive first dose of damage at 4th turn. If you managed to survive it, the next attack will come at you in 7th turn and so on. To increase the probability of success, you should choose one of the following birds :
The rest of the birds aren't really suited for this fight - Bomb does not deal enough damage, while Chuck is strong versus swarms of enemies, not a single foe. After the fight you will be shown a short cut-scene, and you will gain access to the secret Mighty Eagle's Dojo.
 And here's how the interior of the dojo looks like.
After entering the Mighty Eagle's Dojo, you should be able to see a list of the available upgrades. Each class in the game has access to 3 upgrades :
As you can see, the upgrades are worth the effort (by finishing the three upgrades, the damage and health of a given class is almost doubled), but they are extremely expensive, so you should really do them with care.
The other problem is that you can only upgrade 3 classes at once - afterwards, you have to wait 3 real-time hours. The clock starts ticking the moment you enter the building, not when you start any upgrade - that's why you should think twice before even entering the dojo. The clock can be restarted by paying 5 Lucky Coins.
Given the amount of classes available in the game (5 for each bird - 6th for Red is only a "remastered" version of the default class), you can upgrade the classes a total of 75 times. It means, that if you want to "max out" the game, a lot of work awaits you (or real-world expenses, to buy in-game currency).
Magic Cauldron allows you to brew various potions, which can then be used during your encounters. To gain access to this branch of crafting, you will have to acquire the mentioned Magic Cauldron. Don't worry though - you can't miss it, as the acquisition of the cauldron is associated with the main storyline, and the game itself will force you to use it at least once.
To craft an item, you will need the required materials, as well as a recipe, which can be bought at Professor Pig's Lab. Unfortunately, not all of the consumable items can be crafted - some of them can only be bought and / or found hidden in the chests, after fights. After crafting the item, a dice will appear on the screen, with a number of spots on it. Each spot increases the amount of product items you will receive by 1. Thus: 0 spots means 1 potion, 1 spot equals 2 potions (1 primal and 1 additional), and so on.
Additionally, the Magic Cauldron can be upgraded to Golden Cauldron, and further into Diamond Cauldron. The upgraded versions guarantee a set amount of dice's spots after the crafting.
Here's a table presenting the list of all the alchemy recipes in the game:
Icon
Name
Rank
How does it work
Req. level
Req. materials

Banana Juice
1
Restores 75 health points to one bird.
1
4x Vial
4x Water
5x Banana

Sea Berry Juice
1
Restores 120 health points to one bird.
5
4x Vial
4x Water
5x Sea Berry
2
Restores 150 health points to one bird.
7
4x Vial
4x Water
5x Sea Berry
3
Restores 180 health points to one bird.
11
4x Vial
4x Water
5x Sea Berry

Snow Apple Juice
1
Restores 210 health points to one bird.
14
4x Greater Vial
4x Crystal Water
5x Snow Apple
2
Restores 240 health points to one bird.
19
4x Greater Vial
4x Crystal Water
5x Snow Apple

Pig Cherry Juice
1
Restores 300 health points to one bird.
13
4x Greater Vial
4x Magic Water
5x Pig Cherries
2
Restores 350 health points to one bird.
17
4x Greater Vial
4x Magic Water
5x Pig Cherries
3
Restores 400 health points to one bird.
21
4x Greater Vial
4x Magic Water
5x Pig Cherries

Hot Veggie Cake
1
Fills the Rage Chilli bar by 25%.
8
10x Hot Tomato

Ustra Hot Veggie Cake
1
Fills the Rage Chilli bar by 50%.
12
10x Ice Chilli
4x Hot Tomato

Burning Hot Veggie Cake
1
Fills the Rage Chilli bar by 75%
16
4x Ice Chilli
10x Burning Pumpkin
4x Hot Tomato

Fruit Cake
1
Restores 200 health points to all birds.
15
8x Sea Berry
6x Snow Apple
10x Banana
2
Restores 225 health points to all birds.
20
8x Sea Berry
6x Snow Apple
10x Banana
3
Restores 250 health points to all birds.
22
8x Sea Berry
6x Snow Apple
10x Banana
4
Restores 275 health points to all birds.
24
8x Sea Berry
6x Snow Apple
10x Banana

Experience Potion
1
Doubles the experience gain during the next combat.
1
Unable to craft - you can only purchase it.

Mighty Eagle's Favorite Dish
1
Destroys all enemies on the battlefield.
1
Unable to craft - you can only purchase it.
Another branch of crafting, this time allowing you to craft various elements of attire - weapons and off-hand items. To gain access to this branch of crafting, you will have to acquire the mentioned Magic Anvil. Don't worry though - you can't miss it, as the acquisition of the anvil is associated with the main storyline, and the game itself will force you to use it at least once.
To craft an item, you will need (as with the previous branch) to acquire the recipe, as well as the required materials. Recipes can be bought, from various workshops scattered around the world, or they can drop as loot after battles. The materials are obtained after each fight, when you spin the Wheel of Fortune (remember, the more stars you receive at the end of the level, the more materials you will gain).
After crafting the item, a dice will appear on the screen, with a number of spots on it. Each spot increases the bonus the crafted item will receive. You can throw the dice as many times as you want (paying a single Friendship Essence each time) if the end result isn't what you were hoping for.
Additionally, the Magic Anvil can be upgraded to Golden Anvil, and further into Diamond Anvil. The upgraded versions guarantee a set amount of dice's spots after the crafting.
Here's a table presenting the list of all the recipes available to Red:
Icon
Name
Additional stat
Req. materials
Sword
Critical Strike: 15% chance to deal 50% bonus damage
-

Fork Lance
Chain Attack: 30% chance to attack an additional random target with 20% attack power
6x Wood
6x Seashell
6x Flotsam

Cobalt Hammer
Bedtime: 5% chance to stun target for 1 turn
6x Wood
4x Stone
2x Flotsam

Stick Sword
Critical Strike: 15% chance to deal 50% bonus damage
8x Stone
6x Wood
4x Flotsam
Shell Lance
Chain Attack: 30% chance to attack an additional random target with 20% attack power
8x Bamboo
6x Seashell
4x Flotsam

Duck Hammer
Bedtime: 5% chance to stun target for 1 turn
4x Flotsam
6x Stone
8x Wood
Paper Sword
Critical Strike: 15% chance to deal 50% bonus damage
7x Cobalt Stone
6x Wood
4x Cobalt Stone

Feather Lance
Chain Attack: 30% chance to attack an additional random target with 20% attack power
12x Bamboo
10x Seashell
8x Flotsam
Bell Hammer
Bedtime: 5% chance to stun target for 1 turn
Icon
Name
Additional stat
Req. materials

Shield
Vigor: Take 5% less damage
-
Lid Shield
Vigor: Take 5% less damage
6x Wood
4x Stone
2x Flotsam
Shell Banner
Might: Increase attack power by 5%
8x Wood
6x Seashell
4x Flotsam

Tire Shield
Vigor: Take 5% less damage
8x Stone
6x Wood
4x Flotsam
Star Banner
Might: Increase attack power by 5%
10x Bamboo
8x Seashell
6x Flotsam
Leaf Shield
Vigor: Take 5% less damage
8x Flotsam
12x Stone
12x Squarewood
Here's a table presenting the list of all the recipes available to Chuck:
Icon
Name
Additional stat
Req. materials
Staff
Critical Strike: 15% chance to deal 50% bonus damage
-
Feather Broom
Dispel: 20% chance to purge blessings on target
4x Wood
6x Seashell
2x Flotsam
Star Wand
Hocus Pocus: Heal by 10% of dealt damage
6x Wood
8x Seashell
4x Flotsam
Crystal Staff
Critical Strike: 15% chance to deal 50% bonus damage
6x Stone
8x Fossil
4x Flotsam

Sponge Broom
Dispel: 20% chance to purge blessings on target
8x Wood
10x Seashell
6x Flotsam
Stick Wand
Hocus Pocus: Heal by 10% of dealt damage
6x Flotsam
10x Seastar
8x Wood
Bubble Staff
Critical Strike: 15% chance to deal 50% bonus damage
12x Fossil
10x Stone
8x Flotsam
Icon
Name
Additional stat
Req. materials
Book
Might: Increase attack power by 5%
-

Cobalt Orb
Vitality: Increase max HP by 15%
4x Wood
6x Stone
2x Flotsam

Scroll
Might: Increase attack power by 5%
6x Wood
4x Stone
2x Flotsam

Book of Love
Might: Increase attack power by 5%
6x Stone
8x Scrolls
4x Flotsam

Skull Orb
Vitality: Increase max HP by 15%
8x Stone
6x Wood
4x Flotsam
Dark Book
Might: Increase attack power by 5%
6x Flotsam
8x Stone
10x Scrolls

Orb String
Vitality: Increase max HP by 15%
10x Stone
8x Wood
6x Flotsam

Fancy Purple Book
Might: Increase attack power by 5%
-
Here's a table presenting the list of all the recipes available to Matilda:
Icon
Name
Additional stat
Req. materials

Harp
Bedtime: 5% chance to stun target for 1 turn
-
Flower Comb
Dispel: 20% chance to purge blessings on target
4x Stone
3x Seashell
2x Flotsam

Wok O' Whonk
Critical Strike: 15% chance to deal 50% bonus damage
8x Slingshot Twig
6x Stone
4x Flotsam
Pink Comb
Dispel: 20% chance to purge blessings on target
10x Stone
8x Seashell
6x Flotsam
Twig Harp
Bedtime: 5% chance to stun target for 1 turn
10x Wood
8x Seashell
6x Flotsam

Round Ladle
Critical Strike: 15% chance to deal 50% bonus damage
8x Flotsam
10x Stone
12x Slingshot Twig
Icon
Name
Additional stat
Req. materials

Handbag
Vigor: Take 5% less damage
-

Voodoo Doll
Might: Increase attack power by 5%
6x Wood
4x Fossil
4x Flotsam
Purple Handbag
Vigor: Take 5% less damage
8x Seashell
6x Stone
4x Flotsam

Pig Doll
Might: Increase attack power by 5%
10x Fossil
8x Wood
6x Flotsam

Wonderlust Bag
Vigor: Take 5% less damage
8x Stone
10x Seastar
6x Flotsam
Here's a table presenting the list of all the recipes available to Bomb:
Icon
Name
Additional stat
Req. materials
Punching Glove
Hocus Pocus: Heal by 10% of dealt damage
-

Red Fist
Hocus Pocus: Heal by 10% of dealt damage
6x Stone
8x Seashell
4x Flotsam
Water Bomb
Chain Attack: 30% chance to attack an additional random target with 20% attack power
8x Seashell
6x Wood
4x Flotsam
Funnel Gun
Critical Strike: 15% chance to deal 50% bonus damage
10x Ore
8x Seashell
4x Flotsam
Ballooned Glove
Hocus Pocus: Heal by 10% of dealt damage
8x Stone
10x Seashell
6x Flotsam

Rocke Surprise
Chain Attack: 30% chance to attack an additional random target with 20% attack power
8x Flotsam
10x Wood
12x Corals
Icon
Name
Additional stat
Req. materials
Treasure Map
Might: Increase attack power by 5%
-

Jungle Charm
Vigor: Take 5% less damage
2x Fossil
6x Stone
4x Flotsam

Crinkly Map
Might: Increase attack power by 5%
6x Seashell
8x Scroll
4x Flotsam

Wooden Mojo
Vigor: Take 5% less damage
10x Fossil
8x Wood
6x Flotsam
Pencil Memo
Might: Increase attack power by 5%
12x Scrolls
10x Seashell
8x Flotsam
Here's a table presenting the list of all the recipes available to Blues:
Icon
Name
Additional stat
Req. materials
Bow
Critical Strike: 15% chance to deal 50% bonus damage
-

Fortified Sling
Dispel: 20% chance to purge blessings on target
8x Slingshot Twig
6x Stone
4x Flotsam

Straw Bow
Critical Strike: 15% chance to deal 50% bonus damage
8x Wood
10x Seashell
6x Flotsam

Smile O'Rang
Chain Attack: 30% chance to attack an additional random target with 20% attack power
10x Fossil
8x Seashell
6x Flotsam

Accurate Sling
Dispel: 20% chance to purge blessings on target
10x Stone
12x Slingshot Twig
8x Flotsam
Icon
Name
Additional stat
Req. materials

Warhorn
Might: Increase attack power by 5%
-
Orange Card
Vitality: Increase max HP by 15%
8x Scrolls
6x Seashell
4x Flotsam
Cornu Labium
Might: Increase attack power by 5%
10x Fossil
8x Stone
6x Flotsam

Hearts
Vitality: Increase max HP by 15%
10x Scrolls
8x Seashell
6x Flotsam

Twin Horn
Might: Increase attack power by 5%
12x Fossil
10x Stone
8x Flotsam

Fancry Red Card
Vitality: Increase max HP by 15%
14x Scrolls
12x Seashells
10x Flotsam
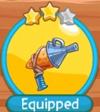
In Angry Birds Epic, the equipment can be acquired by crafting it, as well as by finding them by various means. While drawing items from the Golden Pig Machine, you can find rare items, belonging to a given set, which, besides granting you quite high stats, give a bonus when you collect an item from the same set. Each bird has an access to three different sets.
Protector's Aura - a set granting the allies an aura, which decreases their damage taken by 10%. To activate the set, you have to acquire Steel Force (sword) and Steel Wall (shield).
Grand Slam - a set granting a bonus to the stun effect from weapons, extending the duration of the stun from 1 to 2 turns. To activate the set, you have to acquire Titan's Wrath (Hammer) and Titangrip (Banner).
Dragon Breath - a set granting a 45% chance to deal additional 75% damage to all enemies. To activate the set, you have to acquire Drangtooth (lance) and Draconscale (shield).
Twin Lightning - a set granting a 60% chance to deal additional 50% damage to all enemies. To activate the set, you have to acquire Living Lightning (staff) and Lightning Tome (book).
Time Jump - a set granting a 10% chance that Chuck will be given an additional turn after taking action. To activate the set, you have to acquire Chronos (wand) and Chronometer (orb).
Reborn - if Chuck gets fatally wounded, he will be brought back to life (once during a single fight). To activate the set, you have to acquire Phoenix Feather (broom) and Phoenix Egg (orb).
Perfect Balance - Rage Chilli bar is filled 20% faster. To activate the set, you have to acquire Yin (comb) and Yang (handbag).
Nightmare - Stunned pigs receive 200% damage at the beginning of their turn. To activate the set, you have to acquire Doom (harp) and Demise (doll).
Sweet! - All friendly healing effects are 25% stronger. To activate the set, you have to acquire Honey Spoon (frying pan) and Honey Jar (handbag).
Scissors - 33% chance to deal 100% bonus damage to all targets. To activate the set, you have to acquire Rock (punching glove) and Paper (treasure map).
Sugar Rush - 15% chance per attack to heal all birds for 100% of the dealt damage. To activate the set, you have to acquire Candy Bomb (bomb) and Candy Chain (talisman).
Pickpocket - 30% chance per attack to steal a sum of Snoutlings. To activate the set, you have to acquire Golden Gun (pistol) and Golden Bullet (talisman).
Artillery Strike - if the attack is a critical strike, the normal damage bonus is increased by an additional 100%. To activate the set, you have to acquire Ballista (bow) and Ballista Bolts (war horn).
*BEEP* ATTACK! - a set granting a 45% chance to deal additional 75% damage to all enemies. To activate the set, you have to acquire Remote Controlled Robot (boomerang) and Remote Control (war horn).
Save Me! - if Blues get fatally wounded, they will be brought back to life (once during a single fight). To activate the set, you have to acquire The Sling (slingshot) and Angry Bird Plushies Angry Bird Plushies (lucky cards).
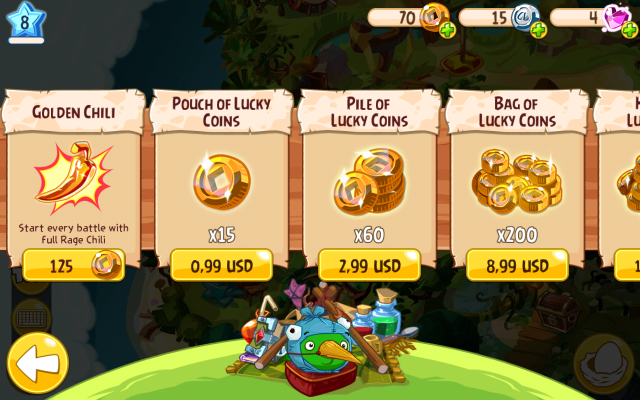 The in-game currency goes as follows : Lucky Coins, Snoutlings, Friendship Essences.
There are 3 types of in-game currencies : Snoutlings, Lucky Coins and Friendship Essences.
Snoutlings are the basic currency in the game, used to buy most of the stuff, like: new character classes, upgrades, weapon schematics, potion recipes, or some crafting components. Snoutlings are the easiest one to acquire - they are dropped after each battle you win, you can also collect a substantial amount of them from chests. Additionally, you can buy them using real-world money - there's no point to do so, however, as there are no problems to acquire this currency.
Probably the most important in-game currency. It allows you to buy the best items, such as the last character class upgrades, the most powerful classes to certain birds, or used to speed up some of the operations in the game (such as upgrading character classes and the need to wait 3 hours to do so again). The most important application for them is a mechanism called Golden Pig Machine, which you can learn about in the next section.
You can also use them to open Friendship Gates - you can read about them in the next sections as well. It's worth to preserve Lucky Coins - don't use them on everything you can, as they are hard to acquire.
Friendship Essence is an in-game currency, which can mainly be acquired with the help of your friends - by connecting the game with your Facebook account. You can acquire one essence from a single friend every 20 hours, so if you want to have plenty of them, there are two choices - you can create a new Facebook account and invite a whole mass of people playing Angry Birds Epic (this way you can acquire essences from hundreds of people each day - there's a lot of those types of accounts on Facebook), or prepare yourself to torture your friends with everyday spam from the game.
Friendship Essences can be uses to spin the Wheel of Fortune (drawing rewards after a won battle) again, or re-throw a dice during crafting. As with the Lucky Coins, don't spend them on everything in sight, as they are extremely valuable. It's best to keep them for later, when you will be trying to craft decent gear.
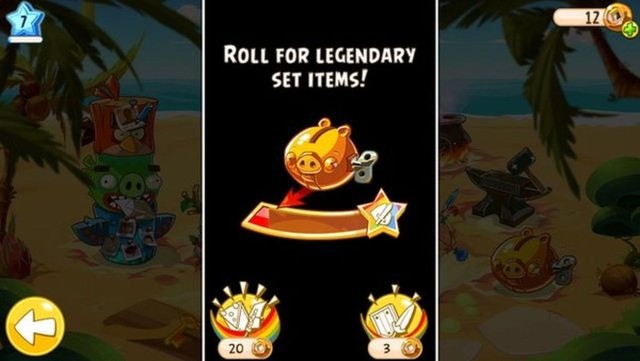 The bottom left corner shows the expensive roll, whereas the bottom right corner shows the cheap roll. Below the big there's the Rainbow Bar.
Golden Pig Machine is an item you receive after finishing Golden Field 3. It allows you to roll some random items (weapons and items held in off-hand slot). What differs it from Wheel of Fortune, is the fact that the items rolled here are a lot rarer - you can also roll a set item using this!
There are two ways to roll the machine, differing in the cost, as well as effect:
As can be seen, using the Golden Pig Machine is quite expensive, that is why it's so important to preserve Lucky Coins.
By spinning the machine each time, you will a bar called Rainbow Bar. When the bar is full, the next spin will have a 100% chance to roll an extremely rare, powerful item from a set. It means, that by spending 100 Lucky Coins, even if you are unable to roll anything in the process, you are guaranteed a unique item.
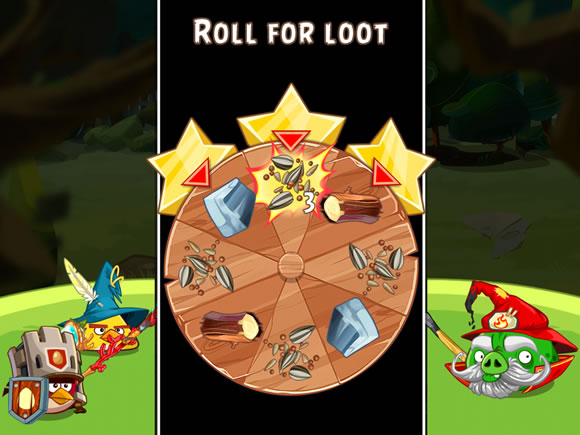 This is how drawing rewards from the Wheel of Fortune looks like. Three items marked with red arrows are pulled out.
The concept of wheel of fortune should be known to everyone - it is used to draw out rewards after each battle you've won. Depending on the result of the fight (the amount of stars you get), the system will allow you to pull out more rewards.
Each star you have been awarded with the ending score of a chapter increases the amount of items you can pull off from the wheel by 1. This is precisely why it's so important to achieve the best scores and the highest amounts of stars. The amount depends on:
After each battle you will be given a chance to spin the Wheel of Fortune - thanks to that, you will be able to draw a maximum of 3 items from the system. If the end result isn't what you were hoping for, you can spin the wheel again, but you will have to pay a single Friendship Essence for the service.
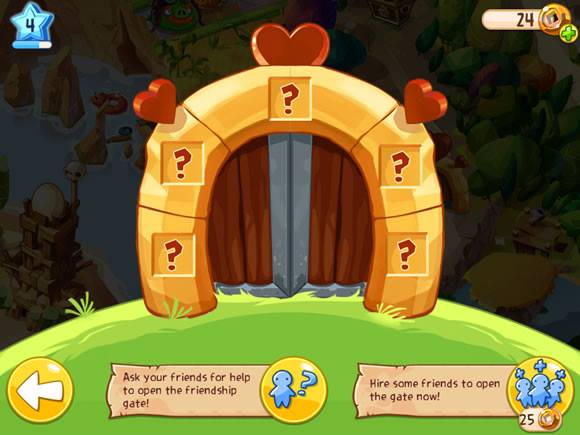 One of the gates. The bottom of the screen has 2 icons - one allows you to ask your friends for help, the other can be used to buy your entry.
Friendship Gates are gates that prevent you from getting into certain sections of the map. The whole game has 9 of them, and to cross each and every one of them you will have to meet one of those two conditions :
There's a short fragment, or to be more specific a few short missions behind each gate, and each of those missions is composed of number of enemy waves you must defeat. The encounters are more difficult than those you may stumble upon your journey. After completing the section, you will arrive at a chest, from which you can acquire a lot rarer items, like Lucky Coins, or extreme amounts of Snoutlings.
It's worth to open those gates and collect the treasures hidden behind them, as you can find interesting items there, as well as collect a serious amount of Snoutlings.
Proper selection of party members depends on the amount of classes you were able to unlock, and the items (or sets of items) which are available to you, but the most important factor are the enemies you are going to be facing.
Obviously, to unlock all the classes and items, you will have to spend hours after hours of strenuous gameplay, because you have to amass an insane amount of various currencies and materials to be able to unlock, buy and craft all the things. You can also buy those things by using your real money, but this route is for losers, right? :)
During the first few hours of your playthrough, you won't be able to create your dream team, because you won't have access to most of the elements and character classes available in the game. During the first several tens of minutes, you should have access to 3 birds : Red (with his Knight and Guardian classes), Chuck (Mage and Lightning Bird), and Matilda (with her Cleric class). By having access to those birds and classes, you can build two different teams.
The first one is :
The basic principle of this team is simple - cast a Shock Shield on Red, Matilda's Healing Shield on the whole team and try to keep the enemy's attention focused on the red bird by attacking the pigs. If the enemy does too much damage, if you focused too many enemies on Red, or when the enemy attacks the other birds, use the Protect ability to decrease the damage output. This team is effective against smaller groups of enemies (as you can keep their attention on red), and it's extremely good versus foes who hit hard - Red's Protect will soak up most of the damage, while Matilda can heal the wounds.
Alternatively, you can swap Chuck's Mage class to his Lightning Bird class, if you are going to fight against enemies capable of buffing their allies. The secondary ability of the yellow bird can be used on Red, which should allow him to attack multiple enemies, drawing their attention onto himself.
The second team will consist of:
The principle of operation of this team is quite different - you won't be able to force the enemy to attack Red anymore. However, thanks to his defensive aura, reducing the received damage by 25%, Matilda's Healing Shield restoring 15% of received damage, you will be able to reduce the effectiveness of enemy's attacks on your whole party by 40%
This team is effective during short encounters, with weaker enemies, or those who have access to Area of Effect attacks - you will be able to outheal those attacks without breaking a sweat thanks to Matilda's abilities. The only drawback appears when the battles are dragged - without using a Rage Chilli on Matilda you won't be able to effectively heal your team.
If you have access to most (or all) of your character classes and items, you will have a broader room to maneuver.
If you want to compile a team, that is efficient versus single, powerful foes, you should choose :
The principle of this team is simple - Red focuses enemy fire on himself, Matilda attacks the enemies, while healing the team at the same time (Matilda's healing abilities + Red's Paladin attacks should be enough to sustain your team), and Blues will dish out some serious damage, forcing the enemies to attack Red and hurt themselves in the process. Unfortunately, this setup does not work against a group of enemies with strong Area of Effect attacks - you won't be able to keep with healing and damaging the enemies at the same time.
If you want to compile a team, that is efficient versus numerous, weaker foes, you should choose :
 Alan Wake Game Guide & Walkthrough
 ArmA II: Operation Arrowhead Game Guide & Walkthrough
 Alpha Protocol: The Espionage RPG Game Guide & Walkthrough
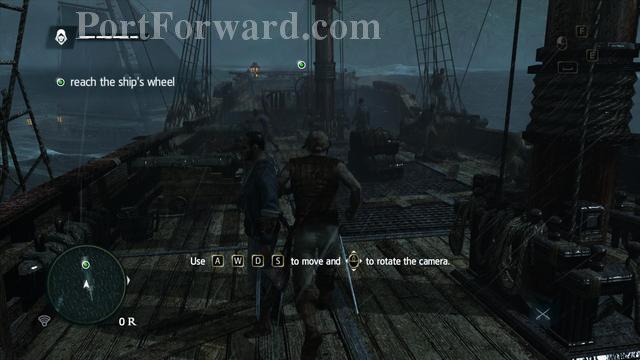 Assassins Creed IV: Black Flag Walkthrough Sequence 1Amnesia A Machine For Pigs Walkthrough Chapter 1: Waking the Dolls House