
This unofficial guide to Alpha Protocol contains a very detailed description of the five campaigns of the single player mode. All differences related to the choices made during the game have been included (they can affect the game dramatically). The last part of the guide contains information on the three main endings and how to get them.
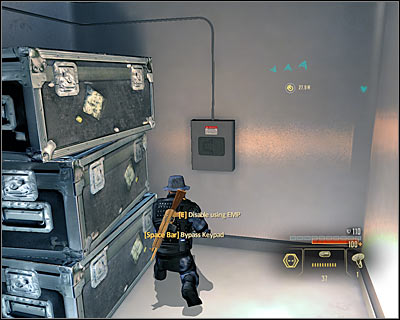
Maps of each area have been included, thanks to which you will be able to easily find specific characters, items and important places. The following symbols have been used:
(M1, 1) - the description refers to place 1 found on map number 1. In case a certain mission has more than one map, they are numbered using the alphabet - M1A, M1B etc.
Red is used to mark potential threats. K stands for security cameras and S for places where you can come across snipers, stationary machine guns and defence turrets.
Blue marks the places where you can find some precious secrets, in most cases - upgrades. An exact name of the item is included in the guide.
Green in connection with a dollar symbol marks the places where you can find cash. Depending on the situation, it can be an easily accessible bag or a treasure hidden inside a safe.
Orange has been used to mark other important places. The consecutive numbers mark the spots where you can find active computers or new Intel. P marks medical points.
Jacek "Stranger" Halas
Translated to English by Jakub "cilgan" Lasota
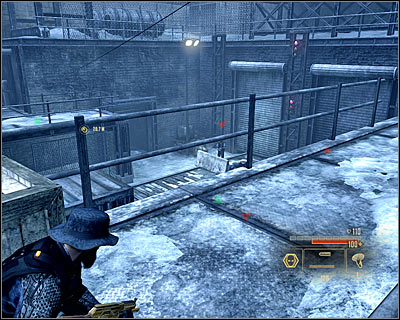
MAP:
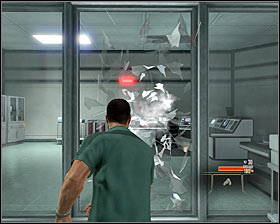
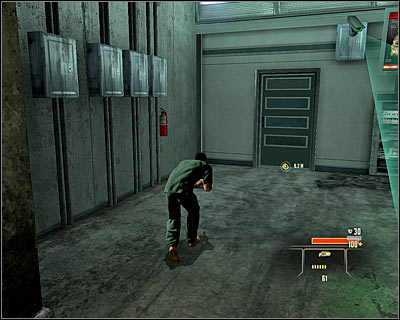
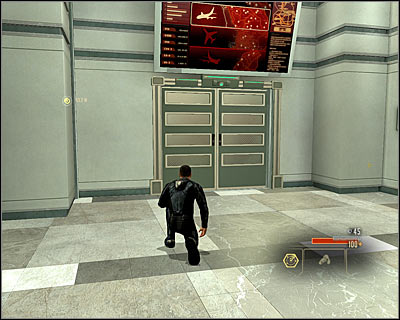
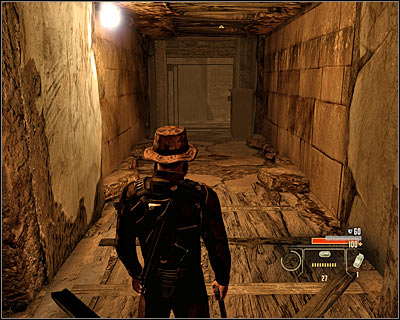
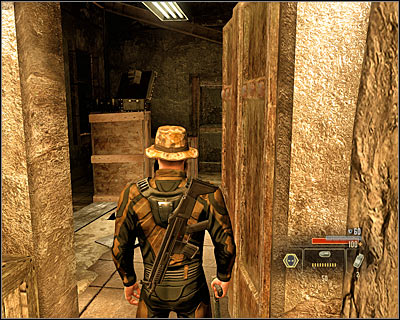
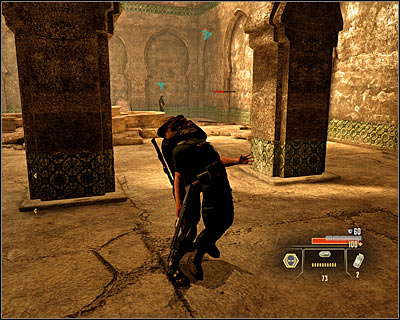
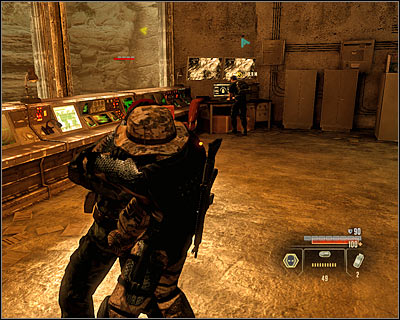
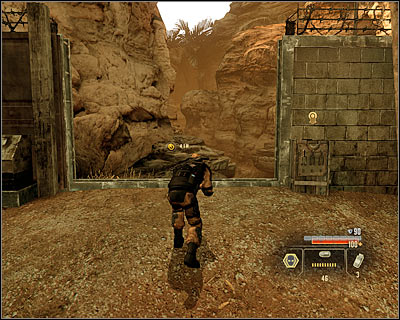
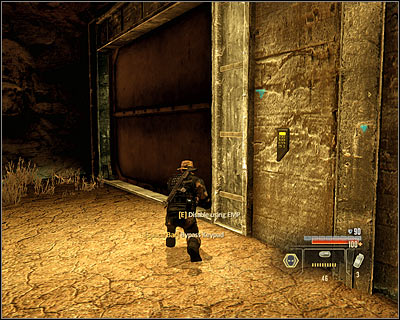
GETTING OUT OF THE CELL:
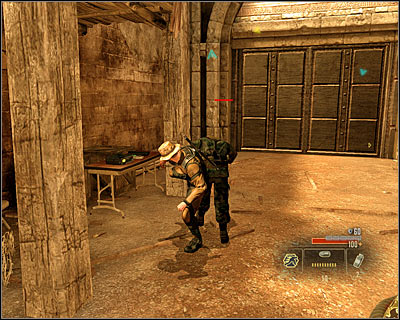
Get out of the bed, get used to the controls and wait for the phone to ring. Approach the (M1, 1) and press SPACE to speak with Mina Tang. During the conversation you will be able to choose how you want to escape from the room. The possibilities have been described below:
Option 1 - Ambush
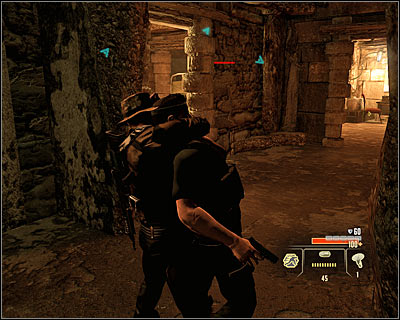
It's an option typical for the aggressive style. Michael will ask Mina to turn on the alarm. Wait for the guard to enter and deal with him.
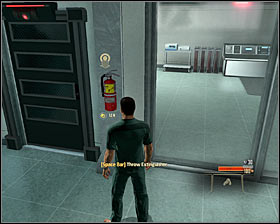
Option 2 - Improvise
It's an option typical for the smooth style. After the conversation ends, approach the extinguisher and press the action key for Michael to break the glass. Wait for the guard and neutralize him.
Option 3 - Distraction
It's an option typical for the professional style. Wait for Mina to open the door to the next room. Go forward; you can easily surprise the patrolling guard.
Option 4 - Ignore
Choosing this option will conclude in having to repeat the actions from option 2 in the end. You have to take the extinguisher to break the glass and then deal with the guard who will appear.
TAKING THE GUN:
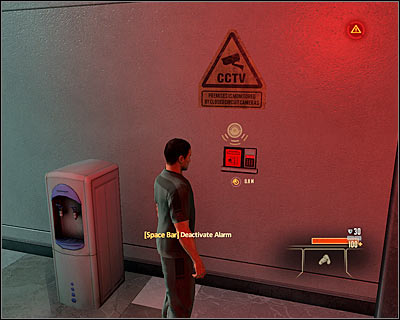
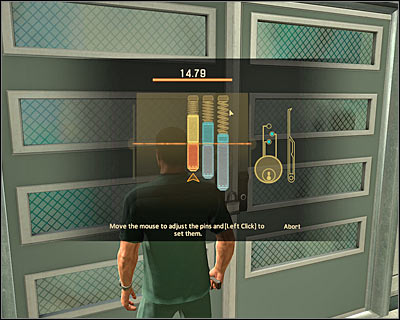
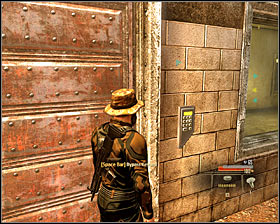
Depending on which option you've chosen, the alarm can be active or will activate upon entering the next room. Approach the control panel on the left wall (M1, 2) and interact with it, which will initiate a mini-game.
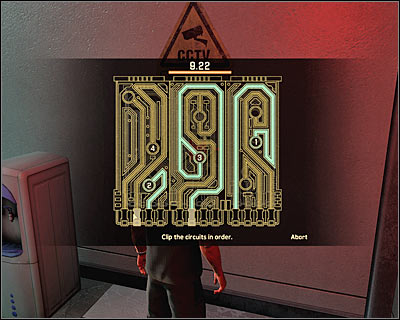
The mini-game is quite easy; you have to clamp the wires in the correct order. Always begin with finding wire number one and then follow the labyrinth to find which lower clamp you should choose. Do the same with the other wires. This time there's four of them, but their numbers will even double further in the game. Of course you have to make it in time and every mistake will cut a portion of the time left.

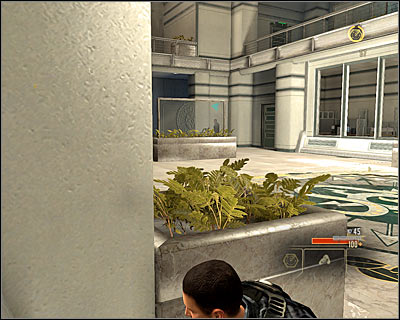
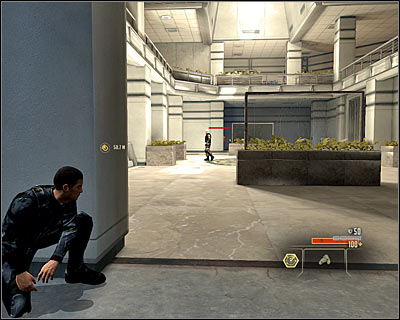
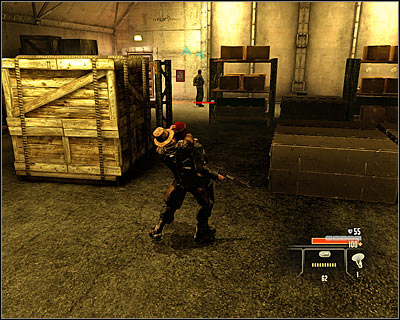
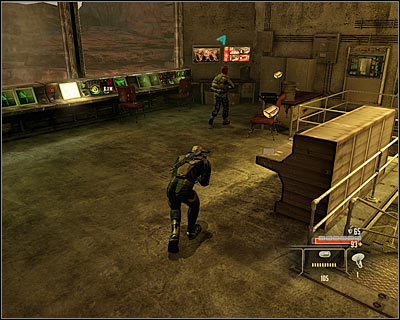
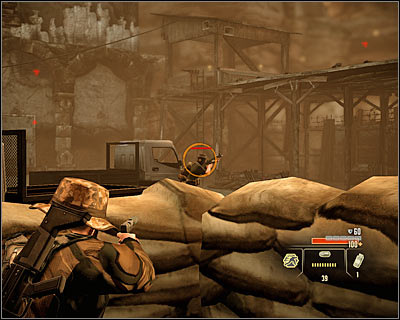
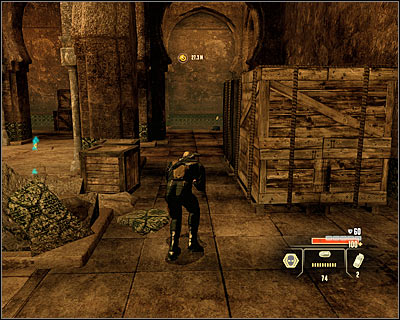
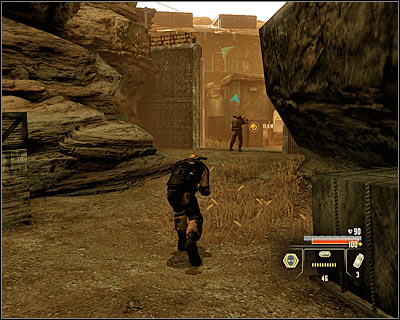
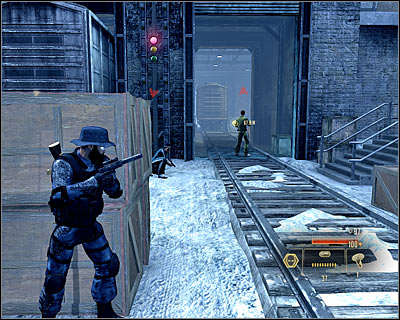
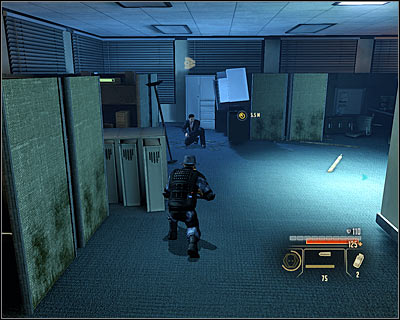
In the other big room (M1, 3) you will bump into two enemies. It would be wise to get rid of them without starting an alarm, as Michael is unarmed at the moment. If the enemies will notice you, they will start an alarm and things will get much harder. You can always switch it off by approaching one of the control panels and completing the mini-game above (more difficult than normally). Begin with neutralising the closer enemy (screen) and then move on his buddy, who's patrolling the further part of the room.
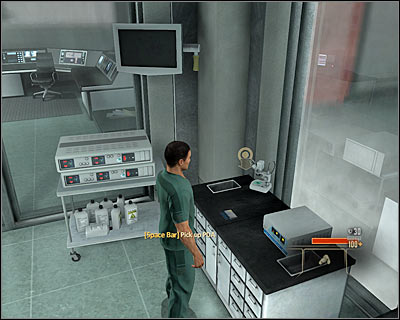
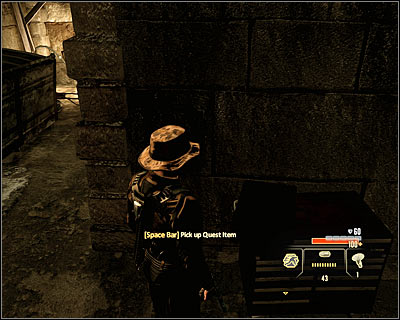
Return to the marked desk (M1, 4) and take the pistol with tranquillizing ammo. You will find two additional ammo packs in the area. Move to the next room in which you will have to neutralize one guard - you can approach him from behind and attack with the pistol. After getting rid of him, take the ammo.
FINDING THE KIDNAPPER:
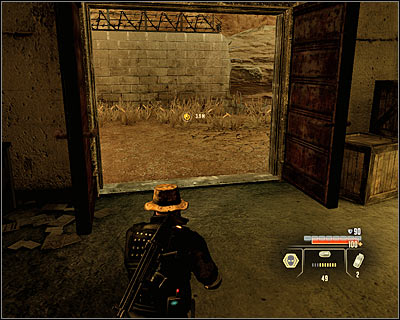
Go down the stairs to the lower level. Look out for the security camera (M1, 5). Wait for it to turn and move round it, while staying close to the left wall. Now you can use the door beneath the camera
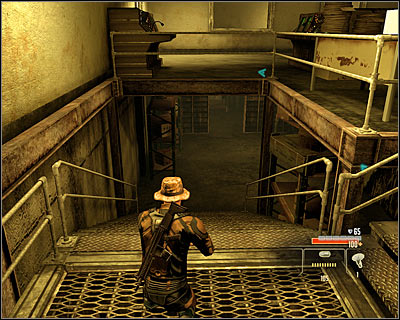
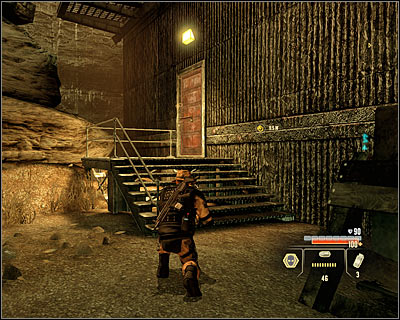
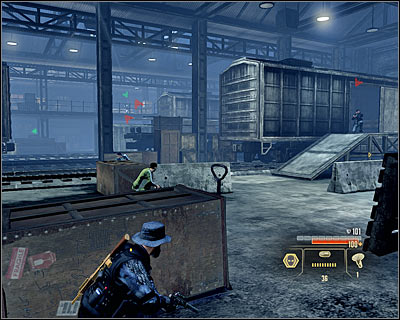
You will return to a familiar room (M1, 3), but now you're at the ground level. Two more guards will appear and it would be wise to get rid of them. Begin with the one patrolling the main room (screen) and then go into one of the rooms on the left in order to neutralize his friend. Use this occasion to look for more ammo. Head towards the marked door (M1, 6). You will have to face a new mini-game type.
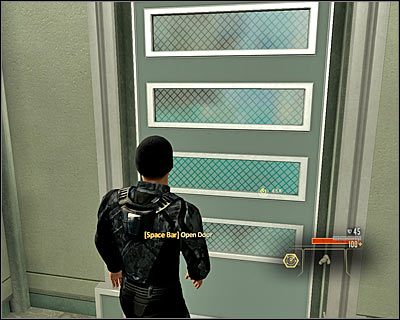
The idea of this mini-game is opening the door. It's pretty easy, even despite the time limit. Move the mouse up and down until each object lights up and then press the left mouse button. Go into the corridor and pick up the ammo on your way. After reaching a bigger room (M1, 7) a short cutscene will start, showing one of the guards getting eliminated.
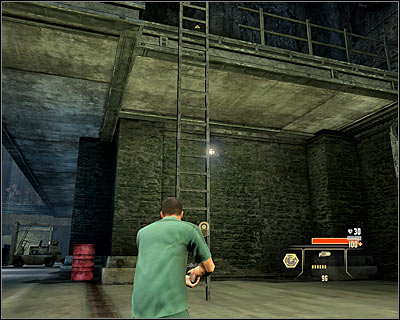
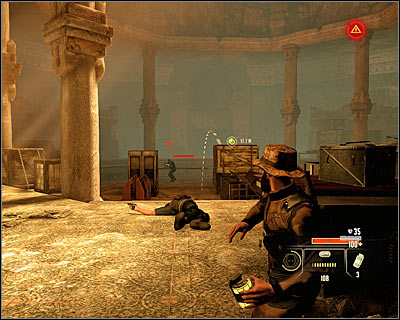
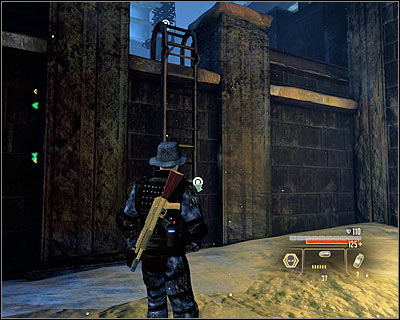
Begin with taking the ammo. Approach the balustrade and eliminate the first enemy with an accurate shot from the pistol. You can eliminate the other enemies as well (for instance by targeting the nearby barrels), but it isn't necessary. After getting down you can use a ladder (M1, 8), thanks to which you will automatically get to the upper balconies. Now you just have to get to the door (M1, 9) leading to the next zone.
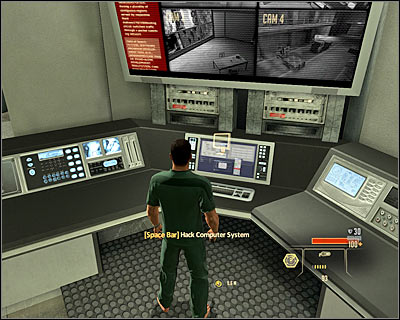
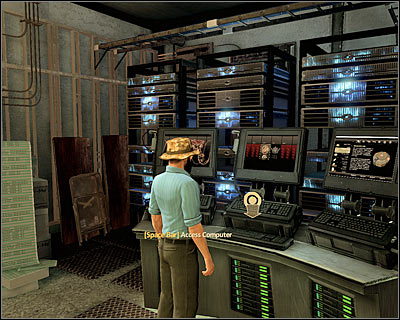
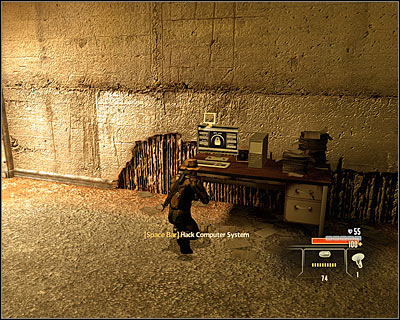
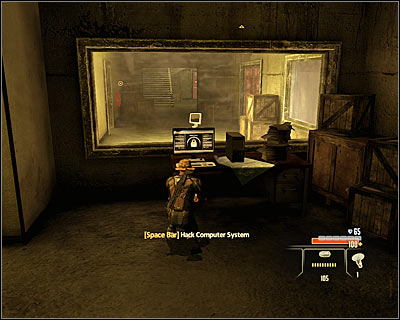
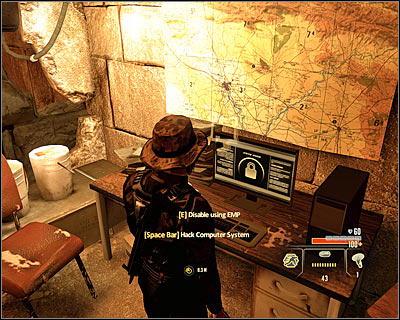
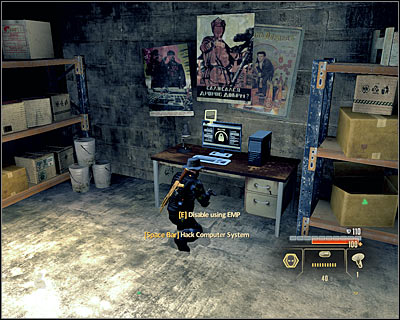
It would be wise to get rid of the guard in this area from a distance, using the pistol. Be sure that his body isn't lying in the area monitored by the camera. Now you have to break into the computer on the right (M1, 10). In order to do that, you will have to complete by far the hardest type on mini-game.
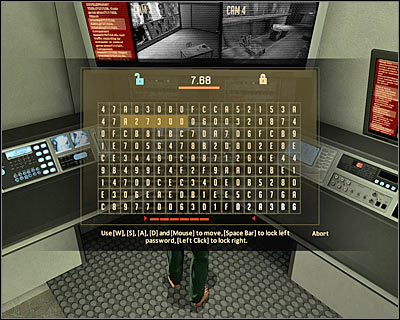
The idea of this mini-game is to fit the two sign sequences into the proper fields. The main difficulty is that each sequence is moved through the main board differently - the left one using the WSAD keys (accept with SPACE) and the right one using the mouse (accept with the left mouse button). Look throughout the main field for places in which the values have stopped and quickly move the proper sequence there. You have to hurry, as the board resets each time the red bar below fills up. Don't worry if you won't make it the first couple times - you will eventually get the hang of it. The possible alarm shouldn't bother you as well, nothing bad can happen to you here.

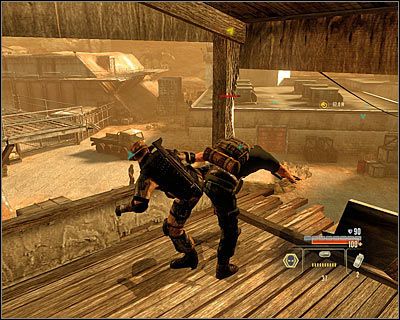
You can take a black suitcase (2500 dollars) from the nearby locker if you want, but you have to wait for the camera to turn or destroy it. Head to the southern room now (M1, 11), where you will speak with the chief of the Alpha Protocol organization - Yancy Westridge. It's the first time you will have the chance to use the special Recruit dialogue option, assuming you're playing with this class of course. Throughout the mission you will be able to choose this option 10 times, for which you will be rewarded with additional point at the end.
GOING TO THE TRAINING SECTOR:
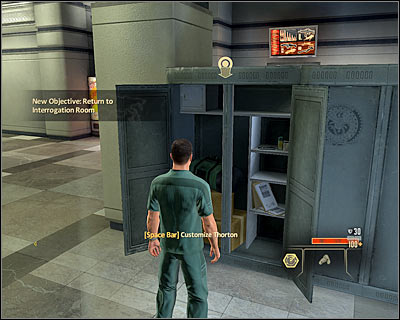
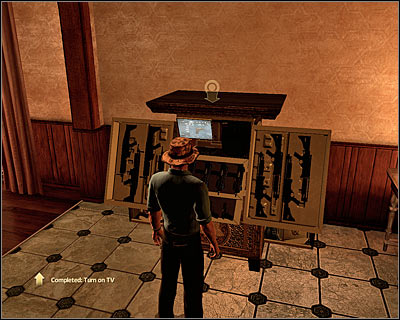
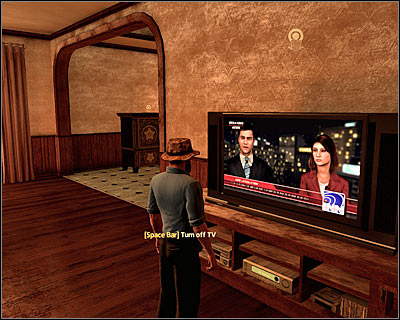
A very easy task. Use the newly unlocked door and head towards the marked room (M1, 12). You can't get lost, as all the other doors are locked. After getting to the goal, use the locker to change your character's looks. Additionally you can turn on the TV and hack into the nearby computer terminal (M1, 1), which will give you access to six messages. Theoretically you can return to Westridge now, but it would be wiser to complete all the side missions for now.
SIDE MISSION - GADGETS CHALLENGE:
Use the left door to begin the gadgets training (M1, 13). Inside you will meet Sean Darcy. In order to complete this training mission, you will have to:
1) throw some grenades at the marked targets
2) throw a grenade so that is bounces off the wall and land near the target
3) throw a grenade through the upper window
4) throw a grenade under the truck so that it explodes
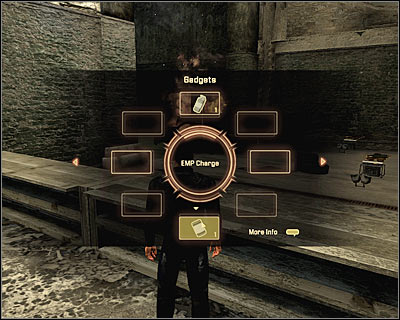
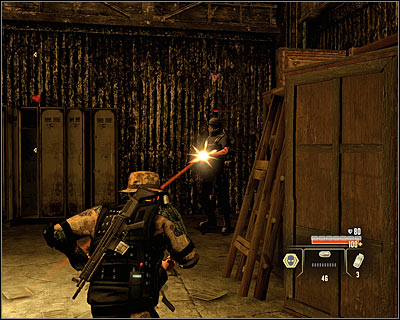
5) equip an EMP grenade EMP (screen) and throw it under the door with an electronic lock
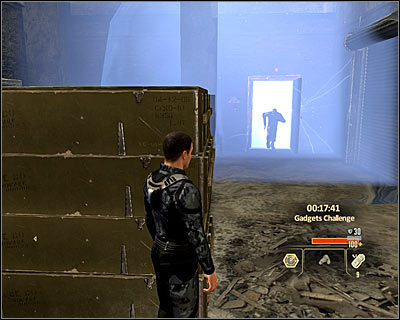
6) place a trap on the next door and wait for it to detonate (screen)
7) deal with the last group of enemies - place some explosives on the nearby walls so that you won't have to fight them in direct combat
The ending score is affected by the time in which you completed the training (it's worth to complete it again, with less hints from Sean), the damage taken and if the trap eliminated more than one enemy at the same time.

After the training, Sean will offer you a deal. Agree, wait until you're transferred to a new location and hear out the rules of the challenge. You will have to shut down three control panels (the well known mini-game). In the meantime you will be disturbed by enemies, which you can knock out or eliminate in direct combat. Note that you can heal with the medical points on the walls. Additionally you don't have to disarm the panels yourself, you can use the gadgets collected from the locker. In return for completing the task you will receive 20000 dollars.
SIDE MISSION - WEAPONS CHALLENGE:
If you intend to go through the weapons training, pass through the middle door (M1, 14). Inside you will meet Mina Tang, with whom you've already talked (call her by her name to improve your relations). In order to complete her lesson, you have to:
1) use the pistol to eliminate some targets
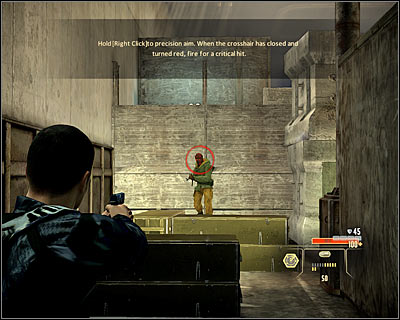
2) hold down the right mouse button and then shoot (screen)
3) use the SMG to eliminate some targets
4) hide behind a cover and eliminate a couple targets with blind shooting
5) lean out of the cover and eliminate the targets
6) move to the next zone ale shoot some moving targets with the pistol
7) move to the next zone (a new target), take the shotgun and eliminate a couple targets using the aiming system (holding down the right mouse button - screen)
8) move to the next zone (new targets on your way) and eliminate two groups with the machine gun
9) move to the next zone, take the rifle and shoot a couple targets (in front of Michael and on the upper construction)
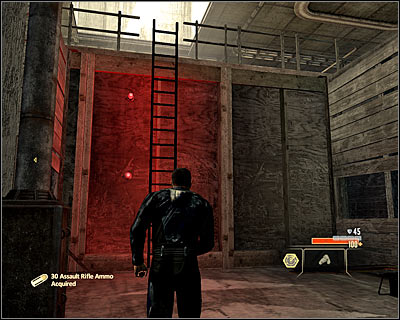
10) use the ladders (screen) in order to return to Mina
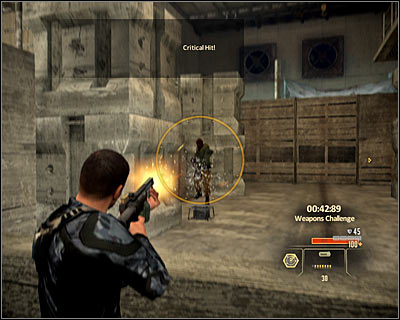
The ending score is affected by the time in which you've completed the training (it's worth to complete it again, with less hints from Mina), number of shots, accuracy and critical hits.
If you manage to gain more than 100 points (missed shots and the bonus for killing two enemies with one shotgun shot have the biggest effect), Mina will offer you an additional challenge, which you should of course accept. You will be moved to the training hall and will have to use the pistol with tranquilizing ammo to get rid of Sean. Go up the ladder, walk till the end and aim at the enemy's head (screen) by holding down the right mouse button. Now you can return to Mina.
SIDE MISSION - STEALTH CHALLENGE:
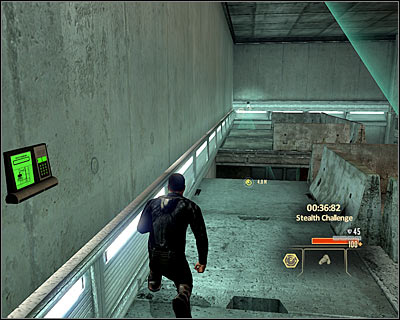
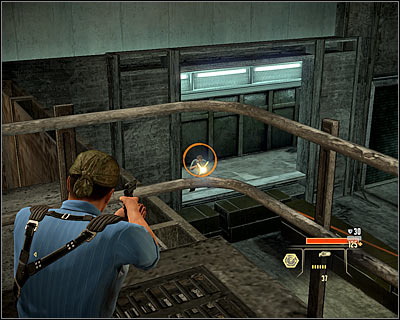
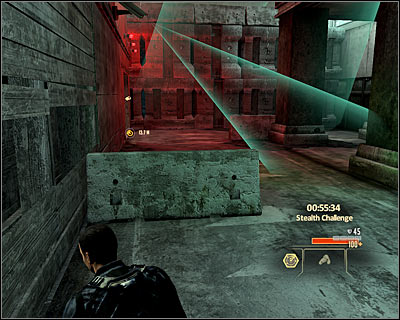
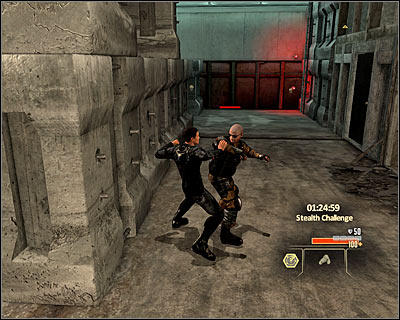
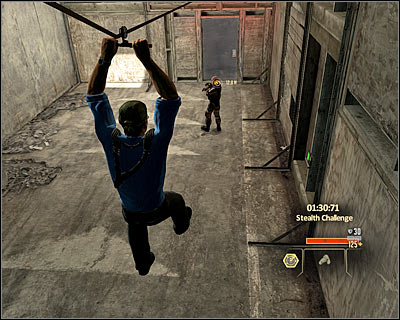
If you want to go through the stealth training (mainly focused on staying hidden), use the right door (M1, 15). Inside you will meet Alan Parker. In order to complete this training, you will have to:
1) go up the ladder and hack into the computer terminal (mini-game)
2) avoid the first camera by sticking to the left wall (screen)
3) jump over onto the nearby platform (SPACE after reaching the edge)
4) lower yourself after the next camera turns right
5) jump down
6) place yourself in the corner in which the fields of view of the both cameras meet (screen)
7) wait for the right moment to go to the next camera and approach the door
8) hack the lock (mini-game)
9) silently jump over the barrier
10) place yourself below the camera
11) head right and defeat the first guard in direct combat (screen)
12) use the ladder
13) climb up once the second guard is looking in the other direction
14) ride down the line and knock out the second guard (screen)
15) head to the exit
The ending score is affected by the time in which you've completed the training, number of activated alarms, neutralized enemies and if you were noticed.
If you suggest that the challenge prepared by Alan was too easy, he will offer you yet another one (accept it). The idea is to silently get back to the place in which you began the game (M1, 1). However for now head through the newly opened door (M1, 16).
You will find yourself in the well-know room (M1, 3). Move along the left wall, the upper floor is being patrolled by a single enemy. Get rid of the nearby guard (screen) and head towards the passage with the security camera (M1, 5). Carefully head upstairs. Get rid of the enemy mentioned before, preferably while he's near the computer (M1, 4).
Continue towards the starting point (M1, 1). Look out for the guard in one of the nearby room (M1, 2). Get rid of him in direct combat. Now you can enter the room with the bed (M1, 1) and take the document (screen).
Now you have to return to where Alan Parker is (M1, 15). On your way you have to look out for the camera (M1, 5) and a new enemy which will appear at the ground floor of the main room (M1, 3). In return for the documents, Parker will offer his help in the future missions in Saudi Arabia.
RETURN TO THE INTERROGATION ROOM:
Nothing too complicated here - you just have to return to the room in which you've spoken with Westridge (M1, 11). Two cutscenes will play - the first one explaining the rules of conversations and the second one focusing on your mission in Saudi Arabia.
MISSION CHOICE:
After a short briefing with Westridge, you can begin. Each mission in Saudi Arabia will begin from this hideout. There are four missions in total, with three available from the start:
- Bug Al-Samad Airfield
- Investigate Jizan Weapon Stockpile
- Intercept Nasri the Arms Dealer
And the last mission in Saudi Arabia is:
- Intercept Shaheed and Recover Missiles
You can choose the mission from the menu (they're displayed in Intel, in exchange for the map) or by using the hideout.
USING THE MAIN COMPUTER:
After finding the computer you can choose one of the two options:
1) Email will let you read messages. It's worth to check your inbox after each mission; for now on only your co-workers will write to you:
- Click Download in the first mail from Mina Tang to earn 10000 dollars.
- You can reply to her second e-mail using one of the three styles you already know. I'd say you should act professional, which will improve your relations.
- The other e-mails are read-only.
2) Clearinghouse lets you buy stuff on the black market. The available categories are:
- pistols
- SMGs
- shotguns
- assault rifles
- armours
- gadgets
- Intel (more info on the Intel available for each mission can be found in its description, in the Introduction section to be precise)
USING THE EQUIPMENT LOCKER:
It's best to use it after shopping at the black market. Don't forget to install the purchased components onto the weapons and armour, as it doesn't happen automatically.
OTHER ACTIVITIES:
You can also:
- turn on the TV (topics regarding the current mission will be talked about during the show)
- change the main character's looks using the mirror in the bathroom (it doesn't influence the game at all)
- take a look at the photos and trophies gained (as above)
INTRODUCTION:
You can buy additional Intel for this mission (use the computer in the hideout and choose Clearinghouse). The available options are:
- More info on the Al-Samad organization.
- Map of the airfield. Useful, especially considering its low price.
- A sniper rifle at the airfield. This is also a considerable option, which will help you get rid of the enemies in the first phase of the mission (it won't of much use later on, as you can't take it with you).
Before departure, there will be a briefing with Min Tang (it's worth to use all the dialogue options).
Take a silenced gun, as a large part of the mission (or even the whole, depending on your skills and willingness) can be completed while staying in the shadows. Remember that after starting an alarm, you can hack into one of the numerous control panels and then wait for the enemies to return to their normal duties.
Don't forget about checking out the building (mostly hangars in this mission). It hasn't been completely described in the guide, which focuses mainly on the mission's goals; however the places in which you can find items have been marked on the map.
MAP:
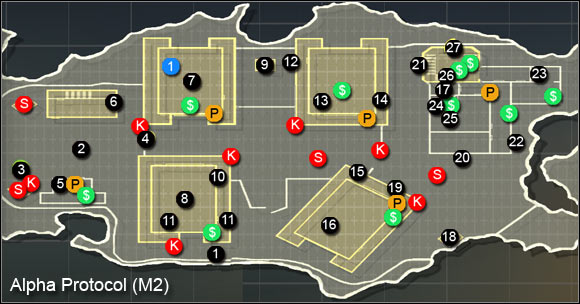
GETTING TO THE AIRFIELD:
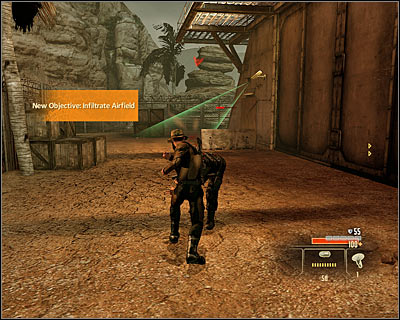
You begin in the western part of the map (M2, 1). The first guard is patrolling the area; you can get rid of him easily, without starting an alarm. Look out for the nearby camera; you can go pass it from the south side. Now you can go near the big square at the western part of the airfield (M2, 2).
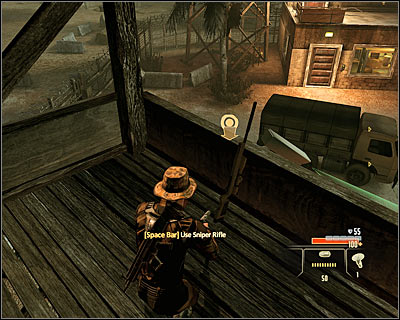
You can get rid of the nearby enemies in two ways. If you have guaranteed yourself a sniper rifle, it would be wise to climb the left building and from there move to the nearby sniper tower (M2, 3). After getting to the top you will be able to easily eliminate the enemies, with the sniper rifle being silenced. In case you can't use this weapon, you'll have to stay below and eliminate all the enemies while keeping an eye for at least one camera.
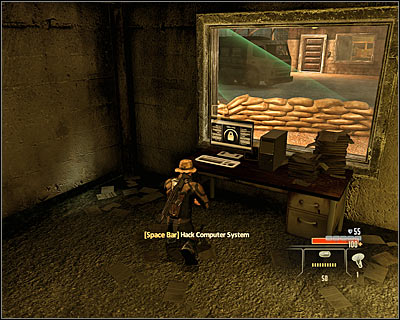
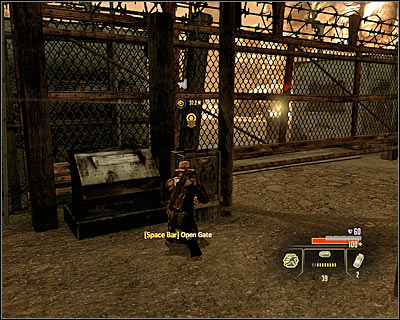
You can get to the next part of the map in two ways. The first option is to use the main gate (M2, 4), which is being monitored by one of the cameras. You can of course hack into the control panel by the gate, but it's very risky. It's better to get into the computer found inside the southern building (M2, 5).
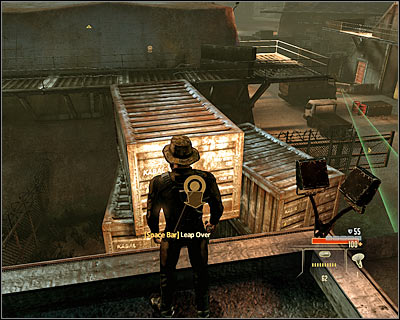
The second possibility assumes using the northern building. You can get inside by jumping onto the roof from the nearby sniper tower or breaking in through the door at the ground level. Ultimately you have to get onto a balcony (M2, 6), from which you will be able to jump onto a container and from it onto a balcony adjoining the bigger hangar.
SIDE MISSION - ELIMIANTING SHAHEED'S ELITE TROOPS:
The enemies mentioned above are staying inside the northern hangar (M2, 7) and of course it will be easier to get to them if you've chosen to jump onto the balcony of this building. In case of choosing the main gate, you'd have to quickly use the door leading to the hangar. There are two enemies close to each other, so there's a high probability of getting spotted. Take a look round the hangar, you can find a Reactive Polymer Weave (armour upgrade) among other items (M2, 1).
GOING THROUGH THE SOUTHERN HANGAR:
You can't use the main passage leading east, so you have to go pass the southern hangar (M2, 8). Keep your eyes opened, as the area is being patrolled by a couple guards. Additionally look out for the sniper to the north-east of this area (M2, 9). Inside the hangar you will find a computer (M2, 10) which will allow you to turn off the two nearby cameras. You can get out of the hangar in two ways (M2, 11). I definitely don't recommend the ground level exit, it's better to use the ladders and ride down the line from the balcony.
AVOIDING THE ENEMY POST:
You have to head to the sniper tower (M2, 9), which will require different tactics depending on whether you activated the alarm or not. If the sniper is shooting at you, eliminate the normal enemies first, get closer to him and try to get rid of him from behind a cover. If the alarm isn't activated, silently eliminate two enemies on your way. You can eliminate the sniper as well, or just leave him be. Whatever the tactics, your goal is to get to the door leading to the new hangar (M2, 12).
APPROACHING THE TOWER:
It's worth to eliminate the nearest enemies as fast as possible, which shouldn't be too hard. Now you have to choose how to get to the tower. The safer option is to climb the ladder (M2, 13) and get to the spot from which you will be able to make two jumps (M2, 14).
The more risky option is to get to the southern hangar (M2, 15), which can be justified by the by the will to complete another side mission. Unfortunately the area is being patrolled by enemy soldiers and additionally you would have to deal with operating a stationary machine gun. In the second case, it's worth to aim at the explosive barrels in the area. Don't forget about the possibility to turn off the alarm after the fight.
SIDE MISSION - SAGOTAGE THE GUN DEPOT:
Completing this task will be fairly easy if you've chosen to go to the southern hangar (M2, 15) or pretty hard in case you used the balconies to get to the tower. The weapon depot can be found in the middle part of the hangar (M2, 16). Just approach the crates and press SPACE. It's worth to notice that you in fact don't need to fight the enemies here, because you can as well get out of the hangar using one of the two southern exits.
GETTING INSIDE THE TOWER:
There are seven ways to get into the last building:
Option 1 - jumping onto the roof of the last building from the balcony of the nearby northern hangar
It's the easiest option if you don't want to destroy the weapon depot. Use the ladder in the northern hangar (M2, 13), get to the balcony (M2, 14), make two jumps and use the hatch on the roof of the last building (M2, 17).
Option 2 - getting to the eastern sniper tower and riding down the line
This on the other side is the best option in case you've chosen to sabotage the depot. You need to get to the eastern sniper tower (M2, 18) and ride down the line, thanks to which you will get to the hatch on the roof of the last building (M2, 17).
Option 3 - use the balconies of the southern hangar and ride down the line
This is a bit risky option (M2, 19), as you may get noticed by the guards below, including one operating a machine gun. Choose it if you've already eliminated the nearby enemies and want to surprise those inside the last building. You'll need to use a hatch in this option as well (M2, 17).
Option 4 - going up the ladder onto the last building's roof
The ladder can be found by the eastern wall of the building (M2, 22), but you may reach it only after eliminating every enemy soldier. Choose it if you don't want to enter the building using any of the doors.
Option 5 - using the main entrance
Choose this option (M2, 20) only if you've already eliminated every enemy soldier. Otherwise it would be very hard, as there's a machine gut post by the entrance.
Option 6 - using the locked door in the north-west corner
It's an interesting possibility (M2, 21), however getting to this door isn't necessarily easy. On the other hand once you've opened them, getting to the last target will be very quick.
Option 7 - using the closed door at the eastern wall
Use it (M2, 22) only if you don't intend to make use of the ladder mentioned in option 4 or the door from option 5.
SIDE MISSION - GATHERING ADDITIONAL INTEL:
You can wait with completing this side mission until the whole ground level is secured. If only you won't rush and will keep an eye on the enemies, you even may be able to do this without starting an alarm. After clearing out the room, head out to one of the eastern rooms (M2, 23) and hack into the computer (mini-game).
SIDE MISSION - GETTING THE FLIGHT RECORDS:
In order to get the records, you have to get to the underground using the stairs in the computer room (M2, 24). Look out for the two guards patrolling the area; get rid of them, localize the computer (M2, 25) and hack into the system.
PLANTING A BUG:
In order to plant the bug, you have to get to the top of the tower and that means having to use the stairs (M2, 26). Look out for a single guard which you will meet upstairs. Take him out and then approach the marked computer (M2, 27). Play the mini-game in order to plant the bug. After getting back to the hideout, there will be a briefing with Mina Tang waiting for you.
INTRODUCTION:
You can buy additional Intel for this mission (use the computer in the hideout and choose Clearinghouse). The available options are:
- Additional supplies to use during the mission. It's worth noticing that if you've already completed the Intercept Nasri the Arms Dealer mission and let Nasri escape, he will offer them for a nominal price.
- The additional goal is related to the security systems and lowers the difficulty during disarming the other systems.
- Lowering the enemies' numbers. This is definitely the most interesting option, which will make the mission much easier.
There will be a briefing with Sean Darcy before the mission starts.
It's worth to take a good assault rifle on this mission, as you will have to go through a series of quite hard fights at the end.
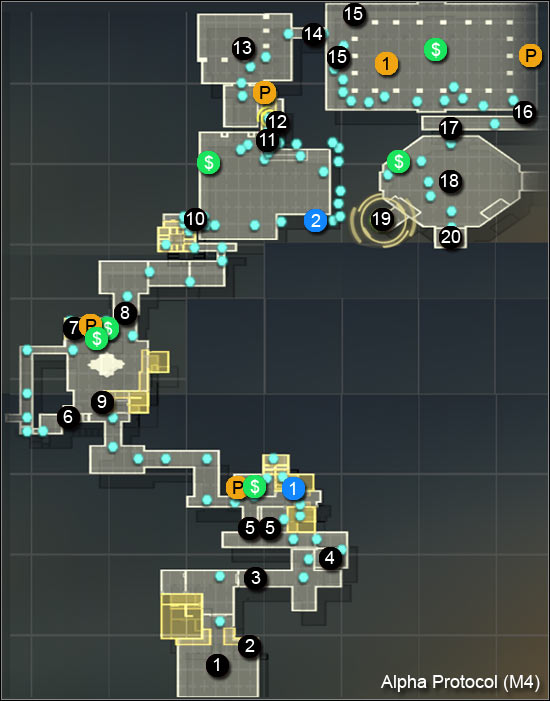
MAP:
GETTING TO THE CAMP:
You begin the mission nearby the first sniper tower (M3, 1). Use the sand storms to your advantage and silently eliminate the enemies, while keeping on hiding behind covers. Follow the only available path to the camp. After getting near the new sniper tower (M3, 2) you will have to choose between going along the left path and then jumping onto the tower and approaching the tower and using the ladder. Whichever way you choose, look out for the nearby guard. Slowly move towards the camp (M3, 3) and eliminate one more guard on your way.
CUTTING OFF THE POWER:
You should definitely get rid of the nearby enemies in the first place. If you've ensured that a part of them will be distracted, only a few of them will be left. In the other case, it can be more difficult. I'd suggest firstly going down the ladders. If you don't mind being aggressive, you should go through the southern building (M3, 4) and then get to one of the two machine gun posts in the eastern part of the camp. Keep an eye on an active machine gun in the western part of the camp.
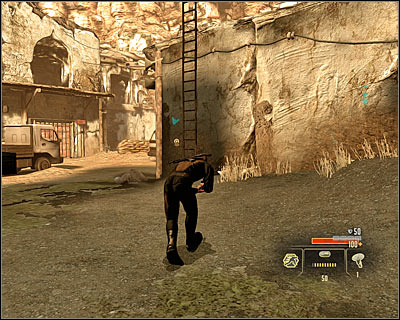
If you prefer to stay in the shadows, you should also begin with securing the area of the southern building (M3, 4), but afterwards it would be wise to get to the ladder (screen) (M3, 5), thanks to which you will get to the northern buildings. At least three enemies will be round the western machine gun post and you have to deal with them one at a time. Leave the enemies at the main square for the end, as they shouldn't notice you if you were careful enough until now.
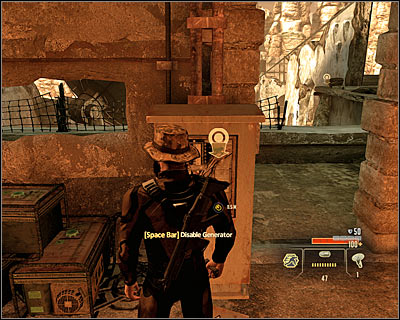
I'd suggest getting to the main goal of this mission only after securing and checking out the whole area. You have to find a ladder (M3, 6), thanks to which you will get to near a big antenna. Look out, as there's a guard inside the adjoining building. Get rid of him and look for a suitcase (M3, 1), which will give you 5000 dollars and will update your info on the Al-Samad organization. Use the stairs and go upstairs. Find the generator (M3, 7) and switch it off.
GETTING TO THE UNDERGROUND SECTION OF THE FACILITY:
The best way to get down is using the line found outside, especially that it will allow you to knock out one of the guards. Now you should eliminate the two others enemies, which shouldn't be too problematic. Now you can localize the door leading underground (M3, 8).
GETTING TO THE DATA TRANSFER SPOT:
Go down the stairs and head to the first bigger room of the underground facility (M3, 9). You could eliminate the enemies here in an open fight, however finishing them off silently is also an option. After the fight it would be wise to check the whole area thoroughly, including breaking into the side rooms (this applies for the whole stay in the underground). After securing the area, head towards the passage leading to the next room (M3, 10).
Check out the left side of the room and then approach the patrol zone of the three guards (M3, 11). You can get rid of them in direct combat as well, but it would require making sure that their bodies aren't found. Ultimately you should reach a gate leading to the cells (M3, 12). It's worth to break in, as you will find a suitcase (M3, 2) with cash (2000 dollars) and info on the Halbech corporation, among others.
Now you can head towards the southern door (M3, 13). Keep focused, as you will reach rooms patrolled by the enemy soon. Just like before, a quiet elimination is possible, but quite hard. After you're done, take a look at the nearby locker with gadgets, which will provide you with an incendiary bomb and a remotely detonated mine.
SIDE MISSION - COLLECTING INTEL ON THE IMPRISONED:
Before you use the main computer, you can also find info on the prisoners, which will give you additional experience. You will find it in one of the badly lit rooms (M3, 14).
TRANSFERRING THE DATA:
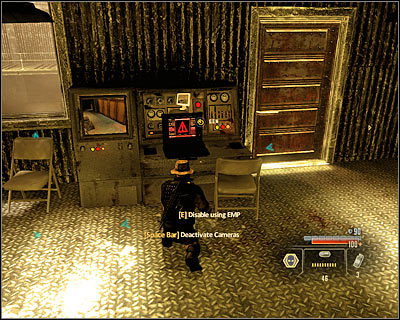
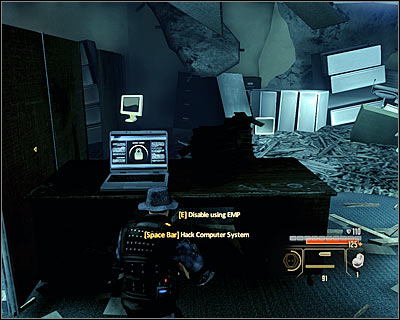
Approach the main computer (M3, 15) once you decide you're ready. I'd suggest you ready an assault rifle and some grenades/mines, as a fight with enemy forces is inevitable. You can break into the system by solving a mini-game or using an EMP charge.
RETURN TO THE SURFACE:
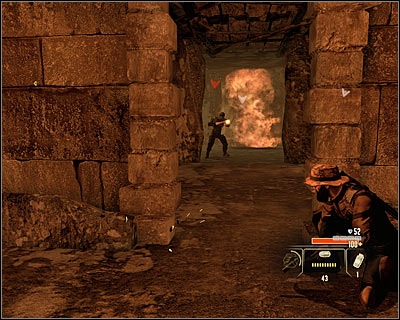
Quickly hide by one of the three passages leading into this room. Enemies have appeared in the area and you have to deal with them. Attacking them from a cover is quite annoying, as they are alerted and in a group, so you'd have to wait for them to calm down. Instead just throw a grenade (screen) and finish off the survivors with conventional weapons.
Fortunately you don't have to go through the whole underground in order to return to the surface, as a new passage has been unlocked (M3, 16). After going through it turn left and eventually you will reach the door leading to the camp (M3, 8).
SECURING THE LANDING ZONE:
After returning to the surface, you will probably notice that new enemy forces have appeared. Most of them are busy shooting at the helicopter, so eliminating them will be quite easy. Firstly take care of the two closest enemies, including the one standing between the two eastern machine gun posts. Afterwards eliminate the enemies with rocket launchers. Don't shoot them from the machine guns, as they might fire back at you; it's better to shoot them from conventional weapons or even defeat in direct combat. Leave the further targets, including the enemies by the deactivated generator for the end.
EVACUATION:
You should hide right after eliminating the last enemy, as a new wave will appear shortly. This time I'd suggest using the western machine gun post; head towards the gate (M3, 17). Use the switch and deal with the last two enemies. Getting to the helicopter (M3, 18) will end the mission. After returning to the hideout, there will be a briefing with Sean Darcy.
INTRODUCTION:
You can buy additional Intel for this mission (use the computer in the hideout and choose Clearinghouse). The available options are:
- An additional goal connected with finding a certain weapon supply. A chance to complete this goal will appear during the end of the mission
- Decreasing the enemy's numbers. It's pretty useful, however not as much as during the mission at the camp.
- A map of the area. It's definitely worth it, especially considering that a suggested path allowing staying hidden has been market on it (blue dots).
There will be a briefing with Yancy Westridge before the mission starts.
MAP:
AVOIDING THE FIRST ENEMY GROUP:
The beginning of this mission is quite unusual, with a talk with one of the guards stationed at the enemy post (M4, 1). You can behave in four different ways, but eventually it all comes down to two possible options.
Option A - neutralize the first group of enemies: if you want to get rid of the enemies, you have to choose either the Joking or Draw Gun options. The first one is of course better, as you can follow the guard and knock him out before he uses the radio. Afterwards you will have to deal with his two buddies.
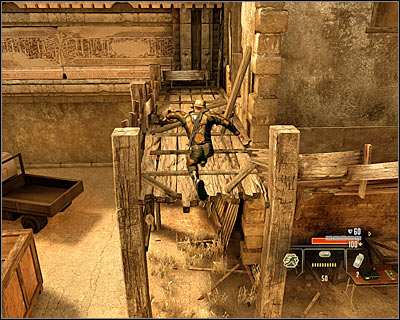
In order to get to the further part of the location, you have to use the ladder (M4, 2), jump to the other side and go through the destroyed building. This way you will get to a passage patrolled by two enemies (M4, 3), who you of course have to eliminate.
Option B - avoiding the first group of enemies: in case you don't want to fight the guards, you can choose the Aggressive or Direct options. This way you will avoid the first post and find yourself in one of the passages (M4, 3). Unfortunately this option is not without flaws, as the alarm will activate after getting to the nearest post (M4, 4), which will hinder avoiding or eliminating the next enemy group.
INFILTRATING THE PALACE:
Whichever option you've chosen, you have to go through the next building (M4, 4). Cautiously approach the group of enemies. Notice that you don't necessarily have to use the main passage leading to the further part of the area, as you can break into the right building (M4, 5) and then jump to the next one as well. You can eliminate or avoid the nearby enemies; while you're at it, I'd suggest checking out the northern building, as you can find a Pistol Laser Sight there (M4, 1).

Head to the north-west. After getting to the next big location, you can behave in two ways. The first option is to break into the building on the left (M4, 6) and go through the alley guarded by a single enemy. It will allow you to easily approach the northern building (M4, 7). After getting up you should eliminate the guard and jump down at the right moment to head north (M4, 8).
The second way of going through this location involves entering the right building (M4, 9). After going up the ladder you will find yourself on a balcony with one of the snipers, from where you'd be able to successively eliminate the enemies. Make note of the explosive barrels in the middle part of the square, it's worth to use them. After eliminating the enemies, head north (M4, 8).
Only a single path leads to the next big location (M4, 10), so you can't get lost. After arriving at the spot, go completely down. You can avoid the enemies according to the path given by the game, but it's rather risky. If you want to stay undetected you should focus on quickly eliminating the enemy at the upper balcony using a silenced pistol, thanks to which getting rid of the other enemies will be much easier.
If you want to attack the enemies, you should consider starting shooting even before jumping down. Otherwise you can get flanked pretty easily. Check out the area after the fight and you will find the Ablative Ceramic Plates (armour upgrade) (M4, 2). In order to leave this location, you have to use the ladder or the platform to get onto the balcony on which one of the enemies was standing and afterwards use the northern passage (M4, 11).
SIDE MISSION - COLLECTING INTEL:
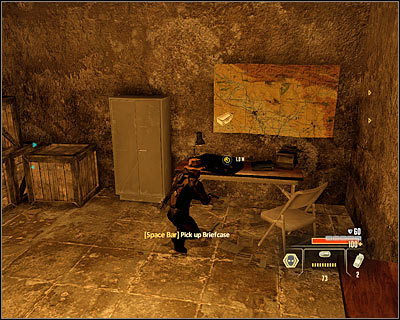
Stay in the building in which you've received the mission connected with getting to Nasri and break into one of the rooms at the ground floor. Take the briefcase (M4, 12) to complete the additional goal of this mission.
GETTING TO NASRI'S HIDEOUT:
Another big room (M4, 13) is guarded by as much as two enemies. You can easily get rid of them, as only one is moving. After securing the area, go through the passage leading to a much larger location (M4, 14).

Here you can once more stay hidden; you can follow the right (as the game advices you to) or left path (M4, 15). Ultimately, you are to get to the door in the lower right corner (M4, 16) and from there head to the passage leading to the last room (M4, 17).
If you intend to eliminate the enemies before getting to Nasr's hideout, it would be once again wise to take care of the guard on one of the upper balconies first. Additionally you can help yourself by hacking one of the SAM missile launcher (M4, 1). Firing a rocket will eliminate the enemies visible in the distance, but will also unfortunately start the alarm.
ELIMINATING NASRI'S BODYGUARDS:
As for the enemies in the next room (M4, 18), it would be best to attack them by surprise, with a little help of grenades. You should especially look out for the enemy on the right balcony and also don't let anyone flank you; try to avoid the grenades thrown at you.
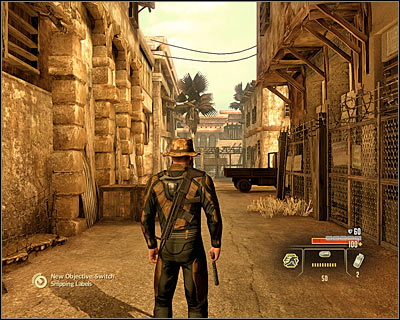
SIDE MISSION - ALTERING THE SHIPPING LABELS:
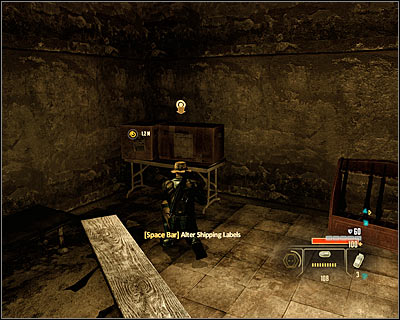
In order to complete this side mission, you have to use the stairs leading to the balcony, on which one of the enemies has been standing. Go into the small room and find the weapon container in order to make the alteration (M4, 19).
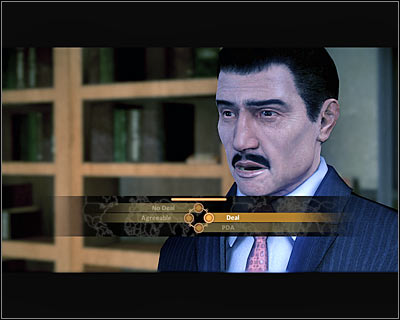
INTERROGATING NASRI:

Go into the last room (M4, 20) and a cutscene will automatically initiate. The first phase of the interrogation (choosing the behaviour style) doesn't play a big role, but the second is crucial. You can choose one of the three options:
1) Arrest - Nasri will be arrested, which will have a negative influence on the process of gathering Intel, but will lower the weapon supplies for the terrorists in the area. After getting back to the hideout you should definitely read the e-mail from Westridge to learn about some unofficial thanks for arresting Nasri. Press Download and 15000 dollars will be transferred onto your account.
2) Extort - Nasri will be set free in exchange for a bribe of 15000 dollars. This choice will increase the weapon supplies in the region, but will have a positive effect on the process of gathering Intel.
3) Shoot - definitely the worst choice, as you won't get any money and will worsen the Intel gathering process at the same time. The only good point of this choice is the reduction in weapon supplies, which however can be achieved with arresting Nasri as well.
Don't forget to familiarize with the new perk, different for each possible option described above.
INTRODUCTION:
You can begin this mission after completing two out of the three basic missions in Saudi Arabia. I'd definitely suggest completing all three of them, as you will gain more equipment and experience that way.
You can buy additional Intel for this mission (use the computer in the hideout and choose Clearinghouse), however not all may be available, depending on the choices made. The available options are:
- Additional supplies available during the mission (visible on the map as suitcases).
- A map of the area with cameras, computer system and control panels marked on it. It's definitely worth it.
MAP:
GETTING TO THE TOWER:
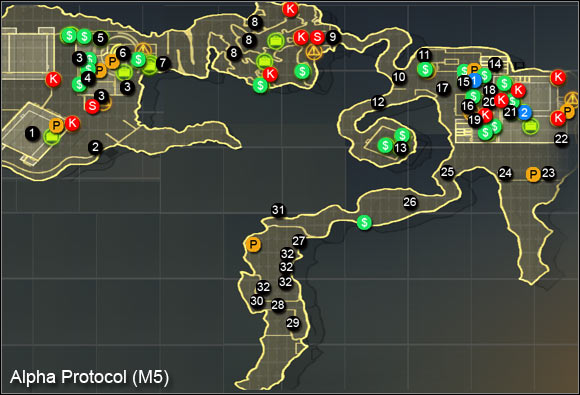
You begin the mission inside on the southern hangars (M5, 1) localized in the already examined part of the airfield. It's worth to mention that your previous actions could have lead to disabling two security cameras and the lack of elite soldiers among those protecting the tower. Go out through the south door. First of all, take care of securing the nearby sniper tower (M5, 2). Ride down the line to the side of the building if you don't want to fight the enemies. Otherwise just get down to deal with some standard guards and a machine gun post.
In this mission, you can get into the marked building in only three ways (M5, 3) - by using the main entrance, the secured side entrance or go up the ladder to the roof and reach a well-known hatch. The last option is by far the best, as it will allow you to surprise the enemies inside.
SIDE MISSION - TRANSFERRING THE DATA:
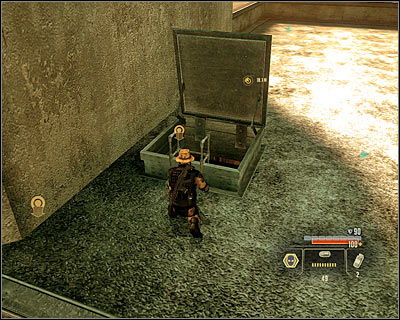
After getting inside the building, begin clearing the ground floor. You shouldn't have too much problems with it, as most of the enemies is just standing still. If you want to complete the SIDE MISSION, you have to head to the basement, find the activated computer (M5, 4) and hack into it by solving a mini-game or using an EMP charge.
FINDING THE ROCKETS:
You have to get the info on the rockets' localization from the computer at the very top of the tower (M5, 5). Look out, as the staircase is being patrolled by a single enemy. Two more are being stationed upstairs, but you can take them by surprise easily. Once again you have to play a mini-game (or use an EMP charge).
PASSING THROUGH THE PLANE CEMETERY:
Now you can go down to the ground floor and use the newly opened northern building exit (M5, 6). After a while you should reach a closed gate. Open it using the nearby lever (M5, 7), which will allow you to get near the cemetery. Go down and take a look at the area, especially the enemy patrols. There are three possible paths (M5, 8):
I wouldn't advise taking the left path, unless you have the possibility to use an EMP to quickly open the gate.
The middle one will lead you to the target the fastest, but is heavily patrolled, so you will have to deal with the enemies.

Choosing the right path will allow you to jump over a small fence and getting to the plane's wing. Here you can wait for the camera to turn, go up the ladder and then head right.
Whichever path you choose, your task is to get the gate leading to the next location (M5, 9). If an alarm gets activated in the meanwhile, you will have look out for a machine gun post and enemies appearing from the small building and open the gate manually. Normally it will be opened, so go through it. You will receive new directives once near the fork (M5, 10) localized nearby the enemy's main camp.
SOLVING THE PROBLEM OF THE LOCKED GATE:
You can solve the locked gate problem in two ways. If you want to quickly get to the mission's goal, you should break into the left warehouse (M5, 11). As for further instructions, head over to the Entering the enemy camp section.
I'd definitely suggest the right path (M5, 12), eliminating one guard on your way. The good point of this way is that you will be able to collect every secret and eventually return to the left warehouse mentioned above. You have to get to a small hut. Go inside and get rid of two guards (you can do it silently). Afterwards break into the computer marked by the game (M5, 13), thanks to which you will open the main gate. You can return to the fork (M5, 10).
ENTERING THE ENEMY CAMP:
You will be able to choose from two paths once again. This time the better way is to go into the left warehouse (M5, 11), thanks to which you won't miss any important secrets. After getting inside, silently get rid of the two guards and then go up the stairs (M5, 14).
After going up the stairs, you will reach two observation point (M5, 15). Silently eliminate the two guards. You can also use the silenced sniper rifle by the left window, hack into the computer in order to sabotage the generators in the distance and take the Arm Guards (armour upgrade) (M5, 1). In the end go down the line and you will land on a roof of a small building (M5, 16).
If you want to quickly get to the target, you shouldn't go into the left warehouse, but approach the main gate leading to the camp (M5, 17). The gate will be guarded by a single enemy, but you can wait until he turns back so you will be able to easily eliminate him. Use this chance to kill the other guards patrolling the area. It would be best if you didn't activate the alarm while doing it (also keep an eye on the cameras!), however you can turn it off with the control panel inside the small (M5, 16).
FINDING THE ROCKETS:
It's the first time you can choose between two ways of getting to the target. If you don't care about finding all the interactive items, it would be better to choose the northern entrance to the next warehouse (M5, 18), as you will only have to avoid one camera (and pick a lock while at it).
If, on the other hand, you want to collect all the interactive items, you should head to the southern entrance (M5, 19) and ready some heavy firearms. Once inside, you will have to eliminate at least three enemies. Take a look around the area and use the stairs to get to the upper balconies. Afterwards head to the entrance located below one of the cameras (M5, 20).
DISABLING THE SECURITY SYSTEMS:
Ultimately you have to reach a small control room on the upper floor and interact with the computer (M5, 21). If you have chosen the northern entrance to the warehouse (M5, 18), you will have to use the ladder in order to get onto the balconies. On the other hand if you have chosen the southern entrance (M5, 20) you will find yourself in the very room you have to reach, so you'll reach the target easier. I'd suggest disabling the security systems before you start to fight with the enemies in the warehouse, as thanks to this all the nearby cameras will be disabled.
LEAVING THE WAREHOUSE:
In order to leave the warehouse, you have to reach the door localized in one of the southern corners (M5, 22) and hack the security. Of course it won't be easy, as there are some enemies in the area. I'd suggest firstly taking care of the guard patrolling the upper balconies first and afterwards the ones below. Silent executions are also possible, if only you stay careful. Take the chance and take a look around the interior of the warehouse and you will find, among other, the SMG Recoil Springs (SMG upgrade) (M5, 2).
GETTING TO THE BRIDGE:
After watching a short cutscene, you get to business. I'd suggest to the top of the closer sniper tower (M5, 23) and quickly eliminating the machine gun operator. Note that you can ride down the line to the next sniper tower (M5, 24) in order to eliminate the second machine gun operator. You can get rid of enemies below using the using the machine gun or in any other way. Ultimately your goal is to get to the nearby fence (M5, 25).
Go along the only possible path. On your way you will come across at least three enemies (M5, 26). It would be best to take care of the guard standing above first and then get rid of his friends. Eventually you will reach a bridge (M5, 27). Once there, jump down onto the lower ledge.
ELIMINATING THE LIEUTENANT (+OPTIONALLY AVOIDING DETECTION):
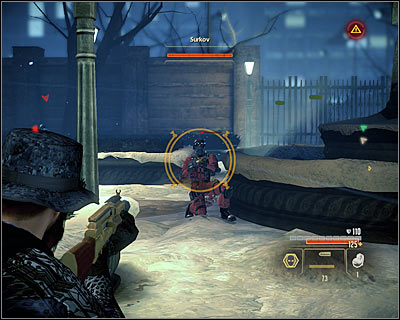
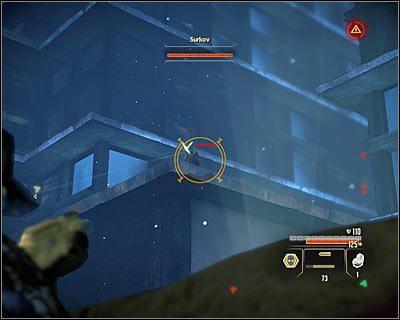
Before you is definitely the hardest part of the mission. You can solve the problem of the lieutenant (M5, 28) in two ways:
1) Fighting the boss - If you do intend to fight the lieutenant, he will act as a boss. You have to drain the health bar visible on the screen. Don't bother once he tells you that he can warn the incoming convoy, as it won't change much.
2) Staying in the shadows - It's definitely the harder option, as the lieutenant can notice you from faraway and there's only one path leading to him. However if you do manage to sneak up to him, you won't have to fight.
Fighting the boss: If you want to fight, begin with eliminating his closest guard (he will leave behind a random expensive item). Afterwards hide behind a good cover and begin attacking the boss. You have to stay cautious, as he uses a sniper rifle with a scope and a laser sight. I'd suggest using an assault rifle with a scope.
If you don't have a good rifle, you will have to decrease the distance between the two of you, so eliminate the two other enemies left and continue getting closer to the bridge. Use the stairs (M5, 29) and get up. Hide behind a good cover and finish the fight; use grenades to your advantage.
Staying in the shadows: Begin with hiding by the closest cover. Wit for the first guard to appear and silently eliminate him in close combat. Note that he left behind a valuable item (random).
Duck behind the crates and use the sound emitter from as far as possible in order to lure him. Wait for him and eliminate him silently. Turn on invisibility if you can so you don't have to risk too much.
Make sure that you weren't noticed by the boss, wait for him to start moving to the side and head towards the bridge then. Once again hide near this construction. Wait for the boss and the last guard to start moving in opposite directions and get rid of the guard. For safety, try to eliminate him while under the bridge, so that the boss doesn't notice his body.
Slowly approach the path leading up (M5, 29). Wait for the boss to start moving in the opposite direction and climb up. Move towards the bridge and then approach the boss himself (M5, 28) to initiate an execution scene. In reward for silently eliminating him, you will be awarded with his gun, the Gold-Plated AR.
DESTROYING THE STRYKER:
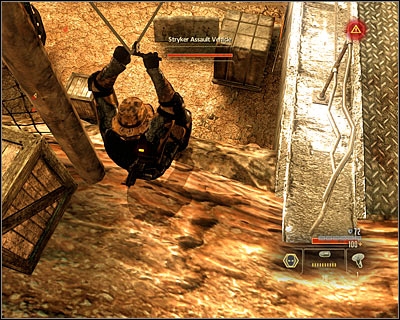
Regardless of which method you've chosen, you will begin to the left side of the bridge (M5, 30) and under heavy fire. Quickly hide, pick up the ammo and then ride down the line. I'd suggest staying here until the enemy soldiers to approach and taking care of them then. As for the sniper visible in the distance, you can pretty much ignore him.
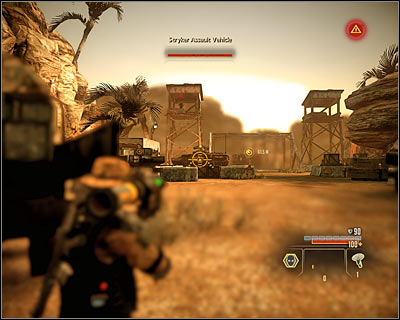
Your goal is to destroy the armoured vehicle (M5, 31); in order to do it, you have to get to the rocket launchers (M5, 32) scattered throughout the area. You have to hit the three times and find another launcher after every shot. Sprint often and you won't be that much of an easy target.
INTERROGATING SHAHEED:
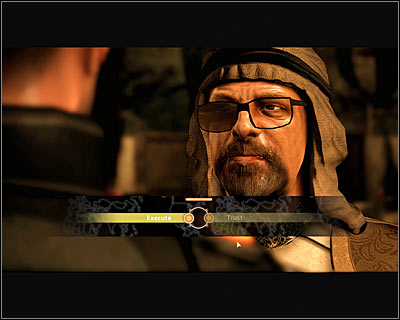
After you destroy the Stryker, there will be a conversation with Leland (choices made don't play a major role here) and afterwards the interrogation will begin. If you want to get more out of him, choose the aggressive or suave option. Also do note that you can execute him at any time during the interrogation (more on this below). In a moment you will be able to make a choice about Shaheed's faith (screen). You can:
1) Take his PDA and throw him off the bridge (Execute). It's the best option for the professional.
2) Trust Shaheed and let him live (Trust). The good point of this option is that he can contact you in the future.
Notice! This decision has an influence on the ending of the game. It would be good to keep Shaheed alive if you don't want to block one of the endings.
After choosing Shaheed faith, some cutscenes will play and then you will have the chance to talk with Mina Tang. Note that during this conversation you will have the chance to try and point out the traitor in the organization. Of course I wouldn't suggest typing Mina, as you will only lose rep points this way.
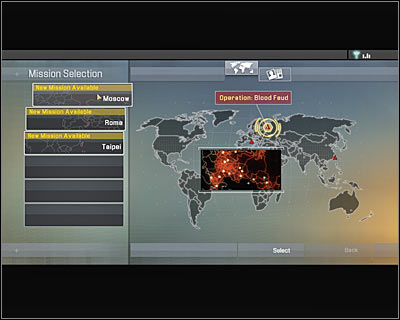
Michael will soon get to the Greek hideout. Here you will have to make two important choices - choose a speciality (it should be connected with your preferred gameplay style) and the next destination. The available places are:
- Moscow (operation Blood Feud)
- Rome (operation Deus Vult)
- Taipei (operation True Heirs)
In the meantime another cutscene with Leland will start.

During the flight to your destination of choice you will meet Scarlet Lake, from whom you will get a business card and a proposition of information exchange. Choose the suave style if you want to improve your relations.
MISSION CHOICE:
The available beginning missions are:
- Assault Lazo's Yacht and Retrieve Data
- Contact Grigori the Informant
- Investigate Weapon Shipments
The others (including the main) will be unlocked as you progress.
OTHER ACTIVITIES:
You can also do the other well-know things as:
- change the character's looks using the mirror in the bathroom
- turn on the TV and watch your trophies and mementoes (for example of Nasri's)
- use the central computer to check your e-mails (it's worth to reply to Mina's newest message) and shop at the black market (the options are very limited for now - you have to contact one of the local arms dealers first)
- change the character's equipment using the locker.
INTRODUCTION:
You can buy additional Intel for this mission (use the computer in the hideout and choose Clearinghouse). The available options are:
- Bribe Lazo's bodyguards. The hint on turning off the guards' attention (displayed in the mission preparations screen) is unfortunately completely useless.
- An additional goal connected with getting some data from Lazo's computer. It's worth mentioning that this goal will be available only if you have already contacted Grigori (arms dealer) and earned his trust.
Absolutely take some heavy guns (shotgun or an assault rifle) and remote mines (or simple grenades), as at the end of this mission you will have to participate in an unavoidable, hard fight.
MAP:
EXPLORING THE YACHT:
You can complete most of the mission without starting the alarm and I'd suggest this option even if your character doesn't specialize in staying unnoticed. You begin the mission far away from the enemy troops (M6, 1). First of all, you should eliminate the two guards patrolling the side passages (M6, 2). At the same time you have to keep an eye on the guard above and look out no to get too close to the nearby camera.

After getting rid of the two guards, you could head to the bow of the boar to eliminate a single guard, but it's not completely necessary. I'd suggest going to the upper deck by using one of the two ladders. The one closer to the start point is probably better (M6, 3). Climb up, get rid of the guard you were trying to avoid before and his buddy standing nearby the disco as well.
Now you have to return to the lower deck. Don't use the nearby stairs (M6, 4), as you can get noticed by the new guard. Instead, return to the ladder (M6, 3) and head to the passage by the security camera (M6, 5). Slowly approach the mentioned enemy. Two more are stationed a bit further, near the gaming machines; it would be good to eliminate them as well.
Secure the whole area and use the stairs leading to the lower deck (M6, 6). Afterwards I'd suggest heading right and localizing a guard standing in one of the bathrooms. Head to the next room and hack into the panel on the wall (M6, 7). This will draw the new guard's attention; wait for him and eliminate him in direct combat.
SIDE MISSION - GETTINT THE DATA FROM LAZO'S COMPUTER:
You can move to the next room (M6, 8). Begin with quickly eliminating the guard on the right and then knock out the dancer. In order to complete this mission's additional goal, head over to the sleeping room by taking the left passage. Get rid of a single enemy here and hack into the computer (M6, 10).
NEUTRALIZING LAZO:
Take the right passage for a change (M6, 9). Ultimately you have to get to the place where Lazo is (M6, 11). If you have activated an alarm before, you might need to defeat him in direct combat. In the other case, you can easily approach him from behind and finish with a single hit. Use this occasion to knock out the dancer and take the Accelerator (Assault Rifle upgrade) (M5, 1).
GETTING TO THE COMPUTER AT THE CAPTAIN'S BRIDGE:
Now you have to return onto the highest deck, with some new enemies trying to stop you in doing so. Note that they all have a yellow status, so approaching them silently may be hard. Use the silenced pistols or plant some mines. After getting to the top, search for the door leading to the captain's deck (M6, 12). Go inside to initiate a cutscene showing Sis' appearance, together with some mercenaries.
FIGHTING SIS AND HER BODYGUARDS:
Winning this fight will be quite hard and you have to make proper preparations. Begin with hiding behind the nearest cover. Don't lean out too much, as Sis (just like the lieutenant in Saudi Arabia) has a laser sight and is able to easily get rid of your armour and health. You should probably begin with getting rid of her bodyguards; incendiary grenades will be good for it.
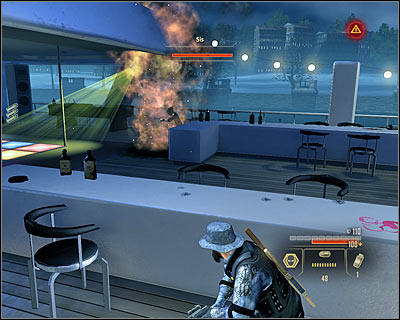
After eliminating those two, you can focus on attacking Sis herself. You have to make use of explosives here, as she has an armour and even if you destroy it a little, it will quickly regenerate. Use grenades or mines to destroy the armour and then quickly attack her with an assault rifle or shotgun. Hide every time you empty the clip or Sis begins to attack. Note that there are remote mines by the disco - you can take them if you're out of your own. Fight until you drain Sis' red health bar.
INTERROGATING SIS:
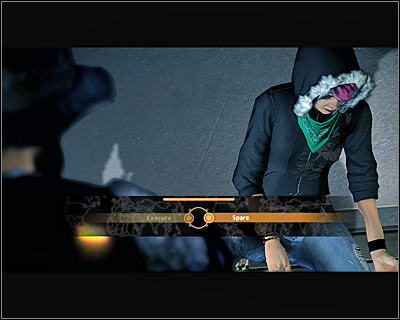
The interrogation will start right after defeating Sis. You don't have to worry too much about the behaviour style, but you do need to make a choice about her faith. You can:
1) Kill Sis (Execute) - it will worsen your relations with the G22 organization.
2) Not kill Sis (Spare) - It will improve your relations with the G22 organization.
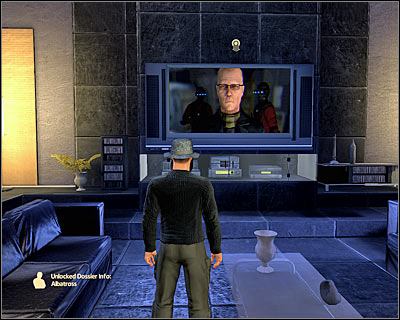
Another cutscene will start after returning to the hideout. You will get the chance to talk with Albatross, leader of the G22. If you've killed Sis, your role will be limited to choosing a style of behaviour after which the conversation will end. If, on the other hand, you haven't killed Sis, Albatross will offer cooperation. Agreeing to his proposition will unlock the Contact Albatross mission.
INTRODUCTION:
You will have a chance to speak with Albatross during the Assault Lazo's Yacht and Retrieve Data mission, if you don't kill Sis and will want to have a private conversation.
You can buy additional Intel for this mission (use the computer in the hideout and choose Clearinghouse). The available options are:
- Additional Intel on Albatross.
- Additional Intel on Sis.
COURSE OF THE MEETING:

This whole mission in fact consists only of a talk with Albatross. You can bring up the topic of Sis and her pendant twice, which will improve your relations with her, but worsen those with the G22 leader. Eventually Albatross will offer you to cooperate. Note that even if you won't agree, your relations will still stay neutral. In both cases you will gain access to items sold by the G22 on the black market.
INTRODUCTION:
You can buy one item from the Intel category (use the computer at the hideout and choose Clearinghouse) - it's some additional Intel on Grigori.
COURSE OF THE MEETING:
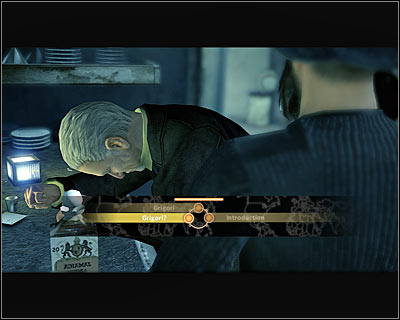
This whole mission in fact consists only of a talk with Grigori. You won't need to make any hard choices, but your behaviour will have an influence on Grigori's reactions. Professional is by far the worst choice, as you will not only have to pay him 5000 dollars, but will also risk that he's going to warn Surkov. You will get the best effects by choosing the suave style. Aggressive methods won't bring the need of paying, but there will be a risk of Grigori telling the authorities about our actions. No matter which style you choose, you gain access to items sold by Gregori on the black market (and to other traders as well, if you choose the suave style). Additionally you will learn about a potential favour - for more info, check out the description of the Investigate Weapon Shipments mission
INTRODUCTION:
You can buy additional Intel for this mission (use the computer in the hideout and choose Clearinghouse). The available options are:
- Getting Additional Intel on Dimitri Dragan.
- Learning the position of all the lockers on the map. It's an interesting option, as you won't have to look around the whole area. All the lockers will be marked as suitcases on your map.
- Snipe rifle drop. If you choose this option, you will be able to use a sniper rifle to clear out one of the last locations. Just like in Saudi Arabia, you won't be able to take the sniper rifle with you afterwards.
- Additional Intel on the VCI organization.
MAP:
TALKING WITH SIE:
The mission begins untypically, with a talk with SIE. If you've already been to Rome and killed the main boss there, you will gain 2 rep points at the very beginning. You can act in two ways - agree to cooperate until you find Dmitri or refuse to do so. I definitely don't recommend the second option, as you will have the chance to put SIE's trust to the test later on, and for now you could use her help. You will be able to appreciate the advantages of working with SIE in just a minute, as she will help you eliminate the first group of enemies (assuming you agreed on the cooperation) (M7, 1). In the other case, you will have to deal with them yourself.
GETTING THROUGH THE COMBAT ZONE:
Two different paths lead to the nearby hall (M7, 2). The main tunnel isn't a good choice, as you would find yourself in a quite uncomfortable place. It's better to choose the right door, thanks to which you will be able to surprise the enemy troops (screen). If you agreed to work with SIE, remember not to attack the mercenaries dressed in white, as they work for her. Try to clear out the whole hall (M7, 3) before taking any further actions. Additionally you will find the Featherweight SMG clips (SMG upgrade) in one of the side rooms (M7, 1).
Once more you have to choose from two paths (M7, 4). If you choose the western path, you will just have to hack a security system at the gate. The bad side of this choice is that you would have to dodge snipers more. As for the eastern path, in order to use it you first have to get to a small room and hack into the computer (M7, 5) in order to unlock the door. The upside of this choice is that you will end up on a balcony near the group of sniper (M7, 6), thanks to which you will be able to easily eliminate them.
SIDE MISSION - GETTING THE CLIENTS LIST:
Regardless of the path chosen, you should devote some time to eliminate all the nearby soldiers, those inside the western building and those patrolling the outside as well (M7, 7). Keep an eye on the two snipers mentioned before in particular (M7, 6). If you don't want to risk too much, just shoot the gas canister below the tower (screen). It will cause a huge explosion and the snipers will die as a result. Wait for more enemies to appear and eliminate them as well. Head to the computer (M7, 8) only once the area is secured.
GETTING TO THE CRANE ZONE:
Head to the only available path leading to the next location and eventually you will reach a locked gate (M7, 9). Break the security system and you will find yourself in a room with a guard, so be careful. Get rid of the enemy and then use the computer (M7, 10) which will unlock the further path. Before you get to the crane, you will have to choose if you want to stay below or use the ladder (M7, 11). I'd suggest the second option, as it will be easier to avoid or eliminate the enemies.
GETTING THROUGH THE BARRICADE:
You will learn about the need to get through the barricade soon after getting to the new location. Ultimately you have to reach the crane's control panel (M7, 12), which of course won't be too easy. The enemies can either patrol the terrain below or stay on the balconies. Dodging them will be more difficult in the second case, so you probably will have to use guns or eliminate them in close combat. You should stay on the balconies and jump onto the train cars at the right moments (M7, 13). In the end use the ladder, while looking out for the guards patrolling the area around it. Use the control panel to activate the crane.
GETTING TO THE WEAPONS CARGO:
The crane will activate right after you use the control panel. Make sure you duck and try to eliminate the enemies on the way. After it stops (M7, 14), I'd suggest quickly getting out, as the enemies can throw grenades inside. Try to eliminate all the enemies from the upper balconies. Remember to avoid killing her SIE's men if you're working with her. Afterwards go down and use the passage leading to the train (M7, 15).
Upon getting to the new location, you will have to look out not only for the enemies, but also for the trains which will appear from time to time on the rails on both sides of the station. It's very important, as they are moving at a very high speed and you will only have around two second to get off the tracks upon hearing the signal. I'd suggest getting to the upper balconies, from where it will be easier to plan further moves. You can get to the cargo in two ways - aggressively or quietly.
Aggressive option: If you want to eliminate all the nearby enemies, I'd suggest getting to the sniper rifle which you could have bought before the mission started (M7, 16). You should firstly take care of the machine gun (screen) and move to the other enemies later. Try to eliminate all the visible enemies from this spot and only then go down (for example using the nearby line) to get rid of the others.
Silent option: If you don't intend to attack the enemies, you should stay at the upper balconies and move clockwise. You will bump into some enemies around the middle (M7, 17). Ultimately you have to reach the southern balconies (M7, 18) so that you're behind the machine gun post. Then use the ladder or ride down the line, thanks to which you will find yourself behind the operator (he shouldn't notice you).
Regardless of the path chosen, pick up the Assault Rifle Muzzle Break (Assault Rifle upgrade) (M7, 2) and get to the marked car (M7, 19). Move the side door and go inside. Now you have to choose what you want to do with the weapons shipment. You can:
1) Destroy Buran - Quickly get away from the car after choosing this option, as new enemies might appear.
2) Reroute Shipment - Enemies shouldn't appear in this case and you will able to choose the destination in a moment.
LOCALIZING THE SHIPPING MANIFEST:
Use the southern passage leading to the new location (M7, 20), which depending on your actions until now can be unprotected, or guarded by a single enemy. After getting inside, locate the computer and hack it (M7, 21). If you've chosen to reroute the shipment, you can now choose its destination point - your hideout or Grigori's whereabouts. The second option is by far the best, as you will not only improve your relations, but also get payment and unlock new items on the black market.
DEFEATING DMITRI AND HIS MEN:
Four enemies will appear in the area after you use the computer. Two of them will enter the warehouse and the rest will stay outside. You don't need to stay hidden, as you will need to fight Dmitri either way. However do try not to use up your grenades and heavy weapons ammo, as you might need them in just a while.
Dmitri and his men will show up right after you eliminate the fourth guard (M7, 22) and it would be wise to get ready for his attack. Throw him some grenades and then finish him off. He's much weaker than most of the bosses, so you can even eliminate his in close combat. However you need to look out for him shooting from a machine gun. Also keep in mind that his death won't end this part of the mission, as you also need to eliminate his.
MEETING SIE ONCE MORE:
You will meet with SIE again after defeating Dmitri and his men. If you weren't hostile until now, it's not worth attacking her. On the other hand if you didn't agree to work with SIE or just want to test yourself in a fight against her, choose the attack option. It's worth mentioning that even if you do fight SIE, she won't die and you will be able to meet her again in the future.
If you decided to fight SIE, quickly hide behind a cover. Notice that SIE will be usually accompanied by two mercenaries. From time to time they will use line to get close to you and you will have to quickly eliminate them in such a case. Additionally in the further part of the battle two enemies will appear above you (screen). You should back up a little and eliminate them from further.
As for SIE herself, you have to use a SMG or an assault rifle (better). Additionally you should equip some special ammo so that your attacks deal more damage or pierce her amour more easily. You will find plenty of normal ammo in the area, which will additionally reappear after some time. Attack SIE with short burst of fire, firstly destroying her armour and then draining her life. Continue attacking her until you lose your own armour. Once you do, stay behind cover until it regenerates. Depending on the difficulty setting the fight can last for a couple minutes, so you have to stay patient and drain her health gradually. As I mentioned before, you won't kill SIE, as she will retreat to a helicopter once she loses all her health. You will only be able to choose a behaviour style (I'd suggest suave, if you want to improve your relations).
After getting to your hideout, don't forget to check out your e-mails:
1) If you've sent the weapons to Grigori, you can reply to his message and choose download, which will give you 30000 dollars.
2) You can reply to Scarlet's e-mail (gaining points with being professional and losing for being aggressive).
3) You can send notes on Halbech to Scarlet, to the black market merchants or to the corporation's headquarters.
4) You can reply to SIE's e-mail (gaining points for being aggressive and losing for being suave).
INTRODUCTION:
You can buy additional Intel for this mission (use the computer in the hideout and choose Clearinghouse). The available options are:
- Additional Intel on the G22 organization.
- Additional Intel on Surkov.
- Map of the embassy with marked security systems. It's a very interesting option, but you will have access to it only if you work with Albatross (G22).
- A sniper rifle placed around the embassy's main entrance. It's not all that useful, but will surely help you in eliminating enemies at the end of the mission. You have to work with G22 in this case too, or else this option won't be available.
Equip yourself with heavy weapons and lots of grenades or mines for this mission, as you won't be able to avoid many fights. Also equip a good armour, as one of the goals will require you to defend form oncoming waves of enemies.
MAPS:
CHOOSING A HANDLER:
Before beginning, you will have to choose an ally who will become your handler (together with Min Tang) for the duration of this mission. If you won't accept Albatross' proposition, you will automatically team up with SIE and VCI forces. If, on the other hand, you do accept his offer, the G22 forces will be on your side. After getting close to the embassy, you will have s short conversation with your handler of choice, which won't play a major role in both cases (you can gain or lose some points depending on the behaviour style).
GETTING INSIDE THE EMBASSY:
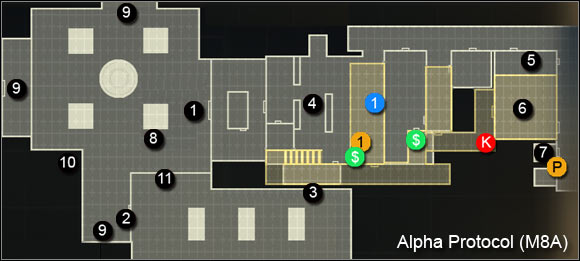
You can get inside the American embassy in two basic ways. The first requires you to talk with the guard standing by the main entrance (M8A, 1). You will get inside regardless on the chosen style and you can also give your real identity. The only exception is attacking the guard. I definitely don't recommend this option, as you will fall in disfavour with other characters, lose rep points with Mina Tang and weaken the embassy's defence.
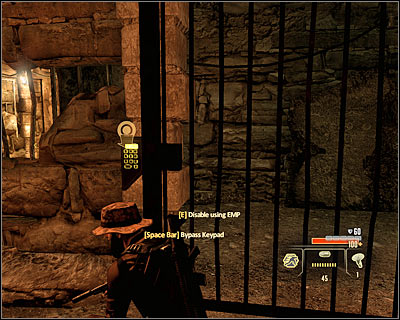
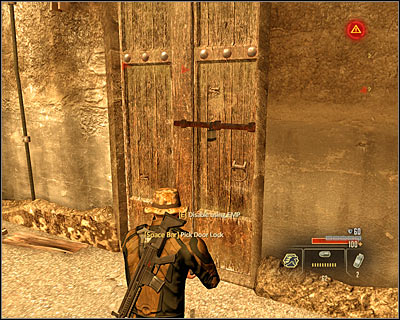
If you don't want to talk with the guard, head to the ladder located on the right side (M8A, 2). After getting onto the roof, you will have to avoid a single guard. You don't need to kill or knock him out, just wait for him to go in the other direction; use the covers to avoid being detected. Ultimately you have to get to the locked door (M8A, 3) and break inside by solving a mini-game or using en EMP charge.
GETTING TO THE ELEVATOR:
Regardless of your method of getting into the embassy, you have to get close to the main room (M8A, 4) and you will be a witness to an attack. If you teamed up with Albatross, VCI forces will be the attackers and if you're in the same team with SIE, G22 soldiers will attack. It's worth having the embassy's employees on your side, as they will keep the enemies busy (otherwise you'd have to attack all of them yourself).
You can eliminate the enemy soldiers gradually, but it's not completely necessary. If you want to avoid fighting, stay at the top balcony. Note that on your way you can break into a room with a computer containing information on SIE (M8A, 1) and the Infrared Flashbulb (armour upgrade) (M8A, 1). Ultimately you have to get to the eastern corridors. If you chose the only possible passage on the ground floor, you will need to defeat some enemies (M8A, 5). If, on the other hand, you stay on the upper floor you will have to avoid a security camera, but will be able to jump down behind the enemies' backs (M8A, 6). Regardless of the chosen path, you have to reach the elevator (M8A, 7), get inside and use the panel.
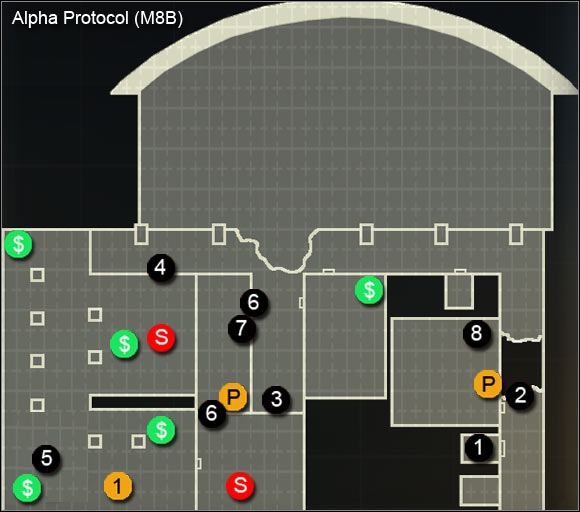
FINDING SURKOV:
The exploration of the first floor will begin with the elevator (M8B, 1). Get out and turn left, jumping over a nearby hole (M8B, 2). You will bump into the first enemies behind the corner and unfortunately avoiding them is pretty much impossible. Attack the enemies from a distance, using the available covers to your advantage. Look out for the grenades, which you of course have to dodge.
There are two paths leading to Surkov - south (M8B, 3) and west (M8B, 4). In both cases you will of course come across more enemies, including your first contact with an automatic machine gun. Always destroy them first and don't let the enemies surprise you. You don't have to kill all the enemy soldiers or race with time. Approach the place where Surkov is hiding (M8B, 5) and a conversation will start. Regardless of the chosen behaviour style, you will get further directives from him.
GETTING TO THE UPPER FLOOR:

Your next task will be to switch off the building's defence systems, however for now you have to focus on getting to the second floor. Have a look around the area and you will find a computer with information on Grigori (M8B, 1). Once you think you're ready, use one of the two available doors to the newly accessible guards room (M8B, 6). Switch off the alarm (it's optional), pick up the ammo and then go up the ladder (M8B, 7).
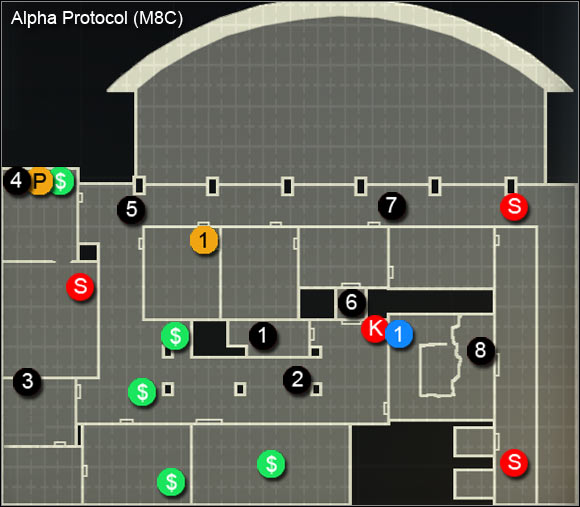
SIDE MISSION - HACK INTO SURKOV'S COMPUTER:
This time you will begin beside one of the security cameras (M8C, 1), so keep cautious not to start an alarm. Head towards the next corridor, which will be guarded by at least a couple enemies. Sneaking will once more be quite difficult, so it would be best to attack them from a distance and not let them get close. Wait for more enemies to appear, it can take some time. After getting rid of them, hack into one of the computers (M8C, 2), which will allow you to gain more info on Surkov.
GETTING TO THE SECURITY CONTROL PANEL:
Head forward and use the room on the left once you reach a barricaded passage. I'd suggest staying low while nearby the big hole in the wall (screen) (M8C, 3), as there's probably a big group of mercenaries in the next room. You should also look out for a stationary machine gun located in that room. Head to the northern room and once then, hack into the computer in the upper left corner (M8C, 4).
RETURNING TO THE GROUND FLOOR:
Now you can head towards the newly unlocked northern corridor (M8C, 5). Note that new enemies have appeared in the area, so be ready that you will need to fight. I'd suggest going through the side rooms frequently, as there are machine gun posts placed in the main corridors. Don't hesitate from hacking into a computer (M8C, 1) on your way to gain new info on Scarlet.
There are two paths leading to the target. I'd suggest picking the southern passage (M8C, 6). Here you will have to avoid a camera, but after going into the previously inaccessible left room (screen) you will find SMG Recoil Dampener (SMG upgrade) (M8C, 1). Additionally you will be able to avoid the enemies, as you have to use the demolished staircase either way, because of the broken elevators. (M8C, 8). If you choose the main corridor (M8C, 7), you will to deal with some enemies and two stationary machine guns.
Use the staircase and go down, getting to the first floor (M8B, 8), and then to the ground level (M8A, 6). On your way you will of course have to make some jumps. Now you need to return to the starting point. Before you get there, ready some serious firepower and grenades, as a quite hard fight awaits you. You can choose if you want to defend on the ground floor (M8A, 1) or rather use the sniper rifle on the roof fragment (M8A, 11). The second option will be of course available only if you've bought the sniper rifle during the mission preparations.
PROTECTING SURKOV:
The last part of this mission requires you to protect Surkov, who will try to defend himself and will be hiding behind a cover opposite to the embassy (M8A, 8). The enemies will keep incoming from three different sides (M8A, 9), at the beginning mainly from the north and west and later on also from the south (the garage's door will open). Generally you have to keep them from getting too close, as then they will throw a grenade, which can immediately kill Surkov. You yourself should use grenades to eliminate larder groups of.
Additionally you have to look out for a sniper who can appear on the roof of the western building (M8A, 10). You should probably get rid of him as fast as possible. Don't shoot the other embassy employees; luckily you also don't need to protect them, as only Surkov has to survive. Completing this mission will initiate a conversation with Surkov and regardless of the style you choose he will offer his help, which will add a new mission to the list - Contact Surkov at Moscow Office.
After getting back to the hideout, don't forget to take a look at the text messages. You should have received e-mails from:
- the person to whom you've send info on the Halbech organization
- Sean Darcy (informing that he's looking for you)
- the person with whom you worked with at the embassy
INTRODUCTION:
You will get the chance for a meeting with Surkov after completing the Intercept Surkov at US Embassy mission.
THE COURSE OF THE MEETING:
The whole mission consists of a conversation with Surkov. Generally you won't make any important choices during this mission, however choosing a proper style will give you additional rep points. The only exception is his favour to not reveal his connections with the Helbech organization (screen), to which you can agree or not. At the end of the talk, you will meet Surkov's new bodyguard - Championchik. It's worth mentioning that if you don't want to talk with Surkov, you can ask him to send all the data to your PDA at the very beginning. After the meeting comes to an end a new mission will be unlocked (Assault Brayko's Mansion) and the further part of the conversation with Leland will be shown.
INTRODUCTION:
You can start this mission only after meeting with Surkov (the Contact Surkov at Moscow Office mission).
You can buy additional Intel for this mission (use the computer in the hideout and choose Clearinghouse). The available options are:
- Additional Intel on Konstantin Brayko.
- Additional Intel on the Russian Mafia.
- A map with security system marked on it. It's not very useful, as it only contains the localization of a single machine gun and some control panels.
- If you've been to Taipei, Steven Heck can deliver a big amount of polluted cocaine to the mansion. I don't suggest buying this, as it costs a whooping 10000 dollars (or little more than 6000, if you've got a discount on Hack's products).
Don't forget to take w good weapon (a shotgun or assault rifle), as there's a quite difficult fight by the end of the.
MAP:
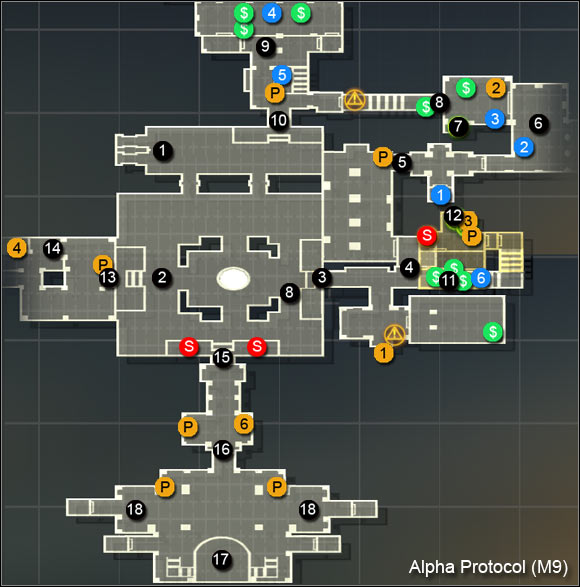
GETTING TO THE MANSION'S MAIN SQUARE:

You begin the mission at the northern part of the mansion (M9, 1), onboard an armoured vehicle. You can't control the vehicle itself, so focus on shooting the enemies appearing on the way. You will eventually stop at the (M9, 2), but fortunately you will have quite some time to eliminate the nearby enemies before your character gets out. Stay cautious, as new enemies are ought to come. You can either avoid or eliminate them (for example using the southern machine gun posts). Ultimately you have to reach the mansion's main door (M9, 3) and hack the security system to get inside.
EXPLORING THE MANSION:
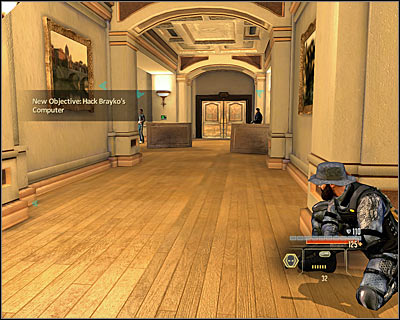
After entering the mansion, you will have to decide if you want to focus on finding connections with Halbech or on Konstantin Brayko; the choice won't have too much of an influence. You can take the chance and take a look round the southern rooms, where you will find, among else, a safe with Intel on Surkov (M9, 1). In the other case, immediately head to the entrance to a sort of an arcade room (M9, 4). Get some heavy weapon ready.
SURVIVING THE AMBUSH:
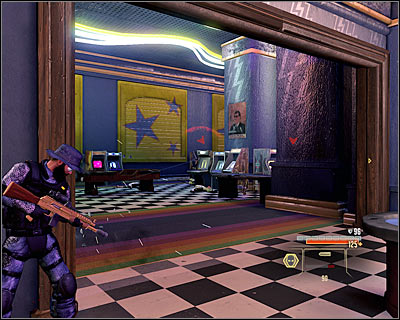
The door will lock itself right after you enter and that means you've fallen into a trap. Use your weapon to eliminate the guards appearing in the distance. Remember not to stay in one spot for too long, as they will throw grenades at you. Ultimately you have to reach the opposite (M9, 5).
HACKING INTO BRAYKO'S COMPUTER:
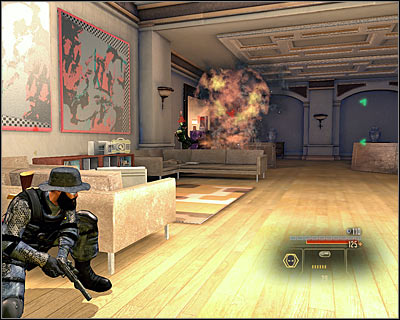
I'd suggest beginning the exploration of the new part of the mansion with checking out the small room in the south, in which you will find Extended SMG Clips (SMG upgrade) (M9, 1). In the next big room (M9, 6) you will participate in a fight between the friendly units and Brayko's bodyguards. Help yourself with grenades and don't take any risks. Afterwards take a look around for secrets, with the Assault Rifle Linear Compensator (assault rifle upgrade) among them (M9, 2).
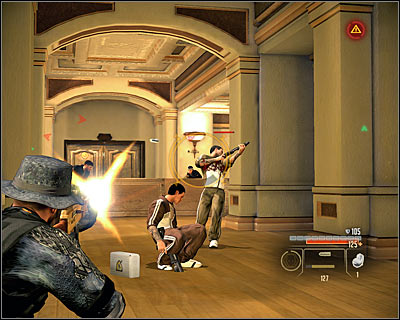
You will find more valuable items in the adjacent bedroom, for example the Printed Circuitry (armour upgrade) (M9, 3) and a box containing info about the Halbech organization (M9, 2). You don't need to kill or knock out the dancer in this room. Instead hack into Brayko's computer, found in the corner of the bedroom (M9, 7).
GETTING OUT OF THE BUILDING:
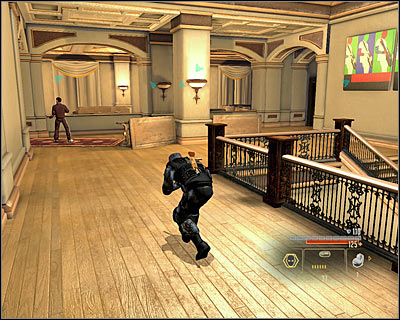
Now you need to get to the main square (M9, 2), but you of course can't follow the same path as before. Instead use the newly opened west passage (M9, 8). After a while you will reach a small (M9, 9). Begin with eliminating the guards on the upper floor and then take care of those below. Use this chance to get two new secrets - the Shock Pads (armour upgrade) (M9, 4) and the Full Choke (shotgun upgrade) (M9, 5). Now you can use the southern door (M9, 10).
COMPLETING ONE OF THE TWO SIDE MISSIONS:
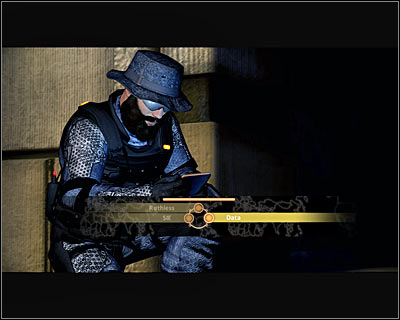
After you get out of the building, you will be contacted by Mina, informing you of the possibility to choose an additional goal (screen). You can:
1) Focus on getting to the data (Data or Ruthless)
or
2) Focus on saving SIE, who's being held captive by Brayko
Regardless of the chosen option, begin with getting rid of the new enemies who will appear on the main square (M9, 2).
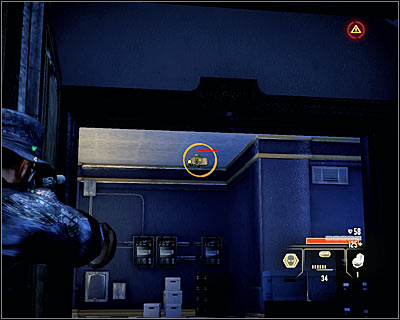
Getting to the data: Once more use the mansion's main entrance (M9, 3). Look out, as new enemies with whom you will have to deal have showed up inside in the mean time. After securing the area head towards the newly unlocked vault entrance (M9, 11) and go down the stairs. Look out for the tower inside the vault (by the ceiling), which you should destroy while shooting from a cover.
Take a look round the area. Hacking into the computer on the right (M9, 3) will give you new info on Championchik, while breaking into the main computer (M9, 12) will open the vault. Take all the items from inside, including the cash from the safe (screen) and the SMG Recoil Nullifier (SMG upgrade) (M9, 6). Look out, as once you get out of the vault some new guards will show up, which you of course will have to get rid of.
Saving SIE: Head to the previously inaccessible entrance to the guest house (M9, 13). Inside there will be four guards, who it would be good to eliminate without using grenades. After you secure the area, a cutscene with SIE will automatically pop up (M9, 14) - you can save her (Free), kill (Kill) or leave her be (Leave). Take the briefcase with new info on Brayko before leaving this location (M9, 4).
GETTING TO BRAYKO'S HIDEOUT:
You now need to head to the entrance to the newly unlocked southern part of the mansion (M9, 15). The adjacent corridor will be quite heavily defended. Use incendiary grenades on them, you will come across similar items soon enough. Use the chance to take the briefcase with info on Brayko (M9, 5) and patch up your character. Enter the last room of the mansion (M9, 16). After a quite interesting intro and a short conversation, you will begin a "rock" fight with Brayko.
THE FIGHT WITH BRAYKO:
The fight is divided into two basic phases, with the first being definitely easier and shorter. Hide behind any available cover and begin attacking the boss, who will be probably hiding somewhere around the main scene (M9, 17). Just like in the previous fights, you first need to get rid of Brayko's armour; luckily it will be regenerating quite slowly. After you take around 1/6 if his health and short cutscene will occur and the second phase of the battle will begin.
The second phase consists of three parts, which will continuously keep on repeating one after another. The first part will look just like before, so just shoot the boss. Afterwards it will be enriched with enemies appearing on the sides of the room (M9, 18). You have to get rid of them rather fast. Use incendiary grenades, as you can find more of them on the main scene.
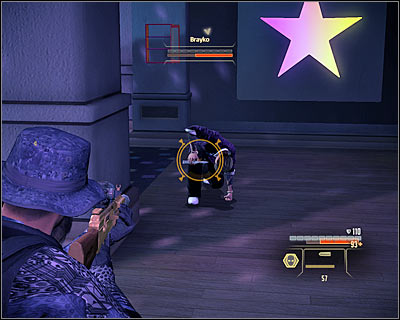
In the second phase Brayko starts to madly attack you after he takes some drugs. You have to run from him, because once he gets to you he will start using his knife, which will rapidly drain your armour and health. Continue avoiding him until he gets tired and kneels down. QUICKLY attack him, as it's the part when you can deal the most damage.

During the part the boss will run onto the upper balconies and attack from there. Some normal enemies can appear as well. Generally if you don't have a good long-range weapon, just wait behind a cover until this part ends, hoping for some armour regeneration. You have to keep on attacking the boss until he loses his whole health bar. First aid points and weapons found on the sides of the room will surely help go get through the fight.
INTERROGATING BRAYKO:
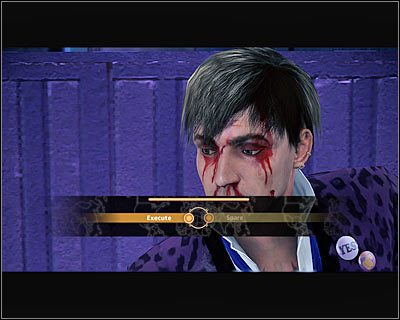
During the last cutscene involving Brayko, it's worth to make him give you some information on the Helbech organization, thanks to which you will learn about Surkov's potential betrayal and activate the Prevent Surkov's Escape mission. As a reward, you will also gain Brayko's SMGs. The last important decision is deciding Brayko's faith (screen). You can either spare him (you will gain 75000 dollars this way) or execute him (you could have done it from the beginning, but this way you'd lose the chance to gain the valuable information). After the mission ends, you will see the further part of the conversation with Leland and will also learn about Surkov's bodyguards and the fictional Molotek corporation from Mina.
INTRODUCTION:
You can begin this mission only if you gained info on Surkov after defeating Brayko (the Assault Brayko's Mansion mission).
You can buy additional Intel for this mission (use the computer in the hideout and choose Clearinghouse). The available options are:
- An additional goal connected with intercepting some data. It's worth buying if you want to complete all the possible actions.
- The security system map. The fact it's so cheap is not coincidental, as it only shows the alarm control panels (the only camera found in Surkov's hideout will be disabled).
- Additional Intel on Surkov's men.
MAP:
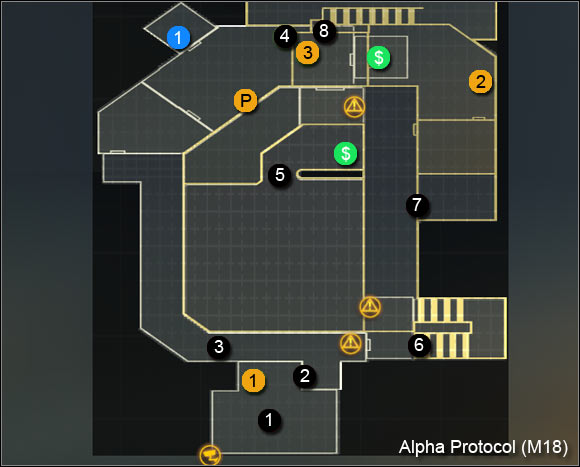
GETTING TO THE NORHTERN PART OF THE HIDEOUT:
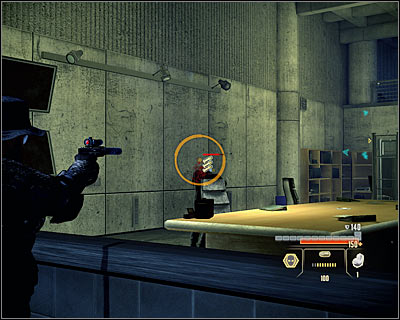
You will begin the mission in the southern part of the map (M18, 1). You can ignore the nearby camera, as it's disabled, however it's worth to break into the nearby computer (M18, 1), as this way you will gain Additional Intel on Championchik. Approach the only available door and break the security system (M18, 2). Carefully approach the main part of the hideout. If you don't mind being aggressive, you can attack the enemies from here (screen). Luckily raising an alarm won't bring any negative consequences in this case.
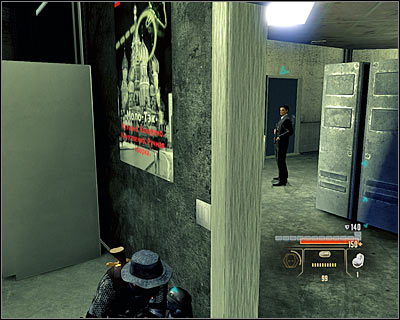
If you don't want to raise the alarm, go into the left corridor (M18, 3). Firstly you will have to eliminate one guard, with two a little further. Definitely take a look round the area - you will find the Featherweight Pistol Clip (pistol upgrade) among else (M18, 1).
SIDE MISSION - GAINING ADDITIONAL DATA:
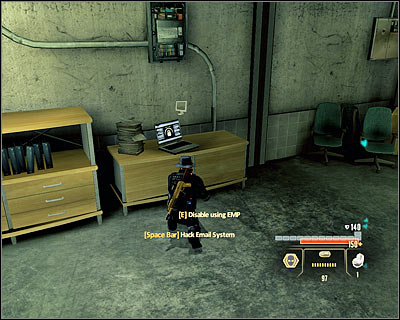
The data can be obtained by breaking into the computer terminal located in the northern part of the hideout (M18, 4). Of course you should do it only after taking care of all the nearby enemies.
FINDING SURKOV:
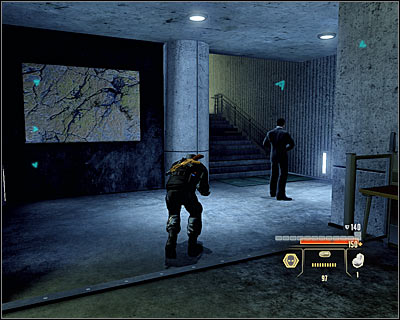
Once more approach the biggest room (M18, 5). You can act in two ways here as well - sneak or eliminate the enemies in direct combat. If you chose to stay silent, use the invisibility and firstly take care of the enemies on the upper balconies. Keep in mind that you don't need to kill all of them, you just need to get to the stairs leading onto the upper floor (screen) (M18, 6). After you get there, the game will automatically stop the action.
TALKING WITH SURKOV:
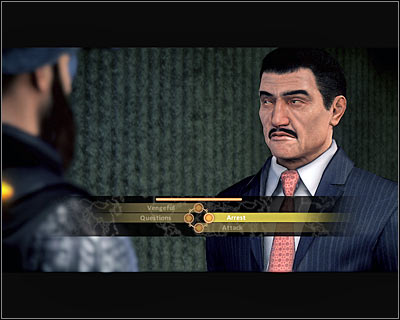
You will begin the conversation right after getting upstairs and it can end in two ways. If you choose to be professional or suave, Surkov will give you the data you need and the mission will end. If, on the other hand, you chose to be aggressive or to attack, you will have to fight Surkov's bodyguard - Championchik.
CHASING AFTER SURKOV:
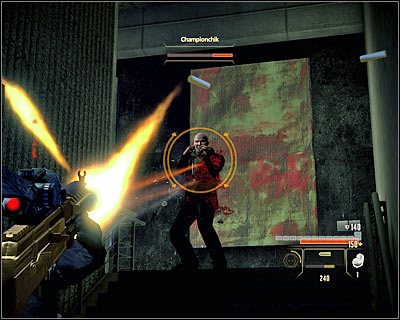
The fight with Championchik is luckily very easy. Chose a heavy weapon (an assault rifle or shotgun will work the best) and shoot the enemy from a safe distance, aiming at his head (screen). If Championchik rushes at you, start to run from him to the ground floor, while still shooting. He should die rather fast and once he does you will be able to return upstairs. Chose the passage leading through the side rooms (M18, 7) and eliminate single enemies on your way. You can break into a safe (M18, 2) to gain info on the Halbech organization and Konstantin Brayko, as well as into a computer terminal (M18, 3) which holds new data on SIE.
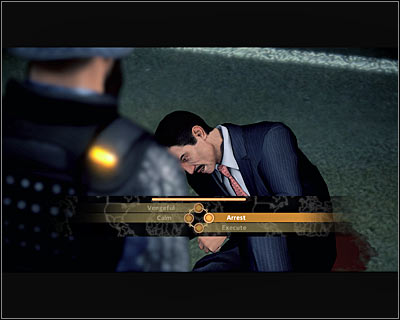
Use the northern building exit (M18, 8) and a cutscene with Surkov will automatically trigger. In this case you can chose between arresting him and completing the planned execution. After returning to the hideout, you can send the data found to one of three characters (only if you've chosen to chase after Surkov).
MISSION CHOICE:
The available beginning missions are:
- Bug CIA Listening Post
- Intercept NSA Intelligence
- Intercept Jibril Al-Bara at Chateau
More missions (including the main) will get unlocked as you advance in the game.
OTHER ACTIVITIES:
You can also do the other well-know things as:
- change the character's looks using the mirror in the bathroom
- turn on the TV and watch your trophies and mementoes (for example of Nasri's)
- use the central computer to check your e-mails (it's worth to reply to Mina's newest message) and shop at the black market (the options are very limited for now - you have to contact one of the local arms dealers first)
- change the character's equipment using the locker.
INTRODUCTION:
You can buy additional Intel for this mission (use the computer in the hideout and choose Clearinghouse). The available options are:
- Additional Intel on the CIA.
- Additional Intel on the security system at the CIA post, which will also decrease the difficulty of disarming them. It's not absolutely needed, but it's a good option considering the low price.
I'd suggest taking an armour and gadgets which increase the chances of staying hidden, is it will be especially awarded.
MAP:
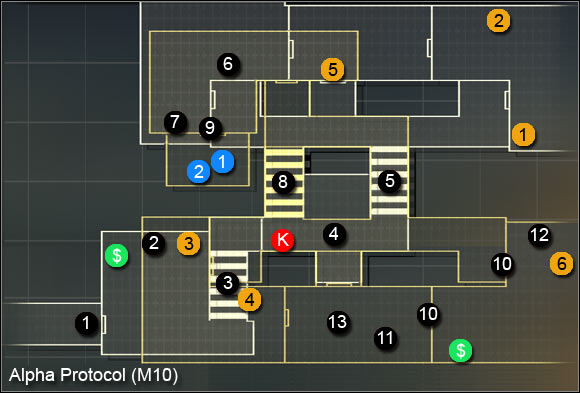
SIDE MISSION - CUTTING OFF THE VIDEO SIGNAL:
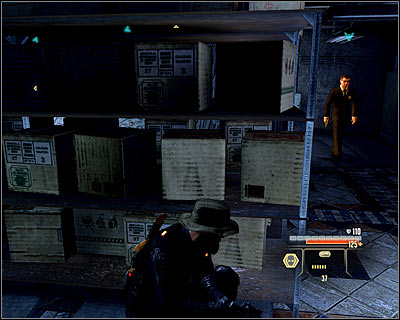
The mission begins in a weekly lit corridor in the (M10, 1). Go into the adjacent room and look for the box on the northern wall (M10, 2). Note that cutting off the signal turned one of the nearby guards' attention. Hide behind the boxes and wit for him to come close (screen). You can pretty much kill the CIA agents during this mission, but it's highly inadvisable, as you would draw the agency's and local services' attention, as well as lose points with Mina. It's better to just avoid them or quietly eliminate. In the second option you have to approach them from behind and press E (not SPACE, as it's an execution!).
SIDE MISSION - DISABLING THE SECURITY CAMERA:

You can now leave the basement by using the nearby stairs (M10, 3). Carefully open the door leading to the main hall (M10, 4), as the upper floor is being patrolled by a single guard. Wait for him to go right, use the stairs (M10, 5) and knock the CIA agent out.
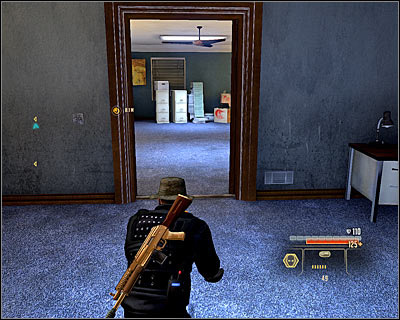
Take this opportunity to take a look around the eastern part of this floor and among other items you will find a briefcase with data on the Halbech organization (M10, 1) and a suitcase with info on Conrad Marburg (M10, 2). Go through the other northern rooms (screen) to the computer (M10, 6), this way you won't be noticed by the guard on the second floor. Approach the computer and hack into the system by solving a mini-game or using an EMP.
INSTALLING THE BACKDOOR:
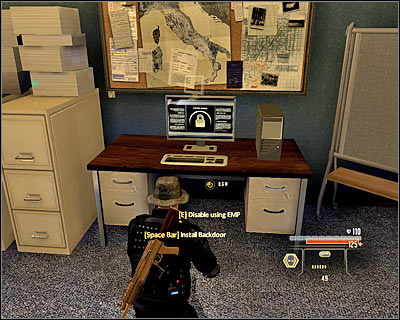
Stay in the same room and approach the second computer terminal (M10, 7). Break in again (mini-game or EMP) and Michael will install a Backdoor, which will allow to intercept the CIA transmission.
SIDE MISSION - GETTING TO THE ARMOURY:
Carefully approach the stairs leading to the second floor (M10, 8). You don't need to worry about the camera upstairs, as you've already disabled it before. Hide to the right of the stairs and wait for the guard. As he starts to move left (screen), go up the stairs and knock him out. Take the chance and check out the whole floor. In the southern rooms you will find a briefcase containing data Mina Tang (M10, 3) and a computer with some e-mails (M10, 4).
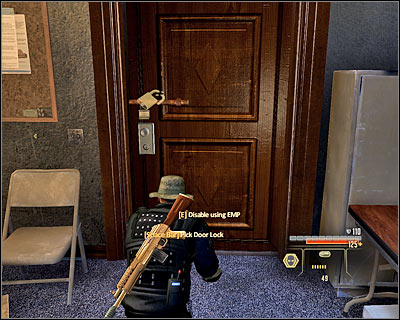
In one of the northern room you will find a computer (M10, 5) with info on Jibril and a couple e-mails. Now you can head towards the armoury door (M10, 9). Break the security system, go inside and you will find, inter alia, the Improved Digital Camouflage (armour upgrade) (M10, 1) and the Silencer Mk3 (pistol upgrade) (M10, 2).
CLEAR OPERATION ROOM:
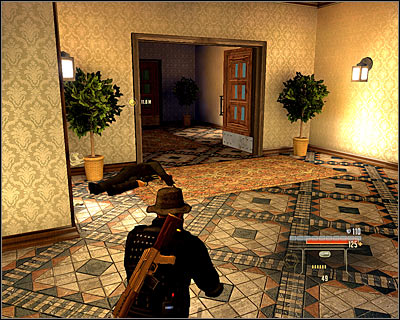
You will receive this goal after approaching one of the two entrances to the operations room (M10, 10). You don't need to think of any complicated strategies here; approach the fan found in the southern room (screen) (M10, 11) and press the action button. Quickly hide, as two guards will exit the room. One will go towards the western rooms and the second one will start patrolling the balcony by the disabled camera. Try to eliminate both of them without having to use a gun.
DOWNLOAD INTEL DATABASE:

You can now enter the operation room. Here you will find, inter alia, a suitcase with data on the Halbech organization (M10, 6). In order to complete the main objective of this mission, you have to break into the computer (M10, 12). Note that you can also read the e-mails.
LEAVE:
Now you have to return to the ground floor. Look out for new agents coming in from the basement in the area of the main hall (M10, 4). Try to knock them out or simply avoid them without starting an alarm. In order to finish this mission, you have to reach the southern exit located on the ground floor (M10, 13).
Upon returning to the hideout, you will have a talk with Madison Saint James. You can learn more about her or ask Mina to block her. Don't forget to take a look at the received messages:
1) You can reply to Scarlet's e-mail (gaining a point for being professional and losing one for being aggressive).
2) You can send the notes on Halbech's actions to Scarlet, the black market merchants or to the company's headquarters.
3) You can download the data collected thanks to installing the backdoor, thanks to which you will gain new Intel on Henry Leland.
INTRODUCTION:
You can begin this short mission right after getting to Rome.
THE COURSE OF THE MEETING:
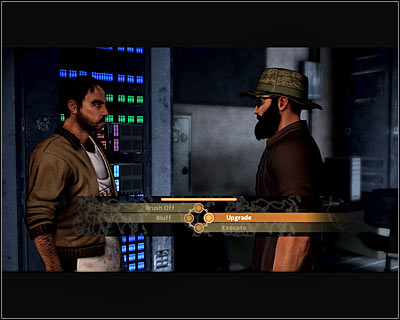
This mission is just a conversation with a man who is staying at the NSA's hideout. The talk will start after a short intro from Mina and it can end in two ways. If you keep on choosing the professional style replies, you will gain access to the server room (screen) and will be able to leave the shop without having to use force.
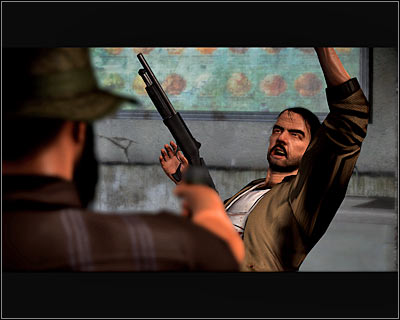
All other options will end with the death of the person who apparently isn't an NSA agent. The only difference is that you can wait for the man to attack first (by choosing suave or aggressive) or execute him at any moment.
Don't forget to check out the messages upon returning to the hideout:
1) You will receive a reply from the person to whom you've sent the data on Halbech.
2) Download the data collected thank to the backdoor, which will give you net Intel on Conrad Marburg.
3) You can reply to Mina Teng's e-mail regarding the DV servers (choose the professional style for best effects).
INTRODUCTION:
You can buy additional Intel for this mission (use the computer in the hideout and choose Clearinghouse). The available options are:
- Additional Intel on Jibril Al-Bara.
- Hints which will help you identify Jibril. Generally it's not worth it, the identification process will speed up a little, but no one requires speed of you.
FIRST LOCATION:
This mission consists of three phases and the characteristic thing is that you won't be able to move. Begin with familiarising with the instructions displayed on screen. No worry - you don't have to hurry, no one will run from you. You can complete each part of the mission in two ways. The more peaceful solution requires you to "scan" the people by aiming at them an waiting for the bar to fill. Afterwards you will receive data from Mina about that person. The aggressive option lets you ignore the bar and focus on killing the people present at the mansion. Each time it's very important that no one escapes. Additionally you have to be ready for negative consequences further in the game if you choose the aggressive way.
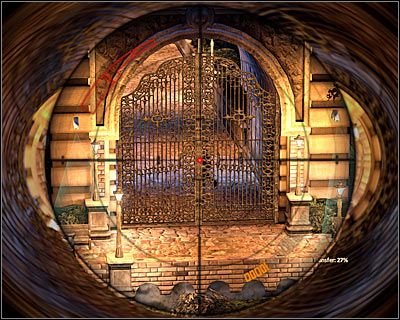
The first location contains three people walking by the mansion's gate - two of them will be standing before the gate and the third behind it. Scan them all if you want to choose the unaggressive style. Otherwise kill the one behind the gate first and then take care of the two others. Additionally you have to make sure that their bodies don't end up in places checked by the two security cameras.
SECOND LOCATION:
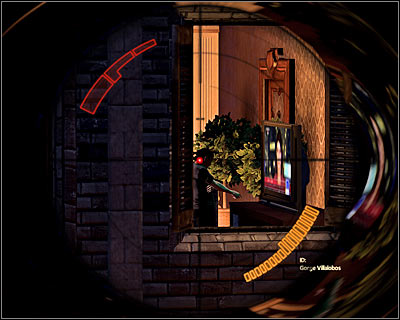
The action will move nearby the main entrance to the mansion. Scan the three people patrolling the terrain outside the mansion (to the left of the entrance, opposite and to the right) and then the one who will appear by one of the first floor windows (screen). If you want to kill them, firstly take care of those by the entrance (they can't run from here!) and then move on to the partly undressed woman in the ground level room.
THIRD LOCATION:
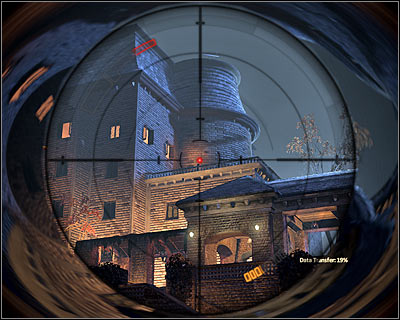
There are five people at the lest location - four of them will be "patrolling" the terrain in front of you. The fifth one is Jibril, who you can find on one of the upper balconies (screen). If you choose the unaggressive style, begin with scanning the other four men present here, thanks to which you will earn an additional perk at the end of the mission. Otherwise take care of those four (making sure they don't leave the scene) and then take care of Jibril, who'll be running down the left staircase.
MAKING A CHOICE ABOUT JIBRIL:
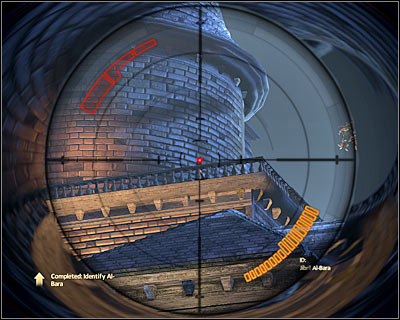
Begin with scanning Jibril and hearing what Mina has to say. If you think that the evidence gathered isn't enough, you may decide not to kill him and press SPACE. On the other hand if you think that Jibril deserves to die, aim and shoot him.
Regardless of the chosen solution, upon returning to the hideout you will be informed about a new e-mail. Use the computer upstairs to read it:
- If you spared Jibil, he will be the sender. A new quest will also activate - Contact Jibril Al-Bara.
- If you killed Jibril, an anonymous person will contact you. A new quest will also activate - Contact Halbech Informant.
In both cases you can reply (professional or suave style) or send it to Mina (aggressive style).
INTRODUCTION:
This quest will only activate if you decided to spare Jibril during the Intercept Jibril Al-Bara at Chateau mission and replied to his e-mail after returning to the hideout.
You can buy one position from the Intel category (use the computer at the hideout and choose Clearinghouse) - acts with additional Intel on Conrad Marburg.
COURSE OF THE MEETING:
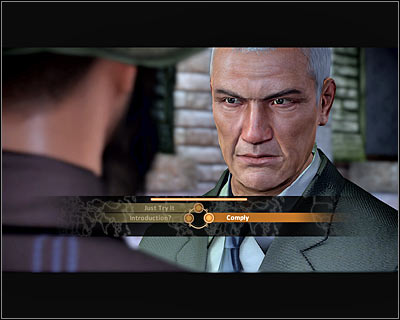
This mission consists only of a long conversation with Conrad Marburg, who will tell you about Jibril's death. Generally you won't make any important choices during this mission. If you want to gain rep points you should choose the professional style and suave if you want to lose them. After the meeting ends, you will see a new fragment of the conversation with Leland and contact Madison Saint James, which will activate a new quest - Contact Madison Saint James. Don't forget to read new messages from Mina once you return to the hideout.
INTRODUCTION:
This quest will only activate if you decided to kill Jibril during the Intercept Jibril Al-Bara at Chateau mission and replied to his e-mail after returning to the hideout.
You can buy one position from the Intel category (use the computer at the hideout and choose Clearinghouse) - acts with additional Intel on Conrad Marburg.
.
THE COURSE OF THE MEETING:
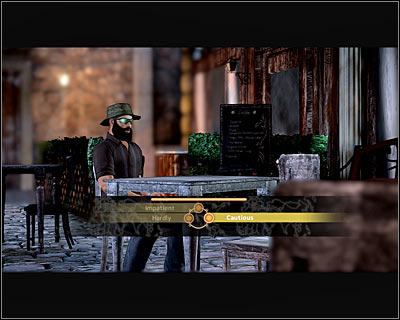
This mission consists only of a long conversation with the anonymous informant, who turns out to be Conrad Marburg. Generally you won't make any important choices during this mission. If you want to gain rep points you should choose the professional style and suave if you want to lose them. After the meeting ends, you will see a new fragment of the conversation with Leland and contact Madison Saint James, which will activate a new quest - Contact Madison Saint James. Don't forget to read new messages from Mina once you return to the hideout.
INTRODUCTION:
You will get the chance to meet with Madison after you speak with Conrad Marburg, that is after finishing Contact Jibril Al-Bara or Contact Halbech Informant.
You can buy one position from the Intel category (use the computer at the hideout and choose Clearinghouse) - acts with additional Intel on Madison Saint James.
THE COURSE OF THE MEETING:
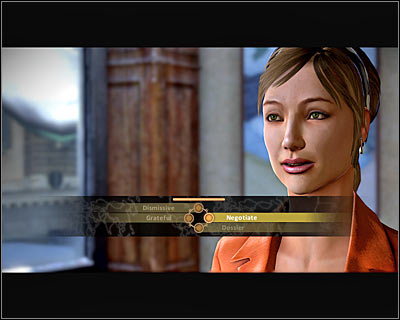
This mission consists only of a long conversation with Madison Saint James, which will take place inside a Roman restaurant. During the meeting you should choose the professional or suave dialogue options to improve your relations, or aggressive to weaken them. Every option will lead you to learning about Conrad Marburg's villa and unlocking a new mission - Investigate Marburg's Villa. Note that after finishing the conversation, Madison will head with Michael to his hideout, where she will be hiding until the end of the campaign in Rome.
INTRODUCTION:
You can buy additional Intel for this mission (use the computer in the hideout and choose Clearinghouse). The available options are:
- Additional Intel on the Deus Vult organization.
- A detailed map of the villa. It's worth buying, as only by having it you will be able to reach a secret room in order to gain additional Intel.
You should equip an armour and gadgets which improve sneaking, as you will be able to complete most of the mission without revealing yourself.
MAP:
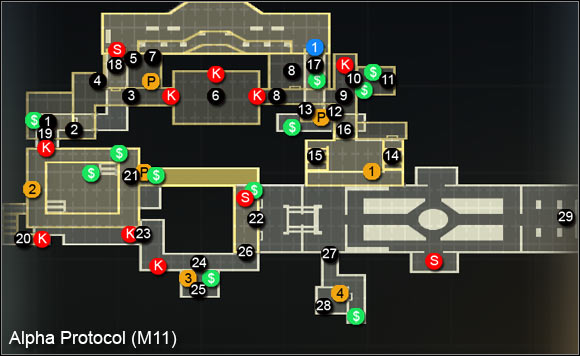
TALK TO MARBURG:
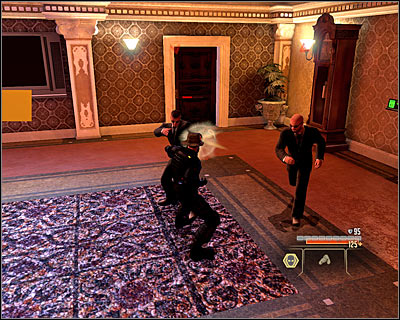
The mission will begin with a talk with Conrad Marburg in his office (M11, 1). You can choose from three different dialogue options, or attack prematurely. Each option will lead to your character being electrocuted, after which you will have to defeat two guards in direct combat. Eliminating them shouldn't be too hard, even if you weren't improving your martial arts.
CHOOSING A HANDLER:
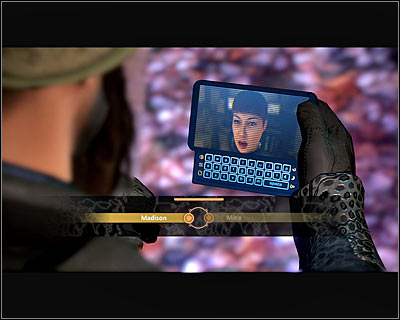
A cutscene with Mina Tang will begin right after you defeat the guards and you will be able to choose your handler for this mission. I'd suggest choosing Madison, thanks to which you will learn more about the villa itself and gain a rep point. However take note that this way you will lose one point with Mina. Wait for one more guard to enter the room (M11, 2) and finish him off in direct combat.
SIDE MISSION - EAVESDROPPING ON THE CONVERSTATION:
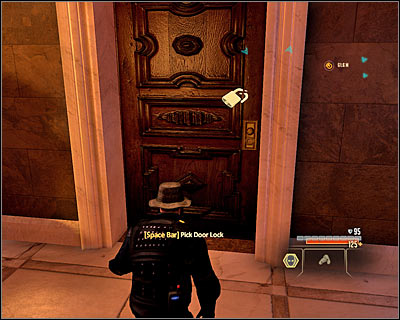
Go out of Marburg's office and head north. Remember that you temporarily can't use your equipment, so try not to get involved in any unnecessary fights. Especially look out for the guard at the eastern corridor (M11, 3), as he can notice you (additionally there's a security camera). Break into the northern room (screen) (M11, 4), approach the desk and interact with the phone (M11, 5) to eavesdrop on the conversation
GETTING THROUGH THE NORTHERN PART OF THE VILLA:
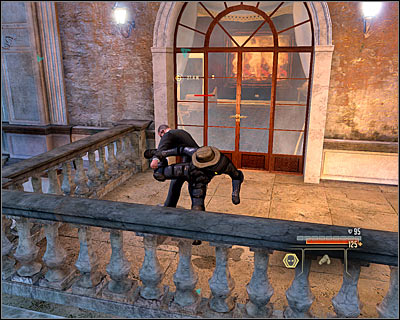
You can get to the further part of the mansion in two ways. I definitely don't suggest passing through the previously visited eastern corridor (M11, 3), as you would have to sneak up to the enemy to get rid of him and inside (M11, 6), apart from new cameras you will also bump into more guards. Instead just stay in the room in which you eavesdropped on the conversation and use the door leading onto the balcony (M11, 7). The area is patrolled by only one guard, who you can easily eliminate. Ultimately you have to reach the eastern corridor or to the new room (M11, 8). Take this opportunity and check out one of the nearby balconies to find the Advanced Accelerator (assault rifle upgrade) (M11, 1).
RECOVERING MICHAEL'S GEAR:

Stay focused, as the nearby corridor (M11, 9) is being patrolled by a single guard and additionally there's a camera in its northern part. Eliminate him as he goes south. Afterwards approach the camera and go pass it from the left side, thanks to which you will be able to enter a small room (M11, 10). Inside you should break into the main computer (M11, 11), which will disable all the cameras found in the mansion.
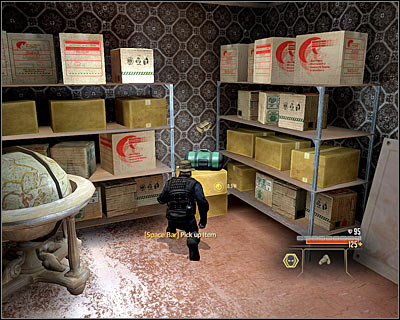
Disabling them isn't obligatory, but will make the further part of the mission much easier. You will find your equipment in the southern storage room (M11, 12) - pick up the suitcase (M11, 13). Now you can get out and head.
GETTING DOWN TO THE GROUND LEVEL:
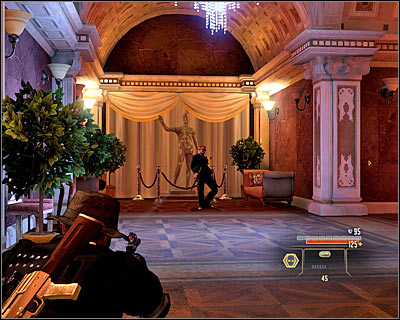
Open the door and go down the stairs (M11, 14) to the mezzanine. Note that you can sneak up to one of the guards, who are standing by a small balcony. Approach another set of stairs (M11, 15). It would be best to eliminate the enemies below with a silenced weapon. Otherwise you will start a new fight. If you do, look out for two more guards that will appear from a nearby corridor (M11, 16). Afterwards take a look around and pick up some Intel on Madison Saint James (M11, 1).
GETTING TO THE GALLERY:
Now you can head to the mentioned corridor (M11, 16) which, depending on your choices until now, will be empty or protected by two guards. Get rid of them and head towards the southern door leading to a big balcony adjoining to the villa (M11, 17).
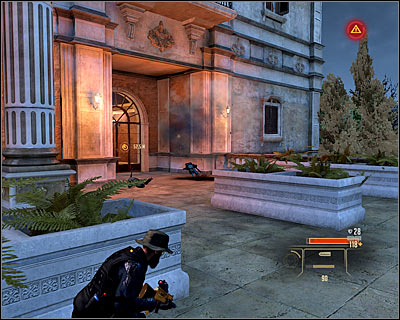
You must be very careful here, as the area is being patrolled by several guards. At least two of them can be eliminated silently, but the rest will be more problematic. Especially look out for the stationary machine gun in the further part of the balcony - it's best to get rid of it using grenades. You can also hack into the nearby control panel to switch off the alarm. Enter the villa once more (M11, 18) and go forward until you reach the gallery entrance (M11, 19). If you've switched off the cameras, you can enter it immediately; otherwise you will have take some time to avoid being detected.
EXPLORING THE GALLERY:
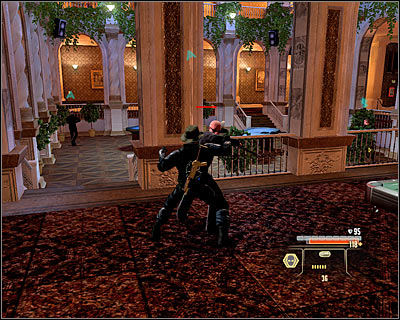
The gallery consists of two floors, with most of the enemies staying at the ground floor. If you intend to eliminate them quietly, you have to make sure that the bodies don't get noticed by the other guards - use the tables as covers. If you prefer to fight, keep away from the middle part, so that you don't get hit by the enemies upstairs. Now you can head to the door leading to the further part of the villa (M11, 23), but I'd suggest going up the stairs first (M11, 20).
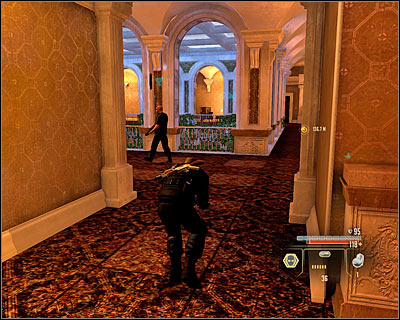
There are two enemies to eliminate there, of course assuming that they haven't gone downstairs. After you eliminate them, search for a briefcase with new Intel on the Halbech organization (M11, 2). Now I'd suggest using the passage leading to the corridor upstairs (M11, 21).
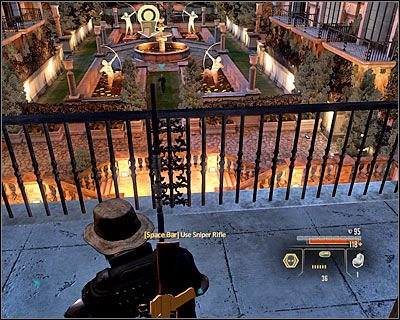
Go through the unprotected corridor and get rid of a single enemy upon entering a new location. Note that there's a silenced sniper rifle by the middle balcony (M11, 22). It's worth using this weapon to eliminate most of the guards below. It shouldn't be too hard and nothing bad will happen even if you get noticed. Afterwards return to the ground floor of the gallery and use the door leading to the further part of the villa (M11, 23).
SIDE MISSION - SWITCHING OFF THE TURRETS:
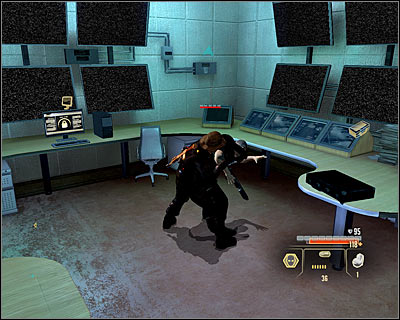
Look out, as the nearby corridor might be patrolled by a single guard. Get to the southern control room (M11, 24). After getting inside eliminate the guard and take the briefcase (M11, 3) to gain new Intel on the Deus Vult organization. Ultimately you have to break into the main computer (M11, 25), which will allow you to switch off all the turrets in the villa. Afterwards you can head over to the main exit (M11, 26). Note the turret in front of the exit, which luckily, thanks to your previous action, is disabled.
SIDE MISSION - INVESTIGATE THE SECRET PASSAGE:
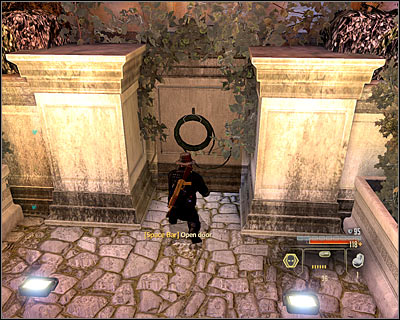
If you haven't eliminated the guards using the sniper rifle, now would be the good time. Otherwise head to the hidden passage located at the southern wall (M11, 27). Interact with the object on the wall (screen) - note that this will be possible only if you've bought the map of the villa before beginning this mission - and go to a small room. Apart from a suitcase with Intel on Conrad Marburg (M11, 4) you will also find a briefcase containing data on Alan Parker (M11, 28).
ESCAPE VILLA:
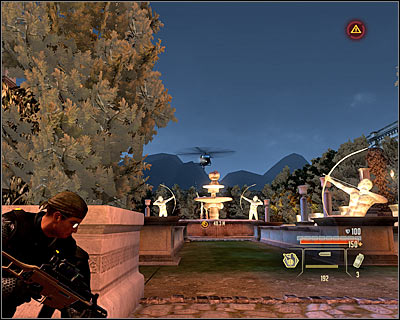
Leave this place and head towards the exit (M11, 29). If you haven't switched off the turrets you have to look out, as on your way you will come across one of them. Additionally if you haven't disabled the alarm, a helicopter will appear (screen). In such a case, quickly move from cover to another. The mission will end once you open the main gate.
After you return to the hideout, there will be a short briefing with Mina and Madison, during which you will learn about two new missions available - Investigate Ruins Transmission and Investigate Delivery at Warehouse. Also take a look at your inbox - you can send new Intel on the Halbech organization to a desired place and suggest Mina who she should take a closer look on (after completing the next mission you will receive detailed information regarding that person).
INTRODUCTION:
You can buy additional Intel for this mission (use the computer in the hideout and choose Clearinghouse). The available options are:
- Info on the weapons depots' localization. This option will be available only if you've chosen to arrest Nasri during the Saudi Arabia campaign.
- Contact Shaheed. Of course it will be only available if you've released him during the Saudi Arabia campaign. You will be able to ask Shaheed for help and he will warn his men of your arrival. It's not very useful, as it will only allow you to avoid one group of enemies.
MAP:
EXPLORING THE RUINS' ENTRANCE AREA:
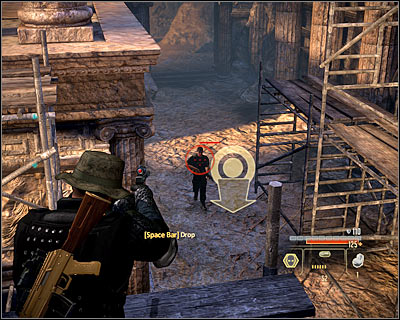
You begin the mission in the southern part of the location (M12, 1). There are three Al-Samad terrorists in the area (M12, 2). If you've releases Shaheed and asked for his help, they won't attack and you'll be able to pass right next to them. However the more probable turn of events is that they will be hostile. Luckily you can attack them silently and in fact it shouldn't be too hard. In order to get to the next location, you have to jump over the wall at the marked location (M12, 3).
SIDE MISSION - PLANTING EXPLOSIVES AT THE FIRST WEAPON DEPOT:
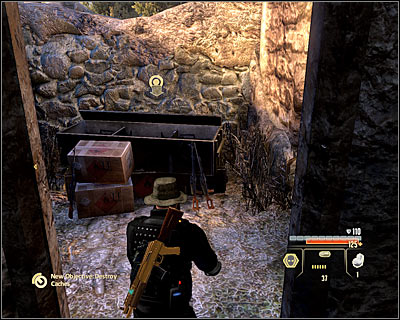
It would be wise to take care of the guard patrolling the area right after you jump over the wall. After you eliminate him, search the area for the Reinforced Pistol Components (pistol upgrade) (M12, 1). You will the first weapons to the south-west from here (M12, 4). Press the action button to plant the explosives. Also keep in mind that you will complete this goal only after finding all three of them.
EXPLORING THE WESTERN PART OF THE RUINS:
Head west. The next big location will be patrolled by three enemies (M12, 5) and depending on the choices made until now they will be terrorists or Marburg's men. You can eliminate the first enemy silently, but the two others will be harder to get this way. If you don't mind using force, consider shooting the nearby explosive barrel. You can also try to avoid the enemies by going through the northern buildings (M12, 6). Either way, you have to get to the passage leading to the further part of the ruins (M12, 7).
SIDE MISSION - PLANTING EXPLOSIVES AT THE SECOND WEAPON DEPOT:
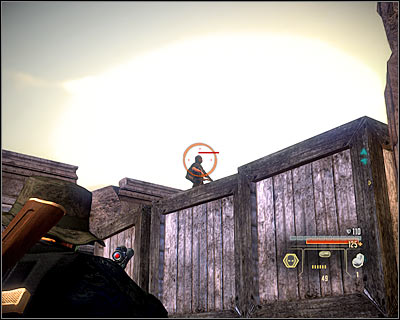
Upon getting to the new location (M12, 8) you should firstly eliminate the enemy patrolling the upper terrain (screen). Take care of his friend afterwards. Approach the area to the south-east of your position (M12, 9). Here you will also meet two enemies and one of them can be surprised. After securing the area search for the second weapon depot (M12, 10) and plant a charge there.
DESCENDING INTO THE CATACOMBS:
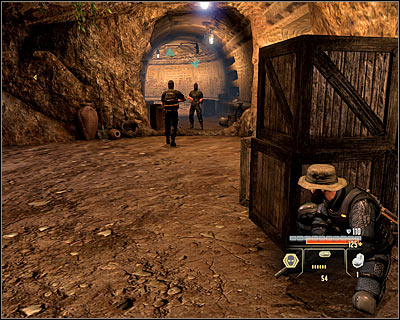
Luckily you don't have to search too much, as the ladder leading to the catacombs is very near (M12, 11). Begin with taking the Vented Pistol Action (pistol upgrade) (M12, 2) and begin exploring the catacombs. At first you won't meet many enemies. They will only guard the biggest area of the catacombs (M12, 12) and eliminating them shouldn't be too problematic. Use this chance to take the Lighter Rifle Stock (assault rifle upgrade) (M12, 3) and head towards the catacombs exit (M12, 13).
SIDE MISSION - PLANTING EXPLOSIVES AT THE THIRD WEAPON DEPOT:
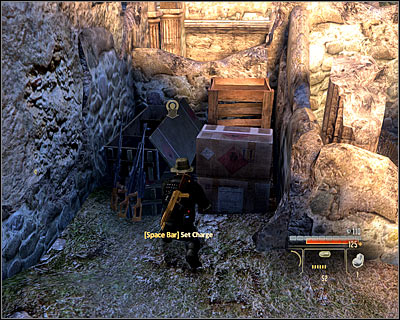
Note that if you hurry, you can surprise and silently eliminate the two guards patrolling the area. Otherwise take care of them in a direct fight, while trying not to alarm the guards at the last part of the ruins. Search the area for more secrets - Custom Shotgun Grip (shotgun upgrade) (M12, 4) and the SMG Recoil Nullifier (SMG upgrade) (M12, 5). You can find the last weapon depot to the north-east from the catacombs (M12, 14).
HACK COMM ARRAY:
Now you can head towards the last part of the ruins (M12, 15). I'd suggest eliminating the nearby guards, as new ones will appear in a while and additionally you wouldn't be able to search the area. It's best to surprise the enemies from the upper balconies, throughout which you can freely jump (screen). After the fight, search for the Ultralight Barrel (M12, 6) and a suitcase with Intel on Madison Saint James (M12, 1). Eventually break into the computer terminal marked by the game (M12, 16).
DEFEND THE ARRAY:
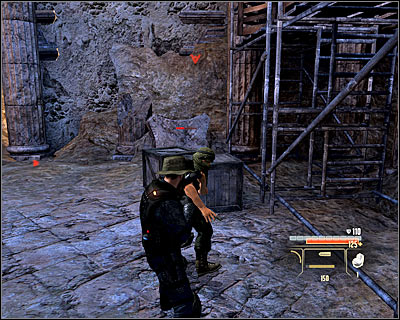
A quite hard task is before you. You have to protect the terminal (M12, 16) and don't allow anyone to approach it. The enemies will income from three different sides (M12, 17), but there shouldn't be more than five of them in the area at once. During this battle it's worth to use the fact that the enemies will have to jump down from the balconies, so you can surprise them in direct combat (screen).
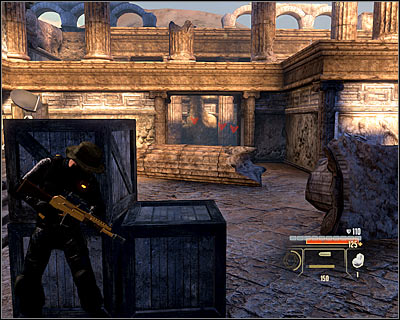
In the further part of the fight it's worth to hide behind one of covers nearby the terminal (screen) and defend from there. Of course use grenades against bigger groups of enemies. You have to keep fight until you receive a message about the success of the mission (it should occur after defeating all the terrorists).
After returning to the hideout you will have the chance to talk with Madison (note that you can ask her an additional question regarding the attempt to cover up the desire of finding Thorton). Of course take a look at your e-mails - you can reply to a message from the person to whom you've sent the Intel on the Halbech corporation, read a message from Shaheed (only if you let him go) and collect the Intel on the previously chosen bureau employee from Mina.
INTRODUCTION:
You can buy one position from the Intel category (use the computer at the hideout and choose Clearinghouse) - unlocking a new mission goal, which is of course worth it.
MAP:
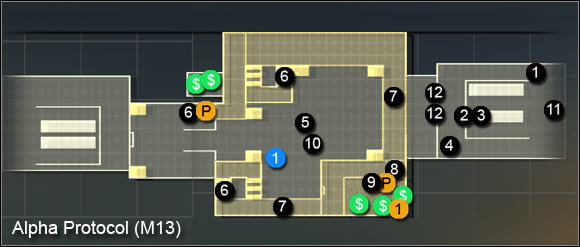
SIDE MISSION - RETRIEVE CASH:
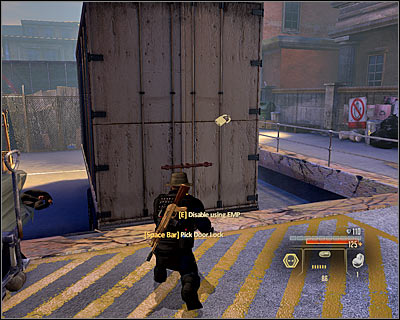
The mission begins nearby the warehouse entrance (M13, 1) and first of all you should take care of the two guards patrolling the parking lot. You can eliminate them silently, but there's in fact no one around who would get alerted if you'd use brute force. Afterwards break into one of the containers (M13, 2). Inside you will find a bag (M13, 3) with money (7500 dollars).
BREAKING INTO THE WAREHOUSE:
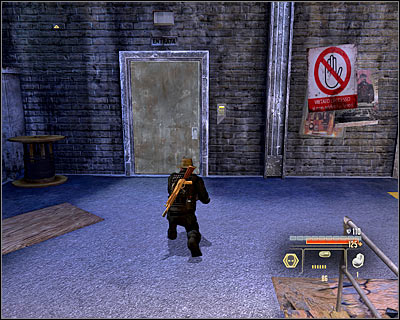
Now you can head to the only possible entrance to the warehouse (M13, 4). Break the door's security by solving a mini-game or using an EMP. After you get inside (M13, 5), a cutscene will start, showing the interrogation and the beginning of a huge fight between Conrad Marburg's men and the Russian mercenaries.
GETTTING TO THE COMPUTER TERMINAL:
It's definitely worth to take part in the ongoing fight, as you will have to return to the starting point in a few minutes. Generally try to attack both sides equally, so that none gets too weak. Use the covers and the fact that at the beginning both groups will be focused on each other only. It's also worth to consider using the upper balconies; you can get onto them by using two sets of stairs or a ladder (M13, 6). It might allow you to surprise the enemies (screen).
Afterwards it would be wise to take a look round the area. Inside the safe found in the southern room you can find a briefcase containing Intel on Scarlet Lake (M13, 1). Apart from that you will find, inter alia, the Perfected Rifling (pistol upgrade) (M13, 1). Head towards the room upstairs. Keep in mind that regardless of the chosen balcony (M13, 7), new enemies will appear inside the warehouse and you will have to quickly eliminate them (screen). Go inside the office room (M13, 8) and break into the marked computer (M13, 9).
ID VICTIM:
Go down the stairs and analyse the body of the man who has been interrogated (press SPACE). You will find it in the middle part of the warehouse (M13, 10).
ESCAPE:
In accordance with Mina's warning, you have to hurry if you don't want to fall into the police hands. If you don't waste any time (the timer starts as you break into the computer upstairs), you should make it with no problem. Ultimately you need to get to the gate located near the starting point (M13, 11).
If you won't make it in time, police officers will start to show up in the area. They will enter the warehouse through the side door (M13, 4) and two more, newly opened main entrances (M13, 12). Note that you will lose a rep point with Mina each time you kill an officer (so just avoid or knock them out). They will just keep on coming, so sooner or later you just have to get to the evacuation point (M13, 11).
RETURN TO THE HIDEOUT:
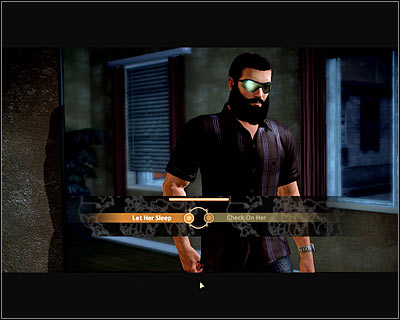
After returning to the hideout (and assuming you completed the mission at the ruins) you will have a chance to talk with Madison. If she doesn't like you much, the conversation will begin right away. If, on the other hand, you managed to gain her trust, a sleeping room cutscene will start (screen). Here you can choose to leave her (Let her sleep) or to have some fun (Check on Her). Additionally a chance to gain additional Intel on Alan Parker will appear. Regardless of the turn of events, you will unlock the main mission in Rome - Intercept Marburg at Museum of Art.
INTRODUCTION:
You can buy one item from the Intel category (use the computer at the hideout and choose Clearinghouse) - a map of the museum's security systems. It's well worth it, especially considering that it costs just a little above 1000 dollars.
MAPS:
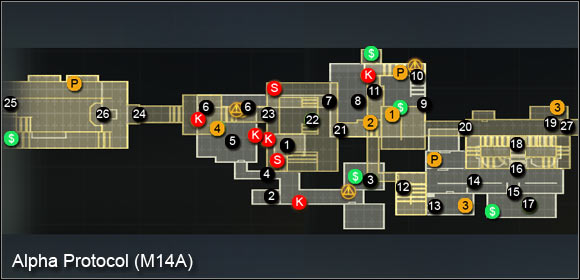
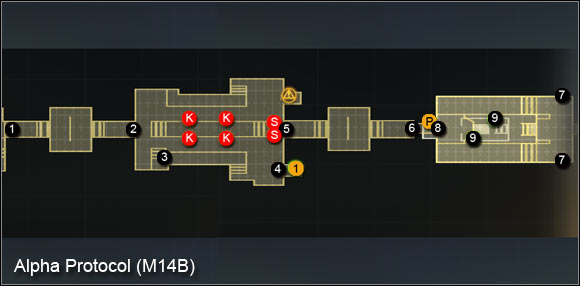
DISABLING THE SECURITY CAMERAS:
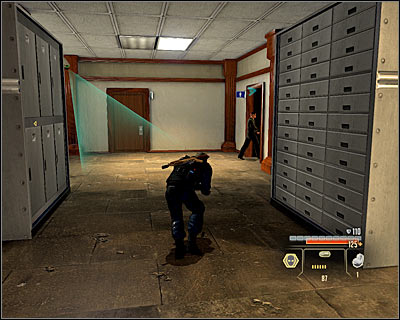
You will learn about Madison's abduction and afterwards the mission will start. You begin in an elevator (M14A, 1). Head south and eliminate the guard patrolling the area as he enters the toilet (screen) (M14A, 2). Now move to the east, passing beneath one of the security cameras. Enter the northern room and break into the computer found here (M14A, 3), thanks to which you will disable all the cameras at the museum.
GETTING TO THE STAIRS LEADING TO THE BASEMENT:
Backtrack to the starting point and choose the previously unchecked corridor (M14A, 4). Look out, as the next room (M14A, 5) is being patrolled by two enemies. Try to eliminate them without raising an alarm. Afterwards choose one of the two exits (M14A, 6) and head east. Ultimately you need to reach the locked door (M14A, 7) which you can open by solving a mini-game or using an EMP (I'd suggest leaving them for later).
There's a couple of enemies in the next room (M14A, 8) and eliminating them can be very hard - they're standing really close to each other. Additionally after you reach the middle part of the room, some more enemies will come out of the elevator (M14A, 9), which will further complicate the situation. I'd suggest using grenades or going up the ladder onto the balcony and shoot them from there.
If you want to avoid being detected at all costs, focus on the enemies' actions. Ultimately you have to get to the door localized in the upper right corner of the room (M14A, 10). Take a look around the area before you use them - you will find, inter alia, a computer with a saved e-mail (M14A, 1) and a suitcase with Intel on Alpha Protocol (M14A, 2).
GOING DEEPER INTO THE MUSEUM:
Go down the stairs and go through the only possible passage (M14A, 11) leading to the further part of the museum. You don't have to sneak here, as the nearest guard is by the next set of stairs (M14A, 12). No need to eliminate him silently, but it's of course possible. Go up the stairs into a small room (M14A, 13) and search for a disc with Intel on the new action of the Halbech organization (M14A, 3).
HELPING THE MUSEUM'S EMPLOYEES:
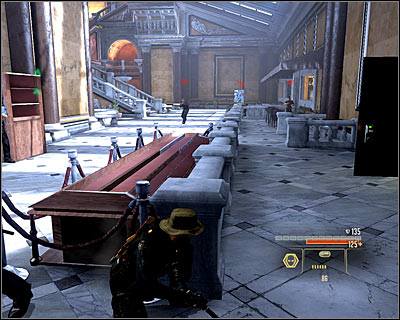
The museum employees and Marburg's men will be fighting in the next part of the museum (M14A, 14). You of course can help the employees - it's not absolutely necessary, as you won't receive any bonuses for keeping them alive. Apart from the nearby enemies, you also have to look out for those hidden at the cafe (M14A, 15) and those by the stairs (M14A, 16).
SIDE MISSION - FIND EVIDENCE:
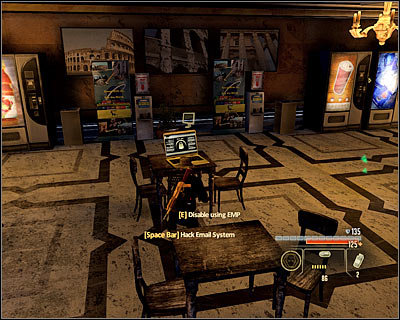
After the fight's over, go to the cafe (M14A, 15) and look for a laptop (M14A, 17). Hacking it will allow you to complete the additional mission. Additionally you can check out the e-mail left on the laptop.
MAKING A CHOICE ON THE FURTHER PART OF THE MISSION:
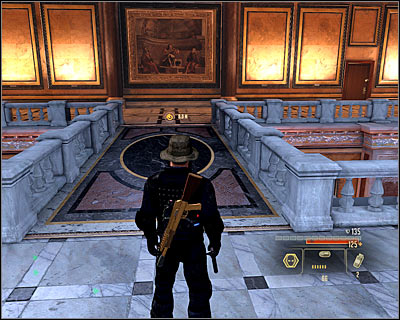
Head towards the stairs (M14A, 16). After getting upstairs (M14A, 18) and listening the Marburg's speech, you have to make a very important choice. You can:
1) Go save Madison, knowing that this way you will lead to the detonation of the bombs at the museum.
2) Go find the bombs knowing that this way you will lead to Madison's death.
Unfortunately you can choose only one option, as after you go the either the east or the west wing, to door will lock behind you.
SAVE MADISON:
Begin with breaking into the storage located on this floor (M14A, 19), thanks to which you will find a suitcase (M14A, 3) with additional Intel on Conrad Marburg. If you have been successfully collecting Intel on him, you should now unlock a perk which will provide you with a bonus during the fights with him. Take the passage leading to the western wing (M14A, 20). Head forward, you will bump into enemies only after getting to the big room (M14A, 21).
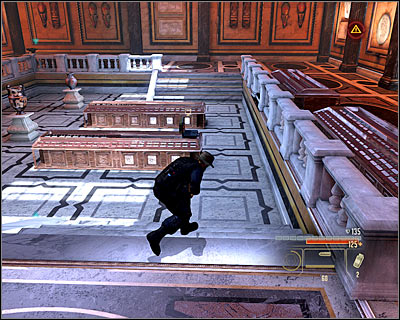
Begin with eliminating the closest guard. The next ones might be more cause more difficulties, but try to stay the this spot. After eliminating the enemies, head towards the computer (M14A, 22). Look out for the mine by the descent, which will detonate if you get too close to it. Break into the computer (mini-game or EMP) in order to disable the other mines planted in this part of the museum.
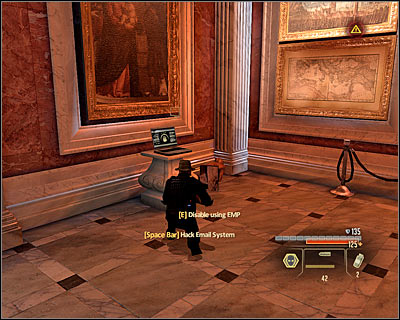
The next location (M14A, 23) is accessible through two corridors with turrets by them. Inevitably you have to destroy at least one of them, use explosives for that; move on. On your way you can break into one more computer (M14A, 4) to read an e-mail. Eventually you will reach the last room of the museum (M14A, 24).
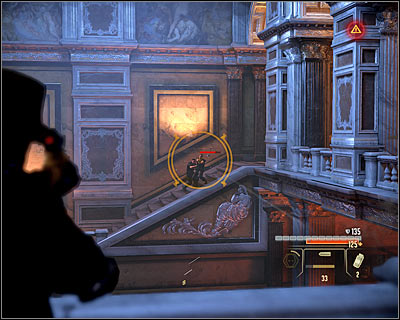
Begin to eliminate the enemies here. Two of them should be patrolling the upper balconies and the other two should be below for now. Look out for the grenades thrown by the enemies. Afterwards check out the balconies to find a first aid kit and a grenade. Head towards the stairs leading to the lower level (M14A, 25).
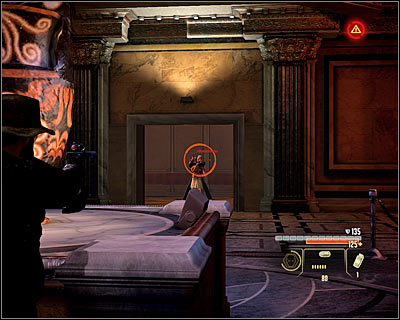
Note that a couple enemies came out of the nearby elevator (M14A, 26). One of the will stay in the middle and hold Madison at gunpoint. Begin with eliminating those enemies who aren't standing by the elevator. At the same point keep sure that your attacks don't kill your friend (refrain from using grenades nearby her). After you eliminate all the enemies, approach the last one who's standing in the elevator. Hold down the right mouse button in order to perform a precise shot (screen) and save Madison. The game will now display a cutscene with Marburg. You can attack him at once, or talk first.
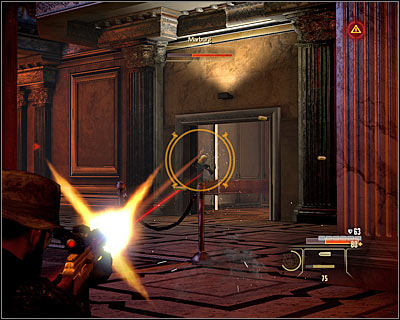
The boss battle with Marburg is quite hard and can be played in two basic ways. If you don't have the weapons and abilities to fight him directly, eliminate just one of his guards. Leave the second one alone so that no one new replaces him. Hide behind covers near the boss and attack him with using the right mouse button so that you can fire more accurately. Just like before, you have to destroy his armour and continue attacking so that it doesn't get regenerated (luckily it's a quite slow process).
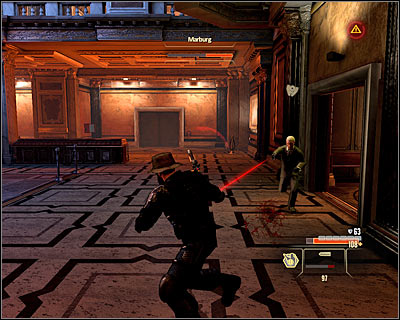
If you do have the weapons and abilities to fight him directly, always begin with eliminating his two bodyguards. That should make him chase you. Run away, as in a direct fight you would lose your amour immediately. You can shoot at him while he's going after you or throw him some explosive surprises. After the chase, hide to regenerate armour and reload your weapon. Repeat this formula while looking out for Michael's health. Regardless of the chosen tactic, the fight will end once Marburg is left with around 1/3 of his health.
DISARMING THE BOMBS:
Begin with breaking into this room's storage room (M14A, 19), thanks to which you will find a suitcase (M14A, 3) with new Intel on Conrad Marburg. If you have been successfully collecting Intel on him, you will unlock a perk which will provide you with a bonus during the fights with him. Chose the passage leading to the eastern wing (M14A, 27) (M14B, 1). Head forward, as you will bump into enemies only after reaching the big room (M14B, 2).
You have to be very careful here, as there are lots of move-sensitive mines in the area. You can recognize them by their yellow colour and you can detonate them from a distance. I'd suggest choosing the quite safe southern balcony (M14B, 3). On the way you will have to eliminate the enemies, but there won't be too much of them.
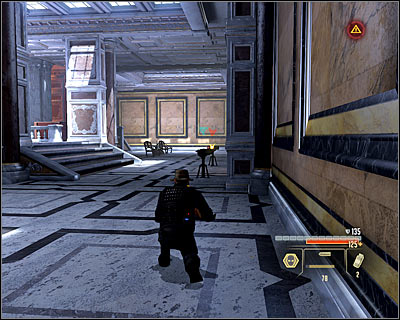
Use the chance and get to the southern control room (M14B, 4). Inside you will find a computer (M14B, 1), hack into it and unlock a new message. Approach the exit (M14B, 5). Note that if you place yourself correctly, one of the nearby turrets will destroy the other. Quickly destroy the second one and then head to the last room of this wing (M14B, 6).
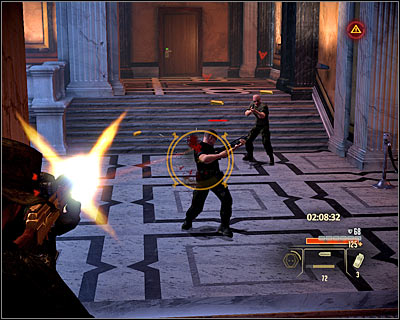
Enter the room and a timer will start - you will have three minutes to disarm both bombs. If you have at least two EMPs at your disposal, you don't have to hurry. In the other case you have to quickly eliminate the enemies, without conserving items. Use the chance to take a look inside the two rooms upstairs (M14B, 7), thanks to which you will find, inter alia, a first aid kit.
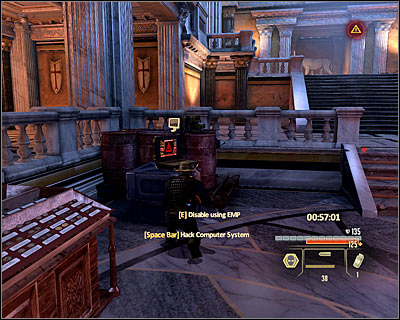
Head down and get ready to get rid of new enemies, who will run out of the elevator (M14B, 8). Use grenades to your advantage, especially if the enemies are close to each other. After securing the area, head towards the bombs (M14B, 9). You must disable each of the charges by hacking into a nearby computer terminal. If you have EMPs, you will get it done almost immediately. In the other case, you have to solve the well-known mini-games, which will of course take some time. A cutscene will play, during which Madison will get executed. You can attack Conrad at once or talk with him first.
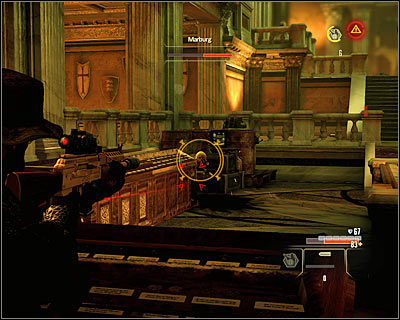
The boss battle with Marburg is quite hard and can be played in two basic ways. If you don't have the weapons and abilities to fight him directly, eliminate just one of his guards. Leave the second one alone so that no one new replaces him. Hide behind covers near the boss and attack him with using the right mouse button so that you can fire more accurately. Just like before, you have to destroy his armour and continue attacking so that it doesn't get regenerated (luckily it's a quite slow process).
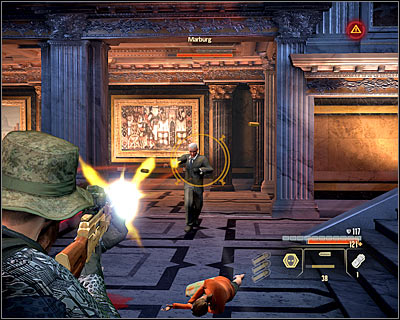
If you do have the weapons and abilities to fight him directly, always begin with eliminating his two bodyguards. That should make him chase you. Run away, as in a direct fight you would lose your amour immediately. You can shoot at him while he's going after you or throw him some explosive surprises. After the chase, hide to regenerate armour and reload your weapon. Repeat this formula while looking out for Michael's health. Regardless of the chosen tactic, the fight will end once Marburg is left with around 1/3 of his health.
TALK AFTER THE FIGHT:
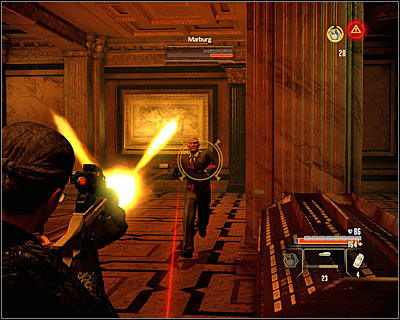
The conversation with Conrad Marburg will start right after you defeat him, regardless of whether you decided to save Madison or disarm the bombs. The conversation can end in two ways. If you choose the standard dialogue options, Marburg will escape and you will meet him once more after completing all three operations. There's also an alternative, as you can provoke Marburg to end this fight. In order to do this, choose the suave style all the time. Nothing will change during the last phase (screen), but Conrad will probably rush at you from the very beginning. Considering his shortened health bar, it shouldn't be hard.
THE FIRST VISIT:
As you arrive at Taipei for the first time, you will find yourself in a quite ugly apartment and Michael will rightly note that this is surely not the actual hideout. Head to the bathroom and use the shower (screen), thanks to which you will ride down an elevator to the proper hideout. Luckily you will be transferred automatically to this place during the next visits.
MISSION CHOICE:
The available beginning missions are:
- Contact Hong Shi
- Investigate Warehouse District Data Trail
- Contact Steven Heck - you should contact him right after arriving in Taipei, as your relations will drop otherwise
More missions (including the main one) will get unlocked as you progress.
OTHER ACTIVITIES:
You can also do the other well-know things as:
- change the character's looks using the mirror in the bathroom
- turn on the TV and watch your trophies and mementoes (for example of Nasri's)
- use the central computer to check your e-mails (it's worth to reply to Mina's newest message) and shop at the black market (the options are very limited for now - you have to contact one of the local arms dealers first)
- change the character's equipment using the locker.
In order to leave the hideout, you won't use the door, instead you need to use the motorcycle parked by the tunnel to the left of the command center.
INTRODUCTION:
You can buy one item from the Intel category (use the computer at the hideout and choose Clearinghouse) - it's some additional Intel on Hong Shi.
THE COURSE OF THE MEETING:
This mission consists of just a long conversation with Hong. If you want to gain some rep points with him, choose professional style replies and suave ones if you want to lose points. Regardless of those decisions, Hong will give you a mission of eliminating some people, which will activate a new mission - Assault Triad Headquarters in Slums. After the meeting ends, check out your inbox - you will gain access to new items on the black market and precise Intel on the people you need to eliminate.
INTRODUCTION:
You can buy additional Intel for this mission (use the computer in the hideout and choose Clearinghouse). The available options are:
- Additional Intel on the Triads.
- Help in completing the mission from one of the bribed lieutenants. It's worth to buy it, as it's quite cheap.
- A map of the area. You can buy it considering the lower price, however you will disable all the security cameras in the first phase of the mission.
MAP:

ELIMINATE RED-EYE JIN:
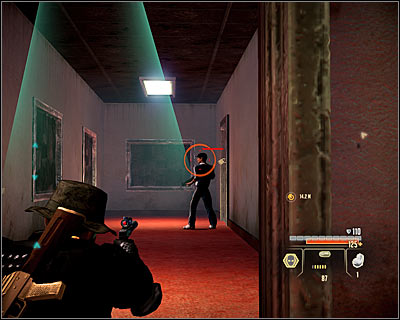
You begin the mission in a weakly-lit alley (M15, 1); enter the nearby building (M15, 2). Ignore the enemies at the ground level room for now (M15, 3) and head towards the nearby stairs (M15, 4). Look out, as the area is patrolled by a single enemy, who you should probably eliminate silently. Open the right door, while looking out for the security camera above you. Eliminate another guard from this spot (screen).
Carefully walk by the security camera and head to the door leading to the room with Jin (M15, 5). Open them by solving a mini-game or using an EMP. If you've been silent until now, you will be able to surprise Jin (screen) without having to fight him. On the other hand if you've started an alarm, just position yourself by the door and use a heavy weapon to eliminate him. Luckily he's far less resistant than normal bosses.
SIDE MISSION - FIND THE FIRST INTEL COLLECTION:
This mission consists of three parts. You don't have to complete all of them, however it's of course advisable considering the additional Intel and experience. Begin with checking out the room in which you fought Jin. You will find a computer terminal (M15, 6), hacking which will disable all the security cameras in the slums.
Now return to the room on the ground floor (M15, 3) and eliminate two enemies here. If the enemies patrolling the nearby square (M15, 7) will get alarmed, you'll have to deal with them as well. Afterwards look for a desk with a turned on computer on it (M15, 8). Hacking it will provide you with the information needed.
GETTING TO TONY TSENG:
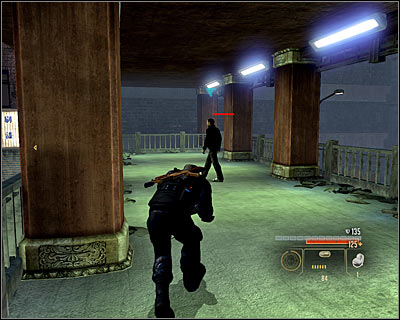
Head onto the mentioned square (M15, 7), using the door located in the same room or the nearby gate (M15, 9). You will find some enemies in the area and silently eliminating them can be quite hard. If you don't mind open fights, don't forget about keeping a safe distance. One of the guards is patrolling the nearby bridge (M15, 10) and if he doesn't run to you, you'll have to deal with him on the way (screen). Ultimately you have to get to the small room located nearby Tseng (M15, 11).
ELIMINATING TONY TSENG:
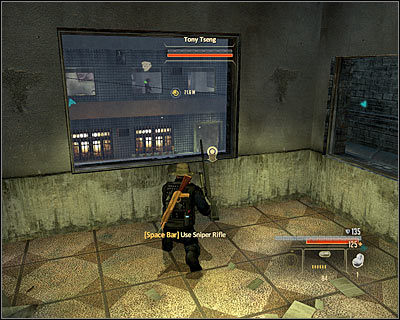
You can eliminate Tseng (who acts like a boss) in two ways. Staying in the shadows is definitely the better option. Head south-east, while avoiding getting on the main square. You need to reach a small ladder (M15, 12). Go up as the guard looks back and take care of him silently. Now head north and you will find a sniper rifle (M15, 13). Aim at the building in front of you and kill Tseng as he appears by one of the windows.
If you don't want to or can't stay hidden, you should firstly secure the nearby square (M15, 14). Keep an eye on the machine gun post, which can be taken by someone in the meantime. After killing all the enemies, head into the northern building (M15, 15) and go upstairs, where you will have to defeat Tseng in a direct fight (use covers and grenades).
SIDE MISSION - FIND THE SECOND INTEL COLLECTION:
In order to get to the second computer terminal, you have to enter the building in which Tseng was (M15, 15). Go upstairs to the room you fought him in. Find the bridge (screen) (M15, 16), thanks to which you will get to the neighbouring building. Hacking into the nearby computer (M15, 17) will give you the precious Intel.
GETTING TO ERIC CHUNG:
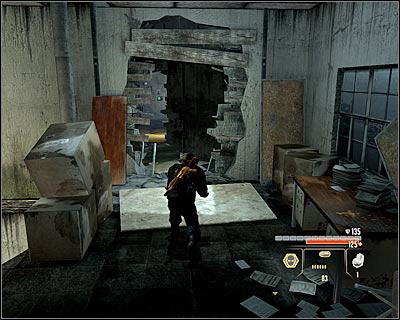
Head towards the passage to the next location (M15, 18), to which you can get by riding down the line or going through the metal gate. Enter the building using the door right next to the camera (M15, 19), go up the ladder and deal with a single enemy. Walk across the bridge into the neighbouring building (M15, 20). It's worth going down here, as you can find new Intel on the Triads (M15, 1).
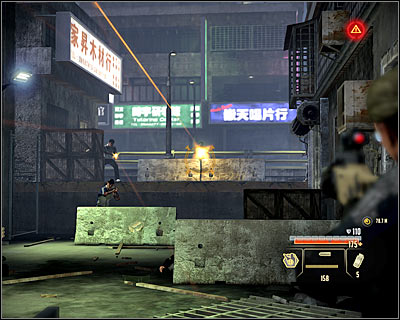
Jump down to the lower level at the marked spot and head toward the building exit (M15, 21). If you were silent, there will be just a single enemy here. Otherwise there's going to be lots more of enemy soldiers, including one who will be using the southern machine gun (screen). Note that the enemies came out of the western room (M15, 22). Check it out, as it holds an Extended Assault Rifle Clip (assault rifle upgrade) (M15, 1).
After securing the area, enter the new building (M15, 23). Go down the ladder and head towards the exit (M15, 24). The area is patrolled by a single enemy and it would be good to wait for him in the weakly-lit niche (screen) (M15, 25) and then move on. Soon you will meet two enemies (M15, 26) and unfortunately will have to attack them, as they won't split even after finishing the talk. Approach the nearby gate and hack the security system.
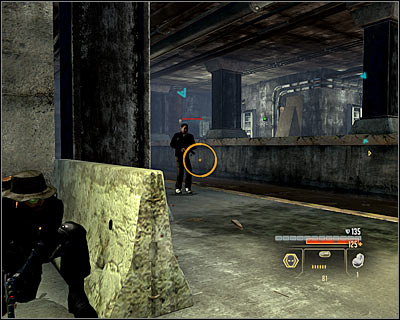
Go down the ladder and carefully approach the new location (M15, 27). The area is patrolled by a couple enemies. If you intend to get rid of them silently, wait until they split up. In the other case, just use the covers (screen). After ending the fight, go through the only accessible passage to the next area (M15, 28). It would be good to eliminate the two guards here in a silent manner. Afterwards head towards the southern room (M15, 29).
SIDE MISSION - FINDING THE THIRD INTEL COLLECTION:
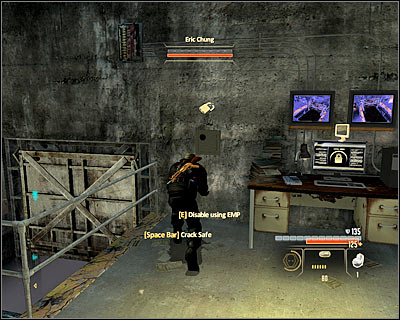
Get rid of the guard here silently, thanks to which you will be able to safely take a look around the area. Above all collect the Adrenaline Regulator (M15, 1). The Intel you're searching for can be found inside the safe on the eastern wall (M15, 30), which you of course have to hack.
ELIMINATING ERIC CHUNG:
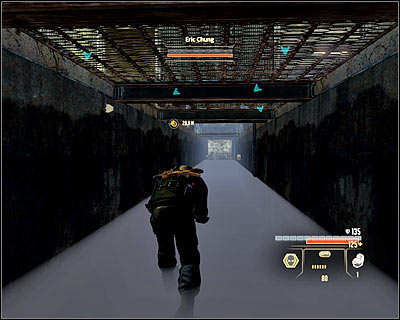
You can eliminate Eric in two ways. Personally I wouldn't recommend getting involved in fights, as it's very risky. If you however want to follow that option, you can begin shooting at the enemies in the next zone (M15, 31) or use the terminal located in the lower right corner (M15, 32), which will unlock the nearby stairs, allowing you to get closer to the enemy troops (screen).
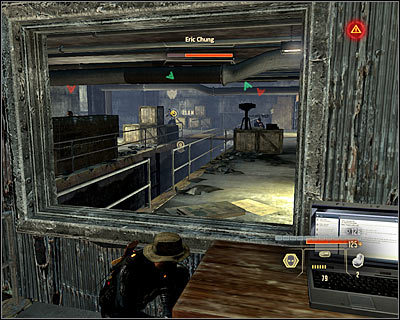
The better option is to hack into the computer in the upper left corner of the room (M15, 33), which will reprogram the two nearby turrets. Now you can wait for them to finish off Eric and his bodyguards or help them by eliminating the closest targets.
SURVIVING THE TRIADS ATTACKS:
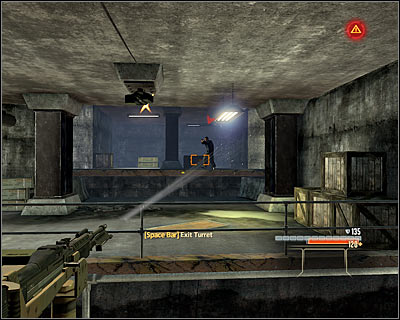
Right after eliminating Chung, you should head to the small platform (M15, 34) located nearby the destroyed or "friendly" turrets. The enemies will income from two ways - from the south (M15, 35) and from the mentioned tunnel (M15, 36). Use the stationary machine gun to your advantage. Generally you won't get too tired here, especially if you have the turrets on your side. After eliminating the enemies, head to the southern passage (M15, 36) to end this part of the mission.
ANOTHER MEETING WITH HONG SHI:
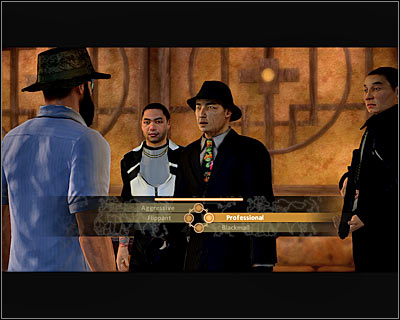
The meeting will begin automatically after returning from the slums. You can behave in two ways:
1) Get the needed Intel from Hong. Choose the professional style for this option.
2) Try to blackmail him. If you don't want to lose his trust, choose (Friendship) in return. The two other options will end your acquaintance and worsen the relations with the Triads. You can ask him for a ransom (10000 dollars) or for additional Intel (on his and the CSP.
Regardless of the chosen option, you will learn about the existence of Omen Deng.
INTRODUCTION:
You can buy additional Intel for this mission (use the computer in the hideout and choose Clearinghouse). The available options are:
- Help in breaking into the computer systems. The bright side of this option is lowering the time needed to do it. It's not really useful, especially if you like to explore thoroughly.
- A map with security system marked on it. It's well worth it, especially that you won't be able to disable all the cameras inside the warehouse.
- Reprogramming the turrets. It's an interesting option, but you will find computer terminal which will allow you to do the same.
MAP:
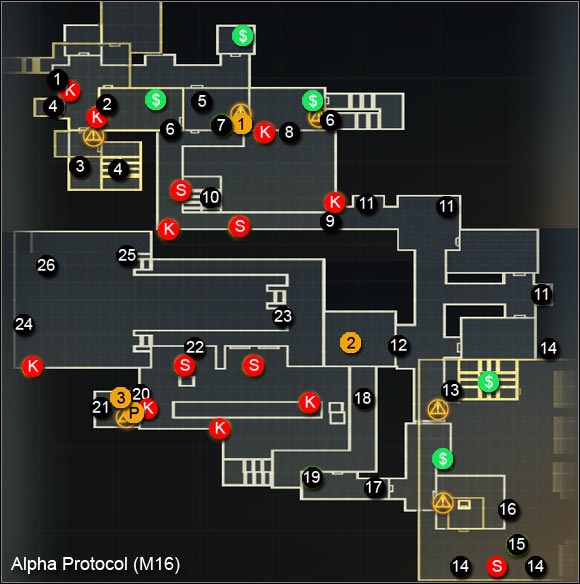
GETTING TO THE LOWER LEVEL:
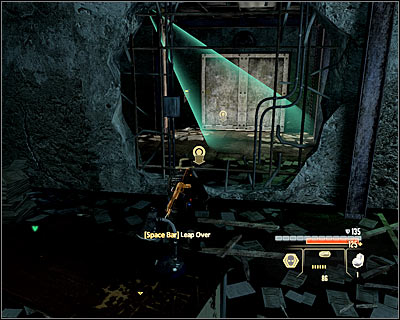
You begin the mission in a rather dangerous place (M16, 1), nearby two security cameras and a guard. If you don't mind the alarm, you can pretty much kill the guard and destroy or ignore the cameras. Otherwise kill the enemy as he stands between the cameras and afterwards go to the eastern room. From this spot (screen) (M16, 2) you will be able to jump to the other side, thanks to which you will avoid the first camera.
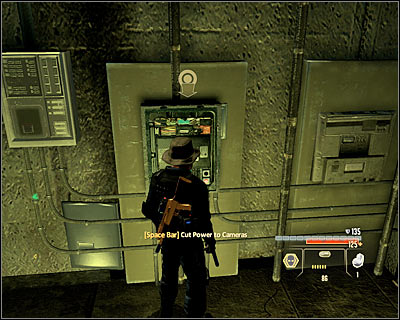
Head left, while avoiding the second camera. In the southern room there's an alarm switch and a computer terminal (M16, 3), thanks to which you can disable both cameras (unfortunately it doesn't affect the other parts of the warehouse). If you've started an alarm, you will have to use the staircase (M16, 4). Otherwise approach the elevator (M16, 4) and use the panel.
LOCATE THE POWER SOURCE:
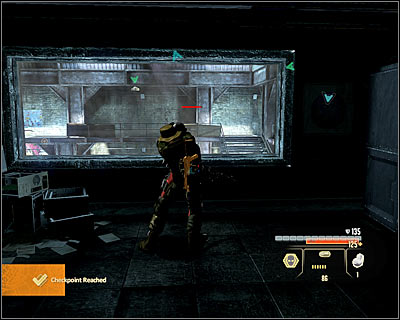
After getting to the spot, eliminate the single guard patrolling the nearby corridor. Afterward go into the southern room (M16, 5) while another enemy is inside. Get rid of him and approach the glass wall to complete this goal.
HACK INTO THREE SERVERS:
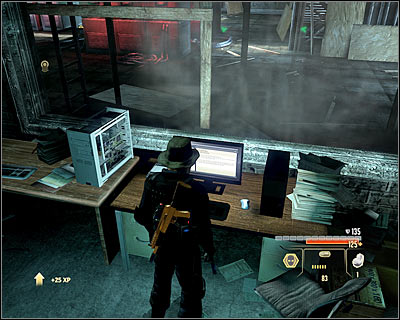
Firstly you have to reach another big part of the warehouse and to do that you can either use the stairs and break in through the door on this floor (M16, 6). I wouldn't suggest the second option if you haven't bought the turret reprogramming option. In such case, you should go down the stairs and find a computer terminal, which will allow you to do this (M16, 7). On your way you of course have to look for enemies and cameras.
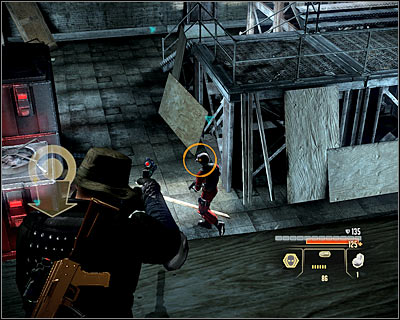
You should take care of eliminating the other enemies only after taking care of the turrets. If you don't mind being aggressive, you can begin the fight at once. However you have to know that it may cause additional enemies to show up in the area. If you want to stay hidden, it would be best to return to the mentioned door upstairs (M16, 6) and conduct fire from there. Leave the guard patrolling the opposite balcony for the end.
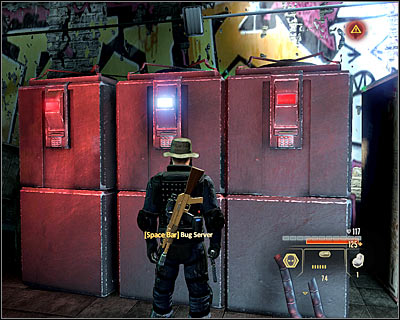
After securing the area, begin the exploration. On the ground level you can find a suitcase with Intel on Sis (M16, 1). As for the servers, which are the main goal of this mission, you can find in different parts of the room (M16, 8). Depending on whether you bought the help of the local hacker or not, you may have to hack into just one system or all three. Keep an eye on the active cameras all the time.
GETTING TO THE FURTHER PART OF THE WAREHOUSE:
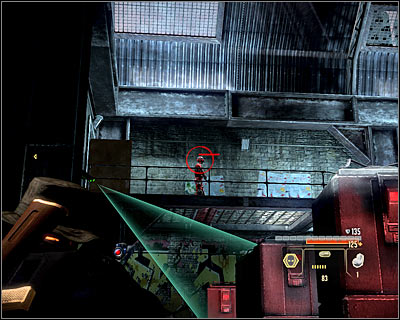
As you hack into the required amount of computer systems, a new guard will appear at the upper balcony (M16, 9). Eliminate him from a distance and using a silenced weapon (screen). Now you need to get to the door through which he came in. If you don't want to start an alarm, use the stairs (M16, 10), which will allow you to avoid the last camera.
HACKING THREE MORE SERVERS:
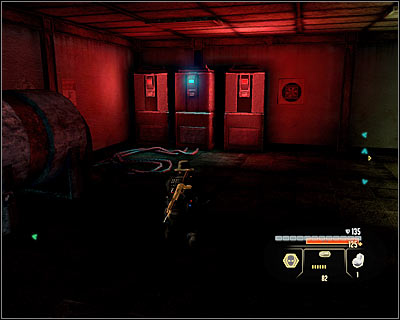
You shouldn't have much problems with finding the other three server (M16, 11). You will come across the first one right after going through the door and the other two during the exploration of the nearby corridors and rooms. Look out for the two guards patrolling this part of the warehouse. Additionally you can enter the western room (M16, 12), get rid of the third guard and take the acts with more Intel on Scarlet Lake (M16, 2).
GETTING TO THE JAMMING DEVICE:

You need to get onto the warehouse's roof, so locate the passage leading to the staircase (M16, 13). Once you're on top, above you will have to look out for the enemies on the higher sections of the roof to the south and north of this spot (M16, 14). Raising an alarm is especially not suggested in the second case, as the enemies could use the stationary machine gun.
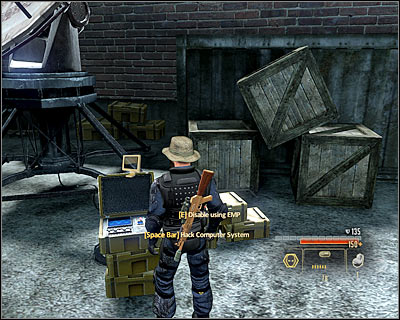
Apart from the enemies mentioned above, two more will be patrolling the section of the roof you're actually on. Try to eliminate them without raising an alarm, but it's of course not required. Make sure that you've secured the area and head to the jamming device (M16, 15). You can disable it by solving a mini-game or an EMP.
GETTING OUT OF THE WAREHOUSE:
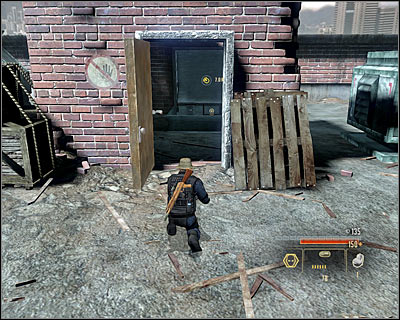
Look out, as a single enemy will appear. Hide behind the crates and wait for him to appear, unless you don't want to eliminate silently. Use the newly unlocked passage (M16, 16). After you get inside, go down the ladder, check out the area and use the nearby door to get near the next big room (M16, 17).
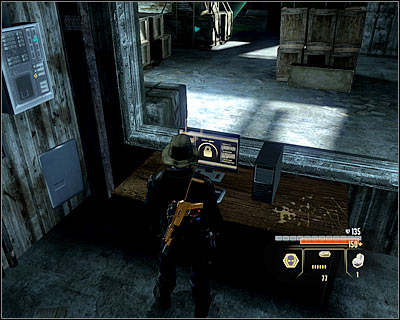
Begin with eliminating the closest guard. There are two turrets in the area and if you haven't bought the reprogramming before the mission, your main priority should be disabling them. In order to do this, use the ladder (M16, 18) to go down and then move to the southern control room, where you will find a computer (M16, 19). Successful hacking will take care of the problem.
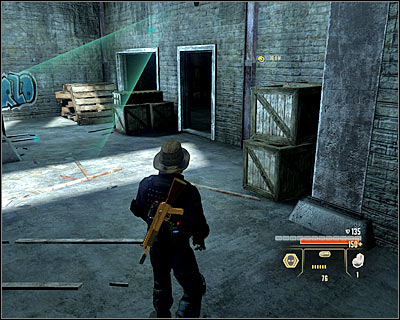
If the turrets are by default "on your side", you can begin eliminating the enemies here at once, the upper balcony would be the best place to do it from. Of course make sure that their bodies aren't found by the other enemies of the security cameras. Your goal is to get to the second control room (M16, 20). Look out, as there's a camera above the entrance. Inside you will find some Intel on the Halbech organization (M16, 3) and a switch (M16, 21) which will unlock the warehouse's door.
EVACUATION:
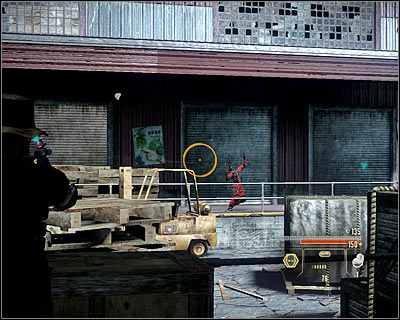
Head towards the newly unlocked warehouse exit (M16, 22). You have to be very cautious here, as the area is being patrolled by enemies and if you haven't disabled the alarm until now, there's going to lots more of them. If you don't mind brute force, make use of the grenades found in one of the containers (M16, 23). If on the other hand you want to stay hidden, you skillfully eliminate the enemies, while making sure that their bodies aren't found by the others.
You can end this mission in two ways. If you won't want to waste time, hack the control panel located nearby one of the cameras (M16, 24). This will cause the main gate to open and most probably cause an alarm. If you prefer to say hidden, locate the ladder (M16, 25) and get to the upper balconies. Afterwards jump down onto the container (screen) (M16, 26) and jump over the fence.
CONVERSATION WITH ALBATROSS:
The conversation will begin right after you get out of the warehouse area. If you've already been to Moscow and killed Sis, you can angry him by mentioning it. The most important part of the conversation will be making the choice about the planted bugs (screen) - you can either (Refuse) to remove them, lie that there's just five of them, instead of six (Bluff) or accept Albatross' proposition (Delete Programs). You will improve you relations by choosing the last two options. After the mission, it's worth to check the mailbox and send the Intel collected on Halbech to one of three different persons.
INTRODUCTION:
You can buy one item from the Intel category (use the computer at the hideout and choose Clearinghouse) - it's some additional Intel on Steven Heck.
COURSE OF THE MEETING:

This mission consists of just a long talk with Steven Heck. Note that if you've already completed other Taipei mission before meeting Steven, you will lose two rep points regardless of the chosen answers. As for the further part of the conversation, it's best to choose aggressive style two times and stick with suave once Steven ends the interrogation. Regardless of your relations, a new mission will be unlocked - Retrieve NSB Data from Grand Hotel.
Traditionally don't forget to check your inbox - you can receive a reply from the person to whom you've sent the Intel on the Halbech organization. Steven will also send you a couple messages and you can reply to one - choose suave style if you want to improve your relations and aggressive in the other case.
INTRODUCTION:
You can buy additional Intel for this mission (use the computer in the hideout and choose Clearinghouse). The available options are:
- A map with security system marked on it. It's of course worth the price, as it costs less than a 1000 dollars.
- An additional goal connected with the other person present at the hotel. It's also a considerable option, especially that completing it won't be hard.
- Previous items left at the hotel at the hotel. I'd once more suggest buying this, as the investment will pay off with interest.
- Presence of less experienced staff at the hotel. It's an interesting option which should interest you if you intend to keep the employees alive (killing them will worsen your relations with Mina).
MAP:
SPEAKING WITH THE OTHERS PARTICIPANTS:
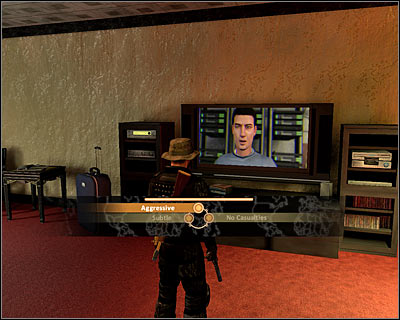
Before you begin, you will talk with the other characters that will help you in completing this mission. Apart from Mina, it will be Heck and Scarlet. Generally the dialogue options you choose won't influence the mission too much. You can just more or less openly as Heck to refrain from causing unnecessary casualties. If you want to gain rep points, you should choose suave style while talking with Scarlet (professional at the end) and aggressive style in case of Heck.
MEET WITH HECK:
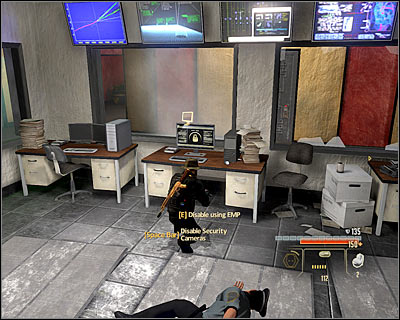
You begin at the hotel room (M17, 1). There's no need to sneak, as there are no guards in the area. Go out of the room and head south to get to the elevator (M17, 2). Use the panel and wait for the elevator to go down. Move forward and you should notice that Heck got into a fight with the local guards. It'd wise to help him. If you want to avoid getting detected, you have to avoid the two security cameras in the area. You can disable them by hacking into the computer terminal in the middle room (screen) (M17, 3).
OBTAINING THE HOTEL MAP:
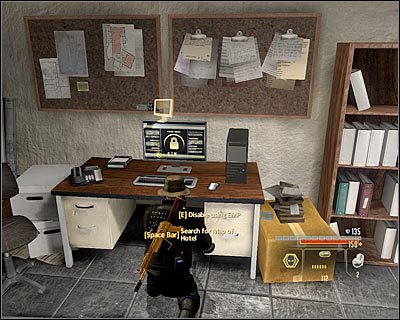
Take a look round the area to fins, inter alia, the Extended Pistol Clip (pistol upgrade) (M17, 1), Over-sized Pistol Clip (pistol upgrade) (M17, 2) and the Ultralight Barrel (SMG upgrade) (M17, 3). Additionally you can gain precious Intel on the NSB organization by breaking into one of the computers (M17, 1). Afterwards head to the computer terminal marked by the game (M17, 4). Traditionally you can either solve a mini-game or use an EMP.
MEET WITH SCARLET:
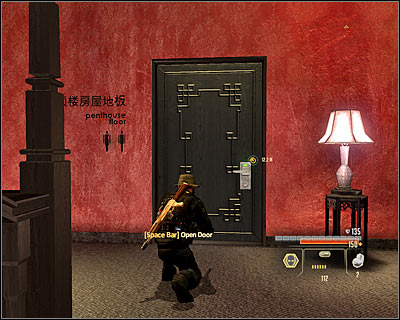
Now you can head to the newly unlocked northern passage (M17, 5). After getting to the staircase go up, having a conversation with Scarlet on the way. Your goal is to get to the Penthouse level and go through the northern door (screen) to meet with the journalist (M17, 6).
SIDE MISSION - FRAME HALBECH REPRESENTATIVE:
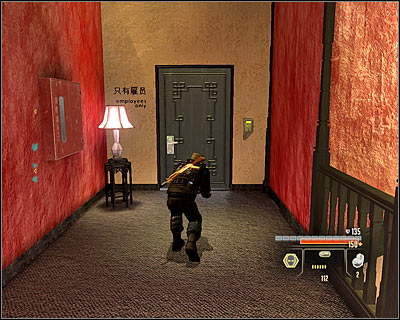
Get back to the staircase and this time go to the highest, sixteenth floor. Head to the eastern door (M17, 7), with an "employees only" warning next to it (screen). Break inside by solving a mini-game (it may be very difficult) or using an EMP. Inside there's a computer terminal (M17, 8), which you must hack in order to frame the given person.
GETTING TO THE APPOINTED ROOM:
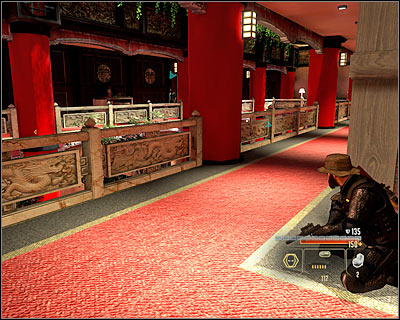
There are two paths leading to the marked hotel room. You can choose either the passage by the place where you talked with Scarlet (M17, 6) or stay at the top level and hack the security on the western door for a change (M17, 9). I'd definitely suggest the second option, as you will get onto the upper balcony (screen).
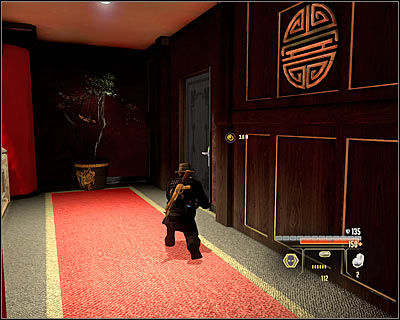
The area will be patrolled by at least two enemies. Eliminating them silently is of course absolutely possible. And I'd suggest securing the area right now. Note that that if you're on the lower floor, it will be harder to get to the upper balconies, as there's a camera by the stairs nearby the elevator. Ultimately you need to get to the hotel room located in the upper left corner of the (M17, 10).
SIDE MISSION - GAINING ADDITIONAL INFO:
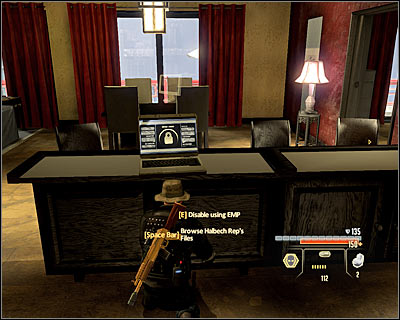
Nothing complicated here - you will find the laptop with the needed Intel in the main room (M17, 11). You need to hack it by solving a mini-game or using an EMP.
OBTAINING AN ID:
You will find the ID inside the hotel room as well (M17, 12). Before you take it it's worth to break into the nearby safe (M17, 2) in order to gain additional Intel on the Halbech organization.
GETTING TO THE CONFERENCE:
Another easy task. Get out of the hotel room and return to the lower floor (going through the staircase or using the stairs by the camera). Head to the newly unlocked elevator (M17, 13), use the control panel and wait until it arrives at the desired floor.
ACQUIRE THE NSB INTEL:
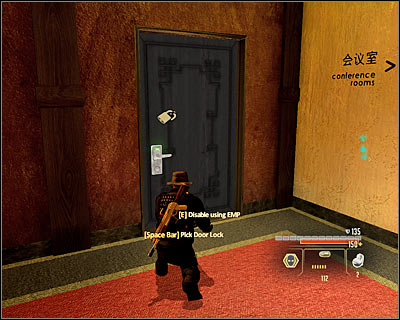
In order to complete this goal, you need to get to the computer located in one of the southern rooms (M17, 14). The terminal is being guarded by four guards and if it doesn't bother you, you can go along the western corridor (M17, 15) to reach and destroy them. On the other hand if you'd like to do things silently, begin with eliminating a single guard patrolling the mentioned corridor. Afterwards take the eastern passage (screen) (M17, 16).
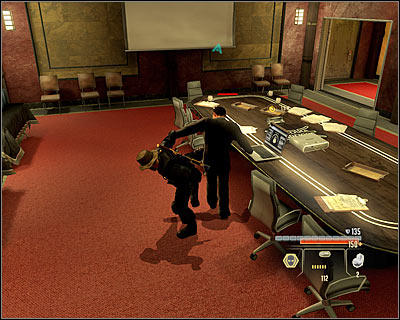
Get to the eastern room (M17, 17) and wait for a single guard to enter. Approach him from behind and afterwards head to the room with terminal (M17, 14). Two guards should be standing here - firstly eliminate the closer one and then take care of the guard by the terminal (screen). Hack into the computer to complete his goal. Now you need to decide if you want to help Heck, or just focus on safely leaving the hotel.
SIDE MISSION - DELETING HECK'S FILES:
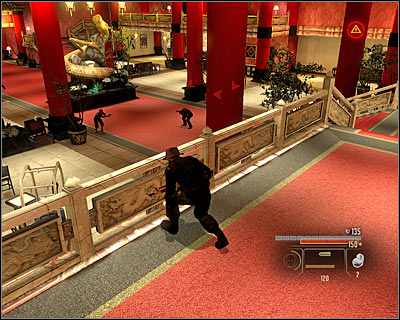
If you want to help Heck, you need to once more use the terminal (M17, 14). Note that it will start an alarm and you have to lift the blockade put on the entire hotel. Choose one of the two passages leading to the bigger room (M17, 18). After getting there (M17, 19), you will see Heck fighting the hotel's employees. You can help him (reinforcements will keep on coming for a short while) or ignore them. Your goal is to get to the stairs located in the upper right corner of the room (M17, 20).
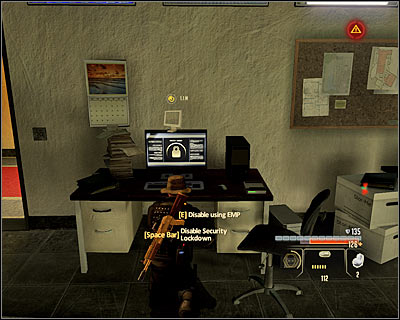
Move to the small rooms in the area. In one of them you will find a terminal (M17, 21) and hacking it successfully will result in turning off the alarm. Use the chance to break the security on the metal gate and take the Printed Circuitry (armour upgrade) (M17, 4).
ESCAPING THE HOTEL:
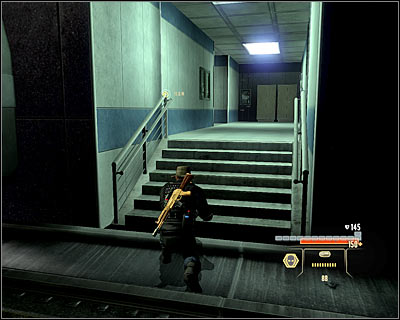
You can get to the corridor described below in both cases, that is gaining the NSB Intel as well as helping Heck and disabling the blockade. Head towards the main room (M17, 19) a choose one of two passages located by the reception (M17, 21). You can ignore the main hotel exit; you'd only get informed that this way is impossible by approaching it.
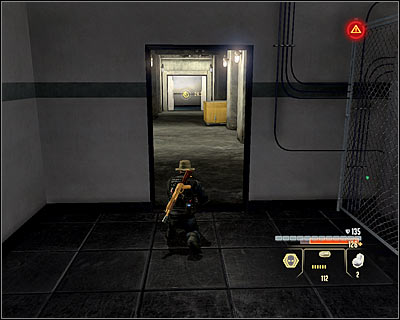
Head to the south-west, avoiding one security camera on the way. Ultimately you need to reach the elevator (M17, 22) and you probably should do it as fast as possible, as new enemies might appear in the meantime. If you helped Heck, you will get two relation points with him at the end of the mission. Regardless of the chosen options, you will unlock a new mission - Intercept Assassination Plans. After you return to the hideout, After you return to the hideout, don't forget to send the Intel collected on the Halbech organization to one of the three possible places.
INTRODUCTION:
You can buy additional Intel for this mission (use the computer in the hideout and choose Clearinghouse). The available options are:
- Additional Intel on the CSP.
- Heck's help in eliminating part of the enemies. It's well worth it, as at most important moment of this mission he will be able to eliminate a quite big amount of enemies for you.
MAP:
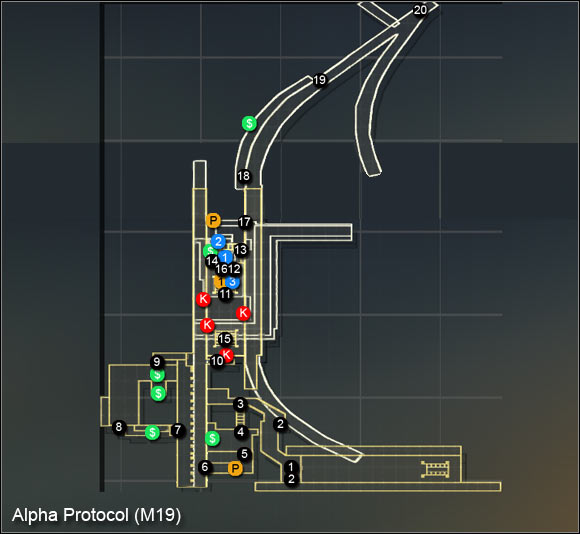
CONVERSATION WITH OMEN DENG:
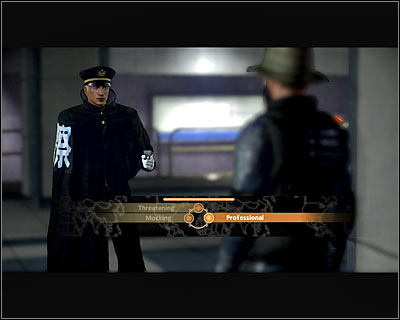
This mission will begin with a talk with Steven (even if you didn't agree to his offer with using the computer terminal in the hideout). After you get to the station, you will meet Omen Deng. You don't need to worry about having to fight. You however can choose how to behave twice and if you want to gain rep points, choose professional.
GETTING TO THE TRAIN RAILS:
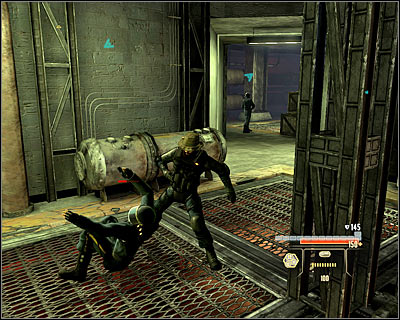
You begin in a place (M19, 1) to which first enemies will come in just a minute. You can of course attack them, which shouldn't be too problematic. If you prefer to stay silent, you can wait for them and easily eliminate (screen) or jump down to the tunnel below, pass through the corridor north and go up the ladder (M19, 2). In total you have to look out for three enemies here. Use the new door (M19, 3) and go up the stairs.
Now you will find yourself in a multi-level room (M19, 4) with new enemies to eliminate. Staying silent is still possible, but you will have use a silenced weapon to properly eliminate the enemies on the upper floors. Look out as two new enemies will enter the location in just a while - try to eliminate them from a distance and without taking any risks. Head to the passage leading to the next location (M19, 5).
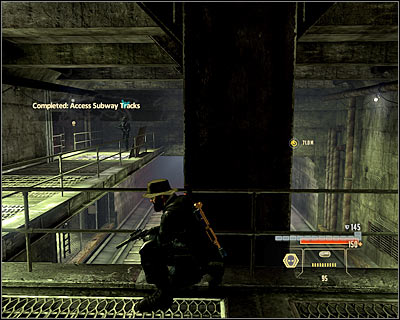
Begin with eliminating the guard who will walk right next to you (M19, 6). The second one is standing a bit further and staying silent will be more difficult this time. After you get to the marked zone (M19, 7) it will turn out that jumping down on the rails is impossible, so use the nearby ladder for a change.
GETTING TO THE TRAIN STATION:
Soon you will get to a bigger room (M19, 8), which will be patrolled by four enemies. Luckily you can easily eliminate them. Begin with approaching the guard at the upper balcony from behind. Now head lower, while silently eliminating two more enemies (screen). The last guard will be patrolling the northern part of this area and you can surprise him by, for example, walking on the pipes by the eastern wall.
After securing the area, return to the upper balconies and choose the northern wall passage (M19, 9). Now head to the east. Ultimately you have to get to the entrance of the train station (M19, 10), where you will get further directives. Make sure not to lean out too fast, as there's an active camera above you!
DISABLING THE SECURITY SYSTEMS:
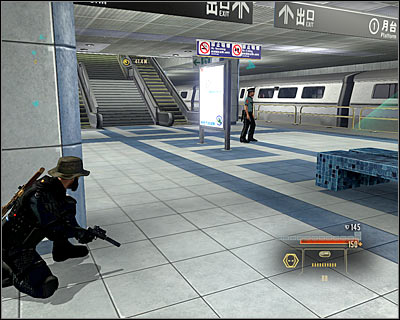
The train station is being patrolled by two guards and if you don't want to lose reo points with Mina or drawing the local forces' attention, you have to only knock them out and not kill. It won't be as there are four security cameras in the area. I'd suggest taking care of the one patrolling the eastern part of the platform first (screen) and then move on to his friend who will go north.
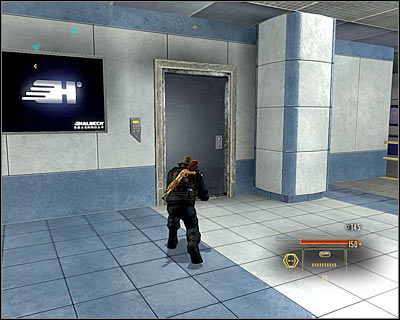
There are two paths leading to the guards' room. I definitely don't suggest using the moving stairs (M19, 11), as you would probably get noticed and need to fight back. It's better to get to the closed door located at the northern part of the platform (screen) (M19, 12). Breaking the security won't be easy, so consider using an EMP.
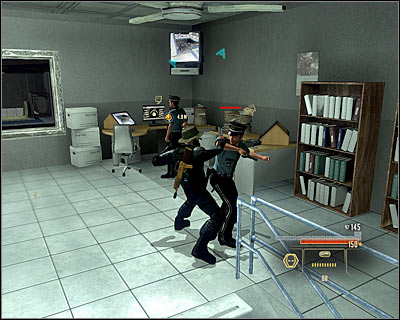
After getting inside, break inside the safe on the ground level in order to gain the Customized Shotgun Magazine (shotgun upgrade) (M19, 1). Carefully go up the stairs, wait for the guards to stand on the right and surprise them both (screen). After the fight, look for the Steel Pocket Inserts (armour upgrade) (M19, 2). Head east and localize the panel marked by the game, which you have to use (M19, 13).
OPENING THE GATE:
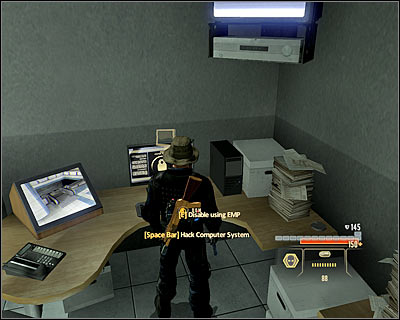
Return to where the enemies were standing and break into the nearby computer terminal (M19, 14). Naturally you can choose between a mini-game and using an EMP.
GETTING TO THE PERSON HOLDING THE DATA:
Now you can return to the main train platform, luckily with already disabled cameras. Head to its southern part and use the newly unlocked path to the lower platform (screen) (M19, 15). The game will then play a short cutscene.
CHASING THE PERSON HOLDING THE DATA:
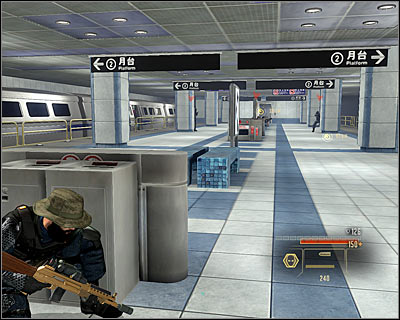
Don't worry about having to chase him, he'll always wait until you get close enough to him and continue running then. For now you need to focus on eliminating the CSP agents. If you can't count on Heck, you need to hide behind the covers and use grenades. If you did buy Heck's help, wait for him to appear in one of the cars and eliminate all the enemies (screen) for you. Check out the main part of the platform and you'll find a suitcase with Intel on CSP (M19, 1) and the Vented Rifle Action (assault rifle upgrade) (M19, 3).
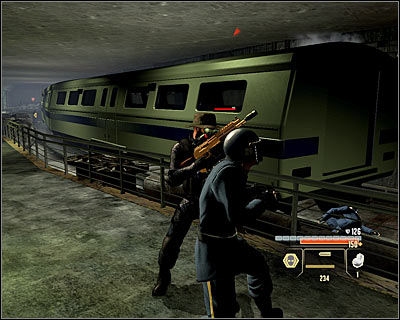
Head towards the platform exit (M19, 16). After you break the security on the door, go down the stairs and go east. Soon you will reach a new underground tunnel (M19, 17) and here you'll need to head north. You'll of course meet enemies on your way and fighting them here will be obligatory. Use grenades to your advantage and frequently use the side corridors to get cover. Eventually you will reach the next platform and will need to QUICKLY get from the rails (M19, 18), as a train will arrive here in just a moment (screen).
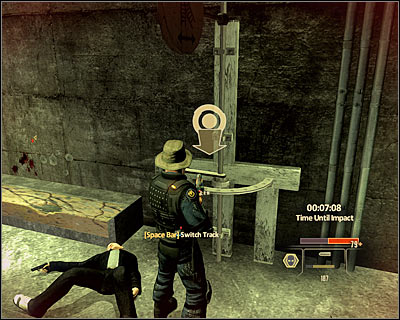
Continue going north. The man you're after will run each time you get too close to him. Eventually jump down from the platform and head toward the northern tunnel (M19, 19). After the cutscene, quickly eliminate the aggressor and interact with the switch (screen) (M19, 20) to avoid certain death (you only have 20 second to do it!).
DECIDING ON THE TAIPEI EVENTS:
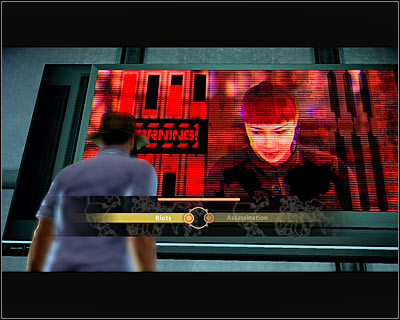
After the mission, there are two conversations waiting for you - one with Mina and one with Leland. The first one is more important, as you will have to decide (screen) between collecting evidence of the planned riots (Riot) and evidence on the planned assassination of the president (Assassination). Regardless of the decision, a new mission will be unlocked - Contact President Sung. After you complete the mission, check out the inbox, as you will receive new Intel on Omen Deng from Mina.
INTRODUCTION:
You can meet with Sung only after completing the previous mission in Taipei - Intercept Assassination Plans.
THE COURSE OF THE MEETING:
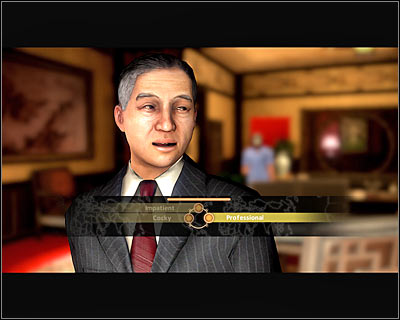
The meeting will have a similar course, regardless of your previous decision. The only difference is that you will give Sung the Intel on either the riots or assassination. After the meeting, the main quest in Taipei will be unlocked ((Stop Omen Deng at Memorial Rally) and upon returning to the hideout you will have a short and irrelevant conversation with Scarlet.
INTRODUCTION:
You can buy additional Intel for this mission (use the computer in the hideout and choose Clearinghouse). The available options are:
- Sniper rifle drop to a designated location. Buying this option will make the first part of the mission somewhat easier. It's not completely necessary, especially if you've developed your character enough to deal with the enemies.
- A detailed map of the area. You can buy it, as some secrets are marked on it and at one point a suggested path for staying hidden. You won't however get to know the locations of the security systems.
- Unlocking a special passage through the park. It's not a very useful option, but you can consider buying it if you want to get to the goal quickly.
- Equipping the allies with better weapons and armours. This option will be available only if you're in good enough relations with Steven Heck. You don't really need it, but the allies can help you at some points.
MAPS:
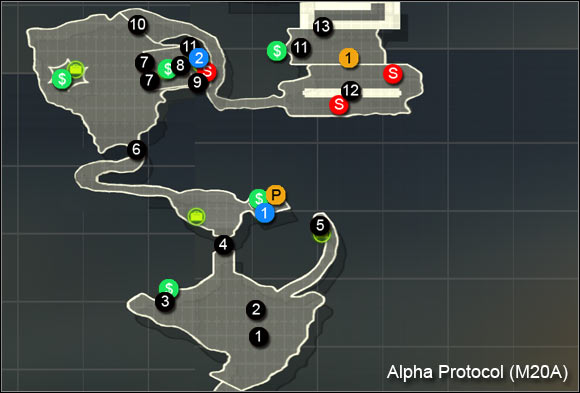
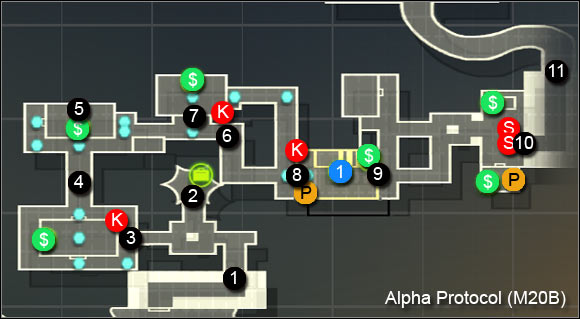
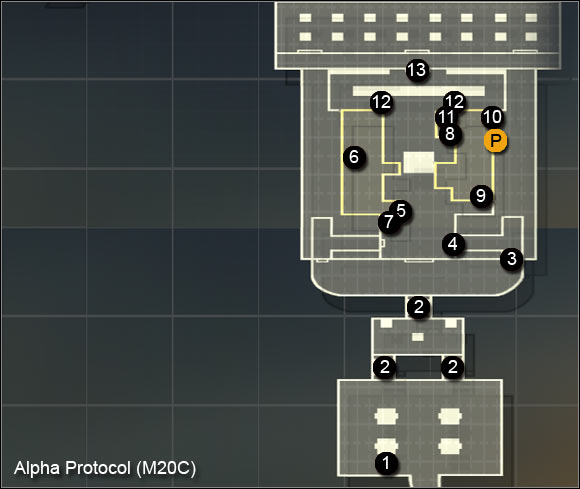
GETTING THROUGH THE SOUTH PART OF THE PARK:
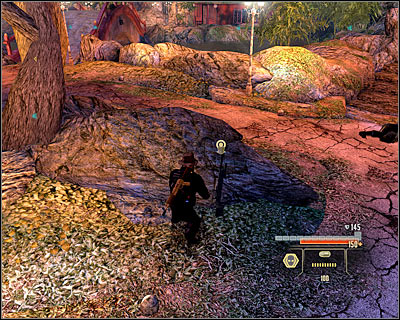
You begin the mission at the southern part of the park (M20A, 1). There are some enemies in the area, so stay cautious. Especially look out for the enemy patrolling the area to the north of this point, who you should eliminate as the first. If you bought the sniper rifle drop, you will find it around here (screen) (M20A, 2). You can use this weapon to eliminate three enemies - one of them is standing inside the garden house on the left side, the second is inside the building opposite to you and the third's on the hill to the right. You can't eliminate the enemies across the bridge with the sniper rifle.
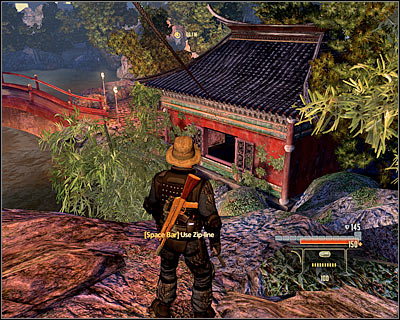
Your goal is to get north. If you haven't started an alarm yet, head to the garden house in which one of the enemies was standing in and hack into the terminal here (M20A, 3). Doing this will disable the explosives set at the bridge (M20A, 4) and you will be able to cross it now. If your actions will trigger an alarm, the bridge will be blown. In such case, your only option will be going to the hill on the right (M20A, 5) and ride down the line (screen) to the northern building.
Check out the inside of the hut, as you can find the Fitted Underlay (armour upgrade) (M20A, 1) there. Secure the area to the north of the bridge, which is being patrolled by two guards. Now you can head west (screen) and afterwards turn to the north-east. You will get further directives after reaching the next section of the park (M20A, 6).
SIDE MISSION - SECURE THE TEMPLE:

The area is patrolled by three enemies. If you're in good relations with G22, Albatross' men will help you secure the area. In the other case you will have to work yourself and you'll probably want to eliminate the enemies without starting an alarm. Look out, because as you eliminate the last guard, the temple's door will open (M20A, 7) and two new enemies will appear. An additional enemy will appear from the eastern door after you eliminate them (M20A, 8) (screen).
I'd suggest using the door through which the last enemy came in. You will find some interactive objects inside. Above all, use the machine gun post to eliminate the enemies below (screen). Remember not to target your allies, in this case the G22 soldiers or the Triad members. There's also a terminal here (M20A, 9) - hacking it will disable the two turrets in the distance (you can also destroy them with the machine gun). Also take the Over-sized Assault Rifle Clip (assault rifle upgrade) (M20A, 2).
GET TO THE GARDENS:
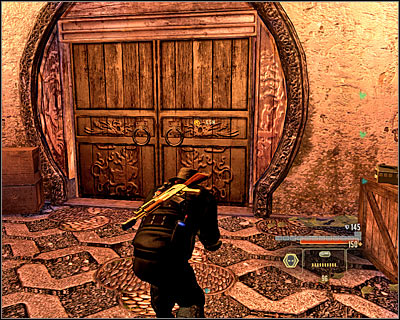
You can get to the gardens in two ways. The first option is to go out of the temple and use the northern passage (M20A, 10). Eventually you can also ride down the line (M20A, 11). It would let you get to the inner part of the temple, you you'd land nearby the enemy soldiers. I'd suggest choosing the main passage. After getting to the entrance (M20A, 12), deal with the new group of soldiers. Use this chance to hack into the nearby terminal (M20A, 1), thank to which you will gain new Intel on the Halbech organization. After securing the area, choose the northern passage (screen) (M20A, 13), which will lead you to the gardens (M20B, 1).
THROUGH THE GARDENS:
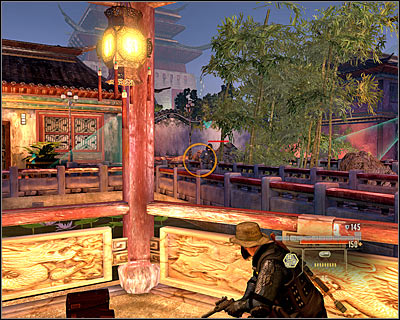
As you explore the gardens, you will have to look out for guards and security cameras. If you don't mind killing the enemies, you can eliminate most of them from the main garden house (screen) (M20B, 2). If you prefer to stay silent, it's worth to use the hints given by the game, that is to follow the path showed by the blue dots (they will be available only if you've bought this option before the mission began). Afterwards head to the western building (M20B, 3) and enter it through the south door. You can still eliminate the guard met (no penalties for doing so), but make sure their bodies aren't found by the cameras, so that no more enemies appear in the area.
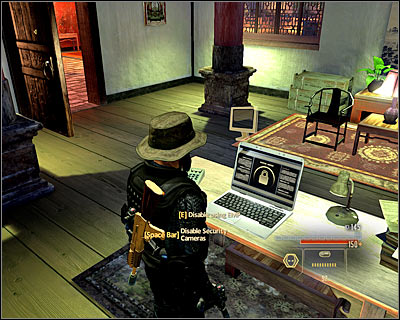
Now head north (M20B, 4). Enter the next building from the western door and afterwards locate the computer terminal (screen) (M20B, 5), which will let you disable all the nearby cameras. Go east. If you don't want to sneak, choose the direct passage to the target (M20B, 6), otherwise enter the northern building (M20B, 7). Your goal is to get to the eastern building, marked by the game (M20B, 8).
LEAVING THE GARDENS:
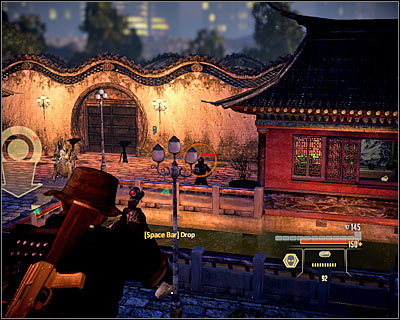
After you get inside the building, head to the first floor. One enemy needs to be eliminated here and additionally you can find the Armored Joints (armour upgrade) (M20B, 1). Go to the nearby balcony (M20B, 9) and note that allies have appeared in the area. Begin attacking the nearby enemies (screen). Stay upstairs during this battle, which will allow you to find the targets more.
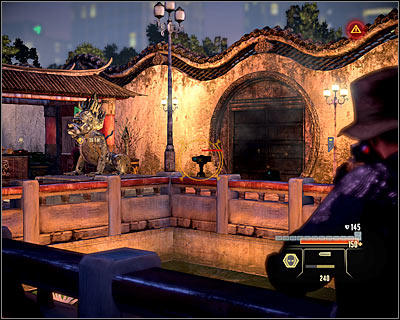
Jump down only after initially securing the area. Don't approach the current goal too much, as there are two active turrets in the area. It's best to destroy them while standing a little to the side (screen) and by using grenades or long distance weapons. After clearing this area, approach the gate by which the turrets were (M20B, 10) and break inside. Go to the next gate (M20B, 11) and wait for the next location to load. After a few steps, a cutscene will start.
CHASING DENG:
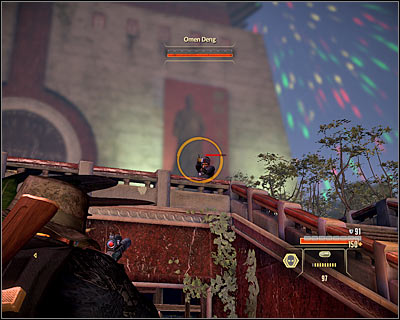
You will begin to the south (M20C, 1) from the place where Omen Deng is standing. Have no fear - you don't need to fight him now, just get closer. Head towards the stairs (M20C, 2) and don't forget to use covers, as Omen will be using a sniper rifle. Successively eliminate his bodyguards, which should be easier if you have the G22 mercenaries' help. There are four enemies in total and you should probably wait until they approach you themselves. Go upstairs and Deng will begin to run away. Follow his lead, using the only available building entrance (M20C, 3).
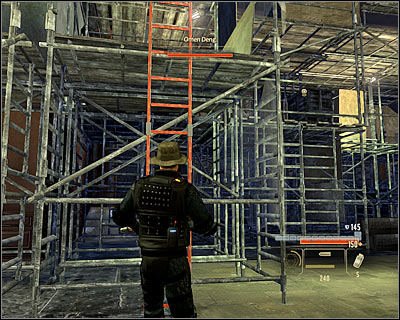
Choose the western corridor and open the door (M20C, 4). Begin with eliminating the two enemies here and afterwards use the ladder (M20C, 5). Head north and be ready to get rid of more enemies, which shouldn't be too hard. Ultimately you have to reach the platform leading to the upper level of the scaffolding (M20C, 6).
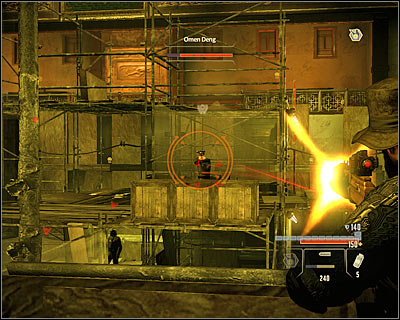
Prepare a good weapon, as you will have the chance to damage Deng for the first time. Hide behind a good cover and begin attacking the boss (screen). Keep in mind that you have to destroy his amour first. Don't worry about Omen running away after the loses around 1/4 of his health bar, he won't recover any of it in the meantime. Kill the other enemies from this spot and afterwards use the line (M20C, 7) to get onto the opposite scaffolding.

Be ready to eliminate new enemies, who will appear in the area (also on the upper balconies). Don't let anyone surprise you and get to the next platform leading to the upper level (M20C, 8). Find a ladder (M20C, 9) and go up. Some tough fights await you here, inter alia with some enemies who will come from the elevator (screen) (M20C, 10).

You don't need to kill the enemies on the mentioned scaffolding, but it's of course possible. You need to get the spot in which you can use the line (M20C, 11). After you get to the spot, jump down two times (screen). Choose one of the two passages leading to the next location (M20C, 12). You need to get to the big door (M20C, 13). As you try to open them, another cutscene will be played.
FIGHTING DENG:
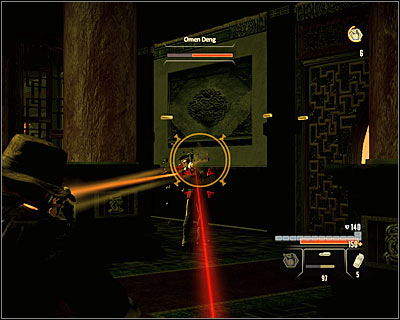
The boss fight with Deng isn't all that hard. In the first phase you should probably hide behind one of the pillars and constantly keep shooting him (screen), destroying his armour and then draining his health. Omen will disappear from time to time, but you don't have to worry about him appearing right next to you. You will always have some time to localize him and take a proper position.
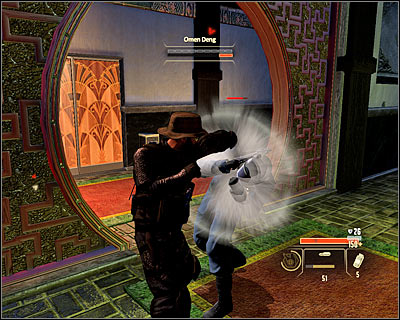
The last part of the battle will be tougher, as Omen will try to damage you in direct combat. Don't try to fight him - you won't lose all your armour at once, but it's hard to block his attacks. Running away from him while keeping on shooting and using gadgets (especially mines) is by far a better tactic. Look out for the explosives thrown by Dens, as being near the explosion might kill you. Ignore his bodyguards and focus solely on him.
MAKING A CHOICE ON DENG:
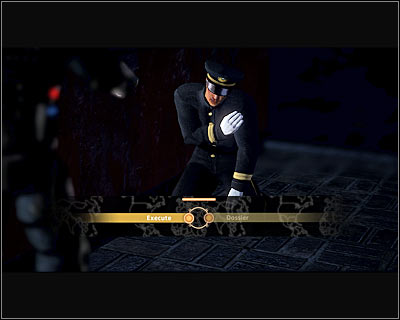
After you defeat Deng, you will have to decide whether to kill him (Execute) or leave him alive (Dossier). By choosing the second option, you will learn that he's in fact a double agent. The assassination attempt will begin in just a while. If you collected Intel on the riots the president will die, but if you gained information on the assassination, he will survive thanks to wearing a bulletproof vest.
After you return to the hideout, you will hear out a report on the Taipei incidents and will have a conversation with Heck and Leland.
INTRODUCTION:
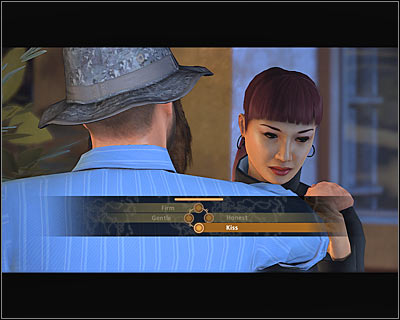
After you complete all three campaigns in Moscow, Rome and Taipei, you will be automatically moved to the Alpha Protocol hideout in the United States and will have a chance to talk with Mina. At the first phase of the talk, you will be able to start a romance with her by choosing to kiss.

Further on you will learn about Mina's actions until now - you will be able to react suavely or aggressively. Another important decision waiting for you here - you can send Mina back or make her stay.
ACTIVITIES:
You can also do the other well-know things as:
- change the character's looks using the mirror in the bathroom
- turn on the TV and watch your trophies and mementoes (for example of Nasri's)
- use the central computer to check your e-mails (it's worth to reply to Mina's newest message) and shop at the black market (the options are very limited for now - you have to contact one of the local arms dealers first)
- change the character's equipment using the locker
MESSAGES:
Depending on your recent actions, you can get messages, inter alia, from:
- The person to whom you've sent the Intel on the Halbech organization
- Steven Heck (choose the suave style while answering)
- SIE (only if you've saved her during the last mission in Moscow; choose the aggressive style while answering)
- Omen Deng (only if you haven't killed him during the main mission in Taipei), who will send you more Intel on Alpha Protocol
INTRODUCTION:
Make sure to meet Scarlet before you begin the Infiltrate Alpha Protocol mission!
THE COURSE OF THE MEETING:

This mission consists only of a long conversation with Scarlet Lake. Depending on your rep points with Scarlet, the meeting might be held in either a cafe or a hotel room. Regardless of the chosen answers, the main character will give the evidence to the journalist. Note that if you have the maximum number of rep points with her (mainly for sending her the Intel found), a chance to spend some intimate time with her will appear (the Stay option - screen). However for it to be possible, you have to choose the professional style answers during the talk, which means being sincere with her.
INTRODUCTION:
Make sure to meet with Shaheed before beginning the Infiltrate Alpha Protocol mission! The meeting will be only possible if you've let Shaheed go during the mission in Saudi Arabia.
THE COURSE OF THE MEETING:
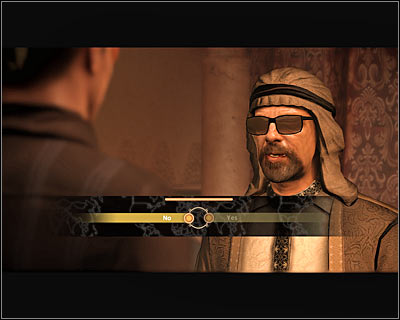
This mission consists only of a long conversation with Shaheed. You can behave in three ways, that is:
1) Execute Shaheed - the result will be the same as if you'd eliminate him during your first meeting.
2) Reject his proposition of teaming up (No option) - it's worth to mention that Shaheed will help you destroy the Halbech organization anyway.
3) Agree to his proposition of teaming up (Yes option) - it means you want to destroy Halbech as well as Alpha Protocol, which means unlocking one of the three main endings. Note that after receiving the necessary Intel you can still kill Shaheed (of course it's need required).
INTRODUCTION:
Make sure you meet with Albatross before beginning the Infiltrate Alpha Protocol mission!
THE COURSE OF THE MEETING:
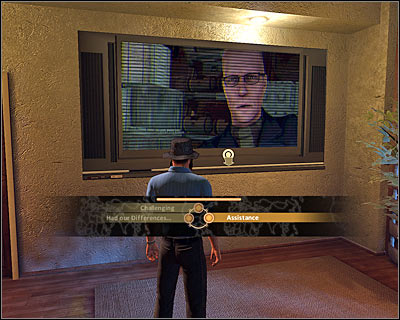
The meeting is quite unconventional, as it will take place in your hideout. If you two were in good relation up until now, you shouldn't have problems with making Albatross help you. Otherwise you're in for some convincing. Remember to choose the professional or (as a last resort) aggressive style, as suave can quickly discourage him. The meeting will end regardless of whether Albatross decides to help you or not.
INTRODUCTION:
I'd suggest beginning this mission only after meeting with the important NPCs and finishing all the things you need to do (reply to the e-mails, buy stuff at the black market etc.), as you won't be able to return to the hideout anymore.
It also would be wise to equip yourself properly. I especially suggest EMPs (you will come across many difficult mechanism) and weapons with rare kinds of ammo (you'll need to fight three bosses).
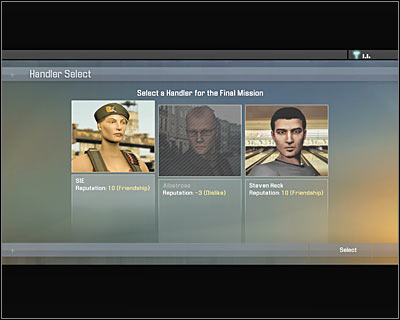
The game will allow you to choose a handler for this mission (screen). You will be able to choose between SIE, Albatross and Heck. SIE will be inactive if she died in Moscow and you won't be able to choose Albatross if you haven't contacted him after beginning this campaign. Luckily there are no limitations for Steven Heck.
MAPS:
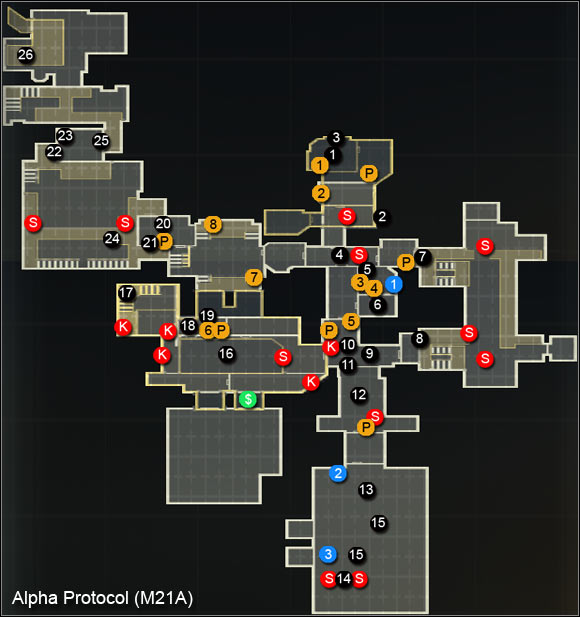
BEGINNING CONVERSATIONS:
Before you begin the mission itself, there's a series of conversation waiting for you. You can ignore the meeting with Sean. Afterwards you will meet Leland and that one is much more important. You can:
1) Agree to join Halbech (Join Halbech). Choosing this option will let you unlock one of the possible game endings. Leland will unveil the plans and will tell you of the need to eliminate Mina Tang.
2) Reject his proposition by choosing the (Forget It) option at the end of the conversation or by knocking him out by choosing (Punch). This option is required if you want to team up with Alpha Protocol or if you've already teamed with Al-Samad (destroying both Halbech and Alpha Protocol).
Regardless of the decision, you will be transported to the clinic (the same in which you started the game).
On your way to the clinic you can bump into Conrad Marburg, of course assuming you haven't killed him during the last mission in Rome. The course of this meeting won't have a big influence on the further gameplay. The only curiosity is the ability to choose a special if you gained all the Intel on him (it was already possible during the stay in Rome).
If you've chosen SIE for your handler and improved your relations to the maximum (choosing aggressive style behaviours), there's a (nice) surprise waiting for you after you get to the clinic. Note that you can resist SIE, or just go for it (screen) (screen). :-)
ESCAPING THE CLINIC:
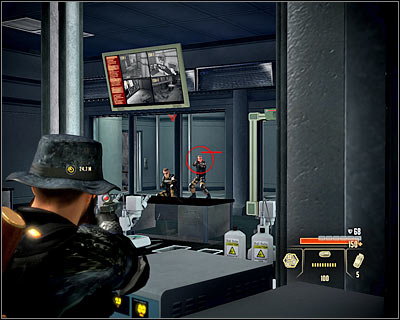
Begin you second visit to this place (M21A, 1) with collecting your gear, which can be found in a small bag somewhere inside the room. Get ready, as two enemies will appear in the area after you take it - take care of them. Additionally there's a turret by the roof in the southern room. Destroy it and keep in mind to regularly break into the alarm switches you come across on your way, as thanks to it you will be disabling parts of the security system, which will allow you to surprise the less cautious enemies more easily. After securing the area, go into the elevator (M21A, 2), which will take you to the next level.
GETTING TO ALAN PARKER:
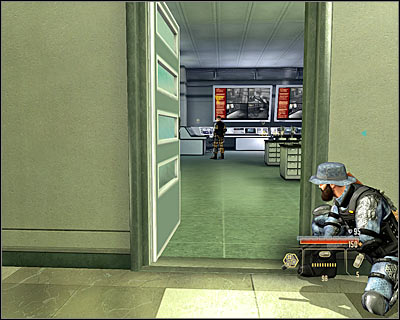
After getting out of the elevator, get ready to eliminate the enemies patrolling the nearby corridor and those in the northern corridor, where you should now head. After getting inside, focus firstly on the (M21A, 1), thanks to which you will gain new Intel on Parker, the safe with Intel on Alpha Protocol (M21A, 2) and EMP grenades lying on the table.
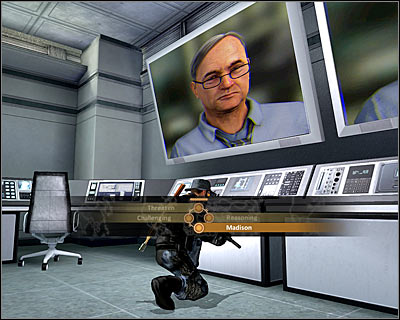
Afterwards use the computer (M21A, 3). If you've killed Omen Deng during the Taipei campaign, the only possible option will be to talk with Parker, which can end in two ways. You can count for a positive attitude if you inform him on Madison's situation. Choosing any of the three other options will result in a bad attitude.
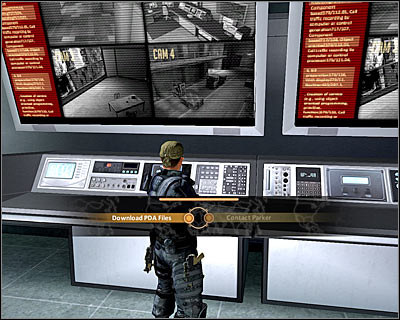
If you haven't killed Omen Deng during the Taipei campaign, you will now be able to download the data, which president Sung is interested in. In order to do this, you would have to choose the (Download PDA Files; screen) option instead of calling Parker.
SIDE MISSION - GETTING TO IMPRISONED SCARLET:
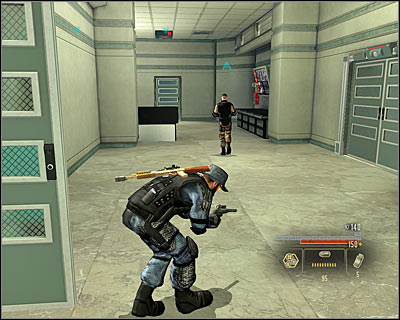
Look out, as after you finish the conversation the enemies will use a flash grenade and you will have to defend from their attack. Afterwards head towards the next corridor (M21A, 4). It would be good to go inside only after disabling the alarm, thanks to which you won't be attacked by the turret by the ceiling.

Talking with Scarlet isn't obligatory, but I'd suggest meeting with her anyway. Break into the southern (M21A, 5), where you will find Intel on United States Military (M21A, 3), EMP grenades and hidden data Conrad Marburg (computer) (M21A, 4). Additionally I'd suggest breaking into the safe at the eastern (M21A, 1), in which you will find the Advanced Pistol Muzzle Assist (pistol upgrade) and more Intel on United States Military. Move to the room in which you've been talking with Westridge at the very beginning of the game (M21A, 6). This time you will meet Scarlet there. If you didn't download the data from Parker's computer, you will now learn that she was the shooter in Taipei. Afterwards you will be able to make a decision (screen) - you can leave her be (Leave Her) or join forces with her (Join Forces). In this second option, Scarlet will replace your previous handler (chosen at the beginning of the mission).
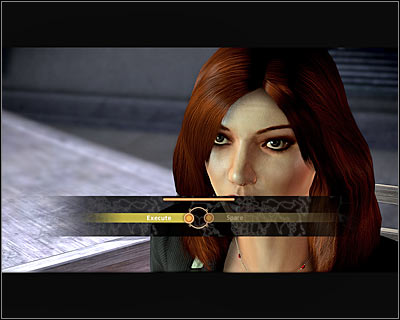
If you've chosen (following Omen Deng's and president Sung's request), you will already know that Scarlet was the shooter. The course of the conversation will also change (screen), as you will be able to kill her (Kill) or let her be (Spare).
GETTING TO THE SOUTHERN PART OF THE COMPLEX:
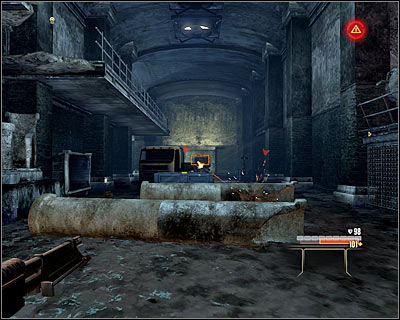
Return to the corridor in which the last guard was (M21A, 4) and go towards the eastern door (M21A, 7). You have to cross a well-knows location, with new enemies who have appeared in the meantime and some new security system as well. I wouldn't suggest staying at the upper balconies, as you'd be an easy target that way. Instead, go down the ladder and use the northern stationary machine gun (screen). You will have to destroy, inter alia, another machine gun post and an active turret.

After securing the area head south, go up the stairs onto the upper balcony and use the nearest passage (M21A, 8). Soon you will get to a smaller room with a camera (M21A, 9) and a short cutscene with a talk with Leland or Westridge will be shown. Generally you don't have to do anything and additionally there are no decisions to be made. It's however worth mentioning that getting to Mina will be necessary only if you've teamed up with Leland and of course you will then have to kill her. In the two other cases (not working with Leland or wanting to destroy both organizations) it won't be needed.
SIDE MISSION - GETTING TO WHERE MINA IS BEING HELD:
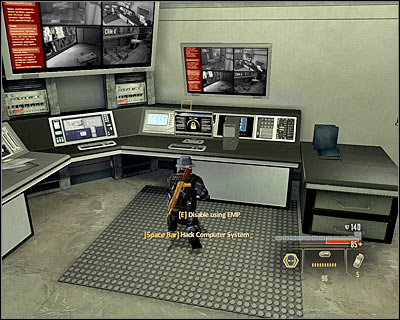
I'd suggest getting to the place where Mina Tang is being held even if you don't work with Leland, as it won't complicate anything. If, on the other hand, you do work with Leland, it's of course obligatory. Begin with breaking into the northern room (M21A, 10), in which you will find a computer with new Intel on Westridge (M21A, 5). It's important, as you won't be able to come here again after you return from Mina. Get back to the main room (M21A, 9) and break the security on the southern door for a change (M21A, 11).
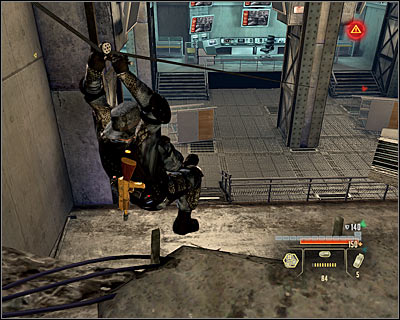
Look out, as in the first room (M21A, 12) you will bump into some enemies and a turret, which of course you have to destroy. Move on, picking up the EMP charges on your way. You can also break into the safe at the main room, which will give you the Featherweight Pistol Reflex Sight (pistol upgrade) (M21A, 2). Now you need to go pass the training ground known from the beginning of the (M21A, 13), which will be guarded by some enemies. Don't rush and try to surprise your enemies.
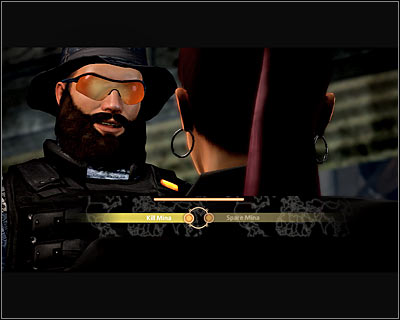
You need to look out here, as there are two turrets set by where Mina is being held. Get rid of them while being hidden behind a cover and afterwards break the security on the door (M21A, 14). After you go inside, a cutscene with Mina will begin. If you're working on your own, Michael will free Mina automatically. In the other case, you will be able to change your mind on killing Mina one last time (screen). Naturally, if you still want to work with Leland, you shouldn't.
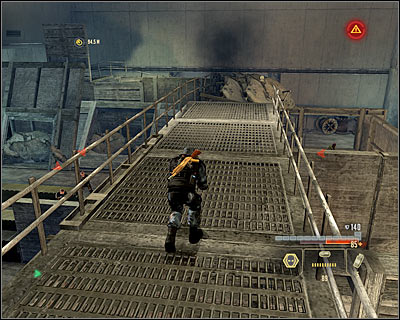
Now you need to return to the room with the camera (M21A, 9). Before you do it, take a look round the area and you will find not only new EMP charges, but also the Composite Pistol Grip (pistol upgrade) (M21A, 3). You can return to the northern rooms in two ways - by using the same path as before or by going up the ladder onto the balconies (M21A, 15). Regardless of the chosen solution, you should be ready to eliminate some more enemies.
MEETING WITH YOUR HANDLER:
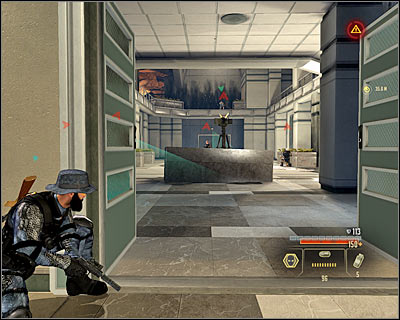
Open the door leading to the western room (M21A, 16). Look out, as the passage behind you will crumble and you will find yourself in an area occupied by the enemy. I'd suggest beginning with destroying the turret opposite to you. Only once it's destroyed should you move to attacking the guards. Be ready to leave your hiding place if the enemies decide to use grenades. Afterwards take the Intel on VCI (M21A, 6) and head towards the stairs leading to the upper floor (M21A, 17). If the alarm is on, you will probably bump into some more enemies on your way. In the other case, it's worth to avoid the cameras. You will meet your handler on the upper floor (M21A, 18).
GETTING TO THE FIRST BOSS:
Approach the hole in the left wall (M21A, 19) and shoot the enemies below from this spot. Ride down the line and take care of the leftovers. Use the chance and take a look around the area. Hack into the local computers to gain new Intel on Alpha Protocol (M21A, 7) and Henry Leland (M21A, 8). Head to the nearby control room (M21A, 20) and pick up the grenades lying there. Use the door leading to the bigger room in order to begin the fight with this mission's first moss (M21A, 21).
FIGHTING THE FIRST BOSS:
This fight can have a different course, depending on the decision made earlier. If you told Alan Parker the truth about Madison, he will attack Marburg and you will have to fight Conrad. Note that you only have six minutes, so you need to hurry. Begin with attacking the normal enemies present in the room. However don't kill them all, as new ones would appear to replace them.
Sooner or later you will have to begin attacking Marburg. Just like before in Rome, you need to use the covers and try to destroy the enemy's armour and then drain his life. Help yourself with explosives and remember not to approach Marburg too much, as he can take a large part of your health in a direct fight.
Note that defeating Marburg won't stop the timer, so you must have at least one minute left. Ignore the other enemies and run towards the northern control room (M21A, 22). Here you have to use the central computer marked by the game (M21A, 23).
If you didn't speak with about Madison with Alan Parker, didn't speak with him at all (the option to send the data needed by president Sung), or killed Conrad Marburg before (in Rome), you will have to fight Alan. This fight will be different from the first one. Parker himself won't participate in the battle, instead you will have to fight some standard enemies and turrets hanging from the ceiling on both side of the room. Try to keep destroying the turrets and don't forget about the six minutes time limit.
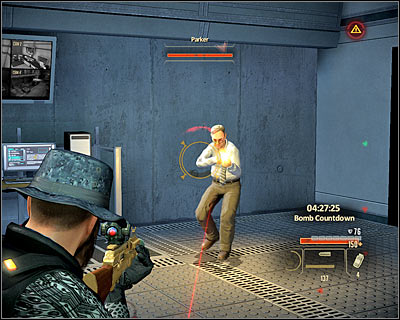
After initially securing the area, look for a computer in the eastern part of the room (M21A, 24) and hack into it, thanks to which you will disable all nearby security system. Now you can head to the northern control room (M21A, 22). After getting there you need to eliminate Parker, which luckily will be very easy (one burst from the rifle will be enough). Afterwards use the central computer marked by the game (M21A, 23).
ESCAPING THE COMPLEX:
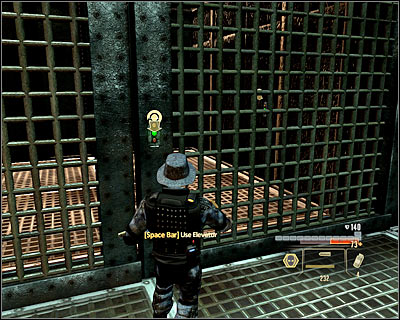
Go out of the room by the eastern door (M21A, 25) an head north. On our way you luckily won't meet any enemies on our way. You goal is to get to the big elevator (M21A, 26). Wait to get transported to the surface.
GETTING TO THE SECOND BOSS:
You begin at the southern part of the map (M21B, 1). Get rid of the two nearest enemies and consider getting onto the left sniper tower in order to eliminate the enemies visible in the distance. Jump down and head to the north-west. As you get close to the new location (M21B, 2), there will be a cutscene.
FIGHTING THE SECOND BOSS:
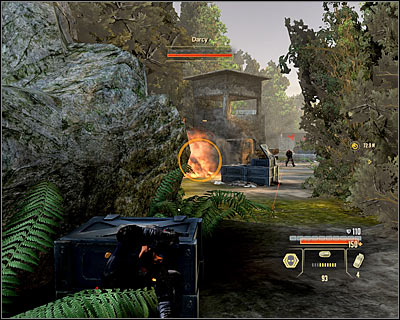
This time you will have to fight Sean Darcy. Stay at by the narrow passage and try to eliminate all the incoming enemies from here. Help yourself by shooting the explosives items. Unfortunately you can't stay here forever, as new enemies keep on appearing in place of the killed ones.
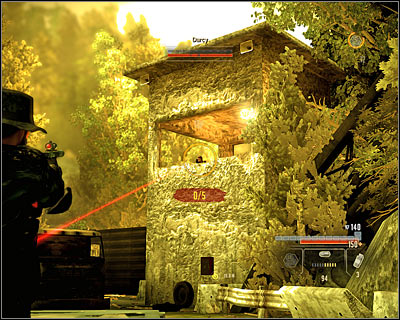
You can defeat the boss, who's hiding inside the northern sniper rifle (M21B, 3) in two ways. The more risky solution is to stay at the main square, as Sean, apart from using the sniper, will also throw grenades at the places you will want to hide at. Inevitably it will make hiding behind, inter alia, the trucks, as they will explode. You can damage him with accurate shots from a bigger distance or by running to the tower and throwing in grenades.
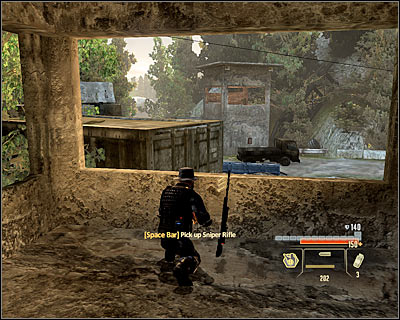
By far the better option is to get into the southern sniper tower (M21B, 4), however you do need to have an EMP, thanks to which you will quickly upon the door leading to the tower. Go up the ladder and use the sniper rifle here, thanks to which you will easily defeat Darcy (screen). O f course you need to hurry, as you can get attacked by other enemies in the meantime.
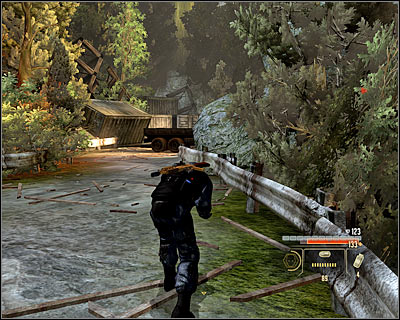
After you eliminate the boss, take care of the other enemies and take a look around the area. Apart from first aid kits, you will also find, inter alia, the SMG Muzzle Break (SMG upgrade) (M21B, 1) and the Printed Circuitry (armour upgrade) (M21B, 2). You can also head towards the newly unlocked northern passage (M21B, 5).
FIGHTING THE HELICOPTER:
Get ready that once you reach the new location (M21B, 6), a hostile helicopter will attack you. Some important hints:
1) try to get the enemies to move to the small canyon (M21B, 7), where you will be safe (screen)
2) don't hide behind exposed obstacles (for example small walls) as then you can be hit by a rocket anyway, which in the best case will seriously damage your armour
3) use sprint to move from one cover to another right after the helicopter fires a missile
4) don't try to use invisibility, it won't work in this case
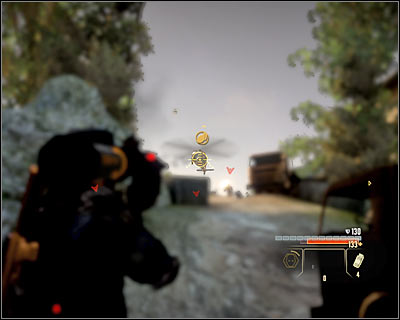
You could of course use standard weaponry to eliminate the helicopter, but it's way better to look around the area for rocket launchers (M21B, 8). Remember that each launcher allows you to shoot only once, so after you use one, immediately run to the next. Attack the helicopter until it catches fire and crashes down.
GETTTING TO THE HELICOPTER WRECK:
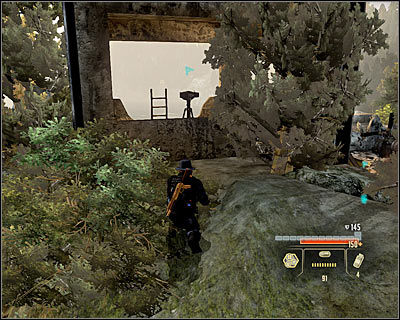
Now you need to get to the wreck of another wreck, which has been shot down right after you got to the surface. Go through the newly unlocked eastern passage (M21B, 9), eliminating a single enemy on your way. After getting to the new location (M21B, 10), firstly take care of destroying the turret on the right tower (screen). Wait until enemies appear. By the way it's worth to check the mentioned tower - you will find the Advanced Pistol Laser Sight there (pistol upgrade) (M21B, 3). There are two more turrets which need to be destroyed and it's best to shoot them from a distance. Don't forget about using a good cover.
GETTING TO THE THIRD BOSS:
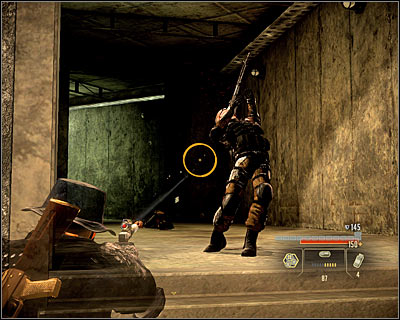
Go to the entrance to the underground complex (M21B, 11); new enemies will come out of it in the meantime. You of course have to get rid of them and then head forward. Your goal is to reach the elevator (M21B, 12) which will take you to the last location, where the third and last boss will be waiting.
OPTION 1 - SUPPORTING ALPHA PROTOCOL:
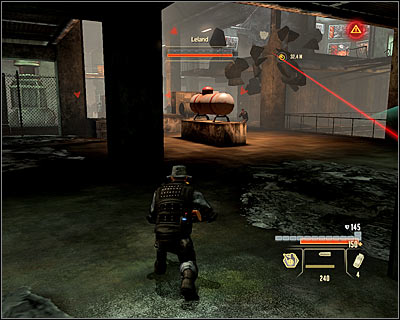
If you haven't joined forces with Halbech and aren't working with Al-Samad, you will have to fight Leland. Note that the enemy (M21B, 13) will be using a rocket launcher and as a result it will be important to move between the covers and avoid the explosives. For starters it would be good to secure the ground level, however you can as well avoid the enemies if you have invisibility.
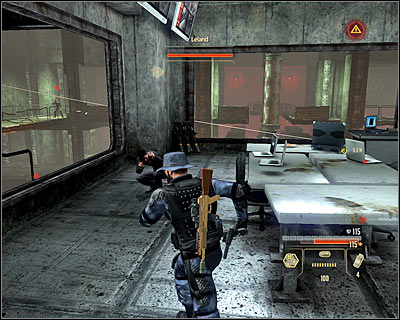
You need to get to the stairs leading to the upper balconies (M21B, 14). Once there, you can behave in two ways - attack Leland or try to get closer to the room in which he's hiding. The second strategy is by far better, especially that the boss can destroy the pillars with his rocket launcher. You can stay at the balcony, or use the line. The room in which Leland is hiding is accessible by two door (M21B, 15).
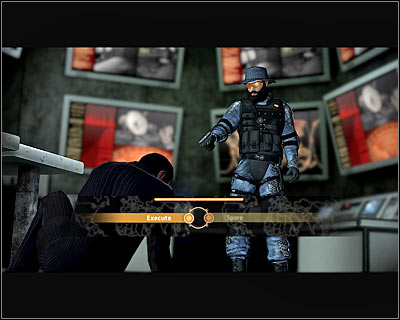
After you get inside, start shooting at Leland, who won't be able to counter your attacks. Soon you will watch a new cutscene and will have to make the last decision - you can kill (Execute) or spare (Spare) Leland.
OPTION 2 - SUPPORTING HALBECH:
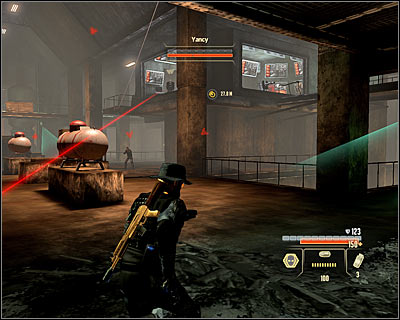
If you haven't joined forces with Leland and aren't working with Al-Samad, the last boss will be Westridge. Note that this enemy (M21B, 13) will be using his own weapon and two stationary turrets, as a result moving between covers and avoiding explosives will be very important. For starters it would be good to secure the ground level, however you can as well avoid the enemies if you have invisibility.
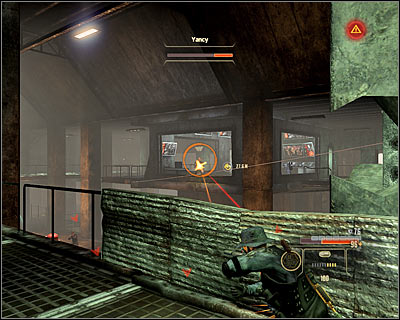
You need to get to the stairs leading to the upper balconies (M21B, 14). Once there, you can behave in two ways - attack Westridge or try to get closer to the room in which he's hiding. The first strategy is by far better, as getting to the room (M21B, 15) would be very difficult and dangerous. Instead find yourself a good cover (screen) and attack from there, while helping yourself with your abilities.
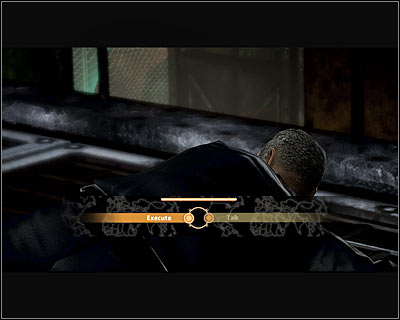
After you defeat the enemy, there will be some important decision to make. The first relates to Westridge himself (screen) - you can either kill him (Execute) or choose to talk (Talk), which will end up with him getting chained to the barrier.
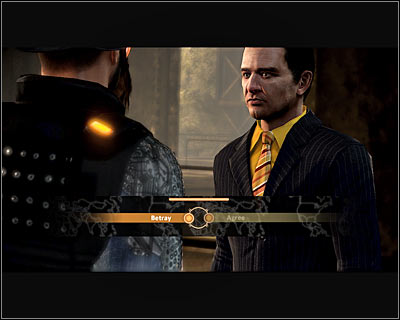
Afterwards you will talk with Leland and here you can choose between betraying him (Betray) to take over the corporation, or continuing your cooperation (Agree). If you betray him, you'll be able to kill him (Kill) or just knock him out (Punch).
OPTION 3 - DESTROYING HALBECH AND ALPHA PROTOCOL:
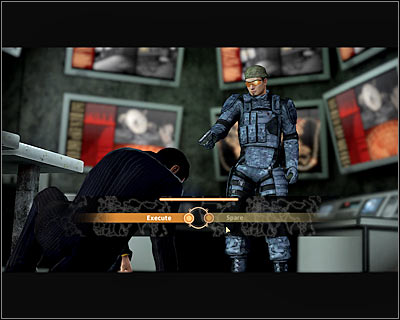
If you have agreed to Shaheed's proposition of working with Al-Samad and refused to work with Leland, Westridge will the last boss. Note that this enemy (M21B, 13) will be using his own weapon and two stationary turrets, as a result moving between covers and avoiding explosives will be very important. For starters it would be good to secure the ground level, however you can as well avoid the enemies if you have invisibility.
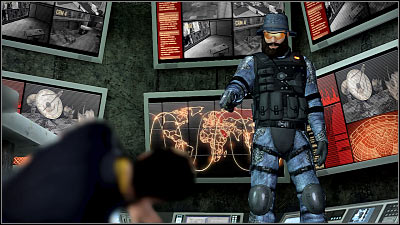
You need to get to the stairs leading to the upper balconies (M21B, 14). Once there, you can behave in two ways - attack Westridge or try to get closer to the room in which he's hiding. The first strategy is by far better, as getting to the room (M21B, 15) would be very difficult and dangerous. Instead find yourself a good cover (screen) and attack from there, while helping yourself with your abilities.

After you defeat the enemy, there will be some important decision to make. The first relates to Westridge himself (screen) - you can either kill him (Execute) or choose to talk (Talk), which will end up with him getting chained to the barrier.
A cutscene will then start, showing Leland being found. Now you can choose (screen) between killing the Halbech corporation leader (Execute) or sparing him (Spare).
The game has three endings and below you can find a list of things you need to do to get each of them. For more detailed information on defeating bosses or getting to certain mission or campaigns, check out the main guide.
What do I need to do to unlock all three endings, without have to complete the game again?
- Free Shaheed at the end of the Saudi Arabia campaign.
- Be at least neutral with Alan Parker.
- Be at least neutral with Leland.
- Save the game right after beginning the last campaign (Endgame), right before going to meet Shaheed to be precise (the Contact Sheikh Ali Shaheed mission).
FIRST ENDING - Joining forces with Alpha Protocol to stop the Halbech organization.
Requirements during the game:
- Killing Shaheed or refusing to work with him during the last phase of the game. A slight note: you can kill Shaheed either at the end of the first campaign or during the meeting after beginning the last campaign.
- Be at least neutral with Alan Parker.
Requirements during the last mission:
- Reject Leland's proposition of working with the Halbech organization.
- Inform Alan Parker of his daughter's faith.
- Defeat Leland during the end of the game. Note that you will be able to choose between killing and sparing him.
SECOND ENDING - Joining forces with Halbech to destroy Alpha Protocol.
Requirements during the game:
- Killing Shaheed or refusing to work with him during the last phase of the game. A slight note: you can kill Shaheed either at the end of the first campaign or during the meeting after beginning the last campaign.
- Be at least neutral with Leland.

Requirements during the last mission:
- Reject Leland's proposition of working with the Halbech organization.
- Get to where Mina is being held and eliminate her, following Leland's wish.
- Defeat Westridge during the last phase of the game. Note that you will be able to choose between killing and handcuffing him. As for Leland, you will be able to betray him or stay faithful till the end and agree to work with Halbech.
THIRD ENDING - Joining forces with Al-Samad to destroy both Halbech and Alpha protocol.
Requirements during the game:
- Free Shaheed at the end of the Saudi Arabia campaign.
- Meet Shaheed after beginning the last campaign and accept his proposition of cooperation. Note that after you get the Intel needed to destroy Halbech and Alpha Protocol, you can pretty much kill Shaheed, as it won't change anything.
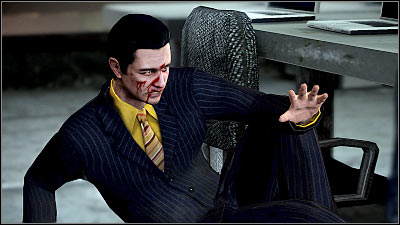
Requirements during the last mission:
- Reject Leland's proposition of working with the Halbech organization.
- Defeat Westridge during the last phase of the game. Note that you will be able to choose between killing and handcuffing him. After taking care of Westridge, you will have to make a choice regarding Leland - you can kill or spare him as well.


 ArmA II Game Guide & Walkthrough
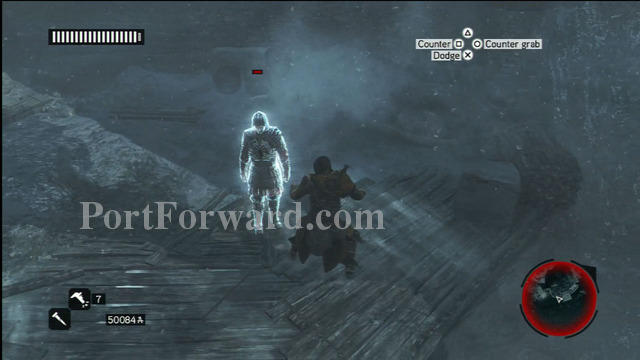 Assassins Creed Revelations Walkthrough Sequence 1- A Sort of Homecoming
 Angry Birds Space Game Guide & Walkthrough
 Anna Game Guide & Walkthrough
 Aquaria Walkthrough Introduction